Category: Air Fryer Recipes

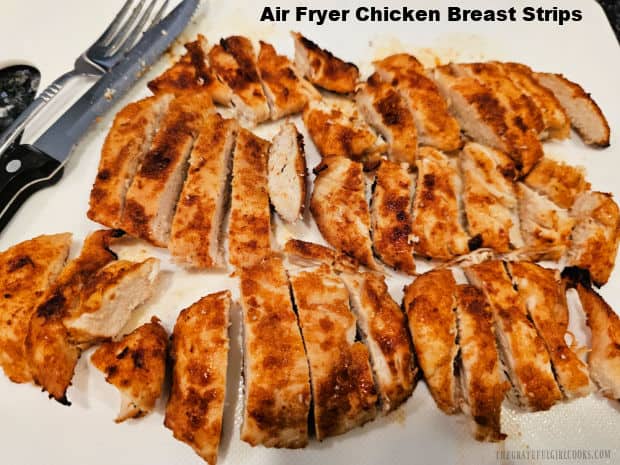
Air Fryer Chicken Breast Strips

Make Air Fryer Chicken Breast Strips to eat as is, or add to soups, salads, burritos or tacos! This well-seasoned chicken is very versatile!

Looking for a quick and delicious air fryer recipe for chicken breasts? Well this one is pretty amazing, and it’s incredibly versatile!

Chicken breasts are well seasoned, then cooked in an air fryer for about 10 minutes. After that they are sliced into strips which can be eaten as is, or added to soups, salads, casseroles, taco shells, quesadillas, burritos, pasta, etc.

How’s that for versatile? This recipe comes together so fast, it is a perfect choice for a crazy busy day… and the chicken tastes so good! Here’s how to make air fryer chicken breast strips. I think you’re going to love them!

Scroll Down For A Printable Recipe Card At The Bottom Of The Page

What Ingredients Will I Need?

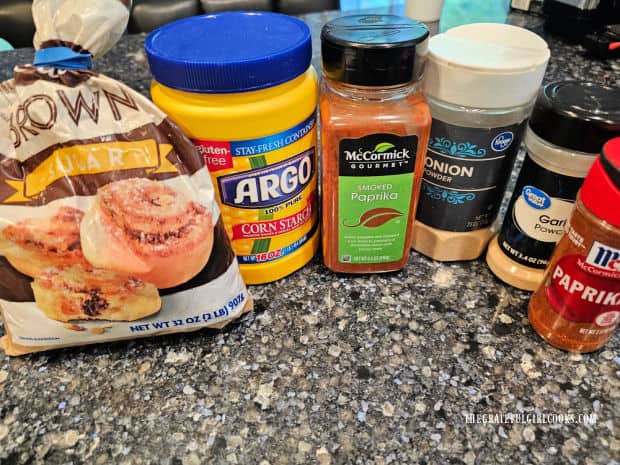
When making this dish, you will need 1¼ pounds of boneless and skinless chicken breasts (about 3), olive oil, and seasoning mix. To make the seasoning mix you need paprika, garlic powder, onion powder, smoked paprika, salt, brown sugar and cornstarch.

Spices used to make seasoning mix for the chicken strips.

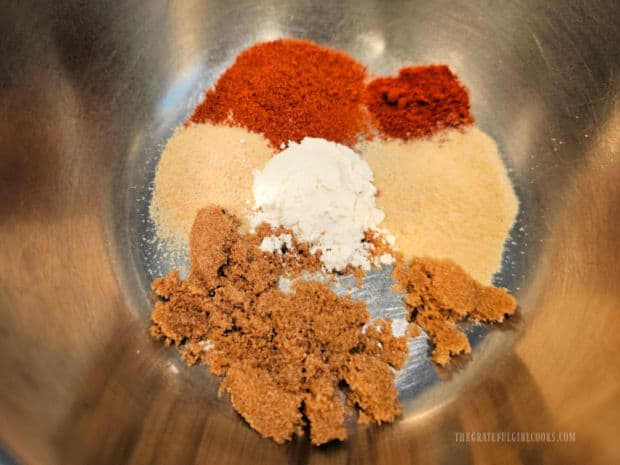
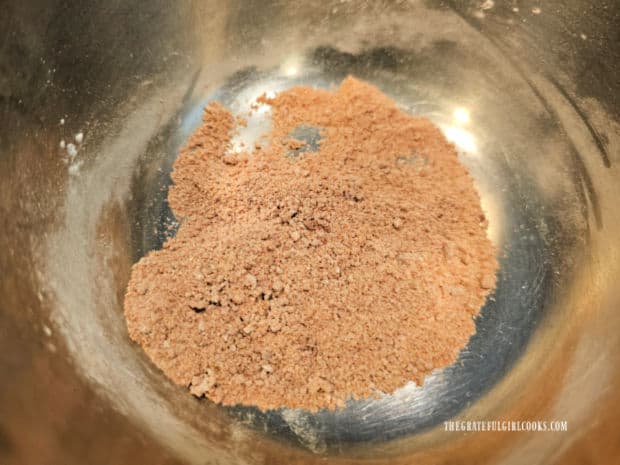
Mix the spices in a small bowl until they’re fully combined. It takes about a minute to whip this spice mix together. That’s it. So easy, right?

A variety of 7 spices are used to make the seasoning mix.Once fully combined, the seasoning mix is ready to apply to the chicken.

Prepare And Season The Chicken

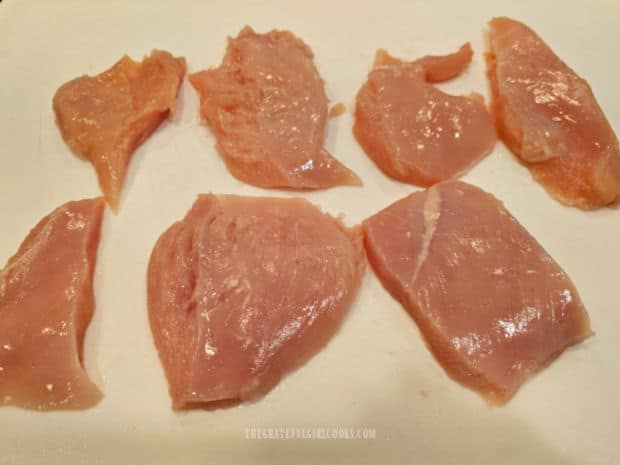
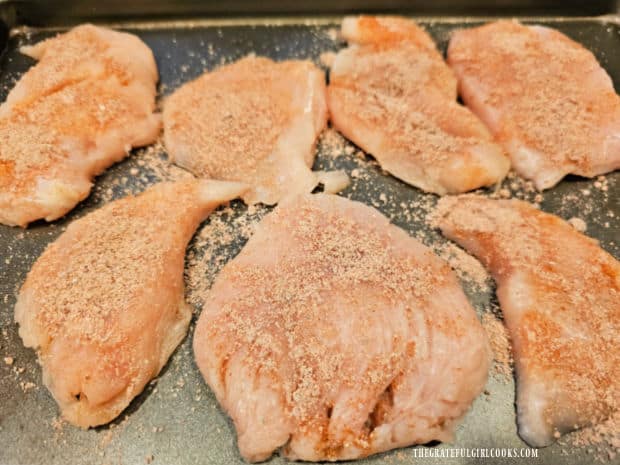
Pat the chicken breasts dry using paper towels, then slice each chicken breast into 3 pieces. Place each piece (one at a time) between layers of plastic wrap, and pound them thin, using a meat mallet.

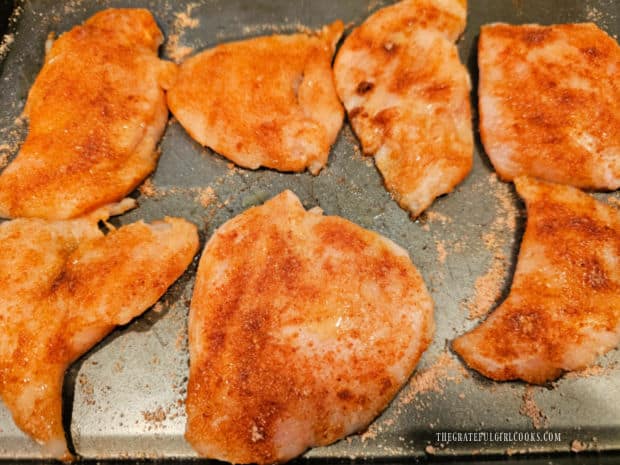
Season the chicken (on one side) with HALF of the seasoning mix, then drizzle with HALF of the olive oil. Rub the oil and spices together to cover the chicken.

Chicken breast pieces are dried with paper towel, then pounded with a mallet.Spice mixture is sprinkled over each chicken breast piece, then drizzled with oil.

Turn the chicken pieces to the other side and repeat the process with the seasoning and olive oil. Now both sides of the chicken should be well-coated with spices and oil.

Chicken is well seasoned and ready for the air fryer.

Cook Chicken Breasts In The Air Fryer

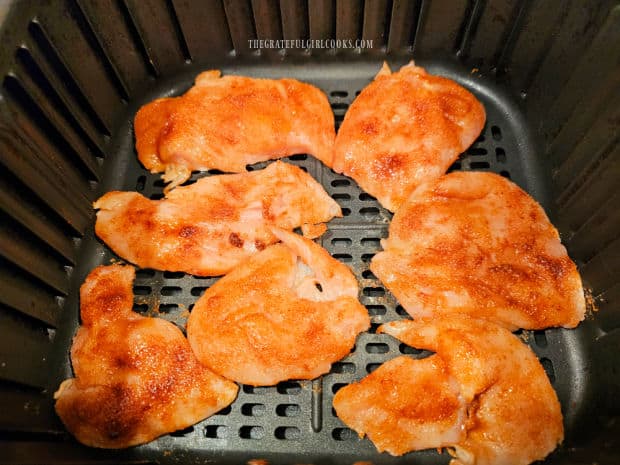
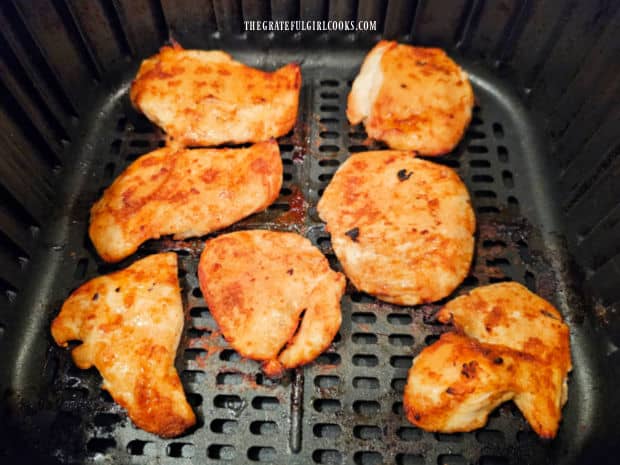
Preheat the air fryer to 400°F. Lay the seasoned chicken pieces (in a single layer) in the basket of the air fryer. Try not to crowd them, so the hot air circulates better.

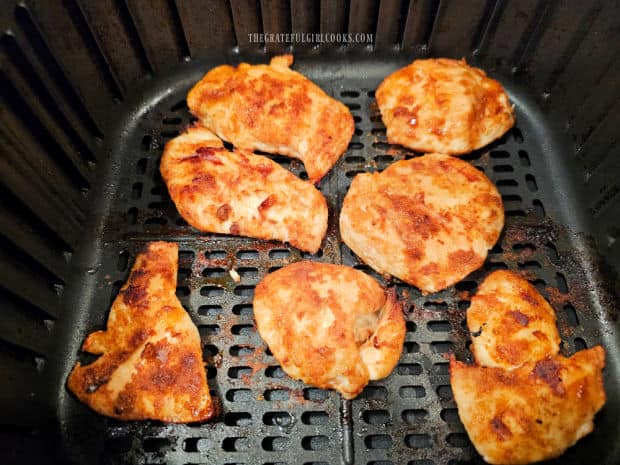
Cook the chicken at 400°F. for 5 minutes, then pause the cooking, and carefully turn the pieces over to the other side. 

Seasoned chicken pieces in air fryer in single layer for cooking.The chicken is flipped over halfway through cooking time.

Put the basket back into the air fryer and continue cooking the other side of the chicken for an additional 3-5 minutes.

Keep an eye on the internal temperature using a digital thermometer. When done, the chicken should register an internal temperature of 165°F.

Chicken should have an internal temperature of 165°F. when done.

Time To Enjoy Air Fryer Chicken Breast Strips!

Now it’s time to enjoy air fryer chicken breast strips! Transfer the chicken from the air fryer onto a cutting board. Let rest for 2-3 minutes.

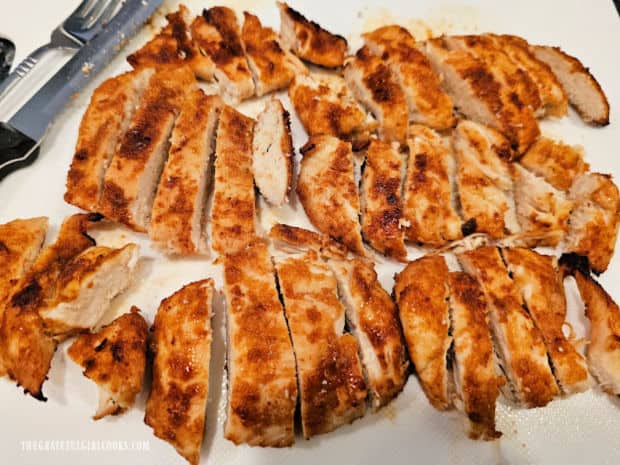
Slice each piece of chicken into thin strips, and then they are ready to be eaten. There are so many different ways you can enjoy these chicken strips!

Serve them on rice, pasta, in tacos, on mixed green salads, make chicken quesadillas, add to a casserole, or use them in soup. There really is no limit to what you can use air fryer chicken breast strips for… use your imagination!

Air fryer chicken breast strips are cut into thin slices and served.

I love that there are so many ways to use this deliciously seasoned chicken, and trust you will find this chicken recipe convenient and tasty, too!

Thanks for stopping by, and I invite you to come back soon for more family-friendly recipes. Take care, may God bless you… and have a wonderful day!

Looking For More AIR FRYER Recipes?

You can find ALL of my recipes in the Recipe Index, which is located at the top of the page. I have a nice variety of Air Fryer recipes to choose from, including:

Want More Recipes? Get My FREE Newsletter!

I publish a newsletter 2 times per month (1st and 15th) with lots of recipes, tips, etc..
Would you like to join our growing list of subscribers?

There is a Newsletter subscription box on the top right (or bottom) of each blog post, depending on the device you use.
You can submit your e-mail address there, to be added to my mailing list.

Find Me On Social Media:

Facebook page: The Grateful Girl Cooks!
Pinterest:
The Grateful Girl Cooks!
Instagram:
jbatthegratefulgirlcooks

Author's signature

Original recipe source: Lindsay, at: https://pinchofyum.com/ridiculously-good-air-fryer-chicken-breast

↓↓ PRINTABLE RECIPE BELOW ↓↓
0 from 0 votes
Air Fryer Chicken Breast Strips
Prep Time
5 mins
Cook Time
10 mins
Total Time
15 mins
 

Make Air Fryer Chicken Breast Strips to eat as is, or add to soups, salads, burritos or tacos! This well-seasoned chicken is very versatile!

Category: Main Dish
Cuisine: All Cuisines
Keyword: air fryer, chicken breast strips
Servings: 4
Calories Per Serving: 190 kcal
Author: JB @ The Grateful Girl Cooks!
Ingredients
For Seasoning Mix:
  • teaspoons brown sugar
  • 1 teaspoon cornstarch
  • ¾ teaspoon paprika
  • ¾ teaspoon salt fine grind-not coarse
  • ½ teaspoon garlic powder
  • ½ teaspoon onion powder
  • ¼ teaspoon smoked paprika
Chicken:
  • pound boneless, skinless chicken breasts (approx. 3 large)
  • 2 teaspoons extra virgin olive oil
Instructions
  1. Mix brown sugar, cornstarch, paprika, salt, garlic powder, onion powder, and smoked paprika in a small bowl until combined.

  2. Pat chicken breasts dry with paper towels; slice each chicken breast into 3 pieces. Place pieces (one at a time) between layers of plastic wrap, and pound them thin, using a meat mallet. Lay in single layer on cookie sheet.

  3. Season chicken (top side) with HALF the seasoning mix, then drizzle with HALF the olive oil. Rub oil/ spices together to cover chicken. Turn chicken over; repeat with remaining seasoning/ oil.

  4. Preheat air fryer to 400°F. Lay chicken (in single layer) in air fryer basket. Cook at 400°F. for 5 minutes; pause cooking; turn pieces over. Continue cooking chicken an additional 3-5 minutes. Keep an eye on internal temp. using a digital thermometer. When done, chicken should have an internal temperature of 165°F.

  5. Transfer chicken to a cutting board. Let rest 2-3 minutes. Slice into thin strips, and serve as is, or added to a favorite salad, soup, etc.. Enjoy!

Nutrition Facts
Air Fryer Chicken Breast Strips
Amount Per Serving (1 (1/4 of total))
Calories 190 Calories from Fat 54
% Daily Value*
Fat 6g9%
Saturated Fat 1g6%
Trans Fat 0.02g
Polyunsaturated Fat 1g
Monounsaturated Fat 3g
Cholesterol 91mg30%
Sodium 602mg26%
Potassium 545mg16%
Carbohydrates 3g1%
Fiber 0.3g1%
Sugar 2g2%
Protein 30g60%
Vitamin A 289IU6%
Vitamin C 2mg2%
Calcium 11mg1%
Iron 1mg6%
* Percent Daily Values are based on a 2000 calorie diet.

Here’s one more to pin on your Pinterest boards!Make Air Fryer Chicken Breast Strips to eat as is, or add to soups, salads, burritos or tacos! This well-seasoned chicken is very versatile!
 

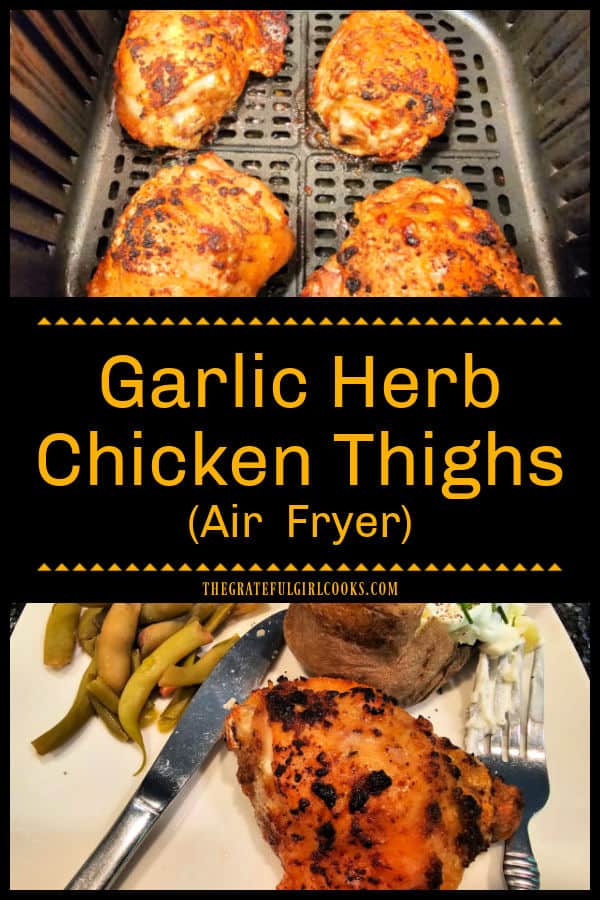
Garlic Herb Chicken Thighs (Air Fryer)

Make Garlic Herb Chicken Thighs in an air fryer! Chicken marinates in olive oil and spices before cooking. Crispy outside, juicy inside!

If you’re looking for a delicious air fryer recipe using chicken, may I suggest this one for garlic herb chicken thighs? It is a simple recipe to prepare with very minimal prep and the chicken comes out fantastic every time I’ve made it.

You will use 4 large bone in, skin on chicken thighs. They are coated with a seasoning marinade for 30 minutes before cooking. Pop them in the air fryer and cook for 20 minutes, and the result is a delicious, flavorful main dish!

It’s such a simple recipe, and it’s so good. Here’s how to make garlic herb chicken thighs in an air fryer.

Scroll Down For A Printable Recipe Card At The Bottom Of The Page

Prepare The Chicken Thighs

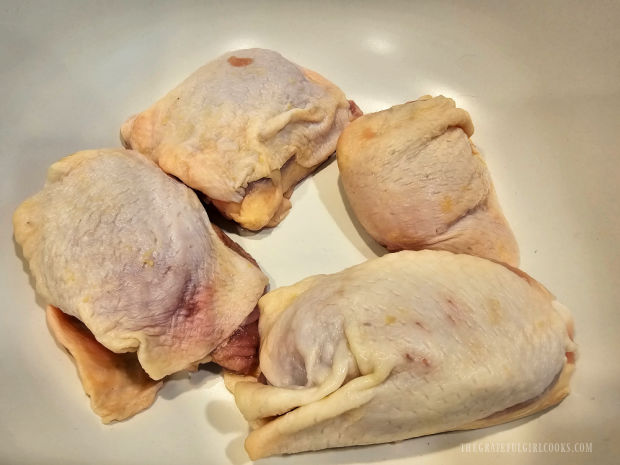
Pat the chicken thighs dry using paper towels. The skin is left on for this recipe, because it adds to the crispiness of the finished garlic herb chicken thighs.

Once patted dry, place the chicken thighs in a large bowl, and set it aside while you prepare a simple seasoning mix.

Four bone-in, skin on chicken thighs, ready to be marinated.

Make The Seasoning Mix

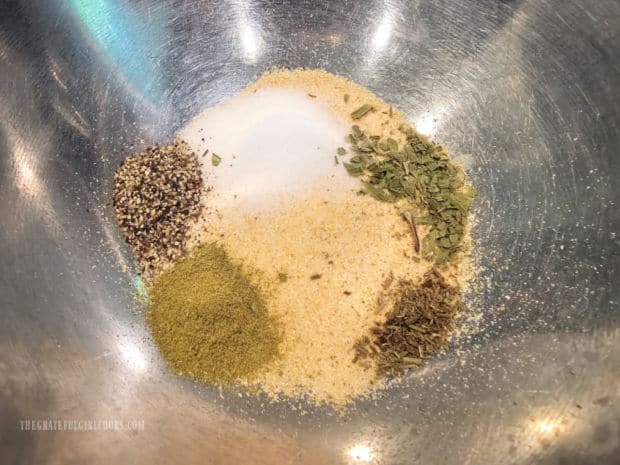
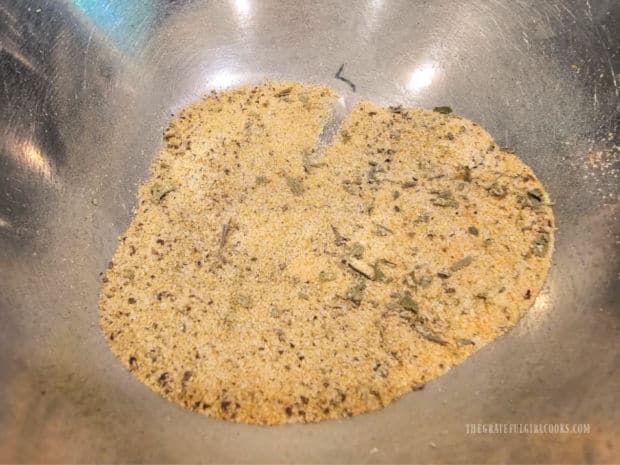
The spice mix is a cinch to make! Simply mix garlic powder, onion powder, salt, black pepper, dried thyme, rosemary and tarragon in a small bowl until they’re combined.

That’s it… see how easy that was? You will use ALL of this mixture for the four chicken thighs.

Dry spices are combined in bowl for the chicken marinade.Garlic powder, salt, pepper, thyme, rosemary and tarragon are mixed.

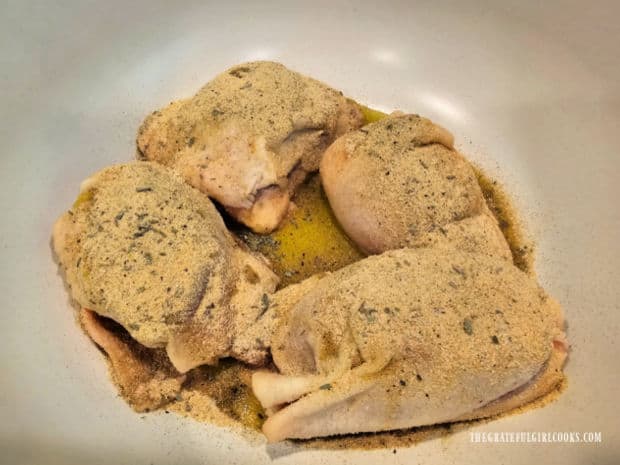
Drizzle olive oil over the chicken thighs, then add the seasoning mix on top. Use your hands to rub and coat the chicken with oil and the spices.

Continue until all the chicken thighs are coated on all sides with oil and spices. Rub the mixture into the surface of the chicken so it adheres.

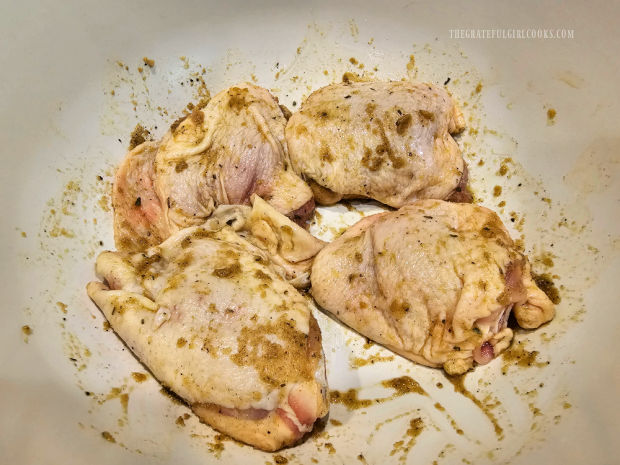
Let the spice/oil-coated chicken marinate for 30 minutes. This allows the spices (and oil, for crispiness) to help give flavor to the chicken skin and meat, before they are cooked.

Chicken is covered with olive oil, then spices are added and combined.Chicken thighs marinate 30 minutes, covered in the spice and oil mixture.

Now It’s Time For The Air Fryer!

Preheat the air fryer to 380°F. NOTE: My air fryer preheats at a default temp. of 400°F, so I preheat it at this temperature, then adjust it down to cook the chicken thighs.

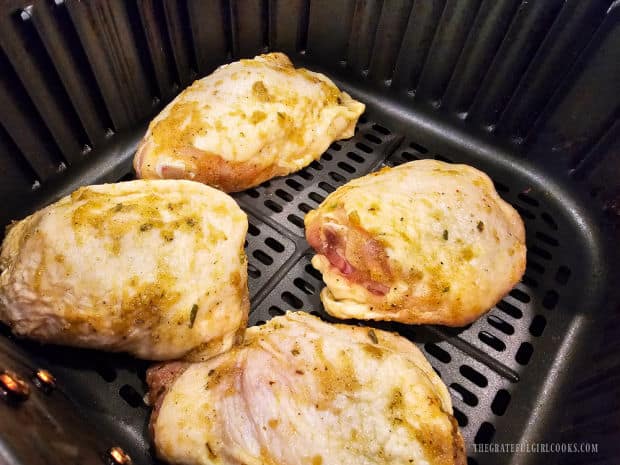
Once the air fryer has preheated, adjust the temperature to 380°F. Place the marinated chicken thighs in the inner basket, leaving a small amount of space between each one.

TIP: If you are cooking more than 4 thighs, be sure to not overcrowd the basket, to ensure each piece of chicken cooks evenly and becomes crisp on the outside.

marinated chicken thighs are place in air fryer basket for cooking.

Select the CHICKEN button if your air fryer has that feature. If not, set the timer for 20 minutes (at 380°F.) . Press START, and air fry the chicken for 10 minutes.

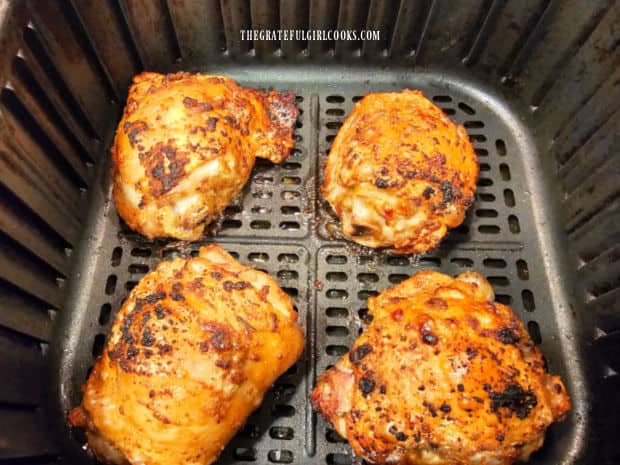
After 10 minutes, press PAUSE, and flip the chicken thighs over to the other side. They should already be nicely browned at this point.

Continue cooking the other side for the remaining 10 minutes OR until the garlic herb chicken thighs reach a “safe” internal temperature of 165°F.

Garlic Herb Chicken Thighs are flipped over halfway through air frying.

Serve The Garlic Herb Chicken Thighs

The garlic herb chicken thighs should be fully cooked at this point and can now be served. We let them rest for 1-2 minutes to let the internal juices redistribute through the meat before serving.

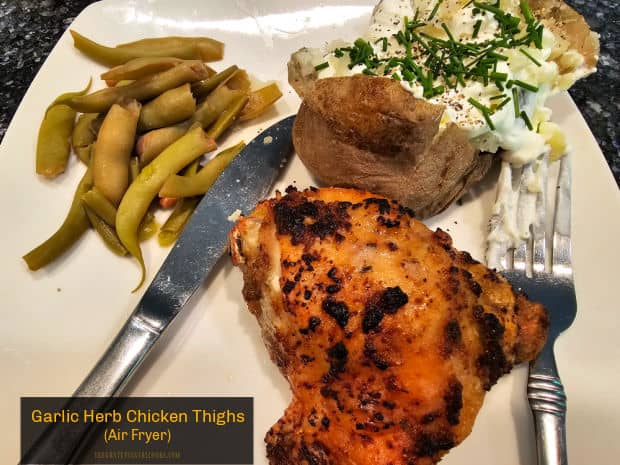
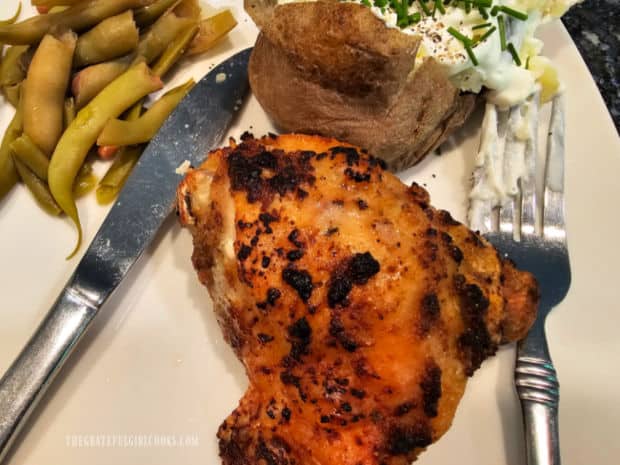
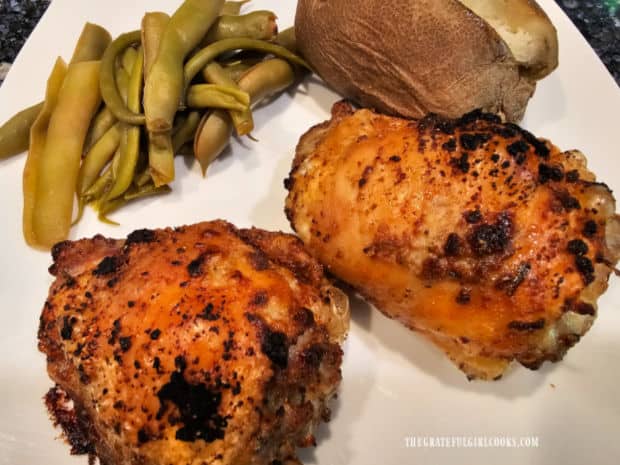
The chicken thighs taste great, thanks to the marinade! They also are juicy on the inside and crispy on the outside. Serve with your favorite sides, and enjoy this simple meat dish!

One of the chicken thighs, served with baked potato and green beans.Two garlic herb chicken thighs, served with green beans and baked potato.

I hope you have the opportunity to make these delicious garlic herb chicken thighs, and trust you’ll like them as much as we do.

Thanks for stopping by, and I invite you to come back soon for more family-friendly recipes. Take care, may God bless you… and make it a GREAT day!

Looking For More AIR FRYER Recipes?

You can find ALL of my recipes in the Recipe Index, which is located at the top of the page. I have a nice variety of air fryer recipes to check out, including:

Want More Recipes? Get My FREE Newsletter!

I publish a newsletter 2 times per month (1st and 15th) with lots of recipes, tips, etc..
Would you like to join our growing list of subscribers?

There is a Newsletter subscription box on the top right (or bottom) of each blog post, depending on the device you use.
You can submit your e-mail address there, to be added to my mailing list.

Find Me On Social Media:

Facebook page: The Grateful Girl Cooks!
Pinterest:
The Grateful Girl Cooks!
Instagram:
jbatthegratefulgirlcooks

Author's signature 

↓↓ PRINTABLE RECIPE BELOW ↓↓

0 from 0 votes
Garlic Herb Chicken Thighs (Instant Pot)
Prep Time
5 mins
Cook Time
20 mins
Inactive Prep: Marinating Time
30 mins
Total Time
55 mins
 

Make Garlic Herb Chicken Thighs in an air fryer! Chicken marinates in olive oil and spices before cooking. Crispy outside, juicy inside!

Category: Main Dish
Cuisine: All Cuisines
Keyword: garlic herb chicken thighs
Servings: 4
Calories Per Serving: 374 kcal
Author: JB @ The Grateful Girl Cooks!
Ingredients
  • 4 large chicken thighs (bone in, skin on)
  • Tablespoons olive oil
For Spice Mix:
  • Tablespoons garlic powder
  • ¾ teaspoon salt
  • ¼ teaspoon black pepper
  • ¼ teaspoon onion powder
  • ¼ teaspoon dried thyme
  • ¼ teaspoon dried rosemary
  • ¼ teaspoon dried tarragon
Instructions
  1. Pat chicken thighs dry using paper towels. Place chicken in a large bowl; set aside.

  2. In a separate small bowl, combine garlic powder, salt, black pepper, thyme, rosemary and tarragon.

  3. Drizzle olive oil over the chicken, then add spice mix. Use your hands to rub and coat chicken with oil and spices until they adhere. Continue until chicken is coated on all sides with oil/spices. Let chicken marinate for 30 minutes.

  4. Preheat air fryer according to manufacturer directions. Once preheated, adjust temperature to 380°F. Place chicken thighs in the inner basket, leaving space between each one. TIP: If cooking more than 4 thighs, don't overcrowd the basket, to ensure each piece cooks evenly and becomes crisp on the outside.

  5. Select the CHICKEN button if the air fryer has that feature. If not, set the timer for 20 minutes (at 380°F). Press START; cook chicken for 10 minutes. After 10 minutes, press PAUSE; flip chicken over to the other side. Continue cooking the other side the remaining 10 minutes OR until the garlic herb chicken thighs reach an internal temperature of 165°F.

  6. When done, let chicken rest 1-2 minutes to let internal juices redistribute in the meat. Serve with favorite side dishes and enjoy!

Nutrition Facts
Garlic Herb Chicken Thighs (Instant Pot)
Amount Per Serving (1 thigh (1/4 of total))
Calories 374 Calories from Fat 261
% Daily Value*
Fat 29g45%
Saturated Fat 7g44%
Trans Fat 0.1g
Polyunsaturated Fat 6g
Monounsaturated Fat 14g
Cholesterol 142mg47%
Sodium 549mg24%
Potassium 338mg10%
Carbohydrates 3g1%
Fiber 0.3g1%
Sugar 0.1g0%
Protein 24g48%
Vitamin A 121IU2%
Vitamin C 0.1mg0%
Calcium 17mg2%
Iron 1mg6%
* Percent Daily Values are based on a 2000 calorie diet.

Here’s one more to pin on your Pinterest boards!Make Garlic Herb Chicken Thighs in an air fryer! Chicken marinates in olive oil and spices before cooking. Crispy outside, juicy inside!

Air Fryer Cheddar Biscuits

Air Fryer Cheddar Biscuits taste amazing! You’re going to love these soft, buttery biscuits filled with cheddar cheese and diced jalapeños.
Air Fryer Cheddar Biscuits taste amazing! You're going to love these soft, buttery biscuits filled with cheddar cheese and diced jalapeños.

Do you enjoy biscuits? We sure do, and the recipe I am sharing today is a fantastic one for making them in an air fryer! I found the original recipe in a manual that came with my air fryer, and only made a couple small changes.

Let me tell you, these air fryer cheddar biscuits (with diced jalapeños) are SO GOOD! They are big enough biscuits that sometimes my hubby and I split one, and every bite is full of deliciousness.

The prep is fairly minimal, but the results are amazing! If you have an air fryer, I hope you will try this biscuit recipe. Here’s how to make them.

Scroll Down For A Printable Recipe Card At The Bottom Of The Page

Make The Dough For The Cheddar Biscuits

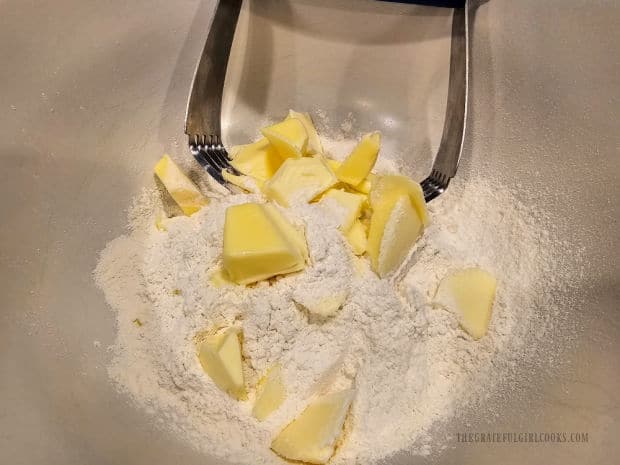
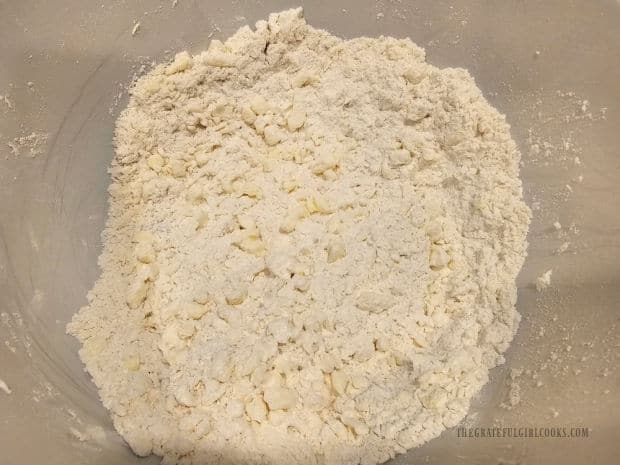
Sift all purpose flour, baking powder, sugar, salt and baking soda together into a large mixing bowl. Cut VERY COLD butter into small chunks and add them to the sifted dry ingredients.

Use a pastry blender or two forks to cut the butter into the flour mixture. Continue until the dough becomes crumbly, and the butter has been reduced to the size of peas.

Cold butter is cut into the dry, sifted flour mixture.It's ready when the cold butter is reduced to the size of peas.

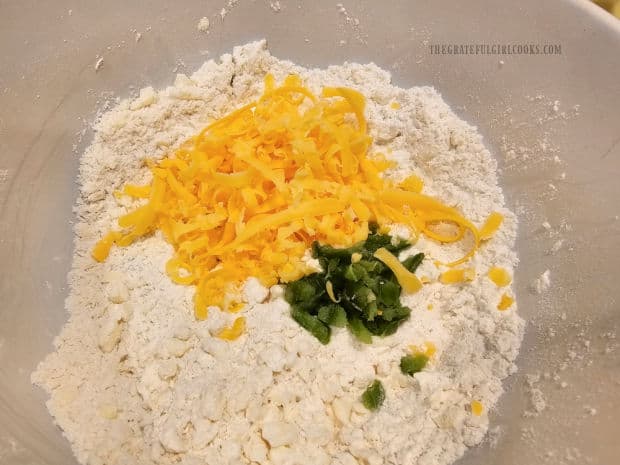
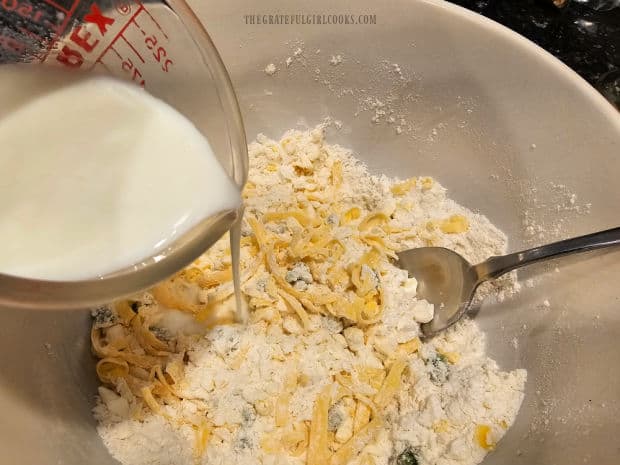
Add grated cheddar cheese and finely diced jalapenos to the dry ingredients and stir, to combine. Once combined, pour in the buttermilk, and stir until it has been incorporated into the mixture.

NOTE: The jalapeno flavor is very mild in this recipe (as written). Don’t like jalapeños? Leave them out! Do you LOVE jalapeños? Add more, if desired, to suit your taste.

Grated cheddar cheese and diced jalapeños are added to dough mixture.Cold buttermilk is added to the cheddar biscuit dough and stirred to combine.

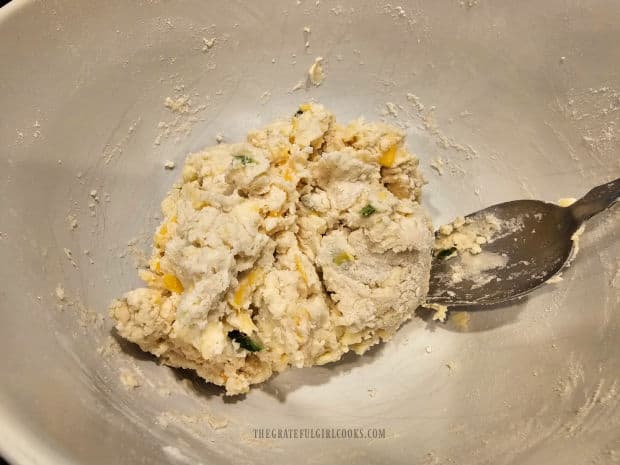
Continue to stir until all the dough ingredients have been fully combined in a shaggy mound of dough.

The ball of dough for the air fryer cheddar biscuits is ready.

Shape, Slice, And Top With Melted Butter

Cut a piece of parchment paper to fit the basket of your air fryer. Place the dough in a mound in the middle of the paper.

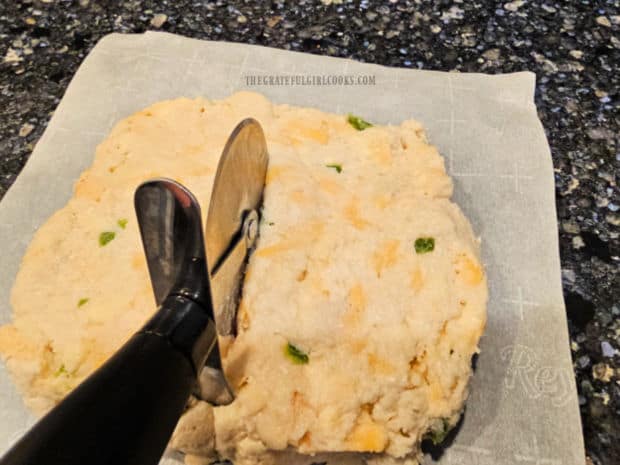
Shape the dough into a square, about 1″ thick, using your hands (a bit sticky). Slice the dough into 4 equal-sized squares using a knife or pizza cutter (my favorite way to cut them).

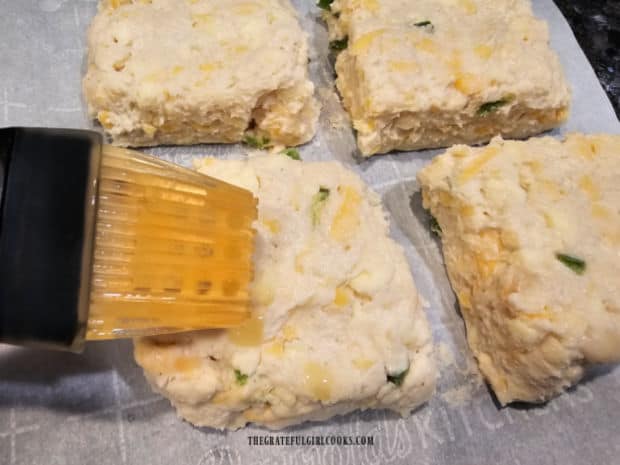
Separate them a bit on the parchment paper, and then brush the tops of each biscuit with melted butter. Now they’re ready for the air fryer.

Dough is formed into a square, then cut in 4 equal squares with pizza cutter.Four biscuits brushed on top with melted butter.

Time For the Air Fryer!

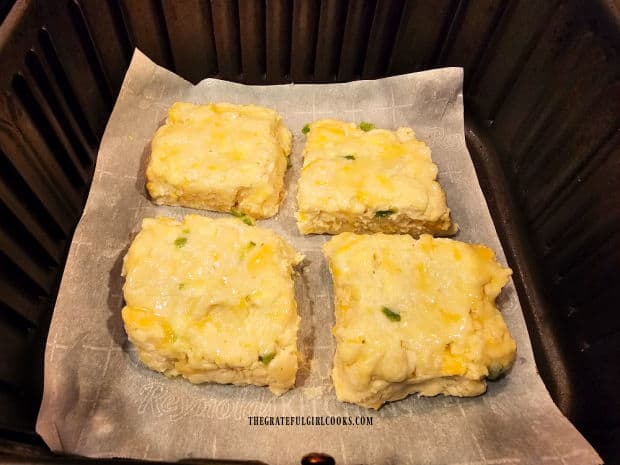
Preheat your air fryer to 350°F. Once it has reached temperature, carefully place the parchment paper and biscuits into the basket. Cook the biscuits at 350°F for 12 minutes without disturbing them.

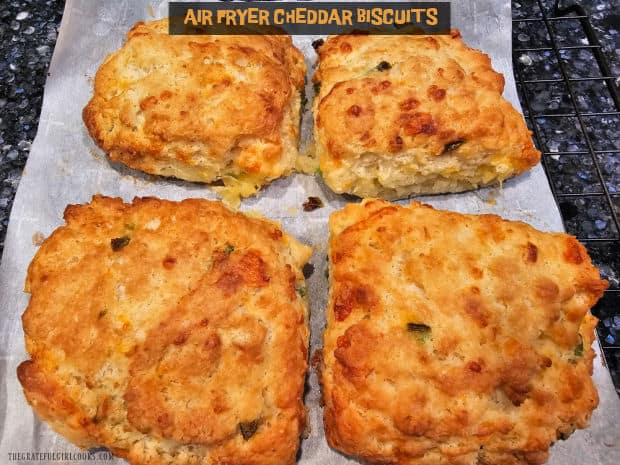
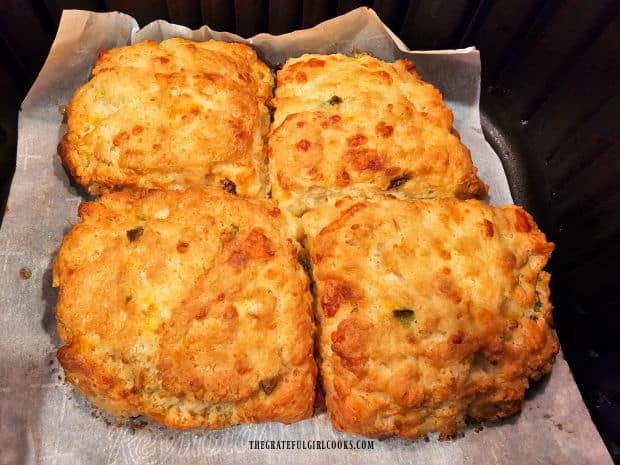
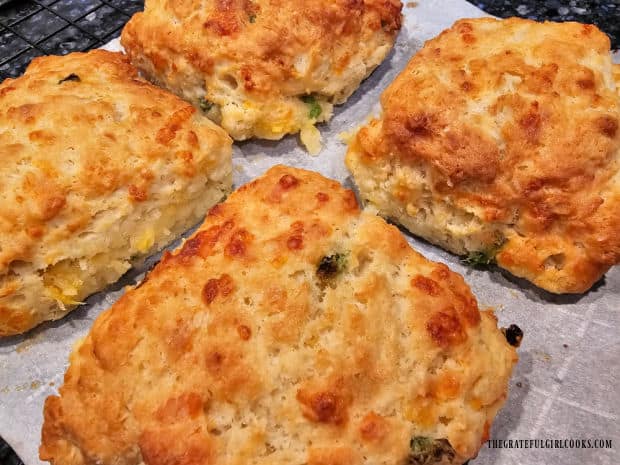
When done, the air fryer cheddar biscuits should be nicely browned on top and cooked all the way through. Transfer the parchment paper (and biscuits) to a wire rack to cool for 1 minute before serving.

Slice through the biscuits to separate them from each other, because they may have cooked together as they rose and cooked in the pan.

Biscuits on parchment paper in the air fryer basket in a preheated machine.After baking, air fryer cheddar biscuits are golden brown on the outside.

Time To Enjoy The Air Fryer Cheddar Biscuits

Serve the air fryer cheddar biscuits while they’re warm and enjoy! My husband and I split them in half at times, because they are a large biscuit, and are a bit calorically “challenging”!

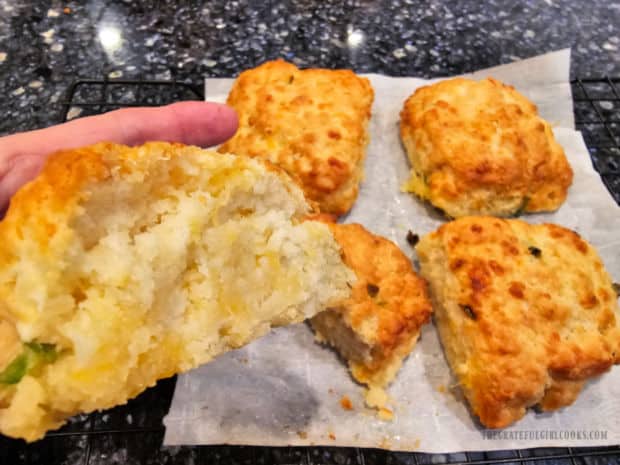
The biscuits are buttery and slightly crunchy on the outside, but the inside is soft and fluffy! These delicious biscuits taste outstanding, as well, and the jalapeños only add a tiny amount of heat.

Biscuits cool on parchment paper on a wire rack after cooking.An air fryer cheddar biscuit is cut in half to reveal the soft, fluffy inside.

I hope you enjoy these amazing biscuits and trust you have the same reaction we did when we tried them the very first time. We said “WOW”!!!

Thanks for stopping by, and I invite you to come back again soon for more family-friendly recipes. Take care, may God bless you… and have a GREAT day!

Looking For More AIR FRYER Recipes?

You can find ALL of my recipes in the Recipe Index, which is located at the top of the page. I have some delicious air fryer recipes to choose from, including:

Want More Recipes? Get My FREE Newsletter!

I publish a newsletter 2 times per month (1st and 15th) with lots of recipes, tips, etc..
Would you like to join our growing list of subscribers?

There is a Newsletter subscription box on the top right (or bottom) of each blog post, depending on the device you use.
You can submit your e-mail address there, to be added to my mailing list.

Find Me On Social Media:

Facebook page: The Grateful Girl Cooks!
Pinterest:
The Grateful Girl Cooks!
Instagram:
jbatthegratefulgirlcooks

Author's signature

Recipe adapted from: “Cosori Air Fryer Recipes” (the manual that came with the air fryer), page 98

↓↓ PRINTABLE RECIPE BELOW ↓↓

0 from 0 votes
Air Fryer Cheddar Biscuits
Prep Time
10 mins
Cook Time
12 mins
Total Time
22 mins
 

Air Fryer Cheddar Biscuits taste amazing! You're going to love these soft, buttery biscuits filled with cheddar cheese and diced jalapeños.

Category: Bread, Side Dish
Cuisine: All Cuisines
Keyword: air fryer cheddar biscuits
Servings: 4
Calories Per Serving: 496 kcal
Author: JB @ The Grateful Girl Cooks!
Ingredients
  • cups all purpose flour
  • teaspoons baking powder
  • 1 teaspoon salt
  • 1 teaspoon granulated sugar
  • teaspoon baking soda
  • ½ cup COLD butter = 8 T. or 1 stick
  • ½ cup shredded cheddar cheese
  • 1 Tablespoon jalapeños seeded, finely diced
  • ½ cup buttermilk (cold)
  • 2 teaspoons butter (for brushing on biscuit tops) melted
Instructions
  1. Sift flour, baking powder, sugar, salt and baking soda into a large mixing bowl. Cut VERY COLD butter into small chunks; add them to flour mixture. Use a pastry blender or two forks to cut butter into the flour mixture. Continue until dough becomes crumbly, and butter has been reduced to the size of peas.

  2. Add grated cheese and jalapeños; stir, to combine. Once combined, stir in buttermilk until it is incorporated. Continue to stir until all the dough ingredients are fully combined in a shaggy mound of dough.

  3. Cut a piece of parchment paper to fit basket of the air fryer. Transfer parchment paper to counter (return basket to air fryer). Preheat air fryer to 350℉.

  4. Place dough in the middle of the parchment paper. Shape dough into a square, about 1" thick, using your hands. Slice dough into 4 equal-sized squares. Separate squares slightly on the parchment paper; brush biscuit tops with melted butter.

  5. Once air fryer has reached temperature, carefully place parchment paper and biscuits into the basket. Cook biscuits at 350°F for 12 minutes. When done, biscuits should be nicely browned and cooked through. Transfer parchment paper (and biscuits) to a wire rack; cool for 1 minute. Serve and enjoy!.

Nutrition Facts
Air Fryer Cheddar Biscuits
Amount Per Serving (1 biscuit)
Calories 496 Calories from Fat 279
% Daily Value*
Fat 31g48%
Saturated Fat 19g119%
Trans Fat 1g
Polyunsaturated Fat 1g
Monounsaturated Fat 8g
Cholesterol 82mg27%
Sodium 953mg41%
Potassium 258mg7%
Carbohydrates 45g15%
Fiber 2g8%
Sugar 3g3%
Protein 10g20%
Vitamin A 968IU19%
Vitamin C 5mg6%
Calcium 205mg21%
Iron 3mg17%
* Percent Daily Values are based on a 2000 calorie diet.

Here’s one more to pin on your Pinterest boards!Air Fryer Cheddar Biscuits taste amazing! You're going to love these soft, buttery biscuits filled with cheddar cheese and diced jalapeños.


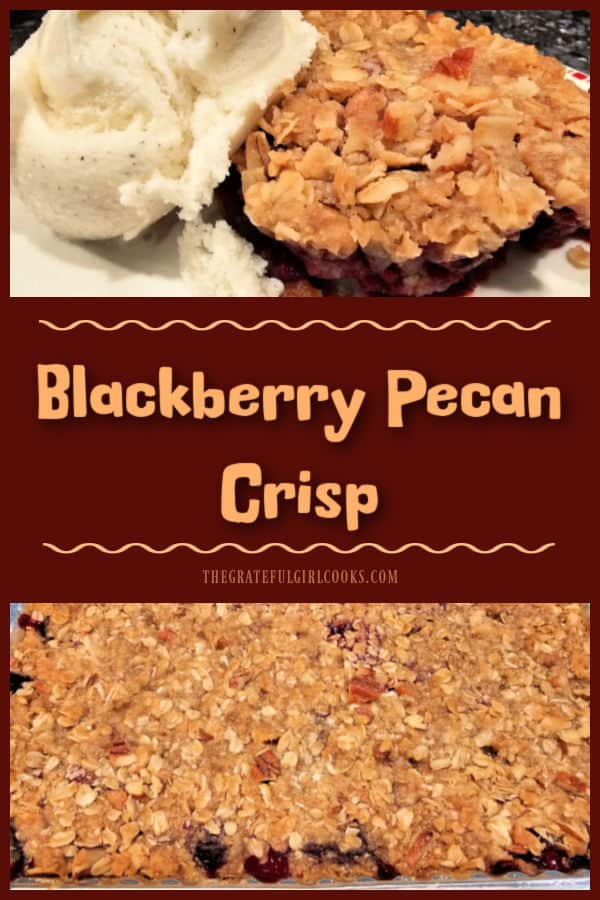
Blackberry Pecan Crisp

Make a delicious Blackberry Pecan Crisp any time, using fresh or frozen blackberries! This simple dessert is topped with crumbly streusel.

Do you enjoy blackberries? We sure do! We have wild blackberry vines that grow over part of our back fence from a neighboring park, and I love to pick them each summer and make wonderful treats using them!

The recipe I’m sharing today is fairly similar to a blackberry crisp recipe I’ve posted in the past, but this one includes pecans in the streusel topping. I also changed a few of the ingredients, and the quantities I used to make this are also different in this particular recipe.

Fresh OR frozen (unthawed) blackberries can be used in this recipe, which makes it convenient to make this dessert any time of the year!

It’s a simple, classic dessert recipe I’m sure you’ll enjoy, because it is DELICIOUS! Here’s how to make blackberry pecan crisp.

Scroll Down For A Printable Recipe Card At The Bottom Of The Page

Make The Streusel Topping

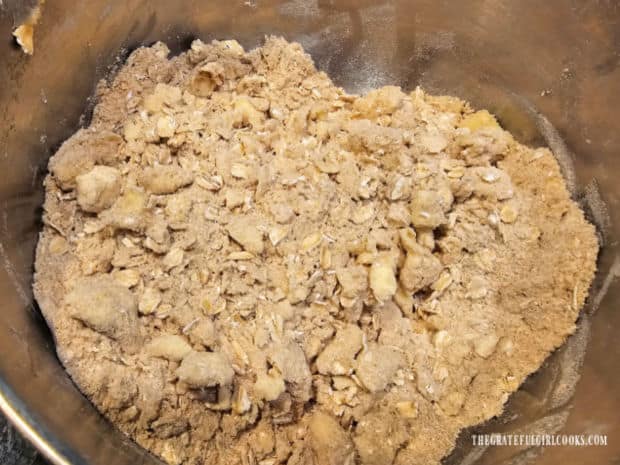
To make the streusel topping for the blackberry crisp, whisk together old fashioned oats, flour, brown sugar and salt in a large mixing bowl. Continue mixing until combined, breaking up any brown sugar lumps you may find in the streusel topping.

Add COLD butter chunks to this mixture. Use a pastry blender or two forks to cut the butter into the streusel topping until the butter is about the size of peas.

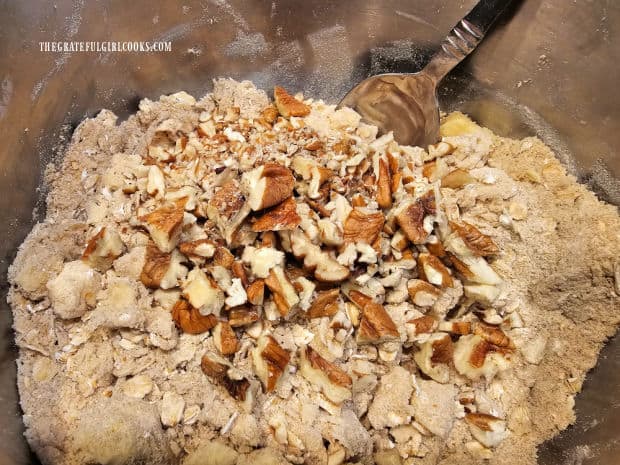
Stir in chopped pecans, until they have been incorporated into the streusel. Set the bowl of streusel topping aside.

A streusel topping is combined to use on the fruit crisp.Chopped pecans are stirred into the streusel topping for the blackberry crisp.

Prepare The Blackberry Filling

TIP: You can use fresh OR frozen blackberries for this recipe. If using frozen blackberries, do not thaw them before adding!

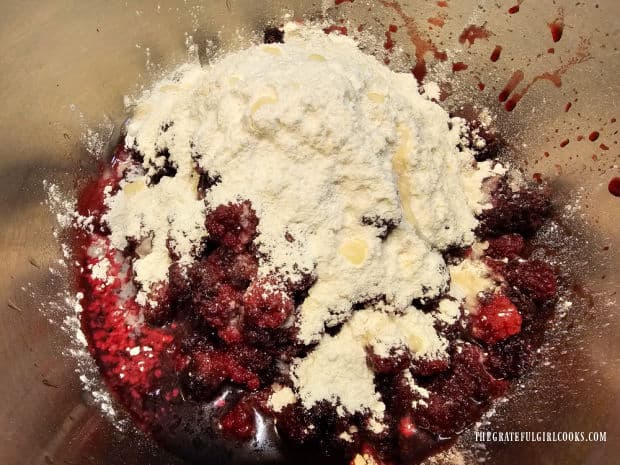
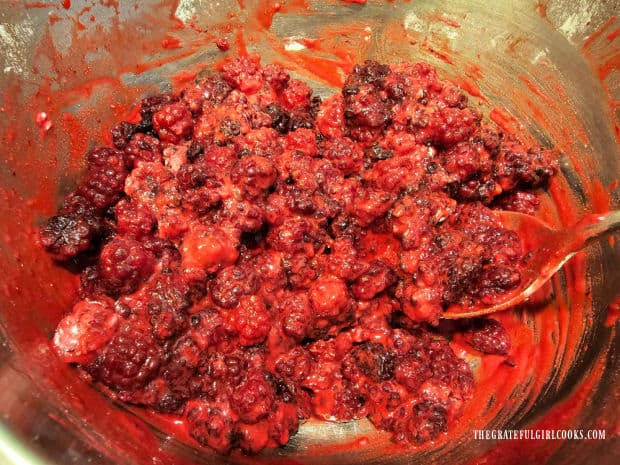
Place blackberries, granulated sugar, all purpose flour and lemon juice in a large mixing bowl. Stir gently, until the ingredients are fully combined.

Blackberries are combined with sugar, flour and lemon juice in a bowl.The blackberry filling is now combined and ready for the baking dish.

Into The Baking Pan It Goes!

Lightly spray or grease a baking dish, approximately 6″ x 9″ or  you can use an 8″ square pan. Be sure to spray the pan on the bottom and all sides.

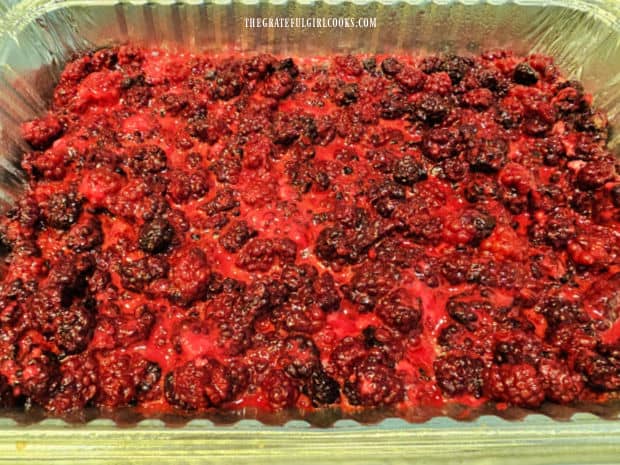
Spread the blackberry filling in the baking dish, evenly distributing it across the bottom until the pan is filled.

NOTE: Occasionally I will use disposable aluminum pans that come with lids, so I can freeze the blackberry crisp after it has been baked (and cooled)! I made this one (shown below in the photos) in the Fall, but we thawed it, and enjoyed it (reheated) in January!

A baking dish filled with the blackberry fruit filling.

Bake The Blackberry Pecan Crisp

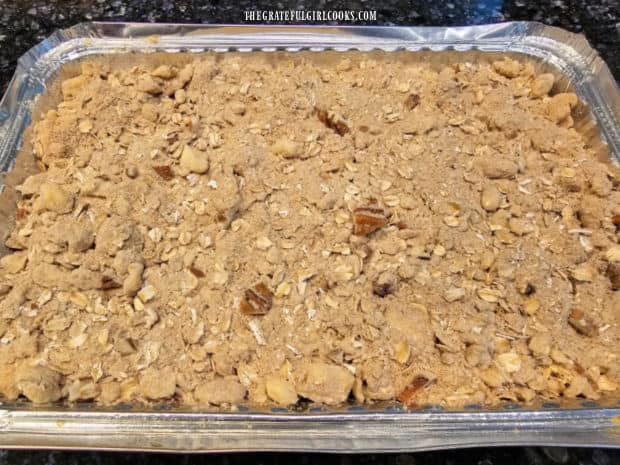
Sprinkle the blackberry fruit filling with all of the streusel topping, making sure the entire top is covered. Once it is fully covered, the blackberry pecan crisp is ready for the oven!

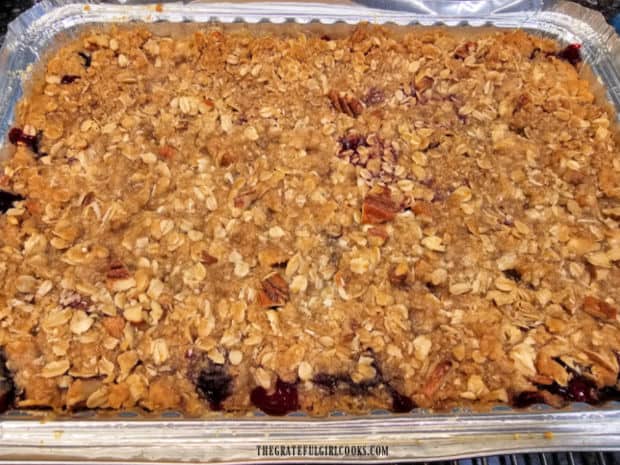
Bake at 350°F. for about 40-45 minutes. When done, the blackberry pecan crisp should be bubbly all around the edges, and it should be golden brown on top.

Transfer the baking dish to a wire rack and let the crisp cool for 15 minutes before serving. The filling will thicken and firm up a bit as it cools, which will help with easier serving.

Pecan streusel topping is sprinkled over the surface of the blackberry crisp.The blackberry pecan crisp cools on a wire rack after being baked.

Time To Enjoy The Blackberry Pecan Crisp

Once the crisp has cooled slightly (15 minutes of patiently waiting!), it’s time to serve this delicious dessert!

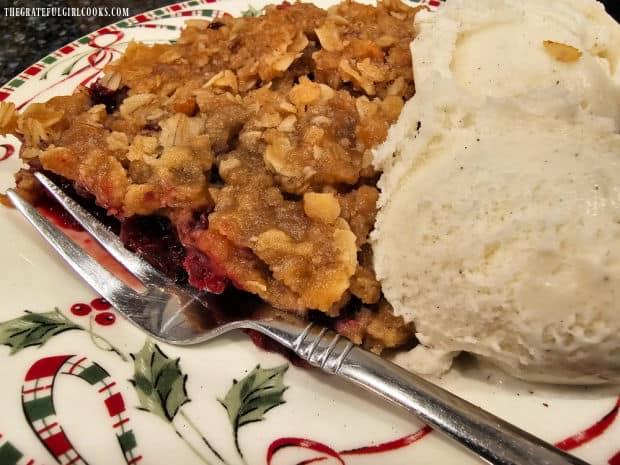
Spoon out individual servings, and top each portion with a nice scoop of vanilla ice cream. I’m pretty sure somewhere there’s an unwritten law that states that cobblers and crisps must be served a la mode… ha ha!

The slightly warm (and oh so delicious) blackberry pecan crisp will  begin to soften that ice cream perfectly! Grab a fork or spoon and dig in! Its absolutely delicious, and I’m confident you’re going to enjoy this treat.

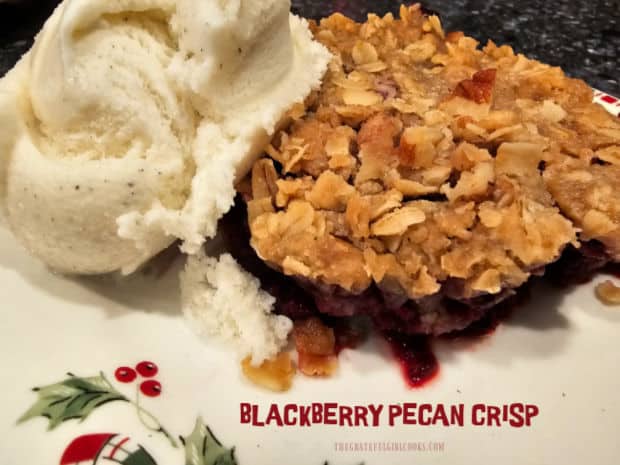
A serving of blackberry pecan crisp on a plate, with a scoop of vanilla ice cream.

I really hope you enjoy this classic dessert, and will enjoy this recipe for many years to come! Whether you use fresh berries or frozen, this is a simple and absolutely yummy fruit crisp!

We store any leftover blackberry crisp (covered) in the refrigerator, and then leftovers can be easily reheated in a microwave to enjoy later!

Thanks for stopping by, and I invite you to come back again soon for more family-friendly recipes. Take care, may God bless you, and have a GREAT day!

Looking For More COBBLER AND CRISP Recipes?

You can find ALL of my recipes in the Recipe Index, which is located at the top of the page. I have quite a few delicious cobbler and crisp recipes, including:

Want More Recipes? Get My FREE Newsletter!

I publish a newsletter 2 times per month (1st and 15th) with lots of recipes, tips, etc..
Would you like to join our growing list of subscribers?

There is a Newsletter subscription box on the top right (or bottom) of each blog post, depending on the device you use.
You can submit your e-mail address there, to be added to my mailing list.

Find Me On Social Media:

Facebook page: The Grateful Girl Cooks!
Pinterest:
The Grateful Girl Cooks!
Instagram:
jbatthegratefulgirlcooks

Author's signature

↓↓ PRINTABLE RECIPE BELOW ↓↓

0 from 0 votes
Blackberry Pecan Crisp
Prep Time
10 mins
Cook Time
40 mins
Total Time
50 mins
 

Make a delicious Blackberry Pecan Crisp any time, using fresh or frozen blackberries! This simple dessert is topped with crumbly streusel.

Category: Dessert
Cuisine: American
Keyword: blackberry pecan crisp
Servings: 8
Calories Per Serving: 485 kcal
Author: JB @ The Grateful Girl Cooks!
Ingredients
For Streusel Topping
  • cups old-fashioned oats
  • 1 cup all purpose flour
  • 1 cup dark brown sugar (packed)
  • ¼ teaspoon salt
  • 12 Tablespoons COLD butter = 1½ sticks, cold & cut in small chunks
For Blackberry Filling:
  • 6 cups blackberries if using frozen, do not thaw
  • ½ cup granulated sugar
  • 6 Tablespoons all purpose flour
  • 1 Tablespoon fresh lemon juice
Instructions
  1. Preheat oven to 350℉. Spray/grease 6" x 9" OR 8" x 8" baking dish on bottom and sides.

  2. Combine oats, flour, brown sugar and salt in a large mixing bowl. Add COLD butter chunks. Use pastry blender or two forks to cut butter into the streusel topping until butter becomes the size of peas. Stir in pecans until incorporated. Set streusel topping aside.

  3. Place blackberries, sugar, flour and lemon juice in a large bowl. Stir gently, until combined. Spread blackberry filling evenly in baking dish until pan is filled.

  4. Sprinkle streusel mixture across surface of the blackberry filling, making sure entire surface is covered.

  5. Bake at 350°F. for 40-45 minutes. When done, it should be bubbly around the edges, and golden brown. Transfer to a wire rack; cool 15 minutes before serving. Filling will thicken as it cools. Serve and enjoy with a scoop of vanilla ice cream!

Nutrition Facts
Blackberry Pecan Crisp
Amount Per Serving (1 (1/8 of total))
Calories 485 Calories from Fat 171
% Daily Value*
Fat 19g29%
Saturated Fat 11g69%
Trans Fat 1g
Polyunsaturated Fat 1g
Monounsaturated Fat 5g
Cholesterol 45mg15%
Sodium 218mg9%
Potassium 297mg8%
Carbohydrates 76g25%
Fiber 8g33%
Sugar 45g50%
Protein 6g12%
Vitamin A 756IU15%
Vitamin C 23mg28%
Calcium 71mg7%
Iron 3mg17%
* Percent Daily Values are based on a 2000 calorie diet.

Here’s one more to pin on your Pinterest boards!Make a delicious Blackberry Pecan Crisp any time, using fresh or frozen blackberries! This simple dessert is topped with crumbly streusel.

Air Fryer Pork Chops For Two

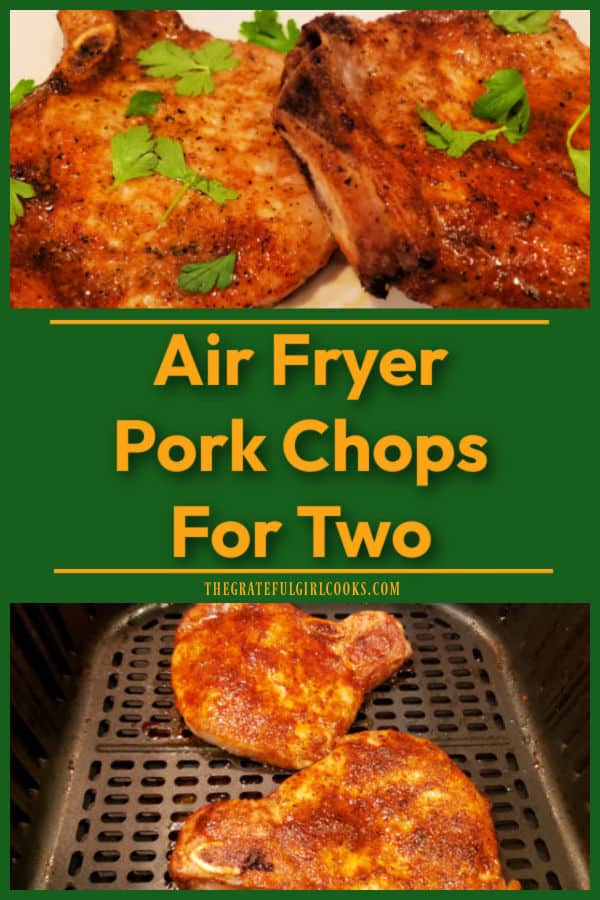
Make Air Fryer Pork Chops For Two! This quick, easy recipe yields delicious, spice-rubbed, bone-in pork chops for two people in 20 minutes.

If you enjoy eating pork chops and have an air fryer, then I’m confident you will LOVE this recipe! The recipe makes two servings, which is convenient for my husband and I, since we’re the only ones left at home. Both of our grown sons live on their own, so it is a fun challenge to alter recipes at times to only make enough for the TWO of us.

Air Fryer Pork Chops For Two is a recipe I originally found online. I cut the recipe in half for the two of us, and gave it a try in our air fryer a few months ago. My husband and I loved the flavor of the air-fried pork chops, thanks to a flavorful, homemade spice rub mixture!

The pork chops were perfectly cooked and browned on the outside, juicy on the inside, and they tasted wonderful! We’ve enjoyed this dish several times since then!

It only takes about 10 minutes to prepare the spice mix and season the meat, then into a preheated air fryer they go. The pork chops cook for about 8-10 minutes, or until they reach temp. All you need to do is flip them over halfway through the cooking time! How’s that for EASY? Here’s how to make them:

Scroll Down For A Printable Recipe Card At The Bottom Of The Page

Preheat Your Air Fryer

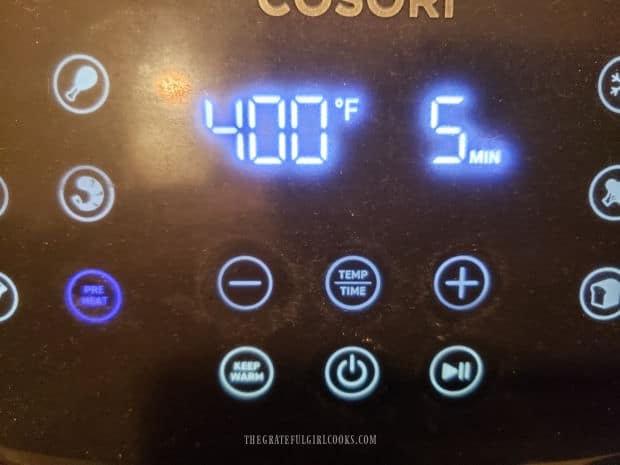
Preheat your air fryer for five minutes at 400°F. If your machine doesn’t have a Preheat function, simply heat it for 5 minutes at that temperature (400°F). You want your air fryer hot when you add the seasoned pork chops, for best results.

I usually mix up the spices, and season the pork chops while the air fryer preheats, because that saves time! Try it… you’ll see what I mean!

An air fryer is preheated to 400°F. before cooking seasoned pork chops.

Make The Seasoning Mix

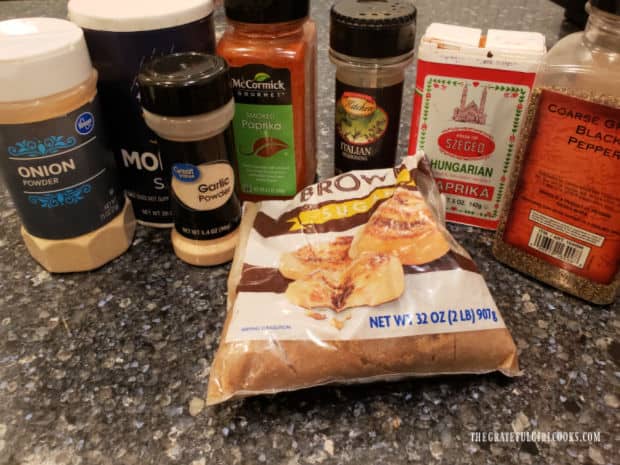
The spice mix is simple to make from scratch! You need brown sugar, salt, Italian seasoning, smoked paprika, garlic powder, onion powder, black pepper and sweet paprika.

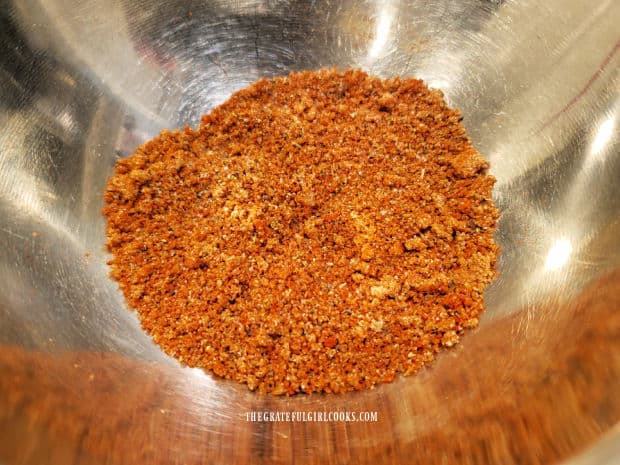
Mix these spices together in a small bowl, until they are fully combined.

There are quite a few spices that make up the spice rub for the air fryer pork chops.A bowl with homemade spice mixture to rub onto the pork chops before they cook.

Season The Pork Chops

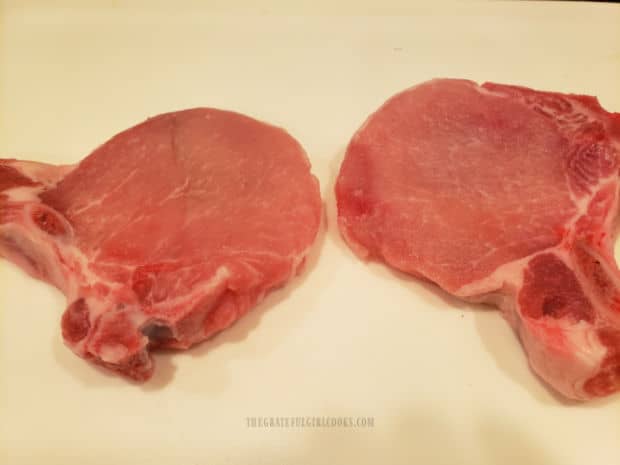
For this recipe you will need two bone-in pork chops, approx. 6-7 ounces each. Each pork chop should be about ¾ to 1″ thick, so they will cook evenly and for about the same amount of time.

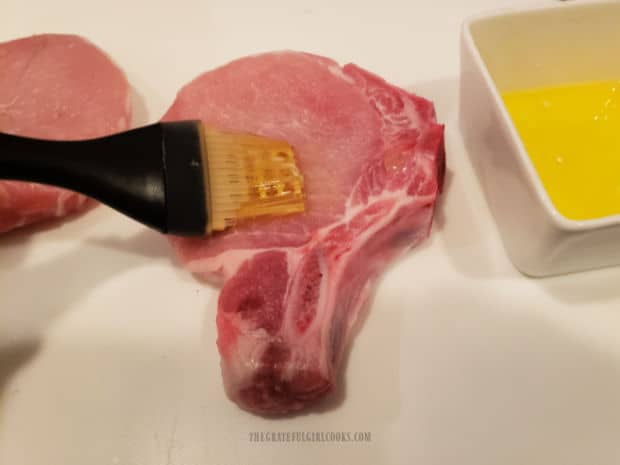
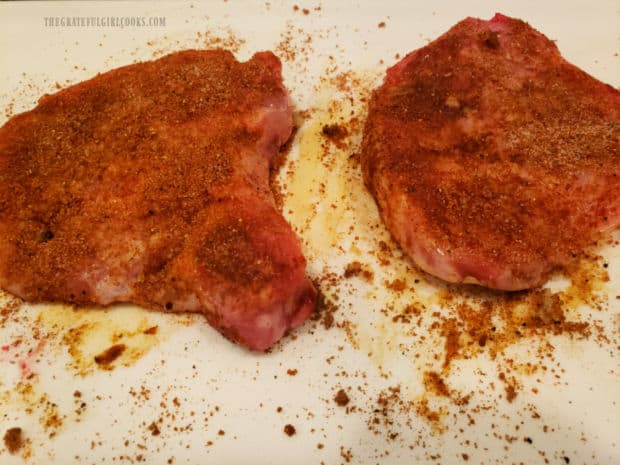
Pat the chops dry using paper towels to absorb extra moisture. Use a pastry brush to cover BOTH SIDES of each pork chop with melted butter.

Cover BOTH SIDES of each pork chop with the spice mixture, rubbing it into the buttered pork chops so it adheres as much as possible. Use all of the spice mix, for the very best flavor on those chops!

Once the pork chops are coated with the spices, they are ready to pop into a preheated air fryer!

Two, six ounce bone-in pork chops, patted dry, and ready to be seasoned.Both sides of the pork chops are brushed with melted butter.Spice mixture is rubbed into both sides of the pork chops before cooking.

Cooking The Pork Chops In the Air Fryer

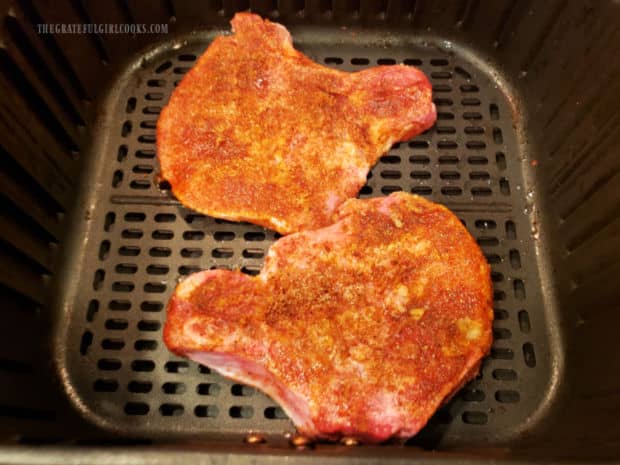
Place the seasoned chops in a single layer in the basket of the air fryer. Please note that if you are making more than two pork chops, you may have to work in batches to ensure they fit in the basket. This also allows the meat to “air fry” better as the hot air can circulate around the pork chops more efficiently!

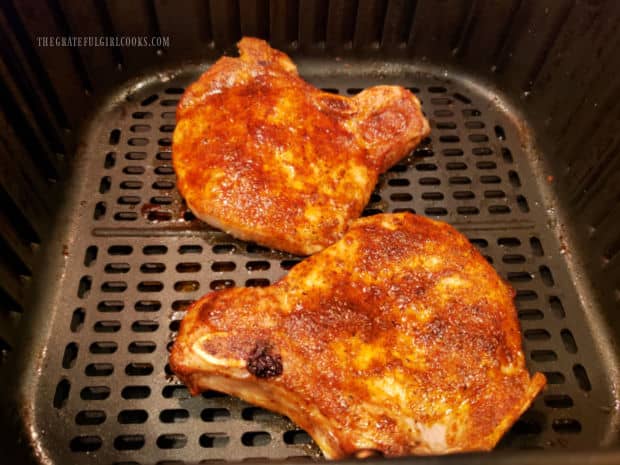
Cook the air fryer pork chops for two at 400°F. for about 6 minutes. Remove the basket, and flip the pork chops over to the other side.

Re-insert basket into the air fryer and continue cooking for 2-4 more minutes OR until a meat thermometer inserted into the middle of a chop reaches 145°F. When done, the pork chops should be nicely browned on the surface, and cooked to 145°F.

The thickness of the pork chops used will ultimately determine how long they take to air fry. Typically, it should take between 8-10 minutes TOTAL time to cook them to temperature.

A couple of times, ours were fully cooked after 7 minutes total time. Keep an eye on them, so you do not overcook or undercook them!

Well seasoned pork chops are placed in basket of air fryer in one layer.Air fryer pork chops for two have been flipped over to finish cooking.

Serve The Air Fryer Pork Chops For Two

Once done, remove the pork chops from the air fryer, and let them rest for 4-5 minutes before serving. This “resting” time lets the juices inside have time to redistribute inside the meat, so the pork chops remain juicy.

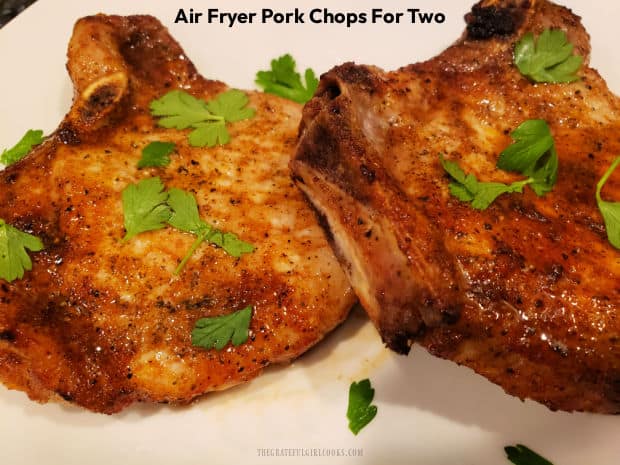
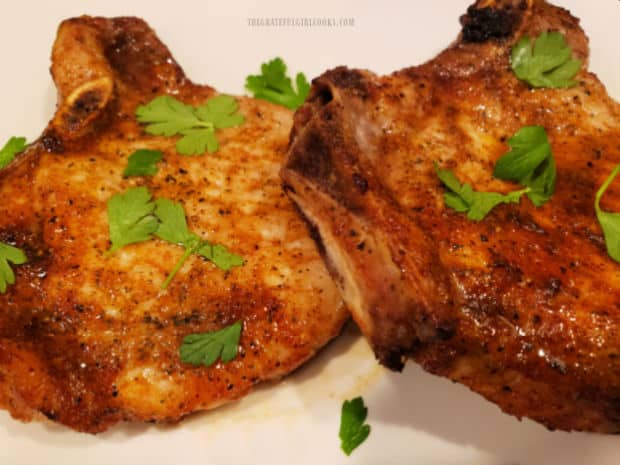
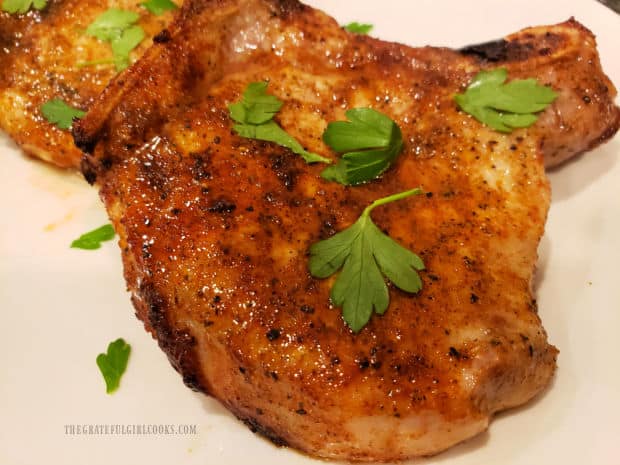
Once they’ve rested, garnish the pork chops with fresh parsley, and serve! The pork chops are juicy, and have wonderful flavor, thanks to the homemade spice mix you used to season them.

Serve immediately, while hot! We enjoy air fryer pork chops for two served with mashed potatoes and a green veggie on the side. YUM!

The air fryer pork chops for two are served, garnished with fresh parsley.A close up of one of the air fryer pork chops, with parsley garnish, on a white plate.

Thanks for stopping by today, and I hope you enjoy this delicious recipe for air fryer pork chops for two! Take care, please come back again soon, and have a GREAT day!

Looking For More AIR FRYER Recipes?

You can find ALL of my recipes in the Recipe Index, which is located at the top of the page. I have quite a few Air Fryer recipes for to you check out, including:

Want More Recipes? Get My FREE Newsletter!

I publish a newsletter 2 times per month (1st and 15th) with lots of recipes, tips, etc..
Would you like to join our growing list of subscribers?

There is a Newsletter subscription box on the top right (or bottom) of each blog post, depending on the device you use.
You can submit your e-mail address there, to be added to my mailing list.

Find Me On Social Media:

Facebook page: The Grateful Girl Cooks!
Pinterest:
The Grateful Girl Cooks!
Instagram:
jbatthegratefulgirlcooks

Author's signature

Recipe adapted from (and with thanks to) Sara, at: dinneratthezoo.com/air-fryer-pork-chops/

↓↓ PRINTABLE RECIPE BELOW ↓↓

0 from 0 votes
Air Fryer Pork Chops For Two
Prep Time
5 mins
Cook Time
10 mins
Total Time
15 mins
 

Make Air Fryer Pork Chops For Two! This quick, easy recipe yields delicious, spice-rubbed, bone-in pork chops for two people in 20 minutes.

Category: Main Dish
Cuisine: American
Keyword: air fryer pork chops
Servings: 2
Calories Per Serving: 315 kcal
Author: JB @ The Grateful Girl Cooks!
Ingredients
  • 2 bone-in pork chops (6-7 oz. each) approx. ¾-1" thick
  • Tablespoons butter melted
For Spice Mix:
  • ¾ Tablespoon brown sugar
  • ½ teaspoon salt
  • ½ teaspoon smoked paprika
  • ½ teaspoon Italian seasoning
  • ½ teaspoon sweet paprika
  • teaspoon onion powder
  • teaspoon garlic powder
  • teaspoon black pepper
Garnish (optional):
  • 1 Tablespoon chopped fresh parsley
Instructions
  1. Preheat air fryer for five minutes at 400°F.

  2. Mix brown sugar, salt, smoked paprika, Italian seasoning, sweet paprika, onion and garlic powders, and pepper in a small bowl, until well combined.

  3. Pat pork chops dry with paper towels to absorb moisture. Use a pastry brush to cover BOTH SIDES of each pork chop with melted butter.

  4. Cover BOTH SIDES of each pork chop with spice mix, rubbing it into the buttered pork chops so it adheres as much as possible.

  5. Place chops in a single layer in air fryer basket. Cook at 400°F. for about 6 minutes. Flip pork chops over. Continue cooking 2-4 minutes OR until a meat thermometer inserted into a chop reaches 145°F. and chops are nicely browned. NOTE: *If making more than two chops, work in batches. This allows meat to "air fry" better as hot air can circulate around pork chops more efficiently!

  6. Once done, remove pork chops from air fryer. Let them rest 4-5 minutes before serving. This lets juices have time to redistribute inside, so the pork chops remain juicy. Garnish chops with parsley (optional), and serve!

Nutrition Facts
Air Fryer Pork Chops For Two
Amount Per Serving (1 pork chop)
Calories 315 Calories from Fat 180
% Daily Value*
Fat 20g31%
Saturated Fat 9g56%
Trans Fat 0.5g
Polyunsaturated Fat 2g
Monounsaturated Fat 7g
Cholesterol 111mg37%
Sodium 722mg31%
Potassium 492mg14%
Carbohydrates 6g2%
Fiber 1g4%
Sugar 5g6%
Protein 27g54%
Vitamin A 940IU19%
Vitamin C 3mg4%
Calcium 45mg5%
Iron 1mg6%
* Percent Daily Values are based on a 2000 calorie diet.

Here’s one more to pin on your Pinterest boards!Make Air Fryer Pork Chops For Two! This quick, easy recipe yields delicious, spice-rubbed, bone-in pork chops for two people in 20 minutes.

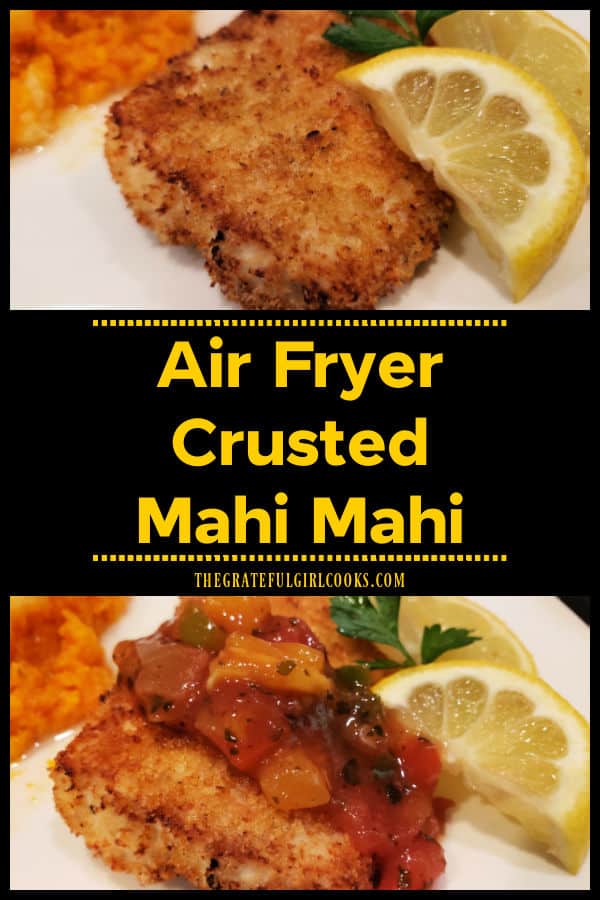
Air Fryer Crusted Mahi Mahi

Air Fryer Crusted Mahi Mahi is a delicious, easy dish! Mahi Mahi fillets are coated in seasoned Panko breadcrumbs and air fried until crispy!

Today I want to share a recipe for air fryer crusted mahi mahi (its Hawaiian name) that we really enjoy! Boneless fillets of this firm white fish are covered with a seasoned panko breadcrumb topping, and then cooked in an air fryer until browned and crispy!

The recipe could not be more simple, and if you happen to own an air fryer you’ll appreciate how easy is to prepare this crispy fish.

We love mahi mahi! It does not have a “fishy taste”, but is a mild flavored piece of fish. Frozen individually wrapped fillets can be found in the frozen food department of many grocery stores (or Costco), and whole fillets can often be found at a local fish market.

The prep time for this is only about 5 minutes, then the mahi mahi cooks in the air fryer, with only a quick flip over, about halfway through the cooking. That’s it! 

Perhaps you are unfamiliar with this delicious piece of seafood. If you’re interested in learning more about this type of fish, be sure to check out the information HERE, which tells you the origins of this fish, where it is commonly found, and lots of other cool facts! Here’s how to make air fryer crusted mahi mahi.

Scroll Down For A Printable Recipe Card At The Bottom Of The Page

Prepare The Panko And Spice Topping

NOTE: Before making the topping for the fish, preheat your air fryer to 400°F. The prep for this dish only takes a few minutes, so you want the air fryer hot, in order to save time!

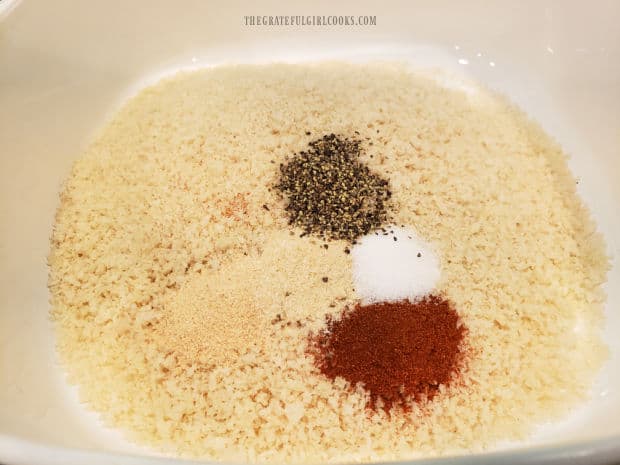
Combine panko breadcrumbs, paprika, garlic powder, onion powder, salt and black pepper in a shallow bowl or dish. Stir to fully combine these ingredients.

This is the panko topping that will coat and season the mahi mahi. The crispy panko breadcrumbs are what will give the fish its crunchy texture on the outside!

Panko breadcrumbs are combined with a variety of spices to coat the fish fillets.

Prepare The Fish Fillets

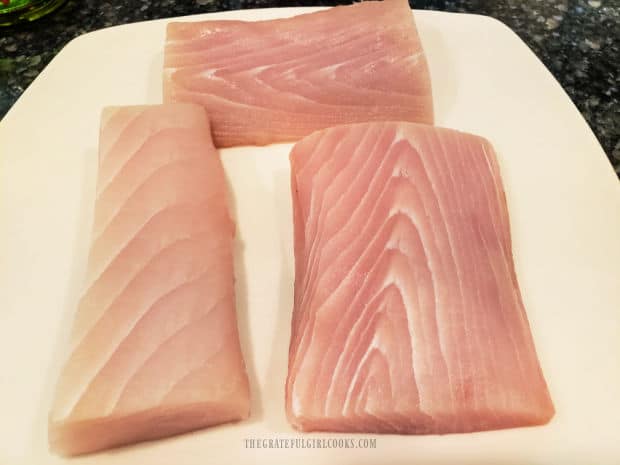
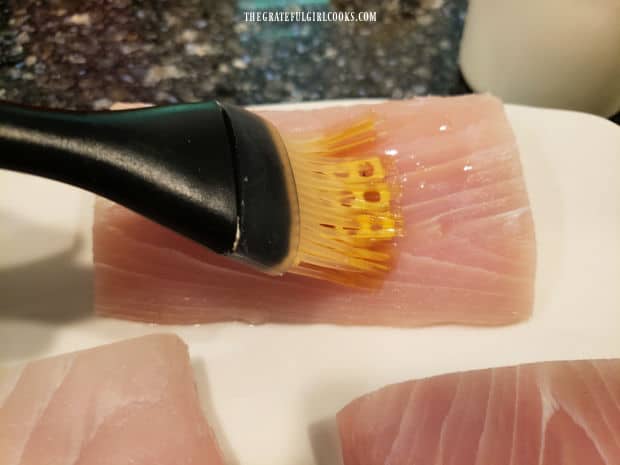
Use several paper towels to pat each of the mahi mahi fillets dry. Use a pastry brush to coat all sides of each piece of fish with olive oil.

Please note that we only used three fillets this time instead of four, as the recipe calls for. 

Mahi Mahi fillets are dried off with paper towels then wait to be breaded.Each fish fillet is brushed on all sides with olive oil.

Add Breadcrumb Seasoning To The Mahi Mahi

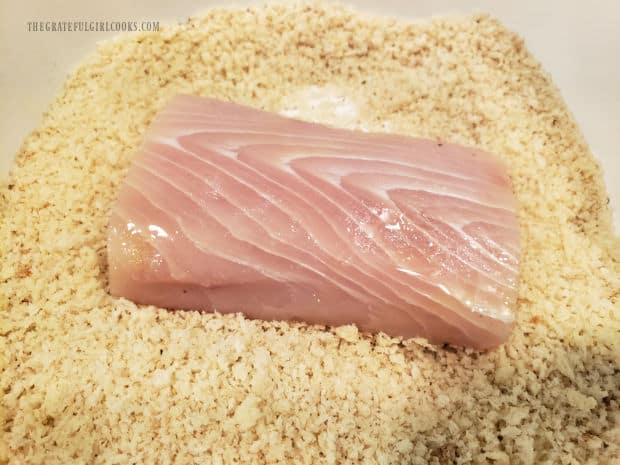
Place the mahi mahi fillets (one at a time) onto the breadcrumb seasoning mixture. Press the breadcrumbs on gently, to help adhere them to the fish. Coat all sides of the fish with the seasoned panko.

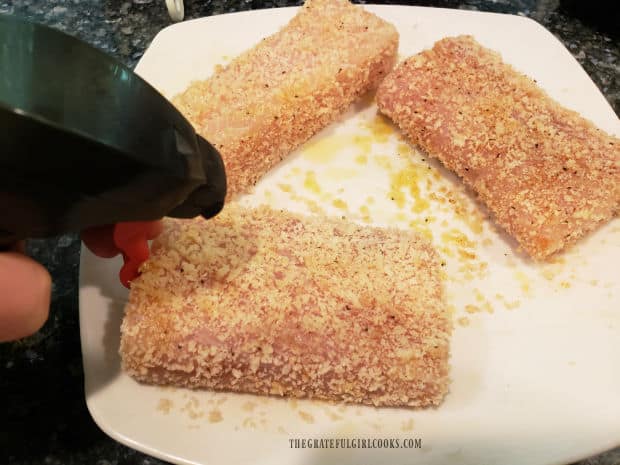
Place each coated fillet onto a large plate, then lightly spritz the top and bottom of each piece of fish with additional olive oil. This will help the panko breadcrumb coating to become very crisp on both sides.

The oiled Mahi Mahi fillets are coated, one at a time in seasoned panko breadcrumbs.Panko coated fish fillets are spritzed with olive oil before being put into air fryer to cook.

Cooking The Mahi Mahi Fillets

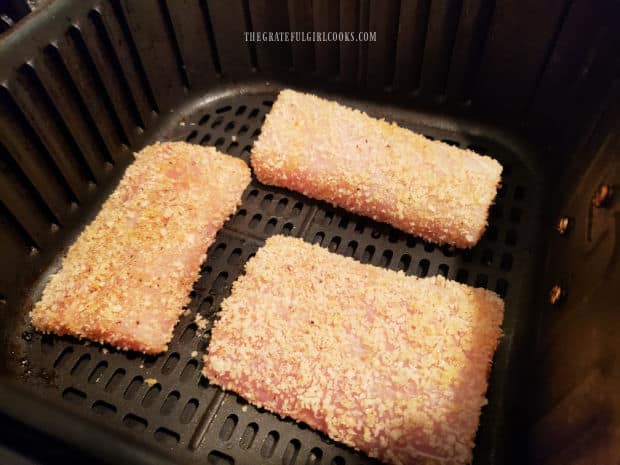
Place the breaded/sprayed mahi mahi fillets (in a single layer) in the basket of the air fryer. Cook at 400°F. for 6-7 minutes, then gently turn the fish fillets over to the other side.

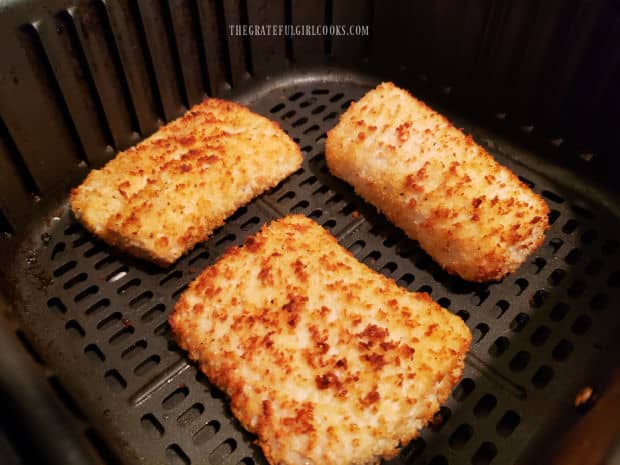
They should be nicely browned on the surface. Continue cooking for an additional 6-8 minutes until cooked through. The panko crust on the fish should be nicely browned and crispy, as well.

Be careful to not overcook the fish. Because mahi mahi is a very lean fish, if overcooked, it runs the risk of being dry, and we don’t want that, do we?

Three crusted mahi mahi fillets are placed in the air fryer basket to be cooked.Halfway through the air frying time, the fillets are flipped to cook the other side.

Serve The Air Fryer Crusted Mahi Mahi

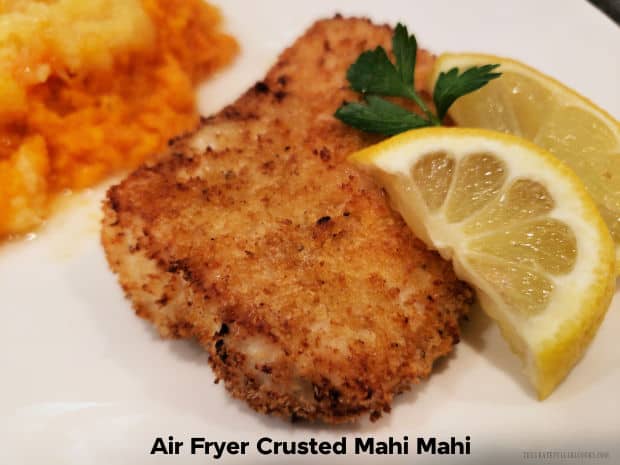
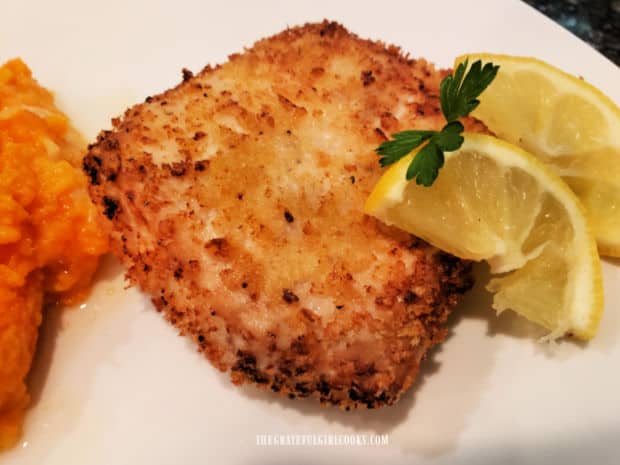
Transfer the air fryer crusted mahi mahi to individual serving plates. Garnish each piece of fish with a lemon wedge or two (for squeezing) and fresh parsley for additional color and flavor.

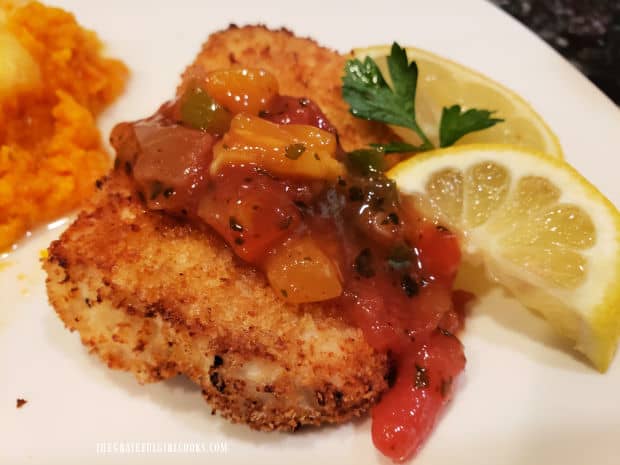
We also love to add peach/mango salsa (which we get at Costco), and lightly spoon it over the top of each piece. That is optional, but oh so good!

The air fryer crusted mahi mahi pairs well with a great variety of side dishes. When I made the dish this time, I served it with Pineapple Topped Sweet Potato Puff. That was a unique pairing, but they actually ended up complimenting each other very well!

An Air fryer crusted mahi mahi filet is served with a lemon wedge on the side.This piece of air fryer crusted mahi mahi is served with fruit salsa on top and lemon on the side.

I hope you have the chance to try this delicious seafood recipe, and trust you’ll enjoy it as much as we do. If you enjoy mahi mahi, be sure to try Easy Baked Mahi Mahi, or Mahi Mahi with Corn & Avocado Salsa,too!

Thanks for stopping by, and I invite you to come back again soon for more family-friendly recipes. Take care, may God bless you, and have a GREAT day!

Looking For More AIR FRYER Recipes?

You can find ALL of my recipes in the Recipe Index, which is located at the top of the page. I have some delicious air fryer recipes for you to enjoy, including:

Interested In More Recipes?

Thank you for visiting this website. I appreciate you using some of your valuable time to do soIf you’re interested, I publish a newsletter 2 times per month (1st and 15th) with all the latest recipes, and other fun info. I would be honored to have you join our growing list of subscribers, so you never miss a great recipe!
There is a Newsletter subscription box on the top right side (or bottom) of each blog post, depending on the device you use, where you can easily submit your e-mail address (only) to be included in my mailing list.

You Can Also Find Me On Social Media:

Facebook page: The Grateful Girl Cooks!
Pinterest:
The Grateful Girl Cooks!
Instagram:
jbatthegratefulgirlcooks

Author's signature

Recipe adapted from Samantha at: everydayfamilycooking.com/air-fryer-mahi-mahi

↓↓ PRINTABLE RECIPE BELOW ↓↓

0 from 0 votes
Air Fryer Crusted Mahi Mahi
Prep Time
5 mins
Cook Time
13 mins
Total Time
18 mins
 

Air Fryer Crusted Mahi Mahi is a delicious, easy dish! Mahi Mahi fillets are coated in seasoned Panko breadcrumbs and air fried until crispy!

Category: Entree-Seafood, Main Dish
Cuisine: American
Keyword: air fryer crusted mahi mahi
Servings: 4
Calories Per Serving: 285 kcal
Author: JB @ The Grateful Girl Cooks!
Ingredients
  • pounds Mahi Mahi fillets (4 fillets)
  • 2 Tablespoons extra virgin olive oil + additional for spritzing
  • cups panko breadcrumbs
  • 1 teaspoon paprika
  • ½ teaspoon garlic powder
  • ½ teaspoon onion powder
  • ½ teaspoon salt
  • ½ teaspoon black pepper
OPTIONAL: Lemon wedges, fresh parsley sprigs, and/or salsa, to serve
    Instructions
    1. Preheat air fryer to 400°F.

    2. Combine panko breadcrumbs, paprika, garlic powder, onion powder, salt and pepper in shallow bowl or dish. Stir to combine.

    3. Pat mahi mahi fillets dry with paper towels. Use a pastry brush to coat all sides of each fillet with olive oil.

    4. Lay fillets (one at a time) on breadcrumbs. Press breadcrumbs onto fish to adhere and coat each with breadcrumbs on all sides. Place each coated fillet onto a large plate; lightly spritz top and bottom sides of each fillet with additional olive oil. This helps panko breadcrumb coating to become very crisp.

    5. Place fish in a single layer in air fryer basket. Cook at 400°F. for 6-7 minutes, then gently turn fish over to the other side. Continue cooking for 6-8 minutes. Fish should be fully cooked; breadcrumb crust should be crisp and browned when done. Be careful to not overcook the fish (or it can become dry).

    6. Transfer mahi mahi to individual serving plates. Garnish each piece with lemon wedges (for squeezing) and fresh parsley., if desired. Also can spoon salsa over the top of each piece, for additional flavor (optional). Enjoy!

    Nutrition Facts
    Air Fryer Crusted Mahi Mahi
    Amount Per Serving (1 fillet (1/4 of total))
    Calories 285 Calories from Fat 81
    % Daily Value*
    Fat 9g14%
    Saturated Fat 2g13%
    Polyunsaturated Fat 1g
    Monounsaturated Fat 6g
    Cholesterol 124mg41%
    Sodium 579mg25%
    Potassium 766mg22%
    Carbohydrates 14g5%
    Fiber 1g4%
    Sugar 1g1%
    Protein 34g68%
    Vitamin A 554IU11%
    Vitamin C 0.1mg0%
    Calcium 64mg6%
    Iron 3mg17%
    * Percent Daily Values are based on a 2000 calorie diet.

    Here’s one more to pin on your Pinterest boards!Air Fryer Crusted Mahi Mahi is a delicious, easy dish! Mahi Mahi fillets are coated in seasoned Panko breadcrumbs and air fried until crispy!

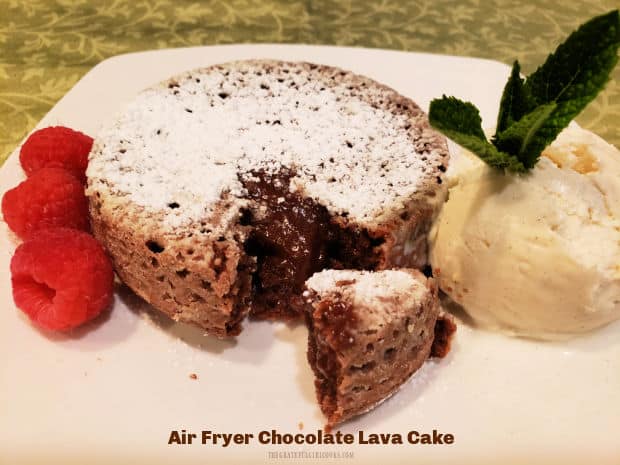
    Air Fryer Chocolate Lava Cake

    Make a scrumptious Air Fryer Chocolate Lava Cake with 5 minutes prep and 10 minutes cooking time! Easy recipe makes 2 gooey molten lava cakes!
    Make a scrumptious Air Fryer Chocolate Lava Cake with 5 minutes prep and 10 minutes cooking time! Easy recipe makes 2 gooey molten lava cakes!

    Now that summer is officially upon us, I decided to share a recipe for a delicious dessert that can be easily made in an air fryer! Because this simple, decadent recipe only takes 5 minutes to prepare, and takes only 10 minutes in an air fryer, it won’t heat up your kitchen too much!

    If you’ve neve tried a chocolate molten lava cake before, you’re in for a TREAT! Once an air fryer chocolate lava cake has cooked, it is allowed to cool for just a few minutes. Then once you take the first forkful out of it, the fudgy, chocolate center oozes out of the cake… just like a lava flow! It is wonderfully delicious, and today I want to show you how simple they are to make.

    You will need an air fryer for this recipe! I received mine several years ago as a birthday gift from family, and it is a hot-air driven appliance. Food cooks with super hot air (like a convection oven) in shorter amounts of time. I found the original recipe in a recipe booklet that came with my Cosori air fryer, and love it. Here’s how to make air fryer chocolate lava cake:

    Scroll Down For A Printable Recipe Card At The Bottom Of The Page

    Make The Batter For The Chocolate Lava Cakes

    TIP: To save time, preheat your air fryer to 320°F. while making the cake batter. The batter takes 5 minutes or less to make, and you want the air fryer preheated and ready to use, once the batter is made.

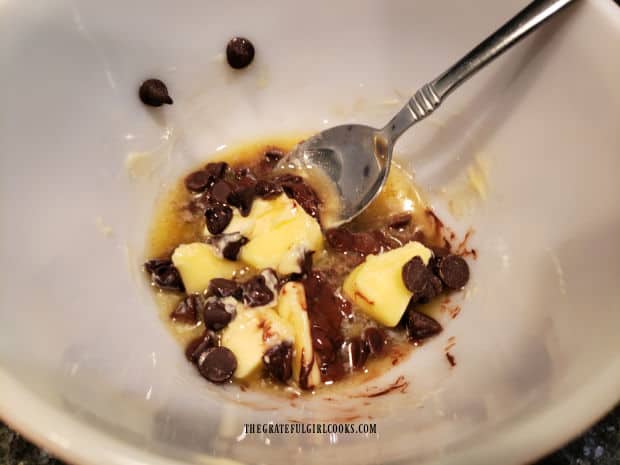
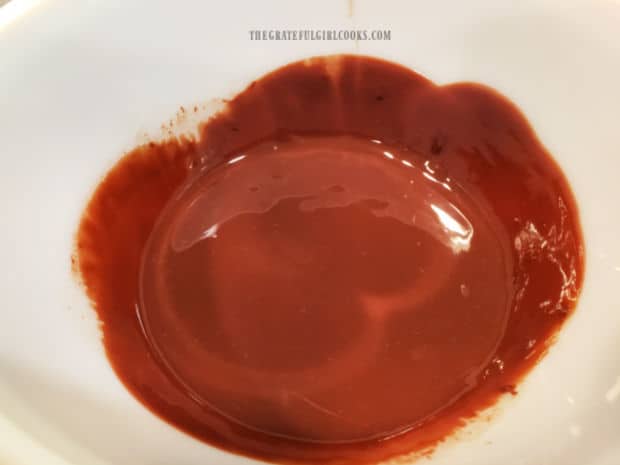
    To make the cake batter, place semi-sweet (or dark) chocolate chips and butter in a microwave safe bowl. Microwave on High power for 30 seconds. Remove from microwave and stir the ingredients until completely smooth. If necessary, put the bowl back in the microwave an additional 15-30 seconds if chocolate did not completely melt on the first try. Stir again. Once done, the chocolate and butter mixture should be smooth.

    Butter and chocolate chips are melted in a microwave safe bowl.Bowl with melted butter and melted chocolate chips, stirred until smooth.

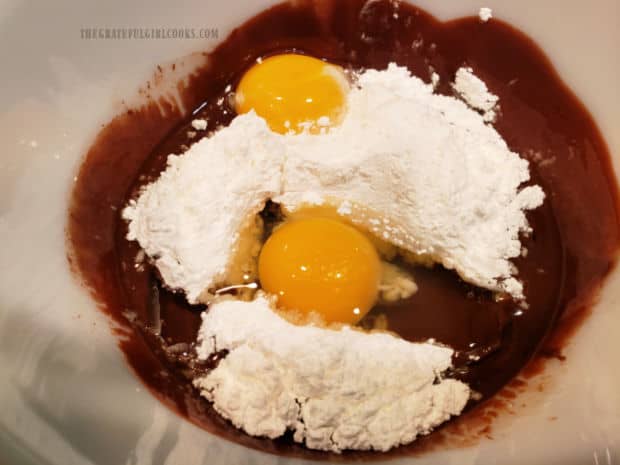
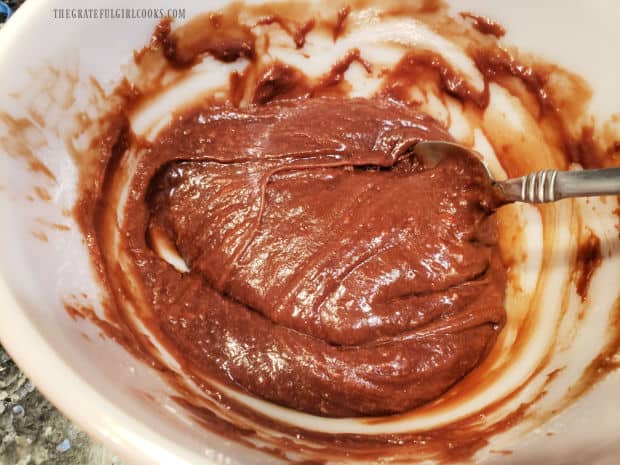
    Whisk powdered sugar, one egg, and one egg YOLK into the chocolate batter until fully combined. Once combined, fold flour into this mixture until incorporated. The batter will be fairly thick when done. TA DA! This is the batter for the lava cakes, and you can see how simple it is to make, right?

    An egg, an egg yolk, and powdered sugar are whisked in bowl until combined.Flour is folded into the thick batter for the air fryer chocolate lava cake.

    Ready For The Air Fryer

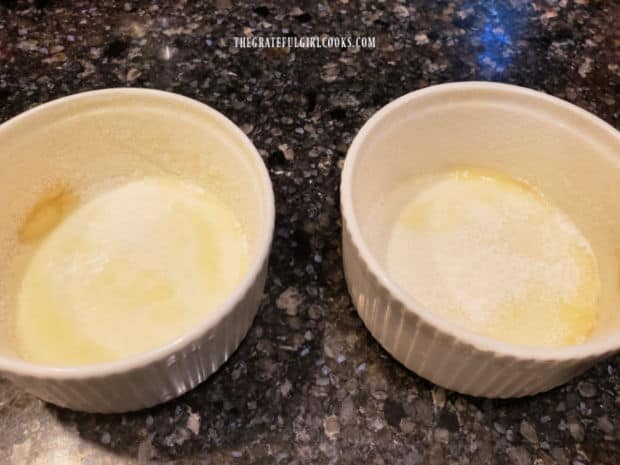
    Generously grease, spray or butter the bottom and sides of two 4″ ramekins, and then dust them with flour. Don’t skip this step! You do NOT want the lava cakes to stick to the ramekin once they’re ready to be plated!

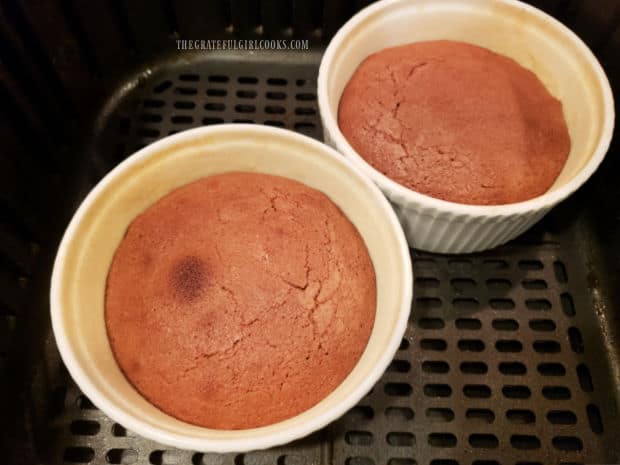
    Evenly divide the batter between the two ramekins, then place them into the preheated air fryer basket. Cook at 320°F. for 10 minutes. When done, transfer the ramekins from the basket onto a wire rack, and allow them to cool slightly for 4-5 minutes.

    Ramekins are buttered or greased, then coated with flour before adding lava cake batter.Air Fryer Chocolate Lava Cake is cooked in an air fryer basket for 10 minutes.

    Cool, Then Remove Cake From Ramekin

    Once the air fryer chocolate lava cake has cooled (4-5 minutes), run a butter knife carefully around the inside edge of each ramekin. Carefully invert the ramekins (turn upside down), one at a time onto serving plates. If greased well, the cake should turn out EASILY onto the plate, upside down. Now you’re ready to decorate and serve this amazing dessert!

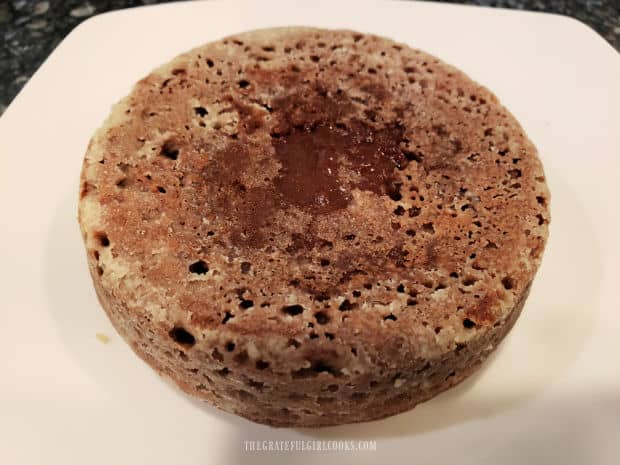
    After cooling for 5 minutes, the air fryer chocolate lava cake is inverted onto a plate.

    Serving The Air Fryer Chocolate Lava Cake

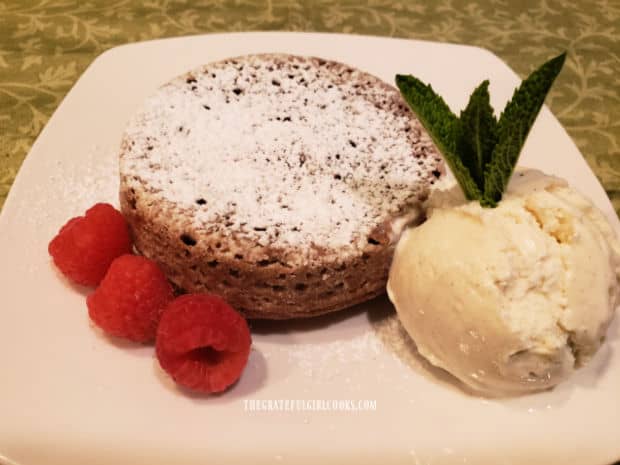
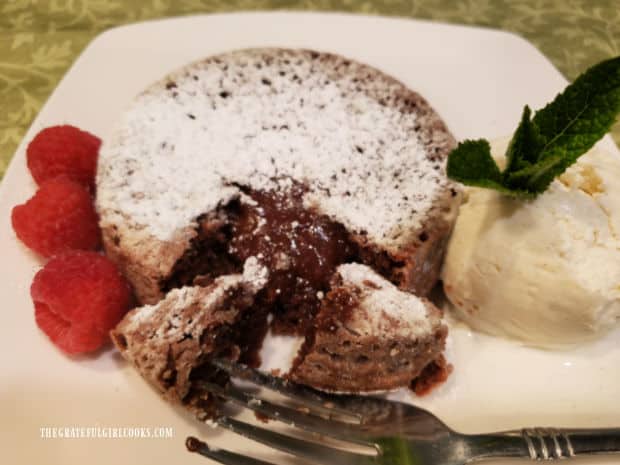
    Generously sift additional powdered sugar over the top of each air fryer chocolate lava cake. If desired, place a scoop of vanilla ice cream and some berries onto each plate, and serve while still hot. When you cut into the lava cake, the fudgy chocolate filling should slowly ooze out from the center of the cake. It’s SO YUMMY!

    Dusted with powdered sugar, air fryer chocolate lava cake is served with ice cream and raspberries.

    Hot melted chocolate oozes out of the air fryer chocolate lava cake once cut.

    I hope you have the chance to try this delicious dessert! I’m confident you and those you love will love it as much as we do… it’s decadent tasting. Thanks for stopping by, and I invite you to come back soon for more family-friendly recipes. Take care, may God bless you, and have a GREAT day!

    Looking For More AIR FRYER RECIPES?

    You can find ALL of my recipes in the Recipe Index, located at the top of the page. I have some wonderful air fryer recipes for you to enjoy, including:

    Interested In More Recipes?

    Thank you for visiting this website. I appreciate you using some of your valuable time to do soIf you’re interested, I publish a newsletter 2 times per month (1st and 15th) with all the latest recipes, and other fun info. I would be honored to have you join our growing list of subscribers, so you never miss a great recipe!
    There is a Newsletter subscription box on the top right side (or bottom) of each blog post, depending on the device you use, where you can easily submit your e-mail address (only) to be included in my mailing list.

    You Can Also Find Me On Social Media:

    Facebook page: The Grateful Girl Cooks!
    Pinterest:
    The Grateful Girl Cooks!
    Instagram:
    jbatthegratefulgirlcooks

    Author's signature

    Original recipe source: Cosori Air Fryer Instruction Manual/Recipe Booklet, page 36.

    ↓↓ PRINTABLE RECIPE BELOW ↓↓

    0 from 0 votes
    Air Fryer Chocolate Lava Cake
    Prep Time
    5 mins
    Cook Time
    10 mins
    Total Time
    15 mins
     

    Make a scrumptious Air Fryer Chocolate Lava Cake with 5 minutes prep and 10 minutes cooking time! Easy recipe makes 2 gooey molten lava cakes!

    Category: Desssert
    Cuisine: American
    Keyword: air fryer chocolate lava cake
    Servings: 2 cakes
    Calories Per Serving: 598 kcal
    Author: JB @ The Grateful Girl Cooks!
    Ingredients
    • ¼ cup butter (½ stick), cut in chunks
    • cup semi-sweet chocolate chips (can substitute dark)
    • ½ cup powdered sugar + more for dusting finished cake
    • 1 large egg
    • 1 large egg yolk
    • 3 Tablespoons all purpose flour
    Instructions
    1. Preheat air fryer at 320°F. for 5 minutes, while making cake batter. Generously grease, spray or butter bottom/sides of two 4" ramekins; then dust with flour.

    Make Cake Batter
    1. Place chocolate chips and butter in microwave safe bowl. Microwave on HIGH for 30 seconds. Remove from microwave; stir until smooth. **If necessary, put bowl back in microwave additional 15-30 seconds to finish melting chocolate. Stir again until mixture is smooth.

    2. Whisk powdered sugar, egg, and one egg YOLK into chocolate batter until fully combined. Fold flour in, until incorporated. Batter will be fairly thick. Evenly divide batter between two ramekins, then put them into air fryer basket.

    Cook In Air Fryer
    1. Cook at 320°F. for 10 minutes. When done, transfer ramekins from basket onto a wire rack; let rest 4-5 minutes.

    To Serve
    1. Once cake rests 4-5 minutes, run a butter knife carefully around inside edge of each ramekin. Carefully invert ramekins (turn upside down), one at a time, onto serving plates. If greased well, cake should turn out EASILY onto plate, upside down. Generously sift more powdered sugar on top of each cake. If desired, serve with vanilla ice cream and berries. Serve immediately.

    Recipe Notes

    Caloric calculation is for cake only. 

    Nutrition Facts
    Air Fryer Chocolate Lava Cake
    Amount Per Serving (1 cake)
    Calories 598 Calories from Fat 351
    % Daily Value*
    Fat 39g60%
    Saturated Fat 23g144%
    Trans Fat 1g
    Polyunsaturated Fat 2g
    Monounsaturated Fat 11g
    Cholesterol 248mg83%
    Sodium 226mg10%
    Potassium 233mg7%
    Carbohydrates 55g18%
    Fiber 3g13%
    Sugar 41g46%
    Protein 8g16%
    Vitamin A 982IU20%
    Calcium 52mg5%
    Iron 3mg17%
    * Percent Daily Values are based on a 2000 calorie diet.

    Here’s one more to pin on your Pinterest boards!Make a scrumptious Air Fryer Chocolate Lava Cake with 5 minutes prep and 10 minutes cooking time! Easy recipe makes 2 gooey molten lava cakes!

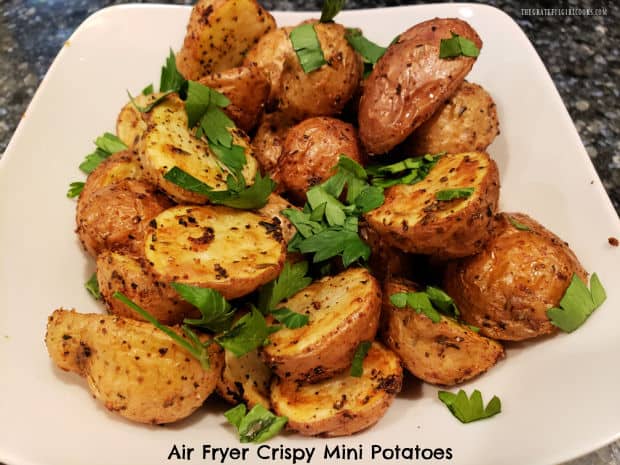
    Air Fryer Crispy Mini Potatoes

    It doesn’t take long to make Air Fryer Crispy Mini Potatoes! Crispy outside, soft inside and seasoned well, they’re a great veggie side dish!
    It doesn't take long to make Air Fryer Crispy Mini Potatoes! Crispy outside, soft inside and seasoned well, they're a great veggie side dish!

    If you enjoy potatoes and have access to an air fryer, you’re more than likely going to LOVE these little potatoes! We sure do! They are cooked in an air fryer, which is a kitchen appliance that uses super hot circulating air to cook food, using very little oil.

    The outside potato peel get all crispy and delicious, yet the inside stays fluffy and soft! These yummy little potatoes are so delicious, and the best part is they’re simple to make, and only take a few minutes to prep! Let me show you how to make this perfect side dish, which pairs well with poultry, fish, beef or pork!

    Scroll Down For A Printable Recipe Card At The Bottom Of The Page

    Prepping The Mini Potatoes For The Air Fryer

    Preheat your air fryer to 400°F. for 3-4 minutes while you get the potatoes ready to cook. You can use small red or golden potatoes, but if you happen to have both kinds, USE them! Ours came already combined in a bag at our local grocery store.

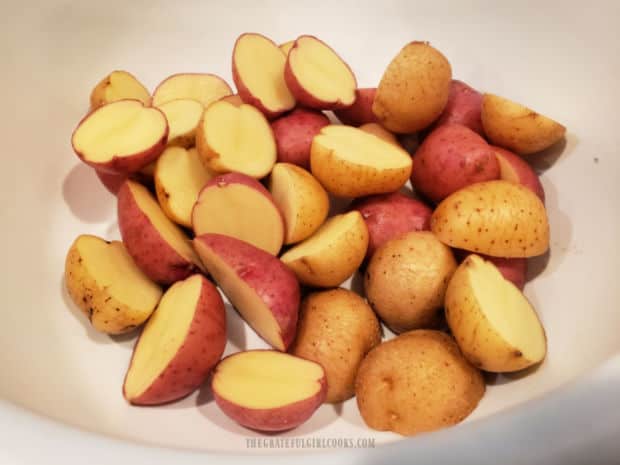
    My favorite way to make this recipe is using both red and gold potatoes. Try to use small potatoes, roughly about the size of a plum for this recipe (and for quickest cooking time). Clean or scrub the outside of the potatoes to remove any dirt, then dry them thoroughly. Slice each potato in half, then place the halves in a mixing bowl.

    Red and gold mini potatoes are rinsed clean, then dried and cut in half before seasoning.

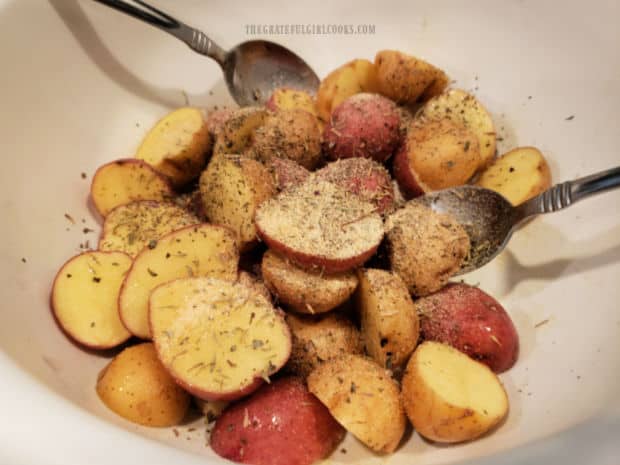
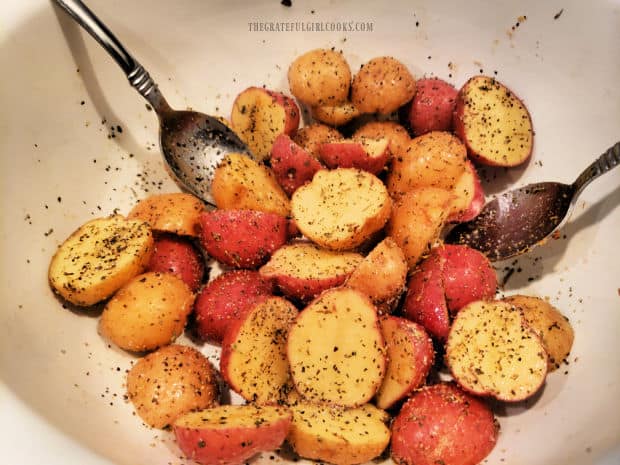
    Drizzle the potatoes with olive oil, and then add Italian seasoning, garlic powder, salt and pepper to the potatoes. Toss the potatoes well, so they’re covered with the oil and the spices. That’s it… see how easy the prep work is? Now the mini potatoes are ready to cook!

    Olive oil and seasonings are added to the bowl of halved mini potatoes.The mini potatoes have been tossed with olive oil and seasonings and are ready to cook.

    Into The Air Fryer They Go!

    Place the seasoned potato halves into the basket of your air fryer, trying to keep them in a single layer, if possible. Cook them at 400°F for 10 minutes, then remove the basket and stir them or give the basket a good shake.

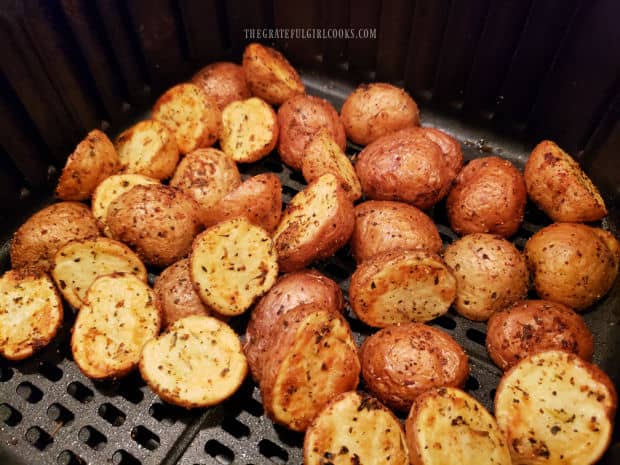
    Cook them for an additional 7-8 minutes, then check to see if they’re done. The outsides should be crispy and lightly browned. Stick a knife into a potato half. If done, the knife should easily glide into the softened insides of the potato. NOTE: If your potatoes are slightly larger in size, please be aware they may require 2-3 more minutes to finish cooking all the way through.

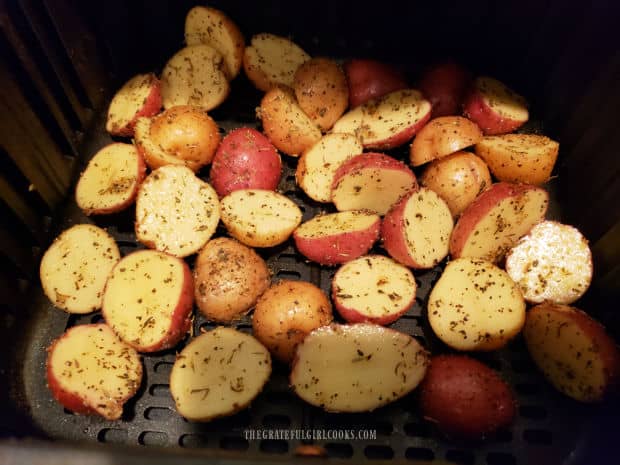
    Seasoned mini potatoes are placed in a single layer in air fryer basket to cook.Air Fryer crispy mini potatoes are finished cooking, and are ready to serve.

    Prepare Potatoes For Serving

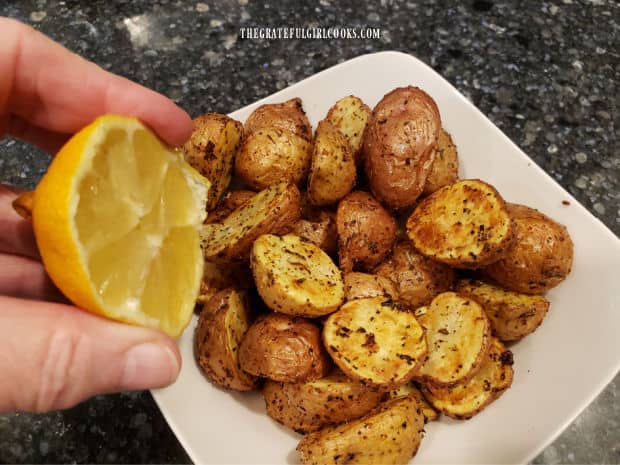
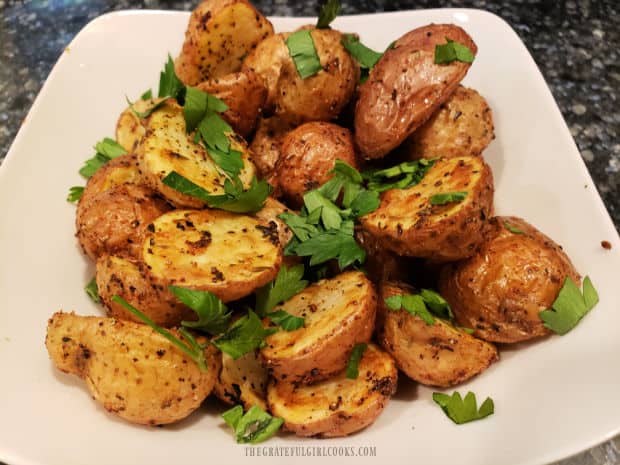
    Once done, transfer the hot air fryer crispy mini potatoes to a serving bowl. Generously squeeze fresh lemon juice over the top of the potatoes and gently stir. Sprinkle the top of the potatoes with chopped fresh parsley, and serve the potatoes immediately.

    Fresh lemon juice is squeezed over the hot mini potatoes before serving.A white bowl of air fryer crispy mini potatoes garnished with parsley, ready to be eaten!

    Time To Enjoy Some Air Fryer Crispy Mini Potatoes!

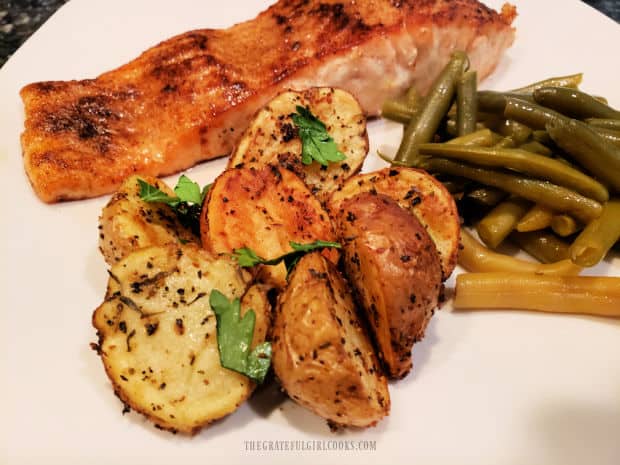
    Wow… I think you’re going to love these little spuds! They were served (in the photo below) with Pan Seared Creole Salmon  and some of our home grown and canned green beans! What a delicious meal, and I’m not kidding… these little potatoes taste wonderful!

    Salmon and green beans served on a plate with air fryer crispy mini potatoes.

    I hope you have the chance to make some air fryer crispy mini potatoes soon for those you love, and trust you’ll enjoy them! Thank you so much for stopping by, and please come back again soon for more family-friendly recipes. Have a great day.

    Looking For More POTATO Recipes?

    You can find ALL of my recipes in the Recipe Index, located at the top of the page. I have some wonderful potato recipes for you to enjoy, including:

    Interested In More Recipes?

    Thank you for visiting this website. I appreciate you using some of your valuable time to do soIf you’re interested, I publish a newsletter 2 times per month (1st and 15th) with all the latest recipes, and other fun info. I would be honored to have you join our growing list of subscribers, so you never miss a great recipe!
    There is a Newsletter subscription box on the top right side (or bottom) of each blog post, depending on the device you use, where you can easily submit your e-mail address (only) to be included in my mailing list.

    You Can Also Find Me On Social Media:

    Facebook page: The Grateful Girl Cooks!
    Pinterest:
    The Grateful Girl Cooks!
    Instagram:
    jbatthegratefulgirlcooks

    Author's signature

    Recipe adapted from: Delish.com

    ↓↓ PRINTABLE RECIPE BELOW ↓↓

    0 from 0 votes
    Air Fryer Crispy Mini Potatoes
    Prep Time
    5 mins
    Cook Time
    17 mins
    Total Time
    22 mins
     

    It doesn't take long to make Air Fryer Crispy Mini Potatoes! Crispy outside, soft inside and seasoned well, they're a great veggie side dish!

    Category: Side Dish, Vegetable Dish
    Cuisine: American
    Keyword: air fryer crispy mini potatoes
    Servings: 4
    Calories Per Serving: 123 kcal
    Author: JB @ The Grateful Girl Cooks!
    Ingredients
    • 1 pound baby potatoes (red /gold) (about 20 small potatoes), halved
    • 1 Tablespoon extra virgin olive oil
    • 1 teaspoon Italian seasoning
    • 1 teaspoon garlic powder
    • ½ teaspoon salt + more if desired
    • ½ teaspoon black pepper + more if desired
    • fresh lemon juice a generous squeeze or two
    • fresh parsley chopped
    Instructions
    1. Preheat air fryer to 400°F. for 3-4 minutes while you get potatoes ready.

    2. Clean potatoes to remove dirt, then dry. Cut potatoes in half; place in bowl.

    3. Drizzle potatoes with olive oil; add Italian seasoning, garlic powder, salt and pepper. Toss potatoes well, so they're covered with oil/spices.

    4. Place potatoes halves in air fryer basket in a single layer. Cook at 400°F for 10 minutes; stir potatoes or give basket a good shake. Cook potatoes 7-8 more minutes, then check to see if they're done. Stick a knife into a potato. If done, knife should easily glide in and out of the potato. NOTE: If potatoes used are larger, they may require 2-3 additional minutes to finish cooking.

    5. Transfer potatoes to serving bowl. Squeeze fresh lemon juice over them; gently stir to combine. Sprinkle with chopped parsley; serve immediately.

    Nutrition Facts
    Air Fryer Crispy Mini Potatoes
    Amount Per Serving (1 (1/4 of total))
    Calories 123 Calories from Fat 36
    % Daily Value*
    Fat 4g6%
    Saturated Fat 1g6%
    Polyunsaturated Fat 1g
    Monounsaturated Fat 3g
    Sodium 298mg13%
    Potassium 496mg14%
    Carbohydrates 21g7%
    Fiber 3g13%
    Sugar 1g1%
    Protein 2g4%
    Vitamin A 12IU0%
    Vitamin C 22mg27%
    Calcium 24mg2%
    Iron 1mg6%
    * Percent Daily Values are based on a 2000 calorie diet.

    Here’s one more to pin on your Pinterest boards!It doesn't take long to make Air Fryer Crispy Mini Potatoes! Crispy outside, soft inside and seasoned well, they're a great veggie side dish!

    Air Fryer Whole Chicken

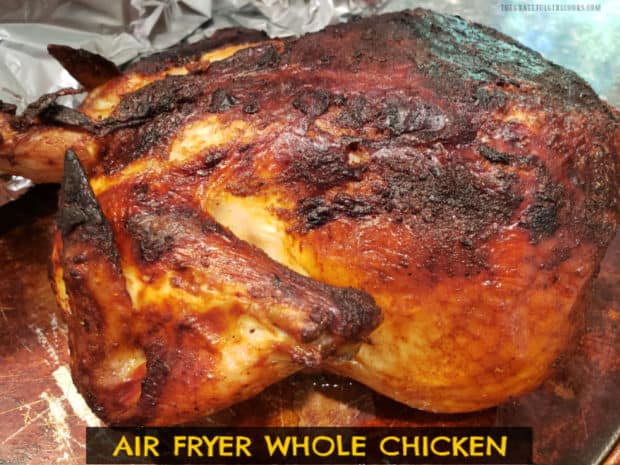
    Use your air fryer to make an Air Fryer Whole Chicken in about 1 hour! The crispy, well-seasoned and browned chicken tastes delicious!
    Use your air fryer to make an Air Fryer Whole Chicken in about 1 hour! The crispy, well-seasoned and browned chicken tastes delicious!

    Using an air fryer to cook an entire chicken is a great way to prepare a crispy, browned whole chicken. The process is extremely simple, and the cooked chicken is full of flavor! After the chicken is well-seasoned, the air fryer does the rest of the work for you!

    Air fryers use extremely hot air circulating around the food to cook it, and we really enjoy using ours! There is minimal hands-on, prep time necessary (about 10 minutes) to make a 4½ pound air fryer whole chicken. The rest of the time is simply letting the air fryer cook the chicken! When you use the homemade spice mixture as shown below, the cooked chicken also has great flavor! Here’s how to make this dish:

    Scroll Down For A Printable Recipe Card At The Bottom Of The Page

    Looking For A Good Spice Rub?

    Obviously, when making an air fryer whole chicken, feel free to use whatever spice mixture you enjoy, to season the chicken. However, I love to use this homemade spice mix and have included the ingredients in the printable recipe card below.

    The spices used are brown sugar, paprika, garlic, salt, pepper, onion powder, cayenne, cumin and dry mustard, and they add great flavor to the chicken! Mix these ingredients together in a medium-sized bowl. The ingredients will yield about 1/2 cup of spice mix, but you’ll only need 4 Tablespoons to season one chicken, so save the rest for another time!

    Spices used to flavor the air fryer whole chicken are measured into a bowl.Seasoning mix is combined before adding it to olive oil to help season a whole chicken.

    Prepare The Chicken For Cooking

    Remove giblets from the cavity of the chicken (and discard). Rinse the chicken, and pat it dry, using paper towels to absorb moisture. I recommend using kitchen twine or raffia to tie the legs of the chicken together (see photo below). This helps the chicken cook more evenly! Tuck the wings snugly under the chicken for cooking, as well.

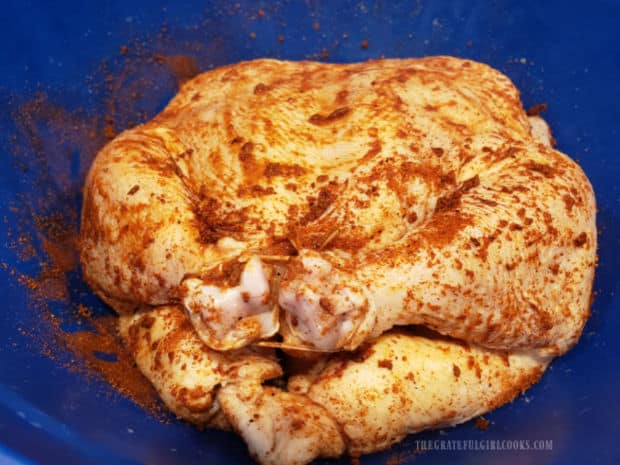
    Place 4 Tablespoons of the combined spice mixture and 1½ T. olive oil in a separate bowl. Mix together, then spread this spice rub over the entire chicken. Be sure to spread some of the spice rub into the chicken cavity, also. Now this big ol’ chicken is ready for the air fryer!

    Chicken legs are tied together, and chicken is covered with spice mixture before cooking.

    Into The Air Fryer It Goes!

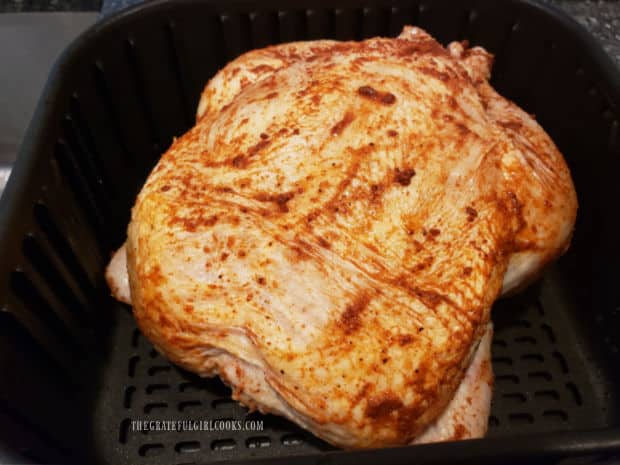
    Preheat your air fryer to 360°F. This usually takes 4-5 minutes. Place the seasoned whole chicken into the fryer BREAST SIDE DOWN. NOTE: The photo below is only to show that an entire chicken can fit into the basket of an air fryer! Anyways… place it breast side down into the basket for cooking.

    Cook the chicken at 360°F. for about 45-50 minutes. Carefully turn the chicken over to the other side (breast side up), and continue cooking for an additional 10 minutes or until the chicken reaches a safe internal temperature of 165°F. Once the internal temperature is 165°F., it is considered done and is safe to eat. To check the temperature, insert a meat thermometer into the thick part of the chicken between the thigh and the breast.  The finished chicken should also be beautifully browned and crispy on the outside. 

    TIP: Because the weight of each chicken used may vary a bit, keep an eye on it! Yours may take slightly less time or slightly more time to finish cooking. Check the temperature occasionally, to make sure it is not overcooked or undercooked.

    An entire seasoned chicken, before cooking, in an air fryer basket.

    Time To Serve The Air Fryer Whole Chicken

    Transfer the whole chicken to a cutting board and let it rest for 5-10 minutes before slicing. This “resting time” allows the juices time to redistribute throughout the chicken. After the air fryer whole chicken has rested, slice away! A whole chicken can be cut into 8 pieces, with two pieces each of the breasts, legs, thighs, and wings.

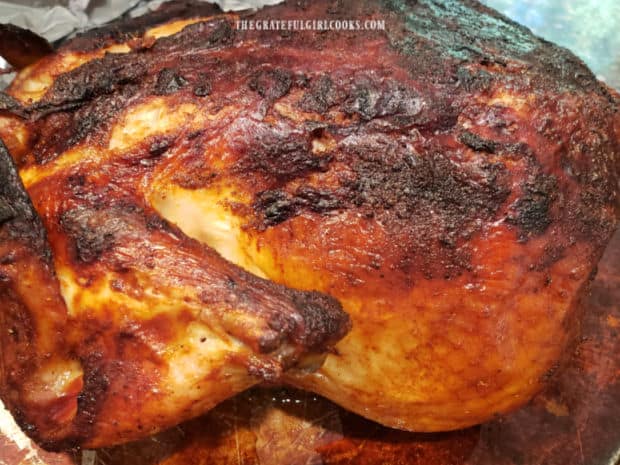
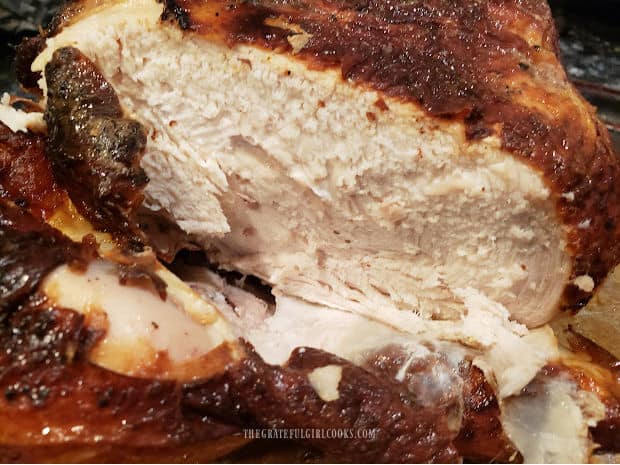
    An Air Fryer Whole Chicken after cooking is browned and crispy on the outside.The inside of the air fryer whole chicken after cooking, now sliced and ready to serve.

    I hope you enjoy making and eating this air fryer whole chicken! We enjoy cooking whole chickens this way, and love the flavor and the way it turns out. Thanks for stopping by today, and I invite you to come back again soon for more recipes! Take care, and have a GREAT day!

    Looking For More AIR FRYER Recipes?

    You can find ALL of my recipes in the Recipe Index, which is located at the top of the page. I have a nice variety of air fryer recipes, including:

    Interested In More Recipes?

    Thank you for visiting this website. I appreciate you using some of your valuable time to do soIf you’re interested, I publish a newsletter 2 times per month (1st and 15th) with all the latest recipes, and other fun info. I would be honored to have you join our growing list of subscribers, so you never miss a great recipe!
    There is a Newsletter subscription box on the top right side (or bottom) of each blog post, depending on the device you use, where you can easily submit your e-mail address (only) to be included in my mailing list.

    You Can Also Find Me On Social Media:

    Facebook page: The Grateful Girl Cooks!
    Pinterest:
    The Grateful Girl Cooks!
    Instagram:
    jbatthegratefulgirlcooks

    Author's signature

    ↓↓ PRINTABLE RECIPE BELOW ↓↓

    0 from 0 votes
    Air Fryer Whole Chicken
    Prep Time
    10 mins
    Cook Time
    1 hr
    Total Time
    1 hr 10 mins
     

    Use your air fryer to make an Air Fryer Whole Chicken in about 1 hour! The crispy, well-seasoned and browned chicken tastes delicious!

    Category: Dinner, Main Course
    Cuisine: American
    Keyword: air fryer whole chicken
    Servings: 8 pieces
    Calories Per Serving: 313 kcal
    Author: JB @ The Grateful Girl Cooks!
    Ingredients
    • pound whole chicken giblets removed from cavity
    For Seasoning:
    • Tablespoons olive oil
    • Tablespoons brown sugar
    • 2 Tablespoons paprika
    • 1 Tablespoon garlic powder
    • 1 Tablespoon salt
    • teaspoons black pepper
    • teaspoons onion powder
    • ¾ teaspoon cayenne pepper
    • ¾ teaspoon ground cumin
    • ¾ teaspoon dry mustard powder
    Instructions
    Prepare Chicken:
    1. Remove giblets from the cavity of the chicken. Rinse and pat the chicken dry using paper towels. Use kitchen twine or raffia to tie the legs of the chicken together. This helps the chicken cook evenly! Tuck the wings snugly under chicken for cooking.

    2. Mix spices together in a medium-sized bowl. NOTE: This will yield about ½ cup spice mix; you only need 4 T. spice mix for one chicken (so save the rest for another time). Place 4 Tablespoons of the combined homemade spice mixture and the olive oil into a separate bowl. Stir to combine, then rub entire chicken with the spice mix. Be sure to spread some spice mix inside the chicken cavity.

    Air Fry The Seasoned Chicken:
    1. Preheat air fryer to 360°F. (about 4-5 minutes). Place seasoned chicken into fryer basket BREAST SIDE DOWN. Cook chicken at 360°F. for about 45-50 minutes. Carefully turn chicken over (now breast side UP). Continue cooking 10 minutes, or until chicken reaches an internal temperature of 165°F. Because weight of chickens used may vary, keep an eye on it! Check internal temp. occasionally, to make sure it isn't overcooked or undercooked.

    2. Transfer chicken to cutting board; let it rest 5-10 minutes before slicing. This allows juices time to redistribute through the meat. Once chicken has rested, slice away, and serve!

    Recipe Notes

    NOTE: Estimated caloric calculation made using 8 pieces of chicken divided between total calories. Depending on the size piece consumed, calorie count may vary. The total amount of spices were used to calculate nutrients, however you will not use all the spice mix for one chicken.

    Nutrition Facts
    Air Fryer Whole Chicken
    Amount Per Serving (1 piece (1/8of total pieces))
    Calories 313 Calories from Fat 189
    % Daily Value*
    Fat 21g32%
    Saturated Fat 6g38%
    Trans Fat 1g
    Polyunsaturated Fat 4g
    Monounsaturated Fat 10g
    Cholesterol 92mg31%
    Sodium 961mg42%
    Potassium 306mg9%
    Carbohydrates 6g2%
    Fiber 1g4%
    Sugar 4g4%
    Protein 23g46%
    Vitamin A 1116IU22%
    Vitamin C 2mg2%
    Calcium 28mg3%
    Iron 2mg11%
    * Percent Daily Values are based on a 2000 calorie diet.

    Here’s one more to pin on your Pinterest boards!Use your air fryer to make an Air Fryer Whole Chicken in about 1 hour! The crispy, well-seasoned and browned chicken tastes delicious!

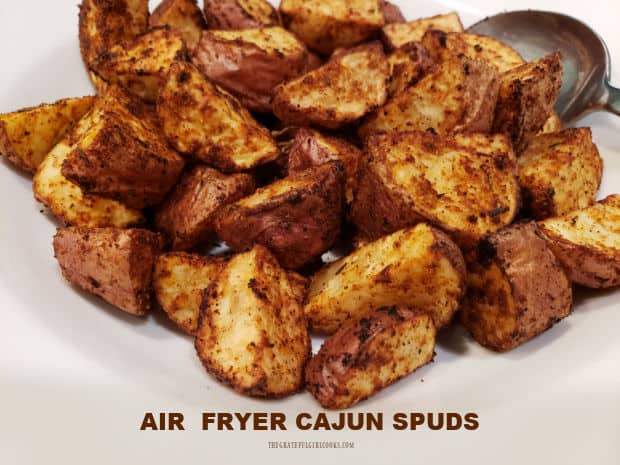
    Air Fryer Cajun Spuds

    Make a batch of Air Fryer Cajun Spuds for a yummy side dish! No air fryer? These well-seasoned potatoes can also be roasted in the oven!
    Make a batch of Air Fryer Cajun Spuds for a yummy side dish! No air fryer? These well-seasoned potatoes can also be roasted in the oven!

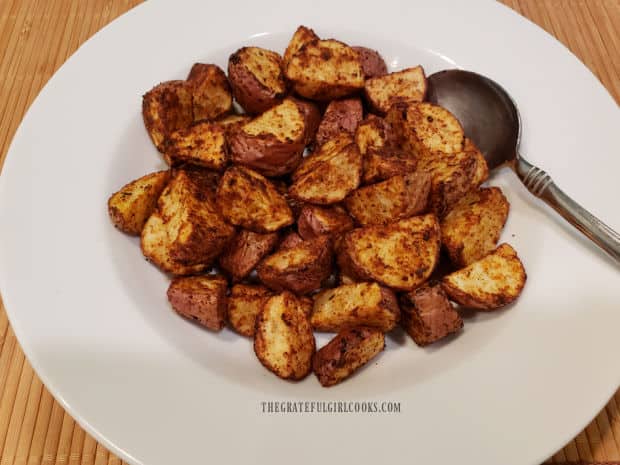
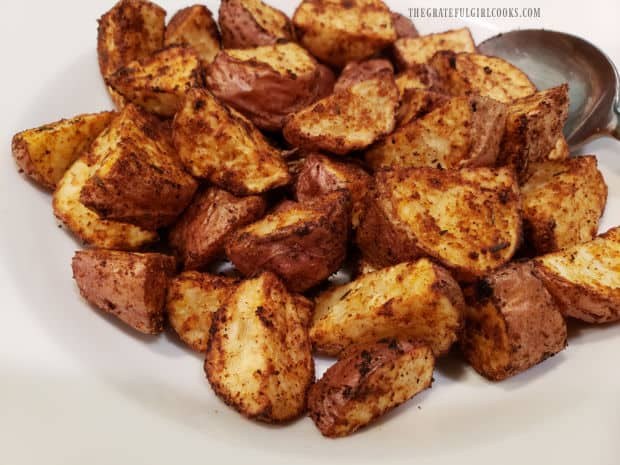
    Who likes potatoes, or as they are also called… taters or spuds? We do in our home, and today I want to share a simple side dish recipe for red potatoes with a wonderful seasoning! I call them Air Fryer Cajun Spuds! They are seasoned well, but aren’t too spicy, and I really think you will enjoy them.
    The recipe is simple to prepare, and enjoy making them using our air fryer. Guess what? Want to know a little secret?  You can also prepare these yummy potatoes in an OVEN! I realize a lot of people do not have access to an air fryer, so I have included instructions for roasting them in a traditional oven.

    Scroll Down For A Printable Recipe Card At The Bottom Of The Page

    Make The Cajun Spice Mix

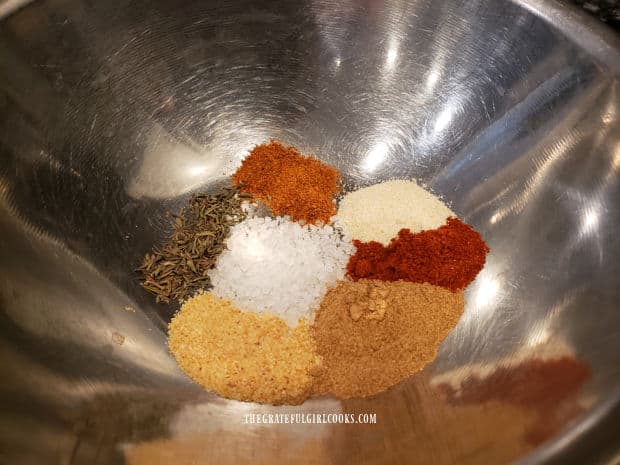
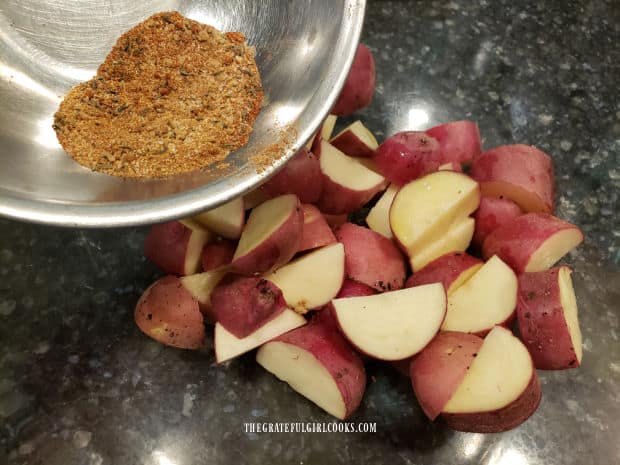
    In a small bowl, combine garlic powder, cumin, paprika, onion powder, thyme, cayenne pepper, and salt and ground black pepper. Stir to combine these ingredients. These are the spices you will use to season the red potatoes. Set the mix aside until ready to use.

    Seasoning mix for the potatoes are combined in a small bowl.

    Prepare The Potatoes (Spuds)

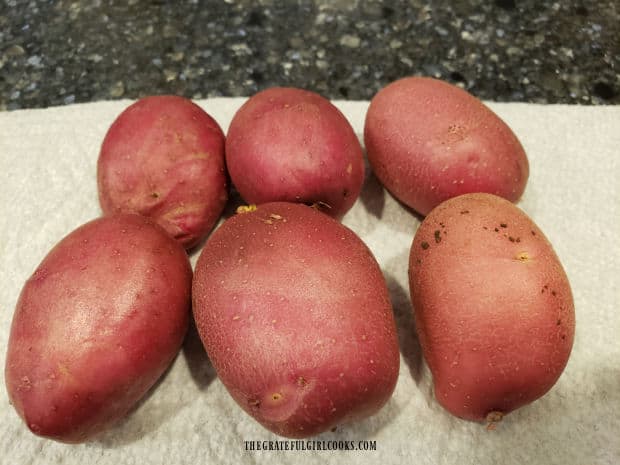
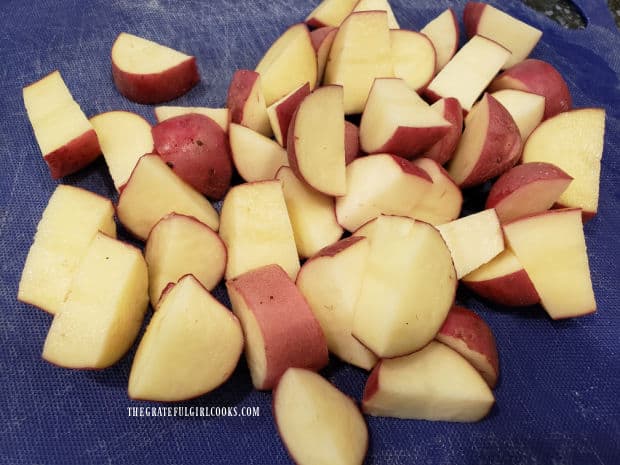
    Wash and dry the red potatoes very well to remove any dirt or little sprouts. Cut the potatoes into bite-sized chunks, leaving the peel ON the potatoes. Once all are cut, place them in a medium mixing bowl.

    Six cleaned/scrubbed medium red potatoes are used for this recipe.The unpeeled red potatoes are cut into bite sized chunks before seasoning.

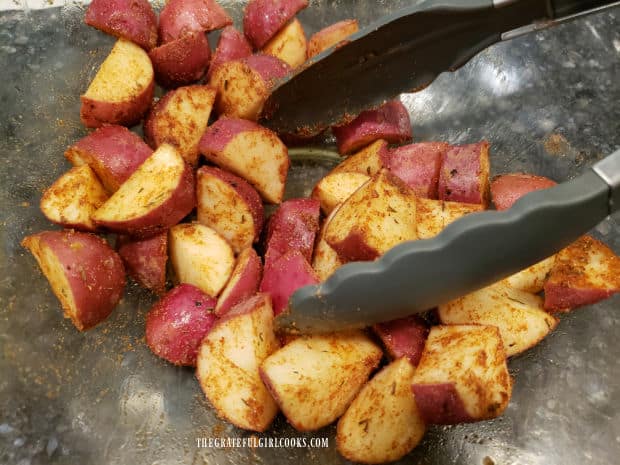
    Now it’s time to season the potatoes.  The first thing you need to do is drizzle the olive oil over the potatoes. Toss or stir them well, so all the potatoes have some oil on them. Now sprinkle all of the spice mix over the potato chunks. Toss or stir the potatoes well, to distribute the spices and coat all the potatoes with seasoning.

    Potatoes are drizzled with olive oil, then Cajun spices are added to season.Air Fryer Cajun Spuds are now seasoned, and are ready for the air fryer or oven.

    Time To Cook The Air Fryer Cajun Spuds

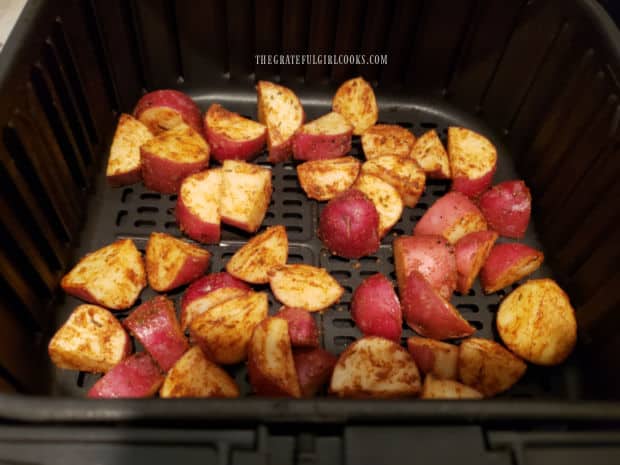
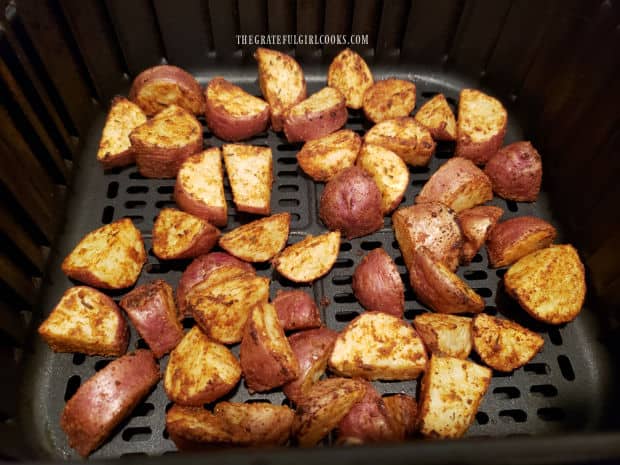
    USING AN AIR FRYER? Preheat your air fryer to 400°F. Arrange the air fryer Cajun spuds in a single layer in the basket. Cook the potatoes for approximately 9 minutes. Toss or turn the other side, and continue cooking the potatoes for another 7-8 minutes on average.

    TIP: Two things can affect your cooking time. 1) Temperatures in air fryers can fluctuate with different models, and 2) The size of the potato chunks can vary between users, so this cooking time is a guide. Test the potatoes for doneness, by inserting a sharp knife into the middle of a potato chunk. When done, they should be crispy on the outside and soft on the inside

    USING AN OVEN? Preheat your oven to 350°F. Place a sheet of parchment paper or aluminum foil onto a baking sheet. Add and arrange the potato chunks, keeping them in a single layer. Cook at 350°F. for approx. 25-30 minutes, turning them half way through the baking time. Test for doneness by inserting a knife into one of the chunks. When done, the Cajun spuds should be crispy on the outside and soft on the inside.

    The potatoes are placed in an air fryer basket in a single layer.Halfway through cooking, the potatoes are turned, then finish cooking.

    Serve The Air Fryer Cajun Spuds

    Once the air fryer Cajun spuds are done cooking, remove them from the oven and transfer them into a serving bowl. They taste delicious eaten as is, straight from the oven. If you’re a dipping fan, you can serve them with ranch dressing, BBQ sauce or ketchup on the side!

    A white bowl, full of air fryer Cajun spuds, ready to eat!Air Fryer Cajun Spuds, ready to be served alongside a favorite main dish.

    I hope you enjoy these tasty taters! We sure do. Thank you for stopping by today, and I sincerely hope you will come back again soon for more family friendly recipes. Have a wonderful day, and may God bless you.
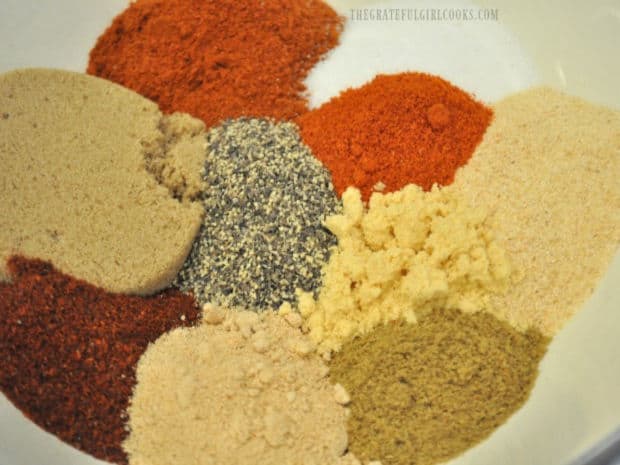
    Looking For More AIR FRYER Recipes?

    You can find ALL of my recipes in the Recipe Index, located at the top of the page. I have a nice variety of air fryer recipes you might want to check out, including:

    Interested In More Recipes?

    Thank you for visiting this website. I appreciate you using some of your valuable time to do soIf you’re interested, I publish a newsletter 2 times per month (1st and 15th) with all the latest recipes, and other fun info. I would be honored to have you join our growing list of subscribers, so you never miss a great recipe!
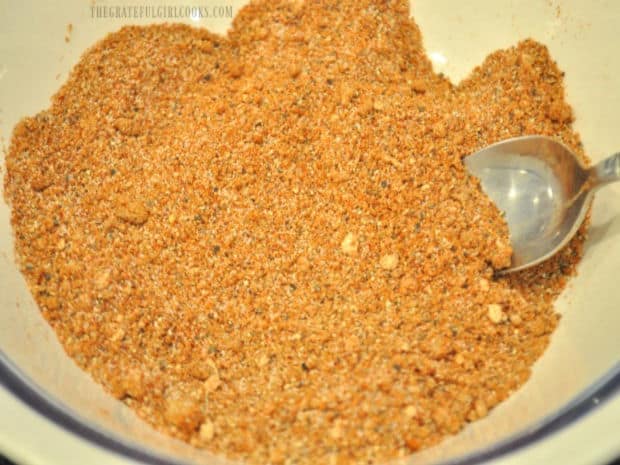
    There is a Newsletter subscription box on the top right side (or bottom) of each blog post, depending on the device you use, where you can easily submit your e-mail address (only) to be included in my mailing list.

    You Can Also Find Me On Social Media:

    Facebook page: The Grateful Girl Cooks!
    Pinterest:
    The Grateful Girl Cooks!
    Instagram:
    jbatthegratefulgirlcooks

    Author's signature

    Recipe adapted from: The book “New Life Promise- Food Meets Faith- Total Trifecta of Weight Loss”, by Isabel D. Price, page 77, published by Live Smart, LLC. 2019

    0 from 0 votes
    Air Fryer Cajun Spuds
    Prep Time
    8 mins
    Cook Time
    17 mins
    Total Time
    25 mins
     

    Make a batch of Air Fryer Cajun Spuds for a yummy side dish! No air fryer? These well-seasoned potatoes can also be roasted in the oven!

    Category: Side Dish, Vegetable Dish
    Cuisine: Cajun
    Keyword: air fryer cajun spuds
    Servings: 4 small servings
    Calories Per Serving: 291 kcal
    Author: JB @ The Grateful Girl Cooks!
    Ingredients
    • 6 medium red potatoes
    • 2 Tablespoons extra virgin olive oil
    Seasoning Mix:
    • ¾ teaspoon garlic powder
    • ¾ teaspoon ground cumin
    • teaspoon onion powder
    • ½ teaspoon salt
    • ¼ teaspoon black pepper
    • ½ teaspoon paprika smoky or sweet
    • ¼ teaspoon dried thyme
    • teaspoon cayenne pepper
    Instructions
    1. In a small bowl, combine garlic powder, cumin, paprika, onion powder, thyme, cayenne pepper, salt and black pepper. Stir to combine. Set seasoning mix aside.

    2. Wash and dry potatoes well to remove any dirt or sprouts. Cut potatoes into bite-sized chunks, leaving peel ON the potatoes. Place potatoes in a medium bowl.

    3. Drizzle olive oil over potatoes. Toss or stir well, so all potatoes have oil on them. Sprinkle all of the spice mix over potatoes. Toss or stir well, to distribute spices and coat all potatoes with seasoning.

    Cook- Using An Air Fryer
    1. USING AN AIR FRYER? Preheat air fryer to 400°F. Arrange seasoned potatoes in a single layer in the basket. Cook for approx. 9 minutes. Turn potatoes to other side; continue cooking potatoes for another 7-8 minutes (on average). TIP: Two things can affect your cooking time. 1) Temperatures in air fryers can fluctuate with different models, and 2) The size of the potato chunks can vary between users, so this cooking time is a guide. Test potatoes for doneness, by inserting a sharp knife into the middle of a potato chunk. When done, they should be crispy on the outside and soft on the inside. Transfer to serving bowl, and enjoy!

    Cook- Using An Oven
    1. USING AN OVEN? Preheat oven to 350°F. Place a sheet of parchment paper or aluminum foil onto a baking sheet. Add and arrange the potato chunks, keeping them in a single layer. Cook at 350°F. for approx. 25-30 minutes, turning them half way through baking time. Test for doneness by inserting a knife into one of the chunks. When done, Cajun spuds should be crispy on the outside and soft on the inside. Transfer to serving bowl, and enjoy!

    Nutrition Facts
    Air Fryer Cajun Spuds
    Amount Per Serving (1 (1/4 of total))
    Calories 291 Calories from Fat 72
    % Daily Value*
    Fat 8g12%
    Saturated Fat 1g6%
    Polyunsaturated Fat 1g
    Monounsaturated Fat 5g
    Sodium 350mg15%
    Potassium 1478mg42%
    Carbohydrates 52g17%
    Fiber 6g25%
    Sugar 4g4%
    Protein 6g12%
    Vitamin A 179IU4%
    Vitamin C 28mg34%
    Calcium 39mg4%
    Iron 3mg17%
    * Percent Daily Values are based on a 2000 calorie diet.

    Here is one more to pin on your Pinterest boards!Make a batch of Air Fryer Cajun Spuds for a yummy side dish! No air fryer? These well-seasoned potatoes can also be roasted in the oven!