Category: Appetizers

Guinness Baked Cheese Dip

Guinness Baked Cheese Dip is a terrific appetizer, with 3 cheeses, caramelized onions, and Guinness beer! Served hot, you’re gonna love it!
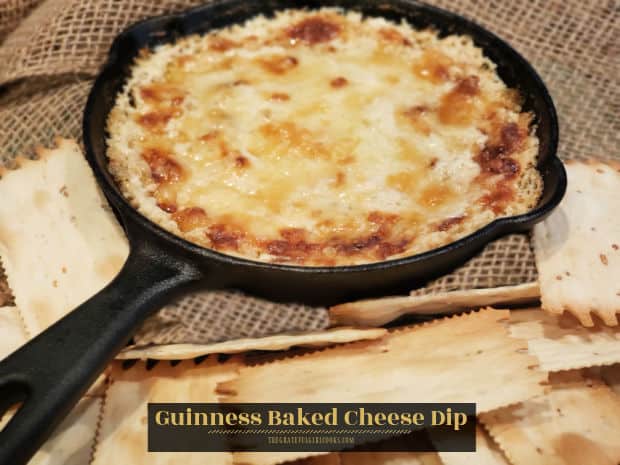
Guinness Baked Cheese Dip is a terrific appetizer, with 3 cheeses, caramelized onions, and Guinness beer! Served hot, you're gonna love it!

My husband and I love to order hot appetizer dips (if available) at restaurants when we go out. Typically we order hot artichoke dip and stuff ourselves silly with the gooey cheesy dip. A while back I saw a recipe for a Baked Cheese Dip online which had caramelized onions and Guinness beer in it. Normally, I don’t even like the smell of beer, but this recipe sounded so delicious, so I knew we absolutely HAD to try it!

One of the cheeses used for this dip is called Dubliner cheese, which I’d never heard of before, but my husband found it easily at our Fred Meyer grocery store (Kroger). Dubliner cheese is a hard, light yellow-colored cheese that is slightly salty, nutty, and reminiscent of a flavorful Parmesan to the bite.

I made a couple slight changes to the original recipe, by adding shredded Parmesan cheese to the Dubliner and cream cheese already in the recipe. I also baked it in two 4″ cast iron skillets. That way my husband and I could have one, and I could give the other to our son (and his girlfriend), so they could enjoy it, too! Guinness Baked Cheese Dip is really quite delicious, and here’s how to make it:

Scroll Down For A Printable Recipe Card At The Bottom Of The Page

Let’s Caramelize Those Onions!

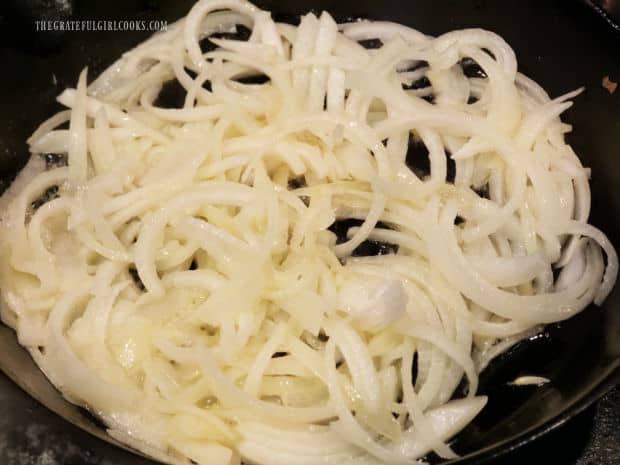
Caramelizing onions takes time, but results in sweet, well-browned, amazing tasting onions, which bring great flavor the dip! To do this, melt butter on medium-low heat in a large skillet. Add thinly sliced onions and a nice big pinch of salt, and then toss, to coat the onions with the butter. It looks like LOTS of onions, but once caramelized, they’ll be greatly reduced in size.

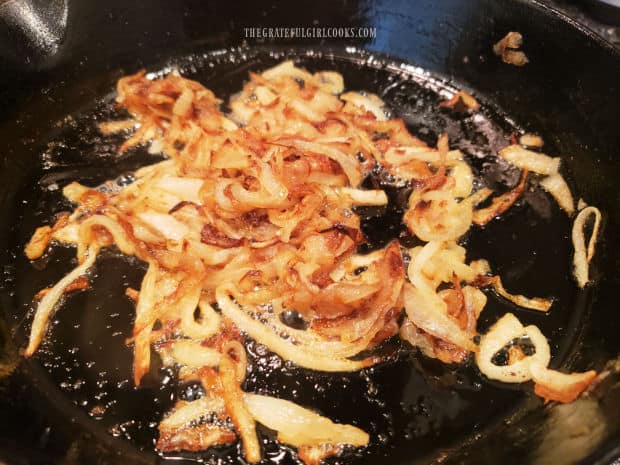
Cook the onions slowly, giving them a toss often as they brown. Continue to cook, turning often until they are soft in texture and wonderfully browned. This will take about 20-25 minutes on medium-low heat. Just be patient, and let those onions caramelize – you’ll be glad you did! Remove the caramelized onions from the heat and let them cool completely.

Thinly sliced onions are cooked in melted butter in skillet.Caramelized onions are nicely browned in butter before adding to dip mixture.

Prepare The Dip Mixture

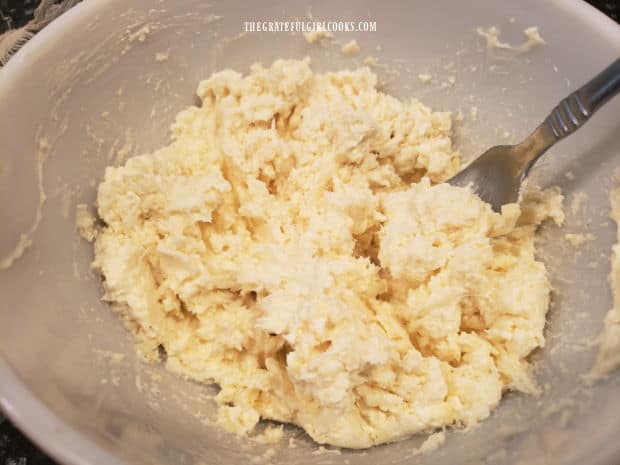
While the onions cool, prepare the dip mixture AND preheat your oven to 400°F. Place cream cheese, mayonnaise, PART of the Dubliner cheese, and PART of the Parmesan cheese in a medium bowl. Stir well, to fully combine ingredients. The remaining cheeses you set aside will be used to top the dip before baking.

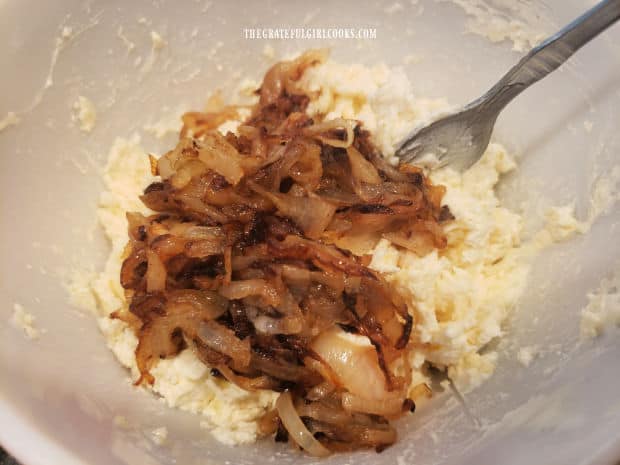
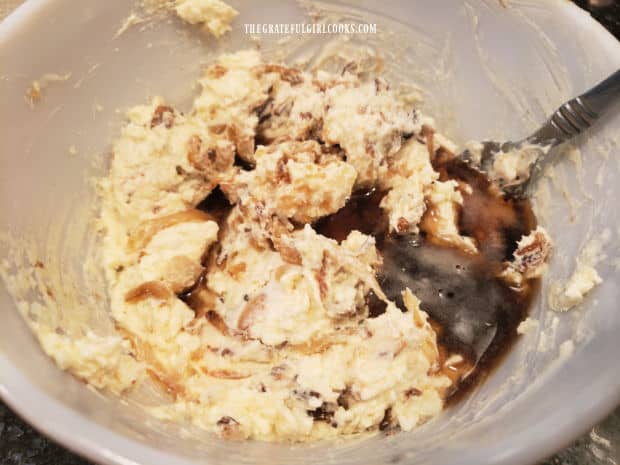
Once the onions are cooled to room temperature, stir them into the dip. The onions need to be cooled so they don’t melt the cheeses! Add the Guinness beer and stir well, to fully incorporate it into the dip. This dip recipe uses ¼ cup of beer, and the alcohol in it will cook away in the oven, leaving only the flavor.

Three cheeses and mayonnaise are combined in a bowl.Caramelized onions are stirred into the dip mixture in the bowl.Guinness beer is added to the cheeses and onion dip mixture in bowl.

Final Step Before Baking

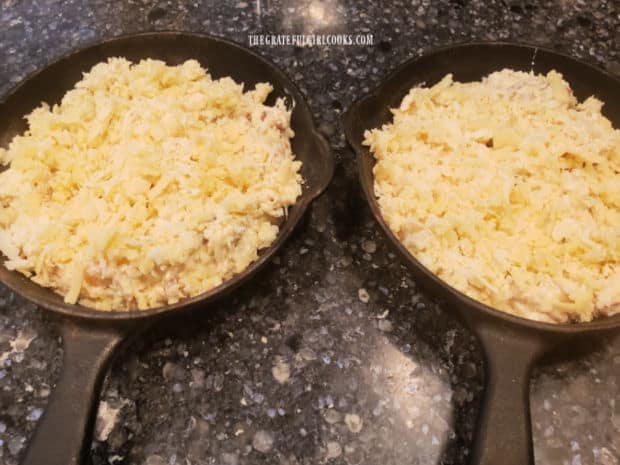
Spread the dip mixture into an 8″ cast iron (or oven-safe) skillet OR two 4″ cast iron skillets. You can also use an oven-safe baking dish, if desired, to make this baked dip. NOTE: For these photos I used two 4″ cast iron skillets to make two separate appetizer dishes! 

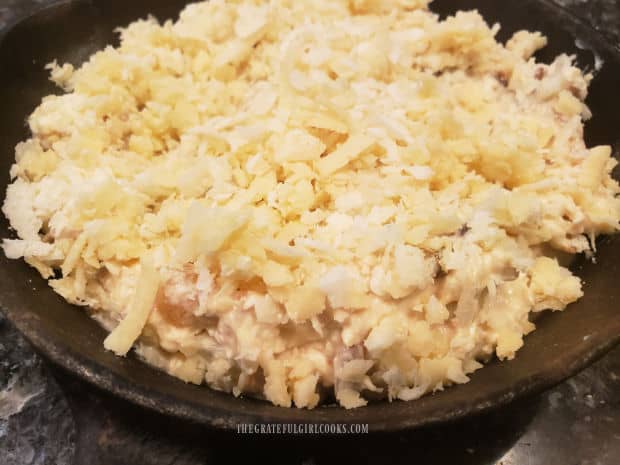
Once the dip is evenly spread in the skillet, sprinkle the top with the reserved shredded Dubliner and Parmesan cheeses. Now the Guinness Baked Cheese Dip is ready for the oven!

Dip is spread in a cast iron skillet and topped with shredded cheeses.Two 4" cast iron skillets filled with cheese dip before baking.

Place a sheet of aluminum foil under the skillet in the oven (to catch any spills). Cook the Guinness Baked Cheese Dip at 400° F. If using an 8″ skillet, you will need to bake the dip for 25-28 minutes. The two 4″ skillets will only need to bake for about 13-15 minutes.

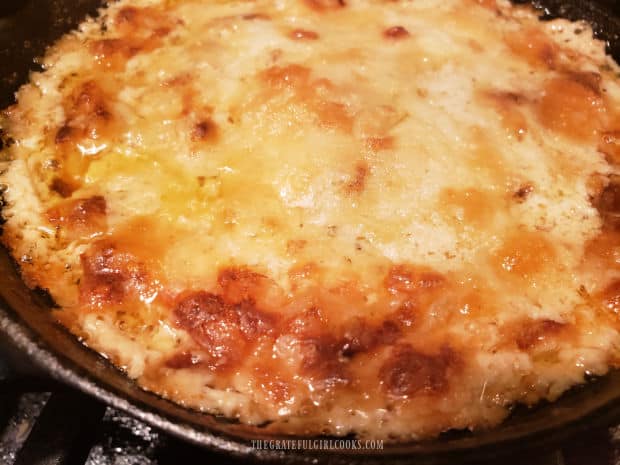
When done, the Guinness Baked Cheese Dip will be browned on top and the cheese will be bubbly. Transfer the hot skillets to a wire rack, and let the dip cool for 10-12 minutes before serving! The baked cheese is VERY hot, and you don’t want anyone to burn themselves on “molten lava” hot cheese!

Hot Guinness Baked Cheese Dip cools on wire rack after baking.

Serving The Guinness Baked Cheese Dip

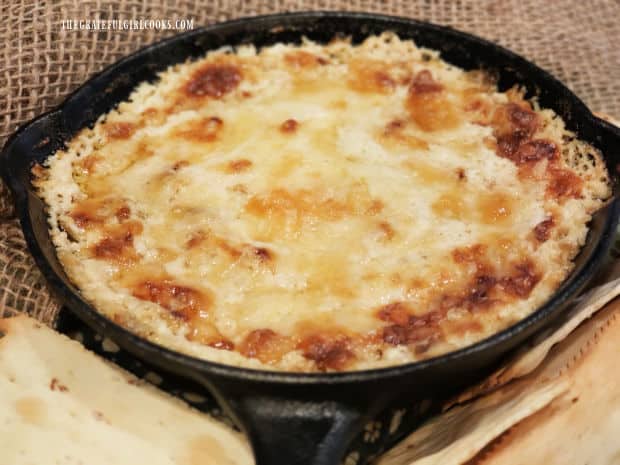
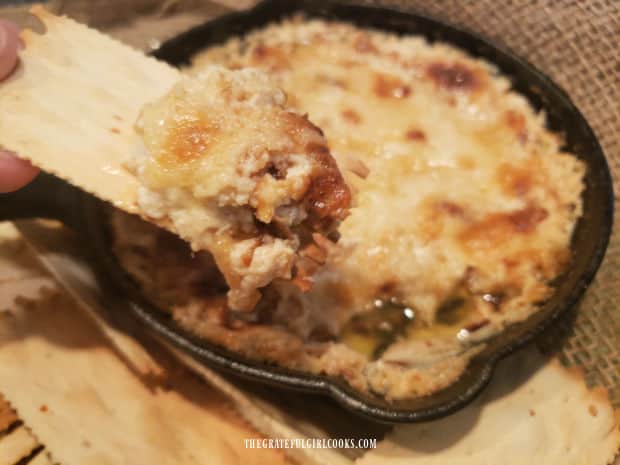
After the cheese dip has cooled sufficiently, it is ready to serve. Serve the Guinness Baked Cheese Dip with crisp, sturdy crackers, toasted baguette slices, or pita chips. Crackers, baguette slices, etc. should be sturdy enough to hold the weight of the cheese dip as it is scooped up!

The cheesy onion dip tastes wonderful with it’s complex flavors, and I’m confident you and your family or friends will enjoy it!

A skillet of Guinness Baked Cheese Dip is served with crackers as an appetizer.Scooping up the hot, baked cheese dip with one of the crackers.

Thanks for stopping by! I hope you enjoy this delicious baked cheese dip as much as we do. Please come back soon for more recipes, take care… and have a wonderful day.

Looking For More APPETIZER Recipes?

You can find ALL of my recipes in the Recipe Index, located at the top of the page. I have some terrific appetizer recipes you might enjoy, including:

Interested In More Recipes?

Thank you for visiting this website. I appreciate you using some of your valuable time to do soIf you’re interested, I publish a newsletter 2 times per month (1st and 15th) with all the latest recipes, and other fun info. I would be honored to have you join our growing list of subscribers, so you never miss a great recipe!
There is a Newsletter subscription box on the top right side (or bottom) of each blog post, depending on the device you use, where you can easily submit your e-mail address (only) to be included in my mailing list.

You Can Also Find Me On Social Media:

Facebook page: The Grateful Girl Cooks!
Pinterest:
The Grateful Girl Cooks!
Instagram:
jbatthegratefulgirlcooks

Author's signature

Recipe adapted from Laurie McNamara at: simplyscratch.com/guinness-dubliner-dip

↓↓ PRINTABLE RECIPE BELOW ↓↓
0 from 0 votes
Guinness Baked Cheese Dip
Prep Time
25 mins
Cook Time
25 mins
Resting Time (cooling)
10 mins
Total Time
1 hr
 

Guinness Baked Cheese Dip is a terrific appetizer, with 3 cheeses, caramelized onions, and Guinness beer! Served hot, you're gonna love it!

Category: Appetizer/Snack
Cuisine: American
Keyword: Guinness baked cheese dip
Servings: 8
Calories Per Serving: 205 kcal
Author: JB @ The Grateful Girl Cooks!
Ingredients
  • 2 Tablespoons butter
  • 1 large yellow onion peeled, thinly sliced
  • 1 pinch salt
  • 8 ounces cream cheese softened
  • 5 ounces Dubliner cheese DIVIDED USE, shredded
  • 2 ounces Parmesan cheese DIVIDED USE, shredded
  • ¼ cup mayonnaise
  • ¼ cup Guinness beer
Crackers, toasted baguette slices, etc. for serving
    Instructions
    1. Melt butter on medium-low heat in a 8" cast iron skillet (or two 4"), OR an oven safe skillet. Add onions and salt; toss to coat onions with butter. Cook onions slowly on medium-low, stirring often until soft in texture and fully browned (20-25 minutes). Remove skillet from heat; let onions cool completely.

    2. While onions cool, preheat oven to 400°F. AND prepare dip. Place cream cheese, mayonnaise, HALF the Dubliner cheese and HALF the Parmesan cheese in a medium bowl. Stir well, to combine. Once onions are cooled to room temp, stir them into the dip. Add Guinness beer and stir well, to combine.

    3. Evenly spread dip mixture into an oven-safe baking dish, 8" cast iron (or oven-safe) skillet OR two 4" skillets. Sprinkle top with reserved Dubliner/Parmesan cheeses.

    4. Bake at 400° F. NOTE: If using 8" skillet, bake for 25-28 minutes. Bake two 4" skillets for approx. 13-15 minutes. When done, the dip should be browned on top and cheese will be bubbly. Transfer hot skillet(s) to a wire rack; let dip cool 10-12 minutes before serving with crackers, pita chips or toasted baguette slices!
    Nutrition Facts
    Guinness Baked Cheese Dip
    Amount Per Serving (1 (1/8 of total))
    Calories 205 Calories from Fat 144
    % Daily Value*
    Fat 16g25%
    Saturated Fat 10g63%
    Trans Fat 1g
    Polyunsaturated Fat 1g
    Monounsaturated Fat 3g
    Cholesterol 44mg15%
    Sodium 433mg19%
    Potassium 107mg3%
    Carbohydrates 5g2%
    Fiber 1g4%
    Sugar 3g3%
    Protein 9g18%
    Vitamin A 310IU6%
    Vitamin C 1mg1%
    Calcium 144mg14%
    Iron 1mg6%
    * Percent Daily Values are based on a 2000 calorie diet.

    Here’s one more to pin on your Pinterest boards!Guinness Baked Cheese Dip is a terrific appetizer, with 3 cheeses, caramelized onions, and Guinness beer! Served hot, you're gonna love it!

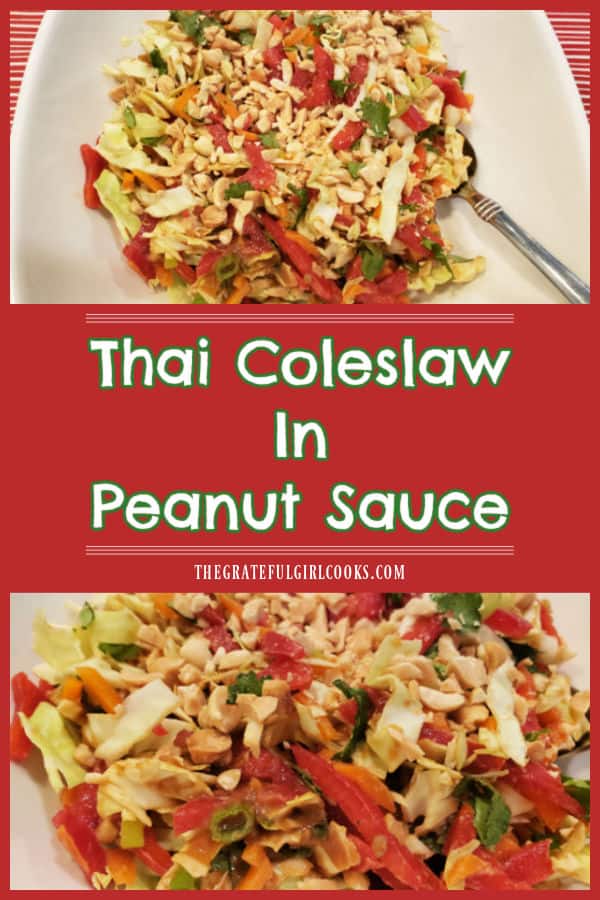
    Thai Coleslaw In Peanut Sauce

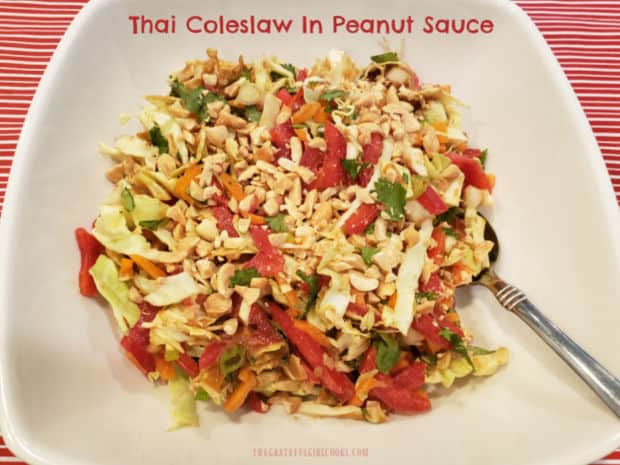
    Thai Coleslaw In Peanut Sauce is a unique twist on good ol’ coleslaw! This cold, crunchy side salad is easy to make, and it tastes GREAT!
    Thai Coleslaw In Peanut Sauce is a unique twist on good ol' coleslaw! This cold, crunchy side salad is easy to make, and it tastes GREAT!

    Do you enjoy coleslaw? We do, and love it… especially in the heat of summer! Coleslaw is easy to prepare, and it’s a wonderful side dish to prepare for a variety of meals or gatherings. This recipe is unique in that the coleslaw is covered in a delicious, flavor-packed Thai peanut dressing! The peanut sauce is the star of this salad and it makes the coleslaw taste absolutely delicious!

    It’s easy to make because the peanut dressing only takes a couple minutes to mix together, and the remaining prep is simply cutting veggies for the coleslaw. If you REALLY want to make this dish quickly, you can always purchase pre-made coleslaw bags at the grocery store. That way you will only have to do a small amount of chopping! Do whatever works best for you and your schedule.

    Once done, this side dish will make approximately six, one cup servings. The peanut sauce is added right before serving, so if you want to save half of the coleslaw for another meal, simply leave half the sauce off half the salad until you’re ready to serve it again. Keep any leftover salad and peanut sauce covered and refrigerated separately.

    Scroll Down For A Printable Recipe Card At The Bottom Of The Page

    Make The Peanut Sauce

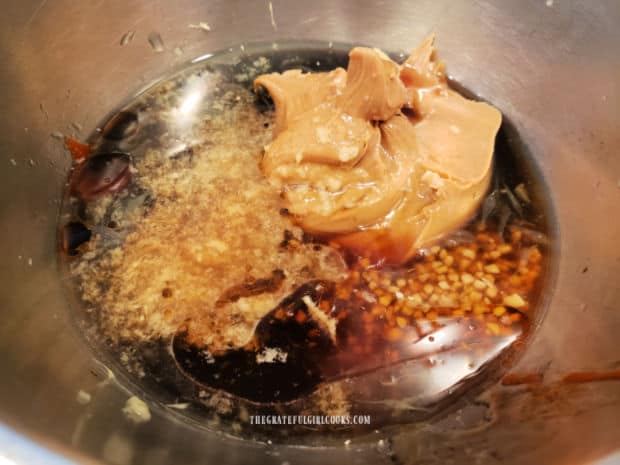
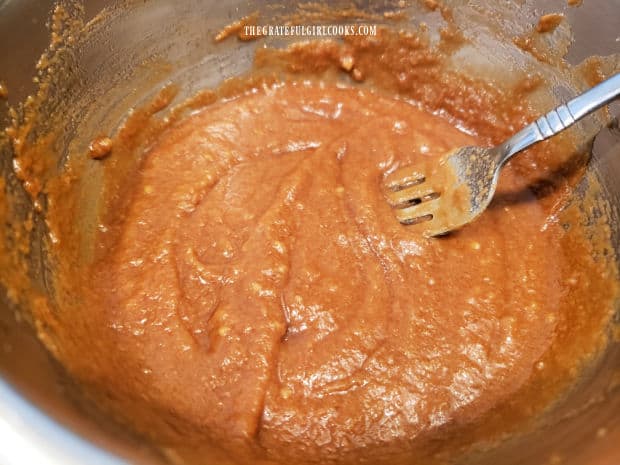
    Place all the ingredients for the peanut sauce in a medium bowl. The ingredients are peanut butter, lime juice, rice vinegar, soy sauce, honey, brown sugar, sriracha, sesame oil, ginger and garlic. Whisk or stir these ingredients together until they are fully combined.

    Please Note: If you’re using regular creamy peanut butter, the sauce will be just a bit thicker than if you’re using all natural peanut butter. When done, set the peanut sauce aside.

    Ingredients for the peanut sauce are measured into a small bowl.Peanut sauce for the coleslaw is mixed together until fully combined.

    Prepping The Coleslaw

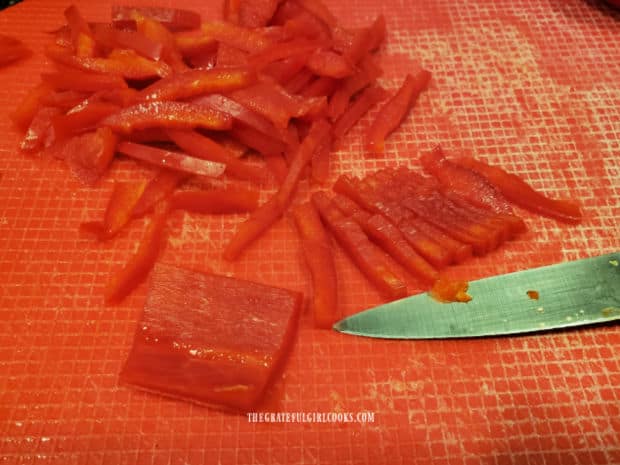
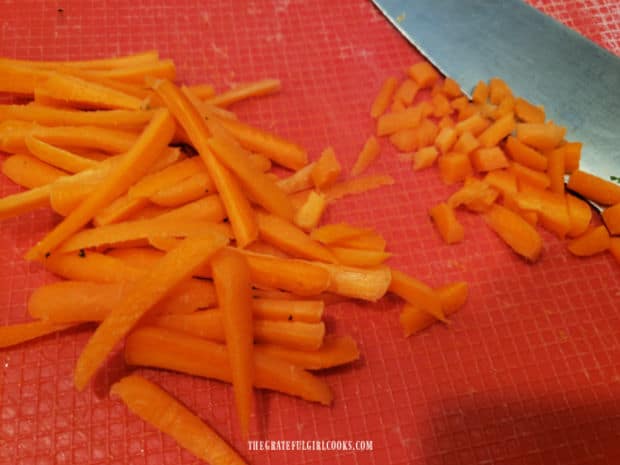
    Remove seeds from, then slice the red bell pepper into very thin matchstick shapes. Slice the carrots in the same way, but then give them a rough chop. You will also need to shred the cabbage, slice the green onions and chop the cilantro for the coleslaw. You can use a combination of green and red cabbage or just green cabbage (that’s how I make it).

    If using bagged coleslaw mix, remember to add the bell pepper, cilantro and green onions to the pre-mixed six cups of coleslaw.

    Red bell pepper is sliced into thin matchstick shapes for the coleslaw.Carrots are cut into matchsticks, then rough chopped for the coleslaw.

    Mix The Coleslaw Salad Together

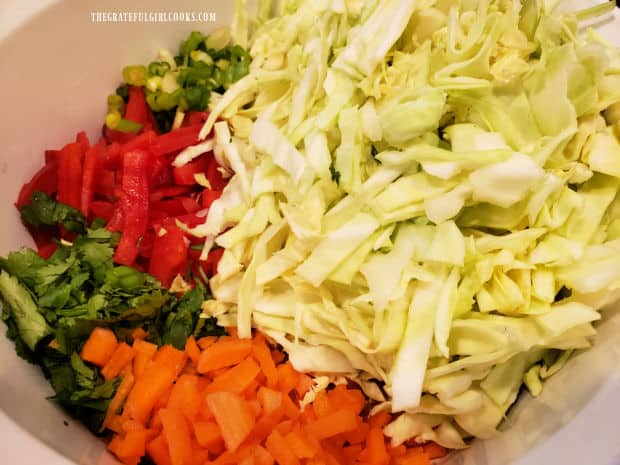
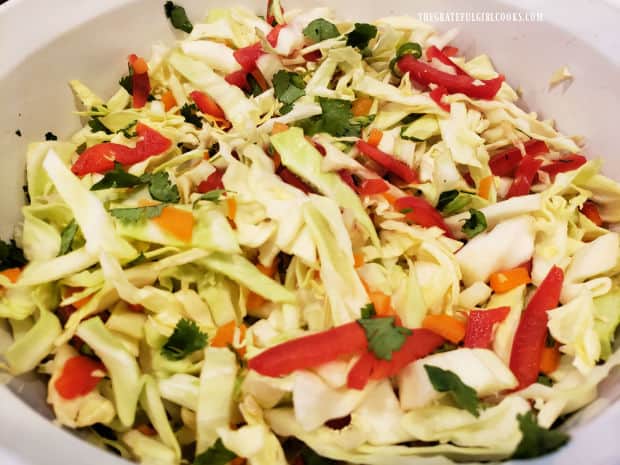
    Place all of the salad ingredients into a medium sized serving bowl, and then toss, to combine all ingredients. This is the coleslaw part of the dish. Cover and refrigerate the coleslaw until you are ready to serve, because you want it to be very cold.

    DO NOT add the peanut sauce until just before serving! Thai Coleslaw In Peanut Sauce is best when tossed with the sauce right before serving, because it helps keeps the cabbage crisp!

    Shredded cabbage, sliced carrots, green onions, red pepper, and cilantro in salad bowl.The Thai coleslaw ingredients are tossed together until combined.

    Serving The Thai Coleslaw In Peanut Sauce

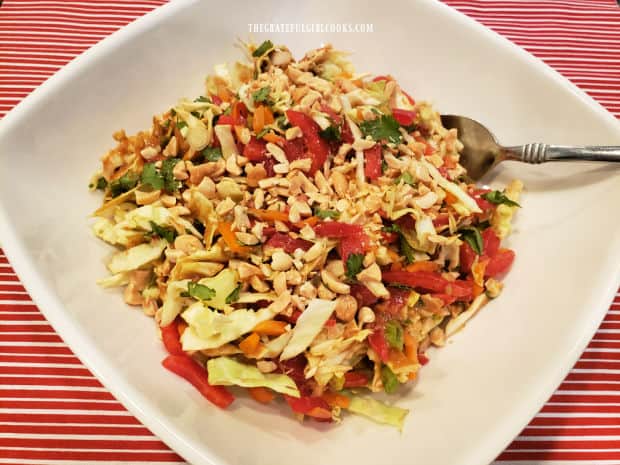
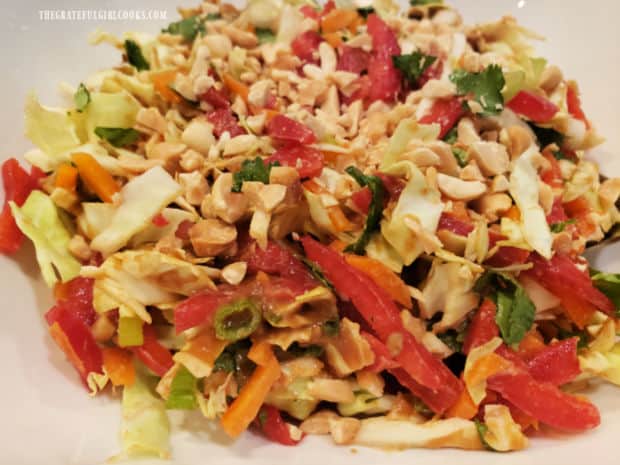
    When ready to serve, toss the coleslaw with the peanut sauce to combine. Sprinkle chopped peanuts on top of the Thai coleslaw in peanut sauce, and serve! The chopped peanuts on top really add nice flavor and extra crunch to the salad.

    Thai coleslaw in peanut sauce is garnished with chopped peanuts, and served in a white dish.A close up picture of the Thai coleslaw in peanut sauce, ready to eat.

    I hope you enjoy this delicious side dish, as much as I do! Thank you for stopping by, and please come back again soon for more recipes! Take care, and have a great day.
    Looking For More COLESLAW Recipes?

    You can find ALL of my recipes in the Recipe Index, located at the top of the page. I have several coleslaw recipes for you to enjoy, including:

    Interested In More Recipes?

    Thank you for visiting this website. I appreciate you using some of your valuable time to do soIf you’re interested, I publish a newsletter 2 times per month (1st and 15th) with all the latest recipes, and other fun info. I would be honored to have you join our growing list of subscribers, so you never miss a great recipe!
    There is a Newsletter subscription box on the top right side (or bottom) of each blog post, depending on the device you use, where you can easily submit your e-mail address (only) to be included in my mailing list.

    You Can Also Find Me On Social Media:

    Facebook page: The Grateful Girl Cooks!
    Pinterest:
    The Grateful Girl Cooks!
    Instagram:
    jbatthegratefulgirlcooks

    Author's signature

    Original recipe source: Jaclyn, at https://www.cookingclassy.com/thai-slaw-peanut-dressing/

    ↓↓ PRINTABLE RECIPE BELOW ↓↓

    0 from 0 votes
    Thai Coleslaw In Peanut Sauce
    Prep Time
    15 mins
    Cook Time
    0 mins
    Total Time
    15 mins
     

    Thai Coleslaw In Peanut Sauce is a unique twist on good ol' coleslaw! This cold, crunchy side salad is easy to make, and it tastes GREAT!

    Category: Salads, Side Dish
    Cuisine: Thai
    Keyword: Peanut Sauce, Thai coleslaw
    Servings: 6 (approx. 1 C. per serving)
    Calories Per Serving: 182 kcal
    Author: JB @ The Grateful Girl Cooks!
    Ingredients
    For Slaw:
    • 6 cups shredded cabbage (green or red/green combo) bagged or hand-shredded
    • 1 medium red bell pepper cut into thin matchsticks
    • 1 cup carrots (measure after cutting) cut in thin matchsticks, then chopped
    • ½ cup sliced green onions
    • cup cilantro (measure after chopping) chopped
    For Peanut Dressing:
    • cup natural creamy peanut butter can substitute regular creamy PB
    • 2 Tablespoons fresh lime juice
    • 2 Tablespoons honey
    • Tablespoons low sodium soy sauce
    • Tablespoons rice vinegar
    • Tablespoons packed brown sugar
    • 2 teaspoons minced ginger peeled, finely minced
    • 1 teaspoon sriracha
    • teaspoons sesame oil
    • 1 large clove garlic peeled, finely minced
    Garnish For Coleslaw:
    • 15 peanuts (approx. 4 teaspoons) rough chopped (regular or dry-roasted)
    Instructions
    1. Place peanut sauce ingredients in medium bowl. Whisk or stir until fully combined. Note: If using regular creamy peanut butter, sauce will be thicker than if using all natural peanut butter. When done, set sauce aside.

    2. Remove seeds from, then slice red bell pepper into very thin matchstick shapes. Slice carrots the same way, but then give them a rough chop. Shred cabbage, slice green onions and chop cilantro. NOTE: If using bagged coleslaw mix, add bell pepper, cilantro and green onions to pre-mixed 6 cups of coleslaw.

    3. Place salad ingredients into medium serving bowl, and toss, to combine. Cover and refrigerate coleslaw until ready to serve, because you want it very cold. NOTE: DO NOT add peanut sauce until right before serving (helps keep cabbage crisp)!

    4. When ready to serve, toss coleslaw with peanut sauce to combine. Sprinkle chopped peanuts on top, and serve! Enjoy!

    Nutrition Facts
    Thai Coleslaw In Peanut Sauce
    Amount Per Serving (1 (1/6 of total))
    Calories 182 Calories from Fat 90
    % Daily Value*
    Fat 10g15%
    Saturated Fat 2g13%
    Polyunsaturated Fat 3g
    Monounsaturated Fat 5g
    Sodium 265mg12%
    Potassium 387mg11%
    Carbohydrates 21g7%
    Fiber 4g17%
    Sugar 15g17%
    Protein 6g12%
    Vitamin A 4400IU88%
    Vitamin C 56mg68%
    Calcium 58mg6%
    Iron 1mg6%
    * Percent Daily Values are based on a 2000 calorie diet.

    Here’s one more to pin on your Pinterest boards!Thai Coleslaw In Peanut Sauce is a unique twist on good ol' coleslaw! This cold, crunchy side salad is easy to make, and it tastes GREAT!

    Cheddar Jack Cheese Spread

    Cheddar Jack Cheese Spread is easy to make, features three cheeses, and is a delicious snack or appetizer, served with your favorite crackers!
    Cheddar Jack Cheese Spread is easy to make, features three cheeses, and is a delicious snack or appetizer, served with your favorite crackers!

    Looking for a delicious party appetizer or delicious cheese spread to keep in the refrigerator for a late night snack? How about this absolutely yummy and super EASY cheddar jack cheese spread?

    This creamy spread (approximately 2 cups) can be made in under 10 minutes using a food processor or high-powered blender.

    The spread is made with cheddar cheese, jack cheese, cream cheese, cooking sherry, Dijon, etc., and tastes great on crackers or pita chips.

    Cheddar jack cheese spread also makes a great food gift for friends or family, when wrapped decoratively in a ramekin, gift container or crock! Let me show you how easy it is to make:

    Scroll Down For A Printable Recipe Card At The Bottom Of The Page

    How To Make Cheddar Jack Cheese Spread

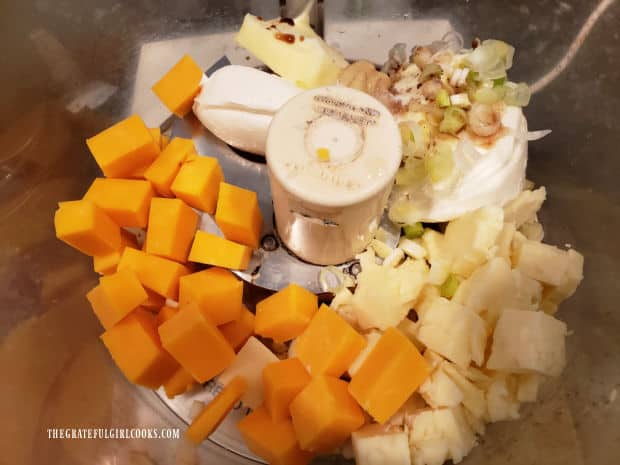
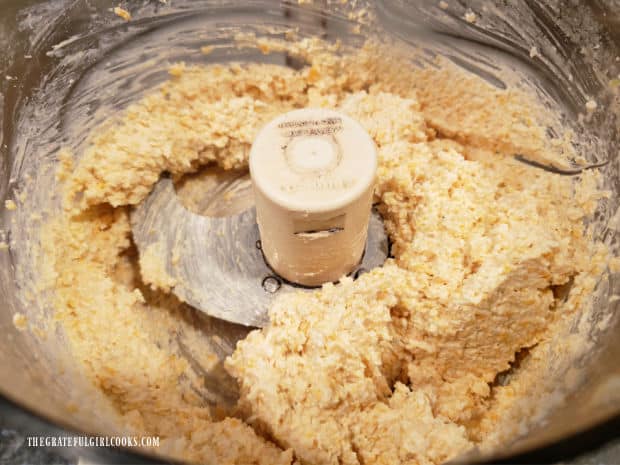
    Place cheddar and jack cheese cubes, cream cheese, butter, green onion, sherry, Worcestershire, Dijon, tabasco, and salt into a food processor. Process these ingredients until the mixture becomes fairly smooth.

    NOTE: For the cream cheese, you can use 3 oz. of cubes cut from a block of cream cheese OR  3 oz. of spreadable cream cheese.

    Ingredients for the cheddar jack cheese spread are placed into a food processor.A food processor is used to process the cheese spread until smooth.

    Last Step Before It’s Done!

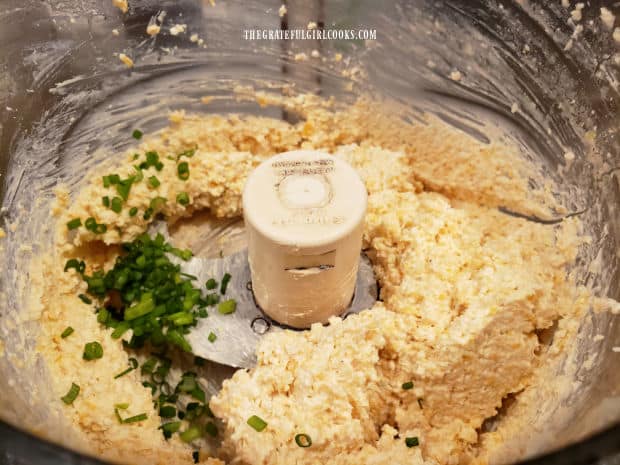
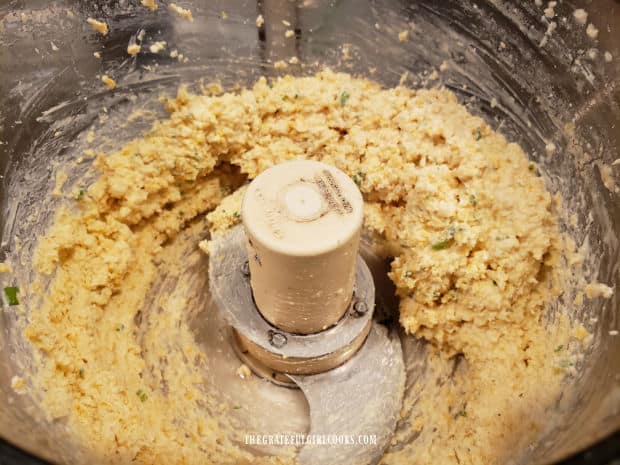
    Once the cheddar jack cheese spread is fairly smooth, add finely chopped chives to the food processor. Pulse just until the chives are incorporated into the mixture.

    Remove the cheese spread from the processor. Spoon it out of the processor and and place it into a ramekin, gift container or crock.

    Cover the cheddar jack cheese spread and refrigerate it for about an hour. This is to give the flavors a chance to “mingle”, which makes the cheese spread taste even better.

    Finely chopped chives are added to the processed cheese spread.Cheddar jack cheese spread is pulsed until chives are incorporated into mixture.

    Serving The Cheddar Jack Cheese Spread

    To serve, remove the cheddar jack cheese spread from the refrigerator. Let it slightly “soften” at room temperature (uncovered) for about 15 minutes, because this makes it easier for spreading and provides the best flavor.

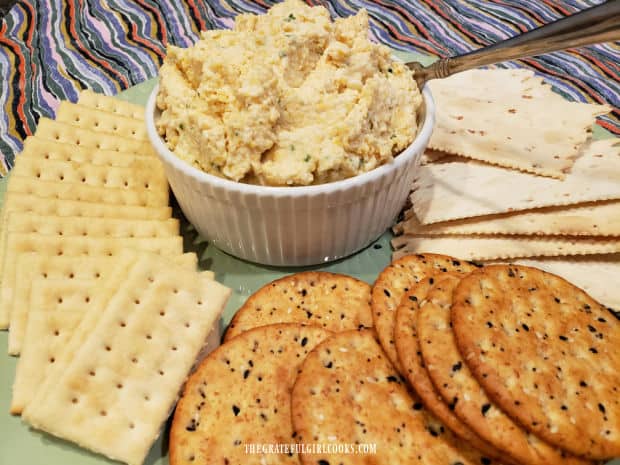
    Serve with an assortment of your favorite crackers or pita chips, and enjoy! You can store any leftovers (covered) in the refrigerator for up to 4-5 days. Remember to let it come to room temperature before serving!

    See how easy it is to make this yummy snack? I really think you’re going to enjoy eating it and serving it to family and friends.

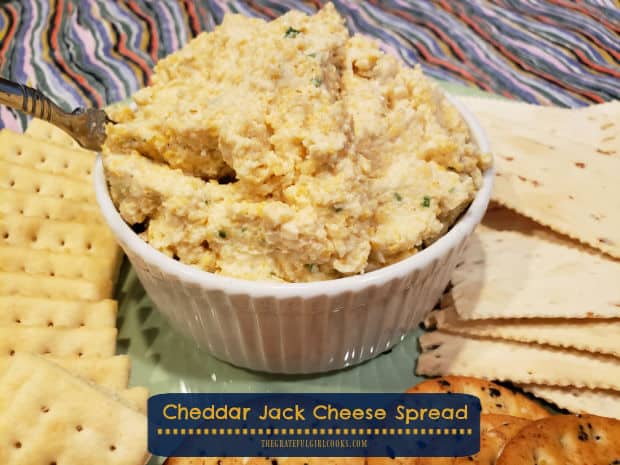
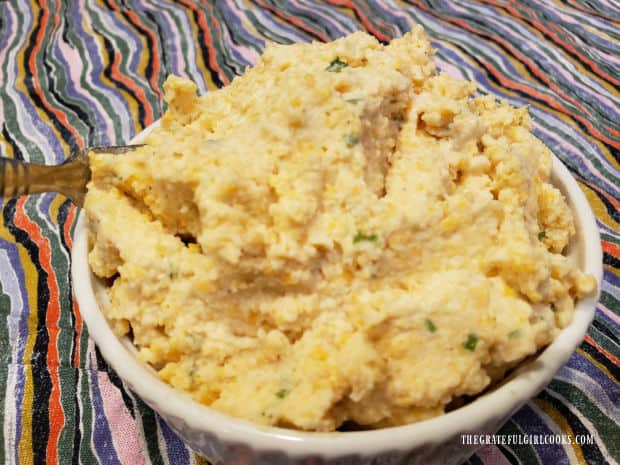
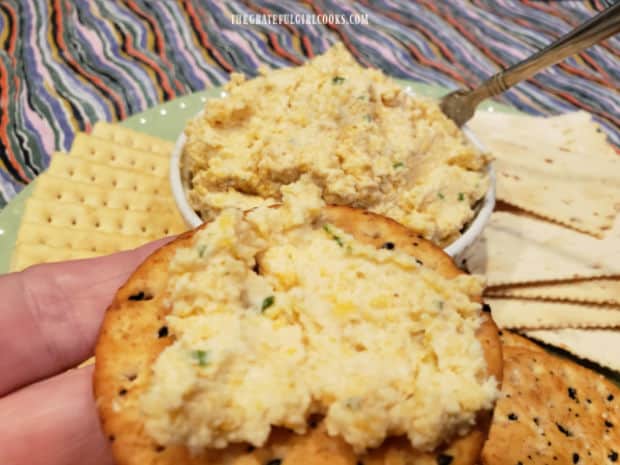
    A ramekin, filled with cheddar jack cheese spread, is served with assorted crackers.A ramekin full of the cheese spread ready to enjoy on crackers.Spread on a cracker, the cheddar jack cheese spread is ready to eat.

    I hope you will have the chance to make this tasty cheddar jack cheese spread for those you love. It’s really GOOD, and I hope you enjoy it like we do.

    Thank you for stopping by this blog, and trust you will come back again for more family-friendly recipes. Have a GREAT day, and may God bless you as you journey through it.

    Looking For More APPETIZER Recipes?

    You can find ALL of my recipes in the Recipe Index, located at the top of the page. I have a wonderful variety of yummy appetizer recipes you may enjoy, including:

    Want More Recipes? Get My FREE Newsletter!

    I publish a newsletter 2 times per month (1st and 15th) with lots of recipes, tips, etc..
    Would you like to join our growing list of subscribers?

    There is a Newsletter subscription box on the top right (or bottom) of each blog post, depending on the device you use.
    You can submit your e-mail address there, to be added to my mailing list.

    Find Me On Social Media:

    Facebook page: The Grateful Girl Cooks!
    Pinterest:
    The Grateful Girl Cooks!
    Instagram:
    jbatthegratefulgirlcooks

    Author's signature

    Original recipe source: unknown- found it handwritten on a 3″x5″ index card in old recipe box (no original source noted)

    ↓↓ PRINTABLE RECIPE BELOW ↓↓

    0 from 0 votes
    Cheddar Jack Cheese Spread
    Prep Time
    10 mins
    Cook Time
    0 mins
    Total Time
    10 mins
     

    Cheddar Jack Cheese Spread is easy to make, features three cheeses, and is a delicious snack or appetizer, served with your favorite crackers!

    Category: Appetizer/Snack
    Cuisine: American
    Keyword: cheddar jack cheese spread
    Servings: 8 (serving = 1/4 cup)
    Calories Per Serving: 136 kcal
    Author: JB @ The Grateful Girl Cooks!
    Ingredients
    • 3 ounces cheddar cheese cut in 1" cubes
    • 3 ounces jack cheese cut in 1" cubes
    • 3 ounces cream cheese cut in 1" cubes (can sub. "spreadable")
    • 6 green onions (white part ONLY) chopped
    • 2 Tablespoons butter softened
    • 2 Tablespoons cooking sherry
    • 1 teaspoon Dijon mustard
    • 1 teaspoon Worcestershire sauce
    • ¼ teaspoon salt
    • 2 dashes Tabasco sauce or other hot sauce
    • 2 Tablespoon chives finely chopped
    Instructions
    1. Place all ingredients (EXCEPT for chopped chives) into a food processor. Process until mixture becomes fairly smooth.

    2. Add chives. Pulse only until chives are incorporated. Remove cheese spread from processor. Spoon it into ramekin, gift container or crock.

    3. Cover and refrigerate for an hour. This gives flavors a chance to "mingle", which helps cheese spread taste even better.

    4. Let cheese spread come to room temperature (approx. 15 minutes) before serving with favorite crackers. Store leftovers (covered) in refrigerator up to 4-5 days.

    Nutrition Facts
    Cheddar Jack Cheese Spread
    Amount Per Serving (1 (1/4 cup))
    Calories 136 Calories from Fat 99
    % Daily Value*
    Fat 11g17%
    Saturated Fat 7g44%
    Trans Fat 1g
    Polyunsaturated Fat 1g
    Monounsaturated Fat 3g
    Cholesterol 34mg11%
    Sodium 287mg12%
    Potassium 83mg2%
    Carbohydrates 2g1%
    Fiber 1g4%
    Sugar 1g1%
    Protein 6g12%
    Vitamin A 458IU9%
    Vitamin C 2mg2%
    Calcium 181mg18%
    Iron 1mg6%
    * Percent Daily Values are based on a 2000 calorie diet.

    Here’s one more to pin on your Pinterest boards!Cheddar Jack Cheese Spread is easy to make, features three cheeses, and is a delicious snack or appetizer, served with your favorite crackers!

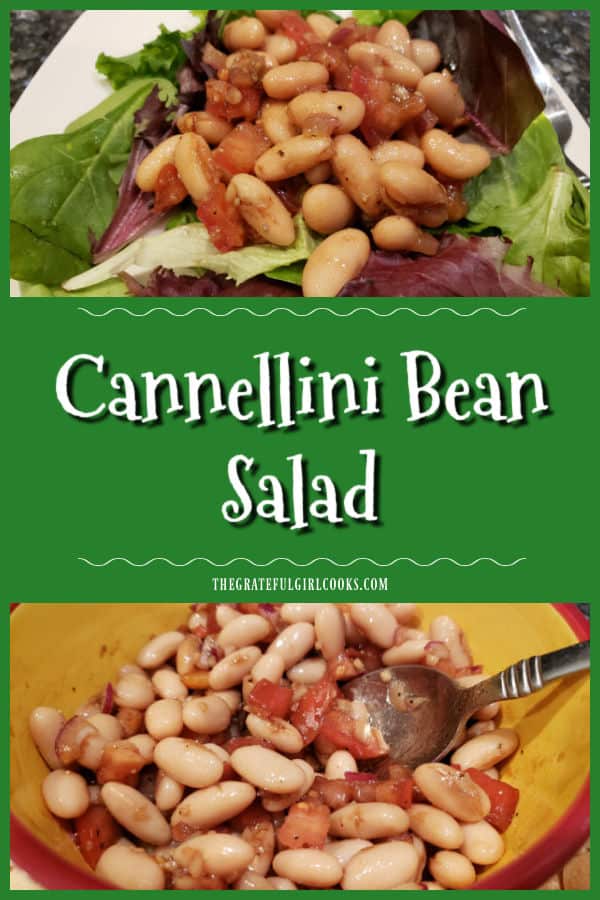
    Cannellini Bean Salad

    Cannellini Bean Salad with tomatoes, onion, olive oil, balsamic, vinegar and garlic is easy to make and delicious as a salad topper OR a dip!
    Cannellini Bean Salad with tomatoes, onion, olive oil, balsamic, vinegar and garlic is easy to make and delicious as a salad topper OR a dip!

    Today I want to share with you a recipe for cannellini bean salad. It’s SUPER EASY to make in just a couple minutes, and can be enjoyed as is, OR on top of mixed greens (delicious) OR served as a dip with pita chips, etc. However you choose to serve it, the flavors are wonderful, and I’m confident you’ll enjoy this simple salad!

    I found the original recipe in one of the cookbooks I own called “100 Days Of Real Food”, by Lisa Leake. It’s a great cookbook for those looking to cook with wholesome family-friendly foods. She serves this salad as a dip, which we love, but I’ve found I enjoy it the most served as a topper over a mixed green salad.

    The beans and the delicious dressing they are covered with make it a double whammy salad. Lots of protein and fiber is provided from the beans and tomatoes, onions, garlic, olive oil, balsamic vinegar with seasoning create a salad dressing! It’s a win-win, no matter how you serve it! Here’s how to make this delicious vegetarian and gluten-free salad:

    Scroll Down For A Printable Recipe Card At The Bottom Of The Page

    How To Make This EASY Cannellini Bean Salad

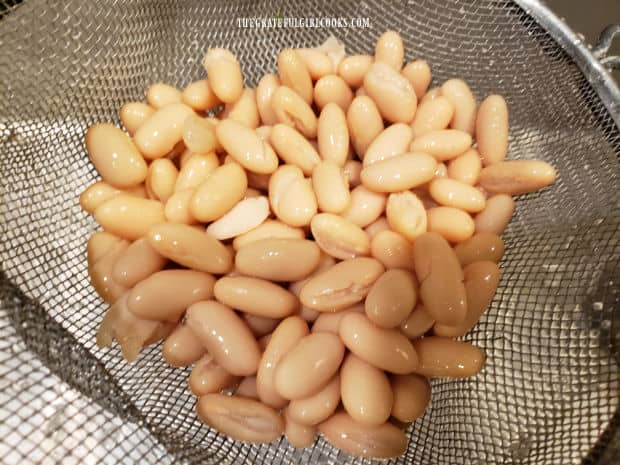
    Drain, and then rinse one can (approx. 15 oz.) of cannellini beans. After the beans are drained and rinsed well, place them into a small or medium-sized serving bowl.

    Cannellini beans are drained from the can and rinsed well before making the salad.

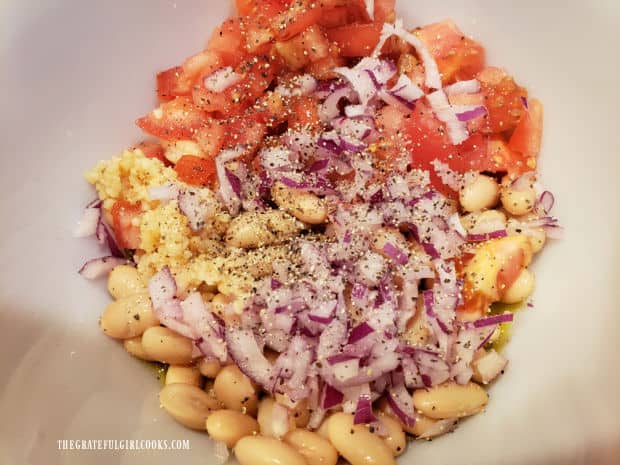
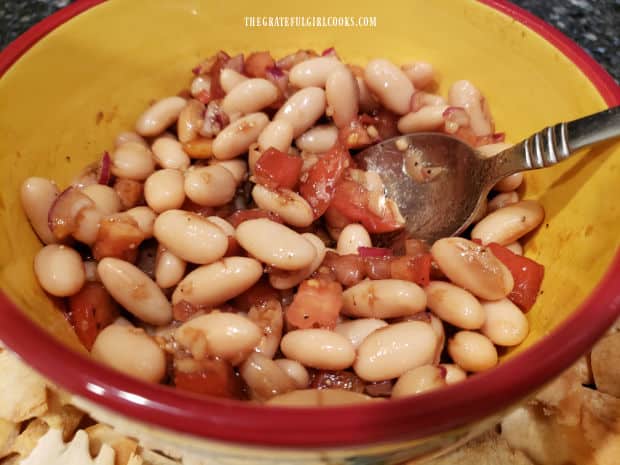
    Add the rest of the ingredients to the bowl of drained cannellini beans. The remaining ingredients are tomato, red onion, garlic, olive oil, balsamic vinegar, salt and black pepper. Stir, to fully combine these ingredients. 

    At this point the cannellini bean salad is finished and can be served immediately. Stir the ingredients a couple of times to keep the beans coated with the simple dressing. OPTIONAL: Cover the bowl and let the flavors “mingle” in the refrigerator for 20-30 minutes before serving, for even more flavor. Your choice!

    All the ingredients for the cannellini bean salad are combined in a bowl.

    Enjoy This Salad On Mixed Greens! 

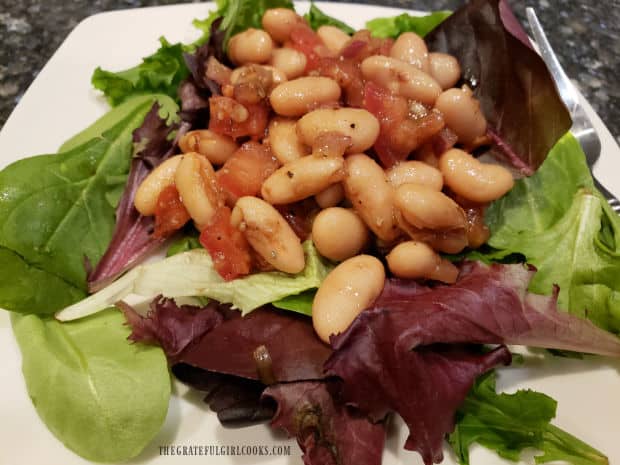
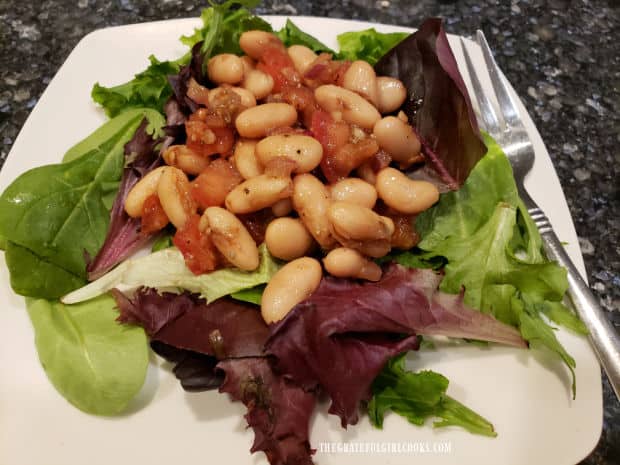
    My favorite way to enjoy the cannellini bean salad is to place a portion on a bed of chilled mixed greens. Stir the beans before serving, and don’t forget to spoon some olive oil/balsamic dressing (from the bottom of the bowl) on top. 

    The beans provide fiber and protein, and the red onion, garlic and tomato add flavor, texture and color. Another added bonus is that the oil/balsamic mixture creates a simple, but delicious salad dressing, so there’s no need to add any. It’s delicious, just as it is!

    Cannellini bean salad is served as a topper for a mixed green salad.

    Cannellini Bean Salad Can Be Served As A DIP, Too!

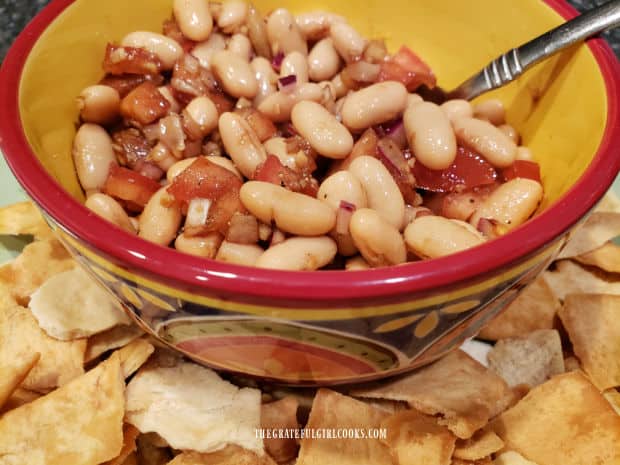
    My husband enjoys the cannellini bean salad served as a dip, too! Just stir it well, and serve it with pita chips, crackers or pieces of firm, crusty bread! It’s a simple, yet tasty dip I’m sure you will enjoy! This easy salad (or dip) has a lot of flavor!

    The cannellini bean salad can be served as a dip with pita chips, crackers or crusty bread.A bowl of cannellini bean salad ready to be served as a dip or eaten as is.

    Thank you for stopping by today. I hope you’ll try this easy to prepare dish, and trust you will enjoy it as much as we do. It should keep well (covered) in the refrigerator for up to 4-5 days. Please come back again soon for more family-friendly recipes. Take care, and have a GREAT day!

    Looking For More SALAD Recipes?

    You can find ALL of my recipes in the Recipe Index, which is located at the top of the page. I have many delicious salad recipes for you to enjoy, including:

    Interested In More Recipes?

    Thank you for visiting this website. I appreciate you using some of your valuable time to do soIf you’re interested, I publish a newsletter 2 times per month (1st and 15th) with all the latest recipes, and other fun info. I would be honored to have you join our growing list of subscribers, so you never miss a great recipe!
    There is a Newsletter subscription box on the top right side (or bottom) of each blog post, depending on the device you use, where you can easily submit your e-mail address (only) to be included in my mailing list.

    You Can Also Find Me On Social Media:

    Facebook page: The Grateful Girl Cooks!
    Pinterest:
    The Grateful Girl Cooks!
    Instagram:
    jbatthegratefulgirlcooks

    Author's signature

    Original recipe source: The cookbook “100 Days Of Real Food”, by Lisa Leake, page 195, published by Harper Collins Publishers in 2014

    ↓↓ PRINTABLE RECIPE BELOW ↓↓

    0 from 0 votes
    Cannellini Bean Salad
    Prep Time
    10 mins
    Cook Time
    0 mins
    Total Time
    10 mins
     

    Cannellini Bean Salad with tomatoes, onion, olive oil, balsamic, vinegar and garlic is easy to make and delicious as a salad topper OR a dip!

    Category: Appetizer, Salad
    Cuisine: American
    Keyword: cannellini bean salad
    Servings: 4
    Calories Per Serving: 190 kcal
    Author: JB @ The Grateful Girl Cooks!
    Ingredients
    • 15 ounces cannellini beans drained/rinsed
    • 1 medium tomato chopped
    • cup red onion diced
    • 2 garlic cloves minced
    • 3 Tablespoons extra virgin olive oil
    • 2 Tablespoons balsamic vinegar
    • ¼ teaspoon salt use more if needed, to taste
    • ¼ teaspoon ground black pepper
    Instructions
    1. Drain and rinse cannellini beans. Place the beans in a small or medium-sized serving bowl.

    2. Add remaining ingredients, and stir to fully combine. Serve and enjoy! OPTIONAL: If desired, cover and refrigerate for 20-30 minutes for flavors to mingle.

    3. Can be served as a dip with pita bread, crackers or crusty slices of bread OR as a salad topper, OR eaten as is. If using as a salad topper, be sure to spoon some olive oil/balsamic dressing (from bottom of the bowl) over the salad.

    4. Store leftovers (covered) in refrigerator for up to 4-5 days.

    Recipe Notes

    NOTE: Canned cannellini beans vary in weight from 15 ounces up to 15.5 ounces. Use a whole can; the various weights will all work just fine!

    Nutrition Facts
    Cannellini Bean Salad
    Amount Per Serving (1 (1/4 of total))
    Calories 190 Calories from Fat 99
    % Daily Value*
    Fat 11g17%
    Saturated Fat 1g6%
    Polyunsaturated Fat 1g
    Monounsaturated Fat 8g
    Sodium 378mg16%
    Potassium 109mg3%
    Carbohydrates 21g7%
    Fiber 6g25%
    Sugar 3g3%
    Protein 6g12%
    Vitamin A 257IU5%
    Vitamin C 6mg7%
    Calcium 76mg8%
    Iron 3mg17%
    * Percent Daily Values are based on a 2000 calorie diet.

    Here’s one more to pin on your Pinterest boards!Cannellini Bean Salad with tomatoes, onion, olive oil, balsamic, vinegar and garlic is easy to make and delicious as a salad topper OR a dip!

    Toasted Sweet Spiced Pecans

    Whip up Toasted Sweet Spiced Pecans in 5 minutes! Pan-roasted pecans are a little bit sweet and spicy, and are a yummy snack or salad topper!
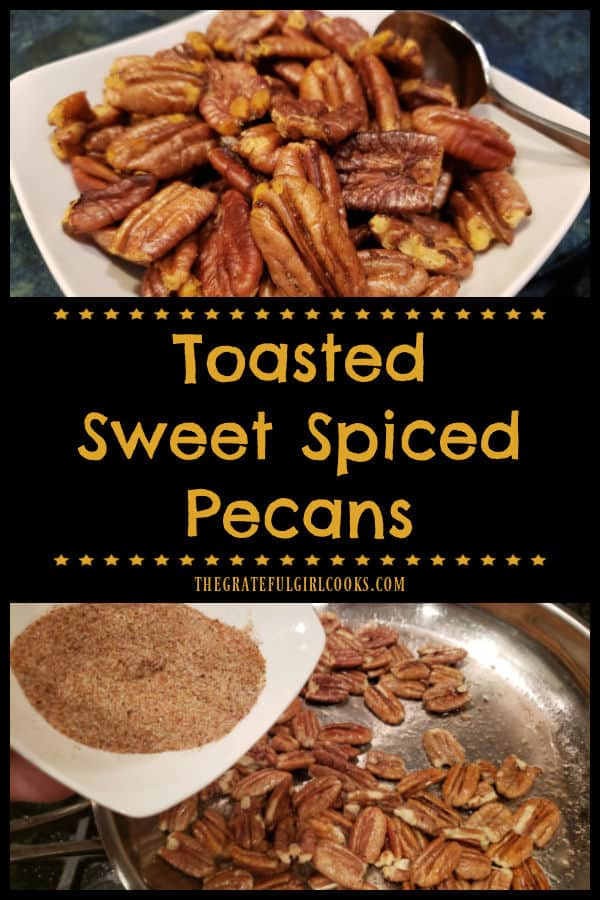
    Whip up Toasted Sweet Spiced Pecans in 5 minutes! Pan-roasted pecans are a little bit sweet and spicy, and are a yummy snack or salad topper!
    If you’re looking for a quick and easy snack or salad topper, may I share this recipe for Toasted Sweet Spiced Pecans with you today? I originally found the recipe quite a while ago, handwritten on an index card in an old recipe box. I made a couple slight changes to the recipe and the result is this simple recipe.

    The pan-roasted pecans are not too sweet and not too spicy, in case you are wondering. They ARE a delicious snack, and taste fantastic tossed onto the top of a mixed green salad. The little bit of crunch, plus the subtle seasoning make them a delicious treat.

    You will end up with 2 cups of toasted sweet spiced pecans, for a total of eight ¼ cup servings! Let me show you how easy they are to make, in just about 5 minutes!

    Scroll Down For A Printable Recipe Card At The Bottom Of The Page

    Make The Spice Mixture

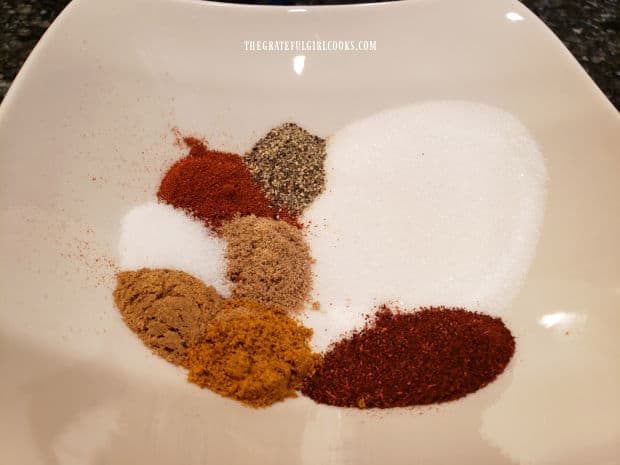
    In a small bowl, combine  the spices to make the seasoning mix. The seasonings used for this mix include sugar, paprika, chili powder, curry powder, cumin, coriander, salt and pepper, and are used in small amounts.

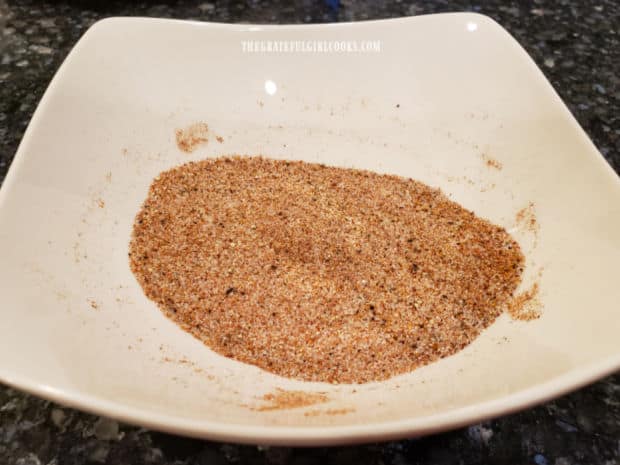
    Stir these spices together, and you will have your seasoning mix ready to go! See how simple this is so far?

    All of the spices to season the pecans are in a white bowl, ready to combine.A white bowl, filled with the spice mixture that will be used to season the toasted pecans.

    Toast The Pecans

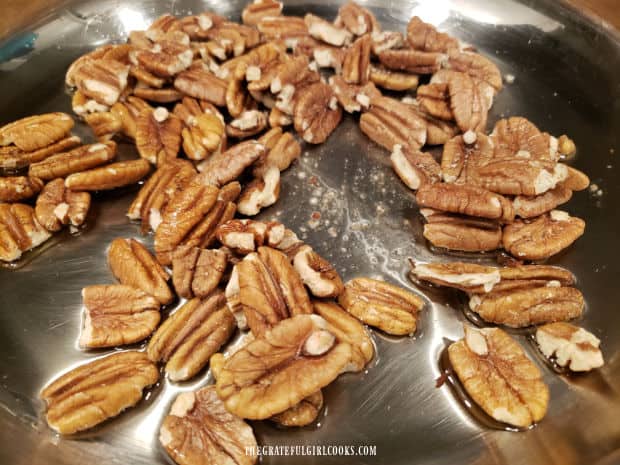
    The next step is to pan-roast the pecans. Heat oil in a medium to large sized skillet on medium heat until very hot (but not smoking). Add the pecans to the skillet and cook, stirring often, for 2-3 minutes, until they have browned. Try to make sure the pecans are evenly coated with the oil, so the seasoning mix will adhere when you add it.

    Pecan halves are lightly toasted in a skillet with hot oil.

    Add The Spices To Finish

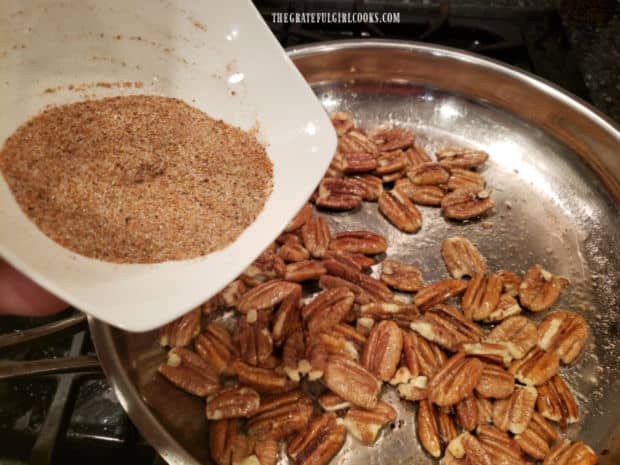
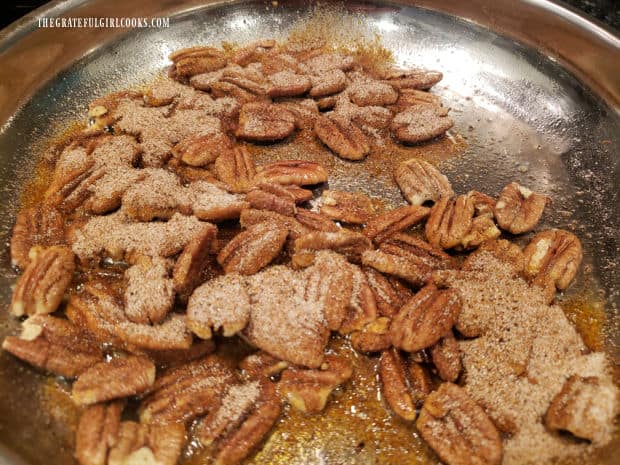
    Once the pecans have toasted and are browned well, sprinkle the seasoning mix over the pecans, and then stir, so they are coated evenly. Continue to cook the toasted sweet spiced pecans for 1-2 minutes, then remove the skillet from the heat.

    Spices will be added to the oil-coated pecans in the skillet, then stirred to combine.Pecans are covered with seasoning, then stirred to combine while heating.

    Drain And Cool Toasted Pecans Before Serving

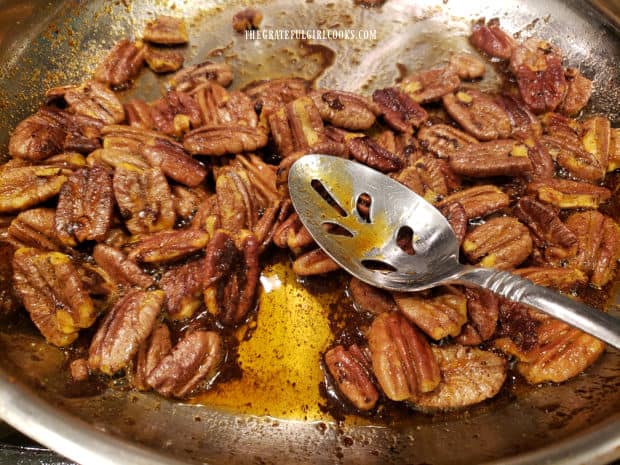
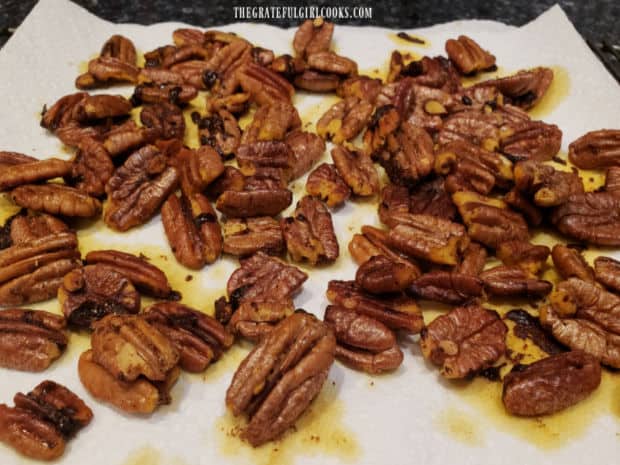
    Use a slotted spoon to remove the pecans from the skillet, and transfer them onto several layers of paper towels. The paper towels will help absorb any extra oil that remains on the pecans. Try to spread the pecans out just a bit, and let them cool slightly before serving.

    Toasted sweet spiced pecans are removed from the skillet using a slotted spoon.Draining the toasted sweet spiced pecans on paper towels to absorb oil.

    Time To Eat Some Toasted Sweet Spiced Pecans

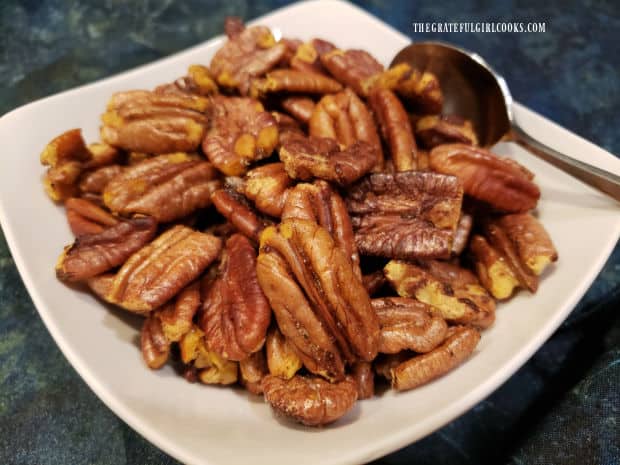
    Once the toasted sweet spiced pecans have cooled for a couple minutes, they can be served. The pecans can be enjoyed, served warm or at room temperature. Both are delicious!

    We enjoy snacking on the pecans, but also love them sprinkled on top of a mixed green salad. You should try adding these to your favorite mixed green salad! The crunch and subtle seasoning of the pecans really add an extra layer of texture and flavor to the green salad and other toppings!

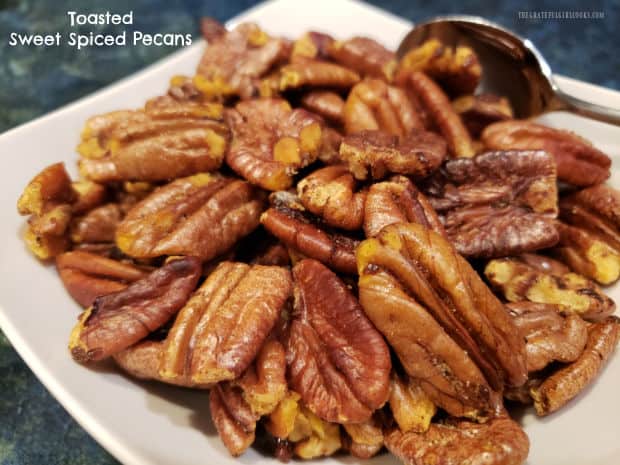
    A white bowl, full of toasted sweet spiced pecans ready for snacking.

    I hope you have the opportunity to try this simple snack! Thank you for stopping by, and I hope you will come back soon for more family-friendly recipes. Take care, and have a GREAT day!

    Looking For More APPETIZER/SNACK Recipes?

    You can find ALL of my recipes in the Recipe Index, which is located at the top of the page. I have quite a few delicious appetizer and snack recipes you’ll enjoy, including:

    Interested In More Recipes?

    Thank you for visiting this website. I appreciate you using some of your valuable time to do soIf you’re interested, I publish a newsletter 2 times per month (1st and 15th) with all the latest recipes, and other fun info. I would be honored to have you join our growing list of subscribers, so you never miss a great recipe!
    There is a Newsletter subscription box on the top right side (or bottom) of each blog post, depending on the device you use, where you can easily submit your e-mail address (only) to be included in my mailing list.

    You Can Also Find Me On Social Media:

    Facebook page: The Grateful Girl Cooks!
    Pinterest:
    The Grateful Girl Cooks!
    Instagram:
    jbatthegratefulgirlcooks

    Author's signature

    Original recipe source: unknown (handwritten on an index card years ago – no source noted)

    ↓↓ PRINTABLE RECIPE BELOW ↓↓

    0 from 0 votes
    Toasted Sweet Spiced Pecans
    Prep Time
    5 mins
    Cook Time
    0 mins
    Total Time
    5 mins
     

    Whip up Toasted Sweet Spiced Pecans in 5 minutes! Pan-roasted pecans are a little bit sweet and spicy, and are a yummy snack or salad topper!

    Category: Appetizer/Snack
    Cuisine: American
    Keyword: toasted sweet spiced pecans
    Servings: 8 (1/4 cup per serving)
    Calories Per Serving: 221 kcal
    Author: JB @ The Grateful Girl Cooks!
    Ingredients
    • 2 Tablespoons vegetable oil
    • 2 cups pecans
    • 3 Tablespoons granulated sugar
    • 1 teaspoon paprika
    • ½ teaspoon curry powder
    • ½ teaspoon chili powder
    • ½ teaspoon cumin (ground)
    • ½ teaspoon coriander (ground)
    • ½ teaspoon black pepper
    • ¼ teaspoon salt
    Instructions
    1. Measure all spices into a small bowl. Stir to combine. Set aside.

    2. In a large skillet, heat oil on medium heat until hot (but not smoking). Add pecans. Cook, stirring often, for 2-3 minutes, until they've browned. Make sure pecans are evenly coated with oil, so spices will adhere.

    3. Sprinkle spice mix over pecans; stir, so they're coated evenly. Cook for 1-2 minutes, then remove skillet from the heat.

    4. Use a slotted spoon to remove pecans from the skillet. Transfer them onto layers of paper towels, to absorb oil. Spread pecans out a bit; let cool slightly before serving.

    5. Pecans can be served warm or at room temperature. They're delicious as a snack or a topping for a green salad. Store pecans in airtight container. Enjoy!

    Nutrition Facts
    Toasted Sweet Spiced Pecans
    Amount Per Serving (1 (1/4 cup))
    Calories 221 Calories from Fat 189
    % Daily Value*
    Fat 21g32%
    Saturated Fat 2g13%
    Trans Fat 1g
    Polyunsaturated Fat 7g
    Monounsaturated Fat 11g
    Sodium 75mg3%
    Potassium 117mg3%
    Carbohydrates 8g3%
    Fiber 3g13%
    Sugar 6g7%
    Protein 2g4%
    Vitamin A 178IU4%
    Vitamin C 1mg1%
    Calcium 22mg2%
    Iron 1mg6%
    * Percent Daily Values are based on a 2000 calorie diet.

    Here’s one more to pin on your Pinterest boards!

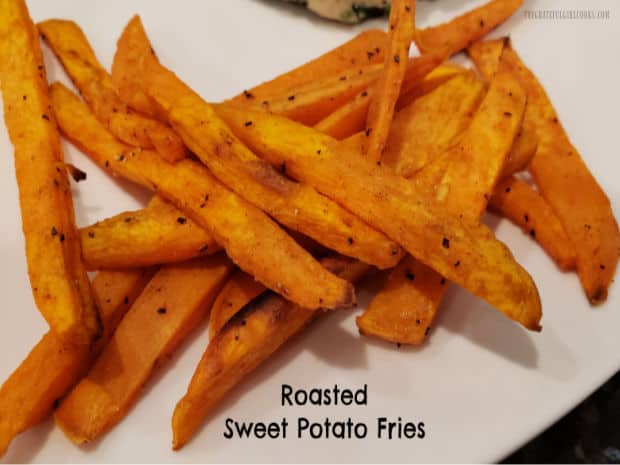
    Roasted Sweet Potato Fries

    Roasted sweet potato fries with a sweet/spicy seasoning are a yummy treat! They’re a great side dish, served with burgers and sandwiches.
    Roasted sweet potato fries with a sweet/spicy seasoning are a yummy treat! They're a great side dish, served with burgers and sandwiches.

    Do you like sweet potato fries? We sure do! There are many ways to make them, and this is the method I came up with to roast sweet potatoes fries for our meals. You will need to plan ahead, because the fries are first soaked in water for an hour before roasting to remove some of the starch from the potatoes. I know people lead very busy lives, so if you don’t have that kind of prep time, simply leave that step out, and your fries will still turn out really tasty!

    The oven-roasted fries have a wonderful spice mix on them. This seasoning is a little “sweet” thanks to brown sugar, and a tiny bit spicy, from chili powder, salt/pepper, paprika, and garlic powder. These ingredients give the roasted sweet potato fries really nice flavor! They pair wonderfully with burgers, hot dogs, hot sandwiches and a variety of meals, and I think you will enjoy them! Here’s how to make them:

    Scroll Down For A Printable Recipe Card At The Bottom Of The Page

    Preparing The Sweet Potatoes

    Before beginning, preheat your oven to 450°F.  and line a large (13×9) baking sheet with parchment paper. You will want your oven to be really hot before adding the sweet potatoes.

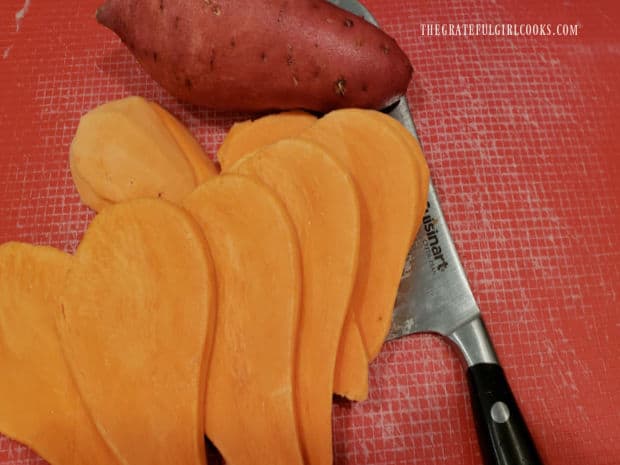
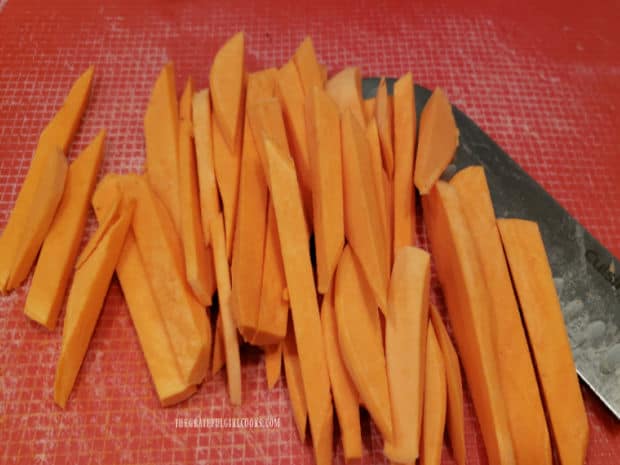
    Now it’s time to prepare the sweet potatoes for roasting. Use a vegetable peeler to remove the peel from the sweet potatoes. Once peeled, cut the sweet potatoes into thin slices lengthwise. The slices should be around 1/4″ thick. Once sliced, cut each piece into fries by cutting lengthwise again. Try to keep the size of the fries about the same, so they will roast more evenly.

    Sweet potatoes are peeled, then sliced into thin wedges.The sweet potatoes are cut into french fry-sized pieces.

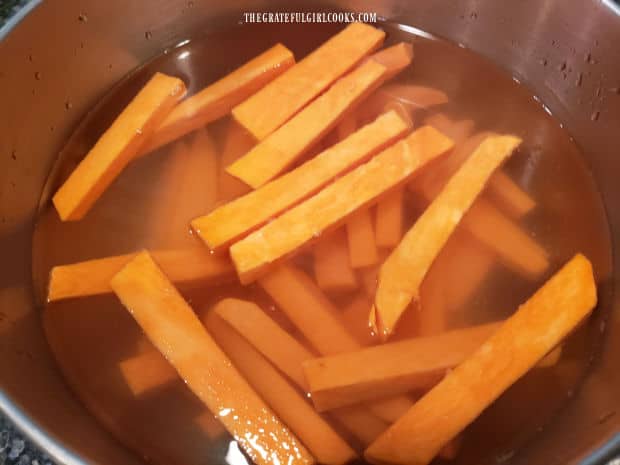
    Soak the potatoes, covered with water, in a large bowl for about an hour. This will help to remove some of the starch from the sweet potatoes. This does take a while, but it really is inactive prep time. Let the sweet potato fries soak, and do whatever else you want while they “take a bath”. NOTE: AGAIN… I know we all have busy lives, so if you don’t have that kind of time, simply leave this soaking step out, but still toss the fries with the cornstarch. Your fries will still turn out really tasty!

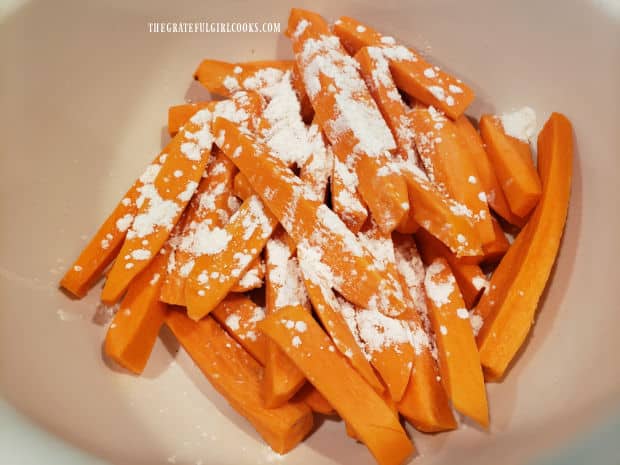
    After soaking, drain the potato fries, and pat them dry with paper towels. Once dry, toss the fries with cornstarch (this helps them crisp up a bit more).

    Soaking the sweet potatoes in water helps remove starches.Cornstarch is tossed with the fries to coat them before baking (to help crisp them).

    Seasoning The Sweet Potato Fries

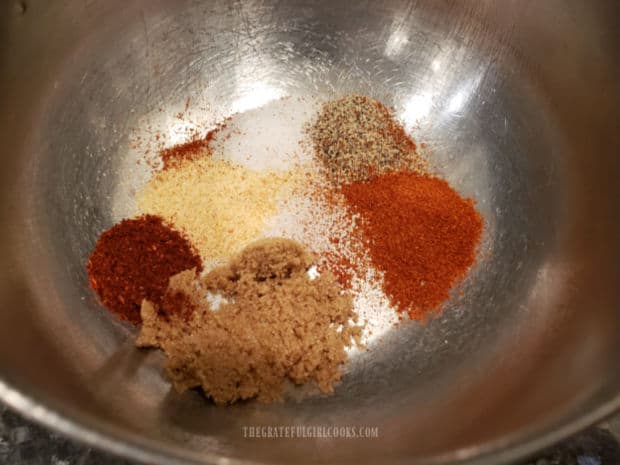
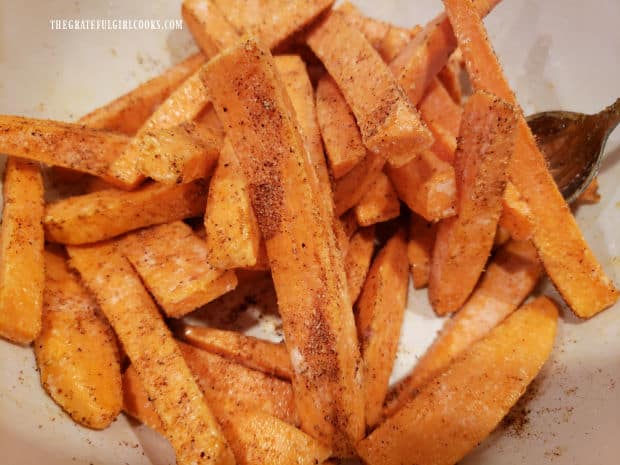
    Now it’s time to season the fries. In a small bowl, stir and combine chili powder, salt, pepper, garlic powder, paprika and brown sugar. Toss the sweet potato fries with vegetable oil until coated, and then add the seasoning mix. Continue to mix until all the sweet potato fries are coated with the seasoning mix.

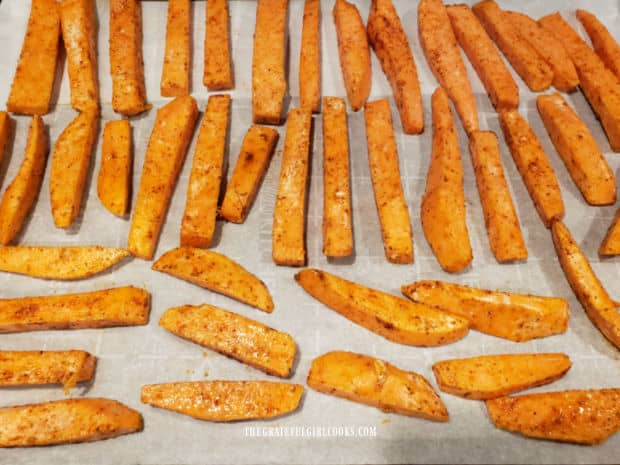
    Spices are combined in bowl to season the roasted sweet potato fries before cooking.Spice mixture covers the sweet potato fries.Lay the seasoned fries out on the parchment paper-lined baking sheet. Be sure to keep them all in a single layer for best results when roasting.

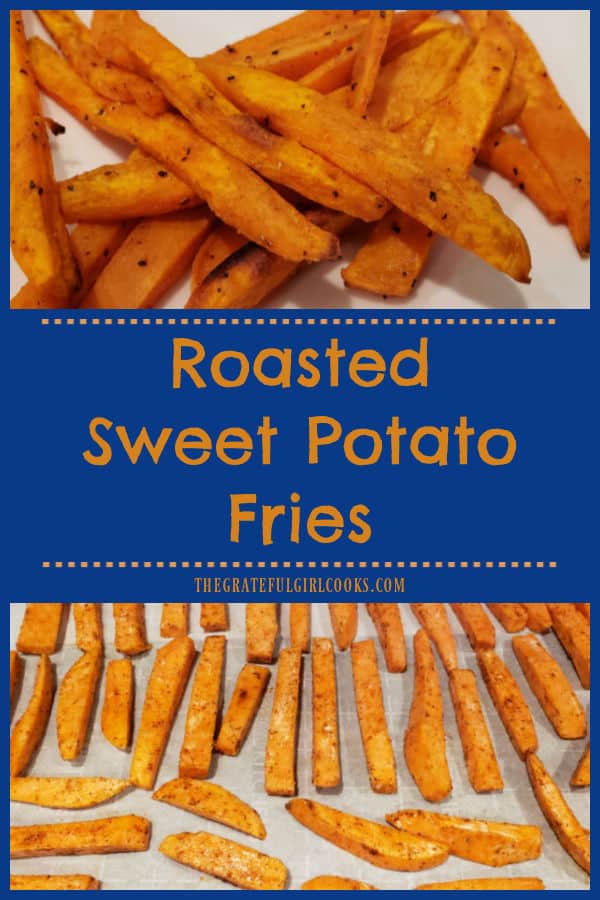
    Fries are cooked on a single layer on parchment paper-lined baking sheet.

    Anybody Want Some Roasted Sweet Potato Fries?

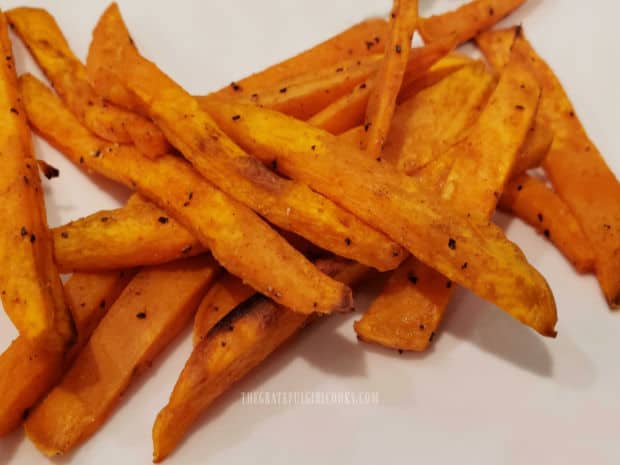
    Bake the sweet potato fries at 450°F. for 20-23 minutes, flipping them over halfway through the roasting time. Oven temps can vary greatly, so keep an eye on the fries! When done, the roasted sweet potato fries should be slightly browned, a bit crunchy on the outside and soft on the inside. They are now ready to serve, alongside a favorite main dish!

    Roasted sweet potato fries are fully cooked, and ready to enjoy!

    We really enjoy these fries, especially when served with burgers or a yummy hot sandwich! I hope you enjoy them, too! Thanks for stopping by today, and I hope you will come back again soon for more family-friendly recipes. Have a great day.

    Looking For More SIDE DISH Recipes?

    You can find ALL of my recipes in the Recipe Index, which is located at the top of the page. I have some really delicious side dish recipes you might enjoy, including:

    Interested In More Recipes?

    Thank you for visiting this website. I appreciate you using some of your valuable time to do soIf you’re interested, I publish a newsletter 2 times per month (1st and 15th) with all the latest recipes, and other fun info. I would be honored to have you join our growing list of subscribers, so you never miss a great recipe!
    There is a Newsletter subscription box on the top right side (or bottom) of each blog post, depending on the device you use, where you can easily submit your e-mail address (only) to be included in my mailing list.

    You Can Also Find Me On Social Media:

    Facebook page: The Grateful Girl Cooks!
    Pinterest:
    The Grateful Girl Cooks!
    Instagram:
    jbatthegratefulgirlcooks

    Author's signature

    0 from 0 votes
    Roasted Sweet Potato Fries
    Prep Time
    15 mins
    Cook Time
    20 mins
    INACTIVE SOAKING TIME
    1 hr
    Total Time
    1 hr 35 mins
     

    Roasted sweet potato fries with a sweet/spicy seasoning are a yummy treat! They're a great side dish, served with burgers and sandwiches.

    Category: Appetizer, Side Dish, Vegetable
    Cuisine: American
    Keyword: roasted sweet potato fries
    Servings: 4
    Calories Per Serving: 138 kcal
    Author: JB @ The Grateful Girl Cooks!
    Ingredients
    • 2 medium sweet potatoes
    • 1 Tablespoon cornstarch
    • 1 Tablespoon vegetable oil
    • ½ teaspoon brown sugar
    • ¼ teaspoon garlic powder
    • ¼ teaspoon chili powder
    • ¼ teaspoon paprika
    • ¼ teaspoon salt
    • ¼ teaspoon black pepper
    Instructions
    1. Preheat oven to 450°F.  Line a large (13x9) baking sheet with parchment paper.

    2. Remove peel from sweet potatoes. Cut sweet potatoes into ¼" slices lengthwise. Slice each of these wedges into fries by cutting lengthwise again. Keep fry size about the same, so they'll roast evenly.

    3. Soak fries covered with water, in a large bowl for about an hour. This helps remove some starch from the potatoes. NOTE: We all have busy lives, so if you don't have that kind of time, simply leave the soaking step out, but still toss the fries with the cornstarch. Your fries will still turn out really tasty! After soaking, drain the fries; pat dry with paper towels. Toss fries with cornstarch (this helps them crisp).

    4. In a small bowl, stir/combine chili powder, salt, pepper, garlic powder, paprika and brown sugar. Toss sweet potato fries with vegetable oil until coated. Add seasoning mix. Continue to stir until fries are coated with seasoning.

    5. Lay seasoned fries in single layer on prepared baking sheet. Bake at 450°F. for 20-23 minutes, flipping them over halfway through roasting. When done, roasted sweet potato fries should be slightly browned, a bit crunchy on the outside and soft on the inside. Serve, and enjoy!

    Nutrition Facts
    Roasted Sweet Potato Fries
    Amount Per Serving (1 (1/4 of total))
    Calories 138 Calories from Fat 27
    % Daily Value*
    Fat 3g5%
    Saturated Fat 1g6%
    Trans Fat 1g
    Polyunsaturated Fat 2g
    Monounsaturated Fat 1g
    Sodium 210mg9%
    Potassium 391mg11%
    Carbohydrates 25g8%
    Fiber 4g17%
    Sugar 5g6%
    Protein 2g4%
    Vitamin A 16131IU323%
    Vitamin C 3mg4%
    Calcium 36mg4%
    Iron 1mg6%
    * Percent Daily Values are based on a 2000 calorie diet.

    Here’s one more to pin on your Pinterest boards!Roasted sweet potato fries with a sweet/spicy seasoning are a yummy treat! They're a great side dish, served with burgers and sandwiches.


    Easy Smoky Almonds

    Need a simple, delicious appetizer, snack or food gift? Make a batch of Easy Smoky Almonds, covered in sauce, and roasted to perfection!
    Need a simple, delicious appetizer, snack or food gift? Make a batch of Easy Smoky Almonds, covered in sauce, and roasted to perfection!

    Years ago I found a recipe for smoked almonds and jotted the recipe down on a 3×5″ index card. I’m not sure of the source for the original recipe, since I didn’t write it down at the time. The recipe card was put into my old, well-worn recipe box, where it sat for years.  After re-discovering it, I knew I had to make these yummy snacks again (and take photos).

    The recipe is simple. Unblanched almonds are mixed with a simple mixture of Liquid Smoke, water, and vegetable oil. After being covered with flavoring, they are roasted in the oven for 20-25 minutes. They come out of the oven wonderfully browned and crunchy! After roasting, the almonds are then lightly salted. They come out of the oven wonderfully browned and crunchy! YUM!

    It really is super simple to make this recipe. The recipe as written will make one cup of Easy Smoky Almonds. However, the recipe is super easy to double or triple, depending on the amount of almonds you want.

    They’re a great snack (we love to munch on them)! It’s also fun to put out a bowl of the smoky almonds with other appetizers. You can also put them in a cute container and give them as a tasty food gift for celebrations or holidays.

    Scroll Down For A Printable Recipe Card At The Bottom Of The Page

    Prepare The Almonds For Roasting

    First, you will need to preheat your oven to 300°F. You will want the oven nice and hot, since it hardly takes any time to prepare the almonds for roasting.

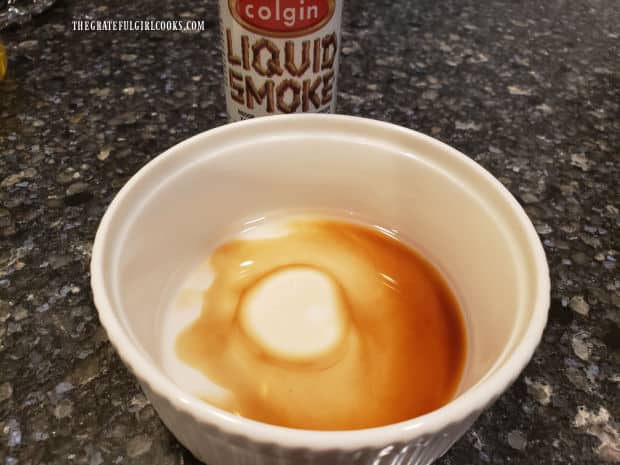
    In a small bowl, combine the liquid smoke and water. Most grocery stores sell Liquid Smoke. It is a highly concentrated liquid that is quite smoky flavored. This mixture is what will flavor the almonds well.

    Water and liquid smoke are combined to help flavor almonds.

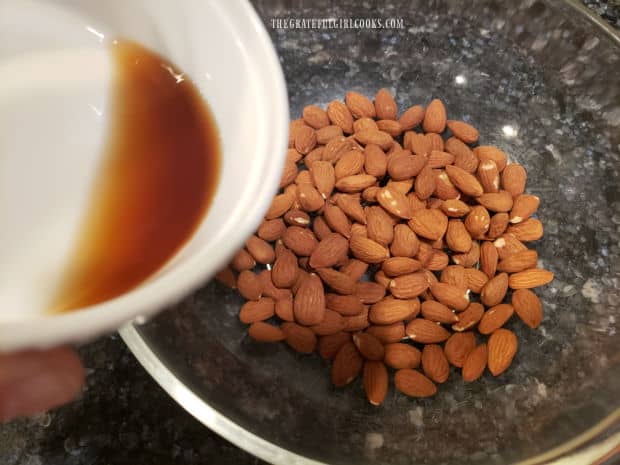
    Place unblanched, unsalted almonds in a bowl, and pour the Liquid Smoke and water mixture over them. Stir well, to ensure all the almonds are coated.

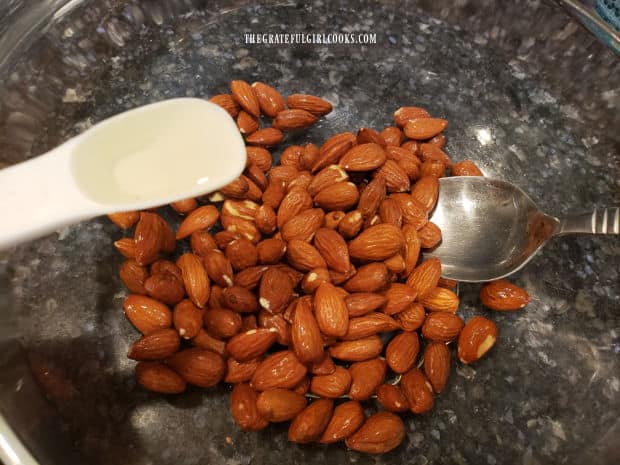
    Once they are covered with the smoky flavoring, add a teaspoon of vegetable oil. Stir the almonds again, to fully coat them with oil.

    A mixture of liquid smoke and water is poured onto the unblanched almonds in a bowl.A teaspoon of vegetable oil is added to the smoky flavored almonds.

    Ready For The Oven

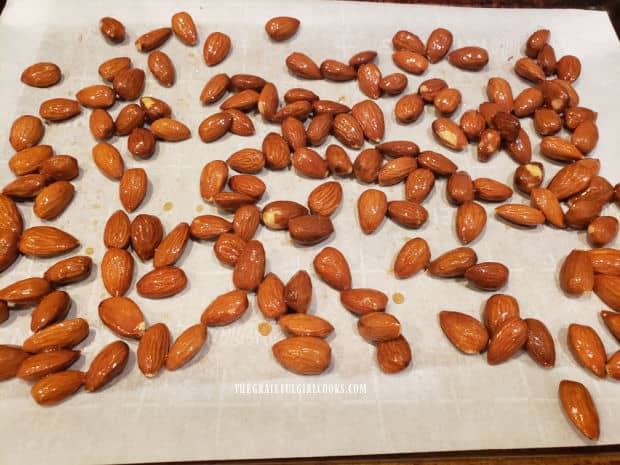
    Cover a baking sheet with a piece of parchment paper (or aluminum foil). Spread the almonds out on the paper in a single layer, and put the almonds into a preheated oven.

    Bake at 300°F. for 20-25 minutes. STIR THE ALMONDS A COUPLE TIMES DURING THE ROASTING TIME!

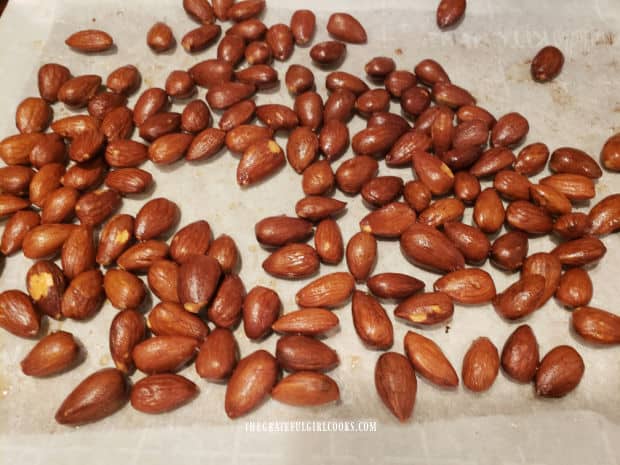
    When done, the almonds will be crunchy and nicely browned. Remove the baking sheet of almonds from the oven.

    Almonds are placed in a single layer on a parchment paper-lined baking sheet for roasting.Nicely browned and crunchy, the easy smoky almonds are removed from the oven.

    A Little Salt For Added Flavor!

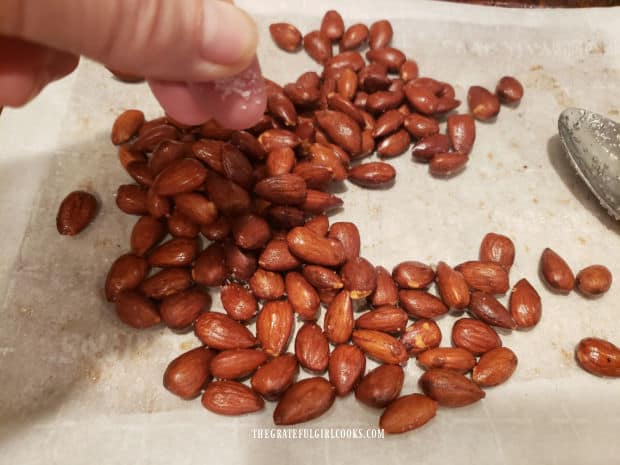
    Lightly sprinkle the roasted almonds with salt, to taste. Let them cool to room temperature before serving.

    Roasted almonds are sprinkled with salt before serving.

    Time To Enjoy Some Easy Smoky Almonds

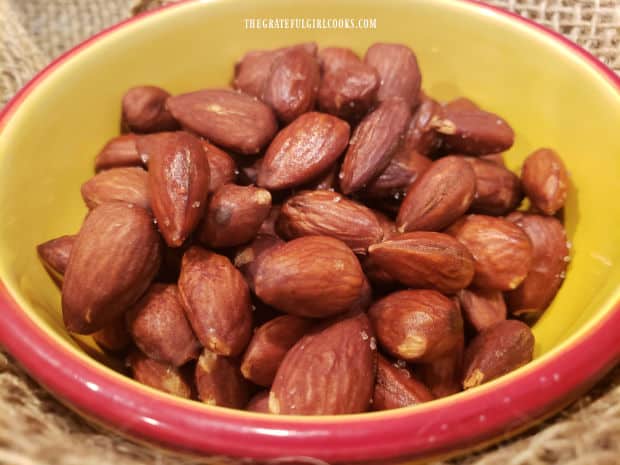
    Once the almonds have cooled, they are ready to eat, OR you can package them up for gift giving! That’s it! See how EASY they were to make? I hope you enjoy them as much as we do.

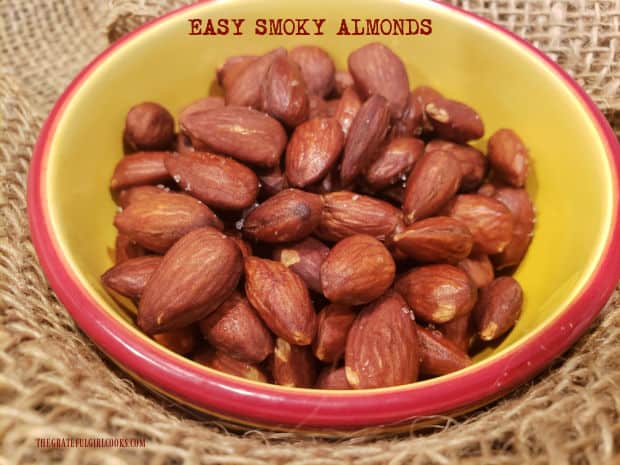
    Easy Smoky Almonds are served in a pretty bowl.

    Thank you for stopping by today. I appreciate your time, and trust you will have the opportunity to make these delicious easy smoky almonds. Please come back soon for more family-friendly recipes. Take care, and have a great day!

    Looking For More APPETIZER Recipes?

    You can find ALL of my recipes in the Recipe Index, which is located at the top of the page. I have quite a few delicious appetizers you might enjoy checking out, including:

    Want More Recipes? Get My FREE Newsletter!

    I publish a newsletter 2 times per month (1st and 15th) with lots of recipes, tips, etc..
    Would you like to join our growing list of subscribers?

    There is a Newsletter subscription box on the top right (or bottom) of each blog post, depending on the device you use.
    You can submit your e-mail address there, to be added to my mailing list.

    Find Me On Social Media:

    Facebook page: The Grateful Girl Cooks!
    Pinterest:
    The Grateful Girl Cooks!
    Instagram:
    jbatthegratefulgirlcooks

    Author's signature


    ↓↓ PRINTABLE RECIPE BELOW ↓↓

    0 from 0 votes
    Easy Smoky Almonds
    Prep Time
    3 mins
    Cook Time
    20 mins
    Total Time
    23 mins
     

    Need a simple, delicious appetizer, snack or food gift? Make a batch of Easy Smoky Almonds, covered in sauce, and roasted to perfection!

    Category: Appetizer/Snack
    Cuisine: American
    Keyword: easy smoky almonds
    Servings: 4 (serving = 1/4 cup)
    Calories Per Serving: 214 kcal
    Author: JB @ The Grateful Girl Cooks!
    Ingredients
    • 1 teaspoon Liquid Smoke
    • 2 teaspoons water
    • 1 cup almonds
    • 1 teaspoon vegetable oil
    • salt to taste
    Instructions
    1. Preheat oven to 300°F.

    2. In a small bowl, combine the liquid smoke and water.

    3. Place unblanched, unsalted almonds in a bowl, and pour the Liquid Smoke/water mixture over them. Stir well, to fully coat. Once covered with smoky flavoring, add vegetable oil. Stir again, to fully cover almonds with oil. Spread almonds on a parchment paper (or foil) lined baking sheet in a single layer.

    4. Bake at 300°F. for 20-25 minutes. STIR ALMONDS A COUPLE TIMES DURING THE ROASTING TIME! When done, the almonds will be crunchy/nicely browned. Remove from oven. Lightly sprinkle with salt, to taste. Let almonds cool to room temperature, then serve. Enjoy!

    Nutrition Facts
    Easy Smoky Almonds
    Amount Per Serving (1 g)
    Calories 214 Calories from Fat 171
    % Daily Value*
    Fat 19g29%
    Saturated Fat 2g13%
    Trans Fat 1g
    Polyunsaturated Fat 4g
    Monounsaturated Fat 11g
    Sodium 3mg0%
    Potassium 252mg7%
    Carbohydrates 8g3%
    Fiber 4g17%
    Sugar 1g1%
    Protein 8g16%
    Vitamin A 1IU0%
    Calcium 94mg9%
    Iron 1mg6%
    * Percent Daily Values are based on a 2000 calorie diet.

    Here’s one more to pin on your Pinterest boards!Need a simple, delicious appetizer, snack or food gift? Make a batch of Easy Smoky Almonds, covered in sauce, and roasted to perfection!

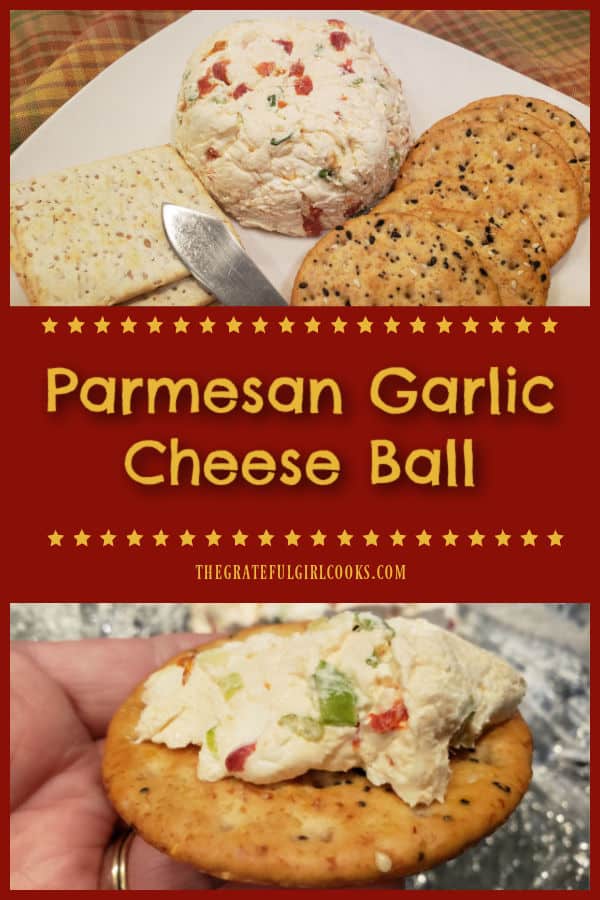
    Parmesan Garlic Cheese Ball

    Make a Parmesan Garlic Cheese Ball for a snack, party or potluck! Simple to make, this yummy appetizer is spread on a variety of crackers!
    Make a Parmesan Garlic Cheese Ball for a snack, party or potluck! Simple to make, this yummy appetizer is spread on a variety of crackers!

    If you’re on the lookout for a simple appetizer or snack, I hope you will give this Parmesan garlic cheese ball a try! It only takes a few minutes to mix together and shape, and then it is refrigerated before serving. YES… it is THAT EASY! I’m not sure where or who I got the original recipe from because I found it written on a 3×5 card in one of my old recipe boxes I’ve had for years.

    This is a wonderful recipe to share at a a party, potluck or just to have around for a quick snack with crackers. It has a lot of flavor, and is easy to spread on your favorite crackers. Guess what? It is super simple to give as a delicious food gift, too, for a treat made (especially by you) for someone you love.

    The recipe as written makes one cheese ball (approx. 8 servings), but can easily be doubled to make a larger cheese ball or a second one the same size. Here’s how to make it:

    Scroll Down For A Printable Recipe Card At The Bottom Of The Page

    Let’s Make This Easy Parmesan Garlic Cheese Ball!

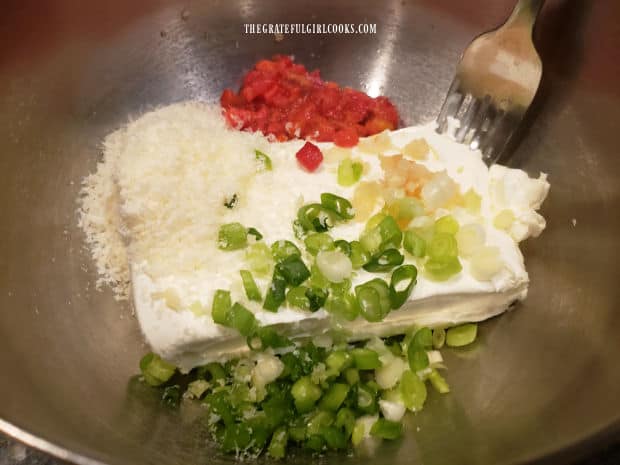
    Place softened cream cheese, chopped pimientos, minced garlic, grated Parmesan cheese, and sliced green onions in a mixing bowl. Use a fork to mix these ingredients together (until fully combined). **NOTE: The reason the cream cheese needs to be softened is so it will mix much easier with the other ingredients.

    Cream cheese, pimientos, Parmesan, garlic and green onions are combined in bowl.

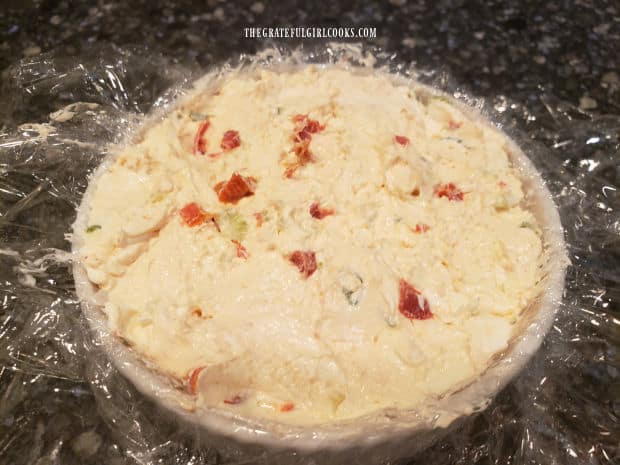
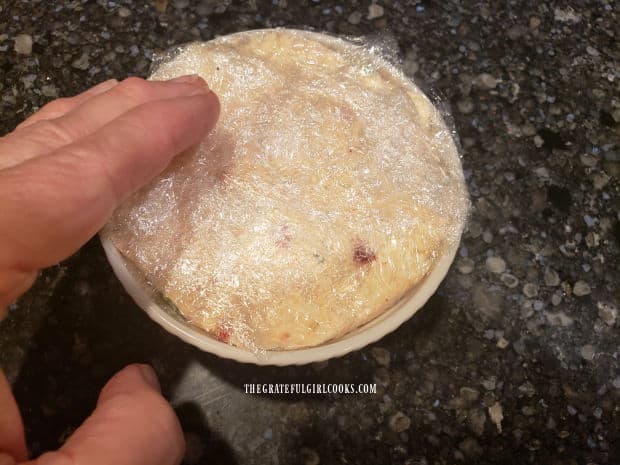
    Line a small ramekin with plastic wrap, leaving the plastic extended far past the edges of the dish. Place the cheese ball mixture firmly into the ramekin, and pack it down with a spoon. Once filled, cover it tightly with the remaining plastic wrap, then press down to flatten and compact the top of the cheese mixture.

    Place the Parmesan garlic cheese ball into the refrigerator and let it chill for at least two hours, for best results.

    Cheese ball mixture is molded into a container before being refrigerated.Covered with plastic and pressure applied, the cheese ball is ready for the refrigerator.

    Serving The Parmesan Garlic Cheese Ball

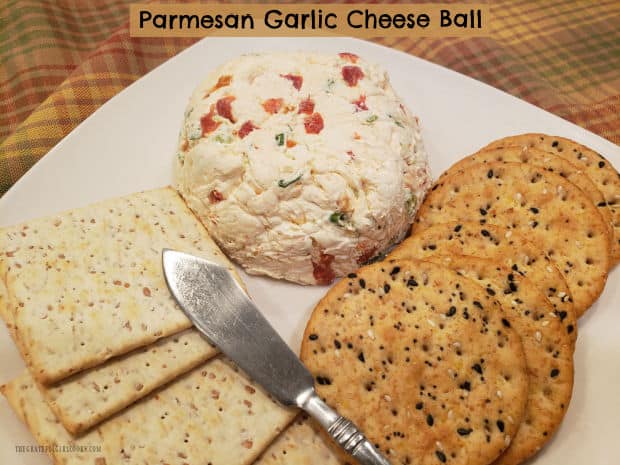
    After the Parmesan garlic cheese ball has been refrigerated for at least two hours, it is ready to serve! Unwrap the cheese ball, and carefully invert it (turn upside down) onto a serving plate (so the flat side is facing down).

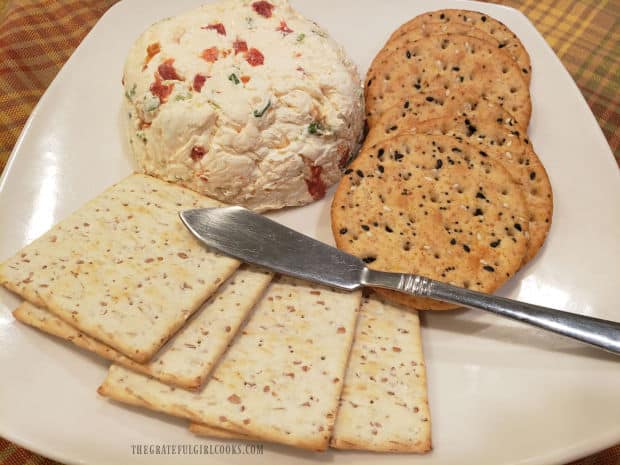
    Serve the cheese ball with an assortment of crisp crackers, a knife to spread it with, and enjoy the great flavor of this appetizer or snack!

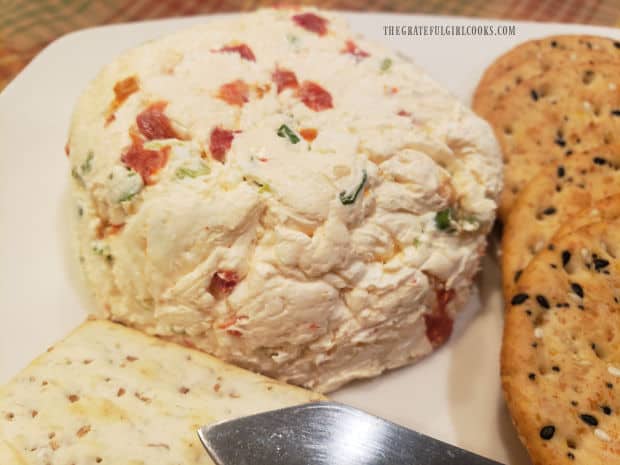
    Parmesan garlic cheese ball on a plate, ready to be spread on crackers.A close up of the Parmesan garlic cheese ball next to crackers on a plate.

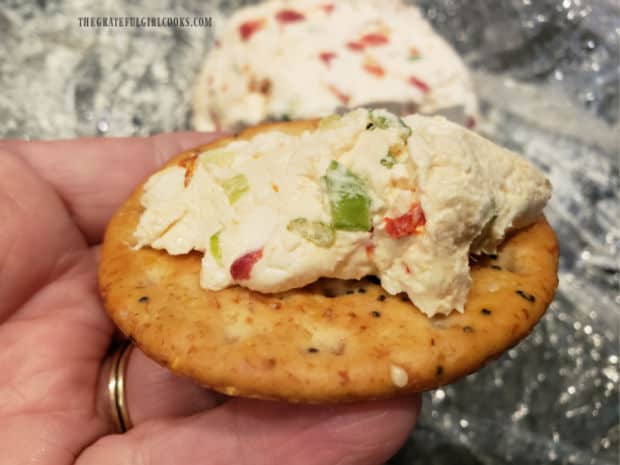
    I saved this bite of the Parmesan garlic cheese ball on a cracker just for you! Go ahead… take a bite! It is delicious, and I’ll bet you will want another one. I am confidant you will enjoy each bite!

    The Parmesan garlic cheese ball is spread onto a cracker for eating.

    Thank you so much for visiting this blog today. I hope you enjoy making and eating this Parmesan garlic cheese ball. Please come back soon for more family-friendly recipes. Take care, and have a wonderful day, friends.

    Looking For More APPETIZER Recipes?

    You can find ALL of my recipes in the Recipe Index, which is located at the top of the page. I have some wonderful appetizers you might want to check out, including:

    Interested In More Recipes?

    Thank you for visiting this website. I appreciate you using some of your valuable time to do soIf you’re interested, I publish a newsletter 2 times per month (1st and 15th) with all the latest recipes, and other fun info. I would be honored to have you join our growing list of subscribers, so you never miss a great recipe!
    There is a Newsletter subscription box on the top right side (or bottom) of each blog post, depending on the device you use, where you can easily submit your e-mail address (only) to be included in my mailing list.

    You Can Also Find Me On Social Media:

    Facebook page: The Grateful Girl Cooks!
    Pinterest:
    The Grateful Girl Cooks!
    Instagram:
    jbatthegratefulgirlcooks

    Author's signature

    Original recipe source: unknown

    0 from 0 votes
    Parmesan Garlic Cheese Ball
    Prep Time
    5 mins
    Cook Time
    0 mins
    Total Time
    5 mins
     

    Make a Parmesan Garlic Cheese Ball for a snack, party or potluck! Simple to make, this yummy appetizer is spread on a variety of crackers!

    Category: Appetizer/Snack
    Cuisine: American
    Keyword: Parmesan garlic cheese ball
    Servings: 8 (approx. 1 oz. per serving)
    Calories Per Serving: 77 kcal
    Author: JB @ The Grateful Girl Cooks!
    Ingredients
    • 8 ounces cream cheese ,softened (light or regular cream cheese)
    • cup grated Parmesan cheese
    • ¼ cup thinly sliced green onion ,green stem and white bulb
    • 2 Tablespoons chopped Pimiento
    • ½ clove garlic ,finely minced
    Instructions
    1. Line a 4" wide ramekin (or very small container) with plastic wrap, leaving plastic extended well past the edges of the dish.

    2. Place softened cream cheese, pimientos, garlic, grated Parmesan and sliced green onions in a mixing bowl. Use a fork to mix together until fully combined.

    3. Place mixture into lined ramekin; pack it down firmly with a spoon. Once filled, cover tightly with remaining plastic wrap. Press down to flatten and compact the top of the cheese mixture. Place covered, cheese-filled ramekin in refrigerator; chill at least two hours, for best results.

    4. To serve: Unwrap cheese ball; carefully invert it (turn upside down) onto a serving plate (flat side down). Serve with an assortment of crackers, a knife to spread it with, and enjoy the great flavor of the cheese ball! Store leftover cheese ball, (covered) in refrigerator.

    Recipe Notes

    Caloric calculation made using light cream cheese.

    Nutrition Facts
    Parmesan Garlic Cheese Ball
    Amount Per Serving (1 ounce (1/8 of total))
    Calories 77 Calories from Fat 54
    % Daily Value*
    Fat 6g9%
    Saturated Fat 3g19%
    Polyunsaturated Fat 1g
    Monounsaturated Fat 1g
    Cholesterol 19mg6%
    Sodium 198mg9%
    Potassium 91mg3%
    Carbohydrates 3g1%
    Fiber 1g4%
    Sugar 2g2%
    Protein 4g8%
    Vitamin A 323IU6%
    Vitamin C 4mg5%
    Calcium 91mg9%
    Iron 1mg6%
    * Percent Daily Values are based on a 2000 calorie diet.

    Here’s one more to pin on your Pinterest boards!Make a Parmesan Garlic Cheese Ball for a snack, party or potluck! Simple to make, this yummy appetizer is spread on a variety of crackers!

    Cheesy Calzone Pinwheels

    Cheesy Calzone Pinwheels are yummy crescent roll appetizers, with pepperoni, bell pepper, mushrooms, and 3 cheeses, served with marinara sauce.
    Cheesy Calzone Pinwheels are yummy crescent roll appetizers, with pepperoni, bell pepper, mushrooms, and 3 cheeses, served with marinara sauce.

    Do you like the taste of Italian calzones? We do… in fact in the past I’ve posted the recipe for Fully Stuffed Calzones, which are amazing Those are full-sized calzones made from scratch and they are delicious! I found this fun little recipe online several years ago for small, appetizer style calzone pinwheels (made with crescent roll dough). I knew I had to try them!

    Using crescent roll dough makes this a very simple (and convenient) recipe! Because the recipe yields 16 cheesy calzone pinwheels, it is a great appetizer to serve to a crowd (or a bunch of hungry kids). The pinwheels are stuffed with pepperoni, bell peppers, onions, Italian seasoning and three different types of cheese, so you know they will be tasty! Here’s how to make them:

    Scroll Down For A Printable Recipe Card At The Bottom Of The Page

    Prepare The Filling

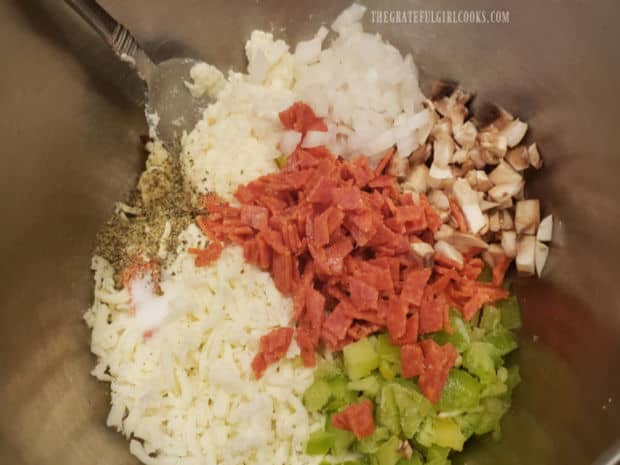
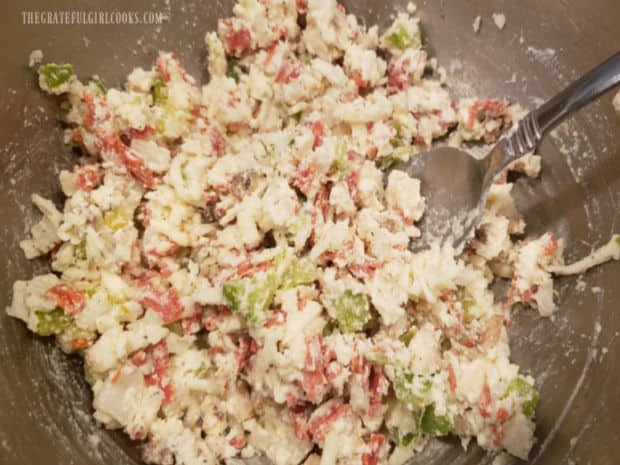
    Before starting to make the filling, preheat your oven to 375°F. Mix together mozzarella, ricotta, Parmesan, pepperoni, mushrooms, green pepper, onion, Italian seasoning and salt in a medium bowl. Stir well, to fully combine these ingredients. This is the mixture you will use to fill the cheesy calzone pinwheels.

    Onions, mushrooms, pepperoni, spices and 3 cheeses make up the calzone filling.The filling for cheesy calzone pinwheels is stirred until fully combined.

    Make The Cheesy Calzone Pinwheels

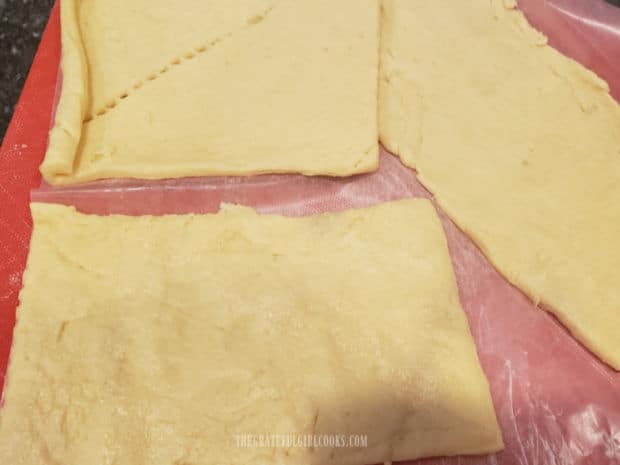
    Carefully unroll the crescent dough from the package. Separate the dough into four rectangles (I put them on wax paper). Make sure to gently press out the perforations, to seal the dough well.

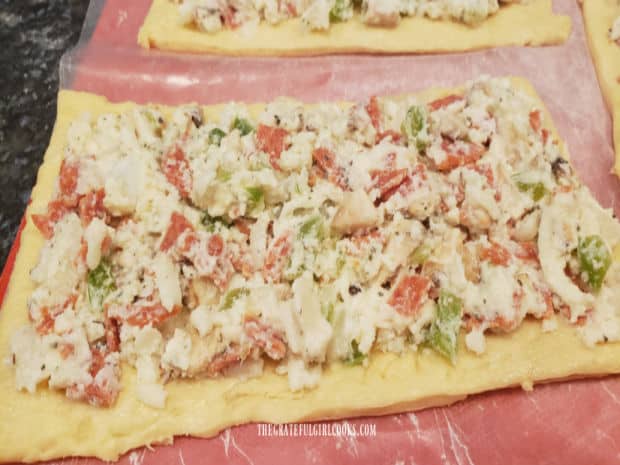
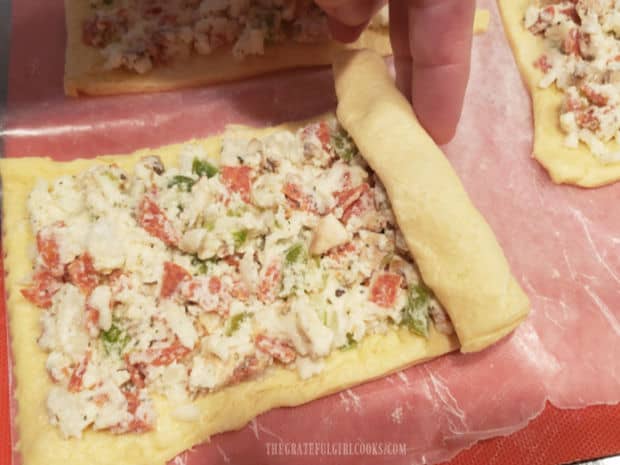
    Divide the calzone filling evenly between the four dough rectangles. Spread the filling carefully over the surface of the dough, leaving about 1/4″ around the edges without any filling. Roll up each piece of dough, beginning with the short side. 

    Crescent roll dough is separated into 4 rectangles, and perforations sealed.Filling is spread out to within 1/4" of the edges of the dough.Each filled calzone dough rectangle is rolled up, starting at short side.

    Seal And Slice

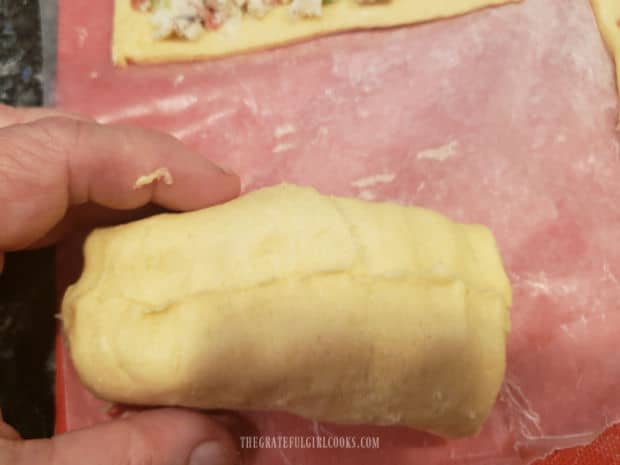
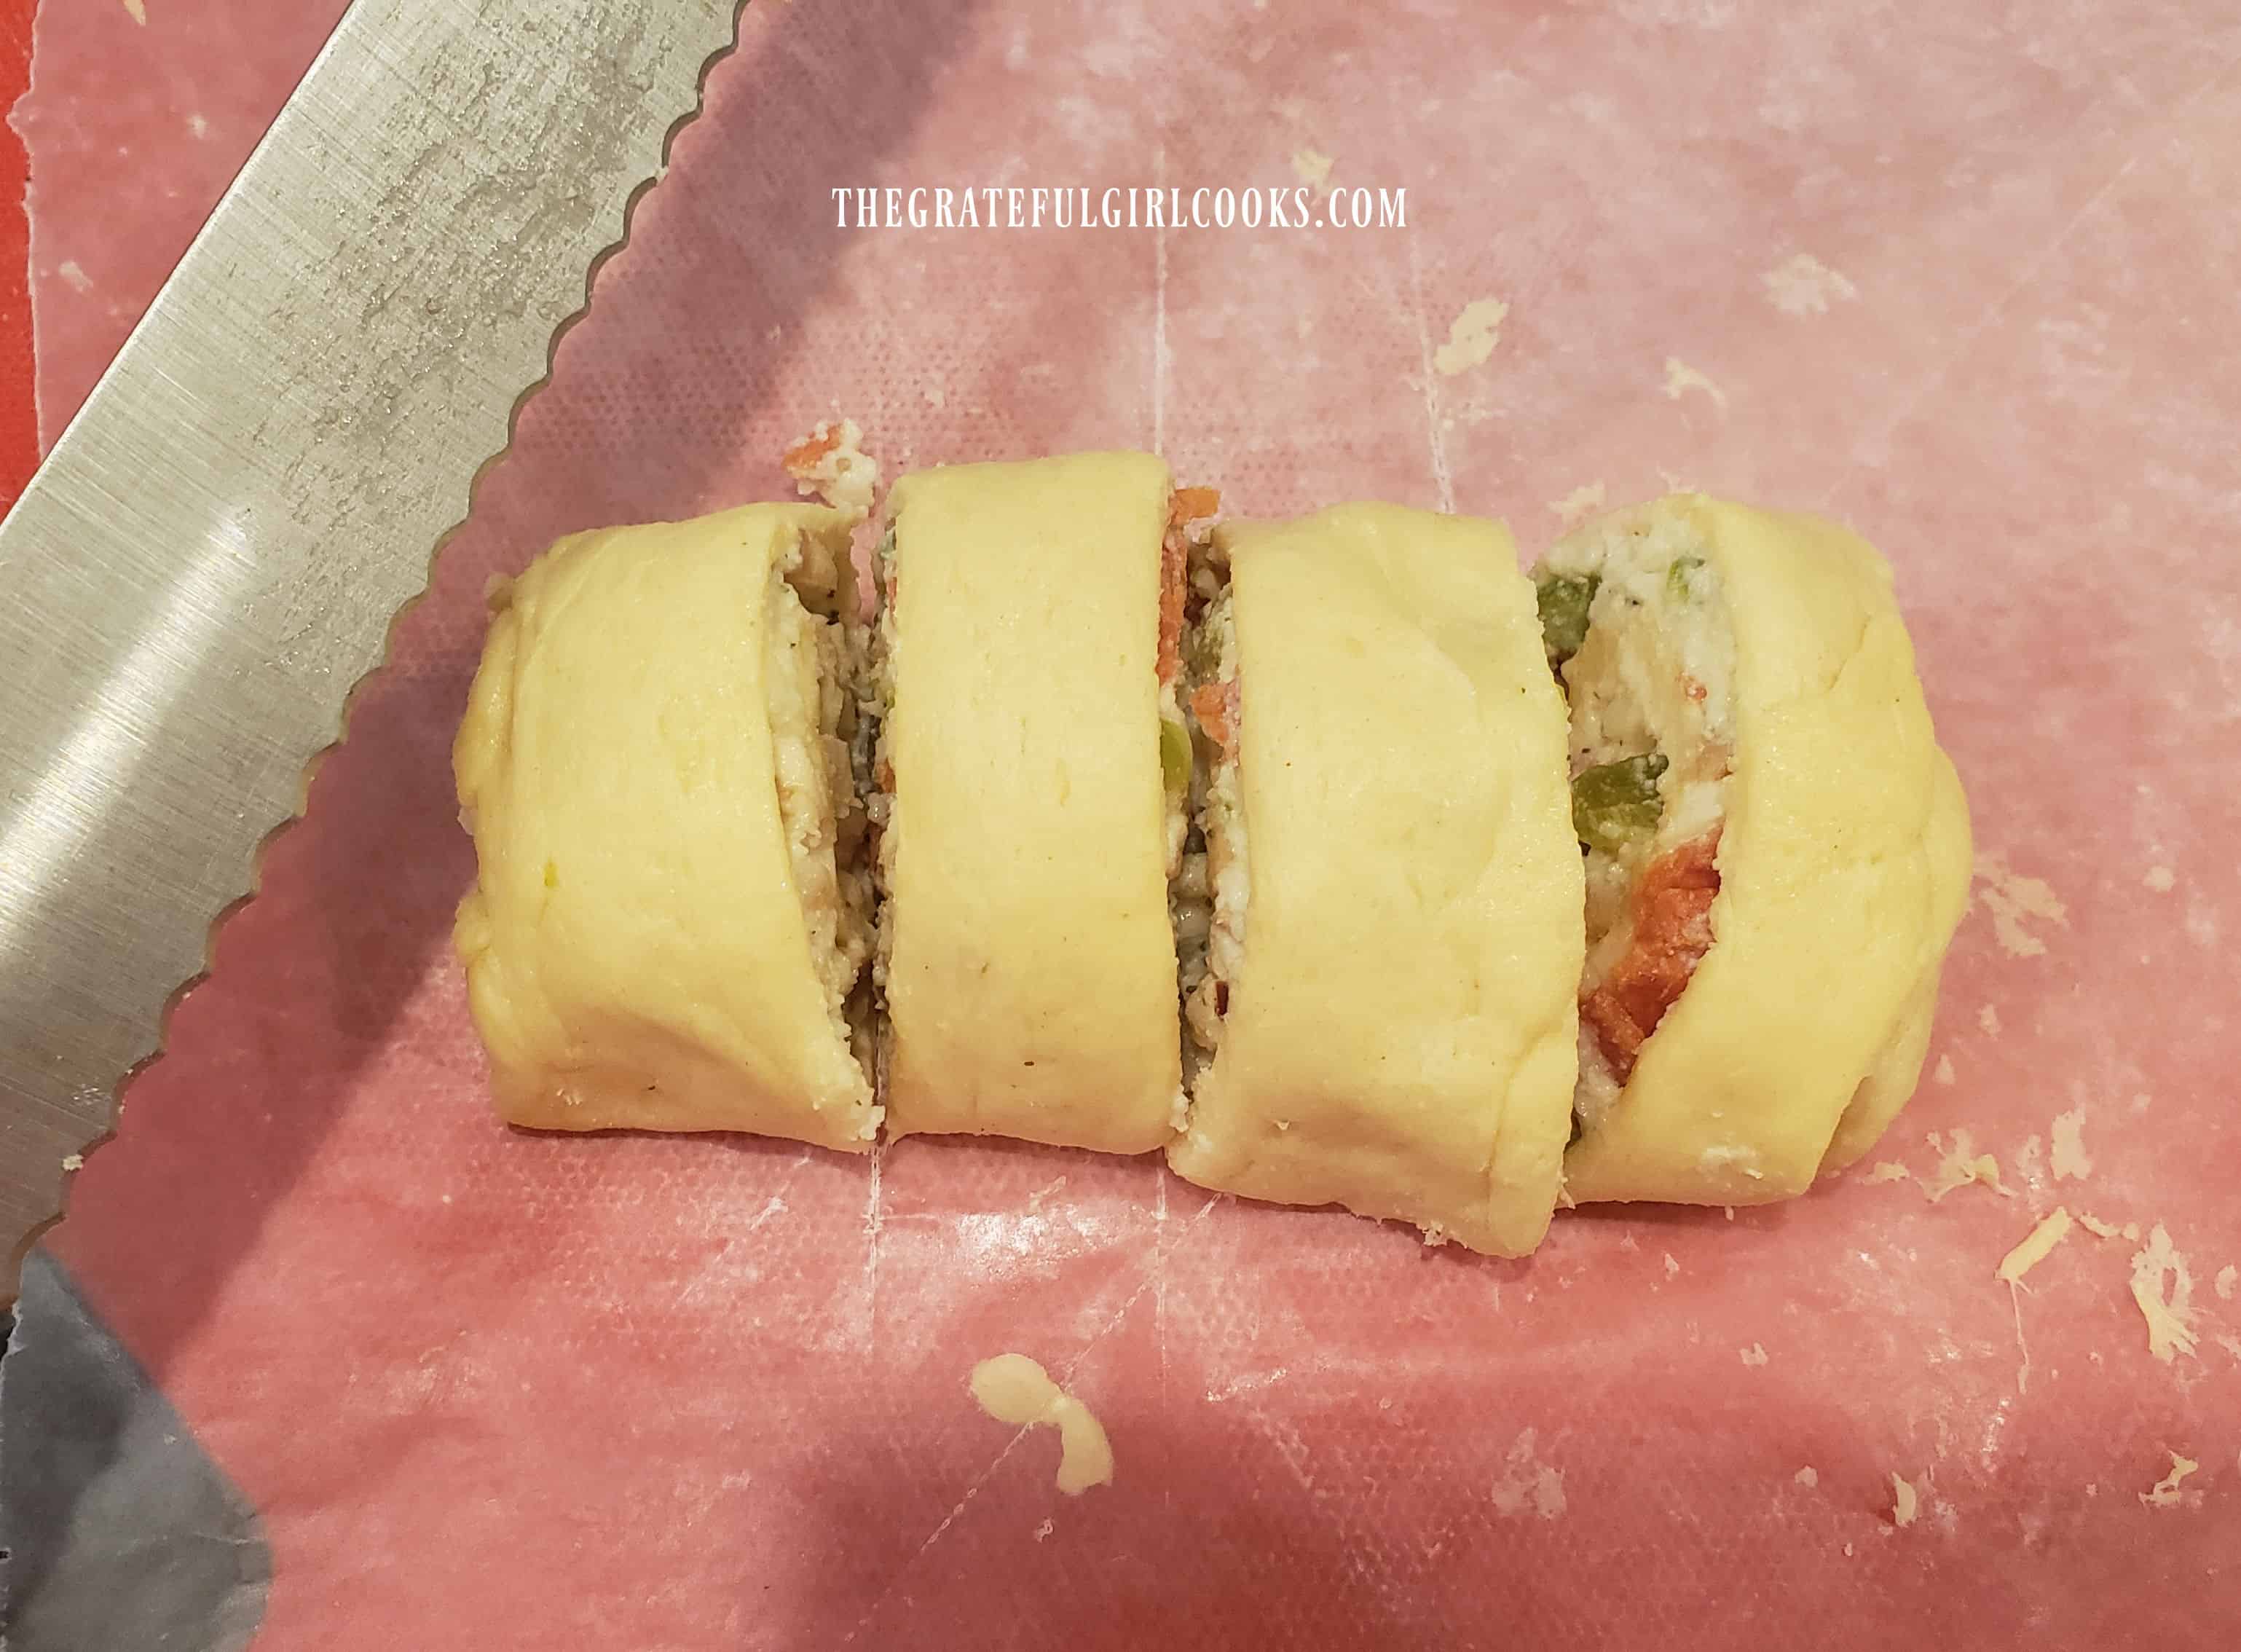
    Once completely rolled, carefully pinch the seams together. Place the rolls, seam side down, and gently cut each roll into 4 slices, using a serrated knife (for best results).Repeat with remaining rolls, until you have 16 slices total.

    Seams are pinched together on the dough.Each of the calzone rolls are cut into four slices with a serrated knife.

    Time To BAKE!

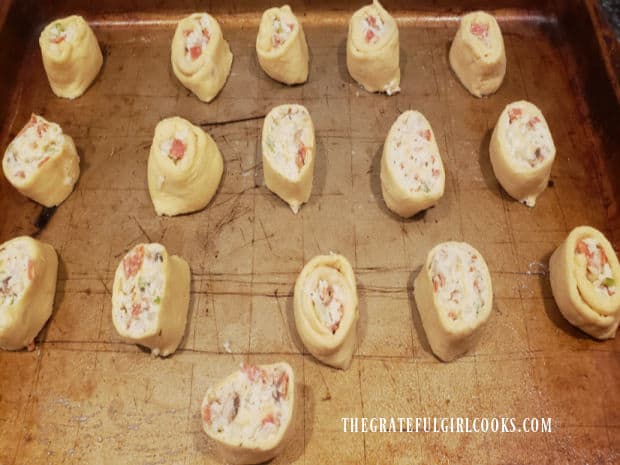
    Okay… the cheesy calzone pinwheels are evenly sliced, and now they are ready to bake! Place the slices, cut side down onto a large, GREASED OR SPRAYED baking sheet. Leave a couple inches between each slice, because they will expand a bit once cooked.

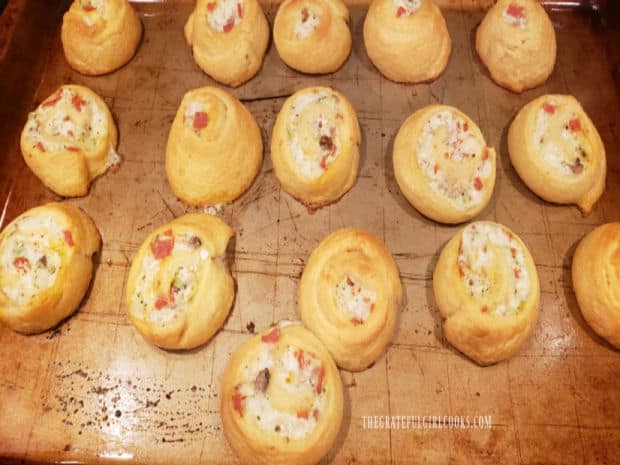
    Bake the cheesy calzone pinwheels in a preheated 375°F. oven for approximately 13-15 minutes. When done, they should be nice and golden brown in color. Remove the pan from the oven and let them cool for a couple minutes before serving.

    Sixteen cheesy calzone pinwheels on baking sheet, ready to bake.When done baking, the pinwheels are golden brown in color.

    Time To EAT!

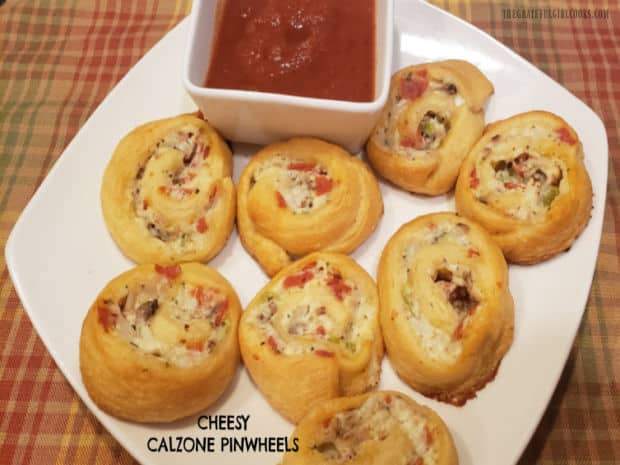
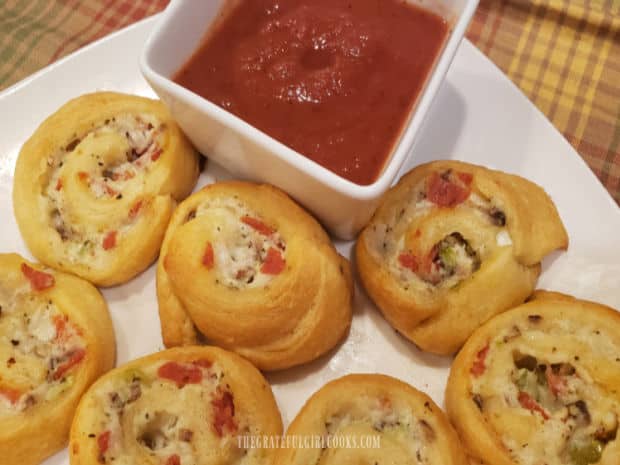
    When you are ready to serve the cheesy calzone pinwheels, place them on a serving platter. We especially enjoy them when served with a warm marinara dipping sauce on the side. These little bitty pastries taste like a calzone, with the pepperoni, three cheeses, mushrooms and peppers with that warm marinara sauce. YUM!

    Close up photo of four of the cheesy calzone pinwheels, ready to eat.The baked pinwheels are served with warm marinara or pizza sauce on the side.

    I hope you have the opportunity to make these cheesy calzone pinwheels for friends or family. They are a great snack or a wonderful appetizer to put out for a crowd. Thank you for stopping by, and I hope you will come back soon for more family-friendly recipes. Have a wonderful day.

    Looking For More APPETIZER Recipes?

    You can find ALL of my recipes in the Recipe Index, which is located at the top of the page. I have some wonderful tasting appetizers you might enjoy, including:

    Interested In More Recipes?

    Thank you for visiting this website. I appreciate you using some of your valuable time to do soIf you’re interested, I publish a newsletter 2 times per month (1st and 15th) with all the latest recipes, and other fun info. I would be honored to have you join our growing list of subscribers, so you never miss a great recipe!
    There is a Newsletter subscription box on the top right side (or bottom) of each blog post, depending on the device you use, where you can easily submit your e-mail address (only) to be included in my mailing list.

    You Can Also Find Me On Social Media:

    Facebook page: The Grateful Girl Cooks!
    Pinterest:
    The Grateful Girl Cooks!
    Instagram:
    jbatthegratefulgirlcooks

    Author's signature

    Original recipe source: Lisa Smith, via https://www.tasteofhome.com/recipes/calzone-pinwheels/

    0 from 0 votes
    Cheesy Calzone Pinwheels
    Prep Time
    15 mins
    Cook Time
    15 mins
    Total Time
    30 mins
     

    Cheesy Calzone Pinwheels are yummy crescent roll appetizers, with pepperoni, bell pepper, mushrooms, and 3 cheeses, served with marinara sauce.

    Category: Appetizers, Snack
    Cuisine: Italian
    Keyword: cheesy calzone pinwheels
    Servings: 16
    Calories Per Serving: 99 kcal
    Author: JB @ The Grateful Girl Cooks!
    Ingredients
    • ½ cup diced pepperoni
    • ½ cup shredded part-skim mozzarella cheese
    • ½ cup part-skim ricotta cheese
    • ¼ cup grated Parmesan cheese
    • ¼ cup finely chopped green bell pepper
    • ¼ cup chopped fresh mushrooms
    • 2 Tablespoons finely chopped yellow onion
    • 1 teaspoon Italian seasoning
    • ¼ teaspoon salt
    • 8 ounces refrigerated crescent rolls one 8 oz. can
    • 1 cup marinara sauce or pizza sauce wamed
    Instructions
    1. Preheat oven to 375°F. Spray or grease a 139" baking sheet. Set aside.

    2. Mix together mozzarella, ricotta, Parmesan, pepperoni, mushrooms, green pepper, onion, Italian seasoning and salt in a medium bowl. Stir well, to fully combine.

    3. Carefully unroll crescent dough from package. Separate dough into four rectangles (I place them on wax paper). Gently press out the perforations, to seal the dough Divide calzone filling evenly between the four dough rectangles. Spread filling over surface of the dough, leaving about 1/4" bare around the edges. Roll up each rectangle, beginning with the short side. 

    4. Once completely rolled, carefully pinch the seams together. Place rolls, seam side down, and gently cut each roll into 4 even slices, using a serrated knife (for best results). Repeat with remaining rolls, until you have 16 slices. Place slices, cut side down onto prepared baking sheet. Leave a couple inches between slices.

    5. Bake at 375°F. for 13-15 minutes. When done, they should be golden brown in color. Remove from oven. Transfer to serving platter with warm marinara or pizza sauce on the side. Serve and enjoy!

    Nutrition Facts
    Cheesy Calzone Pinwheels
    Amount Per Serving (1 pinwheel)
    Calories 99 Calories from Fat 54
    % Daily Value*
    Fat 6g9%
    Saturated Fat 3g19%
    Trans Fat 1g
    Polyunsaturated Fat 1g
    Monounsaturated Fat 2g
    Cholesterol 10mg3%
    Sodium 345mg15%
    Potassium 87mg2%
    Carbohydrates 7g2%
    Fiber 1g4%
    Sugar 2g2%
    Protein 4g8%
    Vitamin A 137IU3%
    Vitamin C 3mg4%
    Calcium 71mg7%
    Iron 1mg6%
    * Percent Daily Values are based on a 2000 calorie diet.

    Here’s one more to pin on your Pinterest boards!Cheesy Calzone Pinwheels are yummy crescent roll appetizers, with pepperoni, bell pepper, mushrooms, and 3 cheeses, served with marinara sauce.

    Air Fryer Buffalo Honey Wings

    Delicious Air Fryer Buffalo Honey Wings are seasoned with a spice rub, cooked until crisp, and coated with a sweet, spicy sauce to serve.
    Delicious Air Fryer Buffalo Honey Wings are seasoned with a spice rub, cooked until crisp, and coated with a sweet, spicy sauce to serve.

    We love chicken wings, and have eaten lots of them since getting an air fryer a couple of years ago. The recipe I am sharing today is an absolutely delicious way to make sweet and spicy wings in an air fryer. I have also included instructions for baking these, in case you do not have access to an air fryer. Either cooking method will produce a scrumptiously addicting chicken wing that you are gonna love!

    Basically, you will whip up a quick spice rub, season the chicken, cook the chicken wings, then toss them in a simple buffalo honey sauce. It’s actually quite simple, whether you air fry the wings or bake the wings. Here’s how to make them:

    Scroll Down For A Printable Recipe Card At the Bottom Of The Page

    Prepare A Spice Mixture For Seasoning The Wings

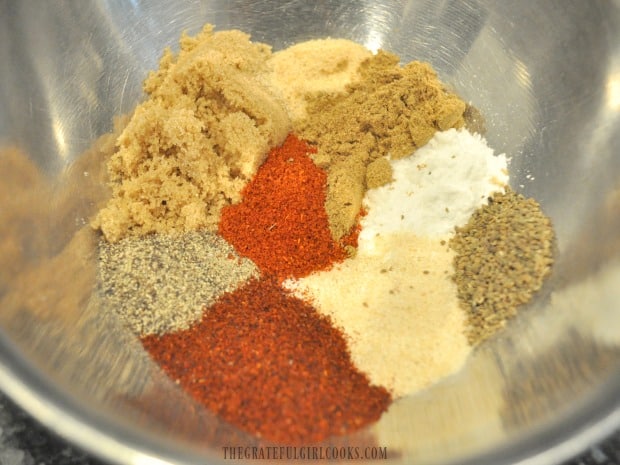
    Making the spice rub for the air fryer buffalo honey wings could not be any more simple! Measure the ingredients into a medium bowl, and stir or whisk until the spices are fully combined. Pat the chicken wings dry using paper towels, then place them in a large bowl or container.

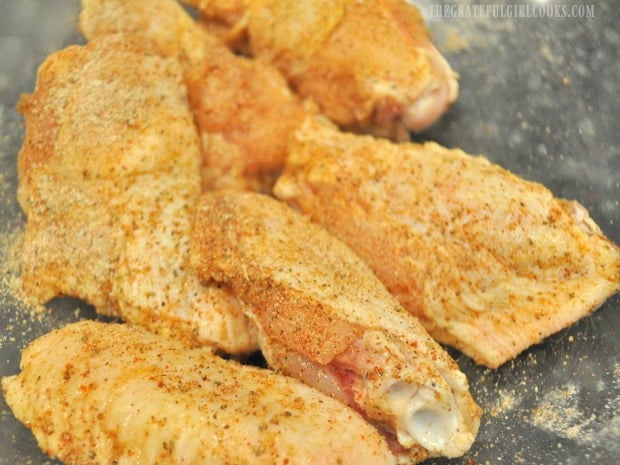
    Sprinkle the chicken wings with the spice rub. Make sure to rub the spices into the chicken wings to coat them all sides. Use all of the spice mixture, if making a full recipe (3 pounds of wings)

    Spices are measured into a small bowl for the chicken wings.Chicken wings are covered with spices before cooking.

    Time To Cook The Air Fryer Buffalo Honey Wings

    There are so many air fryer machines today, which can vary quite a bit in cooking temps, so be sure to keep an eye on the wings as they cook, so they will not undercook OR overcook in YOUR machine! I use a Cosori air fryer, and often cook these wings in a couple batches. Here’s how I cook them in my air fryer.

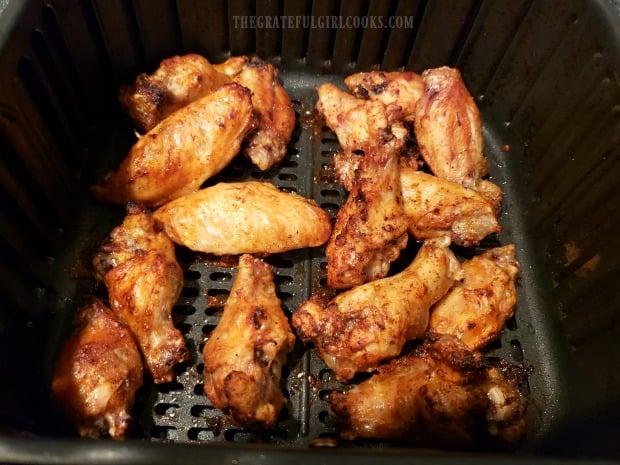
    Preheat air fryer to 380°F. Once preheated, add the seasoned wings to the basket (I usually try to keep them in a single layer if possible). Cook the air fryer buffalo honey wings at 380°F for 12 minutes, then flip the wings to the other side and cook for another 12 minutes. I then turn the temperature up to 400°F and cook them for 3-4 more minutes, until cooked through and crispy on the outside.

    Air Fryer Buffalo Honey Wings in the basket halfway though the cooking time.

    Make The Buffalo Honey Sauce While the Wings Cook

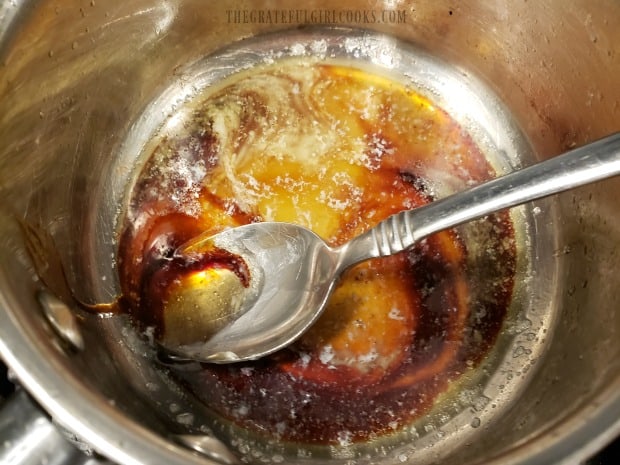
    Melt butter in a medium-sized saucepan on medium heat. In a separate bowl, whisk together cornstarch and Frank’s Original Hot Sauce until blended. Add this to the melted butter in the saucepan, and stir to combine. Now add honey and molasses, and stir again, until ingredients are combined.

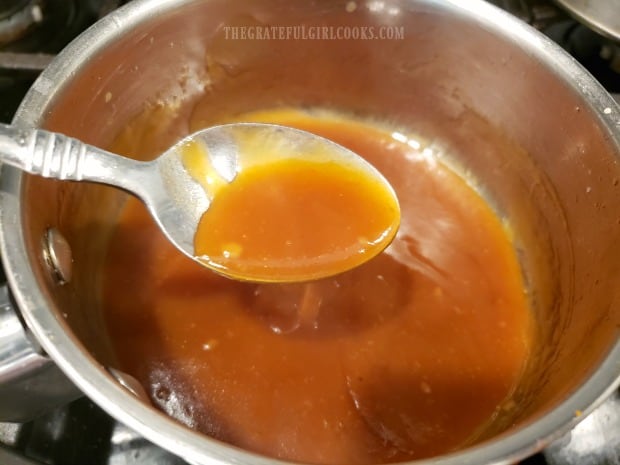
    Heat the buffalo honey sauce until it comes to a boil, making sure to stir (or whisk) it often. When it comes to a boil, reduce the heat to low and then simmer the sauce for 3-5 minutes, until it thickens slightly. Give it a taste. If you want it a bit sweeter, stir in more honey. If you want it spicier, add a bit more hot sauce.

    Cooking the ingredients for the buffalo honey sauce.Sauce is ready to add to the cooked chicken wings.

    Coat Wings With Sauce Then Serve

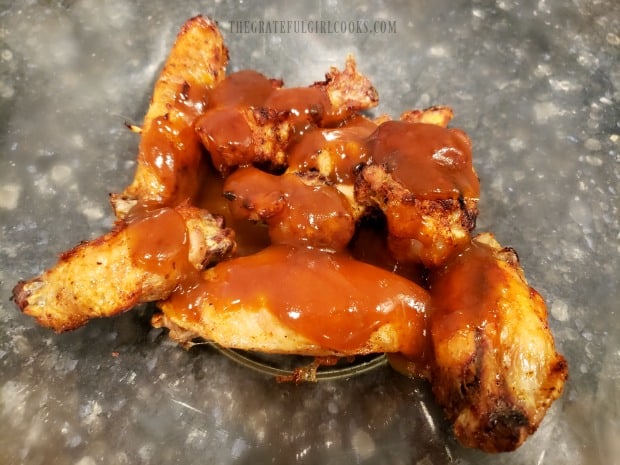
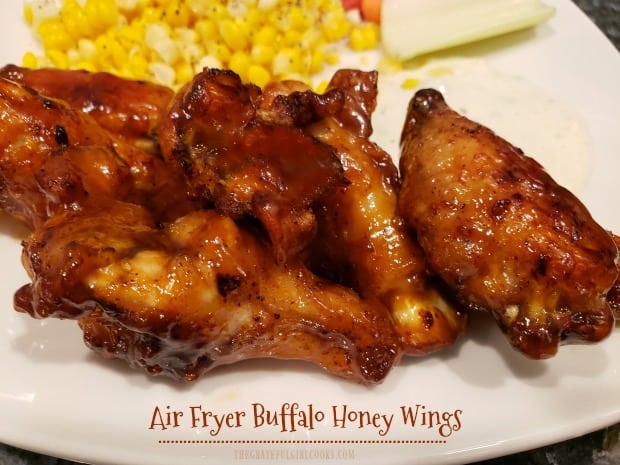
    Place the cooked wings in a large bowl, and pour the sauce over them. Toss the air fryer buffalo honey wings so they are fully coated with sauce. Once all the wings are cooked and coated with the sauce, they are ready to serve, while hot. Serve with bleu cheese or ranch dressing and carrot and celery sticks on the side, if desired. Enjoy!

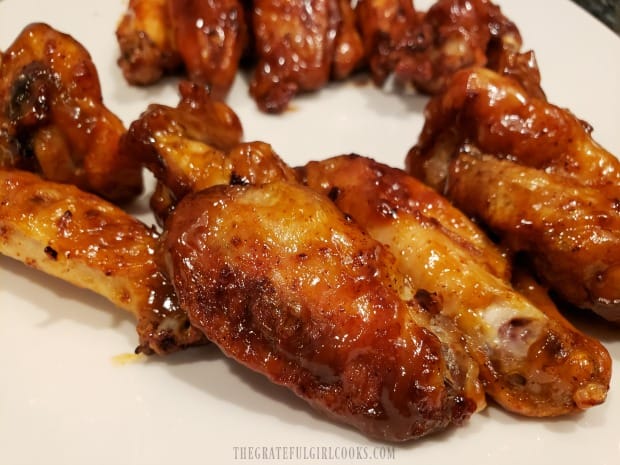
    Air Fryer Buffalo Honey Wings are coated with the spicy and sweet sauce before serving.Some of the air fryer buffalo honey wings on a white plate, ready to serve and eat!

    No Air Fryer? No Problem… BAKE Them!

    It will take longer to bake the wings, but here is how to do it. Cover a 9″x13″ baking sheet with aluminum foil, and spray lightly with non-stick baking spray. Place the seasoned wings on the foil in a single layer. Bake in a preheated 400°F. oven for 45-50 minutes. Once done baking, turn the oven setting to BROIL. Place wings (on baking sheet) about 6-8 inches away from the broiler. 

    Broil the chicken wings until they reach the crispiness you want, then flip them over to the other side and broil again until crispy on outside. Keep a close eye on the wings so they don’t burn. THE BROILING TIME WILL ONLY BE A COUPLE MINUTES TOTAL. Once done, remove from oven, and toss with prepared buffalo honey sauce, and serve!

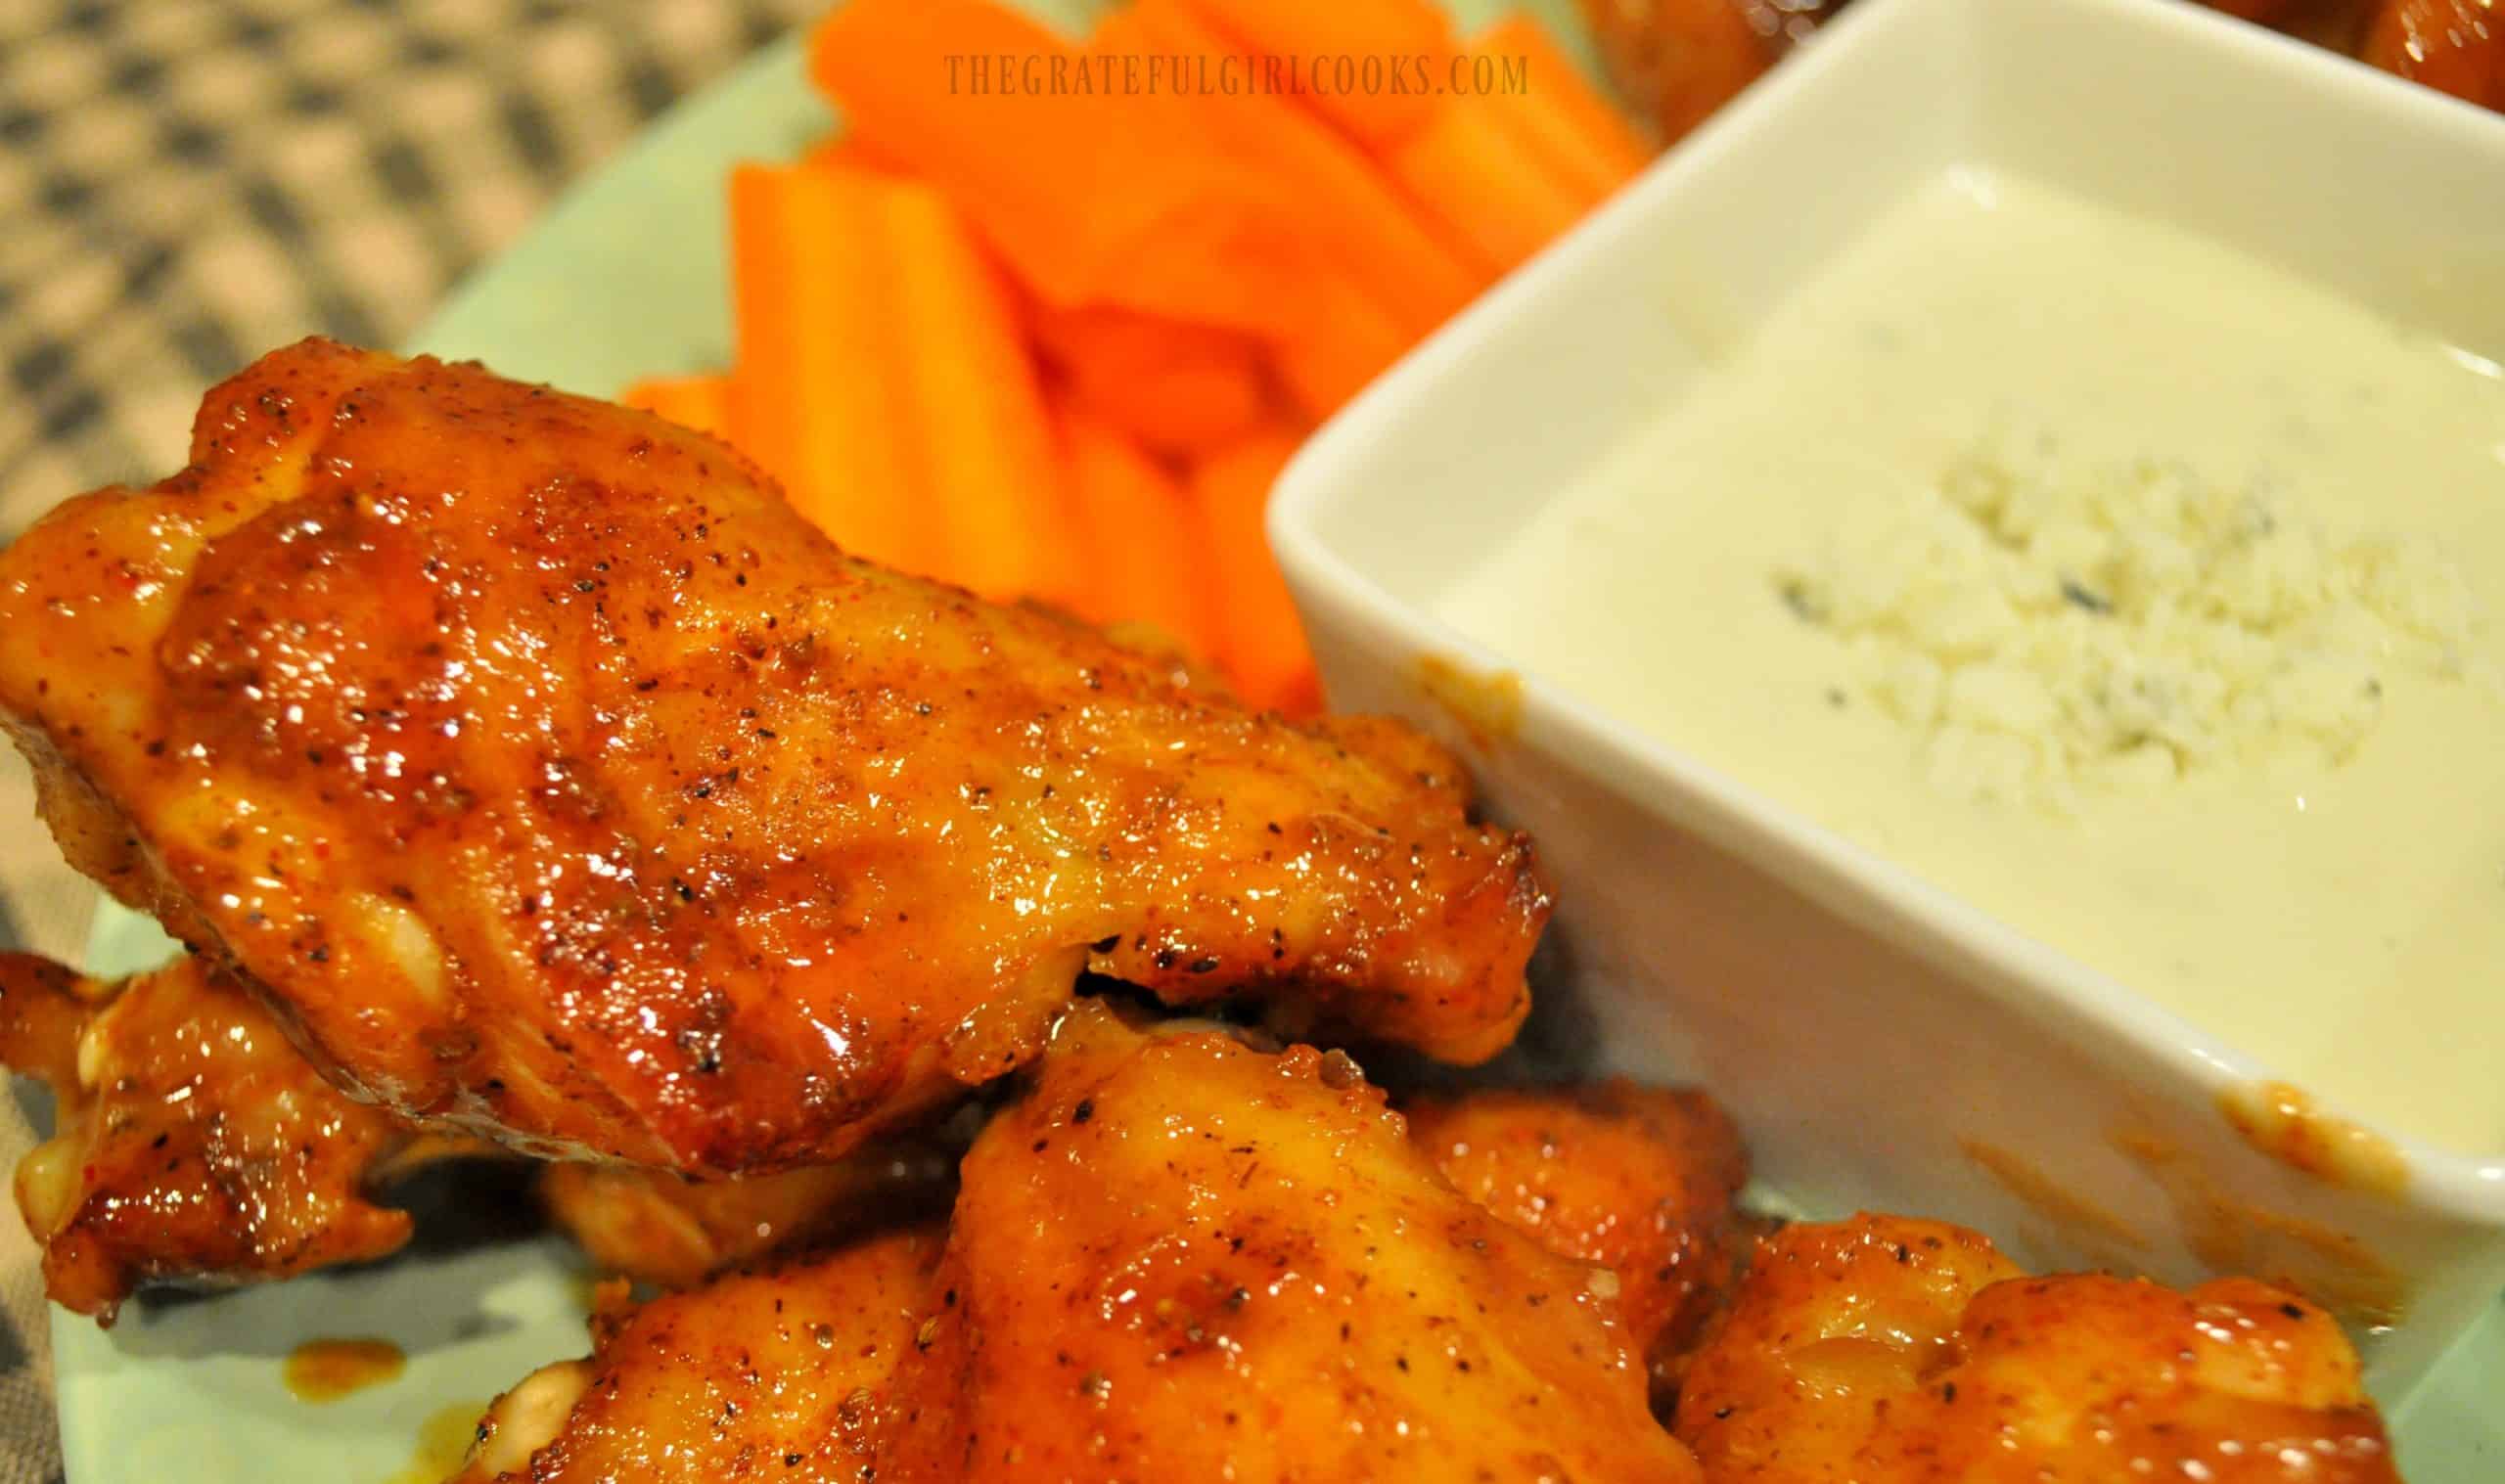
    Carrots and dip are served with the cooked buffalo honey chicken wings.

    Thanks for stopping by today. I really hope you get the opportunity to make these delicious chicken wings, and trust you will enjoy them. Please come back again soon for more yummy recipes. Have a GREAT day.

    Looking For More Appetizer Recipes?

    You can find all of my recipes in the Recipe Index, which is located at the top of the page. I have some delicious appetizer recipes, including:

    Interested In More Recipes?

    Thank you for visiting this website. I appreciate you using some of your valuable time to do soIf you’re interested, I publish a newsletter 2 times per month (1st and 15th) with all the latest recipes, and other fun info. I would be honored to have you join our growing list of subscribers, so you never miss a great recipe!
    There is a Newsletter subscription box on the top right side (or bottom) of each blog post, depending on the device you use, where you can easily submit your e-mail address (only) to be included in my mailing list.

    You Can Also Find Me On Social Media:

    Facebook page: The Grateful Girl Cooks!
    Pinterest:
    The Grateful Girl Cooks!
    Instagram:
    jbatthegratefulgirlcooks

    Author's signature

    Recipe adapted from: https://carlsbadcravings.com/buffalo-honey-hot-wings-traditional-buffalo-hot-wings-recipe/

    0 from 0 votes
    Air Fryer Buffalo Honey Wings
    Prep Time
    5 mins
    Cook Time
    28 mins
    Total Time
    33 mins
     

    Delicious Air Fryer Buffalo Honey Wings are seasoned with a spice rub, cooked until crisp, and coated with a sweet, spicy sauce to serve.

    Category: Appetizer/Snack, Entree
    Cuisine: American
    Keyword: Air Fryer Buffalo Honey Wings
    Servings: 6 (4 wings per serving)
    Calories Per Serving: 376 kcal
    Author: JB @ The Grateful Girl Cooks!
    Ingredients
    • 3 pounds chicken wings (approx. 24 wings)
    Dry Rub Spice Mix:
    • 2 Tablespoons brown sugar
    • 2 Tablespoons baking powder
    • 2 teaspoons onion powder
    • 2 teaspoons salt
    • 2 teaspoons ground black pepper
    • 2 teaspoons paprika
    • 2 teaspoons garlic powder
    • 2 teaspoons ground cumin
    • 2 teaspoons chili powder
    • 1 teaspoon celery salt
    Buffalo Honey Sauce:
    • cup Frank's ORIGINAL Hot Sauce (NOT hot wings sauce)
    • 2 teaspoons cornstarch
    • ¼ cup honey
    • 1 Tablespoon molasses
    • 1 Tablespoon butter
    Instructions
    1. Measure spice rub ingredients into a medium bowl; stir/whisk until combined. Pat chicken wings dry with paper towels; place wings into large bowl or container. Sprinkle with spice rub, rubbing spices into wings to coat all sides.

    If Cooking In Air Fryer:
    1. Preheat air fryer to 380°F. Once preheated, add seasoned wings to basket in single layer, if possible. Cook wings at 380°F for 12 minutes; flip wings to the other side; cook another 12 minutes. Turn temp. up to 400°F. Cook 3-4 minutes, until cooked through/crispy on outside. TIP: Keep an eye on chicken wings. Air fryers can widely vary on heating temperatures!

    If Baking In Oven:
    1. Cover a 9"x13" baking sheet with aluminum foil; spray lightly with non-stick baking spray. Place seasoned wings on foil in single layer. Bake in a preheated 400°F. oven 45-50 minutes. When done, turn oven setting to BROIL. Place wings (on baking sheet) about 6-8 inches away from broiler.  Broil wings until they reach the crispiness you want. Flip over to other side; broil again until crispy. Keep a close eye on wings so they don't burn. BROILING TIME WILL ONLY BE A COUPLE MINUTES TOTAL. Once done, remove from oven; toss with sauce, and serve!

    Make Sauce While Wings Cook:
    1. Melt butter on medium heat in medium saucepan. In separate bowl, whisk together cornstarch and Frank's Original Hot Sauce until blended. Add to melted butter; stir to combine. Stir in the honey and molasses, until combined. Heat sauce until it comes to a boil, making sure to stir (or whisk) often. Once boiling, reduce heat to low; simmer 3-5 minutes, until it thickens slightly.

    Serve:
    1. Place cooked wings in a large bowl; pour warm sauce over them. Toss wings until coated with sauce. Serve wings hot, with bleu cheese or ranch dressing, carrot and celery sticks on the side, if desired. Enjoy!

    Nutrition Facts
    Air Fryer Buffalo Honey Wings
    Amount Per Serving (1 (4 wings))
    Calories 376 Calories from Fat 198
    % Daily Value*
    Fat 22g34%
    Saturated Fat 7g44%
    Trans Fat 1g
    Cholesterol 99mg33%
    Sodium 2107mg92%
    Potassium 725mg21%
    Carbohydrates 23g8%
    Fiber 1g4%
    Sugar 18g20%
    Protein 23g46%
    Vitamin A 776IU16%
    Vitamin C 1mg1%
    Calcium 217mg22%
    Iron 3mg17%
    * Percent Daily Values are based on a 2000 calorie diet.

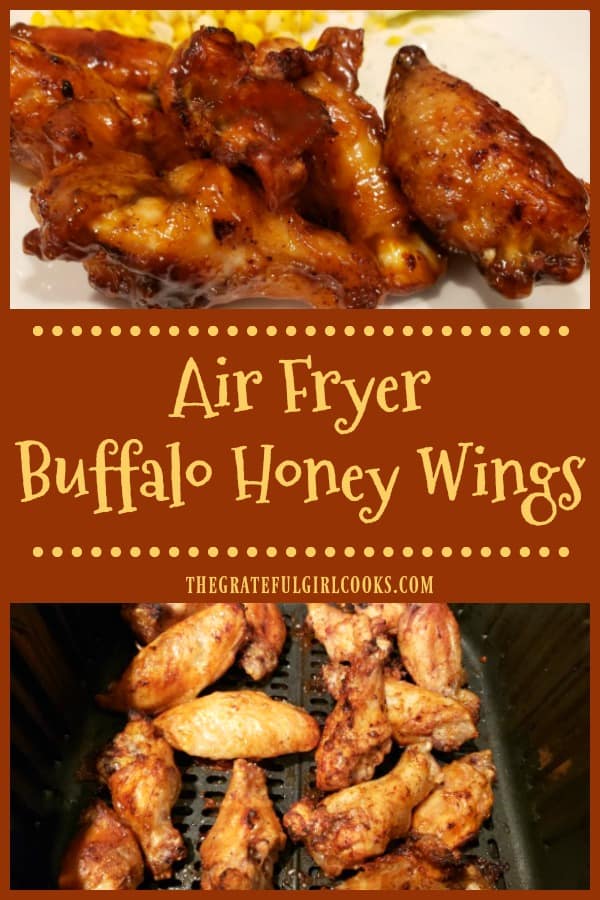
    Here’s one more to pin on your Pinterest boards!Delicious Air Fryer Buffalo Honey Wings are seasoned with a spice rub, cooked until crisp, and coated with a sweet, spicy sauce to serve.