Category: Appetizers

Greek-Style Chicken Wings

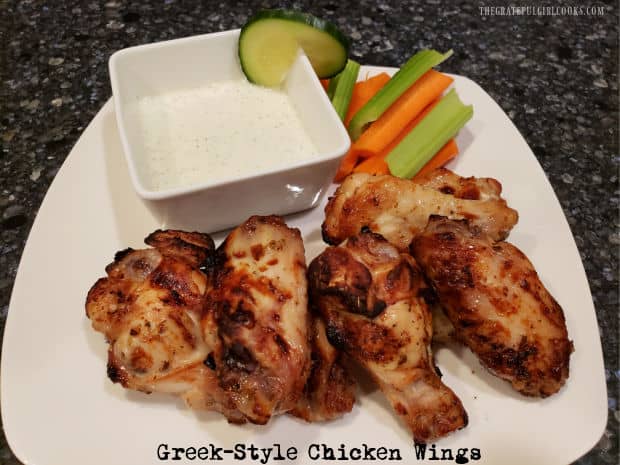
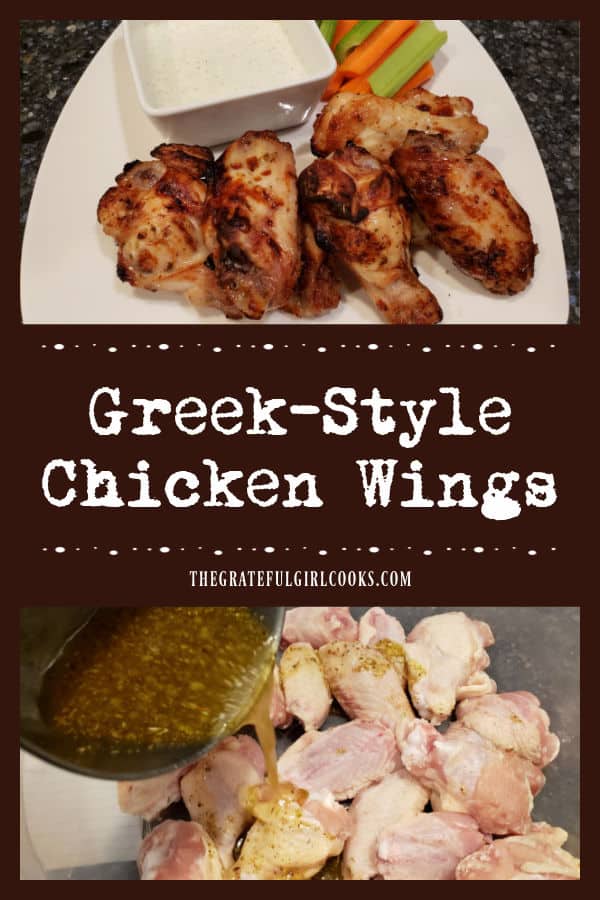
Greek-Style Chicken Wings can be oven-baked, or cooked in an air fryer! These marinated wings are served with homemade tzatziki sauce for dipping.Greek-Style Chicken Wings can be baked or cooked in an air fryer! These marinated wings are served with homemade tzatziki sauce for dipping.

Do you enjoy eating chicken wings? We sure do! A couple of years ago I purchased an air fryer with some gift cards I was given on my birthday. That was the beginning of my love for cooking (and eating) chicken wings.

This recipe for Greek-style chicken wings is simple. The wings can either be baked in the oven OR can be prepared in an air fryer, whichever is most convenient for you. I have included directions for both in the recipe card.

Greek-style chicken wings are marinated several hours, so remember to plan ahead if you are making this recipe! The marinated, seasoned wings are then cooked, then served with a simple Greek inspired homemade tzatziki sauce for dipping. It’s an easy recipe to prepare, and the wings taste wonderful! Here’s how to make them:

Scroll Down For A Printable Recipe Card At The Bottom Of The Page

Marinating The Greek-Style Chicken Wings

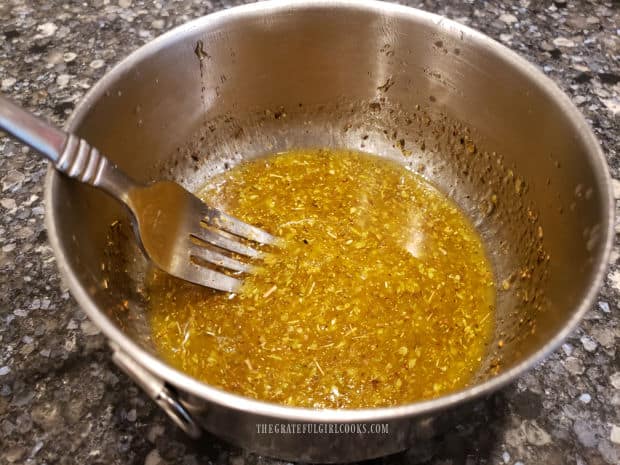
Because these wings taste best once they have marinated for several hours, be sure to plan ahead! Making the marinade is EASY! Simply combine the ingredients in a bowl. The marinade is made from lemon juice, olive oil, honey, oregano, garlic, and salt.

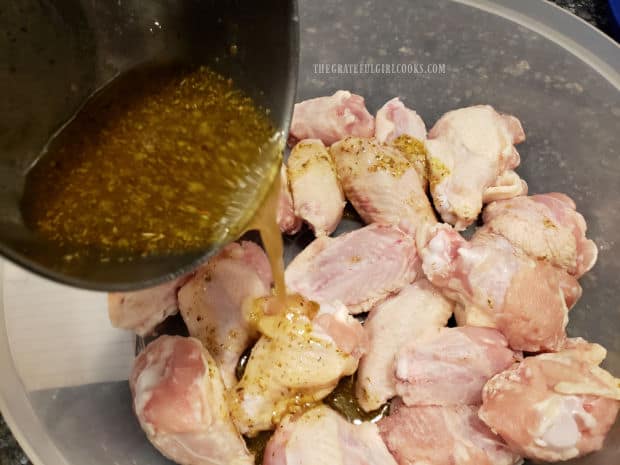
Once fully combined, pour the marinade over the chicken wings. You can either have the wings in a large re-sealable bag or in a shallow large container with a lid. Turn the wings, to ensure all are coated with marinade, then cover, and refrigerate for 6-8 hours (or overnight).

A Greek marinade is mixed together for the chicken wings.Pouring the marinade over the chicken wings before refrigerating.

Make The Tzatziki Sauce For Serving

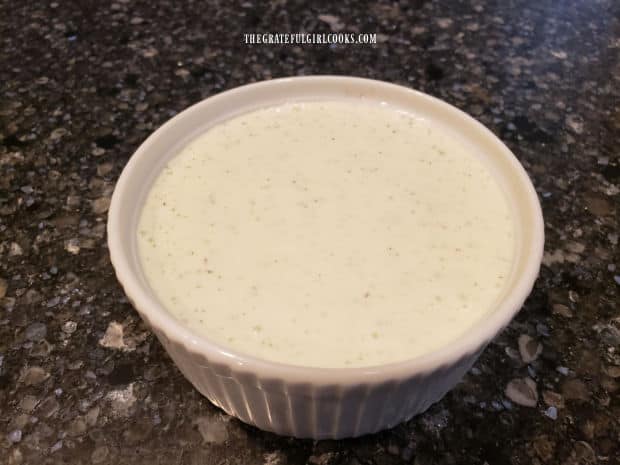
I also make the dipping sauce ahead of time, because it will need time to fully chill, so the flavors can develop well. The sauce, also known as tzatziki sauce, is made with plain yogurt, feta cheese, chopped cucumber, dill, garlic and salt is a cinch to make!

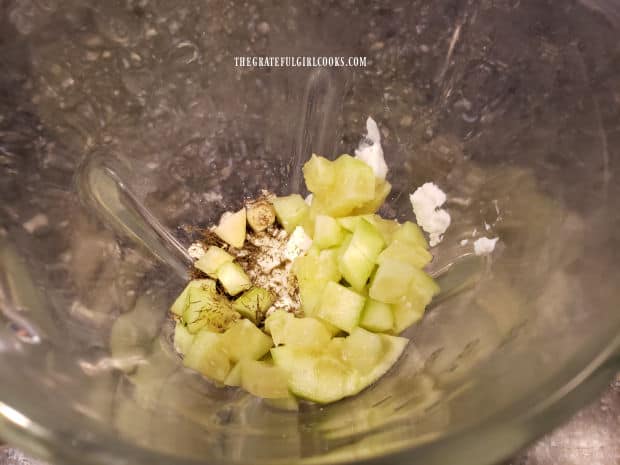
Place the tzatziki ingredients in a blender or food processor. Blend or process until the sauce is smooth. Transfer the sauce to a small serving bowl, cover, and refrigerate until fully chilled and you are ready to serve. The sauce can be made up to 1 day ahead.

Ingredients for tzatziki sauce are placed in a blender to combine.After blending ingredients, the tzatziki sauce (for dipping) is smooth and creamy.

Baking In Oven Directions

If you are BAKING the Greek-style chicken wings, preheat the oven to 400°F. Drain the marinade off the chicken wings (discard the marinade). Place the wings on a wire rack sitting on top of a 9×13 or 15×10 baking pan.

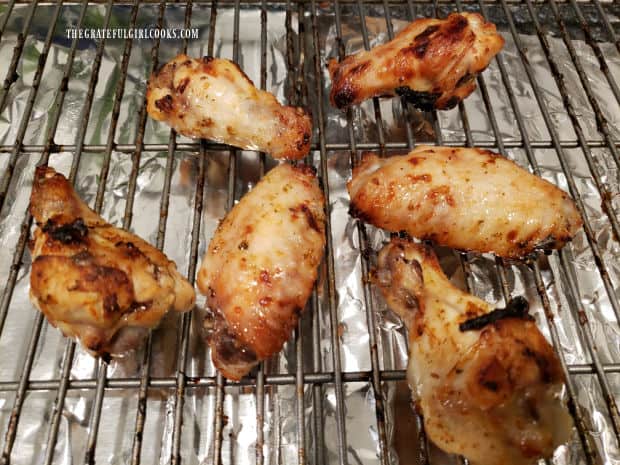
Bake the wings for 35-40 minutes, flipping them over to the other side halfway through the cooking time. Once they have finished baking, I usually turn the oven to BROIL, and keeping the wings about 5-6 inches away, and brown them under the broiler for a couple minutes to help to “darken and crisp them up”. Keep an eye on them so they don’t burn! When browned, they are ready to serve.

Greek-style chicken wings are baked after marinating in sauce.Chicken wings are broiled after baking, to brown them up more.

 Air Fryer Directions

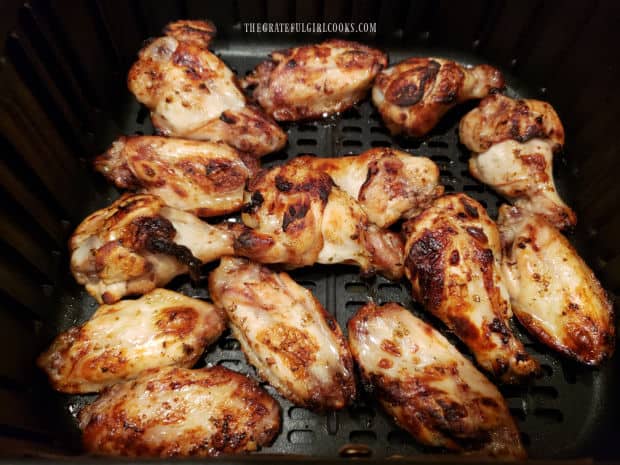
If you are using an air fryer to cook these Greek-style chicken wings, preheat your air fryer to 380° F. Place the marinated wings in the air fryer basket. Lay the wings into the basket, trying to keep as many of them in a single layer as possible.

Cook for 12 minutes, then turn the wings over to the other side. Place the basket back into the fryer, and continue to cook for an additional 12 minutes. Increase the temperature to 400°F., and cook for 4-5 more minutes. When done, the wings should be browned all over, and crispy on the outside. They are now ready to serve.

Greek-style chicken wings cooking in air fryer after marinating in sauce.

Serve The Greek-Style Chicken Wings

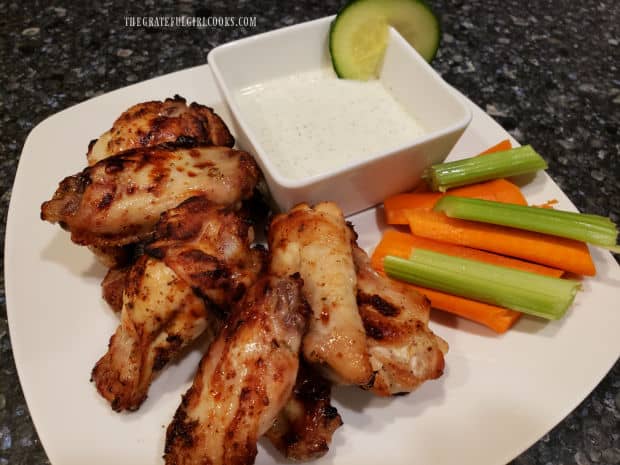
Serve the Greek-style chicken wings with small bowls of tzatziki sauce for dipping on the side. You can also serve the wings with the traditional slices of carrots and celery on the side, if desired. The carrots and celery taste great, dipped in the sauce, as well.
The Greek-style chicken wings are serving with dipping sauce, carrots and celery.

I hope you enjoy these Greek-style chicken wings, whether you bake them OR air fry them! If you like wings, be sure to check out my yummy recipes for baked Asian chicken wings, and buffalo honey hot wings, too!

Be sure to check out ALL of my recipes in the Recipe Index, which is located at the top of the page. There a LOT of great recipes to make and enjoy! Have a great day, thank you for visiting my blog, and I hope you come back soon.

Interested In More Recipes?

Thank you for visiting this website. I appreciate you using some of your valuable time to do soIf you’re interested, I publish a newsletter 2 times per month (1st and 15th) with all the latest recipes, and other fun info. I would be honored to have you join our growing list of subscribers, so you never miss a great recipe!
There is a Newsletter subscription box on the top right side (or bottom) of each blog post, depending on the device you use, where you can easily submit your e-mail address (only) to be included in my mailing list.

You Can Also Find Me On Social Media:

Facebook page: The Grateful Girl Cooks!
Pinterest:
The Grateful Girl Cooks!
Instagram:
jbatthegratefulgirlcooks

Author's signature

Original recipe source: “Taste of Home” magazine, April/May 2007 edition, page 23, published by Reiman Publications, Inc.

0 from 0 votes
Greek-Style Chicken Wings
Prep Time
15 mins
Cook Time
40 mins
Marinating Time (inactive)
6 hrs
Total Time
6 hrs 55 mins
 

Greek-Style Chicken Wings can be oven-baked, or cooked in an air fryer! Marinated wings are served with homemade tzatziki sauce for dipping.

Category: Appetizer, Main Dish
Cuisine: American, Greek
Keyword: Greek-style chicken wings
Servings: 4
Calories Per Serving: 581 kcal
Author: JB @ The Grateful Girl Cooks!
Ingredients
Marinade For Wings:
  • 3 Tablespoons fresh lemon juice
  • 2 Tablespoons olive oil
  • 2 Tablespoons honey
  • 1/4 teaspoon salt
  • 1 large garlic clove, minced
  • 3 pounds chicken wings (approx. 20 wings)
For Tzatziki Dipping Sauce:
  • 1/2 cup plain yogurt
  • 1/2 cup chopped, peeled cucumber
  • 1/2 cup crumbled feta cheese
  • 2 teaspoons dried dill weed or 2 Tablespoons fresh, chopped dill
  • 1 large garlic clove, peeled
  • 1 dash salt
Instructions
  1. Make Marinade For Chicken Wings: Whisk marinade ingredients well in a small bowl (lemon juice, olive oil, honey, oregano, garlic and salt). Pour marinade over chicken wings (use large re-sealable plastic bag or covered, shallow container). Toss wings, to ensure they're coated with marinade; cover and refrigerate 6-8 hours (or overnight).

  2. Make tzatziki sauce: Place yogurt, cucumber, feta, dill, garlic and salt in blender or food processor. Blend or process until sauce is smooth. Transfer sauce to small serving bowl; cover and refrigerate until fully chilled. Sauce can be made up to 1 day ahead.

If Oven-Baking:
  1. Preheat oven to 400° F. Drain marinade off wings (discard marinade). Place wings on a wire rack fitted on top of a 9x13 or 15x10 baking pan. Bake wings on the middle rack 35-40 minutes, turning them over halfway through cooking time. Once done, turn oven to BROIL, keeping wings 5-6 inches away from broiler element. Brown them under broiler for 1-2 minutes to help brown them. Don't let them burn! Once browned and cooked through, they're ready to serve.

If Using An Air Fryer:
  1. Preheat your air fryer to 380° F. Place marinated wings in air fryer basket, in a single layer, if possible. Cook for 12 minutes, then turn wings over. Place basket back into the fryer; continue to cook for 12 more minutes. Increase temperature to 400°F. and cook 4-5 more minutes. Once wings are crispy brown and cooked through, they're ready to serve.

To Serve:
  1. Place hot wings on serving plates. Serve with tzatziki sauce for dipping, and slices of celery and carrots on the side. Enjoy!

Nutrition Facts
Greek-Style Chicken Wings
Amount Per Serving (1 (1/4 of total))
Calories 581 Calories from Fat 369
% Daily Value*
Fat 41g63%
Saturated Fat 12g75%
Trans Fat 1g
Cholesterol 160mg53%
Sodium 512mg22%
Potassium 361mg10%
Carbohydrates 12g4%
Fiber 1g4%
Sugar 11g12%
Protein 40g80%
Vitamin A 408IU8%
Vitamin C 7mg8%
Calcium 163mg16%
Iron 2mg11%
* Percent Daily Values are based on a 2000 calorie diet.

Here’s one more to pin on your Pinterest boards!Greek-Style Chicken Wings can be oven-baked, or cooked in an air fryer! Marinated wings are served with homemade tzatziki sauce for dipping.

Popcorn Italiano

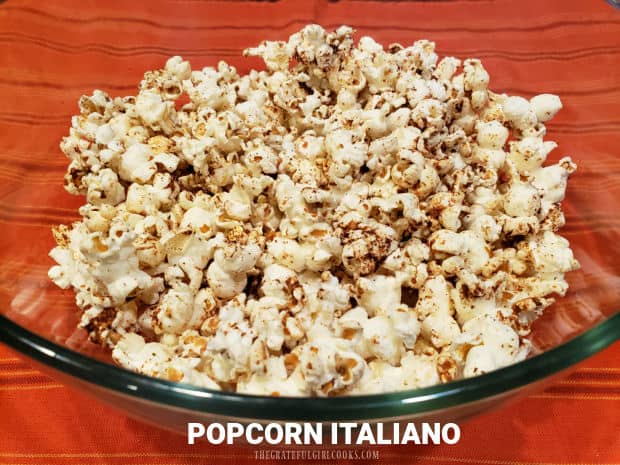
Popcorn Italiano is an easy, Italian-inspired snack. Popped corn is seasoned with butter, Parmesan cheese and Italian seasonings, then baked.
Popcorn Italiano is an easy Italian-inspired snack. Popped corn is seasoned with butter, Parmesan cheese and Italian seasonings, then baked.

Popcorn is one of my “go to” snacks. Usually we just have it drizzled with butter and salt… you know, the old-fashioned way! Sometimes I like to add Parmesan cheese to the mix, and that tastes great, too! I think it’s kind of FUN to experiment with different flavors on popcorn!

Today I want to share a simple, but yummy recipe with you for Popcorn Italiano! I found the recipe years ago in one of my old Taste Of Home magazines, and gave it a try out of curiosity. YUM! Plain popped popcorn is combined with butter, Parmesan cheese and a few Italian-inspired spices. After it’s well-seasoned, it’s baked for a short time, which cooks and crisps up the buttery, cheesy seasoning onto the popcorn.

If you like to try new things, try this yummy popcorn. It’s really good, and has lots of flavor! Here’s how to make this tasty, easy snack:

Scroll Down For A Printable Recipe Card At The Bottom Of the Page

Pop The Popcorn First

Begin by preheating your oven to 350°F. You will want the oven ready to go once the popcorn has been popped and seasoned.

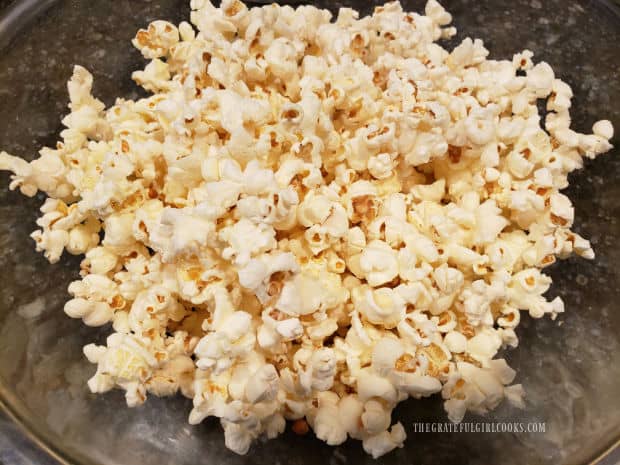
For this recipe you will need 2½ quarts of popped popcorn. Pop the popcorn (hot air popcorn maker, stovetop saucepan or microwave), using your preferred method. If you’re making this in a saucepan or hot air popcorn maker, start with 1/3 cup un-popped kernels. This will give you the amount of popped popcorn you need for this recipe. Set the finished popcorn aside while you prepare the seasoned butter sauce. 

NOTE: I’ve never made this recipe using microwavable popcorn. However, if using microwave popcorn, use PLAIN, unbuttered popcorn. You will most likely need a couple of bags (about 10 cups total popped popcorn) to give you the equivalent of 2½ quarts of popped popcorn.

Plain popped popcorn in a bowl, ready for buttery seasoning sauce.

Make The Sauce And Season The Popcorn

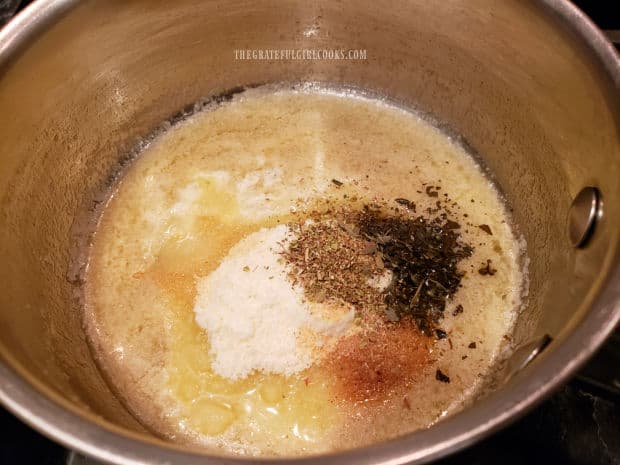
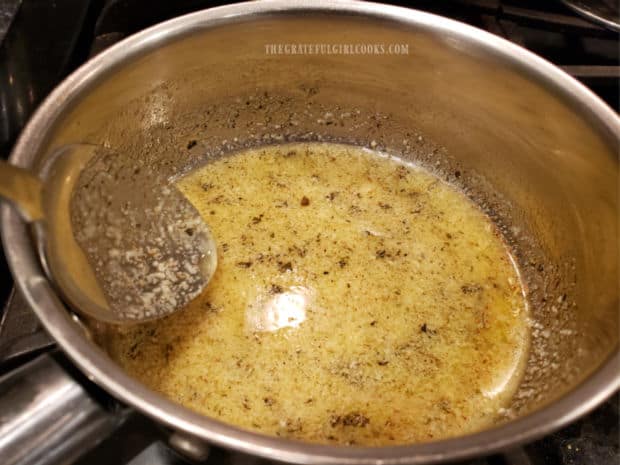
Now it’s time to make the buttery Italian seasoning for the popcorn. Melt butter in a small saucepan, then remove the pan from the heat. Add grated Parmesan cheese and spices (garlic powder, oregano, basil, onion powder, and salt) to the butter. Stir until fully combined.

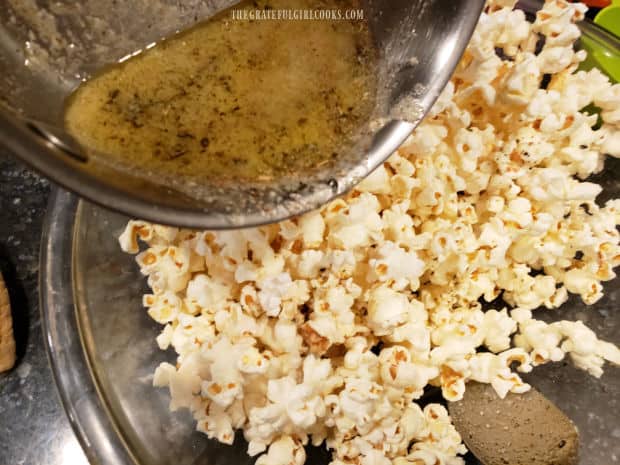
Melted butter, Parmesan cheese and Italian spices in saucepan.Buttery Italian-inspired sauce is ready to pour over popped popcorn.

Pour all of the warm sauce over the popcorn and mix well, stirring as you go, until the popcorn has been well coated.

Seasoned butter is drizzled over popped popcorn and stirred to combine.

Bake The Popcorn Italiano

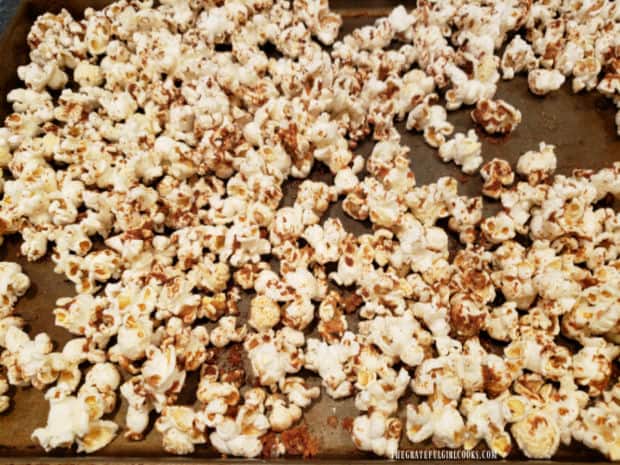
Pour the seasoned popcorn into a 13 x 9″ baking pan. Bake the Popcorn Italiano for 13 minutes, giving it a quick stir halfway through the baking time. Once done baking, remove the pan from the oven and transfer the seasoned popcorn into a serving bowl (or bowls). It will be hot, crispy and the flavors will be “sealed” and browned onto the popcorn.

Popcorn Italiano is baked for 13-15 minutes in a 13"x9" pan.

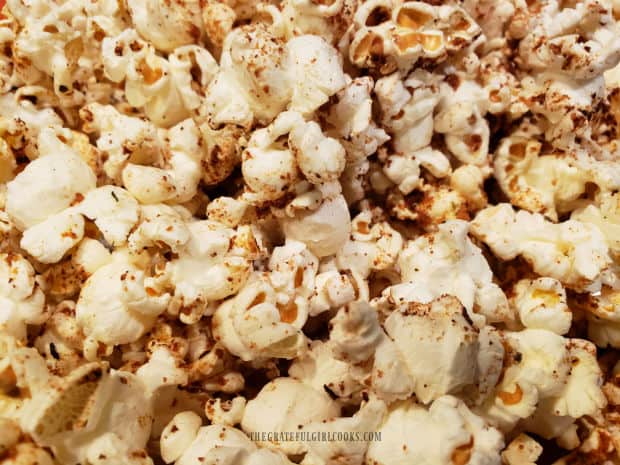
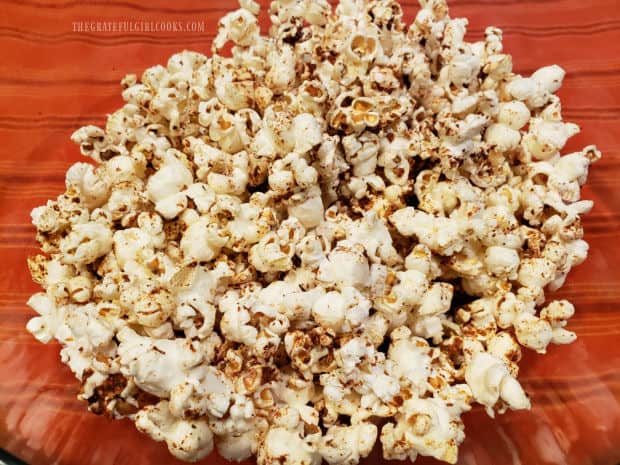
That’s it! Serve this flavorful popcorn Italiano hot, and enjoy this crunchy snack. You will definitely get the “taste” of delicious Italian flavors in every bite of this popcorn. 

Time to eat some crunchy, tasty Popcorn Italiano!A close up of the Popcorn Italiano shows the seasoning on the pieces.

Thank you for stopping by and checking out this fun, unique recipe for Popcorn Italiano. It really does taste good, and I hope you enjoy it. Come back soon, and have a great day.

Looking For More SNACK Recipes?

Yu can find all of my recipes in the Recipe Index, which is located at the top of the page.. I have quite a few snack and appetizer recipes you might enjoy, including:

Interested In More Recipes?

Thank you for visiting this website. I appreciate you using some of your valuable time to do soIf you’re interested, I publish a newsletter 2 times per month (1st and 15th) with all the latest recipes, and other fun info. I would be honored to have you join our growing list of subscribers, so you never miss a great recipe!
There is a Newsletter subscription box on the top right side (or bottom) of each blog post, depending on the device you use, where you can easily submit your e-mail address (only) to be included in my mailing list.

You Can Also Find Me On Social Media:

Facebook page: The Grateful Girl Cooks!
Pinterest:
The Grateful Girl Cooks!
Instagram:
jbatthegratefulgirlcooks

Author's signature

Original recipe source: “Taste of Home” magazine, Sept./Oct. 1998 issue, page 54, published by Reiman Publications

0 from 0 votes
Popcorn Italiano
Prep Time
7 mins
Cook Time
13 mins
Total Time
20 mins
 

Popcorn Italiano is an easy Italian-inspired snack. Popped corn is seasoned with butter, Parmesan cheese and Italian seasonings, then baked.

Category: Appetizer/Snack
Cuisine: American
Keyword: popcorn Italiano
Servings: 5 (2 cups per serving)
Calories Per Serving: 165 kcal
Author: JB @ The Grateful Girl Cooks!
Ingredients
  • cup popcorn kernels = 2½ quarts popped
  • 5 Tablespoons butter
  • ¼ cup grated Parmesan cheese
  • ½ teaspoon dried oregano
  • ½ teaspoon garlic powder
  • ½ teaspoon dried basil
  • ¼ teaspoon onion powder
  • ¼ teaspoon salt
Instructions
  1. Preheat oven to 350°F.

  2. You will need 2½ quarts of popped popcorn. Pop the popcorn (hot air popcorn maker, stovetop saucepan or microwave), using your preferred method. NOTE: If making in saucepan or hot air popcorn maker, start with 1/3 cup un-popped kernels. This will produce the amount of popped popcorn needed. if using microwave popcorn, use PLAIN, unbuttered popcorn. You will need 10 cups total popped popcorn to give you amount needed. Set popped popcorn aside when done. 

  3. Melt butter in a small saucepan; remove pan from heat. Add grated Parmesan cheese, garlic powder, oregano, basil, onion powder and salt. Stir until fully combined. Drizzle sauce over popcorn and stir to combine, until popcorn is well coated.

  4. Pour seasoned popcorn into a 13 x 9" baking pan. Bake 13 minutes, giving it a stir halfway through baking time. Once done, remove pan from oven; transfer hot popcorn into serving bowl (or bowls). Serve immediately and enjoy!

Recipe Notes

NOTE: If popping corn from scratch you will need to use 1/3 cup of popcorn kernels to yield 2.5 quarts popped popcorn.  If using microwave popcorn, you will need 10 cups of plain, unbuttered popped popcorn to equal 2.5 quarts.

Nutrition Facts
Popcorn Italiano
Amount Per Serving (1 (2 cup serving))
Calories 165 Calories from Fat 117
% Daily Value*
Fat 13g20%
Saturated Fat 8g50%
Trans Fat 1g
Cholesterol 35mg12%
Sodium 294mg13%
Potassium 49mg1%
Carbohydrates 9g3%
Fiber 2g8%
Sugar 1g1%
Protein 3g6%
Vitamin A 397IU8%
Vitamin C 1mg1%
Calcium 65mg7%
Iron 1mg6%
* Percent Daily Values are based on a 2000 calorie diet.

Here’s one more to pin on your Pinterest boards!Popcorn Italiano is an easy Italian-inspired snack. Popped corn is seasoned with butter, Parmesan cheese and Italian seasonings, then baked.

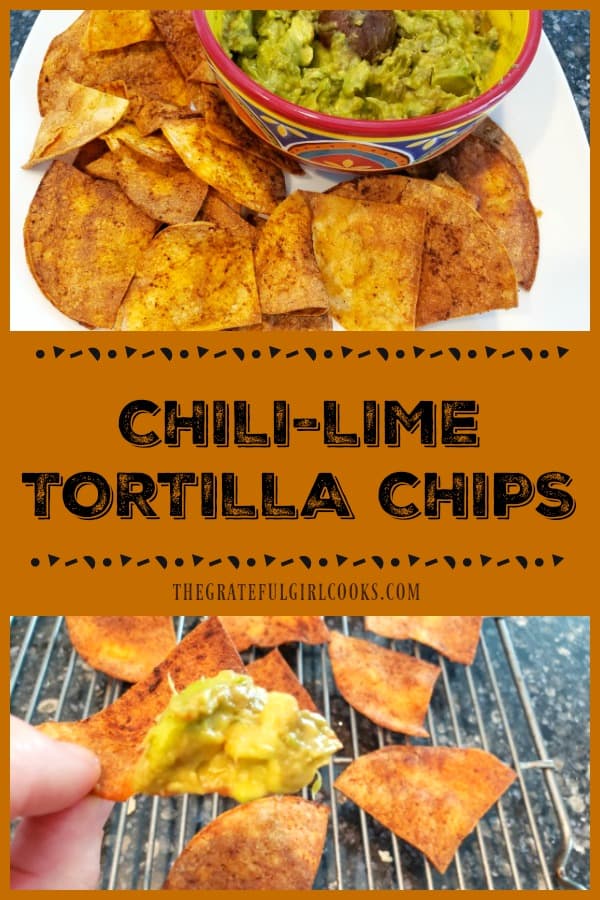
Chili-Lime Tortilla Chips (Air Fryer)

Make a quick batch of crunchy Chili-Lime Tortilla Chips in an air fryer! Corn tortillas, lime juice, oil, and a few spices are all you need!

Do you enjoy finding new recipes? I always love the search, and am thrilled when that search produces a recipe you will use again and again.

A few months ago I stumbled upon a recipe online for making homemade tortilla chips in an air fryer! It sounded really interesting to me, so I made chili-lime tortilla chips (with a slight tweak or two), and they didn’t take much time at all!

These tortilla chips are totally EASY to make, have great flavor, and are absolutely crispy (just how they should be, right?). Here’s how you can make them fairly quickly, using an air fryer:

Scroll Down For A Printable Recipe Card At The Bottom Of The Page

Make The Seasoning For the Chips

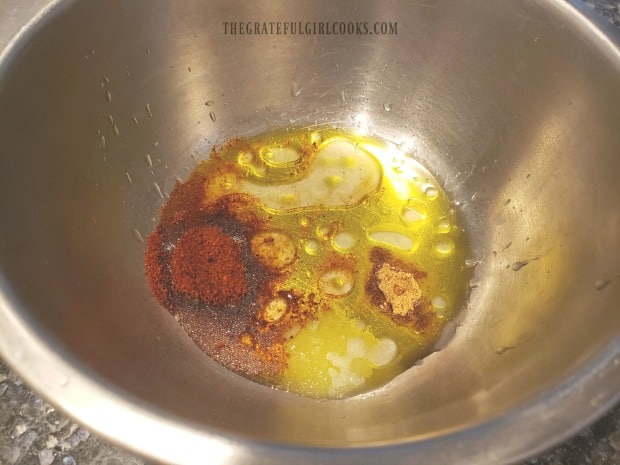
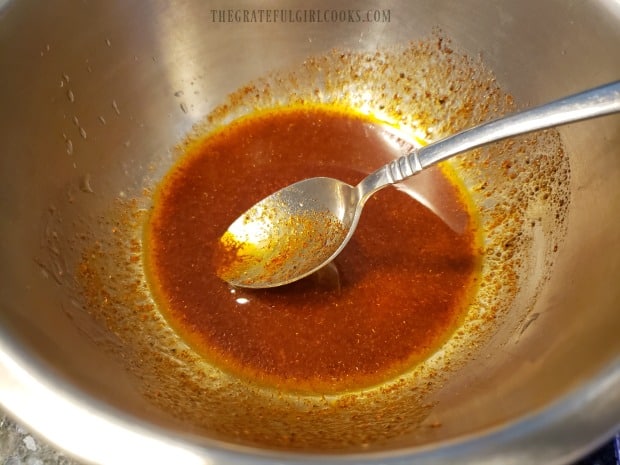
The first thing you will need to do is mix together the simple seasoning sauce that will be used to coat the tortilla chips. The sauce is made using extra-virgin olive oil, fresh lime juice, chili powder, salt, and ground cumin.

Place these ingredients in a small bowl, and whisk or stir until the ingredients are fully blended together.

Olive oil, lime juice and spices are combined to make sauce for tortilla chips.Chili-Lime Sauce is ready to brush onto tortilla chips for cooking.

Prepare The Corn Tortillas Before Air-Frying

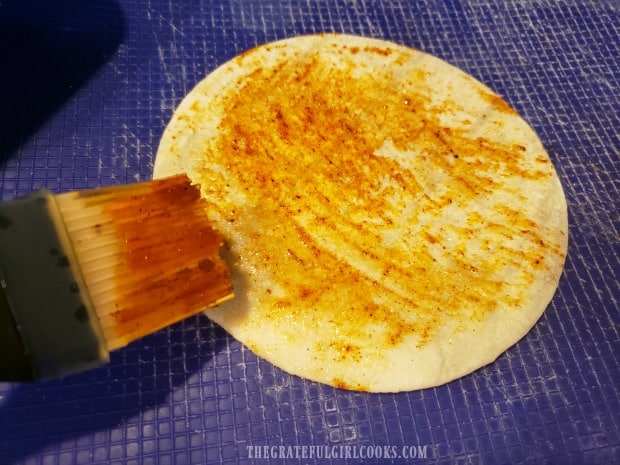
For this recipe, I use six, 5″ corn tortillas. Use a pastry brush to lightly brush the sauce onto both sides of each tortilla. Once that has been done, evenly stack all six seasoned tortillas directly on top of each other.

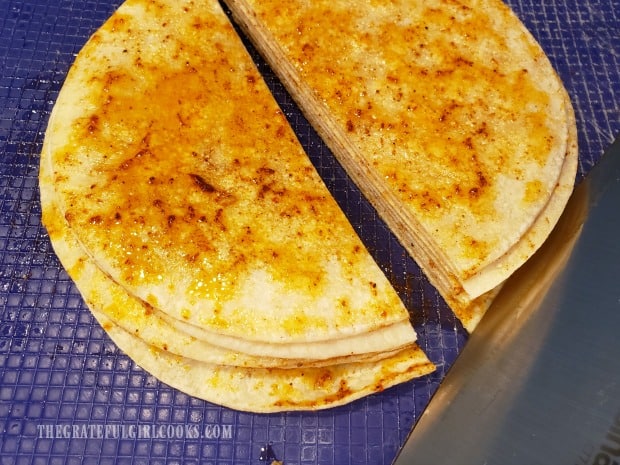
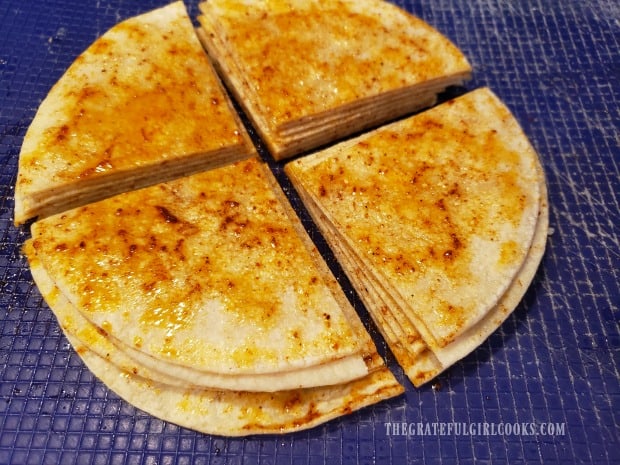
Use a sharp knife to carefully slice the stack of tortillas in half, then cut each half stack in half. Got it? The stack of seasoned tortillas will be cut into four quarters of equal size.

Each corn tortilla is brushed with the spicy sauce before cooking.A stack of seasoned tortillas is cut in half.Tortillas are cut into quarters before placing them into an air fryer.

Cooking Chili-Lime Tortilla Chips In An Air Fryer

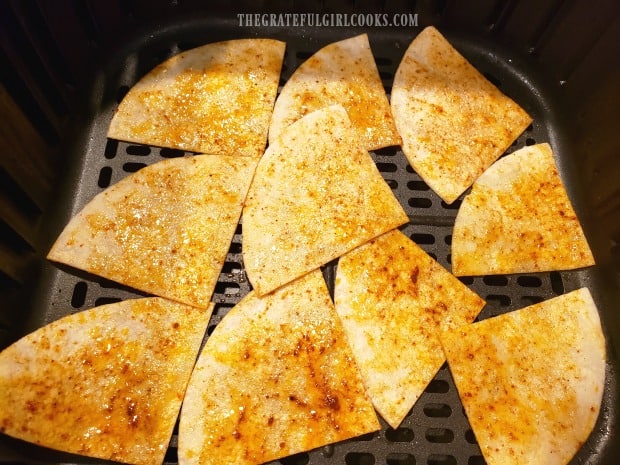
Now it’s time to cook the chili-lime tortilla chips! Preheat your air fryer to 350°F. Once heated, place the tortilla quarters in the basket of the air fryer in a single layer.

You will need to cook the chips in batches, because they need to have room for the hot air to circulate around them, to ensure they become crunchy. 

Cook them at 350°F. for between 6-8 minutes. Different air fryer machines tend to vary in temperatures and the heat they produce, so it is best to keep an eye on the chips as they cook. This will help make sure they don’t burn. I would say definitely check them at the 5 minute mark, and then go from there, a little at a time, until they are lightly browned.

Once done, remove the chili-lime tortilla chips from the air fryer and transfer to a wire rack to cool. The tortilla chips become more crunchy as they cool. Start another batch right away while the air fryer is still hot, and continue until all chips are cooked. 

Cooking Chili-Lime Tortilla Chips in air fryer one batch at a time.

Time To Enjoy Some Chili-Lime Tortilla Chips!

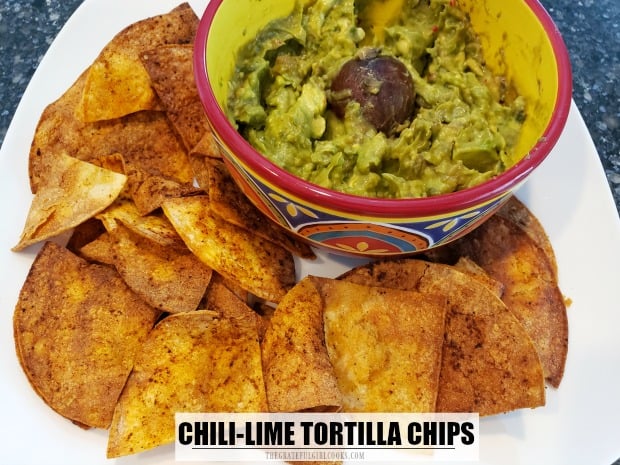
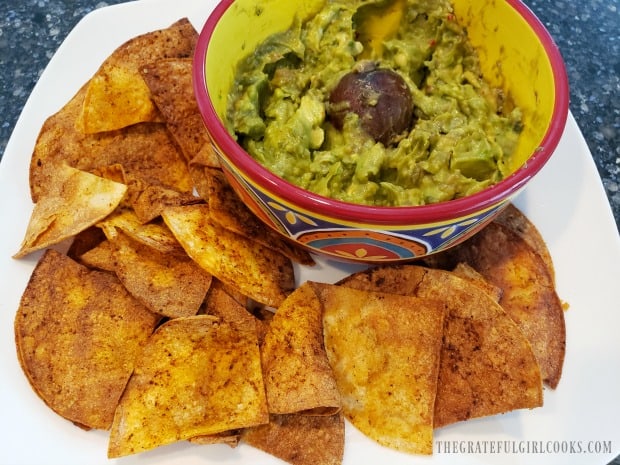
Once the chili-lime tortilla chips have fully cooled down to room temperature, they’re ready to eat! The chips are crunchy, and taste really good, especially when served with salsa or guacamole.

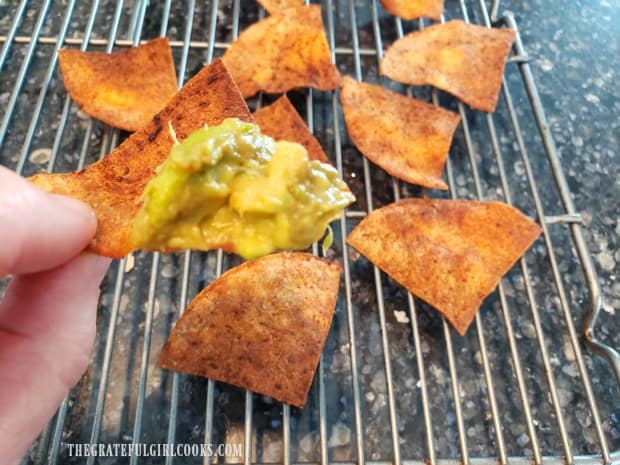
You can see in the photo below that they are crisp enough to hold the guacamole I whipped up the first time I made these chips!

Store any leftover chips in an airtight bag or container. They will be at their peak of crispiness and freshness for about 5-6 days, if stored properly. Because this recipe makes a fairly small batch, we never seem to have too many leftovers… ha ha!

Each seasoned, air fried chip is crunchy and ready for dipping!A plate of air fried chili-lime tortilla chips, served with guacamole.

I sincerely hope you enjoy this recipe for air fryer chili-lime tortilla chips. We sure have enjoyed it! TIP: If you are not a fan of seasoned tortilla chips, you can simply brush the tortillas with olive oil and a sprinkling of salt, for a more traditional tortilla chip.

Thank you for stopping by. I hope you have a wonderful day, and sincerely trust you will come back soon to explore more delicious recipes.

Looking For More AIR FRYER Recipes?

You can find all of my recipes in the Recipe Index, located at the top of the page. I have quite a few delicious air fryer recipes, including:

Want More Recipes? Get My FREE Newsletter!

I publish a newsletter 2 times per month (1st and 15th) with lots of recipes, tips, etc..
Would you like to join our growing list of subscribers?

There is a Newsletter subscription box on the top right (or bottom) of each blog post, depending on the device you use.
You can submit your e-mail address there, to be added to my mailing list.

Find Me On Social Media:

Facebook page: The Grateful Girl Cooks!
Pinterest:
The Grateful Girl Cooks!
Instagram:
jbatthegratefulgirlcooks

Author's signature

Recipe adapted from: Leanne at: crumbtopbaking.com/air-fryer-tortilla-chips/

↓↓ PRINTABLE RECIPE BELOW ↓↓

0 from 0 votes
Chili-Lime Tortilla Chips
Prep Time
5 mins
Cook Time
6 mins
Total Time
11 mins
 

Make a quick batch of crunchy Chili-Lime Tortilla Chips in an air fryer! Corn tortillas, lime juice, oil, and a few spices are all you need!

Category: Appetizer/Snack
Cuisine: American
Keyword: chili-lime tortilla chips
Servings: 4 (6 chips per serving)
Calories Per Serving: 118 kcal
Author: JB @ The Grateful Girl Cooks!
Ingredients
  • 6 5 inch corn tortillas
  • 1 Tablespoon extra virgin olive oil
  • ½ Tablespoon fresh lime juice
  • 1 teaspoon chili powder
  • ¼ teaspoon ground cumin
  • ¼ teaspoon salt
Instructions
  1. Place olive oil, lime juice, chili powder, salt and ground cumin in a small bowl; whisk or stir until the ingredients are fully blended together.

  2. Use a pastry brush to lightly brush sauce onto both sides of each tortilla. Once that has been done, stack all six tortillas on top of each other. Using a sharp knife, carefully slice the stack of tortillas in half, then cut each half stack in half. The stack of seasoned tortillas will be cut into four quarters of equal size.

  3. Preheat air fryer to 350°F. Place the tortilla quarters in the basket of the air fryer in a single layer. NOTE: Cook chips in batches, because they need room for hot air to circulate around them, to ensure they become crunchy. Cook at 350°F. for 6-8 minutes. Air fryers tend to vary in temperature and heat they produce, so keep an eye on chips as they cook, to make sure they don't burn. Check them at the 5 minute mark, and then go from there, a little at a time, until lightly browned.

  4. Once done, remove tortilla chips from air fryer; transfer to a wire rack to cool. The tortilla chips become more crunchy as they cool. Start another batch right away while the air fryer is still hot; continue until all chips are cooked. Store any leftovers in airtight bag or container for up to 5-6 days. Enjoy!

Nutrition Facts
Chili-Lime Tortilla Chips
Amount Per Serving (6 chips)
Calories 118 Calories from Fat 45
% Daily Value*
Fat 5g8%
Saturated Fat 1g6%
Sodium 171mg7%
Potassium 82mg2%
Carbohydrates 18g6%
Fiber 3g13%
Sugar 1g1%
Protein 2g4%
Vitamin A 148IU3%
Vitamin C 1mg1%
Calcium 32mg3%
Iron 1mg6%
* Percent Daily Values are based on a 2000 calorie diet.

Here’s one more to pin on your Pinterest boards!Make a quick batch of crunchy Chili-Lime Tortilla Chips in an air fryer! Corn tortillas, lime juice, oil, and a few spices are all you need!

Crunchy Caramel Corn

Learn how to make yummy, crunchy caramel corn at home! This delicious, easy treat is made with only a few ingredients and will be a big hit!Learn how to make yummy, crunchy caramel corn at home! This delicious, easy treat is made with only a few ingredients and will be a big hit!

Do you enjoy caramel corn? I sure do! I’ve been making it for over 30 years with the same recipe I drag out of my old and tattered recipe box! It is super easy to make, is NOT sticky, and stays crunchy when stored in an airtight container! I am finally getting around to photographing and sharing the process for making it on the ol’ blog today.

The recipe as written makes approximately 24 cups of crunchy caramel corn when all is said and done, and did I mention just how absolutely DELICIOUS it is? Uh huh… addictively YUMMY. I have NO CLUE where the original recipe came from all those years ago. It was handwritten on an old 3×5 card with no source noted. Here’s how to make crunchy caramel corn:

Scroll Down For A Printable Recipe Card At The Bottom Of The Page

The Ingredients Needed

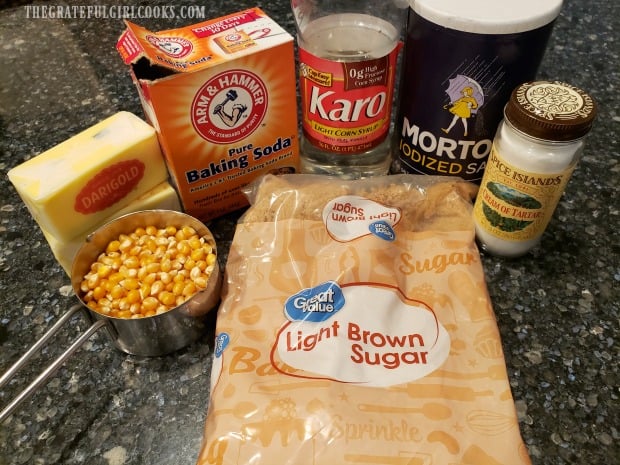
The ingredients you will need include popping corn, brown sugar, butter, light corn syrup, salt, baking soda, and cream of tartar. Cream of tartar can be found in grocery stores in the Spices and Seasonings section.

A photo of the ingredients needed to make this recipe for caramel corn.

Pop the Popcorn!

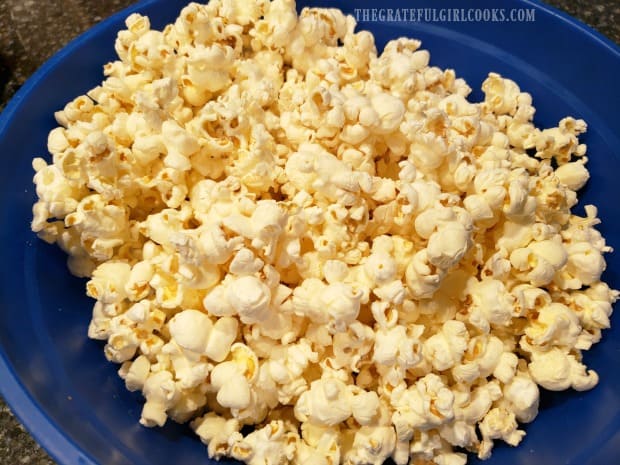
The first thing you will need to do is pop the popcorn! You will need 3/4 cup of UNPOPPED plain popcorn kernels to end up with 6 quarts  of popped corn (approx. 24 cups) , which is necessary for this recipe.

Make the popcorn (in batches) using an air popper, or your own favorite popping method (stovetop/microwave, etc.). Once it is all popped, make sure to remove and discard any uncooked kernels from the batch. Set the popcorn aside in a very LARGE bowl while you make the caramel sauce. NOTE: It’s important to have the popcorn ready, so as soon as the hot caramel sauce is done, it can be added immediately!

Plain popcorn is popped and ready to turn into caramel corn.

Make The Caramel Sauce

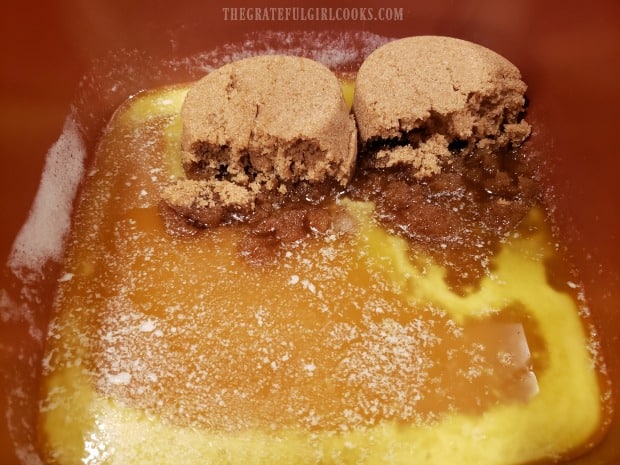
Now it’s time to make the yummy caramel sauce for the popcorn. It’s EASY, and no candy thermometer is needed! Melt butter in a large saucepan. Once it’s melted, add brown sugar, light corn syrup, and salt. Stir well, to fully combine ingredients.

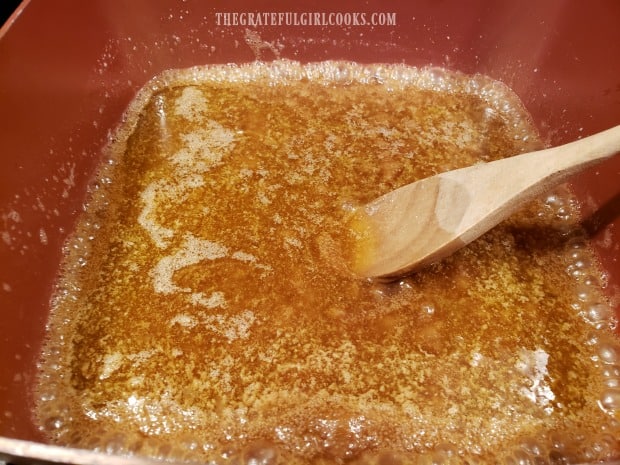
Bring the sauce to a boil on medium heat. Once it begins to boil, continue boiling for exactly 5 minutes, stirring the caramel sauce often.

The ingredients for caramel sauce are added to saucepan.Caramel sauce ingredients are cooked in large saucepan.

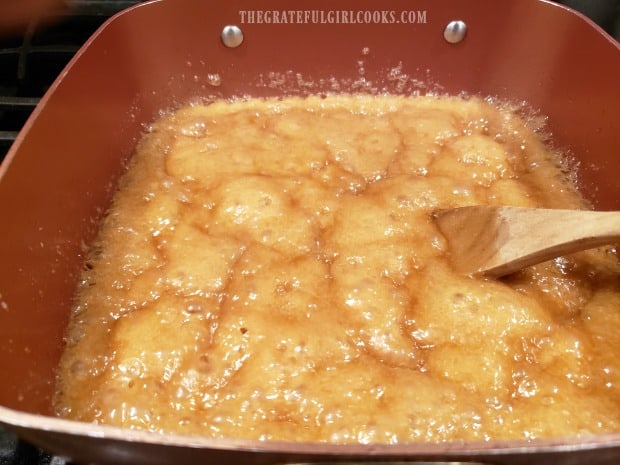
The sauce for the crunchy caramel corn will get pretty “foamy” as it continues to boil, and will rise a bit in the pan (which is why you start with a large saucepan!). Just keep on stirring! As it gets close to the 5 minute mark, it will darken in color, as well.

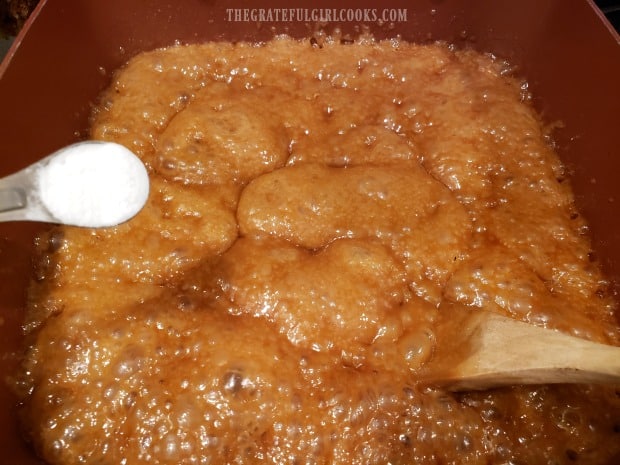
Once you’ve boiled it for 5 minutes, remove the pan from the heat. Immediately stir in the baking soda, and a pinch of the cream of tartar. The cream of tartar and the baking soda add air to the sauce, which is what helps create the crunchy texture on the popcorn!

Crunchy caramel corn sauce is boiling in pan.Baking soda is added to the finished caramel sauce.

Pour And MIX, MIX, MIX!

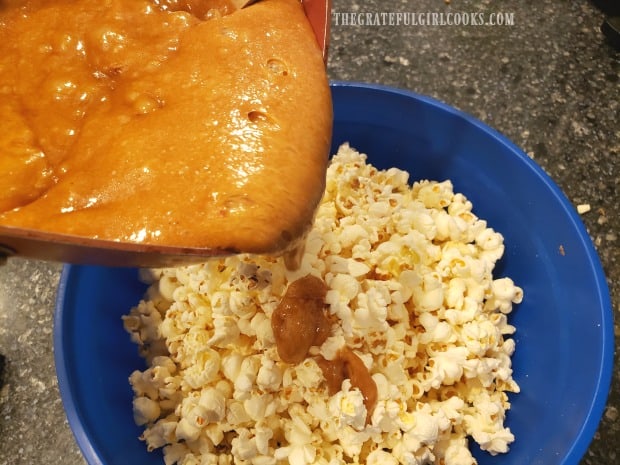
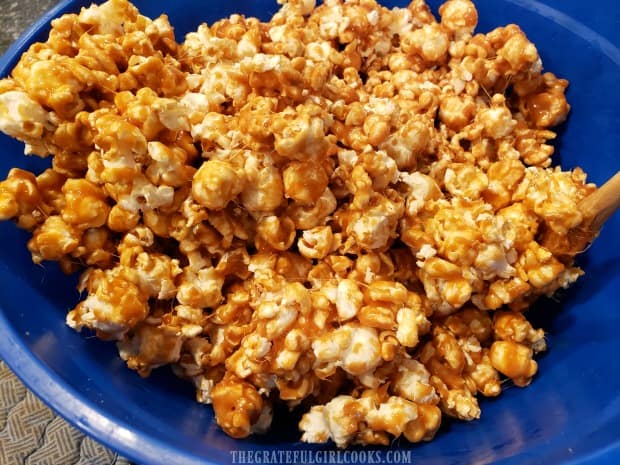
Immediately pour the hot caramel mixture over the popcorn. Use a large spoon and stir and stir, until all the popcorn is well coated in caramel sauce. Just keep stirring! A word of warning: The sauce is VERY HOT, so be careful. This would NOT be a job for the kids!

Pouring the hot caramel sauce over the popcorn in large bowl.Popcorn is stirred until coated with the sauce.

Time To Bake The Crunchy Caramel Corn

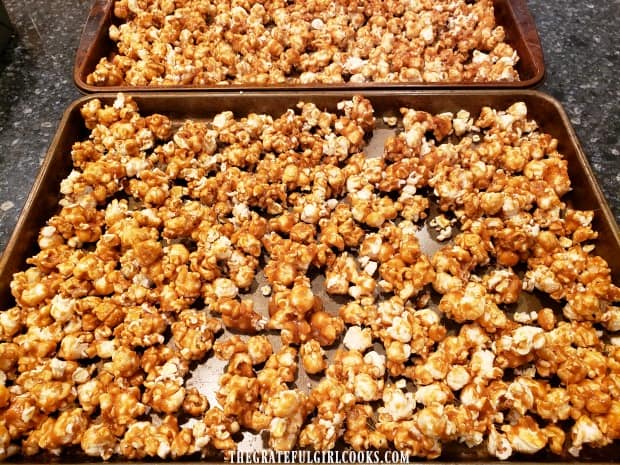
Once the popcorn is well-coated with the caramel sauce, spread it out on two large rimmed cookie sheets. Try to keep the popcorn in a single layer, and separate pieces with your fingers, if necessary, to break up any large “globs”.

Bake the caramel corn in a preheated 200°F oven for 90 minutes (1½ hours). Stir the caramel corn every 20 minutes during the baking time.  Stirring it that much is important, because it keeps the pieces moved around and broken up (for even heat distribution). This will also help the caramel to crisp up nice and crunchy, just the way it should be. Here’s what I do: Put on a great movie, set a timer, then just get up to give the caramel corn a stir every 20 minutes. It’s a WIN-WIN!

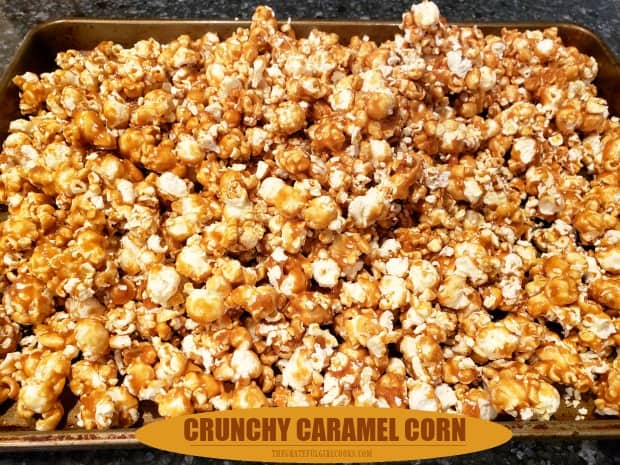
Once done, remove the pans from the oven, and let the crunchy caramel corn cool to room temperature before serving. Break up any large pieces, once cool. Store the crunchy caramel corn in an airtight container to keep it crunchy and fresh for weeks!

Crunchy caramel corn is baked until very crispy, turning at times during baking.

Crunchy Caramel Corn Is A Yummy Homemade Christmas Gift

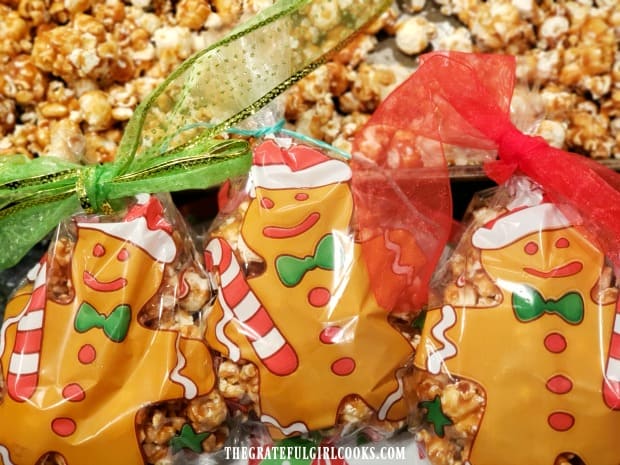
Crunchy caramel corn also makes a fantastic food gift to give to those you love during the holidays! I like to buy inexpensive little Christmas goodie bags at the store, and fill them up with this crispy sweet snack!

Good luck staying out of the entire bowl of crunchy caramel corn… it is so incredibly good! It will be hard to stop eating, once you bite into it and get a taste!

Christmas goodie bags, filled with crunchy caramel corn are a fun homemade treat!

Thanks for stopping by! I truly hope you have the opportunity to make some yummy, crunchy caramel corn for yourself or those you love. It’s such a great recipe, and is so easy to make. Come back soon for another visit, and have a great day.

Looking For More CHRISTMAS GOODIE Recipes?

You can find all of my Christmas goodie recipes in the Recipe Index, located at the top of the page. I have lots of them you’ll enjoy, including:

Interested In More Recipes?

Thank you for visiting this website. I appreciate you using some of your valuable time to do soIf you’re interested, I publish a newsletter 2 times per month (1st and 15th) with all the latest recipes, and other fun info. I would be honored to have you join our growing list of subscribers, so you never miss a great recipe!
There is a Newsletter subscription box on the top right side (or bottom) of each blog post, depending on the device you use, where you can easily submit your e-mail address (only) to be included in my mailing list.

You Can Also Find Me On Social Media:

Facebook page: The Grateful Girl Cooks!
Pinterest:
The Grateful Girl Cooks!
Instagram:
jbatthegratefulgirlcooks

Author's signature

0 from 0 votes
Crunchy Caramel Corn
Prep Time
10 mins
Cook Time
1 hr 30 mins
Total Time
1 hr 40 mins
 

Learn how to make yummy, crunchy caramel corn at home! This delicious, easy treat is made with only a few ingredients and will be a big hit!

Category: Appetizer/Snack
Cuisine: American
Keyword: crunchy caramel corn
Servings: 24 approx.
Calories Per Serving: 177 kcal
Author: JB @ The Grateful Girl Cooks!
Ingredients
  • ¾ cup popcorn kernels (UNPOPPED) (to make 6 quarts popped)
  • 2 cups light brown sugar
  • 1 cup butter (2 sticks or 16 Tablespoons)
  • ½ cup light corn syrup
  • ¼ teaspoon salt
  • ½ teaspoon baking soda
  • 1 pinch cream of tartar
Instructions
  1. Preheat oven to 200°F.

  2. Make popcorn using an air popper, or a favorite popping method (stovetop/microwave, etc.). Once popped, remove/discard any uncooked kernels. Put popcorn in a LARGE bowl; set aside. NOTE: It's important to have popcorn ready before cooking caramel sauce!

  3. Melt butter in a large saucepan. Add brown sugar, corn syrup and salt. Stir to combine. Bring sauce to a boil on medium heat. Once boiling, continue boiling for 5 minutes, stirring often. Sauce will get "foamy" as it cooks, and will rise in the pan (which is why you use a large saucepan). Keep on stirring! Near the 5 minute mark, it will darken in color, as well. Once it's boiled 5 minutes, remove pan from heat. Stir in baking soda and a pinch of cream of tartar (this helps create crunchy texture-don't skip this).

  4. Immediately pour hot caramel over popcorn. Use a large spoon and stir, until all popcorn is well coated in caramel sauce. Just keep stirring! TIP: Sauce is VERY HOT, so be careful.

  5. Spread coated popcorn onto 2 large cookie sheets. Try to keep popcorn in a single layer, separating pieces with your fingers to break up large "globs". Bake at 200°F for 90 minutes (1½ hours), stirring every 20 minutes, to keep pieces moved around and broken up (for even heat distribution). Once done, remove from oven; let caramel corn cool completely. Break up any large pieces before serving. Store in airtight container to keep it crunchy for weeks! Enjoy.

Nutrition Facts
Crunchy Caramel Corn
Amount Per Serving (1 cup)
Calories 177 Calories from Fat 72
% Daily Value*
Fat 8g12%
Saturated Fat 5g31%
Cholesterol 20mg7%
Sodium 124mg5%
Potassium 48mg1%
Carbohydrates 27g9%
Fiber 1g4%
Sugar 23g26%
Protein 1g2%
Vitamin A 236IU5%
Calcium 18mg2%
Iron 1mg6%
* Percent Daily Values are based on a 2000 calorie diet.

Here’s one more to pin on your Pinterest boards!Learn how to make yummy, crunchy caramel corn at home! This delicious, easy treat is made with only a few ingredients and will be a big hit!

Classic Pimiento Cheese

Need a delicious, EASY, quick appetizer or sandwich? Make a small batch of classic pimiento cheese to serve on crackers or a favorite bread.

True story. I used to cringe when my mom made or talked about pimiento cheese. She is from the South, and this is something she grew up with, and has great memories of eating. Growing up, she would occasionally make it, and I thought it was disgusting!

Classic pimiento cheese is basically a cheese spread, commonly used on crackers or sandwiches, especially in the South. I’ve now made it many times, and always enjoy it.

Scroll Down For A Printable Recipe Card At The Bottom Of The Page

Who Knew I Would End Up Loving Classic Pimiento Cheese? A True Story.

In January of this year, I helped my mom move from Southern California to Georgia. Once of the things she wanted on our first quick visit to the store to get a few necessities was PIMIENTO CHEESE. Pre-made pimiento cheese in a carton to have around. Ugh.

HOWEVER…(this is where it gets interesting)…one late evening after helping unpack her moving boxes (and not eating dinner) I was quite hungry. Mom didn’t have much food in her pantry because she eats most meals in the dining room at her retirement community. That’s when I saw it. That carton of pre-made pimiento cheese in her refrigerator, taunting me.

Well, against my better judgement, I spread a couple spoonfuls on a piece of bread (desperate times call for desperate measures). Guess what? I LIKED IT. What?  Ever since then, I’ve thought about that pimiento cheese, and now I’ve found a wonderfully delicious recipe to make it from scratch on my own (with a couple tweaks). I LOVE IT! My husband wasn’t sure he would like it when he first saw it, and HE LIKES IT TOO. Here’s how to make it (adapted from a Paula Deen recipe):

What Ingredients Will I Need?

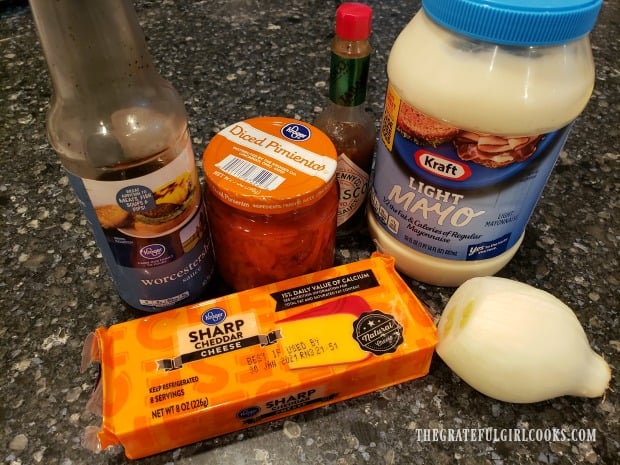
To make this recipe for pimiento cheese, you will need mayonnaise, diced pimientos, yellow onion, Tabasco sauce (or other hot sauce), Worcestershire sauce, and SHARP cheddar cheese. I use light mayo, but feel free to use regular fat mayo, if that’s what you have. No problem.

NOTE: For this recipe I prefer to use sharp cheese that I grate myself with my box grater. I feel like it blends better than the bagged versions (which have added stabilizers), but it’s up to you which you decide to use. Sharp cheese is a must for the best flavor!

Ingredients used to make pimiento cheese, ready to go.

How To Make Classic Pimiento Cheese

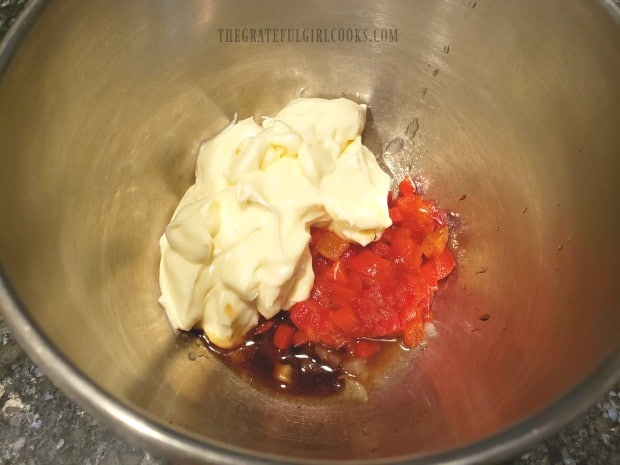
This recipe is so super easy to make you won’t believe it! Place all of the ingredients EXCEPT THE CHEESE in a medium sized mixing bowl. This will be mayo, finely chopped and drained pimientos, finely grated onion, Worcestershire sauce, and hot sauce. Stir them together well, until they’re fully combined.

Mayonnaise, pimientos, Worcestershire, onion, and Tabasco sauce in mixing bowl.

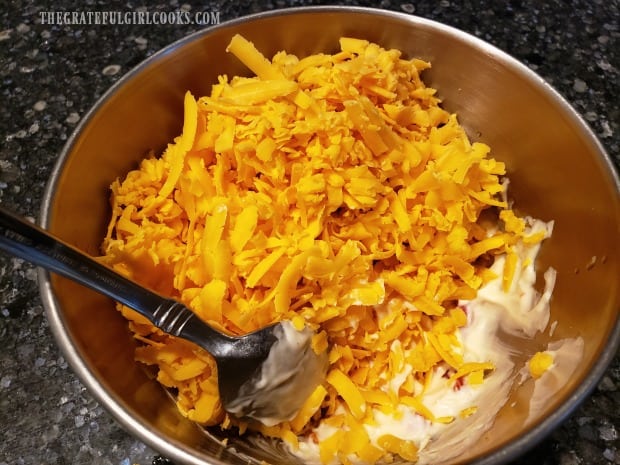
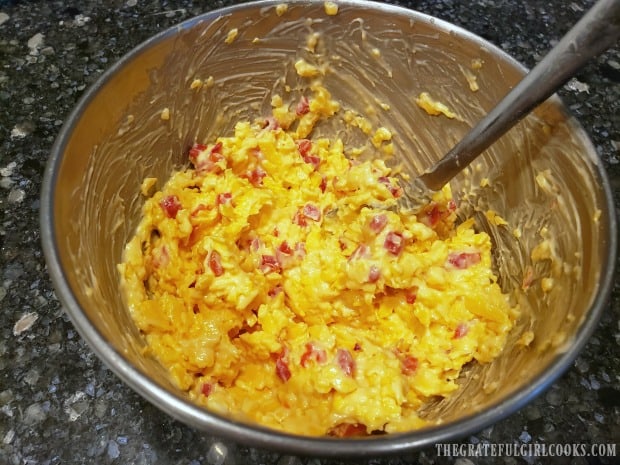
Add the grated sharp cheddar cheese to the bowl, and stir really well. Keep on stirring until the pimiento cheese is completely mixed  together. This only takes a minute or two (with no special equipment needed), and BOOM- your classic pimiento cheese is DONE!

Grated sharp cheddar cheese is added to the ingredients in the mixing bowl.The pimiento cheese ingredients are stirred together until it forms a cheese spread.

Serving Classic Pimiento Cheese

You can eat the pimiento cheese right away if you want, OR you can cover it and let it chill in the refrigerator for an hour or so (whatever you want). This classic pimiento cheese will stay “good” for up to a week, if covered and stored in the refrigerator.

If you want to use it for an appetizer, simply transfer the cheese to a small serving bowl or crock. Serve with a variety of crisp crackers, and let your family or guests gobble it up. The recipe as written below will yield about 1¼ cups ( which comes out to about 20 servings, at 1 Tablespoon each). It is VERY easy to double this recipe, if serving more guests.

Classic pimiento cheese can be served with crackers for an appetizer.

My Mom’s absolute favorite way to enjoy classic pimiento cheese is to simply spread it on a fresh piece of white bread. She is in her “happy place” when she can enjoy a pimiento cheese sandwich for a quick lunch (or dinner, at times!).

A quick and delicious sandwich can be made with classic pimiento cheese.

If you’ve never made pimiento cheese before, I would urge you to give it a try. It makes a wonderful appetizer, and only takes 6 ingredients and 5 minutes to prepare. That’s a winner in my book! Hope you enjoy it, and thanks for stopping by. Hope you come back soon.

Looking For More APPETIZER Recipes?

You can find ALL of my recipes in the Recipe Index, located in the Menu at the top of the page. I have some wonderful appetizer recipes you’ll enjoy, including:

Interested In More Recipes?

Thank you for visiting this website. I appreciate you using some of your valuable time to do soIf you’re interested, I publish a newsletter 2 times per month (1st and 15th) with all the latest recipes, and other fun info. I would be honored to have you join our growing list of subscribers, so you never miss a great recipe!
There is a Newsletter subscription box on the top right side (or bottom) of each blog post, depending on the device you use, where you can easily submit your e-mail address (only) to be included in my mailing list.

You Can Also Find Me On Social Media:

Facebook page: The Grateful Girl Cooks!
Pinterest:
The Grateful Girl Cooks!
Instagram:
jbatthegratefulgirlcooks

Author's signature

Recipe adapted from: pauladeenmagazine.com/classic-pimiento-cheese-recipe/

0 from 0 votes
Classic Pimiento Cheese
Prep Time
5 mins
Cook Time
0 mins
Total Time
5 mins
 

Need a delicious, EASY, quick appetizer or sandwich? Make a small batch of classic pimiento cheese to serve on crackers or a favorite bread.

Category: Appetizer
Cuisine: All Cuisines
Keyword: classic pimiento cheese
Servings: 20 Tablespoons (1.25 cups)
Calories Per Serving: 60 kcal
Author: JB @ The Grateful Girl Cooks!
Ingredients
  • ½ cup light mayonnaise
  • 2 ounces jarred, diced pimientos , drained
  • 1 teaspoon finely grated yellow onion
  • ½ teaspoon Worcestershire sauce
  • ¼ teaspoon Tabasco sauce , or other hot sauce
  • 8 ounces sharp cheddar cheese , grated (fresh is best)
Instructions
  1. Place all ingredients EXCEPT CHEESE in a medium sized mixing bowl. Stir together, until fully combined.

  2. Add grated sharp cheddar cheese, and stir really well. Keep on stirring until pimiento cheese is completely mixed  together. This only takes a minute or two.

  3. To serve, transfer pimiento cheese to a small bowl or crock. Serve with crackers, or use as a sandwich spread. Store leftover pimiento cheese in covered container for up to a week. Enjoy!

Nutrition Facts
Classic Pimiento Cheese
Amount Per Serving (1 Tablespoon)
Calories 60 Calories from Fat 45
% Daily Value*
Fat 5g8%
Saturated Fat 3g19%
Cholesterol 13mg4%
Sodium 115mg5%
Potassium 16mg0%
Carbohydrates 1g0%
Fiber 1g4%
Sugar 1g1%
Protein 3g6%
Vitamin A 193IU4%
Vitamin C 2mg2%
Calcium 82mg8%
Iron 1mg6%
* Percent Daily Values are based on a 2000 calorie diet.

Here’s one more to pin on your Pinterest boards!Need a delicious, EASY, quick appetizer or sandwich? Make a small batch of classic pimiento cheese to serve on crackers or a favorite bread.


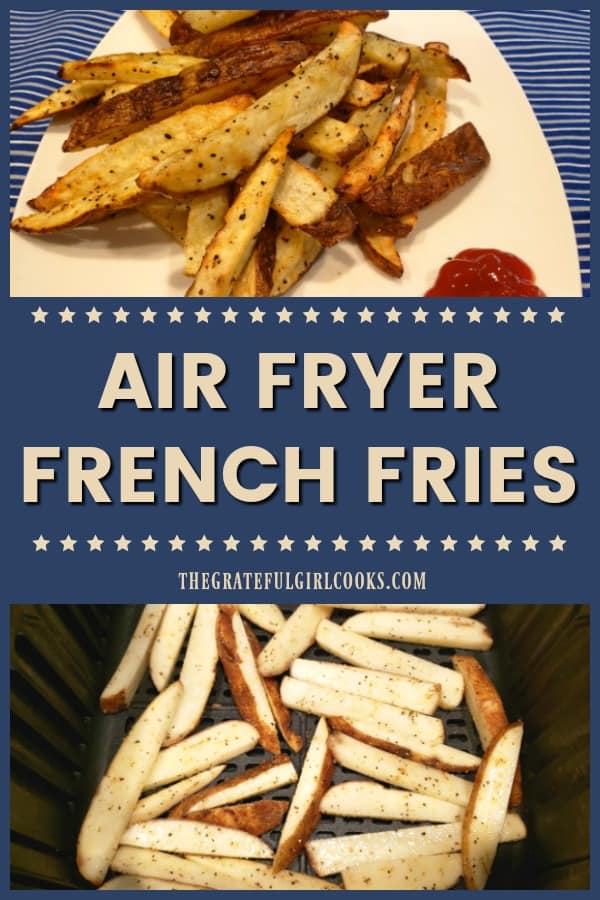
Air Fryer French Fries

Grab 2 russet potatoes and your air fryer, and get ready to make some delicious, crispy air fryer french fries to munch on with your favorite meal!

I don’t know about you, but we sure love french fries! I love ’em dipped in ketchup, my husband dips them in BBQ sauce, and one of our sons enjoys them dunked in ranch dressing!

Normally I deep fry homemade french fries in hot oil, but we also enjoy making air fryer french fries. When we air fry them, they are cooked in super hot air, and require a lot less oil to crisp them up! Less calories, but equally delicious. They’re also very easy to make. Here’s how to make them:

NOTE: The key to this recipe is this: Remember to allow an extra 30 minutes before cooking to soak the potatoes in water to remove excess starch. The fries themselves don’t take much time to cook, but pre-soaking them will yield the best results!

Scroll Down For A Printable Recipe Card At The Bottom Of The Page

Prepare The Potatoes

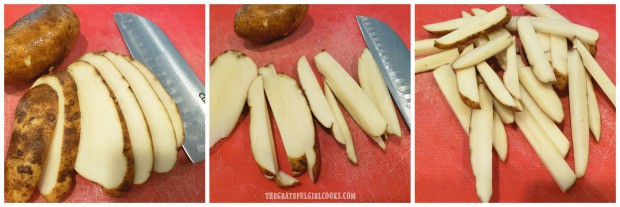
We like the taste of air fryer french fries with the peel left ON the potatoes, but that is your choice. To prepare the potatoes, take 2 medium russet potatoes, and scrub them really well, to remove any dirt. Slice the potatoes lengthwise into 1/2″ slices, then cut each slice into fry sized “sticks” (as shown below).

Raw potatoes are cleaned, then sliced into fry shapes before cooking.

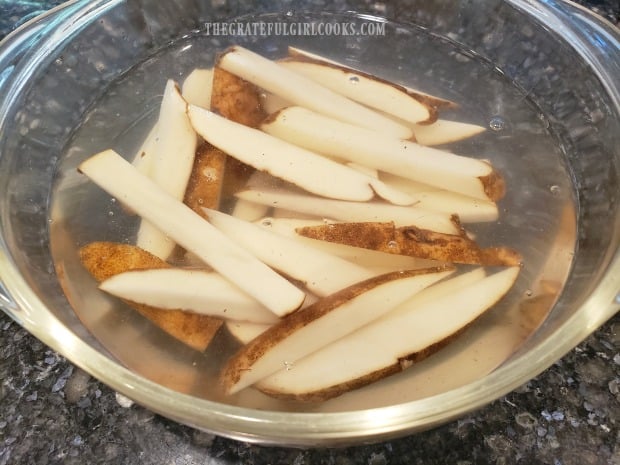
Potatoes have a lot of starch in them, so it is best to remove some of that starch before cooking. This will help the potatoes get crispy when cooked. Place the raw potatoes into a large bowl. Cover them with water, and let them soak for 30 minutes.

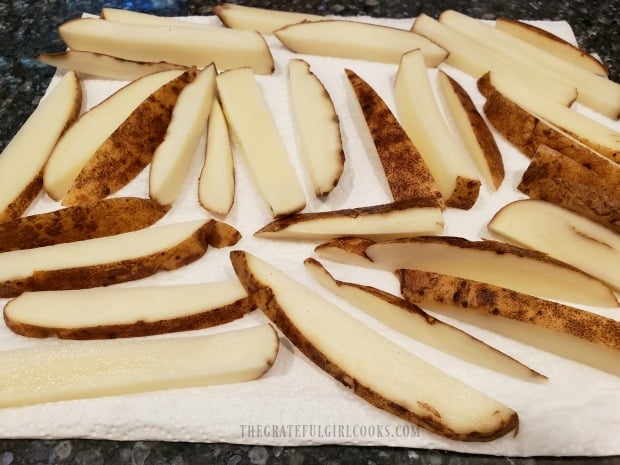
After 30 minutes, drain the water off of the potatoes, and give them a rinse. Lots of starch has now been removed from the potatoes. Place the potatoes onto paper towels and pat them dry. Now we’re ready to go!

French fries are soaked in water for 30 minutes before draining and cooking.The fries are patted dry before oil and seasoning are added.

Season The Air Fryer French Fries

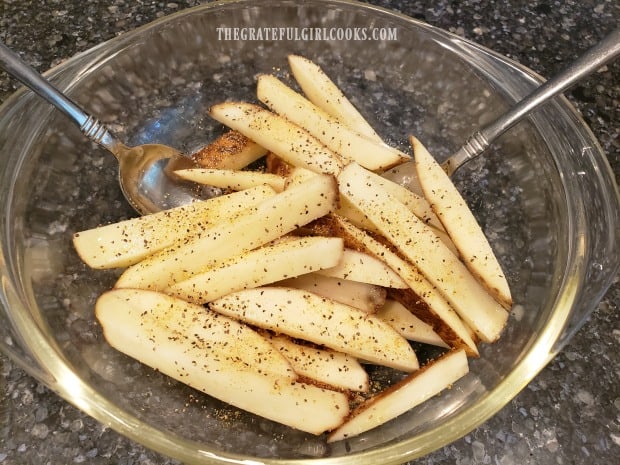
Before you season the potatoes, turn on the air fryer and preheat it to 380°F. While it preheats, place the dry potatoes into a large bowl. Drizzle them with vegetable oil (or your choice of oil) . Gently toss to coat them with oil, and then season with salt and pepper. Add any other seasonings you want at this point (garlic powder, seasoning salt, etc.). Stir to combine.

Fries are seasoned with oil, salt and pepper before cooking.

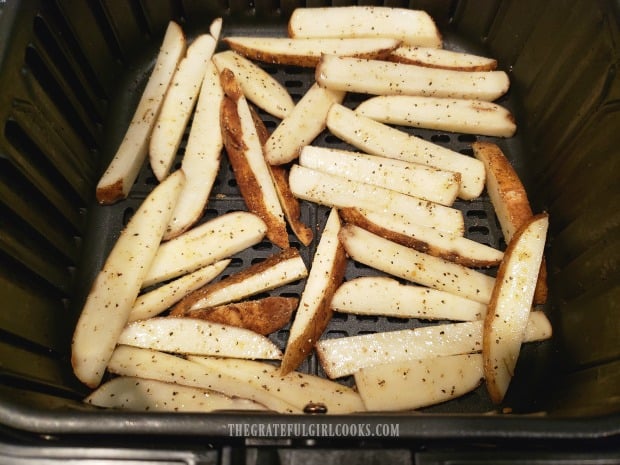
Once the air fryer has preheated, place the seasoned potato fries in the basket of your air fryer. Try to place them in a single layer, for the best results. This will allow the super hot air to circulate around the fries, which is how they cook well.

The air fryer basket holds a single layer of seasoned fries.

Cook The Air Fryer French Fries

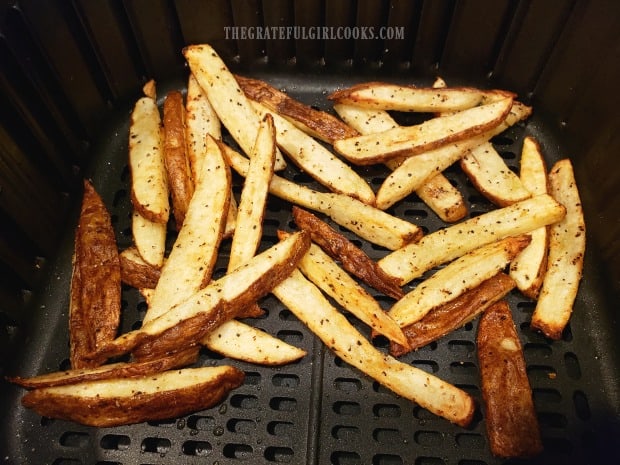
Cook the air fryer french fries at 380°F for 5 minutes. Pause the machine, and give the fries a good shake. Cook another 5 minutes, and then shake them once again. If “shaking” isn’t your thing, move them around a bit using tongs. Try to put them back into a single layer after each “shake”. Now they’ve cooked for 10 minutes.

Air fryers tend to have temperature variances, so keep an eye on them from this point on. Cook the fries for 3-4 more minutes. Check them to see if they have reached a desired crispness. If not, pop ’em back in for a couple more minutes. By now they should be done. The final cooking time will also depend on the thickness of your fries.

Air fryer french fries in basket of machine after cooking.

Serve The Air Fryer French Fries

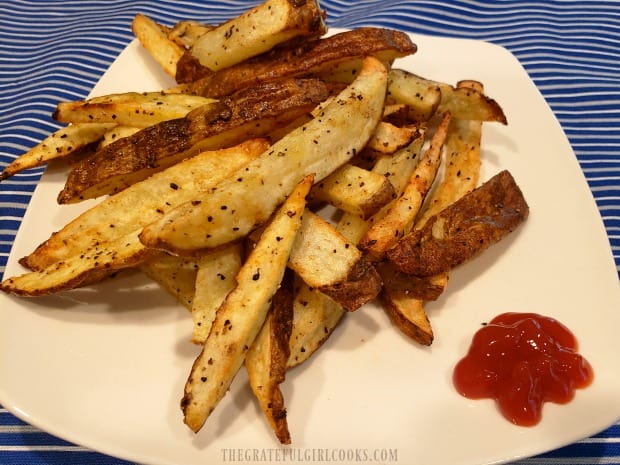
Once the fries have fully cooked, they should be golden brown, slightly crispy on the outside, and soft on the inside. Serve with a dipping sauce of your choice, and dig in! They really are quite simple to make, and taste delicious.

If making a large quantity, repeat the process with the rest of the potatoes, while the air fryer is still hot! Hope you enjoy these fries… we sure do.

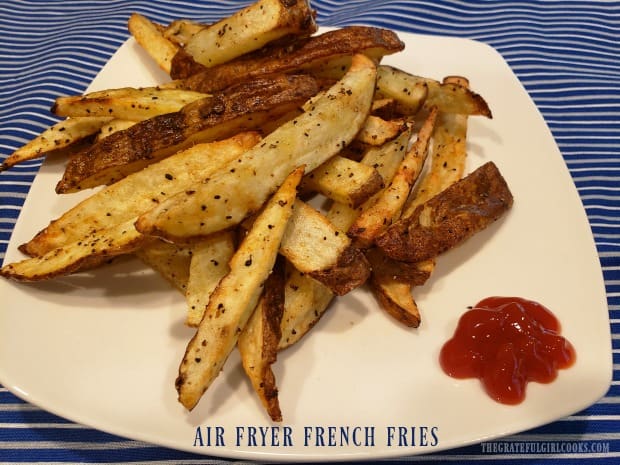
A plate full of air fryer french fries, and dipping ketchup on the side.

Thanks for stopping by. I appreciate you taking the time to do so, and hope you will consider making air fryer french fries for those you love. Take care, and have a great day.

Looking For More AIR FRYER Recipes?

You can find all of my recipes in the Recipe Index, located at the top of the page. A few favorite Air Fryer recipes include:

Interested In More Recipes?

Thank you for visiting this website. I appreciate you using some of your valuable time to do soIf you’re interested, I publish a newsletter 2 times per month (1st and 15th) with all the latest recipes, and other fun info. I would be honored to have you join our growing list of subscribers, so you never miss a great recipe!
There is a Newsletter subscription box on the top right side (or bottom) of each blog post, depending on the device you use, where you can easily submit your e-mail address (only) to be included in my mailing list.

You Can Also Find Me On Social Media:
Facebook page: The Grateful Girl Cooks!
Pinterest: The Grateful Girl Cooks!
Instagram: jbatthegratefulgirlcooks

Author's signature

Recipe adapted from: The recipe booklet that came with my Cosori air fryer.

0 from 0 votes
Air Fryer French Fries
Prep Time
5 mins
Cook Time
14 mins
Soaking Time (inactive)
30 mins
Total Time
49 mins
 

Grab 2 russet potatoes and your air fryer, and get ready to make some delicious, crispy air fryer french fries to munch on with your favorite meal!

Category: Appetizer/Snack, Side Dish, Vegetable Dish
Cuisine: American
Keyword: air fryer french fries
Servings: 3
Calories Per Serving: 193 kcal
Author: JB @ The Grateful Girl Cooks!
Ingredients
  • 2 medium russet potatoes
  • 2 Tablespoons vegetable oil , or oil of choice
  • ½ teaspoon salt , or more to suit your taste
  • ¼ teaspoon black pepper , or more to suit your taste
Instructions
  1. Scrub potato skins well, to remove any dirt. Slice potatoes lengthwise into 1/2" slices, then cut each slice into fry sized "sticks". Place raw potatoes into a large bowl, cover with water, and let them soak for 30 minutes (this removes a lot of starch). After 30 minutes, drain water , then give potatoes a rinse. Pat potatoes dry with paper towels.

  2. Preheat air fryer to 380°F. Place dry potatoes into a large bowl. Drizzle with 2 Tablespoons oil. Gently toss to coat, and then season with salt/pepper, and stir to combine. **Add any additional seasonings you want (garlic powder, seasoning salt, etc.). Once the air fryer has preheated, place seasoned fries in basket of air fryer, in a single layer, for best results.

  3. Cook at 380°F for 5 minutes. Pause machine, and give fries a good shake. Cook for an additional 5 minutes, and then shake once again or move them around a bit using tongs, keeping them in a single layer after each "shake". Because air fryers tend to have temperature variances, set the timer and cook for 3-4 more minutes. Check to see if they've reached your desired crispness. If not, pop 'em back in for a couple more minutes. By that time they should be done (final cooking time will also depend on the thickness of your fries!). Taste, and add more salt/pepper, if desired. Remove, and serve with your favorite dipping sauce. Enjoy!
Nutrition Facts
Air Fryer French Fries
Amount Per Serving (1 (1/3 of total))
Calories 193 Calories from Fat 81
% Daily Value*
Fat 9g14%
Saturated Fat 8g50%
Sodium 395mg17%
Potassium 592mg17%
Carbohydrates 26g9%
Fiber 2g8%
Sugar 1g1%
Protein 3g6%
Vitamin C 8mg10%
Calcium 18mg2%
Iron 1mg6%
* Percent Daily Values are based on a 2000 calorie diet.

Here’s one more to pin on your Pinterest boards!Grab 2 russet potatoes and your air fryer, and get ready to make some delicious, crispy air fryer french fries to munch on with your favorite meal!

Apricot Pineapple Kielbasa Bites

Apricot Pineapple Kielbasa Bites are delicious, easily made appetizers to serve family or friends. A sweet fruit glaze coats each bite to perfection.

Are you looking for a quick and easy to make appetizer for a get together, or a yummy snack for your family? Let me recommend these tiny bites of goodness – apricot pineapple kielbasa bites! They really are yummy.

Slices of polska kielbasa are pan-seared until browned (a few minutes), then finish cooking in a delicious glaze. The glaze is super easy to make using apricot pineapple jam, Dijon mustard, ground ginger, and fresh lemon juice, and gives great flavor to each bite.

Apricot Pineapple Kielbasa Bites do not require a lot of time, so it’s perfect dish to throw together at the last minute. They can be made in about 15 minutes time. Let me tell you, these little snack bites sure taste good, too! Here’s how to make them:

Scroll Down For A Printable Recipe Card At The Bottom Of The Page

Prepare The Apricot Pineapple Glaze

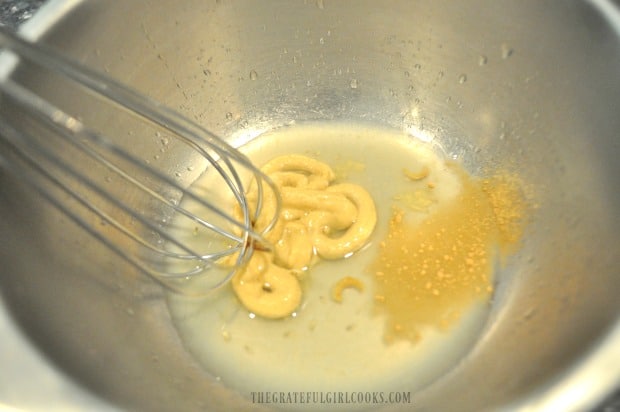
Making the sauce (which will end up glazing the kielbasa) is totally easy. In a small bowl, whisk together fresh lemon juice, Dijon mustard, and ground ginger until combined.
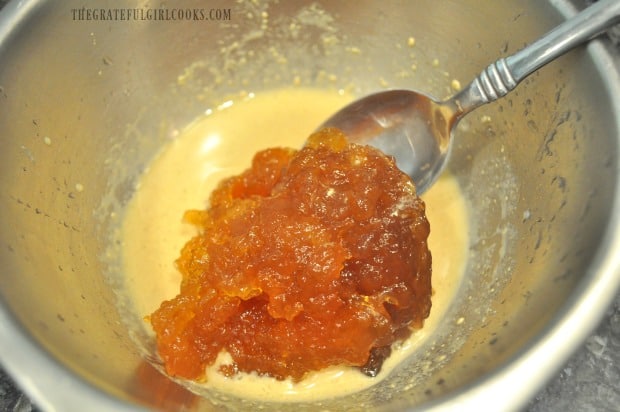
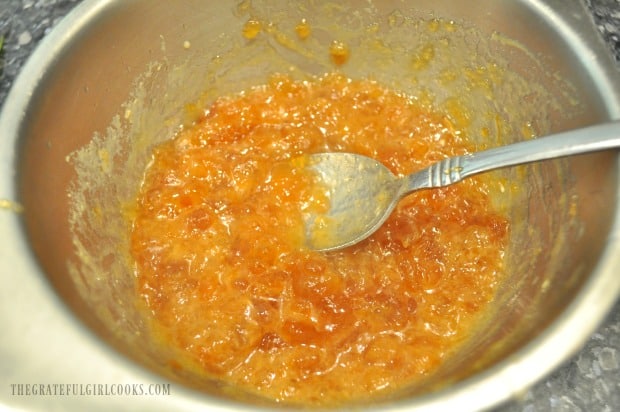
Once combined, stir in the apricot pineapple jam (I used my home-canned apricot pineapple jam- hooray!). NOTE: You can substitute plain apricot jam, if that’s what you have on hand or can buy at the store. The mixture will be thick and will have small pieces of fruit in it. Stir until the sauce is fully blended together.

Lemon juice, ground ginger, and Dijon mustard are whisked together in bowl.Apricot pineapple jam is stirred into the sauce for kielbasa bites.The apricot pineapple sauce will be thick, and have bits of fruit in it from the jam.

Cook The Kielbasa Bites

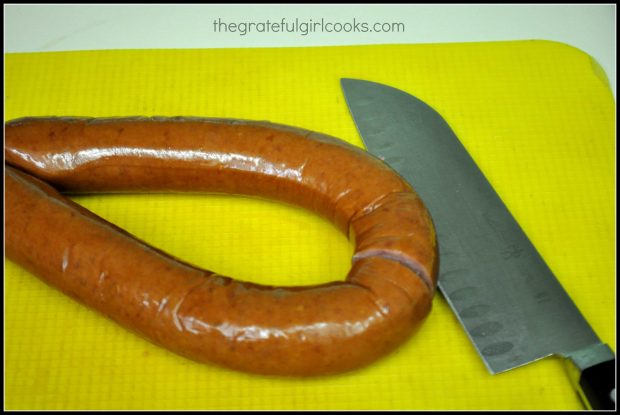
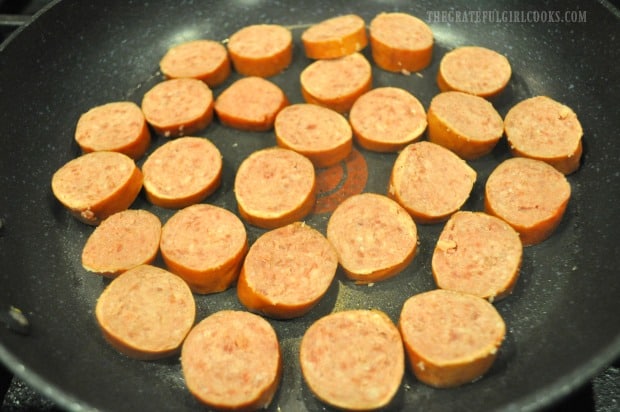
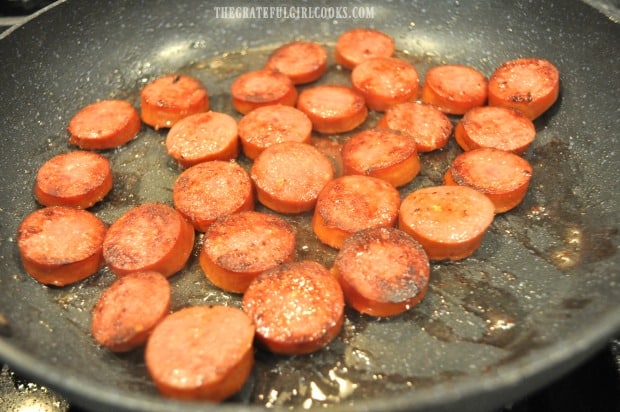
Slice the kielbasa ring into pieces that are about 1″ thick. Place the kielbasa slices into a large skillet in a single layer. Cook on medium high heat until browned on the bottom. Flip over each slice and continue cooking until both sides are browned, and kielbasa is cooked through. This should only take 3-4 minutes.

Once browned and cooked through, remove the kielbasa bites from the skillet to paper towels (to drain off any grease). Keep the kielbasa slices warm.

A ring of kielbasa is cut into 1" slices before cooking.

Kielbasa slices are cooked in a large skillet in a single layer.After the bottom browns on the kielbasa, the slices are turned to other side to finish cooking.

Finish Making The Apricot Pineapple Kielbasa Bites

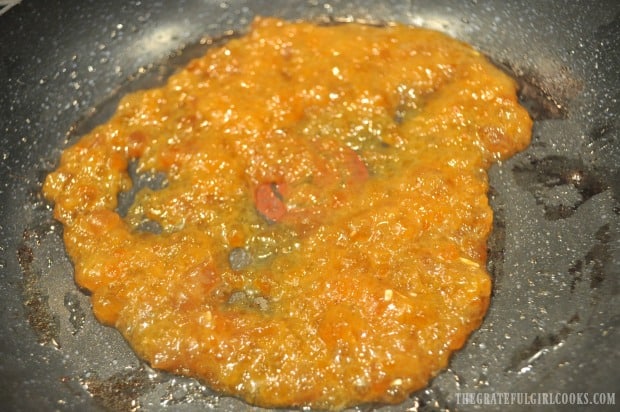
Okay… now it’s time to finish these apricot pineapple kielbasa bites! Pour the glaze mixture into the same skillet you cooked the kielbasa in. Heat the sauce through in the skillet on medium heat, for 2-3 minutes. The sugars from the jam will begin to melt and the sauce will begin to look more like a syrupy glaze as it cooks.

Apricot pineapple glaze is cooked in a large skillet.

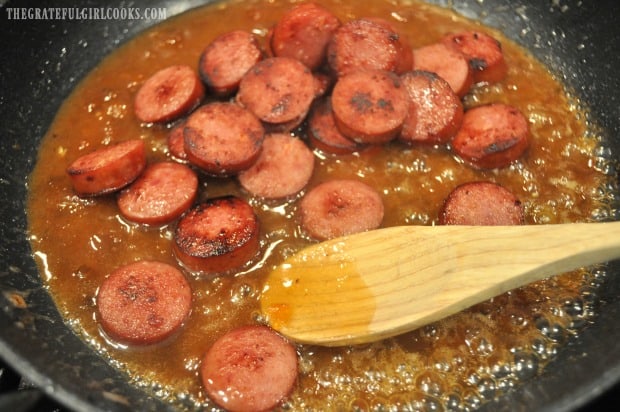
Add the warm and browned kielbasa bites back into the glaze in the skillet, and gently stir to fully coat each piece on all sides with the apricot pineapple glaze. Continue to cook on medium heat for approximately 5-6 minutes, stirring often.

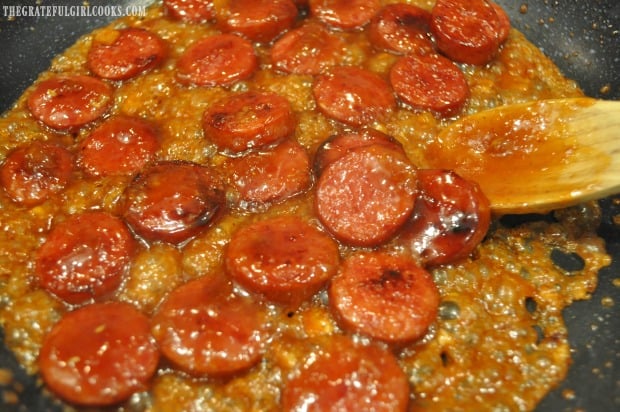
The glaze will slightly reduce in volume during this time, and will become very “sticky”. A glaze is made when the sugar in the jam begins to caramelize as it is heated. That is what you want, so a thick glaze will cover each bite.
The cooked kielbasa slices are added back into the skillet with apricot pineapple glaze.The thick fruit glaze coats each piece of kielbasa in the skillet.

Time To Serve Apricot Pineapple Kielbasa Bites

The apricot pineapple kielbasa bites are best served immediately upon finishing the cooking, so they can be served warm. The easiest way I have found to transfer them from the skillet to the serving platter is this:

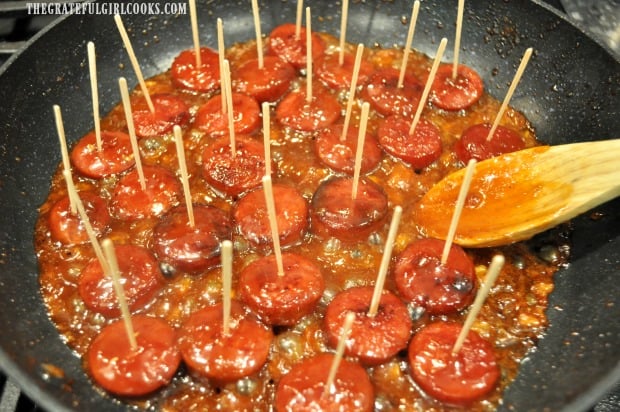
Insert a toothpick into each kielbasa slice in the skillet. Once they all have toothpicks, gently lift each one from the glaze, and place it onto the serving platter. There is so much less mess if you try it this way… trust me! The toothpicks are perfect little “handles” so each person can lift the bites straight off the platter and into their mouth.

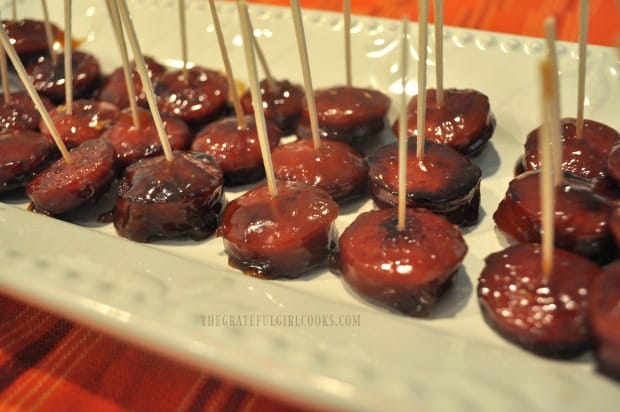
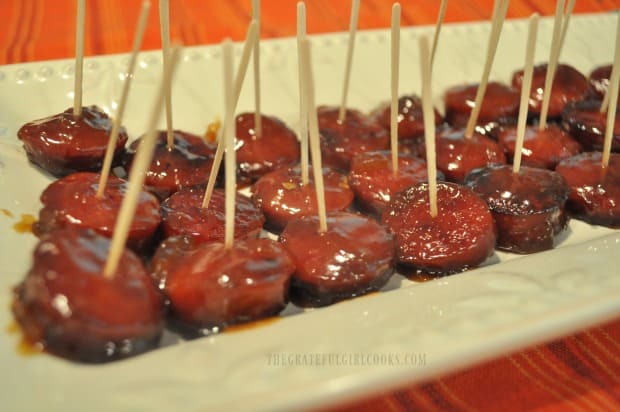
Each of the apricot pineapple kielbasa bites has a toothpick inserted into it.

These Appetizers Are Best Served Immediately

As the kielbasa bites sit, the glaze will begin to firm up. This appetizer is at its best when served immediately after placing on the serving platter. They still taste wonderful later, but you may find the glaze has firmed up to the point where it is harder to lift each serving from the plate.

Your family (or guests) can easily pick up several bites of this delicious appetizer at a time, with little mess! And trust me… these little bites of kielbasa taste fantastic. I think you will really like them.

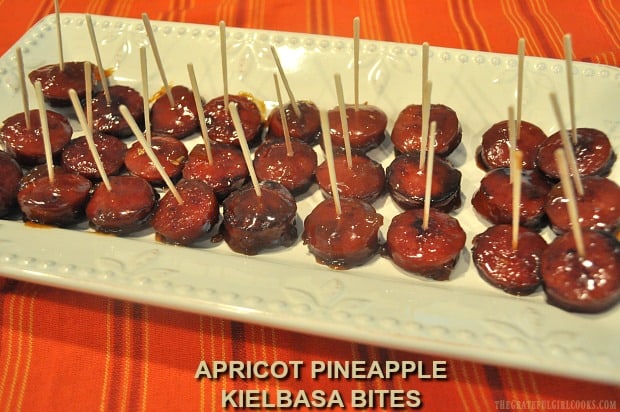
A platter full of apricot pineapple kielbasa bites, ready to eat!You can see the glaze on each of the apricot pineapple kielbasa bites. YUM!

Thank you for spending some of your  time on my blog today. Thanks for reading. I hope you have the opportunity to try these little bites of YUM. They always get gobbled up in a hurry, because they are soooo good.

If you enjoy kielbasa, I hope you will check out my recipe for Sweet n’ Sticky Polska Kielbasa. It is a simple, main course dish that only has TWO ingredients, and tastes fantastic! Take care, and have a wonderful day.

Looking For More APPETIZER Recipes?

You can find ALL of my recipes in the Recipe Index, which is located at the top of the page. I have a variety of delicious appetizers to choose from, including:

Interested In More Recipes?

Thank you for visiting this website. I appreciate you using some of your valuable time to do soIf you’re interested, I publish a newsletter 2 times per month (1st and 15th) with all the latest recipes, and other fun info. I would be honored to have you join our growing list of subscribers, so you never miss a great recipe!
There is a Newsletter subscription box on the top right side (or bottom) of each blog post, depending on the device you use, where you can easily submit your e-mail address (only) to be included in my mailing list.

You Can Also Find Me On Social Media:

Facebook page: The Grateful Girl Cooks!
Pinterest:
The Grateful Girl Cooks!
Instagram:
jbatthegratefulgirlcooks

Author's signature

Original recipe source: Unknown. (wrote it down on a 3×5 index card many years ago, without source noted)

↓↓ PRINTABLE RECIPE BELOW ↓↓

0 from 0 votes
Apricot Pineapple Kielbasa Bites
Prep Time
10 mins
Cook Time
5 mins
Total Time
15 mins
 

Apricot Pineapple Kielbasa Bites are delicious, easily made appetizers to serve family or friends. A sweet fruit glaze coats each bite to perfection.

Category: Appetizer/Snack
Cuisine: American
Keyword: apricot pineapple kielbasa bites
Servings: 36 (or more bites)
Calories Per Serving: 43 kcal
Author: JB @ The Grateful Girl Cooks!
Ingredients
  • 12 ounces polska kielbasa ring (beef) (1 package)
  • 2 teaspoons Dijon mustard
  • 2 Tablespoons fresh lemon juice
  • 6 ounces apricot pineapple jam (3/4 of an 8 ounce jar) (can sub. apricot jam)
  • ¼ teaspoon ground ginger
Instructions
  1. In a small bowl, whisk together lemon juice, Dijon mustard, and ground ginger until combined. Stir in apricot pineapple jam. Mixture will be thick and have small pieces of fruit in it. Stir until sauce is fully blended. Set aside.
  2. Slice kielbasa into 1" thick pieces. Place slices into a large skillet in a single layer. Cook on medium high heat until browned on bottom. Turn over slices and continue cooking until both sides are browned, and kielbasa is cooked through. This takes 3-4 minutes. Remove kielbasa from skillet; transfer to paper towels (to drain off grease), and keep kielbasa warm.

  3. Pour reserved sauce into same skillet you cooked kielbasa in. Heat on medium heat, for 2-3 minutes, stirring often. Add kielbasa to sauce, and gently stir, to coat each piece on all sides with glaze. Continue to cook on medium heat for approximately 5-6 minutes, stirring often. The glaze will reduce in volume slightly, and become "sticky". Insert a toothpick into each kielbasa slice, once done. When they all have toothpicks, gently lift each one from the glaze, and place onto serving platter. Serve immediately, and enjoy!

Nutrition Facts
Apricot Pineapple Kielbasa Bites
Amount Per Serving (1 bite)
Calories 43 Calories from Fat 27
% Daily Value*
Fat 3g5%
Saturated Fat 1g6%
Cholesterol 7mg2%
Sodium 88mg4%
Potassium 26mg1%
Carbohydrates 3g1%
Fiber 1g4%
Sugar 2g2%
Protein 1g2%
Vitamin A 10IU0%
Vitamin C 1mg1%
Calcium 2mg0%
Iron 1mg6%
* Percent Daily Values are based on a 2000 calorie diet.

Here’s one more to pin on your Pinterest boards!Apricot Pineapple Kielbasa Bites are delicious, easily made appetizers to serve family or friends. A sweet fruit glaze coats each bite to perfection.


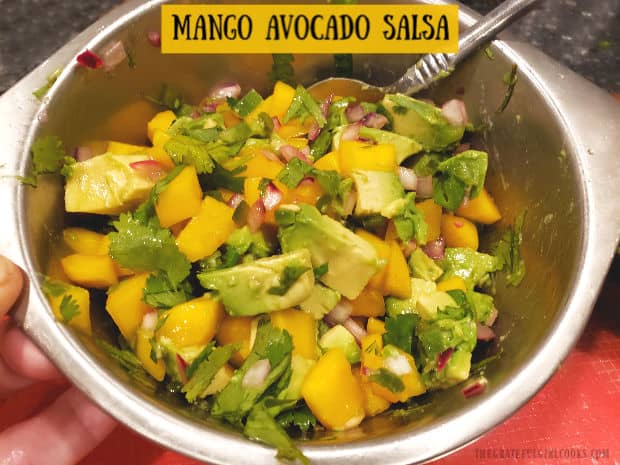
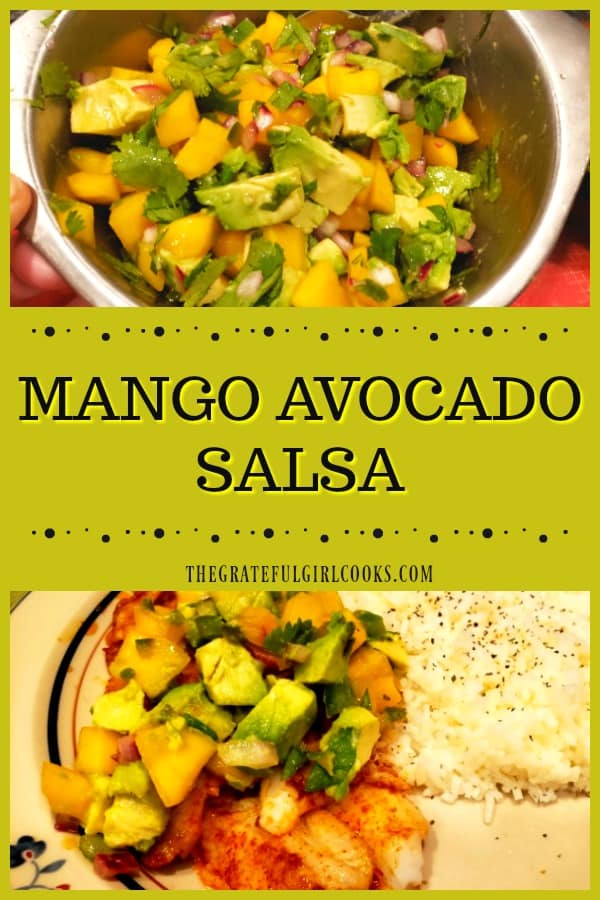
Mango Avocado Salsa

Make delicious mango avocado salsa in 10 minutes! It’s a perfect topping for fish, chicken & pork, or can be served as an appetizer w/ tortilla chips!
Make delicious mango avocado salsa in 10 minutes! It's a perfect topping for fish, chicken & pork, or can be served as an appetizer w/ tortilla chips!

Do you enjoy salsa? We sure do! I always keep jars of home canned salsa in our pantry, including traditional salsa and peach salsa. It’s also very easy to whip up a batch of fresh peach salsa in the summer for a quick appetizer, when peaches are ripe and plentiful.

If you have never tried fresh mango avocado salsa, then hopefully this post will show you how easy it is to make, in just under 10 minutes! This salsa tastes wonderful as an appetizer or snack (served with crunchy tortilla chips!). It also is fantastic as a topping for chicken, fish and pork, because it adds so much flavor to the meat! Here’s how to make it:

Scroll Down For A Printable Recipe Card At The Bottom Of The Page

Prepare The Mango For The Salsa

If you have never cubed a fresh mango before, have no fear… it’s easier than you might think! There is a huge pit (seed) in the middle of a mango, so you will not be able to cut straight through the middle. Instead, slice the mango from top to bottom on all sides of the pit.

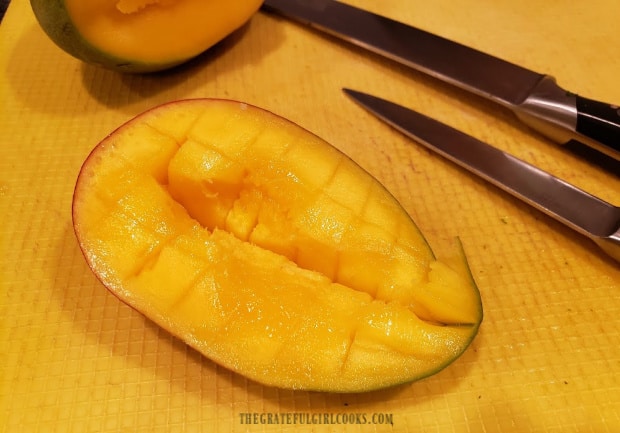
Once that is done, take a sharp paring knife and make gridline cuts from top to bottom on each mango section, and side to side, forming small cubes. Be careful not to cut all the way through the peel (or your fingers).

Mango is sliced into cubes before adding them to salsa.

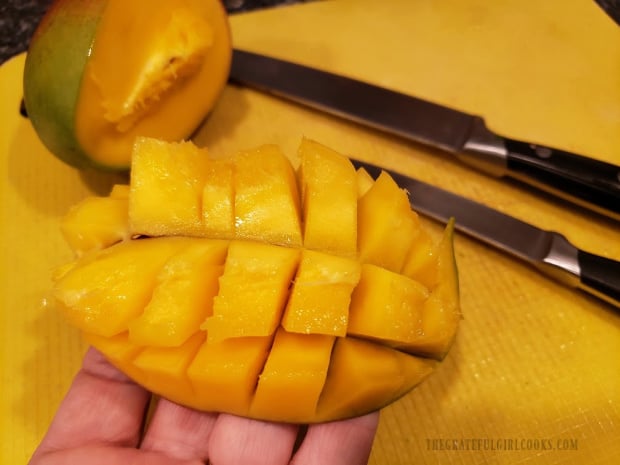
Repeat with all sections. To remove the cubes easily from the mango peel, use your hands to hold both ends of the section and “flip”, pushing up from the bottom peel in the middle, until the mango cubes are fully exposed (see photo below).

Run a knife along the bottom of the cubes, along the peel to cut them away. Repeat this until all sections of the mango are cubed and cut away from the fruit. See the huge pit in the mango, seen below in the upper left corner?

The mango is flipped to expose the cubes, and then they are cut away from the peel.

Prepare The Mango Avocado Salsa

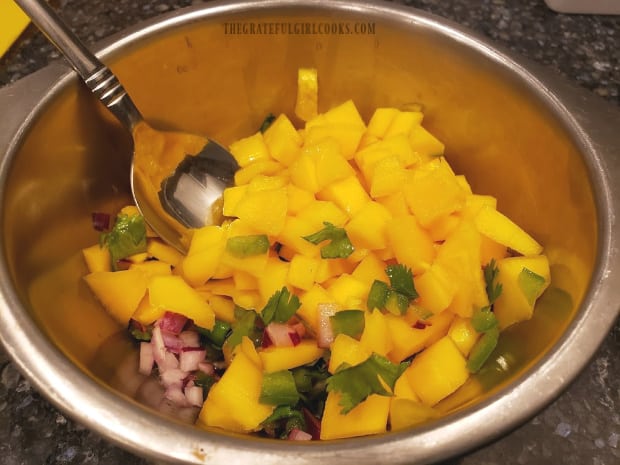
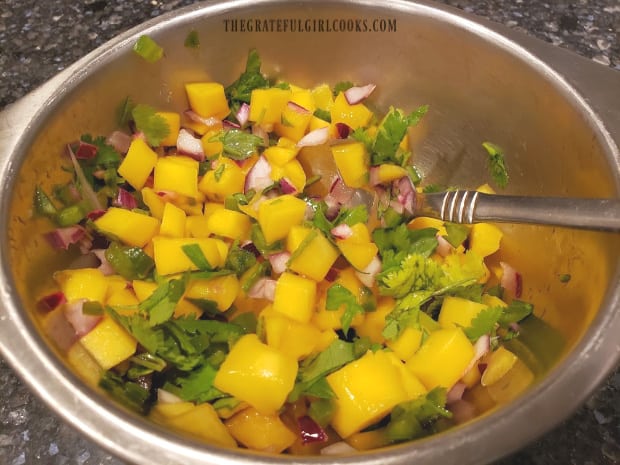
Place chopped cilantro, red onion, and a finely chopped jalapeno (seeds removed) into a medium mixing bowl. Squeeze the juice of half of a large lime into the mixture. Add the cubed mango and stir to combine. NOTE: If you will be making this mango avocado salsa several hours ahead of serving time, cover and refrigerate (without adding the avocado) until just before serving!

Salsa ingredients are stirred together before adding the avocado.Cilantro, red onion, mango, jalapeno and lime juice are mixed together for salsa.

Add Avocado Just Before Serving!

Right before serving, cut and cube the avocado. The avocado is best cut and cubed at this point because, it will have less time to turn brown in the salsa.

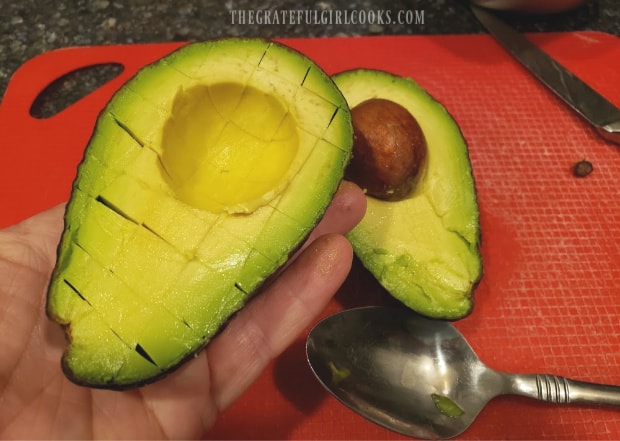
Cubing the avocado is done almost the same way as the mango. Slice the avocado in half, and remove the seed. Slice from top to bottom and side to side in small gridline cubes, without cutting all the way through the peel.

Avocados are halved, then cut into cubes to add to the salsa.

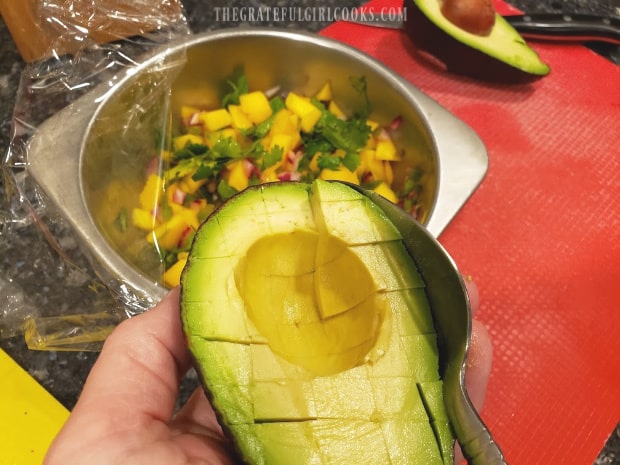
Take a large spoon and guide it all along the the inside of the avocado peel, which will remove the cubes easily. You can place the chunks of avocado directly into the bowl with the rest of the mango avocado salsa!

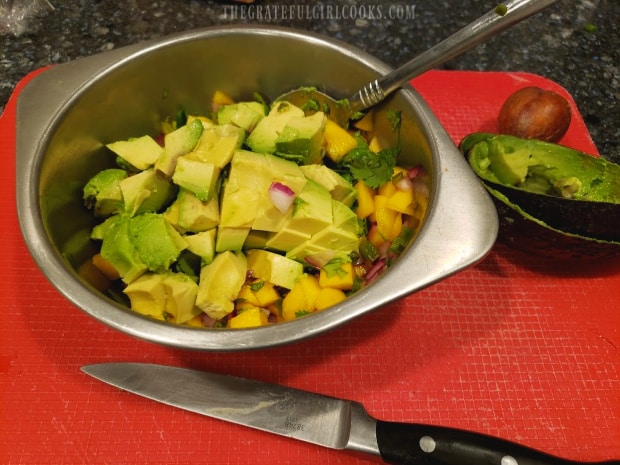
Once all avocado cubes have been added, gently stir the mango avocado salsa to combine ingredients. Ta Da! You just made a really great tasting salsa.

Once cubed, a spoon is used to remove the cubes from the avocado.Ingredients for the mango avocado salsa are gently combined before serving.

Serving Mango Avocado Salsa

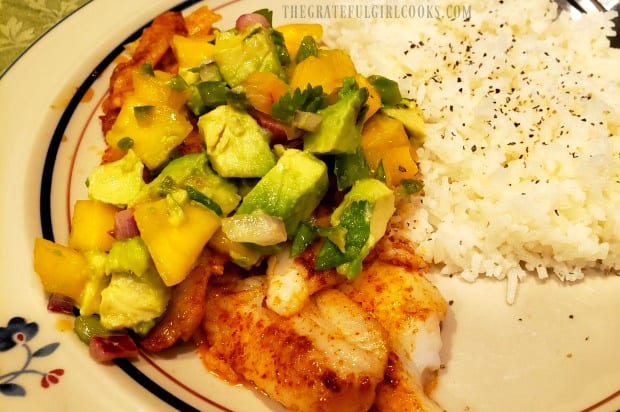
You’re now ready to serve the salsa! Enjoy it with crisp tortilla chips to your heart’s content OR use it to top a nice piece of grilled chicken, fish or pork! The creamy avocado and the sweet mango (and other ingredients) add so much flavor to dishes like this seafood dish below (Dover Sole).

The mango avocado salsa is used as a topping for grilled fish fillets.

I truly hope you will have the opportunity to make this delicious salsa for those you love. It’s fresh, tastes delicious, can be doubled easily, and is super easy to make!  Have a wonderful day! Don’t forget to check out ALL my recipes in the Recipe Index, located at the top of the page. Thanks for stopping by, and come back soon.

Interested In More Recipes?

Thank you for visiting this website. I appreciate you using some of your valuable time to do soIf you’re interested, I publish a newsletter 2 times per month (1st and 15th) with all the latest recipes, and other fun info. I would be honored to have you join our growing list of subscribers, so you never miss a great recipe!
There is a Newsletter subscription box on the top right side (or bottom) of each blog post, depending on the device you use, where you can easily submit your e-mail address (only) to be included in my mailing list.

You Can Also Find Me On Social Media:

Facebook page: The Grateful Girl Cooks!
Pinterest:
The Grateful Girl Cooks!
Instagram:
jbatthegratefulgirlcooks

Author's signature

0 from 0 votes
Mango Avocado Salsa
Prep Time
10 mins
Cook Time
0 mins
Total Time
10 mins
 

Make delicious mango avocado salsa in 10 minutes! It's a perfect topping for fish, chicken & pork, or can be served as an appetizer w/ tortilla chips!

Category: Appetizer, Topping
Cuisine: American
Keyword: mango avocado salsa
Servings: 4
Calories Per Serving: 112 kcal
Author: JB @ The Grateful Girl Cooks!
Ingredients
  • 1 large mango , cut into cubes
  • cup cilantro , chopped
  • ¼ cup red onion , chopped
  • ¼ cup fresh jalapeno , seeds removed and finely chopped
  • ½ large lime (juice of)
  • 1 large avocado , cut into cubes
Instructions
  1. Place peeled and cubed mango, chopped cilantro, red onion, and jalapeno in a medium sized mixing bowl. Squeeze the juice of half of a large lime over the ingredients and stir to combine.

    NOTE: If preparing this salsa a few hours before using it, cover and refrigerate the salsa at this point (without adding the avocado).

  2. Just before you plan to serve the salsa, add the avocado cubes, and "gently" stir, to combine salsa ingredients. Serve, and enjoy, as an appetizer or as a topping for various main dishes!

Tips For Cubing Mango and Avocado:
  1. Mango: Cut from top to bottom on all sides of the pit. Take a sharp paring knife and make cuts from top to bottom, and side to side, forming small cubes. Be careful not to cut all the way through the peel. Repeat with all sections. To remove the cubes easily from the mango peel, use your hands to hold both ends of the section and "flip", pushing up from the bottom peel in the middle, until the mango cubes are fully exposed. Run a knife along the bottom of the cubes, along the peel to cut them away. Repeat this until all sections of the mango are cubed and cut away from the fruit.

  2. Avocado: Slice the avocado in half, and remove the seed. Slice from top to bottom and side to side, in small cubes, without cutting all the way through the peel. Take a large spoon and guide it all along the the inside of the avocado peel, which will remove the cubes easily.

Nutrition Facts
Mango Avocado Salsa
Amount Per Serving (1 (1/4 of total))
Calories 112 Calories from Fat 72
% Daily Value*
Fat 8g12%
Saturated Fat 1g6%
Sodium 5mg0%
Potassium 342mg10%
Carbohydrates 12g4%
Fiber 4g17%
Sugar 7g8%
Protein 2g4%
Vitamin A 670IU13%
Vitamin C 29mg35%
Calcium 11mg1%
Iron 1mg6%
* Percent Daily Values are based on a 2000 calorie diet.

Here’s one more to pin on your Pinterest boards!Make delicious mango avocado salsa in 10 minutes! It's a perfect topping for fish, chicken & pork, or can be served as an appetizer w/ tortilla chips!

Sugared Curry Ginger Pecans

Make delicious sugared curry ginger pecans, baked in a buttery glaze, in only 20 minutes! This appetizer or snack is not too sweet, and not too spicy!

I’m always on the prowl for recipes using pecans, because my Mom generously orders several pounds of them for me each Fall from a pecan farm in Texas! This recipe for sugared curry ginger pecans is a delicious, easy to make snack, and I am happy to share it today!

I have collected cookbooks for over 40 years, and found this recipe in an OLD Southern Living cookbook from 10 years ago, and decided to give it a try! Pecan halves are coated in a seasoned buttery glaze, and then baked for 10 minutes.

This treat couldn’t be any easier to make, and the nuts really do taste yummy as a snack or to set out as an appetizer!

The recipe as written will yield a small batch (about 1.5 cups), but can be easily doubled or tripled. The printable recipe card at the bottom of this post has a button you can utilize to change the amount of ingredients needed, based on the quantity needed.

Scroll Down for a Printable Recipe Card At The Bottom Of The Page

How To Make Sugared Curry Ginger Pecans

Melt butter and pour it into a medium sized bowl. Add the raw pecan halves, and toss, until pecans are coated.

Pecan halves are tossed in melted butter.

In a separate small bowl, stir together granulated sugar, curry powder, ground ginger, cayenne pepper and salt, until blended.

Add this mixture to the buttered pecans, and stir gently, to ensure all the nuts are fully covered with glaze.

NOTE: The finished pecans are very mild in flavor, so taste one now, and if you wish to add additional curry powder, cayenne or ground ginger, do so to suit YOUR taste.

Sugar mixed with curry powder, ginger, salt and red pepper is added to the buttered pecans.When the pecans are fully coated, it is time to bake them!

Place a sheet of aluminum foil on a 13 x 9 inch baking sheet, and spray it lightly with non-stick baking spray.

Spread the sugared curry ginger pecans out in a single layer, leaving a bit of space between each piece.

The nuts are laid in a single layer on a foil covered baking sheet prior to cooking.

Bake The Sugared Curry Ginger Pecans

Now it’s time to bake the nuts! Place the pan in a preheated 350° F. oven, on the middle rack. Bake the sugared curry ginger pecans for 10 minutes. When done, remove the baking sheet (with pecans still on it), and place it on a wire rack to cool.

Sugared curry ginger pecans are finished baking and are cooling down.

Once they have cooled completely, remove the pecans from the foil, and transfer them to a serving plate or bowl, and serve! They are crunchy, with a nice toasted and very mild sugared and spiced flavor.

Can You Store These Pecans?

You can store any uneaten sugared curry ginger pecans for up to a week. Make sure to store them in an airtight container with a lid! Bet they won’t last that long, though!

The sugared curry ginger pecans are transferred to a platter to serve.A white serving plate with the sugared curry ginger pecans on it, ready to eat!

Sure do hope you enjoy this simple,  yummy snack (or appetizer). Put them out at a family gathering and they will go FAST! Grab a few for a light snack during the day, or add them to a mixed green salad, for a delightful crunch! YUM!

Thanks for stopping by, and I invite you to come back again soon for more family-friendly recipes. Take care, and have a GREAT day! 

Looking For More Recipes Featuring NUTS?

You can find all of my recipes in the Recipe Index, located at the top of this post. A few of my delicious recipes featuring nuts include:

Want More Recipes? Get My FREE Newsletter!

I publish a newsletter 2 times per month (1st and 15th) with lots of recipes, tips, etc..
Would you like to join our growing list of subscribers?

There is a Newsletter subscription box on the top right (or bottom) of each blog post, depending on the device you use.
You can submit your e-mail address there, to be added to my mailing list.

Find Me On Social Media:

Facebook page: The Grateful Girl Cooks!
Pinterest:
The Grateful Girl Cooks!
Instagram:
jbatthegratefulgirlcooks

Author's signature

Original recipe source: “Southern Living 2009 Annual Recipes Cookbook”, published by Oxmoor House, Inc., 2009, page 195

↓↓ PRINTABLE RECIPE BELOW ↓↓

0 from 0 votes
Sugared Curry Ginger Pecans
Prep Time
10 mins
Cook Time
10 mins
Total Time
20 mins
 

Make delicious sugared curry ginger pecans, baked in a buttery glaze, in only 20 minutes! This appetizer or snack is not too sweet, and not too spicy!

Category: Appetizer/Snack
Cuisine: American
Keyword: sugared curry ginger pecans
Servings: 6 (1/4 cup per serving)
Calories Per Serving: 228 kcal
Author: JB @ The Grateful Girl Cooks!
Ingredients
  • cups pecan halves
  • 2 Tablespoons butter , melted
  • 3 Tablespoons granulated sugar
  • ¼ teaspoon curry powder
  • ¼ teaspoon ground ginger
  • teaspoon salt
  • teaspoon cayenne pepper
Instructions
  1. Preheat oven to 350° F. Melt butter and pour it into a medium sized bowl. Add the raw pecan halves, and toss, until pecans are coated.

  2. In a separate small bowl, stir together granulated sugar, curry powder, ground ginger, cayenne pepper and salt, until blended. Add this mixture to the buttered pecans, and stir gently, to ensure all the nuts are fully covered with glaze.

    NOTE: The finished pecans are very mild in flavor, so taste one now, and if you wish to add additional curry powder, cayenne or ground ginger, do so to suit YOUR taste.

  3. Place a sheet of aluminum foil on a 13 x 9 inch baking sheet, and spray it lightly with non-stick baking spray. Spread the sugared curry ginger pecans out in a single layer, leaving a bit of space between each piece. Place the pan in a preheated 350° F. oven, on the middle rack. Bake pecans for 10 minutes. When done, remove baking sheet (with pecans still on it), and place it on a wire rack to cool. Once they have cooled completely, remove pecans from foil, and transfer them to a serving plate or bowl, and serve!

Nutrition Facts
Sugared Curry Ginger Pecans
Amount Per Serving (1 (1/4 cup serving))
Calories 228 Calories from Fat 198
% Daily Value*
Fat 22g34%
Saturated Fat 4g25%
Cholesterol 10mg3%
Sodium 82mg4%
Potassium 101mg3%
Carbohydrates 10g3%
Fiber 2g8%
Sugar 7g8%
Protein 2g4%
Vitamin A 148IU3%
Vitamin C 1mg1%
Calcium 17mg2%
Iron 1mg6%
* Percent Daily Values are based on a 2000 calorie diet.

Here’s one more to pin on your Pinterest boards!Make delicious sugared curry ginger pecans, baked in a buttery glaze, in only 20 minutes! This appetizer or snack is not too sweet, and not too spicy!

Cowboy Candy (candied jalapenos)

Cowboy Candy (also known as candied jalapenos) tastes great on cream cheese covered crackers (as an appetizer), or on grilled burgers or hot dogs! It’s easy to can them for long term storage.
Cowboy Candy (also known as candied jalapenos) tastes great on cream cheese covered crackers or burgers! It's easy to can them for long term storage.

The first time I heard of “cowboy candy”, I wasn’t sure that it was something I would enjoy. I like semi-spicy food, but didn’t know if I could handle candied jalapenos! Boy… was I wrong! It is definitely NOT too spicy at all, is actually sweet, and is a FABULOUS appetizer!

This recipe for cowboy candy is preserved for long term storage by canning it through a water bath process (only takes 15 minutes of cooking time).

Scroll Down For A Printable Recipe Card At The Bottom Of The Page

How Much Cowboy Candy Does This Recipe Make?

The recipe as written below, makes 2 pints of this delectable treat, which comes out to about 64 Tablespoons of cowboy candy total!  One Tablespoon is a great topping for a cream cheese topped cracker, so you can see how a couple jars of cowboy candy will go far!

It is also very easy (and recommended) to double or triple this recipe, so you can have LOTS of jars of candied jalapenos in the pantry to serve as a quick fix appetizer! Guess what? Cowboy candy is also wonderful as a topping for grilled hamburgers or hot dogs! YUM!

So How Do I Make Cowboy Candy?

Prepare canning jars and water bath canner, according to USDA canning guidelines. Very basically, you will need to sterilize jars and flat lids, place a rack on the bottom of the canner (to keep jars off bottom), and bring the water in the canner to a simmer.

Thinly slice the jalapeno peppers. You “might” want to wear gloves for this part, but if you don’t, be sure to wash hands thoroughly after slicing, and do not rub your eyes… just sayin’.

Jalapeños are thinly sliced before adding them to the pan.

When I took these photos several years ago, I was ONLY making 2 pints, because it was my first time trying this particular recipe, and I wanted to make sure we liked the cowboy candy before making more.

Make The Sauce For The Cowboy Candy

In a large pan, bring the apple cider vinegar, sugar, mustard seed, garlic powder, turmeric, celery seed, and cayenne pepper to a boil, on medium heat. Once the mixture begins boiling, turn the heat down to low, and simmer the syrup for 5 minutes.

A syrup is made to sweeten and season the candied jalapeños.

Add all of the sliced jalapenos into the syrup, and stir to combine. Continue to cook the cowboy candy on low heat for 5 more minutes.

Thinly sliced jalapeños are added to and cooked in the thick syrup to make cowboy candy

Now the jalapeños are ready to begin canning process for long term storage.

Canning Jars Of Cowboy Candy For Long Term Storage

Divide the cowboy candy into the hot, sterilized canning jars. To do this, add the jalapenos first, then add any remaining liquid from the pan. Fill the jars, being sure to leave 1/4″ headspace on each jar. Insert a plastic utensil a couple of times into each jar, to remove any air bubbles. Wipe the jar rims with a moist towel or cloth to remove excess residue, add a prepared flat lid, and then add the screwband, tightening to fingertip tightness.

Place jars onto rack in canner and make sure there is enough simmering water to cover the top of each jar by 1-2 inches. Process the cowboy candy jars for 15 minutes, after the water comes to a gentle, rolling boil.

Jars are processed in a boiling water bath canner for 15 minutes.

Once you have finished canning the jars of cowboy candy, carefully remove each jar from the boiling water using canning tongs.

Place boiling hot jars onto a dish towel (placing them directly on counter could crack the jars due to temperature variances). Let the jars cool for at least 8 hours before disturbing them. Wipe jars clean, label them, test the seal to make sure the jars have sealed correctly, and store in pantry.

Here is a jar of cowboy candy after it has been canned for long term storage.

Serving Cowboy Candy As An Appetizer

If you want to serve these candied jalapenos as a wonderful appetizer or snack, simply spread some cream cheese (whipped or regular) onto a cracker, and top it with a Tablespoon of cowboy candy. Take a big bite, and enjoy!

The cowboy candy, served on top of a cream cheese covered cracker, is a great appetizer!

I really hope you will try this delicious recipe for cowboy candy!  It is SO GOOD when served as an appetizer (so easy, too), and is a delicious topping on a juicy hamburger or grilled hot dog! Have a wonderful day, and may God bless you as you journey through it!

Looking For Other Recipes For APPETIZERS?

You can find all of my appetizer AND canning recipes in the Recipe Index, located at the top of the page. A few favorite appetizer recipes include:

Interested In More Recipes?

Thank you for visiting this website. I appreciate you using some of your valuable time to do soIf you’re interested, I publish a newsletter 2 times per month (1st and 15th) with all the latest recipes, and other fun info. I would be honored to have you join our growing list of subscribers, so you never miss a great recipe!

There is a Newsletter subscription box on the top right side (or bottom) of each blog post, depending on the device you use, where you can easily submit your e-mail address (only) to be included in my mailing list.

You Can Also Find Me On Social Media:
Facebook page: The Grateful Girl Cooks!
Pinterest: The Grateful Girl Cooks!
Instagram: jbatthegratefulgirlcooks

Author's signature

Recipe Source: www.sbcanning.com/2010/10/cowboy-candy-check-this-out.html

0 from 0 votes
Cowboy Candy (candied jalapenos)
Prep Time
20 mins
Cook Time
15 mins
Total Time
35 mins
 

Cowboy Candy (also known as candied jalapenos) tastes great on cream cheese covered crackers or burgers! It's easy to can them for long term storage.

Category: Appetizer, Canning and Preserving
Cuisine: Southwest
Keyword: cowboy candy
Servings: 2 pints
Calories Per Serving: 30 kcal
Author: JB @ The Grateful Girl Cooks!
Ingredients
  • 1 pound fresh jalapeños , sliced thin
  • 2/3 cup apple cider vinegar
  • 2 cups granulated sugar
  • 2 Tablespoons mustard seed
  • 1 Tablespoon garlic powder
  • 1/4 teaspoon turmeric
  • 1/4 teaspoon celery seed
  • 1/4 teaspoon cayenne pepper
Instructions
  1. Prepare canning jars and water bath canner, according to USDA canning guidelines. Very basically, you will need to sterilize jars and flat lids, place rack in canner, and bring the water in the canner to a simmer.

  2. Thinly slice the jalapeño peppers. You "might" want to wear gloves for this part, but if you don't, be sure to wash hands thoroughly after slicing, and do not rub your eyes... just sayin'.

  3. In a large pan, bring the apple cider vinegar, sugar, mustard seed, garlic powder, turmeric, celery seed, and cayenne pepper to a boil, on medium heat. Once the mixture begins boiling, turn the heat down to low, and simmer the syrup for 5 minutes. Add all of the sliced jalapeños into the syrup, and stir to combine. Continue to cook the cowboy candy on low heat for 5 more minutes.

  4. Divide the cowboy candy into the hot, sterilized canning jars. To do this, add the jalapeños first, then add any remaining liquid from the pan. Fill the jars, being sure to leave 1/4" headspace on each jar. Insert a plastic utensil a couple of times into each jar, to remove any air bubbles. Wipe rims clean, then add the prepared flat lid and screwband. Tighten screwband to fingertip tightness. Place jars onto rack in canner and make sure there is enough simmering water to cover the top of each jar by 1-2 inches. Process jars for 15 minutes, after the water comes to a gentle boil.  Once you have finished processing the jars, carefully remove each jar from the boiling water using canning tongs. Place hot jars onto a dish towel (placing them directly on counter could crack jars due to temperature variances). Let jars cool for at least 8 hours before disturbing them. Wipe jars clean, label, and test the seal to make sure the jars have sealed correctly, and then store in pantry. Enjoy!

Nutrition Facts
Cowboy Candy (candied jalapenos)
Amount Per Serving (1 Tablespoon)
Calories 30 Calories from Fat 9
% Daily Value*
Fat 1g2%
Saturated Fat 1g6%
Sodium 1mg0%
Potassium 29mg1%
Carbohydrates 7g2%
Fiber 1g4%
Sugar 7g8%
Protein 1g2%
Vitamin A 70IU1%
Vitamin C 10.2mg12%
Calcium 2mg0%
Iron 0.1mg1%
* Percent Daily Values are based on a 2000 calorie diet.

Here’s one more to pin on your Pinterest boards!Cowboy Candy (also known as candied jalapenos) tastes great on cream cheese covered crackers or burgers! It's easy to can them for long term storage.