Category: Appetizers

Coconut Shrimp With Sweet Chili-Lime Sauce

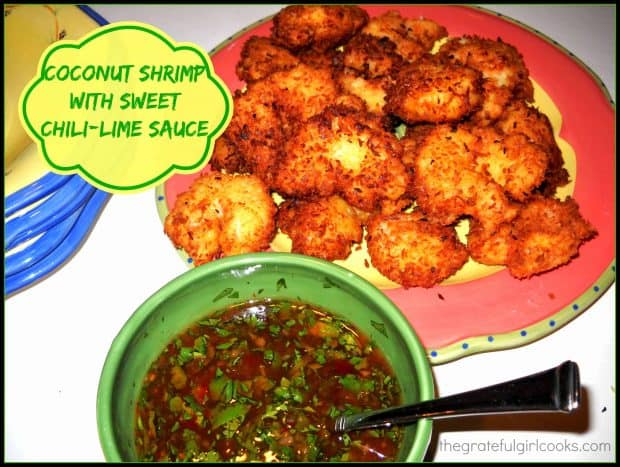
Crunchy Coconut Shrimp, are battered, fried large shrimp, served with a sweet chili-lime dipping sauce! They’re a delicious main course or appetizer!Crunchy Coconut Shrimp, are battered, fried large shrimp, served with a sweet chili-lime dipping sauce! They're a delicious main course or appetizer!
Today I am posting an amazing appetizer recipe that our good friend Shari (and her husband Richard) made for my husband and I one evening at their home. These coconut shrimp are quite possibly one of my very favorite appetizers. The sweet chili-lime sauce just makes this dish PERFECT!

Scroll Down For A Printable Recipe Card At The Bottom Of The Page

My Friend Shari

I’ve mentioned before in this blog that Shari is my inspiration for a lot of my cooking projects.  She has encouraged me to dream big, and be fearless in the kitchen.  She inspires me.  I am blessed to call her my friend, and I thank God for our friendship of 17+ years.
 
This is the recipe Shari used, and (with her permission) I am posting a couple pics of the finished product. I took the photos and watched her prepare these step by step, and then I ate these gorgeous shrimp (someone had to do it…I sacrificed for the team)! Shari and her husband Richard did ALL the true work on these scrumptious coconut shrimp.

Our friends Shari and Richard, with the coconut shrimp.

Where The Recipe For These Coconut Shrimp Originated

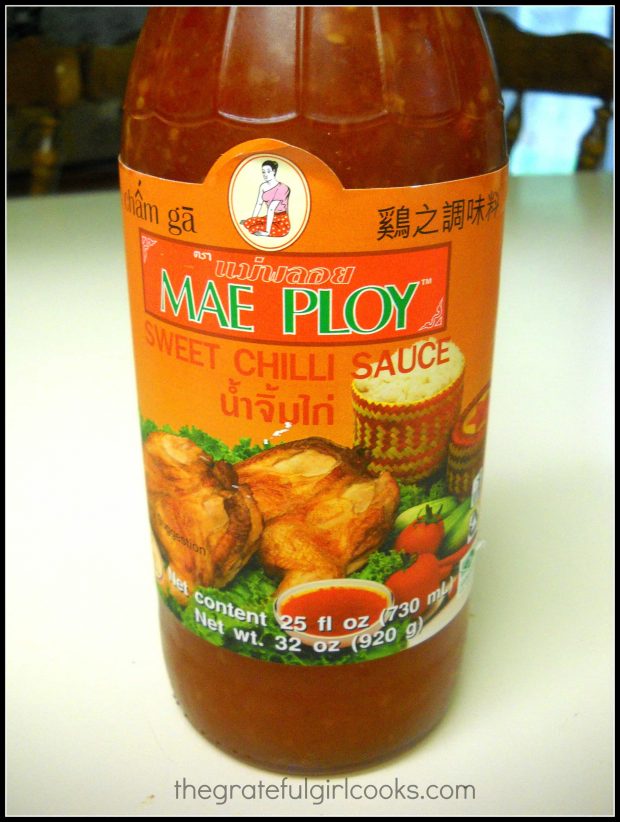
The original recipe was published in Bon Appetit magazine’s October 2006 issue. It is a fairly straightforward recipe, and an incredibly delicious appetizer. This is the chili sauce (below) used for this recipe, which can usually be found in the Asian section of most grocery stores.

Coconut Shrimp with Sweet Chile-Lime Sauce / The Grateful Girl Cooks!

It’s a fairly easy recipe to make. You mix up the dipping sauce, make the batter, then coat the shrimp with the batter, roll them in a seasoned coconut topping and deep fry until done.

The coconut shrimp are nice and crunchy, and when dipped in the sweet and spicy chili-lime sauce…oh my! What an amazing appetizer! I really hope you will give these yummy coconut shrimp a try. Have a great day!

Looking For More APPETIZER Recipes?

You can find all of my appetizer recipes in the Recipe Index, located at the top of the page. A few favorites include:

Interested In More Recipes?

Thank you for visiting this website. I appreciate you using some of your valuable time to do soIf you’re interested, I publish a newsletter 2 times per month (1st and 15th) with all the latest recipes, and other fun info. I would be honored to have you join our growing list of subscribers, so you never miss a great recipe!
There is a Newsletter subscription box on the top right side (or bottom) of each blog post, depending on the device you use, where you can easily submit your e-mail address (only) to be included in my mailing list.

You Can Also Find Me On Social Media:
Facebook page: The Grateful Girl Cooks!
Pinterest: The Grateful Girl Cooks!
Instagram: jbatthegratefulgirlcooks

Author's signatureRecipe Source: http://www.epicurious.com/recipes/food/views/Coconut-Shrimp-with-Sweet-Chili-Lime-Sauce-236168

0 from 0 votes
Coconut Shrimp With Sweet Chili-Lime Sauce
Prep Time
20 mins
Cook Time
10 mins
Total Time
30 mins
 

Crunchy Coconut Shrimp, are battered, fried large shrimp, served with a sweet chili-lime dipping sauce! They're a delicious main course or appetizer!

Category: Appetizer, Main Dish
Cuisine: American
Keyword: coconut shrimp
Servings: 16
Calories Per Serving: 143 kcal
Author: JB @ The Grateful Girl Cooks!
Ingredients
For the sauce:
  • 3/4 cup Asian sweet chili sauce (I use Mae Ploy)
  • 3 Tablespoons chopped fresh cilantro
  • 2 1/2 Tablespoons fresh lime juice
For the shrimp:
  • 3/4 cup all-purpose flour
  • 1 teaspoon curry powder (preferably Madras style)
  • 3/4 teaspoons baking powder
  • 1/4 teaspoon salt
  • 1 large egg , beaten
  • 1 cup club soda
  • 1/4 cup Vegetable oil (for deep frying)
  • 1 1/2 cups medium shredded unsweetened coconut
  • 16 large shrimp , peeled, deveined, tails left intact
Instructions
  1. Make the sauce: Mix the sweet chili sauce, chopped cilantro, and lime juice in a small serving bowl. Cover and chill (sauce can be made a day ahead).
  2. Make the batter for the shrimp: Whisk the flour, curry powder, baking powder and salt in a medium-sized bowl. Add in the lightly beaten egg and the club soda. Whisk these ingredients together only until the ingredients are incorporated. The batter should still be a bit "lumpy". Set the batter aside and let it "rest" for approximately 15 minutes.
  3. To make the shrimp: While the batter is "resting", pour vegetable oil into a large, heavy saucepan (or an electric skillet with temperature gauge). Use enough oil to come up about halfway up the sides of your pan. Attach a deep-fry thermometer to the saucepan. Heat the oil on medium until it reaches 375 degrees.
  4. Before you cook the shrimp, line a baking sheet with several thicknesses of paper towels (to drain the shrimp once cooked). Spread the coconut out onto a plate. Line up the batter bowl, then the plate of coconut and place them near the pan with the hot oil.

  5. Working with one shrimp at a time (hold the shrimp by the tail!), dip it into the batter. Allow the excess batter to drip back into the bowl, then roll it in the coconut, still holding onto that tail. Cover both sides of shrimp-you may have to use your other hand to scoop some of the coconut onto the shrimp.
  6. Carefully put the shrimp into the 375 degree oil (make sure the oil is at temperature before adding, to ensure a good crunch and browning). Work in batches, cooking 4-5 shrimp at a time. Deep-fry the shrimp about 2- 1/2 minutes (turning halfway through cooking time). Remove the golden brown colored, cooked shrimp to the paper-towel lined baking sheet to drain. **Before you add the next batch of shrimp to the oil, make sure the oil is back to temperature! (this is important!). Serve shrimp hot, with dipping sauce on the side. Enjoy!

Nutrition Facts
Coconut Shrimp With Sweet Chili-Lime Sauce
Amount Per Serving (1 shrimp + sauce)
Calories 143 Calories from Fat 81
% Daily Value*
Fat 9g14%
Saturated Fat 7g44%
Cholesterol 25mg8%
Sodium 216mg9%
Potassium 83mg2%
Carbohydrates 12g4%
Fiber 1g4%
Sugar 6g7%
Protein 2g4%
Vitamin A 20IU0%
Vitamin C 1.1mg1%
Calcium 23mg2%
Iron 0.8mg4%
* Percent Daily Values are based on a 2000 calorie diet.

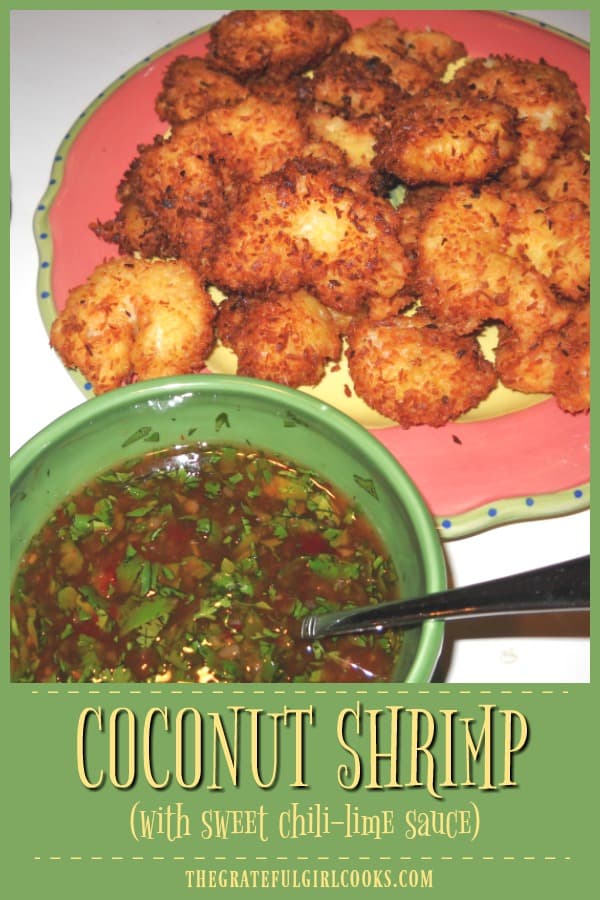
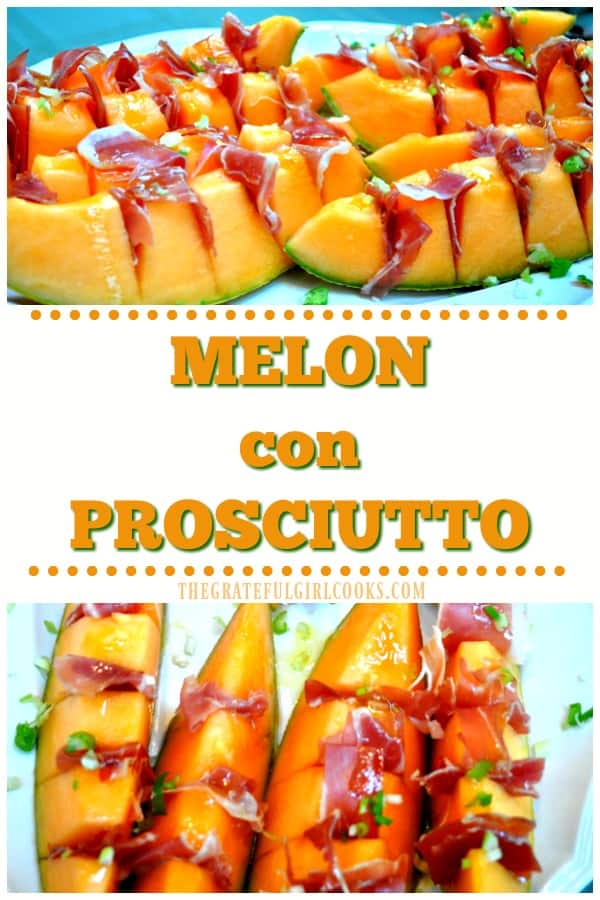
Here’s one more to pin on your Pinterest boards!Crunchy Coconut Shrimp, are battered, fried large shrimp, served with a sweet chili-lime dipping sauce! They're a delicious main course or appetizer!
 

Save

Save

Crunchy Homemade Onion Rings

Restaurant quality crunchy homemade onion rings are so good, and they’re easy to make! Grill a burger and enjoy it with this classic side dish!
Restaurant quality crunchy homemade onion rings are so good, and they're easy to make! Grill a burger and enjoy it with this classic side dish!
I have a confession. I LOVE onion rings…really crunchy onion rings, AND I even dip them in ketchup. Forgive me. I can’t help myself. Thank goodness I only order them once or twice or twelve times a year.

Scroll Down For A Printable Recipe Card At The Bottom Of The Page

Here’s My Story And I’m Sticking to It!

So, here’s the story: It was a gorgeous day here in Oregon. My husband was helping a friend move into an apartment today. I was staying inside because I have been a bit sick with a cold for a couple of days. I really wanted to make something new…something I’ve never made before.

In a moment of sheer madness (maybe it was the cold?), I decided to try and make crunchy homemade onion rings. How hard could THAT be, right? I did a quick search for recipes and settled on one I found on Pinterest from Six Sisters’ Stuff, and off to the kitchen (kleenex in hand-achoo!) I went.

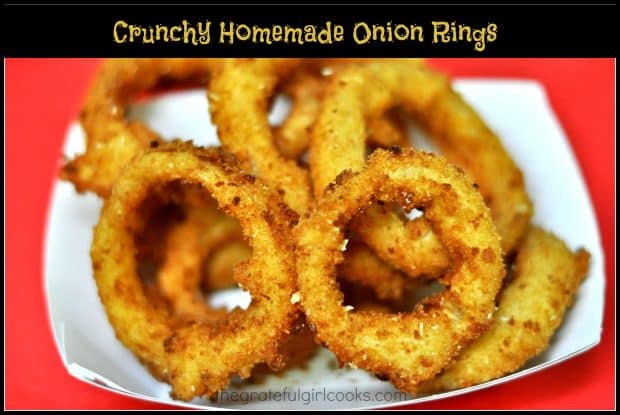
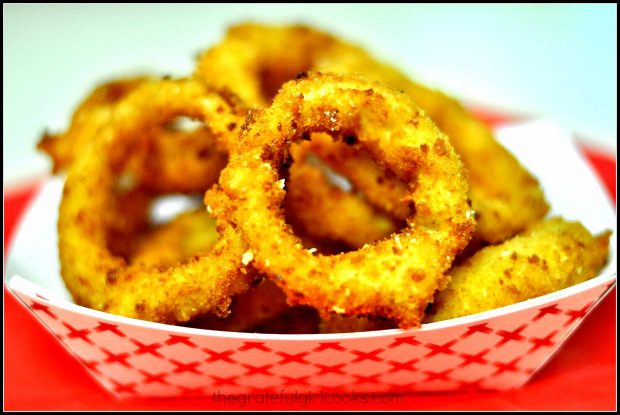
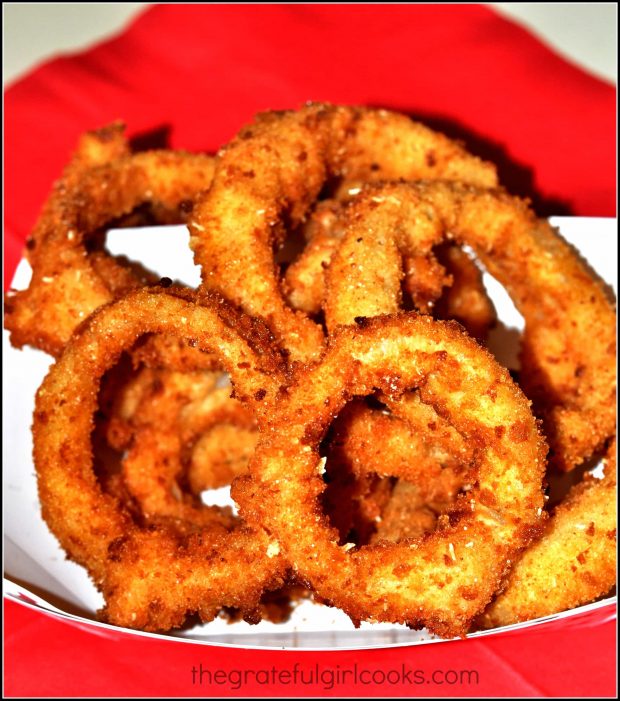
Homemade onion rings in a red and white tray
Before I even knew what happened, the crunchy homemade onion rings were done! Simple and delicious! Naturally I HAD to try one for the sake of quality control. Hmmm…nibble, nibble, nibble. Oh man…these things were GREAT! I might have sampled a couple others before stopping (thankfully there is no photographic evidence…whew). Using great self discipline, I waited until my husband got home to cook the rest.

Guess what? He LOVED them! He munched on the onion rings while grilling our tri-tip dinner – perfect!  I even made these for a big outdoor BBQ with family and friends. The crunchy homemade onion rings were served on a large platter as an appetizer. On the side were 3 serving bowls containing BBQ sauce, Ranch dressing, and ketchup on the side, for dipping! They were a huge hit!

How To Make Crunchy Homemade Onion Rings

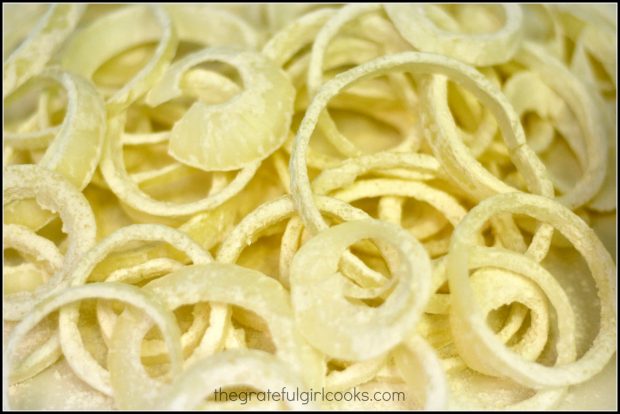
Separate the onion slices into rings; set them aside. In a medium sized bowl, whisk together the flour, baking powder, cayenne pepper, seasoning salt, and the “regular” salt. Take the onion rings (a few at a time) and dip them in the flour mixture until coated on all sides; set them aside again.

Sliced onions are tossed with flour before cooking.
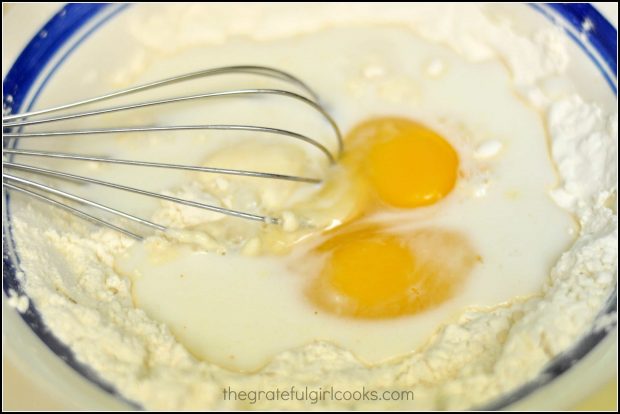
Add the eggs and milk to the remaining flour mixture. Whisk until combined well. (Mixture will be thick). This is the batter for the onion rings.

Eggs are whisked into onion ring batter.
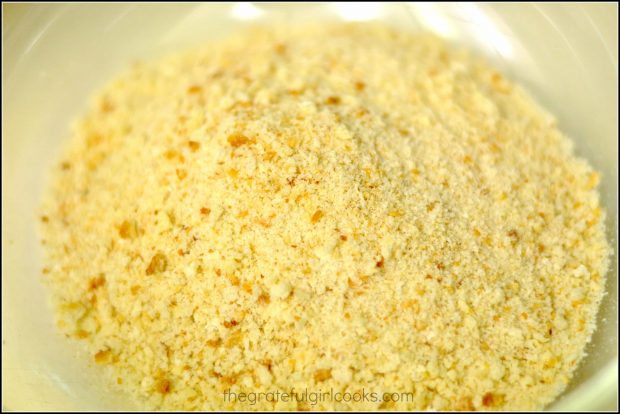
Now pour the bread crumbs into another medium sized bowl.

Bread crumbs are placed into a small bowl to coat onion rings
Take the floured onion rings (two or three at a time works best) and dip them into the flour batter. Coat each ring completely, then remove each ring (I used a fork to lift them out of batter) and let the batter drip off as much as possible. Now place the onion ring into the bread crumbs. Using the fork, gently toss the crumbs to coat the ring evenly; flip and coat the other side.

Cook The Onion Rings

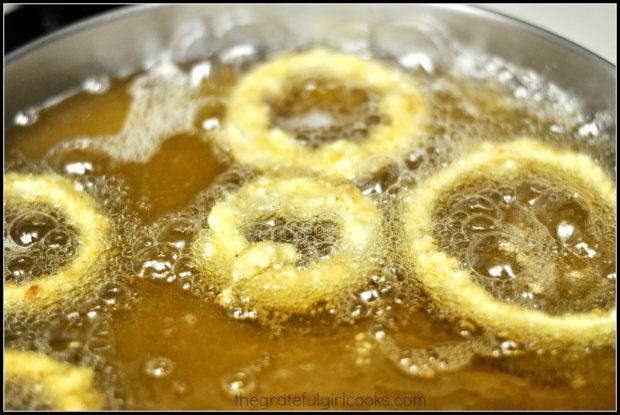
If you are certain the oil has reached 375 degrees, then carefully place 4-5 rings at a time in the hot oil. Fry the rings for 2-3 minutes, making sure to flip the rings over half way through the cooking time. Fry until golden brown.

Battered onion rings are fried in hot oil
Remove the onion rings to a paper-towel lined plate when done, to drain. Season each batch of rings with salt, after removing from oil. Make sure oil is at temperature before adding next batch of onion rings. Repeat the process until done. Serve and enjoy!

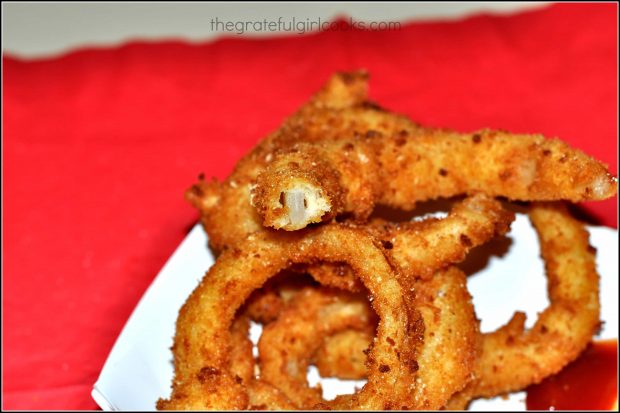
Fried onion rings, ready to eat!
They look really good, huh?  Wait until you taste them! YUM!

Tray of crunchy homemade onion rings, ready to eat!

I hope you will give these a try…the crunchy homemade onion rings were fantastic! (I even froze some of the rings once coated and breaded…we’ll see if they fry up as well, after being frozen. An experiment of mine for another day)  Update: They froze well in a resealable freezer bag! Cooked perfectly!

If you enjoy dishes like this, you’ll enjoy my recipes for Baked Parmesan Zucchini FriesCajun Tater Tots with Dipping Sauce, or Crispy Homemade French Fries! Be sure to check out ALL of my recipes in the Recipe Index, which is located at the top of the page. Have a great day.

Interested In More Recipes?

Thank you for visiting this website. I appreciate you using some of your valuable time to do soIf you’re interested, I publish a newsletter 2 times per month (1st and 15th) with all the latest recipes, and other fun info. I would be honored to have you join our growing list of subscribers, so you never miss a great recipe!
There is a Newsletter subscription box on the top right side (or bottom) of each blog post, depending on the device you use, where you can easily submit your e-mail address (only) to be included in my mailing list.

You Can Also Find Me On Social Media:
Facebook page: The Grateful Girl Cooks!
Pinterest: The Grateful Girl Cooks!
Instagram: jbatthegratefulgirlcooks

Have a fantastic day!

Author's signatureRecipe Adapted From: http://www.sixsistersstuff.com/2013/06/restaurant-style-onion-rings-recipe.html

5 from 1 vote
Crunchy Homemade Onion Rings
Prep Time
15 mins
Cook Time
15 mins
Total Time
30 mins
 

Restaurant quality crunchy homemade onion rings are so good, and they're easy to make! Grill a burger and enjoy it with this classic side dish!

Category: Appetizer
Cuisine: American
Keyword: crunchy homemade onion rings
Servings: 4 servings
Calories Per Serving: 414 kcal
Author: JB @ The Grateful Girl Cooks!
Ingredients
  • 1 quart vegetable oil (strain and save the leftover oil for another batch-keep sealed in refrigerator)
  • 1 large vidalia onion , cut into 1/4" slices
  • 1 1/2 cups all purpose flour
  • 1 teaspoon baking powder
  • 1 teaspoon salt
  • 2 eggs
  • 1 cup milk
  • 1 1/2 cup dry bread crumbs
  • 1/4 teaspoon cayenne pepper
  • 1/4 teaspoon seasoning salt
  • salt , to taste (after rings are cooked)
Instructions
  1. In a deep-fryer, large pot or electric skillet, heat the oil to 375 degrees. (I used an electric skillet; if using pot, make sure to use a cooking thermometer to determine proper heating). It is really important to make sure the oil is heated accurately so the onion rings will brown and "crunch up" properly.
  2. Separate the onion slices into rings; set them aside.
  3. In a medium sized bowl, whisk together the flour, baking powder, cayenne pepper, seasoning salt and the "regular" salt. Take the onion rings (a few at a time) and dip them in the flour mixture until coated on all sides; set them aside again.

  4. Add the eggs and milk to the remaining flour mixture. Whisk until combined well. (Mixture will be thick)
  5. Pour the bread crumbs into another medium sized bowl.
  6. Take the floured onion rings (two or three at a time works best) and dip them into the flour batter. Coat each ring completely, then remove each ring (I used a fork to lift them out of batter) and let the batter drip off as much as possible. Now place the onion ring into the bread crumbs. Using the fork, gently toss the crumbs to coat the ring evenly; flip and coat the other side.
  7. If you are certain the oil has reached 375 degrees, then carefully place 4-5 rings at a time in the hot oil. Fry the rings for 2-3 minutes, making sure to flip the rings over half way through the cooking time. Fry until golden brown. Remove the onion rings to a paper-towel lined plate when done, to drain. Season each batch of rings with salt after removing from oil.

  8. Make sure oil is at temperature before adding next batch of onion rings. Repeat the process until all rings are cooked. Serve (with dipping sauce on the side), and enjoy!

Nutrition Facts
Crunchy Homemade Onion Rings
Amount Per Serving (1 serving)
Calories 414 Calories from Fat 45
% Daily Value*
Fat 5g8%
Saturated Fat 1g6%
Cholesterol 84mg28%
Sodium 1088mg47%
Potassium 447mg13%
Carbohydrates 74g25%
Fiber 3g13%
Sugar 9g10%
Protein 15g30%
Vitamin A 285IU6%
Vitamin C 4mg5%
Calcium 227mg23%
Iron 4.8mg27%
* Percent Daily Values are based on a 2000 calorie diet.

Here’s one more to pin on your Pinterest boards!Restaurant quality crunchy homemade onion rings are so good, and they're easy to make! Grill a burger and enjoy it with this classic side dish!


Save

Save

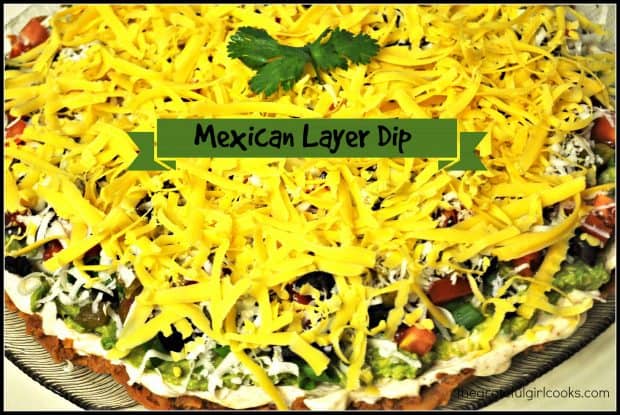
Mexican Layer Dip

Mexican Layer Dip is the perfect party appetizer! Set out a platter of this easy, layered dip with tortilla chips, and let the feeding frenzy begin!Super Bowl 2014 is coming up in a week and a half. Are you looking for a delicious appetizer that will feed the football loving masses, and is a real crowd-pleaser? Well, this Mexican Layer Dip is your answer!!!
Super Bowl 2014 is coming up in a week and a half. Are you looking for a delicious appetizer that will feed the football loving masses, and is a real crowd-pleaser? Well, this Mexican Layer Dip is your answer for football games, parties, New Years celebrations, birthdays, etc.!

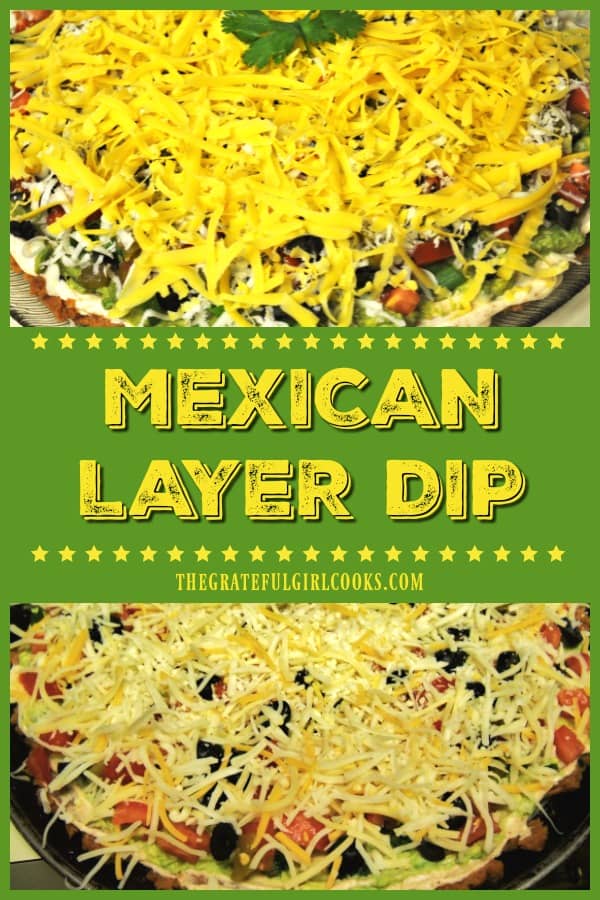
Mexican Layer Dip is layers of refried beans, green chilis, tomatoes, two cheeses, olives, avocados, and creamy spicy sour cream. I mean, how could this NOT taste fantastic! It’s got all the good stuff we LOVE to eat!

Scroll Down For A Printable Recipe Card At The Bottom Of The Page

We LOVE Mexican Layer Dip!

I’ve had this Mexican layer dip recipe on a little index card for over 30 years! Now I really don’t remember how or where I first received it, but I’ve made this countless times over the years. It is a family favorite!

This popular appetizer takes about 20 minutes to make, and then it’s refrigerated for about an hour OR until you’re ready to serve it!  It’s a winner recipe, and I’ve even made it the day before I want to serve it, with perfect results!

Our family loves this easy to assemble appetizer. Our oldest son even asked for a platter of this dip as part of his birthday present this past year.  What? Yes, that’s how good it is!

A pizza platter filled with the Mexican layer dip, ready to eat!

Prep the ingredients before you begin preparing the Mexican layer dip, then all you need to do is layer the ingredients in order! The dip is refrigerated for an hour after that! When you’re ready to serve, all that is left is to gobble it up with a handful of tortilla or corn chips! It’s so very easy – anyone can make this! Here’s how:

How To Prepare This Mexican Layer Dip, Step By Step

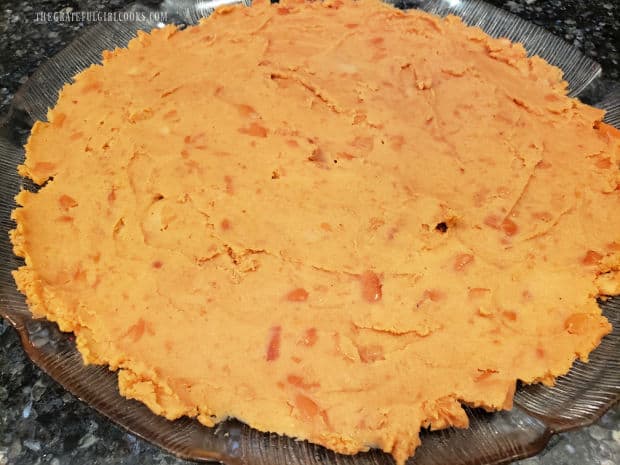
Spread a can of spicy (or regular) refried beans onto a large round serving platter or pizza pan, mashing it and spreading it out to cover almost the entire platter.

Refried beans are spread out onto a large round serving platter.

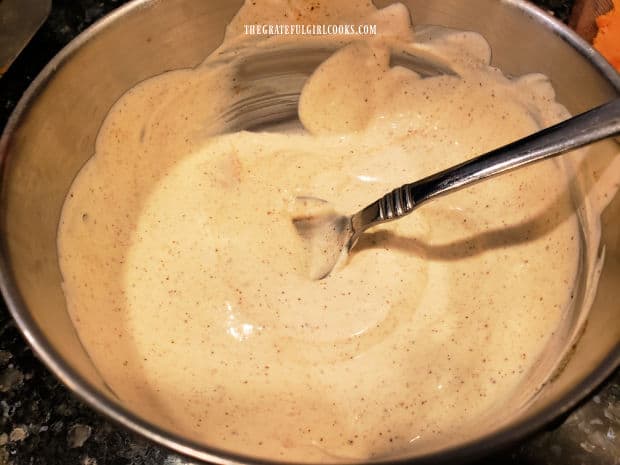
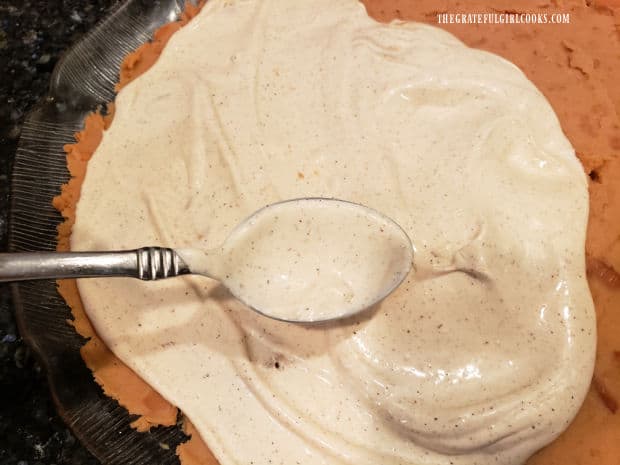
Stir together sour cream, mayonnaise and taco seasoning in a bowl until fully combined. Carefully spread this mixture out (using the back of a large spoon) to cover the refried bean layer. 

Sour cream, mayonnaise and taco seasoning are combined to make a spicy spread.The spicy sour cream mixture is spread over the top of the refried bean layer.

Now For The Creamy Avocado Layer

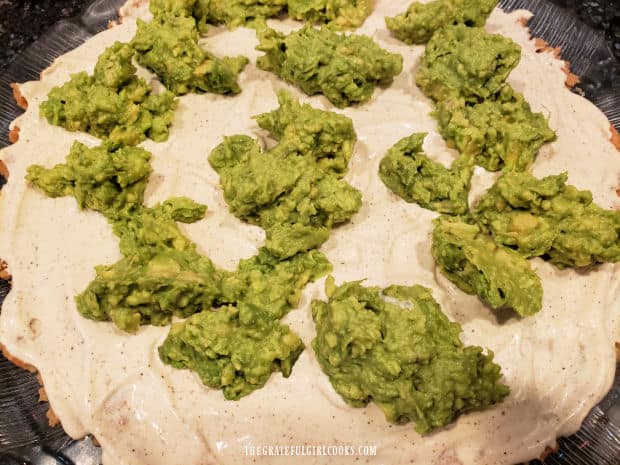
Peel and remove the seeds from three ripe avocados. Place the avocados in a bowl, and add fresh lemon juice. Mash with a fork until the avocados are fairly smooth in texture and the lemon juice has been incorporated. The lemon juice helps the avocados retain their pretty green color!

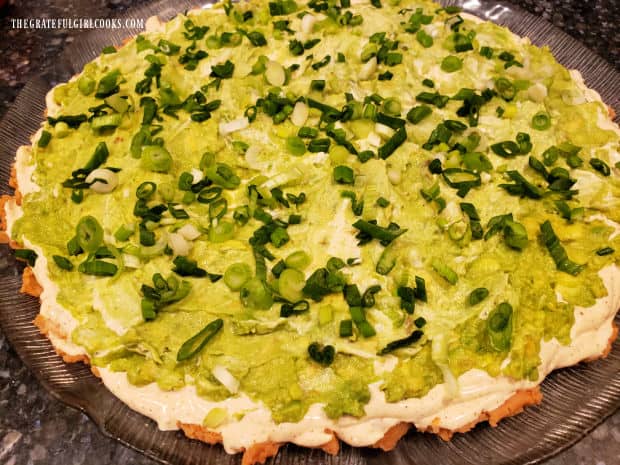
Dollop the avocado mixture over the sour cream layer, then carefully and gently spread the avocado layer to cover. Sprinkle the avocado layer evenly with sliced green onions.

Avocados mashed with lemon juice are spooned on top of sour cream mixture and spread out.Sliced green onions are sprinkled evenly on top of the avocado layer.

Okay… Let’s Layer The Remaining Ingredients!

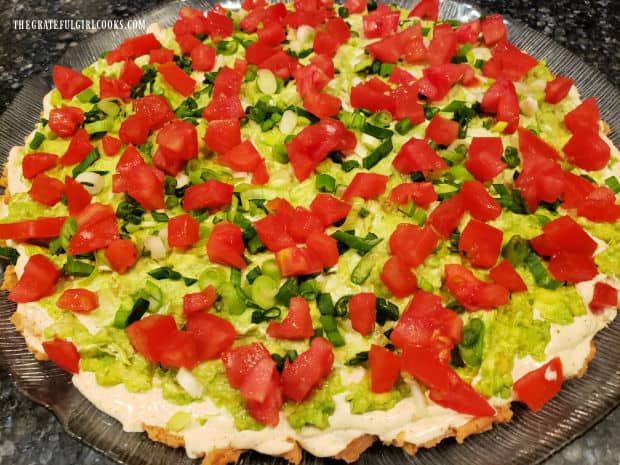
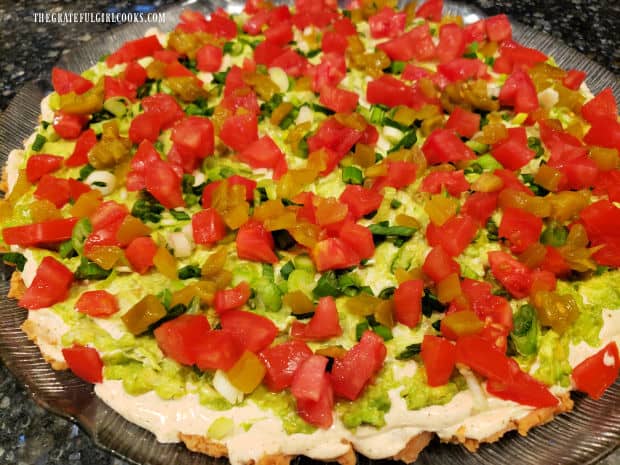
Distribute the chopped tomatoes evenly on top of the green onions. After that, evenly add a layer of chopped green chilis.

Chopped tomatoes are layered on top of the green onion layer.Chopped green chilis are evenly sprinkled on top of the tomato layer.

Ready For The Final Layers

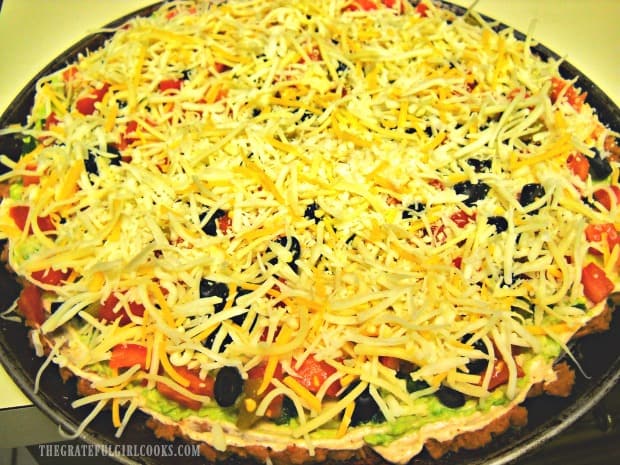
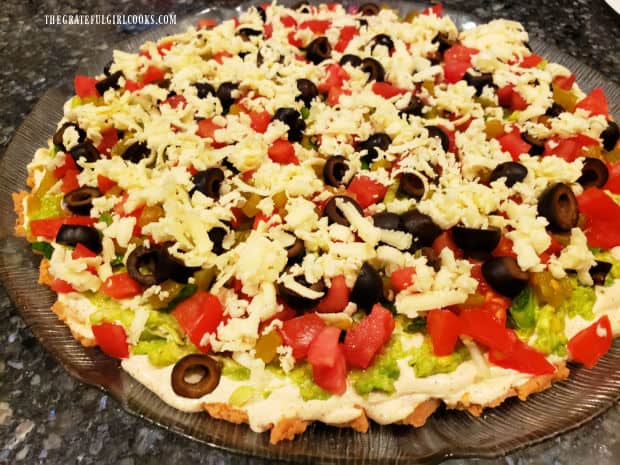
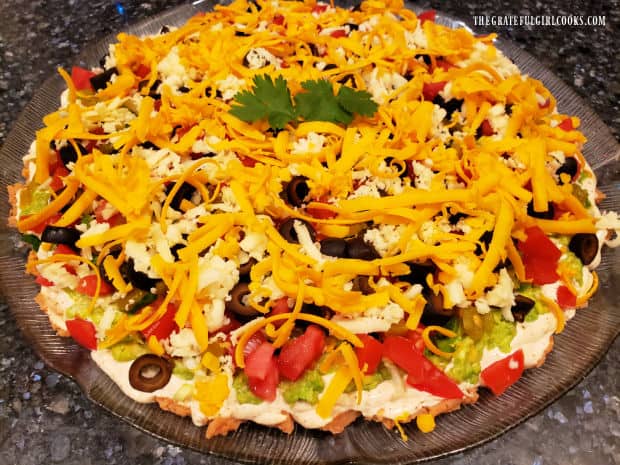
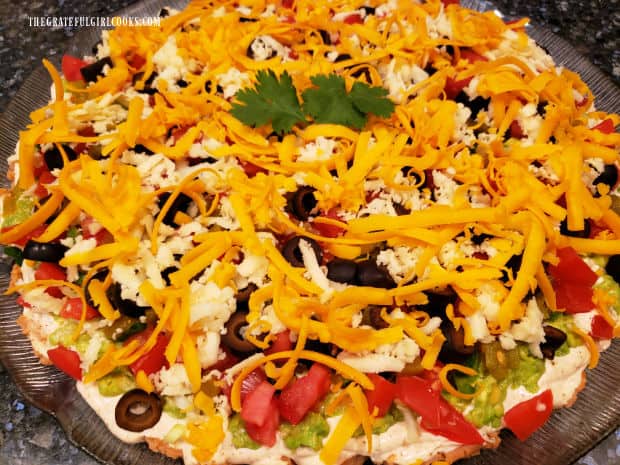
Sprinkle sliced black olives over the top of the tomatoes. The next layer to be added is grated Jack cheese, which is then followed by a final layer of grated Cheddar cheese. Be sure to evenly distribute the cheeses over the surface of the Mexican Layer Dip. If desired, add a garnish of fresh cilantro leaves, but that is totally OPTIONAL.

Cover the Mexican Layer Dip platter with plastic wrap, and refrigerate for at least one hour to let the flavors come together. You can also make this up the day before you want to serve it, too. How’s that for convenience?

Sliced black olives then grated jack cheese is sprinkled on top of the green chili layer..The final layer is grated cheddar cheese on top of the Mexican Layer Dip and a cilantro garnish.

Ready To Serve

I know you will love this Mexican Layer Dip. Isn’t it “pretty”? This is one appetizer that is perfect for scooping! Yum. Serve the Mexican Layer Dip with a big bag of tortilla chips (or corn chips), and watch how fast it disappears. Just wait till you TASTE it!

Mexican Layer Dip is always a family or party favorite appetizer, and it’s fun to watch everyone huddled around it, scooping this delicious dip up as fast as they can! It is wonderful!

Mexican Layer Dip is chilled and is ready to serve with tortilla chips for dipping!

I hope you enjoy this classic layered dip appetizer! We sure do. Thanks for taking time from your busy day to stop by this website today. Have a great day, and please come back again soon, for more family-friendly recipes.

Looking For More APPETIZER Recipes?

You can find all of my recipes in the Recipe Index, located at the top of the page. A few of our favorite appetizers include:

Interested In More Recipes?

Thank you for visiting this website. I appreciate you using some of your valuable time to do soIf you’re interested, I publish a newsletter 2 times per month (1st and 15th) with all the latest recipes, and other fun info. I would be honored to have you join our growing list of subscribers, so you never miss a great recipe!
There is a Newsletter subscription box on the top right side (or bottom) of each blog post, depending on the device you use, where you can easily submit your e-mail address (only) to be included in my mailing list.

You Can Also Find Me On Social Media:
Facebook page: The Grateful Girl Cooks!
Pinterest: The Grateful Girl Cooks!
Instagram: jbatthegratefulgirlcooks

Author's signatureRecipe source: Unknown (had this recipe on an index card for over 30 years)

↓↓ PRINTABLE RECIPE BELOW ↓↓

0 from 0 votes
Mexican Layer Dip
Prep Time
20 mins
Cook Time
0 mins
Refrigeration (inactive time)
1 hr
Total Time
1 hr 20 mins
 

Mexican Layer Dip is the perfect party appetizer! Set out a platter of this easy, layered dip with tortilla chips, and let the feeding frenzy begin!

Category: Appetizer
Cuisine: Mexican
Keyword: Mexican layer dip
Servings: 12
Calories Per Serving: 216 kcal
Author: JB @ The Grateful Girl Cooks!
Ingredients
  • 16 ounces spicy fat-free refried beans (1 can) (can use regular, too)
  • 6 Tablespoons sour cream
  • 4 Tablespoons mayonnaise
  • 1 ounce taco seasoning mix (1 envelope pkg.) (or use your own mix ☺)
  • 3 medium avocados peeled/pits removed
  • 2 teaspoons fresh lemon juice
  • 3 stems green onions , chopped (green and white parts)
  • 4.5 ounces diced green chiles (small can), drained
  • 1 large tomato or 2 Roma tomatoes , chopped
  • 2.25 ounces chopped black olives (small can), drained
  • 1 cup jack cheese , grated
  • 1 cup cheddar cheese , grated
  • Tortilla chips (or corn chips), for serving
Instructions
  1. Spread entire can of refried beans onto a large round serving platter or pizza pan, mashing it down as you spread it out, to cover platter or pan.

  2. In separate bowl, stir together sour cream, mayonnaise and taco seasoning. Spread this mixture on top of refried beans, to cover.

  3. Mash avocados with lemon juice in a bowl until fairly smooth. Drop avocado mixture by large spoonfuls on top of sour cream layer. Gently spread to cover.

  4. Add layer of sliced green onions.

    Add layer of diced green chiles.

    Add layer of chopped tomatoes.

    Add layer of black olives.

    Add layer of grated jack cheese.

    Top with layer of grated cheddar cheese.

  5. Cover platter with plastic wrap and refrigerate for at least one hour. Remove from refrigerator and DIG IN! Serve this with tortilla or corn chips!

Recipe Notes

Caloric calculation does not include tortilla chips!

Nutrition Facts
Mexican Layer Dip
Amount Per Serving (1 (1/12th of total))
Calories 216 Calories from Fat 144
% Daily Value*
Fat 16g25%
Saturated Fat 5g31%
Trans Fat 0.003g
Polyunsaturated Fat 2g
Monounsaturated Fat 7g
Cholesterol 21mg7%
Sodium 699mg30%
Potassium 324mg9%
Carbohydrates 12g4%
Fiber 6g25%
Sugar 2g2%
Protein 8g16%
Vitamin A 679IU14%
Vitamin C 12mg15%
Calcium 172mg17%
Iron 1mg6%
* Percent Daily Values are based on a 2000 calorie diet.

Here’s one more to pin on your Pinterest boards!Mexican Layer Dip is the perfect party appetizer! Set out a platter of this layered dip with tortilla chips, & let the feeding frenzy begin!


Save

Save

Crostini with Figs, Gorgonzola, Honey and Walnuts

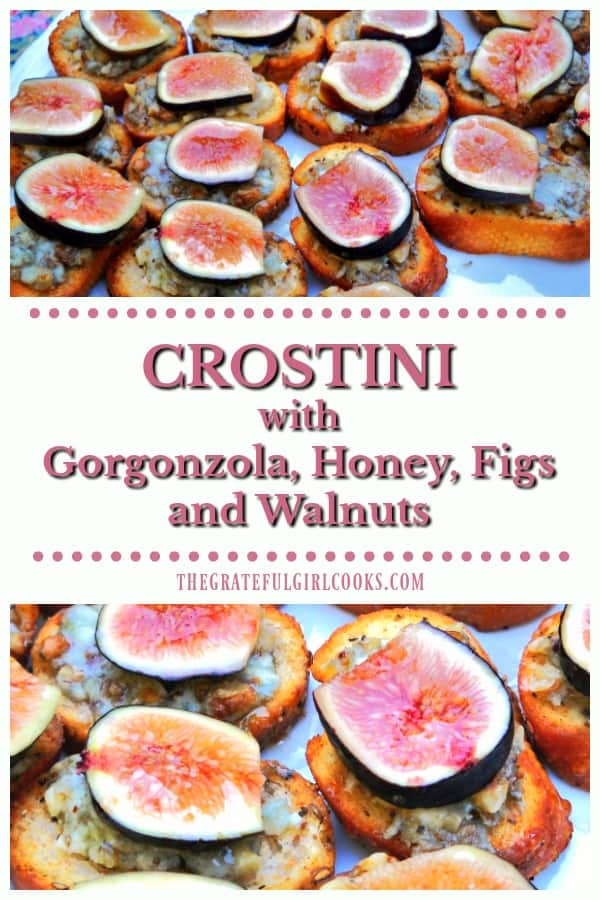
Crostini With Figs, Gorgonzola, Honey & Walnuts is a delicious, yet simple to prepare appetizer, full of great flavor!Crostini With Figs, Gorgonzola, Honey & Walnuts is a delicious, yet simple to prepare appetizer, full of great flavor!
If you like the combination of sweet/salty/crunchy combined with a bit of tangy, then this  Crostini With Figs, Gorgonzola, Honey And Walnuts appetizer is for YOU!  The original recipe was created by Food Network celebrity Giada De Laurentis, and I think it is pretty tasty.

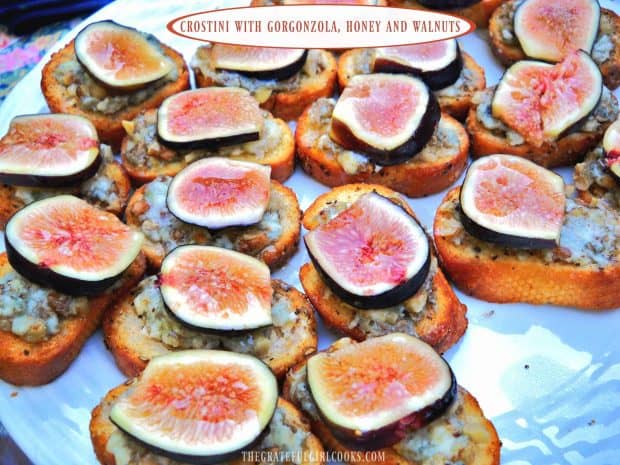
I served this crostini with figs appetizer when we had dinner guests this past summer. Toasted baguette slices are topped with creamy gorgonzola cheese and toasted walnuts, then baked and garnished with a fresh ripe fig slice and a drizzle of honey!

The crispy and creamy appetizers are full of flavor, and are very unique. Our dinner guests and my husband and I noshed on these yummy (and EASY) appetizers, while basking in the all-too rare Pacific Northwest sunshine out on our deck. The crostini with figs are a tasty little before dinner treat.

Scroll Down For A Printable Recipe Card At The Bottom Of The Page

Prepare The Baguette Slices

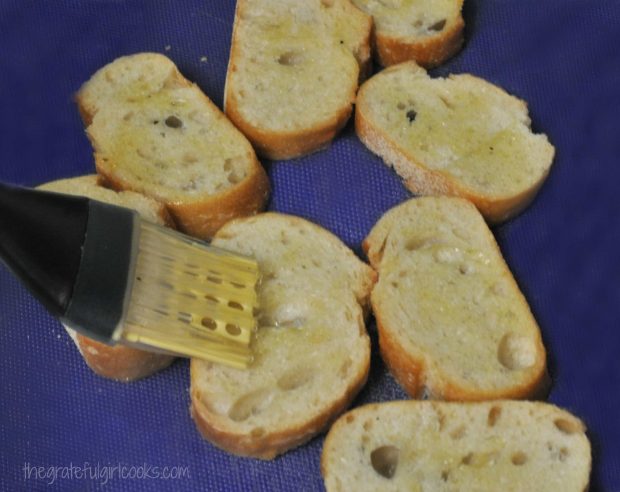
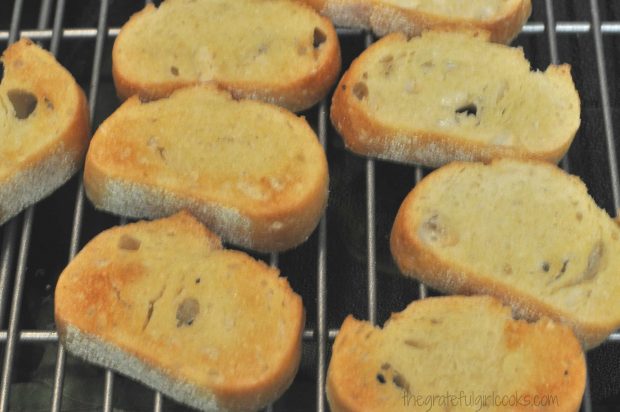
Arrange the baguette slices on a baking sheet in a single layer. Using a pastry brush, lightly baste the baguette slices with the olive oil. Place slices in oven, and bake until the baguette slices are a golden color, about 8 minutes.

Each of the baguette slices are brushed with olive oil before baking.

Baguette slices are baked until crispy and golden brown.Bake The Crostini

Once the bread is toasted and crisp, mix together the gorgonzola cheese and toasted walnuts. Spread this mixture on the crisp baguette slices. Bake them for a few minutes until the cheese has melted. This will take about 6-8 minutes..

Serve The Crostini With Figs

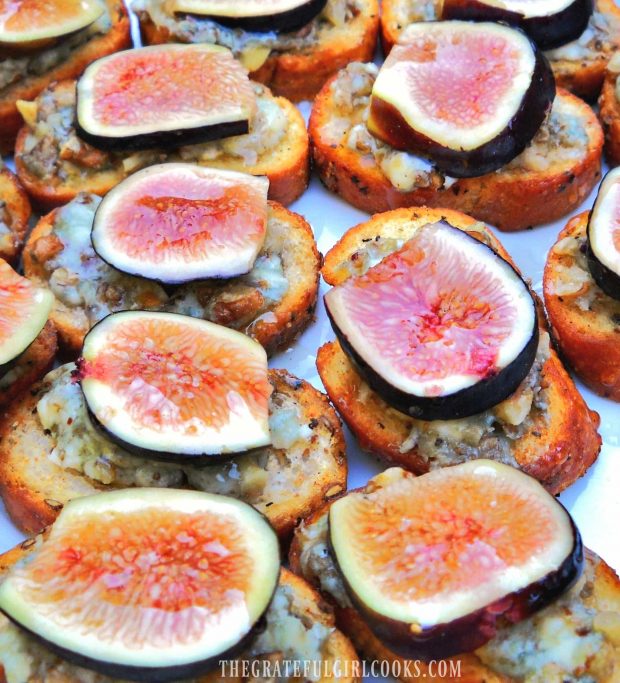
Once baked, top each crostini with a thin slice of fig, then drizzled each crostini with honey, and serve! That’s it. See how easy the crostini with fig is to prepare and serve? Crostini with figs, gorgonzola and honey is really such a simple, flavorful appetizer.

The finished appetizers of crostini with figs are served, drizzled with honey.

These crostini with figs were a welcome departure from my “normal” go-to appetizers. I would definitely make them again. I sure hope you will give them a try! Have a great day.

Looking For More APPETIZER Recipes?

You can find ALL of my recipes in the Recipe Index, located at the top of the page. I have a nice variety of appetizers for you to enjoy, including:

Interested In More Recipes?

Thank you for visiting this website. I appreciate you using some of your valuable time to do soIf you’re interested, I publish a newsletter 2 times per month (1st and 15th) with all the latest recipes, and other fun info. I would be honored to have you join our growing list of subscribers, so you never miss a great recipe!
There is a Newsletter subscription box on the top right side (or bottom) of each blog post, depending on the device you use, where you can easily submit your e-mail address (only) to be included in my mailing list.

You Can Also Find Me On Social Media:
Facebook page: The Grateful Girl Cooks!
Pinterest: The Grateful Girl Cooks!
Instagram: jbatthegratefulgirlcooks

Author's signatureRecipe Source: http://www.oprah.com/food/Crostini-with-Gorgonzola-Honey-and-Walnuts

↓↓ PRINTABLE RECIPE BELOW ↓↓

0 from 0 votes
Crostini with Figs, Gorgonzola, Honey and Walnuts
Prep Time
15 mins
Cook Time
6 mins
Total Time
21 mins
 

Crostini With Figs, Gorgonzola, Honey & Walnuts is a delicious, yet simple to prepare appetizer, full of great flavor!

Category: Appetizer
Cuisine: American
Keyword: crostini with figs
Servings: 24
Calories Per Serving: 98 kcal
Author: JB @ The Grateful Girl Cooks!
Ingredients
  • 2 TBSP olive oil
  • 1 small, long baguette
  • 6 ounces creamy gorgonzola cheese , coarsely crumbled
  • 2/3 cup walnuts , toasted, coarsely chopped
  • 4 ripe figs , thinly sliced, crosswise (optional)
  • 3 TBSP honey
Instructions
  1. Preheat oven to 375 degrees.
  2. Arrange the baguette slices on a baking sheet in a single layer. Using a pastry brush, lightly baste the baguette slices with the olive oil. Place slices in oven, and bake till baguette slices are a golden color, about 8 minutes. (You can also toast the slices a day ahead. Cool, then store them at room temperature in a covered container.)
  3. Toss the gorgonzola, along with the toasted walnuts (that have cooled to room temperature) in a small bowl. Spoon the cheese mixture onto the prepared baguette slices and press slightly to adhere.Return baguette slices to baking sheet. Bake in oven until the cheese melts (about 6-8 minutes).
  4. Arrange the warm crostini on a platter. Top each slice with a thin slice of fig. Drizzle with the honey and serve warm. Enjoy!
Nutrition Facts
Crostini with Figs, Gorgonzola, Honey and Walnuts
Amount Per Serving (1 crostini)
Calories 98 Calories from Fat 45
% Daily Value*
Fat 5g8%
Saturated Fat 1g6%
Cholesterol 5mg2%
Sodium 162mg7%
Potassium 63mg2%
Carbohydrates 9g3%
Sugar 3g3%
Protein 2g4%
Vitamin A 65IU1%
Vitamin C 0.2mg0%
Calcium 52mg5%
Iron 0.5mg3%
* Percent Daily Values are based on a 2000 calorie diet.

Here’s one more to pin on your Pinterest boards!Crostini With Figs, Gorgonzola, Honey & Walnuts is a delicious, yet simple to prepare appetizer, full of great flavor!

Save

Save

Save

Save

Save

Hummus

Creamy hummus, with minced garlic, is an easy to make from scratch dip to serve as an appetizer with pita chips, or fresh vegetables.Creamy hummus, with minced garlic, is an easy to make from scratch dip to serve as an appetizer with pita chips, pita bread or fresh vegetables.

True story…I hadn’t tried hummus until a few years ago. My sister-in-law is a vegan, and once she moved to the great Pacific Northwest, she would occasionally bring this dip and veggies as an appetizer to family gatherings, etc.

Since I am definitely NOT one to leave a good-looking appetizer untouched (snicker, snicker), I found myself loving the various flavors of store-bought hummus. 

I decided to try and make some myself. That way, I could know exactly what was in the food, and I figured if I made it myself it would be cheaper (in the long run) than buying it.

Scroll Down For A Printable Recipe Card At The Bottom Of The Page

Where Does Hummus Come From?

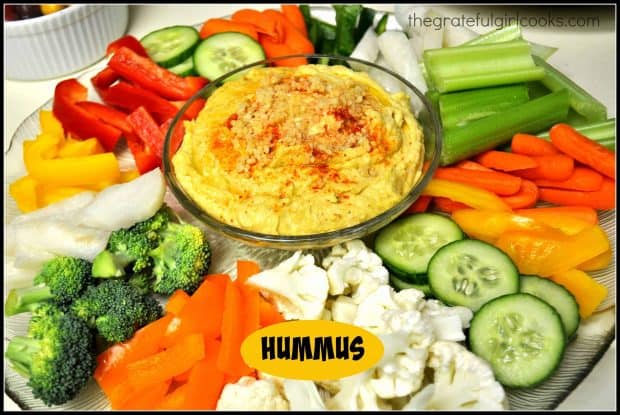
Hummus comes from the Arabic word for chickpeas (garbanzo beans), and is typically garbanzo beans mixed with tahini paste, lemon juice and olive oil, plus various spices. It is commonly used as a dip or spread. I LOVE hummus served with with fresh vegetables for dipping!

If you enjoy “dippable” or “spreadable” appetizers, you might also enjoy my delicious recipe for Homemade Boursin Cheese or my Mom’s Famous Cream Cheese Ball. They are both ridiculously easy to make and taste incredible!

Anyways… back to the HUMMUS. I began searching for a tasty recipe to make and came across this one by TV chef, Ina Garten. The way I figured it was, if she was a caterer AND a famous cook/celebrity, surely she must do hummus “right”.

I tried her recipe and tweaked it just a bit to my liking and have made it ever since then, just like this!

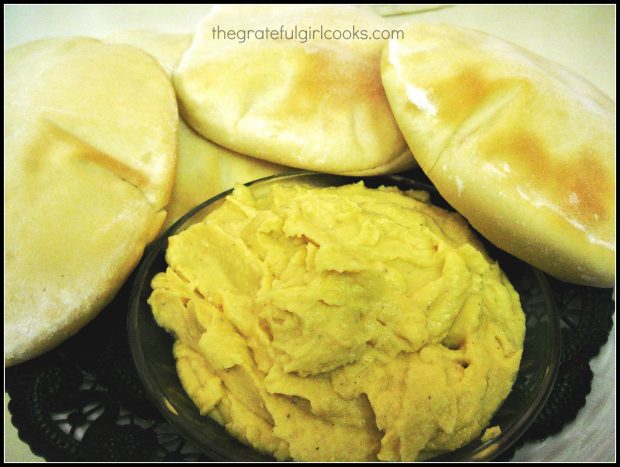
Hummus can also be served with freshly baked pita bread
This classic dip tastes great served with veggies, pita chips, or warm homemade pitas (the recipe for Homemade Pitas (as seen in the photo above) is here on my blog: Pita Bread DIY.  

The best part? Making hummus is so EASY! If you have a food processor it is super easy to make, but can also be made, using a blender, if necessary.

Sure hope you will give this delicious hummus recipe a try… it’s amazing!

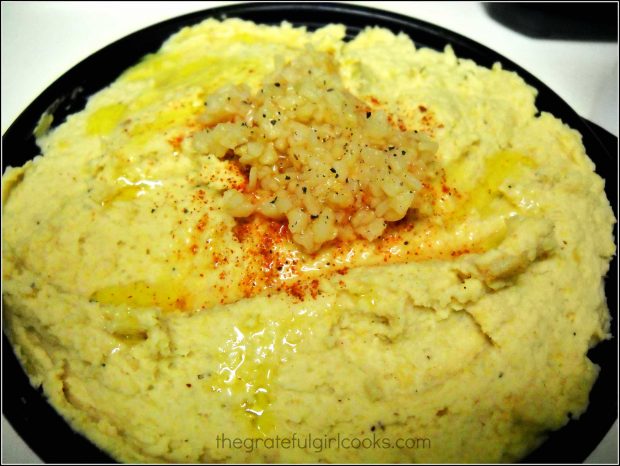
Hummus, with minced garlic and paprika garnish is ready to serve!

Sure hope you try this delicious hummus recipe. I’m sure you will like it as much as we do! It is an easy and delicious appetizer you’ll enjoy.

Thanks for stopping by, and I invite you to come back soon for more family-friendly recipes. Take care, may God bless you, and have a GREAT day!

Looking For More APPETIZER Recipes?

You can find ALL of my recipes in the Recipe Index, which is located at the top of the page. I have some wonderful appetizer recipes to enjoy, including:

Want More Recipes? Get My FREE Newsletter!

I publish a newsletter 2 times per month (1st and 15th) with lots of recipes, tips, etc..
Would you like to join our growing list of subscribers?

There is a Newsletter subscription box on the top right (or bottom) of each blog post, depending on the device you use.
You can submit your e-mail address there, to be added to my mailing list.

Find Me On Social Media:

Facebook page: The Grateful Girl Cooks!
Pinterest:
The Grateful Girl Cooks!
Instagram:
jbatthegratefulgirlcooks

Author's signatureRecipe Adapted From: http://www.foodnetwork.com/recipes/ina-garten/hummus-recipe/index.html

↓↓ PRINTABLE RECIPE BELOW ↓↓

0 from 0 votes
Hummus
Prep Time
10 mins
Cook Time
0 mins
Total Time
10 mins
 

Creamy hummus, with minced garlic, is an easy to make from scratch dip to serve as an appetizer with pita chips, pita bread or fresh vegetables.

Category: Appetizer
Cuisine: Middle Eastern
Keyword: hummus
Servings: 8 servings
Calories Per Serving: 131 kcal
Author: JB @ The Grateful Girl Cooks!
Ingredients
  • 4 garlic cloves , minced (I use minced garlic, straight out of a jar)
  • 2 cups canned chickpeas (garbanzo beans), drained (liquid reserved)
  • 1 ½ teaspoons kosher salt
  • 1/4 teaspoon pepper
  • 1/3 cup Tahini (sesame paste, can be found in most grocery stores or specialty stores)
  • 6 Tablespoons freshly squeezed lemon juice (2 lemons)
  • 2 Tablespoons water (or reserved liquid from chickpeas)
  • 8 dashes hot sauce (I used a Louisiana-style hot sauce...your choice)
  • 2-3 Tablespoons olive oil (to drizzle into hummus)
To Garnish the Finished Hummus:
  • Additional olive oil (optional)
  • Paprika (optional)
  • Minced garlic (optional)
Instructions
  1. Fit a food processor with steel blade. Add all ingredients (except olive oil and garnish ingredients) to processor and process until hummus is coarsely pureed. Then slowly drizzle in the 2-3 TBSP of olive oil a little at a time, until hummus reaches desired consistency (you may or may not have to add the entire amount). Taste for seasoning, and add more salt, etc. as desired.
  2. Before serving (either chilled or at room temp): I drizzle a small amount of olive oil over top, then sprinkle a touch of paprika, followed by additional minced garlic into the middle of the top of the hummus (you know...just to make it "pretty". Keep hummus refrigerated. That's it! Enjoy!
Recipe Notes

You can also purchase dried chickpeas (garbanzo beans) to use- I do this all the time. Put the equivalent of 2 cans of beans (yeah, I "guess-timate") in a bowl of water and let sit overnight (this slightly rehydrates them and begins softening them). Then place them in a saucepan filled with water and cook them for approx. one hour on medium-high, till tender. Then add to recipe and proceed with directions.

Recipe can also be processed in a blender, if a food processor is not available.

Nutrition Facts
Hummus
Amount Per Serving (1 serving)
Calories 131 Calories from Fat 81
% Daily Value*
Fat 9g14%
Saturated Fat 1g6%
Sodium 502mg22%
Potassium 122mg3%
Carbohydrates 9g3%
Fiber 2g8%
Protein 3g6%
Vitamin A 5IU0%
Vitamin C 6mg7%
Calcium 31mg3%
Iron 1mg6%
* Percent Daily Values are based on a 2000 calorie diet.

Here’s one more to pin on your Pinterest boards!Creamy hummus, with minced garlic, is an easy to make from scratch dip to serve as an appetizer with pita chips, pita bread or fresh vegetables.


Save

Save

Pita Bread DIY

It’s EASY making pita bread from scratch! You will enjoy eating and using this traditional puffy pocket bread, for appetizers or sandwiches!It's EASY making pita bread from scratch! You will enjoy eating and using this traditional puffy pocket bread, for appetizers or sandwiches!
Do you ever see a recipe and think to yourself “Hmmm…that might be kinda fun to try?” Well, to be honest, making pita bread had never been high on my bucket list, and I was curious HOW to make it…then I saw a recipe for homemade pita bread posted on Pinterest, and made it. It was so fantastic, I want to share the recipe, so…here is a Pita Bread DIY!

I first saw the recipe more as a challenge to try something new, versus a food item I couldn’t live without, but the part of me that was up for a new challenge won out. And guess what? I now love them!

Scroll Down For A Printable Recipe Card At The Bottom Of The Page

What Can You Use Pita Bread For?

They are best served warm with some homemade Hummus, but are also very good when stuffed with sandwich meats or (my favorite) chicken salad. Yum. I’ve made them many times since I first tried this recipe. Trust me, this recipe for pita bread is a keeper.

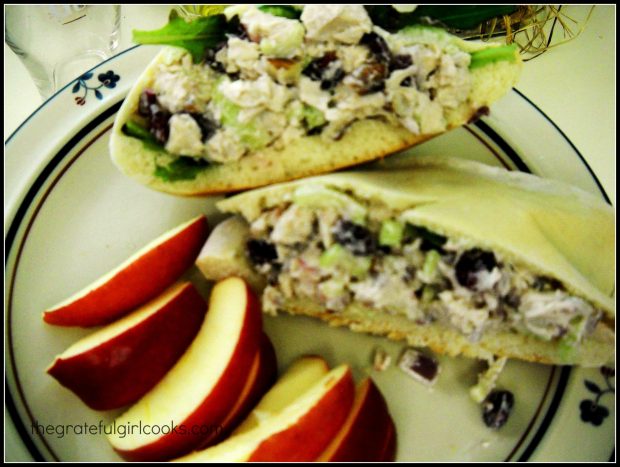
Here’s a pita, shown stuffed full with chicken salad! Simply slice the pita open, and stuff with your choice of meats and/or veggies, for a delicious sandwich!

Pita bread, stuffed with chicken salad

Before Baking… And After Baking, This Pita Bread Is Amazing!

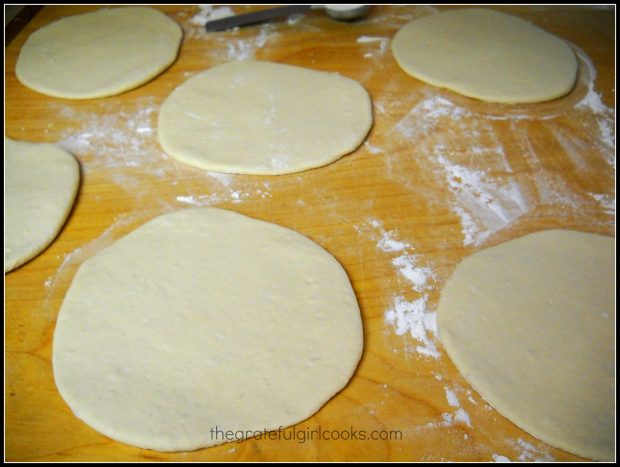
Here’s what the dough looks like, rolled out and ready to bake. They go into the oven flat as a pancake, but just wait until they are done baking…

Dough for pita bread, rolled out in circles on cutting board

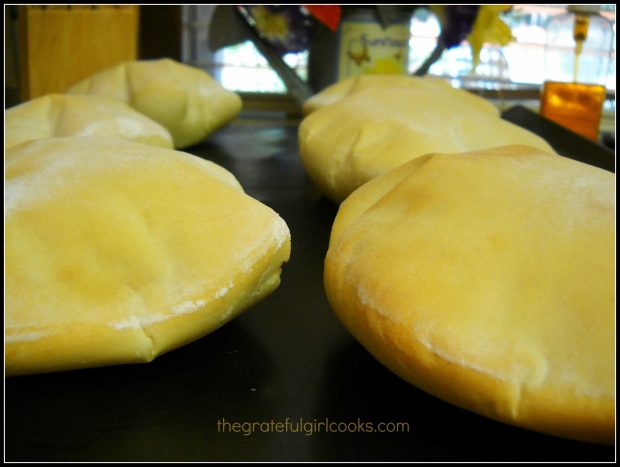
Here is the pita bread, hot out of the oven. See how it is gorgeous and puffed up. Isn’t that amazing?

Puffy pita bread, hot from the oven

They are actually very easy to make; there is something quite satisfying about seeing a flat little circle of dough puff up like the Stay Puft (yes, I did have to look up how to spell this!) Marshmallow Man in the movie Ghostbusters.

Sure hope you will give these a try. I think you will enjoy making them AND eating them! Have a great day, and come back soon!

Looking For More BREAD Recipes?

You can find all my recipes in the Recipe Index, located at the top of the page. I have quite a few delicious homemade bread recipes you may enjoy, including:

Interested In More Recipes?

Thank you for visiting this website. I appreciate you using some of your valuable time to do soIf you’re interested, I publish a newsletter 2 times per month (1st and 15th) with all the latest recipes, and other fun info. I would be honored to have you join our growing list of subscribers, so you never miss a great recipe!

There is a Newsletter subscription box on the top right side (or bottom) of each blog post, depending on the device you use, where you can easily submit your e-mail address (only) to be included in my mailing list.

You Can Also Find Me On Social Media:
Facebook page: The Grateful Girl Cooks!
Pinterest: The Grateful Girl Cooks!
Instagram: jbatthegratefulgirlcooks

Author's signatureRecipe Source: http://www.underthehighchair.com/2009/04/diy-pita-bread.html

↓↓ PRINTABLE RECIPE BELOW ↓↓

0 from 0 votes
Pita Bread DIY
Prep Time
1 hr 10 mins
Cook Time
15 mins
Total Time
1 hr 25 mins
 

It's EASY making pita bread from scratch! You will enjoy this puffy pocket bread, for appetizers or sandwiches!

Category: Bread
Cuisine: Middle Eastern
Keyword: pita bread
Servings: 6 servings
Calories Per Serving: 267 kcal
Author: JB @ The Grateful Girl Cooks!
Ingredients
  • 1 Tablespoon active yeast
  • 1 1/4 cups warm water
  • 1 teaspoon salt
  • 3-3 1/2 cups all-purpose flour
Instructions
  1. In the bowl of a stand mixer, dissolve the yeast in the warm water. Let sit for 5 minutes. Add 1 tsp. salt and 1 1/2 cups of the flour to the yeast mixture. Put the dough hook attachment on the mixer and beat to make the batter. Continue to add the rest of the flour, a little at a time (you may not need the entire 3 1/2 cups), until a rough "shaggy" mess has formed. Continue kneading the dough for 8 minutes or so, until the dough has become somewhat smooth and elastic. (Add more flour if the dough is still too sticky).
  2. Transfer dough to a lightly floured work surface. Tear dough into 6 pieces (for larger pitas) or 10 pieces (for smaller pitas). Form each dough piece into a ball, trying to tuck the seams under, to the bottom of the "ball". Once the dough balls have been formed, put them back onto the slightly floured surface, and flatten them with a rolling pin to between 1/4-1/2 inch thick (try to keep an even thickness for each pita). Let the dough "rest" for approx. 30-40 minutes, till slightly "puffed".
  3. Preheat the oven to 425 degrees. Using a spatula, scoop up each pita and flip it upside down onto a large cookie sheet (or sheets, depending on the number of pitas you are cooking). Bake the pitas at 425 degrees for 10-15 minutes (usually around 15), or till light golden brown. The pitas will miraculously puff up while baking...such fun just how they turn out! When done, remove pitas from oven and let cool on a wire rack. Enjoy!

Recipe Notes

Pitas are fantastic, served warm with hummus (cut them into triangles), or cut in half to form pockets for sandwiches. You can even cut them into triangles, brush them lightly with olive oil, and put them back in the oven till crisp (for pita chips). Enjoy!

Nutrition Facts
Pita Bread DIY
Amount Per Serving (1 pita)
Calories 267
% Daily Value*
Sodium 389mg17%
Potassium 84mg2%
Carbohydrates 55g18%
Fiber 2g8%
Protein 7g14%
Calcium 11mg1%
Iron 3.4mg19%
* Percent Daily Values are based on a 2000 calorie diet.

Here’s one more to pin on your Pinterest boards!
It's EASY making pita bread from scratch! You will enjoy eating and using this traditional puffy pocket bread, for appetizers or sandwiches!

Save

Save

Candied Orange, Cinnamon & Clove Spiced Pecans

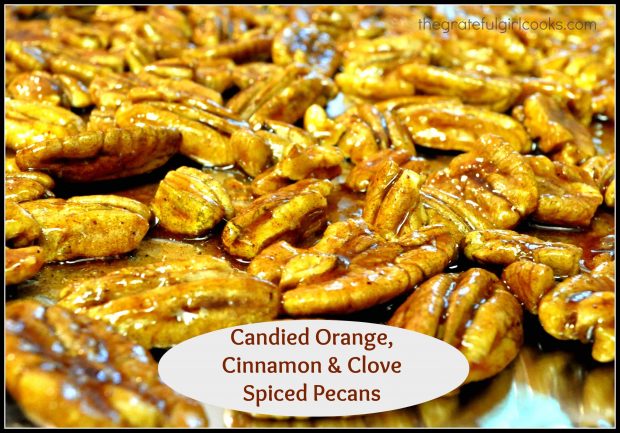
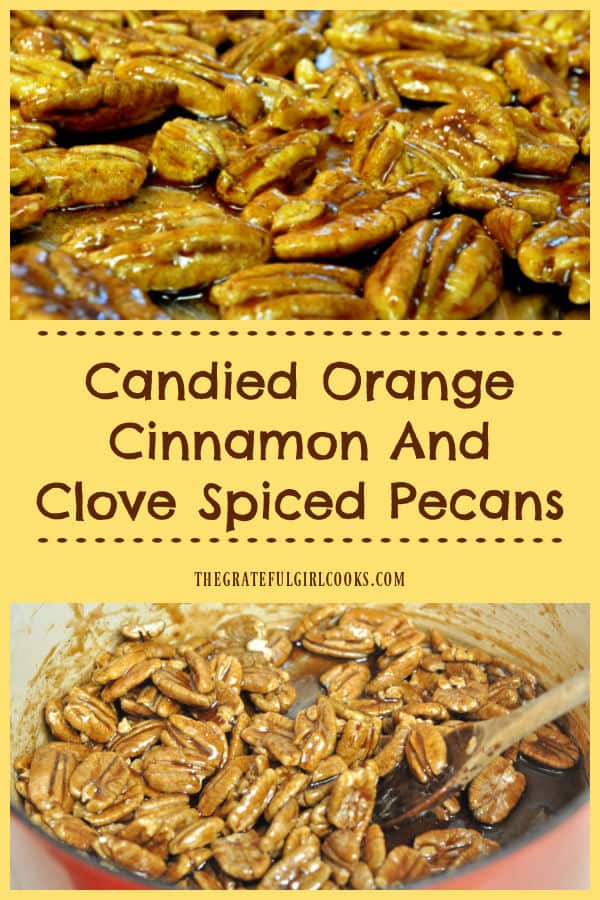
Candied Orange Spiced Pecans are delicious snacks that are first roasted, then coated in orange, cinnamon and clove sauce for maximum flavor! Candied Orange Spiced Pecans are delicious snacks that are first roasted, then coated in orange, cinnamon and clove sauce for maximum flavor!

Every year my mom orders and generously mails us several pounds of fresh-picked and shelled pecans she gets from a pecan farm in Texas.  I almost always make Candied Orange, Cinnamon & Clove Spiced Pecans with some of them at Christmas time! What a great treat it is to open the box we receive each Fall, and see bags and bags of harvested, shelled pecans that were hanging on a tree (minding their own business) just a few days before.

I use lots of these pecans for my holiday baking, but love to set some aside to make this recipe for candied pecans, which (besides being oh-so-yummy) are great to give in gift bags to friends at Christmas!

The wonderful flavors of orange, cinnamon and cloves combine to make this treat one of my personal favorites! I don’t remember where I got this little recipe card many years ago, but I DO remember the smile it brought to our faces the first time we tried them. I hope you enjoy them, as well. Here’s how easy it is to make them:

Scroll Down For A Printable Recipe Card At The Bottom Of The Page

How To Make These Candied Orange Spiced Pecans

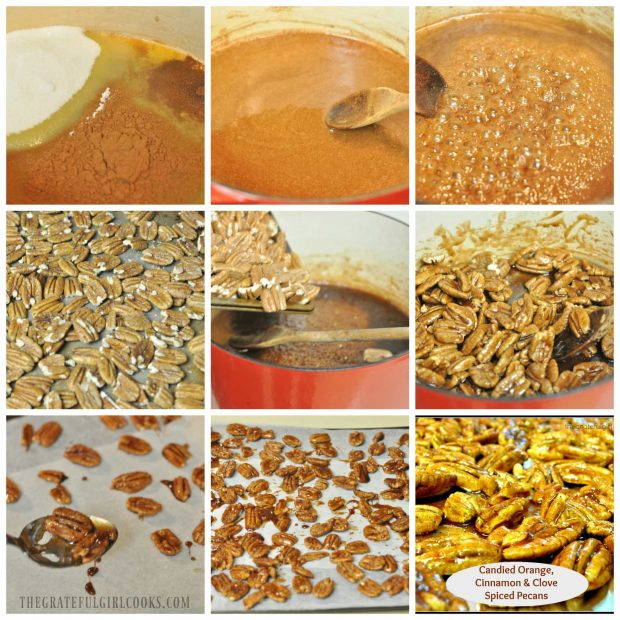
Spread pecans on an ungreased cookie sheet and bake @ 275 degrees for 10 minutes. In a saucepan, combine sugar, orange juice, cinnamon, salt and cloves. Bring to a boil and then boil for 2 minutes longer.  Remove pan from heat, and stir in pecans. Mix well, until pecans are fully coated.

Using a slotted spoon, remove nuts and place on waxed paper or aluminum foil, trying to keep the pecans separated from each other (I use a fork to help separate). Let the pecans dry for several hours (or until dry to the touch), then break up any of the pecans that are “stuck” to each other. That’s it!

The photos below show you the process in pictures, so you can get an idea of what the process looks like!

 A collage of making the candied orange spiced pecans.
Have a great day! Sure hope you will have the opportunity to make these absolutely delicious candied spiced pecans! They’re really delicious, and I am confident you and those you love will enjoy them. Thanks for visiting today, and I hope you come back soon for more recipes.

Looking For More SNACK Recipes?

You can find ALL of my recipes in the Recipe Index, located at the top of the page. I have some great snack recipes you might enjoy, including:

Interested In More Recipes?

Thank you for visiting this website. I appreciate you using some of your valuable time to do soIf you’re interested, I publish a newsletter 2 times per month (1st and 15th) with all the latest recipes, and other fun info. I would be honored to have you join our growing list of subscribers, so you never miss a great recipe!
There is a Newsletter subscription box on the top right side (or bottom) of each blog post, depending on the device you use, where you can easily submit your e-mail address (only) to be included in my mailing list.

You Can Also Find Me On Social Media:
Facebook page: The Grateful Girl Cooks!
Pinterest: The Grateful Girl Cooks!
Instagram: jbatthegratefulgirlcooks

Author's signature
Original Recipe Source: Unknown

↓↓ PRINTABLE RECIPE BELOW ↓↓

0 from 0 votes
Candied Orange Spiced Pecans
Prep Time
5 mins
Cook Time
5 mins
Total Time
10 mins
 

Candied Orange Spiced Pecans are delicious snacks that are first roasted, then coated in orange, cinnamon and clove sauce for maximum flavor!

Category: Candy
Cuisine: American
Keyword: candied spiced pecans
Servings: 18 (4½ cups total)
Calories Per Serving: 160 kcal
Author: JB @ The Grateful Girl Cooks!
Ingredients
  • 3 cups pecan halves
  • 1 cup granulated sugar
  • 1/3 cup prepared orange juice
  • 1 Tablespoon cinnamon
  • 1/2 teaspoon salt
  • 1/2 teaspoon cloves
Instructions
  1. Spread pecans on an ungreased cookie sheet.
  2. Bake pecans @ 275 degrees for 10 minutes.
  3. In a saucepan, combine sugar, orange juice, cinnamon, salt and cloves. Bring to a boil and then boil for 2 minutes longer.
  4. Remove pan from heat, and stir in pecans. Mix well.
  5. Using a slotted spoon, remove nuts and place on waxed paper or aluminum foil, trying to keep the pecans separated from each other (I use a fork to help separate).
  6. Let the pecans dry for several hours (or until dry to the touch), then break up any of the pecans that are "stuck" to each other.
  7. Store the pecans in a covered container to keep them at their peak freshness. This recipe makes approximately 4 1/2 cups. Enjoy!
Nutrition Facts
Candied Orange Spiced Pecans
Amount Per Serving (0.25 cup)
Calories 160 Calories from Fat 99
% Daily Value*
Fat 11g17%
Saturated Fat 1g6%
Sodium 64mg3%
Potassium 76mg2%
Carbohydrates 14g5%
Fiber 1g4%
Sugar 12g13%
Protein 1g2%
Vitamin A 20IU0%
Vitamin C 2.5mg3%
Calcium 16mg2%
Iron 0.5mg3%
* Percent Daily Values are based on a 2000 calorie diet.

Here’s one more to pin on your Pinterest boards!Candied Orange Spiced Pecans are delicious snacks that are first roasted, then coated in orange, cinnamon and clove sauce for maximum flavor!


Save

Save

Save

Save

Save

Mom’s Famous Cream Cheese Ball

Mom’s Famous Cream Cheese Ball is a delicious, easy appetizer, w/ red and green peppers, green onions and chopped pecans! So good, served on assorted crackers!Mom's Famous Cream Cheese Ball is a delicious, easy appetizer, w/ red and green peppers, green onions and chopped pecans! So good, served on assorted crackers!

I love holidays, and all the happy memories associated with them. A lot of my holiday memories revolve around simple, delicious meals with family and friends.

Mom’s Famous Cream Cheese Ball is an appetizer I’ve prepared for many years (35+), and is always a big hit. My Mom got this recipe from a friend at church over 30 years ago. Mom has now passed the recipe down (and the “serving it at the holidays” tradition) to me and my sisters.

This recipe for Mom’s Famous Cream Cheese Ball is so easy to prepare! With only a few ingredients like green and red bell peppers, green onions and pecans, it’s also easy on the wallet. It’s large enough to split into two cheese balls, if you want.

Scroll Down For A Printable Recipe Card At The Bottom Of The Page

How To Make Mom’s Famous Cream Cheese Ball

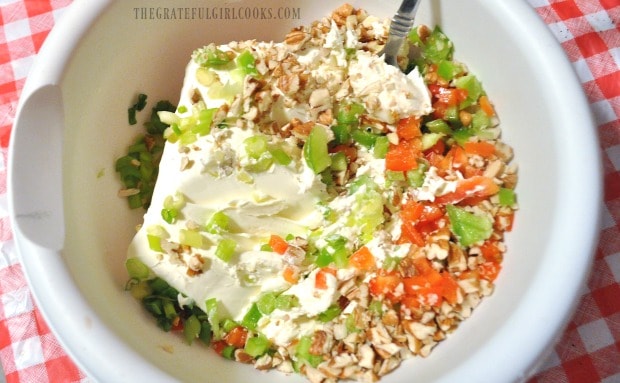
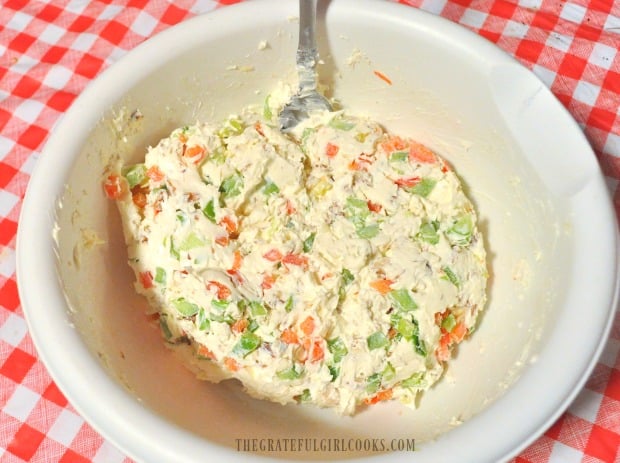
One of the best things about Mom’s Famous Cream Cheese Ball is that it can be made the day before it is served.  I think the “good-flavor elves” work the flavors into the cheese ball even better that way. Place all the ingredients into a medium sized bowl.  Mix these ingredients together with a fork until fully combined.

The ingredients for Mom's famous cream cheese ball are placed in mixing bowl.

Mom's famous cream cheese ball ingredients are mixed together.

How To Shape Mom’s Famous Cream Cheese Ball

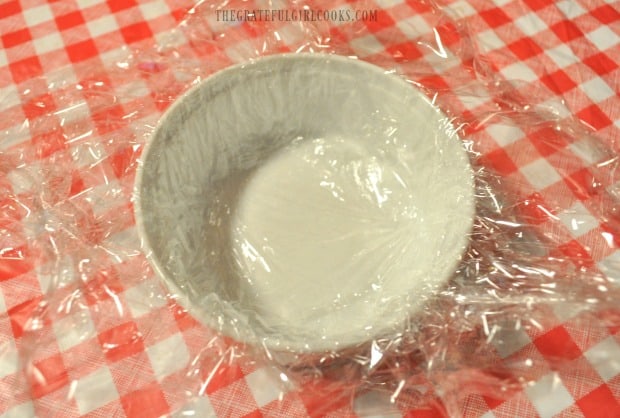
Line a ramekin with plastic wrap, making sure to leave a lot of the plastic wrap extended well past the edges. Use a couple pieces to ensure that all edges of the ramekin have a lot of plastic wrap hanging over the edges.

A ramekin with plastic wrap, is prepared for Mom's famous cream cheese ball mixture.

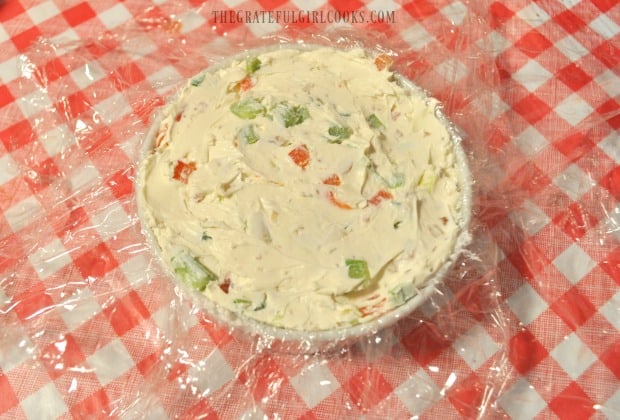
Spoon the cheese ball mixture into the ramekin. Use a spoon to firmly press down into all nooks and crannies of the ramekin.  You want to really pack it in there! Level off the top of the cheese ball.

Ingredients for Mom's famous cream cheese ball are packed into ramekin.

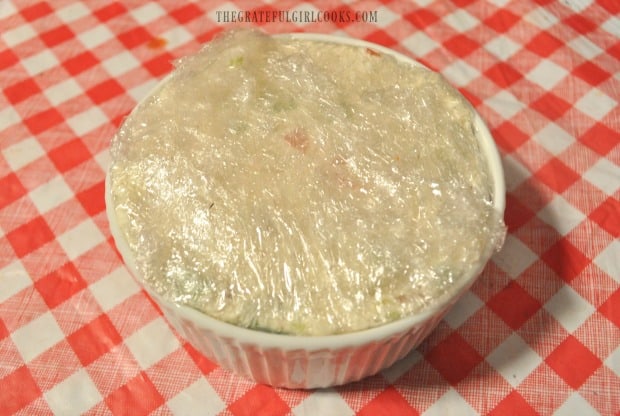
Once Mom’s famous cream cheese ball mixture is FIRMLY packed into the ramekin, cover tightly with the plastic wrap, pressing down as you wrap it. Make sure the cheese ball is completely wrapped. Place Mom’s famous cream cheese ball into the refrigerator for at least 6-8 hours (best if left in fridge overnight so the flavors can really develop!).

Ramekin with Mom's famous cream cheese ball is tightly wrapped, then refrigerated overnight.

When Ready To Serve

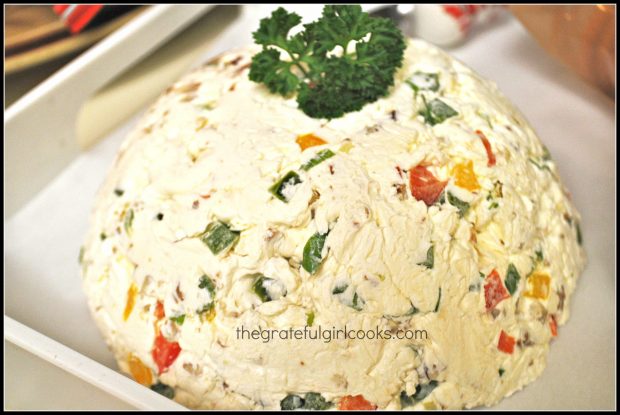
Once you are about half an hour or so before serving, remove cheese ball from refrigerator. Carefully unwrap it, and invert the the cheese ball (turn it upside down onto your serving platter. The rounded dome side of the cheese ball should be face up! Garnish with a sprig of fresh parsley, if desired.

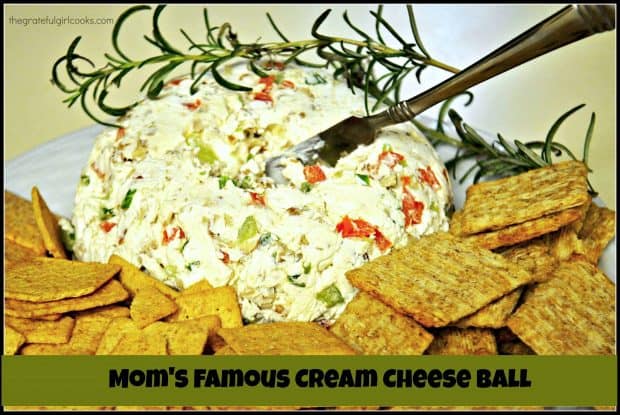
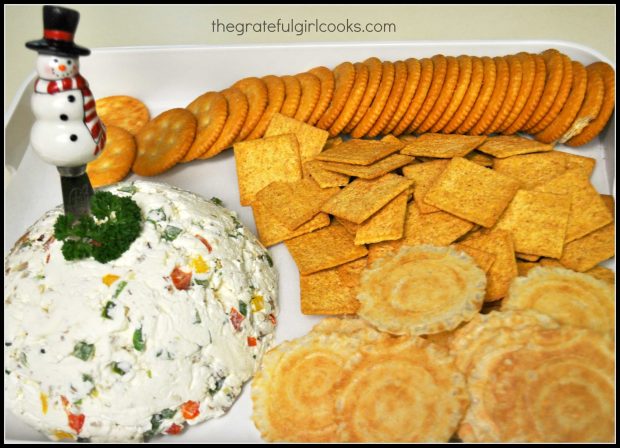
Mom’s famous cream cheese ball can be served with any kind of savory cracker. Let the cheese ball sit out at room temperature for 30-45 minutes before serving. this helps the cheese to soften up a bit (it’s easier to spread it on a cracker that way).

Mom's Famous Cream Cheese Ball, served as appetizer with various crackers.
You’re going to be surprised how delicious Mom’s famous cream cheese ball is! It is a family tradition of ours, and is usually the very first thing our grown sons head straight to, when I make it!

Mom's Famous Cream Cheese Ball, garnished with fresh parsley.
 
Mom’s Famous Cream Cheese Ball will be a HUGE hit at any gathering… trust me! It is SO GOOD! Everyone that tries it wants the recipe! Have a great day, and don’t fet to check out the Recipe Index (with ALL my recipes), located at the top of the page!
 

Looking For More APPETIZER Recipes?

If you are looking for other appetizer recipes, perhaps you would want to check out my recipes for Classic Bruschetta, Mexican Layer Dip, Crostini with Figs, Gorgonzola, Honey and Walnuts.
Maybe you would also like to serve Homemade Boursin Cheese (and crackers), or Sun-Dried Tomato and Kalamata Olive Bruschetta?
 
Interested In More Recipes?

Thank you for visiting this website. I appreciate you using some of your valuable time to do soIf you’re interested, I publish a newsletter 2 times per month (1st and 15th) with all the latest recipes, and other fun info. I would be honored to have you join our growing list of subscribers, so you never miss a great recipe!
There is a Newsletter subscription box on the top right side (or bottom) of each blog post, depending on the device you use, where you can easily submit your e-mail address (only) to be included in my mailing list.

You Can Also Find Me On Social Media:

Facebook page: The Grateful Girl Cooks!
Pinterest:
The Grateful Girl Cooks!
Instagram:
jbatthegratefulgirlcooks

Author's signatureRecipe Source: My Mom

↓↓ PRINTABLE RECIPE BELOW ↓↓

0 from 0 votes
Mom's Famous Cream Cheese Ball
Prep Time
10 mins
Cook Time
0 mins
Total Time
10 mins
 

Mom's Famous Cream Cheese Ball is a delicious, easy appetizer, w/ red and green peppers, green onions and chopped pecans! So good, served on assorted crackers!

Category: Appetizer
Cuisine: American
Keyword: cream cheese ball
Servings: 40 servings (approx.) 1 Tablespoon each
Calories Per Serving: 48 kcal
Author: JB @ The Grateful Girl Cooks!
Ingredients
  • 2 8 ounce packages. cream cheese , at room temp
  • 1/2 cup chopped pecans or walnuts (I use pecans)
  • 2 stalks green onion , sliced (green stem and white part)
  • 1/4 cup chopped green pepper
  • 1/4 cup red pepper
Instructions
  1. Place all ingredients in a medium-sized bowl. I use a fork to "mash" the ingredients together (a fork helps to blend the veggies and nuts into the cream cheese).
  2. Once completely blended, I "mold" the cheese into the shape I want to serve it in. To do this, you take plastic wrap, drape a small bowl (whatever shape you choose to use) and completely cover it with plastic wrap with the sides overlapping and hanging over the bowl several inches on each side. Then I use a spoon to "mold" the cream cheese mixture into the bowl, being sure to push the mixture into every part of the bowl and packing it down.
  3. Once packed into the bowl, make sure you level off the top part of the cheese as flat as you can (this will end up being the bottom of the cheese ball, and you want it lay flat). Wrap the excess plastic wrap completely over the top of the cheese, so it is sealed completely.
  4. Refrigerate overnight, or at least 8 hours, in order for the flavors to come together.
  5. When ready to serve, unwrap the plastic and invert the cheese ball onto serving platter. Grab a serving knife and serve with the crackers of your choice. Enjoy!
Nutrition Facts
Mom's Famous Cream Cheese Ball
Amount Per Serving (1 Tablespoon)
Calories 48 Calories from Fat 36
% Daily Value*
Fat 4g6%
Saturated Fat 2g13%
Cholesterol 12mg4%
Sodium 36mg2%
Potassium 26mg1%
Vitamin A 190IU4%
Vitamin C 2.1mg3%
Calcium 13mg1%
Iron 0.1mg1%
* Percent Daily Values are based on a 2000 calorie diet.

Here’s one more to pin on your Pinterest boards!Mom's Famous Cream Cheese Ball is a delicious, easy appetizer, w/ red and green peppers, green onions and chopped pecans! So good, served on assorted crackers!

Save

Save