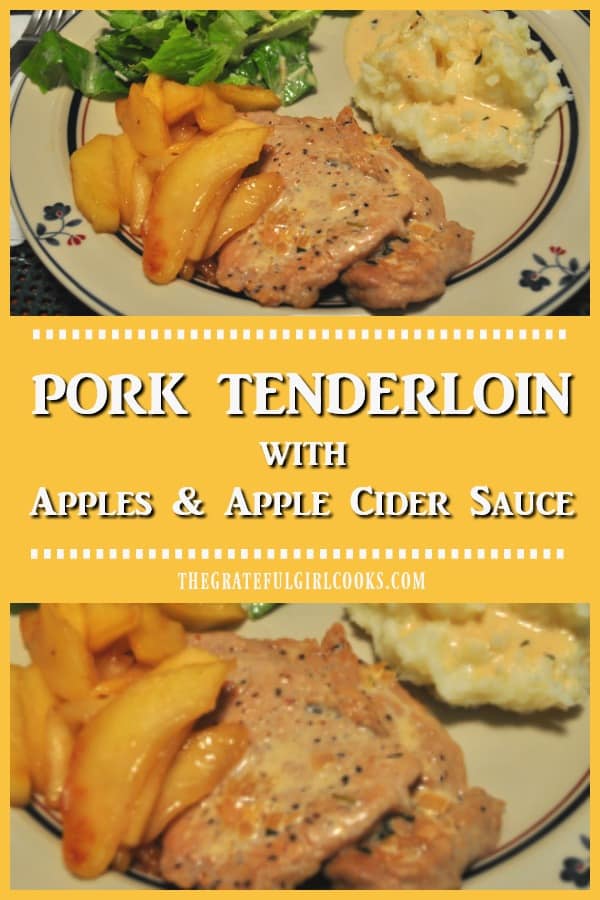
Category: Apples

Garlic Butter Naan Bread

Make Garlic Butter Naan Bread to accompany a favorite main dish! This classic Indian flatbread is delicious, especially with curry dishes.
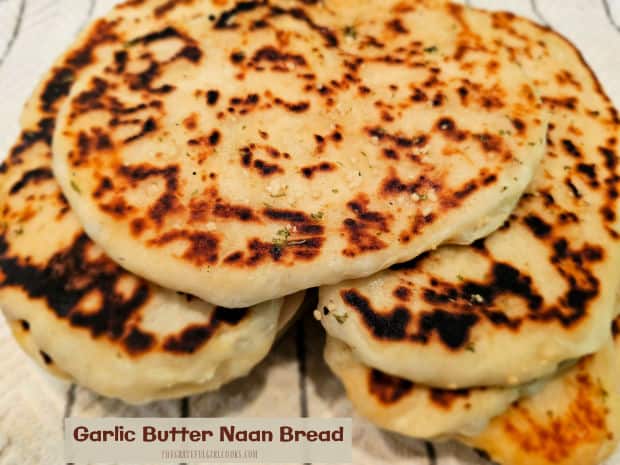

My first time tasting Naan bread was the first time my husband and I had Indian food in a local restaurant. We ordered garlic butter Naan on the side to accompany our meal, and from the very first bite, I was hooked!

I LOVED it, and was pleasantly surprised it had taken so many years before trying Indian cuisine. Now I enjoy making and eating Butter Chicken, Garlic Butter Naan Bread, and Chicken Tikka Masala! YUM!

That first time at the Indian restaurant I decided to LEARN how to make Naan (at home), and we have enjoyed this delicious flatbread ever since! Today I want to share this recipe with you, and hope you will enjoy it, too!

Scroll Down For A Printable Recipe Card At The Bottom Of The Page

Make The Naan Dough

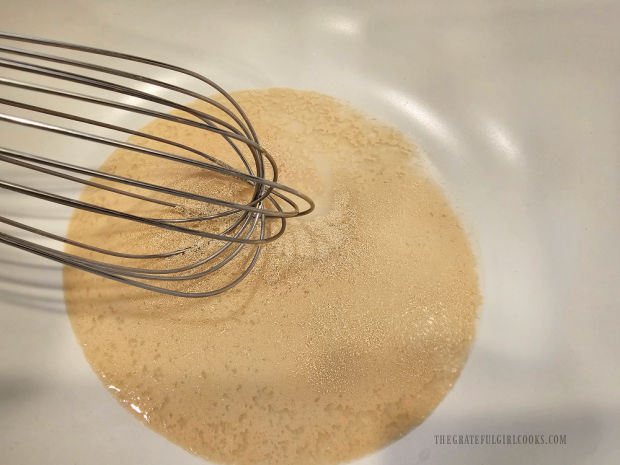
Whisk water, granulated sugar and active dry yeast in a large bowl until combined. Let this mixture rest for 7-8 minutes, or until the yeast begins to bubble on the surface. The bubbles indicate the yeast is healthy and alive!

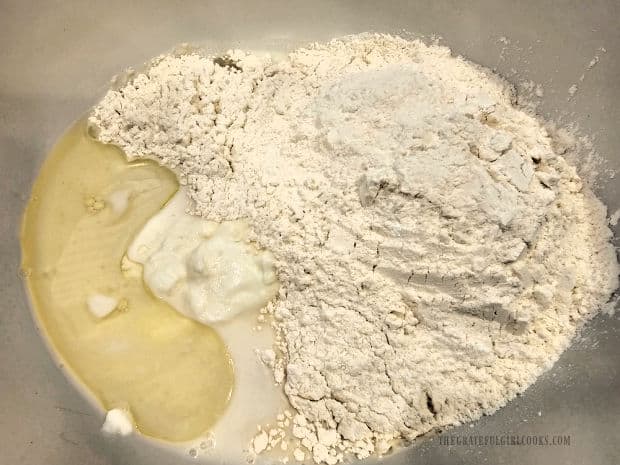
In a separate bowl whisk together all purpose flour, salt and baking powder. Add this flour mixture plus warm milk, plain Greek yogurt, and oil to the large bowl with the yeast mixture.

Water, sugar and yeast are whisked to combine in a bowl.Milk, yogurt, flour, etc. are added to the yeast mixture in bowl.

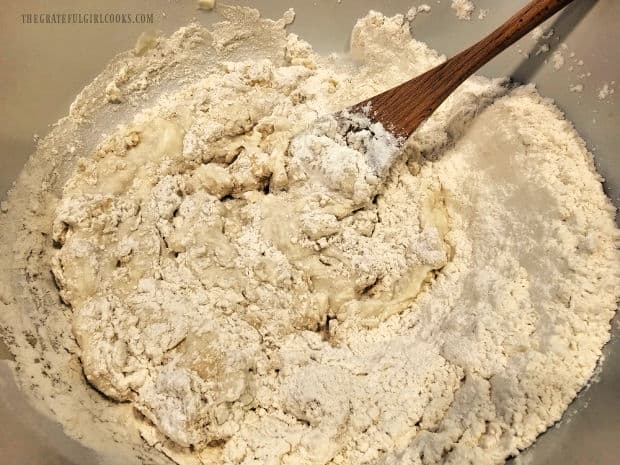
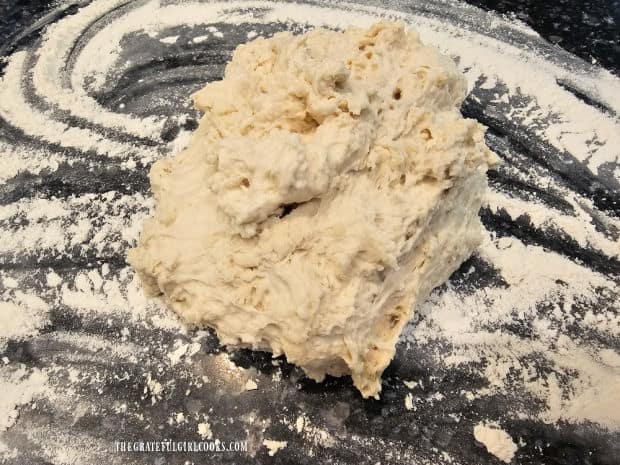
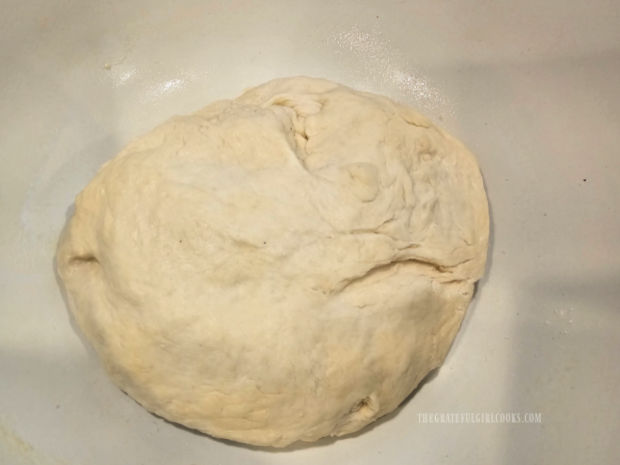
Stir well, until these ingredients come together into a mound of dough. The dough will be quite sticky (or tacky), and quite thick. Lightly flour a work surface, then scrape the dough out of the bowl onto the floured surface.

Knead the dough (with floured hands!) for 3-5 minutes OR until it becomes smooth in texture and a cohesive ball. If necessary, add a little more flour to the work area so the dough doesn’t stick.

The dough is stirred until it comes together and ingredients are combined.Dough is turned out onto a floured surface to knead it.

Let The Dough Rise

Give the large bowl (the one that held the dough) a quick wash and dry, then lightly grease or spray it on the bottom and up the sides.

Put the dough ball back into the now-greased bowl. Cover the bowl with a dish towel or plastic wrap, and set it aside in a warm place, free from drafts.

Let the dough sit a room temperature for about an hour OR until it has doubled in size. Now it’s time to shape the Naan bread.

Dough for garlic butter naan bread rises in a large, oiled bowl.

Shape And Roll the Risen Dough

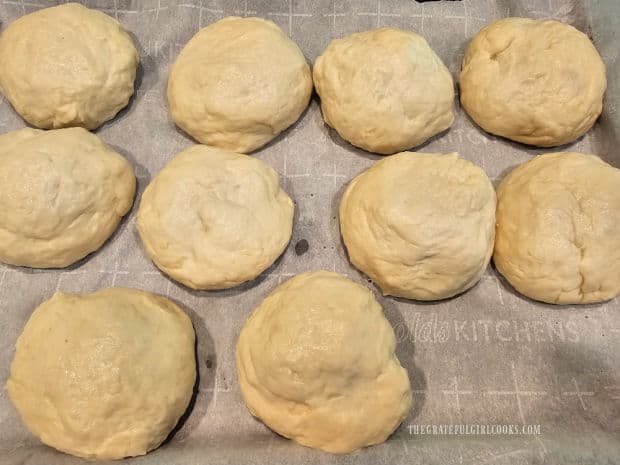
Evenly divide the risen dough into 10 equal-sized portions and using the palms of your hands, roll them into balls. Place them on a large piece of parchment paper.

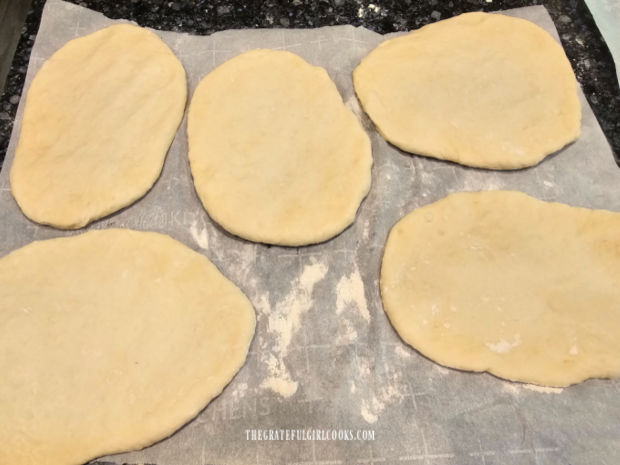
Use a rolling pin to gently roll each dough ball into an oval shape. Each oval should be approx. 6 inches long, and 1/8 inch thick.

I find it convenient to roll them on pieces of parchment paper. Roll out all 10 pieces, and let them rest on the parchment paper as you cook them, one at a time.

The risen dough is divided into 10 portions..Each portion of naan dough is rolled into 10 oval-shaped pieces.

Make The Garlic Butter

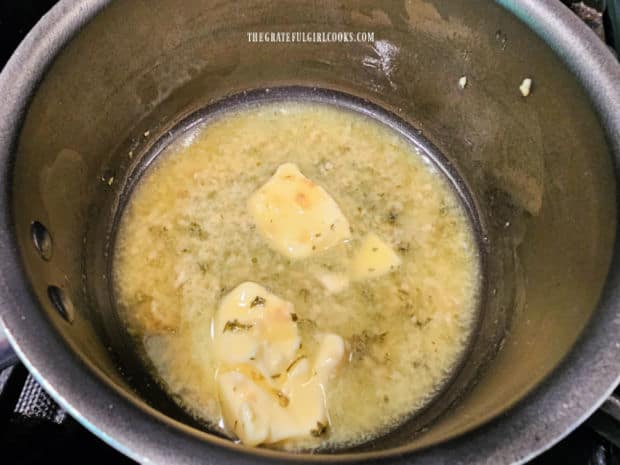
Melt butter in a small saucepan, then remove the pan from the heat.  Stir in 3 cloves of minced garlic and ½ teaspoon of dried, chopped parsley. NOTE: If using fresh chopped parsley, use 1 teaspoon.

Set the garlic butter sauce aside while you begin cooking the Naan bread.

Melted butter, minced garlic and parsley are combined in a saucepan.

Cooking The Naan

Preheat a large cast iron skillet on Medium-High heat. *Cast iron is recommended because it gets really hot, which is beneficial for cooking Naan bread.* Use a pastry brush or a wadded up paper towel to grease the skillet with ½ teaspoon of additional oil.

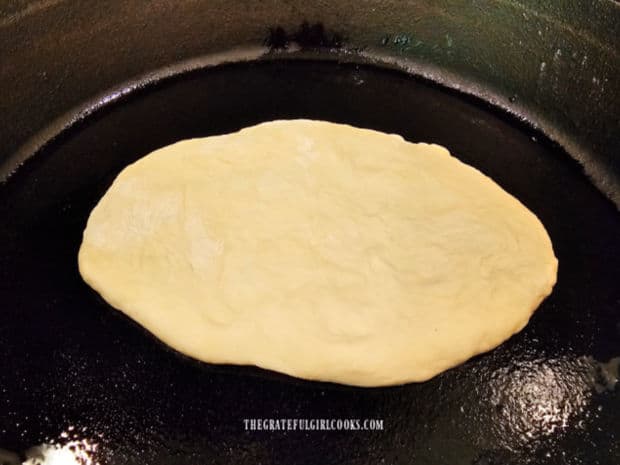
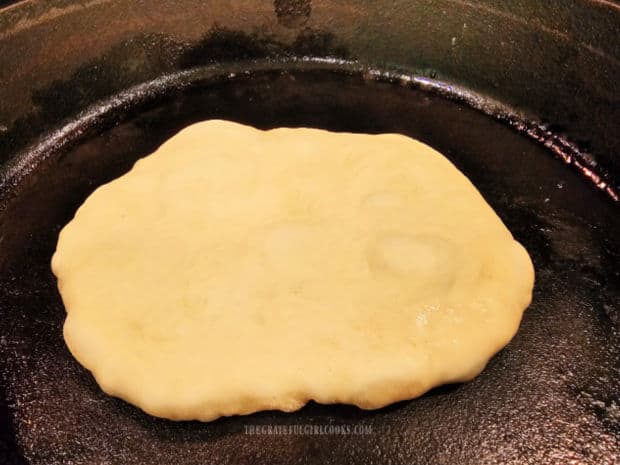
When the skillet is very hot (but not smoking), carefully add one piece of the Naan dough. Cook it until you begin to see air pockets forming on the surface of the dough. This will typically happen in about 1-2 minutes.

Garlic Butter Naan Bread is cooked one at a time in a very hot, oiled skillet.Pockets of air appear on the surface of the Naan bread as it cooks.

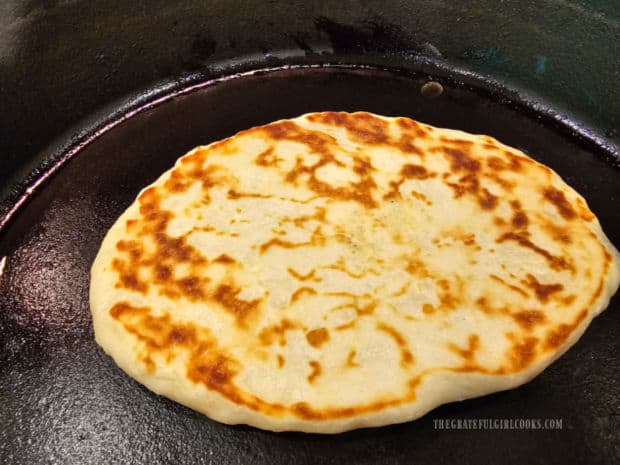
Use a spatula and flip the Naan bread to the other side. Now the top of the bread should be nicely golden brown.

Brush the melted butter garlic sauce on top of the browned Naan bread while it cooks. The second side will also take between 1-2 minutes to cook and become golden brown in color.

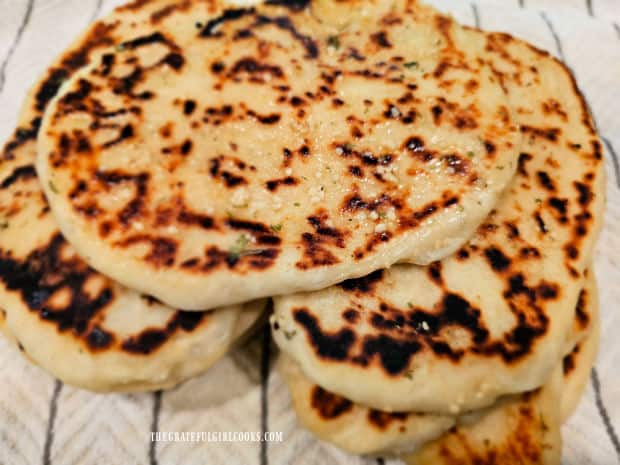
Transfer the cooked Garlic Butter Naan Bread out of the skillet and quickly wrap it in a dish towel to keep it warm. Continue cooking the remaining pieces of bread, one at a time, repeating the process with each one.

Naan bread is flipped halfway through cooking, revealing browned surface.Cooked Garlic Butter Naan Bread, ready to be eaten warm.

Time To Enjoy Some Garlic Butter Naan Bread

Serve Garlic Butter Naan Bread with a favorite thick soup or curry dish. The fluffy flatbread is absolutely perfect for dipping up (or sopping up) the soup or sauces.

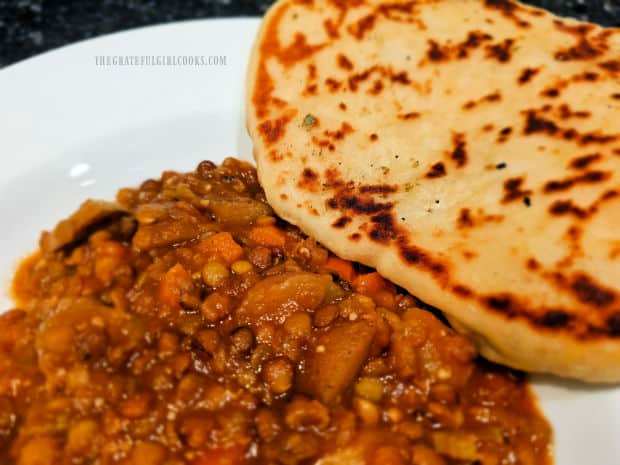
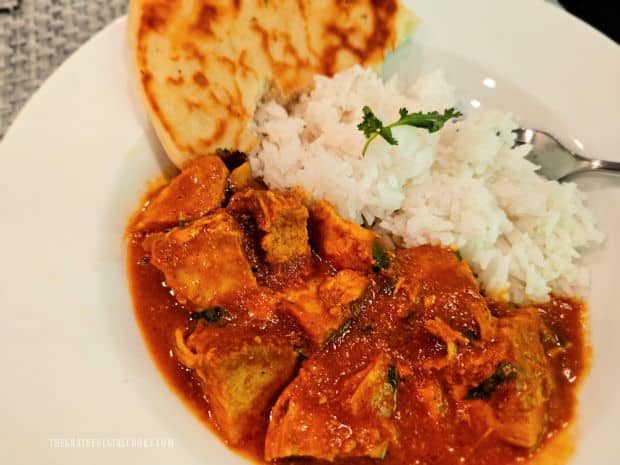
We really enjoy it served alongside big bowls of Lentil Potato Soup (shown below), or Butter Chicken (made in an Instant Pot)!

Naan bread is soft, yet “sturdy” enough to hold pieces of meat from curries, and can be used to eat them “taco-style”! The bread is delicious, especially with the garlic butter topping adding extra flavor!

Garlic Butter Naan Bread is served with lentil potato soup.

Butter chicken. served with Garlic Butter Naan Bread and rice on the side.

I hope you have the chance to make Garlic Butter Naan Bread for yourself (and those you love), and trust you’ll enjoy it as much as we do! You can freeze leftovers if you let them cool completely, then wrap them well and store in the freezer in an airtight container.

Thank you for stopping by today, and I invite you to come back again soon for more family-friendly recipes. Take care, may God bless you… and have a wonderful day.

Looking For More BREAD Or ROLL Recipes?

You can find ALL of my recipes in the Recipe Index, which is located at the top of the page. I have some wonderful homemade bread recipes you can check out, including:

Want More Recipes? Get My FREE Newsletter!

I publish a newsletter 2 times per month (1st and 15th) with lots of recipes, tips, etc..
Would you like to join our growing list of subscribers?

There is a Newsletter subscription box on the top right (or bottom) of each blog post, depending on the device you use.
You can submit your e-mail address there, to be added to my mailing list.

Find Me On Social Media:

Facebook page: The Grateful Girl Cooks!
Pinterest:
The Grateful Girl Cooks!
Instagram:
jbatthegratefulgirlcooks

Author's signature

Recipe adapted from: craveitall.com/soft-naan-bread/

↓↓ PRINTABLE RECIPE BELOW ↓↓

0 from 0 votes
Garlic Butter Naan Bread
Prep Time
15 mins
Cook Time
20 mins
RISE TIME (inactive prep)
1 hr
Total Time
1 hr 35 mins
 

Make Garlic Butter Naan Bread to accompany a favorite main dish! This classic Indian flatbread is delicious, especially with curry dishes.

Category: Bread, Side Dish
Cuisine: Indian
Keyword: naan bread
Servings: 10
Calories Per Serving: 294 kcal
Author: JB @ The Grateful Girl Cooks!
Ingredients
For Naan Bread:
  • ¼ cup warm water 110℉
  • 2 teaspoons granulated sugar
  • teaspoons active dry yeast or rapid rise (instant yeast)
  • ¾ cup plain Greek yogurt or natural plain yogurt
  • ¾ cup warm milk (1% or 2%)
  • ¼ cup vegetable oil + 2 T. for cooking Naan
  • 4 cups all purpose flour + more as needed (for dusting)
  • teaspoons salt
  • 1 teaspoon baking powder
For Garlic Butter Topping:
  • ¼ cup butter , melted
  • 3 cloves garlic, minced
  • 1 teaspoon fresh chopped parsley or ½ teaspoon dried
Instructions
  1. Whisk water, sugar and yeast in large bowl until combined. Let it rest 7-8 minutes, or until it begins to bubble on top. Bubbles indicate the yeast is healthy/alive!

  2. In separate bowl combine flour, salt and baking powder. Add flour mixture, milk, yogurt, and oil to the yeast mixture.

  3. Stir well, until ingredients come together. Dough will be tacky/thick. Lightly flour work surface; scrape dough onto floured surface. Knead dough (with floured hands) 3-5 minutes OR until it is smooth in texture and a cohesive ball. Add more flour to work area (as needed) so dough doesn't stick.

  4. Clean/dry large (yeast) bowl. Lightly grease/spray the bottom and sides. Put dough ball back into greased bowl. Cover with dish towel or plastic wrap; set in warm place, free from drafts. Let dough sit at room temperature for an hour OR until it has doubled in size.

  5. Evenly divide dough into 10 equal-sized portions. Using the palms of your hands, roll them into balls. Place on parchment paper. Use a rolling pin to roll each ball into an oval shape, approx. 6 inches long, and 1/8 inch thick. Set aside.

  6. Make Garlic Butter Sauce: Melt butter in small pan; remove from heat.  Stir in garlic and parsley. Set sauce aside while you cook the Naan.

  7. Preheat a large cast iron skillet on Medium-High. Use pastry brush to grease skillet with ½ tsp. of additional oil. When skillet is very hot (but not smoking), add 1 piece of Naan. Cook until air pockets form on the surface (usually 1-2 minutes).

  8. Turn Naan to the other side. Brush garlic butter on top. Cook another 1-2 minutes (both sides should be browned). Transfer Naan out of the skillet; wrap in a dish towel to keep it warm. Repeat with remaining pieces, one at a time, following same process. Serve warm, and enjoy!

Nutrition Facts
Garlic Butter Naan Bread
Amount Per Serving (1 naan)
Calories 294 Calories from Fat 99
% Daily Value*
Fat 11g17%
Saturated Fat 4g25%
Trans Fat 0.2g
Polyunsaturated Fat 4g
Monounsaturated Fat 3g
Cholesterol 14mg5%
Sodium 342mg15%
Potassium 153mg4%
Carbohydrates 41g14%
Fiber 2g8%
Sugar 2g2%
Protein 8g16%
Vitamin A 178IU4%
Vitamin C 0.3mg0%
Calcium 67mg7%
Iron 2mg11%
* Percent Daily Values are based on a 2000 calorie diet.

Here’s one more to pin on your Pinterest boards!Make Garlic Butter Naan Bread to accompany a favorite main dish! This classic Indian flatbread is delicious, especially with curry dishes.

 

Chunky Crock Pot Apples

Use a slow cooker to make chunky crock pot apples, with cinnamon and brown sugar, then enjoy them on pancakes, waffles, oatmeal, or pound cake, etc.Use a slow cooker to make chunky crock pot apples, with cinnamon and brown sugar, then enjoy them on pancakes, waffles, oatmeal, or pound cake, etc

My husband was recently given a bag filled with homegrown apples from one of his clients. Not wanting to waste any of them, I decided it was the PERFECT opportunity to make up a batch of Chunky Crock Pot Apples!

Do you ever slow cook apples?  The process is so completely easy! In about 10 minutes time, the apples, lemon juice, brown sugar, cinnamon, etc. can be cooking in the crock pot.

The prep work is minimal, then you let the apples cook on low all day. When done, give them a light “mash”, and end up with phenomenal tasting chunky crock pot apples!

Scroll Down for A Printable Recipe Card At the Bottom Of The Page

There Are MANY Ways To Use Chunky Crock Pot Apples

These yummy apples can be eaten warm straight out of the crock pot, or can be used  as a topping for oatmeal, pancakes or waffles! The apples can also be used on cake, ice cream, or yogurt.

Chunky crock pot apples also make a perfect side dish for pork dinners.  The ways to use them are endless! They taste fantastic, and there’s only a minimal amount of prep involved!

How To Make Chunky Crock Pot Apples

To make the chunky crock pot apples, first peel and remove seeds from 8 large apples (any kind will taste great!).  Slice the apples and then cut the slices into chunks.

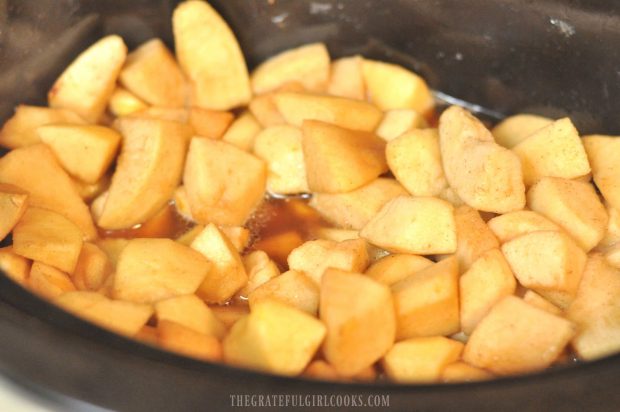
Place the apple pieces into a crock pot, then stir in some fresh squeezed lemon juice.  Add cinnamon, brown sugar, water and a touch of butter. Put the lid on the slow cooker, and cook the apples for 6-7 hours on LOW heat.

Apple chunks are ready in the slow cooker to make chunky crock pot apples!

When the apples are done cooking, they will be nice and tender and will smell (and taste amazing!). You can lightly mash them with a potato masher, but make sure to leave lots of chunks!

Once you’ve mashed the softened apples a bit, the chunky crock pot apples are DONE! They can be eaten just like this! Ooh boy… are they ever GOOD!

They can also be used in a great variety of ways, cold OR hot. The seasoned, sweet chunky apples are so good, I can eat them warm, right out of the bowl! YUM!

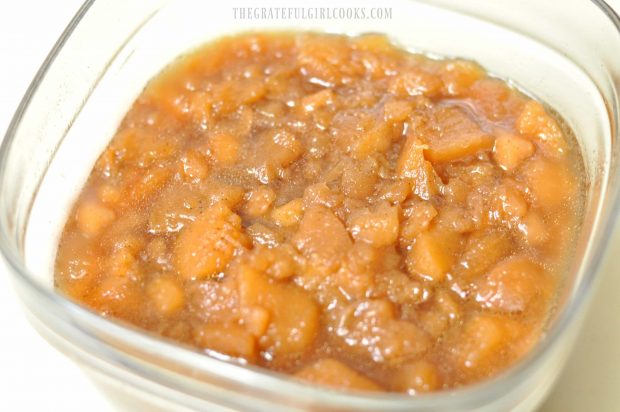
Chunky crock pot apples in dish are partially mashed before serving.

You Can Serve Warm Chunky Crock Pot Apples In Oatmeal

The apples taste phenomenal when added to oatmeal. Their sweetness and the warm, cinnamon flavored apples means there is no need to add additional sugar! Chunky crock pot apples really add a LOT of flavor to a bowl of plain, ordinary oatmeal!

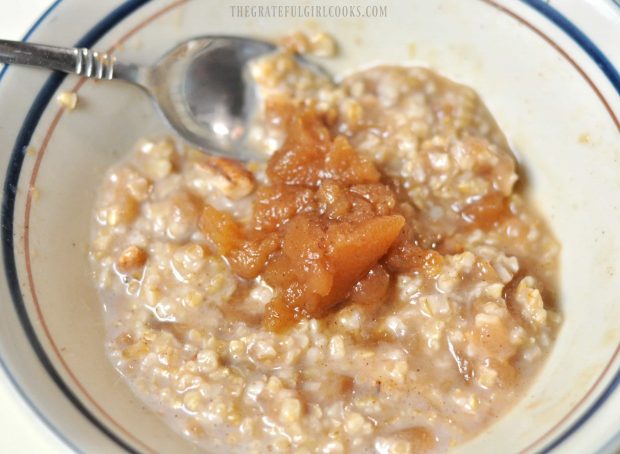
Chunky Crock Pot Apples are served on top of a bowl of oatmeal.

You Can Serve Them On Pancakes Or Waffles

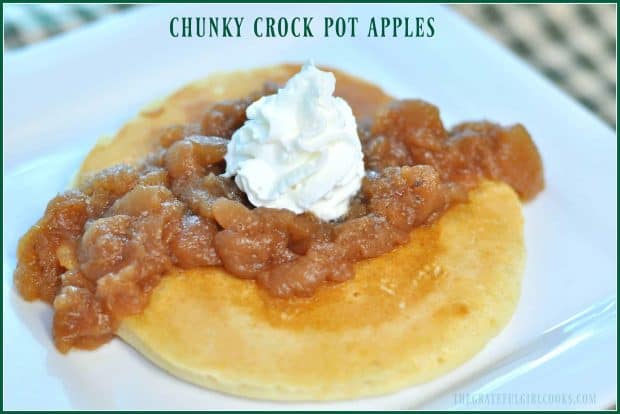
The topping tastes great on pancakes or waffles, too! It’s warm, spicy cinnamon flavor pairs well with both breakfast foods! Trust me, these apples make a GREAT topping, and no syrup is needed!
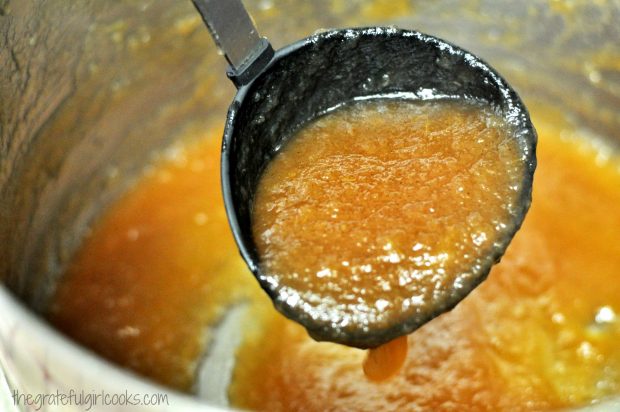
TIP: Use a slotted spoon to let a tiny bit of the juice drain off before adding to the pancake or waffle.

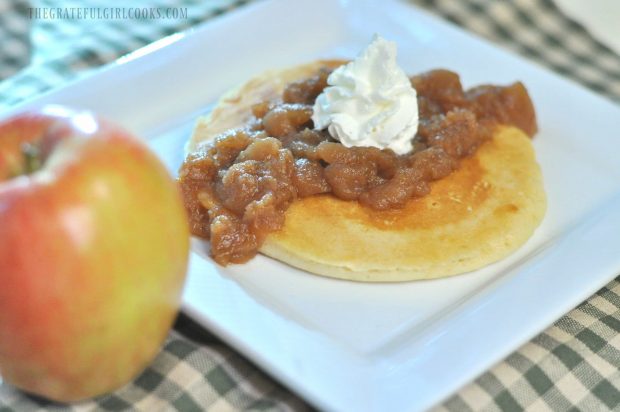
Chunky Crock Pot Apples are served on top of pancakes, with a dollop of whipped cream.

Chunky Crock Pot Apples also taste delicious as a filling for dessert crepes, and as a topping for vanilla or caramel flavored ice cream, yogurt, or slices of pound cake.  They are also a yummy side dish, when served with a baked pork roast or pork chops.

I hope you will consider making this easy, versatile recipe.  I’ve never been disappointed in all the years I’ve been making them.  Once the apples are cooked, the possibilities are endless! Have a fantastic day, and come back soon.
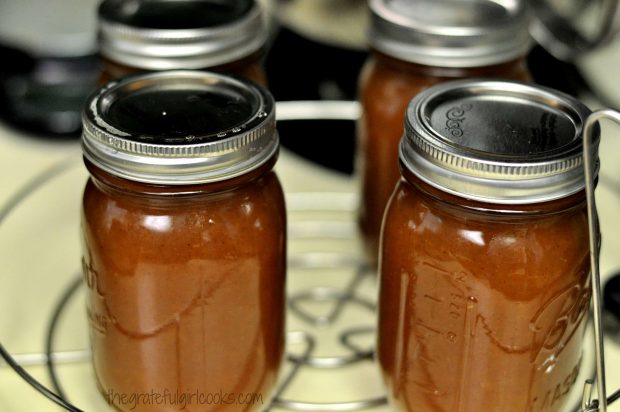
Looking For More APPLE Recipes?

You can find all of my recipes in the Recipe Index, located at the top of the page. If you enjoy cooking with apples, you might be interested in trying my recipes for:

Interested In More Recipes?

Thank you for visiting this website. I appreciate you using some of your valuable time to do soIf you’re interested, I publish a newsletter 2 times per month (1st and 15th) with all the latest recipes, and other fun info. I would be honored to have you join our growing list of subscribers, so you never miss a great recipe!
There is a Newsletter subscription box on the top right side (or bottom) of each blog post, depending on the device you use, where you can easily submit your e-mail address (only) to be included in my mailing list.

You Can Also Find Me On Social Media:

Facebook page: The Grateful Girl Cooks!
Pinterest:
The Grateful Girl Cooks!
Instagram:
jbatthegratefulgirlcooks

Author's signature

0 from 0 votes
Chunky Crock Pot Apples
Prep Time
10 mins
Cook Time
6 hrs
Total Time
6 hrs 10 mins
 
Use a slow cooker to make chunky crock pot apples, with cinnamon and brown sugar, then enjoy them on pancakes, waffles, oatmeal, or pound cake, etc.
Category: Breakfast, Side Dish
Cuisine: American
Keyword: chunky crock pot apples
Servings: 10 (1/2 cup servings)
Calories Per Serving: 109 kcal
Author: JB @ The Grateful Girl Cooks!
Ingredients
  • 8 large apples (any variety)
  • Lemon juice (from 1/2 a large lemon)
  • 1 Tablespoon cinnamon
  • 1/3 cup brown sugar (packed)
  • 1/3 cup water
  • 1 teaspoon butter
Instructions
  1. Peel apples, slice, remove seeds, then cut into chunks. Put apples into crock pot.
  2. Squeeze fresh lemon juice over apples and stir to combine.
  3. Add cinnamon, brown sugar, water and butter to crock pot. Stir well.
  4. Place lid on slow cooker; cook apples on LOW for 6-7 hours. Remove lid from apples. Lightly mash tender apples with a potato masher (or a fork if you don't have a potato masher), being sure to leave lots of chunks. Serve and enjoy!
Recipe Notes

IDEAS: Serve warm as a side dish with pork. Serve warm over pancakes or waffles (no need for butter or syrup!) Serve warm apples on top of cooked oatmeal (yum) Use as a filling for dessert crepes. Serve cooled chunky apples as a topping on ice cream or yogurt Serve on top of pound cake, etc.

Nutrition Facts
Chunky Crock Pot Apples
Amount Per Serving (1 g)
Calories 109
% Daily Value*
Cholesterol 1mg0%
Sodium 7mg0%
Potassium 165mg5%
Carbohydrates 28g9%
Fiber 3g13%
Sugar 22g24%
Vitamin A 90IU2%
Vitamin C 7.1mg9%
Calcium 23mg2%
Iron 0.3mg2%
* Percent Daily Values are based on a 2000 calorie diet.

Here’s one more to pin on your Pinterest boards!Use a slow cooker to make delicious chunky crock pot apples, with cinnamon and brown sugar, then enjoy them on pancakes, waffles, oatmeal, or pound cake, etc.


Save

Save

Save

Save

Save

Save

Save

Save

Save

Save

Save

Save

Save

Spinach, Apple and Goat Cheese Salad with Apple Cider Vinaigrette

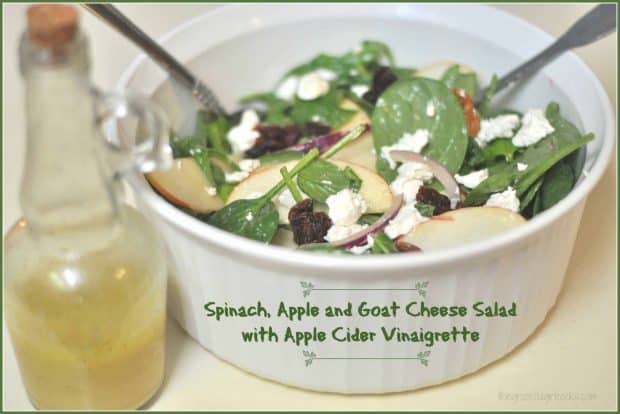
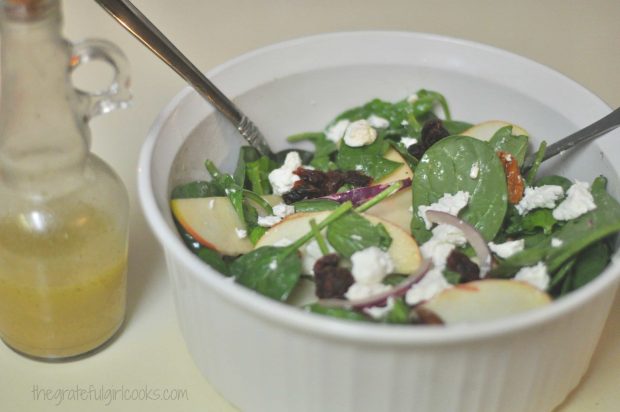
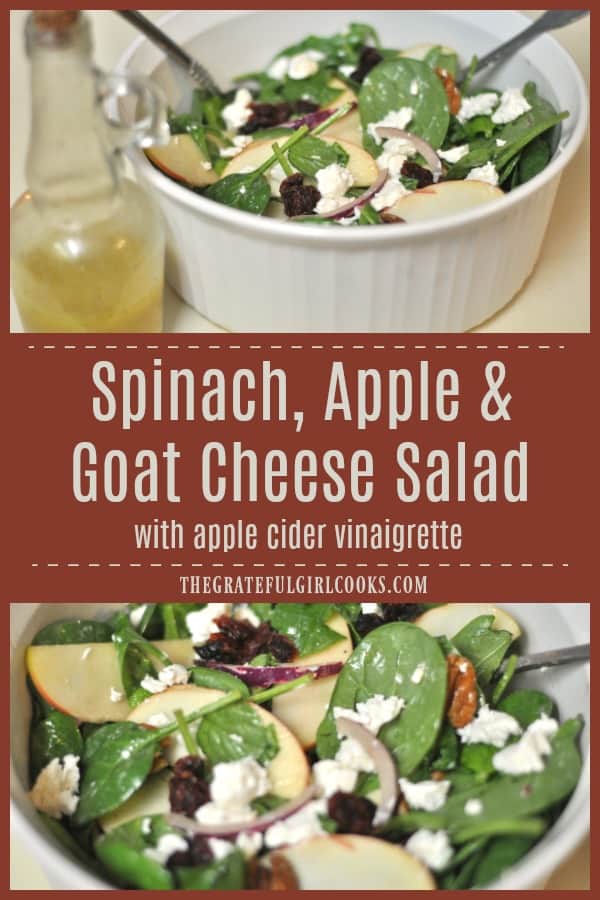
The other evening I made a Spinach, Apple and Goat Cheese Salad with Apple Cider Vinaigrette to go with dinner. It tasted wonderful, with crunchy apple slices, creamy goat cheese, spinach, dried cranberries, toasted pecans, and a fantastic dressing – amazing!Spinach, Apple and Goat Cheese Salad with Apple Cider Vinaigrette / The Grateful Girl Cooks!
Talk about a quick and easy salad (and homemade dressing)… wow! The entire salad and amazing vinaigrette dressing took only about 15 minutes from start to finish. My husband and I both loved it!

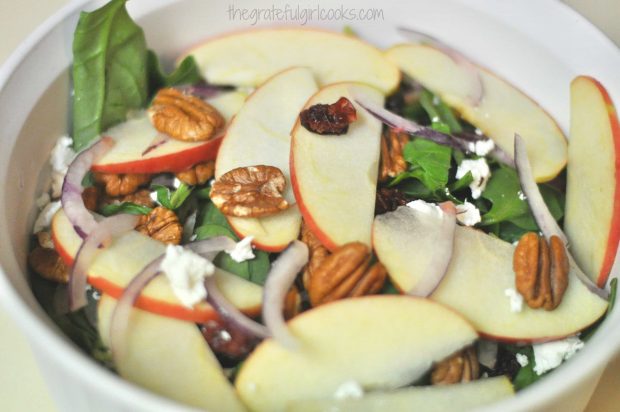
Here’s how you make this incredibly EASY salad:  Place baby spinach , thinly sliced apples, red onion, dried cranberries, toasted pecans (or walnuts), and goat cheese (half of total amount) into a large salad bowl.

Note: I sliced the apples right before serving. If preparing this salad ahead of time, remember to brush apple slices with lemon juice, to prevent them from darkening once exposed to air, OR slice the apples and add to salad just before serving.

Spinach, Apple and Goat Cheese Salad with Apple Cider Vinaigrette / The Grateful Girl Cooks!

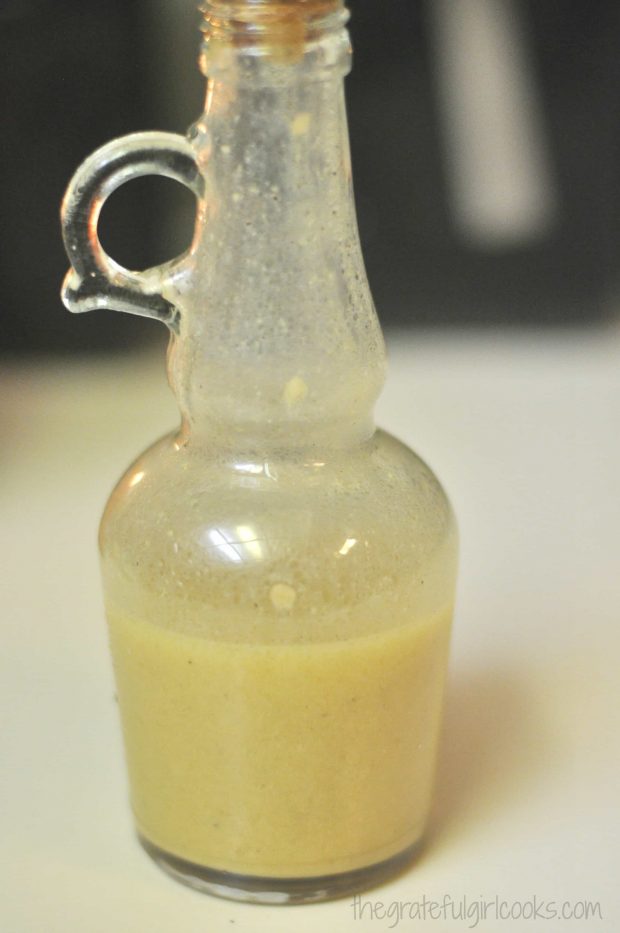
Quickly whisk together the vinaigrette ingredients or place in a bottle or container with lid, and shake to fully combine.

Spinach, Apple and Goat Cheese Salad with Apple Cider Vinaigrette / The Grateful Girl Cooks!

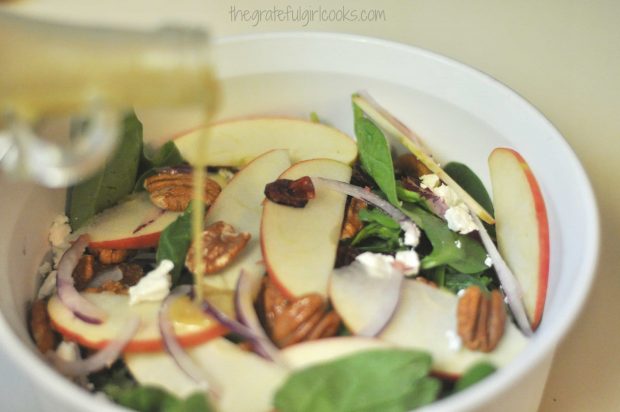
Lightly drizzle the salad with vinaigrette.

Spinach, Apple and Goat Cheese Salad with Apple Cider Vinaigrette / The Grateful Girl Cooks!

Toss the salad to mix in the salad dressing, covering all ingredients.  Once salad has been tossed, top the salad with the other half of the goat cheese, and serve!  THAT’S IT!

See how easy that was? In case you are thinking that the salad is too easy to taste good, let me assure you, the vinaigrette is absolutely fantastic on this salad, AND the salad itself is FULL of great flavors AND textures (chewy, crunchy, creamy)!

Spinach, Apple and Goat Cheese Salad with Apple Cider Vinaigrette / The Grateful Girl Cooks!

I hope you have a wonderful day. Seek out someone you can encourage or give a helping hand to today.  We can ALL make a difference in this often hopeless world. Blessings.

Interested In More Recipes?

Thank you for visiting this website. I appreciate you using some of your valuable time to do soIf you’re interested, I publish a newsletter 2 times per month (1st and 15th) with all the latest recipes, and other fun info. I would be honored to have you join our growing list of subscribers, so you never miss a great recipe!
There is a Newsletter subscription box on the top right side (or bottom) of each blog post, depending on the device you use, where you can easily submit your e-mail address (only) to be included in my mailing list.

You Can Also Find Me On Social Media:
Facebook page: The Grateful Girl Cooks!
Pinterest: The Grateful Girl Cooks!
Instagram: jbatthegratefulgirlcooks

Spinach, Apple and Goat Cheese Salad with Apple Cider Vinaigrette / The Grateful Girl Cooks!

Recipe Source:  http://www.gimmesomeoven.com/my-favorite-apple-spinach-salad/

0 from 0 votes
Spinach, Apple and Goat Cheese Salad with Apple Cider Vinaigrette
Prep Time
15 mins
Cook Time
0 mins
Total Time
15 mins
 
Quick and easy to prepare, this salad is full of flavor and textures, thanks to spinach, crisp apple slices, red onion, cranberries, creamy goat cheese, toasted pecans, and apple cider vinaigrette!
Category: Salad
Cuisine: American
Keyword: spinach goat cheese salad
Servings: 4 servings
Calories Per Serving: 576 kcal
Author: JB @ The Grateful Girl Cooks!
Ingredients
For salad:
  • 10 ounces baby spinach
  • 2 apples (cored/thinly sliced- leave peel ON)
  • 2/3 cup dried cranberries
  • 1 cup pecans (or walnut halves), lightly toasted
  • Half small red onion , peeled/thinly sliced
  • 5 ounces goat cheese , DIVIDED. (May also substitute feta or bleu cheese)
For Apple Cider Vinaigrette:
  • 1/3 cup extra virgin olive oil
  • 1/4 cup apple cider vinegar (may also substitute champagne vinegar)
  • 2 Tablespoons fresh lemon juice
  • 1 Tablespoon Dijon mustard
  • 1 garlic clove , peeled/minced
  • 1 Tablespoon maple syrup (or honey), to sweeten
  • pinch salt and pepper , to taste
Instructions
  1. Place baby spinach, sliced apples, cranberries, toasted pecans (see NOTES section), red onion slices, and crumble HALF of the goat cheese into a large salad bowl.
  2. In separate bowl, jar, or container with lid, mix together the vinaigrette ingredients. Shake or whisk until all salad dressing ingredients are fully blended.
  3. Lightly drizzle the vinaigrette over the salad. Toss salad, to combine.
  4. Crumble the remaining goat cheese over the top of the salad, and serve!
Recipe Notes

To toast pecans (walnuts): Place in skillet (a dry skillet) and cook on medium-low for about 5 minutes, stirring/turning often, until nuts are lightly toasted and aromatic. Let nuts cool a minute or two, before adding to salad.

Nutrition Facts
Spinach, Apple and Goat Cheese Salad with Apple Cider Vinaigrette
Amount Per Serving (1 salad (1/4 of total))
Calories 576 Calories from Fat 396
% Daily Value*
Fat 44g68%
Saturated Fat 9g56%
Cholesterol 16mg5%
Sodium 242mg11%
Potassium 645mg18%
Carbohydrates 40g13%
Fiber 7g29%
Sugar 28g31%
Protein 11g22%
Vitamin A 7075IU142%
Vitamin C 28.5mg35%
Calcium 151mg15%
Iron 3.6mg20%
* Percent Daily Values are based on a 2000 calorie diet.

Here’s one more to pin on your Pinterest boards!Spinach, Apple and Goat Cheese Salad with Apple Cider Vinaigrette / The Grateful Girl Cooks!


Save

Save

Save

Save

Save

Save

Save

Save

Save

Save

Save

Save

Save

Save

Save

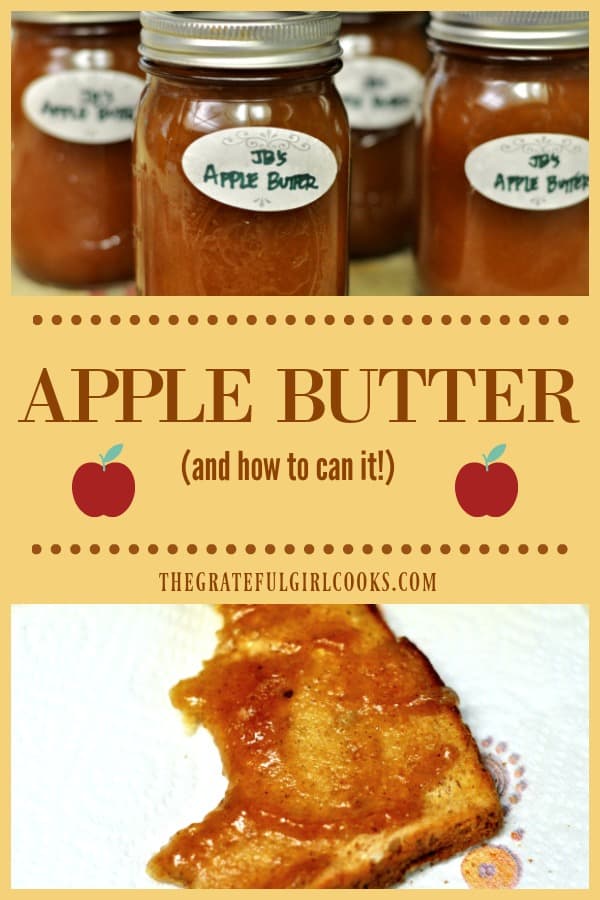
Apple Butter – and how to can it!

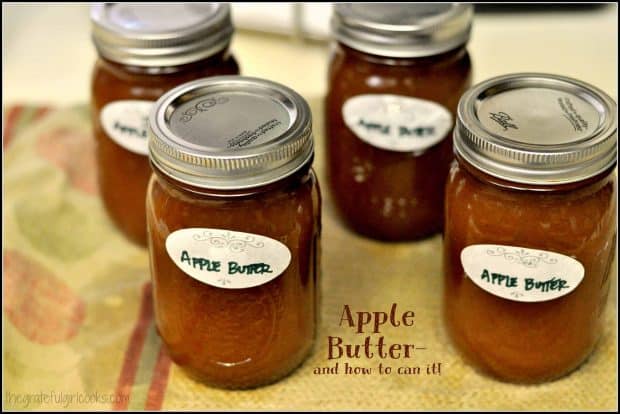
Smooth creamy apple butter is a delicious topping for toast, pound cake, or can be a sauce for roast pork. Learn how to can it with step by step instructions.Smooth creamy apple butter is a delicious topping for toast, pound cake, or can be a sauce for roast pork. Learn how to can it with step by step instructions.
Apples and Fall go together… like rain galoshes and buckets of rain, here in the Pacific Northwest! If you’ve never tried Apple Butter before, you’re missing out! Smearing a spoonful of it on a piece of toast is cinnamon-apple goodness, folks!

I’ve read that a lot of people use apple butter (think “jam”) as an accompaniment to roasted pork or other meat dishes, but I prefer it in it’s purest form… spread on a great piece of toast.  Apple Butter tastes like FALL, to me, with apples, sugar, cinnamon and cloves blended into this wonderful spread!

This recipe yields 8 half-pint (8 oz.) or 4 pint sized (12 oz.) jars of Apple Butter.  I canned 4 pint jars and gave a couple of the jars away to friends to enjoy, but that’s another story. If not canning for long term storage, make sure jars are refrigerated and apple butter used within a couple weeks.

Scroll Down For A Printable Recipe Card At The Bottom Of The Page

How To Make Apple Butter

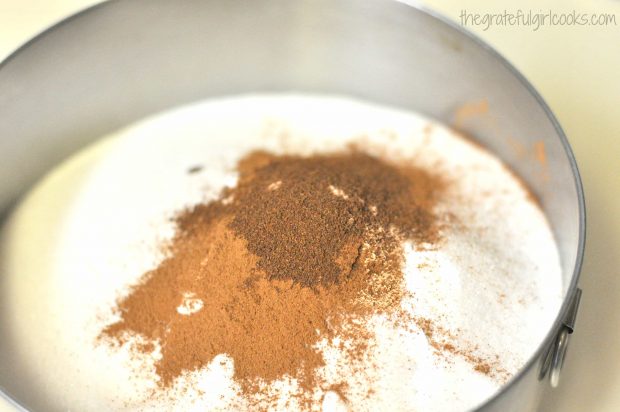
In a mixing bowl, whisk together granulated sugar, cinnamon and ground cloves; set aside. (If you are using really sweet apples, decrease sugar amount to 5 cups).

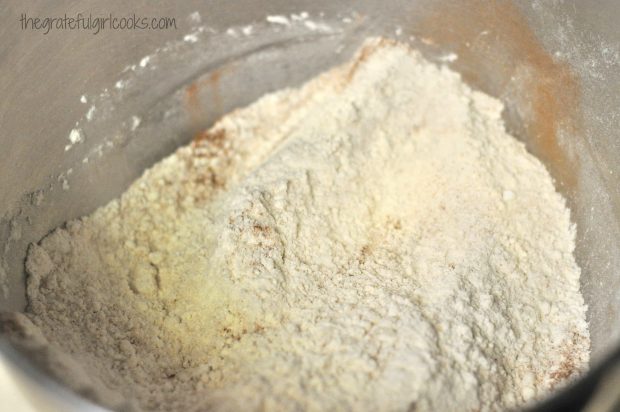
Sugar and spices in metal mixing bowl

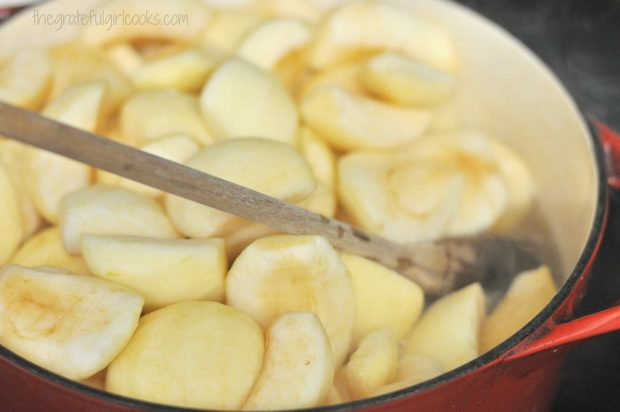
Place peeled, cored and quartered apples in a large stainless steel saucepan, along with water. You can use a variety of apples including Gala, Gravenstein, Golden Delicious, McIntosh, Braeburn, etc. You can also mix varieties to suit your taste.

These softer, sweet apples seem to work the best for making this apple butter, as opposed to using tart firm apples, such as Granny Smith.

Apples and water in red saucepan

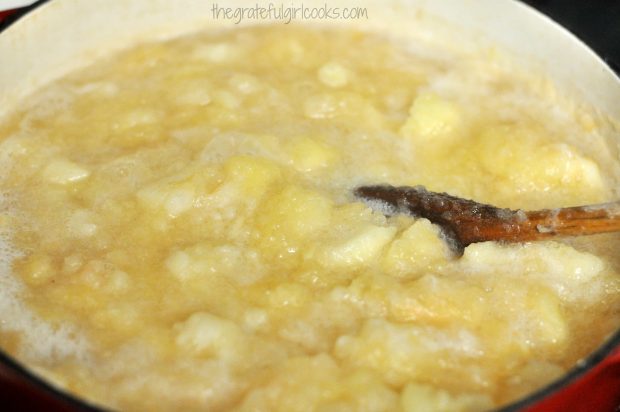
Bring this mixture to a full boil on medium-high heat. Reduce the heat to low and continue to gently boil the apples and water for about 30 minutes. Stir occasionally. Apples should be softened.

Chopped apple chunks softening in red saucepan

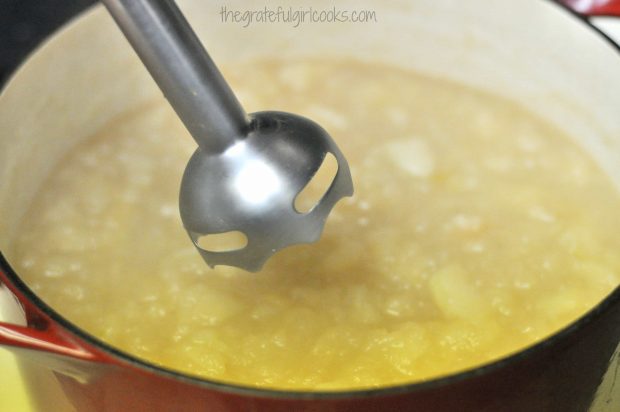
Using an immersion blender (or a canister blender or food processor), puree the hot apple mixture until you have a consistent, smooth texture, but do not liquefy.

Immersion blender in pan of apples to blend

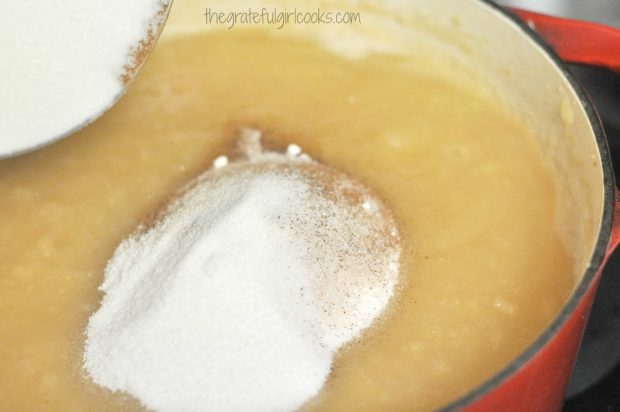
Measure out apple puree (see recipe below) and pour it into a large, clean stainless steel saucepan. Add the sugar/cinnamon/clove mixture; stir to combine.

Adding sugar and spices to apple puree in pan

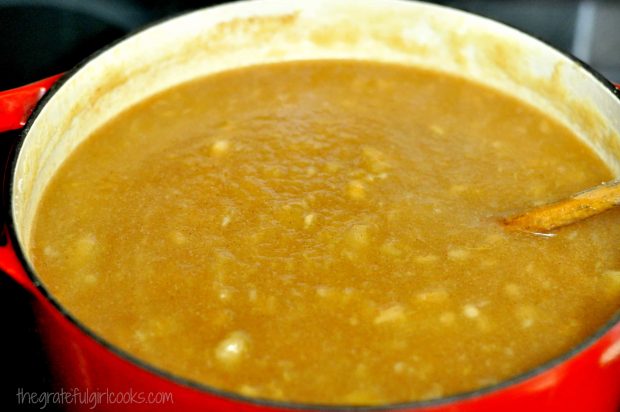
Bring the puree to a boil (medium-high), and stir frequently while it cooks. Once it reaches a boil, reduce heat again to low and boil gently until the puree has thickened and can hold it’s shape on a spoon.

Red saucepan of apple butter cooking

Here’s an easy way to test and see if it is done. Take a small spoonful and put it onto a CHILLED plate. If the liquid does NOT separate (making a watery rim around the edge), and the puree maintains a spreadable shape, then the apple butter is ready.

Ladle with hot apple butter dripping

If you are NOT canning the apple butter, ladle the hot butter into clean mason jars, wipe lids clean, secure lids on jars, and refrigerate (and/or give away). Apple Butter that is not canned must be kept refrigerated, and has a limited storage time.

Canning Apple Butter

If you ARE canning for long term storage, prepare jars, canner, and jar lids while making the apple butter, according to canner manufacturer and USDA canning guidelines.

Ladle the hot apple butter into hot canning jars. Leave 1/4 inch head space. Remove air bubbles by inserting plastic knife or plastic canning tool into butter several times. Adjust the head space, if necessary, to maintain 1/4 inch head space. Wipe the rims of the jars clean, then put flat lid on, followed by screw lid. Tighten it just to fingertip tight.

Sealed jars of apple butter going into canner

Process apple butter on rack in prepared canner, and process according to directions (see recipe below).

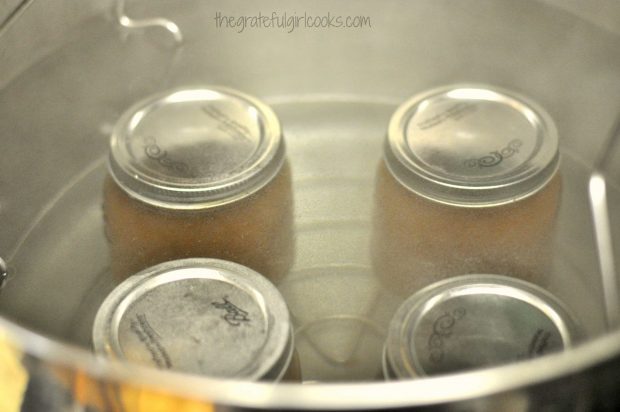
Jars of apple butter sitting in water in canner

When done, remove canner lid, wait 5 minutes, then carefully remove jars from canner; let jars cool on kitchen towel on counter (not directly on counter-don’t want them to crack due to temperature extremes). Once you have made sure jars have sealed (with the famous “pinging sound”), let them cool for 24 hours, then store.

Time To Enjoy Some Apple Butter!

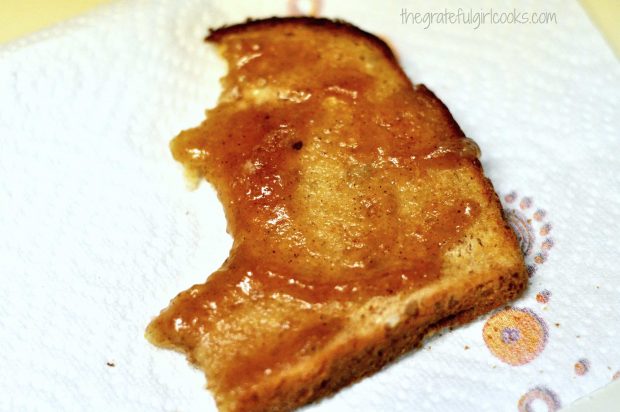
  Enjoy some of this tasty apple butter, spread on a good piece of toast! It also tastes wonderful as a topping for plain yogurt, or even added to vanilla ice cream!

Toast with apple butter spread on it

I hope you enjoy this delicious recipe. If you have a lot of pears you want to use up, be sure to check out my blog post for canning Pear Butter (no pectin). It’s delicious, too! .Have a great day. Be kind… encourage those who are experiencing pain or sorrow, and be a force for GOOD in this hurting world!

Looking For More CANNING Recipes?

You can find all of my canning recipes in the Recipe Index, located at the top of the page. They include:

Interested In More Recipes?

Thank you for visiting this website. I appreciate you using some of your valuable time to do soIf you’re interested, I publish a newsletter 2 times per month (1st and 15th) with all the latest recipes, and other fun info. I would be honored to have you join our growing list of subscribers, so you never miss a great recipe!
There is a Newsletter subscription box on the top right side (or bottom) of each blog post, depending on the device you use, where you can easily submit your e-mail address (only) to be included in my mailing list.

You Can Also Find Me On Social Media:
Facebook page: The Grateful Girl Cooks!
Pinterest: The Grateful Girl Cooks!
Instagram: jbatthegratefulgirlcooks

Author's signatureRecipe Source: Ball Complete Book Of Home Preserving, page 53, Published by Robert Rose, Inc., 2006.

5 from 1 vote
Apple Butter - and how to can it!
Prep Time
1 hr 5 mins
Cook Time
10 mins
Total Time
1 hr 15 mins
 

Smooth creamy apple butter is a delicious topping for toast, pound cake, or can be a sauce for roast pork. Learn how to can it with step by step instructions.

Category: Jam
Cuisine: American
Keyword: apple butter
Servings: 128 Tablespoons (4 pint jars)
Calories Per Serving: 47 kcal
Author: JB @ The Grateful Girl Cooks!
Ingredients
  • 6 lbs. apples (peeled, cored, and quartered)
  • 3 cups water
  • 6 cups sugar (if using sweet apples, decrease to 5 cups)
  • 1 1/2 teaspoons ground cinnamon
  • 1/2 teaspoon ground cloves
Instructions
  1. Combine the apples and water in a large saucepan. Bring this to a boil over medium-high heat. Once it reaches boiling, reduce the heat to low and boil mixture gently, for about 30 minutes, until the apples soften. Stir mixture occasionally.
  2. Puree the apple mixture using an immersion blender OR transfer the apple mixture to a food processor or blender. Process until smooth, but do not liquefy.
  3. Measure out 12 cups of apple puree into a clean large saucepan. Add sugar, cinnamon and cloves. Stir this mixture up until all the sugar has dissolved. Once dissolved, bring the mixture to a boil (again over medium-high heat). Once it reaches a boil, reduce heat to low and continue to cook. Stir this very frequently to prevent scorching. Continue cooking until the mixture thickens and can hold its shape on a spoon. To test to see if it is ready, spoon a spoonful of the apple mixture onto a CHILLED plate. If the liquid does not separate and form a rim around the edge of the apple butter, and the mixture can hold a spreadable shape, the apple butter is ready to place into canning jars.
  4. While the apple butter is cooking, prepare your canner, jars, and lids, according to manufacturer and USDA canning guidelines.
  5. Once apple butter is done, ladle the hot apple butter into your hot canning jars. Leave 1/4 inch headspace. Make sure to remove air bubbles, then re-adjust the headspace, if needed. Wipe rim well, to ensure it is clean. Place the flat lid on jar, then screw on the band until it is fingertip tight.
  6. Place jars onto rack in prepared canner. Make sure they are completely covered with water (water should be at least an inch over the top of jars). Place lid on canner. Bring water to a full rolling boil, then process jars for 10 minutes. Take off the canner lid; let jars sit in water for 5 more minutes, then remove jars to a dish towel on kitchen counter (do not place hot jars directly on kitchen counter as they could crack due to temperature variations). Let jars sit on counter undisturbed for 24 hours. After testing each jar to make sure they have sealed properly, the jars are safe to store in pantry.
Nutrition Facts
Apple Butter - and how to can it!
Amount Per Serving (1 Tablespoon)
Calories 47 Calories from Fat 9
% Daily Value*
Fat 1g2%
Saturated Fat 1g6%
Sodium 1mg0%
Potassium 23mg1%
Carbohydrates 12g4%
Fiber 1g4%
Sugar 12g13%
Protein 1g2%
Vitamin A 11IU0%
Vitamin C 1mg1%
Calcium 2mg0%
Iron 1mg6%
* Percent Daily Values are based on a 2000 calorie diet.

Here’s one more to pin on your Pinterest boards!Smooth creamy apple butter is a delicious topping for toast, pound cake, or can be a sauce for roast pork. Learn how to can it with step by step instructions.


Save

Save

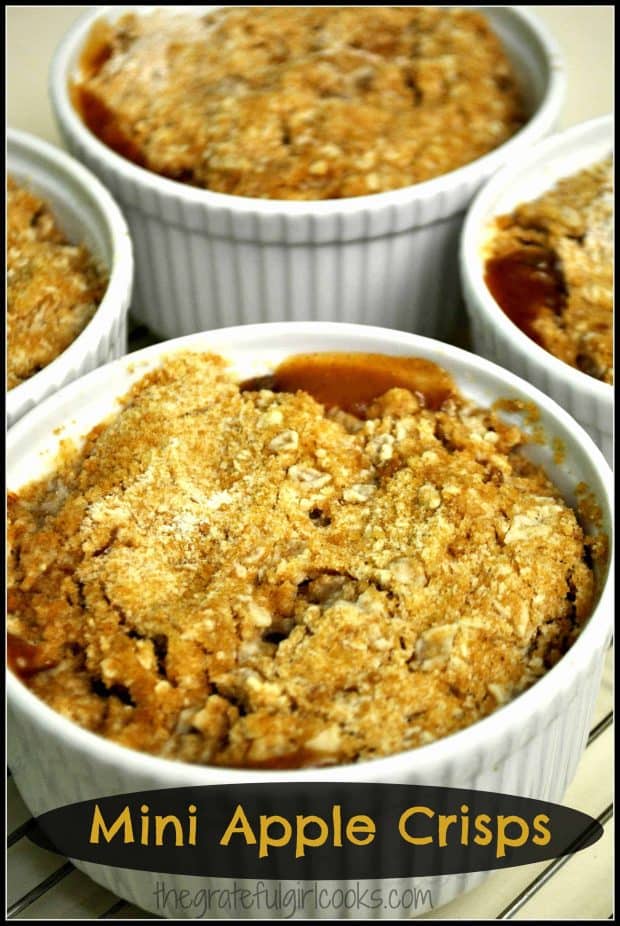
Mini Apple Crisps

Mini Apple Crisps are individual sized versions of this favorite American classic dessert! Whether you call them crisps or cobblers, they are super easy to make – serve with a scoop of vanilla ice cream!Mini Apple Crisps are individual sized versions of this favorite American classic dessert! Super easy to make - serve with a scoop of vanilla ice cream!

Well, well, well… the OFFICIAL start to Fall 2015 will be here in a couple of days. School’s begun, the days are cooler here in the Northwest, sunsets are earlier each day, leaves are beginning their color changes… and apples are everywhere!

Time to make Mini Apple Crisps and welcome in this change of season with a tasty dessert! Here’s how to make Mini Apple Crisps.

Scroll Down for A Printable Recipe Card At The Bottom Of The Page

Fall And Apples Just Seem To Go Well together, Right?

Fall just sort of screams “APPLES”, don’t ya think? There are so many varieties that come into season this time of year, and to me, there is something so memorable about making my first Apple Pie or Apple Crisp of the Fall.

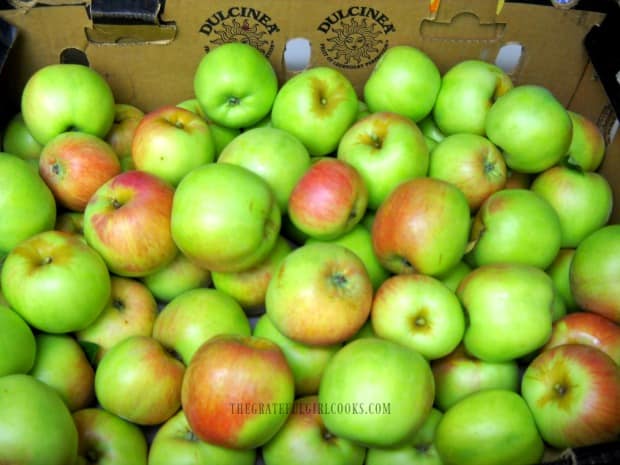
Fall apples, freshly picked, and can be used to make mini apple crisps!

Apple desserts just seems to fit right in with Fall, wearing sweatshirts, raking leaves, football games, pumpkins, brilliant fall foliage, etc. Can you tell I enjoy this season?

I especially enjoy it here in the beautiful Pacific Northwest. The gorgeous colors on display make the ever present RAIN tolerable!

Fall leaves indicate it's time to make apple crisps, pies and cobblers!

Mini Apple Crisps Are PERFECT for Fall Weather!

This recipe for individual sized mini apple crisps is perfect for those nights when you just want to crawl up on the couch in your sweats, under a big warm blanket, and eat something decadent, like some warm apple crisp “goodness” while reading a good book, or watching a good TV show or movie.

Warm and bursting with fresh apple and cinnamon flavor, what could be better than that? Well, I guess a little scoop of vanilla ice cream could make this even better, right?

This is a very easy recipe that makes 4 individual servings, so you can eat one, and save 3 for later, if you are so inclined (Ha Ha).

How To Make Mini Apple Crisps

First thing to do is peel, core and slice the apples. Then place the apple slices, brown sugar, flour, lemon juice and cinnamon into a large skillet.

Mix the ingredients well, to combine. Cook the apples on medium-low for about 10 minutes, or until the apple slices have slightly softened.

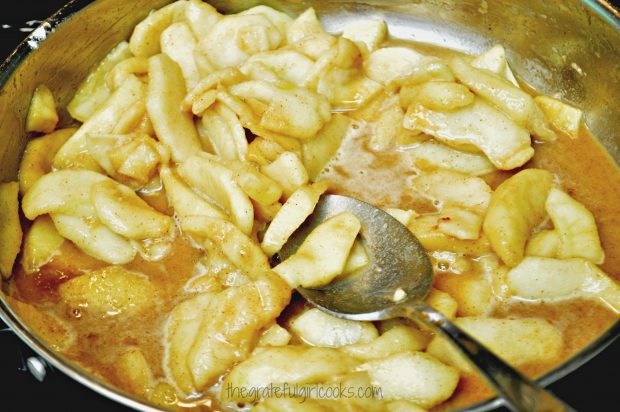
Apple slices cooking with brown sugar, cinnamon, etc. for mini apple crisps.
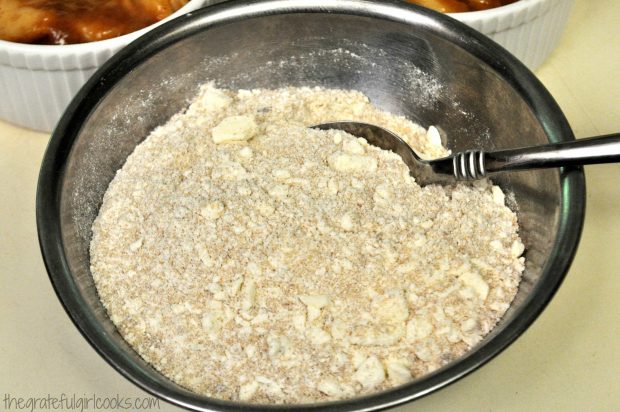
While the apples are cooking, use a pastry blender (or two forks) to blend the crumb topping ingredients in a small bowl. Easy!

Crumb topping is mixed to add to top of apple crisps.
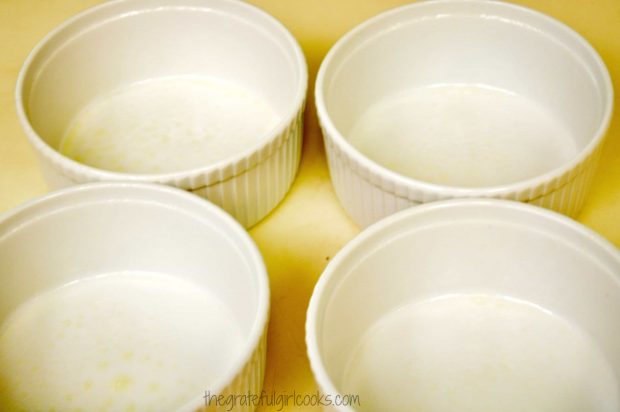
Spray 4 ramekins with non-stick cooking spray. The ones I use are 4″ wide.

Ramekins are coated with non stick cooking spray to bake apple crisps.
Fill ‘Em Up

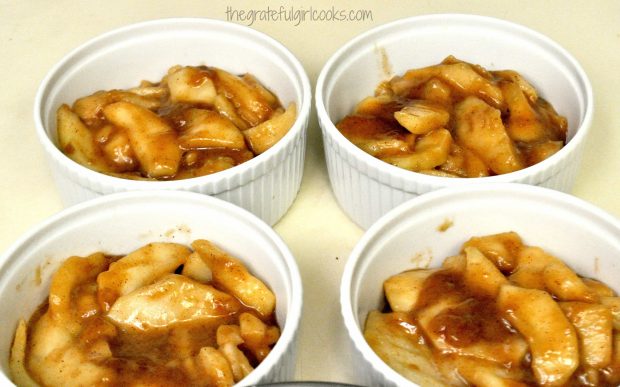
Once the apples are done cooking, divide them evenly between the 4 greased ramekins.

Prepared apple filling divided and added to ramekins.
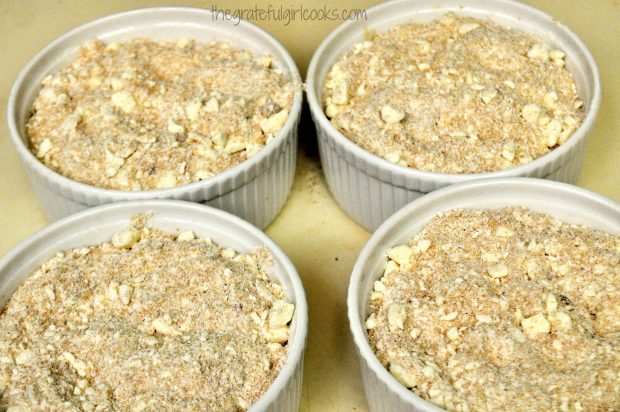
Divide the crumb topping evenly between the 4 ramekins, sprinkling it over the top of the mini apple crisps, all the way to the edges.

Crumb topping is added to mini apple crisps in ramekins before baking.Time To Cook the Mini Apple Crisps!
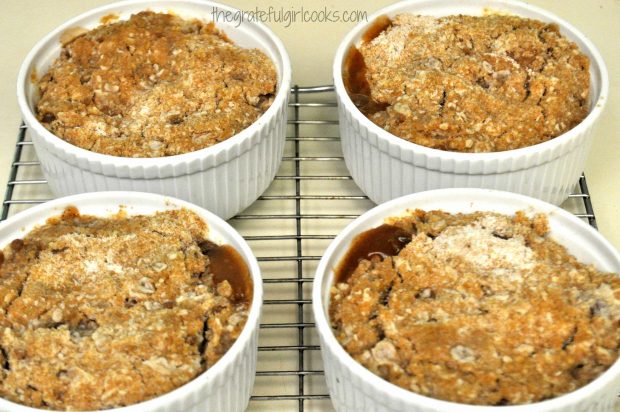
Bake the mini apple crisps in a 375 degree oven for about 25 minutes, until the mixture is bubbly, and the top crumble mixture is lightly browned.

Mini apple crisps, after baking for 25 minutes... ready to eat!
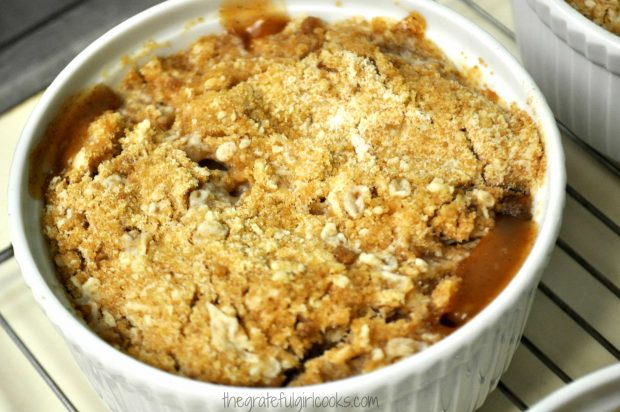
Let the desserts cool on a wire rack for a bit, then serve the Mini Apple Crisps while they are still warm. They are delicious!
Mini apple crisps are served warm!
Doesn’t that look delicious? These mini apple crisps are especially good with a tiny scoop of vanilla ice cream served on top! This recipe is so easy to make, too! You’re gonna LOVE it!

If you enjoy apple desserts, you might also be interested in Dutch Crumb Apple Pie, Apple Cobbler, Apple Shortbread Tart, or Apple Pie Stuffed Won Tons!

Welcome, FALL! Sure hope you will give this delicious recipe a try! Have a great week!

Looking For More COBBLER or CRISP Recipes?

You can find ALL of my recipes in the Recipe Index, which is located at the top of the page. I have a good variety of cobblers and crisp recipes to enjoy, including:

Want More Recipes? Get My FREE Newsletter!

I publish a newsletter 2 times per month (1st and 15th) with lots of recipes, tips, etc..
Would you like to join our growing list of subscribers?

There is a Newsletter subscription box on the top right (or bottom) of each blog post, depending on the device you use.
You can submit your e-mail address there, to be added to my mailing list.

Find Me On Social Media:

Facebook page: The Grateful Girl Cooks!
Pinterest:
The Grateful Girl Cooks!
Instagram:
jbatthegratefulgirlcooks

Author's signatureRecipe Slightly Adapted From: The New Pillsbury Family Cookbook, page 131, published 1973 by The Pillsbury Company,

↓↓ PRINTABLE RECIPE BELOW ↓↓

0 from 0 votes
Mini Apple Crisps
Prep Time
15 mins
Cook Time
25 mins
Total Time
40 mins
 
Mini Apple Crisps are individual sized versions of this favorite American classic dessert! Super easy to make - serve with a scoop of vanilla ice cream!
Category: Dessert
Cuisine: American
Keyword: mini apple crisps
Servings: 4 servings
Calories Per Serving: 591 kcal
Author: JB @ The Grateful Girl Cooks!
Ingredients
For apples:
  • 5 cups Granny Smith apples (peeled, cored, and sliced)
  • 1/4 cup brown sugar
  • 1/2 teaspoon cinnamon
  • 1 Tablespoon lemon juice
  • 2 Tablespoons water
For crumble mixture:
  • 3/4 cup firmly packed brown sugar
  • 1/2 cup all purpose flour (unsifted)
  • 1/2 cup rolled oats (old fashioned or quick cook)
  • 1 teaspoon cinnamon
  • 1/2 cup cold butter
Instructions
  1. Place sliced apples, 1/4 cup brown sugar, 1/2 tsp. cinnamon, lemon juice and water into a large skillet. Stir to combine. Cook on medium-low heat, stirring occasionally, for approximately 10 minutes, or until apples have softened slightly. Remove from heat.
  2. While apples are cooking, prepare the crumb topping. Place the brown sugar, flour, rolled oats, 1 tsp. and cinnamon in a medium sized bowl. Cut the butter into chunks and add to bowl. Using a pastry blender, cut in the butter until mixture is crumbly and butter is about the size of peas. Set aside.
  3. Spray 4 ramekins with non-stick spray. Once apples are done, divide and spoon them equally into the 4 ramekins.
  4. Divide the crumb topping equally between the 4 apple-filled ramekins.Spoon the crumb topping over the entire surface of the apples, all the way to the edges.
  5. Bake apple crisps at 375 degrees for approximately 25-30 minutes, or until mixture is bubbly and the crumb topping is a light, golden brown. Remove hot ramekins to a wire rack to cool a bit. Serve warm, with a tiny scoop of vanilla ice cream, if desired.

Recipe Notes

Firm tart baking apples are used in this recipe (Granny Smith, Gravenstein, etc.).

Nutrition Facts
Mini Apple Crisps
Amount Per Serving (1 serving)
Calories 591 Calories from Fat 216
% Daily Value*
Fat 24g37%
Saturated Fat 14g88%
Cholesterol 61mg20%
Sodium 220mg10%
Potassium 293mg8%
Carbohydrates 95g32%
Fiber 5g21%
Sugar 69g77%
Protein 3g6%
Vitamin A 795IU16%
Vitamin C 8.7mg11%
Calcium 72mg7%
Iron 1.7mg9%
* Percent Daily Values are based on a 2000 calorie diet.

Here’s one more to pin on your Pinterest boards!Mini Apple Crisps are individual sized versions of this favorite American classic dessert! Super easy to make - serve with a scoop of vanilla ice cream!


Save

Save

Save

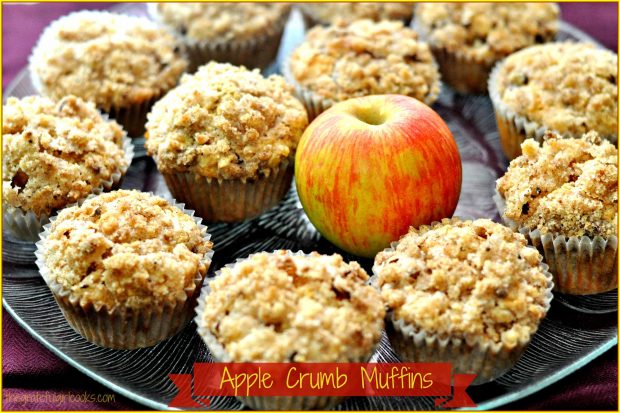
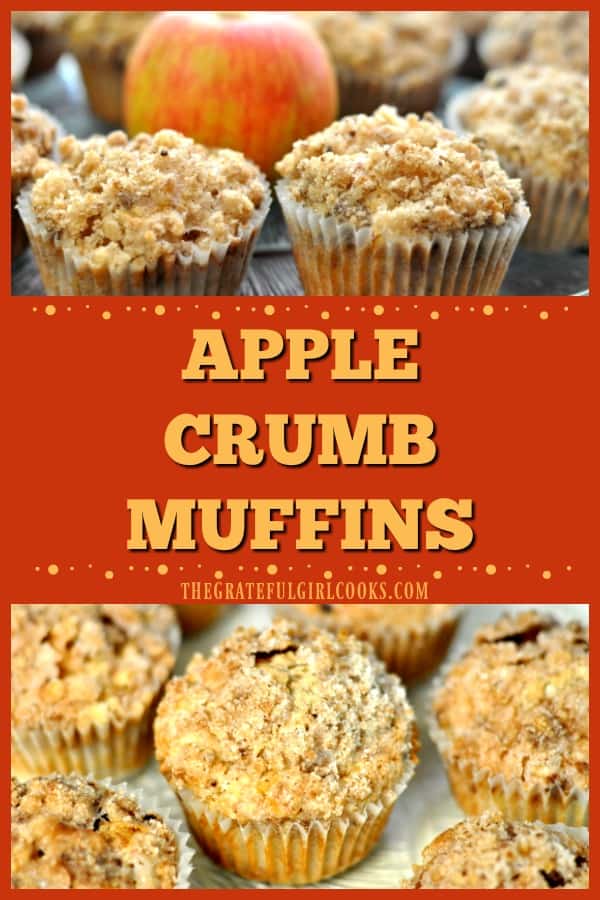
Apple Crumb Muffins

Apple crumb muffins with streusel topping, are moist, delicious, easy to make and will become a family favorite breakfast treat!Apple crumb muffins with streusel topping, are moist, delicious, easy to make and will become a family favorite breakfast treat!

This past weekend we have had quite lot of wind and heavy rain hit us here in Portland. The temperature has dropped quite a bit from the consistent HOT temps we’ve been experiencing all summer long.

To celebrate what FEELS like Fall, I made these Apple Crumb Muffins! Apples and cool, rainy weather just seem to go together well! So does a hungry tummy and these yummy muffins! 

I found the recipe for these delicious, easy-to-prepare muffins on a blog site that I enjoy, called “Heather’s French Press”, and decided to give ’em a try.

These apple crumb muffins are SO EASY to make… really! Here’s how you make them:

Scroll Down For A Printable Recipe Card At The Bottom Of The Page

How To Make Apple Crumb Muffins

First you whisk together flour, baking powder, granulated sugar, salt and cinnamon. You have to use cinnamon to make any good apple recipe a hit, right?

Flour and spices in bowl

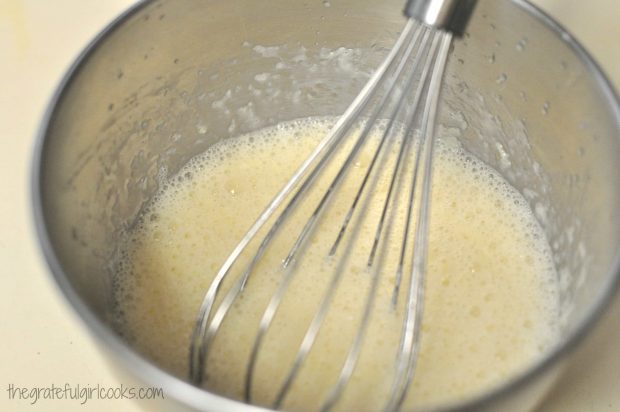
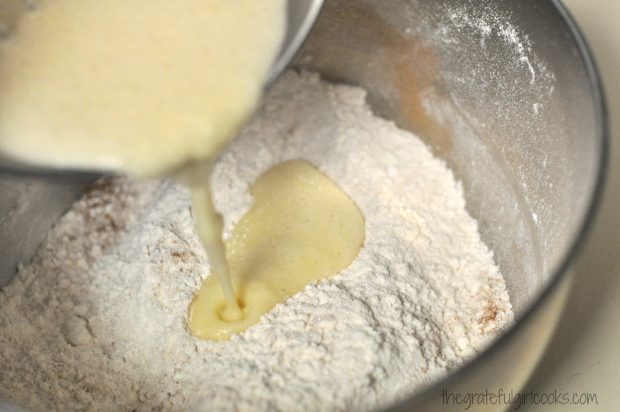
Next, whisk together one egg, some milk and a bit of melted butter. Whisk it up good, then pour it into the flour mixture.

Egg, milk and butter with whisk in bowlPouring muffin batter into dry ingredients in bowl

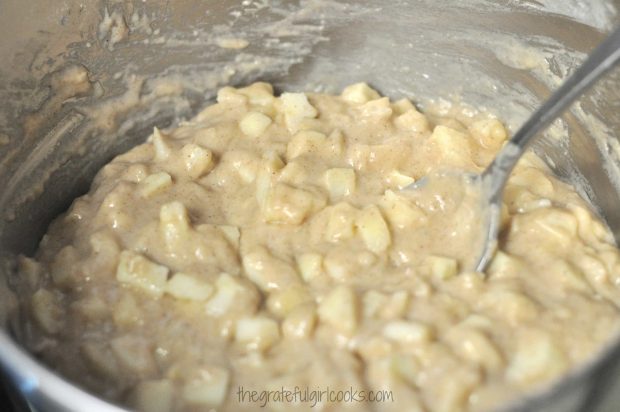
Stir to combine the ingredients (just until blended in), then fold in the chopped apples.

Muffin batter with apple chunks in bowl

Time To Fill the Muffin Tins!

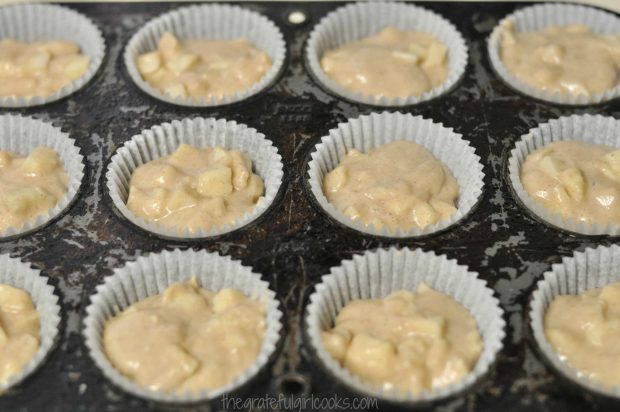
Fill paper-lined muffin cups with the apple mixture. Fill each muffin cup about 2/3 full. Now it’s time to bake the muffins.

PLEASE IGNORE my totally ancient/much-abused, horrible-looking muffin pans that have seen a LOT of use over the years! They are a little worse for the wear, but “work” just fine, so I can live with that.

Batter in paper-lined muffin cup tins

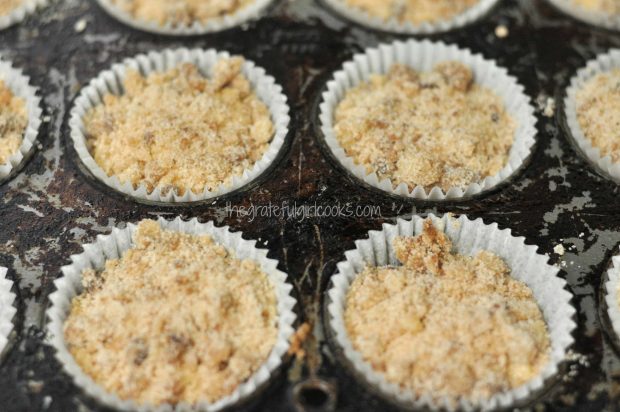
Now it’s time to make the crumb/streusel topping. Easy. Mix the ingredients together in a small bowl, then distribute the streusel over the top of each muffin.

Batter with streusel on top in muffin tins

Bake The Apple Crumb Muffins!

Bake the muffins at 400°F. for about 20 minutes, then remove the pan from the oven. The streusel topping on the muffins will be golden brown in color.

You can check for doneness by inserting a toothpick into the center of a muffin. If the toothpick comes out clean, the muffins are done!

Transfer the muffin tin to a wire rack and let the muffins cool slightly (2-3 minutes) before removing the muffins and serving.

Serve The Apple Crumb Muffins

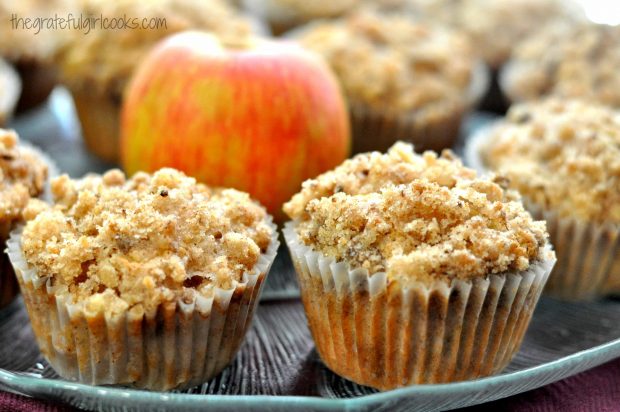
Remove the muffins from the pan and serve these delicious breakfast or snack treats to those you love. See how nice the streusel topping looks?

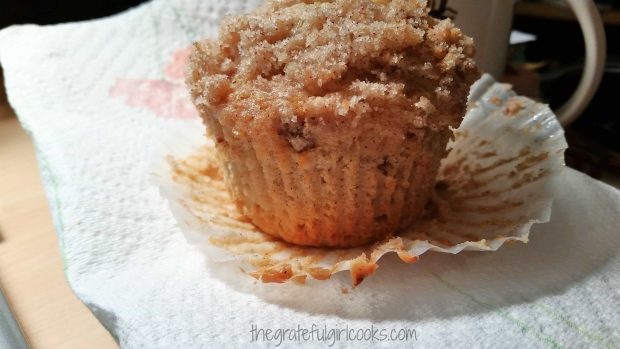
Two muffins close up with apple on plateBaked apple crumb muffin on a paper towel

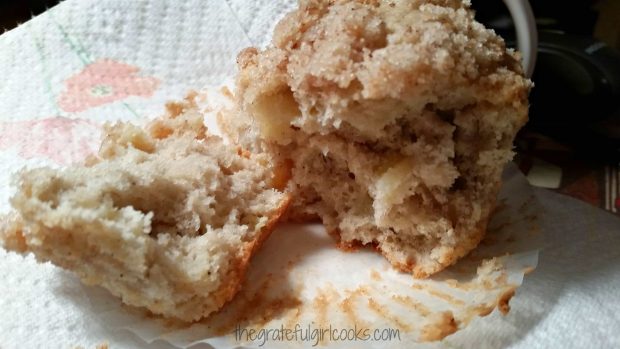
Here’s an apple crumb muffin that has been cut in half. See those apple chunks inside the muffin? YUM.

You can see the apple chunks inside the muffin!

These apple crumb muffins also freeze well, if wrapped securely! Sure hope you will find some time to give this recipe a try! I’m sure you will LOVE these muffins!

Thanks for stopping by, and I invite you to come back soon for more family-friendly recipes. Take care, and have a GREAT day!

Looking For More MUFFIN Recipes?

You can find ALL my recipes in the Recipe Index, which is located at the top of the page! I have lots of muffin recipes to choose from, including:

Want More Recipes? Get My FREE Newsletter!

I publish a newsletter 2 times per month (1st and 15th) with lots of recipes, tips, etc..
Would you like to join our growing list of subscribers?

There is a Newsletter subscription box on the top right (or bottom) of each blog post, depending on the device you use.
You can submit your e-mail address there, to be added to my mailing list.

Find Me On Social Media:

Facebook page: The Grateful Girl Cooks!
Pinterest:
The Grateful Girl Cooks!
Instagram:
jbatthegratefulgirlcooks

Author's signatureRecipe Source: http://www.heathersfrenchpress.com/2015/08/apple-streusel-coffee-cake-muffins.html

↓↓ PRINTABLE RECIPE BELOW ↓↓

0 from 0 votes
Apple Crumb Muffins
Prep Time
15 mins
Cook Time
20 mins
Total Time
35 mins
 
Apple crumb muffins with streusel topping, are moist, delicious, easy to make and will become a family favorite breakfast treat!
Category: Breakfast
Cuisine: American
Keyword: apple crumb muffins
Servings: 12 muffins
Calories Per Serving: 202 kcal
Author: JB @ The Grateful Girl Cooks!
Ingredients
For The Muffins:
  • 1 1/2 cups all purpose flour
  • 2 teaspoons baking powder
  • 1/2 cup granulated sugar
  • 1/2 teaspoon salt
  • 1/2 teaspoon cinnamon
  • 1 egg
  • 1/2 cup + 2 Tablespoons milk
  • 4 Tablespoons butter , melted
  • 2 cups apples , peeled, and diced
For The Crumb Topping:
  • 1/2 cup granulated sugar
  • 1/4 cup flour
  • 1/2 teaspoon cinnamon
  • 2 Tablespoons butter , melted
Instructions
  1. Preheat your oven to 400 degrees F.
  2. In a medium sized bowl, combine the flour, granulated sugar, baking powder, cinnamon and salt.
  3. In a separate bowl, whisk the egg, milk and melted butter (cooled) together.
  4. Add the egg mixture to the flour mixture. Stir this until is is just barely combined.
  5. Add the diced apples; fold them into the batter.
  6. Spoon the mixture into paper-lined or spayed standard sized muffin cups.
  7. In separate small bowl, mix together the crumb topping ingredients. Sprinkle the crumb topping over the top of each of the muffins. Use all the topping mixture.
  8. Bake the muffins at 400 degrees for 20 minutes. Remove to a wire rack, and let cool before serving. Enjoy!
Nutrition Facts
Apple Crumb Muffins
Amount Per Serving (1 muffin)
Calories 202 Calories from Fat 54
% Daily Value*
Fat 6g9%
Saturated Fat 3g19%
Cholesterol 29mg10%
Sodium 157mg7%
Potassium 126mg4%
Carbohydrates 34g11%
Fiber 1g4%
Sugar 19g21%
Protein 2g4%
Vitamin A 225IU5%
Vitamin C 1mg1%
Calcium 48mg5%
Iron 1mg6%
* Percent Daily Values are based on a 2000 calorie diet.

Here’s one more to pin on your Pinterest boards!Apple crumb muffins with streusel topping, are moist, delicious, easy to make and will become a family favorite breakfast treat!


Save

Save

Apple, Cranberries & Oats Skillet Breakfast

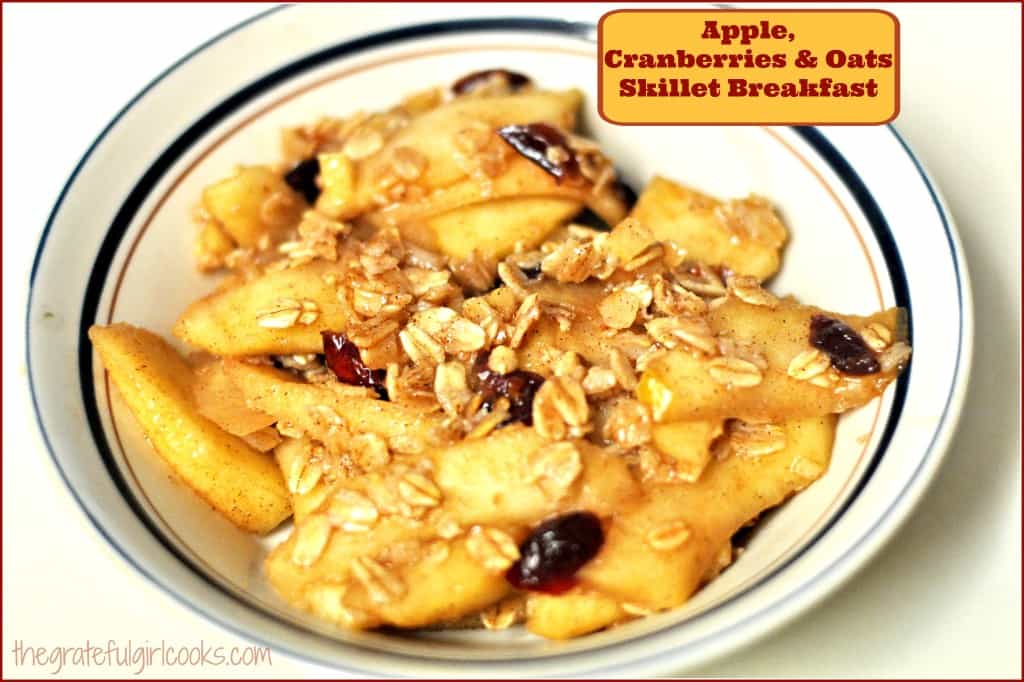
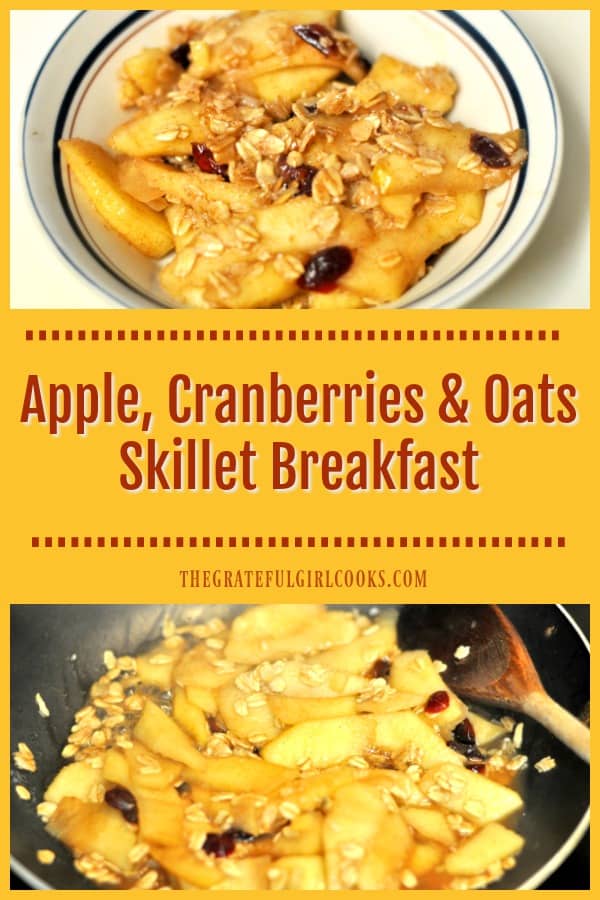
Comforting and delicious, this easy and healthy apple cranberries oats skillet breakfast will make you think you’re eating apple pie for breakfast!Comforting and delicious, this easy and healthy apple cranberries oats skillet breakfast will make you think you're eating apple pie for breakfast!

A few mornings ago, I was trying to decide what to eat for breakfast. I decided to eat a LARGE apple, but then thought it sounded rather boring. I wanted to eat a fairly healthy breakfast, but wanted it to taste fantastic and help fill me up.  So I made an Apple Cranberries Oats Skillet Breakfast and it was wonderful, delicious, and filling!

I decided to cook the apple slices in my trusty skillet, then added in additional flavor with some extra goodies (like cinnamon, dried cranberries, a smidge of brown sugar, etc.) and some “good for you” old-fashioned oats. What I ended up with was a healthy, satisfying meal… with a huge apple as the main ingredient!

Scroll Down For A Printable Recipe Card At The Bottom Of The Page

How to Make This Apple Cranberries Oats Skillet Breakfast

I love to cook oatmeal with fresh apples in it, but this time I reversed the process. I cooked an entire large apple, and added in only 1 Tablespoon of raw oats and dried cranberries while cooking (for extra texture and fiber).

I liberally sprinkled the mixture with cinnamon, lemon juice, a tiny pinch of brown sugar, and cooked the apples down until they were softened, but NOT mushy.

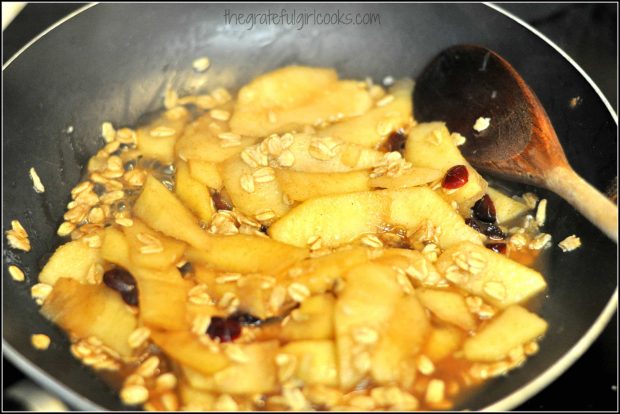
Apple slices, oats and cranberries cooking in skillet
I added a bit of water to my skillet while cooking to help the oats and apple soften up. That’s it!  Once the apples had softened (about 5 minutes later), I spooned the entire mixture into a bowl, let it cool just a bit, and ate the whole thing!

Truthfully it felt like I was eating apple crisp (kinda) for breakfast. It was delicious, and was a totally EASY and very satisfying start to my day! Another breakfast recipe (one of my faves) you might want to check out is my post for Apple Cinnamon Steel Cut Oats With Pecans! Yum.

Hope you will give this quick breakfast a try! Have a great day; my hope is that God blesses you with moments where you see evidence of HIS beauty, kindness, and love as you go through this day!

Interested In More Recipes?

Thank you for visiting this website. I appreciate you using some of your valuable time to do soIf you’re interested, I publish a newsletter 2 times per month (1st and 15th) with all the latest recipes, and other fun info. I would be honored to have you join our growing list of subscribers, so you never miss a great recipe!
There is a Newsletter subscription box on the top right side (or bottom) of each blog post, depending on the device you use, where you can easily submit your e-mail address (only) to be included in my mailing list.

You Can Also Find Me On Social Media:

Facebook page: The Grateful Girl Cooks!
Pinterest:
The Grateful Girl Cooks!
Instagram:
jbatthegratefulgirlcooks

Author's signatureRecipe source: My brain (and 2 cups of coffee)

0 from 0 votes
Apple, Cranberries & Oats Skillet Breakfast
Prep Time
5 mins
Cook Time
8 mins
Total Time
13 mins
 
Comforting and delicious, this easy and healthy apple cranberries oats skillet breakfast will make you think you're eating apple pie for breakfast!
Category: Breakfast
Cuisine: American
Keyword: apple cranberries oats skillet
Servings: 1 serving
Calories Per Serving: 181 kcal
Author: JB @ The Grateful Girl Cooks!
Ingredients
  • 1 apple , large, peeled, cored and sliced into thin slices
  • 1 Tablespoon fresh lemon juice
  • 3/4 teaspoon cinnamon
  • 3/4 teaspoon brown sugar
  • 1 Tablespoon dried cranberries
  • 1 Tablespoon old-fashioned oats (dry)
  • 1/4 cup water
Instructions
  1. Peel, core, and slice the apple into thin slices. Place in skillet. Stir in lemon juice. Cook apple slices on medium-low heat until apples begin to soften (2-3 minutes).

  2. Add cinnamon, brown sugar, dried cranberries, and oats. Stir together.
  3. Add water, stir to combine and continue cooking until apple mixture is hot, most of the water has cooked away, and the apples have softened (approx. 5 minutes). That's it! Serve while warm. Enjoy.
Nutrition Facts
Apple, Cranberries & Oats Skillet Breakfast
Amount Per Serving (1 serving)
Calories 181
% Daily Value*
Sodium 6mg0%
Potassium 194mg6%
Carbohydrates 46g15%
Fiber 6g25%
Sugar 32g36%
Protein 1g2%
Vitamin A 100IU2%
Vitamin C 14.2mg17%
Calcium 26mg3%
Iron 0.5mg3%
* Percent Daily Values are based on a 2000 calorie diet.

Here’s one more to pin on your Pinterest boards!Comforting and delicious, this easy and healthy apple cranberries oats skillet breakfast will make you think you're eating apple pie for breakfast!


Save

Save

Dutch Crumb Apple Pie

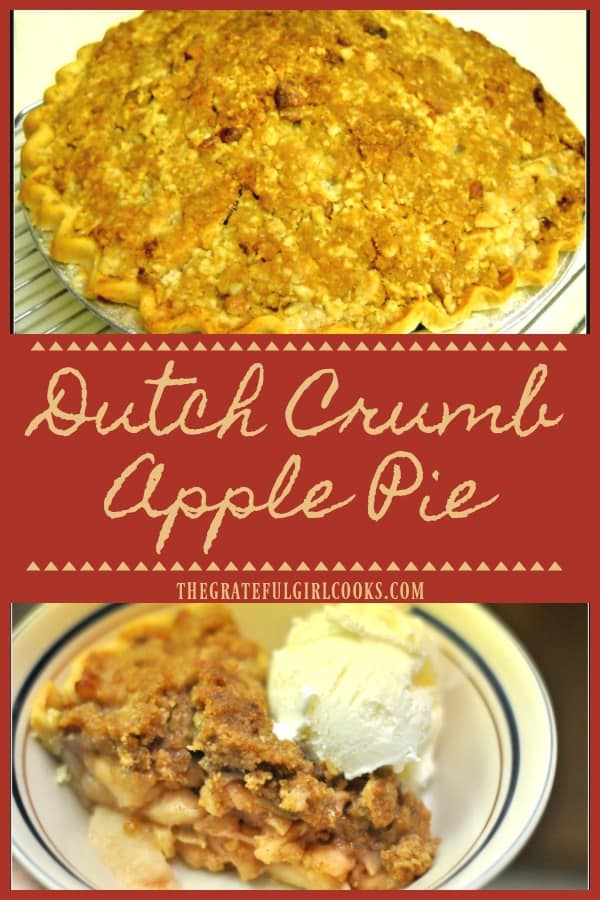
You’re gonna LOVE Dutch Crumb Apple Pie! This classic apple pie, topped with buttery pecan streusel crumbs will be a hit with everyone who enjoys dessert!You're gonna LOVE Dutch Crumb Apple Pie! This classic apple pie, topped with buttery pecan streusel crumbs will be a hit with everyone who enjoys dessert!
I made a Dutch Crumb Apple Pie this past week for my hubby (because I love him).  It’s one of his very favorite pies, especially with the buttery pecan streusel crumb topping!

He owns a real estate appraisal business, and has been working LONG, crazy hours for the past couple months to keep up with demand. He mentioned to me a few weeks ago on an incredibly busy, stressful day, how good a piece of Dutch Crumb Apple Pie pie sounded. So I made him a pie this week as a “thank you” for how hard he works for our family. THIS pie. It’s delicious!

Scroll Down For A Printable Recipe Card At The Bottom Of The Page

How I Found this Recipe

I’ve been making apple pies for as long as I can remember, from the same old recipe I found in a cookbook when I was a newlywed, almost 40 years ago. Last Fall I made several pies and enjoyed surprising a few friends and neighbors with a pie of their own!

I usually make apple pies the traditional way, with a top crust, but discovered a couple of years ago that we really enjoyed the buttery topping found on a Dutch Crumb Apple Pie. The brown sugar and pecans in the topping really give this pie added flavor! I found the recipe for the crumb topping in the same cookbook, added it to the pie recipe…and we LOVED it!

What Kind Of Apples Are Used For This Dutch Crumb Apple Pie?

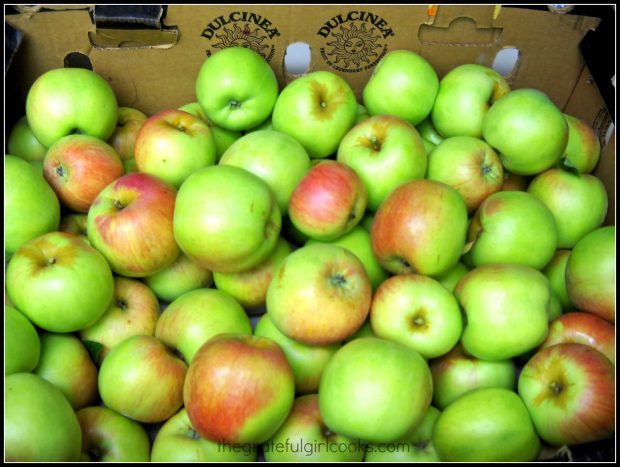
Firm baking apples are the apple of choice for this pie. I love to use Gravenstein, but Granny Smith apples are a perfect substitute (firm and tart). Last summer I picked a huge amount of Gravenstein apples at a local U-Pick farm nearby, so that is what I used in these photos.

Gravenstein or Granny Smith apples are used to make this Dutch Crumb Apple Pie.
How To Make This Delicious Dutch Crumb Apple Pie

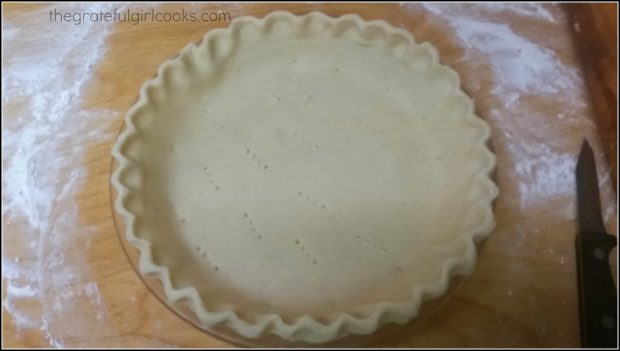
Preheat your oven to 425 degrees.  Make a single pie crust. Use your own recipe, buy one, or make my recipe (DIY Mom’s Pie Crust!). Prick the dough on bottom and sides with tines of a fork, so the dough doesn’t “puff up” while baking.

Pie crust is ready to make a Dutch crumb apple pie.
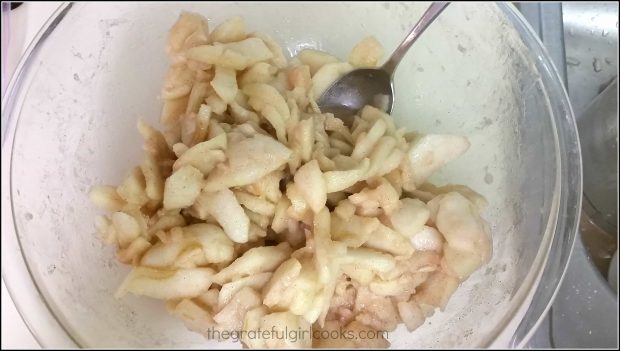
Prepare the apple filling per recipe instructions. Set aside.

Dutch crumb apple pie filling is mixed in a large bowl.
Make The Crumb Topping

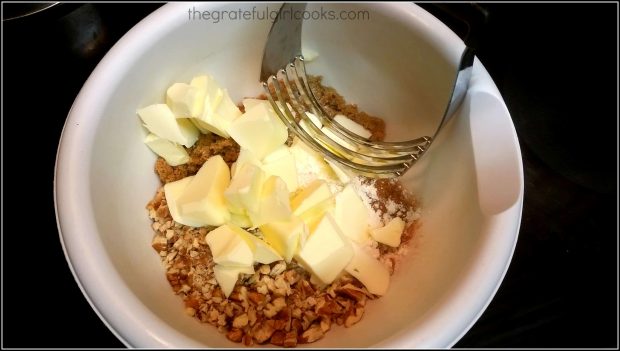
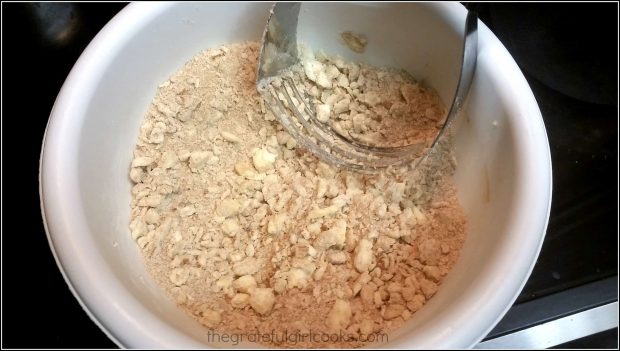
Prepare crumb topping, using a pastry blender to cut butter into mixture. Mix until all butter is worked in, and is about the size of peas.

Making the streusel to top the Dutch crumb apple pie is easy.
The topping mixture should look something like this when done:

Butter has been cut into the streusel topping for the Dutch crumb apple pie.
Fill the Pie

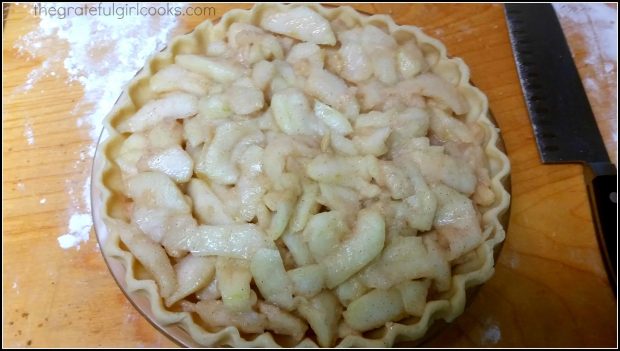
Add the apple filling to the prepared pie crust. Make sure it is fairly even when distributed over the crust.

Apple pie filling is arranged on top of the pie crust in pan.
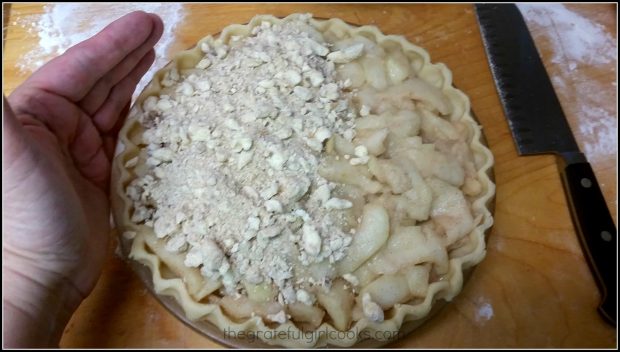
Carefully distribute the crumb topping mixture on top of the apples. I cup my hand around the sides as I go, to keep most of the crumbs ON the pie and OFF the kitchen counter.

Dutch crumb topping is added to top of the apple pie.
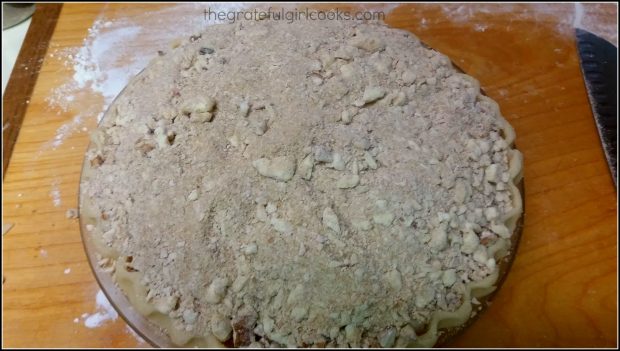
Spread crumb topping over entire surface of pie and mound it up toward the center of pie.

Dutch crumb apple pie has streusel topping over entire surface of pie.
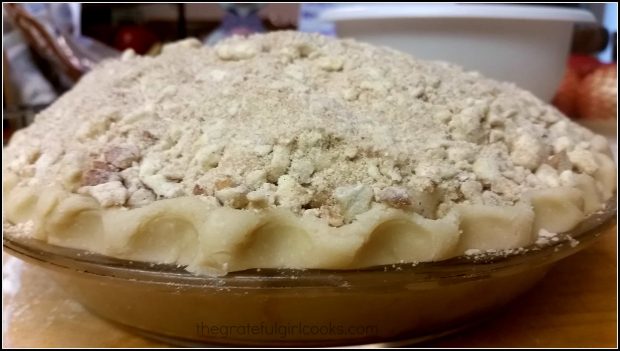
This is what it should look like from the side. See how high it is in the middle?

A side view to see the topping piled up on the Dutch crumb apple pie before baking.
Time To Bake The Dutch Crumb Apple Pie

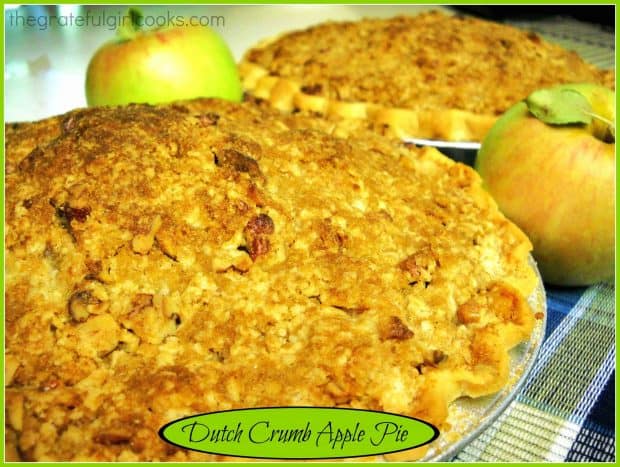
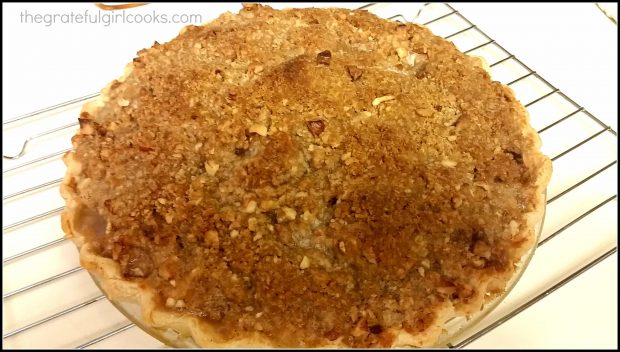
Bake the pie at  425 degrees, for  40-45 minutes. I put a piece of aluminum foil on the rack below the rack the pie is baked on, to catch any wayward drips (easy to clean up). A Dutch Crumb Apple Pie should be a wonderful, golden brown color when done.

Dutch Crumb Apple Pie is golden brown on top after it comes out of oven.
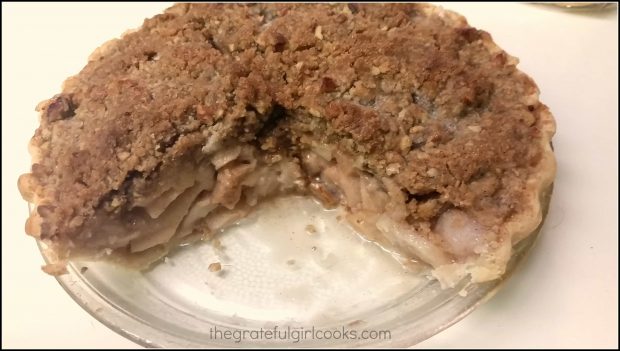
Let cool for a bit, then dig in! Here’s what the inside of the pie looks like: (Same pie… but used my phone’s camera for this one…)

A look at the inside of the Dutch crumb apple pie.
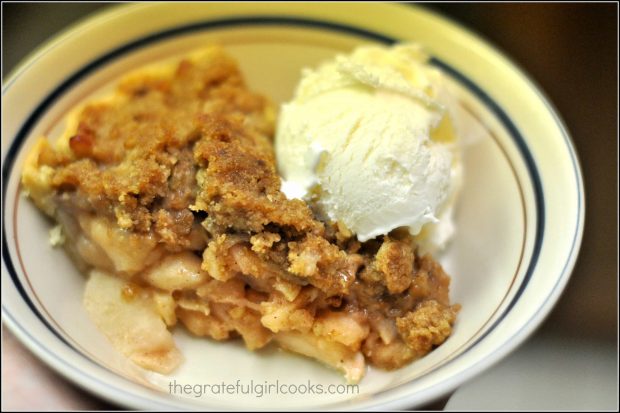
And here’s what a slice of the Dutch crumb apple pie looks like with a scoop of my homemade vanilla ice cream, (gotta have the pie a la mode, of course). So incredibly good!

A slice of Dutch crumb apple pie, served with a scoop of vanilla ice cream.
Hope you will give this Dutch crumb apple pie recipe a try! We love it, and think you will, too! Thanks for stopping by, and have a great day. Come back soon!

Looking For More PIE Recipes?

You can find all of my recipes in the Recipe Index, located at the top of the page. I have a nice variety of pie recipes, including:

Interested In More Recipes?

Thank you for visiting this website. I appreciate you using some of your valuable time to do soIf you’re interested, I publish a newsletter 2 times per month (1st and 15th) with all the latest recipes, and other fun info. I would be honored to have you join our growing list of subscribers, so you never miss a great recipe!
There is a Newsletter subscription box on the top right side (or bottom) of each blog post, depending on the device you use, where you can easily submit your e-mail address (only) to be included in my mailing list.

You Can Also Find Me On Social Media:

Facebook page: The Grateful Girl Cooks!
Pinterest:
The Grateful Girl Cooks!
Instagram:
jbatthegratefulgirlcooks

Author's signatureRecipe Source: “The New Pillsbury Family Cookbook”, copyright 1973 by The Pillsbury Company. [Apple Pie recipe: page 149]. [Crumb topping recipe: page 147].

0 from 0 votes
Dutch Crumb Apple Pie
Prep Time
20 mins
Cook Time
40 mins
Total Time
1 hr
 

You're gonna LOVE Dutch Crumb Apple Pie! This classic apple pie, topped with buttery pecan streusel crumbs will be a hit with everyone who enjoys dessert!

Category: Dessert
Cuisine: American
Keyword: Dutch crumb apple pie
Servings: 8 servings
Calories Per Serving: 460 kcal
Author: JB @ The Grateful Girl Cooks!
Ingredients
For Pie:
  • 1 9" pie crust , at room temperature
  • 6 cups apples , peeled, cored, and sliced
  • 3/4 cup granulated sugar
  • 2 Tablespoons all purpose flour
  • 3/4 teaspoon cinnamon
  • 1 Tablespoon fresh lemon juice
For Crumb Topping:
  • 1 cup all purpose flour
  • 1/2 cup firmly packed brown sugar (I use dark brown sugar)
  • 1/2 teaspoon cinnamon
  • 1/2 cup cold butter
  • 1/4 cup chopped pecans (or walnuts)
Instructions
  1. Preheat oven to 425 degrees. While oven is preheating, put pie crust into 9" pie pan. Form crust. Prick the bottom and sides of dough with tines of a fork, so the dough won't puff up while pie is baking. Set aside.
  2. Prepare the crumb topping: In a small mixing bowl, combine the flour, brown sugar and chunks of the the butter. Cut in the butter using a pastry blender or two forks. Cut the butter in until the mixture is crumbly and the butter has been reduced to the size of peas. Stir in the chopped pecans (or walnuts). Set aside.

  3. Make the pie filling: Place the peeled apple slices in a large mixing bowl. Add the granulated sugar, flour, cinnamon, and lemon juice. Stir gently to combine.
  4. Pour the apple filling into a prepared (*unbaked) pie crust lined pie pan. Cover the entire surface of the pie with the crumb topping, and forming a mound which rises in the middle of the pie. Use all the crumbs (the topping will flatten out a bit while baking).

  5. TIP FOR BAKING: Place a large piece of aluminum foil under the pie in oven, on the rack below the one the pie will be on. This will catch any drips, and help with easy clean-up.

  6. Bake pie at 425 degrees for 40-45 minutes. Pie should be bubbly and golden brown when done. Remove hot pie to a wire rack to cool a bit before serving. Slice a piece, top it with some vanilla ice cream... and ENJOY!

Nutrition Facts
Dutch Crumb Apple Pie
Amount Per Serving (1 slice)
Calories 460 Calories from Fat 171
% Daily Value*
Fat 19g29%
Saturated Fat 9g56%
Cholesterol 30mg10%
Sodium 193mg8%
Potassium 169mg5%
Carbohydrates 69g23%
Fiber 3g13%
Sugar 42g47%
Protein 3g6%
Vitamin A 405IU8%
Vitamin C 5mg6%
Calcium 31mg3%
Iron 1.7mg9%
* Percent Daily Values are based on a 2000 calorie diet.

Here’s one more to pin on your Pinterest boards!You're gonna LOVE Dutch Crumb Apple Pie! This classic apple pie, topped with buttery pecan streusel crumbs will be a hit with everyone who enjoys dessert!


Save

Save

Rise n’ Shine Juice

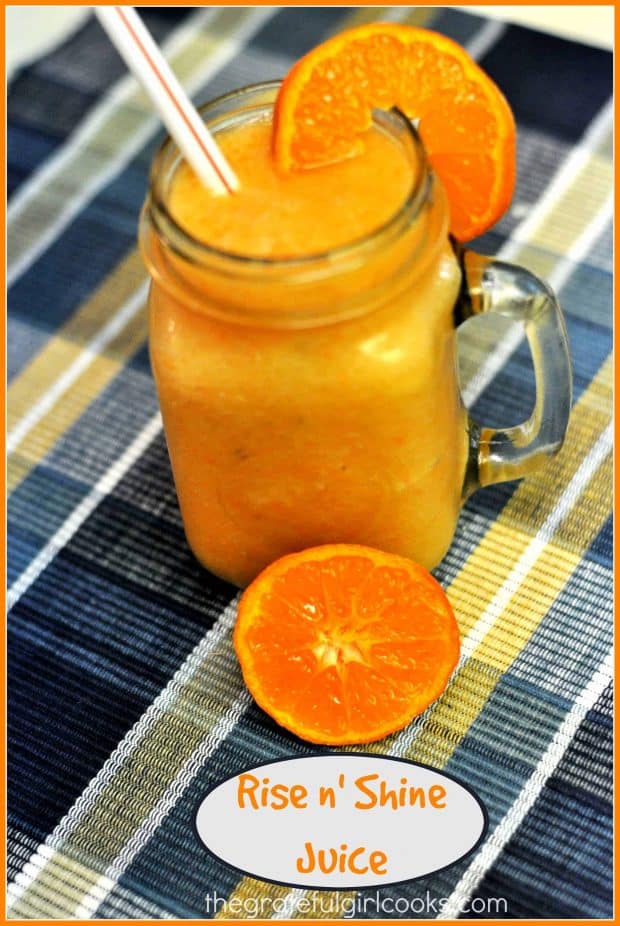
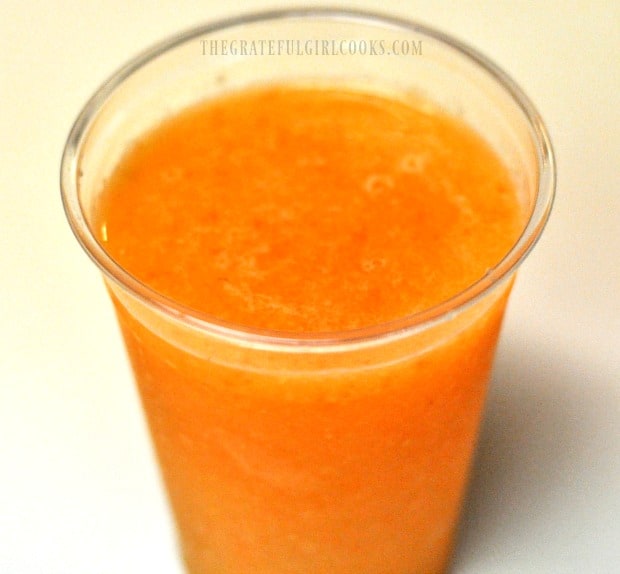
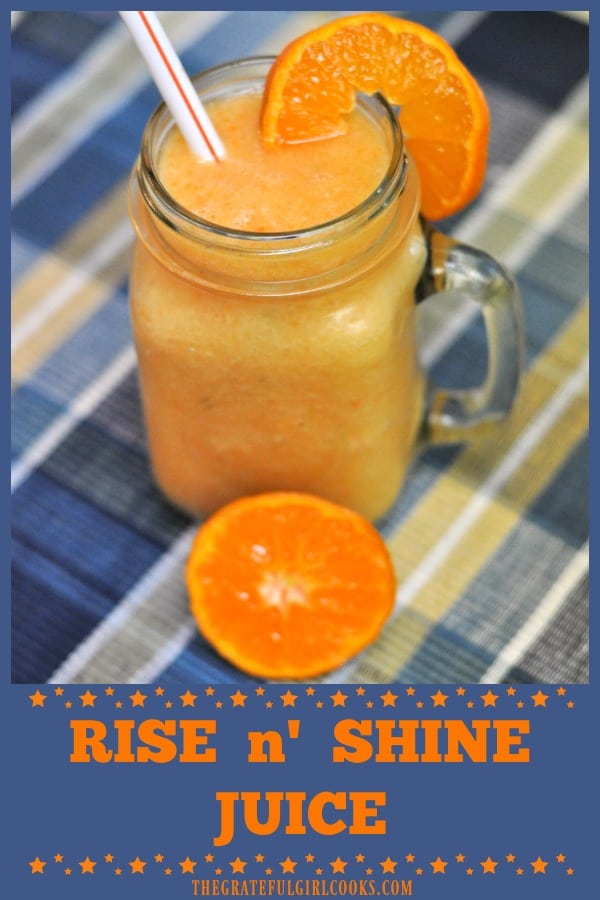
Rise n’ Shine Juice is a delicious citrus beverage flavored with red grapefruit, mandarins, oranges, lemons, apples, carrots, ginger, and a frozen banana!Rise n' Shine Juice is a delicious citrus beverage flavored with red grapefruit, mandarins, oranges, lemons, apples, carrots, ginger, and a frozen banana!

The other day I wanted a healthy, filling, and BIG blended juice for my breakfast. I ended up juicing a ruby red grapefruit, mandarin oranges, valencia oranges, half a lemon, and then… if that wasn’t enough, I added apples, carrots, fresh ginger, half a frozen banana, and a handful of crushed ice into the mix. I called it “Rise n’ Shine Juice”! YUM!

Scroll Down For A Printable Recipe Card At The Bottom Of The Page

Making Rise n’ Shine Juice In A Food Processor

After juicing the citrus fruits, I strained out the pulp, then added the juice, along with sliced raw carrots, a small knob of fresh ginger, 2 sliced apples, and half a frozen banana into my food processor. (FYI) * I have not made this juice using a blender, but if you want to try it, you will definitely need to grate the carrots and apples, not slice them, to give them a better chance of being fully blended*.

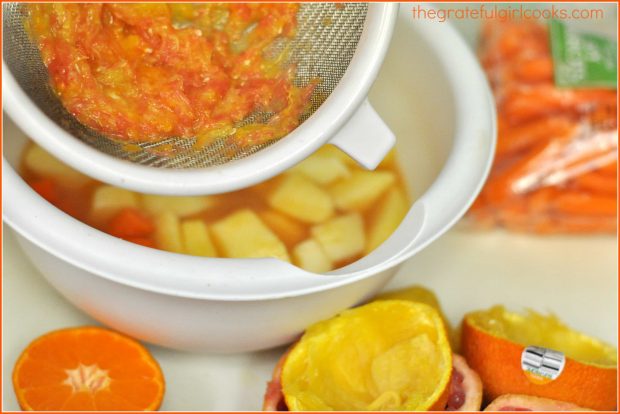
See all the pulp? That’s a lot of citrus pulp strained out of the juice… Now all that is left to do is “pulverize” all the ingredients into a thick, cold citrus juice drink!

After juicing the citrus, strain and discard the pulp.

Time For A Cold Citrus Juice!

I blended all the ingredients up in the food processor, then added a small handful of ice to get it really cold, and mixed that in, as well. The beauty of it is that it actually tasted good, after completely pulverizing it!

The result was a delicious, slightly thicker than normal juice (thanks to the apple and carrots).  I liked it, certainly got my fruit requirement for the day in, it filled me up, and I froze the leftovers (recipe makes enough for 2!) for another day!

Cold leftover Rise n' Shine Juice is delicious, even the next day!

I really hope you enjoy this great tasting rise n’ shine juice!  If you enjoy cold breakfast smoothies or juice drinks, you might also enjoy my recipes for Triple Berry Banana Smoothies, Strawberry Smoothies , or a copycat version of an Orange Julius.

Thanks for stopping by, and I hope you will come back again soon. Remember that you can find ALL of my recipes in the Recipe Index, located at the top of the page. Have a great day.

Interested In More Recipes?

Thank you for visiting this website. I appreciate you using some of your valuable time to do soIf you’re interested, I publish a newsletter 2 times per month (1st and 15th) with all the latest recipes, and other fun info. I would be honored to have you join our growing list of subscribers, so you never miss a great recipe!
There is a Newsletter subscription box on the top right side (or bottom) of each blog post, depending on the device you use, where you can easily submit your e-mail address (only) to be included in my mailing list.

You Can Also Find Me On Social Media:
Facebook page: The Grateful Girl Cooks!
Pinterest: The Grateful Girl Cooks!
Instagram: jbatthegratefulgirlcooks

Hope you enjoy it!

Author's signature

0 from 0 votes
Rise n' Shine Juice
Prep Time
15 mins
Cook Time
0 mins
Total Time
15 mins
 

Rise n' Shine Juice is a delicious citrus beverage flavored with red grapefruit, mandarins, oranges, lemons, apples, carrots, ginger, and a frozen banana!

Category: Beverage
Cuisine: American
Keyword: rise n' shine juice
Servings: 2
Calories Per Serving: 324 kcal
Author: JB @ The Grateful Girl Cooks!
Ingredients
  • 1 Ruby red grapefruit
  • 3 oranges
  • 2 mandarin oranges
  • 2 small apples , peeled, seeded, cored, and sliced
  • 7 baby carrots , sliced
  • 1/2 banana (frozen)
  • 1 teaspoon fresh ginger , minced
  • handful of ice
Instructions
  1. Juice the grapefruit, oranges, and mandarin oranges. Pour juice through a strainer to remove pulp. Pour juice into food processor (or heavy duty blender).
  2. Add apple slices, sliced carrots, frozen banana and ginger to processor. Process for several minutes until almost all of the apples and carrots have broken down.
  3. Add a handful of crushed ice to the processor. Process again, until ice is fully incorporated into liquid.
  4. Pour into serving glasses. Garnish with an orange slice, if desired.  Enjoy your fruit fix for the day!

Recipe Notes

If you are going to use a blender, be sure to GRATE the carrots and apple (instead of cutting and slicing them) before adding them to ensure they blend easier!

Nutrition Facts
Rise n' Shine Juice
Amount Per Serving (1 g)
Calories 324 Calories from Fat 9
% Daily Value*
Fat 1g2%
Sodium 31mg1%
Potassium 1051mg30%
Carbohydrates 82g27%
Fiber 14g58%
Sugar 60g67%
Protein 4g8%
Vitamin A 7380IU148%
Vitamin C 178.3mg216%
Calcium 160mg16%
Iron 1mg6%
* Percent Daily Values are based on a 2000 calorie diet.

Here’s one more to pin on your Pinterest boards!Rise n' Shine Juice is a delicious citrus beverage flavored with red grapefruit, mandarins, oranges, lemons, apples, carrots, ginger, and a frozen banana!


Save

Save

Pork Tenderloin With Apples And Apple Cider Sauce

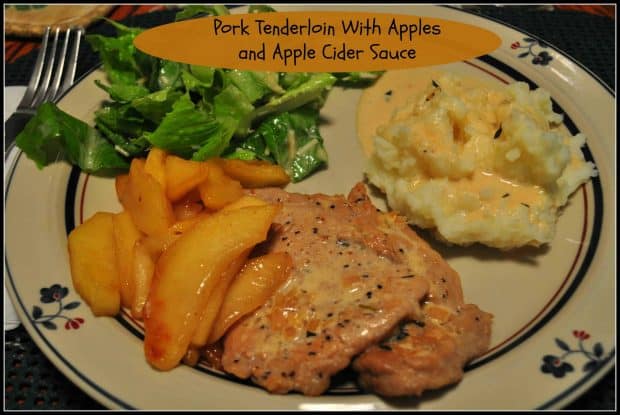
Pork tenderloin with apples features tender pork cutlets with cooked apples, drizzled with a lovely apple cider sauce. Delicious!Pork tenderloin with apples features tender pork cutlets with cooked apples, drizzled with a lovely apple cider sauce. Delicious!
This recipe for Pork Tenderloin With Apples And Apple Cider Sauce has FALL written all over it! It’s surprising how well pork and apples go together! My husband and I had dinner recently at a friend’s home. Our friend Shari prepared a wonderful meal for us and it was FANTASTIC! It was absolutely delicious, and a wonderful recipe that was perfect for a cool, Fall evening.

This week we have a friend (a friend for 40 years) staying with us in our home. Her first night here, I decided to try making this recipe for our own dinner. I found the original recipe online at Epicurious, and prepared it for us. Miracle of miracles, it turned out GREAT (guess even little old me can’t hurt a good recipe, right?)

The original recipe from Bon Appétit, calls for Calvados, which is an apple brandy from France. I didn’t have any, and didn’t want to go buy an entire bottle for the small amount needed, so I substituted dry white wine (which I did have), and it turned out fine, as well. I followed the rest of the instructions as written, and was very pleased with the results (as was our guest).

Scroll Down For A Printable Recipe Card At The Bottom Of The Page

How To Make Pork Tenderloin With Apples

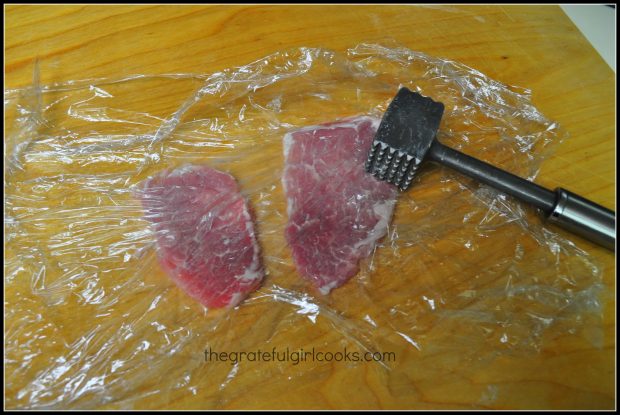
Pounding pork slices out with a meat mallet is a great stress reliever, yes? This helps to tenderize the pork.

Pounding the pork thin with a meat mallet helps tenderize the meat.

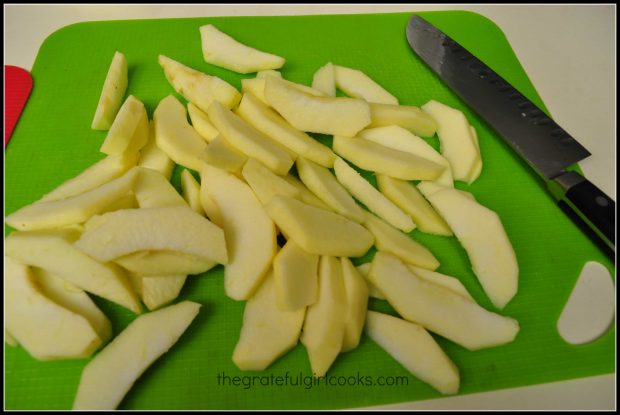
Peel and slice Golden Delicious apples, then they are ready to cook.

Golden delicious apples are peeled and sliced before cooking.

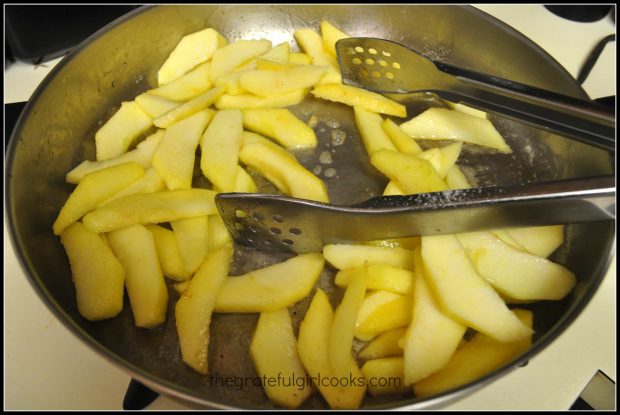
Apple slices are cooked in butter in a large skillet.

Cooking the apples in melted butter in a skillet.

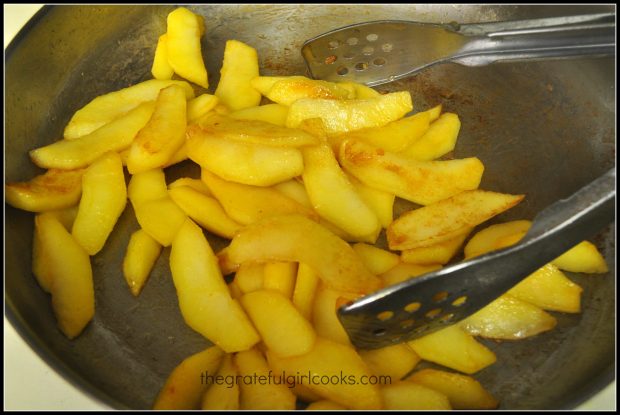
When the apples are light golden brown, they are removed from the skillet.

Apples are cooked in a large skillet until golden brown on the outside.

Cooking The Pork Cutlets

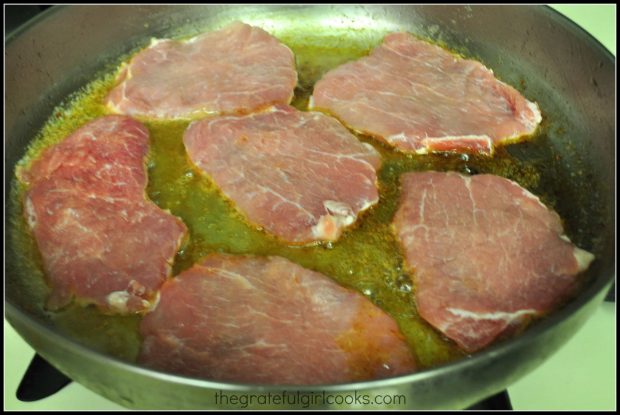
Pork tenderloin cutlets are cooked in melted butter for a few minutes on each side.

The pork cutlets are cooked in melted butter in a hot skillet.

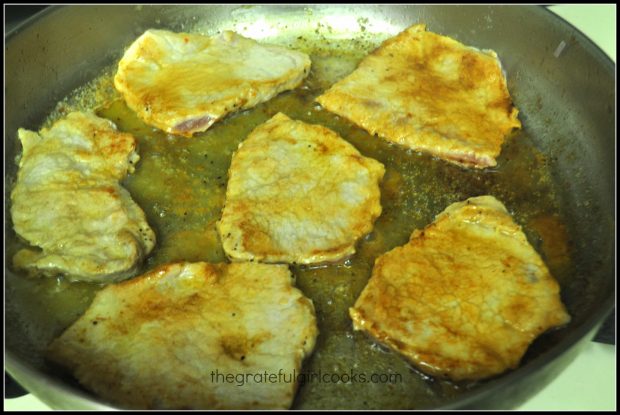
Halfway through the cooking time, they are turned to the other side to finish cooking. They are so thin, they only need to cook a few minutes on each side.

Pork cutlets are cooked on both sides in butter in a large skillet.

Preparing The Apple Cider Sauce

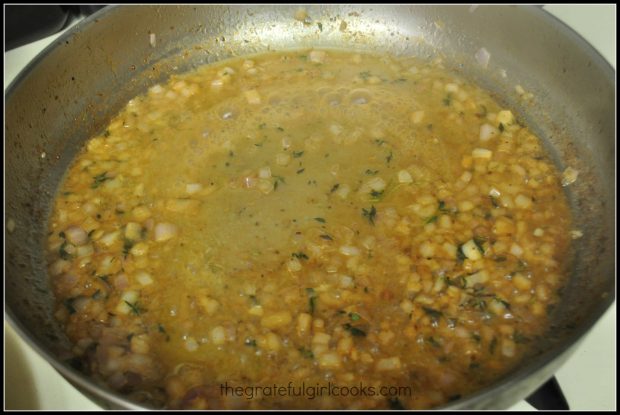
After removing the cooked pork cutlets, an apple cider sauce is made in the same skillet. Wine or Calvados is used to deglaze the skillet, then shallots and thyme are added to the mixture.

Shallots, thyme and wine are added to the sauce in the skillet.

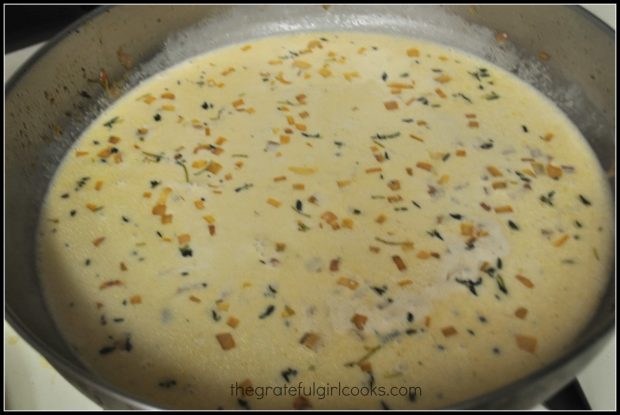
Apple cider and whipping cream are then added to the sauce, and stirred to incorporate them into the sauce. By now the sauce is looking  and smelling delicious!

Apple cider and whipping cream are added to the sauce for the pork cutlets.

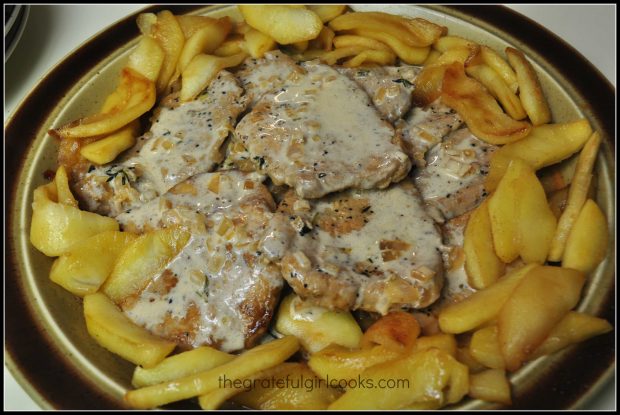
The finished pork tenderloin with apples is surrounded by lots of cooked, tender apples. It is then covered with the apple cider sauce, and is now ready to serve.

Apple cider sauce is poured over the cooked pork tenderloin with apples.

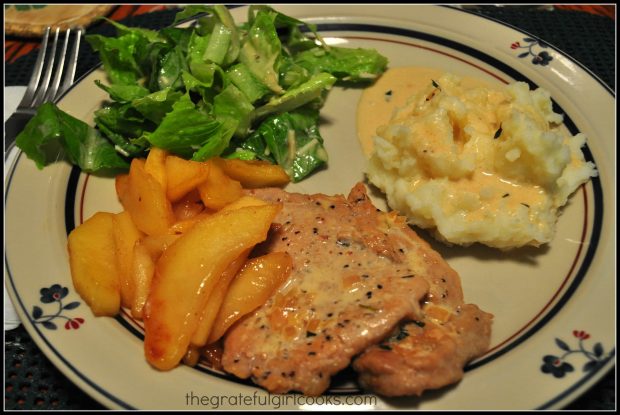
Pork tenderloin with apples is served. We usually give a couple of slices per person. Spoon some of the sauce on top of the pork, and serve, accompanied by apples on the side. We also like this dish with mashed potatoes on the side (with some of the sauce on top). Dig In!

The pork tenderloin with apples is served with mashed potatoes and a salad.

Sure hope you will give this wonderful meal a try. I know I will definitely make this again and again. It’s really very simple to make, and is full of flavor!

Looking For More PORK Recipes?

You can find ALL of my recipes in the Recipe Index, located at the top of the page. I have many delicious pork recipes for you to enjoy, including:

Interested In More Recipes?

Thank you for visiting this website. I appreciate you using some of your valuable time to do soIf you’re interested, I publish a newsletter 2 times per month (1st and 15th) with all the latest recipes, and other fun info. I would be honored to have you join our growing list of subscribers, so you never miss a great recipe!
There is a Newsletter subscription box on the top right side (or bottom) of each blog post, depending on the device you use, where you can easily submit your e-mail address (only) to be included in my mailing list.

You Can Also Find Me On Social Media:

Facebook page: The Grateful Girl Cooks!
Pinterest:
The Grateful Girl Cooks!
Instagram:
jbatthegratefulgirlcooks

Author's signatureRecipe Slightly Adapted From: http://www.epicurious.com/recipes/food/views/Pork-with-Apples-Calvados-and-Apple-Cider-1797

↓↓ PRINTABLE RECIPE BELOW ↓↓

0 from 0 votes
Pork Tenderloin With Apples And Apple Cider Sauce
Prep Time
15 mins
Cook Time
20 mins
Total Time
35 mins
 

Pork tenderloin with apples features tender pork cutlets with cooked apples, drizzled with a lovely apple cider sauce. Delicious!

Category: Entree
Cuisine: American
Keyword: pork tenderloin
Servings: 4 servings
Calories Per Serving: 595 kcal
Author: JB @ The Grateful Girl Cooks!
Ingredients
For the pork and apples:
  • 1 lb. pork tenderloin , cut into 1 inch thick slices
  • Salt & pepper (to season pork)
  • 5 Tablespoons butter
  • 3 medium Golden Delicious apples , (peeled, cored, sliced into 1/3 inch thick slices)
  • 1 1/2 teaspoons granulated sugar
For the Apple Cider Sauce:
  • 2 large shallots , chopped
  • 1 Tablespoon fresh thyme , chopped (or use 1 teaspoon dried)
  • 1/4 cup Calvados or other apple brandy (I substituted 1/4 cup dry white wine)
  • 1 cup heavy whipping cream
  • 1/4 cup apple cider (not apple juice)
Instructions
  1. Put the pork slices between two sheets of plastic wrap. Pound them out, one at a time, until they are about 1/4 inch thick. Set aside.
  2. In a large skillet over medium-high heat, melt 2 Tablespoons of butter. Add the apple slices, then sprinkle the slices with the sugar. Saute the apple slices until they are golden brown, on both sides (approximately 5-6 minutes). Remove apples from skillet and set aside. Cover and keep warm.
  3. Add 2 Tablespoons butter back into the large skillet. Melt butter over high heat. Season the pork with salt and pepper. Add pork slices to the hot skillet. Cook the slices until they are lightly browned and cooked through (about 3 minutes per side). Cook pork in batches, if necessary. Once pork has cooked through on both sides, remove to a platter, cover and keep warm. DO NOT CLEAN SKILLET OUT!
  4. Melt 1 Tablespoon butter over medium heat in the same skillet you cooked the pork in. Add the chopped shallots and thyme; saute these for 2 minutes.
  5. Add the Calvados (if using) or the white wine to the shallots, butter and thyme. Boil until the liquid is reduced to a glaze like consistency, scraping up the browned bits into the sauce as you go.
  6. Stir in the apple cider and whipping cream. Cook until the mixture thickens to sauce consistency (about 2-3 minutes). Lightly season with salt and pepper, to taste.
  7. Reheat the apples in another skillet or microwave, if necessary.
  8. Place pork slices on platter. Spoon the sauce over the top of the pork slices. Top with the apple slices, or place the apple slices around the pork.
  9. Serve and enjoy. This dish is perfect with mashed potatoes on the side. Use some of the apple cider sauce on top (like gravy) of the mashed potatoes for a perfect entree!
Nutrition Facts
Pork Tenderloin With Apples And Apple Cider Sauce
Amount Per Serving (1 g)
Calories 595 Calories from Fat 360
% Daily Value*
Fat 40g62%
Saturated Fat 24g150%
Cholesterol 192mg64%
Sodium 210mg9%
Potassium 703mg20%
Carbohydrates 26g9%
Fiber 3g13%
Sugar 18g20%
Protein 25g50%
Vitamin A 1470IU29%
Vitamin C 10.4mg13%
Calcium 70mg7%
Iron 1.7mg9%
* Percent Daily Values are based on a 2000 calorie diet.

Here’s one more to pin on your Pinterest boards!Pork tenderloin with apples features tender pork cutlets with cooked apples, drizzled with a lovely apple cider sauce. Delicious!


Save

Save