Category: Bacon

How To Make Candied Bacon

Candied bacon is becoming a popular ingredient in desserts, salads, etc. Here’s how to quickly make this sweet/salty treat!Candied bacon is becoming a popular ingredient in desserts, salads, etc. Here's how to quickly make this sweet/salty treat!
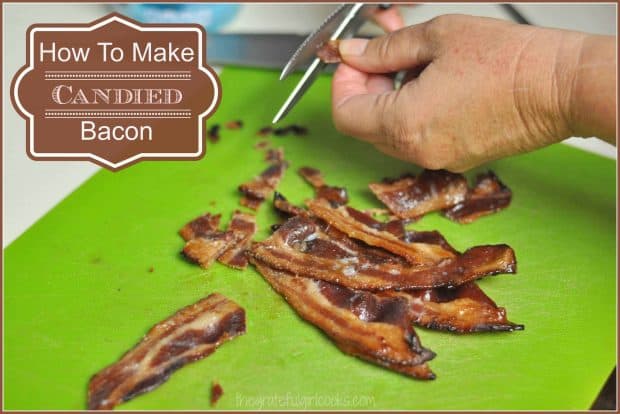
Recipes for cookies, salads, desserts, etc. are popping up all the time that include “candied bacon”. It would be helpful to know “HOW” to make this treat, right? Well… it’s EASY! Candied bacon can be used in salads, on appetizers, or even in ice cream. I used this batch in some homemade Candied Bacon Ice Cream. Amazing!

Scroll Down for A Printable Recipe Card At The Bottom Of The Page

How to Make Candied Bacon

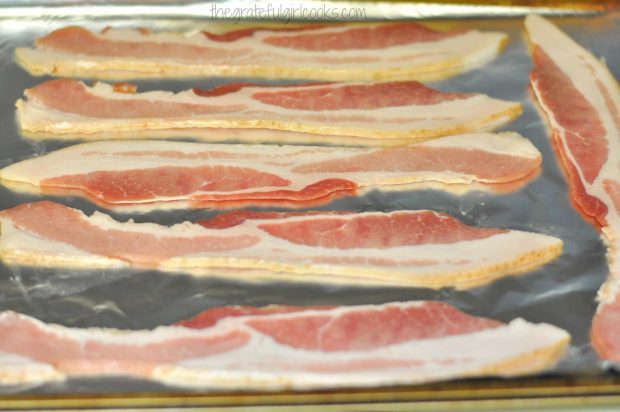
Here’s how you can easily make candied bacon: First line a baking sheet with aluminum foil (or a silicone mat). If using aluminum foil, put the shiny side down. Lay strips of bacon down on the foil in a single layer, leaving a bit of space between each piece.

Individual slices are placed on an aluminum foil covered baking sheet.

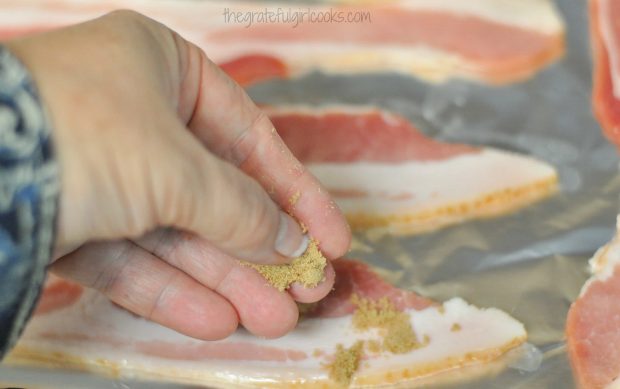
Sprinkle approximately 1½ – 2 teaspoons brown sugar over the length of each slice.

Brown sugar is sprinkled over each piece of uncooked bacon.

Cook The Bacon

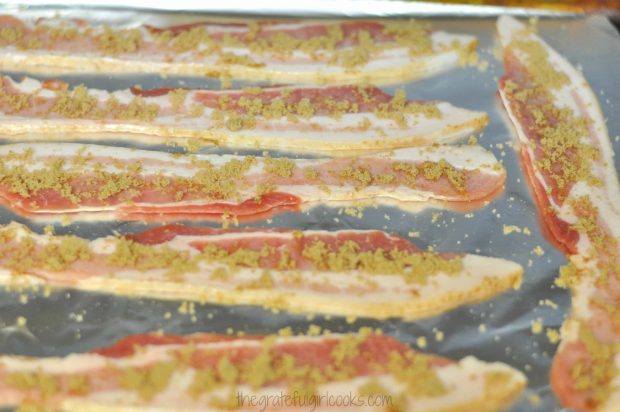
The strips of bacon looked like this (see photo below). Put the bacon in a preheated 400 degree oven and bake it for 12-16 minutes. NOTE: About half way through the baking time, turn the bacon strips over and pull them through the syrupy glaze (to coat) on the baking sheet.

Each slice of bacon is lightly covered with brown sugar.

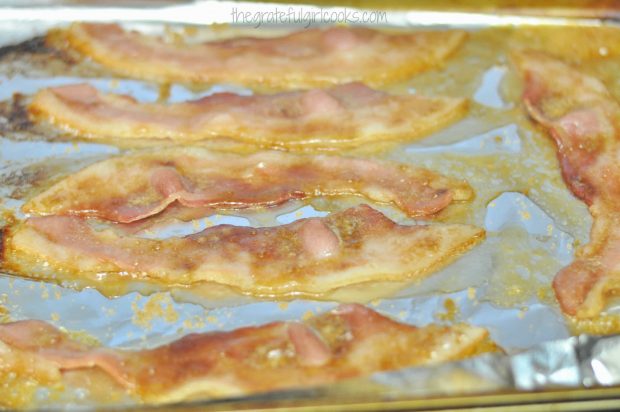
After turning the bacon over and dragging the pieces in the brown sugar syrup on the foil, continue baking for the rest of the baking time, until the bacon is done and dark in color.

The bacon strips are turned halfway through baking time.

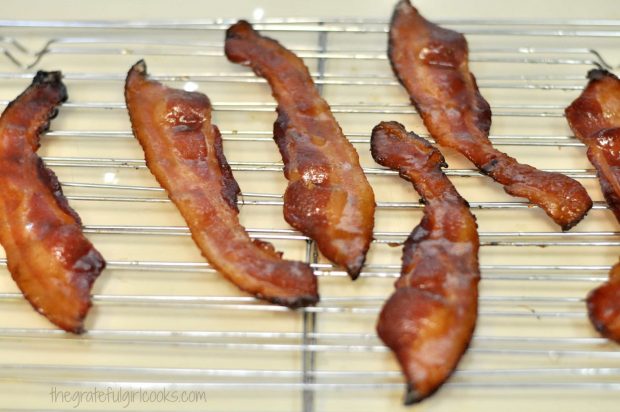
Remove the bacon strips from the foil, and transfer them to a wire rack. Let the candied bacon strips cool completely.

The bacon cools on a wire rack.

The Candied Bacon Is Now Ready To Use

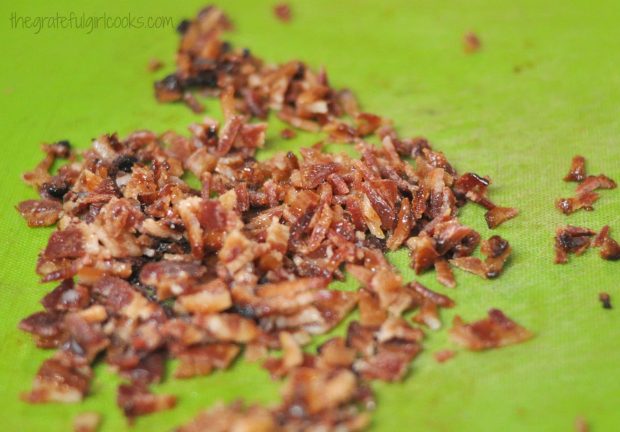
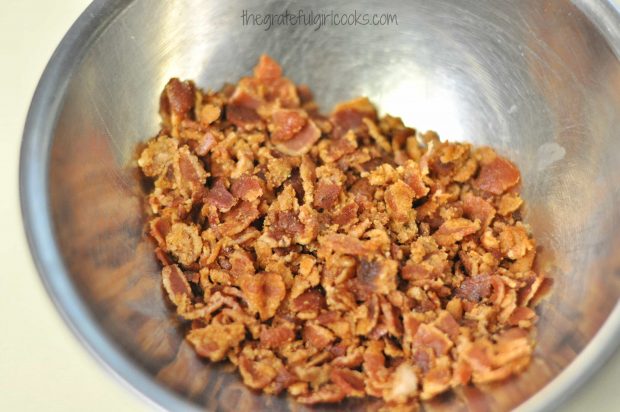
Once the bacon has cooled, chop it up or cut with kitchen scissors into small pieces. It is now ready to be added to a great salad, or recipe that requires candied bacon. If you’ve never had a mixed green salad with these sweet little bacon bits added, you’re missing out! It’s a great tasting addition.

The finished candied bacon is crumbled to add to salads, etc.

See how easy it is to make? The sugary, salty taste of the sweet bacon bits is AMAZING! Hope you’ll try this easy technique for making candied bacon. You can store the bacon bits in an airtight covered container in refrigerator for a couple days, OR you can freeze them for a couple weeks ahead of when you will be using them! Try not to eat them all BEFORE adding it to a recipe! Have a great day.

Looking For More Simple Tips?

You can find all my recipes and easy tips in the Recipe Index, located at the top of the page. I have quite a few you might be interested in, including:

Interested In More Recipes?

Thank you for visiting this website. I appreciate you using some of your valuable time to do soIf you’re interested, I publish a newsletter 2 times per month (1st and 15th) with all the latest recipes, and other fun info. I would be honored to have you join our growing list of subscribers, so you never miss a great recipe!
There is a Newsletter subscription box on the top right side (or bottom) of each blog post, depending on the device you use, where you can easily submit your e-mail address (only) to be included in my mailing list.

You Can Also Find Me On Social Media:

Facebook page: The Grateful Girl Cooks!
Pinterest:
The Grateful Girl Cooks!
Instagram:
jbatthegratefulgirlcooks

Author's signatureRecipe Source:  http://www.davidlebovitz.com/2008/03/candied-bacon-i-1/

0 from 0 votes
How To Make Candied Bacon
Prep Time
5 mins
Cook Time
16 mins
Total Time
21 mins
 
Candied bacon is becoming a popular ingredient in desserts, salads, etc. Here's how to quickly make this sweet/salty treat!
Category: Miscellaneous
Cuisine: American
Keyword: candied bacon
Servings: 8
Calories Per Serving: 114 kcal
Author: JB @ The Grateful Girl Cooks!
Ingredients
  • 8 strips Bacon strips (or as many as desired)
  • 12 teaspoons Brown sugar (can use dark or light-I use dark)-will need 1½-2 teaspoons per slice of bacon
Instructions
  1. Preheat oven to 400 degrees. Cover a baking sheet with aluminum foil (or a silicone mat).
  2. Place bacon strips in single layer on foil. Sprinkle each piece of bacon with 1½ - 2 teaspoons brown sugar.

  3. Bake at 400 degrees for 12-16 minutes. Halfway through the baking time, turn the pieces over and drag them through the brown sugar glaze to coat. Finish baking time. Remove from oven when bacon is done and is dark brown in color. Place bacon strips on wire rack to cool completely.
  4. Once cooled to room temp., cut or chop bacon into small pieces. Bacon pieces may be stored in a covered airtight container in refrigerator for a couple days. Bacon can also be stored in freezer for a couple weeks prior to using.
Nutrition Facts
How To Make Candied Bacon
Amount Per Serving (1 slice)
Calories 114 Calories from Fat 72
% Daily Value*
Fat 8g12%
Saturated Fat 2g13%
Cholesterol 14mg5%
Sodium 147mg6%
Potassium 51mg1%
Carbohydrates 6g2%
Sugar 5g6%
Protein 2g4%
Vitamin A 10IU0%
Calcium 5mg1%
Iron 0.1mg1%
* Percent Daily Values are based on a 2000 calorie diet.

Here’s one more to pin on your Pinterest boards!How To Make Candied Bacon / The Grateful Girl Cooks!


Save

Save

Corn, Bacon & Potato Chowder

Corn Bacon Potato Chowder- this thick, creamy soup with potatoes, corn, and bacon is filling, delicious, and easy to prepare. Perfect dish for a cold day!Corn Bacon Potato Chowder- this thick, creamy soup with potatoes, corn, and bacon is filling, delicious, and easy to prepare. Perfect dish for a cold day!When it’s cold outside, a big pot of hot soup always helps to take the chill off! A few days ago, on a drizzly, cold Pacific Northwest day, I made corn bacon potato chowder, from a recipe I’ve used for over 30 years.

This thick, creamy soup is easy to prepare, very filling, delicious, and it’s definitely a family favorite I am confident you will enjoy!!

The recipe is simple to prepare, and the reward for a small amount of your time is a big pot of thick, tasty chowder! Here’s how easy it is to prepare:

Scroll Down For A Printable Recipe Card At The Bottom Of The Page

Cook the Bacon

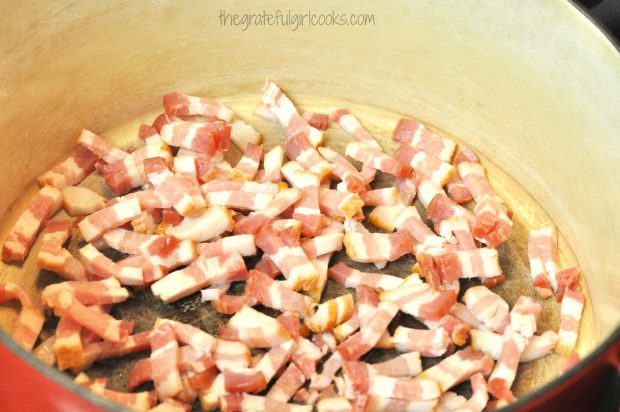
Start by cooking the bacon (everything is better with bacon, right?). Fry the bacon until fully cooked and crisp.

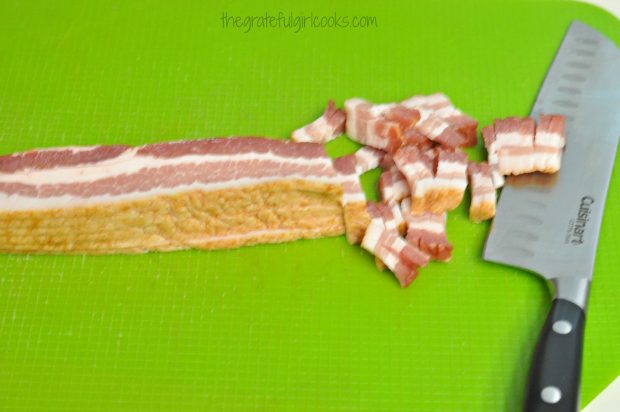
TIP: Stack the bacon, slice into thin strips, then fry it in the pan you are using for the soup. The smaller pieces cook faster this way.

Cutting bacon before cooking chowder.
When I make this, I fry the bacon in the same pan I cook the soup in, so it makes this a one pot meal! Less cleanup!  YES!!!

Bacon pieces are cooked in large soup pot.

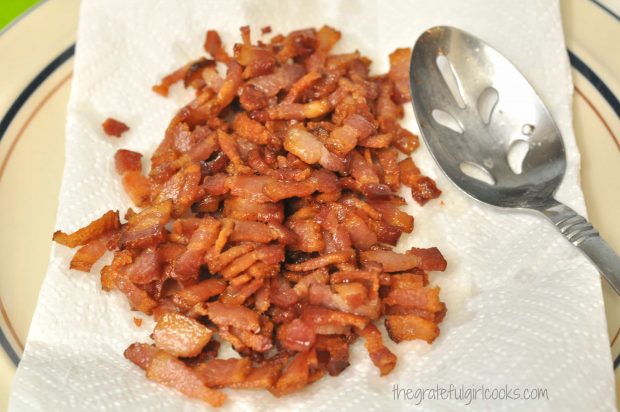
Once bacon is really crisp, remove (using a slotted spoon) to a paper towel lined plate. The paper towels will absorb any leftover bacon grease.

Set a few bacon pieces aside to garnish the soup with later, if desired.  Leave 3 Tablespoons of bacon grease in pan, and discard the rest.

Crisp, cooked bacon is drained and ready to use in the chowder.

Prepare The Chowder Base

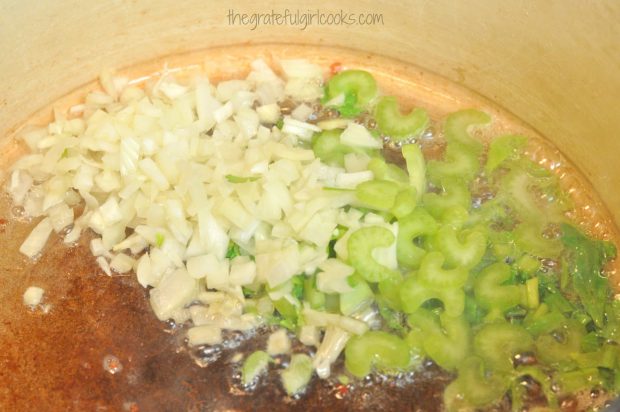
Add onion and celery (including celery tops) to the 3 Tablespoons bacon drippings left in the pan. Cook & stir until the onion is translucent in color and tender (3-4 minutes).

Chopped onions and celery are cooked in bacon drippings before adding to corn chowder.

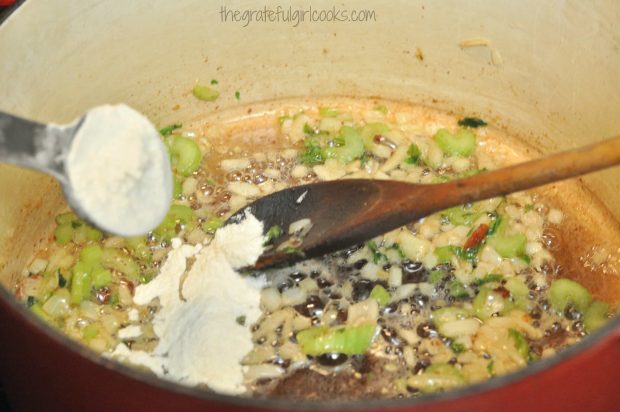
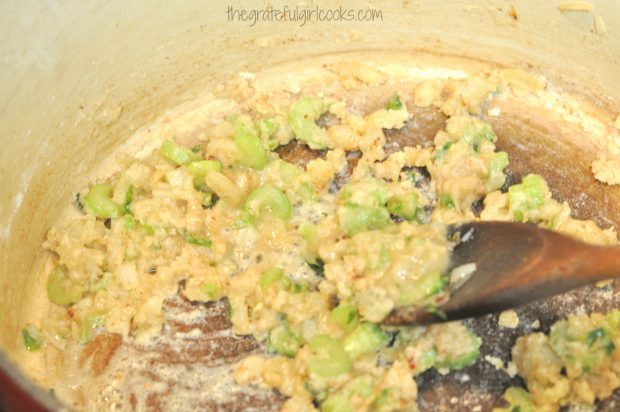
Add 3 Tablespoons flour (this will act as a thickening agent for the corn bacon potato chowder). Stir to combine, and cook on low heat for a minute or two (this helps to “cook out” the floury taste).

Flour is added to cooked onions and celery to help thicken corn chowder.

Flour is cooked with onions and celery.

Time To Add The Milk

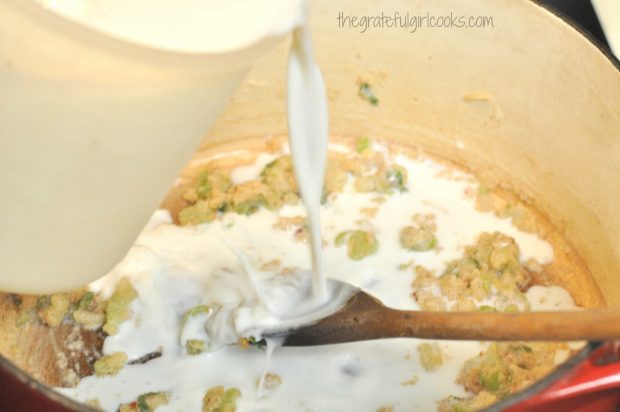
Add milk to the saucepan. Stir well, to combine all the ingredients. Heat the liquid until it boils, stirring constantly, and scraping the bottom of pan, so it doesn’t stick.

Once it comes to a boil, cook for one more minute, stirring constantly. The chowder mixture will thicken as it cooks.

Milk is added to corn chowder base and cooked until thickened.

Time To Add The Corn And Potatoes

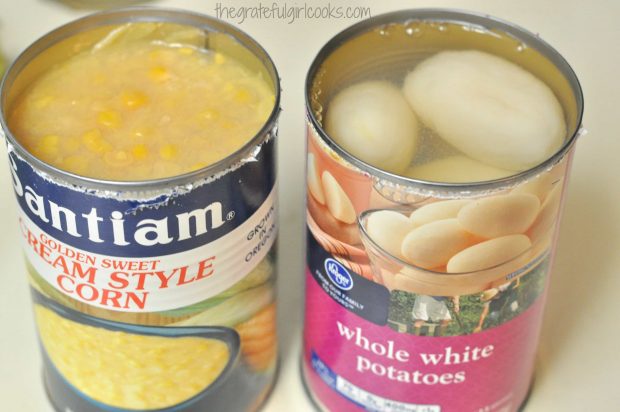
The next step is to add in the cream style corn, potatoes, bacon, salt and pepper. Canned potatoes are used in this recipe.

Here is a photo of the kind of canned potatoes you need for this recipe. They are called new potatoes (or whole white potatoes) at the grocery store.

Cream style corn and new potatoes about to be added to chowder.

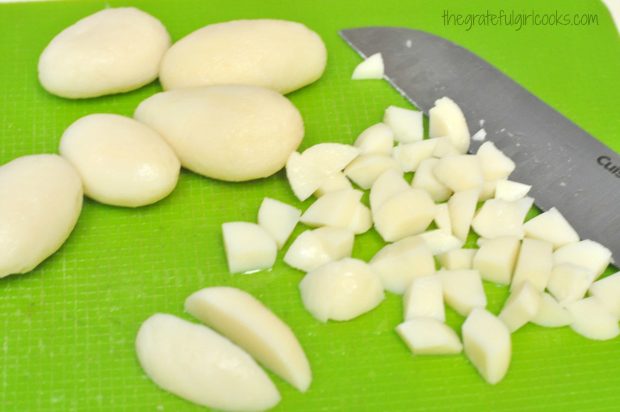
Drain, then dice the potatoes before adding them to soup. I cut them in half length-wise, then in half again lengthwise, then dice.

New potatoes are diced before adding them to corn chowder.

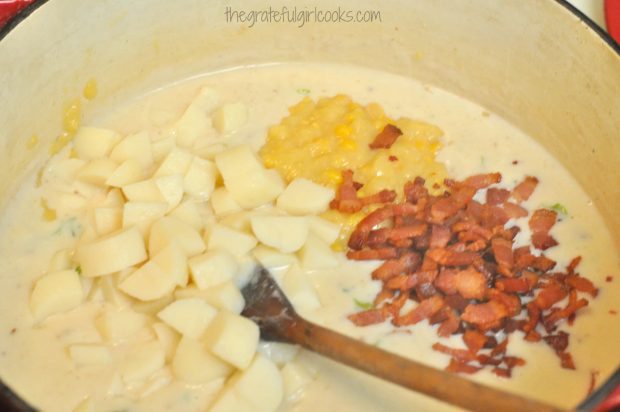
Once potatoes are diced, add in the potatoes, cream style corn, bacon pieces, salt and pepper; stir to combine.

Corn, bacon and potatoes are added to chowder in soup pot.

Cook The Corn Bacon Potato Chowder Until Hot And Thick 

Cook the corn bacon potato chowder only until it is heated through. Take a small taste of the chowder, and add additional salt and pepper to suit your preference.

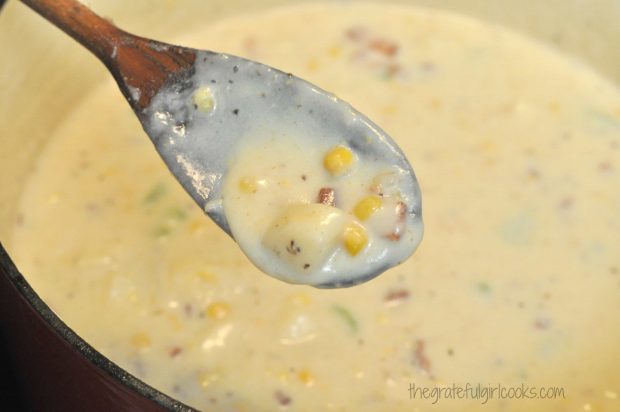
See how nice and thick this corn bacon potato chowder is? That is perfect, and this means it is now ready to be served and enjoyed.

Corn bacon potato chowder has thickened and is ready to eat.

Serve The Chowder!

Ladle the chowder into bowls (or cups). If you use bowls, this recipe will make 4-5 servings. If you use small mugs or cups, it should make about 6-8 smaller servings.

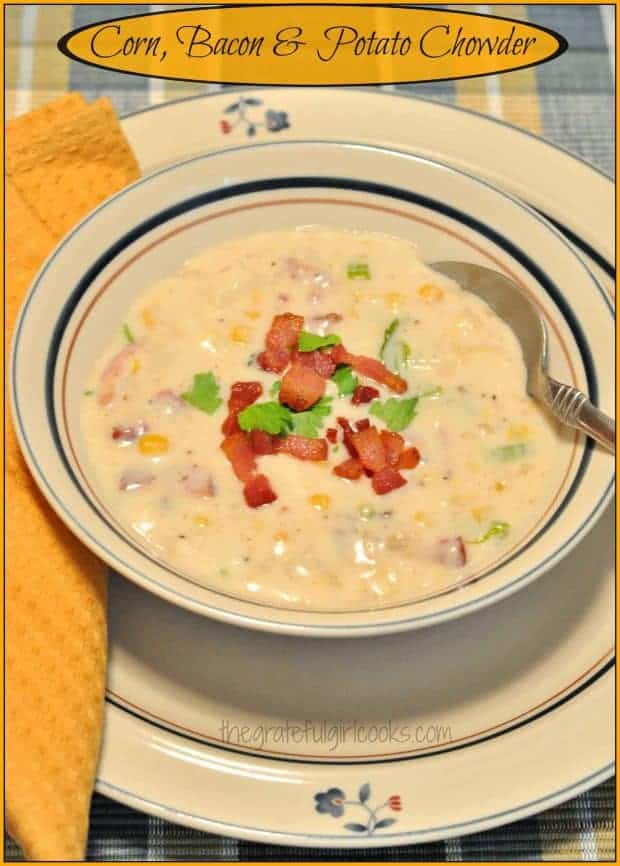
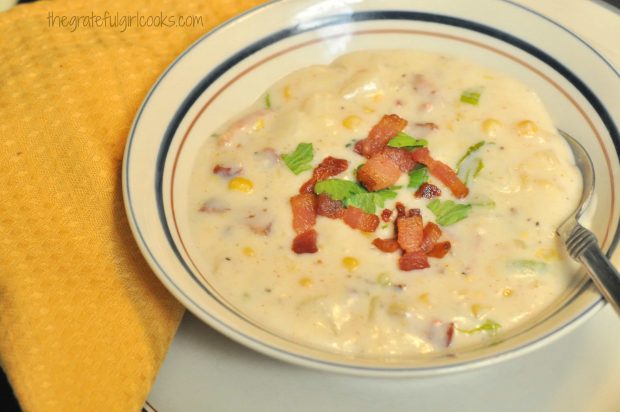
Garnish each portion with reserved bacon pieces, and chopped celery tops, if desired. Enjoy this hearty and filling corn, bacon & potato chowder!

Corn bacon potato chowder is served with garnishes in bowl.

I really hope you will consider making this corn bacon potato chowder… it is so good for lunch OR dinner, especially on a cold day!

If you enjoy this chowder, be sure to check out my recipe for Fully Loaded Potato Soup! Have a great day, and may God bless and hold you close throughout it.

Looking For More SOUP Recipes?

You can find all of my recipes in the Recipe Index, located at the top of the page. I have LOTS of yummy soup recipes you’ll enjoy, including:

Want More Recipes? Get My FREE Newsletter!

I publish a newsletter 2 times per month (1st and 15th) with lots of recipes, tips, etc..
Would you like to join our growing list of subscribers?

There is a Newsletter subscription box on the top right (or bottom) of each blog post, depending on the device you use.
You can submit your e-mail address there, to be added to my mailing list.

Find Me On Social Media:

Facebook page: The Grateful Girl Cooks!
Pinterest:
The Grateful Girl Cooks!
Instagram:
jbatthegratefulgirlcooks

Author's signature

Recipe Source: I got this recipe from my sister-in-law over 30 years ago, written on a 3×5 card. Do not know the original source, however!

↓↓ PRINTABLE RECIPE BELOW ↓↓

0 from 0 votes
Corn, Bacon & Potato Chowder
Prep Time
15 mins
Cook Time
10 mins
Total Time
25 mins
 
Corn Bacon Potato Chowder- this thick, creamy soup with potatoes, corn, and bacon is filling, delicious, and easy to prepare. Perfect dish for a cold day!
Category: Soup
Cuisine: American
Keyword: corn bacon potato chowder
Servings: 6 servings
Calories Per Serving: 349 kcal
Author: JB @ The Grateful Girl Cooks!
Ingredients
  • 1/2 pound bacon (I used 6 thick slices bacon)
  • 1/2 cup chopped onion
  • 1/2 cup sliced celery (including the celery tops)
  • 3 Tablespoons flour
  • 4 cups milk
  • 1 can cream style corn
  • 1 can new potatoes (whole white), drained and diced
  • 1/2 teaspoon salt
  • 1/4 teaspoon black pepper
  • Bacon pieces and celery tops (chopped), for garnish if desired
Instructions
  1. In large soup pot, cook bacon until crisp; drain and set aside (save a few bacon pieces for garnish). Leave 3 Tablespoon bacon drippings in pan (discard the rest).
  2. Add onion and celery; cook/stir until onion is tender (3-4 minutes).
  3. Add and blend in flour; cook over low heat for 1-2 minutes, stirring constantly.
  4. Stir in milk, mix well to combine. Heat to boiling, then boil for 1 minute, stirring constantly.
  5. Add in creamed corn, diced potatoes, bacon pieces, salt and pepper to pan. Heat only until heated through. Taste test soup; add additional salt/pepper, if necessary, to suit your taste.
  6. Ladle soup into serving dishes. Garnish with crisp bacon pieces and chopped celery green tops. Serve hot, and enjoy!
Nutrition Facts
Corn, Bacon & Potato Chowder
Amount Per Serving (1 serving)
Calories 349 Calories from Fat 144
% Daily Value*
Fat 16g25%
Saturated Fat 6g38%
Cholesterol 32mg11%
Sodium 726mg32%
Potassium 745mg21%
Carbohydrates 37g12%
Fiber 2g8%
Sugar 11g12%
Protein 13g26%
Vitamin A 415IU8%
Vitamin C 18.5mg22%
Calcium 216mg22%
Iron 1.2mg7%
* Percent Daily Values are based on a 2000 calorie diet.

Here’s one more to pin on your Pinterest boards!Corn Bacon Potato Chowder- this thick, creamy soup with potatoes, corn, and bacon is filling, delicious, and easy to prepare. Perfect dish for a cold day!


Save

Save

Save

Breakfast Burritos

Breakfast burritos, with scrambled eggs, bacon, cheddar cheese and salsa rolled in a flour tortilla are easy to prepare! You’ll enjoy this delicious breakfast!Breakfast burritos, with scrambled eggs, bacon, cheddar cheese and salsa rolled in a flour tortilla are easy to prepare! You'll enjoy this delicious breakfast!
Have you ever eaten or made breakfast burritos?  I tasted my first one about 8 years ago when called in to work overtime on a Saturday morning by my former boss. He bought breakfast burritos for all of us, and that was my first taste of one, but not my last!

They are very easy to make at home, so thought I would share a quick “how to” in case you would like to try making them yourself! This is a simple version… eggs, bacon, cheese and salsa… but add whatever additional ingredients you would like… to make it your own!

Scroll Down For A Printable Recipe Card At The Bottom Of The Page

How To Make Breakfast Burritos

Mix together a couple eggs with a bit of milk. Add mixture to non-stick skillet that has been sprayed or buttered. Season eggs with salt and pepper (to taste).

Scrambling eggs for breakfast burritos.

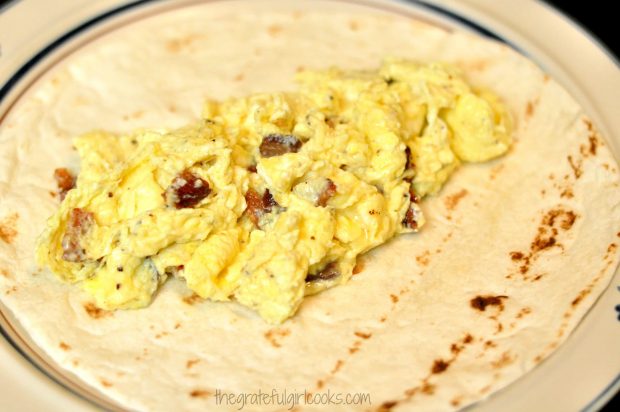
Add pre-cooked, crumbled bacon to the eggs. Mix together; scramble eggs on medium low heat until eggs are fully cooked.

Cooked, crumbled bacon is added to eggs for breakfast burritos.

Prepare The Burrito

Place a medium sized flour tortilla between two paper towels and microwave for 20 seconds.  Remove the warm tortilla and place scrambled egg/bacon mixture down the center of tortilla. Leave a little bit of the tortilla uncovered at each end (to help with rolling the burrito).

Scrambled eggs with bacon is placed in center of warm flour tortilla for breakfast burritos.

Add grated cheddar cheese to top the eggs (can also use pepper jack, if desired), and then spoon some salsa on top.

If NOT Eating right Away

TIP: If you are not eating these right away, I would suggest putting the salsa on top of the eggs, THEN covering the salsa with the grated cheese. This will help the salsa not to soak the tortilla too much while waiting for someone to come eat it.

You can also wrap the breakfast burritos in aluminum foil once done, to keep warm.

Breakfast Burritos are filled with eggs, bacon, cheddar cheese and salsa before rolling.

Roll up tortilla (burrito style), by first turning up one end of the tortilla. Repeat with other end of tortilla.

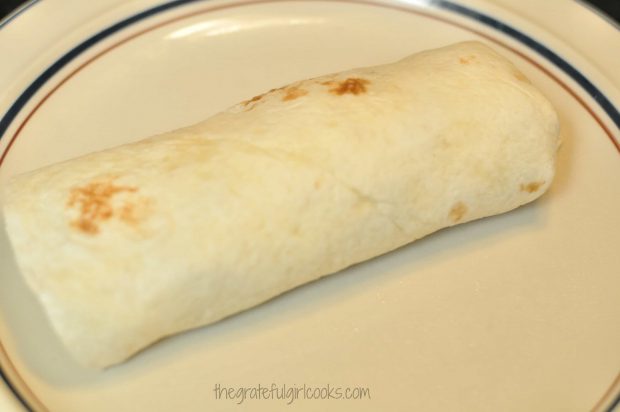
Once ends are turned up, tightly roll the tortilla up and over the filling. Place burrito on serving plate. Repeat with other breakfast burritos.

Rolling up the tortilla around the filling, to make breakfast burritos.

One of the breakfast burritos, rolled up, on a plate.

Serve Breakfast Burritos With Salsa On The Side

Serve with additional salsa on the side (for dipping) for an extra kick. I don’t normally cut them in half, but did for the photo, so you could see the inside of the Breakfast Burritos.

Breakfast Burritos are served with salsa on the side.

This is simply a very easy way to make a quick, delicious breakfast burrito. The best part is how easy it is to add ingredients you enjoy to make it your own. Add some cilantro, green onion slices, spinach, or avocado, etc. if you wish.  You really can’t hurt these burritos!

Hope you enjoy your breakfast burritos! Have a wonderful weekend, friends. Be kind to each other out there!

Looking For More BREAKFAST Recipes?

You can find all of my recipes in the Recipe Index, located at the top of the page. I have a nice variety of breakfast recipes, including:

Interested In More Recipes?

Thank you for visiting this website. I appreciate you using some of your valuable time to do soIf you’re interested, I publish a newsletter 2 times per month (1st and 15th) with all the latest recipes, and other fun info. I would be honored to have you join our growing list of subscribers, so you never miss a great recipe!
There is a Newsletter subscription box on the top right side (or bottom) of each blog post, depending on the device you use, where you can easily submit your e-mail address (only) to be included in my mailing list.

You Can Also Find Me On Social Media:

Facebook page: The Grateful Girl Cooks!
Pinterest:
The Grateful Girl Cooks!
Instagram:
jbatthegratefulgirlcooks

Author's signature

0 from 0 votes
Breakfast Burritos
Prep Time
5 mins
Cook Time
4 mins
Total Time
9 mins
 

Breakfast burritos, with scrambled eggs, bacon, cheddar cheese and salsa rolled in a flour tortilla are easy to make! Enjoy this delicious breakfast!

Category: Breakfast
Cuisine: Mexican
Keyword: breakfast burritos
Servings: 2 burritos
Calories Per Serving: 442 kcal
Author: JB @ The Grateful Girl Cooks!
Ingredients
  • 4 large eggs
  • 2 Tablespoons milk
  • 1 pinch salt and pepper , to season
  • 2 slices bacon , precooked
  • 2 medium flour tortillas
  • 4 Tablespoons cheddar cheese , or more, if desired
  • 2 Tablespoons salsa , plus more for serving on side
Instructions
  1. Whisk eggs with milk in a small bowl. Add mixture to non-stick skillet that has been sprayed with non-stick spray or buttered. Season eggs with salt and pepper (to taste).

  2. Add pre-cooked, crumbled bacon to the eggs. Mix together; scramble eggs on medium low heat until eggs are fully cooked.
  3. For burritos, place medium sized flour tortillas between two paper towels and microwave for 20 seconds. Remove the warm tortillas and evenly distribute scrambled egg/bacon mixture down the center of each tortilla. Add a handful of grated cheddar cheese (can also use pepper jack, if desired), and then spoon salsa on top (approx. 1 Tablespoon of salsa per burrito).

  4. Roll up tortilla (burrito style), by first turning up one end of the tortilla. Once end is turned up, tightly roll the tortilla over the filling and place on serving plate. Serve with additional salsa on the side (for dipping) for an extra kick. Enjoy!

Nutrition Facts
Breakfast Burritos
Amount Per Serving (1 burrito)
Calories 442 Calories from Fat 261
% Daily Value*
Fat 29g45%
Saturated Fat 12g75%
Cholesterol 374mg125%
Sodium 801mg35%
Potassium 305mg9%
Carbohydrates 18g6%
Sugar 3g3%
Protein 24g48%
Vitamin A 855IU17%
Calcium 314mg31%
Iron 2.7mg15%
* Percent Daily Values are based on a 2000 calorie diet.

Here’s one more to pin on your Pinterest boards!Breakfast burritos, with scrambled eggs, bacon, cheddar cheese and salsa rolled in a flour tortilla are easy to prepare! You'll enjoy this delicious breakfast!

Save

Save

Save

Maple Bacon Pecan Truffles

Maple Bacon Pecan Truffles are a decadent treat! They’re creamy & maple flavored, w/ nuts & crisp bacon, coated in melted chocolate and butterscotch.Maple Bacon Pecan Truffles are a decadent treat! They're creamy & maple flavored, w/ nuts & crisp bacon, coated in melted chocolate and butterscotch.

This morning I am posting a recipe for Maple Bacon Pecan Truffles that I made for a bacon-themed dinner we enjoyed with dear friends a couple months ago. They’re so good, and decadent!

In Memory Of Our Friend, Richard

This was an extremely hard post to write, because I began to write this post over a week ago, but then tragedy struck. The host for that dinner (my husband’s best friend) passed away very suddenly this past weekend, and we have been in shock ever since, grieving his loss.

He and his wife were two of our very best friends so we grieve for her, as well. Our comfort comes because our dear friend Richard believed in and knew Jesus, so we know this is a “temporary” loss, because we trust in God’s Word that we will see him again in heaven. How we long for that great reunion!

Richard… this one’s in your honor today, as I know you tried these maple bacon pecan truffles the last time we shared a meal together. We loved you… with all our hearts, and miss you terribly already.

Scroll Down For A Printable Recipe Card At The Bottom Of The Page

How To Make Maple Bacon Pecan Truffles

Here’s how to make these really delicious truffles, (which I adapted from my recipe for Maple Cream Bon Bons) for our Bacon Themed dinner. I figured bacon makes everything better, so that was my inspiration. Here’s what I did: First, cook 6-7 slices of bacon until VERY crisp.

Frying the bacon until crisp to add to the truffles.

When bacon is crisp, drain, cool, then crumble or chop it up into very small pieces. Set aside a small amount to be used for garnishing the finished truffles later.

Crisp bacon crumbles will be added to the truffle dough.

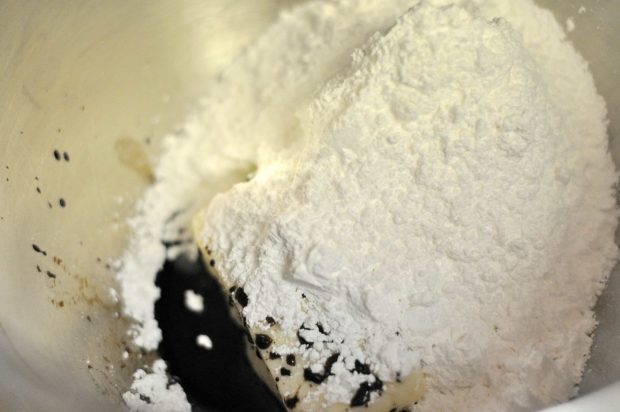
Place the butter, powdered sugar and maple flavoring in a large bowl or base of an electric stand mixer.

Butter, powdered sugar and maple extract are beaten together to make dough for truffles.

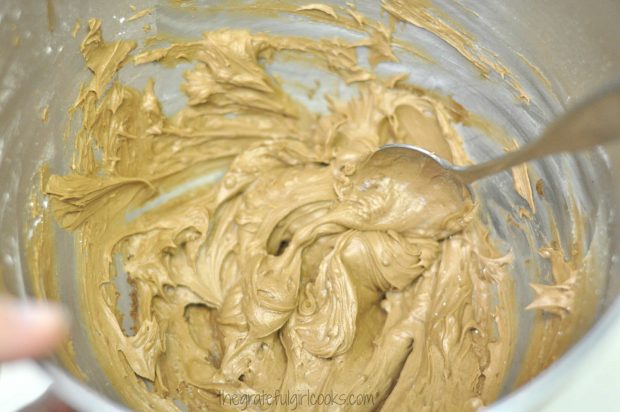
Using an electric mixer, cream these ingredients until fully combined and creamy.

Creamy batter for the maple bacon pecan truffles is prepared.

Add Pecans And Bacon Crumbles To The Truffle Mixture

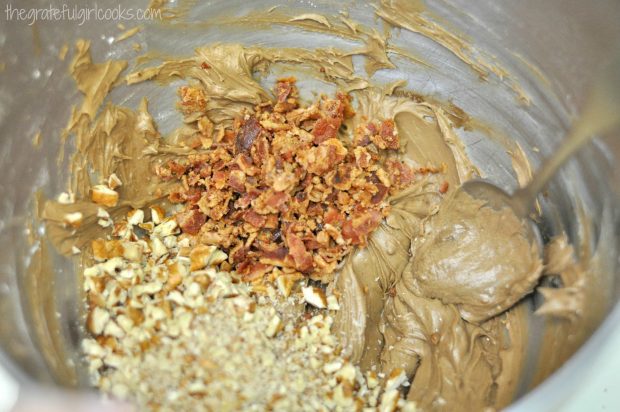
Add the chopped pecans and most of the bacon crumbles to the truffle mixture. NOTE: Set some of the bacon crumbles aside for garnishing the truffles later. Mix well until combined. Refrigerate the dough for maple bacon pecan truffles for a while to let it chill and firm up.

Crisp bacon and chopped pecans are added to the truffle dough.

Shape The Maple Bacon Pecan Truffles

Once mixture is chilled, shape the mixture into 1″ balls, by rolling them between your hands. Place dough balls onto a wax paper covered cooking sheet. Once all of the maple bacon pecan truffles have been formed, place them into freezer for 1/2 an hour to firm up again.

Coat The Maple Bacon Pecan Truffles With Chocolate

Remove truffles from freezer and carefully dip each one into the melted chocolate butterscotch coating. Let excess chocolate drip back into the bowl. NOTE: My picture turned out blurry (sorry), but I use a toothpick inserted into truffle to dip into the chocolate, and a spoon to help cover each one.

The maple bacon pecan truffles are dipped in chocolate, to cover.

Dip each truffle completely in chocolate, then place it onto wax paper or aluminum foil. Use another toothpick to help pull the first toothpick out of the truffle. See the little holes on top of the chocolate covered truffles? You will fill those later. Repeat until all the truffles are coated in chocolate.

Some of the truffles have been covered with melted chocolate.

Finish The Truffles

Spoon a little melted chocolate over each of the holes created by the toothpick to cover them up. Then sprinkle a few of the reserved bacon crumbles over the top of each of the maple bacon pecan truffles as a garnish.

Lots of maple bacon pecan truffles, garnished with crisp bacon crumbles.

Refrigerate Finished Truffles To Firm Them Up

Let the finished truffles sit for a while (at least half an hour), to allow the chocolate to firm up, then place them into little candy sized paper wrappers, as shown. Keep truffles in a covered container in the refrigerator until you are ready to serve.

To serve, the maple bacon pecan truffles are placed into paper candy wrappers.

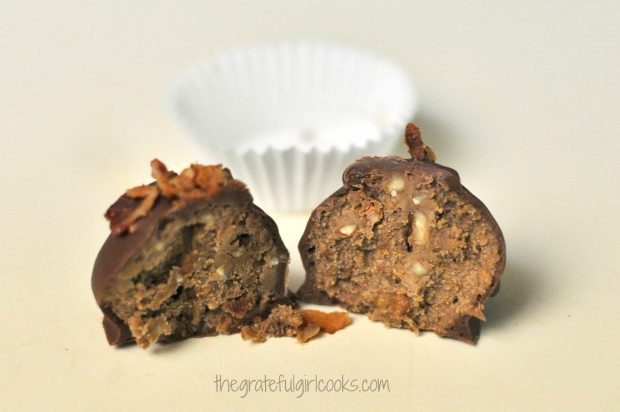
Here’s an inside view of one of the maple bacon pecan truffles. They taste their very best when served chilled!

A look at the inside of one of the truffles.

Hope you enjoy these maple bacon pecan truffles. The maple, pecans, bacon, chocolate and butterscotch flavors make this an INCREDIBLY delicious treat, and they really aren’t too hard to make, either! God Bless You. Have a great day. Hold your family and friends close. Let them KNOW you love and care for them. Life IS short.

Looking For More TRUFFLE or BON BON Recipes?

You can find all of my recipes in the Recipe Index, located at the top of the page. You might also enjoy these yummy treats!

Interested In More Recipes?

Thank you for visiting this website. I appreciate you using some of your valuable time to do soIf you’re interested, I publish a newsletter 2 times per month (1st and 15th) with all the latest recipes, and other fun info. I would be honored to have you join our growing list of subscribers, so you never miss a great recipe!
There is a Newsletter subscription box on the top right side (or bottom) of each blog post, depending on the device you use, where you can easily submit your e-mail address (only) to be included in my mailing list.

You Can Also Find Me On Social Media:

Facebook page: The Grateful Girl Cooks!
Pinterest:
The Grateful Girl Cooks!
Instagram:
jbatthegratefulgirlcooks

Author's signature

0 from 0 votes
Maple Bacon Pecan Truffles
Prep Time
1 hr
Cook Time
0 mins
Total Time
1 hr
 
Maple Bacon Pecan Truffles are a decadent treat! They're creamy & maple flavored, w/ nuts & crisp bacon, coated in melted chocolate and butterscotch.
Category: Dessert
Cuisine: American
Keyword: truffles
Servings: 48
Calories Per Serving: 158 kcal
Author: JB @ The Grateful Girl Cooks!
Ingredients
For Truffles:
  • 1 cup butter (2 cubes)
  • 3 1/2 cups powdered sugar
  • 3 Tablespoons Maple flavoring
  • 1 1/2 cups pecans , chopped (may substitute walnuts)
  • 6-7 slices bacon , cooked crisp, and crumbled (reserve some to garnish finished truffles)
For Truffle Coating:
  • 2 cups semi-sweet chocolate chips
  • 1 cup butterscotch chips
Instructions
  1. Cook bacon slices until very crisp. Drain, then crumble or chop into small pieces once cooled. Set aside.
  2. In a large bowl, use an electric mixer to cream the butter, powdered sugar, and maple flavoring until smooth.
  3. Stir in chopped pecans and most of the bacon crumbles (remember to save some for garnishing the finished truffles!)
  4. Place bowl in refrigerator for half an hour to let it firm up a bit.
  5. When chilled, shape the dough into 1 inch balls, by rolling the dough between your hands (yes, it might be a bit messy...) Place the dough balls onto a wax paper or foil lined baking sheet and place into freezer for about half an hour or so. (You want the dough to be very chilled before dipping in chocolate).
  6. While dough is in freezer, make the chocolate/butterscotch coating. In a microwavable bowl, melt the chocolate and butterscotch chips (30 seconds on HIGH. Stir. 30 seconds on HIGH. Stir again. Watch carefully so that you don't burn the chocolate. At this point the chips should be melted and smooth after stirring the second time; if not, microwave an additional 15 seconds, then stir again.
  7. Dip dough balls into coating mixture one at a time (I insert a toothpick into the dough ball, dip, cover with coating then remove, allowing the excess to drip back into the bowl. You may find it helpful to use a spoon to help coating the truffle. Place each coated truffle onto wax paper or foil-lined baking sheets. Remove the toothpick after each one, and re-use on the next truffle.
  8. When all have been coated, hide the toothpick hole with a small bit of chocolate coating, then sprinkle (while it is still wet) with a few bacon crumbles for garnish.
  9. Let truffles sit until chocolate firms up. Place each truffle in a candy paper wrapper, if desired. Store in a covered container in refrigerator until chocolate has hardened and is ready to serve. These truffles are at their best when completely chilled.
Nutrition Facts
Maple Bacon Pecan Truffles
Amount Per Serving (1 truffle)
Calories 158 Calories from Fat 90
% Daily Value*
Fat 10g15%
Saturated Fat 4g25%
Cholesterol 12mg4%
Sodium 66mg3%
Potassium 61mg2%
Carbohydrates 16g5%
Sugar 14g16%
Protein 1g2%
Vitamin A 125IU3%
Calcium 8mg1%
Iron 0.6mg3%
* Percent Daily Values are based on a 2000 calorie diet.

Here’s one more to pin on your Pinterest boards!Maple Bacon Pecan Truffles are a decadent treat! They're creamy & maple flavored, w/ nuts & crisp bacon, coated in melted chocolate and butterscotch.


Save

Save

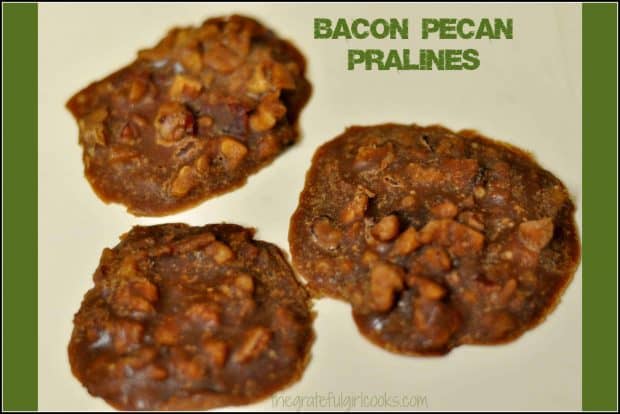
Bacon Pecan Pralines

Bacon Pecan Pralines are a delightful twist on traditional pralines. These sweet treats include BACON, which gives them a sweet and salty flavor – a great combination! Bacon Pecan Pralines are a twist on traditional pralines. These sweet treats include BACON, which gives them a sweet and salty flavor - a great combination!
I recently made these Bacon Pecan Pralines for a “BACON” themed dinner my husband and I went to, with two other couples. Every course of the dinner had to include some type of bacon.

Since I was in charge of desserts, I made several. Included were these yummy pralines, which included salty bacon. Sweet and salty… a great combination! They were really good! Remember… everything is better with bacon. Even bacon pecan pralines, right?

I had never made Pralines before this, but I plunged right in, and managed to pull this one off!

Scroll Down For A Printable recipe Card At The Bottom Of The Page

Important Tip When Making Bacon Pecan Pralines

The only thing I would do different next time when making these pralines is to use a larger cooking pan. The one I used was medium sized.

I THOUGHT the medium sized pan was big enough, but I was wrong. There were a couple moments of near panic as the mixture nearly boiled up and out of my pan.

The hot praline mixture never did boil over, but please, listen to my advice here. Use a LARGE and DEEP saucepan when you prepare this recipe. You won’t have to frantically stir to keep the candy from boiling over the top of the pan… and yes, you will thank me for this important tip!

How To Make Bacon Pecan Pralines

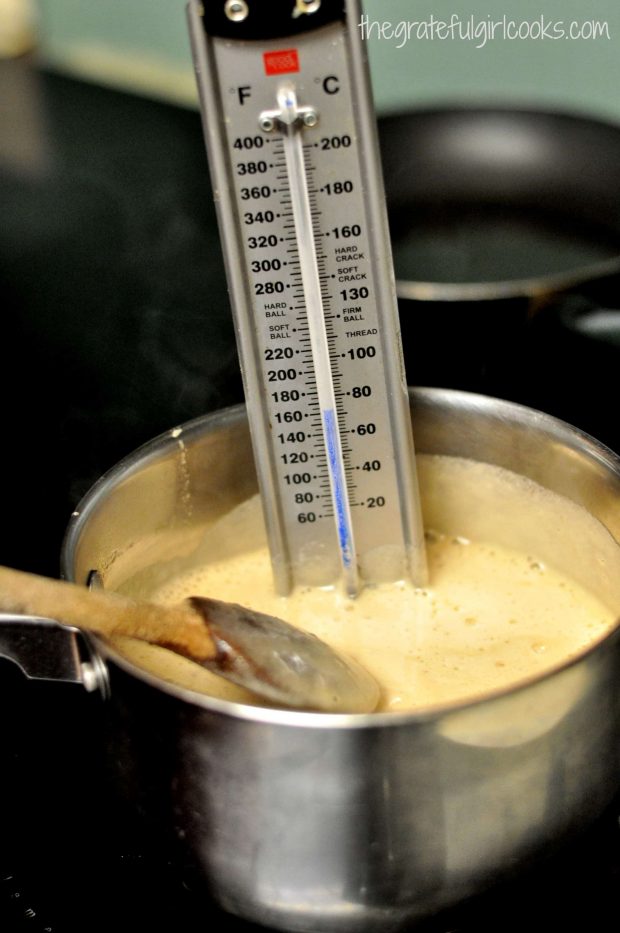
In a LARGE and DEEP saucepan, mix together granulated sugar, brown sugar, buttermilk, corn syrup, baking soda and salt. Insert a candy thermometer into the mixture.

Cook mixture on medium heat, until it reaches 235 degrees on a candy thermometer.

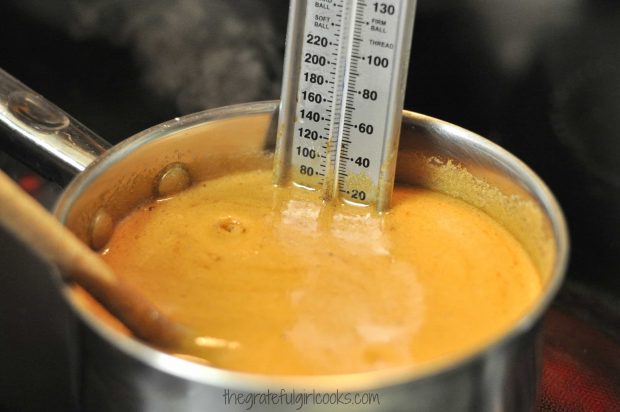
This will take about 20 minutes or so. Mixture will be VERY hot. Stir mixture often while it cooks to prevent it from burning on the bottom of the pan. The mixture will turn a rich caramel color near the end of the cooking time.

Candy thermometer in boiling sauce for bacon pecan pralines.Candy thermometer in saucepan full of bacon pecan pralines sauce.
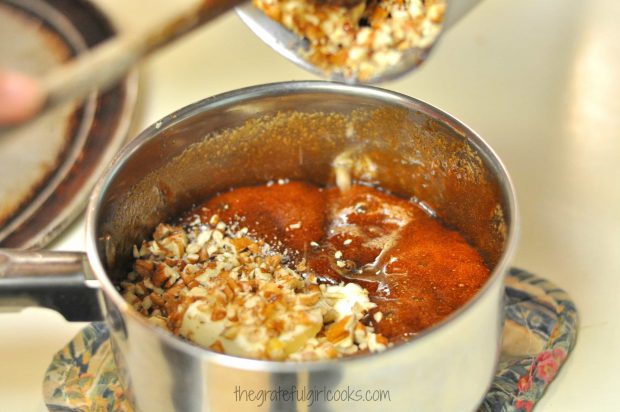
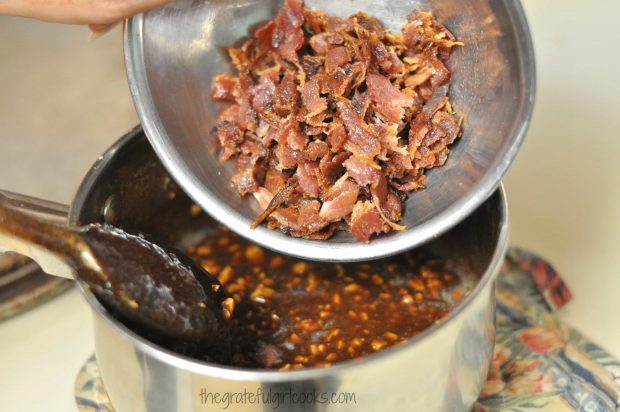
Once mixture reaches 235 degrees, remove pan from heat. Immediately add the butter, vanilla, chopped pecans, orange zest, and cooked bacon crumbles.

Adding chopped pecans for bacon pecan pralines to saucepan

Crumbled, cooked bacon pieces are added to praline mixture in pan.

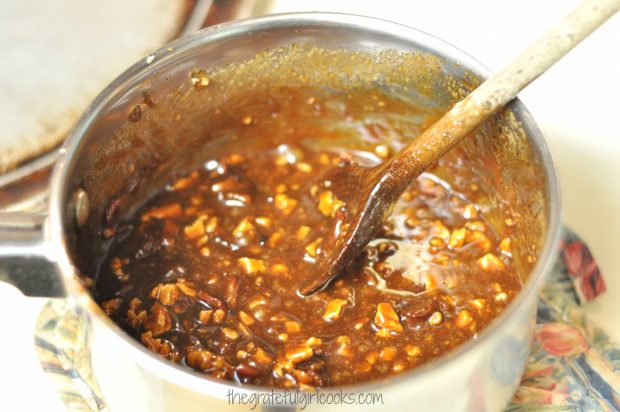
Beat the bacon pecan praline mixture with a wooden spoon until the mixture is thoroughly combined. WARNING: The praline mixture will be very, very hot. Be very careful so you don’t burn yourself!

Hot bacon pecan pralines mixture, in saucepan after cooking.

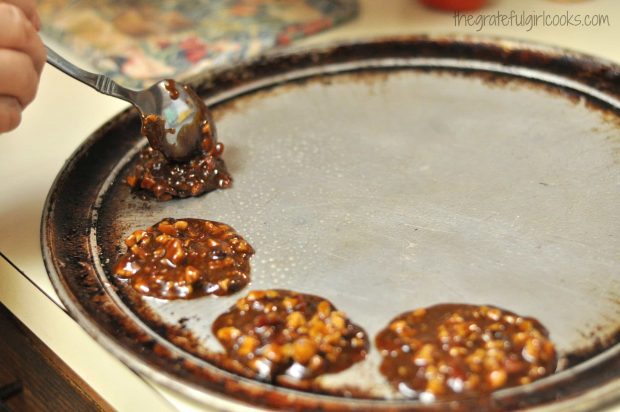
Drop pralines by teaspoonfuls onto a sprayed baking sheet , a silicone mat, OR onto buttered parchment paper. Leave space between each of the pralines, as they will spread a bit while hot.

Dropping spoonfuls of bacon pecan pralines onto round baking pan, to cool.
Let the bacon pecan pralines sit and cool at room temperature for at least 30 minutes. The pralines will firm up as they cool. When completely firm, they are ready to be served. Carefully remove from pan.

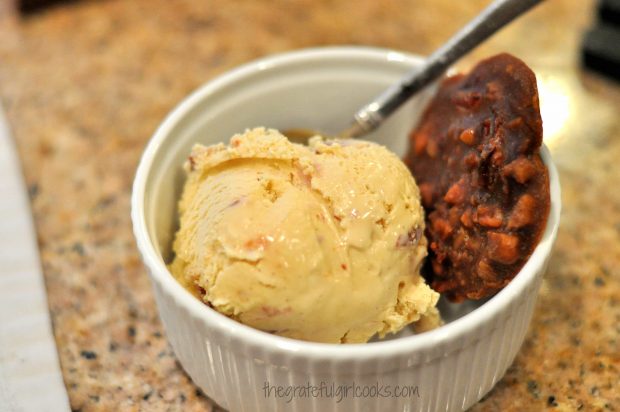
Serve pralines by themselves, as a small treat, or as I did for our Bacon Night, on the side of a scoop of Candied Bacon Ice Cream. YEP! Bacon overload!

Bacon pecan pralines were served with a scoop of candied bacon ice cream!
If you’re looking for an interesting, yet amazingly good dessert treat, I hope you will consider making these yummy bacon pecan pralines! Have a great day!

Interested In More Recipes?

Thank you for visiting this website. I appreciate you using some of your valuable time to do soIf you’re interested, I publish a newsletter 2 times per month (1st and 15th) with all the latest recipes, and other fun info. I would be honored to have you join our growing list of subscribers, so you never miss a great recipe! 

There is a Newsletter subscription box on the top right side (or bottom) of each blog post, depending on the device you use, where you can easily submit your e-mail address (only) to be included in my mailing list.

You Can Also Find Me On Social Media:

Facebook page: The Grateful Girl Cooks!
Pinterest:
The Grateful Girl Cooks!
Instagram:
jbatthegratefulgirlcooks

Author's signatureRecipe Source: http://www.framedcooks.com/2011/06/buttermilk-bacon-pralines.html

0 from 0 votes
Bacon Pecan Pralines
Prep Time
10 mins
Cook Time
20 mins
Total Time
30 mins
 

Bacon Pecan Pralines are a twist on traditional pralines. These sweet treats include BACON, which gives them a sweet and salty flavor - a great combination!

Category: Candy
Cuisine: American
Keyword: bacon pecan pralines, pralines
Servings: 20
Calories Per Serving: 142 kcal
Author: JB @ The Grateful Girl Cooks!
Ingredients
  • 1 cup granulated sugar
  • 1/2 cup brown sugar (packed)
  • 1/2 cup buttermilk
  • 1 Tablespoon light corn syrup
  • 1/2 teaspoon baking soda
  • 1/4 teaspoon salt
  • 4 Tablespoons butter
  • 1/2 teaspoon vanilla extract
  • 1 cup chopped pecans
  • 1/2 teaspoon orange zest
  • 4 bacon slices , pre-cooked crisp, then crumbled
Instructions
  1. Place the granulated sugar, brown sugar, buttermilk, corn syrup, baking soda and salt into a large and deep heavy saucepan. Stir to combine. Insert a candy thermometer into mixture, attaching it to the side of pan. Heat on medium heat until the mixture reaches 235 degrees F on the candy thermometer, stirring often to prevent candy from burning on the bottom of pan.
  2. Once thermometer reads 235 degrees, carefully remove pan from heat. Be careful... it will be HOT!
  3. Add butter, vanilla extract, chopped pecans, orange zest, and bacon to the hot praline mixture. Beat ingredients together, using a wooden spoon, until all is combined.
  4. Drop by rounded teaspoonfuls onto a sprayed baking sheet, a silicone mat, OR onto buttered parchment paper. Leave space between each praline, as mixture will spread while hot.
  5. Let the pralines cool at room temperature for at least 30 minutes, until totally cooled and firm all the way through. Serve and enjoy! (Pralines may be stored in refrigerator).
Nutrition Facts
Bacon Pecan Pralines
Amount Per Serving (1 serving)
Calories 142 Calories from Fat 72
% Daily Value*
Fat 8g12%
Saturated Fat 2g13%
Cholesterol 9mg3%
Sodium 114mg5%
Potassium 46mg1%
Carbohydrates 17g6%
Sugar 16g18%
Protein 1g2%
Vitamin A 85IU2%
Vitamin C 0.2mg0%
Calcium 16mg2%
Iron 0.2mg1%
* Percent Daily Values are based on a 2000 calorie diet.

Here’s one more to pin on your Pinterest boards!Bacon Pecan Pralines are a twist on traditional pralines. These sweet treats include BACON, which gives them a sweet and salty flavor - a great combination!


Save

Save

Save

Cobb Salad

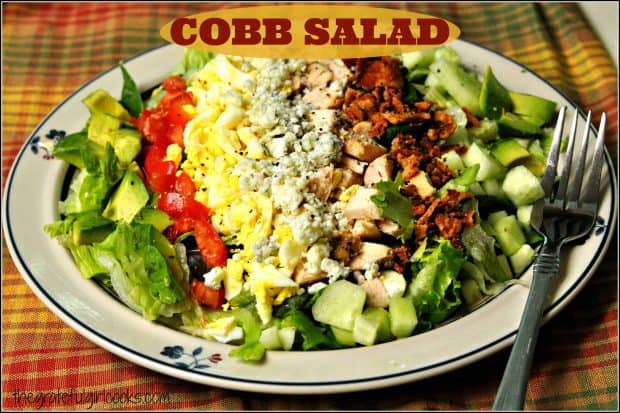
Cobb Salad is a delicious “all in one” meal, with chicken breast, chilled salad greens, bacon, avocado, bleu cheese crumbles, and crunchy veggies!Cobb Salad is a delicious "all in one" meal, featuring chicken breast, chilled salad greens, bacon, avocado, bleu cheese crumbles, and crunchy veggies!
This past week I made a Cobb Salad for my husband and I for dinner. Cobb Salads are one of my favorite meals, because of all the chopped veggies, chicken, bacon, etc. that go into it. It’s an entire meal… we are always full when done eating, that’s for sure!

Scroll Down For A Printable Recipe Cad At The Bottom Of the Page

Making A Cobb Salad

The majority of work involved in making this chopped Cobb Salad is simply that… chopping! Chopping up cooked, crisp bacon, grilled chicken breasts, tomatoes, hard boiled eggs, tomatoes, cucumber and avocados.

The prep work is not so bad… it’s easy!  Once you have THAT done, all that is involved is layering the ingredients onto the cold crisp salad greens, adding your favorite dressing and enjoying this great salad!

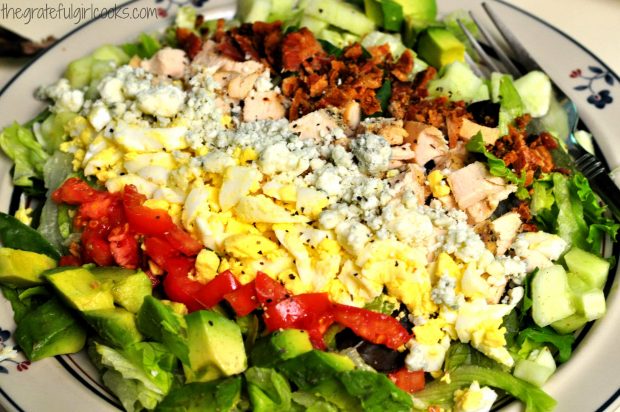
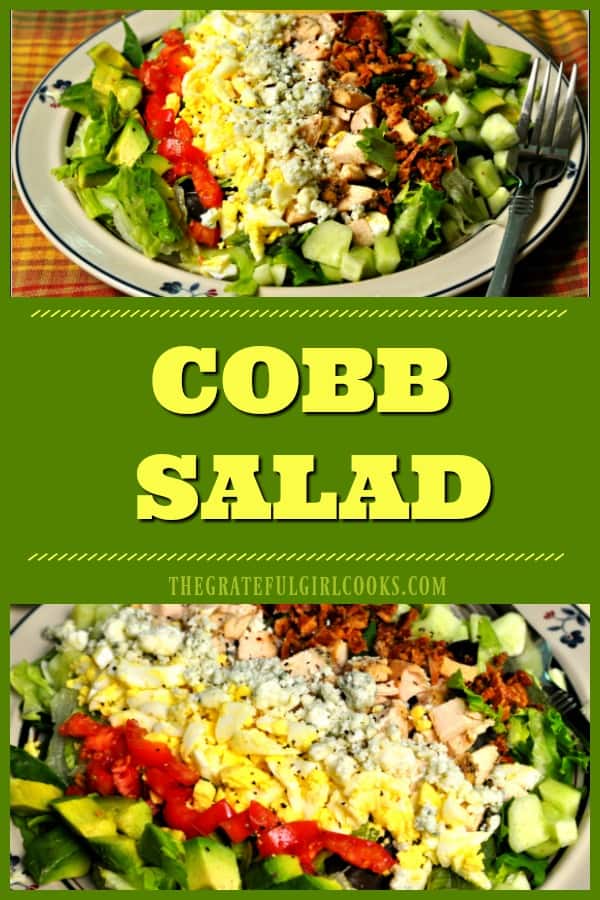
Cobb salad, with chicken, bleu cheese, bacon and avocado!
If you have already have cooked chicken (I used leftover grilled chicken breasts!) and hard-boiled eggs, then this salad comes together very quickly!

The recipe makes enough for two meal sized salads. It could easily be adapted to make 4 smaller salads as a side dish.  You know what else I like about this yummy salad?  It not only TASTES good, it LOOKS good!

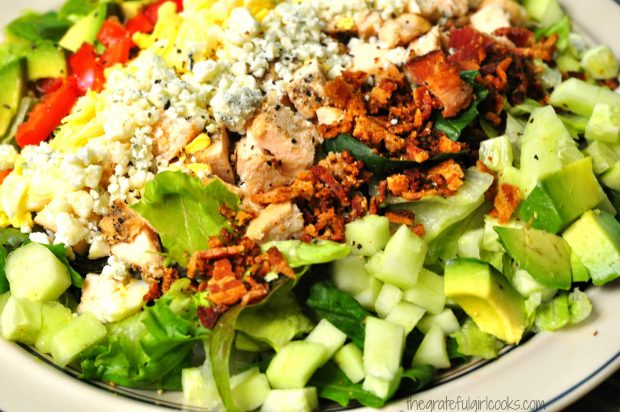
Chunks of chicken, avaocado, cucumber and bacon on cobb salad
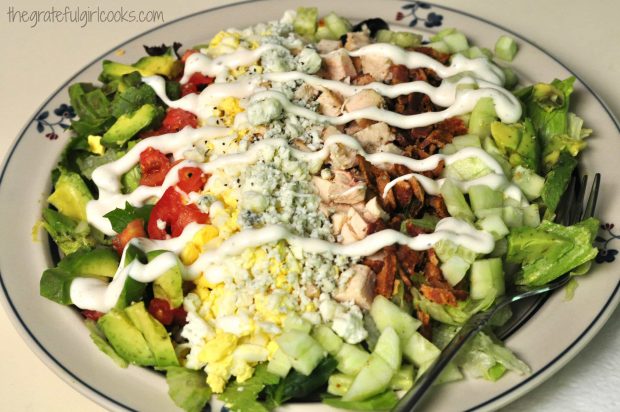
Once you’ve “assembled” this cobb salad, all that is left to do is add your favorite salad dressing, grab a fork, and dig in!!! Sure hope you will give this salad a try. I really think you will LOVE it!

Salad dressing is drizzled over cobb salad, ready to serve!

I hope you have the chance to make and enjoy this delicious Cobb Salad. Have a fantastic week, friends. May God bless the work of your hands as you journey through each day you are given!

Looking For More SALAD Recipes?

You can find all of my recipes in the Recipe Index, located at the top of the page. I have some wonderful salad recipes that include:

Interested In More Recipes?

Thank you for visiting this website. I appreciate you using some of your valuable time to do soIf you’re interested, I publish a newsletter 2 times per month (1st and 15th) with all the latest recipes, and other fun info. I would be honored to have you join our growing list of subscribers, so you never miss a great recipe!
There is a Newsletter subscription box on the top right side (or bottom) of each blog post, depending on the device you use, where you can easily submit your e-mail address (only) to be included in my mailing list.

You Can Also Find Me On Social Media:

Facebook page: The Grateful Girl Cooks!
Pinterest:
The Grateful Girl Cooks!
Instagram:
jbatthegratefulgirlcooks

Have a GREAT day!

Author's signature

0 from 0 votes
Cobb Salad
Prep Time
15 mins
Cook Time
0 mins
Total Time
15 mins
 

Cobb Salad is a delicious "all in one" meal, featuring chicken breast, chilled salad greens, bacon, avocado, bleu cheese crumbles, and crunchy veggies!

Category: Entree Salad
Cuisine: American
Keyword: cobb salad
Servings: 2 entree salads
Calories Per Serving: 701 kcal
Author: JB @ The Grateful Girl Cooks!
Ingredients
  • Iceberg Lettuce and assorted Spring Greens
  • 4 slices bacon , cooked until crispy, then crumbled
  • 2 grilled or cooked skinless , boneless chicken breasts, cut into 1 inch cubes
  • 1/2 cup bleu cheese crumbles
  • 1 medium tomato , chopped
  • 2 hard boiled eggs , chopped
  • 1 medium cucumber , peeled and cubed
  • 1 avocado , cubed
  • Salt and pepper to taste
Instructions
  1. Place mixed chilled salad greens on serving plate.
  2. Place layers (lines) of remaining ingredients on top of salad greens in any order you wish, remembering to divide all ingredients in half (half for each salad).
  3. Top with your favorite salad dressing; serve and enjoy!
Recipe Notes

FYI-The prep time does not include time for boiling the eggs or cooking the chicken. It's really quick and easy to throw this salad together when those are already pre-cooked.

Caloric calculation is based on TWO salads. If recipe is divided into 4 servings, the calorie count will be cut in half.

Nutrition Facts
Cobb Salad
Amount Per Serving (1 main course salad)
Calories 701 Calories from Fat 450
% Daily Value*
Fat 50g77%
Saturated Fat 16g100%
Cholesterol 313mg104%
Sodium 969mg42%
Potassium 1514mg43%
Carbohydrates 16g5%
Fiber 8g33%
Sugar 5g6%
Protein 46g92%
Vitamin A 1400IU28%
Vitamin C 25.1mg30%
Calcium 248mg25%
Iron 2.3mg13%
* Percent Daily Values are based on a 2000 calorie diet.

Here’s one more to pin on your Pinterest boards!Cobb Salad is a delicious "all in one" meal, featuring chicken breast, chilled salad greens, bacon, avocado, bleu cheese crumbles, and crunchy veggies!


Save

Save

Chocolate-Covered Bacon

Chocolate-covered bacon is both sweet and salty, incredibly easy to make, and is a very unique, but DELICIOUS crispy treat you will LOVE!Chocolate-covered bacon is both sweet and salty, incredibly easy to make, and is a very unique, but DELICIOUS crispy treat you will LOVE!!
A couple years ago, my husband tried a piece of Chocolate-Covered Bacon at a little bakery, while out of our area on business. He said it was fantastic (I had my doubts). Now, don’t get me wrong… I love bacon, but chocolate covered bacon seemed a bit wonky to me. That is, UNTIL I MADE MY OWN! Wowzers! It’s fantastic, and EASY to make!

Scroll Down For A Printable Recipe Card At The Bottom Of The Page

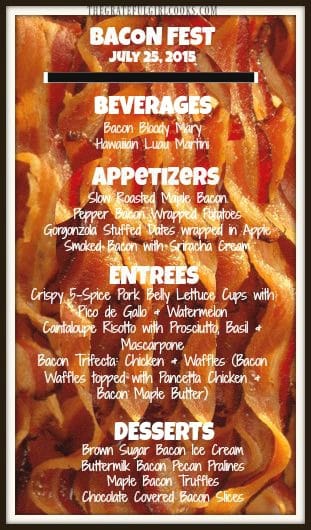
My husband and I recently attended a THEMED dinner party with dear friends. The theme this time was BACON. All parts of the meal had to include some form of bacon. Everything. Beverages, appetizers, entrees (3), and desserts. All bacon inspired. Here’s our menu for the bacon-themed dinner:

Menu for bacon-themed dinner

Here’s a collage of some of the bacon dishes we enjoyed… everything from prosciutto risotto to candied bacon ice cream!

Collage of bacon themed dishes from our bacon themed dinner

I was in charge of the desserts, (as I typically am). One of the desserts I made was chocolate covered bacon strips. YUM! Even after being coated in semi-sweet chocolate, the bacon was crispy inside. The chocolate actually is a perfect counter balance to the saltiness of the bacon.  You can also see my Bacon Pecan Pralines, Maple Bacon Pecan Truffles, and Candied Bacon Ice Cream in the collage photo above.

It really was easy to make this chocolate-covered bacon. I didn’t have a “recipe”; I just used the technique I use for dipping truffles in chocolate. My fingers got a bit messy, but that’s no big deal. Here’s what I did.

How To Make Chocolate-Covered Bacon

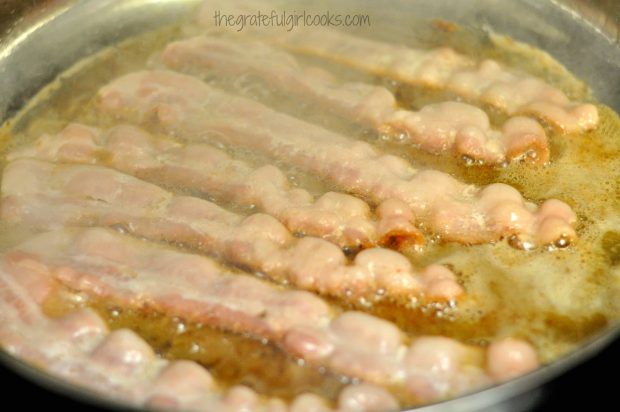
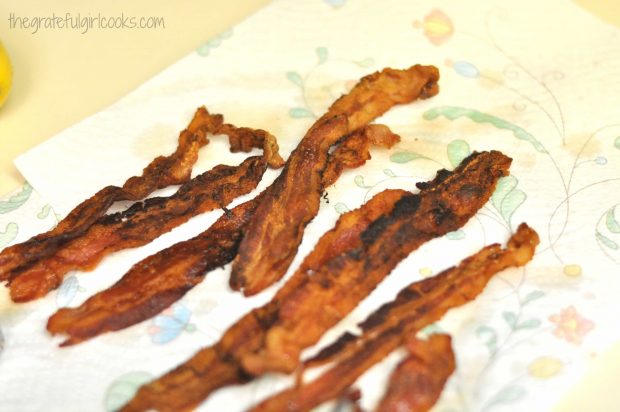
First I fried the number of bacon strips I wanted. This recipe is for 8, but you can easily alter recipe to accommodate the number of strips you want to make.  I cooked the bacon strips until they were very crispy, then drained them on a paper towel to absorb the grease.

Bacon is fried until crisp.
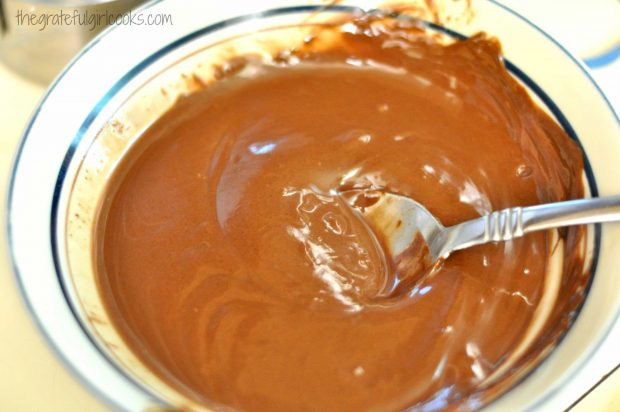
I let the bacon cool completely. Then I melted semi-sweet chocolate chips with a heaping Tablespoon of vegetable shortening in my microwave. (30 seconds, stir. 30 seconds stir).

Chocolate chips and shortening are melted together to coat baconDipping the Bacon

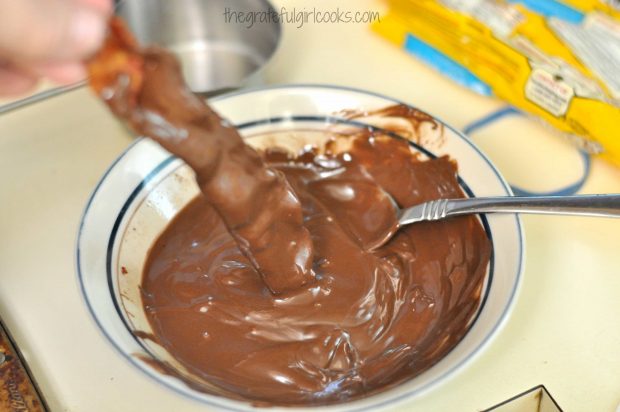
The next thing I did was carefully (the bacon is crisp, remember?) dip one piece of bacon at a time in the chocolate.  I used a spoon to help cover about 3/4 of the piece on both sides with chocolate, then carefully flipped it over and did the remaining bit on both sides.

I used a spoon to spoon the chocolate into nooks and crannies that needed help to be covered. I let the excess chocolate drip back into the bowl.

Crisp bacon is dipped in melted chocolate until fully covered.
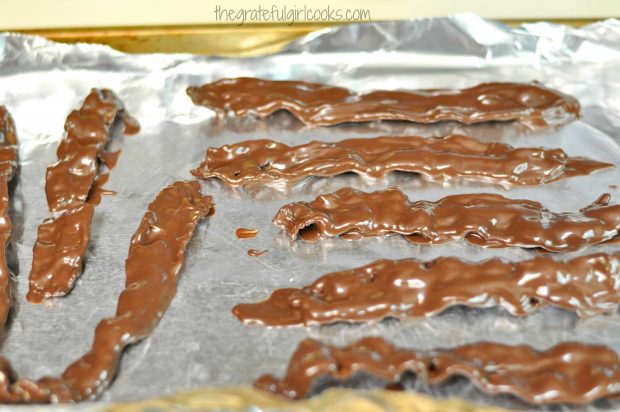
After each piece was completely covered in chocolate, it was carefully placed on a piece of aluminum foil to let the chocolate firm up.

Chocolate dipped bacon is left to dry until chocolate firms up
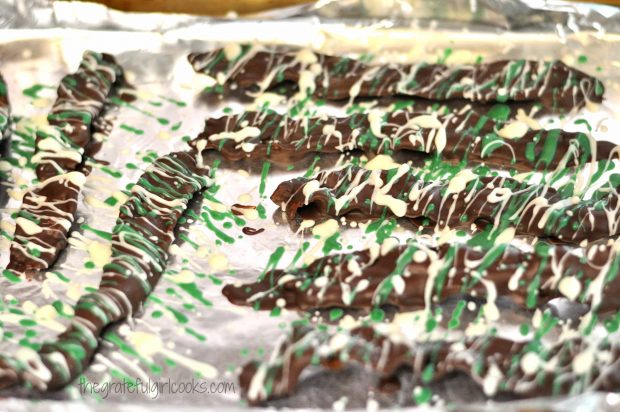
Once the chocolate had firmed up, I melted some white chocolate chips (about 1/2 cup) with a small amount of shortening (1 teaspoon), then decoratively drizzled it over the bacon slices. I even had some green colored chocolate chips from a bag of Christmas colored ones, so I also drizzled that over, for contrast (optional).

Ready For Some Chocolate-Covered Bacon!

At our bacon dinner that evening, one of my friends wondered if I had put mint flavored drizzle (the GREEN chips) on the bacon. No way… just used a different colored semi-sweet chocolate chip!

Chocolate covered bacon is drizzled with white and green chocolate
When I was done being “creative” (ha ha), I let the chocolate-covered bacon slices firm up completely before attempting to remove them from the aluminum foil. I then placed them in a single layer in a sealed plastic container, and kept them in the refrigerator until ready to serve later that evening.

The truffles you see in the picture (with the bacon strips) are another creation I made for bacon night. Here’s the recipe for these Maple Bacon Pecan Truffles. (they were yummy, too!)

Close up photo of chocolate-covered bacon strips
That’s it! It’s really not hard to make chocolate-covered bacon, at all! Hope you will give it a try. Bacon just seems to make everything better… even chocolate! Thanks for stopping by, and come back soon. Don’t forget to check out ALL of my recipes in the Recipe Index, located at the top of the page.

Interested In More Recipes?

Thank you for visiting this website. I appreciate you using some of your valuable time to do soIf you’re interested, I publish a newsletter 2 times per month (1st and 15th) with all the latest recipes, and other fun info. I would be honored to have you join our growing list of subscribers, so you never miss a great recipe!
There is a Newsletter subscription box on the top right side (or bottom) of each blog post, depending on the device you use, where you can easily submit your e-mail address (only) to be included in my mailing list.

You Can Also Find Me On Social Media:

Facebook page: The Grateful Girl Cooks!
Pinterest:
The Grateful Girl Cooks!
Instagram:
jbatthegratefulgirlcooks

Have a GREAT day!

Chocolate Covered Bacon / The Grateful Girl Cooks!

0 from 0 votes
Chocolate-Covered Bacon
Prep Time
25 mins
Cook Time
0 mins
Total Time
25 mins
 
Chocolate-covered bacon is both sweet and salty, incredibly easy to make, and is a very unique, but DELICIOUS crispy treat you will LOVE!!
Category: Candy
Cuisine: American
Keyword: chocolate covered bacon
Servings: 8 servings
Calories Per Serving: 301 kcal
Author: JB @ The Grateful Girl Cooks!
Ingredients
  • Bacon (I used 8 strips)
  • 1 1/2 cups semi-sweet chocolate chips
  • 1 HEAPING tablespoon vegetable shortening
  • 1/2 cup white chocolate chips + 1 teaspoon vegetable shortening (for drizzle)
  • 1/2 cup colored chocolate chips + 1 teaspoon vegetable shortening (for drizzle... totally optional!)
Instructions
  1. Cook bacon until very crisp. Remove from skillet to paper towels to absorb extra grease. Let cool completely.
  2. Place 1 1/2 cups chocolate chips in a microwave safe bowl. Add the shortening. Cook on high power for 30 seconds. Remove. Stir. Place bowl back in microwave. Cook on high power for 30 seconds. Stir well, to fully combine. If mixture is not fully smooth, place it back in microwave on medium high power for 15 seconds (I usually don't have to do this, but you might, depending on the wattage of your microwave). DO NOT BURN THE CHOCOLATE!
  3. Carefully coat all sides of the bacon strips with melted chocolate. Using a spoon to help get the chocolate onto the bacon works great! Place coated bacon strips onto aluminum foil, and let sit, undisturbed until chocolate has set.
  4. Melt white chocolate chips and shortening in the exact same way as described above. Decoratively drizzle the mixture over the chocolate covered strips. Let sit until chocolate is completely firmed up, then place bacon strips in a covered container and refrigerate until ready to serve. Enjoy!
Nutrition Facts
Chocolate-Covered Bacon
Amount Per Serving (1 slice)
Calories 301 Calories from Fat 207
% Daily Value*
Fat 23g35%
Saturated Fat 10g63%
Cholesterol 16mg5%
Sodium 149mg6%
Potassium 234mg7%
Carbohydrates 17g6%
Fiber 2g8%
Sugar 12g13%
Protein 4g8%
Vitamin A 25IU1%
Calcium 21mg2%
Iron 2.2mg12%
* Percent Daily Values are based on a 2000 calorie diet.

Here’s one more to pin on your Pinterest boards!Chocolate-covered bacon is both sweet and salty, incredibly easy to make, and is a very unique, but DELICIOUS crispy treat you will LOVE!!


Save

Save

Bacon-Wrapped Grilled Hot Dogs

Make your BBQ dinner go from ordinary to special with these yummy, easy bacon-wrapped grilled hot dogs! Remember, everything’s better with bacon!Make your BBQ dinner go from ordinary to special with these yummy, easy bacon-wrapped grilled hot dogs! Remember, everything's better with bacon!
Last night we grilled hamburgers for dinner. Right before we put the burgers on the grill, I decided to also throw on a few hot dogs, but hot dogs with a slight twist!

Oh my goodness… I took one taste of a bacon-wrapped grilled hot dog and knew it was a good decision to cook them this way! Bacon makes everything better… it even “classed up” an ordinary hot dog!

The smoky bacon flavor really adds to the grilled hot dog flavor. My husband raved about them! They were so very simple to make… here’s what I did, using 4 hot dogs and 4 pieces of bacon. Adjust the quantity to however many hot dogs you will be making.

How To Make Bacon-Wrapped Grilled Hot Dogs

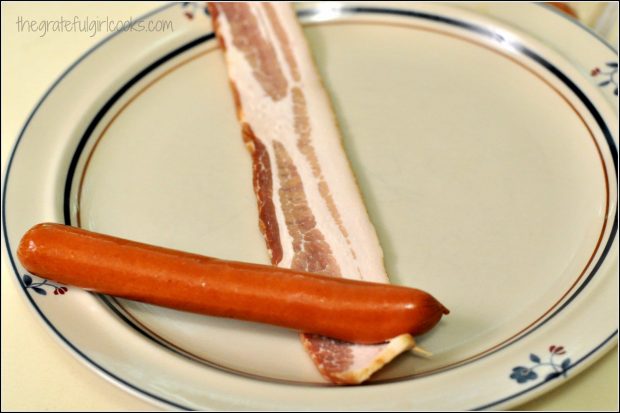
Fasten one end of the bacon into the end of a hot dog with a toothpick like this (shown below).

Wrapping a hot dog weiner with raw bacon
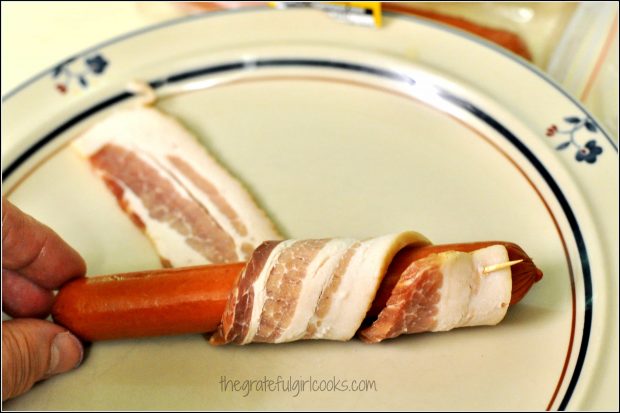
Tightly roll bacon around hot dog, covering the hot dog as much as possible.

Wrapping hot dog weiner with tightly wound raw bacon strip
Attach the bacon to the hot dog using another toothpick. Repeat for each hot dog.

Four all beef weiners wrapped with bacon strip and secured with toothpicks
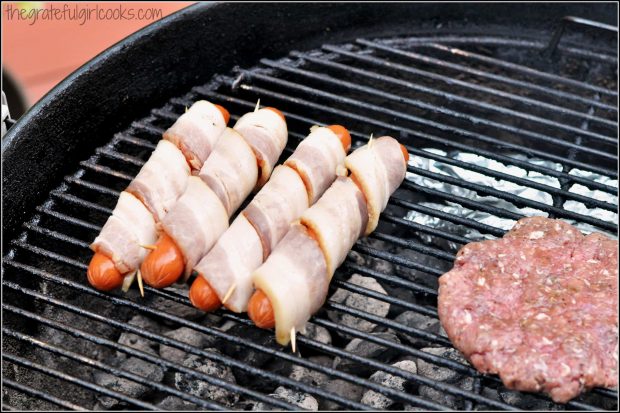
Cook the hot dogs on a really HOT side of the grill.

Four hot dogs wrapped in bacon cooking over hot coals.
How Long Do They Take To Cook?

Turn the hot dogs every couple of minutes (and spread ’em out a bit), to ensure that ALL the bacon has cooked. It will take about 25 minutes to cook the bacon completely through.

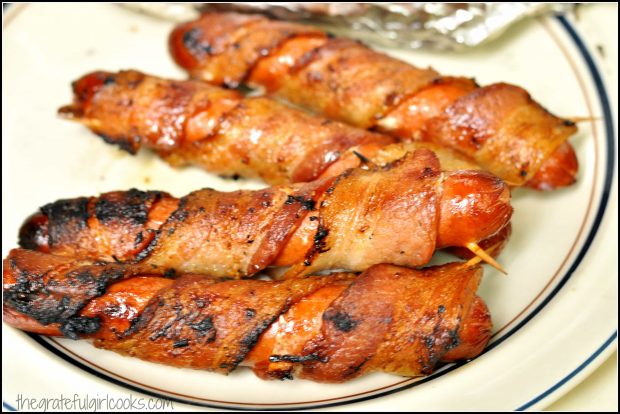
Four hot dogs grilled with bacon wrap.
When done, remove from heat, and serve. Put them in a hot dog bun, or just eat them as they are, fresh off the grill. They taste wonderful!

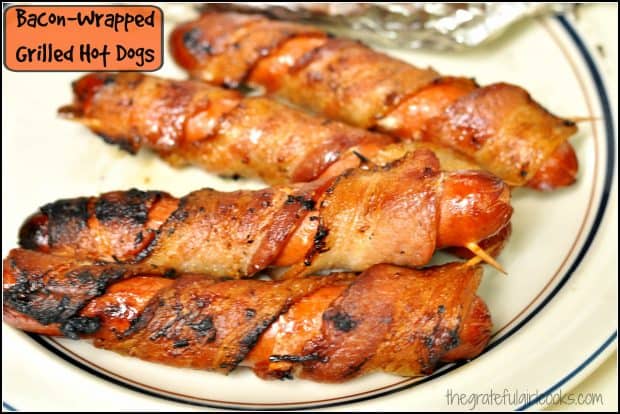
Four bacon-wrapped grilled hot dogs on plate, ready to eat.
That’s it! See how easy that was? My only tip is… REMEMBER TO REMOVE THE TOOTHPICKS FROM THE HOT DOGS BEFORE SERVING!  Nobody wants to eat a big ol’ toothpick, right?

Hope you enjoy these. They would be good on toasted hot dog buns, but my husband just cut one up with a knife and fork and ate it that way, and said it was DELICIOUS, without the bun. I guess bacon really does make everything tastes better… even hot dogs!

If you enjoy hot dogs, be sure to check out my recipe for yummy coney dogs! They’re absolutely delicious and are another simple meal to prepare! Thanks so much for stopping by, and I invite you to come back soon for more family-friendly recipes. Take care, and have a great day!

Interested In More Recipes?

Thank you for visiting this website. I appreciate you using some of your valuable time to do soIf you’re interested, I publish a newsletter 2 times per month (1st and 15th) with all the latest recipes, and other fun info. I would be honored to have you join our growing list of subscribers, so you never miss a great recipe!
There is a Newsletter subscription box on the top right side (or bottom) of each blog post, depending on the device you use, where you can easily submit your e-mail address (only) to be included in my mailing list.

You Can Also Find Me On Social Media:

Facebook page: The Grateful Girl Cooks!
Pinterest:
The Grateful Girl Cooks!
Instagram:
jbatthegratefulgirlcooks

Author's signature

Here’s one more to pin on your Pinterest boards!Make your BBQ dinner go from ordinary to special with these yummy, easy bacon-wrapped grilled hot dogs! Remember, everything's better with bacon!

Save

Save

BLT Wedge Salad

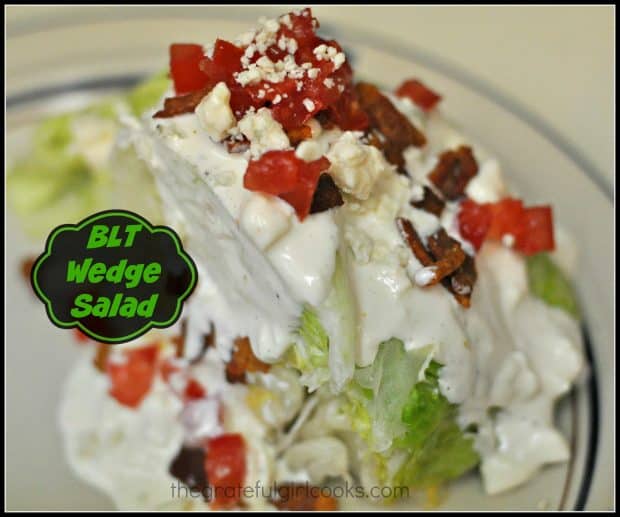
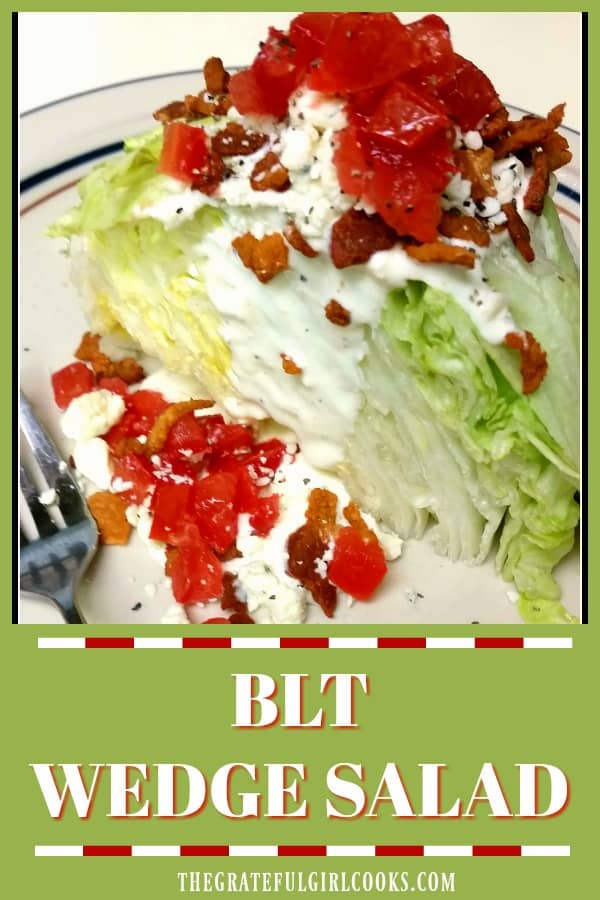
You’re gonna LOVE this classic BLT wedge salad with bacon, iceberg lettuce, crumbled blue cheese, and chopped tomatoes, topped with a thick, creamy, homemade blue cheese dressing!Classic BLT wedge salad with bacon, iceberg lettuce, crumbled blue cheese, and chopped tomatoes, topped with a thick, creamy, homemade blue cheese dressing.My husband LOVES wedge salads. I think they are his favorite salad. Ever.  When we have the opportunity to eat “out”, he will almost always order a wedge salad if it’s on the menu, to go with his meal. I, on the other hand, have NEVER ordered a wedge salad OR made a BLT wedge salad for that matter… until now.

My husband had hinted around that “we” should try making one at home (you know, the proverbial “we”). I wasn’t convinced I would even like it, but because I love my guy so much, I hunted around for recipes. The one I decided on is similar to the wedge salads on the menu at Morton’s – The Steak House. He LOVES those!

So… I made a couple little tweaks in the recipe, and fixed us a BLT Wedge Salad last week with our dinner. And guess what? We BOTH loved it! Who knew that a really cold quarter head of lettuce, covered with a delicious homemade dressing, chopped tomatoes, crisp bacon crumbles and chunks of blue cheese could be so good? We liked the salad and dressing so much that the following evening all we had for dinner was another BLT Wedge Salad! Nothing else… just the salad! (Can you tell we liked it?)

Scroll Down For A Printable Recipe Card At The Bottom Of The Page

How To Make The Dressing For A BLT Wedge Salad

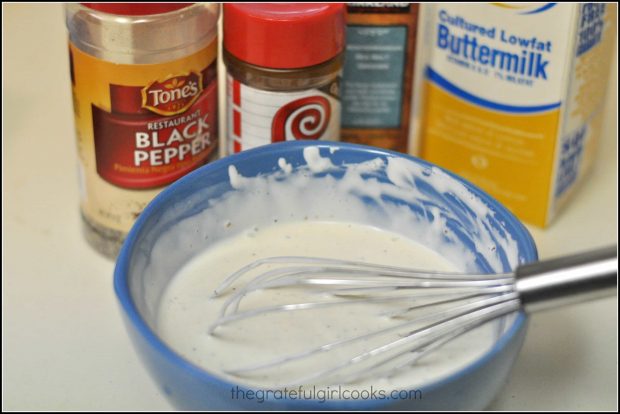
First you make the salad dressing by whisking together mayonnaise and sour cream. Then buttermilk , seasoning salt, Worcestershire sauce, minced garlic, and black pepper is added.

Buttermilk, sour cream, mayonnaise and spices are whisked together to make salad dressing.

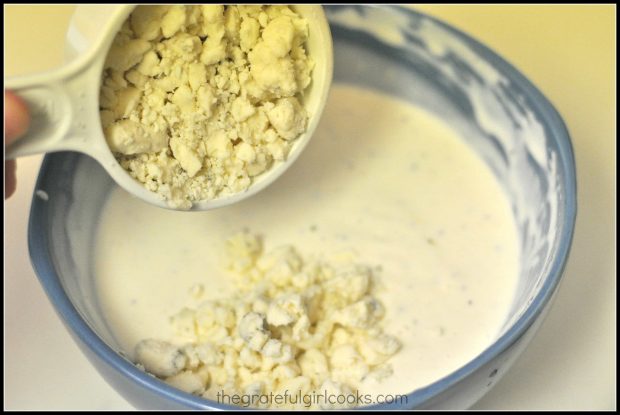
Gently fold in the crumbled blue cheese. Once blue cheese is folded in, salad dressing is covered and refrigerated for several hours, for the flavors to fully develop.

Crumbled blue cheese is added to salad dressing.

Prepare The Rest Of The Ingredients For The Salad

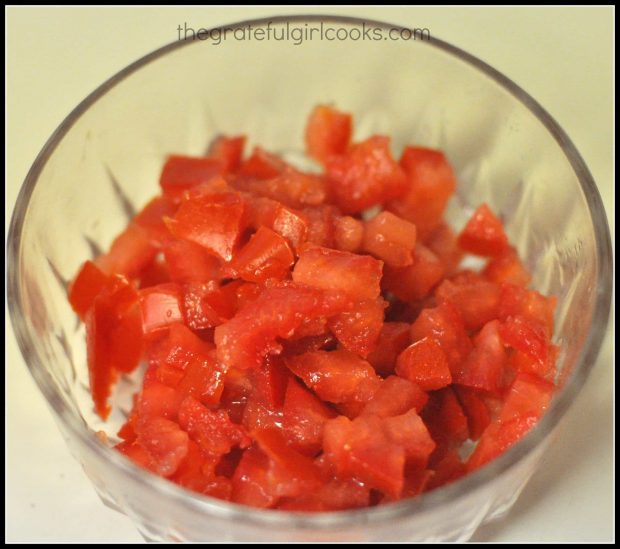
Chop and de-seed (as much as possible) 1-2 large Roma tomatoes.

Roma tomatoes are diced for adding to wedge salad.

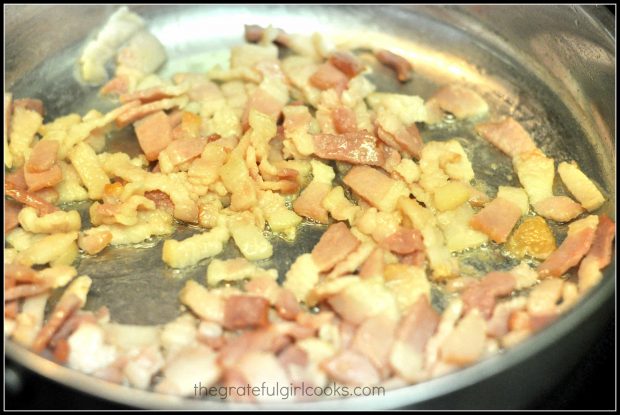
Cook the bacon pieces until very crisp. I like to cut up the bacon using kitchen shears before cooking, because it helps it to cook faster.

Bacon is diced, then cooked until crisp for BLT wedge salad.

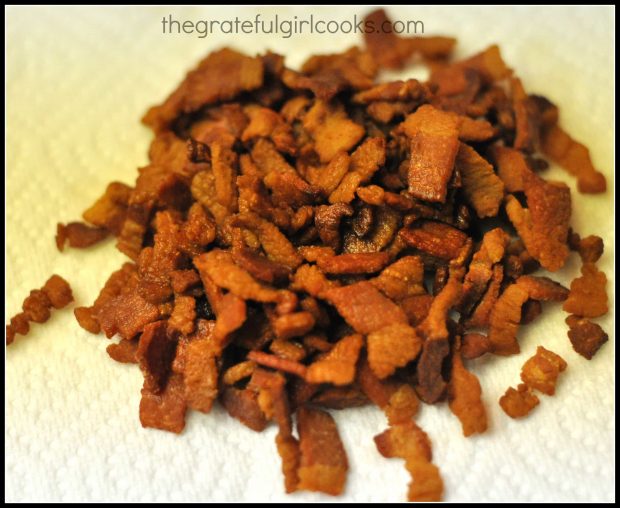
Once the bacon is fully cooked and crisp, remove it from the skillet. Drain it on paper towels, and set aside.

Crisp cooked bacon is ready to add to salad

Serve The BLT Wedge Salad

Make sure the iceberg lettuce is really cold. When ready to serve, take the core of the lettuce head out by holding the lettuce firmly and smacking the core (on the bottom) onto the kitchen counter. The core should be easy to remove after this. Cut the lettuce head, from top to bottom in half, then cut each half again.

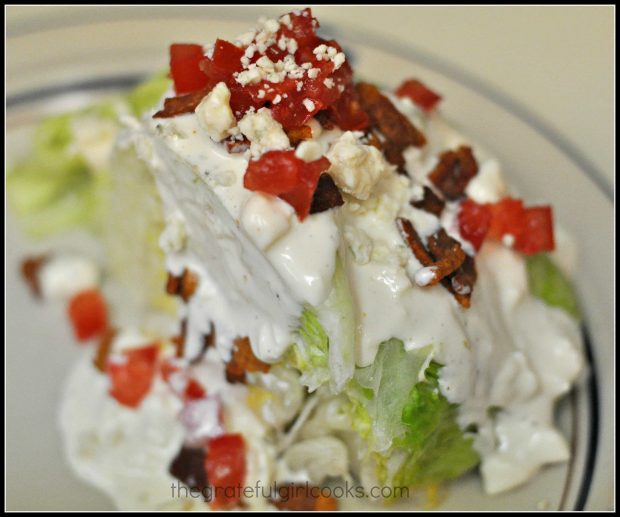
To serve, place one entire lettuce wedge onto serving plate, drizzle with salad dressing, then top with chopped tomatoes, crumbled blue cheese and bacon crumbles.

Cold crisp lettuce wedge is topped with blue cheese dressing, bacon, tomato and crumbled blue cheese

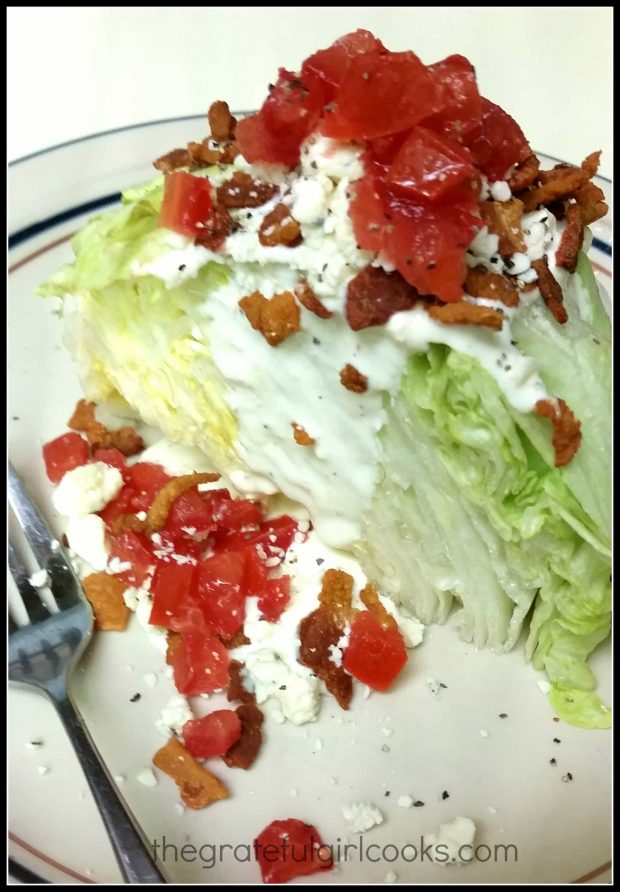
Enjoy the crunch as you cut through the chilled lettuce wedge!

BLT Wedge Salad on plate with fork.

I really hope you try and enjoy this restaurant style BLT Wedge Salad. It’s cold, crisp, and DELICIOUS! Have a wonderful day, friends, and come back again soon.

Looking For More SALAD Recipes?

You can find all of my recipes in the Recipe Index, located at the top of the page. I have LOTS of delicious salad recipes, including:


Interested In More Recipes?

Thank you for visiting this website. I appreciate you using some of your valuable time to do soIf you’re interested, I publish a newsletter 2 times per month (1st and 15th) with all the latest recipes, and other fun info. I would be honored to have you join our growing list of subscribers, so you never miss a great recipe!
There is a Newsletter subscription box on the top right side (or bottom) of each blog post, depending on the device you use, where you can easily submit your e-mail address (only) to be included in my mailing list.

You Can Also Find Me On Social Media:
Facebook page: The Grateful Girl Cooks!
Pinterest: The Grateful Girl Cooks!
Instagram: jbatthegratefulgirlcooks

Have a GREAT day!

Author's signature


Recipe Adapted From: http://pattycakescooking.blogspot.com.au/2012/01/mortons-steak-house-iceberg-blue-cheese.html

↓↓ PRINTABLE RECIPE BELOW ↓↓

0 from 0 votes
BLT Wedge Salad
Prep Time
15 mins
Cook Time
0 mins
Total Time
15 mins
 

Classic wedge salad with bacon, iceberg lettuce, blue cheese, and chopped tomatoes drizzled with a homemade creamy blue cheese dressing.

Category: Salad
Cuisine: American
Keyword: BLT wedge salad
Servings: 4 servings
Calories Per Serving: 605 kcal
Author: JB @ The Grateful Girl Cooks!
Ingredients
For the Sauce:
  • 1 cup real mayonnaise
  • 1/2 cup , plus 1 Tablespoon sour cream
  • 2 Tablespoons buttermilk (more if needed, for desired consistency)
  • 1/4 teaspoon Worcestershire sauce
  • 3/4 teaspoon minced garlic
  • 1/4 teaspoon seasoning salt
  • Salt and pepper (to taste)
  • 1/2 cup crumbled blue cheese
For salad:
  • 1 head iceberg lettuce (very cold)
  • 6 slices bacon , cooked crisp and crumbled
  • 1-2 Roma tomatoes , chopped and de-seeded as much as possible
Instructions
  1. Make the sauce several hours before assembling salad. Whisk the mayonnaise and sour cream together in a medium sized bowl. Add the buttermilk, Worcestershire sauce, garlic, and seasoning salt to this mixture. Mix well to combine. Season the dressing with salt and pepper. Gently fold in the blue cheese crumbles and stir to combine. Cover with plastic wrap and refrigerate for several hours (or even better- overnight!) until ready to serve.
  2. When ready to serve, take completely chilled lettuce out of refrigerator. Pull off any discolored outer leaves. Remove core by hitting the lettuce (core side down) onto kitchen counter to loosen up the core. Remove the core, and discard.
  3. Slice the lettuce into 4 wedges, slicing from the top of the lettuce to the bottom. Place a completely cold lettuce wedge onto each serving plate. Spoon the dressing over the top of the wedge, and allow the dressing to overflow and run down the side.
  4. Sprinkle the top of the wedge with crumbled bacon bits, chopped tomatoes, and additional blue cheese crumbles. Serve and enjoy!
Recipe Notes

The key to this salad is having the lettuce wedges be extremely COLD. You can cut the lettuce wedges and then refrigerate them for several hours, if desired. I even put our lettuce wedges in our freezer for 10 minutes right before serving, to get them even colder.

Nutrition Facts
BLT Wedge Salad
Amount Per Serving (1 wedge)
Calories 605 Calories from Fat 540
% Daily Value*
Fat 60g92%
Saturated Fat 14g88%
Cholesterol 58mg19%
Sodium 980mg43%
Potassium 356mg10%
Carbohydrates 6g2%
Fiber 1g4%
Sugar 4g4%
Protein 9g18%
Vitamin A 970IU19%
Vitamin C 5.9mg7%
Calcium 126mg13%
Iron 0.9mg5%
* Percent Daily Values are based on a 2000 calorie diet.

Here’s one more to pin on your Pinterest boards!Classic BLT wedge salad with bacon, iceberg lettuce, crumbled blue cheese, and chopped tomatoes, topped with a thick, creamy, homemade blue cheese dressing.

Save

Save

Butternut Squash Soup with Bacon

Butternut Squash Soup with Bacon is creamy, thick, and absolutely DELICIOUS! Satisfy even the pickiest of eaters with a bowl of this soup on a cold day!Butternut Squash Soup with Bacon is creamy, thick, and absolutely DELICIOUS! Satisfy even the pickiest of eaters with a bowl of this soup on a cold day!

Well, let’s just start this post by saying that those two butternut squash I bought at the Farmer’s Market never knew what hit ’em. The Butternut Squash Soup With Bacon I made with them was truly outstanding! I knew I wanted to try making butternut squash soup, and found a recipe from Food & Wine that called for using pancetta, but I went for something we always seems to have around the house… BACON.

So, let me first start by telling you I have NEVER, EVER cooked butternut squash before, in the 37 years I have been married. Now that I got that off my chest, let me tell you something… this will not be the last time, either! This soup was amazing… my husband and I even had leftovers for lunch today, and it’s still tastes just as good as it did a couple of nights ago when I first made it.

The butternut squash soup is filling, incredibly delicious (especially with the bacon crumbles on top!), and the soup itself is thick and creamy. Seriously orange colored (ha ha) and seriously GOOD.  I hope you will give this soup a try… I think you’re gonna love it!

Scroll Down For A Printable Recipe Card At The Bottom Of The Page

Prepare The Butternut Squash

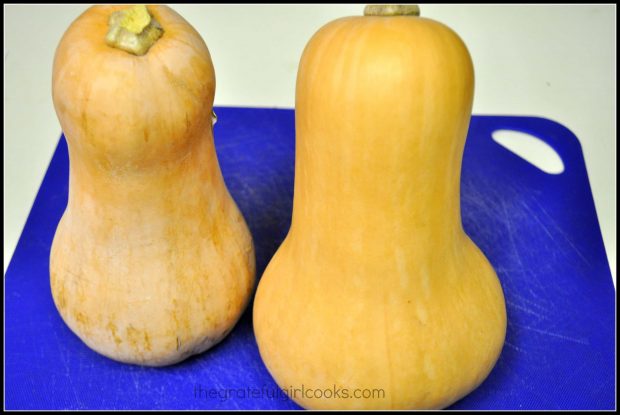
Behold… the humble butternut squash… not too lovely in appearance, but boy, oh boy…it sure makes a GREAT tasting soup!

Butternut squash before baking them, to make soup.

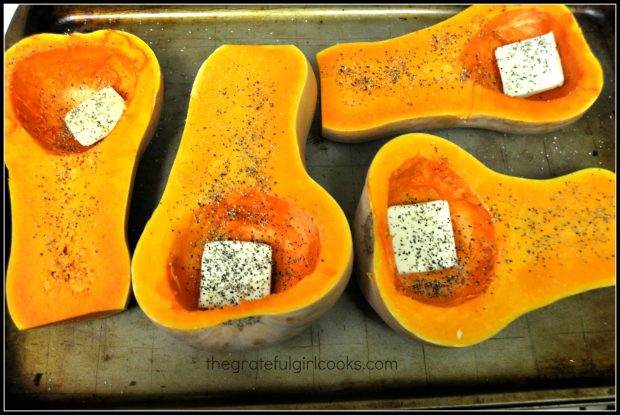
Split the squash in half lengthwise, scoop out the seeds, add butter and salt/pepper, and into the oven they go to bake until tender

Butternut squash are halved, seeded, and butter, salt and pepper added before baking.

Here are the squash right out of the oven… that melted butter will also go into the soup. Yes, please!

Buttermilk squash are baked, and ready to use for soup!

Preparing The Butternut Squash Soup

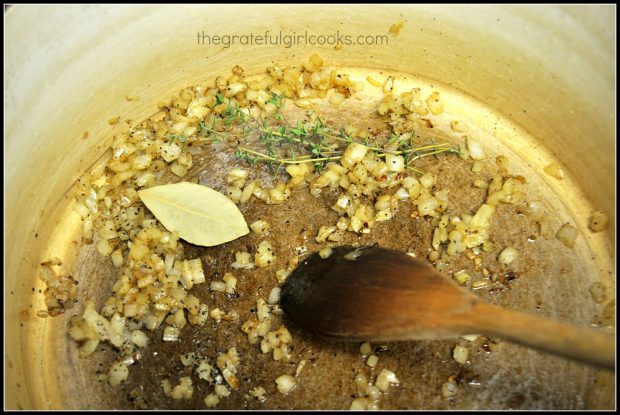
Cook chopped onion in a bit of bacon grease in a heavy bottomed pan, then add thyme sprigs and a bay leaf. Building flavor into butternut squash soup is a GOOD thing!

Onion, thyme, and bay leaf are cooked to season butternut squash soup.

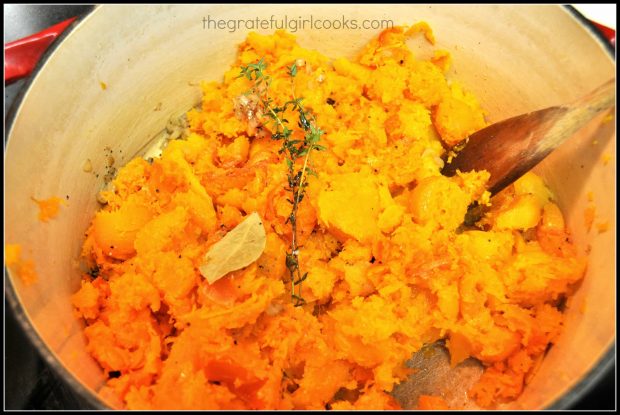
Scoop the cooked squash out of the peel and and add it to a large stockpot or Dutch oven. 

Baked butternut squash is scooped out of skin and added to soup pot.

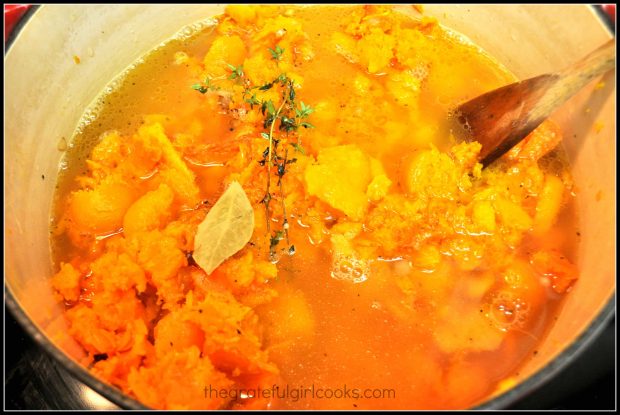
Now you will add chicken stock to the pan. Bring this mixture to a boil, then reduce the heat and cook the butternut squash soup for 15 additional minutes.

Chicken stock is added to butternut squash soup in pot.

Time To Purée The Soup

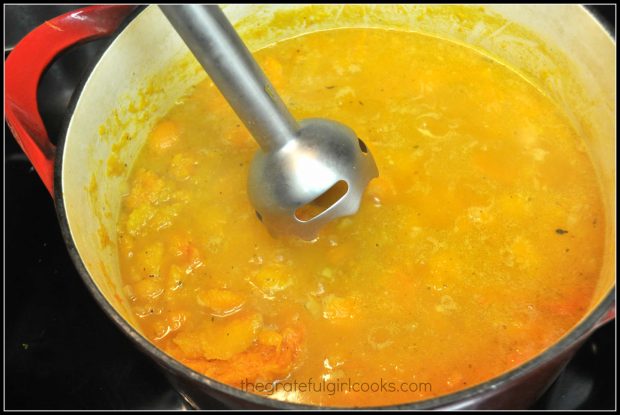
Okay… now it’s time to blend the soup to make it nice, thick and creamy!  NOTE: My Mom gave me an immersion blender. You can use one of those OR blend the soup in batches (in blender or a food processor), till smooth and creamy. Don’t forget to remove the thyme and bay leaves before blending!

Butternut squash soup is blended with an immersion blender.

The butternut squash soup is all blended together. Stir in the whipping cream to the creamy soup. See how thick and smooth it is? Now it’s time to ladle it up into serving bowls.

Thick and creamy butternut squash soup.

Time To Serve The Butternut Squash Soup With Bacon

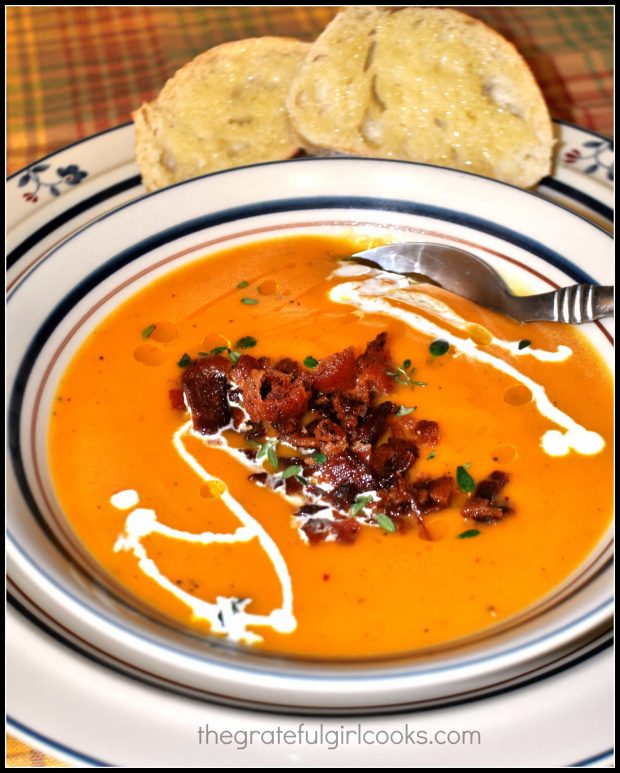
To serve, place bacon crumbles on top of each portion of soup. Drizzle with whipping cream, a bit of olive oil, and some extra thyme leaves (if desired). Grab a spoon, butter some warm bread, and enjoy this butternut squash soup with bacon! It is lip-smackin’ good!

Butternut Squash Soup with Bacon is served, with bread on the side!

I really hope you will try this delicious soup, and as always, my hope is you enjoy sharing this delicious meal with those you love!

Looking For More SOUP Recipes?

You can find ALL of my recipes in the Recipe Index, which is located at the top of the page. I have LOTS of yummy soup recipes you’re gonna enjoy, including:

Interested In More Recipes?

Thank you for visiting this website. I appreciate you using some of your valuable time to do soIf you’re interested, I publish a newsletter 2 times per month (1st and 15th) with all the latest recipes, and other fun info. I would be honored to have you join our growing list of subscribers, so you never miss a great recipe!
There is a Newsletter subscription box on the top right side (or bottom) of each blog post, depending on the device you use, where you can easily submit your e-mail address (only) to be included in my mailing list.

You Can Also Find Me On Social Media:
Facebook page: The Grateful Girl Cooks!
Pinterest: The Grateful Girl Cooks!
Instagram: jbatthegratefulgirlcooks

Author's signatureRecipe Adapted From: http://www.foodandwine.com/recipes/butternut-squash-soup-with-crisp-pancetta

↓↓ PRINTABLE RECIPE BELOW ↓↓

0 from 0 votes
Butternut Squash Soup with Bacon
Prep Time
1 hr 10 mins
Cook Time
15 mins
Total Time
1 hr 25 mins
 

Creamy, thick, and delicious, this butternut squash soup with bacon will satisfy even the pickiest of taste buds on a cold day!

Category: Soup
Cuisine: American
Keyword: butternut squash soup
Servings: 8 servings
Calories Per Serving: 269 kcal
Author: JB @ The Grateful Girl Cooks!
Ingredients
  • 2 medium butternut squash (about 3 pounds)
  • 3 Tablespoons butter , cut into 4 slices
  • Salt and Pepper (to season)
  • 4 slices bacon , cooked crisp, then crumbled (Reserve bacon drippings in pan)
  • 2 Tablespoons bacon drippings
  • 1/2 large brown onion , chopped finely
  • 6 fresh thyme sprigs , divided
  • 1 bay leaf (found in spice section, or Mexican food section in bags)
  • 5-6 cups chicken stock (or low-sodium broth)
  • 2 Tablespoons heavy whipping cream , divided
  • olive oil (for drizzling as garnish), optional
Instructions
  1. Preheat oven to 400 degrees. Carefully slice squash in half, lengthwise; scoop out the seeds. Put 4 squash halves cut side up, on a large cookie sheet (with edges). Put one slice of butter into each hole (where the seeds were). Season with salt and pepper. Roast butternut squash for 50-60 minutes at 400 degrees (or until tender). When tender, remove from oven. Let squash cool until it is cool enough to scoop all the squash out of the skins into a large bowl.

  2. Cook bacon in a medium skillet until very crisp. Remove bacon from pan; drain off bacon grease with the exception of 2 Tablespoons (and any little brown bits remaining in the skillet), which you leave in the skillet. Crumble bacon pieces, and set aside for garnishing soup before serving.

  3. Add chopped onion to bacon grease in skillet; cook until softened (about 5 minutes). Transfer onions and any remaining bacon grease from the skillet into a large, heavy stockpot. Stir in cooked squash, chicken stock (add 5 cups of chicken stock at first), 3 thyme sprigs (whole), and the bay leaf. Bring mixture to a boil over high heat; stir frequently. Once mixture comes to a boil, reduce heat and simmer for 15 minutes, stirring occasionally.

  4. After 15 minutes, remove thyme sprigs and bay leaf. Discard. Using an immersion blender, blend soup until thick and creamy. If not using immersion blender, transfer soup in batches to a food processor or blender, and blend until smooth (about a minute per batch), then return soup to stockpot. If you want soup to be thinner, add an additional cup of chicken stock and stir to combine. Stir 1 Tablespoon whipping cream into soup; season with salt and pepper, to taste.

  5. Reheat soup, if necessary. Ladle soup into serving bowls. To serve, place some of the crumbled bacon onto the top middle of the soup. Drizzle a tiny bit of whipping cream onto top, then drizzle with a tiny bit of olive oil. Garnish with thyme leaves. Serve, and enjoy!

Recipe Notes

The prep time includes the time for roasting the squash. Cook the bacon, onions, etc. while squash is in oven to reduce overall time.

Nutrition Facts
Butternut Squash Soup with Bacon

Amount Per Serving (1 serving)
Calories 269 Calories from Fat 135
% Daily Value*
Fat 15g23%
Saturated Fat 6g38%
Cholesterol 31mg10%
Sodium 578mg25%
Potassium 853mg24%
Carbohydrates 28g9%
Fiber 3g13%
Sugar 6g7%
Protein 7g14%
Vitamin A 20155IU403%
Vitamin C 41.4mg50%
Calcium 103mg10%
Iron 1.8mg10%
* Percent Daily Values are based on a 2000 calorie diet.

Here’s one more to pin on your Pinterest boards!Butternut Squash Soup with Bacon is creamy, thick, and absolutely DELICIOUS! Satisfy even the pickiest of eaters with a bowl of this soup on a cold day!


Save

Save

Save