Category: Doughnuts/Pastries

Citrus Cannoli

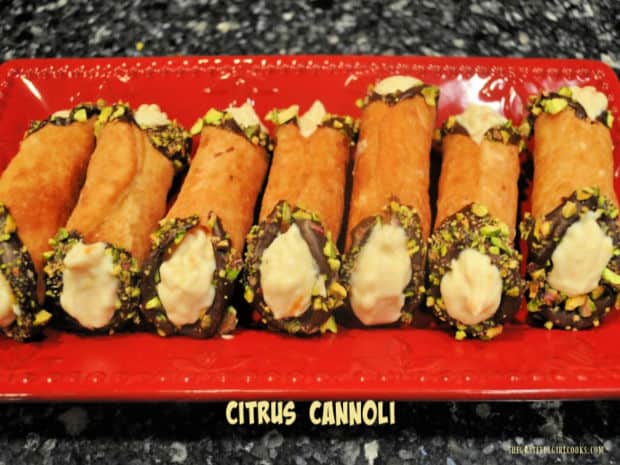
Make about 15 (or more) delicious Citrus Cannoli, with sweetened orange ricotta filling, and decorated with chocolate and chopped pistachios!

Do you enjoy cannoli? My husband and I sure do! We have a coffee house very close to us that serves cannoli, and we have been known to drive there, just for the cannoli! A few years back while on a cruise up the eastern coast of the U.S., we spent a day in Boston.

We enjoyed doing the Freedom Trail walk, seeing historic sites, such as The Boston Commons, and Paul Revere’s home. We also saw the Old North Church and the “Cheers” bar from the old TV show. Our day also included tracking down a famous cannoli shop in the north end of Boston, to bring back some cannoli onto the ship. YUM!

A few years ago, a dear friend of ours who is a great Italian cook, posted a recipe she uses for homemade cannoli. After adapting the recipe slightly for our tastes and preferences, I made these delicious citrus cannoli. YUM!

The recipe, as written, will yield about 15-18 delicious cannoli. Cannoli are always best eaten the same day you make them, so share them!. I’ve shared them with quite a few of our neighbors!

Making citrus cannoli takes a bit of time and prep, but the finished treats are worth every minute! They’re DELICIOUS! Here’s how to make them:

Scroll Down For A Printable Recipe Card At The Bottom Of The Page

Make The Citrus Ricotta Filling For the Cannoli

Place ricotta cheese in a wire mesh strainer over a bowl, and let the excess liquid drain out. Discard liquid, then place the drained ricotta in a blender.

Cover and blend the ricotta until it becomes smooth. You can also use an electric mixer to mix the ricotta until smooth, if that is more convenient. Pour the smooth ricotta into a large bowl.

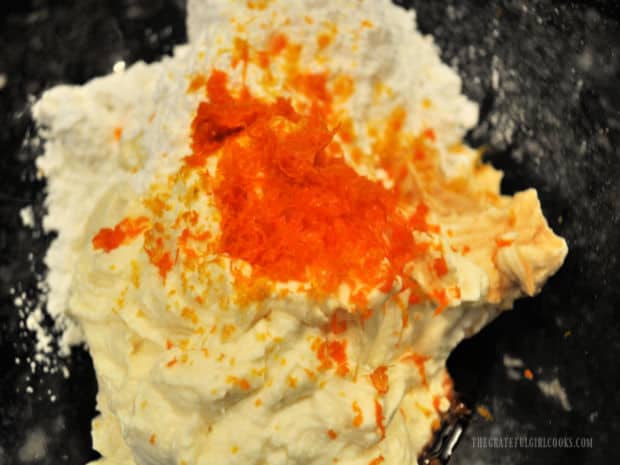
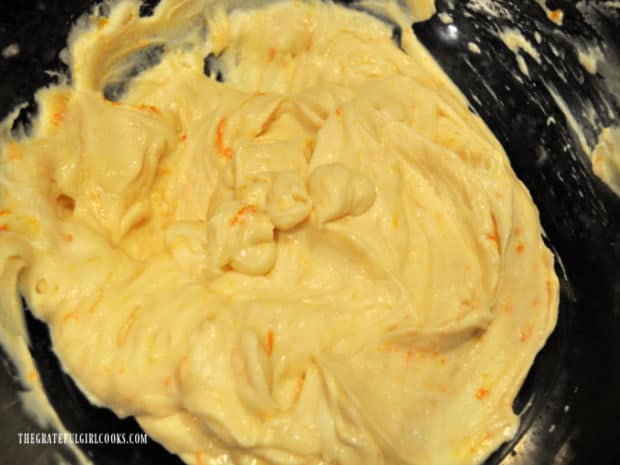
Gently FOLD in un-sifted powdered sugar, vanilla extract, and finely grated orange zest. Continue to gently fold these ingredients into the ricotta until completely incorporated.

Cover the bowl, and keep the citrus ricotta filling refrigerated and well chilled until you’re ready to fill the cannoli shells.

Powdered sugar, vanilla and orange zest is added to drained, blended ricotta cheese for cannoli filling.Citrus ricotta cannoli filling is refrigerated after being fully combined.

Make The Dough For The Cannoli Shells

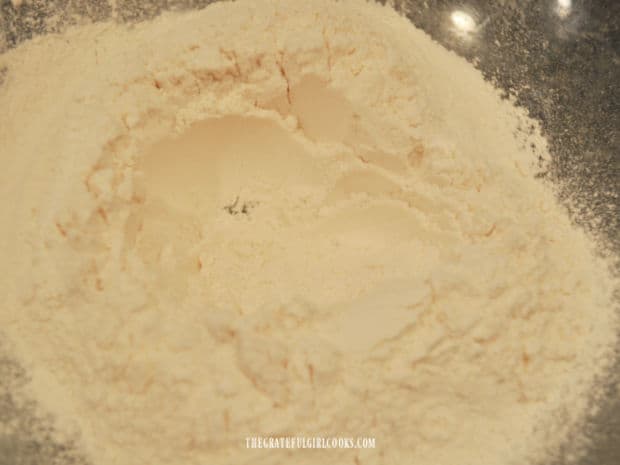
While the ricotta mixture chills in the refrigerator, make the dough for the cannoli shells. Sift flour, salt and sugar together in a large mixing bowl. Use your fingers to create a “well” in the center of the mixture.

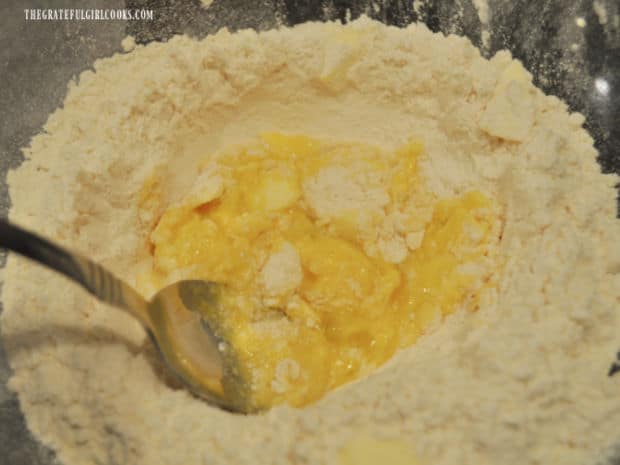
Add a slightly beaten egg and cold butter (cut in pieces) to the center well. Stir the egg and butter into the flour, from the outside in, to incorporate them into and moisten the flour mixture.

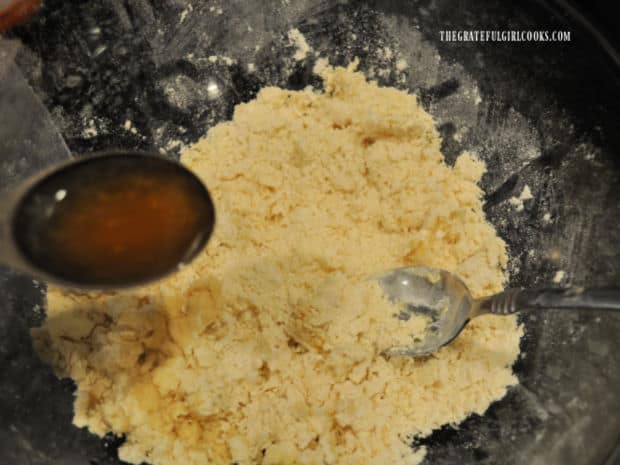
Add Marsala wine, one Tablespoonful at a time, stirring only until the dough mixture clings together.

Flour, salt, and granulated sugar are sifted into a bowl, and a "well" is created in the middle.An egg and cold pieces of butter are added to the flour mixture in a large bowl to make dough.Marsala wine is added, 1 Tablespoon at a time to the cannoli dough, until dough clings together.

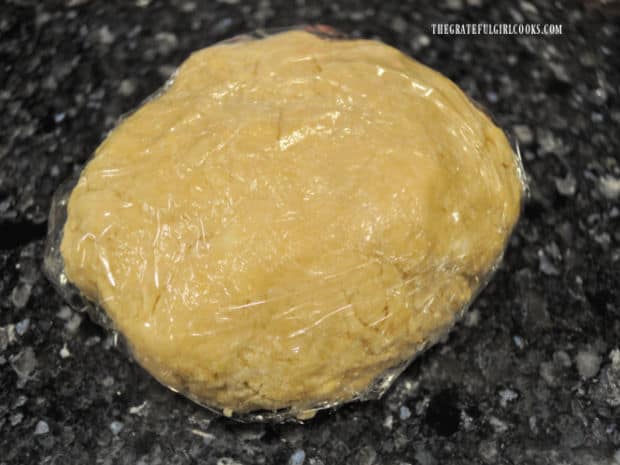
Use your hands to shape the dough into a firm round ball, then wrap the dough tightly with plastic wrap. Let the dough rest at room temperature for 15 minutes before unwrapping.

Cannoli dough is formed into a firm dough ball, wrapped and rests for 15 minutes before shaping.

Cut Out And Shape the Cannoli Shells For Frying

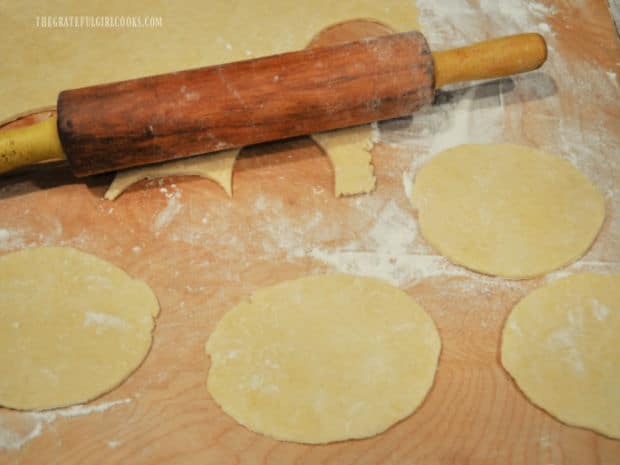
Unwrap the dough, and place it on a lightly floured work surface. Using a rolling pin, roll the dough out until it is about ¼” thick. Use a  3½” round biscuit or cookie cutter to create circles out of the dough (each circle is 3½” wide).

Use the rolling pin to roll out each circle just a bit more into a slightly oval shape. You should end up with approx. 15-18 dough circles (and sometimes more).

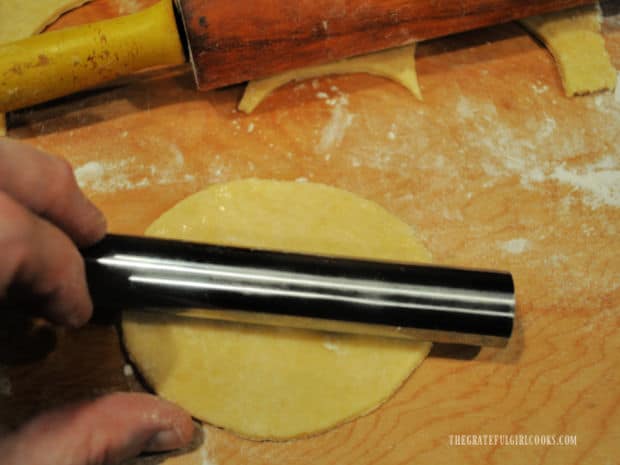
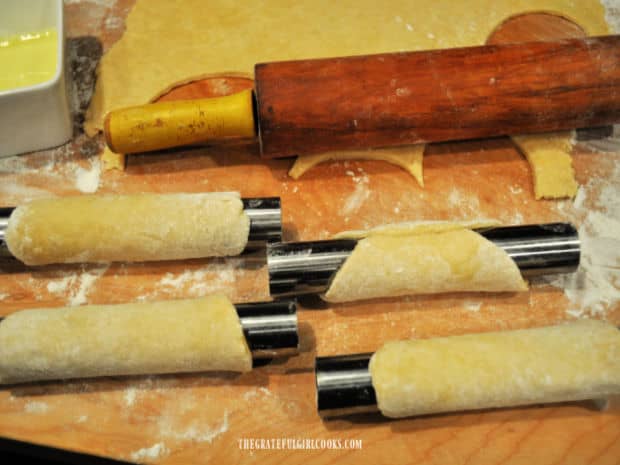
Lay a metal cannoli tube (bought a set of 4 on Amazon for about $7) across the middle of a dough circle. Wrap the dough around the cannoli tube, and seal the edges together with a slightly beaten egg white (acts like glue), to hold the two seams together. Press the seam together, to ensure the cannoli shells seal properly and hold together when frying.

Use your fingers to slightly flare the edges (on both ends) of the dough out a little bit before frying the cannoli shells.

Dough for cannoli is rolled, then cut into circles before they are molded onto tubes and fried.One of the dough circles is wrapped around a metal cannoli tube.Four cannoli tubes are wrapped and seams are sealed with egg white before frying.

Cook The Cannoli Shells

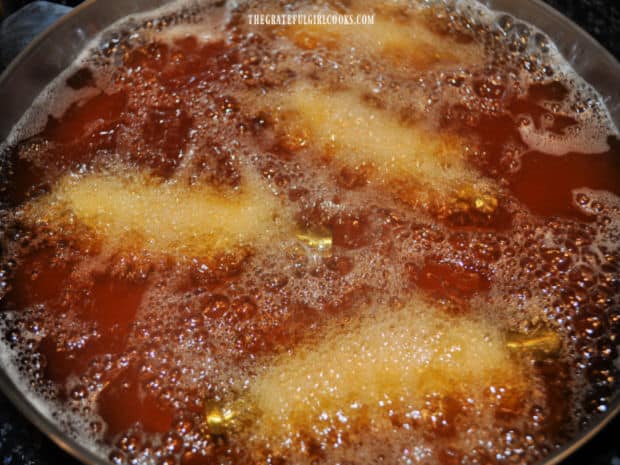
Heat oil in a large skillet (or electric skillet) until it reaches 350°F.  Fry 3-4 cannoli shells at a time in the hot oil for ONE MINUTE, turning until they become golden in color on all sides.

NOTE: If using a smaller skillet, only cook 2-3 at a time so the cannoli don’t touch while cooking.

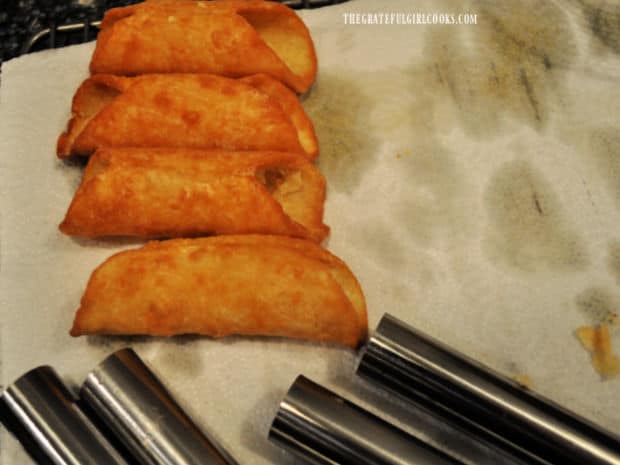
Use tongs to carefully remove the cannoli shells from the hot oil and transfer them to paper towels to drain. Allow the fried cannoli shells to cool for 5-8 seconds, then carefully slide them off the metal tubes onto paper towels.

Next Batch!

Wrap the next batch of cannoli shells back onto the metal forms, making sure to seal them well. Re-check the temperature of the oil to make sure it is 350°F. before adding the cannoli shells..

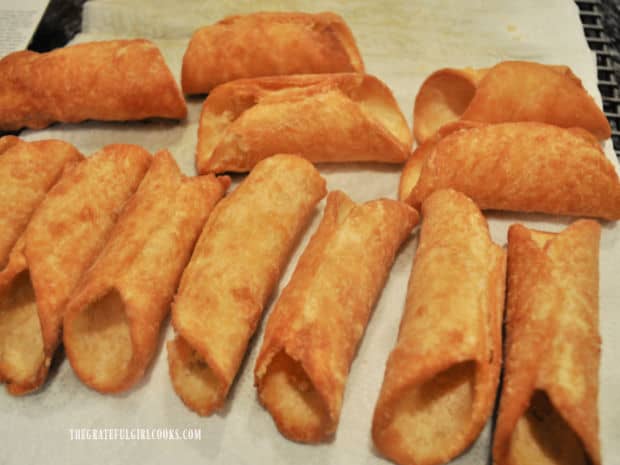
Repeat the cooking process until all the cannoli dough has been used. Let the cannoli shells cool completely after frying, before decorating and filling the shells.

NOTE: If you want to FREEZE some of the shells for later use, wrap the cooled shells carefully, then store them in the freezer in an airtight container. When you are ready to use them, thaw and then decorate shells and fill with cold ricotta mixture before serving.

3-4 cannoli at a time are fried for 1 minute in very hot oil until golden brown in color.Metal cannoli tubes are removed from fried shells, cooling and draining on paper towels.Some of the fried cannoli shells, cooling on paper towels before decorating and filling.

Decorating The Citrus Cannoli Shells

Decorating the cooled cannoli shells is optional, but it really gives them a wonderful look! Melt semi sweet chocolate chips in a double boiler (or in the microwave) until completely smooth.

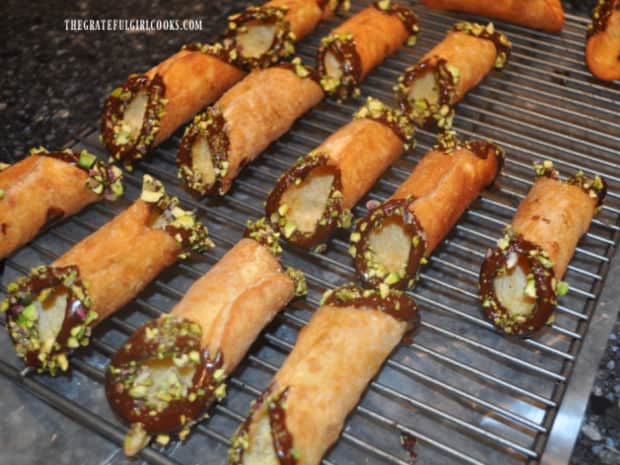
Lightly dip the ends (both sides) of the cannoli shells into melted chocolate, then immediately sprinkle the chocolate with finely chopped pistachios. You can also sift powdered sugar onto the shells, if desired.

Place the shells on a wire rack after decorating, and let them cool completely at room temperature until the chocolate has hardened. TIP: I find it helpful to put wax paper, foil, or parchment paper UNDER the wire rack to catch any drips, etc..

Both ends of cannoli shells are dipped in melted chocolate and sprinkled with chopped pistachios.

Serve The Citrus Cannoli

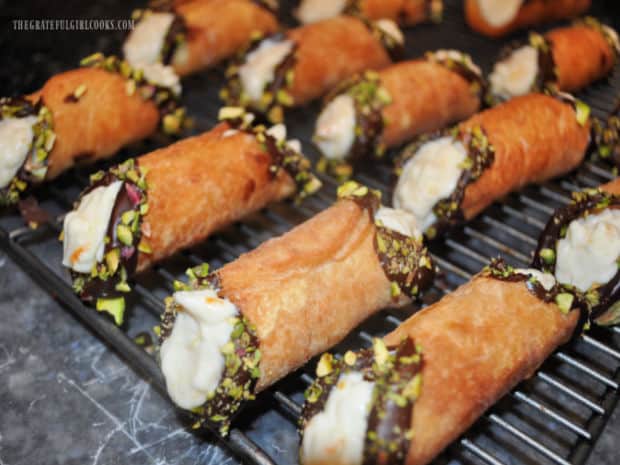
Remove the chilled citrus ricotta filling from the refrigerator. Use a pastry bag to pipe the filling into each of the shells. I pipe it into both ends of the cannoli shell.

If you don’t have a pastry bag, you can add the citrus filling to a zip-loc bag. Snip a corner off a bottom edge to pipe it, OR you can carefully fill the shells using a small spoon.

NOTE: Citrus cannoli are at their very best when eaten on the same day they are made. The shells are much crisper that way, the way you want them to be.

Yes, you can refrigerate leftovers, but honestly, the shells will soften up when filled and refrigerated, so it’s not recommended.

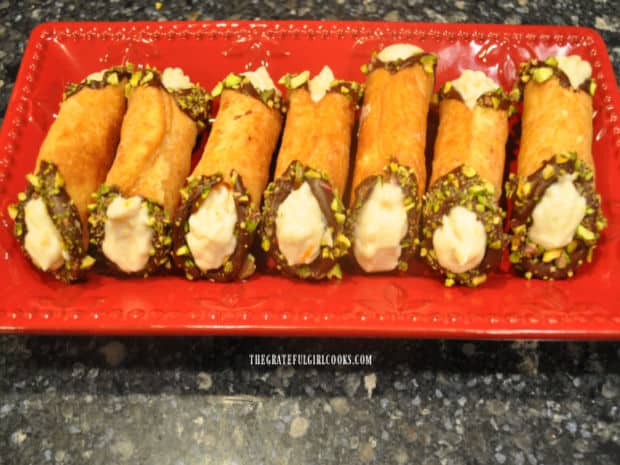
Cold citrus ricotta filling is piped into the decorated cannoli shells before serving.A red serving platter holds seven citrus cannoli that are ready to be eaten!

I hope you have the chance to try making this recipe for yummy citrus cannoli. They’re really good! Thanks for stopping by, and I invite you to come back soon for more family-friendly recipes. Take care, may God bless you, and have a GREAT day.

Looking For More DESSERT Recipes?

You can find ALL of my recipes in the Recipe Index, which is located at the top of the page. I have lots of yummy dessert recipes for you to enjoy, including:

Want More Recipes? Get My FREE Newsletter!

I publish a newsletter 2 times per month (1st and 15th) with lots of recipes, tips, etc..
Would you like to join our growing list of subscribers?

There is a Newsletter subscription box on the top right (or bottom) of each blog post, depending on the device you use.
You can submit your e-mail address there, to be added to my mailing list.

Find Me On Social Media:

Facebook page: The Grateful Girl Cooks!
Pinterest:
The Grateful Girl Cooks!
Instagram:
jbatthegratefulgirlcooks

Author's signature

Recipe adapted from our friend, Diane Mueller

↓↓ PRINTABLE RECIPE BELOW ↓↓

0 from 0 votes
Citrus Cannoli
Prep Time
40 mins
Cook Time
5 mins
Total Time
45 mins
 

Make about 15 (or more) delicious Citrus Cannoli, with sweetened orange ricotta filling, and decorated with chocolate and chopped pistachios!

Category: Dessert
Cuisine: Italian
Keyword: citrus cannolis
Servings: 15
Calories Per Serving: 306 kcal
Author: JB @ The Grateful Girl Cooks!
Ingredients
For Citrus Ricotta Filling:
  • 4 cups ricotta cheese drained
  • cups un-sifted powdered sugar
  • 4 teaspoons vanilla extract
  • ½ cup finely grated orange zest orange peel, not the white pith
For Cannoli Shells:
  • cup all purpose flour
  • ½ teaspoon salt
  • 2 teaspoons granulated sugar
  • 1 large egg slightly beaten
  • 2 Tablespoons COLD butter cut in small pieces
  • ¼ cup Marsala wine
  • 1 large egg white slightly beaten
  • OIL, for frying 1" deep in skillet used
For Decorating Cannoli Shells (optional, but good):
  • ½ cup semi sweet chocolate chips
  • ½ cup chopped pistachios
Instructions
  1. Place ricotta in a wire mesh strainer over a bowl. Let liquid drain (and discard). Place ricotta in blender. Cover and blend until smooth (can use electric mixer). Put ricotta in a large bowl. Gently FOLD in powdered sugar (un-sifted), vanilla, and orange zest. Continue to fold in, until fully incorporated. Cover bowl; refrigerate ricotta filling until ready to fill cannoli shells.

  2. To make cannoli shell dough, sift flour, salt and sugar into large bowl. Create a "well" in the center. Add slightly beaten egg and cold butter (cut in pieces) to the "well". Stir egg/butter pieces into flour, from the outside in, to incorporate them into flour mixture. Add Marsala wine, one Tablespoonful at a time, stirring only until dough clings together. Use your hands to shape dough into a firm round ball. Wrap dough tightly with plastic wrap. Let dough rest at room temperature for 15 minutes before unwrapping.

  3. Unwrap dough; place it on lightly floured work surface. Roll dough out with rolling pin until about ¼" thick. Use a  3½" round biscuit or cookie cutter to cut out circles of dough. Roll each circle just a bit more into a slightly oval shape. You should have approx. 15-18 dough circles (sometimes more).

  4. Lay metal cannoli tube across middle of the dough circle. Wrap dough around metal tube; seal edges together well, brushing them with lightly beaten egg white, to hold seams together; pinch seam together. This is an important step, to ensure cannoli shells seal properly and hold together when frying. Use fingers to slightly flare edges (on both ends) of dough out a bit before frying.

  5. Heat oil (2" deep) in a large skillet (or electric skillet) until it reaches 350°F.  Fry 3-4 cannoli shells at a time for ONE MINUTE, turning as they cook until they become golden in color on all sides. NOTE: If using a smaller skillet, only cook 2-3 at a time so cannoli don't touch while cooking. Use tongs to carefully remove cooked shells from hot oil; transfer to paper towels to drain. Let shells cool for 5-8 seconds, then carefully slide them off (hot) tubes onto paper towels. Re-check oil temp. for each batch to make sure it is at 350°. Repeat cooking process until all dough has been used. Let shells cool completely before decorating and filling. NOTE: If you want to FREEZE some shells for later use, wrap cooled shells carefully; store in freezer in airtight container. When ready to use, thaw and decorate shells; fill with cold ricotta mixture before serving.

  6. To decorate cannoli shells, melt chocolate chips in double boiler (or microwave) until smooth. Lightly dip both ends of shells into melted chocolate; immediately sprinkle chocolate with chopped pistachios. Place shells on a wire rack after decorating; cool at room temp. until chocolate hardens. TIP: I find it helpful to put wax paper, foil, or parchment paper UNDER the wire rack to catch any drips, etc..

  7. Remove cold ricotta filling from refrigerator. Use a pastry bag to pipe filling into cannoli shells (both ends). TIP: No pastry bag? Add ricotta filling to a zip-loc bag. Snip a corner off bottom of bag to pipe it, OR fill shells using a small spoon. NOTE: Citrus cannoli are at their best, eaten the same day they're made. Cannoli shells are crisper that way. Yes, you can refrigerate leftovers, but the shells will soften when filled and refrigerated, so it's not recommended.

Recipe Notes

NOTE: Caloric calculation was based on 1 cannoli out of a total of 15 cannoli being made. It also includes the optional chocolate and pistachio decorations. If made WITHOUT the chocolate and pistachio, each of the 15 cannoli would have a caloric calculation of approx. 248 calories each.
Nutrition Facts
Citrus Cannoli
Amount Per Serving (1 cannoli (decorated))
Calories 306 Calories from Fat 135
% Daily Value*
Fat 15g23%
Saturated Fat 8g50%
Trans Fat 0.1g
Polyunsaturated Fat 1g
Monounsaturated Fat 5g
Cholesterol 50mg17%
Sodium 155mg7%
Potassium 181mg5%
Carbohydrates 31g10%
Fiber 2g8%
Sugar 15g17%
Protein 11g22%
Vitamin A 390IU8%
Vitamin C 5mg6%
Calcium 154mg15%
Iron 2mg11%
* Percent Daily Values are based on a 2000 calorie diet.

Here’s one more to pin on your Pinterest boards!Make about 15 (or more) delicious Citrus Cannoli, with sweetened orange ricotta filling, and decorated with chocolate and chopped pistachios!

Baked Banana Doughnuts

Whip up some Baked Banana Doughnuts, glazed, then topped with chocolate and toasted nuts! Easy to make, delicious, and ready in 25 minutes!

Good morning! Today I want to share a delicious recipe for baked banana doughnuts! Our family enjoyed them at our Easter brunch this past April, and they were a wonderful addition to our “feast”. Banana baked doughnuts have wonderful flavor, and look good, too!. I “prettied them up” a bit by adding chocolate drizzle and toasted nuts to each one, which gave them even better presentation and flavor! A family member was overheard saying they look like “REAL” doughnuts… ha ha!!

These breakfast treats (or snacks) are BAKED, and not FRIED, which makes them even easier to prepare! To make them, you will need to have a doughnut pan with a six doughnut well in it. I got mine years ago online, and it was fairly inexpensive. I’ve used mine many times over the years to make doughnuts, so it was a worthwhile purchase. 

Scroll Down For A Printable Recipe Card At The Bottom Of The Page

Make The Batter For The Doughnuts

Before beginning, remember to preheat your oven to 325°F. It doesn’t take long at all to prepare the batter, so you will want that oven hot and ready to go, when you’re ready to bake the doughnuts. While the oven preheats, make the batter. Lightly spray or grease the doughnut pan, as well.

Whisk together all purpose flour, granulated sugar, cinnamon, baking powder and salt in a large bowl. Once you’ve combined these ingredients, make a “well” in the center of the mix, then set the bowl aside. In a separate bowl, combine mashed banana, buttermilk, a beaten egg, melted (cooled) butter and vanilla extract.

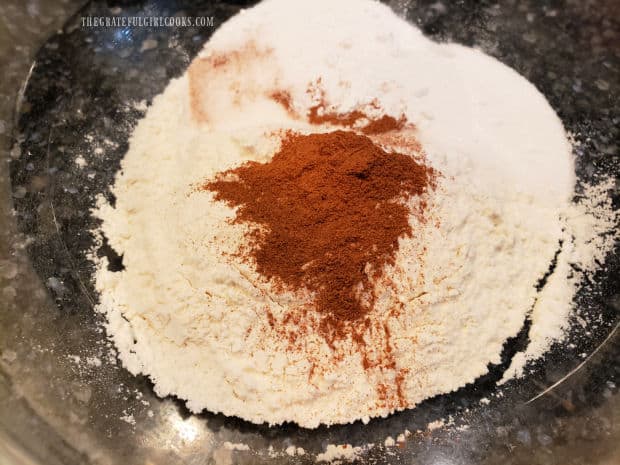
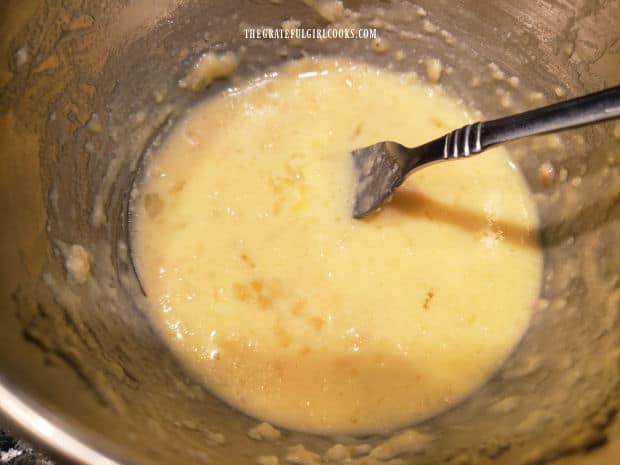
Flour, sugar, baking powder, cinnamon and salt are placed in a medium bowl and combined.Egg, banana, buttermilk, vanilla and melted butter are combined in bowl.

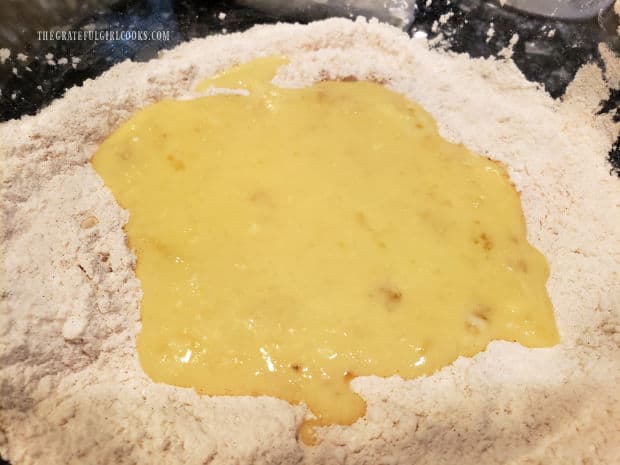
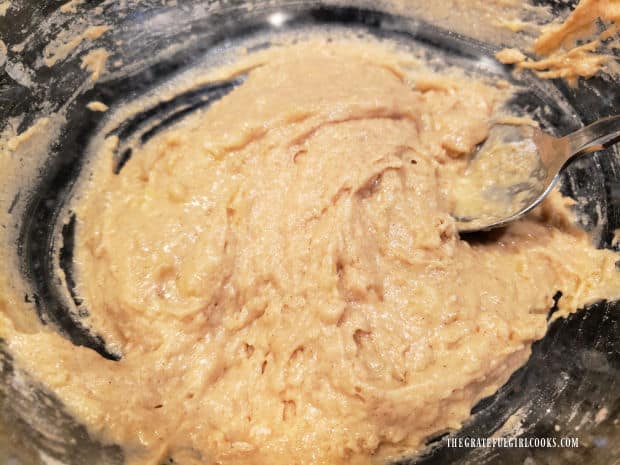
Pour the banana mixture into the well in the middle of the dry ingredients, and then stir until all ingredients are combined. Don’t overmix the batter… only stir until all ingredients have been incorporated into a thick batter.

Egg mixture is poured into a well in the dry ingredients, then combined.Batter for baked banana doughnuts is thoroughly combined and ready to use.

Bake The Doughnuts

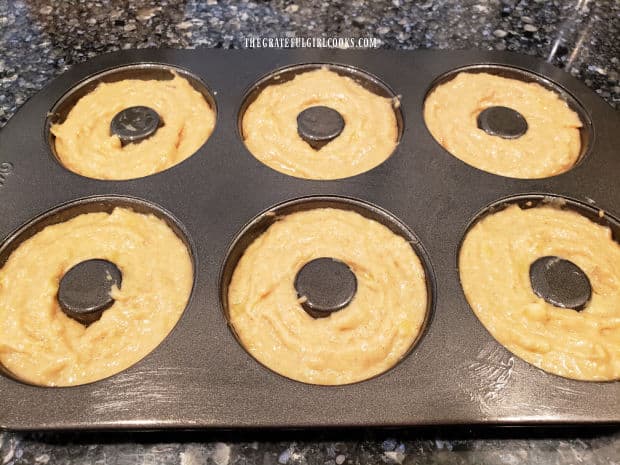
Evenly divide the doughnut batter into your lightly greased doughnut pan. I spoon the batter into each doughnut well, and it is not too messy at all. You will find that the batter will fill each well almost to the top.

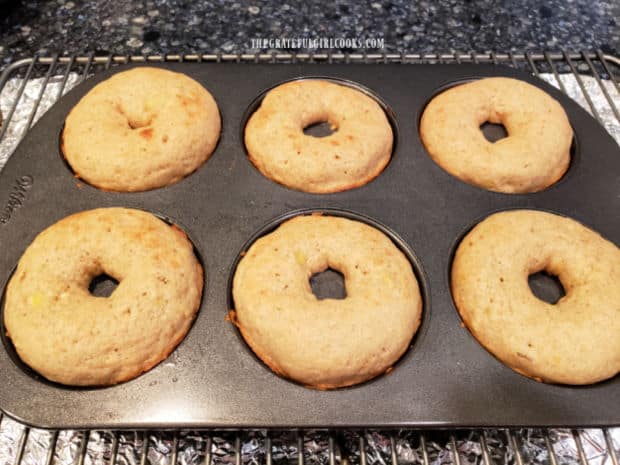
Bake the doughnuts on the middle rack of the oven, at 325°F. for about 10-12 minutes. They will not be overly browned once done baking, but they should be set on top and cooked through. If you gently touch the top of the doughnut, it should spring back lightly.

Transfer the pan to a wire rack to cool slightly before removing the baked banana doughnuts from the pan. Once cooled slightly, place the doughnuts onto the wire rack, and put a sheet of wax paper or aluminum foil UNDER the rack. The foil or wax paper will catch any drips when you glaze the doughnuts later.

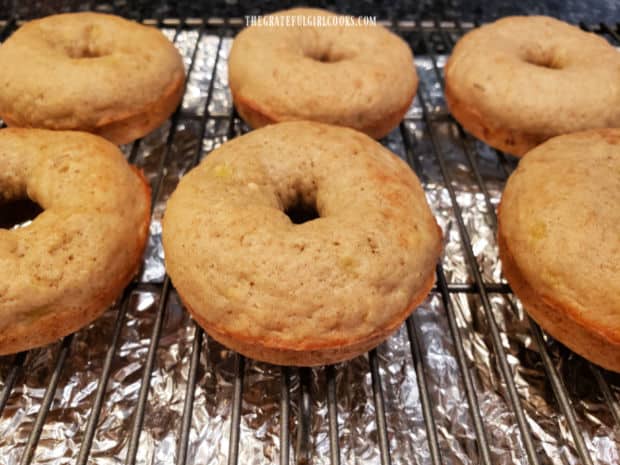
The baked banana doughnut batter is divided evenly into six wells in doughnut pan.After baking, the banana doughnuts cool in the pan on a wire rack before removing.Baked banana doughnuts cooling on a wire rack.

Glaze And Decorate The Doughnuts

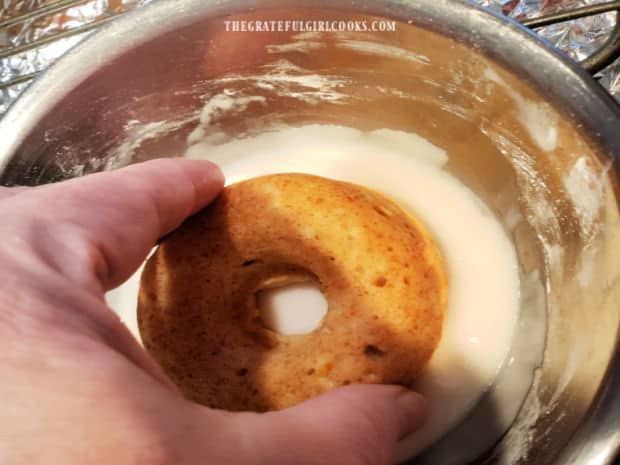
While the baked banana doughnuts cool, make the simple glaze. Stir or whisk together powdered sugar, vanilla extract and milk until the glaze is smooth (no lumps!). Once the doughnuts have cooled to room temperature, dip the top of each doughnut (one at a time) into the glaze.

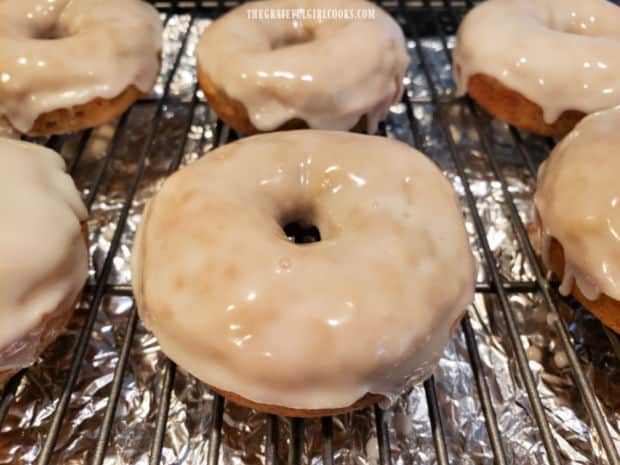
Dip doughnuts enough to cover the top of the doughnut, then quickly flip it over, allowing excess glaze to drip back into the bowl. Set the glazed doughnut back (frosting side UP) onto the wire rack, and repeat this process with the remaining doughnuts. 

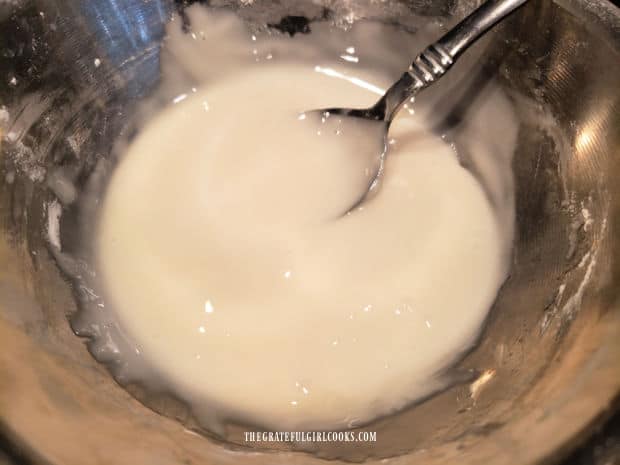
A glaze is made with powdered sugar, milk and vanilla to frost the baked doughnuts.Each doughnut is placed in the glaze to fully coat the top of each one.Six baked banana doughnuts on a wire rack after being glazed.

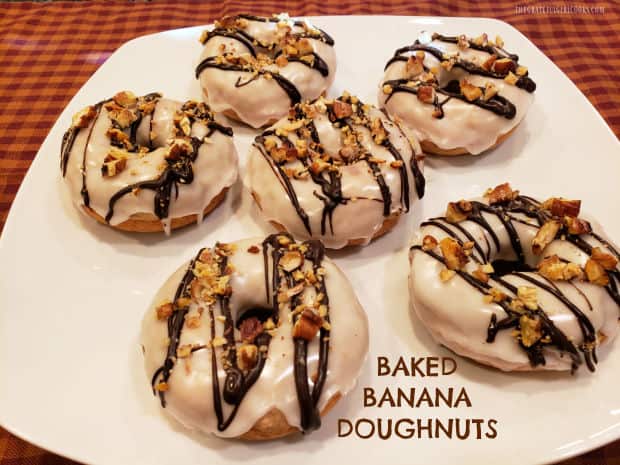
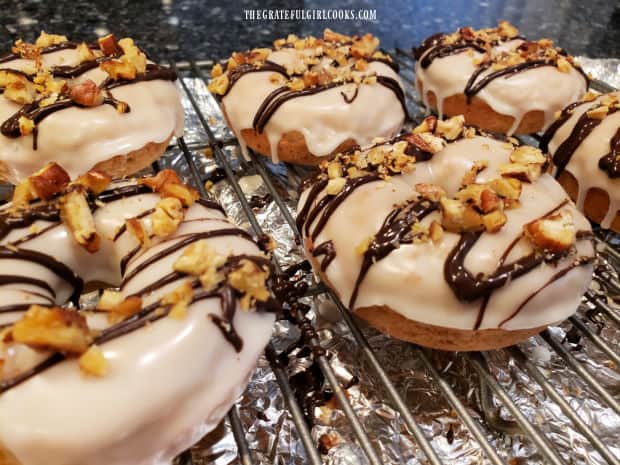
Once the glaze has been applied and has firmed up just a bit… drizzle melted chocolate over each donut, then add the toasted, chopped nuts on top of the chocolate. Lightly press the nuts into the chocolate so they will adhere to the doughnut. Let the toppings firm up before serving.

Chopped toasted nuts and melted chocolate are added to the top of each doughnut.

Serve The Baked Banana Doughnuts!

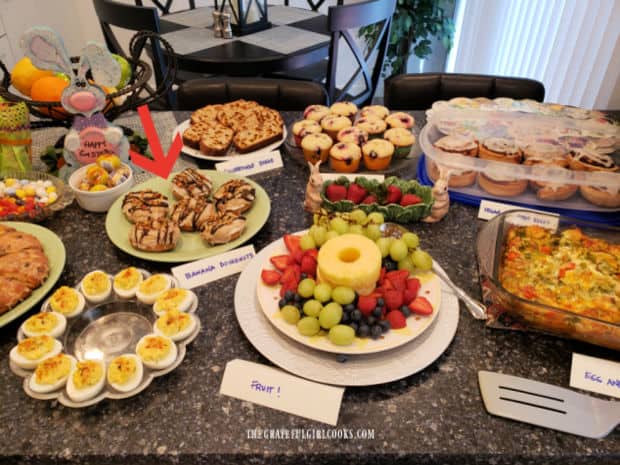
Once the glaze and chocolate toppings have firmed up, the baked banana doughnuts are ready to serve! We served them at our Easter brunch, and they were a hit! In the photo below you can see them (with the red arrow), along with our other choices.

We enjoyed them with a variety of dishes, including creamy deviled eggs, snickerdoodle bread, egg, cheese and veggie breakfast casserole, chocolate chip orange scones, and blueberry lemon muffins!

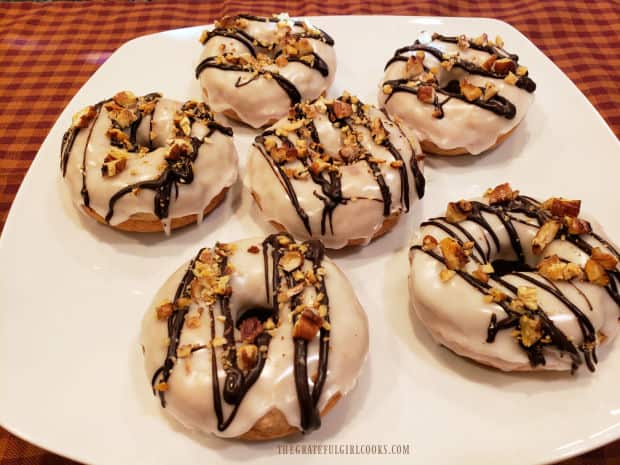
A serving plate with six baked banana doughnuts on it, ready to eat!Easter brunch included the baked banana doughnuts (see red arrow).

I hope you enjoy these yummy baked banana doughnuts! Thank you for stopping by my blog today, and I invite you to come back again for more family friendly recipes. Take care, and have a GREAT day!

Looking for More DOUGHNUT Recipes?

You can find ALL of my recipes in the Recipe Index, located at the top of the page. I have some absolutely delicious doughnut recipes for you to enjoy, including:

Interested In More Recipes?

Thank you for visiting this website. I appreciate you using some of your valuable time to do soIf you’re interested, I publish a newsletter 2 times per month (1st and 15th) with all the latest recipes, and other fun info. I would be honored to have you join our growing list of subscribers, so you never miss a great recipe!
There is a Newsletter subscription box on the top right side (or bottom) of each blog post, depending on the device you use, where you can easily submit your e-mail address (only) to be included in my mailing list.

You Can Also Find Me On Social Media:

Facebook page: The Grateful Girl Cooks!
Pinterest:
The Grateful Girl Cooks!
Instagram:
jbatthegratefulgirlcooks

Author's signature

Recipe adapted from: https://www.imbored-letsgo.com/baked-banana-donuts/

↓↓ PRINTABLE RECIPE BELOW ↓↓

0 from 0 votes
Baked Banana Doughnuts
Prep Time
15 mins
Cook Time
10 mins
Total Time
25 mins
 

Whip up some Baked Banana Doughnuts, glazed, then topped with chocolate and toasted nuts! Easy to make, delicious, and ready in 25 minutes!

Category: Breakfast, Snack
Cuisine: American
Keyword: , doughnuts, baked banana doughnuts, banana donuts
Servings: 6 doughnuts
Calories Per Serving: 307 kcal
Author: JB @ The Grateful Girl Cooks!
Ingredients
  • 1 cup all purpose flour
  • ¼ cup granulated sugar
  • 1 teaspoon baking powder
  • ½ teaspoon salt
  • ½ teaspoon cinnamon
  • 1 banana very ripe, mashed
  • 1 large egg beaten
  • ¼ cup buttermilk
  • 1 teaspoon vanilla extract
  • 1 Tablespoon butter melted
For Glaze:
  • 1 cup powdered sugar
  • 1 Tablespoon milk
  • ½ teaspoon vanilla extract
For Topping:
  • 10 walnuts or pecans lightly toasted, chopped
  • ¼ cup semi-sweet chocolate melted
Instructions
  1. Preheat oven to 325°F. Lightly spray/grease doughnut pan.

  2. Whisk flour, sugar, cinnamon, baking powder and salt in large bowl. Once combined, make a "well" in the center; set bowl aside.

  3. In separate bowl, combine mashed banana, buttermilk, egg, melted butter (cooled) and vanilla. Add this to the flour mixture. Stir to combine ingredients only until incorporated into batter.

  4. Evenly spoon batter into prepared pan, filling each well almost to the top. Bake at 325°F. for 10-12 minutes (on middle rack of oven). Finished doughnuts will be cooked through, and lightly sping back when gently touched on the top. Place pan on wire rack to cool 1-2 minutes, then transfer doughnuts out of pan to wire rack. Let cool completely. Place foil or wax paper UNDER the rack to prepare for glazing doughnuts.

Glaze/Garnish Doughnuts
  1. While doughnuts cool, make glaze. In a small bowl, stir powdered sugar, vanilla and milk until smooth (no lumps!). Once the doughnuts have cooled to room temp., dip top of doughnuts (one at a time) into glaze, to cover top of doughnut. Allow excess glaze to drip back into bowl, then flip doughnut over. Set doughnut, glazed side UP on wire rack. Repeat with remaining doughnuts.

  2. Once glaze has firmed up, drizzle melted chocolate over each donut, then quickly sprinkle with toasted, chopped nuts. Lightly press the nuts into the chocolate so they adhere. Let toppings firm up before serving.

Recipe Notes

NOTE: To toast walnuts/pecans, place them in a skillet and heat on medium heat for 2-3 minutes, stirring occasionally until lightly toasted and aromatic.

Nutrition Facts
Baked Banana Doughnuts
Amount Per Serving (1 doughnut)
Calories 307 Calories from Fat 72
% Daily Value*
Fat 8g12%
Saturated Fat 4g25%
Trans Fat 1g
Polyunsaturated Fat 2g
Monounsaturated Fat 2g
Cholesterol 38mg13%
Sodium 235mg10%
Potassium 248mg7%
Carbohydrates 54g18%
Fiber 2g8%
Sugar 34g38%
Protein 5g10%
Vitamin A 140IU3%
Vitamin C 2mg2%
Calcium 63mg6%
Iron 2mg11%
* Percent Daily Values are based on a 2000 calorie diet.

Here’s one more to pin on your Pinterest boards!Whip up some Baked Banana Doughnuts, glazed, then topped with chocolate and toasted nuts! Easy to make, delicious, and ready in 25 minutes!

Apple Cinnamon Baked Doughnuts

Make 18 delicious apple cinnamon baked doughnuts topped with cinnamon sugar. An easy to make treat for breakfast or snacks for family or friends.

Do you enjoy baked doughnuts? You know, the kind that you don’t have to deep fry in oil? Well we do! Our favorite doughnuts are (truthfully) the deep-“fried” kind you get at a doughnut shop. BUT… after finding our local doughnut shop closed due to the pandemic, I decided to make my own at home. The result was delicious apple cinnamon BAKED doughnuts, made in my cute little doughnut pan!

You will need to have a doughnut pan for this recipe. The little “6 doughnut” one I use was purchased online (Amazon) several years ago very inexpensively. My pan only makes 6 baked doughnuts, so I made 3 batches, since this recipe yields 18 doughnuts. We gave 6 to our son for his birthday, 6 to our other son to devour, and we enjoyed the other 6! They are so easy to make… here’s how:

Scroll Down For A Printable Recipe Card At The Bottom Of The Page

Prepare The Batter

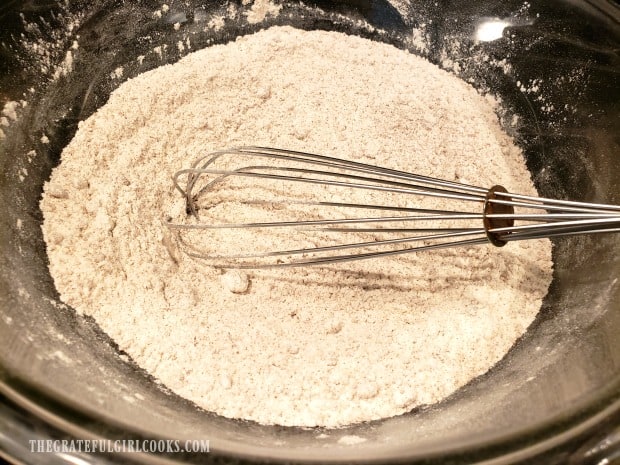
Before making the batter, preheat your oven to 350°F. Prepare the dry ingredients by sifting flour, baking powder, baking soda, and cinnamon into a large bowl. Add the brown sugar, and whisk these ingredients together.

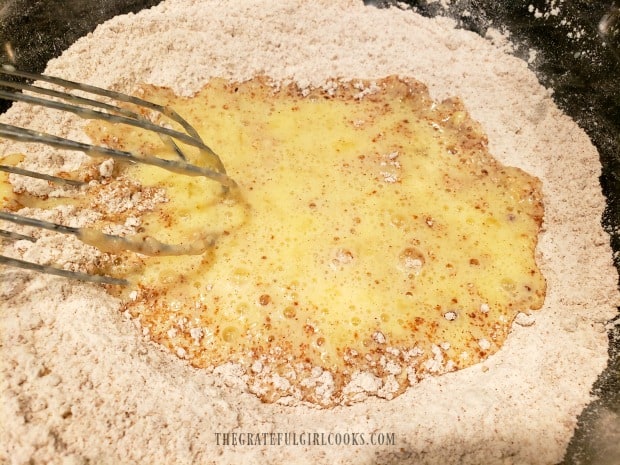
In a separate bowl, whisk together the buttermilk, eggs, melted butter, and vanilla extract until combined. Pour the wet ingredients into the large bowl with the dry ingredients. Whisk or stir well, to fully combine the batter ingredients.

Dry ingredients for doughnuts are whisked together in bowl.The wet ingredients are then whisked into the dry ingredients.

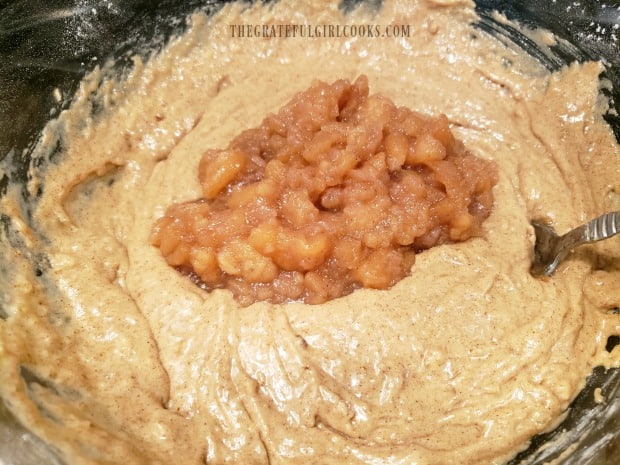
Once the batter has been combined, add the apple pie filling, and stir it in. I was able to use some of my home-canned apple pie filling. This is now the finished batter for the apple cinnamon baked doughnuts.

Apple pie filling is stirred into the batter for the doughnuts.

Bake The Doughnuts

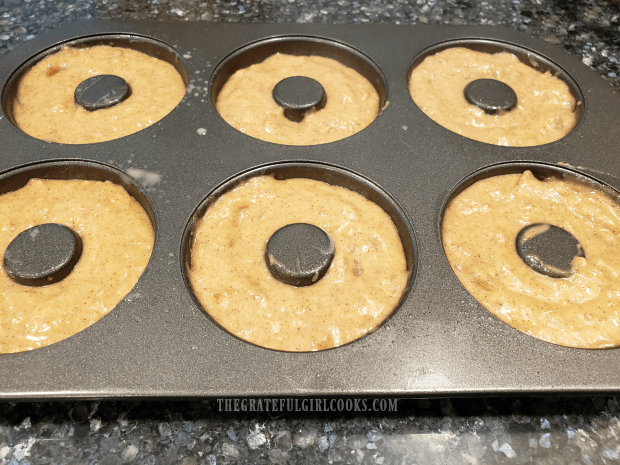
Spoon or pipe the batter into a greased doughnut pan. I used a spoon to fill the “wells” of the pan, but you can use a large piping bag to fill them, if desired. Fill each doughnut “well” 3/4 full, and spread the batter evenly. Because this recipe makes 18 doughnuts, you will need to make a couple batches, if you only have one pan, like me!

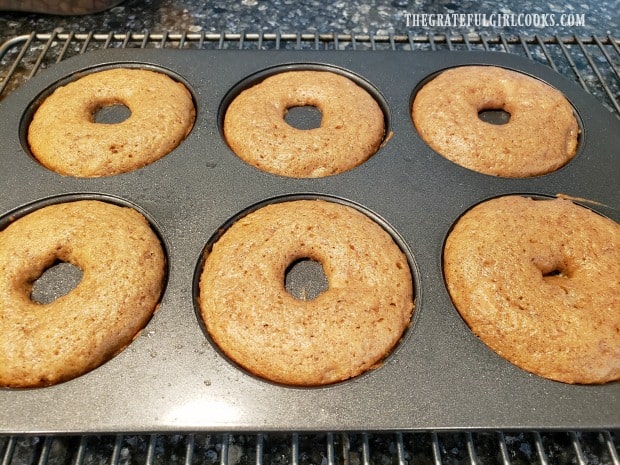
Bake the doughnuts at 350°F for 11-12 minutes (mine took 12), until a toothpick inserted into the middle comes out clean. The doughnuts will be light golden brown. Remove the pan from the oven and place on a wire rack. After a couple minutes, remove the doughnuts from the pan. I inverted the pan to release the doughnuts, then let them cool slightly on the wire rack.

Repeat process with remaining batter, washing and re-greasing pan after each batch of doughnuts.

The doughnut batter is placed into a doughnut baking pan to cook.The baked doughnuts, cooling in pan on a wire rack.

Adding The Topping To The Apple Cinnamon Baked Doughnuts

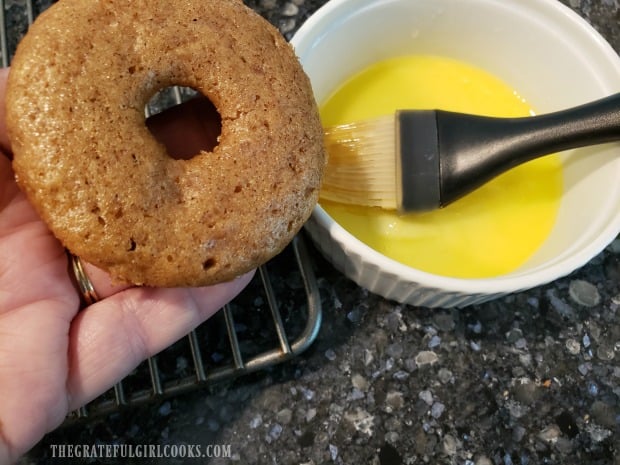
For the doughnut topping, melt butter in a small bowl. Combine granulated sugar and ground cinnamon in another bowl (that is large enough to hold a doughnut)/ While the doughnuts are still warm (after each batch), brush the top of the doughnut with melted butter.

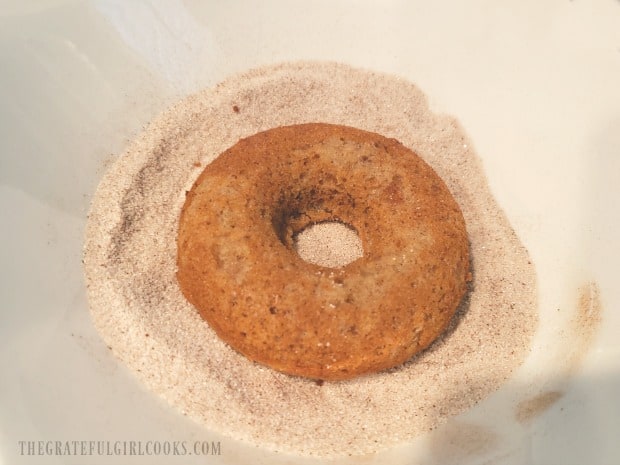
Immediately place the buttered side of the doughnut into the cinnamon sugar mixture, Coat the top surface of the doughnut with the mixture, and then place doughnut back onto a wire rack to finish cooling. When all the doughnuts have been covered with topping, dip each one of them back into the cinnamon sugar mixture for a second coat.

Each baked doughnut is brushed with melted butter on top.The doughnut is placed, butter side down into cinnamon sugar mixture.

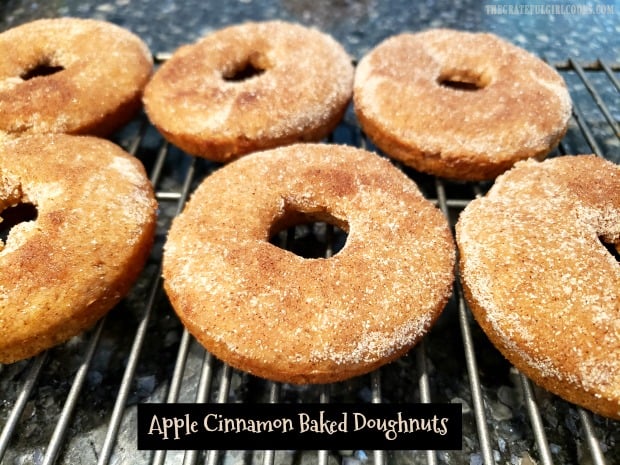
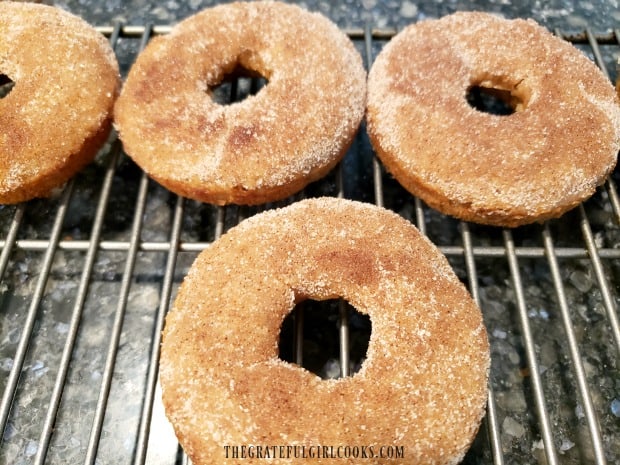
Follow this process until all of the doughnuts have been baked and double dipped in the cinnamon sugar mixture. Now the apple cinnamon baked doughnuts are ready to EAT! (insert my smiley face here… ha ha!) In the photo below, you can see the doughnuts after the FIRST cinnamon sugar dipping.

Apple cinnamon baked doughnuts resting on wire rack before eating.

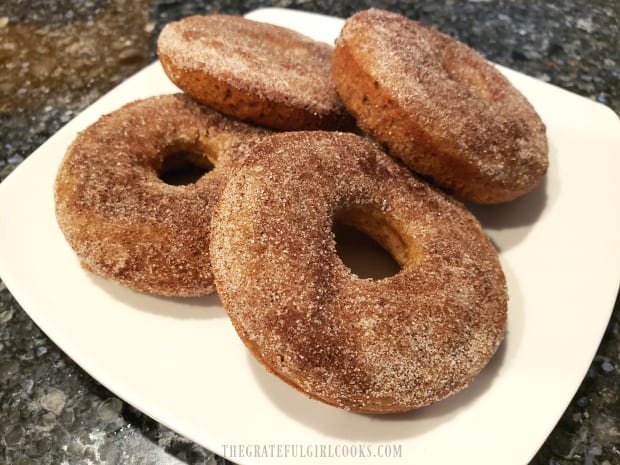
Here are four of the finished doughnuts on a plate, just begging to be eaten. See all the double dipped cinnamon sugar topping on each one?  I saved one for you. Go ahead, take the one you want, and enjoy it. Oh yeah… these doughnuts are good!

A plate with four of the apple cinnamon baked doughnuts, ready to eat.

I hope you have a chance to try these easy, but yummy apple cinnamon baked doughnuts. Thank you for stopping by, and I hope you have a really GOOD day. Take care.

Looking For More DOUGHNUT recipes?

You can find all of my doughnut recipes in the Recipe Index, located at the top of the page. I have several, including:

Interested In More Recipes?

Thank you for visiting this website. I appreciate you using some of your valuable time to do soIf you’re interested, I publish a newsletter 2 times per month (1st and 15th) with all the latest recipes, and other fun info. I would be honored to have you join our growing list of subscribers, so you never miss a great recipe!
There is a Newsletter subscription box on the top right side (or bottom) of each blog post, depending on the device you use, where you can easily submit your e-mail address (only) to be included in my mailing list.

You Can Also Find Me On Social Media:
Facebook page: The Grateful Girl Cooks!
Pinterest: The Grateful Girl Cooks!
Instagram: jbatthegratefulgirlcooks

Author's signature

Recipe adapted from: Lyuba, at https://www.willcookforsmiles.com/apple-pie-baked-doughnuts/

0 from 0 votes
Apple Cinnamon Baked Doughnuts
Prep Time
15 mins
Cook Time
12 mins
Total Time
27 mins
 

Make 18 delicious apple cinnamon baked doughnuts topped with cinnamon sugar. An easy to make treat for breakfast or snacks for family or friends.

Category: Breakfast, Snack
Cuisine: American
Keyword: apple cinnamon baked doughnuts
Servings: 18
Calories Per Serving: 139 kcal
Author: JB @ The Grateful Girl Cooks!
Ingredients
For Doughnuts:
  • cups all purpose flour
  • ¾ cup brown sugar
  • teaspoons baking powder
  • ½ teaspoon baking soda
  • 1 teaspoon ground cinnamon
  • ¾ cup apple pie filling
  • ¾ cup buttermilk
  • 2 large eggs
  • 3 Tablespoons butter (salted) , melted
  • 1 teaspoon vanilla extract
For Doughnut Topping:
  • Tablespoons butter , melted
  • cup white granulated sugar
  • 1 Tablespoon ground cinnamon
Instructions
  1. Preheat oven to 350°F

Make The Batter:
  1. Sift flour, baking powder, baking soda, and cinnamon into a large bowl. Add brown sugar, and whisk together. In a separate bowl, whisk together buttermilk, eggs, melted butter, and vanilla extract until combined. Pour wet ingredients into dry ingredients. Whisk or stir well, to fully combine. Add apple pie filling, and stir until fully incorporated.

Bake The Doughnuts:
  1. Spoon or pipe batter into a greased doughnut pan. Fill each doughnut "well" 3/4 full, and spread batter evenly. You may need to make a couple batches, if you only have one pan, like me. Bake at 350°F for 11-12 minutes (mine took 12), until golden brown and a toothpick inserted into the middle comes out clean. Transfer pan from oven to a wire rack. After 2 minutes, remove doughnuts from pan. I inverted the pan to release doughnuts, then let them cool slightly on the wire rack before adding the cinnamon sugar topping. Repeat process with remaining batter, washing and re-greasing pan after each additional batch of doughnuts.

Add Cinnamon Sugar Topping While Doughnuts Are Still Warm:
  1. Place melted butter in a small bowl. In a separate bowl (large enough for a doughnut), combine granulated sugar and ground cinnamon. While doughnuts are still warm (after each batch), brush the top of the doughnut with melted butter. Immediately place buttered side of doughnut into cinnamon sugar mix. Coat the top surface of the doughnut with the mix, and then place doughnut back onto wire rack to finish cooling. When all doughnuts have been covered with topping, dip each one back into the cinnamon sugar mixture for a second time. Once doughnuts are double-dipped with topping, they're ready to eat! Enjoy.

Nutrition Facts
Apple Cinnamon Baked Doughnuts
Amount Per Serving (1 g)
Calories 139 Calories from Fat 36
% Daily Value*
Fat 4g6%
Saturated Fat 2g13%
Cholesterol 29mg10%
Sodium 82mg4%
Potassium 83mg2%
Carbohydrates 24g8%
Fiber 1g4%
Sugar 15g17%
Protein 2g4%
Vitamin A 134IU3%
Vitamin C 1mg1%
Calcium 44mg4%
Iron 1mg6%
* Percent Daily Values are based on a 2000 calorie diet.

Here’s one more to pin on your Pinterest boards!Make 18 delicious apple cinnamon baked doughnuts topped with cinnamon sugar. An easy to make treat for breakfast or snacks for family or friends.

Apple Cream Cheese Pastries

Apple cream cheese pastries are easy to make baked puff pastry sheets, topped with a sweet cream cheese spread, apple pie filling, and vanilla icing!

A few years ago I made some puff pastry tarts that had a variety of flavored jams on top, and we really enjoyed them a LOT! Last year I wanted to experiment a bit with my original recipe. I made a couple very slight changes to my original recipe for Fruit and Cheese Danish Pastry, and used some of my own home-canned apple pie filling, to create a NEW version!

A sweet friend of mine named Grace had knee replacement surgery just over a year ago, so I took dinner over to her home while she was recuperating. I also took her family some of these apple cream cheese pastries, for dessert (or a quick breakfast treat)!

The results turned out wonderful, and she told me they loved them, so now I am FINALLY getting the recipe for these dessert OR breakfast treats on the ol’ blog! Better late than never, right? They are fairly simply to make! Here’s how:

Scroll Down For A Printable Recipe Card At The Bottom Of The Page

Make The Cream Cheese Filling

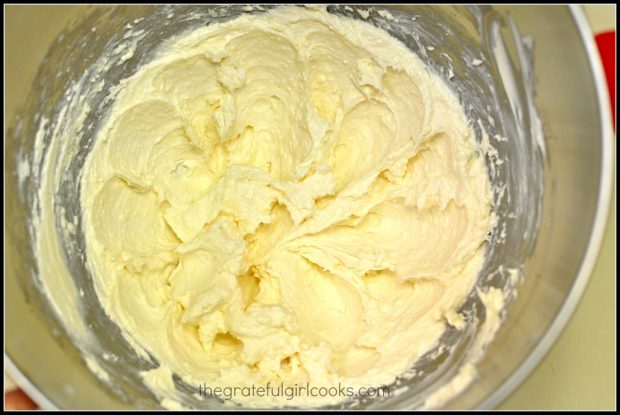
In a medium sized bowl, beat the cream cheese, sugar, vanilla extract and milk (or half and half) together, using an electric mixer. Mix the filling for 2-3 minutes, until mixture is very smooth and sugar has dissolved. Set this mixture aside, once spreadable.

Cream cheese filling in bowl, used for apple cream cheese pastries.

How To Prepare Pastry Dough For Apple Cream Cheese Pastries

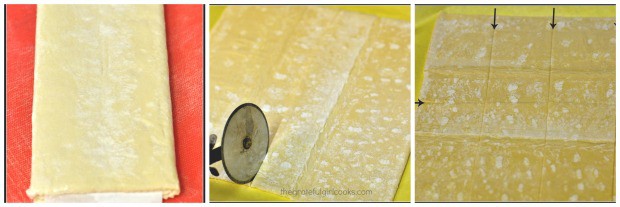
Remove a sheet of puff pastry from the freezer, and let it thaw slightly (for about 15 minutes) before unfolding it. While the dough is thawing, preheat your oven to 400° F.

Once the dough has slightly thawed, gently unfold it. Press the dough together where any line perforations may be, to form one large piece of dough.

Cut the pastry dough into 8 rectangles. Do this by cutting the dough in half, then cut each half in half. Finally, cut each of the 4 squares in half once again. You should end up with 8 equal sized rectangles. I use a pizza cutter for nice even cuts!

Cutting puff pastry dough to make individual apple cream cream cheese pastries.

Place the 8 rectangles of dough onto 2 parchment paper lined baking sheets. Place 4 pastries per baking sheet, and make sure to leave a couple inches between each pastry.

Scoring A Border On The Pastry Dough

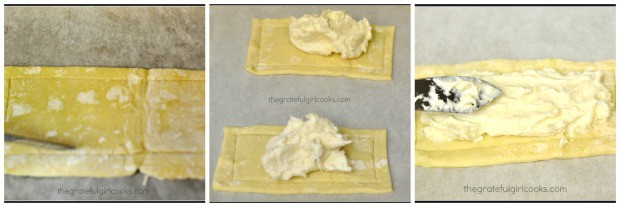
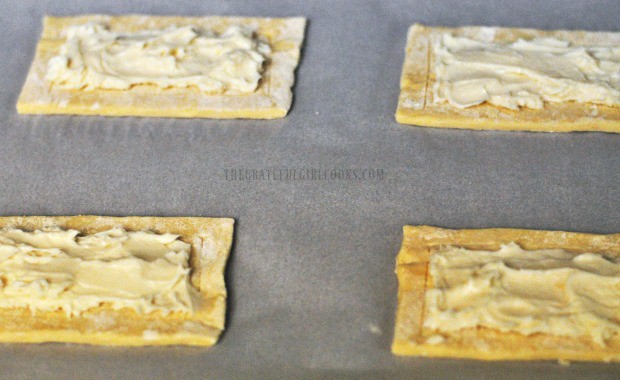
Using a sharp knife, score a border all the way around each of the pastries, about half an inch from the outside edge. By cutting this border in the dough, the edges will rise up and hold the filling in better! Don’t forget to do this step! IMPORTANT: Make sure to NOT cut all the way through the dough to the bottom!

Evenly distribute the cream cheese filling into middle of each of the apple cream cheese pastries. Use a knife or small spatula to spread the filling over the dough, BUT STAY INSIDE THE BORDER!

Placing the cream cheese filling onto pastry dough, for apple cream cheese pastries.Cream cheese filling is placed onto puff pastry rectangles.

Add The Apple Pie Filling

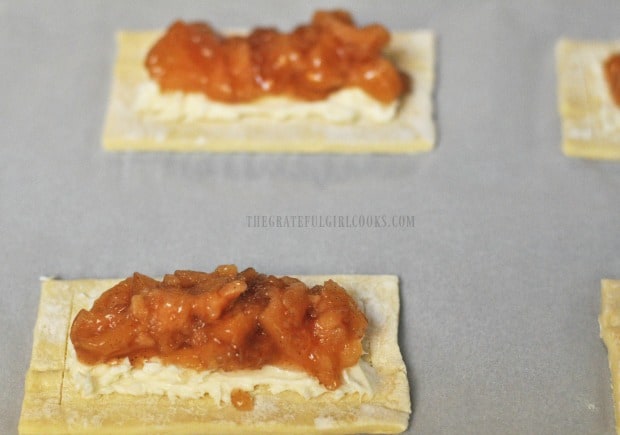
Place approx. 2 Tablespoons of apple pie filling onto the cream cheese filling. Gently spread the apple pie filling over the cream cheese, to cover most of  the apple cream cheese pastries!

Apple pie filling is placed on top of cream cheese on pastry.

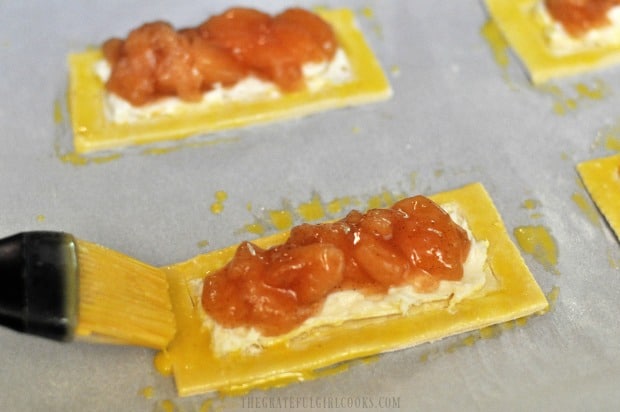
Mix the egg yolk in a small bowl. Using a pastry brush, brush the egg yolk mixture around the outer border of each pastry. While the dough is still wet, lightly sprinkle the outer edge of the dough with a tiny bit of sugar.

Egg yolk is brushed onto edges of apple cream cheese pastries before baking.

Time To Bake The Apple Cream Cheese Pastries

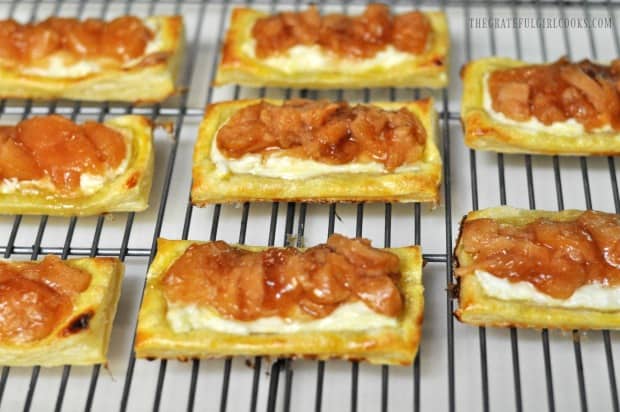
Place the baking sheets into the preheated oven. Bake the apple cream cheese pastries at 400°F. for 13-14 minutes. The pastries should turn a beautiful golden brown, and be slightly crispy around the edges, and will have risen a bit, when done.

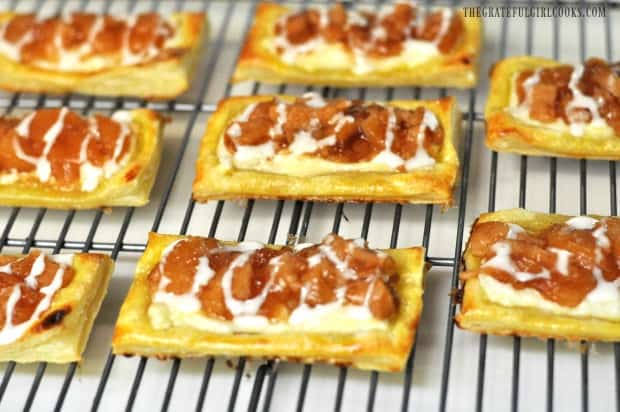
Remove the baking pans from the oven. Using a spatula, carefully transfer the apple cream cheese pastries to a wire rack, to cool.

Apple cream cheese pastries are baked, then cool on a wire rack.

Prepare The Sweet Icing

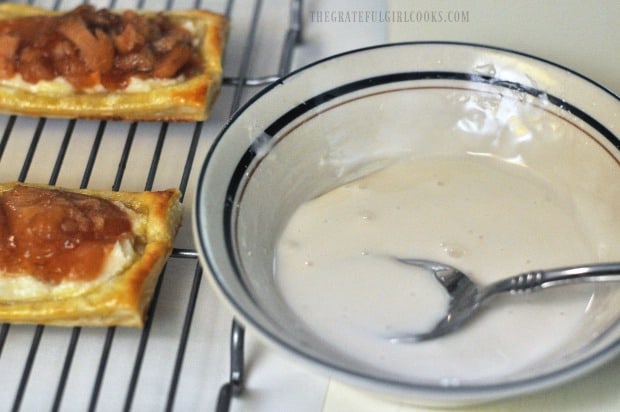
While the pastries are cooling, mix powdered sugar, water, and vanilla for icing in a small bowl. TIP: If icing is too thick to drizzle, add a few more drops of water. Too thin? Add more powdered sugar.

Powdered sugar glaze is prepared, to drizzle on top of apple cream cheese pastries.

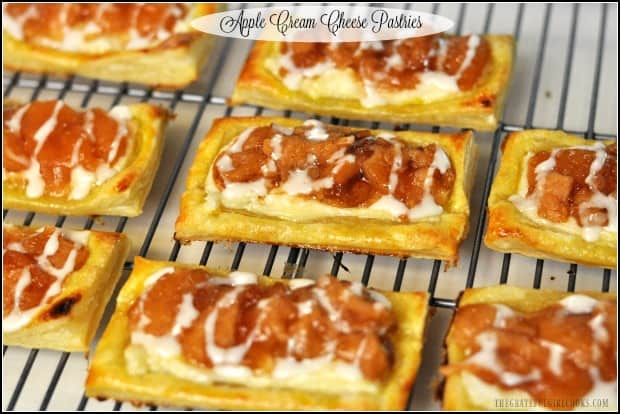
Once the apple cream cheese pastries are completely cool, use a spoon and drizzle the glazed over the pastries from side to side. TIP: Cleanup is really easy if you put a piece of plastic wrap, foil, parchment or wax paper UNDER the wire rack before doing this step! It will catch any drips!

Apple cream cheese pastries are drizzled with powdered sugar glaze.

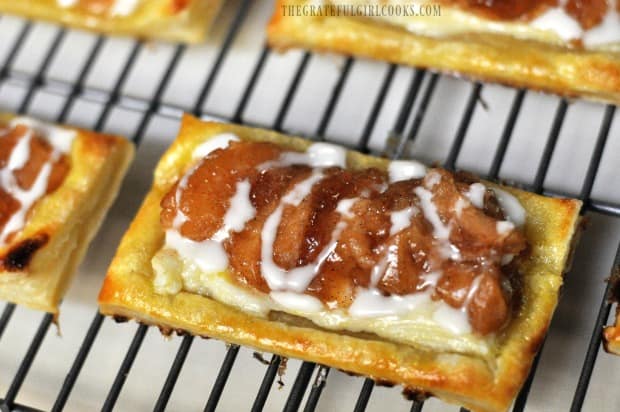
Close up photo of apple cream cheese pastries with glaze, on wire rack.

Let the pastries sit while the icing firms up, then the apple cream cheese pastries are ready to be served!

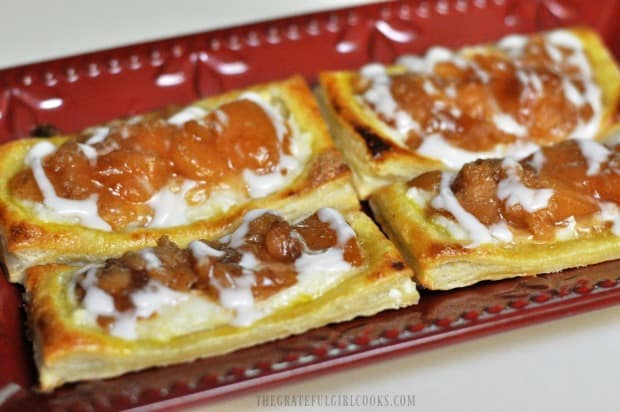
Apple cream cheese pastries, on red platter, ready to serve!

I sincerely hope you will consider trying this recipe! The pastries are REALLY GOOD! Have a blessed day, friends. Make it a GREAT one!

Looking For More PASTRY Recipes?

You can find all of my recipes in the Recipe Index, located at the top of the page. I have several pastry recipes you might enjoy, including:

Interested In More Recipes?

Thank you for visiting this website. I appreciate you using some of your valuable time to do soIf you’re interested, I publish a newsletter 2 times per month (1st and 15th) with all the latest recipes, and other fun info. I would be honored to have you join our growing list of subscribers, so you never miss a great recipe!
There is a Newsletter subscription box on the top right side (or bottom) of each blog post, depending on the device you use, where you can easily submit your e-mail address (only) to be included in my mailing list.

You Can Also Find Me On Social Media:

Facebook page: The Grateful Girl Cooks!
Pinterest:
The Grateful Girl Cooks!
Instagram:
jbatthegratefulgirlcooks

Author's signature

0 from 0 votes
Apple Cream Cheese Pastries
Prep Time
25 mins
Cook Time
13 mins
Total Time
38 mins
 
Apple cream cheese pastries are easy to make baked puff pastry sheets, topped with a sweet cream cheese spread, apple pie filling, and vanilla icing!
Category: Breakfast
Cuisine: American
Keyword: apple cream cheese pastries
Servings: 8 pastries
Calories Per Serving: 318 kcal
Author: JB @ The Grateful Girl Cooks!
Ingredients
For Pastries:
  • 1 sheet frozen puff pastry
  • 4 ounces cream cheese , room temperature
  • 1/2 teaspoon vanilla extract
  • 1/4 cup granulated sugar
  • 1 Tablespoon milk , or half and half
  • 16 Tablespoons canned apple pie filling , approx. 2 T. per pastry
  • 1 egg yolk
  • 8 teaspoons granulated sugar
For Icing Drizzle:
  • 1 cup confectioner's sugar (powdered)
  • 2 Tablespoons water , or more (to thin)
  • 1/4 teaspoon vanilla extract
Instructions
  1. In a medium sized bowl, beat cream cheese, sugar, vanilla extract and milk (or half and half) together, using an electric mixer. Mix filling for 2-3 minutes, until mixture is very smooth and sugar has dissolved. Set mixture aside, once spreadable.

  2. Remove a sheet of puff pastry from freezer, and let it thaw slightly (for about 15 minutes) before unfolding it. While dough thaws, preheat oven to 400° F. Once dough is slightly thawed, gently unfold it. Press dough together where any line perforations may be, to form one large piece. Cut pastry dough into 8 rectangles. Do this by cutting dough in half, then cut each half in half. Finally, cut each of the 4 squares in half once again. You should end up with 8 equal sized rectangles. I use a pizza cutter for nice even cuts!

  3. Place the 8 rectangles of dough onto 2 parchment paper lined baking sheets. Place 4 pastries per baking sheet, and make sure to leave a couple inches between each pastry. Using a sharp knife, score a border all the way around each of the pastries, about half an inch from the outside edge. By cutting this border in the dough, the edges will rise up and hold the filling in better! Don't forget to do this step! IMPORTANT: Make sure to NOT cut all the way through the dough to the bottom! Evenly distribute the cream cheese filling into middle of each of the apple cream cheese pastries. Use a knife or small spatula to spread the filling over the dough, BUT STAY INSIDE THE BORDER!

  4. Place approx. 2 Tablespoons of apple pie filling onto cream cheese filling. Gently spread apple pie filling over cream cheese, to cover most of  the  pastries! Mix the egg yolk in a small bowl. Using a pastry brush, brush egg yolk mixture around the outer border of each pastry. While dough is still wet, lightly sprinkle the outer edge of the dough with a tiny bit of sugar.

  5. Place baking sheets into preheated oven. Bake pastries at 400°F. for 13-14 minutes. The pastries should turn a beautiful golden brown, and be slightly crispy around the edges, and should have risen a bit, when done. Remove baking pans from oven. Using a spatula, carefully transfer pastries to a wire rack, to cool.

  6. While the pastries are cooling, mix powdered sugar, water, and vanilla for icing in a small bowl. TIP: If icing is too thick to drizzle, add a few more drops of water. Too thin? Add more powdered sugar. Once pastries are completely cool, use a spoon and drizzle the glazed over pastries from side to side. TIP: Cleanup is really easy if you put a piece of plastic wrap, foil, parchment or wax paper UNDER the wire rack before doing this step! Let pastries sit while icing firms up, then the pastries are ready to be served!

Nutrition Facts
Apple Cream Cheese Pastries
Amount Per Serving (1 pastry)
Calories 318 Calories from Fat 126
% Daily Value*
Fat 14g22%
Saturated Fat 4g25%
Cholesterol 32mg11%
Sodium 159mg7%
Potassium 67mg2%
Carbohydrates 44g15%
Sugar 26g29%
Protein 3g6%
Vitamin A 120IU2%
Vitamin C 0.5mg1%
Calcium 29mg3%
Iron 1mg6%
* Percent Daily Values are based on a 2000 calorie diet.

Here’s one more to pin on your Pinterest boards!These delicious apple cream cheese pastries are easy to make baked puff pastry sheets, topped with a sweet cream cheese spread, apple pie filling, and vanilla icing!

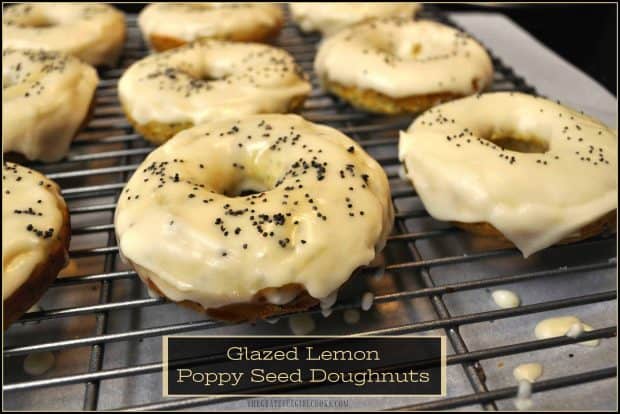
Glazed Lemon Poppy Seed Doughnuts

These delicious Glazed Lemon Poppy Seed Doughnuts are tart AND sweet, simple to make, and baked (not fried)! They are a wonderful breakfast treat!These delicious Glazed Lemon Poppy Seed Doughnuts are tart AND sweet, simple to make, and baked (not fried)! They are a wonderful breakfast treat!

Who wants doughnuts? How about these Glazed Lemon Poppy Seed Doughnuts? They are baked (not fried), a little sweet, a little tangy, glazed with a lemon icing… and very good! Yes, please!

I found this recipe on Pinterest and decided to give it a try. I love all things lemon… and lemon poppy seed doughnuts with lemon glaze on top? C’mon!!!  I knew I had to make them.  The doughnuts are baked and are crazy easy to make.

Scroll Down For A Printable Recipe Card At The Bottom Of The Page

Prepare The Doughnut Pan

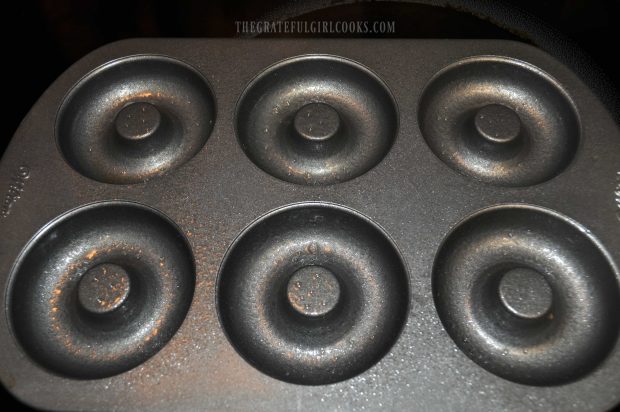
Spray a doughnut pan with non-stick spray; set aside. Preheat your oven to 350 degrees F. Speaking of doughnut pans… I bought a Wilton 6 cavity doughnut pan a couple years ago with a gift card I received for my birthday.

I think the doughnut pan was only $9 or $10 dollars on Amazon, and I’ve used it a lot.  It’s wonderful to be able to BAKE doughnuts, instead of FRYING them! This is what the pan looks like.

Glazed Lemon Poppy Seed Doughnuts / The Grateful Girl Cooks!

How To Make Lemon Poppy Seed Doughnuts

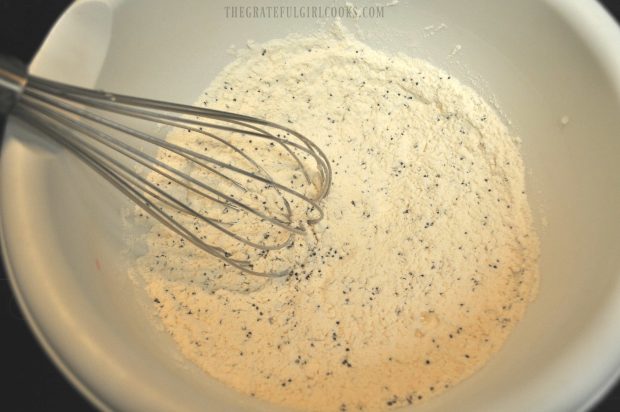
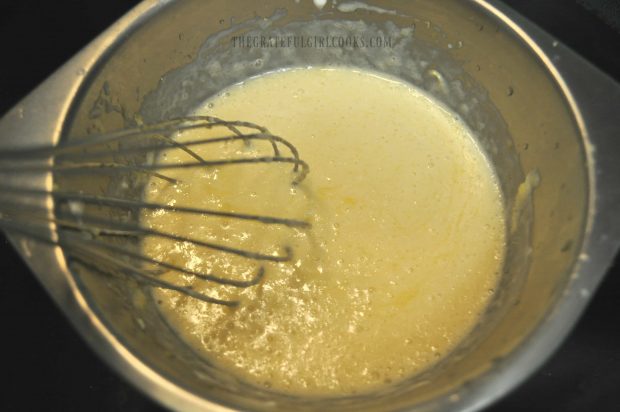
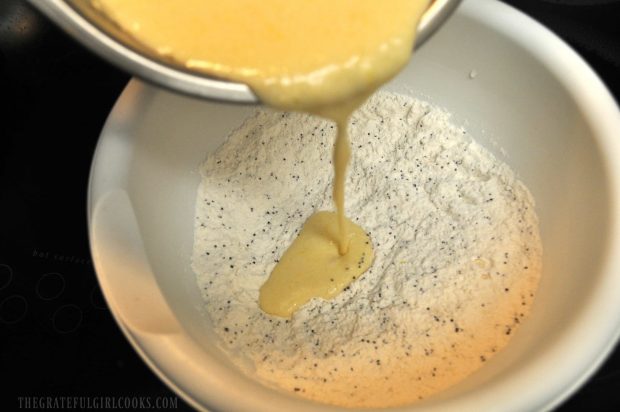
In a medium sized bowl, place flour, poppy seeds, baking powder, salt and baking soda. Whisk these together, then set bowl aside. In a separate bowl, combine butter, egg, granulated sugar, sour cream, milk, vanilla, lemon zest and juice. Whisk these together until batter is smooth.

Glazed Lemon Poppy Seed Doughnuts / The Grateful Girl Cooks!

Glazed Lemon Poppy Seed Doughnuts / The Grateful Girl Cooks!

Pour this wet mixture into the bowl with the dry ingredients. Stir until all ingredients are combined into a thick batter, but make sure not to over mix! You now have the batter made for the lemon poppy seed doughnuts! Easy, right?

Glazed Lemon Poppy Seed Doughnuts / The Grateful Girl Cooks!

Fill Pan Then Bake The Doughnuts

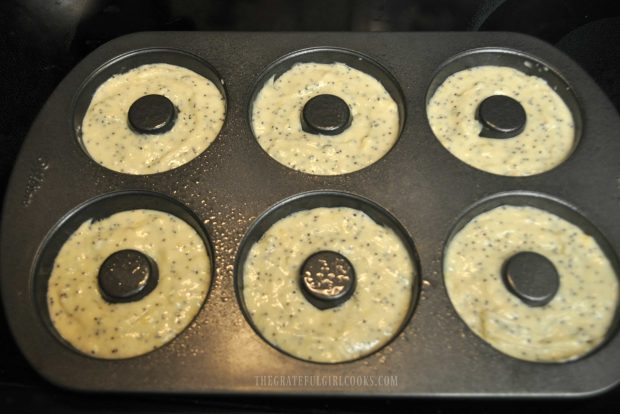
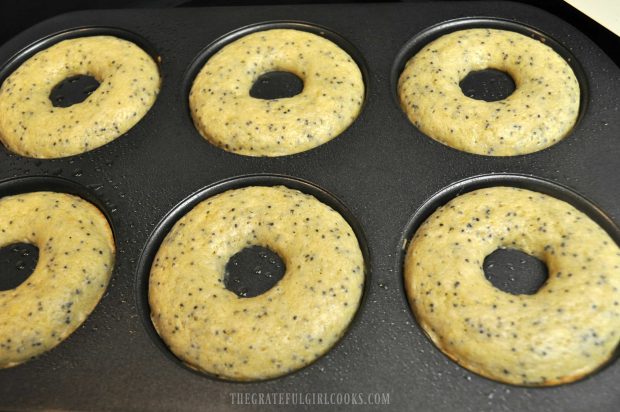
Carefully spoon (or pipe) the batter into doughnut pan, filling each cup 2/3 to 3/4 of the way full. If you have a 6 cup pan, you may have to bake these in batches. Bake the lemon poppy seed doughnuts at 350°F for approximately 10 minutes. Check them at 9 minutes. The edges should be slightly brown when done.

Glazed Lemon Poppy Seed Doughnuts / The Grateful Girl Cooks!

Glazed Lemon Poppy Seed Doughnuts / The Grateful Girl Cooks!

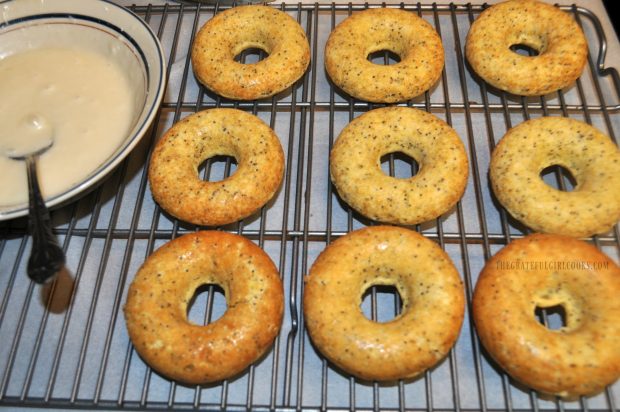
When done, remove pan from oven, and let it sit for a couple of minutes, then transfer the doughnuts from pan to a wire rack that is positioned on top of a piece of parchment paper.

When you glaze the doughnuts later, any glaze that drips will land on parchment paper, which is better for easy clean up!). Repeat process with any leftover batter. Once done, let the doughnuts cool a bit before putting the glaze on them.

Make Glaze For The Lemon Poppy Seed Doughnuts

To make the lemon glaze, place powdered sugar, melted butter, lemon juice, milk and vanilla extract in a medium sized bowl. Mix together well, until you have a creamy glaze. NOTE: I used 1½ Tablespoons of milk to get it to the consistency I wanted, but if you want the glaze to be thicker, only use 1 Tablespoon milk.

Glazed Lemon Poppy Seed Doughnuts / The Grateful Girl Cooks!

Icing The Doughnuts

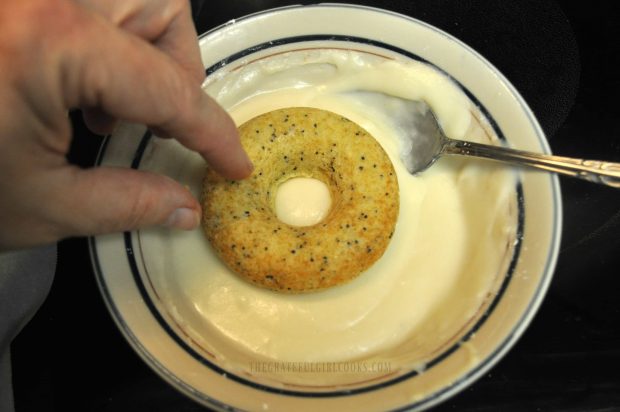
Once the doughnuts have cooled down, frost them with the lemon glaze by picking up a doughnut and dipping the top side into the glaze to coat. Flip it over and put the iced lemon poppy seed doughnuts back onto the wire rack.

Glazed Lemon Poppy Seed Doughnuts / The Grateful Girl Cooks!

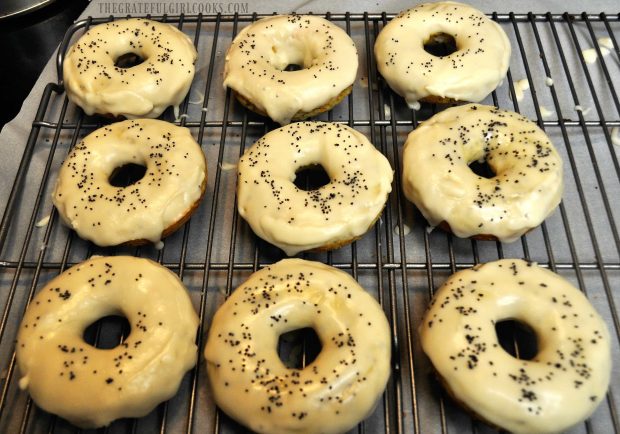
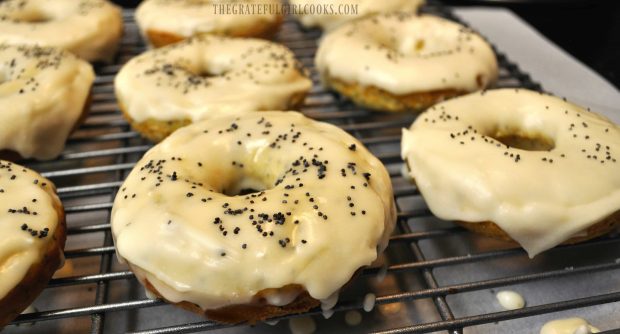
Once all the doughnuts have been iced, sprinkle with a few poppy seeds, if desired. Repeat until all doughnuts have been glazed. Once the “icing” has firmed up, the lemon poppy seed doughnuts are ready to serve.

Glazed Lemon Poppy Seed Doughnuts / The Grateful Girl Cooks!

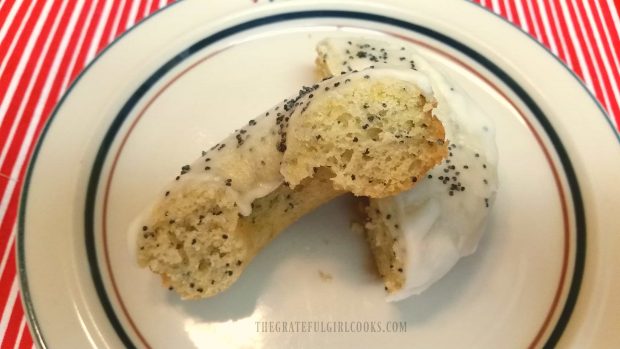
Lemon poppy seed doughnuts are best eaten on the same day they are made, BUT you can store them for a couple days at room temp, if covered well.

Can You FREEZE Lemon Poppy Seed Doughnuts?

YES. The doughnuts can be frozen for a month or two, if wrapped and sealed well.  I made these doughnuts a couple weeks ago before our complete kitchen remodel begins. We won’t have an oven for 6-8 weeks, so I froze several doughnuts for later. I’m looking forward to having them conveniently stashed in our freezer to pull out for a quick breakfast treat!

Glazed Lemon Poppy Seed Doughnuts / The Grateful Girl Cooks!

Glazed Lemon Poppy Seed Doughnuts / The Grateful Girl Cooks!

There you have it… Baked Lemon Poppy Seed Doughnuts!  A big thank you goes out to Sally at Sally’s Baking Addiction for her lovely recipe!  Sure hope you will give these yummy lemon infused doughnuts a try.

Looking For More DOUGHNUT Recipes?

You can find all my recipes in the Recipe Index, located at the top of the page. A few doughnut recipes you might enjoy include:

Interested In More Recipes?

Thank you for visiting this website. I appreciate you using some of your valuable time to do soIf you’re interested, I publish a newsletter 2 times per month (1st and 15th) with all the latest recipes, and other fun info. I would be honored to have you join our growing list of subscribers, so you never miss a great recipe!

There is a Newsletter subscription box on the top right side (or bottom) of each blog post, depending on the device you use, where you can easily submit your e-mail address (only) to be included in my mailing list.

You Can Also Find Me On Social Media:
Facebook page: The Grateful Girl Cooks!
Pinterest: The Grateful Girl Cooks!
Instagram: jbatthegratefulgirlcooks

Author's signature

Recipe Source: https://sallysbakingaddiction.com/2016/09/02/glazed-lemon-poppy-seed-donuts/

0 from 0 votes
Glazed Lemon Poppy Seed Doughnuts
Prep Time
15 mins
Cook Time
10 mins
Total Time
25 mins
 
These delicious Glazed Lemon Poppy Seed Doughnuts are tangy, sweet, simple to make, and baked (not fried)! A wonderful breakfast treat! 
Category: Breakfast
Cuisine: American
Keyword: lemon poppy seed doughnuts
Servings: 9 Doughnuts
Calories Per Serving: 207 kcal
Author: JB @ The Grateful Girl Cooks!
Ingredients
For the Doughnuts:
  • 1 cup all purpose flour
  • 1 Tablespoon poppy seeds
  • 1 teaspoon baking powder
  • 1/2 teaspoon salt
  • 1/4 teaspoon baking soda
  • 2 Tablespoons butter , melted (and cooled a bit)
  • 1 large egg
  • 1/3 cup granulated sugar
  • 1/4 cup sour cream
  • 1/4 cup milk
  • 1 teaspoon vanilla extract
  • 1 Tablespoon lemon zest
  • 1 Tablespoon fresh lemon juice
For the Lemon Glaze:
  • 1 cup powdered sugar
  • 2 Tablespoon butter , melted
  • 1 Tablespoon fresh lemon juice
  • 1-2 Tablespoons milk (depends on thickness of glaze you desire)
  • 1/2 teaspoon vanilla extract
  • Poppy seeds for garnish (completely optional)
Instructions
  1. Spray a doughnut pan with non-stick spray and set aside. Preheat oven to 350° F.

  2. In a medium bowl, place flour, poppy seeds, baking powder, salt and baking soda. Whisk together, then set bowl aside. In separate bowl, combine butter, egg, granulated sugar, sour cream, milk, vanilla, lemon zest and juice. Whisk together until batter is smooth, Pour this wet mixture into bowl with dry ingredients. Stir until combined into a thick batter, but make sure not to over mix!

  3. Carefully spoon (or pipe) batter into doughnut pan, filling each cup 2/3 to 3/4 of the way full. If you have a 6 cup pan, you may have to bake these in batches.

  4. Bake doughnuts for approx. 10 minutes. Check them at 9 minutes. The edges should be slightly brown when done. When done, remove pan from oven, and let it sit for 2-3 minutes, then transfer doughnuts from pan to a wire rack that is on top of a piece of parchment paper (when you glaze the doughnuts later, any glaze that drips will land on parchment paper, which is better for easy clean up!). Repeat process with any leftover batter. Once done, let doughnuts cool before putting the glaze on them.

  5. To make the lemon glaze, place powdered sugar, melted butter, lemon juice, milk and vanilla extract in a medium sized bowl. Mix together until you have a creamy glaze. I used 1½ Tablespoons of milk to get it to the consistency I wanted, but if you want the glaze to be thicker, only use 1 Tablespoon milk.

  6. Once doughnuts have cooled, frost with lemon glaze by picking up a doughnut and dipping the top side into the glaze to coat. Flip it over and put the doughnut back on wire rack. Sprinkle with a few poppy seeds, if desired. Repeat until all doughnuts are glazed. Once the "icing" has firmed, doughnuts are ready to serve.

Nutrition Facts
Glazed Lemon Poppy Seed Doughnuts
Amount Per Serving (1 doughnut)
Calories 207 Calories from Fat 63
% Daily Value*
Fat 7g11%
Saturated Fat 4g25%
Cholesterol 35mg12%
Sodium 221mg10%
Potassium 92mg3%
Carbohydrates 32g11%
Sugar 21g23%
Protein 2g4%
Vitamin A 235IU5%
Vitamin C 2.1mg3%
Calcium 56mg6%
Iron 0.9mg5%
* Percent Daily Values are based on a 2000 calorie diet.

Here’s one more to pin on your Pinterest boards!These delicious Glazed Lemon Poppy Seed Doughnuts are tart AND sweet, simple to make, and baked (not fried)! They are a wonderful breakfast treat!


Old-Fashioned Cake Doughnuts

You’ll be surprised how easy it is to prepare old-fashioned cake doughnuts, with hints of cinnamon and nutmeg. The recipe makes 12 doughnuts + holes!
You'll be surprised how easy it is to prepare old-fashioned cake doughnuts, with hints of cinnamon and nutmeg. The recipe makes 12 doughnuts + holes!
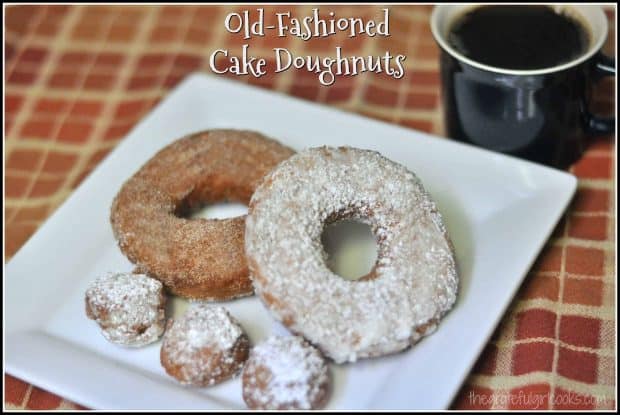
In spite of all the fancy gourmet doughnuts available at specialty shops nowadays, sometimes a simple Old-Fashioned Cake Doughnut, maybe sprinkled with powdered sugar or cinnamon-sugar hits the spot!

If and when we have doughnuts, it’s because my doughnut-crazy husband picks them up at a local doughnut shop. BUT… I wanted to try my hand at making this simple cake doughnut out of simple curiosity on the “how-to’s” of making them. I located a recipe that sounded good on Pinterest and gave it a go… with very good results!

These old-fashioned cake doughnuts do not contain yeast, so there is no time waiting for dough to rise, which is a real timesaver! They are made with simple ingredients that are typically found in most kitchens. These yummy doughnuts are very easy to prepare. Here’s how to make them:

Scroll Down For A Printable Recipe Card At The Bottom Of The Page

How To Make Cake Doughnuts

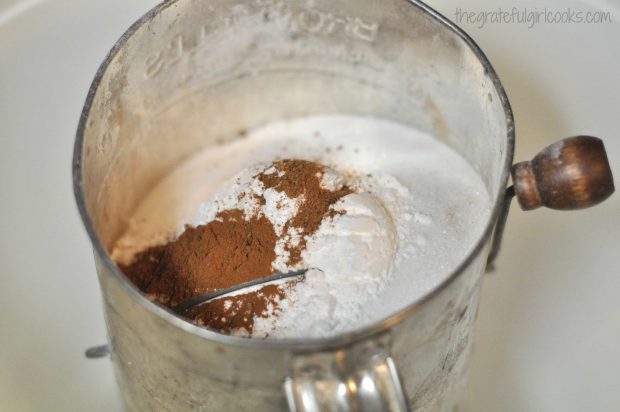
Sift flour, sugar, salt, baking powder, cinnamon and nutmeg into a medium-sized bowl.

Dry ingredients for doughnuts are sifted together.

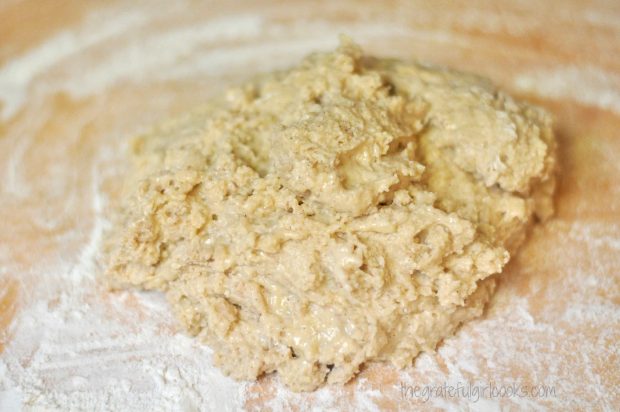
Mix in melted butter and stir until dough is crumbly. Stir in milk and beaten egg. Turn out the dough (it is sticky) onto a lightly floured work surface. Flour your hands a little bit,  and then knead the dough lightly, adding a sprinkle or two of flour if the dough remains sticky.

The dough is kneaded together on a floured surface.

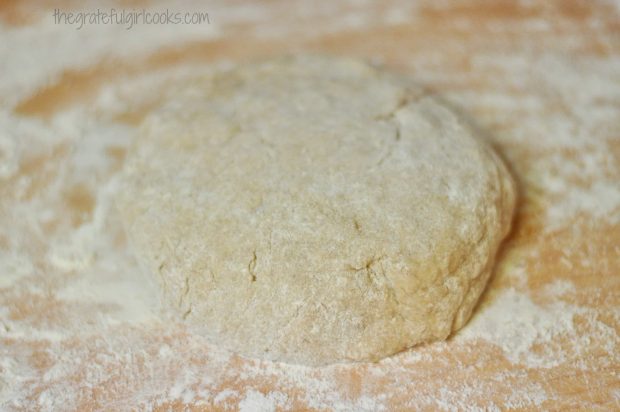
Doughnut dough is shaped into a circle before cutting out shapes.

Cut Out The Cake Doughnuts

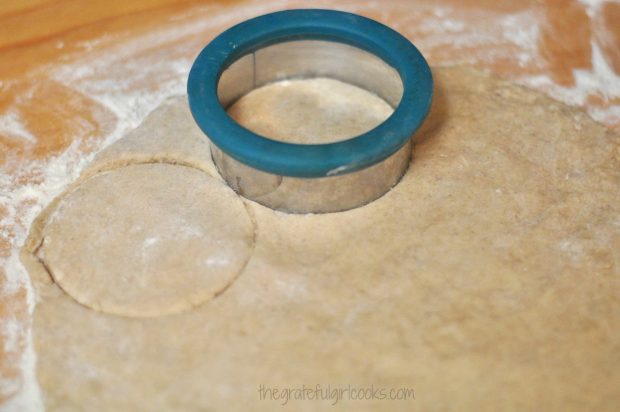
Pat the dough out so that it is 1/4 inch thick. Dip a doughnut cutter or a biscuit cutter into flour, then cut out doughnuts. Be sure to dip the cutter into flour before cutting out each doughnut..

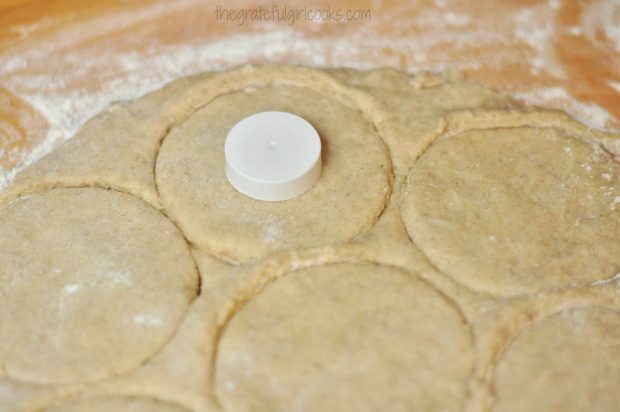
Because I used a biscuit cutter, I then used a very small cap from a bottle to cut out the center of the doughnuts. Gather scraps of leftover dough, and cut additional doughnuts out.

Circles are cut out of the dough with a biscuit or doughnut cutter.

A bottle cap can be used to cut out the doughnut holes.

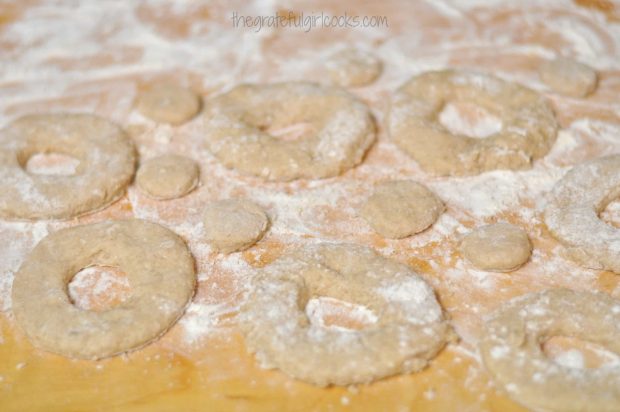
Old-Fashioned Cake Doughnuts and holes ready to fry.

Cooking Old-Fashioned Cake Doughnuts

Heat oil to 375 degrees (make sure oil is at correct temperature before adding doughnuts).  I used my electric skillet with a temperature gauge on it, but a meat or candy thermometer would also work!

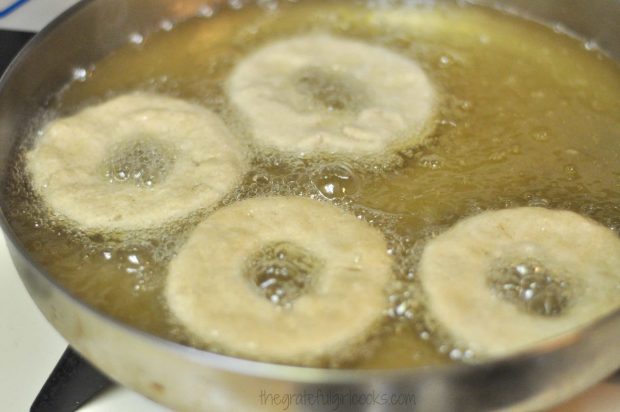
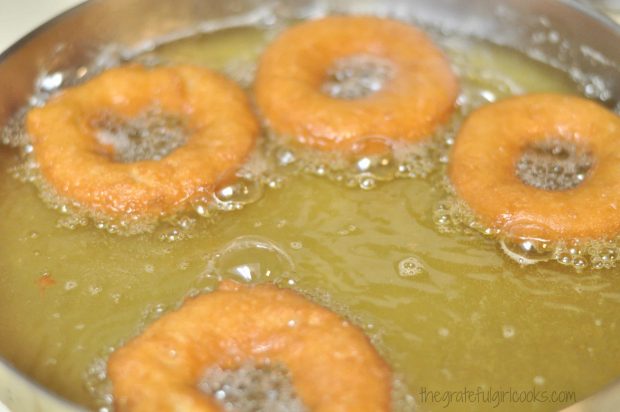
Carefully add the doughnuts, 3-4 at a time to the hot oil. Cook them for 3 minutes, turning them over at mid-point in the cooking time. I use two chopsticks (one in center of doughnut, one on outside) to carefully flip the doughnuts over.  Doughnuts should be golden brown on both sides.

The doughnuts are cooked in very hot oil to brown.

Old-Fashioned Cake Doughnuts are turning golden brown in the hot oil.

Old-Fashioned Cake Doughnuts Are Done Cooking – Now What?

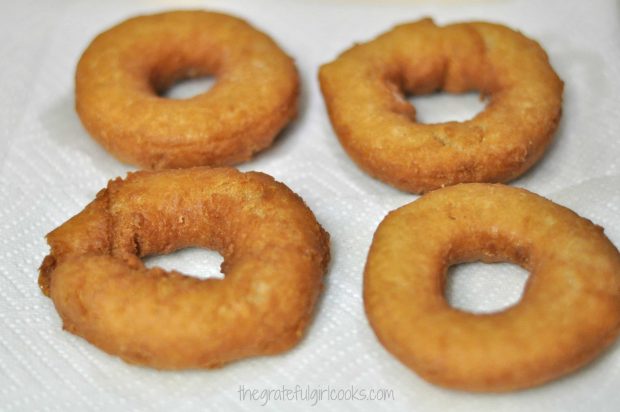
Place the cooked doughnuts onto several layers of paper towels to drain. Make sure oil comes back to temperature and continue cooking doughnuts until all have been prepared.

Paper towels absorb the oil after frying the doughnuts.

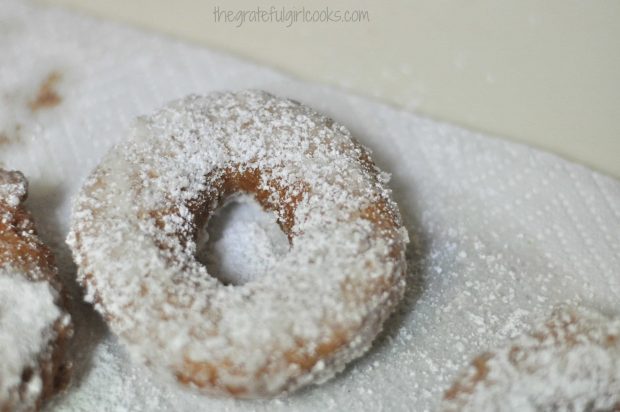
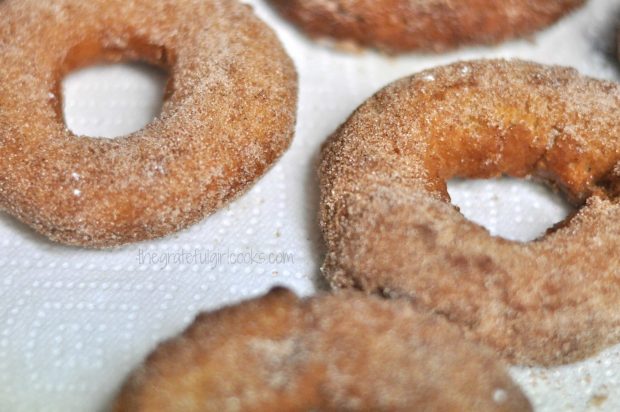
Once the doughnuts have cooled off, they are ready to serve, as is (plain and simple).  If you want you can sprinkle some or all of the doughnuts with sifted powdered sugar OR sprinkle with a cinnamon-sugar mixture.

TIP: When using powdered sugar, make sure the doughnuts are totally cooled off before adding. If using cinnamon-sugar mixture, sprinkle it on while doughnuts are still hot.

Old-Fashioned Cake Doughnuts can be dusted with sifted powdered sugar before serving.

A cinnamon-sugar mixture coats these old-fashioned cake doughnuts.

However you enjoy eating cake doughnuts, I hope you consider making these. It’s nice to know that occasionally you can make your own, instead of having to go to a shop to buy them.

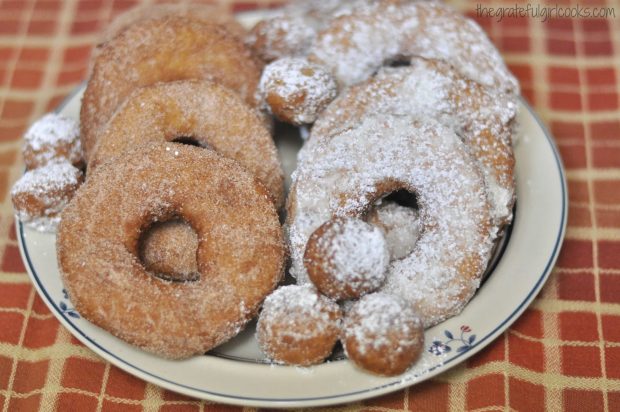
A plate of old-fashioned cake doughnuts and doughnut holes, ready to eat.

Have a blessed week, as you gather with family and/or friends, to give thanks to God for our many blessings, big or small. There is ALWAYS something to be grateful for!

Looking For More DOUGHNUT Recipes?

You can find all of my recipes in the Recipe Index, located at the top of the page. I have several doughnut recipes, including:

Interested In More Recipes?

Thank you for visiting this website. I appreciate you using some of your valuable time to do soIf you’re interested, I publish a newsletter 2 times per month (1st and 15th) with all the latest recipes, and other fun info. I would be honored to have you join our growing list of subscribers, so you never miss a great recipe!
There is a Newsletter subscription box on the top right side (or bottom) of each blog post, depending on the device you use, where you can easily submit your e-mail address (only) to be included in my mailing list.

You Can Also Find Me On Social Media:
Facebook page: The Grateful Girl Cooks!
Pinterest: The Grateful Girl Cooks!
Instagram: jbatthegratefulgirlcooks

Author's signature

Recipe Source:  http://baking.about.com/od/doughnutsanddonuts/r/plaincake.htm

0 from 0 votes
Old-Fashioned Cake Doughnuts
Prep Time
20 mins
Cook Time
3 mins
Total Time
23 mins
 

You'll be surprised how easy it is to prepare old-fashioned cake doughnuts, with hints of cinnamon and nutmeg. The recipe makes 12 doughnuts + holes!

Category: Breakfast
Cuisine: American
Keyword: cake doughnuts
Servings: 12
Calories Per Serving: 140 kcal
Author: JB @ The Grateful Girl Cooks!
Ingredients
  • 2 cups flour
  • 1/2 cup granulated sugar
  • 1 teaspoon salt
  • 1 Tablespoon baking powder
  • 1/4 teaspoon cinnamon
  • 1/8 teaspoon nutmeg
  • 2 Tablespoons butter , melted
  • 1/2 cup milk
  • 1 egg , beaten
  • approx. 1 quart oil , for frying
  • Optional: powdered sugar or cinnamon-sugar mixture for cooked doughnuts
Instructions
  1. Sift flour, sugar, salt, baking powder, cinnamon and nutmeg into a medium-sized bowl.
  2. Mix in melted butter-stir until dough is crumbly. Stir in milk and beaten egg. Turn out dough (it is sticky) onto a lightly floured work surface. Flour your hands and knead dough lightly, (adding a sprinkle or two of flour if dough remains sticky) until it comes together in a ball.
  3. Pat the dough out until it is 1/4 inch thick. Dip a doughnut cutter or a biscuit cutter into flour, then cut out doughnuts (dipping cutter into flour before cutting each one). Cut out center of the doughnuts if using biscuit cutter. Gather scraps of leftover dough, and cut additional doughnuts.
  4. Heat oil to 375 degrees (make sure oil is at correct temperature before adding dough). I used an electric skillet with temperature gauge, but a meat or candy thermometer would work! Carefully add doughnuts, 3-4 at a time to hot oil. Cook for 3 minutes, turning them over at mid-point in the cooking time. I use two chopsticks (one in center of doughnut, one on outside) to carefully flip the doughnuts over. Doughnuts should be golden brown on both sides. Place cooked doughnuts onto several layers of paper towels to drain. Bring oil back to temperature and continue cooking doughnuts and doughnut holes until all have been prepared.
  5. Once doughnuts have cooled, they are ready to serve. If desired, sprinkle doughnuts with sifted powdered sugar OR with a cinnamon-sugar mixture. If using powdered sugar, make sure doughnuts are totally cooled off before sprinkling. If using cinnamon-sugar mixture, sprinkle it on while doughnuts are still hot.
Recipe Notes

The quantity of doughnuts made will vary, depending on the size of the doughnut or biscuit cutter used. Caloric calculation does not include optional toppings such as powdered sugar or cinnamon-sugar.

Nutrition Facts
Old-Fashioned Cake Doughnuts
Amount Per Serving (1 doughnut)
Calories 140 Calories from Fat 27
% Daily Value*
Fat 3g5%
Saturated Fat 1g6%
Cholesterol 19mg6%
Sodium 221mg10%
Potassium 141mg4%
Carbohydrates 25g8%
Sugar 8g9%
Protein 2g4%
Vitamin A 95IU2%
Calcium 60mg6%
Iron 1.1mg6%
* Percent Daily Values are based on a 2000 calorie diet.

Here’s one more to pin on your Pinterest boards!You'll be surprised how easy it is to prepare old-fashioned cake doughnuts, with hints of cinnamon and nutmeg. The recipe makes 12 doughnuts + holes!


Save

Save

Save

Save

Save

Save

Save

Save

Save

Save

Save

Save

Save

Save

Save

Save

Save

Save

Save

Chocolate Cream Cheese Danish

You’re gonna LOVE this decadent chocolate cream cheese danish! This chocolate filled pastry is EASY to make, using store bought crescent roll dough!You're gonna LOVE this decadent chocolate cream cheese danish! This chocolate filled pastry is EASY to make, using store bought crescent roll dough!

If you enjoy a good pastry AND enjoy chocolate, I’m pretty sure you will love this recipe for a Chocolate Cream Cheese Danish I found online recently. Added bonus? It’s EASY to make! This pastry is super easy to prepare, because it starts with a can of store-bought crescent rolls, and only takes about 30 minutes total to prepare! Let me show you just how easy it is to make this treat!

Scroll Down For A Printable Recipe Card At The Bottom Of The Page

How To Make A Chocolate Cream Cheese Danish

Before beginning, preheat your oven to 375 degrees F. (See? I told you this would be EASY!). Mix together room temperature cream cheese, sugar, flour and vanilla extract in a small bowl. I used an electric mixer to do this and it was mixed in a flash! Once it is creamy and thoroughly combined, set aside.

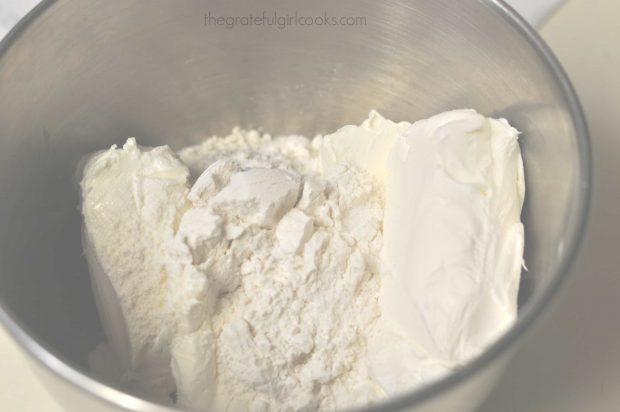
Cream cheese and flour in metal mixing bowl (filling for danish)

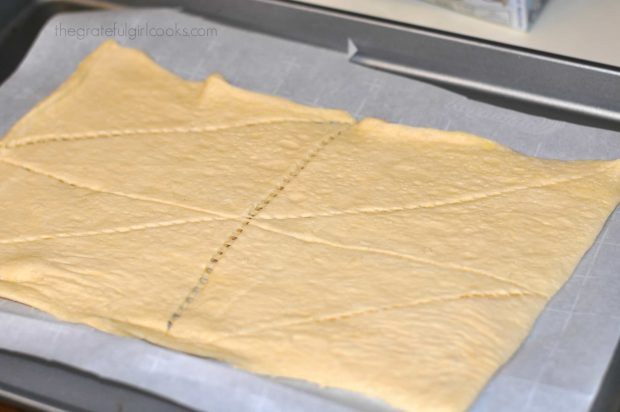
Open the can of crescent dough; without separating the triangles, unroll the dough and place it onto a parchment paper-lined baking sheet. Using your fingers, press the dough together to close all the holes (perforations) up, so you have one complete piece of dough.

Crescent dough rolled out on parchment paper to make chocolate cream cheese danish.

Filling The Pastry

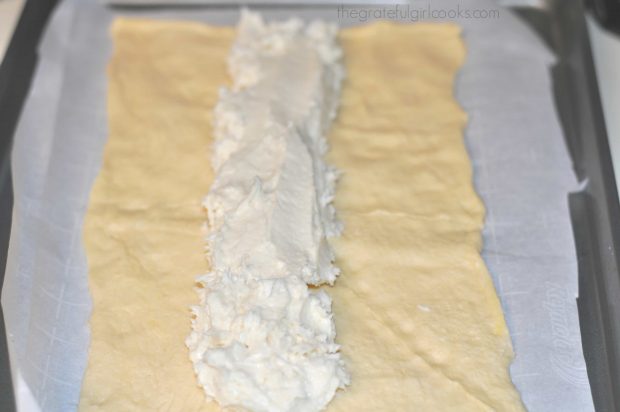
Once you have pressed all the holes in the dough together, drop the cream cheese filling (by spoonfuls) in the center, down the length of the dough. Make sure to evenly spread the filling out, so that the filling for the chocolate cream cheese danish is between 2-3 inches wide.

Cream cheese filling for chocolate cream cheese danish, is placed on crescent dough.

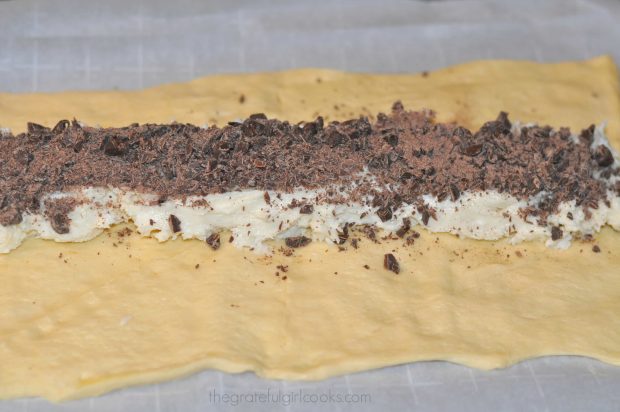
Evenly sprinkle the chopped chocolate over the top of the cream cheese filling.

Chopped chocolate sprinkled onto cream cheese filling on dough

Cutting The Pastry Strips For “Braiding”

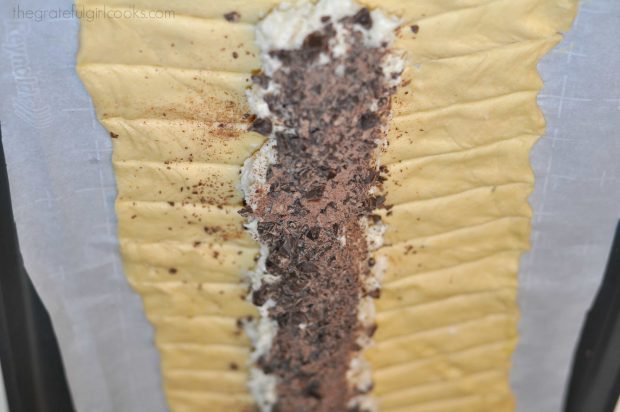
Starting at one end of the pastry, cut 1 inch strips (at a slight angle toward the top) into both sides of the dough. Cut in until it reaches the filling.

Pull the strips up and over the filling making sure to alternate sides (L,R,L,R, etc) until entire chocolate cream cheese danish has been “braided. Tuck in any extra bits of dough that you may end up with, on each end of the roll.

Dough with strips cut on sides, with chocolate and cream cheese in middle

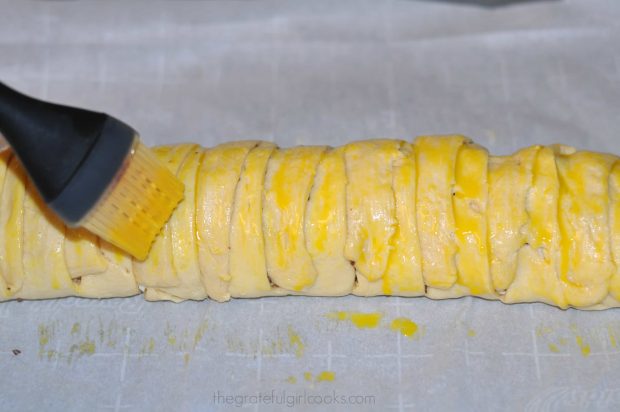
Once the chocolate cream cheese danish has been braided and rolled, it’s time to bake it, after it gets one more special touch. Give the chocolate cream cheese danish an “egg bath” BEFORE baking. To do this, whisk an egg YOLK in a small bowl, then brush the surface of the pastry roll with the beaten yolk.
Brushing egg yolk onto the chocolate cream cheese danish.
Ready To Bake!

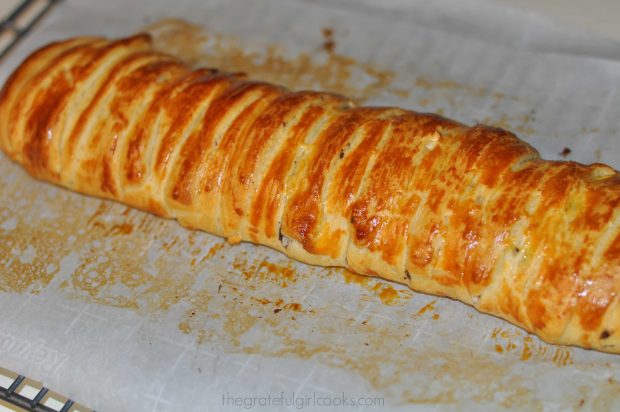
Bake the chocolate cream cheese danish at 375 degrees for 20 minutes, until the pastry is golden brown in color. Remove the pastry from the oven and place it (still on the parchment paper) onto a wire rack to cool.  Let it cool COMPLETELY.
Browned chocolate cream cheese danish, right out of the oven.

Make The Glaze For The Chocolate Cream Cheese Danish

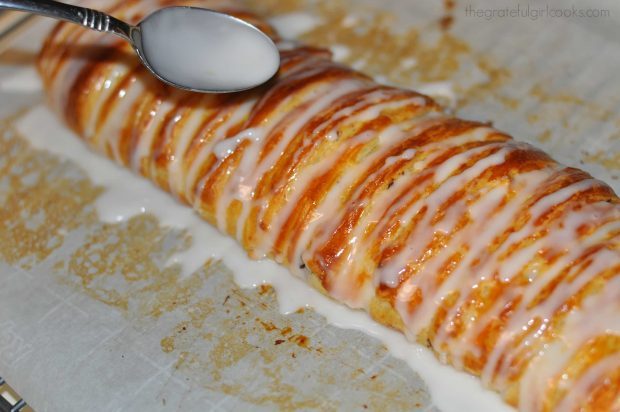
While the chocolate cream cheese danish is cooling, make the glaze to top the pastry.  Mix together a simple glaze of powdered sugar, milk, and vanilla in a small bowl, until smooth. Once the pastry has cooled completely, decoratively drizzle the glaze back and forth across the pastry until all the glaze is gone.

The parchment paper will help to collect any run-off glaze, and will help to make it an easy cleanup.  Let the chocolate cream cheese danish rest, while the glaze firms up.

Glaze being spooned over top of baked chocolate cream cheese danish.

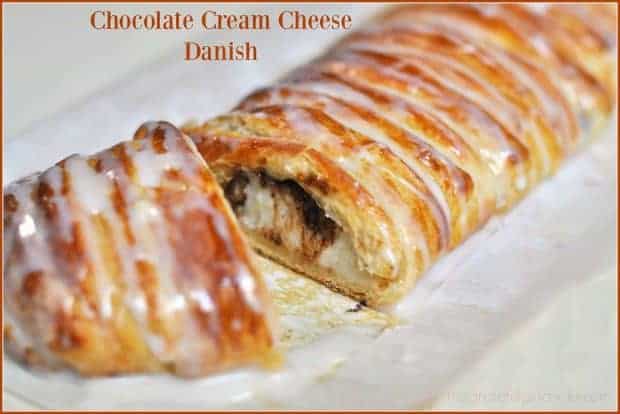
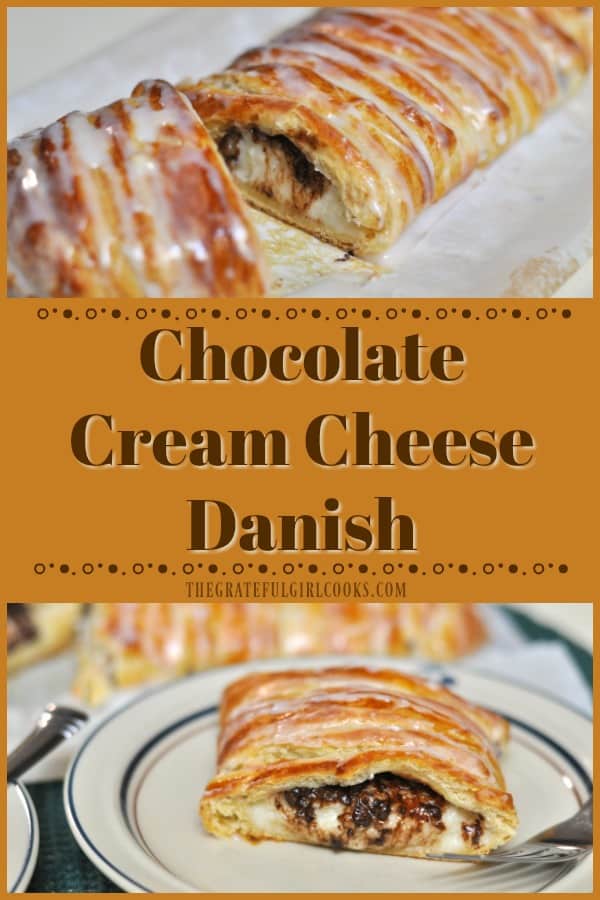
The pastry is ready to serve, once the glaze on top has become firm.  When ready to serve, cut the pastry into slices, grab a cup of coffee or tea… and dig in!

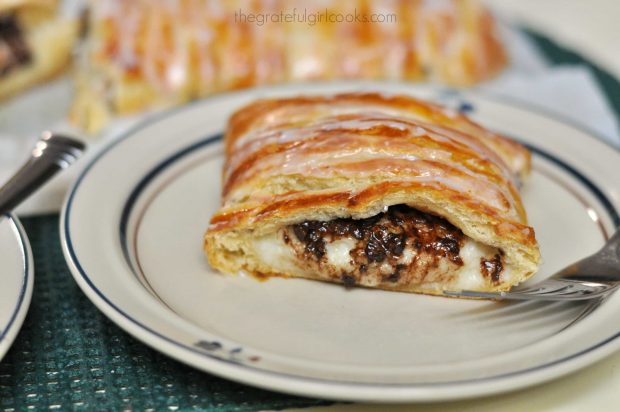
Slice of chocolate cream cheese danish on a plate with fork

This chocolate pastry is decadently rich, creamy, and filled with chocolate, so obviously it’s not something you want to eat every day, but for an occasional treat! It really is delicious!  A small piece goes a long way! Sure hope you enjoy this chocolate cream cheese danish. We sure do. Thanks for stopping by, and have a great day.

Looking For More Delicious Breakfast Treats Like This?

You can find all of my recipes in the Recipe Index, located at the top of the page. I have lots of yummy breakfast treats, including:

Interested In More Recipes?

Thank you for visiting this website. I appreciate you using some of your valuable time to do soIf you’re interested, I publish a newsletter 2 times per month (1st and 15th) with all the latest recipes, and other fun info. I would be honored to have you join our growing list of subscribers, so you never miss a great recipe!
There is a Newsletter subscription box on the top right side (or bottom) of each blog post, depending on the device you use, where you can easily submit your e-mail address (only) to be included in my mailing list.

You Can Also Find Me On Social Media:

Facebook page: The Grateful Girl Cooks!
Pinterest:
The Grateful Girl Cooks!
Instagram:
jbatthegratefulgirlcooks

Author's signatureRecipe Source:  http://www.laurenslatest.com/chocolate-cream-cheese-danish/

0 from 0 votes
Chocolate Cream Cheese Danish
Prep Time
10 mins
Cook Time
20 mins
Total Time
30 mins
 
You're gonna LOVE this decadent chocolate cream cheese danish! This chocolate filled pastry is EASY to make, using store bought crescent roll dough!
Category: Breakfast
Cuisine: American
Keyword: chocolate cream cheese danish
Servings: 8 servings
Calories Per Serving: 330 kcal
Author: JB @ The Grateful Girl Cooks!
Ingredients
For Pastry:
  • 1 can crescent rolls
  • 8 ounces cream cheese , softened (at room temp)
  • 1/2 cup granulated sugar
  • 2 Tablespoons all purpose flour
  • 1 teaspoon vanilla extract
  • 2 ounces chopped semi-sweet chocolate
  • 1 egg yolk , beaten (for brushing onto rolled pastry before baking)
For Glaze:
  • 1/2 cup powdered sugar
  • 1 teaspoon milk
  • 1/4 teaspoon vanilla extract
Instructions
  1. Before beginning, preheat your oven to 375 degrees F.
  2. Cream together softened cream cheese, granulated sugar, flour and vanilla until smooth. Set aside.
  3. Unroll the crescent dough without separating any of the triangles. Keep the dough all in one piece! Place dough onto a parchment paper-lined baking sheet, then press together all the perforations in the dough with your fingers.
  4. Spoon the cream cheese filling down the center of the dough lengthwise. Spread the dough out so it is 2-3 inches wide in center of roll.
  5. Evenly sprinkle chopped chocolate on top of the cream cheese filling.
  6. Cut 1 inch strips of dough evenly on each side of the filling (at a slight angle toward the top).
  7. Starting at top, lift pieces of dough and pull up and over filling, alternating sides as you go, so that you end up with a somewhat "braided" pastry. (Left side strip, Right side strip, etc.). Tuck any leftover pieces of dough into the ends.
  8. Beat an egg yolk in a small dish. Using a pastry brush, gently "paint" the yolk over the surface of the pastry until covered. Place pastry in a preheated 375 degree oven; bake for 20 minutes, until golden brown in color. Remove pastry (keeping the parchment paper underneath) to a wire rack. Let cool completely.
  9. Mix together glaze ingredients until smooth. Once pastry is completely cool, decoratively drizzle glaze over surface of pastry. Let glaze firm up, then cut into slices, serve and enjoy!
Nutrition Facts
Chocolate Cream Cheese Danish
Amount Per Serving (1 slice)
Calories 330 Calories from Fat 171
% Daily Value*
Fat 19g29%
Saturated Fat 9g56%
Cholesterol 56mg19%
Sodium 315mg14%
Potassium 79mg2%
Carbohydrates 37g12%
Sugar 26g29%
Protein 3g6%
Vitamin A 415IU8%
Calcium 35mg4%
Iron 1.1mg6%
* Percent Daily Values are based on a 2000 calorie diet.

Here’s one more to pin on your Pinterest boards!You're gonna LOVE this decadent chocolate cream cheese danish! This chocolate filled pastry is EASY to make, using store bought crescent roll dough!


Save

Save

Save

Save

Save

Save

Save

Save

Save

Save

Save

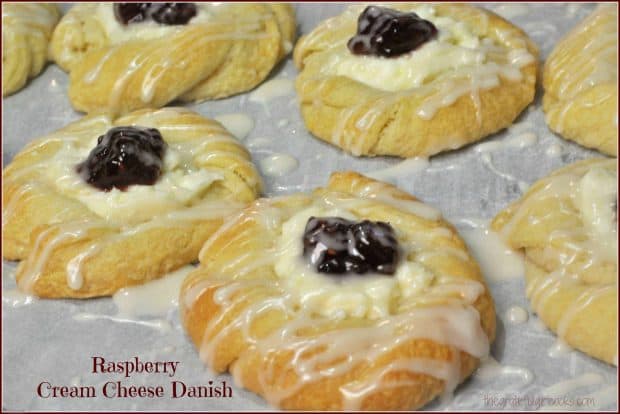
Raspberry Cream Cheese Danish

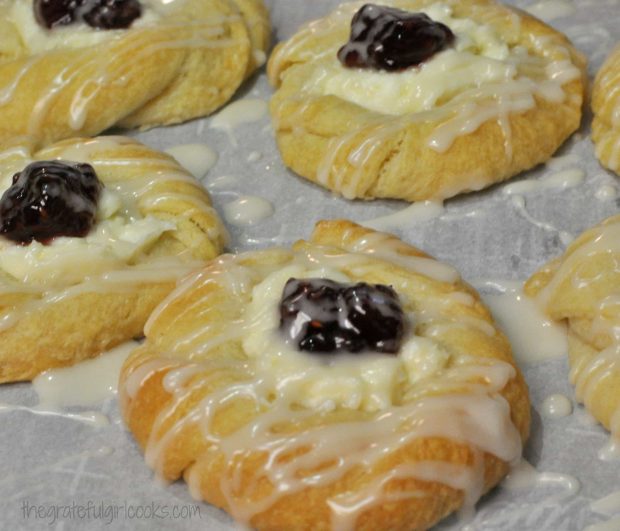
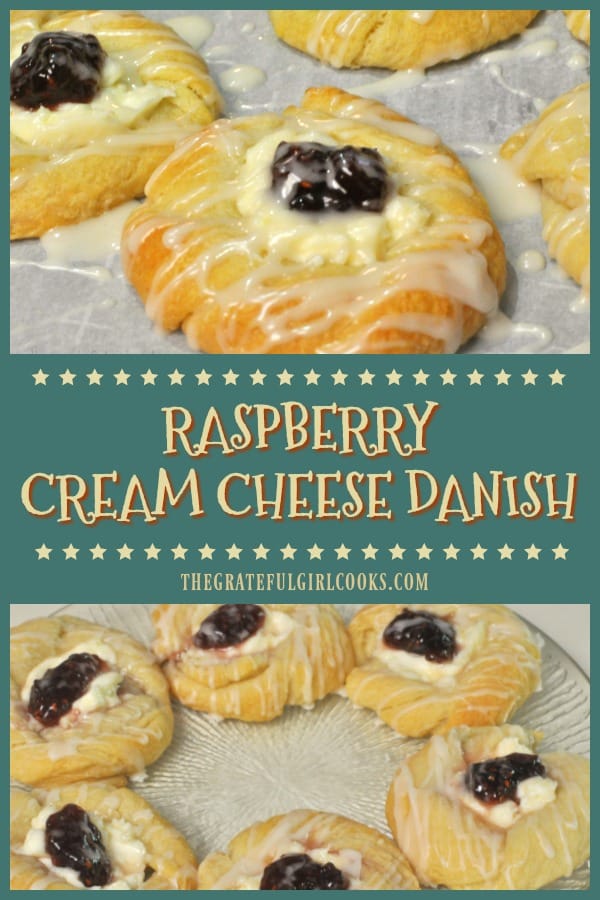
Raspberry cream cheese danish are crescent roll pastries with sweet cream cheese filling, baked and topped with jam, and drizzled with a simple glaze.Raspberry cream cheese danish are crescent roll pastries with sweet cream cheese filling, baked and topped with jam, and drizzled with a simple glaze.
I found a recipe for a quick, easy danish pastry the other day and decided to give it a try. I changed up the recipe just a smidge and the end result? An absolutely delicious Raspberry Cream Cheese Danish pastry, that was enjoyed with a steaming cup of strong coffee!

Our youngest son (“young” meaning 29 years old) popped in for a visit just as I started making these, so he ended up getting to enjoy them with us, and also went home with a big plate full of pastries. There are ALWAYS side benefits of visiting Mom and Dad, right? This recipe is actually fairly easy, and you’ll end up with 16 small danish pastries. Here’s how you make them:

Scroll Down For A Printable Recipe Card At The Bottom Of The Page

How To Make Raspberry Cream Cheese Danish Pastries

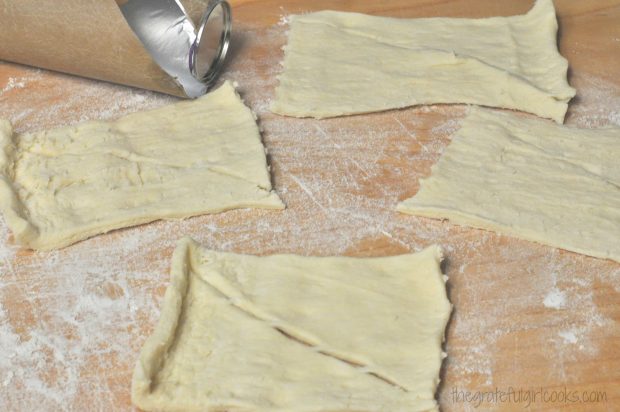
Start with 2 cans of refrigerated crescent rolls. The dough will come out with 4 rectangular pieces of dough (two triangles of dough attached with perforations in between). Press the perforations closed to form a solid rectangle.

Once you have done this to both cans of dough you should have 8 rectangles of dough. Sprinkle each rectangle very lightly with sugar (use 1 Tablespoon total evenly divided between rectangles).

Canned crescent roll dough is rolled out into rectangles.

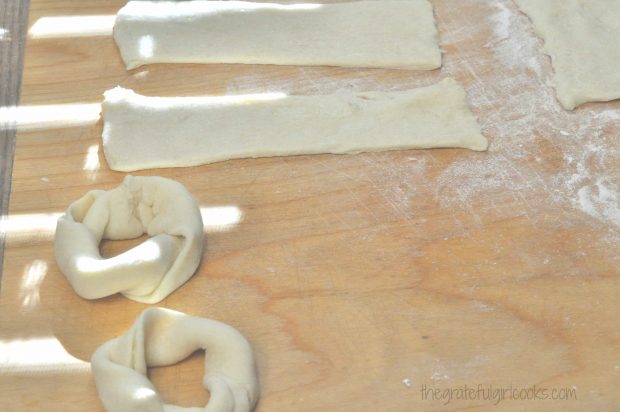
Gently roll out each rectangle to 8 inches long. Cut each rectangle in half length-wise. You will then have 16 rectangles, about 1 inch by 8 inches.

Shape The Dough

Pick up each piece of dough by each end and lightly twist the dough ends in opposite directions (i.e. left hand twist toward you, right hand away from you). Form a small circle with the twisted dough, and pinch to seal the ends.

The crescent roll dough is shaped into round rings.

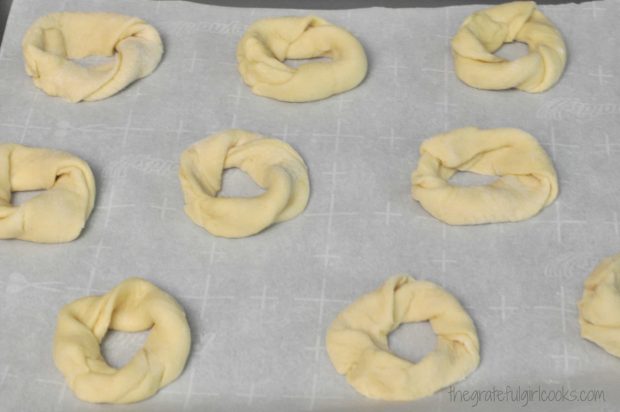
Place the dough circles onto parchment paper lined baking sheet(s), about 2 inches apart. Set aside.  Preheat oven to 350 degrees.

Dough circles are placed onto parchment paper line baking sheet.

Make The Cream Cheese Filling

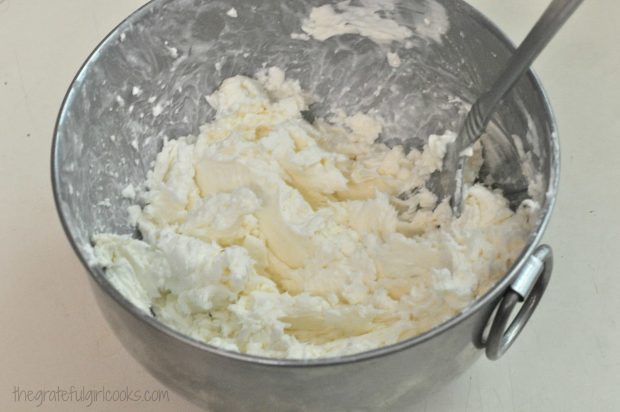
In a medium bowl, mix together room temperature cream cheese, 1 Tablespoon granulated sugar, lemon juice, vanilla extract and sour cream, until well combined.

A simple cream cheese filling is mixed together.

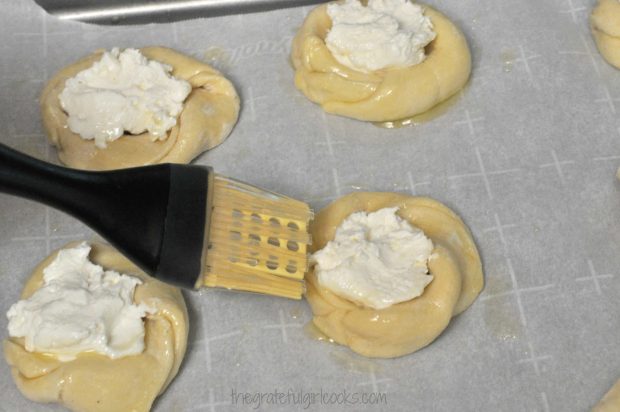
Add approximately 1 Tablespoon cream cheese filling to the center of each pastry. Lightly brush the pastry dough with melted butter. NOTE: I was concerned the cream cheese would run out the bottom of the pastry by leaving the pastry circle “open”, but having the parchment paper underneath prevented that from happening!

Bake The Raspberry Cream Cheese Danish Pastries

Bake the raspberry cream cheese danish pastries in a preheated 350 oven for 13-15 minutes, or until they are light golden brown.  When done, remove from oven to a wire rack (LEAVE THE PARCHMENT PAPER UNDERNEATH)

Brushing the danish pastries with melted butter before baking.

Prepare The Glaze While Pastries Cool

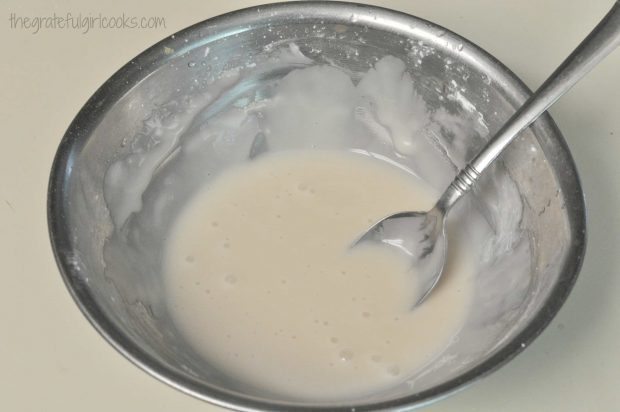
While pastries are cooling, prepare the glaze to drizzle over the top of the cooled pastries. Stir powdered sugar, milk, and vanilla extract together until smooth. You want to get it to a drizzling consistency. Too thick? Add drops of milk. Too thin? Add additional powdered sugar.

Place the glaze into a squeeze bottle or into a zip-top bag (you can snip off a tiny spout on the bottom corner of zip-top bag and use it as a pastry bag). You can also just use a spoon to drizzle the glaze onto cooled pastries.

Icing is mixed to drizzle over the finished raspberry cream cheese danish.

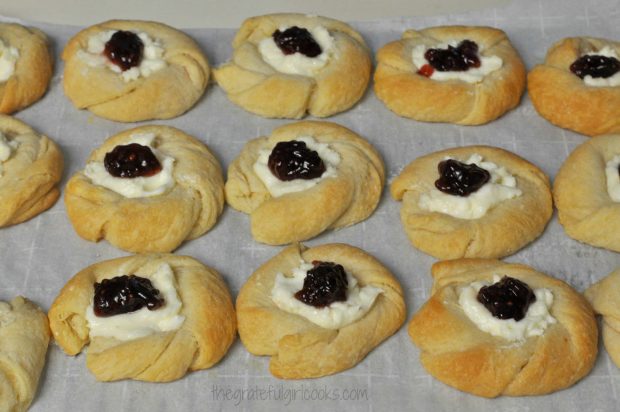
This is what the raspberry cream cheese danish pastries looked like fresh from the oven. Once they are completely cooled off, dollop with jam. Decoratively drizzle the glaze over each pastry. Let the glaze firm up a bit, then serve!

A dollop of raspberry jam is added to each baked danish pastry.

They are quite delicious, and weren’t hard to make, either!  THAT is a win-win.  Now where’s my huge mug of coffee??

A drizzle of icing is added to each of the raspberry cream cheese danish pastries before serving.

Hope you consider making these for the ones you love. See the notes section of the printable recipe for other flavors that would taste great as toppings for these pastries.  Have a wonderful day.

Looking For More Recipes For BREAKFAST PASTRIES?

You can find all of my recipes in the Recipe Index, located at the top of the page. A few recipes for breakfast pastries you might enjoy include:

Interested In More Recipes?

Thank you for visiting this website. I appreciate you using some of your valuable time to do soIf you’re interested, I publish a newsletter 2 times per month (1st and 15th) with all the latest recipes, and other fun info. I would be honored to have you join our growing list of subscribers, so you never miss a great recipe!
There is a Newsletter subscription box on the top right side (or bottom) of each blog post, depending on the device you use, where you can easily submit your e-mail address (only) to be included in my mailing list.

You Can Also Find Me On Social Media:
Facebook page: The Grateful Girl Cooks!
Pinterest: The Grateful Girl Cooks!
Instagram: jbatthegratefulgirlcooks

Author's signatureRecipe Slightly Adapted From: http://cakescottage.com/2016/03/07/easy-cream-cheese-danish/

0 from 0 votes
Raspberry Cream Cheese Danish
Prep Time
15 mins
Cook Time
15 mins
Total Time
30 mins
 

Raspberry cream cheese danish are crescent roll pastries with sweet cream cheese filling, baked and topped with jam, and drizzled with a simple glaze.

Category: Breakfast
Cuisine: American
Keyword: raspberry cream cheese danish
Servings: 16 servings
Calories Per Serving: 216 kcal
Author: JB @ The Grateful Girl Cooks!
Ingredients
  • 2 cans crescent rolls
  • 1 package (8 ounce) cream cheese, at room temperature
  • 2 Tablespoons granulated sugar , divided
  • 1 teaspoon fresh lemon juice
  • 3/4 teaspoon vanilla extract
  • 1 teaspoon sour cream
  • Melted butter , approx. 2 Tablespoons (for brushing onto pastries before baking)
  • Raspberry jam (1 small dollop per danish)
For icing:
  • 1 cup confectioner's sugar (powdered sugar)
  • 1 Tablespoon milk (may substitute water)
  • 1/4 teaspoon vanilla extract
Instructions
  1. Before beginning, preheat oven to 350 degrees. Line baking sheets with parchment paper.
  2. Remove crescent roll dough from cans. Keep crescent roll in rectangle shape (two triangles together). Press the perforations closed between dough triangles to make solid rectangle. You should end up with 8 rectangles. Using one Tablespoon (total amount) granulated sugar, sprinkle each rectangle lightly with sugar. Lightly roll out each rectangle to 8 inches long. Cut each rectangle in half lengthwise. (You should now have 16 pieces of dough 1 inch x 8 inches long).
  3. Pick up each piece of dough and holding on to both ends, twist the ends in opposite directions to make a loose "twisted rope" shape. Shape into a small circle and pinch ends of each circle together to seal. Place dough circles two inches apart on parchment paper lined baking sheet(s).
  4. In a separate bowl, prepare filling. Combine (room temp.) cream cheese, remaining Tablespoon granulated sugar, lemon juice, sour cream and vanilla extract. Mix until well combined.
  5. Place approximately 1 Tablespoon filling into the middle of each pastry circle (don't worry-the parchment paper underneath will keep the filling "in" the pastry!). Brush pastry dough with melted butter. Bake in 350 degree oven for 13-15 minutes (mine took 15), or until they are light golden brown. Remove pans from oven and let pastries cool on the parchment paper.
  6. Prepare icing by mixing together powdered sugar, milk and vanilla extract. You want it thin enough to drizzle over cooled pastries. Too thick? Add drops of milk. Too thin? Add more powdered sugar.
  7. Once pastries have completely cooled, place a small dollop of raspberry jam in the middle of the cream cheese filling; decoratively drizzle icing over the top of each pastry. Let icing firm up, then they are ready to serve! (icing can be put into squeeze bottle, drizzled with a spoon, or can be placed into a zip-top bag and the bottom corner can be snipped off to use as a piping bag.
  8. Enjoy!
Recipe Notes

There are lots of flavor variations for these pastries. Instead of raspberry, why not try other jam or pie filling, like cherry, blackberry, blueberry, strawberry, or lemon? All would be fantastic!

Nutrition Facts
Raspberry Cream Cheese Danish
Amount Per Serving (1 danish)
Calories 216 Calories from Fat 108
% Daily Value*
Fat 12g18%
Saturated Fat 6g38%
Cholesterol 19mg6%
Sodium 283mg12%
Potassium 24mg1%
Carbohydrates 25g8%
Sugar 15g17%
Protein 1g2%
Vitamin A 235IU5%
Vitamin C 0.7mg1%
Calcium 16mg2%
Iron 0.5mg3%
* Percent Daily Values are based on a 2000 calorie diet.

Here’s one more to pin on your Pinterest boards!Raspberry cream cheese danish are crescent roll pastries with sweet cream cheese filling, baked and topped with jam, and drizzled with a simple glaze.


Save

Save

Peach Turnovers

Peach turnovers with vanilla glaze are delicious, and so quick and easy to make using peach pie filling and puff pastry sheets! Sure to be a family favorite!Peach turnovers with vanilla glaze are delicious, and so quick and easy to make using peach pie filling and puff pastry sheets! Sure to be a family favorite!

Well, I’m finally coming up for air again after having houseguests for nearly 3 of the past 5 weeks, AND having tweaked my back big-time. How about I just say that the month of JULY 2015 was a memorable one, and leave it at that! Seriously, it’s time to get back to the old blog , since I can now sit down at my desk without wincing (ouch!). Today I am sharing a quick recipe for peach turnovers!

Scroll Down For A Printable Recipe Card At The Bottom Of The Page

How I Came Up With the Recipe For Peach Turnovers

After I saw a doctor and was able to move again without as much pain, I canned 9 quarts of Peach Pie Filling after going out and picking peaches at a local U-Pick Farm. I had to make up for lost time! With just a little bit of pie filling left over, I tried to figure out what else I could make with it. 

I remembered I had one sheet of Puff Pastry left in my freezer, and decided to make some quick Peach Turnovers, and off to the kitchen I went! The recipe uses two pastry sheets to make 8 turnovers, but I only made half a recipe, which is why you only see 4 turnovers in my pictures. The printable recipe gives the amount necessary to make 8 turnovers.

Prepare The Puff Pastry

First I got out the frozen puff pastry and let it thaw on the counter for about half an hour. The thawing out time was the hardest/longest part of the whole recipe. Go figure!

Puff pastry sheets are used to make peach turnovers.
Once thawed, carefully unroll the entire pastry sheet, and seal the perforated fold lines in the pastry together (using fingers) to form one whole sheet of puff pastry. You can see the fold lines in the photo below.

Puff pastry is rolled out and perforated lines in dough are sealed.
Cut the pastry into 4 equal sized squares, using a knife.

Peach turnover dough is cut into 4 equal squares.
Add The Peach Pie Filling

Place a heaping Tablespoonful of peach pie filling into the middle of each square, trying not to put too much onto each square (if using canned pie filling, you will not use the entire can!). Brush all the edges of each square with a beaten egg white and water mixture, then fold one side of each square (over the pie filling) to the opposite side, to form a triangle.

Once each triangle is made, crimp the edges of each triangle using the tines of a fork to seal the two sides of the dough together. (sorry, forgot to take photo of the crimping part). You can also just pinch the two pieces of dough together to completely seal the edges of the peach turnovers.

Peach pie filling is added to puff pastry squares, then dough is folded over.
Bake The Peach Turnovers

Carefully place the peach turnovers onto a cookie sheet which has been sprayed with non-stick spray, and bake for 20-25 minutes until light golden brown. When I make them, it usually takes 23 minutes, but keep an eye on yours, as oven temps can vary quite a bit!

Peach Turnovers are baked, then cooled on wire rack.
Time To Glaze The Turnovers

Once done, remove the peach turnovers to a wire rack to cool slightly. I place aluminum foil under the rack to catch any drips that might occur while glazing the turnovers. Mix up a quick glaze while the hand pies are cooling, and drizzle each of them with it.

Peach Turnovers are drizzled with glaze once cooled.
The glaze firmed up in a few minutes, then these delicious Peach Turnovers were ready to eat.  The recipe makes 8 peach turnovers (using 2 sheets of puff pastry), and I think they would be fantastic hand pies with cherry or apple pie filling, as well.

Peach Turnovers / The Grateful Girl Cooks!

Sure hope you will give these delicious peach turnovers a try. Hope you have a great week! Make the most of every minute you are given… and go out and make a difference to all you happen to interact with today!

Looking For More Recipes For PEACH DESSERTS?

You can find ALL of my recipes in the Recipe Index, located at the top of the page. I have some wonderful peach desserts you might be interested in, including:

Interested In More Recipes?

Thank you for visiting this website. I appreciate you using some of your valuable time to do soIf you’re interested, I publish a newsletter 2 times per month (1st and 15th) with all the latest recipes, and other fun info. I would be honored to have you join our growing list of subscribers, so you never miss a great recipe!
There is a Newsletter subscription box on the top right side (or bottom) of each blog post, depending on the device you use, where you can easily submit your e-mail address (only) to be included in my mailing list.

You Can Also Find Me On Social Media:

Facebook page: The Grateful Girl Cooks!
Pinterest:
The Grateful Girl Cooks!
Instagram:
jbatthegratefulgirlcooks

Author's signatureRecipe Source: http://thedomesticrebel.com/2015/07/13/the-easiest-peach-turnovers/

0 from 0 votes
Peach Turnovers
Prep Time
15 mins
Cook Time
23 mins
Total Time
38 mins
 

Peach turnovers with vanilla glaze are delicious, and so quick and easy to make using peach pie filling and puff pastry sheets! Sure to be a family favorite!

Category: Dessert
Cuisine: American
Keyword: peach turnovers
Servings: 8 turnovers
Calories Per Serving: 514 kcal
Author: JB @ The Grateful Girl Cooks!
Ingredients
For the Turnovers:
  • 1 box puff pastry (2 sheets total), thawed
  • 21 ounces (1 can) peach pie filling (or use your own homemade peach pie filling)
  • 1 egg white , beaten with 1 teaspoon water
For the Glaze:
  • 2 cups powdered sugar
  • 2 Tablespoons milk
  • 1 teaspoon vanilla extract
Instructions
  1. Preheat your oven to 375 degrees F.
  2. Prepare 2 cookie sheets by spraying with non-stick spray (or line with parchment paper). Set prepared sheets aside. You will put 4 turnovers on each baking sheet.
  3. Thaw the puff pastry sheets per instructions on box (approx. 30 min). Carefully unroll the puff pastry sheets, then gently press any of the perfprated fold lines together so that they are completely sealed.
  4. Cut the pastry sheets into four equal square pieces, using a sharp knife.
  5. Place a large Tablespoonful of peach pie filling into the middle of each puff pastry square.
  6. In a small bowl, mix together the egg white and the water. Make one turnover at a time. Use a pastry brush to brush the edges of the pastry square with egg white mixture. After brushing edges with egg white mixture, gently take one corner of the puff pastry and bring it over the pie filling to the opposite corner. Use the tines of a fork to crimp the 2 edges shut, which will seal the dough.
  7. Brush the top of each turnover with the egg white/water mixture. Repeat this process with each of the turnovers.
  8. Gently place turnovers onto prepared baking sheets. Bake at 375 degrees for about. 20-25 minutes. The turnovers should be a light golden brown when done. Remove to a wire rack to cool.
  9. While the turnovers are cooling down, whisk the glaze ingredients together in a medium sized bowl. You want the glaze to be smooth, and pourable. Add a bit more milk if necessary to thin glaze out a bit. Drizzle the glaze decoratively over the tops of the turnovers. When glaze has firmed up a bit, the turnovers are ready to serve and enjoy!
  10. These turnovers are great warm... OR at room temperature, and are best eaten on the day you make them. Enjoy!
Recipe Notes

30 minutes needed to thaw out the frozen puff pastry is not included in the Prep Time. Perhaps thaw the pastry earlier in the day and keep refrigerated until ready to use. Once pastry is thawed, these can be put together and baked in no time at all!

Nutrition Facts
Peach Turnovers
Amount Per Serving (1 turnover)
Calories 514
* Percent Daily Values are based on a 2000 calorie diet.

Here’s one more to pin on your Pinterest boards!Peach turnovers with vanilla glaze are delicious, and so quick and easy to make using peach pie filling and puff pastry sheets! Sure to be a family favorite!


Save

Save

Maple Twists

Maple Twists are delicious, made from scratch, maple-glazed pastry rings! The recipe makes 3 pastries (24 servings), so there’s plenty for everyone to enjoy!
Maple Twists are delicious, made from scratch, maple-glazed pastry rings! The recipe makes 3 pastries (24 servings), so there's plenty for everyone to enjoy!
I recently stumbled upon a recipe on the internet for Maple Twists that really intrigued me. I love the flavor of maple, so how could I go wrong with a maple glazed pull-apart breakfast pastry ring, especially one as cute as this?

As an added bonus, this recipe makes 3 pastry rings! (I froze two of them for another time, and one was eaten… quite quickly, I might add). Because the recipe makes 3, it is a perfect item to make for a large family, a brunch or to take to a potluck!).

This is a great “pull-apart” pastry ring, so you can grab one or two twists and enjoy them with a cup of good coffee or tea! Seriously good, AND they were actually kind of FUN to make.

Scroll Down For A Printable Recipe Card At the Bottom Of The Page

How To Make Maple Twists

First, I made the streusel (easy!) and set it aside while I made the dough.

Streusel topping is made for maple twists.
Next I made the dough, and let it rise for 45 minutes. Here it is before rising.

Dough for maple twists sits to let it rise before making pastries.
After dough had risen, I divided it into 3 equal pieces, and formed each piece into a ball. Then I rolled each dough ball out into a 12 inch circle. The dough was then placed it on a sprayed baking sheet (or on lightly sprayed parchment paper on a baking sheet).

Dough for maple twists is divided into 3 pieces, and rolled into circle.
Add The Filling To the Dough

When I took these next couple of pictures, I took them while dough was still on my cutting board… oops! PLEASE put the dough circles on baking sheet BEFORE doing the next steps (trust me-much easier!) Spread each of the dough circles with the streusel mixture. Spread it out as thinly as you can.

Streusel mixture is spread onto each of the maple twist dough circles.
Take something that is 2 inches across (I cut off the bottom of a small dixie cup), center it on top of the dough circle and press down slightly. Leave an indentation in the dough (without going all the way through).

Paper cup is used to make a two inch circle indentation in center of maple twists.
Using scissors or a pizza cutter, cut the dough circles into 16 equal sized wedges. Cut from the outside edge of the circle in. Stop at the indentation you made in the dough previously.

Each pastry is cut into 16 pieces.
If you look closely you can see where the slices stopped at the middle circle indentation.

Maple Twists are sliced into 16 wedges, but center of dough is not cut.
Twist And Turn The Maple Twists!

Now comes the FUN part! Carefully lift up each wedge, and twirl it 5 TIMES and then flatten the end down a bit so each wedge stays twisted. I literally counted every single twist. 1..2..3..4..5! It’s a tiny bit messy, but kinda fun!

Do this for each of the pastry rings! I used both hands, but for this picture, I had to snap the pic, so you get one freakishly pink set of fingers only!

Each wedge of maple twist dough is twisted several times.Time To Bake!

Once all are twisted, cover rings with plastic wrap and let them rise again for about an hour, then bake in a 375 degree oven for 18-22 minutes (mine took about 20). This is what the maple twists look like prior to baking.

Maple twists are ready to go into oven.Make The Maple Glaze

While they are baking, mix up the maple glaze (Easy!) The ingredients are simply mixed together to form a nice topping!

Maple glaze is mixed to brush onto the baked maple twists once done.
This is what the maple twists will look like once removed from oven. Let them cool down for about 5 minutes BEFORE you put the glaze on them.

Maple twists, fresh from the oven, before glazing.Glaze The Baked Maple Twists

Put aluminum foil UNDER the baking rack (to catch drips. After they have cooled for 5 minutes, drizzle the maple glaze over the top of each of the twists.

Use a pastry brush to help spread the glaze out, on each of the warm maple twists. Re-use any glaze that has dripped onto the foil. You want to get it all on top of these pastries.  Don’t they look good enough to eat? YUM.

Maple glaze has been brushed onto the pastry twists.
That’s it. Delicious, and full of maple flavor! Remember to wrap the maple twists really good after they have cooled completely, if you wish to freeze them. It was fun for me learning how to make these wonderful Maple Twists. Sure hope you will give them a try!

Looking For More PASTRY Recipes?

You can find ALL my recipes in the Recipe Index, located at the top of the page. I have a nice variety of pastry recipes you might want to check out, including:

Interested In More Recipes?

Thank you for visiting this website. I appreciate you using some of your valuable time to do soIf you’re interested, I publish a newsletter 2 times per month (1st and 15th) with all the latest recipes, and other fun info. I would be honored to have you join our growing list of subscribers, so you never miss a great recipe!
There is a Newsletter subscription box on the top right side (or bottom) of each blog post, depending on the device you use, where you can easily submit your e-mail address (only) to be included in my mailing list.

You Can Also Find Me On Social Media:

Facebook page: The Grateful Girl Cooks!
Pinterest:
The Grateful Girl Cooks!
Instagram:
jbatthegratefulgirlcooks

Author's signatureRecipe Source: http://fakeginger.com/2009/10/05/maple-twists/

0 from 0 votes
Maple Twists
Prep Time
2 hrs 30 mins
Cook Time
18 mins
Total Time
2 hrs 48 mins
 
Maple Twists are delicious, made from scratch, maple-glazed pastry rings! The recipe makes 3 pastries (24 servings), so there's plenty for everyone to enjoy!
Category: Breakfast
Cuisine: American
Keyword: maple twists
Servings: 24 (total of 3 pastry rings)
Calories Per Serving: 155 kcal
Author: JB @ The Grateful Girl Cooks!
Ingredients
For Dough:
  • 2 .75 cups all purpose flour
  • 3/4 cup milk
  • 1/4 cup butter
  • 3 Tablespoons granulated sugar
  • 1/2 teaspoon salt
  • 1 Tablespoon active dry yeast
  • 1 teaspoon Maple extract (or Mapleine imitation extract)
  • 1 egg
For Streusel:
  • 1/4 cup melted butter
  • 1/2 cup granulated sugar
  • 1/3 cup chopped pecans
  • 1 teaspoon cinnamon
  • 1 teaspoon Maple extract (or Mapleine imitation extract)
For Glaze:
  • 1 cup powdered sugar
  • 2 Tablespoons melted butter
  • 1-2 Tablespoons milk (I used 2)
  • 1/2 teaspoon Maple extract (or Mapleine imitation extract)
  • 1/2 teaspoon vanilla extract
Instructions
  1. Make the streusel: Combine streusel ingredients in small bowl; set aside.
  2. Make the dough: In a small saucepan, heat the milk and butter on low until very warm (but not too hot or boiling!).
  3. In the bowl of a stand mixer using a dough hook, place the warm milk/butter mixture. Add 1 cup of flour, granulated sugar, salt, yeast, egg, and the maple extract. Beat on low for a couple of minutes, then add the rest of the flour, in 1/2 cup increments, until dough is completely mixed together. Knead this in mixer for 5 minutes. Remove mixer bowl; cover with plastic wrap, and let dough rise in a warm place for 45 minutes (until it doubles in size).
  4. Once dough rises, remove it to a lightly floured surface. Divide dough into 3 equal-sized pieces. Roll into a ball. Roll each dough ball into a 12 inch wide circle. Put each dough circle onto prepared baking pan (sprayed with non-stick spray or covered with parchment paper that has been lightly sprayed). Evenly distribute streusel topping over each circle, spreading it as thin as you can to the edges.
  5. Use a 2" sized cup (or other instrument); press gently down; make a circle indentation in center of each circle. Do not cut all the way through.
  6. Use a pizza cutter or sharp knife; cut each circle into 16 equal sized wedges. Cut from outside of circle to the indentation mark.
  7. Carefully lift each "wedge" or section. Twist it 5 times, then press end down, so dough stays twisted. Twirl each section the same direction, using same process. Once done, cover each pastry circle with plastic wrap; let dough rise again for an hour.
  8. Preheat oven to 375 degrees. Uncover pastry rings, and bake in a 375 degree oven for 18-22 minutes. (oven times vary, so check it at 18 minutes. Mine took 20 minutes). The pastry should be golden brown. Remove to wire racks. Let cool for 5 minutes before glazing.
  9. While pastry is cooling down, whisk together glaze ingredients. Place aluminum foil under wire rack (to catch drips); after twists have cooled for 5 minutes, drizzle the glaze over the top of each pastry. I also used a pastry brush to brush the glaze across the top. Serve, and enjoy!
Recipe Notes

Most of the prep time is "inactive" time, waiting for dough to rise.

Nutrition Facts
Maple Twists
Amount Per Serving (2 strips)
Calories 155 Calories from Fat 54
% Daily Value*
Fat 6g9%
Saturated Fat 3g19%
Cholesterol 20mg7%
Sodium 97mg4%
Potassium 37mg1%
Carbohydrates 22g7%
Sugar 11g12%
Protein 2g4%
Vitamin A 170IU3%
Calcium 16mg2%
Iron 0.7mg4%
* Percent Daily Values are based on a 2000 calorie diet.

Here’s one more to pin on your Pinterest boards!Maple Twists are delicious, made from scratch, maple-glazed pastry rings! The recipe makes 3 pastries (24 servings), so there's plenty for everyone to enjoy!


Save

Save