Fruit and Cheese Danish Pastry is an easy to make treat using puff pastry dough, topped with cream cheese filling, assorted fruit jams, and icing.
I tried a new recipe for Fruit and Cheese Danish Pastry recently. The recipe was found on Pinterest after clicking through different websites looking for a great breakfast pastry recipe. This recipe I landed on is absolutely delicious and easy to prepare.
I happened to have a box of Puff Pastry sitting in my freezer patiently waiting (for a few months) it’s turn to be transformed into something wonderful. Well… this recipe for fruit and cheese danish was a great way to utilize it!
The pastries were perfect for an “out of the ordinary” breakfast for my husband and myself. Honestly, munching on one of these and sipping a large cup of strong, HOT coffee was a nice way to start the day. This pastry recipe is pretty straightforward, doesn’t require a degree in rocket science to make, and they are delicious! Hope you’ll give these fruit and cheese danish pastries a try!
Scroll Down for A Printable Recipe Card At The Bottom Of The Page
How To Make Fruit and Cheese Danish Pastry
Here’s what you do: First, remove one sheet of puff pastry from box and let it thaw slightly before unfolding it.

While the puff pastry dough is thawing, prepare the cream cheese filling… easy!

Cut The Pastry Dough In Steps
The next step is to unroll the dough. Press together the fold lines, and then cut the dough in half. I used my pizza cutter to make the cuts.
 Now you need to cut the dough in half again. You should now have 4 equal sized squares of puff pastry.
 Cut each of the 4 puff pastry squares in half. You should now have 8 rectangle sized pieces of pastry dough.

Forming and Filling The Fruit and Cheese Danish
Place 4 pieces of the dough onto a parchment paper lined baking sheet. Place the remaining 4 pieces of pastry dough onto another lined sheet, making sure to leave lots of space in between each piece.
Using a sharp knife, cut a border all around the edge (but don’t cut all the way through the pastry dough!). The outside part will rise up nice and puffy. The inside pastry will also rise, but not as much, due to the weight of the fruit and cheese.
 Now spoon some of the cream cheese filling onto each piece of dough like this, as shown below.
 Carefully spread the cream cheese filling out, almost to the border. This is where you need to stay within the lines!

Add The Fruit Toppings
Now place a small dollop of your favorite jam on top of the cream cheese and swirl it around a bit to blend (I used a toothpick). Use any flavor jam you prefer. I used my homemade jams: orange marmalade, strawberry, raspberry, and boysenberry and made a couple pastries of each flavor. It should look kind of like this shown below:
 Bake The Fruit And Cheese Danish
Brush the outside border of each pastry with an egg yolk mixture, then sprinkle the border with turbinado sugar. Place pans into the oven, and bake for 13-14 minutes (or until golden brown).
 The fruit and cheese danish pastries will look like this when you remove them from oven. Don’t they look colorful and good enough to eat?
 Here’s an “up close and personal” look at a boysenberry fruit and cheese danish. YUM.

Once the pastries have cooled, they are drizzled with a simple powdered sugar/lemon glaze. When the glaze has firmed up, they are ready to eat!

Dig in… and enjoy! We thought the fruit and cheese danish pastries were wonderful, and I really hope you do, too! If you enjoy this pastry, be sure and check out my recipe for Orange Cheese Danish Pastry (my very first recipe posted on the blog).
Looking For More BREAKFAST PASTRY Recipes?
You can find all of my recipes in the Recipe Index, located at the top of the page. I have some delicious pastry recipes you might enjoy, including:
Interested In More Recipes?
Thank you for visiting this website. I appreciate you using some of your valuable time to do so. If you’re interested, I publish a newsletter 2 times per month (1st and 15th) with all the latest recipes, and other fun info. I would be honored to have you join our growing list of subscribers, so you never miss a great recipe!
There is a Newsletter subscription box on the top right side (or bottom) of each blog post, depending on the device you use, where you can easily submit your e-mail address (only) to be included in my mailing list.
You Can Also Find Me On Social Media:
Facebook page: The Grateful Girl Cooks!
Pinterest: The Grateful Girl Cooks!
Instagram: jbatthegratefulgirlcooks

Original recipe source: https://sites.google.com/site/oakcottagerecipes/easy-fruit-and-cheese-danish

Fruit and Cheese Danish Pastry is an easy to make treat using puff pastry dough, topped with cream cheese filling, assorted fruit jams, and icing.
- 1 sheet of frozen puff pastry
- 4 ounces cream cheese , room temp.
- 1/4 cup granulated sugar
- 1/2 teaspoon vanilla extract
- 1 Tablespoon heavy whipping cream (or half n' half)
- 2 Tablespoons jam (of your choice)
- 1 egg yolk , beaten with 1 teaspoon water
- Turbinado sugar (to sprinkle on pastries before baking)
- 1 cup powdered sugar
- 2-3 Tablespoons lemon juice
- Preheat your oven to 400 degrees F.
- While oven is pre-heating, remove one sheet of puff pastry from freezer. Let it slightly thaw before unfolding dough (15 minutes or so).
- While dough is slightly thawing, prepare the cream cheese "filling". In a medium sized bowl, beat the cream cheese, granulated sugar, vanilla extract and whipping cream together, using an electric mixer. Mix for several minutes until mixture is smooth and spreadable. Set mixture aside.
- Unroll the puff pastry carefully, and try to press dough together where the fold lines were. Cut dough into 8 rectangles (dough is cut in half, then in half again, then each of the 4 squares is cut in half once more).
- Cover 2 baking sheets with parchment paper. Place 4 dough rectangles on each baking sheet, leaving ample space in between each piece. Take a sharp knife, and score a border all the way around the dough. Make sure to NOT cut all the way through to the bottom! (by cutting a border, the edges will rise up and hold the filling in better!-don't leave this step out!)
- Evenly distribute the cream cheese filling onto the middle of each dough rectangle. Use a knife or spatula to spread it out over the top of the pastry dough, but stay inside the cut border!
- Place a very small dollop of your favorite jam onto the cream cheese mixture. Use a toothpick and gently swirl the jam across the top of the pastry.
- Mix the egg yolk and water in a small bowl. Using a pastry brush, brush the egg yolk mixture around the outer border of each pastry. While the dough is still "wet", sprinkle the border lightly with turbinado sugar.
- Put the baking sheets into the oven and bake at 400 degrees F. for 13-14 minutes. The pastries should be golden around the edges. The dough should have also risen a bit. Take the pans from the oven and place them on a wire rack to cool completely.
- Once the pastries are cool, mix the powdered sugar and lemon juice in a small bowl. (if too thick to drizzle, just add a bit more lemon juice!). Use a spoon, and drizzle the glaze over the cooled pastries (I went side to side). Let the glaze firm up, then pastries are ready to be served.
- Enjoy!
Here’s one more to pin on your Pinterest boards!


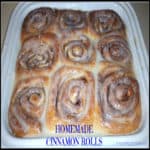
, they're boiled then baked, chewy AND delicious! / The Grateful Girl Cooks!")


, they're boiled then baked, chewy AND delicious! / The Grateful Girl Cooks!")


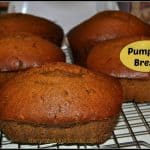
 in about 30 minutes! No rising time involved for this easy recipe. / The Grateful Girl Cooks!")


 in about 30 minutes! No rising time involved for this easy recipe. / The Grateful Girl Cooks!")


