Category: Breads

Sweet Potato Biscuits

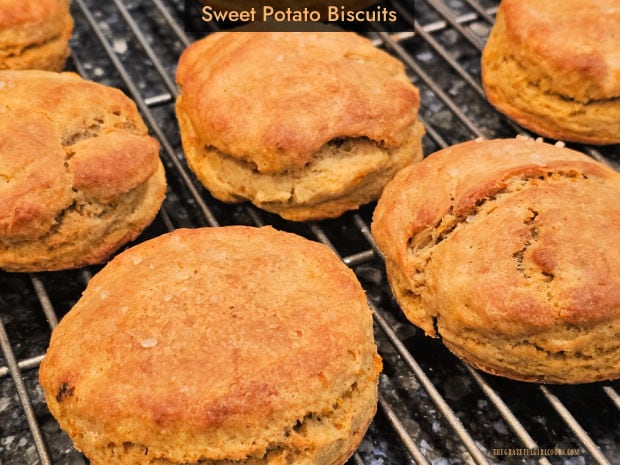
Sweet Potato Biscuits, flavored with cinnamon, nutmeg and cloves are a tasty side dish for soups or meat entrees! Recipe yields 8 biscuits.

If you’re looking for a delicious “bread” or “biscuit” recipe to serve on the side of your favorite soup or main dish, I hope you’ll check this one out.

I found the original recipe online. The original recipe made 4 pumpkin biscuits, but I changed some of the ingredients (especially the key ingredient), and created a sweet potato biscuit recipe that yields 8 biscuits.

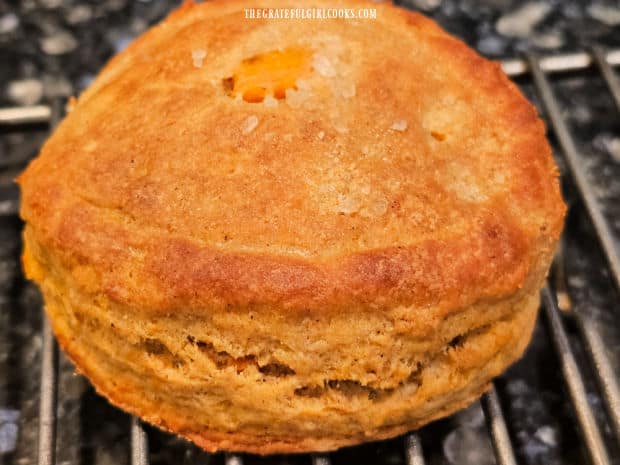
These biscuits are so good, and they’re fairly easy to make, which is a win-win in my book! The finished sweet potato biscuits are full of layers, and have great color, texture, and flavor.

I’m confident you’ll enjoy them with many of your favorite meals. Here’s how to make sweet potato biscuits.

Scroll Down For A Printable Recipe Card At The Bottom Of The Page

Cook And Then Mash The Sweet Potatoes

This recipe calls for ½ cup mashed sweet potatoes with no added ingredients. If you don’t have any mashed, plain sweet potatoes simply laying around your kitchen begging to be used, here’s how to make them fairly quickly.

NOTE: You can use drained, canned sweet potatoes if necessary, but this recipe calls for only a half cup, so a lot is wasted. I prefer to use a medium sized fresh sweet potato, because it doesn’t take much time at all to prepare and mash it.

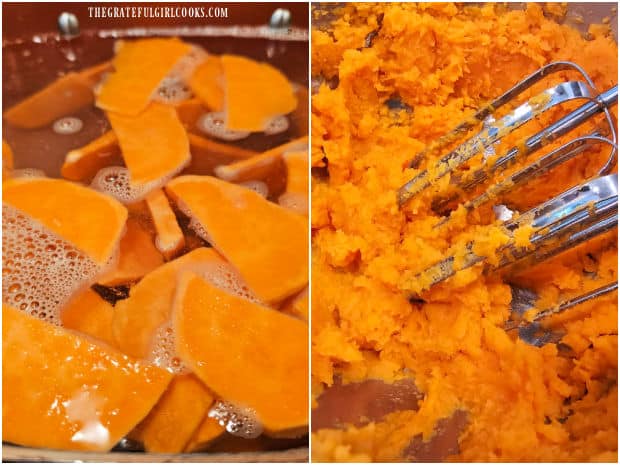
Peel a medium-sized sweet potato. Slice it length-wise in half, then cut each half into very thin slices (about ¼” thick).

Place the sweet potato slices in a saucepan. Cover completely with water, then bring them to a boil on Medium-high heat. Boil them for approx. 10-12 minutes or until tender.

When they’re tender, drain them well, and then use an electric mixer or potato masher to “mash” them well. Let the mashed sweet potatoes cool before adding this puree to the dough (make them ahead of time, if convenient).

Thin slices of sweet potato are boiled until tender, then mashed.

Make The Biscuit Dough

Before beginning, preheat your oven to 425°F. and line a large baking sheet with parchment paper (or a silpat mat).

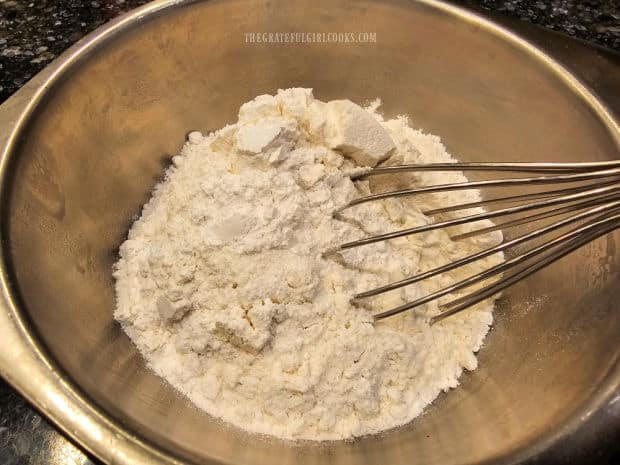
Now let’s make the biscuit dough. Whisk all the dry ingredients together in a large mixing bowl. These ingredients are flour, cinnamon, sugar, salt, baking soda, baking powder, ground nutmeg and cloves.

Use a pastry blender or two forks to cut VERY COLD butter chunks into the dry ingredients. Cut the butter in until it becomes about the size of peas.

Dry ingredients are combined in a large bowl.Cold chunks of butter are cut into the dry ingredients using a pastry blender.

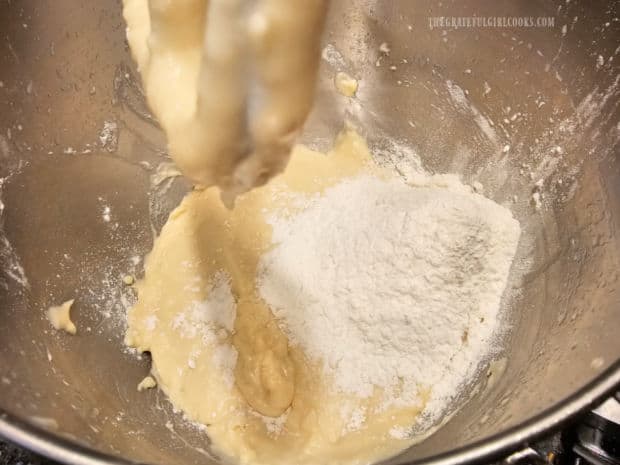
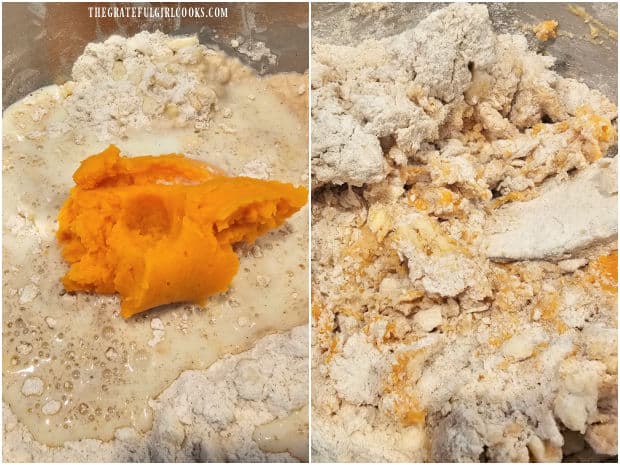
Add the mashed (cooled) sweet potatoes to the dough, along with cold buttermilk. Stir these ingredients into the dough only until combined and moistened. Don’t overmix!

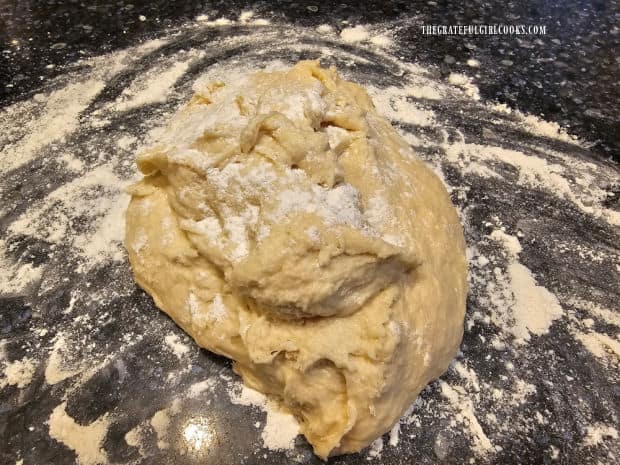
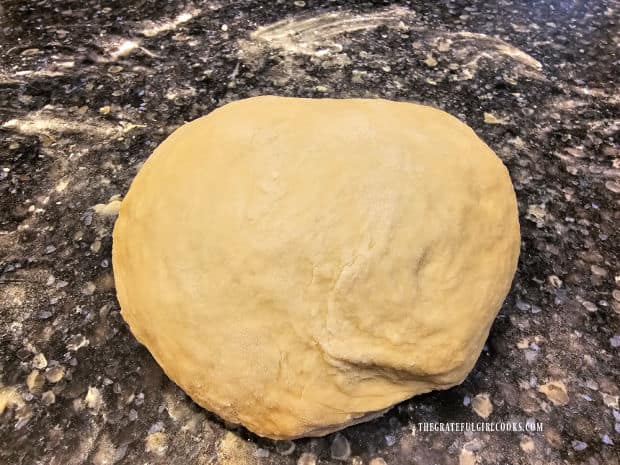
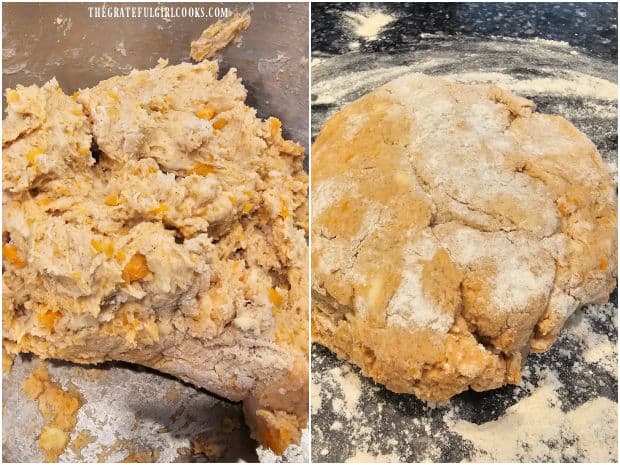
The dough will be very thick and tacky in texture. Place the dough “ball” onto a floured work surface, sprinkle lightly with flour, and gently knead it 4-5 times until it comes together in a somewhat cohesive ball. Don’t over-knead the dough!

Sweet potato puree and buttermilk are added to the biscuit dough.Thick biscuit dough is formed into a cohesive ball on a floured surface.

“Laminating” The Dough

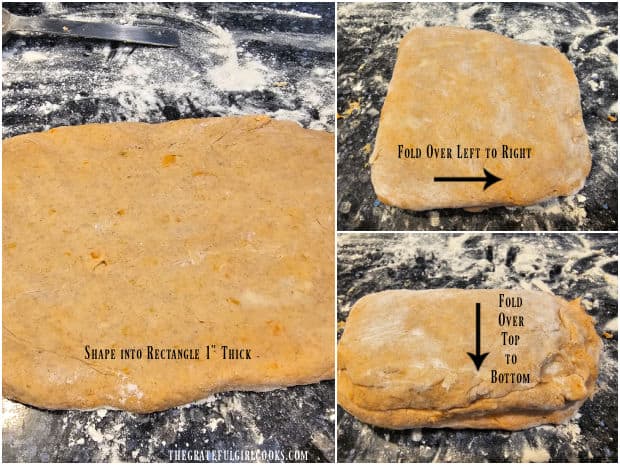
Now comes the fun part! This is called “laminating the dough”, and this simple process helps to create thin layers in the biscuits.

Use a flour dusted rolling pin to shape the dough into a rectangle about 1″ thick. Use your hands to square up the edges, if necessary.

Fold the dough from the left side over to the right side edge (see photo below). Now fold the dough over from the top side to the bottom side edge (see photo below).

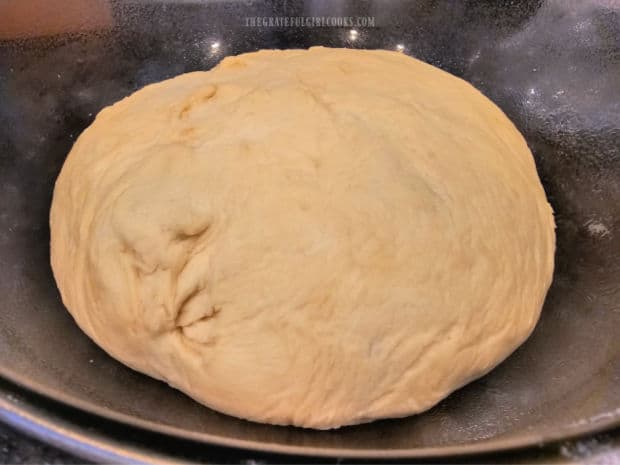
Pat or roll the dough out again to a rectangle and repeat this process TWO MORE TIMES. Don’t leave these steps out, as they help to create layers in the sweet potato biscuits.

The biscuit dough is "laminated" by a series of folds for the dough.

Cut Out The Biscuits

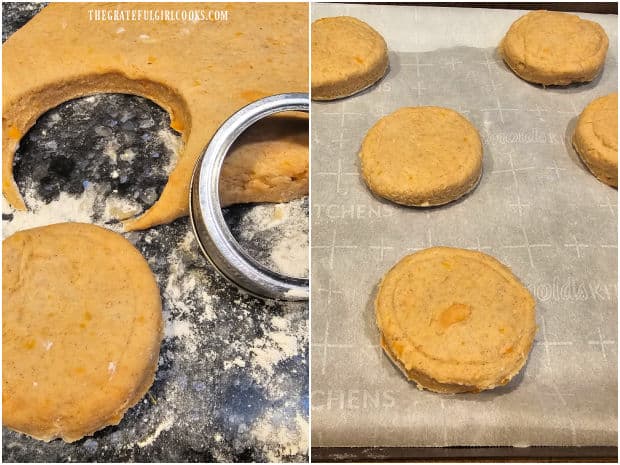
Roll the dough back out into a rectangle shape about 1″ thick. Use a 2½” wide (floured) biscuit cutter or a small canning jar screwband (see below) to cut out the sweet potato biscuits. This recipe will yield enough dough for 8 biscuits, each about 2½” wide.

You can gently reform the dough once cut to use it all up. Place the cut out biscuits on the parchment lined baking sheet, keeping them about 2″ apart. 

Lightly sprinkle a tiny pinch of sea salt on top of each biscuit, if desired. Now it’s time to bake the biscuits! 

Biscuit dough is cut into eight circles using biscuit cutter or jar screwband.

Bake The Sweet Potato Biscuits

Bake the sweet potato biscuits at 425°F. for 12 minutes, then brush the top of each biscuit with melted butter. Put the biscuits back into the oven to continue baking for another 2-3 minutes.

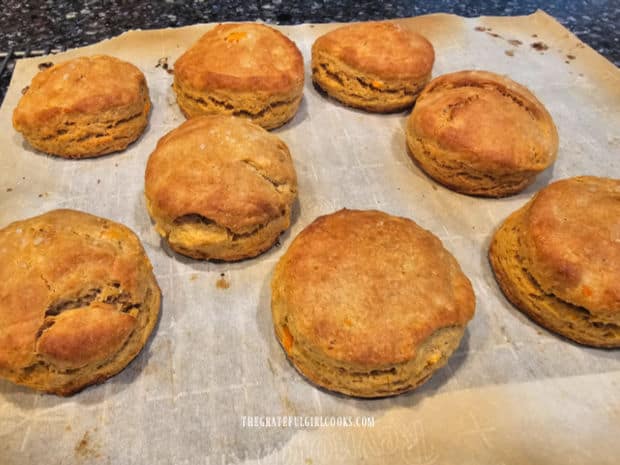
The biscuits should be done at this point. They should have some nice layering and be beautifully golden brown in color.

TIP: Optional- If you want browner biscuits, place the sheet of biscuits on a middle rack and turn on the broiler. Keep a very close eye on them and remove from the oven when they reach your desired “brown-ness”. 

The sweet potato biscuits cool on parchment paper after baking.

Remove the pan from the oven. Let the biscuits rest for a minute, then use a spatula to transfer them to a wire rack to cool slightly.

Serve the sweet potato biscuits while they’re warm. These delicious biscuits are wonderful served alongside a bowl of hot soup, or other main dishes.

A close up of a sweet potato biscuit, with flecks of sea salt on top.Cut in half, topped with butter, sweet potato biscuits are served with soup.

I hope you have the chance to make these flavorful biscuits, and trust you’ll enjoy them as much as we do. They can be frozen, if wrapped well and stored in an airtight freezer container.

Thank you for stopping by, and I invite you to come back soon for more family-friendly recipes. Take care, may God bless you, and have a GREAT day!

Looking For More Recipes Featuring SWEET POTATOES?

You can find ALL of my recipes in the Recipe Index, which is located at the top of the page. I have a nice variety of recipes featuring sweet potatoes, including:

Want More Recipes? Get My FREE Newsletter!

I publish a newsletter 2 times per month (1st and 15th) with lots of recipes, tips, etc..
Would you like to join our growing list of subscribers?

There is a Newsletter subscription box on the top right (or bottom) of each blog post, depending on the device you use.
You can submit your e-mail address there, to be added to my mailing list.

Find Me On Social Media:

Facebook page: The Grateful Girl Cooks!
Pinterest:
The Grateful Girl Cooks!
Instagram:
jbatthegratefulgirlcooks

Author's signature

Recipe adapted from (and with thanks to Chahinez at): https://lifestyleofafoodie.com/small-batch-pumpkin-biscuits/

↓↓ PRINTABLE RECIPE BELOW ↓↓

0 from 0 votes
Sweet Potato Biscuits
Prep Time
20 mins
Cook Time
15 mins
Total Time
35 mins
 

Sweet Potato Biscuits, flavored with cinnamon, nutmeg and cloves are a tasty side dish for soups or meat entrees! Recipe yields 8 biscuits.

Category: Bread, Side Dish
Cuisine: American
Keyword: sweet potato biscuits
Servings: 8 biscuits
Calories Per Serving: 252 kcal
Author: JB @ The Grateful Girl Cooks!
Ingredients
  • 2 cups all purpose flour
  • 1 teaspoon ground cinnamon
  • 1 teaspoon granulated sugar
  • 1 teaspoon baking powder
  • ½ teaspoon salt
  • ½ teaspoon baking soda
  • ¼ teaspoon ground nutmeg
  • teaspoon ground cloves
  • 8 Tablespoons COLD butter = 1 stick
  • ½ cup sweet potato (mashed) cooked, mashed, no added ingredients
  • ½ cup buttermilk (cold)
  • sea salt (optional) very small pinch to top each biscuit
  • 1 Tablespoon melted butter to top biscuits with while baking
Instructions
  1. Peel sweet potato. Slice in half, length-wise; cut into thin slices (about ¼" thick). Place slices in a saucepan; cover with water. Bring to a boil on Medium-high heat. Boil 10-12 minutes or until tender. Drain well, then mash, using electric mixer or potato masher. Let cool before adding puree to the dough.

  2. Preheat oven to 425°F. and cover a large baking sheet with parchment paper.

  3. Whisk first 8 ingredients together in a large bowl. Use pastry blender or two forks to cut VERY COLD butter chunks into the dry ingredients, until butter becomes about the size of peas.

  4. Add cooled sweet potato puree and buttermilk to the dough. Stir only until combined/moistened. Don't overmix! Dough will be thick and tacky in texture. Place dough onto lightly floured surface; sprinkle lightly with flour, and gently knead it 4-5 times until it comes together. Don't over-knead dough!

  5. Laminate the dough. Use rolling pin to shape dough into a rectangle approx. 1" thick. Use hands to square up edges. Fold dough from the left side over to the right side edge. Now fold the dough over from the top side to the bottom side edge. Roll dough out again to a rectangle; repeat this process TWO MORE TIMES. Don't leave these steps out, as they help create thin layers in the biscuits.

  6. Roll dough back into a rectangle shape 1" thick. Use a 2½" wide (floured) biscuit cutter or a small canning jar screwband to cut out 8 biscuits. Gently reshape dough once cut to use all the dough. Place cut out biscuits 2" apart on parchment lined baking sheet. Sprinkle a tiny pinch of sea salt on each biscuit (optional).

  7. Bake at 425°F. for 12 minutes, then brush top of biscuits with melted butter. Put biscuits back in oven; continue baking 2-3 more minutes. When done, biscuits should be golden brown in color. OPTIONAL- Want browner biscuits? Place sheet of biscuits on middle rack under the broiler. Broil, keeping a very close eye on them; remove from oven when they reach desired "brown-ness". 

  8. Remove biscuits from oven. Let sit a minute, then transfer biscuits to a wire rack to cool slightly. Serve sweet potato biscuits warm. Enjoy!

Nutrition Facts
Sweet Potato Biscuits
Amount Per Serving (1 biscuit)
Calories 252 Calories from Fat 117
% Daily Value*
Fat 13g20%
Saturated Fat 8g50%
Trans Fat 1g
Polyunsaturated Fat 1g
Monounsaturated Fat 3g
Cholesterol 34mg11%
Sodium 345mg15%
Potassium 195mg6%
Carbohydrates 29g10%
Fiber 2g8%
Sugar 2g2%
Protein 4g8%
Vitamin A 3765IU75%
Vitamin C 4mg5%
Calcium 57mg6%
Iron 2mg11%
* Percent Daily Values are based on a 2000 calorie diet.

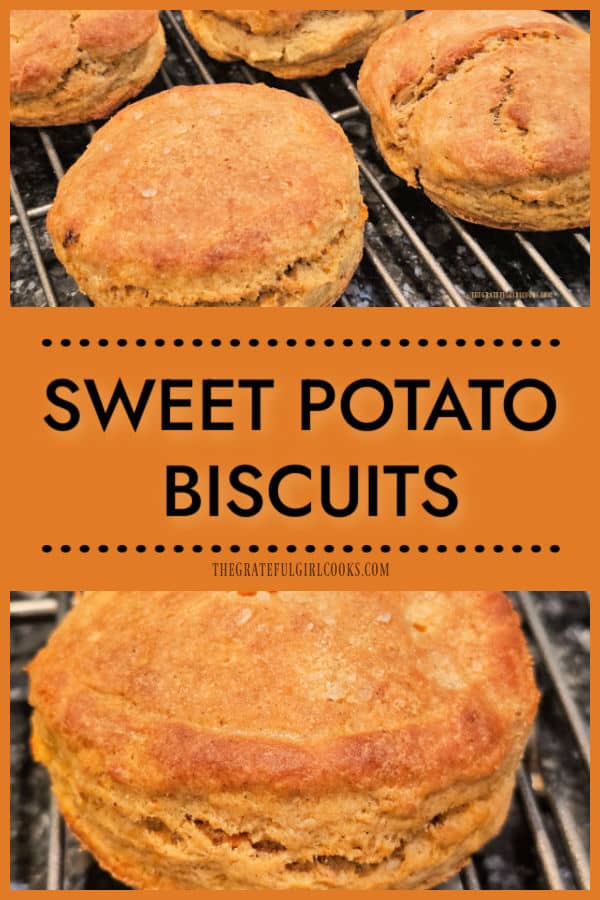
Here’s one more to pin on your Pinterest boards!Sweet Potato Biscuits, flavored with cinnamon, nutmeg and cloves are a tasty side dish for soups or meat entrees! Recipe yields 8 biscuits.


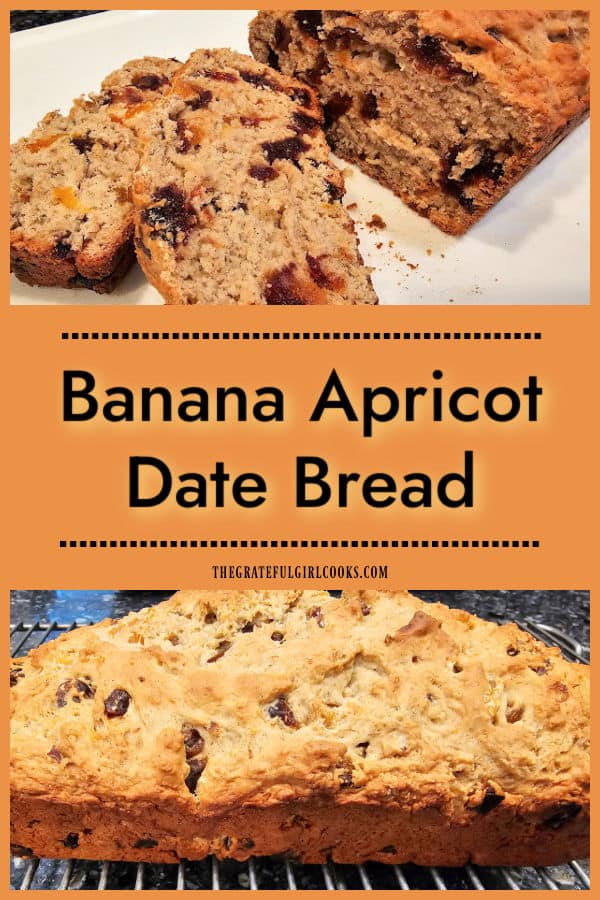
Banana Apricot Date Bread

Make a delicious loaf of Banana Apricot Date Bread for breakfast or a snack! Easy, low fat, and filled with dried apricots, dates and banana!

I love to bake loaves of bread, both sweet and savory, and have them around to enjoy for breakfast or as a snack / side dish. This bread takes about 15 minutes to pull together, and then into the oven it goes, so it’s simple to prepare!

Today I want to share a recipe I found in one of my old Weight Watcher cookbooks. I made a few slight changes to the original recipe and we really enjoy this bread, so it’s time to post the “how-to’s” on my blog.

The recipe (as written) will yield about 10 slices of bread, and does not call for a large amount of sugar. This bread gets most of its sweetness from the natural sugars that are present in dried dates and apricots, and one VERY RIPE banana!

A loaf of banana apricot date bread is really quite delicious, and I think you will enjoy it, too! Here’s how to make a loaf.

Scroll Down For A Printable Recipe Card At The Bottom Of The Page

Prepare The “Dry” Ingredients

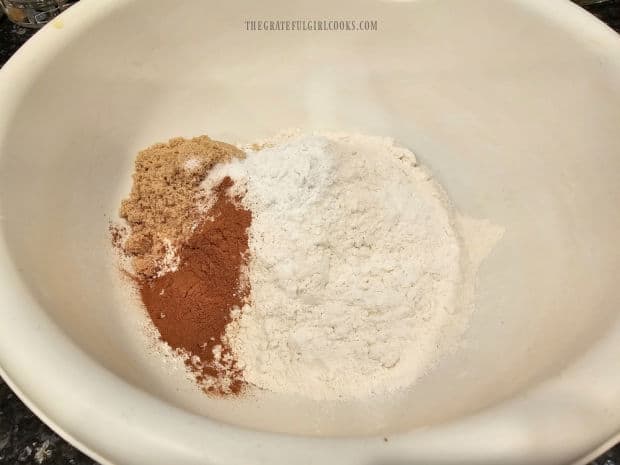
Measure all purpose flour, light brown sugar, baking powder, ground cinnamon and salt in a large mixing bowl. Stir well, to combine these ingredients.

Flour, brown sugar, baking powder, cinnamon and salt in a mixing bowl.

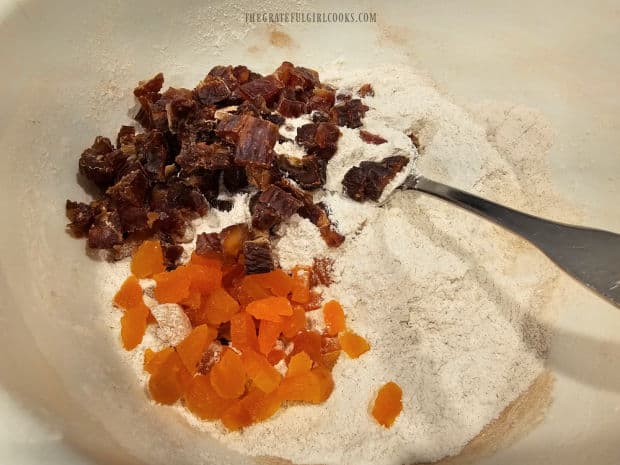
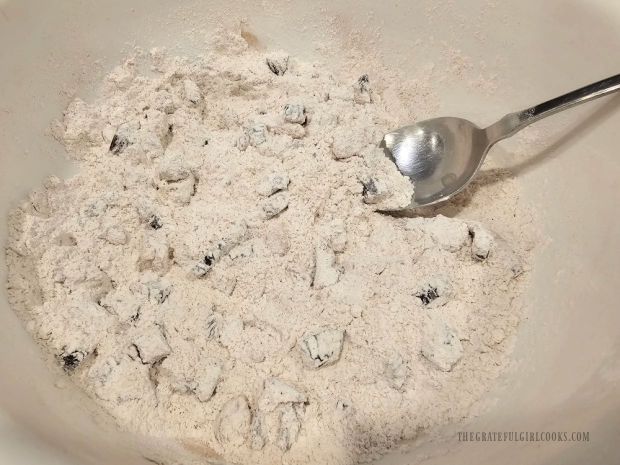
Add finely chopped dried dates and apricots, and stir them into the flour mixture until the fruit is well-coated.

The flour coating will help the fruit to stay suspended in the bread dough and not fall to the bottom of the loaf.

Dried, chopped dates and apricots are added to flour mixture in bowl.Chopped dates and apricots are coated with the flour mixture.

Make The “Wet” Ingredients

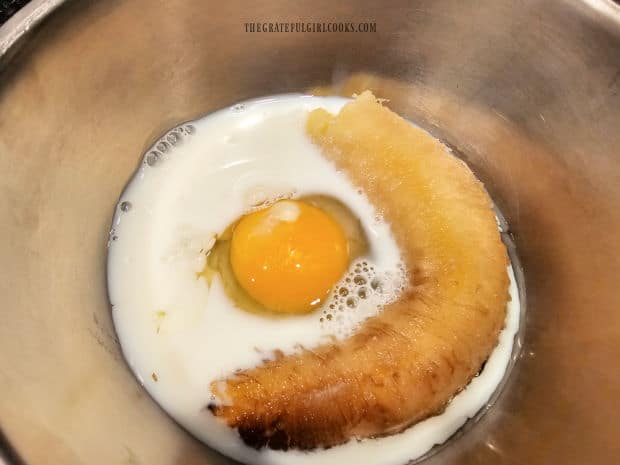
In a separate bowl, combine a large egg, a VERY RIPE banana, and low-fat milk. The riper the banana, the more sweetness there will be!

Use a fork to fully mash the banana and mix it very well with the egg and milk. Add this mixture to the bowl of dry ingredients.

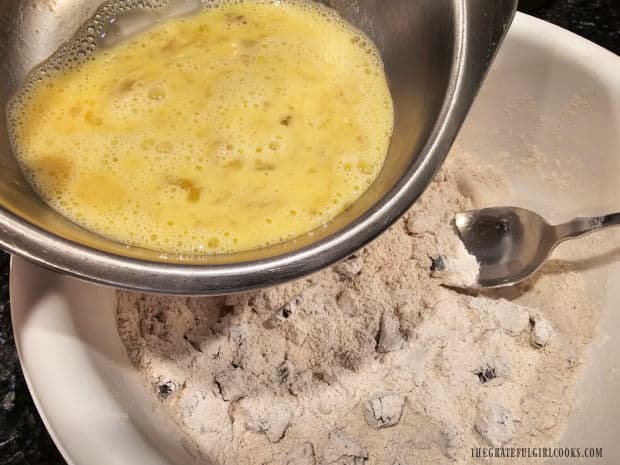
A ripe banana, an egg and milk in a bowl, ready to be mashed and beaten.Pouring the banana, milk and egg mixture into the dry ingredient bowl.

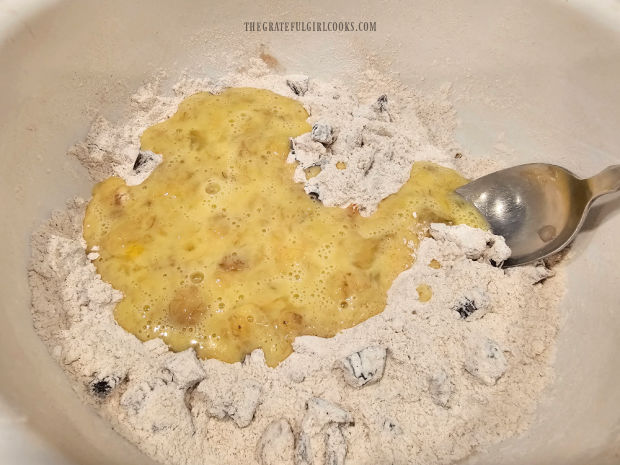
Use a spoon to stir together these ingredients. Yes, the dough will be fairly thick. Mix until it comes together.

Mashed banana mixture is added to the dry ingredients for the bread.

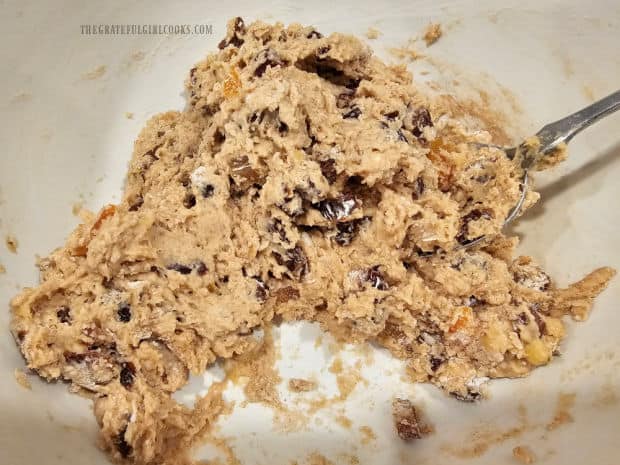
Do not overmix, simply stir until all the wet and dry ingredients have been combined into a thick dough.

The bread batter is fairly thick after all ingredients are mixed together.

Time To Bake!

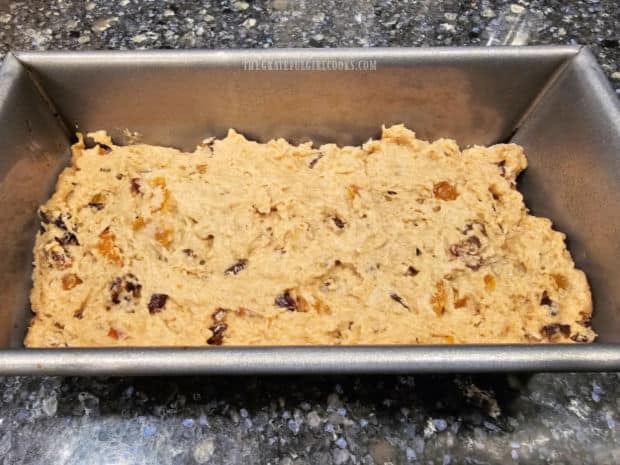
Generously spray or grease an 8″ x 4″ loaf pan on the bottom and sides. Spoon the thick bread batter into the pan, and spread, to evenly distribute it in the pan.

Bake the banana apricot date bread at 350°F. for between 45-55 minutes. When done, a toothpick inserted into the top/center of the loaf should come out clean, and the loaf will be golden brown on top.

TIP: Oven temps can vary quite a bit, so I recommend checking the loaf at 45 minutes, then cook more, if necessary.

Let the baked loaf cool in the pan for 3-4 minutes, then remove it from the pan, and let it cool on a wire rack.

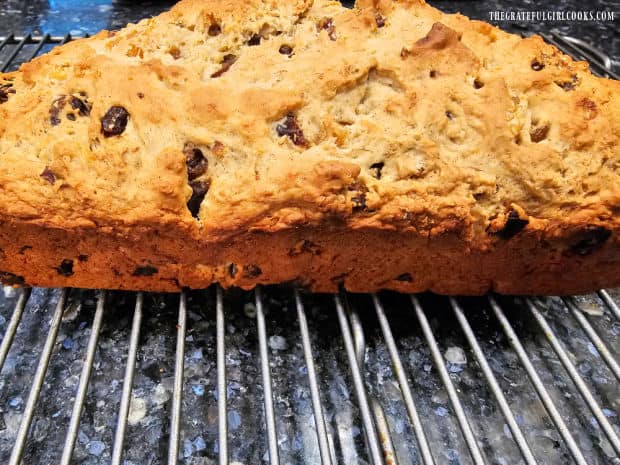
Bread dough batter, in a loaf pan, ready to be baked.A side view of a loaf of banana apricot date bread, cooling on a wire rack.

Enjoy A Slice Of Banana Apricot Date Bread

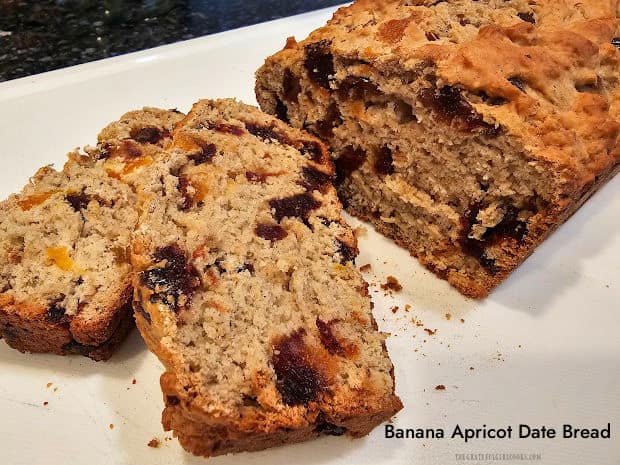
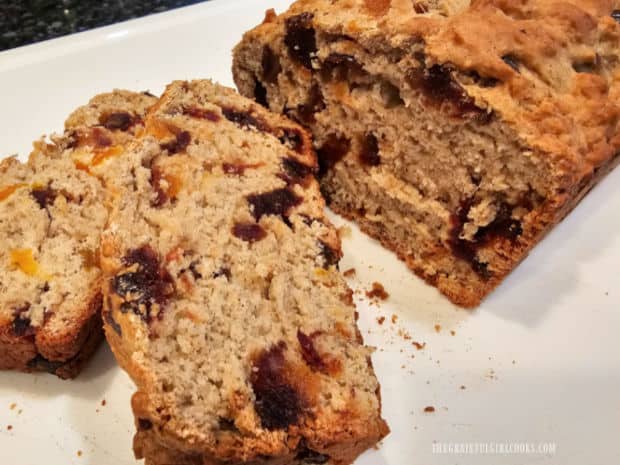
Let the loaf cool for about 15 minutes before attempting to slice it, for best results. Slice and serve this delicious bread, and enjoy the chewy fruit filling!

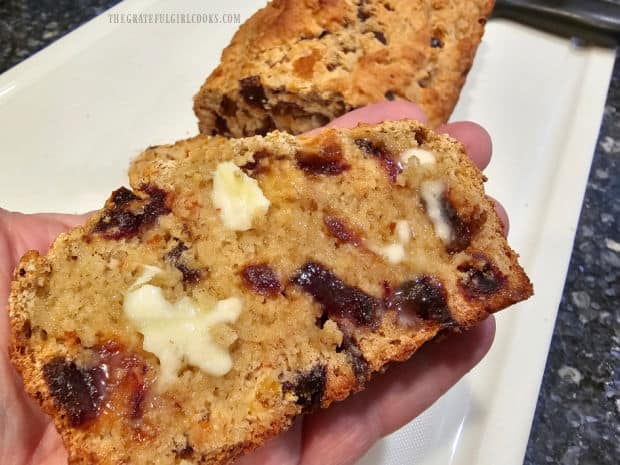
Wrap any leftover slices well in plastic wrap, and store at room temperature for 2-3 days (for best freshness). This bread reheats well in the microwave (low temp.), and we enjoy it served slightly warm, with butter on top.

Two slices of banana apricot date bread, with remaining loaf in background.A slice of warm banana apricot date bread, with melted butter on top.

I hope you have the opportunity to make this delicious banana apricot date bread, and trust you’ll enjoy it as much as we do.

Thank you for stopping by, and I invite you to come back again soon for more family-friendly recipes. Take care, may God bless you, and have a GREAT day!

Looking For More BREAD Recipes?

You can find ALL of my recipes in the Recipe Index, which is located at the top of the page. I have LOTS of delicious quick bread and yeast bread recipes to choose from, including:

Want More Recipes? Get My FREE Newsletter!

I publish a newsletter 2 times per month (1st and 15th) with lots of recipes, tips, etc..
Would you like to join our growing list of subscribers?

There is a Newsletter subscription box on the top right (or bottom) of each blog post, depending on the device you use.
You can submit your e-mail address there, to be added to my mailing list.

Find Me On Social Media:

Facebook page: The Grateful Girl Cooks!
Pinterest:
The Grateful Girl Cooks!
Instagram:
jbatthegratefulgirlcooks

Author's signature

Original recipe source: “Weight Watchers New Complete Cookbook” page 61, published in 1998 by Wiley Publishing

↓↓ PRINTABLE RECIPE BELOW ↓↓

0 from 0 votes
Banana Apricot Date Bread
Prep Time
15 mins
Cook Time
45 mins
Total Time
1 hr
 

Make a delicious loaf of Banana Apricot Date Bread for breakfast or a snack! Easy, low fat, and filled with dried apricots, dates and banana!

Category: Bread/Breakfast, Snack
Cuisine: All Cuisines
Keyword: banana apricot date bread
Servings: 10 slices
Calories Per Serving: 148 kcal
Author: JB @ The Grateful Girl Cooks!
Ingredients
  • cup all purpose flour
  • 3 Tablespoons light brown sugar (packed)
  • teaspoons baking powder
  • ¾ teaspoon ground cinnamon
  • ½ teaspoon salt
  • 8 dried dates pitted, finely chopped
  • 8 dried apricots pitted, finely chopped
  • 1 large egg
  • 1 large very ripe banana
  • ¼ cup lowfat milk
Instructions
  1. Preheat oven to 350℉. Grease or spray bottom and sides of an 8" x 4" loaf pan. Set aside.

  2. Stir flour, brown sugar, baking powder, cinnamon and salt in a large mixing bowl until combined.

  3. Add chopped dried dates and apricots; stir them into flour mixture until fruit is well-coated. The flour coating helps the fruit stay suspended in the bread and not fall to the bottom of the loaf.

  4. In separate bowl, combine egg, ripe banana, and milk. Use a fork to fully mash the banana; mix with the egg and milk. Add this to the flour mixture; stir only until combined (don't overmix); dough will be fairly thick.

  5. Spoon batter into prepared loaf pan; spread, to evenly distribute it in the pan. Bake at 350°F. for between 45-55 minutes. When done, a toothpick inserted into the top/center of the loaf should come out clean; loaf will be golden brown. TIP: Oven temps can vary quite a bit, so I recommend checking the loaf at 45 minutes, then cook longer, if necessary.

  6. Let loaf cool in the pan for 3-4 minutes, then remove it from the pan, and let it cool on a wire rack for at least 15 minutes before slicing. Enjoy!

Nutrition Facts
Banana Apricot Date Bread
Amount Per Serving (1 slice (1/10 of total))
Calories 148 Calories from Fat 9
% Daily Value*
Fat 1g2%
Saturated Fat 0.2g1%
Trans Fat 0.002g
Polyunsaturated Fat 0.2g
Monounsaturated Fat 0.2g
Cholesterol 19mg6%
Sodium 129mg6%
Potassium 296mg8%
Carbohydrates 32g11%
Fiber 2g8%
Sugar 12g13%
Protein 4g8%
Vitamin A 279IU6%
Vitamin C 1mg1%
Calcium 63mg6%
Iron 1mg6%
* Percent Daily Values are based on a 2000 calorie diet.

Here’s one more to pin on your Pinterest boards!Make a delicious loaf of Banana Apricot Date Bread for breakfast or a snack! Easy, low fat, and filled with dried apricots, dates and banana!

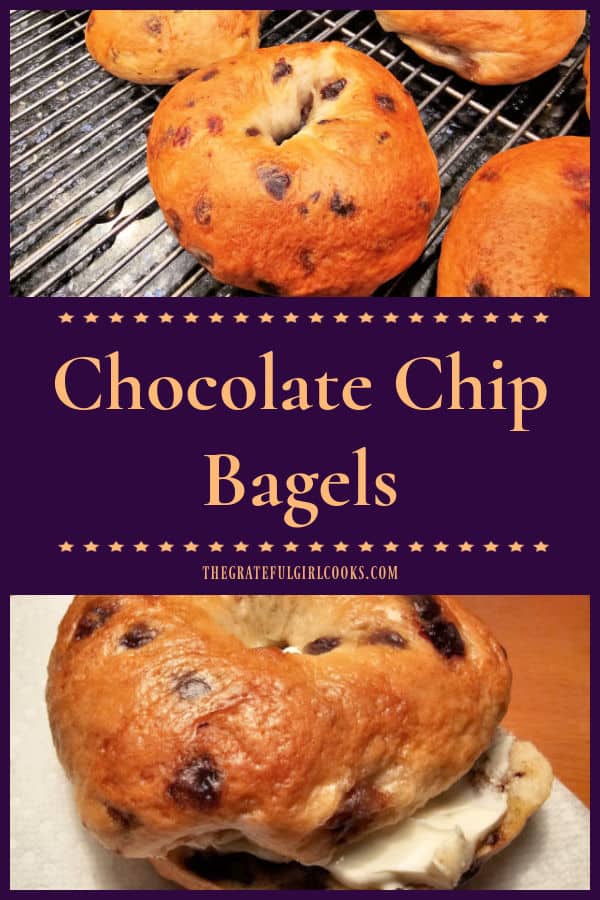
Chocolate Chip Bagels

Make homemade NY-style Chocolate Chip Bagels at home. They’re filled with mini chocolate chips, and are absolutely delicious! Recipe makes 8.
Make homemade NY-style Chocolate Chip Bagels at home. They're filled with mini chocolate chips, and are absolutely delicious! Recipe makes 8.

Do you enjoy bagels? We REALLY do, and over the years I have made quite a few varieties of them. I always make them NY style which means you boil the bagels first, BEFORE baking them.

This technique gives the bagels a wonderful, chewy texture, which is the trademark of a great bagel, in my opinion! Add lots of mini semi-sweet chocolate chips inside, and you’ve got yourself a fantastic bagel!

These chocolate chip bagels taste wonderful, and honestly, they are fairly simple to make, with only a few kitchen ingredients. Once you make a batch successfully, you may never go back to store-bought! Here’s how to make them.

Scroll Down For A Printable Recipe Card At The Bottom Of The Page

Make The Bagel Dough

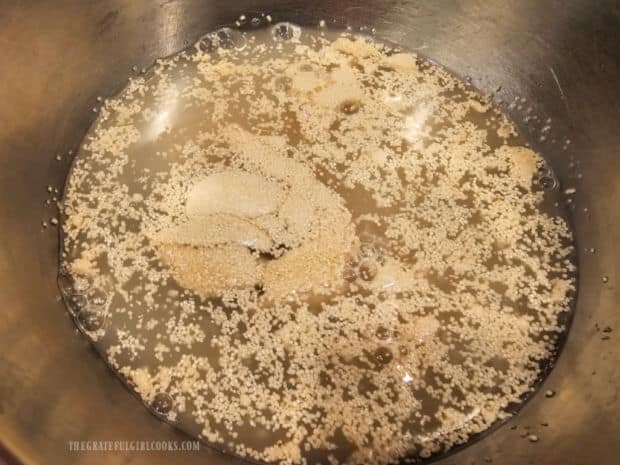
Dissolve yeast and granulated sugar in ½ cup of very warm water (110°F / 43.33°C). If the water is too hot, it can “kill off” the yeast (and you do NOT want that!). Once dissolved, let the mixture rest for about 5 minutes.

After 5 minutes, you should see tiny bubbles forming on top, which indicate the yeast is “good and alive”. Hooray, because that is a GOOD thing!

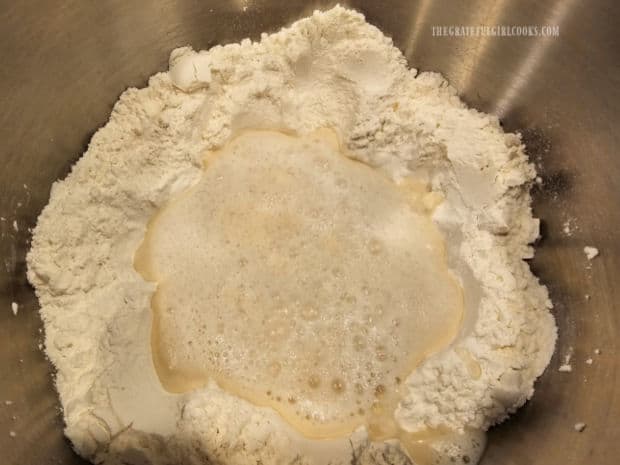
In a large bowl (or a stand mixer bowl), combine all purpose flour and salt. Make a “deep well” in the center of the flour mixture, then slowly pour the yeast liquid into the “well”. Add the remaining ½ cup of water at this time, as well.

Yeast, sugar and water are combined for 5 minutes in a mixing bowl.Yeast mixture is added to the well of a flour and salt mixture.

Use an electric mixer with a dough hook (*see note below) to incorporate the yeast mixture and water into the flour mixture. The dough will be fairly sticky and thick when it has been combined.

*NOTE: If you don’t have a dough hook, no problem! Simply knead the dough by hand, incorporating the liquid into the dough until fully combined. Yes, it is a bit messy, but you’ll get it done.

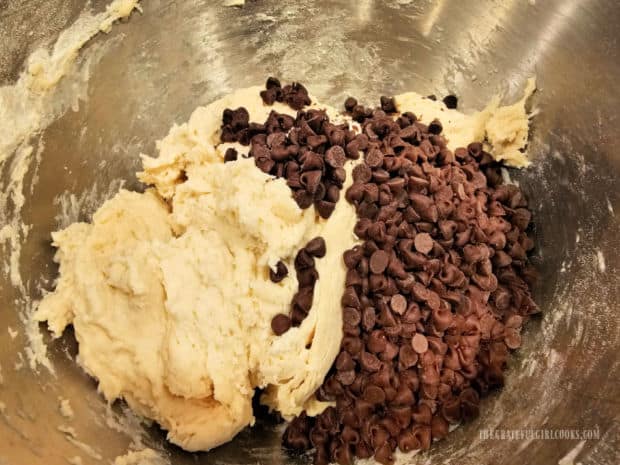
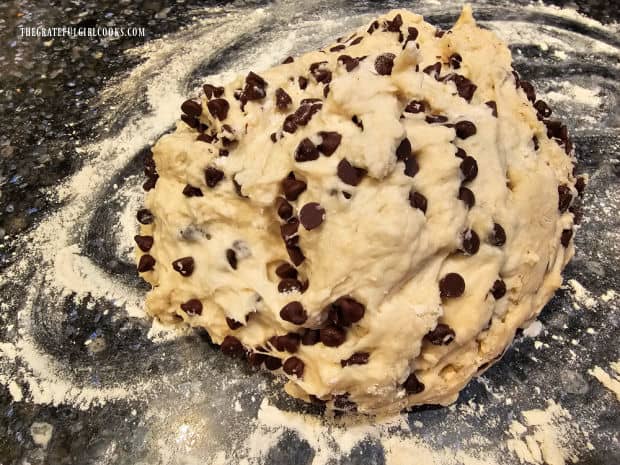
STIR the mini chocolate chips in until they are evenly distributed in the dough. Transfer the dough from the bowl onto a floured work surface.

Mini chocolate chips are added and stirred into the bagel dough.The chocolate chip bagel dough is put on a floured surface to knead.

Knead, Then Let The Dough Rise 

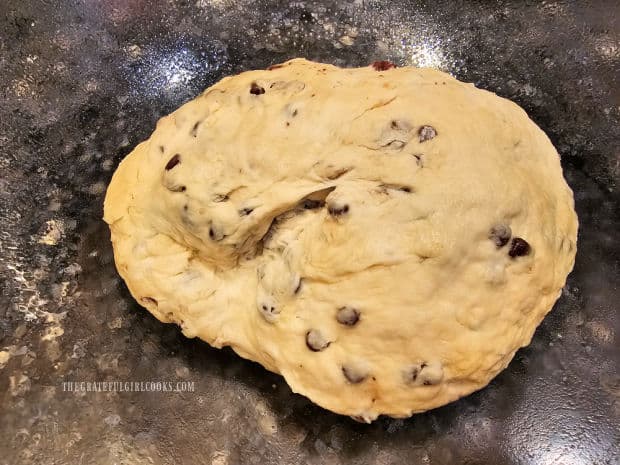
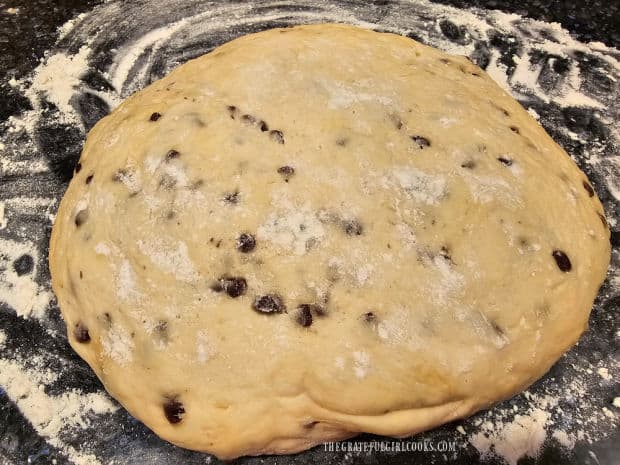
Knead the dough, using the palms of your hands for 3-5 minutes, rotating the dough as you knead it. Sprinkle dough and/or surface with additional flour (if necessary) so it doesn’t stick.

When done, the dough should be soft and elastic, and shaped in a nice, round ball. Grease or spray a large bowl on the bottom and sides, and place the dough ball in it.

Flip the dough over so that both sides have some of the spray or grease on them. Cover the bowl with plastic wrap and place it in a warm place, free from drafts. 

After kneading, dough is placed in greased bowl and covered, to let rise.

Shape And Cut The Dough

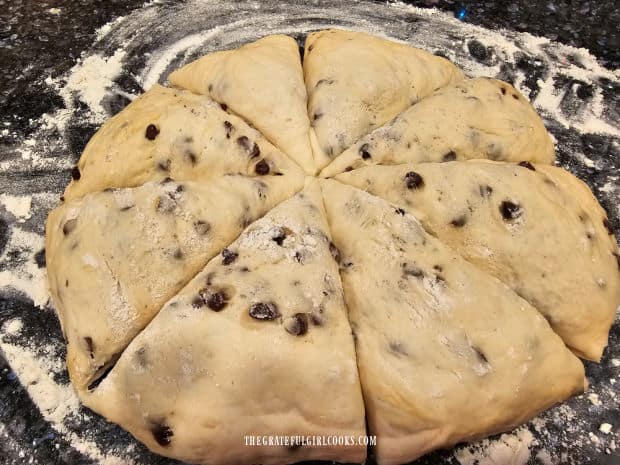
Let the dough rise until it has doubled in size (about 1½ hours). Turn the dough out onto a lightly floured surface, and lightly sprinkle the top of the dough with flour, as well. Lightly shape the dough into a circle.

Use a sharp knife (or pizza cutter) to divide the dough into 8 portions (approx. the same size). It’s easy to cut them into equal-sized wedges before rolling them into a ball.

The risen dough is placed on a lightly floured surface to cut into 8 pieces.A knife is used to cut the dough into 8 equal-sized pieces.

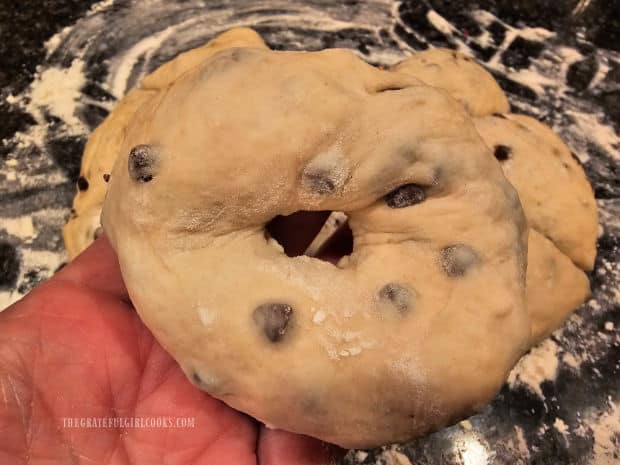
Remove a piece and shape it into a ball, by pulling the edges of the dough to the underside of the dough, resulting in a smooth ball.

With floured hands, take both of your thumbs and press into the center of each dough ball. Form a hole, and stretch the hole slightly to form a bagel shape. You can even pick up the bagel and enlarge the hole from the bottom.

Place the bagels on parchment or wax paper once they’re formed. Repeat until all 8 bagels are done, then cover them with a dish towel, and let the dough rest for 30 minutes.

TIP: Keep the holes open in the dough. You may need to stretch the holes out as the dough rests and slightly rises.

Each piece of dough is formed into a bagel shape.

Boil The Bagels

While the dough rests, preheat your oven to 425°F / 218.33°C. Bring a large stockpot of water to a rolling boil.

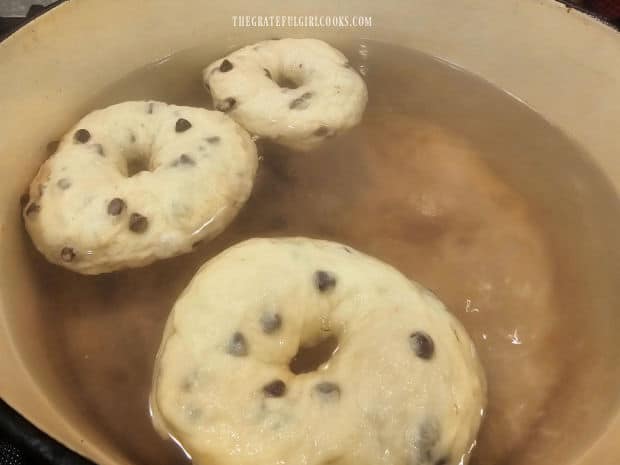
Boil the bagels (3 at a time) for about 3 minutes, turning them over halfway after 1½ minutes. The bagels should float to the top of the water when done. 

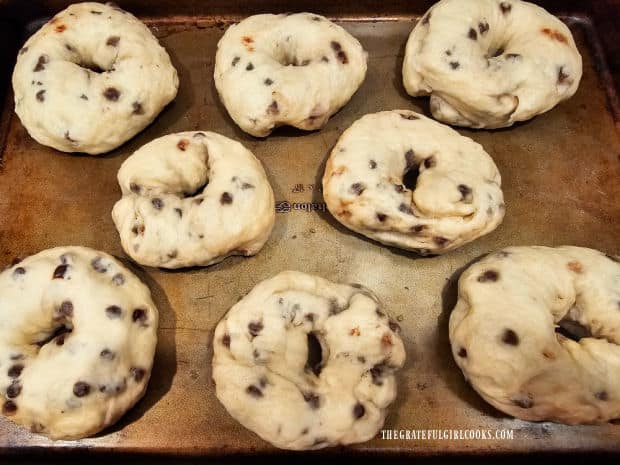
When they finish boiling, transfer the bagels to a large, ungreased baking sheet, leaving space between each one. Repeat until all the bagels have been boiled.

Chocolate chip bagels are boiled, 3 at a time, before baking.

Bake The Chocolate Chip Bagels

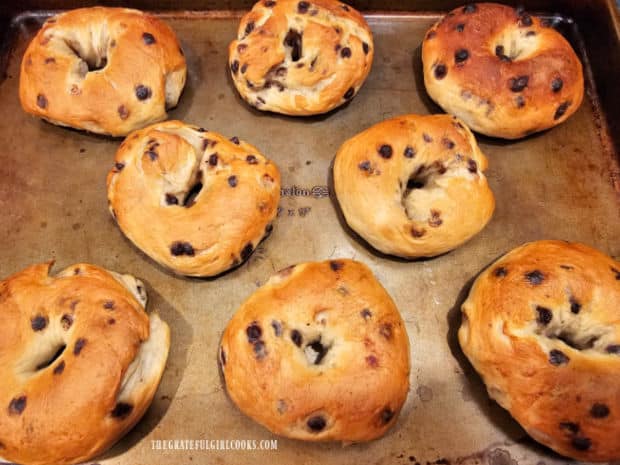
Bake the chocolate chip bagels at 425°F. for 20-24 minutes, or until they’re cooked through and are nicely browned on top.

Boiled chocolate chip bagels on a baking sheet, ready for the oven.Eight chocolate chip bagels, straight from the oven after baking.

Serve The Chocolate Chip Bagels

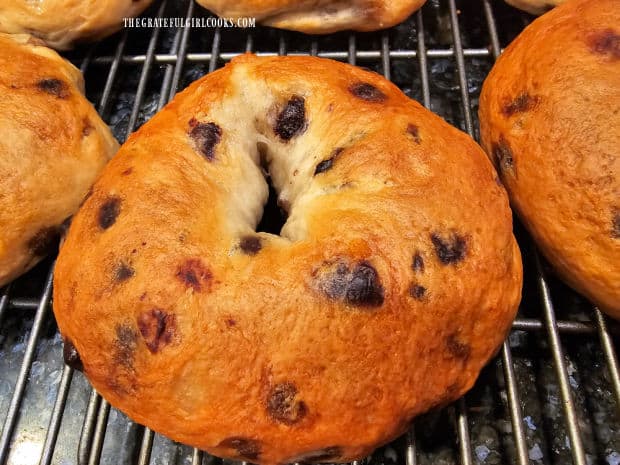
Transfer the chocolate chip bagels from the baking sheet to a wire rack to cool down a bit, before slicing or serving.

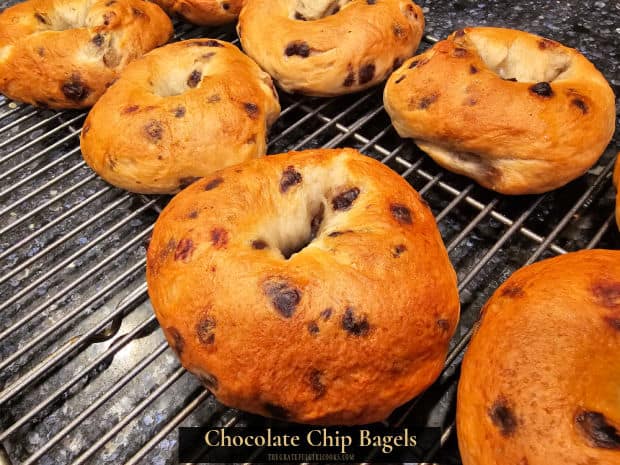
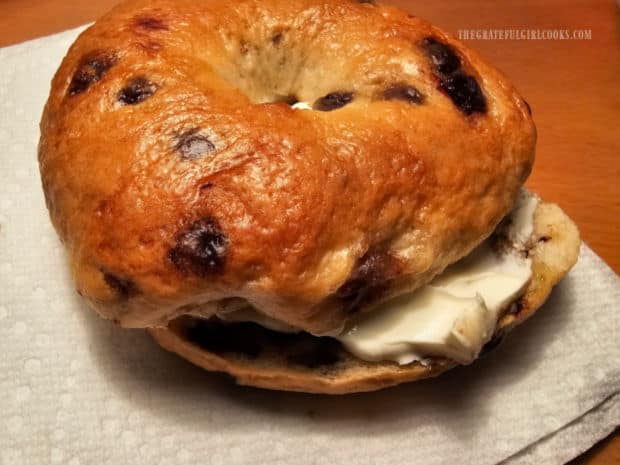
A close up of one of the chocolate chip bagels on a wire rack.

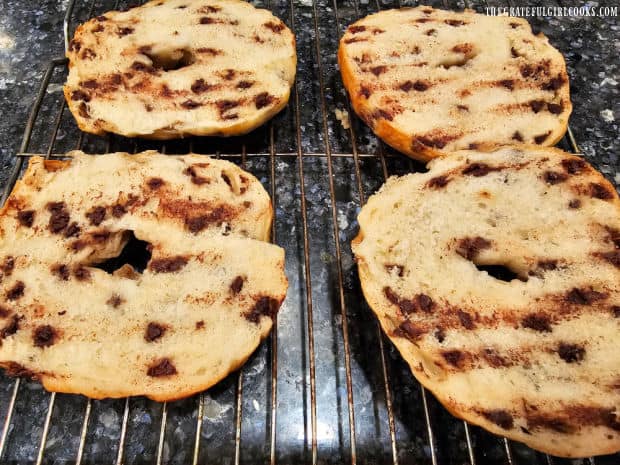
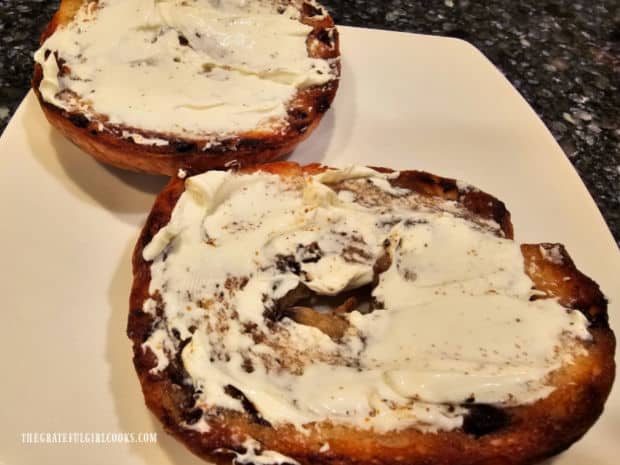
Once sliced in half, you can clearly see all those yummy chocolate chips inside the bagels. We usually slice them in half and broil them in the oven, then slather them with soft cream cheese. YUM!

Cutting the bagels in half shows all the chocolate chips inside.Cream cheese was spread on two toasted bagel halves, and are ready to eat.

We absolutely love these chocolate chip bagels. They turn out looking like store bought bagels, and they are wonderfully chewy and delicious, wither plain or toasted!

A chocolate chip bagel, filled with cream cheese, ready to be eaten.

I hope you have the chance to make these scrumptious chocolate chip bagels. It sure costs less to make eight homemade bagels than it currently costs to buy them at a bakery!

Thank you for stopping by today, and I invite you to come back soon for more family-friendly recipes. Take care, may God bless you, and have a great day.

Looking For More BAGEL Recipes?

You can find ALL of my recipes in the Recipe Index, which is located at the top of the page. I have a great variety of bagel recipes to choose from, including:

Want More Recipes? Get My FREE Newsletter!

I publish a newsletter 2 times per month (1st and 15th) with lots of recipes, tips, etc..
Would you like to join our growing list of subscribers?

There is a Newsletter subscription box on the top right (or bottom) of each blog post, depending on the device you use.
You can submit your e-mail address there, to be added to my mailing list.

Find Me On Social Media:

Facebook page: The Grateful Girl Cooks!
Pinterest:
The Grateful Girl Cooks!
Instagram:
jbatthegratefulgirlcooks

Author's signature

↓↓ PRINTABLE RECIPE BELOW ↓↓

0 from 0 votes
Chocolate Chip Bagels
Prep Time
30 mins
Cook Time
22 mins
INACTIVE Prep Time (dough rising)
2 hrs
Total Time
2 hrs 52 mins
 

Make homemade NY-style Chocolate Chip Bagels at home. They're filled with mini chocolate chips, and are absolutely delicious!

Category: Bread, Breakfast, Snack
Cuisine: All Cuisines
Keyword: chocolate chip bagels
Servings: 8
Calories Per Serving: 342 kcal
Author: JB @ The Grateful Girl Cooks!
Ingredients
  • teaspoons active dry yeast = one 0.25 oz. pkg.
  • 2 Tablespoons granulated sugar
  • cups warm water (at 110℉), divided ** see NOTE below
  • cups all purpose flour
  • teaspoons salt
  • ¾ cup mini semi-sweet chocolate chips
Instructions
  1. Whisk yeast and granulated sugar in ½ cup of warm water (110°F / 43.33°C). Once dissolved, let rest for 5 minutes. You should see bubbles form on top, which indicate the yeast is alive.

  2. In a large bowl (or stand mixer bowl), combine flour and salt. Make a "deep well" in center of the flour; pour yeast liquid into the "well", then add remaining ½ cup warm water. Use electric mixer with a dough hook (* see NOTE below) to incorporate yeast mixture and water. Dough will be thick (and sticky). *NOTE: If you don't have a dough hook, knead the dough by hand, incorporating liquid into the dough until fully combined. STIR in chocolate chips until evenly distributed. Transfer dough onto a lightly floured surface.

  3. Knead the dough for 3-5 minutes, using palms of your hands, rotating dough as you knead. Sprinkle dough and/or surface with flour (if necessary) so it doesn't stick. When done, dough should be soft and elastic, and shaped in a nice, round ball. Grease / spray a large bowl on bottom and sides; place dough ball in it. Flip dough over so both sides have spray or grease. Cover bowl with plastic wrap; place bowl in a warm spot, free from drafts. 

  4. Let dough rise until doubled in size (about 1½ hours). Turn dough out onto a lightly floured surface; lightly sprinkle dough with flour, as well. Gently shape dough into a circle. Use knife (or pizza cutter) to divide into 8 equal size pieces.

  5. Shape each piece into a ball, by pulling the edges of the dough to the underside , resulting in a smooth ball. With floured hands, take both thumbs and press into the center of each dough ball. Form a hole, and stretch the hole slightly to form a bagel shape. You can pick up the bagel and enlarge the hole from the bottom. Place bagels on parchment or wax paper once formed. Repeat until all bagels are done. Cover them with a dish towel, and let rest for 30 minutes. TIP: Keep holes open in bagels. You may need to re-stretch holes as dough rests and slightly rises.

  6. While dough rests, preheat oven to 425°F / 218.33°C. Bring large stockpot of water to a rolling boil. Boil bagels (3 at a time) for a total of 3 minutes, flipping them over after 1½ minutes. Bagels should float to the top when done. Transfer boiled bagels to a large, ungreased baking sheet, leaving space between each.

  7. Bake at 425°F. for 20-24 minutes, or until cooked through and golden brown. Transfer bagels to wire rack to cool, before slicing or serving. Enjoy!

Nutrition Facts
Chocolate Chip Bagels
Amount Per Serving (1 bagel)
Calories 342 Calories from Fat 81
% Daily Value*
Fat 9g14%
Saturated Fat 5g31%
Trans Fat 0.02g
Polyunsaturated Fat 0.5g
Monounsaturated Fat 3g
Cholesterol 1mg0%
Sodium 442mg19%
Potassium 193mg6%
Carbohydrates 57g19%
Fiber 3g13%
Sugar 11g12%
Protein 7g14%
Vitamin A 11IU0%
Vitamin C 0.003mg0%
Calcium 24mg2%
Iron 4mg22%
* Percent Daily Values are based on a 2000 calorie diet.

Here’s one more to p[in on your Pinterest boards!Make homemade NY-style Chocolate Chip Bagels at home. They're filled with mini chocolate chips, and are absolutely delicious!


Blueberry Banana Bread

Make three mini-loaves of Blueberry Banana Bread in under 45 minutes! Filled with juicy blueberries, this is a great snack or breakfast!

Today I want to share with you a recipe to make three loaves of yummy blueberry banana bread. I’ve made many loaves of banana bread and blueberry bread over the years, but finally decided last Fall to combine the two in a recipe! DUH!

Not quite sure why I’ve not thought of this combination before, but oh well! Bananas and blueberries pair wonderfully in this delicious bread, and the easy recipe yields enough batter to bake 3 small loaves. Here’s how to make blueberry banana bread. 

Scroll Down For A Printable Recipe Card At The Bottom Of The Page

Prepare The Batter

Before making the batter, preheat your oven to 350°F. and prepare 3 mini-loaf pans by generously spraying or greasing them on the bottom and sides.

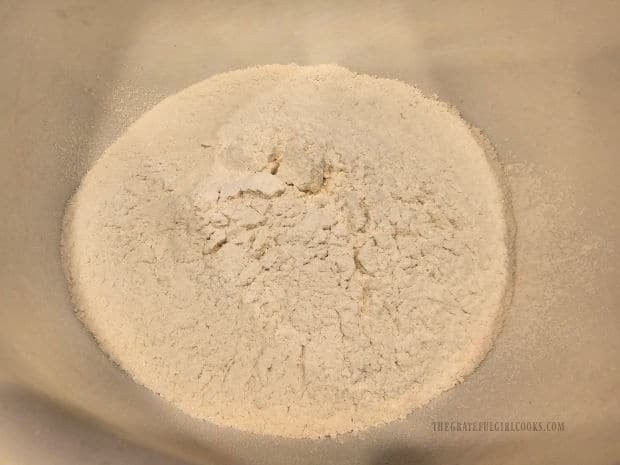
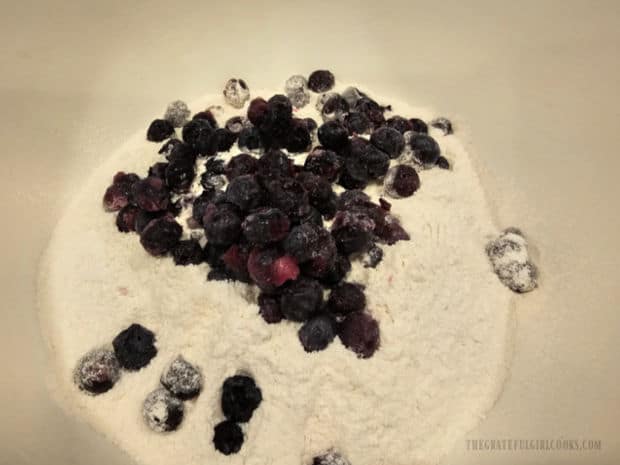
To make the batter, sift flour, granulated sugar, baking powder, salt and baking soda in a large mixing bowl. Gently stir in blueberries until incorporated into the “dry ingredients”.

NOTE: You can use fresh OR frozen blueberries for this recipe. If you are using FROZEN blueberries, do NOT thaw them before adding.

Flour, sugar, salt, baking powder and baking soda are sifted into a large bowl.Blueberries are added to the dry ingredients for the mini-loaves of bread.

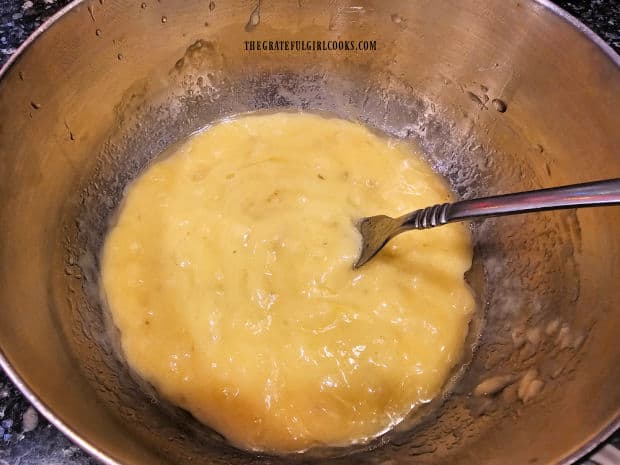
In a separate bowl, mash the ripe bananas very well (until chunk-free), then add a large egg, vegetable oil and fresh lemon juice.

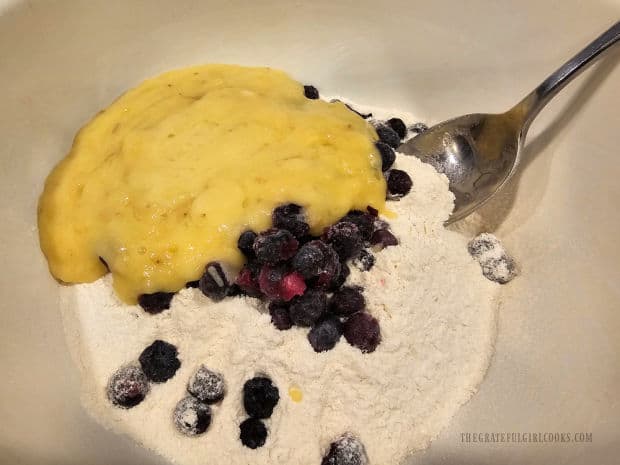
Stir until these ingredients have been fully combined (and are fairly smooth). Once combined, add these “wet ingredients” to the bowl of dry ingredients.

Eggs, oil, mashed bananas and lemon juice are mixed together in large bowl.Banana mixture is added to the dry ingredients and blueberries.

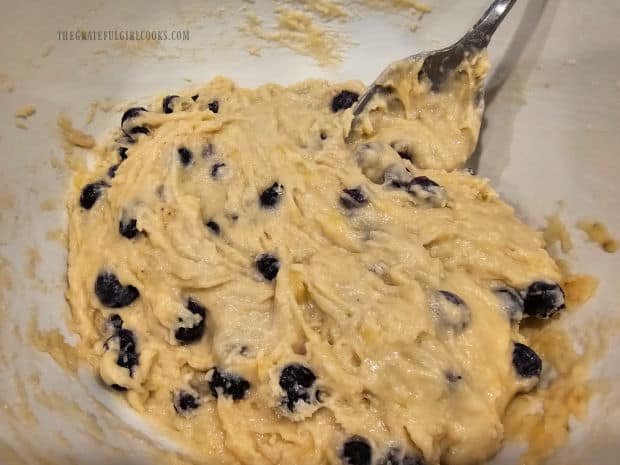
Gently stir until the banana mixture has been incorporated into the batter. Don’t overmix. The finished batter for the blueberry banana bread will be very thick.

The batter for the blueberry banana bread is ready for loaf pans.

Bake The Blueberry Banana Bread

Divide the batter evenly into the prepared mini-loaf pans, and top each loaf with additional blueberries (optional, but good!). These additional blueberries will decorate the top of each baked loaf nicely, when done.

Place the loaf pans on the middle rack of the preheated oven. Bake at 350°F. for 30-35 minutes OR until a toothpick inserted in the top/middle of the loaves comes out clean. The loaves should also be nicely browned on top.

NOTE: See the NOTES section in the printable recipe card below for baking time if using this recipe to make one 9″ x 5″ loaf of this bread.

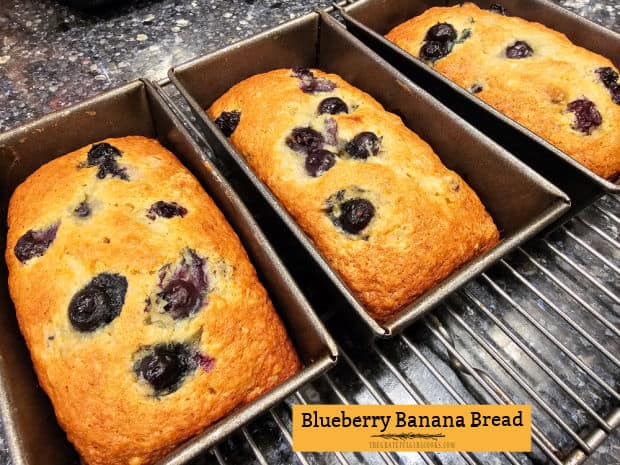
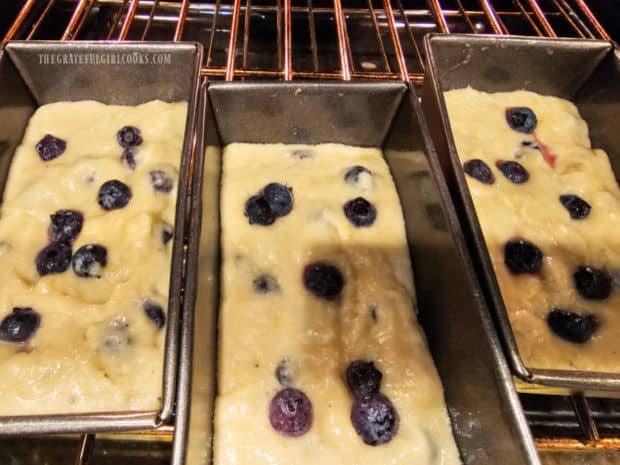
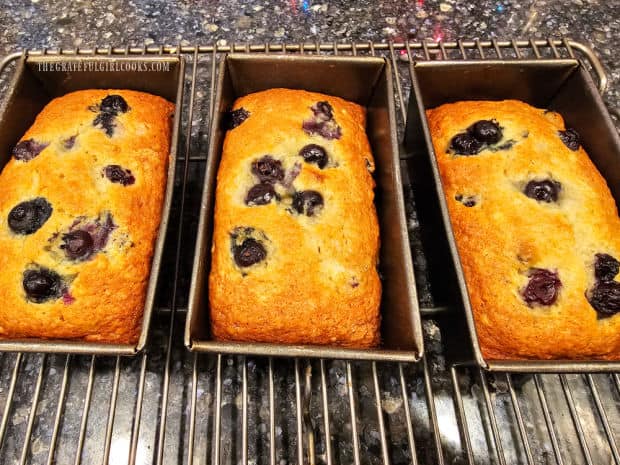
The batter for the blueberry banana bread in loaf pans in the oven.Three mini-loaves cool in loaf pans on a wire rack, after baking.

Time To Enjoy Some Blueberry Banana Bread!

Transfer the loaf pans to a wire rack, and let the blueberry banana bread cool 12-15 minutes before removing the loaf from the pan.

Once they’ve cooled, run a butter knife around all the inside edges of the pans. Invert a plate on top of a loaf, then holding the platter and loaf pan tightly together, turn them upside down.

This should release the bread from the pan. If the bread fails to release from the pan, turn it back over, let it rest a few more minutes, then try again.

Let the blueberry banana bread cool slightly on the wire rack before slicing the loaf for serving. Cool the loaf completely before wrapping for storage or gift giving.

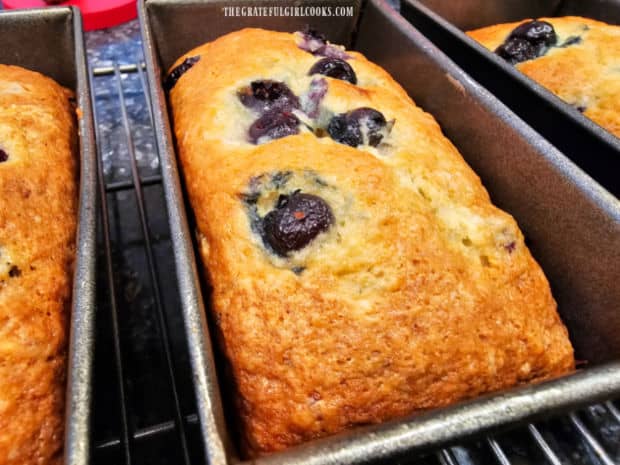
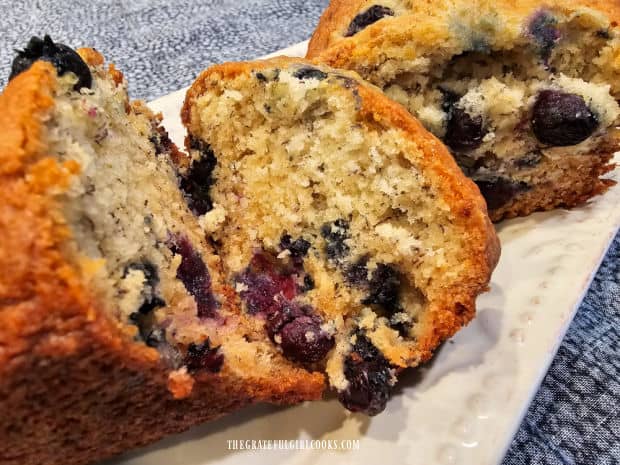
The mini-loaves of baked blueberry banana bread in their baking pans.Cutting into the loaves reveals the juicy blueberries inside.

Who Wants A Slice Of Blueberry Banana Bread?

With three mini-loaves, you have the option of eating them all, storing them, or giving them as gifts. It’s your choice! I like to enjoy one loaf, freeze a loaf for later, and give one to family or friends.

To serve, slice a loaf into your desired thickness, spread butter on a warm piece, and take a big bite! YUM… it is so delicious!

NOTE: The calorie calculation given in the printable recipe card below is for one whole mini-loaf of this bread, because some people like THICK slices, while others prefer a THIN slice. Again… this is your choice!

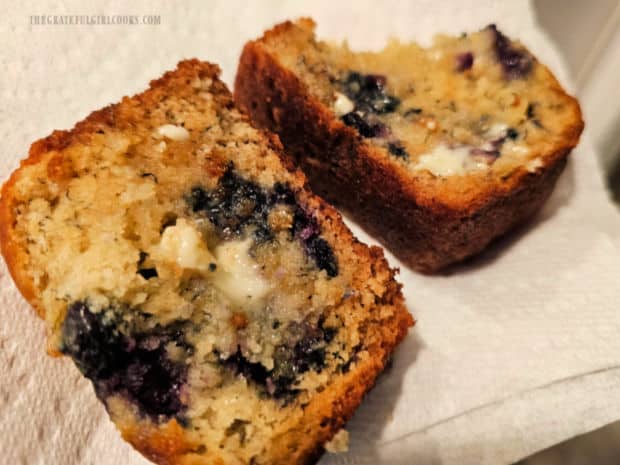
Two slices of blueberry banana bread, with melted butter on top.

I hope you enjoy this delicious blueberry banana bread, whether it’s for a light snack or breakfast! You can freeze this bread as well, as long as it is tightly wrapped and stored in an airtight container.

Thanks for stopping by today, and I invite you to come back soon for more family friendly recipes. Take care, may God bless you, and have a GREAT day!

Looking for More “Sweet” BREAD Recipes?

You can find ALL of my recipes in the Recipe Index, which is located at the top of the page. I have lots of delicious sweet bread recipes to choose from, including:

Want More Recipes? Get My FREE Newsletter!

I publish a newsletter 2 times per month (1st and 15th) with lots of recipes, tips, etc..
Would you like to join our growing list of subscribers?

There is a Newsletter subscription box on the top right (or bottom) of each blog post, depending on the device you use.
You can submit your e-mail address there, to be added to my mailing list.

Find Me On Social Media:

Facebook page: The Grateful Girl Cooks!
Pinterest:
The Grateful Girl Cooks!
Instagram:
jbatthegratefulgirlcooks

Author's signature

↓↓ PRINTABLE RECIPE BELOW ↓↓

0 from 0 votes
Blueberry Banana Bread
Prep Time
10 mins
Cook Time
30 mins
Total Time
40 mins
 

Make three mini-loaves of Blueberry Banana Bread in under 45 minutes! Filled with juicy blueberries, this is a great snack or breakfast!

Category: Bread/Breakfast, Snack
Cuisine: All Cuisines
Keyword: blueberry banana bread
Servings: 3 mini-loaves
Calories Per Serving: 715 kcal
Author: JB @ The Grateful Girl Cooks!
Ingredients
  • 2 cups all purpose flour
  • ½ cup granulated sugar
  • 2 teaspoons baking powder
  • ¾ teaspoon salt
  • ½ teaspoon baking soda
  • 1 cup blueberries if frozen, do NOT thaw
  • 1 cup mashed very ripe bananas approx. 2 medium
  • ¼ cup vegetable oil
  • 1 large egg
  • 1 Tablespoon fresh lemon juice
Additional Blueberries (15-20) For Garnishing Top Of Loaves (optional, but nice!)
    Instructions
    1. Preheat oven to 350°F. Generously spray or grease 3 mini-loaf pans on the bottom and sides. **See NOTE section below if making one large 9x5 loaf.**

    2. Sift flour, sugar, baking powder, salt and baking soda in a large bowl. Gently stir in blueberries until incorporated. Set aside. NOTE: If using FROZEN blueberries, do NOT thaw them before adding.

    3. In separate bowl, mash ripe bananas very well (until chunk-free); add egg, oil and lemon juice. Stir until fully combined (and fairly smooth). Add this to the flour mix. Gently stir until banana mixture is incorporated. Don't overmix; batter is thick.

    4. Divide batter evenly into 3 prepared mini-loaf pans; top each loaf with more blueberries, if desired. Place pans on middle rack of oven. Bake at 350°F. for 30-35 minutes OR until toothpick inserted in the top of loaves comes out clean. Bread should be nicely browned on top.

    5. Transfer pans to a wire rack; cool 12-15 minutes before removing loaf from pan. Once cooled, run a butter knife around inside edges of the pans. Invert a plate on top of a loaf, then holding platter and loaf pan tightly together, turn them upside down. This "should" release bread from pan. If bread fails to release, turn it back over, let it rest a few more minutes, then try again. Let bread cool slightly on wire rack before slicing and serving. Enjoy!

    Recipe Notes

    NOTES: The caloric calculation given is for 1 whole mini-loaf of bread. Calories per serving will depend on the thickness of your slices.

    **If you wish to use a large 9"x 5" loaf pan to make ONE loaf of this bread, bake for 55-60 minutes. Check it at 50 minutes for doneness, then continue baking until toothpick comes out clean.**

    Nutrition Facts
    Blueberry Banana Bread
    Amount Per Serving (1 mini-loaf)
    Calories 715 Calories from Fat 189
    % Daily Value*
    Fat 21g32%
    Saturated Fat 4g25%
    Trans Fat 0.1g
    Polyunsaturated Fat 11g
    Monounsaturated Fat 5g
    Cholesterol 62mg21%
    Sodium 793mg34%
    Potassium 694mg20%
    Carbohydrates 123g41%
    Fiber 5g21%
    Sugar 48g53%
    Protein 12g24%
    Vitamin A 165IU3%
    Vitamin C 13mg16%
    Calcium 145mg15%
    Iron 5mg28%
    * Percent Daily Values are based on a 2000 calorie diet.

    Here’s one more to pin on your Pinterest boards!Make three mini-loaves of Blueberry Banana Bread in under 45 minutes! Filled with juicy blueberries, this is a great snack or breakfast!

    Garlic Butter Herb Rolls

    Delicious Garlic Butter Herb Rolls are easy to prepare (using canned biscuit dough!), and are a perfect accompaniment for your favorite meal!
    Delicious Garlic Butter Herb Rolls are easy to prepare (using canned biscuit dough!), and are a perfect accompaniment for your favorite meal!

    If you’re looking for a totally EASY recipe for a dinner roll or bread to serve with a favorite soup, salad or main dish, then you’ve got to try these garlic butter herb rolls!

    Because they’re made using canned jumbo biscuits as the base, there is hardly any prep work involved. That’s a wonderfully quick way to get these yummy rolls on the table!

    The biscuit dough is halved, rolled into balls, then covered in a simple garlic butter herb sauce, and baked. That’s it, and I think you will love them because they have great flavor! Here’s how simple they are to make.

    Scroll Down For A Printable Recipe Card At The Bottom Of The Page

    Make The Dough Balls

    Preheat your oven to 375°F. before shaping the rolls, because you will want the oven hot and ready to go when you’re finished, to save time. Lightly grease a 10″ cast iron skillet or a large square baking dish and set aside.

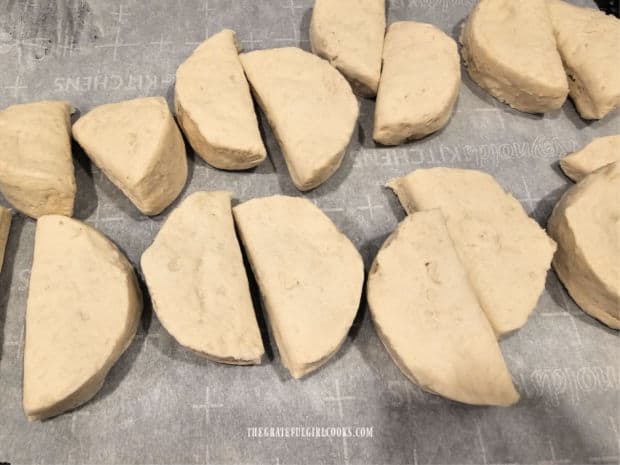
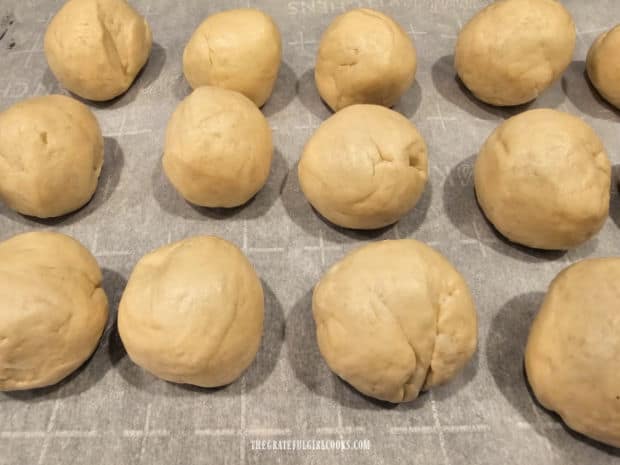
    Remove the biscuit dough from the package and place the dough onto parchment paper or wax paper. Use a sharp knife or kitchen scissors to cut each of the biscuits in half. You will have 16 biscuit dough halves at this point.

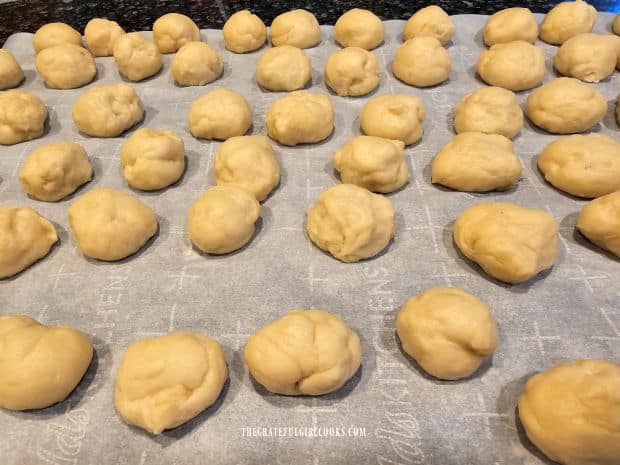
    Using your hands, roll each piece between your palms into a ball, pinching the dough together to close any seams. Once done, let the dough balls rest on the paper while you mix the garlic butter herb sauce.

    Eight canned jumbo biscuits are cut in half.Each biscuit dough half is shaped into a ball.

    Make The Garlic Butter Herb Sauce

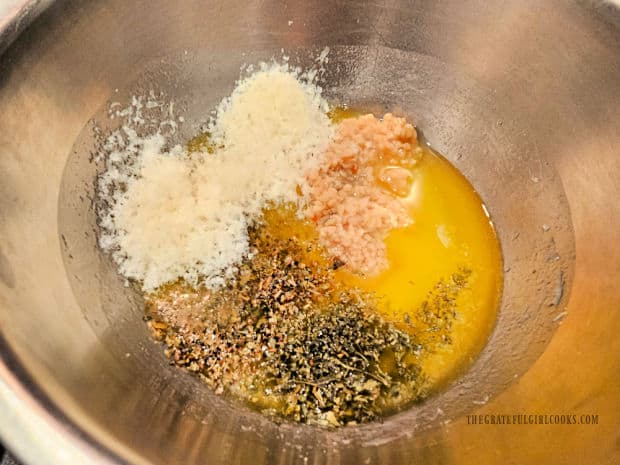
    To make the garlic butter herb sauce, combine melted butter, Parmesan cheese, minced garlic, parsley and oregano in a small bowl. It will be a slightly thick sauce once it’s fully mixed.

    Melted butter, garlic, oregano, parsley and Parmesan are combined in bowl.The butter herb sauce is combined and ready to top the rolls.

    Dipping The Dough Balls

    Dip each of the dough balls, one at a time, in the garlic butter herb sauce. I find it helpful to use a spoon to turn the dough balls over so all sides get coated with the sauce.

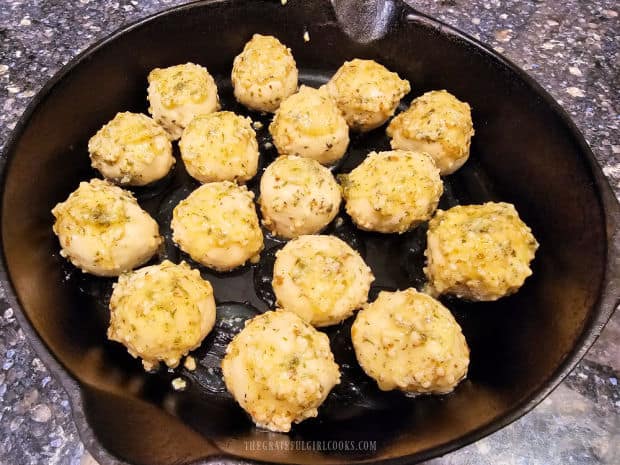
    As you finish coating each dough ball, place it into the prepared skillet OR baking dish. Repeat this process until all the dough balls are coated in sauce.

    TIP: Make sure to leave a small space between each of the rolls in the skillet or baking dish, so they have some “personal space” to rise and spread as they bake!

    Each dough ball is immersed and covered with the butter herb sauce.Butter and herb covered dough balls are placed in skillet OR baking dish.

    Time To Bake The Rolls!

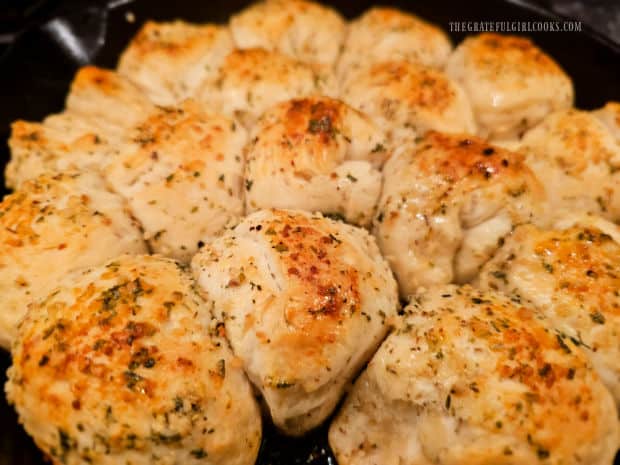
    Now it’s time to bake these little cuties! Bake the garlic butter herb rolls at 375°F (or 190° C.) for 18-20 minutes. They’re done when the tops of the rolls are wonderfully golden brown.

    Remove the garlic butter herb rolls from the oven. There’s usually some seasoned, melted butter that ends up on the bottom of the skillet or baking dish.

    Use a pastry brush to brush the seasoned butter from the skillet or baking dish onto the tops of the finished rolls while they’re still hot.

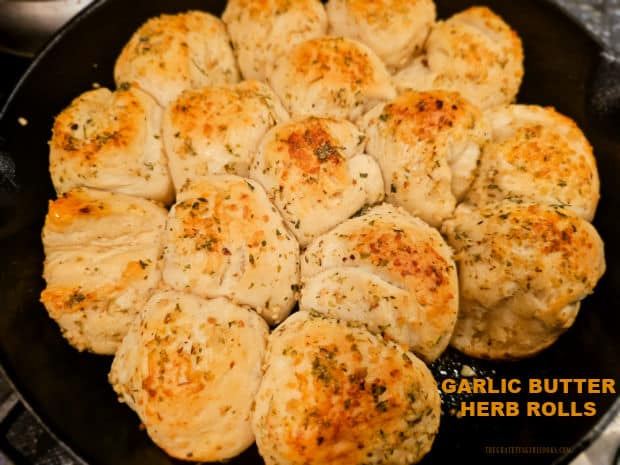
    Sixteen butter and herb covered rolls are placed in a cast iron skillet.After baking, the garlic butter herb rolls are golden brown on top.

    Serve The Garlic Butter Herb Rolls

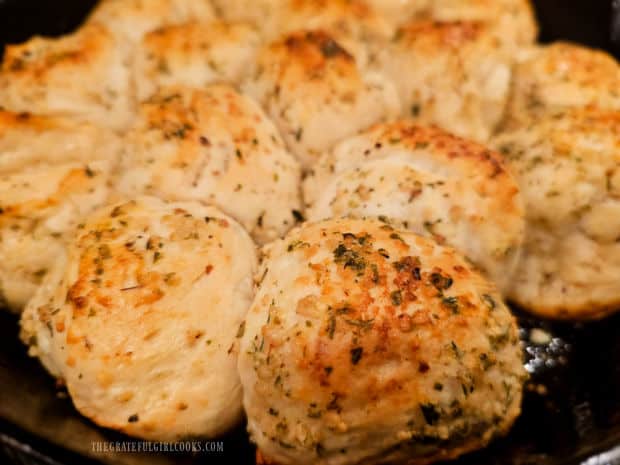
    Serve the garlic butter herb rolls right out of the skillet or baking dish while they’re HOT. Each of these tasty dinner rolls can be pulled apart from each other, to enjoy!

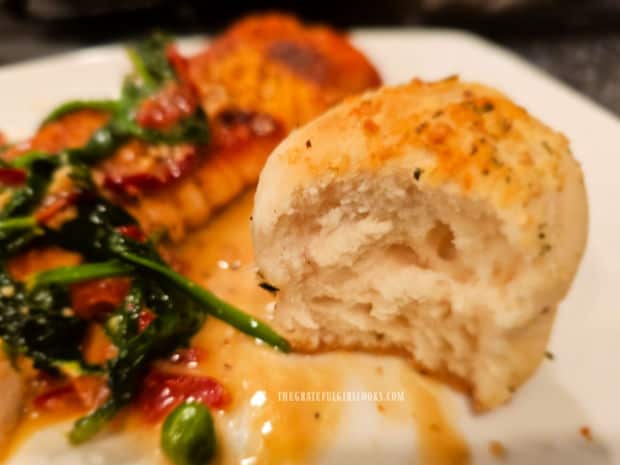
    We enjoyed them (this time) served with a delicious main dish of Salmon in Spinach Cream Sauce, and they paired perfectly with this meal. YUM!

    The rolls are beautiful to look at, they taste WONDERFUL, and it “might” appear like it took a lot of work to make them! You can see how simple these dinner rolls actually were to make, though, so that can be your little secret (wink, wink).

    The garlic butter herb rolls are ready to be pulled apart and eaten.One of the garlic butter herb rolls on a white plate, with salmon in background.

    I really hope you have the opportunity to make these delicious garlic butter herb rolls, and trust you’ll enjoy them as much as we do!

    We always love this super easy recipe that tastes GREAT every time! Any leftover rolls can easily be reheated in an oven or microwave!

    Thanks for stopping by today, and I invite you to come back again soon for more family friendly recipes. Take care, may God bless you, and have a GREAT day!

    Looking For More BREAD Recipes?

    You can find ALL of my recipes in the Recipe Index, which is located at the top of the page. I have some really delicious bread recipes to choose from, including:

    Want More Recipes? Get My FREE Newsletter!

    I publish a newsletter 2 times per month (1st and 15th) with lots of recipes, tips, etc..
    Would you like to join our growing list of subscribers?

    There is a Newsletter subscription box on the top right (or bottom) of each blog post, depending on the device you use.
    You can submit your e-mail address there, to be added to my mailing list.

    Find Me On Social Media:

    Facebook page: The Grateful Girl Cooks!
    Pinterest:
    The Grateful Girl Cooks!
    Instagram:
    jbatthegratefulgirlcooks

    Author;s signature

    Original recipe source (and with thanks to): Anna, at http://www.crunchycreamysweet.com/2017/02/17/garlic-parmesan-skillet-rolls/

    ↓↓ PRINTABLE RECIPE BELOW ↓↓

    0 from 0 votes
    Garlic Butter Herb Rolls
    Prep Time
    15 mins
    Cook Time
    18 mins
    Total Time
    33 mins
     

    Delicious Garlic Butter Herb Rolls are easy to prepare (using canned biscuit dough!), and are a perfect accompaniment for your favorite meal!

    Category: Bread, Side Dish
    Cuisine: American
    Keyword: garlic butter herb rolls
    Servings: 16 rolls
    Calories Per Serving: 134 kcal
    Author: JB @ The Grateful Girl Cooks!
    Ingredients
    • 1 can jumbo biscuit dough (8 biscuits in pkg/can.)
    • 4 Tablespoons butter melted
    • teaspoons minced garlic = approx. 3 cloves, minced
    • 2 Tablespoons grated Parmesan Cheese *fresh is best, if you have it.
    • ½ teaspoon dried parsley
    • ½ teaspoon dried oregano
    Instructions
    1. Preheat oven to 375°F. Grease a 10" cast iron skillet or large baking dish; set aside.

    2. Remove biscuit dough from package; separate/place dough on parchment or wax paper. Use knife or kitchen scissors to cut each biscuit in half. Roll each piece between your palms into a ball, pinching dough to close any seams, then place them back on the paper.

    3. Make sauce: Combine melted butter, Parmesan, garlic, parsley and oregano in a small bowl.

    4. Dip each dough ball (1 at a time), in the sauce. Use a spoon to turn them over so all sides are coated with sauce. Place dough ball into prepared skillet OR dish. Repeat until all the dough balls are coated. TIP: Leave a small space between each of the rolls, so they have "personal space" to rise and spread as they bake!

    5. Bake rolls at 375°F (or 190° C) for 18-20 minutes. They're done when the tops are nicely golden brown. Remove from oven. There will be seasoned melted butter that ends up on the bottom of the skillet. Use a pastry brush to lightly brush that butter onto the top of the rolls.

    6. Serve immediately, and enjoy these delicious, pull-apart dinner rolls.

    Nutrition Facts
    Garlic Butter Herb Rolls
    Amount Per Serving (1 roll)
    Calories 134 Calories from Fat 72
    % Daily Value*
    Fat 8g12%
    Saturated Fat 3g19%
    Trans Fat 0.1g
    Polyunsaturated Fat 2g
    Monounsaturated Fat 3g
    Cholesterol 8mg3%
    Sodium 306mg13%
    Potassium 69mg2%
    Carbohydrates 14g5%
    Fiber 0.4g2%
    Sugar 1g1%
    Protein 2g4%
    Vitamin A 95IU2%
    Vitamin C 0.1mg0%
    Calcium 22mg2%
    Iron 1mg6%
    * Percent Daily Values are based on a 2000 calorie diet.

    Here’s one more to pin on your Pinterest boards!Delicious Garlic Butter Herb Rolls are easy to prepare (using canned biscuit dough!), and are a perfect accompaniment for your favorite meal!


    Chocolate Zucchini Muffins

    Make a dozen yummy chocolate zucchini muffins. They’re easy to make, and filled with chocolate chips and a surprise- shredded zucchini!
    Make a dozen yummy chocolate zucchini muffins. They're easy to make, and filled with chocolate chips and a surprise- shredded zucchini!

    I don’t know about you, but I enjoy making muffins to have around for breakfasts or a quick snack. There are so many flavors of muffins and I enjoy testing new recipes to find some “good” ones.

    Years ago I began making loaves of double chocolate zucchini bread, and we LOVE it. I had never tried making muffins with that recipe, so I proceeded to do just that!

    This past summer, I had a few zucchini left from our little raised bed garden, decided to make chocolate zucchini muffins, and the results were wonderful! Today I am sharing that recipe so you can make these delicious muffins, too! Here’s how to prepare them.

    Scroll Down For A Printable Recipe Card At The Bottom Of The Page

    Make The Muffin Batter

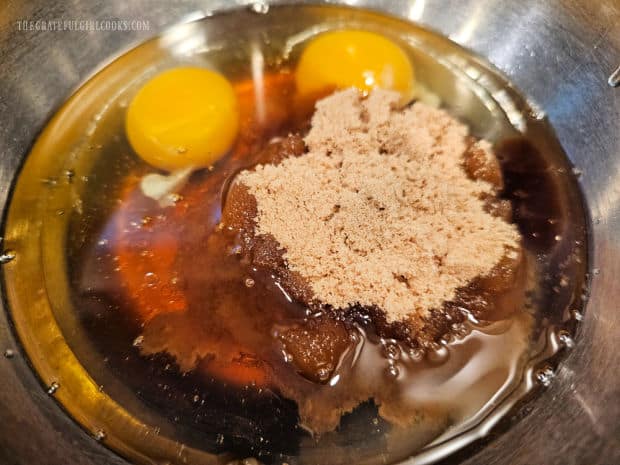
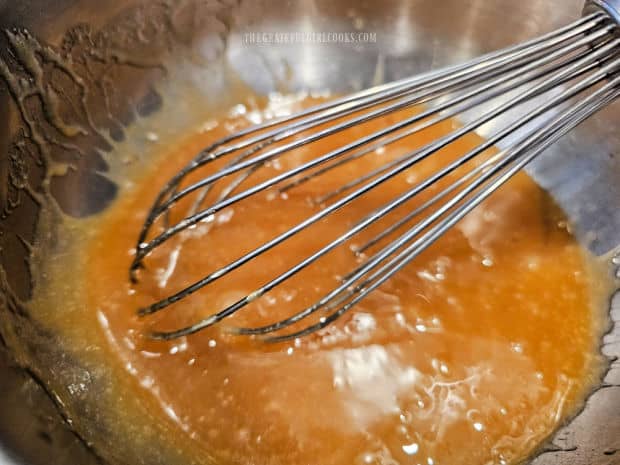
    Beat or whisk eggs, honey, oil, brown sugar and vanilla extract together in a large bowl until combined. These are the “wet ingredients” for the muffin batter. Set the bowl aside.

    Eggs, brown sugar, honey, oil and vanilla are combined in a mixing bowl.Wet ingredients for muffin batter are whisked together in a bowl.

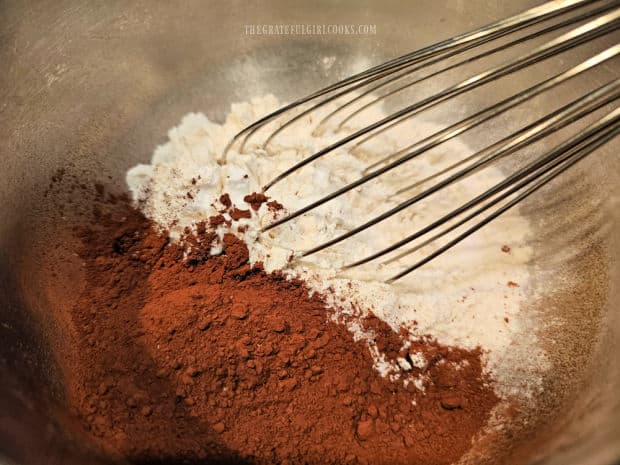
    In a separate bowl, whisk flour, cocoa powder, baking soda, salt and baking powder together until fully combined.

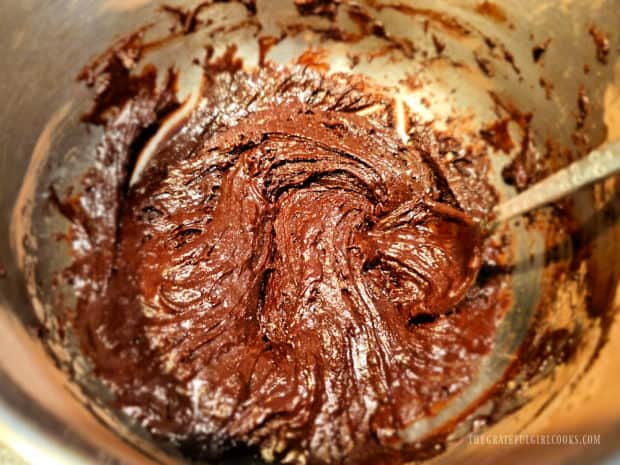
    Stir these “dry” ingredients into the bowl containing the “wet ingredients” until fully incorporated into a thick batter.

    Flour, cocoa powder, baking soda, salt, baking powder are whisked together.Wet and dry ingredients combine to make thick chocolate muffin batter.

    Add Zucchini And Chocolate Chips

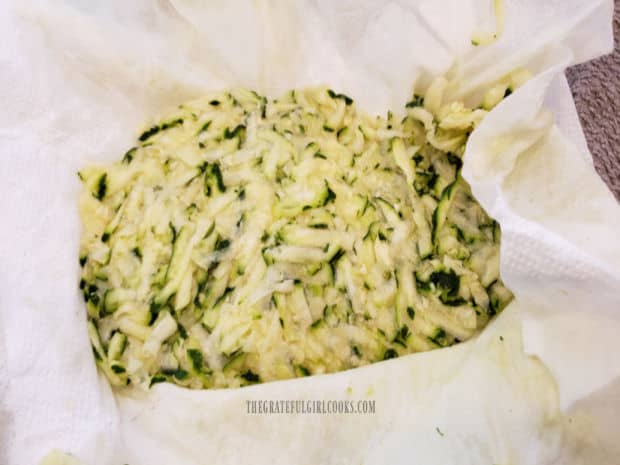
    Blot the shredded zucchini REALLY WELL between layers of paper towels to absorb excess moisture. You may need to repeat this a couple times, because there’s lots of moisture in shredded zucchini!

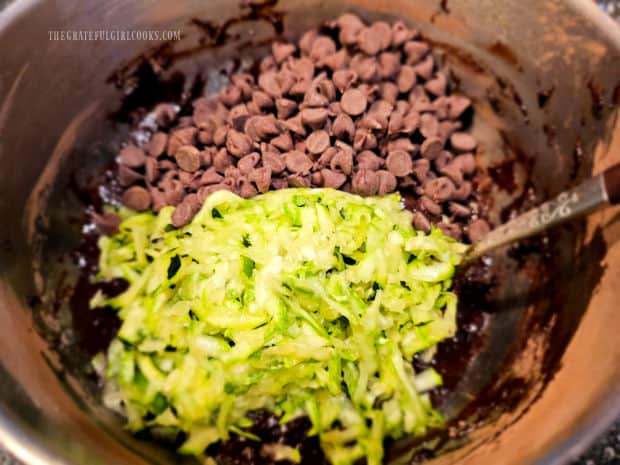
    Add the shredded zucchini and chocolate chips to the muffin batter, and stir it well, to combine. This is the batter for the muffins.

    Shredded zucchini is blotted to remove moisture before adding to batter.Chocolate chips and zucchini are stirred into chocolate zucchini muffin batter.

    Time To Bake The Chocolate Zucchini Muffins!

    Preheat oven to 350°F. Put paper muffin liner cups into the wells of a standard sized (12) muffin tin. Give the bottom of each liner a quick shot of non-stick baking spray. NOTE: If you do not have paper liners, lightly grease or spray muffin cups with non-stick baking spray.

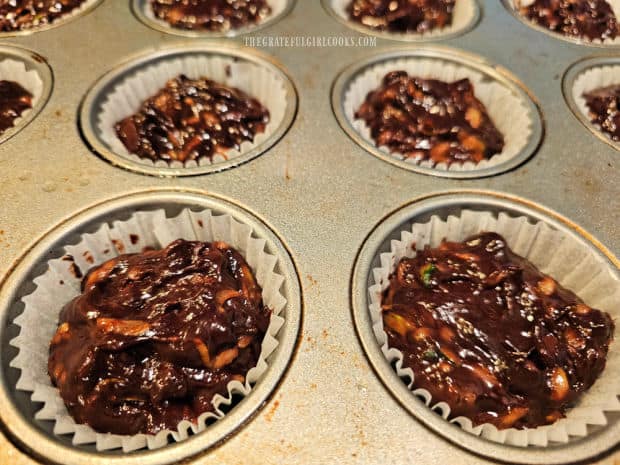
    Evenly divide the batter between the 12 muffin cups, filling each of them between ½ and ¾ full.

    Bake at 350°F. on a middle rack in the oven for 30-35 minutes. Oven temps can vary widely, so I recommend checking them after 30 minutes.

    Muffin cups are filled with the chocolate zucchini batter for baking.

    When done, the top of the muffins should be set. Insert a toothpick into the top of a muffin to check for doneness. If it comes out batter-free, the muffins are done.

    Let them rest in the pan for 3-4 minutes, then transfer them out of the muffin pan to a wire rack, to finish cooling.

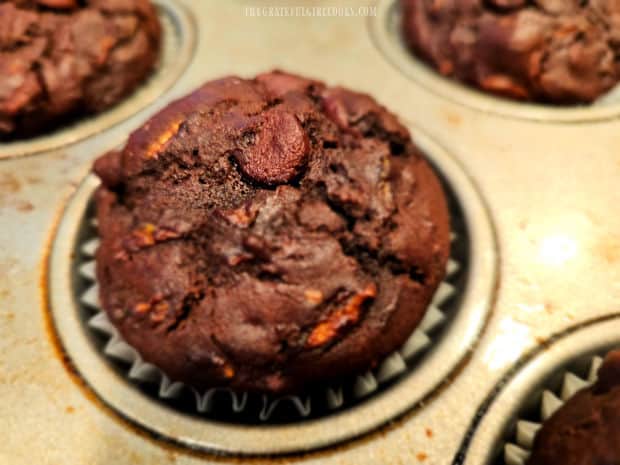
    Chocolate Zucchini Muffins rest after baking for 30 minutes.

    Serve The Chocolate Zucchini Muffins

    The chocolate zucchini muffins can be served warm (with butter!) or at room temperature. They are dense and rich in chocolate flavor!

    These muffins are perfect for a quick breakfast on the go, a pretty brunch platter, or simply an afternoon snack with cold milk or a hot cup of coffee or tea!

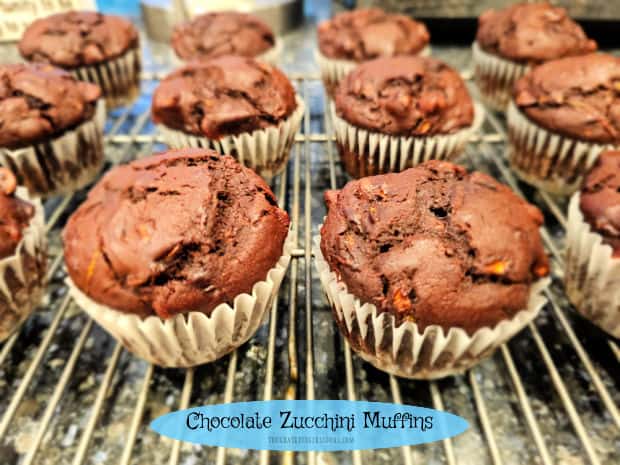
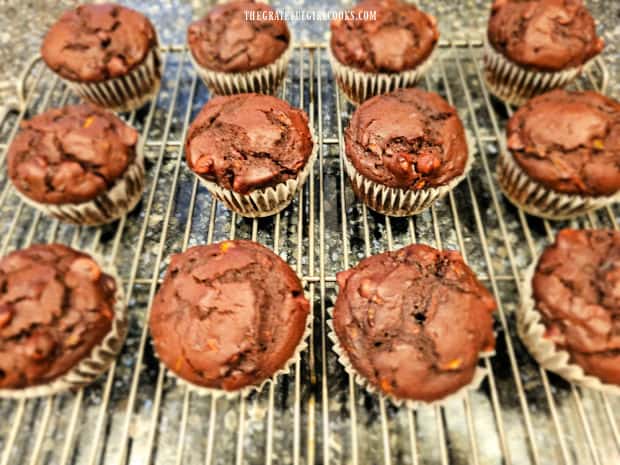
    A dozen chocolate zucchini muffins cooling on a wire rack.

    I hope you have the opportunity to make these scrumptious, chocolate zucchini muffins for those you love! Any leftovers can be wrapped well and frozen for another time, too!

    Thanks for stopping by, and I invite you to come back again soon for more family-friendly recipes. Take care, have a GREAT day, and may God bless you!

    Looking For More MUFFIN Recipes?

    You can find ALL of my recipes in the Recipe Index, which is located at the top of the page. I have lots of yummy muffin recipes to check out, including:

    Want More Recipes? Get My FREE Newsletter!

    I publish a newsletter 2 times per month (1st and 15th) with lots of recipes, tips, etc..
    Would you like to join our growing list of subscribers?

    There is a Newsletter subscription box on the top right (or bottom) of each blog post, depending on the device you use.
    You can submit your e-mail address there, to be added to my mailing list.

    Find Me On Social Media:

    Facebook page: The Grateful Girl Cooks!
    Pinterest:
    The Grateful Girl Cooks!
    Instagram:
    jbatthegratefulgirlcooks

    Author's signature

    Recipe adapted from: http://www.whatmegansmaking.com/2013/07/double-chocolate-zucchini-bread.html

    ↓↓ PRINTABLE RECIPE BELOW ↓↓

    0 from 0 votes
    Chocolate Zucchini Muffins
    Prep Time
    20 mins
    Cook Time
    30 mins
    Total Time
    50 mins
     

    Make a dozen yummy chocolate zucchini muffins. They're easy to make, and filled with chocolate chips and a surprise- shredded zucchini!

    Category: Breakfast, Brunch, Snack
    Cuisine: All Cuisines
    Keyword: chocolate zucchini muffins
    Servings: 12
    Calories Per Serving: 316 kcal
    Author: JB @ The Grateful Girl Cooks!
    Ingredients
    • 2 large eggs
    • cup honey
    • ½ cup vegetable oil or other neutral oil
    • ½ cup brown sugar
    • 1 teaspoon vanilla extract
    • 1⅔ cups all purpose flour
    • cup unsweetened cocoa powder
    • 1 teaspoon salt
    • ½ teaspoon baking powder
    • ½ teaspoon baking soda
    • 2 cups shredded, unpeeled zucchini blotted well, to remove moisture
    • 1 cup semi-sweet chocolate chips
    Instructions
    1. Preheat oven to 350℉. Put paper liner cups into the wells of a standard muffin tin. Give the bottom of each liner a quick shot of non-stick spray. NOTE: If you don't have paper liners, lightly grease or spray muffin cups with non-stick spray.

    2. Beat or whisk eggs, honey, oil, brown sugar and vanilla in a large bowl until combined. Set this bowl of wet ingredients aside.

    3. In a separate bowl, whisk flour, cocoa powder, baking soda, salt and baking powder together until combined. Stir this mixture into the "wet ingredients" until fully incorporated into a thick batter.

    4. Blot shredded zucchini REALLY WELL between layers of paper towels to absorb excess moisture. You may need to repeat this a couple times. Add zucchini and chocolate chips to the batter; stir well, to combine. Evenly divide batter between 12 muffin cups, filling each between ½ and ¾ full.

    5. Bake at 350°F. (on middle oven rack) for 30-35 minutes. Oven temps can vary widely, so I recommend checking them for doneness at 30 minutes. When done, top of the muffins should be set. Insert a toothpick into the top of a muffin to check for doneness. If it comes out batter-free, muffins are done. Remove muffins from oven. Let them rest in the pan 3-4 minutes, then transfer to a wire rack, to finish cooling.

    6. Serve warm or at room temperature, and enjoy!

    Nutrition Facts
    Chocolate Zucchini Muffins
    Amount Per Serving (1 muffin)
    Calories 316 Calories from Fat 144
    % Daily Value*
    Fat 16g25%
    Saturated Fat 5g31%
    Trans Fat 0.1g
    Polyunsaturated Fat 6g
    Monounsaturated Fat 4g
    Cholesterol 32mg11%
    Sodium 258mg11%
    Potassium 240mg7%
    Carbohydrates 40g13%
    Fiber 3g13%
    Sugar 23g26%
    Protein 5g10%
    Vitamin A 94IU2%
    Vitamin C 4mg5%
    Calcium 38mg4%
    Iron 2mg11%
    * Percent Daily Values are based on a 2000 calorie diet.

    Here’s one more to pin on your Pinterest boards!Make a dozen yummy chocolate zucchini muffins. They're easy to make, and filled with chocolate chips and a surprise- shredded zucchini!


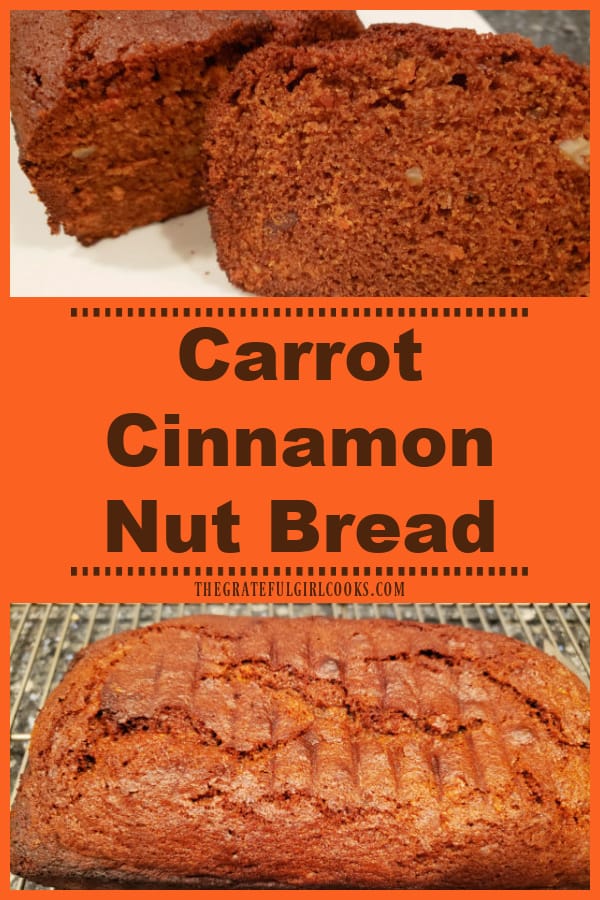
    Carrot Cinnamon Nut Bread

    Carrot Cinnamon Nut Bread is an “easy to make” delicious bread, flavored with cinnamon and molasses, and filled with grated carrots and nuts.
    Carrot Cinnamon Nut Bread is an "easy to make" delicious bread, flavored with cinnamon and molasses, and filled with grated carrots and nuts.

    I really enjoy baking bread, whether it’s loaves of savory bread or sweetened bread! It’s fun to try different recipes, then get to enjoy a slice of warm bread with a meal or for breakfast!

    Today I am sharing a recipe from a woman named Fern who attended church with my husband and I. This recipe was published in our church cookbook about 35 years ago.

    Fern was an excellent cook (I have several of her recipes), and though she has been in heaven for awhile now, her recipes live on!

    The recipe for carrot cinnamon nut bread is really tasty, quick and simple to make, so I am sharing it here so you can enjoy it, too! Here’s how to make it.

    Scroll Down For A Printable Recipe Card At The Bottom Of The Page

    Make The Batter For The Carrot Cinnamon Nut Bread

    Mix granulated sugar, molasses, vegetable oil and two eggs together in a large mixing bowl. Use a wire whisk to combine these ingredients.

    This is the bowl of “wet ingredients”. Set the bowl aside while you mix the “dry ingredients” together in a separate bowl. 

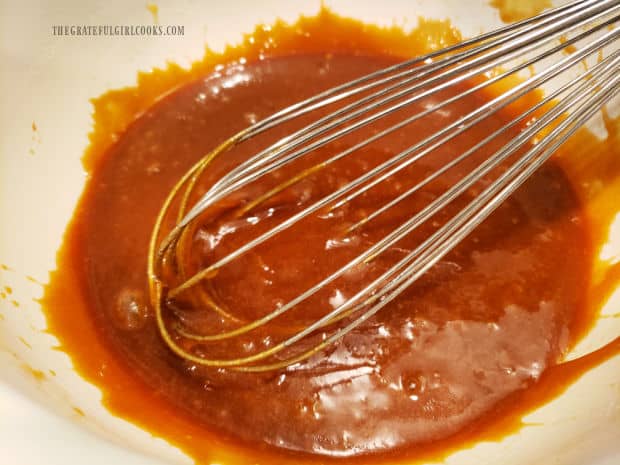
    Two eggs, molasses, sugar and vegetable oil, in a large white bowl.A wire whisk is used to combine the wet ingredients for the batter.

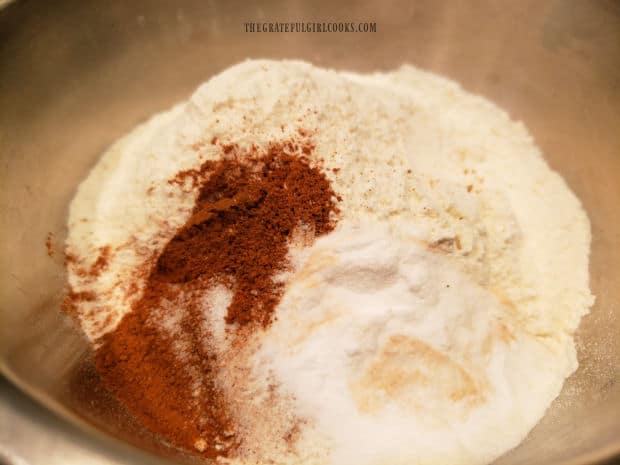
    In a separate bowl, stir together all purpose flour, cinnamon, baking soda and salt until combined.

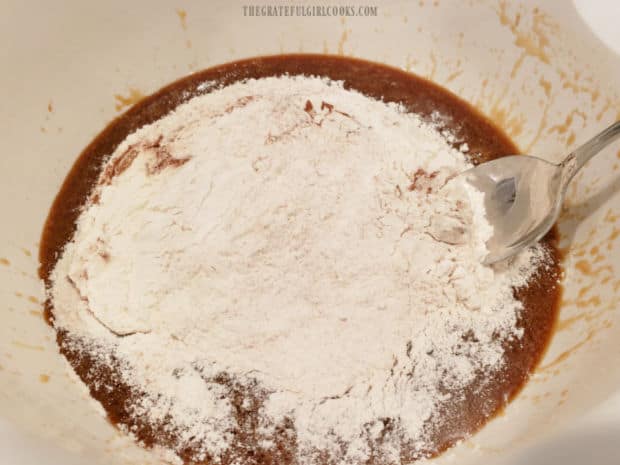
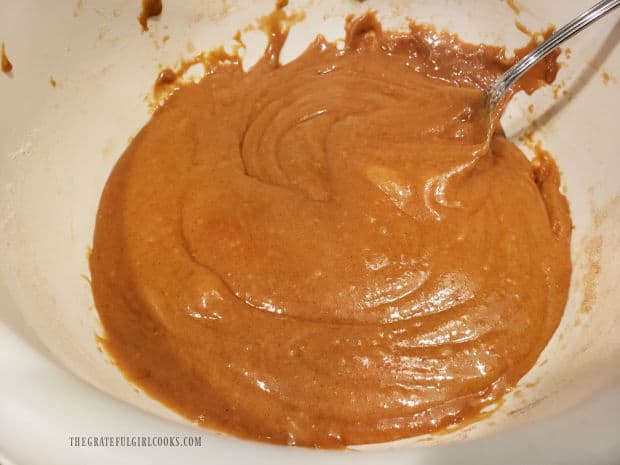
    Add these “dry ingredients” to the bowl of “wet ingredients”, and stir until the ingredients are combined.

    Flour, cinnamon, baking soda and salt are measured into a large bowl.Flour mixture is stirred into the wet batter mixture until combined.

    Final Step Before Baking

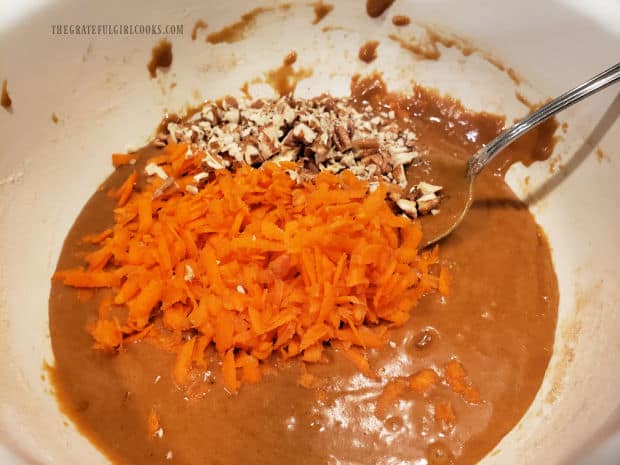
    The batter for the carrot cinnamon nut bread is almost ready! The final step is to add grated and peeled carrots and chopped walnuts (or pecans) to the batter.

    Stir the carrots and nuts into the batter only until just combined. Don’t overmix the batter or the bread can become dense.

    A white bowl, full of combined batter for the carrot cinnamon nut bread.Grated carrots and chopped nuts are added to the bread batter in the bowl.

    Time To Bake The Bread

    Generously spray or grease the bottom and sides of a 9″ x 5″ loaf pan. Pour the batter into the prepared pan, spreading the batter evenly to distribute.

    Bake the carrot cinnamon nut bread at 375°F. for 50-60 minutes, or until a toothpick inserted into the top/middle of the loaf comes out clean.

    TIP: Oven temps can vary quite a bit, so I suggest checking for doneness at the 50 minute mark. If not completely done at that point, check again every couple of minutes until fully cooked.

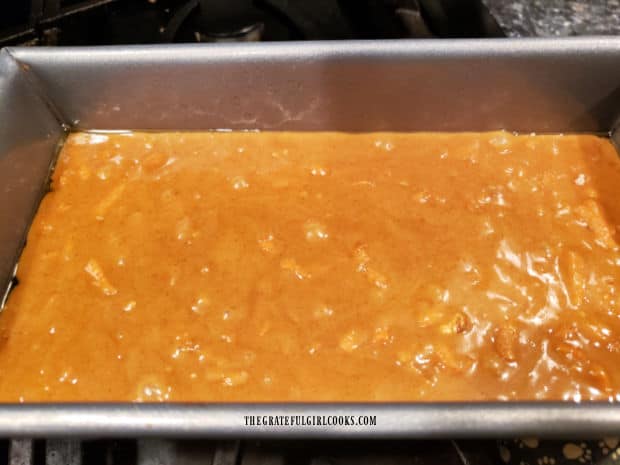
    The batter for the bread in a 9" x 5" baking loaf pan.

    Once done, remove the pan from the oven and let cool on a wire rack. After about 15 minutes, run a butter knife around the inside edges of the pan, to loosen the bread.

    Invert the pan upside down to remove the loaf, then allow the loaf of carrot cinnamon nut bread to cool on a wire rack.

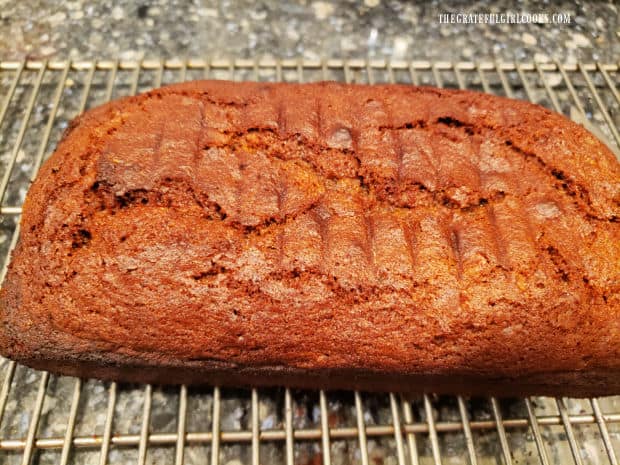
    One loaf of carrot cinnamon nut bread, cooling on a wire rack after baking.

    Slice And Serve The Carrot Cinnamon Nut Bread

    When the bread cools enough to suit your taste (we like it slightly warm), slice the carrot cinnamon nut bread and serve.

    With a loaf this size, we usually get 10 slices. If desired, spread each slice with some softened butter… and dig in!

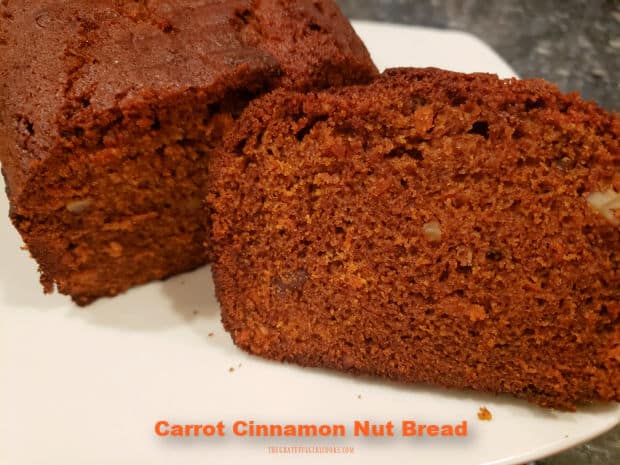
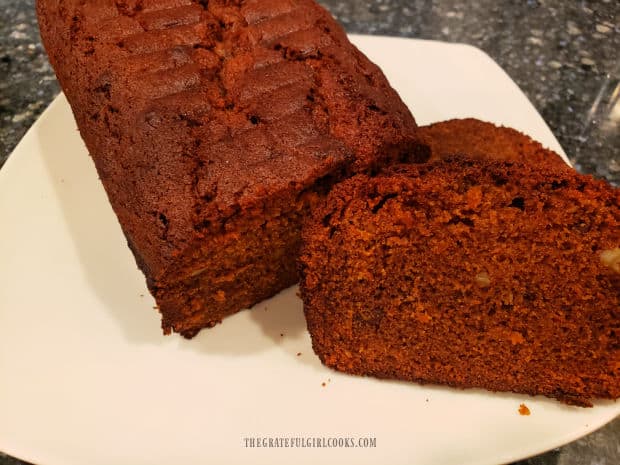
    This bread has a deep brown color, and you can see the flecks of carrot and nuts all through each slice. It’s really delicious!

    Carrot cinnamon nut bread loaf and one slice, on a white plate.

    I hope you have the opportunity to make this yummy bread, and trust you will enjoy it as much as we do! The loaf also freezes well, if wrapped tightly in plastic wrap and aluminum foil.

    Thanks for stopping by, and I invite you to come back again soon for more family friendly recipes. Take care, may God bless you, and have a GREAT day!

    Looking For More “Sweet” BREAD RECIPES?

    You can find ALL of my recipes in the Recipe Index, which is located at the top of the page. I have lots of “sweet” bread recipes to choose from, including:

    Want More Recipes? Get My FREE Newsletter!

    I publish a newsletter 2 times per month (1st and 15th) with lots of recipes, tips, etc..
    Would you like to join our growing list of subscribers?

    There is a Newsletter subscription box on the top right (or bottom) of each blog post, depending on the device you use.
    You can submit your e-mail address there, to be added to my mailing list.

    Find Me On Social Media:

    Facebook page: The Grateful Girl Cooks!
    Pinterest:
    The Grateful Girl Cooks!
    Instagram:
    jbatthegratefulgirlcooks

    Author's signature

    Original recipe source: submitted by Fern Bain in “Cooking With Love”, page 23, published by Monte Vista Chapel Ladies Fellowship, 1988

    ↓↓ PRINTABLE RECIPE BELOW ↓↓

    0 from 0 votes
    Carrot Cinnamon Nut Bread
    Prep Time
    10 mins
    Cook Time
    50 mins
    Total Time
    1 hr
     

    Carrot Cinnamon Nut Bread is an "easy to make" delicious bread, flavored with cinnamon and molasses, and filled with grated carrots and nuts.

    Category: Bread/Breakfast, Snack
    Cuisine: American
    Keyword: carrot cinnamon nut bread
    Servings: 10 slices
    Calories Per Serving: 337 kcal
    Author: JB @ The Grateful Girl Cooks!
    Ingredients
    • ¾ cup granulated sugar
    • ¼ cup molasses
    • cup vegetable oil
    • 2 large eggs
    • cups all purpose flour unsifted
    • 1 teaspoon ground cinnamon
    • 1 teaspoon baking soda
    • ½ teaspoon salt
    • 1 cup grated, peeled raw carrots
    • ½ cup chopped walnuts (or pecans)
    Instructions
    1. Preheat oven to 375℉. Generously grease (or spray) bottom and sides of a 9" x 5" loaf pan.

    2. Mix sugar, molasses, oil and eggs together in a large mixing bowl, using a wire whisk. Set aside.

    3. In separate bowl, stir flour, cinnamon, baking soda and salt until combined. Add this to the bowl of molasses mixture; stir until combined.

    4. Add carrots and chopped nuts to the batter. Stir just until combined. Don't overmix batter or bread can become dense.

    5. Spread batter evenly in greased loaf pan. Bake at 375°F. for 50-60 minutes (check it at 50 minutes), or until a toothpick inserted into the top/middle of the loaf comes out clean.

    6. Remove pan from oven; cool on wire rack for about 15 minutes. Run a butter knife around inside edges of pan, to loosen bread. Invert pan to remove loaf; cool loaf on wire rack. Slice, serve, and enjoy!

    Nutrition Facts
    Carrot Cinnamon Nut Bread
    Amount Per Serving (1 slice (1/10 of total))
    Calories 337 Calories from Fat 180
    % Daily Value*
    Fat 20g31%
    Saturated Fat 3g19%
    Trans Fat 0.1g
    Polyunsaturated Fat 11g
    Monounsaturated Fat 4g
    Cholesterol 37mg12%
    Sodium 253mg11%
    Potassium 225mg6%
    Carbohydrates 38g13%
    Fiber 1g4%
    Sugar 22g24%
    Protein 4g8%
    Vitamin A 2194IU44%
    Vitamin C 1mg1%
    Calcium 38mg4%
    Iron 2mg11%
    * Percent Daily Values are based on a 2000 calorie diet.

    Here’s one more to pin on your Pinterest boards!Carrot Cinnamon Nut Bread is an "easy to make" delicious bread, flavored with cinnamon and molasses, and filled with grated carrots and nuts.

    Tomato Basil Drop Biscuits

    Tomato Basil Drop Biscuits are an easy side dish you’ll enjoy! Biscuits are flavored with Parmesan cheese, tomatoes, onions and basil.
    Tomato Basil Drop Biscuits are an easy side dish you'll enjoy! Biscuits are flavored with Parmesan cheese, tomatoes, onions and basil.

    Looking for a simple side dish to serve alongside soups, salads or various entrees? I hope you’ll check out this recipe today for tomato basil drop biscuits!

    The dough batter for these biscuits is simple to prepare. These savory biscuits are a cinch to make, because you only drop the batter onto the baking sheet. There’s no cutting out these biscuits with a biscuit cutter!

    Filled with chopped tomato, onions, and basil, the biscuits are topped with a bit of Parmesan cheese before baking them for 10-12 minutes. They’re delicious, and here’s how to make them. 

    Scroll Down For A Printable Recipe Card At The Bottom Of The Page

    Prep The Veggies

    Heat olive oil (or vegetable oil) in a medium skillet on Medium heat. Add chopped onions, and cook them for 3 minutes, until they have softened slightly.

    Stir in fresh, chopped tomatoes, and cook this mixture for 1 more minute, stirring often.

    Chopped onions are cooked in olive oil in a skillet.Fresh, chopped tomatoes are added to the cooked onion in the skillet.

    Remove the skillet from the heat source, then stir in chopped fresh basil (you can substitute dried basil if necessary).

    Set the veggie mixture aside to cool while you mix up the dough batter for the drop biscuits.

    Minced fresh basil is added to the tomatoes and onions in skillet.

    Make The Biscuit Dough

    In a medium-sized mixing bowl, stir together all purpose flour, baking powder, salt and pepper.

    Once combined, cut in vegetable shortening, using a pastry blender (as shown below) or two forks. Cut the shortening in until it becomes about the size of peas.

    Add the tomato, basil, and onion mixture to the bowl of dry ingredients. Pour in milk, then stir only until the ingredients are combined.

    Do not overmix the dough because it causes the biscuits to become very dense in texture, once baked.

    Vegetable shortening is cut into the dry ingredients in a large bowl.Tomato, onion and basil mixture is added to dry biscuit ingredients.

    Prepare The Biscuits For Baking

    Drop the biscuit dough by generous Tablespoons onto a well-greased baking sheet. Keep the biscuits about 2 inches apart, because they’ll spread slightly while baking.

    Depending on the size of your spoonful, the recipe (as written) should yield 8 tomato basil drop biscuits.

    Lightly sprinkle the top of each biscuit with finely grated Parmesan cheese before baking. This adds additional flavor!

    After combining, the biscuit dough is thick and tacky in texture.Batter for eight tomato basil drop biscuits is dropped onto baking sheet.

    Time To Bake The Biscuits

    Bake the tomato basil drop biscuits at 425°F (or 218.3°C) for 10-12 minutes. When done, the biscuits should be light golden brown in color, and set around the bottom edges.

    Check for doneness by inserting a toothpick into the top of a biscuit. If the toothpick comes out clean, they are ready!

    Let the biscuits cool for a minute on the baking sheet, then transfer them with a spatula to a wire rack to cool slightly before serving.

    After baking, the tomato basil drop biscuits cool on the baking sheet.Tomato basil drop biscuits continue cooling on a wire rack.

    Serve The Tomato Basil Drop Biscuits

    Serve the tomato basil drop biscuits warm. We enjoy them sliced open with a little softened butter spread on them. 

    The biscuits are light in texture and have good flavor. I’m confident you’re going to enjoy them, served alongside a delicious soup, salad or meat dish. 

    Eight Tomato Basil Drop Biscuits, with basil leaves, served on a white plate.

    I hope you have the opportunity to make these tasty, simple biscuits, and trust you’ll enjoy them as much as we do.

    Thanks for stopping by, and I invite you to come back again soon for more family friendly recipes. Take care, may God bless you, and have a GREAT day!

    Looking For More BISCUIT Recipes?

    You can find ALL of my recipes in the Recipe Index, which is located at the top of the page. I have some delicious biscuit recipes you might enjoy, including:

    Want More Recipes? Get My FREE Newsletter!

    I publish a newsletter 2 times per month (1st and 15th) with lots of recipes, tips, etc..
    Would you like to join our growing list of subscribers?

    There is a Newsletter subscription box on the top right (or bottom) of each blog post, depending on the device you use.
    You can submit your e-mail address there, to be added to my mailing list.

    Find Me On Social Media:

    Facebook page: The Grateful Girl Cooks!
    Pinterest:
    The Grateful Girl Cooks!
    Instagram:
    jbatthegratefulgirlcooks

    Author's signature

    Recipe adapted from: “Taste of Home” magazine, June/July 2000 edition, page 41, published by Reiman Publications

    ↓↓ PRINTABLE RECIPE BELOW ↓↓
    0 from 0 votes
    Tomato Basil Drop Biscuits
    Prep Time
    15 mins
    Cook Time
    10 mins
    Total Time
    25 mins
     

    Tomato Basil Drop Biscuits are an easy side dish you'll enjoy! Biscuits are flavored with Parmesan cheese, tomatoes, onions and basil.

    Category: Bread, Side Dish
    Cuisine: All Cuisines
    Keyword: tomato basil drop biscuits
    Servings: 8 biscuits
    Calories Per Serving: 108 kcal
    Author: JB @ The Grateful Girl Cooks!
    Ingredients
    • 2 teaspoons olive oil or other neutral oil
    • ¼ cup finely chopped yellow onion
    • cup fresh chopped tomato
    • 2 Tablespoons minced fresh basil or 2 tsp. dried
    • 1 cup all purpose flour
    • ½ Tablespoon baking powder
    • ½ teaspoon salt
    • teaspoon black pepper
    • 2 Tablespoons vegetable shortening
    • cup milk
    • 2 Tablespoons grated Parmesan cheese
    Instructions
    1. Preheat oven to 425℉ or 218.3℃. Lightly grease/spray a baking sheet.

    2. Heat oil in a small skillet on Medium heat. Add chopped onions; cook for 3 minutes, until they've softened slightly. Stir in tomatoes; cook 1 minute. Remove skillet from heat; stir in basil. Set aside to cool.

    3. In a medium-sized bowl, stir together flour, baking powder, salt and pepper. Cut in shortening, using pastry blender or 2 forks until it becomes the size of peas.

    4. Add tomato mixture to the flour mixture. Pour in milk; stir only until ingredients are combined. Do not overmix dough.

    5. Drop dough by generous Tablespoons onto greased baking sheet, about 2" apart. Depending on the size of your spoonful, the recipe should yield 8 small biscuits. Lightly sprinkle each biscuit with Parmesan cheese.

    6. Bake biscuits at 425°F (or 218.3°C) for 10-12 minutes. When done, biscuits should be golden brown in color, and set around the bottom edges. Check for doneness by inserting a toothpick into a biscuit. If it comes out clean, they're ready! Let biscuits cool 1 minute on baking sheet, then transfer to a wire rack to cool slightly before serving. Enjoy!

    Nutrition Facts
    Tomato Basil Drop Biscuits
    Amount Per Serving (1 biscuit)
    Calories 108 Calories from Fat 45
    % Daily Value*
    Fat 5g8%
    Saturated Fat 1g6%
    Trans Fat 0.4g
    Polyunsaturated Fat 1g
    Monounsaturated Fat 2g
    Cholesterol 2mg1%
    Sodium 173mg8%
    Potassium 143mg4%
    Carbohydrates 14g5%
    Fiber 1g4%
    Sugar 1g1%
    Protein 2g4%
    Vitamin A 139IU3%
    Vitamin C 2mg2%
    Calcium 62mg6%
    Iron 1mg6%
    * Percent Daily Values are based on a 2000 calorie diet.

    Here’s one more to pin on your Pinterest boards!Tomato Basil Drop Biscuits are an easy side dish you'll enjoy! Biscuits are flavored with Parmesan cheese, tomatoes, onions and basil.
    Dilly Bread

    Dilly Bread is a yummy homemade yeast bread. It’s light in texture, flavored with dill seed & dried onion, and best served warm with butter!
    Dilly Bread is a yummy homemade yeast bread. It's light in texture, flavored with dill seed & dried onion, and best served warm with butter!

    If you enjoy the smell and taste of homemade bread, then I enthusiastically recommend this recipe for Dilly Bread to you!

    Dilly bread is a yeast bread, which means it will take a bit of “inactive prep time” to let the dough rise, but if you’ve got the time, then you’ve got to try this scrumptious bread!

    The dough is interesting in that it has cottage cheese in it. I know… what? When I first saw the recipe years ago in one of my old cookbooks, I thought adding cottage cheese was odd! However, after making this loaf, I’ve found you can’t taste it, and it adds protein, too.

    The bread loaf is also studded with dried dill seeds and dried minced onions, which give this bread AMAZING flavor. It’s so delicious, I can hardly keep myself from eating the entire loaf!

    I think you will love this bread, which is “practically perfect” eaten on its own (with butter!), or as a side dish for a variety of meals. Here’s how to make it.

    Scroll Down for A Printable Recipe Card At The Bottom Of The Page

    A Little Bit Of Prep

    The first thing you need to do is put the cottage cheese and butter in a small saucepan. Turn the heat to Low and heat and stir it only until the butter melts and the mixture is warm (not hot). Set the pan aside.

    Next, in a separate bowl, add the active dry yeast, then add ¼ cup of warm (110°F) water. The water needs to be no hotter than this temperature or it can kill the yeast.

    Stir the yeast and water together, then let it sit for 5 minutes. The yeast mix should become bubbly, indicating the yeast is alive and active.

    Cottage cheese and butter are warmed slightly in a small saucepan.Active dry yeast is combined with warm water in a small bowl to activate it.

    Prepare The Dilly Bread Dough

    In a large mixing bowl, combine an egg, granulated sugar, dried minced onion, dill seeds, salt, and baking soda. Stir until well-combined.

    Egg, sugar, salt, dill seed, dried onions and baking soda in a large, clear bowl.After mixing, wet ingredients for dilly bread are ready for more ingredients.

    Add the cottage cheese/butter mixture to the bowl, then add the yeast mixture. Stir this, to combine the ingredients.

    Yeast and water, plus butter and cottage cheese are added to mixing bowl.A clear mixing bowl of wet dilly bread ingredients are ready for the flour.

    Add all purpose flour to the bowl, and stir to fully incorporate the flour into the wet ingredients. You will end up with a fairly stiff dough.

    All purpose flour is added to the dilly bread dough in bowl.The dilly bread dough is set aside, for the dough to rise for one hour.

    Time To Let The Dough Rise

    Cover the bowl of bread dough very well with plastic wrap. Place the dough in a warm spot, free from drafts. Sometimes I even cover the bowl with several towels to keep it warm.

    Let the dough rise for about one hour, or until it has doubled in size. Once done, use a large spoon to tap down the dough, which lets some of the air and volume out. Do not knead the dough.

    The dough has risen, then it is punched down in the bowl, to deflate.

    Generously grease the bottom and sides of a 9″ x 5″ loaf pan (spray the pan with non-stick spray, or use oil or shortening to do this). Spoon the thick bread dough into the prepared pan, then spread the dough out, covering the bottom of the pan.

    Cover the pan tightly with plastic wrap. Let the dough rise (again) in a warm place for 40 minutes, or until it has doubled in size.

    Toward the end of this time, preheat your oven to 350°F, because the next step is to finally bake this delicious bread.

    A bread loaf pan is filled with the dough for the dilly bread.After the dough rises a second time, the dilly bread is ready to bake.

    Bake The Dilly Bread

    Now it’s time to bake the Dilly Bread… hooray! All your hard work of watching and waiting for the dough to rise will pay off (ha ha!).

    Bake on a middle oven rack at 350°F. for 35 minutes, or until a toothpick inserted into the top of the loaf comes out clean. The finished dilly bread should be nice and golden brown on the surface, too!

    Transfer the pan to a wire rack to cool for about 15 minutes, before removing the loaf from the pan. Run a butter knife around the edges of the pan, then invert the pan. If you greased your pan really well, the loaf should practically fall out!

    Finish cooling the dilly bread on the wire rack, after removing it from the pan.

    A loaf of baked dilly bread, right out of the oven.A side view of the loaf of dilly bread, showing the height of the loaf.

    Time For A Warm Slice Of Dilly Bread!

    Slice the bread into 1″ slices once it is warm (and not burning hot). We love to add softened butter to each warm slice, too.

    The dilly bread is absolutely DELICIOUS! There is a lot of flavor, and the bread itself is NOT dense, but light and fluffy!

    One slice of dilly bread with butter, and the loaf behind it.

    I really hope you enjoy making a loaf of dilly bread for yourself and those you love. It’s one of my favorite savory bread recipes, and I really trust you’ll love it, too!

    Thanks for stopping by, and I invite you to come back soon for more family-friendly recipes. Take care, may God bless you, and have a GREAT day!

    Looking for More HOMEMADE BREAD Recipes?

    You can find ALL of my recipes in the Recipe Index, which is located at the top of the page. I have some delicious homemade bread recipes (sweet and savory) you might enjoy, including:

    Want More Recipes? Get My FREE Newsletter!

    I publish a newsletter 2 times per month (1st and 15th) with lots of recipes, tips, etc..
    Would you like to join our growing list of subscribers?

    There is a Newsletter subscription box on the top right (or bottom) of each blog post, depending on the device you use.
    You can submit your e-mail address there, to be added to my mailing list.

    Find Me On Social Media:

    Facebook page: The Grateful Girl Cooks!
    Pinterest:
    The Grateful Girl Cooks!
    Instagram:
    jbatthegratefulgirlcooks

    Author's signature

    Original recipe source: “A Taste Of Oregon”, page 153, published in 1980 by The Junior League of Eugene, Inc.

    ↓↓ PRINTABLE RECIPE BELOW ↓↓

    0 from 0 votes
    Dilly Bread
    Prep Time
    10 mins
    Cook Time
    35 mins
    Rising Time (inactive prep)
    1 hr 45 mins
    Total Time
    2 hrs 30 mins
     

    Dilly Bread is a yummy homemade yeast bread. It's light in texture, flavored with dill seed & dried onion, and best served warm with butter!

    Category: Bread
    Cuisine: All Cuisines
    Keyword: dilly bread
    Servings: 9 slices
    Calories Per Serving: 183 kcal
    Author: JB @ The Grateful Girl Cooks!
    Ingredients
    • 1 cup small curd cottage cheese
    • 1 Tablespoon butter
    • teaspoons active dry yeast = 1 small packet
    • ¼ cup warm water (110℉) NOT hot
    • 1 large egg
    • 2 Tablespoons granulated sugar* *generous Tablespoons!
    • 2 Tablespoons dried, minced onion
    • 2 teaspoons dried dill seed* *generous teaspoons!
    • 1 teaspoon salt
    • ¼ teaspoon baking soda
    • cups all purpose flour
    Instructions
    1. Put cottage cheese and butter in a small saucepan. Heat on Low and stir only until butter melts and mixture is warm (not hot). Remove from heat; set aside.

    2. In separate bowl, add yeast, then add ¼ cup of warm (110°F) water. The water needs to be no hotter than this temp. or it can kill the yeast. Stir to dissolve yeast, then let it sit 5 minutes. Mixture should become bubbly.

    3. In a large mixing bowl, combine an egg, granulated sugar, dried minced onion, dill seeds, salt, and baking soda. Stir until well-combined. Add cottage cheese/butter mixture, then yeast mixture. Stir well, to combine. Add flour; stir to combine. You'll end up with a fairly stiff dough.

    4. Cover bowl tightly with plastic wrap. Place bowl in a warm spot, free from drafts. Let dough rise for 1 hour, or until doubled in size. Once done, use large spoon to tap down the dough. Do not knead the dough.

    5. Generously grease bottom and sides of a 9 x 5 loaf pan (spray or use oil/shortening to do this). Spoon dough into prepared pan, then spread the thick dough out, covering bottom of pan. Cover pan tightly with plastic wrap. Let dough rise (again) in a warm place for 40 minutes, or until doubled in size.

    6. Preheat oven to 350℉.

    7. Bake on middle oven rack at 350°F. for 35 minutes, until golden brown, and a toothpick inserted in the top comes out clean. Transfer pan to a wire rack; cool 15 minutes before removing bread. Run a butter knife around edges of pan, then invert to remove. Cool on wire rack, after removing it from pan. Slice & enjoy!

    Nutrition Facts
    Dilly Bread
    Amount Per Serving (1 slice (1/9 of total))
    Calories 183 Calories from Fat 27
    % Daily Value*
    Fat 3g5%
    Saturated Fat 1g6%
    Trans Fat 0.1g
    Polyunsaturated Fat 0.3g
    Monounsaturated Fat 1g
    Cholesterol 25mg8%
    Sodium 411mg18%
    Potassium 95mg3%
    Carbohydrates 32g11%
    Fiber 1g4%
    Sugar 4g4%
    Protein 8g16%
    Vitamin A 79IU2%
    Vitamin C 0.5mg1%
    Calcium 37mg4%
    Iron 2mg11%
    * Percent Daily Values are based on a 2000 calorie diet.

    Here’s one more to pin on your Pinterest boards!
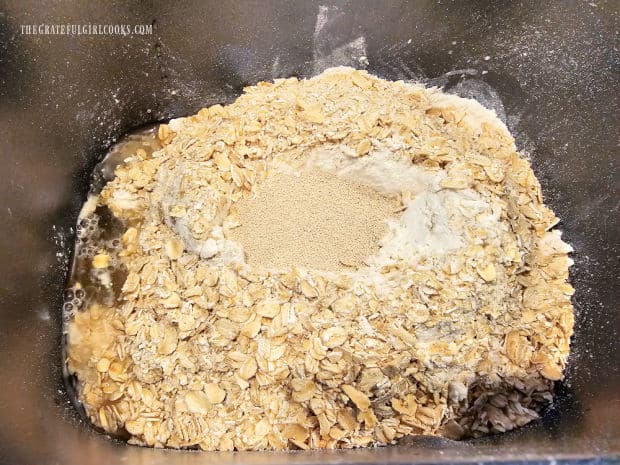
    Dilly Bread is a yummy homemade yeast bread. It's light in texture, flavored with dill seed & dried onion, and best served warm with butter!

    Bacon Apple Cheddar Scones

    Bacon Apple Cheddar Scones are delicious! Recipe makes 8 buttery, savory scones, filled with diced apples, cheddar cheese and crisp bacon!
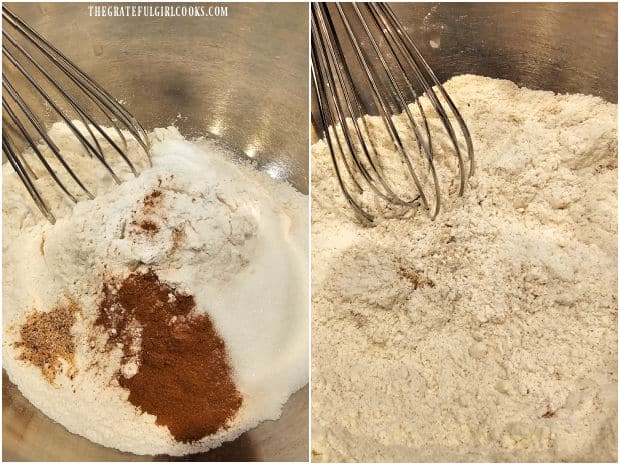
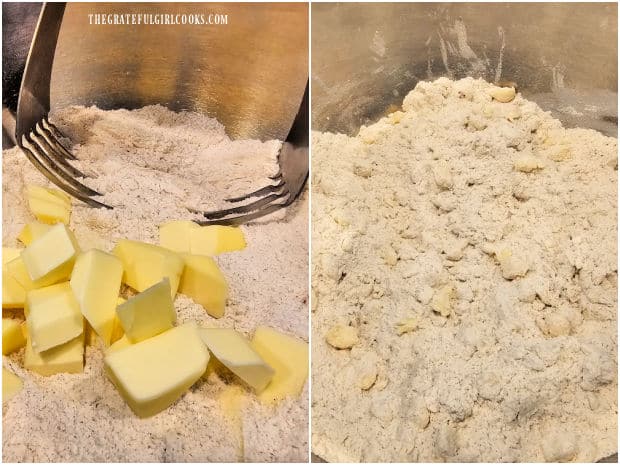
    Bacon Apple Cheddar Scones are delicious! Recipe makes 8 buttery, savory scones, filled with diced apples, cheddar cheese and crisp bacon!
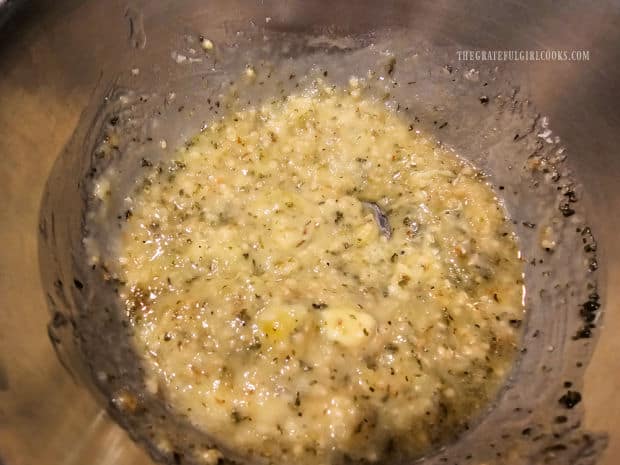
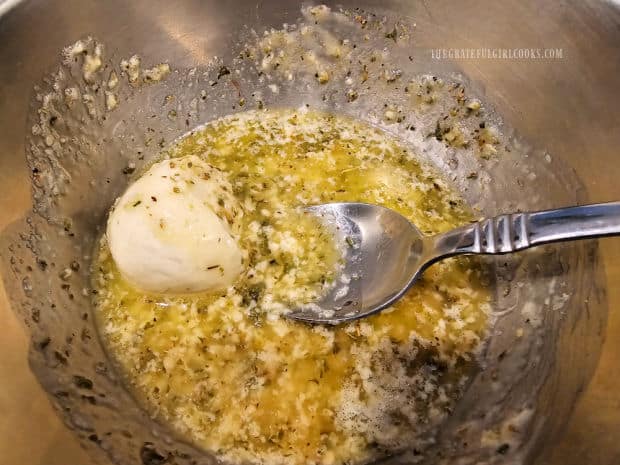
    Today I would like to share this recipe for Bacon Apple Cheddar Scones with you. Many years ago I found a recipe in a magazine for apple cheese scones, and thought they sounded pretty tasty. I made a few changes to the original recipe and also added cooked, crispy bacon! YUM!

    These savory scones are not sweet like a typical scone, but they sure have great flavor! We love to serve them as a side dish for a big pot of chili or soup, or with a large mixed green salad.

    We know that apples and cheese compliment each other, but when you add crisp bacon to the party… wow! These soft, buttery scones are a wonderful addition to any meal.

    My husband and I think these scones are the best when served warm, with some soft butter spread on them. Here’s how to make these yummy scones.

    Scroll Down For A Printable Recipe Card At The Bottom Of The Page

    Let’s Make Some Scones!

    The scones come together fairly quickly, so preheat your oven to 450°F. before beginning. By the time you have cut out the scones, your oven should be ready to go!

    Place flour, sugar, baking powder, salt and baking soda in a medium sized bowl, and stir or whisk to combine these ingredients. Add small chunks of COLD butter.

    Cut the butter into the dry ingredients using a pastry blender (as shown) or two forks. Do this until the butter has been reduced to the size of peas.

    Stir buttermilk into the mixture, but only until all the dough is moistened. Do not overmix the dough, because that can lead to dense (heavy) scones.

    Cold butter is cut into the dry scone ingredients using a pastry blender.Buttermilk is stirred into the bowl of scone batter until just combined.

    Add The “Good Stuff”

    Now add grated cheddar cheese, precooked, chopped crispy bacon, and pealed/chopped apples to the dough batter. Stir these into the batter until fully incorporated.

    The scone dough will be a fairly “wet” and chunky dough at this point. Now it’s time to roll out the dough and cut the scones for baking.

    Grated cheese, bacon, and diced apples are stirred into the scone batter.

    Knead, Shape, And Cut The Dough

    It’s time to get that scone dough into shape. Generously spread a work surface with flour. Because this is a sticky dough, do not skip this step!

    Pour the dough onto the floured surface. Sprinkle the dough with additional flour, then coat your hands with flour, too. Keep the flour handy, because you will more than likely need to sprinkle it on the dough as you knead it.

    Knead the dough about 8-10 times with your well-floured hands, adding more flour if necessary, until it comes together in a ball. The dough should not be sticky and wet at this point.

    Dusted with flour, the scone dough is ready to be kneaded, then shaped.

    Shape the dough into a 9″ wide circle with your hands. Use a very sharp knife or pizza cutter to slice the scone dough into eight pie-shaped wedges.

    Scone dough is shaped into a 9" circle, and cut into eight wedges.

    Time To Bake The Scones

    Place the scones on a parchment paper lined baking sheet. NOTE: If you do not have parchment paper, grease the baking sheet with non stick cooking spray.

    Place the scone wedges in a circle on the parchment paper (or greased baking sheet), leaving about an inch between each slice, as pictured below.

    Bake at 450°F. on a middle rack in the oven for 13-15 minutes. When done, the bacon apple cheddar scones should be golden brown on top.

    TIP: Because oven temps can vary quite a bit, check them after 13 minutes, then continue cooking until done. A toothpick inserted into the middle of a scone should come out clean.

    Scone dough, sliced in 8 wedges and placed on parchment paper-lined pan for baking.Baked bacon apple cheddar scones on parchment paper after coming out of the oven.

    Serve the Bacon Apple Cheddar Scones

    Transfer the scones to a wire rack and let them cool for a few minutes before serving. We think they taste best when served warm, and not hot! 

    Serve these delicious bacon apple cheddar scones alongside any meal you would normally serve bread or rolls with. They pair well with meats, and are wonderful with soups or stews.

    The bacon apple cheddar scones cool on a wire rack after baking.Bacon apple cheddar scones, served on a white plate.

    I really am confident you’ll enjoy these delicious scones. I think you’ll be surprised how good they are! Thanks for stopping by, and I invite you to come back soon for more family-friendly recipes.

    Take care, may God bless you, and I hope you have a GREAT day!

    Looking For More BREAD Recipes?

    You can find ALL of my recipes in the Recipe Index, which is located at the top of the page. I have some wonderful bread recipes you can check out, including:

    Want More Recipes? Get My FREE Newsletter!

    I publish a newsletter 2 times per month (1st and 15th) with lots of recipes, tips, etc..
    Would you like to join our growing list of subscribers?

    There is a Newsletter subscription box on the top right (or bottom) of each blog post, depending on the device you use.
    You can submit your e-mail address there, to be added to my mailing list.

    Find Me On Social Media:

    Facebook page: The Grateful Girl Cooks!
    Pinterest:
    The Grateful Girl Cooks!
    Instagram:
    jbatthegratefulgirlcooks

    Author's signature

    Recipe adapted from: “Taste of Home” magazine, August/September 2003 edition, page 9

    ↓↓ PRINTABLE RECIPE BELOW ↓↓

    0 from 0 votes
    Bacon Apple Cheddar Scones
    Prep Time
    15 mins
    Cook Time
    15 mins
    Total Time
    30 mins
     

    Bacon Apple Cheddar Scones are delicious! Recipe makes 8 buttery, savory scones, filled with diced apples, cheddar cheese and crisp bacon!

    Category: Bread, Side Dish
    Cuisine: American
    Keyword: bacon apple cheddar scones
    Servings: 8 scones
    Calories Per Serving: 253 kcal
    Author: JB @ The Grateful Girl Cooks!
    Ingredients
    • 2 cups all purpose flour
    • 2 Tablespoons granulated sugar
    • teaspoons baking powder
    • ½ teaspoon salt
    • ¼ teaspoon baking soda
    • Tablespoons butter (COLD)
    • ¾ cup buttermilk
    • ¾ cup chopped apples (sweet, not tart) peeled, chopped
    • ½ cup grated cheddar cheese
    • 2 slices cooked bacon chopped, cooked crisp
    Instructions
    1. Preheat oven to 450°F. Line a baking sheet with parchment paper OR spray with non stick cooking spray.

    2. Stir or whisk flour, sugar, baking powder, salt and baking soda in a medium bowl, Add small chunks of COLD butter. Cut butter in with pastry blender or 2 forks, until butter's reduced to size of peas. Stir in buttermilk, only until dough is moistened. Do not overmix, as that can lead to dense (heavy) scones.

    3. Add cheese, bacon, and apples to dough. Stir into batter until fully incorporated. Dough will be fairly "wet" and chunky at this point.

    4. Generously spread work surface with flour. Pour dough onto floured surface. Sprinkle dough with additional flour, then coat your hands with flour. Knead dough 8-10 times with well-floured hands, adding more flour if necessary, until it comes together in a ball. The dough should not be sticky and wet at this point.

    5. Shape dough into 9" circle. Use knife or pizza cutter to slice dough into 8 pie-shaped wedges. Place scones on prepared baking sheet in a circle, leaving an inch between each slice.

    6. Bake at 450°F. (on middle oven rack) for 13-15 minutes. When done, scones should be golden brown. TIP: Because oven temps vary, check them at 13 minutes; continue cooking until done. A toothpick inserted into scone should come out clean. Transfer scones to wire rack to cool slightly . Serve warm.

    Recipe Notes

    TIP: Out of buttermilk? Here's an easy substitute to make 1 cup of buttermilk (you will only use 3/4 cup): Measure out 1 cup milk. Remove 1 Tablespoon milk from the cup. Add 1 Tablespoon white vinegar to the cup. Stir, then let the milk sit for 5 full minutes. Use 3/4 cup of it in recipe.

    Nutrition Facts
    Bacon Apple Cheddar Scones
    Amount Per Serving (1 scone)
    Calories 253 Calories from Fat 108
    % Daily Value*
    Fat 12g18%
    Saturated Fat 7g44%
    Trans Fat 0.3g
    Polyunsaturated Fat 1g
    Monounsaturated Fat 3g
    Cholesterol 32mg11%
    Sodium 346mg15%
    Potassium 170mg5%
    Carbohydrates 30g10%
    Fiber 1g4%
    Sugar 5g6%
    Protein 6g12%
    Vitamin A 355IU7%
    Vitamin C 1mg1%
    Calcium 116mg12%
    Iron 2mg11%
    * Percent Daily Values are based on a 2000 calorie diet.

    Here’s one more to pin on your Pinterest boards!Bacon Apple Cheddar Scones are delicious! Recipe makes 8 buttery, savory scones, filled with diced apples, cheddar cheese and crisp bacon!