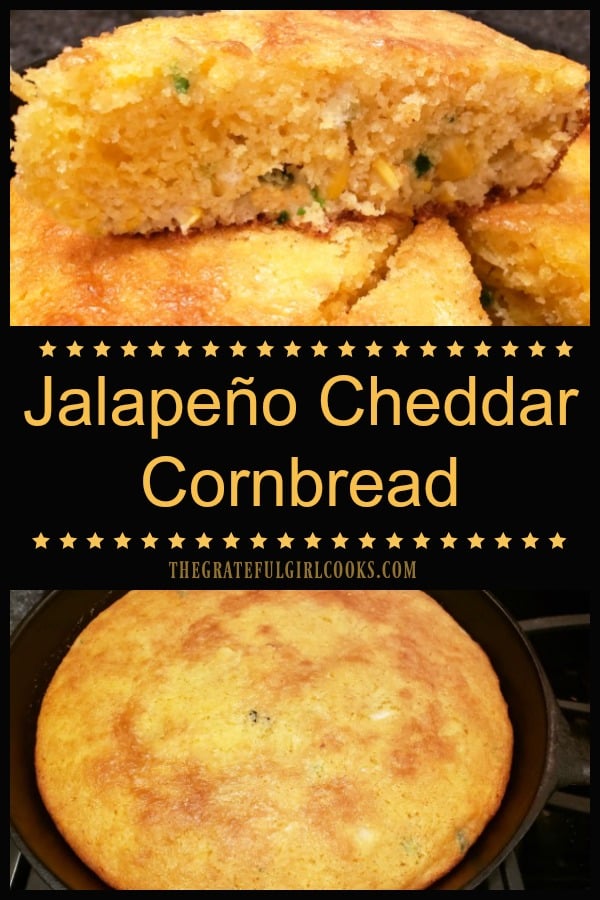
Category: Breads

Mom’s Southern Hush Puppies

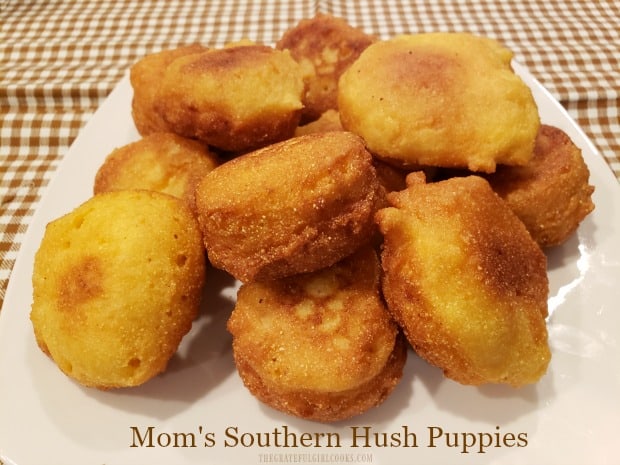
Mom’s Southern Hush Puppies are a simple, delicious side dish (fried till crispy, served hot w/ butter) to accompany a favorite soup or chili.
Mom's Southern Hush Puppies are a simple, delicious side dish (fried till crispy, served hot w/ butter) to accompany a favorite soup or chili.

I grew up eating hush puppies. My East Texas born and raised Mom made them every couple of weeks for our family, and they were always served with a big pot of spinach and turnip greens. As a kid, I never quite developed a love for the “greens” part of that meal, however… give me a few hot, crispy hush puppies with soft butter on them! Now THAT spoke to me… ha ha!

Growing up our family didn’t have a lot of money, so that simple meal could be made quite inexpensively, yet fill all five of us up! I have wonderful memories of watching my Mom lovingly fry a batch on our old kitchen stove. She made them like her Mom made them. Hush Puppies are a classic Southern staple dish, and are made with fairly common ingredients. There are a LOT of ways to make them. There’s also a LOT of history and myths detailing the origin and legends about them, which you can read here. It’s pretty interesting.

Some hush puppy recipes include corn, jalapeños, or green onions, and fried in small balls until really brown. My Mom’s recipe is for basic hush puppies, with minced brown onion, and are a little more disc-shaped. They are fried until crispy and lightly browned on the outside, but amazingly soft on the inside. They are so delicious and easy to make. Here’s how:

Scroll Down For A Printable Recipe At The Bottom Of The Page

What Ingredients Do I Need To Make Hush Puppies?

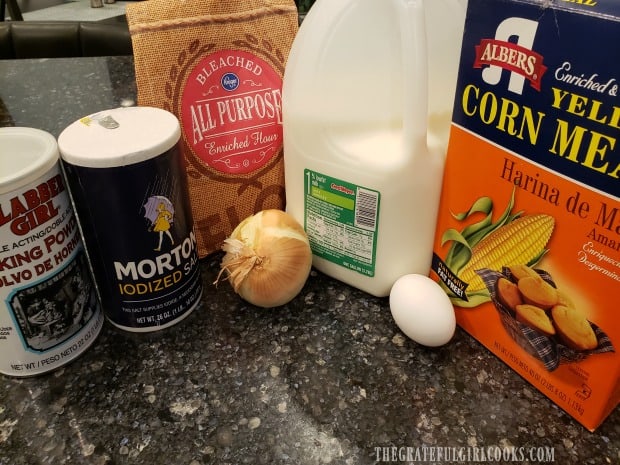
Seven ingredients (plus vegetable oil for frying) are what you will need to make a dozen hush puppies. The ingredients used are cornmeal, flour, baking powder, salt, minced onion, an egg, and milk.

I try to always keep  a box of cornmeal in our pantry. If you’ve never bought it before, it can usually be found on the flour aisle in most grocery stores. Very basic ingredients, right?

Hush puppy ingredients are cornmeal, flour, baking powder, salt, onion, egg and milk.

How To Make The Hush Puppy Batter

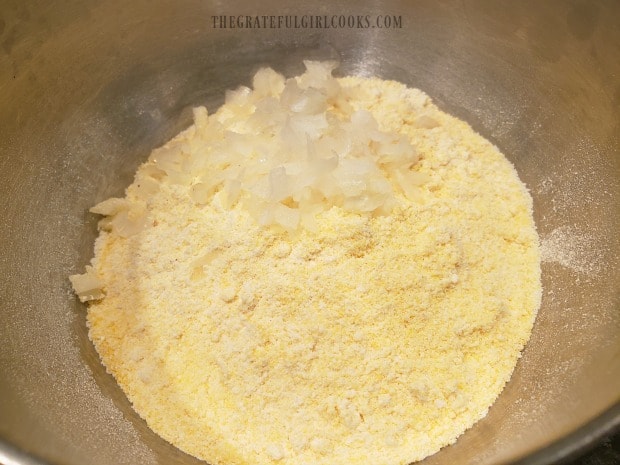
Sift the dry ingredients together into a large mixing bowl, and then add the minced onion. In a separate dish, lightly beat the egg with a fork, and then add the milk, and stir to combine. Pour the egg/milk mixture into the bowl with the dry ingredients.

Dry ingredients are sifted into bowl, and minced onion is added.Milk and egg mixture is added to dry ingredients in bowl.

Stir the ingredients until fully blended together. The batter for the hush puppies will be fairly thick. Once that’s done, you are ready to fry some of Mom’s Southern Hush Puppies!

Batter for Mom's southern hush puppies is fairly thick.Thick batter is ready to be fried in hot oil to make hush puppies.

Frying Mom’s Southern Hush Puppies

Heat enough oil in a large skillet to cover the bottom with 1/2 inch of oil. Heat the oil on medium heat until it is REALLY hot, but not smoking. I like to use a cast iron skillet when I make hush puppies, but it isn’t necessary. Plan on a skillet large enough to cook about 6 at a time.
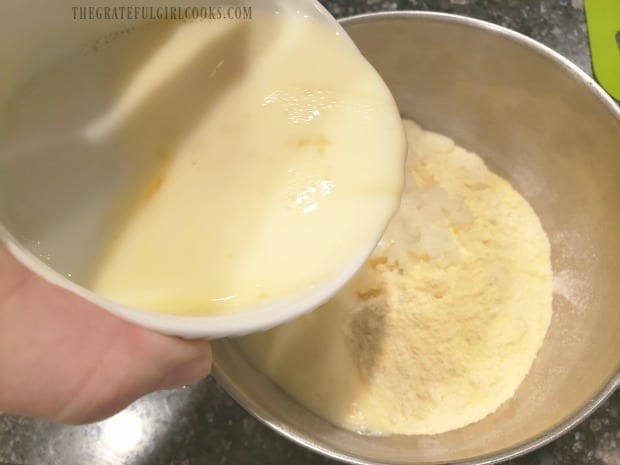
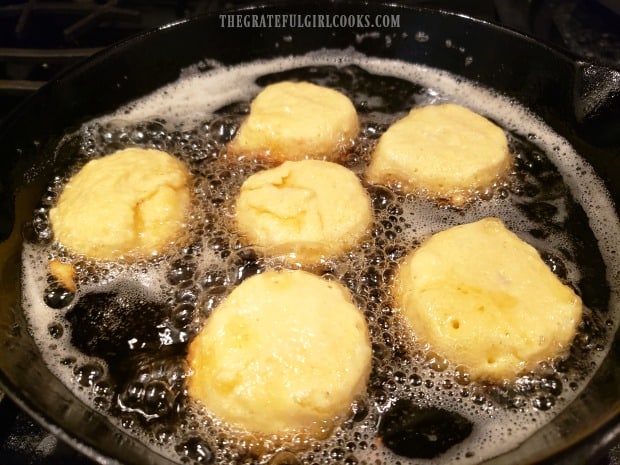
Drop by generous Tablespoons into the hot oil, leaving space between each hush puppy. The batter should sizzle when it hits the oil. Do not move them once they hit the hot oil. Fry them until you see the bottom edges turning brown all the way around. This usually takes 2-3 minutes. You may need to fry the hush puppies in a couple of batches. I fry about six at a time, so I don’t overcrowd the skillet.
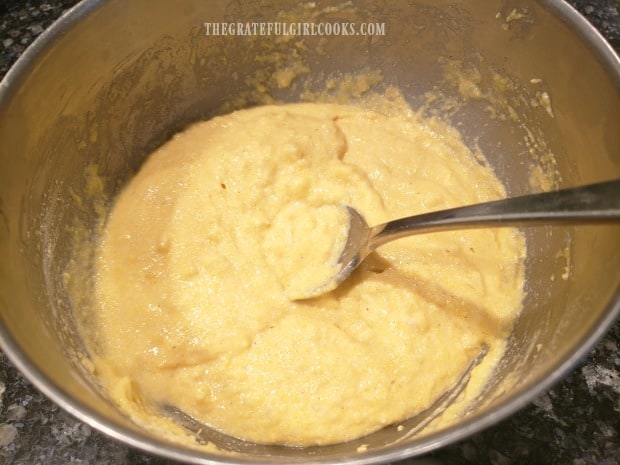
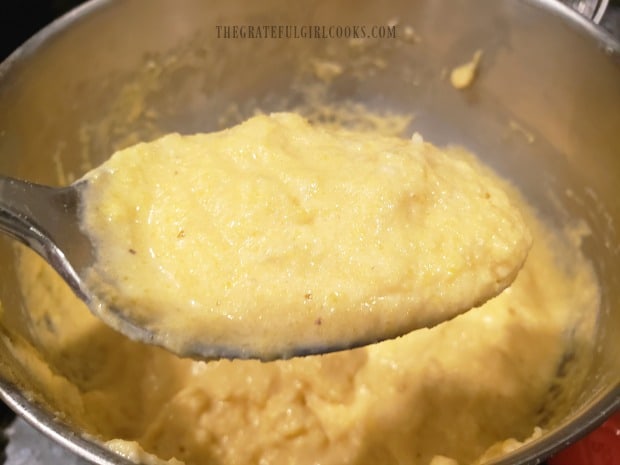
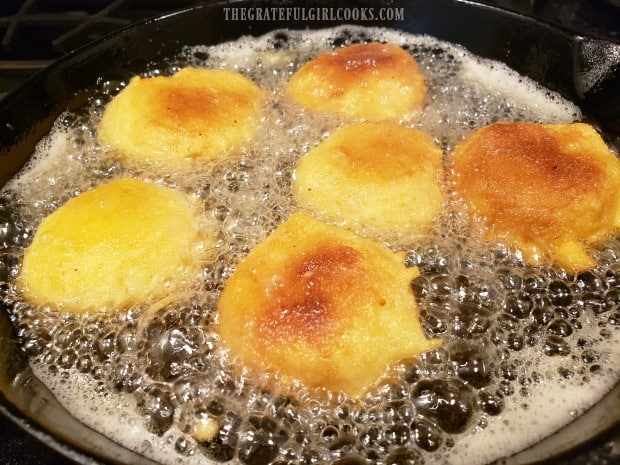
Use a spatula and a large spoon to CAREFULLY turn the hush puppies to the other side. Lightly press down on the hush puppy with a spatula to flatten the top slightly. Be careful… that oil is very hot. Continue cooking until the hush puppies are golden brown on the bottom again. Depending on how brown you want them, you can cook the second side longer, if desired.

Mom's southern hush puppies are cooked in hot oil in a large skillet.Hush puppies are carefully turned to fry the other side in the hot oil.
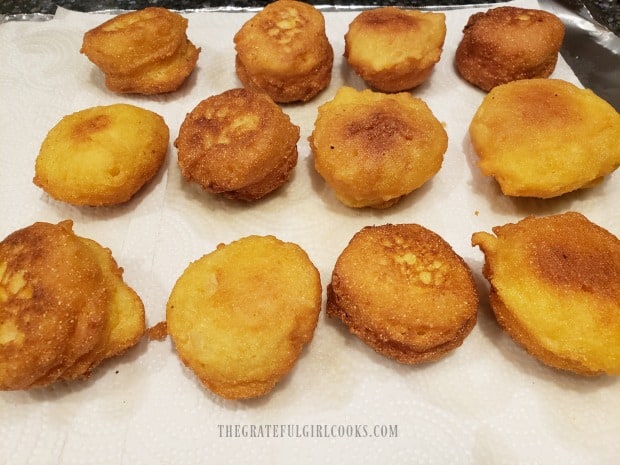
When Mom’s Southern hush puppies finish frying and are browned and crispy on all sides, remove them from the skillet and place on several thicknesses of paper towels. The paper towels will quickly absorb any leftover grease.
Paper towels absorb oil from the fried hush puppies before serving.

Serve Mom’s Southern Hush Puppies HOT!

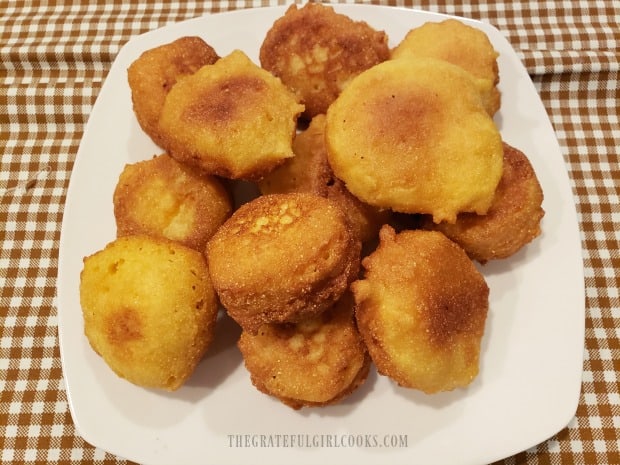
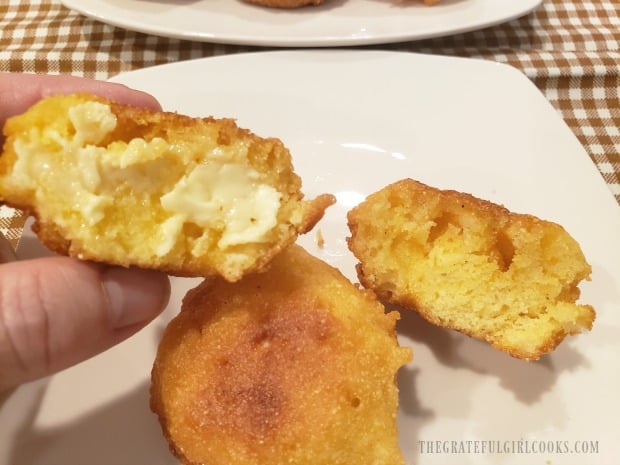
Serve Mom’s Southern hush puppies hot! Slice them open, spread them with softened butter, and dig in! The finished hush puppies should be really crispy on the outside, and delicious and soft on the inside.

They are such a simple side dish… if you enjoy the flavor of cornbread, it’s pretty certain you will like these, too! Once you’ve gobbled down a hot hush puppy with butter, it’s hard NOT to grab another… and another!

A white plate full of Mom's southern hush puppies, ready to eat!Hot, sliced, and spread with soft butter is the best way to enjoy hush puppies!

If you enjoy these hush puppies, perhaps you would also be interested in my recipes for Jalapeño Cheddar Cornbread, or Marie Callender’s Cornbread (copycat recipe)? All taste wonderful, and are another great option to serve with a variety of homemade soups or chilis.

I hope you will have the opportunity to try my Mom’s Southern Hush Puppies recipe. They really ARE easy to make. We love ’em, and hope you will, too! Thank you for stopping by, and humbly invite you to come back soon.

Interested In More Recipes?

Thank you for visiting this website. I appreciate you using some of your valuable time to do soIf you’re interested, I publish a newsletter 2 times per month (1st and 15th) with all the latest recipes, and other fun info. I would be honored to have you join our growing list of subscribers, so you never miss a great recipe!
There is a Newsletter subscription box on the top right side (or bottom) of each blog post, depending on the device you use, where you can easily submit your e-mail address (only) to be included in my mailing list.

You Can Also Find Me On Social Media:

Facebook page: The Grateful Girl Cooks!
Pinterest:
The Grateful Girl Cooks!
Instagram:
jbatthegratefulgirlcooks

Author's signature

Original recipe source: My Mom gave me he recipe, about 45 years ago

0 from 0 votes
Mom's Southern Hush Puppies
Prep Time
7 mins
Cook Time
8 mins
Total Time
15 mins
 

Mom's Southern Hush Puppies are a simple, delicious side dish (fried till crispy, served hot w/ butter) to accompany a favorite soup or chili.

Category: Side Dish
Cuisine: American
Keyword: Mom's southern hush puppies
Servings: 12
Calories Per Serving: 82 kcal
Author: JB @ The Grateful Girl Cooks!
Ingredients
  • 1 cup yellow cornmeal
  • ½ cup all purpose flour
  • teaspoons baking powder
  • ¾ teaspoon salt
  • 2 Tablespoons brown onion finely chopped
  • 1 large egg
  • cup milk
Enough vegetable oil to cover skillet bottom with 1/2" of oil for frying.
    Instructions
    1. Sift the dry ingredients together into a large mixing bowl, and then add the minced onion. In a separate dish, lightly beat the egg with a fork, and then add the milk. Pour the egg/milk mixture into the bowl with the dry ingredients. Stir the ingredients until fully blended together. The batter for the hush puppies will be pretty thick.

    2. Heat enough oil in a large skillet to cover bottom with about 1/2 inch of oil. Heat oil on medium heat until very hot, but not smoking. Drop batter by generous Tablespoons into hot oil, leaving space between each. Batter should sizzle when it hits oil. Do not move them once they hit oil. Fry until bottom edges turn brown all the way around (about 2-3 min.).
    3. CAREFULLY turn hush puppies to the other side (use spatula).. Flatten top slightly with spatula. Be careful... oil is very hot. Continue cooking until hush puppies are golden brown on the bottom again. When done, hush puppies should be very crispy, and browned on all sides.

    4. When hush puppies finish frying and are browned and very crispy on all sides, remove them from the skillet and place on several thicknesses of paper towels. The paper towels will absorb any leftover grease. Serve hot; slice open and spread softened butter on them. Enjoy!

    Nutrition Facts
    Mom's Southern Hush Puppies
    Amount Per Serving (1 g)
    Calories 82 Calories from Fat 9
    % Daily Value*
    Fat 1g2%
    Saturated Fat 1g6%
    Cholesterol 16mg5%
    Sodium 158mg7%
    Potassium 124mg4%
    Carbohydrates 15g5%
    Fiber 1g4%
    Sugar 1g1%
    Protein 3g6%
    Vitamin A 48IU1%
    Vitamin C 1mg1%
    Calcium 40mg4%
    Iron 1mg6%
    * Percent Daily Values are based on a 2000 calorie diet.

    Here’s one more to pin on your Pinterest boards!Mom's Southern Hush Puppies are a simple, delicious side dish (fried till crispy, served hot w/ butter) to accompany a favorite soup or chili.

    Chocolate Chip Banana Bread

    Chocolate Chip Banana Bread is a delicious, easy-to make treat. The recipe yields two 9×5 loaves, perfect for gift-giving or snacking.
    Chocolate Chip Banana Bread is a delicious, easy-to make treat. The recipe yields two 9x5 loaves, perfect for gift-giving or snacking.

    Do you enjoy banana bread? We sure do! Years ago I made some simple tweaks to my mom’s recipe for banana nut bread, and started making golden brown loaves of moist, chocolate chip banana bread (filled with chocolate chips and without the nuts). How can you go wrong by adding chocolate to just about anything? Not sure it’s possible.

    Anyways, this simple recipe was born from her recipe. The recipe makes two big loaves of this delicious, moist bread. It hardly takes any time at all to whip up the batter, and then all that is left to do is pop ’em in the oven, and wait for them to be done. Easy Peasy! Here’s how to make this yummy bread, which can be a snack or a breakfast treat. We like to eat our slices warm, with a dab of soft butter on them. YUM. Here’s how to make this bread:

    Scroll Down For A Printable Recipe Card At The Bottom Of The Page

    Make The Batter

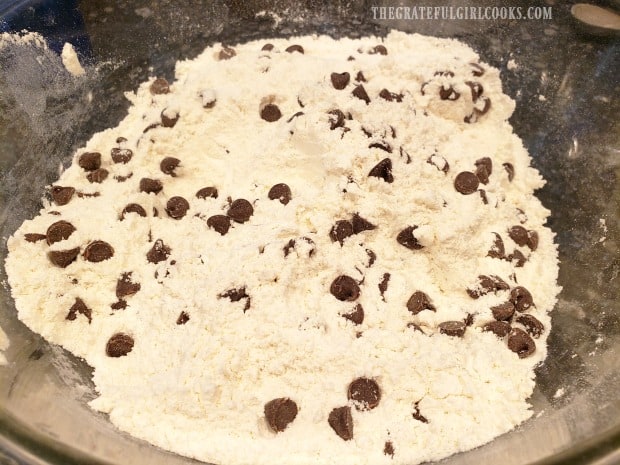
    Making the batter is simple. Sift flour, baking powder, baking soda, salt and granulated sugar into a large bowl. Stir in the chocolate chips, reserving some (1/4 cup) to add to the top of the loaves before baking. These are the “dry ingredients”.
    Dry ingredients are sifted, together then chocolate chips are added.

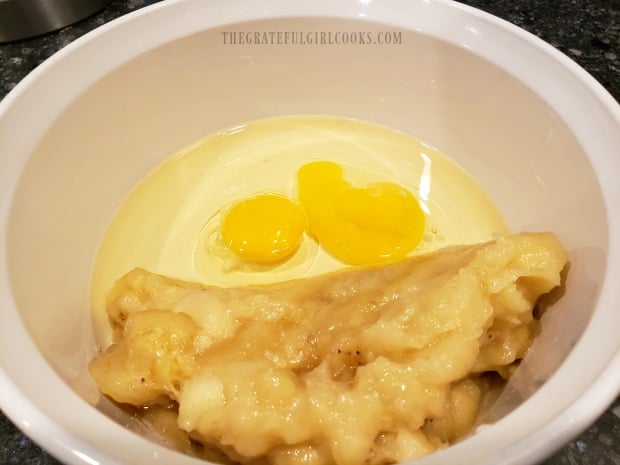
    In a separate bowl, whisk or stir together eggs, oil, lemon juice, and mashed (very ripe) bananas. You will want to use bananas that have brown spots all over the peels (very ripe), because they will be the sweetest, which is perfect for this bread. These are your “wet ingredients”.

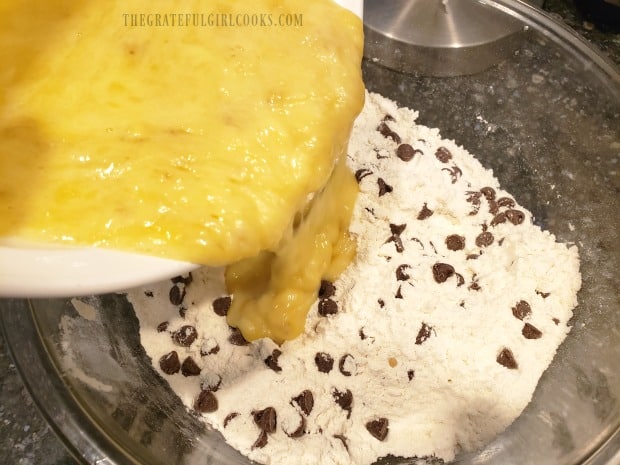
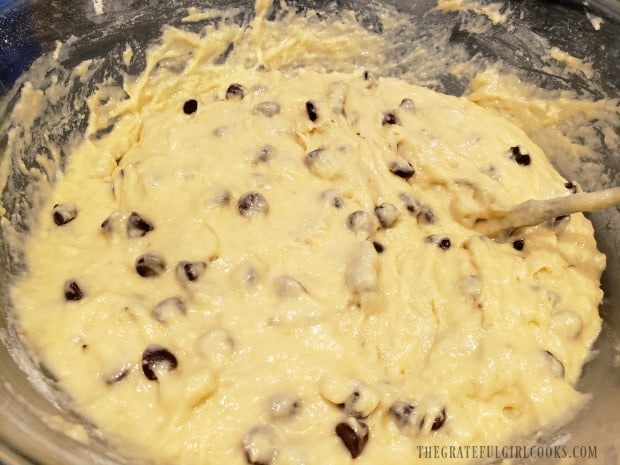
    Once combined, pour the “wet ingredients” into the bowl with the “dry ingredients”, and stir well, only until all the ingredients are combined. Do not over-mix the batter.

    Mashed bananas, eggs, oil, and lemon juice are combined in bowl.The wet ingredients are poured into the bowl of dry ingredients.The banana bread batter is stirred only until ingredients are combined.

    Bake The Chocolate Chip Banana Bread 

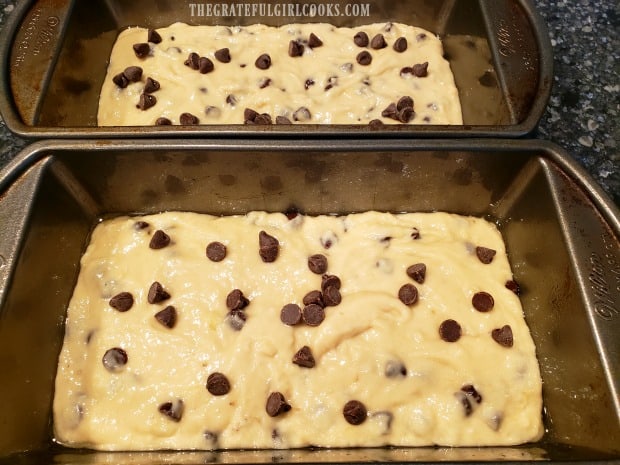
    Now it’s time to bake the chocolate chip banana bread. Spray two 9×5″ loaf pans with non-stick baking spray (bottom and sides). Evenly divide the batter between the two pans. Sprinkle the reserved 1/4 cup of chocolate chips over the top of the bread batter.

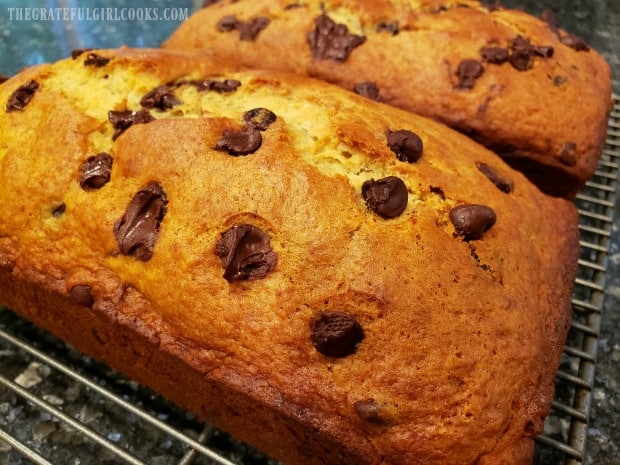
    Place the loaves on the middle rack in a preheated 350°F oven. Bake for 55-60 minutes, or until a toothpick inserted into the top comes out clean. I recommend checking the bread at 50 minutes, then again, until done. The chocolate chip banana bread should be golden brown on top. Let the loaves cool for 10-15 minutes (in the pan) on a wire rack, before attempting to remove them from the pans.

    Chocolate chip banana bread batter is divided into two loaf pans for baking.Two loaves of chocolate chip banana bread cool on wire racks after baking.

    Time To Eat!

    Once the loaves have cooled, run a butter knife around the edges of the pan. Place a platter on top of a loaf, and holding both the platter and the loaf pan… invert the loaf upside down. It should come out of the pan easily (if you greased your pan well!).

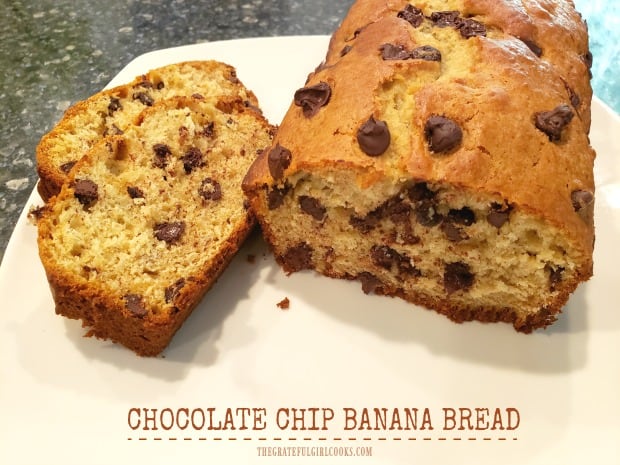
    Slice and serve. Each loaf should give you about 8 slices of this delicious bread. It is delicious slightly warmed, with butter, too! YUM.
    NOTE: This bread also freezes very well, if wrapped well, in plastic wrap and aluminum foil.

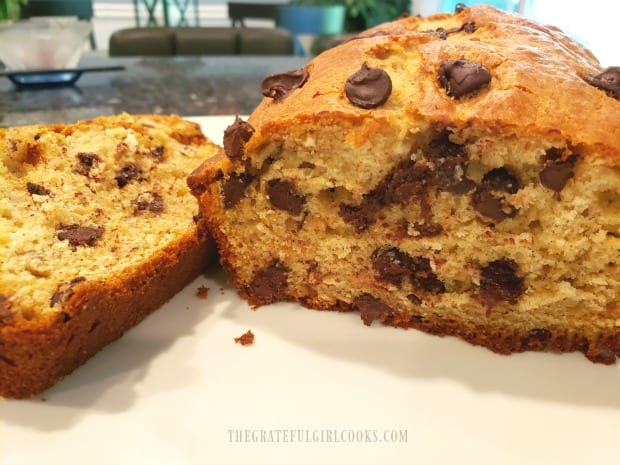
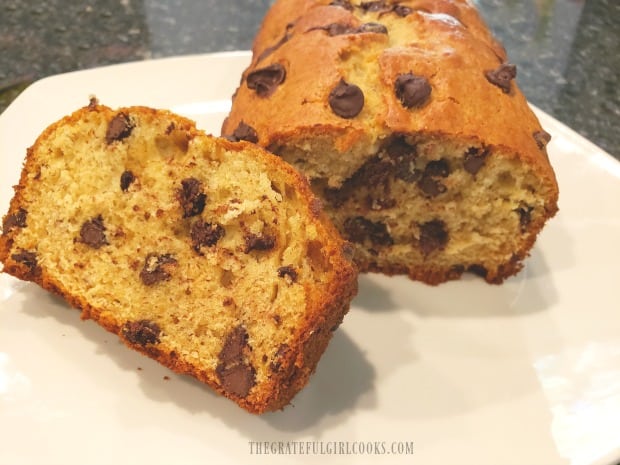
    A view of the inside of the bread, once sliced. Lots of chocolate chips.A slice of the chocolate chip banana bread, sliced and ready to eat.

    I hope you enjoy this yummy chocolate chip banana bread. It has been a favorite in our home for many, many years! Thank you for stopping by, and I sincerely hope you will come back soon. Have a wonderful day.

    Looking For More “Sweet” Bread Loaf Recipes?

    You can find all of my sweetened bread loaf recipes in the Recipe Index, located at the top of the page. I have quite a few recipes, including:

    Interested In More Recipes?

    Thank you for visiting this website. I appreciate you using some of your valuable time to do soIf you’re interested, I publish a newsletter 2 times per month (1st and 15th) with all the latest recipes, and other fun info. I would be honored to have you join our growing list of subscribers, so you never miss a great recipe!
    There is a Newsletter subscription box on the top right side (or bottom) of each blog post, depending on the device you use, where you can easily submit your e-mail address (only) to be included in my mailing list.

    You Can Also Find Me On Social Media:

    Facebook page: The Grateful Girl Cooks!
    Pinterest:
    The Grateful Girl Cooks!
    Instagram:
    jbatthegratefulgirlcooks

    Author's signature

    0 from 0 votes
    Chocolate Chip Banana Bread
    Prep Time
    10 mins
    Cook Time
    55 mins
    Total Time
    1 hr 5 mins
     

    Chocolate Chip Banana Bread is a delicious, easy-to make treat. The recipe yields two 9x5 loaves, perfect for gift-giving or snacking.

    Category: Breakfast, Dessert, Snack
    Cuisine: American
    Keyword: chocolate chip banana bread
    Servings: 16 (2 loaves)
    Calories Per Serving: 386 kcal
    Author: JB @ The Grateful Girl Cooks!
    Ingredients
    • 4 cups all purpose flour
    • 4 teaspoons baking powder
    • 1 teaspoon baking soda
    • teaspoons salt
    • 1 cup granulated sugar
    • 2 cups semi-sweet chocolate chips , divided
    • 2 large eggs , slightly beaten
    • ½ cup vegetable oil
    • 2 cups mashed VERY RIPE bananas (approx. 4 med. bananas)
    • 2 Tablespoons lemon juice (fresh)
    Instructions
    1. Preheat oven to 350°F. Grease or spray two 9x5 loaf pans with non-stick baking spray.

    2. Sift flour, baking powder, baking soda, salt and granulated sugar into a large bowl. Stir in chocolate chips (reserving 1/4 cup) to add to the top of loaves before baking.

    3. In a separate bowl, whisk or stir together eggs, oil, lemon juice, and mashed (very ripe) bananas. Once combined, pour it into bowl with the "dry ingredients". Stir well, only until all ingredients are incorporated. Don't over-mix batter.

    4. Evenly divide batter between pans. Sprinkle reserved 1/4 cup chocolate chips over the top. Place loaves on the middle rack of oven. Bake for 55-60 minutes, or until a toothpick inserted into the top comes out clean. I recommend checking bread at 50 minutes, then again, until done/golden brown on top. Let loaves cool 10-15 minutes (in the pan) on a wire rack, before attempting to remove from pans.

    5. Once cooled, run a butter knife around edges of pan. Place a platter on top of a loaf, and holding both the platter and the pan, invert the loaf upside down. It should come out of the pan easily (if you greased your pan well!). Slice and serve. Each loaf should yield 8 slices. Enjoy!

    Recipe Notes

    If making mini-loaves, you will probably get 5-6 mini-loaves. These should be baked between 30-35 minutes.

    Nutrition Facts
    Chocolate Chip Banana Bread
    Amount Per Serving (1 slice)
    Calories 386 Calories from Fat 144
    % Daily Value*
    Fat 16g25%
    Saturated Fat 11g69%
    Cholesterol 25mg8%
    Sodium 299mg13%
    Potassium 371mg11%
    Carbohydrates 55g18%
    Fiber 3g13%
    Sugar 24g27%
    Protein 6g12%
    Vitamin A 63IU1%
    Vitamin C 3mg4%
    Calcium 67mg7%
    Iron 3mg17%
    * Percent Daily Values are based on a 2000 calorie diet.

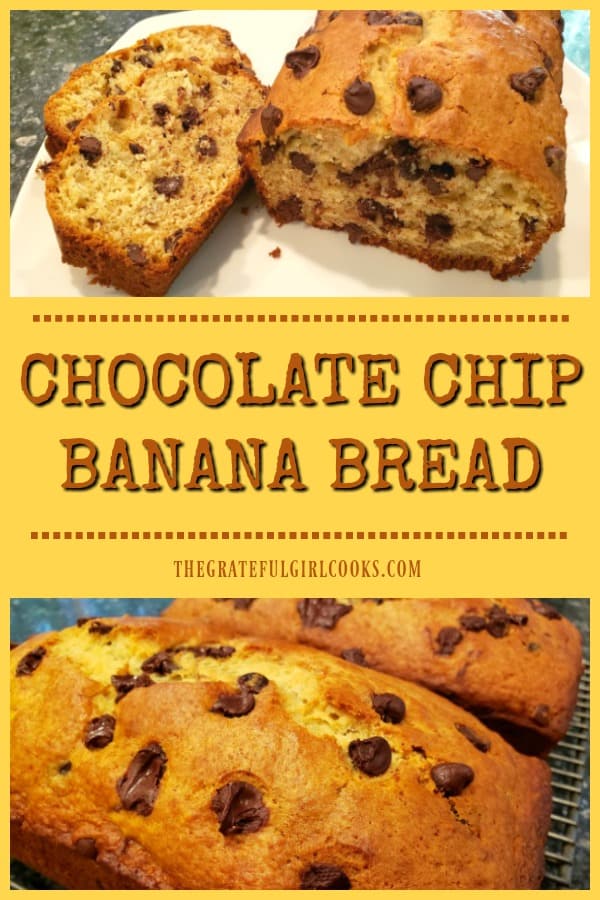
    Here’s one more to pin on your Pinterest boards!Chocolate Chip Banana Bread is a delicious, easy-to make treat. The recipe yields two 9x5 loaves, perfect for gift-giving or snacking.

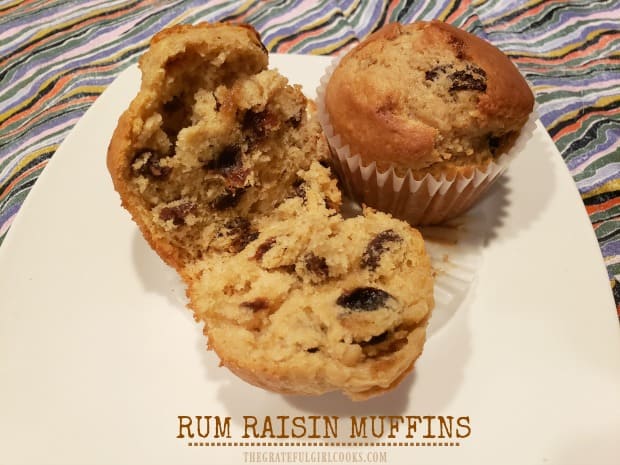
    Rum Raisin Muffins

    Rum Raisin Muffins are an easy to prepare breakfast treat! Brown sugar muffins filled with rum-soaked raisins! Recipe yields 1 dozen.
    Rum Raisin Muffins are an easy to prepare breakfast treat! Brown sugar muffins filled with rum-soaked raisins! Recipe yields 1 dozen.

    I originally found this recipe for rum raisin muffins in one of the many cookbooks I have collected over the years. This recipe has a very basic brown sugar batter, and has lots of rum-marinated raisins inside. It sounded intriguing, so I made them the first time for my husband and I.

    We really liked them! They are not overly sweet, and honestly don’t taste too “rum-like” (in case you’re wondering), but are a moist, yummy muffin. They’re perfect for a quick breakfast or snack, and are very easy to make! Here’s how:

    Scroll Down For A Printable Recipe Card At The Bottom Of The Page

    Do You REALLY Soak The Raisins In Rum?

    Yes. For this recipe, the raisins are soaked in a very small amount of rum. The alcohol will cook out as the muffins bake, leaving a small bit of flavor behind. You can use light rum, dark rum, or coconut rum, whatever type you have access to.

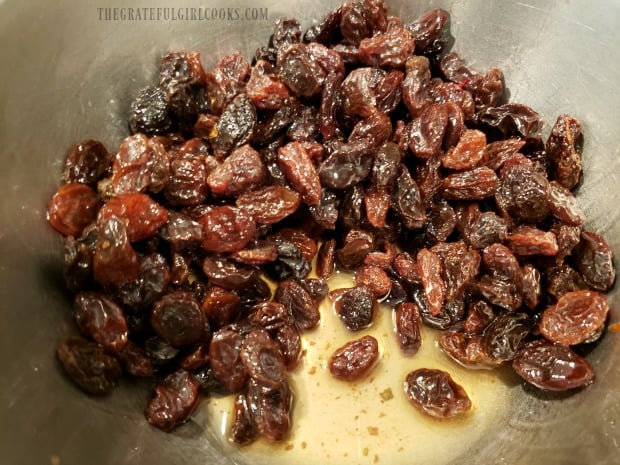
    The raisins will take an hour to soak, so plan ahead! Truly, this is the only thing about the entire recipe that will take time. Place the raisins in a small bowl, and stir in the rum, until the raisins are coated. Let them sit for one hour, stirring occasionally, to allow the rum to lightly infuse the raisins with extra flavor. Do NOT drain, once done.

    Raisins are soaked in rum before adding to muffin batter.

    Prepare The Muffin Batter

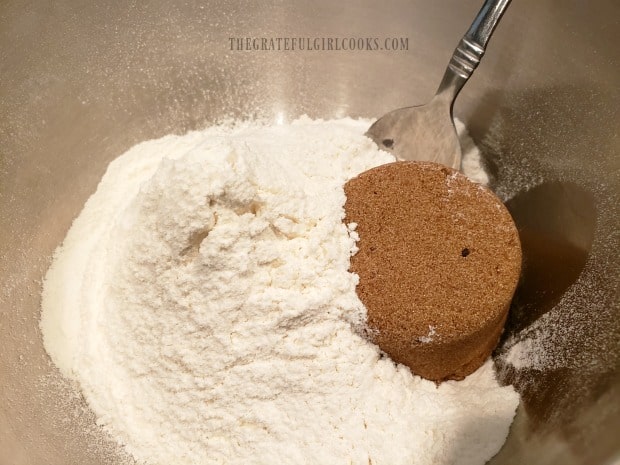
    Before beginning, preheat your oven to 400°F, and grease or line with paper liners a 12 cup muffin pan. Now let’s make the batter! It’s a cinch. Sift all purpose flour, baking powder, cinnamon and salt into a large mixing bowl. Add the brown sugar, and stir well, to combine the dry ingredients.

    Brown sugar is stirred into sifted flour, baking powder and salt.

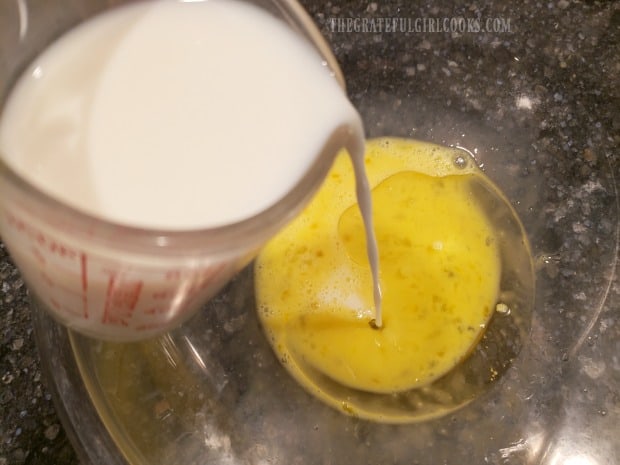
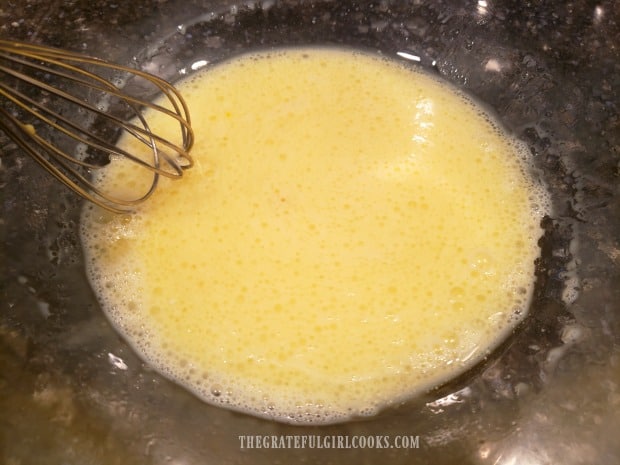
    Place two eggs in a separate bowl, and whisk them lightly. Add the oil and milk, and whisk these wet ingredients together until fully combined.

    Milk is added to beaten eggs and oil in large bowl.Wet ingredients are whisked together before adding to dry ingredients.

    Finish The Batter

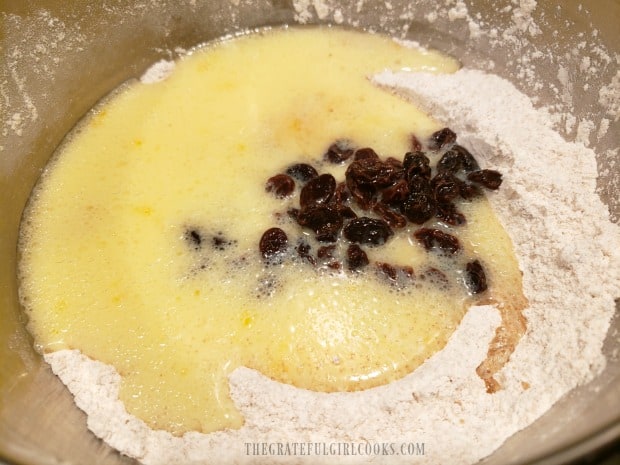
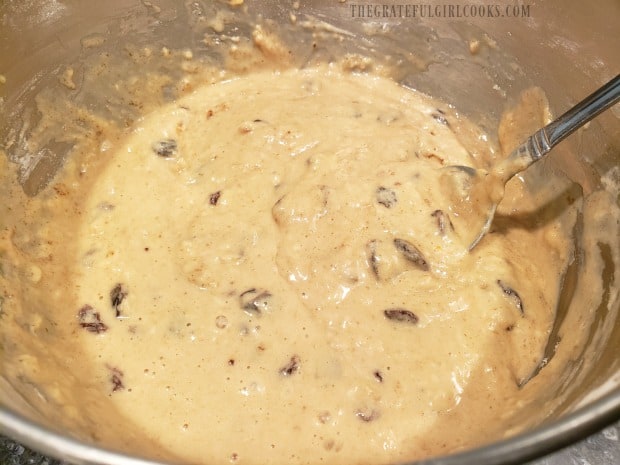
    Hollow out a “well” in the middle of the bowl of dry ingredients, and pour in the wet ingredients. Now add the rum-soaked raisins (and any leftover liquid from their bowl) to the mix. Stir all the batter ingredients together gently until everything is combined. Be careful to not overmix the batter. Stir only until all ingredients have been incorporated into a slightly thick batter.

    Wet ingredients and rum-soaked raisins are added to dry ingredients.The batter for the rum raisin muffins is ready to use.

    Bake The Rum Raisin Muffins

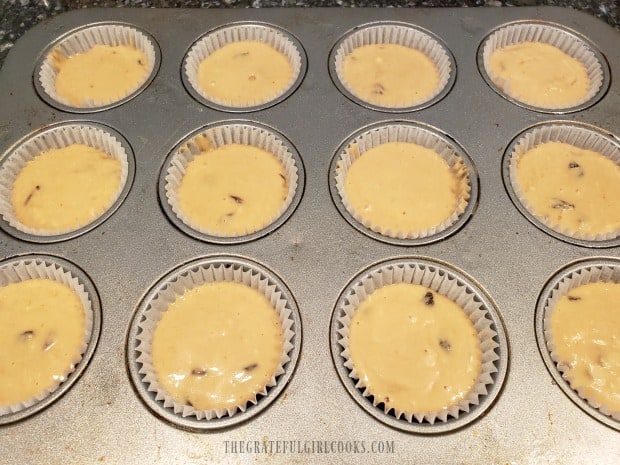
    Carefully pour or spoon the batter into the 12 prepared muffin cups, evenly dividing the batter between them. The batter will fill each cup to between 1/2 and 2/3 full.

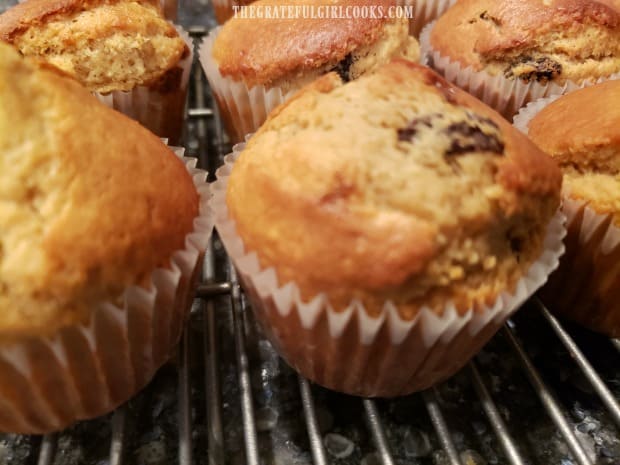
    Bake the rum raisin muffins at 400°F for 18-20 minutes. Test to see if they are done around the 18 minutes mark, by inserting a toothpick into the top of a muffin. If it comes out clean, they are done. The finished muffins will have risen considerably, and be nicely browned. Remove pan from oven. Let muffins cool (still in the pan) for 5 minutes, then transfer them to a wire rack to finish cooling.

    Paper-lined muffin cups are filled with the muffin batter.After baking, the rum raisin muffins are nicely browned on top.

    Time To Eat!

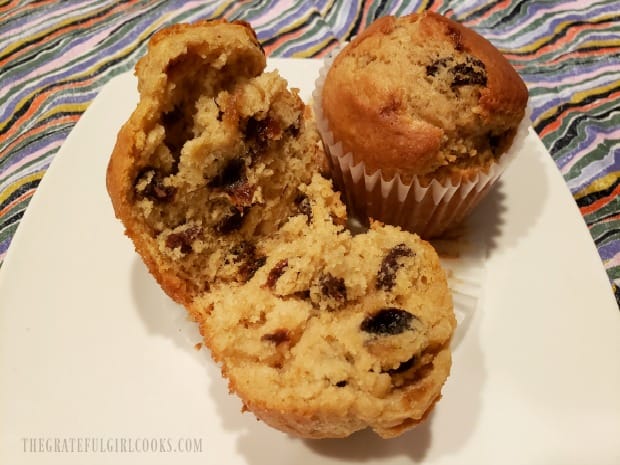
    The rum raisin muffins are delicious, served warm, with a dab of softened butter. They are also yummy, when eaten at room temperature, just as they are. They are filled with plump, chewy raisins, and taste wonderful. I really hope you enjoy them.

    Each of the rum raisin muffins is full of rum-soaked raisins!

    Thank you so much for stopping by. I hope you have the opportunity to try this recipe for rum raisin muffins. They freeze well, so if you can’t possibly finish them all in one sitting, pop a few into re-sealable freezer bags and toss ’em in the freezer to enjoy at a later date.

    Looking For More MUFFIN Recipes?

    You can find all of my yummy muffin recipes in the Recipe Index, which is located at the top of the page. I have lots of them, including:

    Interested In More Recipes?

    Thank you for visiting this website. I appreciate you using some of your valuable time to do soIf you’re interested, I publish a newsletter 2 times per month (1st and 15th) with all the latest recipes, and other fun info. I would be honored to have you join our growing list of subscribers, so you never miss a great recipe!
    There is a Newsletter subscription box on the top right side (or bottom) of each blog post, depending on the device you use, where you can easily submit your e-mail address (only) to be included in my mailing list.

    You Can Also Find Me On Social Media:

    Facebook page: The Grateful Girl Cooks!
    Pinterest:
    The Grateful Girl Cooks!
    Instagram:
    jbatthegratefulgirlcooks

    Author's signature

    Adapted from: The book “1 Mix, 100 Muffins”, by Susanna Tee, published by Parragon Books, 2008, page 28 (Caribbean Rum & Raisin Muffins)

    0 from 0 votes
    Rum Raisin Muffins
    Prep Time
    10 mins
    Cook Time
    18 mins
    Marinating Time For Raisins (inactive)
    1 hr
    Total Time
    1 hr 28 mins
     

    Rum Raisin Muffins are an easy to prepare breakfast treat! Brown sugar muffins filled with rum-soaked raisins! Recipe yields 1 dozen.

    Category: Breakfast, Snack
    Cuisine: American
    Keyword: rum raisin muffins
    Servings: 12 muffins
    Calories Per Serving: 255 kcal
    Author: JB @ The Grateful Girl Cooks!
    Ingredients
    • cups raisins
    • 3 Tablespoons rum white, dark or coconut
    • 2 cups all purpose flour
    • 1 Tablespoon baking powder
    • ½ teaspoon ground cinnamon
    • teaspoon salt
    • ½ cup dark brown sugar* * a HEAPING, packed ½ cup
    • 2 large eggs
    • 1 cup milk* * a SCANT cup of milk
    • 6 Tablespoons vegetable or sunflower oil can sub. melted/cooled butter
    Instructions
    1. Place raisins in small bowl; stir in rum. Let raisins sit for 1 hour, stirring occasionally. Do NOT drain, once done.

    2. Preheat oven to 400°F, Grease or insert paper muffin liners into a 12 cup muffin tin.

    3. Sift flour, baking powder, cinnamon and salt into a large mixing bowl. Add brown sugar; stir well, to combine these dry ingredients. Set aside.

    4. Place two eggs in separate bowl; whisk lightly. Add oil and milk; whisk until these "wet ingredients" are combined. Hollow out a "well" in the middle of the bowl of dry ingredients; pour in these wet ingredients. Add rum-soaked raisins (and any liquid from their bowl). Stir gently until all ingredients are combined. Be careful to not overmix the batter... only stir until ingredients have been incorporated into a slightly thick batter.

    5. Evenly divide batter into 12 prepared muffin cups. Fill each cup between 1/2 to 2/3 full. Bake at 400°F for 18-20 minutes. Test to see if done at the 18 minute mark, by inserting a toothpick into the top of a muffin. If it comes out clean, they're done. They will have risen considerably, and be nicely browned. Remove pan from oven. Let muffins cool (still in pan) for 5 minutes, then transfer to wire rack to finish cooling. Enjoy!

    Recipe Notes

    Caloric calculation made utilizing vegetable oil in recipe.

    Nutrition Facts
    Rum Raisin Muffins
    Amount Per Serving (1 muffin)
    Calories 255 Calories from Fat 72
    % Daily Value*
    Fat 8g12%
    Saturated Fat 6g38%
    Cholesterol 32mg11%
    Sodium 54mg2%
    Potassium 326mg9%
    Carbohydrates 41g14%
    Fiber 2g8%
    Sugar 10g11%
    Protein 4g8%
    Vitamin A 84IU2%
    Vitamin C 1mg1%
    Calcium 88mg9%
    Iron 2mg11%
    * Percent Daily Values are based on a 2000 calorie diet.

    Here’s one more to pin on your Pinterest boards!Rum Raisin Muffins are an easy to prepare breakfast treat! Brown sugar muffins filled with rum-soaked raisins! Recipe yields 1 dozen.

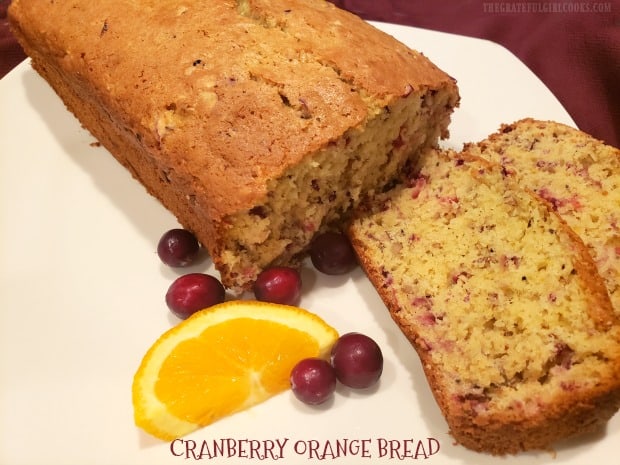
    Cranberry Orange Bread

    Make a large, delicious loaf of Cranberry Orange Bread! You’ll love this EASY recipe which is perfect for snacking, holidays, or gift-giving!Make a large, delicious loaf of Cranberry Orange Bread! You'll love this EASY recipe which is perfect for snacking, holidays, or gift-giving!

    Do you like the flavor combination of cranberries and oranges? I sure do! In the past I’ve posted recipes here using cranberry-orange flavor palettes for cake, scones, and muffins.

    I’ve even used the cranberry-orange combo for saladsIsraeli couscous, bagels, sauce and cookies, but realized I’ve never posted my tried and true recipe for simple, easy cranberry orange BREAD. No glazes, icings, etc. to complicate it… just sweet, delicious cranberry orange bread. YUMMO.

    This recipe is SO EASY to make! The prep time is very minimal, and then into a hot oven a pan full of batter goes, only to re-appear as a golden loaf of amazing tasting bread!

    Cranberry Orange Bread is a yummy treat you will enjoy for breakfast, snacking, OR giving lovingly to a dear friend or family member over the holidays! Here’s how easy it is to make:

    Scroll Down For A Printable Recipe Card At The Bottom Of The Page

    Prepare The  Batter

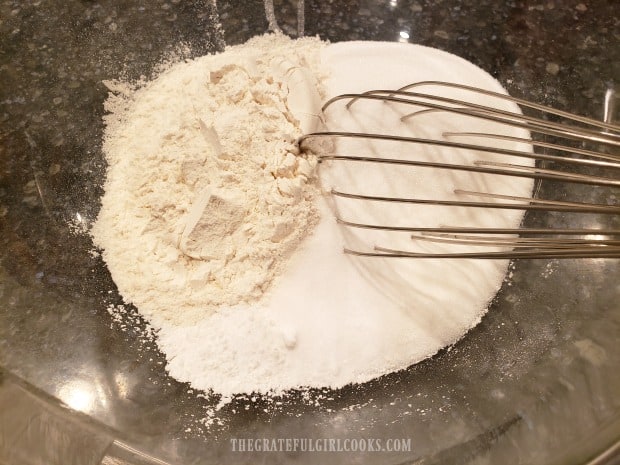
    Before beginning, preheat your oven to 350°F. Whisk (or stir) together flour, granulated sugar, baking powder, salt and baking soda in a large mixing bowl, until combined.

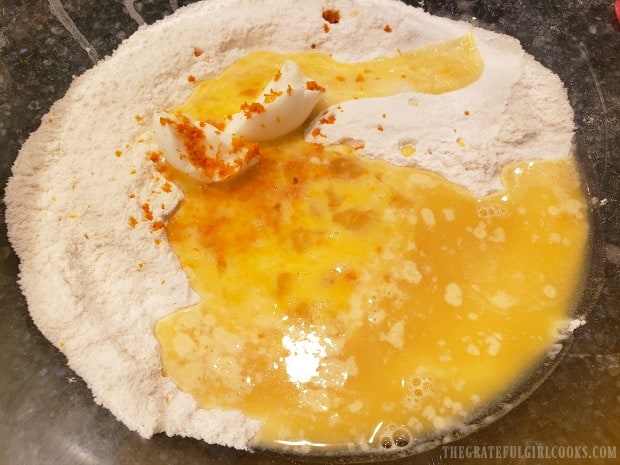
    Add one egg (lightly beaten), orange juice, orange zest, and vegetable shortening to the flour mixture. 

    The dry ingredients are whisked together in a large bowl until combined.Egg, orange juice, orange zest and shortening are added to dry ingredients.

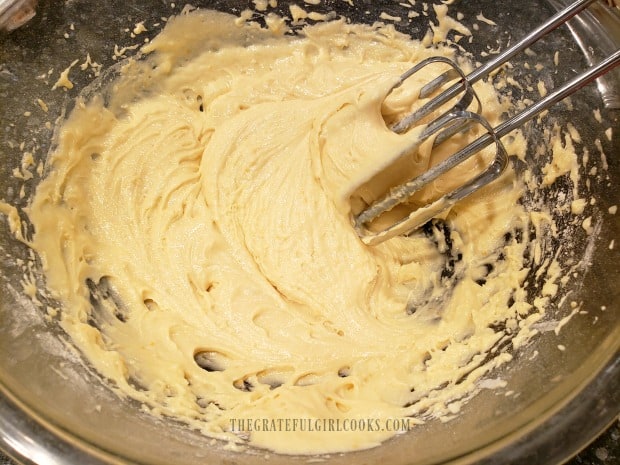
    Use an electric mixer to fully combine these ingredients together, then remove the beaters.

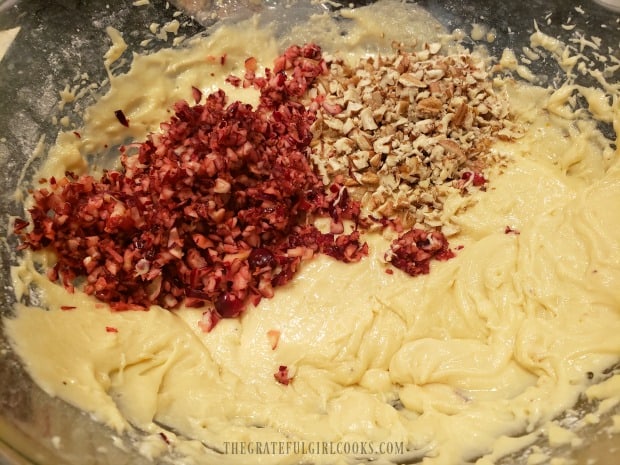
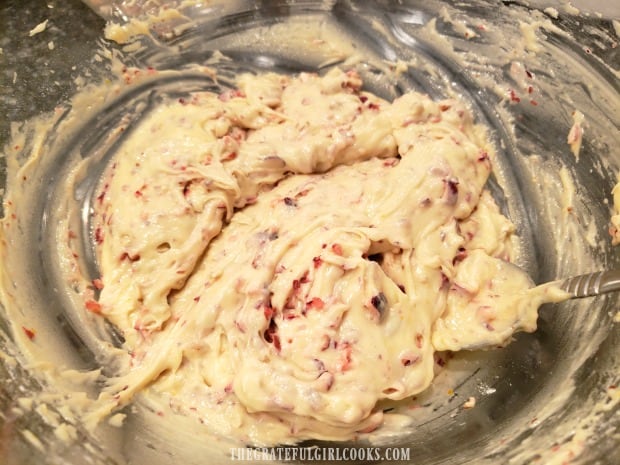
    Once mixed, STIR in finely chopped cranberries and nuts (walnuts or pecans). Stir only until all ingredients have been incorporated into the batter.

    Wet and dry ingredients are mixed together to form batter for the bread.Finely chopped cranberries and pecans are added to the bread batter.After stirring, the cranberry orange bread batter is ready for a baking pan.

    Bake The Cranberry Orange Bread

    Now that the batter for the cranberry orange bread is ready, it’s time to bake! Grease or spray the bottom only of a 9×5 inch bread pan.

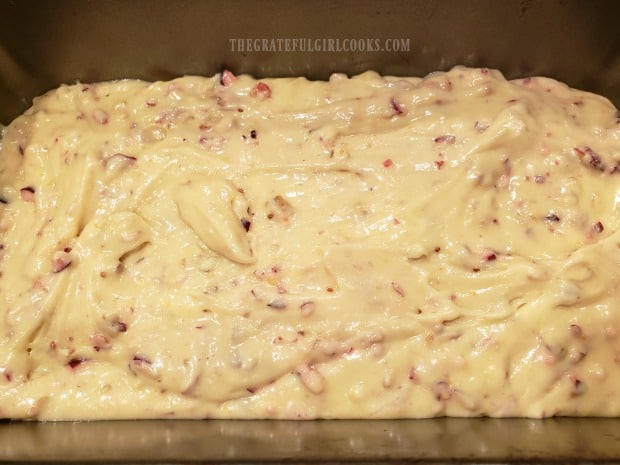
    Transfer the batter into the prepared bread pan, evenly distributing the batter. Place the pan on the middle rack of a preheated oven.

    Time to bake the cranberry orange bread.

    Bake at 350°F for 50-55 minutes, or until a toothpick inserted into the top of the loaf comes out clean.

    Oven temperatures tend to vary quite a bit, so I recommend checking the bread at the 50 minute mark, just to make sure you don’t over-cook it.

    Removing The Bread From The Pan

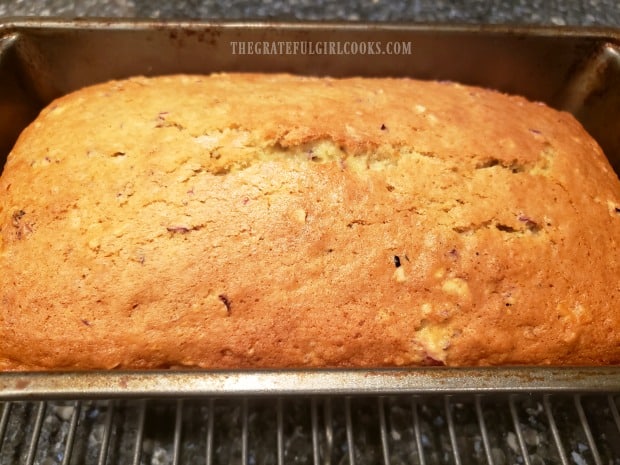
    When done, the top should be beautiful and golden brown, and a toothpick will come out CLEAN. Transfer the pan to a wire rack, and let cool for about 10 minutes, before attempting to remove it from the pan.

    After it cools, gently slide a butter knife around the edges of the bread to loosen it from the pan.

    Place a platter on top of the bread pan. Quickly turn the loaf upside down, and tap on the bottom of the pan until the bread releases. If it doesn’t immediately release, turn it back over, re-do the sides with the butter knife, and let it cool a few more minutes.

    Carefully place the loaf back onto a wire rack to finish cooling after removing it from the pan.

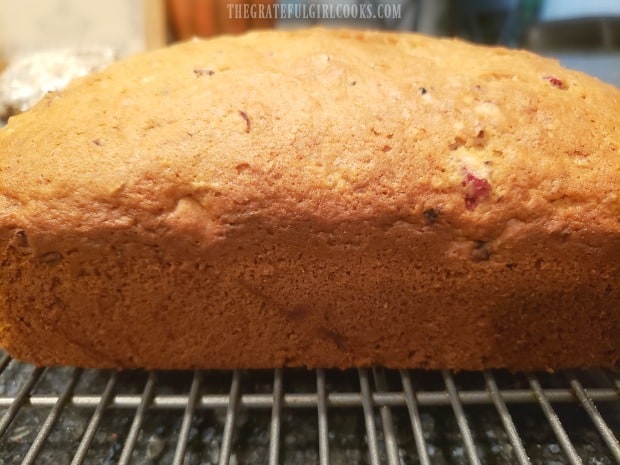
    When done, the cranberry orange bread is golden brown on top.A side view of the finished loaf of bread while cooling on wire rack.

    Cool, Slice, And Eat!

    Let the cranberry orange bread cool for awhile before slicing. This will ensure a nicely cut slice! You can eat the bread warm with a dab of butter if desired. We enjoy this bread the most when served at room temperature, but it’s most certainly YOUR choice.

    However you choose to eat it, either still warm or at room temperature… it really is delicious! The cranberry orange flavor is wonderful, and I am confident you will like it! The bread also freezes well, if wrapped very well!

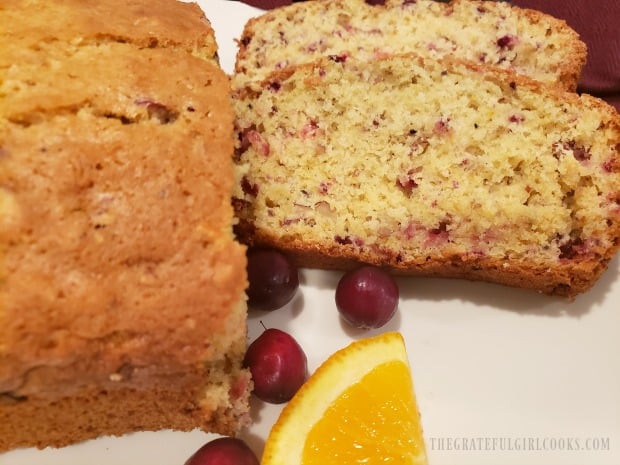
    Two slices of cranberry orange bread and remaining loaf on a white plate.

    Thank you so much for stopping by. I am grateful you took some of your precious time and spent it here. Hopefully you will have the opportunity to try this delicious bread for yourself, or can make a loaf for someone you love.

    Please come back again soon for more family-friendly recipes! Have a great day, and may God bless you.

    Looking For More “SWEET” BREAD Recipes?

    You can find all of my bread recipes (sweetened and savory) in the Recipe Index, located at the top of the page. I have quite a few “sweet” bread recipes, including:

    Want More Recipes? Get My FREE Newsletter!

    I publish a newsletter 2 times per month (1st and 15th) with lots of recipes, tips, etc..
    Would you like to join our growing list of subscribers?

    There is a Newsletter subscription box on the top right (or bottom) of each blog post, depending on the device you use.
    You can submit your e-mail address there, to be added to my mailing list.

    Find Me On Social Media:

    Facebook page: The Grateful Girl Cooks!
    Pinterest:
    The Grateful Girl Cooks!
    Instagram:
    jbatthegratefulgirlcooks

    Author's signatureOriginal recipe source: unknown (written on an index card I’ve had for over 30 years)

    ↓↓ PRINTABLE RECIPE BELOW ↓↓

    0 from 0 votes
    Cranberry Orange Bread
    Prep Time
    10 mins
    Cook Time
    50 mins
    Total Time
    1 hr
     

    Make a large, delicious loaf of Cranberry Orange Bread! You'll love this EASY recipe which is perfect for snacking, holidays, or gift-giving!

    Category: Bread/Breakfast, Snack
    Cuisine: American
    Keyword: cranberry orange bread
    Servings: 9
    Calories Per Serving: 278 kcal
    Author: JB @ The Grateful Girl Cooks!
    Ingredients
    • 2 cups all purpose flour
    • 1 cup granulated sugar
    • teaspoons baking powder
    • 1 teaspoon salt
    • ½ teaspoon baking soda
    • ¾ cup orange juice
    • 1 large egg , lightly beaten
    • 2 Tablespoons vegetable shortening
    • 1 Tablespoon orange zest , finely grated orange peel
    • 1 cup cranberries , finely chopped
    • ½ cup walnuts or pecans , finely chopped
    Instructions
    1. Preheat oven to 350°F. Grease or spray the bottom only of a 9x5 inch bread pan.

    2. Whisk (or stir) flour, sugar, baking powder, salt and baking soda in a large bowl, until combined. Add egg (lightly beaten), orange juice, orange zest, and vegetable shortening to flour mixture. Use an electric mixer to mix ingredients together. STIR in cranberries and nuts. Stir only until all ingredients have been incorporated into batter. Transfer batter into prepared pan, evenly distributing batter. Place pan on middle rack in preheated oven.

    3. Bake at 350°F for 50-55 minutes, or until a toothpick inserted into the top of loaf comes out clean. I recommend checking the bread at 50 minutes, to make sure you don't over-cook it.

    4. When done, the top should be golden brown, and a toothpick has come out CLEAN. Transfer pan to a wire rack; let cool for 10 minutes, before attempting to remove bread from pan. After it cools, slide a butter knife around edges of the bread to loosen it from pan. Place a platter on top of the bread pan. Holding both platter and bread pan carefully turn loaf upside down; tap on bottom of pan until bread releases. If it doesn't immediately release, turn it back over, re-do sides with butter knife, and let cool 3-4 more minutes. Carefully place loaf on wire rack to finish cooling after removing it from pan. Let cool, slice and enjoy warm, or at room temperature.

    Recipe Notes

    Caloric calculation made using pecans.

    Nutrition Facts
    Cranberry Orange Bread
    Amount Per Serving (1 g)
    Calories 278 Calories from Fat 72
    % Daily Value*
    Fat 8g12%
    Saturated Fat 1g6%
    Cholesterol 21mg7%
    Sodium 329mg14%
    Potassium 184mg5%
    Carbohydrates 48g16%
    Fiber 2g8%
    Sugar 25g28%
    Protein 5g10%
    Vitamin A 78IU2%
    Vitamin C 13mg16%
    Calcium 45mg5%
    Iron 2mg11%
    * Percent Daily Values are based on a 2000 calorie diet.

    Here’s one more to pin on your Pinterest boards!Make a large, delicious loaf of Cranberry Orange Bread! You'll love this EASY recipe which is perfect for snacking, holidays, or gift-giving!


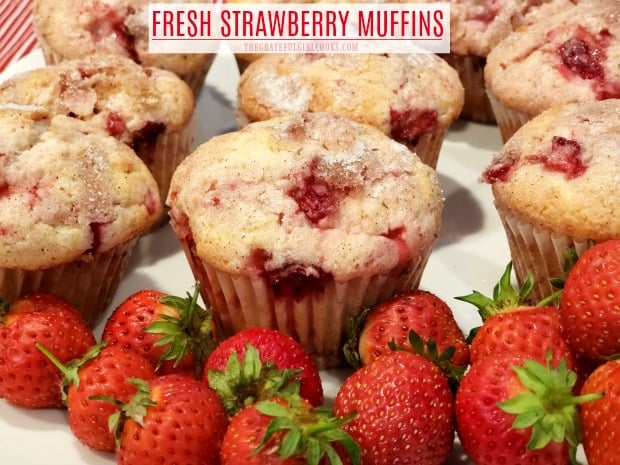
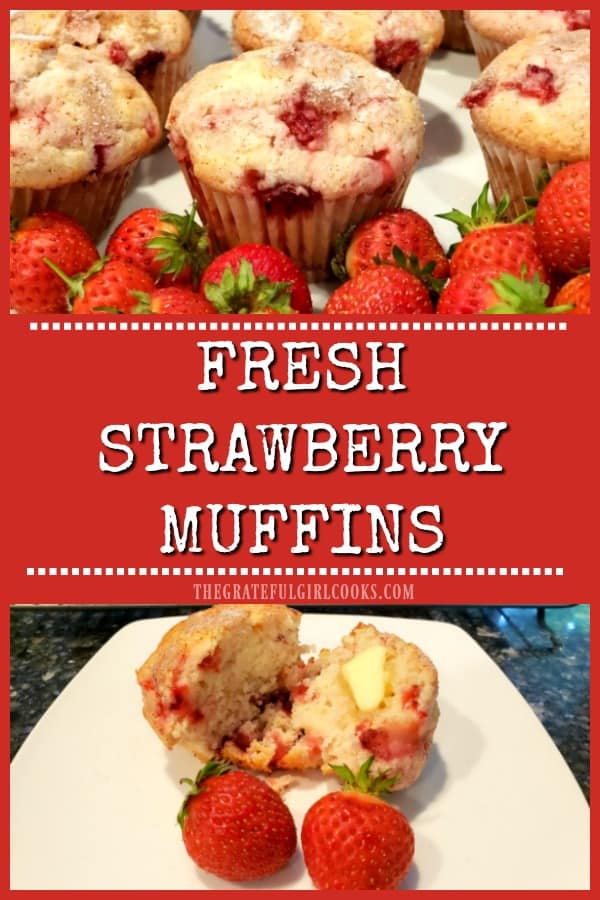
    Fresh Strawberry Muffins

    Make a dozen delicious fresh strawberry muffins for those you love. They are cinnamon-sugar topped, and bursting with FRESH, juicy strawberries.
    Make a dozen delicious fresh strawberry muffins for those you love. They are cinnamon-sugar topped, and bursting with FRESH, juicy strawberries.

    We love muffins for breakfast in our home! I probably make muffins about twice a month! That might not sound like a lot to you, but since there are only TWO of us at home these days, a dozen muffins go pretty far!

    I typically like to freeze some OR give a few to family members or friends, in order to spread out the “muffin love”.

    Strawberry muffins always taste wonderful, and I’ve made several different recipe versions over the years. Recently I tried a NEW (to me) recipe, and it was so good, I decided to post it here.

    I happily shared several of these muffins with our neighbors, so we didn’t have to eat the entire dozen by ourselves (nobody needs THAT)! 

    Scroll Down For A Printable Recipe Card At the Bottom Of The Page

    Use FRESH Strawberries

    This muffin recipe is very straightforward, and simple to prepare. One catch is that you will need to use FRESH strawberries!

    Frozen strawberries become mushy once thawed, and produce too much syrup for this light batter, so using fresh fruit is necessary.

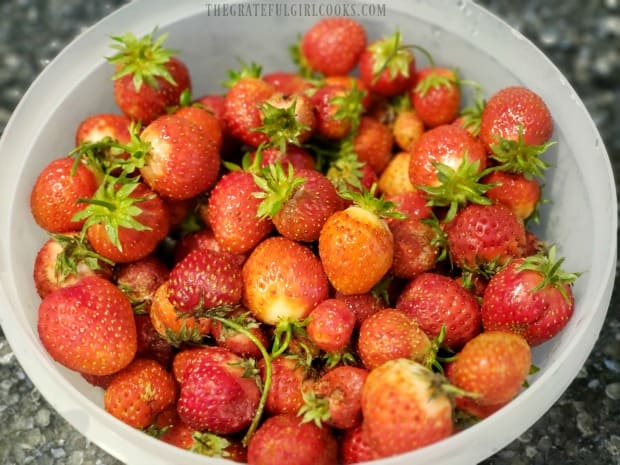
    This year has been a bumper crop for our little raised garden bed of strawberries in the backyard! I went out and picked a large amount (in photo below) over the course of two mornings, just to make these delicious, fresh strawberry muffins.

    Here’s how to make them.

    Fresh strawberries from our garden will be added to muffin batter.

    Make The Muffin Batter

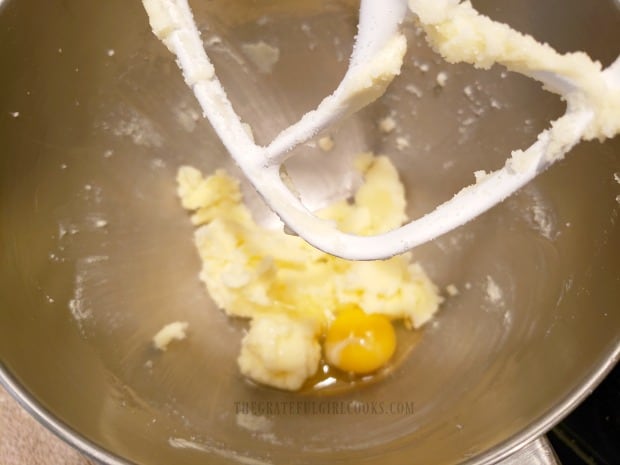
    Making the muffin batter is very easy. The first thing you will need to do is cream softened butter with granulated sugar (using an electric or stand mixer) for a couple of minutes.

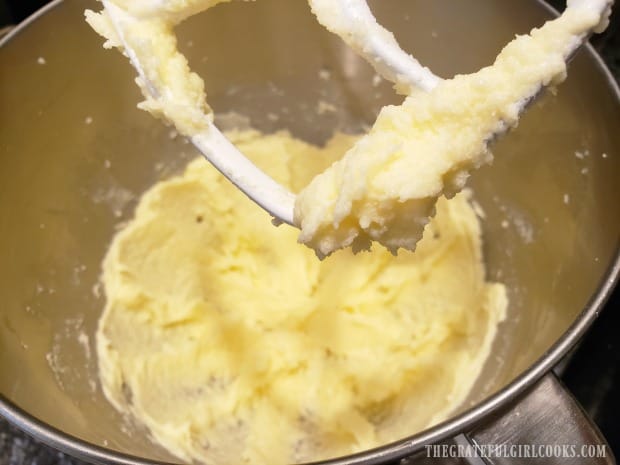
    Add a large egg, and then continue mixing these ingredients until they have been fully combined.

    Butter and sugar are creamed using a mixer, and then an egg is added to batter.The batter is fully mixed together before adding dry ingredients and milk.

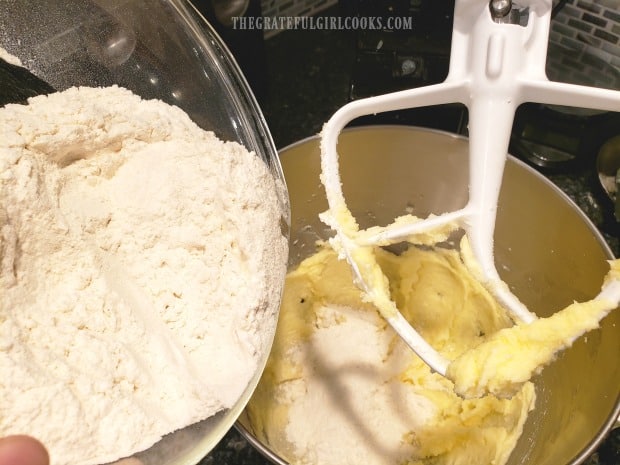
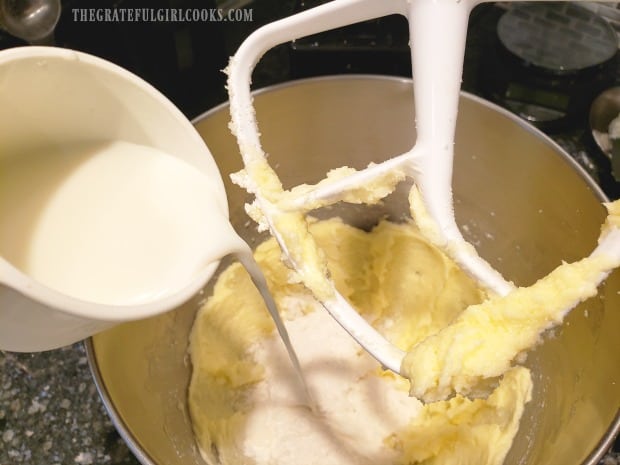
    In a medium bowl, sift together all purpose flour, baking powder and salt. Add a little bit of flour mixture to the batter, alternating it with some milk.

    Continue to add flour mixture, then some milk, beating a little bit at a time until blended. Add vanilla extract to the batter, and blend.

    Dry ingredients (flour, baking powder, salt) are slowly added to muffin batter in batches..Milk is added to muffin batter in batches (alternating with dry ingredients).

    Add Strawberries – GENTLY!

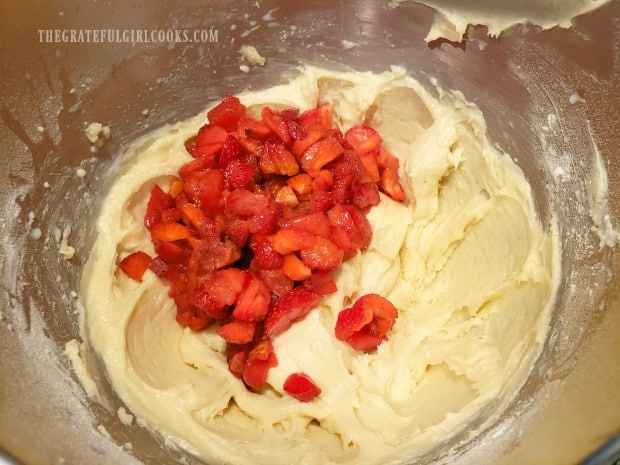
    Now it’s time to add chopped fresh strawberries to the batter. This is where you need to be careful. The strawberries must be gently stirred or folded into the batter.

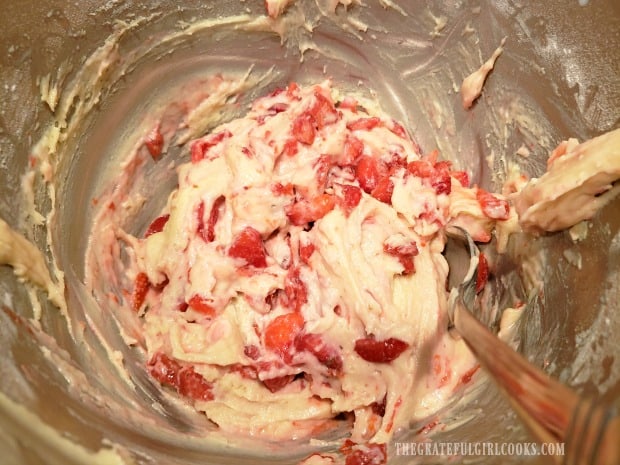
    By gently folding in the strawberries, it will help prevent the muffin batter from turning red (or pink), or possibly looking like a murder scene.

    Be Gentle. Stir/Fold only until the strawberries are worked into the batter.

    Chopped fresh strawberries are added to the bowl of muffin batter.The fresh strawberries are GENTLY mixed into the muffin batter.

    Preparing Fresh Strawberry Muffins For Baking

    This recipe will yield 12 muffins. Spray a standard, 12 cup muffin tin (each cup) with non-stick spray OR line each cup with paper muffin liners.

    TIP: Lightly spray the paper liners. A co-worker (whose hubby was a professional baker) told me over 25 years ago that he always lightly sprayed paper liners, so I’ve done it ever since, to prevent sticking!

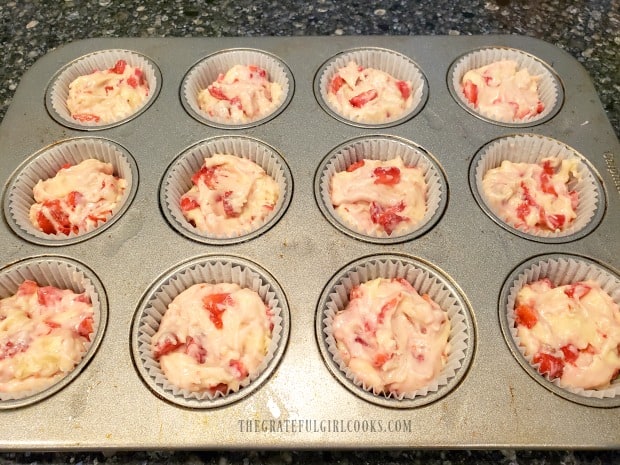
    Evenly divide the batter between the prepared muffin cups (they’ll be about 2/3 of the way full). Use a scoop or large spoon to do this.

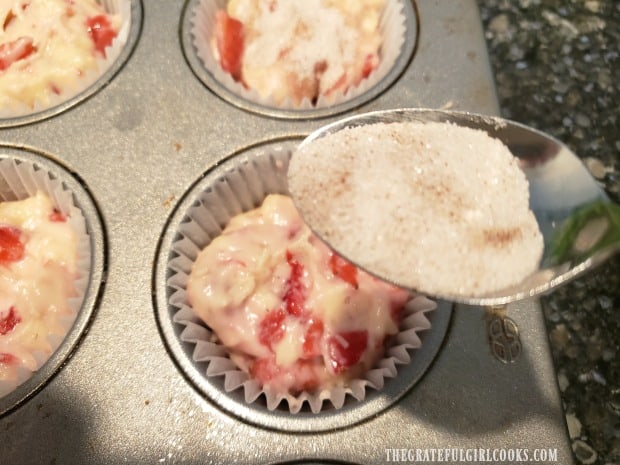
    In a small bowl, mix 1 Tablespoon of granulated sugar with 3/4 teaspoon of ground cinnamon. Sprinkle this cinnamon-sugar mixture over the top of each muffin, dividing the mixture evenly.

    Once they’re all topped with cinnamon-sugar, your fresh strawberry muffins are ready to bake!

    Batter is placed into greased paper liners in muffin tin.A cinnamon sugar mixture is sprinkled over top of fresh strawberry muffins before baking.

    Ready For The Oven

    Bake the fresh strawberry muffins in a preheated 400°F oven. The muffins will take between 20-25 minutes to bake.

    Because ovens can vary widely in temperature settings (and run hot), it is wise to check the muffins for done-ness at the 20 minute mark.

    TIP: You can place a large piece of aluminum foil directly under the muffin tin while baking. If any strawberry juice oozes out and over the edges of the muffin tin, you’ll have an easier cleanup. Mine did not do this, but “just in case”, you might want to consider this useful tip.

    You can tell when the muffins are done by inserting a toothpick into the center of a muffin. If it comes out clean (free of batter), the muffins are finished baking.

    The muffins will be a light golden brown in color. Remove the pan from the oven, and let the muffins rest (still in the pan) for 2-3 minutes.

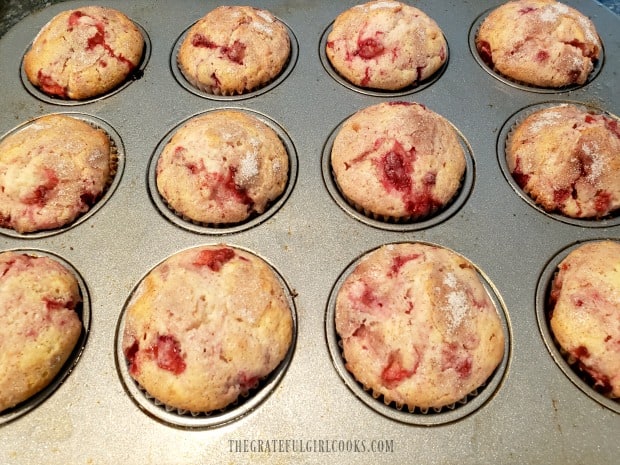
    Baked fresh strawberry muffins, hot from the oven.

    The Fresh Strawberry Muffins Are Ready To Eat!

    Transfer the fresh strawberry muffins to a wire rack, and let them cool a bit. We prefer to eat these muffins just slightly warm, or at room temperature.

    The flavor of the strawberries seems to be more prevalent when they are not served totally smokin’ hot. Just my experience!

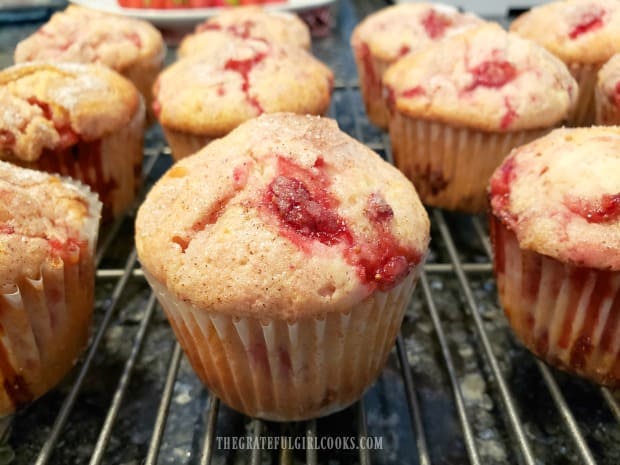
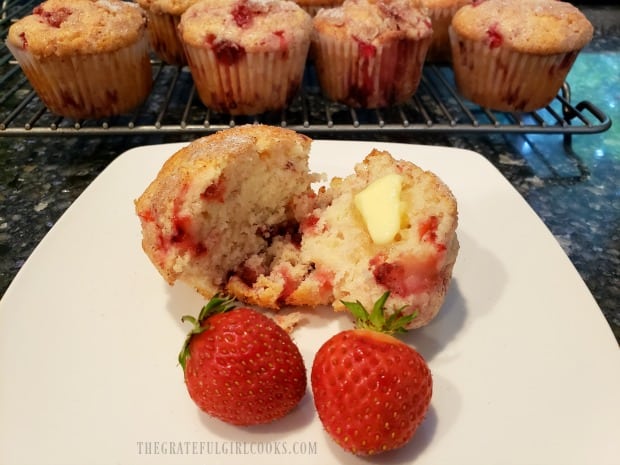
    The strawberry muffins cooling on a wire rack.One of the fresh strawberry muffins, cut in half, buttered, and ready to eat!

    I sure hope you have the opportunity to try these yummy fresh strawberry muffins. If you store them in an airtight container, they will keep for 2-3 days.

    Fresh strawberry muffins also freeze well (for 1-2 months), IF you have any leftovers. They are so good, you might not have any leftovers. Amen.

    Thanks for stopping by, and I hope you come back soon. Take care, be kind to others, and have a wonderful day. There are a lot of hurting people out there that might just need YOU to encourage them today.

    Looking For More MUFFIN Recipes?

    You can find all of my muffin recipes in the Recipe Index, located at the top of the page, I have quite a few you might enjoy, including:

    Want More Recipes? Get My FREE Newsletter!

    I publish a newsletter 2 times per month (1st and 15th) with lots of recipes, tips, etc..
    Would you like to join our growing list of subscribers?

    There is a Newsletter subscription box on the top right (or bottom) of each blog post, depending on the device you use.
    You can submit your e-mail address there, to be added to my mailing list.

    Find Me On Social Media:

    Facebook page: The Grateful Girl Cooks!
    Pinterest:
    The Grateful Girl Cooks!
    Instagram:
    jbatthegratefulgirlcooks

    Author's signature

    Recipe adapted from: Monica, at: oldermommystillyummy.com/strawberry-muffins/

    ↓↓ PRINTABLE RECIPE BELOW ↓↓

    0 from 0 votes
    Fresh Strawberry Muffins
    Prep Time
    15 mins
    Cook Time
    20 mins
    Total Time
    35 mins
     

    Make a dozen delicious fresh strawberry muffins for those you love. They are cinnamon-sugar topped, and bursting with FRESH, juicy strawberries.

    Category: Breakfast, Snack
    Cuisine: American
    Keyword: fresh strawberry muffins
    Servings: 12 muffins
    Calories Per Serving: 214 kcal
    Author: JB @ The Grateful Girl Cooks!
    Ingredients
    • ½ cup butter , softened
    • ¾ cup granulated sugar
    • 1 large egg
    • 2 cups all purpose flour
    • ½ teaspoon salt
    • 2 teaspoons baking powder
    • ½ cup milk
    • ¾ teaspoon vanilla extract
    • cups chopped fresh strawberries
    • 1 Tablespoon granulated sugar (for topping)
    • ¾ teaspoon ground cinnamon (for topping)
    Instructions
    1. Preheat oven to 400°F. Spray a standard 12 cup muffin tin with non-stick spray, or insert paper liners into each muffin cup.

    2. Use electric mixer to cream softened butter with granulated sugar (1-2 minutes). Add egg; continue mixing until fully combined.

    3. In a medium bowl, sift flour, baking powder and salt together. Add flour mixture and milk to the batter, a little at a time (alternating between the two), beating after each addition. Add vanilla extract, and mix well. Remove mixer. Gently stir or fold chopped strawberries into batter. Stir only until strawberries are incorporated into the batter. Evenly divide batter between 12 prepared muffin cups (they will be about 2/3 of the way full).

    4. In a small bowl, combine 1 Tablespoon granulated sugar with ¾ teaspoon cinnamon. Sprinkle this cinnamon-sugar mixture over the top of each muffin, dividing mixture evenly between the 12 muffins.

    5. Bake muffins in preheated 400°F oven for 20-25 minutes. Check for done-ness at the 20 minute mark, by inserting a toothpick into the center of a muffin. If it comes out clean (free of batter), muffins are done. Muffins will be light golden brown in color. Remove pan from oven; let muffins cool (still in pan) for 2-3 minutes. Transfer muffins to a wire rack to finish cooling before serving. Enjoy!

    Nutrition Facts
    Fresh Strawberry Muffins
    Amount Per Serving (1 muffin)
    Calories 214 Calories from Fat 72
    % Daily Value*
    Fat 8g12%
    Saturated Fat 5g31%
    Cholesterol 36mg12%
    Sodium 176mg8%
    Potassium 138mg4%
    Carbohydrates 32g11%
    Fiber 1g4%
    Sugar 15g17%
    Protein 3g6%
    Vitamin A 278IU6%
    Vitamin C 11mg13%
    Calcium 53mg5%
    Iron 1mg6%
    * Percent Daily Values are based on a 2000 calorie diet.

    Here’s one more to pin on your Pinterest boards!Make a dozen delicious fresh strawberry muffins for those you love. They are cinnamon-sugar topped, and bursting with FRESH, juicy strawberries.

    Apple Cinnamon Baked Doughnuts

    Make 18 delicious apple cinnamon baked doughnuts topped with cinnamon sugar. An easy to make treat for breakfast or snacks for family or friends.
    Make 18 delicious apple cinnamon baked doughnuts topped with cinnamon sugar. An easy to make treat for breakfast or snacks for family or friends.

    Do you enjoy baked doughnuts? You know, the kind that you don’t have to deep fry in oil? Well we do! Our favorite doughnuts are (truthfully) the deep-“fried” kind you get at a doughnut shop. BUT… after finding our local doughnut shop closed due to the pandemic, I decided to make my own at home. The result was delicious apple cinnamon BAKED doughnuts, made in my cute little doughnut pan!

    You will need to have a doughnut pan for this recipe. The little “6 doughnut” one I use was purchased online (Amazon) several years ago very inexpensively. My pan only makes 6 baked doughnuts, so I made 3 batches, since this recipe yields 18 doughnuts. We gave 6 to our son for his birthday, 6 to our other son to devour, and we enjoyed the other 6! They are so easy to make… here’s how:

    Scroll Down For A Printable Recipe Card At The Bottom Of The Page

    Prepare The Batter

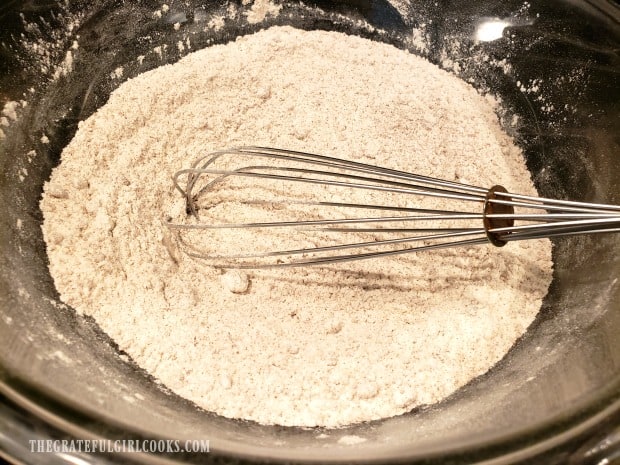
    Before making the batter, preheat your oven to 350°F. Prepare the dry ingredients by sifting flour, baking powder, baking soda, and cinnamon into a large bowl. Add the brown sugar, and whisk these ingredients together.

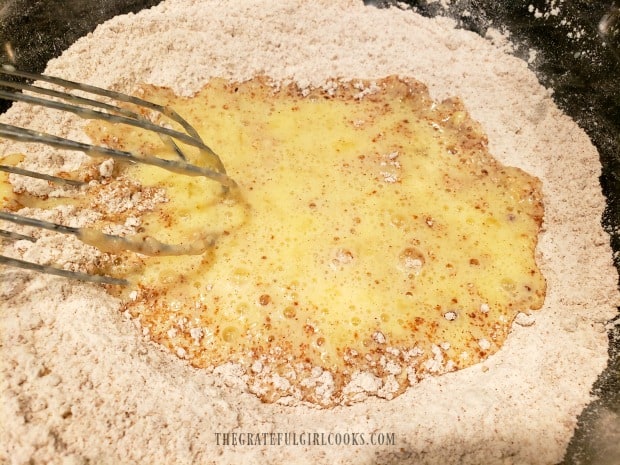
    In a separate bowl, whisk together the buttermilk, eggs, melted butter, and vanilla extract until combined. Pour the wet ingredients into the large bowl with the dry ingredients. Whisk or stir well, to fully combine the batter ingredients.

    Dry ingredients for doughnuts are whisked together in bowl.The wet ingredients are then whisked into the dry ingredients.

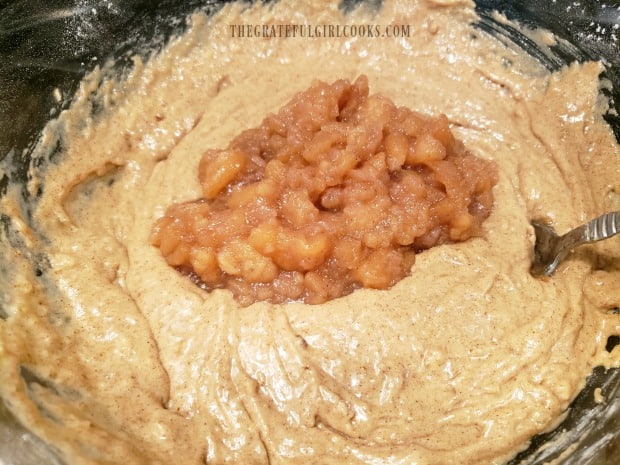
    Once the batter has been combined, add the apple pie filling, and stir it in. I was able to use some of my home-canned apple pie filling. This is now the finished batter for the apple cinnamon baked doughnuts.

    Apple pie filling is stirred into the batter for the doughnuts.

    Bake The Doughnuts

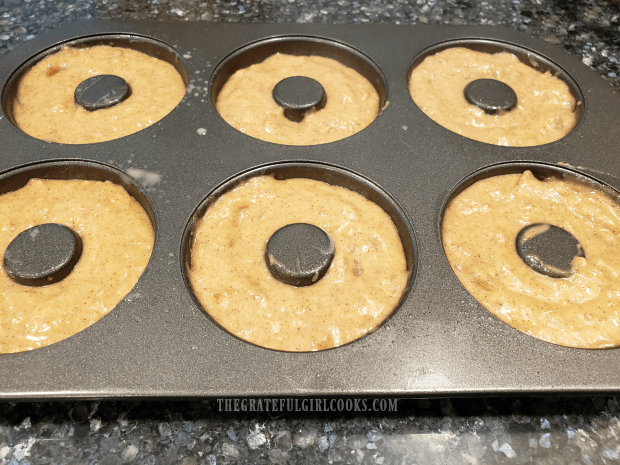
    Spoon or pipe the batter into a greased doughnut pan. I used a spoon to fill the “wells” of the pan, but you can use a large piping bag to fill them, if desired. Fill each doughnut “well” 3/4 full, and spread the batter evenly. Because this recipe makes 18 doughnuts, you will need to make a couple batches, if you only have one pan, like me!

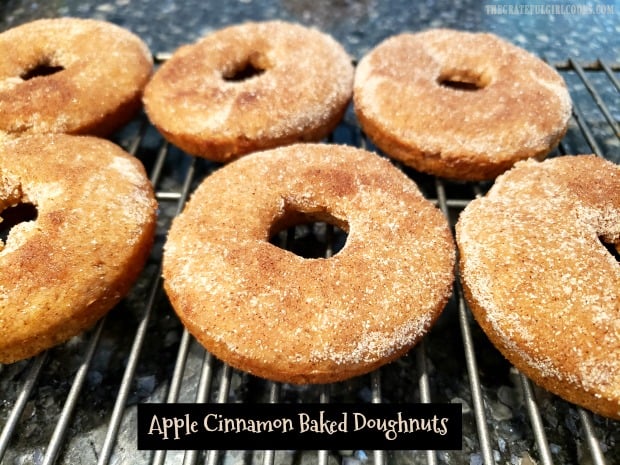
    Bake the doughnuts at 350°F for 11-12 minutes (mine took 12), until a toothpick inserted into the middle comes out clean. The doughnuts will be light golden brown. Remove the pan from the oven and place on a wire rack. After a couple minutes, remove the doughnuts from the pan. I inverted the pan to release the doughnuts, then let them cool slightly on the wire rack.

    Repeat process with remaining batter, washing and re-greasing pan after each batch of doughnuts.

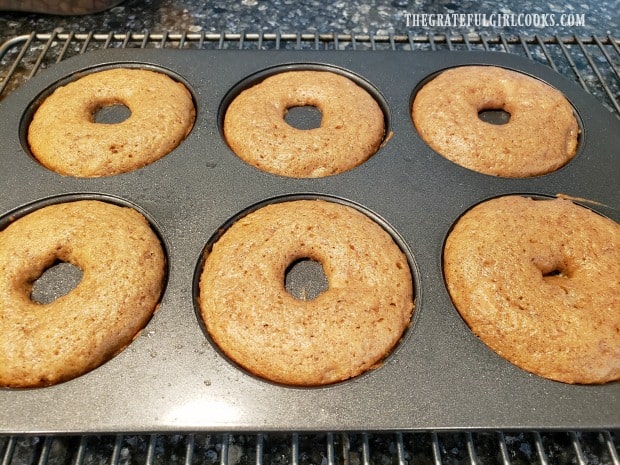
    The doughnut batter is placed into a doughnut baking pan to cook.The baked doughnuts, cooling in pan on a wire rack.

    Adding The Topping To The Apple Cinnamon Baked Doughnuts

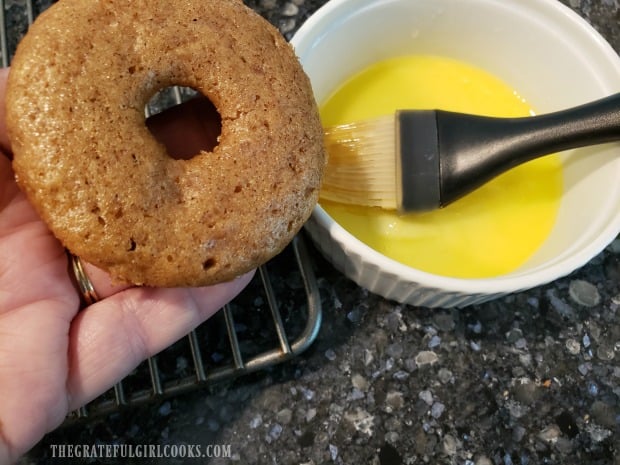
    For the doughnut topping, melt butter in a small bowl. Combine granulated sugar and ground cinnamon in another bowl (that is large enough to hold a doughnut)/ While the doughnuts are still warm (after each batch), brush the top of the doughnut with melted butter.

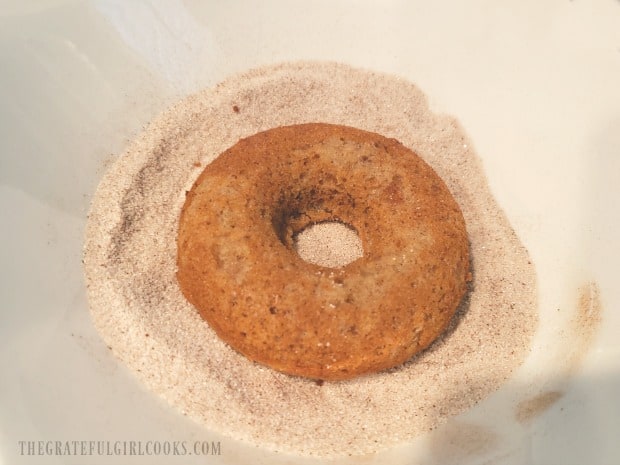
    Immediately place the buttered side of the doughnut into the cinnamon sugar mixture, Coat the top surface of the doughnut with the mixture, and then place doughnut back onto a wire rack to finish cooling. When all the doughnuts have been covered with topping, dip each one of them back into the cinnamon sugar mixture for a second coat.

    Each baked doughnut is brushed with melted butter on top.The doughnut is placed, butter side down into cinnamon sugar mixture.

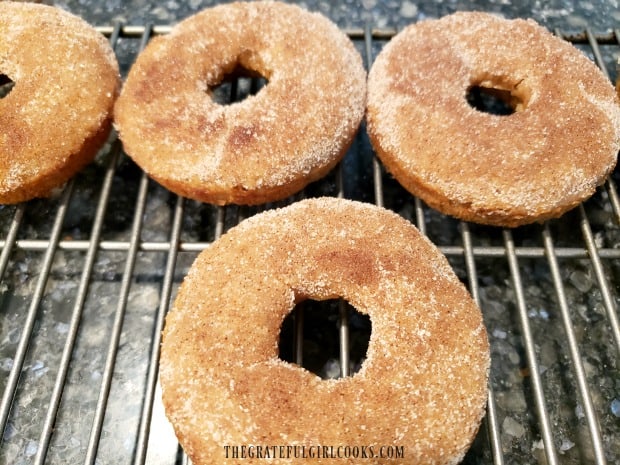
    Follow this process until all of the doughnuts have been baked and double dipped in the cinnamon sugar mixture. Now the apple cinnamon baked doughnuts are ready to EAT! (insert my smiley face here… ha ha!) In the photo below, you can see the doughnuts after the FIRST cinnamon sugar dipping.

    Apple cinnamon baked doughnuts resting on wire rack before eating.

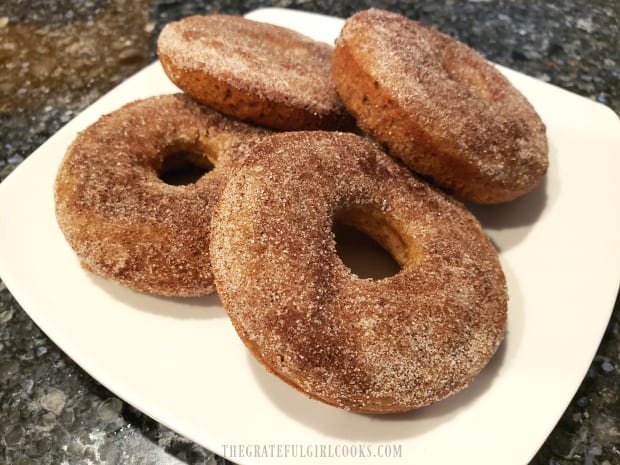
    Here are four of the finished doughnuts on a plate, just begging to be eaten. See all the double dipped cinnamon sugar topping on each one?  I saved one for you. Go ahead, take the one you want, and enjoy it. Oh yeah… these doughnuts are good!

    A plate with four of the apple cinnamon baked doughnuts, ready to eat.

    I hope you have a chance to try these easy, but yummy apple cinnamon baked doughnuts. Thank you for stopping by, and I hope you have a really GOOD day. Take care.

    Looking For More DOUGHNUT recipes?

    You can find all of my doughnut recipes in the Recipe Index, located at the top of the page. I have several, including:

    Interested In More Recipes?

    Thank you for visiting this website. I appreciate you using some of your valuable time to do soIf you’re interested, I publish a newsletter 2 times per month (1st and 15th) with all the latest recipes, and other fun info. I would be honored to have you join our growing list of subscribers, so you never miss a great recipe!
    There is a Newsletter subscription box on the top right side (or bottom) of each blog post, depending on the device you use, where you can easily submit your e-mail address (only) to be included in my mailing list.

    You Can Also Find Me On Social Media:
    Facebook page: The Grateful Girl Cooks!
    Pinterest: The Grateful Girl Cooks!
    Instagram: jbatthegratefulgirlcooks

    Author's signature

    Recipe adapted from: Lyuba, at https://www.willcookforsmiles.com/apple-pie-baked-doughnuts/

    0 from 0 votes
    Apple Cinnamon Baked Doughnuts
    Prep Time
    15 mins
    Cook Time
    12 mins
    Total Time
    27 mins
     

    Make 18 delicious apple cinnamon baked doughnuts topped with cinnamon sugar. An easy to make treat for breakfast or snacks for family or friends.

    Category: Breakfast, Snack
    Cuisine: American
    Keyword: apple cinnamon baked doughnuts
    Servings: 18
    Calories Per Serving: 139 kcal
    Author: JB @ The Grateful Girl Cooks!
    Ingredients
    For Doughnuts:
    • cups all purpose flour
    • ¾ cup brown sugar
    • teaspoons baking powder
    • ½ teaspoon baking soda
    • 1 teaspoon ground cinnamon
    • ¾ cup apple pie filling
    • ¾ cup buttermilk
    • 2 large eggs
    • 3 Tablespoons butter (salted) , melted
    • 1 teaspoon vanilla extract
    For Doughnut Topping:
    • Tablespoons butter , melted
    • cup white granulated sugar
    • 1 Tablespoon ground cinnamon
    Instructions
    1. Preheat oven to 350°F

    Make The Batter:
    1. Sift flour, baking powder, baking soda, and cinnamon into a large bowl. Add brown sugar, and whisk together. In a separate bowl, whisk together buttermilk, eggs, melted butter, and vanilla extract until combined. Pour wet ingredients into dry ingredients. Whisk or stir well, to fully combine. Add apple pie filling, and stir until fully incorporated.

    Bake The Doughnuts:
    1. Spoon or pipe batter into a greased doughnut pan. Fill each doughnut "well" 3/4 full, and spread batter evenly. You may need to make a couple batches, if you only have one pan, like me. Bake at 350°F for 11-12 minutes (mine took 12), until golden brown and a toothpick inserted into the middle comes out clean. Transfer pan from oven to a wire rack. After 2 minutes, remove doughnuts from pan. I inverted the pan to release doughnuts, then let them cool slightly on the wire rack before adding the cinnamon sugar topping. Repeat process with remaining batter, washing and re-greasing pan after each additional batch of doughnuts.

    Add Cinnamon Sugar Topping While Doughnuts Are Still Warm:
    1. Place melted butter in a small bowl. In a separate bowl (large enough for a doughnut), combine granulated sugar and ground cinnamon. While doughnuts are still warm (after each batch), brush the top of the doughnut with melted butter. Immediately place buttered side of doughnut into cinnamon sugar mix. Coat the top surface of the doughnut with the mix, and then place doughnut back onto wire rack to finish cooling. When all doughnuts have been covered with topping, dip each one back into the cinnamon sugar mixture for a second time. Once doughnuts are double-dipped with topping, they're ready to eat! Enjoy.

    Nutrition Facts
    Apple Cinnamon Baked Doughnuts
    Amount Per Serving (1 g)
    Calories 139 Calories from Fat 36
    % Daily Value*
    Fat 4g6%
    Saturated Fat 2g13%
    Cholesterol 29mg10%
    Sodium 82mg4%
    Potassium 83mg2%
    Carbohydrates 24g8%
    Fiber 1g4%
    Sugar 15g17%
    Protein 2g4%
    Vitamin A 134IU3%
    Vitamin C 1mg1%
    Calcium 44mg4%
    Iron 1mg6%
    * Percent Daily Values are based on a 2000 calorie diet.

    Here’s one more to pin on your Pinterest boards!Make 18 delicious apple cinnamon baked doughnuts topped with cinnamon sugar. An easy to make treat for breakfast or snacks for family or friends.

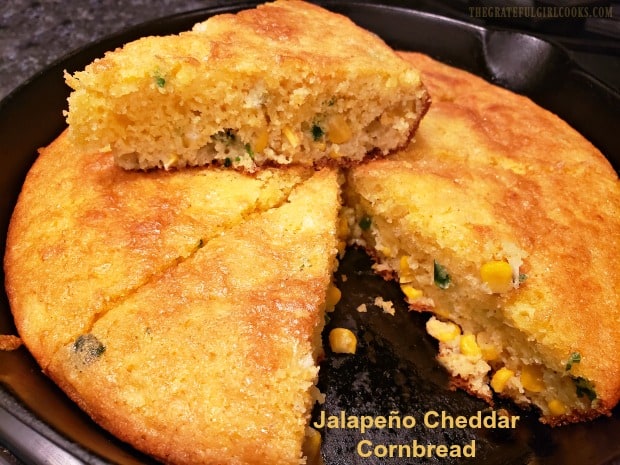
    Jalapeño Cheddar Cornbread

    Jalapeño Cheddar Cornbread, (with corn kernels, sliced jalapeños, onions and grated cheddar cheese), is an EASY to make, flavorful side dish for 8!
    Jalapeño Cheddar Cornbread, (with corn kernels, sliced jalapeños, onions and grated cheddar cheese), is an EASY to make, flavorful side dish for 8!

    Do you enjoy cornbread as a side dish? We do, especially when it is paired with a big bowl of hot soup! A lot of times I use a recipe I’ve posted for Marie Callender’s cornbread, which is a traditional flavored, high-rising cornbread. It is a family favorite, especially when I make my recipe for chicken and dumplings!

    Sometimes, however, I want to make cornbread with a bit more kick! My mom occasionally made “Mexican Cornbread” when I was growing up, which tastes very similar to this recipe (which I’ve had for over 20 years). This recipe for jalapeño cheddar cornbread is not too spicy at all, and has whole kernel corn, onions, and grated cheddar cheese in it, which adds texture, color, and flavor! It’s DELICIOUS, and today I want to share the easy recipe with you.

    Scroll Down For A Printable Recipe Card At The Bottom Of The Page

    Prepare The Skillet Or Pan For The Cornbread First!

    Generously grease or spray a 9″ oven-proof skillet, square baking dish, or pie pan on the bottom and sides (I use a cast iron skillet). Place the pan on the middle rack of your oven. Preheat the oven to 350° F, and let the oven preheat WITH THE SKILLET STILL IN THE OVEN. You want the skillet for the cornbread to be really hot when you add the batter, because this helps the edges to get crispy!

    While the oven (and skillet) are heating, prepare the batter for the cornbread. Since the oven will typically take about 10 minutes to preheat, you have plenty of time to whip up the easy batter!

    Prepare The Batter

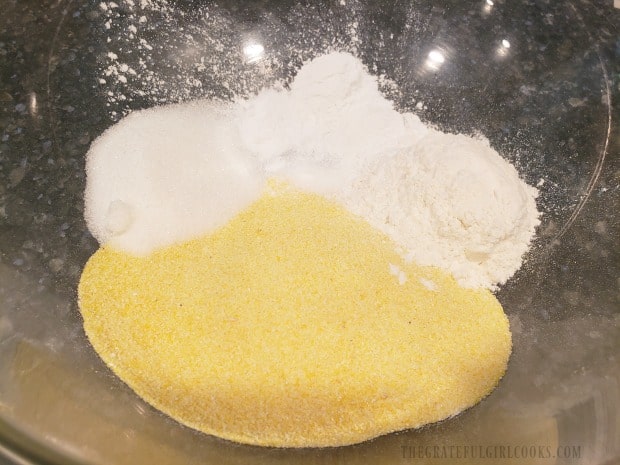
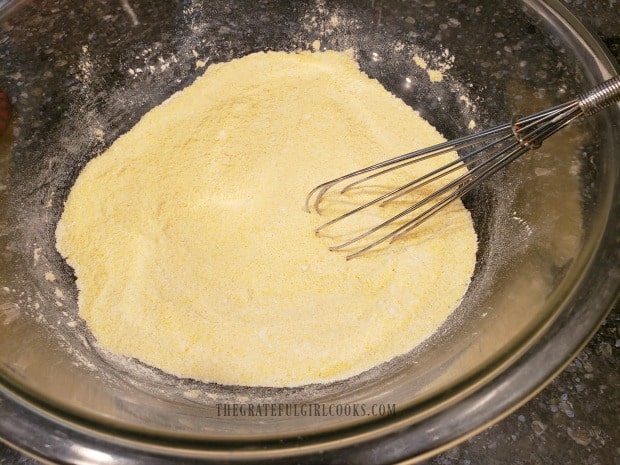
    Making the cornbread batter is REALLY easy! The first thing you need to do is measure the yellow cornmeal, flour, sugar, salt, baking powder and baking soda into a large mixing bowl. Whisk these dry ingredients together, until fully combined, and then set the bowl aside.

    The dry ingredients for cornbread batter are added to a large mixing bowl.Flour, cornmeal and other dry ingredients are whisked together to mix.

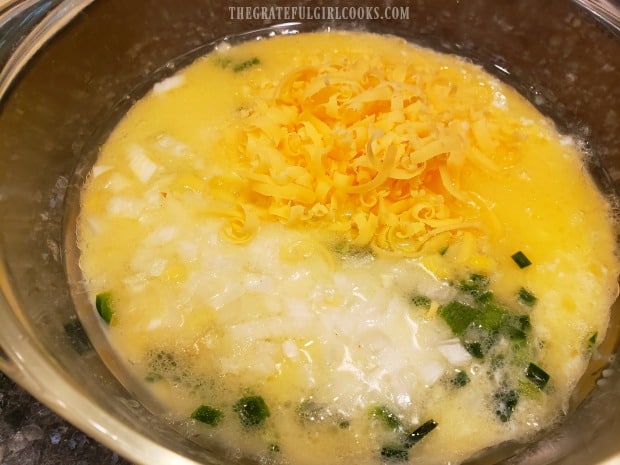
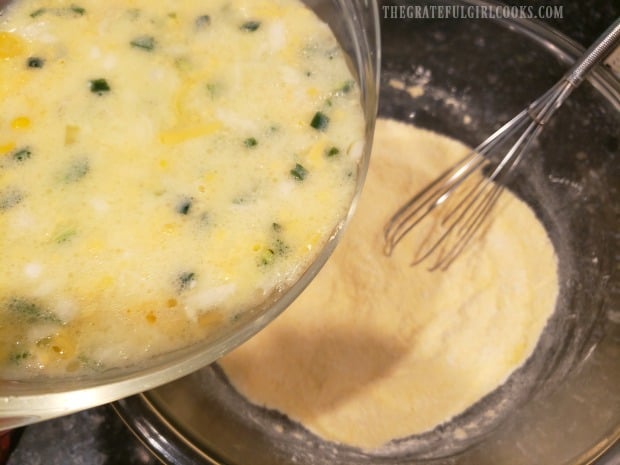
    In a SEPARATE mixing bowl, combine beaten eggs, buttermilk, oil, corn, onion, grated cheddar cheese, and sliced, de-seeded jalapeños. Stir these wet ingredients very well, until fully combined. **(See note in printable recipe card at the bottom of this post for easy substitutions for buttermilk, jalapeños or the whole kernel canned corn).

    Pour the bowl full of the wet ingredients into the bowl with the dry ingredients. Stir the cornbread batter well, just until the batter is moistened and fully mixed. Now the batter for your jalapeño cheddar cornbread is ready to go! (See how easy that was?)

    Onions cheddar cheese, jalapenos, eggs, etc. help flavor the cornbread batter.The wet ingredients are poured into the dry ingredients to make a batter.

    Time To Bake The Jalapeño Cheddar Cornbread!

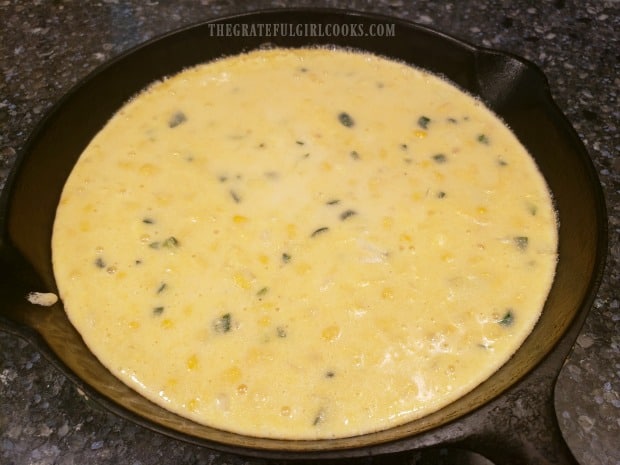
    Once the oven is preheated, CAREFULLY remove the skillet or pan from the oven. IT WILL BE HOT! Immediately pour the cornbread batter into the skillet. You might even hear it sizzle when it hits the hot pan!

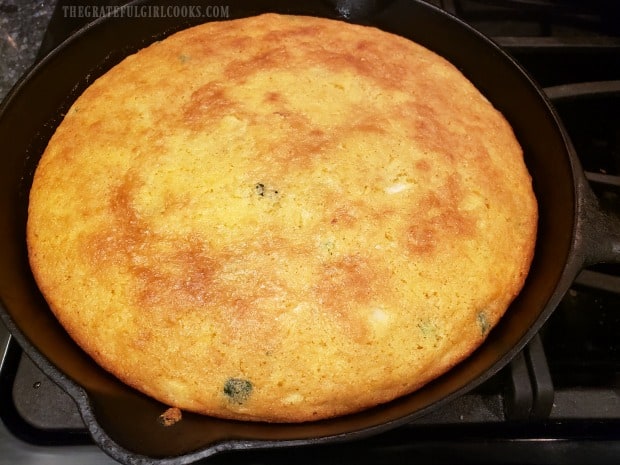
    Bake the jalapeño cheddar cornbread (on a middle oven rack) at 350° F. for 30-35 minutes. When done, the cornbread should be golden brown on top, and a toothpick inserted into the middle should come out clean! Since ovens vary in temperatures, be sure to check it at the 30 minute mark to ensure you don’t overcook the cornbread!

    Batter for jalapeño cheddar cornbread is poured into a heated skillet before baking..

    Remove the finished cornbread from the oven, and let it cool for 2-3 minutes before attempting to slice and serve it.

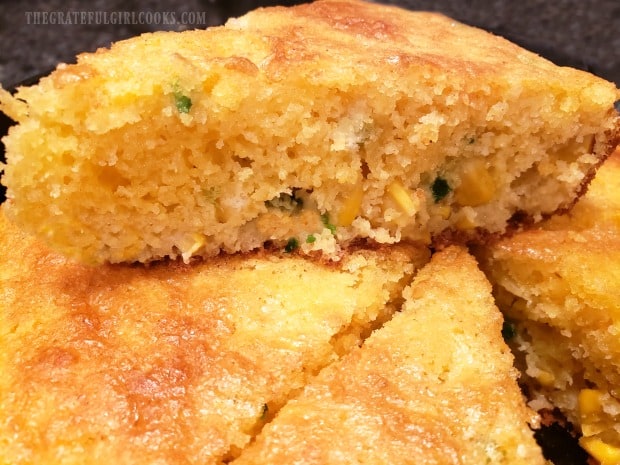
    When ready to serve, slice the jalapeño cheddar cornbread into 8 wedges (or pieces, if using a square baking dish). Lift each piece out of the skillet using a spatula, serve, and enjoy! We enjoyed our cornbread along with a bowl of my hubby’s favorite pinto beans and ham. This yummy cornbread was a perfect side dish (smeared with butter, of course!).

    Baked jalapeño cheddar cornbread is golden brown on the top.A slice of the finished jalapeño cheddar cornbread is ready to eat!

    Hope you are staying safe and well, during this month of “stay at home” guidelines. I pray you and those you love will soon have a chance to share a meal together, and enjoy each others company and hugs once again. I know we sure are looking forward to that day!

    Take care, stay strong, and look for opportunities to serve or support others during this time, in whatever way you safely can. Have a GOOD day, and may God bless you with His love and presence!

    Looking For Other BREAD Recipes?

    You can find all of my bread recipes in the Recipe Index, located at the top of the page. I have quite a few you might want to try, including:

    Interested In More Recipes?

    Thank you for visiting this website. I appreciate you using some of your valuable time to do soIf you’re interested, I publish a newsletter 2 times per month (1st and 15th) with all the latest recipes, and other fun info. I would be honored to have you join our growing list of subscribers, so you never miss a great recipe!
    There is a Newsletter subscription box on the top right side (or bottom) of each blog post, depending on the device you use, where you can easily submit your e-mail address (only) to be included in my mailing list.

    You Can Also Find Me On Social Media:
    Facebook page: The Grateful Girl Cooks!
    Pinterest: The Grateful Girl Cooks!
    Instagram: jbatthegratefulgirlcooks

    Author's signature

    Original recipe source: unknown (wrote it down many years ago on a 3×5″ recipe card – original publication not noted)

    0 from 0 votes
    Jalapeño Cheddar Cornbread
    Prep Time
    10 mins
    Cook Time
    30 mins
    Total Time
    40 mins
     

    Jalapeño Cheddar Cornbread, (with corn kernels, sliced jalapeños, onions and grated cheddar cheese), is an EASY to make, flavorful side dish for 8!

    Category: Bread, Side Dish
    Cuisine: American
    Keyword: jalapeño cheddar cornbread
    Servings: 8 pieces
    Calories Per Serving: 315 kcal
    Author: JB @ The Grateful Girl Cooks!
    Ingredients
    • 1 cup yellow cornmeal
    • cup all purpose flour
    • 2 Tablespoons granulated sugar
    • 1 teaspoon salt
    • 2 teaspoons baking powder
    • ½ teaspoon baking soda
    • 2 large eggs , beaten
    • 1 cup buttermilk , see NOTES for substitution
    • ½ cup vegetable oil
    • 8 ounces canned whole kernel corn , drained - See NOTES for substitution
    • cup brown onion , finely chopped
    • 2 small fresh jalapeños , seeded, diced - See NOTES for substitution
    • ½ cup grated cheddar cheese
    Instructions
    1. Generously grease or spray a 9" oven-proof skillet, square baking dish, or pie pan on bottom and sides. Place pan on middle rack in oven. Preheat oven to 350° F, leaving skillet in oven while it preheats. While oven (and skillet) are heating, prepare cornbread batter.

    2. Measure cornmeal, flour, sugar, salt, baking powder and baking soda into a large mixing bowl. Whisk together, until fully combined; set bowl aside.

    3. In a SEPARATE mixing bowl, combine beaten eggs, buttermilk, oil, corn, onion, cheddar cheese, and jalapeños. Stir well, until combined. Pour into bowl with the dry ingredients. Stir well, just until batter is moistened and fully mixed.

    4. Once oven is preheated, carefully remove skillet or pan from oven. IT WILL BE HOT! Immediately pour batter into skillet. Bake on a middle oven rack at 350° F. for 30-35 minutes. When done, cornbread should be golden brown on top, and a toothpick inserted into the middle should come out clean! Since ovens vary in temperatures, be sure to check it at 30 minutes, to ensure you don't overcook it! Remove finished cornbread from oven. Let it cool for 2-3 minutes before attempting to slice. When ready to serve, slice into 8 portions. Serve, and enjoy (with butter, if desired).

    Recipe Notes

    SUBSTITUTIONS -
    No fresh jalapeños? You can substitute canned OR 2 Tablespoons chopped green bell pepper.
    No buttermilk? Add 1 Tablespoon white vinegar to 1 C. milk. Stir, let stand for 5 minutes.
    No whole kernel canned corn? Add 8 ounces canned cream style corn.

    Nutrition Facts
    Jalapeño Cheddar Cornbread
    Amount Per Serving (1 piece)
    Calories 315 Calories from Fat 180
    % Daily Value*
    Fat 20g31%
    Saturated Fat 14g88%
    Cholesterol 57mg19%
    Sodium 501mg22%
    Potassium 289mg8%
    Carbohydrates 28g9%
    Fiber 2g8%
    Sugar 5g6%
    Protein 8g16%
    Vitamin A 221IU4%
    Vitamin C 6mg7%
    Calcium 137mg14%
    Iron 1mg6%
    * Percent Daily Values are based on a 2000 calorie diet.

    Here’s one more to pin on your Pinterest boards!Jalapeño Cheddar Cornbread, (with corn kernels, sliced jalapeños, onions and grated cheddar cheese), is an EASY to make, flavorful side dish for 8!

    Chocolate Chip Banana Nut Muffins

    Make 12 delicious chocolate chip banana nut muffins in almost no time at all! These EASY to make muffins are perfect for breakfast or a mid-day snack!Make 12 delicious chocolate chip banana nut muffins in almost no time at all! These EASY to make muffins are perfect for breakfast or a mid-day snack!

    Well… here we are, in the first week of being advised to basically confine ourselves to our homes for two weeks due to the coronavirus that is spreading rapidly around the entire world! We are rightfully concerned, but not overly dismayed or fearful, because our trust is ultimately in God, so we have great HOPE, in spite of circumstances! Our future is secure, no matter what happens, and for that, we are truly GRATEFUL!

    If you’re like me, you still want to make sure you have adequate food prepared in a time like this. Muffins are a great way (with not too many ingredients) to provide an easy, tasty breakfast or snack for yourself or other family members!

    So, I decided to make a batch of chocolate chip banana nut muffins to have around, because I had the ingredients in our pantry. I’ve made them for years using my Mom’s banana nut bread recipe, with a couple slight modifications! These muffins are easily made with fairly common ingredients, so I thought I would share this family-friendly recipe to all who might want it!

    Scroll Down For A Printable Recipe Card At the Bottom Of The Page

    Making The Muffin Batter Is EASY!

    While you make the muffin batter, preheat your oven to 350°F. Sift the flour, baking powder, baking soda, salt and granulated sugar into a large mixing bowl. Add the miniature chocolate chips and chopped pecans to the bowl.

    Sifted dry ingredients, chocolate chips, and chopped pecans in mixing bowl.

    In a separate bowl, mix together three very ripe bananas, an egg, and the vegetable oil. Use a fork to mash the bananas very well, and combine the wet ingredients until fully incorporated.

    Ripe bananas, an egg, and vegetable oil are mixed together in medium bowl.Once mixed, the banana, egg and oil mixture is ready to add to dry ingredients.

    Combine The Wet And Dry Ingredients

    Pour the banana/egg/oil mixture into the large mixing bowl with the dry ingredients. Stir this very well, to fully combine all the batter ingredients. The muffin batter will be fairly thick, once done.

    Time to stir together all the ingredients for the chocolate chip banana nut muffins.The muffin batter is now ready to scoop into the muffin cup paper liners.

    Time To Bake The Chocolate Chip Banana Nut Muffins!

    Okay… now it’s time to get these chocolate chip banana nut muffins in the oven to bake! Place paper cupcake liners into the muffin tin holders. NOTE: If you do not have paper liners, no worries. Simply lightly spray each muffin “well” with non-stick baking spray or grease well.

    Fill each muffin holder about 3/4 of the way full with the batter. You should have enough batter to make 12 chocolate chip banana nut muffins! Place the muffins into your preheated 350°F. oven, and bake between 25-30 minutes.

    The muffins are done when golden brown and a toothpick inserted into the middle comes out clean. Check them at 25 minutes for done-ness, because oven temps can vary greatly, and you do not want dry muffins! Mine were perfect when cooked for 25 minutes.

    The 12 muffin cup holders are each filled 3/4 of the way with batter.The finished chocolate chip banana nut muffins are golden brown when fully baked.

    Let Cool A Bit, Then It’s Time To EAT!

    Remove the muffins from the oven and pan once done, and let them cool on a wire rack for a few minutes before serving. If you are NOT using paper liners, let the muffins cool for 5-6 minutes BEFORE attempting to remove them from the pan.

    Once they have cooled down a few minutes, they are ready to eat! Slice one open, add butter if that’s your thing, and enjoy these absolutely delicious chocolate chip banana nut muffins!

    A dozen muffins are cooling on a wire rack.Chocolate chip banana nut muffins are filled with chocolate and taste delicious.

    I truly hope you enjoy these muffins for your family breakfast or just as a yummy snack! They sure are GOOD! Have a blessed day, friends.

    Looking For More MUFFIN Recipes?

    You can find all of my recipes in the Recipe Index, located at the top of the page. I have many muffin recipes you might enjoy, including:

    Interested In More Recipes?

    Thank you for visiting this website. I appreciate you using some of your valuable time to do soIf you’re interested, I publish a newsletter 2 times per month (1st and 15th) with all the latest recipes, and other fun info. I would be honored to have you join our growing list of subscribers, so you never miss a great recipe!
    There is a Newsletter subscription box on the top right side (or bottom) of each blog post, depending on the device you use, where you can easily submit your e-mail address (only) to be included in my mailing list.

    You Can Also Find Me On Social Media:
    Facebook page: The Grateful Girl Cooks!
    Pinterest: The Grateful Girl Cooks!
    Instagram: jbatthegratefulgirlcooks

    Author's signature

    Recipe Adapted From: my mom’s recipe for banana nut bread

    0 from 0 votes
    Chocolate Chip Banana Nut Muffins
    Prep Time
    10 mins
    Cook Time
    25 mins
    Total Time
    35 mins
     

    Make 12 delicious chocolate chip banana nut muffins in almost no time at all! These EASY to make muffins are perfect for breakfast or a mid-day snack!

    Category: Breakfast, Snack
    Cuisine: American
    Keyword: chocolate chip banana nut muffins
    Servings: 12
    Calories Per Serving: 295 kcal
    Author: JB @ The Grateful Girl Cooks!
    Ingredients
    • 2 cups all purpose flour
    • 2 teaspoons baking powder
    • ½ teaspoon baking soda
    • ¾ teaspoon salt
    • ½ cup granulated sugar
    • 1 cup pecans or walnuts , chopped
    • ½ cup mini chocolate chips (semi-sweet) *can substitute regular sized
    • 1 large egg
    • ¼ cup vegetable oil
    • 3 medium bananas (very ripe)
    • 1 Tablespoon fresh lemon juice
    Instructions
    1. Preheat oven to 350°F. Sift flour, baking powder, baking soda, salt and granulated sugar into a large mixing bowl. Add chocolate chips and chopped pecans to the bowl.

    2. In a separate bowl, mix together bananas, egg, and vegetable oil. Use a fork to mash the bananas very well, and mix wet ingredients until fully incorporated. Add banana mixture to the dry ingredients. Stir well, to fully combine batter ingredients. Batter will be fairly thick,

    3. Place paper liners into the muffin tin. NOTE: If you don't have paper liners, lightly spray each muffin "well" with non-stick baking spray, or grease well. Fill each muffin holder 3/4 of the way full with the batter. You should have enough batter to make 12 muffins! Bake at 350°F. between 25-30 minutes. Muffins are done when golden brown and a toothpick inserted into the middle comes out clean. Check them at 25 minutesfor done-ness, because oven temps can vary greatly, and you do not want dry muffins!

    4. Remove muffins from oven and pan once done, and let them cool on a wire rack for a few minutes before serving. NOTE: If you are NOT using paper liners, let muffins cool 5-6 minutes BEFORE attempting to remove them from pan. After they've cooled a few minutes, they're ready to eat! Enjoy!

    Nutrition Facts
    Chocolate Chip Banana Nut Muffins
    Amount Per Serving (1 muffin)
    Calories 295 Calories from Fat 135
    % Daily Value*
    Fat 15g23%
    Saturated Fat 7g44%
    Cholesterol 18mg6%
    Sodium 200mg9%
    Potassium 291mg8%
    Carbohydrates 38g13%
    Fiber 3g13%
    Sugar 16g18%
    Protein 4g8%
    Vitamin A 54IU1%
    Vitamin C 3mg4%
    Calcium 48mg5%
    Iron 2mg11%
    * Percent Daily Values are based on a 2000 calorie diet.

    Here’s one more to pin on your Pinterest boards!Make 12 delicious chocolate chip banana nut muffins in almost no time at all! These EASY to make muffins are perfect for breakfast or a mid-day snack!

    Zucchini Nut Bread

    This simple recipe for zucchini nut bread yields two standard-sized loaves. The bread is EASY to make (honest!), and tastes absolutely delicious!This simple recipe for zucchini nut bread yields two standard-sized loaves. The bread is EASY to make (honest!), and tastes absolutely delicious!

    My husband and I are spending “quality time” staying at home during the ongoing viral health scare currently spreading it’s reach around the world.

    A few days ago I decided to make a couple loaves of my old “stand by” zucchini nut bread recipe to have around the house, for us to enjoy for breakfast or an afternoon snack, as we “hunker down”.

    This delicious recipe makes two standard sized loaves of zucchini bread, which equals out to about 16 slices. Since it is a very easy recipe to prepare, it was a fantastic way to use one of my large zucchinis in the fridge, to make several breakfasts (or snacks).

    This is a wonderful slightly sweet, cinnamon spiced bread, and it tastes wonderful! Here’s how to make it:

    Scroll Down For A Printable Recipe Card At The Bottom Of The Page

    Prepare The Batter For Zucchini Nut Bread

    Place the eggs in a large mixing bowl (or the base of a stand mixer), and lightly beat them. Add granulated sugar, vegetable oil, and vanilla extract to the eggs.

    Mix well (with stand mixer or hand held electric mixer), to fully combine these “wet ingredients”.

    Eggs, sugar, oil, and vanilla are mixed together in large bowl.

    Preparing The Zucchini

    Grate the zucchini onto absorbent paper towels, leaving the peel ON. Once you’re finished grating, lightly press the zucchini with more paper towels, to dry the zucchini and remove LOTS of moisture.

    Add the grated zucchini to the wet ingredients in the bowl, and beat again, just until the ingredients are combined.

    Unpeeled zucchini is grated, then dabbed with paper towels to absorb moisture.The grated zucchini is added to the wet bread ingredients and mixed together.

    Now add the dry ingredients (flour/cinnamon/salt/baking soda and baking powder) to the wet ingredients, and mix until everything is combined.

    If you are using a stand mixer, once the ingredients are fully combined, remove the bowl from the base.

    The "dry" ingredients are then combined with the "wet" ingredients in bowl.

    STIR in the chopped pecans (or walnuts, if using). Whoo Hoo… that’s it! Now the batter for your zucchini nut bread is ready to bake!

    Chopped pecans (or walnuts) are stirred into the bread batter.

    Baking The Zucchini Nut Bread

    Lightly grease or spray two 9×5″ bread loaf pans on the bottom and sides. Divide the zucchini nut bread batter between the two pans.

    Place the pans on the middle rack in a preheated 325°F oven. Bake for 1 hour, or until a toothpick inserted into the top of the bread comes out clean.

    Remove the baking pans to a wire rack and let cool for 10-15 minutes, before attempting to remove the zucchini nut bread from the pan. When ready to remove, run a butter knife around the edges of the pan, then turn pan over, to release the bread.

    Zucchini nut bread batter is evenly divided into 2 greased loaf pans to bake.Here are the golden brown loaves of zucchini nut bread. hot from the oven.

    Time To Slice The Bread And EAT!

    Once the bread has been removed from the pan, and has cooled slightly, you can slice into this yummy treat, and serve it! We always enjoy  cutting a slice of zucchini nut bread, and eating it with some butter spread on it. YUM! It’s so good, and has a slight cinnamon flavor, too!

    CAN YOU FREEZE THIS BREAD? YES!!!! We usually eat one loaf and freeze the other. If freezing, let the loaf (or loaves) completely cool down.

    Once cool, wrap each loaf tightly in plastic wrap, and then in aluminum foil, and store in the freezer, to have a loaf to enjoy another time!


    Cooling loaves of bread on wire racks, before slicing.One slice of warm zucchini nut bread, smeared with butter, and ready to eat!

    Hope you enjoy this recipe for zucchini nut bread! Thank you for taking the time to stop by for a visit. Have a wonderful day, even if circumstances look less than optimal. Beauty and joy can be found all around, if you earnestly seek to find it.

    May God bless you (and those you love) with good health and deep love for each other. Hang in there!

    Looking For Other “SWEET” BREAD Recipes?

    You can find ALL of my recipes in the Recipe Index, which is located at the top of the page. I have some delicious “sweet” bread recipes you might enjoy, including:

    Want More Recipes? Get My FREE Newsletter!

    I publish a newsletter 2 times per month (1st and 15th) with lots of recipes, tips, etc..
    Would you like to join our growing list of subscribers?

    There is a Newsletter subscription box on the top right (or bottom) of each blog post, depending on the device you use.
    You can submit your e-mail address there, to be added to my mailing list.

    Find Me On Social Media:

    Facebook page: The Grateful Girl Cooks!
    Pinterest:
    The Grateful Girl Cooks!
    Instagram:
    jbatthegratefulgirlcooks

    Author's signature

    Original recipe source: unknown (found in an old recipe box many years ago, handwritten on a 3×5 index card)

    ↓↓ PRINTABLE RECIPE BELOW ↓↓

    0 from 0 votes
    Zucchini Nut Bread
    Prep Time
    15 mins
    Cook Time
    1 hr
    Total Time
    1 hr 15 mins
     

    This simple recipe for zucchini nut bread yields two standard-sized loaves. The bread is EASY to make (honest!), and tastes absolutely delicious!

    Category: Bread, Breakfast, Snack
    Cuisine: American
    Keyword: zucchini nut bread
    Servings: 16 (2 loaves)
    Calories Per Serving: 263 kcal
    Author: JB @ The Grateful Girl Cooks!
    Ingredients
    • 3 large eggs , lightly beaten
    • 2 cups granulated sugar
    • 1 cup vegetable oil
    • 3 teaspoons vanilla extract
    • 2 cups unpeeled, grated zucchini (approx. 1 large zucchini)
    • 3 cups all purpose flour
    • 3 teaspoons ground cinnamon
    • 1 teaspoon baking soda
    • 1 teaspoon salt
    • ¼ teaspoon baking powder
    • 1 cup chopped pecans (or walnuts)
    • non stick spray or grease (for pans)
    Instructions
    1. Preheat oven to 325°F. Grease or spray two 9x5 loaf pans on the bottom and sides. Set aside.

    2. Place eggs in large mixing bowl (or the base of a stand mixer), and beat lightly. Add granulated sugar, vegetable oil and vanilla. Mix well (with stand mixer or hand held electric mixer), to combine.

    3. Grate unpeeled zucchini onto absorbent paper towels. Once done, press zucchini with more paper towels, to remove LOTS of moisture. Add zucchini to wet ingredients in bowl, and beat again, just until incorporated. Add flour/cinnamon/salt/baking soda and baking powder, and mix until everything is combined. STIR in the chopped pecans (or walnuts, if using).

    4. Divide batter between two greased loaf pans. Place pans on middle rack in preheated oven. Bake for 1 hour, or until a toothpick inserted into top of the bread comes out clean. Transfer baking pans to a wire rack; let cool 10-15 minutes, before attempting to remove bread. To remove, run a butter knife around the edges of the pan, then turn pan over, to release bread. Let cool (if desired), then slice and enjoy!

    Recipe Notes

    NOTE: If freezing, let bread cool completely. Wrap loaf in plastic wrap, then in aluminum foil, and store in freezer.

    Nutrition Facts
    Zucchini Nut Bread
    Amount Per Serving (1 slice (1/16th of total))
    Calories 263 Calories from Fat 63
    % Daily Value*
    Fat 7g11%
    Saturated Fat 2g13%
    Cholesterol 40mg13%
    Sodium 231mg10%
    Potassium 119mg3%
    Carbohydrates 45g15%
    Fiber 1g4%
    Sugar 26g29%
    Protein 5g10%
    Vitamin A 88IU2%
    Vitamin C 3mg4%
    Calcium 26mg3%
    Iron 2mg11%
    * Percent Daily Values are based on a 2000 calorie diet.

    Here’s one more to pin on your Pinterest boards!This simple recipe for zucchini nut bread yields two standard-sized loaves. The bread is EASY to make (honest!), and tastes absolutely delicious!

    Chocolate Espresso Muffins (Air Fryer)

    Chocolate Espresso Muffins are a cinch to make in an Air Fryer! These delicious breakfast or snack treats take 25 minutes, from start to finish!
    Chocolate Espresso Muffins are a cinch to make in an Air Fryer! These delicious breakfast or snack treats take 25 minutes, from start to finish!

    Today I want to share a delicious recipe for yummy chocolate espresso muffins COOKED IN AN AIR FRYER! These muffins are ridiculously EASY to make, and taste really GOOD! I’ve also included directions for preparing them in an oven (see recipe card below), in case you don’t have access to an air fryer.

    We are sure enjoying the air fryer I ordered last year using gift cards I was given for my birthday. In air fryers, highly heated air cooks all types of food, and gives it the “effect” of frying without having to use lots of cooking oil. I found this particular recipe in the cookbook that came along with the Cosori air fryer I got last year.

    Scroll Down For A Printable Recipe Cad At the Bottom Of the Page

    TRUE STORY OF MUFFIN FAILURE!

    When I first got my air fryer last year, I’m embarrassed to tell you this, BUT I made these muffins without a muffin tin! I filled up paper liners (cause the cookbook said to fill up the muffin cups, and paper liners are KINDA muffin cups, right?), then cooked them. Probably one of the dumbest things I’ve ever done in the kitchen!

    I had NO idea what I was doing with this newfangled air fryer thing of mine! BIG MISTAKE! They cooked all right, but came out looking like hard chocolate hockey pucks! Ugh. Seriously… the batter had spread and flattened way out in the paper liners (probably begging for mercy). True Story. I was mortified! Into the trash they went.

    **Moral of That Sad Story: Don’t Be Like ME. When making muffins in an air fryer, you will need to have muffin tins that fit in the basket of your air fryer. DUH. The End.** Once I figured it out, there have been no problems with ’em ever since! The ones I have hold 4 muffins each (I ordered them online). This recipe yields 8 muffins, so I cooked them in 2 batches!

    Time To Make The Batter For Chocolate Espresso Muffins!

    Measure all purpose flour, sugar, cocoa powder, espresso powder (or instant coffee), baking powder, salt and baking soda into a medium sized bowl. Whisk these “dry” ingredients together to fully combine them.

    Dry ingredients for muffins are whisked together until blended.

    In a separate bowl, whisk together the milk, egg, vanilla extract, oil and vinegar. Once combined, pour these “wet” ingredients into the bowl with the “dry” ingredients. Whisk well, to fully incorporate all ingredients. THIS is your batter for the chocolate espresso muffins! EASY!

    Wet ingredients for the chocolate espresso muffins are added to dry ingredients.The muffin batter is mixed together before adding to paper liners.

    Prepare To Cook The Chocolate Espresso Muffins In The Air Fryer

    You will need muffin tins that are small enough to fit in your air fryer. Spray the muffin cups with non-stick cooking spray OR fill with paper liners, and then lightly spray. Divide the batter between 8 muffin cups. Each muffin cup should be about 3/4 of the way full.

    Batter is poured into paper liners in muffin tins, and then cooked in an air fryer.

    Cooking The Muffins In An Air Fryer

    Preheat the air fryer to 300°F. Once the air fryer is preheated, quickly but carefully put your filled muffin tin into the basket. Be careful, because the air fryer is hot at this point!

    Cook the chocolate espresso muffins at 300°F for 15 minutes. I recommend checking on them for “done-ness” at the 13 minute mark. Pause the machine and check by inserting a toothpick into the top center of a muffin. Continue to cook until done. This is important because temperatures can vary between different brands of air fryers.

    Four chocolate espresso muffins are cooked at a time in the air fryer.

    This is how the muffins looks like after cooking them in the air fryer. A little wonky at times (this was my 3rd batch), but absolutely delicious! Transfer the muffins from the pans to a wire rack to cool. Pop the remaining batch of muffins into the air fryer, and then you’re done!

    The finished air fryer muffins turned out really nice!

    Ready To Enjoy These Muffins!

    The photo below shows one of the chocolate espresso muffins, sliced in half. The inside is perfectly cooked! This was a fun way to make breakfast muffins… in an air fryer… who knew?

    A peek at the inside of one of the air fryer chocolate muffins.Chocolate espresso muffins on a plate, ready to eat!

    Can Chocolate Espresso Muffins Be Baked In An OVEN?

    Yes! If you do not have access to an air fryer, these muffins can be baked in a traditional oven. They will only take a few minutes more to bake! Prepare the batter using the  instructions below (in the recipe card). Cook them in a 375°F oven for between 15 and 20 minutes. Insert a toothpick into the center of the muffin to check for doneness. If it comes out clean, they are ready!

    Thanks for visiting! Hope you enjoy these yummy tasting muffins. If you enjoy muffins, you will enjoy my recipes for cranberry orange muffins, dark chocolate almond chia muffins, and many others listed in the Recipe Index at the top of the page.  I hope you have a wonderful day, friends. Make it a good one!

    Looking For More AIR FRYER Recipes?

    You can find all of my recipes in the Recipe Index, located at the top of the page. I have several air fryer recipes, including:

    Interested In More Recipes?

    Thank you for visiting this website. I appreciate you using some of your valuable time to do soIf you’re interested, I publish a newsletter 2 times per month (1st and 15th) with all the latest recipes, and other fun info. I would be honored to have you join our growing list of subscribers, so you never miss a great recipe!
    There is a Newsletter subscription box on the top right side (or bottom) of each blog post, depending on the device you use, where you can easily submit your e-mail address (only) to be included in my mailing list.

    You Can Also Find Me On Social Media:
    Facebook page: The Grateful Girl Cooks!
    Pinterest: The Grateful Girl Cooks!
    Instagram: jbatthegratefulgirlcooks

    Author's signature

    Original recipe source: “Cosori Air Fryer Recipes”, (this recipe booklet came with the purchase of my Cosori air fryer), page 108

    0 from 0 votes
    Chocolate Espresso Muffins (Air Fryer)
    Prep Time
    10 mins
    Cook Time
    15 mins
    Total Time
    25 mins
     

    Chocolate Espresso Muffins are a cinch to make in an Air Fryer! These delicious breakfast or snack treats take 25 minutes, from start to finish!

    Category: Breakfast, Snack
    Cuisine: American
    Keyword: chocolate espresso muffins
    Servings: 8 muffins
    Calories Per Serving: 247 kcal
    Author: JB @ The Grateful Girl Cooks!
    Ingredients
    • 1 cup all purpose flour
    • ¾ cup light brown sugar
    • ½ cup cocoa powder
    • ½ teaspoon baking powder
    • ½ teaspoon salt
    • ½ teaspoon espresso powder *see Notes Section
    • ½ teaspoon baking soda
    • 1 large eggs
    • ¾ cup milk
    • 1 teaspoon vanilla extract
    • 1 teaspoon apple cider vinegar
    • cup vegetable oil
    • non stick cooking spray
    Instructions
    1. Measure flour, sugar, cocoa powder, espresso powder (or instant coffee), baking powder, salt and baking soda into a medium sized bowl. Whisk together to fully combine.

    2. In a separate bowl, whisk together milk, egg, vanilla, oil and vinegar. Once combined, pour into the bowl with the flour, cocoa powder, etc. Whisk well, to fully mix ingredients, and remove any lumps in the batter.

    3. You will need muffin tins small enough to fit your air fryer basket. Spray muffin cups with non-stick cooking spray OR fill with paper liners, and then lightly spray. Divide batter between 8 muffin cups. Each muffin cup should be about 3/4 of the way full.

    For Air Fryer:
    1. Preheat air fryer to 300°F. Once preheated, quickly but carefully place filled muffin tin into the basket. Be careful, because air fryer is hot! Cook at 300°F for 15 minutes. Check for "done-ness" at the 13 minute mark. Pause machine and check, by inserting a toothpick into center of a muffin. Continue to cook until done, and toothpick comes out clean. Transfer pan from air fryer basket to a wire rack to cool. Let cool for 5 minutes, before removing muffins from pan. Cook remaining batch of muffins, and enjoy, once cooled to room temperature!

    For Oven:
    1. Prepare muffins following instructions above. Cook muffins at 375°F for 15-20 minutes. Insert a toothpick into center of the muffin to check for doneness. If it comes out clean, they are ready! Let cool for 5 minutes before removing them from pan.

    Recipe Notes

    **No espresso powder? Substitute 3/4 teaspoon finely ground instant coffee granules!**

    Nutrition Facts
    Chocolate Espresso Muffins (Air Fryer)
    Amount Per Serving (1 muffin)
    Calories 247 Calories from Fat 99
    % Daily Value*
    Fat 11g17%
    Saturated Fat 8g50%
    Cholesterol 27mg9%
    Sodium 241mg10%
    Potassium 194mg6%
    Carbohydrates 37g12%
    Fiber 2g8%
    Sugar 21g23%
    Protein 4g8%
    Vitamin A 82IU2%
    Calcium 69mg7%
    Iron 2mg11%
    * Percent Daily Values are based on a 2000 calorie diet.

    Here’s one more to pin on your Pinterest boards!Chocolate Espresso Muffins are a cinch to make in an Air Fryer! These delicious breakfast or snack treats take 25 minutes, from start to finish!