Category: Breads

Blackberry Muffins

Make some yummy fresh blackberry muffins for breakfast or snack time! This easy recipe makes 16 muffins, and they’ll be a hit with family and friends!
Make some yummy fresh blackberry muffins for breakfast or snack time! This easy recipe makes 16 muffins, and they'll be a hit with family and friends!

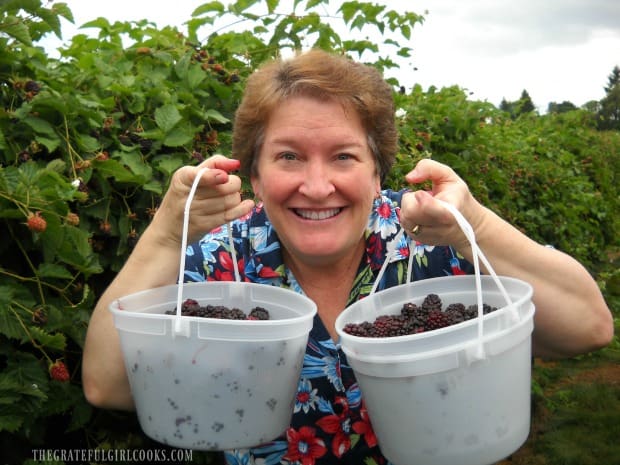
We live in an area just west of the city of Portland, Oregon. Around here, summer blackberries grow wild just about everywhere, it seems. What I don’t pick around our neighborhood or hanging over our back fence, I can pick quickly and rather inexpensively at a local U-Pick farm, as shown in the photo below!

Last week, I picked over 4 cups of wild blackberries while walking our dog Cooper (a cute corgi), around our neighborhood park and school early one morning! We love to use them for cobbler, bar cookies, scones, soda, or homemade jam, so these early ripening berries were a good find!

I decided to make some blackberry muffins using some of the ones I found in our neighborhood, and I’m excited to share this delicious recipe with you. But guess what? You can make these yummy muffins using fresh OR frozen blackberries, and I’ve included directions for both!

Scroll Down For A Printable Recipe Card At The Bottom Of The Page

Picking fresh blackberries at a local farm!

Let’s Make Some Blackberry Muffins!

The first thing you will need to do is preheat your oven to 400° F. and grease standard sized muffin cups (or use paper muffin liners). NOTE: This recipe make between 16 – 18 muffins, so you can use 2 muffin pans, or cook them in batches.

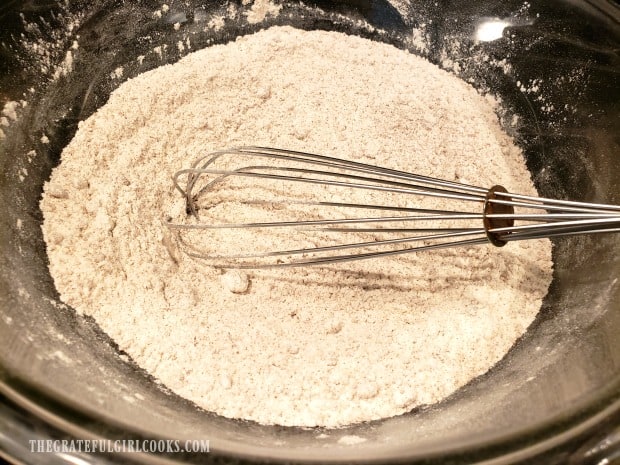
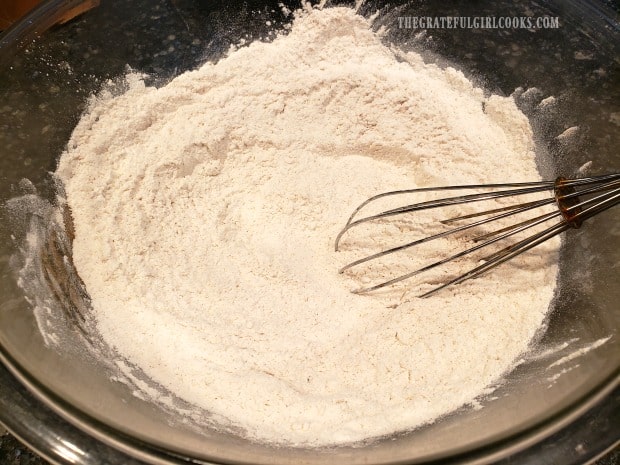
Whisk the dry ingredients together in a large bowl. These ingredients are flour, baking powder, salt, baking soda and cinnamon. Set the bowl aside.

Flour, cinnamon, salt, baking powder and baking soda are whisked in bowl.

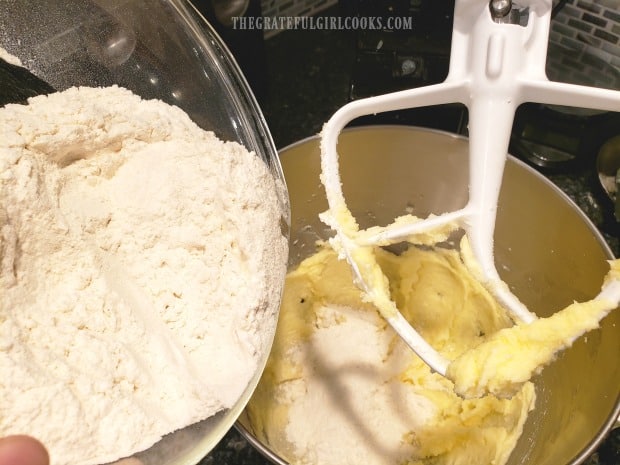
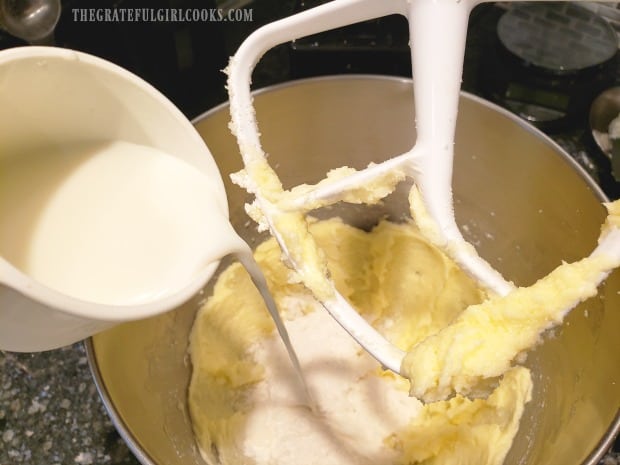
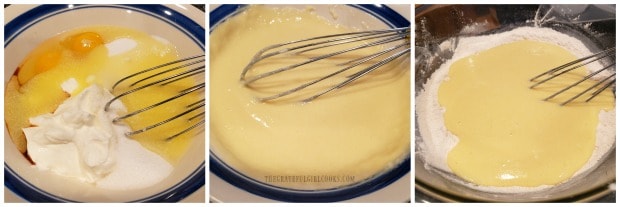
In a separate bowl, combine the eggs, sour cream, melted butter, milk, granulated sugar, and vanilla extract. Whisk them together until all ingredients are combined.

Add these wet ingredients to the dry ingredients in the large bowl. Whisk (or stir) only until just combined, and the wet ingredients are incorporated into the dry.

Eggs, sour cream, etc. are mixed together, then added to dry ingredients to make muffin batter.

Prepare The Blackberries

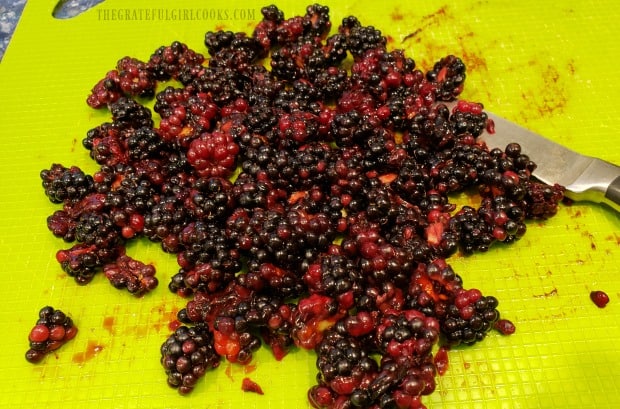
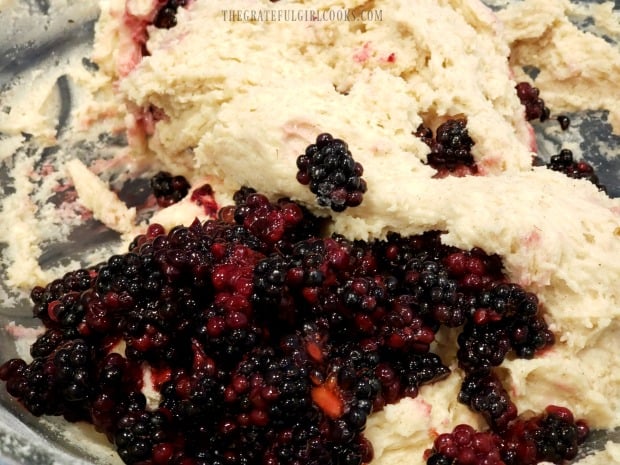
If using FRESH blackberries: cut them in half before adding to the muffin batter.
If using FROZEN blackberries: defrost, then drain any extra liquid. Coat lightly in a little bit of flour, before adding them to the muffin batter.

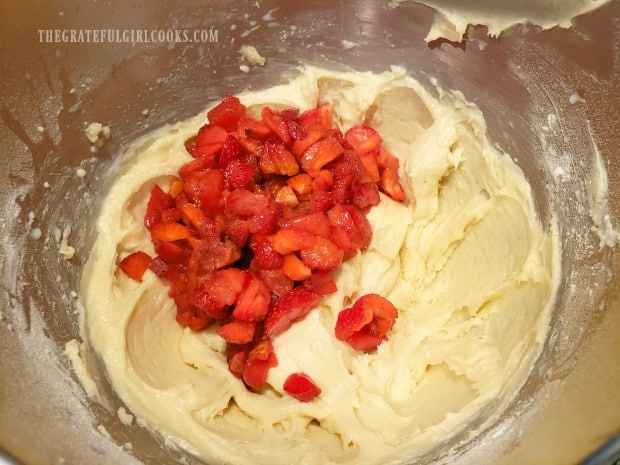
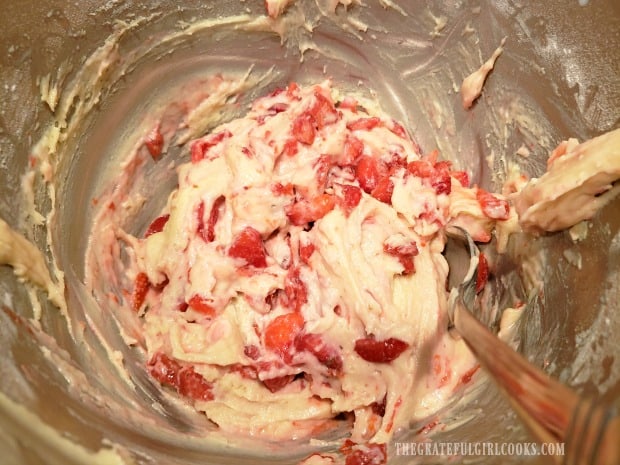
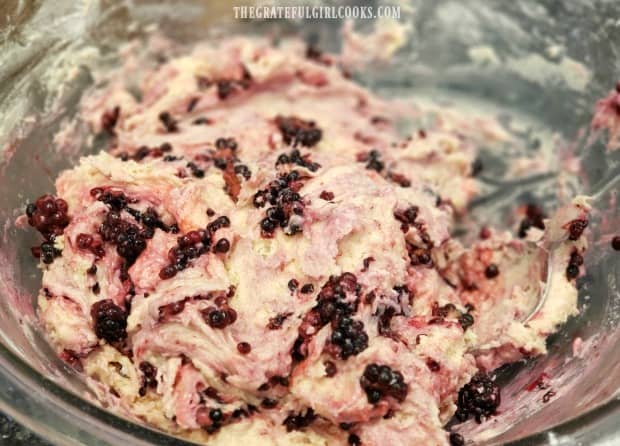
Add the blackberries to the bowl of muffin batter, and fold berries gently into batter, only until combined. Be careful NOT to over mix the batter. Yes, the batter will have red streaks. Yes, the batter will be slightly lumpy and thick!

Blackberries are cut in half before adding to muffin batter.Blackberries are added to the muffin batter.

Fill The Muffin Cups

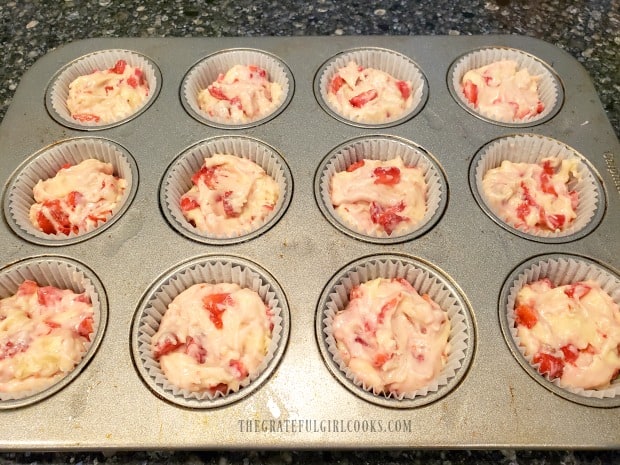
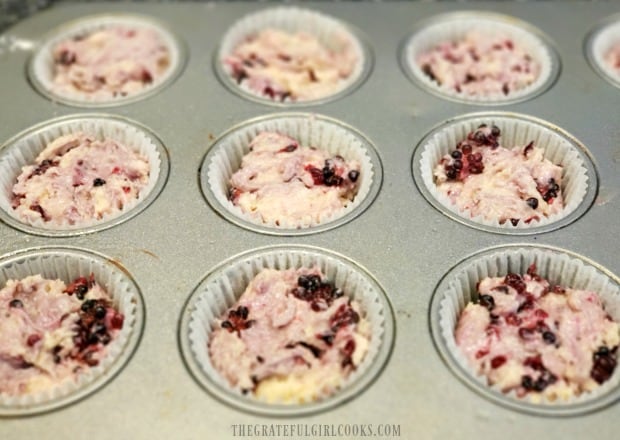
Evenly distribute the muffin batter between muffin cups, filling them about 2/3 full. I used two pans lined with paper liners, because I had enough batter to make 16 muffins. Use the back of a spoon (or your clean fingers, if necessary), to level out the thick muffin batter in each cup.

The batter for the muffins is streaked with color from the blackberries.Muffin batter is placed into muffin liners, and is ready to bake!

Time To Bake The Blackberry Muffins!

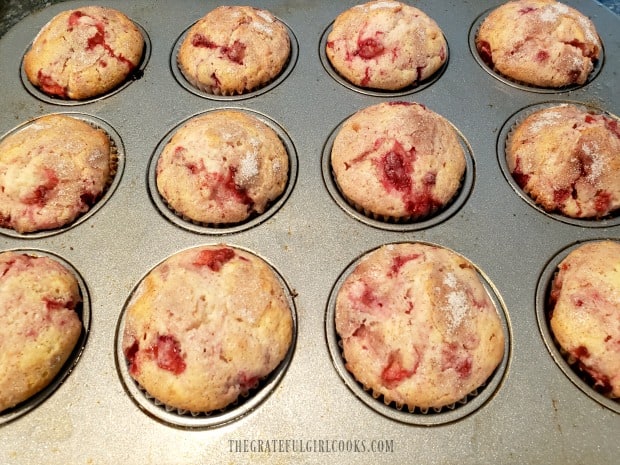
Bake the blackberry muffins on a middle oven rack at 400° F. for 17-20 minutes until golden brown on top, or until a toothpick placed into the middle of a muffin comes out clean. My blackberry muffins ended up taking all 20 minutes to cook until they were done.

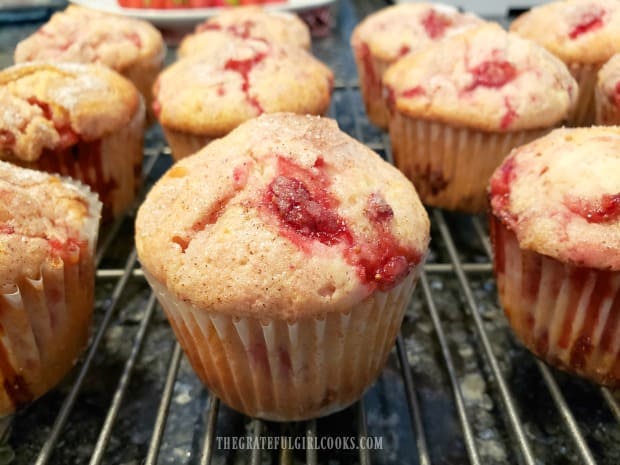
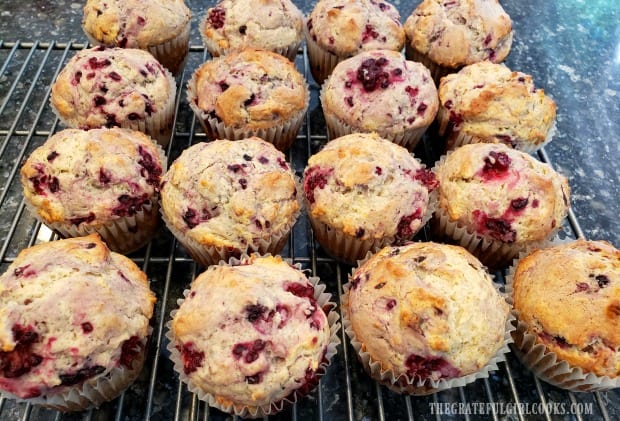
Once the blackberry muffins are done, remove the pans from oven, and transfer to a wire rack to cool. Be sure to let the muffins cool down for 2-3 minutes before you remove them from the muffin tin.

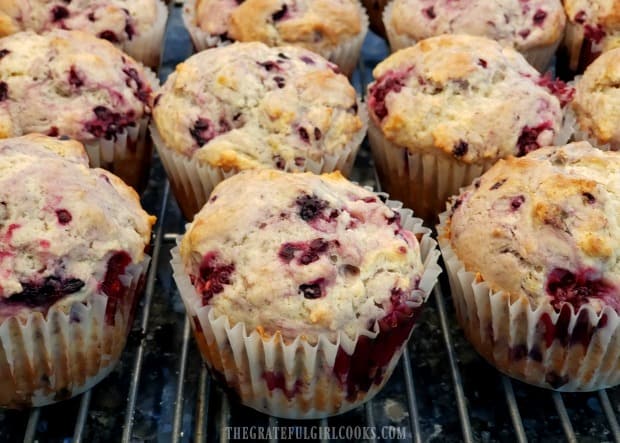
Here are the muffins, straight out of the oven, cooling on a wire rack.Can you see all the blackberries in the muffins? Yum.

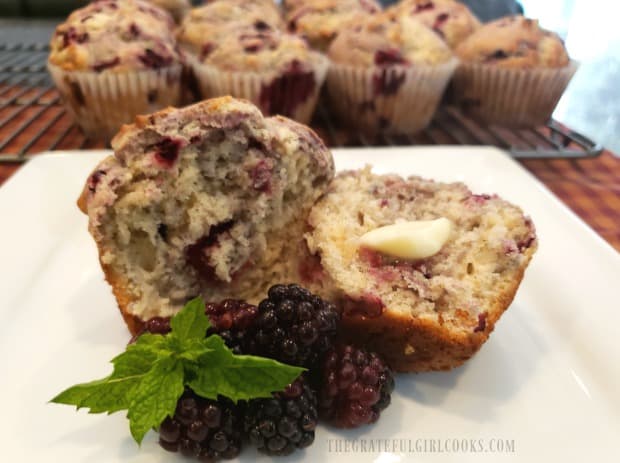
We enjoyed the blackberry muffins served warm (not hot), with a bit of soft butter. YUM! The muffins are not overly sweet, but are filled with blackberries!

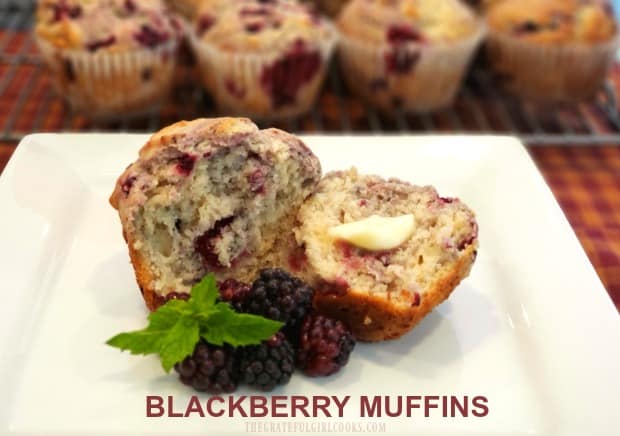
One of the blackberry muffins, cut in half, served with butter.

We gave several of these blackberry muffins to one of our sons who popped in for a visit, and know he will enjoy them, too! Hope you will enjoy this little taste of summer, as well! The muffins are delicious!

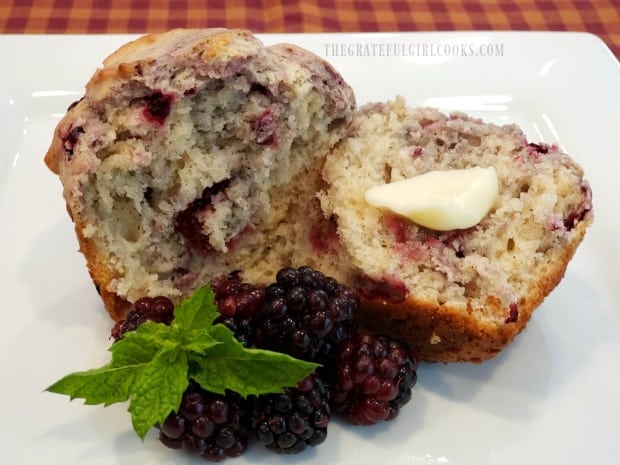
You can see the blackberry pieces inside each of the blackberry muffins once cut.

Have a great day, and thank you for stopping by for a visit! May you find encouragement, contentment, and joy from the people and experiences you encounter today.

Looking For More MUFFIN Recipes?

You can find all of my muffin recipes in the Recipe Index, located at the top of the page. A few favorites include:

Interested In More Recipes?

Thank you for visiting this website. I appreciate you using some of your valuable time to do soIf you’re interested, I publish a newsletter 2 times per month (1st and 15th) with all the latest recipes, and other fun info. I would be honored to have you join our growing list of subscribers, so you never miss a great recipe!
There is a Newsletter subscription box on the top right side (or bottom) of each blog post, depending on the device you use, where you can easily submit your e-mail address (only) to be included in my mailing list.

You Can Also Find Me On Social Media:
Facebook page: The Grateful Girl Cooks!
Pinterest: The Grateful Girl Cooks!
Instagram: jbatthegratefulgirlcooks

Author's signature

Original recipe source: https://www.simplyrecipes.com/recipes/blackberry_muffins/

0 from 0 votes
Blackberry Muffins
Prep Time
20 mins
Cook Time
20 mins
Total Time
40 mins
 

Make some yummy fresh blackberry muffins for breakfast or snack time! This easy recipe makes 16 muffins, and they'll be a hit with family and friends!

Category: Bread/Breakfast, Snack
Cuisine: American
Keyword: blackberry muffins
Servings: 16 muffins
Calories Per Serving: 207 kcal
Author: JB @ The Grateful Girl Cooks!
Ingredients
  • cups all purpose flour
  • 1/2 teaspoon ground cinnamon
  • 1 Tablespoon baking powder
  • ½ teaspoon baking soda
  • ½ teaspoon salt
  • 2 large eggs
  • 1 cup sour cream
  • 1 teaspoon milk
  • 1 cup granulated sugar
  • 8 Tablespoons warm melted butter (1 stick)
  • 1 teaspoon vanilla extract
  • cups blackberries (fresh or frozen) *See note in directions*
Instructions
  1. Preheat your oven to 400° F. and grease standard sized (12 cup) muffin tin(s), or use paper muffin liners to line the cups.

  2. Whisk dry ingredients (flour, baking powder, salt, baking soda and cinnamon) together in a large bowl. Set bowl aside.

  3. In a separate bowl, combine eggs, sour cream, melted butter (warm, not hot), milk, granulated sugar, and vanilla extract. Whisk them together until all ingredients are combined. Add these wet ingredients to the dry ingredients in the large bowl. Whisk (or stir) only until just combined, and the wet ingredients are incorporated into the dry.

  4. If using FRESH blackberries: cut them in half before adding to muffin batter.
    If using FROZEN blackberries: defrost, then drain any extra liquid. Coat lightly in some flour before adding to muffin batter.

    *Add blackberries to the muffin batter; fold gently into batter, only until combined. Be careful NOT to over mix batter. Batter will have red streaks, and be slightly lumpy! Evenly distribute muffin batter between muffin cups, filling them about 2/3 full. Use the back of a spoon (or your clean fingers), to level out the batter in each cup. *I used two pans, because I had enough batter to make 16 muffins, but you can make them in batches, if necessary.

  5. Bake muffins on a middle oven rack at 400° F. for 17-20 minutes until golden brown on top, and toothpick inserted into the middle of a muffin comes out clean. Once done, remove pans from oven; transfer to a wire rack to cool. Let muffins cool down for 2-3 minutes before you remove them from muffin tin. Enjoy!

Nutrition Facts
Blackberry Muffins
Amount Per Serving (1 g)
Calories 207 Calories from Fat 72
% Daily Value*
Fat 8g12%
Saturated Fat 5g31%
Cholesterol 46mg15%
Sodium 179mg8%
Potassium 159mg5%
Carbohydrates 30g10%
Fiber 1g4%
Sugar 13g14%
Protein 4g8%
Vitamin A 289IU6%
Vitamin C 3mg4%
Calcium 65mg7%
Iron 1mg6%
* Percent Daily Values are based on a 2000 calorie diet.

Here’s one more to pin on your Pinterest boards!Make some yummy fresh blackberry muffins for breakfast or snack time! This easy recipe makes 16 muffins, and they'll be a hit with family and friends!


Cinnamon Roll Crescents

Cinnamon roll crescents are quick and easy to make! Crescent roll dough is coated in a brown sugar/cinnamon mixture, then rolled, baked and drizzled with glaze!
Cinnamon roll crescents are quick and easy to make! Crescent roll dough is coated in brown sugar/cinnamon, then rolled, baked and drizzled with glaze!

I found a recipe on Pinterest that sounded like a totally quick and easy way to have a “cinnamon roll” to munch on with breakfast, so I decided to try it! There was a can of crescent roll dough in the refrigerator begging to be used, so out it came, for this delicious recipe!

We LOVE my homemade cinnamon rolls, but they take quite a while to prepare because of time necessary to let the homemade dough rise, etc. When you want the taste of a cinnamon roll, but without the fuss and effort, these cute little cinnamon roll crescents are the way to go!

We were having scrambled eggs and some bacon that I cooked in our oven, and I wanted something quick, easy, and yummy to serve with it. This was the perfect accompaniment, and we loved these cute little cinnamon roll crescents! They only take a couple minutes to prepare, and then they bake for only 9-12 minutes!

Scroll Down For A Printable Recipe Card At The Bottom Of The Page

How To Make Cinnamon Roll Crescents

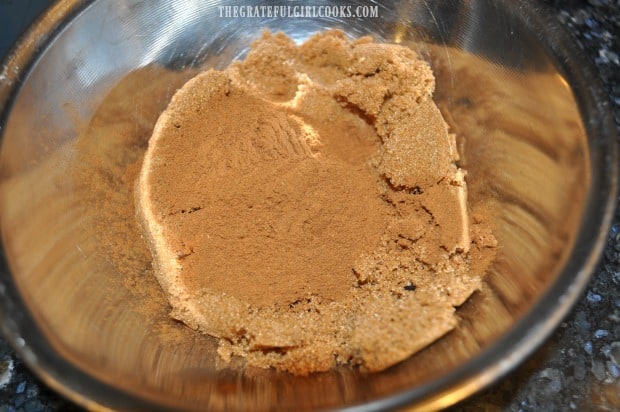
The first thing you need to do is mix up the cinnamon roll filling! Easy! Simply mix together some brown sugar and cinnamon in a small bowl, until combined. DONE!

Brown sugar and cinnamon are mixed together for the cinnamon roll crescents filling.

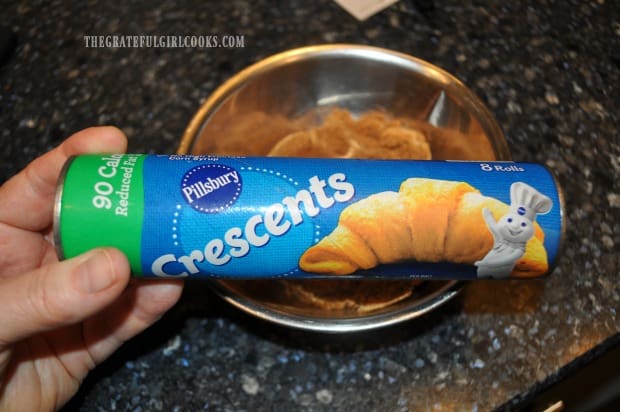
Grab a can of refrigerated crescent roll dough out of the fridge. I used this kind, which has the dough for 8 crescent rolls in it.

Refrigerated crescent roll dough is used to make this breakfast treat quick and easy!

Cover The Crescent Roll Triangles With Filling Mixture

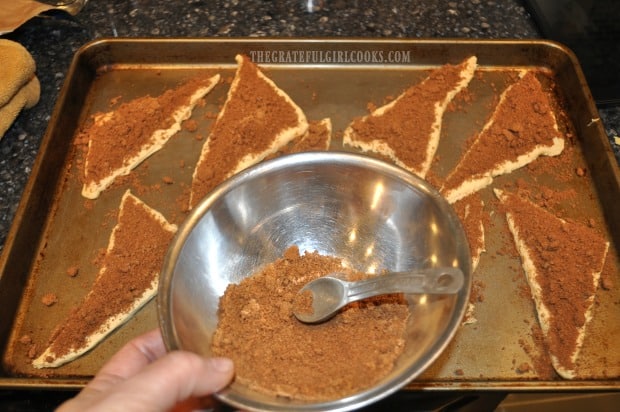
Separate each of the crescent rolls at the perforations, then lay them on a 13 x 9 inch ungreased baking sheet, about an inch apart. NOTE: You can also make them and roll them, THEN put them on the baking sheet, if desired.

Sprinkle the entire surface of each dough triangle with the filling mixture. Yes… it will be a bit messy, and yes, it will fall all over the baking sheet. No worries. Just scoop up as much as you can and dump it right back on top! Gently press down some of the filling onto the dough.

NOTE: You will most likely NOT use all of the mix. You can see in the photo below how much I had left AFTER completely covering the dough! Store the extras for next time!

Dough is separated into 8 portions and covered with brown sugar/cinnamon filling.

Now roll up the cinnamon roll crescents. If you can, roll each one up, beginning at the short side, and roll toward the tip of the triangle, but no worries! You can see in the photo below how mine weren’t that “pretty” or even moderately fashionable. This particular can of dough was pretty decimated when I took it out of the can. Trust me… it doesn’t matter!

Simply roll them up and tuck the end point under. Yes… again, some of the filling will fall out as you roll. I just scooped up what I could, and sprinkled it right back, on top! I used a pastry brush to clean up and remove the extra filling on the pan.

Dough is rolled up and sprinkled with extra filling mixture on top.

Bake The Cinnamon Roll Crescents

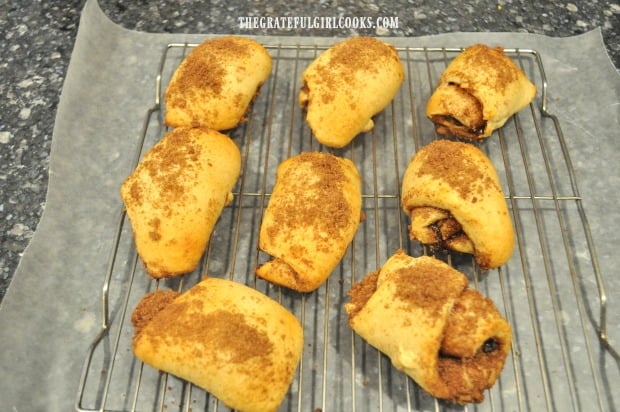
Bake the cinnamon roll crescents in a preheated 350° F oven, for between 9-12 minutes. Since oven temps vary greatly, be sure to check on them around 8-9 minutes.

When done, the cinnamon roll crescents will be golden brown on top (and will sure smell good!). Transfer the crescents to a wire rack, that is positioned on top of wax or parchment paper, and let them cool. The paper underneath will catch the drips when you glaze the crescents later.

Cinnamon roll crescents are baked until golden brown, then transferred to wire rack to cool.

Glazing The Cinnamon Roll Crescents

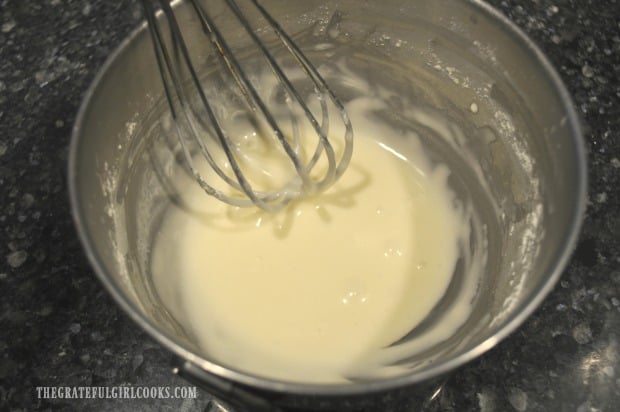
While the cinnamon roll crescents cool, mix together the glaze. Whisk together powdered sugar and heavy cream (or milk) in a small bowl, it reaches your desired consistency.

A simple glaze is mixed to drizzle onto the baked cinnamon roll crescents once done.

Lightly drizzle the glaze over the tops of the cinnamon roll crescents once they have cooled down a bit. The wax (or parchment) paper placed under the wire rack will make your cleanup a lot easier!

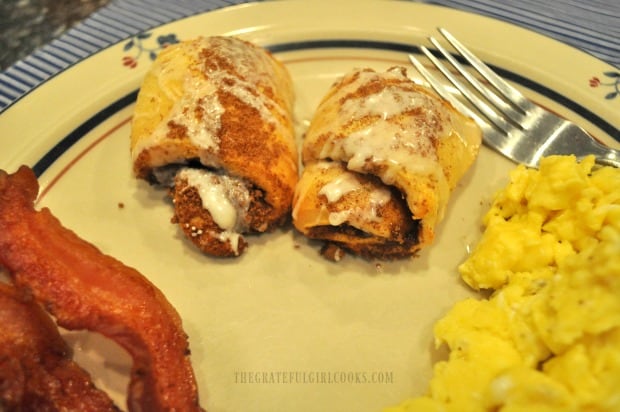
The glaze will firm up very quickly, and then the cinnamon roll crescents are ready to serve! Aren’t they CUTE? You can see the glaze on top, and all that cinnamon and brown sugar filling in every bit of these decadent breakfast treats!

The cinnamon roll crescents were served along with scrambled eggs and bacon.

I truly hope you will consider trying these super easy and quick cinnamon roll crescents. They are absolutely delicious, and I am confident you will enjoy them as much as we did! Have a wonderful day, and may God bless you.

Looking For More BREAKFAST Recipes?

You can find all of my recipes in the Recipe Index, located at the top of the page. A few other breakfast recipes you might be interested in trying include:

Interested In More Recipes?

Thank you for visiting this website. I appreciate you using some of your valuable time to do soIf you’re interested, I publish a newsletter 2 times per month (1st and 15th) with all the latest recipes, and other fun info. I would be honored to have you join our growing list of subscribers, so you never miss a great recipe!

There is a Newsletter subscription box on the top right side (or bottom) of each blog post, depending on the device you use, where you can easily submit your e-mail address (only) to be included in my mailing list.

You Can Also Find Me On Social Media:
Facebook page: The Grateful Girl Cooks!
Pinterest: The Grateful Girl Cooks!
Instagram: jbatthegratefulgirlcooks

Author's signature

Original recipe source: http://www.sprinklesomesugar.com/cinnamon-roll-crescents/

↓↓ PRINTABLE RECIPE BELOW ↓↓

0 from 0 votes
Cinnamon Roll Crescents
Prep Time
10 mins
Cook Time
9 mins
Total Time
19 mins
 
Cinnamon roll crescents are quick and easy to make! Crescent roll dough is coated in a brown sugar/cinnamon mixture, then rolled, baked and drizzled with glaze!
Category: Breakfast, Brunch
Cuisine: American
Keyword: cinnamon roll crescents
Servings: 8 crescents
Calories Per Serving: 186 kcal
Author: JB @ The Grateful Girl Cooks!
Ingredients
  • 8 ounces refrigerated crescent roll dough (1 can)
  • 1/2 cup brown sugar (light or dark)
  • 3 teaspoons cinnamon
For Glaze:
  • 1/2 cup powdered sugar (confectioner's sugar)
  • 2-3 Tablespoons heavy cream or milk
Instructions
  1. Preheat oven to 375° F. 

  2. Separate the crescent rolls at the perforations, then lay them on a 13 x 9 inch ungreased baking sheet, about an inch apart. Sprinkle entire surface of each dough triangle with the filling mixture. Yes... it will be messy. Scoop up as much as you can and dump it right back on top! Gently press down the filling onto the dough. Roll up crescents and tuck the end point under. Some of the filling will fall out as you roll. Scoop up what you can, and sprinkle it back, on top! NOTE: You will most likely NOT use all of the mix.  Store extra filling for next time! 

  3. Bake at 350° F, between 9-12 minutes. Since oven temps vary, check on them around 8-9 minutes. When done, crescents will be golden brown. Remove from oven and transfer to a wire rack, positioned on top of wax or parchment paper; let them cool for a few minutes.

  4. While crescents cool, make the glaze. Whisk together powdered sugar and heavy cream (or milk) in a small bowl, until it reaches desired consistency. Lightly drizzle glaze over the top of the crescents once they have cooled slightly. The paper placed under the wire rack will make cleanup a lot easier! The glaze firms up quickly, and then cinnamon roll crescents are ready to serve! Enjoy!

Nutrition Facts
Cinnamon Roll Crescents
Amount Per Serving (1 g)
Calories 186 Calories from Fat 63
% Daily Value*
Fat 7g11%
Saturated Fat 3g19%
Cholesterol 5mg2%
Sodium 228mg10%
Potassium 18mg1%
Carbohydrates 33g11%
Sugar 23g26%
Protein 1g2%
Vitamin A 55IU1%
Calcium 21mg2%
Iron 0.5mg3%
* Percent Daily Values are based on a 2000 calorie diet.

Here’s one more to pin on your Pinterest boards!Cinnamon roll crescents are quick and easy to make! Crescent roll dough is coated in brown sugar/cinnamon, then rolled, baked and drizzled with glaze!

Irish Soda Bread

Irish Soda Bread is a classic St. Patrick’s Day treat! This high-rising bread is very easy to make, filled with sweet raisins, and tastes amazing!
Irish Soda Bread is a classic St. Patrick's Day treat! This high-rising bread is very easy to make, filled with sweet raisins, and tastes amazing!

I subscribed to Taste Of Home magazines for many, many years, and have kept all of my issues! Let me tell you, I have lots of those magazines in my office! I keep them for inspiration, and still look through some of these back issues for great ideas!

Many years ago I cut out a recipe from the pages for a classic Irish soda bread, and have kept it all these years in my trusty recipe box! The recipe card doesn’t indicate which magazine issue it was from (month/year), so I have no way of knowing WHICH of my MANY Taste of Home magazines I clipped it from. But, since the recipe is so good, I want to share it with you today!

St. Patrick’s Day is just around the corner, and Irish soda bread can EASILY be part of your traditional Irish dinner, or ANY meal, for that matter! This delicious bread is so easy to prepare, and the taste is wonderful!  Serve a loaf of this bread, along with some corned beef and cabbage, and you’ve got yourself a wonderful Irish meal!

Scroll Down For A Printable Recipe Card At The Bottom Of The Page

How To Make Irish Soda Bread

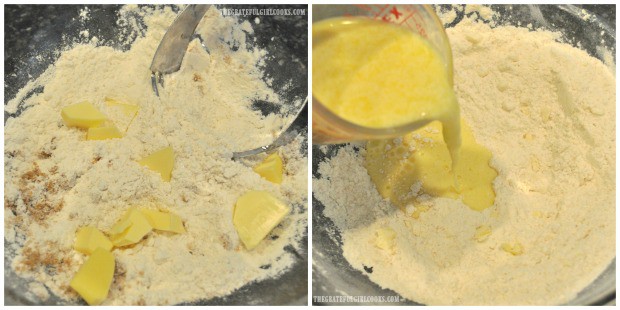
Preheat your oven to 375° F.  While the oven preheats, place flour, brown sugar, baking powder, baking soda and salt in a large mixing bowl. Whisk or stir the dry ingredients together.  Use a pastry blender (or two forks), to cut in very cold butter, until the mixture is crumbly, and the butter has been reduced almost to the size of peas.

In a separate container, mix together buttermilk and one egg, and pour it into the bowl with the dry ingredients. Stir to combine, but only until the flour mixture is just moistened. Be careful not to over mix the dough!

Butter, eggs, and buttermilk is added to dry ingredients to make Irish soda bread dough.

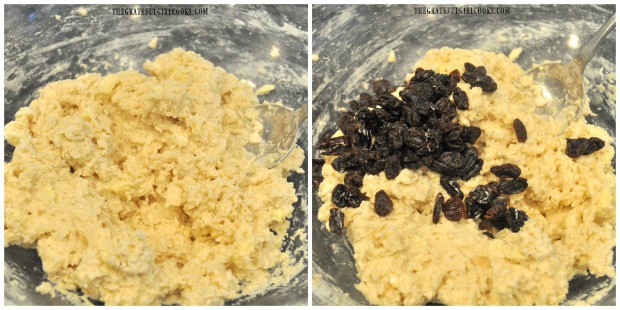
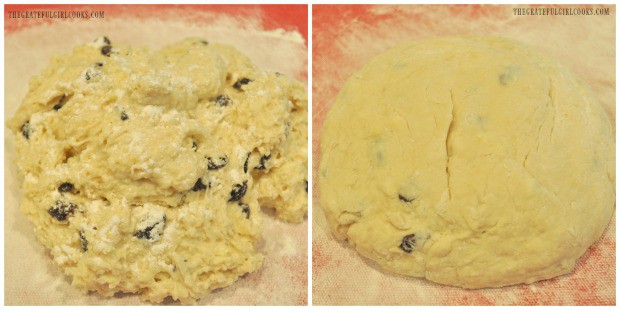
The batter will be fairly sticky/tacky. Add the raisins, and fold them into the dough.

Raisins are added to the Irish soda bread dough.

Transfer the dough onto a floured work surface. Lightly sprinkle with additional flour, and knead the dough for 1 minute, adding flour as necessary. Shape the Irish soda bread dough into a round circle.

The dough for the Irish soda bread is kneaded, then formed into a circle before baking.

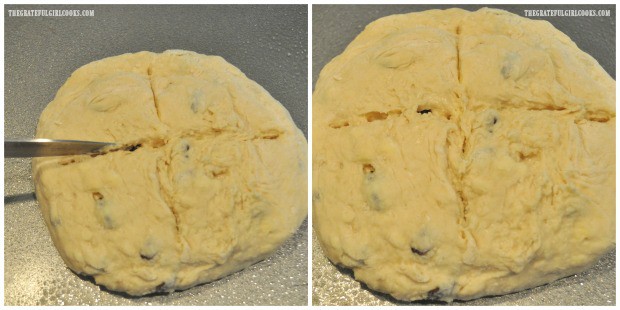
Place the round Irish soda bread loaf onto a well greased baking pan/sheet. Use a sharp knife, and cut a cross shape in the top of the loaf, cutting about 1/4″ deep.

A cross is cut into the top of the Irish soda bread before baking.

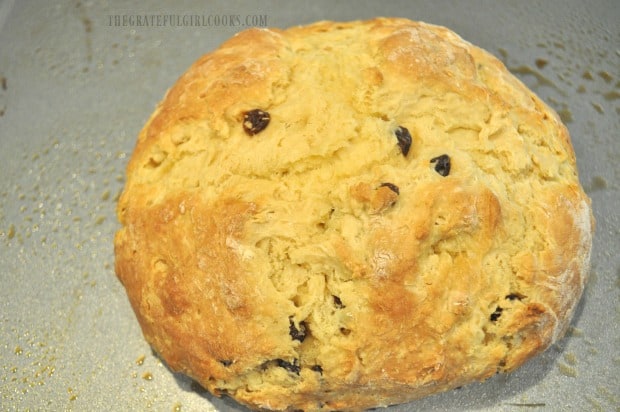
Lightly beat the one remaining egg, and brush it over the top of the loaf. Bake the Irish soda bread for 30-35 minutes in a preheated 375° F. oven.

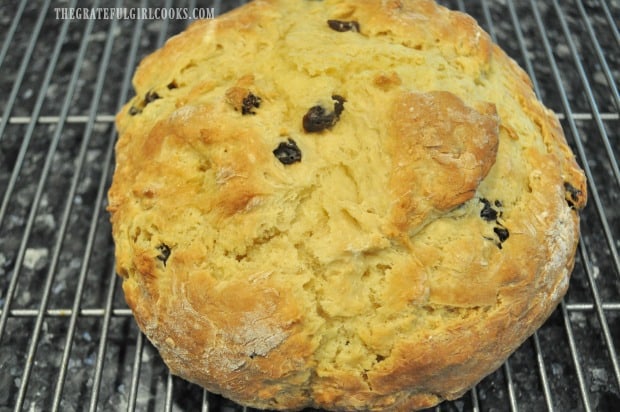
When done, the loaf should be gorgeous and golden brown and “set” in the top/middle of the loaf. Transfer the loaf to a wire rack to cool for several minutes before slicing.

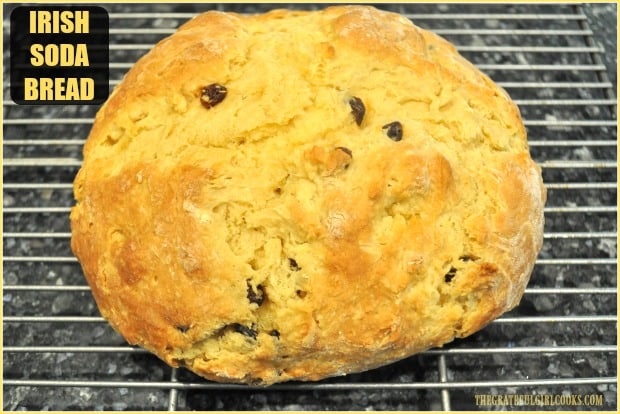
Irish soda bread is baked for about 30 minutes until done and golden brown.

Here, the baked Irish soda bread is cooling down on a wire rack before slicing.

When ready to serve the Irish soda bread, use a sharp serrated knife, and cut the loaf into 8 slices. The bread tastes fantastic when eaten warm, with a little bit of butter on it! YUM!

A slice is cut out of the Irish soda bread, to reveal the inside of the loaf.

Hope you enjoy this Irish soda bread for St. Patrick’s Day or ANY time of year! It truly is quite an easy bread to make, and really does taste wonderful. Thanks for reading… have a GREAT day!

Looking For More BREAD Recipes?

You can find all of my recipes in the Recipe Index, located at the top of the page. A few of our family’s favorite homemade bread recipes include:

Interested In More Recipes?

Thank you for visiting this website. I appreciate you using some of your valuable time to do soIf you’re interested, I publish a newsletter 2 times per month (1st and 15th) with all the latest recipes, and other fun info. I would be honored to have you join our growing list of subscribers, so you never miss a great recipe! 

There is a Newsletter subscription box on the top right side (or bottom) of each blog post, depending on the device you use, where you can easily submit your e-mail address (only) to be included in my mailing list.

You Can Also Find Me On Social Media:

Facebook page: The Grateful Girl Cooks!
Pinterest:
The Grateful Girl Cooks!
Instagram:
jbatthegratefulgirlcooks

Author's signature

Recipe Source: Gloria Warczak (from Cedarburg, Wisconsin), on a recipe card cut out of one of my old “Taste Of Home” Magazines (original date unknown, recipe was on page 13).

0 from 0 votes
Irish Soda Bread
Prep Time
10 mins
Cook Time
30 mins
Total Time
40 mins
 
Irish Soda Bread is a classic St. Patrick's Day treat! This high-rising bread is very easy to make, filled with sweet raisins, and tastes amazing!
Category: Bread
Cuisine: Irish
Keyword: Irish soda bread
Servings: 8 servings
Calories Per Serving: 215 kcal
Author: JB @ The Grateful Girl Cooks!
Ingredients
  • 2 cups all purpose flour
  • 2 Tablespoons brown sugar
  • 1 teaspoon baking powder
  • 1/2 teaspoon baking soda
  • 1/4 teaspoon salt
  • 3 Tablespoons butter (very cold)
  • 2 large eggs , divided use
  • 3/4 cup buttermilk
  • 1/3 cup raisins
Instructions
  1. Preheat oven to 375° F.  Place flour, brown sugar, baking powder, baking soda and salt in a large mixing bowl. Whisk the dry ingredients together.  Use a pastry blender (or two forks), to cut in very cold butter, until the mixture is crumbly, and the butter is about the size of peas.

  2. In a separate container, mix together buttermilk and one egg, and pour it into the bowl with the dry ingredients. Stir to combine, but only until flour mixture is just moistened. Do not overmix! The batter will be fairly sticky/tacky. Add the raisins, and fold them into the dough.

  3. Transfer the dough onto a floured work surface. Lightly sprinkle with additional flour, and knead dough for 1 minute, adding flour as necessary. Shape the dough into a round loaf. Place the loaf onto a well greased baking pan/sheet. Use a sharp knife, and cut a cross shape in the top of the loaf, cutting about 1/4" deep.

  4. Lightly beat the one remaining egg, and brush it over the top of loaf. Bake for 30-35 minutes in a preheated 375° F. oven. When done, the bread should be golden brown and "set" in the top/middle of the loaf. Transfer the loaf to a wire rack to cool for a few minutes before slicing. Slice loaf into 8 slices, spread with softened butter, serve and enjoy!

Nutrition Facts
Irish Soda Bread
Amount Per Serving (1 (1/8th of loaf))
Calories 215 Calories from Fat 54
% Daily Value*
Fat 6g9%
Saturated Fat 3g19%
Cholesterol 66mg22%
Sodium 225mg10%
Potassium 183mg5%
Carbohydrates 32g11%
Fiber 1g4%
Sugar 4g4%
Protein 5g10%
Vitamin A 245IU5%
Vitamin C 0.3mg0%
Calcium 66mg7%
Iron 1.9mg11%
* Percent Daily Values are based on a 2000 calorie diet.

Here’s one more to pin on your Pinterest boards!Irish Soda Bread is a classic St. Patrick's Day treat! This high-rising bread is very easy to make, filled with sweet raisins, and tastes amazing!

Double Chocolate Scones

Double Chocolate Scones are easy to make, decadent chocolate scones, filled with white chocolate chips, and drizzled with a simple glaze on top!

Do you enjoy scones? We sure do, in our home! I’ve been making them for YEARS and YEARS, and always love searching for, and trying new scone recipes. 

Recently I found an old, handwritten recipe on a 3″x5″ index card I saved at least 15 years ago (LONG before the internet and  Pinterest made it so easy to save recipes!).

Unfortunately, I had not written down what magazine, newspaper or cookbook I found the original recipe in, so I can’t give due credit to the original author. 

All these years later, I still had not ever made these scones, but they sounded good. So… I made a couple basic changes to the original recipe and ended up with 8 delicious double chocolate scones! Here’s how to make them:

Scroll Down For A Printable Recipe Card At The Bottom Of The Page

Make The Dough For The Double Chocolate Scones

Preheat your oven to 375° F.  Mix flour, brown sugar, cocoa powder, baking soda, baking powder and salt in a large bowl.

Cut in VERY COLD butter, using a hand held pastry blender or two forks. Cut the butter into the dry ingredients until butter is reduced to the size of peas.

Mixing ingredients with butter to make double chocolate scones.

Add plain yogurt and one egg yolk to the mixture in the bowl. Stir mixture by hand, or with an electric beater until blended. The dough is fairly thick, so if you are mixing by hand, it will take a few minutes to bind together.

Add the white chocolate chips to the dough, and place the dough onto a lightly floured work surface. Knead the dough with the palm of your hand 10 times, folding the dough over, after each time. Do this until the dough comes together in a nice ball.

Eggs, plain yogurt, and white chocolate chips are added to the double chocolate scones dough.

Pat and shape the double chocolate scones dough out with your hands until it is formed into a 9″ wide circle.  Use a sharp knife or a pizza cutter to evenly cut the dough into 8 pie shaped wedges.

Place the eight scones onto an UNGREASED large baking sheet ( I used my ratty old pizza pan!). Leave about an inch in between each of the wedges, so they stay separated while baking.

The double chocolate scones dough is rolled into a 9 inch circle, then cut into 8 pieces.

Bake The Scones

Bake the double chocolate scones at 375° F. for 17-18 minutes. When done, remove pan from oven, and let the scones cool for 5-10 still on the pan. Because ovens can vary in temperatures, I would recommend checking the scones at the 15 minute mark, to check for “doneness”.

Place a piece of wax paper on the counter, and transfer the double chocolate scones from the pan to a wire rack (on top of the wax paper).

TIP: The wax paper will collect any drips when you drizzle the scones with glaze later, making your cleanup much easier!

Double chocolate scones are baked, then placed on wire rack to cool.

Glaze The Baked Double Chocolate Scones

Once the double chocolate scones have cooled, it is time to add the decorative glaze! The simple powdered sugar glaze helps make them look good, and adds an extra touch of sweetness to the finished scones!

Making the glaze is simple! Mix together powdered sugar and a few drops of water at a time, in a small bowl. Stir. Add a couple more drops of water, and stir. Continue to do this until the glaze is an easy to drizzle consistency… not too thick, and not too thin!

If glaze is too thick, add a couple drops of water. Got it too thin? Add more powdered sugar. Use a spoon or fork, and decoratively drizzle the glaze over the tops of the scones. The wax paper below will catch any messy drips!

A powdered sugar glaze is drizzled over the baked double chocolate scones before serving.

After glazing the scones, let the icing firm up (it will only take a few minutes), and then you double chocolate scones are ready to serve!

The glaze on top is allowed to firm up, before serving the double chocolate scones.

Serve The Double Chocolate Scones!

You can either just pick up a scone and enjoy it, as is, OR you can get all fancy with them! We usually just shove them into our mouths (truth), but sometimes, (especially for company) I want the presentation to be memorable! Remember… you eat with your EYES first, right?

I sifted cocoa powder very lightly on a small white plate, and then placed the double chocolate scone on top. A big dollop of aerosol whipped cream was sprayed next to the scone, and the whipped cream was garnished with a thin, half slice of a Cara Cara orange!

The double chocolate scone is served with a dollop of whipped cream and an orange slice.The double chocolate scone is cut in half to reveal the inside.

This recipe for double chocolate scones is a KEEPER! We really enjoyed them! I even put a few away in our freezer, so my husband and I can enjoy them for another breakfast soon!

Hope you have a wonderful day.  May your joys be many, and your sorrows few! Thank you for visiting this blog. I trust you will find some wonderful recipes to make for those you love!

Looking For More SCONE Recipes?

I have LOTS of scone recipes! They can be found in the Recipe Index, located at the top of the page.  They’re all good, but a few of our family favorites include:

Interested In More Recipes?

Thank you for visiting this website. I appreciate you using some of your valuable time to do soIf you’re interested, I publish a newsletter 2 times per month (1st and 15th) with all the latest recipes, and other fun info. I would be honored to have you join our growing list of subscribers, so you never miss a great recipe!
There is a Newsletter subscription box on the top right side (or bottom) of each blog post, depending on the device you use, where you can easily submit your e-mail address (only) to be included in my mailing list.

You Can Also Find Me On Social Media:

Facebook page: The Grateful Girl Cooks!
Pinterest:
The Grateful Girl Cooks!
Instagram:
jbatthegratefulgirlcooks

Author's signature

Original recipe source: Unknown

0 from 0 votes
Double Chocolate Scones
Prep Time
10 mins
Cook Time
17 mins
Total Time
27 mins
 
Double Chocolate Scones are easy to make, decadent chocolate scones, filled with white chocolate chips, and drizzled with a simple glaze on top!
Category: Bread/Breakfast
Cuisine: American
Keyword: double chocolate scones
Servings: 8 scones
Calories Per Serving: 408 kcal
Author: JB @ The Grateful Girl Cooks!
Ingredients
  • 2 cups all purpose flour
  • 1/3 cup brown sugar
  • 1/3 cup cocoa powder (unsweetened)
  • 2 teaspoons baking powder
  • 3/4 teaspoon baking soda
  • 1/8 teaspoon salt
  • 1/2 cup butter (very cold)
  • 1 egg yolk , beaten
  • 8 ounces plain yogurt , regular or Greek
  • 3/4 cup white chocolate chips
For Glaze:
  • 1/2 cup powdered sugar
  • water , as needed
Instructions
  1. Preheat oven to 375° F.  Mix flour, brown sugar, cocoa powder, baking soda, baking powder and salt in a large bowl. Cut in VERY COLD butter, using a hand held pastry blender or two forks. Cut the butter into dry ingredients until butter is reduced to the size of peas.

  2. Add yogurt and egg yolk to the bowl. Mix by hand, or with electric beater until fully blended. The dough is fairly thick, so if mixing by hand, it will take a few minutes to bind together. Add white chocolate chips to dough, and stir to combine. Place dough on lightly floured work surface. Knead dough with the palms of your hand 10 times, folding dough over, after each time. Do this until the dough comes together in a ball.

  3. Pat and shape dough with your hands until it is formed into a 9" wide circle.  Use a sharp knife or a pizza cutter to evenly cut dough into 8 pie shaped wedges. Put scones on an ungreased baking sheet, about 1" apart, so they stay separated while baking. Bake at 375° F. for 17-18 minutes. 

  4. When done, remove pan from oven, and let scones cool for 5-10 minutes, still on the pan. Place a piece of wax paper on the counter, with wire rack on top. Transfer scones to the wire rack. TIP: The wax paper will collect any drips when you drizzle the scones with glaze, making cleanup much easier!

  5. Make The Glaze: While scones cool, mix together powdered sugar and a few drops of water at a time, in a small bowl. Stir. Add a couple more drops of water, and stir. Continue to do this until the glaze is an easy to drizzle consistency... not too thick, and not too thin! Too thick? Add drops of water. Too thin? Add powdered sugar! Drizzle the glaze over the tops of the cooled scones, using a spoon or fork. Let glaze firm up, then scones are ready to serve. Enjoy!

Nutrition Facts
Double Chocolate Scones
Amount Per Serving (1 scone)
Calories 408 Calories from Fat 162
% Daily Value*
Fat 18g28%
Saturated Fat 11g69%
Cholesterol 60mg20%
Sodium 273mg12%
Potassium 249mg7%
Carbohydrates 54g18%
Fiber 2g8%
Sugar 27g30%
Protein 8g16%
Vitamin A 405IU8%
Calcium 133mg13%
Iron 2.2mg12%
* Percent Daily Values are based on a 2000 calorie diet.


Here’s one more to pin on your Pinterest boards!Double Chocolate Scones are easy to make, decadent chocolate scones, filled with white chocolate chips, and drizzled with a simple glaze on top!

Banana Chocolate Chip Muffins

EASY, delicious banana chocolate chip muffins can be ready and on the table in 30 minutes! You’ll LOVE these simple, yummy breakfast treats!
EASY, delicious banana chocolate chip muffins can be ready and on the table in 30 minutes! You'll LOVE these simple, yummy breakfast treats!

I’ve been making banana chocolate chip muffins for years, because we love them! Recently I tried a “slightly different” recipe I found on Pinterest, which has sour cream as one of the ingredients.

We had some super ripe bananas on the counter that were begging to be used… so they became yummy breakfast muffins!

This recipe is incredibly EASY to make with minimal “prep time” (10 minutes), and the addition of sour cream makes these banana chocolate chip muffins very moist and delicious! We really enjoyed them a lot, so I want to pass the simple recipe on to you today!

Scroll Down For A Printable Recipe Card At The Bottom Of The Page

How To Make Banana Chocolate Chip Muffins

Preheat your oven to 350° F.  Prepare a standard sized muffin tin, by inserting paper cupcake/muffin liners OR by greasing each muffin cup. Set the muffin tin aside.

Place very ripe bananas, sour cream, vanilla extract, softened butter and eggs into a large mixing bowl. Use an electric mixer to blend these ingredients well. You will still have little pieces of banana in the batter when done mixing.

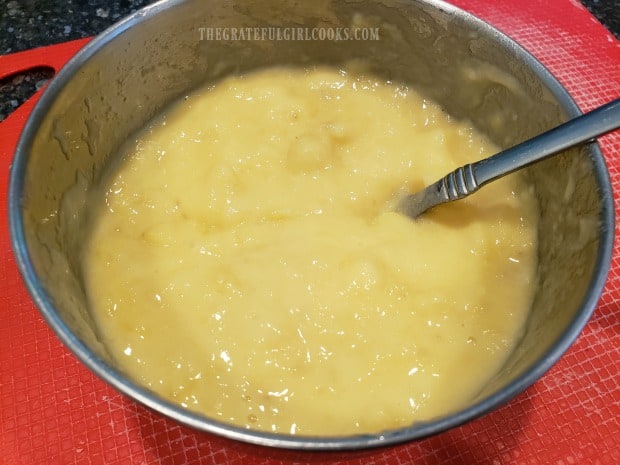
Bananas, eggs, butter, sour cream, etc. are mixed together for batter for banana chocolate chip muffins.

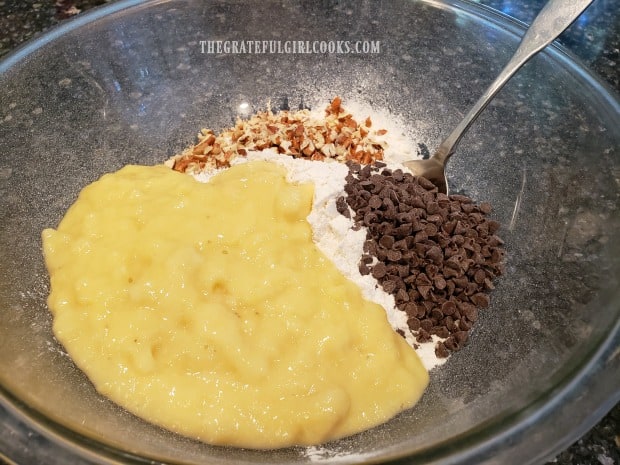
Add granulated sugar, all purpose flour, baking soda and chocolate chips to the bowl. Stir these ingredients together until batter is fully blended.

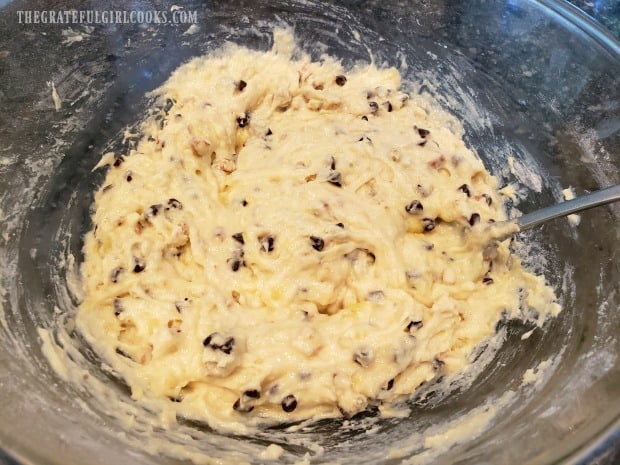
Just like that, you have the batter made for these banana chocolate chip muffins! In less than 10 minutes prep time, you are ready to get these muffins portioned out, and in the oven!

Flour, sugar, soda and chocolate chips are mixed into banana chocolate chip muffins batter.

Bake The Banana Chocolate Chip Muffins

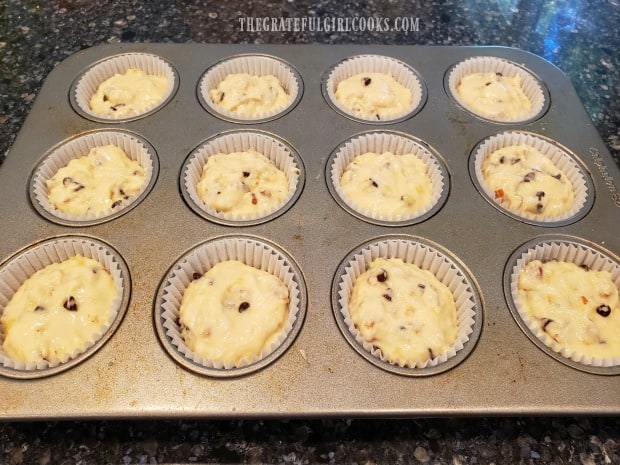
Pour or spoon the banana chocolate chip batter into the prepared muffin tin, equally dividing the batter into 12 portions. The batter will come up fairly high in each of the paper liners or muffin wells.

OPTIONAL: If you want, you can a few chocolate chips to the top of the muffins before baking (for appearance), but it is not necessary. I did not do this step, as you can see from the photos below.

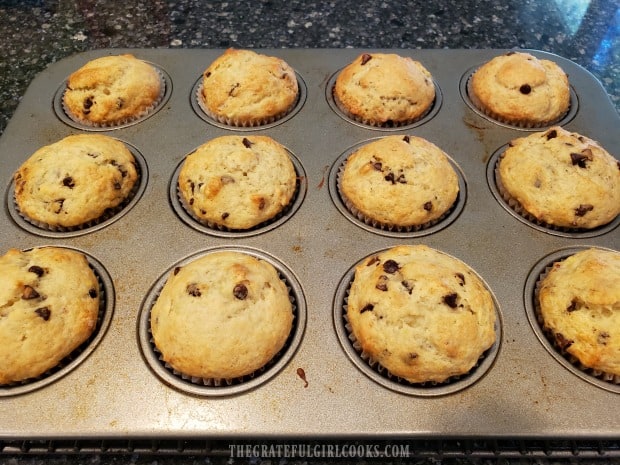
Bake the banana chocolate chip muffins on the middle rack at 350° F for 20 minutes, or until the muffins are golden brown on top.  When done, remove the pan from the oven.

Banana chocolate chip muffins are prepared in muffin tins, then baked until golden brown.

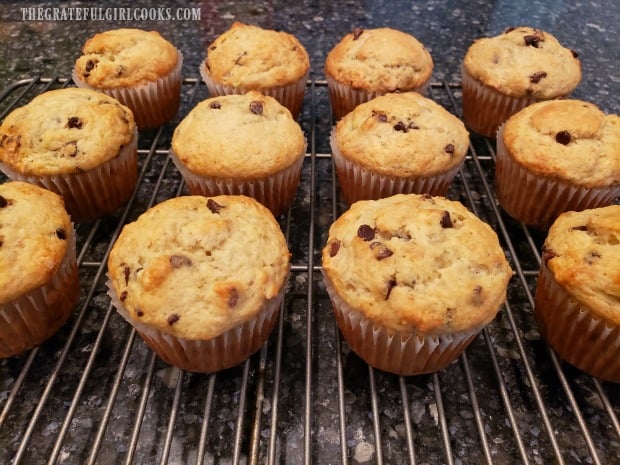
Transfer the muffins to a wire rack to cool slightly before serving.  This recipe makes 12 delicious banana chocolate chip muffins (and they freeze well).

The banana chocolate chip muffins, cooling on a wire rack after baking.

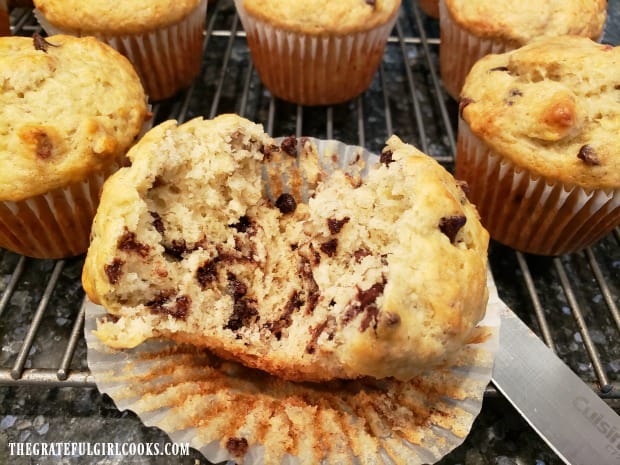
Once cooled a bit, the muffins are ready for you (and those you love) to enjoy!  Behold… my cute little banana chocolate chip muffin, on a plate, ready to slice in half and enjoy with a tiny bit of softened butter (and a cup of coffee)!

One of the banana chocolate chip muffins, on a plate, ready to be eaten.

One of the banana chocolate chip muffins, sliced in half to show the inside.

We really enjoyed these scrumptious banana chocolate chip muffins. My husband really loved these muffins, too, even though he is not the world’s biggest banana muffin or banana bread fan! They were so easy to make, and taste delicious!

I gave a few of the muffins to our oldest son to enjoy, and froze a few for another time when we want a muffin for breakfast! YUM! Hope you try this EASY and quick recipe! I’m pretty sure you will love these muffins as much as we did! Have a GREAT day!

Looking for More MUFFIN Recipes?

You can find ALL of my muffin recipes in the Recipe Index, located at the top of the page. A few favorites you might enjoy include:

Want More Recipes? Get My FREE Newsletter!

I publish a newsletter 2 times per month (1st and 15th) with lots of recipes, tips, etc..
Would you like to join our growing list of subscribers?

There is a Newsletter subscription box on the top right (or bottom) of each blog post, depending on the device you use.
You can submit your e-mail address there, to be added to my mailing list.

Find Me On Social Media:

Facebook page: The Grateful Girl Cooks!
Pinterest:
The Grateful Girl Cooks!
Instagram:
jbatthegratefulgirlcooks

Author's signature

Original Recipe Source: https://designeddecor.com/tantalizing-tuesday-chocolate-chip-banana-muffins/

↓↓ PRINTABLE RECIPE BELOW ↓↓

0 from 0 votes
Banana Chocolate Chip Muffins
Prep Time
10 mins
Cook Time
20 mins
Total Time
30 mins
 
EASY, delicious banana chocolate chip muffins can be ready and on the table in 30 minutes! You'll LOVE these simple, yummy breakfast treats!
Category: Bread/Breakfast
Cuisine: American
Keyword: banana chocolate chip muffins
Servings: 12 muffins
Calories Per Serving: 306 kcal
Author: JB @ The Grateful Girl Cooks!
Ingredients
  • 3 bananas (very ripe)
  • 3 Tablespoons sour cream
  • 1 teaspoon vanilla extract
  • 1/2 cup butter (1 stick) , softened
  • 2 eggs
  • 1 cup granulated sugar
  • 2 cups all purpose flour
  • 1 teaspoon baking soda
  • 3/4 cup chocolate chips
Instructions
  1. Preheat oven to 350° F. Prepare a standard-sized muffin tin by inserting paper cupcake/muffin liners OR by greasing each muffin cup. Set the muffin tin aside.

  2. Place bananas, sour cream, vanilla extract, softened butter and eggs into a large mixing bowl. Use electric mixer to blend well. You will still have little pieces of banana in the batter when done. Add granulated sugar, all purpose flour, baking soda and chocolate chips to the bowl. Stir ingredients until batter is fully blended.

  3. Pour or spoon batter into prepared muffin tin, equally dividing batter into 12 portions. The batter will come up fairly high in each of the paper liners or muffin wells. OPTIONAL: You can add a few chocolate chips to the top of the batter before baking (for appearance), but it is not necessary.  

  4. Bake on the middle rack of preheated 350° F oven for 20 minutes, or until golden brown on top. When done, remove from oven. Transfer muffins out of pan to a wire rack to cool slightly before serving. Enjoy!
Nutrition Facts
Banana Chocolate Chip Muffins
Amount Per Serving (1 muffin)
Calories 306 Calories from Fat 99
% Daily Value*
Fat 11g17%
Saturated Fat 6g38%
Cholesterol 50mg17%
Sodium 179mg8%
Potassium 144mg4%
Carbohydrates 47g16%
Fiber 1g4%
Sugar 27g30%
Protein 4g8%
Vitamin A 330IU7%
Vitamin C 2.6mg3%
Calcium 28mg3%
Iron 1.3mg7%
* Percent Daily Values are based on a 2000 calorie diet.

Here’s one more to pin on your Pinterest boards!EASY, delicious banana chocolate chip muffins can be ready and on the table in 30 minutes! You'll LOVE these simple, yummy breakfast treats!

Mini Zucchini Loaves with Browned Butter Icing

Mini zucchini loaves (with creamy browned butter icing) are a delicious treat or snack. This easy recipe makes 2 mini loaves, which are perfect for gift-giving!
Mini zucchini loaves, with creamy browned butter icing are a delicious treat or snack. Easy recipe makes 2 mini loaves, perfect for gift-giving!

This past Fall, I saw a recipe for a zucchini cake that had amazing looking frosting on it, and knew I had to try it! The twist to the original recipe came when I decided to make mini zucchini loaves out of the recipe (instead of a cake), but still use the creamy frosting!

The recipe was very easy to make, and yielded two very moist, absolutely scrumptious mini zucchini loaves. My husband and I shared a loaf over the next couple of days, and we gave the second loaf to one of our neighbors.  Oh YUM… what a great tasting treat!

Scroll Down For A Printable Recipe Card At The Bottom Of The Page

How To Make Mini Zucchini Loaves

The process is very easy to make this bread. Begin by preheating the oven to 350°F. Stir the flour, salt, baking powder, cinnamon, and baking soda together in a medium bowl. Set the bowl with these dry ingredients aside until later.

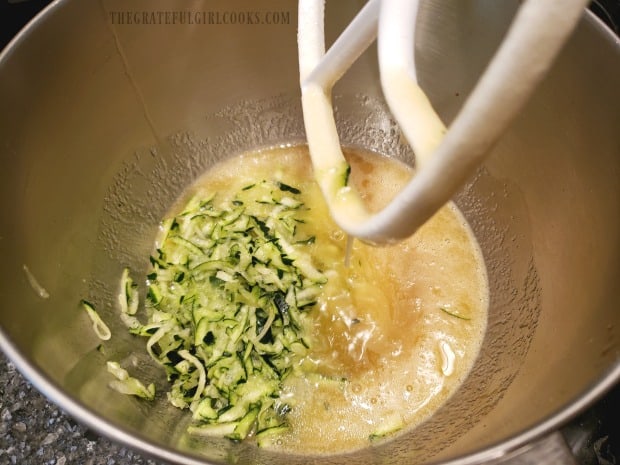
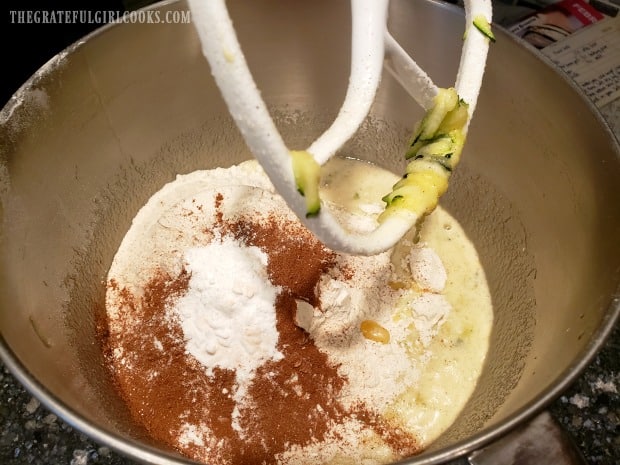
In a separate bowl, beat the eggs well. Add the granulated sugar to the eggs, and beat well again, until combined and sugar has dissolved. Stir vanilla extract and vegetable oil into the egg mixture, until fully combined. Add the dry ingredients to the bowl with the egg mixture, and stir the ingredients just until the mixture is combined.

Mixing dry ingredients, then adding eggs, sugar and vanilla to better for mini zucchini loaves.

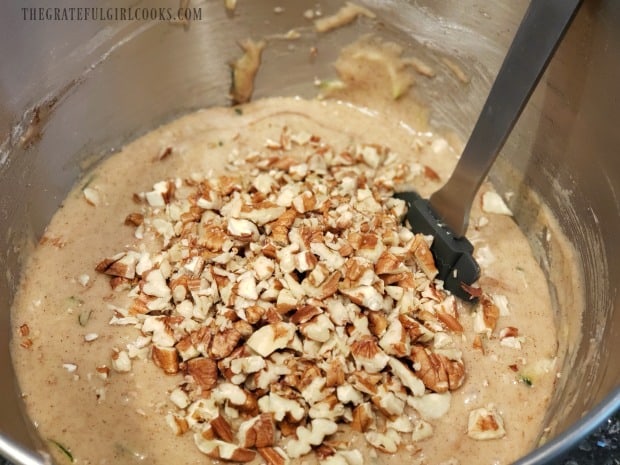
Add the chopped walnuts (or pecans) and the grated, drained zucchini to the batter (see tip below for “draining” zucchini). Gently stir the zucchini and nuts in, until combined. This is the batter for the mini zucchini loaves. See how EASY that was?

Adding dry ingredients, zucchini and nuts to batter for mini zucchini loaves.

TIP For “Draining” Zucchini

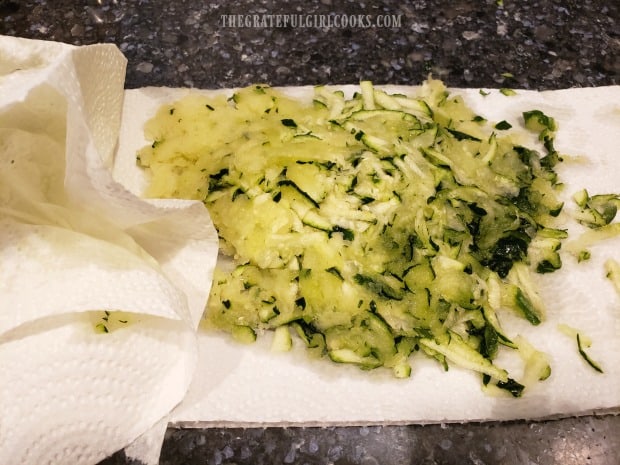
You can easily “drain” the shredded zucchini between layers of paper towels, to help absorb a lot of the moisture from the veggie. Trust me, you don’t want wet, soggy zucchini in your mini zucchini loaves!

To do this, lay out several layers of paper towel, and place all of the grated zucchini on top.  Add a couple layers of paper towels on top of the zucchini, and press down to absorb lots of excess moisture. Who knew zucchini had so much moisture in it? You will be glad you did this!

Draining shredded zucchini between layers of paper towels, to absorb moisture.

Baking The Mini Zucchini Loaves

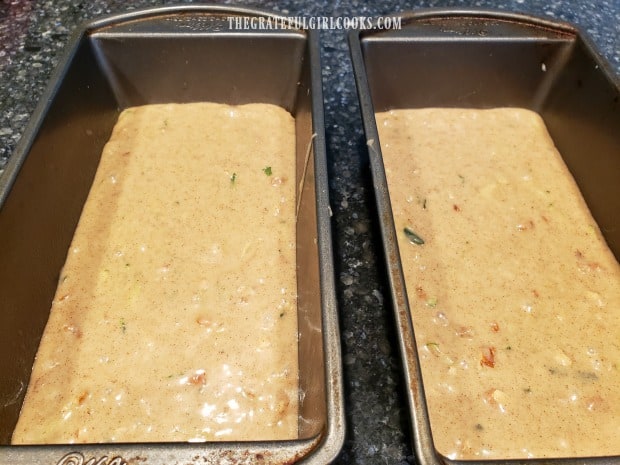
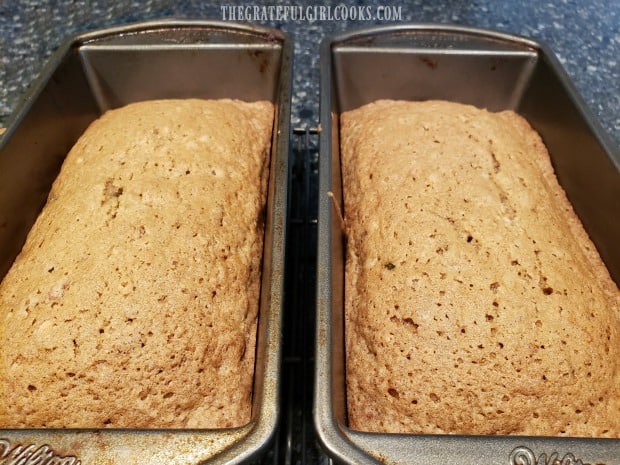
Once you have your batter prepared for the mini zucchini loaves, it’s time to BAKE!  Divide the batter evenly into 2 greased mini sized bread loaf pans. Bake the mini zucchini loaves in a preheated 350°F oven for 40-45 minutes. Since oven temps vary greatly, be sure to check the loaves at 35 minutes, then 40, to make sure they are completely “done” .

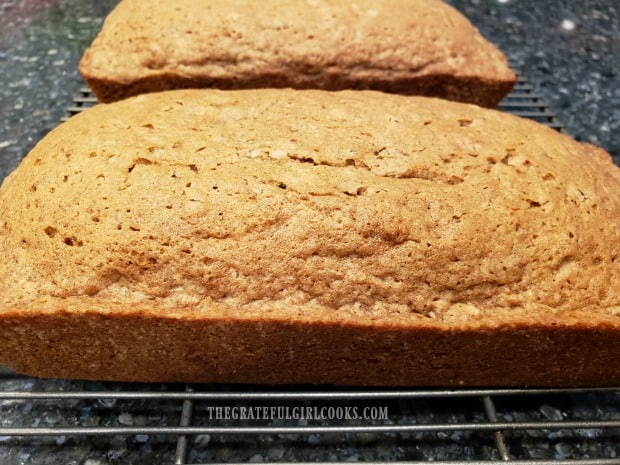
To test their “doneness”, simply insert a toothpick into the top center of a loaf. If the toothpick comes out “clean” (with no wet batter hanging on for dear life), the loaves are done. The mini zucchini loaves should also be nice and golden brown on the outside. Transfer the loaves to a wire rack to cool completely before covering them with browned butter icing.

Baking mini zucchini loaves in oven and 2 finished loaves, out of oven.

Making Browned Butter Icing For Mini Zucchini Loaves

To make the browned butter icing, melt 3 Tablespoons unsalted butter in a skillet on medium low heat. Cook the butter on this temperature until the color starts to change slightly to golden brown.

Turn the temperature down to low heat.  The milk solids will begin to turn into brown specks in the liquid (see middle photo below).  Continue cooking, taking care to not let it burn, until butter is a nice brown color (photo on right, below). Remove skillet from the heat.

3 photos showing how to brown butter for the icing for mini zucchini loaves.

Let the browned butter cool for 5-6 minutes, then add the powdered sugar.  Add cinnamon and vanilla, and then thin the icing out by adding the milk. Stir to combine. If necessary, add a tiny bit more milk (if needed), to create a spreadable consistency for the icing for the mini zucchini loaves.

Powdered sugar and cinnamon are added to icing mixture for mini zucchini loaves.

Evenly divide the browned butter icing between the two mini zucchini loaves. Spread as much (or as little) as you want onto the loaves. I used it all on the two loaves, and the icing was nice and thick on top!

Two mini zucchini loaves are topped with browned butter icing.

Time To EAT!

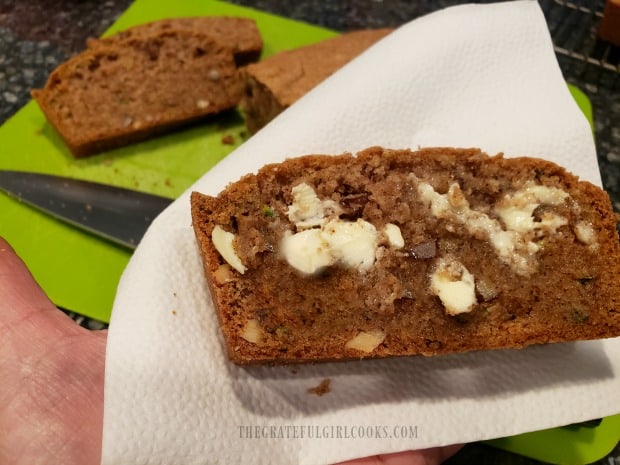
Let the mini zucchini loaves sit for a few minutes, to give the icing a chance to firm up a little bit. The only remaining step left is to slice a nice piece… and EAT IT! YUMMY! The mini zucchini loaves are very moist, full of cute little pieces of zucchini and chopped nuts, flavored with cinnamon and taste WONDERFUL. The browned butter frosting takes it OVER THE TOP to Flavor Town! Enjoy!
A slice of one of the mini zucchini loaves is held in hand before eating!

Sure do hope you will consider trying this recipe for mini zucchini loaves, with browned butter icing. Pour yourself a hot cup of coffee or tea, and enjoy a slice (or two). Have a GREAT day!

By the way, if you are looking for more homemade sweet bread loaf recipes, I hope you will check out a few favorites. These and ALL my recipes can be found in the Recipe Index, located at the top of the page.

Interested In More Recipes?

Thank you for visiting this website. I appreciate you using some of your valuable time to do soIf you’re interested, I publish a newsletter 2 times per month (1st and 15th) with all the latest recipes, and other fun info. I would be honored to have you join our growing list of subscribers, so you never miss a great recipe!
There is a Newsletter subscription box on the top right side (or bottom) of each blog post, depending on the device you use, where you can easily submit your e-mail address (only) to be included in my mailing list.

You Can Also Find Me On Social Media:

Facebook page: The Grateful Girl Cooks!
Pinterest:
The Grateful Girl Cooks!
Instagram:
jbatthegratefulgirlcooks

Author's signature

Recipe Adapted From: https://theviewfromgreatisland.com/end-of-summer-zucchini-cake-with-browned-butter-frosting/

0 from 0 votes
Mini Zucchini Loaves with Browned Butter Icing
Prep Time
20 mins
Cook Time
40 mins
Resting Time
15 mins
Total Time
1 hr 15 mins
 

Mini zucchini loaves (with creamy browned butter icing) are a delicious treat or snack. This easy recipe makes 2 mini loaves, perfect for gift-giving!

Category: Bread/Breakfast
Cuisine: American
Keyword: mini zucchini loaves
Servings: 10 servings (2 mini loaves)
Calories Per Serving: 385 kcal
Author: JB @ The Grateful Girl Cooks!
Ingredients
For Bread:
  • 1 cup all purpose flour
  • 1 teaspoon baking soda
  • 1 teaspoon cinnamon
  • 1/2 teaspoon salt
  • 1 pinch baking powder
  • 1 cup granulated sugar
  • 1/2 cup vegetable oil
  • 2 teaspoons vanilla extract
  • 1 cup shredded zucchini , drained and packed into cup
  • 1/2 cup chopped walnuts (or pecans)
For Browned Butter Icing:
  • 3 Tablespoons unsalted butter
  • 2 cups confectioner's sugar (powdered)
  • 1/4 teaspoon cinnamon
  • 1/8 teaspoon vanilla extract
  • 2 Tablespoons milk, to thin , plus additional if needed
Instructions
  1. Preheat oven to 350°F.  Stir the flour, salt, baking powder, cinnamon, and baking soda together in a medium bowl. Set aside.

  2. In a separate bowl, beat the eggs well. Add the granulated sugar to the eggs, and beat well again, until combined and sugar has dissolved. Stir vanilla extract and vegetable oil into the egg mixture, until fully combined. Add the dry ingredients to the bowl with the egg mixture, and stir the ingredients just until the mixture is combined. Add chopped walnuts (or pecans) and the grated, drained zucchini to the batter. Gently stir zucchini and nuts in, until combined. TIP TO DRAIN ZUCCHINI: Lay out several layers of paper towel, and place grated zucchini on top.  Add a couple layers of paper towels on top of the zucchini, and press down to absorb lots of excess moisture.

  3. Divide batter evenly into 2 greased mini sized bread loaf pans. Bake in 350°F oven for 40-45 minutes. Since oven temps vary greatly, be sure to check the loaves at 35 minutes, then 40 etc., to make sure they are done. To test "doneness", insert a toothpick into the top center of a loaf. If it comes out "clean" (with no wet batter hanging on for dear life), loaves are done. Transfer loaves to a wire rack to cool completely before removing from pan and covering with  icing.

To Make Browned Butter Icing:
  1. Melt butter in a skillet on medium low heat. Cook the butter at this temperature until the color starts to change slightly to golden brown. Once golden brown, lower the temperature to low heat.  The milk solids will begin to turn into brown specks in the liquid.  Continue cooking, taking care NOT to let it burn, until the butter is a deep brown color. Remove skillet from the heat.

  2. Let the browned butter cool for 5-6 minutes, then add powdered sugar.  Add cinnamon and vanilla, then thin the icing out by adding milk. Stir to combine. If necessary, add a tiny bit more milk, to create a spreadable consistency for the icing. Evenly divide the browned butter icing between the two mini zucchini loaves. Let the loaves sit for a few minutes, to give the icing a chance to firm up.  Slice each mini loaf into 5 pieces, serve, and enjoy!

Nutrition Facts
Mini Zucchini Loaves with Browned Butter Icing
Amount Per Serving (1 slice)
Calories 385 Calories from Fat 162
% Daily Value*
Fat 18g28%
Saturated Fat 11g69%
Cholesterol 9mg3%
Sodium 229mg10%
Potassium 75mg2%
Carbohydrates 55g18%
Sugar 44g49%
Protein 2g4%
Vitamin A 130IU3%
Vitamin C 2.2mg3%
Calcium 16mg2%
Iron 0.8mg4%
* Percent Daily Values are based on a 2000 calorie diet.

Here’s one more to pin on your Pinterest boards!Mini zucchini loaves (with creamy browned butter icing) are a delicious treat or snack. This easy recipe makes 2 mini loaves, perfect for gift-giving!

Apple Cream Cheese Pastries

Apple cream cheese pastries are easy to make baked puff pastry sheets, topped with a sweet cream cheese spread, apple pie filling, and vanilla icing!

A few years ago I made some puff pastry tarts that had a variety of flavored jams on top, and we really enjoyed them a LOT! Last year I wanted to experiment a bit with my original recipe. I made a couple very slight changes to my original recipe for Fruit and Cheese Danish Pastry, and used some of my own home-canned apple pie filling, to create a NEW version!

A sweet friend of mine named Grace had knee replacement surgery just over a year ago, so I took dinner over to her home while she was recuperating. I also took her family some of these apple cream cheese pastries, for dessert (or a quick breakfast treat)!

The results turned out wonderful, and she told me they loved them, so now I am FINALLY getting the recipe for these dessert OR breakfast treats on the ol’ blog! Better late than never, right? They are fairly simply to make! Here’s how:

Scroll Down For A Printable Recipe Card At The Bottom Of The Page

Make The Cream Cheese Filling

In a medium sized bowl, beat the cream cheese, sugar, vanilla extract and milk (or half and half) together, using an electric mixer. Mix the filling for 2-3 minutes, until mixture is very smooth and sugar has dissolved. Set this mixture aside, once spreadable.

Cream cheese filling in bowl, used for apple cream cheese pastries.

How To Prepare Pastry Dough For Apple Cream Cheese Pastries

Remove a sheet of puff pastry from the freezer, and let it thaw slightly (for about 15 minutes) before unfolding it. While the dough is thawing, preheat your oven to 400° F.

Once the dough has slightly thawed, gently unfold it. Press the dough together where any line perforations may be, to form one large piece of dough.

Cut the pastry dough into 8 rectangles. Do this by cutting the dough in half, then cut each half in half. Finally, cut each of the 4 squares in half once again. You should end up with 8 equal sized rectangles. I use a pizza cutter for nice even cuts!

Cutting puff pastry dough to make individual apple cream cream cheese pastries.

Place the 8 rectangles of dough onto 2 parchment paper lined baking sheets. Place 4 pastries per baking sheet, and make sure to leave a couple inches between each pastry.

Scoring A Border On The Pastry Dough

Using a sharp knife, score a border all the way around each of the pastries, about half an inch from the outside edge. By cutting this border in the dough, the edges will rise up and hold the filling in better! Don’t forget to do this step! IMPORTANT: Make sure to NOT cut all the way through the dough to the bottom!

Evenly distribute the cream cheese filling into middle of each of the apple cream cheese pastries. Use a knife or small spatula to spread the filling over the dough, BUT STAY INSIDE THE BORDER!

Placing the cream cheese filling onto pastry dough, for apple cream cheese pastries.Cream cheese filling is placed onto puff pastry rectangles.

Add The Apple Pie Filling

Place approx. 2 Tablespoons of apple pie filling onto the cream cheese filling. Gently spread the apple pie filling over the cream cheese, to cover most of  the apple cream cheese pastries!

Apple pie filling is placed on top of cream cheese on pastry.

Mix the egg yolk in a small bowl. Using a pastry brush, brush the egg yolk mixture around the outer border of each pastry. While the dough is still wet, lightly sprinkle the outer edge of the dough with a tiny bit of sugar.

Egg yolk is brushed onto edges of apple cream cheese pastries before baking.

Time To Bake The Apple Cream Cheese Pastries

Place the baking sheets into the preheated oven. Bake the apple cream cheese pastries at 400°F. for 13-14 minutes. The pastries should turn a beautiful golden brown, and be slightly crispy around the edges, and will have risen a bit, when done.

Remove the baking pans from the oven. Using a spatula, carefully transfer the apple cream cheese pastries to a wire rack, to cool.

Apple cream cheese pastries are baked, then cool on a wire rack.

Prepare The Sweet Icing

While the pastries are cooling, mix powdered sugar, water, and vanilla for icing in a small bowl. TIP: If icing is too thick to drizzle, add a few more drops of water. Too thin? Add more powdered sugar.

Powdered sugar glaze is prepared, to drizzle on top of apple cream cheese pastries.

Once the apple cream cheese pastries are completely cool, use a spoon and drizzle the glazed over the pastries from side to side. TIP: Cleanup is really easy if you put a piece of plastic wrap, foil, parchment or wax paper UNDER the wire rack before doing this step! It will catch any drips!

Apple cream cheese pastries are drizzled with powdered sugar glaze.

Close up photo of apple cream cheese pastries with glaze, on wire rack.

Let the pastries sit while the icing firms up, then the apple cream cheese pastries are ready to be served!

Apple cream cheese pastries, on red platter, ready to serve!

I sincerely hope you will consider trying this recipe! The pastries are REALLY GOOD! Have a blessed day, friends. Make it a GREAT one!

Looking For More PASTRY Recipes?

You can find all of my recipes in the Recipe Index, located at the top of the page. I have several pastry recipes you might enjoy, including:

Interested In More Recipes?

Thank you for visiting this website. I appreciate you using some of your valuable time to do soIf you’re interested, I publish a newsletter 2 times per month (1st and 15th) with all the latest recipes, and other fun info. I would be honored to have you join our growing list of subscribers, so you never miss a great recipe!
There is a Newsletter subscription box on the top right side (or bottom) of each blog post, depending on the device you use, where you can easily submit your e-mail address (only) to be included in my mailing list.

You Can Also Find Me On Social Media:

Facebook page: The Grateful Girl Cooks!
Pinterest:
The Grateful Girl Cooks!
Instagram:
jbatthegratefulgirlcooks

Author's signature

0 from 0 votes
Apple Cream Cheese Pastries
Prep Time
25 mins
Cook Time
13 mins
Total Time
38 mins
 
Apple cream cheese pastries are easy to make baked puff pastry sheets, topped with a sweet cream cheese spread, apple pie filling, and vanilla icing!
Category: Breakfast
Cuisine: American
Keyword: apple cream cheese pastries
Servings: 8 pastries
Calories Per Serving: 318 kcal
Author: JB @ The Grateful Girl Cooks!
Ingredients
For Pastries:
  • 1 sheet frozen puff pastry
  • 4 ounces cream cheese , room temperature
  • 1/2 teaspoon vanilla extract
  • 1/4 cup granulated sugar
  • 1 Tablespoon milk , or half and half
  • 16 Tablespoons canned apple pie filling , approx. 2 T. per pastry
  • 1 egg yolk
  • 8 teaspoons granulated sugar
For Icing Drizzle:
  • 1 cup confectioner's sugar (powdered)
  • 2 Tablespoons water , or more (to thin)
  • 1/4 teaspoon vanilla extract
Instructions
  1. In a medium sized bowl, beat cream cheese, sugar, vanilla extract and milk (or half and half) together, using an electric mixer. Mix filling for 2-3 minutes, until mixture is very smooth and sugar has dissolved. Set mixture aside, once spreadable.

  2. Remove a sheet of puff pastry from freezer, and let it thaw slightly (for about 15 minutes) before unfolding it. While dough thaws, preheat oven to 400° F. Once dough is slightly thawed, gently unfold it. Press dough together where any line perforations may be, to form one large piece. Cut pastry dough into 8 rectangles. Do this by cutting dough in half, then cut each half in half. Finally, cut each of the 4 squares in half once again. You should end up with 8 equal sized rectangles. I use a pizza cutter for nice even cuts!

  3. Place the 8 rectangles of dough onto 2 parchment paper lined baking sheets. Place 4 pastries per baking sheet, and make sure to leave a couple inches between each pastry. Using a sharp knife, score a border all the way around each of the pastries, about half an inch from the outside edge. By cutting this border in the dough, the edges will rise up and hold the filling in better! Don't forget to do this step! IMPORTANT: Make sure to NOT cut all the way through the dough to the bottom! Evenly distribute the cream cheese filling into middle of each of the apple cream cheese pastries. Use a knife or small spatula to spread the filling over the dough, BUT STAY INSIDE THE BORDER!

  4. Place approx. 2 Tablespoons of apple pie filling onto cream cheese filling. Gently spread apple pie filling over cream cheese, to cover most of  the  pastries! Mix the egg yolk in a small bowl. Using a pastry brush, brush egg yolk mixture around the outer border of each pastry. While dough is still wet, lightly sprinkle the outer edge of the dough with a tiny bit of sugar.

  5. Place baking sheets into preheated oven. Bake pastries at 400°F. for 13-14 minutes. The pastries should turn a beautiful golden brown, and be slightly crispy around the edges, and should have risen a bit, when done. Remove baking pans from oven. Using a spatula, carefully transfer pastries to a wire rack, to cool.

  6. While the pastries are cooling, mix powdered sugar, water, and vanilla for icing in a small bowl. TIP: If icing is too thick to drizzle, add a few more drops of water. Too thin? Add more powdered sugar. Once pastries are completely cool, use a spoon and drizzle the glazed over pastries from side to side. TIP: Cleanup is really easy if you put a piece of plastic wrap, foil, parchment or wax paper UNDER the wire rack before doing this step! Let pastries sit while icing firms up, then the pastries are ready to be served!

Nutrition Facts
Apple Cream Cheese Pastries
Amount Per Serving (1 pastry)
Calories 318 Calories from Fat 126
% Daily Value*
Fat 14g22%
Saturated Fat 4g25%
Cholesterol 32mg11%
Sodium 159mg7%
Potassium 67mg2%
Carbohydrates 44g15%
Sugar 26g29%
Protein 3g6%
Vitamin A 120IU2%
Vitamin C 0.5mg1%
Calcium 29mg3%
Iron 1mg6%
* Percent Daily Values are based on a 2000 calorie diet.

Here’s one more to pin on your Pinterest boards!These delicious apple cream cheese pastries are easy to make baked puff pastry sheets, topped with a sweet cream cheese spread, apple pie filling, and vanilla icing!

Pumpkin Chocolate Chip Muffins

Pumpkin chocolate chip muffins are a yummy Fall breakfast treat! Made with Greek yogurt and no oil, they are light, delicious, and easy to make!

Fall is here and pumpkins are everywhere you look!  I decided to get in on the crazy pumpkin recipe trend. So, this past weekend I tried a new “lightened up” recipe for pumpkin chocolate chip muffins. This particular recipe for pumpkin chocolate chip muffins intrigued me, because no oil was used in it.  There also was no granulated sugar, just a small amount of brown sugar. The recipe also called for Greek nonfat plain yogurt. Needless to say, I was very curious to try these muffins.

I only made a couple very slight tweaks to the original recipe. All purpose flour was used, instead of whole wheat flour, and regular chocolate chips were used, instead of miniature chips. The pumpkin chocolate chip muffins were incredibly quick and easy to make, and turned out GREAT! They have a slightly different texture than traditional pumpkin muffins, due to the tweaking of the ingredients. The great news is they still have ALL the flavor you would expect, with only 154 calories per muffin!

Scroll Down For A Printable Recipe Card At The Bottom Of The Page

How To Make Pumpkin Chocolate Chip Muffins

The first thing to do is preheat your oven to 400°F. While the oven is preheating, place paper muffin liners into a standard sized (12 holder) muffin tin. Lightly spray paper liners with non-stick cooking spray.

Place pumpkin puree, Greek yogurt, brown sugar, eggs, and vanilla extract into a medium sized mixing bowl. Whisk these ingredients together to form a smooth batter.

Eggs, pumpkin, Greek yogurt and brown sugar are mixed to make batter for pumpkin chocolate chip muffins.

Batter for pumpkin chocolate chip muffins is whisked together.

In a separate bowl, whisk together the dry ingredients (flour, spices, and rolled oats).  Add this dry mixture to the pumpkin batter in bowl. Stir the batter only until all ingredients have been combined. Be careful to NOT overmix!

Dry ingredients are added to batter for pumpkin chocolate chip muffins.

Add chocolate chips, then fold them into batter.

Chocolate chips are added to pumpkin muffin batter.

Evenly divide filling into prepared paper muffin liners in pan.  The batter will almost come to the top of the liners. Sprinkle the top of each muffin with a few more chocolate chips.

Batter for pumpkin chocolate chip muffins is divided into 12 muffin tins.

Time To Bake The Pumpkin Chocolate Chip Muffins

Bake the pumpkin chocolate chip muffins in preheated 400°F oven for approximately 15-17 minutes. To test for doneness, insert a toothpick into center of a muffin. If the toothpick comes out clean, the muffins are done.

Pumpkin chocolate chip muffins cooling down, after baking.

Time to EAT!

Remove the muffin pan from oven. Carefully lift out pumpkin chocolate chip muffins, and transfer them to a wire rack to cool.

Close up photo of pumpkin chocolate chip muffins, on wire rack.

Pumpkin chocolate chip muffins can be served either warm or at room temperature (my preferred temp). Store leftovers in an airtight covered container. Here is a photo of the inside of one of the pumpkin chocolate chip muffins, after cooling down.  The muffins are filled with flavor (and chocolate chips!).

A look at the inside of one of the pumpkin chocolate chip muffins.

I hope you enjoy these easy to prepare muffins! Each muffin, when prepared as written, have a total of approximately 154 calories. That’s pretty low in calories for such a great tasting muffin! Hope you enjoy these muffins…Have a GREAT day!

If You Enjoyed These Muffins, Read On!

We love muffins!  Be sure and check out my other muffin recipes in the Recipe Index (at the top of the page). There are many delicious muffin recipes, including:

Interested In More Recipes?

Thank you for visiting this website. I appreciate you using some of your valuable time to do soIf you’re interested, I publish a newsletter 2 times per month (1st and 15th) with all the latest recipes, and other fun info. I would be honored to have you join our growing list of subscribers, so you never miss a great recipe!
There is a Newsletter subscription box on the top right side (or bottom) of each blog post, depending on the device you use, where you can easily submit your e-mail address (only) to be included in my mailing list.

You Can Also Find Me On Social Media:

Facebook page: The Grateful Girl Cooks!
Pinterest:
The Grateful Girl Cooks!
Instagram:
jbatthegratefulgirlcooks

Author's signature.

Original Recipe Source: https://buildyourbite.com/skinny-pumpkin-chocolate-chip-muffins/

0 from 0 votes
Pumpkin Chocolate Chip Muffins
Prep Time
10 mins
Cook Time
17 mins
Total Time
27 mins
 

Pumpkin chocolate chip muffins are a yummy Fall breakfast treat! Made with Greek yogurt and no oil, they are light, delicious, and easy to make!

Category: Breakfast, Snacks
Cuisine: American
Keyword: pumpkin chocolate chip muffins
Servings: 12 muffins
Calories Per Serving: 154 kcal
Author: JB @ The Grateful Girl Cooks!
Ingredients
  • 1 cup nonfat Greek plain yogurt
  • 1 cup canned pumpkin puree
  • 1/3 cup brown sugar
  • 2 eggs
  • 1 Tablespoon vanilla extract
  • cups all purpose flour (or whole wheat flour)
  • 1/2 cup old fashioned rolled oats
  • 1 teaspoon pumpkin pie spice
  • 1 teaspoon baking powder
  • 1/4 teaspoon salt
  • 1/4 teaspoon baking soda
  • 1/2 cup chocolate chips (reg. or mini)
Instructions
  1. Preheat oven to 400°F. While oven preheats, place paper muffin liners into a standard sized (12 holder) muffin tin. Lightly spray paper liners with non-stick cooking spray.

  2. Place pumpkin puree, Greek yogurt, brown sugar, eggs, and vanilla extract into a medium sized mixing bowl. Whisk these ingredients together to form a smooth batter.
  3. In a separate bowl, whisk together the dry ingredients (flour, rolled oats, pumpkin pie spice, baking powder, salt, baking soda).  Add to pumpkin batter in bowl.  Stir batter only until all ingredients have been combined. Be careful to NOT overmix! Add chocolate chips; fold them into batter.

  4. Evenly divide filling into prepared paper muffin liners.  Batter will almost come to top of the liners. Sprinkle the top of each muffin with a few chocolate chips.

  5. Bake muffins in preheated 400°F oven for 15-17 minutes.To test for doneness, insert a toothpick into center of a muffin. If toothpick comes out clean, muffins are done. Remove muffin pan from oven. Carefully lift out muffins, and transfer to a wire rack to cool. Muffins can be served warm, or at room temperature. Store leftovers in sealed airtight container.

Recipe Notes

Caloric calculation was based on using all purpose flour (versus whole wheat).

Nutrition Facts
Pumpkin Chocolate Chip Muffins
Amount Per Serving (1 muffin)
Calories 154 Calories from Fat 18
% Daily Value*
Fat 2g3%
Saturated Fat 1g6%
Cholesterol 29mg10%
Sodium 97mg4%
Potassium 147mg4%
Carbohydrates 26g9%
Fiber 1g4%
Sugar 12g13%
Protein 5g10%
Vitamin A 3235IU65%
Vitamin C 0.8mg1%
Calcium 64mg6%
Iron 1.4mg8%
* Percent Daily Values are based on a 2000 calorie diet.

Here’s one more to pin on your Pinterest boards!Pumpkin chocolate chip muffins are a yummy Fall breakfast treat! Made with Greek yogurt and no oil, they are light, delicious, and easy to make!

Peach Jam Muffins

You will enjoy these family friendly, easy to make Peach Jam Muffins, with a sweet peach glaze on top! They are delicious and filled with peaches and cinnamon!
You will enjoy these family friendly, easy to make Peach Jam Muffins, with a sweet peach glaze on top! They are delicious, and filled with peaches and cinnamon!

Do you enjoy making muffins? I’ve posted a variety of muffin recipes on this blog, including Blueberry Crumble, Banana Espresso Chocolate Chip, Cranberry Orange, Carrot Cake, and Apple Raisin, to name a few.

I really enjoy making muffins for breakfast, and this recipe for a dozen peach jam muffins is EASY, quick, and delicious! Here’s how to make them:

Scroll Down for A Printable Recipe Card At The Bottom Of The Page

How To Make Peach Jam Muffins

Preheat oven to 400° F.  Peel, pit, and finely dice peaches. Place diced peaches in bowl with vegetable oil, egg and vanilla. Stir well, to combine. TIP: If FRESH peaches are not in season or readily available, you can easily substitute a 16 ounce can of peaches. DRAIN them, then dice them, before adding to recipe.

Fresh peaches are peeled, then diced and added to egg, for muffins.

In separate bowl, combine flour, sugar, baking powder, cinnamon and salt. Stir to mix, then add dry ingredients to peaches, a little at a time, while stirring. Stir only until the batter is combined and moistened. The mixture will be fairly thick.

Dry ingredients are combined then added to peaches for muffins.

Fill a 12 cup standard sized muffin tin with paper liners. Spray bottom of paper liners with non-stick spray. Divide muffin batter evenly between 12 muffin holders.

Batter for peach jam muffins is added to muffin tin for baking.

Time To Bake The Peach Jam Muffins

Bake peach jam muffins at 400° F. for 15-20 minutes, or until the tops of the muffins are light golden brown.  Remove the pan from oven. Let the peach jam muffins cool in the pan for 5 minutes, then transfer muffins out of pan onto a wire rack to cool.

Baked peach jam muffins, hot out of oven.

Peach jam muffins cool down on wire rack before adding glaze.

Brush The Top Of The Muffins With Peach Jam

Use a pastry brush to cover the tops of the muffins with (room temperature) peach jam. I place a piece of wax paper under the wire rack to catch any drips that might occur. I was fortunate to be able to use my homemade canned peach jam for this recipe. YUM!

Peach jam is brushed on top of each muffin with a pastry brush.

Time To EAT!

Once the peach jam muffins have cooled  to room temperature, they are ready to eat and enjoy! They’re sweet, and filled with peaches. I’m confident you’ll enjoy these delicious treats.

One dozen peach jam muffins on white serving tray, ready to eat!

Close up photo of one peach jam muffin, with fresh peach slice in front.

Nothing like a yummy peach jam muffin to bring the taste of summer right onto your breakfast table!  See the diced peaches inside the muffin (below)? 

An inside look at a cut open peach jam muffin.

These peach jam muffins taste wonderful! They also freeze well, if wrapped well and placed in freezer storage bags. I really hope you will consider making a dozen of them for those you love!  Be sure to check out ALL of my recipes in the Recipe Index, located at the top of the page. Have a fantastic day, friends!

Interested In More Recipes?

Thank you for visiting this website. I appreciate you using some of your valuable time to do soIf you’re interested, I publish a newsletter 2 times per month (1st and 15th) with all the latest recipes, and other fun info. I would be honored to have you join our growing list of subscribers, so you never miss a great recipe!
There is a Newsletter subscription box on the top right side (or bottom) of each blog post, depending on the device you use, where you can easily submit your e-mail address (only) to be included in my mailing list.

You Can Also Find Me On Social Media:

Facebook page: The Grateful Girl Cooks!
Pinterest:
The Grateful Girl Cooks!
Instagram:
jbatthegratefulgirlcooks

Author's signature

0 from 0 votes
Peach Jam Muffins
Prep Time
15 mins
Cook Time
18 mins
Total Time
33 mins
 
You will enjoy these family friendly, easy to make Peach Jam Muffins, with a sweet peach glaze on top! They are delicious, and filled with peaches and cinnamon!
Category: Bread/Breakfast
Cuisine: American
Keyword: peach jam muffins
Servings: 12
Calories Per Serving: 192 kcal
Author: JB @ The Grateful Girl Cooks!
Ingredients
  • 2 peaches (large) , peeled, chopped fine
  • 1/3 cup vegetable oil
  • 1/2 teaspoon vanilla extract
  • 1 egg , slightly beaten
  • 2 cups all purpose flour
  • 1/3 cup granulated sugar
  • 3 teaspoons baking powder
  • 3/4 teaspoon cinnamon
  • 1/2 teaspoon salt
  • 1/3 cup peach jam , room temperature
Instructions
  1. Preheat oven to 400° F.  Peel, pit, and finely dice peaches. Place diced peaches in bowl with vegetable oil, egg and vanilla. Stir well, to combine.
  2. In separate bowl, combine flour, sugar, baking powder, cinnamon and salt. Stir to mix, then add dry ingredients to peaches, a little at a time, while stirring. Stir only until batter is combined and moistened. Mixture will be fairly thick.
  3. Fill 12 cup standard sized muffin tin with paper liners. Spray bottom of paper liners with non-stick spray. Divide muffin batter evenly between 12 muffin holders. Bake muffins at 400° F. for 15-20 minutes, or until tops are light golden brown.  Remove pan from oven. Let peach jam muffins cool in pan for 5 minutes, then transfer muffins out of pan onto wire rack.

  4. Use a pastry brush to cover tops of muffins with room temperature peach jam. Once the peach jam muffins have cooled to room temperature, they are ready to eat and enjoy!
Recipe Notes

No fresh peaches in season? Can substitute a 16 ounce can peaches, drained and chopped fine, if necessary.

Nutrition Facts
Peach Jam Muffins
Amount Per Serving (1 muffin)
Calories 192 Calories from Fat 54
% Daily Value*
Fat 6g9%
Saturated Fat 5g31%
Cholesterol 13mg4%
Sodium 106mg5%
Potassium 183mg5%
Carbohydrates 30g10%
Fiber 1g4%
Sugar 12g13%
Protein 2g4%
Vitamin A 100IU2%
Vitamin C 2.5mg3%
Calcium 53mg5%
Iron 1.2mg7%
* Percent Daily Values are based on a 2000 calorie diet.

Here’s one more to pin on your Pinterest boards!You will enjoy these family friendly, easy to make Peach Jam Muffins, with a sweet peach glaze on top! They are delicious, and filled with peaches and cinnamon!

Blueberry Lemon Muffins

Blueberry Lemon Muffins are absolutely light and DELICIOUS, easy to make, bursting with the flavors of fresh blueberries and lemon zest, and topped with a lemon glaze. You’re gonna LOVE these muffins!
Blueberry Lemon Muffins are absolutely light and DELICIOUS, easy to make, bursting with blueberries and lemon zest, and topped with a lemon glaze you will love!

Do you love blueberries! We sure do! In the past I’ve used blueberries to make scones, crumble muffins,  ice cream, smoothies, french toast, jam, bagels and galettes, to name a few recipes that feature this versatile little berry! And wow, do I ever LOVE these yummy blueberry lemon muffins!
Scroll Down For A Printable Recipe Card At The Bottom Of The Page

Picking Fresh Blueberries Is One Of My Summer Traditions

I love to go pick fresh blueberries at Rowell Brothers Farm every summer (a local U-Pick farm that’s been farming the land there since 1853). They consistently produce a wide variety of delicious berries on their HUGE farm (marionberries, blackberries, boysenberries, raspberries, blueberries, etc.). They sell them at very reasonable prices (and you can nibble on the berries for free while you pick!).

Earlier this summer I picked raspberries and boysenberries there, but this time, once they were ripe, I went for BLUEBERRIES! I went there last week and picked 9 pounds of juicy blueberries in an hour, then brought them home. Some were destined for our freezer, where I can use them all year round. BUT… some of the fresh blueberries were used to make these incredible tasting blueberry lemon muffins!

A photo collage from blueberry picking at a local farm.

How Do I Make These Delicious Blueberry Lemon Muffins?

I’m so glad you asked!  Here’s how: Before you begin making the muffin batter, preheat your oven to 400° F. Place cupcake liners into a standard sized (12 cup) muffin tin. Set aside.

Beat eggs and granulated sugar together in a mixing bowl. Beat on HIGH speed for 5 minutes (yes… 5 minutes!).  When done, the mixture will have thickened slightly.  Add sour cream, oil, vanilla and salt to the egg mixture. Beat on LOW speed only until ingredients are combined.

Beating eggs, sugar, and sour cream for the muffin batter.

In a separate small bowl, whisk together flour and baking powder until combined. Add flour, 1/3 cup at a time to the egg mixture, and whisk (by hand) only until flour is incorporated into batter.  Continue adding flour 1/3 cup at a time until all flour is incorporated.

Be careful to NOT OVERMIX the batter (overmixing can cause the muffins to end up being too dense in texture).

Whisking flour and baking powder into muffin batter.

Add lemon zest and lemon juice to the muffin batter; whisk only until barely combined. Fold in the blueberries gently, just until incorporated into batter.

Adding lemon zest, lemon juice and blueberries into muffin batter.

Fill The Muffin Tins And Bake!

Fill the 12 muffin cup liners with the batter, dividing evenly. Use all the batter (mine were filled almost to the top). Bake muffins at 400° F. for 20-22 minutes. When done, you should be able to stick a toothpick into the middle of the muffin and it will come out clean. The tops of the muffins will be light golden brown in color.

When done baking, remove pan from oven. The muffins should be slightly golden in color.

Muffin cups are filled with batter, then baked until done.

Transfer muffins out of muffin tin and onto a wire rack to cool. I place a piece of aluminum foil (or parchment paper) UNDER the rack to catch any icing drips when glazing the muffins later.

Let the muffins cool to room temperature. By the way… LOOK at those muffins with those juicy blueberries!

Baked blueberry lemon muffins, cooling on a wire rack.

Make The Lemon Glaze

While the muffins are cooling, whip up a quick lemon glaze (trust me… you WANT the lemon glaze on these muffins… it is the perfect finishing touch! To make the glaze, simply combine powdered sugar, lemon juice and lemon zest in a small bowl until fully blended.

You want the glaze to have a good consistency to drizzle over the top of each muffin, but not be too thin where it runs all over. If you want it thicker, add a bit more powdered sugar. If you want it a bit thinner, add a bit more lemon juice (or water). Stir until all lumps are gone.

Mixing lemon glaze to drizzle on top of blueberry muffins.

Glaze The Blueberry Lemon Muffins

When muffins are at room temperature, drizzle lemon glaze over top of each one. The foil you placed under the wire rack should catch any wayward drips, which will make your cleanup so much easier!

Let the glaze firm up for several minutes, then these delicious blueberry lemon muffins are ready to eat! Don’t they look GOOD? (picture me drooling here!)

Blueberry lemon muffins are drizzled with lemon glaze and are ready to eat!

Pour yourself a good cup of coffee or tea, grab a muffin… and ENJOY the absolutely yummy taste of these delicious treats! You can see in the photo below what the blueberry lemon muffins look like on the inside. They’re bursting with blueberries!

Time for a blueberry muffin with lemon glaze... and a cup of coffee!

Lots of lemon and blueberry flavor in each bite of muffin!

We LOVED these blueberry lemon muffins, and I am confident you will, too! We enjoyed them so much I froze several of them so that we could take them with us on an upcoming road trip!  That’s right… these delicious muffins are going on vacation with us! HA HA!

Hope you will give these delicious muffins a try. Your family and/or friends will thank you! Thanks for stopping by today, and hope you will come back soon for more yummy recipes.

Looking For More MUFFIN Recipes?

You can find all of my recipes in the Recipe Index, which is located at the top of the page. I have LOTS of delicious muffin recipes you’re gong to love, including:

Interested In More Recipes?

Thank you for visiting this website. I appreciate you using some of your valuable time to do soIf you’re interested, I publish a newsletter 2 times per month (1st and 15th) with all the latest recipes, and other fun info. I would be honored to have you join our growing list of subscribers, so you never miss a great recipe!
There is a Newsletter subscription box on the top right side (or bottom) of each blog post, depending on the device you use, where you can easily submit your e-mail address (only) to be included in my mailing list.

You Can Also Find Me On Social Media:

Facebook page: The Grateful Girl Cooks!
Pinterest:
The Grateful Girl Cooks!
Instagram:
jbatthegratefulgirlcooks

Have a FANTASTIC day!

Author's signature

Recipe Adapted from: Natasha, at https://natashaskitchen.com/blueberry-muffins-with-lemon-glaze/

0 from 0 votes
Blueberry Lemon Muffins
Prep Time
10 mins
Cook Time
20 mins
Total Time
30 mins
 
Blueberry Lemon Muffins are absolutely light and DELICIOUS, easy to make, bursting with blueberries and lemon zest, and topped with a lemon glaze you will love!
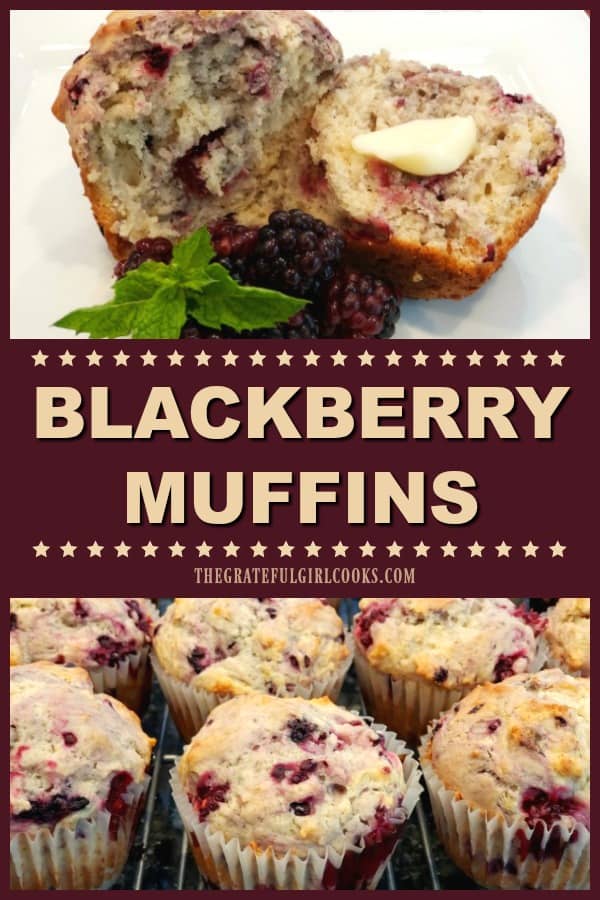
Category: Breakfast
Cuisine: American
Keyword: blueberry lemon muffins
Servings: 12 muffins
Calories Per Serving: 307 kcal
Author: JB @ The Grateful Girl Cooks!
Ingredients
For Muffin Batter:
  • 2 eggs (large) (at room temperature)
  • 1 cup granulated sugar
  • 1 cup sour cream
  • 1/2 cup vegetable oil (or LIGHT olive oil)
  • 1 teaspoon vanilla extract
  • 1/4 teaspoon salt
  • 2 cups all purpose flour
  • 2 teaspoons baking powder
  • 2 teaspoons lemon zest
  • 2 Tablespoons fresh lemon juice
  • cups fresh blueberries
For Lemon Glaze:
  • 1 cup powdered sugar
  • 1/2 teaspoon lemon zest
  • Tablespoons fresh lemon juice
Instructions
  1. Preheat your oven to 400° F. Place cupcake liners into a standard sized (12 cup) muffin tin. Set aside.

  2. Beat eggs and granulated sugar together in a mixing bowl. Beat on HIGH speed for 5 minutes (yes... 5 minutes!). When done, the mixture will have thickened slightly. Add sour cream, oil, vanilla and salt to the egg mixture. Beat on LOW speed only until ingredients are combined.
  3. In a separate small bowl, whisk together flour and baking powder until combined. Add flour, 1/3 cup at a time to the egg mixture, and whisk (by hand) only until flour is incorporated into batter.  Continue adding flour 1/3 cup at a time until all flour is incorporated. Be careful to NOT OVERMIX the batter (overmixing can cause the muffins to end up being too dense in texture).
  4. Add lemon zest and lemon juice to the muffin batter; whisk only until barely combined. Fold in the blueberries gently, just until incorporated into batter.
  5. Fill the 12 muffin cup liners with the batter, dividing evenly. Use all the batter (mine were filled almost to top). Bake muffins at 400° F. for 20-22 minutes . When done, you should be able to stick a toothpick into the middle of the muffin and it will come out clean. The tops of the muffins will be light golden brown in color. Transfer muffins out of muffin tin and onto a wire rack to cool. I place a piece of aluminum foil (or parchment paper) UNDER the rack to catch any icing drips when glazing the muffins later. Let the muffins cool to room temperature. While muffins cool, prepare lemon glaze.

To Make Lemon Glaze:
  1. Stir powdered sugar, lemon juice and lemon zest in a small bowl until fully blended, and lumps are gone. You want a good consistency to drizzle over the top of each muffin, but not too thin where it runs all over. If you want glaze thicker, add a bit more powdered sugar. If you want glaze thinner, add a tiny bit more lemon juice (or water). Once muffins are at room temperature, drizzle lemon glaze on top of each one (the foil under the rack will catch wayward drips, which makes cleanup easy). Let the glaze firm up for several minutes, then muffins are ready to eat! ENJOY!

Nutrition Facts
Blueberry Lemon Muffins
Amount Per Serving (1 muffin)
Calories 307 Calories from Fat 108
% Daily Value*
Fat 12g18%
Saturated Fat 8g50%
Cholesterol 33mg11%
Sodium 74mg3%
Potassium 154mg4%
Carbohydrates 47g16%
Fiber 1g4%
Sugar 28g31%
Protein 3g6%
Vitamin A 110IU2%
Vitamin C 4.2mg5%
Calcium 64mg6%
Iron 1.2mg7%
* Percent Daily Values are based on a 2000 calorie diet.

Here’s one more to pin on your Pinterest boards!Blueberry Lemon Muffins are absolutely light and DELICIOUS, easy to make, bursting with blueberries and lemon zest, and topped with a lemon glaze you will love!