You’re gonna LOVE this decadent chocolate cream cheese danish! This chocolate filled pastry is EASY to make, using store bought crescent roll dough!
If you enjoy a good pastry AND enjoy chocolate, I’m pretty sure you will love this recipe for a Chocolate Cream Cheese Danish I found online recently. Added bonus? It’s EASY to make! This pastry is super easy to prepare, because it starts with a can of store-bought crescent rolls, and only takes about 30 minutes total to prepare! Let me show you just how easy it is to make this treat!
Scroll Down For A Printable Recipe Card At The Bottom Of The Page
How To Make A Chocolate Cream Cheese Danish
Before beginning, preheat your oven to 375 degrees F. (See? I told you this would be EASY!). Mix together room temperature cream cheese, sugar, flour and vanilla extract in a small bowl. I used an electric mixer to do this and it was mixed in a flash! Once it is creamy and thoroughly combined, set aside.

Open the can of crescent dough; without separating the triangles, unroll the dough and place it onto a parchment paper-lined baking sheet. Using your fingers, press the dough together to close all the holes (perforations) up, so you have one complete piece of dough.

Filling The Pastry
Once you have pressed all the holes in the dough together, drop the cream cheese filling (by spoonfuls) in the center, down the length of the dough. Make sure to evenly spread the filling out, so that the filling for the chocolate cream cheese danish is between 2-3 inches wide.

Evenly sprinkle the chopped chocolate over the top of the cream cheese filling.

Cutting The Pastry Strips For “Braiding”
Starting at one end of the pastry, cut 1 inch strips (at a slight angle toward the top) into both sides of the dough. Cut in until it reaches the filling.
Pull the strips up and over the filling making sure to alternate sides (L,R,L,R, etc) until entire chocolate cream cheese danish has been “braided. Tuck in any extra bits of dough that you may end up with, on each end of the roll.

Once the chocolate cream cheese danish has been braided and rolled, it’s time to bake it, after it gets one more special touch. Give the chocolate cream cheese danish an “egg bath” BEFORE baking. To do this, whisk an egg YOLK in a small bowl, then brush the surface of the pastry roll with the beaten yolk.

Ready To Bake!
Bake the chocolate cream cheese danish at 375 degrees for 20 minutes, until the pastry is golden brown in color. Remove the pastry from the oven and place it (still on the parchment paper) onto a wire rack to cool. Let it cool COMPLETELY.

Make The Glaze For The Chocolate Cream Cheese Danish
While the chocolate cream cheese danish is cooling, make the glaze to top the pastry. Mix together a simple glaze of powdered sugar, milk, and vanilla in a small bowl, until smooth. Once the pastry has cooled completely, decoratively drizzle the glaze back and forth across the pastry until all the glaze is gone.
The parchment paper will help to collect any run-off glaze, and will help to make it an easy cleanup. Let the chocolate cream cheese danish rest, while the glaze firms up.

The pastry is ready to serve, once the glaze on top has become firm. When ready to serve, cut the pastry into slices, grab a cup of coffee or tea… and dig in!

This chocolate pastry is decadently rich, creamy, and filled with chocolate, so obviously it’s not something you want to eat every day, but for an occasional treat! It really is delicious! A small piece goes a long way! Sure hope you enjoy this chocolate cream cheese danish. We sure do. Thanks for stopping by, and have a great day.
Looking For More Delicious Breakfast Treats Like This?
You can find all of my recipes in the Recipe Index, located at the top of the page. I have lots of yummy breakfast treats, including:
- Fruit and Cheese Danish Pastry.
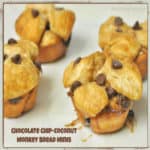
- Chocolate Chip Coconut Monkey Bread Minis
- Apple Cream Cheese Pastries
- Homemade Cinnamon Rolls
Interested In More Recipes?
Thank you for visiting this website. I appreciate you using some of your valuable time to do so. If you’re interested, I publish a newsletter 2 times per month (1st and 15th) with all the latest recipes, and other fun info. I would be honored to have you join our growing list of subscribers, so you never miss a great recipe!
There is a Newsletter subscription box on the top right side (or bottom) of each blog post, depending on the device you use, where you can easily submit your e-mail address (only) to be included in my mailing list.
You Can Also Find Me On Social Media:
Facebook page: The Grateful Girl Cooks!
Pinterest: The Grateful Girl Cooks!
Instagram: jbatthegratefulgirlcooks
 Recipe Source: http://www.laurenslatest.com/chocolate-cream-cheese-danish/

- 1 can crescent rolls
- 8 ounces cream cheese , softened (at room temp)
- 1/2 cup granulated sugar
- 2 Tablespoons all purpose flour
- 1 teaspoon vanilla extract
- 2 ounces chopped semi-sweet chocolate
- 1 egg yolk , beaten (for brushing onto rolled pastry before baking)
- 1/2 cup powdered sugar
- 1 teaspoon milk
- 1/4 teaspoon vanilla extract
- Before beginning, preheat your oven to 375 degrees F.
- Cream together softened cream cheese, granulated sugar, flour and vanilla until smooth. Set aside.
- Unroll the crescent dough without separating any of the triangles. Keep the dough all in one piece! Place dough onto a parchment paper-lined baking sheet, then press together all the perforations in the dough with your fingers.
- Spoon the cream cheese filling down the center of the dough lengthwise. Spread the dough out so it is 2-3 inches wide in center of roll.
- Evenly sprinkle chopped chocolate on top of the cream cheese filling.
- Cut 1 inch strips of dough evenly on each side of the filling (at a slight angle toward the top).
- Starting at top, lift pieces of dough and pull up and over filling, alternating sides as you go, so that you end up with a somewhat "braided" pastry. (Left side strip, Right side strip, etc.). Tuck any leftover pieces of dough into the ends.
- Beat an egg yolk in a small dish. Using a pastry brush, gently "paint" the yolk over the surface of the pastry until covered. Place pastry in a preheated 375 degree oven; bake for 20 minutes, until golden brown in color. Remove pastry (keeping the parchment paper underneath) to a wire rack. Let cool completely.
- Mix together glaze ingredients until smooth. Once pastry is completely cool, decoratively drizzle glaze over surface of pastry. Let glaze firm up, then cut into slices, serve and enjoy!
Here’s one more to pin on your Pinterest boards!
 is a yummy version of \"a famous coffee place's\" beloved gingerbread loaf. Make it at home for a fraction of the price! / The Grateful Girl Cooks!")
 / The Grateful Girl Cooks!")
 / The Grateful Girl Cooks!")
 / The Grateful Girl Cooks!")
 / The Grateful Girl Cooks!")
 / The Grateful Girl Cooks!")
 / The Grateful Girl Cooks!")
 / The Grateful Girl Cooks!")
 / The Grateful Girl Cooks!")
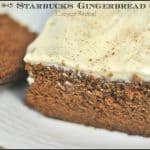
 is a yummy version of \"a famous coffee place's\" beloved gingerbread loaf. Make it at home for a fraction of the price! / the Grateful Girl Cooks!")


