Category: Breakfast

Ground Pork Sausage Patties

Make homemade ground pork sausage patties to serve with pancakes, eggs, or other favorite breakfast dishes. Recipe makes 8 sausage patties.

We enjoy sausage with many different breakfasts, like eggs or pancakes, etc. Today I want to share a simple recipe for making homemade ground pork sausage patties from scratch!

This recipe is very simple and straightforward and the ground pork sausage patties are delicious! I’ve included some directions for how you can also freeze the prepared, uncooked patties and cook them once frozen, as needed.

I hope you enjoy this recipe, and have “fun” creating your own homemade breakfast sausage! Here’s how to make it.

Scroll Down for A Printable Recipe Card At The Bottom Of The Page

Make The Seasoning Mix

In a medium bowl, add the spices for the sausage. Stir well until they are blended together. The spices you will use are dried thyme, sage, fennel, salt, pepper.

Spices for the sausage patties are combined in a bowl.

Make The Ground Pork Sausage Patties

Add a pound of ground pork, minced garlic and an egg white to the spice mixture, then stir very well until the ingredients have been fully incorporated. Use your hands, if preferred, to mix these ingredients easily.

Ground pork, garlic and an egg white are added to the spice mixture in bowl.

Divide the seasoned pork evenly into 8 balls. Use your (clean) hands to press each ball into a 2½ inch wide round disk.

TIP: Put each one on a small piece of parchment (or wax) paper, because this helps keep the patties separated, if you’re planning to freeze some of them.

Seasoned ground pork is divided into 8 portions and placed on parchment.The ground pork sausage patties are flattened into 8 round disks.

At this point, if you want to freeze a few sausage patties for later, place them (with the parchment paper still underneath each one) in an airtight container or freezer bag. Freeze until needed.

Cook The Sausage (Fresh or Frozen)

COOKING FRESH?: If cooking fresh sausage patties, heat a large skillet over High heat. Add 2 teaspoons vegetable oil and continue heating. When the oil is very hot (but not smoking), carefully place the sausage patties in the skillet in a single layer.

Fry them about 4 minutes per side until they are well-browned and fully cooked through.

COOKING FROZEN? (shown below): If cooking frozen sausage patties, you don’t have to thaw them. Add 3 Tablespoons water (instead of oil) to the skillet, and place the frozen patties into the skillet in a single layer.

Cover the skillet and cook on High heat for 2-3 minutes, then remove the lid and continue to cook. As the patties cook (and thaw), the water will slowly evaporate, and the patties will begin to brown.

Four frozen ground pork sausage patties are cooked in water in skillet.

Turn the sausage patties over once most of the water has cooked away. Continue to cook for several minutes on each side (turning occasionally) until each sausage is well browned on all sides and fully cooked through.

Sausage patties are flipped halfway through the cooking time.Ground pork sausage patties are done when browned and fully cooked through.

Serve The Ground Pork Sausage Patties

Once the ground pork sausage patties are fully cooked, transfer them from the skillet onto paper towels before serving. The paper towels will help absorb any extra grease.

Serve the sausage patties immediately, with pancakes, French toast, eggs, on a breakfast sandwich, etc.. You can also make gravy for biscuits using the sausage.

The sausages are drained on paper towels and then are ready to be served.

I hope you enjoy these simple, yet delicious ground pork sausage patties! I love to keep some in our freezer for when we want a couple sausage patties to go with our breakfast! Yum!

Thanks for stopping by, and I invite you to come back soon for more family-friendly recipes. Take care, may God bless you… and have a wonderful day!

Looking For More BREAKFAST Recipes?

You can find ALL of my recipes in the Recipe Index, which is located at the top of the page. I have lots of delicious breakfast recipes to check out, including:

Want More Recipes? Get My FREE Newsletter!

I publish a newsletter 2 times per month (1st and 15th) with lots of recipes, tips, etc..
Would you like to join our growing list of subscribers?

There is a Newsletter subscription box on the top right (or bottom) of each blog post, depending on the device you use.
You can submit your e-mail address there, to be added to my mailing list.

Find Me On Social Media:

Facebook page: The Grateful Girl Cooks!
Pinterest:
The Grateful Girl Cooks!
Instagram:
jbatthegratefulgirlcooks

Author's signature

↓↓ PRINTABLE RECIPE BELOW ↓↓

0 from 0 votes
Ground Pork Sausage Patties
Prep Time
15 mins
Cook Time
10 mins
Total Time
25 mins
 

Make homemade ground pork sausage patties to serve with pancakes, eggs, or other favorite breakfast dishes. Recipe makes 8 sausage patties.

Category: Breakfast
Cuisine: American
Keyword: ground pork sausage patties
Servings: 8 sausage patties
Calories Per Serving: 153 kcal
Author: JB @ The Grateful Girl Cooks!
Ingredients
  • 1 pound ground pork
  • 2 teaspoons dried sage crumbled
  • teaspoons salt
  • ¾ teaspoon dried thyme
  • ½ teaspoon dried fennel crushed
  • ½ teaspoon black pepper
  • 1 clove garlic finely minced
  • 1 large egg white (no yolk)
For Cooking Fresh Sausages: (**if using frozen patties, use 3 Tablespoons water instead of oil)
  • 2 teaspoons vegetable oil
Instructions
  1. Stir sage, salt, thyme, fennel and pepper in a medium sized bowl until combined. Add minced garlic, ground pork and egg white. Stir (or use your hands) to fully combine these ingredients.

  2. Divide pork mixture evenly into 8 balls. Use your hands to flatten each one into a 2½ inch wide round disk.

  3. TIP: Put each one on a small piece of parchment paper to keep them separated. If freezing, place sausage patties (and paper) in airtight container or freezer bag. Freeze until needed.

  4. COOKING FRESH?: Heat a large skillet over High heat. Add vegetable oil; continue heating. When oil is very hot (but not smoking), carefully place sausage patties in skillet in a single layer. Fry them about 4 minutes per side until well-browned and fully cooked through.

    COOKING FROZEN?: You do not need to thaw sausage. Add 3 Tablespoons water (instead of oil) to skillet; place frozen patties in skillet in a single layer. Cover and cook on High heat for 2-3 minutes. Remove lid. As patties cook (and thaw), the water will slowly evaporate. Turn sausage patties over once most of the water has cooked away. Continue to cook several minutes on each side (turning occasionally) until well browned and fully cooked through.

  5. Once sausage patties are fully cooked, transfer them out of the skillet onto paper towels to absorb any extra grease. Serve immediately after draining, while hot.

Recipe Notes

NOTE: Caloric calculation was made without including the vegetable oil, as all oil is not absorbed into patties, and frozen patties are cooked in water.

Nutrition Facts
Ground Pork Sausage Patties
Amount Per Serving (1 sausage patty)
Calories 153 Calories from Fat 108
% Daily Value*
Fat 12g18%
Saturated Fat 4g25%
Polyunsaturated Fat 1g
Monounsaturated Fat 5g
Cholesterol 41mg14%
Sodium 475mg21%
Potassium 176mg5%
Carbohydrates 0.4g0%
Fiber 0.1g0%
Sugar 0.04g0%
Protein 10g20%
Vitamin A 10IU0%
Vitamin C 1mg1%
Calcium 13mg1%
Iron 1mg6%
* Percent Daily Values are based on a 2000 calorie diet.

Here’s one more to pin on your Pinterest boards!Make homemade ground pork sausage patties to serve with pancakes, eggs, or other favorite breakfast dishes. Recipe makes 8 sausage patties.

Apricot Glazed Scones

Make 8 tasty Apricot Glazed Scones from scratch, filled with apricot jam and dried apricots, and topped with glaze and more dried apricots!

I don’t know about you, but I LOVE scones, and have been collecting scone recipes for years and years. Today I want to share a recipe for Apricot Glazed Scones that I discovered years ago in one of my old cookbooks!

The flavor mainly comes from dried apricots and apricot jam in the dough and dried apricots on top of the baked scones. When you drizzle a little powdered sugar glaze to the baked scones, it adds an additional sweetness to these treats.

Apricot glazed scones are a great option for a “portable” breakfast or a quick snack. They’re delicious! Here’s how to make apricot glazed scones.

Scroll Down For A Printable Recipe Card At The Bottom Of The Page

Make The Dough

Before beginning, preheat your oven to 400°F (or 204.44°C). The scones don’t take long to prepare, so you will want your oven preheated, and ready to go.

To make the dough, combine flour, baking powder, baking soda, salt and sugar in a large mixing bowl. Use a pastry blender or two forks to cut very cold butter chunks into the mixture, until crumbly and the butter is reduced to the size of peas.

Dry ingredients for the scones are combined in a large mixing bowl.Chunks of very cold butter are cut into the flour mixture with a pastry cutter.

Time For Some Apricot Flavor!

Add 1/3 cup of finely chopped dried apricots to the flour mixture and stir or toss well, to coat the apricot pieces with flour. Coating them well with the flour mixture helps them stay “suspended” in the dough, and not sink to the bottom of the scones while they bake.

Once the apricots have been combined, add an egg, buttermilk, and apricot jam. Stir well, but only until the ingredients have been incorporated. Don’t overmix the dough.

The dough should be very thick and “tacky” (quite sticky) to the touch. This is the dough for the apricot glazed scones. Now you’re ready to shape and cut the scones before baking.

Finely chopped dried apricots are tossed well in the flour mixture.Buttermilk, egg, and apricot jam are combined with the dry ingredients.Dough for the apricot glazed scones is very thick once combined.

Final Step Before Baking

Turn the dough out onto a floured surface. Lightly sprinkle the dough with flour (and lightly flour your hands). Knead the dough 4-5 times until it comes together in a smooth dough ball.

Pat the dough out with your hands into a 8-9″ circle (still on the floured surface), shaping and smoothing the outer edges. Use a pizza cutter or a sharp knife to cut the scone dough into 8 even wedges (like a pie).

Brush the top of the scones with a lightly beaten egg white and then sprinkle with granulated sugar. Now the apricot glazed scones are ready to bake!

Scone dough is kneaded, then shaped into a 9" circle and sliced into wedges.Scones are brushed with egg white, then sprinkled with sugar before baking.

Bake The Apricot Scones

Spray or grease a large baking sheet. Arrange the scones onto the prepared sheet, leaving them in a circle formation, with about half an inch in between each scone.

Bake the apricot glazed scones at 400°F. for 13-14 minutes OR until they are golden brown on top and a toothpick inserted down into the thick part of a scone comes out clean.

When done baking, remove the scones from the oven, and let them cool on the baking sheet for 2-3 minutes. Carefully cut the scone wedges (to separate), and transfer them to a wire rack to cool completely before glazing.

Apricot Glazed Scones are lightly browned on top, once baked.Scones are separated and cool on a wire rack before glazing.

Make Glaze And Garnish The Apricot Scones!

In a small bowl, place powdered sugar and vanilla extract. Add 3-4 drops of water and stir to combine. Continue adding water, a couple drops at a time, until the glaze has thinned enough to be able to drizzle it over the scones. If you get it too thin, simply add a bit more powdered sugar and stir.

Once the scones are completely cooled, drizzle the top of each scone with glaze, evenly dividing it between all 8 scones. I typically use a fork to easily drizzle the glaze.

TIP: Place paper towels, wax paper, parchment paper OR foil underneath the wire rack before glazing the scones. Having it underneath will ensure easy cleanup for any glaze that may drip off the scones.

While the glaze is still “wet”, sprinkle additional chopped dried apricots onto the glaze (it will act as “glue” to hold the apricots on top). This step adds a nice “pop” of color and additional flavor to the scones.

A simple glaze is mixed, then drizzled on top of the cooled scones.

Serve The Apricot Glazed Scones

Once the glaze has firmed up and “set”, the scones can be served! Place them on a serving plate, and let the hungry throngs dig in!

These scones also freeze very well (if wrapped tightly and individually, and frozen in an airtight container). That way, you can pull a scone out of the freezer, let it thaw, and enjoy it anytime you want! YUM! 

The glazed apricot scones are topped with more dried apricots and served.

I hope you will consider trying this yummy scone recipe, and trust you will enjoy them, too! We love scones for breakfast and also enjoy them for a quick afternoon snack, with a cup of hot coffee or tea.

Thank you for stopping by today, and I invite you to come back again soon for more family-friendly recipes. Take care, may God bless you… and have a great day.

Looking For More SCONE Recipes?

You can find ALL of my recipes in the Recipe Index, which is located at the top of the page. I have a wonderful variety of delicious scone recipes to choose from, including:

Want More Recipes? Get My FREE Newsletter!

I publish a newsletter 2 times per month (1st and 15th) with lots of recipes, tips, etc..
Would you like to join our growing list of subscribers?

There is a Newsletter subscription box on the top right (or bottom) of each blog post, depending on the device you use.
You can submit your e-mail address there, to be added to my mailing list.

Find Me On Social Media:

Facebook page: The Grateful Girl Cooks!
Pinterest:
The Grateful Girl Cooks!
Instagram:
jbatthegratefulgirlcooks

Author's signature

Recipe adapted from: “The Complete Cooking Light Cookbook”, pgs. 64-65, published in 2000 by Oxmoor House, Inc.

↓↓ PRINTABLE RECIPE BELOW ↓↓

0 from 0 votes
Apricot Glazed Scones
Prep Time
17 mins
Cook Time
13 mins
Total Time
30 mins
 

Make 8 tasty Apricot Glazed Scones from scratch, filled with apricot jam and dried apricots, and topped with glaze and more dried apricots!

Category: Breakfast, Snack
Cuisine: All Cuisines
Keyword: apricot glazed scones
Servings: 8 scones
Calories Per Serving: 278 kcal
Author: JB @ The Grateful Girl Cooks!
Ingredients
  • 2 cups all purpose flour
  • ¼ cup granulated sugar
  • teaspoons baking powder
  • ½ teaspoon baking soda
  • ¼ teaspoon salt
  • ¼ cup butter (COLD) = 4 Tablespoons, cut in small chunks
  • cup dried apricots finely chopped
  • 1 large egg lightly beaten
  • ¼ cup buttermilk
  • 4 Tablespoons apricot jam room temperature
  • 1 egg white lightly beaten (to brush on scones)
  • 1 Tablespoon granulated sugar (to sprinkle on scones)
For Glaze (after baking):
  • ½ cup powdered sugar (confectioner's sugar)
  • ¼ teaspoon vanilla extract
  • water* *to add by drops
Optional Topping: *2 finely chopped dried apricots for sprinkling on top of glazed scones
    Instructions
    1. Preheat oven to 400°F (or 204.44°C). Spray/grease a large cookie sheet (set aside).

    2. In large bowl, combine flour, baking powder, baking soda, salt and sugar. Use pastry blender (or 2 forks) to cut in butter, until butter is size of peas.

    3. Add ⅓ cup dried apricots to flour mixture; toss well, to coat. Add 1 egg, buttermilk and apricot jam. Stir well, but only until incorporated. Don't overmix. Dough is thick and "tacky" (quite sticky) to the touch.

    4. Turn dough out onto a floured surface. Lightly sprinkle dough (and your hands) with flour. Knead dough 4-5 times until it forms a smooth ball. Pat dough out (using hands) into a 8-9" circle (still on floured surface), smoothing outer edges. Use pizza cutter or knife to cut dough into 8 wedges (like pie). Brush top of scones with beaten egg white; sprinkle with granulated sugar.

    5. Arrange scones on baking sheet in a circle, with ½" between each scone. Bake at 400°F. for 13-14 minutes OR until golden brown, and toothpick inserted in thick part comes out clean. Remove scones from oven; let cool on sheet 2-3 minutes. Carefully separate scones; transfer to a wire rack; cool completely.

    6. In a small bowl, place powdered sugar and vanilla extract. Add a few drops of water and stir to combine. Continue adding water, a couple drops at a time, until glaze has thinned enough to be able to drizzle it over scones. If you get it too thin, add a bit more powdered sugar and stir.

    7. Once scones are completely cool, drizzle them with glaze (I use a fork). While glaze is still "wet", sprinkle additional chopped dried apricots onto the glaze (glaze will help hold apricots in place).TIP: Place paper towels, foil, etc. underneath wire rack before glazing scones. Let glaze firm up, then serve!

    Nutrition Facts
    Apricot Glazed Scones
    Amount Per Serving (1 scone)
    Calories 278 Calories from Fat 63
    % Daily Value*
    Fat 7g11%
    Saturated Fat 4g25%
    Trans Fat 0.2g
    Polyunsaturated Fat 0.5g
    Monounsaturated Fat 2g
    Cholesterol 39mg13%
    Sodium 216mg9%
    Potassium 207mg6%
    Carbohydrates 50g17%
    Fiber 1g4%
    Sugar 23g26%
    Protein 5g10%
    Vitamin A 439IU9%
    Vitamin C 1mg1%
    Calcium 56mg6%
    Iron 2mg11%
    * Percent Daily Values are based on a 2000 calorie diet.

    Here’s one more to pin on your Pinterest boards!Make 8 tasty Apricot Glazed Scones from scratch, filled with apricot jam and dried apricots, and topped with glaze and more dried apricots!

    Overnight Oats Fruit Bowl

    Make a delicious Overnight Oats Fruit Bowl for breakfast! Maple cinnamon oats are topped with bananas, blueberries, strawberries and granola.Make a delicious Overnight Oats Fruit Bowl for breakfast! Maple cinnamon oats are topped with bananas, blueberries, strawberries and granola.

    My husband and I had the opportunity to travel to Portugal this past October, and enjoyed our time in central Portugal, Porto and Lisbon. While in Lisbon we discovered a fabulous, yet unassuming little restaurant several doors down from our hotel.

    Menu cover from the Lisbon restaurant where I enjoyed overnight oats.

    This restaurant is called Gosto do Castelo, and the food was so fantastic (thank you, Chef Demer!) we went back several times for dinner and breakfast. The food, atmosphere and service were top notch, all the way!

    The restaurant is up on the hill near the huge castle in Lisbon (in the Alfama district), and I TOTALLY recommend it, if you’re ever fortunate enough to be in Lisbon.

    One of the breakfasts I ordered was an overnight oats bowl (seen below), and I REALLY enjoyed it, especially with all the fresh fruit on top! This dish was presented in a different way then I usually serve overnight oats, but their use of colorful fresh fruit and granola on top got my attention and INSPIRED me!

    The overnight oats I had for breakfast in Lisbon at Gosto do Castelo.

    I’ve made overnight oats so many times, over the years, and have posted quite a few of the recipes here on my blog. Typically I make them in small canning jars, with a small amount of chopped fruit mixed into the oats. That way they are very portable and convenient to have around!

    However, after enjoying my fantastic breakfast at this restaurant I was determined to “up my game” a bit, and that’s how I ended up with this simple, tasty recipe!

    While this version may not be as “stunningly beautiful” as the chef-created dish I was served at the restaurant, it sure looks good and tastes great! Here’s how to make it.

    Scroll Down For A Printable Recipe Card At The Bottom Of The Page

    Prepare The Oats For Their Overnight Chill

    Any time you make “overnight oats” you will need to remember that the oats must “soak” overnight in the refrigerator, so PLAN AHEAD!

    For each serving you will need old-fashioned oats, chia seeds, ground cinnamon, milk, and real maple syrup (or honey). You will also need fresh sliced fruit to put on top of the  oats before serving the next morning.

    To prepare this dish, place oats, chia seeds, and ground cinnamon into a bowl (use a separate bowl for each serving).

    Old-fashioned oat, chia seeds and cinnamon in a white bowl.

    Refrigerate The Oats Overnight

    Stir in milk and maple syrup (or substitute honey), until all ingredients are very well combined. Cover the bowl securely with plastic wrap, then place it in a refrigerator overnight.

    As the oats soak in the milk and seasonings overnight, they absorb a lot of liquid, so overnight refrigeration time is necessary, for soft and creamy oats and chia seeds (which have lots of fiber and help to fill you up).

    Oats, cinnamon and chia seeds are soaked overnight in milk and maple syrup.

    Top The Oats With Fresh Fruit And Granola

    In the morning, before you serve the overnight oats, prepare the fresh fruit to display on the surface of the oats. I use half a small banana (thinly sliced), a few thinly sliced fresh strawberries, and about 15 fresh blueberries.

    If you have homemade (or store-bought) granola, I recommend adding a couple Tablespoons to the top of the oats as well. They add a wonderful crunch to this dish!

    Give the oats a good stir, then decoratively place the sliced fruit and granola over the surface of the oats. This give this breakfast good visual appeal and lots of color, because “we eat with our eyes first”, right?

    The overnight oats are topped with a variety of fresh sliced fruit and granola.

    Serve And Enjoy The Overnight Oats Fruit Bowl

    I once had a reader ask me if the fruit get “weird” or “mushy” when you heat the oats up after overnight refrigeration, which is when I realized some folks have never eaten overnight oats before.

    So in case you didn’t know… you EAT THE OVERNIGHT OATS FRUIT BOWL COLD!!! Yep… after topping the oats with fruit, you just dig in! The soft and creamy overnight oats are surprisingly good when eaten cold!

    Serve the overnight oats fruit bowl and enjoy the soft creamy oats, sweet fresh fruit, and crunchy granola! All these individual components combine for a delicious, filling, enjoyable, and hearty breakfast!

    I love having an overnight oats fruit bowl for breakfast, and feel confident you will, too! It’s a wonderful way to start the day, and always keeps me full until lunch time!

    A spoonful of overnight oats and blueberries are a good start to breakfast.Overnight Oats Fruit Bowl is a delicious, colorful and filling breakfast!

    I hope you have the opportunity to try this simple breakfast! This recipe, as written below is enough for one serving, but the recipe can EASILY be doubled, tripled, etc. to meet your needs.

    Thank you for stopping by, and I invite you to come back again soon for more family-friendly recipes. Take care, may God bless you… and have a GREAT day.

    Looking For More OVERNIGHT OATS Recipes?

    You can find ALL of my recipes in the Recipe Index, which is located at the top of the page. I have several delicious overnight oats recipes you might enjoy checking out, including:

    Want More Recipes? Get My FREE Newsletter!

    I publish a newsletter 2 times per month (1st and 15th) with lots of recipes, tips, etc..
    Would you like to join our growing list of subscribers?

    There is a Newsletter subscription box on the top right (or bottom) of each blog post, depending on the device you use.
    You can submit your e-mail address there, to be added to my mailing list.

    Find Me On Social Media:

    Facebook page: The Grateful Girl Cooks!
    Pinterest:
    The Grateful Girl Cooks!
    Instagram:
    jbatthegratefulgirlcooks

    Author's signature

    ↓↓ PRINTABLE RECIPE BELOW ↓↓

    0 from 0 votes
    Overnight Oats Fruit Bowl
    Prep Time
    10 mins
    Cook Time
    0 mins
    Refrigeration Time (inactive overnight)
    8 hrs
    Total Time
    8 hrs 10 mins
     

    Make a delicious Overnight Oats Fruit Bowl for breakfast! Maple cinnamon oats are topped with bananas, blueberries, strawberries and granola.

    Category: Breakfast
    Cuisine: All Cuisines
    Keyword: overnight oats fruit bowl
    Servings: 1
    Calories Per Serving: 492 kcal
    Author: JB @ The Grateful Girl Cooks!
    Ingredients
    For Overnight Oats:
    • ½ cup old-fashioned oats uncooked
    • 1 Tablespoon chia seeds
    • ½ teaspoon ground cinnamon
    • 1 teaspoon real maple syrup (can substitute honey)
    • ½ cup milk (I use 1%)
    For Topping: (estimates- use fresh fruit or combinations you enjoy!)
    • ¼ cup granola **See NOTE below
    • ½ small banana thinly sliced
    • 3 medium strawberries de-stemmed, cored, thinly sliced
    • 15 fresh blueberries
    Instructions
    1. Place oats, chia seeds, and cinnamon into a bowl (use a separate bowl for each serving).

    2. Stir in milk and maple syrup (or honey), until all ingredients are well-combined.

    3. Cover the bowl securely with plastic wrap, then refrigerate overnight (at least 8 hours).

    4. In the morning, give the oats a good stir, then decoratively place the sliced fruit and granola on top of the oats.

    5. Serve immediately (while still cold), and enjoy!

    Recipe Notes

    NOTE: If you do not wish to use granola on top, consider using chopped walnuts or sliced almonds for the additional "crunch"!

    Nutrition Facts
    Overnight Oats Fruit Bowl
    Amount Per Serving (1 g)
    Calories 492 Calories from Fat 117
    % Daily Value*
    Fat 13g20%
    Saturated Fat 2g13%
    Trans Fat 0.02g
    Polyunsaturated Fat 5g
    Monounsaturated Fat 3g
    Cholesterol 6mg2%
    Sodium 62mg3%
    Potassium 769mg22%
    Carbohydrates 81g27%
    Fiber 13g54%
    Sugar 26g29%
    Protein 16g32%
    Vitamin A 285IU6%
    Vitamin C 27mg33%
    Calcium 299mg30%
    Iron 4mg22%
    * Percent Daily Values are based on a 2000 calorie diet.

    Here’s one more to pin on your Pinterest boards!Make a delicious Overnight Oats Fruit Bowl for breakfast! Maple cinnamon oats are topped with bananas, blueberries, strawberries and granola.

    Blackberry Apple French Toast Bake

    Blackberry Apple French Toast Bake is a fabulous dish! Make it ahead of time, refrigerate overnight, then bake it for a delicious breakfast!
    Blackberry Apple French Toast Bake is a fabulous dish! Make it ahead of time, refrigerate overnight, then bake it for a delicious breakfast!

    I don’t know about you, but every now and then I love French toast for breakfast! It’s not something we have often, but when we do… YUM!

    Over the years I’ve made many varieties and flavors of baked French toast and “regular” ol’ French toast! Today I want to share a recipe I created for a Blackberry Apple French Toast Bake!

    What I enjoy about this recipe (besides the taste) is that it’s easy to prepare the night BEFORE I want to serve it for breakfast. I mix it together, refrigerate it overnight and then bake it the next morning. This is a simple and absolutely DELICIOUS breakfast! Here’s how to make it.

    Scroll Down For A Printable Recipe Card At The Bottom Of The Page

    Prepare The Bread And Fruit

    Coat the bottom and sides of a 10″ x 8″ baking dish with softened or melted butter. Place cubes of slightly stale day old bread over the bottom of the dish in an even layer.

    The type of bread really doesn’t matter too much. I typically use French or sourdough bread, but have also used white bread to make baked French toast.

    TIP: The most important thing about the bread you use is you don’t want the bread to be fresh or it will turn into a soft “mush” while soaking. It is important to use “stale bread” to retain the structure of the bread cubes.

    Stale bread cubes are place in a buttered baking dish.

    Add blackberries (fresh OR frozen, unthawed) on top of the bread, distributing them evenly. The next thing to do is evenly spread peeled, cored and cubed apple pieces on top of the blackberries. 

    NOTE: When I made it this time, I was able to use fresh, juicy blackberries I picked in our backyard. You CAN use FROZEN blackberries if that’s what you have available, but do NOT thaw them before adding them to the dish.

    Blackberries and apple pieces are spread on top of bread cubes in dish.

    Prepare The Egg Filling

    Place eggs, milk, granulated sugar, vanilla extract and ground cinnamon in a medium bowl. Use a whisk to mix these ingredients, until they     are fully combined. This is the egg filling for the French Toast bake.

    Eggs, milk, sugar, vanilla and cinnamon are whisked together in bowl.Once combined, this becomes the egg filling for baked French toast.

    Soak And Refrigerate

    Slowly pour the egg filling over the top of the bread and fruit, covering as much of the surface as possible, for best results.

    Use the back of a large spoon to gently press down on the bread and fruit in order to moisten them with the egg filling. The filling will not cover them, but try to get as much of the bread and fruit pressed down into the liquid as possible, for best results.

    Tightly cover the baking dish with plastic wrap or foil, then place the dish in a refrigerator to chill and “soak” overnight (at least 8 hours). The bread will soak up most of the liquid while it chills.

    Fruit and bread are pressed down into egg mixture using the back of a spoon.Dish is covered, then is refrigerated overnight.

    Bake The French Toast

    After it refrigerates overnight, take the baking dish out and let it sit at room temperature for 30 minutes BEFORE popping it in the oven. While it comes to room temperature, preheat your oven to 350°F.

    Remove the plastic wrap (or foil), and then bake the French toast at 350°F. for 45-50 minutes. When done, the Blackberry Apple French Toast Bake should be golden brown and the egg filling should be set in the middle.

    When done cooking, Blackberry Apple French Toast Bake cools slightly.

    Remove the baking dish from the oven and let the French toast cool slightly before slicing it into 9 portions for serving.

    The French toast bake is sliced into 9 servings.

    Serve The Blackberry Apple French Toast Bake

    Place each serving on a plate, and sift powdered sugar on top. This “garnish” is optional, but it is a nice touch that makes the French toast look and taste great, too!

    You can also drizzle maple syrup on top of each serving for added sweetness, if desired. Serve warm, and enjoy this delicious breakfast treat!

    Sifted powdered sugar garnishes each piece of the French Toast bake.A piece of Blackberry Apple French Toast Bake, with powdered sugar and syrup.

    I hope you have the opportunity to try this recipe, and trust you will enjoy it as much as we do! It’s a delicious breakfast (with 9 servings), so it’s a perfect choice for a large family, holidays or when you have extra guests.

    Thank you so much for visiting my website, and I invite you to come back again soon for more family-friendly recipes. Take care, may God bless you… and have a wonderful day.

    Looking For More FRENCH TOAST RECIPES?

    You can find ALL of my recipes in the Recipe Index, which is located at the top of the page. I have a nice variety of French Toast recipes to choose from, including:

    Want More Recipes? Get My FREE Newsletter!

    I publish a newsletter 2 times per month (1st and 15th) with lots of recipes, tips, etc..
    Would you like to join our growing list of subscribers?

    There is a Newsletter subscription box on the top right (or bottom) of each blog post, depending on the device you use.
    You can submit your e-mail address there, to be added to my mailing list.

    Find Me On Social Media:

    Facebook page: The Grateful Girl Cooks!
    Pinterest:
    The Grateful Girl Cooks!
    Instagram:
    jbatthegratefulgirlcooks

    Author's signature

    ↓↓ PRINTABLE RECIPE BELOW ↓↓

    0 from 0 votes
    Blackberry Apple French Toast Bake
    Prep Time
    10 mins
    Cook Time
    45 mins
    Overnight Refrigeration (inactive prep)
    8 hrs
    Total Time
    8 hrs 55 mins
     

    Blackberry Apple French Toast Bake is a fabulous dish! Make it ahead of time, refrigerate overnight, then bake it for a delicious breakfast!

    Category: Breakfast
    Cuisine: All Cuisines
    Keyword: blackberry, apple, French toast
    Servings: 9
    Calories Per Serving: 492 kcal
    Author: JB @ The Grateful Girl Cooks!
    Ingredients
    • 1 Tablespoon butter melted or soft
    • 5 cups day old bread cut in bite-size cubes
    • cup blackberries fresh OR frozen (do NOT thaw)
    • 1 medium apple peeled/cored/ cut in bite-size cubes
    For Egg Filling:
    • 5 large eggs
    • cups milk
    • ½ cup granulated sugar
    • 1 teaspoon vanilla extract
    • 1 teaspoon ground cinnamon
    For Serving: sifted powdered sugar and/or maple syrup
      Instructions
      1. Coat bottom and sides of a 10" x 8" baking dish with soft or melted butter. Place bread cubes in an even layer on the bottom of the dish.

      2. Add blackberries (fresh OR frozen, unthawed) on top of the bread, spreading them evenly. Spread apples on top of the blackberries.

      3. Place eggs, milk, sugar, vanilla and cinnamon in a medium bowl; whisk/mix until fully combined.

      4. Pour egg filling over bread/fruit, covering as much of the fruit/bread as possible. Use the back of a large spoon to gently press down on bread/fruit to moisten them with liquid. Liquid will not cover them, but get as much bread/fruit as possible saturated in the liquid. Tightly cover dish with plastic wrap or foil; refrigerate overnight (at least 8 hours).

      5. In morning, remove dish from fridge; let sit at room temp. 30 minutes BEFORE baking. While it sits, preheat oven to 350°F. Bake (uncovered) at 350°F. for 45-50 minutes, until golden brown on top and egg filling is set in the middle.

      6. Remove from oven; let cool slightly before slicing it into 9 portions. If desired, sift powdered sugar on each piece and/or drizzle with maple syrup. Serve warm.

      Recipe Notes

      TIP: The most important thing about the bread you use is you don't want the bread to be fresh or it will turn into a soft "mush" while soaking. It's important to use "stale bread" to retain the structure of the bread cubes.

      Nutrition Facts
      Blackberry Apple French Toast Bake
      Amount Per Serving (1 g)
      Calories 492 Calories from Fat 90
      % Daily Value*
      Fat 10g15%
      Saturated Fat 3g19%
      Trans Fat 0.1g
      Polyunsaturated Fat 3g
      Monounsaturated Fat 2g
      Cholesterol 109mg36%
      Sodium 687mg30%
      Potassium 342mg10%
      Carbohydrates 81g27%
      Fiber 7g29%
      Sugar 24g27%
      Protein 19g38%
      Vitamin A 323IU6%
      Vitamin C 5mg6%
      Calcium 239mg24%
      Iron 5mg28%
      * Percent Daily Values are based on a 2000 calorie diet.

      Here’s one more to pin on your Pinterest boards!Blackberry Apple French Toast Bake is a fabulous dish! Make it ahead of time, refrigerate overnight, then bake it for a delicious breakfast!

      Chocolate Chip Granola Bars

      Make 16 delicious, chewy Chocolate Chip Granola Bars for family and friends! These granola bars are easy to make and they taste fabulous!
      Make 16 delicious, chewy Chocolate Chip Granola Bars for family and friends! These granola bars are easy to make and they taste fabulous!

      Today I want to share a fantastic recipe for chocolate chip granola bars that we LOVE! These granola bars taste amazing AND they freeze well, so you can keep them around, even if you have a very small family!

      Since the recipe as written yields 16 granola bars, it makes it convenient to have them around for lunch boxes, or a quick snack. Making them from scratch (with common ingredients) is actually quite simple!

      I’m sure you are going to love these yummy granola bars! Here’s how to make 16 delicious Chocolate Chip Granola Bars from scratch!

      Scroll Down For A Printable Recipe Card At The Bottom Of The Page

      Make The Granola Bar Dough

      Place soft butter, granulated sugar and brown sugar in a large bowl. Use electric beaters to cream and fully mix these ingredients together.

      Add an egg, corn syrup (or honey), and vanilla extract to the mixture, and continue to beat, until they’re fully combined.

      Butter, brown sugar and granulated sugar are beaten with a mixer.Egg, vanilla and corn syrup (or honey) are mixed into the dough.

      Add the “Dry Ingredients”

      In a separate bowl, combine all purpose flour, ground cinnamon, baking soda and salt. Add these “dry” ingredients, A LITTLE AT A TIME to the butter/egg mixture, beating well after each addition. The dough will be very thick.

      Flour, cinnamon, baking soda and salt are combined, then added to the dough.

      Add chocolate chips, old fashioned oats, and finely crushed graham crackers to the dough. STIR these ingredients into the dough, until they have been completely incorporated.

      NOTE: I use a combination of ½ cup miniature semi-sweet chocolate chips and ½ cup regular sized milk chocolate chips, but you can use whatever variety you have (for a total of 1 cup chocolate chips).

      Graham cracker crumbs, chocolate chips and oats are stirred into the dough.The dough for chocolate chip granola bars is ready for the baking pan.Prepare The Dough For Baking

      Prepare a 13″ x 9″ baking pan. Spray a small amount of non-stick spray on the bottom of the pan (to help hold the paper in place), then place a (larger than the pan) piece of parchment paper on top.

      TIP: You want the side edges of the paper long enough so you can hold onto them to lift the granola bars easily out of the pan after baking!

      Spray the parchment paper lightly on the bottom and sides with non-stick spray. If you have them, I suggest using “chip clips” to hold the parchment paper in place while adding the thick dough (it helps!)

      Baking pan is covered with lightly sprayed parchment paper.Add The Dough

      Spoon all the dough into the prepared baking pan. Spray or grease your fingers lightly, then firmly press down on the dough and begin distributing it throughout the entire pan.

      Keep packing the dough firmly down until it is FULLY covering the bottom of the pan into all four corners. If using, remove the “chip clips” now. 

      Dough for the granola bars is added to the parchment paper-lined pan.Dough is pressed down into the pan until bottom of pan is covered.

      Time To Bake

      Bake the chocolate chip granola bars in a preheated oven at 350°F for 20-25 minutes. When done, the edges of the bars should be crisp, and the entire pan of bars should be nicely browned on top.

      Transfer the pan to a wire rack, and let the bars cool (still in the pan) for 10 minutes (they will firm up as they “cool”).

      Using the overhanging edges of parchment paper, carefully lift the entire pan of granola bars up and out of the baking pan. Place the granola bars (still on the paper) back on the wire rack, and let them cool to room temperature before slicing.

      Baked granola bar dough cools on parchment paper on a wire rack.

      Slice The Chocolate Chip Granola Bars

      When the bars are at room temperature, they can be sliced into their familiar rectangular shape. First cut the bars in half (top to bottom) using a very sharp knife OR a pizza cutter (my favorite!) You will have 2 halves.

      Now slice the bars in half going the opposite direction (side to side). You should now have 4 sections at this point! Slice each section in half (from top to bottom, as shown below in 2nd photo). You should now have 8 rectangles.

      The final step is to slice each cut all 8 pieces in half (top to bottom), which will leave you with 16 rectangular chocolate chip granola bars (in 3rd photo below). HOORAY… YOU DID IT!

      Baked granola bars are cut in half using a pizza cutter.The dough is then sliced into 8 pieces.Chocolate chip granola bars are cut into 16 rectangles before serving.

      Serve The Chocolate Chip Granola Bars

      Now you can enjoy these absolutely scrumptious chocolate chip granola bars! They are slightly crisp on the outside edge, but chewy on the inside.

      Wrap all the remaining granola bars individually in plastic wrap, to preserve their freshness. We set them out on a plate once wrapped, and they stay fresh for days. They’re also perfect to add to a lunch box for the kids or take in the car (to munch on while driving to work)!

      These chocolate chip granola bars also freeze VERY WELL. After wrapping them individually, place them in a large re-sealable freezer bag or container and freeze. When ready to use them later, simply thaw, unwrap and enjoy!

      A hand holding a chocolate chip granola bar, with 3 in the background.A white plate holding plastic-wrapped chocolate chip granola bars.

      I really hope you have the chance to make these chocolate chip granola bars! We absolutely LOVE them, and trust you and those you love will, too!

      Thanks for stopping by my website today, and I invite you to come back soon for more family-friendly recipes. Take care, may God bless you… and have a wonderful day!

      Looking For More “Bar Cookie” Style Recipes?

      You can find ALL of my recipes in the Recipe Index, which is located at the top of the page. I have lots of yummy bar cookie recipes to choose from, including:

      Want More Recipes? Get My FREE Newsletter!

      I publish a newsletter 2 times per month (1st and 15th) with lots of recipes, tips, etc..
      Would you like to join our growing list of subscribers?

      There is a Newsletter subscription box on the top right (or bottom) of each blog post, depending on the device you use.
      You can submit your e-mail address there, to be added to my mailing list.

      Find Me On Social Media:

      Facebook page: The Grateful Girl Cooks!
      Pinterest:
      The Grateful Girl Cooks!
      Instagram:
      jbatthegratefulgirlcooks

      Author's signature

      Recipe adapted from: “Dining On A Dime Cookbook”, by Tawra Kellam and Jill Cooper, page 290, published by T & L Group in 2004

      ↓↓ PRINTABLE RECIPE BELOW ↓↓

      0 from 0 votes
      Chocolate Chip Granola Bars
      Prep Time
      15 mins
      Cook Time
      22 mins
      Total Time
      37 mins
       

      Make 16 delicious, chewy Chocolate Chip Granola Bars for family and friends! These granola bars are easy to make and they taste fabulous!

      Category: Dessert, Snack
      Cuisine: All Cuisines
      Keyword: chocolate chip granola bars
      Servings: 16 bars
      Calories Per Serving: 285 kcal
      Author: JB @ The Grateful Girl Cooks!
      Ingredients
      • ¾ cup brown sugar dark or light
      • ½ cup granulated sugar
      • ½ cup butter , soft
      • 2 Tablespoons honey or light corn syrup
      • ½ teaspoon vanilla extract
      • 1 large egg
      • 1 cup all purpose flour
      • 1 teaspoon ground cinnamon
      • ½ teaspoon baking soda
      • ¼ teaspoon salt
      • cups old fashioned oats uncooked
      • cups finely crushed graham crackers approx. 4-5 rectangular graham crackers
      • ½ cup mini semi-sweet chocolate chips
      • ½ cup milk chocolate chips
      Instructions
      1. Preheat oven to 350℉. Lightly spray a 13" x 9" baking pan, then place parchment paper on top. TIP: Paper should be long enough to hang over the sides of the pan, so you can lift granola bars easily out, after baking! Spray the parchment paper on bottom/sides with non-stick spray. *If you have them, use "chip clips" to hold parchment paper in place while adding dough.

      2. Cream butter, granulated and brown sugars in a large bowl, using electric mixer. Add egg, corn syrup (or honey), and vanilla. Beat well, until fully combined.

      3. In separate bowl, combine flour, cinnamon, baking soda and salt. Add them (a little at a time) to butter/egg mixture, beating well after each addition. STIR chocolate chips, oats, and graham cracker crumbs into the dough, until combined.

      4. Add dough to prepared pan. Spray/grease fingers lightly, then firmly press down on the dough. Keep packing dough down firmly until bottom of the pan and all corners are covered. *Remove "chip clips", if using.*

      5. Bake at 350°F for 20-25 minutes. When done, edges should be crisp, and bars nicely browned on top. Transfer pan to a wire rack; let bars cool (in pan) for 10 minutes. Using parchment paper edges, carefully lift granola bars out of the pan. Place granola bars (still on the paper) on wire rack; cool to room temperature (they'll firm up more as they "cool").

      6. Cut bars in half (top to bottom) using sharp knife OR pizza cutter. You should have 2 halves. Now slice the bars in half going the opposite direction (side to side). You should now have 4 sections. Slice each section in half (top to bottom). You should now have 8 rectangles. Slice all 8 pieces in half (top to bottom). You should have 16 granola bars. Serve and enjoy.

      7. *Wrap each bar individually in plastic wrap to keep fresh and chewy. If freezing, place wrapped bars in airtight freezer bag or container.

      Recipe Notes

      NOTE: If you only have one type of chocolate chips, use that! Make sure you use 1 cup total. The caloric calculation was made using the ingredients listed.

      Nutrition Facts
      Chocolate Chip Granola Bars
      Amount Per Serving (1 granola bar)
      Calories 285 Calories from Fat 99
      % Daily Value*
      Fat 11g17%
      Saturated Fat 6g38%
      Trans Fat 0.3g
      Polyunsaturated Fat 1g
      Monounsaturated Fat 3g
      Cholesterol 28mg9%
      Sodium 175mg8%
      Potassium 112mg3%
      Carbohydrates 43g14%
      Fiber 2g8%
      Sugar 26g29%
      Protein 4g8%
      Vitamin A 211IU4%
      Vitamin C 0.1mg0%
      Calcium 35mg4%
      Iron 2mg11%
      * Percent Daily Values are based on a 2000 calorie diet.

      Here’s one more to pin on your Pinterest boards!Make 16 delicious, chewy Chocolate Chip Granola Bars for family and friends! These granola bars are easy to make and they taste fabulous!


      Blueberry Lemon Poppyseed Muffins

      Blueberry Lemon Poppyseed Muffins are absolutely delicious! Juicy blueberries, lemon juice, zest and poppyseeds are the stars! Makes 12.
      Blueberry Lemon Poppyseed Muffins are absolutely delicious! Juicy blueberries, lemon juice, zest and poppyseeds are the stars! Makes 12.

      I don’t know about you, but I LOVE blueberry muffins! My love for this type of muffin goes way back, and I am always on the hunt for new recipes to try.

      I have posted several blueberry muffin recipes on this blog previously (
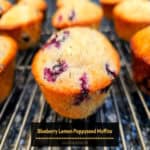
Blueberry Lemon Muffins, Blueberry Crumble Muffins, and several others). Today I am adding a new blueberry muffin recipe to this collection, because we really enjoy this one, too!

      I found a cut-out recipe in one of my Mom’s old recipe boxes a while ago, and am finally getting around to sharing it here. It is a very easy recipe to make, and I’m sure you’re going to like it, too! Here’s how to make one dozen blueberry lemon poppyseed muffins.

      Scroll Down for A Printable Recipe Card At the Bottom Of The Post

      Make The Muffin Batter

      Before making the batter, preheat your oven to 400°F. and generously spray/grease the bottom and sides of a 12 cup standard-sized muffin pan. The batter comes together very quickly, so you will want the oven hot and ready to go once the batter’s ready!

      In a large mixing bowl, mix flour, sugar, baking powder, salt and poppyseeds together until combined.  Add COLD butter that’s been cut into small pieces.

      Use a pastry blender (or two forks) to cut the butter in, until it is has been reduced to the size of peas. Set the bowl aside.

      Flour, sugar, baking powder, salt and poppyseeds in a large, white bowl.Cold pieces of butter are cut into the dry ingredients using a pastry blender.

      Lightly beat one large egg, grated lemon rind, lemon juice, and vanilla extract in a small bowl until combined.

      Add the egg mixture to the flour mixture. Stir the ingredients only until they are blended into a thick batter. Do not overmix.

      Egg, milk, lemon zest, lemon juice and vanilla stirred into the dry ingredients.Batter for the blueberry lemon poppyseed muffins is thick.

      Add The Blueberries

      Now it’s time to add the blueberries. Before adding them to the batter, put them in a small bowl and add 1 Tablespoon of flour. Gently stir until the blueberries are coated with flour.

      Add the flour-coated blueberries to the batter. *When the berries are covered in flour, it helps them NOT sink to the bottom of the muffins, but stay suspended in the batter.

      Fresh blueberries are coated with flour in a bowl.Flour-covered blueberries are added to the muffin batter.

      Gently fold the berries into the batter until they’re distributed evenly. Now it’s time to make some tasty muffins!

      The muffin batter is now fully combined and ready to go.

      Divide the batter evenly into lightly greased, standard-sized muffin cups. You should have enough batter for 12 muffins. Each muffin cup should be about two-thirds full.

      Lightly sprinkle 1 Tablespoon of sugar over top of the batter, dividing the sugar equally between the 12 muffins. 

      Batter is distributed in pan and muffin tops are sprinkled with sugar.

      Bake The Blueberry Lemon Poppyseed Muffins

      Bake the blueberry lemon poppyseed muffins at 400°F. for 19-20 minutes. The muffins will be golden brown on top. To test for doneness, insert a toothpick into the center of a muffin. If it comes out clean and batter-free, the muffins are done!

      Transfer the muffin pan to a wire rack, and let the muffins cool for 1 minute, then lift and remove them from the pan with a butter knife (or spatula). Let the blueberry lemon poppyseed muffins cool slightly on the wire rack before serving.

      Blueberry Lemon Poppyseed Muffins cool on wire rack after baking.A side view of one of the muffins on a wire rack.

      Time To Enjoy A Delicious Muffin!

      The muffins are delicious served warm or at room temperature. Our favorite way to eat them is warm, with a tiny bit of soft butter spread on them.

      Ooh… they are so good, and the blueberries are juicy and spread throughout the muffins! I think you will love them!

      A blueberry lemon poppyseed muffin, sliced open and spread with butter.Butter inside warm blueberry lemon poppyseed muffins, on a white plate.

      I hope you have the opportunity to make these yummy muffins for yourself, your family and/or your friends. They are so good, and I’m confident you’ll enjoy them!

      Thank you for visiting my website today, and I invite you to come back again soon for more family-friendly recipes! Take care, may God bless you… and have a wonderful day.

      Looking For More MUFFIN Recipes?

      You can find ALL of my recipes in the Recipe Index, which is located at the top of the page. I have LOTS of fabulous muffin recipes to check out, including:

      Want More Recipes? Get My FREE Newsletter!

      I publish a newsletter 2 times per month (1st and 15th) with lots of recipes, tips, etc..
      Would you like to join our growing list of subscribers?

      There is a Newsletter subscription box on the top right (or bottom) of each blog post, depending on the device you use.
      You can submit your e-mail address there, to be added to my mailing list.

      Find Me On Social Media:

      Facebook page: The Grateful Girl Cooks!
      Pinterest:
      The Grateful Girl Cooks!
      Instagram:
      jbatthegratefulgirlcooks

      Author's signature

      Original recipe source: unknown (found on a cut out piece of paper in an old recipe box of my Mom’s).

      ↓↓ PRINTABLE RECIPE BELOW ↓↓

      0 from 0 votes
      Blueberry Lemon Poppyseed Muffins
      Prep Time
      10 mins
      Cook Time
      20 mins
      Total Time
      30 mins
       

      Blueberry Lemon Poppyseed Muffins are absolutely delicious! Juicy blueberries, lemon juice, zest and poppyseeds are the stars! Makes 12.

      Category: Breakfast, Snack
      Cuisine: All Cuisines
      Keyword: blueberry lemon poppyseed muffins
      Servings: 12 muffins
      Calories Per Serving: 214 kcal
      Author: JB @ The Grateful Girl Cooks!
      Ingredients
      • 2 cups all purpose flour **PLUS 1 Tablespoon for blueberries
      • 1 cup granulated sugar **PLUS 1 Tablespoon for muffin topping
      • 1 Tablespoon baking powder
      • 1 teaspoon salt
      • 2 teaspoons poppyseeds
      • 6 Tablespoons cold butter
      • 1 large egg
      • cup milk
      • 2 teaspoons lemon zest finely grated lemon rind (yellow part only)
      • 2 Tablespoons fresh lemon juice
      • 1 teaspoon vanilla extract
      • 1 cup blueberries
      Instructions
      1. Preheat oven to 400°F. Generously spray/grease a 12 cup standard muffin pan.

      2. In a large bowl, mix flour, sugar, baking powder, salt and poppyseeds together. Add COLD butter (cut into small pieces). Use a pastry blender (or 2 forks) to cut the butter in until it's reduced to the size of peas. Set the bowl aside.

      3. Lightly beat egg, grated lemon rind, lemon juice, and vanilla extract in a small bowl until combined. Add egg mixture to the flour mixture. Stir only until they are blended into a thick batter. Do not overmix.

      4. Put blueberries in a small bowl; add 1 Tablespoon flour. Gently stir until blueberries are coated with flour. Gently fold the berries into the batter. Batter will be thick.

      5. Divide batter evenly into greased muffin cups. You should have enough batter for 12 muffins. Each muffin cup should be about two-thirds full. Lightly sprinkle 1 Tbl. sugar over the top of the muffins, dividing it equally between all 12 muffins. 

      6. Bake muffins at 400°F. for 19-20 minutes. Muffins will be golden brown on top. To test for doneness, insert a toothpick into the center of a muffin. If it comes out clean and batter-free, the muffins are done! Transfer pan to a wire rack; let muffins cool for 1 minute, then lift and remove them from the pan with a knife (or spatula). Let muffins cool slightly on wire rack before serving. Enjoy!

      Nutrition Facts
      Blueberry Lemon Poppyseed Muffins
      Amount Per Serving (1 muffin)
      Calories 214 Calories from Fat 63
      % Daily Value*
      Fat 7g11%
      Saturated Fat 4g25%
      Trans Fat 0.2g
      Polyunsaturated Fat 1g
      Monounsaturated Fat 2g
      Cholesterol 31mg10%
      Sodium 252mg11%
      Potassium 169mg5%
      Carbohydrates 36g12%
      Fiber 1g4%
      Sugar 19g21%
      Protein 3g6%
      Vitamin A 230IU5%
      Vitamin C 3mg4%
      Calcium 76mg8%
      Iron 1mg6%
      * Percent Daily Values are based on a 2000 calorie diet.

      Here’s one more to pin on your Pinterest boards!Blueberry Lemon Poppyseed Muffins are absolutely delicious! Juicy blueberries, lemon juice, zest and poppyseeds are the stars! Makes 12.

      Cheesy Hash Brown Casserole

      Cheesy Hash Brown Casserole is an easy side dish, with cheddar and pepper jack cheeses, onions, bell peppers and sour cream. It tastes GREAT!
      Cheesy Hash Brown Casserole is an easy side dish, w/ cheddar and pepper jack cheeses, onions, bell peppers and sour cream. It tastes GREAT!

      Today I want to share a classic recipe for cheesy hash brown casserole. This casserole dish has existed (with many ingredient variations) for as long as I can remember and has many different “names”.

      I’ve heard it called “Potato Casserole”, “Hash Brown and Cheese Casserole”, and my personal favorite from many years ago… “Funeral Potatoes”. It seems like everyone enjoys this simple shredded potato recipe… even people sharing a meal after a funeral!

      The recipe is really quite simple, but it’s truly delicious (and any leftovers can be easily reheated in a microwave!). Here’s how I make this delicious, cheesy hash brown casserole.

      Scroll Down For A Printable Recipe Card At The Bottom Of The Page

      Make The Seasoning “Sauce”

      The seasoning “sauce” for this casserole is actually a binder that basically holds all the ingredients together. It only has two ingredients, which are sour cream and chicken bouillon powder.

      I’ve found the chicken bouillon powder provides wonderful flavor without having to add too many other spices. NOTE: You can substitute vegetable bouillon powder (for vegetarians), but I prefer the overall flavor of this casserole using chicken bouillon powder.

      Combine the sour cream and bouillon powder in a small bowl, and stir well until fully incorporated, then set the bowl aside.

      Sour cream and chicken bouillon powder are combined in a small metal bowl.Seasoned sour cream becomes the binder for remaining casserole ingredients.

      Prepare The Casserole

      In a large bowl, combine shredded hash browns, onion, green pepper, pepper jack cheese, cheddar cheese, salt and black pepper. Set aside some of the cheddar cheese to sprinkle over the top of the casserole before baking.

      NOTE: If you are using frozen hash browns, let them partially thaw before adding them to the bowl with the other ingredients.

      Stir to combine, then add the sour cream/chicken bouillon mixture. Continue stirring until all ingredients are fully mixed and incorporated.

      Casserole ingredients are combined in a large mixing bowl.Seasoned sour cream is stirred into the other casserole ingredients in bowl.

      Spray the bottom and sides of a 9″ x 9″ square baking dish with non-stick spray. Pour the casserole mixture into the baking dish, and spread to cover.

      Use the back of a spoon to press down on the mixture to flatten and slightly compact it into the baking dish. Sprinkle the remaining cheddar cheese over the top of the cheesy hash brown casserole.

      Casserole mixture is pressed into a greased 9" square baking dish.Shredded cheddar cheese is sprinkled on top of the casserole before baking.

      Bake The Casserole

      Place the casserole in a preheated 350°F. oven. Bake it for 45-50 minutes. When it’s done, the edges should be golden brown and the casserole should be cooked through in the center of the dish.

      Transfer the cheesy hash brown casserole to a wire rack, and let it cool slightly so it will firm up before slicing into 9 pieces, each one being about 3″ square. 

      Cheesy hash brown casserole cools on a wire rack after baking.

      Serve The Cheesy Hash Brown Casserole

      Now all that is left to do is serve and enjoy this delicious casserole! We really enjoy it as a breakfast dish, served with eggs an fruit on the side.

      This casserole also can be served with a variety of meat dishes (for dinner or lunch), as well. After all, it is a potato dish at its very core, right? Potatoes, sour cream, onions, bell peppers and cheese pair well to create a wonderful side dish!

      A look at the inside of the casserole after pieces have been removed.A piece of cheesy hash brown casserole, served with eggs and strawberries.

      I really hope you try this scrumptious recipe for cheesy has brown casserole. It REALLY is yummy, and I am confident you’re going to love it, too!

      You can store any leftovers you might have in the refrigerator (covered). This casserole reheats very well in a microwave, so it’s perfect to enjoy over a few days time.

      Thanks so much for stopping by, and I invite you to come back again soon for more family-friendly recipes. Take care, may God bless you, and have a GREAT day!

      Looking For More POTATO Recipes?

      You can find ALL of my recipes in the Recipe Index, which is located at the top of the page. I have a wonderful variety of recipes featuring potatoes, including:

      Want More Recipes? Get My FREE Newsletter!

      I publish a newsletter 2 times per month (1st and 15th) with lots of recipes, tips, etc..
      Would you like to join our growing list of subscribers?

      There is a Newsletter subscription box on the top right (or bottom) of each blog post, depending on the device you use.
      You can submit your e-mail address there, to be added to my mailing list.

      Find Me On Social Media:

      Facebook page: The Grateful Girl Cooks!
      Pinterest:
      The Grateful Girl Cooks!
      Instagram:
      jbatthegratefulgirlcooks

      Author's signature

      ↓↓ PRINTABLE RECIPE BELOW ↓↓

      0 from 0 votes
      Cheesy Hash Brown Casserole
      Prep Time
      10 mins
      Cook Time
      45 mins
      Total Time
      55 mins
       

      Cheesy Hash Brown Casserole is an easy side dish, w/ cheddar and pepper jack cheeses, onions, bell peppers and sour cream. It tastes GREAT!

      Category: Breakfast, Side Dish
      Cuisine: American
      Keyword: cheesy hash brown casserole
      Servings: 9
      Calories Per Serving: 144 kcal
      Author: JB @ The Grateful Girl Cooks!
      Ingredients
      • ¾ cup light sour cream
      • 2 teaspoons chicken bouillon powder
      • 16 ounces shredded hash browns if frozen, let them partially thaw
      • ¾ cup pepper jack cheese (shredded)
      • ¾ cup cheddar cheese (shredded) **DIVIDED USE**
      • 3 Tablespoons chopped green bell pepper
      • 3 Tablespoons chopped yellow onion
      • ½ teaspoon salt
      • ¼ teaspoon black pepper
      Instructions
      1. Preheat oven to 350℉. Lightly grease or spray a 9" x 9" square baking dish.

      2. Combine sour cream and chicken bouillon powder in a small bowl. Stir well until combined; set bowl aside.

      3. In large bowl, combine hash browns, onion, green pepper, pepper jack cheese, ½ cup cheddar cheese, salt and black pepper. *Reserve remaining ¼ cup cheddar cheese. NOTE: If using frozen hash browns, let them partially thaw before adding.

      4. Stir to combine, then add reserved sour cream/chicken bouillon mixture. Continue stirring until all ingredients are fully mixed.

      5. Pour casserole mixture into greased baking dish; spread to cover. Use the back of a spoon to press down on mixture to flatten/slightly compact it into baking dish. Sprinkle remaining ¼ cup cheddar cheese on top of casserole.

      6. Bake at 350°F. for 45-50 minutes. When done, edges should be golden brown and casserole will be cooked through in the center. Transfer to a wire rack to cool slightly (so it firms up) before slicing into 9 pieces. Serve and enjoy!

      Nutrition Facts
      Cheesy Hash Brown Casserole
      Amount Per Serving (1 slice (1/9 of total))
      Calories 144 Calories from Fat 72
      % Daily Value*
      Fat 8g12%
      Saturated Fat 5g31%
      Polyunsaturated Fat 0.4g
      Monounsaturated Fat 2g
      Cholesterol 25mg8%
      Sodium 381mg17%
      Potassium 212mg6%
      Carbohydrates 11g4%
      Fiber 1g4%
      Sugar 0.4g0%
      Protein 6g12%
      Vitamin A 241IU5%
      Vitamin C 7mg8%
      Calcium 171mg17%
      Iron 1mg6%
      * Percent Daily Values are based on a 2000 calorie diet.

      Here’s one more to pin on your Pinterest boards!Cheesy Hash Brown Casserole is an easy side dish, w/ cheddar and pepper jack cheeses, onions, bell peppers and sour cream. It tastes GREAT!

      Blackberry Pecan Crisp

      Make a delicious Blackberry Pecan Crisp any time, using fresh or frozen blackberries! This simple dessert is topped with crumbly streusel.
      Make a delicious Blackberry Pecan Crisp any time, using fresh or frozen blackberries! This simple dessert is topped with crumbly streusel.

      Do you enjoy blackberries? We sure do! We have wild blackberry vines that grow over part of our back fence from a neighboring park, and I love to pick them each summer and make wonderful treats using them!

      The recipe I’m sharing today is fairly similar to a blackberry crisp recipe I’ve posted in the past, but this one includes pecans in the streusel topping. I also changed a few of the ingredients, and the quantities I used to make this are also different in this particular recipe.

      Fresh OR frozen (unthawed) blackberries can be used in this recipe, which makes it convenient to make this dessert any time of the year!

      It’s a simple, classic dessert recipe I’m sure you’ll enjoy, because it is DELICIOUS! Here’s how to make blackberry pecan crisp.

      Scroll Down For A Printable Recipe Card At The Bottom Of The Page

      Make The Streusel Topping

      To make the streusel topping for the blackberry crisp, whisk together old fashioned oats, flour, brown sugar and salt in a large mixing bowl. Continue mixing until combined, breaking up any brown sugar lumps you may find in the streusel topping.

      Add COLD butter chunks to this mixture. Use a pastry blender or two forks to cut the butter into the streusel topping until the butter is about the size of peas.

      Stir in chopped pecans, until they have been incorporated into the streusel. Set the bowl of streusel topping aside.

      A streusel topping is combined to use on the fruit crisp.Chopped pecans are stirred into the streusel topping for the blackberry crisp.

      Prepare The Blackberry Filling

      TIP: You can use fresh OR frozen blackberries for this recipe. If using frozen blackberries, do not thaw them before adding!

      Place blackberries, granulated sugar, all purpose flour and lemon juice in a large mixing bowl. Stir gently, until the ingredients are fully combined.

      Blackberries are combined with sugar, flour and lemon juice in a bowl.The blackberry filling is now combined and ready for the baking dish.

      Into The Baking Pan It Goes!

      Lightly spray or grease a baking dish, approximately 6″ x 9″ or  you can use an 8″ square pan. Be sure to spray the pan on the bottom and all sides.

      Spread the blackberry filling in the baking dish, evenly distributing it across the bottom until the pan is filled.

      NOTE: Occasionally I will use disposable aluminum pans that come with lids, so I can freeze the blackberry crisp after it has been baked (and cooled)! I made this one (shown below in the photos) in the Fall, but we thawed it, and enjoyed it (reheated) in January!

      A baking dish filled with the blackberry fruit filling.

      Bake The Blackberry Pecan Crisp

      Sprinkle the blackberry fruit filling with all of the streusel topping, making sure the entire top is covered. Once it is fully covered, the blackberry pecan crisp is ready for the oven!

      Bake at 350°F. for about 40-45 minutes. When done, the blackberry pecan crisp should be bubbly all around the edges, and it should be golden brown on top.

      Transfer the baking dish to a wire rack and let the crisp cool for 15 minutes before serving. The filling will thicken and firm up a bit as it cools, which will help with easier serving.

      Pecan streusel topping is sprinkled over the surface of the blackberry crisp.The blackberry pecan crisp cools on a wire rack after being baked.

      Time To Enjoy The Blackberry Pecan Crisp

      Once the crisp has cooled slightly (15 minutes of patiently waiting!), it’s time to serve this delicious dessert!

      Spoon out individual servings, and top each portion with a nice scoop of vanilla ice cream. I’m pretty sure somewhere there’s an unwritten law that states that cobblers and crisps must be served a la mode… ha ha!

      The slightly warm (and oh so delicious) blackberry pecan crisp will  begin to soften that ice cream perfectly! Grab a fork or spoon and dig in! Its absolutely delicious, and I’m confident you’re going to enjoy this treat.

      A serving of blackberry pecan crisp on a plate, with a scoop of vanilla ice cream.

      I really hope you enjoy this classic dessert, and will enjoy this recipe for many years to come! Whether you use fresh berries or frozen, this is a simple and absolutely yummy fruit crisp!

      We store any leftover blackberry crisp (covered) in the refrigerator, and then leftovers can be easily reheated in a microwave to enjoy later!

      Thanks for stopping by, and I invite you to come back again soon for more family-friendly recipes. Take care, may God bless you, and have a GREAT day!

      Looking For More COBBLER AND CRISP Recipes?

      You can find ALL of my recipes in the Recipe Index, which is located at the top of the page. I have quite a few delicious cobbler and crisp recipes, including:

      Want More Recipes? Get My FREE Newsletter!

      I publish a newsletter 2 times per month (1st and 15th) with lots of recipes, tips, etc..
      Would you like to join our growing list of subscribers?

      There is a Newsletter subscription box on the top right (or bottom) of each blog post, depending on the device you use.
      You can submit your e-mail address there, to be added to my mailing list.

      Find Me On Social Media:

      Facebook page: The Grateful Girl Cooks!
      Pinterest:
      The Grateful Girl Cooks!
      Instagram:
      jbatthegratefulgirlcooks

      Author's signature

      ↓↓ PRINTABLE RECIPE BELOW ↓↓

      0 from 0 votes
      Blackberry Pecan Crisp
      Prep Time
      10 mins
      Cook Time
      40 mins
      Total Time
      50 mins
       

      Make a delicious Blackberry Pecan Crisp any time, using fresh or frozen blackberries! This simple dessert is topped with crumbly streusel.

      Category: Dessert
      Cuisine: American
      Keyword: blackberry pecan crisp
      Servings: 8
      Calories Per Serving: 485 kcal
      Author: JB @ The Grateful Girl Cooks!
      Ingredients
      For Streusel Topping
      • cups old-fashioned oats
      • 1 cup all purpose flour
      • 1 cup dark brown sugar (packed)
      • ¼ teaspoon salt
      • 12 Tablespoons COLD butter = 1½ sticks, cold & cut in small chunks
      For Blackberry Filling:
      • 6 cups blackberries if using frozen, do not thaw
      • ½ cup granulated sugar
      • 6 Tablespoons all purpose flour
      • 1 Tablespoon fresh lemon juice
      Instructions
      1. Preheat oven to 350℉. Spray/grease 6" x 9" OR 8" x 8" baking dish on bottom and sides.

      2. Combine oats, flour, brown sugar and salt in a large mixing bowl. Add COLD butter chunks. Use pastry blender or two forks to cut butter into the streusel topping until butter becomes the size of peas. Stir in pecans until incorporated. Set streusel topping aside.

      3. Place blackberries, sugar, flour and lemon juice in a large bowl. Stir gently, until combined. Spread blackberry filling evenly in baking dish until pan is filled.

      4. Sprinkle streusel mixture across surface of the blackberry filling, making sure entire surface is covered.

      5. Bake at 350°F. for 40-45 minutes. When done, it should be bubbly around the edges, and golden brown. Transfer to a wire rack; cool 15 minutes before serving. Filling will thicken as it cools. Serve and enjoy with a scoop of vanilla ice cream!

      Nutrition Facts
      Blackberry Pecan Crisp
      Amount Per Serving (1 (1/8 of total))
      Calories 485 Calories from Fat 171
      % Daily Value*
      Fat 19g29%
      Saturated Fat 11g69%
      Trans Fat 1g
      Polyunsaturated Fat 1g
      Monounsaturated Fat 5g
      Cholesterol 45mg15%
      Sodium 218mg9%
      Potassium 297mg8%
      Carbohydrates 76g25%
      Fiber 8g33%
      Sugar 45g50%
      Protein 6g12%
      Vitamin A 756IU15%
      Vitamin C 23mg28%
      Calcium 71mg7%
      Iron 3mg17%
      * Percent Daily Values are based on a 2000 calorie diet.

      Here’s one more to pin on your Pinterest boards!Make a delicious Blackberry Pecan Crisp any time, using fresh or frozen blackberries! This simple dessert is topped with crumbly streusel.

      Blackberry French Toast Cups

      Make delicious Blackberry French Toast Cups in an oven OR an air fryer. They’re easy to make, and are decadent, single serving breakfasts.
      Make delicious Blackberry French Toast Cups in an oven OR an air fryer. They're easy to make, and are decadent, single serving breakfasts.

      Every now and then I make French toast cups for our breakfast. They are a delicious, occasional TREAT we really enjoy, and I’ve been making them in different variations for years.

      I came up with this version because I wanted to use some of our blackberries last summer. What I like about this dish is you make it the night BEFORE you’ll be serving it, and refrigerate it overnight. The next morning, all you will need to do is bake and serve! 

      I have included instructions for cooking this recipe in a traditional oven or an air fryer. Both are convenient, trusted methods which can be used to make this yummy breakfast.

      The recipe (as written) makes two servings, but can easily be doubled or tripled, etc. Here’s how to make Blackberry French Toast Cups.

      Scroll Down For A Printable Recipe Card At The Bottom Of The Page

      Butter And Fill The Ramekins

      The first thing you need to do is prepare the ingredients for overnight “refrigeration”. Yes, you need to plan ahead for this recipe! Make it up the night before you want to enjoy it for breakfast the next morning. Here’s how:

      Butter the bottom and sides of 2 oven-safe ramekins. The ramekins I use are a standard size, about 4½ wide by 2″ tall.

      Cut some 1-2 day old, fairly stale Italian bread into bite-sized cubes, leaving the crusts ON the bread. You will need 2 cups total. Divide HALF the bread cubes between the 2 ramekins, reserving the rest for a second layer.

      IMPORTANT: The reason for using stale bread is that it has become slightly hardened, which allows it to soak in an egg mixture overnight without becoming so soggy that it falls apart into MUSH.

      Add The Blackberries In Layers

      Gently stir ½ teaspoon lemon juice and 1 teaspoon granulated sugar into the blackberries until the sugar dissolves. Add HALF of the blackberries on top of the bread cubes, dividing them evenly between the ramekins. 

      Bread cubes and buttered ramekins are ready to go!A layer of bread cubes and blackberries in a buttered ramekin.

      Repeat with a second layer of bread cubes, and another layer of blackberries, until the ramekins are full.

      Second layer of bread cubes and blackberries are added to ramekin.

      Mix And Add The Egg Filling

      In a medium bowl, place the eggs, vanilla, milk, and 2 teaspoons granulated sugar. Whisk these ingredients together with a fork or wire whisk until they’re well blended.

      Eggs, milk, vanilla and sugar are whisked together to make egg batter.

      Carefully pour the egg mixture into the ramekins, evenly dividing it between the two dishes. The mixture should come very close to the top of the ramekins. 

      Egg mixture is poured over bread cubes and blackberries before refrigerating.

      Time To Chill!

      Use a spoon or fork to lightly press the bread cubes down into the egg mixture. You want as many of the bread cubes covered with the liquid as possible.

      Cover the ramekins tightly with plastic wrap, and place them in the refrigerator overnight (at least 6 hours). The bread cubes will soak up some of the liquid overnight.

      Remove the ramekins from the fridge about 15 minutes before baking, to take off some of the chill. Remove the plastic wrap, and press the bread cubes back down into any remaining liquid. Preheat your oven to 375°F. during this time.

      Bake Or Air-Fry The Blackberry French Toast Cups

      Now It’s time to cook the Blackberry French Toast Cups! They can be cooked using a traditional oven OR an air-fryer. When baking, place a sheet of foil underneath, to catch any spills (for easy cleanup).

      To Cook In An Oven: Preheat oven to 375°F. Bake for 30 minutes, or until a toothpick inserted into the middle comes out free of “batter”. The French toast cups should be nice and golden brown on top.

      To Cook In An Air Fryer: Preheat air fryer to 350° F. Place ramekins carefully into the basket, being careful not to spill. Cook for 13 minutes, then reduce the temperature to 250°F, and cook 3 more minutes, or until a toothpick inserted into the middle comes out free of “batter”. The French toast cups should be nicely browned on top.

      IMPORTANT: Since air fryer AND oven temps can vary with different manufacturers, be sure to check on the French toast cups occasionally toward the end of the cooking time, to ensure they do not overcook.

      Tow baked Blackberry French Toast Cups cooling on a wire rack.A close up of one of the French toast cups cooling on a rack after baking.

      Serve And Enjoy!

      Once they’ve finished cooking (either method), transfer the ramekins to a wire rack to cool for a few minutes. Sift powdered sugar over the top of each ramekin before serving.

      We think they taste best when they’ve had time to cool a bit, and we like to eat them warm, but not blazing hot!

      My husband likes to eat his right out of the ramekin, with only sifted powdered sugar. I prefer to slide a butter knife around the edges of the ramekin and remove the French toast cup from the ramekin.

      Powdered sugar is sifted on Blackberry French Toast Cups for serving.

      Serve the blackberry French toast cups with powdered sugar, maple syrup or pancake syrup (whatever you prefer). Grab a fork, dig in, and enjoy this delicious breakfast treat!

      One of the French toast cups (out of the ramekin) served on a white plate.Inside of the French toast cup, which was served with pancake syrup.

      I hope you have the chance to make this dish, and trust you will like it as much as we do! The recipe can easily be doubled or tripled to meet your needs.

      Thank you for stopping by, and I invite you to come back again soon for more family-friendly recipes. Take care, may God bless you, and have a GREAT day!

      Looking For More FRENCH TOAST RECIPES?

      You can find ALL of my recipes in the Recipe Index, which is located at the top of the page. I have some delicious French toast recipes, including:

      Want More Recipes? Get My FREE Newsletter!

      I publish a newsletter 2 times per month (1st and 15th) with lots of recipes, tips, etc..
      Would you like to join our growing list of subscribers?

      There is a Newsletter subscription box on the top right (or bottom) of each blog post, depending on the device you use.
      You can submit your e-mail address there, to be added to my mailing list.

      Find Me On Social Media:

      Facebook page: The Grateful Girl Cooks!
      Pinterest:
      The Grateful Girl Cooks!
      Instagram:
      jbatthegratefulgirlcooks

      Author's signature

      ↓↓ PRINTABLE RECIPE BELOW ↓↓

      0 from 0 votes
      Blackberry French Toast Cups
      Prep Time
      10 mins
      Cook Time
      30 mins
      Overnight Refrigeration (6-8 hours)
      6 hrs
      Total Time
      6 hrs 40 mins
       

      Make delicious Blackberry French Toast Cups in an oven OR an air fryer. They're easy to make, and are decadent, single serving breakfasts.

      Category: Breakfast
      Cuisine: American
      Keyword: blackberry French toast cups
      Servings: 2
      Calories Per Serving: 385 kcal
      Author: JB @ The Grateful Girl Cooks!
      Ingredients
      • 1 teaspoon butter softened (for ramekins)
      • 2 cups Italian bread cubes (stale-2 or 3 days old) cut in 1" cubes
      • ¾ cup blackberries (if frozen, thaw/drain)
      • 1 teaspoon granulated sugar
      • ½ teaspoon lemon juice
      For Egg Batter:
      • 3 large eggs
      • 1 cup 1% milk
      • 2 teaspoons granulated sugar
      • 1 teaspoon vanilla extract
      Serve With: powdered sugar, maple syrup or pancake syrup
        Instructions
        1. Butter bottom and sides of 2 oven-safe ramekins (4½" wide by 2" tall).

        2. Cut bread into 1" cubes (can leave crusts on). Divide HALF the bread cubes evenly between the ramekins, reserving other half for a 2nd layer.

        3. Gently combine lemon juice and 1 tsp. sugar with blackberries until sugar dissolves. Place HALF the blackberries on top of the bread cubes, dividing them evenly between ramekins. Add 2nd layer of remaining bread cubes, and 2nd layer of remaining blackberries, until ramekins are full. Set aside.

        4. Place eggs, vanilla, milk, and 2 tsp. sugar in a medium bowl; whisk until fully blended. Pour into the ramekins, evenly dividing between the two. Liquid should come very close to the top of the ramekins. 

        5. Use a spoon or fork to press bread cubes down into egg mixture, covering as many as possible with liquid. Cover ramekins with plastic wrap; refrigerate overnight (at least 6 hours). Remove ramekins from refrigerator 15 minutes before baking. Remove plastic wrap; press bread cubes down into any remaining liquid. Preheat oven during this time.

        6. To Cook In Oven: Preheat oven to 375°F. Bake for 30 minutes, or until a toothpick inserted in the middle comes out free of “batter”. The French toast cups should be nice and golden brown on top.

          To Cook In Air Fryer: Preheat air fryer to 350° F. Place ramekins carefully into the basket, being careful not to spill. Cook 13 minutes, then reduce temperature to 250°F. Cook 3 more minutes, or until a toothpick inserted in the middle comes out free of “batter”. The French toast cups should be nicely browned on top.

          IMPORTANT: Air fryer/Oven temps can vary widely- check for doneness occasionally toward the end of cooking time, so they don't overcook.

        7. Transfer ramekins to a wire rack; cool a few minutes. Serve in the ramekin or after removing it from the dish (use knife around edges to help remove it). Serve with sifted powdered sugar, maple syrup or pancake syrup, and enjoy!

        Nutrition Facts
        Blackberry French Toast Cups
        Amount Per Serving (1 serving)
        Calories 385 Calories from Fat 180
        % Daily Value*
        Fat 20g31%
        Saturated Fat 10g63%
        Trans Fat 0.2g
        Polyunsaturated Fat 3g
        Monounsaturated Fat 6g
        Cholesterol 290mg97%
        Sodium 273mg12%
        Potassium 444mg13%
        Carbohydrates 33g11%
        Fiber 4g17%
        Sugar 24g27%
        Protein 16g32%
        Vitamin A 814IU16%
        Vitamin C 12mg15%
        Calcium 207mg21%
        Iron 2mg11%
        * Percent Daily Values are based on a 2000 calorie diet.

        Here’s one more to pin on your Pinterest boards!Make delicious Blackberry French Toast Cups in an oven OR an air fryer. They're easy to make, and are decadent, single serving breakfasts.


        Blueberry Banana Bread

        Make three mini-loaves of Blueberry Banana Bread in under 45 minutes! Filled with juicy blueberries, this is a great snack or breakfast!
        Make three mini-loaves of Blueberry Banana Bread in under 45 minutes! Filled with juicy blueberries, this is a great snack or breakfast!

        Today I want to share with you a recipe to make three loaves of yummy blueberry banana bread. I’ve made many loaves of banana bread and blueberry bread over the years, but finally decided last Fall to combine the two in a recipe! DUH!

        Not quite sure why I’ve not thought of this combination before, but oh well! Bananas and blueberries pair wonderfully in this delicious bread, and the easy recipe yields enough batter to bake 3 small loaves. Here’s how to make blueberry banana bread. 

        Scroll Down For A Printable Recipe Card At The Bottom Of The Page

        Prepare The Batter

        Before making the batter, preheat your oven to 350°F. and prepare 3 mini-loaf pans by generously spraying or greasing them on the bottom and sides.

        To make the batter, sift flour, granulated sugar, baking powder, salt and baking soda in a large mixing bowl. Gently stir in blueberries until incorporated into the “dry ingredients”.

        NOTE: You can use fresh OR frozen blueberries for this recipe. If you are using FROZEN blueberries, do NOT thaw them before adding.

        Flour, sugar, salt, baking powder and baking soda are sifted into a large bowl.Blueberries are added to the dry ingredients for the mini-loaves of bread.

        In a separate bowl, mash the ripe bananas very well (until chunk-free), then add a large egg, vegetable oil and fresh lemon juice.

        Stir until these ingredients have been fully combined (and are fairly smooth). Once combined, add these “wet ingredients” to the bowl of dry ingredients.

        Eggs, oil, mashed bananas and lemon juice are mixed together in large bowl.Banana mixture is added to the dry ingredients and blueberries.

        Gently stir until the banana mixture has been incorporated into the batter. Don’t overmix. The finished batter for the blueberry banana bread will be very thick.

        The batter for the blueberry banana bread is ready for loaf pans.

        Bake The Blueberry Banana Bread

        Divide the batter evenly into the prepared mini-loaf pans, and top each loaf with additional blueberries (optional, but good!). These additional blueberries will decorate the top of each baked loaf nicely, when done.

        Place the loaf pans on the middle rack of the preheated oven. Bake at 350°F. for 30-35 minutes OR until a toothpick inserted in the top/middle of the loaves comes out clean. The loaves should also be nicely browned on top.

        NOTE: See the NOTES section in the printable recipe card below for baking time if using this recipe to make one 9″ x 5″ loaf of this bread.

        The batter for the blueberry banana bread in loaf pans in the oven.Three mini-loaves cool in loaf pans on a wire rack, after baking.

        Time To Enjoy Some Blueberry Banana Bread!

        Transfer the loaf pans to a wire rack, and let the blueberry banana bread cool 12-15 minutes before removing the loaf from the pan.

        Once they’ve cooled, run a butter knife around all the inside edges of the pans. Invert a plate on top of a loaf, then holding the platter and loaf pan tightly together, turn them upside down.

        This should release the bread from the pan. If the bread fails to release from the pan, turn it back over, let it rest a few more minutes, then try again.

        Let the blueberry banana bread cool slightly on the wire rack before slicing the loaf for serving. Cool the loaf completely before wrapping for storage or gift giving.

        The mini-loaves of baked blueberry banana bread in their baking pans.Cutting into the loaves reveals the juicy blueberries inside.

        Who Wants A Slice Of Blueberry Banana Bread?

        With three mini-loaves, you have the option of eating them all, storing them, or giving them as gifts. It’s your choice! I like to enjoy one loaf, freeze a loaf for later, and give one to family or friends.

        To serve, slice a loaf into your desired thickness, spread butter on a warm piece, and take a big bite! YUM… it is so delicious!

        NOTE: The calorie calculation given in the printable recipe card below is for one whole mini-loaf of this bread, because some people like THICK slices, while others prefer a THIN slice. Again… this is your choice!

        Two slices of blueberry banana bread, with melted butter on top.

        I hope you enjoy this delicious blueberry banana bread, whether it’s for a light snack or breakfast! You can freeze this bread as well, as long as it is tightly wrapped and stored in an airtight container.

        Thanks for stopping by today, and I invite you to come back soon for more family friendly recipes. Take care, may God bless you, and have a GREAT day!

        Looking for More “Sweet” BREAD Recipes?

        You can find ALL of my recipes in the Recipe Index, which is located at the top of the page. I have lots of delicious sweet bread recipes to choose from, including:

        Want More Recipes? Get My FREE Newsletter!

        I publish a newsletter 2 times per month (1st and 15th) with lots of recipes, tips, etc..
        Would you like to join our growing list of subscribers?

        There is a Newsletter subscription box on the top right (or bottom) of each blog post, depending on the device you use.
        You can submit your e-mail address there, to be added to my mailing list.

        Find Me On Social Media:

        Facebook page: The Grateful Girl Cooks!
        Pinterest:
        The Grateful Girl Cooks!
        Instagram:
        jbatthegratefulgirlcooks

        Author's signature

        ↓↓ PRINTABLE RECIPE BELOW ↓↓

        0 from 0 votes
        Blueberry Banana Bread
        Prep Time
        10 mins
        Cook Time
        30 mins
        Total Time
        40 mins
         

        Make three mini-loaves of Blueberry Banana Bread in under 45 minutes! Filled with juicy blueberries, this is a great snack or breakfast!

        Category: Bread/Breakfast, Snack
        Cuisine: All Cuisines
        Keyword: blueberry banana bread
        Servings: 3 mini-loaves
        Calories Per Serving: 715 kcal
        Author: JB @ The Grateful Girl Cooks!
        Ingredients
        • 2 cups all purpose flour
        • ½ cup granulated sugar
        • 2 teaspoons baking powder
        • ¾ teaspoon salt
        • ½ teaspoon baking soda
        • 1 cup blueberries if frozen, do NOT thaw
        • 1 cup mashed very ripe bananas approx. 2 medium
        • ¼ cup vegetable oil
        • 1 large egg
        • 1 Tablespoon fresh lemon juice
        Additional Blueberries (15-20) For Garnishing Top Of Loaves (optional, but nice!)
          Instructions
          1. Preheat oven to 350°F. Generously spray or grease 3 mini-loaf pans on the bottom and sides. **See NOTE section below if making one large 9x5 loaf.**

          2. Sift flour, sugar, baking powder, salt and baking soda in a large bowl. Gently stir in blueberries until incorporated. Set aside. NOTE: If using FROZEN blueberries, do NOT thaw them before adding.

          3. In separate bowl, mash ripe bananas very well (until chunk-free); add egg, oil and lemon juice. Stir until fully combined (and fairly smooth). Add this to the flour mix. Gently stir until banana mixture is incorporated. Don't overmix; batter is thick.

          4. Divide batter evenly into 3 prepared mini-loaf pans; top each loaf with more blueberries, if desired. Place pans on middle rack of oven. Bake at 350°F. for 30-35 minutes OR until toothpick inserted in the top of loaves comes out clean. Bread should be nicely browned on top.

          5. Transfer pans to a wire rack; cool 12-15 minutes before removing loaf from pan. Once cooled, run a butter knife around inside edges of the pans. Invert a plate on top of a loaf, then holding platter and loaf pan tightly together, turn them upside down. This "should" release bread from pan. If bread fails to release, turn it back over, let it rest a few more minutes, then try again. Let bread cool slightly on wire rack before slicing and serving. Enjoy!

          Recipe Notes

          NOTES: The caloric calculation given is for 1 whole mini-loaf of bread. Calories per serving will depend on the thickness of your slices.

          **If you wish to use a large 9"x 5" loaf pan to make ONE loaf of this bread, bake for 55-60 minutes. Check it at 50 minutes for doneness, then continue baking until toothpick comes out clean.**

          Nutrition Facts
          Blueberry Banana Bread
          Amount Per Serving (1 mini-loaf)
          Calories 715 Calories from Fat 189
          % Daily Value*
          Fat 21g32%
          Saturated Fat 4g25%
          Trans Fat 0.1g
          Polyunsaturated Fat 11g
          Monounsaturated Fat 5g
          Cholesterol 62mg21%
          Sodium 793mg34%
          Potassium 694mg20%
          Carbohydrates 123g41%
          Fiber 5g21%
          Sugar 48g53%
          Protein 12g24%
          Vitamin A 165IU3%
          Vitamin C 13mg16%
          Calcium 145mg15%
          Iron 5mg28%
          * Percent Daily Values are based on a 2000 calorie diet.

          Here’s one more to pin on your Pinterest boards!Make three mini-loaves of Blueberry Banana Bread in under 45 minutes! Filled with juicy blueberries, this is a great snack or breakfast!