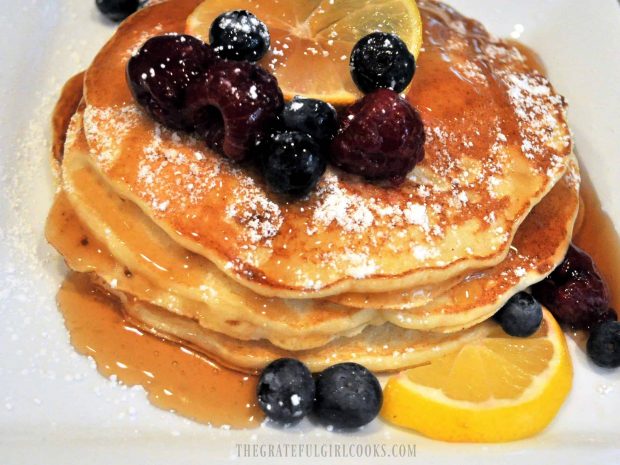
Category: Breakfast

Blueberry and Cream Cheese-Stuffed French Toast

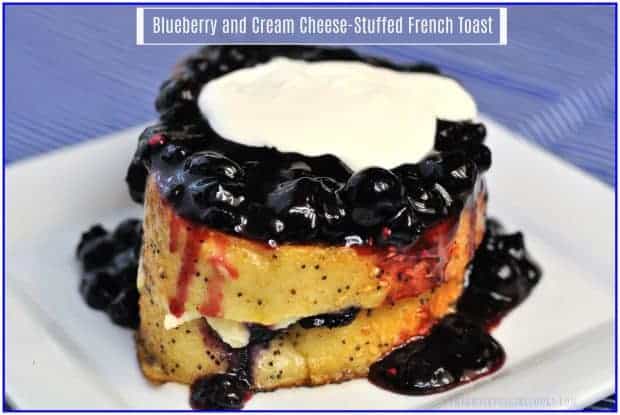
Blueberry Cream Cheese Stuffed French Toast is a delicious, flavor-filled, decadent breakfast treat you will really enjoy!
I’m “typically” an eggs, English muffin or oatmeal kind of girl for my breakfast choices, BUT… every now and then I do love a decadent, over the top breakfast. A real gut-buster, but oh soooo good! This one definitely fits the bill for DECADENT!

My husband and I had the opportunity to have a weekend getaway on the Oregon coast (the town of Newport) several years ago. We especially enjoyed a breakfast out at one particular restaurant.

I ordered this dish, and was blown away with how amazing it tasted (French toast calories aside… *cough cough). I’ve remembered that yummy breakfast ever since, and last Fall I decided to try making my own version of it at home, and it was delicious! Here’s how to make it:

Scroll Down For A Printable Recipe Card At The Bottom Of The Page

How To Make Blueberry and Cream Cheese-Stuffed French Toast

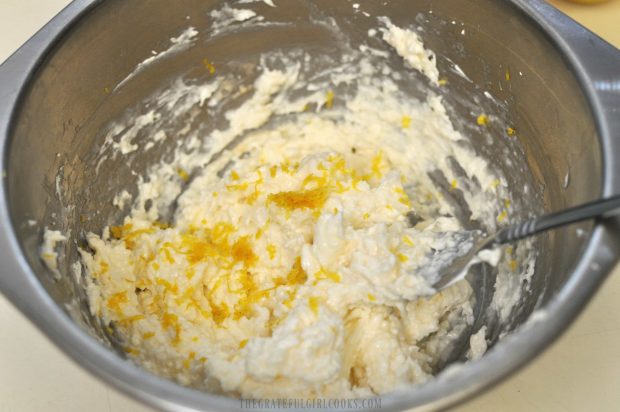
In medium sized bowl, combine cream cheese filling ingredients (with lemon zest for added flavor). Use a mixer or fork to blend well, until smooth. Set aside.

Cream cheese filling for french toast, mixed together in small bowl

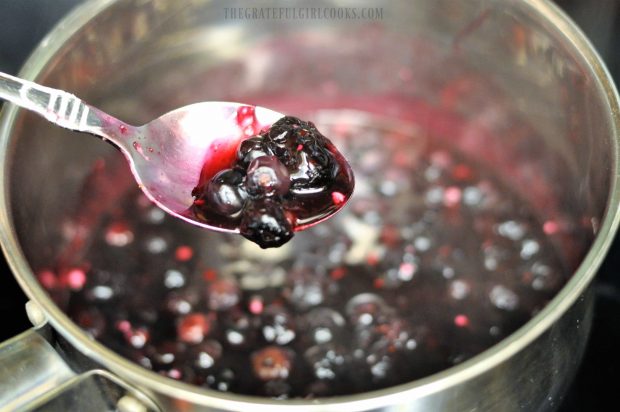
In a medium sized saucepan, place blueberries, water, cornstarch and granulated sugar. Cook on low heat, stirring occasionally, until blueberries “pop” (burst), and mixture has thickened. (approx. 5-6 minutes). Set aside; stir occasionally to cool.

Thickened blueberries on spoon over saucepan

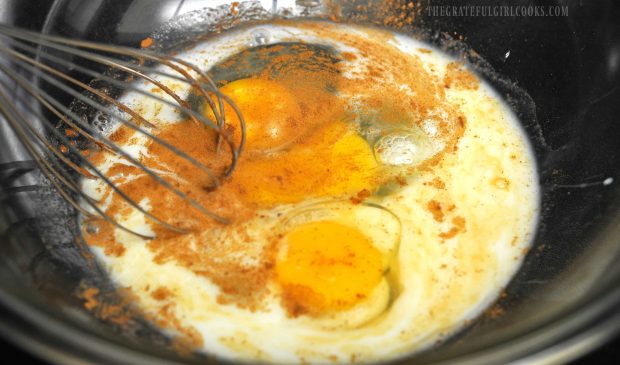
In a large bowl, whisk together the eggs, milk, vanilla, and cinnamon.

Whisking milk, eggs and cinnamon for french toast

Layering The French Toast For Cooking

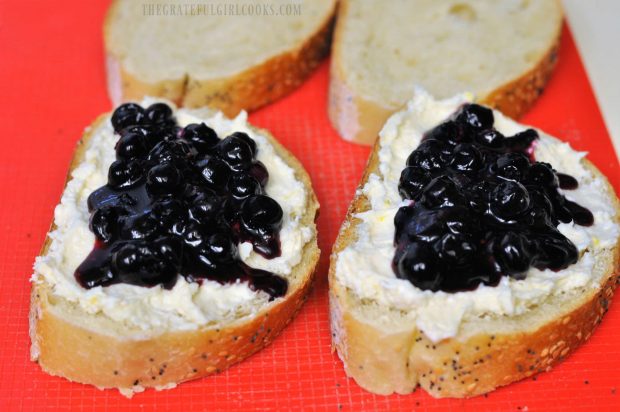
To prepare, divide the cream cheese mixture evenly and spread on two pieces of French bread. Evenly top with some of the blueberry mixture. DO NOT USE ALL OF IT- SAVE SOME BLUEBERRY MIXTURE SEPARATELY TO SPOON OVER TOP OF FINISHED DISH.

Try hard to not place the blueberries all the way to the edge of the bread, or the sauce will run out while cooking. Place a piece of French bread on top of blueberries.

Blueberries and cream cheese filling on French bread slices

Time To Cook The Blueberry And Cream Cheese-Stuffed French Toast

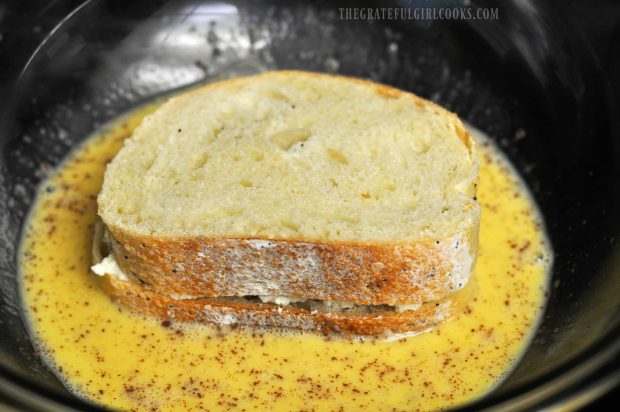
Heat a large non-stick skillet (or grill pan) on medium heat. Melt butter in skillet.  Place each “sandwich” into egg mixture, one at a time, to soak up the egg mixture. Turn, to coat each side in the egg mixture.  Shake off excess, then place the French toast into a hot skillet.

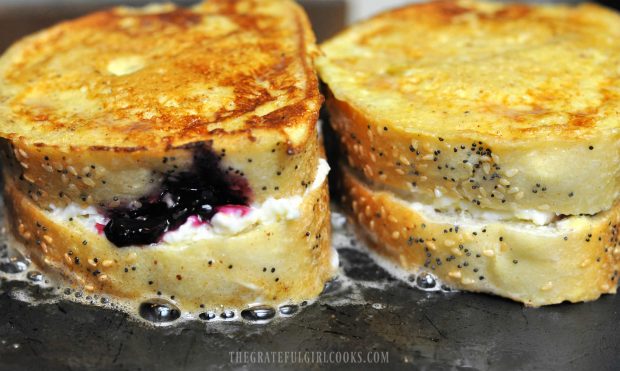
Repeat with the other serving. Cook until bottom side is browned nicely, then very carefully turn the French toast to other side. Continue to cook until both sides are crispy and browned. This will take a few minutes.

Stuffed French toast soaking up egg mixture before cooking

Stuffed French Toast cooking on the grill

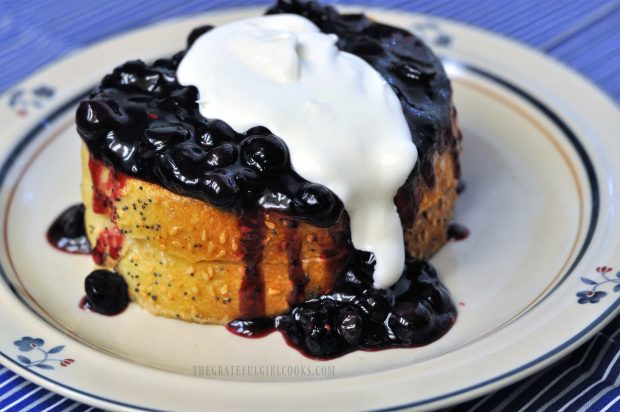
Once cooked/browned, transfer French toast to serving plate. Spoon some of the reserved blueberry sauce over the top of the blueberry and cream cheese-stuffed French toast, then add a dollop of whipped cream, if desired. You’ll notice my whipped cream on this serving melted from the heat by the time I finally got a photo… oh well… you get the idea, right?

Blueberry and cream cheese stuffed french toast with whipped cream, on small plate

Serve and enjoy every bit of this decadent breakfast, THEN go for a long walk to work it off! I totally recommend that, by the way… ha ha! It’s all about BALANCE!

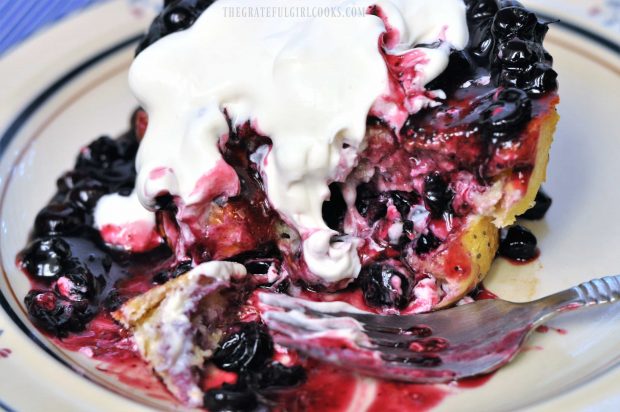
The stuffed French toast is high in calories (the equivalent of one large Cinnabon, by the way – yikes!). If you want to consume less calories but still enjoy this dish, cut it in half once you’re done cooking it, THEN add the blueberry topping! It will be messy, but GOOOOOD!

Blueberry french toast, half eaten, on plate with fork

Have a great day! Make it a good one! And get those walking shoes out… you’re gonna need a walk after this scrumptious stuffed French toast breakfast!

Looking For More Decadent BREAKFAST Recipes?

You can find all of my recipes in the Recipe Index, located at the top of the page. I have some wonderfully decadent breakfast recipes, including:

Interested In More Recipes?

Thank you for visiting this website. I appreciate you using some of your valuable time to do soIf you’re interested, I publish a newsletter 2 times per month (1st and 15th) with all the latest recipes, and other fun info. I would be honored to have you join our growing list of subscribers, so you never miss a great recipe!
There is a Newsletter subscription box on the top right side (or bottom) of each blog post, depending on the device you use, where you can easily submit your e-mail address (only) to be included in my mailing list.

You Can Also Find Me On Social Media:

Facebook page: The Grateful Girl Cooks!
Pinterest:
The Grateful Girl Cooks!
Instagram:
jbatthegratefulgirlcooks

Author's signature

0 from 0 votes
Blueberry and Cream Cheese-Stuffed French Toast
Prep Time
15 mins
Cook Time
8 mins
Total Time
23 mins
 

Blueberry Cream Cheese Stuffed French Toast is a delicious, flavor-filled, decadent breakfast treat you will really enjoy!

Category: Breakfast
Cuisine: American
Keyword: blueberry stuffed french toast
Servings: 2 servings
Calories Per Serving: 803 kcal
Author: JB @ The Grateful Girl Cooks!
Ingredients
For Cream Cheese Filling
  • 1 teaspoon lemon zest
  • 4 ounces cream cheese , low fat
  • 1/4 cup powdered sugar
  • 1/4 teaspoon vanilla extract
For Blueberry Sauce
  • cups fresh blueberries
  • 1 teaspoon cornstarch
  • 2 Tablespoons granulated sugar
  • 2 Tablespoons water
For French Toast
  • 4 slices French bread , approx. 1" thick per slice
  • 3 eggs
  • 1/4 cup milk , low-fat
  • 1/2 teaspoon vanilla extract
  • 1/4 teaspoon cinnamon
  • 2 teaspoons butter
  • Whipped cream , OPTIONAL for topping
Instructions
  1. In medium sized bowl, combine cream cheese filling ingredients. Use a mixer to blend until smooth. Set aside.

  2. In a medium sized saucepan, place blueberries, cornstarch and granulated sugar.  Cook on low heat, stirring occasionally, until blueberries "pop" (burst), and mixture has thickened. (approx. 5-6 minutes). Set aside; stir occasionally to cool.

  3. In a large bowl, whisk together the eggs, milk, vanilla, and cinnamon.

  4. To prepare, divide the cream cheese mixture evenly and spread on two pieces of french bread. Evenly top with some of the blueberry mixture (DO NOT USE ALL OF IT-SAVE SOME BLUEBERRY MIXTURE SEPARATELY TO SPOON OVER TOP OF FINISHED DISH).  Try hard to not place the blueberries all the way to the edge of the bread, or the sauce will run out while cooking. Place a piece of french bread on top of blueberries.  

  5. Heat a large non-stick skillet (or grill pan) on medium heat. Melt butter in skillet.  Place each "sandwich" into egg mixture, one at a time, to soak up the egg mixture. Turn, to coat each side in the egg mixture.  Shake off excess, then place french toast onto hot skillet. Repeat with other serving.  Cook until bottom side is browned nicely, then very carefully turn french toast to other side and continue to cook until both sides are crispy and browned. This will take a few minutes.
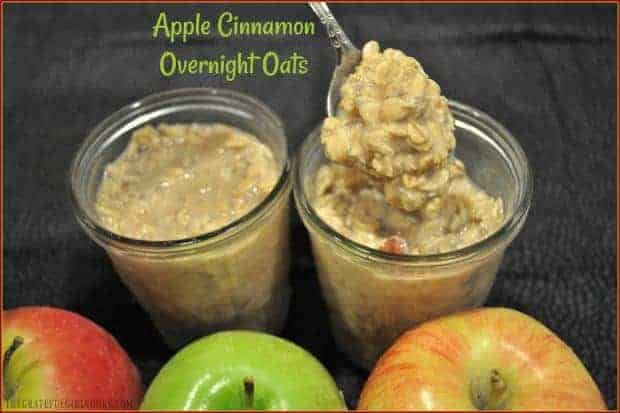
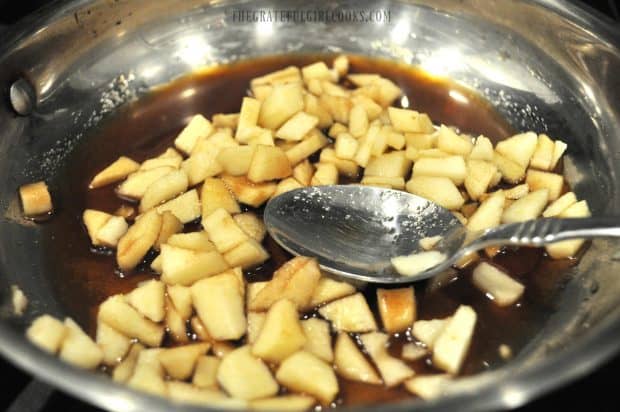
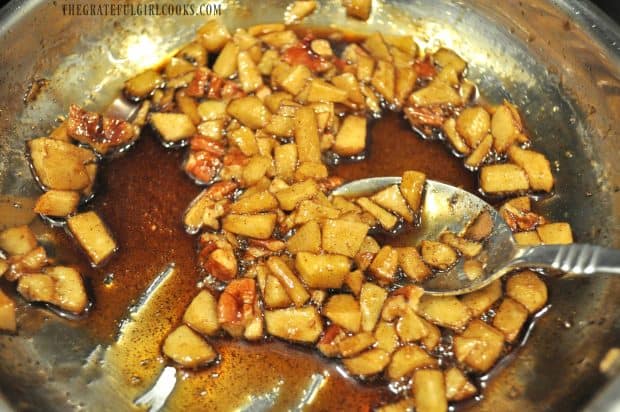
  6. Once cooked/browned, transfer french toast to serving plate.  Spoon some of the reserved blueberry sauce over the top of the dish, then add a dollop of whipped cream, if desired. Serve and enjoy, THEN go for a long walk to work it off! (ha ha) 

Recipe Notes

NOTE: Caloric calculation does not include whipped cream topping (as it is optional).
TIP: If you wish to have less calories, cut the french toast in half after removing it from skillet, THEN cover the top with the blueberry filling, etc. Still all the taste, but half the calories!

Nutrition Facts
Blueberry and Cream Cheese-Stuffed French Toast
Amount Per Serving (2 slices)
Calories 803 Calories from Fat 189
% Daily Value*
Fat 21g32%
Saturated Fat 10g63%
Cholesterol 288mg96%
Sodium 1067mg46%
Potassium 524mg15%
Carbohydrates 123g41%
Fiber 5g21%
Sugar 46g51%
Protein 29g58%
Vitamin A 910IU18%
Vitamin C 12mg15%
Calcium 221mg22%
Iron 6.2mg34%
* Percent Daily Values are based on a 2000 calorie diet.

Here’s one more to pin on your Pinterest boards!Blueberry cream cheese stuffed French toast is a delicious, flavor-filled, decadent breakfast treat you will really enjoy!

Save

Save

Save

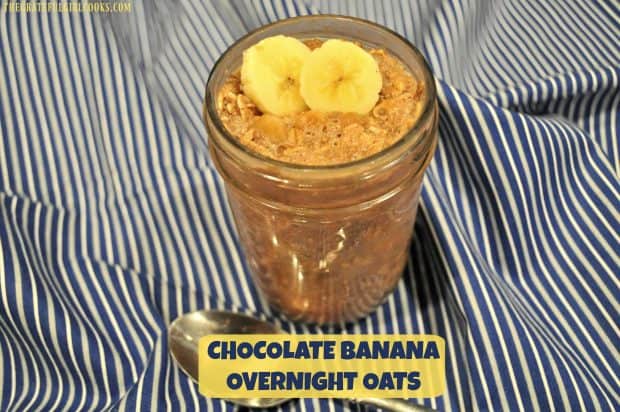
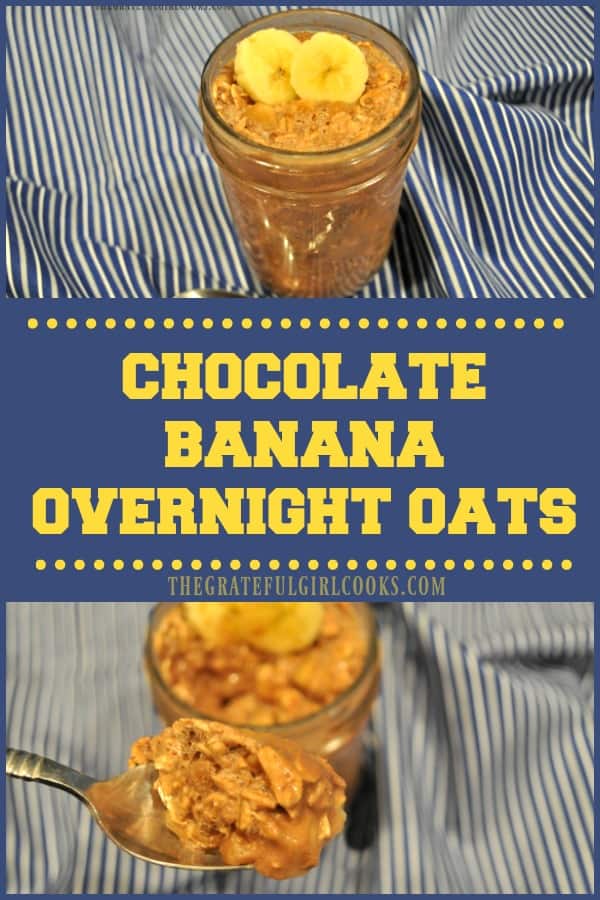
Chocolate Banana Overnight Oats

Creamy, filling, and absolutely delicious, Chocolate Banana Overnight Oats are a convenient, quick and satisfying breakfast that can be made ahead of time!Chocolate Banana Overnight Oats are creamy, filling, absolutely delicious, and a convenient, quick and satisfying breakfast that can be made ahead of time!

If you appreciate having a “ready to eat breakfast” waiting for you when you stumble sleepy-eyed into the kitchen in the morning, you will enjoy the convenience of Chocolate Banana Overnight Oats! Simply make them before you go to bed, and BOOM… they will be ready and waiting for you… thick, creamy and delicious in the morning!

I’ve made overnight oats many times, and really like the convenience of this filling, delicious breakfast item! I think you will enjoy them, too, so I’m sharing this recipe here today.

Scroll Down For A Printable Recipe Card At The Bottom Of The Page 

How Do I Make These Chocolate Banana Overnight Oats?

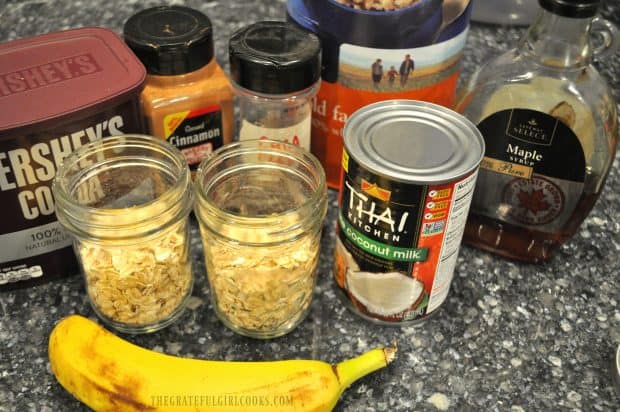
Here are the cast of characters for this flavorful version: You will need old fashioned oats, cocoa powder, cinnamon, chia seeds, vanilla extract, lite coconut milk, a banana, and pure maple syrup.

It only takes a couple of minutes to mix everything together. Once mixed, all you will need to do is cover and refrigerate them overnight. That’s it! All that’s left to do is enjoy them the next morning!

Ingredients for overnight oats on counter

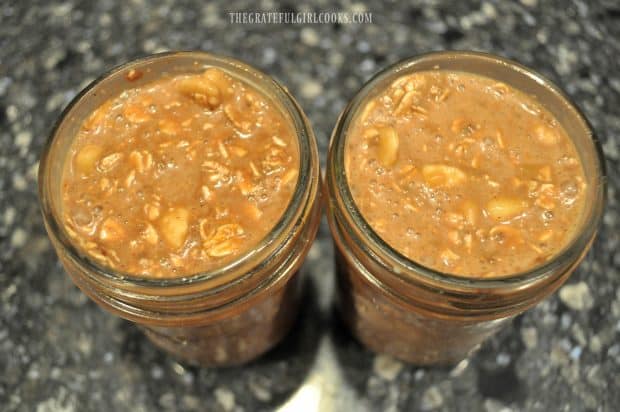
The recipe, as written below, below makes 1 serving. I doubled the recipe to have two of these pint jars of creamy oats ready to eat, so my photos reflect that. These yummy chocolate banana overnight oats are so easy to make!
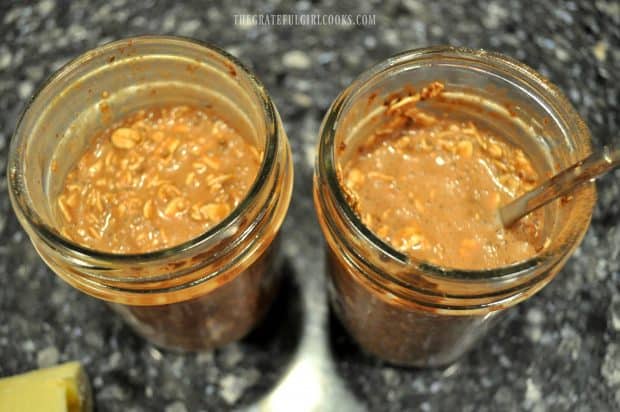
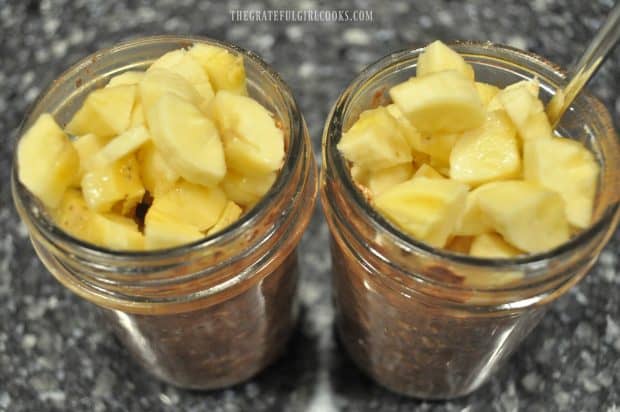
Begin by adding all ingredients, except for banana and maple syrup to jar. You will need to give the ingredients a good stir, to fully mix them together. Once mixed, You can add the banana slices. Drizzle with maple syrup, if using. NOTE: maple syrup is optional; use only if a sweeter taste is desired.

2 pint jars containing oats mixed with coconut milk

Chopped bananas in jars with chocolate oats

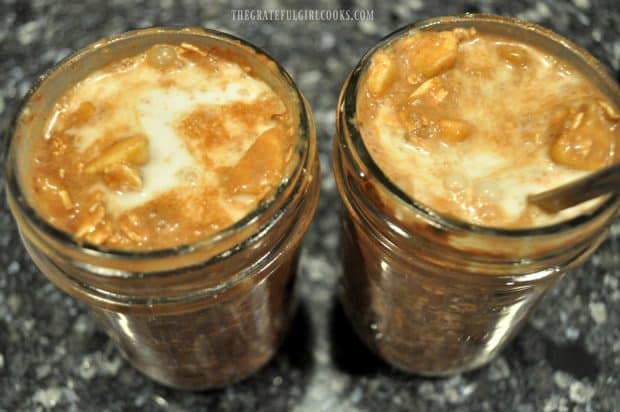
Once ALL ingredients are mixed, add a tiny bit more coconut milk (about a Tablespoon) to loosen up the oats a bit, then give it another good stir. You can see that the chocolate banana overnight oats mixture came right up to the top of the cute little pint jars!

Coconut milk in jars of chocolate oats

2 jars of overnight chocolate banana oats

Ready To Eat Some Chocolate Banana Overnight Oats?

Now you will need to cover containers tightly with plastic wrap! Place jars in the refrigerator overnight.  In the morning, the chocolate banana overnight oats will have firmed up quite a bit (almost to a pudding consistency) by the time you’re ready to eat!
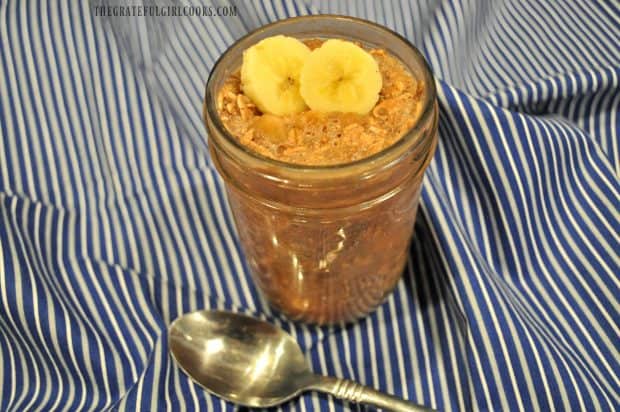
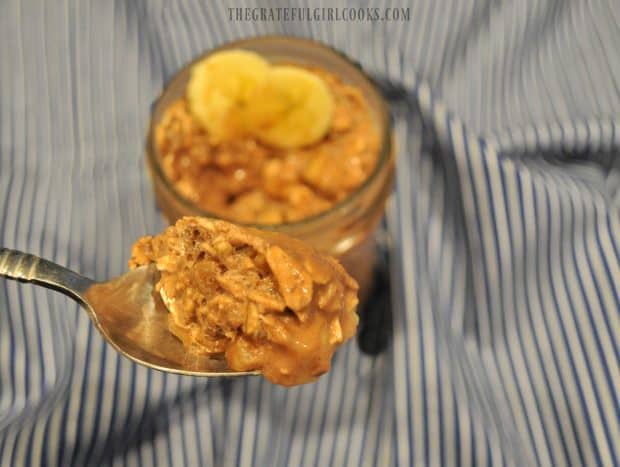
If desired, garnish each jar with a couple fresh slices of banana, then dig in and enjoy this simple, yet filling breakfast!

Jar of chocolate oats with banana sliceschocolate overnight oats on a spoon

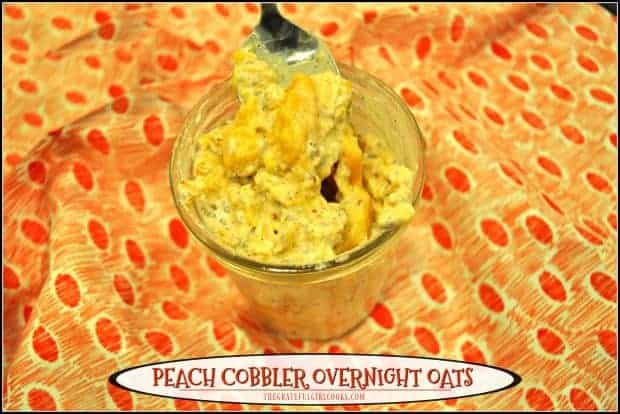
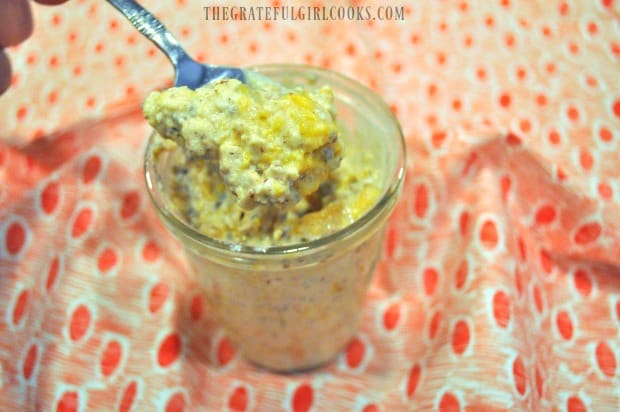
That’s how easy it is to make this simple dish for a scrumptious, quick and convenient breakfast. If you enjoy this recipe you might enjoy my other overnight oat recipes for Blueberry Cinnamon Overnight OatsBanana Coconut, Apple Cinnamon, Peach Cobbler, or Strawberry Coconut Overnight Oats!
The jars of chocolate banana overnight oats will keep in the refrigerator for 2-3 days after making them. You can make several jars ahead of time to conveniently grab when you are hungry! Sure hope you will consider trying these Chocolate Banana Overnight Oats! They’re really good!  Have a wonderful day, friends. Don’t forget to check out ALL of my recipes in the Recipe Index, which is located at the top of the page.

Interested In More Recipes?

Thank you for visiting this website. I appreciate you using some of your valuable time to do soIf you’re interested, I publish a newsletter 2 times per month (1st and 15th) with all the latest recipes, and other fun info. I would be honored to have you join our growing list of subscribers, so you never miss a great recipe! 

There is a Newsletter subscription box on the top right side (or bottom) of each blog post, depending on the device you use, where you can easily submit your e-mail address (only) to be included in my mailing list.

You Can Also Find Me On Social Media:

Facebook page: The Grateful Girl Cooks!
Pinterest:
The Grateful Girl Cooks!
Instagram:
jbatthegratefulgirlcooks

Author's signature

Recipe Source: https://www.organizeyourselfskinny.com/2015/07/02/banana-chocolate-overnight-oats/

0 from 0 votes
Chocolate Banana Overnight Oats
Prep Time
5 mins
Cook Time
0 mins
Overnight Refrigeration
8 hrs
Total Time
5 mins
 
Chocolate Banana Overnight Oats are creamy, filling, absolutely delicious, and a convenient, quick and satisfying breakfast that can be made ahead of time!
Category: Breakfast
Cuisine: American
Keyword: chocolate banana overnight oats
Servings: 1 serving
Calories Per Serving: 318 kcal
Author: JB @ The Grateful Girl Cooks!
Ingredients
  • 1/2 cup old fashioned rolled oats
  • 1/2 Tablespoon cocoa powder
  • 1/2 teaspoon chia seeds
  • 1/8 teaspoon cinnamon
  • 1/4 teaspoon vanilla extract
  • 1/2 cup lite coconut milk , unsweetened
  • 1/2 banana , peeled/chopped
  • 1 teaspoon pure maple syrup (OPTIONAL) , plus more if desired
Instructions
  1. Place all ingredients, except for banana and maple syrup into pint sized jar or container. Give the ingredients a good stir, to fully mix together. 

  2. Once mixed together, add banana slices. Drizzle with maple syrup, if using, (maple syrup is optional, use if a sweeter taste is desired) to jars. Stir. Once ALL ingredients are mixed together, add additional milk (if desired) to loosen up the oats a bit, then stir well, to blend.

  3. Cover jars with plastic wrap, and refrigerate overnight.  When ready to serve, garnish with additional banana slices (if desired).  Oats will keep for 2-3 days when stored tightly covered in refrigerator.

Recipe Notes

Maple syrup is optional, if a sweeter taste is desired. It is not calculated in the caloric count.

Nutrition Facts
Chocolate Banana Overnight Oats
Amount Per Serving (1 serving)
Calories 318 Calories from Fat 99
% Daily Value*
Fat 11g17%
Saturated Fat 8g50%
Sodium 98mg4%
Potassium 395mg11%
Carbohydrates 47g16%
Fiber 7g29%
Sugar 7g8%
Protein 6g12%
Vitamin C 5.1mg6%
Calcium 34mg3%
Iron 2.1mg12%
* Percent Daily Values are based on a 2000 calorie diet.

Here’s one more to pin on your Pinterest boards!Chocolate Banana Overnight Oats are creamy, filling, absolutely delicious, and a convenient, quick and satisfying breakfast that can be made ahead of time!Long pin for Chocolate Banana Overnight Oats

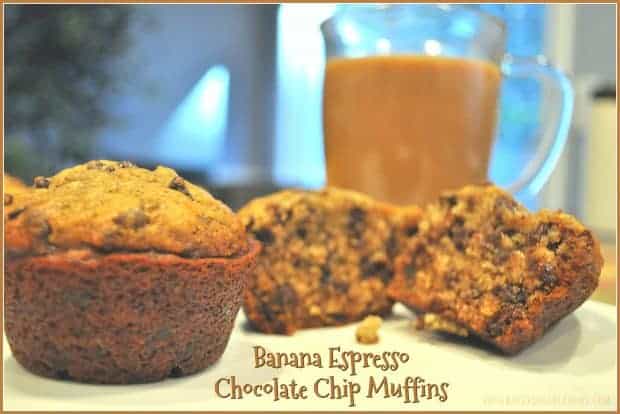
Banana Espresso Chocolate Chip Muffins

You’ll LOVE these delicious Banana Espresso Chocolate Chip Muffins! EASY to make, flavorful treat for a family friendly breakfast, brunch, or snack!You'll LOVE these delicious Banana Espresso Chocolate Chip Muffins! EASY to make, flavorful treat for a family friendly breakfast, brunch, or snack!

If you are the kind of person who enjoys banana muffins, coffee, and chocolate chips, then you will LOVE these absolutely delicious Banana Espresso Chocolate Chip Muffins! 

They’re packed with flavor, incredibly SIMPLE to make, and will be a perfect treat for a breakfast, brunch buffet, or afternoon snack!

I love banana muffins of all kinds… but if you add in some chocolate chips, and just a smidge of espresso powder giving them an extra level of flavor… whoa… those sounded like muffins I wanted to try!

I found the original recipe on Pinterest and decided to whip up a batch to have around for breakfast or a yummy snack!

The muffins have excellent flavor, and were super EASY to prepare!  The tiny bit of espresso powder in this recipe enhances the chocolate flavor, and does NOT overpower the muffins, by the way! Here’s how to make them:

Scroll Down For A Printable Recipe Card At The Bottom Of The Page

How To Make Banana Espresso Chocolate Chip Muffins

First thing to do (try not to break a sweat!) is preheat your oven to 350 degrees, and spray a standard size 12 cup muffin tin with non-stick spray.

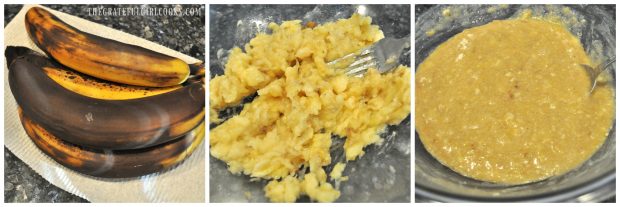
Next, place some really ripe peeled bananas in a large mixing bowl, and mash them “silly” with a fork (use really ripe bananas, cause they are much sweeter!).

Add granulated and brown sugars, melted butter, milk, and then the egg. Stir the ingredients really well together until blended. (No need for a mixer, just use a spoon!)

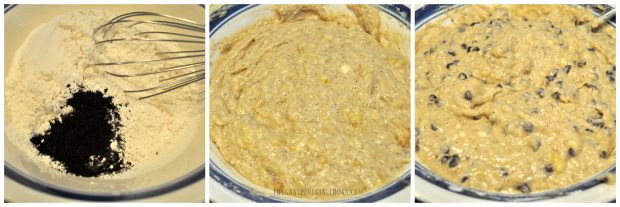
3 photos: ripe bananas, mashed bananas, and muffin batterIn a large separate bowl, combine the flour, baking soda, salt, and espresso powder. Whisk them together. Create a well right in the middle of the dry ingredients, then carefully pour in the banana mixture, and stir to combine.

Add the chocolate chips (I used mini chips), and fold them into the batter, stirring only until ingredients are combined.

3 photos: flour with espresso powder, muffin batter, batter with chocolate chips

Bake The Muffins

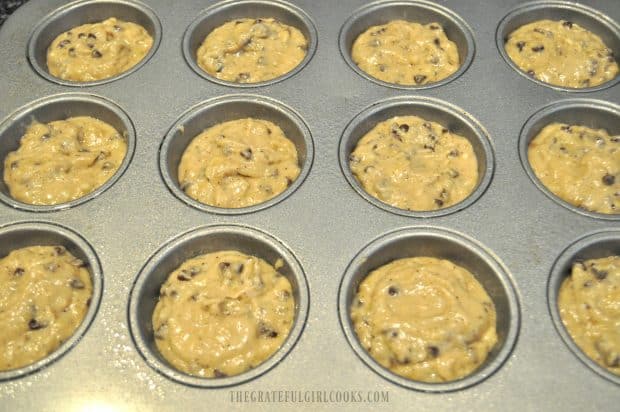
Divide the muffin batter equally between the muffin cups. The mixture should fill each cup about 3/4 of the way full. Place the muffins in a preheated 350 degree oven on the middle rack.

Bake them for between 20 and 25 minutes (oven temps very greatly- mine were ready at 22 minutes).

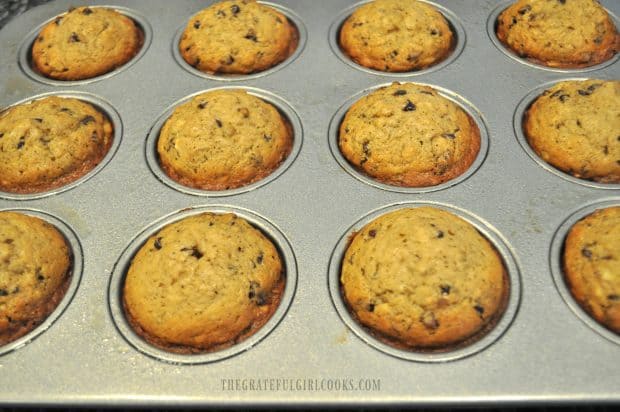
Test their doneness by inserting a toothpick into center of muffin.  If it comes out clean, the muffins are ready to remove from oven! The muffin tops should be golden brown in color.

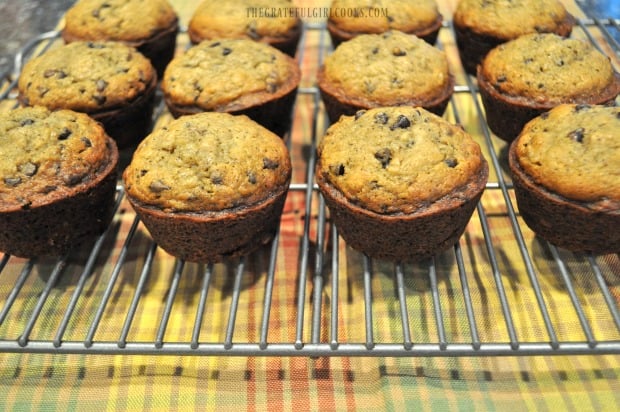
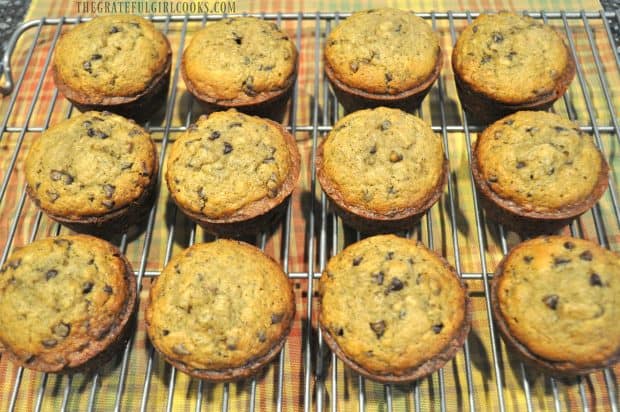
Once the banana muffins are out of the oven, let them cool for about 15 minutes (still in the muffin tin) on a wire rack.

Muffin batter in metal muffin tin cup holdersBanana muffins baked and golden brown in muffin tinAfter 15 minutes, transfer the banana muffins from the pan to the wire rack, and let them finish cooling down.

Banana chocolate chip muffins cooling on wire rack12 muffins on a wire rackWhen you’re ready to enjoy these truly tasty banana muffins, pour yourself a big mug of coffee or tea, or even a tall glass of cold milk, and sink your teeth into them! I really think you’re gonna LOVE ’em!

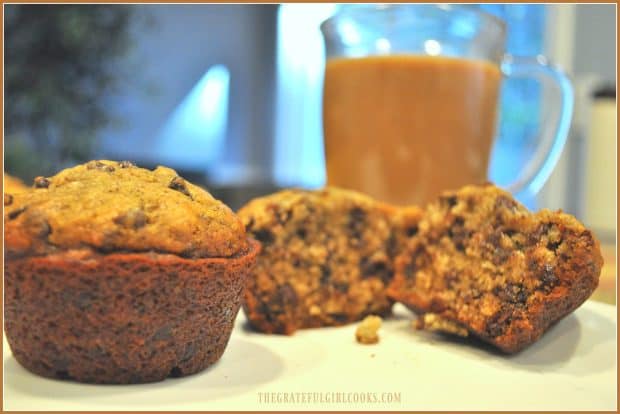
Inside look at banana espresso chocolate chip muffin with coffee behind itIf you enjoy muffins like we do, I’m confident you’ll like these yummy, unique muffins for breakfast or a quick snack.

Thanks for stopping by, and I invite you to come back soon for more family-friendly recipes. Have a blessed day! May it be filled with JOY!

Looking For More MUFFIN Recipes?

You can find ALL of my recipes in the Recipe Index, which is located at the top of the page. I have lots of delicious muffin recipes to check out, including:

Want More Recipes? Get My FREE Newsletter!

I publish a newsletter 2 times per month (1st and 15th) with lots of recipes, tips, etc..
Would you like to join our growing list of subscribers?

There is a Newsletter subscription box on the top right (or bottom) of each blog post, depending on the device you use.
You can submit your e-mail address there, to be added to my mailing list.

Find Me On Social Media:

Facebook page: The Grateful Girl Cooks!
Pinterest:
The Grateful Girl Cooks!
Instagram:
jbatthegratefulgirlcooks

Author's signature

Recipe Source: Tessa, at https://www.handletheheat.com/banana-espresso-chocolate-chip-muffins/

↓↓ PRINTABLE RECIPE BELOW ↓↓

0 from 0 votes
Banana Espresso Chocolate Chip Muffins
Prep Time
10 mins
Cook Time
25 mins
Total Time
35 mins
 
You'll LOVE these delicious Banana Espresso Chocolate Chip Muffins! EASY to make, flavorful treat for a family friendly breakfast, brunch, or snack!
Category: Bread/Breakfast
Cuisine: American
Keyword: banana espresso chocolate chip muffins
Servings: 12 muffins
Calories Per Serving: 304 kcal
Author: JB @ The Grateful Girl Cooks!
Ingredients
  • 4 medium bananas , very ripe (approx. 1.5 cups)
  • 1/2 cup granulated sugar
  • 1/4 cup brown sugar , firmly packed
  • 1/2 cup butter ,(1 cube) melted
  • 1/4 cup whole milk
  • 1 egg (large)
  • cups all purpose flour
  • 1 teaspoon instant espresso powder , see Tip
  • teaspoons baking soda
  • 1 teaspoon salt
  • 1 cup semi-sweet chocolate chips
Instructions
  1. Preheat your oven to 350 degrees, and spray a standard size 12 cup muffin tin with non-stick spray. Place really ripe bananas in a large mixing bowl, and mash them "silly" with a fork. Add granulated and brown sugars, melted butter, milk, and then the egg. Stir the ingredients really well together until blended. (No need for a mixer; use a spoon!)

  2. In a separate, large bowl, combine flour, baking soda, salt, and espresso powder. Whisk together. Create a well right in the middle of the dry ingredients, then pour in the banana mixture, and stir to combine. Next add the chocolate chips (I used mini chips), and fold them into the batter, only until ingredients are combined.

  3. Divide the muffin batter equally between prepared muffin cups. The mixture should fill each cup about 3/4 of the way. Place muffins in preheated oven on the middle rack. Bake them for 20 to 25 minutes (oven temps very greatly- mine were ready at 22 minutes). Test their doneness by inserting a toothpick into center of muffin. If it comes out clean, the muffins are ready to remove from oven! The muffin tops should be golden brown in color. Once the muffins are out of the oven, let them cool for about 15 minutes (still in the muffin tin) on a wire rack. After 15 minutes, transfer muffins from the pan to the wire rack, and let them finish cooling down. Serve... and ENJOY!

Recipe Notes

TIP: If you don't have access to instant espresso powder, you can substitute 2 teaspoons of very finely ground dark roast coffee.

Nutrition Facts
Banana Espresso Chocolate Chip Muffins
Amount Per Serving (1 muffin)
Calories 304 Calories from Fat 126
% Daily Value*
Fat 14g22%
Saturated Fat 8g50%
Cholesterol 35mg12%
Sodium 409mg18%
Potassium 263mg8%
Carbohydrates 41g14%
Fiber 2g8%
Sugar 23g26%
Protein 3g6%
Vitamin A 295IU6%
Vitamin C 3.4mg4%
Calcium 27mg3%
Iron 1.9mg11%
* Percent Daily Values are based on a 2000 calorie diet.

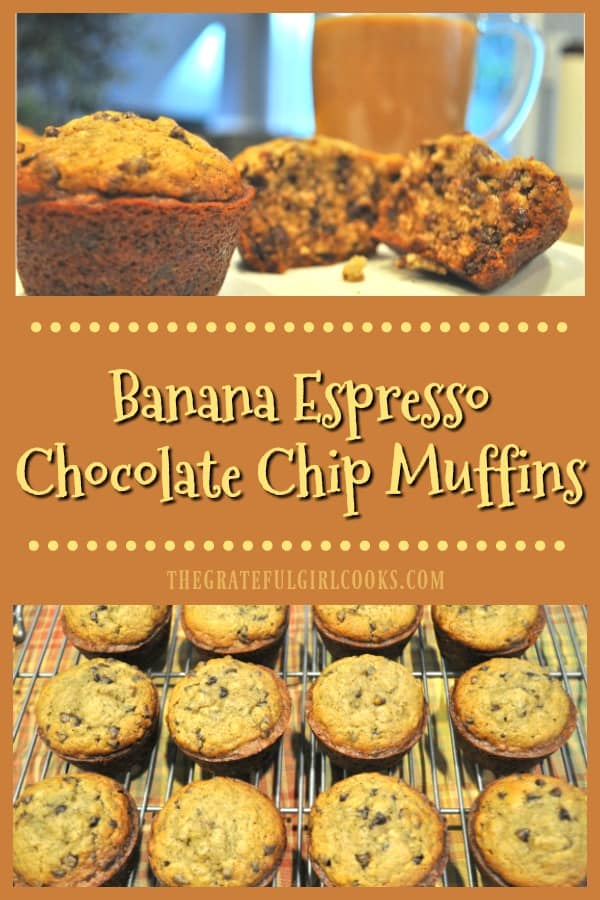
Here’s one more to pin on your Pinterest boards!You'll LOVE these delicious Banana Espresso Chocolate Chip Muffins! EASY to make, flavorful treat for a family friendly breakfast, brunch, or snack!

Chocolate Chip Muffins

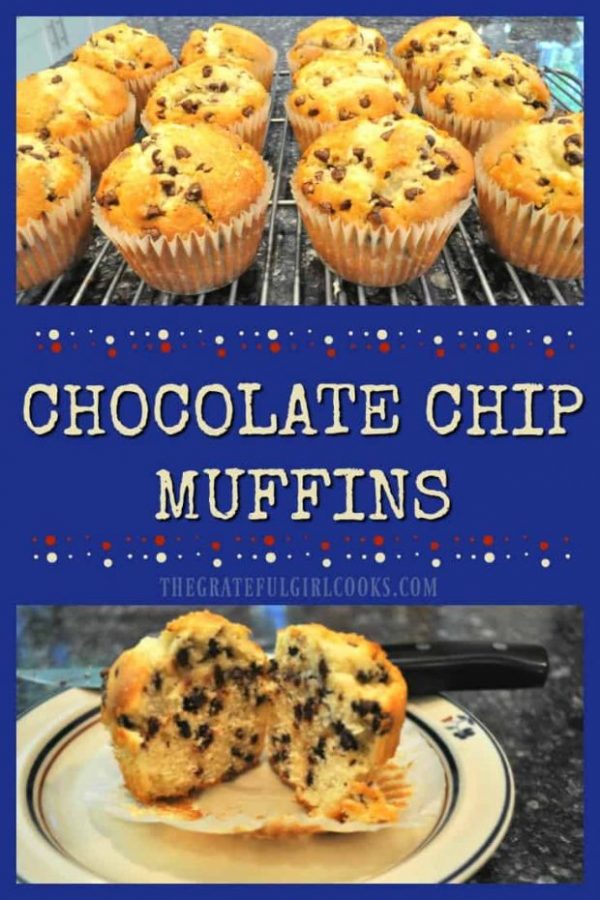
Chocolate Chip Muffins are easy to make, amazingly delicious, and will be a family favorite for breakfast or a light snack!Chocolate Chip Muffins will be a family favorite for breakfast or a light snack, and they're easy to make!

Do you enjoy a great tasting treat for breakfast or a snack?  If so, then you will want to read on and will need to make these delicious Chocolate Chip Muffins, bursting with miniature chocolate chips! Grab a cup of coffee or tea and read on.

I found the recipe on Pinterest and whipped up a batch for our family several weeks ago. WOW!!! They are wonderful, and were difficult to stay out of! 

The recipe made 12 standard sized muffins, which were packed with chocolate chips and were NOT dry!  Absolutely DELICIOUS! As an added bonus… they are super easy to make, too! Here’s how:

Scroll Down For A Printable Recipe Card At The Bottom Of The Page

How To Make Chocolate Chip Muffins

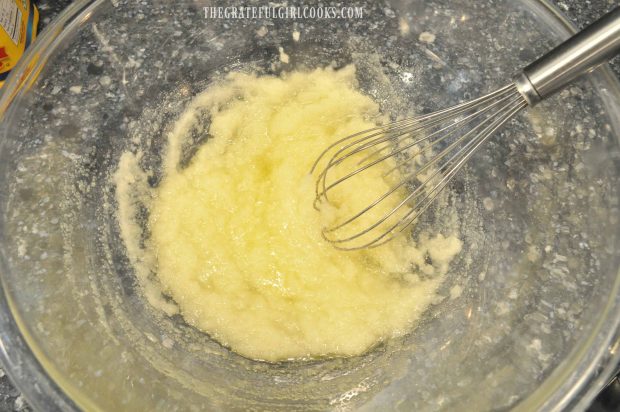
In a large bowl, mix together butter and oil, until well blended. Add sugar, egg, egg white and vanilla extract.

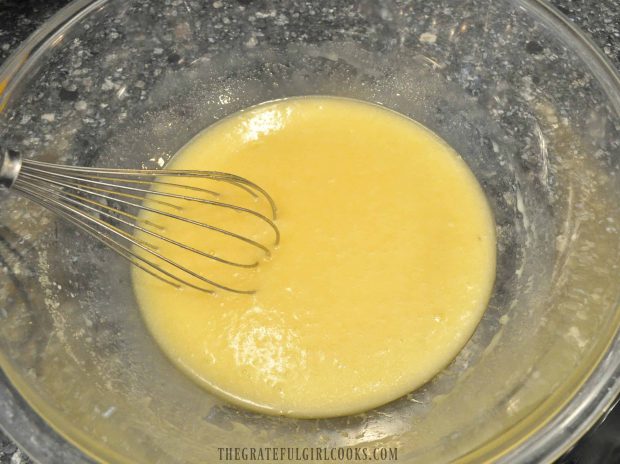
Stir or whisk ingredients very well, until completely combined and smooth. Add the buttermilk, and stir until combined.

Whisking eggs and butter together

Yellow muffin batter in clear mixing bowl with whisk

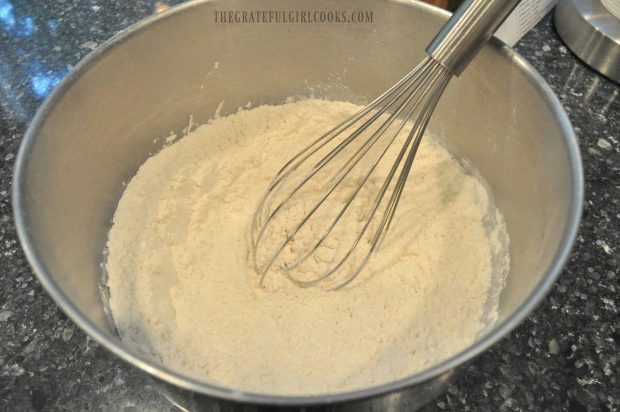
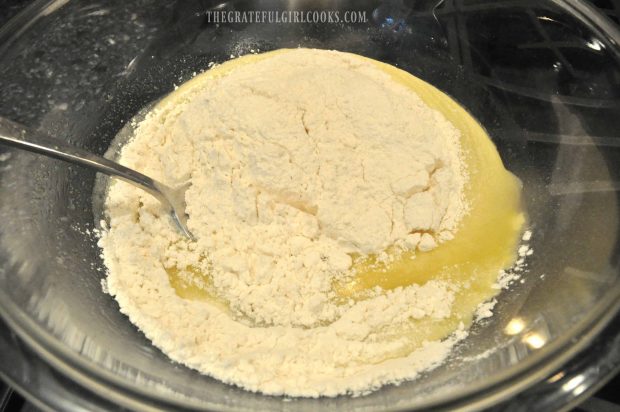
Whisk together flour, corn starch, baking powder and salt in a separate mixing bowl.  Add the dry ingredients to the bowl with the wet ingredients.

Fold or gently stir dry ingredients into batter, making sure NOT to overmix.

Whisk with flour in metal bowl

Yellow egg mixture added to flour in bowl

About half way through folding dry ingredients into wet ingredients, stir in the chocolate chips. Once combined, cover the bowl and let the batter sit at room temperature for at least 15 minutes (trust me-this will help the muffins to rise higher).

While batter is “resting”, preheat oven to 425 degrees. Line a standard sized muffin tin with paper cupcake liners and spray bottom of each paper liner with non-stick baking spray (I learned this trick from a friend whose husband was a baker).

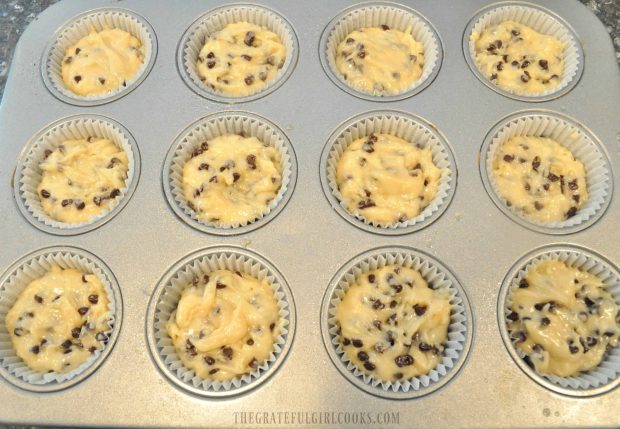
Once batter has “rested”,  fill each paper liner with batter (about 3/4 full), distributing evenly between muffin cups.

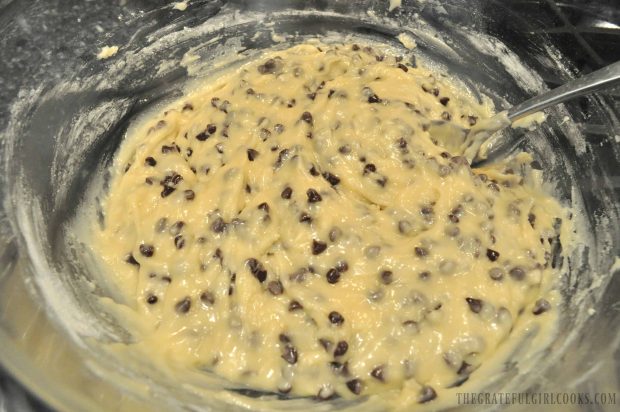
Muffin batter with chocolate chips in clear mixing bowl

12 chocolate chip muffins in muffin pan

Bake The Chocolate Chip Muffins

Sprinkle the top of each muffin with coarse granulated sugar.  Bake at 425 degrees for 8 minutes, then turn down the oven to 350 degrees and cook for another 7-8 minutes.

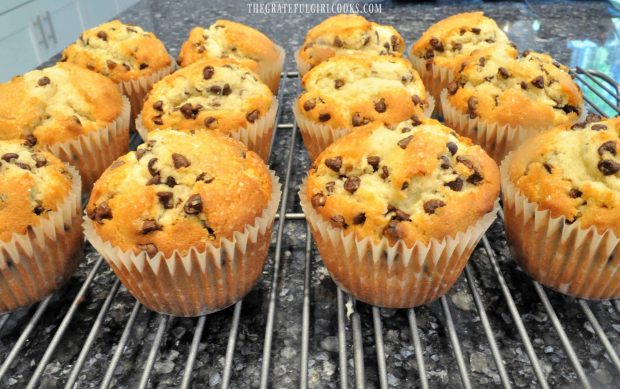
Check muffins for doneness (they should be light golden brown on top and a toothpick inserted into middle of muffin should come out dry). When done, remove muffins from oven to a wire rack, and let muffins cool.

Baked muffins cooling on wire rack

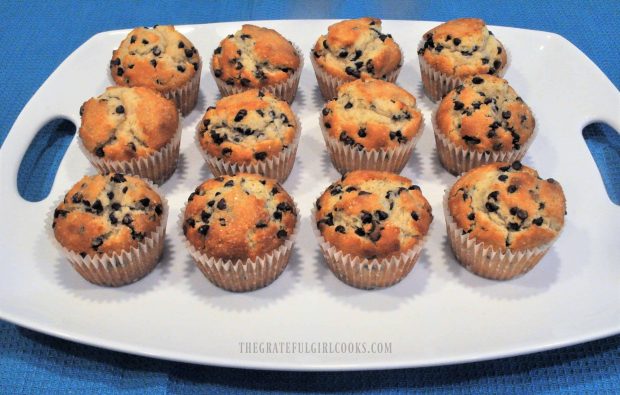
12 muffins on white serving tray with blue background

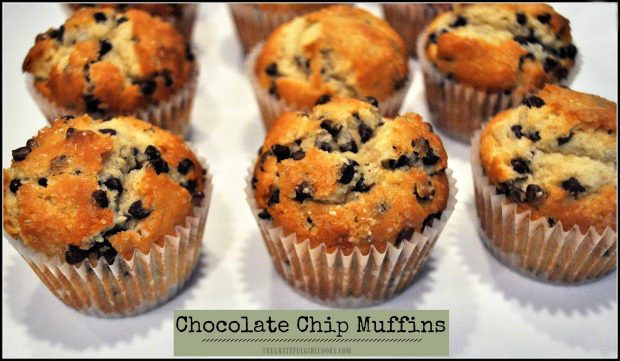
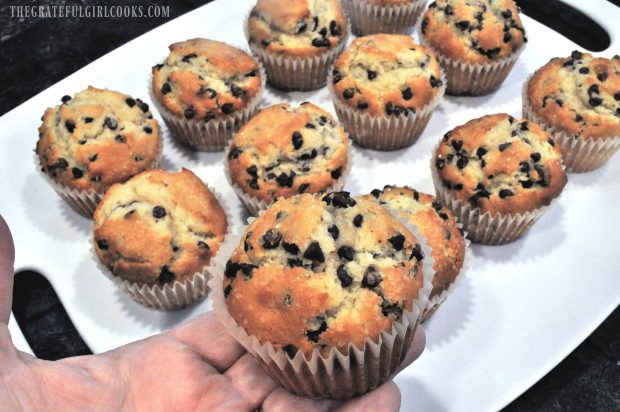
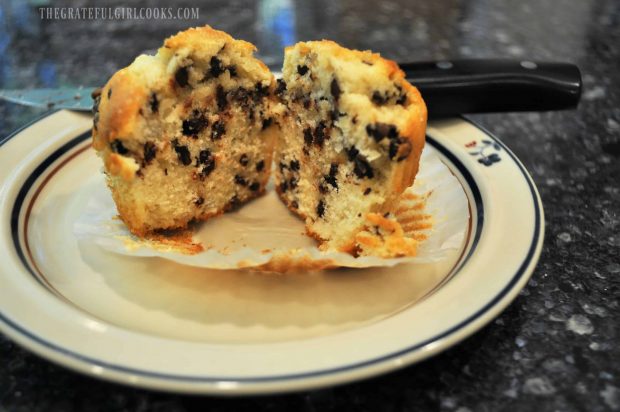
And that’s how easy it is to make these wonderful treats!  Don’t they LOOK good?  Each muffin rose well above the top of the paper liner!  And just look at all those mini chocolate chips inside… YUM!

One muffin held in hand over other muffins

One muffin cut in half on a small plate

These chocolate chip muffins tasted FANTASTIC!  We loved them. I sent some of them home with one of our sons, and he loved them, too.

I hope you will consider trying this recipe, and trust that you, and those you love will enjoy them as much as we did. Have a GREAT day!

Looking For More MUFFIN Recipes?

You can find all of my recipes in the Recipe Index, located at the top of the page. Some of our favorite muffins include:

Interested In More Recipes?

Thank you for visiting this website. I appreciate you using some of your valuable time to do soIf you’re interested, I publish a newsletter 2 times per month (1st and 15th) with all the latest recipes, and other fun info. I would be honored to have you join our growing list of subscribers, so you never miss a great recipe!
There is a Newsletter subscription box on the top right side (or bottom) of each blog post, depending on the device you use, where you can easily submit your e-mail address (only) to be included in my mailing list.

You Can Also Find Me On Social Media:

Facebook page: The Grateful Girl Cooks!
Pinterest:
The Grateful Girl Cooks!
Instagram:
jbatthegratefulgirlcooks

Chocolate Chip Muffins / The Grateful Girl Cooks!

Recipe Source: Samantha Merritt, at https://sugarspunrun.com/bakery-style-chocolate-chip-muffins/

↓↓ PRINTABLE RECIPE BELOW ↓↓

0 from 0 votes
Chocolate Chip Muffins
Prep Time
20 mins
Cook Time
15 mins
Total Time
35 mins
 

Chocolate Chip Muffins will be a family favorite for breakfast or a light snack, and they're easy to make!

Category: Breakfast
Cuisine: American
Keyword: chocolate chip muffins
Servings: 12 muffins
Calories Per Serving: 279 kcal
Author: JB @ The Grateful Girl Cooks!
Ingredients
  • 4 Tablespoons butter (melted, cooled to room temp.)
  • 1/4 cup vegetable (or canola) oil
  • 1 cup granulated sugar
  • 1 large egg (at room temp. is best)
  • 1 egg white
  • teaspoons vanilla extract
  • 1/2 cup buttermilk (see NOTES for substitute)
  • cup all purpose flour
  • 2 teaspoons baking powder
  • 2 teaspoons corn starch
  • 1/2 teaspoon salt
  • 1 cup chocolate chips (I used mini-chips!)
  • 1/3 cup granulated or coarse sugar (for sprinkling on muffins before baking)
Instructions
  1. In a large bowl, mix together butter and oil, until well blended. Add sugar, egg, egg white and the vanilla extract. Stir or whisk ingredients very well, until completely combined and smooth. Add buttermilk; stir until combined.
  2. Whisk together flour, corn starch, baking powder and salt in a separate mixing bowl. Add the dry ingredients to the bowl with the wet ingredients. Fold or gently stir dry ingredients into batter, making sure NOT to overmix. About half way through folding dry ingredients into wet ingredients, stir in the chocolate chips. Once combined, cover the bowl and let the batter sit at room temperature for at least 15 minutes (this will help the muffins to rise higher).
  3. While batter is "resting", preheat oven to 425 degrees. Line a standard sized muffin tin with paper cupcake liners and spray bottom of each paper liner with non-stick baking spray (I learned this trick from a friend whose husband was a baker). Once batter has "rested", divide batter evenly, and fill each paper liner with batter (about 3/4 full), distributing evenly between muffin cups.
  4. Sprinkle the top of each muffin with coarse granulated sugar. Bake at 425 degrees for 8 minutes, then turn down oven to 350 degrees and cook for another 7-8 minutes (without removing muffins from oven). At the 7 minute mark, check muffins for doneness (they should be light golden brown and a toothpick inserted into middle should come out dry). When done, remove muffins from oven to a wire rack, and let muffins cool. Serve, and enjoy!
Recipe Notes

!No buttermilk? Use this as a substitute: Put 1½ tsp. white vinegar OR lemon juice into a measuring cup. Fill to 1/2 cup marking with milk. Stir. Let sit 5 minutes before using.
!Want to make 6 JUMBO sized muffins? Follow exact recipe and use jumbo sized muffin tins - bake at 425° for 8 mins., reduce heat to 350°, then bake an additional 15 mins. before checking for doneness.

Nutrition Facts
Chocolate Chip Muffins
Amount Per Serving (1 muffin)
Calories 279 Calories from Fat 72
% Daily Value*
Fat 8g12%
Saturated Fat 4g25%
Cholesterol 27mg9%
Sodium 163mg7%
Potassium 117mg3%
Carbohydrates 48g16%
Fiber 1g4%
Sugar 32g36%
Protein 3g6%
Vitamin A 380IU8%
Vitamin C 0.5mg1%
Calcium 65mg7%
Iron 1.2mg7%
* Percent Daily Values are based on a 2000 calorie diet.

Here’s one more to post on your Pinterest boards!Chocolate Chip Muffins will be a family favorite for breakfast or a light snack, and they're easy to make!

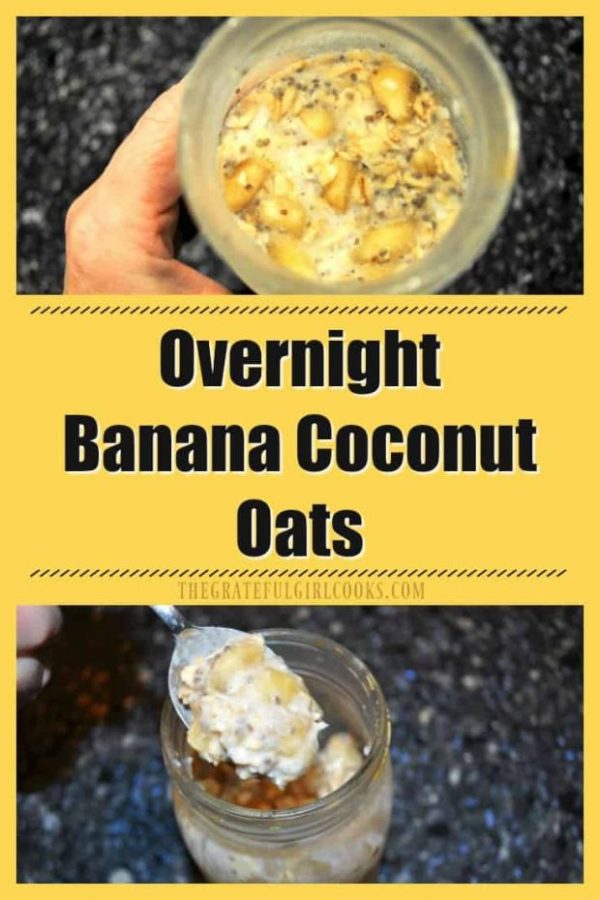
Overnight Banana Coconut Oats

5 minutes prep time is all you need to make a family friendly breakfast of Overnight Banana Coconut Oats! A quick, easy and delicious dish everyone will enjoy! 5 minutes prep time is all you need to make a family friendly breakfast of Overnight Banana Coconut Oats! A quick, easy and delicious dish everyone will enjoy!

Have you ever made overnight oats before? I would like to recommend these Overnight Banana Coconut Oats today, for your consideration! Take a couple minutes to mix up the ingredients, and simply refrigerate them while you sleep, then wake up to a thick and creamy cup of “ready to go DELICIOUS oatmeal” the next morning!

I really like the idea of having overnight oats ready to grab and go in the morning. There’s no fuss- just a hearty, filling, DELICIOUS breakfast to enjoy with my coffee!

It couldn’t be easier to make banana coconut oats, with a few ingredients! Make a few up and go to bed at night, knowing your breakfast will be waiting for YOU!  Here’s how to make one serving:

Scroll Down For A Printable Recipe Card At The Bottom Of The Page

How To Make Overnight Banana Coconut Oats

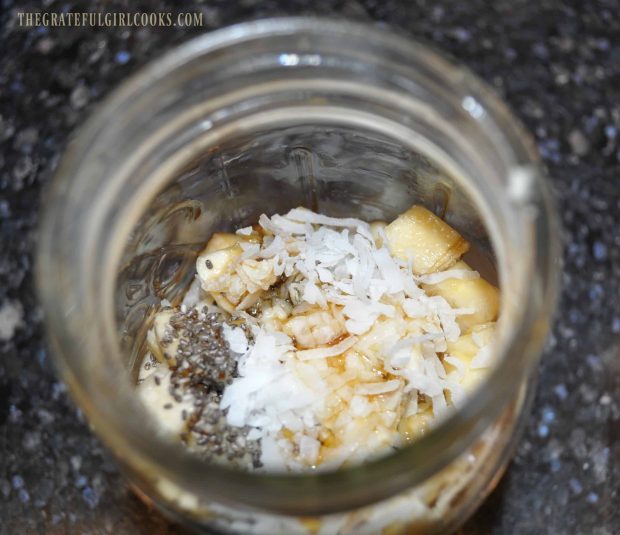
In an airtight container with a lid (I used a pint sized Mason jar), place rolled oats, sliced banana, vanilla extract, chia seeds, shredded coconut, and pure maple syrup. NOTE: If you want more coconut flavor, you can also add a very small bit of coconut extract.  I didn’t find it necessary, but it is an option!

Oats, chia seeds, coconut, bananas and maple syrup are placed in a mason jar.

Add unsweetened coconut milk until the oats are fully covered. Give the ingredients a good stir, until they are completely mixed together. If necessary, you might need to add a bit more coconut milk to ensure the ingredients are covered.

Canned coconut milk is added to jar with overnight banana coconut oats.

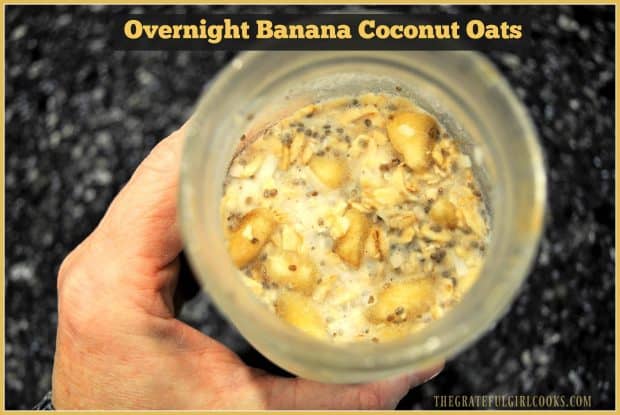
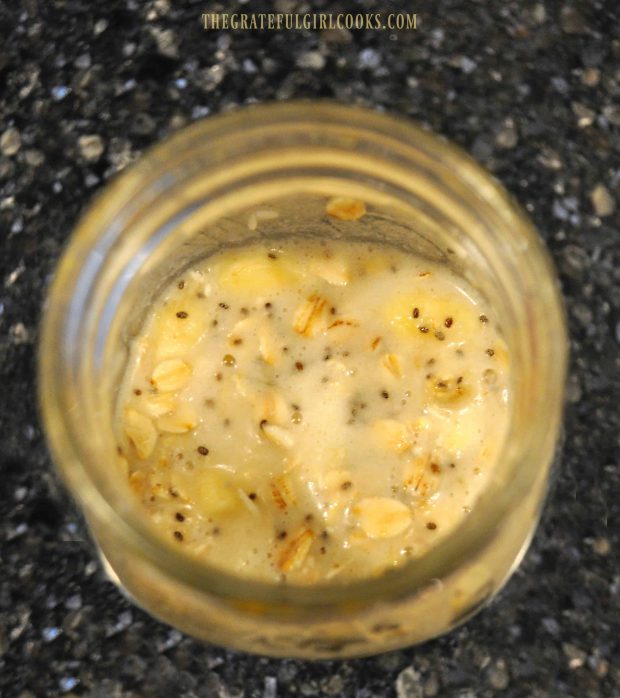
This is what the overnight banana coconut oats looked like after mixing.  Place a lid on the jar or container, and refrigerate overnight.

Overnight Banana Coconut Oats are mixed in jar, then refrigerated overnight.

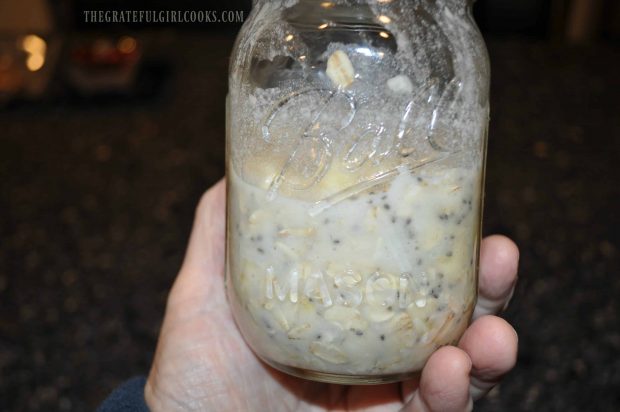
The next morning, remove jar from refrigerator and remove lid.  Overnight the oats will have absorbed quite a bit of the coconut milk, leaving a creamy, thicker consistency of oats. You can add in a bit more coconut milk, to thin out the oats more and loosen them up, if desired. Give the oats a good stir, and they are ready to eat cold (no, you don’t heat them!).

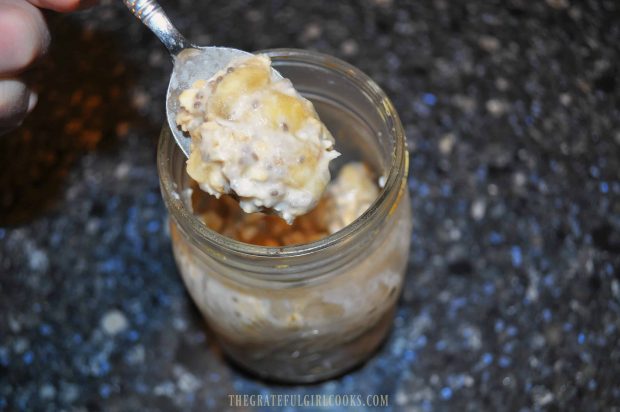
Overnight Banana Coconut Oats have thickened after refrigerating overnight.

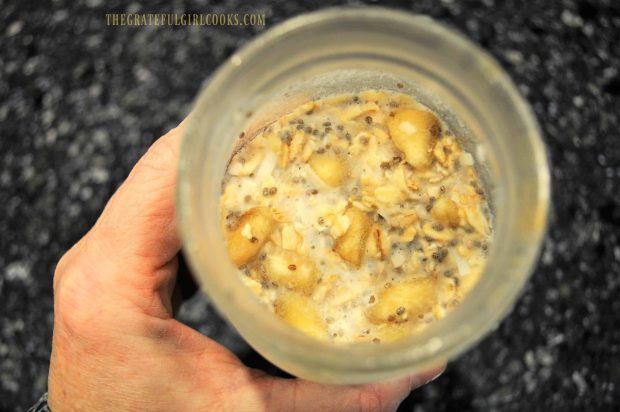
See how thick the banana coconut oats have become after being refrigerated overnight? They taste wonderful cold, too… kind of like pudding!

Overnight Banana Coconut Oats have the consistency of pudding after being refrigerated overnight.

The recipe as written below will yield ONE serving, but is easily doubled or tripled to make several more servings. Overnight banana coconut oats can be prepared 2-3 days in advance.  If you enjoy the flavors of coconut and banana, you will enjoy this easy breakfast that will also fill you up!

Looking for More OVERNIGHT OAT Recipes?

You can find ALL my recipes in the Recipe Index, located at the top of the page. You might also enjoy my other overnight oats recipes, including:

Interested In More Recipes?

Thank you for visiting this website. I appreciate you using some of your valuable time to do soIf you’re interested, I publish a newsletter 2 times per month (1st and 15th) with all the latest recipes, and other fun info. I would be honored to have you join our growing list of subscribers, so you never miss a great recipe!
There is a Newsletter subscription box on the top right side (or bottom) of each blog post, depending on the device you use, where you can easily submit your e-mail address (only) to be included in my mailing list.

You Can Also Find Me On Social Media:

Facebook page: The Grateful Girl Cooks!
Pinterest:
The Grateful Girl Cooks!
Instagram:
jbatthegratefulgirlcooks

Author's signature

Recipe Source: Tammy, at https://www.organizeyourselfskinny.com/2017/07/05/banana-coconut-overnight-oats/

0 from 0 votes
Overnight Banana Coconut Oats
Prep Time
5 mins
Cook Time
0 mins
Total Time
5 mins
 

5 minutes prep time is all you need to make a family friendly breakfast of Overnight Banana Coconut Oats! A quick, easy and delicious dish everyone will enjoy!

Category: Breakfast
Cuisine: American
Keyword: overnight banana coconut oats
Servings: 1 serving
Calories Per Serving: 581 kcal
Author: JB @ The Grateful Girl Cooks!
Ingredients
  • 1/2 cup old fashioned rolled oats (not instant)
  • 1/2 very ripe banana , sliced thin
  • 1/4 teaspoon vanilla extract
  • 1 Tablespoon shredded coconut (unsweetened preferred)
  • 1 teaspoon chia seeds
  • 2 teaspoon pure maple syrup
  • 1/2 cup unsweetened coconut milk (plus more, if necessary)
  • 1/8 teaspoon coconut extract (OPTIONAL-use only if more coconut flavor desired)
Instructions
  1. Place all ingredients (except coconut milk) in a mason jar or container with a lid. Give ingredients a stir until combined.
  2. Pour coconut milk into container. Stir well. Make sure the ingredients are fully covered by coconut milk. Add additional coconut milk (if necessary), to cover. Seal jar or container. Refrigerate overnight.
  3. When ready to serve, remove from refrigerator, remove lid, and give oats a stir. Stir in additional coconut milk, if desired, to thin out the oats a bit.
  4. Serve, and enjoy!
Recipe Notes

Oats can be prepared 2-3 days in advance, if desired.

Nutrition Facts
Overnight Banana Coconut Oats
Amount Per Serving (1 serving)
Calories 581 Calories from Fat 315
% Daily Value*
Fat 35g54%
Saturated Fat 28g175%
Sodium 42mg2%
Potassium 673mg19%
Carbohydrates 62g21%
Fiber 9g38%
Sugar 23g26%
Protein 9g18%
Vitamin C 8.5mg10%
Calcium 81mg8%
Iron 4mg22%
* Percent Daily Values are based on a 2000 calorie diet.

Here’s one more to pin on your Pinterest boards!5 minutes prep time is all you need to make a family friendly breakfast of Overnight Banana Coconut Oats! A quick, easy and delicious dish everyone will enjoy!


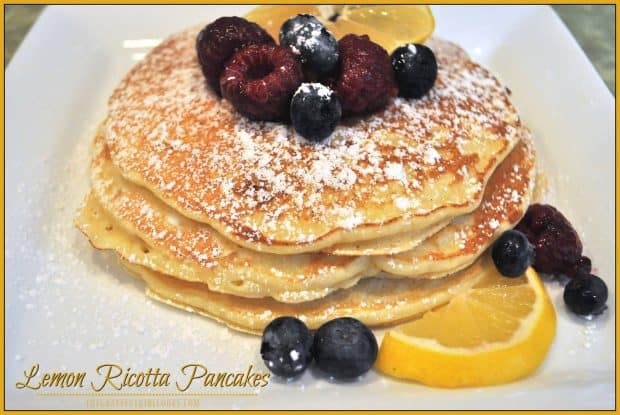
Lemon Ricotta Pancakes

If you are looking for a decadent breakfast that is easy to prepare and incredibly DELICIOUS, may I suggest Lemon Ricotta Pancakes? Easily made from scratch, light and fluffy, and infused with lemon flavor, this is one breakfast your family and friends will remember!Lemon Ricotta Pancakes are easily made from scratch, light and fluffy, and infused with lemon flavor, for an absolutely delicious breakfast you'll remember!

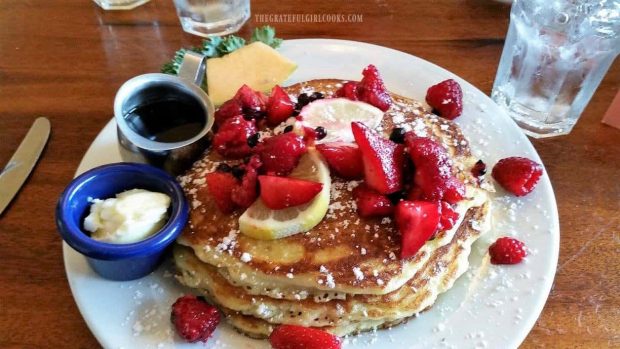
I first tasted lemon ricotta pancakes last Fall when my husband and I enjoyed a 4 day getaway to Bend, Oregon. Oh my goodness! We stumbled upon a restaurant called The McKay Cottage Restaurant (voted best breakfast restaurant in Bend, every year since 2010), and had a wonderful breakfast there.

Our meal was so good, we ended up going back again the next day, and thoroughly enjoyed their incredible lemon ricotta pancakes! Soooo good! Look how scrumptious they looked when served to us! YUM!

The lemon ricotta pancakes served at McKay Cottage, in Bend, Oregon.

Once we returned home, I vowed to eventually make them from scratch, so we could enjoy them here in our home, instead of a restaurant 4 hours away from us! I searched online for a recipe that sounded perfect, and picked this one!

Scroll Down For A Printable Recipe Card At The Bottom Of The Page

Lemons, Lemons, Lemons!

Right before Christmas, I received a box of fresh, homegrown Meyer lemons from my dear friend Lenita, in Southern California. I KNEW I had to use a few of those extraordinary lemons to make some pancakes… STAT!  So I did, and yes…they were amazing! Here’s how easy it is to make a batch of these fluffy and delicious pancakes from scratch!:

Lemon Ricotta Pancakes / The Grateful Girl Cooks!

Make The Batter For Lemon Ricotta Pancakes

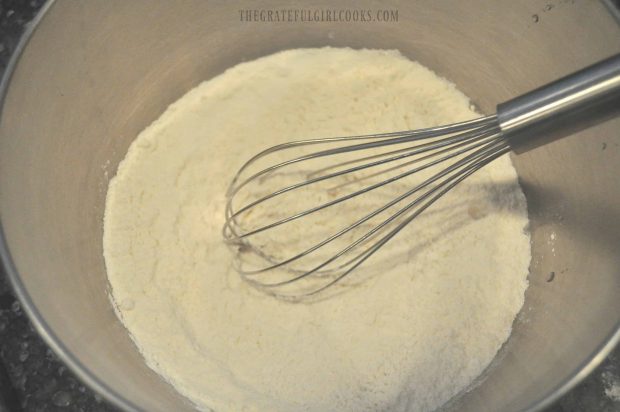
Whisk together flour, sugar, salt, baking soda and baking powder in a large mixing bowl.

Lemon Ricotta Pancakes / The Grateful Girl Cooks!

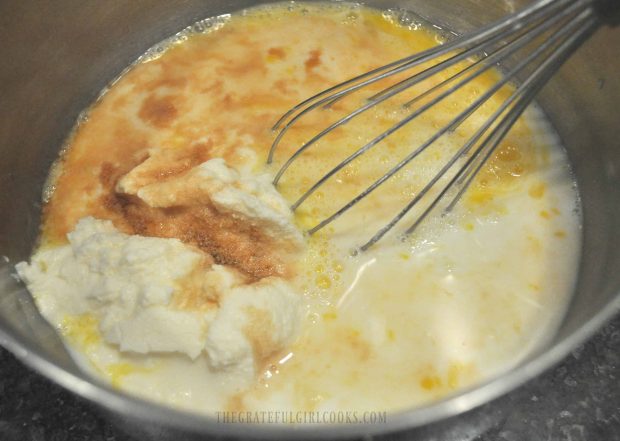
In a separate mixing bowl, whisk eggs until blended. Add ricotta cheese, milk and vanilla extract. Whisk these very well, so the ingredients are fully blended.

Lemon Ricotta Pancakes / The Grateful Girl Cooks!

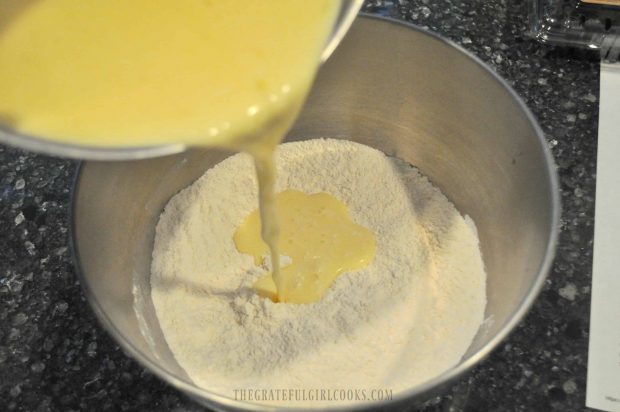
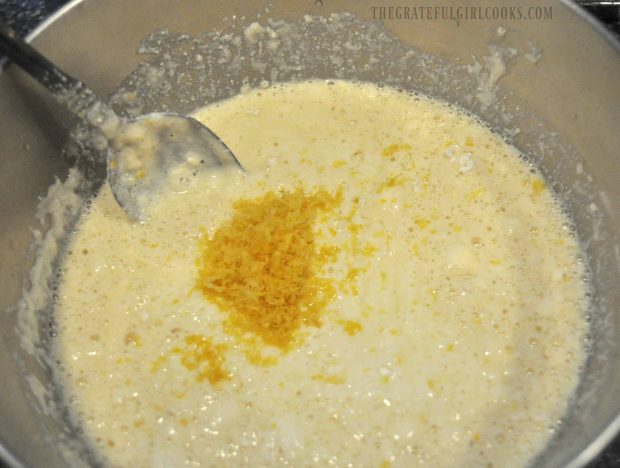
Pour the wet ingredients into the bowl with the dry ingredients. Stir until all ingredients are fully combined (do not OVERMIX!). Add fresh squeezed lemon juice and lemon zest; stir only until they are incorporated into batter.

Lemon Ricotta Pancakes / The Grateful Girl Cooks!

Lemon Ricotta Pancakes / The Grateful Girl Cooks!

Cook the Lemon Ricotta Pancakes

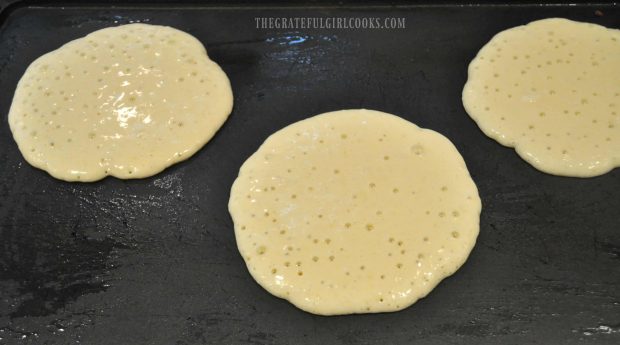
Lightly spray, butter or grease a griddle or large skillet. Heat griddle until very hot, then pour 1/3 cup of batter for each pancake onto hot griddle. Make sure to leave enough space between them, so they do not run into each other.

Cook a couple minutes, until bubbles form on top of batter. Flip over, and cook the other side for a couple minutes or until the bottom is golden brown. Repeat process with remaining batter (you can keep the cooked pancakes in the oven on a low temperature to keep them warm).

Lemon Ricotta Pancakes / The Grateful Girl Cooks!

Serve The Pancakes!

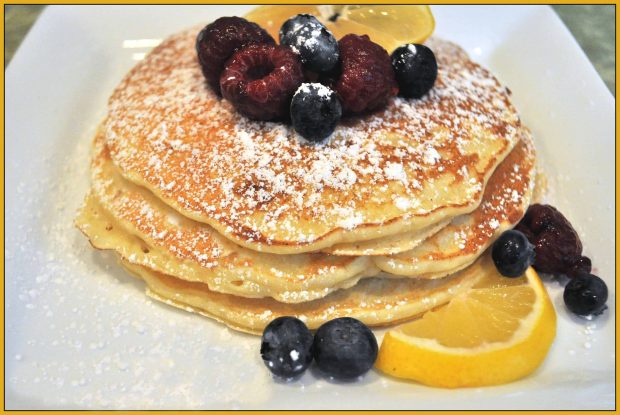
When ready to serve, place stack of pancakes onto individual plates. Sift powdered sugar over the top of the pancakes and garnish with fresh fruit (if desired).

I tend to “eat with my eyes” first, so I “fancied” the pancakes up a bit (like the restaurant did)! I used thin lemon slices, raspberries and blueberries. Sliced fresh strawberries would be pretty, as well!

Lemon Ricotta Pancakes / The Grateful Girl Cooks! Lemon Ricotta Pancakes are easily made from scratch, light and fluffy, and infused with lemon flavor, for an absolutely delicious breakfast you'll remember!

Serve warm, with maple syrup or whipped cream!  Take a big bite and enjoy this decadent breakfast treat! They taste WONDERFUL, and LOOK pretty good, too!

Lemon Ricotta Pancakes / The Grateful Girl Cooks!

I really hope you will consider trying this recipe… the lemon ricotta pancakes are EASY to prepare, and would be perfect for a weekend breakfast with family or friends! You’ll definitely enjoy these absolutely delicious pancakes! They’re so good I bet you’ll want to make them again… and again!  Have a great day!

Looking For More PANCAKE Recipes?

You can find ALL my recipes in the Recipe Index, located at the top of the page. I have some delicious pancake recipes, including:

Interested In More Recipes?

Thank you for visiting this website. I appreciate you using some of your valuable time to do soIf you’re interested, I publish a newsletter 2 times per month (1st and 15th) with all the latest recipes, and other fun info. I would be honored to have you join our growing list of subscribers, so you never miss a great recipe!
There is a Newsletter subscription box on the top right side (or bottom) of each blog post, depending on the device you use, where you can easily submit your e-mail address (only) to be included in my mailing list.

You Can Also Find Me On Social Media:

Facebook page: The Grateful Girl Cooks!
Pinterest:
The Grateful Girl Cooks!
Instagram:
jbatthegratefulgirlcooks

Author's signature

Recipe Source: Ashley, at https//bakerbynature.com/lemon-ricotta-pancakes/

0 from 0 votes
Lemon Ricotta Pancakes
Prep Time
10 mins
Cook Time
3 mins
Total Time
13 mins
 
Lemon Ricotta Pancakes are easily made from scratch, light and fluffy, and infused with lemon flavor, for an absolutely delicious breakfast you'll remember!
Category: Breakfast
Cuisine: American
Keyword: lemon ricotta pancakes
Servings: 16 pancakes
Calories Per Serving: 115 kcal
Author: JB @ The Grateful Girl Cooks!
Ingredients
  • 2 cups all purpose flour
  • 1/4 cup granulated sugar
  • 3/4 teaspoon salt
  • 3/4 teaspoon baking powder
  • teaspoons baking soda
  • 2 eggs (large)
  • cups milk
  • 1 cup ricotta cheese (full fat is best!)
  • teaspoons vanilla extract
  • 1/4 cup freshly squeezed lemon juice (approx. 2 large lemons)
  • 2 teaspoons lemon zest
For Garnish/Serving (if desired):
  • Powdered sugar (sifted), Fresh fruit, or whipped cream
  • Maple syrup
Instructions
  1. Whisk together flour, sugar, salt, baking soda and baking powder in a large mixing bowl.
  2. In a separate mixing bowl, whisk eggs until blended. Add ricotta cheese, milk and vanilla extract. Whisk these very well, so the ingredients are fully blended. Pour the wet ingredients into the bowl with the dry ingredients. Stir until all ingredients are fully combined (do not OVERMIX!). Add fresh squeezed lemon juice and lemon zest; stir only until they are incorporated into batter.
  3. Lightly spray, butter or grease a griddle or large skillet. Heat griddle until hot, then pour 1/3 cup of batter for each pancake onto hot griddle. Make sure to leave enough space between them, so they do not run into each other. Cook a couple minutes, until bubbles form on top of batter. Flip over, and cook the other side for a couple minutes or until the bottom is golden brown. Repeat process with remaining batter (you can keep the cooked pancakes in the oven on a low temperature to keep them warm).
  4. When ready to serve, place stack of pancakes onto individual plates. Sift powdered sugar over the top of the pancakes and garnish with fresh fruit (if desired). Serve warm, with maple syrup or whipped cream, and ENJOY!
Recipe Notes

The pancakes can easily be frozen. Place a sheet of wax paper between each room temp. pancake, wrap securely in aluminum foil or resealable plastic storage bag, and store in freezer. Reheat pancakes (in oven or microwave) for another meal. 
*Caloric count does not include powdered sugar garnish or maple syrup.

Nutrition Facts
Lemon Ricotta Pancakes
Amount Per Serving (1 pancake)
Calories 115 Calories from Fat 18
% Daily Value*
Fat 2g3%
Saturated Fat 1g6%
Cholesterol 29mg10%
Sodium 242mg11%
Potassium 96mg3%
Carbohydrates 17g6%
Sugar 4g4%
Protein 4g8%
Vitamin A 140IU3%
Vitamin C 1.8mg2%
Calcium 73mg7%
Iron 0.9mg5%
* Percent Daily Values are based on a 2000 calorie diet.

Here’s one more to pin on your Pinterest boards!Lemon Ricotta Pancakes are easily made from scratch, light and fluffy, and infused with lemon flavor, for an absolutely delicious breakfast you'll remember!

Triple Berry Banana Smoothie

A Triple Berry Banana Smoothie is a delicious treat, with raspberries, blueberries, blackberries, banana, spinach, orange juice, and Greek yogurt!

Do you enjoy cold, fresh fruit smoothies? We sure do at our house! Recently for lunch I made a Triple Berry Banana Smoothie, which included blended frozen raspberries, blueberries, and blackberries with a banana, orange juice, Greek yogurt and spinach! It was DELICIOUS!

Here in the Portland, Oregon area, we’ve been experiencing many days with temperatures in the low 30’s this Winter. I realize that sounds like a “heat wave” to others experiencing absolutely frigid temps, heavy snowfall and blizzard conditions, BUT… it still was COLD.

So in spite of everything my brain told me NOT to do on a freezing cold day, I made a really COLD fruit smoothie for lunch… ha ha! And guess what? IT WAS WONDERFUL!

Scroll Down For A Printable Recipe Card At The Bottom Of The Page

What’s IN A Triple Berry Banana Smoothie?

The smoothie couldn’t be easier to make!  Here are the cast of characters… frozen berries (3 kinds- blueberry, blackberry and raspberry, bought in a fruit medley bag at Costco. I added non-fat plain Greek yogurt (a good source of protein), a handful of fresh baby spinach (trust me- the kids will NEVER know there’s a veggie in there!), a banana, and a small amount of orange juice.

It’s EASY To Make This Smoothie!

All the ingredients are placed into a blender and mixed until it is smooth! That’s it!  There is enough to make 2 (8 ounce) smoothies, or 4 little smoothies (for the kids). By using frozen berries there is no need to add ice to make the smoothie cold (which can possibly water down the drink).

All the ingredients used to make a triple berry banana smoothie!

Looking For Other Smoothie Recipes?

If you are a lover of fruit smoothies, I would also recommend checking out my recipes for Orange Julius (copycat), Blueberry, Banana and Kale Smoothie, or a Super Creamy Chocolate Peanut Butter Smoothie! They all taste wonderful, and are very easy to prepare!

You might also enjoy this Orange Julius (copycat).

Maybe you would also enjoy this Blueberry, Banana, and Kale Smoothie.

This Super Creamy Chocolate Peanut Butter Smoothie is another smoothie that is delicious.

A Triple Berry Banana Smoothie Is SO EASY To Make

But for now, let’s go back to THIS incredible tasting triple berry banana smoothie! Once it is well blended, pour yourself a great big glass full, and ENJOY this yummy, filling drink! The best part is that it only takes a couple minutes to make, tastes GREAT, and is nice and cold from those frozen berries! Lip-smackin’ good!

One serving of the triple berry banana smoothie.

Hope you enjoy this triple berry banana smoothie! We sure did! The recipe for the triple berry smoothie is easily doubled, and can be easily adapted to use other berries you may enjoy.  It was a very light lunch for me that day, but it left me filling full and satisfied. 

Thank you for stopping by, and I hope you will come back again soon. Don’t forget to check out ALL my recipes in the Recipe Index, located at the top of the page. Have a wonderful day!

Interested In More Recipes?

Thank you for visiting this website. I appreciate you using some of your valuable time to do soIf you’re interested, I publish a newsletter 2 times per month (1st and 15th) with all the latest recipes, and other fun info. I would be honored to have you join our growing list of subscribers, so you never miss a great recipe! 

There is a Newsletter subscription box on the top right side (or bottom) of each blog post, depending on the device you use, where you can easily submit your e-mail address (only) to be included in my mailing list.

You Can Also Find Me On Social Media:

Facebook page: The Grateful Girl Cooks!
Pinterest:
The Grateful Girl Cooks!
Instagram:
jbatthegratefulgirlcooks

Author's signature

↓↓ PRINTABLE RECIPE BELOW ↓↓

0 from 0 votes
Triple Berry Banana Smoothie
Prep Time
3 mins
Cook Time
0 mins
Total Time
3 mins
 

A Triple Berry Banana Smoothie is a delicious treat, with raspberries, blueberries, blackberries, banana, spinach, orange juice, and Greek yogurt!

Category: Beverage, Breakfast
Cuisine: American
Keyword: triple berry banana smoothie
Servings: 2 (8 ounce) servings
Calories Per Serving: 160 kcal
Author: JB @ The Grateful Girl Cooks!
Ingredients
  • 2 cups frozen berry medley (blueberries, blackberries, raspberries)
  • 1 large banana
  • 1 large handful fresh baby spinach leaves (approx. 1½ cups)
  • 3 heaping Tablespoons non-fat Greek yogurt
  • 1/2 cup orange juice (I used commercially prepared)
Instructions
  1. Place all ingredients in blender. Make sure berries (or banana) are frozen before adding. By using frozen fruit, you avoid having to add ice cubes to the drink to make it cold, which can water it down.
  2. Process ingredients until well blended and smooth.
  3. Pour into glasses and serve!
Recipe Notes

Recipe yields approximately 2 (8 ounce) servings) or 4 (1/2 cup) servings.

Nutrition Facts
Triple Berry Banana Smoothie
Amount Per Serving (1 serving (8 ounce))
Calories 160 Calories from Fat 9
% Daily Value*
Fat 1g2%
Sodium 3mg0%
Potassium 418mg12%
Carbohydrates 38g13%
Fiber 5g21%
Sugar 25g28%
Protein 1g2%
Vitamin A 280IU6%
Vitamin C 40mg48%
Calcium 19mg2%
Iron 0.6mg3%
* Percent Daily Values are based on a 2000 calorie diet.

Here’s one more to pin on your Pinterest boards!A Triple Berry Banana Smoothie is a delicious treat, with raspberries, blueberries, blackberries, banana, spinach, orange juice, and Greek yogurt!


Microwave Egg Breakfast Sandwich

Need breakfast quick? Try this 2 minute microwave egg breakfast sandwich, prepared in a microwave, with egg, ham and cheese on a toasted English muffin!Need breakfast quick? Try this 2 minute microwave egg breakfast sandwich, prepared in a microwave, with egg, ham and cheese on a toasted English muffin!

Need a quick, yet filling breakfast? What if I told you that you can make a hearty Microwave Egg Breakfast Sandwich in 2 minutes?

Yep… it’s delicious, and this breakfast sandwich can be ready faster than stopping for take-out at a fast-food restaurant!

Scroll Down For A Printable Recipe Card At the Bottom Of The Page

Remodeling Our Kitchen AND Trying To Cook Breakfast

Our kitchen is currently undergoing a complete remodel from floor to ceiling. At the time of this writing, there is nothing but bare walls in it (see below on left). 

My husband and I have set up an itsy bitsy tiny temporary kitchen on a table in our dining room with a few essential appliances, so we can survive the 2 month remodeling process (see below on right).

One of the most used appliances (well, besides the COFFEE MAKER), is our old microwave, which has been a real life-saver. 

I recently began making eggs in the microwave – who knew? Now I’ve made these 2 minute breakfast sandwiches several times already.

Photos of our kitchen remodel demolition, which forced us to use microwave to cook.

We LOVE these sandwiches for breakfast! We are making them (using the microwave) out of necessity, but love how convenient it’s been to make a hearty “breakfast on the go” for us in just a couple minutes.

How To Make A Microwave Egg Breakfast Sandwich

Here’s how easy they are to make using a microwave, and a few simple ingredients. The ingredients are an egg, grated cheddar, deli sliced ham, and one whole English muffin.

Microwave Egg Breakfast Sandwiches only require a few ingredients.

Spray a microwave-safe ramekin or mug with non-stick spray. Add one egg, a teaspoon of water, and salt and pepper.

Egg, water and salt and pepper, in a ramekin before cooking in microwave.

Give it a good stir until the ingredients are mixed together thoroughly.

Egg is stirred well, to blend, before microwaving for breakfast sandwich.

Next place the English muffin halves in toaster and lightly toast them until they are lightly browned. Now it’s time to multi-task!!!!

Cook The Egg In The Microwave

While the muffin is in the toaster, cook the egg. Place ramekin with egg mixture into microwave. Cook (uncovered) for 40-60 seconds on high (mine cooked fully in 40!).

Here’s what the egg looked like when I took it out after 40 seconds. Perfectly cooked! By the way, did you notice the plastic utensils we are using during the kitchen remodel? (ha ha).

I used the lovely and quite glamorous plastic fork to remove the egg from the ramekin. We are LIVIN’ LARGE during this kitchen remodel… ha ha ha!

Microwave Egg is cooked and ready for breakfast sandwich.

As soon as the English muffin is toasted, lightly butter it, then add the ham immediately. Place the cooked egg on top of the ham, add sharp cheddar cheese and put the lid on top.

If you’re more of a “I like my cheese UNDER the egg” kind of person, then by all means, make it work for YOU!

Egg, ham and cheese on the breakfast sandwich.

Ready To Eat

That’s it! In under 2 minutes, you’ve got yourself an wonderfully tasty breakfast!  The warmth from the top half of the English muffin lightly melts the cheese, as well.

I made a microwave egg breakfast sandwich one morning when our grown son was here at breakfast time, and he thought they tasted wonderful, as well!

We served them on (you guessed it) PAPER PLATES, and voila! A great tasting microwave egg breakfast sandwich was made “lickety split” for us kitchen “orphans”.

Microwave Egg Breakfast Sandwich, ready to eat!

Holding a Microwave Egg Breakfast Sandwich after a couple bites.

These would be fantastic item for a quick breakfast to eat on the go  I’m pretty sure many of you eat in your car on the way to work- (wink, wink).

Why stop for take-out, when it would take less time to make this breakfast before ever leaving the house? This microwave egg breakfast sandwich would also be a quick way to feed the kids before school. It tastes really good, too.

Hope you’ll give it a try! Thanks for stopping by, and I invite you to come back again soon for more family-friendly recipes. Take care, and have a GREAT day!

Looking for More BREAKFAST Recipes?

You can find ALL my recipes in the Recipe Index, located at the top of the page. I have a wonderful variety of breakfast recipes you might enjoy, including:

Want More Recipes? Get My FREE Newsletter!

I publish a newsletter 2 times per month (1st and 15th) with lots of recipes, tips, etc..
Would you like to join our growing list of subscribers?

There is a Newsletter subscription box on the top right (or bottom) of each blog post, depending on the device you use.
You can submit your e-mail address there, to be added to my mailing list.

Find Me On Social Media:

Facebook page: The Grateful Girl Cooks!
Pinterest:
The Grateful Girl Cooks!
Instagram:
jbatthegratefulgirlcooks

Author's signature

↓↓ PRINTABLE RECIPE BELOW ↓↓

0 from 0 votes
Microwave Egg Breakfast Sandwich
Prep Time
1 min
Cook Time
1 min
Total Time
2 mins
 
Need breakfast quick? Try this 2 minute microwave egg breakfast sandwich, prepared in a microwave, with egg, ham and cheese on a toasted English muffin!
Category: Breakfast
Cuisine: American
Keyword: microwave egg breakfast sandwich
Servings: 1 sandwich
Calories Per Serving: 430 kcal
Author: JB @ The Grateful Girl Cooks!
Ingredients
  • Non-stick cooking spray
  • 1 large egg
  • 1 teaspoon water
  • 1 pinch salt/pepper (to season egg)
  • 1 english muffin , split and toasted
  • 1 teaspoon butter (optional, for muffin)
  • 2 ounces deli ham (2-3 very thin slices)
  • 1 Tablespoon grated sharp cheddar cheese (small handful or thin slice)
Instructions
  1. Lightly coat a small ramekin with non-stick cooking spray. Place egg, water, salt and pepper in ramekin. Stir to blend ingredients. Set aside.
  2. Lightly toast english muffin. When done, butter one half (optional).
  3. While muffin is toasting, place ramekin with egg in microwave. Cook on high power for 40-60 seconds (mine only took 40 seconds to fully cook). Remove dish from microwave.
  4. Place warm ham slices on one half of toasted english muffin. Top with cooked egg, then grated cheddar. Immediately place the top half of the english muffin on the cheese. Serve and enjoy while it's hot!
Nutrition Facts
Microwave Egg Breakfast Sandwich
Amount Per Serving (1 sandwich)
Calories 430 Calories from Fat 207
% Daily Value*
Fat 23g35%
Saturated Fat 10g63%
Cholesterol 225mg75%
Sodium 1167mg51%
Potassium 297mg8%
Carbohydrates 26g9%
Fiber 1g4%
Protein 25g50%
Vitamin A 515IU10%
Calcium 162mg16%
Iron 1.8mg10%
* Percent Daily Values are based on a 2000 calorie diet.

Here’s one more to pin on your Pinterest boards!

Need breakfast quick? Try this 2 minute microwave egg breakfast sandwich, prepared in a microwave, with egg, ham and cheese on a toasted English muffin!

Glazed Lemon Poppy Seed Doughnuts

These delicious Glazed Lemon Poppy Seed Doughnuts are tart AND sweet, simple to make, and baked (not fried)! They are a wonderful breakfast treat!These delicious Glazed Lemon Poppy Seed Doughnuts are tart AND sweet, simple to make, and baked (not fried)! They are a wonderful breakfast treat!

Who wants doughnuts? How about these Glazed Lemon Poppy Seed Doughnuts? They are baked (not fried), a little sweet, a little tangy, glazed with a lemon icing… and very good! Yes, please!

I found this recipe on Pinterest and decided to give it a try. I love all things lemon… and lemon poppy seed doughnuts with lemon glaze on top? C’mon!!!  I knew I had to make them.  The doughnuts are baked and are crazy easy to make.

Scroll Down For A Printable Recipe Card At The Bottom Of The Page

Prepare The Doughnut Pan

Spray a doughnut pan with non-stick spray; set aside. Preheat your oven to 350 degrees F. Speaking of doughnut pans… I bought a Wilton 6 cavity doughnut pan a couple years ago with a gift card I received for my birthday.

I think the doughnut pan was only $9 or $10 dollars on Amazon, and I’ve used it a lot.  It’s wonderful to be able to BAKE doughnuts, instead of FRYING them! This is what the pan looks like.

Glazed Lemon Poppy Seed Doughnuts / The Grateful Girl Cooks!

How To Make Lemon Poppy Seed Doughnuts

In a medium sized bowl, place flour, poppy seeds, baking powder, salt and baking soda. Whisk these together, then set bowl aside. In a separate bowl, combine butter, egg, granulated sugar, sour cream, milk, vanilla, lemon zest and juice. Whisk these together until batter is smooth.

Glazed Lemon Poppy Seed Doughnuts / The Grateful Girl Cooks!

Glazed Lemon Poppy Seed Doughnuts / The Grateful Girl Cooks!

Pour this wet mixture into the bowl with the dry ingredients. Stir until all ingredients are combined into a thick batter, but make sure not to over mix! You now have the batter made for the lemon poppy seed doughnuts! Easy, right?

Glazed Lemon Poppy Seed Doughnuts / The Grateful Girl Cooks!

Fill Pan Then Bake The Doughnuts

Carefully spoon (or pipe) the batter into doughnut pan, filling each cup 2/3 to 3/4 of the way full. If you have a 6 cup pan, you may have to bake these in batches. Bake the lemon poppy seed doughnuts at 350°F for approximately 10 minutes. Check them at 9 minutes. The edges should be slightly brown when done.

Glazed Lemon Poppy Seed Doughnuts / The Grateful Girl Cooks!

Glazed Lemon Poppy Seed Doughnuts / The Grateful Girl Cooks!

When done, remove pan from oven, and let it sit for a couple of minutes, then transfer the doughnuts from pan to a wire rack that is positioned on top of a piece of parchment paper.

When you glaze the doughnuts later, any glaze that drips will land on parchment paper, which is better for easy clean up!). Repeat process with any leftover batter. Once done, let the doughnuts cool a bit before putting the glaze on them.

Make Glaze For The Lemon Poppy Seed Doughnuts

To make the lemon glaze, place powdered sugar, melted butter, lemon juice, milk and vanilla extract in a medium sized bowl. Mix together well, until you have a creamy glaze. NOTE: I used 1½ Tablespoons of milk to get it to the consistency I wanted, but if you want the glaze to be thicker, only use 1 Tablespoon milk.

Glazed Lemon Poppy Seed Doughnuts / The Grateful Girl Cooks!

Icing The Doughnuts

Once the doughnuts have cooled down, frost them with the lemon glaze by picking up a doughnut and dipping the top side into the glaze to coat. Flip it over and put the iced lemon poppy seed doughnuts back onto the wire rack.

Glazed Lemon Poppy Seed Doughnuts / The Grateful Girl Cooks!

Once all the doughnuts have been iced, sprinkle with a few poppy seeds, if desired. Repeat until all doughnuts have been glazed. Once the “icing” has firmed up, the lemon poppy seed doughnuts are ready to serve.

Glazed Lemon Poppy Seed Doughnuts / The Grateful Girl Cooks!

Lemon poppy seed doughnuts are best eaten on the same day they are made, BUT you can store them for a couple days at room temp, if covered well.

Can You FREEZE Lemon Poppy Seed Doughnuts?

YES. The doughnuts can be frozen for a month or two, if wrapped and sealed well.  I made these doughnuts a couple weeks ago before our complete kitchen remodel begins. We won’t have an oven for 6-8 weeks, so I froze several doughnuts for later. I’m looking forward to having them conveniently stashed in our freezer to pull out for a quick breakfast treat!

Glazed Lemon Poppy Seed Doughnuts / The Grateful Girl Cooks!

Glazed Lemon Poppy Seed Doughnuts / The Grateful Girl Cooks!

There you have it… Baked Lemon Poppy Seed Doughnuts!  A big thank you goes out to Sally at Sally’s Baking Addiction for her lovely recipe!  Sure hope you will give these yummy lemon infused doughnuts a try.

Looking For More DOUGHNUT Recipes?

You can find all my recipes in the Recipe Index, located at the top of the page. A few doughnut recipes you might enjoy include:

Interested In More Recipes?

Thank you for visiting this website. I appreciate you using some of your valuable time to do soIf you’re interested, I publish a newsletter 2 times per month (1st and 15th) with all the latest recipes, and other fun info. I would be honored to have you join our growing list of subscribers, so you never miss a great recipe!

There is a Newsletter subscription box on the top right side (or bottom) of each blog post, depending on the device you use, where you can easily submit your e-mail address (only) to be included in my mailing list.

You Can Also Find Me On Social Media:
Facebook page: The Grateful Girl Cooks!
Pinterest: The Grateful Girl Cooks!
Instagram: jbatthegratefulgirlcooks

Author's signature

Recipe Source: https://sallysbakingaddiction.com/2016/09/02/glazed-lemon-poppy-seed-donuts/

0 from 0 votes
Glazed Lemon Poppy Seed Doughnuts
Prep Time
15 mins
Cook Time
10 mins
Total Time
25 mins
 
These delicious Glazed Lemon Poppy Seed Doughnuts are tangy, sweet, simple to make, and baked (not fried)! A wonderful breakfast treat! 
Category: Breakfast
Cuisine: American
Keyword: lemon poppy seed doughnuts
Servings: 9 Doughnuts
Calories Per Serving: 207 kcal
Author: JB @ The Grateful Girl Cooks!
Ingredients
For the Doughnuts:
  • 1 cup all purpose flour
  • 1 Tablespoon poppy seeds
  • 1 teaspoon baking powder
  • 1/2 teaspoon salt
  • 1/4 teaspoon baking soda
  • 2 Tablespoons butter , melted (and cooled a bit)
  • 1 large egg
  • 1/3 cup granulated sugar
  • 1/4 cup sour cream
  • 1/4 cup milk
  • 1 teaspoon vanilla extract
  • 1 Tablespoon lemon zest
  • 1 Tablespoon fresh lemon juice
For the Lemon Glaze:
  • 1 cup powdered sugar
  • 2 Tablespoon butter , melted
  • 1 Tablespoon fresh lemon juice
  • 1-2 Tablespoons milk (depends on thickness of glaze you desire)
  • 1/2 teaspoon vanilla extract
  • Poppy seeds for garnish (completely optional)
Instructions
  1. Spray a doughnut pan with non-stick spray and set aside. Preheat oven to 350° F.

  2. In a medium bowl, place flour, poppy seeds, baking powder, salt and baking soda. Whisk together, then set bowl aside. In separate bowl, combine butter, egg, granulated sugar, sour cream, milk, vanilla, lemon zest and juice. Whisk together until batter is smooth, Pour this wet mixture into bowl with dry ingredients. Stir until combined into a thick batter, but make sure not to over mix!

  3. Carefully spoon (or pipe) batter into doughnut pan, filling each cup 2/3 to 3/4 of the way full. If you have a 6 cup pan, you may have to bake these in batches.

  4. Bake doughnuts for approx. 10 minutes. Check them at 9 minutes. The edges should be slightly brown when done. When done, remove pan from oven, and let it sit for 2-3 minutes, then transfer doughnuts from pan to a wire rack that is on top of a piece of parchment paper (when you glaze the doughnuts later, any glaze that drips will land on parchment paper, which is better for easy clean up!). Repeat process with any leftover batter. Once done, let doughnuts cool before putting the glaze on them.

  5. To make the lemon glaze, place powdered sugar, melted butter, lemon juice, milk and vanilla extract in a medium sized bowl. Mix together until you have a creamy glaze. I used 1½ Tablespoons of milk to get it to the consistency I wanted, but if you want the glaze to be thicker, only use 1 Tablespoon milk.

  6. Once doughnuts have cooled, frost with lemon glaze by picking up a doughnut and dipping the top side into the glaze to coat. Flip it over and put the doughnut back on wire rack. Sprinkle with a few poppy seeds, if desired. Repeat until all doughnuts are glazed. Once the "icing" has firmed, doughnuts are ready to serve.

Nutrition Facts
Glazed Lemon Poppy Seed Doughnuts
Amount Per Serving (1 doughnut)
Calories 207 Calories from Fat 63
% Daily Value*
Fat 7g11%
Saturated Fat 4g25%
Cholesterol 35mg12%
Sodium 221mg10%
Potassium 92mg3%
Carbohydrates 32g11%
Sugar 21g23%
Protein 2g4%
Vitamin A 235IU5%
Vitamin C 2.1mg3%
Calcium 56mg6%
Iron 0.9mg5%
* Percent Daily Values are based on a 2000 calorie diet.

Here’s one more to pin on your Pinterest boards!These delicious Glazed Lemon Poppy Seed Doughnuts are tart AND sweet, simple to make, and baked (not fried)! They are a wonderful breakfast treat!


Blackberry Scones

Delicious blackberry scones are easy to make, using frozen blackberries! The scones are absolutely perfect for a simple breakfast or afternoon snack.Delicious blackberry scones are easy to make year round, using frozen blackberries! The scones are absolutely perfect for a simple breakfast or afternoon snack.
Anyone who knows me well, knows I love a good scone… and I sure do love these yummy Blackberry Scones for breakfast or an afternoon snack!

Blackberries grow wild all over the beautiful Pacific Northwest.  We have a forest park behind our home and the blackberry vines creep over our back fence (until we madly hack them back each Fall!). 

This summer we have a bumper crop of blackberries, free for the taking, and so it is a perfect scenario for making blackberry scones!

I’ve been picking berries every other day, and get about a quart of berries each time.  I’ve already used them to make  a Blackberry Cobbler, a Berry and Orange Spinach Salad, and  Blackberry Pie Bars, so now I’m making blackberry scones, and have saved a bunch more to make jam. Yeehaw!

Scroll Down For A Printable Recipe Card At The Bottom Of The Page

Blackberries growing in our backyard - perfect for scones!

These scones are very easy to prepare; the method used is similar to my other scone recipes on this blog.  For this particular recipe, it is important to use frozen blackberries, because blackberries are really juicy and if not frozen, they will “leak” juice all over the scones while mixing and baking. 

Here’s how to make them (there’s a printable recipe card at the bottom of this post):

How To Make Blackberry Scones

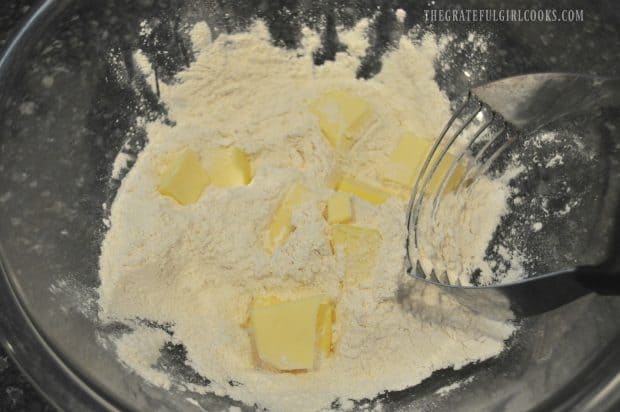
First, preheat your oven to 400° F.  In a large bowl, whisk together the all purpose flour, baking powder and salt.  Cut up COLD butter into small chunks and add to flour mixture.

Use a pastry blender to cut the butter into the flour until the butter has been reduced to the size of small peas. 

You can also do this in a food processor, if desired.  Add sugar to the bowl, and stir to combine. Set this mixture aside.

Cutting butter into flour to make scone dough

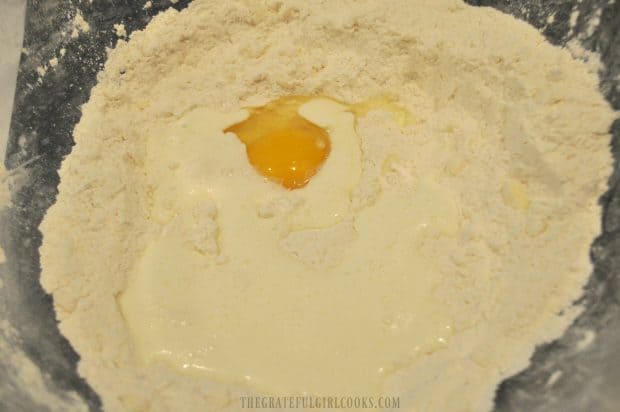
In a separate bowl, add heavy whipping cream, eggs and vanilla extract. Whisk together until blended.  Set aside.

Whipping cream, eggs and vanilla mixed for scone dough

Add frozen blackberries to flour mixture. Toss gently to lightly coat the berries with flour.

Frozen blackberries added to scone dough mixture

Pour the whisked whipping cream/egg mixture into the flour mixture.  Stir gently to mix. Your dough will be fairly sticky.

Please note that the frozen berries will begin to thaw very quickly, so do this step quickly, but gently.  

Whipping cream, egg and vanilla added to dry scone mixture

Shape And Cut The Scones

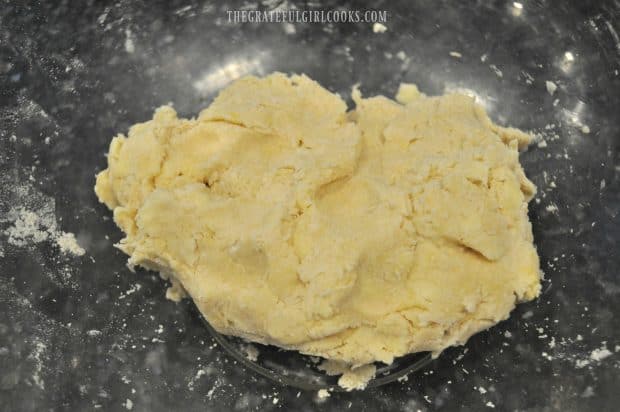
Once mixed, place the dough onto a lightly floured work surface. Knead the dough VERY LIGHTLY 3-4 times to ensure the dough comes together in a ball. 

Shape dough into an 8 inch circle using your clean hands. The dough should be about 1½ inches high. 

Cut the blackberry scones into 8 wedges with a sharp knife or pizza cutter. I use a pizza cutter- easy, and works like a charm!

Scone dough formed, then cut into 8 wedges before baking

Bake The Blackberry Scones

Place the scones onto an ungreased baking sheet in a circle.  I leave a little space between each wedge. If desired, sprinkle tops with sugar (optional).

Bake the scones in a preheated 400 degree oven for 20-22 minutes. They are done when the tops are light golden brown in color and they are “set” in the middle.

Blackberry scone wedges placed on cookie sheet to bake

Blackberry scones, golden brown and fresh from the oven!

Time To Eat Some Blackberry Scones!

When the blackberry scones have finished baking, let them cool on the baking sheet for several minutes. Once cooled, separate them and transfer to a wire rack to finish cooling.  That’s it!

I hope you enjoy these tasty blackberry scones for breakfast, or for an afternoon treat with some tea, coffee, or a big cold glass of milk! They are delicious!

Blackberry scone on a white plate with a mint garnish.

Close up of a blackberry scone being held up.

Thanks for taking time to look at this recipe!  I am thankful to Roberta Reynolds for this delicious recipe, and hope you give it a try (and give my other scone recipes a look, too!).

Have a wonderful day, friends… be kind and encouraging to others out there in the big ol’ world. It can really make a positive difference in someones day!

Looking For More Recipes For SCONES?

You can find all of my recipes in the Recipe Index, located at the top of the page. All of my scone recipes are in the BREAD category, and I have quite a few, including:

Want More Recipes? Get My FREE Newsletter!

I publish a newsletter 2 times per month (1st and 15th) with lots of recipes, tips, etc..
Would you like to join our growing list of subscribers?

There is a Newsletter subscription box on the top right (or bottom) of each blog post, depending on the device you use.
You can submit your e-mail address there, to be added to my mailing list.

Find Me On Social Media:

Facebook page: The Grateful Girl Cooks!
Pinterest:
The Grateful Girl Cooks!
Instagram:
jbatthegratefulgirlcooks

Author's signature

Recipe Adapted From:  http://birdsnestbites.com/blackberry-scones/

↓↓ PRINTABLE RECIPE BELOW ↓↓

0 from 0 votes
Blackberry Scones
Prep Time
15 mins
Cook Time
20 mins
Total Time
35 mins
 

Delicious blackberry scones are easy to make year round, using frozen blackberries! The scones are absolutely perfect for a simple breakfast or afternoon snack.

Category: Breakfast
Cuisine: American
Keyword: blackberry scones
Servings: 8 scones
Calories Per Serving: 307 kcal
Author: JB @ The Grateful Girl Cooks!
Ingredients
  • 2 cups all purpose flour
  • teaspoons baking powder
  • 1 teaspoon salt
  • 7 Tablespoons COLD butter (almost a whole cube)
  • 1/4 cup granulated sugar
  • 1/2 cup heavy whipping cream
  • 2 large eggs
  • teaspoons vanilla extract
  • cups FROZEN blackberries
Instructions
  1. Preheat oven to 400 degrees. In a large bowl, whisk together the flour, baking powder and salt. Cut up COLD butter into small chunks; add to flour mixture. Use a pastry blender and cut the butter into the flour until butter has been reduced to the size of small peas. You can also do this in a food processor if desired. Add sugar; stir to combine. Set aside.
  2. In separate bowl, add heavy whipping cream, eggs and vanilla extract. Whisk together until blended. Set aside.
  3. Add frozen blackberries to flour mixture. Toss gently to lightly coat the berries with flour. Pour whipping cream/egg mixture into flour mixture. Stir gently to mix. Please note that frozen berries will begin to thaw very fast, so do this step quickly, but gently. Your dough will be fairly sticky.
  4. Once mixed, place the dough onto a lightly floured work surface. Knead the dough VERY LIGHTLY 3-4 times so dough comes together in a ball. Shape dough into an 8 inch circle using your hands. The dough should be about 1½ inches high. Cut into 8 wedges with a sharp knife or pizza cutter.
  5. Place the scones onto an ungreased baking sheet in a circle, leaving a little space between each wedge. If desired, sprinkle tops with sugar (optional). Bake in preheated 400 degree oven for 20-22 minutes, or until tops are light golden brown in color and they are "set" in the middle. When finished baking, let scones cool on baking sheet for several minutes, then transfer to a wire rack to finish cooling. Serve at room temperature... and enjoy!
Nutrition Facts
Blackberry Scones
Amount Per Serving (1 scone)
Calories 307 Calories from Fat 144
% Daily Value*
Fat 16g25%
Saturated Fat 10g63%
Cholesterol 87mg29%
Sodium 401mg17%
Potassium 229mg7%
Carbohydrates 33g11%
Fiber 2g8%
Sugar 7g8%
Protein 5g10%
Vitamin A 640IU13%
Vitamin C 5.7mg7%
Calcium 85mg9%
Iron 1.9mg11%
* Percent Daily Values are based on a 2000 calorie diet.

Here’s one more to pin on your Pinterest boards!Delicious blackberry scones are easy to make year round, using frozen blackberries! The scones are absolutely perfect for a simple breakfast or afternoon snack.


Save

Save

Save

Save

Save

Save

Save

Save

Save

Save

Save

Save

Save

Save

Save

Save