Category: Breakfast

Banana Crumb Muffins

You’re gonna love these delicious Banana Crumb Muffins, with a surprise cream cheese filling! Easy to make, they will be a family favorite breakfast or snack!You're gonna love these delicious Banana Crumb Muffins, with a surprise cream cheese filling! Easy to make, they will be a family favorite breakfast or snack!What’s a girl to do when her husband is out of state at a seminar and she can’t sleep? Make these amazing Banana Crumb Muffins (with a surprise cream cheese filling) at 5:00 AM for breakfast… that’s what!

I found this recipe for banana crumb muffins on a blog that I love… “The Café Sucré Farine”, and thought I would give these muffins a try. I highly recommend this website and it’s author, Chris Scheuer. She is very creative, and posts wonderful recipes, along with great photography by her husband, Scott!

Back to my story… I woke up very early after only 3 hours sleep  and decided to whip up these muffins. They sounded wonderful, and I loved the idea of cream cheese filling inside the muffins, along with a crumbly topping.

Scroll Down For A Printable Recipe Card At The Bottom Of The Page

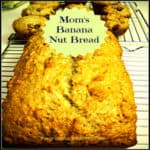
If You Enjoy Banana Bread, You Will Enjoy Banana Crumb Muffins

I compare these banana crumb muffins to a really, REALLY good banana nut bread… on steroids. They are soooo delicious!

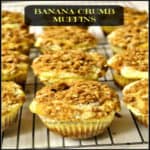
The muffins are made with a layer of banana batter, a surprise layer of cream cheese filling, and another layer of banana batter. For a finishing touch, the banana crumb muffins are crowned with a brown sugar, cinnamon and pecan crumb mixture on top. Here’s a photo of the banana crumb muffins, hot and  fresh from the oven… looking GOOD!

Banana muffins with crumb topping on wire rack

Once the paper baking wrapper has been removed, you can see the three layers, plus the crumb topping!

Side view of banana crumb muffin on plate

My favorite way to eat these delicious banana crumb muffins is warm, with a touch of butter… Yum! You are gonna LOVE these muffin treats!

Banana crumb muffins cut in half with butter inside

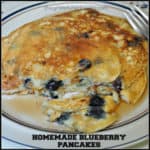
By the way, if you enjoy muffins, you might enjoy other delicious recipes on my blog for Blueberry Crumble Muffins, Cranberry Orange Muffins, or Triple Chocolate Zucchini Muffins, to name a few! Be sure and check out the Recipe Index with ALL of my blog recipes! The Recipe Index is located at the top of the page.

I enthusiastically recommend these moist, delicious Banana Crumb Muffins for breakfast OR a light snack! The recipe as written makes 12 muffins, and they freeze well. Hope you will give them a try! Have a GREAT day, friends! Get in that kitchen and whip up a batch of these muffins. You won’t regret it!

Interested In More Recipes?

Thank you for visiting this website. I appreciate you using some of your valuable time to do soIf you’re interested, I publish a newsletter 2 times per month (1st and 15th) with all the latest recipes, and other fun info. I would be honored to have you join our growing list of subscribers, so you never miss a great recipe!
There is a Newsletter subscription box on the top right side (or bottom) of each blog post, depending on the device you use, where you can easily submit your e-mail address (only) to be included in my mailing list.

You Can Also Find Me On Social Media:

Facebook page: The Grateful Girl Cooks!
Pinterest:
The Grateful Girl Cooks!
Instagram:
jbatthegratefulgirlcooks

Author's signatureRecipe Source: http://thecafesucrefarine.com/2011/04/banana-crumb-muffins/

↓↓ PRINTABLE RECIPE BELOW ↓↓

0 from 0 votes
Banana Crumb Muffins
Prep Time
15 mins
Cook Time
18 mins
Total Time
33 mins
 

You're gonna love these delicious Banana Crumb Muffins, with a surprise cream cheese filling! Easy to make, they will be a family favorite breakfast or snack!

Category: Breakfast
Cuisine: American
Keyword: banana crumb muffins
Servings: 12 muffins
Calories Per Serving: 283 kcal
Author: JB @ The Grateful Girl Cooks!
Ingredients
For Muffins:
  • 1 1/2 cups all-purpose flour
  • 1 teaspoon baking soda
  • 1 teaspoon baking powder
  • 1/2 teaspoon salt
  • 3 very ripe bananas , mashed
  • 3/4 cup granulated sugar
  • 1 egg , slightly beaten
  • 1/3 cup butter , melted
For Cream Cheese Filling:
  • 4 oz. cream cheese , softened
  • 3 Tablespoons granulated sugar
  • 1 Tablespoon flour
  • 1/2 teaspoon vanilla
  • 1 egg , slightly beaten
For Crumble Topping:
  • 2 Tablespoons packed brown sugar
  • 4 Tablespoons all-purpose flour
  • 2 Tablespoons old-fashioned oats
  • 2 Tablespoons finely chopped pecans or walnuts
  • 1/2 teaspoon cinnamon
  • pinch of salt
  • 2 Tablespoons butter , melted
Instructions
  1. Preheat oven to 375 degrees. Line a standard muffin tin with 12 muffin wrappers or spray lightly with a non stick spray.
  2. Prepare the muffin batter in a large bowl: Mix the 1 1/2 cups flour, baking soda, powder and salt together. In a separate bowl, beat the bananas, sugar, egg and melted butter. Add the banana mixture to the dry ingredients and mix only until ingredients are combined and moist. Do not over mix. Set aside.
  3. Make the Cream Cheese Filling: In a separate bowl, mix together the softened cream cheese, sugar, flour, egg and vanilla. Mix these ingredients until well blended. Set aside.
  4. Make the Crumb Topping: Mix together brown sugar, flour, oats, cinnamon and butter in a small bowl. Use a fork to combine; mix until the ingredients becomes small crumbs. Set aside.
  5. To prepare/layer the muffins: Spoon half of the muffin batter into the bottom of the prepared muffin cups. Top muffin batter with a Tablespoon of the cream cheese filling. Top cream cheese filling with the remaining half of muffin batter. There should be three layers: muffin batter, cream cheese filling, muffin batter. Sprinkle the top of each muffin with crumb topping to cover. Total of four layers!
  6. Bake the muffins in a 375 degree oven for 18-20 minutes (mine took 20), or until a toothpick inserted into middle of the muffin comes out clean. Remove pan to a wire rack to cool. Enjoy!
Recipe Notes

**TIP: Once you remove the muffins from oven, If the muffin is spilling over the top of the pan, simply take a butter knife and gently but quickly push the muffin back into the pan on all of it's sides. This tends to round the muffin off and make for a prettier presentation. The recipe's author suggested this and I did it... it works!

Nutrition Facts
Banana Crumb Muffins
Amount Per Serving (1 muffin)
Calories 283 Calories from Fat 108
% Daily Value*
Fat 12g18%
Saturated Fat 6g38%
Cholesterol 56mg19%
Sodium 292mg13%
Potassium 189mg5%
Carbohydrates 40g13%
Fiber 1g4%
Sugar 21g23%
Protein 4g8%
Vitamin A 400IU8%
Vitamin C 2.6mg3%
Calcium 36mg4%
Iron 1.2mg7%
* Percent Daily Values are based on a 2000 calorie diet.

Here’s one more to pin on your Pinterest boards!You're gonna love these delicious Banana Crumb Muffins, with a surprise cream cheese filling! Easy to make, they will be a family favorite breakfast or snack!


Save

Save

Save

Homemade Breakfast Sausage Patties

It’s EASY to make eight delicious Homemade Breakfast Sausage Patties for breakfast from scratch, using ground turkey or pork!It's EASY to make eight delicious Homemade Breakfast Sausage Patties for breakfast from scratch, using ground turkey or pork!
So… in my never ending quest experimenting with new recipes, I decided to try making Homemade Breakfast Sausage Patties from scratch. I found the recipe via Pinterest via Martha Stewart via Lucinda Scala Quinn’s book “Mad Hungry”. Did ya get all that? Ha Ha… it takes a village.

When I was growing up my Mom used to make eggs and sausage for us about once a week. She always made sausage patties by hand (using a one pound “chub” from her favorite “name brand”). As a “busy” adult, I usually end up buying link sausage instead of patties, the kind you simply “brown and serve”.

But, when I saw this recipe, I decided to see what making homemade breakfast sausage patties “from scratch” was all about. I knew I could control the ingredients and leave out some of the unpronounceable “add ins” typically found in mass produced name brand products for longer life.

Scroll Down For A Printable Recipe Card At The Bottom Of The Page

Okay… How Do I Make Homemade Breakfast Sausage?

The original recipe called for ground pork (which is my personal favorite), but I had a pound of ground turkey that I was itching to use, so I substituted turkey in this recipe for a healthier version. The sausage patties turned out very good, and I would definitely make this recipe again. Hope you will give it a try!

First things first… get all the ingredients (spices) together to add to the ground meat. Let’s do this!

Spices for homemade sausage patties

After mixing the ingredients, form the sausage patties (with clean hands, of course!). Place them onto foil or wax paper after making each one.

Breakfast sausage patties formed in palm of hand

Cooking Homemade Breakfast Sausage Patties

Place the homemade breakfast sausage patties in a lightly oiled, hot skillet. I cooked several sausages at a time, then repeated the process for the remaining sausage patties.

6 breakfast sausage patties cooking in skillet

Carefully turn the patties over about half way through cooking time and continue cooking until the homemade breakfast sausage patties are cooked all the way through..

Browned homemade breakfast sausage patties cooking in skillet.

Once done, transfer the cooked sausage patties to a paper towel so any extra grease is absorbed. Once they drain a bit, they are done, and ready to eat!

One of the homemade breakfast sausage patties, up close.

I prepared these homemade breakfast sausage patties one fine morning, and ended up using them to make sausage, egg and cheese biscuits. The sausage patty was added to a fluffy biscuit, along with sliced cheddar cheese and a fried egg. It was delicious!

If you enjoy breakfast sandwiches, I hope you will check out my recipes for:

How Many Homemade Breakfast Sausage Patties Does This Make?

The recipe made 8 small sausage patties and only took about 25 minutes or so to make from start to finish!  I ended up freezing half of the cooked sausage patties, to save for another breakfast.

Breakfast sausage patty on biscuit with egg and cheese

Hope you will give this easy recipe for homemade breakfast sausage a try. The calorie calculation was based on using ground turkey for the sausage. The recipe is easily adapted for using ground pork, but the calorie count will be slightly higher.  Have a fantastic day, and be sure to check out ALL my recipes in the Recipe Index, located at the top of the page.

Interested In More Recipes?

Thank you for visiting this website. I appreciate you using some of your valuable time to do soIf you’re interested, I publish a newsletter 2 times per month (1st and 15th) with all the latest recipes, and other fun info. I would be honored to have you join our growing list of subscribers, so you never miss a great recipe!
There is a Newsletter subscription box on the top right side (or bottom) of each blog post, depending on the device you use, where you can easily submit your e-mail address (only) to be included in my mailing list.

You Can Also Find Me On Social Media:
Facebook page: The Grateful Girl Cooks!
Pinterest: The Grateful Girl Cooks!
Instagram: jbatthegratefulgirlcooks

Author's signatureRecipe Adapted from: http://www.marthastewart.com/341904/simple-homemade-sausage-patties

↓↓ PRINTABLE RECIPE BELOW ↓↓

0 from 0 votes
Homemade Breakfast Sausage Patties
Prep Time
15 mins
Cook Time
10 mins
Total Time
25 mins
 

It's EASY to make eight delicious Homemade Breakfast Sausage Patties for breakfast from scratch, using ground turkey or pork!

Category: Breakfast
Cuisine: American
Keyword: homemade breakfast sausage
Servings: 8 sausage patties
Calories Per Serving: 72 kcal
Author: JB @ The Grateful Girl Cooks!
Ingredients
  • 1 pound ground turkey or ground pork
  • 1 clove garlic , minced
  • 1 Tablespoon dried sage , crumbled
  • 3/4 teaspoon dried thyme
  • 1/2 teaspoon dried fennel , crushed
  • 1 pinch of ground nutmeg
  • 1 1/2 teaspoons coarse salt
  • 1/2 teaspoon freshly ground black pepper
  • 1 large egg white
  • 2 teaspoons vegetable oil (for cooking the sausage patties in)
Instructions
  1. In a medium sized bowl, combine all the ingredients except vegetable oil. Mix thoroughly. Cover the bowl; refrigerate for 15 minutes.
  2. To make the patties: Rinse your hands in really cold water (this helps to make it easier to make the patties without it sticking as much). Divide the meat into 8 patties. Shape each patty into a 2 1/2 inch wide disk.
  3. If you don't want to cook all the patties at once, you can refrigerate the patties or freeze them until you want to use them.
  4. If cooking immediately, heat a large skillet or griddle over high heat. Add the vegetable oil and continue heating. Place the sausages in hot skillet or griddle. Fry them about 4 minutes on each side until golden brown. Carefully turn patties over and repeat until cooked through and lightly browned on both sides.
  5. When done, remove sausages to paper towels to briefly drain. Serve immediately.
  6. Cooked sausage patties can be cooled and wrapped and frozen for use at another time, if desired. Microwave sausage patties (in paper towels) to re-heat
Recipe Notes

NOTE:**Caloric calculation was based on the use of ground turkey.

Nutrition Facts
Homemade Breakfast Sausage Patties
Amount Per Serving (1 sausage pattie)
Calories 72 Calories from Fat 9
% Daily Value*
Fat 1g2%
Cholesterol 31mg10%
Sodium 471mg20%
Potassium 178mg5%
Protein 13g26%
Vitamin A 30IU1%
Vitamin C 0.1mg0%
Calcium 11mg1%
Iron 0.7mg4%
* Percent Daily Values are based on a 2000 calorie diet.

Here’s one more to pin on your Pinterest boards!It's EASY to make eight delicious Homemade Breakfast Sausage Patties for breakfast from scratch, using ground turkey or pork!


Save

Save

Cinnamon Chip Scones

Make 16 absolutely delicious Cinnamon Chip Scones in under 30 minutes for a fraction of the cost of buying them at a coffeehouse! They freeze well, too!Make 16 absolutely delicious Cinnamon Chip Scones in under 30 minutes for a fraction of the cost of buying them at a coffeehouse! They freeze well, too!

Do you like the flavor of cinnamon? Do you like to eat scones? Want to make fantastic tasting Cinnamon Chip Scones for breakfast or to snack on any other time???  Well, look no further, because this is the most delicious scone recipe you will ever want!

I’m so happy to share this recipe for amazing tasting cinnamon chip scones. They are soooo yummy! I recently bought a bag of cinnamon chips at the grocery store. Sometimes the chips are seasonal (not in stores), but they can be ordered online. I’d never bought this kind of baking chip before, but remembered seeing a scone recipe that used cinnamon chips, featured on Taste of Home, thought they sounded delicious, so decided to give it a try.

My husband said after tasting one that before he tried one he wasn’t sure he was going to like them, but after tasting one (or two ☺) decided they are awesome! I sure hope you will give these cinnamon chip scones a try. WAY LESS EXPENSIVE than paying for the same quantity at your local coffeehouse. They are absolutely EASY AND DELICIOUS!

Scroll Down For A Printable Recipe Card At The Bottom Of The Page

How To Make Cinnamon Chip Scones

First, add COLD butter to the dry ingredients in a large mixing bowl. I cut it into small pieces to allow it to mix in faster.

Chunks of cold butter are added to dry ingredients for cinnamon chip scones.

Cut in the butter with a pastry blender until mixture has been reduced to coarse crumbs.

Butter is cut into dry ingredients for cinnamon chip scones, using a pastry blender

Add the buttermilk and blend until the scone dough is moistened.

Buttermilk is added to cinnamon chip scones dough in bowl.

Add The Cinnamon Chips

Now you’re ready to add the cinnamon chips. Gently fold in until well distributed throughout the scone dough. TIP: Sometimes cinnamon chips are only available during the holidays, so grab them while you can, and stock up!

Cinnamon chips are added to scone dough, and mixed in.

This is what the dough for the cinnamon chip scones will look like, once mixed together.

The dough for cinnamon chip scones is mixed together and ready to shape into wedges.

Shape the Dough

Sprinkle the dough lightly with flour. Knead the dough gently 10-12 times on a lightly floured surface, until the dough is no longer sticky.

Dough for cinnamon chip scones is kneaded by hand.

Divide the dough in half, and shape each half into a 7 inch circle. Brush the top of the scones with melted butter and then sprinkle the surface with granulated sugar.

Dough for cinnamon chip scones is divided in half, shaped into two circles.

Bake The Cinnamon Chip Scones

Place wedges onto an ungreased baking sheet and bake them in the oven for about 13-15 minutes, or until they have become lightly browned. I love making scones and could tell just from the amazing aroma coming out of my oven as they were baking that I would LOVE these, too. I was right, because they are so yummy.

Cinnamon Chip Scones are cut into wedges, and placed on cookie sheet to bake.

Remove scones to wire rack to cool. Prepare the sweet glaze and then lightly “paint” it onto the top of each scone with a pastry brush. Let the glaze harden, then serve.

Cinnamon Chip Scones are baked, cooled, then covered with a glaze icing.

Serve… And ENJOY These Tasty Cinnamon Chip Scones!

Cinnamon chip scones go perfectly with a morning cup of coffee! They are soft on the inside, and they are FILLED with delicious cinnamon flavor! I really believe you will absolutely LOVE these cinnamon chip scones.

A plate full of cinnamon chip scones, ready to enjoy!

The recipe makes 16 medium sized scones, so I put half of them in my freezer for another time. Wrap them well, then store them in an airtight container until you’re craving them again! How perfect is that???

Cinnamon Chip Scones on a plate, ready to eat!

Looking For More SCONE Recipes?

If you enjoy scones, be sure and check out my other recipes, such as Apple Cinnamon Scones, Cranberry-Orange Scones, Chocolate Chip Orange Scones, or Double-Glazed Pumpkin Scones, to name a few! They are all DELICIOUS! You can find ALL of my recipes (and lots more scone recipes) in The Recipe Index, which is located at the top of the page.

A collage of some of the other scone recipes on this website.

Sure hope you will enjoy making wonderful scones for those you love! Thank you for stopping by today, and I hope you will come back soon. Have a wonderful day.

Interested In More Recipes?

Thank you for visiting this website. I appreciate you using some of your valuable time to do soIf you’re interested, I publish a newsletter 2 times per month (1st and 15th) with all the latest recipes, and other fun info. I would be honored to have you join our growing list of subscribers, so you never miss a great recipe!
There is a Newsletter subscription box on the top right side (or bottom) of each blog post, depending on the device you use, where you can easily submit your e-mail address (only) to be included in my mailing list.

You Can Also Find Me On Social Media:

Facebook page: The Grateful Girl Cooks!
Pinterest:
The Grateful Girl Cooks!
Instagram:
jbatthegratefulgirlcooks

Author's signatureRecipe Source: http://www.tasteofhome.com/recipes/cinnamon-chip-scones (submitted by Barbara Humiston)
Glaze Source: Me. (The Grateful Girl Cooks!)

↓↓ PRINTABLE RECIPE BELOW ↓↓

0 from 0 votes
Cinnamon Chip Scones
Prep Time
15 mins
Cook Time
13 mins
Total Time
28 mins
 
Make 16 absolutely delicious Cinnamon Chip Scones in under 30 minutes for a fraction of the cost of buying them at a coffeehouse! They freeze well, too!
Category: Bread, Breakfast
Cuisine: American
Keyword: cinnamon chip scones
Servings: 16 scones
Calories Per Serving: 331 kcal
Author: JB @ The Grateful Girl Cooks!
Ingredients
For the Scones:
  • 3 1/4 cups all-purpose flour
  • 1/3 cup plus 2 Tablespoons granulated sugar , divided
  • 2 1/2 teaspoons baking powder
  • 1/2 teaspoon baking soda
  • 1/2 teaspoon salt
  • 3/4 cup cold butter , cubed
  • 1 cup buttermilk
  • 1 package (10 oz.) cinnamon baking chips
  • 2 Tablespoons butter , melted
For the Glaze: (optional, but totally think it makes the scones taste even better)
  • 1 cup powdered sugar
  • 1/2 teaspoon vanilla extract
  • 1/8 teaspoon cinnamon
  • 5-6 drops of water (or more) (enough to thin the glaze to a "thin, "paintable" consistency
Instructions
  1. Preheat oven to 425 degrees.
  2. Combine the flour, 1/3 cup sugar, baking powder, baking soda and salt in a large mixing bowl. Cut the butter into the dry ingredients using a pastry blender until mixture is reduced to coarse crumbs.

  3. Stir buttermilk in to the mixture. Stir only until moistened. Fold in cinnamon chips until dispersed throughout the dough.

  4. Turn the dough out onto a lightly floured work surface. Knead dough gently 10-12 times (until dough is not sticky). Divide dough in half; form each half into a 7 inch circle. Brush each half with melted butter and sprinkle with remaining 2 Tablespoons granulated sugar.

  5. Cut each circle into 8 wedges (for medium sized), or 6 wedges (for larger). Separate the wedges and place them onto an ungreased baking sheet. Bake at 425 degrees for 13-15 minutes (or until light golden brown). Remove to a wire rack to cool.

  6. Mix glaze ingredients together in small bowl. Using a pastry brush, "paint" the glaze over the tops of the scones. Let glaze harden, then serve at room temp, for best taste! Enjoy!
Nutrition Facts
Cinnamon Chip Scones
Amount Per Serving (1 scone)
Calories 331 Calories from Fat 90
% Daily Value*
Fat 10g15%
Saturated Fat 6g38%
Cholesterol 28mg9%
Sodium 212mg9%
Potassium 113mg3%
Carbohydrates 32g11%
Sugar 12g13%
Protein 3g6%
Vitamin A 335IU7%
Calcium 51mg5%
Iron 1.2mg7%
* Percent Daily Values are based on a 2000 calorie diet.

Here’s one more to pin on your Pinterest boards!Make 16 absolutely delicious Cinnamon Chip Scones in under 30 minutes for a fraction of the cost of buying them at a coffeehouse! They freeze well, too!

Save

Save

Save

Save

Chocolate Butterhorns

Chocolate butterhorns are made from scratch yeast rolls, with a delicious chocolate filling. Recipe yields 32, using a bread machine or made by hand.Chocolate butterhorns are made from scratch yeast rolls, with a delicious chocolate filling. Recipe yields 32, using a bread machine or made by hand.
Well, after almost a week of insane “busy-ness”, I am back to taking time out of my day to add a new recipe to this blog.  Today’s recipe is for Chocolate Butterhorns. I found this recipe online a couple of years ago from Jessica Fisher (at Life As Mom.com). After looking at the recipe, I thought these rolls sounded pretty good, so I gave them a try. Delicious!

The butterhorns are filled with chocolate chips (so how bad can that be?), are easy to make, and freeze well. This chocolate butterhorns recipe makes 32 rolls, so freezing some for another time is a perfect option for busy families!

Scroll Down For A Printable Recipe Card At The Bottom Of The Page

Making Chocolate Butterhorns

The recipe (as written) utilizes a bread machine. The dough is mixed and rises in the bread machine. The dough is then removed, rolled out, cut into portions, then chocolate pieces are added. Chocolate butterhorns are then rolled, rise again, and then are baked. That’s the instructions in a nutshell.

Do I Have To Have A Bread Machine To Make Chocolate Butterhorns?

The answer is NO. If you don’t have a bread machine, there are a couple other options, shown below.

Option #1: You can mix the dough in a stand mixer, with a dough hook.
Option # 2: You can also mix the dough by using your muscles and mixing the dough by hand.

Once Dough Is Mixed By Hand

If making the dough by hand (or stand mixer), once your dough has been mixed, place it in a lightly greased mixing bowl. Cover the dough, and place in a warm spot. Let the dough rise until it has doubled in size.

Once the dough has doubled in size, simply follow the remaining instructions in the recipe card for rolling them up, filling, baking, etc.

The dough for chocolate butterhorns in a large bowl has doubled in size.

The dough is rolled into a circle, then cut into individual rolls. Once cut, the dough is topped with semi-sweet chocolate, rolled into crescent shapes, and baked.

To Serve

Once done, the warm butterhorns are lightly dusted with sifted powdered sugar and cocoa powder before serving.

Platter of chocolate butterhorns, ready to eat!

Here is a picture of the rolls, fresh from the oven. They sure look good enough to eat!!!!

Close up photo of chocolate butterhorns.

I hope you will give these soft, chocolate butterhorns a try…we really enjoyed them! I think they would also taste fantastic with seedless raspberry jam added to the chocolate chip filling! Wouldn’t THAT be decadent to sink your teeth into??? YUM.

Looking For More “From Scratch” Bread Recipes?

All of my homemade bread recipes are located in the Recipe Index, which can be found at the top of the page. A few favorites you might enjoy include:

Interested In More Recipes?

Thank you for visiting this website. I appreciate you using some of your valuable time to do soIf you’re interested, I publish a newsletter 2 times per month (1st and 15th) with all the latest recipes, and other fun info. I would be honored to have you join our growing list of subscribers, so you never miss a great recipe!
There is a Newsletter subscription box on the top right side (or bottom) of each blog post, depending on the device you use, where you can easily submit your e-mail address (only) to be included in my mailing list.

You Can Also Find Me On Social Media:

Facebook page: The Grateful Girl Cooks!
Pinterest:
The Grateful Girl Cooks!
Instagram:
jbatthegratefulgirlcooks

Author's signatureRecipe Source: http://lifeasmom.com/2010/04/chocolate-butterhorns-perfect-for-freezing-perfect-for-anytime.html

↓↓ PRINTABLE RECIPE BELOW ↓↓

0 from 0 votes
Chocolate Butterhorns
Prep Time
1 hr 30 mins
Cook Time
12 mins
Total Time
1 hr 42 mins
 
Chocolate butterhorns are made from scratch yeast rolls, with a delicious chocolate filling. Recipe yields 32, using a bread machine or made by hand.
Category: Bread/Breakfast
Cuisine: American
Keyword: chocolate butterhorns
Servings: 32
Calories Per Serving: 145 kcal
Author: JB @ The Grateful Girl Cooks!
Ingredients
For dough:
  • 1 cup milk
  • 1/2 cup butter , melted
  • 2 eggs
  • 1/2 cup granulated sugar
  • 4 cups all-purpose flour
  • 1 teaspoon salt
  • 1 Tablespoon (heaping) dry active yeast
For rolls:
  • 1 - 2 cups chocolate chips (how much you add is up to you, depending on taste preference)
For Garnish: (optional-not included in caloric calculation)
  • 1/4 cup powdered sugar
  • 1 Tablespoon cocoa powder
Instructions
  1. Place the dough ingredients in a bread machine cannister. Set controls for dough cycle and start machine. Once dough cycle has completed, remove dough from pan. Place on lightly floured work surface and divide into 4 equal parts.
  2. Roll each section of dough into a 12 inch circle. Cut each circle into 8 pie shaped wedges. Place a small amount of chocolate chips over the surface of each individual wedge. Roll up each of the wedges, beginning at the wide part of the triangle and rolling up, ending at the point. Roll up each of the wedges, beginning at the wide part of the triangle and rolling up, ending at the point.

  3. Place rolls on greased baking sheet or parchment paper lined baking sheet. Let rise in a warm place until doubled in size.
  4. Bake rolls in a preheated 375 degree oven for 12-15 minutes (until golden brown). Remove from oven and cool on wire racks.
  5. TO PREPARE AHEAD FOR FREEZING: Once you roll up the rolls, place them (point side down) on a baking sheet. Place in freezer. Once frozen, remove rolls and store them in freezer bags in freezer until you want to prepare them. To prepare the frozen rolls: Remove from bag, place on greased or parchment paper lined baking sheet. Let thaw and rise for approximately 5 hours (until rolls are doubled in size). Bake in 375 degree oven for 12-15 minutes or until golden brown.
  6. TO GARNISH: Once rolls are baked, lightly sift cocoa powder and powdered sugar over the top of each butterhorn.  Serve warm, and enjoy!

Recipe Notes

No Bread Machine Available? Here are two options to prepare the dough:  Lightly spray a large mixing bowl with spray. Option #1: Mix the dough in a stand mixer, with a dough hook. Option # 2: Mix the dough by hand (really takes muscles!). Once dough is mixed, transfer to the greased mixing bowl. Cover the bowl, place in a warm spot, and let dough rise until doubled in size. One doubled in size, continue with Step #2 in recipe.

Nutrition Facts
Chocolate Butterhorns
Amount Per Serving (1 butterhorn)
Calories 145 Calories from Fat 45
% Daily Value*
Fat 5g8%
Saturated Fat 3g19%
Cholesterol 19mg6%
Sodium 111mg5%
Potassium 35mg1%
Carbohydrates 21g7%
Sugar 8g9%
Protein 2g4%
Vitamin A 135IU3%
Vitamin C 0.1mg0%
Calcium 24mg2%
Iron 0.9mg5%
* Percent Daily Values are based on a 2000 calorie diet.

Here’s one more to pin on your Pinterest boards!Chocolate butterhorns are made from scratch yeast rolls, with a delicious chocolate filling. Recipe yields 32, using a bread machine or made by hand.


Save

Save

Save

PeachBerry Smoothie

A PeachBerry Smoothie is a cold and creamy, peach, raspberry, boysenberry, almond milk and yogurt fruit drink that tastes great any time!
PeachBerry Smoothie is a cold and creamy, peach, raspberry, boysenberry, almond milk and yogurt filled fruit drink that tastes great any time of day!

Summer. Heatwave. Hot!  Making a delicious, creamy, ice cold PeachBerry Smoothie beverage to enjoy drinking and cooling down with…priceless!

I sure enjoy a cold, refreshing drink on a really hot summer day, don’t you? When you finally get tired of drinking large amounts of ice water or cold iced tea, how about making a really good tasting peachberry smoothie?

Scroll Down For A Printable Recipe Card At The Bottom Of The Page

The Search Begins… In The Refrigerator!

The quest for to create this smoothie began as most of mine do…scouring the contents of our refrigerator or fruit basket to see what we had available. During this scavenging for ingredients I came up with a couple of ripe peaches, some raspberries and some amazingly delicious boysenberries (can substitute blackberries).

These sounded like the beginning of a great peachberry smoothie to me, so I gathered the rest of the necessary ingredients and whipped a couple smoothies up for my husband and myself. Pretty tasty, if I might say so!

How To Make This PeachBerry Smoothie

Let’s hear it for the stars of this delicious fruit smoothie: Fresh peaches, raspberries and boysenberries. How can you go wrong with these sweet and delicious fruit ingredients?

Fresh peaches, raspberries and boysenberries ready for smoothie

Now add some vanilla flavored Greek yogurt and cinnamon to the fruit in the blender. This will help make the peachberry smoothie nice and creamy, plus add some protein!

Vanilla yogurt and cinnamon for smoothie added to peaches in blender

The next thing to do is add vanilla almond milk to the mix. Give it all a good blending until the mixture is smooth and creamy. Throw in some crushed ice to make it really cold and thick, and blend well until combined. Now you have an absolutely delicious, creamy peachberry smoothie!

Almond milk and yogurt added to peaches and berries in blender

Time To Enjoy A PeachBerry Smoothie!

I still think it’s weird that the color of the berries overtakes the beautiful orange color of the peaches. Oh well. This peachberry smoothie may not LOOK like it is full of fresh peaches, but it is, and it has lots of peach flavor!

Spoonful of fresh peachberry smoothie in glass with straw

This yummy peachberry smoothie is wonderfully refreshing. With the addition of Greek yogurt for a protein punch and in season fresh fruit, how can you not love this delicious drink? Hope you will give this recipe a try. I’m pretty sure you’ll love it! Have a wonderful day, and please come back again soon. 

Looking For More FUIT SMOOTHIE Recipes?

If you enjoy fruit drinks similar to this peachberry smoothie, be sure and check out my other smoothie recipes, including Blueberry, Banana and Kale, Orange Julius (copycat), Peach Crumble, Raspberry, Strawberry, and Triple Berry Banana. These and ALL of my recipes from the blog can be found in the Recipe Index, located at the top of the page.

Interested In More Recipes?

Thank you for visiting this website. I appreciate you using some of your valuable time to do soIf you’re interested, I publish a newsletter 2 times per month (1st and 15th) with all the latest recipes, and other fun info. I would be honored to have you join our growing list of subscribers, so you never miss a great recipe! 

There is a Newsletter subscription box on the top right side (or bottom) of each blog post, depending on the device you use, where you can easily submit your e-mail address (only) to be included in my mailing list.

You Can Also Find Me On Social Media:

Facebook page: The Grateful Girl Cooks!
Pinterest:
The Grateful Girl Cooks!
Instagram:
jbatthegratefulgirlcooks

Author's signature

↓↓ PRINTABLE RECIPE BELOW ↓↓

0 from 0 votes
PeachBerry Smoothie
Prep Time
5 mins
Cook Time
0 mins
Total Time
5 mins
 

PeachBerry Smoothie is a cold and creamy, peach, raspberry, boysenberry, almond milk and yogurt filled fruit drink that tastes great any time of day!

Category: Beverage, Breakfast
Cuisine: American
Keyword: peachberry smoothie
Servings: 2 servings
Calories Per Serving: 180 kcal
Author: JB @ The Grateful Girl Cooks!
Ingredients
  • 2 ripe peaches , peeled, pitted, and sliced
  • 5-6 raspberries
  • 5-6 boysenberries (or blackberries)
  • 1 cup vanilla yogurt
  • 3/4 cup vanilla almond milk
  • 1/2 teaspoon cinnamon
  • 1/2 cup crushed ice
Instructions
  1. Peel, pit, and slice peaches.
  2. Puree first 6 ingredients in blender until well blended.
  3. Add crushed ice to blender. Blend until smooth.
  4. Serve in 2 glasses. Enjoy!
Nutrition Facts
PeachBerry Smoothie
Amount Per Serving (1 serving)
Calories 180 Calories from Fat 27
% Daily Value*
Fat 3g5%
Saturated Fat 1g6%
Cholesterol 6mg2%
Sodium 202mg9%
Potassium 553mg16%
Carbohydrates 32g11%
Fiber 3g13%
Sugar 29g32%
Protein 7g14%
Vitamin A 540IU11%
Vitamin C 12.2mg15%
Calcium 331mg33%
Iron 0.4mg2%
* Percent Daily Values are based on a 2000 calorie diet.

Here’s one more to pin on your Pinterest boards!PeachBerry Smoothie is a cold and creamy, peach, raspberry, boysenberry, almond milk and yogurt filled fruit drink that tastes great any time of day!


Save

Save

Carrot Zucchini Bread

Carrot Zucchini Bread is a wonderful tasting loaf of sweet bread, topped with a cream cheese and pecan frosting! This easy to make recipe yields two loaves!Carrot Zucchini Bread is a wonderful tasting loaf of sweet bread, topped with a cream cheese and pecan frosting! This easy to make recipe yields two loaves!

What do you get if carrot cake gets married to zucchini bread? This! Carrot Zucchini Bread. I found this recipe online and decided to try it and use up some of the frozen, grated zucchini hanging out in my freezer, leftover from our garden surplus. It was a great find.

I made this bread yesterday…the flavor combo of the zucchini, carrots, brown sugar and cinnamon is a winning one, for sure! Then to top it all off (quite literally!), the cream cheese pecan frosting is fantastic!

Scroll Down For A Printable Recipe Card At The Bottom Of The Page

Carrot Zucchini Bread Is Incredibly EASY To Make!

The batter for the carrot zucchini bread is easy to mix together. REALLY easy! 

Batter is mixed and ready, in bowl.

Divide the batter and add to floured loaf pans, then into the oven it goes to bake!

Carrot zucchini bread batter in loaf pan, ready to bake!

Here is the carrot zucchini bread, fresh from the oven, and cooling on a wire rack before frosting.

Carrot zucchini bread, baked and cooling on a wire rack.

Easy To Make Cream Cheese Frosting For Carrot Zucchini Bread

The cream cheese and pecan frosting is super easy to make, and goes PERFECTLY with this delicious bread. Wait until the loaves are completely cooled to room temperature before frosting.

Cream cheese and pecan frosting, for carrot zucchini bread.

Here is a finished, frosted loaf of carrot zucchini bread. I garnished it with a few tiny strips of dehydrated carrots, just for fun!

This loaf of carrot zucchini bread is frosted and ready to serve!

Ready To Slice And Enjoy

The bread is moist, and filled with FLAVOR!  LOOK – I cut a slice just for YOU!

A slice of carrot zucchini bread on a plate, with loaf in background.

The bread was easy to prepare, and very tasty! I had a slice this morning with my coffee. Delicious! I really think you and your family will LOVE this loaf of bread!

Once slice of carrot zucchini bread, on a plate.
The recipe, as written makes 2 loaves of carrot zucchini bread, and is easily cut in half in case you only want to make one loaf, so it’s a win-win!  You can also make two loaves, eat one, and share another with a friend, neighbor, or family member! Hope you will give this yummy bread a try…and hope you enjoy it as much as we did! Have a great day, and come back soon.

You can find ALL of my recipes in the Recipe Index, located at the top of the page. You might also enjoy my recipes for banana bread, apple cinnamon, pumpkin, or cinnamon raisin bread.

Interested In More Recipes?

Thank you for visiting this website. I appreciate you using some of your valuable time to do soIf you’re interested, I publish a newsletter 2 times per month (1st and 15th) with all the latest recipes, and other fun info. I would be honored to have you join our growing list of subscribers, so you never miss a great recipe!
There is a Newsletter subscription box on the top right side (or bottom) of each blog post, depending on the device you use, where you can easily submit your e-mail address (only) to be included in my mailing list.

You Can Also Find Me On Social Media:
Facebook page: The Grateful Girl Cooks!
Pinterest: The Grateful Girl Cooks!
Instagram: jbatthegratefulgirlcooks

Author's signatureRecipe Adapted From: http://www.howtoinstructions.us/carrot-zucchini-bread/#.U5MvNCi4mSq

↓↓ PRINTABLE RECIPE BELOW ↓↓

0 from 0 votes
Carrot Zucchini Bread
Prep Time
15 mins
Cook Time
50 mins
Total Time
1 hr 5 mins
 
Carrot Zucchini Bread is a wonderful tasting loaf of sweet bread, topped with a cream cheese and pecan frosting! This easy to make recipe yields two loaves!
Category: Bread/Breakfast
Cuisine: American
Keyword: carrot zucchini bread
Servings: 16 slices
Calories Per Serving: 407 kcal
Author: JB @ The Grateful Girl Cooks!
Ingredients
For bread:
  • 3 cups all purpose flour
  • 1 1/2 teaspoons baking powder
  • 3/4 teaspoon baking soda
  • 3/4 teaspoon salt
  • 1 3/4 teaspoons ground cinnamon
  • 1/4 teaspoon ground nutmeg
  • 3/4 cup granulated sugar
  • 3/4 cup packed brown sugar
  • 1/2 cup vegetable (or canola) oil
  • 6 Tablespoons unsweetened applesauce
  • 3 large eggs
  • 1 1/2 teaspoons vanilla extract
  • 1 1/2 cups finely shredded , peeled carrots (about 3 medium carrots)
  • 1 1/2 cups finely grated , shredded zucchini (and drained well, if using frozen)
For frosting:
  • 6 Tablespoons butter , softened
  • 5 oz. cream cheese , softened
  • 2 1/2 cups powdered sugar
  • 1/2 teaspoon vanilla extract
  • 1/2 cup chopped pecans (or walnuts, if desired)
Instructions
  1. Preheat oven to 350 degrees. While oven is preheating, coat 2 8x4 inch loaf pans with non stick baking spray, then lightly flour pans.
  2. In a large mixing bowl, whisk the flour, baking powder, baking soda, salt, cinnamon, and nutmeg together. Set aside.
  3. In another large mixing bowl place the granulated and brown sugars; whisk these until combined.
  4. Add the vegetable oil, applesauce, eggs, and vanilla to the sugar mixture; mix until well incorporated.
  5. Stir the shredded carrots and zucchini into this mixture.
  6. Add the flour mixture to the carrot zucchini mixing bowl all at once. Stir this only until combined.
  7. Divide the bread batter into the two loaf pans.
  8. Place loaf pans in oven. Bake at 350 degrees for 35 minutes, then without removing loaves from oven, quickly place a piece of aluminum foil over the top of each pan (to prevent too much browning), then continue baking the bread for an additional 15-20 minutes longer.
  9. Remove bread from oven when toothpick inserted in middle of loaves comes out clean.
  10. Allow the bread to cool in the loaf pan for another 5-10 minutes, then invert it onto a wire rack and let it finish cooling.
  11. While bread is cooling, make the cream cheese frosting: Using a hand mixer, whip the butter and cream cheese together in a medium sized mixing bowl. When smooth and fluffy, add the powdered sugar and the vanilla. Beat this mixture on medium high speed for 2-3 minutes, until it is light and fluffy.
  12. Frost cooled loaf with the cream cheese frosting, then top with chopped pecans. (I just added the pecans to the frosting, by the way...no big deal).
Recipe Notes

Recipe is easily halved. (just use 2 eggs instead of 1 1/2).

Nutrition Facts
Carrot Zucchini Bread
Amount Per Serving (1 slice)
Calories 407 Calories from Fat 153
% Daily Value*
Fat 17g26%
Saturated Fat 10g63%
Cholesterol 51mg17%
Sodium 251mg11%
Potassium 187mg5%
Carbohydrates 59g20%
Fiber 1g4%
Sugar 39g43%
Protein 4g8%
Vitamin A 2325IU47%
Vitamin C 2.8mg3%
Calcium 53mg5%
Iron 1.6mg9%
* Percent Daily Values are based on a 2000 calorie diet.

Here’s one more to pin on your Pinterest boards!Carrot Zucchini Bread is a wonderful tasting loaf of sweet bread, topped with a cream cheese and pecan frosting! This easy to make recipe yields two loaves!


Save

Strawberry Smoothie

It’s EASY to make a homemade strawberry smoothie, with Greek yogurt, honey, fresh strawberries and banana! Cold, thick and creamy, you’ll enjoy this drink!It's EASY to make a homemade strawberry smoothie, with Greek yogurt, honey, fresh strawberries and banana! Cold, thick and creamy, you'll enjoy this drink!
It’s that time of year- yes, it’s strawberry season! Who wants a strawberry smoothie? I do, I do! Doesn’t that sound delicious? Well it does to me!

It gets pretty exciting here when the amazingly wonderful Hood Strawberries come into season in the great Pacific Northwest! People head out to the local U-Pick farms to grab big bucketfuls of these local delicious and sweet Oregon strawberries!

I love to go pick extra strawberries at a nearby U-Pick farm, to supplement what the small strawberry beds in my backyard garden produce each year. There’s just something about a creamy, cold morning smoothie, bursting with great strawberry flavor, that really gets me excited! Here’s a picture I took last year while out on a morning strawberry picking “mission”.

Picking fresh strawberries is a fun part of making a strawberry smoothie!
Whether you go pick them yourself, or you grow them in your own yard, OR you buy them from your local grocer or at a Farmer’s Market, a tasty strawberry smoothie is a GOOD thing!

Why Not Make A Delicious Strawberry Smoothie for Breakfast?

I love to have a strawberry smoothie for breakfast, especially as the weather warms up! They are also a great afternoon cold, healthy, and filling drink! In most of my smoothies, I use plain Greek yogurt, because I like the extra protein I receive from adding it to the drink.

It also helps to grow our strawberries in our little raised bed garden!  That way, I always have them fresh picked or flash-frozen to make a quick strawberry smoothie, year round!

Fresh strawberries growing in our backyard garden can be used to make a strawberry smoothie!A bucket of fresh strawberries can be used to make more than one strawberry smoothie!
So, no matter how you get your fresh berries for your smoothies, I hope you will give this simple, delicious strawberry smoothie a try. Have a great day. Cheers, and bottoms up!

Looking For More SMOOTHIE Recipes?

You can find all of my recipes in the Recipe Index, located at the top of the page. I have quite a few smoothie recipes, including:

Interested In More Recipes?

Thank you for visiting this website. I appreciate you using some of your valuable time to do soIf you’re interested, I publish a newsletter 2 times per month (1st and 15th) with all the latest recipes, and other fun info. I would be honored to have you join our growing list of subscribers, so you never miss a great recipe!
There is a Newsletter subscription box on the top right side (or bottom) of each blog post, depending on the device you use, where you can easily submit your e-mail address (only) to be included in my mailing list.

You Can Also Find Me On Social Media:

Facebook page: The Grateful Girl Cooks!
Pinterest:
The Grateful Girl Cooks!
Instagram:
jbatthegratefulgirlcooks

Author's signature

↓↓ PRINTABLE RECIPE BELOW ↓↓

0 from 0 votes
Strawberry Smoothie
Prep Time
5 mins
Cook Time
0 mins
Total Time
5 mins
 
It's EASY to make a homemade strawberry smoothie, with Greek yogurt, honey, fresh strawberries and banana! Cold, thick and creamy, you'll enjoy this drink!
Category: Beverage, Breakfast
Cuisine: American
Keyword: strawberry smoothie
Servings: 2 large servings (or 4 small)
Calories Per Serving: 157 kcal
Author: JB @ The Grateful Girl Cooks!
Ingredients
  • 10 large strawberries , sliced
  • 1/2 large banana , sliced
  • 3/4 cup plain Greek yogurt
  • 1/4 cup vanilla almond milk (can use regular milk if desired)
  • 2 Tablespoons honey
  • 2 handfuls of crushed ice
Instructions
  1. Place all ingredients into a blender and blend for a couple of minutes until ice and all ingredients have been fully incorporated, and the mixture is smooth. If you want the smoothie to be even thicker, add additional crushed ice.
  2. Pour into 2 large glasses and serve!
  3. Enjoy!
Recipe Notes

Recipe Source: my head trying to think of new ways to use my strawberries!

Nutrition Facts
Strawberry Smoothie
Amount Per Serving (1 serving)
Calories 157
% Daily Value*
Cholesterol 3mg1%
Sodium 69mg3%
Potassium 303mg9%
Carbohydrates 31g10%
Fiber 1g4%
Sugar 26g29%
Protein 8g16%
Vitamin C 37.9mg46%
Calcium 130mg13%
Iron 0.3mg2%
* Percent Daily Values are based on a 2000 calorie diet.

Here’s one more to pin on your Pinterest boards!It's EASY to make a homemade strawberry smoothie, with Greek yogurt, honey, fresh strawberries and banana! Cold, thick and creamy, you'll enjoy this drink!


Save

Save

Mom’s Banana Nut Bread

Make Mom’s banana nut bread with pecans or walnuts. This easy, classic loaf is delicious, and makes 1 large loaf, or 3 small mini-loaves!
Make Mom's banana nut bread with pecans or walnuts. This easy, classic loaf is delicious, and makes 1 large loaf, or 3 small mini-loaves!
It seems like everyone has a recipe for banana bread. So do I… and it’s a recipe for my Mom’s Banana Nut Bread. I’ve made it for years using this recipe for over 35 years and it never disappoints! 

The 3×5 index card it is written on wins the award for most splatters! This recipe has been made too many times over the years to even count.

Whether it’s making one large loaf of banana nut bread, or splitting the batter up to make 3 small loaves, this is a very good, reliable recipe for classic banana nut bread.

Scroll Down For A Printable Recipe Card At The Bottom Of The Page

It’s Fun To Make Mini-Loaves Of Banana Nut Bread For Holiday Gifts

Sometimes at Christmas I make 9 small loaves at a time, for gifts to our neighbors. It then feels rather like a banana bread factory in my kitchen (but it sure smells good the day I make the loaves).

Mini-loaves of Mom's banana nut bread, ready to give as gifts!

For me, it’s always been about the over ripe bananas cluttering up the kitchen counter. That, alone is enough motivation to whip up a loaf or loaves of banana nut bread!

After all, over-ripe bananas are the “perfect” candidate for morphing into a tasty loaf of bread, right? Anyways, this is a very simple, straightforward recipe. It’s easy to make, and delicious to eat!

Remember to reduce the baking time if you will be making the smaller loaves. The instructions are for one standard sized (9×5) loaf. Hope you enjoy this tasty bread as much as we do!

An inside look at a loaf of Mom's banana bread.
Hope you enjoy this banana bread. It’s especially good, eaten warm with softened butter. If you really enjoy banana bread, be sure to check out another recipe on my blog for Banana Apricot Date Bread. YUM!

Thank you for stopping by today, and I invite you to come back soon for more family-friendly recipes. Take care, may God bless you, and have a GREAT day!

Looking For More “SWEET” BREAD Recipes?

You can find all of my bread recipes in the Recipe Index, located at the top of the page. A few favorites you might enjoy include:

Want More Recipes? Get My FREE Newsletter!

I publish a newsletter 2 times per month (1st and 15th) with lots of recipes, tips, etc..
Would you like to join our growing list of subscribers?

There is a Newsletter subscription box on the top right (or bottom) of each blog post, depending on the device you use.
You can submit your e-mail address there, to be added to my mailing list.

Find Me On Social Media:

Facebook page: The Grateful Girl Cooks!
Pinterest:
The Grateful Girl Cooks!
Instagram:
jbatthegratefulgirlcooks

Author's signature

Original Recipe Source: Unknown

↓↓ PRINTABLE RECIPE BELOW ↓↓

0 from 0 votes
Mom's Banana Nut Bread
Prep Time
10 mins
Cook Time
55 mins
Total Time
1 hr 5 mins
 

Make Mom's banana nut bread with pecans or walnuts. This easy, classic loaf is delicious, and makes 1 large loaf, or 3 small mini-loaves!

Category: Bread
Cuisine: American
Keyword: Mom's banana nut bread
Servings: 9 slices ( 1 lg. loaf or 3 small)
Calories Per Serving: 312 kcal
Author: JB @ The Grateful Girl Cooks!
Ingredients
  • 2 cups all purpose flour
  • 2 teaspoons baking powder
  • 1/2 teaspoon baking soda
  • 3/4 teaspoon salt
  • 1/2 cup granulated sugar
  • 1 cup walnuts or pecans , chopped
  • 1 large egg , beaten
  • 1/4 cup vegetable oil
  • 1 cup mashed very ripe bananas (approximately 2 medium sized bananas)
  • 1 Tablespoon fresh lemon juice
Instructions
  1. Sift the flour, baking powder, baking soda, salt and sugar together into a large mixing bowl. Add 3/4 cup of the chopped nuts to the dry ingredients.

  2. In a small bowl, combine the egg, vegetable oil, mashed up bananas, and lemon juice until well blended, then add to dry ingredients. Stir only until the flour is moistened and dry ingredients have been incorporated into batter.

  3. Pour batter into a greased/sprayed 9x5 inch loaf pan (or into 3 small prepared loaf pans). Sprinkle the remaining chopped nuts over the top of the loaf.

  4. Bake at 350 degrees for 55 minutes to 1 hour (large loaf) and approximately 35 minutes for small loaves. A toothpick inserted into middle of loaf should come out clean. Loaves should be golden brown on top. Enjoy!
Recipe Notes

Remember to bake for less time if making 3 small loaves!

Nutrition Facts
Mom's Banana Nut Bread
Amount Per Serving (1 slice (large loaf))
Calories 312 Calories from Fat 135
% Daily Value*
Fat 15g23%
Saturated Fat 5g31%
Cholesterol 18mg6%
Sodium 263mg11%
Potassium 277mg8%
Carbohydrates 40g13%
Fiber 2g8%
Sugar 14g16%
Protein 5g10%
Vitamin A 45IU1%
Vitamin C 3.1mg4%
Calcium 59mg6%
Iron 1.9mg11%
* Percent Daily Values are based on a 2000 calorie diet.

Here’s one more to pin on your Pinterest boards!Make Mom's banana nut bread with pecans or walnuts. This easy, classic loaf is delicious, and makes 1 large loaf, or 3 small mini-loaves!


Save

Save

Homemade Blueberry Pancakes

Delicious, homemade blueberry pancakes are easy to make from scratch, using Greek yogurt. Bursting with flavor…a perfect treat for a family breakfast!Delicious, homemade blueberry pancakes are easy to make from scratch, using Greek yogurt. Bursting with flavor...a perfect treat for a family breakfast!

Yesterday morning I made homemade blueberry pancakes for my husband and I for breakfast.  They were FANTASTIC! Blueberry pancakes, from scratch. This recipe calls for fresh blueberries, and my goodness, they are so good!

Scroll Down For A Printable Recipe Card At The Bottom Of The Page

I picked 15 pounds of blueberries last summer and froze a bunch of them. Once frozen, all I had to do was grab some out of our freezer and enjoy the fruits of my labor (picking them in the hot Oregon sunshine last summer!).

Fresh picked blueberries are perfect for making pancakes!
Making Homemade Blueberry Pancakes Is Easy

I was searching Pinterest for some new recipes to try that sounded good, and I stumbled upon this recipe for blueberry pancakes. They are made from scratch, and so I decided to give the recipe a try. I’d made blueberry pancakes before where you just toss in blueberries to add to a packaged pancake mix.

However,  making them from scratch sounded much better to me. It was easy! The batter is mixed together quickly and easily, and then it’s ready to turn it into yummy breakfast pancakes!

Mixing batter from scratch for homemade blueberry pancakes
The batter was easy to make. It is low in sugar, and is made using plain Greek yogurt for some extra protein. How about that-pancakes with extra protein tossed in for good measure? Alrighty then!

Homemade blueberry pancakes cooking on griddle.
Throw in some delicious blueberries as you are cooking the pancakes. Cook until bubbles form on the surface, then carefully flip them to the other side. Continue to cook the homemade blueberry pancakes until they’re set, and golden brown on both sides!

Serve The Homemade Blueberry Pancakes

Homemade blueberry pancakes taste very close to what you would find in a purchased pancake mix, and they’re easy to prepare, also! Top the pancakes with butter and pancake syrup, and dig into a stack of yummy pancakes.

Blueberry pancakes, topped with butter and maple syrup!

These homemade blueberry pancakes taste delicious and are filled with great blueberry flavor! I hope you will give them a try! Take care, and please come back again soon, for more family friendly recipes.

Looking For More PANCAKE Recipes?

You can find all of my recipes in the Recipe Index, which is located at the top of the page. I have quite a few pancake recipes for you to choose from, including:

Interested In More Recipes?

Thank you for visiting this website. I appreciate you using some of your valuable time to do soIf you’re interested, I publish a newsletter 2 times per month (1st and 15th) with all the latest recipes, and other fun info. I would be honored to have you join our growing list of subscribers, so you never miss a great recipe!
There is a Newsletter subscription box on the top right side (or bottom) of each blog post, depending on the device you use, where you can easily submit your e-mail address (only) to be included in my mailing list.

You Can Also Find Me On Social Media:

Facebook page: The Grateful Girl Cooks!
Pinterest:
The Grateful Girl Cooks!
Instagram:
jbatthegratefulgirlcooks

Have a GREAT day!

Author's signature


Recipe Source: http://www.heathersfrenchpress.com/2013/07/the-best-buttermilk-blueberry-pancakes-using-greek-yogurt.html#more-1289

↓↓ PRINTABLE RECIPE BELOW ↓↓

0 from 0 votes
Homemade Blueberry Pancakes
Prep Time
10 mins
Cook Time
10 mins
Total Time
20 mins
 
Delicious, homemade blueberry pancakes are easy to make from scratch, using Greek yogurt. Bursting with flavor...a perfect treat for a family breakfast!
Category: Breakfast
Cuisine: American
Keyword: homemade blueberry pancakes
Servings: 8 large pancakes
Calories Per Serving: 158 kcal
Author: JB @ The Grateful Girl Cooks!
Ingredients
  • 1 ¼ cups all purpose flour
  • 3 Tablespoons granulated sugar
  • 1 ½ teaspoons baking powder
  • ½ teaspoon baking soda
  • ½ teaspoon salt
  • 2 Tablespoons butter , melted
  • 1 large egg
  • 1 teaspoon vanilla extract
  • ½ cup milk
  • 1 cup plain Greek yogurt
  • 1 cup blueberries (I used frozen blueberries, right out of the freezer)
Instructions
  1. In a medium sized bowl, whisk the dry ingredients (flour, sugar, baking powder, baking soda, salt).
  2. Whisk the milk and yogurt into the dry ingredients. Whisk until batter is smooth and no lumps are present.
  3. Stir in the melted butter, egg and vanilla. Mix until well incorporated.
  4. Heat a skillet or electric griddle to 275 degrees (a low temp for cooking pancakes)
  5. Lightly spray or butter the griddle or skillet.
  6. Pour pancake batter in 1/3 cup increments onto hot griddle. Spread a bit to create the size pancake you want.
  7. Sprinkle blueberries on top of each pancake.
  8. Cook pancakes about 4 minutes on each side (this is longer than when you use a commercial mix, but it IS the proper time for these to ensure the middle of the pancake is "set".
  9. When beautifully browned and done, remove pancakes to serving plate, and serve with additional blueberries and powdered sugar or syrup. Enjoy!
Nutrition Facts
Homemade Blueberry Pancakes
Amount Per Serving (2 pancakes)
Calories 158 Calories from Fat 36
% Daily Value*
Fat 4g6%
Saturated Fat 2g13%
Cholesterol 30mg10%
Sodium 263mg11%
Potassium 173mg5%
Carbohydrates 24g8%
Sugar 8g9%
Protein 5g10%
Vitamin A 150IU3%
Vitamin C 1.8mg2%
Calcium 83mg8%
Iron 1.1mg6%
* Percent Daily Values are based on a 2000 calorie diet.

Here’s one more to pin on your Pinterest boards!Delicious, homemade blueberry pancakes are easy to make from scratch, using Greek yogurt. Bursting with flavor...a perfect treat for a family breakfast!

Save

Save

Save

Save

Apple Cinnamon Steel Cut Oats With Pecans

Apple cinnamon steel cut oats with cinnamon, pecans, cranberries, brown sugar, garnished w/ Greek yogurt and honey will be a favorite breakfast treat. Yum!Apple cinnamon steel cut oats with cinnamon, pecans, cranberries, brown sugar, garnished w/ Greek yogurt and honey will be a favorite breakfast treat. Yum!

Sure… the title for this recipe “Apple Cinnamon Steel Cut Oats With Pecans” is a mouthful…but so are these steel cut oats! They’re delicious!

Scroll Down For A Printable Recipe Card At The Bottom Of The Page

Steel Cut Oats… Who Knew I Would Like them?

I grew up eating oatmeal…and didn’t like it so much. I preferred my oatmeal in a COOKIE, thank you very much! But as an adult, I’ve discovered I actually like oatmeal, especially steel cut oats! The caveat to this is I like steel cut oats if they are “classed up” a bit with some tasty add-ins!

This is THAT kind of steel cut oats recipe! The kind of recipe where you take humble oats and add in chopped apples, cinnamon, pecans, dried cranberries, brown sugar…well, you get the picture!

These are the steel cut oats I used for this recipe.

I love to make this recipe because by the time I add all the good stuff in, I have enough for 6 decent sized servings. The oats will really firm up when refrigerated!

Do You Eat Apple Cinnamon Steel Cut Oats HOT Or COLD?

My preferred method for eating them is to eat them cold, with a dollop of plain Greek yogurt on top, along with a drizzle of honey, and a pinch of cinnamon on top (for pizzazz!) It’s so good!

Of course, this recipe is great eaten hot, as well… (but remember to leave off the yogurt and honey at the end if you eat them that way).

Apple Cinnamon Steel Cut Oats Are Great For “On The Go” Meals

It is very convenient to package these apple cinnamon steel cut oats up in little plastic cups with lids on them…then my oatmeal becomes a “Grab and Go” kind of meal.

I used to take a container of apple cinnamon steel cut oats to work, for a quick and filling breakfast or break treat. With a dollop of Greek yogurt and a drizzle of honey on top, this was a delicious “to go” breakfast!

Keep the covered containers in the refrigerator, then just grab one any time you want, or you can take it with you in the car if you’re in a hurry! See how cute they look in their little “Grab and Go” cups?

Containers of apple cinnamon steel cut oats with yogurt make a "to go" quick breakfast!

The first time I tried making apple cinnamon steel cut oats and decided to eat them cold, I was skeptical I would enjoy them served that way. Well, I was totally surprised at how fantastic it tastes!

If you told me a year ago that I’d enjoy COLD apple cinnamon steel cut oats I would have laughed. I’m not laughing now…I LOVE it, and I love the convenience of being able to make a few servings extra, ahead of time. Perfect… Hope you will give this recipe for apple cinnamon steel cut oats a try. They are delicious!

Looking For More OATMEAL Recipes?

All of my recipes can be found in the Recipe Index, located at the top of the page. A few favorite breakfast using oats include:

Interested In More Recipes?

Thank you for visiting this website. I appreciate you using some of your valuable time to do soIf you’re interested, I publish a newsletter 2 times per month (1st and 15th) with all the latest recipes, and other fun info. I would be honored to have you join our growing list of subscribers, so you never miss a great recipe! 

There is a Newsletter subscription box on the top right side (or bottom) of each blog post, depending on the device you use, where you can easily submit your e-mail address (only) to be included in my mailing list.

You Can Also Find Me On Social Media:

Facebook page: The Grateful Girl Cooks!
Pinterest:
The Grateful Girl Cooks!
Instagram:
jbatthegratefulgirlcooks

Author's signatureRecipe Source: My brain, plus instructions for making oats on the back of bag.

↓↓ PRINTABLE RECIPE BELOW ↓↓

5 from 1 vote
Apple Cinnamon Steel Cut Oats With Pecans
Prep Time
10 mins
Cook Time
10 mins
Total Time
20 mins
 
Apple cinnamon steel cut oats with cinnamon, pecans, cranberries, brown sugar, garnished w/ Greek yogurt and honey will be a favorite breakfast treat. Yum!
Category: Breakfast
Cuisine: American
Keyword: apple cinnamon steel cut oats
Servings: 6 servings
Calories Per Serving: 220 kcal
Author: JB @ The Grateful Girl Cooks!
Ingredients
  • 2 cups water
  • 1 cup steel cut oats
  • 1/8 teaspoon salt
  • 1 green apple , large, peeled, seeded and chopped
  • 1/2 cup dried cranberries
  • 1/2 cup pecans (or walnuts), chopped
  • 2 Tablespoons brown sugar , heaping
  • 1/2 teaspoon cinnamon
  • 1/2 teaspoon vanilla
  • 6 Tablespoons plain , Greek yogurt (for topping oats-this is optional, but I recommend)
  • 1 teaspoon Honey (to drizzle on top of yogurt topping-this is optional, but I recommend)
  • Additional cinnamon (to sprinkle on top of yogurt and honey-this is optional, but I recommend)
Instructions
  1. In a medium saucepan, bring the water to a boil. Add the steel cut oats, salt, chopped apple, dried cranberries, chopped pecans, brown sugar and cinnamon. Stir well to combine and continue cooking and stirring occasionally for approximately 7-10 minutes, until water has all been incorporated into oats.

  2. When oats are done cooking, remove pan from heat; add in the vanilla and stir. If eating warm, serve it at this point.

  3. If eating cold (YUM), place oat mixture into a covered container and refrigerate for at least 4 hours. When ready to serve, divide into 6 equal portions. On top of each serving, place a large dollop (1 Tablespoon) of yogurt, then a drizzle of honey on top of yogurt, then a sprinkle of cinnamon on top of honey. Serve and ENJOY!

Recipe Notes

I have also added in just a bit of vanilla almond milk at times to the finished product (especially if eating it warm). If desired, you can also add in 1/2 cup milk to the recipe...just decrease the water used to 1 1/2 cups.

Nutrition Facts
Apple Cinnamon Steel Cut Oats With Pecans
Amount Per Serving (1 serving)
Calories 220 Calories from Fat 72
% Daily Value*
Fat 8g12%
Sodium 59mg3%
Potassium 54mg2%
Carbohydrates 32g11%
Fiber 4g17%
Sugar 12g13%
Protein 6g12%
Calcium 41mg4%
Iron 1.4mg8%
* Percent Daily Values are based on a 2000 calorie diet.

Here’s one more to pin on your Pinterest boards!Apple cinnamon steel cut oats with cinnamon, pecans, cranberries, brown sugar, garnished w/ Greek yogurt and honey will be a favorite breakfast treat. Yum!


Save

Save