Category: Breakfast

Banana Nut Scones

Banana Nut Scones, with pecans (or walnuts) and a banana flavored glazed icing are a delicious, easy to make treat for breakfast, brunch or a light snack!Banana Nut Scones, with pecans (or walnuts) and a banana flavored glazed icing are a delicious, easy to make treat for breakfast, brunch or a light snack! True story – I LOVE scones (wow…bold lettering AND underlined…can you tell how much I love them?) That includes these Banana Nut Scones! But… I don’t like paying high prices for one OR getting one in a coffee house that is dry, crumbly, and rather sawdust-like. UGH. Seriously, scones are so very quick, easy, and inexpensive to make! You can make EIGHT scones for a little more than what some people will pay for ONE! Why not whip up a batch, and freeze a few for later?

These scones are good for “those times“. You know…the times you’re running fast and furious to get to a meeting and forget to eat breakfast…or you’re snowed in…or you need something yummy to enjoy with your afternoon cup of coffee or tea. Perhaps you’ve had those times when you find overly-ripe (dead) bananas on the counter and they need to either go to the resting place for dead bananas or be used in something yummy! All very valid reasons (in my humble opinion) for making BANANA NUT SCONES!

I found this recipe online, made a few minor changes, and just like that had 8 delicious scones (half to be eaten and half to be given away). If you like the flavor of banana nut bread, you will LOVE these scones!

Scroll Down For A Printable Recipe Card At The Bottom Of The Page

Making Banana Nut Scones Is EASY

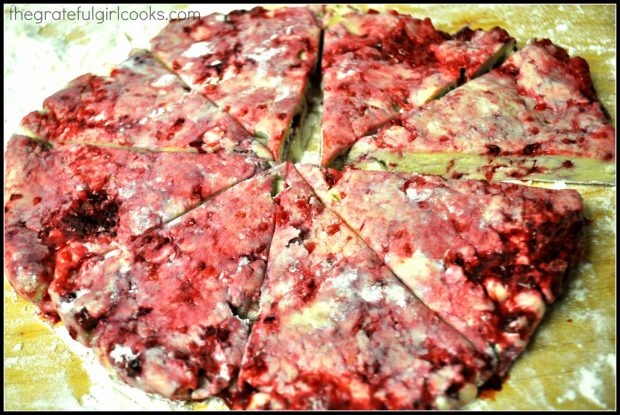
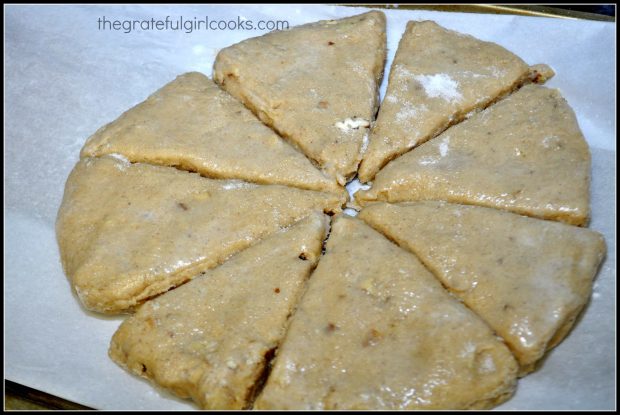
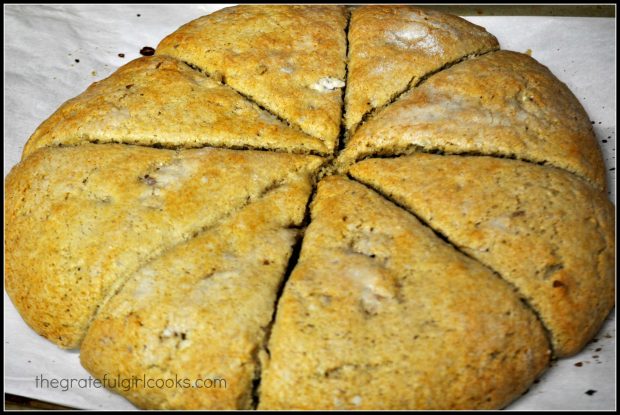
Here are the banana nut scones, rolled out and cut. It is dusted with sugar and now they are ready for baking in the oven.

Scones divided into 8 wedges on parchment paper

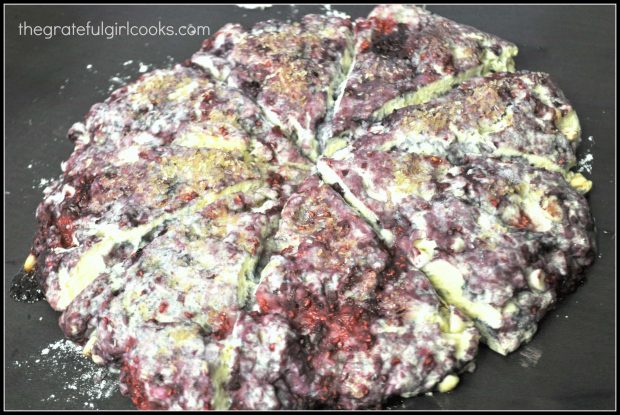
The banana nut scones are hot out of the oven, and lightly browned on top. Now they just need some sweet glaze drizzled on top before eating!

Browned banana nut scones on parchment paper

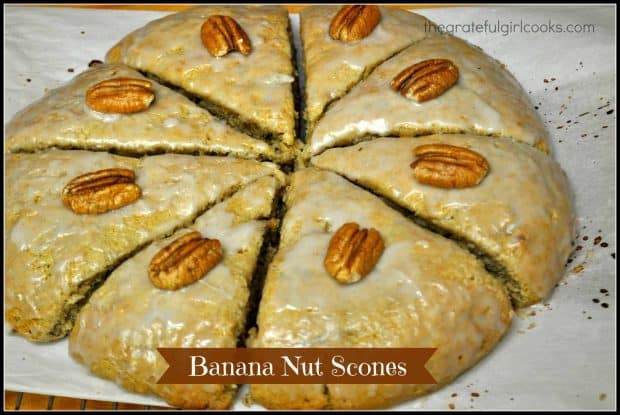
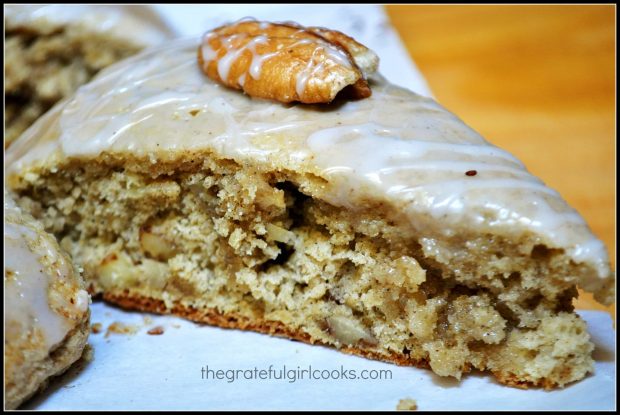
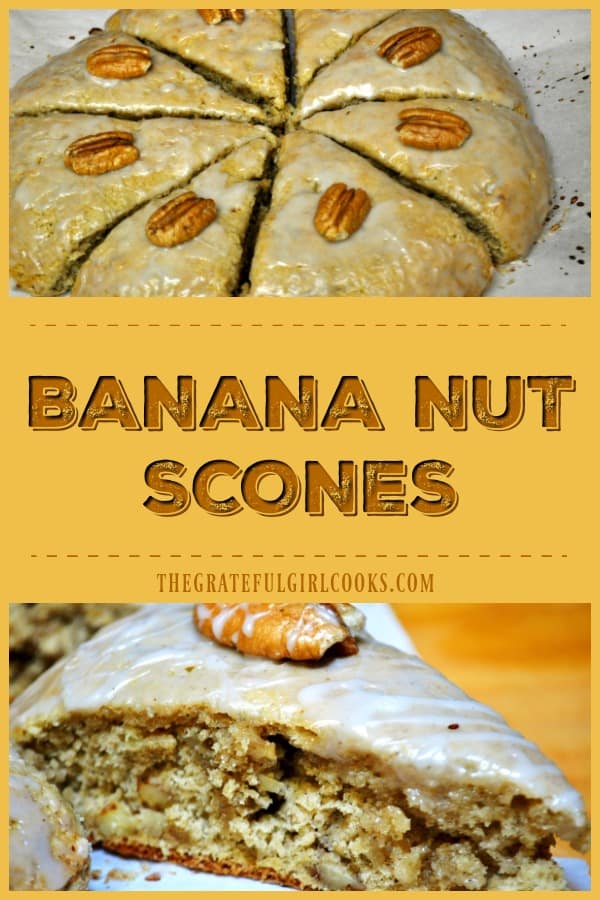
Here is one of the finished banana nut scones. It is lightly glazed, sliced, and is ready to enjoy!

Banana scone side view with pecan on top

I enjoyed nibbling (i.e. “scarfing”, but nibbling sounds daintier) ne of the banana nut scones while sipping my coffee. I did this while also writing in my Gratitude Journal (a daily practice of mine to name and write God’s blessings, as I become aware of and see them). Boy, was I grateful for that delicious scone!  I hope you will give them a try…think you will enjoy them.

Looking For More SCONE Recipes?

You can find all of my scone recipes in the Recipe Index, located at the top of the page. I have lots of them, including:

Interested In More Recipes?

Thank you for visiting this website. I appreciate you using some of your valuable time to do soIf you’re interested, I publish a newsletter 2 times per month (1st and 15th) with all the latest recipes, and other fun info. I would be honored to have you join our growing list of subscribers, so you never miss a great recipe!
There is a Newsletter subscription box on the top right side (or bottom) of each blog post, depending on the device you use, where you can easily submit your e-mail address (only) to be included in my mailing list.

You Can Also Find Me On Social Media:
Facebook page: The Grateful Girl Cooks!
Pinterest: The Grateful Girl Cooks!
Instagram: jbatthegratefulgirlcooks

Have a wonderful day!

Author's signature

Recipe Adapted from: http://heatherchristo.com/cooks/2013/01/10/banana-scones/

↓↓ PRINTABLE RECIPE BELOW ↓↓

0 from 0 votes
Banana Nut Scones
Prep Time
20 mins
Cook Time
20 mins
Total Time
40 mins
 
Banana Nut Scones, with pecans (or walnuts) and a banana flavored glazed icing are a delicious, easy to make treat for breakfast, brunch or a light snack!
Category: Breakfast
Cuisine: American
Keyword: banana nut scones
Servings: 8 servings
Calories Per Serving: 417 kcal
Author: JB @ The Grateful Girl Cooks!
Ingredients
For Scones:
  • 2 cups flour
  • 1/2 cup granulated sugar
  • 1 teaspoon baking powder
  • 1/2 teaspoon baking soda
  • 1/2 teaspoon salt
  • 1/2 teaspoon cinnamon
  • 8 Tablespoons cold butter , cut into small pieces
  • 1 large banana ( very ripe, mashed)
  • 2 Tablespoons milk or heavy cream (I used milk)
  • 1 egg , beaten slightly
  • 1/2 cup pecans or walnuts , chopped (I used pecans)
  • 1 Tablespoon milk or heavy cream
  • Granulated sugar (for sprinkling)
For Glaze Topping:
  • 1 1/2 cups confectioner's sugar (powdered)
  • 1/4 teaspoon banana extract
  • 1/4 teaspoon vanilla extract
  • 3-4 teaspoons warm water (to get glaze to correct "painting" consistency)
Instructions
  1. Preheat oven to 400°F. While oven preheats, line a baking sheet with parchment paper.

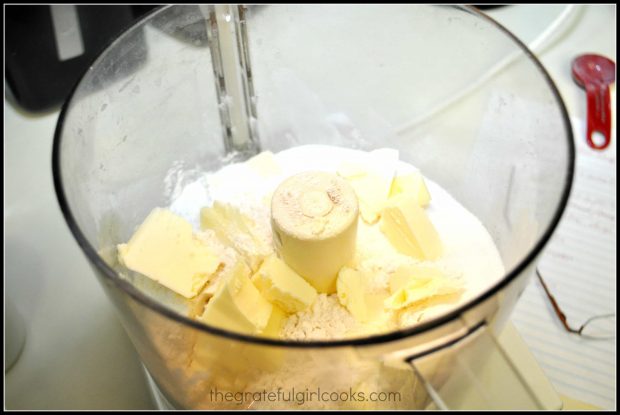
  2. In the bowl of a food processor (or large bowl if making by hand), combine all dry ingredients. Add cold butter to processor; pulse to cut in butter (or use hand-held pastry cutter). Process until mixture is crumbly and butter is about the size of peas.

  3. In separate bowl, mix mashed banana, milk (or heavy cream), and egg; Mix until well blended. Add banana mixture to dry ingredients; pulse till dough comes together in a "shaggy" looking ball (If mixing by hand, stir till you have a "shaggy" looking dough ball). Turn dough ball onto a floured work surface; mix in nuts till blended.

  4. With floured hands (sprinkle a bit more flour on dough, cause dough is sticky), gently form dough ball into a round "disc" approx. 8" across. Using sharp knife or pizza cutter, cut disc into 8 wedges.

  5. Re-arrange wedges in a circle on prepared baking sheet. Brush scone tops with 1 TBSP of cream or milk; lightly sprinkle with sugar.

  6. Bake scones at 400°F for 20-23 minutes (check them at the 20 minute mark-keep an eye on them). Bake till golden brown. When done, transfer scones to wire rack (with parchment or foil underneath to catch any drips from glaze icing). Let cool.

  7. While cooling, mix glaze ingredients in small bowl. Once scones are completely cooled, "paint" icing over the scones using pastry brush. ENJOY!

Nutrition Facts
Banana Nut Scones
Amount Per Serving (1 scone)
Calories 417 Calories from Fat 144
% Daily Value*
Fat 16g25%
Saturated Fat 7g44%
Cholesterol 50mg17%
Sodium 325mg14%
Potassium 175mg5%
Carbohydrates 63g21%
Fiber 1g4%
Sugar 36g40%
Protein 4g8%
Vitamin A 395IU8%
Vitamin C 1.3mg2%
Calcium 44mg4%
Iron 1.8mg10%
* Percent Daily Values are based on a 2000 calorie diet.

Here’s one more to pin on your Pinterest boards!Banana Nut Scones, with pecans (or walnuts) and a banana flavored glazed icing are a delicious, easy to make treat for breakfast, brunch or a light snack!
Save

Chocolate Chip Orange Scones

Chocolate chip orange scones with citrus glaze, are a delicious treat for breakfast, brunch or an afternoon snack!
Chocolate chip orange scones with a citrus glaze, are a delicious and easy to make treat for breakfast, brunch or an afternoon snack!
These chocolate chip orange scones are my “all-time favorite”! I LOVE them!  When I worked full-time (for almost 30 years), I would occasionally bring plates of them to the office, to share with my friends. They were always a big hit… and I always returned home with empty serving plates!

Now that I have my own blog (to share favorite recipes with family and friends in one convenient location), I decided to share this special recipe with you. I’ve been making them for over 20 years, and I am sure you will LOVE these scones!

Scroll Down For A Printable Recipe Card At The Bottom Of The Page

Do You Love SCONES?

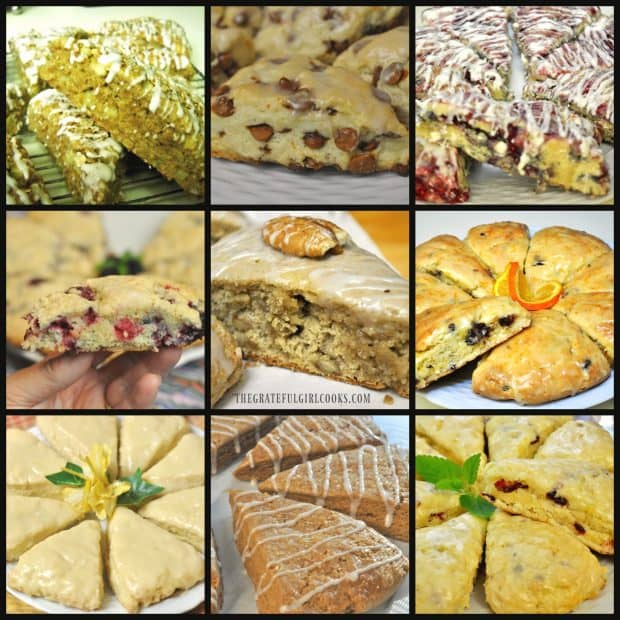
If you love scones, I hope you will consider checking out some of the other recipes for them I have on this blog, like Apple Cinnamon, Lemon Cream, Cranberry Orange, Cinnamon Chip or Banana Nut, to name a few. All my recipes can be found in the Recipe Index at the top of this page! Here’s a few photos to tempt you!

Photo collage of scones from The Grateful Girl Cooks!

I made a batch of these chocolate chip orange scones this morning. It was a brisk 36 degrees outside; a gorgeous Pacific Northwest kind of day (thank you, God, for the beauty all around). My husband and I discussed our plans for the day while enjoying a scone, accompanied by our cups of “strong” coffee. Ahhhh… delicious!

Chocolate and orange are a favorite flavor combination of mine, and these scones, with their sweet citrus glaze on top, are “practically perfect in every way”.  What a great way to start the day (and much less expensive than buying them at a local coffee house!)  Give them a try… I hope you enjoy them as much as we do!

Making Chocolate Chip Orange Scones

Here’s a few pics showing how to make them: First you mix up the ingredients for the dough…(I used a food processor, but you can also use a small pastry blender).

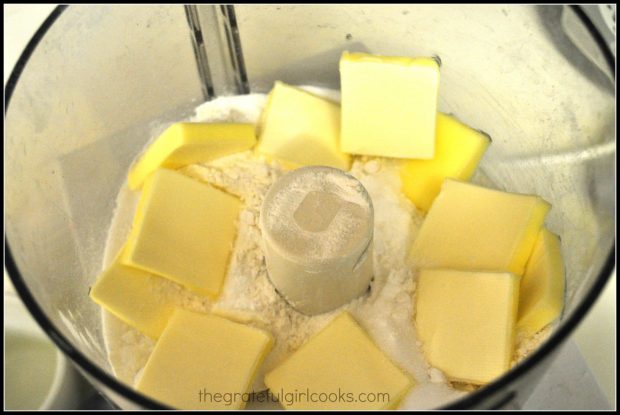
Flour and butter for scones, in a food processor.

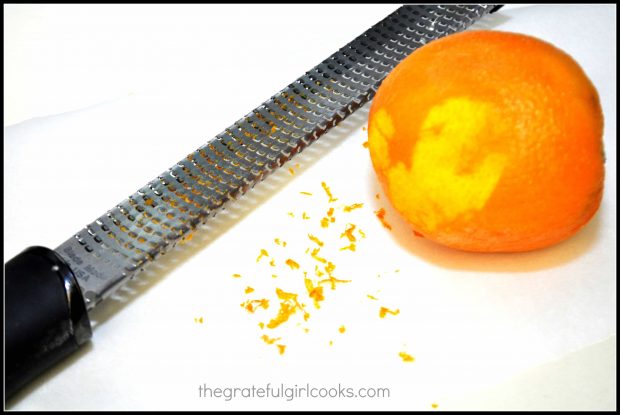
The grated orange peel makes the dough smell good and “citrusy”, and helps add in citrus flavor!

Orange zest, orange and microplane zester, used for scones

Forming The Dough For Chocolate Chip Orange Scones

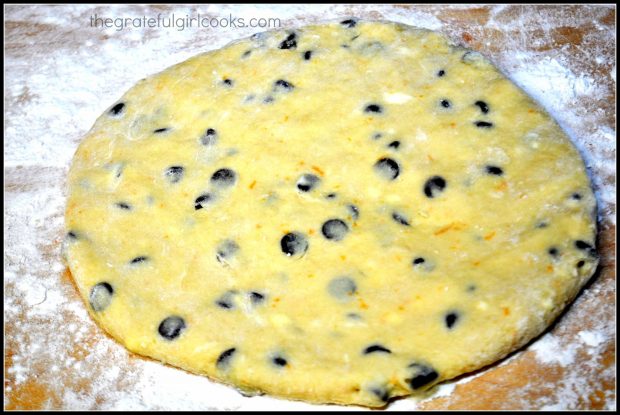
Shape the dough into a circle after all the dough ingredients have been mixed together. Look at those chocolate chips and orange zest!

Scone dough, with chocolate chips, is rolled out into circle shape

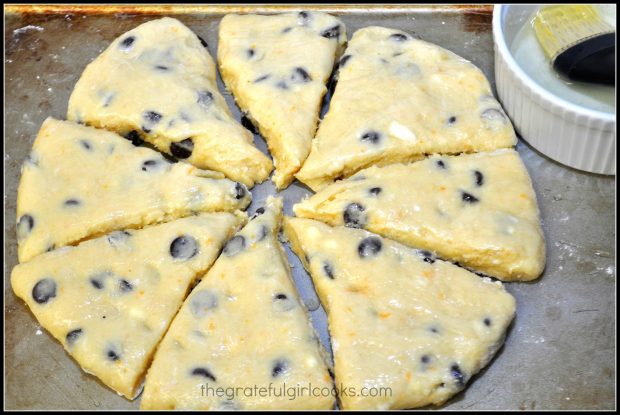
Next, cut the dough circle into 8 pie-shaped wedges, brush the tops with egg white/water combo, and into the oven they go. I like to use a pizza cutter to make the cuts.

Scone dough is cut into 8 pie shaped wedges

Prepare The Citrus Glaze While Scones Bake

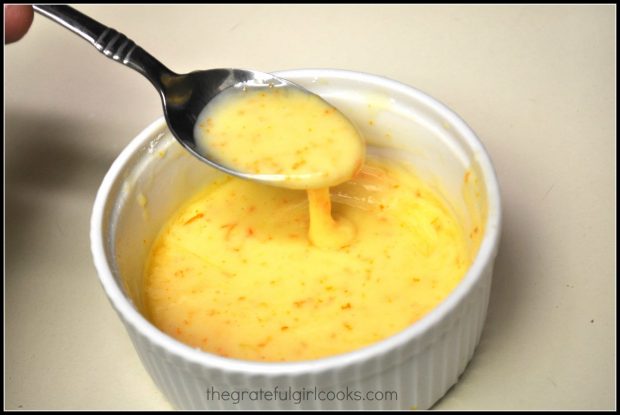
While the scones are baking, mix up the orange glaze…see all the orange zest? This glaze is made with orange juice, orange zest, orange extract, vanilla and powdered sugar.

That’s a lot of citrus flavor! The glaze will be brushed onto the scones once they have been baked and completely cooled. It’s the most wonderful topping, and adds so much additional citrus flavor to the chocolate chip orange scones.!

Orange glaze is mixed to put on top of baked scones

Glaze The Baked Chocolate Chip Orange Scones

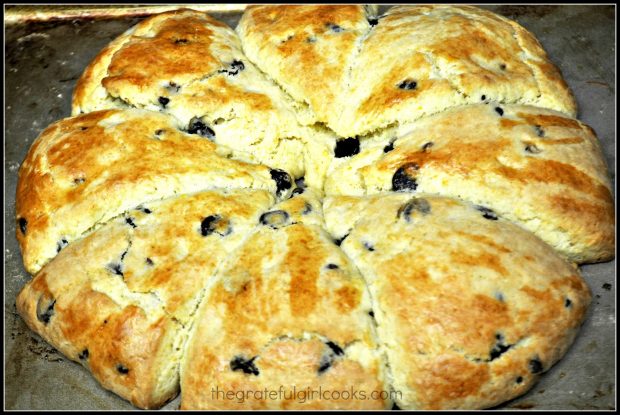
Here are the chocolate chip orange scones, golden brown and hot, straight out of the oven. Now they just need a shiny orange glaze after they’ve cooled, to make them PERFECT!

Chocolate chip orange scones, baked, and out of oven cooling.

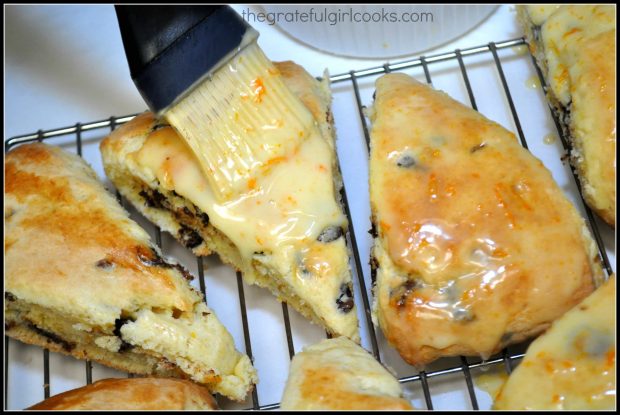
“Painting” the citrus glaze onto the scones with a pastry brush gives them an extra burst of flavor, plus a beautiful shiny top!

Orange glaze is brushed on top of chocolate chip orange scones

Ready To EAT!

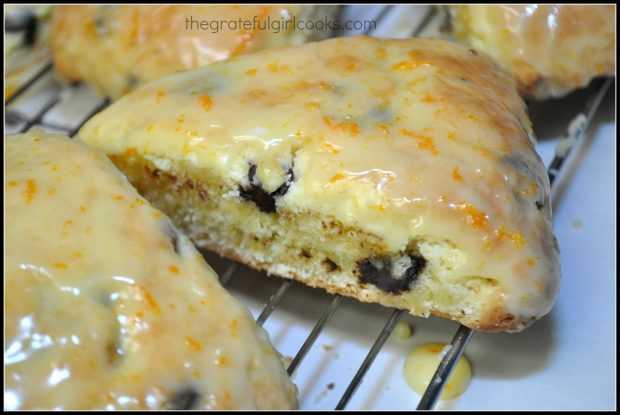
Let the chocolate chip orange scones cool until the glaze firms up. All that’s left to do is take a big bite, and enjoy!

Chocolate Chip Orange Scones with citrus glaze, cooling on wire rack

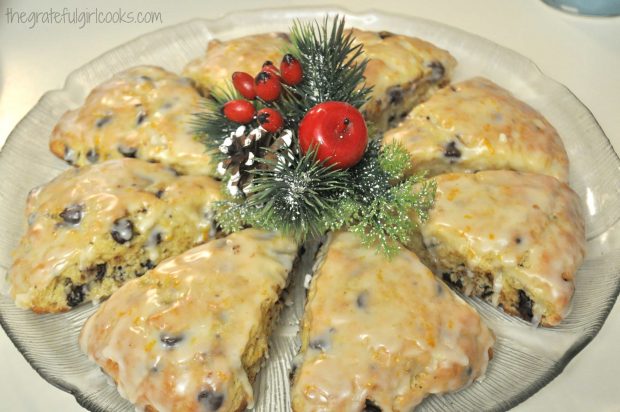
Update: I made some this past Christmas (2015) for breakfast for my husband, myself, and our two grown sons. Here’s a picture. These scones sure disappeared in a flash!!

Christmas decorated platter of chocolate chip orange scones

Sure hope you enjoy these easy to make chocolate chip orange scones! I think you will love them as much as our family does! Have a GREAT day, and thanks for stopping by!

Interested In More Recipes?

Thank you for visiting this website. I appreciate you using some of your valuable time to do soIf you’re interested, I publish a newsletter 2 times per month (1st and 15th) with all the latest recipes, and other fun info. I would be honored to have you join our growing list of subscribers, so you never miss a great recipe!
There is a Newsletter subscription box on the top right side (or bottom) of each blog post, depending on the device you use, where you can easily submit your e-mail address (only) to be included in my mailing list.

You Can Also Find Me On Social Media:
Facebook page: The Grateful Girl Cooks!
Pinterest: The Grateful Girl Cooks!
Instagram: jbatthegratefulgirlcooks

Author's signature

Original Recipe Source: unknown

↓↓ PRINTABLE RECIPE BELOW ↓↓

0 from 0 votes
Chocolate Chip Orange Scones
Prep Time
20 mins
Cook Time
20 mins
Total Time
40 mins
 

Chocolate chip orange scones with a citrus glaze, are a delicious and easy to make treat for breakfast, brunch or an afternoon snack!

Category: Breakfast
Cuisine: American
Keyword: chocolate chip orange scones
Servings: 8
Calories Per Serving: 458 kcal
Author: JB @ The Grateful Girl Cooks!
Ingredients
For scones:
  • 2 cups all-purpose flour
  • 1/3 cup granulated sugar
  • 2 teaspoons baking powder
  • 1/2 teaspoon salt
  • 1/2 cup (1 cube) unsalted butter, very cold
  • 2 large eggs
  • 1/4 cup orange juice
  • 1 teaspoon vanilla
  • 1/2 teaspoon grated orange peel (finely grated; I use a micro-plane zester)
  • 3/4 cup semi-sweet chocolate chips (regular or mini-sized)
  • 1 egg white + 1/2 tsp. water
For glaze:
  • 1 1/2 cups powdered sugar (can always add more if you need extra)
  • 1/4 teaspoon vanilla extract
  • 1/4 teaspoon orange extract (I use it for enhanced flavor, but optional)
  • 1 teaspoon grated orange zest
  • 3-4 teaspoons orange juice (until you get the right consistency of glaze to
  • "paint" on the scones)
Instructions
  1. Preheat oven to 425 degrees. In a food processor (or cut in by hand with a pastry blender in a large bowl), mix flour, sugar, baking powder, salt and chilled butter together until well combined.

  2. In a separate bowl, mix together the eggs, orange juice, vanilla, and grated orange peel. Add egg mixture to the flour mixture; combine till fully blended.Stir in chocolate chips. Mix well, to fully combine. 

  3. Transfer dough onto a well-floured surface. Knead dough with floured hands until dough comes together...(continue to sprinkle the dough and surface with additional flour as needed, as dough is usually fairly "sticky"-I usually do this 3-4 times). Shape dough into an 8" circle.

  4. Mix egg white and water together in small bowl. Using a pastry brush, brush the tops of the scones with this mixture. Using a pizza cutter or very sharp knife, cut the dough circle into 8 pie-shaped wedges.

  5. Spray a baking sheet with cooking spray. Place wedges on baking sheet and bake at 425 degrees for 20-25 minutes (mine are usually ready at the 20 minute mark), or until golden brown on top.  When done, remove from oven; transfer scones to a wire rack, with foil or parchment paper underneath.

  6. When scones have slightly cooled, "paint" the glaze on with a pastry brush (glaze is made by mixing up the ingredients listed, in a small bowl). Completely cover the tops of the scones with the glaze. Let scones cool until glaze has hardened., then serve, and enjoy!

Nutrition Facts
Chocolate Chip Orange Scones
Amount Per Serving (1 scone)
Calories 458 Calories from Fat 171
% Daily Value*
Fat 19g29%
Saturated Fat 11g69%
Cholesterol 72mg24%
Sodium 172mg7%
Potassium 272mg8%
Carbohydrates 65g22%
Fiber 2g8%
Sugar 37g41%
Protein 6g12%
Vitamin A 440IU9%
Vitamin C 5.7mg7%
Calcium 68mg7%
Iron 2.8mg16%
* Percent Daily Values are based on a 2000 calorie diet.

Here’s one more to pin on your Pi!nterest boards!Chocolate chip orange scones with a citrus glaze, are a delicious and easy to make treat for breakfast, brunch or an afternoon snack!


Save

Save

Save

New York Style Blueberry Bagels DIY

It’s easy to make chewy, delicious, authentic New York Style Blueberry Bagels from scratch! Grab the cream cheese and enjoy this classic treat!It's easy to make chewy, delicious, authentic New York Style Blueberry Bagels from scratch! Grab the cream cheese and enjoy this classic treat!
I love bagels, especially these authentic, made from scratch New York Style Blueberry Bagels. I love them plain or toasted, with cream cheese! My husband also loves a good bagel, and is notorious for grabbing a few “fresh” bagels from the bakery department at our local grocery store.

Scroll Down For A Printable Recipe Card At The Bottom Of The Page

Making Bagels From Scratch Is Economical!

Last year I decided to take on the challenge of making bagels from the comfort of my very own kitchen. That way I would know what was in them, and in the long run, it would be a lot cheaper than buying them at a coffee house or grocery store.

I’ve Made Several Bagel Varieties Over the Years

The first bagels I made were cranberry-orange and they were amazing (and not nearly as hard to make as I had imagined). Next came the jalapeno cheddar bagels, cinnamon crunch bagels, gingerbread bagels, and everything bagels… all with good results!

Trust me… these blueberry bagels are absolutely amazing! If you like bagels, AND you like blueberries, you really should try this recipe!

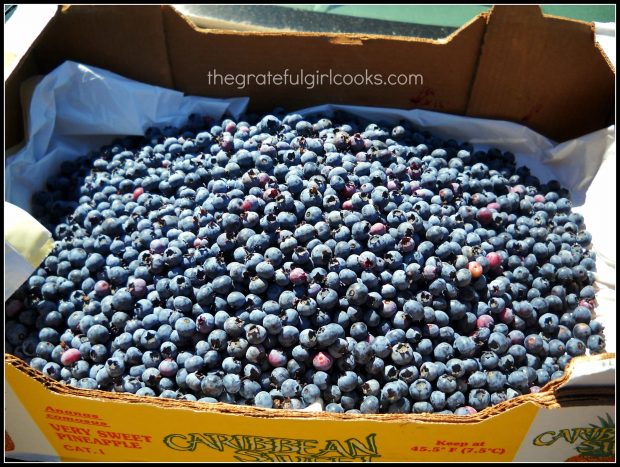
Look at these beautiful Oregon blueberries in the photo below! I picked almost 20 pounds of blueberries this past summer at a local U-Pick farm, so my freezer always seems to have bags full of frozen blueberries! I used fresh for this recipe, but either fresh OR frozen blueberries will work in this recipe.

Fresh picked blueberries used to make bagels

Is It Hard To Make New York Style Blueberry Bagels?

Honestly, NO. These NY style blueberry bagels are fairly easy to make, and there are a few steps to follow. But… the end result is creating bagels that are chewy, delicious, and bursting with blueberries! The only real thing you need to have is patience to wait for the dough to rise!

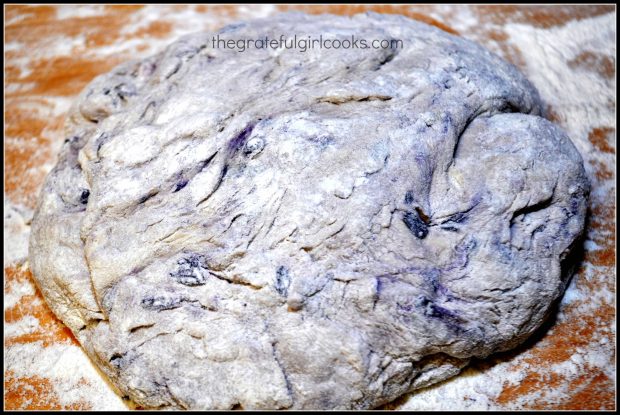
That waiting time for the dough to rise is truly the only hard part of making them. Don’t worry if the dough looks a little bit purple. That’s just from a little of the blueberry juice mixing into the dough… it’s all good!

Blueberry bagel dough on lightly floured surface

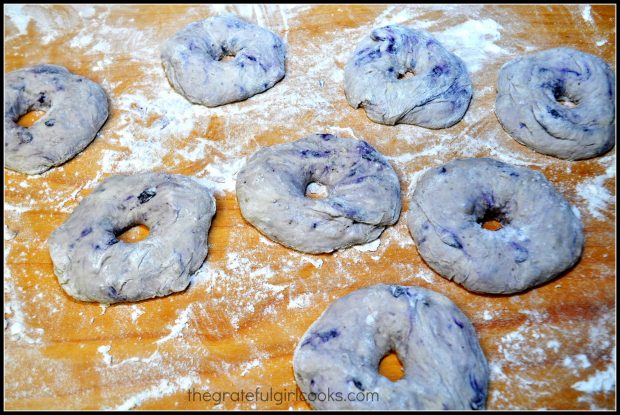
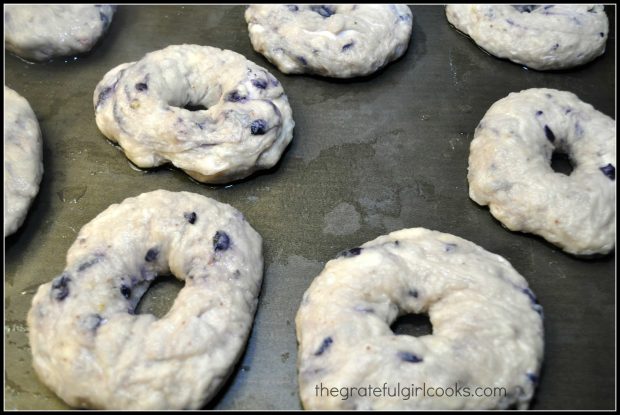
Dough for NY style blueberry bagels is formed into their distinctive circular shapes. Now they are ready to boil! Boiling them before baking helps ensure a chewy, authentic textured bagel!

Dough formed into 8 bagel shapes on floured surfaceBoil First Then Bake

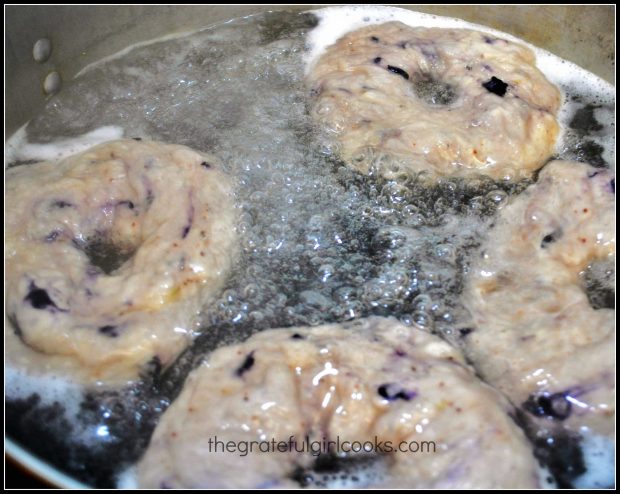
True NY style blueberry bagels are boiled before they are baked.  This two step process gives them their nice, traditional chewy texture! It is one extra authentic step you will be glad you took!

Look at those gorgeous blueberry bagels boiling away in a big pot of water below. It sort of looks like a blueberry bagel jacuzzi, don’t ya think? They are only boiled for 3-4 minutes, so this extra step doesn’t take too long!

Blueberry bagels cooking in boiling water in pan

The bagels are boiled in batches in a LARGE pot of water, until all of them have been boiled.  Once the NY style blueberry bagels have been boiled, they are drained, just prior to baking.

Blueberry bagels, draining on baking sheet after boiling, just prior to baking.

Bake The New York Style Blueberry Bagels, Then Enjoy!

The blueberry bagels are baked at 425° F. for approximately 20 minutes. When done, the bagels will have risen, are baked all the way through, and are wonderfully golden brown on the outside. Bagels are then transferred to a wire rack to slightly cool, then served!

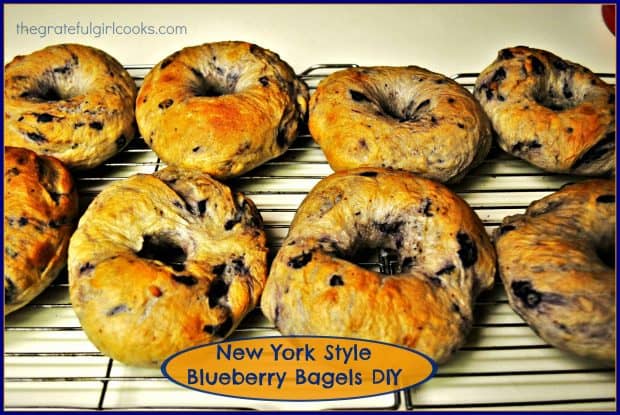
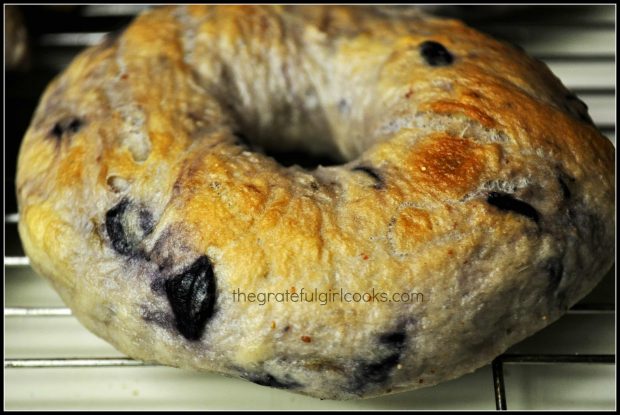
Voila! Here’s one of the hot, chewy New York Style Blueberry Bagels, fresh out of the oven! All that is left to do is slice it in half, toast it (if that’s how you like ’em), spread some cream cheese on it, and EAT IT! So good!

New York style blueberry bagels after baking, on wire rack

Trust me…if I can make delicious NY style blueberry bagels, so can YOU! Toast one, grab some cream cheese to spread on it, throw on a pot of coffee or tea… and ENJOY one of these delicious blueberry bagels! I love the crispy outside, combined with the chewy goodness on the inside. It tastes like an authentic New York-style bagel should! The blueberry bagels also freeze very well, which is an added bonus!

Thank you for stopping by today, and I hope you will come back soon for more delicious recipes. Have a GREAT day, and don’t forget to check out ALL my recipes in the Recipe Index, located at the top of the page!

Interested In More Recipes?

Thank you for visiting this website. I appreciate you using some of your valuable time to do soIf you’re interested, I publish a newsletter 2 times per month (1st and 15th) with all the latest recipes, and other fun info. I would be honored to have you join our growing list of subscribers, so you never miss a great recipe! 

There is a Newsletter subscription box on the top right side (or bottom) of each blog post, depending on the device you use, where you can easily submit your e-mail address (only) to be included in my mailing list.

You Can Also Find Me On Social Media:

Facebook page: The Grateful Girl Cooks!
Pinterest:
The Grateful Girl Cooks!
Instagram:
jbatthegratefulgirlcooks

 
Author's signature
 
Recipe Source: http://www.heathersfrenchpress.com/2014/01/ny-style-blueberry-bagels.html#more-2475  

↓↓ PRINTABLE RECIPE BELOW ↓↓

4 from 2 votes
New York Style Blueberry Bagels DIY
Prep Time
30 mins
Cook Time
20 mins
INACTIVE Prep Time (dough rising)
2 hrs
Total Time
2 hrs 50 mins
 
It's easy to make chewy, delicious, authentic New York Style Blueberry Bagels from scratch! Grab the cream cheese and enjoy this classic treat!
Category: Breakfast
Cuisine: American
Keyword: blueberry bagels
Servings: 8 servings
Calories Per Serving: 221 kcal
Author: JB @ The Grateful Girl Cooks!
Ingredients
  • 1 (0.25 ounce) package (envelope) active dry yeast (2¼ tsp.)
  • 2 Tablespoons sugar
  • 1 1/4 cups warm water (divided)
  • 3 1/2 cups all-purpose flour
  • 1 1/2 teaspoons salt
  • 1 cup blueberries tossed in additional 1/4 cup AP flour
Instructions
  1. In a small bowl, dissolve yeast and sugar in ½ cup of warm water. Let rest for 5 minutes. You should see little bubbles forming on the surface after 5 minutes or so, indicating yeast is "good" and "alive".

  2. In large bowl or bowl from a stand mixer, mix together salt and 3½ C. flour - making a "well" in the center of the flour. Add yeast mixture and remaining water to the flour mixture. Gently fold in blueberries that have been tossed in an additional ¼ cup of flour.

  3. Knead (either by hand or by using dough hook on your stand mixer) until dough becomes soft and elastic (this could take approx. 5 + minutes). Don't worry when you see dough turning a bit purple...it's all "good".

  4. Cover dough with a dishtowel, set bowl in a warm place and let dough rise until doubled (about 1 ½ hours).

  5. Turn dough out onto lightly floured surface (I even lightly dusted the dough with flour so it was easier to work with). Divide dough into 8 balls (shape and pull edges of dough to the underside of the ball for a smoother ball). With floured hands, take both of your thumbs and press into the center of each ball, forming a hole, and stretch the hole to form a bagel shape (I even pick up the bagel dough and enlarge the hole from the bottom). Once bagels have been formed, let dough rest for 30 minutes.

  6. While dough rests, preheat oven to 425°F. and bring a large stockpot to a rolling boil. Boil bagels 2-3 at a time in boiling water for 3-4 minutes (make sure they float to the top at the end). Remove bagels from water. and place on an ungreased baking sheet, allowing bagels to drain a bit.

  7. Bake bagels on same baking sheet at 425°F. for 20-24 minutes, or until golden brown on top. When done, transfer bagels to a wire rack to cool, then ENJOY!

Nutrition Facts
New York Style Blueberry Bagels DIY
Amount Per Serving (1 bagel)
Calories 221
% Daily Value*
Sodium 437mg19%
Potassium 72mg2%
Carbohydrates 47g16%
Fiber 1g4%
Sugar 4g4%
Protein 5g10%
Vitamin A 10IU0%
Vitamin C 1.8mg2%
Calcium 8mg1%
Iron 2.6mg14%
* Percent Daily Values are based on a 2000 calorie diet.

Here’s one more to pin on your Pinterest boards!It's easy to make chewy, delicious, authentic New York Style Blueberry Bagels from scratch! Grab the cream cheese and enjoy this classic treat!

Save

Save

Save

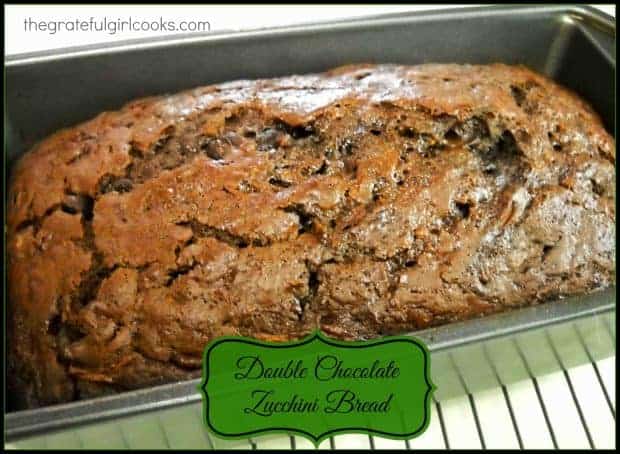
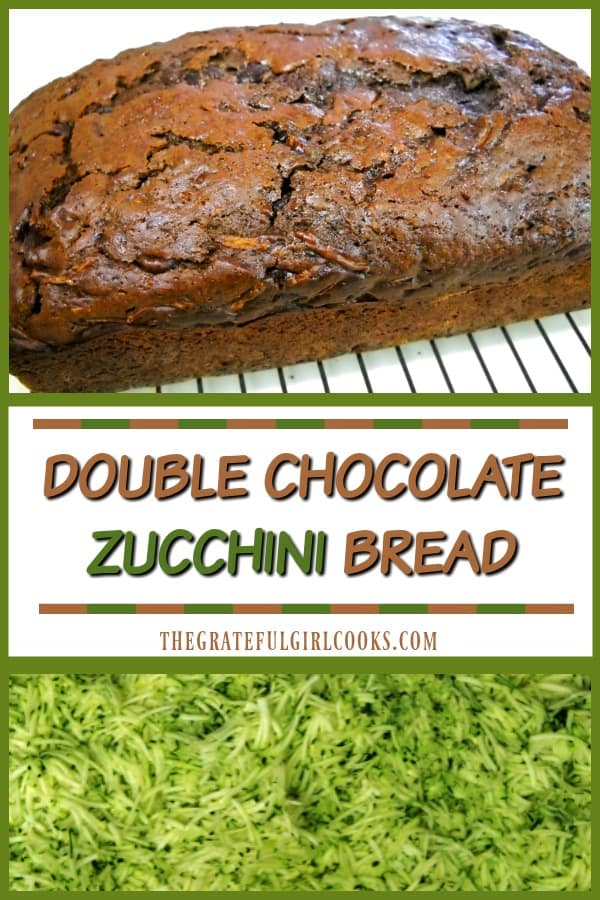
Double Chocolate Zucchini Bread

Have extra zucchini? Double Chocolate Zucchini Bread is a delicious chocolate loaf with a secret ingredient your kids will never know is in there…zucchini!Have extra zucchini? Double Chocolate Zucchini Bread is a delicious chocolate loaf with a secret ingredient your kids will never know is in there...zucchini!

I recently found this very easy recipe for Double Chocolate Zucchini Bread on Pinterest.  That same day I made a couple loaves, and my husband and I loved it! Two forms of chocolate are used… cocoa powder and chocolate chips!

Scroll Down For A Printable Recipe Card At The Bottom Of The Page

What To Do With A LOT Of Zucchini

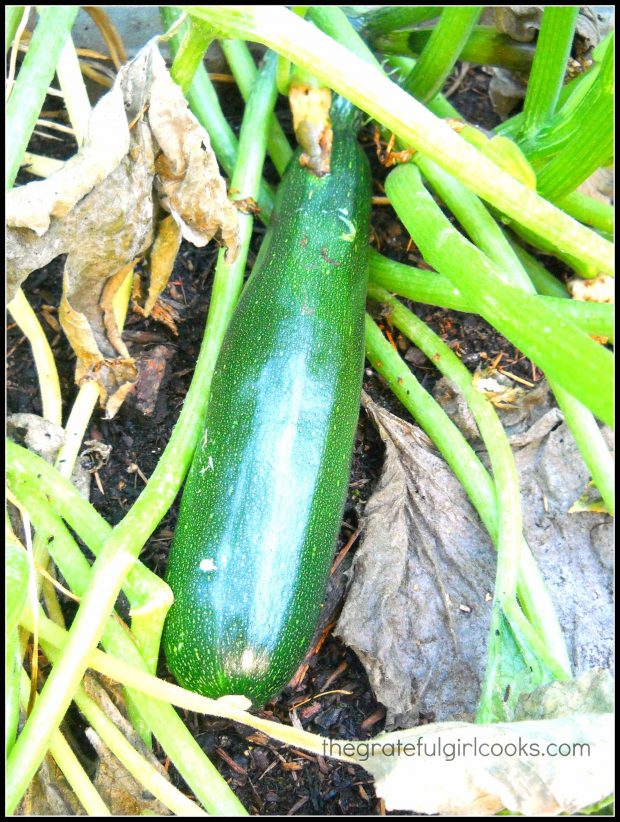
I really enjoy growing my own vegetables in raised beds in our backyard. This past summer, my zucchini plants decided to become “over-achievers”. I had zucchini coming out of my ears (nice problem, huh?).

This prolific garden abundance (even after giving plenty to my family and neighbors), forced me to search for new creative ways to prepare it. I’ve made Curried Zucchini Soup, and Italian Stuffed Zucchini already. We love “regular” zucchini bread, but this CHOCOLATE zucchini bread? Get outta here… that sounds so GOOD!

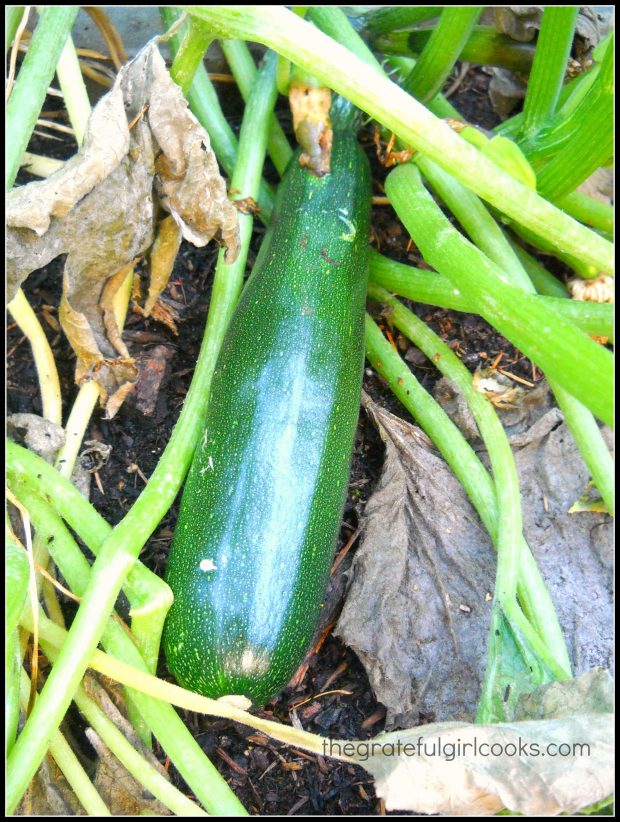
Growing zucchini in our garden to be used for baking chocolate zucchini bread.


Solution – Make Double Chocolate Zucchini Bread!

This delicious chocolate zucchini bread was a perfect solution. The recipe is completely EASY to prepare, and the results were wonderful! Looks like I found a new way to utilize some of our home-grown zucchini!

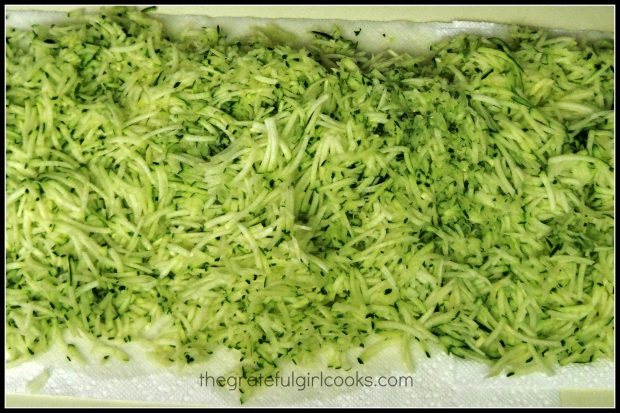
I think the “hardest” part, if you can call it “hard” was grating the zucchini, since I made a couple loaves! That’s a LOT of grated zucchini from the garden being used to make loaves of this wonderful chocolate zucchini bread! But since it was going to a good cause, it was worth all the grating.

Grated zucchini used to make loaves of double chocolate zucchini bread.

This sweet chocolate zucchini bread is decadently rich and chocolaty, and you’d never know it has zucchini in it! That makes it perfect for hiding the veggies, for little ones with picky palates! I hope you will give it a try. The chocolate zucchini bread is easy to prepare, and is really quite delicious! Thanks for stopping by, and come back again soon.

Looking For More Sweet Bread Loaf Recipes?

You can find all of my recipes in the Recipe Index, located at the top of the page. A few other family favorites include:

Interested In More Recipes?

Thank you for visiting this website. I appreciate you using some of your valuable time to do soIf you’re interested, I publish a newsletter 2 times per month (1st and 15th) with all the latest recipes, and other fun info. I would be honored to have you join our growing list of subscribers, so you never miss a great recipe!

There is a Newsletter subscription box on the top right side (or bottom) of each blog post, depending on the device you use, where you can easily submit your e-mail address (only) to be included in my mailing list.

You Can Also Find Me On Social Media:
Facebook page: The Grateful Girl Cooks!
Pinterest: The Grateful Girl Cooks!
Instagram: jbatthegratefulgirlcooks

Author's signature

Recipe Source: http://www.whatmegansmaking.com/2013/07/double-chocolate-zucchini-bread.html 

↓↓ PRINTABLE RECIPE BELOW ↓↓

0 from 0 votes
Double Chocolate Zucchini Bread
Prep Time
20 mins
Cook Time
1 hr 5 mins
Total Time
1 hr 25 mins
 
Have extra zucchini? Double Chocolate Zucchini Bread is a delicious chocolate loaf with a secret ingredient your kids will never know is in there...zucchini!
Category: Bread
Cuisine: American
Keyword: chocolate zucchini bread
Servings: 10 slices (1 loaf)
Calories Per Serving: 374 kcal
Author: JB @ The Grateful Girl Cooks!
Ingredients
  • 2 large eggs
  • 1/3 cup honey
  • 1/2 cup vegetable oil
  • 1/2 cup brown sugar
  • 1 teaspoon vanilla extract
  • 1 teaspoon salt
  • 1/2 teaspoon baking soda
  • 1/2 teaspoon baking powder
  • 1/3 cup unsweetened cocoa powder
  • 1 2/3 cups all-purpose flour
  • 2 cups shredded , unpeeled zucchini (gently pressed between paper towels to remove some moisture)
  • 1 cup semi-sweet chocolate chips
Instructions
  1. Preheat oven to 350 degrees; lightly grease an 8 1/2" x 4 1/2" loaf pan.
  2. In a large mixing bowl, beat together the eggs, honey, oil, sugar and vanilla.
  3. In separate bowl, whisk together the salt, baking powder, baking soda, cocoa and flour.
  4. Add flour mixture to the egg mixture, and stir well until combined.
  5. Stir in the zucchini and the chocolate chips.
  6. Pour batter into the prepared pan and bake for 65-75 minutes (oven temps vary), or until a toothpick inserted into the center of the loaf comes out clean. Remove pan from oven; transfer pan to a wire rack. Let cool for approx. 10-15 minutes before turning the bread out of the pan onto the rack. Cool bread completely before slicing. Enjoy!
Nutrition Facts
Double Chocolate Zucchini Bread
Amount Per Serving (1 slice)
Calories 374 Calories from Fat 171
% Daily Value*
Fat 19g29%
Saturated Fat 13g81%
Cholesterol 33mg11%
Sodium 308mg13%
Potassium 285mg8%
Carbohydrates 48g16%
Fiber 3g13%
Sugar 27g30%
Protein 5g10%
Vitamin A 105IU2%
Vitamin C 4.5mg5%
Calcium 45mg5%
Iron 2.9mg16%
* Percent Daily Values are based on a 2000 calorie diet.

Here’s one more to pin on your Pinterest boards!Have extra zucchini? Double Chocolate Zucchini Bread is a delicious chocolate loaf with a secret ingredient your kids will never know is in there...zucchini!


Save

Save

Save

Save

Save

Double Glazed Pumpkin Scones

Fall is here, and it’s time to enjoy delicious Double Glazed Pumpkin Scones (a Starbucks copycat recipe), with cinnamon spiced and powdered sugar glazes!Fall is here, and it's time to enjoy delicious Double Glazed Pumpkin Scones (a Starbucks copycat recipe), with cinnamon spiced and powdered sugar glazes!

I think you’re going to love these Double Glazed Pumpkin Scones! Our family sure loves them! The recipe (which I found online) is a copycat recipe of the classic Starbucks glazed pumpkin scones.

Easy and delicious, they are perfect for breakfast (or a quick afternoon treat with coffee or tea) any time of the year. HOWEVER… there’s something about Fall that screams “Bake these glazed PUMPKIN scones…now!”

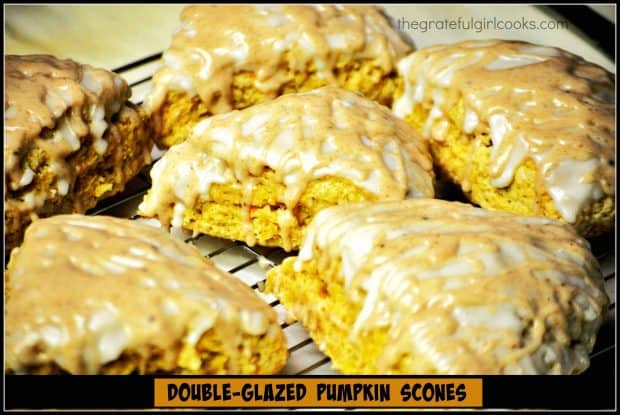
The scones are glazed with a powdered sugar glaze once done, THEN they are glazed again with a spiced glaze. This spiced glaze, with cinnamon, ginger, nutmeg and cloves has all the warm flavors associated with Fall.

Here’s how to make these double glazed pumpkin scones.

Scroll Down For A Printable Recipe Card At The Bottom Of The Page

Double Glazed Pumpkin Scones Are Perfect To Serve This Time Of Year

There’s just something about cool weather, warm jackets, fires in the fireplace, pumpkin, cinnamon, cloves and nutmeg that just “goes” together, right?

The traditional flavors of Fall are definitely present in these delicious scones! That’s why these double glazed PUMPKIN scones are perfect for this time of year!

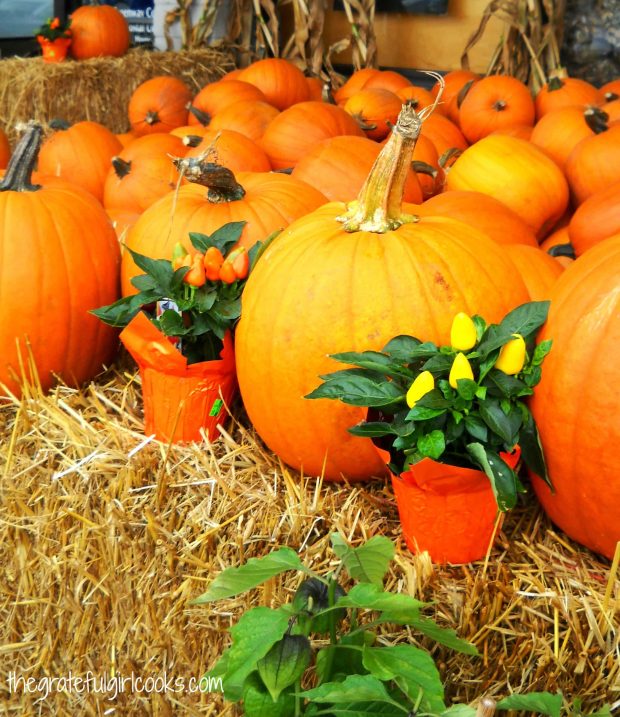
Pumpkin glazed scones go perfect with Fall... pumpkins are everywhere!

Double Glazed Pumpkin Scones Are Delicious!

These scones are ridiculously delicious! They are NOT crumbly and dry, and that’s a good thing because there’s nothing worse than that in a scone. 

The pumpkin scones are flavored with cinnamon, nutmeg, ginger and cloves. These traditional spices combine to create the unique “Fall” pumpkin spice flavor featured in these scones.

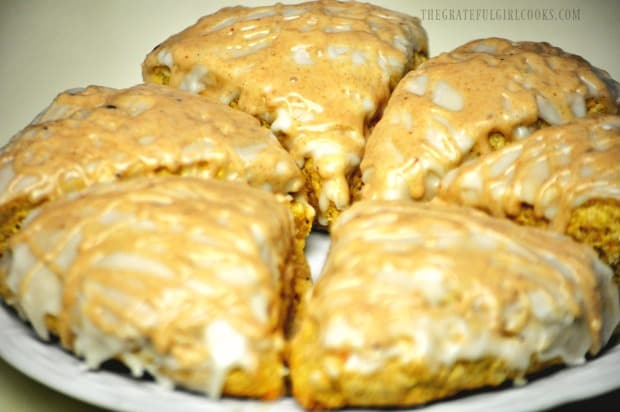
Double glazed pumpkin scones on a white plate, ready to serve!
Get comfy on your couch or in front of a nice fire in the fireplace and enjoy every bite of these Fall inspired glazed pumpkin scones!

If you’ve never made scones before, no worries. They are very easy to make, and you will love the yummy results!

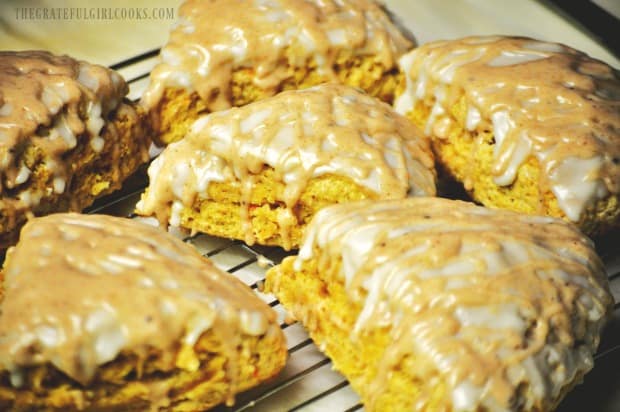
Double glazed pumpkin scones are ready to eat!

Scones, Scones… And More Scones!

I didn’t take a bunch of photos to document the process this time. If you’d like to see photos of the “basics” for making scones, you can see them in my recipe for Chocolate Chip Orange Scones.

I also have a LOTS of scone recipes listed in the Recipe Index, found at the top of each blog post. I’m confident there will be a scone recipe there you will enjoy! Here is a photo collage of several of them!

A collage of other scone recipes available on blog besides glazed pumpkin scones.

Hope you enjoy making these glazed pumpkin scones, and trust that you will enjoy them as much as we do. They’re so good!

Thank you for stopping by, and I invite you to come back again soon for more family-friendly recipes. Take care, and have a fantastic day!

Looking For More SCONE Recipes?

You can find ALL of my recipes in the Recipe Index, which is located at the top of the page. I have a great selection of scone recipes to check out, including:

Want More Recipes? Get My FREE Newsletter!

I publish a newsletter 2 times per month (1st and 15th) with lots of recipes, tips, etc..
Would you like to join our growing list of subscribers?

There is a Newsletter subscription box on the top right (or bottom) of each blog post, depending on the device you use.
You can submit your e-mail address there, to be added to my mailing list.

Find Me On Social Media:

Facebook page: The Grateful Girl Cooks!
Pinterest:
The Grateful Girl Cooks!
Instagram:
jbatthegratefulgirlcooks

Double-Glazed Pumpkin Scones / The Grateful Girl Cooks!Recipe Source: http://www.gonnawantseconds.com/2011/10/double-glazed-pumpkin-scones/

↓↓ PRINTABLE RECIPE BELOW ↓↓

0 from 0 votes
Double-Glazed Pumpkin Scones
Prep Time
10 mins
Cook Time
15 mins
Total Time
25 mins
 
Fall is here, and it's time to enjoy delicious Double Glazed Pumpkin Scones (a Starbucks copycat recipe), with cinnamon spiced and powdered sugar glazes!
Category: Breakfast
Cuisine: American
Keyword: glazed pumpkin scones
Servings: 6 scones
Calories Per Serving: 503 kcal
Author: JB @ The Grateful Girl Cooks!
Ingredients
For Scones:
  • 2 cups flour
  • 7 Tablespoons granulated sugar
  • 1 Tablespoon baking powder
  • 1/2 teaspoon salt
  • 1/2 teaspoon nutmeg
  • 1/4 teaspoon cloves
  • 1/4 teaspoon ground ginger
  • 6 Tablespoons cold , unsalted butter
  • 1/2 cup canned pumpkin
  • 3 Tablespoons half and half
  • 1 large egg
For powdered sugar glaze #1:
  • 1 cup + 1 TBSP powdered sugar
  • 2 Tablespoons milk
For spiced glaze #2:
  • 1 cup + 3 TBSP powdered sugar
  • 2 Tablespoons milk
  • 1/4 teaspoon cinnamon
  • 1/8 teaspoon nutmeg
  • 1 pinch ground ginger
  • 1 pinch ground cloves
Instructions
  1. Preheat oven to 425 degrees. Lightly oil (or spray) a baking sheet with parchment paper. Combine flour, sugar, baking powder, salt and spices in a large bowl. Using a pastry blender, or fork, (or just slightly pulse these ingredients in a food processor), cut the butter into the dry ingredients until mixture is crumbly and there are no obvious big chunks of butter. Set the bowl aside.
  2. In a separate bowl, whisk together the pumpkin, half and half, and egg. Fold the wet ingredients into the dry ingredients. Mix together, and then form the dough into a ball.
  3. Pat out the dough onto a lightly floured surface and form into a circle, rolling or shaping it out to about 1 inch high and approx. 8 inches wide. Using a pizza cutter or a long, sharp knife (I'm a knife girl, myself), slice dough circle in half, width-wise, then equally cut each half into 3 pieces (just like cutting a pie, right?). You should end up with 6 scones. (*If you want some really small, light-bite scones: divide the dough ball in half and form two wedges, then cut as usual.)
  4. Bake scones at 425 degrees for 14-16 minutes on prepared baking sheet (*slightly less time if making the much smaller scones). Scones should begin to turn light brown. Remove from oven and place on a wire rack to cool. Add glaze after scones have cooled completely. Serves 6. Enjoy!
  5. To make Glaze #1 (plain glaze): Mix the powdered sugar and 2 TBSP milk till smooth. When scones have cooled, use a pastry brush to "paint" the glaze over the top of each scone. Let dry (harden) slightly.
  6. To make Glaze #2 (spiced glaze): Mix the ingredients for the spiced glaze together. Drizzle this thicker glaze over the plain glaze and allow the glaze to dry (harden) before serving (approx. 1 hour). It is easy to drizzle this glaze with a whisk (or a squirt bottle works fantastic!).
Recipe Notes

If you want smaller scones, there are 2 options. 1) Slice dough wedge into 8 wedges before baking, OR 2) Divide dough into 2 rounds, then cut each one into 6 small scones. If cooking the much smaller portions (option 2), remember to adjust baking time... they will take less time to bake.

Nutrition Facts
Double-Glazed Pumpkin Scones
Amount Per Serving (1 scone (1/6th of total))
Calories 503 Calories from Fat 126
% Daily Value*
Fat 14g22%
Saturated Fat 8g50%
Cholesterol 61mg20%
Sodium 283mg12%
Potassium 321mg9%
Carbohydrates 89g30%
Fiber 2g8%
Sugar 54g60%
Protein 6g12%
Vitamin A 3600IU72%
Vitamin C 0.8mg1%
Calcium 127mg13%
Iron 2.6mg14%
* Percent Daily Values are based on a 2000 calorie diet.

Here’s one more to pin on your Pinterest boards!Fall is here, and it's time to enjoy delicious Double Glazed Pumpkin Scones (a Starbucks copycat recipe), with cinnamon spiced and powdered sugar glazes!


Save

Save

Save

Save

Save

Save

Save

Save

Save

Orange Almond Biscotti

Orange Almond Biscotti are crispy Italian inspired cookies, with a semi-sweet chocolate base, and chocolate drizzle on top. They are perfect to dunk in coffee!Orange Almond Biscotti are crispy Italian inspired cookies, with a semi-sweet chocolate base, and chocolate drizzle on top. Perfect to dunk in coffee!

Do you like biscotti?  I REALLY love biscotti, that crispy little “breakfast cookie” Dunking biscotti unceremoniously and without apology into my steaming, hot cup of morning coffee is a good thing! Ahhhh- life’s simple pleasures! You will love the taste of these Orange Almond Biscotti!

I found this orange almond biscotti recipe online, and they were a snap to make. These Italian cookies are crispy, and taste great with a nice strong cup of coffee! A good flavor combination of orange and chocolate makes these one of my “go to” biscotti recipes.

I’ve made these crisp biscotti many times, and have given many plates of them as gifts to my unsuspecting good friends and neighbors. They are always a hit.

Scroll Down For A Printable Recipe Card At The Bottom Of The Page

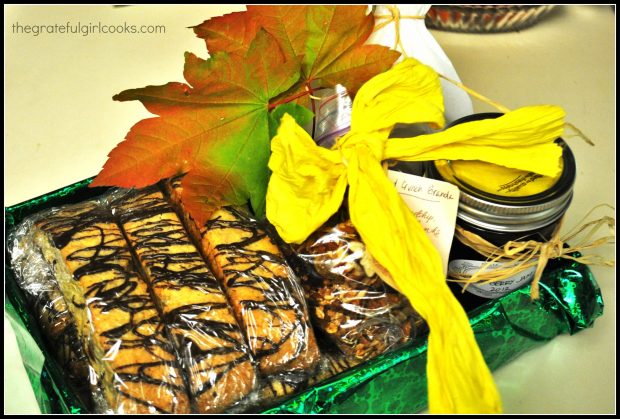
Some of the biscotti were wrapped and given to friends celebrating the arrival of Fall!
Decorating The Orange Almond Biscotti

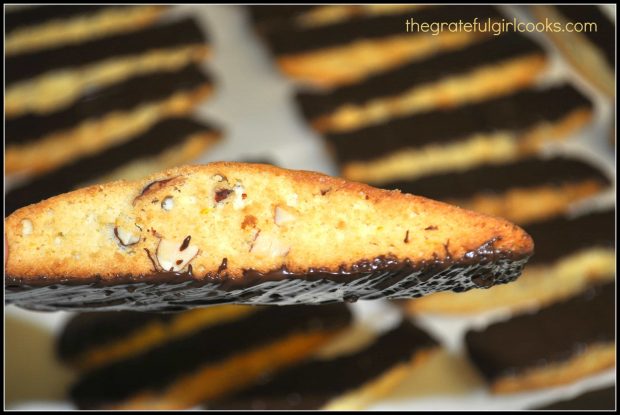
Dipping the bottoms of the baked and cooled biscotti into melted semi-sweet chocolate makes these cookies perfect! Once cooked, place the orange almond biscotti on waxed paper to harden the chocolate. For a nice touch, drizzle some of the melted chocolate over the top of the biscotti, to finish them off.

You can see the melted chocolate on the bottom of the orange almond biscotti.
Chocolate On The Bottom AND Top Of These Biscotti

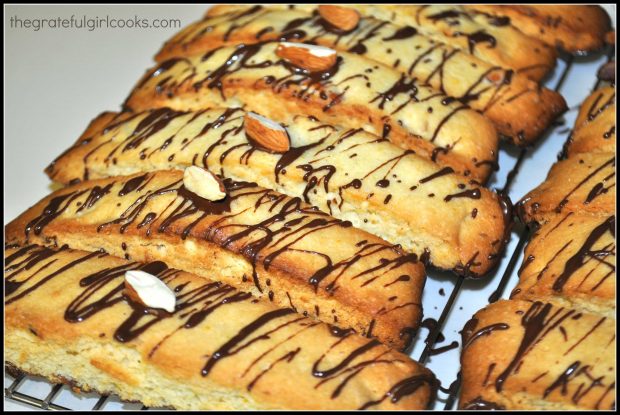
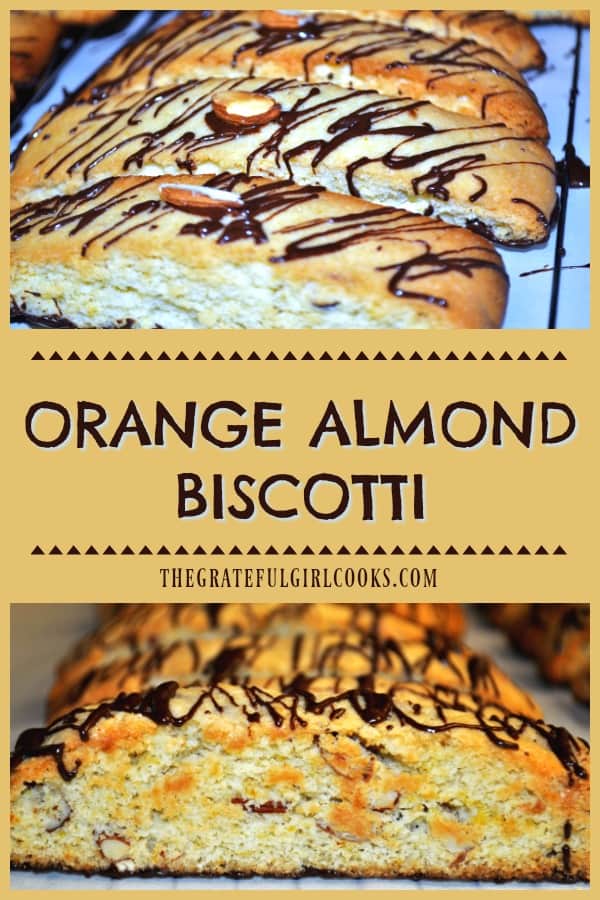
Here is a photo of the last batch of orange almond biscotti I made. I hope you enjoy these delicious little crispy cookies, too! And by all means, dunk them in a mug of coffee before each bite!

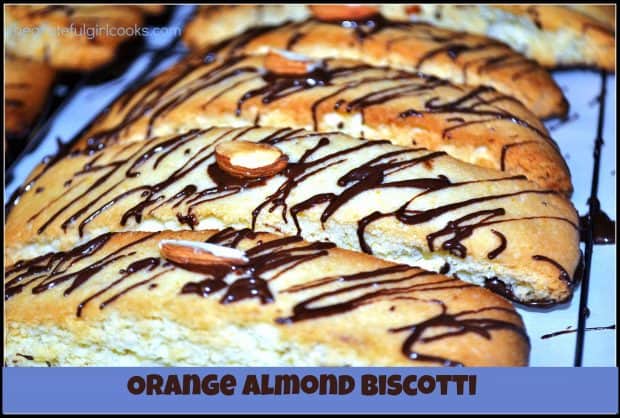
Orange almond biscotti are drizzled with melted chocolate on top.See? There is chocolate on the bottom AND drizzled on top of these cookies to make them look all cute and fancy! YUMMO!

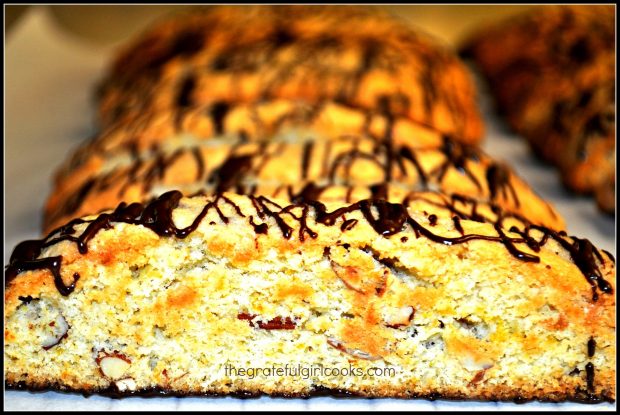
A look at the side of one orange almond biscotti... you can see the almonds!
Hope you enjoy this recipe for orange almond biscotti! If you enjoy it, be sure to also check out my recipe for Pumpkin Spice Latte Biscotti! Have a wonderful day, friends. Thanks for stopping by. Don’t forget to check out the Recipe Index at the top of the page where you can find ALL of my recipes. Take care.

Interested In More Recipes?

Thank you for visiting this website. I appreciate you using some of your valuable time to do soIf you’re interested, I publish a newsletter 2 times per month (1st and 15th) with all the latest recipes, and other fun info. I would be honored to have you join our growing list of subscribers, so you never miss a great recipe!
There is a Newsletter subscription box on the top right side (or bottom) of each blog post, depending on the device you use, where you can easily submit your e-mail address (only) to be included in my mailing list.

You Can Also Find Me On Social Media:
Facebook page: The Grateful Girl Cooks!
Pinterest: The Grateful Girl Cooks!
Instagram: jbatthegratefulgirlcooks

Author's signatureRecipe Source: http://bakingbites.com/2011/10/orange-almond-biscotti/ 

↓↓ PRINTABLE RECIPE BELOW ↓↓

0 from 0 votes
Orange Almond Biscotti
Prep Time
30 mins
Cook Time
55 mins
Total Time
1 hr 25 mins
 

Orange Almond Biscotti are crispy Italian inspired cookies, with a semi-sweet chocolate base, and chocolate drizzle on top. Perfect to dunk in coffee!

Category: Cookie
Cuisine: American
Keyword: orange almond biscotti
Servings: 24 (approx. 2 dozen)
Calories Per Serving: 264 kcal
Author: JB @ The Grateful Girl Cooks!
Ingredients
  • 3 1/2 cups all-purpose flour
  • 1 1/2 Tablespoons baking powder
  • 1/2 teaspoon salt
  • 1 cup butter , room temperature
  • 1 1/2 cups granulated sugar
  • 3 large eggs
  • 1 large egg white
  • 1 teaspoon vanilla extract
  • 2/3 cup sliced almonds , toasted (cook in skillet, stir constantly on low,. 2-3 minutes)
  • 3 Tablespoons fresh orange zest (from approx. 2 oranges)
To make chocolate glaze for bottoms of biscotti and drizzle glaze:
  • 1 cup semi-sweet chocolate chips
  • 1 Tablespoon vegetable shortening
Instructions
  1. Preheat oven to 375 degrees. Line a large baking sheet with parchment paper.
  2. In a medium bowl, whisk together the flour, baking powder and salt.
  3. In a large bowl, cream together butter and sugar till fully mixed and light. Beat in the eggs, one at a time, followed by the egg white and vanilla extract.
  4. With the mixer on a slow speed, gradually add in the flour mixture, blending just until flour is fully mixed in. Stir in the orange zest and the toasted almonds.
  5. Divide the dough in half. With lightly floured hands, shape one half of the dough into a "log", about 2 1/2 inches high and 8-10 inches long (log should be fairly narrow) on the prepared cookie sheet (dough will be sticky, so make sure you flour your hands to work with the dough). Prepare the other half of the dough in the same manner, but make sure to use another parchment-lined cookie sheet, as the dough will "spread a bit".
  6. Place the cookie sheets in the oven and bake for 30 minutes (or until the biscotti are dark golden and set. The biscotti should spring back slightly when lightly pressed in the center. Remove from oven and place on a wire rack to cool.
  7. Allow the dough logs to cool on a wire rack for approximately 20 minutes, then slice into cookies 1/2-3/4 inch thick, using a sharp knife. Arrange the biscotti upright on baking sheets. Lower oven temperature to 350 degrees. Put biscotti back into oven a second time and bake for 20-25 minutes, until they are lightly browned on the sides and slightly crisp. The top and bottom of the biscotti should be relatively dark. Remove from oven and cool completely on a wire rack.
  8. If you want to dip the bottom of the biscotti or drizzle them with chocolate: Melt 1 cup chocolate chips (or more, as needed) in a microwave-safe bowl with 1 T. vegetable shortening in the microwave for approx. 1 to 1 1/2 minutes, stirring every 30 seconds so the chocolate doesn't burn, till smooth).
  9. When biscotti have cooled completely, I dip the bottom of the biscotti (or "paint" on the chocolate using a pastry brush) in melted semi-sweet chocolate , then place on parchment paper or foil until chocolate has hardened. Then I drizzle the chocolate on top of the biscotti. I usually end up using a pastry brush to brush the melted chocolate onto the bottom of the biscotti and a honey dipper to drizzle the glaze over the top of the biscotti. Set the biscotti aside and let the chocolate complete harden, then store finished biscotti in an airtight container till you're ready to dunk 'em in your coffee. Enjoy!
Nutrition Facts
Orange Almond Biscotti
Amount Per Serving (1 biscotti)
Calories 264 Calories from Fat 126
% Daily Value*
Fat 14g22%
Saturated Fat 7g44%
Cholesterol 41mg14%
Sodium 128mg6%
Potassium 179mg5%
Carbohydrates 32g11%
Fiber 2g8%
Sugar 15g17%
Protein 4g8%
Vitamin A 275IU6%
Vitamin C 1mg1%
Calcium 57mg6%
Iron 1.6mg9%
* Percent Daily Values are based on a 2000 calorie diet.

Here’s one more to pin on your Pinterest boards!Orange Almond Biscotti are crispy Italian inspired cookies, with a semi-sweet chocolate base, and chocolate drizzle on top. Perfect to dunk in coffee!


Save

Save

Save

Swedish Pancakes

Swedish pancakes are a delicious breakfast treat! Thin crepe-like pancakes are buttered, dusted with powdered sugar and a dollop of raspberry jam.Swedish pancakes are a delicious breakfast treat! Thin crepe-like pancakes are buttered, dusted with powdered sugar and a dollop of raspberry jam. 

 I found this recipe for Swedish Pancakes online a couple of years ago, and it quickly became a favorite to fix when we have out of town guests staying in our home.

The original recipe calls for Lingonberry jam, which is the true Swedish way to serve these. Since I pick fresh raspberries each summer at a local berry farm, then make my own jam, I always seem to have plenty of RASPBERRY jam around. That is what I use for serving with the pancakes. We LOVE these Swedish pancakes with the fresh taste of raspberries (good old Pacific Northwest raspberries).

Scroll Down For A Printable Recipe Card At The Bottom Of The Page

Are Swedish Pancakes Hard To Make?

These pancakes are fairly easy to make. Once you “master” the cooking technique, these will be easy peasy. Really. Batter is swirled in a skillet to form a very thin “crepe-like” pancake and cooked briefly on both sides until done.  Pancakes are then folded, and topped with jam, dusted with powdered sugar and served.

Swedish pancakes are always a big hit with our guests (and my always hungry husband). I hope you enjoy them, as well! Ya, you betcha! (said with a Swedish accent, of course).

Here’s a picture of the last batch of Swedish pancakes I made…yum.

Several Swedish pancakes on plate with link sausage on the side.
 
Be sure to try these amazing tasting Swedish pancakes. They really are a delicious breakfast treat. Hope you have a great day, and please come back again soon!

Looking For More PANCAKE Recipes?

You can find all of my recipes in the Recipe Index, located at the top of the page. A few pancake recipes you might enjoy include:

Interested In More Recipes?

Thank you for visiting this website. I appreciate you using some of your valuable time to do soIf you’re interested, I publish a newsletter 2 times per month (1st and 15th) with all the latest recipes, and other fun info. I would be honored to have you join our growing list of subscribers, so you never miss a great recipe!
There is a Newsletter subscription box on the top right side (or bottom) of each blog post, depending on the device you use, where you can easily submit your e-mail address (only) to be included in my mailing list.

You Can Also Find Me On Social Media:
Facebook page: The Grateful Girl Cooks!
Pinterest: The Grateful Girl Cooks!
Instagram: jbatthegratefulgirlcooks

Author's signature


Recipe Source: http://www.alaskafromscratch.com/2012/03/10/swedish-pancakes/

↓↓ PRINTABLE RECIPE BELOW ↓↓

0 from 0 votes
Swedish Pancakes
Prep Time
10 mins
Cook Time
15 mins
Total Time
25 mins
 

Swedish pancakes are a delicious breakfast treat! Thin crepe-like pancakes are buttered, dusted with powdered sugar and a dollop of raspberry jam. 

Category: Breakfast
Cuisine: American, Swedish
Keyword: Swedish pancakes
Servings: 12 crepes
Calories Per Serving: 160 kcal
Author: JB @ The Grateful Girl Cooks!
Ingredients
  • 5 eggs
  • 1 cup milk
  • 3 TBSP. sour cream
  • 1 1/4 cup all-purpose flour
  • 1/2 tsp. salt
  • 2 TBSP granulated sugar
  • Oil , for the skillet
  • Raspberry Jam (or jam of your choice), for serving
  • Melted butter , for serving
  • Powdered sugar , for a dusting on top of the cooked crepes
Instructions
  1. In a blender, blend eggs, milk and sour cream together.
  2. Add flour, salt, and sugar to the blender. Blend until completely smooth. The batter will be thin and pourable.
  3. Heat a medium-sized frying pan over medium heat. With a pastry brush, oil the pan with about a teaspoon of oil (you may need to add more later).
  4. When the pan and the oil are hot, pour 1/4 cup of batter onto the center of the pan. Quickly, but gently lift and swirl the pan to spread the batter to the edges. The batter should sizzle some in the oil if the pan is hot enough. Cook about 60-90 seconds, until the bottom begins to turn golden, then carefully flip the thin pancake over. Cook another 30-60 seconds until the other side begins to brown. Remove from skillet. Fold in half, then in half again to make a triangle. Set the pancake aside and repeat with remaining batter.
  5. To Serve: Place folded Swedish pancakes onto plates. Lightly brush melted butter onto tops, then dust with sifted powdered sugar, and put a generous dollop of Raspberry jam in the middle. Enjoy!
Nutrition Facts
Swedish Pancakes
Amount Per Serving (1 crepe (w/ butter, jam, powdered sugar))
Calories 160 Calories from Fat 54
% Daily Value*
Fat 6g9%
Saturated Fat 4g25%
Cholesterol 75mg25%
Sodium 153mg7%
Potassium 78mg2%
Carbohydrates 20g7%
Sugar 8g9%
Protein 4g8%
Vitamin A 215IU4%
Vitamin C 0.6mg1%
Calcium 41mg4%
Iron 1mg6%
* Percent Daily Values are based on a 2000 calorie diet.

Here’s one more to pin on your Pinterest boards!Swedish pancakes are a delicious breakfast treat! Thin crepe-like pancakes are buttered, dusted with powdered sugar and a dollop of raspberry jam. 


Save

Save

Orange Cheese Danish Pastry

Enjoy a delicious Orange Cheese Danish Pastry, a buttery, orange-glazed treat filled with orange-flavored cream cheese and ricotta. Recipe makes 2 pastries!Enjoy a delicious Orange Cheese Danish Pastry, a buttery, orange-glazed treat filled with orange-flavored cream cheese and ricotta. Recipe makes 2!
SERIOUSLY- Some mornings you just don’t want a nutritious, healthy breakfast. Period. I know that’s how it is for me some days…I want to eat a healthy breakfast, but… you know how it is. That’s how this recipe for Orange Cheese Danish Pastry came about.

You know how it is at times when you wake up and all you want is a humongous cup of steaming hot coffee and something sweet and “not so good for you”?

It was that way for me one morning, so I went on a search for something tasty that would rock my world (in a “breakfast-y” kind of way), and found this recipe.

Scroll Down For A Printable Recipe Card At the Bottom Of The Page

How This Orange Cheese Danish Pastry Is Made

I don’t have a lot of photos (sorry-my bad), but the process for making this delicious pastry is fairly simple. An orange-flavored cream cheese and ricotta cheese filling is mixed with other ingredients.

This creamy mixture is then spread down the middle of puff pastry sheets. The pastry dough is sliced and “decoratively draped over the filling in a cross-wise “weaving” sort of way.

The pastries (the recipe make TWO) are then baked until golden brown, and then glazed with an orange-flavored icing. Sliced almonds are also sprinkled over the top! Once the glaze firms up, this incredible tasting breakfast treat is ready to slice and EAT!

The orange cheese danish pastry is topped with glaze and sliced almonds when done.

This orange cheese danish pastry is fairly easy to make, and is really tasty! Why not give it a try…I think you will be surprised at how delicious it is! Hope you enjoy this Orange Cheese Danish Pastry! Have a great day.

Looking For More PASTRY Recipes?

You can find all of my recipes in the Recipe Index, located at the top of the page. A few favorite pastry recipes include:

Interested In More Recipes?

Thank you for visiting this website. I appreciate you using some of your valuable time to do soIf you’re interested, I publish a newsletter 2 times per month (1st and 15th) with all the latest recipes, and other fun info. I would be honored to have you join our growing list of subscribers, so you never miss a great recipe!
There is a Newsletter subscription box on the top right side (or bottom) of each blog post, depending on the device you use, where you can easily submit your e-mail address (only) to be included in my mailing list.

You Can Also Find Me On Social Media:
Facebook page: The Grateful Girl Cooks!
Pinterest: The Grateful Girl Cooks!
Instagram: jbatthegratefulgirlcooks

Author's signature

Recipe adapted from: https://sites.google.com/site/thecomfortofcookingrecipes/orange-cheese-danish-pastry

0 from 0 votes
Orange Cheese Danish Pastry
Prep Time
30 mins
Cook Time
25 mins
Total Time
55 mins
 

Enjoy a delicious Orange Cheese Danish Pastry, a buttery, orange-glazed treat filled with orange-flavored cream cheese and ricotta. Recipe makes 2!

Category: Breakfast
Cuisine: American
Keyword: orange cheese danish
Servings: 10
Calories Per Serving: 428 kcal
Author: JB @ The Grateful Girl Cooks!
Ingredients
  • 4 ounces ricotta cheese
  • 4 ounces cream cheese
  • 1/3 cup sugar
  • 1 large egg
  • 2 Tablespoons butter , softened
  • 1 Tablespoons all-purpose flour
  • 2 teaspoons grated orange rind
  • 1/2 teaspoon vanilla
  • 2 sheets frozen puff pastry , thawed (1 lb.)
ICING:
  • 1/2 cup confectioners sugar (powdered)
  • 1 Tablespoon orange juice
GARNISH:
  • 2 Tablespoon sliced almonds (or you can use walnuts or pecans)(optional)
Instructions
  1. Combine cheeses, sugar, egg, butter, flour, orange rind and vanilla in a large bowl. Beat with a whisk, or an electric mixer on medium speed, until well blended.
  2. Carefully unfold the pastry sheet into a rectangle; place it on a baking sheet.
  3. With a sharp knife make 2-inch deep cuts at 1-inch intervals on the long sides of the pastry. Spread 1/2 of the cheese mixture down the center 3 inches of the pastry.
  4. Crisscross strips over the filling, alternating sides and bringing the strips all the way across the filling.
  5. Repeat process for the second pastry.
  6. Bake in a preheated 400 degree oven approximately 25 minutes or until the bottom of the pastry is golden brown. Remove from oven and cool on a wire rack.
  7. While pastry is cooling down, sift confectioners sugar into the orange juice in a bowl. Mix until the icing is smooth.
  8. Drizzle the mixture over the pastries, then sprinkle with sliced almonds.
  9. Serve and Enjoy!
Nutrition Facts
Orange Cheese Danish Pastry
Amount Per Serving (1 slice (1/10 of total))
Calories 428 Calories from Fat 252
% Daily Value*
Fat 28g43%
Saturated Fat 10g63%
Cholesterol 41mg14%
Sodium 195mg8%
Potassium 85mg2%
Carbohydrates 37g12%
Fiber 1g4%
Sugar 14g16%
Protein 7g14%
Vitamin A 300IU6%
Vitamin C 2.1mg3%
Calcium 53mg5%
Iron 1.6mg9%
* Percent Daily Values are based on a 2000 calorie diet.

Here’s one more to pin on your Pinterest boards!Enjoy a delicious Orange Cheese Danish Pastry, a buttery, orange-glazed treat filled with orange-flavored cream cheese and ricotta. Recipe makes 2!


Save

Save

Save

Save

Save