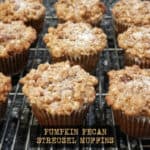
Pumpkin Pecan Streusel Muffins are full of pumpkin spice flavor and topped with a buttery pecan streusel. You’ll love these yummy muffins!

Fall is the time for all things PUMPKIN! I have been making pumpkin muffins for years, but today I want to share our absolute FAVORITE recipe (found online) for these delicious breakfast treats. Full of flavor from pumpkin pie spices and topped with a decadent streusel topping, they are a real taste treat! Here’s how to make them:
Scroll Down For A Printable Recipe Card At The Bottom Of The Page
Prepare The Muffin Batter
Before mixing the batter, remember to preheat your oven to 375°F so it’s hot when the muffins are ready to bake. To make the batter, place pumpkin puree, milk, eggs, vanilla and butter (melted but cooled) in a large mixing bowl. Whisk these ingredients well, until combined and smooth. These are your “wet” ingredients.


In a separate bowl, combine all purpose flour, granulated sugar, pumpkin pie spice, baking soda and salt, and stir to combine. These are your “dry” ingredients. Stir or whisk the dry ingredients a little at a time into the wet ingredients. Continue to stir or whisk only until the ingredients have been incorporated into the batter. Don’t overmix!.


Place 12 paper-liners into a standard sized muffin tin. I like to give each paper liner a little shot of non-stick baking spray before filling them with batter (a little trick a former professional baker told me over 25 years ago). Fill each muffin cup about halfway with batter, dividing the batter evenly. Set the pan aside and make the streusel topping.

Make The Pecan Streusel Topping
In a small bowl, combine flour, brown sugar, granulated sugar, chopped pecans, pumpkin pie spice, melted butter and salt. Once mixed together with a spoon or fork, it will be a crumbly streusel topping for your muffins.
If you don’t have any pumpkin pie spice mix in your pantry, you can use my simple recipe to make your own. It will make a bit more than you need for this recipe, so you can have extra for the NEXT batch of muffins! Get the pumpkin pie spice mix recipe HERE.


Time To Bake The Pumpkin Pecan Streusel Muffins!
Top each of the muffins with the pecan streusel, dividing it evenly between the 12 muffins. Now they’re ready to bake in your preheated oven. Bake the muffins for 20 minutes at 375°F.
When done, the muffins will be nicely browned, and a toothpick inserted into the top of a muffin should come out free of batter. Remove the muffins, and lightly sprinkle sifted powdered sugar over the top of each muffin. Transfer to a wire rack to finish cooling, and then they’re ready to serve and enjoy!


Who Wants A Yummy Muffin?
After the muffins have cooled slightly, they are ready to gobble up. We think they taste fantastic just slightly warm or at room temperature! Peel back those muffin paper-liners, and take a big bite.
These muffins are AMAZING! My husband says they are some of the best muffins he’s ever had (and he’s eaten a LOT of muffins over the years). Hope you enjoy them just as much as we do. YUM! They truly taste wonderful any time of year, but we especially love their warm pumpkin spice flavor during FALL!


I am confident you will really love these delicious Pumpkin Pecan Streusel Muffins. They are absolutely wonderful! Thanks for stopping by, and I sincerely invite you to come back soon for more family-friendly recipes. Have a great day.
Looking For More MUFFIN Recipes?
You can find ALL of my recipes in the Recipe Index, which is located at the top of the page. I have lots of delicious muffin recipes for you to enjoy, including:
Interested In More Recipes?
Thank you for visiting this website. I appreciate you using some of your valuable time to do so. If you’re interested, I publish a newsletter 2 times per month (1st and 15th) with all the latest recipes, and other fun info. I would be honored to have you join our growing list of subscribers, so you never miss a great recipe!
There is a Newsletter subscription box on the top right side (or bottom) of each blog post, depending on the device you use, where you can easily submit your e-mail address (only) to be included in my mailing list.
You Can Also Find Me On Social Media:
Facebook page: The Grateful Girl Cooks!
Pinterest: The Grateful Girl Cooks!
Instagram: jbatthegratefulgirlcooks

Original recipe source: Kathi and Rachel (a mother-daughter team), at laughingspatula.com/pumpkin-pecan-crunch-muffins/
Pumpkin Pecan Streusel Muffins are full of pumpkin spice flavor and topped with a buttery pecan streusel. You'll love these yummy muffins!
- 1½ cups all purpose flour
- ¾ cup granulated sugar
- 2 teaspoons pumpkin pie spice (see NOTES below to make your own)
- 1 teaspoon baking soda
- ½ teaspoon salt
- 1 cup pumpkin puree NOT pumpkin pie filling
- 2 large eggs
- ¼ cup milk
- ⅓ cup butter (melted and cooled) = 5½ Tablespoons
- 1 teaspoon vanilla extract
- 1 cup all purpose flour
- ½ cup brown sugar
- ½ cup chopped pecans can substitute walnuts
- 2 Tablespoons granulated sugar
- 1 teaspoon pumpkin pie spice (see NOTES below for substitution)
- ¼ teaspoon salt
- ⅓ cup butter, melted = 5½ Tablespoons
Preheat oven to 375°F.
Place pumpkin puree, milk, eggs, vanilla and melted (but cooled) butter in a large mixing bowl. Whisk well, until combined/smooth.
In a separate bowl, combine flour, sugar, pumpkin pie spice, baking soda and salt; stir to combine. Stir or whisk these ingredients a little at a time into the pumpkin mixture. Stir or whisk only until ingredients have been incorporated into the batter. Don't overmix!
Place 12 paper-liners into a standard sized muffin tin. Spray paper liners with non-stick baking spray, if desired. Fill each muffin cup about halfway with batter, dividing the batter evenly. Set pan aside; make streusel topping.
MAKE STREUSEL TOPPING: In a small bowl, combine flour, brown sugar, granulated sugar, pecans, pumpkin spice, melted butter and salt. Streusel topping will be fairly crumbly. Top muffins with streusel, dividing evenly.
Bake muffins for 20 minutes at 375°F. When done, muffins will be browned on top and a toothpick inserted into the top of a muffin should come out batter-free. Remove from oven; lightly sprinkle sifted powdered sugar on top of each muffin. Transfer to wire rack to finish cooling, then serve and enjoy!
NOTES: Don't have any pumpkin pie spice for this recipe? Make your own! HERE is the recipe for a handy mix (this makes extra), so you will have it handy. https://www.thegratefulgirlcooks.com/pumpkin-pie-spice-mix/
Here’s one more to pin on your Pinterest boards!


 in only a few minutes! Ingredients for this fluffy German pancake are blended, then baked in a skillet! / The Grateful Girl Cooks!")


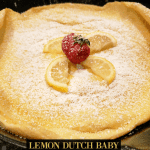
 in only a few minutes! Ingredients for this fluffy German pancake are blended, then baked in a skillet! / The Grateful Girl Cooks!")


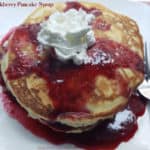

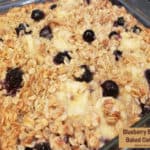
 are filled with yummy raspberries, blueberries, blackberries, cream cheese and maple syrup, then baked. / The Grateful Girl Cooks!")


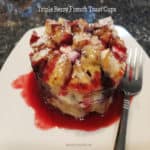
 are filled with yummy raspberries, blueberries, blackberries, cream cheese and maple syrup, then baked. / The Grateful Girl Cooks!")
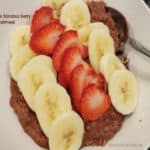
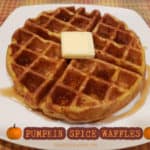
 in under 30 minutes for a yummy breakfast or snack! / The Grateful Girl Cooks!")


 in under 30 minutes for a yummy breakfast or snack! / The Grateful Girl Cooks!")


