Category: Cakes

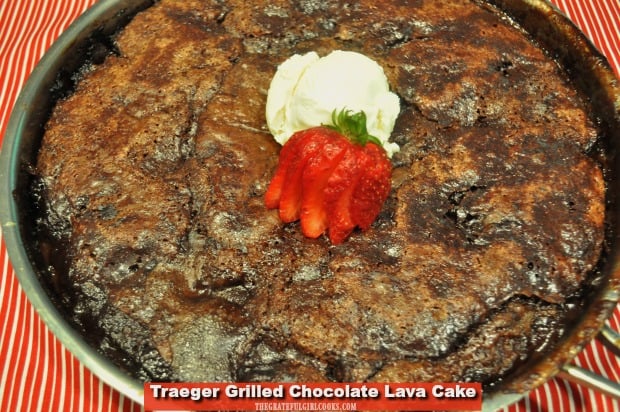
Traeger Grilled Chocolate Lava Cake

Cook a Traeger Grilled Chocolate Lava Cake (for 10) on a smoker or pellet grill! Easy to make dessert that tastes amazing, and is done in 35 minutes.

If you like to eat gooey lava cakes that practically “erupt” when you eat then, you are going to ABSOLUTELY LOVE this Traeger grilled chocolate lava cake! No… really! This “grilled” dessert serves 10, and tastes amazing!

Scroll Down For A Printable Recipe Card At The Bottom Of The Page

Last year we were fortunate enough to get a new Traeger pellet grill. I had scrimped and saved for a couple years, and was able to buy it for my husband’s birthday and Father’s Day gift. It was also a blogging gift to me, because a smoker grill provides a new way to cook and create delicious foods!

Traeger Grilled Chocolate Lava Cake / The Grateful Girl Cooks!

We’ve Already Used The Traeger For Several Recipes!

I’ve been fortunate to have already gotten used to this form of grilling… user a smoker / pellet grill! Some of the foods we’ve already grilled using our Traeger include roasted whole chicken, turkey breast, pork loin roast, and rosemary wine pork chops.

We’ve also used this smoker to make asparagus, Caribbean jerk pork chops, and an amazing berry cobbler. I’ve also got a few more recipes to post, just as soon as I can get to them!

Since I was inspired by how good the dessert berry cobbler was, it excited me to find a recipe online for a lava cake, and realized I could adapt it for our grill! Traeger grilled chocolate lava cake for the WIN! Here’s how:

Prepare Traeger Grill

Make sure hopper is loaded with pellets (we used Cherry, but it won’t really matter what kind!). Turn to smoke setting, leave lid open, and let the fire get established and smoking. This usually takes 4-5 minutes.

Once fire is established and it’s really smoking, set the temperature gauge to 350° F.  Close the lid, and let the Traeger preheat until it reaches temperature (about 10-15 minutes). While the grill preheats, prepare the lava cake.

Make The Traeger Grilled Chocolate Lava Cake

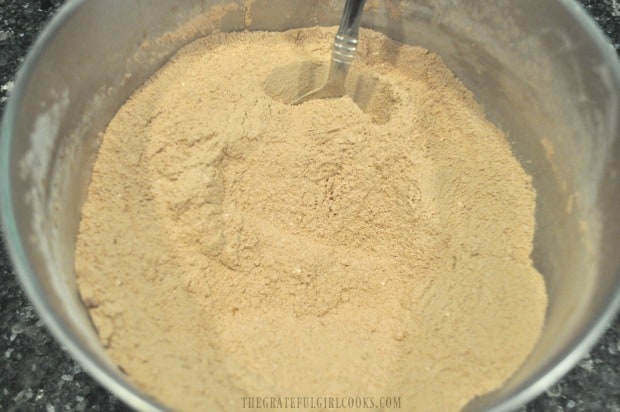
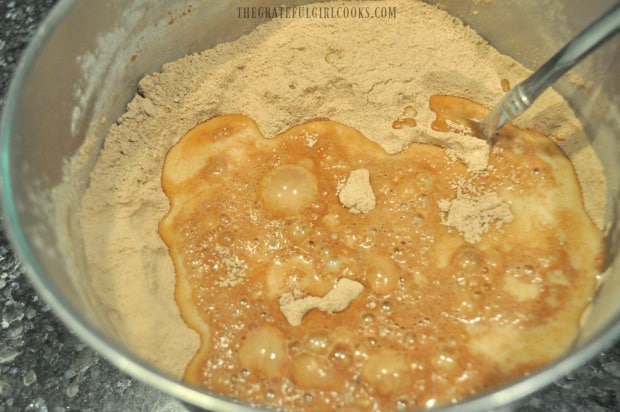
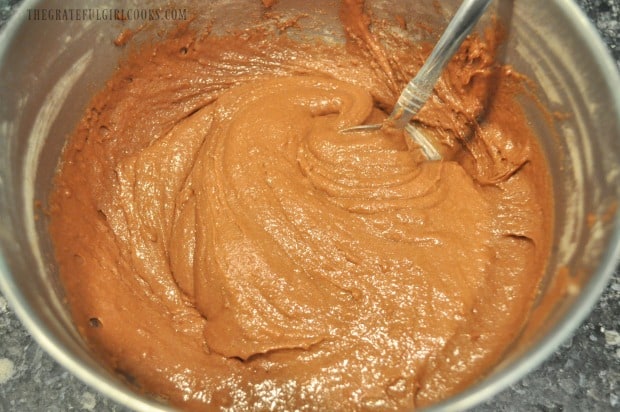
Using a medium sized bowl, stir together 2 cups of self-rising flour, 1½ cups of granulated sugar and 3 Tablespoons of unsweetened cocoa powder. Add milk and vanilla extract and stir well, to make a nice, thick and smooth batter. Set aside.

Traeger Grilled Chocolate Lava Cake / The Grateful Girl Cooks!Traeger Grilled Chocolate Lava Cake / The Grateful Girl Cooks!Traeger Grilled Chocolate Lava Cake / The Grateful Girl Cooks!

Batter Is Now Added To Skillet

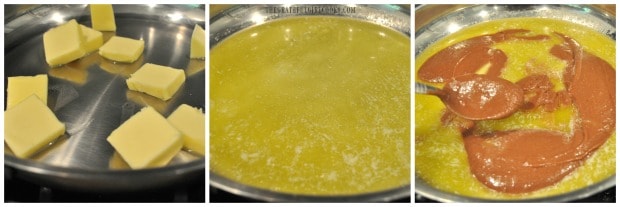
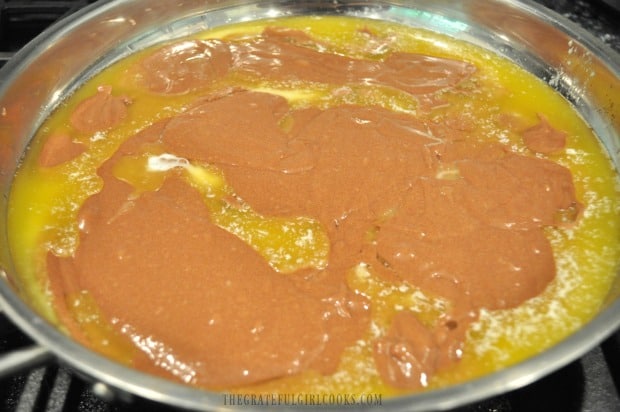
Melt butter in a 12″ ovenproof skillet or cast iron skillet on medium heat. Once the butter has melted, remove skillet from heat source, and spoon the batter over the top of the butter.

Traeger Grilled Chocolate Lava Cake / The Grateful Girl Cooks!

The batter will not fully cover the butter… no worries! This is what mine looked like after all the batter had been added. Try to spoon it evenly around the skillet. Do not stir.

Traeger Grilled Chocolate Lava Cake / The Grateful Girl Cooks!

Sprinkle With Cocoa Sugar Topping

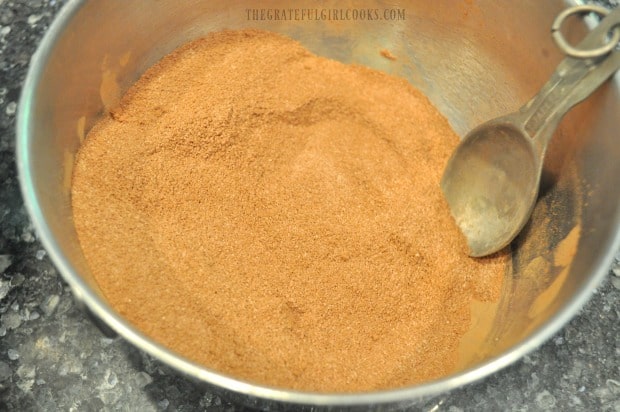
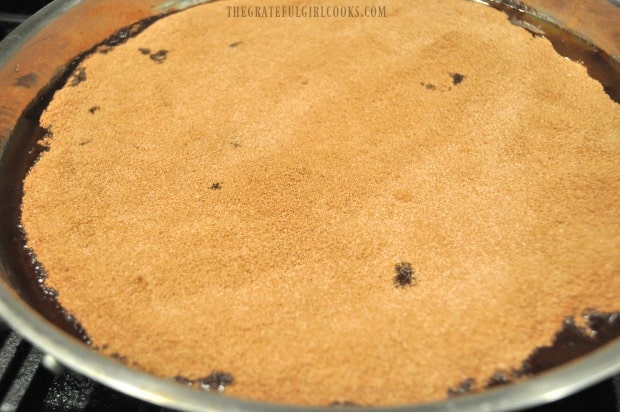
Take the remaining 2 cups of granulated sugar and 1/2 cup of unsweetened cocoa powder, and stir together in a separate medium bowl. Once mixed, sprinkle all this mixture over the top of the batter and butter in skillet. This mixture should cover just about the entire surface of the chocolate lava cake.

Traeger Grilled Chocolate Lava Cake / The Grateful Girl Cooks!Traeger Grilled Chocolate Lava Cake / The Grateful Girl Cooks!

Take Skillet Outside For Last Step (With Boiling Water)

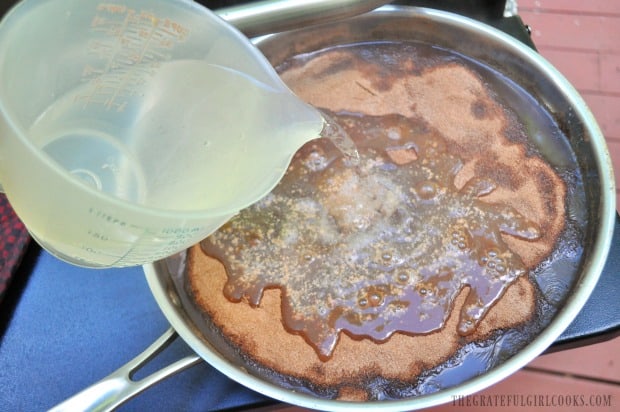
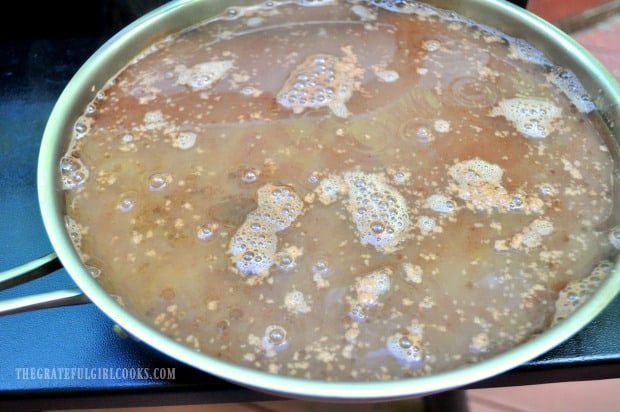
For this last step, I would recommend you do this OUTSIDE, right by the grill. You will be using boiling hot water, and nobody wants to carry a huge skillet with boiling water through the house, right? Carefully and slowly pour 3 cups of boiling water over the surface of the chocolate lava cake. Do not stir.

Traeger Grilled Chocolate Lava Cake / The Grateful Girl Cooks!Traeger Grilled Chocolate Lava Cake / The Grateful Girl Cooks!

Time To Cook The Traeger Grilled Chocolate Lava Cake!

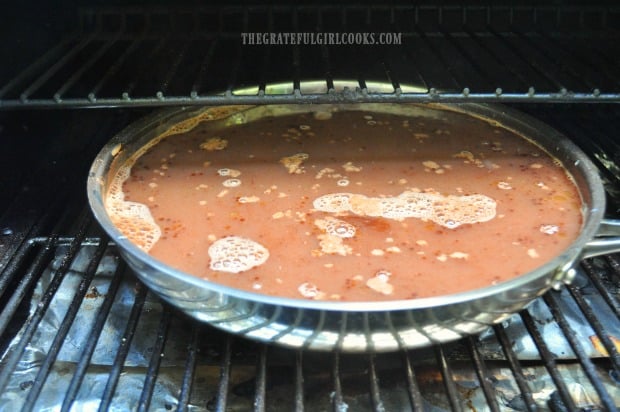
Place the skillet onto a rack in the Traeger. Bake the lava cake at 350° for 30-35 minutes, with the lid closed. Check the cake at the 30 minute mark.

When done, the chocolate lava cake should be set on top in the middle.  Since there is some liquid chocolate “lava” inside, it will not feel solid all the way through. Just cook it until it looks and feels fairly “set”. Mine ended up taking 40 minutes to finish cooking, and I was satisfied with how it looked (and felt on top).

Traeger Grilled Chocolate Lava Cake / The Grateful Girl Cooks!

After Cooking The Traeger Grilled Chocolate Lava Cake

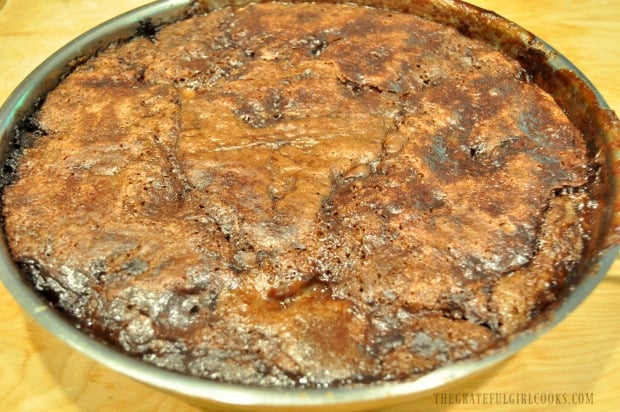
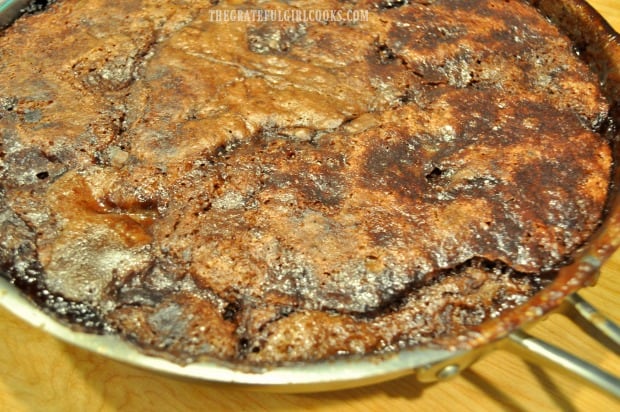
The photo below show the Traeger grilled chocolate lava cake, right after I brought it inside. Oh my goodness! It looked so good! Let the cake cool for 10-15 minutes until it is warm but not boiling hot. If you look closely at the photo, you can see in a crack in the lower third of the cake a glimpse of some “lava” inside. You can also see how the top is set.

Traeger Grilled Chocolate Lava Cake / The Grateful Girl Cooks!Traeger Grilled Chocolate Lava Cake / The Grateful Girl Cooks!

Ready To Serve The Chocolate Lava Cake!

When it is ready to serve,  take a large spoon, and dip out the cake into small serving bowls. You should have enough for 10 portions! You will be amazed how much chocolate “lava” comes running (like a volcano) out of the cake.

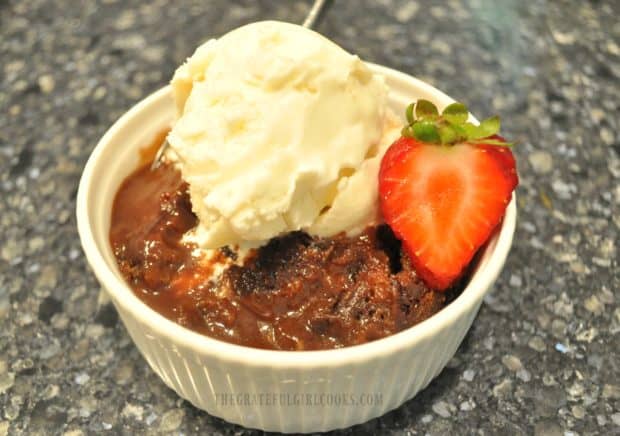
Top each portion of Traeger grilled chocolate lava cake with a scoop of ice cream, and serve. You can see in the photo below, the cake AND the “lava” in the bowl. YUMMO! This cake tastes wonderful!

Traeger Grilled Chocolate Lava Cake / The Grateful Girl Cooks!

We LOVED this dessert, and wouldn’t hesitate to make it again for family and friends! I hope you will have the opportunity to make this Traeger grilled chocolate lava cake on your own smoker or pellet grill! Have a GREAT day, and be sure to check out ALL my recipes in the Recipe Index, located at the top of the page!

Interested In More Recipes?

Thank you for visiting this website. I appreciate you using some of your valuable time to do soIf you’re interested, I publish a newsletter 2 times per month (1st and 15th) with all the latest recipes, and other fun info. I would be honored to have you join our growing list of subscribers, so you never miss a great recipe!
There is a Newsletter subscription box on the top right side (or bottom) of each blog post, depending on the device you use, where you can easily submit your e-mail address (only) to be included in my mailing list.

You Can Also Find Me On Social Media:
Facebook page: The Grateful Girl Cooks!
Pinterest: The Grateful Girl Cooks!
Instagram: jbatthegratefulgirlcooks

Traeger Grilled Chocolate Lava Cake / The Grateful Girl Cooks!

Original recipe source: thesauce.atbbq.com/cast-iron-chocolate-lava-cake/

↓↓ PRINTABLE RECIPE BELOW ↓↓

0 from 0 votes
Traeger Grilled Chocolate Lava Cake
Prep Time
15 mins
Cook Time
35 mins
Total Time
50 mins
 

Cook a Traeger Grilled Chocolate Lava Cake (for 10) on a smoker or pellet grill! Easy to make dessert that tastes amazing, and is done in 35 minutes.

Category: Dessert
Cuisine: American
Keyword: Traeger Grilled Chocolate Lava Cake
Servings: 10
Calories Per Serving: 512 kcal
Author: JB @ The Grateful Girl Cooks!
Ingredients
  • 2 cups self rising flour (see NOTES for substitute)
  • cups granulated white sugar
  • 3 Tablespoons unsweetened cocoa powder
  • 1 cup milk
  • 1 teaspoon vanilla extract
  • 3/4 cup butter
  • 2 cups granulated white sugar
  • 1/2 cup unsweetened cocoa powder
  • 3 cups boiling water
Instructions
  1. Load hopper with pellets. Turn to smoke setting, leave lid open, and let fire get established and smoking. This usually takes 4-5 minutes. Once fire is established and it's smoking, set the temperature gauge to 350° F.  Close lid, and let Traeger preheat to 350° (about 10-15 minutes). While grill preheats, prepare cake.

  2. Stir together 2 cups self-rising flour, 1½ cups of granulated sugar and 3 Tablespoons of unsweetened cocoa powder in medium bowl. Add milk and vanilla extract and stir well, to make a nice, thick and smooth batter. Set aside.

  3. Melt butter in a 12" ovenproof skillet or cast iron skillet on medium heat. Once butter has melted, remove skillet from heat, and spoon the cake batter over the top of the butter. The batter will not fully cover the butter. Try to spoon it evenly around the skillet. Do not stir.

  4. In a medium bowl, stir remaining 2 cups of granulated sugar and 1/2 cup of unsweetened cocoa powder together. Once mixed, evenly sprinkle this mixture over the top of the batter and butter in skillet. It should cover the surface of the cake. Carefully and slowly pour 3 cups of boiling water over the surface of the chocolate lava cake. Do not stir. TIP: I recommend pouring the hot water into skillet OUTSIDE, next to grill.

  5. Place the skillet onto a rack in the Traeger. Bake the lava cake at 350° for 30-35 minutes, with the lid closed. Check the cake at the 30 minute mark. When done, the chocolate lava cake should be set on top in the middle.  Since there is some liquid chocolate "lava" inside, it will not feel solid all the way through. (I ended up cooking mine for 40 minutes-perfect!). When done, remove from grill and let it cool for 15 minutes until it is warm but not boiling hot.

  6. When ready to serve,  take a large spoon, and dip out the cake into small serving bowls. You should have enough for 10 portions! You will be amazed how much chocolate "lava" comes running (like a volcano) out of the cake. Top each portion with a scoop of vanilla ice cream, and serve. Enjoy!

Recipe Notes

TIP: Don't have self-rising flour? Do this: Sift 2 cups flour, 3 teaspoons baking powder, and 1 teaspoon salt together. Use this mixture to replace the self-rising flour called for in recipe.

Nutrition Facts
Traeger Grilled Chocolate Lava Cake
Amount Per Serving (1 g)
Calories 512 Calories from Fat 144
% Daily Value*
Fat 16g25%
Saturated Fat 10g63%
Cholesterol 39mg13%
Sodium 138mg6%
Potassium 150mg4%
Carbohydrates 93g31%
Fiber 3g13%
Sugar 71g79%
Protein 5g10%
Vitamin A 465IU9%
Calcium 45mg5%
Iron 1mg6%
* Percent Daily Values are based on a 2000 calorie diet.

Here’s one more to pin on your Pinterest boards!Cook a Traeger Grilled Chocolate Lava Cake (for 10) on a smoker or pellet grill! Easy to make dessert that tastes amazing, and is done in 35 minutes.
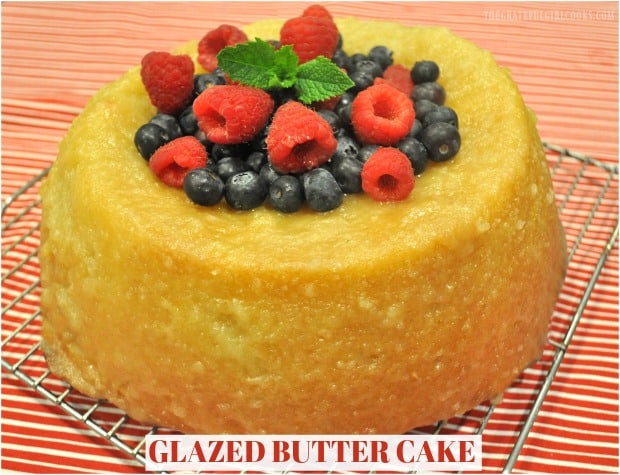
Glazed Butter Cake

Glazed Butter Cake is a yummy, easy tube pan cake that is completely covered with a sweet icing (also poked down into cake). This is a GREAT dessert!

Have you ever tried a glazed butter cake before? I had never tried one (or HEARD of one) before I made this recipe. Wow, what a treat, AND it’s fairly simple to make! That’s a winning combination, folks, and I’m confident you will love it, too!

I found the recipe on Pinterest via “Taste of Home” magazine. A reader found the original recipe in an old cookbook she bought at a garage sale, tried and submitted it. They published the recipe, and I’m glad they did! This is a great dessert to take to any gathering, potluck or brunch with a crowd, because it serves 16.

This glazed butter cake is fairly traditional in its list of ingredients- nothing uncommon. It is baked in a tube pan, and then inverted (turned upside down) onto a serving plate, and glazed.

Holes are poked into the top of the cake and sides, and then a sweet buttery sweet glaze is spread over the entire surface. The top is even glazed a couple more times, which allows the sweet glaze to drizzle down into the cake! YUM! Here’s how to make this dessert.

Scroll Down for a Printable Recipe Card At The Bottom Of The Page

How To Make This Glazed Butter Cake

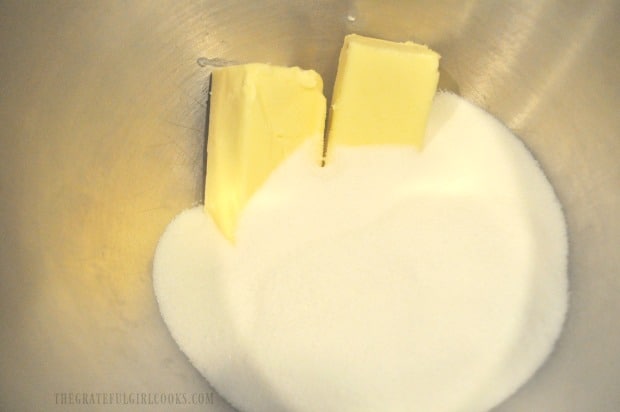
Preheat your oven to 350° F. Using an electric mixer (or stand mixer), cream together granulated sugar and butter until it is very creamy. I beat this mixture for 2-3 minutes.

Add 4 room temperature eggs, ONE AT A TIME, making sure to really beat the batter well, after adding each one. Once all the eggs are in, add the vanilla extract, and beat well.

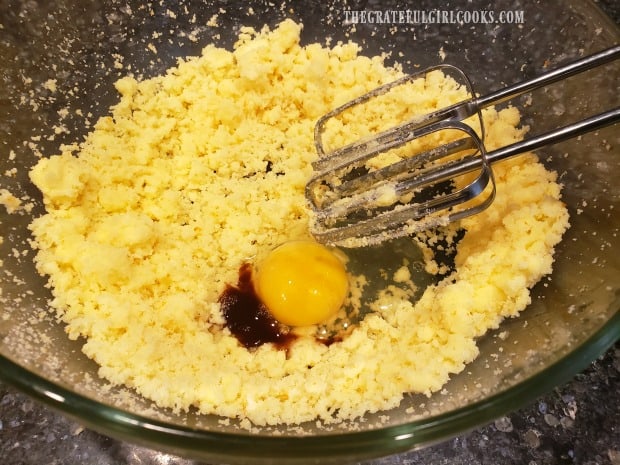
Butter and granulated sugar are creamed together for the cake batter.

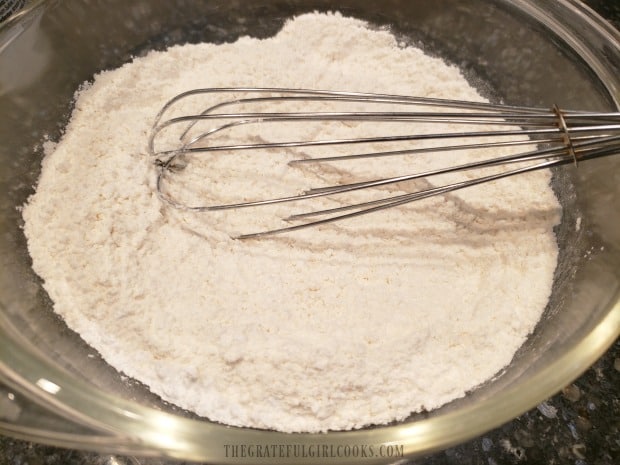
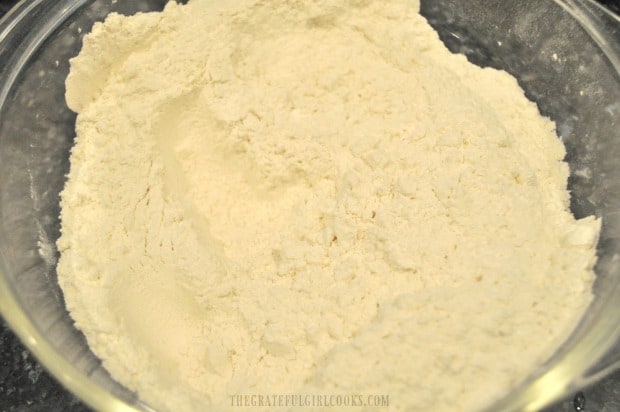
In a separate bowl, whisk together flour, baking soda, baking powder, and salt until combined.

Alternate adding the flour and the buttermilk a little at a time to the butter mixture, continuing to beat the batter well after each addition.

Flour, baking powder, salt and baking soda are mixed to add to the cake batter.

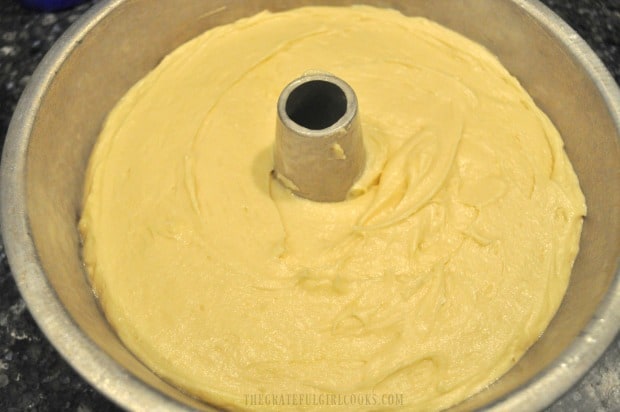
Generously grease and flour a 10 inch tube pan (including the center part).  Spoon or pour the glazed butter cake batter into the prepared pan, and spread it out evenly.

Bake The Glazed Butter Cake

Bake the cake in a preheated 350° F. oven for approximately 55-70 minutes. Check it at 55 minutes, because oven temps vary greatly!

Batter for the butter cake is spread evenly in a tube pan before baking.

When done the cake should be a beautiful golden brown color on top. Test the cakes “doneness” by inserting a toothpick into the very middle of the cake.

If the toothpick comes out “clean”, then the cake is done. If not, stick it back in the oven for a few more minutes, and then check it again. Once done, transfer pan to a wire rack to cool.

To Remove Cake From The Pan

Place the cake pan on a wire rack, and let it cool for 10 minutes (important). After it has cooled, take a knife and gently run it around the edges of the cake (including center). This helps to loosen the cake from the pan.

Place a wire rack upside down over the top of the cake. Carefully, (holding both the rack and the cake pan), “flip” the cake and rack over, to invert the cake bottom side up onto the wire rack.

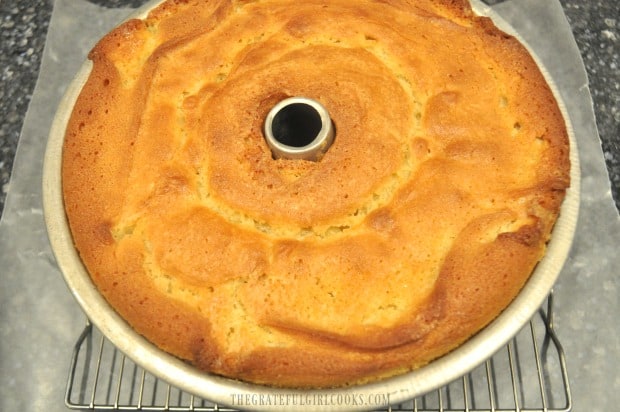
Now place a large piece of wax or parchment paper UNDER the wire rack. This will help catch drips when you glaze the cake. The photo below shows the cake BEFORE it has been flipped over.

The butter cake browns nicely while baking, then it cools before removing it from pan.

Make The Butter Sauce For The Glazed Butter Cake

While the cake cools, make the butter sauce. Place butter, sugar, and water in a small pan, and cook on medium heat only until the butter has melted. The sugar should also have dissolved.

Remove the sauce from the heat and stir in the vanilla and almond extracts.

How To Glaze The Butter Cake

Now you’re ready to put the glaze on. Poke holes all over the top of the butter cake. I used a chopstick to do this, but use whatever you have to do this.

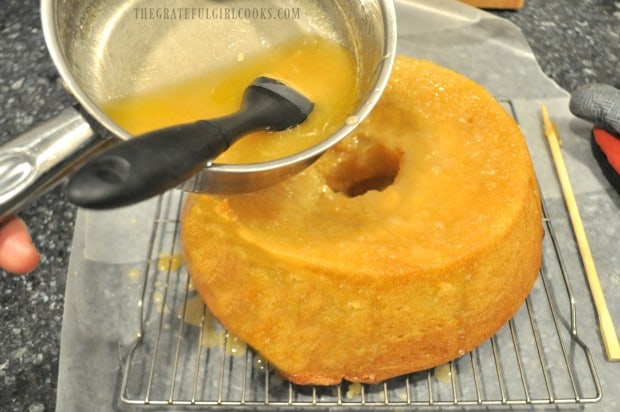
Spoon (or pour) 1/4 of the sauce over the top and spread to cover. Let the sauce thicken while standing, then repeat the process on the top of the cake two more times.

Now poke holes into the sides of the cake. Use a pastry brush to “paint” on the glaze to cover the sides. Use all the remaining glaze to do this.

You will be very glad you have that paper underneath the cake, because some glaze will drip through or down the edges, and it will catch it.

Holes are poked in top and sides of cake, then a butter glaze is added.
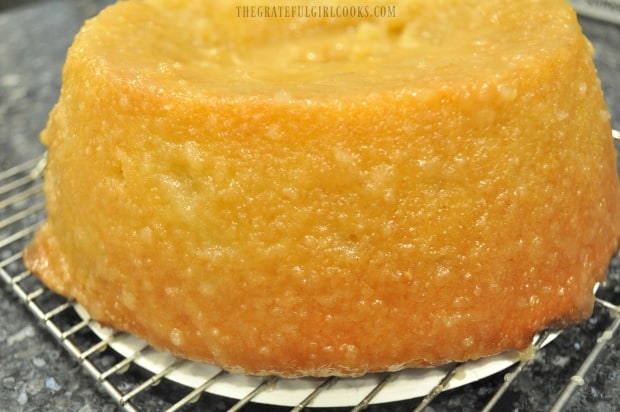
Here is what the glazed butter cake looks like from the side.

When you are all done with the icing on the glazed butter cake, let it stand for awhile, to ensure all of that glaze firms up before serving!

To Serve The Cake

Once the glaze has firmed up, and cake has cooled completely, you are ready to serve. You can slice and eat the cake just as it is OR you can “pretty it up” to serve (we eat with our eyes first, right?)

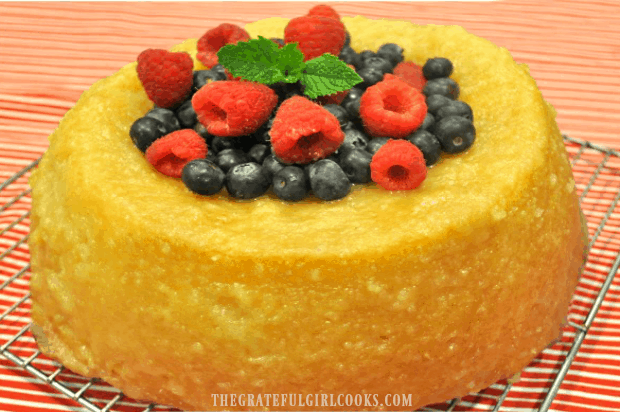
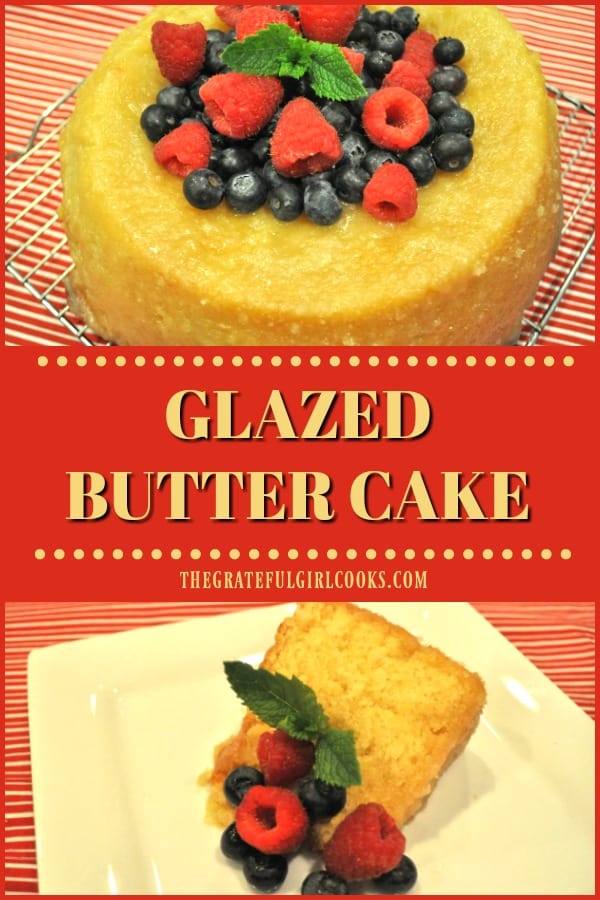
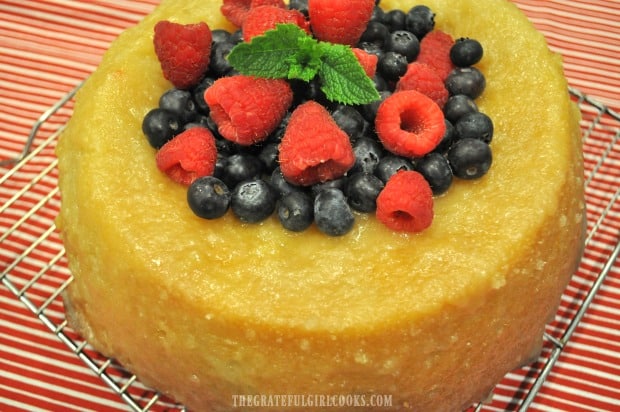
TIP: Put a tiny wadded up ball of aluminum foil into the center hole of the cake to act as a filler. Top the glazed butter cake with fresh blueberries, raspberries and a sprig of mint. This colorful finishing touch makes the cake look quite beautiful when serving!

Fresh raspberries, blueberries & a mint sprig garnish the top of the glazed butter cake!
The cake is shiny from the butter glaze on the top and the sides.

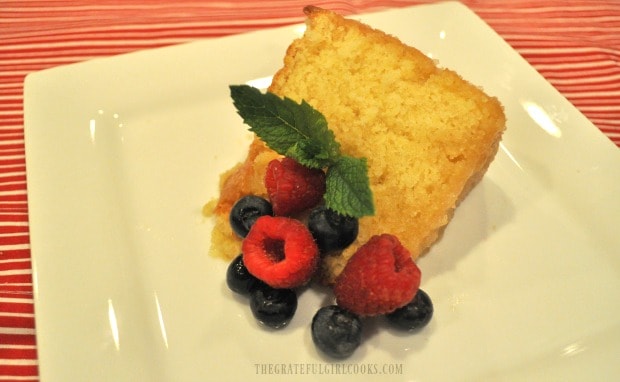
Slice the cake into 16 servings, and serve with or without the fruit. If you look closely at the photo below, you can see traces of where the buttery sweet glaze permeated the cake through the holes poked on top!

A slice of glazed butter cake on a plate with fresh blueberries, raspberry and a mint sprig.

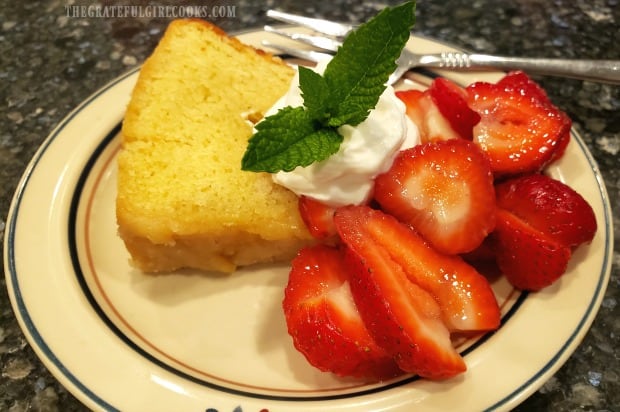
Another serving idea is to serve cake slices with fresh sliced strawberries (lightly sugared), a dollop of whipped cream and a mint leaf for garnish.

Think of it as an extra decadent strawberry shortcake on steroids! YUM! It adds even more color and flavor to this decadent dessert.

Glazed butter cake is served with strawberries and whipped cream, like a shortcake.

And there you have it! An absolutely delectable glazed butter cake, that can feed a crowd! Hope you will consider trying this delicious dessert. Pretty sure you will be glad you did!

Thanks for stopping by, and I hope you’ll come back soon for more family-friendly recipes. Take care, and have a GREAT day!

Looking For More CAKE Recipes?

You can find all of my dessert/cake recipes in the Recipe Index, located at the top of the page. A few family favorites include:

Want More Recipes? Get My FREE Newsletter!

I publish a newsletter 2 times per month (1st and 15th) with lots of recipes, tips, etc..
Would you like to join our growing list of subscribers?

There is a Newsletter subscription box on the top right (or bottom) of each blog post, depending on the device you use.
You can submit your e-mail address there, to be added to my mailing list.

Find Me On Social Media:

Facebook page: The Grateful Girl Cooks!
Pinterest:
The Grateful Girl Cooks!
Instagram:
jbatthegratefulgirlcooks

Author's signature

Recipe Source: https://www.tasteofhome.com/recipes/blue-ribbon-butter-cake/

↓↓ PRINTABLE RECIPE BELOW ↓↓

0 from 0 votes
Glazed Butter Cake
Prep Time
20 mins
Cook Time
55 mins
Total Time
1 hr 15 mins
 

Glazed Butter Cake is a yummy, easy tube pan cake that is completely covered with a sweet icing (also poked down into cake). This is a GREAT dessert!

Category: Dessert
Cuisine: American
Keyword: glazed butter cake
Servings: 16
Calories Per Serving: 416 kcal
Author: JB @ The Grateful Girl Cooks!
Ingredients
  • 1 cup butter , softened
  • 2 cups granulated sugar
  • 4 large eggs , at room temperature
  • 2 teaspoons vanilla extract
  • 3 cups all purpose flour
  • 1 teaspoon baking powder
  • 1/2 teaspoon baking soda
  • 1 cup buttermilk
For Butter Sauce:
  • 1 cup granulated sugar
  • 1/2 cup butter , cubed
  • 1/4 cup water
  • teaspoons vanilla extract
  • teaspoons almond extract
Instructions
  1. Preheat oven to 350° F. Using an electric mixer (or stand mixer), cream together granulated sugar and butter until it is very light/creamy. I beat this mixture for 2-3 minutes. Add 4 room temperature eggs, ONE AT A TIME, making sure to really beat the batter well, after adding each one. Once all the eggs are in, add the vanilla extract, and beat well.

  2. In a separate bowl, whisk together flour, baking soda, baking powder, and salt. Alternate adding the flour and the buttermilk a little at a time to the butter mixture, continuing to beat the batter well after each addition. Generously grease and flour a 10 inch tube pan (including center part).  Spoon or pour batter into prepared pan, and spread out evenly.

  3. Bake at 350° F. for approximately 55-70 minutes. Check it at 55 minutes, because oven temps vary greatly! When done the cake should be golden brown on top. Test the cakes "doneness" by inserting a toothpick into the middle of the cake. If toothpick comes out "clean", cake is done. If not, stick it back in the oven for a few more minutes, then check again. Once done, transfer pan to a wire rack to cool.

  4. Let cake cool for 10 minutes (important). Take a knife and gently run it around the edges of the cake (including center). This helps loosen cake from pan. Place a wire rack upside down over top of cake. Carefully, (holding rack and cake pan), "flip" the cake and rack over, to invert cake, bottom side up, onto the wire rack. TIP: Place a large piece of wax or parchment paper UNDER wire rack. This helps catch drips when you glaze the cake.

  5. While cake cools, make the butter sauce (glaze). Place butter, sugar, and water in a small pan; cook on medium heat only until butter has melted and sugar is dissolved. Remove sauce from heat; stir in vanilla and almond extracts. Poke holes all over the top of the still warm butter cake. Spoon (or pour) 1/4 of the sauce over the top and spread to cover. Let the sauce thicken while standing, then repeat process on top of cake two more times (1/4 cup each time). Now poke holes into the sides of the cake. Use a pastry brush to "paint" on the glaze to cover sides. Use all remaining glaze to do this. Let cake cool completely (this will firm up the glaze). Garnish with fresh fruit, cut into slices, serve, and enjoy!

Nutrition Facts
Glazed Butter Cake
Amount Per Serving (1 slice)
Calories 416 Calories from Fat 171
% Daily Value*
Fat 19g29%
Saturated Fat 12g75%
Cholesterol 100mg33%
Sodium 223mg10%
Potassium 94mg3%
Carbohydrates 57g19%
Fiber 1g4%
Sugar 38g42%
Protein 5g10%
Vitamin A 635IU13%
Calcium 45mg5%
Iron 1.4mg8%
* Percent Daily Values are based on a 2000 calorie diet.

Here’s one more to pin on your Pinterest boards!Glazed Butter Cake is a yummy, easy tube pan cake that is completely covered with a sweet icing (also poked down into cake). This is a GREAT dessert!

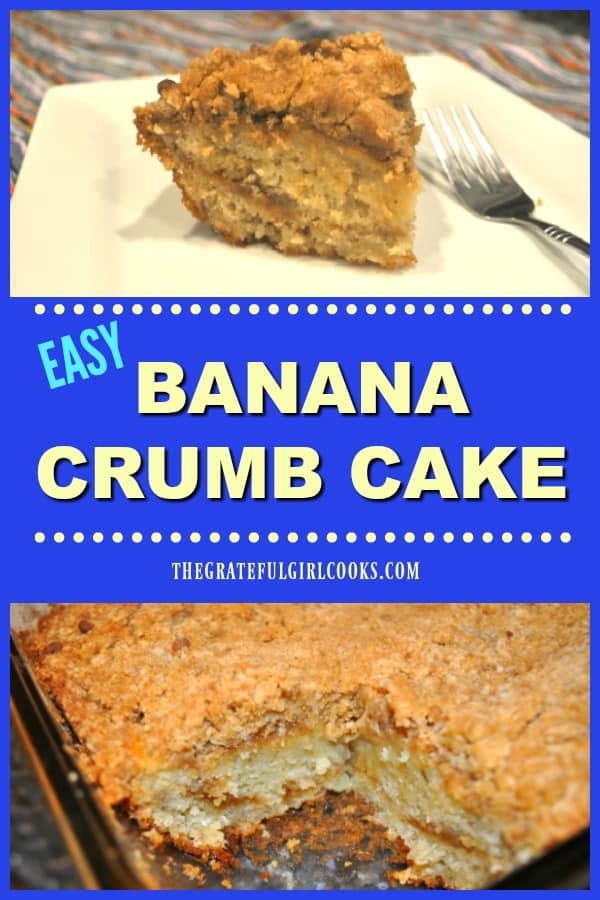
Banana Crumb Cake

You’ll LOVE this easy to make, delicious Banana Crumb Cake! It’s a banana cake (dessert or coffeecake), with layers of streusel inside and on top!
You'll LOVE this easy to make, delicious Banana Crumb Cake! It's a banana cake (dessert or coffeecake), with layers of streusel inside and on top!

About a month ago I made a “new to us” recipe for Banana Crumb Cake! Oh. My. Goodness!  This cake tastes amazing, and it was so good we shared it with a few of our neighbors!

The cake was so easy to make, and I was able to use some over-ripe bananas that were lurking around our kitchen! Basically the process is make the cake batter, layer in some butter and brown sugar streusel, then top the cake with more crumb streusel! EASY!

This banana crumb cake can be served as a dessert OR as a coffeecake!  I cut the cake into 12 large servings, but you can certainly get 24 smaller pieces out of this recipe (with a lot less calories per piece)! It is soooo delicious, you’ve just got to try it!

Scroll Down For A Printable Recipe Card At the Bottom Of The Page

Prepare The Banana Crumb Cake Batter

Before you start making the batter, remember to preheat your oven to 350° F. and spray a 9×13 inch pan with some non-stick baking spray. Set the baking dish aside while you mix the batter.

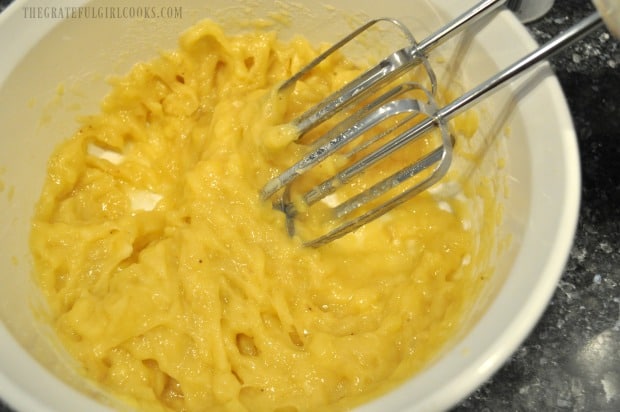
Place very ripe bananas into a large mixing bowl. Mix the bananas (or mash them) until bananas are pureed. Add room temperature butter to the bowl, and continue to mix until these two ingredients are combined.

Bananas are mixed together to form a banana puree, to make cake batter.

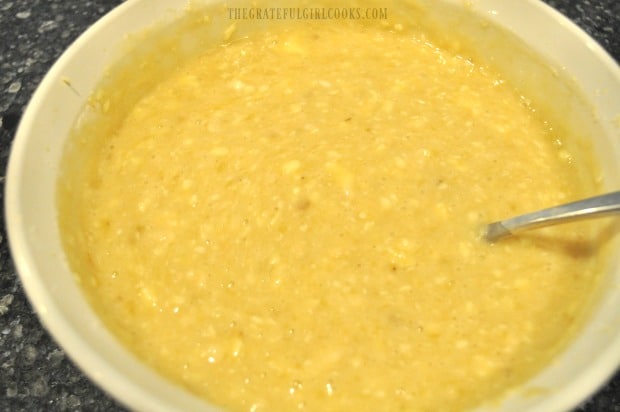
STIR in the sugar, vanilla extract and eggs, until they are fully blended with the banana puree. Add two cups of flour and a cup of milk to the batter, and continue to stir until they are also fully incorporated into the batter.

Eggs, sugar and butter are added and mixed into the banana crumb cake batter.

Make The Crumb Streusel

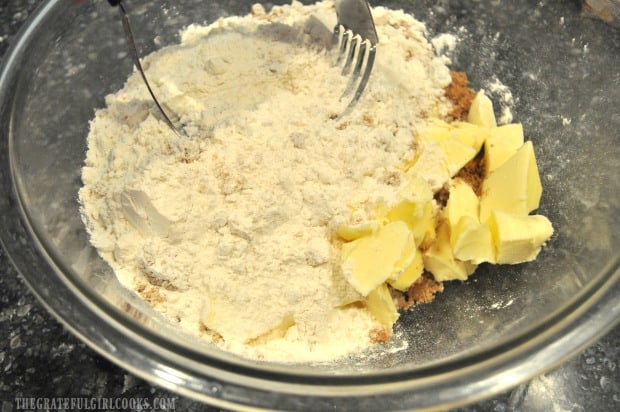
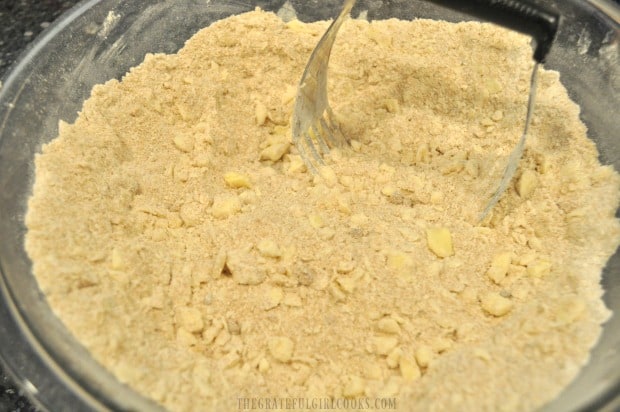
To make the crumb streusel topping, place the COLD butter (cut into small chunks), brown sugar and flour into a medium bowl. Cut these ingredients together using a pastry cutter OR a fork. Continue until the butter is reduced to the size of peas, and then you will have made the simple crumb topping.

Butter, brown sugar and flour are mixed together to make crumb topping for the cake.

the crumb topping for the banana crumb cake is ready when butter is the size of peas.

Layer The Cake And Crumb Topping

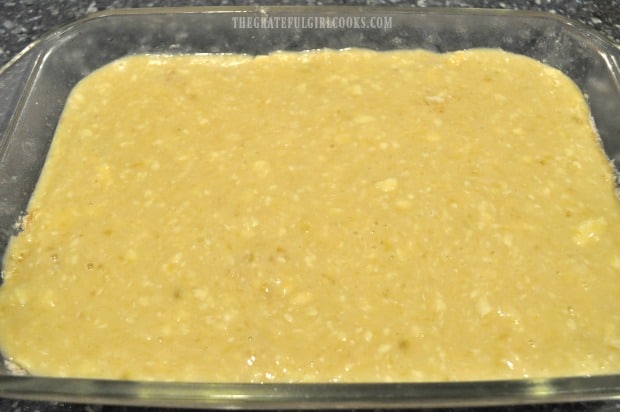
Pour HALF of the banana crumb cake batter into a prepared baking pan. Spread it out, to fill the bottom of the pan. Sprinkle 1/3 of the crumb topping mixture evenly over the surface of the batter.

Half of the banana cake batter is poured into baking dish.

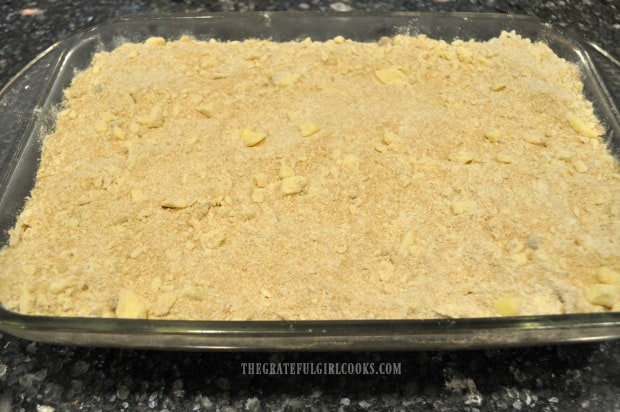
Pour the remaining cake batter over the layer of crumb topping. Top this layer of batter with all the remaining crumb topping, making sure to cover the entire surface of the batter.

Banana crumb cake batter is topped with the crumb streusel topping before baking.

Bake The Banana Crumb Cake

Bake the banana crumb cake in a preheated 350° F. oven for 50-55 minutes. I would suggest checking to see if it is done at the 50 minute mark.

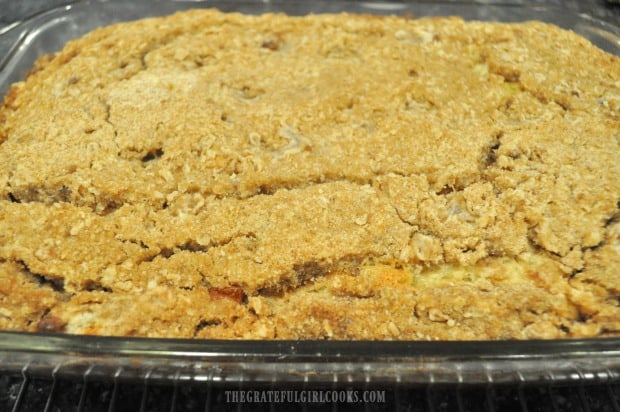
The cake is done when golden brown on top, and the very center of the cake is set. If you insert a toothpick into the center of the cake, it should come out clean! The photo below shows what the banana crumb cake looks like, straight out of the oven.

The cake is golden brown on top once it has finished baking.

Ready To Eat This Delicious Banana Crumb Cake?

Let the cake cool down for about 10 minutes (or let it come to room temperature) before you attempt to cut into it! It’s hard waiting for this delicious cake that long, but you can do it!

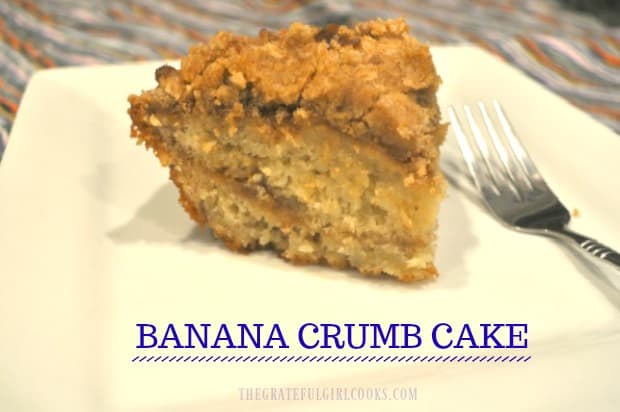
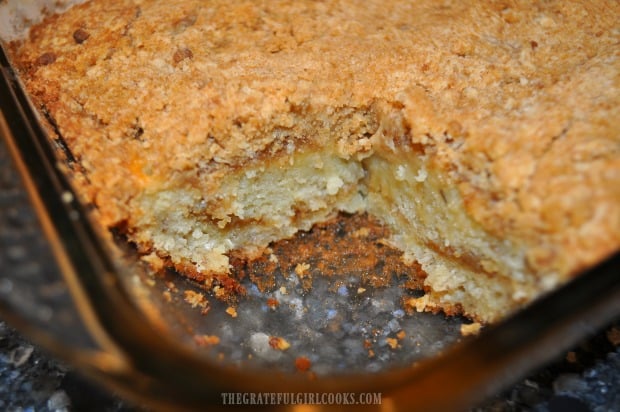
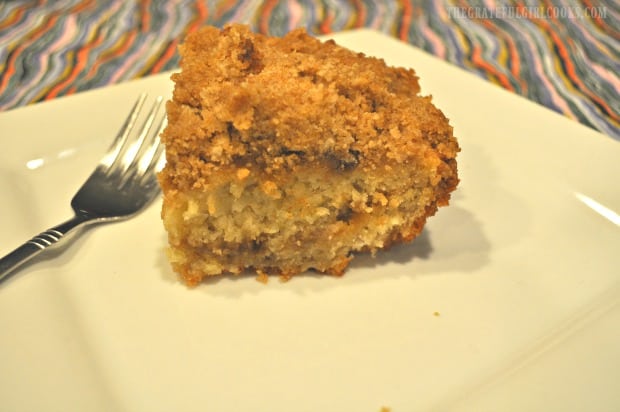
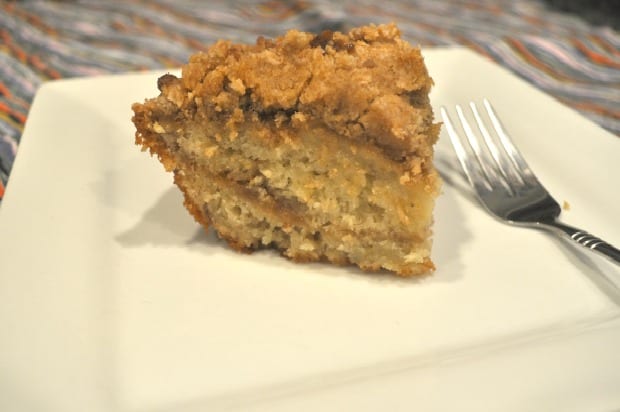
Once the banana crumb cake has cooled slightly, go ahead and cut a piece to enjoy! You can see in the photo below that thin layer of crumb topping in the middle. YUM! You can serve this yummy cake warm, or at room temperature (we like it best at room temp.).

A piece has been removed from the banana crumb cake to reveal the inside.

If you want (optional), try drizzling the cake with a simple powdered sugar/milk glaze. You don’t need it, though. We really enjoy this cake unglazed, and think it is best just the way it comes out of the oven! The cake is moist and completely delicious, and full of banana flavor! I can’t say enough GOOD things about this amazing treat, because it is so good!

A slice of the banana crumb cake on a white plate, ready to eat!

There is a layer of crumb topping running through the middle of this piece of cake.

Hope you will be inspired to try this wonderful banana crumb cake for dessert, or as a breakfast coffeecake! We absolutely LOVED it, and because it was fabulous, I will definitely be making it again! Have a wonderful day, friends!

Looking For More CAKE Recipes?

You can find all of my recipes in the Recipe Index, located at the top of the page. A few family favorite cake recipes include:

Interested In More Recipes?

Thank you for visiting this website. I appreciate you using some of your valuable time to do soIf you’re interested, I publish a newsletter 2 times per month (1st and 15th) with all the latest recipes, and other fun info. I would be honored to have you join our growing list of subscribers, so you never miss a great recipe!

There is a Newsletter subscription box on the top right side (or bottom) of each blog post, depending on the device you use, where you can easily submit your e-mail address (only) to be included in my mailing list.

You Can Also Find Me On Social Media:
Facebook page: The Grateful Girl Cooks!
Pinterest: The Grateful Girl Cooks!
Instagram: jbatthegratefulgirlcooks

Author's signature

Original recipe source: https://cookiesandcups.com/banana-bread-crumb-cake/

0 from 0 votes
Banana Crumb Cake
Prep Time
15 mins
Cook Time
50 mins
Total Time
1 hr 5 mins
 
You'll LOVE this easy to make, delicious Banana Crumb Cake! It's a banana cake (dessert or coffeecake), with layers of streusel inside and on top!
Category: Breakfast, Dessert or Coffeecake
Cuisine: American
Keyword: banana crumb cake
Servings: 12
Calories Per Serving: 674 kcal
Author: JB @ The Grateful Girl Cooks!
Ingredients
  • 2 cups all purpose flour
  • 3 teaspoons baking powder
  • 1 teaspoon salt
  • 3 ripe bananas
  • 1/2 cup butter , at room temperature
  • 2 cups granulated sugar
  • 2 eggs
  • 1 cup milk
  • 1 teaspoon vanilla extract
For Crumb Filling and Topping:
  • 1 cup COLD butter , cut in chunks
  • 2 cups brown sugar
  • 2 cups all purpose flour
Instructions
  1. Preheat oven to 350° F. and spray a 9x13 inch pan with non-stick spray.

    Place very ripe bananas into a large mixing bowl. Mix the bananas (or mash them) until bananas are pureed or liquified. Add room temperature butter to the bowl, and continue to mix until these two ingredients are combined. Once combined, STIR in the sugar, vanilla extract and eggs, until they are fully blended. Add two cups of flour and a cup of milk to the batter, and continue to stir until they are fully incorporated into the batter. Set aside.

  2. Make crumb streusel topping: Place COLD butter (cut into small chunks), brown sugar and flour in a medium bowl. Cut these ingredients together with a pastry cutter OR by using a fork. Continue until butter becomes the size of peas, and you have a coarse crumb mixture.

  3. Pour HALF of the cake batter into prepared pan. Spread it out, to fill pan. Sprinkle 1/3 of the crumb topping mixture over the batter, to cover. Pour remaining cake batter over the layer of crumb topping (gently spread to cover). Top batter with all the remaining crumb topping, making sure entire surface of cake is covered.

  4. Bake cake in preheated 350° F. oven for 50-55 minutes. Check for doneness at the 50 minute mark. Cake is done when golden brown on top, and very center of  cake is set. If you insert a toothpick into center of cake, it should come out clean!  Let the cake cool down for 10 minutes (or let it come to room temperature) before you cut into it! Serve, and enjoy!

Recipe Notes

NOTE: These are large pieces (total of 12 servings). You can also cut the cake into 24 pieces, for a calorie count of 337 per piece.

OPTIONAL: I did not glaze this cake. If you want to add a glaze on top, simply mix 1 cup of powdered sugar with 1-2 Tablespoons of milk, and drizzle on cooled cake.

Nutrition Facts
Banana Crumb Cake
Amount Per Serving (1 (1/12th of total))
Calories 674 Calories from Fat 216
% Daily Value*
Fat 24g37%
Saturated Fat 15g94%
Cholesterol 90mg30%
Sodium 428mg19%
Potassium 341mg10%
Carbohydrates 109g36%
Fiber 1g4%
Sugar 73g81%
Protein 6g12%
Vitamin A 800IU16%
Vitamin C 2.6mg3%
Calcium 115mg12%
Iron 2.5mg14%
* Percent Daily Values are based on a 2000 calorie diet.

Here’s one more to pin on your Pinterest boards!You'll LOVE this easy to make, delicious Banana Crumb Cake! It's a banana cake (dessert or coffeecake), with layers of streusel inside and on top!

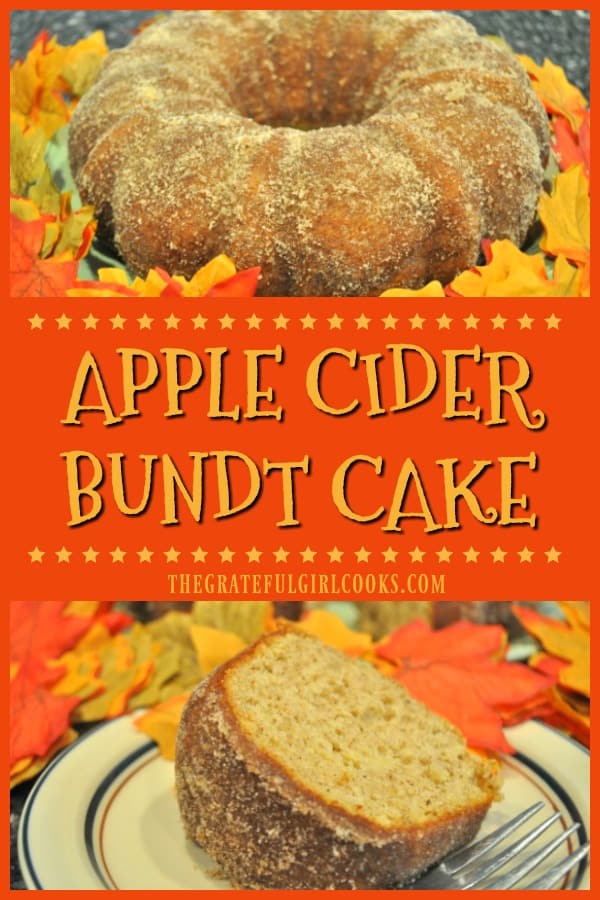
Apple Cider Bundt Cake

You’ll love Apple Cider Bundt Cake! It’s an easy, delicious Fall dessert or coffeecake with apple cider, grated apples, cinnamon, nutmeg, and a cinnamon sugar topping.
You'll love Apple Cider Bundt Cake! It's an easy, yummy Fall dessert or coffeecake with cider, grated apples, cinnamon, nutmeg & a cinnamon sugar topping.

Have you ever had apple cider doughnuts, covered with cinnamon sugar coating?  Well, they are DELICIOUS, and this Apple Cider Bundt Cake tastes a LOT like them! YUM!

This recipe was one I found online from Betty Crocker (you know… good ol’ Betty!).  The base for this cake is a basic “super moist” yellow cake mix. Using a boxed cake mix is not only convenient, it makes this recipe incredibly EASY to make!

Made with apple cider, shredded tart apples, and the warm seasoning of cinnamon and nutmeg, this delicious, flavor-filled apple cider bundt cake absolutely screams “AUTUMN!”.

Scroll Down For A Printable Recipe Card At The Bottom Of The Page

How To Make Apple Cider Bundt Cake

Making this apple cider bundt cake couldn’t be easier!  Preheat your oven to 350° F. Spray a standard size (12 cup) bundt cake (or tube cake) pan with non-stick spray, then coat with flour.

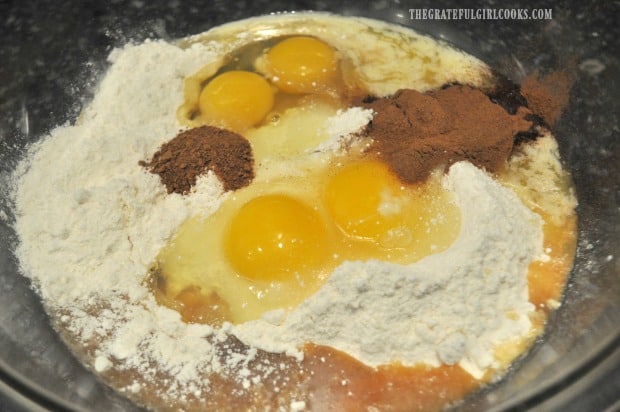
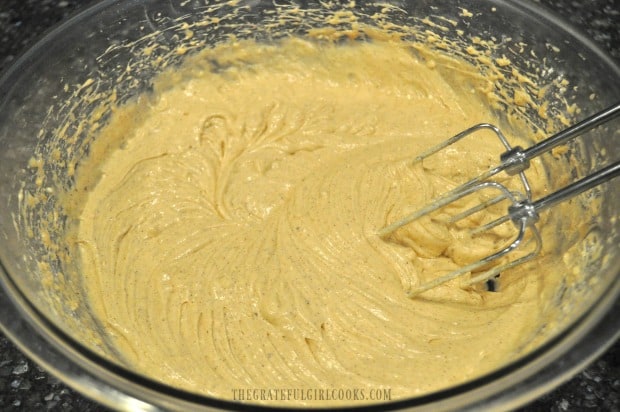
Place yellow cake mix, melted butter, apple cider, eggs, cinnamon and nutmeg in a large mixing bowl. Beat for 2 minutes with an electric mixer on medium speed. Scrape the bowl occasionally, to incorporate all ingredients into batter.

Ingredients for apple cider bundt cake batter are placed in large bowl to mix.

The batter is combined for apple cider bundt cake with an electric mixer.

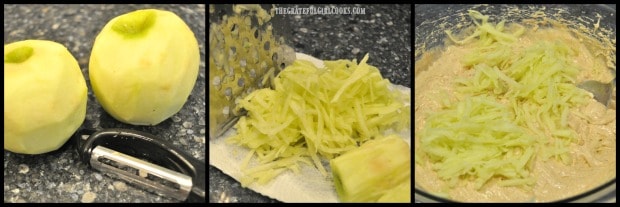
Peel, then grate or shred 2 medium tart apples (I used Granny Smith).  Add the shredded apple to the bowl with the apple cider bundt cake batter. Stir well, to fully combine.

Apples are peeled, then coarsely shredded for apple cider bundt cake.

Bake The Apple Cider Bundt Cake

Pour the batter into the greased and floured bundt pan. Bake at 350° for 35-40 minutes, or until golden brown on top and a toothpick inserted into the middle of the cake comes out clean.

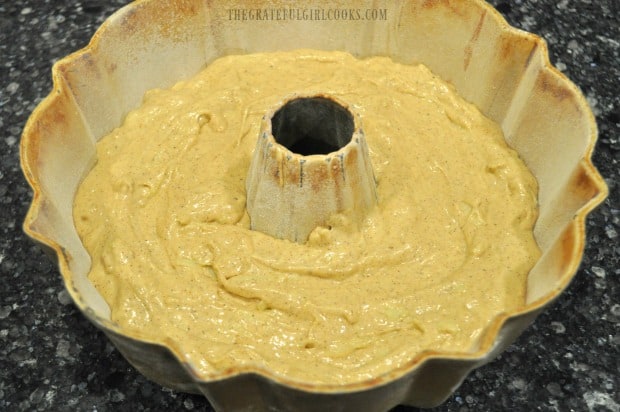
The batter for apple cider bundt cake is placed in a greased/floured bundt pan.

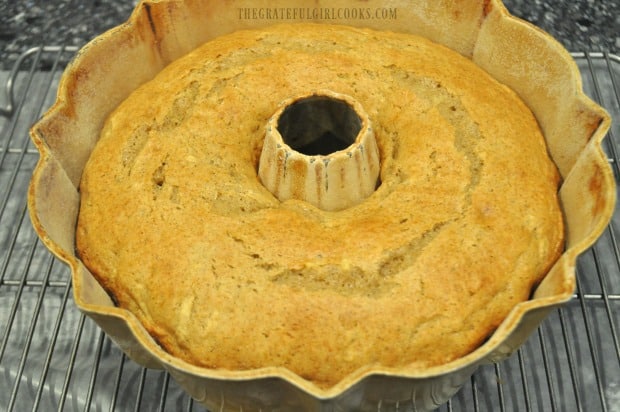
Remove the cake from the oven. Let it “rest” for about 20 minutes on a wire rack, to cool slightly.

Baked apple cider bundt cake cooling on wire rack before removing from pan.

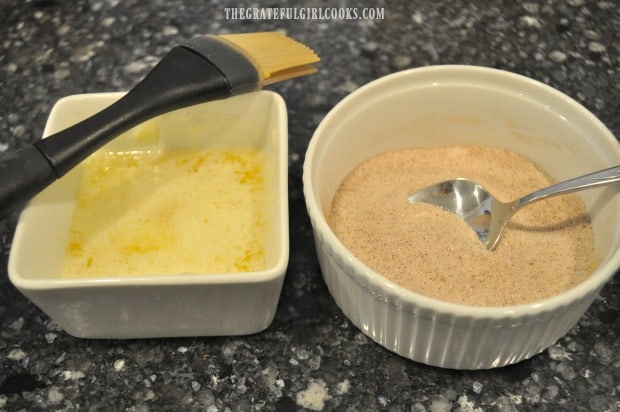
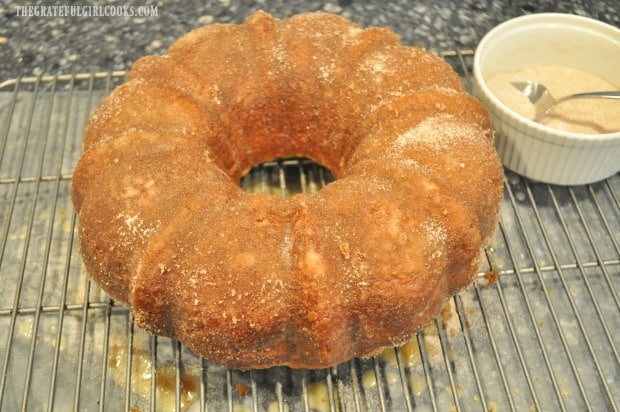
While the cake is cooling, melt butter in a small dish or pan.  Combine sugar and ground cinnamon in a separate small dish.  You will use these to top the apple cider bundt cake, once it is removed from pan.

Melted butter and cinnamon sugar topping is ready to add to baked apple cider bundt cake.

After the apple cider bundt cake has cooled for about 20 minutes, run a spatula (or metal butter knife) around the edges of the bundt pan, to help loosen the cake from the pan.

To Finish The Apple Cider Bundt Cake

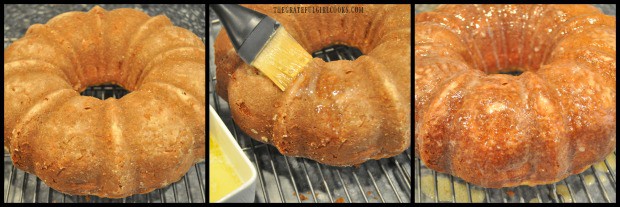
Once loosened from pan, place a large plate over top of pan. Holding pan securely to the plate with both hands, quickly invert (turn upside down) the cake. It should release easily from the bundt pan. Place cake on a wire rack.

TIP: It is very helpful to place a large piece of parchment or wax paper UNDER the wire rack to catch drips.  Use a pastry brush and completely cover the top, middle ring, and sides of the cake with melted butter. Make sure to use ALL of the melted butter.

Apple cider bundt cake is removed from pan, then is completely covered with melted butter.

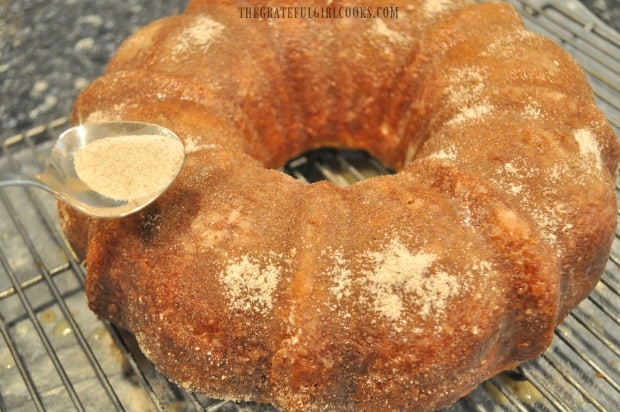
Sprinkle (and press) 2/3 of the cinnamon sugar mixture (save the rest for later) onto the top, sides, and middle ring of the apple cider bundt cake.

I found it helpful to hold my hands right up next to the sides of the cake when I added the cinnamon sugar to the sides, to catch any that falls.

Cinnamon sugar topping is added to top and sides of baked apple cider bundt cake.

Let the bundt cake stand and rest for another 20 minutes after first application of cinnamon sugar mixture.

Apply The Second Coating Of Cinnamon Sugar Mixture

After 20 minutes, sprinkle the top and sides again with the remaining 1/3 cup of the cinnamon sugar mix. Press the mixture into the cake with your fingers.

See the butter drips and cinnamon sugar underneath the apple cider bundt cake? That’s why it is helpful to put a piece of parchment or wax paper underneath. It will make your cleanup so EASY!

Apple cider bundt cake gets a second coating of cinnamon sugar topping.

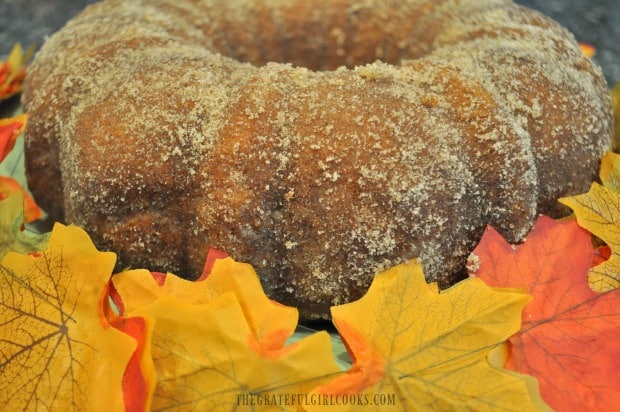
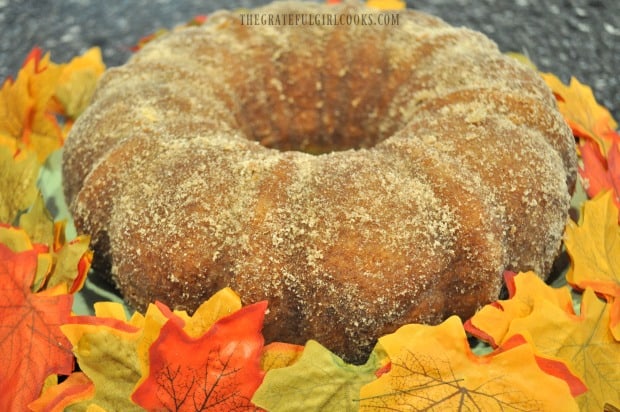
Let the cake cool completely once done. This is how it looked after it had cooled for about an hour. Oh my goodness!

Apple cider bundt cake side view, with Fall leaves in front.

It’s very dangerous to have such a delicious cake sitting around our home, since it is only my husband and I. Neither of us need to eat an ENTIRE cake, right?

I ended up taking plates with slices of this delicious apple cider bundt cake on it, to four of our neighbors homes, so they could all enjoy it, too!

Apple Cider Bundt Cake on green plate, with Fall leaves.

Time To Eat!

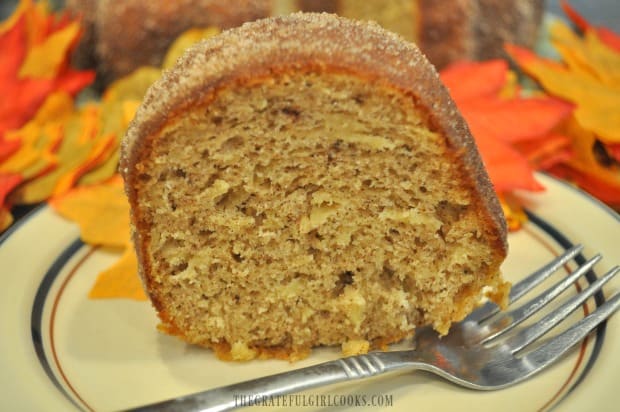
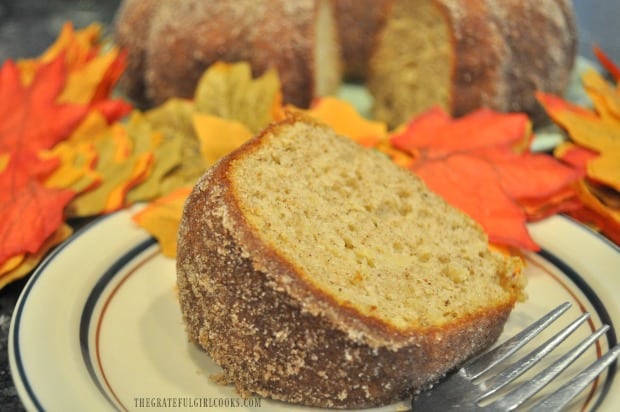
The cake cuts very easily, once cool.  Here is a slice of it on a plate, to show you what it looks like on the inside. Can you see the shredded apple in the photo below? I sure can!

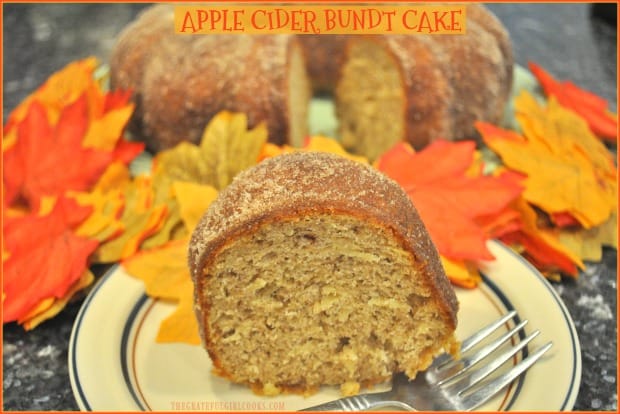
A slice of apple cider bundt cake on plate, with Fall leaves in background.

All that’s left to do is pour a cup of tea or coffee, and sit down at the table with a nice slice of delicious Apple Cider Bundt Cake!  Grab your fork – this coffeecake is DELICIOUS!

Apple Cider Bundt Cake slice on plate with fork, with rest of cake in background with Fall leaves.

We truly enjoyed this apple cider bundt cake!  The flavors I associate with fall (apples, cinnamon, and nutmeg) are integral to this coffeecake, which can double as a dessert too, if you want! Hope you will give it a try… pretty sure you won’t be disappointed! Have a GREAT day!

Looking For Other Coffeecake Recipes On This Blog?

Be sure and check out these delicious coffeecake recipes:

Interested In More Recipes?

Thank you for visiting this website. I appreciate you using some of your valuable time to do soIf you’re interested, I publish a newsletter 2 times per month (1st and 15th) with all the latest recipes, and other fun info. I would be honored to have you join our growing list of subscribers, so you never miss a great recipe! 

There is a Newsletter subscription box on the top right side (or bottom) of each blog post, depending on the device you use, where you can easily submit your e-mail address (only) to be included in my mailing list.

You Can Also Find Me On Social Media:

Facebook page: The Grateful Girl Cooks!
Pinterest:
The Grateful Girl Cooks!
Instagram:
jbatthegratefulgirlcooks

Author's signature

Original Recipe Source: https://www.bettycrocker.com/recipes/apple-cider-doughnut-cake/7d9dadd5-834d-469e-9485-3356d8f028c4

0 from 0 votes
Apple Cider Bundt Cake
Prep Time
10 mins
Cook Time
35 mins
Total Time
45 mins
 
You'll love Apple Cider Bundt Cake! It's an easy, delicious Fall dessert or coffeecake with cider, grated apples, cinnamon, nutmeg & a cinnamon sugar topping.
Category: Breakfast, Dessert
Cuisine: American
Keyword: apple cider bundt cake
Servings: 12
Calories Per Serving: 302 kcal
Author: JB @ The Grateful Girl Cooks!
Ingredients
For Cake:
  • 1 box yellow cake mix
  • 3/4 cup apple cider
  • 4 eggs
  • 1/2 cup butter , melted
  • 2 teaspoons ground cinnamon
  • 1 teaspoon ground nutmeg
  • 1 cup shredded, peeled tart apples (I used 2 medium Granny Smith)
For Topping:
  • 3 Tablespoons butter, melted
  • 1/4 cup granulated sugar
  • 1 teaspoon ground cinnamon
Instructions
  1. Preheat your oven to 350° F. Spray a standard size (12 cup) bundt cake (or tube cake) pan with non-stick spray, then coat with flour.

  2. Place yellow cake mix, melted butter, apple cider, eggs, cinnamon and nutmeg in a large mixing bowl. Beat for 2 minutes with an electric mixer on medium speed. Scrape the bowl occasionally, to incorporate all ingredients into batter. Peel, then grate 2 medium tart apples.  Add the shredded apple to the batter. Stir well, to fully combine.

  3. Pour the batter into generously greased and floured bundt pan. Bake at 350° for 35-40 minutes, or until golden brown on top and a toothpick inserted into the middle of cake comes out clean. Remove cake from oven. Let it "rest" in pan for 20 minutes on a wire rack, to cool slightly. 

  4. While cake is cooling, melt butter in a small dish or pan. Combine sugar and ground cinnamon in a separate small dish. Set aside.

  5. After cake has cooled, run a spatula (or metal butter knife) around edges of the bundt pan, to help loosen cake from pan. Once loosened, place a large plate over top of pan. Holding pan securely to the plate with both hands, quickly invert (turn upside down) the cake. It should release easily from bundt pan. Place cake on wire rack. TIP: It is very helpful to place a large piece of parchment or wax paper UNDER the wire rack to catch drips.  

  6. Use a pastry brush and completely cover the top and sides of the cake with melted butter. Use ALL of the melted butter. Sprinkle 2/3 of cinnamon sugar mix (save the rest for later) onto the buttered top, sides, and middle ring of cake, pressing it onto the cake. It's helpful to hold hands right up next to the sides of cake when adding  cinnamon sugar, to catch any that falls. Let cake rest for another 20 minutes. After 20 minutes, sprinkle top and sides of cake again with remaining cinnamon sugar mix. Press mixture into the cake with fingers.

    Once done, let cake cool completely, then slice and serve! Enjoy!

Recipe Notes

NOTE: I used Betty Crocker Super Moist Yellow Cake Mix for this recipe.

Nutrition Facts
Apple Cider Bundt Cake
Amount Per Serving (1 slice)
Calories 302 Calories from Fat 117
% Daily Value*
Fat 13g20%
Saturated Fat 7g44%
Cholesterol 82mg27%
Sodium 427mg19%
Potassium 66mg2%
Carbohydrates 43g14%
Fiber 1g4%
Sugar 25g28%
Protein 3g6%
Vitamin A 410IU8%
Vitamin C 0.6mg1%
Calcium 108mg11%
Iron 1.2mg7%
* Percent Daily Values are based on a 2000 calorie diet.

Here’s one more to pin on your Pinterest boards!You'll love Apple Cider Bundt Cake! It's an easy, delicious Fall dessert or coffeecake with cider, grated apples, cinnamon, nutmeg & a cinnamon sugar topping.

Raspberry Lemon Crumb Cake

You will LOVE this easy, delicious Raspberry Lemon Crumb Cake, which can be served as a dessert (yummy with a scoop of ice cream) OR a breakfast coffeecake.

This time of the year is the PERFECT time to find ripe raspberries at local farms or in the local produce section at the grocery store. Then you can make this absolutely yummy raspberry lemon crumb cake!

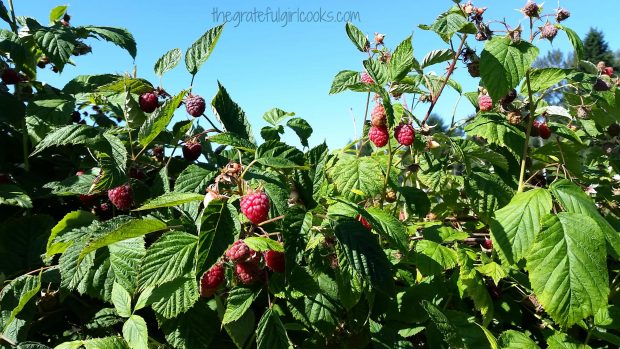
This past weekend I took my sister and brother-in-law raspberry picking at a local U-Pick farm. They were visiting Oregon from Southern CA for several days, and this is one of the activities my sister really enjoys when she comes up here to visit.

Scroll Down For A Printable Recipe Card At The Bottom Of The Page

Where I Go To Pick Fresh Berries Every Summer

Rowell Brothers Berry Farm has been around since 1853, is about 15 minutes from our home, and is one of the scenic places I LOVE to pick raspberries, blueberries, and boysenberries each summer (plus the fact that you can eat berries for free while you pick is always fun!).

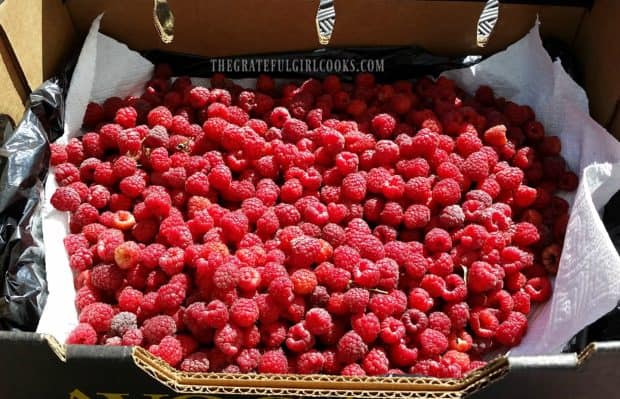
We got to the farm early in the morning, picked raspberries for half an hour and then we were done! Over eight pounds of raspberries picked in half an hour, and we only paid a little over $10, which is a real deal, compared to what they sell for at the grocery store.

A couple days later I used the berries to make homemade raspberry jam , froze a lot of them to use another time, and then also made this delicious raspberry lemon crumb cake with the remaining berries!

Raspberries ready to pick at local U-Pick farm!Fresh picked raspberries are so delicious!

How I Got This Recipe For Raspberry Lemon Crumb Cake

I received this recipe from a friend from Southern California 3 years ago.  Diane and I grew up together in the youth group at church, and ran into each other once again at a music group reunion we both attended. I hadn’t seen her in over 40 years! It was fun catching up with her, and I learned she had attended culinary school in the past.  Ooh… how fun!

Once I returned home to Oregon, Diane sent me this recipe via e-mail and suggested I might enjoy trying it!  I saved the recipe in a basket which contains a HUGE pile of recipes I want to try (too many recipes, never enough TIME), and just this week finally hunted it down and pulled it out to use with these fresh picked raspberries! So glad I did – this is a delicious recipe!

The recipe is incredibly EASY, and the fruit-filled crumb cake tastes wonderful.  We enjoy a slice for breakfast, accompanied by a good, strong cup of coffee! My husband said his favorite way to eat this would be with a big ol’ scoop of vanilla ice cream on the side!  It’s that versatile – it can be either a breakfast coffeecake or a dessert cake!

Here’s How To Make Raspberry Lemon Crumb Cake

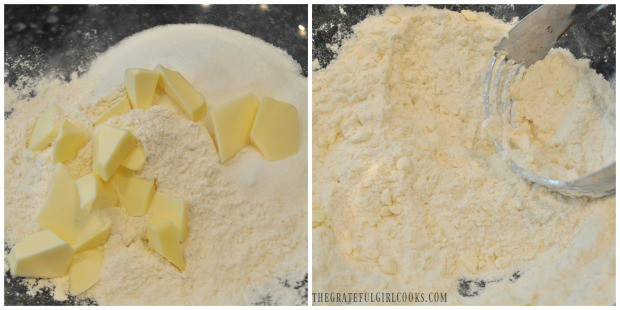
Very cold chunks of butter are cut into flour sugar and salt, using a pastry blender. The butter is worked into the dry ingredients until mixture is crumbly and butter is about the size of a pea. One half of a cup of the crumbly mixture is set aside to use for a crumb topping for the cake later on.

Butter is cut into flour and sugar for cake

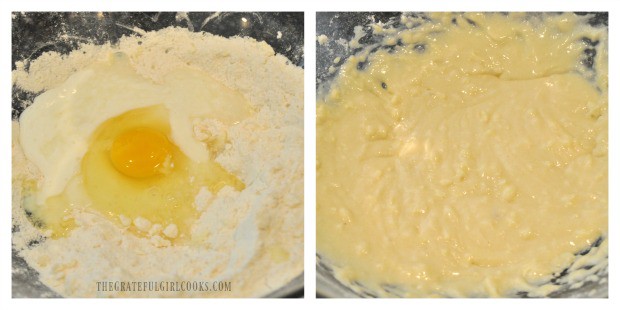
The remaining flour mixture is combined with baking powder, baking soda, egg, buttermilk and fresh lemon juice, and blended until fully combined.

Egg, lemon juice and buttermilk are blended into dry ingredients for cake

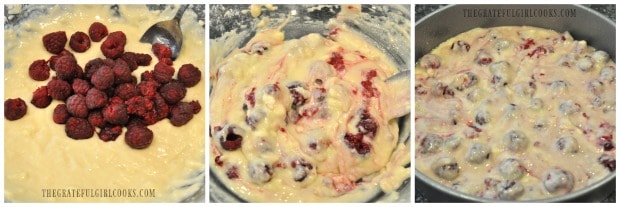
Fresh raspberries are gently stirred into cake batter.  The batter is then placed into a cake pan that has been coated (bottom and sides) with non-stick cooking spray.

Raspberries are gently stirred into batter, then batter is placed in cake pan

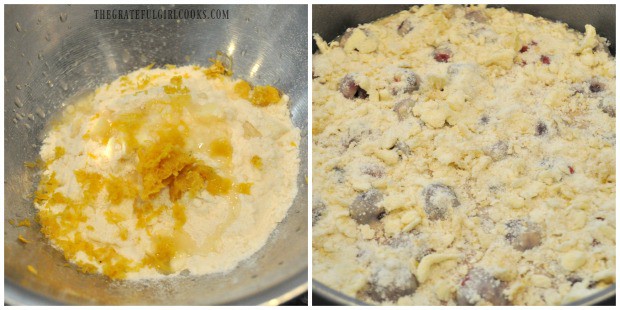
Lemon zest and juice are then added to the reserved flour mixture that was set aside earlier. This crumb topping is mixed until combined, then sprinkled over the top of the cake batter in cake pan.

Lemon zest and juice added to crumb topping, then sprinkled onto cake batter

Time To Bake The Cake!

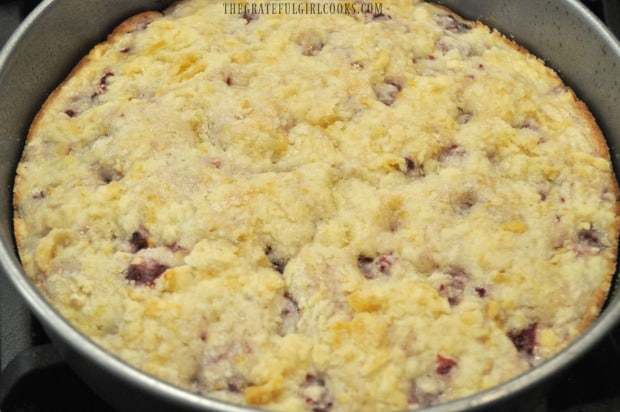
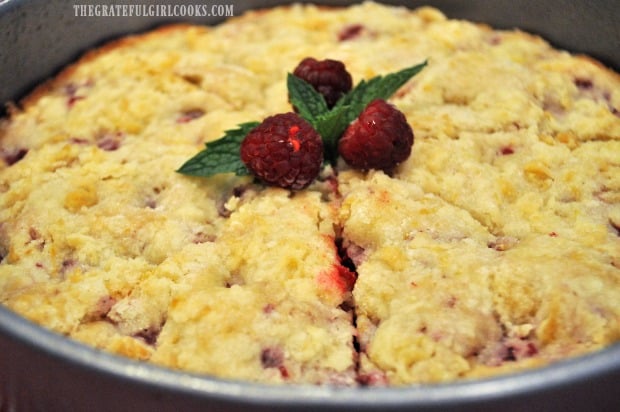
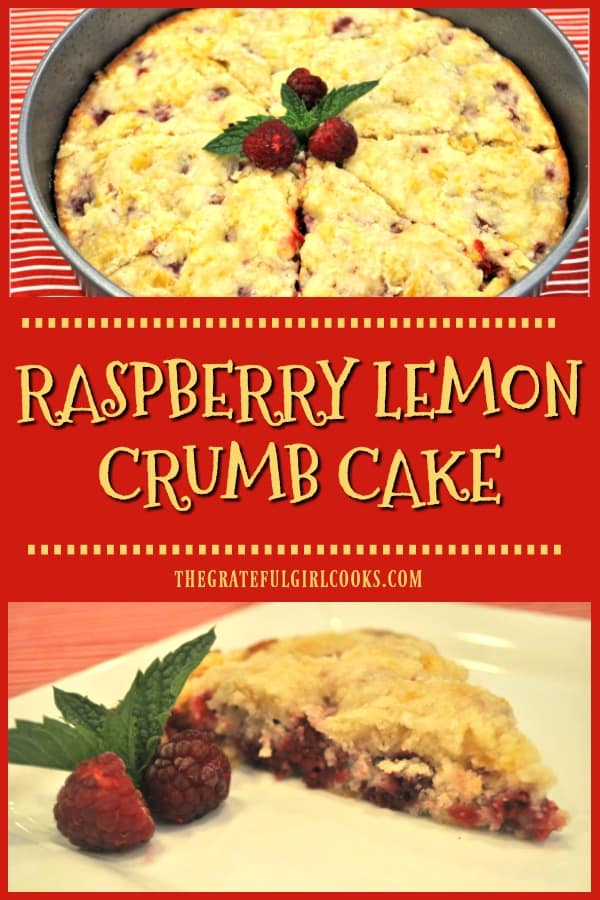
The raspberry lemon crumb cake is baked in a preheated 350°F oven for 25-30 minutes, or until the cake springs back when touched lightly in the center. This picture below shows how it looked straight out of the oven.

Raspberry lemon crumb cake, right out of the oven.

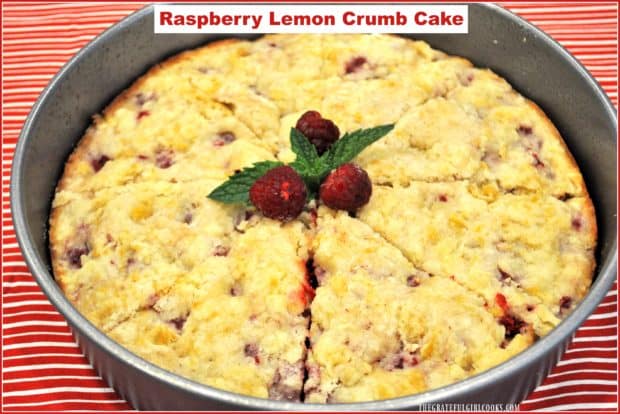
Once the cake cooled to room temperature, it was cut into 8 wedges. The top was garnished with a few raspberries and a sprig of fresh mint (from my garden!).

Raspberry lemon crumb cake cut in 8 wedges, garnished with raspberries and mint leaf.

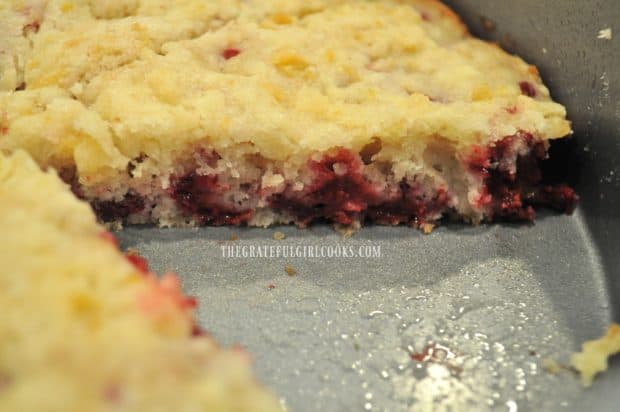
The inside look at a slice of this raspberry cake in pan.

Time To EAT!

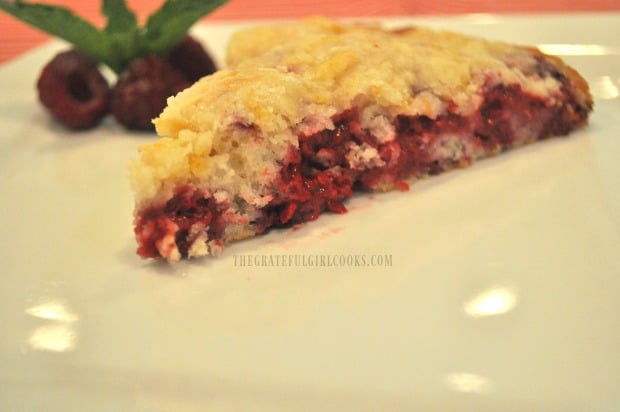
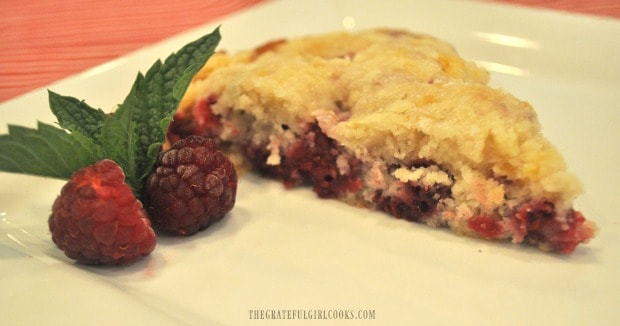
You can see what the raspberry lemon crumb cake looks like on the plate. It’s LOADED with raspberries! The cake is not dry at all, and the combination of raspberry and lemon flavors are absolutely perfect!

A slice of raspberry lemon crumb cake, served on a white plate

Slice of raspberry lemon crumb cake, with fresh raspberries and mint garnish.

We truly enjoyed this simple, yet delicious raspberry lemon crumb cake!  I really hope you will consider trying this cake for yourself… you will be surprised just how easy it is to make, and hope you will enjoy it, as well!

Looking For More CAKE Recipes?

You can find ALL my recipes in the Recipe Index, located at the top of the page. I have a nice variety of delicious cake recipes, including:

Interested In More Recipes?

Thank you for visiting this website. I appreciate you using some of your valuable time to do soIf you’re interested, I publish a newsletter 2 times per month (1st and 15th) with all the latest recipes, and other fun info. I would be honored to have you join our growing list of subscribers, so you never miss a great recipe!
There is a Newsletter subscription box on the top right side (or bottom) of each blog post, depending on the device you use, where you can easily submit your e-mail address (only) to be included in my mailing list.

You Can Also Find Me On Social Media:

Facebook page: The Grateful Girl Cooks!
Pinterest:
The Grateful Girl Cooks!
Instagram:
jbatthegratefulgirlcooks

Have a wonderful day!

Author's signature

Recipe Source: Diane Schultz O’Brien

0 from 0 votes
Raspberry Lemon Crumb Cake
Prep Time
10 mins
Cook Time
30 mins
Total Time
40 mins
 
You will LOVE this easy, delicious Raspberry Lemon Crumb Cake, which can be served as a dessert (yummy with a scoop of ice cream) OR a breakfast coffeecake. 
Category: Dessert or Coffeecake
Cuisine: American
Keyword: raspberry lemon crumb cake
Servings: 8 slices
Calories Per Serving: 207 kcal
Author: JB @ The Grateful Girl Cooks!
Ingredients
  • cups all purpose flour
  • 2/3 cup granulated sugar
  • 1/8 teaspoon salt
  • 1/4 cup butter (very cold)
  • 1/2 teaspoon baking powder
  • 1/4 teaspoon baking soda
  • 1/3 cup buttermilk (low-fat)
  • 2 Tablespoons lemon juice (fresh)
  • 1 egg
  • 1 cup fresh raspberries
  • 2 teaspoons lemon zest (finely grated lemon rind)
  • 3/4 teaspoon lemon juice (fresh)
Instructions
  1. Preheat oven to 350°F. Coat an 8" round cake pan with non-stick cooking spray (bottom and sides).

  2. Place flour, granulated sugar and salt in a large mixing bowl. Cut in chunks of COLD butter, using a pastry blender or 2 knives or forks, until the butter/crumbs are about the size of peas.  Measure out 1/2 cup of this crumb mixture and set aside to use as crumb topping later (set aside).

  3. To the mixing bowl with remaining flour mixture add the baking powder, baking soda, buttermilk, lemon juice, and egg. Beat on medium speed with a mixer until well blended. Gently STIR in fresh raspberries until fully combined with batter. Spoon batter into the prepared (sprayed) cake pan. Gently spread to cover bottom of pan.

  4. Take the reserved flour/crumb mixture and add lemon zest and juice to it. Combine these ingredients with a fork until crumbly.  Sprinkle this mixture over the top of the cake batter, until top of cake is covered.

  5. Bake cake on center rack of preheated 350°F oven for 25-30 minutes or until it is light golden brown on top and cake springs back with touched lightly in the center (mine took 30 minutes). Remove cake pan to a wire rack to cool to room temperature. Slice into 8 wedges, and garnish cake with fresh raspberries and a mint sprig, if desired. ENJOY!

Nutrition Facts
Raspberry Lemon Crumb Cake
Amount Per Serving (1 slice)
Calories 207 Calories from Fat 54
% Daily Value*
Fat 6g9%
Saturated Fat 3g19%
Cholesterol 36mg12%
Sodium 140mg6%
Potassium 91mg3%
Carbohydrates 34g11%
Fiber 1g4%
Sugar 17g19%
Protein 3g6%
Vitamin A 205IU4%
Vitamin C 6.2mg8%
Calcium 34mg3%
Iron 1.1mg6%
* Percent Daily Values are based on a 2000 calorie diet.

Here’s one more to pin on your Pinterest boards!You will LOVE this easy, delicious Raspberry Lemon Crumb Cake, which can be served as a dessert (yummy with a scoop of ice cream) OR a breakfast coffeecake.

Easy German Chocolate Cake with Homemade Frosting

It’s EASY to make an absolutely delicious German Chocolate Cake for dessert, thanks to a simple shortcut (using a box mix) and then topping it with yummy HOMEMADE coconut pecan frosting! SO GOOD!!!!
It's EASY to make a delicious German Chocolate Cake for dessert, thanks to a shortcut using a box mix and topping it with yummy HOMEMADE coconut pecan frosting!

Do you enjoy German chocolate cake? We sure do, but I think my Mom might be the biggest fan of all. She is the one who taught me this quick shortcut which I have used for years to make this delicious dessert!

Scroll Down For A Printable Recipe Card At The Bottom Of The Page

My Mom LOVES German Chocolate Cake

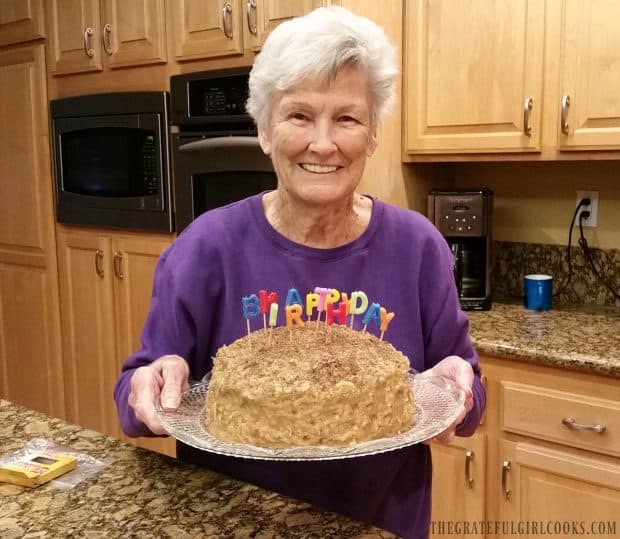
German Chocolate Cake is my Mom’s all-time favorite cake – (she used to make one for herself for her birthday whenever possible).  I recently flew down to see her in Southern California because she was very sick (and it was her birthday), and made her a German chocolate cake as a SURPRISE!

She loved it, and I even froze a few extra slices for her, which she was able to enjoy long after I had returned home to Oregon.

My mom, holding her birthday German Chocolate Cake

My mom has made LOTS of German chocolate cakes over the years. She told me how easy it has NOW become, thanks to using a boxed cake mix for the base.  Her cakes are always good; she cooks most of them from scratch, so I assumed she still made this particular cake from scratch. Nope. She switched because of the time it saved her to make this cake (a box mix can be made lickety split)!

So that’s how I make it now, too. She insists it’s the FROSTING that needs to be made from scratch for a PERFECT TASTING German chocolate cake! I gotta tell you – this frosting is the best – better than a tub of frosting from the store!

How To Make This EASY German Chocolate Cake

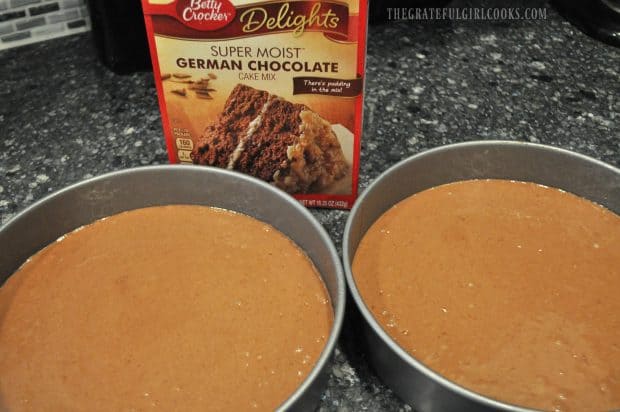
So here’s how to make this delicious cake, easily and quickly!  Prepare boxed cake mix using the ingredients and instructions on the box. I made a 9″ two layer cake, but it’s perfectly okay to make a 13×9 sheet cake with this recipe, as well (even EASIER).

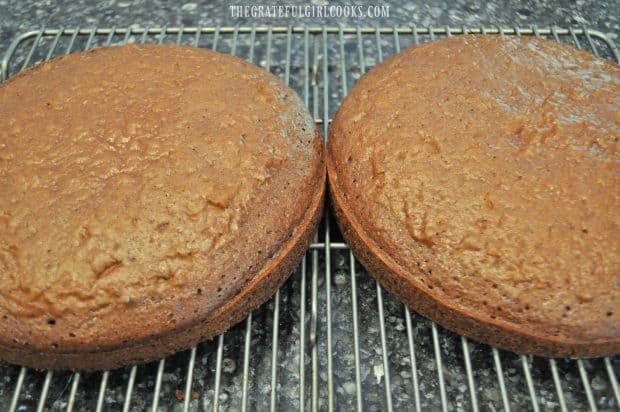
When done baking, transfer the cake pans to a wire rack. Let the cake cool for about 10 minutes, then carefully invert cake layers onto wire rack, one at a time. You can do this by placing a wire rack on top of the cake pan. Quickly and carefully turn it over while holding both the wire rack and the cake pan tightly together. This will release the cake from the pan.  Let the cake layers cool to room temperature before frosting.

German chocolate cake mix batter in two pans, ready to bake

Two baked cake layers, cooling on wire rack

Time To Make The Easy German Chocolate Cake Frosting!

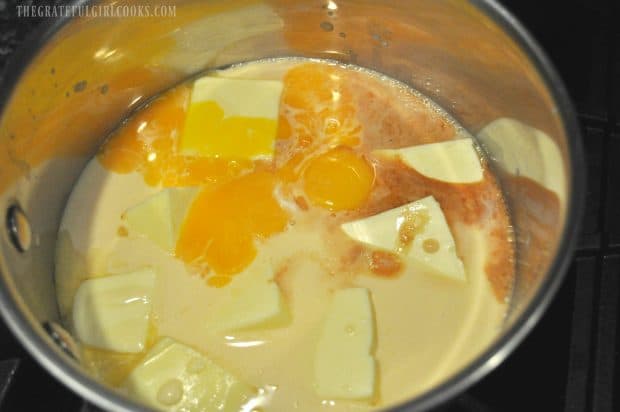
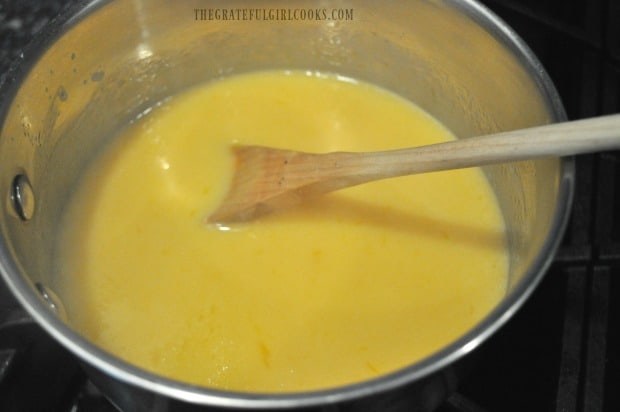
Once you put the cake in oven, make the homemade frosting: Cook butter, evaporated milk, sugar, egg yolks and vanilla in medium saucepan over medium-low heat. Cook for a full 12 minutes, stirring often, until mixture thickens. Remove the pan from the heat.

Butter, evaporated milk, eggs, cooking in pan for homemade German chocolate cake frosting

Thickened sauce for homemade cake frosting in saucepan

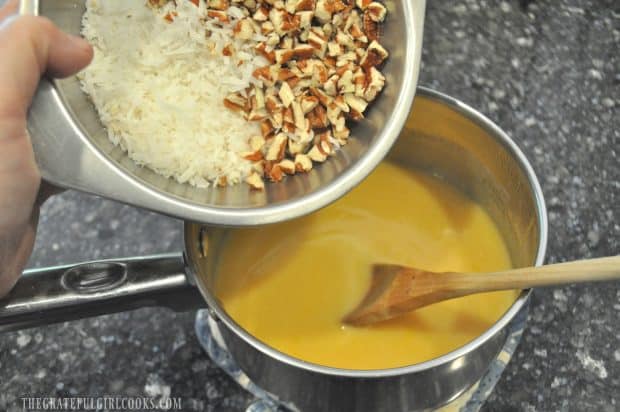
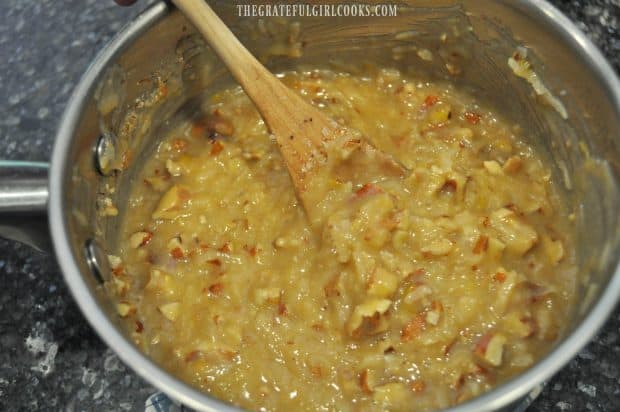
Stir in shredded coconut and chopped pecans until fully blended. Let this frosting cool to room temperature before frosting cake. You can speed up the cooling process by stirring the frosting often, if desired.

Shredded coconut and chopped pecans added to German chocolate cake frosting

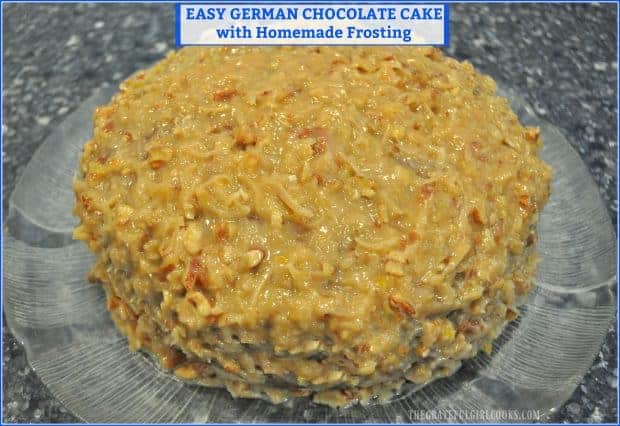
Homemade coconut pecan frosting for German chocolate cake

Frost The Cake

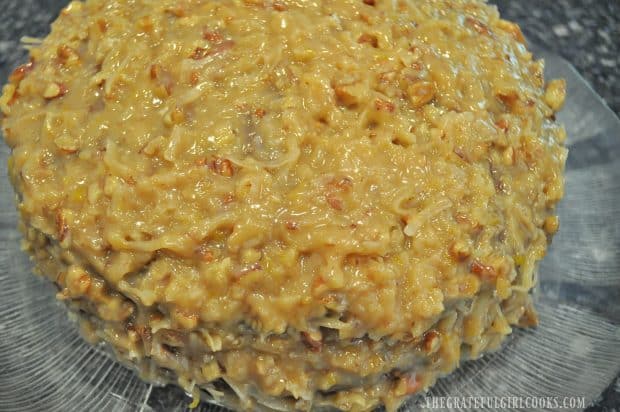
To frost the cake, place one layer onto a serving platter. Spread a thin layer of frosting over the top of this layer.  Place another layer of cake on top of the frosted layer. Carefully spread frosting lightly over the top and sides of cake until fully covered.

Homemade coconut pecan frosting is spread onto and covers cake

Serve The German Chocolate Cake

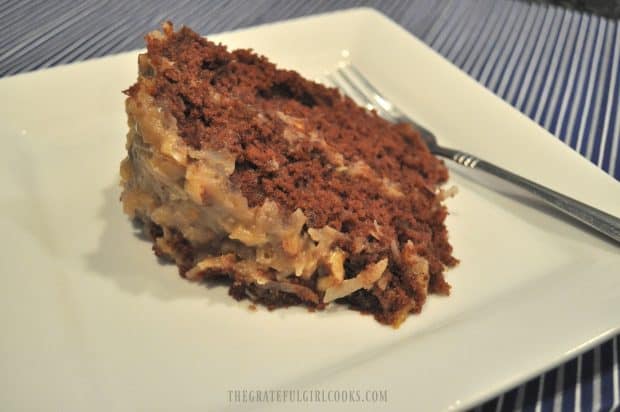
Once the cake is frosted, all that is left for you to do is… slice cake, serve… and ENJOY! (Insert everyone’s happy face here!!!!!). The frosting is so incredibly good, and you made it from SCRATCH. You don’t have to tell your friends that you used a boxed cake mix for convenience… that will be OUR little secret (wink, wink).

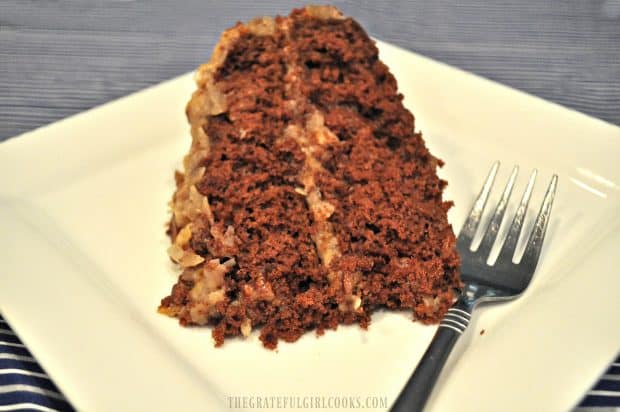
Slice of German chocolate cake served on white plate with fork

Easy German chocolate cake with homemade frosting on white plate

This is a light, moist, absolutely delicious cake… one you will be proud to serve to family and friends, and the homemade frosting is outta this world good! The recipe makes enough frosting to lightly frost a two layer cake or a 13×9 inch cake (see NOTES section in printable recipe for larger quantity ingredient calculations), if additional cake layers or a thicker layer of frosting is desired.

Thank you for stopping by today!  I hope you will check out some of the other cake recipes here, like Apple Cake, Carrot Cake, Hummingbird Cake, Lemon Jello Cake, and several others. They are delicious, and can easily be found in the Recipe Index at the top of this page.  Have a fantastic day, friends.

Interested In More Recipes?

Thank you for visiting this website. I appreciate you using some of your valuable time to do soIf you’re interested, I publish a newsletter 2 times per month (1st and 15th) with all the latest recipes, and other fun info. I would be honored to have you join our growing list of subscribers, so you never miss a great recipe!
There is a Newsletter subscription box on the top right side (or bottom) of each blog post, depending on the device you use, where you can easily submit your e-mail address (only) to be included in my mailing list.

You Can Also Find Me On Social Media:

Facebook page: The Grateful Girl Cooks!
Pinterest:
The Grateful Girl Cooks!
Instagram:
jbatthegratefulgirlcooks

Author's signature

Frosting Recipe Source: My Mom

0 from 0 votes
Easy German Chocolate Cake with Homemade Frosting
Prep Time
10 mins
Cook Time
25 mins
Total Time
35 mins
 
It's EASY to make a delicious German Chocolate Cake for dessert, thanks to a shortcut using a box mix and topping it with yummy HOMEMADE coconut pecan frosting!
Category: Desssert
Cuisine: American
Keyword: German chocolate cake
Servings: 12 servings
Calories Per Serving: 449 kcal
Author: JB @ The Grateful Girl Cooks!
Ingredients
  • 1 German chocolate box cake mix
  • 1/2 cup butter
  • 1 cup evaporated milk
  • 1 cup granulated sugar
  • 3 egg yolks , beaten slightly
  • 1 teaspoon vanilla extract
  • cups shredded coconut
  • 1 cup chopped pecans
Instructions
  1. Prepare boxed cake mix using ingredients and instructions from box.  When done baking, transfer cake pans to wire rack. Let cool for about 10 minutes, then carefully invert cake onto wire rack (place wire rack on top of cake pan, then quickly and carefully turn over, to release cake from pan.  Let cake layers cool to room temperature before frosting.

  2. To make frosting (make while cake is baking): Cook butter, evaporated milk, sugar, egg yolks and vanilla in medium saucepan over medium-low heat. Cook for a full 12 minutes, stirring often, until mixture thickens. Remove pan from heat.

  3. Stir in shredded coconut and chopped pecans until fully blended. Let frosting cool to room temperature before frosting cake layers. (You can speed up the cooling process by stirring the frosting often, if desired).

  4. To frost cake, place one layer onto serving platter. Spread a thin layer of frosting over top of cake layer.  Place another layer of cake on top of frosting. Carefully spread frosting over top and sides of cake until covered. Slice cake, serve... and ENJOY!

Recipe Notes

NOTE: This makes enough frosting for a 13x9 or two layer cake.  If you want more frosting for your cake, use these ingredients: 1 can (12 oz.) evap. milk, 1½ cups sugar, 3/4 cup butter, 4 yolks, 1½ tsp. vanilla, 1 pkg (7 oz.) shredded coconut, and 1½ cups chopped pecans. (this will make 4½ cups total)

Nutrition Facts
Easy German Chocolate Cake with Homemade Frosting
Amount Per Serving (1 serving)
Calories 449 Calories from Fat 234
% Daily Value*
Fat 26g40%
Saturated Fat 11g69%
Cholesterol 75mg25%
Sodium 418mg18%
Potassium 263mg8%
Carbohydrates 51g17%
Fiber 2g8%
Sugar 37g41%
Protein 5g10%
Vitamin A 355IU7%
Vitamin C 0.6mg1%
Calcium 126mg13%
Iron 2.2mg12%
* Percent Daily Values are based on a 2000 calorie diet.

Here’s one more to pin on your Pinterest boards! It's EASY to make a delicious German Chocolate Cake for dessert, thanks to a shortcut using a box mix and topping it with yummy HOMEMADE coconut pecan frosting!
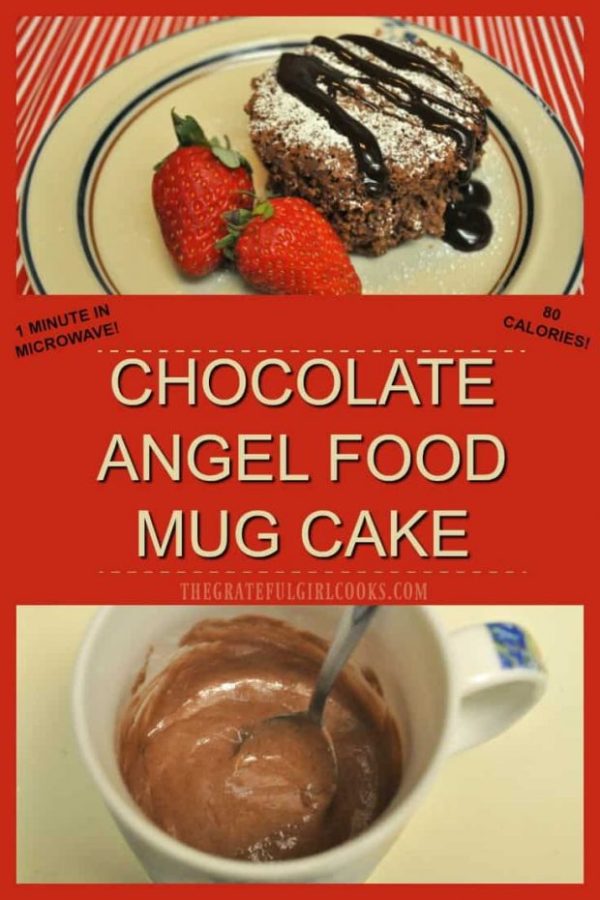
Chocolate Angel Food Mug Cake

Make a master mix with two ingredients , then enjoy an easy “low-calorie” chocolate angel food mug cake any time you want, cooked for only ONE MINUTE in a microwave! Make a master mix with two ingredients , then enjoy an easy "low-calorie" chocolate mug cake any time you want, cooked for only ONE MINUTE in a microwave!

If you’re trying to lose weight or cut calories, but enjoy dessert… you’ll enjoy this recipe for Chocolate Angel Food Mug Cake, made in a microwave in 1 MINUTE!  You’ll feel like you’re “cheating”, but with the cake being only 80 calories, it’s a fast, tasty option to curb a sweet tooth!

My sister Joni told me about the Weight Watchers 3-2-1 Cake. She heard about it, tried it,  and then told me about it. So I just HAD to make this chocolate angel food mug cake, too!

Scroll Down for A Printable Recipe Card At The Bottom Of The Page

Why This Dessert Is Also Called A 3-2-1 Cake

The numbers 3-2-1 refer to the easy way to remember the recipe for each individual mug cake. 3 Tablespoons mix- 2 Tablespoons water- 1 minute in the microwave! Get it?  It is one of the EASIEST ways to quickly satisfy a sweet tooth “attack”, without going overboard!!

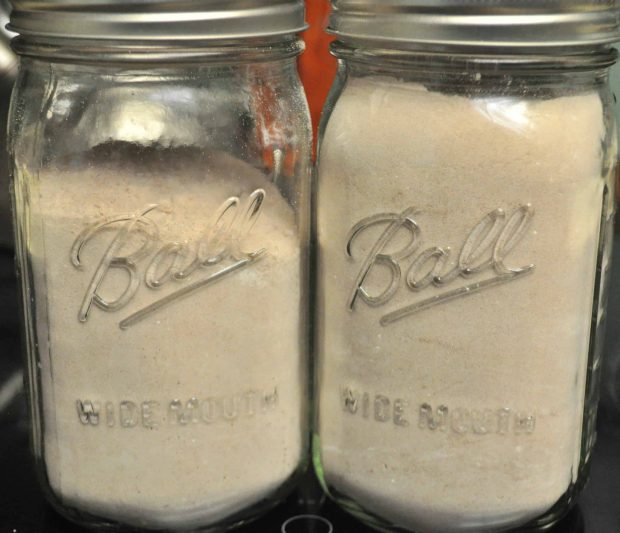
The “mix” is made by simply combining dry cake mix with angel food cake mix (the kind that only has you add water). Both dry cake mixes are whisked together until well blended, with no lumps. Store the mix in an airtight, sealed container, then you can use it as needed.

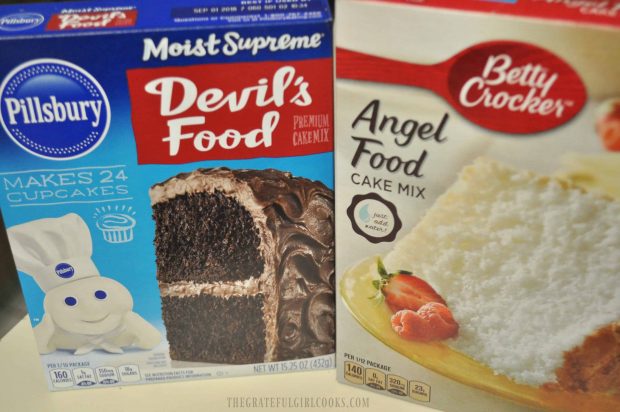
The cake mixes used to make the mug cake.

The recipe makes enough for 46 mug cakes, so there will be plenty! I used 2 quart sized canning jars to store the cake mixture, and taped instructions to each jar for future use.

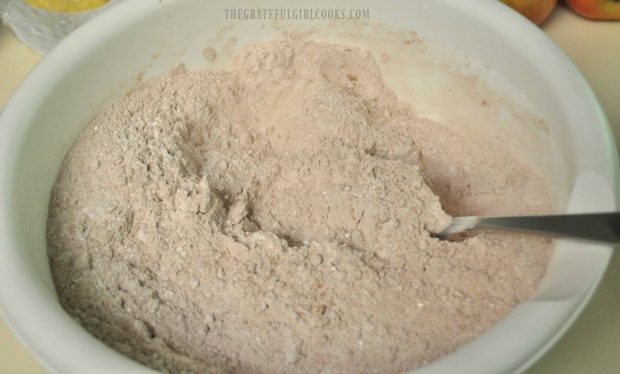
The dry cake mixes are combined in a large bowl.

I used Devil’s Food cake mix to make my mug cake chocolate flavored, but you can substitute any flavor mix for the Devil’s Food. You can also add 2-3 teaspoons mix-ins like finely chopped nuts or dried fruit, or mini chocolate chips for additional flavor, if you want.

**Please note that adding these additional ingredients will raise the caloric value!! The cake by itself with no additional filling or topping equals 80 calories per serving, AND if you follow WW, the point value is 2 Points Plus, or 3 Smart Points.**  

The chocolate mug cake mix is stored in airtight containers until needed.

Okay, I Made The Mix. How Do I MAKE The Chocolate Mug Cake?

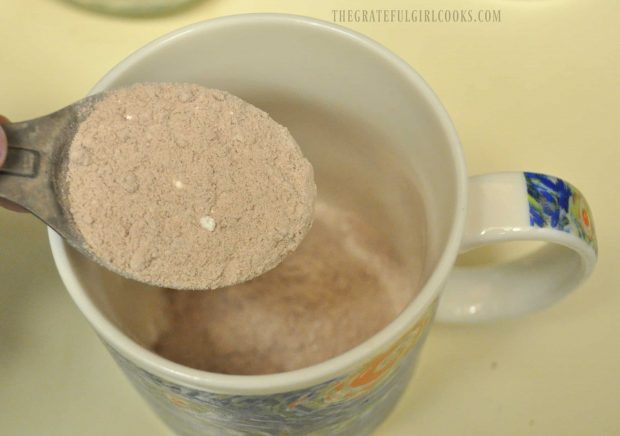
Once you’ve made the Master Mix, when the craving for something a little sweet mug cake hits, make the cake. For one single chocolate mug cake, place 3 Tablespoons mix into a straight sided microwave safe mug.

Measuring the mug cake mix into microwaveable mug.

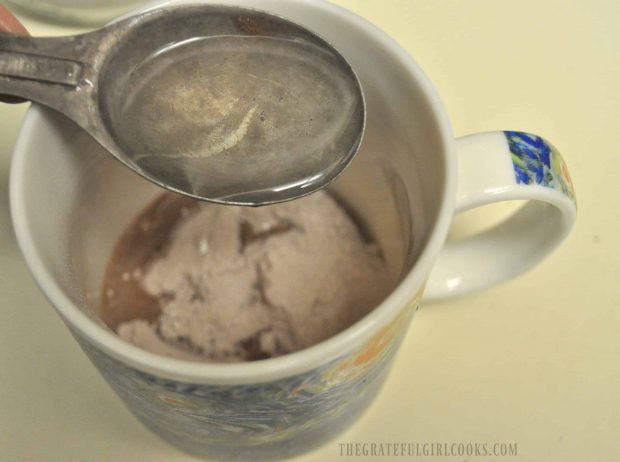
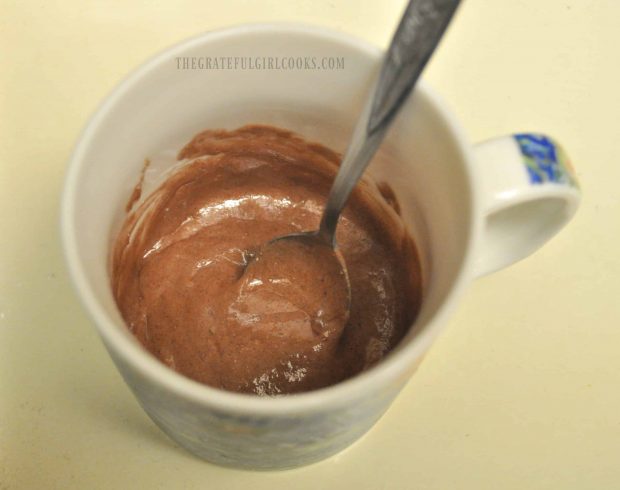
Add 2 Tablespoons water, and mix well with a spoon or fork until mixture is smooth.

Water is added to the cake mix in mug.

Ingredients for the mug cake are stirred together in the coffee cup before cooking.

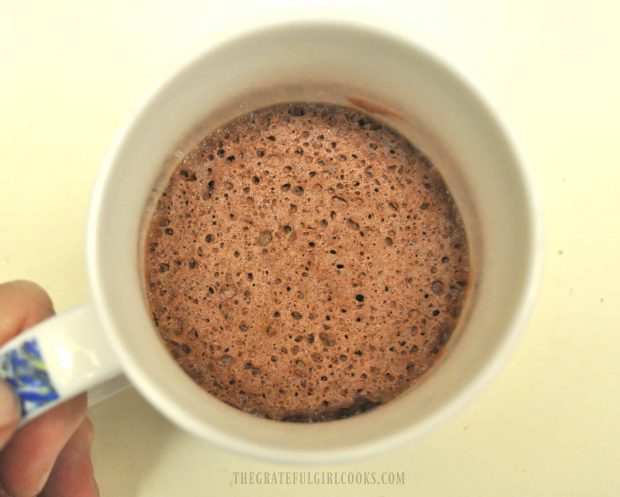
Microwave for 1 minute on HIGH power. Remove mug from microwave; let it sit and cool down a little bit. It will come out looking like this…

The cake cooks for one minute in the microwave.

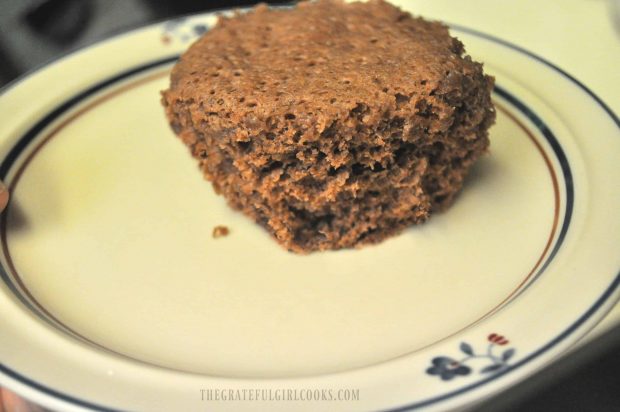
It can be eaten straight from the mug, OR you can run a butter knife around edges and gently remove the cake from the mug onto a plate.

Chocolate angel food mug cake can be eaten plain, without any additional toppings.

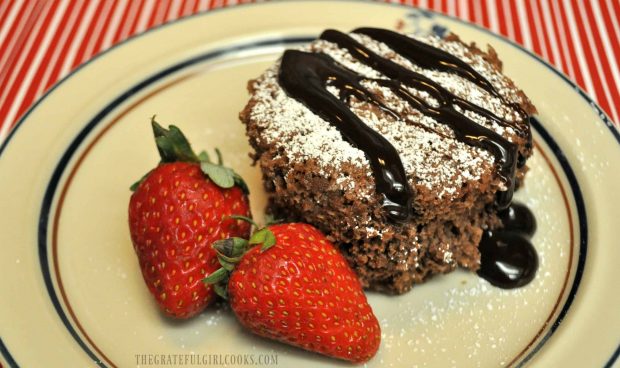
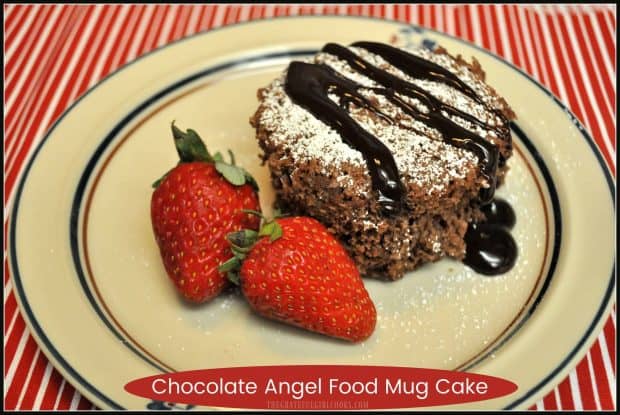
Serve the mug cake plain for least amount of calories (80), or top it with frosting, ice cream, fruit, powdered sugar, frozen yogurt, and/or chocolate syrup.

Chocolate mug cake, topped with powdered sugar and chocolate syrup.

Now can you see why it is commonly called a 3-2-1 Mug Cake?  THREE tablespoons of prepared mix, TWO tablespoons of water, and ONE minute in the microwave!!! It’s a perfect mix to keep on hand, so when the urge for dessert hits you can satisfy your craving with a slightly “healthier” solution!

Sure hope you will make this mug cake mix and will enjoy having it on hand in your kitchen for those “gotta have something sweet now” emergencies… ha ha!

Looking For More CAKE Recipes?

You can find all of my recipes in the Recipe Index, located at the top of the page. I have quite a few delicious cake recipes, including:

Interested In More Recipes?

Thank you for visiting this website. I appreciate you using some of your valuable time to do soIf you’re interested, I publish a newsletter 2 times per month (1st and 15th) with all the latest recipes, and other fun info. I would be honored to have you join our growing list of subscribers, so you never miss a great recipe!
There is a Newsletter subscription box on the top right side (or bottom) of each blog post, depending on the device you use, where you can easily submit your e-mail address (only) to be included in my mailing list.

You Can Also Find Me On Social Media:

Facebook page: The Grateful Girl Cooks!
Pinterest:
The Grateful Girl Cooks!
Instagram:
jbatthegratefulgirlcooks

Author's signature

Recipe Source: https://simple-nourished-living.com/weight-watchers-3-2-1-microwave-mug-cake/

0 from 0 votes
Chocolate Angel Food Mug Cake
Prep Time
2 mins
Cook Time
1 min
Total Time
3 mins
 
Make a master mix with two ingredients , then enjoy an easy "low-calorie" chocolate mug cake any time you want, cooked for only ONE MINUTE in a microwave!
Category: Dessert
Cuisine: American
Keyword: mug cake
Servings: 46 cakes
Calories Per Serving: 72 kcal
Author: JB @ The Grateful Girl Cooks!
Ingredients
For Cake Mix:
  • 1 box (15.25 - 18.25 ounces) Devil's Food cake mix
  • 1 box (16 ounces) Angel Food cake mix (the type that only needs water-one step)
To Make One Mug Cake:
  • 3 Tablespoons of the combined dry cake mix
  • 2 Tablespoons water
Instructions
  1. Whisk both dry cake mixes together until well blended, with no lumps. Store in an airtight, sealed container. I used canning jars to store the cake mixture, and taped instructions to jar.
  2. When ready to make one mug cake, place 3 Tablespoons mix into a straight sided microwave safe mug. Add 2 Tablespoons water, and mix well until mixture is smooth.
  3. Microwave for 1 minute on HIGH power. Remove mug from microwave; let it sit and cool down a little bit. It will be ready to eat straight from the mug, OR you can run a butter knife around edges and gently remove the cake from the mug onto a plate. Serve the cake plain for least amount of calories (80), or you can garnish cake with frosting, ice cream or frozen yogurt, fruit, powdered sugar (sifted) and/or chocolate syrup.
Recipe Notes

TIP# 1 - You can substitute any flavor cake mix for the Devil's Food.
TIP # 2 - May also add 2-3 teaspoons additional mix-ins like finely chopped nuts or dried fruit, or mini chocolate chips for additional flavor. Please note that adding these additional ingredients will raise the caloric value.

Nutrition Facts
Chocolate Angel Food Mug Cake
Amount Per Serving (1 cake)
Calories 72
* Percent Daily Values are based on a 2000 calorie diet.

Here’s one more to pin on your Pinterest boards!Make a master mix with two ingredients , then enjoy an easy "low-calorie" chocolate mug cake any time you want, cooked for only ONE MINUTE in a microwave!
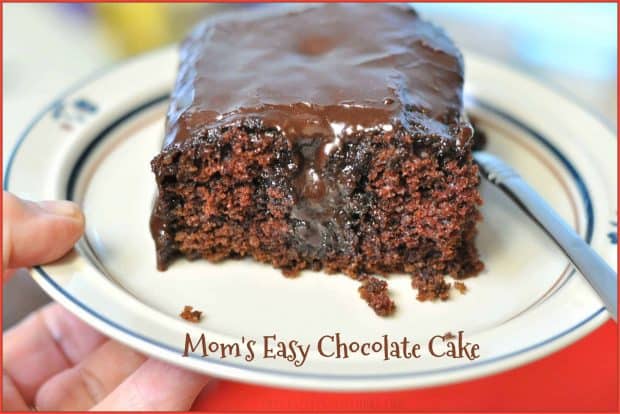
Mom’s Easy Chocolate Cake

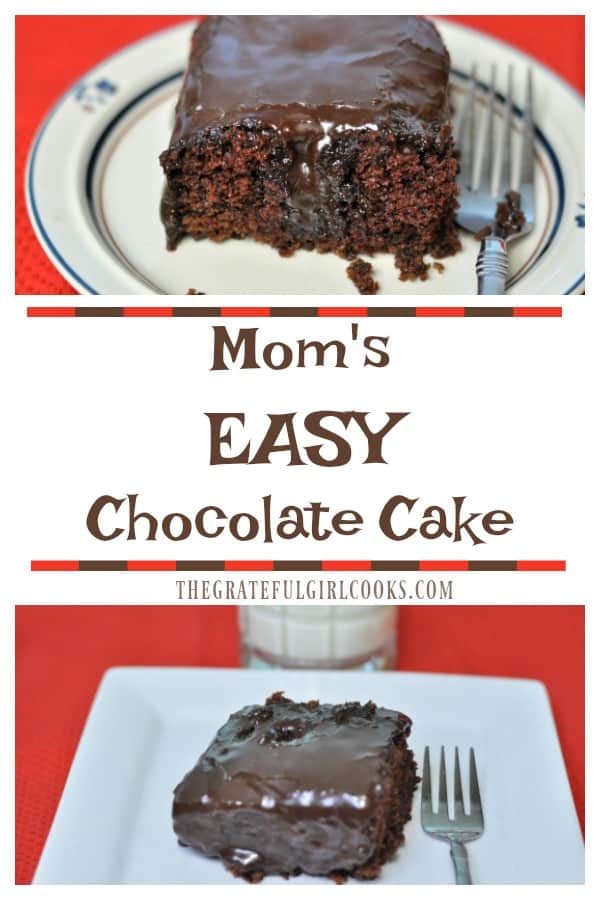
Mom’s EASY Chocolate Cake, with chocolate frosting, is a delicious dessert for the whole family, and can be made from scratch in practically no time at all!Mom's EASY Chocolate Cake, with chocolate frosting, is a delicious dessert for the whole family, and can be made from scratch in practically no time at all!

 Today I want to share with you an old family favorite recipe for Mom’s Easy Chocolate Cake! It is super easy to make, and will be a big hit with everyone who gets to enjoy a piece I have such great memories of having this cake as I was growing up, and I have my sweet Mom to thank for that!

Scroll Down For A Printable Recipe Card At The Bottom Of The Page

Sweet Memories Of This Chocolate Cake

When I was growing up, occasionally my Mom would sneak back into the kitchen after dinner (while we were watching TV or doing homework) and whip up a delicious chocolate cake from scratch for our family of 5 as a surprise.  We LOVED it! Within a few minutes of the cake going into the oven, the smell coming out of our little kitchen would alert us to the surprise treat ahead for us!

What a great memory! We didn’t have a lot of money or a fancy home growing up, but my Mom sure could cook and make wonderful meals with simple items from our pantry.  I am grateful for the inspiration I have received from her, to this very day!

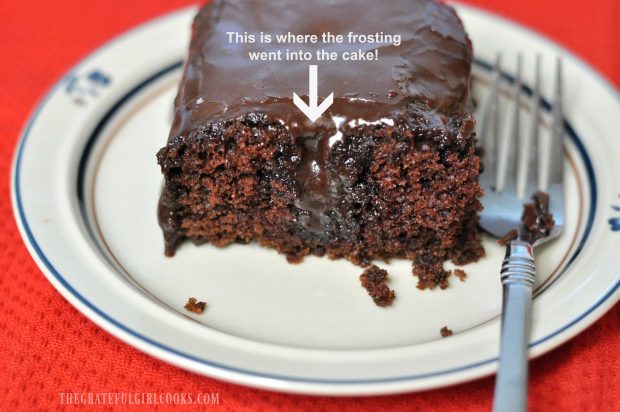
The cake is very simple to make, and so is the easy frosting!  Instead of waiting for the cake to “cool down” after it was finished baking, Mom would poke holes in the cake when it came out of the oven, and pour/spread the creamy chocolate frosting all over the cake. The frosting would drip down into the holes in the cake, so we had small tunnels of chocolate throughout our slices when we would eat it!  Oh boy… this is a GREAT tasting chocolate cake.  Here’s how to make it!

How To Make Mom’s Easy Chocolate Cake Batter

Cream together sugar, vegetable shortening and eggs in a large bowl, using an electric hand mixer or a stand mixer. Beat the ingredients well, for 2-3 minutes.

Sugar, eggs, and shortening mixed together for cake batter

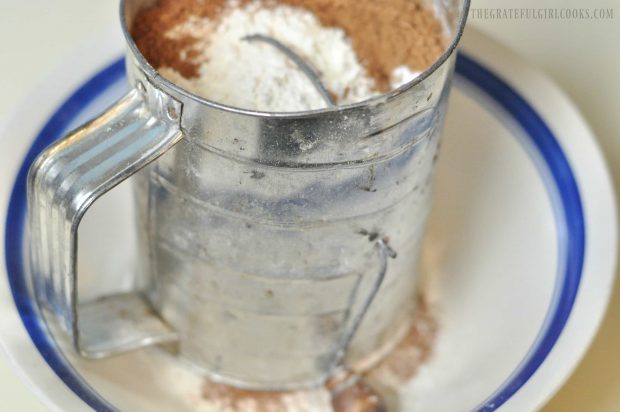
In a separate large bowl, sift together the all purpose flour, cocoa, baking soda and salt.

Flour, cocoa, and other dry ingredients sifted for chocolate cake batter

Add the dry, sifted ingredients to the wet ingredients, along with 1 cup of buttermilk.  Once blended, slowly pour in 3/4 cup of boiling water, and a teaspoon of vanilla extract. Blend on low until batter is fully mixed together.

Time To Bake!

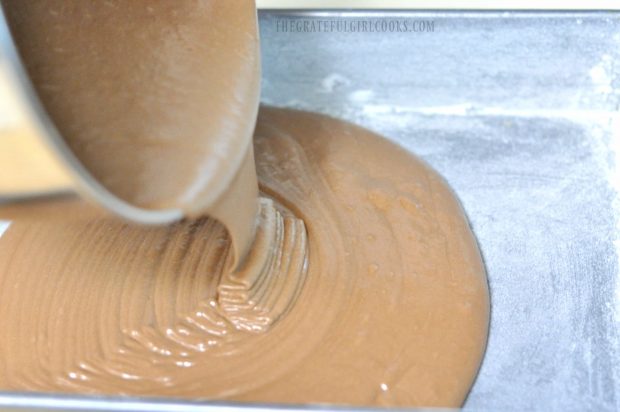
Pour the batter for Mom’s easy chocolate cake into a greased and floured 9×13 baking pan, and distribute the batter evenly. Bake the cake at 350 degrees for 35 minutes, or until a toothpick inserted into middle of cake comes out clean..

Mom's chocolate cake batter poured into pan

Make The Frosting

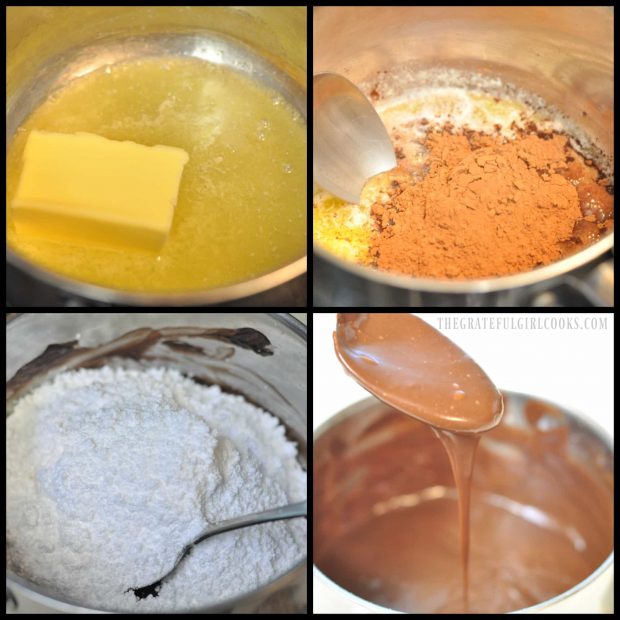
While the cake is baking, make up the frosting. Melt butter in saucepan on low heat.  Add cocoa powder and mix well with a spoon.  Add salt, vanilla, and milk; mix well.  Add the powdered sugar to the frosting ingredients. Mix until the frosting is not too thick, but “pourable”. Add additional milk to thin… or add additional powdered sugar to thicken, as needed.

4 photos showing chocolate frosting for cake being made

Frosting Mom’s Easy Chocolate Cake!

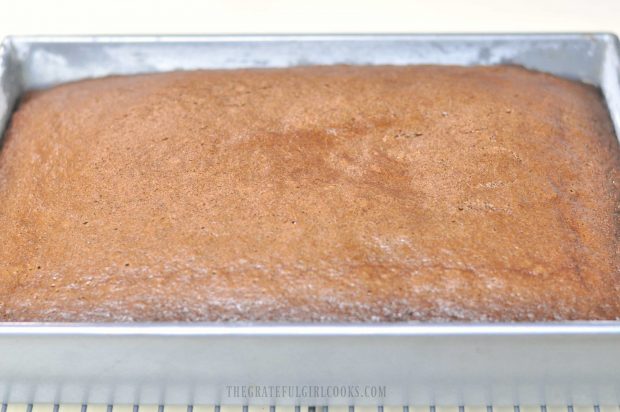
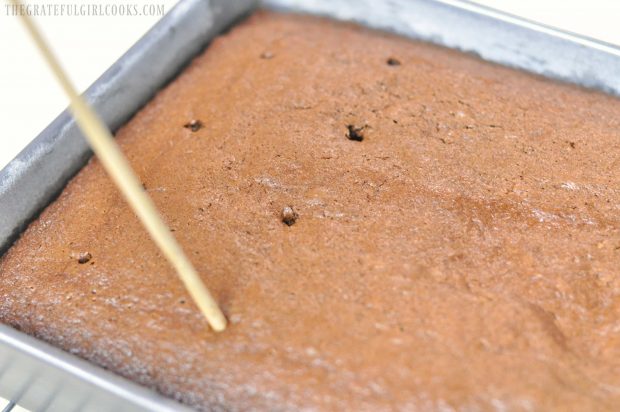
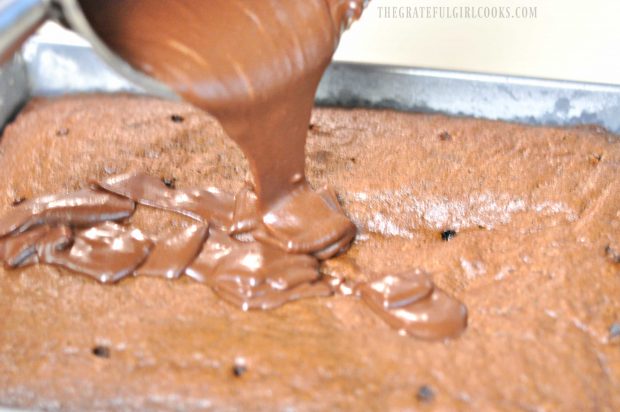
When Mom’s easy chocolate cake is done, remove the pan from the oven, and place pan on a wire rack. Let the cake rest for 2-3 minutes, then poke holes all over surface of cake every couple inches (I use a chopstick!).  Pour the chocolate frosting over the surface of Mom’s easy chocolate cake, and spread it out, to cover.Baked chocolate cake, in pan on wire rack, cooling down

Holes poked into cake once baked

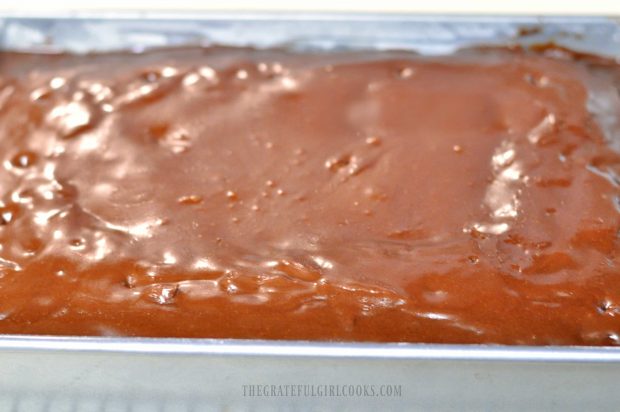
Chocolate frosting poured over baked cake
When finished, Mom’s easy chocolate cake should look like this.  The frosting will be fairly “fluid” since the cake is still hot. Continue to spread the warm frosting over the holes as they “re-appear”. As the frosting oozes down into the cake, the holes on top surface will open up again.

Mom's easy cake is baked then frosted with chocolate icing

Time To EAT!

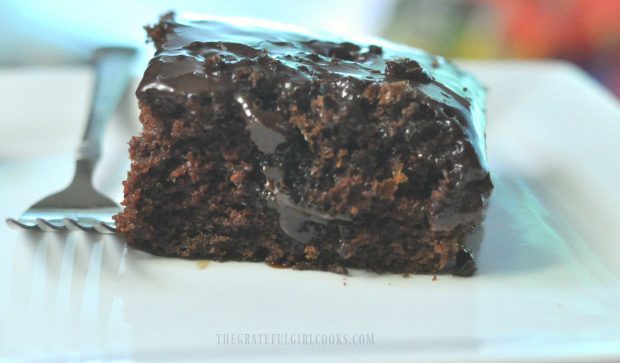
Let the frosting firm up and the cake cool down!  Once Mom’s easy chocolate cake is at room temperature, you can slice and serve it up!  It’s as simple as that! By the way, in the picture below the frosting looks darker than in previous photo. Don’t know what’s up with that- it IS the very same cake!.

Piece of Mom's chocolate cake on white plate with forkPiece of chocolate cake with frosting dripping through the middle

I have such vivid memories of enjoying Mom’s easy chocolate cake from my childhood. That MUST be where I got my love of cake from, right?  Ha Ha! Hope you will give this easy, simple and delicious recipe a try!  The chocolate cake and creamy chocolate frosting taste fantastic!  Thanks, Mom!

Looking For More CAKE Recipes?

You can find all of my recipes in the Recipe Index, located at the top of the page. My cake recipes are all delicious, and include:

Interested In More Recipes?

Thank you for visiting this website. I appreciate you using some of your valuable time to do soIf you’re interested, I publish a newsletter 2 times per month (1st and 15th) with all the latest recipes, and other fun info. I would be honored to have you join our growing list of subscribers, so you never miss a great recipe!
There is a Newsletter subscription box on the top right side (or bottom) of each blog post, depending on the device you use, where you can easily submit your e-mail address (only) to be included in my mailing list.

You Can Also Find Me On Social Media:

Facebook page: The Grateful Girl Cooks!
Pinterest:
The Grateful Girl Cooks!
Instagram:
jbatthegratefulgirlcooks

Author's signatureRecipe Source: My Mom

0 from 0 votes
Mom's Easy Chocolate Cake
Prep Time
10 mins
Cook Time
35 mins
Total Time
45 mins
 
Mom's EASY Chocolate Cake, with chocolate frosting, is a delicious dessert for the whole family, and can be made from scratch in practically no time at all!
Category: Dessert
Cuisine: American
Keyword: Mom's easy chocolate cake
Servings: 16 servings (9x13 cake)
Calories Per Serving: 363 kcal
Author: JB @ The Grateful Girl Cooks!
Ingredients
For Cake:
  • 2 cups granulated sugar
  • 2 eggs
  • 3/4 cup vegetable shortening
  • cups all purpose flour
  • 1/2 cup unsweetened cocoa powder
  • 2 teaspoons baking soda
  • 1/2 teaspoon salt
  • 1 cup buttermilk
  • 3/4 cup boiling water
  • 1 teaspoon vanilla
For Chocolate Frosting:
  • 3/4 cube butter
  • 4 Tablespoons unsweetened cocoa powder
  • Dash of salt
  • 1 teaspoon vanilla extract
  • 12 ounces powdered sugar (about 3/4 of a one pound box)
  • 1/4 to 1/2 cup milk (enough to make frosting pourable, but not too thin)
Instructions
  1. Preheat oven to 350 degrees. Lightly grease and flour a 9x13 cake pan.
  2. Cream together sugar, vegetable shortening and eggs, using an electric hand mixer or stand mixer. Beat well for 2-3 minutes.
  3. In a separate large bowl, sift together flour, cocoa, baking soda and salt. Add dry, sifted ingredients to the wet ingredients, along with 1 cup of buttermilk, and mix well on LOW speed.
  4. Once blended, slowly pour in 3/4 cup of boiling water, and a teaspoon of vanilla extract. Blend on low until batter is fully mixed together. Pour batter into a greased and floured 9x13 baking pan, and distribute batter evenly.
  5. Bake at 350 degrees for 35 minutes, or until toothpick inserted into middle of cake comes out clean.
To Make Frosting:
  1. While cake is baking, make frosting. Melt butter in saucepan on low heat. Add cocoa powder and mix well with a spoon. Add salt, vanilla, and milk; mix well. Add powdered sugar. Mix until frosting is not too thick, but "pourable". Add additional milk to thin... add additional powdered sugar to thicken, as needed.
  2. When cake is done, remove from oven. Let rest for 2-3 minutes, then poke holes over surface of cake every couple inches (I use a chopstick!). Pour frosting over surface of cake, and spread to cover. Let cake cool to room temperature, then slice and serve!
Nutrition Facts
Mom's Easy Chocolate Cake
Amount Per Serving (1 piece (1/16th))
Calories 363 Calories from Fat 99
% Daily Value*
Fat 11g17%
Saturated Fat 3g19%
Cholesterol 22mg7%
Sodium 238mg10%
Potassium 108mg3%
Carbohydrates 64g21%
Fiber 1g4%
Sugar 46g51%
Protein 3g6%
Vitamin A 55IU1%
Calcium 28mg3%
Iron 1.6mg9%
* Percent Daily Values are based on a 2000 calorie diet.

Here’s one more to pin on your Pinterest boards!Mom's EASY Chocolate Cake, with chocolate frosting, is a delicious dessert for the whole family, and can be made from scratch in practically no time at all!


Save

Save

Save

Save

Save

Save

Save

Save

Save

Save

Save

Save

Save

Save

Save

Save

Gingerbread Bundt Cakes With Cinnamon Icing

Miniature gingerbread bundt cakes with cinnamon icing are delicious, and make a wonderful gift to give friends and family during the holidays!Miniature gingerbread bundt cakes with cinnamon icing are delicious, and make a wonderful gift to give friends and family during the holidays!
Do you enjoy gingerbread?  I sure do. The warm flavors of the spices has always been a favorite of mine. There is quite a bit of history behind this beloved cake. You can read all about gingerbread here.

A few years ago I enjoyed making miniature Gingerbread Cakes With Cinnamon Icing to give to our neighbors and friends. Using a miniature bundt pan (preferably a 12 cup pan), I was able to make two dozen of these delicious food gifts to give away!

Scroll Down For A Printable Recipe Card At The Bottom Of The Page

How Many Gingerbread Bundt Cakes Will This Recipe Make?

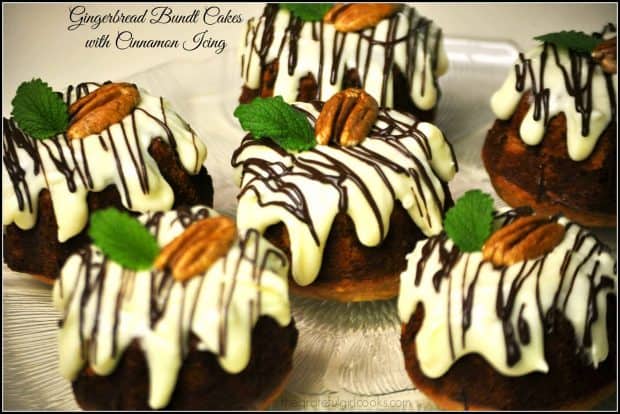
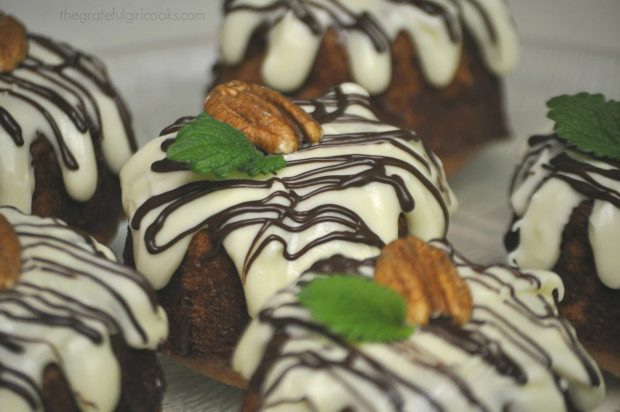
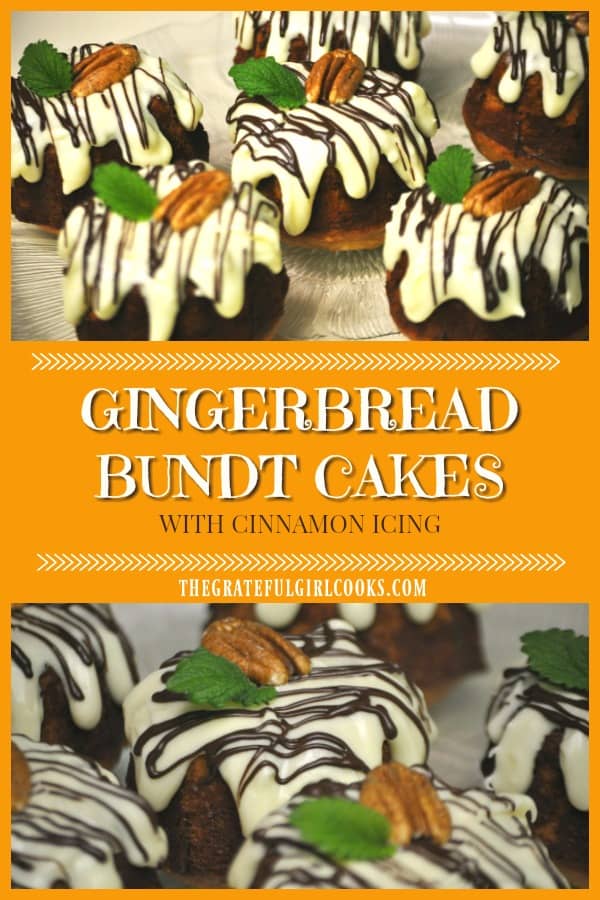
The recipe is simple to prepare, and as written, makes approximately 24 cute, mini bundt cakes.  Each individual sized gingerbread-flavored cake is covered with a delicious creamy Cinnamon icing (or glaze), then drizzled with chocolate to “fancy” them up.

The gingerbread bundt cakes are then garnished with a pecan and a mint sprig. When I made these, I doubled the amount of cinnamon icing. With double the amount of cinnamon icing, it covered more of the top of each cake.

Gingerbread bundt cakes are frosted, then garnished with a pecan and a fresh mint sprig.

Another Way To Serve These Gingerbread Bundt Cakes

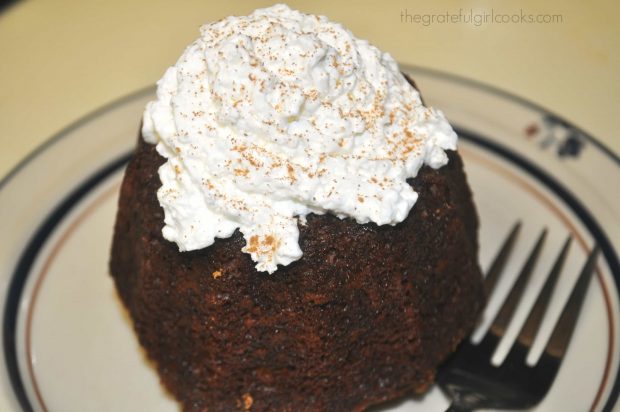
Another option for serving these yummy treats is to leave the cinnamon icing off of the finished cakes. When ready to serve, cover the tops of each cake with whipped cream and a light dusting of cinnamon. The gingerbread bundt cakes are delicious served this way, as well.

Gingerbread bundt cakes can also be topped with whipped cream, sprinkled with cinnamon.

Great For Gift-Giving!

It was fun to wrap up each individual mini cake (the ones with the cinnamon icing) and decorate them with pretty seasonal Fall leaves and ribbons. Gingerbread bundt cakes are also a wonderful Christmas gift for friends who enjoy food! They are a nice homemade gift to share (from our kitchen) with our friends and neighbors.

If you enjoy giving food gifts like gingerbread bundt cakes to family and friends, be sure to check out my recipes for Spiced Tea Mix, Old-Fashioned Fudge, and Chocolate Dipped Shortbread Cookies.  These, along with other recipes for holiday goodies are available in my Recipe Index, at the top of each blog post.

The little gingerbread bundt cakes taste wonderful… they are LOADED with flavor!  Sure hope you will consider making these little edible gifts for those you love!  They would be a perfect food gift for the holidays!

Looking for More GINGERBREAD-INSPIRED Recipes?

You can find all of my recipes in the Recipe Index, located at the top of the page. I have several delicious, gingerbread-inspired recipes you might enjoy, including:

Interested In More Recipes?

Thank you for visiting this website. I appreciate you using some of your valuable time to do soIf you’re interested, I publish a newsletter 2 times per month (1st and 15th) with all the latest recipes, and other fun info. I would be honored to have you join our growing list of subscribers, so you never miss a great recipe!
There is a Newsletter subscription box on the top right side (or bottom) of each blog post, depending on the device you use, where you can easily submit your e-mail address (only) to be included in my mailing list.

You Can Also Find Me On Social Media:

Facebook page: The Grateful Girl Cooks!
Pinterest:
The Grateful Girl Cooks!
Instagram:
jbatthegratefulgirlcooks

Gingerbread Bundt Cakes With Cinnamon Icing / The Grateful Girl Cooks!

Recipe Adapted From:  http://thesepeasarehollow.blogspot.com/2010/10/gingerbread-bundts.html

0 from 0 votes
Gingerbread Bundt Cakes With Cinnamon Icing
Prep Time
15 mins
Cook Time
30 mins
Total Time
45 mins
 

Miniature gingerbread bundt cakes with cinnamon icing are delicious, and make a wonderful gift to give friends and family during the holidays!

Category: Dessert
Cuisine: American
Keyword: gingerbread bundt cakes
Servings: 24 mini cakes
Calories Per Serving: 216 kcal
Author: JB @ The Grateful Girl Cooks!
Ingredients
For Gingerbread Cakes:
  • 2 ¼ cups all purpose flour
  • ½ teaspoon baking soda
  • ½ salt
  • ½ teaspoon allspice
  • ½ teaspoon ground cloves
  • ½ teaspoon nutmeg
  • 1 teaspoon cocoa powder
  • 1 teaspoon ground cinnamon
  • 2 teaspoons ground ginger
  • 1 cube unsalted butter (melted, then brought to room temp.)
  • ¾ cup dark molasses
  • ¾ cup granulated sugar
  • 1 egg (large)
  • ½ cup buttermilk
  • ½ cup milk
For Cinnamon Glaze:
  • 2 cups powdered sugar
  • 6-8 Tablespoons milk (depends on how thick or thin you want icing!)
  • ½ teaspoon ground cinnamon
  • (OPTIONAL) Melted chocolate for drizzle, whole pecans and/or mint sprigs for garnish
Instructions
  1. Preheat oven to 350 degrees F. Grease and flour the miniature bundt pan cups.
  2. Place flour, baking soda, salt, allspice, cloves, nutmeg, cocoa powder, cinnamon and ginger in a medium sized bowl. Whisk together until combined.
  3. Using an electric mixer or a stand mixer, combine molasses, granulated sugar and melted (but at room temperature) butter until blended well. Add the egg to this mixture, and continue beating until ingredients are completely combined.
  4. Slowly pour in the buttermilk, followed by the milk, beating slowly as you add, until ingredients are combined. Add the dry ingredients from the medium bowl (flour, spices, etc.) in small increments to the wet ingredients in mixing bowl, beating well after each addition. Be sure to scrape down the sides of bowl as you go. Stop mixing when ingredients have all been added and are just incorporated into batter.
  5. Pour or spoon batter into each prepared bundt pan cup, filling each to 3/4 of the way full. Smooth the top of the batter. Bake at 350 degrees, with the pan on the middle rack of oven, for approx. 30 minutes, OR until a toothpick that is inserted into the middle of the cake comes out clean. Remove pan to a wire rack. Let cakes cool for 15-20 minutes, then remove cakes from pan to wire rack.
  6. To prepare icing: Place the powdered sugar, cinnamon and milk in medium sized bowl. Mix well with a fork until smooth. Too thin? Add powdered sugar. Too thick? Add milk. Pour or spread icing over tops of each cooled cake. Let icing firm up before serving.
  7. If desired, drizzle melted chocolate over each cake. Garnish with a whole pecan or walnut, then add a sprig of mint for a festive garnish. Let chocolate firm up before serving or wrapping. Enjoy!
Nutrition Facts
Gingerbread Bundt Cakes With Cinnamon Icing
Amount Per Serving (1 g)
Calories 216 Calories from Fat 72
% Daily Value*
Fat 8g12%
Saturated Fat 5g31%
Cholesterol 28mg9%
Sodium 40mg2%
Potassium 192mg5%
Carbohydrates 34g11%
Sugar 24g27%
Protein 1g2%
Vitamin A 270IU5%
Calcium 43mg4%
Iron 1.1mg6%
* Percent Daily Values are based on a 2000 calorie diet.

Here’s one more to pin on your Pinterest boards!Miniature gingerbread bundt cakes with cinnamon icing are delicious, and make a wonderful gift to give friends and family during the holidays!


Save

Save

Save

Save

Save

Save

Save

Save

Save

Save

Save

Save

Save

Save

Save

Save

Poppyseed Cake

This Poppyseed Cake is absolutely EASY, delicious, serves 12 as dessert or coffeecake, and takes only 5 minutes prep time, using a boxed cake mix!This Poppyseed Cake is absolutely EASY, delicious, serves 12 as dessert or coffeecake, and takes only 5 minutes prep time, using a boxed cake mix!
Want a fabulous tasting cake recipe that only has a few ingredients, takes 5 minutes to throw together, and can be served as dessert OR coffeecake? Well if you do, this Poppyseed Cake is perfect for you!

I found the recipe for this poppyseed cake in my Mom’s trusty recipe box over 35 years ago and wrote it down on a little 3×5 index card. It looked easy to prepare, and turned out fantastic the very first time I made it, so I’ve been making it ever since!

The recipe is totally EASY, EASY, EASY, and tastes amazing, due to the subtle flavor imparted into a simple boxed yellow cake mix by adding a couple additional ingredients like poppyseeds and cooking sherry!

Scroll Down for A Printable Recipe Card At The Bottom Of The Page

Prepare The Cake Batter

The poppyseed cake can be in the oven in about 5 minutes! How’s THAT for easy? Combine cake mix, oil, cooking sherry, eggs and poppyseeds in a large bowl. Mix well for 4-5 minutes. That’s it! The cake batter is ready!

Poppyseeds, cake mix, and eggs in mixing bowl.

Batter for poppyseed cake in white bowl, and ready to pour into pan.

Bake The Poppyseed Cake

Pour the cake batter into a very well-greased bundt pan. Make sure the batter is evenly distributed.  Bake the poppyseed cake at 350 degrees for 45 minutes. You can test for “done-ness” by inserting a toothpick into the center of the cake. If it comes out clean, then it is ready!

When the cake is done, remove the bundt pan from the oven, and transfer the pan to a wire rack to completely cool the cake.

Here is the poppyseed cake batter in bundt pan, ready to bake.

Removing the Poppyseed Cake From the Bundt Pan

Once the cake has cooled completely, run a spatula or butter knife around the edges of the cake, because it helps to loosen the edges. Place a large plate upside down on top of the bundt pan, and holding both bundt pan and plate securely, flip the cake upside down, inverting the cake onto the plate.

If you greased the pan really well, it should come right out onto the plate.  Once onto plate, carefully turn the cake over again so it is right side up on a serving platter.

Fully baked poppyseed cake in bundt pan on rack

Make The Decorative Icing To Drizzle On the Cake

Decorating the cake with an icing drizzle is completely optional (cake tastes great all by itself), and the icing adds a nice fancy touch, and a little sweetness.

In a small bowl, mix together the icing ingredients until you have an icing that can be decoratively drizzled over the surface of the cake. Let this icing firm up completely, once you’ve drizzled it onto cake.

Icing dripping off of the poppyseed cake.

Time To Serve The Poppyseed Cake!

Slice and serve! If serving poppyseed cake as a dessert, a scoop of ice cream is a perfect accompaniment.  When serving it as a breakfast or snack coffeecake, it tastes great with a good cup of coffee or tea! Doesn’t it look yummy?

One slice of poppyseed cake, sitting on a plate.

The flavor is wonderful, and the cake is not dry!  Sure hope you will consider making this Poppyseed Cake. It’s also a wonderful addition to any brunch table, too.

A fork and bite of the poppyseed cake on a white plate.

Thanks for taking time out of your day to give this recipe a “look”. Really glad I found it in my Mom’s old recipe box so long ago.  I don’t have a clue who the original author was, but am thankful for the recipe, because I’ve made it many, many times over the past 35 years!

By the way, if you enjoy cakes that can double as dessert OR coffeecake, be sure to check out my recipe for Hummingbird Cake! Have a wonderful day.

Looking For More CAKE Recipes?

You can find all of my cake recipes in the Recipe Index, located at the top of the page. A few favorites include:

Interested In More Recipes?

Thank you for visiting this website. I appreciate you using some of your valuable time to do soIf you’re interested, I publish a newsletter 2 times per month (1st and 15th) with all the latest recipes, and other fun info. I would be honored to have you join our growing list of subscribers, so you never miss a great recipe!
There is a Newsletter subscription box on the top right side (or bottom) of each blog post, depending on the device you use, where you can easily submit your e-mail address (only) to be included in my mailing list.

You Can Also Find Me On Social Media:
Facebook page: The Grateful Girl Cooks!
Pinterest: The Grateful Girl Cooks!
Instagram: jbatthegratefulgirlcooks

Author's signature

Recipe Source:  My Mom (years and years ago)

0 from 0 votes
Poppyseed Cake
Prep Time
5 mins
Cook Time
45 mins
Total Time
50 mins
 

This Poppyseed Cake is absolutely EASY, delicious, serves 12 as dessert or coffeecake, and takes only 5 minutes prep time, using a boxed cake mix!

Category: Dessert or Coffeecake
Cuisine: American
Keyword: poppyseed cake
Servings: 12 servings
Calories Per Serving: 363 kcal
Author: JB @ The Grateful Girl Cooks!
Ingredients
For cake:
  • 1 box yellow cake mix (get the kind that says "with pudding")
  • 3/4 cup cooking sherry
  • 3/4 cup vegetable oil
  • 4 large eggs
  • 1/3 cup poppyseeds
For Icing:
  • 1 cup powdered sugar
  • 1 teaspoon vanilla extract
  • a few sprinkles water at a time (until icing becomes a "drizzling" consistency)
Instructions
  1. Preheat oven to 350 degrees F. Grease a bundt pan very well. Set aside.
  2. In large bowl, mix cake ingredients for 5 minutes (boxed yellow cake mix, cooking sherry, oil, eggs and poppyseeds). Pour batter evenly into greased/floured cake pan. Bake cake at 350 degrees for 45 minutes. Remove pan to wire rack to cool.
  3. While cake is cooling, mix up icing ingredients in small bowl. Add sprinkles of water until icing is thick enough to drizzle over top of finished cake. (Too thick... add couple drops water. Too thin... add more powdered sugar).
  4. Once cake has completely cooled, invert a plate over top of bundt pan, and holding both plate and bundt pan securely, flip the cake over. Once cake is on plate, carefully turn it over once more on serving platter so the right side is facing up. Decoratively drizzle the icing over top of cake. Let icing firm up, then serve and enjoy this tasty cake for dessert (with a scoop of ice cream) or as a coffeecake for breakfast!
Recipe Notes

The baking time indicated is designed for a bundt pan. If using a standard sized cake pan, your cooking time will need to be adjusted slightly.

Nutrition Facts
Poppyseed Cake
Amount Per Serving (1 slice)
Calories 363 Calories from Fat 153
% Daily Value*
Fat 17g26%
Saturated Fat 12g75%
Cholesterol 54mg18%
Sodium 336mg15%
Potassium 70mg2%
Carbohydrates 46g15%
Fiber 1g4%
Sugar 28g31%
Protein 3g6%
Vitamin A 80IU2%
Calcium 140mg14%
Iron 1.5mg8%
* Percent Daily Values are based on a 2000 calorie diet.

Here’s one more to pin on your Pinterest boards!This Poppyseed Cake is absolutely EASY, delicious, serves 12 as dessert or coffeecake, and takes only 5 minutes prep time, using a boxed cake mix!


Save

Save

Save

Save

Save

Save

Save

Save

Save

Save

Save

Save

Save

Save

Save