Category: Ice Cream/Frozen Treats

Strawberry Almond Romanoff Sundae

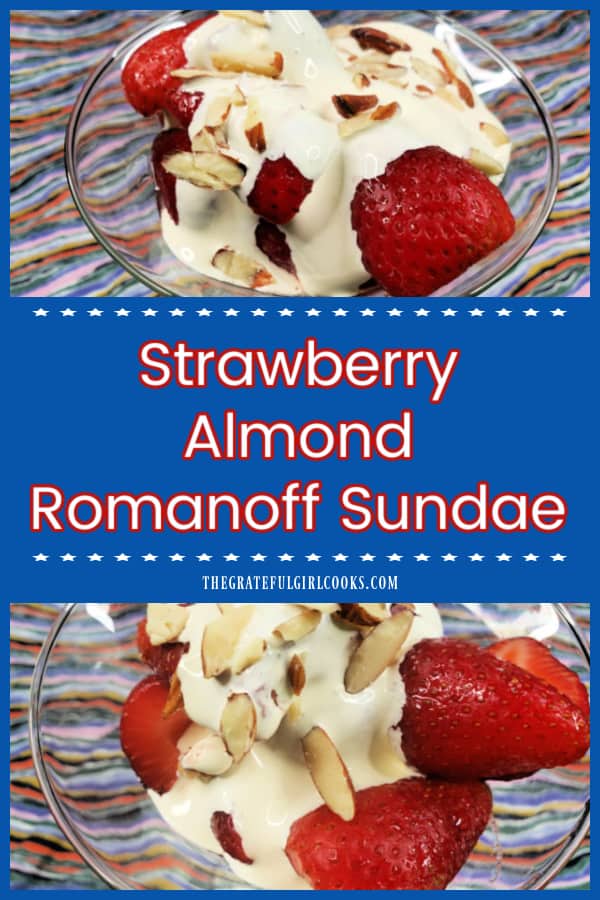
A Strawberry Almond Romanoff Sundae is a delicious dessert. Almond flavored whipped cream and strawberries are served over vanilla ice cream.
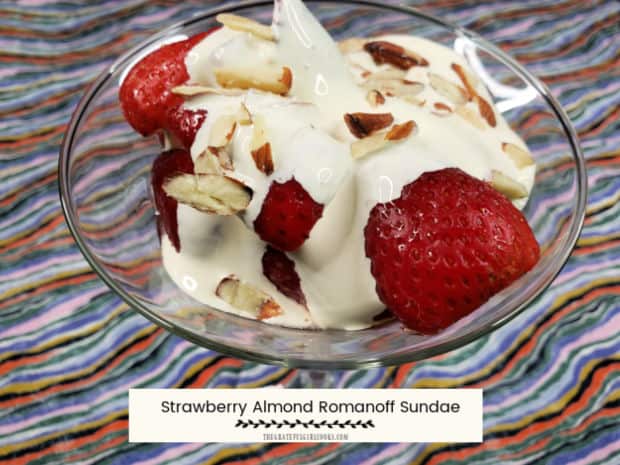

A strawberry almond Romanoff sundae is an easy to make, delicious COLD “no cook” dessert that is perfect for hot Summer days!

You will need to plan ahead, because the strawberries need to be chilled with a couple other ingredients before using.

Why Is It Called A ROMANOFF Sundae?

STORY #1- Strawberries Romanoff is the name of a famous dish (strawberries, liqueur, and cream). It was “supposedly” created by the chef for Czar Nicholas I, a Russian ruler from the well known Romanov family (typically spelled Romanoff in English). 

STORY #2- A different story of it’s origins involves a man named Hershel Geguzin (born in Lithuania). Hershel immigrated to the U.S. as a child. He changed his name from Hershel Geguzin to Harry Gerguson, then later changed his name to Michael Romanoff. He “claimed” to be of Russian royalty, even though it was widely disputed (and allegedly proven false over the years).

Romanoff later became a restaurant owner in Beverly Hills, serving famous movie stars in the 1940’s and 1950’s. He served a dessert called “Strawberries Romanoff” at his restaurant, and it became popular in the United States.

Who truly knows the actual origins of this delicious dessert? All I know is I’ve taken a basic recipe for Strawberries Romanoff and serve it over vanilla ice cream to make a delicious ice cream sundae. Here’s here’s how to make it.

Scroll Down For A Printable Recipe Card At The Bottom Of The Page

Prepare The Fresh Strawberries

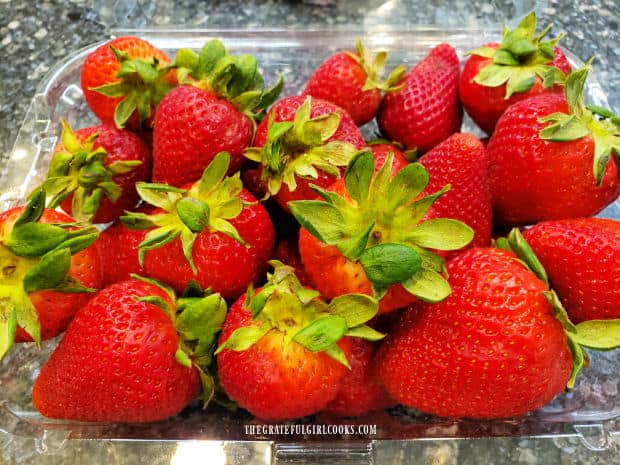
Fresh strawberries are used for this dessert. This recipe (as written in the recipe card at the bottom of the page) will make enough for 4 servings.

You will need about 4 cups of juicy, fresh strawberries, to make this sundae for 4 people.

NOTE: My photos below reflect the amounts used for 2 servings. When I photographed this, I was only making two servings.

Four cups of fresh strawberries are used to make this recipe.

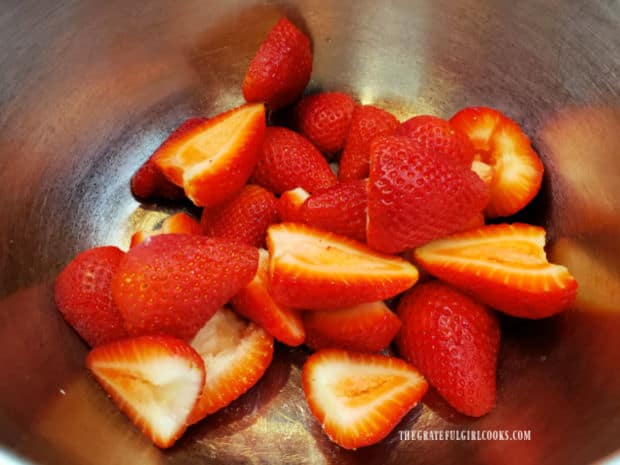
Rinse the strawberries, then pat them dry. Remove the leaves and core, then cut each strawberry in half.

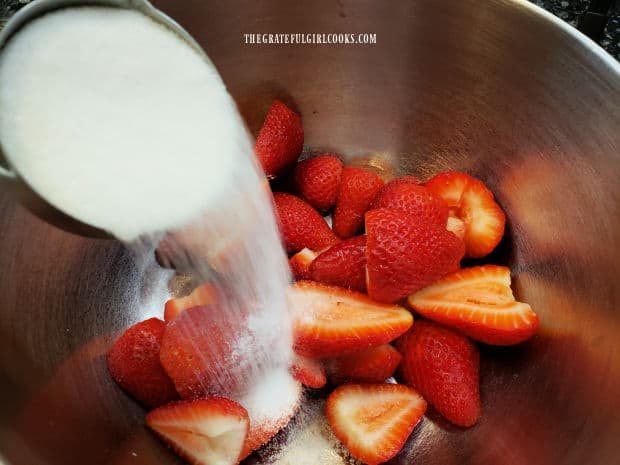
Place the strawberry halves in a large bowl, then sprinkle granulated sugar over the strawberries.

Strawberries are rinsed, cored, and sliced in half, then placed in bowl.Granulated sugar is added to the halved strawberries in a bowl.

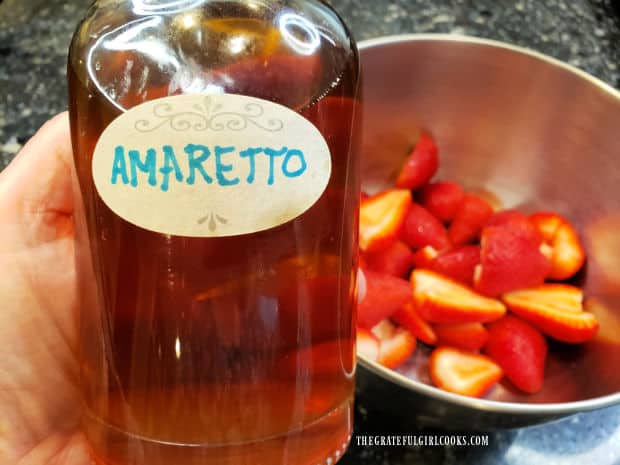
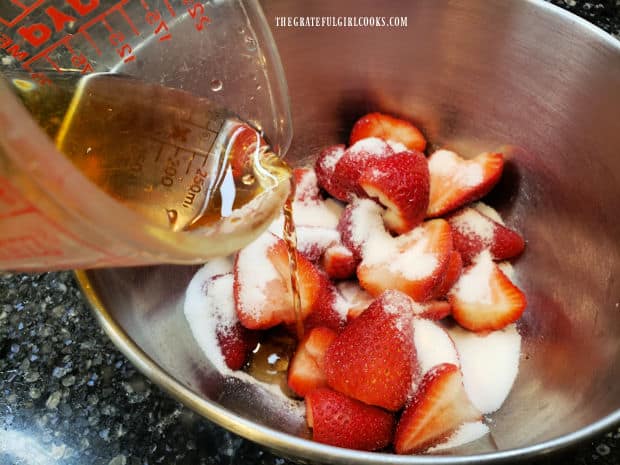
Now add almond liqueur (Amaretto) to the strawberries. I use my homemade amaretto, which is wonderful (and convenient to have around)!

Don’t leave out the almond flavoring for the strawberries, because it adds so much flavor, and simply makes this dish perfect.

Amaretto liqueur will be added to the bowl of strawberries.Pouring amaretto into the bowl with the strawberries and granulated sugar.

Macerate The Strawberries

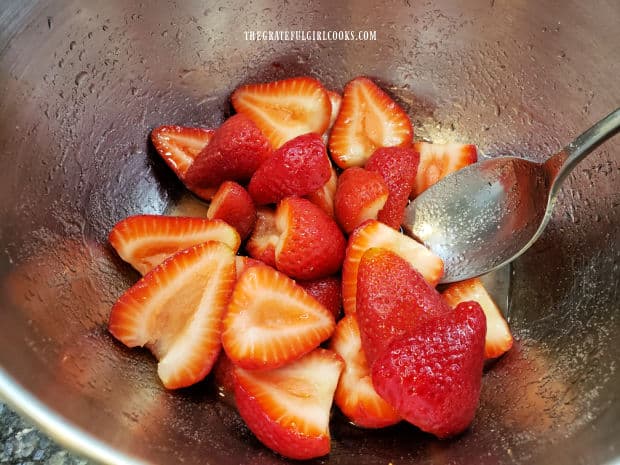
Stir well, to dissolve the granulated sugar, and combine the strawberries with the Amaretto and the sugar. Cover the bowl, and let the strawberries chill in a refrigerator for 2 hours.

This process is called “macerating” the strawberries, because the sugar and amaretto will draw out the natural juices of the strawberries as they chill. It will also infuse almond flavor into the berries.

This is a GOOD thing, so please don’t skimp on this “inactive” prep time. I try to do this early on the day I’ll make the sundaes.

Strawberry halves are stirred, to dissolve sugar in the amaretto in bowl.

Prepare The Cream Sauce

Right before serving this dish, you will need to make the cream sauce, which is spooned over the strawberry almond Romanoff sundae.

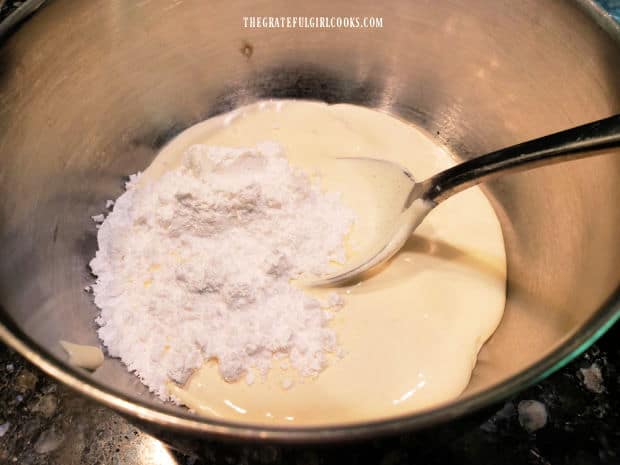
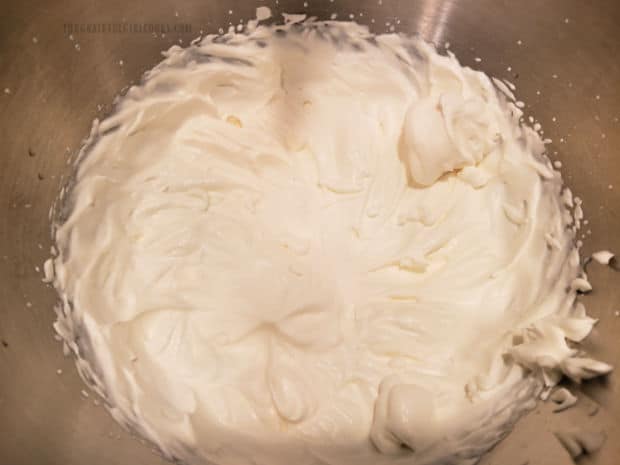
Beat heavy whipping cream and powdered sugar in a mixing bowl until it becomes foamy. Add almond extract to the whipping cream as you are beating it. Continue beating the whipping cream until SOFT peaks form. 

TIP: If you put the bowl and beaters in the freezer about 20 minutes before doing this step it helps the whipping cream form peaks faster.

Powdered sugar, whipping cream and almond extract, in a large metal bowl.Almond flavored whipping cream is beaten until peaks form.


Make The Strawberry Almond Romanoff Sundae

So, now the strawberries are fully chilled, and the whipping cream has been beaten to soft peaks… now what? IT’s TIME to build a strawberry almond Romanoff sundae!

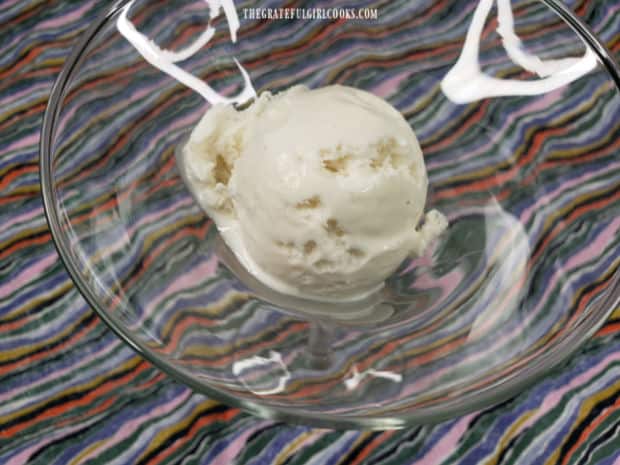
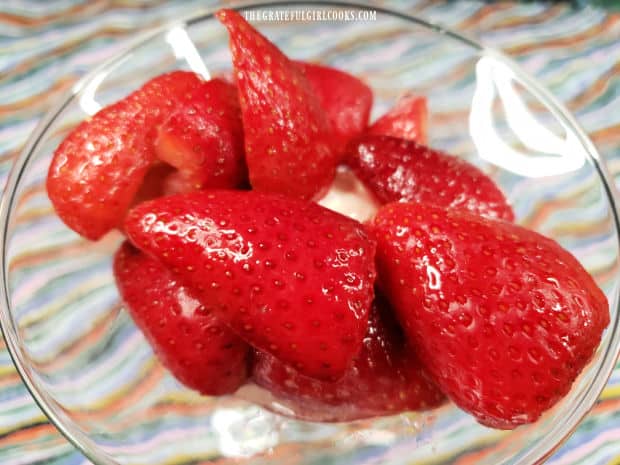
For each serving, place a scoop of vanilla ice cream in a stemmed parfait glass (or bowl). Add a generous helping of the strawberries on top of the ice cream.

A scoop of vanilla ice cream is placed in glass dish to start making the sundae.Macerated strawberries are added on top of the vanilla ice cream in dish.

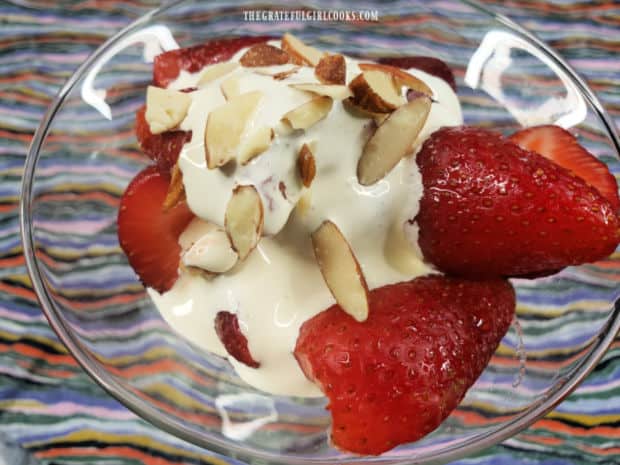
Spoon a generous amount of the whipped cream over the strawberries. Garnish each serving with some toasted almond slices, and serve!

The cold strawberries AND the whipped cream have a hint of almond flavoring, which is unique and delicious! They pair so well with the cold, creamy  scoop of vanilla ice cream under it all! YUM.

A Strawberry Almond Romanoff Sundae is so simple to make, yet it is a decadent dessert to serve. I’m absolutely positive you will enjoy it.

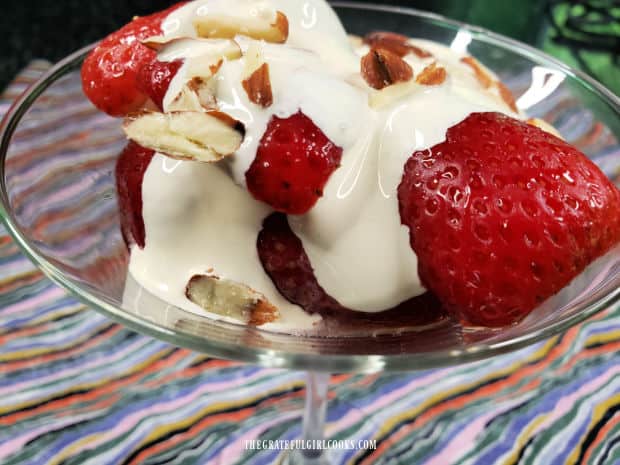
Almond whipping cream and toasted, sliced almond top the sundae.A strawberry almond Romanoff sundae, ready to be enjoyed.

I hope you have the opportunity to try this yummy dessert sometime soon, and hope you enjoy it, like we do.

Thanks for stopping by, and I invite you to come back soon for more family-friendly recipes. Take care, may God bless you, and have a GREAT day.

Looking For More DESSERT Recipes?

You can find ALL of my recipes in the Recipe Index, which is located at the top of the page. I have a large variety of amazing dessert recipes to choose from, including:

Want More Recipes? Get My FREE Newsletter!

I publish a newsletter 2 times per month (1st and 15th) with lots of recipes, tips, etc..
Would you like to join our growing list of subscribers?

There is a Newsletter subscription box on the top right (or bottom) of each blog post, depending on the device you use.
You can submit your e-mail address there, to be added to my mailing list.

Find Me On Social Media:

Facebook page: The Grateful Girl Cooks!
Pinterest:
The Grateful Girl Cooks!
Instagram:
jbatthegratefulgirlcooks

Author's signature

Original recipe for Strawberry Almond Romanoff: Janet Eilders, via “Southern Living 1998 Annual Recipes”, page 99, published by Oxmoor House

↓↓ PRINTABLE RECIPE BELOW ↓↓
0 from 0 votes
Strawberry Almond Romanoff Sundae
Prep Time
10 mins
Cook Time
0 mins
Refrigeration Time (inactive prep)
3 hrs
Total Time
3 hrs 10 mins
 

A Strawberry Almond Romanoff Sundae is a delicious dessert. Almond flavored whipped cream and strawberries are served over vanilla ice cream.

Category: Dessert
Cuisine: American
Keyword: strawberry almond Romanoff sundae
Servings: 4
Calories Per Serving: 602 kcal
Author: JB @ The Grateful Girl Cooks!
Ingredients
  • 4 cups fresh strawberries de-stemmed, cored, halved
  • ½ cup almond liqueur (Amaretto)
  • ½ cup granulated sugar
  • 1 cup heavy whipping cream
  • 2 Tablespoons powdered sugar
  • 1 teaspoon almond extract
  • 2 cups vanilla ice cream (½ cup per serving)
  • 2 teaspoons toasted almond slices (optional garnish)
Instructions
  1. Rinse strawberries; pat them dry. Remove leaves and core, then cut each strawberry in half.

  2. Put strawberry halves in large bowl. Add granulated sugar and almond liqueur (Amaretto) to strawberries. Stir well, to dissolve sugar and combine with strawberries. Cover bowl; refrigerate strawberries for 2 hours.

  3. Make whipped cream right before serving. Beat whipping cream and powdered sugar in bowl until it becomes foamy. Add almond extract to whipping cream as you beat it. Continue beating the whipping cream until SOFT peaks form. TIP: If you put bowl and beaters in freezer for 20 minutes before doing this step it helps whipping cream form peaks faster.

  4. For each serving, place a scoop of vanilla ice cream in a stemmed parfait glass or bowl. Add a generous helping of the strawberries. Spoon whipped cream over the strawberries. Garnish each serving with toasted almond slices (see note below). Serve and enjoy!

Recipe Notes

To lightly toast almonds, slice thin and place in a dry skillet. Cook on low heat, stirring often, for 2-3 minutes or until almonds become fragrant and lightly browned. Remove from hot skillet immediately. Let cool.

Nutrition Facts
Strawberry Almond Romanoff Sundae
Amount Per Serving (1 (1/4 of total))
Calories 602 Calories from Fat 270
% Daily Value*
Fat 30g46%
Saturated Fat 18g113%
Polyunsaturated Fat 2g
Monounsaturated Fat 8g
Cholesterol 96mg32%
Sodium 73mg3%
Potassium 434mg12%
Carbohydrates 67g22%
Fiber 4g17%
Sugar 61g68%
Protein 5g10%
Vitamin A 1170IU23%
Vitamin C 85mg103%
Calcium 153mg15%
Iron 1mg6%
* Percent Daily Values are based on a 2000 calorie diet.

Here’s one more to pin on your Pinterest boards!A Strawberry Almond Romanoff Sundae is a delicious dessert. Almond flavored whipped cream and strawberries are served over vanilla ice cream.
 

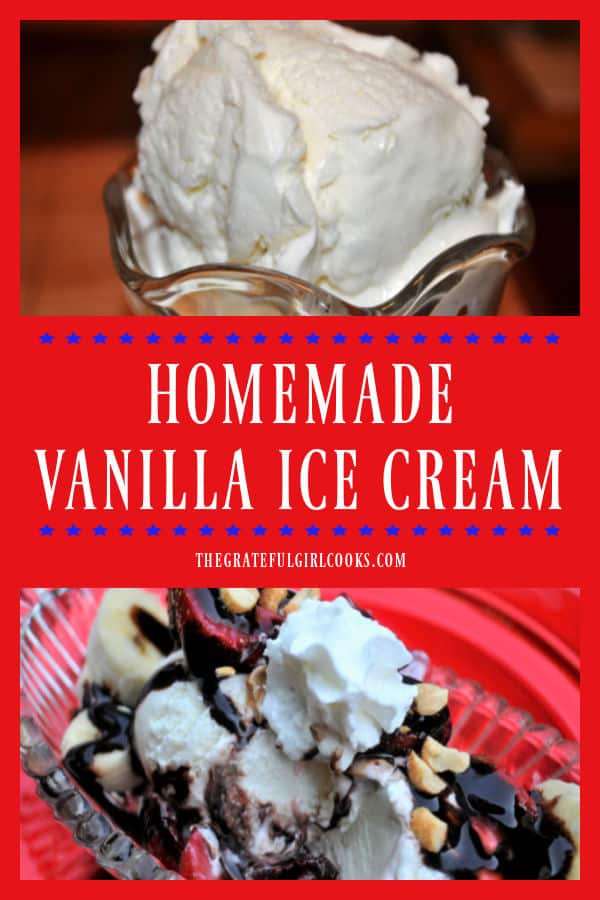
Homemade Vanilla Ice Cream

Nothing says summer like homemade vanilla ice cream! Grab your ice cream maker and whip up a delicious batch of this simple, frozen treat!

Homemade vanilla ice cream is practically a part of my genetic DNA makeup. I have such wonderful memories of my parents AND even my aunts and grandmother making homemade ice cream as far back as I can remember. When I was little I would watch my Dad cranking our old ice cream maker on the patio, full to the brim with ice and rock salt, until glorious ice cream was finished freezing.

Such fantastic memories of a simpler childhood that I treasure. Nowadays, I use my handy dandy electric ice cream maker (that doesn’t need ice OR salt), and plug it in, on our kitchen counter. I still get excited to make it though, and enjoy every creamy bite! Homemade vanilla ice cream was my Dad’s favorite, so I post this today in his memory.

Plain old ordinary vanilla ice cream goes with just about any dessert… pie, cake, cobblers, brownies, cookies, etc. It truly is timeless! I’ve made so many varieties of homemade ice cream over the years, but finally am posting my tried and true, simple, basic vanilla ice cream recipe. Go figure! Here’s how I make it, quickly and easily!
Scroll Down For A Printable Recipe Card At The Bottom Of The Page

How To Make This Homemade Vanilla Ice Cream

When I make ice cream nowadays, I use my Cuisinart Indoor electric ice cream maker, and it is super easy to make homemade ice cream. It has a cannister which needs to be solidly frozen BEFORE making the ice cream, so I plan ahead and freeze it overnight. This recipe will yield approximately 1½ quarts of ice cream.

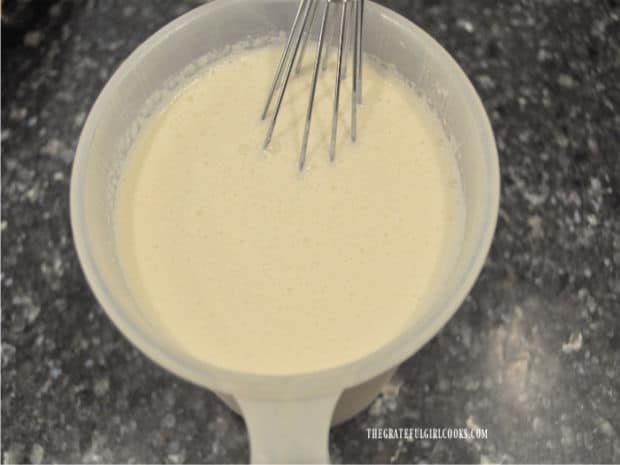
To make this version of homemade vanilla ice cream, you will need to whisk together the whipping cream, milk, sugar and vanilla in a medium mixing bowl or a large measuring cup (4 cup). Mix until the sugar has dissolved into the whipping cream mixture.

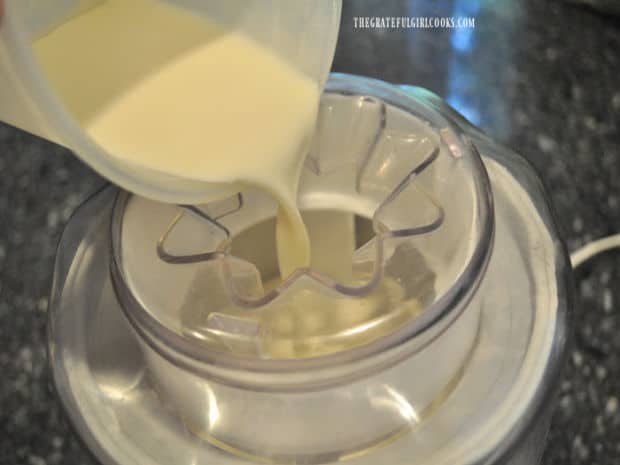
Once the sugar has dissolved, pour it into the cannister of your ice cream machine, and freeze, according to the manufacturer directions for your particular ice cream maker. Using the Cuisinart machine, after pouring in the ingredients, I simply turn it on by flipping a switch. (See how easy that is?)

Milk, whipping cream, vanilla and sugar are whisked together for the ice cream.The blended ingredients for the vanilla ice cream are poured into the cannister before freezing.

Freezing And “Ripening” Homemade Vanilla Ice Cream

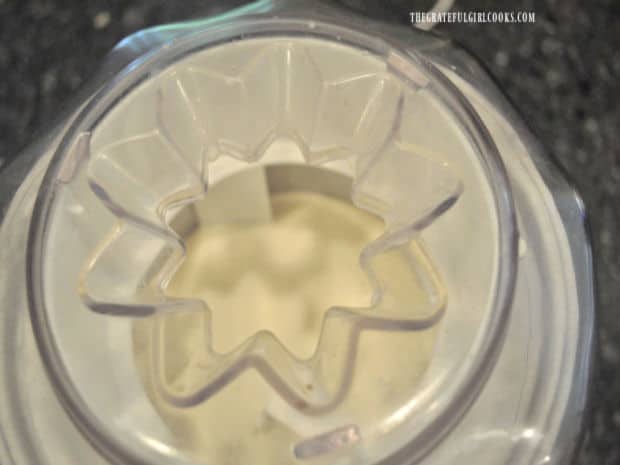
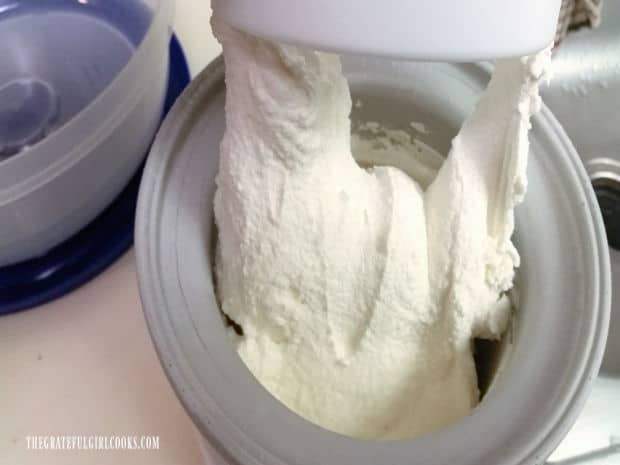
The paddle attachment inside the cannister keeps the ice cream mixture moving during the freezing process, so no need for cranking a handle! It’s effortless! As the homemade vanilla ice cream churns, it will thicken considerably, until it is a thick “soft serve” consistency. This usually takes about 20-22 minutes in my ice cream maker.

As soon as the ice cream reaches the desired consistency, I transfer it from the cannister into an airtight container and place the ice cream in my freezer for at least an hour to “ripen” and freeze it a bit firmer before serving. Of course, if you can’t wait that long, by all means dig in to it, straight from the ice cream machine! We’ve been known to do BOTH!

Ice Cream mixture churning in the Cuisinart ice cream machine.When done, the ice cream will be a thick soft-serve consistency.

Anyone Want Some Homemade Vanilla Ice Cream?

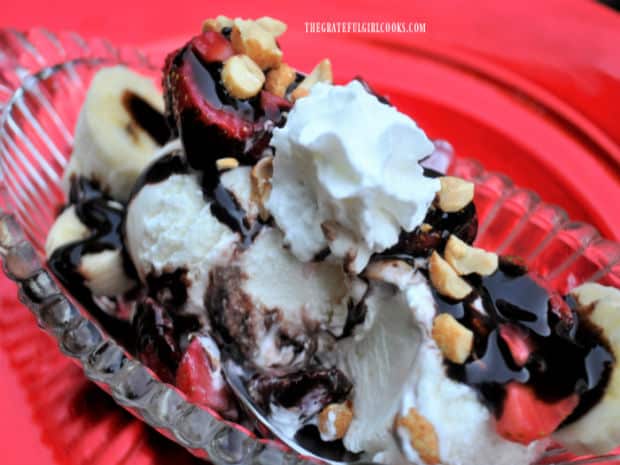
Once the ice cream has firmed up some more, scoop it up and enjoy it with your favorite toppings! My dad always enjoyed his plain (no toppings), but we love it, especially with my homemade hot fudge sauce, fresh fruit, or on a banana split with multiple toppings! YUM! You can’t go wrong with this simple ice cream!

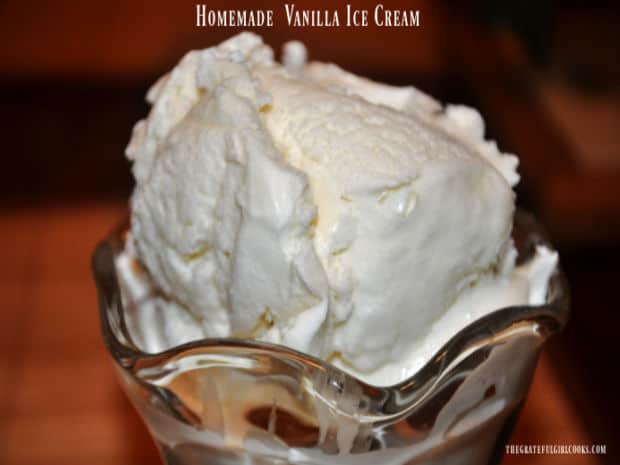
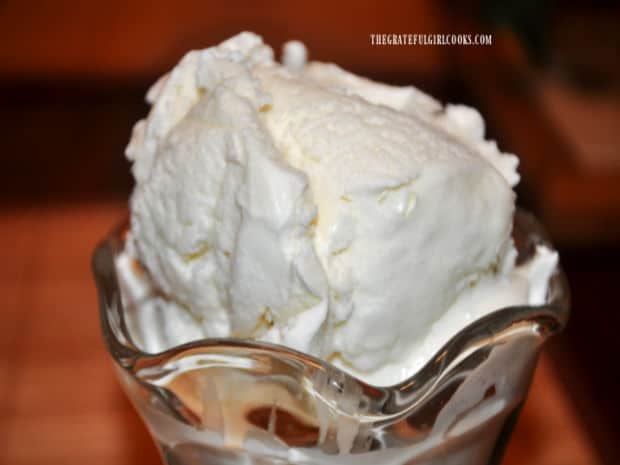
A scoop of homemade vanilla ice cream in a glass dish.Homemade vanilla ice cream is used to make a banana split.

I hope you enjoy this ridiculously EASY recipe for homemade vanilla ice cream. It’s a family favorite, and I cannot even begin to fathom how many times we’ve made it over the years. Way too many times to count, and it is always yummy!

Thank you for stopping by, and I hope you will come back again soon for more family-friendly recipes. Take care, friends. Have a wonderful day, and may God bless you with His love, peace and JOY today.

Looking For More HOMEMADE ICE CREAM Recipes?

You can find ALL of my recipes in the Recipe Index, located at the top of the page. I have some absolutely yummy homemade ice cream recipes you’ll enjoy, including:

Interested In More Recipes?

Thank you for visiting this website. I appreciate you using some of your valuable time to do soIf you’re interested, I publish a newsletter 2 times per month (1st and 15th) with all the latest recipes, and other fun info. I would be honored to have you join our growing list of subscribers, so you never miss a great recipe!
There is a Newsletter subscription box on the top right side (or bottom) of each blog post, depending on the device you use, where you can easily submit your e-mail address (only) to be included in my mailing list.

You Can Also Find Me On Social Media:

Facebook page: The Grateful Girl Cooks!
Pinterest:
The Grateful Girl Cooks!
Instagram:
jbatthegratefulgirlcooks

Author's signature

Original recipe source: Cuisinart Ice Cream and Yogurt Maker User Manual (came with the ice cream machine)

0 from 0 votes
Homemade Vanilla Ice Cream
Prep Time
5 mins
FREEZING TIME (approx.)
22 mins
Total Time
27 mins
 

Nothing says summer like homemade vanilla ice cream! Grab your ice cream maker and whip up a delicious batch of this simple, frozen treat!

Category: Dessert
Cuisine: American
Keyword: homemade vanilla ice cream
Servings: 12 (1/2 cup per serving)
Calories Per Serving: 200 kcal
Author: JB @ The Grateful Girl Cooks!
Ingredients
  • 2 cups heavy whipping cream , well chilled
  • 1 cup whole milk , well chilled
  • ¾ cup granulated sugar
  • 2 teaspoons vanilla extract
Instructions
NOTE: If your ice cream maker requires it, make sure to place the cannister in a freezer overnight BEFORE making the ice cream. Plan ahead.
  1. Whisk together whipping cream, milk, sugar and vanilla in a medium mixing bowl or a large measuring cup (4 cup). Mix until sugar has dissolved into the whipping cream mixture.

  2. Once sugar has dissolved, pour ice cream mixture into the prepared cannister of your ice cream machine. Freeze, according to the manufacturer directions for your particular ice cream maker. Mine usually takes between 20-22 minutes to reach thick, soft-serve consistency.

  3. As soon as ice cream reaches the desired consistency (for your ice cream machine), transfer it from the cannister into an airtight container. Place ice cream into freezer for at least an hour to "ripen" and freeze it firmer before serving. Serve, and enjoy, plain, or with desired toppings.

Nutrition Facts
Homemade Vanilla Ice Cream
Amount Per Serving (1 1/2 cup serving))
Calories 200 Calories from Fat 135
% Daily Value*
Fat 15g23%
Saturated Fat 10g63%
Polyunsaturated Fat 1g
Monounsaturated Fat 4g
Cholesterol 56mg19%
Sodium 24mg1%
Potassium 58mg2%
Carbohydrates 15g5%
Sugar 14g16%
Protein 1g2%
Vitamin A 616IU12%
Vitamin C 1mg1%
Calcium 49mg5%
Iron 1mg6%
* Percent Daily Values are based on a 2000 calorie diet.

Here’s one more to pin on your Pinterest boards!Nothing says summer like homemade vanilla ice cream! Grab your ice cream maker and whip up a delicious batch of this simple, frozen treat!

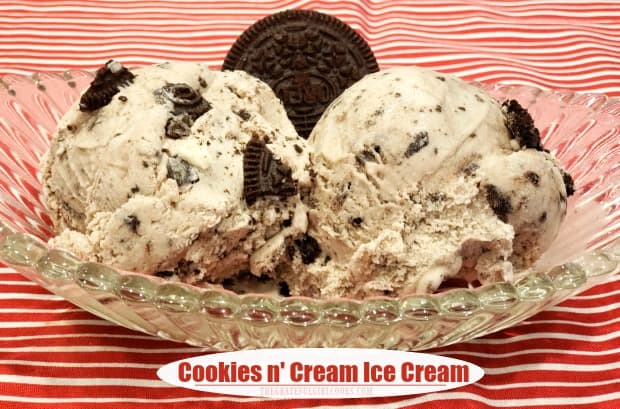
Cookies n’ Cream Ice Cream

Any time is a great time to make some homemade cookies n’ cream ice cream! Grab an ice cream maker and a few simple ingredients, and get ready to EAT!
Any time is a great time to make some homemade cookies n' cream ice cream! Grab an ice cream maker and a few simple ingredients, and get ready to EAT!

It’s summer time in good old Oregon. It is HOT! What better way to enjoy these warm summer days than with a big old scoop of homemade cookies n’ cream ice cream!

We love to make our own ice cream in our little indoor Cuisinart ice cream maker, and this simple recipe is a real winner!

Scroll Down For A Printable Recipe Card At The Bottom Of The Page

How To Make Cookies n’ Cream Ice Cream

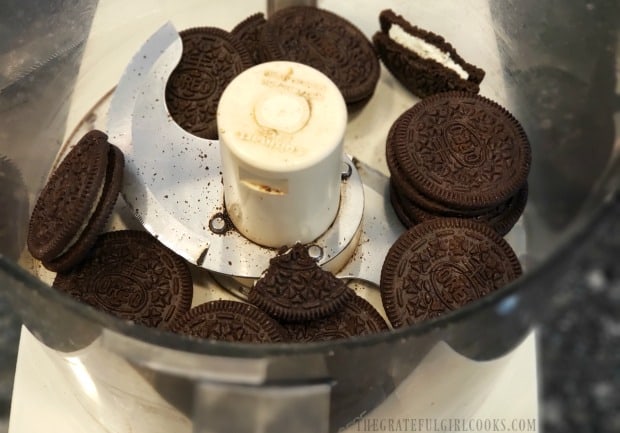
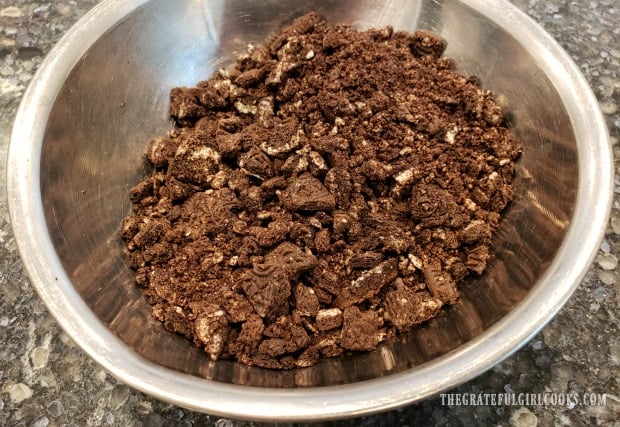
Begin by placing 10 Oreo cookies into a food processor. Pulse them about 10 times until they are fairly small crumbles. When done, set aside. They will not be added until the last 5 minutes of freezing time!

NOTE: If you do not have access to a food processor, place the cookies in a sealable plastic bag, and give them quite a few good “whacks” with a rolling pin or meat mallet. You can also crumble them in the bag, using your fingers.

Pulverizing Oreo cookies in a food processor for the ice cream.Crumbled cookies ready to add to the cookies n' cream ice cream.

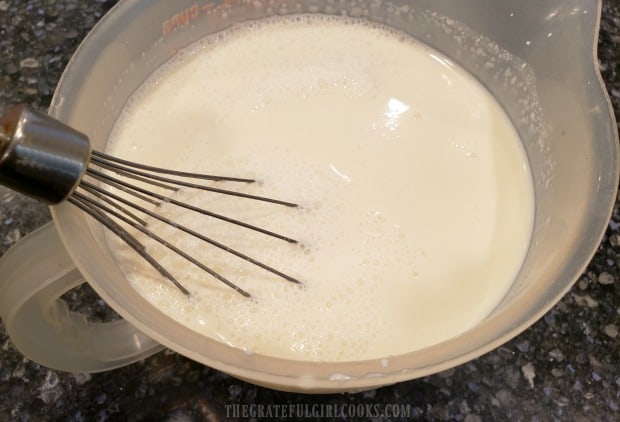
In a medium sized bowl or container, whisk together heavy whipping cream, half and half, milk, sugar and vanilla extract. Whisk these ingredients only until the sugar has pretty much dissolved.

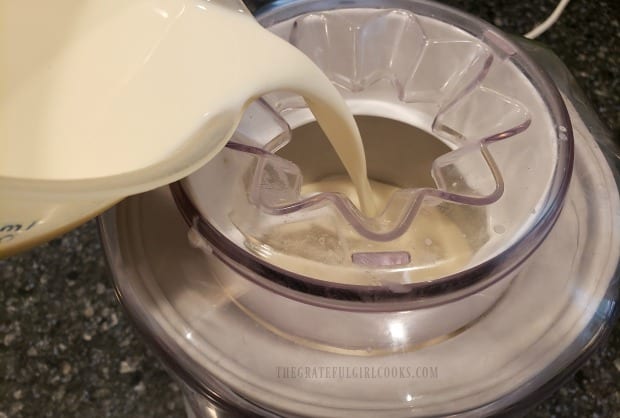
Once this is done, turn on the ice cream maker. Pour the cookies n’ cream ice cream base into the freezer canister!

Whisking up the ice cream base is easy!Pouring the ice cream base into the ice cream maker to begin freezing.

Freezing The Cookies n’ Cream Ice Cream

Freeze the ice cream according to your machines manufacturer’s instructions. I use an older electric Cuisinart ice cream machine, and it takes about 20 minutes to freeze.

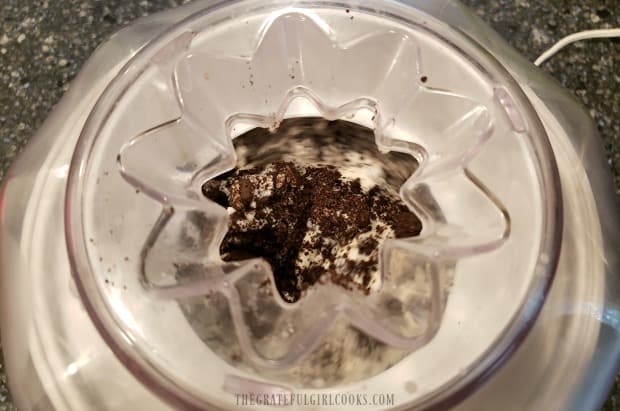
Five minutes before the end of the freezing time, pour the Oreo cookie crumbles into the canister of ice cream. The paddle in the machine will continue to mix the cookie crumbles into the ice cream!

Oreo cookie crumbles are added to ice cream during the last 5 minutes of freezing time.

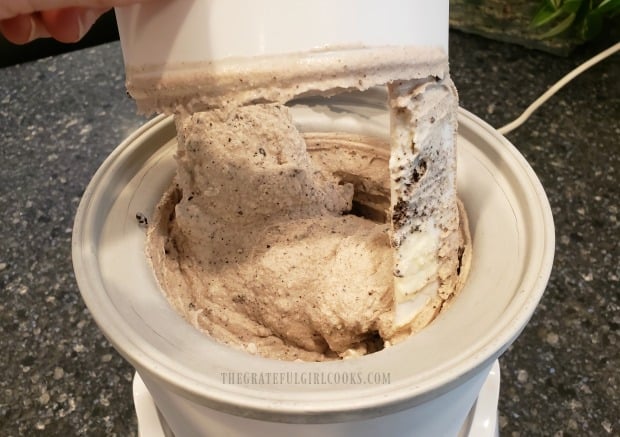
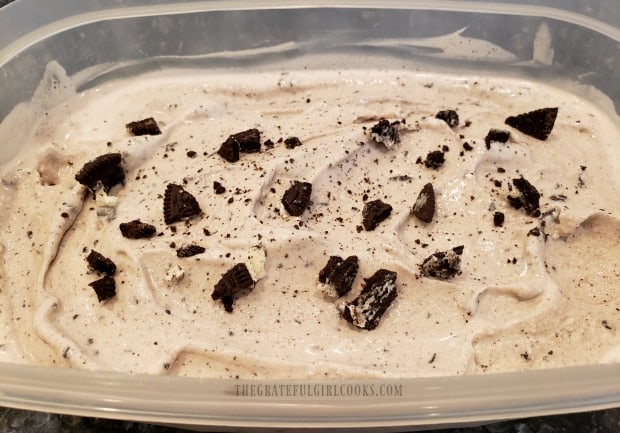
When done (approx. 20 minutes), remove the paddle (and any cookies n’ cream ice cream attached to it). Transfer ice cream to a covered container. The ice cream is the consistency of soft serve at this point and can be eaten right away, or it can be frozen more in your kitchen freezer, in order to make firmer scoops.

To Firm Up the Cookies n’ Cream Ice Cream

We almost always freeze it in our kitchen freezer for a couple more hours for a more “scoop-able” consistency! It’s hard to wait, but we do! Transfer the ice cream to a freezer-safe container with a lid. Place it in your freezer for a couple more hours to really firm up.

Ice cream is finished freezing, and is removed from machine.Cookies n' cream ice cream is transferred to a container, and put in kitchen freezer to firm up.

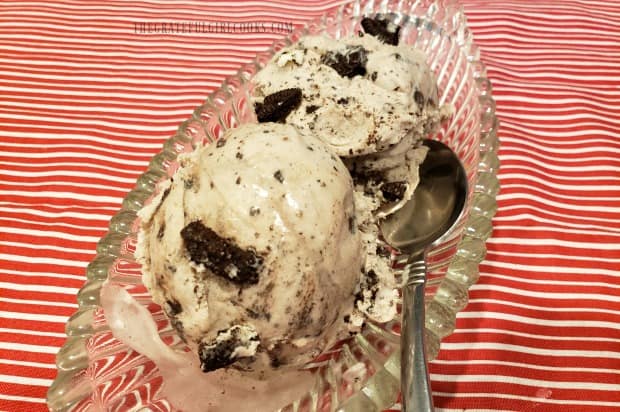
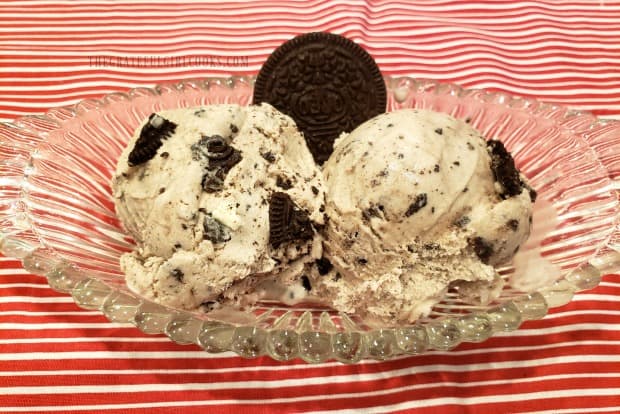
Once the cookies n’ cream ice cream has firmed up, grab an ice cream scoop and go for it! If desired, you can top the scoops of this delicious ice cream with more crumbled Oreos. Why not serve it with a whole Oreo cookie garnishing the dish? After all, can there ever be too many Oreos? *grins*

Now the ice cream is ready to EAT!Two scoops of cookies n' cream ice cream in dish, with a cookie for garnish!

Hope you enjoy this easy to make, absolutely delicious cookies n’ cream ice cream! Have a GREAT day!

Looking For More HOMEMADE ICE CREAM Recipes?

You can find all of my recipes in the Recipe Index, located at the top of the page. I have a variety of homemade ice cream recipes, including:

Interested In More Recipes?

Thank you for visiting this website. I appreciate you using some of your valuable time to do soIf you’re interested, I publish a newsletter 2 times per month (1st and 15th) with all the latest recipes, and other fun info. I would be honored to have you join our growing list of subscribers, so you never miss a great recipe!
There is a Newsletter subscription box on the top right side (or bottom) of each blog post, depending on the device you use, where you can easily submit your e-mail address (only) to be included in my mailing list.

You Can Also Find Me On Social Media:
Facebook page: The Grateful Girl Cooks!
Pinterest: The Grateful Girl Cooks!
Instagram: jbatthegratefulgirlcooks

Author's signature

0 from 0 votes
Cookies n' Cream Ice Cream
Prep Time
5 mins
Cook Time
0 mins
Freezing Time
20 mins
Total Time
25 mins
 

Any time is a great time to make some homemade cookies n' cream ice cream! Grab an ice cream maker and a few simple ingredients, and get ready to EAT!

Category: Desserts- Ice Cream
Cuisine: American
Keyword: cookies n' cream ice cream
Servings: 10 (makes 1.5 quarts total)
Calories Per Serving: 304 kcal
Author: JB @ The Grateful Girl Cooks!
Ingredients
  • 10 Oreo cookies , crushed
  • 2 cups whipping cream
  • ½ cup half and half
  • ½ cup milk
  • ¾ cup granulated sugar
  • 2 teaspoons vanilla extract
Instructions
  1. Place 10 Oreo cookies into a food processor. Pulse them about 10 times until they are fairly small crumbles. When done, set aside. They will not be added until the last 5 minutes of freezing time! NOTE: If you do not have access to a food processor, place the cookies in a sealable plastic bag, and give them quite a few good "whacks" with a rolling pin or meat mallet. You can also crumble them in the bag, using your fingers.

  2. In a medium sized bowl or container, whisk together heavy whipping cream, half and half, milk, sugar and vanilla extract. Whisk only until sugar has pretty much dissolved. Turn on ice cream maker. Pour the ice cream base into the freezer canister! Freeze ice cream according to your machines manufacturer's instructions. Five minutes before the end of the freezing time, pour the Oreo cookie crumbles into the canister of ice cream.

  3. When done (approx. 20 minutes), remove the paddle (and any cookies n' cream ice cream attached to it). Transfer ice cream to a covered container. The ice cream is the consistency of soft serve at this point and can be eaten right away, or it can be frozen more in your kitchen freezer for a couple hours, in order to make firmer scoops. Garnish with additional cookie crumbles, if desired. Enjoy!

Nutrition Facts
Cookies n' Cream Ice Cream
Amount Per Serving (1 g)
Calories 304 Calories from Fat 198
% Daily Value*
Fat 22g34%
Saturated Fat 13g81%
Cholesterol 71mg24%
Sodium 84mg4%
Potassium 93mg3%
Carbohydrates 26g9%
Fiber 1g4%
Sugar 21g23%
Protein 2g4%
Vitamin A 762IU15%
Vitamin C 1mg1%
Calcium 60mg6%
Iron 1mg6%
* Percent Daily Values are based on a 2000 calorie diet.

Here’s one more to pin on your Pinterest boards!Any time is a great time to make some homemade cookies n' cream ice cream! Grab an ice cream maker and a few simple ingredients, and get ready to EAT!

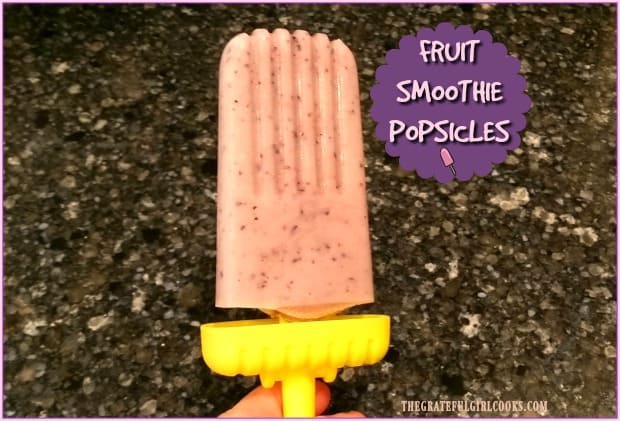
Fruit Smoothie Popsicles

It’s EASY and ECONOMICAL to make yummy homemade fruit smoothie popsicles! Enjoy a fresh fruit smoothie, popsicle style! You and your kids will love ’em!
It's EASY and ECONOMICAL to make yummy homemade fruit smoothie popsicles! Enjoy a fresh fruit smoothie, popsicle style! You and your kids will love 'em!

Summer was a hot one, here in good ol’ Oregon. We had less rain than usual, and many days were above 90 degrees.  One of the things we enjoyed having in our freezer were fruit smoothie popsicles! Best part? These are not summer only treats…you can make them ANY time of year!

I tend to drink a lot of fresh fruit smoothies in the summer, so it was only natural that I started making popsicles out of them. The beauty of making fruit smoothie popsicles is that you can tailor make them to your own preferences! How great is that?

Scroll Down For A Printable Recipe Card At The Bottom Of The Page

What Ingredients Are Used To Make Fruit Smoothie Popsicles?

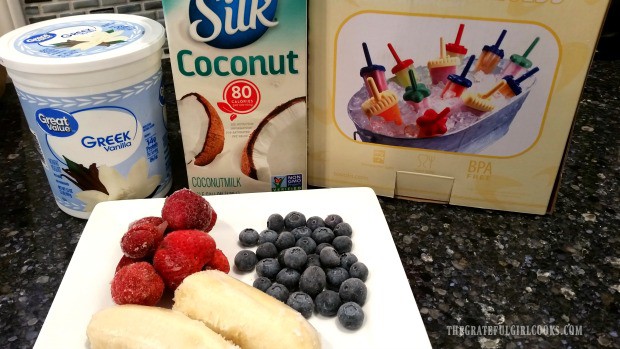
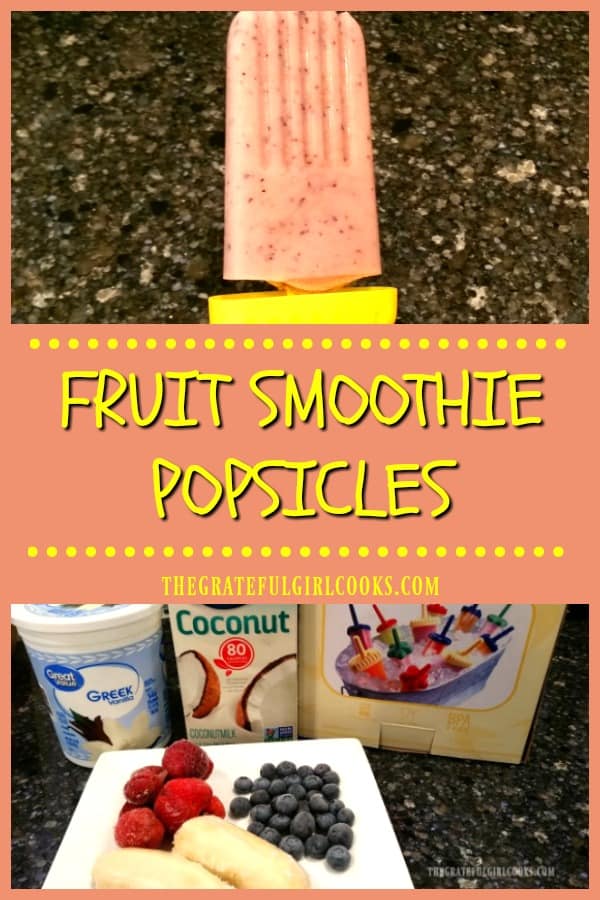
The ingredients were quite simple… fresh fruit, milk (of choice – I used coconut milk for this batch), and Greek vanilla yogurt. The best part is that you can make YOUR favorite smoothie, any flavor, into a popsicle!

For this recipe for fruit smoothie popsicles I used bananas, and blueberries and strawberries! I even was able to use homegrown blueberries and strawberries from our garden in the backyard!

Ingredients for fruit smoothie popsicles (strawberries, banana, blueberries, coconut milk, Greek vanilla yogurt)

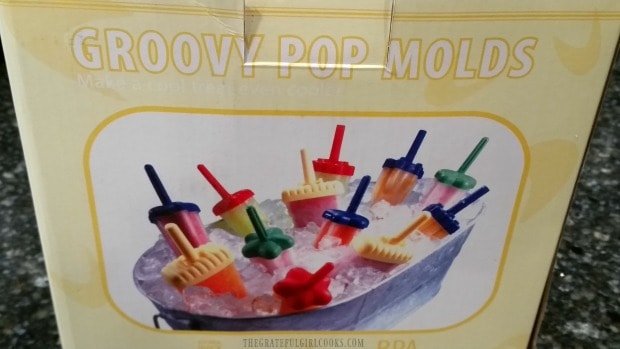
Several years ago I paid around $8 for these “GROOVY” pop molds, and I have gotten so much use out of them! They make popsicle creating so easy (and NO, I don’t receive compensation from them, just thought I’d show what I used to make these fruit smoothie popsicles!).

Popsicle molds used to make fruit smoothie popsicles.

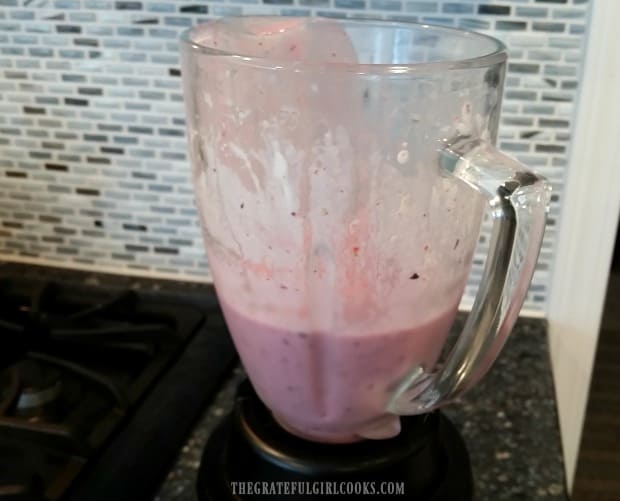
Making fruit smoothie popsicles could NOT be any easier!  You simply add the ingredients (again… YOUR choice) to a blender, just like making your smoothie normally.  Blend together for a couple minutes until mixture is smooth.

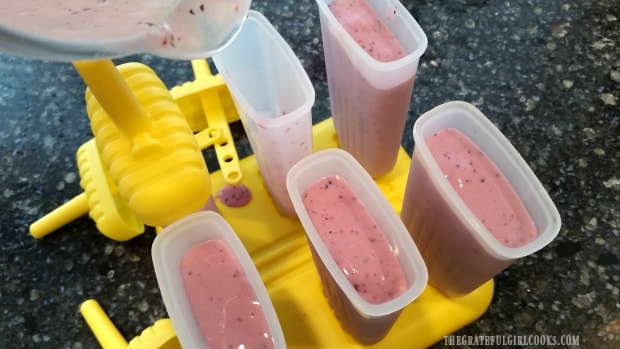
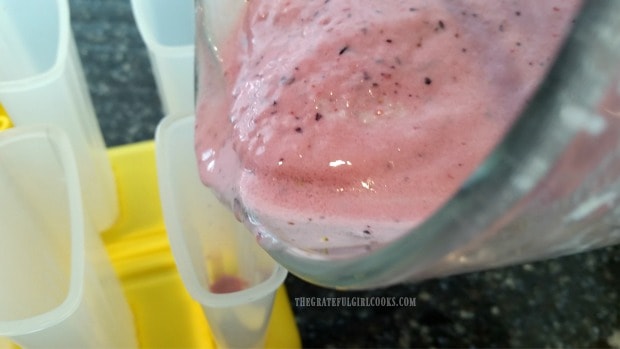
Once fully blended, pour the liquid into your popsicle molds. Make sure the plastic popsicle holders are securely standing in the base unit to secure them.  Fill the popsicle molds about 3/4 of the way full.

What If I Don’t Own A Popsicle Mold To Make Fruit Smoothie Popsicles?

If you do not own a popsicle mold, you can also make the fruit smoothie popsicles this way. Pour the smoothie mixture 3/4 of the way into a small paper dixie cup. Place in freezer on baking sheet. After the smoothie has partly frozen (thickened up), insert a popsicle or wood craft stick into the cup.  Freeze popsicles overnight, then simply tear off the paper cup to reveal the popsicle.

Fruit smoothie is made with ingredients blended in blender.

Fruit smoothie is poured into popsicle molds.

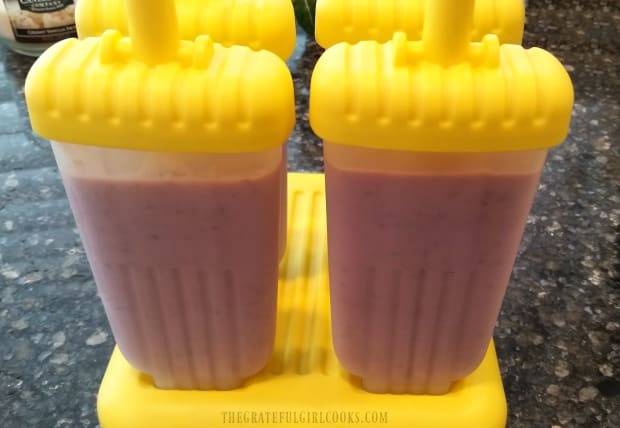
Here you can see the holder that securely anchors the popsicle molds for filling.  Once molds are filled, snap on and firmly secure the lids (with handles) onto tops of containers.

Popsicle molds are filled with fruit smoothie mix.

Fruit Smoothie popsicles, with lids on, ready to freeze!

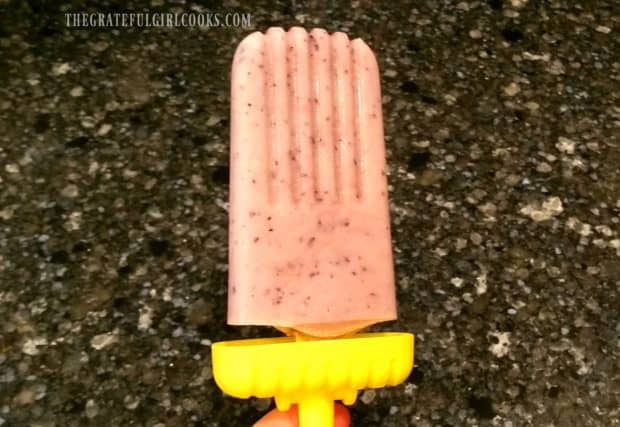
Freeze smoothies overnight, and BOOM!  You’ve just made fruit smoothie popsicles!  See how easy that was? When you are ready to enjoy one, simply hold the popsicle mold under some running warm water to loosen popsicle from sides of the container, then carefully slip popsicle out… and ENJOY!

If you used the “paper cup” method (mentioned above), simply tear off the paper cup, and enjoy your fruit smoothie popsicles! Now you have a fruit-filled and protein-enhanced (Greek yogurt) “snack” for the kids after school, or an after dinner creamy frozen fruit smoothie popsicle for YOU!

Frozen fruit smoothie popsicle, ready to eat!

Using Other Smoothie Recipes To Make Popsicles

There are so many choices of flavors for fruit smoothies, including Orange Julius, PeachBerry, Triple Berry Banana, Chocolate Peanut Butter, Blueberry Kale, Strawberry, etc. Have fun making your very own flavor combinations for fruit smoothie popsicles!

thanks for stopping by. Be sure to check out ALL of my recipes in the Recipe Index, located at the top of the page. Have a GREAT day!

Interested In More Recipes?

Thank you for visiting this website. I appreciate you using some of your valuable time to do soIf you’re interested, I publish a newsletter 2 times per month (1st and 15th) with all the latest recipes, and other fun info. I would be honored to have you join our growing list of subscribers, so you never miss a great recipe! 

There is a Newsletter subscription box on the top right side (or bottom) of each blog post, depending on the device you use, where you can easily submit your e-mail address (only) to be included in my mailing list.

You Can Also Find Me On Social Media:

Facebook page: The Grateful Girl Cooks!
Pinterest:
The Grateful Girl Cooks!
Instagram:
jbatthegratefulgirlcooks

Author's signature

0 from 0 votes
Fruit Smoothie Popsicles
Prep Time
5 mins
Cook Time
0 mins
Freezing Time (inactive)
6 hrs
Total Time
6 hrs 5 mins
 
It's EASY and ECONOMICAL to make yummy homemade fruit smoothie popsicles! Enjoy a fresh fruit smoothie, popsicle style! You and your kids will love 'em!
Category: Frozen, Snack
Cuisine: American
Keyword: fruit smoothie popsicles
Servings: 6 popsicles
Calories Per Serving: 59 kcal
Author: JB @ The Grateful Girl Cooks!
Ingredients
  • 1 cup coconut milk (dairy) , or milk of choice
  • 1/2 cup Greek vanilla yogurt
  • 1 large banana
  • 1/2 cup blueberries
  • 8-10 strawberries
Instructions
  1. Place all ingredients in a blender or food processor. Blend until ingredients become smooth, approximately 2-3 minutes.

  2. Pour smoothie into popsicle molds, securely attached to holder/stand. Fill each container about 3/4 of the way full.  Cover with lid securely, then move entire holder with popsicle molds (vertically standing) to freezer. Freeze overnight, of for 6-8 hours.

  3. When ready to serve, hold a popsicle mold (still sealed) under warm running water, turning, until it has loosened from sides, and can easily slip out of the plastic mold.  Serve, and enjoy!

Recipe Notes

No plastic popsicle molds? You can make these popsicles using small paper dixie cups. Pour smoothie into paper cups, place cups on baking sheet, and let firm up a bit in the freezer. Insert a wooden popsicle or craft stick into cup, and let the popsicles finish freezing overnight.

Nutrition Facts
Fruit Smoothie Popsicles
Amount Per Serving (1 g)
Calories 59 Calories from Fat 9
% Daily Value*
Fat 1g2%
Saturated Fat 1g6%
Cholesterol 1mg0%
Sodium 6mg0%
Potassium 132mg4%
Carbohydrates 12g4%
Fiber 1g4%
Sugar 8g9%
Protein 2g4%
Vitamin A 15IU0%
Vitamin C 12.5mg15%
Calcium 19mg2%
Iron 0.2mg1%
* Percent Daily Values are based on a 2000 calorie diet.

Here’s one more to pin on your Pinterest boards!It's EASY and ECONOMICAL to make yummy homemade fruit smoothie popsicles! Enjoy a fresh fruit smoothie, popsicle style! You and your kids will love 'em!

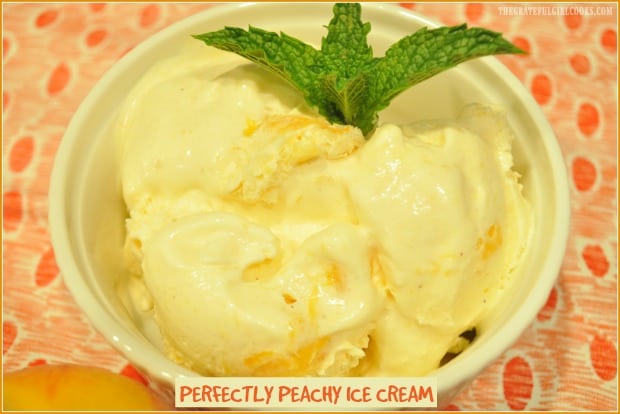
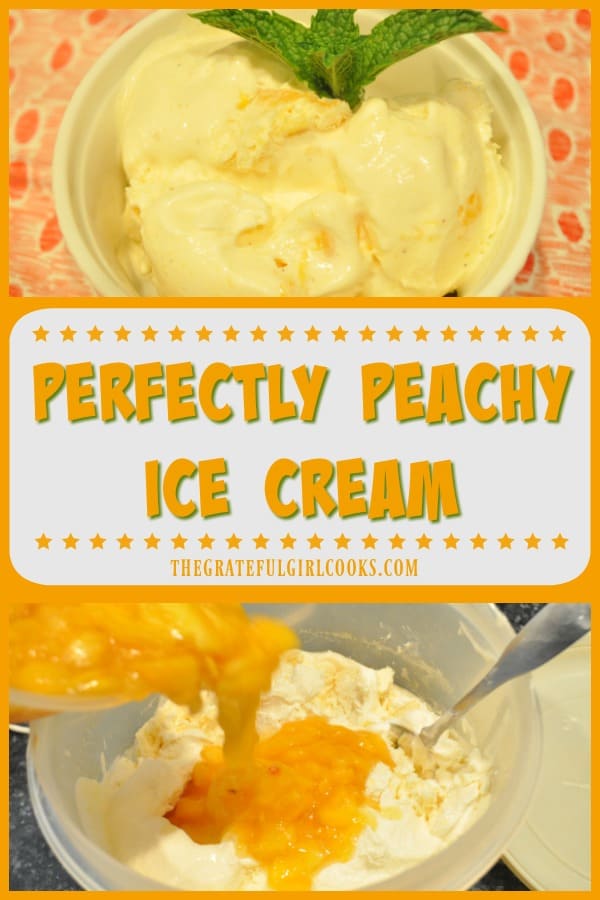
Perfectly Peachy Ice Cream

Nothing says summer like homemade perfectly peachy ice cream, made with a few simple ingredients like fresh peaches, cream, sugar and spices! You will LOVE it!Nothing says summer like homemade perfectly peachy ice cream, made with a few simple ingredients like fresh peaches, cream, sugar and spices! You will LOVE it!

Made with only a few simple ingredients, this Perfectly Peachy Ice Cream is a scrumptious frozen treat to enjoy during those HOT summer days, or to make any other time of year!

Scroll Down For A Printable Recipe Card At The Bottom Of The Page

Fresh Ripe Peaches Are the Best!

Each summer I love to pick fresh peaches at a local U-Pick farm (usually in late July/early August).  This year my husband asked if we could have fresh peach ice cream as dessert for July 4th, but the local peaches here in Oregon weren’t fully ripe enough to pick.

He ended up going to Costco, and bought a small flat of gorgeous peaches and brought them home, just so we could have this homemade ice cream for Independence Day!

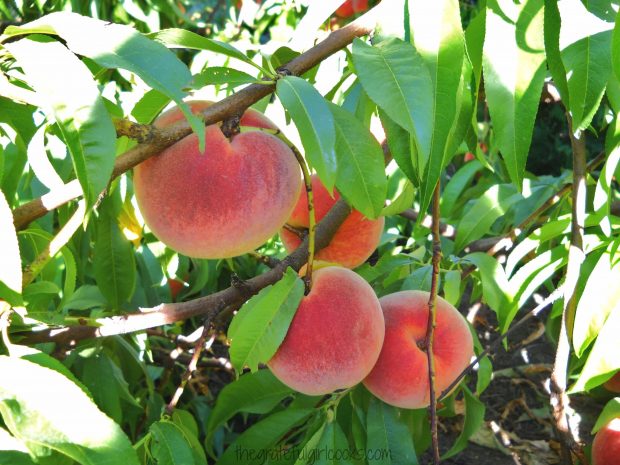
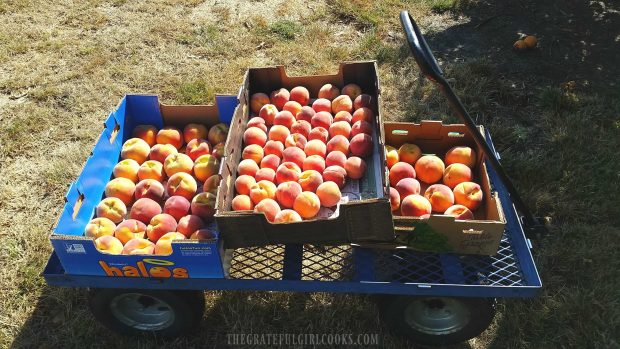
The peaches he bought at the store were absolutely delicious!  Still, there’s just something about picking those peaches right off the tree that screams “summer” to me.  Here are some of the peaches I’ve been able to pick in the past at my local U-Pick peach farm! Aren’t they gorgeous?

Fresh peaches on the tree... ready for me to pick them to make ice cream and pies!

Picked these fresh peaches YUM!

I don’t know about you… but we LOVE peach ice cream!  I have a recipe already on my blog from several years ago for homemade peach ice cream. It uses canned peach nectar and sour cream in it, and tastes wonderful.

This year I wanted to try a simpler peach ice cream recipe with only the basics: peaches, cream, sugar and spices! This delicious ice cream is the result! Boy… is it GOOD! Here’s how to make this wonderful homemade ice cream:

Here’s How To Make Perfectly Peachy Ice Cream

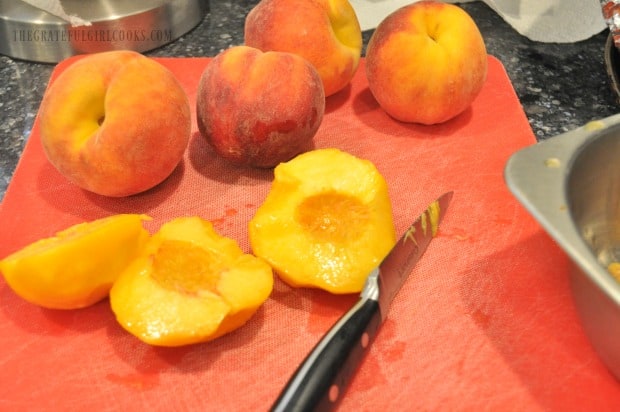
Peel and thinly slice fresh peaches. These were SO juicy! The juice was running down my hands while I sliced them…yum!

Fresh peaches are peeled, then sliced for perfectly peachy ice cream

Place sliced peaches into a large mixing bowl.  Add granulated sugar, juice of one lemon, vanilla and almond extracts and a bit of cinnamon.

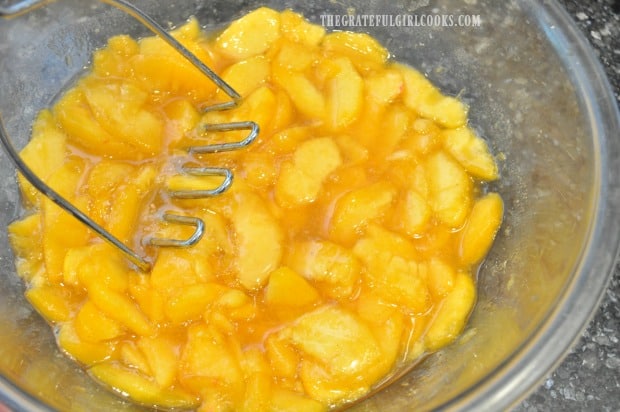
Stir to combine, then let fruit sit for 15-20 minutes.  This resting time will allow the peaches to release some of that juicy goodness, AND let the sugar fully dissolve. Once done “resting”, mash the peaches into small pieces using a potato masher.

Fresh peach slices are crushed with a potato masher for ice cream

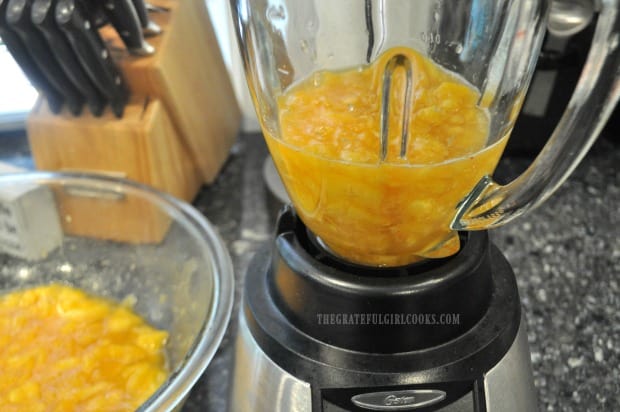
Once peaches are mashed, remove 2 cups of crushed peaches. Place them in a blender. Puree peaches until you have a smooth fruit mixture.

Part of the peaches are blended for ice cream

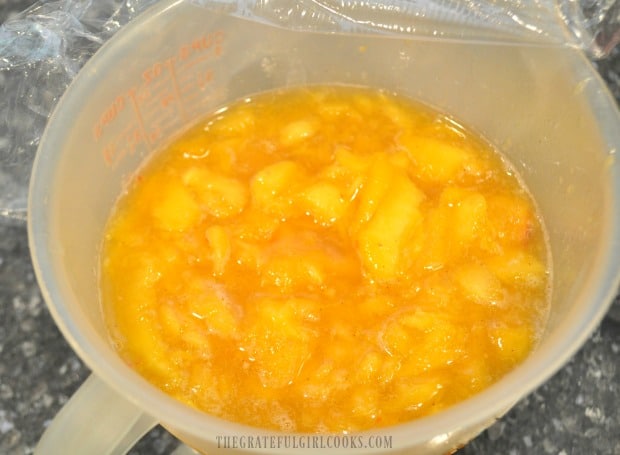
Pour the remaining crushed peaches (the ones left in the mixing bowl) into a container, cover, and keep refrigerated until ice cream is finished freezing.

Part of the peaches are set aside and chilled before adding to ice cream.

Getting Ready To FREEZE The Perfectly Peach Ice Cream

Add the heavy whipping cream to the 2 cups of peach puree in the blender. Give it a couple pulses to combine peach puree and whipping cream.  Cover blender (or pour into a container with a lid) and refrigerate this peach puree/cream mixture until very cold.

You can also pour the fruit/cream mixture into large bowl, cover with plastic wrap and refrigerate (but it’s one more bowl to clean- just sayin’!).

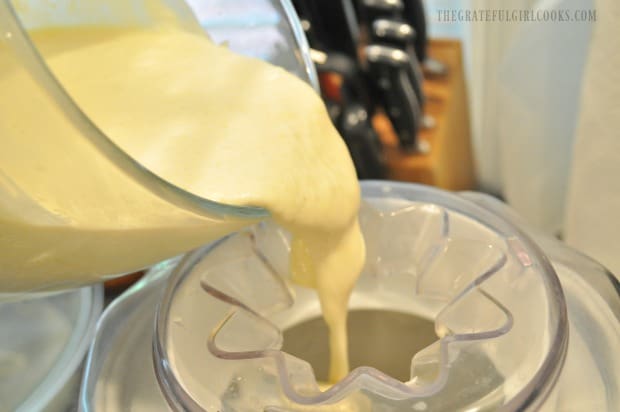
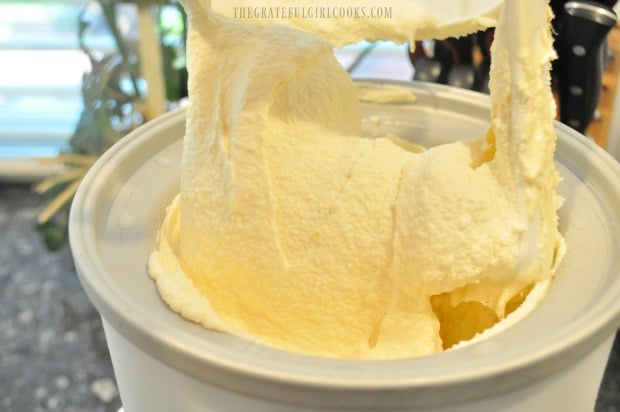
After peach/cream mixture is really cold, pour it into cannister of ice cream machine, and freeze ice cream according to the manufacturer’s instructions. I use a Cuisinart machine, and the ice cream is thick and soft serve consistency in about 20 minutes.

Peach ice cream mixture is added to ice cream machine.

Perfectly peach ice cream is done freezing.

Let The Ice Cream “Ripen” In the Freezer, Then ENJOY!

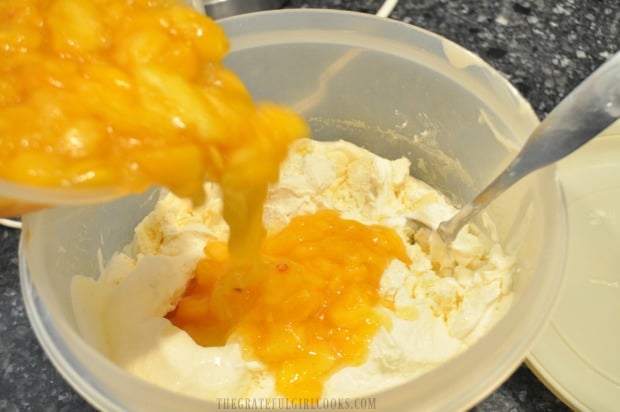
Transfer the ice cream to a bowl with a lid as soon as it is done churning in the freezer. Immediately add the reserved mashed and chilled peaches, and stir to combine. Place lid on container and put it in freezer to “ripen and firm up” for a few hours!

Cold reserved peaches are added to finished ice cream and stirred in.

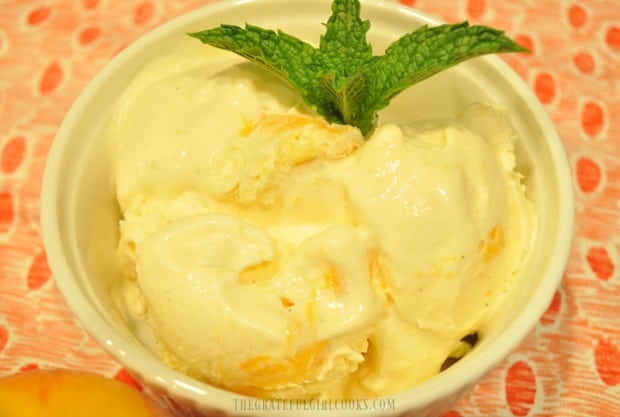
Once ice cream has firmed up, it is ready to serve and gobble up!  The recipe makes approximately 1½ quarts, which means you will en up with about 12 (half-cup) servings of this delicious frozen “perfectly peachy ice cream”!

Big scoop of perfectly peachy ice cream is served with a mint sprig.

And that is how easy it is to make this delicious, perfectly peachy ice cream! It tasted soooo good, and we loved this easy to prepare, simple recipe! I hope you will consider making it for those you love.

If you love homemade ice cream like we do, be sure to check out the Recipe Index at the top of each blog post where you will find all the homemade ice cream recipes on this blog. They include Blueberry Cheesecake, Candied Bacon, Chocolate Peanut Butter, Coffee, Strawberry, and many others! Enjoy the, and have a great day. Come back soon.

Interested In More Recipes?

Thank you for visiting this website. I appreciate you using some of your valuable time to do soIf you’re interested, I publish a newsletter 2 times per month (1st and 15th) with all the latest recipes, and other fun info. I would be honored to have you join our growing list of subscribers, so you never miss a great recipe!
There is a Newsletter subscription box on the top right side (or bottom) of each blog post, depending on the device you use, where you can easily submit your e-mail address (only) to be included in my mailing list.

You Can Also Find Me On Social Media:

Facebook page: The Grateful Girl Cooks!
Pinterest:
The Grateful Girl Cooks!
Instagram:
jbatthegratefulgirlcooks

Have a wonderful day!

Author's signature

Recipe Source: https://www.makeandtakes.com/fresh-peach-ice-cream

0 from 0 votes
Perfectly Peachy Ice Cream
Prep Time
30 mins
Cook Time
0 mins
Freezer Firming Up Time
2 hrs
Total Time
2 hrs 30 mins
 
Nothing says summer like homemade perfectly peachy ice cream, made with a few simple ingredients like fresh peaches, cream, sugar and spices! You will LOVE it!
Category: Desserts- Ice Cream
Cuisine: American
Keyword: perfectly peachy ice cream
Servings: 12 (1/2 cup)-1½ quarts total
Calories Per Serving: 265 kcal
Author: JB @ The Grateful Girl Cooks!
Ingredients
  • 6 fresh peaches , peeled and sliced thin
  • cups granulated sugar
  • 1 large lemon (juice of)
  • 2 teaspoons vanilla extract
  • 1/8 teaspoon almond extract
  • 1/4 teaspoon ground cinnamon
  • 2 cups heavy whipping cream (no substitutions!)
Instructions
  1. Peel and thinly slice fresh peaches.  Place sliced peaches into a large mixing bowl.  Add granulated sugar, juice of one lemon, vanilla and almond extracts and cinnamon.  Stir to combine, then let fruit sit for 15-20 minutes.  This resting time will allow the peaches to release some of their juicy goodness, AND let the sugar fully dissolve. Once done "resting", smash the peaches into small pieces using a potato masher. 

  2. Once peaches are mashed, remove 2 cups of crushed peaches. Place them in a blender. Puree these two cups of peaches until you have a smooth fruit mixture.

  3. Pour the remaining crushed peaches (the ones left in the mixing bowl) into a container, cover, and keep refrigerated until ice cream is finished freezing.
  4. Add whipping cream to the 2 cups of peach puree in blender. Give it a few pulses to combine peach puree and whipping cream.  Cover blender (or pour into a container with a lid) and refrigerate this peach puree/cream mixture until very cold.  After peach/cream mixture is really cold, pour it into cannister of ice cream machine, and freeze according to the manufacturer's instructions.

  5. Transfer ice cream to a large bowl/container as soon as it is done churning in the freezer. Immediately add reserved mashed/chilled peaches; stir to combine.  Place lid on container and place in freezer to "firm up" for a few hours! When firmed up, serve, and enjoy!

Nutrition Facts
Perfectly Peachy Ice Cream
Amount Per Serving (0.5 cup)
Calories 265 Calories from Fat 126
% Daily Value*
Fat 14g22%
Saturated Fat 9g56%
Cholesterol 54mg18%
Sodium 15mg1%
Potassium 172mg5%
Carbohydrates 33g11%
Fiber 1g4%
Sugar 31g34%
Protein 1g2%
Vitamin A 830IU17%
Vitamin C 6.2mg8%
Calcium 30mg3%
Iron 0.2mg1%
* Percent Daily Values are based on a 2000 calorie diet.

Here’s one more to pin on your Pinterest boards!Nothing says summer like homemade perfectly peachy ice cream, made with a few simple ingredients like fresh peaches, cream, sugar and spices! You will LOVE it!

Homemade Hot Fudge Sauce

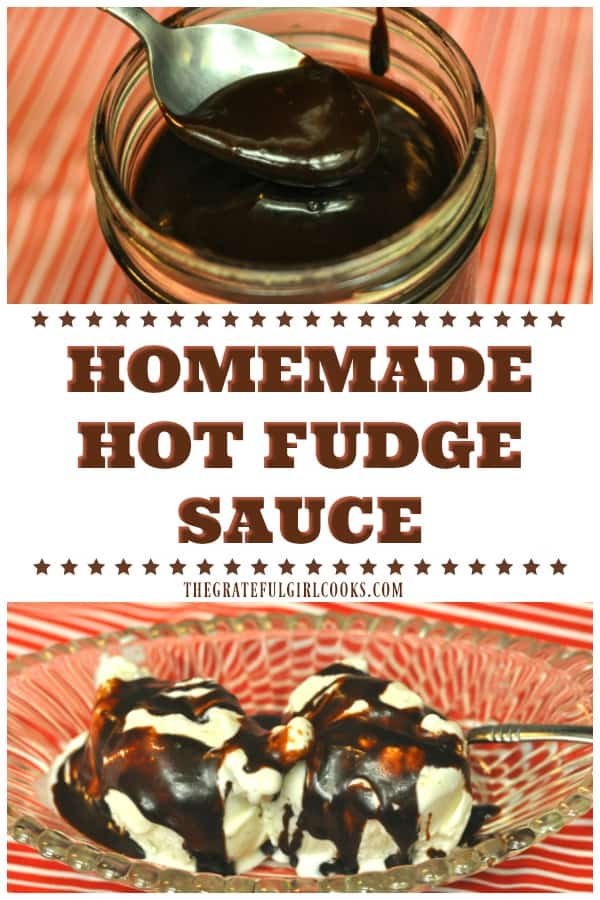
Thick, creamy, decadent and ready in 10 minutes, this easy homemade chocolate hot fudge sauce is so scrumptious you may never want to buy it at the store again!Thick, creamy, decadent and ready in 10 minutes, this easy homemade chocolate hot fudge sauce is so scrumptious you may never want to buy it at the store again!
It’s the middle of summer, it’s extremely HOT in Oregon this week, with temps expected to reach 108-110 degrees. However… we do have some yummy ice cream in the freezer!

We also have this amazing, thick Homemade Hot Fudge Sauce ready to drizzle on the ice cream, so it’s all GOOD! We may be HOT, but at least we will have a smile on our faces!

This recipe for homemade hot fudge sauce is a keeper, folks. It’s fudge-y, creamy, and is ready in under 10 minutes!  I’m NOT kidding… it tastes amazing!  Here’s how you can make this decadent sauce at home, rather than buying it at the local grocery store!

Scroll Down For A Printable Recipe Card At The Bottom Of The Page

How To Make Homemade Hot Fudge Sauce

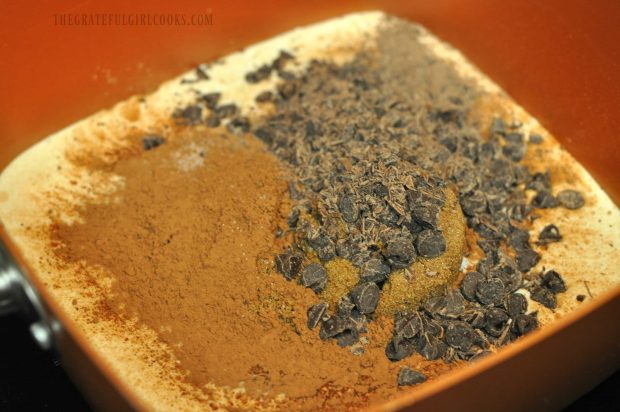
In a large saucepan, bring the whipping cream, corn syrup, dark brown sugar, salt, and HALF of the finely chopped chocolate to a boil over medium heat. Stir often, until all the chocolate has melted.

Reduce the heat under the pan and simmer (a low boil) for 5 minutes. While cooking, make sure to stir the mixture frequently to prevent scorching.

Whipping cream, brown sugar and chocolate for fudge sauce, in saucepan

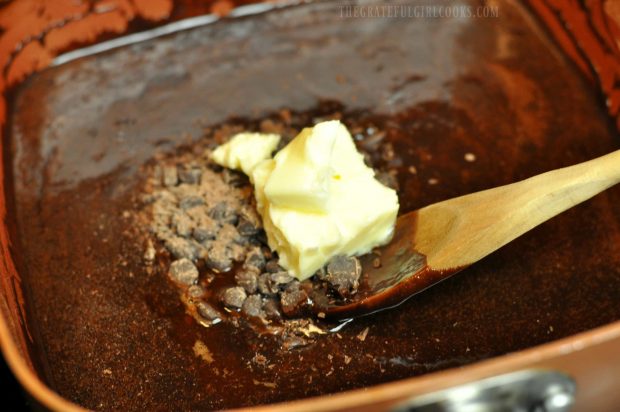
Remove the pan from the heat. Add butter, vanilla extract and the rest of the chocolate to the pan.

Stir the homemade hot fudge sauce until the chocolate is smooth and lump-free. Let the HOT fudge sauce cool just a bit before serving.

Butter and chocolate added to hot fudge sauce in pan

Spoon the hot fudge sauce over ice cream, cake, or even drizzled on top of dessert crepes!  It tastes soooo good!

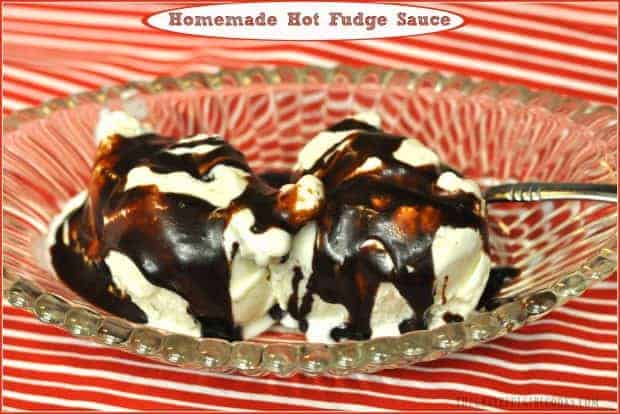
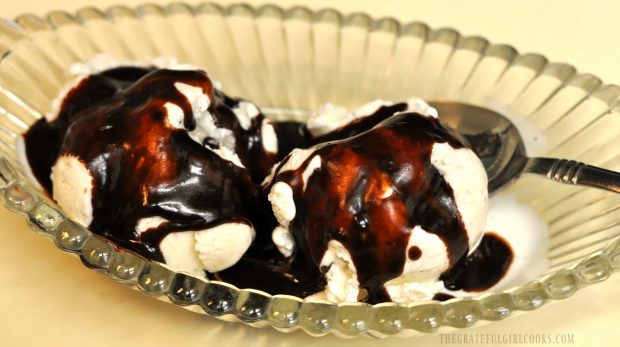
Homemade hot fudge sauce served over vanilla ice cream in dish.

Storing The Sauce

Store the unused sauce in a covered jar or container with a lid for up to a week in the refrigerator. Once the sauce has been refrigerated, it will thicken considerably.

How To Reheat Hot Fudge Sauce Once It Has Been Refrigerated

When ready to use it again, remove the thick hot fudge sauce from the refrigerator.  The sauce can either be cooked in a saucepan on the stove, or in a microwave.

  • TO MICROWAVE: Place the amount you will be using in the microwave (in a microwave-safe container). Re-heat hot fudge sauce for 10-15 seconds on high setting. Give it a stir. If it needs just a bit more time, place it back in microwave for a few seconds.
  • TO REHEAT ON STOVE: The hot fudge sauce can also be reheated in a small saucepan on your stovetop using low heat.

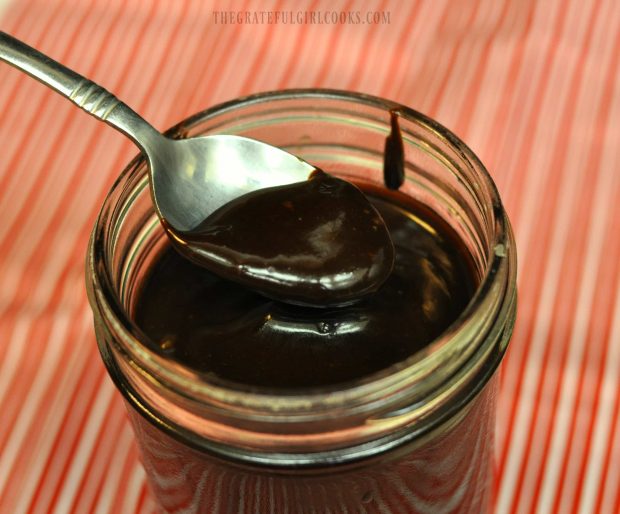
Spoonful of thick hot fudge sauce, over a glass jar

Spoon some of the homemade hot fudge sauce over ice cream, cake, or whatever you want to top with it!

My favorite way to use this thick, delicious sauce is to top homemade vanilla ice cream with it! Oh YUM.

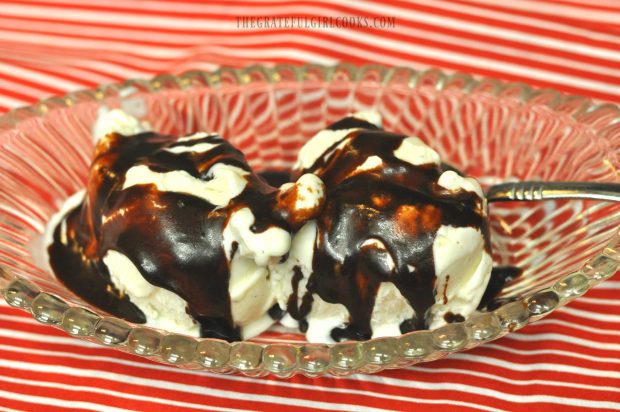
Hot fudge sauce as topping for ice cream

This homemade hot fudge sauce is so delicious, thick and fudgy, you might be tempted to grab a spoon and eat it straight out of the jar! NOT that I would know anything about that, of course… wink, wink!.

This recipe is most definitely going into my “keeper” file!  Hope you will give it a try – I just KNOW you’re gonna love it, too!

Looking For More DESSERT SAUCE Recipes? 

Be sure to check out ALL my recipes in the Recipe Index, located at the top of the page. If you are interested in finding other delicious dessert sauces to serve over ice cream, you might want to try these:

Want More Recipes? Get My FREE Newsletter!

I publish a newsletter 2 times per month (1st and 15th) with lots of recipes, tips, etc..
Would you like to join our growing list of subscribers?

There is a Newsletter subscription box on the top right (or bottom) of each blog post, depending on the device you use.
You can submit your e-mail address there, to be added to my mailing list.

Find Me On Social Media:

Facebook page: The Grateful Girl Cooks!
Pinterest:
The Grateful Girl Cooks!
Instagram:
jbatthegratefulgirlcooks

Author's signature

Recipe Adapted From: https://www.averiecooks.com/2013/04/10-minute-homemade-hot-fudge-html

↓↓ PRINTABLE RECIPE BELOW ↓↓

0 from 0 votes
Homemade Hot Fudge Sauce
Prep Time
5 mins
Cook Time
5 mins
Total Time
10 mins
 

Thick, creamy, decadent and ready in 10 minutes, this easy homemade chocolate hot fudge sauce is so scrumptious you may never want to buy it at the store again!

Category: Dessert Sauce
Cuisine: American
Keyword: homemade hot fudge sauce
Servings: 16 (2 cups-2 Tablespoons per serving)
Calories Per Serving: 160 kcal
Author: JB @ The Grateful Girl Cooks!
Ingredients
  • 2/3 cup heavy whipping cream
  • 1/2 cup light corn syrup
  • 1/3 cup dark brown sugar , packed
  • 1/4 cup unsweetened cocoa powder
  • 1/4 teaspoon salt
  • 6 ounces semi-sweet chocolate (can also use dark or bittersweet), finely chopped
  • 2 Tablespoons butter
  • 2 teaspoons vanilla extract
Instructions
  1. In a large saucepan, bring whipping cream, corn syrup, dark brown sugar, salt, and HALF of the finely chopped chocolate to a boil over medium heat. Stir often until chocolate has melted. Reduce the heat under the pan and simmer (a low boil) for 5 minutes, making sure to stir the mixture frequently to prevent scorching.
  2. Remove pan from the heat. Add butter, vanilla extract and the rest of the chocolate. Stir until chocolate is smooth and lump-free. Let the hot fudge sauce cool just a bit before serving.
  3. Store the unused sauce in a covered jar or container with a lid for up to a week in the refrigerator. Once refrigerated, the sauce will thicken considerably. When ready to use it again, place the amount you will be using in the microwave (in a microwave-safe container) and re-heat for 10-15 seconds. The sauce can also be reheated on your stovetop. Enjoy!
Nutrition Facts
Homemade Hot Fudge Sauce
Amount Per Serving (2 Tablespoons)
Calories 160 Calories from Fat 81
% Daily Value*
Fat 9g14%
Saturated Fat 5g31%
Cholesterol 17mg6%
Sodium 61mg3%
Potassium 94mg3%
Carbohydrates 19g6%
Fiber 1g4%
Sugar 16g18%
Protein 1g2%
Vitamin A 195IU4%
Vitamin C 0.1mg0%
Calcium 20mg2%
Iron 0.9mg5%
* Percent Daily Values are based on a 2000 calorie diet.

Here’s one more to pin on your Pinterest boards!Thick, creamy, decadent and ready in 10 minutes, this easy homemade chocolate hot fudge sauce is so scrumptious you may never want to buy it at the store again!

Save

Save

Save

Save

Save

Save

Save

Save

Save

Save

Save

Save

Save

Save

Save

Strawberry Cheesecake Ice Cream

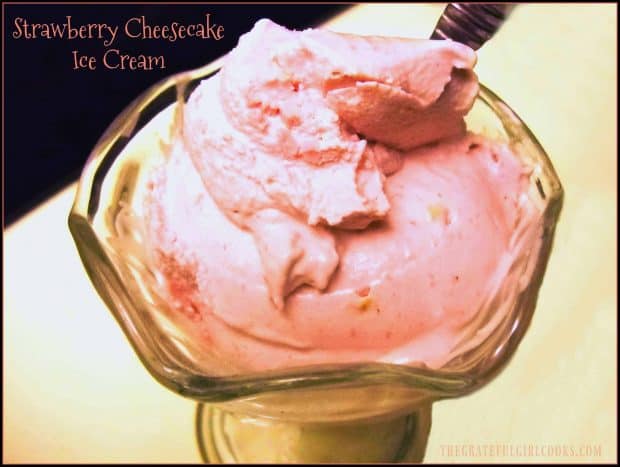
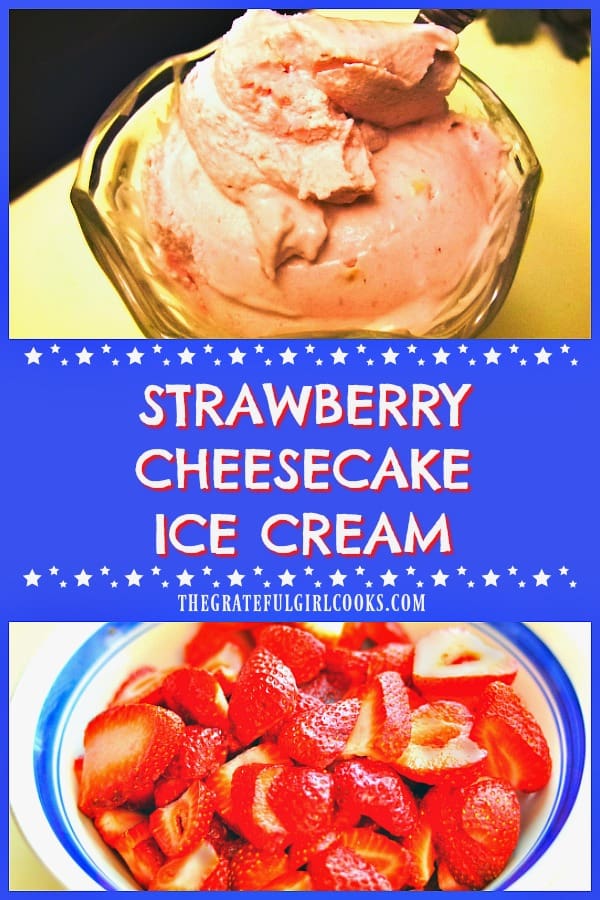
It’s easy to make delicious, fresh homemade strawberry cheesecake ice cream, with an ice cream maker and only a few common ingredients!It's easy to make delicious, fresh homemade strawberry cheesecake ice cream, with an ice cream maker and only a few common ingredients!
I love cheesecake, and I love strawberries. Believe it or not, I also love cheesecake with strawberry topping! So it stands to reason that I would also love homemade Strawberry Cheesecake Ice Cream!

It’s fun making homemade ice cream in my little electric ice cream maker that I received several years ago for my birthday. The kind I have is perfect for a quick batch… no ice cubes and no salt to freeze it.

It just sits on my kitchen counter waiting patiently for me.  I pour in the ice cream mixture and a little over 20 minutes later… boom… ice cream! It’s fun (and dangerous) to be able to make homemade ice cream, even when it’s snowing or pouring down rain outside.

Scroll Down For A Printable Recipe Card At The Bottom Of The Page

How I Came Up With Recipe

This recipe for strawberry cheesecake ice cream is an easy recipe I tried one summer while experimenting with a LOT of ice cream recipes. For this recipe I added in a few ingredients that I thought would make a great ice cream to my standard vanilla base.

Did I mention that I ate all the different kinds of ice cream I made that summer? Well… SOMEONE had to do it.  Heh heh heh. This recipe for Strawberry Cheesecake ice cream tasted great, and is very simple to make. Here’s how:

How To Make Strawberry Cheesecake Ice Cream

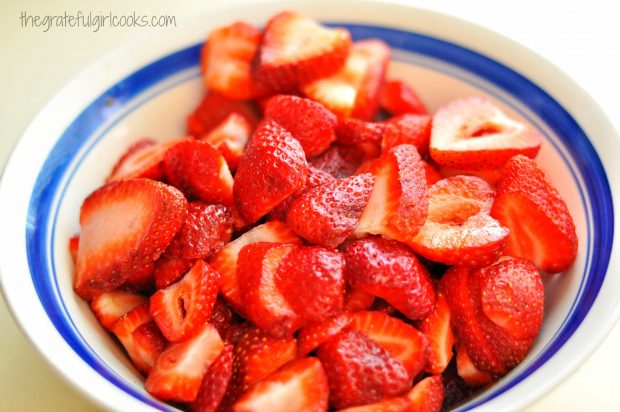
Place cleaned, stemmed, cored and sliced fresh strawberries, sugar and lemon juice into a blender. Blend on high until mixture is pureed.  Add 8 ounces of room temperature cream cheese (cut into chunks) to the liquid. Blend again until mixture is well pureed.

Transfer the strawberry/cream cheese mixture to a large bowl.  Stir in whipping cream, milk, and vanilla extract, to fully combine. This is you strawberry cheesecake ice cream base.

Fresh strawberries will be used to make strawberry cheesecake ice cream.

Pour the ice cream mixture into the cannister of an ice cream machine. Freeze, per manufacturer instructions until done. My beloved ice cream machine takes just over 20 minutes to freeze to soft-serve consistency.

The strawberry cheesecake ice cream is ready to eat right then and there, but I suggest transferring ice cream to a freezable container with a lid, and freeze for 2-3 additional hours to firm ice cream up to a more “scoopable” consistency.

My Cuisinart ice cream machine.That’s it!  When the ice cream is done, grab a big ol’ scoop, plop down into the nearest chair and enjoy this delicious strawberry cheesecake ice cream.  Sure hope you enjoy it… we sure do!

Looking For More HOMEMADE ICE CREAM Recipes?

You can find all of my recipes in the Recipe Index, located at the top of the page. I have many ice cream recipes, including:

Interested In More Recipes?

Thank you for visiting this website. I appreciate you using some of your valuable time to do soIf you’re interested, I publish a newsletter 2 times per month (1st and 15th) with all the latest recipes, and other fun info. I would be honored to have you join our growing list of subscribers, so you never miss a great recipe!
There is a Newsletter subscription box on the top right side (or bottom) of each blog post, depending on the device you use, where you can easily submit your e-mail address (only) to be included in my mailing list.

You Can Also Find Me On Social Media:
Facebook page: The Grateful Girl Cooks!
Pinterest: The Grateful Girl Cooks!
Instagram: jbatthegratefulgirlcooks

Author's signature

0 from 0 votes
Strawberry Cheesecake Ice Cream
Prep Time
30 mins
Cook Time
0 mins
Total Time
30 mins
 
It's easy to make delicious, fresh homemade strawberry cheesecake ice cream, with an ice cream maker and only a few common ingredients!
Category: Dessert
Cuisine: American
Keyword: strawberry cheesecake ice cream
Servings: 10 (1/2 cup servings)
Calories Per Serving: 203 kcal
Author: JB @ The Grateful Girl Cooks!
Ingredients
  • 2 cups fresh strawberries , de-stemmed, cored, sliced
  • 3/4 cup granulated sugar
  • 2 teaspoons fresh lemon juice
  • 8 ounces cream cheese (room temp)
  • 1 cup whipping cream
  • 1/2 cup whole milk
  • 1 teaspoon vanilla extract
Instructions
  1. Combine strawberries, sugar and lemon juice in blender. Blend until mixture is smooth and pureed.
  2. Cut softened cream cheese into chunks and add to blender. Blend until smooth. Transfer fruit puree into a large mixing bowl.
  3. Stir in whipping cream, milk and vanilla until blended.
  4. Pour ingredients into freezer cannister of ice cream machine and freeze according to manufacturer instructions (usually between 20 and 25 minutes).
  5. When done, transfer ice cream to a covered freezer container and place in freezer for 2-3 hours to firm up to a scoopable consistency.
  6. Serve, and enjoy!
Nutrition Facts
Strawberry Cheesecake Ice Cream
Amount Per Serving (1 (1/2 cup serving))
Calories 203 Calories from Fat 108
% Daily Value*
Fat 12g18%
Saturated Fat 7g44%
Cholesterol 46mg15%
Sodium 121mg5%
Potassium 134mg4%
Carbohydrates 20g7%
Sugar 18g20%
Protein 2g4%
Vitamin A 495IU10%
Vitamin C 17.5mg21%
Calcium 67mg7%
Iron 0.2mg1%
* Percent Daily Values are based on a 2000 calorie diet.

Here’s one more to pin on your Pinterest boards!It's easy to make delicious, fresh homemade strawberry cheesecake ice cream, with an ice cream maker and only a few common ingredients!

Save

Save

Save

Save

Save

Save

Save

Save

Save

Save

Save

Piña Colada Ice Cream

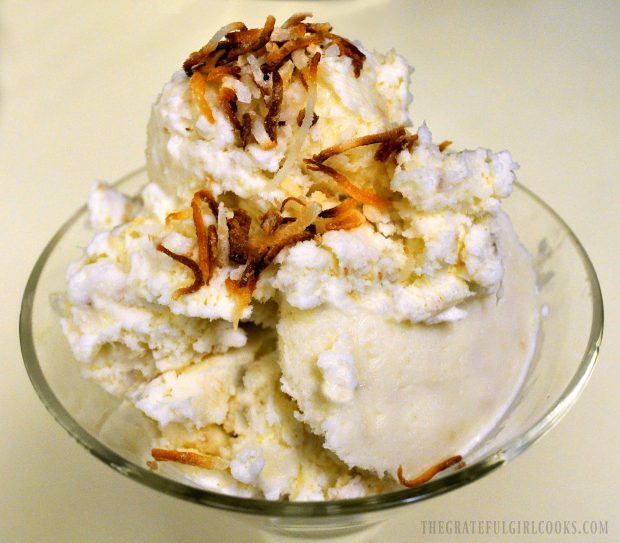
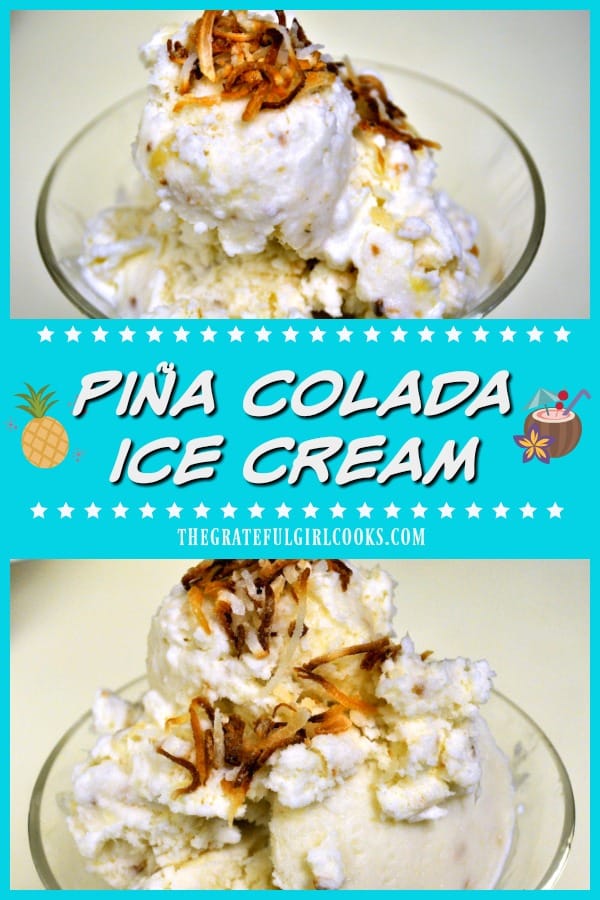
Enjoy a taste of the tropics with yummy Piña Colada Ice Cream, with pineapple, cream of coconut, rum extract, coconut milk, & grated toasted coconut.Enjoy a taste of the tropics with yummy Piña Colada Ice Cream, with pineapple, cream of coconut, rum extract, coconut milk, & grated toasted coconut.
Summertime is coming… blue skies, warm weather, evenings spent out on the back deck by the fire pit… enjoying a dish of homemade Piña Colada Ice Cream! Oh boy – I can hardly wait! We have had the wettest winter I can remember in a LONG time here in Oregon, and we are LONGING for sunshine and hot weather to finally make it’s appearance!

One of the traditions we have is to make homemade ice cream throughout the year… at least this Piña Colada Ice Cream makes it FEEL like summer, thanks to it’s coconut/pineapple tropical flavor!

Scroll Down For A Printable Recipe Card At The Bottom Of The Page

How To Make Piña Colada Ice Cream

In a large mixing bowl, combine whipping cream, cream of coconut, coconut milk, and pineapple juice. (If desired, you can add 1/4 teaspoon of Rum extract, but it is not necessary).  Stir until combined.  Add coconut flakes and stir.

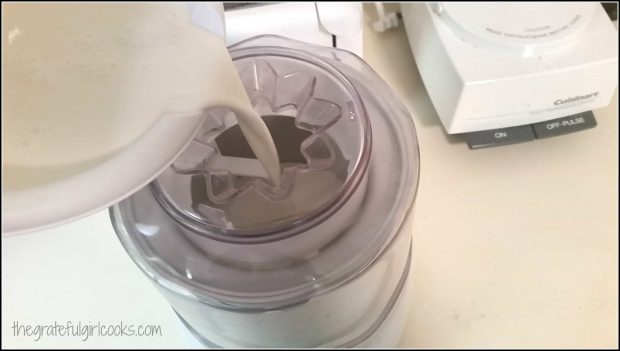
Pour this mixture into the canister of an ice cream maker and freeze according to manufacturer instructions. I use an electric indoor machine and it takes 20-25 minutes for soft serve consistency.  About 5 minutes BEFORE the piña colada ice cream is done, add the drained, crushed pineapple.

Ice cream base is poured into machine for freezing.

Let Ice Cream Firm Up In Freezer, Then Serve!

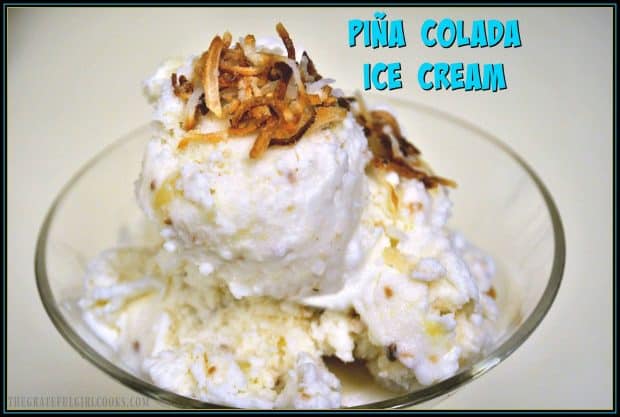
When ice cream is done, transfer it to a freezer safe container with a lid. Freeze an additional 3-4 hours until firm.  When it is ready to serve, garnish each scoop of piña colada ice cream with toasted coconut flakes. NOTE: See the notes section of the printable recipe (below) for instructions on how to toast the coconut.

The pina colada ice cream is garnished with toasted shredded coconut to serve.

That’s it! Enjoy a “taste of the tropics” any time of the year with this simple and delicious piña colada ice cream! Sure hope you enjoy it.

Looking For More ICE CREAM Recipes?

You can find all of my recipes in the Recipe Index, located at the top of the page. I have quite a few recipes for ice cream. they include:

Interested In More Recipes?

Thank you for visiting this website. I appreciate you using some of your valuable time to do soIf you’re interested, I publish a newsletter 2 times per month (1st and 15th) with all the latest recipes, and other fun info. I would be honored to have you join our growing list of subscribers, so you never miss a great recipe!
There is a Newsletter subscription box on the top right side (or bottom) of each blog post, depending on the device you use, where you can easily submit your e-mail address (only) to be included in my mailing list.

You Can Also Find Me On Social Media:
Facebook page: The Grateful Girl Cooks!
Pinterest: The Grateful Girl Cooks!
Instagram: jbatthegratefulgirlcooks

Author's signatureRecipe Source:  Unknown. Copied recipe onto notebook paper many, many years ago, but did not write down the source. Oops.

0 from 0 votes
Piña Colada Ice Cream
Prep Time
30 mins
Cook Time
0 mins
Total Time
30 mins
 

Enjoy a taste of the tropics with yummy Piña Colada Ice Cream, with pineapple, cream of coconut, rum extract, coconut milk, & grated toasted coconut.

Category: Dessert
Cuisine: American
Keyword: piña colada ice cream
Servings: 10 ½ cup servings
Calories Per Serving: 387 kcal
Author: JB @ The Grateful Girl Cooks!
Ingredients
  • 3/4 cup whipping cream
  • 1 can cream of coconut use 15 oz. or 13.5 oz (brands vary in weight)
  • 1 cup coconut milk unsweetened (canned=13.66 oz.)
  • 2 Tablespoons pineapple juice (reserved from can of crushed pineapple)
  • 1/4 teaspoon Rum extract (optional-not necessary)
  • 1 cup coconut flakes
  • 3/4 cup canned crushed pineapple , drained (juice reserved)
  • 1/4 cup TOASTED coconut flakes , for garnish (see Notes section for instructions)
Instructions
  1. In a large mixing bowl, combine whipping cream, cream of coconut, coconut milk, and pineapple juice. (you can also add 1/4 teaspoon of Rum extract, if desired). Stir until combined. Add coconut flakes and stir to incorporate. Pour this mixture into canister of ice cream maker and freeze according to manufacturer instructions. About 5 minutes BEFORE the ice cream is done, add drained crushed pineapple.
  2. When ice cream is done, transfer it to a freezer safe container with a lid. Freeze for an additional 3-4 hours until firm. When it is ready to serve, garnish each scoop with toasted coconut flakes (see notes section of printable recipe for instructions on how to toast the coconut).
Recipe Notes

To toast coconut flakes for garnish: Preheat oven to 325 degrees. Spread coconut evenly on cookie sheet lined with parchment paper. Bake for about 15-20 minutes. Check it every 5 minutes. Remove from oven when coconut is golden brown. Remove coconut from cookie sheet; let cool completely before garnishing ice cream.

Nutrition Facts
Piña Colada Ice Cream
Amount Per Serving (0.5 cup)
Calories 387 Calories from Fat 225
% Daily Value*
Fat 25g38%
Saturated Fat 20g125%
Cholesterol 24mg8%
Sodium 35mg2%
Potassium 177mg5%
Carbohydrates 40g13%
Fiber 3g13%
Sugar 35g39%
Protein 1g2%
Vitamin A 285IU6%
Vitamin C 4.8mg6%
Calcium 25mg3%
Iron 1.2mg7%
* Percent Daily Values are based on a 2000 calorie diet.

Here’s one more to pin on your Pinterest boards!Enjoy a taste of the tropics with yummy Piña Colada Ice Cream, with pineapple, cream of coconut, rum extract, coconut milk, & grated toasted coconut.

Save

Save

Save

Save

Save

Save

Save

Save

Save

Save

Save

Save

Save

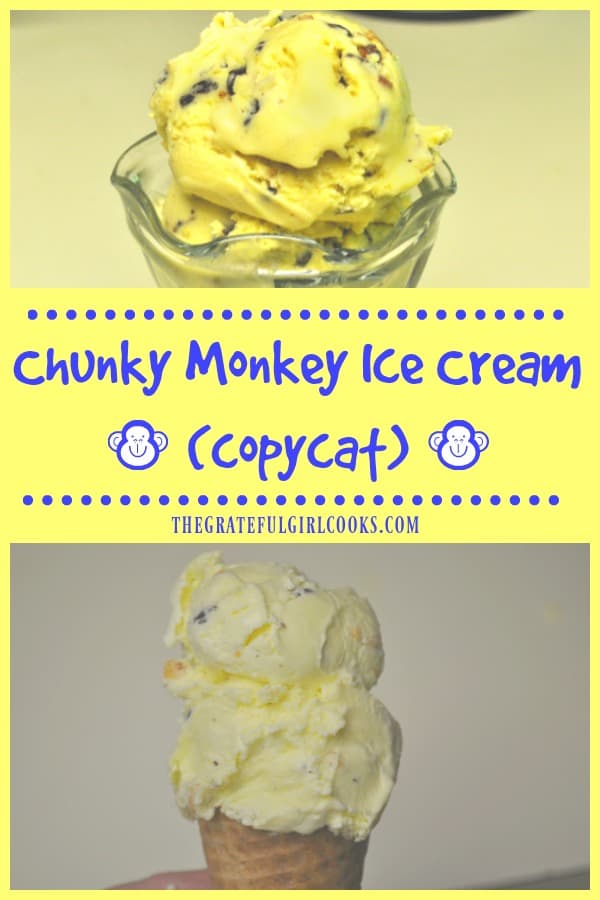
Chunky Monkey Ice Cream (copycat)

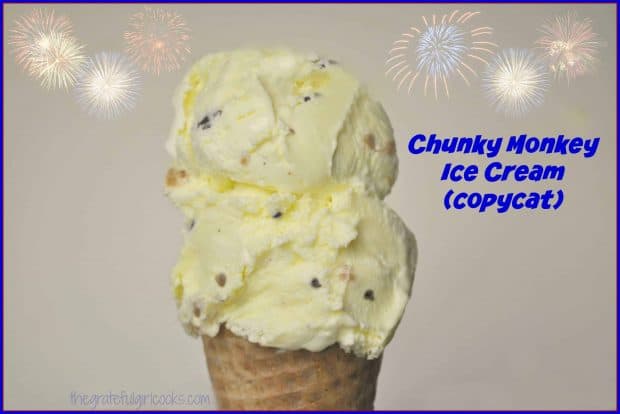
A copycat recipe for yummy chunky monkey ice cream – with bananas, chocolate chunks and toasted pecans helping to make this frozen treat amazing!A copycat recipe for yummy chunky monkey ice cream - with bananas, chocolate chunks and toasted pecans helping to make this frozen treat amazing!
Happy Fourth of July week! One of the ways we celebrate this holiday each year is by making homemade ice cream. One of our favorites is this copycat recipe for Chunky Monkey Ice Cream.

I am fortunate to have an indoor Cuisinart ice cream maker I was given for a birthday several years ago, and have loved trying LOTS of different recipes with my family. The first time I made this recipe (I was experimenting with flavors), we all crowded around the ol’ ice cream maker taking spoonfuls out when it was done.  Our reactions were priceless.

We were ALL amazed how delicious this chunky monkey ice cream was. This ice cream is ridiculously GOOD, and I’ve continued making it to this very day!

Scroll Down for A Printable Recipe Card At the Bottom Of The Pge

How Do You Make Chunky Monkey Ice Cream?

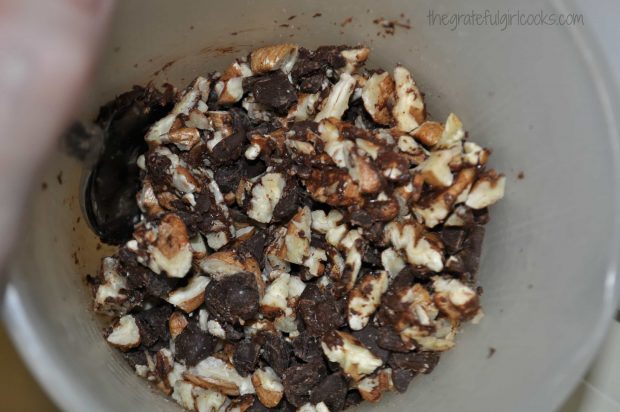
The ice cream is frozen, then during the last few minutes the banana puree, toasted pecans and chocolate chunks are added to mixture.

Pecans and chocolate chips will be added to the ice cream during the last 5 minutes of freezing.

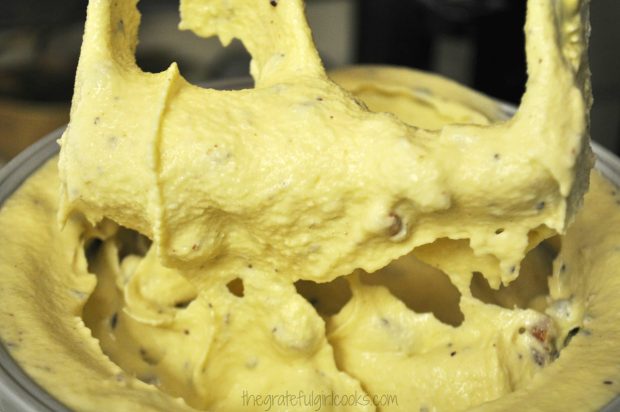
Here is what it looked like, right when the chunky monkey ice cream was done. All I needed was for someone to hand me a BIG spoon at this point, and I was in my happy place!

The ice cream is semi-soft when it is first done freezing.

Ice Cream Is Best When “Ripened” In The Freezer

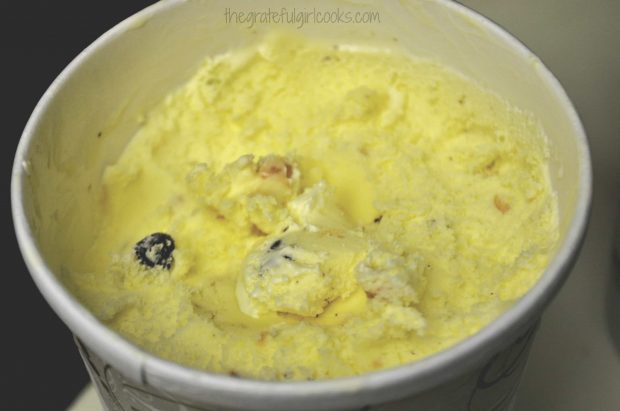
I placed the rest of the ice cream into a covered container (you know… what we didn’t devour), and put it into our kitchen freezer for a couple hours.

This extra time in the freezer is recommended, because it helps to  “ripen” or firm up the chunky monkey ice cream even further. That will result is some good scoops later.

A carton of this ice cream has frozen firm, and is now ready to scoop!

Time For A Scoop Of Chunky Monkey Ice Cream!

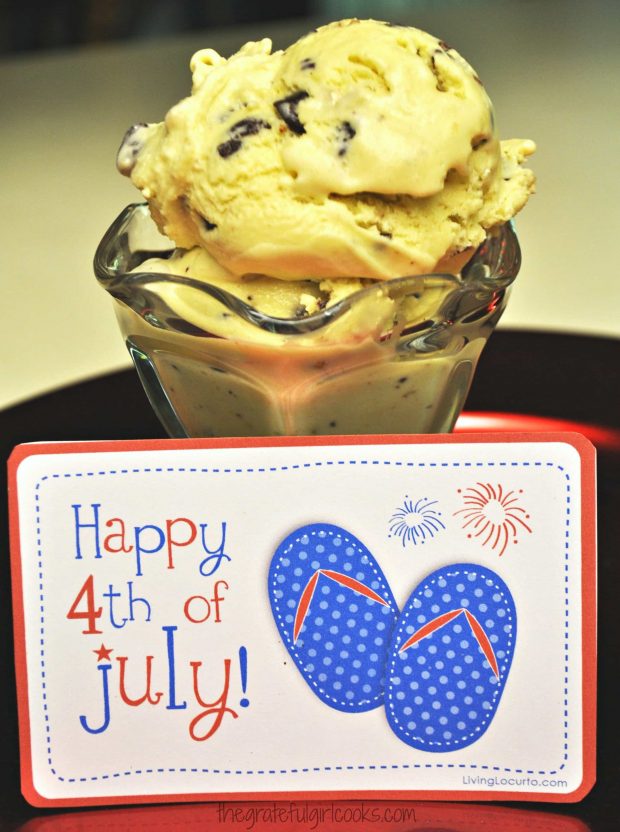
So there you have it… a perfectly scoopable and an incredibly delicious “copycat” version of chunky monkey ice cream! Now… where’s my spoon and a bib? (I’m drooling!)

Two scoops of chunky monkey ice cream in a glass dish.

Have a wonderful 4th of July celebration, friends. Hope you enjoy this yummy chunky monkey ice cream! I am truly grateful and blessed to be a proud citizen of this great country.

Looking For More Homemade ICE CREAM Recipes?

You can find all of my recipes in the Recipe Index, located at the top of the page. A few of my ice cream recipes include:

Interested In More Recipes?

Thank you for visiting this website. I appreciate you using some of your valuable time to do soIf you’re interested, I publish a newsletter 2 times per month (1st and 15th) with all the latest recipes, and other fun info. I would be honored to have you join our growing list of subscribers, so you never miss a great recipe!
There is a Newsletter subscription box on the top right side (or bottom) of each blog post, depending on the device you use, where you can easily submit your e-mail address (only) to be included in my mailing list.

You Can Also Find Me On Social Media:
Facebook page: The Grateful Girl Cooks!
Pinterest: The Grateful Girl Cooks!
Instagram: jbatthegratefulgirlcooks

Author's signature

Recipe Adapted From:  Cuisinart Automatic Frozen Yogurt-Ice Cream & Sorbet Maker Instruction And Recipe Booklet, published 2002 by Cuisinart.

0 from 0 votes
Chunky Monkey Ice Cream (copycat)
Prep Time
25 mins
Cook Time
0 mins
Total Time
25 mins
 
A copycat recipe for yummy chunky monkey ice cream - with bananas, chocolate chunks and toasted pecans helping to make this frozen treat amazing!
Category: Ice Cream
Cuisine: American
Keyword: chunky monkey ice cream
Servings: 10 ½ cup servings
Calories Per Serving: 372 kcal
Author: JB @ The Grateful Girl Cooks!
Ingredients
  • 2 cups heavy whipping cream
  • 1 cup milk (NOT skim!)
  • 3/4 cup granulated sugar
  • 2 teaspoons vanilla extract
  • 2-3 drops yellow food coloring (optional, but it does add a bit of color!)
  • 2 really ripe bananas
  • 1 ½ teaspoons fresh lemon juice
  • 3/4 cup semi-sweet chocolate chips (may substitute dark chocolate, if preferred), refrigerated
  • 1/2 cup toasted pecans (or walnuts), chopped
Instructions
  1. In a large bowl, whisk together the whipping cream, milk, granulated sugar, vanilla extract and yellow food coloring. Whisk this mixture for about a minute, until fully blended, and sugar has dissolved.
  2. Place this mixture into your cold ice cream maker canister; freeze ice cream according to manufacturer's directions.
  3. Refrigerate the chocolate chips while ice cream is freezing (this will help them from softening).
  4. Mash the bananas with lemon juice in a small bowl, until smooth. (I use a fork to mash).
  5. About 5 minutes before the ice cream is finished freezing, add the banana mixture, toasted pecans and chocolate chips to the ice cream. Continue freezing until done.
  6. Ice cream can be eaten right away (soft style), OR place it in a covered container in your freezer for a couple hours to let it "ripen" and firm up more. Enjoy!
Nutrition Facts
Chunky Monkey Ice Cream (copycat)
Amount Per Serving (1 (1/2 cup serving))
Calories 372 Calories from Fat 243
% Daily Value*
Fat 27g42%
Saturated Fat 14g88%
Cholesterol 68mg23%
Sodium 30mg1%
Potassium 249mg7%
Carbohydrates 30g10%
Fiber 2g8%
Sugar 24g27%
Protein 3g6%
Vitamin A 760IU15%
Vitamin C 2.6mg3%
Calcium 72mg7%
Iron 1mg6%
* Percent Daily Values are based on a 2000 calorie diet.

Here’s one more to pin on your Pinterest boards!A copycat recipe for yummy chunky monkey ice cream - with bananas, chocolate chunks and toasted pecans helping to make this frozen treat amazing!


Save

Save

Mint Chocolate Chip Ice Cream

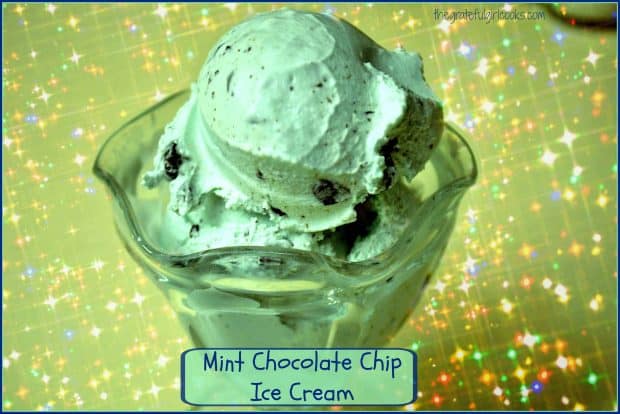
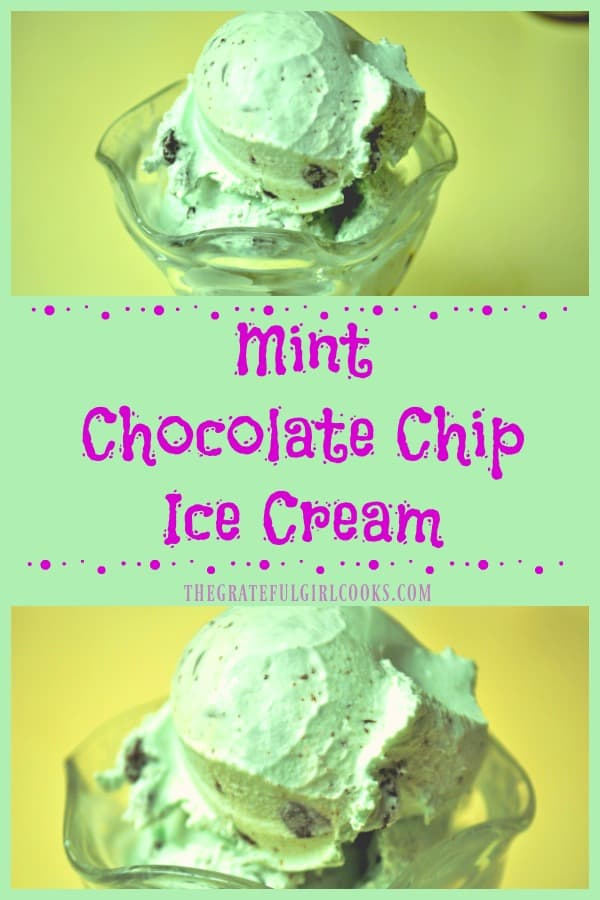
Nothing quite beats the taste of homemade Mint Chocolate Chip Ice Cream! Enjoy this cool, creamy treat any time of the year!Nothing quite beats the taste of homemade Mint Chocolate Chip Ice Cream! Enjoy this cool, creamy treat any time of the year!
“I Scream, You Scream… We ALL Scream For Ice Cream!” It seems like just about everyone loves a good scoop of ice cream. I know I sure do!  Here’s a quick and easy recipe for one of my favorites… Mint Chocolate Chip Ice Cream, just in time for good ol’ Summertime!

Scroll Down For A Printable Recipe Card At The Bottom Of The Page

Memories Of Homemade Ice Cream

Growing up in sunny Southern California, I have such fond memories of my Mom and Dad making many varieties of homemade ice cream for our family and friends, as an extra special cold and creamy treat in the HEAT of summertime. Back in those days, my Dad would be the one to hand crank the old wooden ice cream maker, then carefully wrap the finished ice cream and canister in lots of towels, etc. to keep it frozen while it firmed up a bit.

We would stand around, giddy with excitement, licking our lips in eager anticipation of the frozen treat we would soon be served. It was (and still is) one of my favorite summertime treats! Lucky for me, my husband has the same memories with his family, so we can enjoy this together! Nowadays, there are all kinds of electric homemade ice cream makers, which have taken some of the hard work out of it (all that hand-cranking!), but with the same delicious results.

I don’t know about you, but I find the prospect of having some freshly frozen ice cream hard to resist… especially Mint Chocolate Chip… I love it!  And it’s so easy to make (with or without an electric ice cream maker).  I’ve included directions for both in the printable recipe.

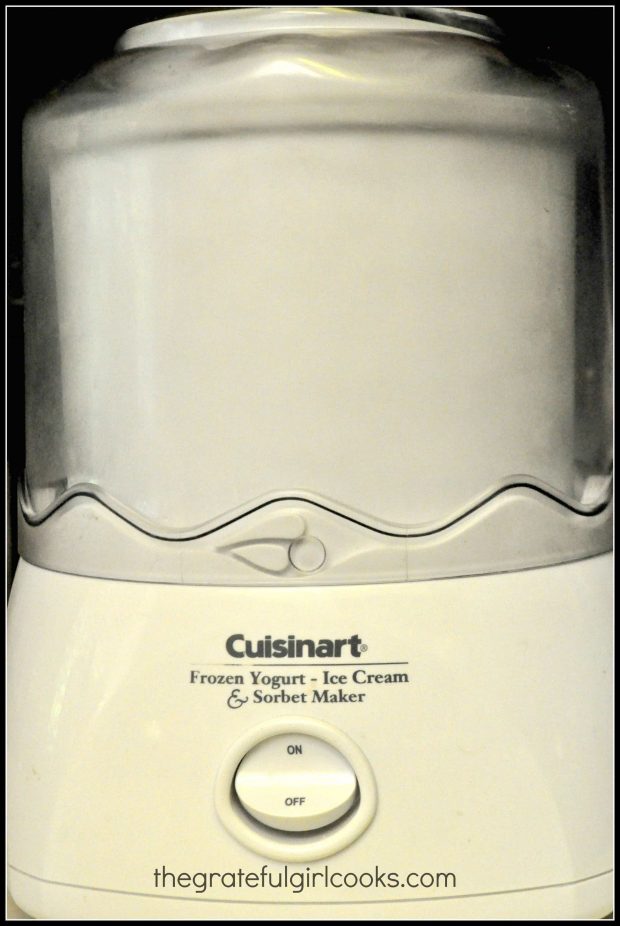
The Cuisinart ice cream maker I used to make mint chocolate chip ice cream.

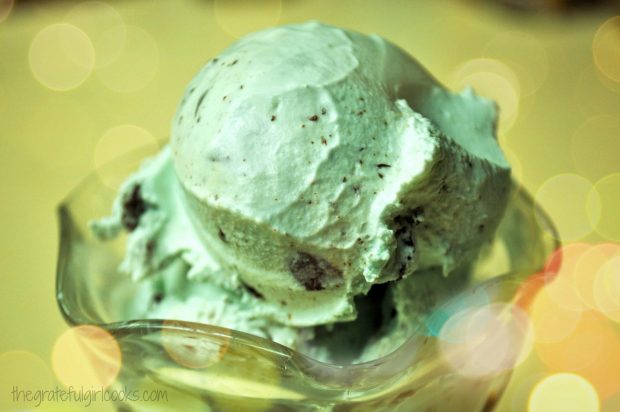
Perhaps you will consider trying this easy recipe… the mint flavor shines, and the flecks and pieces of chocolate…well, you know… it’s so delicious!

Homemade mint chocolate chip ice cream is a treat year round!

I sincerely hope you enjoy this ice cream.  I’ve posted at least 14 flavors, including this Mint Chocolate Chip Ice Cream (so far), from the summer I had my “Great Ice Cream Experiment” to try many different recipes! Have a great day, treat yourself and enjoy a big old scoop (or two) of ice cream!

Looking For More ICE CREAM Recipes?

You can find ALL my recipes in the Recipe Index, located at the top of the page. I have lots of homemade ice cream recipes, including:

Interested In More Recipes?

Thank you for visiting this website. I appreciate you using some of your valuable time to do soIf you’re interested, I publish a newsletter 2 times per month (1st and 15th) with all the latest recipes, and other fun info. I would be honored to have you join our growing list of subscribers, so you never miss a great recipe!
There is a Newsletter subscription box on the top right side (or bottom) of each blog post, depending on the device you use, where you can easily submit your e-mail address (only) to be included in my mailing list.

You Can Also Find Me On Social Media:

Facebook page: The Grateful Girl Cooks!
Pinterest:
The Grateful Girl Cooks!
Instagram:
jbatthegratefulgirlcooks

Author's signatureRecipe Source:  Cuisinart Instruction and Recipe Booklet for Automatic Frozen Yogurt-Ice Cream & Sorbet Maker, copyright 2002, Cuisinart, page 4.

0 from 0 votes
Mint Chocolate Chip Ice Cream
Prep Time
25 mins
Cook Time
0 mins
Total Time
25 mins
 
Nothing quite beats the taste of homemade Mint Chocolate Chip Ice Cream! Enjoy this cool, creamy treat any time of the year!
Category: Desserts- Ice Cream
Cuisine: American
Keyword: mint chocolate chip ice cream
Servings: 10 (1/2 cup servings)
Calories Per Serving: 303 kcal
Author: JB @ The Grateful Girl Cooks!
Ingredients
  • 1 cup whole milk (well chilled)
  • 3/4 cup granulated sugar
  • 2 cups heavy whipping cream (well chilled)
  • 1 to 1½ teaspoons pure peppermint extract (to taste)
  • 3 drops green food coloring
  • 4 ounces semi-sweet chocolate (chopped into tiny, uneven pieces)
Instructions
  1. Mix milk and sugar in a medium bowl until sugar has dissolved (about 1-2 minutes on low speed).
  2. STIR in the heavy whipping cream, peppermint extract, and 3 drops green food coloring, until fully combined.
  3. Turn ice cream machine on, and pour the mixture through the spout into the machine. Freeze ice cream, according to manufacturer's instructions, until thick and creamy (approx. 20-25 minutes). During the last 5 minutes of mixing, add the chopped chocolate pieces and all the leftover chocolate flakes to the ice cream.
  4. Store ice cream in a covered container in the freezer for a couple hours to let it firm up more. Scoop, serve... and enjoy!

Recipe Notes

No ice cream maker? In a large bowl, whip the heavy cream on high for about 10 minutes until stiff peaks begin to form. In separate bowl, stir together milk, peppermint extract, food coloring and chocolate bits and flakes. Fold the whipping cream gently into milk mixture until combined. Pour mixture into a 2-3 quart container; cover. Put the covered container into the freezer; let it freeze for a minimum of 6 -7 hours. Serve, and enjoy!

Nutrition Facts
Mint Chocolate Chip Ice Cream
Amount Per Serving (1 (1/2 cup serving))
Calories 303 Calories from Fat 198
% Daily Value*
Fat 22g34%
Saturated Fat 13g81%
Cholesterol 68mg23%
Sodium 29mg1%
Potassium 132mg4%
Carbohydrates 23g8%
Sugar 20g22%
Protein 2g4%
Vitamin A 745IU15%
Vitamin C 0.2mg0%
Calcium 66mg7%
Iron 0.7mg4%
* Percent Daily Values are based on a 2000 calorie diet.

Here’s one more to pin on your Pinterest boards!Nothing quite beats the taste of homemade Mint Chocolate Chip Ice Cream! Enjoy this cool, creamy treat any time of the year!


Save

Save