Category: Ice Cream/Frozen Treats

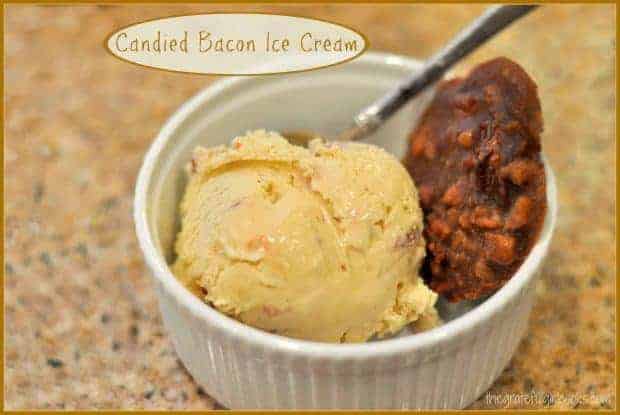
Candied Bacon Ice Cream

What do you do when providing dessert for a “Bacon-Themed” Dinner? You make homemade Candied Bacon Ice Cream, of course! And, oh boy… was it ever good! Bacon makes everything better, including desserts, with this amazing, delicious homemade ice cream flavored with candied bacon, cinnamon, rum, and brown sugar!
Last summer a small group of friends enjoyed another Themed Dinner. This time our theme was BACON. Everything, from beverages, appetizers, main courses, to desserts, including this ice cream and Chocolate-Covered Bacon and Maple Bacon Pecan Truffles and Bacon Pecan Pralines, had to include some form of bacon.

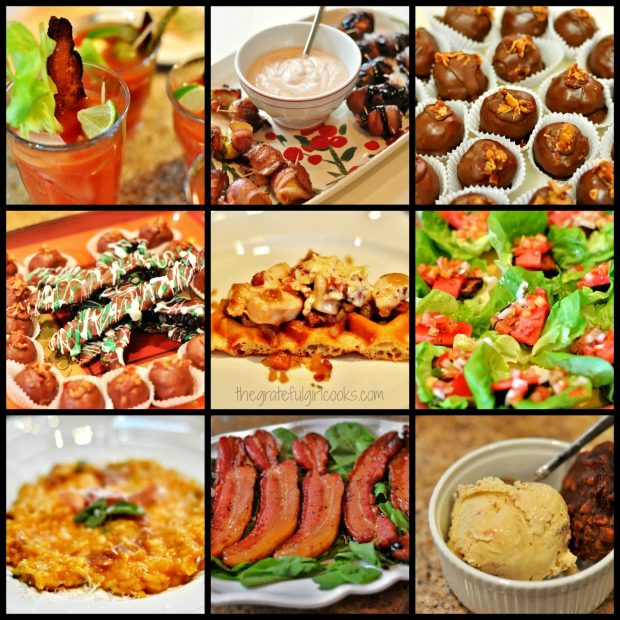
Oh my goodness. It was amazing! Look at some of the food we enjoyed, in this photo!

Collage of nine bacon-themed food pictures

I am usually in charge of bringing several desserts to our themed dinner parties, so I scoured the internet to find some good choices utilizing BACON. This homemade bacon ice cream recipe was one of them, from celebrated author David Lebovitz… and let me tell you… it was FANTASTIC! Who knew bacon ice cream could taste so good? Here’s how you make this decadent dessert treat:

Scroll Down For A Printable Recipe Card At The Bottom Of The Page

Make The Candied Bacon

First thing I did was to “candy” some thick cut bacon. The instructions are in the recipe that follows, but if you want more in-depth pics, etc. see my previous post for How To Make Candied Bacon.
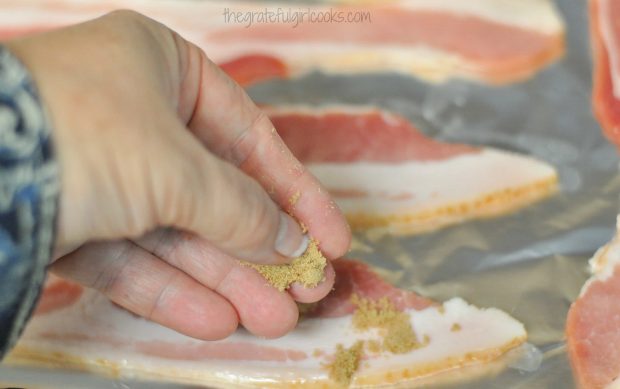
Brown sugar is sprinkled on raw bacon
Short version… bacon is coated with brown sugar and baked. Then it is cut into small pieces and cooled to room temp.
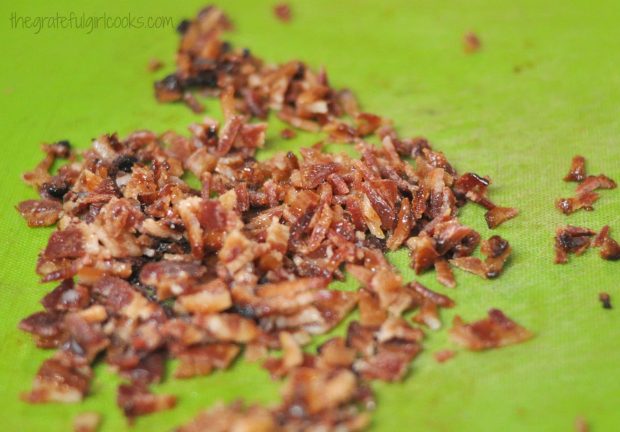
Chopped, candied bacon for ice cream, on green cutting boardMake The Ice Cream Base

Combine the half and half and the whipping cream. Measure out 1 ½ cups of this mixture into a medium bowl, which is set over another larger bowl that is filled with ice and water (ice bath). Put a mesh strainer over the top of the cream mixture. Set aside.

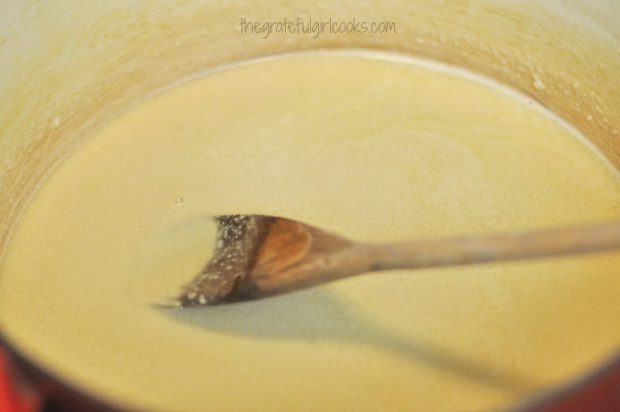
Next thing to do is make the ice cream “custard base”. Melt the butter in a medium saucepan, then remove it from the heat. Let it cool down a bit (you want it warm, not HOT). Stir in the brown sugar, and then add the remaining half and half/cream mixture (the amount NOT over the water bath). Stir to combine; set aside.

Cooking custard base for homemade candied bacon ice cream

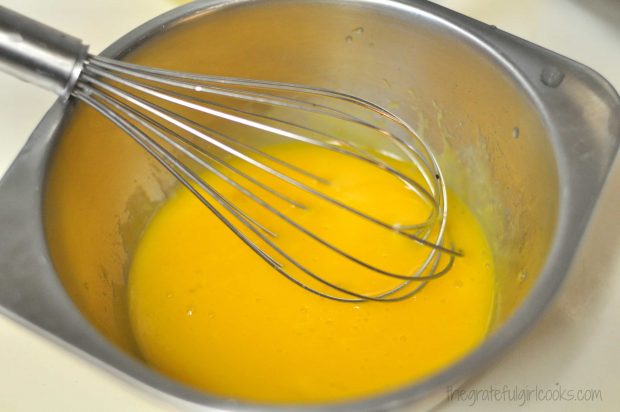
In a separate bowl, whisk the egg yolks.

Egg yolks in metal bowl, with whisk

Temper The Eggs

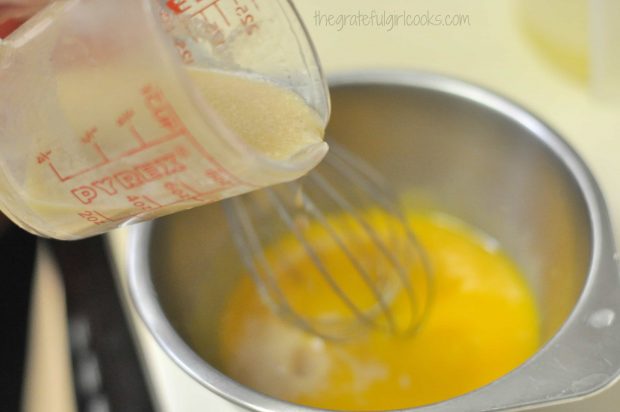
Remove ½ cup of the (warm, not hot) butter/brown sugar/half and half/ whipping cream mixture from the saucepan. Pour it slowly into the egg yolks, whisking constantly while it is being added. This helps to “temper” the eggs, so they won’t scramble when adding them to saucepan. I know we’re adding bacon to ice cream, but bacon AND scrambled eggs? I don’t think so!

Pouring brown sugar and half and half into egg yolks in bowl

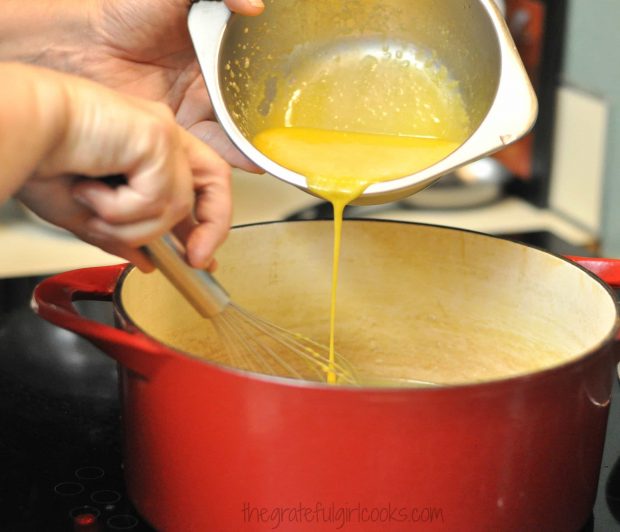
The “tempered” egg yolks are then poured slowly back into the saucepan with the butter/brown sugar/ half and half mixture, whisking while adding.

Tempered egg yolks for ice cream poured into red saucepan

Cook The Ice Cream Base

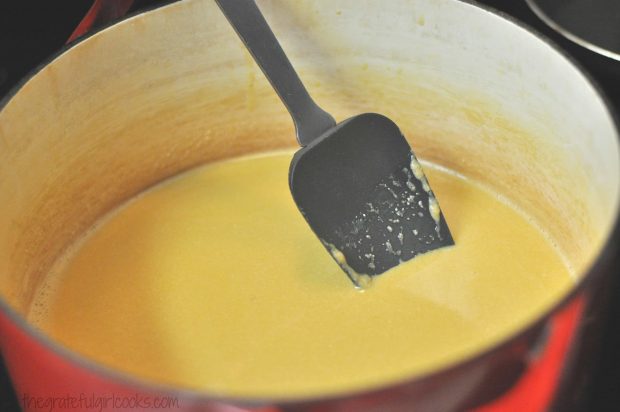
The ice cream base is then cooked on low-medium heat until the liquid thickens enough to coat a spatula. Stir constantly while this is cooking, making sure to scrape the bottom of the pan (so the liquid won’t stick and burn on bottom).

Ice cream ingredients in red saucepan with spatula

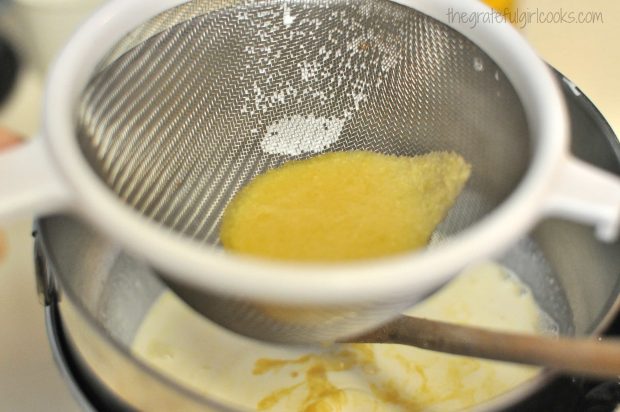
Remove the ice cream base from the heat, and let cool slightly (you don’t want it HOT). Once it has cooled down some, pour the ice cream base through the strainer into the half and half/whipping cream in the bowl over the ice bath, stirring as you pour.

Straining ice cream base liquid into bowl

Add the liquor, vanilla extract and cinnamon to the ice cream base. Stir to combine. Refrigerate ice cream liquid for 2-3 hours until completely chilled.

Time To Freeze The Candied Bacon Ice Cream

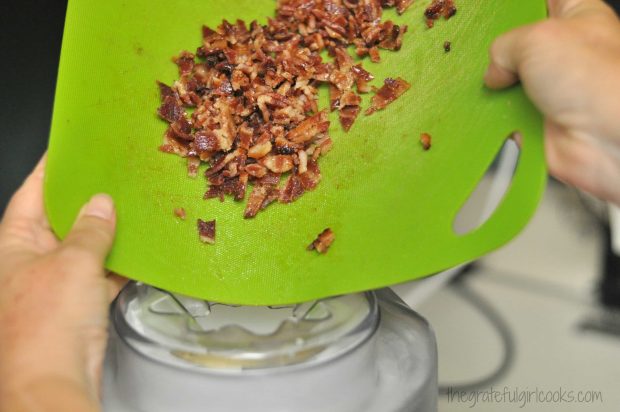
Once totally cold, pour mixture into ice cream maker, and freeze according to manufacturer’s directions. During the last couple minutes the ice cream is churning, add the chopped candied bacon pieces.

Adding candied bacon to ice cream machine

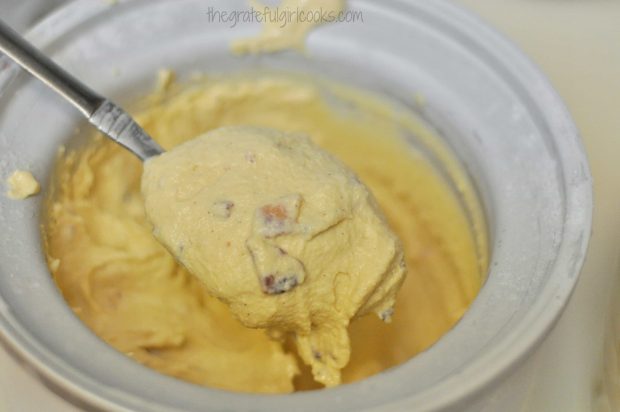
Once ice cream is done, remove ice cream to a covered container. Place in freezer for several hours until nice and firm. You MIGHT want to sneak a little bitty bite before freezing it, just so you can see how GOOD this stuff is (*QUALITY CONTROL). Just sayin’.

Spoonful of bacon ice cream from frozen cannister

When ready to serve, remove ice cream from freezer, and dish up a big scoop of this decadent, rich and creamy, frozen treat. I served each scoop with one of my Bacon Pecan Pralines. It was a BACON-THEMED dinner party, and EVERYTHING is better with bacon, after all! Right? EVEN bacon ice cream!!

Candied Bacon Ice Cream, with a praline

I love to make homemade ice cream and enjoy trying new flavors each summer. Some recipes I like, some I love. This bacon ice cream sure was a unique recipe, but I gotta be honest… it was absolutely DELICIOUS and we loved it!!!

Hope you’ll consider making this on a hot summer’s night (or any night, for that matter!). Think you’re gonna be surprised how good this really is!

Looking For More ICE CREAM Recipes?

You can find ALL of my recipes in the Recipe Index, which is located at the top of the page. I have LOTS of decadent ice cream recipes, including:

Interested In More Recipes?

Thank you for visiting this website. I appreciate you using some of your valuable time to do soIf you’re interested, I publish a newsletter 2 times per month (1st and 15th) with all the latest recipes, and other fun info. I would be honored to have you join our growing list of subscribers, so you never miss a great recipe!
There is a Newsletter subscription box on the top right side (or bottom) of each blog post, depending on the device you use, where you can easily submit your e-mail address (only) to be included in my mailing list.

You Can Also Find Me On Social Media:

Facebook page: The Grateful Girl Cooks!
Pinterest:
The Grateful Girl Cooks!
Instagram:
jbatthegratefulgirlcooks

Author's Signature

Recipe Source: www.davidlebovitz.com/2008/03/candied-bacon-i-1/

0 from 0 votes
Candied Bacon Ice Cream
Prep Time
1 hr 30 mins
Cook Time
0 mins
Total Time
1 hr 30 mins
 

Bacon makes everything better, including desserts, with this amazing, delicious homemade ice cream flavored with Candied Bacon, cinnamon, rum, and brown sugar!

Category: Dessert
Cuisine: American
Keyword: candied bacon ice cream
Servings: 16 1/2 cup servings (2 qts. total)
Calories Per Serving: 204 kcal
Author: JB @ The Grateful Girl Cooks!
Ingredients
For The Candied Bacon:
  • 5 strips thick cut bacon
  • 8 teaspoons brown sugar (I used dark, but light is great, as well)
For The Ice Cream Base:
  • 3 Tablespoons salted butter
  • 3/4 cup brown sugar (packed-I used dark, but can use either kind)
  • 2 cups Half and Half (may substitute 2 c. whole milk if you don't have Half and Half)
  • 1 cup Heavy whipping cream
  • 5 large egg yolks
  • 2 teaspoons dark rum or whiskey
  • 1/4 teaspoon vanilla extract
  • 1/4 teaspoon ground cinnamon (this is optional, but USE IT!)
Instructions
Make candied bacon before beginning ice cream base.
  1. Preheat oven to 400 degrees. Put bacon strips onto baking sheet lined with foil or silicone mat. Leave space between each strip. Sprinkle each piece with approx. 1½ teaspoons brown sugar. Bake at 400 degrees for 12-16 minutes. Halfway through baking time, turn bacon over, dragging pieces through syrup on foil. Bake until bacon is dark brown and cooked through. Remove from oven; let bacon cool on wire rack. Once cool, cut into very small pieces!)

Make Ice Cream Base:
  1. Combine the half and half and whipping cream in a bowl, and stir, to combine. In a medium saucepan, melt butter. Stir in ¾ cup brown sugar. Measure out ONE CUP of the half and half/whipping cream mixture and add it to the pan. Set aside.

  2. Pour the remaining half and half/whipping cream mixture into a medium bowl. Set this bowl on top of a larger bowl that has been filled with ice cubes and water (ice bath). Place a mesh strainer over the top of the bowl containing the half and half. Set aside.

  3. In a separate bowl, whisk together egg yolks. Slowly pour some (not all) of the warm brown sugar mixture (in the saucepan) into the whisked eggs, whisking constantly while you pour. Once mixed, pour this mixture back into the saucepan with the butter/brown sugar/half and half mixture. Cook on low heat, stirring constantly until it thickens enough to coat a spatula. Keep bottom of the pan stirred and scraped, so it doesn't stick to the bottom of the pan.

  4. Once thickened, slowly pour this mixture through the mesh strainer, into the half and half in the bowl over the ice bath. Continue to stir the ice cream base over the ice bath, until the mixture has cooled completely. Remove bowl with ice cream base from the ice bath bowl.

  5. Add liquor, vanilla and cinnamon to the ice cream base, and stir to combine. Cover and refrigerate. Once completely cold, freeze in your ice cream maker, per manufacturer's directions. A couple minutes before ice cream is "done", pour the candied bacon pieces into the ice cream (or stir them in to finished ice cream, if desired).

  6. Place ice cream in a covered container, and freeze for at least 2-3 hours to firm up. Once firm, scoop, serve... and enjoy this delicious ice cream!

Recipe Notes

Prep time includes everything (including refrigeration time prior to freezing ice cream). Additional non-active prep time is 2-3 hours AFTER ice cream is done, to firm it up in the freezer.

Nutrition Facts
Candied Bacon Ice Cream
Amount Per Serving (0.5 cups)
Calories 204 Calories from Fat 135
% Daily Value*
Fat 15g23%
Saturated Fat 8g50%
Cholesterol 102mg34%
Sodium 88mg4%
Potassium 86mg2%
Carbohydrates 14g5%
Sugar 12g13%
Protein 2g4%
Vitamin A 470IU9%
Vitamin C 0.3mg0%
Calcium 60mg6%
Iron 0.3mg2%
* Percent Daily Values are based on a 2000 calorie diet.

Here’s one more to pin on your Pinterest boards! Bacon makes everything better, including desserts, with this amazing, delicious homemade ice cream flavored with candied bacon, cinnamon, rum, and brown sugar!


Save

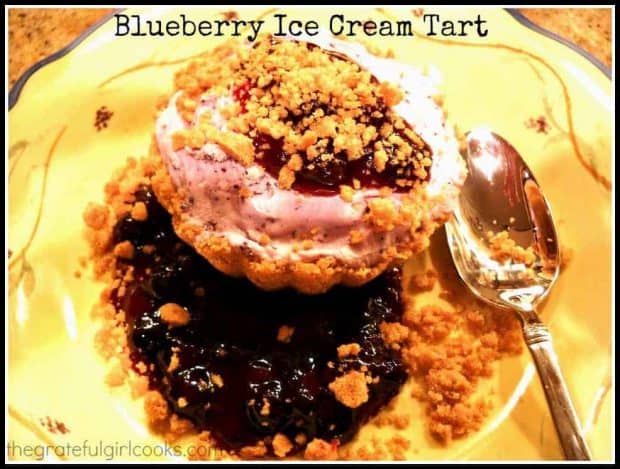
Blueberry Ice Cream Tart

A blueberry ice cream tart is a delicious, frozen dessert treat! Ice cream in a graham cracker crust, served with fresh blueberry sauce on the side!A blueberry ice cream tart is a delicious, frozen dessert treat! Ice cream in a graham cracker crust, served with fresh blueberry sauce on the side!

I love taking a tried and true recipe and tweaking and morphing it into a different recipe. Do you do that? That was the case when I took my recipe for Blueberry Ice Cream and changed it into a delicious, small Blueberry Ice Cream Tart for each guest at a dinner & dessert party.

I thought long and hard about what I wanted to make for dessert, then decided to make my blueberry ice cream, and add a graham cracker crust from another of my recipes. Then I decided to server it with a simple blueberry sauce on the side. Voila! That is how I came up with this recipe for these wonderful frozen dessert tarts! And boy… were they ever good, if I do say so myself!

Scroll Down For A Printable Recipe Card At The Bottom Of The Page

Do I Need An Ice Cream Machine?

I have an electric indoor Krups ice cream maker, which makes homemade ice cream in about 20 minutes. If you don’t have one or don’t want to take the time, just buy a good quality blueberry ice cream or gelato at the grocery store, and shave some time off of this recipe!

This recipe is actually very easy to prepare… it just needs to be done in steps. Make the ice cream, make the crumb topping, make the blueberry sauce, assemble the tarts, freeze, then serve!

Make Or Buy Blueberry Ice Cream

First make (or buy) the blueberry ice cream. If making homemade ice cream, put it back into your kitchen freezer after the initial freezing to really firm it up. My homemade blueberry ice cream also has cream cheese in it, so it has more of a blueberry cheesecake flavor!

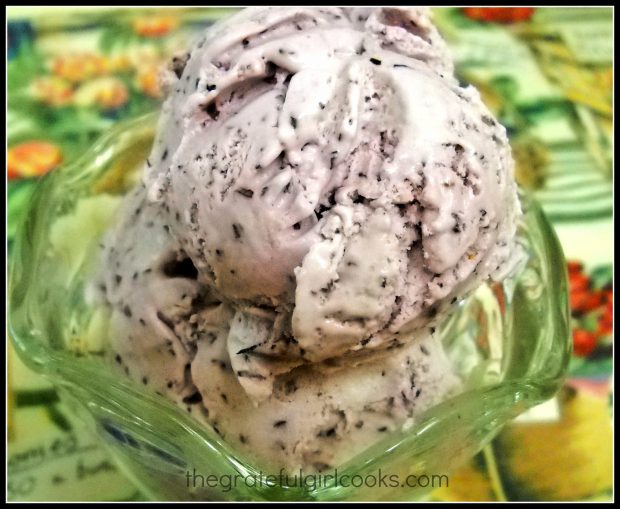
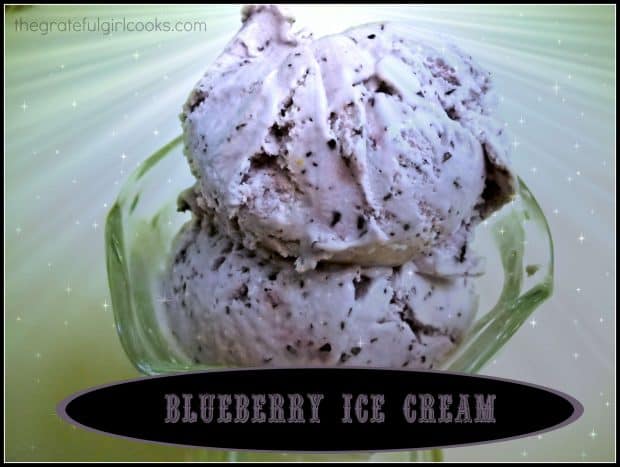
My homemade blueberry ice cream looks like this photo below, when done. Here it is scooped up nice and pretty:

Blueberry ice cream is the main ingredient for these delicious frozen tarts.

Make The Crust Mix

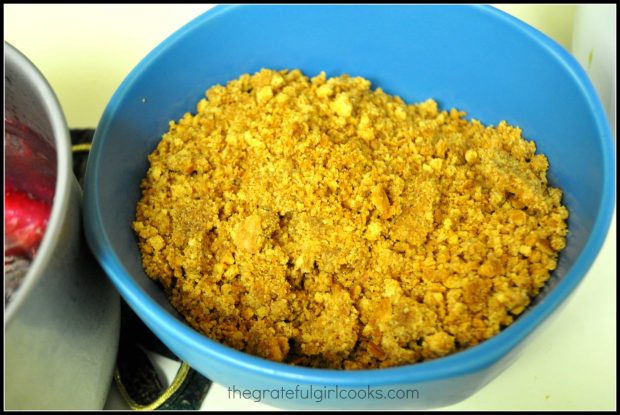
The next thing I do is prepare a simple graham cracker crust mixture. This is made by mixing graham cracker crumbs with melted butter and sugar! EASY!

Ingredients for the graham cracker crust are mixed together in bowl.

Making The Blueberry Sauce Is Simple!

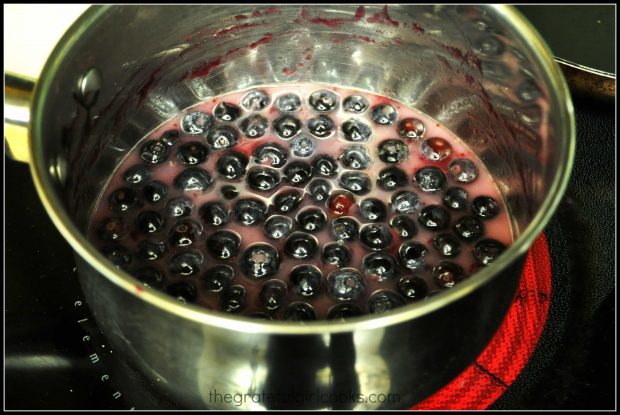
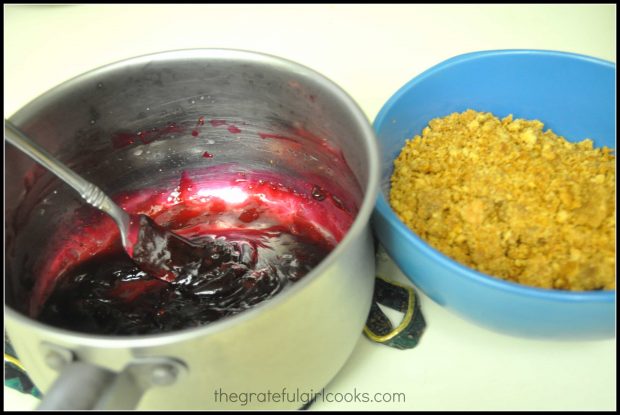
Prepare the blueberry sauce, by cooking blueberries, sugar, cornstarch and water until the sauce thickens and the blueberries “pop” open (6-7 minutes). Once the sauce thickens, remove the pan from the heat and let it cool completely. Set aside.

A thickened blueberry sauce is made to garnish the ice cream tart.

The blueberry sauce and graham cracker crust mix are ready to use.

Make The Crust For The Tarts

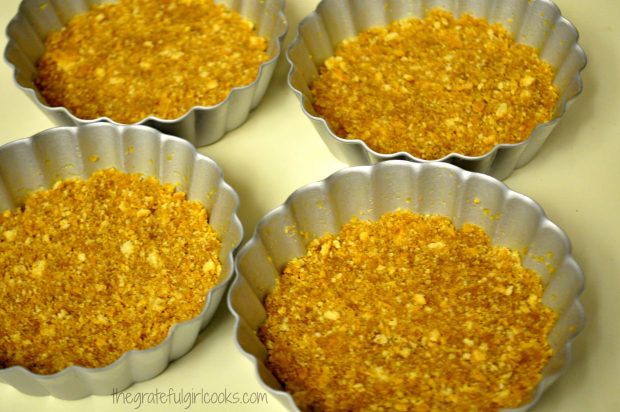
Firmly pack the graham cracker crumb mixture (reserve 1/2 cup for garnish) onto the bottom of 4 small tart pans (with removable bottoms). The crusts are baked for 6-7 minutes. Once they’re done, let them cool completely.

Graham cracker mixture is baked in mini tart pans.

Cover the crust and fill each cooled tart pan with slightly softened blueberry ice cream. Put each blueberry ice cream tart (in the pans) back into the freezer for 2 hours to firm up.

Ready To Serve The Blueberry Ice Cream Tart

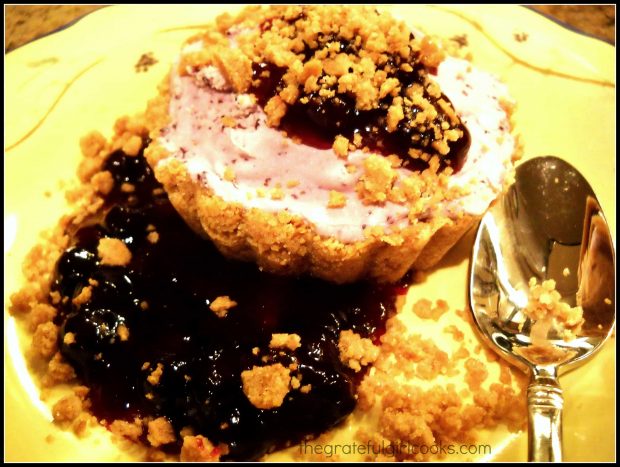
Spread some of the thickened blueberry sauce onto each dessert plate. Sprinkle the sauce with some reserved graham cracker crumb mix. Carefully remove each blueberry ice cream tart from the removable bottom tart pans, and set them on top of the blueberry sauce.

Garnish the top of each blueberry ice cream tart with a spoonful of sauce, and sprinkle with graham cracker crumb mixture. Let each dessert sit on the plates for a couple minutes at room temp. to let the ice cream soften slightly, before serving! Serve and enjoy, because this dessert is delicious!!!!

Blueberry Ice Cream Tart is garnished with sauce, and sprinkled with graham cracker crumbs to serve.

What If I Don’t Have Small Tart Pans?

If you don’t have removable bottom tart pans, think outside the box! This recipe could be easily adapted to make into a pie. Make a graham cracker crust (using this recipe you might have to double amounts) or buy a graham cracker crust, then follow the rest of the directions.

You will have a delicious frozen pie, rather than a tart, but a slice of THAT pie would be fantastic, garnished with the blueberry sauce and graham cracker crumbs. It’s ALL good. Hope you will give this blueberry ice cream tart recipe  a try… it’s worth it!

Looking For More Recipes Featuring BLUEBERRIES?

You can find all of my recipes in the Recipe Index, located at the top of the page. I have lots of recipes that feature blueberries, including:

Interested In More Recipes?

Thank you for visiting this website. I appreciate you using some of your valuable time to do soIf you’re interested, I publish a newsletter 2 times per month (1st and 15th) with all the latest recipes, and other fun info. I would be honored to have you join our growing list of subscribers, so you never miss a great recipe!
There is a Newsletter subscription box on the top right side (or bottom) of each blog post, depending on the device you use, where you can easily submit your e-mail address (only) to be included in my mailing list.

You Can Also Find Me On Social Media:

Facebook page: The Grateful Girl Cooks!
Pinterest:
The Grateful Girl Cooks!
Instagram:
jbatthegratefulgirlcooks

Author's signature

↓↓ PRINTABLE RECIPE BELOW ↓↓

0 from 0 votes
Blueberry Ice Cream Tart
Prep Time
1 hr
Cook Time
7 mins
Inactive Freezer Time
2 hrs
Total Time
3 hrs 7 mins
 

A blueberry ice cream tart is a delicious, frozen dessert treat! Ice cream in a graham cracker crust, served with fresh blueberry sauce on the side!

Category: Dessert
Cuisine: American
Keyword: blueberry ice cream tart
Servings: 4 servings
Calories Per Serving: 789 kcal
Author: JB @ The Grateful Girl Cooks!
Ingredients
For Blueberry Ice Cream:
  • 2 cups blueberries (fresh or frozen)
  • 1/2 cup granulated sugar
  • 8 oz. cream cheese , room temp, and cut into chunks
  • 1/2 teaspoon vanilla extract
  • 3/4 cup whole milk
  • 3/4 cup heavy whipping cream
  • 3 drops blue food coloring (optional, but it helps enhances the color)
For Graham Cracker Crust and Garnish:
  • 1 cube butter , melted
  • 1 1/2 cups finely crushed graham cracker crumbs
  • 1/3 cup granulated sugar
For Blueberry Sauce:
  • 2 cups blueberries
  • 1/2 cup water
  • 2 Tablespoons granulated sugar
  • 1 Tablespoon cornstarch
Instructions
Prepare the ice cream:
  1. Place blueberries and sugar into blender or food processor. Blend/pulse until liquified. Add cream cheese chunks and vanilla. Mix until fairly smooth. Add milk; blend well. Pour mixture into large bowl. Add whipping cream and whisk to combine. Pour mixture into canister of ice cream maker, and freeze per manufacturer instructions. When done, remove to a covered container and place in freezer.

Prepare Blueberry Sauce:
  1. Place the water, sugar and cornstarch into a medium sized sauce pan. Stir until smooth. Add the blueberries. Cook on medium heat, stirring often, for about 6-7 minutes, until blueberries have popped, and the sauce has thickened. Remove from heat, and cool completely.
Prepare Graham Cracker Crust:
  1. Mix graham cracker crust ingredients until well blended. Reserve about 1/2 cup for garnish. Set aside. Divide the rest between 4 small tart pans with removable bottoms. Press crumb mixture firmly down to form bottom crust in pan. Bake at 375 degrees for about 7 minutes. Remove from oven. Cool completely. Do not remove crust from pan. Once crust has cooled completely, spoon blueberry ice cream into each shell to fill to top of the tart pan. Place in freezer for 2 hours to completely firm up.

To Assemble/Serve:
  1. Spread some blueberry sauce onto individual serving plates. Sprinkle with a little of the graham crumb mixture. Carefully remove ice cream tart from the pan by gently pushing up on the bottom to remove from pan, then slide the tart off the bottom tray onto the blueberry sauce on serving plate. Spoon a little sauce on top of the tart, then sprinkle with additional graham cracker crumbs. Let finished plates sit for several minutes to soften ice cream slightly, then serve and enjoy!

Recipe Notes

Most of the prep time is INACTIVE time... just waiting for ice cream to harden in freezer. I made up the ice cream, sauce and crust early in the day, then it was a snap to assemble later in the evening. ALL can be made ahead of time, if needed.

Nutrition Facts
Blueberry Ice Cream Tart
Amount Per Serving (1 tart)
Calories 789 Calories from Fat 369
% Daily Value*
Fat 41g63%
Saturated Fat 22g138%
Cholesterol 128mg43%
Sodium 430mg19%
Potassium 341mg10%
Carbohydrates 100g33%
Fiber 4g17%
Sugar 73g81%
Protein 9g18%
Vitamin A 1570IU31%
Vitamin C 14.6mg18%
Calcium 170mg17%
Iron 1.9mg11%
* Percent Daily Values are based on a 2000 calorie diet.

Here’s one more to pin on your Pinterest boards!A blueberry ice cream tart is a delicious, frozen dessert treat! Ice cream in a graham cracker crust, served with fresh blueberry sauce on the side!


Save

Save

Save

Healthy Chocolate Banana “Ice Cream”

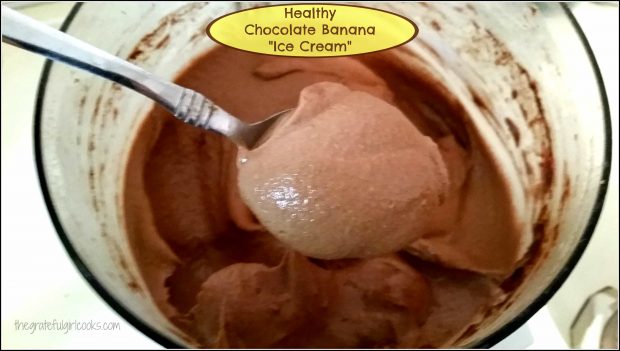
All you need are several frozen bananas, cocoa powder and a food processor to make a batch of this yummy and healthy Chocolate Banana “Ice Cream”!All you need are several frozen bananas, cocoa powder and a food processor to make a batch of this yummy and healthy Chocolate Banana "Ice Cream"!
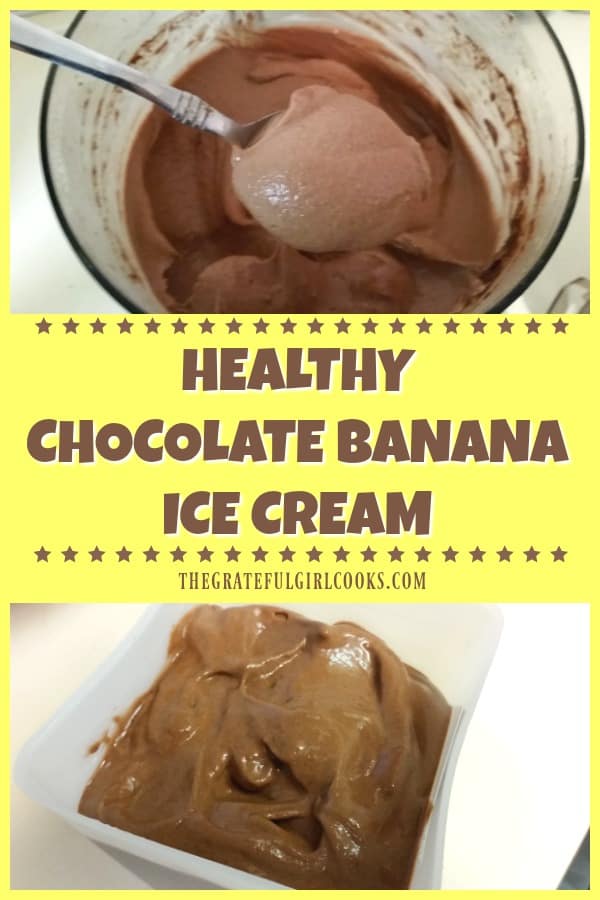
So… here’s the backstory on this Healthy Chocolate Banana “Ice Cream”… there’s no cream in this at all!  As a matter of fact, there are only TWO ingredients. Frozen bananas and cocoa powder.

And amazing as it seems, I was skeptical the first time I tried it, but boy was I surprised! It tasted GREAT! All the flavor of chocolate banana ice cream, but it’s NOT ice cream! Take note, calorie-counters!

The only thing you need to have is a food processor or a majorly powerful blender (and some previously frozen bananas!) to mix this up really well. I am fortunate that I was given one that a family member no longer wanted… yay! That makes this healthy chocolate banana ice cream a breeze to make.

Scroll Down For A Printable Recipe Card At the Bottom Of The Page

Really Ripe Bananas Are Essential For Sweetness!

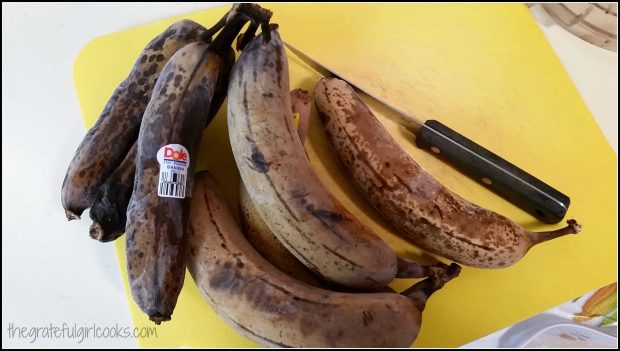
You know those bananas on the counter that have turned brown? Yeah. Put them into your freezer instead of throwing them away. They give this chocolate banana ice cream it’s creaminess and natural sweetness.

See these gnarly looking bananas? They are perfect for this recipe. They are frozen solid. Yep. Sometimes I peel them before freezing, but other times I just shove them in the freezer just the way they are!

Frozen ripe bananas, ready to peel to make ice cream!
Processing Healthy Chocolate Banana Ice Cream Is Easy!

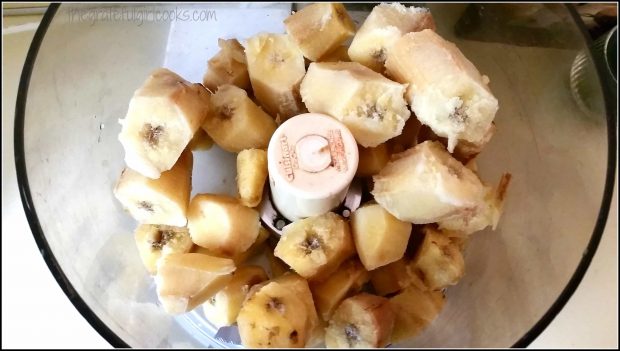
Take those completely frozen bananas, peel, and then slice them into small chunks. Now toss the slices into your handy dandy food processor (or heavy duty blender).

Frozen chunks of banana are placed in a food processor.
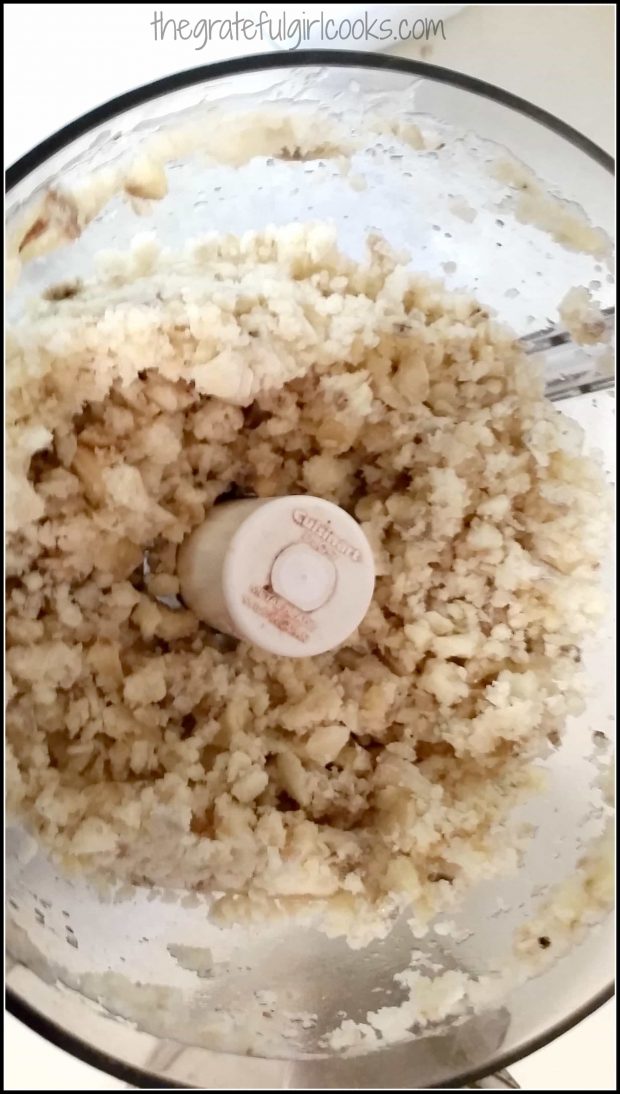
Put the lid on and fire up your food processor to pulse the frozen banana chunks. After a minute or so the frozen bananas should be in tiny pieces and look like this (shown below).

The frozen bananas are processed into tiny pieces in food processor.
Time To Add Some Chocolate Flavoring

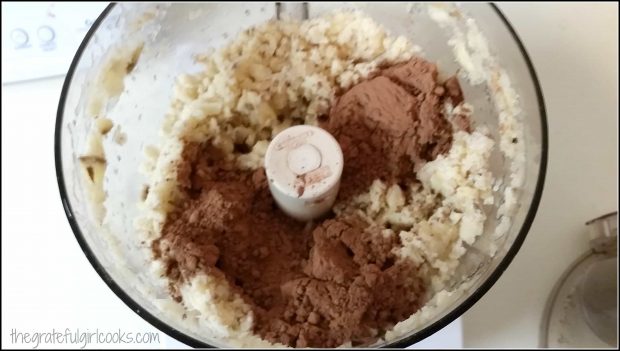
Once the bananas are pulverized into tiny pieces, add 4 Tablespoons cocoa powder to the mix. The cocoa powder adds wonderful flavor to the healthy chocolate banana ice cream, without adding lots of calories!

Cocoa powder is added to the frozen bananas in the food processor.
Keep Processing The Healthy Chocolate Banana Ice Cream

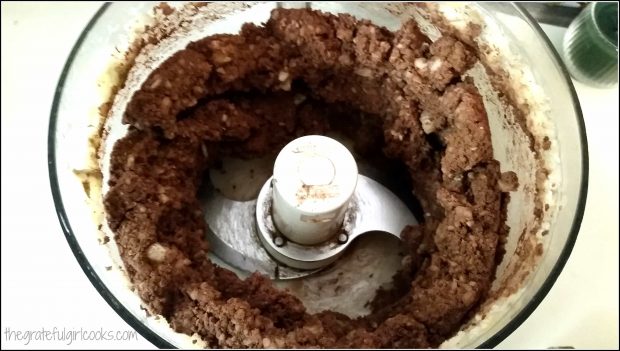
Turn the food processor back on, and keep on pulsing/mixing the ingredients together. Have no fear… this WILL work! Be patient, because this will take a bit of time to fully come together into a creamy, delicious treat!

Continue processing the frozen bananas and cocoa powder until smooth.
All Of A Sudden- “Ice Cream”!

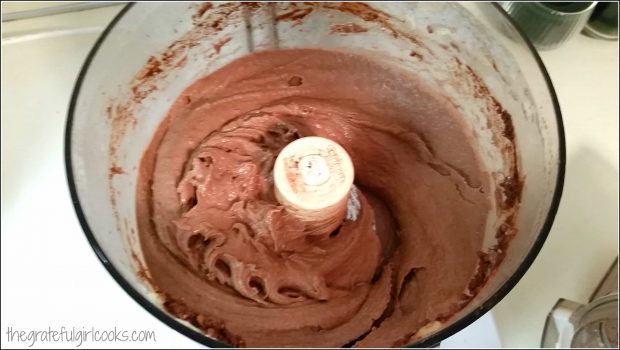
After several minutes (when you think it’s NOT ever gonna turn into anything that resembles ice cream, and you’re starting to get hungry) this happens (see photo below)! Whoa… I’ll bet ya didn’t see THAT happening! Those frozen bananas and cocoa powder turn into a smooth, delectable  “Ice Cream-y” looking mixture! Time to stop processing it, and EAT!

Finally the healthy chocolate banana ice cream is smooth and creamy!Okay, Now What?
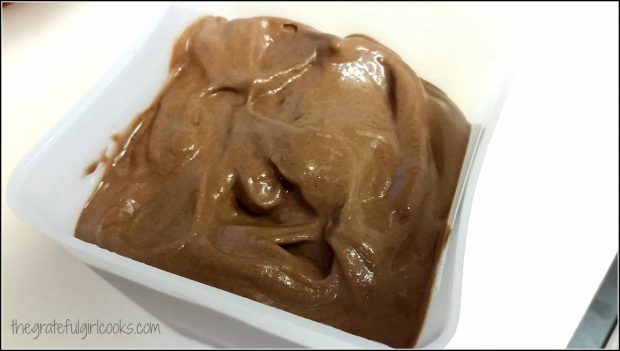
Now that it’s finished processing, you can either eat it right away, OR put it into a sealed container in your refrigerator’s freezer for awhile and let it firm up more. I usually let it firm up a bit in the freezer (after sampling it, of course!). The photo below shows what it looks like going into the freezer. Once frozen, let it sit out a few minutes to thaw slightly before serving, then enjoy!

Let healthy chocolate banana ice cream firm up in the freezer, after processing.
Enjoy every bite, knowing you saved some calories by not pigging out on regular ice cream, but enjoyed this delicious treat instead!  Remember… 7 bananas, 4 T. cocoa powder, and MIX, MIX, MIX. (makes approx. five or six 1/2 cup servings).

I thought everyone had heard of this kind of “ice cream” before, but we had a friend visit here recently. She had never heard of this before, so she tried some, and was quite surprised how good it was!  See? Scientific proof. Absolutely 1 out of 1 house guests recommend this treat! Hope you will give it a try, as well. You’re gonna love it!

Looking For More FROZEN TREAT Recipes?

You can find all of my recipes in the Recipe Index, located at the top of the page. I have lots of traditional ice cream recipes, too. A few favorite frozen treats include:

Interested In More Recipes?

Thank you for visiting this website. I appreciate you using some of your valuable time to do soIf you’re interested, I publish a newsletter 2 times per month (1st and 15th) with all the latest recipes, and other fun info. I would be honored to have you join our growing list of subscribers, so you never miss a great recipe! 

There is a Newsletter subscription box on the top right side (or bottom) of each blog post, depending on the device you use, where you can easily submit your e-mail address (only) to be included in my mailing list.

You Can Also Find Me On Social Media:

Facebook page: The Grateful Girl Cooks!
Pinterest:
The Grateful Girl Cooks!
Instagram:
jbatthegratefulgirlcooks

Author's signature


Here’s one more to pin on your Pinterest boards!All you need are several frozen bananas, cocoa powder and a food processor to make a batch of this yummy and healthy Chocolate Banana "Ice Cream"!

Save

Save

Save

Red, White and Blue Ice Cream Sundaes

Homemade red, white and blue ice cream sundaes, with strawberries, blueberries, chocolate syrup and whipped cream make patriotic celebrations special!Red, White and Blue Ice Cream Sundaes / The Grateful Girl Cooks!
This past weekend another celebration of Independence Day occurred in the United States. It’s such a special day!

We are so very grateful to live in this country, and thankful for all who have stood boldly and sacrificed their lives to provide us with the freedoms we are blessed to have here in the U.S.A.

We celebrated with Red, White and Blue Ice Cream Sundaes! They are so easy to make… here’s how!

Scroll Down For A Printable Recipe Card At The Bottom Of The Page

Making Red, White and Blue Ice Cream Sundaes Is A Cinch!

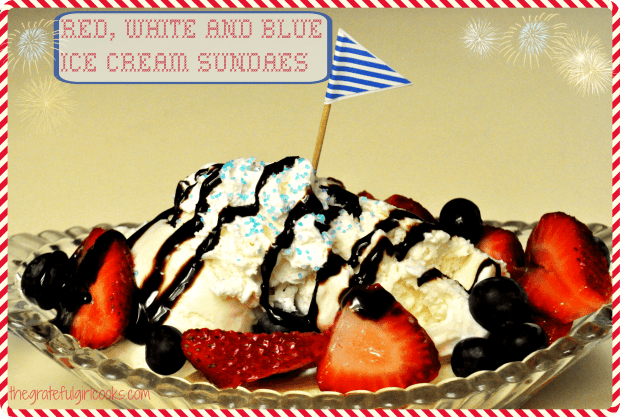
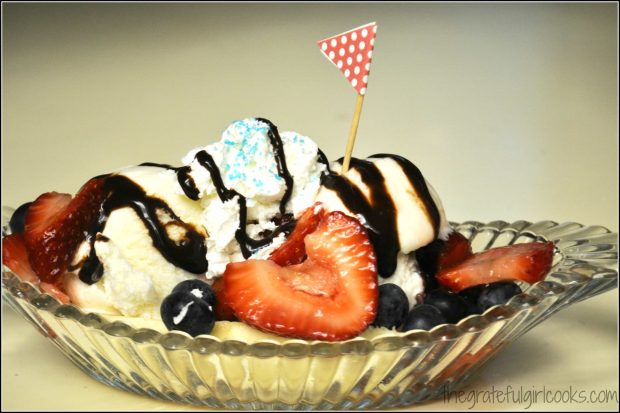
Homemade vanilla ice cream is topped with whipped cream, chocolate syrup, blueberries, blue sprinkles, and fresh sliced strawberries.

You really don’t need a recipe for that, but I am including my basic homemade vanilla ice cream recipe below, for anyone who enjoys making homemade ice cream, and might want it.

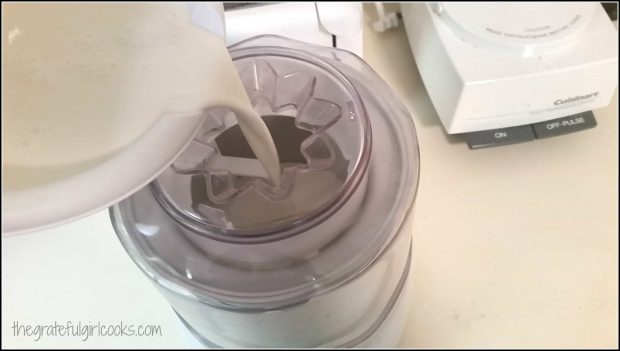
Making homemade vanilla ice cream is what I enjoy doing! The ice cream part is easy. Mix up heavy whipping cream, milk, sugar and vanilla, then pour it into an ice cream maker.

Pouring ice cream mixture into machine for freezing.
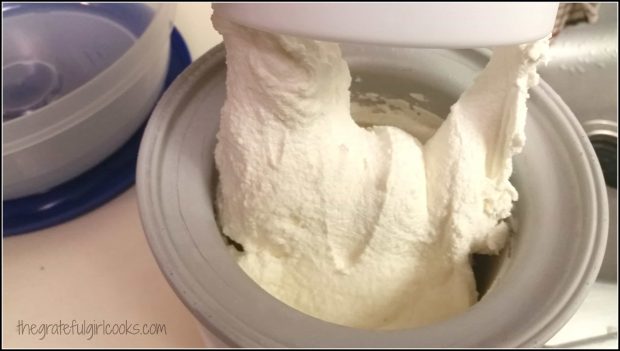
After about 20 minutes, the vanilla ice cream has frozen to soft serve consistency. We LOVE making ice cream in our little Cuisinart ice cream machine, which I received as a gift!

Homemade vanilla ice cream is ready to make into ice cream sundaes!
Remove the ice cream from the machine, and put it into a sealed container in the freezer to firm up some more (an hour or two).

Time To Serve The Red, White and Blue Ice Cream Sundaes!

When ready to serve, scoop vanilla ice cream into serving dishes. Spray some whipped cream on top (along with some colored decorating sugar, if desired).

Drizzle ice cream with chocolate syrup, then surround ice cream with blueberries and sliced strawberries, and serve! Red, White, and Blue Ice Cream Sundaes, for the win!

Red, White and Blue Ice Cream Sundaes are decorated and ready to eat!
These simple ice cream sundaes are colorful, easy and delicious, and they are perfect for any patriotic celebration!

By the way, if you enjoy ice cream sundaes, check out the recipe for making a Strawberry Almond Romanoff Sundae. YUM!

It doesn’t have to be complicated, just fun! Happy Independence Day, from our home to yours!

Sparklers lit, and wishing you a Happy 4th of July!
Have a great week! Let’s be grateful for the freedoms we celebrate in this great country. We are blessed.

Thanks for stopping by, and please come back soon for more family-friendly recipes. Take care, and may God bless you.

Looking For More HOMEMADE ICE CREAM Recipes?

You can find all of my recipes in the Recipe Index, located at the top of the page. A few homemade ice cream recipes I think you will really enjoy include:

Want More Recipes? Get My FREE Newsletter!

I publish a newsletter 2 times per month (1st and 15th) with lots of recipes, tips, etc..
Would you like to join our growing list of subscribers?

There is a Newsletter subscription box on the top right (or bottom) of each blog post, depending on the device you use.
You can submit your e-mail address there, to be added to my mailing list.

Find Me On Social Media:

Facebook page: The Grateful Girl Cooks!
Pinterest:
The Grateful Girl Cooks!
Instagram:
jbatthegratefulgirlcooks

Author's signature

↓↓ PRINTABLE RECIPE BELOW ↓↓

0 from 0 votes
Red, White and Blue Ice Cream Sundaes
Prep Time
25 mins
Cook Time
0 mins
Total Time
25 mins
 

Homemade red, white and blue ice cream sundaes, with strawberries, blueberries, chocolate syrup and whipped cream make patriotic celebrations special!

Category: Dessert
Cuisine: American
Keyword: ice cream sundaes
Servings: 6 (1 cup each) 1.5 qts. total
Calories Per Serving: 439 kcal
Author: JB @ The Grateful Girl Cooks!
Ingredients
For ice cream:
  • 2 cups heavy whipping cream
  • 1 cup milk
  • 3/4 cup granulated sugar
  • 2 teaspoons vanilla extract
For sundae:
  • Chocolate syrup
  • Prepared whipping cream (spray can or fresh)
  • Blue or red colored decorating sugar (optional)
  • Sliced strawberries (Fresh)
  • Blueberries (Fresh)
Instructions
  1. In large mixing bowl, combine the ice cream ingredients. Whisk well, to combine and dissolve the sugar. Pour into freezer canister, and freeze, according to manufacturer's instructions.

  2. When ice cream is "done", remove to a freezeable container, seal and place in freezer for at least 2 hours to firm up ice cream.
  3. When ready to serve, scoop ice cream into serving dishes, and garnish with sliced strawberries, blueberries, whipped cream, chocolate syrup, and colored decorating sugar. Serve and enjoy!
Recipe Notes

Prep time indicated is for making the ice cream. It does not include additional time in the freezer where the ice cream firms up. Caloric calculation is for 1 cup ice cream, plus all toppings (evenly divided between 6 servings)

Nutrition Facts
Red, White and Blue Ice Cream Sundaes
Amount Per Serving (1 (1 cup per, plus toppings))
Calories 439 Calories from Fat 279
% Daily Value*
Fat 31g48%
Saturated Fat 19g119%
Cholesterol 116mg39%
Sodium 48mg2%
Potassium 156mg4%
Carbohydrates 34g11%
Sugar 31g34%
Protein 3g6%
Vitamin A 1265IU25%
Vitamin C 14.6mg18%
Calcium 106mg11%
Iron 0.1mg1%
* Percent Daily Values are based on a 2000 calorie diet.

Here’s one more to pin on your Pinterest boards!Homemade red, white and blue ice cream sundaes, with strawberries, blueberries, chocolate syrup and whipped cream make patriotic celebrations special!


Save

Save

Homemade Peach Ice Cream

Fresh peaches and peach nectar bring flavor to delicious homemade peach ice cream (a Food Network recipe), easily made in an ice cream machine!Fresh peaches and peach nectar bring flavor to delicious homemade peach ice cream (a Food Network recipe), easily made in an ice cream machine!
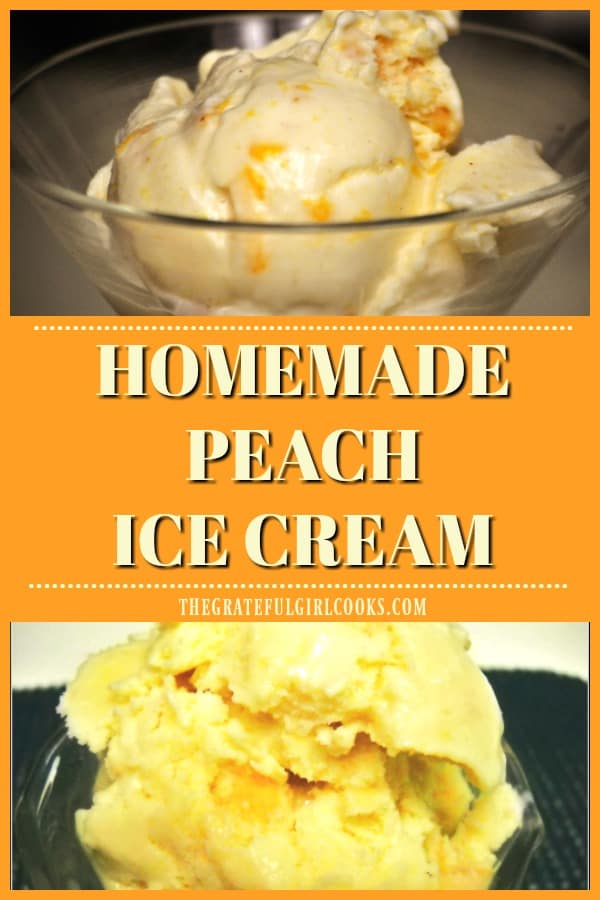
It’s officially SUMMER!!! Time for BBQ’s with friends, lots of sunshine, starlit evenings hanging out on our back deck, ping pong tournaments, and Homemade Peach Ice Cream!  What could be better than a big old bowl of frozen peachy goodness on a hot summer day?

I found this recipe from Patrick and Gina Neely on The Food Network’s website a couple years ago, and thought I would give it a try! I love experimenting with new recipes for homemade ice cream, and this one sounded like a winner!

Scroll Down For A Printable Recipe Card At The Bottom Of The Page

Top Homemade Peach Ice Cream With Pecan Praline Sauce!

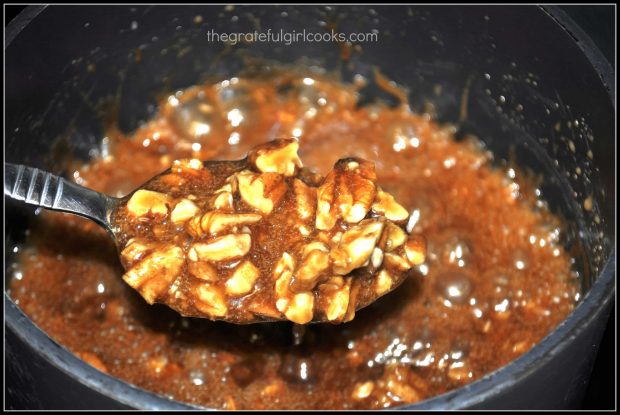
Their recipe for homemade peach ice cream also included instructions for a wonderful pecan and praline topping. This praline topping is the perfect accompaniment to the ice cream! It is called Southern Praline Sauce and it tastes fantastic, served warm over this homemade peach ice cream!

A praline sauce is made to add to the top of each scoop of homemade peach ice cream!

Preparing The Homemade Peach Ice Cream

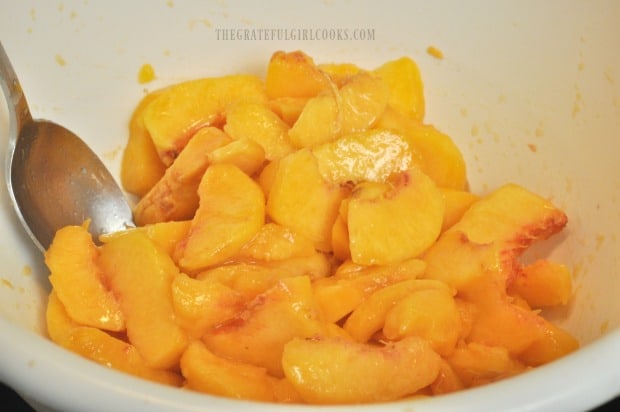
The peaches are peeled, pitted, sliced and then chopped, which is about the only “difficult” thing about this recipe… ha ha! After that, cook the peaches with other ingredients, then blend and let it cool. When that is done, freeze the homemade peach ice cream to creamy perfection in an ice cream maker!

Fresh peaches are peeled, pitted, sliced and then chopped to add to ice cream base.

Time To Freeze The Ice Cream!

Add the ice cream mixture to an ice cream machine and process, according to manufacturer instructions. The recipe will yield approximately 1.5 quarts, for about 6 servings. Once finished, I put the semi-firm ice cream into a covered container, and place it back into my refrigerator’s freezer. This helps it freeze and firm up a little bit more (1-2 hours), for best texture!

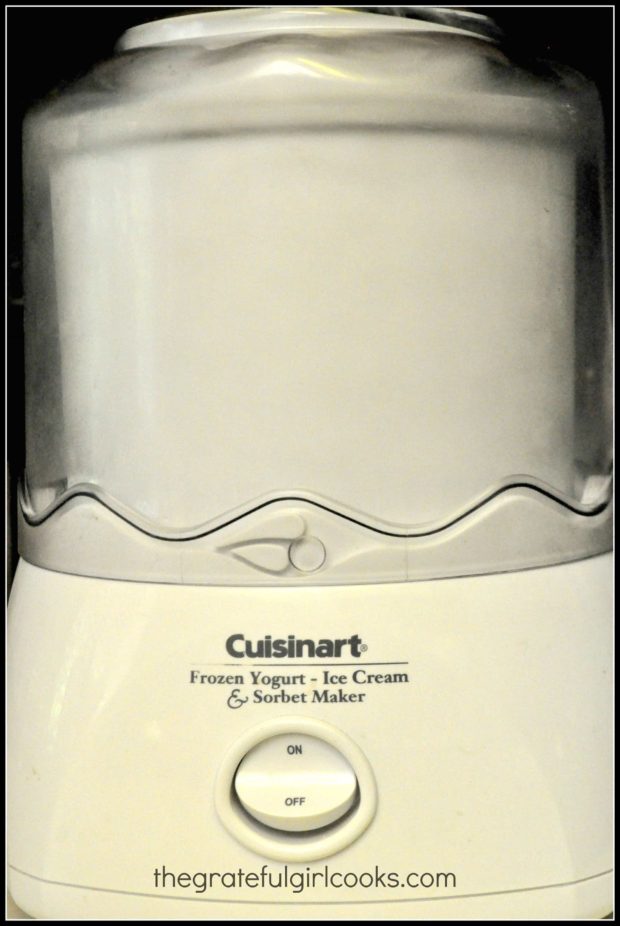
I use a Cuisinart ice cream machine to make homemade peach ice cream.

Time To Eat!

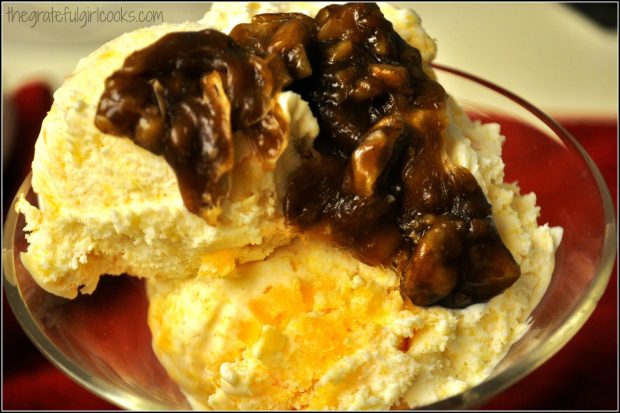
When you are ready to serve, just scoop it right up. The homemade peach ice cream tastes really good, especially when topped with the praline sauce, which is a yummy addition of flavor!

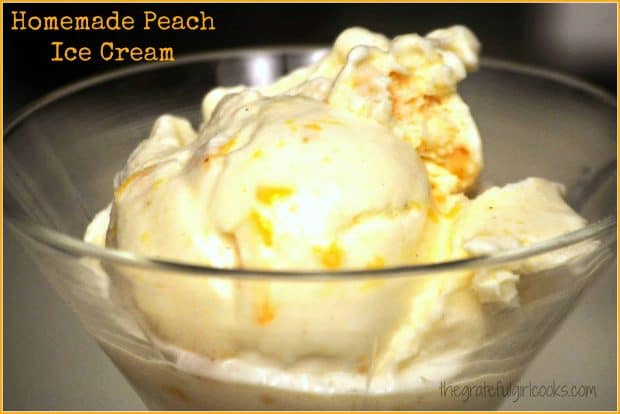
Homemade Peach Ice Cream topped with a praline sauce, in a glass dish.
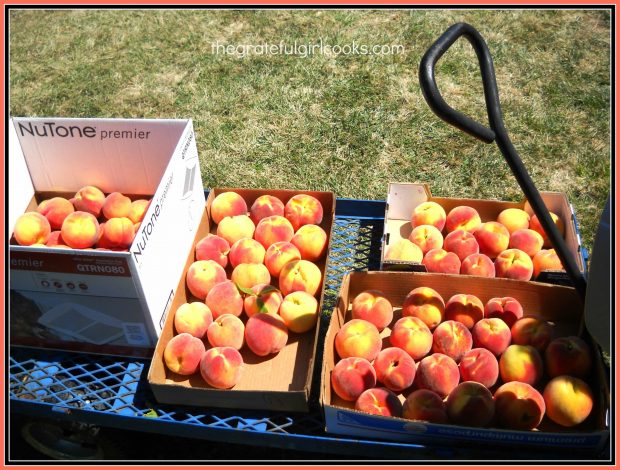
Whether you make the praline sauce or not, this peach ice cream is fabulous! The recipe uses fresh peaches, peach nectar, and sour cream, etc., so you KNOW it has to be yummy! I was fortunate to use some of the fresh juicy peaches I picked at a local farm to make this ice cream!

Fresh peaches were picked and used to make homemade peach ice cream!
Anyways… this is a great recipe, all you ice cream lovers out there. If you’re looking for a good recipe for Homemade Peach Ice Cream to add to your summer enjoyment, this is one I recommend, as well as my recipe for Perfectly Peachy Ice Cream. Hope you’ll give it a try. It’s amazing!

Looking For More ICE CREAM Recipes?

You can find all of my recipes in the Recipe Index, located at the top of the page. I have quite a few recipes for homemade ice cream, including:

Interested In More Recipes?

Thank you for visiting this website. I appreciate you using some of your valuable time to do soIf you’re interested, I publish a newsletter 2 times per month (1st and 15th) with all the latest recipes, and other fun info. I would be honored to have you join our growing list of subscribers, so you never miss a great recipe!
There is a Newsletter subscription box on the top right side (or bottom) of each blog post, depending on the device you use, where you can easily submit your e-mail address (only) to be included in my mailing list.

You Can Also Find Me On Social Media:

Facebook page: The Grateful Girl Cooks!
Pinterest:
The Grateful Girl Cooks!
Instagram:
jbatthegratefulgirlcooks

Author's signaturePeach Ice Cream Recipe Source: http://www.foodnetwork.com/recipes/patrick-and-gina-neely/neelys-homemade-peach-ice-cream-recipe.html

0 from 0 votes
Homemade Peach Ice Cream
Prep Time
30 mins
Cook Time
10 mins
Total Time
40 mins
 

Fresh peaches and peach nectar bring flavor to delicious homemade peach ice cream (a Food Network recipe), easily made in an ice cream machine!

Category: Dessert
Cuisine: American
Keyword: peach ice cream
Servings: 6 servings (1.5 qts.)
Calories Per Serving: 487 kcal
Author: JB @ The Grateful Girl Cooks!
Ingredients
  • 5 large ripe peaches , peeled, pitted, chopped
  • ¼ cup water
  • 12 ounces peach nectar (I used Kerns brand- found in juice aisle)
  • 1 cup granulated sugar
  • ½ cup sour cream
  • 1 pint heavy whipping cream
  • 1/4 teaspoon vanilla extract
  • 2 teaspoons lemon juice
Instructions
  1. Put the chopped peaches into a medium saucepan. Add water and canned peach nectar to the peaches. Stir to combine. Cook on medium heat until peaches have softened and cooked (about 10 minutes). Remove pan from heat. Drain off the peach juice (you can discard the leftover juice). Pour the peaches into a large mixing bowl. Stir in the granulated sugar, then let the peaches sit for awhile, so they cool back down to room temperature.

  2. Once peaches have cooled to room temp., add in sour cream, whipping cream, vanilla extract, and lemon juice. Blend well, using an immersion blender, food processor, or a blender (might have to do in batches).

  3. Pour peach mixture into the canister of your ice cream freezer and freeze, according to your particular manufacturer's instructions. When done, put the ice cream in a covered container and freeze for a couple hours to firm it up a bit.
  4. OPTIONAL: If desired, serve with warm Southern Praline Sauce over the top of the ice cream (see link in post for recipe). Serve, and enjoy!

Nutrition Facts
Homemade Peach Ice Cream
Amount Per Serving (1 (1/6th of total))
Calories 487 Calories from Fat 297
% Daily Value*
Fat 33g51%
Saturated Fat 20g125%
Cholesterol 117mg39%
Sodium 45mg2%
Potassium 323mg9%
Carbohydrates 48g16%
Fiber 1g4%
Sugar 44g49%
Protein 3g6%
Vitamin A 1685IU34%
Vitamin C 9.6mg12%
Calcium 80mg8%
Iron 0.3mg2%
* Percent Daily Values are based on a 2000 calorie diet.

Here’s one more to pin on your Pinterest boards!Fresh peaches and peach nectar bring flavor to delicious homemade peach ice cream (a Food Network recipe), easily made in an ice cream machine!


Save

Save

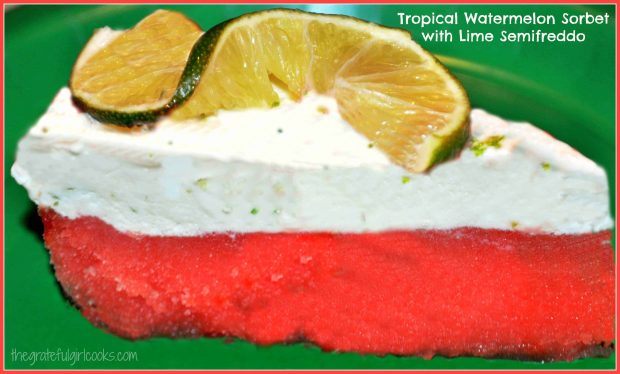
Tropical Watermelon Sorbet With Lime Semifreddo

Tropical watermelon sorbet with a creamy lime semifreddo on top is a 2 layered frozen dessert, w/ lots of FLAVOR! A perfect dessert to enjoy on a hot summer night!Tropical watermelon sorbet with a creamy lime semifreddo is a 2 layered frozen dessert, w/ lots of FLAVOR! A PERFECT dessert on a hot summer night!
A few years ago I was searching for a dessert featuring watermelon, for a “Watermelon-Themed” dinner party we attended. All the courses prepared for the dinner had to include watermelon!  One of the desserts I brought was this amazing Tropical Watermelon Sorbet with Lime Semifreddo!

Scroll Down For A Printable Recipe Card At The Bottom Of The Page

Ever Been To A “WATERMELON” Themed Dinner Party?

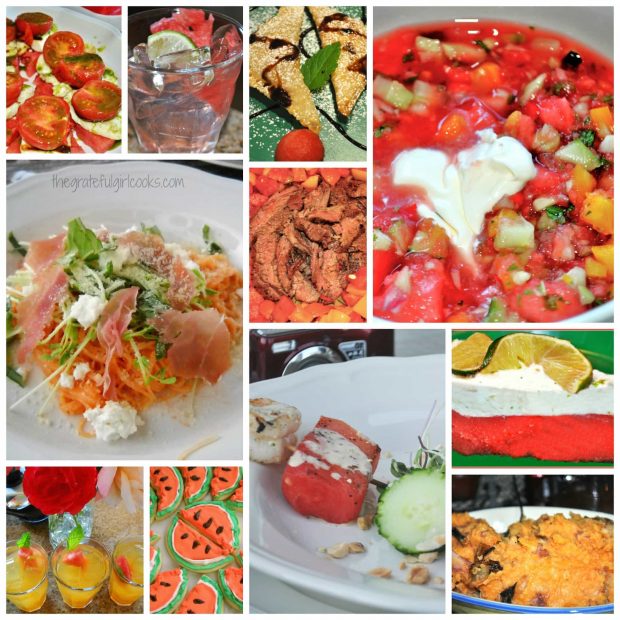
Our “watermelon-Themed dinner party ( for three couples) was so much fun! Each part of the dinner had to include watermelon, from drinks, appetizers, and main courses, to the desserts. We all contributed to the dinner, and all of us enjoyed it immensely!

Some pictures from a watermelon themed dinner we enjoyed.

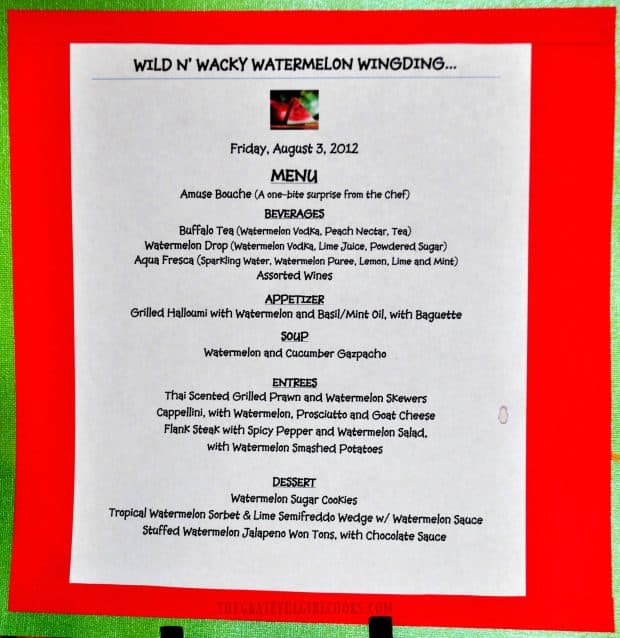
Here is a copy (below) of our menu from this watermelon-themed dinner! We loved all these unique watermelon-themed foods and drinks! The night we enjoyed this tropical watermelon sorbet with lime semifreddo, I drizzled some homemade watermelon “sauce” over the dessert, but that is NOT necessary.

The menu for our watermelon themed dinner, which included tropical watermelon sorbet.

How I Created This Watermelon Sorbet And Lime Semifreddo

I created this frozen treat by using a recipe for watermelon sorbet (from Giada DeLaurentiis of the Food Network). This was paired with another recipe (from Serious Eats) I wanted to try for Lime Semifreddo. It sounded good to me, that combining these two recipes into one would make a GREAT frozen dessert! I was right. It tastes fabulous!

How Watermelon Sorbet And Lime Semifreddo Is Made

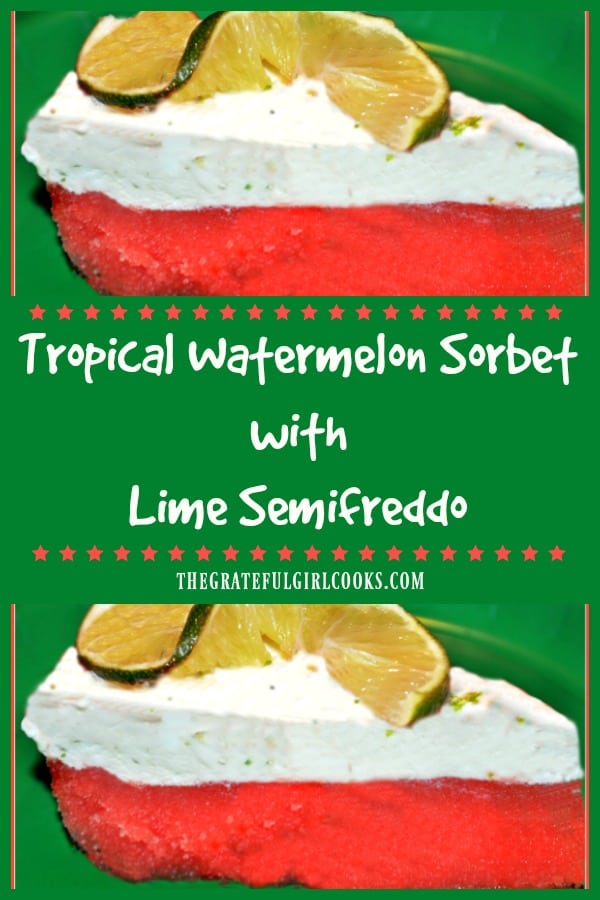
I only took the ONE picture (which is a TOTAL bummer), but the instructions below will get you from Point A to Point B with no problem. Basically what I did was make the tropical watermelon sorbet, and freeze it in a round cake pan.

Then I made the lime semifreddo, and spread it on top of the frozen watermelon sorbet. Both were then frozen together. At serving time, I cut the frozen dessert into pie shaped wedges. Each wedge is served with a twist of fresh lime on top.

The tropical watermelon sorbet gets it’s flavor from watermelon, pineapple juice, lime juice and ginger ale. It’s wonderful! If you’ve never heard of semifreddo before (neither had I BEFORE making this), you will LOVE it! Think ice cream on steroids.

What IS Semifreddo?

“Semifreddo” is Italian, and means “half-cold”. Kind of like ice cream. Because of the air and sugar in it, the semifreddo maintains a soft, creamy texture even after being frozen. A true semifreddo will never get rock hard like ice cream does in the freezer – YAY!).

The lime flavor is magnificent in this semifreddo…light and fresh-tasting! Layer it with some yummy tropical watermelon sorbet, and you’ve got a refreshing, frozen dessert!

Watermelon is the chief ingredient for this dessert!

The combination of the two recipes into one was a great pairing of summertime flavors (in my humble opinion!  Seriously DELICIOUS, COLD, AND REFRESHINGLY LIGHT on a hot summer’s night! I really hope you will give this frozen dessert a try. It’s best if you make it the day before you want to serve it, so that everything freezes well together.

Don’t let the length of the prep time stop you from trying this. The tropical watermelon sorbet actually only takes a few minutes to make, and the lime semifreddo can be made in under half an hour. Most of the prep time is inactive “waiting for the stuff to freeze” time. Enjoy!

Looking For More Sorbet Or Ice Cream Recipes?

You can find ALL my recipes in the Recipe Index, located at the top of the page. I have a nice variety of sorbet and ice cream recipes, including:

Interested In More Recipes?

Thank you for visiting this website. I appreciate you using some of your valuable time to do soIf you’re interested, I publish a newsletter 2 times per month (1st and 15th) with all the latest recipes, and other fun info. I would be honored to have you join our growing list of subscribers, so you never miss a great recipe!
There is a Newsletter subscription box on the top right side (or bottom) of each blog post, depending on the device you use, where you can easily submit your e-mail address (only) to be included in my mailing list.

You Can Also Find Me On Social Media:

Facebook page: The Grateful Girl Cooks!
Pinterest:
The Grateful Girl Cooks!
Instagram:
jbatthegratefulgirlcooks

Author's signatureRecipe Source for Tropical Watermelon Sorbet: http://www.foodnetwork.com/recipes/giada-de-laurentiis/tropical-watermelon-sorbet-recipe.html

Recipe Source for Lime Semifreddo: http://www.seriouseats.com/recipes/2011/04/lime-semifreddo-with-pretzel-crust-recipe.html

↓↓ PRINTABLE RECIPE BELOW ↓↓

0 from 0 votes
Tropical Watermelon Sorbet With Lime Semifreddo
Prep Time
1 hr
Cook Time
0 mins
Freezing Time
8 hrs
Total Time
9 hrs
 

Tropical watermelon sorbet with a creamy lime semifreddo is a 2 layered frozen dessert, w/ lots of FLAVOR! A PERFECT dessert on a hot summer night!

Category: Dessert
Cuisine: American
Keyword: watermelon sorbet
Servings: 8 servings
Calories Per Serving: 386 kcal
Author: JB @ The Grateful Girl Cooks!
Ingredients
For the Tropical Watermelon Sorbet:
  • cups (seedless watermelon (fruit cut into 1 inch pieces for a yield of 3 1/2 cups)
  • 6 ounce (6 ounce) can pineapple juice, chilled well
  • 3/4 cup ginger ale , chilled well
  • 1/3 cup fresh lime juice (approximately 3 large limes)
  • 1/2 cup Grenadine syrup (I used Rose's)
For the Lime Semifreddo:
  • 1 (14 ounce) can sweetened condensed milk
  • 1/2 cup fresh lime juice (approx. 4 limes)
  • 2 teaspoons finely grated lime zest
  • 1 cup granulated sugar
  • 1/4 cup water
  • 2 Tablespoons light corn syrup
  • 4 large egg whites (at room temperature)
  • 1/4 teaspoon salt
Instructions
  1. Make the watermelon sorbet first: Combine the chilled watermelon pieces, pineapple juice, ginger ale, lime juice, and grenadine syrup in a blender (may have to work in batches). Blend until smooth. Pour mixture into an ice cream maker; freeze, according to your manufacturer's instructions. (between 25 and 30 minutes). I spooned the frozen sorbet out of the ice cream machine into a round 9 inch cake pan. Spread the sorbet out to level it out. Cover, and freeze until solid. (I froze mine for several hours before adding the semifreddo to the top of it.

  2. Make the Lime Semifreddo (after the sorbet has frozen for several hours): In a medium bowl, whisk the sweetened condensed milk, lime juice and finely grated lime zest until mixture is smooth. Set bowl aside.

  3. In a medium sized, heavy-duty saucepan, place the granulated sugar, water, and corn syrup. Stir well, to combine. Heat this mixture on medium-low until sugar is dissolved. Then increase the heat to medium-high; Bring the syrup to a boil, continue boiling and stirring (occasionally) until the mixture registers 240 degrees F on a candy thermometer (this will take between 8 and 10 minutes)
  4. While the syrup is boiling, beat the room temperature egg whites and salt with an electric mixer (with a whisk attachment) on medium speed for about a minute. Increase mixer speed to medium-high; whisk the egg whites until soft peaks form (about 2-3 minutes). When the egg whites are at soft peak stage (and with mixer running at medium-high speed), SLOWLY drizzle the corn syrup mixture to the egg whites. Continue mixing for about 7 minutes more. When ready, the outside of the mixing bowl should be cool to the touch, and the egg whites will be thick and glossy looking. Mix about 1/3 of the meringue mixture (with electric beaters) into the bowl of reserved lime mixture. FOLD IN THE REMAINING MERINGUE, with a rubber spatula until well blended.

  5. Remove watermelon sorbet from freezer. Evenly spread the lime semifreddo over the entire surface of the sorbet. Cover loosely with plastic wrap. Place pan back into freezer, and freeze for at least 8 hours.
  6. When ready to serve, remove plastic wrap, and carefully slice into pie shaped wedges, and place onto serving plates. Garnish with a twist of fresh lime, and serve! Enjoy!
Recipe Notes

***Please note that the long prep time for this recipe really is how long the dessert will be frozen. Most of this is inactive prep time. The sorbet only takes a few minutes to prepare; the lime semifreddo can be made in about half an hour.

Nutrition Facts
Tropical Watermelon Sorbet With Lime Semifreddo
Amount Per Serving (1 serving)
Calories 386 Calories from Fat 36
% Daily Value*
Fat 4g6%
Saturated Fat 2g13%
Cholesterol 16mg5%
Sodium 174mg8%
Potassium 345mg10%
Carbohydrates 83g28%
Sugar 76g84%
Protein 6g12%
Vitamin A 520IU10%
Vitamin C 16.5mg20%
Calcium 153mg15%
Iron 0.4mg2%
* Percent Daily Values are based on a 2000 calorie diet.

Here’s one more to pin on your Pinterest boards!Tropical watermelon sorbet with a creamy lime semifreddo is a 2 layered frozen dessert, w/ lots of FLAVOR! A PERFECT dessert on a hot summer night!


Save

Save

Save

Homemade Strawberry Ice Cream

Thick, cold and creamy homemade strawberry ice cream is packed with fresh strawberries and is the perfect dessert treat, any time of year!Thick, cold and creamy homemade strawberry ice cream is packed with fresh strawberries and is the perfect dessert treat, any time of year!

Summer is just around the corner… I’m ready for warm days, sitting out on the back deck in the evenings by the firepit, BBQs with friends… and HOMEMADE STRAWBERRY ICE CREAM!

I grew up in hot and sunny Southern California, where making homemade ice cream was practically an art form in our family. My parents loved to make homemade ice cream, and my mom had several favorite recipes she would make, during the heat of the summer. I can still picture my Dad sitting on top of newspapers and bath towels on top of the old crank-style ice cream maker, to help keep the ice cream cold (while it firmed up) after freezing. Such great memories!

Nowadays (in the often rainy Pacific Northwest), I pull out my indoor electric ice cream maker (no salt or ice necessary). I can whip up a batch of homemade ice cream in about 20 minutes! Such was the case with this homemade strawberry ice cream!

My indoor ice cream machine

My husband bought a flat of local strawberries at a roadside stands recently, and asked me if I could make homemade strawberry ice cream with some of them. I don’t make strawberry ice cream too often, but I tried it anyways. Let me tell you… it was DELICIOUS!

Scroll Down For A Printable Recipe Card At The Bottom Of The Page

Making Homemade Strawberry Ice Cream

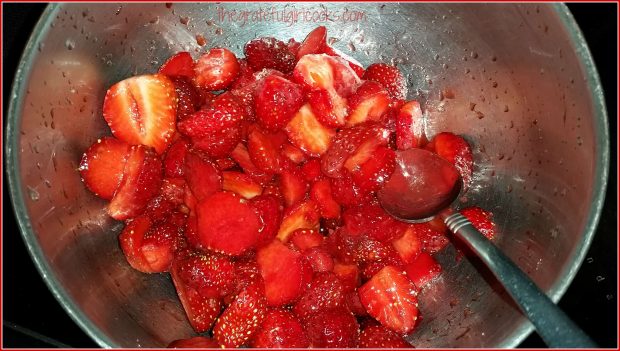
First you will need to clean, de-stem and slice those gorgeous strawberries. Add 1 Tablespoon granulated sugar, and stir to combine until sugar has dissolved. Let the strawberries sit for about 15 minutes. This is known as mascerating the fruit. The sugar will help to draw out some of the juice from the strawberries.

Once the strawberries have softened up, lightly mash them with a potato masher. Doing this will help to break them up a bit.

Sliced strawberries in metal bowl, ready to make homemade strawberry ice cream!
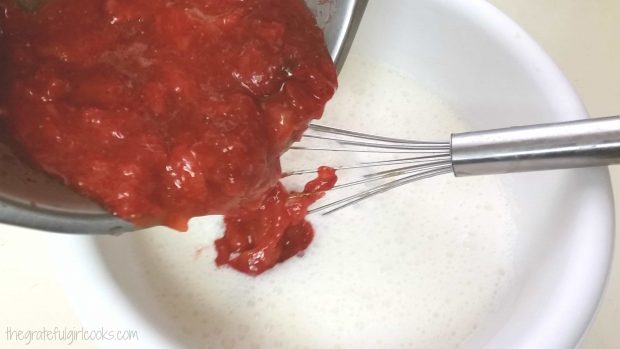
Whisk the whipping cream, milk, sugar, and vanilla together in a large bowl. Stir or whisk until the sugar has dissolved, then add the strawberries (and their juice).

Mashed strawberry mixture added to whipping cream and sugar.

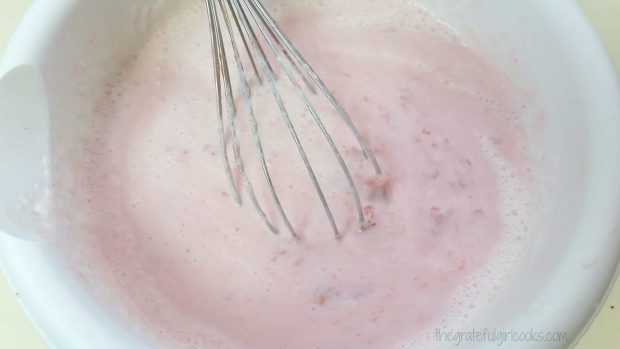
Once you’ve added the strawberries and their juice, continue to lightly whisk until ingredients are fully combined. Now the homemade strawberry ice cream base will turn pink.

Homemade strawberry ice cream mixture ready to put into machine

Ready To Freeze The Ice Cream!

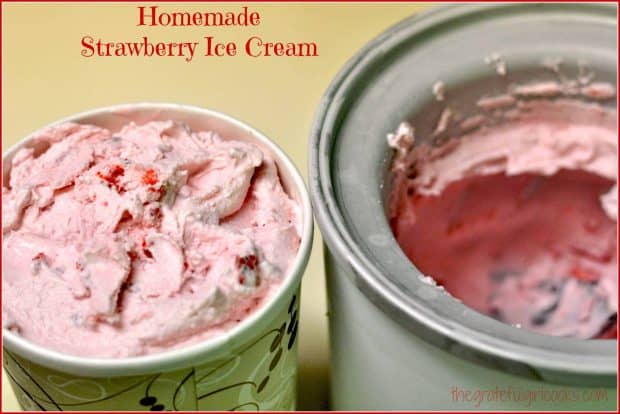
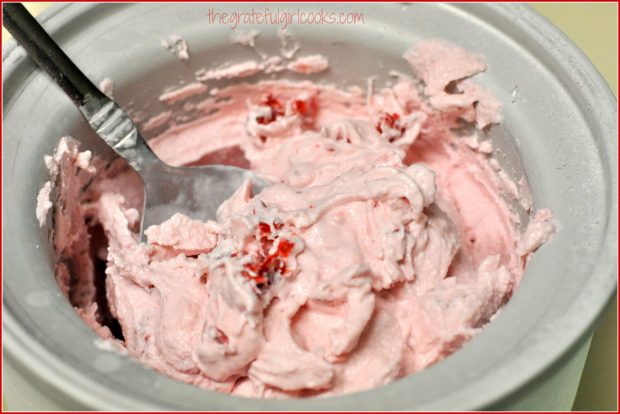
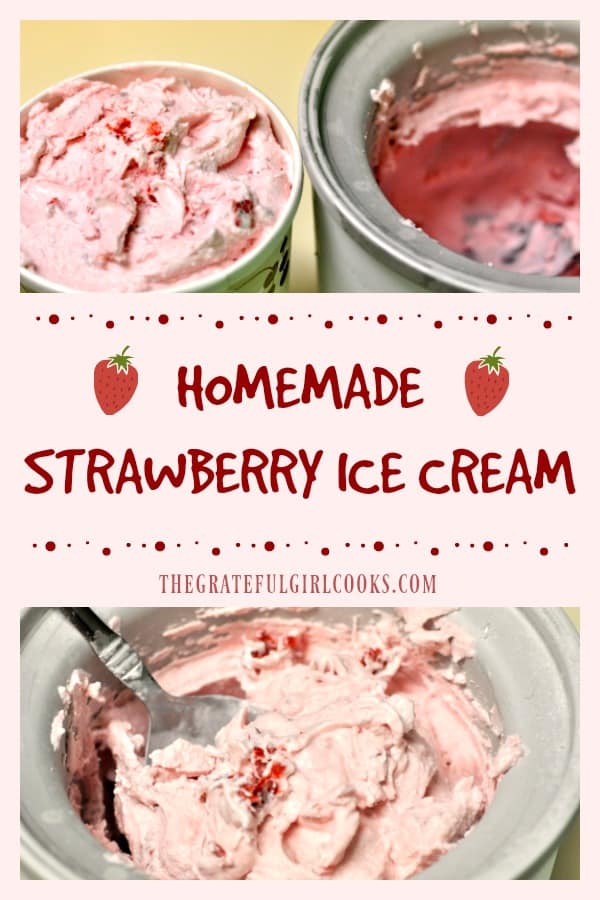
Once the ice cream base has been combined, pour it into the canister of an ice cream machine. The homemade strawberry ice cream is processed for about 20 minutes. When done, the homemade strawberry ice cream will be fairly thick, and will have increased in volume. You can see the chunks of fresh strawberries in the ice cream!

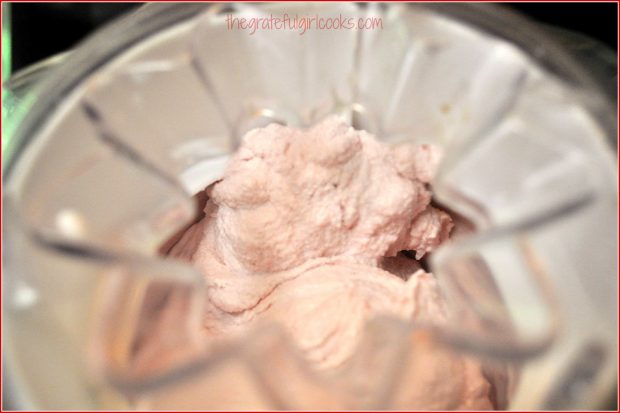
Homemade strawberry ice cream in machine, almost ready!

Spoonful of homemade strawberry ice cream, in cannister.
Transfer the homemade strawberry ice cream into a covered container (with a lid). Place container into freezer.  Let the ice cream firm up for a couple hours in the freezer.

When you are ready to eat it, remove container from freezer. Scoop out some delicious homemade strawberry ice cream.  If you want, you can add some more sliced strawberries to the top. Fantastic! This homemade strawberry ice cream recipe, as written, makes 1 1/2 quarts. The ingredients are easy to double, so remember to do that if using a standard-sized ice cream maker.

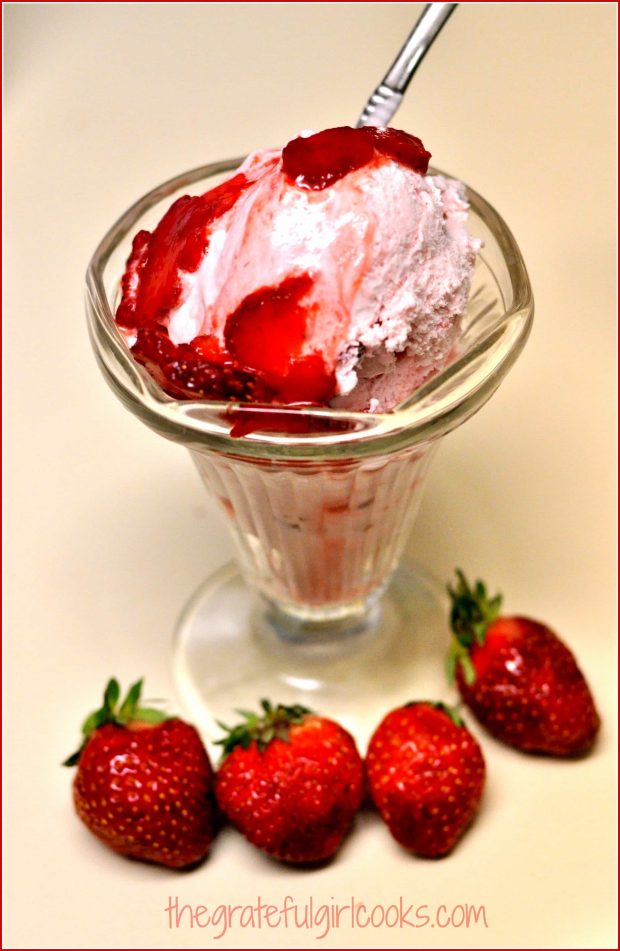
Homemade strawberry ice cream, in dish with strawberry topping
Bring on summer… Bring on homemade strawberry ice cream! It’s a wonderful summertime treat! (who am I kidding here – ice cream is good ANY old time of the year, right?) Enjoy this delicious, creamy dessert! Hope you have a wonderful day… may God bless you.

Looking For More Homemade Ice Cream Recipes?

I have many homemade ice cream recipes on this blog. You can find them all in the Recipe Index, located at the top of the page. A few of the flavors include:

Interested In More Recipes?

Thank you for visiting this website. I appreciate you using some of your valuable time to do soIf you’re interested, I publish a newsletter 2 times per month (1st and 15th) with all the latest recipes, and other fun info. I would be honored to have you join our growing list of subscribers, so you never miss a great recipe!
There is a Newsletter subscription box on the top right side (or bottom) of each blog post, depending on the device you use, where you can easily submit your e-mail address (only) to be included in my mailing list.

You Can Also Find Me On Social Media:

Facebook page: The Grateful Girl Cooks!
Pinterest:
The Grateful Girl Cooks!
Instagram:
jbatthegratefulgirlcooks

Author's signatureRecipe Source: Krups Ice Cream and Sorbet Maker Handbook (for vanilla base)

5 from 1 vote
Homemade Strawberry Ice Cream
Prep Time
20 mins
Cook Time
0 mins
Freezing Time
20 mins
Total Time
40 mins
 
Thick, cold and creamy homemade strawberry ice cream is packed with fresh strawberries and is the perfect dessert treat, any time of year!
Category: Dessert
Cuisine: American
Keyword: homemade strawberry ice cream
Servings: 12 1/2 cup servings (1½ quarts total)
Calories Per Serving: 204 kcal
Author: JB @ The Grateful Girl Cooks!
Ingredients
  • 1 ½ cups sliced fresh strawberries
  • 1 Tablespoon granulated sugar
  • 2 cups heavy whipping cream
  • 1 cup milk
  • ¾ cup granulated sugar
  • teaspoons vanilla extract
Instructions
  1. Combine strawberries and 1 Tablespoon granulated sugar in medium bowl. Mash with a potato masher to break up the strawberries a bit. Let sit for about 15 minutes.
  2. In a large bowl, whisk together the whipping cream, milk, granulated sugar and vanilla extract until sugar has dissolved.
  3. Add strawberries to ice cream mixture. Stir well to combine. Pour into canister of ice cream maker, and freeze according to manufacturer's instructions.
  4. When done, remove ice cream to a freezable covered container. Place in freezer to firm up, for about 2 hours.
  5. Serve, and enjoy!
Nutrition Facts
Homemade Strawberry Ice Cream
Amount Per Serving (0.5 cup)
Calories 204 Calories from Fat 126
% Daily Value*
Fat 14g22%
Saturated Fat 9g56%
Cholesterol 55mg18%
Sodium 24mg1%
Potassium 86mg2%
Carbohydrates 17g6%
Sugar 15g17%
Protein 1g2%
Vitamin A 620IU12%
Vitamin C 10.8mg13%
Calcium 53mg5%
Iron 0.1mg1%
* Percent Daily Values are based on a 2000 calorie diet.

Here’s one more to pin on your Pinterest boards!Thick, cold and creamy homemade strawberry ice cream is packed with fresh strawberries and is the perfect dessert treat, any time of year!

Save

Save

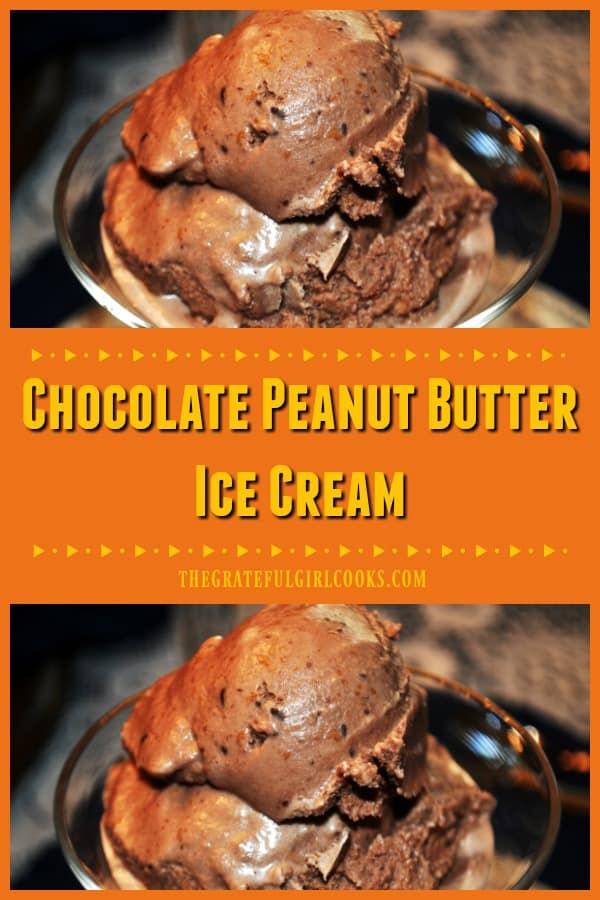
Chocolate Peanut Butter Ice Cream

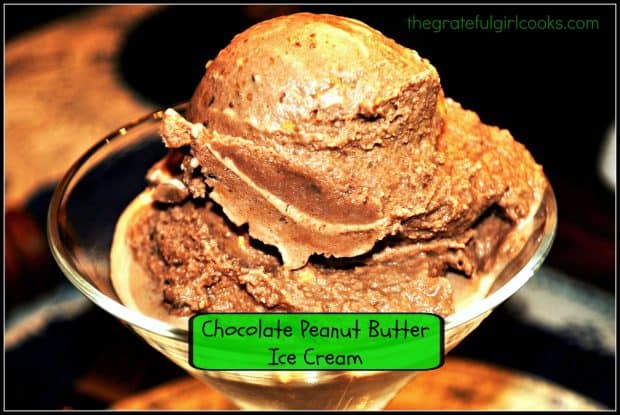
Grab the ol’ ice cream maker and enjoy a scoop of this delicious, cold and creamy chocolate peanut butter ice cream! You’re gonna love it!Grab the ol' ice cream maker and enjoy a scoop of this delicious, cold and creamy chocolate peanut butter ice cream! You're gonna love it!
Chocolate peanut butter ice cream is such a great flavor combo!  I tried to capture that “yummi-ness” one summer while experimenting with homemade ice cream flavors, and tasting them, too!. Somebody has to do it, right?
Scroll Down For A Printable Recipe Card At The Bottom Of The Page

Making Chocolate Peanut Butter Ice Cream Is Easy!

I took a basic chocolate ice cream recipe from the book that came with our ice cream maker, and incorporated some creamy peanut butter into the mix. The result was really wonderful.  Making this ice cream is really a no brainer, if I’m being truthful.

I added some peanut butter to the ice cream mixture, poured it into my ice cream maker. About 5 minutes before it was done freezing, I added more peanut butter (in small bits) to the ice cream. By adding bits of peanut butter to the mostly finished ice cream, it allowed for it to be spread throughout the ice cream.  Easy-Peasy!

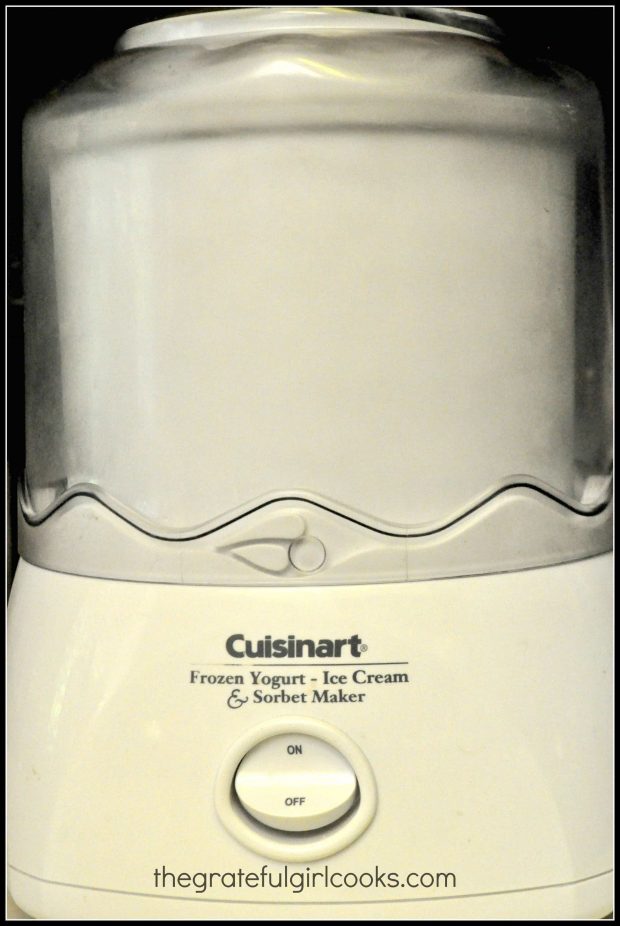
My trusty old machine used to make chocolate peanut butter ice cream.

The end result was a wonderful taste treat on a hot, summer’s day! And surprise, surprise! This chocolate peanut butter ice cream is even good in Winter, Spring, and Fall!

Hope you will consider giving this recipe a try! If you like ice cream, AND you like chocolate and peanut butter. I am confident you will enjoy it!

Looking For More ICE CREAM Recipes?
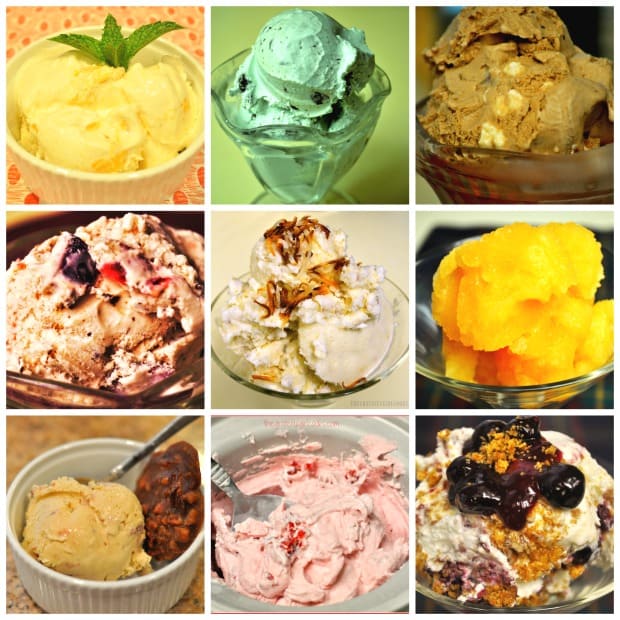
A collage of ice cream photos from my blog recipes.

You can find all of my recipes in the Recipe Index, located at the top of the page. A few favorite ice cream recipes include:

Interested In More Recipes?

Thank you for visiting this website. I appreciate you using some of your valuable time to do soIf you’re interested, I publish a newsletter 2 times per month (1st and 15th) with all the latest recipes, and other fun info. I would be honored to have you join our growing list of subscribers, so you never miss a great recipe!
There is a Newsletter subscription box on the top right side (or bottom) of each blog post, depending on the device you use, where you can easily submit your e-mail address (only) to be included in my mailing list.

You Can Also Find Me On Social Media:

Facebook page: The Grateful Girl Cooks!
Pinterest:
The Grateful Girl Cooks!
Instagram:
jbatthegratefulgirlcooks

Author's signatureRecipe slightly adapted from: Cuisinart Automatic Frozen Yogurt-Ice Cream & Sorbet Maker Instruction and Recipe Booklet, page 4

3 from 1 vote
Chocolate Peanut Butter Ice Cream
Prep Time
1 hr 30 mins
Cook Time
0 mins
Total Time
1 hr 30 mins
 

Grab the ol' ice cream maker and enjoy a scoop of this delicious, cold and creamy chocolate peanut butter ice cream! You're gonna love it!

Category: Dessert
Cuisine: American
Keyword: chocolate peanut butter ice cream
Servings: 12 (1/2 cup) servings
Calories Per Serving: 315 kcal
Author: JB @ The Grateful Girl Cooks!
Ingredients
  • 1 cup whole milk
  • 1/2 cup granulated sugar
  • 8 ounces semi-sweet chocolate chips
  • 2 Tablespoons peanut butter
  • 2 cups heavy whipping cream (very COLD)
  • 1 teaspoon vanilla extract
  • 1 heaping Tablespoon peanut butter (added in bits right before ice cream is finished)
Instructions
  1. In a small saucepan, heat the milk until it has begun to bubble around the edges of the pan (but not a full rolling boil). You want it hot, but not boiling.
  2. Using a food processor or blender, pulse the granulated sugar and chocolate pieces together, until the chocolate is finely chopped up. Add the 2 Tablespoons of peanut butter, then add the hot milk.
  3. Process until the mixture is well blended, and the mixture is fairly smooth.
  4. Pour the mixture into a large bowl, and let it cool COMPLETELY. Once mixture is cool, stir in the whipping cream and the vanilla extract. Cover ice cream mixture with plastic wrap and put into the refrigerator for at least an hour (the longer time, the better- you want it cold).
  5. When thoroughly chilled, remove mixture from refrigerator. Turn on the ice cream maker, and pour the cold ice cream mixture into the canister. Freezer per manufacturer's instructions (usually about 25 minutes). About 5 minutes BEFORE the ice cream is done, add the final heaping Tablespoon of peanut butter, (in small amounts at a time), to the ice cream.
  6. When ice cream is done, and has thickened, transfer to a covered container and place in freezer for an hour or two to firm up and "ripen".
Recipe Notes

Note that most of the "prep" time is inactive time, while mixture is refrigerating or firming up in freezer. I found it easiest to make up the ice cream and refrigerate it early in the day. I then made the ice cream right before dinner, then it was "ready and firmed up" for dessert a couple hours later!

Nutrition Facts
Chocolate Peanut Butter Ice Cream
Amount Per Serving (1 serving (1/2 cup))
Calories 315 Calories from Fat 216
% Daily Value*
Fat 24g37%
Saturated Fat 14g88%
Cholesterol 57mg19%
Sodium 44mg2%
Potassium 189mg5%
Carbohydrates 21g7%
Fiber 1g4%
Sugar 16g18%
Protein 3g6%
Vitamin A 625IU13%
Vitamin C 0.2mg0%
Calcium 62mg6%
Iron 1.3mg7%
* Percent Daily Values are based on a 2000 calorie diet.

Here’s one more to pin on your Pinterest boards!Grab the ol' ice cream maker and enjoy a scoop of this delicious, cold and creamy chocolate peanut butter ice cream! You're gonna love it!


Save

Save

Save

Blueberry Ice Cream

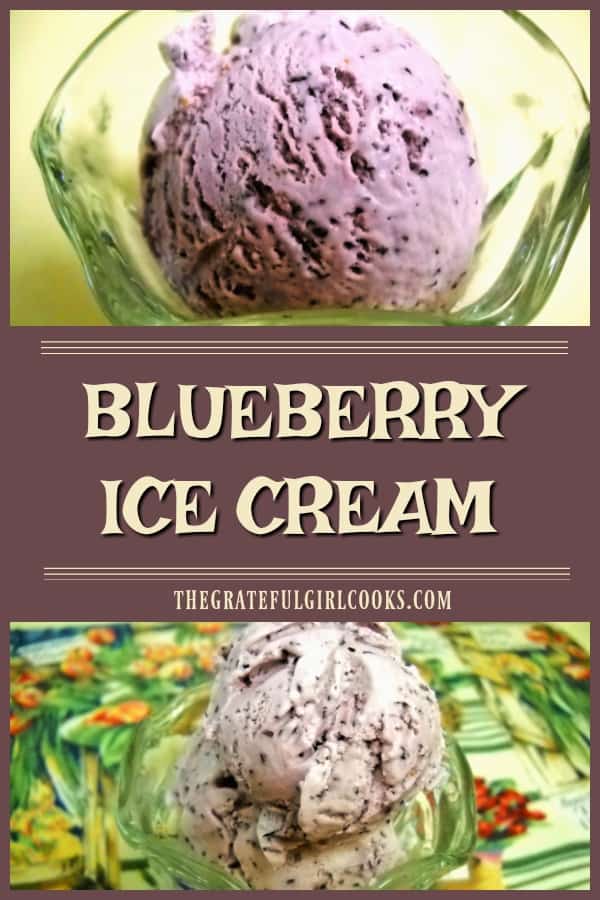
Grab the ol’ ice cream maker and get ready to make some creamy and delicious homemade blueberry ice cream, filled with lots of yummy blueberries!Grab the ol' ice cream maker and get ready to make some creamy and delicious homemade blueberry ice cream, filled with lots of yummy blueberries!
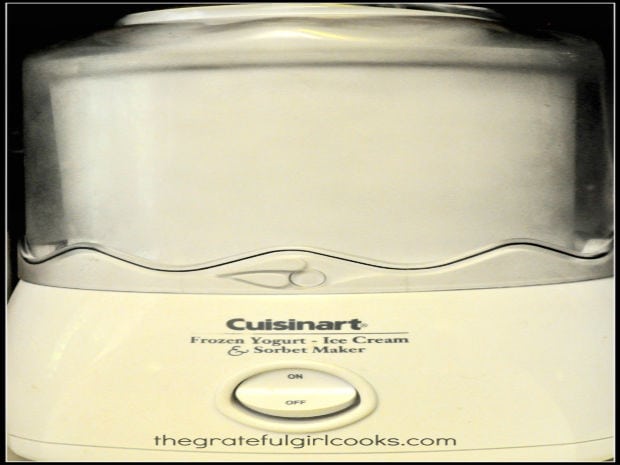
Two years ago I made blueberry ice cream as part of an Ice Cream Experiment, where I made many different varieties of ice cream with my Cuisinart ice cream maker over the course of the summer. 

We really enjoyed this ice cream, and I loved using some of the blueberries I picked at a local U-Pick Farm and had stored in our freezer.

I experimented with grinding frozen blueberries and sugar in my food processor until liquified. This was done, as opposed to the more “traditional” method of cooking them until the blueberries “pop” and make a thick sauce.

My wish was to have little bits of “fresh, uncooked” blueberries throughout the ice cream. It worked!

This was a very easy to prepare ice cream. I also added in a block of cream cheese, to enhance to the flavor and creamy thickness of this delicious ice cream, and I’m very glad I did! Here’s how to make it.

Scroll Down For A Printable Recipe Card At The Bottom Of The Page

Blueberries Ready For The Picking!

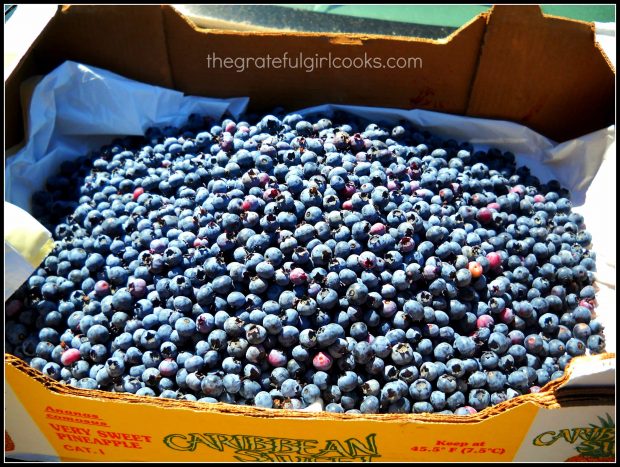
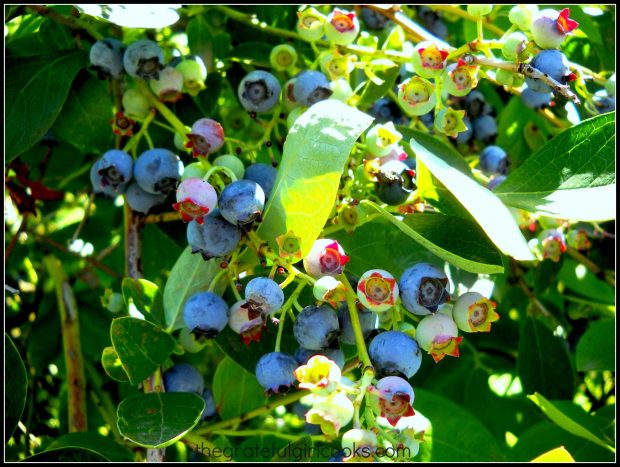
Here are the blueberries at my local U-Pick Farm, in their natural state… before I got to them! Fresh blueberries, ready for the picking!

Blueberries ready to pick to make homemade blueberry ice cream!

Yeehaw! Here are the blueberries after I got to them. Look at all of them! That’s not bad, for 1½  hours of my time at our local U-Pick Farm.

These are the fresh blueberries I picked at a local farm.

I also ended up using some of the blueberry ice cream in another recipe, which we took to a friend’s home. It was a blueberry ice cream tart, and it was so yummy!

Making Blueberry Ice Cream

To make blueberry ice cream, first blend fresh or frozen (not defrosted) blueberries and sugar together in a blender until they become liquified. Cream cheese and vanilla extract are then added to the blueberry mixture, and mixed until combined.

Add milk to the blender and continue blending until incorporated. Pour the ice cream mixture out of the blender and into a large bowl. Whisk heavy whipping cream into it until it is fully combined.

Electric ice cream maker used to make blueberry ice cream.

Freeze the blueberry ice cream in an ice cream maker until firm, according to manufacturer’s instructions, then serve and enjoy!

Time To Enjoy Homemade Blueberry Ice Cream!

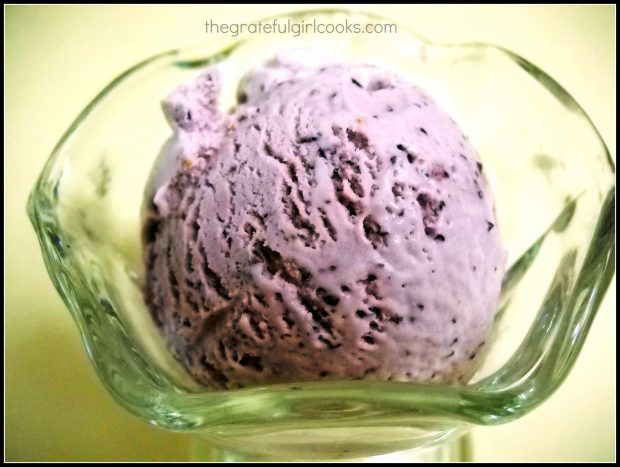
I sure hope you will give this yummy blueberry ice cream a try… and really hope you like it!  The color and flavor of this ice cream is amazing!

One scoop of blueberry ice cream, in a glass dish.

Blueberry ice cream tastes good year round, so I really hope you will try this recipe out! I trust you (and those you love) will really enjoy this dessert, too!

Thanks for stopping by, and I invite you to come back soon for more family-friendly recipes. Take care, may God bless you… and have a wonderful day!

Looking For More ICE CREAM Recipes?

You can find ALL of my recipes in the Recipe Index, located at the top of the page. I have lots of homemade ice cream recipes you may want to check out, including:

Want More Recipes? Get My FREE Newsletter!

I publish a newsletter 2 times per month (1st and 15th) with lots of recipes, tips, etc..
Would you like to join our growing list of subscribers?

There is a Newsletter subscription box on the top right (or bottom) of each blog post, depending on the device you use.
You can submit your e-mail address there, to be added to my mailing list.

Find Me On Social Media:

Facebook page: The Grateful Girl Cooks!
Pinterest:
The Grateful Girl Cooks!
Instagram:
jbatthegratefulgirlcooks

Author's signature

Recipe source: my brain, prior to “brain-freeze” (Ice cream induced!)

↓↓ PRINTABLE RECIPE BELOW ↓↓

0 from 0 votes
Blueberry Ice Cream
Prep Time
25 mins
Cook Time
0 mins
Freezing time
2 hrs
Total Time
2 hrs 25 mins
 

Grab the ol' ice cream maker and get ready to make some creamy and delicious homemade blueberry ice cream, filled with lots of yummy blueberries!

Category: Dessert
Cuisine: American
Keyword: blueberry ice cream
Servings: 8 servings
Calories Per Serving: 258 kcal
Author: JB @ The Grateful Girl Cooks!
Ingredients
  • 2 cups blueberries (fresh or frozen)
  • 1/2 cup granulated sugar
  • 8 oz. cream cheese
  • 1/2 teaspoon vanilla extract
  • 3/4 cup whole milk
  • 3/4 cup heavy whipping cream
  • 3 drops blue food coloring (this is optional...but it does enhance the color)
Instructions
  1. Place the blueberries and granulated sugar into a food processor or heavy duty blender. (If using frozen blueberries, put them in frozen... no need to defrost). Pulse or blend until liquified.
  2. Cut the cream cheese into chunks and add to the blueberry mixture. Add the vanilla extract. Mix until mixture is fairly smooth.
  3. Add milk to mixture. Mix until well blended. Pour mixture into large bowl.
  4. Lightly whisk in the heavy whipping cream, until well combined.
  5. Pour into ice cream maker canister. Freeze according to the manufacturer's instructions. Once done, remove to sealed container, and place in freezer for an hour or two to "ripen" and firm up.
  6. Scoop it up when ice cream is firm... and enjoy!
Nutrition Facts
Blueberry Ice Cream
Amount Per Serving (1 (1/2 cup) serving)
Calories 258 Calories from Fat 162
% Daily Value*
Fat 18g28%
Saturated Fat 11g69%
Cholesterol 64mg21%
Sodium 109mg5%
Potassium 114mg3%
Carbohydrates 20g7%
Sugar 18g20%
Protein 3g6%
Vitamin A 765IU15%
Vitamin C 3.7mg4%
Calcium 70mg7%
Iron 0.2mg1%
* Percent Daily Values are based on a 2000 calorie diet.

Here’s one more to pin on your Pinterest boards!Grab the ol' ice cream maker and get ready to make some creamy and delicious homemade blueberry ice cream, filled with lots of yummy blueberries!


Save

Chocolate Dipped Frozen Banana Bites

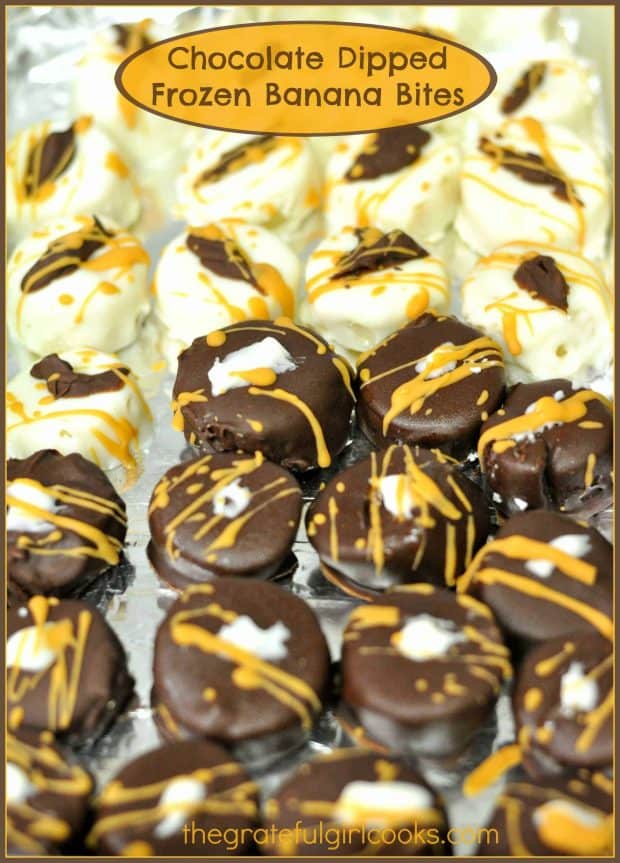
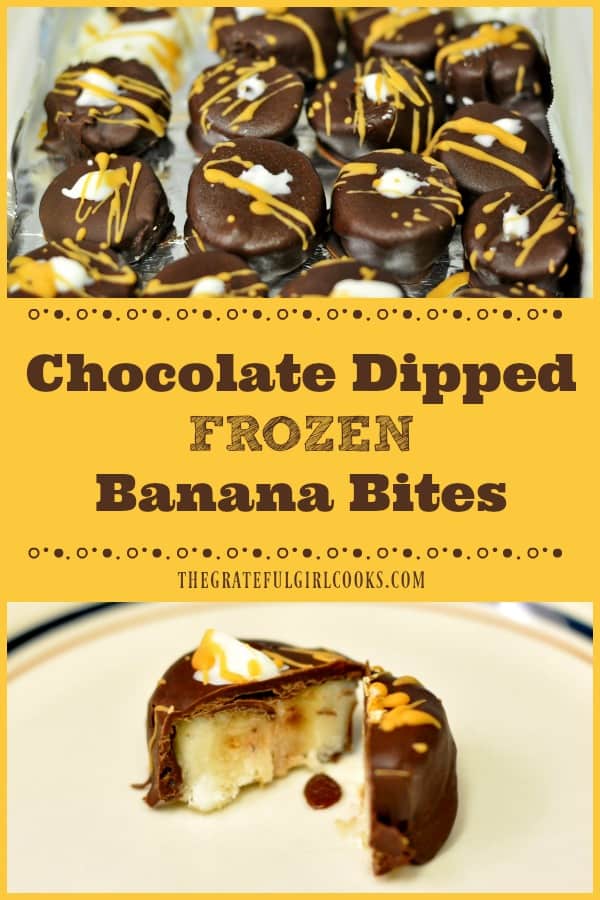
Chocolate dipped frozen banana bites are sure to be a big hit with family or friends! A couple bites will help satisfy any sweet tooth!Frozen banana bites, dipped in chocolate, are sure to be a big hit with family or friends... just a couple pieces will satisfy your sweet tooth!
I love frozen chocolate bananas… and now I love making these chocolate dipped frozen banana bites!  Tiny bites of yumminess, that bring back lots of great memories!

Scroll Down For A Printable Recipe Card At The Bottom Of The Page

Chocolate Covered Frozen Bananas Bring Back Lots Of Memories

When our boys were little, we lived near Newport Beach, CA. We loved taking our boys every couple of weeks to Balboa Island (at Newport Beach) to feed the ducks! Our weekend or early evening walks would take us around the entire waterfront island.

We loved walking with our little boys, enjoying the sunshine AND gawking at the stunning multi-million dollar waterfront homes right next to the sidewalks we walked on. The sidewalks were also right next to the water in the bay! It was our CHEAP form of family entertainment, and our boys LOVED this fun family time!

Our walks around the island took quite a while (especially with two curious little boys AND hungry ducks!), as you can imagine. These family walks would always end up on the main street, which had lots of shops, restaurants, AND take out food stands!

We would end our adventure by purchasing  “Balboa Bars” (chocolate covered vanilla ice cream bars) or Chocolate Covered Frozen Bananas for each of us! My favorite treat was getting a frozen banana, and watching them dip it into a vat of melted chocolate! YUM!

How I Decided To Make This Bite-Size Frozen Treat

I have made frozen slices of bananas as snacks for several years, but decided recently that they would be even more delicious if the bite-sized slices were dipped in chocolate. I mean… who doesn’t enjoy a good chocolate dipped frozen banana at times, so I made some!

There were some semi-sweet and white chocolate chips left over in the pantry from a recent recipe, along with some butterscotch chips. I melted a little bit of EACH variety, and dipped some frozen banana slices into the chocolate to coat them, and then re-froze the banana slices. These chocolate dipped frozen banana bites are the result!

The results were wonderful! Here’s some photos and a few details showing how to make these frozen treats!

How To Make Chocolate Dipped Frozen Banana Bites

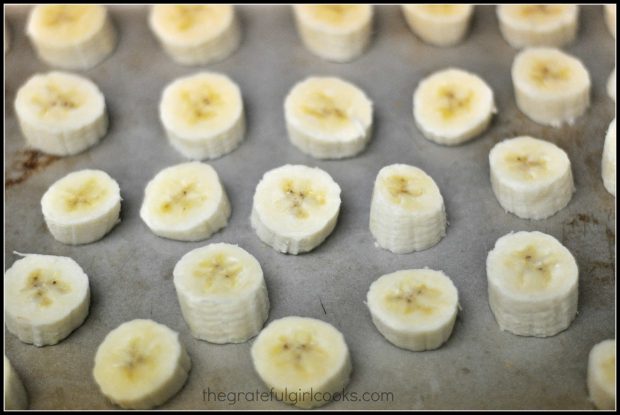
First you will need to slice up several bananas (I used 3). Place the slices in a single layer (not touching) on a large baking tray and freeze for 2 hours.

Sliced frozen bananas on a cookie sheet are ready to make chocolate dipped frozen banana bites.

Dipping the Frozen Banana Bites

Remove the frozen banana slices once solidly frozen. Melt the chocolate chips (whatever kind you like), and then completely coat each of the frozen banana slices.

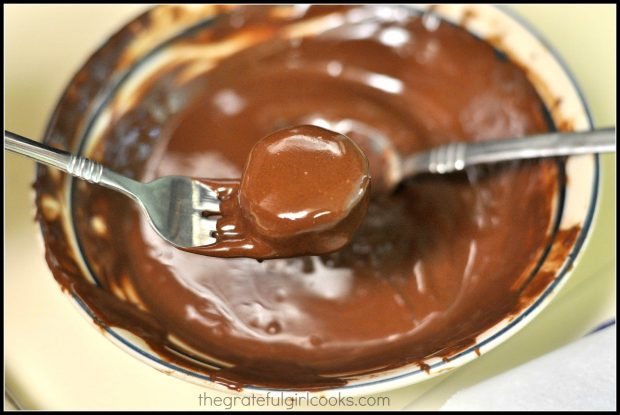
The photo below shows me dipping the frozen banana bites into semi-sweet chocolate. Let the excess chocolate drip back into the bowl after dipping.

Melted semi-sweet chocolate is used to coat a frozen banana bite.

Place the covered frozen banana bites onto a baking sheet lined with wax paper. Refreeze the slices after coating with chocolate.

Decorating Chocolate Dipped Frozen Banana Bites

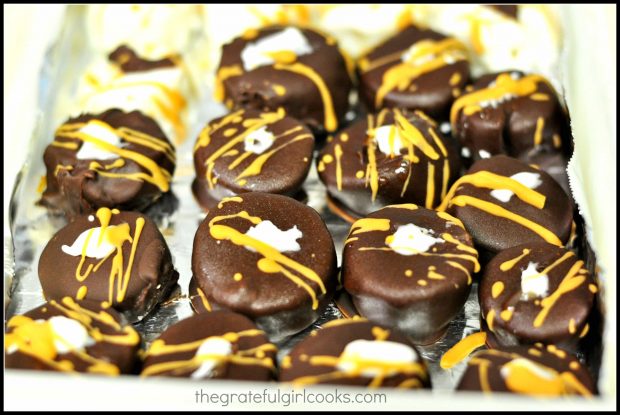
Once solidly frozen, you can decorate the tops of the chocolate dipped frozen banana bites, if desired. Drizzle some melted white chocolate and/or butterscotch chips over each one. Place back into the freezer for a final time. Freeze for a couple hours before serving!

These frozen chocolate covered banana bites are drizzled with melted white chocolate and butterscotch chips.

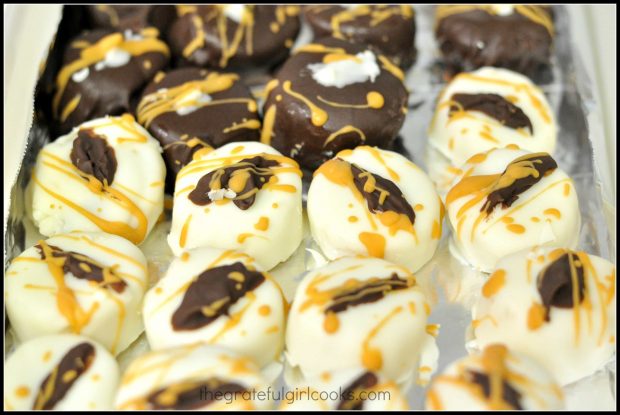
I also coated some of the banana slices in white chocolate, then drizzled melted semi-sweet and butterscotch chips over the tops. Just remember to freeze coated slices for a couple hours before serving!

Frozen banana bites are dipped in semi sweet chocolate or white chocolate.

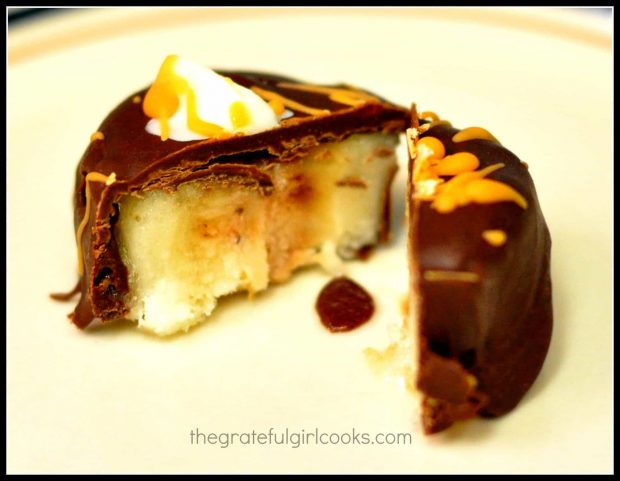
Here’s a closeup picture of one that was cut into, so you could see what the inside looks like… nothing but frozen banana! YUM!

This chocolate dipped frozen banana bite is cut in half, to show inside.

PERFECTION!  The chocolate dipped frozen banana bites are just the right size for a quick bite. Instead of eating an entire chocolate dipped frozen banana, I can eat just a couple slices and be deliriously happy! Hope you’ll give these a try. You (and most kids) will love ’em!

Looking For More Frozen Dessert Treats?

You can find all of my recipes in the Recipe Index, located at the top of the page. I have lots of frozen desserts, including:

Interested In More Recipes?

Thank you for visiting this website. I appreciate you using some of your valuable time to do soIf you’re interested, I publish a newsletter 2 times per month (1st and 15th) with all the latest recipes, and other fun info. I would be honored to have you join our growing list of subscribers, so you never miss a great recipe! 

There is a Newsletter subscription box on the top right side (or bottom) of each blog post, depending on the device you use, where you can easily submit your e-mail address (only) to be included in my mailing list.

You Can Also Find Me On Social Media:

Facebook page: The Grateful Girl Cooks!
Pinterest:
The Grateful Girl Cooks!
Instagram:
jbatthegratefulgirlcooks

Author's signature

Recipe source: My brain.

↓↓ PRINTABLE RECIPE BELOW ↓↓

0 from 0 votes
Chocolate Dipped Frozen Banana Bites
Prep Time
2 hrs
Cook Time
0 mins
Freezing Time (inactive)
2 hrs
Total Time
4 hrs
 

Chocolate dipped frozen banana bites are sure to be a big hit with family or friends! A couple bites will help satisfy any sweet tooth!

Category: Dessert
Cuisine: American
Keyword: chocolate dipped frozen banana
Servings: 15 servings (2 per serving)
Calories Per Serving: 102 kcal
Author: JB @ The Grateful Girl Cooks!
Ingredients
  • 3 medium bananas
  • 1 cup semi-sweet chocolate chips (or chocolate of your choice)
  • 1 heaping teaspoon vegetable shortening
  • Additional melted butterscotch chips or white chocolate chips for garnish (optional)
Instructions
  1. Peel and slice bananas into 1 inch slices. Place slices in a single layer (not touching) on a baking tray, and freeze for 2-3 hours.

  2. In a small microwaveable bowl, put the chocolate chips and vegetable shortening. Microwave on high for 30 seconds. STIR. Melt an additional 30 seconds. Remove chocolate mixture and stir until completely smooth.
  3. Dip each frozen slice of banana into melted chocolate. Remove from chocolate (a fork works well), letting excess chocolate drip back into bowl. Place banana bites onto parchment paper or aluminum foil lined baking sheet to harden. Repeat process with other banana slices. If desired, you can freeze banana bites until hard again, then drizzle with additional melted white chocolate or butterscotch.

  4. Place cookie tray back into freezer. Freeze chocolate dipped banana bites for 2 additional hours or until frozen solid. Once frozen solidly, they are ready to eat! Keep extra frozen banana bites in a sealed container in freezer. Enjoy!

Recipe Notes

No matter what kind of baking chip you use, the ratio is still the same: 1 cup chips to 1 heaping teaspoon vegetable shortening.

Nutrition Facts
Chocolate Dipped Frozen Banana Bites
Amount Per Serving (2 pieces)
Calories 102 Calories from Fat 36
% Daily Value*
Fat 4g6%
Saturated Fat 2g13%
Sodium 12mg1%
Potassium 152mg4%
Carbohydrates 14g5%
Fiber 1g4%
Sugar 9g10%
Vitamin A 20IU0%
Vitamin C 2.1mg3%
Calcium 9mg1%
Iron 0.8mg4%
* Percent Daily Values are based on a 2000 calorie diet.

Here’s one more to pin on your Pinterest boards!Chocolate dipped frozen banana bites are sure to be a big hit with family or friends! A couple bites will help satisfy any sweet tooth!

Save

Save

Save

Save

Save