Category: Desserts

Mom’s Easy Chocolate Cake

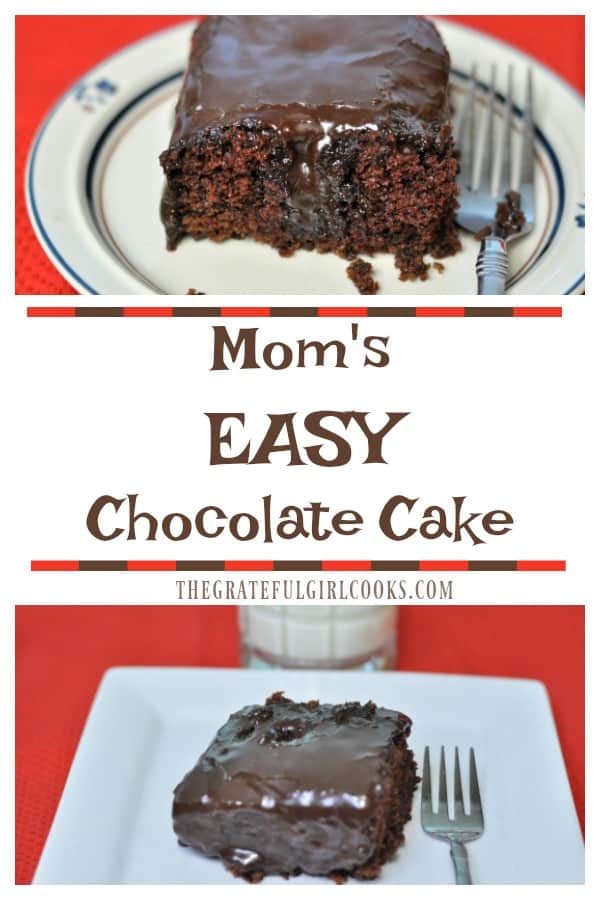
Mom’s EASY Chocolate Cake, with chocolate frosting, is a delicious dessert for the whole family, and can be made from scratch in practically no time at all!Mom's EASY Chocolate Cake, with chocolate frosting, is a delicious dessert for the whole family, and can be made from scratch in practically no time at all!

 Today I want to share with you an old family favorite recipe for Mom’s Easy Chocolate Cake! It is super easy to make, and will be a big hit with everyone who gets to enjoy a piece I have such great memories of having this cake as I was growing up, and I have my sweet Mom to thank for that!

Scroll Down For A Printable Recipe Card At The Bottom Of The Page

Sweet Memories Of This Chocolate Cake

When I was growing up, occasionally my Mom would sneak back into the kitchen after dinner (while we were watching TV or doing homework) and whip up a delicious chocolate cake from scratch for our family of 5 as a surprise.  We LOVED it! Within a few minutes of the cake going into the oven, the smell coming out of our little kitchen would alert us to the surprise treat ahead for us!

What a great memory! We didn’t have a lot of money or a fancy home growing up, but my Mom sure could cook and make wonderful meals with simple items from our pantry.  I am grateful for the inspiration I have received from her, to this very day!

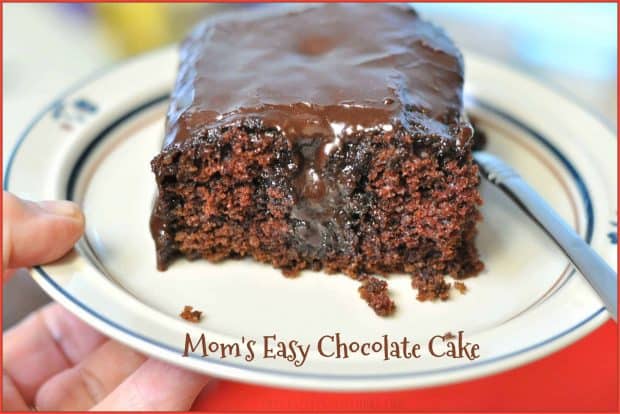
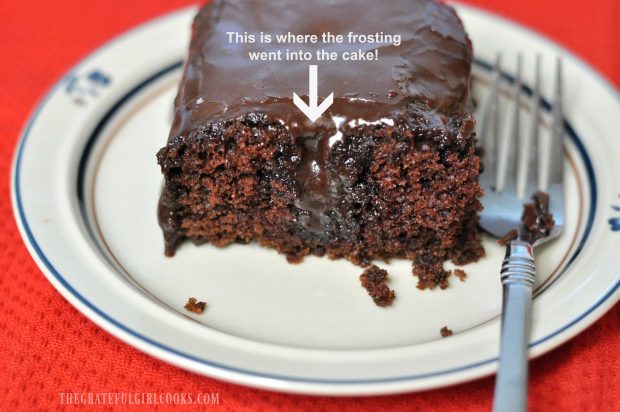
The cake is very simple to make, and so is the easy frosting!  Instead of waiting for the cake to “cool down” after it was finished baking, Mom would poke holes in the cake when it came out of the oven, and pour/spread the creamy chocolate frosting all over the cake. The frosting would drip down into the holes in the cake, so we had small tunnels of chocolate throughout our slices when we would eat it!  Oh boy… this is a GREAT tasting chocolate cake.  Here’s how to make it!

How To Make Mom’s Easy Chocolate Cake Batter

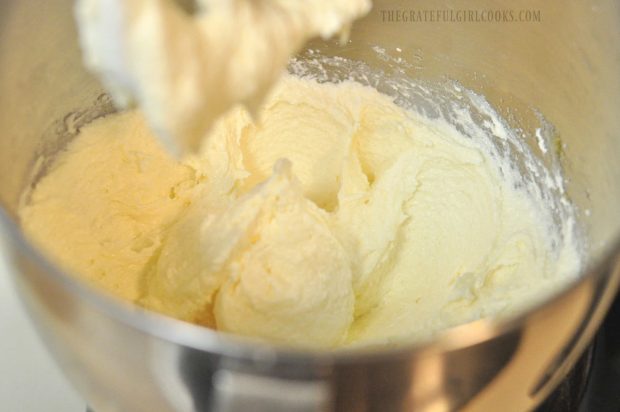
Cream together sugar, vegetable shortening and eggs in a large bowl, using an electric hand mixer or a stand mixer. Beat the ingredients well, for 2-3 minutes.

Sugar, eggs, and shortening mixed together for cake batter

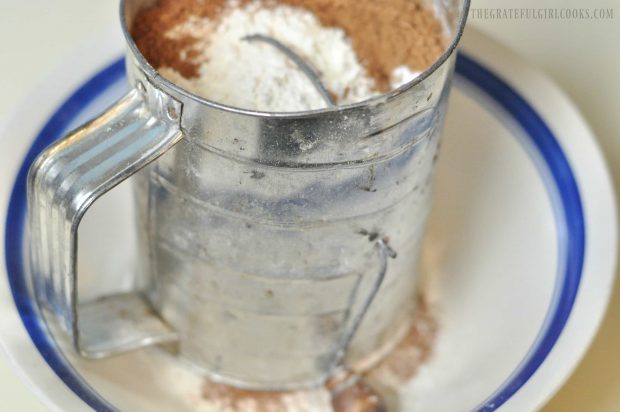
In a separate large bowl, sift together the all purpose flour, cocoa, baking soda and salt.

Flour, cocoa, and other dry ingredients sifted for chocolate cake batter

Add the dry, sifted ingredients to the wet ingredients, along with 1 cup of buttermilk.  Once blended, slowly pour in 3/4 cup of boiling water, and a teaspoon of vanilla extract. Blend on low until batter is fully mixed together.

Time To Bake!

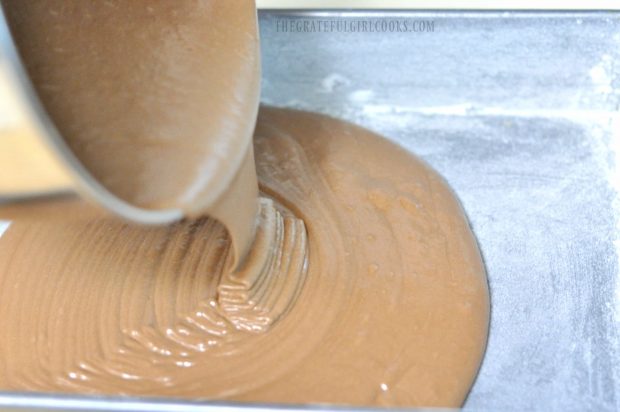
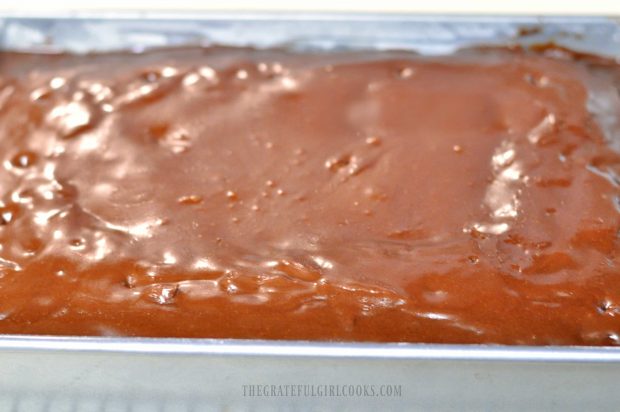
Pour the batter for Mom’s easy chocolate cake into a greased and floured 9×13 baking pan, and distribute the batter evenly. Bake the cake at 350 degrees for 35 minutes, or until a toothpick inserted into middle of cake comes out clean..

Mom's chocolate cake batter poured into pan

Make The Frosting

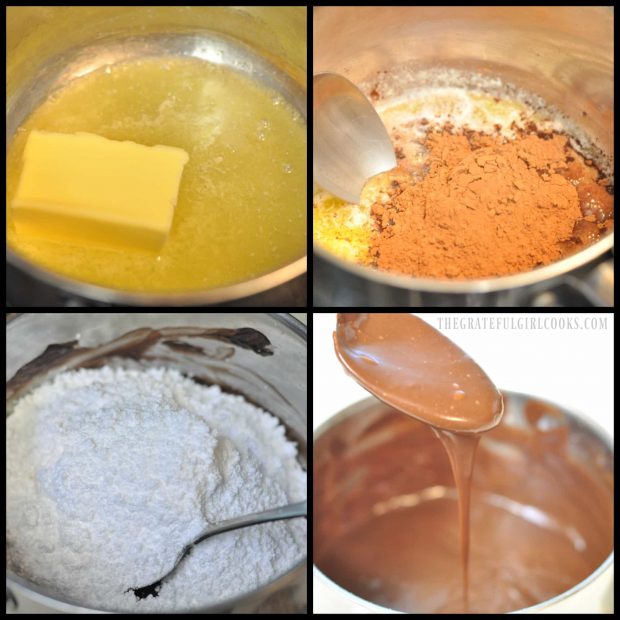
While the cake is baking, make up the frosting. Melt butter in saucepan on low heat.  Add cocoa powder and mix well with a spoon.  Add salt, vanilla, and milk; mix well.  Add the powdered sugar to the frosting ingredients. Mix until the frosting is not too thick, but “pourable”. Add additional milk to thin… or add additional powdered sugar to thicken, as needed.

4 photos showing chocolate frosting for cake being made

Frosting Mom’s Easy Chocolate Cake!

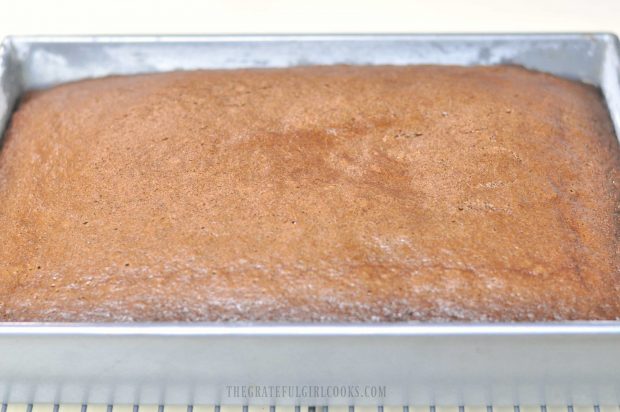
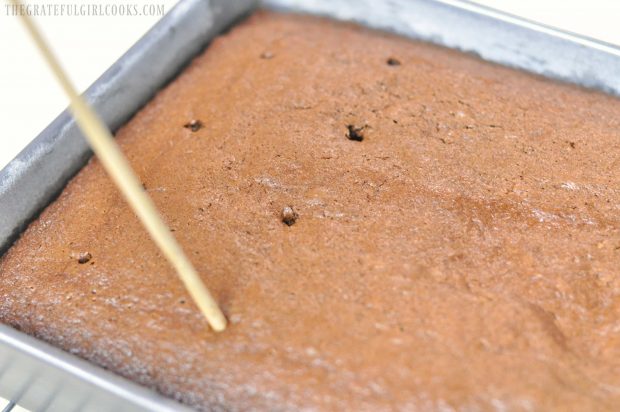
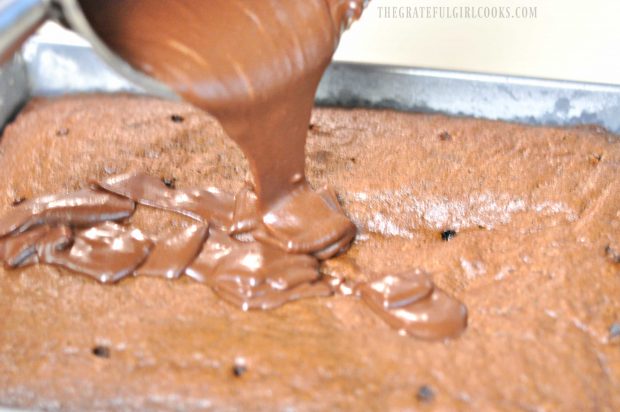
When Mom’s easy chocolate cake is done, remove the pan from the oven, and place pan on a wire rack. Let the cake rest for 2-3 minutes, then poke holes all over surface of cake every couple inches (I use a chopstick!).  Pour the chocolate frosting over the surface of Mom’s easy chocolate cake, and spread it out, to cover.Baked chocolate cake, in pan on wire rack, cooling down

Holes poked into cake once baked

Chocolate frosting poured over baked cake
When finished, Mom’s easy chocolate cake should look like this.  The frosting will be fairly “fluid” since the cake is still hot. Continue to spread the warm frosting over the holes as they “re-appear”. As the frosting oozes down into the cake, the holes on top surface will open up again.

Mom's easy cake is baked then frosted with chocolate icing

Time To EAT!

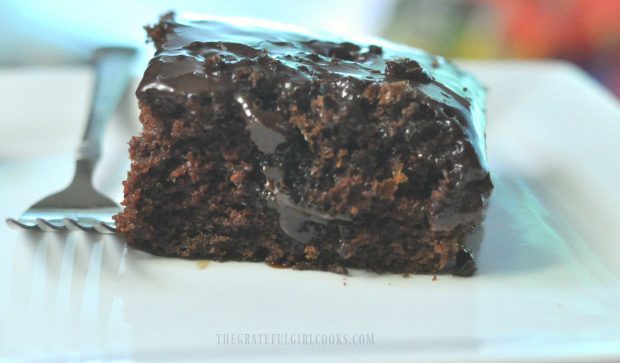
Let the frosting firm up and the cake cool down!  Once Mom’s easy chocolate cake is at room temperature, you can slice and serve it up!  It’s as simple as that! By the way, in the picture below the frosting looks darker than in previous photo. Don’t know what’s up with that- it IS the very same cake!.

Piece of Mom's chocolate cake on white plate with forkPiece of chocolate cake with frosting dripping through the middle

I have such vivid memories of enjoying Mom’s easy chocolate cake from my childhood. That MUST be where I got my love of cake from, right?  Ha Ha! Hope you will give this easy, simple and delicious recipe a try!  The chocolate cake and creamy chocolate frosting taste fantastic!  Thanks, Mom!

Looking For More CAKE Recipes?

You can find all of my recipes in the Recipe Index, located at the top of the page. My cake recipes are all delicious, and include:

Interested In More Recipes?

Thank you for visiting this website. I appreciate you using some of your valuable time to do soIf you’re interested, I publish a newsletter 2 times per month (1st and 15th) with all the latest recipes, and other fun info. I would be honored to have you join our growing list of subscribers, so you never miss a great recipe!
There is a Newsletter subscription box on the top right side (or bottom) of each blog post, depending on the device you use, where you can easily submit your e-mail address (only) to be included in my mailing list.

You Can Also Find Me On Social Media:

Facebook page: The Grateful Girl Cooks!
Pinterest:
The Grateful Girl Cooks!
Instagram:
jbatthegratefulgirlcooks

Author's signatureRecipe Source: My Mom

0 from 0 votes
Mom's Easy Chocolate Cake
Prep Time
10 mins
Cook Time
35 mins
Total Time
45 mins
 
Mom's EASY Chocolate Cake, with chocolate frosting, is a delicious dessert for the whole family, and can be made from scratch in practically no time at all!
Category: Dessert
Cuisine: American
Keyword: Mom's easy chocolate cake
Servings: 16 servings (9x13 cake)
Calories Per Serving: 363 kcal
Author: JB @ The Grateful Girl Cooks!
Ingredients
For Cake:
  • 2 cups granulated sugar
  • 2 eggs
  • 3/4 cup vegetable shortening
  • cups all purpose flour
  • 1/2 cup unsweetened cocoa powder
  • 2 teaspoons baking soda
  • 1/2 teaspoon salt
  • 1 cup buttermilk
  • 3/4 cup boiling water
  • 1 teaspoon vanilla
For Chocolate Frosting:
  • 3/4 cube butter
  • 4 Tablespoons unsweetened cocoa powder
  • Dash of salt
  • 1 teaspoon vanilla extract
  • 12 ounces powdered sugar (about 3/4 of a one pound box)
  • 1/4 to 1/2 cup milk (enough to make frosting pourable, but not too thin)
Instructions
  1. Preheat oven to 350 degrees. Lightly grease and flour a 9x13 cake pan.
  2. Cream together sugar, vegetable shortening and eggs, using an electric hand mixer or stand mixer. Beat well for 2-3 minutes.
  3. In a separate large bowl, sift together flour, cocoa, baking soda and salt. Add dry, sifted ingredients to the wet ingredients, along with 1 cup of buttermilk, and mix well on LOW speed.
  4. Once blended, slowly pour in 3/4 cup of boiling water, and a teaspoon of vanilla extract. Blend on low until batter is fully mixed together. Pour batter into a greased and floured 9x13 baking pan, and distribute batter evenly.
  5. Bake at 350 degrees for 35 minutes, or until toothpick inserted into middle of cake comes out clean.
To Make Frosting:
  1. While cake is baking, make frosting. Melt butter in saucepan on low heat. Add cocoa powder and mix well with a spoon. Add salt, vanilla, and milk; mix well. Add powdered sugar. Mix until frosting is not too thick, but "pourable". Add additional milk to thin... add additional powdered sugar to thicken, as needed.
  2. When cake is done, remove from oven. Let rest for 2-3 minutes, then poke holes over surface of cake every couple inches (I use a chopstick!). Pour frosting over surface of cake, and spread to cover. Let cake cool to room temperature, then slice and serve!
Nutrition Facts
Mom's Easy Chocolate Cake
Amount Per Serving (1 piece (1/16th))
Calories 363 Calories from Fat 99
% Daily Value*
Fat 11g17%
Saturated Fat 3g19%
Cholesterol 22mg7%
Sodium 238mg10%
Potassium 108mg3%
Carbohydrates 64g21%
Fiber 1g4%
Sugar 46g51%
Protein 3g6%
Vitamin A 55IU1%
Calcium 28mg3%
Iron 1.6mg9%
* Percent Daily Values are based on a 2000 calorie diet.

Here’s one more to pin on your Pinterest boards!Mom's EASY Chocolate Cake, with chocolate frosting, is a delicious dessert for the whole family, and can be made from scratch in practically no time at all!


Save

Save

Save

Save

Save

Save

Save

Save

Save

Save

Save

Save

Save

Save

Save

Save

Giant Chocolate Chip Cookie Pizza

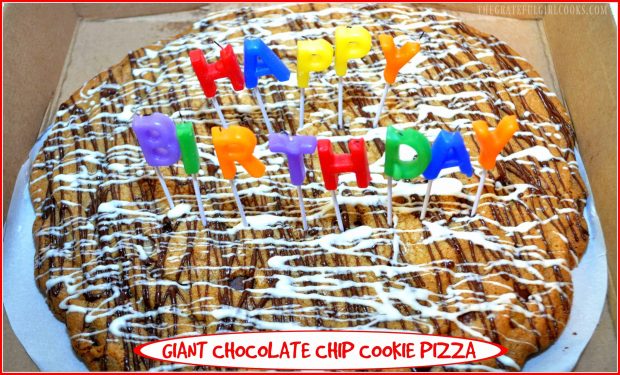
Make a delicious, GIANT chocolate chip cookie pizza as a sweet, unique gift for a birthday or other occasion! Recipe serves 12!Make a delicious, GIANT chocolate chip cookie pizza as a sweet, unique gift for a birthday or other occasion! Recipe serves 12!
Wouldn’t it be fun to receive an absolutely delicious Giant Chocolate Chip Cookie Pizza for a birthday surprise? Sometimes I think it’s even more fun to GIVE one as a birthday surprise!

Scroll Down For A Printable Recipe Card At The Bottom Of The Page

Make A Giant Chocolate Chip Cookie Pizza As A Gift!

I made the giant cookie pizza, pictured above, as a birthday gift for a friend. The chocolate chip cookie pizza was placed inside a pizza box, and hand delivered right to her front doorstep. There was no tipping of the delivery driver necessary!  What a fun way to honor them in a unique way on their special day.

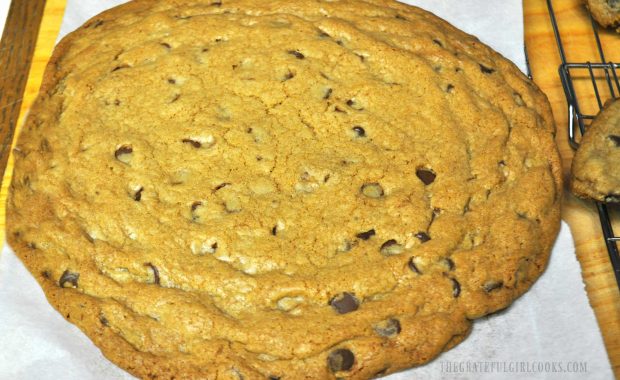
Giant cookie pizza, out of oven, and ready to be decorated!

This Chocolate Chip Cookie Pizza Is HUGE

The cookie itself is very easy to make, and it is BIG! This cookie is baked on a traditional 12 inch round pizza pan. It is a big dessert, which can be cut into 12 individual servings.

Once baked and cooled, the cookie is drizzled decoratively with semi-sweet chocolate and white chocolate for a finishing touch. Once the chocolate icing has firmed up, the cookie is ready to be served (or boxed up for delivery).

Fire Up The Birthday Candles!

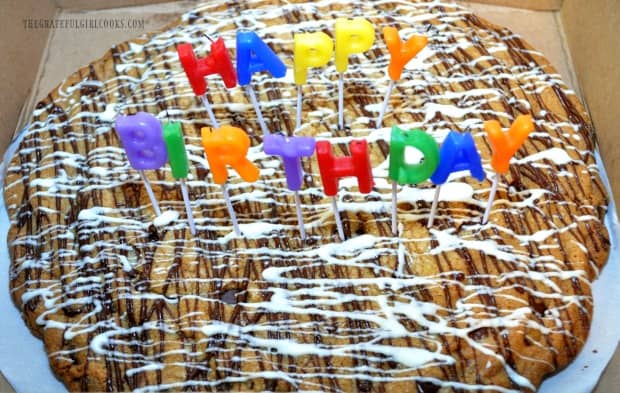
Add some little birthday candles once the pizza box is opened, to make it an extra special birthday gift! This treat is so easy, and once delivered in a pizza box, it becomes a unique treat for a special friend or family member. 

The cookie can be sliced into 12 pie shaped wedges with a pizza cutter. Just remember… if your friend decides to eat the WHOLE cookie themselves, they’re going to need a HUGE glass of milk!

The chocolate chip cookie pizza, decorated with chocolate icing, and birthday candles!

Hope you try this recipe for this delicious, giant chocolate chip cookie pizza. It’s a fun and creative way to make a dessert cookie that actually serves 12 people!  Make it a special occasion to remember! By the way – if you enjoy BIG cookies, be sure to check out my recipe for Giant Sugar Cookies! Have a GREAT day!

Looking For More COOKIE Recipes?

You can find all of my recipes in the Recipe Index, located at the top of the page. I have some delicious cookie recipes you might enjoy, including:

Interested In More Recipes?

Thank you for visiting this website. I appreciate you using some of your valuable time to do soIf you’re interested, I publish a newsletter 2 times per month (1st and 15th) with all the latest recipes, and other fun info. I would be honored to have you join our growing list of subscribers, so you never miss a great recipe!
There is a Newsletter subscription box on the top right side (or bottom) of each blog post, depending on the device you use, where you can easily submit your e-mail address (only) to be included in my mailing list.

You Can Also Find Me On Social Media:
Facebook page: The Grateful Girl Cooks!
Pinterest: The Grateful Girl Cooks!
Instagram: jbatthegratefulgirlcooks

Have a FANTASTIC day!

Author's signature

Recipe Adapted From: http://sallysbakingaddiction.com/2016/06/27/chocolate-chip-cookie-pizza/

0 from 0 votes
Giant Chocolate Chip Cookie Pizza
Prep Time
10 mins
Cook Time
25 mins
Total Time
35 mins
 
Make a delicious, GIANT chocolate chip cookie pizza as a sweet, unique gift for a birthday or other occasion! Recipe serves 12!
Category: Dessert
Cuisine: American
Keyword: chocolate chip cookie pizza
Servings: 12 servings
Calories Per Serving: 454 kcal
Author: JB @ The Grateful Girl Cooks!
Ingredients
For Cookie Dough
  • 2 cups all purpose flour
  • 2 teaspoons cornstarch
  • 1 teaspoon baking soda
  • 1/2 teaspoon salt
  • 3/4 cup butter , room temp (1½ cubes)
  • 3/4 cup brown sugar , firmly packed (light or dark brown sugar is okay)
  • 1/4 cup granulated sugar
  • 1 large egg
  • 2 teaspoons vanilla extract
  • cups semi-sweet chocolate chips
For Decorative Drizzle:
  • 1/2 cup semi-sweet chocolate chips
  • 2 teaspoons vegetable shortening , divided (1 for semi-sweet, 1 for white chocolate)
  • 1/2 cup white chocolate chips
Instructions
To Make Cookie:
  1. Preheat your oven to 350 degrees F. Lightly coat a pizza pan with non-stick cooking spray.
  2. In medium bowl, mix flour, cornstarch, baking soda and salt together. Set bowl aside.
  3. Cream butter, brown sugar, and granulated sugar together on medium speed until well combined (about 2 minutes). Add egg; beat for 1 minute on high. Add vanilla extract, and beat well to combine.
  4. Add the flour mixture to the wet ingredients. Slowly mix on low until they are fully combined. Stir in the chocolate chips.
  5. Place the dough onto prepared pizza pan. Use a rubber spatula or your clean fingers to spread and flatten out the thick dough until the dough just about reaches the edges of pan.
  6. Bake cookie for 22-25 minutes. When done, the cookie should be lightly browned on top. If you want crispy edges on the cookie, let it bake a couple minutes longer. When done, remove pan to a wire rack and let cookie cool (still on the pan).
To Make Decorative Drizzle:
  1. Place semi-sweet chocolate chips and white chocolate chips in two separate bowls. Add 1 teaspoon vegetable shortening to each bowl. Microwave each on high for 30 seconds. Stir until smooth. If necessary, heat additional 15 seconds, then stir, until smooth. Do not over cook as the chocolate can burn. Drizzle the chocolate over the cooled cookie in a decorative pattern. Let chocolate firm up on pizza before wrapping as a gift or slicing. For packaging, place cookie on parchment paper (cut to fit) and place cookie "pizza" inside a clean pizza box.
Recipe Notes

Dough can be prepared ahead of time. Prepare dough as directed. Wrap dough in plastic wrap then cover with foil. May be stored 3 days in fridge or up to 3 months in freezer. If freezing, thaw dough in fridge before placing/spreading onto pizza pan.

Nutrition Facts
Giant Chocolate Chip Cookie Pizza
Amount Per Serving (1 slice)
Calories 454 Calories from Fat 225
% Daily Value*
Fat 25g38%
Saturated Fat 14g88%
Cholesterol 47mg16%
Sodium 308mg13%
Potassium 219mg6%
Carbohydrates 52g17%
Fiber 2g8%
Sugar 31g34%
Protein 4g8%
Vitamin A 385IU8%
Calcium 51mg5%
Iron 2.8mg16%
* Percent Daily Values are based on a 2000 calorie diet.

Here’s one more to pin on your Pinterest boards!Make a delicious, GIANT chocolate chip cookie pizza as a sweet, unique gift for a birthday or other occasion! Recipe serves 12!


Save

Save

Save

Save

Save

Save

Save

Save
Save

Save

Save

Save

Save

Save

Save

Save

Save

Butterscotch Chip Cookies

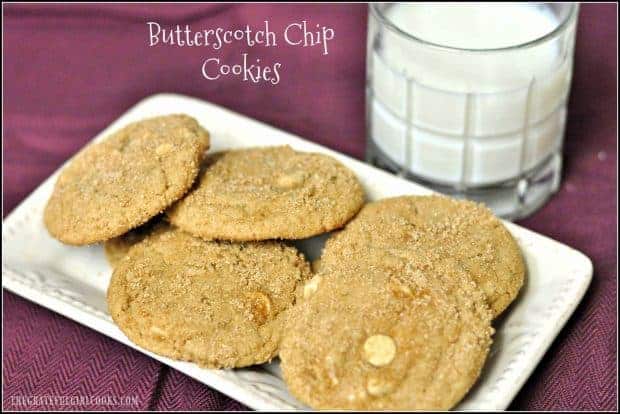
Your family will LOVE these crispy, chewy, easy to make, flavor-filled Butterscotch Chip Cookies for dessert or snack time!Your family will LOVE these crispy, chewy, easy to make, flavor-filled Butterscotch Chip Cookies for dessert or snack time!
I recently experimented with a cookie recipe I found on Pinterest many months ago. These Butterscotch Chip Cookies were wonderful!  The use of browned butter and butterscotch chips in the recipe add even more unique flavor to these chewy, crispy, fabulous tasting treats!

These delicious butterscotch chip cookies were so EASY to make, and they truly have a wonderful butterscotch flavor!  The recipe makes about 4½ dozen small cookies, but (as you will be able to see from my photos) I made them slightly larger than original recipe instructed, so my net yield was 28 cookies. Whether you choose to prepare large or small cookies, here’s how to make them:

Scroll Down For A Printable Recipe Card At The Bottom Of The Page

How To Make Butterscotch Chip Cookies

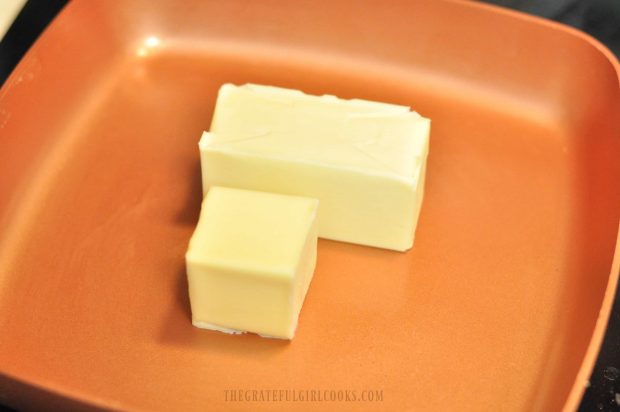
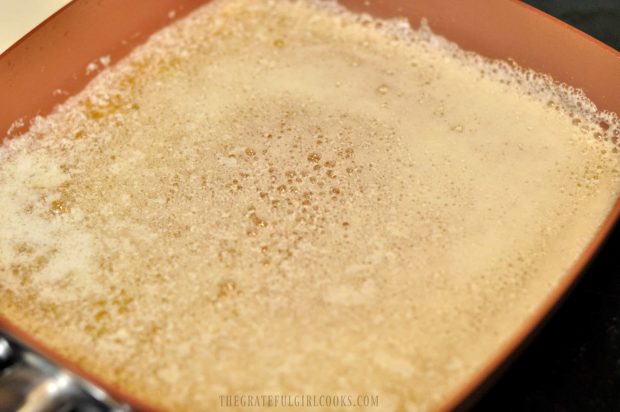
Begin by browning the butter. To do this, place 1½ cubes of butter in a skillet. Melt butter using medium heat, until the butter melts, begins to bubble, froths up, then slightly browns (don’t let butter get too brown… just barely!). Once done, remove skillet from heat.

One and a half cubes of butter in a copper skillet

Melted butter for cookie dough in copper skillet

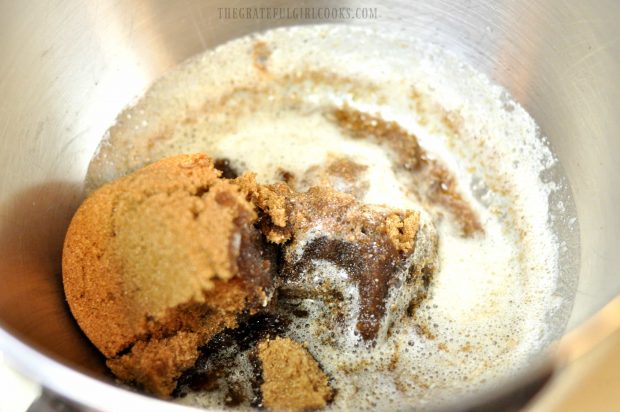
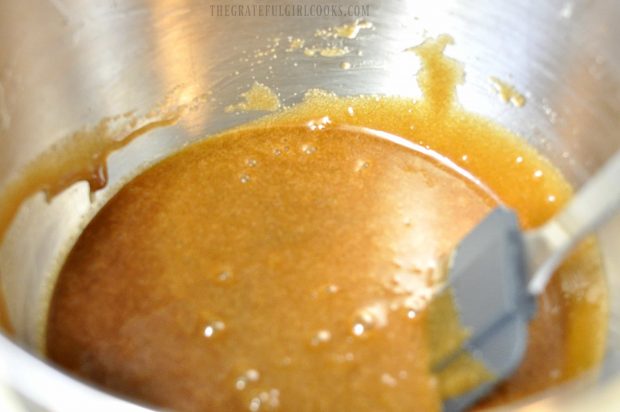
Add browned butter and brown sugar to a large mixer bowl. Beat these together on medium speed. Once mixed, let mixture sit for a couple minutes, stirring occasionally to let the mixture cool down a bit before adding other ingredients.

You don’t want the mixture hot when you add eggs or they could begin to scramble. Definitely… you really DON’T want that to happen! Once the mixture has cooled down a bit, add salt, eggs, and vanilla extract.  Mix well.

Melted butter, brown sugar in metal mixing bowl

Eggs, vanilla, butter mixture in metal bowl with spatula

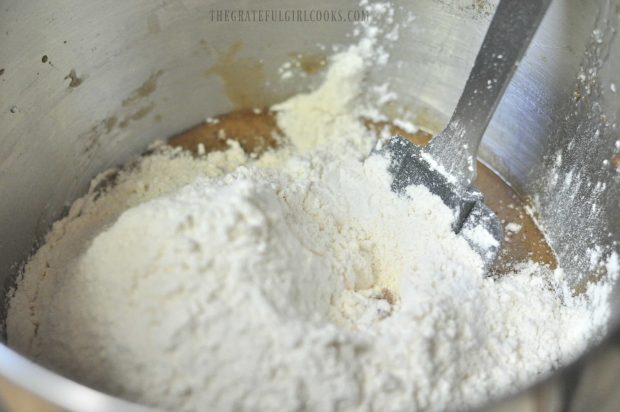
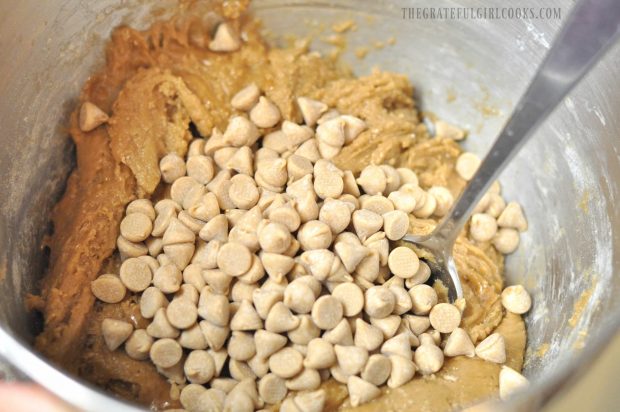
After this, STIR in the flour, baking powder, and baking soda. Once mixed, add butterscotch chips and stir well to combine. Set aside.

Flour, salt, etc. for cookie dough added to mixing bowl

Butterscotch chips added to cookie dough

Roll The Cookie Dough Into Round Balls

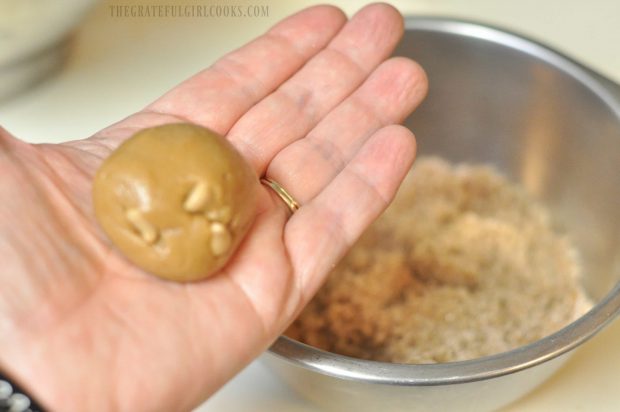
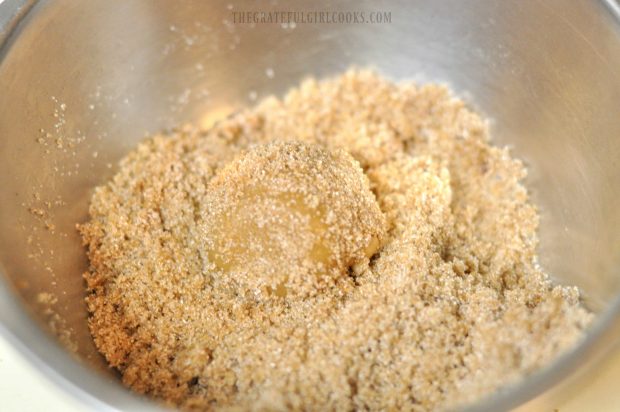
In a separate small bowl, mix together brown sugar and granulated sugar, for topping.  Use a 1 Tablespoon sized scoop to scoop dough from bowl and roll dough between your clean hands to form a ball.

*Note: This is where I used a slightly larger scoop to make cookies larger. Process is still the same, though. Once dough is a ball, place it in brown sugar/granulated sugar topping. Roll dough around to cover completely with sugar topping.

Cookie dough rolled into ball

Cookie dough ball rolled in brown sugar mixture

Bake The Butterscotch Chip Cookies

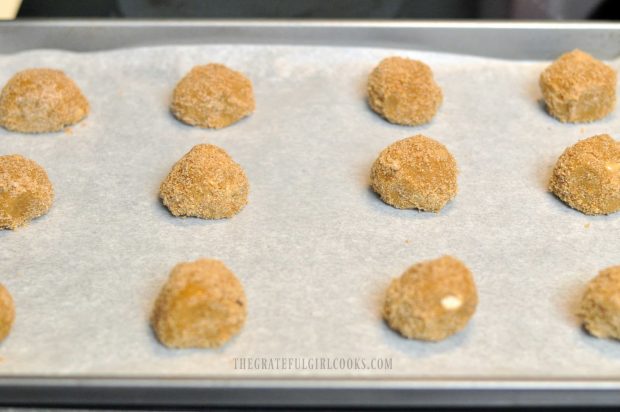
Place topping covered balls of dough onto a parchment paper lined baking sheet. Keep the dough balls about 2 inches apart, as they spread a bit while baking. Bake butterscotch chip cookies in a 375 degree oven for 10 minutes.

Cookie dough balls on parchment paper lined baking sheet

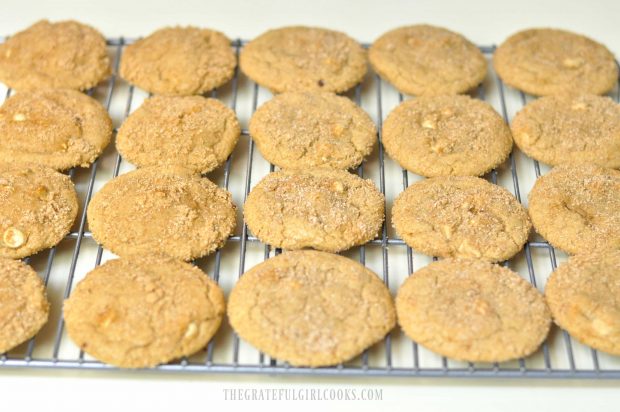
When done, remove the baking sheet from the oven. Let the cookies rest for about a minute on baking sheet, then carefully remove them with a spatula to a wire rack, to finish cooling.

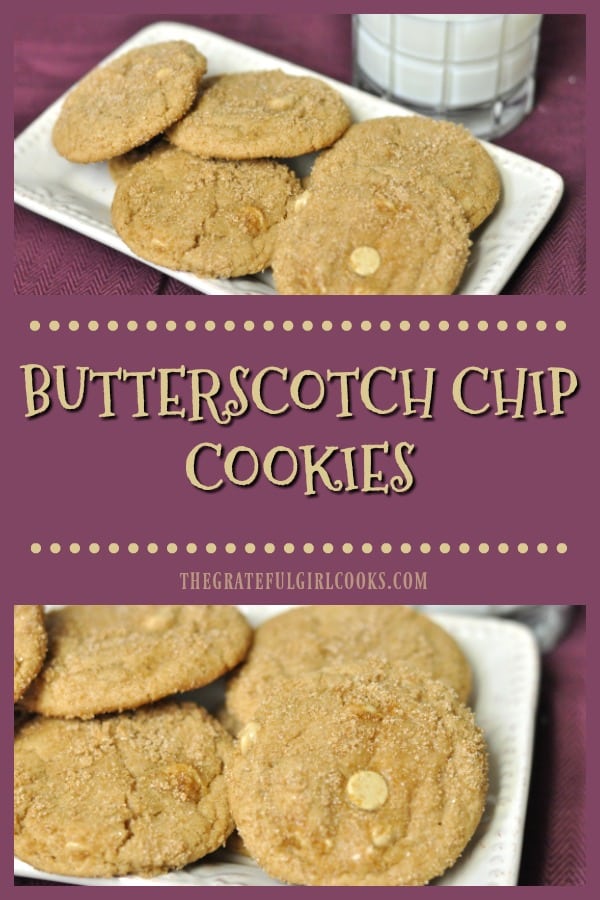
Baked butterscotch cookies, cooling on wire rackOnce cookies have cooled, they are good to go!  Enjoy the slight crunch on the outside!  I think they’re at their best once they have completely cooled (I know it’s hard to wait, but trust me on this!).

Once cooled, pile some on a plate, pour yourself a big old glass of milk… and dig in! They’re delicious!

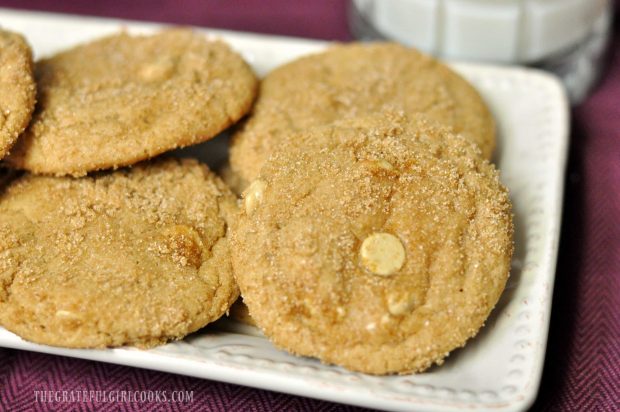
Close up of butterscotch cookies on white platter

I hope you enjoy these wonderful cookies! My husband was unexpectedly rushed to the ER and hospitalized earlier this week, and making these butterscotch chip cookies ( a few for us, and the rest for friends) helped take my mind off of everything. He is doing okay now, and we are very grateful to God for his recovery and the additional medical care he is receiving.

Have a blessed day. Be kind.

Looking For More COOKIE Recipes?
You can find ALL of my cookie recipes in the Recipe Index, which is located at the top of the page. I have LOTS of scrumptious cookies for you to enjoy, including:

Interested In More Recipes?
Thank you for visiting this website. I appreciate you using some of your valuable time to do soIf you’re interested, I publish a newsletter 2 times per month (1st and 15th) with all the latest recipes, and other fun info. I would be honored to have you join our growing list of subscribers, so you never miss a great recipe!
There is a Newsletter subscription box on the top right side (or bottom) of each blog post, depending on the device you use, where you can easily submit your e-mail address (only) to be included in my mailing list.

You Can Also Find Me On Social Media:

Facebook page: The Grateful Girl Cooks!
Pinterest:
The Grateful Girl Cooks!
Instagram:
jbatthegratefulgirlcooks

Author's signature

Recipe Adapted From: http://www.shugarysweets.com/2011/09/butterscotch-cookies

0 from 0 votes
Butterscotch Chip Cookies
Prep Time
15 mins
Cook Time
10 mins
Total Time
25 mins
 

Easy to make and delicious to eat, these crispy chewy cookies feature browned butter and butterscotch chips for GREAT flavor!

Category: Cookies
Cuisine: American
Keyword: butterscotch chip cookies
Servings: 54 cookies (total 4.5 dozen)
Calories Per Serving: 91 kcal
Author: JB @ The Grateful Girl Cooks!
Ingredients
For cookie dough:
  • 3/4 cup cubes butter (12 Tablespoons)
  • cups brown sugar
  • ½ teaspoon salt
  • 2 eggs
  • 1 teaspoon vanilla extract
  • cups all purpose flour
  • 1 teaspoon baking powder
  • ½ teaspoon baking soda
  • 1 cup butterscotch chips
For topping:
  • 1/4 cup brown sugar
  • 2 Tablespoons granulated sugar
Instructions
  1. Place 1½ cubes of butter in a skillet. Melt butter on medium heat, until butter melts, begins to bubble, froths up, then slightly browns. Once done, remove skillet from heat.
  2. Add browned butter and brown sugar to large mixer bowl. Beat together on medium speed. Once mixed, let mixture sit for a couple minutes, stirring occasionally to let mixture cool down slightly, before adding other ingredients.
  3. Once cooled down a bit, add salt, eggs, and vanilla extract. Mix well.
  4. STIR in flour, baking powder, and baking soda. Once mixed, add butterscotch chips; stir well to combine. Set aside.
  5. In a separate small bowl, mix brown sugar and granulated sugar for topping. Use a 1 Tablespoon sized scoop to scoop dough from bowl and roll dough between your clean hands to form a ball. (*Note: This is where I used a slightly larger scoop to make cookies larger. Process is still the same, though). Once dough is a ball, place it in brown sugar/granulated sugar topping. Roll dough around to cover completely with sugar topping.
  6. Place dough balls onto parchment paper lined baking sheets. Keep dough balls about 2 inches apart, as they spread a bit while baking. Bake cookies in a 375 degree oven for 10 minutes.
  7. Remove baking sheet from oven; let cookies cool for a minute, then remove cookies to a wire rack to cool completely. Enjoy!
Nutrition Facts
Butterscotch Chip Cookies
Amount Per Serving (1 cookie)
Calories 91 Calories from Fat 18
% Daily Value*
Fat 2g3%
Saturated Fat 1g6%
Cholesterol 13mg4%
Sodium 71mg3%
Potassium 27mg1%
Carbohydrates 15g5%
Sugar 10g11%
Vitamin A 90IU2%
Calcium 13mg1%
Iron 0.4mg2%
* Percent Daily Values are based on a 2000 calorie diet.

Here’s one more to pin on your Pinterest boards!Your family will LOVE these crispy, chewy, easy to make, flavor-filled Butterscotch Chip Cookies for dessert or snack time!


Save

Save

Save

Save

Save

Save

Save

Save

Save

Save

Save

Save

Save

Save

Save

Save

Save

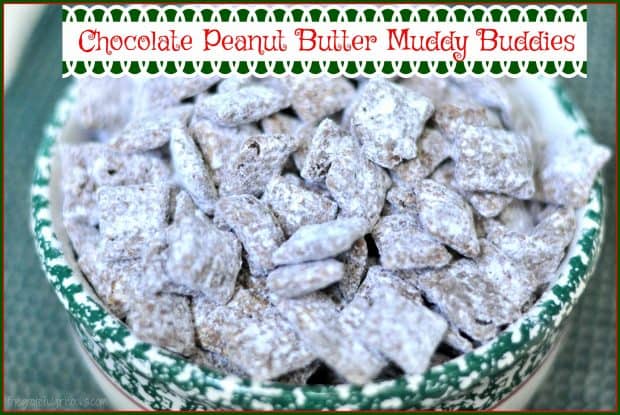
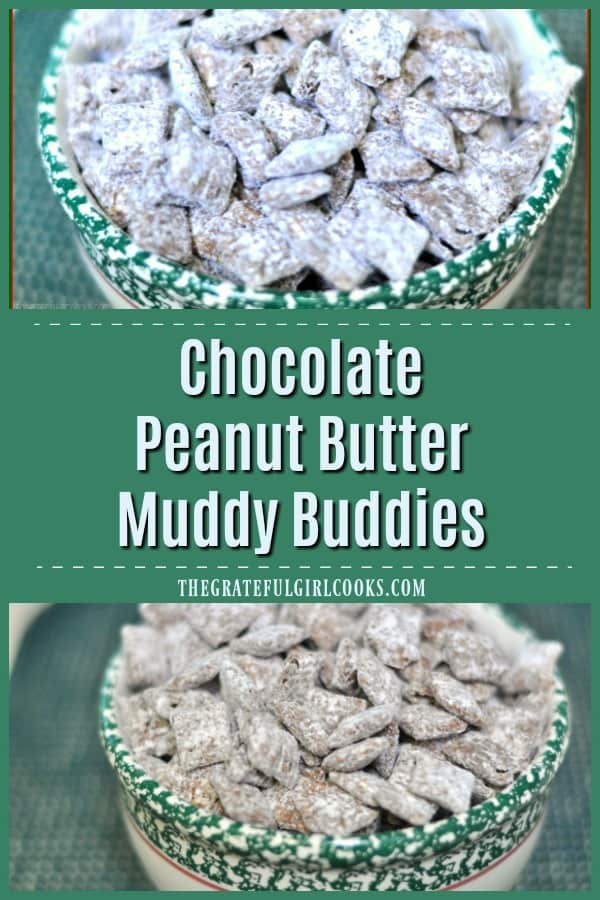
Chocolate Peanut Butter Muddy Buddies

Chocolate Peanut Butter Muddy Buddies are powdered sugar dusted chocolate peanut butter crispy treats you will love! They’re yummy snacks or holiday gifts!Chocolate Peanut Butter Muddy Buddies are powdered sugar dusted chocolate peanut butter crispy treats you will love! They're yummy snacks or holiday gifts!
Chocolate Peanut Butter Muddy Buddies are a fun little snack during the holidays… or anytime, for that matter. Perfect for snacking OR giving to friends as a food gift… they are sure to make someone smile!

I love these decadent little snacks… with a crunch and the taste of chocolate and peanut butter, they are perfect for serving at a party, or sitting in front of the TV watching a football game!  Best part… they are so easy to make!

Scroll Down For A Printable Recipe Card At The Bottom Of The Page

How To Make Chocolate Peanut Butter Muddy Buddies

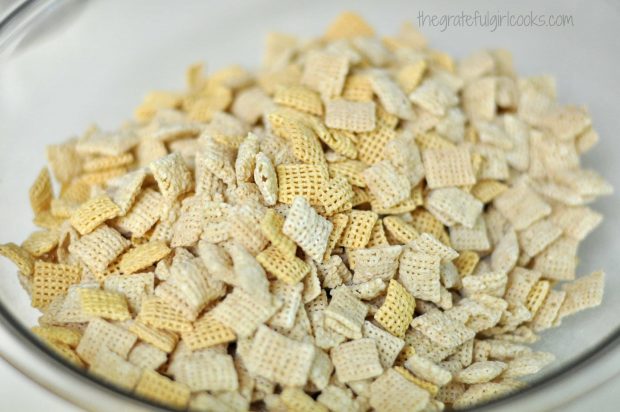
Measure out the Chex cereal into a LARGE bowl. I used corn and rice for this recipe.

The different crispy cereals for muddy buddies are placed into a large bowl.

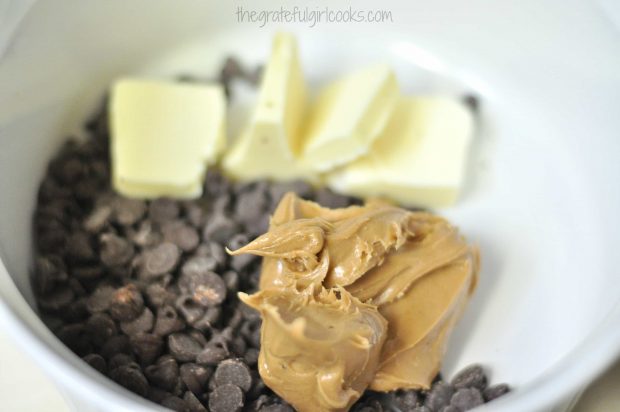
Melt chocolate chips, peanut butter and butter in a microwavable bowl on High for 1 minute. Remove and stir until creamy smooth. If necessary, microwave an additional 15 seconds, then stir until smooth. Do NOT overcook or chocolate will burn.

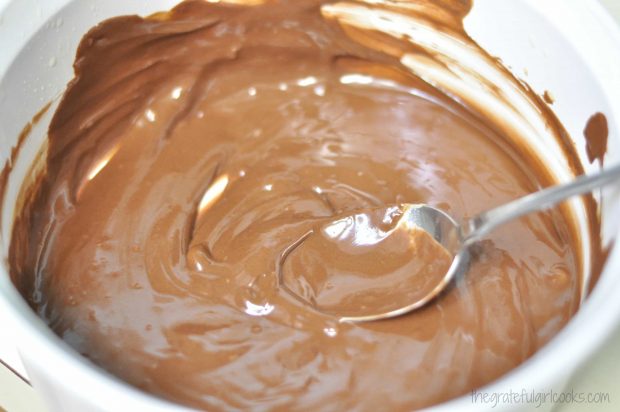
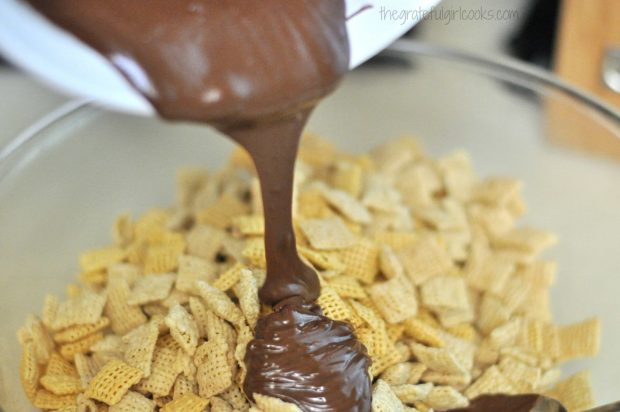
Mine was smooth after first minute of cooking and stirring well.  Once totally smooth, add the vanilla extract. Stir.  Pour the chocolate mixture over the cereal. Stir well, to fully coat all the cereal.

Chocolate, peanut butter and butter are placed in bowl in microwave to melt.

Chocolate Peanut Butter Muddy Buddies mixture is melted and ready to add to cereal.

Chocolate Peanut Butter Muddy Buddies sauce is poured over crispy cereal.

Time To Coat The Muddy Buddies

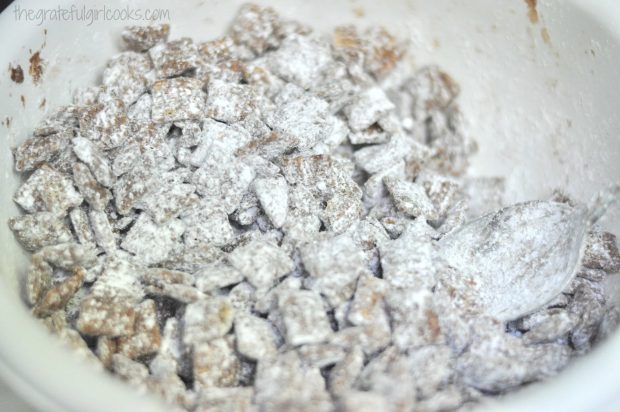
Once all cereal has been coated with chocolate, place HALF the mixture into a separate clean LARGE bowl.  Add HALF the powdered sugar, and stir to fully coat. When done, remove the chocolate peanut butter muddy buddies to wax paper. Repeat this process with the other half of the cereal and powdered sugar.

Chocolate Peanut Butter Muddy Buddies are coated with powdered sugar in bowl.

Let The Chocolate Peanut Butter Muddy Buddies Cool

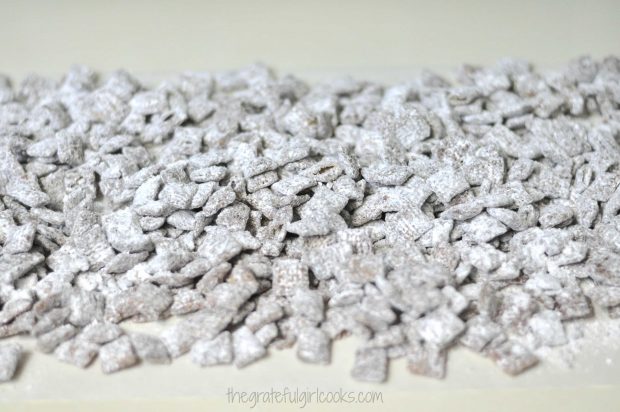
Spread the chocolate peanut butter muddy buddies out on wax paper and let them cool completely, before serving.

Chocolate Peanut Butter Muddy Buddies are laid on wax paper, to dry.

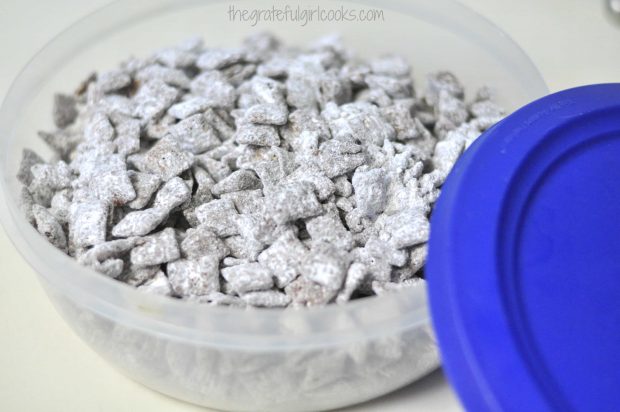
Store the Muddy Buddies in an airtight covered container in refrigerator for up to 2 weeks.  Try to stay out of them, cause they are ADDICTING! It’s also fun to divide the mix up into fancy covered containers or jars and give this simple gift to friends over the holidays.

Chocolate Peanut Butter Muddy Buddies should be stored in airtight container.

If you’re looking for another recipe using Chex cereal I hope you will check out my Chex Mix Munchies!  They are another great snack, made in the microwave!

Have a wonderful day! I sincerely hope you can find time during this busy time of year to quietly reflect on the true meaning of Christmas. You are deeply loved by the One who created you, and sent His only Son to earth that first Christmas to draw us all back to Him.

Looking For More Snack Recipes?
You can find all of my recipes in the Recipe Index, located at the top of the page. I have some wonderful snack recipes you might enjoy, including:

Interested In More Recipes?

Thank you for visiting this website. I appreciate you using some of your valuable time to do soIf you’re interested, I publish a newsletter 2 times per month (1st and 15th) with all the latest recipes, and other fun info. I would be honored to have you join our growing list of subscribers, so you never miss a great recipe!
There is a Newsletter subscription box on the top right side (or bottom) of each blog post, depending on the device you use, where you can easily submit your e-mail address (only) to be included in my mailing list.

You Can Also Find Me On Social Media:
Facebook page: The Grateful Girl Cooks!
Pinterest: The Grateful Girl Cooks!
Instagram: jbatthegratefulgirlcooks

Author's signature

Recipe Adapted From: The cookbook titled : “Betty Crocker Christmas Cookbook”, Page 278, Wiley Publishing, Inc., Copyright 2010, General Mills.

0 from 0 votes
Chocolate Peanut Butter Muddy Buddies
Prep Time
10 mins
Cook Time
0 mins
Total Time
10 mins
 
Chocolate Peanut Butter Muddy Buddies are powdered sugar dusted chocolate peanut butter crispy treats you will love! They're yummy snacks or holiday gifts!
Category: Snack
Cuisine: American
Keyword: muddy buddies
Servings: 36 (approx. 9 cups total)
Calories Per Serving: 134 kcal
Author: JB @ The Grateful Girl Cooks!
Ingredients
  • 9 cups Chex cereal (any variety- I used half corn and half rice)
  • 1 cup semi-sweet chocolate chips
  • 1/2 cup peanut butter
  • 1/4 cup butter
  • 1 teaspoon vanilla extract
  • 1 1/2 cups powdered sugar
Instructions
  1. Place the cereal into a large bowl. Set the bowl aside.
  2. Place the chocolate chips, peanut butter and butter into a microwaveable bowl. Cook this uncovered on the HIGH setting for 1 minute. Remove from microwave, and stir well. It is ready when all ingredients become smooth. If necessary, place back in microwave for15 additional seconds, then stir again until mixture is smooth.
  3. Stir vanilla extract into melted chocolate peanut butter mixture. Pour this mixture over the cereal. Stir well, until all is coated with chocolate. Once coated, pour HALF the cereal into a separate large clean bowl. Add HALF the powdered sugar. Stir well, until completely coated.
  4. Remove powdered sugar coated cereal to wax paper. Repeat process with other half of cereal and powdered sugar. Spread finished cereal on wax paper, until cool. This is the method I used.
  5. (Note: If desired, you can place all the cereal and powdered sugar in a 2 gallon plastic storage bag, and shake until covered).
  6. Store muddy buddies in a sealed, airtight container in refrigerator for up to 2 weeks
Nutrition Facts
Chocolate Peanut Butter Muddy Buddies
Amount Per Serving (1 (1/4 cup serving))
Calories 134 Calories from Fat 45
% Daily Value*
Fat 5g8%
Saturated Fat 2g13%
Cholesterol 3mg1%
Sodium 116mg5%
Potassium 108mg3%
Carbohydrates 21g7%
Fiber 2g8%
Sugar 8g9%
Protein 2g4%
Vitamin A 205IU4%
Vitamin C 2mg2%
Calcium 38mg4%
Iron 5.1mg28%
* Percent Daily Values are based on a 2000 calorie diet.

Here’s one more to pin on your Pinterest boards!Chocolate Peanut Butter Muddy Buddies are powdered sugar dusted chocolate peanut butter crispy treats you will love! They're yummy snacks or holiday gifts!


Save

Save

Save

Save

Save

Save

Save

Save

Save

Save

Save

Save

Save

Save

Save

Save

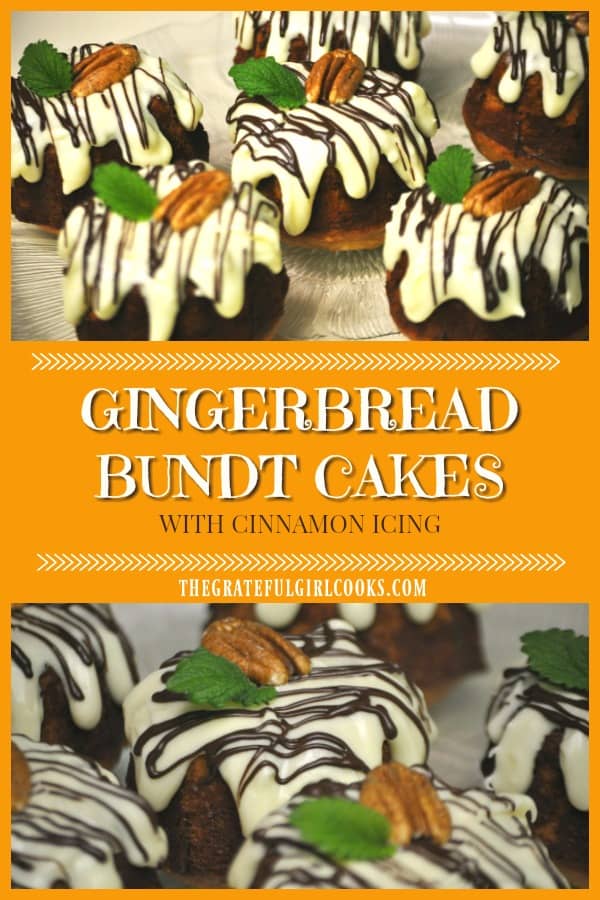
Gingerbread Bundt Cakes With Cinnamon Icing

Miniature gingerbread bundt cakes with cinnamon icing are delicious, and make a wonderful gift to give friends and family during the holidays!Miniature gingerbread bundt cakes with cinnamon icing are delicious, and make a wonderful gift to give friends and family during the holidays!
Do you enjoy gingerbread?  I sure do. The warm flavors of the spices has always been a favorite of mine. There is quite a bit of history behind this beloved cake. You can read all about gingerbread here.

A few years ago I enjoyed making miniature Gingerbread Cakes With Cinnamon Icing to give to our neighbors and friends. Using a miniature bundt pan (preferably a 12 cup pan), I was able to make two dozen of these delicious food gifts to give away!

Scroll Down For A Printable Recipe Card At The Bottom Of The Page

How Many Gingerbread Bundt Cakes Will This Recipe Make?

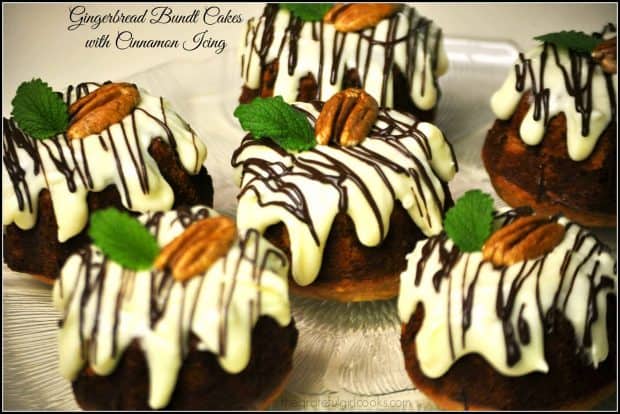
The recipe is simple to prepare, and as written, makes approximately 24 cute, mini bundt cakes.  Each individual sized gingerbread-flavored cake is covered with a delicious creamy Cinnamon icing (or glaze), then drizzled with chocolate to “fancy” them up.

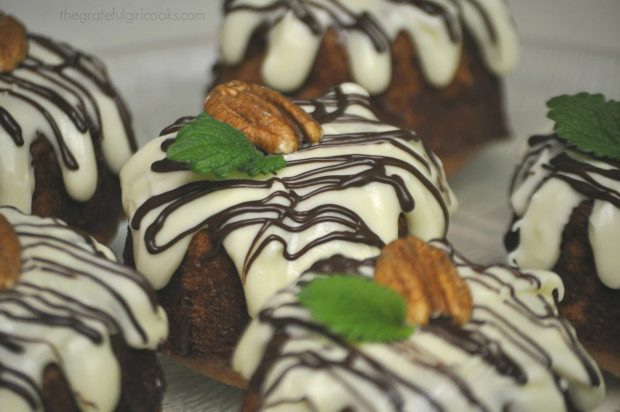
The gingerbread bundt cakes are then garnished with a pecan and a mint sprig. When I made these, I doubled the amount of cinnamon icing. With double the amount of cinnamon icing, it covered more of the top of each cake.

Gingerbread bundt cakes are frosted, then garnished with a pecan and a fresh mint sprig.

Another Way To Serve These Gingerbread Bundt Cakes

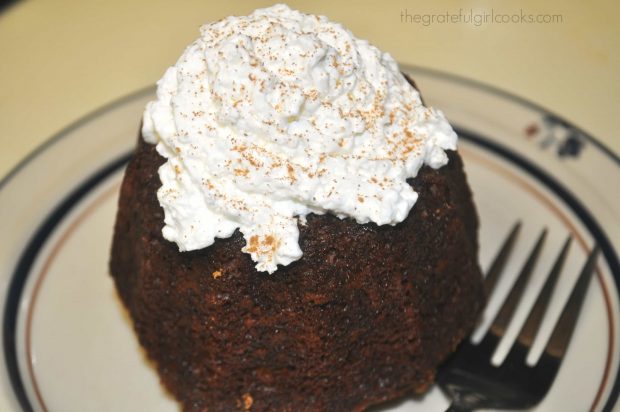
Another option for serving these yummy treats is to leave the cinnamon icing off of the finished cakes. When ready to serve, cover the tops of each cake with whipped cream and a light dusting of cinnamon. The gingerbread bundt cakes are delicious served this way, as well.

Gingerbread bundt cakes can also be topped with whipped cream, sprinkled with cinnamon.

Great For Gift-Giving!

It was fun to wrap up each individual mini cake (the ones with the cinnamon icing) and decorate them with pretty seasonal Fall leaves and ribbons. Gingerbread bundt cakes are also a wonderful Christmas gift for friends who enjoy food! They are a nice homemade gift to share (from our kitchen) with our friends and neighbors.

If you enjoy giving food gifts like gingerbread bundt cakes to family and friends, be sure to check out my recipes for Spiced Tea Mix, Old-Fashioned Fudge, and Chocolate Dipped Shortbread Cookies.  These, along with other recipes for holiday goodies are available in my Recipe Index, at the top of each blog post.

The little gingerbread bundt cakes taste wonderful… they are LOADED with flavor!  Sure hope you will consider making these little edible gifts for those you love!  They would be a perfect food gift for the holidays!

Looking for More GINGERBREAD-INSPIRED Recipes?

You can find all of my recipes in the Recipe Index, located at the top of the page. I have several delicious, gingerbread-inspired recipes you might enjoy, including:

Interested In More Recipes?

Thank you for visiting this website. I appreciate you using some of your valuable time to do soIf you’re interested, I publish a newsletter 2 times per month (1st and 15th) with all the latest recipes, and other fun info. I would be honored to have you join our growing list of subscribers, so you never miss a great recipe!
There is a Newsletter subscription box on the top right side (or bottom) of each blog post, depending on the device you use, where you can easily submit your e-mail address (only) to be included in my mailing list.

You Can Also Find Me On Social Media:

Facebook page: The Grateful Girl Cooks!
Pinterest:
The Grateful Girl Cooks!
Instagram:
jbatthegratefulgirlcooks

Gingerbread Bundt Cakes With Cinnamon Icing / The Grateful Girl Cooks!

Recipe Adapted From:  http://thesepeasarehollow.blogspot.com/2010/10/gingerbread-bundts.html

0 from 0 votes
Gingerbread Bundt Cakes With Cinnamon Icing
Prep Time
15 mins
Cook Time
30 mins
Total Time
45 mins
 

Miniature gingerbread bundt cakes with cinnamon icing are delicious, and make a wonderful gift to give friends and family during the holidays!

Category: Dessert
Cuisine: American
Keyword: gingerbread bundt cakes
Servings: 24 mini cakes
Calories Per Serving: 216 kcal
Author: JB @ The Grateful Girl Cooks!
Ingredients
For Gingerbread Cakes:
  • 2 ¼ cups all purpose flour
  • ½ teaspoon baking soda
  • ½ salt
  • ½ teaspoon allspice
  • ½ teaspoon ground cloves
  • ½ teaspoon nutmeg
  • 1 teaspoon cocoa powder
  • 1 teaspoon ground cinnamon
  • 2 teaspoons ground ginger
  • 1 cube unsalted butter (melted, then brought to room temp.)
  • ¾ cup dark molasses
  • ¾ cup granulated sugar
  • 1 egg (large)
  • ½ cup buttermilk
  • ½ cup milk
For Cinnamon Glaze:
  • 2 cups powdered sugar
  • 6-8 Tablespoons milk (depends on how thick or thin you want icing!)
  • ½ teaspoon ground cinnamon
  • (OPTIONAL) Melted chocolate for drizzle, whole pecans and/or mint sprigs for garnish
Instructions
  1. Preheat oven to 350 degrees F. Grease and flour the miniature bundt pan cups.
  2. Place flour, baking soda, salt, allspice, cloves, nutmeg, cocoa powder, cinnamon and ginger in a medium sized bowl. Whisk together until combined.
  3. Using an electric mixer or a stand mixer, combine molasses, granulated sugar and melted (but at room temperature) butter until blended well. Add the egg to this mixture, and continue beating until ingredients are completely combined.
  4. Slowly pour in the buttermilk, followed by the milk, beating slowly as you add, until ingredients are combined. Add the dry ingredients from the medium bowl (flour, spices, etc.) in small increments to the wet ingredients in mixing bowl, beating well after each addition. Be sure to scrape down the sides of bowl as you go. Stop mixing when ingredients have all been added and are just incorporated into batter.
  5. Pour or spoon batter into each prepared bundt pan cup, filling each to 3/4 of the way full. Smooth the top of the batter. Bake at 350 degrees, with the pan on the middle rack of oven, for approx. 30 minutes, OR until a toothpick that is inserted into the middle of the cake comes out clean. Remove pan to a wire rack. Let cakes cool for 15-20 minutes, then remove cakes from pan to wire rack.
  6. To prepare icing: Place the powdered sugar, cinnamon and milk in medium sized bowl. Mix well with a fork until smooth. Too thin? Add powdered sugar. Too thick? Add milk. Pour or spread icing over tops of each cooled cake. Let icing firm up before serving.
  7. If desired, drizzle melted chocolate over each cake. Garnish with a whole pecan or walnut, then add a sprig of mint for a festive garnish. Let chocolate firm up before serving or wrapping. Enjoy!
Nutrition Facts
Gingerbread Bundt Cakes With Cinnamon Icing
Amount Per Serving (1 g)
Calories 216 Calories from Fat 72
% Daily Value*
Fat 8g12%
Saturated Fat 5g31%
Cholesterol 28mg9%
Sodium 40mg2%
Potassium 192mg5%
Carbohydrates 34g11%
Sugar 24g27%
Protein 1g2%
Vitamin A 270IU5%
Calcium 43mg4%
Iron 1.1mg6%
* Percent Daily Values are based on a 2000 calorie diet.

Here’s one more to pin on your Pinterest boards!Miniature gingerbread bundt cakes with cinnamon icing are delicious, and make a wonderful gift to give friends and family during the holidays!


Save

Save

Save

Save

Save

Save

Save

Save

Save

Save

Save

Save

Save

Save

Save

Save

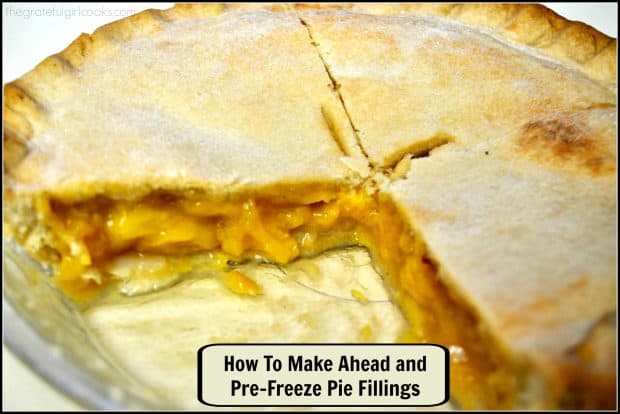
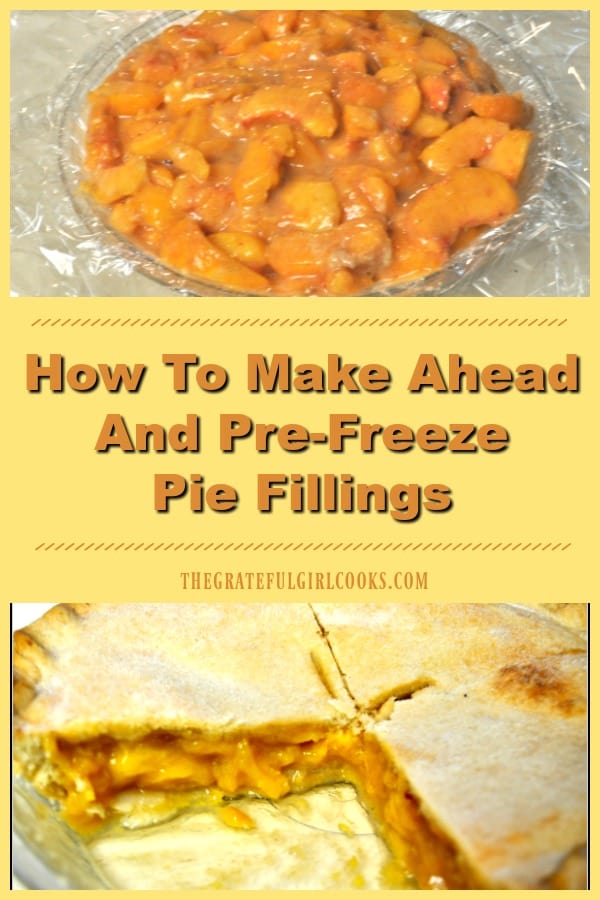
How To Make Ahead and Pre-Freeze Pie Fillings

Learn how to make and pre-freeze pie fillings for your favorite fruit pie with this easy tutorial. This is a great way to save time making pies!Learn how to make and pre-freeze pie fillings for your favorite fruit pie with this easy tutorial. This is a great way to save time making pies!
I am grateful I was shown how to make ahead and pre-freeze pie fillings. Have you ever done this before? If you haven’t… it’s a real time saver, especially if you have lots of fruit pies to prepare!

Having the filling already made for a pie or two and frozen is very convenient! Not too great if you are trying to watch your calories, but handy, nonetheless!

How To Pre-Freeze Pie Fillings

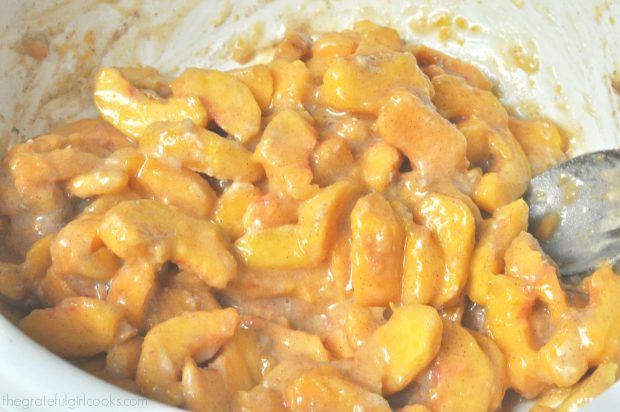
This tip works on just about all fruit pies. To pre-freeze pie fillings, begin by making a fruit pie filling according to your recipe’s instructions. Here is a photo of peach pie filling, for example.

Filling for fruit pies is made up according to your own recipe.

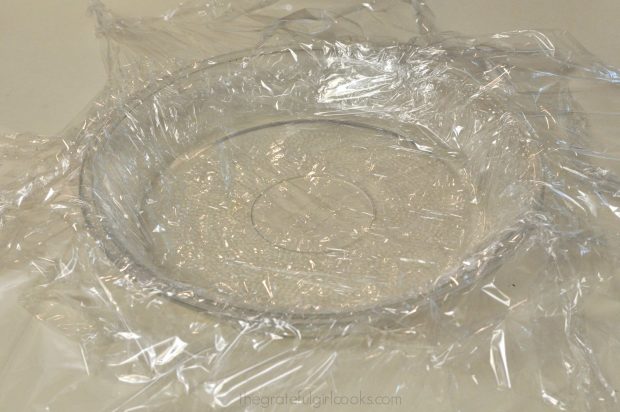
Cover a standard sized pie dish with several layers of plastic wrap, making sure to let the edges extend about 4-5 inches over the rim of the pie plate on all sides.

A standard pie dish is completely covered with plastic wrap.

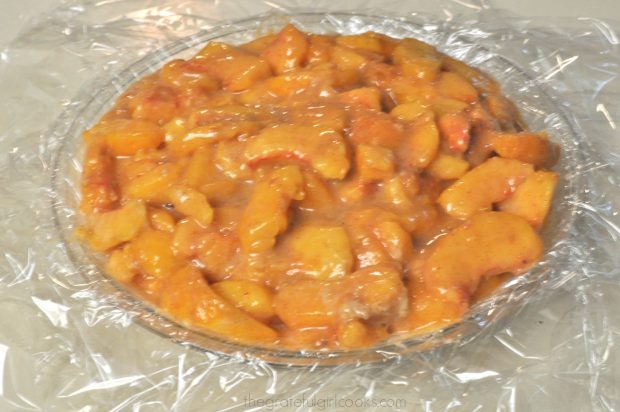
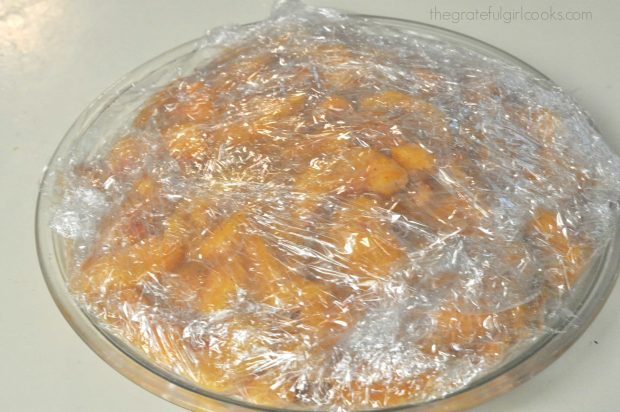
Pour the pie filling into the prepared pie dish, and evenly distribute ingredients.  Bring in all the sides of the plastic wrap, to completely cover the pie filling.

All of the prepared filling for one pie is then added to dish.

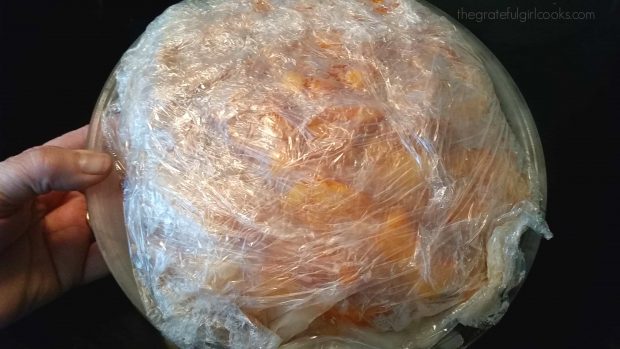
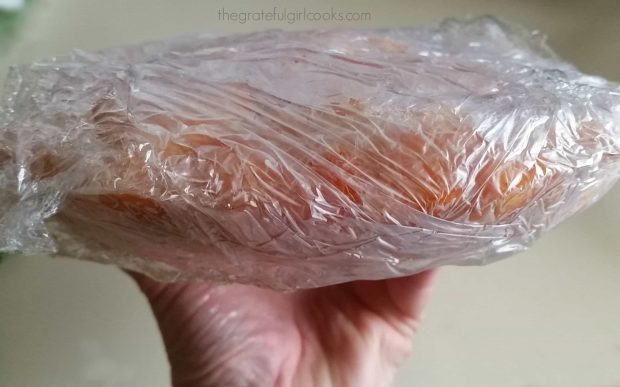
Tightly seal the pie filling with the plastic wrap.

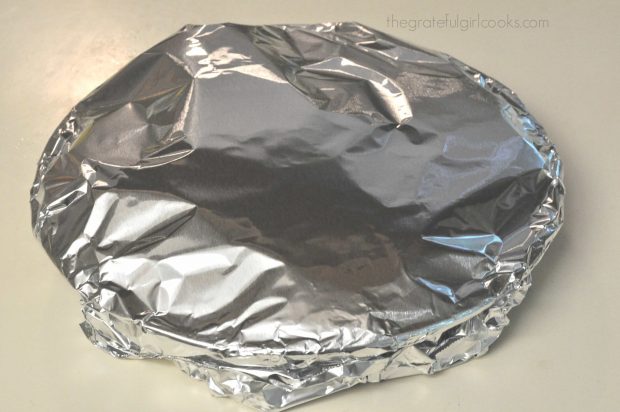
Now wrap the pie filling (pie dish included) in aluminum foil. Cover completely.  Place pie plate into freezer, and let the filling completely freeze (overnight is best!).

Aluminum foil covers the plastic wrapped pie filling.

Remove the pie plate after the filling is solidly frozen. Re-cover pie filling with aluminum foil, label, and freeze until you’re ready to bake pie.

Once frozen solidly, the pie plate is removed and filling stays in freezer. When you pre-freeze pie fillings, they will hold their shape in freezer.

What Do I Do When I’m Ready To Bake My Pie?

Once you are ready to bake a pie, remove the aluminum foil and plastic wrap from pie filling. Place the frozen pie filling, unthawed, into an unbaked pie crust (using same pie plate the filling was frozen in).

If using a double crust, place additional pie dough on top of frozen filling, and crimp edges to form crust. Make small slits on top of pie to let steam release.  Your pie can go into the oven frozen.

Baking A Pie AFTER You Pre-Freeze Pie Fillings

Bake your pie at the temperature given for the recipe you are using, but remember you will need to bake pie longer (on average 25-35 minutes longer), because the pie filling is frozen.

To make sure pie is fully baked, look for slow bubbling juices to come to the top of the crust without bursting. That is a good sign the inside is fully cooked through.  If the crust begins to brown too much, simply add aluminum foil strips over the crimped crust edges.

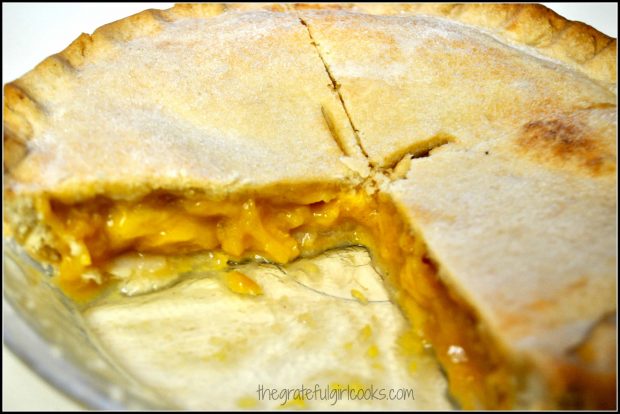
When done, remove and let pie cool slightly before serving.  That’s it! This is a convenient way to get pies ready ahead of time, to save you precious minutes (especially around the holidays) when there are a bazillion other things to do.

Baked and ready to enjoy!

Hope you will give this handy tip a try! It really can be a real time-saver!  Blessings.

Interested In More Recipes?

Thank you for visiting this website. I appreciate you using some of your valuable time to do soIf you’re interested, I publish a newsletter 2 times per month (1st and 15th) with all the latest recipes, and other fun info. I would be honored to have you join our growing list of subscribers, so you never miss a great recipe!
There is a Newsletter subscription box on the top right side (or bottom) of each blog post, depending on the device you use, where you can easily submit your e-mail address (only) to be included in my mailing list.

You Can Also Find Me On Social Media:
Facebook page: The Grateful Girl Cooks!
Pinterest: The Grateful Girl Cooks!
Instagram: jbatthegratefulgirlcooks

Author's signature

Here’s one more to pin on your Pinterest boards!How To Make Ahead And Pre-Freeze Pie Fillings / The Grateful Girl Cooks!

Save

Save

Save

Save

Save

Save

Save

Save

Starbucks Gingerbread (Copycat Recipe)

Starbucks Gingerbread (copycat recipe) is a yummy version of “a famous coffee place’s” beloved gingerbread loaf. Make it at home for a fraction of the price!Starbucks Gingerbread (copycat recipe) is a yummy version of "a famous coffee place's" beloved gingerbread loaf. Make it at home for a fraction of the price!
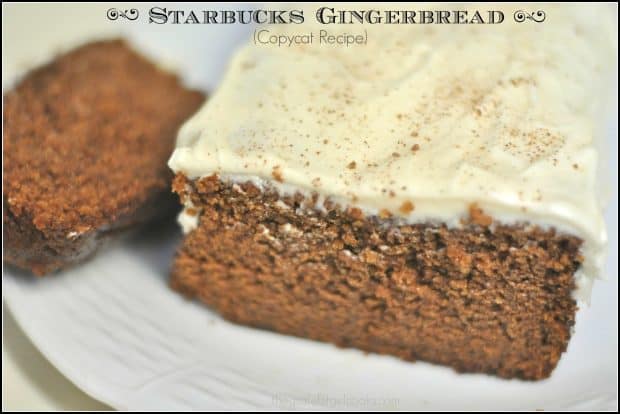
Our family recently gobbled up some of the most wonderful gingerbread with cream cheese icing I’ve ever made! It’s a knockoff recipe called Starbucks Gingerbread (Copycat Recipe), because it tastes as good (or better) than the kind available at our local “famous” coffee spot.

The gingerbread loaf is flavor-filled with lots of aromatic spices associated with Fall… cinnamon, nutmeg, cloves, and ginger, and is a very moist cake… definitely NOT dry!

This Starbucks gingerbread copycat recipe is perfect for a late afternoon snack, or a quick breakfast with a great cup of coffee or tea! My family thought it was absolutely fantastic, and it did not last long around our home, at all.

Scroll Down For A Printable Recipe Card At the Bottom Of The Page

How To Prepare Starbucks Gingerbread (copycat recipe)

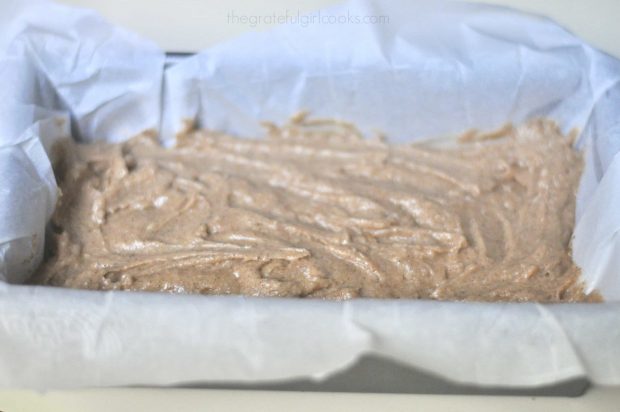
First preheat your oven to 350 degrees.  Prepare a 9×5 inch bread loaf pan by spraying it with non-stick spray. To make your work easier, line the loaf pan with parchment paper. Leave some of the parchment paper well extended over the rim of the pan, so that you can easily lift the entire loaf out of the pan once cooled. Set pan aside.

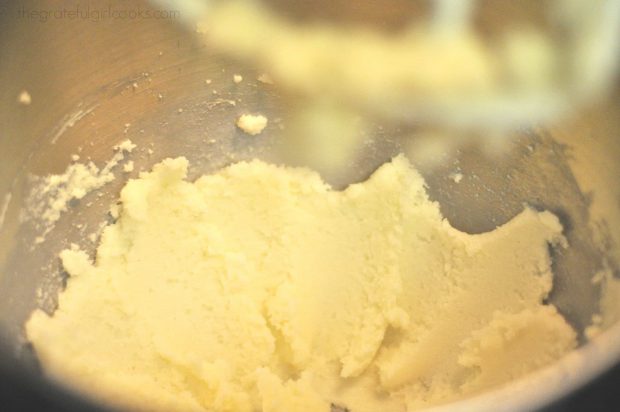
Cream the room temperature butter and granulated sugar until it is fully combined. Add the vanilla and a room temperature egg. Beat the ingredients well until fully incorporated.

Mixing up the batter for Starbucks gingerbread loaf.

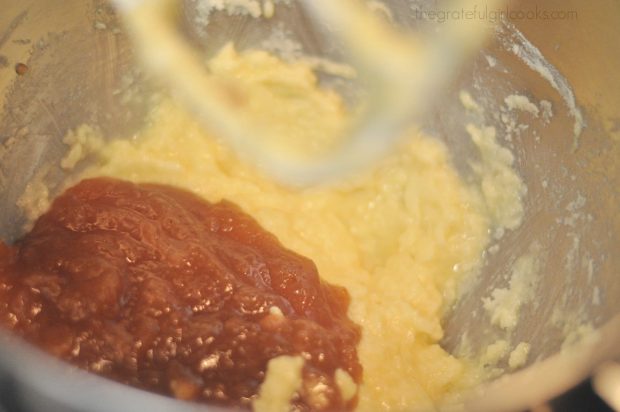
Add apple butter to the batter and mix well, to combine. I was fortunate to have some home canned Apple Butter available in our pantry. You can substitute applesauce for the apple butter, if desired. TIP: The blogger I got this recipe from used a 15 ounce can or pears, drained them and pureed them. That is another good substitute you could try.

Apple butter is added to Starbucks gingerbread batter.

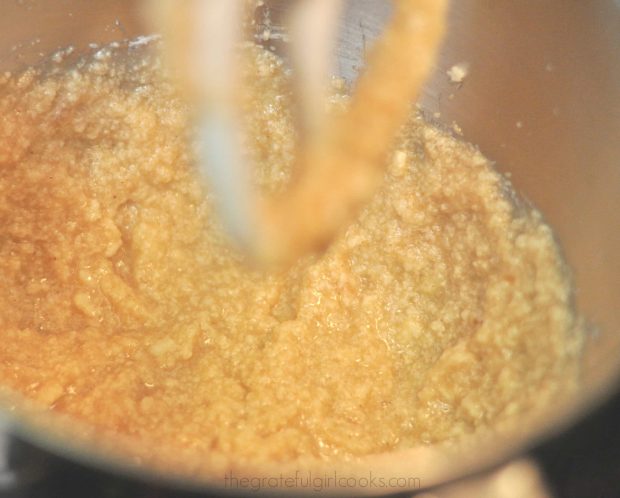
Apple butter is mixed into the batter for Starbucks gingerbread (copycat recipe).

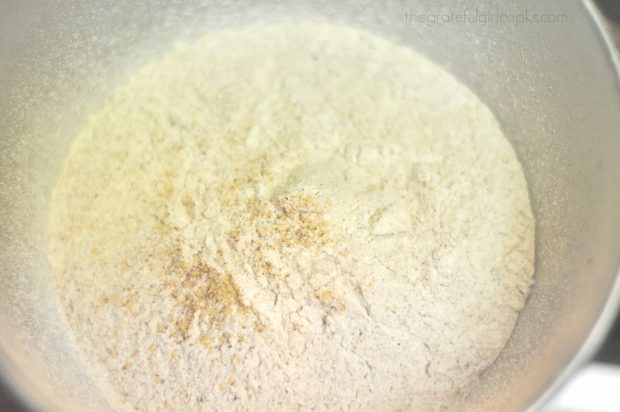
Sift the all purpose flour, baking soda, salt, ginger, cinnamon, cloves and nutmeg together. Slowly add the dry ingredients to the batter, mixing well to combine. Once the batter is fully mixed together, evenly spread it out in your prepared loaf pan.

Flour and spices are sifted before adding them to wet batter for Starbucks gingerbread.

Baking Starbucks Gingerbread (copycat recipe)

Place the batter-filled baking pan in a preheated oven. Bake at 350 degrees for about 55 minutes, or until a toothpick inserted into the top/middle part of the loaf comes out clean. TIP: Check the bread at 50 minutes to test for done-ness.

When the gingerbread is done, remove pan to a wire rack to cool. Once it has cooled, lift the Starbucks gingerbread loaf out of the pan, using the extended edges of the parchment paper.

Batter for Starbucks gingerbread (copycat recipe) is placed in paper lined bread pan to bake.

Make The Icing

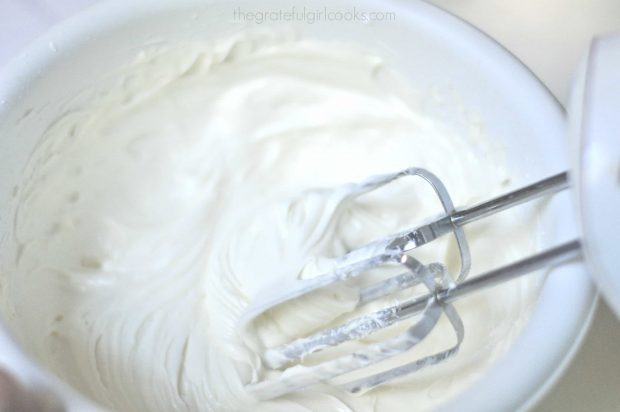
While the gingerbread is baking, beat together 8 ounces of room temperature cream cheese. Trust me, it will blend much smoother if it’s at room temp. Add powdered sugar and vanilla, continuing to beat until icing is smooth and creamy, with no lumps. A bit too thick? Add a drop or two of water. Too thin? Add a bit more powdered sugar.

Frosting is mixed together for Starbucks gingerbread (copycat) while bread is baking.

Frost The Starbucks Gingerbread Loaf

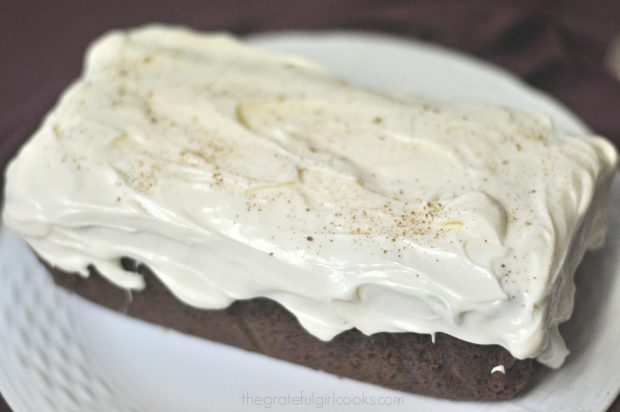
Once the gingerbread has completely cooled, frost the top (and let it slightly run over the edges) of the gingerbread. You will end up with a LOT of frosting, which makes for a thick, creamy and amazing topping for the gingerbread.

If you don’t want that much frosting on the gingerbread (but it’s soooo good!), simply cut the icing quantity in half. Lightly dust the frosted gingerbread loaf with ground nutmeg.

Starbucks Gingerbread (copycat) is frosted once cool, then sprinkled with nutmeg.

Time To Eat!

Once the icing has had a chance to slightly firm up, slice yourself a piece, take a big bite, and ENJOY! It tastes TERRIFIC! A whole loaf with 8 slices can be made for a fraction of the cost of buying 8 pieces of this loaf at that “you-know-where” coffee spot!

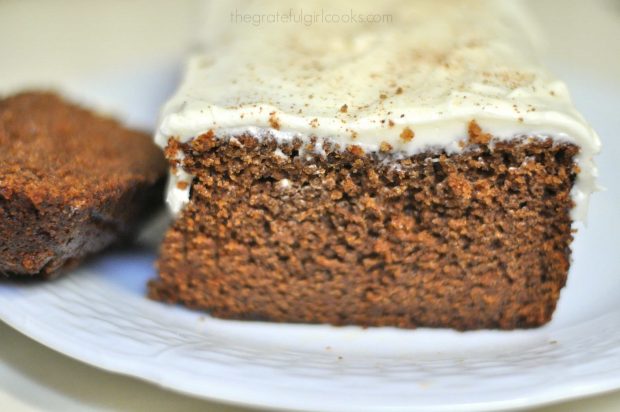
A close up look at the Starbucks Gingerbread (Copycat Recipe) on a white plate.

Sure hope you will try this recipe for Starbucks gingerbread (a copycat recipe). I’m going to make it again around Christmas time, and I can’t wait!  Have a wonderful day!

Looking For More Recipes For “Sweet” Bread Loaves?

You can find all of my bread recipes in the Recipe Index, located at the top of the page. I have quite a few, including:

Interested In More Recipes?

Thank you for visiting this website. I appreciate you using some of your valuable time to do soIf you’re interested, I publish a newsletter 2 times per month (1st and 15th) with all the latest recipes, and other fun info. I would be honored to have you join our growing list of subscribers, so you never miss a great recipe! 

There is a Newsletter subscription box on the top right side (or bottom) of each blog post, depending on the device you use, where you can easily submit your e-mail address (only) to be included in my mailing list.

You Can Also Find Me On Social Media:

Facebook page: The Grateful Girl Cooks!
Pinterest:
The Grateful Girl Cooks!
Instagram:
jbatthegratefulgirlcooks

Author's signature

Recipe Source: http://theviewfromgreatisland.com/copycat-starbucks-gingerbread/

0 from 0 votes
Starbucks Gingerbread (Copycat Recipe)
Prep Time
10 mins
Cook Time
55 mins
Total Time
1 hr 5 mins
 
Starbucks Gingerbread (copycat recipe) is a yummy version of "a famous coffee place's" beloved gingerbread loaf. Make it at home for a fraction of the price!
Category: Starbucks Gingerbread (Copycat Recipe)
Cuisine: American
Keyword: Starbucks gingerbread
Servings: 8 slices
Calories Per Serving: 601 kcal
Author: JB @ The Grateful Girl Cooks!
Ingredients
For The Gingerbread Loaf:
  • 1/2 cup unsalted butter , room temperature
  • 1 cup granulated sugar
  • 1/2 teaspoon vanilla extract
  • 1 large egg , room temperature
  • 1 cup apple butter (can substitute applesauce or pear purée)
  • cups all purpose flour
  • 1 teaspoon baking soda
  • 1 teaspoon salt
  • 2 teaspoons ground ginger
  • 2 teaspoons ground cinnamon
  • 1 teaspoon ground cloves
  • ½ teaspoon ground nutmeg
For Cream Cheese Icing:
  • 8 ounces cream cheese , room temperature
  • 1 teaspoon vanilla extract
  • 2.5 cups powdered (confectioner's) sugar
Instructions
  1. Preheat your oven to 350 degrees F. Prepare a 9x5 inch bread loaf pan (Spray with non-stick spray, line with parchment paper with paper extending well past the rim of loaf pan for ease in lifting loaf out of pan once cool).
  2. Beat the butter and granulated sugar until completely mixed. Add vanilla and egg; beat well until batter is smooth and light. Add apple butter (or applesauce/pear puree). Blend well.
  3. In separate bowl, sift together the all purpose flour, baking soda, salt, ginger, cinnamon, cloves, and nutmeg. Slowly add the flour mixture to the wet mixture, a little at a time, mixing as you add. Once batter is fully mixed, evenly distribute it into the prepared loaf pan.
  4. Bake at 350 degrees for approximately 55 minutes. Check it at 50 minutes by inserting a toothpick into the top/middle of the loaf. If the toothpick comes out clean, the gingerbread is done. Once done, remove pan to a wire rack to cool completely before lifting the loaf from the pan.
  5. Prepare the icing while gingerbread is baking by using electric mixer and blending room temperature cream cheese, powdered sugar, and vanilla into a creamy, no lumps, thick icing.
  6. Once gingerbread has completely cooled, spread icing completely over the top (and let some run off the sides). Dust the icing with a small amount of ground nutmeg. Let icing firm up just a bit, then cut a piece, serve, and enjoy!
Recipe Notes

Note on Pear Purée: The original author of the recipe says she substituted a 15 ounce can of pears for the apple butter. She drained, then processed pears in food processor or blender until smooth.

Nutrition Facts
Starbucks Gingerbread (Copycat Recipe)
Amount Per Serving (1 g)
Calories 601 Calories from Fat 198
% Daily Value*
Fat 22g34%
Saturated Fat 13g81%
Cholesterol 82mg27%
Sodium 535mg23%
Potassium 110mg3%
Carbohydrates 97g32%
Fiber 1g4%
Sugar 75g83%
Protein 5g10%
Vitamin A 775IU16%
Vitamin C 0.2mg0%
Calcium 49mg5%
Iron 1.6mg9%
* Percent Daily Values are based on a 2000 calorie diet.

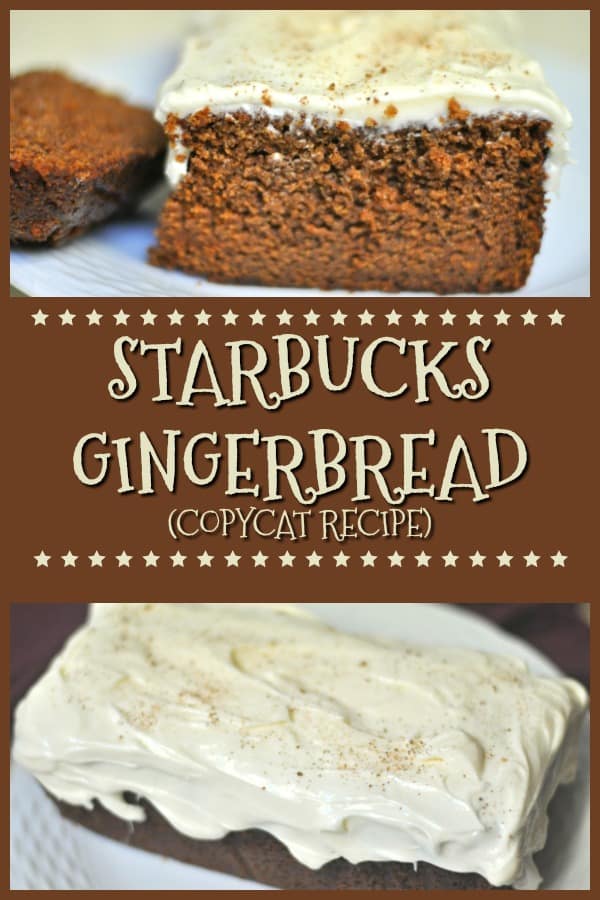
Here’s one more to pin on your Pinterest boards!Starbucks Gingerbread (copycat recipe) is a yummy version of "a famous coffee place's" beloved gingerbread loaf. Make it at home for a fraction of the price!


Save

Save

Save

Save

Save

Save

Save

Save

Save

Save

Save

Save

Save

Save

Save

Save

Save

Save

Save

Poppyseed Cake

This Poppyseed Cake is absolutely EASY, delicious, serves 12 as dessert or coffeecake, and takes only 5 minutes prep time, using a boxed cake mix!This Poppyseed Cake is absolutely EASY, delicious, serves 12 as dessert or coffeecake, and takes only 5 minutes prep time, using a boxed cake mix!
Want a fabulous tasting cake recipe that only has a few ingredients, takes 5 minutes to throw together, and can be served as dessert OR coffeecake? Well if you do, this Poppyseed Cake is perfect for you!

I found the recipe for this poppyseed cake in my Mom’s trusty recipe box over 35 years ago and wrote it down on a little 3×5 index card. It looked easy to prepare, and turned out fantastic the very first time I made it, so I’ve been making it ever since!

The recipe is totally EASY, EASY, EASY, and tastes amazing, due to the subtle flavor imparted into a simple boxed yellow cake mix by adding a couple additional ingredients like poppyseeds and cooking sherry!

Scroll Down for A Printable Recipe Card At The Bottom Of The Page

Prepare The Cake Batter

The poppyseed cake can be in the oven in about 5 minutes! How’s THAT for easy? Combine cake mix, oil, cooking sherry, eggs and poppyseeds in a large bowl. Mix well for 4-5 minutes. That’s it! The cake batter is ready!

Poppyseeds, cake mix, and eggs in mixing bowl.

Batter for poppyseed cake in white bowl, and ready to pour into pan.

Bake The Poppyseed Cake

Pour the cake batter into a very well-greased bundt pan. Make sure the batter is evenly distributed.  Bake the poppyseed cake at 350 degrees for 45 minutes. You can test for “done-ness” by inserting a toothpick into the center of the cake. If it comes out clean, then it is ready!

When the cake is done, remove the bundt pan from the oven, and transfer the pan to a wire rack to completely cool the cake.

Here is the poppyseed cake batter in bundt pan, ready to bake.

Removing the Poppyseed Cake From the Bundt Pan

Once the cake has cooled completely, run a spatula or butter knife around the edges of the cake, because it helps to loosen the edges. Place a large plate upside down on top of the bundt pan, and holding both bundt pan and plate securely, flip the cake upside down, inverting the cake onto the plate.

If you greased the pan really well, it should come right out onto the plate.  Once onto plate, carefully turn the cake over again so it is right side up on a serving platter.

Fully baked poppyseed cake in bundt pan on rack

Make The Decorative Icing To Drizzle On the Cake

Decorating the cake with an icing drizzle is completely optional (cake tastes great all by itself), and the icing adds a nice fancy touch, and a little sweetness.

In a small bowl, mix together the icing ingredients until you have an icing that can be decoratively drizzled over the surface of the cake. Let this icing firm up completely, once you’ve drizzled it onto cake.

Icing dripping off of the poppyseed cake.

Time To Serve The Poppyseed Cake!

Slice and serve! If serving poppyseed cake as a dessert, a scoop of ice cream is a perfect accompaniment.  When serving it as a breakfast or snack coffeecake, it tastes great with a good cup of coffee or tea! Doesn’t it look yummy?

One slice of poppyseed cake, sitting on a plate.

The flavor is wonderful, and the cake is not dry!  Sure hope you will consider making this Poppyseed Cake. It’s also a wonderful addition to any brunch table, too.

A fork and bite of the poppyseed cake on a white plate.

Thanks for taking time out of your day to give this recipe a “look”. Really glad I found it in my Mom’s old recipe box so long ago.  I don’t have a clue who the original author was, but am thankful for the recipe, because I’ve made it many, many times over the past 35 years!

By the way, if you enjoy cakes that can double as dessert OR coffeecake, be sure to check out my recipe for Hummingbird Cake! Have a wonderful day.

Looking For More CAKE Recipes?

You can find all of my cake recipes in the Recipe Index, located at the top of the page. A few favorites include:

Interested In More Recipes?

Thank you for visiting this website. I appreciate you using some of your valuable time to do soIf you’re interested, I publish a newsletter 2 times per month (1st and 15th) with all the latest recipes, and other fun info. I would be honored to have you join our growing list of subscribers, so you never miss a great recipe!
There is a Newsletter subscription box on the top right side (or bottom) of each blog post, depending on the device you use, where you can easily submit your e-mail address (only) to be included in my mailing list.

You Can Also Find Me On Social Media:
Facebook page: The Grateful Girl Cooks!
Pinterest: The Grateful Girl Cooks!
Instagram: jbatthegratefulgirlcooks

Author's signature

Recipe Source:  My Mom (years and years ago)

0 from 0 votes
Poppyseed Cake
Prep Time
5 mins
Cook Time
45 mins
Total Time
50 mins
 

This Poppyseed Cake is absolutely EASY, delicious, serves 12 as dessert or coffeecake, and takes only 5 minutes prep time, using a boxed cake mix!

Category: Dessert or Coffeecake
Cuisine: American
Keyword: poppyseed cake
Servings: 12 servings
Calories Per Serving: 363 kcal
Author: JB @ The Grateful Girl Cooks!
Ingredients
For cake:
  • 1 box yellow cake mix (get the kind that says "with pudding")
  • 3/4 cup cooking sherry
  • 3/4 cup vegetable oil
  • 4 large eggs
  • 1/3 cup poppyseeds
For Icing:
  • 1 cup powdered sugar
  • 1 teaspoon vanilla extract
  • a few sprinkles water at a time (until icing becomes a "drizzling" consistency)
Instructions
  1. Preheat oven to 350 degrees F. Grease a bundt pan very well. Set aside.
  2. In large bowl, mix cake ingredients for 5 minutes (boxed yellow cake mix, cooking sherry, oil, eggs and poppyseeds). Pour batter evenly into greased/floured cake pan. Bake cake at 350 degrees for 45 minutes. Remove pan to wire rack to cool.
  3. While cake is cooling, mix up icing ingredients in small bowl. Add sprinkles of water until icing is thick enough to drizzle over top of finished cake. (Too thick... add couple drops water. Too thin... add more powdered sugar).
  4. Once cake has completely cooled, invert a plate over top of bundt pan, and holding both plate and bundt pan securely, flip the cake over. Once cake is on plate, carefully turn it over once more on serving platter so the right side is facing up. Decoratively drizzle the icing over top of cake. Let icing firm up, then serve and enjoy this tasty cake for dessert (with a scoop of ice cream) or as a coffeecake for breakfast!
Recipe Notes

The baking time indicated is designed for a bundt pan. If using a standard sized cake pan, your cooking time will need to be adjusted slightly.

Nutrition Facts
Poppyseed Cake
Amount Per Serving (1 slice)
Calories 363 Calories from Fat 153
% Daily Value*
Fat 17g26%
Saturated Fat 12g75%
Cholesterol 54mg18%
Sodium 336mg15%
Potassium 70mg2%
Carbohydrates 46g15%
Fiber 1g4%
Sugar 28g31%
Protein 3g6%
Vitamin A 80IU2%
Calcium 140mg14%
Iron 1.5mg8%
* Percent Daily Values are based on a 2000 calorie diet.

Here’s one more to pin on your Pinterest boards!This Poppyseed Cake is absolutely EASY, delicious, serves 12 as dessert or coffeecake, and takes only 5 minutes prep time, using a boxed cake mix!


Save

Save

Save

Save

Save

Save

Save

Save

Save

Save

Save

Save

Save

Save

Save

Old-Fashioned Peach Crisp

Is anything better than delicious Old-Fashioned Peach Crisp? Make individual sized desserts with fresh peaches, and top it with a streusel crust!Is anything better than delicious Old-Fashioned Peach Crisp? Make individual sized desserts with fresh peaches, and top it with a streusel crust!

I love fresh juicy peaches in the Summer… right off the tree, and ready to eat just the way they are (with juice running down your arms), OR to be transformed into other delicious dishes… like this Old-Fashioned Peach Crisp, for example!

Old fashioned peach crisps have rolled oats in the crumbly topping. This topping makes them a bit different from a cobbler, which typically have a biscuit-type topping. The oats crisp up as the dish bakes, making a nice streusel topping for that delicious fresh fruit!

Scroll Down For A Printable Recipe Card At The Bottom Of The Page

We LOVE Fresh Peaches!

I pick peaches every summer at a local U-Pick farm about 15 minutes from our home. Once I get home with my 25-30 pounds of fresh peaches, the race against the clock begins! I have a few days to do LOTS of things with these beauties.

These activities include canning them for long term storage, making peach jampeach pies, peach ice cream, and this Old-Fashioned Peach Crisp! It often seems like a PEACH FACTORY in our kitchen! It’s a wonder I don’t turn into a peach!


Peaches on trees, ready to pick, and make peach crisp!Lots of fresh peaches, picked and ready to make a peach crisp!
It’s really easy to make individual sized peach crisps for a scrumptious, classic dessert. Here’s how I make Old-Fashioned Peach Crisp!

How To Make Old Fashioned Peach Crisp

Please note that I made 6 individual sized servings, but the recipe works just as well if you make it in a large 13×9 baking dish, too (with a bit longer cooking time)! First, peel and thinly slice all those beautiful fresh, juicy peaches. Try hard not to eat them all… this is important!

Fresh peaches peeled and sliced to make a crisp!

Light coat the bottom of baking dish (or dishes) with non-stick spray. Evenly divide the fresh sliced peaches between serving dishes (if making individual sized).

Peach slices placed into individual baking dishes.

Make The Streusel Topping

In a separate bowl, mix dry ingredients, then cut in COLD butter, using a pastry blender, until mixture is about the size of peas.

Butter is cut into streusel topping for old-fashioned crisp.

Spoon the crumb topping over each dish to cover (or over the entire surface if using a single baking dish).

Streuesel topping is placed on top of peaches.

Bake The Old-Fashioned Peach Crisp

Place the old fashioned peach crisp dish(es) into 375 degree preheated oven and bake for 35-40 minutes (slightly longer time if making a single 13×9 dish). When done, the crumb topping will be browned and edges will be bubbly (from all those delicious peach juices).

TIP: I find it helpful to place a large sheet of aluminum foil on the rack below the dishes before cooking, to catch any juices that try to escape (less mess if juice bubbles out and over the edge of individual dishes).

Old-Fashioned peach crisps are ready for the oven!

When done, remove the old fashioned peach crisp dish(es) to a wire rack and let cool slightly before serving.

Old-Fashioned Peach Crisp is baked and ready to eat.

See that gorgeous peach goodness on the bottom of the dish? Oh yum. The streusel forms a nice crust on the peach crisp, and the butter, cinnamon, and brown sugar flavor the fruit wonderfully!

Side view of old-fashioned peach crisp.

Ready To Serve

All that’s left to do to make these ABSOLUTELY PERFECT is to serve them warm, with a small scoop of vanilla ice cream, and enjoy this absolutely PERFECT taste of SUMMER!

Peach crisps are done baking and ready to serve, with a scoop of vanilla ice cream!
Hope you will consider making this delicious old-fashioned peach crisp while peaches are in season! You just can’t beat the classic flavor! Grab a spoon, put on some stretchy pants, plop down on the couch,  and enjoy this treat. You can start your diet tomorrow… ha ha! Have a great day, and thanks for stopping by. Come back again soon for more delicious recipes.

Looking For More Recipes That Use PEACHES?

You can find all of my recipes in the Recipe Index, located at the top of the page. If you enjoy peach recipes, you might also be interested in my recipes for:

Interested In More Recipes?

Thank you for visiting this website. I appreciate you using some of your valuable time to do soIf you’re interested, I publish a newsletter 2 times per month (1st and 15th) with all the latest recipes, and other fun info. I would be honored to have you join our growing list of subscribers, so you never miss a great recipe!
There is a Newsletter subscription box on the top right side (or bottom) of each blog post, depending on the device you use, where you can easily submit your e-mail address (only) to be included in my mailing list.

You Can Also Find Me On Social Media:

Facebook page: The Grateful Girl Cooks!
Pinterest:
The Grateful Girl Cooks!
Instagram:
jbatthegratefulgirlcooks

Have a FANTASTIC day!

Author's signature

Adapted From:  “The New Pillsbury Family Cookbook”, Published 1973 by The Pillsbury Company, page 131.

0 from 0 votes
Old-Fashioned Peach Crisp
Prep Time
10 mins
Cook Time
35 mins
Total Time
45 mins
 
Is there anything better than a delicious Old-Fashioned Peach Crisp? Make individual sized desserts with fresh summer peaches, and top it with a streusel crust!
Category: Dessert
Cuisine: American
Keyword: old-fashioned peach crisp
Servings: 6 servings
Calories Per Serving: 365 kcal
Author: JB @ The Grateful Girl Cooks!
Ingredients
  • 6 cups fresh , peeled and sliced peaches
  • 1 Tablespoon lemon juice
  • 3/4 cup firmly packed brown sugar
  • 1/2 cup + 1 Tablespoon all purpose flour (unsifted)
  • 1/2 cup rolled oats (old fashioned, NOT instant)
  • 1 teaspoon cinnamon
  • 1/2 cup COLD butter
Instructions
  1. Preheat oven to 375 degrees. Spray the bottom of individual baking dishes or a 9 inch square or 10x6 baking dish with non-stick spray.
  2. Sprinkle peach slices with lemon juice. Stir to combine. Place peaches onto bottom of baking dish (if using individual dishes, divide evenly).
  3. In a separate bowl, combine brown sugar, flour, rolled oats and cinnamon. Cut the COLD butter into chunks and add to dry ingredients. Cut the butter into the dry ingredients using a pastry blender until butter is size of peas. (Can also mix dry ingredients with cold butter and pulse in a food processor).
  4. Sprinkle crumb topping over sliced peaches, to cover.
  5. Bake in preheated 375 degree oven for approximately 35-40 minutes, until topping is browned and juices are bubbly around edges.
  6. Remove from oven to wire rack; let cool slightly, serve with a scoop of vanilla ice cream, and enjoy!
Nutrition Facts
Old-Fashioned Peach Crisp
Amount Per Serving (1 g)
Calories 365 Calories from Fat 144
% Daily Value*
Fat 16g25%
Saturated Fat 9g56%
Cholesterol 40mg13%
Sodium 143mg6%
Potassium 364mg10%
Carbohydrates 54g18%
Fiber 3g13%
Sugar 39g43%
Protein 3g6%
Vitamin A 975IU20%
Vitamin C 11.1mg13%
Calcium 43mg4%
Iron 1.4mg8%
* Percent Daily Values are based on a 2000 calorie diet.

Here’s one more to pin on your Pinterest boards!Is there anything better than a delicious Old-Fashioned Peach Crisp? Make individual sized desserts with fresh summer peaches, and top it with a streusel crust!


Save

Save

Blackberry Pie Bars

You’ll LOVE these delicious dessert Blackberry Pie Bars, made with fresh juicy blackberries baked on a shortbread crust, with a buttery streusel crumb topping.You'll LOVE these delicious dessert Blackberry Pie Bars, made with fresh juicy blackberries baked on a shortbread crust, with a buttery streusel crumb topping.
It’s THAT time of the summer when fresh berries are making their annual appearance all around the Pacific Northwest. The other day I picked 4 quarts of fresh blackberries that were growing wild in our neighborhood, and made these fantastic tasting Blackberry Pie Bars! It’s nice to pick wild blackberries (for FREE), and then use them to create a special “something” that my husband and I can enjoy AND I can give to others.

This recipe makes 24 bars, so I kept a few for us, then gave away 2 big plates of them to our sons and another friend. The Blackberry Pie Bars are delicious; they do taste like you’re eating a piece of pie!

Scroll Down For A Printable Recipe Card At The Bottom Of The Page

How To Make Blackberry Pie Bars

Place flour, 1 cup sugar, baking powder, cinnamon, salt and lemon zest into a food processor. Pulse these together a couple times to mix. *Don’t have a food processor? No problem… just use a hand held pastry blender.

Flour, lemon zest, cinnamon, etc. mixed in food processor for blackberry bar base

Add egg, butter, and vanilla extract to the mixture. Pulse again until the mixture is crumbly (and the butter is in small pieces).

Butter, egg, vanilla added to ingredients in food processor

Put half of the crumbly dough into a prepared 13×9 inch pan. (either sprayed with non-stick spray, OR in a 13×9 pan that is covered with parchment paper with paper hanging over the edges.

This is what I do, and it makes lifting the entire pan of bars out very easy, once cooled!)  Pack down the crumbs with your hands, until it forms a solid crust.

Crumbled ingredients (before baking) form base for bar cookies
In a large bowl, combine 1/2 cup sugar, cornstarch and lemon juice. Add the fresh blackberries, and stir gently until the berries are coated.

Blackberries, sugar and lemon juice in large bowl

Evenly spoon out the blackberry mixture over the crust.

Blackberry filling spread out over bar cookie base in baking pan

Sprinkle the remaining half of the crumb mixture over the top of the berries, to cover the surface of the bars.  

Crumb mixture spread over blackberry pie filling before baking

Bake The Blackberry Pie Bars

Bake in a preheated 375 degree oven for 45 minutes, or until the crumb topping is lightly browned. When done, remove the pan from the oven. Let the blackberry pie bars cool completely, while still in the pan.

Once cool, if using parchment paper, lift out the entire pan of bars. Pull paper away from the sides of the dessert. If not using parchment paper, let blackberry pie bars cool completely, then cut.

Blackberry pie bars are removed from pan after baking

The best way I have found to make even cuts is by using my pizza cutter! Make 4 cuts lengthwise, then make 6 cuts the other direction, for a total of 24 bars.

Blackberry bar cookies are cut into squares with pizza cutter

Piece of a blackberry pie bar cookie

Here… I saved one of the blackberry pie bars for YOU! Go ahead… you KNOW you want a bite, right?  You’re welcome! Sure hope you enjoy every bite of it!

Blackberry pie bar close up photo, resting on a serving spatula

Have a great day!  Think of ways you could bring joy or encouragement into someone’s life today… and be intentional about considering just how much you and I have to be grateful for.

Looking For Other Bar Cookie Recipes?

You can find all of my recipes in the Recipe Index, located at the top of the page. I have quite a few scrumptious bar cookie recipes on my blog, including:

Interested In More Recipes?

Thank you for visiting this website. I appreciate you using some of your valuable time to do soIf you’re interested, I publish a newsletter 2 times per month (1st and 15th) with all the latest recipes, and other fun info. I would be honored to have you join our growing list of subscribers, so you never miss a great recipe!
There is a Newsletter subscription box on the top right side (or bottom) of each blog post, depending on the device you use, where you can easily submit your e-mail address (only) to be included in my mailing list.

You Can Also Find Me On Social Media:

Facebook page: The Grateful Girl Cooks!
Pinterest:
The Grateful Girl Cooks!
Instagram:
jbatthegratefulgirlcooks

Author's signature

Recipe Source: http://www.thenovicechefblog.com/2013/07/blackberry-pie-bars/

0 from 0 votes
Blackberry Pie Bars
Prep Time
10 mins
Cook Time
45 mins
Total Time
55 mins
 

You'll LOVE these delicious dessert Blackberry Pie Bars, made with fresh juicy blackberries baked on a shortbread crust, with a buttery streusel crumb topping.

Category: Bar Cookies
Cuisine: American
Keyword: blackberry pie bars
Servings: 24 bars
Calories Per Serving: 188 kcal
Author: JB @ The Grateful Girl Cooks!
Ingredients
  • 3 cups all purpose flour
  • 1 1/2 cups granulated sugar (divided)
  • 1 teaspoon baking powder
  • 1 teaspoon cinnamon
  • 1/4 teaspoon salt
  • Zest and juice from 1 lemon (divided)
  • 1 cup (2 cubes) cold butter (cut into 1 inch slices)
  • 1 large egg
  • 2 teaspoons vanilla extract
  • 4 cups fresh blackberries
  • 4 teaspoons cornstarch
Instructions
  1. Before beginning, preheat your oven to 375 degrees. Line a 9x13 pan with parchment paper and spray the bottom. Make sure to leave parchment paper extended over the edges, so you can lift out the entire pan of bars once cooled. (If not using parchment paper, simply spray baking pan with non-stick spray).
  2. Place flour, 1 CUP of the sugar, baking powder, cinnamon, salt and lemon zest into a food processor. Pulse a couple times to mix. Add egg, butter, and vanilla extract. Pulse the mixture until dough gets crumbly (and butter is size of small peas).
  3. Put HALF of the dough mixture into the baking pan. Pat down with fingers to form a solid crust. Set aside the rest of the mixture to use for the crumb topping.
  4. In a large mixing bowl, combine the rest of the sugar, cornstarch and lemon juice. Add the blackberries, and stir gently to fully coat berries. Spoon the blackberries over the crust in the pan. Sprinkle the remaining crumb mixture over the top of the berries.
  5. Bake at 375 degrees for 45 minutes (or until the topping is golden brown). Remove to a wire rack. COOL COMPLETELY before lifting the bar cookies out of the pan (using the parchment paper).
  6. Cut into serving sizes. (It is easy to cut into bars if you use a pizza cutter!) Enjoy!
Recipe Notes

I cut the bars lengthwise into 4 sections, then cut 6 pieces in each section, for a total of 24 bars (each about 2 inches)

Nutrition Facts
Blackberry Pie Bars
Amount Per Serving (1 bar)
Calories 188 Calories from Fat 72
% Daily Value*
Fat 8g12%
Saturated Fat 4g25%
Cholesterol 27mg9%
Sodium 95mg4%
Potassium 77mg2%
Carbohydrates 27g9%
Fiber 1g4%
Sugar 13g14%
Protein 2g4%
Vitamin A 300IU6%
Vitamin C 5mg6%
Calcium 21mg2%
Iron 0.9mg5%
* Percent Daily Values are based on a 2000 calorie diet.

Here’s one more to pin on your Pinterest boards!You'll LOVE these delicious dessert Blackberry Pie Bars, made with fresh juicy blackberries baked on a shortbread crust, with a buttery streusel crumb topping.


Save

Save