Category: Desserts

Blueberry Ice Cream Tart

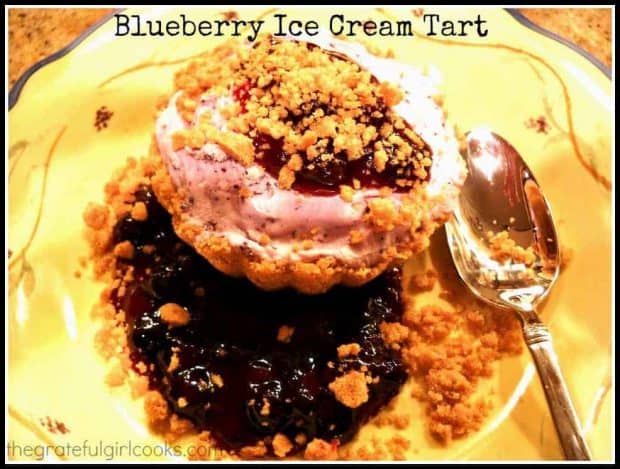
A blueberry ice cream tart is a delicious, frozen dessert treat! Ice cream in a graham cracker crust, served with fresh blueberry sauce on the side!A blueberry ice cream tart is a delicious, frozen dessert treat! Ice cream in a graham cracker crust, served with fresh blueberry sauce on the side!

I love taking a tried and true recipe and tweaking and morphing it into a different recipe. Do you do that? That was the case when I took my recipe for Blueberry Ice Cream and changed it into a delicious, small Blueberry Ice Cream Tart for each guest at a dinner & dessert party.

I thought long and hard about what I wanted to make for dessert, then decided to make my blueberry ice cream, and add a graham cracker crust from another of my recipes. Then I decided to server it with a simple blueberry sauce on the side. Voila! That is how I came up with this recipe for these wonderful frozen dessert tarts! And boy… were they ever good, if I do say so myself!

Scroll Down For A Printable Recipe Card At The Bottom Of The Page

Do I Need An Ice Cream Machine?

I have an electric indoor Krups ice cream maker, which makes homemade ice cream in about 20 minutes. If you don’t have one or don’t want to take the time, just buy a good quality blueberry ice cream or gelato at the grocery store, and shave some time off of this recipe!

This recipe is actually very easy to prepare… it just needs to be done in steps. Make the ice cream, make the crumb topping, make the blueberry sauce, assemble the tarts, freeze, then serve!

Make Or Buy Blueberry Ice Cream

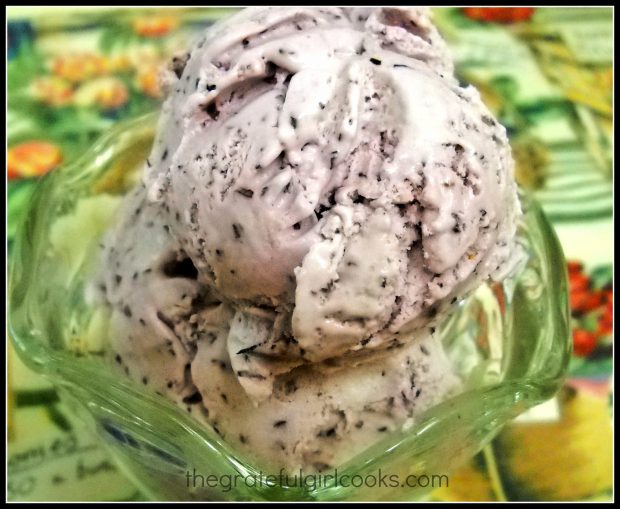
First make (or buy) the blueberry ice cream. If making homemade ice cream, put it back into your kitchen freezer after the initial freezing to really firm it up. My homemade blueberry ice cream also has cream cheese in it, so it has more of a blueberry cheesecake flavor!

My homemade blueberry ice cream looks like this photo below, when done. Here it is scooped up nice and pretty:

Blueberry ice cream is the main ingredient for these delicious frozen tarts.

Make The Crust Mix

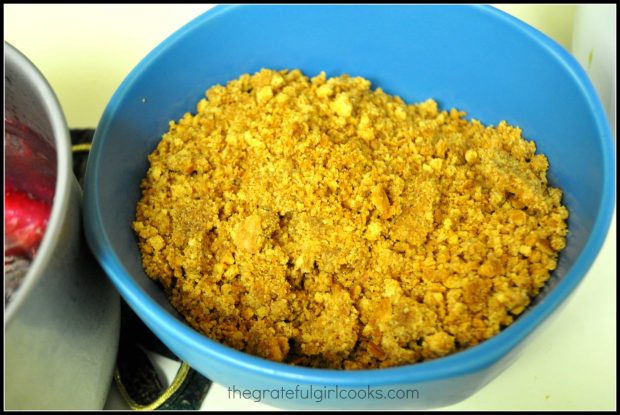
The next thing I do is prepare a simple graham cracker crust mixture. This is made by mixing graham cracker crumbs with melted butter and sugar! EASY!

Ingredients for the graham cracker crust are mixed together in bowl.

Making The Blueberry Sauce Is Simple!

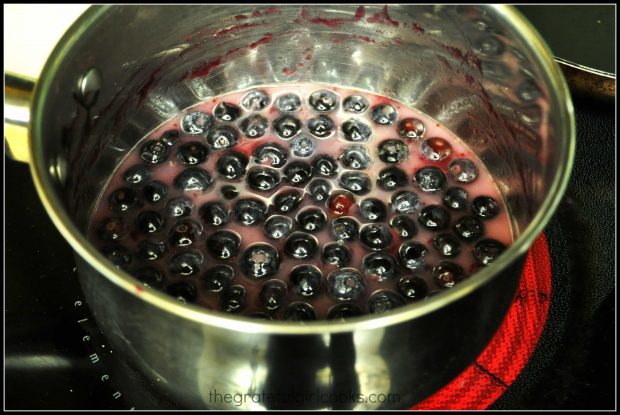
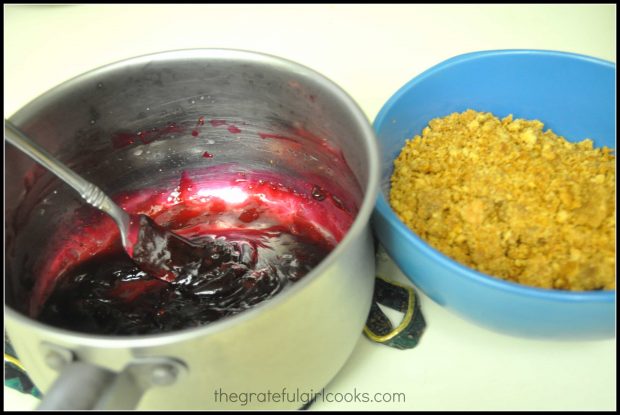
Prepare the blueberry sauce, by cooking blueberries, sugar, cornstarch and water until the sauce thickens and the blueberries “pop” open (6-7 minutes). Once the sauce thickens, remove the pan from the heat and let it cool completely. Set aside.

A thickened blueberry sauce is made to garnish the ice cream tart.

The blueberry sauce and graham cracker crust mix are ready to use.

Make The Crust For The Tarts

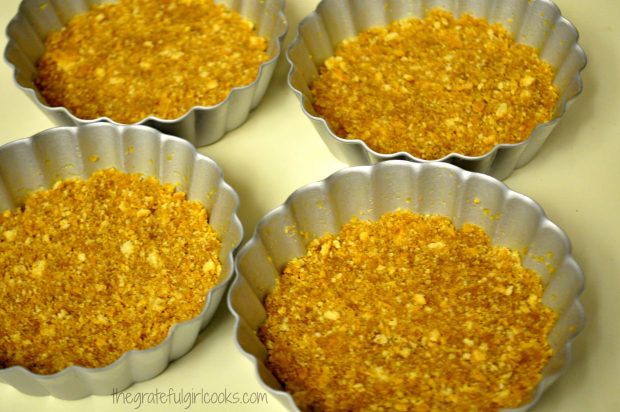
Firmly pack the graham cracker crumb mixture (reserve 1/2 cup for garnish) onto the bottom of 4 small tart pans (with removable bottoms). The crusts are baked for 6-7 minutes. Once they’re done, let them cool completely.

Graham cracker mixture is baked in mini tart pans.

Cover the crust and fill each cooled tart pan with slightly softened blueberry ice cream. Put each blueberry ice cream tart (in the pans) back into the freezer for 2 hours to firm up.

Ready To Serve The Blueberry Ice Cream Tart

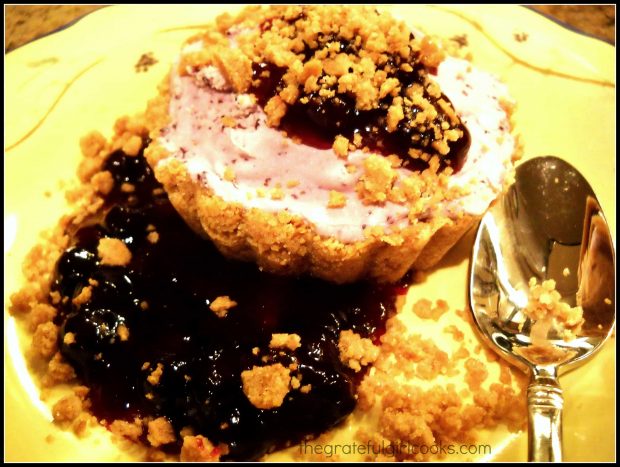
Spread some of the thickened blueberry sauce onto each dessert plate. Sprinkle the sauce with some reserved graham cracker crumb mix. Carefully remove each blueberry ice cream tart from the removable bottom tart pans, and set them on top of the blueberry sauce.

Garnish the top of each blueberry ice cream tart with a spoonful of sauce, and sprinkle with graham cracker crumb mixture. Let each dessert sit on the plates for a couple minutes at room temp. to let the ice cream soften slightly, before serving! Serve and enjoy, because this dessert is delicious!!!!

Blueberry Ice Cream Tart is garnished with sauce, and sprinkled with graham cracker crumbs to serve.

What If I Don’t Have Small Tart Pans?

If you don’t have removable bottom tart pans, think outside the box! This recipe could be easily adapted to make into a pie. Make a graham cracker crust (using this recipe you might have to double amounts) or buy a graham cracker crust, then follow the rest of the directions.

You will have a delicious frozen pie, rather than a tart, but a slice of THAT pie would be fantastic, garnished with the blueberry sauce and graham cracker crumbs. It’s ALL good. Hope you will give this blueberry ice cream tart recipe  a try… it’s worth it!

Looking For More Recipes Featuring BLUEBERRIES?

You can find all of my recipes in the Recipe Index, located at the top of the page. I have lots of recipes that feature blueberries, including:

Interested In More Recipes?

Thank you for visiting this website. I appreciate you using some of your valuable time to do soIf you’re interested, I publish a newsletter 2 times per month (1st and 15th) with all the latest recipes, and other fun info. I would be honored to have you join our growing list of subscribers, so you never miss a great recipe!
There is a Newsletter subscription box on the top right side (or bottom) of each blog post, depending on the device you use, where you can easily submit your e-mail address (only) to be included in my mailing list.

You Can Also Find Me On Social Media:

Facebook page: The Grateful Girl Cooks!
Pinterest:
The Grateful Girl Cooks!
Instagram:
jbatthegratefulgirlcooks

Author's signature

↓↓ PRINTABLE RECIPE BELOW ↓↓

0 from 0 votes
Blueberry Ice Cream Tart
Prep Time
1 hr
Cook Time
7 mins
Inactive Freezer Time
2 hrs
Total Time
3 hrs 7 mins
 

A blueberry ice cream tart is a delicious, frozen dessert treat! Ice cream in a graham cracker crust, served with fresh blueberry sauce on the side!

Category: Dessert
Cuisine: American
Keyword: blueberry ice cream tart
Servings: 4 servings
Calories Per Serving: 789 kcal
Author: JB @ The Grateful Girl Cooks!
Ingredients
For Blueberry Ice Cream:
  • 2 cups blueberries (fresh or frozen)
  • 1/2 cup granulated sugar
  • 8 oz. cream cheese , room temp, and cut into chunks
  • 1/2 teaspoon vanilla extract
  • 3/4 cup whole milk
  • 3/4 cup heavy whipping cream
  • 3 drops blue food coloring (optional, but it helps enhances the color)
For Graham Cracker Crust and Garnish:
  • 1 cube butter , melted
  • 1 1/2 cups finely crushed graham cracker crumbs
  • 1/3 cup granulated sugar
For Blueberry Sauce:
  • 2 cups blueberries
  • 1/2 cup water
  • 2 Tablespoons granulated sugar
  • 1 Tablespoon cornstarch
Instructions
Prepare the ice cream:
  1. Place blueberries and sugar into blender or food processor. Blend/pulse until liquified. Add cream cheese chunks and vanilla. Mix until fairly smooth. Add milk; blend well. Pour mixture into large bowl. Add whipping cream and whisk to combine. Pour mixture into canister of ice cream maker, and freeze per manufacturer instructions. When done, remove to a covered container and place in freezer.

Prepare Blueberry Sauce:
  1. Place the water, sugar and cornstarch into a medium sized sauce pan. Stir until smooth. Add the blueberries. Cook on medium heat, stirring often, for about 6-7 minutes, until blueberries have popped, and the sauce has thickened. Remove from heat, and cool completely.
Prepare Graham Cracker Crust:
  1. Mix graham cracker crust ingredients until well blended. Reserve about 1/2 cup for garnish. Set aside. Divide the rest between 4 small tart pans with removable bottoms. Press crumb mixture firmly down to form bottom crust in pan. Bake at 375 degrees for about 7 minutes. Remove from oven. Cool completely. Do not remove crust from pan. Once crust has cooled completely, spoon blueberry ice cream into each shell to fill to top of the tart pan. Place in freezer for 2 hours to completely firm up.

To Assemble/Serve:
  1. Spread some blueberry sauce onto individual serving plates. Sprinkle with a little of the graham crumb mixture. Carefully remove ice cream tart from the pan by gently pushing up on the bottom to remove from pan, then slide the tart off the bottom tray onto the blueberry sauce on serving plate. Spoon a little sauce on top of the tart, then sprinkle with additional graham cracker crumbs. Let finished plates sit for several minutes to soften ice cream slightly, then serve and enjoy!

Recipe Notes

Most of the prep time is INACTIVE time... just waiting for ice cream to harden in freezer. I made up the ice cream, sauce and crust early in the day, then it was a snap to assemble later in the evening. ALL can be made ahead of time, if needed.

Nutrition Facts
Blueberry Ice Cream Tart
Amount Per Serving (1 tart)
Calories 789 Calories from Fat 369
% Daily Value*
Fat 41g63%
Saturated Fat 22g138%
Cholesterol 128mg43%
Sodium 430mg19%
Potassium 341mg10%
Carbohydrates 100g33%
Fiber 4g17%
Sugar 73g81%
Protein 9g18%
Vitamin A 1570IU31%
Vitamin C 14.6mg18%
Calcium 170mg17%
Iron 1.9mg11%
* Percent Daily Values are based on a 2000 calorie diet.

Here’s one more to pin on your Pinterest boards!A blueberry ice cream tart is a delicious, frozen dessert treat! Ice cream in a graham cracker crust, served with fresh blueberry sauce on the side!


Save

Save

Save

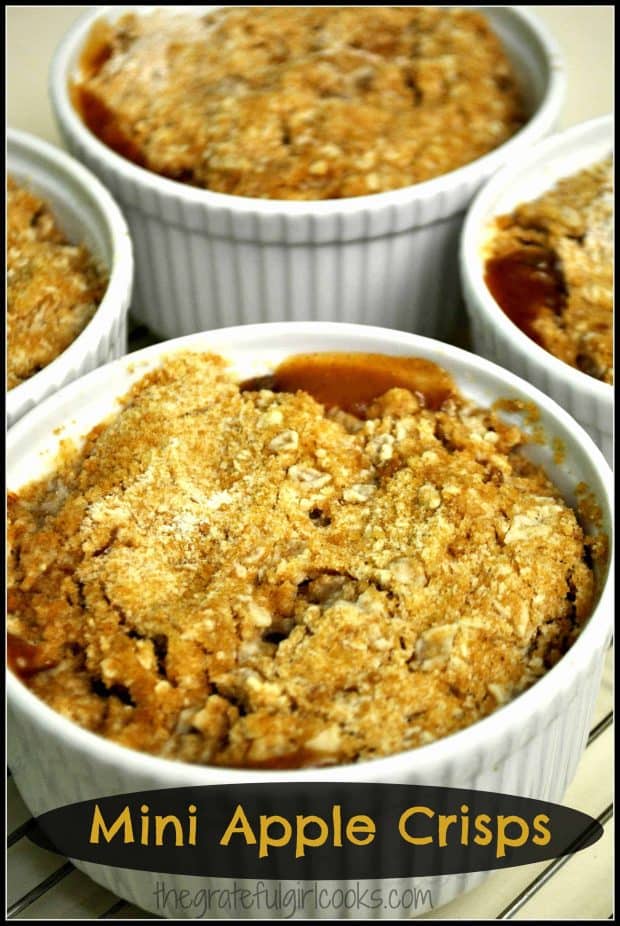
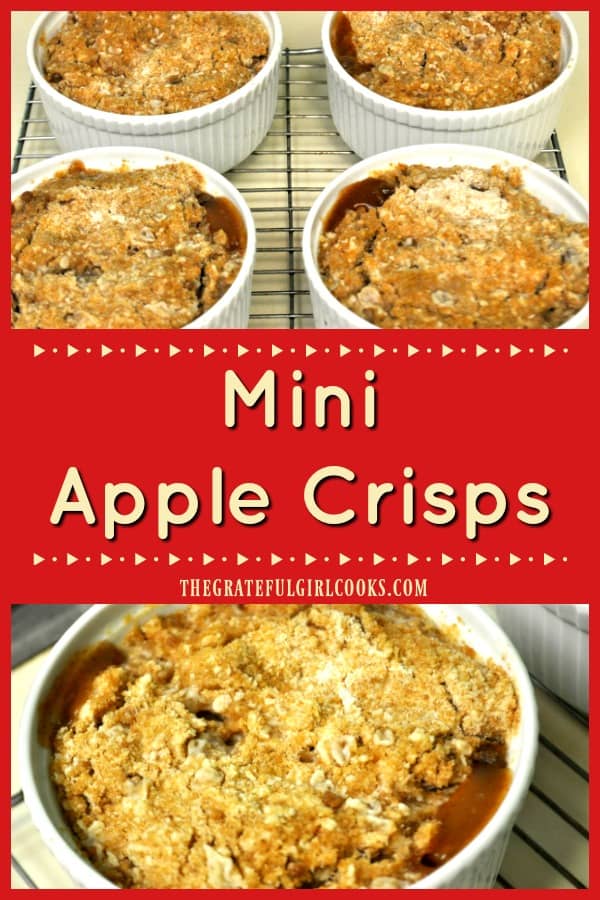
Mini Apple Crisps

Mini Apple Crisps are individual sized versions of this favorite American classic dessert! Whether you call them crisps or cobblers, they are super easy to make – serve with a scoop of vanilla ice cream!Mini Apple Crisps are individual sized versions of this favorite American classic dessert! Super easy to make - serve with a scoop of vanilla ice cream!

Well, well, well… the OFFICIAL start to Fall 2015 will be here in a couple of days. School’s begun, the days are cooler here in the Northwest, sunsets are earlier each day, leaves are beginning their color changes… and apples are everywhere!

Time to make Mini Apple Crisps and welcome in this change of season with a tasty dessert! Here’s how to make Mini Apple Crisps.

Scroll Down for A Printable Recipe Card At The Bottom Of The Page

Fall And Apples Just Seem To Go Well together, Right?

Fall just sort of screams “APPLES”, don’t ya think? There are so many varieties that come into season this time of year, and to me, there is something so memorable about making my first Apple Pie or Apple Crisp of the Fall.

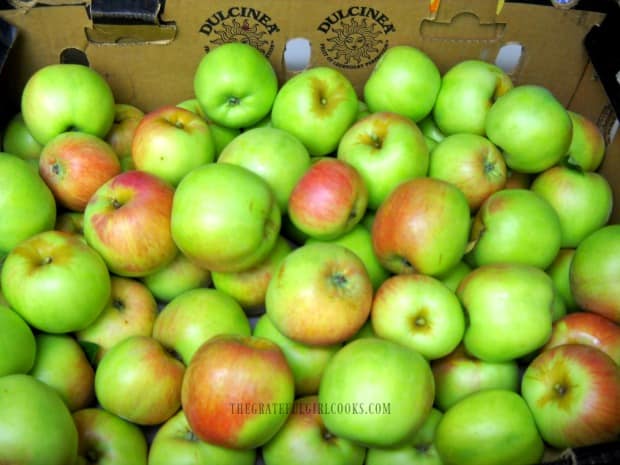
Fall apples, freshly picked, and can be used to make mini apple crisps!

Apple desserts just seems to fit right in with Fall, wearing sweatshirts, raking leaves, football games, pumpkins, brilliant fall foliage, etc. Can you tell I enjoy this season?

I especially enjoy it here in the beautiful Pacific Northwest. The gorgeous colors on display make the ever present RAIN tolerable!

Fall leaves indicate it's time to make apple crisps, pies and cobblers!

Mini Apple Crisps Are PERFECT for Fall Weather!

This recipe for individual sized mini apple crisps is perfect for those nights when you just want to crawl up on the couch in your sweats, under a big warm blanket, and eat something decadent, like some warm apple crisp “goodness” while reading a good book, or watching a good TV show or movie.

Warm and bursting with fresh apple and cinnamon flavor, what could be better than that? Well, I guess a little scoop of vanilla ice cream could make this even better, right?

This is a very easy recipe that makes 4 individual servings, so you can eat one, and save 3 for later, if you are so inclined (Ha Ha).

How To Make Mini Apple Crisps

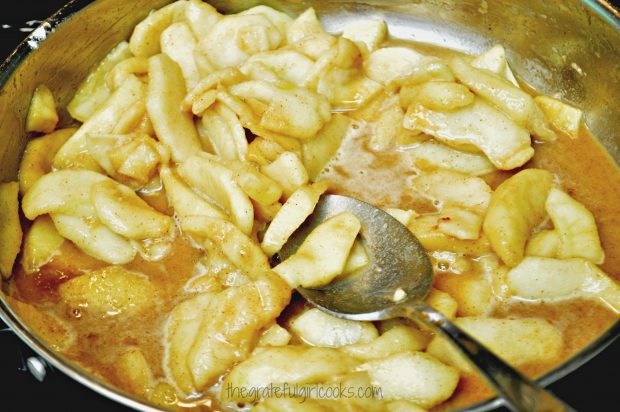
First thing to do is peel, core and slice the apples. Then place the apple slices, brown sugar, flour, lemon juice and cinnamon into a large skillet.

Mix the ingredients well, to combine. Cook the apples on medium-low for about 10 minutes, or until the apple slices have slightly softened.

Apple slices cooking with brown sugar, cinnamon, etc. for mini apple crisps.
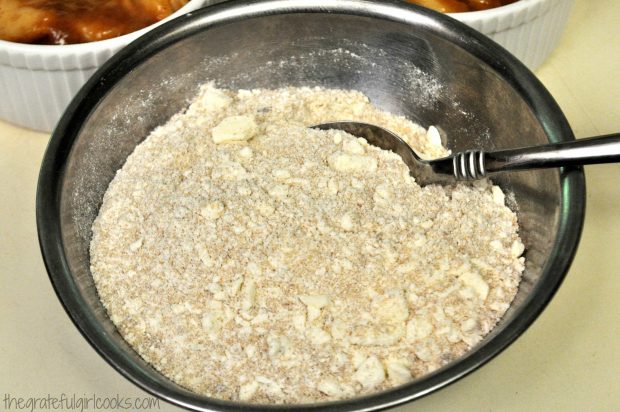
While the apples are cooking, use a pastry blender (or two forks) to blend the crumb topping ingredients in a small bowl. Easy!

Crumb topping is mixed to add to top of apple crisps.
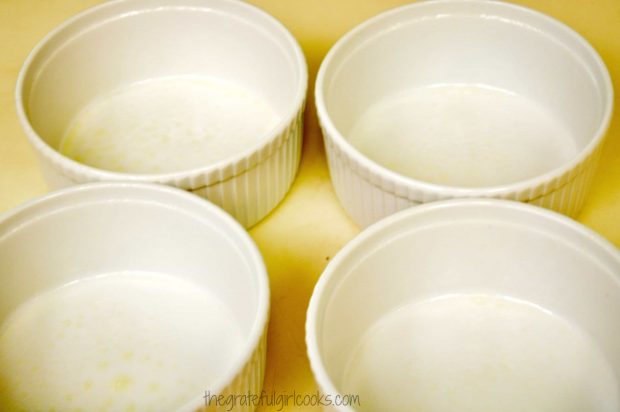
Spray 4 ramekins with non-stick cooking spray. The ones I use are 4″ wide.

Ramekins are coated with non stick cooking spray to bake apple crisps.
Fill ‘Em Up

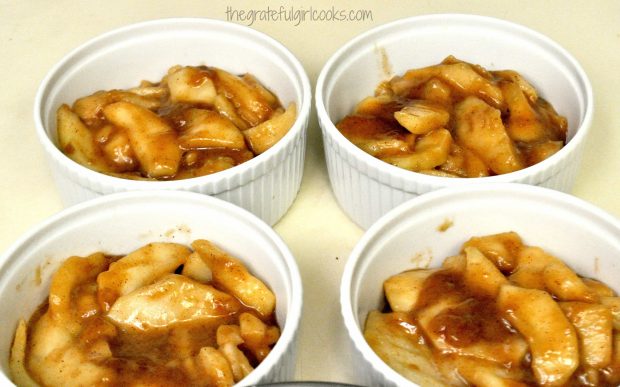
Once the apples are done cooking, divide them evenly between the 4 greased ramekins.

Prepared apple filling divided and added to ramekins.
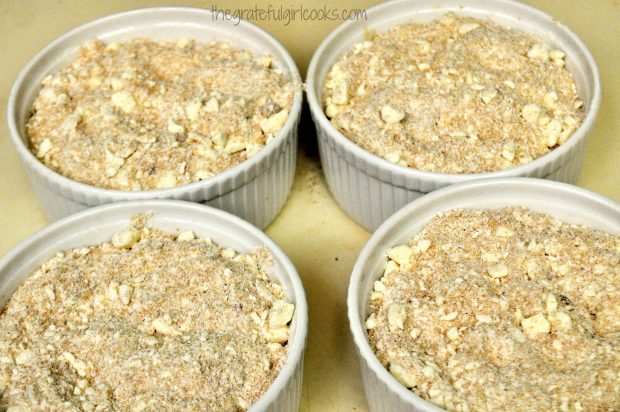
Divide the crumb topping evenly between the 4 ramekins, sprinkling it over the top of the mini apple crisps, all the way to the edges.

Crumb topping is added to mini apple crisps in ramekins before baking.Time To Cook the Mini Apple Crisps!

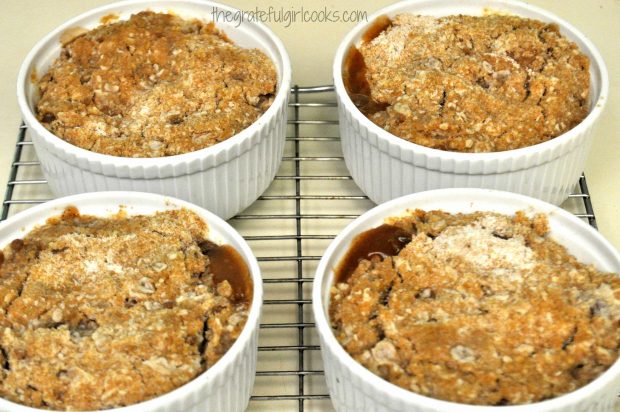
Bake the mini apple crisps in a 375 degree oven for about 25 minutes, until the mixture is bubbly, and the top crumble mixture is lightly browned.

Mini apple crisps, after baking for 25 minutes... ready to eat!
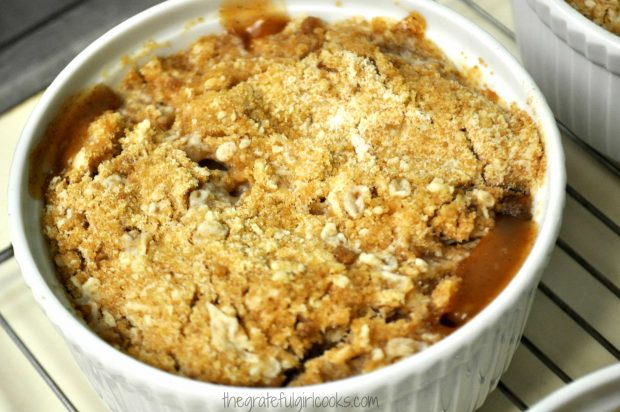
Let the desserts cool on a wire rack for a bit, then serve the Mini Apple Crisps while they are still warm. They are delicious!

Mini apple crisps are served warm!
Doesn’t that look delicious? These mini apple crisps are especially good with a tiny scoop of vanilla ice cream served on top! This recipe is so easy to make, too! You’re gonna LOVE it!

If you enjoy apple desserts, you might also be interested in Dutch Crumb Apple Pie, Apple Cobbler, Apple Shortbread Tart, or Apple Pie Stuffed Won Tons!

Welcome, FALL! Sure hope you will give this delicious recipe a try! Have a great week!

Looking For More COBBLER or CRISP Recipes?

You can find ALL of my recipes in the Recipe Index, which is located at the top of the page. I have a good variety of cobblers and crisp recipes to enjoy, including:

Want More Recipes? Get My FREE Newsletter!

I publish a newsletter 2 times per month (1st and 15th) with lots of recipes, tips, etc..
Would you like to join our growing list of subscribers?

There is a Newsletter subscription box on the top right (or bottom) of each blog post, depending on the device you use.
You can submit your e-mail address there, to be added to my mailing list.

Find Me On Social Media:

Facebook page: The Grateful Girl Cooks!
Pinterest:
The Grateful Girl Cooks!
Instagram:
jbatthegratefulgirlcooks

Author's signatureRecipe Slightly Adapted From: The New Pillsbury Family Cookbook, page 131, published 1973 by The Pillsbury Company,

↓↓ PRINTABLE RECIPE BELOW ↓↓

0 from 0 votes
Mini Apple Crisps
Prep Time
15 mins
Cook Time
25 mins
Total Time
40 mins
 
Mini Apple Crisps are individual sized versions of this favorite American classic dessert! Super easy to make - serve with a scoop of vanilla ice cream!
Category: Dessert
Cuisine: American
Keyword: mini apple crisps
Servings: 4 servings
Calories Per Serving: 591 kcal
Author: JB @ The Grateful Girl Cooks!
Ingredients
For apples:
  • 5 cups Granny Smith apples (peeled, cored, and sliced)
  • 1/4 cup brown sugar
  • 1/2 teaspoon cinnamon
  • 1 Tablespoon lemon juice
  • 2 Tablespoons water
For crumble mixture:
  • 3/4 cup firmly packed brown sugar
  • 1/2 cup all purpose flour (unsifted)
  • 1/2 cup rolled oats (old fashioned or quick cook)
  • 1 teaspoon cinnamon
  • 1/2 cup cold butter
Instructions
  1. Place sliced apples, 1/4 cup brown sugar, 1/2 tsp. cinnamon, lemon juice and water into a large skillet. Stir to combine. Cook on medium-low heat, stirring occasionally, for approximately 10 minutes, or until apples have softened slightly. Remove from heat.
  2. While apples are cooking, prepare the crumb topping. Place the brown sugar, flour, rolled oats, 1 tsp. and cinnamon in a medium sized bowl. Cut the butter into chunks and add to bowl. Using a pastry blender, cut in the butter until mixture is crumbly and butter is about the size of peas. Set aside.
  3. Spray 4 ramekins with non-stick spray. Once apples are done, divide and spoon them equally into the 4 ramekins.
  4. Divide the crumb topping equally between the 4 apple-filled ramekins.Spoon the crumb topping over the entire surface of the apples, all the way to the edges.
  5. Bake apple crisps at 375 degrees for approximately 25-30 minutes, or until mixture is bubbly and the crumb topping is a light, golden brown. Remove hot ramekins to a wire rack to cool a bit. Serve warm, with a tiny scoop of vanilla ice cream, if desired.

Recipe Notes

Firm tart baking apples are used in this recipe (Granny Smith, Gravenstein, etc.).

Nutrition Facts
Mini Apple Crisps
Amount Per Serving (1 serving)
Calories 591 Calories from Fat 216
% Daily Value*
Fat 24g37%
Saturated Fat 14g88%
Cholesterol 61mg20%
Sodium 220mg10%
Potassium 293mg8%
Carbohydrates 95g32%
Fiber 5g21%
Sugar 69g77%
Protein 3g6%
Vitamin A 795IU16%
Vitamin C 8.7mg11%
Calcium 72mg7%
Iron 1.7mg9%
* Percent Daily Values are based on a 2000 calorie diet.

Here’s one more to pin on your Pinterest boards!Mini Apple Crisps are individual sized versions of this favorite American classic dessert! Super easy to make - serve with a scoop of vanilla ice cream!


Save

Save

Save

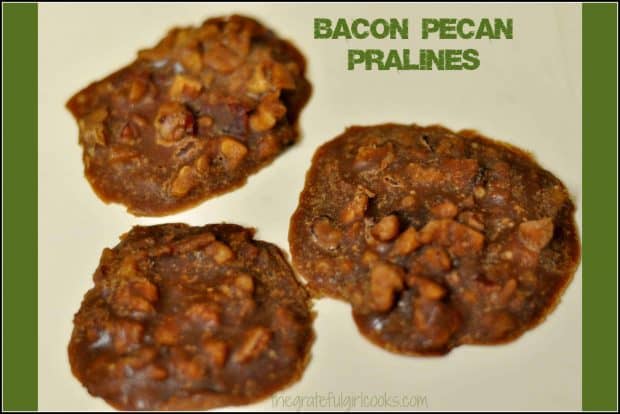
Bacon Pecan Pralines

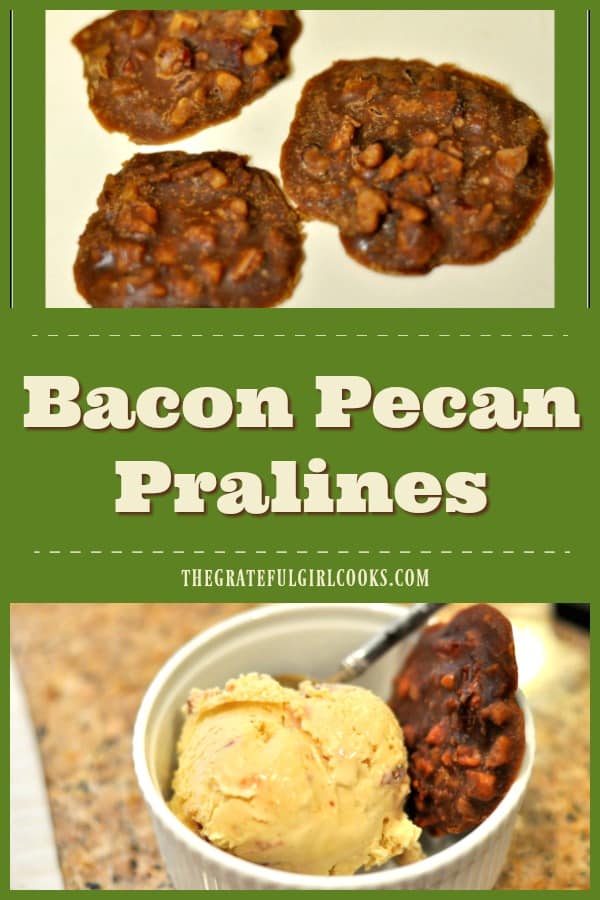
Bacon Pecan Pralines are a delightful twist on traditional pralines. These sweet treats include BACON, which gives them a sweet and salty flavor – a great combination! Bacon Pecan Pralines are a twist on traditional pralines. These sweet treats include BACON, which gives them a sweet and salty flavor - a great combination!
I recently made these Bacon Pecan Pralines for a “BACON” themed dinner my husband and I went to, with two other couples. Every course of the dinner had to include some type of bacon.

Since I was in charge of desserts, I made several. Included were these yummy pralines, which included salty bacon. Sweet and salty… a great combination! They were really good! Remember… everything is better with bacon. Even bacon pecan pralines, right?

I had never made Pralines before this, but I plunged right in, and managed to pull this one off!

Scroll Down For A Printable recipe Card At The Bottom Of The Page

Important Tip When Making Bacon Pecan Pralines

The only thing I would do different next time when making these pralines is to use a larger cooking pan. The one I used was medium sized.

I THOUGHT the medium sized pan was big enough, but I was wrong. There were a couple moments of near panic as the mixture nearly boiled up and out of my pan.

The hot praline mixture never did boil over, but please, listen to my advice here. Use a LARGE and DEEP saucepan when you prepare this recipe. You won’t have to frantically stir to keep the candy from boiling over the top of the pan… and yes, you will thank me for this important tip!

How To Make Bacon Pecan Pralines

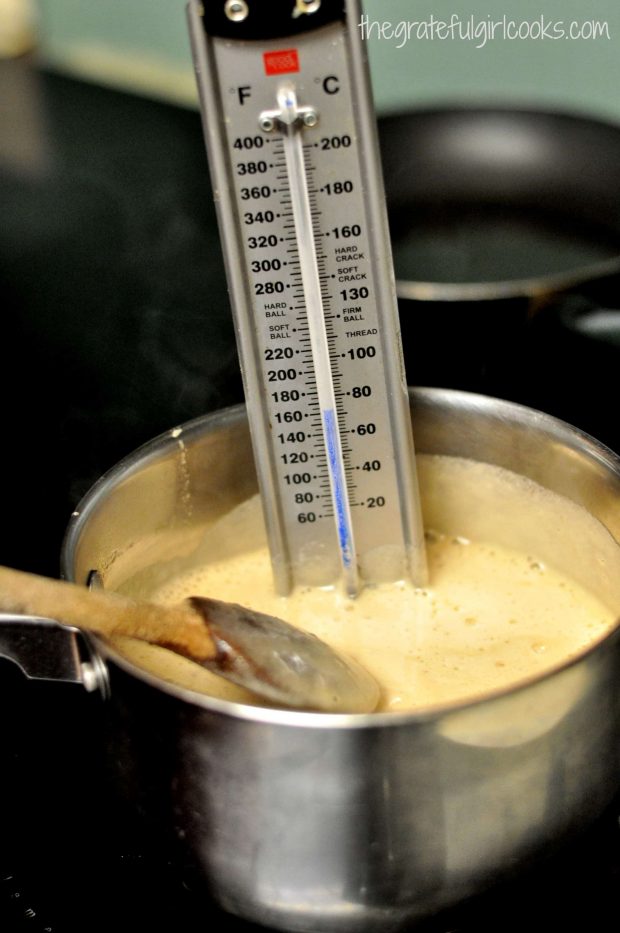
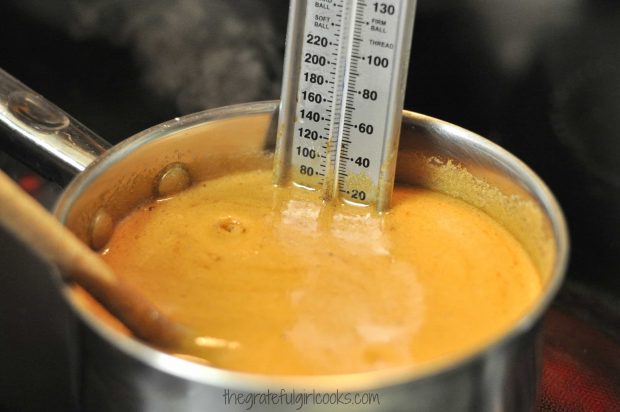
In a LARGE and DEEP saucepan, mix together granulated sugar, brown sugar, buttermilk, corn syrup, baking soda and salt. Insert a candy thermometer into the mixture.

Cook mixture on medium heat, until it reaches 235 degrees on a candy thermometer.

This will take about 20 minutes or so. Mixture will be VERY hot. Stir mixture often while it cooks to prevent it from burning on the bottom of the pan. The mixture will turn a rich caramel color near the end of the cooking time.

Candy thermometer in boiling sauce for bacon pecan pralines.Candy thermometer in saucepan full of bacon pecan pralines sauce.
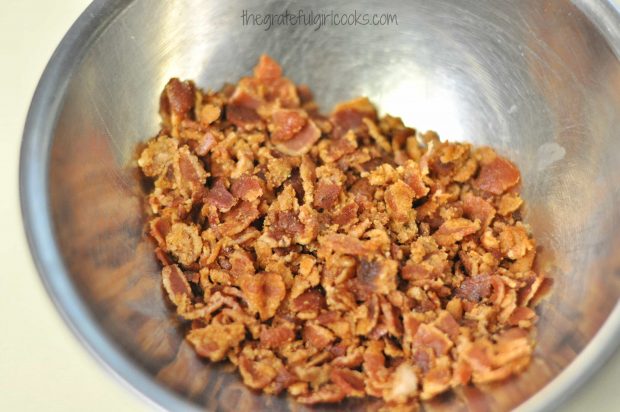
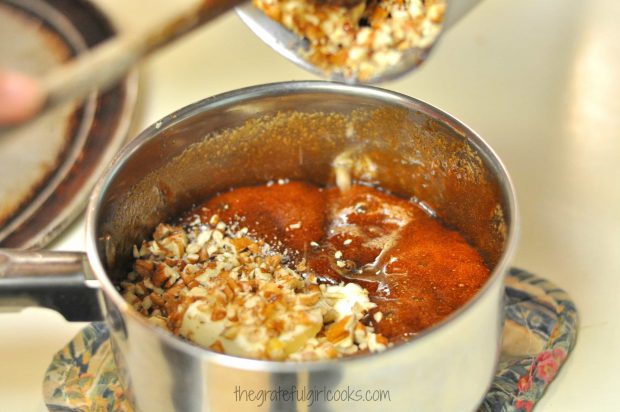
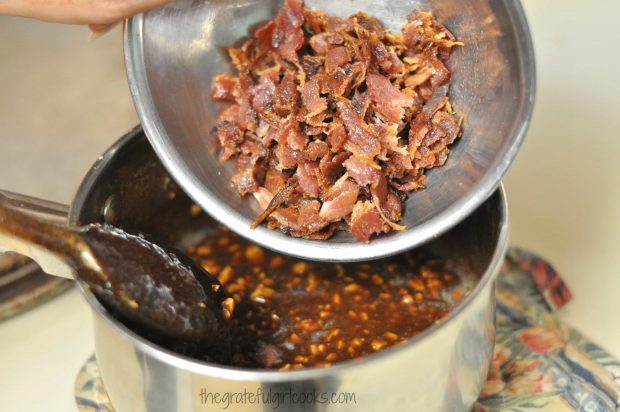
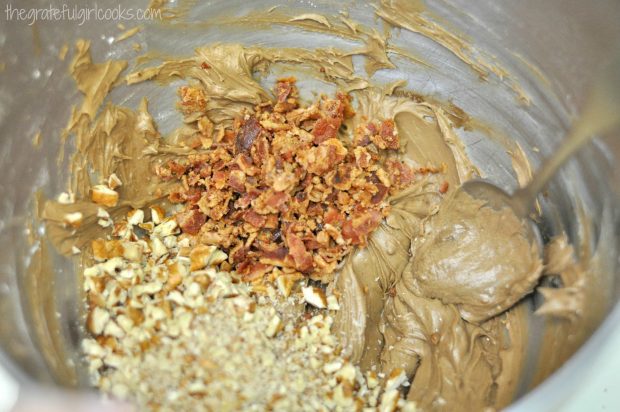
Once mixture reaches 235 degrees, remove pan from heat. Immediately add the butter, vanilla, chopped pecans, orange zest, and cooked bacon crumbles.

Adding chopped pecans for bacon pecan pralines to saucepan

Crumbled, cooked bacon pieces are added to praline mixture in pan.

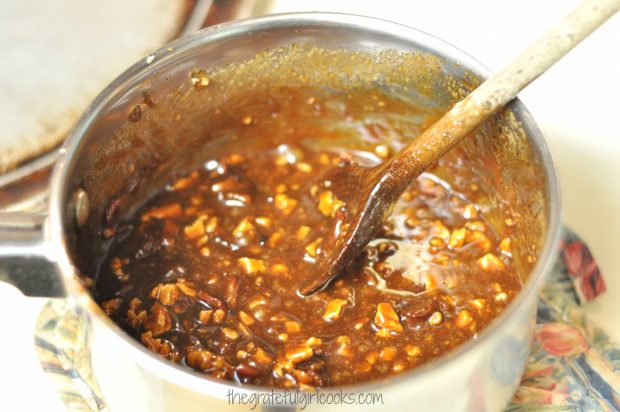
Beat the bacon pecan praline mixture with a wooden spoon until the mixture is thoroughly combined. WARNING: The praline mixture will be very, very hot. Be very careful so you don’t burn yourself!

Hot bacon pecan pralines mixture, in saucepan after cooking.

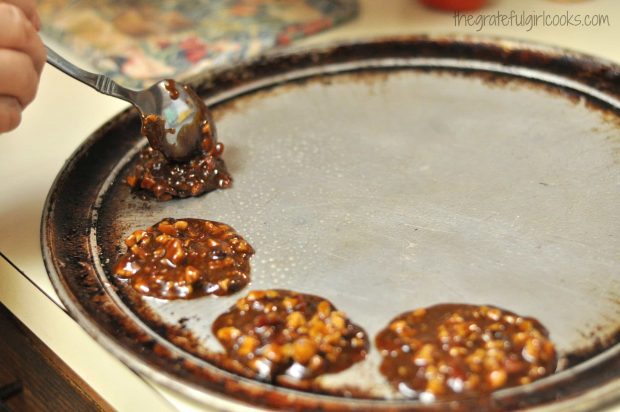
Drop pralines by teaspoonfuls onto a sprayed baking sheet , a silicone mat, OR onto buttered parchment paper. Leave space between each of the pralines, as they will spread a bit while hot.

Dropping spoonfuls of bacon pecan pralines onto round baking pan, to cool.
Let the bacon pecan pralines sit and cool at room temperature for at least 30 minutes. The pralines will firm up as they cool. When completely firm, they are ready to be served. Carefully remove from pan.

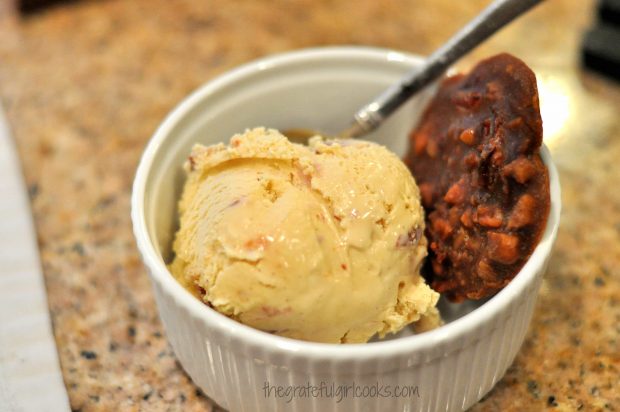
Serve pralines by themselves, as a small treat, or as I did for our Bacon Night, on the side of a scoop of Candied Bacon Ice Cream. YEP! Bacon overload!

Bacon pecan pralines were served with a scoop of candied bacon ice cream!
If you’re looking for an interesting, yet amazingly good dessert treat, I hope you will consider making these yummy bacon pecan pralines! Have a great day!

Interested In More Recipes?

Thank you for visiting this website. I appreciate you using some of your valuable time to do soIf you’re interested, I publish a newsletter 2 times per month (1st and 15th) with all the latest recipes, and other fun info. I would be honored to have you join our growing list of subscribers, so you never miss a great recipe! 

There is a Newsletter subscription box on the top right side (or bottom) of each blog post, depending on the device you use, where you can easily submit your e-mail address (only) to be included in my mailing list.

You Can Also Find Me On Social Media:

Facebook page: The Grateful Girl Cooks!
Pinterest:
The Grateful Girl Cooks!
Instagram:
jbatthegratefulgirlcooks

Author's signatureRecipe Source: http://www.framedcooks.com/2011/06/buttermilk-bacon-pralines.html

0 from 0 votes
Bacon Pecan Pralines
Prep Time
10 mins
Cook Time
20 mins
Total Time
30 mins
 

Bacon Pecan Pralines are a twist on traditional pralines. These sweet treats include BACON, which gives them a sweet and salty flavor - a great combination!

Category: Candy
Cuisine: American
Keyword: bacon pecan pralines, pralines
Servings: 20
Calories Per Serving: 142 kcal
Author: JB @ The Grateful Girl Cooks!
Ingredients
  • 1 cup granulated sugar
  • 1/2 cup brown sugar (packed)
  • 1/2 cup buttermilk
  • 1 Tablespoon light corn syrup
  • 1/2 teaspoon baking soda
  • 1/4 teaspoon salt
  • 4 Tablespoons butter
  • 1/2 teaspoon vanilla extract
  • 1 cup chopped pecans
  • 1/2 teaspoon orange zest
  • 4 bacon slices , pre-cooked crisp, then crumbled
Instructions
  1. Place the granulated sugar, brown sugar, buttermilk, corn syrup, baking soda and salt into a large and deep heavy saucepan. Stir to combine. Insert a candy thermometer into mixture, attaching it to the side of pan. Heat on medium heat until the mixture reaches 235 degrees F on the candy thermometer, stirring often to prevent candy from burning on the bottom of pan.
  2. Once thermometer reads 235 degrees, carefully remove pan from heat. Be careful... it will be HOT!
  3. Add butter, vanilla extract, chopped pecans, orange zest, and bacon to the hot praline mixture. Beat ingredients together, using a wooden spoon, until all is combined.
  4. Drop by rounded teaspoonfuls onto a sprayed baking sheet, a silicone mat, OR onto buttered parchment paper. Leave space between each praline, as mixture will spread while hot.
  5. Let the pralines cool at room temperature for at least 30 minutes, until totally cooled and firm all the way through. Serve and enjoy! (Pralines may be stored in refrigerator).
Nutrition Facts
Bacon Pecan Pralines
Amount Per Serving (1 serving)
Calories 142 Calories from Fat 72
% Daily Value*
Fat 8g12%
Saturated Fat 2g13%
Cholesterol 9mg3%
Sodium 114mg5%
Potassium 46mg1%
Carbohydrates 17g6%
Sugar 16g18%
Protein 1g2%
Vitamin A 85IU2%
Vitamin C 0.2mg0%
Calcium 16mg2%
Iron 0.2mg1%
* Percent Daily Values are based on a 2000 calorie diet.

Here’s one more to pin on your Pinterest boards!Bacon Pecan Pralines are a twist on traditional pralines. These sweet treats include BACON, which gives them a sweet and salty flavor - a great combination!


Save

Save

Save

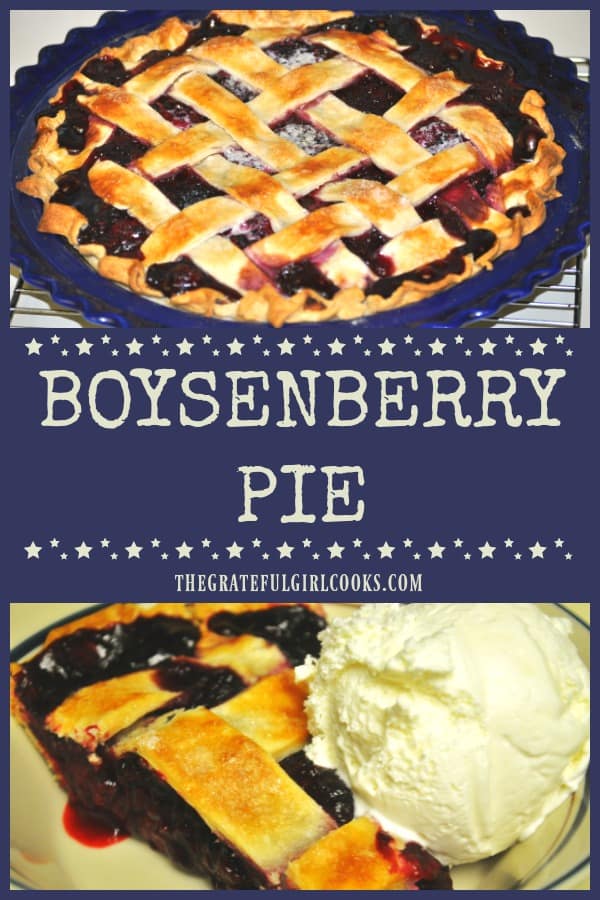
Boysenberry Pie

Enjoy the flavor of summer berries with homemade Boysenberry Pie! Serve a slice topped with vanilla ice cream for a classic, delicious dessert!Enjoy the flavor of summer berries with homemade Boysenberry Pie! Serve a slice topped with vanilla ice cream for a classic, delicious dessert!

When I was growing up in Southern California, I LOVED to visit my Great-Aunt’s home in the summer, because she grew boysenberries in her backyard. We could pick them right out of her garden and eat them.

Sometimes we would get lucky and she would bake a Boysenberry Pie for us! This is one of my all-time FAVORITE pies… and talk about delicious!!!! Oh My!

Scroll Down For A Printable Recipe Card At The Bottom Of The Page

I Grew Up Enjoying Boysenberry Pie At Knott’s Berry Farm

Another reason I love homemade boysenberry pie is due to family trips to Knott’s Berry Farm in Southern CA as I was growing up. Our family always stopped into their restaurant for their famous Fried Chicken Dinner and, of course, their FAMOUS Boysenberry Pie for dessert. YUMMO!!! What a delicious treat!

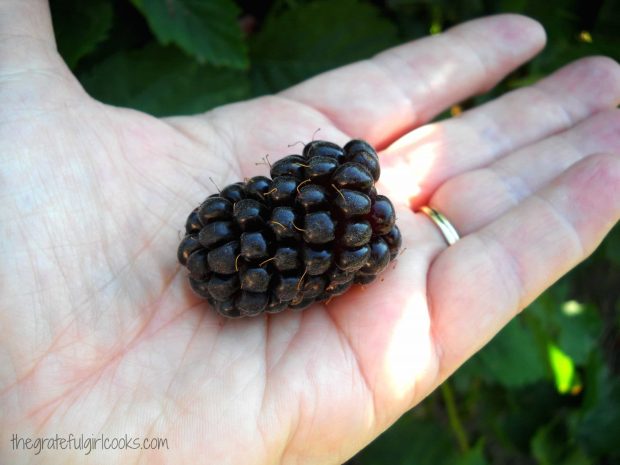
This is a fresh picked boysenberry... my FAVORITE!

I  LOVE to go to a local U-Pick Farm each summer and pick boysenberries while ripe, and store them away so I can make a Boysenberry Shortbread Tart, a cobbler, or this Boysenberry Pie any time I want to during the year.

The recipe I am posting is for a 9-inch boysenberry pie, but I’ve included quantity instructions for an 8 inch pie in the Notes section of the printable recipe.

This Boysenberry Pie Recipe Is An Oldie, But A Goodie!

The recipe I use for my Boysenberry Pie is one I have been using for nearly 40 years. It is straight from the pages of a cookbook I received as a wedding present YEARS AND YEARS AGO. The recipe is as easy as making (or buying) a double pie crust, mixing up the pie ingredients, adding it to the pie crust, then baking.

I use this recipe from my blog to make pie crusts: DIY – Mom’s Pie Crust.  Always makes a flaky, great crust.  I either make a double crust pie or I make a lattice-weaved crust pie.

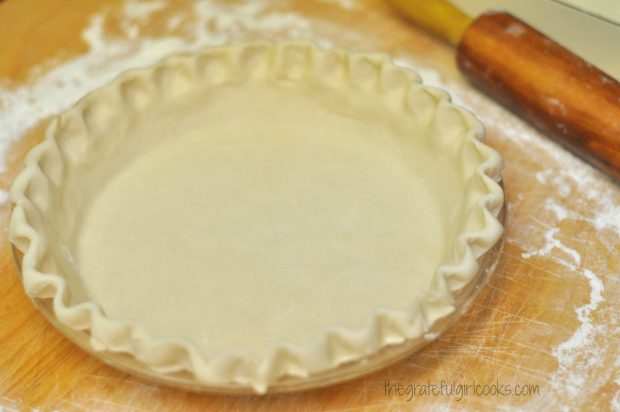
Preparing the pie crust to make a boysenberry pie.

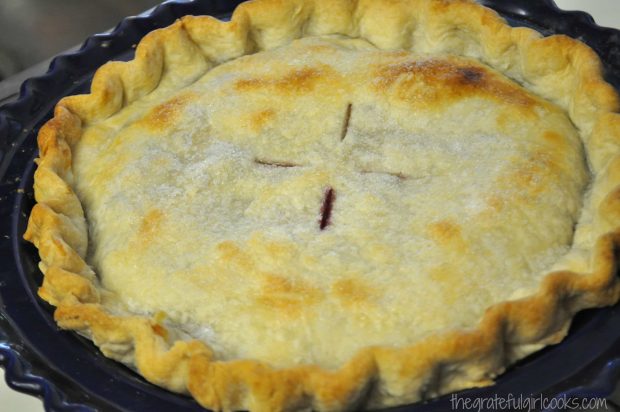
Whether you make your own crust OR buy it, this pie is delicious! Here are picture of both ways I make my crusts for this pie. The first photo is a traditional double crust boysenberry pie.

Boysenberry Pie, with a traditional double crust.

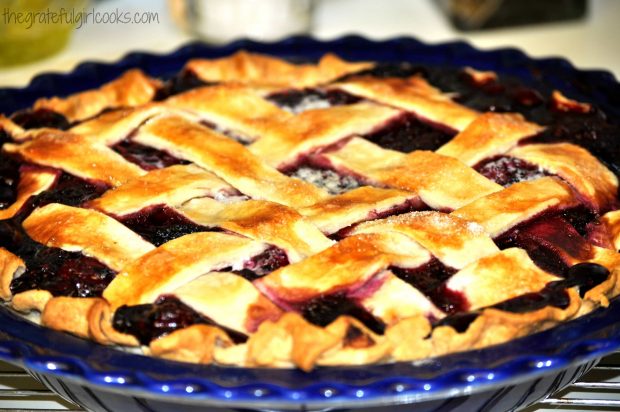
This boysenberry pie was made with a lattice-weaved crust. We sure love this pie!

Boysenberry pie, with a lattice crust.

I hope you will consider making this classic dessert!  The recipe is also adaptable for using blackberries, too!!  I use fresh berries whenever they are available, but it is also fine to use unsweetened frozen berries (thawed before adding to pie).

Serve Boysenberry Pie A La Mode!

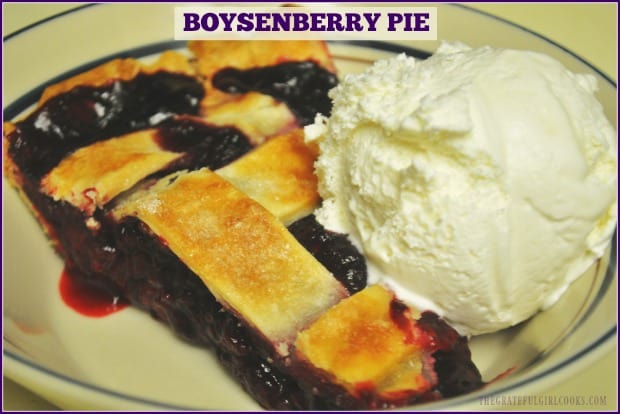
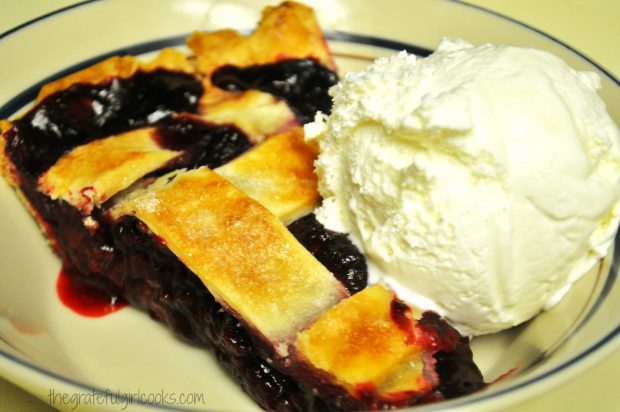
Homemade boysenberry pie is a delicious dessert… especially with a scoop of vanilla ice cream!), and for me, brings back sweet memories of childhood, spent in the company of my wonderful family!

Boysenberry Pie, served with a scoop of vanilla ice cream!
Hope you enjoy a wonderful day, full of sweet memories! Hope you make this delicious dessert!

Looking For More PIE Recipes?

You can find all of my pie recipes in the Recipe Index, located at the top of the page. A few family favorites include:

Interested In More Recipes?

Thank you for visiting this website. I appreciate you using some of your valuable time to do soIf you’re interested, I publish a newsletter 2 times per month (1st and 15th) with all the latest recipes, and other fun info. I would be honored to have you join our growing list of subscribers, so you never miss a great recipe!
There is a Newsletter subscription box on the top right side (or bottom) of each blog post, depending on the device you use, where you can easily submit your e-mail address (only) to be included in my mailing list.

You Can Also Find Me On Social Media:
Facebook page: The Grateful Girl Cooks!
Pinterest: The Grateful Girl Cooks!
Instagram: jbatthegratefulgirlcooks

Author's signaturePie Recipe Source: “The New Pillsbury Family Cookbook”, copyright 1973, the Pillsbury Company, page 149.

Pie Crust Recipe:  http://www.thegratefulgirlcooks.com/diy-moms-pie-crust/

0 from 0 votes
Boysenberry Pie
Prep Time
20 mins
Cook Time
40 mins
Total Time
1 hr
 
Enjoy the flavor of summer berries with homemade Boysenberry Pie! Serve a slice topped with vanilla ice cream for a classic, delicious dessert!
Category: Dessert
Cuisine: American
Keyword: boysenberry pie
Servings: 8 servings
Calories Per Serving: 368 kcal
Author: JB @ The Grateful Girl Cooks!
Ingredients
For the pie crusts:
  • 2 Two pastry pie crusts (one for top, one for bottom-homemade or store bought)
For the Pie Filling (a 9 inch pie):
  • 4 cups boysenberries (fresh)
  • 1 cup granulated sugar
  • 1/3 cup all purpose flour
  • 1/4 teaspoon cinnamon
  • 2 Tablespoons butter
Instructions
  1. Preheat oven to 425 degrees.
  2. In a large bowl, gently mix together the boysenberries, sugar, all purpose flour and cinnamon. Pour the fruit mixture into a pastry lined pie pan. Cut the butter into small pieces; dot the top of the fruit with the butter.

  3. Top the pie with the second crust; completely seal and flute the edges to make the crust. Make a slight cut with a knife in the middle of the top crust to vent the pie. If you wish to have a shiny/sugary top crust, brush the top crust with a tiny bit of milk (using a pastry brush), then sprinkle with granulated sugar).

  4. Bake for approximately 40-45 minutes, or until the juices are bubbly in the center and the crust is golden brown.
Recipe Notes

For an 8 inch pie, measurements are as follows: 3 cups fresh fruit, 3/4 cup sugar, 1/4 cup flour, 1/4 teaspoon cinnamon, and 1 Tablespoon butter. Same time for baking.

Nutrition Facts
Boysenberry Pie
Amount Per Serving (1 slice)
Calories 368 Calories from Fat 126
% Daily Value*
Fat 14g22%
Saturated Fat 5g31%
Cholesterol 7mg2%
Sodium 199mg9%
Potassium 138mg4%
Carbohydrates 57g19%
Fiber 4g17%
Sugar 29g32%
Protein 3g6%
Vitamin A 130IU3%
Vitamin C 2.1mg3%
Calcium 26mg3%
Iron 1.9mg11%
* Percent Daily Values are based on a 2000 calorie diet.

Here’s one more to pin on your Pinterest boards!Enjoy the flavor of summer berries with homemade Boysenberry Pie! Serve a slice topped with vanilla ice cream for a classic, delicious dessert!
 

Save

Chocolate-Covered Bacon

Chocolate-covered bacon is both sweet and salty, incredibly easy to make, and is a very unique, but DELICIOUS crispy treat you will LOVE!Chocolate-covered bacon is both sweet and salty, incredibly easy to make, and is a very unique, but DELICIOUS crispy treat you will LOVE!!
A couple years ago, my husband tried a piece of Chocolate-Covered Bacon at a little bakery, while out of our area on business. He said it was fantastic (I had my doubts). Now, don’t get me wrong… I love bacon, but chocolate covered bacon seemed a bit wonky to me. That is, UNTIL I MADE MY OWN! Wowzers! It’s fantastic, and EASY to make!
Scroll Down For A Printable Recipe Card At The Bottom Of The Page

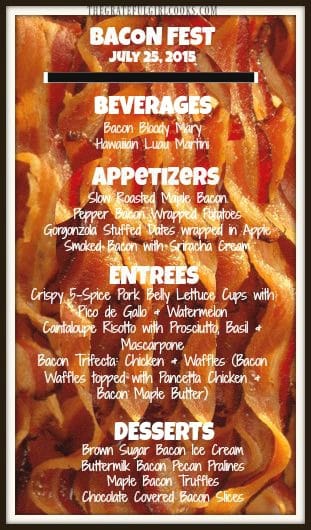
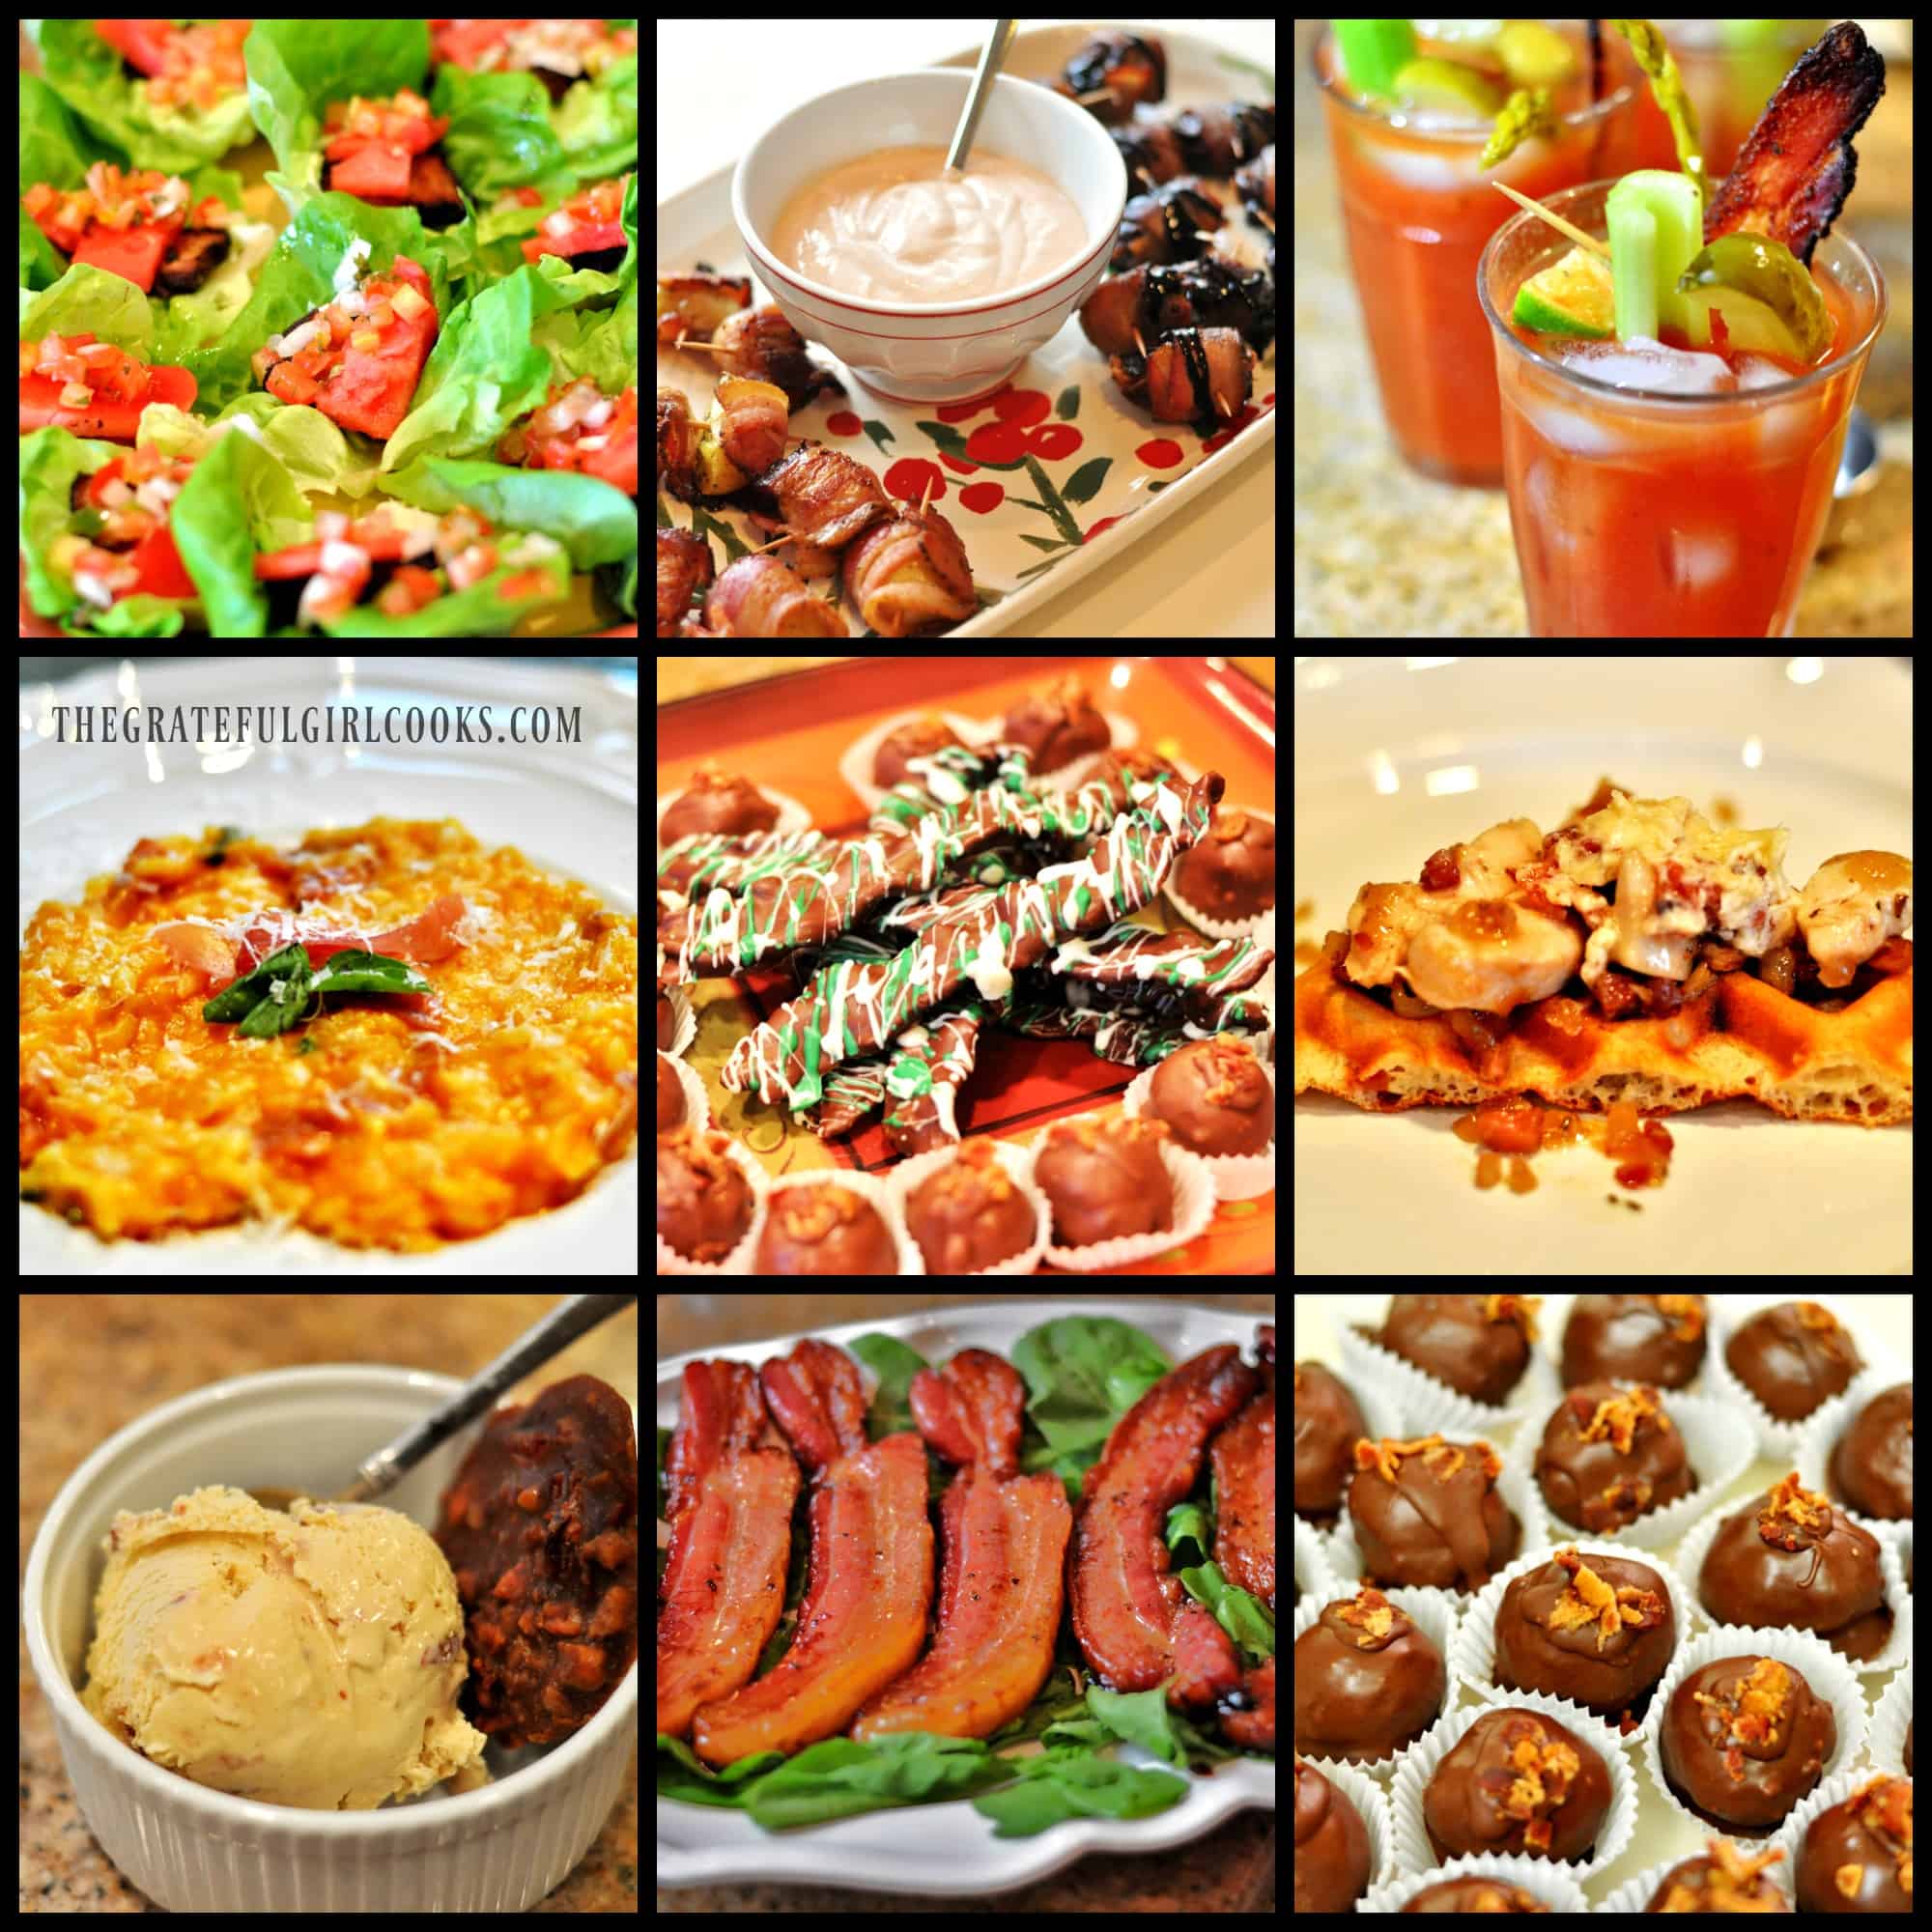
My husband and I recently attended a THEMED dinner party with dear friends. The theme this time was BACON. All parts of the meal had to include some form of bacon. Everything. Beverages, appetizers, entrees (3), and desserts. All bacon inspired. Here’s our menu for the bacon-themed dinner:

Menu for bacon-themed dinner

Here’s a collage of some of the bacon dishes we enjoyed… everything from prosciutto risotto to candied bacon ice cream!

Collage of bacon themed dishes from our bacon themed dinner

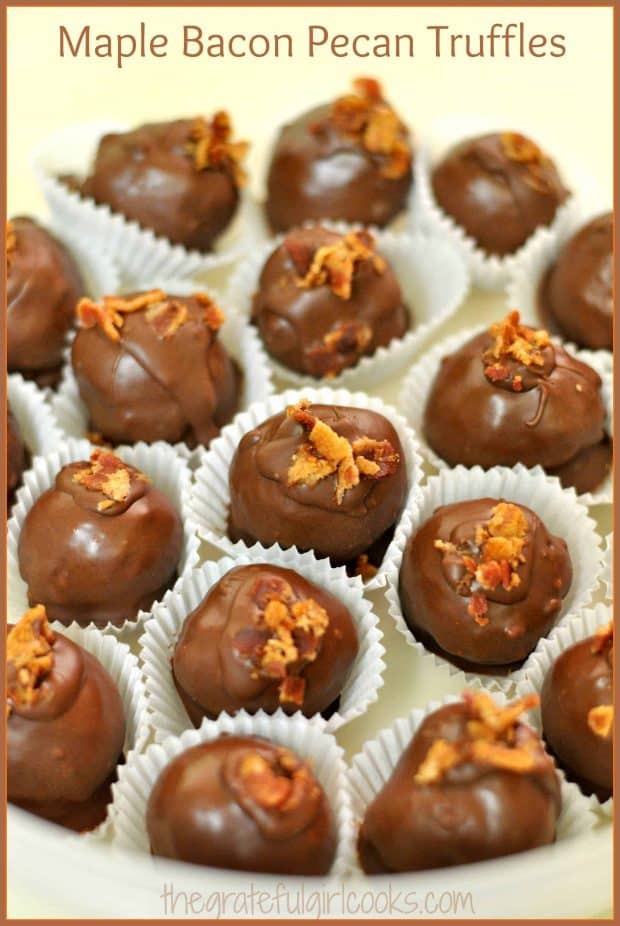
I was in charge of the desserts, (as I typically am). One of the desserts I made was chocolate covered bacon strips. YUM! Even after being coated in semi-sweet chocolate, the bacon was crispy inside. The chocolate actually is a perfect counter balance to the saltiness of the bacon.  You can also see my Bacon Pecan Pralines, Maple Bacon Pecan Truffles, and Candied Bacon Ice Cream in the collage photo above.

It really was easy to make this chocolate-covered bacon. I didn’t have a “recipe”; I just used the technique I use for dipping truffles in chocolate. My fingers got a bit messy, but that’s no big deal. Here’s what I did.

How To Make Chocolate-Covered Bacon

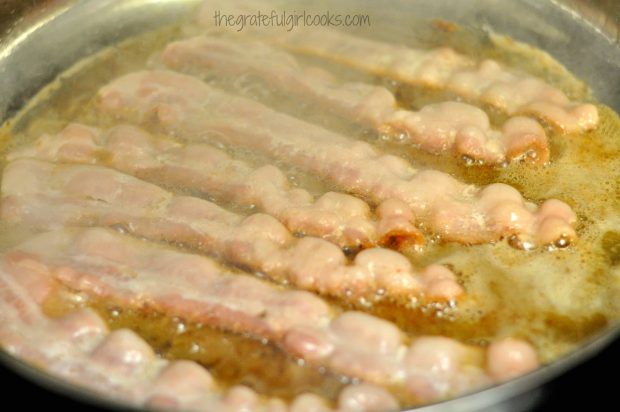
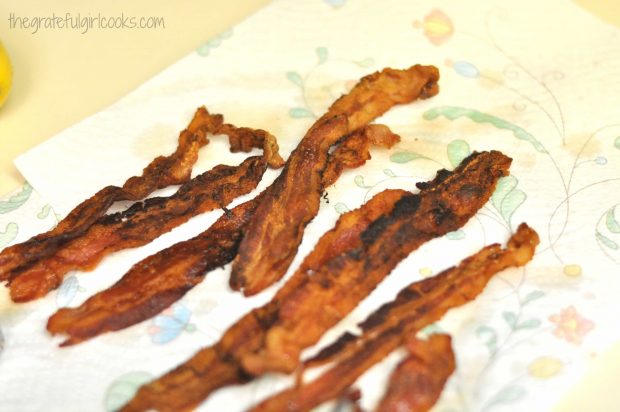
First I fried the number of bacon strips I wanted. This recipe is for 8, but you can easily alter recipe to accommodate the number of strips you want to make.  I cooked the bacon strips until they were very crispy, then drained them on a paper towel to absorb the grease.

Bacon is fried until crisp.
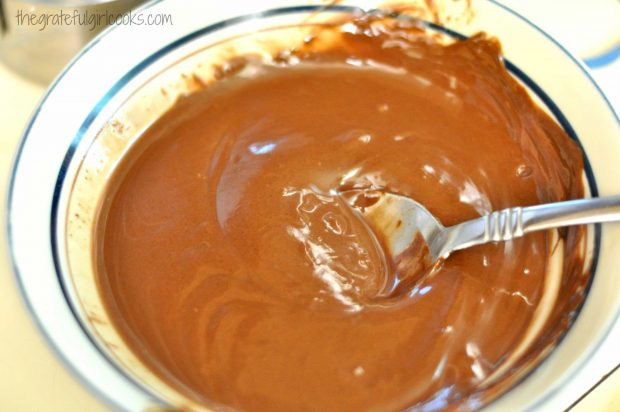
I let the bacon cool completely. Then I melted semi-sweet chocolate chips with a heaping Tablespoon of vegetable shortening in my microwave. (30 seconds, stir. 30 seconds stir).

Chocolate chips and shortening are melted together to coat baconDipping the Bacon

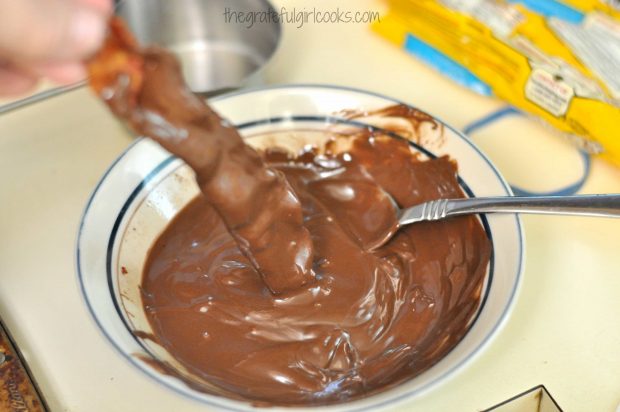
The next thing I did was carefully (the bacon is crisp, remember?) dip one piece of bacon at a time in the chocolate.  I used a spoon to help cover about 3/4 of the piece on both sides with chocolate, then carefully flipped it over and did the remaining bit on both sides.

I used a spoon to spoon the chocolate into nooks and crannies that needed help to be covered. I let the excess chocolate drip back into the bowl.

Crisp bacon is dipped in melted chocolate until fully covered.
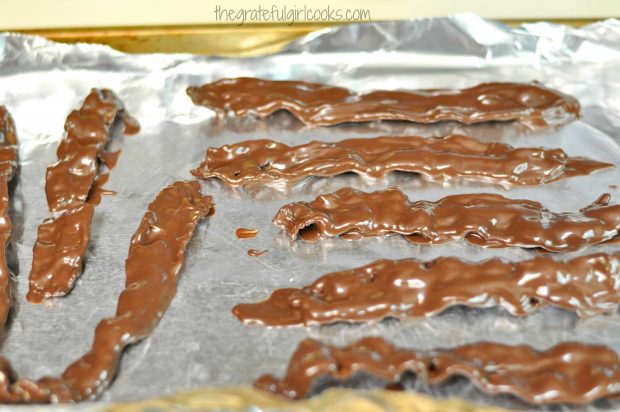
After each piece was completely covered in chocolate, it was carefully placed on a piece of aluminum foil to let the chocolate firm up.

Chocolate dipped bacon is left to dry until chocolate firms up
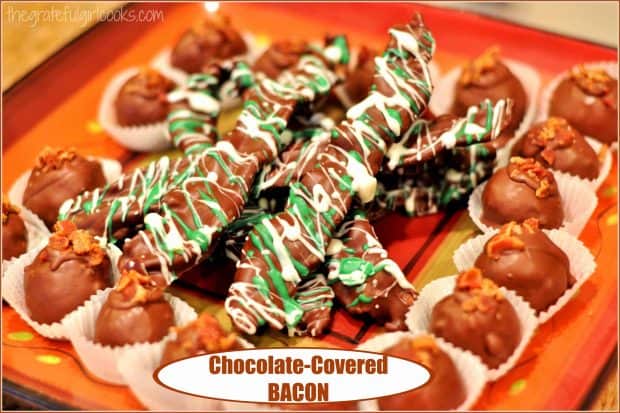
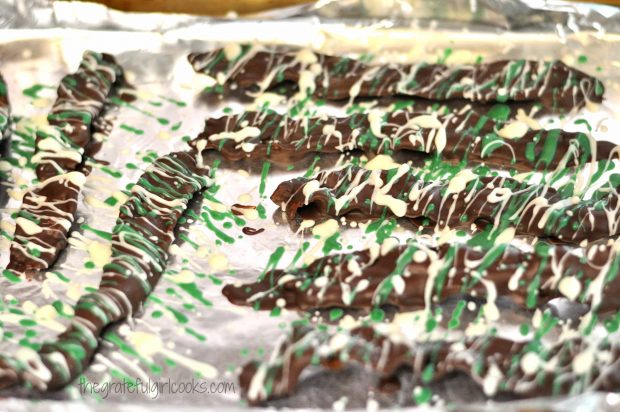
Once the chocolate had firmed up, I melted some white chocolate chips (about 1/2 cup) with a small amount of shortening (1 teaspoon), then decoratively drizzled it over the bacon slices. I even had some green colored chocolate chips from a bag of Christmas colored ones, so I also drizzled that over, for contrast (optional).

Ready For Some Chocolate-Covered Bacon!

At our bacon dinner that evening, one of my friends wondered if I had put mint flavored drizzle (the GREEN chips) on the bacon. No way… just used a different colored semi-sweet chocolate chip!

Chocolate covered bacon is drizzled with white and green chocolate
When I was done being “creative” (ha ha), I let the chocolate-covered bacon slices firm up completely before attempting to remove them from the aluminum foil. I then placed them in a single layer in a sealed plastic container, and kept them in the refrigerator until ready to serve later that evening.

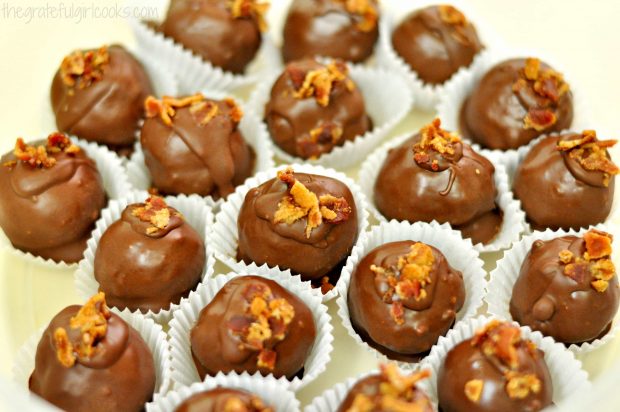
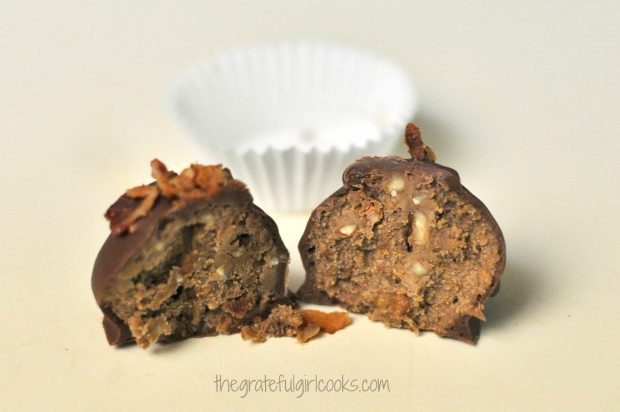
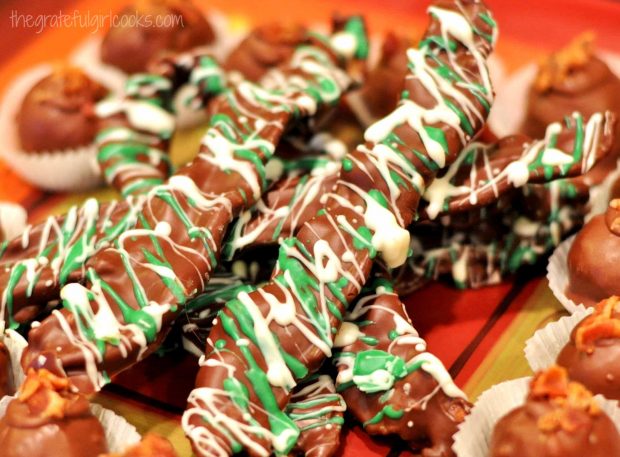
The truffles you see in the picture (with the bacon strips) are another creation I made for bacon night. Here’s the recipe for these Maple Bacon Pecan Truffles. (they were yummy, too!)

Close up photo of chocolate-covered bacon strips
That’s it! It’s really not hard to make chocolate-covered bacon, at all! Hope you will give it a try. Bacon just seems to make everything better… even chocolate! Thanks for stopping by, and come back soon. Don’t forget to check out ALL of my recipes in the Recipe Index, located at the top of the page.

Interested In More Recipes?

Thank you for visiting this website. I appreciate you using some of your valuable time to do soIf you’re interested, I publish a newsletter 2 times per month (1st and 15th) with all the latest recipes, and other fun info. I would be honored to have you join our growing list of subscribers, so you never miss a great recipe!
There is a Newsletter subscription box on the top right side (or bottom) of each blog post, depending on the device you use, where you can easily submit your e-mail address (only) to be included in my mailing list.

You Can Also Find Me On Social Media:

Facebook page: The Grateful Girl Cooks!
Pinterest:
The Grateful Girl Cooks!
Instagram:
jbatthegratefulgirlcooks

Have a GREAT day!

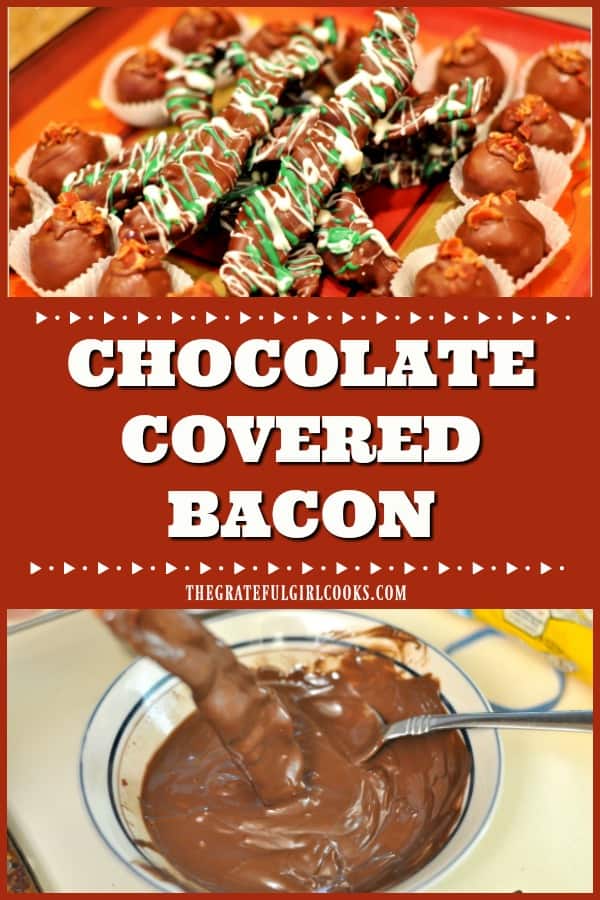
Chocolate Covered Bacon / The Grateful Girl Cooks!

0 from 0 votes
Chocolate-Covered Bacon
Prep Time
25 mins
Cook Time
0 mins
Total Time
25 mins
 
Chocolate-covered bacon is both sweet and salty, incredibly easy to make, and is a very unique, but DELICIOUS crispy treat you will LOVE!!
Category: Candy
Cuisine: American
Keyword: chocolate covered bacon
Servings: 8 servings
Calories Per Serving: 301 kcal
Author: JB @ The Grateful Girl Cooks!
Ingredients
  • Bacon (I used 8 strips)
  • 1 1/2 cups semi-sweet chocolate chips
  • 1 HEAPING tablespoon vegetable shortening
  • 1/2 cup white chocolate chips + 1 teaspoon vegetable shortening (for drizzle)
  • 1/2 cup colored chocolate chips + 1 teaspoon vegetable shortening (for drizzle... totally optional!)
Instructions
  1. Cook bacon until very crisp. Remove from skillet to paper towels to absorb extra grease. Let cool completely.
  2. Place 1 1/2 cups chocolate chips in a microwave safe bowl. Add the shortening. Cook on high power for 30 seconds. Remove. Stir. Place bowl back in microwave. Cook on high power for 30 seconds. Stir well, to fully combine. If mixture is not fully smooth, place it back in microwave on medium high power for 15 seconds (I usually don't have to do this, but you might, depending on the wattage of your microwave). DO NOT BURN THE CHOCOLATE!
  3. Carefully coat all sides of the bacon strips with melted chocolate. Using a spoon to help get the chocolate onto the bacon works great! Place coated bacon strips onto aluminum foil, and let sit, undisturbed until chocolate has set.
  4. Melt white chocolate chips and shortening in the exact same way as described above. Decoratively drizzle the mixture over the chocolate covered strips. Let sit until chocolate is completely firmed up, then place bacon strips in a covered container and refrigerate until ready to serve. Enjoy!
Nutrition Facts
Chocolate-Covered Bacon
Amount Per Serving (1 slice)
Calories 301 Calories from Fat 207
% Daily Value*
Fat 23g35%
Saturated Fat 10g63%
Cholesterol 16mg5%
Sodium 149mg6%
Potassium 234mg7%
Carbohydrates 17g6%
Fiber 2g8%
Sugar 12g13%
Protein 4g8%
Vitamin A 25IU1%
Calcium 21mg2%
Iron 2.2mg12%
* Percent Daily Values are based on a 2000 calorie diet.

Here’s one more to pin on your Pinterest boards!Chocolate-covered bacon is both sweet and salty, incredibly easy to make, and is a very unique, but DELICIOUS crispy treat you will LOVE!!


Save

Save

Peach Turnovers

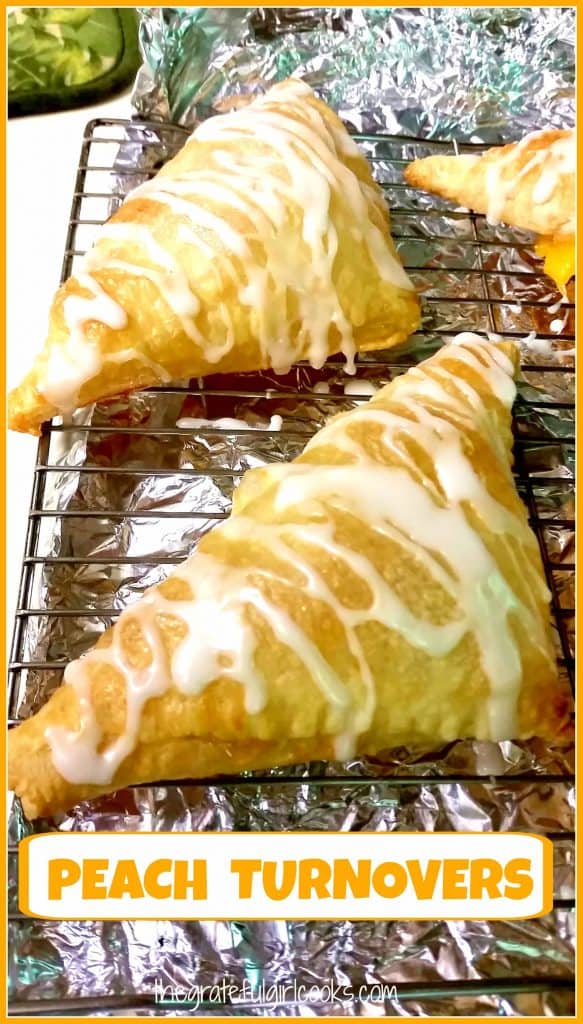
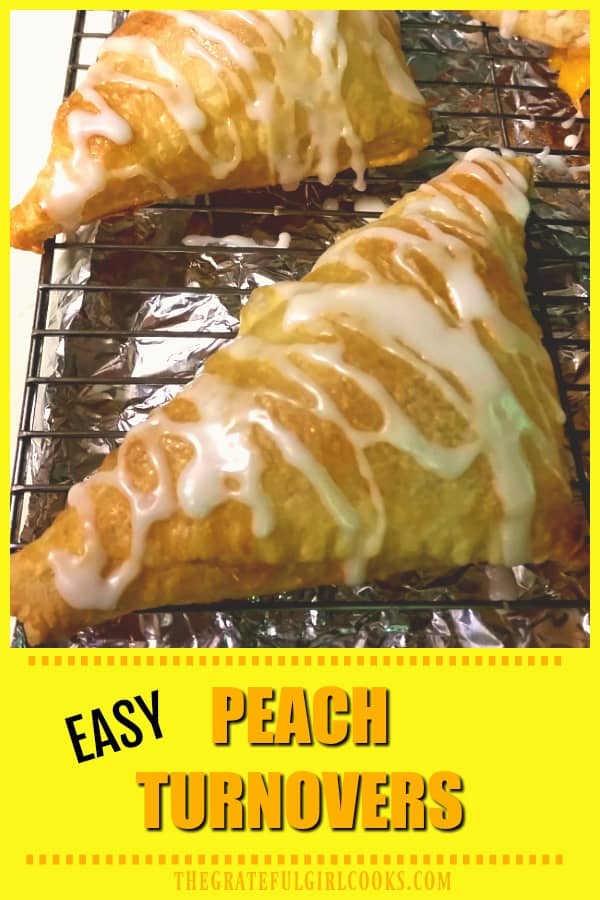
Peach turnovers with vanilla glaze are delicious, and so quick and easy to make using peach pie filling and puff pastry sheets! Sure to be a family favorite!Peach turnovers with vanilla glaze are delicious, and so quick and easy to make using peach pie filling and puff pastry sheets! Sure to be a family favorite!

Well, I’m finally coming up for air again after having houseguests for nearly 3 of the past 5 weeks, AND having tweaked my back big-time. How about I just say that the month of JULY 2015 was a memorable one, and leave it at that! Seriously, it’s time to get back to the old blog , since I can now sit down at my desk without wincing (ouch!). Today I am sharing a quick recipe for peach turnovers!

Scroll Down For A Printable Recipe Card At The Bottom Of The Page

How I Came Up With the Recipe For Peach Turnovers

After I saw a doctor and was able to move again without as much pain, I canned 9 quarts of Peach Pie Filling after going out and picking peaches at a local U-Pick Farm. I had to make up for lost time! With just a little bit of pie filling left over, I tried to figure out what else I could make with it. 

I remembered I had one sheet of Puff Pastry left in my freezer, and decided to make some quick Peach Turnovers, and off to the kitchen I went! The recipe uses two pastry sheets to make 8 turnovers, but I only made half a recipe, which is why you only see 4 turnovers in my pictures. The printable recipe gives the amount necessary to make 8 turnovers.

Prepare The Puff Pastry

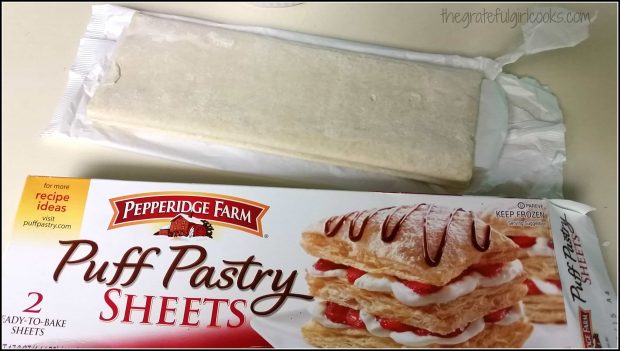
First I got out the frozen puff pastry and let it thaw on the counter for about half an hour. The thawing out time was the hardest/longest part of the whole recipe. Go figure!

Puff pastry sheets are used to make peach turnovers.
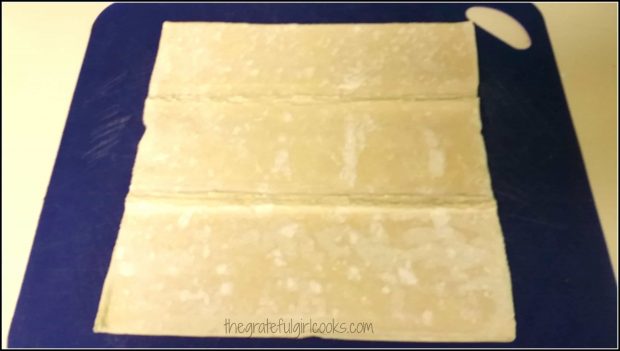
Once thawed, carefully unroll the entire pastry sheet, and seal the perforated fold lines in the pastry together (using fingers) to form one whole sheet of puff pastry. You can see the fold lines in the photo below.

Puff pastry is rolled out and perforated lines in dough are sealed.
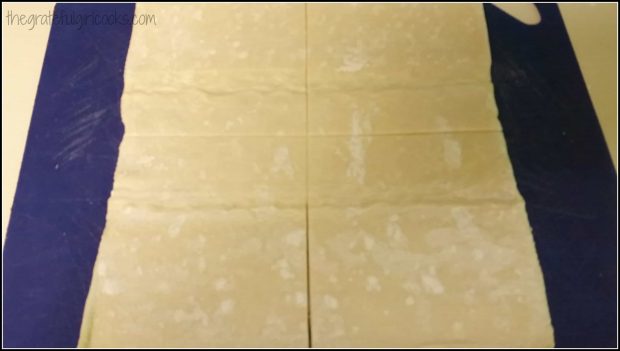
Cut the pastry into 4 equal sized squares, using a knife.

Peach turnover dough is cut into 4 equal squares.
Add The Peach Pie Filling

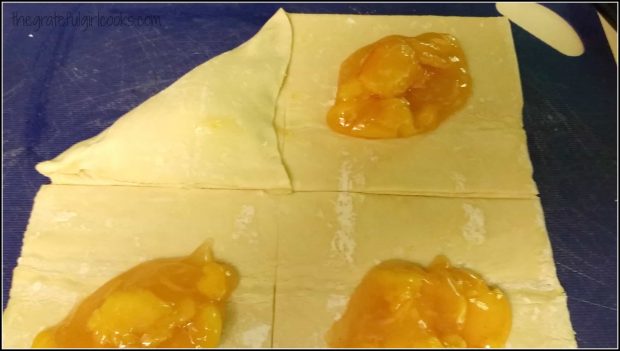
Place a heaping Tablespoonful of peach pie filling into the middle of each square, trying not to put too much onto each square (if using canned pie filling, you will not use the entire can!). Brush all the edges of each square with a beaten egg white and water mixture, then fold one side of each square (over the pie filling) to the opposite side, to form a triangle.

Once each triangle is made, crimp the edges of each triangle using the tines of a fork to seal the two sides of the dough together. (sorry, forgot to take photo of the crimping part). You can also just pinch the two pieces of dough together to completely seal the edges of the peach turnovers.

Peach pie filling is added to puff pastry squares, then dough is folded over.
Bake The Peach Turnovers

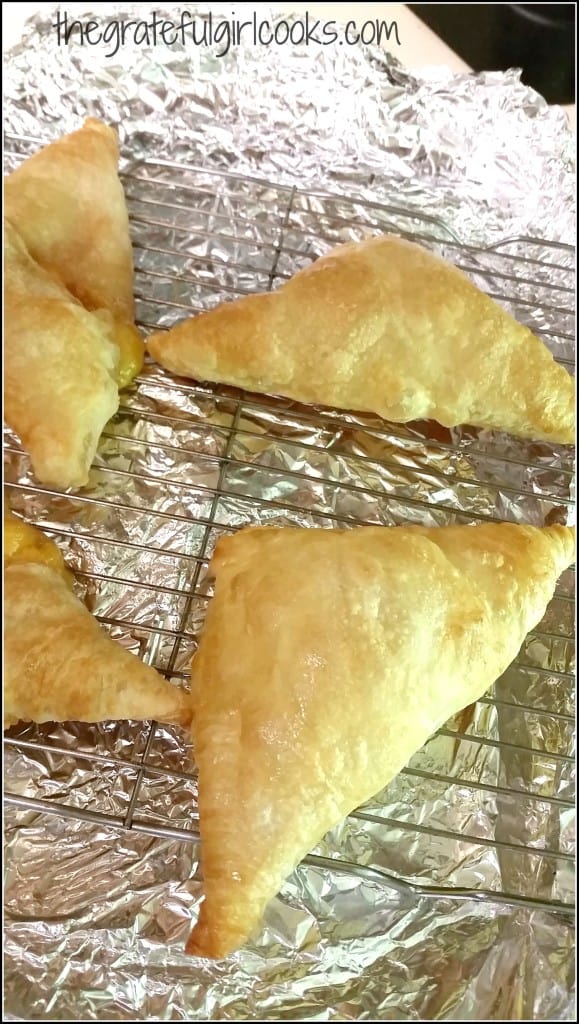
Carefully place the peach turnovers onto a cookie sheet which has been sprayed with non-stick spray, and bake for 20-25 minutes until light golden brown. When I make them, it usually takes 23 minutes, but keep an eye on yours, as oven temps can vary quite a bit!

Peach Turnovers are baked, then cooled on wire rack.
Time To Glaze The Turnovers

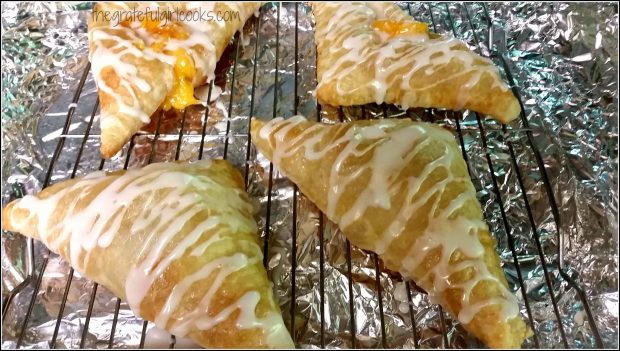
Once done, remove the peach turnovers to a wire rack to cool slightly. I place aluminum foil under the rack to catch any drips that might occur while glazing the turnovers. Mix up a quick glaze while the hand pies are cooling, and drizzle each of them with it.

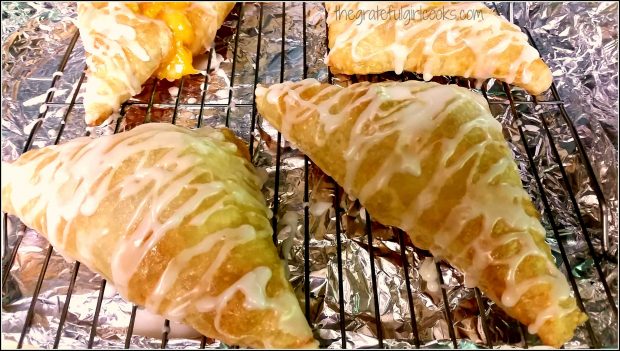
Peach Turnovers are drizzled with glaze once cooled.
The glaze firmed up in a few minutes, then these delicious Peach Turnovers were ready to eat.  The recipe makes 8 peach turnovers (using 2 sheets of puff pastry), and I think they would be fantastic hand pies with cherry or apple pie filling, as well.

Peach Turnovers / The Grateful Girl Cooks!

Sure hope you will give these delicious peach turnovers a try. Hope you have a great week! Make the most of every minute you are given… and go out and make a difference to all you happen to interact with today!

Looking For More Recipes For PEACH DESSERTS?

You can find ALL of my recipes in the Recipe Index, located at the top of the page. I have some wonderful peach desserts you might be interested in, including:

Interested In More Recipes?

Thank you for visiting this website. I appreciate you using some of your valuable time to do soIf you’re interested, I publish a newsletter 2 times per month (1st and 15th) with all the latest recipes, and other fun info. I would be honored to have you join our growing list of subscribers, so you never miss a great recipe!
There is a Newsletter subscription box on the top right side (or bottom) of each blog post, depending on the device you use, where you can easily submit your e-mail address (only) to be included in my mailing list.

You Can Also Find Me On Social Media:

Facebook page: The Grateful Girl Cooks!
Pinterest:
The Grateful Girl Cooks!
Instagram:
jbatthegratefulgirlcooks

Author's signatureRecipe Source: http://thedomesticrebel.com/2015/07/13/the-easiest-peach-turnovers/

0 from 0 votes
Peach Turnovers
Prep Time
15 mins
Cook Time
23 mins
Total Time
38 mins
 

Peach turnovers with vanilla glaze are delicious, and so quick and easy to make using peach pie filling and puff pastry sheets! Sure to be a family favorite!

Category: Dessert
Cuisine: American
Keyword: peach turnovers
Servings: 8 turnovers
Calories Per Serving: 514 kcal
Author: JB @ The Grateful Girl Cooks!
Ingredients
For the Turnovers:
  • 1 box puff pastry (2 sheets total), thawed
  • 21 ounces (1 can) peach pie filling (or use your own homemade peach pie filling)
  • 1 egg white , beaten with 1 teaspoon water
For the Glaze:
  • 2 cups powdered sugar
  • 2 Tablespoons milk
  • 1 teaspoon vanilla extract
Instructions
  1. Preheat your oven to 375 degrees F.
  2. Prepare 2 cookie sheets by spraying with non-stick spray (or line with parchment paper). Set prepared sheets aside. You will put 4 turnovers on each baking sheet.
  3. Thaw the puff pastry sheets per instructions on box (approx. 30 min). Carefully unroll the puff pastry sheets, then gently press any of the perfprated fold lines together so that they are completely sealed.
  4. Cut the pastry sheets into four equal square pieces, using a sharp knife.
  5. Place a large Tablespoonful of peach pie filling into the middle of each puff pastry square.
  6. In a small bowl, mix together the egg white and the water. Make one turnover at a time. Use a pastry brush to brush the edges of the pastry square with egg white mixture. After brushing edges with egg white mixture, gently take one corner of the puff pastry and bring it over the pie filling to the opposite corner. Use the tines of a fork to crimp the 2 edges shut, which will seal the dough.
  7. Brush the top of each turnover with the egg white/water mixture. Repeat this process with each of the turnovers.
  8. Gently place turnovers onto prepared baking sheets. Bake at 375 degrees for about. 20-25 minutes. The turnovers should be a light golden brown when done. Remove to a wire rack to cool.
  9. While the turnovers are cooling down, whisk the glaze ingredients together in a medium sized bowl. You want the glaze to be smooth, and pourable. Add a bit more milk if necessary to thin glaze out a bit. Drizzle the glaze decoratively over the tops of the turnovers. When glaze has firmed up a bit, the turnovers are ready to serve and enjoy!
  10. These turnovers are great warm... OR at room temperature, and are best eaten on the day you make them. Enjoy!
Recipe Notes

30 minutes needed to thaw out the frozen puff pastry is not included in the Prep Time. Perhaps thaw the pastry earlier in the day and keep refrigerated until ready to use. Once pastry is thawed, these can be put together and baked in no time at all!

Nutrition Facts
Peach Turnovers
Amount Per Serving (1 turnover)
Calories 514
* Percent Daily Values are based on a 2000 calorie diet.

Here’s one more to pin on your Pinterest boards!Peach turnovers with vanilla glaze are delicious, and so quick and easy to make using peach pie filling and puff pastry sheets! Sure to be a family favorite!


Save

Save

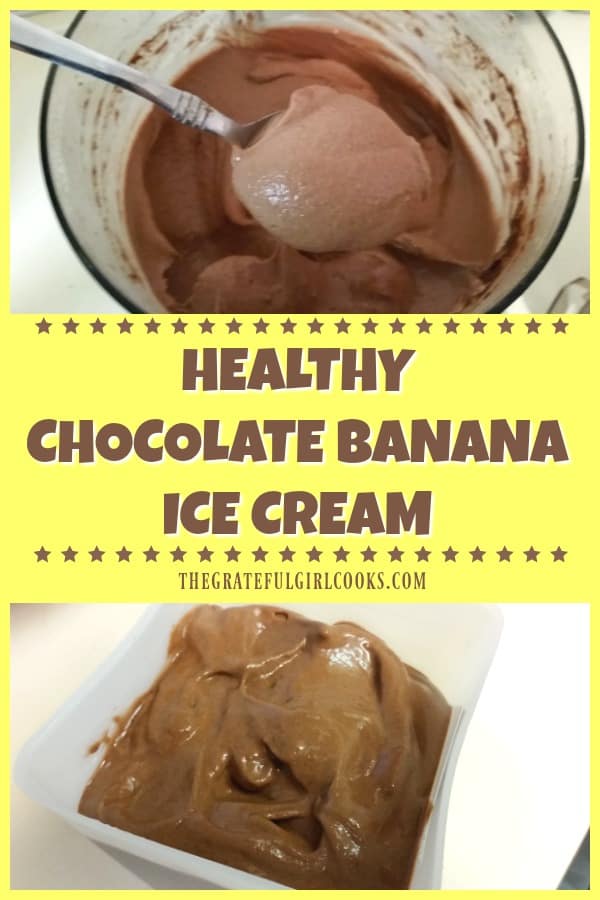
Healthy Chocolate Banana “Ice Cream”

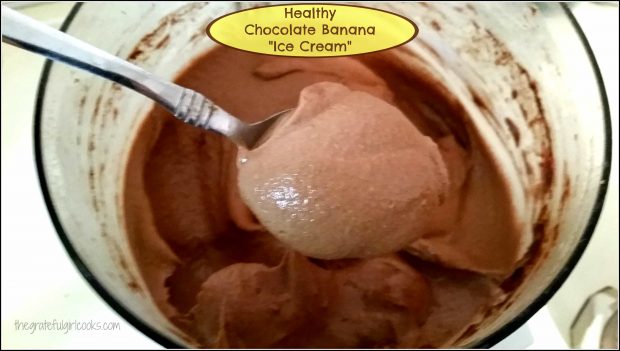
All you need are several frozen bananas, cocoa powder and a food processor to make a batch of this yummy and healthy Chocolate Banana “Ice Cream”!All you need are several frozen bananas, cocoa powder and a food processor to make a batch of this yummy and healthy Chocolate Banana "Ice Cream"!
So… here’s the backstory on this Healthy Chocolate Banana “Ice Cream”… there’s no cream in this at all!  As a matter of fact, there are only TWO ingredients. Frozen bananas and cocoa powder.

And amazing as it seems, I was skeptical the first time I tried it, but boy was I surprised! It tasted GREAT! All the flavor of chocolate banana ice cream, but it’s NOT ice cream! Take note, calorie-counters!

The only thing you need to have is a food processor or a majorly powerful blender (and some previously frozen bananas!) to mix this up really well. I am fortunate that I was given one that a family member no longer wanted… yay! That makes this healthy chocolate banana ice cream a breeze to make.

Scroll Down For A Printable Recipe Card At the Bottom Of The Page

Really Ripe Bananas Are Essential For Sweetness!

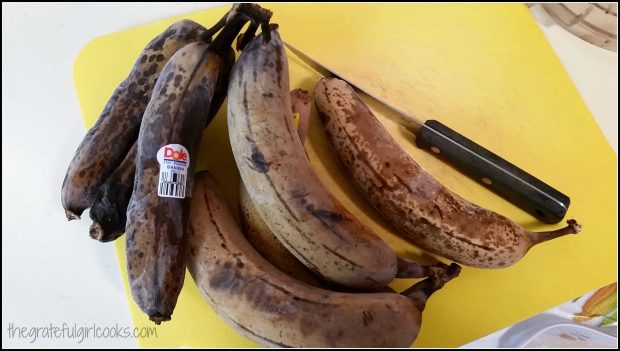
You know those bananas on the counter that have turned brown? Yeah. Put them into your freezer instead of throwing them away. They give this chocolate banana ice cream it’s creaminess and natural sweetness.

See these gnarly looking bananas? They are perfect for this recipe. They are frozen solid. Yep. Sometimes I peel them before freezing, but other times I just shove them in the freezer just the way they are!

Frozen ripe bananas, ready to peel to make ice cream!
Processing Healthy Chocolate Banana Ice Cream Is Easy!

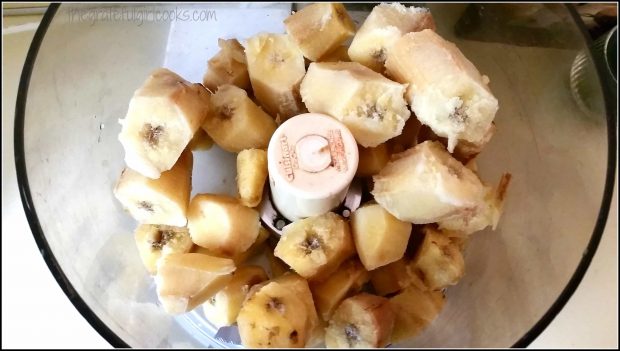
Take those completely frozen bananas, peel, and then slice them into small chunks. Now toss the slices into your handy dandy food processor (or heavy duty blender).

Frozen chunks of banana are placed in a food processor.
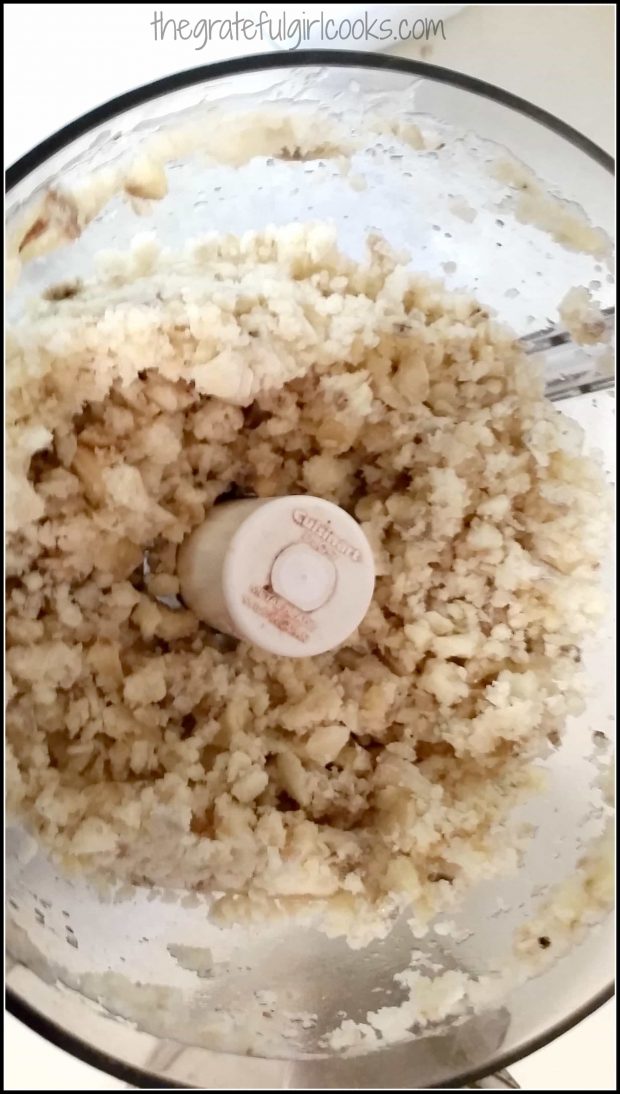
Put the lid on and fire up your food processor to pulse the frozen banana chunks. After a minute or so the frozen bananas should be in tiny pieces and look like this (shown below).

The frozen bananas are processed into tiny pieces in food processor.
Time To Add Some Chocolate Flavoring

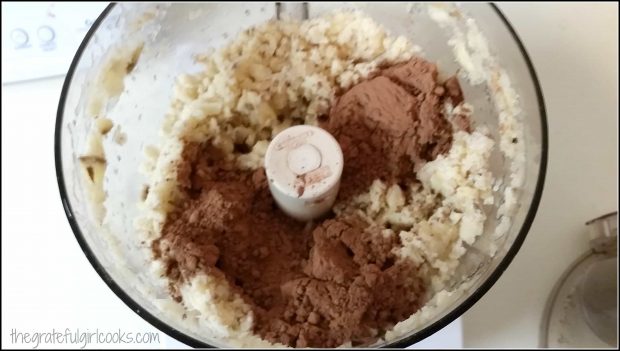
Once the bananas are pulverized into tiny pieces, add 4 Tablespoons cocoa powder to the mix. The cocoa powder adds wonderful flavor to the healthy chocolate banana ice cream, without adding lots of calories!

Cocoa powder is added to the frozen bananas in the food processor.
Keep Processing The Healthy Chocolate Banana Ice Cream

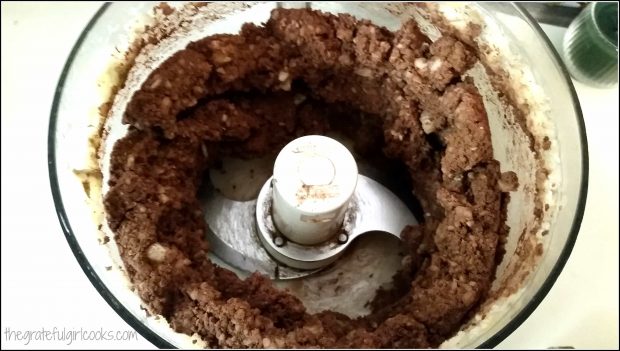
Turn the food processor back on, and keep on pulsing/mixing the ingredients together. Have no fear… this WILL work! Be patient, because this will take a bit of time to fully come together into a creamy, delicious treat!

Continue processing the frozen bananas and cocoa powder until smooth.
All Of A Sudden- “Ice Cream”!

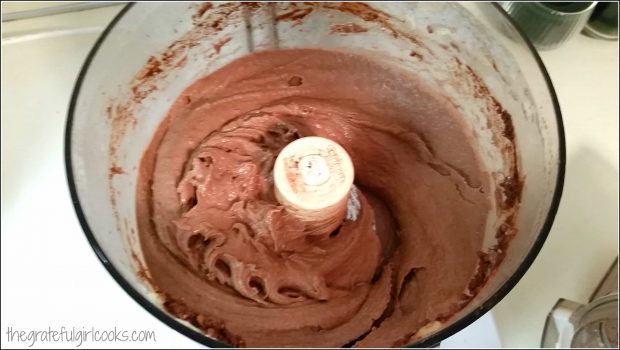
After several minutes (when you think it’s NOT ever gonna turn into anything that resembles ice cream, and you’re starting to get hungry) this happens (see photo below)! Whoa… I’ll bet ya didn’t see THAT happening! Those frozen bananas and cocoa powder turn into a smooth, delectable  “Ice Cream-y” looking mixture! Time to stop processing it, and EAT!

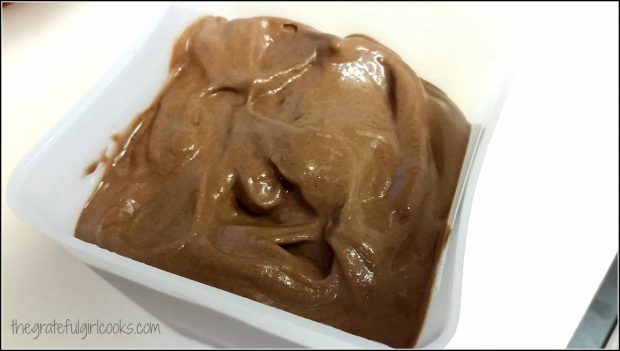
Finally the healthy chocolate banana ice cream is smooth and creamy!Okay, Now What?

Now that it’s finished processing, you can either eat it right away, OR put it into a sealed container in your refrigerator’s freezer for awhile and let it firm up more. I usually let it firm up a bit in the freezer (after sampling it, of course!). The photo below shows what it looks like going into the freezer. Once frozen, let it sit out a few minutes to thaw slightly before serving, then enjoy!

Let healthy chocolate banana ice cream firm up in the freezer, after processing.
Enjoy every bite, knowing you saved some calories by not pigging out on regular ice cream, but enjoyed this delicious treat instead!  Remember… 7 bananas, 4 T. cocoa powder, and MIX, MIX, MIX. (makes approx. five or six 1/2 cup servings).

I thought everyone had heard of this kind of “ice cream” before, but we had a friend visit here recently. She had never heard of this before, so she tried some, and was quite surprised how good it was!  See? Scientific proof. Absolutely 1 out of 1 house guests recommend this treat! Hope you will give it a try, as well. You’re gonna love it!

Looking For More FROZEN TREAT Recipes?

You can find all of my recipes in the Recipe Index, located at the top of the page. I have lots of traditional ice cream recipes, too. A few favorite frozen treats include:

Interested In More Recipes?

Thank you for visiting this website. I appreciate you using some of your valuable time to do soIf you’re interested, I publish a newsletter 2 times per month (1st and 15th) with all the latest recipes, and other fun info. I would be honored to have you join our growing list of subscribers, so you never miss a great recipe! 

There is a Newsletter subscription box on the top right side (or bottom) of each blog post, depending on the device you use, where you can easily submit your e-mail address (only) to be included in my mailing list.

You Can Also Find Me On Social Media:

Facebook page: The Grateful Girl Cooks!
Pinterest:
The Grateful Girl Cooks!
Instagram:
jbatthegratefulgirlcooks

Author's signature


Here’s one more to pin on your Pinterest boards!All you need are several frozen bananas, cocoa powder and a food processor to make a batch of this yummy and healthy Chocolate Banana "Ice Cream"!

Save

Save

Save

Strawberry Pie

Nothing beats this classic dessert recipe for delicious homemade Strawberry Pie, with strawberry glaze! It’s SO QUICK AND EASY to make, you won’t believe it!Nothing beats this classic dessert recipe for delicious homemade Strawberry Pie, with strawberry glaze! It's SO QUICK AND EASY to make, you won't believe it!

A couple days ago I was scrolling through my Facebook news feed, and found a recipe for an easy, fresh Strawberry Pie from “Taste of Home”, a website/magazine I have loved for years!

I recently bought 2 large containers of strawberries at the grocery store (got a screamin’ good deal on them), and had been looking for a “new” recipe for strawberry pie to make using them.

The next morning I got up and made this delicious strawberry pie, and I’m sure glad I did. Totally delicious, classic fruit pie!!!!  I’m reminded of a quote I saw: “The best thing to put into a homemade pie is your teeth!” (author unknown). Honestly, this pie is super easy to make.

I made my own pie crust (here’s my recipe that I’ve used for years:  (DIY-moms-pie-crust/), but if you want quick and easy, just buy a pre-made pie crust, and save yourself some time.

Once you’ve got your pie crust taken care of, making the pie is as simple as slicing strawberries, mixing the glaze up in a saucepan, and pouring the glaze on top. Seriously EASY.

How To Make This Classic Strawberry Pie

Start with a pie crust. Make your own pie crust or buy one. Either way, it’s all good. Make sure to flute the edges to form a pretty edge.

Empty pie crust and rolling pin used to make a strawberry pie.

Pre-Bake The Strawberry Pie Crust

You will need to cook the pie crust before filling it. Put a layer of heavy duty aluminum foil over the crust, then fill it with dry beans to weigh it down.

Doing this simple step will help keep the pie crust from “puffing” up too much while cooking.

Dry beans on foil in empty pie crust help to keep air bubbles out of pie crust.

Bake the pie crust for 8 minutes, then lift out the foil and beans, and pop the crust back into the oven for 5-6 more minutes. When done, it will look something like this, shown below.

Baked pie crust cooling on wire rack, ready to make strawberry pie.
Make The Glaze For The Pie

Let the pie crust cool completely. While it is cooling, mix up the sugar, cornstarch and water in a saucepan over medium heat, until thickened. This mixture will be part of your glaze for the strawberry pie.

Sugar, cornstarch and water in saucepan with a whisk, making glaze for strawberry pie

Once the liquid has thickened, add a small box of strawberry gelatin, and stir well to combine. This is the glaze for your strawberry pie!

Let the strawberry glaze cool for 15-20 minutes in the refrigerator before using it to fill the pie. 

Strawberry gelatin added to glaze mixture for strawberry pieStrawberry pie filling in saucepan with metal whisk.Fill the Pie With Strawberries

While the glaze is cooling in the refrigerator, go ahead and slice up 4½ cups of ripe, sweet, fresh strawberries.

Fresh strawberries, sliced in bowl with blue rim, ready to go into a pie crust.
When the pie crust has cooled, arrange the strawberries in the crust. Now it’s starting to LOOK LIKE a REAL strawberry pie!

Strawberries arranged in baked pie crust, for strawberry pie!Time To Glaze This Strawberry Pie!

Once the glaze has cooled, give it a stir, then carefully pour it all over the top of the strawberry pie.

Pour the glaze all around, to completely cover the strawberries on top, AND to fill any little spaces. Try not to drizzle it onto the crimped pie crust.

Strawberry glaze is poured over strawberry pie in crust.
Once all the glaze is on the strawberry pie, place the pie in a refrigerator for several hours, so the glaze will firm up.

When ready to serve the strawberry pie, garnish the pie with a sprig of mint, and/or some whipped cream, slice and serve!

Strawberry Pie with fresh sprig of mint garnish on top.Time To EAT!

Because the glaze has firmed up, this is not a messy pie to cut and serve. Just sayin’. See how “clean” the cuts in the strawberry pie are?

Strawberry pie, with one slice removed.
That’s it! Slice yourself a good sized piece, grab a fork, a can of whipped cream to decorate the slice with, and a good cup of coffee!

Hope you enjoy this delicious, fresh-tasting Strawberry Pie!

One slice of strawberry pie on a plate with a fork.
Thanks for stopping by, and try this pie! It’s awesome. Hope you have a great day, and trust you will come back soon!

Looking For Other PIE Recipes?

All of my recipes can be found in the Recipe Index at the top of the page. A few of our family favorite pie recipes include:

Want More Recipes? Get My FREE Newsletter!

I publish a newsletter 2 times per month (1st and 15th) with lots of recipes, tips, etc..
Would you like to join our growing list of subscribers?

There is a Newsletter subscription box on the top right (or bottom) of each blog post, depending on the device you use.
You can submit your e-mail address there, to be added to my mailing list.

Find Me On Social Media:

Facebook page: The Grateful Girl Cooks!
Pinterest:
The Grateful Girl Cooks!
Instagram:
jbatthegratefulgirlcooks

Author's signatureRecipe Source: http://www.tasteofhome.com/recipes/easy-fresh-strawberry-pie

↓↓ PRINTABLE RECIPE BELOW ↓↓

0 from 0 votes
Strawberry Pie
Prep Time
35 mins
Cook Time
0 mins
Refrigeration Time
2 hrs
Total Time
2 hrs 35 mins
 
Nothing beats this classic dessert recipe for delicious homemade Strawberry Pie, with strawberry glaze! It's SO QUICK AND EASY to make, you won't believe it!
Category: Dessert
Cuisine: American
Keyword: strawberry pie
Servings: 8 slices
Calories Per Serving: 278 kcal
Author: JB @ The Grateful Girl Cooks!
Ingredients
  • 1 unbaked pastry (pie) shell (9 inches)
  • * a couple cups of dry beans (ONLY TO WEIGH DOWN THE CRUST DURING PRE-BAKE)
  • 3/4 cup granulated sugar
  • 2 Tablespoons cornstarch
  • 1 cup water
  • 1 package (3 ounces) strawberry gelatin
  • 4 1/2 cups sliced fresh strawberries
  • Fresh sprig of mint (optional)
  • Whipping cream for garnish (optional)
Instructions
To make pie shell:
  1. Line an unpricked and uncooked pie shell with heavy duty aluminum foil. Fill with dried beans to weigh down the shell (this helps keep the crust from puffing up full of air). Bake crust at 425 degrees for 8 minutes. Carefully lift out the aluminum foil and beans (**beans can be put back in the container you got them from and can still be used**). After beans and foil are out of the shell, put it back into the oven for an additional 5-6 minutes longer, then remove to a wire rack to cool.
To make strawberry glaze:
  1. In a medium saucepan, whisk together the granulated sugar, cornstarch and water until it is fully combined and smooth. Bring mixture to a boil; stir and cook it for 2 minutes, until thickened. Remove the pan from the heat. Stir in the strawberry gelatin powder, until dissolved. Refrigerate the glaze mixture for 15-20 minutes, or until it has cooled down some.
To assemble the pie:
  1. Slice the strawberries. Carefully place/arrange them into the baked pie crust. Pour the cooled strawberry glaze over the entire surface of the pie, even filling in the little nooks and crannies. Use all of the glaze mixture. When done, place pie in refrigerator for 2-3 hours, or until it is completely "set up" (the glaze will congeal and firm up).
  2. Garnish pie with mint and/or whipped cream, if desired.
  3. Cut into 8 pieces, serve... and enjoy!
Recipe Notes

Note: Prep time of 3 hours INCLUDES inactive prep time of 2 1/2 hours for refrigeration of pie. If using a pre-made crust, this recipe can be made in about 30 minutes.

Nutrition Facts
Strawberry Pie
Amount Per Serving (1 slice)
Calories 278 Calories from Fat 72
% Daily Value*
Fat 8g12%
Saturated Fat 2g13%
Sodium 150mg7%
Potassium 149mg4%
Carbohydrates 49g16%
Fiber 2g8%
Sugar 31g34%
Protein 2g4%
Vitamin A 10IU0%
Vitamin C 47.6mg58%
Calcium 19mg2%
Iron 1mg6%
* Percent Daily Values are based on a 2000 calorie diet.

Here’s one more to pin on your Pinterest boards!Nothing beats this classic dessert recipe for delicious homemade Strawberry Pie, with strawberry glaze! It's SO QUICK AND EASY to make, you won't believe it!

Save

Save

Save

Save

Red, White and Blue Ice Cream Sundaes

Homemade red, white and blue ice cream sundaes, with strawberries, blueberries, chocolate syrup and whipped cream make patriotic celebrations special!Red, White and Blue Ice Cream Sundaes / The Grateful Girl Cooks!
This past weekend another celebration of Independence Day occurred in the United States. It’s such a special day!

We are so very grateful to live in this country, and thankful for all who have stood boldly and sacrificed their lives to provide us with the freedoms we are blessed to have here in the U.S.A.

We celebrated with Red, White and Blue Ice Cream Sundaes! They are so easy to make… here’s how!

Scroll Down For A Printable Recipe Card At The Bottom Of The Page

Making Red, White and Blue Ice Cream Sundaes Is A Cinch!

Homemade vanilla ice cream is topped with whipped cream, chocolate syrup, blueberries, blue sprinkles, and fresh sliced strawberries.

You really don’t need a recipe for that, but I am including my basic homemade vanilla ice cream recipe below, for anyone who enjoys making homemade ice cream, and might want it.

Making homemade vanilla ice cream is what I enjoy doing! The ice cream part is easy. Mix up heavy whipping cream, milk, sugar and vanilla, then pour it into an ice cream maker.

Pouring ice cream mixture into machine for freezing.
After about 20 minutes, the vanilla ice cream has frozen to soft serve consistency. We LOVE making ice cream in our little Cuisinart ice cream machine, which I received as a gift!

Homemade vanilla ice cream is ready to make into ice cream sundaes!
Remove the ice cream from the machine, and put it into a sealed container in the freezer to firm up some more (an hour or two).

Time To Serve The Red, White and Blue Ice Cream Sundaes!

When ready to serve, scoop vanilla ice cream into serving dishes. Spray some whipped cream on top (along with some colored decorating sugar, if desired).

Drizzle ice cream with chocolate syrup, then surround ice cream with blueberries and sliced strawberries, and serve! Red, White, and Blue Ice Cream Sundaes, for the win!

Red, White and Blue Ice Cream Sundaes are decorated and ready to eat!
These simple ice cream sundaes are colorful, easy and delicious, and they are perfect for any patriotic celebration!

By the way, if you enjoy ice cream sundaes, check out the recipe for making a Strawberry Almond Romanoff Sundae. YUM!

It doesn’t have to be complicated, just fun! Happy Independence Day, from our home to yours!

Sparklers lit, and wishing you a Happy 4th of July!
Have a great week! Let’s be grateful for the freedoms we celebrate in this great country. We are blessed.

Thanks for stopping by, and please come back soon for more family-friendly recipes. Take care, and may God bless you.

Looking For More HOMEMADE ICE CREAM Recipes?

You can find all of my recipes in the Recipe Index, located at the top of the page. A few homemade ice cream recipes I think you will really enjoy include:

Want More Recipes? Get My FREE Newsletter!

I publish a newsletter 2 times per month (1st and 15th) with lots of recipes, tips, etc..
Would you like to join our growing list of subscribers?

There is a Newsletter subscription box on the top right (or bottom) of each blog post, depending on the device you use.
You can submit your e-mail address there, to be added to my mailing list.

Find Me On Social Media:

Facebook page: The Grateful Girl Cooks!
Pinterest:
The Grateful Girl Cooks!
Instagram:
jbatthegratefulgirlcooks

Author's signature

↓↓ PRINTABLE RECIPE BELOW ↓↓

0 from 0 votes
Red, White and Blue Ice Cream Sundaes
Prep Time
25 mins
Cook Time
0 mins
Total Time
25 mins
 

Homemade red, white and blue ice cream sundaes, with strawberries, blueberries, chocolate syrup and whipped cream make patriotic celebrations special!

Category: Dessert
Cuisine: American
Keyword: ice cream sundaes
Servings: 6 (1 cup each) 1.5 qts. total
Calories Per Serving: 439 kcal
Author: JB @ The Grateful Girl Cooks!
Ingredients
For ice cream:
  • 2 cups heavy whipping cream
  • 1 cup milk
  • 3/4 cup granulated sugar
  • 2 teaspoons vanilla extract
For sundae:
  • Chocolate syrup
  • Prepared whipping cream (spray can or fresh)
  • Blue or red colored decorating sugar (optional)
  • Sliced strawberries (Fresh)
  • Blueberries (Fresh)
Instructions
  1. In large mixing bowl, combine the ice cream ingredients. Whisk well, to combine and dissolve the sugar. Pour into freezer canister, and freeze, according to manufacturer's instructions.

  2. When ice cream is "done", remove to a freezeable container, seal and place in freezer for at least 2 hours to firm up ice cream.
  3. When ready to serve, scoop ice cream into serving dishes, and garnish with sliced strawberries, blueberries, whipped cream, chocolate syrup, and colored decorating sugar. Serve and enjoy!
Recipe Notes

Prep time indicated is for making the ice cream. It does not include additional time in the freezer where the ice cream firms up. Caloric calculation is for 1 cup ice cream, plus all toppings (evenly divided between 6 servings)

Nutrition Facts
Red, White and Blue Ice Cream Sundaes
Amount Per Serving (1 (1 cup per, plus toppings))
Calories 439 Calories from Fat 279
% Daily Value*
Fat 31g48%
Saturated Fat 19g119%
Cholesterol 116mg39%
Sodium 48mg2%
Potassium 156mg4%
Carbohydrates 34g11%
Sugar 31g34%
Protein 3g6%
Vitamin A 1265IU25%
Vitamin C 14.6mg18%
Calcium 106mg11%
Iron 0.1mg1%
* Percent Daily Values are based on a 2000 calorie diet.

Here’s one more to pin on your Pinterest boards!Homemade red, white and blue ice cream sundaes, with strawberries, blueberries, chocolate syrup and whipped cream make patriotic celebrations special!


Save

Save

Melba Pie!

You’ll love Melba Pie for your next dessert… a classic, double-crusted pie, featuring the wonderful, sweet flavors of fresh raspberries and peaches!You'll love Melba Pie for your next dessert... a classic, double-crusted pie, featuring the wonderful, sweet flavors of fresh raspberries and peaches!
Do you know what Melba Pie is? I sure didn’t… until I stumbled upon this recipe in an old cookbook of mine. I’d heard of Peach Melba (a classic dessert) in the past, but didn’t know there was even such a thing as a Melba PIE. Melba Pie is a delicious pie which features raspberries AND peaches! Go figure!

This recipe is for a two crusted pie. One crust on the bottom, the other (you guessed it!) on the top. The filling is a snap to make, so whether you like to make your own pie crust (here’s my recipe for “Mom’s Pie Crust“), or you prefer to buy pre-made pie crust dough, it’s a rather simple and tasty pie to make with the summer bounty of peaches and raspberries available.

Scroll Down For A Printable Recipe Card At The Bottom Of The Page

How To Make A Melba Pie

First thing you need to do is prepare a DOUBLE crust pastry shell. Once you have the pie dough ready, you need to make the filling. Of course, you can also purchase commercially prepared pie crust (you will need two crusts), if that’s more convenient!

In a medium sized saucepan, mix together the granulated sugar, cornstarch, and the cinnamon. Stir in the raspberries (if using FROZEN raspberries, do NOT drain them… add it all in).

Fresh raspberries mixed with sugar, cinnamon and cornstarch for pie filling.
Cook  and stir the raspberry mixture until it thickens and the mixture comes to a boil.

Raspberries, sugar, cinnamon and cornstarch are cooked until pie filling thickens.
Once it begins to boil and is thickened, add the peaches and lemon juice, then remove from heat.

Fresh peach slices and lemon juice added to melba pie filling.Melba pie filling is cooked until thickened.
Fill The Pie

Line a pie pan with the bottom pastry. Prick the dough in several spots with the tines of a fork. Carefully add the pie filling on top of the pie crust.

Raspberry-peach melba pie filling added into to pie crust.
Top the Melba pie filling with the other pie crust. Seal, and decoratively flute the edges of the pie crust dough. Cut a couple of slits into the top of the pie, to allow steam to escape while baking.

A top crust is placed on top of melba pie filling, and edges of crust are crimped.Time To Bake The Melba Pie!

Bake the pie for about 30-35 minutes (or until light golden brown on top). Some of the juices may be bubbling around the slits you cut in the top crust. Remove the pie from the oven, and transfer carefully to a wire rack to cool. When the pie has cooled, it’s ready to serve.

Slice of pie is removed to show raspberry-peach melba pie filling.
Time To EAT!

Slice a nice piece of pie, and serve it with some vanilla ice cream on top or on the side! Yum! Take a few bites, and enjoy your homemade raspberry and peach Melba Pie!

Slice of melba pie with a scoop of vanilla ice cream is always a big hit!

I hope you will find time to make this delicious pie, and as always, I really trust you will enjoy it! Don’t forget you can check out ALL my recipes in the Recipe Index, located at the top of the page.

If you enjoy baking (and EATING) pies, you might also be interested in some of my other pie recipes, including Boysenberry, Dutch Crumb Apple, Strawberry-Rhubarb, Old-Fashioned Banana Cream, Peach, Strawberry, or Toll House. You can find the rest in the Recipe Index, at the top of the page.

Interested In More Recipes?

Thank you for visiting this website. I appreciate you using some of your valuable time to do soIf you’re interested, I publish a newsletter 2 times per month (1st and 15th) with all the latest recipes, and other fun info. I would be honored to have you join our growing list of subscribers, so you never miss a great recipe!
There is a Newsletter subscription box on the top right side (or bottom) of each blog post, depending on the device you use, where you can easily submit your e-mail address (only) to be included in my mailing list.

You Can Also Find Me On Social Media:

Facebook page: The Grateful Girl Cooks!
Pinterest:
The Grateful Girl Cooks!
Instagram:
jbatthegratefulgirlcooks

Have a GREAT day, friends.

Author's signature

Recipe Source: “The New Pillsbury Family Cookbook”, copyright 1973, The Pillsbury Company, page151.

0 from 0 votes
Melba Pie!
Prep Time
20 mins
Cook Time
30 mins
Total Time
50 mins
 

You'll love Melba Pie for your next dessert... a classic, double-crusted pie, featuring the wonderful, sweet flavors of fresh raspberries and peaches!

Category: Dessert
Cuisine: American
Keyword: melba pie
Servings: 8 servings
Calories Per Serving: 263 kcal
Author: JB @ The Grateful Girl Cooks!
Ingredients
  • Double crust pastry (homemade or store-bought)
  • 1/3 cup granulated sugar
  • 3 Tablespoons cornstarch
  • 1/4 teaspoon cinnamon
  • 1 1/4 cups (10 oz. package) raspberries (fresh or frozen-if frozen, thawed but UNDRAINED)
  • 2 cups fresh peach slices (can also use a 1 lb.,13 oz. can of peaches, DRAINED)
  • 1 Tablespoon lemon juice
Instructions
  1. While making the pie filling, preheat your oven to 425 degrees.
  2. Prepare a double crust pastry shell. Place one of the crusts into a 9" pie pan. Prick the bottom of the crust with the tines of a fork.
  3. Place the granulated sugar, cornstarch and cinnamon into a medium sized pan. Gently stir in the (undrained) raspberries. Cook this, (while stirring constantly so it won't stick) on medium heat until it begins to thicken, and comes to a boil.
  4. Stir in the sliced (drained) peaches, and the lemon juice. Once ingredients are all combined, pour the pie filling into the pie pastry shell.
  5. Put the other pie crust on top of the filling; seal the two crusts together around edges, then decoratively flute the edges.
  6. Using a sharp knife, make a couple small slits in the center of the top crust.
  7. Bake pie in preheated 425 degree oven for approximately 30 minutes, or until the crust has begun to turn golden brown.
  8. Remove pie to a wire rack to cool.
  9. Serve with a scoop of vanilla ice cream... and enjoy!
Nutrition Facts
Melba Pie!
Amount Per Serving (1 slice)
Calories 263 Calories from Fat 99
% Daily Value*
Fat 11g17%
Saturated Fat 3g19%
Sodium 174mg8%
Potassium 142mg4%
Carbohydrates 37g12%
Fiber 2g8%
Sugar 12g13%
Protein 3g6%
Vitamin A 125IU3%
Vitamin C 8.2mg10%
Calcium 15mg2%
Iron 1.3mg7%
* Percent Daily Values are based on a 2000 calorie diet.

Here’s one more to pin on your Pinterest pages!You'll love Melba Pie for your next dessert... a classic, double-crusted pie, featuring the wonderful, sweet flavors of fresh raspberries and peaches!


Save

Save