Craving chocolate? Make yummy chocolate peanut butter grahams easily and quickly to satisfy those cravings, using only a few simple ingredients!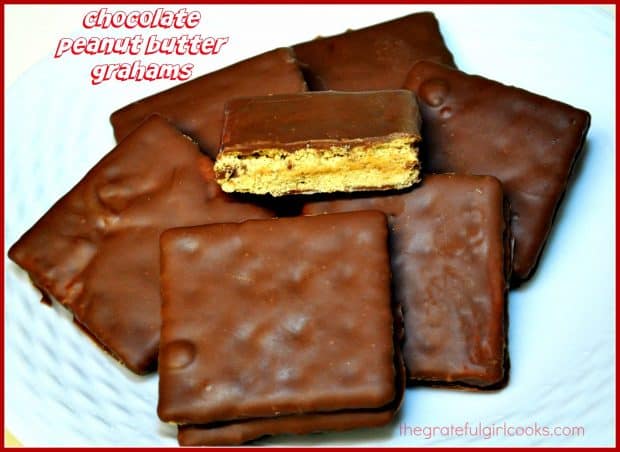
Okay… have you ever had one of those nights when you craved chocolate so bad… and there was nothing to be found in the house, and it was too late to head to the store? UGH. Well, I experienced that several months ago, and these delicious & easy Chocolate Peanut Butter Grahams were the result!
Scroll Down for A Printable Recipe Card At The Bottom Of The Page
How I Came Up With this Recipe
After opening every kitchen cabinet and drawer hoping I would find some old piece of chocolate just waiting to be found and devoured, I gave up the search. Tragic. But then… miracle of miracles, I remembered I had a small amount of chocolate chips… and peanut butter… and some graham crackers.
I put my thinking cap on (I guess most of the time I don’t have my thinking cap ON… which might explain a lot!), and decided to make these yummy little snacks. No recipe to use… only my brain and chocolate cravings (a dangerous combo, I might add) created these little munchies.
Anyways, they ended up tasting fantastic. I got my chocolate fix, and thankfully I survived. The ingredients are so simple, but these babies are good. Really good. The crunch of the graham crackers, combined with a peanut butter/chocolate combo = YUM!
Here’s How To Make Chocolate Peanut Butter Grahams:
1) Grab some graham crackers. Break them in half, carefully until they are in squares. Go crazy. Use as many as you like. (I only made 8). I won’t tell you how many of them I personally ate… wouldn’t be prudent.
2) Spread creamy or crunchy peanut butter (whatever floats your boat) fairly thick on one half all the way to edges. Put another half graham cracker on top. Are you tired yet? I know this is physically demanding….if you feel like you need to sit down and rest after one or two are “sandwiched” together, go ahead. I feel your pain..
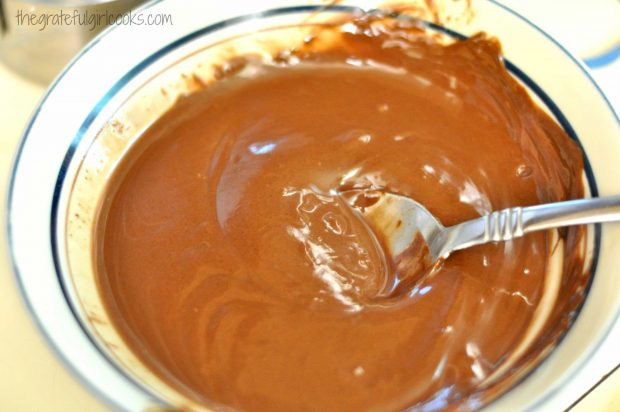
3) In a small microwave safe bowl, melt 1 1/2 cups of chocolate chips plus 2 Tablespoons of vegetable shortening in the microwave. Cook on high for 30 seconds. Stir well. If not all the way melted and smooth, put it back in the microwave for 30 seconds. Remove. Stir well. By now the chocolate and shortening should be completely melted. If not, put it back in for only 10 seconds. Stir until smooth. (Do not overcook or it will BURN…bad news if you’re hungry!)
Dipping The Chocolate Peanut Butter Grahams
Put some foil or a cookie sheet on the counter (to catch drips). Place a second sheet of foil on counter (to place the dipped cookies on) Carefully dip the filled graham crackers into the melted chocolate (spoon chocolate onto crackers, if necessary).
I held and dipped the grahams with one hand, and used a spoon in the other to help cover grahams with the chocolate. Coat all sides of the graham crackers completely. If you run out of chocolate, just follow step 3 again.
Place chocolate coated grahams onto aluminum foil and do not move them until chocolate has completely hardened (in about 1/2 hour or so). If you’re desperate, you can put them in the refrigerator to speed the firming up process along. Once the chocolate has hardened, remove from foil and serve. I store them, covered, in the refrigerator to keep the chocolate firm.
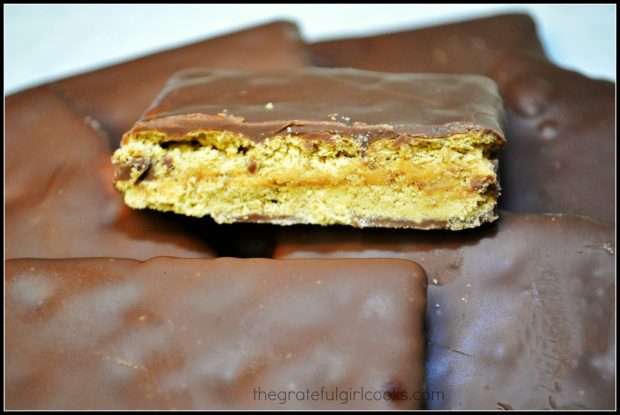
That’s it! “Late Night Chocolate Deprivation Catastrophe Averted”! Hope you will give these chocolate peanut butter grahams a try… they are so good! If you like these, be sure and try my chocolate covered BACON! It’s also amazing! Have a great day!
Looking for More BAR COOKIE Recipes?
You can find all of my recipes in the Recipe Index, located at the top of the page. I have quite a few bar cookie recipes you might enjoy, including:
Interested In More Recipes?
Thank you for visiting this website. I appreciate you using some of your valuable time to do so. If you’re interested, I publish a newsletter 2 times per month (1st and 15th) with all the latest recipes, and other fun info. I would be honored to have you join our growing list of subscribers, so you never miss a great recipe!
There is a Newsletter subscription box on the top right side (or bottom) of each blog post, depending on the device you use, where you can easily submit your e-mail address (only) to be included in my mailing list.
You Can Also Find Me On Social Media:
Facebook page: The Grateful Girl Cooks!
Pinterest: The Grateful Girl Cooks!
Instagram: jbatthegratefulgirlcooks
- 8 graham crackers (rectangle sized)
- 1/3 cup creamy peanut butter (or more as needed)
- 1½ cups semi-sweet chocolate chips
- 2 Tablespoons vegetable shortening
Break graham crackers (rectangle size) in half, carefully until they are in squares.
Spread creamy peanut butter fairly thick on one half all the way to edges. Put another half graham cracker on top.
In a small microwave safe bowl, melt 1 1/2 cups of chocolate chips plus 2 Tablespoons of vegetable shortening in the microwave. Cook on high for 30 seconds. Stir well. If not all the way melted and smooth, put it back in the microwave for 30 seconds. Remove. Stir well. By now the chocolate and shortening should be completely melted. If not, put it back in for only 10 seconds. Stir until smooth. (Do not overcook or it will BURN)
- Put some foil or a cookie sheet on the counter (to catch drips). Place a second sheet of foil on counter (to place the dipped cookies on) Carefully dip the filled graham crackers into the melted chocolate (spoon chocolate onto crackers, if necessary). I held and dipped the grahams with one hand, and used a spoon in the other to help cover grahams with the chocolate. Coat all sides of the graham crackers completely. If you run out of chocolate, just follow step 3 again.
Place chocolate coated grahams onto aluminum foil and do not move them until chocolate has completely hardened (in about 1/2 hour or so). If you're desperate, you can put them in the refrigerator to speed the firming up process along. Once chocolate has hardened, remove from foil and serve. Store extras, covered, in the refrigerator to keep the chocolate firm.
As written, this recipe made a total of 8 chocolate covered grahams, but obviously, you can adapt this to make any quantity you desire.
Here’s one more to pin on your Pinterest boards!