Category: Desserts

Chocolate Covered Strawberries

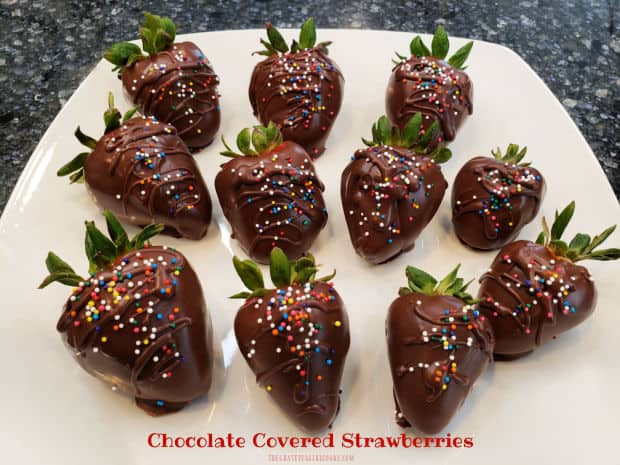
Chocolate Covered Strawberries are EASY to make, decadent treats which can be enjoyed any time! They are made using only 3 ingredients.Chocolate Covered Strawberries are EASY to make, decadent treats which can be enjoyed any time! They are made using only 3 ingredients.

I’ve been making chocolate covered strawberries for many, many years now (over 20), and never get tired of them! What tastes better than a huge, juicy, fresh strawberry coated in chocolate?

Whether you want to serve chocolate covered strawberries at a fancy brunch, or just have them around for a nice treat, they are DELICIOUS!

True Story

When we were cruising to Alaska a few years ago, we ran into the Director of Restaurant Operations (whom I had met previously on a food galley tour and food demo on another cruise).

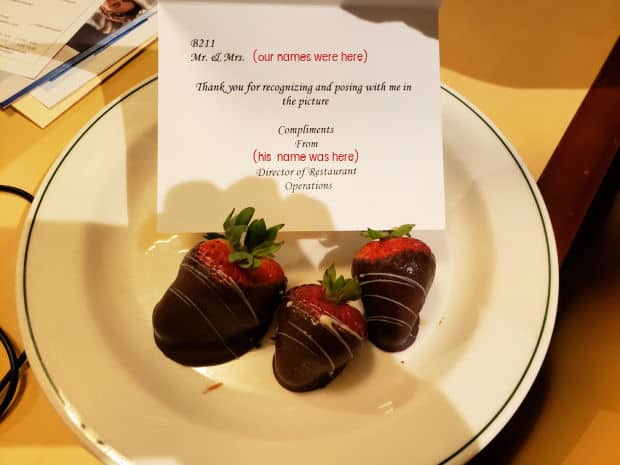
After we visited with him, he secretly had a plate of chocolate covered strawberries delivered to us as a surprise. They were waiting for us when we returned to our room. Wasn’t that nice?

Here’s a photo I took of a few of the strawberries we received, after we ate a few and shared the rest with our family.

Note on a plate of chocolate covered strawberries sent to our room on a cruise.

They were delicious and were such a wonderful, unexpected treat! This was a very kind and generous gift from this very busy professional, to us.

Guess what? To be honest, I feel my homemade chocolate covered strawberries are just as delicious as those that were made by the team of culinary pros!

So… I want to share with you how I make chocolate covered strawberries. They are quite simple to make, but look fabulous when served at a party, holiday, or brunch. They are usually one of the first treats to disappear, too! Here’s how to make them.

Scroll Down For A Printable Recipe Card At The Bottom Of The Page

Large, Fresh Strawberries!

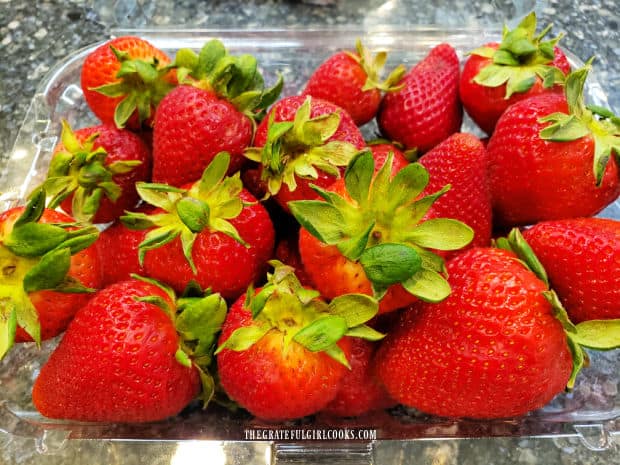
For the best chocolate covered strawberries, you will want to have large, fresh strawberries. The bigger the better, as far as I am concerned.

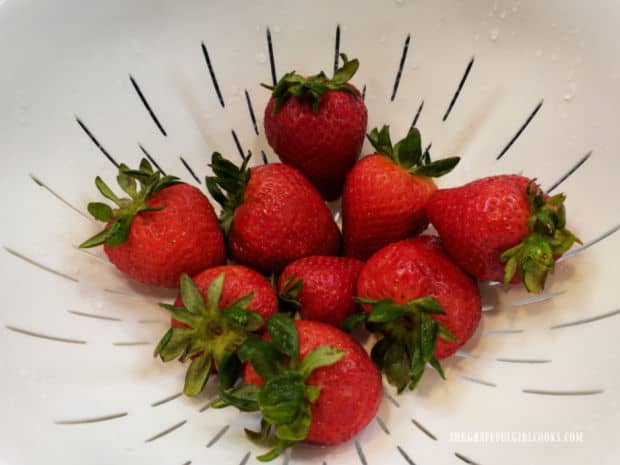
Gently rinse the strawberries in a colander, but be sure to leave the green leaves/stem on the strawberries. This recipe is written to fully coat one dozen large strawberries with chocolate.

Large fresh strawberries are needed to make chocolate covered strawberries.Strawberries in a colander are gently rinsed with water.

DRY, DRY, DRY Those Strawberries!

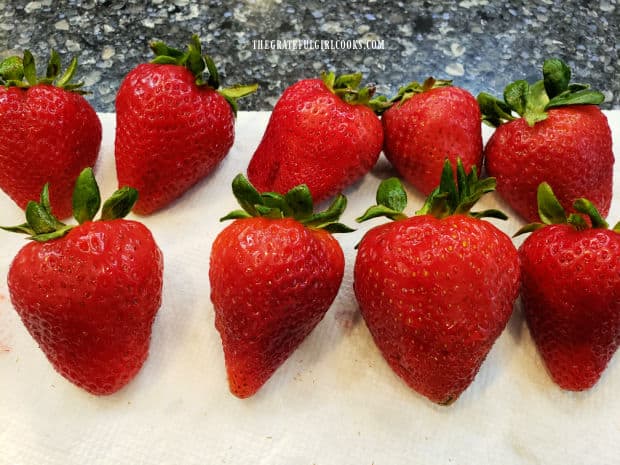
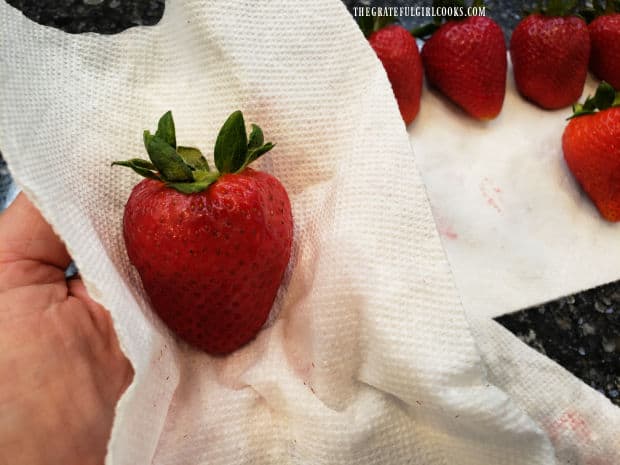
Now… here’s the most important part. DRY the strawberries really, really well. I gently place them on paper towels after rinsing and let them air dry for a few minutes.

Then I hand dry each strawberry (GENTLY) between layers of paper towels. Water and chocolate are NOT friends, so take the time to do this right!

It is vitally important the strawberries be absolutely dry before decorating them, so the chocolate will adhere, and won’t “seize up” from the water droplets. 

The strawberries air dry on layers of paper towels.Each strawberry is gently patted completely dry using paper towels.

Prepare The Chocolate For Dipping

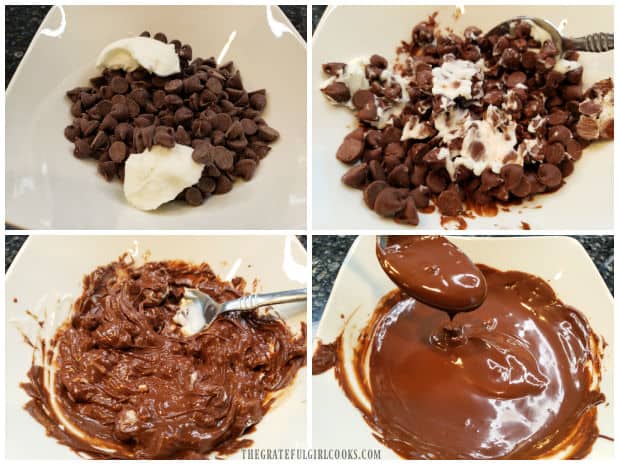
I use the microwave to melt the chocolate for the strawberries (easy!). A little bit of vegetable shortening is also added, which smooths out the chocolate, and allows for a nice firm, shiny finish on the strawberries.

Place chocolate chips (we prefer semi-sweet) and vegetable shortening in a microwave-safe bowl. Place the bowl in the microwave and heat on High power for 45 seconds.

Remove the bowl and stir the mixture as much as possible. Put it back in the microwave for 30 more seconds, remove and stir again.

Continue this process in 30 second increments until the chocolate and shortening are melted, smooth and lump-free. Now you’re ready to dip the strawberries.

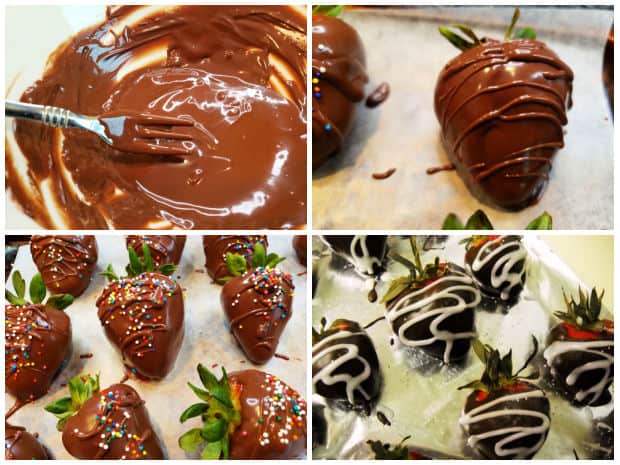
A four photo collage showing various stages of melting the chocolate.

Dipping The Strawberries

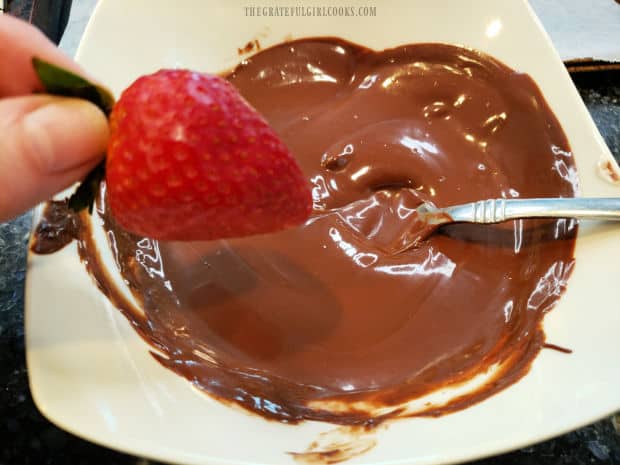
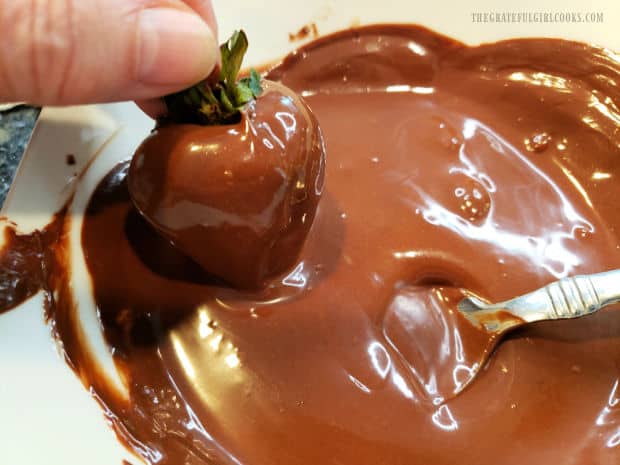
Cover a baking sheet with wax paper. Take the DRY strawberries, one at a time, and dip them in the hot, melted chocolate, rotating them to cover. Gently hold the strawberry by the green leaves to do this.

If necessary, use a spoon to add chocolate to the strawberry, covering all sides of the berry. Let the excess chocolate drip back into the bowl.

A completely dry strawberry is dipped into the melted chocolate.Entire strawberry (except for leaves) is coated with melted chocolate.

Carefully place the chocolate covered strawberry onto the wax paper-lined baking sheet. Repeat process with the remaining strawberries.

Do not move the strawberries once you place them on the wax paper, and make sure to leave space between each one.

If the chocolate firms up slightly as it cools, place it back in the microwave for about 20 seconds, then stir it again.

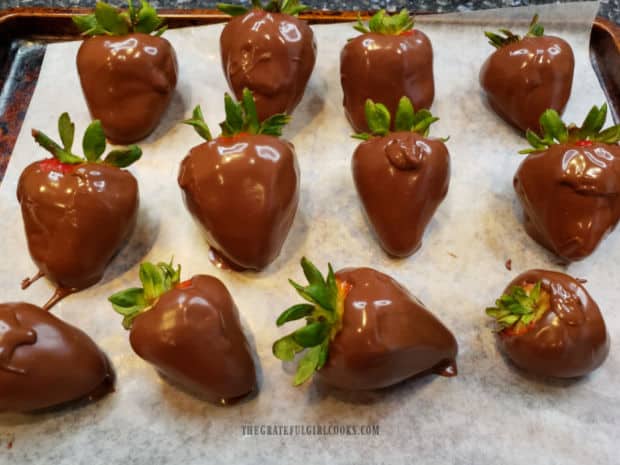
Chocolate covered strawberries resting on wax paper-lined baking sheet.

Decorate The Chocolate Covered Strawberries

Once the chocolate has firmed up, they can be eaten, as is. HOWEVER I enthusiastically recommend decorating them to look a bit more fancy, and chilling them before serving!

Make sure the chocolate is smooth again before using it to decorate. Use a fork to decoratively drizzle melted chocolate over the top of the strawberries.

Do not move the strawberries while decorating them. Instead, drizzle the chocolate over them right where they are on the wax paper.

You can use melted white chocolate (if desired, for contrast), or use the remaining chocolate in the bowl.

TIP: If you will be using colorful sprinkles, drizzle a strawberry (one at a time) with chocolate. IMMEDIATELY add the sprinkles while the chocolate is still “wet”, so they will adhere.

Four photo collage showing ways to decorate chocolate covered strawberries.

Chill, Then ENJOY Chocolate Covered Strawberries

Place the decorated chocolate covered strawberries (still on baking sheet) in a refrigerator to chill for an hour or so.

Once chilled, they should be absolutely perfect for serving! The chocolate covering should be firm and ready to go.

Carefully transfer the chocolate covered strawberries to a serving platter, serve, and enjoy these delicious treats.

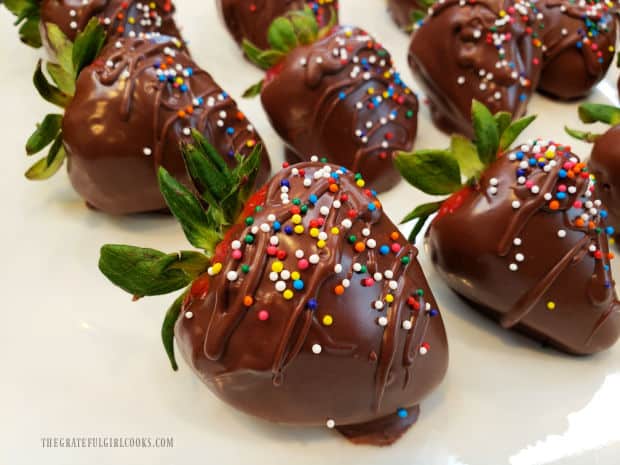
White plate with chocolate covered strawberries topped with colored sprinkles.

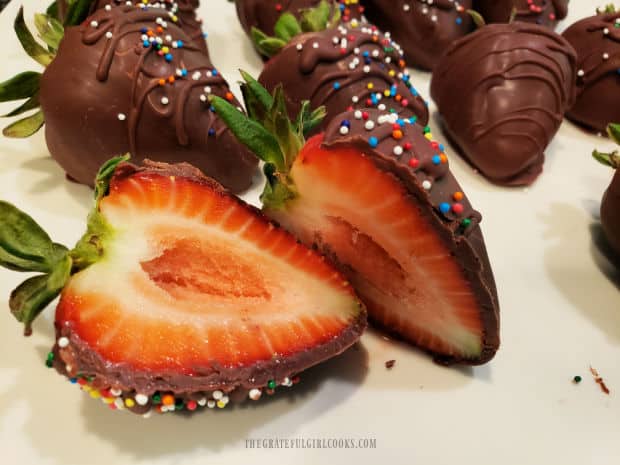
Here you can see one of the chocolate covered strawberries sliced in half. Notice that the chocolate coating remains firm, even after cutting! That’s what you want!

If you have any leftovers after serving (not sure you will, though), you can safely refrigerate them for 1-2 more days.

A chocolate covered strawberry sliced in half to reveal the inside.

That’s it! See how easy it is to make these wonderful desserts? I hope you have the opportunity to make these for a special occasion, or as a unique dessert for family and/or friends!

Thank you for stopping by, and I invite you to come back soon for more family-friendly recipes. Take care, may God bless you, and have a GREAT day!

Looking For More CHOCOLATE DESSERT Recipes?

You can find ALL of my recipes in the Recipe Index, which is located at the top of the page. I have some really delicious desserts you may enjoy that feature chocolate, including:

Want More Recipes? Get My FREE Newsletter!

I publish a newsletter 2 times per month (1st and 15th) with lots of recipes, tips, etc..
Would you like to join our growing list of subscribers?

There is a Newsletter subscription box on the top right (or bottom) of each blog post, depending on the device you use.
You can submit your e-mail address there, to be added to my mailing list.

Find Me On Social Media:

Facebook page: The Grateful Girl Cooks!
Pinterest:
The Grateful Girl Cooks!
Instagram:
jbatthegratefulgirlcooks

Author's signature

↓↓ PRINTABLE RECIPE BELOW ↓↓

0 from 0 votes
Chocolate Covered Strawberries
Prep Time
30 mins
Cook Time
0 mins
Refrigeration Time (inactive prep)
1 hr
Total Time
1 hr 30 mins
 

Chocolate Covered Strawberries are EASY to make, decadent treats which can be enjoyed any time! They are made using only 3 ingredients.

Category: Dessert
Cuisine: All Cuisines
Keyword: chocolate covered strawberries
Servings: 12 large strawberries
Calories Per Serving: 114 kcal
Author: JB @ The Grateful Girl Cooks!
Ingredients
  • 12 large strawberries (fresh)
  • 1 cup semi-sweet chocolate chips
  • 2 Tablespoons vegetable shortening
  • colored sprinkles (if using)
Instructions
  1. Cover a baking sheet with wax paper.

  2. Gently rinse strawberries in a colander. Leave green leaves/stem attached. DRY strawberries really well. Place on paper towels after rinsing; let air dry a few minutes. Gently dry each strawberry between paper towels. It is vitally important the strawberries be absolutely dry so chocolate adheres, and won't "seize up".

  3. Place chocolate chips and vegetable shortening in microwave-safe bowl. Place bowl in microwave; heat on High for 45 seconds. Remove bowl and stir mixture as much as possible. Put bowl back in microwave for 30 more seconds on High, remove and stir again. Continue in 30 second increments until chocolate and shortening are melted, smooth and lump-free.

  4. Take DRY strawberries, one at a time, holding them carefully by the green leaves. Dip them in melted chocolate, rotating to cover all sides. If necessary, use a spoon to add chocolate to the strawberry to cover all sides. Let excess chocolate drip back into bowl.

  5. Carefully place chocolate covered strawberry onto wax paper-lined baking sheet. Repeat process with remaining strawberries. Don't move strawberries once on the wax paper; leave space between each one. If melted chocolate in bowl firms up as it cools, place back in the microwave for about 20 seconds; stir it again.

  6. Let chocolate on the strawberries firm up before decorating. Make sure remaining chocolate in bowl is warm and smooth again before using it to decorate. Use a fork to decoratively drizzle melted chocolate over the top of the strawberries. Do not move strawberries while decorating. Drizzle chocolate over them right where they are on the wax paper. TIP: If using colorful sprinkles, drizzle a strawberry (one at a time) with chocolate. IMMEDIATELY add sprinkles while chocolate is still "wet", so they adhere.

  7. Place baking sheet with strawberries in the refrigerator. Chill for at least 1 hour before transferring to a serving platter. Serve, and enjoy! Any leftovers can be stored in refrigerator for 1-2 days.

Nutrition Facts
Chocolate Covered Strawberries
Amount Per Serving (1 chocolate covered strawberry)
Calories 114 Calories from Fat 72
% Daily Value*
Fat 8g12%
Saturated Fat 4g25%
Trans Fat 0.3g
Polyunsaturated Fat 1g
Monounsaturated Fat 3g
Cholesterol 1mg0%
Sodium 2mg0%
Potassium 126mg4%
Carbohydrates 10g3%
Fiber 2g8%
Sugar 7g8%
Protein 1g2%
Vitamin A 11IU0%
Vitamin C 16mg19%
Calcium 14mg1%
Iron 1mg6%
* Percent Daily Values are based on a 2000 calorie diet.

Here’s one more to pin on your Pinterest boards!Chocolate Covered Strawberries are EASY to make, decadent treats which can be enjoyed any time! They are made using only 3 ingredients.

Mocha Cinnamon Brownies

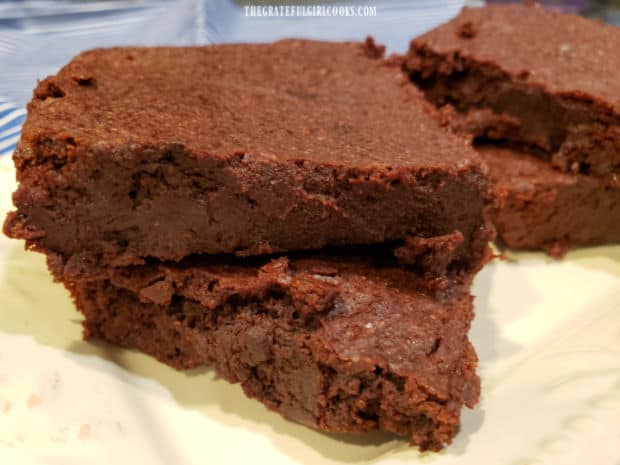
Whip up a pan of Mocha Cinnamon Brownies for a quick dessert! These brownies are fudgy and delicious, with hints of cinnamon and coffee.

Do you like delicious, fudgy brownies? You know… the kind that by eating them seem to cure all the world’s problems? If you do, then I’m sure you’ll enjoy these Mocha Cinnamon brownies!

The recipe originated on a TV show called “Chopped”, and found it in a cookbook I had that was published quite a few years ago. These brownies are really good and I hope you’ll try them!

I slightly tweaked the original recipe to add a bit more coffee and cinnamon, and we loved the result! These are dense, fudgy brownies that are deeply chocolate-flavored, but with a subtle back taste of cinnamon and mocha.

Mocha Cinnamon Brownies are simple to make in a short amount of time, so be warned! Before you know it, you’ll be serving them or stuffing your face with this decadent dessert. Here’s how to make them.

Scroll Down For A Printable Recipe Card At The Bottom Of The Page

Make The Brownie Batter

This recipe is a bit unique to me because the technique used to make the batter is quite different than the way I “normally” do it for my other brownie recipes!

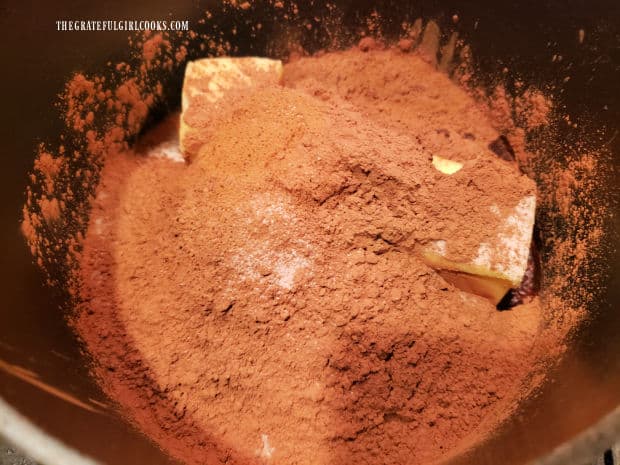
It’s actually quite easy, though. Place butter, sugar, cocoa powder, instant coffee, vanilla extract, cinnamon and salt into a medium-sized saucepan.

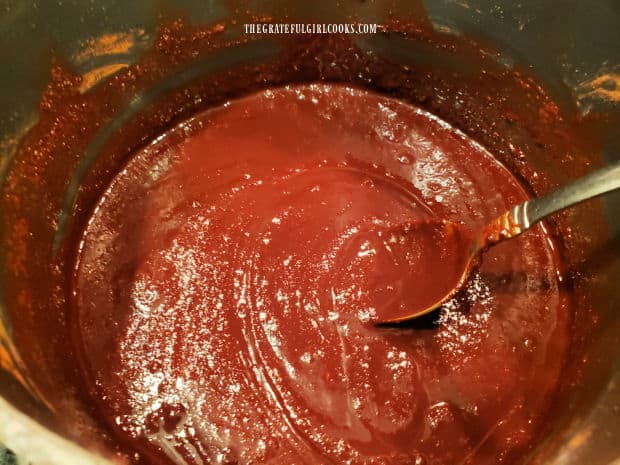
Turn the heat to MEDIUM, then cook, stirring often, until the butter melts. As the butter melts and you stir, the ingredients will all become combined.

Butter, sugar, coffee powder, cocoa powder, cinnamon, salt and vanilla are cooked in saucepan.

Let It COOL

Once the mixture has been fully combined, remove the pan from the heat source. Set the pan aside and let the batter cool until it has become WARM, but not hot.

This will usually take about 10 minutes (or a little less if you keep stirring). You want the batter only slightly warm when you add the eggs.

Why? If the batter is too hot, the eggs will “scramble” as they are added, and you absolutely do NOT want that!

Once ingredients are combined, pan of batter is removed from the heat to cool.

Finish The Brownie Batter

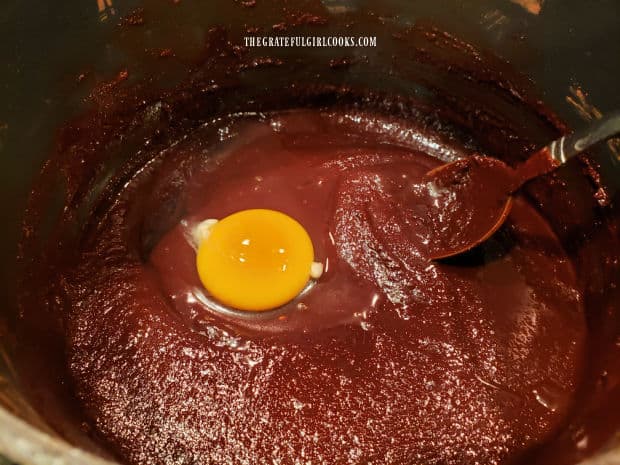
Stir or beat in the eggs, ONE AT A TIME. Continue mixing after each addition, until the batter is smooth with a bit of a glossy shine to it.

Eggs are stirred, on at a time, into cooled batter, and stirred to combine.

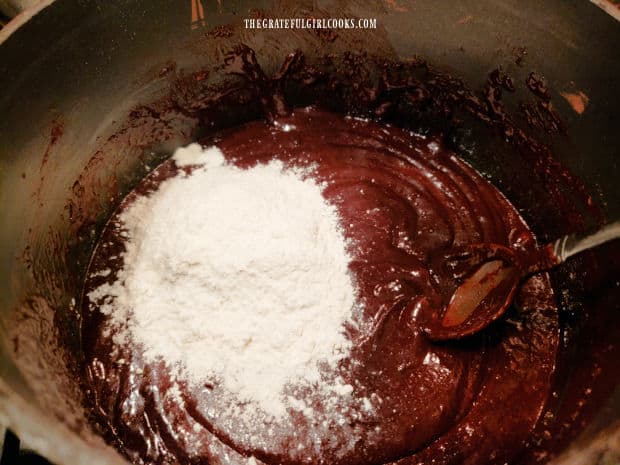
Add the flour to the batter and stir until it has been combined with the rest of the batter. Now the brownie batter is ready for baking!

Flour is added and then stirred into the batter for the mocha cinnamon brownies.

Ready, Set… Bake!

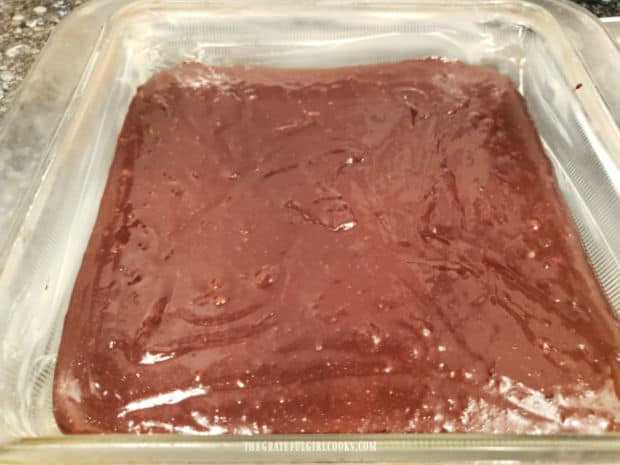
Pour the brownie batter into the previously buttered baking pan. Place the pan of mocha cinnamon brownies on a middle rack in a preheated oven.

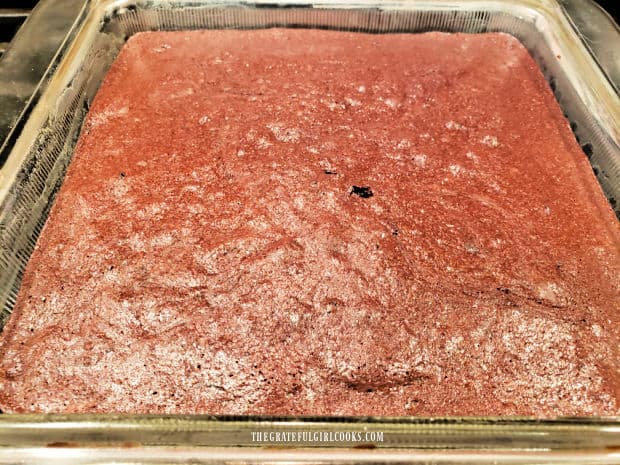
Bake at 325°F. for about 20-25 minutes, or until the brownies are set. Oven temps can vary widely, so keep an eye on them.

To check for doneness, insert a toothpick into the middle of the brownies. If it comes out clean, the brownies are ready.

Batter is spread into a buttered 9" x 9" baking dish then cooked in oven.The mocha cinnamon brownies are baked for 20-25 minutes until set.

Time For Some Mocha Cinnamon Brownies!

Remove the pan of brownies from the oven and transfer the pan to a wire rack. Let the mocha cinnamon brownies cool to room temperature in the baking pan before cutting and serving.

When cooled, cut the brownies into 12 bars, and then serve these delicious treats! Cover any leftovers well with plastic wrap or in an airtight container.

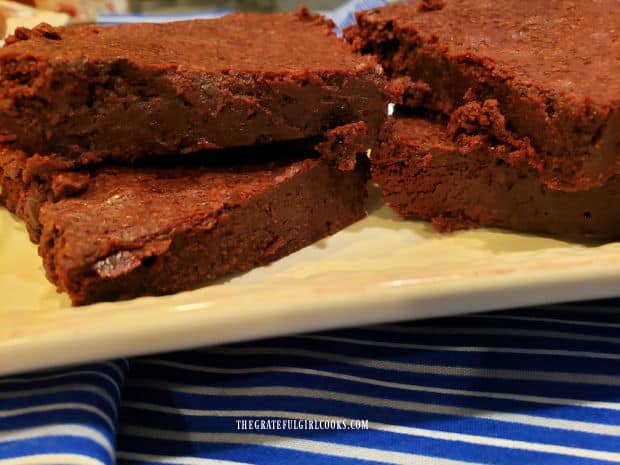
The mocha cinnamon brownies can be stored (covered) on the countertop for up to 2-3 days (if they’re not all gobbled up by then). They’re delicious, dense, and filled with chocolate flavor!

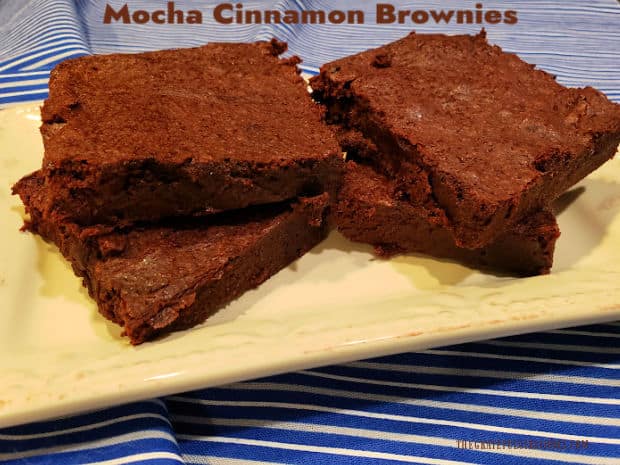
A beige platter with four mocha cinnamon brownies on it, ready to be eaten.A close up of mocha cinnamon brownies, dense and fudgy, and ready to be enjoyed.

I hope you have the opportunity to make these mocha cinnamon brownies for yourself or for those you love. You’re going to like them, I’m sure!

Thanks for stopping by, and I invite you to come back again soon for more family-friendly recipes. Take care, may God bless you, and have a GREAT day!

Looking For More Recipes For BAR COOKIES?

You can find ALL of my recipes in the Recipe Index, which is located at the top of the page. I have some delicious bar cookie recipes for you to enjoy, including:

Want More Recipes? Get My FREE Newsletter!

I publish a newsletter 2 times per month (1st and 15th) with lots of recipes, tips, etc..
Would you like to join our growing list of subscribers?

There is a Newsletter subscription box on the top right (or bottom) of each blog post, depending on the device you use.
You can submit your e-mail address there, to be added to my mailing list.

Find Me On Social Media:

Facebook page: The Grateful Girl Cooks!
Pinterest:
The Grateful Girl Cooks!
Instagram:
jbatthegratefulgirlcooks

Author's signature

Recipe adapted from: “The Chopped Cookbook”, page 229, published by Clarkson Potter in 2014 for Television Food Network, G. P.

↓↓ PRINTABLE RECIPE BELOW ↓↓

0 from 0 votes
Mocha Cinnamon Brownies
Prep Time
10 mins
Cook Time
20 mins
Total Time
30 mins
 

Whip up a pan of Mocha Cinnamon Brownies for a quick dessert! These brownies are fudgy and delicious, with hints of cinnamon and coffee.

Category: Dessert, Snacks
Cuisine: All Cuisines
Keyword: mocha cinnamon brownies
Servings: 12 brownies
Calories Per Serving: 203 kcal
Author: JB @ The Grateful Girl Cooks!
Ingredients
  • 12 Tablespoons butter =1½ sticks + more for greasing pan
  • 1 cup granulated sugar
  • ¾ cup unsweetened cocoa powder
  • teaspoons instant coffee
  • 1 teaspoon vanilla extract
  • ¾ teaspoon ground cinnamon
  • ¼ teaspoon salt
  • 2 large eggs
  • cup all purpose flour
Instructions
  1. Preheat oven to 325℉. Use additional butter (about 1 T.) to butter bottom and sides of 9"x9" square baking pan.

  2. Place butter, sugar, cocoa powder, instant coffee, vanilla, cinnamon and salt into a medium saucepan. Turn heat to MEDIUM. Cook, stirring often, until butter melts and ingredients are combined.

  3. Remove pan from heat source. Set aside. Let batter cool until WARM, but not hot (about 10 minutes). You want batter only slightly warm before you add eggs.

  4. Stir or beat in eggs, one at a time. Continue mixing until batter is smooth with a slight glossy shine. Add flour; stir until combined

  5. Spread batter in buttered pan. Place pan on middle rack in preheated oven. Bake at 325°F. for 20-25 minutes, or until brownies are set. To check for doneness, insert a toothpick into middle of the brownies. If it comes out clean, they're done.

  6. Remove brownies from oven; transfer pan to a wire rack. Let brownies cool to room temp. (in pan) before cutting into 12 bars and serving. ENJOY! *Store leftovers in airtight container on countertop.

Nutrition Facts
Mocha Cinnamon Brownies
Amount Per Serving (1 brownie)
Calories 203 Calories from Fat 117
% Daily Value*
Fat 13g20%
Saturated Fat 8g50%
Trans Fat 0.5g
Polyunsaturated Fat 1g
Monounsaturated Fat 3g
Cholesterol 61mg20%
Sodium 152mg7%
Potassium 109mg3%
Carbohydrates 23g8%
Fiber 2g8%
Sugar 17g19%
Protein 3g6%
Vitamin A 395IU8%
Vitamin C 0.01mg0%
Calcium 17mg2%
Iron 1mg6%
* Percent Daily Values are based on a 2000 calorie diet.

Here’s one more to pin on your Pinterest boards!Whip up a pan of Mocha Cinnamon Brownies for a quick dessert! These brownies are fudgy and delicious, with hints of cinnamon and coffee.

Shamrock Sugar Cookies

Make Shamrock Sugar Cookies for St. Patrick’s Day! You’ll love these soft cookies, which can be decorated with green icing (recipe included).Make Shamrock Sugar Cookies for St. Patrick's Day! You'll love these soft cookies, which can be decorated with green icing (recipe included).

Top o’ the morning to ya! St. Patrick’s Day is right around the corner, so why not make shamrock cookies to mark the occasion? Better yet, why not make the cookies and let the kids (your own little leprechauns) help decorate them?

These soft sugar cookies are easily made, and can be cut into any desired shape. I used two different sized shamrock cookie cutters for this batch, and then added Irish green icing and sprinkles for decoration.

The icing for decorating the cookies is optional, so you can choose to add it or not. Undecorated shamrock cookies are soft, slightly sweet and delicious even without icing. Here’s how to make these festive cookies.

Scroll Down For A Printable Recipe Card At The Bottom Of The Page

Make The Cookie Batter

Cream room temperature butter and granulated sugar together in a large bowl, using an electric mixer. Beat until the mixture becomes fully combined, and fluffy.

Add 2 eggs, ONE AT A TIME, beating between each addition. Measure vanilla extract and almond extract into the batter, and continue beating until they’re incorporated into the dough.

Granulated sugar and butter are creamed together in a large bowl, with an electric mixer.Eggs are added, one at a time to the butter mixture.

Mix Dry Ingredients And Add To Batter

In a separate large bowl, stir (or whisk) flour, baking powder and salt together. Add this dry mixture a little at a time to the batter, while beating on LOW speed until fully combined.

The cookie dough at this point will be fairly thick, a bit sticky, and soft in texture.

Flour, baking powder and salt are mixed into the dough until incorporated.Dough for the shamrock cookies is thick and soft after mixing.

Rolling And Chilling the Dough

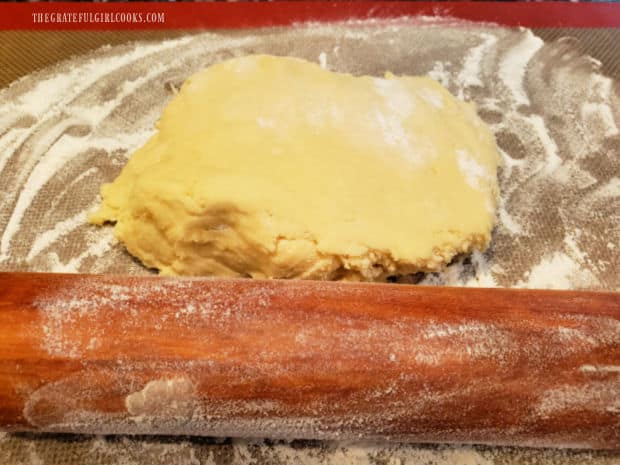
Equally divide the cookie dough into two portions. Put each piece on a lightly floured silicone mat OR parchment paper (also floured).

Use a rolling pin (lightly floured) to roll each portion of dough out until it is approx. ¼” in thick. If the dough starts to stick, sprinkle the top of the dough and rolling pin with a tiny bit more flour.

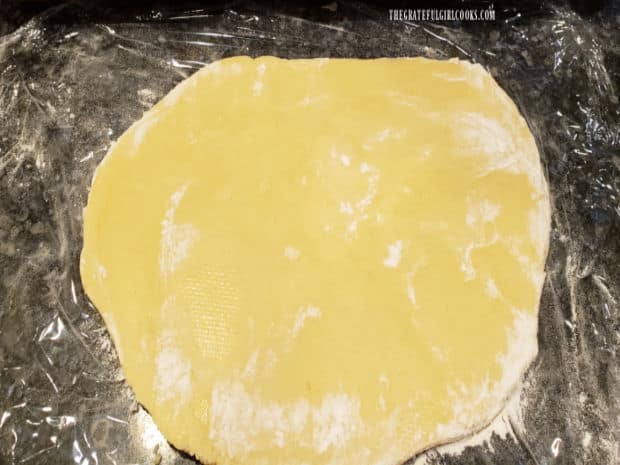
After the dough is rolled to ¼” thickness, lightly sprinkle the top of each piece of dough with flour. Cover each portion with plastic wrap, and place them in the refrigerator to chill at least 2 hours (or overnight, if desired).

Cookie dough is halved, then each piece is rolled out on a floured surface until 1/4" thick.Dough for shamrock cookies is covered with plastic wrap and refrigerated two hours until firm.

Cut Out The Cookies

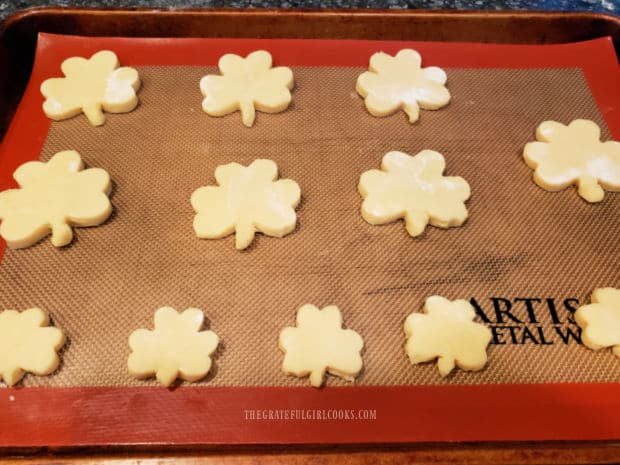
Preheat your oven to 375°F. before cutting out the cookies. Take ONE PORTION of the dough out of the refrigerator (keep other piece refrigerated). Use a shamrock cookie cutter to carefully cut out the cookies. 

Place the cutout cookies onto large baking sheets lined with silicone mats, or parchment paper that has been lightly floured. Leave about 2″ between each cookie. Remove the second half of the dough and repeat the process.

TIP: You can use those remaining scrap pieces of dough! Combine the scraps, re-roll the dough and cut out more cookies, then refrigerate cookies for 10 minutes before baking. You want the dough cold and slightly firm again, so the cookies don’t spread out too much while baking, ruining their shape!

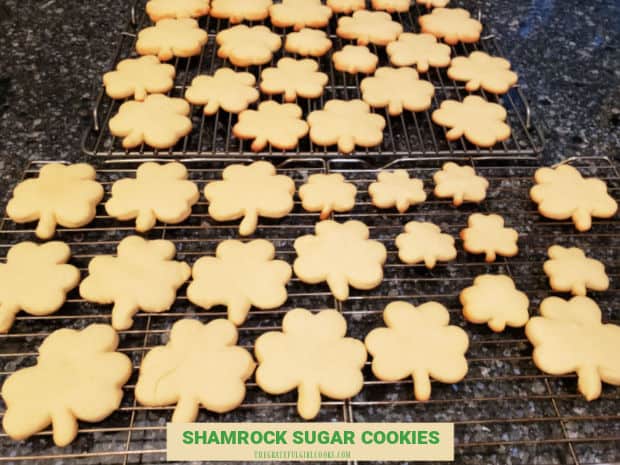
On average, this recipe yields about 36 cookies. I used 2 different sized cookie cutters (one was fairly small), so I ended up with about 40 shamrock cookies. The size cookie cutter(s) you use will determine the total quantity of cookies.

Bake The Shamrock Sugar Cookies

Bake the cookies at 375°F. for 8-10 minutes, or ONLY until the cookies are very lightly browned on the bottom. DO NOT OVERBAKE!

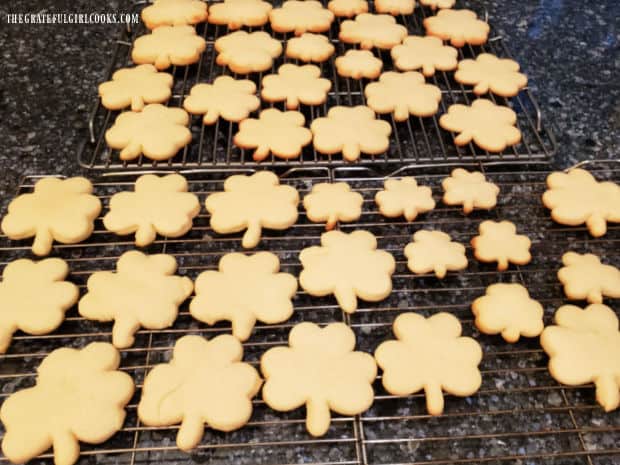
Let the cookies rest and cool on the baking sheet for 5 minutes, then transfer them with a spatula to wire racks to finish cooling. 

Cut out shamrock cookies on a silicone mat (on baking sheet) ready to be baked.Shamrock cookies are baked until only very slightly browned, then cool on wire rack.

Make The Icing (Optional)

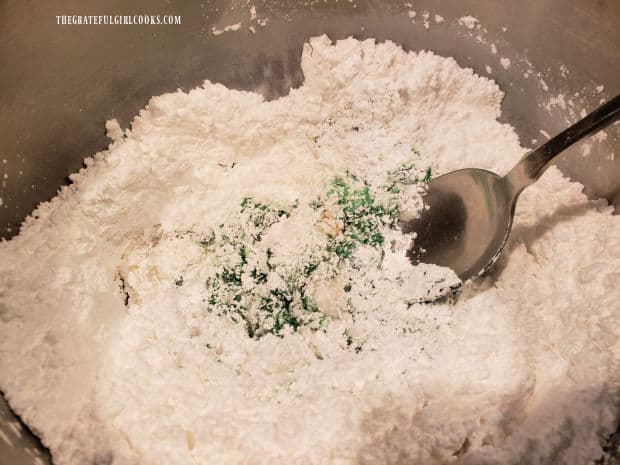
If you want to make decorative icing for the cookies, it’s simple. Measure powdered sugar, 2 Tablespoons of milk (to start), light corn syrup, and vanilla extract into a medium bowl.

TIP: If you want to color the icing, add the gel coloring at this point. Stir until the desired color is reached and evenly distributed in the icing.

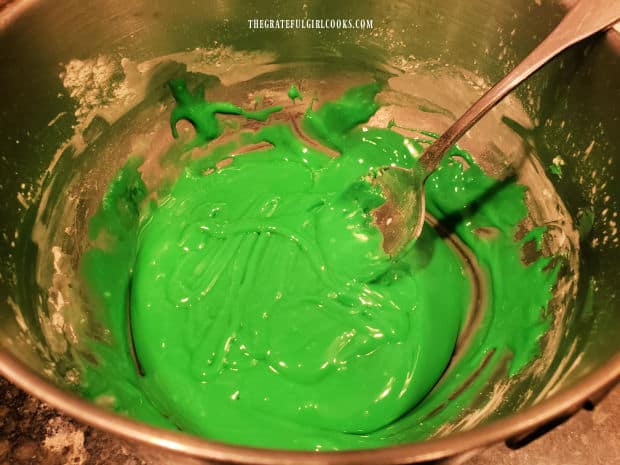
Stir until the icing ingredients are combined and lump-free. If the icing is too thick, add a tiny bit of milk (about 1 teaspoon) at a time, stirring until it reaches the desired consistency.

You will want the icing to be spreadable and slightly thick (or pipeable, if using a pastry bag). TIP: Too thick? Add a tiny bit of milk. Too thin? Add a little more powdered sugar.

Mixing the ingredients for green icing to decorate the shamrock cookies.Green icing is mixed and is now ready to decorate the shamrock cookies.

To Decorate Or Not? That IS The Question!

TRUTH! If there were awards for worst cookie decorator, I’m fairly sure I would rank right up there somewhere near the top of the list. I am not a good or skilled cookie decorator AT ALL.

That being said, if you make the icing and want to decorate your shamrock cookies, go for it! Whether you spread it, pipe it, or dunk the cookies in icing, have fun decorating these shamrock cookies, whatever the result!

Kids LOVE to be creative with their own special decorated cookie creations, so make that icing, and let them have a go at it. Their decorated cookies will probably be better looking than mine… ha ha!

Wait until the cookies have cooled to room temperature before decorating. After decorating, let the cookies rest, so the icing gets firm. Once the icing has hardened, grab a cookie and enjoy a bite! They’re delicious.

Shamrock cookies, with green icing and colored sprinkles, resting on a wire rack.

Thanks for taking time out of your day to visit my blog. I hope you have the opportunity to try these yummy little shamrock cookies. Remember you can use your favorite cookie cutters to make these cookies for any holiday or occasion, too!

I hope you have a great day, and invite you to come back again soon for more family-friendly recipes. Take care, and may God bless you!

Looking For More COOKIE Recipes?

You can find ALL of my recipes in the Recipe Index, which is located at the top of the page. I have lots of cookie recipes for you to enjoy, including:

Want More Recipes? Get My FREE Newsletter!

I publish a newsletter 2 times per month (1st and 15th) with lots of recipes, tips, etc..
Would you like to join our growing list of subscribers?

There is a Newsletter subscription box on the top right (or bottom) of each blog post, depending on the device you use.
You can submit your e-mail address there, to be added to my mailing list.

Find Me On Social Media:

Facebook page: The Grateful Girl Cooks!
Pinterest:
The Grateful Girl Cooks!
Instagram:
jbatthegratefulgirlcooks

Author's signature

Original recipe source (and with thanks to): Blair Lonergan, at: theseasonedmom.com/cut-out-sugar-cookies/

↓↓ PRINTABLE RECIPE BELOW ↓↓

0 from 0 votes
Shamrock Sugar Cookies
Prep Time
15 mins
Cook Time
10 mins
Refrigeration Time (Inactive)
1 hr
Total Time
1 hr 25 mins
 

Make Shamrock Sugar Cookies for St. Patrick's Day! You'll love these soft cookies, which can be decorated with green icing.

Category: Dessert
Cuisine: All Cuisines
Keyword: shamrock cookies
Servings: 36 cookies (approx.)
Calories Per Serving: 95 kcal
Author: JB @ The Grateful Girl Cooks!
Ingredients
For Cookies:
  • cups all purpose flour
  • 1 teaspoon baking powder
  • ½ teaspoon salt
  • 1 cup granulated sugar
  • ¾ cup butter (=12 Tbl. or 1½ sticks), at room temp.
  • 2 large eggs at room temp.
  • teaspoons vanilla extract
  • ¼ teaspoon almond extract
For Icing: (this is optional, but can be used to decorate cookies!)
  • 3 cups powdered sugar
  • 3 Tablespoons milk + more as needed
  • 2 Tablespoons light corn syrup
  • ½ teaspoon vanilla extract
  • gel food coloring (optional) to color the icing
Instructions
For Cookies:
  1. Cream butter and sugar together in large bowl, using electric mixer. Beat until fully combined/fluffy. Add eggs, one at a time, beating between each addition. Measure vanilla and almond extracts into batter; continue beating until they're incorporated into dough.

  2. In separate large bowl, stir (or whisk) flour, baking powder and salt together. Add this (a little at a time) to the bowl of batter, while mixing on LOW speed until combined. Cookie dough will be fairly thick, and a bit sticky.

  3. Divide dough into two equal portions. Put each on lightly floured silicone mats OR parchment paper (also floured). Use a rolling pin (lightly floured) to roll each portion of dough out until it is ¼" thick. If dough begins to stick, sprinkle dough and rolling pin with a tiny bit more flour. After dough is rolled to ¼" thickness, lightly sprinkle the top of dough with flour. Cover each portion with plastic wrap; refrigerate at least 2 hours (or overnight, if desired).

  4. Preheat oven to 375°F. before cutting out cookies.

  5. Take 1 portion of chilled dough out of refrigerator (keep other one refrigerated). Use shamrock cookie cutter to cut out cookies. Place cookies on large baking sheets lined with silicone mats, or lightly floured parchment paper. Leave 2" between cookies. Remove remaining half of dough from refrigerator; repeat process. The size cookie cutter(s) you use determines the total quantity of cookies. TIP: You can use those remaining scrap pieces of dough! Combine scraps, re-roll the dough, cut out more cookies, then refrigerate cookies for 10 minutes before baking. You want dough cold/firm again, so cookies don't spread out too much while baking, ruining their shape!

  6. Bake cookies at 375°F. for 8-10 minutes, or ONLY until the cookies are very lightly browned on the bottom. DO NOT OVERBAKE! Let cookies rest on baking sheet for 5 minutes, then transfer to a wire rack to finish cooling. 

Make Icing And Decorate:
  1. Measure powdered sugar, 2 Tablespoons of milk (to start), light corn syrup, and vanilla into a medium bowl. If you want colored icing, add gel coloring. Stir until ingredients are fully combined, lump-free, and desired color. If icing is too thick, add a bit of milk (about 1 teaspoon) at a time, stirring until it reaches desired consistency. Icing should be spreadable and slightly thick (or pipeable, if using a pastry bag). TIP: Too thick? Add a tiny bit of milk. Too thin? Add a little more powdered sugar.

  2. Wait until cookies have cooled to room temperature before decorating. After decorating, let cookies rest, so the icing hardens. Serve, and enjoy!

Recipe Notes

NOTE: Caloric calculation was made for cookies WITHOUT icing. If icing is added to the cookies, their approximate caloric value would increase to 138 per cookie, on average.

Nutrition Facts
Shamrock Sugar Cookies
Amount Per Serving (1 cookie)
Calories 95 Calories from Fat 36
% Daily Value*
Fat 4g6%
Saturated Fat 3g19%
Trans Fat 0.2g
Polyunsaturated Fat 0.2g
Monounsaturated Fat 1g
Cholesterol 21mg7%
Sodium 67mg3%
Potassium 27mg1%
Carbohydrates 13g4%
Fiber 0.3g1%
Sugar 6g7%
Protein 1g2%
Vitamin A 133IU3%
Calcium 9mg1%
Iron 1mg6%
* Percent Daily Values are based on a 2000 calorie diet.

Here’s one more to pin on your Pinterest boards!

Make Shamrock Sugar Cookies for St. Patrick's Day! You'll love these soft cookies, which can be decorated with green icing, if desired (recipe included).

Citrus Cannoli

Make about 15 (or more) delicious Citrus Cannoli, with sweetened orange ricotta filling, and decorated with chocolate and chopped pistachios!

Do you enjoy cannoli? My husband and I sure do! We have a coffee house very close to us that serves cannoli, and we have been known to drive there, just for the cannoli! A few years back while on a cruise up the eastern coast of the U.S., we spent a day in Boston.

We enjoyed doing the Freedom Trail walk, seeing historic sites, such as The Boston Commons, and Paul Revere’s home. We also saw the Old North Church and the “Cheers” bar from the old TV show. Our day also included tracking down a famous cannoli shop in the north end of Boston, to bring back some cannoli onto the ship. YUM!

A few years ago, a dear friend of ours who is a great Italian cook, posted a recipe she uses for homemade cannoli. After adapting the recipe slightly for our tastes and preferences, I made these delicious citrus cannoli. YUM!

The recipe, as written, will yield about 15-18 delicious cannoli. Cannoli are always best eaten the same day you make them, so share them!. I’ve shared them with quite a few of our neighbors!

Making citrus cannoli takes a bit of time and prep, but the finished treats are worth every minute! They’re DELICIOUS! Here’s how to make them:

Scroll Down For A Printable Recipe Card At The Bottom Of The Page

Make The Citrus Ricotta Filling For the Cannoli

Place ricotta cheese in a wire mesh strainer over a bowl, and let the excess liquid drain out. Discard liquid, then place the drained ricotta in a blender.

Cover and blend the ricotta until it becomes smooth. You can also use an electric mixer to mix the ricotta until smooth, if that is more convenient. Pour the smooth ricotta into a large bowl.

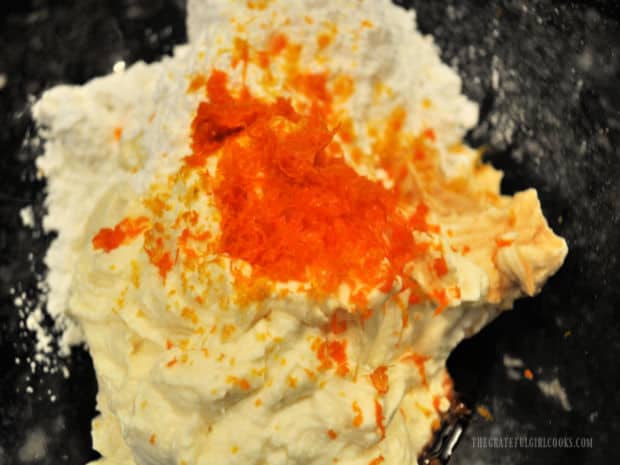
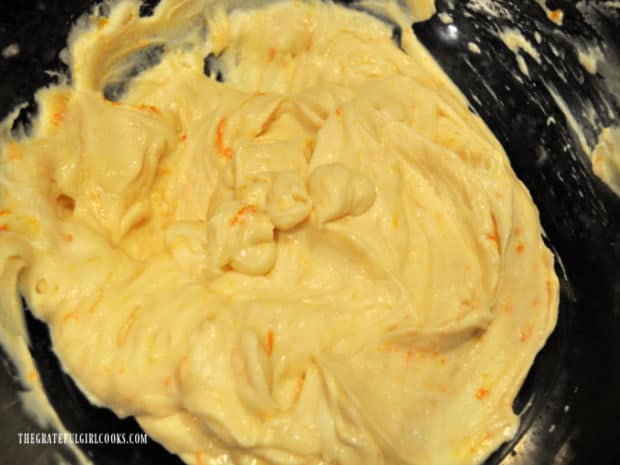
Gently FOLD in un-sifted powdered sugar, vanilla extract, and finely grated orange zest. Continue to gently fold these ingredients into the ricotta until completely incorporated.

Cover the bowl, and keep the citrus ricotta filling refrigerated and well chilled until you’re ready to fill the cannoli shells.

Powdered sugar, vanilla and orange zest is added to drained, blended ricotta cheese for cannoli filling.Citrus ricotta cannoli filling is refrigerated after being fully combined.

Make The Dough For The Cannoli Shells

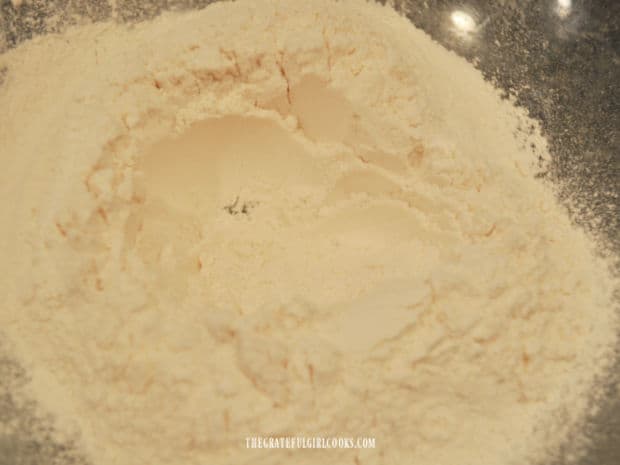
While the ricotta mixture chills in the refrigerator, make the dough for the cannoli shells. Sift flour, salt and sugar together in a large mixing bowl. Use your fingers to create a “well” in the center of the mixture.

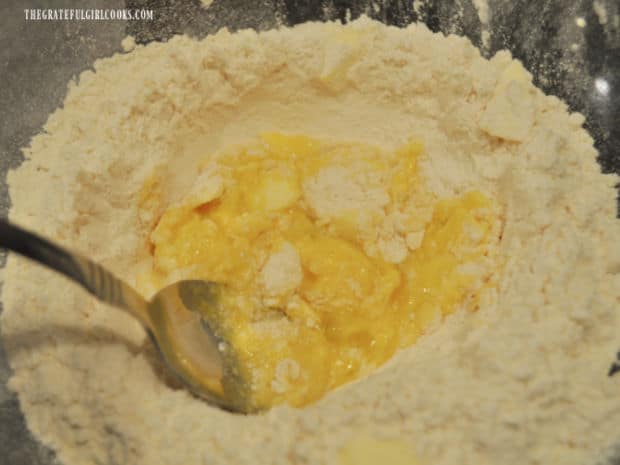
Add a slightly beaten egg and cold butter (cut in pieces) to the center well. Stir the egg and butter into the flour, from the outside in, to incorporate them into and moisten the flour mixture.

Add Marsala wine, one Tablespoonful at a time, stirring only until the dough mixture clings together.

Flour, salt, and granulated sugar are sifted into a bowl, and a "well" is created in the middle.An egg and cold pieces of butter are added to the flour mixture in a large bowl to make dough.Marsala wine is added, 1 Tablespoon at a time to the cannoli dough, until dough clings together.

Use your hands to shape the dough into a firm round ball, then wrap the dough tightly with plastic wrap. Let the dough rest at room temperature for 15 minutes before unwrapping.

Cannoli dough is formed into a firm dough ball, wrapped and rests for 15 minutes before shaping.

Cut Out And Shape the Cannoli Shells For Frying

Unwrap the dough, and place it on a lightly floured work surface. Using a rolling pin, roll the dough out until it is about ¼” thick. Use a  3½” round biscuit or cookie cutter to create circles out of the dough (each circle is 3½” wide).

Use the rolling pin to roll out each circle just a bit more into a slightly oval shape. You should end up with approx. 15-18 dough circles (and sometimes more).

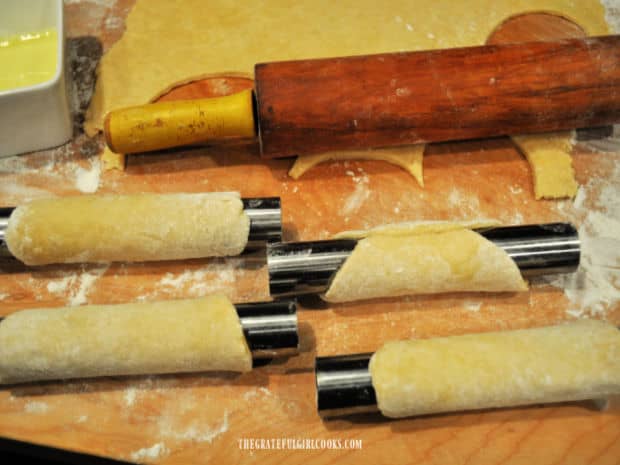
Lay a metal cannoli tube (bought a set of 4 on Amazon for about $7) across the middle of a dough circle. Wrap the dough around the cannoli tube, and seal the edges together with a slightly beaten egg white (acts like glue), to hold the two seams together. Press the seam together, to ensure the cannoli shells seal properly and hold together when frying.

Use your fingers to slightly flare the edges (on both ends) of the dough out a little bit before frying the cannoli shells.

Dough for cannoli is rolled, then cut into circles before they are molded onto tubes and fried.One of the dough circles is wrapped around a metal cannoli tube.Four cannoli tubes are wrapped and seams are sealed with egg white before frying.

Cook The Cannoli Shells

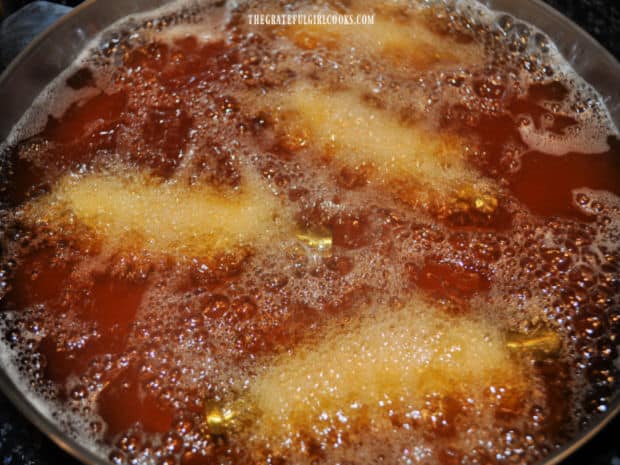
Heat oil in a large skillet (or electric skillet) until it reaches 350°F.  Fry 3-4 cannoli shells at a time in the hot oil for ONE MINUTE, turning until they become golden in color on all sides.

NOTE: If using a smaller skillet, only cook 2-3 at a time so the cannoli don’t touch while cooking.

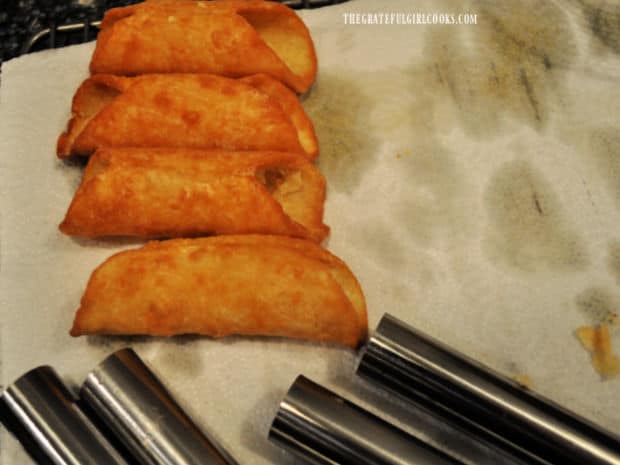
Use tongs to carefully remove the cannoli shells from the hot oil and transfer them to paper towels to drain. Allow the fried cannoli shells to cool for 5-8 seconds, then carefully slide them off the metal tubes onto paper towels.

Next Batch!

Wrap the next batch of cannoli shells back onto the metal forms, making sure to seal them well. Re-check the temperature of the oil to make sure it is 350°F. before adding the cannoli shells..

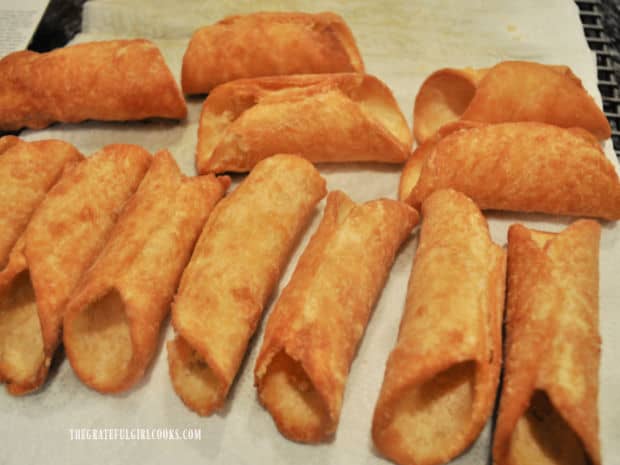
Repeat the cooking process until all the cannoli dough has been used. Let the cannoli shells cool completely after frying, before decorating and filling the shells.

NOTE: If you want to FREEZE some of the shells for later use, wrap the cooled shells carefully, then store them in the freezer in an airtight container. When you are ready to use them, thaw and then decorate shells and fill with cold ricotta mixture before serving.

3-4 cannoli at a time are fried for 1 minute in very hot oil until golden brown in color.Metal cannoli tubes are removed from fried shells, cooling and draining on paper towels.Some of the fried cannoli shells, cooling on paper towels before decorating and filling.

Decorating The Citrus Cannoli Shells

Decorating the cooled cannoli shells is optional, but it really gives them a wonderful look! Melt semi sweet chocolate chips in a double boiler (or in the microwave) until completely smooth.

Lightly dip the ends (both sides) of the cannoli shells into melted chocolate, then immediately sprinkle the chocolate with finely chopped pistachios. You can also sift powdered sugar onto the shells, if desired.

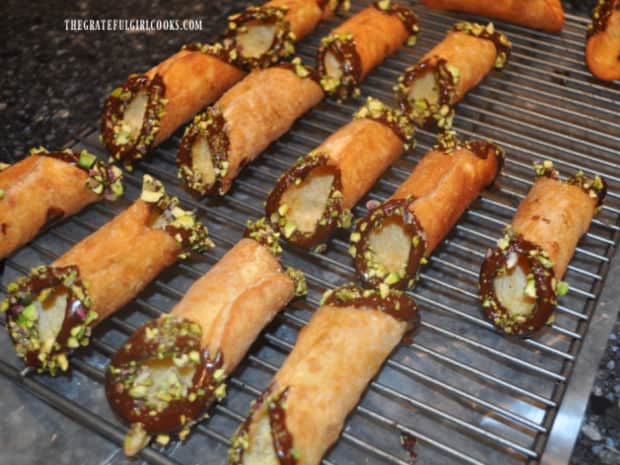
Place the shells on a wire rack after decorating, and let them cool completely at room temperature until the chocolate has hardened. TIP: I find it helpful to put wax paper, foil, or parchment paper UNDER the wire rack to catch any drips, etc..

Both ends of cannoli shells are dipped in melted chocolate and sprinkled with chopped pistachios.

Serve The Citrus Cannoli

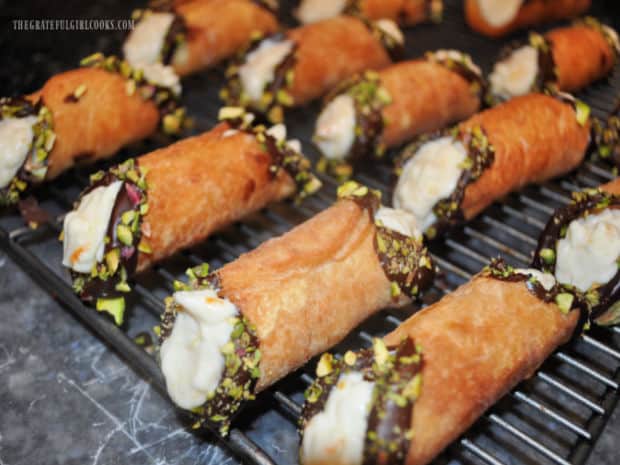
Remove the chilled citrus ricotta filling from the refrigerator. Use a pastry bag to pipe the filling into each of the shells. I pipe it into both ends of the cannoli shell.

If you don’t have a pastry bag, you can add the citrus filling to a zip-loc bag. Snip a corner off a bottom edge to pipe it, OR you can carefully fill the shells using a small spoon.

NOTE: Citrus cannoli are at their very best when eaten on the same day they are made. The shells are much crisper that way, the way you want them to be.

Yes, you can refrigerate leftovers, but honestly, the shells will soften up when filled and refrigerated, so it’s not recommended.

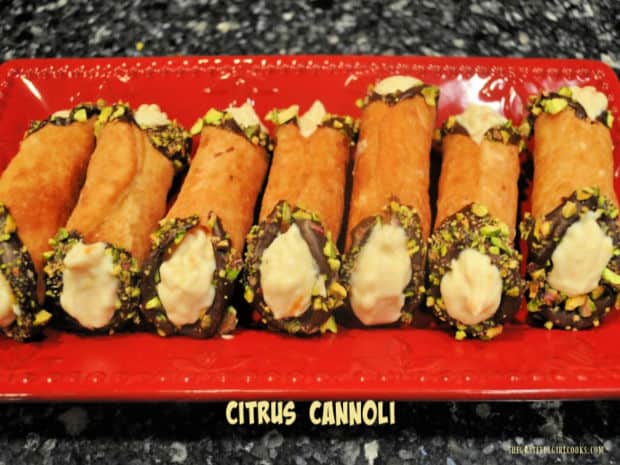
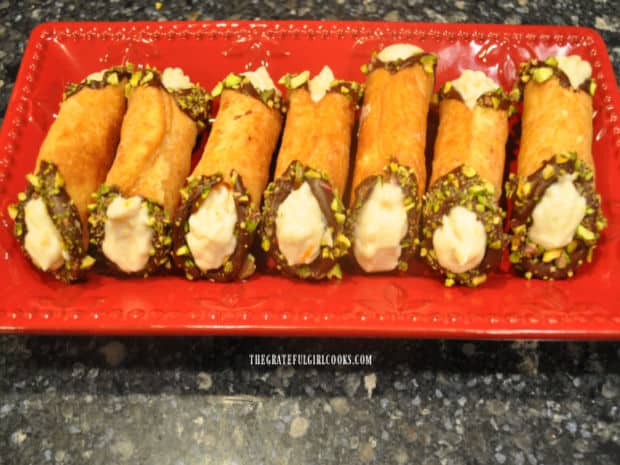
Cold citrus ricotta filling is piped into the decorated cannoli shells before serving.A red serving platter holds seven citrus cannoli that are ready to be eaten!

I hope you have the chance to try making this recipe for yummy citrus cannoli. They’re really good! Thanks for stopping by, and I invite you to come back soon for more family-friendly recipes. Take care, may God bless you, and have a GREAT day.

Looking For More DESSERT Recipes?

You can find ALL of my recipes in the Recipe Index, which is located at the top of the page. I have lots of yummy dessert recipes for you to enjoy, including:

Want More Recipes? Get My FREE Newsletter!

I publish a newsletter 2 times per month (1st and 15th) with lots of recipes, tips, etc..
Would you like to join our growing list of subscribers?

There is a Newsletter subscription box on the top right (or bottom) of each blog post, depending on the device you use.
You can submit your e-mail address there, to be added to my mailing list.

Find Me On Social Media:

Facebook page: The Grateful Girl Cooks!
Pinterest:
The Grateful Girl Cooks!
Instagram:
jbatthegratefulgirlcooks

Author's signature

Recipe adapted from our friend, Diane Mueller

↓↓ PRINTABLE RECIPE BELOW ↓↓

0 from 0 votes
Citrus Cannoli
Prep Time
40 mins
Cook Time
5 mins
Total Time
45 mins
 

Make about 15 (or more) delicious Citrus Cannoli, with sweetened orange ricotta filling, and decorated with chocolate and chopped pistachios!

Category: Dessert
Cuisine: Italian
Keyword: citrus cannolis
Servings: 15
Calories Per Serving: 306 kcal
Author: JB @ The Grateful Girl Cooks!
Ingredients
For Citrus Ricotta Filling:
  • 4 cups ricotta cheese drained
  • cups un-sifted powdered sugar
  • 4 teaspoons vanilla extract
  • ½ cup finely grated orange zest orange peel, not the white pith
For Cannoli Shells:
  • cup all purpose flour
  • ½ teaspoon salt
  • 2 teaspoons granulated sugar
  • 1 large egg slightly beaten
  • 2 Tablespoons COLD butter cut in small pieces
  • ¼ cup Marsala wine
  • 1 large egg white slightly beaten
  • OIL, for frying 1" deep in skillet used
For Decorating Cannoli Shells (optional, but good):
  • ½ cup semi sweet chocolate chips
  • ½ cup chopped pistachios
Instructions
  1. Place ricotta in a wire mesh strainer over a bowl. Let liquid drain (and discard). Place ricotta in blender. Cover and blend until smooth (can use electric mixer). Put ricotta in a large bowl. Gently FOLD in powdered sugar (un-sifted), vanilla, and orange zest. Continue to fold in, until fully incorporated. Cover bowl; refrigerate ricotta filling until ready to fill cannoli shells.

  2. To make cannoli shell dough, sift flour, salt and sugar into large bowl. Create a "well" in the center. Add slightly beaten egg and cold butter (cut in pieces) to the "well". Stir egg/butter pieces into flour, from the outside in, to incorporate them into flour mixture. Add Marsala wine, one Tablespoonful at a time, stirring only until dough clings together. Use your hands to shape dough into a firm round ball. Wrap dough tightly with plastic wrap. Let dough rest at room temperature for 15 minutes before unwrapping.

  3. Unwrap dough; place it on lightly floured work surface. Roll dough out with rolling pin until about ¼" thick. Use a  3½" round biscuit or cookie cutter to cut out circles of dough. Roll each circle just a bit more into a slightly oval shape. You should have approx. 15-18 dough circles (sometimes more).

  4. Lay metal cannoli tube across middle of the dough circle. Wrap dough around metal tube; seal edges together well, brushing them with lightly beaten egg white, to hold seams together; pinch seam together. This is an important step, to ensure cannoli shells seal properly and hold together when frying. Use fingers to slightly flare edges (on both ends) of dough out a bit before frying.

  5. Heat oil (2" deep) in a large skillet (or electric skillet) until it reaches 350°F.  Fry 3-4 cannoli shells at a time for ONE MINUTE, turning as they cook until they become golden in color on all sides. NOTE: If using a smaller skillet, only cook 2-3 at a time so cannoli don't touch while cooking. Use tongs to carefully remove cooked shells from hot oil; transfer to paper towels to drain. Let shells cool for 5-8 seconds, then carefully slide them off (hot) tubes onto paper towels. Re-check oil temp. for each batch to make sure it is at 350°. Repeat cooking process until all dough has been used. Let shells cool completely before decorating and filling. NOTE: If you want to FREEZE some shells for later use, wrap cooled shells carefully; store in freezer in airtight container. When ready to use, thaw and decorate shells; fill with cold ricotta mixture before serving.

  6. To decorate cannoli shells, melt chocolate chips in double boiler (or microwave) until smooth. Lightly dip both ends of shells into melted chocolate; immediately sprinkle chocolate with chopped pistachios. Place shells on a wire rack after decorating; cool at room temp. until chocolate hardens. TIP: I find it helpful to put wax paper, foil, or parchment paper UNDER the wire rack to catch any drips, etc..

  7. Remove cold ricotta filling from refrigerator. Use a pastry bag to pipe filling into cannoli shells (both ends). TIP: No pastry bag? Add ricotta filling to a zip-loc bag. Snip a corner off bottom of bag to pipe it, OR fill shells using a small spoon. NOTE: Citrus cannoli are at their best, eaten the same day they're made. Cannoli shells are crisper that way. Yes, you can refrigerate leftovers, but the shells will soften when filled and refrigerated, so it's not recommended.

Recipe Notes

NOTE: Caloric calculation was based on 1 cannoli out of a total of 15 cannoli being made. It also includes the optional chocolate and pistachio decorations. If made WITHOUT the chocolate and pistachio, each of the 15 cannoli would have a caloric calculation of approx. 248 calories each.

Nutrition Facts
Citrus Cannoli
Amount Per Serving (1 cannoli (decorated))
Calories 306 Calories from Fat 135
% Daily Value*
Fat 15g23%
Saturated Fat 8g50%
Trans Fat 0.1g
Polyunsaturated Fat 1g
Monounsaturated Fat 5g
Cholesterol 50mg17%
Sodium 155mg7%
Potassium 181mg5%
Carbohydrates 31g10%
Fiber 2g8%
Sugar 15g17%
Protein 11g22%
Vitamin A 390IU8%
Vitamin C 5mg6%
Calcium 154mg15%
Iron 2mg11%
* Percent Daily Values are based on a 2000 calorie diet.

Here’s one more to pin on your Pinterest boards!Make about 15 (or more) delicious Citrus Cannoli, with sweetened orange ricotta filling, and decorated with chocolate and chopped pistachios!

Christmas Tree “Gumdrops”

Make festive, lime-flavored Christmas tree gumdrops for the holidays! Only use 4 ingredients (and small cookie cutter) to make these treats.

If you’re looking for a unique and fun treat to make for the holidays, how about checking out this recipe for Christmas tree gumdrops? If you have a small Christmas tree cookie cutter (or any favorite Christmas cookie cutter for that matter) and four simple ingredients, then you’re ready to roll!

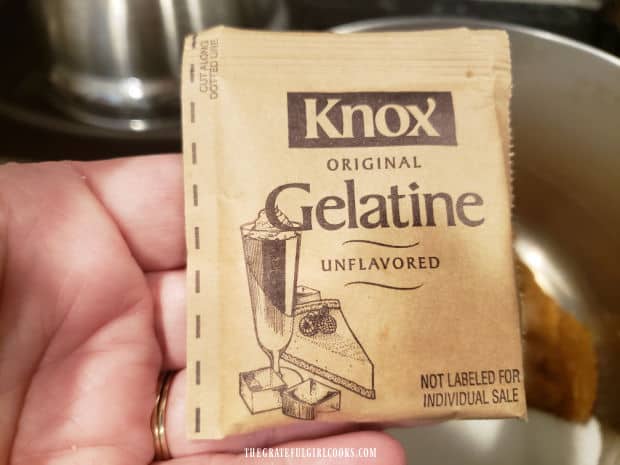
The ingredients you’ll need for this recipe are unsweetened applesauce, granulated sugar, lime jello powder, and unflavored gelatin (like Knox). Basically- you will cook the ingredients, pour them into a greased baking pan, let cool completely until firm, then cut into shapes with the cookie cutter. It’s a fairly easy recipe that will yield about 20 Christmas tree gumdrops. You can get more out of the recipe if your cookie cutter is smaller then the 2″ one I use. Here’s how to make them:

Scroll Down For A Printable Recipe Card At The Bottom Of The Page

Ready? GREASE That Pan!

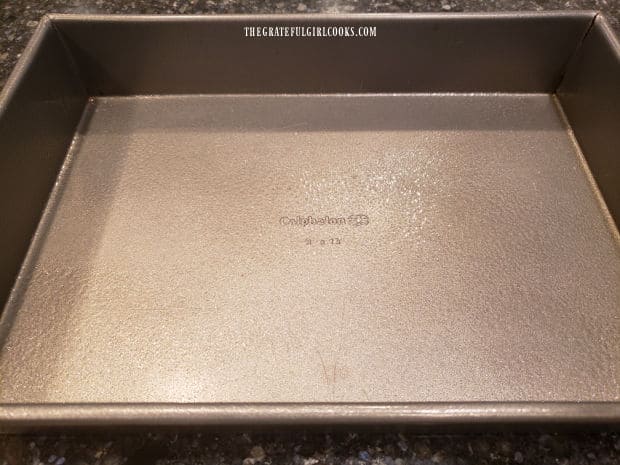
The first thing you will need to do is generously coat a 9″ x 13″ baking pan with non-stick baking spray on the bottom and sides of the pan. This is a crucial step to ensure the candy mixture can be easily removed from the pan in one entire slab. Set the pan aside.

A 9x13 inch baking pan is greased on the bottom and sides before adding cooked gelatin mixture.

Cooking The Gelatin Mixture

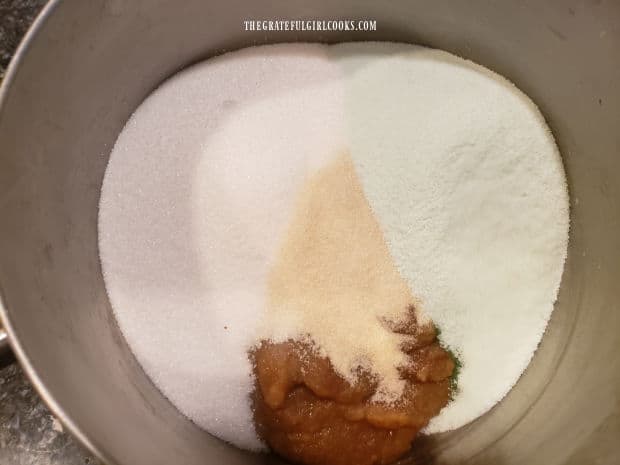
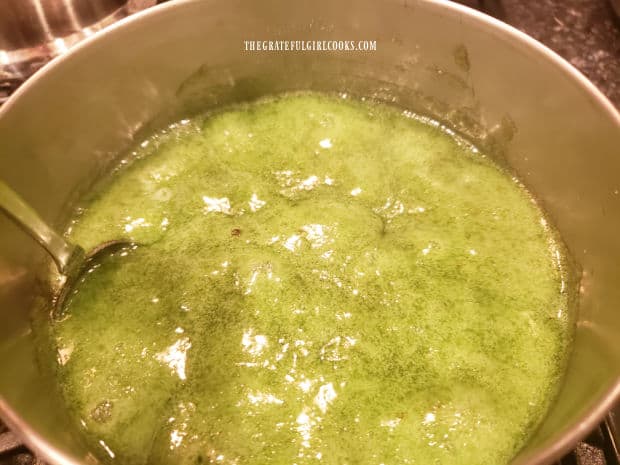
Place applesauce, granulated sugar, lime jello powder, and unflavored gelatin in a large saucepan. Turn the heat to Medium, and stir to combine. Bring this mixture to a boil, continuing to stir constantly as it cooks. Once it comes to a boil, let the mixture cook for one full minute (still stirring!).

Applesauce, lime jello, sugar, and unflavored gelatin are placed in a large saucepan to cook.Envelopes of unflavored gelatin powder are used to make the Christmas tree gumdrops.The lime flavored gelatin mixture is boiled for one minute before removing it from the heat..

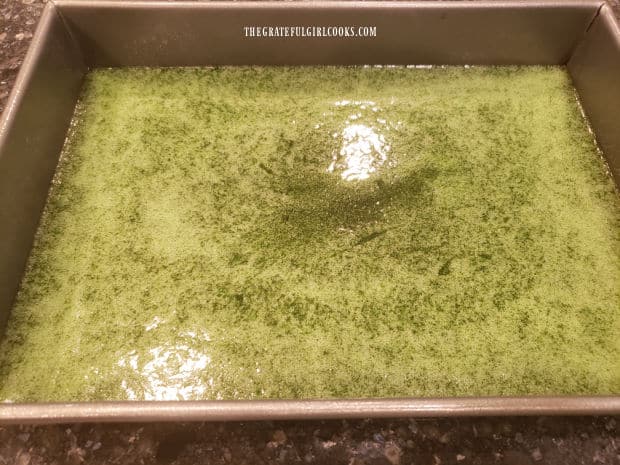
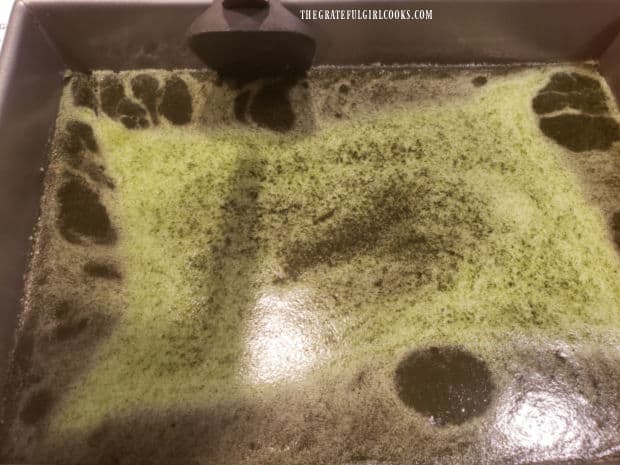
Remove the pan from the heat, and immediately pour the hot gelatin mixture into the prepared baking pan. Place the pan into the refrigerator, and refrigerate it until the gelatin is completely “set” in the pan. This typically will take about 2 hours or a bit more to set completely.

Hot lime gelatin is poured into prepared baking pan, then refrigerated until set.

Getting The Gelatin Slab Out Of The Pan

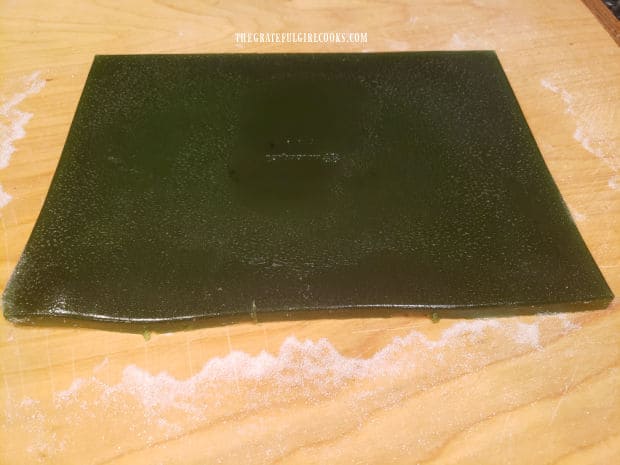
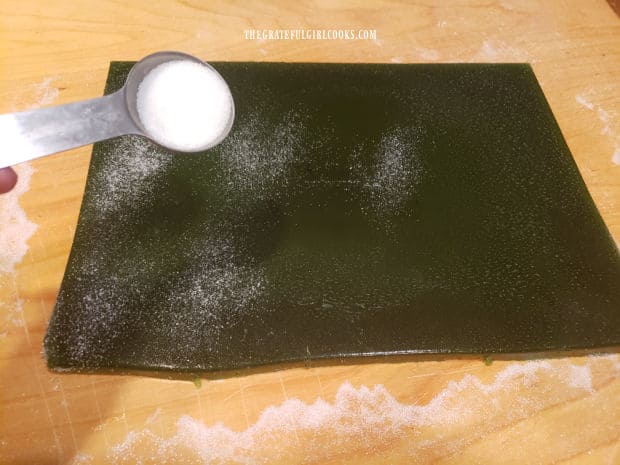
Generously dust a large cutting board with additional granulated sugar. Now comes the FUN part! Once the gelatin mixture is firm and set up, it’s time to get it out of the pan in one piece.

Gently use a spatula to loosen the jello mixture from the sides of the pan. I also try to gently lift and go under the slab as much as possible, to loosen the gelatin from the pan. Be careful not to tear the gelatin, but loosen as much of it as possible before flipping the pan over.

Flip the pan over and turn out the gelatin in one piece onto the sugared board. If it has been loosened enough, it should easily come out of the pan onto the board. If you have trouble, don’t panic! Just flip it back over, continue loosening it with the spatula, and try again. Once on the cutting board, dust the top of the gelatin with more granulated sugar.

A spatula is used to gently loosen the gelatin mixture from the baking pan.The entire baking pan full of lime gelatin is flipped onto a sugar coated cutting board.Granulated sugar is lightly sprinkled over the top of the lime gelatin mixture.

Cut Out The Christmas Trees

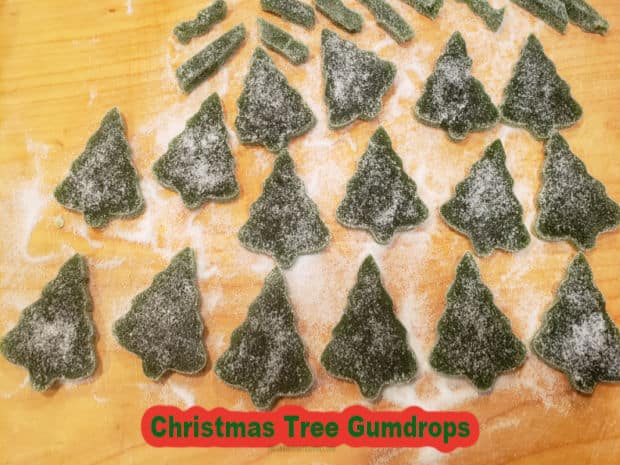
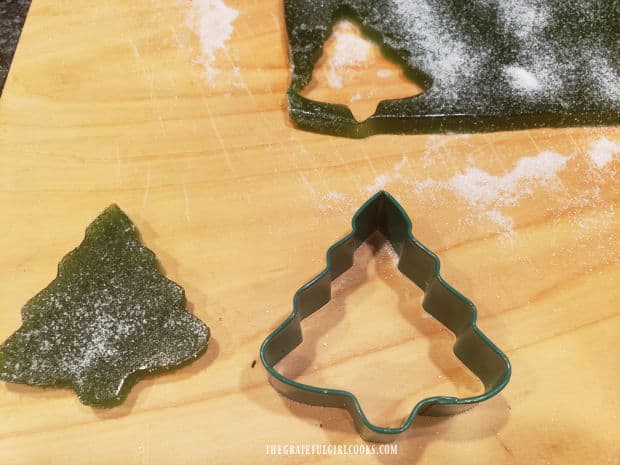
Use your cookie cutter (my tree cutter was about 2″ tall) and cut out as many Christmas tree gumdrops as possible from the gelatin. I get about 20 in total, with some small pieces left over (they taste good, too). The amount you get in total will obviously depend on the shape and size of the cookie cutter you are using. The smaller the cookie cutter, the more treats you will end up with!

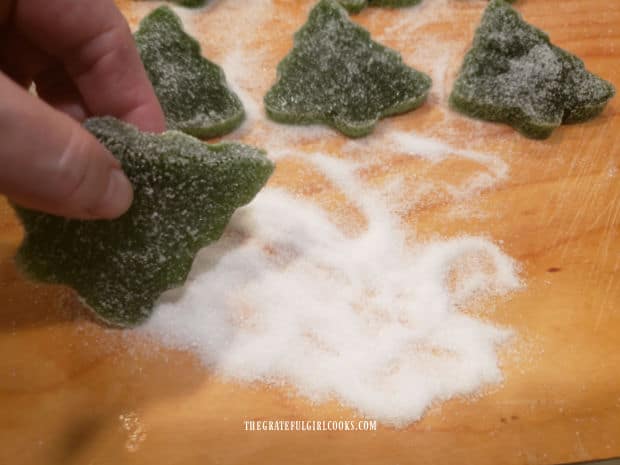
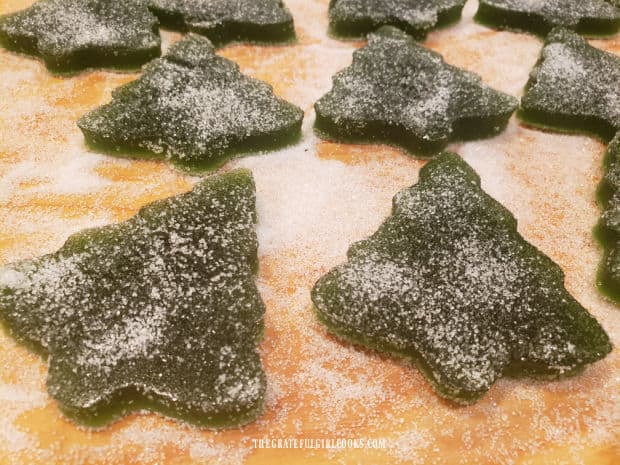
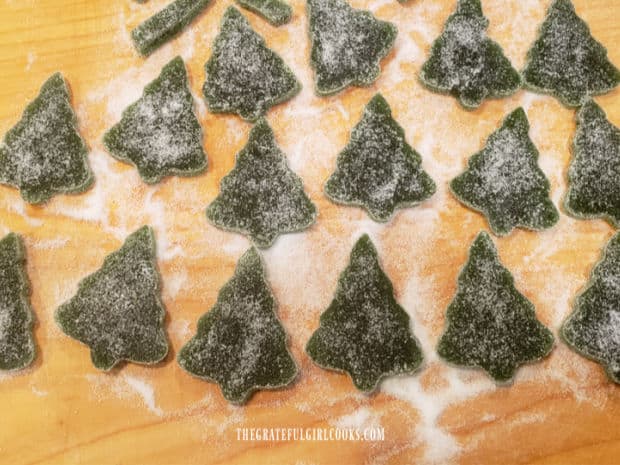
Roll the edges of the trees with additional sugar so that bottom, top, and sides have a nice, light coating of sugar on them. Cut any leftover small end pieces into bites that can also be enjoyed. Once cut and sugared, let the gumdrops “dry” on the cutting board (or a piece of wax paper) for about an hour. This helps the treats dry out just a bit more before they are ready to be enjoyed.

A small Christmas tree-shaped cookie cutter is used to cut out design from the gelatin.Edges of the Christmas tree gumdrops are rolled in sugar to lightly cover.

Let Dry, Then Enjoy These Christmas Tree “Gumdrops”!

After the Christmas tree gumdrops have dried for an hour, they can be served! Place them on a platter, and let the kids dive in! To store, place any leftovers in an airtight container, separating any layers with waxed paper, so they don’t stick together.

The finished Christmas tree gumdrops are allowed to sit and dry slightly on the sugar coated board.A lot of Christmas tree gumdrops on a cutting board, ready to be enjoyed.

The finished Christmas tree gumdrops are lime flavored, sweet, soft and chewy, and will be a memorable treat (especially for kids) during the holidays. Thanks so much for stopping by today, and I hope you’ll come back soon for more family-friendly recipes. Have a blessed day.

Looking For More HOLIDAY CANDY Recipes?

You can find ALL of my recipes in the Recipe Index, which is located at the top of the page. I have a wonderful variety of holiday recipes you’ll love, including:

Interested In More Recipes?

Thank you for visiting this website. I appreciate you using some of your valuable time to do soIf you’re interested, I publish a newsletter 2 times per month (1st and 15th) with all the latest recipes, and other fun info. I would be honored to have you join our growing list of subscribers, so you never miss a great recipe!
There is a Newsletter subscription box on the top right side (or bottom) of each blog post, depending on the device you use, where you can easily submit your e-mail address (only) to be included in my mailing list.

You Can Also Find Me On Social Media:

Facebook page: The Grateful Girl Cooks!
Pinterest:
The Grateful Girl Cooks!
Instagram:
jbatthegratefulgirlcooks

Author's signature

Recipe Adapted From Chrysa, at: https://thriftyjinxy.com/homemade-st-patricks-day-gum-drops-recipe/

↓↓ PRINTABLE RECIPE BELOW ↓↓

0 from 0 votes
Christmas Tree "Gumdrops"
Prep Time
30 mins
Cook Time
0 mins
Inactive Prep Time
3 hrs
Total Time
3 hrs 30 mins
 

Make festive, lime-flavored Christmas tree "gumdrops" for the holidays! Only use 4 ingredients (and small cookie cutter) to make these treats.

Category: Candy, Snack
Cuisine: American
Keyword: christmas tree gumdrops
Servings: 20 (or more)
Calories Per Serving: 129 kcal
Author: JB @ The Grateful Girl Cooks!
Ingredients
  • cups unsweetened applesauce
  • cups granulated sugar
  • 6 ounces Lime Jello (powder) (two 3 oz. boxes)
  • 2 envelopes unflavored gelatin (like Knox)
Additional granulated sugar for dusting cutting board and gumdrops
    Instructions
    1. Generously coat 9" x 13" baking pan with non-stick baking spray on bottom/sides. Set aside.

    2. Place applesauce, sugar, lime jello powder, and unflavored gelatin in a large saucepan. Turn heat to Medium; stir to combine. Bring mixture to a boil, stirring constantly as it cooks. Let mixture boil for one minute (still stirring!).

    3. Remove pan from heat; immediately pour hot gelatin into prepared baking pan. Refrigerate until gelatin is completely "set" (about 2 hours or so).

    4. Generously dust large cutting board with sugar. Gently use spatula to loosen jello from sides of pan. Gently lift and slide spatula under jello as much as possible, to loosen it. Flip pan over and turn out gelatin in one piece onto sugared board. It should easily come out of the pan onto the board. If you have trouble, don't panic! Just flip it back over, continue loosening with spatula, and try again. Once on cutting board, lightly sprinkle top of jello with more sugar.

    5. Use your cookie cutter to cut out as many trees as possible from gelatin. I get about 20 in total, with some small pieces left over (they taste good, too). Your yield will depend on shape/ size of cookie cutter you use. The smaller the cookie cutter, the more treats you'll end up with!

    6. Roll edges of trees in sugar so that bottom, top, and sides have light sugar coating, Let trees "dry" on cutting board (or wax paper) for 1 hour. This helps them dry out a bit before serving. Place on platter, serve and enjoy!

    7. Store any leftovers in an airtight container, separating layers with wax paper.

    Nutrition Facts
    Christmas Tree "Gumdrops"
    Amount Per Serving (1 (1/20 of total))
    Calories 129 Calories from Fat 1
    % Daily Value*
    Fat 0.1g0%
    Saturated Fat 0.002g0%
    Polyunsaturated Fat 0.003g
    Monounsaturated Fat 0.001g
    Sodium 42mg2%
    Potassium 15mg0%
    Carbohydrates 32g11%
    Fiber 0.2g1%
    Sugar 31g34%
    Protein 1g2%
    Vitamin A 5IU0%
    Vitamin C 0.2mg0%
    Calcium 2mg0%
    Iron 0.1mg1%
    * Percent Daily Values are based on a 2000 calorie diet.

    Here’s one more to pin on your Pinterest boards!Make festive, lime-flavored Christmas tree gumdrops for the holidays! Only use 4 ingredients (and small cookie cutter) to make these treats.

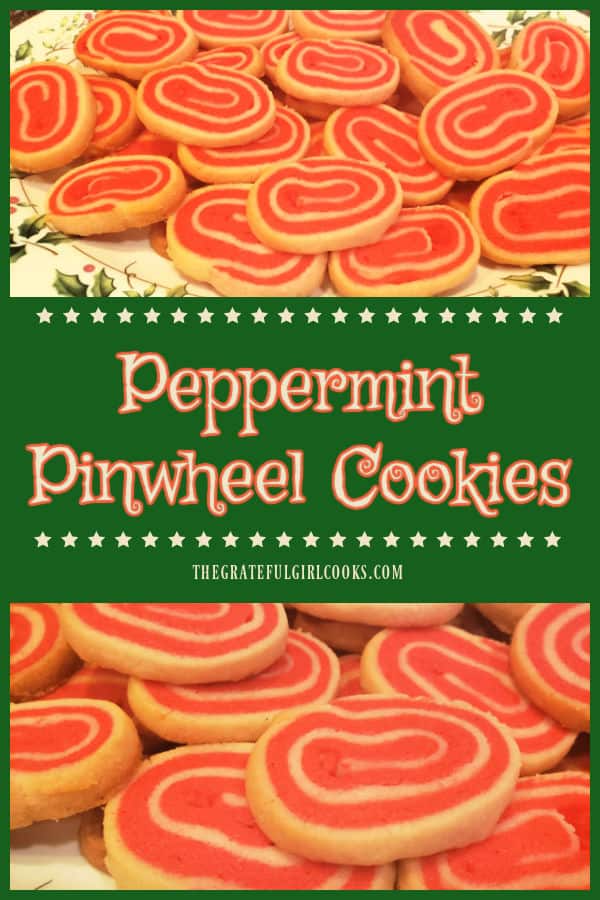
    Peppermint Pinwheel Cookies

    Peppermint Pinwheel Cookies are festive holiday treats for family and friends! Colored spirals and light peppermint flavor make them special!
    Peppermint Pinwheel Cookies are festive holiday treats for family and friends! Colored spirals and light peppermint flavor make them special!

    If you’re looking for a new Christmas cookie recipe to try this year, may I suggest these Peppermint Pinwheel Cookies? They’re not only pretty to look at, they have a nice light peppermint flavor, which is perfect for the holidays!

    I found the recipe many years ago (don’t remember where), and made them for my annual cookie exchange in our home. They were a hit! Two layers of an easily made dough (red and white) are tightly rolled into a log shape. The dough is well chilled, then sliced and baked! That’s it! Let me show you how to make these adorable holiday cookies!

    Scroll Down For A Printable Recipe Card At The Bottom Of The Page

    Make The Dough For The Peppermint Pinwheel Cookies

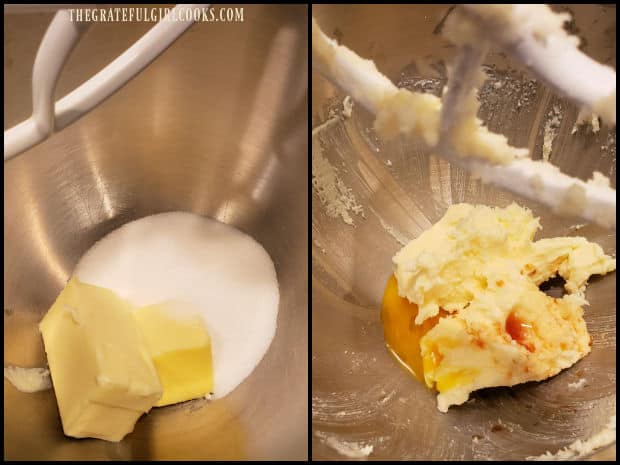
    Cream softened butter and granulated sugar in a mixing bowl, using an electric mixer. Once well blended, beat in one egg YOLK and vanilla extract, until the batter is creamy and well combined.

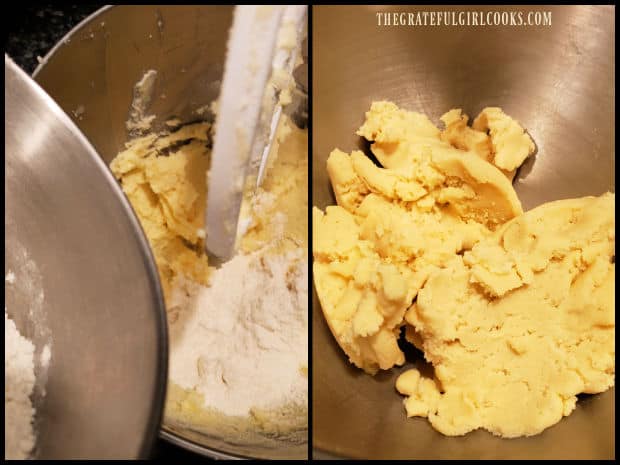
    In a separate bowl, stir together all purpose flour, salt and baking powder. Add this mixture to the batter, a little at a time while mixing. Continue beating until fully incorporated and a thick, soft dough has formed.

    Butter and sugar are creamed, then egg yolk and vanilla extract are added.Dry ingredients are added to the cookie batter until thoroughly combined.

    Color And Flavor Half The Dough

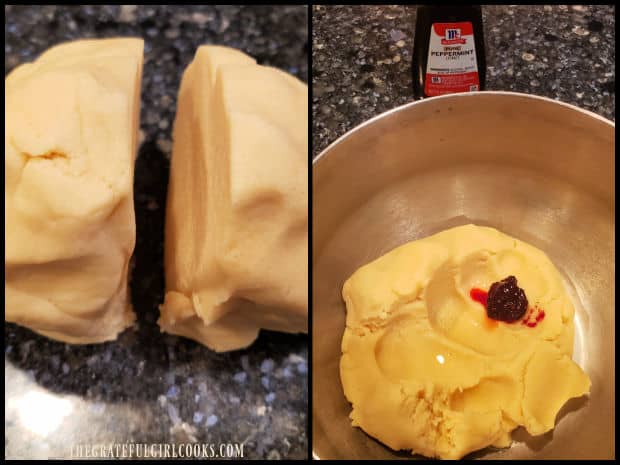
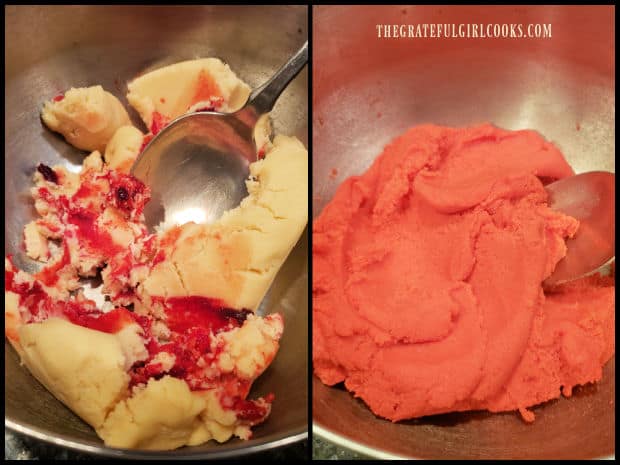
    Evenly divide the cookie dough in half, and set one half aside. Place the remaining half of the dough in a large bowl, and add peppermint extract and red food coloring (liquid or gel- I used gel).

    Use a large spoon to combine the extract and food coloring. I find it helpful to use the back of the spoon to fully blend in the color. Yes, you will have to work hard to fully stir in the red coloring! Just keep blending until the red coloring has been completely incorporated into the dough! Set the red dough aside.

    Cookie dough is cut in half, and one half has red food color and peppermint extract added to it.Peppermint extract and red food coloring is worked into the dough until it has completely turned red.

    Rolling The Red And White Dough Into Rectangles

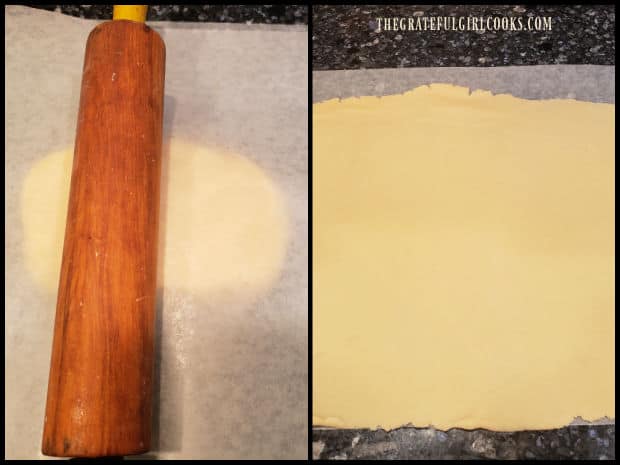
    Place the plain dough on a long piece of waxed paper. Use your hands to shape it into a small rectangle. Now place another long piece of wax paper on top. Roll the dough out into a rectangle shape until it measures 16″ long by 10″ wide. Slowly peel off the top layer of wax paper, and set the dough aside.

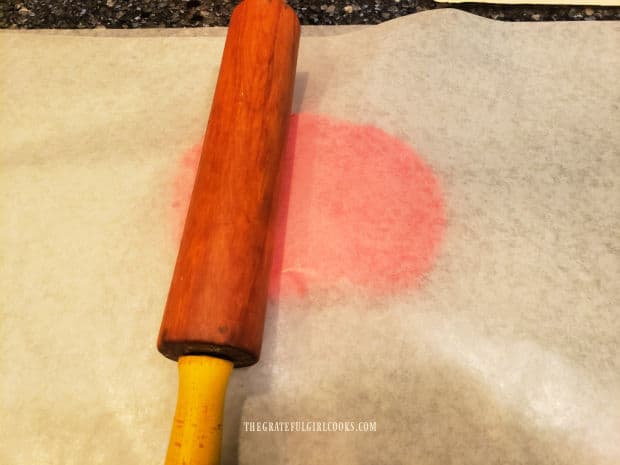
    Repeat this process with the red dough (using clean wax paper), rolling it out to the same measurements (16″ x 10″). Slowly peel off the top layer of wax paper, and set the dough aside.

    Plain cookie dough is rolled out between layers of wax paper into a long rectangle shape.Red peppermint dough is rolled out between layers of wax paper into a long rectangle shape.

    Layering The Dough

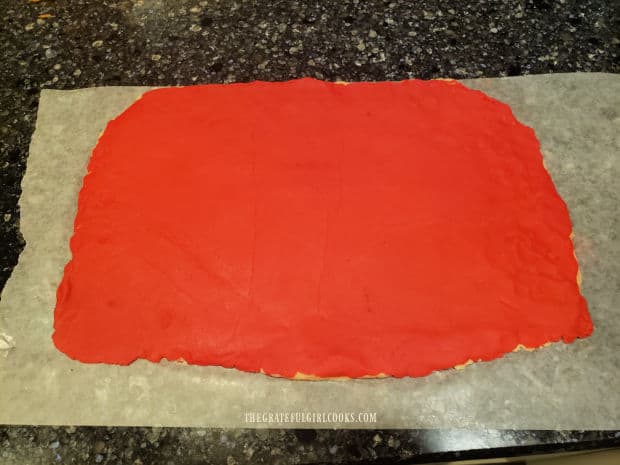
    Now you should have one 16″ long by 10″ wide plain rectangle and a red rectangle (both with wax paper on the bottom). Place the plain dough rectangle in front of you. Carefully flip the RED layer over on top of the PLAIN layer, fitting it to the shape of the plain rectangle. The red dough wax paper should now be on the top. Slowly and carefully peel off the wax paper from the red layer.

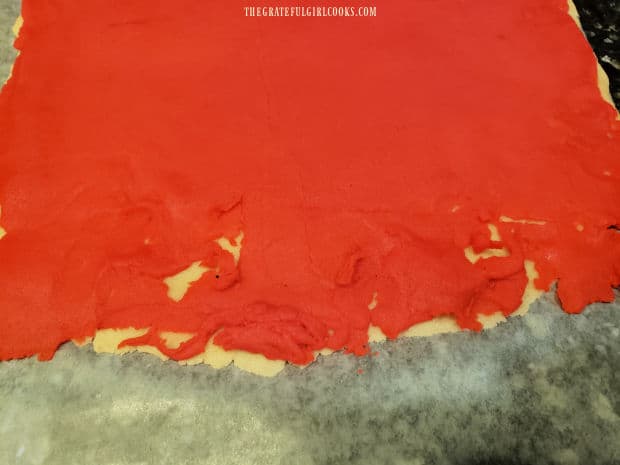
    TIP: In the photo below you can see that occasionally the dough will stick to the wax paper or rip as you remove the wax paper- NO worries)! This is a very forgiving dough. Just keep slowly removing the wax paper, then go back and patch any ripped areas with excess dough from the edges.

    Red dough layer is placed on top of the plain dough rectangle, and holes are patched.Red dough for the peppermint pinwheel cookies is fitted on top of the plain dough layer.

    Roll The Dough Into A Tight “Log”

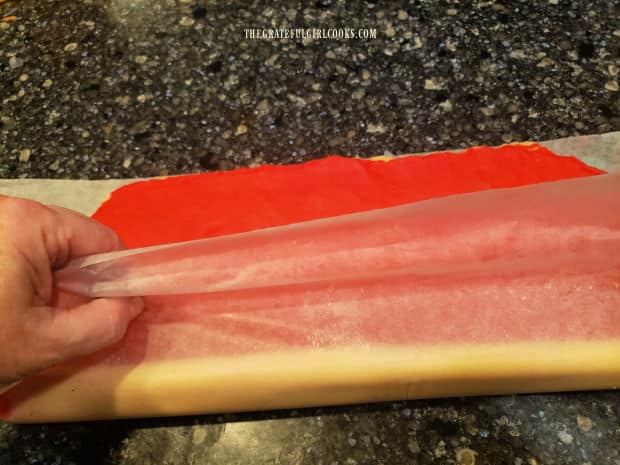
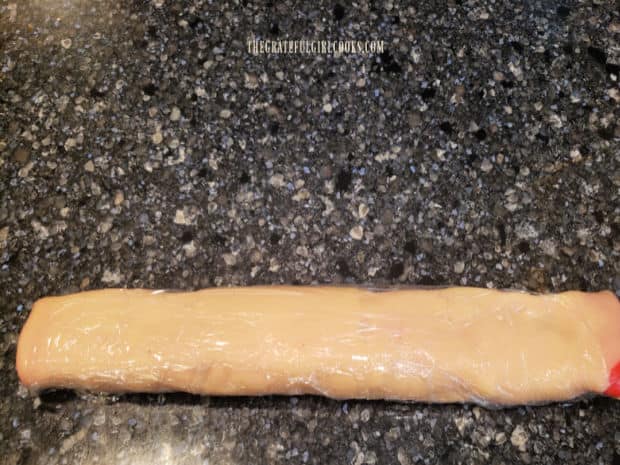
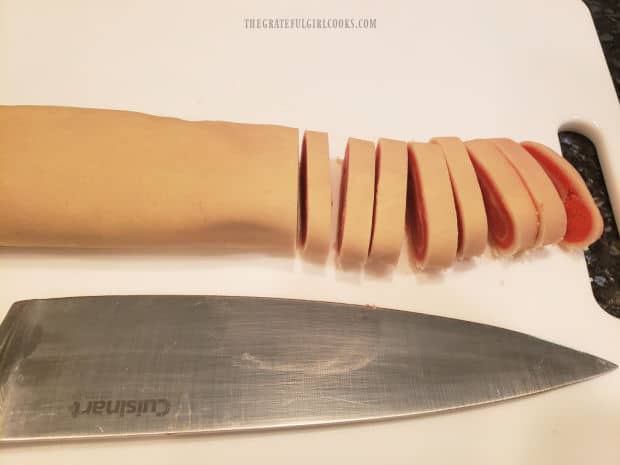
    Using the wax paper (on the bottom of the plain dough) as a guide, tightly roll up the dough (jelly roll style), starting with the long side. Wrap the dough log in plastic wrap once done. Place the dough log on a baking sheet and refrigerate it for 2 hours. This is an important step, because you need the dough to be very cold and firm, in order to make clean slices later! 

    Dough for the peppermint pinwheel cookies is tightly rolled into a long log shape.After being rolled, the cookie dough is sealed in plastic wrap and refrigerated until firm.

    Slice The Chilled Dough Before Baking

    After the dough has chilled for 2 hours, preheat your oven to 350°F. Unwrap the dough, and place the “log” on a cutting board. Use a sharp knife to cut the dough into 1/4″ slices. Because the dough is very cold and firm, this is an easy step, resulting in wonderfully cut, clean slices.

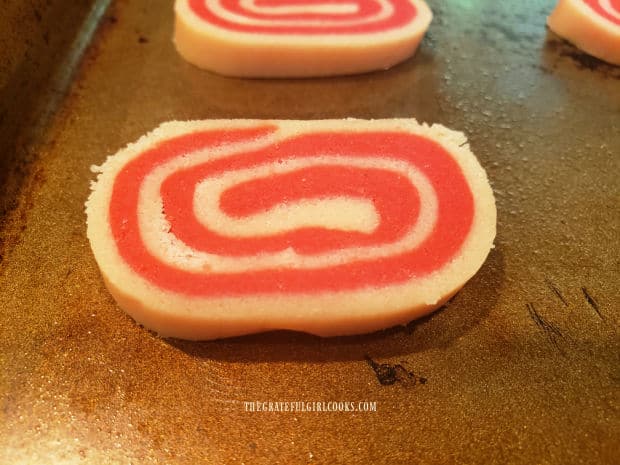
    Place the sliced cookies onto lightly greased cookie sheets, keeping the cookies about 2″ apart. You should end up with between 36-46 cookies, depending on the thickness of the slices (and length of the dough rectangle you rolled up). Typically I end up with about 40 cookies, but your quantity may vary slightly.

    Cold cookie dough is sliced into 1/4" slices before baking.The peppermint pinwheel cookies are put on baking sheets 2" apart.

    Ready, Set, Bake!

    Bake the cookies at 350°F. for approximately 10-12 minutes. The peppermint pinwheel cookies are done when barely lightly browned on the bottom, and the dough is “set”. Keep an eye on them, because they can brown very quickly (and you don’t want that).

    Let the cookies cool for 1 minute, then transfer the cookies from the baking sheet to a wire rack. Let the cookies cool completely before serving. They will crisp up slightly, once cooled.

    After baking, the peppermint pinwheel cookies cool on a wire rack.

    Who’s Ready To Eat Some Peppermint Pinwheel Cookies?

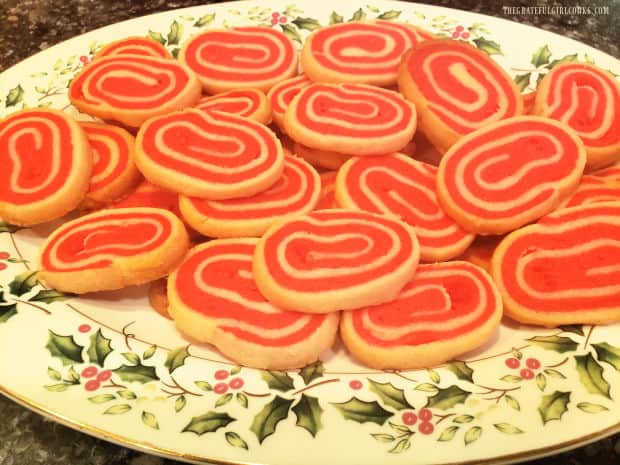
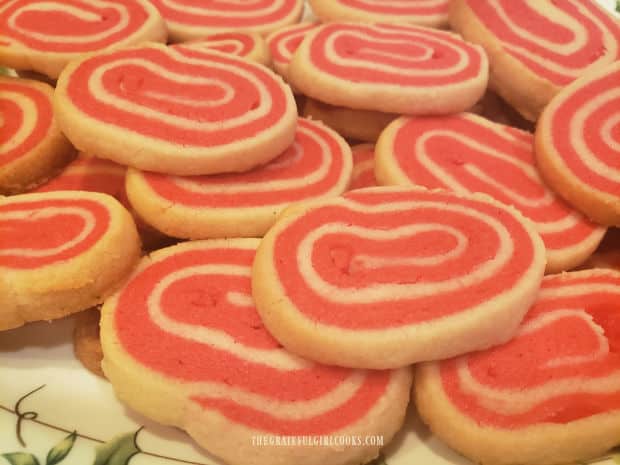
    The peppermint pinwheel cookies are ready to serve, once they have cooled completely!  Serve them on a pretty, decorative platter, and watch how fast they disappear. They have a light peppermint taste, but don’t worry! The peppermint flavor is absolutely NOT overpowering, in case you were wondering.

    These cookies also freeze very well, if wrapped and placed in an airtight container in the freezer. Simply thaw them out before you need them, and enjoy!

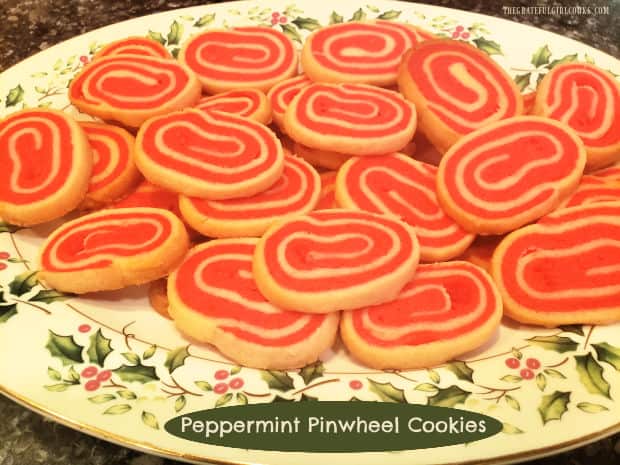
    Peppermint pinwheel cookies are served on a festive and decorative Christmas platter.Spirals are visible on each of the peppermint pinwheel cookies.

    I hope you have the opportunity to try these peppermint pinwheel cookies, and trust you will enjoy them as much as we do! Thank you for visiting my blog today, and I invite you to come back soon for more family-friendly recipes. Take care, God bless you, and have a GREAT day!

    Looking For More CHRISTMAS COOKIE Recipes?

    You can find ALL of my recipes in the Recipe Index, which is located at the top of the page. I have some wonderful Christmas cookie recipes (and lots of other cookie recipes, too!), including:

    Interested In More Recipes?

    Thank you for visiting this website. I appreciate you using some of your valuable time to do soIf you’re interested, I publish a newsletter 2 times per month (1st and 15th) with all the latest recipes, and other fun info. I would be honored to have you join our growing list of subscribers, so you never miss a great recipe!
    There is a Newsletter subscription box on the top right side (or bottom) of each blog post, depending on the device you use, where you can easily submit your e-mail address (only) to be included in my mailing list.

    You Can Also Find Me On Social Media:

    Facebook page: The Grateful Girl Cooks!
    Pinterest:
    The Grateful Girl Cooks!
    Instagram:
    jbatthegratefulgirlcooks

    Original recipe source: unknown

    ↓↓ PRINTABLE RECIPE BELOW ↓↓

    0 from 0 votes
    Peppermint Pinwheel Cookies
    Prep Time
    20 mins
    Cook Time
    10 mins
    Inactive Prep Time- Dough Refrigeration
    2 hrs
    Total Time
    2 hrs 30 mins
     

    Peppermint Pinwheel Cookies are festive holiday treats for family and friends! Colored spirals and light peppermint flavor make them special!

    Category: Dessert
    Cuisine: American
    Keyword: peppermint pinwheel cookies
    Servings: 40
    Calories Per Serving: 70 kcal
    Author: JB @ The Grateful Girl Cooks!
    Ingredients
    • ¾ cup butter softened (no substitutes)
    • ¾ cup granulated sugar
    • 1 large egg YOLK
    • 1 teaspoon vanilla extract
    • 2 cups all purpose flour
    • ½ teaspoon salt
    • ½ teaspoon baking powder
    • ½ teaspoon peppermint extract
    • ¼ teaspoon red liquid food coloring (or gel)
    Instructions
    1. Cream butter and sugar with electric mixer in large bowl. Beat in one egg YOLK and vanilla extract into batter, until combined/creamy.

    2. In separate bowl, combine flour, salt, baking powder. Add to batter, a small amount at a time; mix until combined and thick, soft dough has formed.

    3. Evenly divide dough in half; set one half aside. Place remaining half in large bowl. Add peppermint extract and red food coloring; stir to combine. You have to work hard to mix in red coloring! Keep blending until dough is completely red. Set red dough aside.

    4. Place reserved white dough on a long piece of waxed paper. Use hands to shape it into small rectangle. Place another long piece of wax paper on top. Roll dough into rectangle shape (16" long by 10" wide). Slowly peel off top layer of wax paper; set dough aside. Repeat process with red dough (using clean wax paper), rolling it out to same measurements (16" x 10"). Slowly peel off top layer of wax paper; set dough aside.

    5. You should have a 16"x 10" white rectangle and a red rectangle (each with wax paper on the bottom). Place white dough rectangle in front of you. Carefully flip RED layer over on top of the PLAIN layer, fitting it to the shape of the plain rectangle. Red dough wax paper should now be on top. Slowly peel off wax paper from red layer. Repair any rips or tears that may occur with excess dough.

    6. Using wax paper (on bottom of white rectangle) as a guide, tightly roll up dough, starting with long side. Wrap dough "log" in plastic wrap. Place dough log on a baking sheet; refrigerate dough for 2 hours, then preheat oven to 350°F.

    7. Unwrap dough; place on cutting board. Use sharp knife to cut dough into 1/4" slices. Place slices on lightly greased cookie sheets, about 2" apart.

    8. Bake at 350°F. for 10-12 minutes. Cookies are done when lightly browned on bottom, and dough is "set". Keep an eye on them, because they can brown very quickly. Let cookies cool for 1 minute; transfer to wire rack to cool completely before serving. Enjoy!
    Recipe Notes

    NOTE: You should end up with between 36-46 cookies, depending on thickness of slices (and length of dough rectangle you rolled up).

    Nutrition Facts
    Peppermint Pinwheel Cookies
    Amount Per Serving (1 cookie)
    Calories 70 Calories from Fat 36
    % Daily Value*
    Fat 4g6%
    Saturated Fat 2g13%
    Trans Fat 0.1g
    Polyunsaturated Fat 0.2g
    Monounsaturated Fat 1g
    Cholesterol 14mg5%
    Sodium 57mg2%
    Potassium 14mg0%
    Carbohydrates 9g3%
    Fiber 0.2g1%
    Sugar 4g4%
    Protein 1g2%
    Vitamin A 112IU2%
    Calcium 5mg1%
    Iron 0.3mg2%
    * Percent Daily Values are based on a 2000 calorie diet.

    Here’s one more to pin on your Pinterest boards!Peppermint Pinwheel Cookies are festive holiday treats for family and friends! Colored spirals and light peppermint flavor make them special!

    Peanut Butter Fudge

    Make 3 dozen pieces of peanut butter fudge in 10 minutes, using only 4 ingredients! Delicious treat for the holidays or any time of year!
    Make 3 dozen pieces of peanut butter fudge in 10 minutes, using only 4 ingredients! Delicious treat for the holidays or any time of year!

    This recipe for peanut butter fudge is so easy to make in such a short time, you’re not going to believe it! I found the recipe a number of years ago in one of my cooking magazines, and wanted to share it with you today. If you enjoy peanut butter, then you’re probably going to love this sweet holiday treat.

    The holidays can be somewhat challenging for some people, as they try to create a “memorable” Christmas season for those they love. Well, if you’re finding it hard to find time to make treats for neighbors, friends, family, teachers, co-workers, etc., may I suggest this recipe? It only takes 4 ingredients and 10 minutes prep to make 3 dozen pieces of fudge. Then you refrigerate it, and BOOM! Your yummy fudge is ready to cut and serve! That in my book is a winning recipe! Here’s how simple it is to make this delicious fudge.

    Scroll Down For A Printable Recipe Card At The Bottom Of The Page

    Let’s Make Some Peanut Butter Fudge!

    NOTE: BEFORE you begin, generously butter an 8″ x 8″ square baking dish (bottom and sides) and set it aside. You will need this dish ready to go once the fudge ingredients are melted!

    Measure the granulated sugar and milk into a very large saucepan. You will need a large pan because you will be adding the other ingredients to this pan later! Stir to combine the milk and sugar, and bring the mixture to a boil on Medium heat, stirring often. Once the liquid begins boiling, let it boil for exactly 3 minutes, stirring constantly. 

    Granulated sugar and milk are combined and cooked in a large saucepan.Sugar and milk are boiled for three minutes until syrupy.

    Stir, Stir, Stir!

    When done boiling, remove the pan from the heat and immediately stir in the creamy peanut butter and marshmallow creme. The mixture will be very thick! Keep on stirring and eventually you will have all the ingredients melted and combined. Trust me… just stir and stir, and in a couple minutes it will be fully blended!

    Creamy peanut butter and marshmallow creme are stirred into the sugar and milk syrup.Peanut butter fudge ingredients being mixed in saucepan before pouring into dish.Once peanut butter and marshmallow creme are mixed in, the fudge is ready to pour into pan.

    Refrigerate The Fudge Until Set

    Spread the peanut butter fudge evenly into the buttered 8″ x 8″ dish immediately after it is combined. The fudge will set up fairly quickly. Try to pat down the surface a bit, so there are no points sticking up.

    Cover the fudge loosely and put it into the refrigerator to chill for 2-3 hours before cutting into portions. When the fudge is completely chilled and firmed up, slice it into 36 small pieces.

    The creamy peanut butter fudge is spread into and refrigerated in an 8x8" square dish.When cold and firm, the peanut butter fudge is cut into 35 pieces.

    Who Wants A Piece Of Peanut Butter Fudge?

    Transfer the cut pieces of peanut butter fudge to a serving plate and enjoy this delicious treat! Remember to keep all remaining pieces of fudge covered in the refrigerator! This is a yummy treat to give to friends or family for holidays or special occasions. It will be our little secret just how easy it was to make, okay? Wink, wink.

    A Christmas plate with several pieces of peanut butter fudge, ready to enjoy.A close up look at a few pieces of the peanut butter fudge on a Christmas plate.

    I hope you enjoy making (and eating) this peanut butter fudge! Thank you for stopping by today, and I hope you come back soon for more family-friendly recipes. Take care, may God bless you throughout this holiday season, and have a GREAT day!

    Looking For More Recipes For HOLIDAY TREATS?

    You can find ALL of my recipes in the Recipe Index, which is located at the top of the page. I have some wonderful recipes for holiday treats that you might want to check out, including:

    Interested In More Recipes?

    Thank you for visiting this website. I appreciate you using some of your valuable time to do soIf you’re interested, I publish a newsletter 2 times per month (1st and 15th) with all the latest recipes, and other fun info. I would be honored to have you join our growing list of subscribers, so you never miss a great recipe!
    There is a Newsletter subscription box on the top right side (or bottom) of each blog post, depending on the device you use, where you can easily submit your e-mail address (only) to be included in my mailing list.

    You Can Also Find Me On Social Media:

    Facebook page: The Grateful Girl Cooks!
    Pinterest:
    The Grateful Girl Cooks!
    Instagram:
    jbatthegratefulgirlcooks

    Author's signature

    Original recipe source: “Taste of Home’s Quick Cooking” magazine, Collector’s Edition, pages 29-30

    ↓↓ PRINTABLE RECIPE BELOW ↓↓

    0 from 0 votes
    Peanut Butter Fudge
    Prep Time
    10 mins
    Cook Time
    0 mins
    Inactive refrigeration time
    3 hrs
    Total Time
    3 hrs 10 mins
     

    Make 3 dozen pieces of peanut butter fudge in 10 minutes, using only 4 ingredients! Delicious treat for the holidays or any time of year!

    Category: Candy, Desssert
    Cuisine: American
    Keyword: peanut butter fudge
    Servings: 36 pieces
    Calories Per Serving: 118 kcal
    Author: JB @ The Grateful Girl Cooks!
    Ingredients
    • 2 cups granulated sugar
    • ½ cup milk
    • 1⅓ cups creamy peanut butter don't use "all natural"
    • 7 ounces marshmallow creme
    Instructions
    1. Generously butter an 8" x 8" square baking dish (bottom and sides) and set aside. You will need this dish ready to go once the fudge ingredients are melted! 

    2. Measure sugar and milk into very large saucepan. Stir to combine; bring to a boil on medium heat, stirring often. Once boiling, let boil for exactly 3 minutes, stirring constantly.

    3. When done boiling, remove pan from heat. Immediately stir in peanut butter and marshmallow creme (mixture will be thick). Continue to stir until all ingredients have melted and are fully combined.

    4. Spread fudge evenly into buttered 8" x 8" dish immediately after it is combined. Fudge will set up fairly quickly. Try to pat down the surface, so there are no points sticking up.

    5. Cover dish loosely and put it into refrigerator to chill for about 2 hours before cutting. When fudge is chilled and firm, cut it into 36 small pieces. Serve and enjoy.

    Nutrition Facts
    Peanut Butter Fudge
    Amount Per Serving (1 piece)
    Calories 118 Calories from Fat 45
    % Daily Value*
    Fat 5g8%
    Saturated Fat 1g6%
    Polyunsaturated Fat 1g
    Monounsaturated Fat 2g
    Cholesterol 0.2mg0%
    Sodium 42mg2%
    Potassium 59mg2%
    Carbohydrates 18g6%
    Fiber 0.5g2%
    Sugar 16g18%
    Protein 2g4%
    Vitamin A 6IU0%
    Calcium 9mg1%
    Iron 0.2mg1%
    * Percent Daily Values are based on a 2000 calorie diet.

    Here’s one more to pin on your Pinterest boards!Make 3 dozen pieces of peanut butter fudge in 10 minutes, using only 4 ingredients! Delicious treat for the holidays or any time of year!

    Pumpkin Cream Cheese Roll

    Make a delicious Pumpkin Cream Cheese Roll for the holidays (or any time)! This classic dessert has sweet cream cheese filling rolled inside!
    Make a delicious Pumpkin Cream Cheese Roll for the holidays (or any time)! This classic dessert has sweet cream cheese filling rolled inside!

    I don’t know about you, but I LOVE the classic Fall flavors of pumpkin, cinnamon, nutmeg and cloves! This dessert takes those flavors and imports them into a thin cake that is spread with sweet cream cheese filling and rolled into a long “log” of sorts. After chilling, the pumpkin roll is sliced, revealing the spiral shaped cream cheese filling.

    This pumpkin cream cheese roll not only LOOKS good, it tastes WONDERFUL! NOTE: Don’t be scared off by the amount of photos or the long recipe card instructions! I only want to give you explicit instructions so you, too, can be confident in making this recipe! Today I want to share all this so you see how simple it actually is to make this lip-smackin’ dessert!

    My youngest sister Joni recently visited us in Oregon from her home in Georgia. I asked her before she got here to email me the recipe she’s used for years to make pumpkin rolls, and told her we’d make it together (and photograph the steps), so I could share it here on my blog. We had fun making this pumpkin roll, and shared it with our extended family at a dessert night. So… here’s how to make a delicious pumpkin cream cheese roll for holidays, Fall, or any time of year!

    Scroll Down For A Printable Recipe Card At The Bottom Of The Page

    First Things First

    Preheat your oven to 350°F. while you prepare the pumpkin roll. Grease and flour a 10″ by 15″ cookie sheet or jelly roll pan GENEROUSLY. I can’t say this enough. You need to generously grease then generously flour the bottom and sides of the pan, so the cake will release easier when you flip it out of the pan later. This is the method I used in the photos below.

    Another option for preparing the baking sheet is to lightly grease the pan, then place a large sheet of parchment paper in the pan (to fit). Use softened butter to then generously “grease” the parchment paper (all of it) before adding the pumpkin batter to the pan.

    Make The Pumpkin Batter

    Beat eggs and granulated sugar using an electric mixer on High speed in a large bowl (or stand mixer bowl). Continue beating these two ingredients for about 1-2 minutes until well-combined and the sugar has dissolved.

    Mix in pumpkin puree and lemon juice on Low speed only until they have been incorporated into the egg mixture. In a separate medium bowl, whisk together flour, baking powder, salt, nutmeg, cinnamon and cloves. STIR the dry ingredients into the pumpkin batter until combined.

    Eggs and sugar are beaten with an electric mixer until sugar dissolves.Pumpkin puree and lemon juice are mixed into the egg mixture for the pumpkin roll batter.Flour, cinnamon, nutmeg, cloves and other ingredients are added to the pumpkin batter.

    Time To Bake!

    Pour the pumpkin batter into the prepared baking pan, and spread it out, evenly filling the pan. Place the pan into a preheated 350° oven. Bake for 12-15 minutes, or until a toothpick inserted into the top/middle comes out clean. Another way to test for doneness is by lightly touching the surface of the cake with a finger. If the “cake” springs back, it should be done.

    Pumpkin roll batter is spread in a large greased/floured cookie sheet.

    Prepare Damp Towel For Cake While It’s Baking

    A few minutes before the cake is done baking, wet a large kitchen dish towel with water and then wring the excess water out. Lay the very damp towel on the kitchen counter and GENEROUSLY sift powdered sugar over the surface. You want enough powdered sugar to be the same size/shape as the baking pan. The cake will be turned out onto the towel, and the powdered sugar will help the cake to not stick.

    Sifted powdered sugar is used to cover a damp kitchen towel where the baked cake will go.

    Remove Cake From Pan Immediately After Baking

    As soon as the cake is finished baking, check for doneness, and remove the pan from the oven. Use an offset spatula (or regular long one) to loosen all the edges (sides and under) the cake. You may find you need to really get the spatula under that pumpkin roll to loosen it from the pan. Carefully slide the spatula around under the cake, trying not to cut up the cake with the spatula as much as possible. NOTE: If using the alternative parchment paper method, simply go around the edges of the cake to loosen from the sides.

    Using oven mitts, hold the pan on both of the short sides of the pan, and immediately invert (flip over) the pan of “loosened” cake onto the powdered sugar on the damp towel. It may not look perfect, but remember that this “top surface” will be covered with the cream cheese filling later! NOTE: Remove the parchment paper carefully (if you used that method). NOW it’s time to roll the cake up while it is still hot.

    The pumpkin cake is removed from the oven after baking, and edges are loosened from pan.Pumpkin cake is inverted onto the powdered sugar lined damp dish towel while still hot.

    Rolling Up The Cake With The Towel Inside

    Beginning with the LONG side of the pumpkin roll, fold the still damp towel over the bottom edge of the cake (about 2″ or so). Carefully and tightly roll the towel INTO the cake as you go. Roll until it is completely rolled up and the “seam” side is on the bottom.

    Once rolled (with the towel inside), let the pumpkin roll sit and rest/cool on the counter for 30 minutes, before proceeding to the next step.

    The damp dish towel is rolled up into the pumpkin cake to form a long roll.Finishing rolling up the damp dish towel and pumpkin cake into a log shape, before it rests.

    Fill the Pumpkin Roll And Roll Again

    Okay… once the cake is rolled in the towel and “resting”, it’s time to make the simple cream cheese filling! Place cream cheese, butter, a cup of powdered sugar and vanilla extract in a medium bowl. Use an electric mixer to beat these ingredients until smooth, fully combined and lump-free.

    After the pumpkin roll has cooled (rolled in the towel) for 30 minutes, carefully unroll the cake. Evenly spread the cream cheese filling over the surface of the cake, all the way to the edges.

    Now you need to re-roll the cake, but this time only use the towel to help guide the rolling. You will now roll the cream cheese covered cake up tightly, starting again on the long side, but rolling the cake by itself (no towel IN the cake). The towel is simply used to help roll the cake as one long unit (see 3rd photo of my sister rolling it below). Your pumpkin roll should now be fully rolled up only as cake and filling.

    Cream cheese, butter, powdered sugar and vanilla are combined for pumpkin roll filling.The cream cheese filling is spread on the unrolled pumpkin cake after it has rested.Now the pumpkin cream cheese roll is re-rolled without the dish towel rolled up inside.

    Wrap And Chill for Best Results

    Carefully transfer the finished pumpkin roll to a large sheet of parchment paper and carefully seal the cake. Place the parchment paper-wrapped roll onto a large sheet of aluminum foil, and wrap and seal the package. At this point, you can either freeze the pumpkin roll to be thawed later OR refrigerate it to serve it chilled that same day.

    This pumpkin cream cheese roll freezes well, and only needs to thaw for 15-25 minutes before slicing and serving it.  This makes it very convenient to make this dessert ahead of time if that works best for you! When you want to enjoy the pumpkin roll, just pull it out of the freezer, unwrap, and let it thaw slightly! The pumpkin roll tastes best when served slightly chilled.

    The pumpkin cream cheese roll will now be well-wrapped and refrigerated or frozen before serving.

    Serve The Pumpkin Cream Cheese Roll

    Transfer the pumpkin cream cheese roll to a large serving platter, and give it a good dusting of sifted powdered sugar right before slicing. The cake may absorb some of the powdered sugar, so if you see that, simply sift a bit more on top for a light dusting! It’s so pretty to decorate the platter with some Autumn colors or garnishes of your choice to add to the Fall theme!

    Cut the pumpkin roll with a sharp knife into 10 slices, then serve, sliced side up! Once sliced, you will be able to see the spiraled cream cheese filling inside the pumpkin roll. The combination of the pumpkin flavored cake (seasoned with cinnamon, nutmeg and cloves) screams “Fall”, and the cream cheese filling sends it over the top! It’s so yummy, and we think it’s a perfect Fall or Thanksgiving dessert! Be sure to store any leftovers (wrapped well) in the refrigerator.

    The pumpkin cream cheese roll is sprinkled with powdered sugar before slicing to serve.A slice of the pumpkin cream cheese roll reveals the spiraled cream cheese filling inside.

    I hope you have the opportunity to make this fabulous pumpkin cream cheese roll for those you love, and trust you enjoy it’s great flavor! Thanks for taking time out of your busy day to stop by! I invite you to come back again soon for more family-friendly recipes. Take care, may God bless you, and have a GREAT day!

    Looking for More PUMPKIN Recipes?

    You can find ALL of my recipes in the Recipe Index, which is located at the top of the page. I have some delicious recipes featuring pumpkin to enjoy, including:

    Interested In More Recipes?

    Thank you for visiting this website. I appreciate you using some of your valuable time to do soIf you’re interested, I publish a newsletter 2 times per month (1st and 15th) with all the latest recipes, and other fun info. I would be honored to have you join our growing list of subscribers, so you never miss a great recipe!
    There is a Newsletter subscription box on the top right side (or bottom) of each blog post, depending on the device you use, where you can easily submit your e-mail address (only) to be included in my mailing list.

    You Can Also Find Me On Social Media:

    Facebook page: The Grateful Girl Cooks!
    Pinterest:
    The Grateful Girl Cooks!
    Instagram:
    jbatthegratefulgirlcooks

    Author's signature

    Original recipe source: my sister Joni (she does not remember where she got the recipe from, many years ago)

    ↓↓ PRINTABLE RECIPE BELOW ↓↓

    0 from 0 votes
    Pumpkin Cream Cheese Roll
    Prep Time
    10 mins
    Cook Time
    14 mins
    Resting Time (cooling)
    30 mins
    Total Time
    54 mins
     

    Make a delicious Pumpkin Cream Cheese Roll for the holidays (or any time)! This classic dessert has sweet cream cheese filling rolled inside!

    Category: Dessert, Holidays
    Cuisine: American
    Keyword: pumpkin cream cheese roll
    Servings: 10 slices
    Calories Per Serving: 272 kcal
    Author: JB @ The Grateful Girl Cooks!
    Ingredients
    For Pumpkin Roll:
    • 3 large eggs
    • 1 cup granulated sugar
    • cup pumpkin puree NOT pie filling!
    • 1 teaspoon lemon juice
    • ¾ cup all purpose flour
    • 1 teaspoon baking powder
    • ½ teaspoon salt
    • 1 teaspoon ground cloves
    • 1 teaspoon ground cinnamon
    • 1 teaspoon ground nutmeg
    • **damp dish towel and powdered sugar for dusting
    For Filling:
    • 8 ounces cream cheese softened
    • 4 Tablespoons butter softened
    • 1 cup powdered sugar
    • 1 teaspoon vanilla extract
    • powdered sugar for dusting
    Instructions
    1. Preheat oven to 350°F. Option #1: Generously grease/flour a 10" x 15" cookie sheet or jelly roll pan. Option#2: Lightly grease pan; place parchment paper in pan (to fit). Use butter to generously "grease" parchment paper (all of it).

    2. Beat eggs and sugar in large bowl with electric mixer on High. Continue beating for 1-2 minutes until well-combined/sugar dissolves. Add pumpkin and lemon juice. Beat on Low only until incorporated into egg mixture. In a separate bowl, whisk together flour, baking powder, salt, nutmeg, cinnamon and cloves. STIR this into pumpkin mixture until combined.

    3. Pour batter into prepared pan; spread it evenly in pan. Place in oven. Bake at 350°F for 12-15 minutes, or until a toothpick inserted into the top/middle comes out clean, OR lightly touching the cake surface with a finger. If cake springs back, it should be done.

    4. 3-4 minutes before cake is done, soak a kitchen dish towel with water; wring excess water out. Lay damp towel on counter; GENEROUSLY sift powdered sugar over towel in same size/shape as the baking pan. Cake will be turned out onto the towel; powdered sugar will help it to not stick.

    5. When cake is done, remove from oven and immediately use an offset or regular metal spatula to loosen all edges (sides and under) the cake. Carefully slide spatula around under cake, to loosen it as much as possible. NOTE: If using alternative parchment paper method, simply run spatula around edges of cake to loosen. Using oven mitts, hold pan on both short sides; immediately invert (flip over) pan of "loosened" cake onto powdered sugar on towel. It may not look perfect, but this will be covered with cream cheese filling later! NOTE: Peel parchment paper carefully off cake (if you used that method).

    6. Roll the cake while it's still hot. Beginning with the LONG side, fold damp towel over bottom edge of the cake (about 2"). Carefully and tightly roll towel INTO the cake, forming a log-shaped roll. Continue until fully rolled and "seam" side is on the bottom. Once rolled (with towel inside), let it cool for 30 minutes.

    7. While cake cools, place cream cheese, butter, a powdered sugar and vanilla in a medium bowl. Beat with electric mixer until combined/lump-free. After pumpkin roll has cooled for 30 minutes, carefully unroll cake. Evenly spread cream cheese filling over the top of the cake, all the way to the edges.

    8. Re-roll the cake, but this time only use the towel to help guide the rolling. Starting rolling again on the long side, but roll cake into itself (no towel IN the cake). Use the towel to help roll cake as one long unit, with seam on bottom.

    9. Carefully transfer pumpkin roll to parchment paper and wrap it, then cover with aluminum foil and seal. You can freeze the pumpkin roll at this point OR refrigerate it to serve later the same day. Note; If freezing, frozen roll needs to be thawed for 15-20 minutes before slicing.

    10. To serve: Place unwrapped chilled pumpkin roll on serving platter. Sift powdered sugar on top just before slicing. Cut pumpkin roll into 10 slices, then serve, with the sliced side up! Wrap any leftovers well, and store in refrigerator. Enjoy!
    Recipe Notes

    NOTE: Caloric calculation does not include additional powdered sugar used to sprinkle on the damp dish towel or dust the finished cake, as the amounts may vary per cook.

    Nutrition Facts
    Pumpkin Cream Cheese Roll
    Amount Per Serving (1 slice (1/10 of total))
    Calories 272 Calories from Fat 90
    % Daily Value*
    Fat 10g15%
    Saturated Fat 6g38%
    Trans Fat 0.2g
    Polyunsaturated Fat 1g
    Monounsaturated Fat 3g
    Cholesterol 80mg27%
    Sodium 257mg11%
    Potassium 154mg4%
    Carbohydrates 42g14%
    Fiber 1g4%
    Sugar 34g38%
    Protein 5g10%
    Vitamin A 1872IU37%
    Vitamin C 1mg1%
    Calcium 69mg7%
    Iron 1mg6%
    * Percent Daily Values are based on a 2000 calorie diet.

    Here’s one more to pin on your Pinterest boards!Make a delicious Pumpkin Cream Cheese Roll for the holidays (or any time)! This classic dessert has sweet cream cheese filling rolled inside!


    Chocolate Chip Swirl Bars

    Make a dozen Chocolate Chip Swirl Bars in about 30 minutes! Be warned! These delicious, simple bar cookies are so good, they’re dangerous!
    Make a dozen Chocolate Chip Swirl Bars in about 30 minutes! Be warned! These delicious, simple bar cookies are so good, they're dangerous!

    Do you enjoy warm chocolate chip cookies? Well, I sure do! If you enjoy them as much as I do, I’m positive you’re going to love these chocolate chip swirl bars! The bar cookies are filled with chopped pecans (or walnuts), and a layer of chocolate chips are swirled through the batter after a minute or two of baking. They are so good!

    I originally found this recipe in one of my old cookbooks that was published way back in 2005. The recipe is super simple to prepare, and the results are outstanding! Chocolate Chip Swirl Bars are a decadent treat, that take only about 10 minutes prep to get into the oven. The rest is about 20 minutes of baking time, and then you get to enjoy one (or seven!) of these yummy dessert bars! Here’s how to make them.

    Scroll Down For A Printable Recipe Card At The Bottom Of The Page

    Make The Bar Cookie Dough

    First thing you’ll need to do is preheat your oven to 375°F. and spray an 8″x8″ square baking pan with non-stick spray. The dough doesn’t take long to prepare, so you will want your oven hot and ready to go, once it is made. Now you’re ready to mix up the dough for these chocolate chip dessert bars!

    Sift together flour, baking soda and salt into a Medium sized bowl, then set the bowl aside. In a separate Large bowl, use an electric mixer to beat softened butter, granulated and brown sugars, vanilla extract and water together until fully combined.

    Once combined, use the electric mixer to beat an egg and the flour mixture into the dough, a little at a time, until incorporated. Remove the mixer, and STIR chopped pecans (or walnuts) into the dough until they’re incorporated.

    Chopped pecans (or walnuts) are stirred into the prepared dessert bars dough.

    Getting Ready To Bake

    Evenly spread the dough into the prepared baking pan. Sprinkle the chocolate chips over the entire surface of the dough. Now you’re ready to bake the chocolate chip swirl bars! See how easy it was to get them ready to bake?

    Dough for the chocolate chip swirl bars is spread in a greased baking dish.Chocolate chips are sprinkled over the surface of the dough.

    Bake The Chocolate Chip Swirl Bars

    Place the baking pan into a preheated 375°F. oven and let them bake for ONLY 2 minutes. Remove the pan from the oven and quickly take a butter knife and run it through the dough, creating marbleized “swirls” throughout the dough in the pan.

    After creating swirls of softened chocolate chips, put the pan back into the hot oven, and continue baking for 16-18 minutes longer. When done, the top of the chocolate chip swirl bars will be nicely browned, and a toothpick inserted into the top middle should come out free of dough batter (clean).

    After baking for 2 minutes, a knife is used to swirl the softened chocolate chips through the dough.Chocolate chips are swirled through the dough, then pan is put back in oven to finish baking.

    Remove the pan from the oven once done, and transfer it to a wire rack to cool. The chocolate chip swirl bars will slice easier once they have had several minutes to cool, so make sure to let them “rest” a bit.

    Golden brown and firm on top, the chocolate chip swirl bars are removed from oven.Chocolate chip swirl bars, in baking dish, cooling down before slicing.

    Serve The Chocolate Chip Swirl Bars

    We enjoy these cookie bars best when served slightly warm, but if you prefer them hot OR at room temperature, that is your choice. Either way, when you’re ready to serve, slice the bars into 12 pieces. However, when served warm, the chocolate chips will still be ooey gooey and delicious (just sayin’)!

    Serve and enjoy these decadent treats. IF you have any leftovers (notice I said “IF”?), they can be wrapped tightly or placed in a freezer bag or airtight container and frozen for use at a later date. YUM!

    The chocolate chip dessert bars are cut into 12 pieces before serving.Four of the chocolate chip swirl bars are served on a white plate.

    I hope you have the chance to make these yummy dessert bars for those you love. They’re REALLY delicious! Thanks for stopping by today, and I hope you can come back soon for more family-friendly recipes. Take care, have a GREAT day, and may God bless you in all you do.

    Looking For More BAR COOKIE Recipes?

    You can find ALL of my recipes in the Recipe Index, which is located at the top of the page. I have lots of amazing bar cookie recipes for you to enjoy, including:

    Interested In More Recipes?

    Thank you for visiting this website. I appreciate you using some of your valuable time to do soIf you’re interested, I publish a newsletter 2 times per month (1st and 15th) with all the latest recipes, and other fun info. I would be honored to have you join our growing list of subscribers, so you never miss a great recipe!
    There is a Newsletter subscription box on the top right side (or bottom) of each blog post, depending on the device you use, where you can easily submit your e-mail address (only) to be included in my mailing list.

    You Can Also Find Me On Social Media:

    Facebook page: The Grateful Girl Cooks!
    Pinterest:
    The Grateful Girl Cooks!
    Instagram:
    jbatthegratefulgirlcooks

    Author's signature

    Original recipe source: Betty Green, in “Church Suppers”, page 351, published by Black Dog & Leventhal Publishers in 2005

    ↓↓ PRINTABLE RECIPE BELOW ↓↓

    0 from 0 votes
    Chocolate Chip Swirl Bars
    Prep Time
    12 mins
    Cook Time
    18 mins
    Total Time
    30 mins
     

    Make a dozen Chocolate Chip Swirl Bars in about 30 minutes! Be warned! These delicious, simple bar cookies are so good, they're dangerous!

    Category: Bar Cookies, Dessert
    Cuisine: American
    Keyword: chocolate chip swirl bars
    Servings: 12 bars
    Calories Per Serving: 272 kcal
    Author: JB @ The Grateful Girl Cooks!
    Ingredients
    • 1 cup + 2 teaspoons all purpose flour
    • ½ teaspoon baking soda
    • ½ teaspoon salt
    • 8 Tablespoons butter, softened = 1 stick or ½ cup
    • 6 Tablespoons packed brown sugar
    • 6 Tablespoons granulated sugar
    • 1 teaspoon vanilla extract
    • ¼ teaspoon water
    • 1 large egg
    • ½ cup chopped pecans (or walnuts)
    • 6 ounces semi-sweet chocolate chips
    Instructions
    1. Preheat oven to 375°F. and spray an 8"x8" square baking pan with non-stick spray.

    2. Sift together flour, baking soda and salt into a medium bowl; set bowl aside. In a separate large bowl, use electric mixer to beat butter, granulated and brown sugars, vanilla and water together until combined. Add egg and reserved flour mixture to the dough, a little at a time, beating until incorporated. STIR chopped pecans (or walnuts) into the dough until incorporated. Evenly spread dough into baking pan. Evenly sprinkle surface of dough with chocolate chips.

    3. Place pan with dough into 375°F. oven and bake dough for ONLY 2 minutes. Remove pan from oven. Take a butter knife and run it through the dough, creating marbleized "swirls" throughout the dough. Put the pan back into oven; continue baking 16-18 minutes longer. Bars should be nicely browned, and a toothpick inserted into the top should come out free of dough (clean). Transfer pan to a wire rack to cool before attempting to slice.

    4. When you're ready to serve (warm or room temperature), slice into 12 bars. Serve and enjoy! NOTE: If you have leftovers, they can be wrapped or placed in a freezer bag or airtight container and frozen for later use.
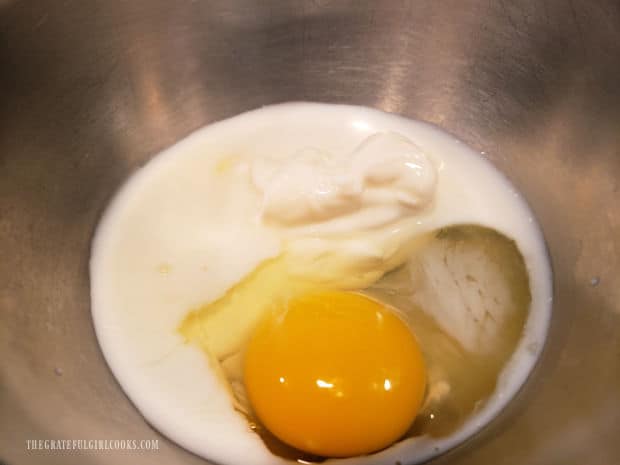
    Nutrition Facts
    Chocolate Chip Swirl Bars
    Amount Per Serving (1 (1/12 of total))
    Calories 272 Calories from Fat 153
    % Daily Value*
    Fat 17g26%
    Saturated Fat 8g50%
    Trans Fat 0.3g
    Polyunsaturated Fat 3g
    Monounsaturated Fat 4g
    Cholesterol 36mg12%
    Sodium 212mg9%
    Potassium 130mg4%
    Carbohydrates 28g9%
    Fiber 2g8%
    Sugar 17g19%
    Protein 3g6%
    Vitamin A 264IU5%
    Vitamin C 0.1mg0%
    Calcium 25mg3%
    Iron 2mg11%
    * Percent Daily Values are based on a 2000 calorie diet.

    Here’s one more to pin on your Pinterest boards!Make a dozen Chocolate Chip Swirl Bars in about 30 minutes! Be warned! These delicious, simple bar cookies are so good, they're dangerous!
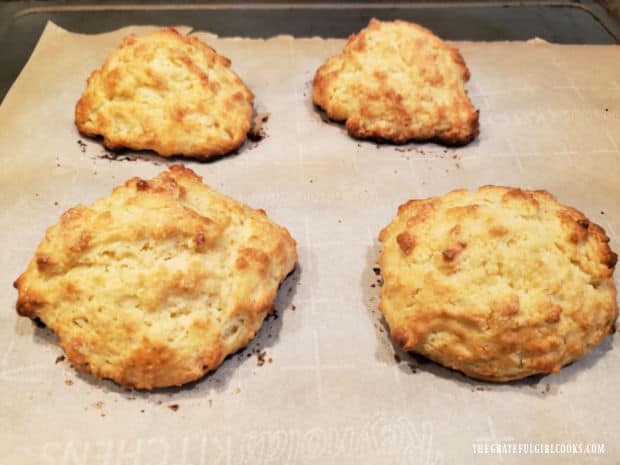
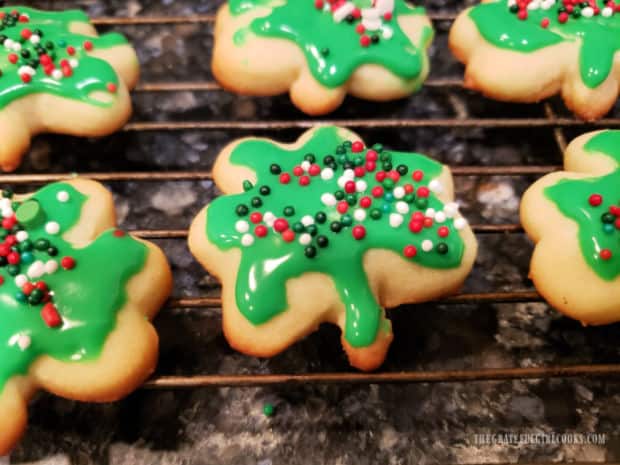
    Homemade Caramel Sauce

    Make a batch of delicious Homemade Caramel Sauce using only 3 ingredients! This sauce is a perfect topping for ice cream and other desserts!
    Make a batch of delicious Homemade Caramel Sauce using only 3 ingredients! This sauce is a perfect topping for ice cream and other desserts!

    Did you know it actually is very simple to make homemade caramel sauce at home? YEP… it sure is! The only ingredients needed to make it are butter, sugar and whipping cream (or half and half). That’s it! Best of all, you can make it in under 10 minutes! The recipe as written below, will yield about 1½ cups of sauce, and can be stored for up to a week in the refrigerator.

    This creamy caramel sauce is lip-smackin’ good, too! Buttery and smooth, you may find yourself dipping a big old spoon into it, in order to get a good taste. Knowing how to make homemade caramel sauce can save you yet another trip to the grocery store to buy it, which is a plus in my book! Here’s how to make this delicious dessert sauce:

    Scroll Down For A Printable Recipe Card At The Bottom Of The Page

    Let’s Make Some Caramel Sauce

    Place 4 Tablespoons of softened butter into a large skillet (non-stick or cast iron work best!). Add 1¼ cups of granulated sugar, and then cook on Medium-High heat and stir, as the sugar begins melting. Keep an eye on the pan, because the sugar will slowly start to lightly brown. Stir it occasionally, and watch it carefully, so it doesn’t burn. In the 3rd photo below, you can see the sugar has begun to melt at the bottom of the skillet.

    Butter and granulated sugar are heated in a large skillet.As it cooks, the sugar and butter begin to turn slightly brown in color.The granulated sugar begins to melt as it heats up in the skillet.

    Keep cooking until the sugar turns amber in color (as shown below), stirring as it cooks. The heating time will usually be about 3-5 minutes total, so keep an eye on it! Once the sugar has completely melted, and the caramel sauce is smooth (no lumps), remove the skillet immediately from the heat.

    Butter and granulated sugar begin to turn amber in color and liquefy as it cooks.Once sugar and butter are completely melted and smooth, the skillet is removed from the heat.

    Time To Finish The Caramel Sauce!

    When the skillet is OFF the heat, slowly pour a cup of heavy whipping cream (or half and half) into the skillet. The COLD cream will sputter and bubble as it is added to the smooth, HOT caramel mixture! Keep stirring or whisking in the cream until it has fully been incorporated into the homemade caramel sauce.

    Whipping cream (or half and half) is stirred into the hot caramel sauce.

    Serving Homemade Caramel Sauce

    Once the cream has been incorporated fully into the sauce, the homemade caramel sauce is ready to go! We usually let it cool slightly, then spoon the WARM sauce over a favorite dessert.

    Homemade caramel sauce tastes wonderful drizzled over ice cream, or on top of a slice of pound cake! We also love to drizzle it over apple pie, apple bars, or my Apple Shortbread Tart (seen in 2nd photo below). I’ve also been known (*cough, cough) to enjoy a spoonful of it all by itself… YUM!

    Homemade caramel sauce is drizzled over vanilla ice cream.Apple shortbread tart and ice cream, drizzled with the homemade caramel sauce.

    The homemade caramel sauce leftovers can be stored up to a week, when covered and refrigerated. It will solidify some as it is chilled. To re-use it, gently reheat the sauce and then give it a good stir before serving.

    Leftover caramel sauce is stored in a covered container in a refrigerator for up to a week.

    I hope you have the chance to make this simple homemade caramel sauce. It tastes great on a variety of desserts, and is simple to make, from the convenience of home. Thanks for stopping by today, and I invite you to come back soon for more delicious, family-friendly recipes.

    Looking For More DESSERT SAUCE Recipes?

    You can find ALL of my recipes in the Recipe Index, which is located at the top of the page. I have several delicious dessert sauces for you to enjoy, including:

    Interested In More Recipes?

    Thank you for visiting this website. I appreciate you using some of your valuable time to do soIf you’re interested, I publish a newsletter 2 times per month (1st and 15th) with all the latest recipes, and other fun info. I would be honored to have you join our growing list of subscribers, so you never miss a great recipe!
    There is a Newsletter subscription box on the top right side (or bottom) of each blog post, depending on the device you use, where you can easily submit your e-mail address (only) to be included in my mailing list.

    You Can Also Find Me On Social Media:

    Facebook page: The Grateful Girl Cooks!
    Pinterest:
    The Grateful Girl Cooks!
    Instagram:
    jbatthegratefulgirlcooks

    Author's signature

    Recipe adapted from a recipe (page 114), torn out of an old issue of Sunset Magazine (original month and year are unknown)

    ↓↓ PRINTABLE RECIPE BELOW ↓↓

    0 from 0 votes
    Homemade Caramel Sauce
    Prep Time
    2 mins
    Cook Time
    5 mins
    Total Time
    7 mins
     

    Make a batch of delicious Homemade Caramel Sauce using only 3 ingredients! This sauce is a perfect topping for ice cream and other desserts!

    Category: Dessert Sauce
    Cuisine: All Cuisines
    Keyword: homemade caramel sauce
    Servings: 24 (1 Tablespoon per serving)
    Calories Per Serving: 91 kcal
    Author: JB @ The Grateful Girl Cooks!
    Ingredients
    • 4 Tablespoons butter (don't use margarine)
    • cups granulated sugar
    • 1 cup heavy whipping cream or half and half
    Instructions
    1. Place butter in a large skillet. Add 1¼ cups of granulated sugar; cook on Medium-High heat and stir, as sugar begins melting. Keep an eye on the pan-sugar will slowly start to brown. Stir occasionally, and watch carefully, so it doesn't burn. Sugar will begin to liquefy.

    2. Keep cooking until sugar turns amber in color; keep stirring as it cooks. Total cooking time is usually 3-5 minutes total, Once sugar has completely melted, and sauce is smooth (no lumps), remove skillet immediately from heat.

    3. Slowly pour whipping cream (or half and half) into skillet. The COLD cream will sputter and bubble as it is added to HOT caramel mixture! Keep stirring or whisking in the cream until it is fully incorporated into caramel sauce.

    4. Let sauce cool slightly, then serve WARM sauce over a favorite dessert. Leftover sauce can be stored in a covered container in refrigerator for up to a week.

    Recipe Notes

    NOTE: Caloric calculation was made using heavy whipping cream.
    **If you are using half and half instead, each serving (1 Tablespoon) will be approx. 70 calories. 

    Nutrition Facts
    Homemade Caramel Sauce
    Amount Per Serving (1 Tablespoon)
    Calories 91 Calories from Fat 54
    % Daily Value*
    Fat 6g9%
    Saturated Fat 3g19%
    Trans Fat 0.1g
    Polyunsaturated Fat 0.2g
    Monounsaturated Fat 1g
    Cholesterol 16mg5%
    Sodium 18mg1%
    Potassium 10mg0%
    Carbohydrates 11g4%
    Sugar 11g12%
    Protein 0.3g1%
    Vitamin A 204IU4%
    Vitamin C 0.1mg0%
    Calcium 7mg1%
    Iron 0.02mg0%
    * Percent Daily Values are based on a 2000 calorie diet.

    Here’s one more to pin on your Pinterest boards!Make a batch of delicious Homemade Caramel Sauce using only 3 ingredients! This sauce is a perfect topping for ice cream and other desserts!