Category: Desserts

Chocolate Caramel Clusters

Five ingredients are all you need to quickly make yummy Caramel Chocolate Clusters, with chow mein noodles, peanut butter, chocolate chips & caramels!

Looking for a quick, yet tasty snack or treat that only has 5 ingredients (and one of them is water)? Check out this recipe for chocolate caramel clusters, an easy, classic “stand-by” treat you’ll be glad to have in your recipe box! These chocolate crispy treats are a total cinch to make. Caramels, chocolate chips, crunchy peanut butter and water are melted together in a small pan.

Once melted, the “sauce” is added to chow mein noodles and mixed, dropped by spoonfuls, and then cooled to room temperature before eating! That’s it! Here’s how easy these chocolate caramel clusters are to make. Here’s how to make them:

Scroll Down For A Printable Recipe Card At The Bottom Of The Page

How To Make Chocolate Caramel Clusters

Measure chow mein noodles into a large mixing bowl, then set the bowl aside. Do this before you cook the other ingredients, because you want to have them ready to mix with the caramel chocolate mixture as soon as it comes off the heat.

Crunchy chow mein noodles are measured into mixing bowl.

Make The Chocolate Peanut Butter Caramel Topping

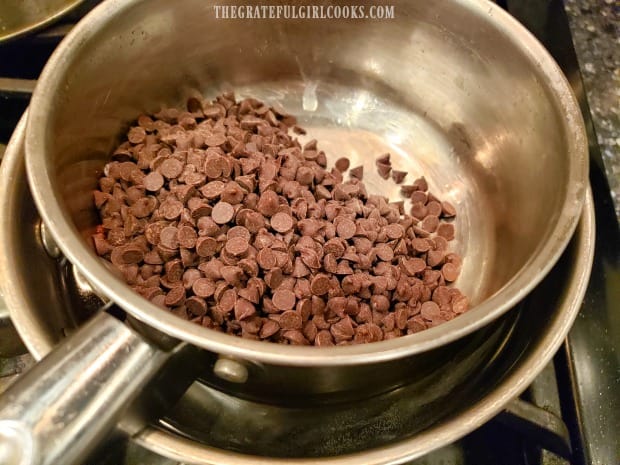
In a small saucepan, combine the caramels, chocolate chips, crunchy peanut butter and water. Cook on low heat, stirring continually until all ingredients have melted and are well combined. This will only take a few minutes.

NOTE: Make sure to keep stirring! You do NOT want the caramels or chocolate to burn on the bottom of the pan! Just sayin’!

Peanut butter, chocolate chips, water and caramels are cooked in saucepan.The melted chocolate, peanut butter and caramel mixture, ready to pour!

Combine The Ingredients

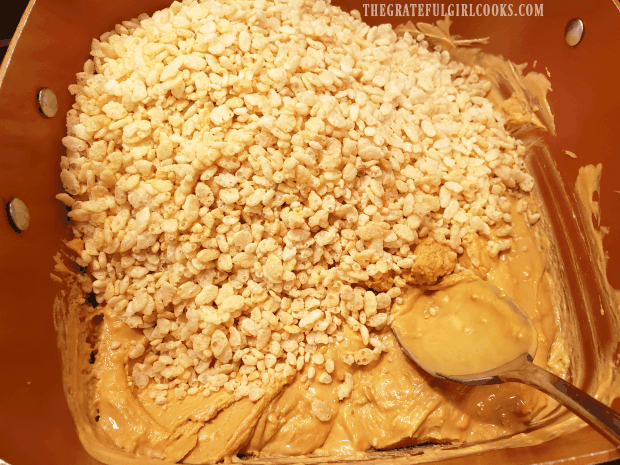
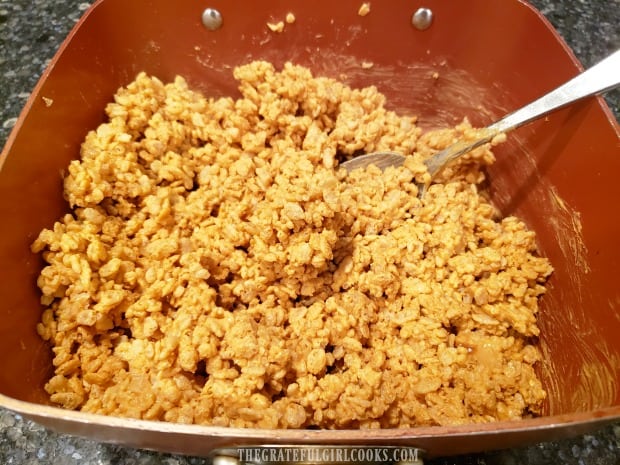
As soon as the chocolate caramel mixture is fully melted and combined, remove  the pan from the heat, and immediately pour it over the chow mein noodles. Stir quickly, to cover all the noodles with the hot chocolate mixture!

Melted caramel and chocolate mixture is poured over chow mein noodles.Once chow mein noodles are covered, they're ready to shape into clusters.

Time To Make Chocolate Caramel Clusters!

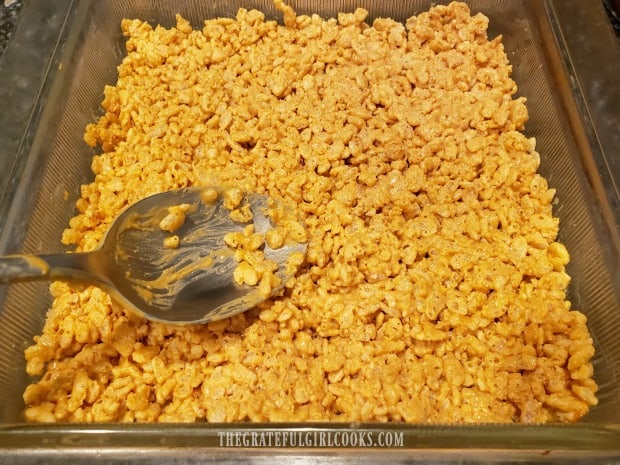
As soon as all the ingredients are fully incorporated, drop by teaspoonfuls onto wax paper or aluminum foil. Be sure to leave a tiny bit of space between each piece.

The recipe, as written below in the printable recipe card, should make between 20-30 chocolate caramel clusters. I decided to make mine using heaping teaspoons, and ended up with 20 clusters for these photos. You can determine the amount you need, and make them the size you desire.

The chocolate caramel clusters are dropped by teaspoonfuls onto foil to firm up.

Once all of the chocolate caramel clusters have been shaped and “dropped”, let them stand until they are firm. The yummy chocolate mixture will need time to harden, before serving!

Once the treats are completely firm, pull them off of the wax paper or foil, and enjoy! Store leftover clusters in an airtight container at room temperature, or in the refrigerator (your choice). They are yummy treats!

Chocolate caramel clusters waiting for chocolate to firm up, before being eaten.

I hope you enjoy these chocolate clusters. Whether you feel they are a cookie, or candy, I hope you enjoy them! It’s a quick way to make lots of delicious treats for your family, friends, or any occasion where you have to bring a dessert! Have a GREAT day!

Looking For More Chocolate Treats?

You can find all of my recipes in the Recipe Index, located at the top of the page. A few favorite chocolate treats you might enjoy include:

Interested In More Recipes?

Thank you for visiting this website. I appreciate you using some of your valuable time to do soIf you’re interested, I publish a newsletter 2 times per month (1st and 15th) with all the latest recipes, and other fun info. I would be honored to have you join our growing list of subscribers, so you never miss a great recipe!
There is a Newsletter subscription box on the top right side (or bottom) of each blog post, depending on the device you use, where you can easily submit your e-mail address (only) to be included in my mailing list.

You Can Also Find Me On Social Media:
Facebook page: The Grateful Girl Cooks!
Pinterest: The Grateful Girl Cooks!
Instagram: jbatthegratefulgirlcooks

Author's signature

Original recipe source unknown (I found it over 20 years ago on a 3×5 card in an OLD recipe box)

0 from 0 votes
Chocolate Caramel Clusters
Prep Time
15 mins
Cook Time
0 mins
Total Time
15 mins
 

Five ingredients are all you need to quickly make yummy Caramel Chocolate Clusters, with chow mein noodles, peanut butter, chocolate chips & caramels!

Category: Candy, Dessert
Cuisine: American
Keyword: chocolate caramel clusters
Servings: 20
Calories Per Serving: 136 kcal
Author: JB @ The Grateful Girl Cooks!
Ingredients
  • 15 Kraft caramels (approx. 4 ounces)
  • ¼ cup semi-sweet chocolate chips
  • 2 Tablespoons crunchy peanut butter
  • 2 Tablespoons water
  • 2 cups chow mein noodles
Instructions
  1. Measure chow mein noodles into a large mixing bowl, then set aside.

  2. In a small saucepan, combine caramels, chocolate chips, crunchy peanut butter and water. Cook on low heat, stirring continually until all ingredients have melted and are well combined. This will only take a few minutes. NOTE: Make sure to keep stirring! You do NOT want caramels or chocolate to burn onto the bottom of the pan!

  3. As soon as chocolate caramel mixture is fully melted, remove pan from heat and immediately pour hot mixture over chow mein noodles. Stir quickly, to fully cover noodles!

  4. Quickly drop chocolate clusters by teaspoonfuls onto wax paper or aluminum foil before chocolate firms up. Be sure to leave space between each piece. The recipe, as written, will make between 20-30 chocolate caramel clusters, based on how big or small you make the spoonfuls. Let clusters cool until chocolate has firmed up completely, then they're ready to eat! Store extras in an airtight container at room temperature, or in refrigerator. Enjoy!
Nutrition Facts
Chocolate Caramel Clusters
Amount Per Serving (1 g)
Calories 136 Calories from Fat 27
% Daily Value*
Fat 3g5%
Saturated Fat 1g6%
Cholesterol 1mg0%
Sodium 174mg8%
Potassium 39mg1%
Carbohydrates 24g8%
Fiber 2g8%
Sugar 6g7%
Protein 4g8%
Vitamin A 3IU0%
Calcium 12mg1%
Iron 1mg6%
* Percent Daily Values are based on a 2000 calorie diet.

Here’s one more to pin on your Pinterest boards!Five ingredients are all you need to quickly make yummy Caramel Chocolate Clusters, with chow mein noodles, peanut butter, chocolate chips & caramels!

Mocha Chocolate Chip Cookies

Make 4 dozen Mocha Chocolate Chip Cookies in no time at all! These delicious treats are easy to make, chewy, and have a hint of coffee liqueur flavor!

Do you like cookies? I’m pretty sure just about everyone that breathes loves a good cookie! Recently I hauled out one of my old cookie cookbooks (published 22 years ago!), and made a “new to us” recipe for mocha chocolate chip cookies. Wow… are they ever GOOD!

Many years ago there were “Mrs. Field” Cookie stores in practically every large shopping mall. There was just something about grabbing a freshly baked cookie while out on a shopping run that was hard to resist! Well, thanks to my old Mrs. Fields Cookie cookbook, I can make these yummy mocha chocolate chip cookies conveniently AT MY HOME!

The “mocha” flavor is not a smack you in the face kinda flavor… it’s more subtle! The cookies get that little bit of mocha flavor from pairing a small amount of instant coffee with a little bit of coffee liqueur! When that is added to the chocolate cocoa powder in the cookie dough, you’ve got a winning combination!

The recipe doesn’t take too long to make, either! Prep time is about 15 minutes, and the cookies take about 20 minutes to bake. Before ya know it, you’ve made 4 dozen DELICIOUS mocha chocolate chip cookies!

Scroll Down For A Printable Recipe Card At The Bottom Of The Page

Prepare The Cookie Dough

Before starting the dough, remember to preheat your oven to 300°F. Measure the flour, cocoa powder, salt and baking soda into a medium sized bowl. Whisk to combine these dry ingredients, and then set the bowl aside.

Flour, cocoa powder, baking soda and salt are combined in large bowl.

In a SEPARATE small bowl, dissolve the instant coffee powder (or crystals) in the coffee liqueur (or STRONG coffee, if not using liqueur). Set the bowl aside.

Instant coffee powder is dissolved in coffee liqueur before adding to cookie dough.

Measure the granulated and dark brown sugars into a large mixing bowl. Blend these sugars together using an electric mixer on medium speed until combined.

Add the softened butter and beat until this mixture is thoroughly combined. It will be kind of grainy and paste-like, but just keep on beating this mixture until combined. Now add two eggs and the dissolved coffee mixture to the bowl, and continue to beat (still on medium speed) until all ingredients are combined.

Granulated and brown sugars are mixed together.Butter is mixed into the brown and granulated sugars in bowl.Eggs, and dissolved coffee powder are added to the cookie dough.

Add The Reserved Dry Ingredients To The Cookie Dough

Slowly add the flour mix to the dough for the mocha chocolate chip cookies a little bit at a time, beating on LOW speed as you add it. Continue beating on low until all the flour has been added.

TIP: This cookie dough will be VERY thick. You may wish to switch to a large spoon (and STIR) when about half of the flour mix has been added, because this is a really thick batter! Once all the flour has been incorporated, stir in the chocolate chips until combined.

Dry ingredients are added to the batter for the mocha chocolate chip cookies.Chocolate chips are added to the cookie dough, and stirred to combine.

Time To Bake Some Mocha Chocolate Chip Cookies!

Now that the cookie dough is ready, it’s time to bake some cookies! Drop the cookie dough using rounded Tablespoons onto ungreased cookie sheets. You will want to leave a couple inches in between each ball of dough!

Bake the mocha chocolate chip cookies for 20-22 minutes at 300°F. Check them at 20 minutes (mine were done then!), and when done remove the baking sheets from the oven. Let the cookies rest for about a minute, then transfer them with a spatula to a wire rack to finish cooling.

Mocha chocolate chip cookies are scooped out onto baking sheet for cooking.The cookies bake for about 20 minutes, then cool on a wire rack.

YUM – Time To Enjoy a Cookie Or Two!

Now all that is left to do is pour yourself a small glass of cold milk, grab a cookie or two, and enjoy a delicious treat! Hey- why not go crazy, and put your feet up, too? You deserve a break! The cookies are chewy, and taste wonderful! I really do think you (and those you love) will enjoy these cookies, thanks to the recipe from good old Mrs. Fields!

A glass of cold milk is served with the mocha chocolate chip cookies.Three mocha chocolate chip cookies on a white plate.

Thanks for visiting! I hope you enjoy these yummy mocha chocolate chip cookies as much as we did! They really are good, and any leftovers freeze well! Have a wonderful day… I hope you come back soon!

Looking For More Cookie Recipes?

You can find all of my cookie recipes in the Recipe Index, located at the top of the page. A few favorites include:

Interested In More Recipes?

Thank you for visiting this website. I appreciate you using some of your valuable time to do soIf you’re interested, I publish a newsletter 2 times per month (1st and 15th) with all the latest recipes, and other fun info. I would be honored to have you join our growing list of subscribers, so you never miss a great recipe!
There is a Newsletter subscription box on the top right side (or bottom) of each blog post, depending on the device you use, where you can easily submit your e-mail address (only) to be included in my mailing list.

You Can Also Find Me On Social Media:
Facebook page: The Grateful Girl Cooks!
Pinterest: The Grateful Girl Cooks!
Instagram: jbatthegratefulgirlcooks

Author's signature

Recipe adapted from the cookbook: “Mrs. Fields Best Ever Cookie Book!”, published by Mrs. Fields Development Corporation via Time-Life Custom Publishing, 1998, page 21.

0 from 0 votes
Mocha Chocolate Chip Cookies
Prep Time
15 mins
Cook Time
20 mins
Total Time
35 mins
 

Make 4 dozen Mocha Chocolate Chip Cookies in no time at all! These delicious treats are easy to make, chewy, and have a hint of coffee liqueur flavor!

Category: Desssert
Cuisine: American
Keyword: mocha chocolate chip cookies
Servings: 48 cookies
Calories Per Serving: 136 kcal
Author: JB @ The Grateful Girl Cooks!
Ingredients
  • cups all purpose flour
  • cup unsweetened cocoa powder
  • ¼ teaspoon salt
  • ½ teaspoon baking soda
  • 2 teaspoons instant coffee crystals (powder)
  • 1 Tablespoon coffee liqueur (I used Kahlua) (can substitute STRONG coffee)
  • 1 cup granulated sugar
  • ¾ cup (packed) dark brown sugar
  • 1 cup salted butter, softened (2 sticks)
  • 2 large eggs
  • 2 cups semi-sweet chocolate chips
Instructions
  1. Preheat oven to 300°F. Place flour, cocoa powder, salt and baking soda into a medium bowl. Whisk to combine; set bowl aside.

  2. In separate small bowl, dissolve instant coffee crystals in coffee liqueur (or STRONG coffee, if not using liqueur). Set bowl aside.

  3. Measure granulated and dark brown sugars into a large mixing bowl. Blend using an electric mixer on medium speed until combined. Add softened butter; beat until combined. It will be grainy. Add eggs and dissolved coffee mixture, and beat (on medium speed) until combined.

  4. Add flour mix to the dough a little at a time, beating on LOW speed as you add it. Continue beating mixture on low until all flour has been added. Cookie dough will be VERY thick. TIP: Switch to a large spoon (and stir) when about half of the flour mix has been added, because this is a really thick batter! Once all flour has been incorporated, stir in chocolate chips.

  5. Drop cookie dough by rounded Tablespoons onto ungreased cookie sheets. Leave a couple inches between each cookie! Bake for 20-22 minutes at 300°F. Check them at 20 minutes, and when done, remove from oven. Let cookies rest for a minute, then transfer with a spatula to a wire rack to finish cooling. Enjoy!
Nutrition Facts
Mocha Chocolate Chip Cookies
Amount Per Serving (1 cookie)
Calories 136 Calories from Fat 63
% Daily Value*
Fat 7g11%
Saturated Fat 4g25%
Cholesterol 19mg6%
Sodium 63mg3%
Potassium 69mg2%
Carbohydrates 17g6%
Fiber 1g4%
Sugar 10g11%
Protein 2g4%
Vitamin A 135IU3%
Calcium 12mg1%
Iron 1mg6%
* Percent Daily Values are based on a 2000 calorie diet.

Here’s one more to post on your Pinterest boards!Make 4 dozen Mocha Chocolate Chip Cookies in no time at all! These delicious treats are easy to make, chewy, and have a hint of coffee liqueur flavor!

Peanut Butter Kiss Cookies

Enjoy this classic recipe for yummy peanut butter kiss cookies, a soft peanut butter cookie with a milk chocolate kiss on top! Recipe makes 4 dozen.

Who doesn’t LOVE peanut butter kiss cookies? This classic cookie, also known as peanut butter blossoms, has always been a personal favorite of mine. If they are on a dessert platter, it is usually one of the very first cookies I head straight to grab!

I decided to post this traditional recipe, just in case someday they don’t print the recipe on the bags of Hershey’s kisses, which is where I got it! Be prepared… that’s my motto, especially in the case of these absolutely YUMMY cookies!

Truth is, they are incredibly easy to make! Last week I made some of these peanut butter kiss cookies to add to the dessert plates I will give our neighbors this Christmas.

The recipe makes approximately 48 cookies, so there are plenty to share, and a few to munch on, too! Here’s how to make them:

Scroll Down for A Printable Recipe Card At The Bottom Of The Page

Unwrapping Those Kisses!

First- peel the wrappers off all 48 Hershey’s kisses. That’s probably the hardest thing about the recipe (ha ha)! Try NOT to eat all 48, people! You need them ready to go, so you can press them into the soft, hot cookies as soon as they come out of the oven!

Unwrapped Hershey Kisses, ready to add to baked cookies.

Time To Make The Cookie Dough!

Preheat your oven to 375°F. while you mix up the cookie dough.  Place peanut butter and shortening in a large mixing bowl. Beat these well with an electric mixer, until smooth.

Add 1/3 cup of granulated sugar and light brown sugar, and beat these into the peanut butter mixture until thoroughly blended. Now add the milk, one egg, and vanilla into the dough batter, and again beat well, until fully combined.

Peanut butter and vegetable shortening are beaten together.Sugars, egg, milk and vanilla are added to the cookie dough mixture.

Add Dry Ingredients

In a separate bowl, stir together all purpose flour, baking soda, and salt. Add these dry ingredients to the peanut butter cookie dough, a little at a time.

Continue to beat the ingredients together while you are adding them. The dough will be fairly thick once all the ingredients have been mixed together. Now the cookie dough is ready to be shaped!

Flour, baking soda and salt are added to the cookie dough batter.

Time To Roll The Cookies!

In order to get 48 cookies out of the dough, you will need to shape roll each cookie into a 1″ ball. If you have a small cookie scoop, it makes it fairly easy to do! Roll the dough between the palms of your hands until a small ball of dough is formed.

Cookie dough is rolled into 1" balls before baking.

Place some additional granulated sugar in a small bowl (about 1/3 cup). Drop the cookie dough ball into the sugar, and turn, to coat the ball completely with sugar. Place the sugar coated dough ball onto an ungreased cookie sheet.

Repeat this process until all 48 cookies have been formed and placed onto cookie sheets. Keep about 2 inches between dough balls, because the dough will spread as it bakes.

Each dough ball is rolled in granulated sugar, and then placed on baking sheet.

Time To BAKE The Peanut Butter Kiss Cookies!

Bake the cookies at 375°F. for 8-10 minutes. They will be lightly browned when done. Remove the cookies from the oven, and immediately press one of the chocolate kisses down slightly into the center of each cookie.

You will see that the cookies will crack slightly around the edges as the chocolate kiss is pressed down slightly. Once all of the kisses have been added, transfer the peanut butter kiss cookies to a wire rack to finish cooling.

Hershey kisses are placed in middle of each cookie, once baked.Peanut butter kiss cookies, cooling on a wire rack.

Who Wants Some Yummy Peanut Butter Kiss Cookies?

Cool the cookies completely before serving. It’s a challenge to not tear right into them, but just let them cool down before popping one into your mouth, okay?

Here are some finished peanut butter kiss cookies, ready to eat!

I really hope you enjoy these peanut butter and chocolate kiss cookies! Peanut butter and chocolate are one of my favorite flavor combos, so how could I NOT love them?

They’re so good, and I hope you love them too! Have a great day, and thank you for visiting my blog! Take care, and may God bless you today.

Looking For More COOKIE Recipes?

You can find all of my cookie recipes in the Recipe Index, located at the top of the page. I have quite a few cookie recipes, including:

Want More Recipes? Get My FREE Newsletter!

I publish a newsletter 2 times per month (1st and 15th) with lots of recipes, tips, etc..
Would you like to join our growing list of subscribers?

There is a Newsletter subscription box on the top right (or bottom) of each blog post, depending on the device you use.
You can submit your e-mail address there, to be added to my mailing list.

Find Me On Social Media:

Facebook page: The Grateful Girl Cooks!
Pinterest:
The Grateful Girl Cooks!
Instagram:
jbatthegratefulgirlcooks

Author's signature

Original recipe source: Found on the back of a Hershey Kisses package

↓↓ PRINTABLE RECIPE BELOW ↓↓

0 from 0 votes
Peanut Butter Kiss Cookies
Prep Time
15 mins
Cook Time
8 mins
Total Time
23 mins
 

Enjoy this classic recipe for yummy peanut butter kiss cookies, a soft peanut butter cookie with a milk chocolate kiss on top! Recipe makes 4 dozen.

Category: Dessert
Cuisine: American
Keyword: peanut butter kiss cookies
Servings: 48 cookies (approx.)
Calories Per Serving: 92 kcal
Author: JB @ The Grateful Girl Cooks!
Ingredients
  • 48 Hershey's Kisses (milk chocolate)
  • ½ cup vegetable shortening
  • ¾ cup peanut butter (creamy)
  • cup granulated sugar
  • cup packed light brown sugar
  • 1 egg
  • 2 Tablespoons milk
  • 1 teaspoon vanilla extract
  • cups all purpose flour
  • 1 teaspoon baking soda
  • ½ teaspoon salt
  • additional granulated sugar , to roll cookie balls in
Instructions
  1. Preheat oven to 375°F. Peel the wrappers off 48 Hershey's kisses. You need them ready to go, so you can press them into the soft cookies as soon as they come out of the oven!

  2. Place peanut butter and shortening in a large mixing bowl. Beat well with an electric mixer, until smooth. Add granulated sugar and light brown sugar; beat these into the peanut butter mixture until well combined. Add milk, egg, and vanilla into batter; beat well, until fully combined. In a separate bowl, stir together flour, baking soda, and salt. Add these dry ingredients to dough, a little at a time. Continue to beat together while adding them.

  3. Shape and roll dough into 48, one inch dough balls. Roll each piece of dough between the palms of your hands until a 1" ball is formed.

  4. Place additional granulated sugar in a small bowl (about 1/3 cup). Drop dough ball into sugar, and turn, to coat ball completely. Place sugar coated dough ball onto an ungreased cookie sheet. Repeat process until 48 cookies have been formed and placed onto cookie sheets. Leave 2 inches between dough balls, because dough will spread as it bakes.

  5. Bake at 375°F. for 8-10 minutes. They will be lightly browned when done. Remove cookies from the oven, and immediately press one of the chocolate kisses down slightly into the center of each cookie. The cookies will crack around the edges as the chocolate kiss is pressed down. Once all of the kisses have been added, transfer cookies to a wire rack to finish cooling. Once cooled completely, serve and enjoy!

Nutrition Facts
Peanut Butter Kiss Cookies
Amount Per Serving (1 cookie)
Calories 92 Calories from Fat 54
% Daily Value*
Fat 6g9%
Saturated Fat 2g13%
Cholesterol 5mg2%
Sodium 72mg3%
Potassium 35mg1%
Carbohydrates 10g3%
Fiber 1g4%
Sugar 6g7%
Protein 2g4%
Vitamin A 6IU0%
Calcium 14mg1%
Iron 1mg6%
* Percent Daily Values are based on a 2000 calorie diet.

Here’s one more to pin on your Pinterest boards!Enjoy this classic recipe for yummy peanut butter kiss cookies, a soft peanut butter cookie with a milk chocolate kiss on top! Recipe makes 4 dozen.

Blackberry Air Fryer Handpies

Make six delicious, glazed blackberry air fryer handpies in about 20 minutes total! They’re easy to make, with purchased or homemade pie crust dough!
Make six delicious, glazed blackberry air fryer handpies in about 20 minutes total! They're easy to make, with purchased or homemade pie crust dough!

Do you like “fried” handpies? I sure do! When I was growing up, my grandma would come and live with us for a few months at a time. I have great memories of seeing her frying fruit pies (apricot, peach, berry, etc) in hot oil in a large skillet. Boy, they sure tasted great when Grandma made them!

I’ve made apricot mini-fried pies (now that I’m all grown up), and always enjoy those, because they remind me of her. Now that I own an air fryer (a birthday gift!), I am longing to create different recipes for air fried “fried pies” (without the oil!).

A couple months ago I decided to try my hand at making blackberry air fryer handpies. I used my standard blackberry pie filling (but cut the recipe in half), and my homemade pie dough (you can use store bought) to make these treats. Guess what? They taste fantastic, so I want to share the easy recipe here on the ol’ blog. Here’s how to make ’em:

Scroll Down For A Printable Recipe Card At The Bottom Of The Page

Prepare The Blackberry Filling

Place the blackberries, sugar, flour and cinnamon in a medium sized bowl. NOTE: If you will be using frozen blackberries, please let them thaw first, and then drain off any accumulated juice before adding the other ingredients.

Stir gently, until these ingredients are combined. This is the filling for your blackberry air fryer handpies. See how easy that was? Set the bowl aside while you cut out the pie dough circles.

Blackberries, flour, cinnamon and sugar are combined in a medium sized bowl.Once mixed, the fruit filling is ready to make the blackberry handpies.

Cutting Out The Pie Crust Dough

Roll out the pie crust dough (mine shown below is homemade) into a circle shape, large enough for at least a 9″ pie. If using a purchased pie dough crust, you may need to roll it out a bit more, so you have enough dough for 6 handpies!

Cut the dough into six 5″ circles. You can use a wide mug or glass, or a mini pie tin (like I used) to cut the shape. Collect any leftover scraps of dough, then roll them out again to get enough dough for 6 handpies.

Pie dough is rolled out before cutting into circle shapes for handpies.The pie dough is cut into 6 circles for the blackberry handpies.

Fill The Blackberry Handpies

Place a heaping Tablespoonful of the blackberry filling into the center of the dough circles. Be careful not to overfill, or the filling will ooze out! I speak from experience! *cough, cough*

Also, be sure to leave some empty dough around all the circle. Do NOT spread the filling out to the edges, because you need to fold the dough over the blackberry filling, and seal the edges.

A spoonful of blackberry pie filling is placed onto each pie dough circle.

Anyways… pull the dough up and over the blackberry filling to the other edge of the pie dough. Use the tines of a fork (the backside) and press down on the edges of the handpie to seal the two crusts together. Make sure they are sealed together well, so the pies don’t open up while they are cooking.

You can see where some of the filling juiced out of a couple of the handpies when I crimped the edges.. No big deal, it just looks nicer if they don’t look like they are part of a murder scene! Just sayin’.

Dough is folded over the pie filling, and edges are crimped to seal.

Brush the beaten egg over the entire top surface of the dough. This helps the crust to brown nicely while cooking in the air fryer.

A beaten egg is brushed over the handpies before cooking.

Time To Cook Some Blackberry Air Fryer Handpies!

Preheat your air fryer to 370°F. This will take a few minutes. Once pre-heated, carefully place the handpies into the basket. I was able to get all 6 of them into the basket at the same time, but you can cook them in batches, if your air fryer is smaller.

Cook the blackberry air fryer handpies at 370°F for 7-8 minutes. Check them at the 7 minute mark, since air fryer temps can vary greatly with different machines. When the dough is nicely golden brown and crispy on the outside, they are done.

Carefully remove them from the air fryer once done, and transfer them to a wire rack (with wax paper of aluminum foil UNDER the rack. The wax paper or foil will help catch any drips when you brush on the glaze.

Blackberry air fryer handpies are golden brown once fully cooked.

Glaze The Blackberry Air Fryer Handpies

While the handpies cool down just a bit, mix the powdered sugar with drops of water in a small bowl, to make a fairly thin glaze.

Once the blackberry handpies have cooled a bit, use a pastry brush to brush the glaze all over the top of the pastry. When the glaze has hardened, the handpies are ready to serve!

A glaze is made with water and powdered sugar.

The blackberry handpies are brushed with the glaze, and then are ready to eat!

Here’s a peek inside one of the blackberry air fryer handpies.  See that yummy looking blackberry filling inside? Go on… take a big bite… you know you want to, right?

A peek at the inside of one of the handpies, after cooking.

Hope you will consider trying this recipe! I really love my fairly new air fryer, and these mini handpies were absolutely delicious! Have a great day.

Looking For More AIR FRYER Recipes?

You can find all of my recipes in the Recipe Index, located at the top of the page. I have some delicious air fryer recipes you might enjoy, including:

Interested In More Recipes?

Thank you for visiting this website. I appreciate you using some of your valuable time to do soIf you’re interested, I publish a newsletter 2 times per month (1st and 15th) with all the latest recipes, and other fun info. I would be honored to have you join our growing list of subscribers, so you never miss a great recipe!
There is a Newsletter subscription box on the top right side (or bottom) of each blog post, depending on the device you use, where you can easily submit your e-mail address (only) to be included in my mailing list.

You Can Also Find Me On Social Media:
Facebook page: The Grateful Girl Cooks!
Pinterest: The Grateful Girl Cooks!
Instagram: jbatthegratefulgirlcooks

Author's signature


0 from 0 votes
Blackberry Air Fryer Handpies
Prep Time
15 mins
Cook Time
7 mins
Total Time
22 mins
 

Make six delicious, glazed blackberry air fryer handpies in about 20 minutes total! They're easy to make, with purchased or homemade pie crust dough!

Category: Desssert
Cuisine: American
Keyword: blackberry air fryer handpies
Servings: 6
Calories Per Serving: 322 kcal
Author: JB @ The Grateful Girl Cooks!
Ingredients
  • 2 cups blackberries
  • ½ cup granulated sugar
  • Tablespoons all purpose flour
  • teaspoon ground cinnamon
  • 1 pie crust (unbaked) homemade or store bought
  • 1 egg beaten
For Icing:
  • ½ cup powdered sugar
  • 3-4 drops water
Instructions
  1. Place blackberries, sugar, flour and cinnamon in a medium sized bowl. Stir gently, until ingredients are combined. Set bowl aside. NOTE: If using frozen blackberries, thaw first, and then drain off any accumulated juice before adding other ingredients.

  2. Roll pie crust dough into a circle shape, large enough for a 9" pie. If using a purchased pie dough crust, you might need to roll it out more, so you have enough dough for 6 handpies! Cut dough into six 5" circles. Collect leftover scraps of dough, then roll them out again to get enough dough for 6 handpies.

  3. Place a heaping Tablespoonful of blackberry filling into center of each circle. Don't overfill the handpies, or the filling will leak out! Be sure to leave a dough edge around the circle. Do NOT spread the filling out to the edge.

  4. Pull the dough (gently) up and over the blackberry filling to the other edge of the dough. Use the tines of a fork (the backside) and press down on the edges of the handpie to crimp and seal the two crusts together. Make sure they are sealed together well, so the pies don't open up while they are cooking. Brush beaten egg over the top of the handpies. This helps the crust to brown nicely while cooking in the air fryer.

  5. Preheat air fryer to 370°F. Once pre-heated, carefully place handpies into basket. You can cook them in batches, if necessary. Cook handpies at 370°F for 7-8 minutes. Check them at the 7 minute mark, as temperatures can vary with air fryers. When handpies are golden brown and crispy on the outside, they are done. Carefully remove them from air fryer, and transfer to a wire rack.

  6. While the handpies cool, mix the powdered sugar with drops of water in a small bowl, to make a fairly thin glaze. Once handpies have cooled a bit, use a pastry brush to brush the glaze all over the top. When glaze hardens, the handpies are ready to serve! Enjoy!
Nutrition Facts
Blackberry Air Fryer Handpies
Amount Per Serving (1 g)
Calories 322 Calories from Fat 108
% Daily Value*
Fat 12g18%
Saturated Fat 3g19%
Cholesterol 27mg9%
Sodium 144mg6%
Potassium 122mg3%
Carbohydrates 51g17%
Fiber 3g13%
Sugar 29g32%
Protein 4g8%
Vitamin A 142IU3%
Vitamin C 10mg12%
Calcium 26mg3%
Iron 1mg6%
* Percent Daily Values are based on a 2000 calorie diet.

Here’s one more to pin on your Pinterest boards!Make six delicious, glazed blackberry air fryer handpies in about 20 minutes total! They're easy to make, with purchased or homemade pie crust dough!

Chocolate Cashew Cranberry Bites

FIVE MINUTES and THREE INGREDIENTS are all you need to make 2 dozen yummy chocolate cashew cranberry bites, perfect for munching or gift giving!

Looking for an EASY, delicious treat for the holidays, a special snack, or a food gift for a friend or neighbor? Look no further! These chocolate bites can be made quickly, and taste fantastic!

Sweet chocolate, combined with chewy dried cranberries and crunchy cashews make this a treat you and your loved ones will enjoy! Here’s how to make these goodies, in under 10 minutes:
Scroll Down For A Printable Recipe Card At The Bottom Of The Page

It’s EASY To Make Chocolate Cashew Cranberry Bites!

The ingredients for this super simple recipe are semi-sweet chocolate chips, dried cranberries, and roasted cashews (I used salted).

Ingredients for these treats are semi-sweet chocolate, dried cranberries, and roasted cashews.

Melt The Chocolate Chips

Place the chocolate chips in a medium sized MICROWAVE-SAFE bowl. Microwave the chips on High for 45 seconds. Remove the bowl from the microwave, and stir the chocolate chips (as best as you can). Mixture will be really thick at first.

Place the bowl of chocolate chips back into the microwave, and microwave on High for 30 seconds. Remove and stir. Repeat this process until the chocolate is completely melted once stirred. This may take a few times in the microwave, due to varying temps. Don’t over-cook the chocolate, or it will burn!

Chocolate chips are melted in the microwave until smooth and creamy.

Add Cranberries And Cashews

Immediately add the dried cranberries and cashews to the bowl, once the chocolate is melted and smooth. Gently stir, until the melted chocolate covers all of the cranberries and cashews.

Dried cranberries and cashews are added to the melted chocolate in the bowl.The ingredients are stirred until blended, and are ready to form these chocolate bites.

Time To Make Chocolate Cashew Cranberry Bites!

Once you’ve combined the melted chocolate, cashews and cranberries, it’s time to form these yummy bites!  Drop the chocolates by teaspoonfuls onto a wax paper lined baking sheet. You should be able to get 24 treats from this recipe!

Keep a bit of space between each of the chocolate cashew cranberry bites. This way they won’t stick together as the chocolate firms up!

Two dozen chocolate cashew cranberry bites on wax paper.

Let The Chocolate “Firm Up” Before Serving

In the first photo below you see the chocolate cashew cranberry bites right after they have been placed on the wax paper. The chocolate looks “wet and shiny”, because it is still soft.

Now, in the second photo below you see the chocolate cashew cranberry bites after they have been allowed to firm up for about 45 minutes.  See how the chocolate is no longer as shiny?

The chocolate looks shiny while it is still slightly melted, so let the candies rest to firm up.You can see the chocolate is not as shiny once it has firmed up.

Serving And Storing These Goodies

You’re ready to serve the goodies once the chocolate has completely firmed up! They’re perfect to give to neighbors and friends during the holidays, or serve at a potluck or party! I’m sure they will be gobbled up quickly, because they are so good!

If you want to “fancy them up” even more, place the bites in festive paper candy holders! Store any leftovers in a covered container in the refrigerator. They can also be frozen, if you wrap them well.

Two dozen chocolate cashew cranberry bites are ready to serve!

These chocolate candies are a perfect, easy to make treat during the holidays! Throw together the goodies in just a few minutes, and your friends and family will think you’ve been in the kitchen all day! Hope you will give them a try, and trust you will enjoy them!

Looking For More CHOCOLATE Recipes?

You can find all of my recipes in the Recipe Index, located at the top of the page. I have many recipes featuring chocolate, including:

Interested In More Recipes?

Thank you for visiting this website. I appreciate you using some of your valuable time to do soIf you’re interested, I publish a newsletter 2 times per month (1st and 15th) with all the latest recipes, and other fun info. I would be honored to have you join our growing list of subscribers, so you never miss a great recipe!
There is a Newsletter subscription box on the top right side (or bottom) of each blog post, depending on the device you use, where you can easily submit your e-mail address (only) to be included in my mailing list.

You Can Also Find Me On Social Media:
Facebook page: The Grateful Girl Cooks!
Pinterest: The Grateful Girl Cooks!
Instagram: jbatthegratefulgirlcooks

Author's signature

Original recipe source: unknown

0 from 0 votes
Chocolate Cashew Cranberry Bites
Prep Time
5 mins
Cook Time
0 mins
Inactive "Resting" Time (waiting for chocolate to firm up)
45 mins
Total Time
50 mins
 

FIVE MINUTES and THREE INGREDIENTS are all you need to make 2 dozen yummy chocolate cashew cranberry bites, perfect for munching or gift giving!

Category: Dessert
Cuisine: American
Keyword: chocolate cashew cranberry bites
Servings: 24 chocolates
Calories Per Serving: 117 kcal
Author: JB @ The Grateful Girl Cooks!
Ingredients
  • 2 cups semi-sweet chocolate chips
  • cup cashews
  • cup dried cranberries
Instructions
  1. Place chocolate chips in a medium sized MICROWAVE-SAFE bowl. Microwave on HIGH for 45 seconds. Remove the bowl from microwave, and stir chocolate chips (as best as you can). Mixture will be really thick at first. Place bowl back into microwave, and heat again on High for 30 seconds. Remove and stir. Repeat process until chocolate is completely melted once stirred. This may take a few times in the microwave, due to varying temps. Don't over-cook the chocolate, or it will burn!

  2. Immediately add the dried cranberries and cashews to the smooth, melted chocolate. Gently stir, until chocolate covers them all. Drop by teaspoonfuls onto a wax paper lined baking sheet. Keep a bit of space between each of the chocolates, so they won't stick together as the chocolate firms up! Set aside, to let chocolate firm up, for about 45 minutes.

  3. They are ready to serve, once the chocolate has completely firmed up! If you want to "fancy them up" even more, place the bites in festive paper candy holders! Store any leftovers in a covered container in the refrigerator. They can also be frozen, if you wrap them well. Enjoy!
Nutrition Facts
Chocolate Cashew Cranberry Bites
Amount Per Serving (1 chocolate)
Calories 117 Calories from Fat 63
% Daily Value*
Fat 7g11%
Saturated Fat 4g25%
Cholesterol 1mg0%
Sodium 2mg0%
Potassium 109mg3%
Carbohydrates 12g4%
Fiber 2g8%
Sugar 8g9%
Protein 2g4%
Vitamin A 8IU0%
Calcium 11mg1%
Iron 1mg6%
* Percent Daily Values are based on a 2000 calorie diet.

Here’s one more to pin on your Pinterest boards!FIVE MINUTES and THREE INGREDIENTS are all you need to make 2 dozen yummy chocolate cashew cranberry bites, perfect for munching or gift giving!

Banana Nut Pound Cake

Ten minutes prep time is all you need to make this simple, scrumptious Banana Nut Pound Cake, drizzled with a simple glaze. Easy recipe serves 12!

Years and years ago I received this recipe for banana nut pound cake from my younger sister, Julie. It is written out on an old 3×5 index card, and I re-discovered it recently in an old recipe box. I have NO IDEA where she got the recipe years ago, but I recently made it again (and took photos this time) and decided to put the recipe on my blog! It’s SO GOOD!

Making this pound cake is a cinch, with minimal prep time! To put it simply, all you need to do is mix the ingredients, bake, flip the finished cake over, drizzle with icing, and you’ve got yourself a fantastic tasting cake!

It really is THAT easy, especially by using two shortcuts to a quick recipe with lots of flavor: yellow cake mix, and banana pudding mix! Yep! If you enjoy banana nut bread or banana cake, you will enjoy this dessert, too! Here’s how to make this yummy cake:

Scroll Down For A Printable Recipe Card At The Bottom Of The Page

Prepare The Batter

Place all the cake ingredients into a large mixing bowl. The ingredients are yellow cake mix, banana pudding mix, oil, water, eggs, bananas and chopped pecans (or walnuts). Stir very well, until these ingredients are completely combined.

All ingredients for the pound cake are mixed in a large bowl.Batter for the pound cake is ready to pour into a tube pan for baking.

Generously grease a tube pan with non-stick spray, oil, or shortening. Make sure the bottom, sides, and center tube are coated well. I cannot stress this enough, because you do NOT want the cake to stick to the pan when it is flipped upside down later!

Pour the cake batter into the prepared pan, spreading it evenly, to disperse all the batter.

The batter is evenly dispersed in a tube pan before baking.

Bake The Banana Nut Pound Cake

Bake the pound cake in a preheated 350° F. oven for 45-55 minutes (mine took 55 minutes total). Because oven temps can vary quite a bit, I recommend checking it at the 45 minute mark, and then continue baking, if not fully done.

To check the cake for done-ness, simply insert a toothpick into the top middle of the cake. If the toothpick comes out clean, the cake is done. If not, let it bake a few more minutes, then check again, until done. Here is the fully cooked cake, after being removed from the oven.

This is what the banana nut pound cake looks like straight from the oven.

Invert The Banana Nut Pound Cake After Cooling

Let the cake cool for 20 minutes while still in the tube pan.  Run a butter knife carefully around the edges and the middle tube, to loosen the cake from the pan.

Place a dinner plate or platter over the top of the tube pan, and using both hands to hold the plate and tube pan securely together, quickly flip the cake over.  The pound cake should release from the pan onto the plate. Transfer the cake from the plate to a wire rack, to finish cooling completely.

TIP: If it does not EASILY come out of the pan on to the plate on the first try, don’t freak out! Simply flip it back over, and re-run the knife around the edges, let it cool a couple more minutes, then try again.

After cooling, the banana nut pound cake is inverted onto a wire rack.

Drizzle Cooled Cake With Icing

While the banana nut pound cake is cooling, you can make the super easy icing! Mix powdered sugar and milk in a small bowl, until smooth and non-lumpy. The icing needs to be thin enough to drizzle over the cake.

HELPFUL TIP: Place a sheet of aluminum foil or wax paper UNDER the wire rack. This will make your cleanup much easier, after icing the cake!

Once the cake has COMPLETELY cooled, drizzle the icing over the surface of the cake. I like to make sure it goes all the way to the edges, so it can run down the sides of the cake, too! Once done, let the icing firm up for awhile before slicing and serving!

A simple glaze is made to drizzle on the finished cake.Icing is drizzled over the top of the cooled cake.The banana nut pound cake is covered with a simple icing before serving.

Time To EAT!

Once the icing on the banana nut pound cake has firmed up, this yummy cake is ready to slice and eat! YUMMO!  You should be able to get 12 servings from the cake. Cut the cake into quarters, then slice 3 pieces per quarter!

This moist pound cake has wonderful banana flavor, and is filled with the crunch of chopped pecans (or walnuts, if using)! Cut yourself a slice, pour a big cup of coffee or tea, sit back, and enjoy this delicious treat!

A close up peek at the inside of the pound cake, with a slice removed.A single slice of banana nut pound cake, served on a white plate.

I really hope you will consider trying this yummy cake recipe! It’s the perfect size for a crowd, or to ensure lots of leftovers for YOU and those you love! Have a blessed day!

Looking For More CAKE Recipes?

You can find all of my cake recipes in the Recipe Index, located at the top of the page. I have quite a few delicious cake recipes published, including:

Interested In More Recipes?

Thank you for visiting this website. I appreciate you using some of your valuable time to do soIf you’re interested, I publish a newsletter 2 times per month (1st and 15th) with all the latest recipes, and other fun info. I would be honored to have you join our growing list of subscribers, so you never miss a great recipe!
There is a Newsletter subscription box on the top right side (or bottom) of each blog post, depending on the device you use, where you can easily submit your e-mail address (only) to be included in my mailing list.

You Can Also Find Me On Social Media:
Facebook page: The Grateful Girl Cooks!
Pinterest: The Grateful Girl Cooks!
Instagram: jbatthegratefulgirlcooks

Author's signature

Original recipe source: My younger sister, Julie

5 from 1 vote
Banana Nut Pound Cake
Prep Time
10 mins
Cook Time
50 mins
Total Time
1 hr
 

Ten minutes prep time is all you need to make this simple, scrumptious Banana Nut Pound Cake, drizzled with a simple glaze. Easy recipe serves 12!

Category: Dessert
Cuisine: American
Keyword: banana nut pound cake, pound cake
Servings: 12
Calories Per Serving: 388 kcal
Author: JB @ The Grateful Girl Cooks!
Ingredients
For Cake
  • 1 box yellow cake mix (15.25 ounces)
  • 1 box banana pudding mix (3.4 ounces)
  • ½ cup vegetable oil
  • ¾ cup water
  • 4 large eggs
  • 2 bananas (very ripe) (mashed)
  • 1 cup chopped pecans (or walnuts)
For Glaze
  • 1 cup powdered sugar
  • 2 Tablespoons milk
Instructions
  1. Preheat oven to 350°F . GENEROUSLY grease a tube pan on the bottom, sides, and center tube.

  2. Place all cake ingredients in a large bowl. Stir well, until these ingredients are completely combined. Pour batter into prepared pan, spreading evenly, to disperse batter.

  3. Bake at 350° F. for 45-55 minutes (mine took 55). Because oven temps vary, I recommend checking it at the 45 minute mark, and then continue baking, if not fully done. To check cake for done-ness, insert a toothpick into the top middle of cake. If toothpick comes out clean, cake is done. If not, let it bake a few more minutes, then check again, until done. When done, remove cake from oven, and let cake cool on a wire rack for 20 minutes (still in the tube pan).

  4. To Invert The Cake: Once cake has cooled for 20 minutes, run a butter knife carefully around edges and middle tube, to loosen cake from pan. Place a dinner plate (plate side down)over the top of the tube pan. Using both hands to hold the plate and tube pan securely together, quickly flip cake over.  The pound cake should release from the pan onto the plate. Transfer cake to a wire rack, to finish cooling completely.

    TIP: If it does not EASILY come out of the pan on to the plate on the first try, don't freak out! Simply flip it back over, and re-run the knife around the edges, let it cool a couple more minutes, then try again.

  5. While cake is cooling, make the icing! Mix powdered sugar and milk in a small bowl, until smooth. The icing needs to be thin enough to drizzle over the cake. Once cake has COMPLETELY cooled, drizzle icing over top of the cake. Once done, let icing firm up before slicing and serving! Serve, and enjoy!

    HELPFUL TIP: Place a sheet of aluminum foil or wax paper UNDER the wire rack. This will make your cleanup much easier, after icing the cake!

Nutrition Facts
Banana Nut Pound Cake
Amount Per Serving (1 slice)
Calories 388 Calories from Fat 171
% Daily Value*
Fat 19g29%
Saturated Fat 9g56%
Cholesterol 70mg23%
Sodium 411mg18%
Potassium 154mg4%
Carbohydrates 53g18%
Fiber 2g8%
Sugar 34g38%
Protein 5g10%
Vitamin A 125IU3%
Vitamin C 2mg2%
Calcium 97mg10%
Iron 1mg6%
* Percent Daily Values are based on a 2000 calorie diet.

Here’s one more to pin on your Pinterest boards!Ten minutes prep time is all you need to make this simple, scrumptious Banana Nut Pound Cake, drizzled with a simple glaze. Easy recipe serves 12!

Cinnamon Spice Crinkle Cookies

Make 3 dozen, yummy Cinnamon Spice Crinkle Cookies (easily), using only 5 ingredients, including a spice cake mix as a shortcut!
Make 3 dozen, super yummy Cinnamon Spice Crinkle Cookies very easily, using only 5 ingredients, including a boxed spice cake mix as a shortcut!

If you’re looking for a delicious cookie that is absolutely EASY to make, keep reading! This recipe today, for cinnamon spice crinkle cookies couldn’t be any easier, and wow, are they good!

The cookie dough is made by mixing 4 ingredients, which takes only a couple of minutes. Once the cookie dough is mixed, it is refrigerated for one hour, then shaped into balls, coated in powdered sugar and baked!

Other than waiting for the dough to chill for an hour (paint the house or crochet a scarf… ha ha), there is nothing hard at all involved in making these cinnamon spiced cookies! Here’s how to make them:

Scroll Down For A Printable Recipe Card At The Bottom Of The Pge

Prepare The Batter For The Crinkle Cookies

Place the cake mix, eggs, cinnamon, and oil in a large mixing bowl. Use an electric mixer and mix, until the ingredients are fully combined.

Ingredients for the cookies are mixed together in a large bowl.

Once the dough is made for the crinkle cookies, it needs to be well chilled. Cover the bowl and place it in the refrigerator for one hour. Don’t skip this step! This refrigeration time is necessary to firm up the batter, so that it can be shaped into dough balls easier.

After mixing the dough, it is refrigerated for one hour.

When the dough is fully chilled, preheat your oven to 350°F. You will also want to line two large cookie sheets with parchment paper. Okay- now it’s time to shape the cookies!

Roll The Cinnamon Spice Crinkle Cookies Into Balls

Measure out the powdered sugar into a small bowl. This will be used to coat the cookie dough balls, before they are baked.

To form the cookies, place a small Tablespoon of dough into the palm of your hand. Roll the dough between your palms until it forms a ball. NOTE: As you work, the dough will begin to warm up a bit. Your hands will get a bit messy (as you can see in the 2nd photo below!). No biggie!

Drop the balls of cookie dough (a couple at a time) into the powdered sugar. Turn them, to fully coat on all sides with the powdered sugar. TIP: The important thing is to not make the cookies too big, AND to get them coated very well in the powdered sugar.

The chilled dough is shaped into balls and coated in powdered sugar.Dough is shaped into balls in the palm of your hands, leaving them a bit messy!

Time To Bake The Cinnamon Spice Crinkle Cookies!
Place the coated cinnamon spice crinkle cookies onto the parchment paper-lined baking sheets. Leave about 2″ of space between each cookie, because they will spread as they bake!

Bake the cookies at 350° F. for 7-8 minutes, or until done. Mine usually take about 8 minutes, but check them around 7 minutes, since oven temps can vary.

The cinnamon spice crinkle cookies are ready to bake.

When done, remove the baking sheets from the oven, and let the cookies rest for about a minute, then transfer them with a spatula to a wire rack. Once they have cooled completely, they are ready to eat!

Once baked, the crinkle cookies are cracked on the tops.

I love the look of these yummy cookies! Nice and crackled looking on the top, and soft and wonderfully cinnamon-spice flavored on the inside! The cookies are perfect to enjoy any time of the year! The warm cinnamon and spices flavoring the cookies are especially perfect for the Fall season. YUM!

A small plate with several of the cookies on it, ready to eat.Here is a close up of the inside of one of the cinnamon spice crinkle cookies.

I really hope you will give this recipe for delicious cinnamon spice crinkle cookies a try! They taste REALLY good, and honestly are a cinch to make! Have a wonderful day, and thank you for visiting. I hope you will come back soon for more family-friendly recipes. Enjoy the cookies! 

Looking For More COOKIE Recipes?

You can find ALL of my recipes in the Recipe Index, located at the top of the page. I have quite a few delicious cookie recipes, including:

Interested In More Recipes?

Thank you for visiting this website. I appreciate you using some of your valuable time to do soIf you’re interested, I publish a newsletter 2 times per month (1st and 15th) with all the latest recipes, and other fun info. I would be honored to have you join our growing list of subscribers, so you never miss a great recipe!
There is a Newsletter subscription box on the top right side (or bottom) of each blog post, depending on the device you use, where you can easily submit your e-mail address (only) to be included in my mailing list.

You Can Also Find Me On Social Media:
Facebook page: The Grateful Girl Cooks!
Pinterest: The Grateful Girl Cooks!
Instagram: jbatthegratefulgirlcooks

Author's signature

Original recipe source: Heidi, at: thefrugalgirls.com/2018/10/cinnamon-crinkle-cookies-recipe.html

0 from 0 votes
Cinnamon Spice Crinkle Cookies
Prep Time
15 mins
Cook Time
7 mins
Time Included For Chilling Dough (inactive)
1 hr
Total Time
1 hr 22 mins
 

Make 3 dozen, super yummy Cinnamon Spice Crinkle Cookies very easily, using only 5 ingredients, including a boxed spice cake mix as a shortcut!

Category: Dessert
Cuisine: American
Keyword: cinnamon spice crinkle cookies, crinkle cookies
Servings: 36 cookies
Calories Per Serving: 103 kcal
Author: JB @ The Grateful Girl Cooks!
Ingredients
  • 1 box Betty Crocker Spice Cake Mix (15.25 ounce box)
  • 2 large eggs
  • 2 teaspoons ground cinnamon
  • ½ cup vegetable oil (or canola)
  • ¾ cup powdered sugar
Instructions
  1. Place cake mix, eggs, cinnamon, and oil in a large mixing bowl. Mix well, (with electric beaters or by hand) until ingredients are fully combined. Cover bowl and place in refrigerator for one hour. Don't skip the refrigeration step, because you want the dough really cold before you shape the dough balls.

  2. When the dough is fully chilled, preheat oven to 350°F, and line two large cookie sheets with parchment paper.

  3. Measure powdered sugar into a small bowl. To form cookies, place a small Tablespoon of dough into the palm of your hand. Roll dough between your palms until it forms a ball. Drop the balls of cookie dough (a couple at a time) into the powdered sugar. Turn them, to fully coat on all sides with powdered sugar. TIP: The important thing is to not make the cookies too big, AND to get them coated very well in powdered sugar.

  4. Place coated dough balls on parchment paper-lined baking sheets. Leave 2" of space between each cookie. Bake at 350° F. for 7-8 minutes, or until done. Remove from oven, and let cookies rest for a minute, then transfer them with a spatula to a wire rack. Once cooled completely, they are ready to eat! Enjoy!

Nutrition Facts
Cinnamon Spice Crinkle Cookies
Amount Per Serving (1 cookie)
Calories 103 Calories from Fat 45
% Daily Value*
Fat 5g8%
Saturated Fat 3g19%
Cholesterol 12mg4%
Sodium 99mg4%
Potassium 53mg2%
Carbohydrates 13g4%
Fiber 1g4%
Sugar 9g10%
Protein 1g2%
Vitamin A 17IU0%
Vitamin C 1mg1%
Calcium 16mg2%
Iron 1mg6%
* Percent Daily Values are based on a 2000 calorie diet.

Here’s one more to pin on your Pinterest boards!Make 3 dozen, super yummy Cinnamon Spice Crinkle Cookies very easily, using only 5 ingredients, including a boxed spice cake mix as a shortcut!

Cranberry Orange Cake

You’ll love the flavors in this easy, delicious, glazed cranberry orange cake, bursting with fresh cranberries and citrus zest (makes 12 servings)!
You'll love the flavors in this easy, delicious, glazed cranberry orange cake, bursting with fresh cranberries and citrus zest (makes 12 servings)!

If you enjoy the flavor combination of cranberries and oranges, then you will most likely LOVE this delicious cranberry orange cake! It is really easy to make, and I am confident you will enjoy it, like we did! I tweaked the original recipe just a smidge, and added a simple glaze, which enhanced the cake wonderfully!

I love this time of year, when fresh cranberries appear in the grocery stores. It is always fun to experiment with new recipes using cranberries (and oranges) each year.

In the past I’ve used this combo to make scones, breadbagels, cookies, muffins, salads, and even homemade cranberry orange sauce for our Thanksgiving table! So much flavor!

This recipe for cranberry orange cake is wonderful! It was so good I KNEW it would be dangerous to have around the kitchen, because I “might” be tempted to shove the entire cake into my mouth.

To avoid that little problem, I wrapped up and delivered plates with a couple pieces on them to 4 of our neighbors, so they could enjoy it, too! Here’s how to make it:

Scroll Down For A Printable Recipe Card At The Bottom Of The Page

Make The Batter For The Cranberry Orange Cake

Before you start on the cake batter, preheat your oven to 350° F. Since it doesn’t take too long until the batter is ready to bake, you will want to have your oven ready to go! 

Generously grease or spray a 9×9″  or 8×10″ baking pan (bottom and sides). You can use butter or a non-stick baking spray to do this.

Place room temperature butter, orange zest (finely grated peel), and 1 cup of the granulated sugar into a large mixing bowl (or a stand mixer bowl). Cream the ingredients together with a mixer, until they become fully blended and fluffy (a couple minutes).

Add the egg and vanilla extract to the butter mixture, and beat until they have been fully incorporated.

Butter, sugar and orange zest are creamed together for cake batter mixture.An egg and vanilla are added to creamed cake batter mixture.

Mixing The DRY Ingredients

Measure 2 Tablespoons of all purpose flour out into a small dish and set aside. You will use this later. Place the remaining flour, salt and baking powder in a large bowl, and whisk the ingredients together, to combine.

Add the flour mixture and the buttermilk to the butter mixture, a little at a time, alternating between the flour and buttermilk, and mixing on low speed after each addition.

Flour, salt, and baking powder are whisked together for cake batter mix.The cake batter is now creamed together and is ready for cranberries to be added.

Remember the 2 Tablespoons of flour you previously set aside? Okay… now you need to add the fresh cranberries to the flour. Gently stir until the cranberries are completely coated with flour! Doing this helps prevent the cranberries from “bleeding color” into the cake batter!

Once the cranberries are coated in flour, add them to the cranberry orange cake batter. Gently fold the floured cranberries into the batter.

The batter for the cranberry orange cake is ready for the baking dish!

Baking The Cranberry Orange Cake

Evenly spread the cake batter into your prepared baking dish. Sprinkle the batter with the remaining Tablespoon of granulated sugar.  Bake the cranberry orange cake at 350° F. for 35-40 minutes, then test for done-ness.

When done, the cake should be golden brown on top. Test for done-ness by inserting a toothpick into the middle of the cake. If it comes out clean, the cake is done.

If cake needs a little more time (oven temps. vary), put it back in the oven and check on it every 4-5 minutes, until done. Mine ended up taking 40 minutes to be done, but yours may take a few minutes more or less, depending on the heat of your oven. Just keep an eye on it from the 35 minute on.

Once done, remove the cake from the oven, and transfer the baking dish to a wire rack. While it is still hot, use a toothpick to poke holes all over the top of the cake.

Cake in pan, before baking and after baking.

Making A Glaze For The Cranberry Orange Cake Is A Cinch!

While the cake is baking, make the glaze. Place powdered sugar into a small bowl, and add 1 teaspoon orange juice. Stir well. 

Continue to add a few drops of water at a time to the glaze, stirring after each addition, until the glaze is thin enough to drizzle over the cake, but not too thick OR too thin. You want it to drizzle in a thin stream.

Use a spoon and drizzle the glaze over the entire surface of the cake while it is still hot. All the glaze will run over the cake and into all of those holes you poked with the toothpick! Once you’ve drizzled all of the glaze evenly over the top, let the cranberry orange cake cool completely!

A simple powdered sugar glaze is mixed to drizzle on the finished cake.An up close photo of the glazed cranberry orange cake.

The glaze will firm up as the cake cools, and once the cake has cooled completely, it is ready to serve! Cut the cranberry orange cake into 12 small pieces, serve and enjoy this delicious treat!

See all those colorful cranberries peeking out everywhere in this cake? Yum. Lots of FLAVOR, and the finished cake is nice and moist!

Glazed cake is cut into 12 pieces, and served!A piece of the glazed cranberry orange cake on a white plate, with orange slice.

Sure do hope you will try this yummy cake, and trust you will enjoy it as much as we did! Have a fantastic day, and please come back again soon for more recipes!

Looking For More CAKE Recipes?

You can find all of my cake recipes in the Recipe Index, located at the top of the page. This variety of cake recipes includes (among others):

Want More Recipes? Get My FREE Newsletter!

I publish a newsletter 2 times per month (1st and 15th) with lots of recipes, tips, etc..
Would you like to join our growing list of subscribers?

There is a Newsletter subscription box on the top right (or bottom) of each blog post, depending on the device you use.
You can submit your e-mail address there, to be added to my mailing list.

Find Me On Social Media:

Facebook page: The Grateful Girl Cooks!
Pinterest:
The Grateful Girl Cooks!
Instagram:
jbatthegratefulgirlcooks

Author's signature

Original source for cake (no icing): https://alexandracooks.com/2011/12/16/cranberry-buttermilk-breakfast-cake/

↓↓ PRINTABLE RECIPE BELOW ↓↓

0 from 0 votes
Cranberry Orange Cake
Prep Time
10 mins
Cook Time
45 mins
Total Time
55 mins
 

You'll love the flavors in this easy, delicious, glazed cranberry orange cake, bursting with fresh cranberries and citrus zest (makes 12 servings)!

Category: Dessert
Cuisine: American
Keyword: cranberry orange cake
Servings: 12
Calories Per Serving: 290 kcal
Author: JB @ The Grateful Girl Cooks!
Ingredients
For Cake Batter
  • ½ cup butter (1 stick) , room temperature
  • 1 orange (ZEST ONLY) (reserve juice for glaze)
  • 1 cup granulated sugar (+ 1 Tablespoon set aside for later)
  • 1 large egg , room temperature
  • 1 teaspoon vanilla extract
  • 2 cups all purpose flour , divided use
  • 2 teaspoon baking powder
  • 1 teaspoon salt
  • 2 cups fresh cranberries
  • ½ cup buttermilk
For Glaze
  • cups powdered sugar
  • 1 teaspoon orange juice (can substitute water)
  • water (as needed)
Instructions
  1. Preheat oven to 350° F. Generously grease or spray a 9x9 " baking pan (bottom and sides). Use butter or non-stick baking spray.

  2. Place butter, orange zest (finely grated peel), and 1 cup of granulated sugar into a large mixing bowl (or a stand mixer bowl). Cream ingredients together with electric mixer, until fully blended and fluffy (2-3 minutes). Add egg and vanilla extract to the mixture; beat until fully incorporated.

  3. Measure 2 Tablespoons of all purpose flour into a small dish and set aside (you will use this later). Place remaining flour, salt and baking powder in a large bowl, and whisk together, to combine. Add flour mixture and buttermilk to the butter mixture, a little at a time, alternating between flour and buttermilk, mixing on low speed after each addition.

  4. In a small bowl, add fresh cranberries to reserved 2 Tablespoons of flour. Gently stir until cranberries are completely coated with flour. Doing this prevents cranberries from "bleeding color" into cake batter! Once coated, gently fold them into the cake batter. Evenly spread cake batter into prepared baking dish. Sprinkle the batter with remaining Tablespoon of granulated sugar. 

  5. Bake cake at 350° F. for 35-40 minutes, then test for done-ness. When done, cake should be golden brown on top. Test for done-ness by inserting a toothpick into middle of the cake. If it comes out clean, cake is done. If cake needs more time (oven temps. vary), put it back in the oven and check on it every 4-5 minutes, until done. Once done, remove cake from oven, and transfer dish to a wire rack. While still hot, use a toothpick to poke holes all over the top of the cake.

  6. Place powdered sugar into a small bowl. Add 1 teaspoon orange juice. Stir well.  Continue to add a few drops of water at a time to this glaze, stirring after each addition, until glaze is thin enough to drizzle over the cake. You want it to drizzle in a thin stream. Use a spoon to drizzle glaze over the top of the cake while it is still hot. The glaze will run over the cake and into all of the holes you poked with the toothpick! Once you've drizzled all of the glaze evenly over the top, let the cranberry orange cake cool completely! Once cooled completely (and glaze has firmed up), slice cake into 12 pieces, serve and enjoy!

Nutrition Facts
Cranberry Orange Cake
Amount Per Serving (1 g)
Calories 290 Calories from Fat 81
% Daily Value*
Fat 9g14%
Saturated Fat 5g31%
Cholesterol 39mg13%
Sodium 280mg12%
Potassium 124mg4%
Carbohydrates 51g17%
Fiber 1g4%
Sugar 33g37%
Protein 3g6%
Vitamin A 293IU6%
Vitamin C 4mg5%
Calcium 51mg5%
Iron 1mg6%
* Percent Daily Values are based on a 2000 calorie diet.

Here’s one more to pin on your Pinterest boards!You'll love the flavors in this easy, delicious, glazed cranberry orange cake, bursting with fresh cranberries and citrus zest (makes 12 servings)!


Coconut Chocolate Chip Pie

Coconut Chocolate Chip Pie is a tasty, crust-less, easy dessert to make! Mix ingredients in blender, pour into pie pan, add chocolate chips, & bake!

Well, if you like desserts that don’t take a lot of prep work, this is the pie for you! With a MINIMAL amount of prep time (5 minutes or less), this coconut chocolate chip pie will surprise you with just how EASY it is to make!

I found this recipe in one of my old (from 1998) Taste of Home magazines that I keep in my home office. Occasionally I browse through my old cooking magazines for new recipe ideas, and when I saw this old recipe for a quickly (made in a blender) coconut pie, I knew I wanted to try it.

Personally I like coconut and chocolate together, so I slightly tweaked the original recipe to include chocolate chips, and before I knew it, this pie was made and baked! Even if you don’t know how to cook, YOU can make this tasty pie!

Scroll Down For A Printable Recipe Card At The Bottom Of The Page

Blend The Coconut Pie Filling

Place milk, eggs, sugar, flour, butter, vanilla and salt into a blender. Cover the blender, and process for about 15 seconds, Scrape the sides down of the blender, put the lid back on, and blend for another 15 seconds.

Ingredients for the pie are mixed in a blender.

Add the shredded coconut to the blended pie filling. Put the lid on the blender and blend this for only 5 seconds. Yep… only 5 seconds! See how EASY this is?

Spray a 9″ or 10″ pie pan with non-stick baking spray (or grease bottom and sides with vegetable shortening or butter. Once done, pour all of the blended coconut pie filling into the pie pan.

Shredded coconut is added to pie filling ingredients in blender.Coconut pie filling is poured into a greased pie pan.

Sprinkle the chocolate chips around the top of the pie, and then push them (with the back of a spoon or a spatula) until they are submerged below the surface.

Chocolate chips are added to the pie filling, and then submerged.

Time To Bake The Coconut Chocolate Chip Pie!

Once you have “submerged” the chocolate chips into the pie filling, the pie is ready to bake! Carefully place the coconut chocolate chip pie on the middle rack of a preheated 350° F. oven.

Coconut pie in pie pan is ready for the oven.

Bake the pie at 350° F. oven for 50-55 minutes (mine took 55 minutes). When done, the pie will be golden brown, and a knife inserted in the top/middle of the pie will come out clean. Remove the pie from the oven and transfer the pan to a wire rack to cool.

The pie will puff up considerably during the baking process. As you can see in the photo below, it rises well above the rim. The coconut chocolate chip pie will flatten out as the filling cools, and the air inside dissipates.

The coconut chocolate chip pie has finished baking and cools on wire rack.

A coconut chocolate chip pie cools in the pie pan, on a wire rack.

Slice, Serve, and Enjoy Coconut Chocolate Chip Pie

Let the coconut pie cool down for about 15-20 minutes before slicing, if you will be eating it while warm. The pie slices very easily and cleanly! This coconut pie can be served while still warm, or you can wait until it has completely cooled off completely, before serving.

Slice the pie into 8 pieces, serve, and enjoy! Any leftovers may be stored (covered) in the refrigerator, for 3-4 days.

A look at the inside of a sliced into coconut pie in the pan.

Even without an “official” crust, you can see that a slice of this “crust-less” coconut pie holds its shape well! Now all that is left to do is eat it warm or at room temperature!

A slice of the coconut chocolate chip pie is served on a white plate.

I really hope you enjoy this easy to make coconut pie! It truly could not be any easier to make, which is pretty handy, when you need a quick dessert! Have a great day, friends.

Looking For More PIE Recipes?

You can find all of my pie recipes in the Recipe Index, located at the top of the page. A few favorite pie recipes you may enjoy include:

Interested In More Recipes?

Thank you for visiting this website. I appreciate you using some of your valuable time to do soIf you’re interested, I publish a newsletter 2 times per month (1st and 15th) with all the latest recipes, and other fun info. I would be honored to have you join our growing list of subscribers, so you never miss a great recipe!
There is a Newsletter subscription box on the top right side (or bottom) of each blog post, depending on the device you use, where you can easily submit your e-mail address (only) to be included in my mailing list.

You Can Also Find Me On Social Media:
Facebook page: The Grateful Girl Cooks!
Pinterest: The Grateful Girl Cooks!
Instagram: jbatthegratefulgirlcooks

Author's signature

Recipe Adapted From: Taste of Home Magazine, published by Reiman Publications, December/January 1998 issue (Volume 5, No.6), page 13

0 from 0 votes
Coconut Chocolate Chip Pie
Prep Time
5 mins
Cook Time
50 mins
Total Time
55 mins
 

Coconut Chocolate Chip Pie is a tasty, crust-less, easy dessert to make! Mix ingredients in blender, pour into pie pan, add chocolate chips, & bake!

Category: Dessert
Cuisine: American
Keyword: coconut chocolate chip pie
Servings: 8
Calories Per Serving: 367.02 kcal
Author: JB @ The Grateful Girl Cooks!
Ingredients
  • 2 cups milk
  • 4 large eggs
  • 1 cup granulated sugar
  • ½ cup all purpose flour
  • 6 Tablespoons butter
  • 1 teaspoon vanilla extract
  • ½ teaspoon salt
  • 1 cup shredded coconut
  • cup semi-sweet chocolate chips
Instructions
  1. Preheat oven to 350° F. Spray bottom and sides of a 9 or 10" pie pan with non-stick cooking spray (or grease pan with vegetable shortening)

  2. Place milk, eggs, sugar, flour, butter, vanilla and salt into a blender. Cover blender, and process for 15 seconds, Scrape sides of the blender down, put lid back on, and blend for another 15 seconds. Add shredded coconut to the blended pie filling. Put id on blender and blend this for only 5 seconds. Pour the blended coconut pie filling into the greased pie pan. Sprinkle chocolate chips around the top of the pie, and then push them (with the back of a spoon or a spatula) until they are submerged below surface.

  3. Carefully place pie on the middle rack of preheated oven. Bake at 350° F. for 50-55 minutes. When done, pie will be golden brown, and knife inserted in the top/middle of the pie will come out clean. Remove from oven, and transfer pan to a wire rack to cool. Let pie cool for 15-20 minutes before slicing. Pie can be served warm, or at room temperature. Enjoy! *Leftovers may be stored (covered) in refrigerator, for 3-4 days.
Nutrition Facts
Coconut Chocolate Chip Pie
Amount Per Serving (1 slice (1/8th of pie))
Calories 367.02 Calories from Fat 169
% Daily Value*
Fat 18.73g29%
Saturated Fat 11.86g74%
Cholesterol 131.44mg44%
Sodium 317.21mg14%
Potassium 216.42mg6%
Carbohydrates 43.47g14%
Fiber 1.32g6%
Sugar 35.82g40%
Protein 7.23g14%
Vitamin A 531.13IU11%
Calcium 98.48mg10%
Iron 1.55mg9%
* Percent Daily Values are based on a 2000 calorie diet.

Here’s one more to pin on your Pinterest boards!Coconut Chocolate Chip Pie is a tasty, crust-less, easy dessert to make! Mix ingredients in blender, pour into pie pan, add chocolate chips, & bake!

How To Can Apple Pie Filling

Learn how to can apple pie filling for your pantry! Once canned, having homemade pie filling already made for pies, cobblers, etc. is a real time saver!
Learn how to can apple pie filling for your pantry! Once canned, having homemade pie filling already made for pies, cobblers, etc. is a time saver!

Okay, lets be honest. Making canned apple pie filling takes some time to pull off, but can I remind you that the results will be worth it, in time saved down the road? You will be able to pull a jar right out of your pantry and whip up a dessert in much less time! YEEHAW!

This “recipe” came straight out of my treasured canning book called “Ball Complete Book Of Home Preserving”, and it’s a real keeper! Once made, you can use this apple pie filling for pies, cobblers or crisps, turnovers, or even as a topping for PANCAKES!

The recipe (as written below in the recipe card) will give you a yield of 3 quart jars (plus a pint) OR it will give you about 7 smaller pint jars of apple pie filling. **Please note that I DOUBLED the recipe, and made 7 QUART sized jars of pie filling (as shown in photos)!

Scroll Down for A Printable Recipe Card At The bottom Of The Page

Prepare Canning Equipment

Before canning apple pie filling, prepare quart (or pint) size canning jars, flat lids and screw bands, as well as a water bath canner, according to the manufacturer instructions, and USDA safe canning guidelines.

Prepare The Apples

There are several wonderful varieties of apples that are great for pie filling. A few that come to mind are Granny Smith, Honeycrisp, Jonathan, and my favorite, Gravensteins (shown below). I love to go pick them at local U-Pick Farms! It takes quite a few apples to make 7 quarts, as you can imagine! Basically, each quart sized jar will require approximately 3 pounds of apples!

Picked some Gravenstein apples to use in many recipes.

Peel, remove the core, and slice the apples. Treat the apples with lemon juice, fruit fresh or follow my old-fashioned tip here, to keep the apples from darkening once exposed to air.

It will take about 3-40 minutes to peel, slice and treat all those apples. My suggestion is to get someone to help you, if possible! This is a GREAT way to get a friend or other family member involved, in order to save time! This is especially helpful if doubling the recipe!

Blanch The Apple Slices

You will need to blanch the apple slices (once they’re peeled , sliced and treated). Bring a large pot of water to a boil. Add 6 cups of sliced apples at a time to the boiling water. Cook for 1 minute, then remove and keep them warm while you finish blanching all the apples.

Apples are peeled, cored, sliced and treated to prevent browning.

Prepare The Pie Filling

A lot of folks thicken pie fillings with flour or cornstarch. That’s fine for making a pie. However, when CANNING apple pie filling, these ingredients don’t hold up too well in storage, so a product called ClearJel (for cooking, not instant) is typically used. ClearJel is a type of cooking starch (approved for home canning) that can be ordered online from many retailers.

To make the pie filling, measure granulated sugar, ClearJel, water, apple juice, cinnamon and nutmeg into a LARGE stainless steel saucepan. Bring this to a boil on medium-high heat. Stir constantly, and continue to cook until it starts to bubble and thickens. Add the lemon juice, and cook for 1 more minute, continuing to stir constantly! Take off heat when done.

The thickener for the apple pie filling is cooked until thickened.

Add The Apple Slices To Pie Filling

Transfer the warm (drained) apple slices to this thickened pie filling in the large saucepan, and fold them into the mixture. Heat the apple pie filling just until heated through, before placing the filling into your hot, prepared jars.

Time To Can Apple Pie Filling!

Once heated through, ladle the hot pie filling into prepared canning jars, being sure to leave 1 inch of headspace in each jar. Use a plastic utensil to remove the air bubbles from the jars, making adjustments to the headspace if necessary, by adding or removing filling.

Wipe the jar rims clean with a wet cloth or paper towel, to help ensure a good seal. Place flat lid centered on top, and add the jar ring. Screw the band on until it is fingertip tight.

How To Can Apple Pie Filling

Place the hot jars on an elevated rack and lower into simmering water in canner. Make sure that the water completely covers the tops of the jars (by about an inch). Place lid on canner. Bring the water to a gentle rolling boil, and process the jars for 25 minutes AFTER it begins boiling. The processing time is the same for both pint and quart sized jars.

When you can apple pie filling, the jars must be processed in a water bath canner.

When processing time is finished, turn off heat, and carefully remove lid from the pan. Wait for 5-10 minutes, and then remove the HOT jars from the pan, using canning tongs. Transfer jars to a dish towel on counter. IMPORTANT NOTE: Don’t place hot jars directly onto your counter top, as temperature variances (hot jars vs. cold counter top) might cause jars to crack.

Four jars of apple pie filling resting on dish towel after processing.

Let The Jars Cool Completely

Let the jars of apple pie filling cool completely (overnight or 12 hours) without disturbing. Once completely cooled, check to make sure jars sealed. The jar lids should have NO GIVE in them if properly sealed. If you find one has not sealed properly, it is not safe to store. Refrigerate it, and use it within a week.

Wipe the jars clean with a wet cloth, then label (with date canned), and place them in your pantry for long term storage. There you go… you just learned how to can apple pie filling!

The jars of apple pie filling are cleaned, seal is checked, and are labeled for storage.

Even though it is a labor-intensive process to make pie filling, the benefit comes later! It’s very convenient to make a pie, cobbler or dessert requiring apple pie filling by grabbing an “already made” jar right out of the pantry!

Looking For More CANNING Recipes?

You can find all of my canning recipes in the Recipe Index, located at the top of the page. I have recipes for a variety of foods and jams. They include:

Interested In More Recipes?

Thank you for visiting this website. I appreciate you using some of your valuable time to do soIf you’re interested, I publish a newsletter 2 times per month (1st and 15th) with all the latest recipes, and other fun info. I would be honored to have you join our growing list of subscribers, so you never miss a great recipe!
There is a Newsletter subscription box on the top right side (or bottom) of each blog post, depending on the device you use, where you can easily submit your e-mail address (only) to be included in my mailing list.

You Can Also Find Me On Social Media:
Facebook page: The Grateful Girl Cooks!
Pinterest: The Grateful Girl Cooks!
Instagram: jbatthegratefulgirlcooks

Author's signature

Original recipe source: my beloved “Ball Complete book Of Home Preserving”, published 2006, The Jarden Corporation, page 170.

0 from 0 votes
How To Can Apple Pie Filling
Prep Time
45 mins
Cook Time
25 mins
Total Time
1 hr 10 mins
 

Learn how to can apple pie filling for your pantry! Once canned, having homemade pie filling already made for pies, cobblers, etc. is a time saver!

Category: Canning and Preserving, Dessert
Cuisine: American
Keyword: can apple pie filling
Servings: 7 pints (or 3 qts + 1 pint)
Calories Per Serving: 462 kcal
Author: JB @ The Grateful Girl Cooks!
Ingredients
  • 12 cups apples , peeled, cored, sliced, treated to prevent browning
  • cups granulated sugar
  • ¾ cup ClearJel
  • teaspoons ground cinnamon
  • ½ teaspoon ground nutmeg
  • cups cold water
  • cups unsweetened apple juice
  • ½ cup lemon juice
Instructions
  1. Prepare quart (or pint) size canning jars, flat lids and screw bands, and water bath canner, according to the manufacturer instructions, and USDA safe canning guidelines.

  2. Peel, remove the core, and slice the apples. Treat the apples with lemon juice (not from the ingredient list), fruit fresh or another method, to keep the apples from darkening once exposed to air. Once they're peeled , sliced and treated, blanch the slices . Bring a large pot of water to a boil. Add 6 cups of sliced apples at a time to the boiling water. Cook for 1 minute, then remove and keep them warm while you finish blanching all the apples.

  3. To make the pie filling, measure granulated sugar, ClearJel, water, apple juice, cinnamon and nutmeg into a LARGE stainless steel saucepan. Bring this to a boil on medium-high heat. Stir constantly, and continue to cook until it bubbles and thickens. Add ½ cup lemon juice, and cook for 1 more minute, stirring constantly! Take off heat when done. Transfer warm (drained) apple slices into pie filling in large saucepan, and fold them into the mixture. Re-heat filling only until heated through, before placing the filling into hot, prepared jars.

  4. Ladle hot pie filling into prepared canning jars, leaving 1 inch of headspace in each jar. Use a long utensil inserted several times into jars, to remove the air bubbles, making adjustments to the headspace if necessary, by adding or removing filling. Wipe jar rims clean, to help ensure a good seal. Place flat lid on top, and add the jar ring. Screw the band on until it is fingertip tight. Place the hot jars onto an elevated rack and lower rack and jars into simmering water in canner. Make sure the water completely covers the tops of the jars (by about an inch). Place lid on canner.

  5. Bring the water to a gentle rolling boil, and process the jars for 25 minutes AFTER it begins boiling. When processing time is finished, turn off heat. Remove lid from pan. Wait 5-10 minutes, and then remove the VERY HOT jars from the pan, using canning tongs. Transfer jars to a dish towel on counter. IMPORTANT NOTE: Don't place hot jars directly onto your counter top, as temperature variances (boiling hot jars vs. cold counter top) might cause jars to crack. Let the jars of apple pie filling cool completely (overnight or 12 hours) without disturbing.

  6. Once completely cooled, check to make sure jars sealed. The jar lids should have NO GIVE in them if properly sealed. If you find one has not sealed properly, it is not safe to store. Refrigerate it, and use it within a couple weeks. Wipe the jars clean with a wet cloth, then label (with date canned), and place them in your pantry for long term storage. Enjoy!
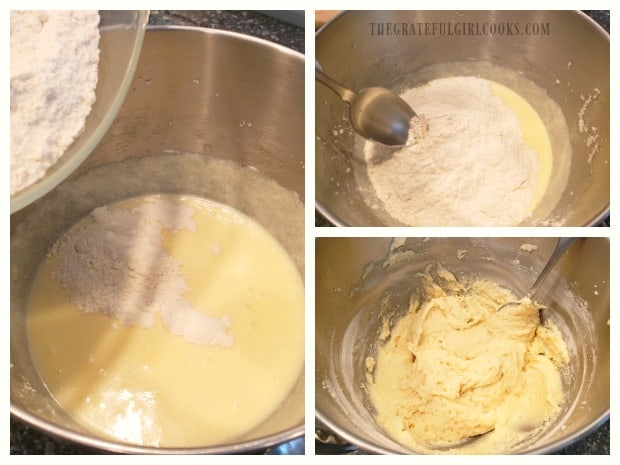
Recipe Notes

NOTE: If treating apples with lemon juice to prevent browning, you will need a couple extra lemons for this purpose.

Nutrition Facts
How To Can Apple Pie Filling
Amount Per Serving (1 g)
Calories 462 Calories from Fat 9
% Daily Value*
Fat 1g2%
Saturated Fat 1g6%
Sodium 9mg0%
Potassium 337mg10%
Carbohydrates 120g40%
Fiber 6g25%
Sugar 110g122%
Protein 1g2%
Vitamin A 116IU2%
Vitamin C 17mg21%
Calcium 25mg3%
Iron 1mg6%
* Percent Daily Values are based on a 2000 calorie diet.

Here’s one more to pin on your Pinterest boards!Learn how to can apple pie filling for your pantry! Once canned, having homemade pie filling already made for pies, cobblers, etc. is a time saver!