Category: Holidays!

Lemon Hazelnut Green Beans

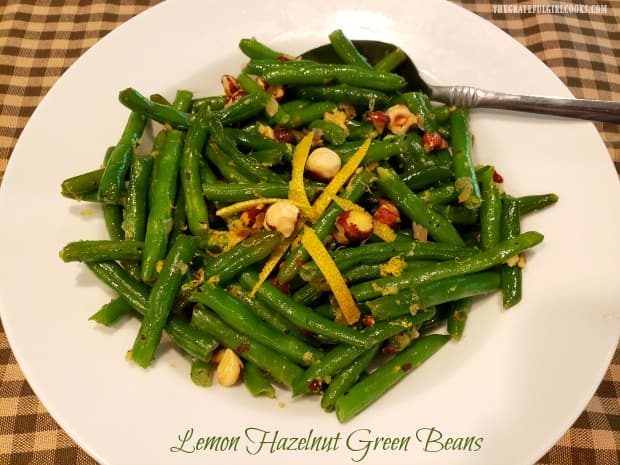
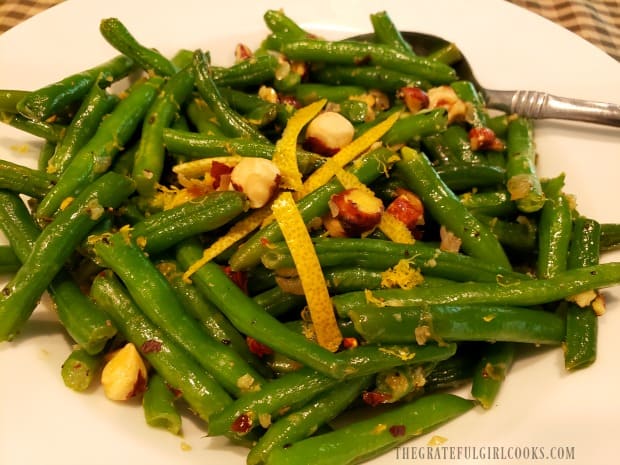
Lemon Hazelnut Green Beans are a delicious, flavor-filled side dish, and are a perfect choice for either a casual meal or a holiday feast!

I’m always looking for different ways to prepare green beans. Each summer I harvest a bumper crop of them in our little backyard raised garden. I can a lot of them, putting aside 15-20 jars each year in our pantry for the coming Fall and Winter. The rest we enjoy in a variety of different recipes as summer progresses.

We eat a LOT of green beans in the summer, and this recipe is one I came up with (after experimenting), and have enjoyed ever since. Lemon hazelnut green beans are a simple side dish, but let me tell you… there’s a LOT of flavor to enjoy in every bite. Freshly grated lemon zest adds a pop of fresh, bright flavor, shallots, garlic and red chili flakes give them a bit of zing, and the hazelnuts give the dish CRUNCH.

Lemon Hazelnut Green Beans are a perfect side for any “average” dinner of beef, chicken, pork or seafood. “These beans plays well with others”, as they say. However, this dish would also be absolutely wonderful served for Thanksgiving, or any other special celebration. Here’s how easy it is to make them:

Scroll Down For A Printable Recipe Card At The Bottom Of The Page

How To Make This Veggie Side Dish

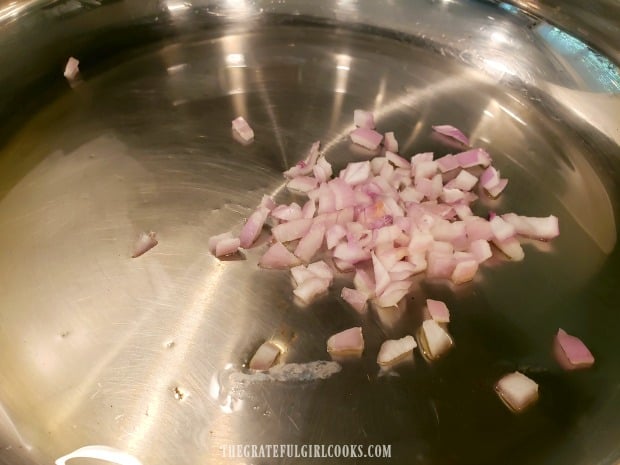
Measure a Tablespoon of extra virgin olive oil into a large skillet, and spread it around to cover the bottom of the skillet. Heat the oil on medium heat. Once hot (but not smoking), add chopped shallots (milder than a red onion). Cook, stirring often for 1-2 minutes.

TIP: If you do not have access to shallots, use a yellow onion as a substitute (same measurement).

Chopped shallots are cooked in hot olive oil in a large skillet.

Cooking The Lemon Hazelnut Green Beans

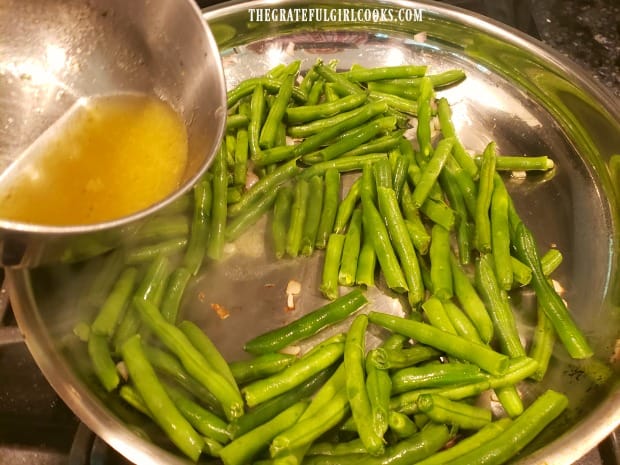
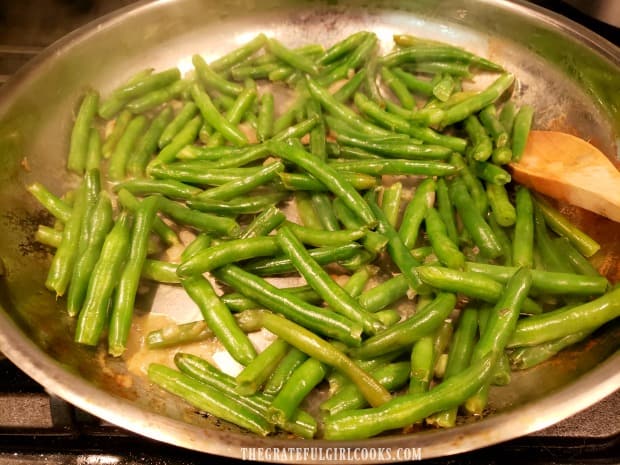
Add the green beans and the vegetable (or chicken) broth to the skillet. The liquid will steam and sizzle when it hits the hot skillet. Stir to combine, and let the green beans cook (uncovered) for approximately 10 minutes. When done, the broth should have dissipated, and the beans should be crisp-tender (not mushy).

NOTE: I recommend using FRESH green beans, without apologies. There’s just something about crisp FRESH green beans for this dish, versus using frozen beans. Just my humble opinion…

Green beans and vegetable (or chicken) broth are added to the skillet.The green beans are cooked about 10 minutes until broth has dissipated.

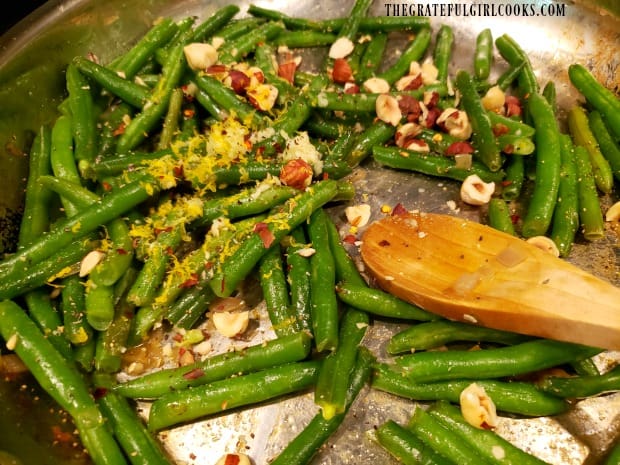
Immediately add minced garlic, red chili flakes, lemon zest, and roughly chopped roasted hazelnuts to the skillet. Give everything a good stir to incorporate all the ingredients.

TIP: The hazelnuts give the dish a nice crunch, which we really love. Remember- you can always substitute sliced, roasted almonds if hazelnuts are difficult to find in your area. They will add a wonderful crunch, as well!

Cook for about one minute, stirring OFTEN (so garlic doesn’t burn), until the lemon hazelnut green beans are fully heated through. Season to taste with salt and pepper, if desired. Remove the skillet from the heat source, and transfer green beans to a serving dish.

Minced garlic, chili flakes, lemon zest and hazelnuts are added to green beans.

Time To Serve The Lemon Hazelnut Green Beans

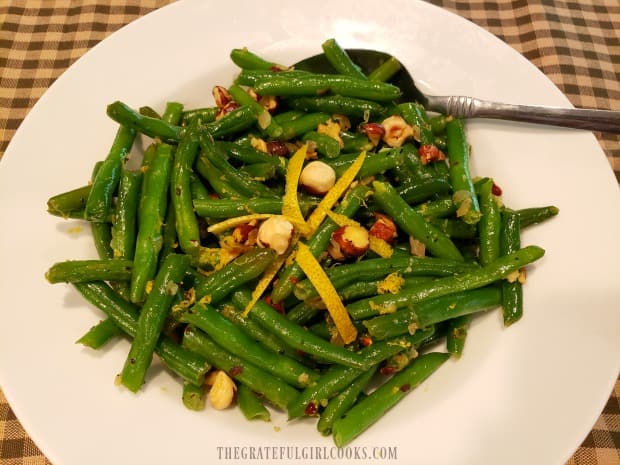
As soon as you remove the lemon hazelnut green beans from the heat, it is time to serve them while HOT! Transfer everything to a serving bowl, and dish it up.** If desired, a simple garnish of a few roasted hazelnuts and some pretty thinly sliced lemon peel looks nice (but is totally optional).

Lemon Hazelnut Green Beans are garnished and ready to serve.

The green beans have so much flavor, I’m confident you will enjoy them. The recipe makes enough for 4 side servings, but can be EASILY doubled! The lemon hazelnut green beans pair wonderfully with chicken, beef, pork OR fish, so it’s a versatile side dish for all occasions.

A look at the Lemon Hazelnut Green Beans, up close in a white bowl.

I really hope you enjoy this easy, but absolutely DELICIOUS veggie dish. Easy to prepare, and packed with bright flavors, you’re gonna love them. Have a great day, and come back for a visit again soon.

Looking For More VEGGIE SIDE DISH Recipes?

You can find ALL of my side dish recipes in the Recipe Index, located at the top of the page. I have quite a few delicious veggie side dishes, including:

Interested In More Recipes?

Thank you for visiting this website. I appreciate you using some of your valuable time to do soIf you’re interested, I publish a newsletter 2 times per month (1st and 15th) with all the latest recipes, and other fun info. I would be honored to have you join our growing list of subscribers, so you never miss a great recipe!
There is a Newsletter subscription box on the top right side (or bottom) of each blog post, depending on the device you use, where you can easily submit your e-mail address (only) to be included in my mailing list.

You Can Also Find Me On Social Media:

Facebook page: The Grateful Girl Cooks!
Pinterest:
The Grateful Girl Cooks!
Instagram:
jbatthegratefulgirlcooks

Author's signature

0 from 0 votes
Lemon Hazelnut Green Beans
Prep Time
12 mins
Cook Time
13 mins
Total Time
25 mins
 

Lemon Hazelnut Green Beans are a delicious, flavor-filled side dish, and are a perfect choice for either a casual meal or a holiday feast!

Category: Side Dish, Vegetable Dish
Cuisine: American
Keyword: lemon hazelnut green beans
Servings: 4
Calories Per Serving: 120 kcal
Author: JB @ The Grateful Girl Cooks!
Ingredients
  • 1 Tablespoon extra virgin olive oil
  • 2 Tablespoons chopped shallots
  • 1 pound green beans , trimmed/snapped or cut into 2" pieces
  • ½ cup vegetable OR chicken broth
  • 1 large clove garlic , minced
  • ½ large lemon (ZEST OF) , zest only
  • ¼ teaspoon red chili flakes
  • 3 Tablespoons roughly chopped roasted hazelnuts
  • salt & black pepper , to season to taste
Instructions
  1. Measure olive oil into a large skillet, and spread around to cover bottom of skillet. Heat on medium heat. Once hot (but not smoking), add chopped shallots. Cook, stirring often for 1-2 minutes.

  2. Add green beans and broth to skillet. Stir to combine; cook (uncovered) for 9-10 minutes. When done, broth should have dissipated, and beans should be crisp-tender.

  3. Immediately add garlic, red chili flakes, lemon zest, and hazelnuts to skillet. Stir, to combine. Cook for one minute, stirring OFTEN (so garlic doesn't burn), until beans are heated through. Season to taste with salt and pepper, if desired. Garnish with additional hazelnuts and thinly sliced lemon peel, if desired. Serve immediately.

    TIP: Substitute sliced, roasted almonds if hazelnuts are difficult to find in your area. Enjoy!

Nutrition Facts
Lemon Hazelnut Green Beans
Amount Per Serving (1 g)
Calories 120 Calories from Fat 72
% Daily Value*
Fat 8g12%
Saturated Fat 1g6%
Sodium 10mg0%
Potassium 307mg9%
Carbohydrates 11g4%
Fiber 4g17%
Sugar 5g6%
Protein 4g8%
Vitamin A 820IU16%
Vitamin C 16mg19%
Calcium 51mg5%
Iron 2mg11%
* Percent Daily Values are based on a 2000 calorie diet.

Here’s one more to pin on your Pinterest boards!

Lemon Hazelnut Green Beans are a delicious, flavor-filled side dish, and are a perfect choice for either a casual meal or a holiday feast!

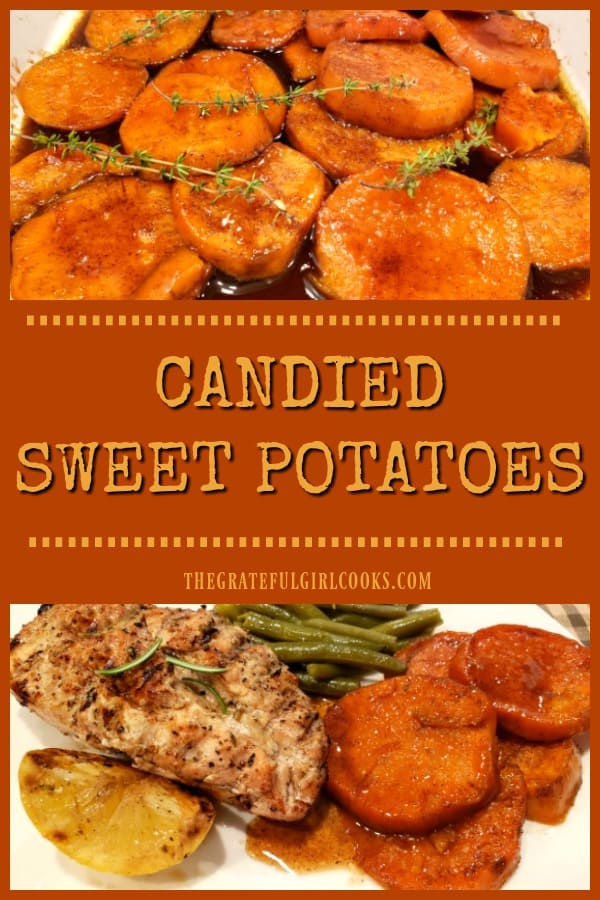
Candied Sweet Potatoes

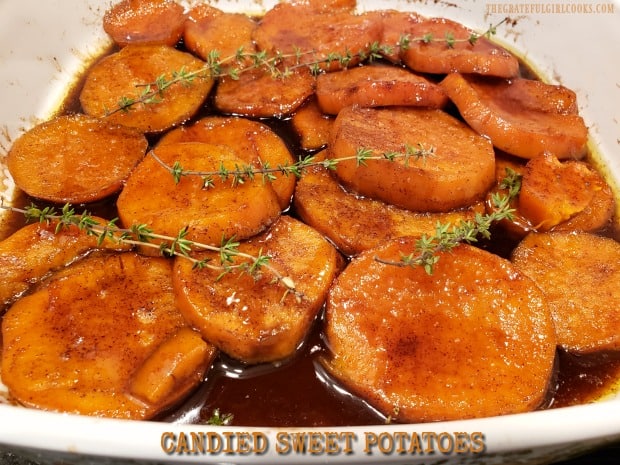
Candied Sweet Potatoes are delicious, and easy to make for a simple dinner or a holiday feast! Soft, caramelized, & baked in an amazing sauce, you’ll love ’em!
Candied Sweet Potatoes are delicious, and easy to make for dinner or a holiday feast! Soft, caramelized, & baked in an amazing sauce, you'll love 'em!

Whoa! If you’re looking for an easy, delicious side dish for dinner, may I suggest these amazing candied sweet potatoes? You don’t have to wait until Thanksgiving or other traditional holidays to enjoy these buttery, soft delicious veggies.

And guess what? This recipe uses FRESH sweet potatoes… and they are a CINCH to make!

Fresh sweet potato slices are coated in an amazing butter, brown sugar, and maple syrup sauce, which is seasoned with cinnamon, nutmeg, ginger, vanilla, and orange zest!

I’m not joking… the sauce is AMAZING. The candied sweet potatoes are then baked, coated in all that yummy sauce until they become soft and tender, and practically perfect in every way. YUM! Here’s how to make them:

Scroll Down For A Printable Recipe Card At The Bottom Of The Page

Prepare The Sweet Potatoes

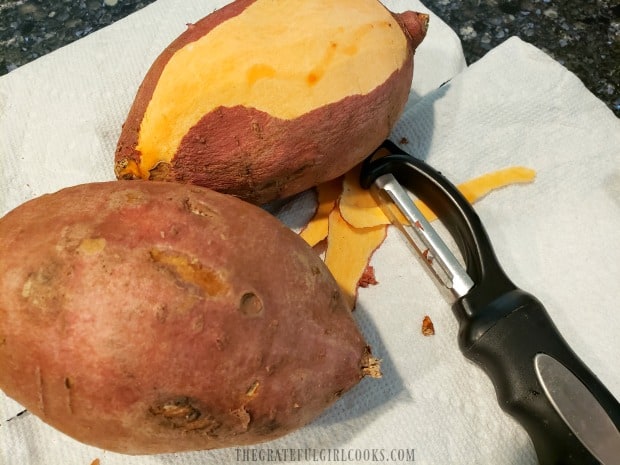
The first thing you will need to do is peel the copper-skinned sweet potatoes with a vegetable peeler or knife, and take a small slice off both ends of each potato. You can use either 3 medium sized sweet potatoes or 2 large ones, as I did.

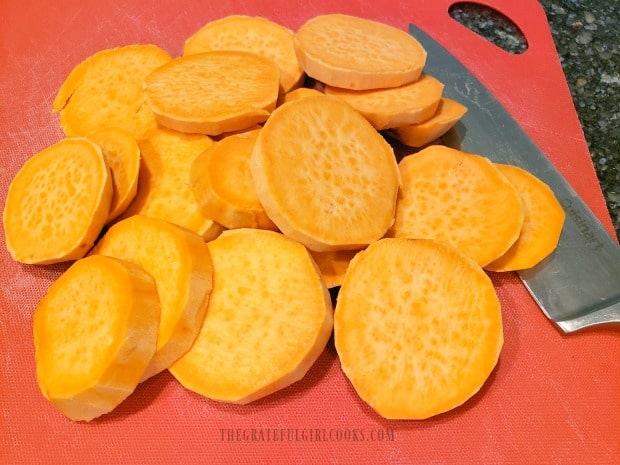
Once the sweet potatoes are peeled, cut each potato into 1/2″ thick round slices. Don’t cut them too thick or they will take too long to bake.

If you cut them too thin, they will take less time to bake. I even drug out a tape measure to get an idea of just what 1/2″ thickness was! You know… for quality control! Ha Ha!

Peeling the sweet potatoes is the first step necessary for making this recipe.Sweet potatoes are peeled, then cut into 1/2" thick round slices.

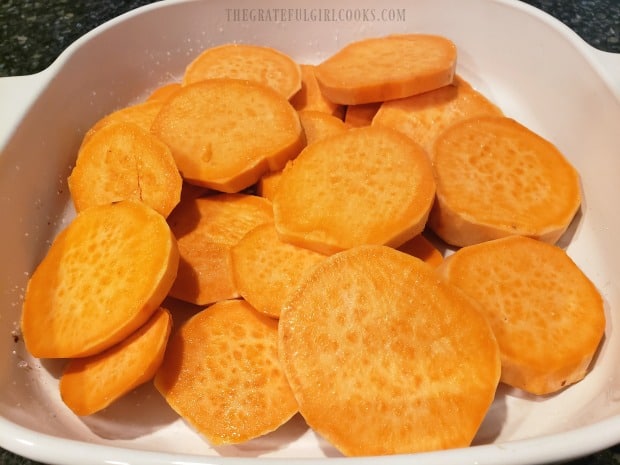
Spray an oven-safe (approx. 1½- 2 quart) baking dish with non-stick spray, and place the sliced sweet potatoes in the dish.

Sprinkle the potatoes lightly with salt, and then set dish aside while you make the yummy sauce.

Peeled, fresh sweet potato rounds are placed into a greased baking dish.

Make The Sauce For The Candied Sweet Potatoes

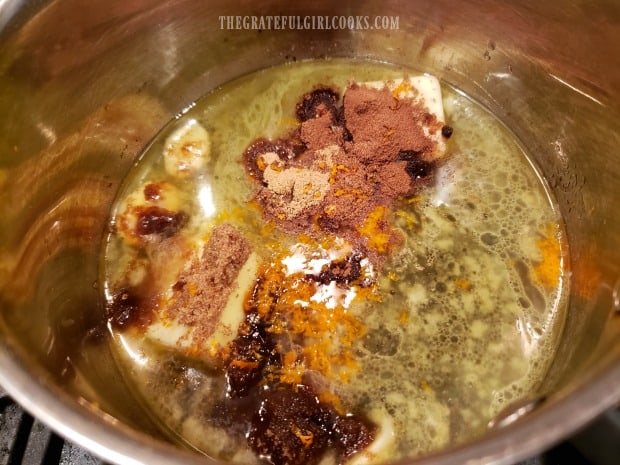
Place the butter in a medium saucepan, and melt on low heat. Once melted, add the water, maple syrup, brown sugar, orange zest, cinnamon, nutmeg and ginger (do NOT add the vanilla), and stir to combine.

Turn the heat up to medium. While stirring, bring the sauce to a low boil. Once it begins boiling, remove the spoon and let the sauce boil (gently) for 2 minutes (without stirring at all).

When it has gently boiled for two minutes, remove the pan from the heat, and stir in the vanilla extract.

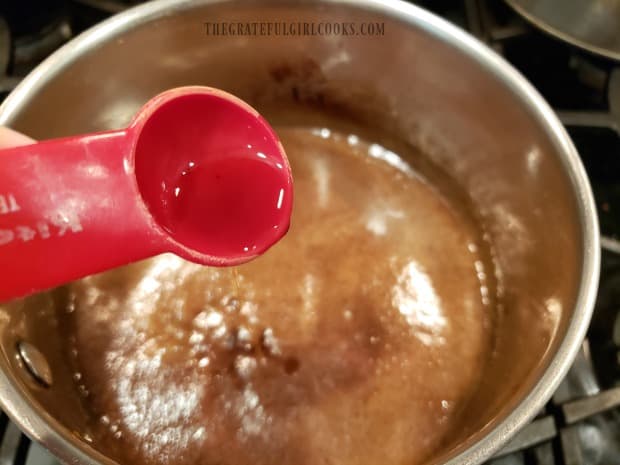
Butter, maple syrup, water, brown sugar, orange zest and spices are cooked for sauce.Vanilla extract is added to the butter and spice sauce in pan.

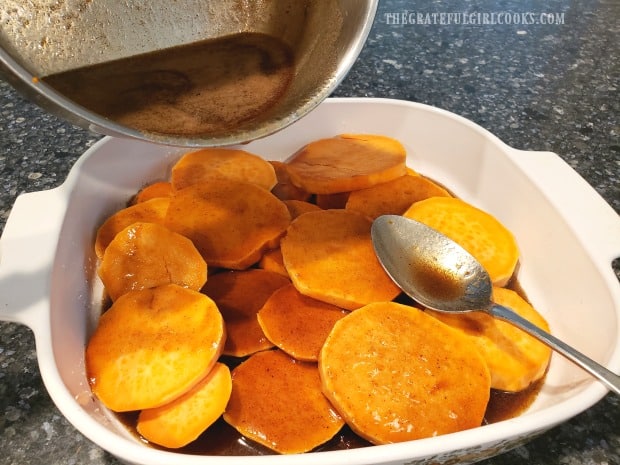
Pour the hot (and yummy smelling) sauce over the sliced sweet potatoes. Stir or use tongs to coat the slices well with the buttery sweet sauce.

Sauce is poured over the sweet potato rounds, to coat before baking.

Time To Bake The Candied Sweet Potatoes

Okay, now the candied sweet potatoes are ready for the oven. Bake in a preheated 375°F. oven, uncovered, for 20 minutes. Remove the potatoes from the oven, and give them a quick, gentle stir to keep them coated in sauce.

Before placing them back in the oven, cover the dish with aluminum foil, and pop ’em back into the hot oven.

Bake for an additional 20 minutes, then remove and stir again to coat the slices. At this point, stick a butter knife into one of the slices to check for tenderness. The candied sweet potatoes were perfectly tender, so I knew they were done!

If the knife cannot be easily inserted and removed (like butter!), pop ’em back in the oven again for another 5-10 minutes, then check again (mine took 45 total). They should be slightly caramelized on the outside, but creamy and soft on the inside!

NOTE: If you are doubling the recipe and using a 9×13″ baking dish, it may take up to an hour to bake all the sweet potatoes evenly. Just be sure to check on their tenderness after the 40 minute mark.

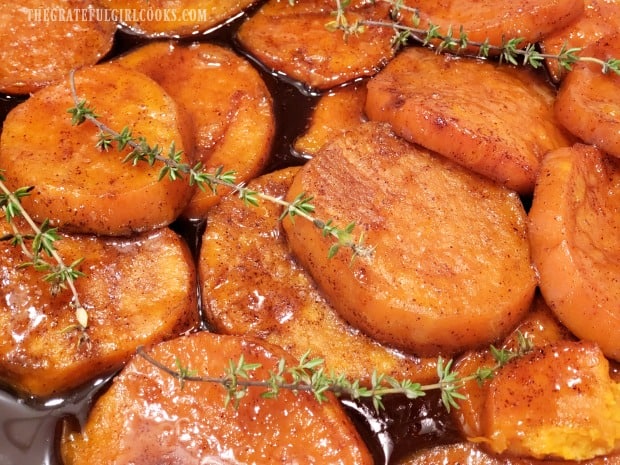
Close up of candied sweet potatoes with sprigs of fresh thyme on top.

Time To Serve Candied Sweet Potatoes

Once the sweet potatoes are done, remove the pan from the oven. Spoon a bit more sauce on top when serving. If desired, lightly sprinkle the top of the sweet potatoes with flaky sea salt (optional, but it’s a good contrast to the sweet sauce).

You can also garnish the dish with sprigs of fresh thyme or rosemary, if desired.

My husband and I absolutely LOVE these flavor-packed, tender, candied sweet potatoes! The sauce is soooo good, I could eat it right out of the pan (maybe I DID!). It tends to thicken just a little bit as the sweet potatoes cool slightly.

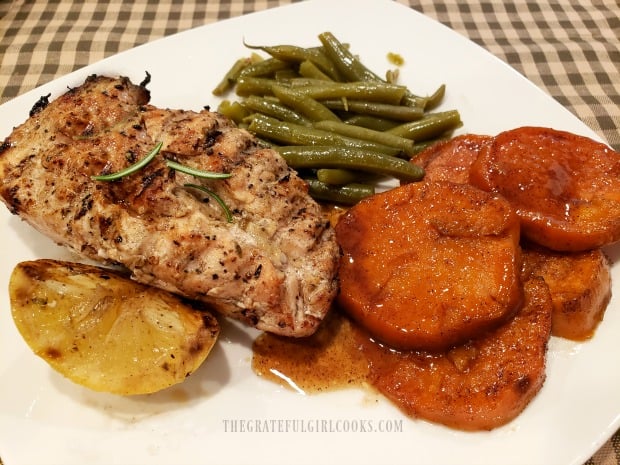
The candied sweet potatoes were a delicious side dish (along with my home canned green beans) for our grilled lemon chicken breasts.

Candied sweet potatoes on plate with grilled lemon chicken and green beans.

I really hope you will take the opportunity to try this delicious veggie side dish. The recipe can easily doubled to serve 8-10 people, which makes this a GREAT holiday or large gathering veggie side dish. I know you will love it.

Take care, thank you for stopping by, and have a GREAT day!

Looking For More VEGETABLE SIDE DISH Recipes?

You can find all of my side dish recipes in the Recipe Index, located at the top of the page. I have quite a few veggie side dishes, including:

Interested In More Recipes?

Thank you for visiting this website. I appreciate you using some of your valuable time to do soIf you’re interested, I publish a newsletter 2 times per month (1st and 15th) with all the latest recipes, and other fun info. I would be honored to have you join our growing list of subscribers, so you never miss a great recipe!
There is a Newsletter subscription box on the top right side (or bottom) of each blog post, depending on the device you use, where you can easily submit your e-mail address (only) to be included in my mailing list.

You Can Also Find Me On Social Media:
Facebook page: The Grateful Girl Cooks!
Pinterest: The Grateful Girl Cooks!
Instagram: jbatthegratefulgirlcooks

Author's signature

Recipe adapted from: https://sallysbakingaddiction.com/candied-sweet-potatoes/

0 from 0 votes
Candied Sweet Potatoes
Prep Time
15 mins
Cook Time
45 mins
Total Time
1 hr
 

Candied Sweet Potatoes are delicious, and easy to make for dinner or a holiday feast! Soft, caramelized, & baked in an amazing sauce, you'll love 'em!

Category: Side Dish, Vegetable Dish
Cuisine: American
Keyword: candied sweet potatoes
Servings: 4
Calories Per Serving: 383 kcal
Author: JB @ The Grateful Girl Cooks!
Ingredients
  • 2 large sweet potatoes , or 3 medium
  • ¼ teaspoon salt
  • ¼ cup butter , equals 4 Tablespoons (½ stick)
  • Tablespoons water
  • cup pure maple syrup
  • ½ cup brown sugar (packed)
  • teaspoons orange zest
  • ½ teaspoon ground cinnamon
  • ¼ teaspoon ground nutmeg
  • ¼ teaspoon ground ginger
  • ½ teaspoon vanilla extract
  • sea salt (optional, to sprinkle as garnish)
Instructions
  1. Preheat oven to 375°F. Spray a 2 quart baking dish with non-stick spray (sides and bottom).

  2. Peel sweet potatoes , then cut each one into 1/2" thick round slices. Place slices in prepared dish. Sprinkle potatoes with salt, and then set dish aside.

  3. MAKE SAUCE: Melt butter on low heat in a medium pan. Add water, maple syrup, brown sugar, orange zest, cinnamon, nutmeg and ginger; stir to combine. Turn heat to medium. While stirring, bring sauce to a low boil. Once it begins boiling, remove spoon and let sauce boil for 2 minutes (without stirring). Remove pan from heat; stir in vanilla extract. Pour sauce over sweet potatoes. Toss gently, to coat slices well.

  4. Bake, uncovered, in 375°F. oven for 20 minutes. Remove potatoes from oven, and gently stir, to keep them coated in sauce. Cover the dish with aluminum foil, and place dish back into oven. Bake for an additional 20 minutes; remove and stir again. Insert a butter knife into a slice to check for tenderness. If knife cannot be easily inserted and removed (like butter!), pop 'em back in the oven for another 5-10 minutes, then check again (mine took 45). They should be slightly caramelized on the outside, but creamy and soft on the inside! NOTE: If you are doubling the recipe (5-6 potatoes) and using a 9x13" baking dish, it may take up to an hour to bake all the sweet potatoes evenly. Just be sure to check on the tenderness after the 40 minute mark.

  5. When done, remove pan from oven. Uncover pan; let cool for about 10 minutes before serving. To serve: Spoon a bit of sauce on top. Lightly sprinkle sweet potatoes with flaky sea salt (optional, but a good contrast to sweet sauce). Garnish with sprigs of fresh thyme or rosemary, if desired. Enjoy!

Recipe Notes

TIP: According to the original recipe author, this dish can be frozen for up to 3 months. Thaw in refrigerator. When ready to re-heat, cover dish with foil, and reheat in 350°F. oven for 25-30 minutes (or until fully heated through).

Nutrition Facts
Candied Sweet Potatoes
Amount Per Serving (1 g)
Calories 383 Calories from Fat 108
% Daily Value*
Fat 12g18%
Saturated Fat 7g44%
Cholesterol 31mg10%
Sodium 349mg15%
Potassium 632mg18%
Carbohydrates 69g23%
Fiber 5g21%
Sugar 40g44%
Protein 3g6%
Vitamin A 24472IU489%
Vitamin C 5mg6%
Calcium 88mg9%
Iron 1mg6%
* Percent Daily Values are based on a 2000 calorie diet.

Here’s one more to pin on your Pinterest boards!Candied Sweet Potatoes are delicious, and easy to make for dinner or a holiday feast! Soft, caramelized, & baked in an amazing sauce, you'll love 'em!


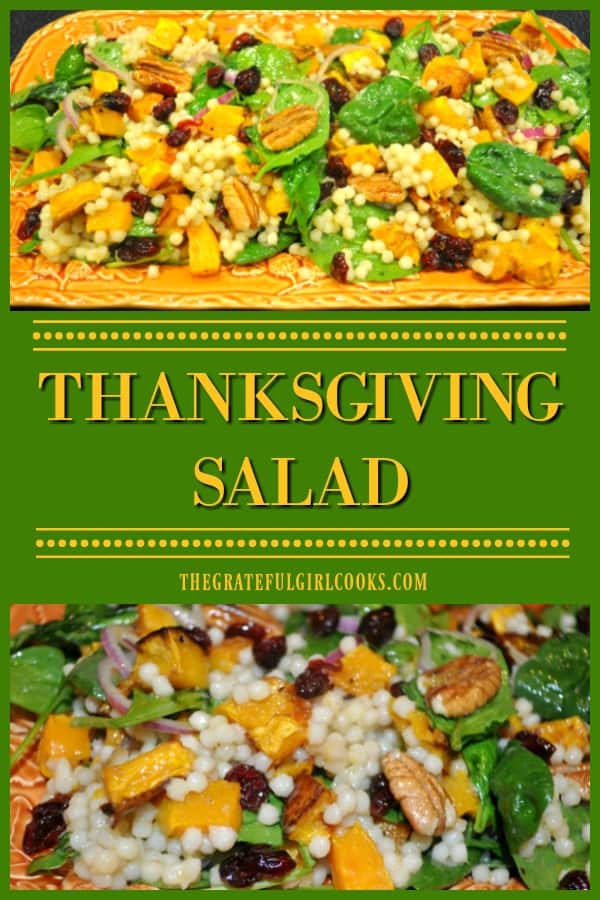
Thanksgiving Salad

Thanksgiving Salad is a delicious dish, with pearl couscous, roasted butternut squash, cranberries, pecans, spinach & red onion in a citrus dijon vinaigrette.
Thanksgiving Salad is a delicious dish, w/ pearl couscous, roasted butternut squash, cranberries, pecans, spinach & red onion in a citrus vinaigrette.

How I Came Up With This Salad’s Name

When I first made this delicious salad, my husband and I LOVED it! I knew I HAD to share the recipe on this blog, but really struggled to come up with a blog title for it. Pretty sure I didn’t want to call it a “Pearl Couscous Salad with Roasted Butternut Squash, in a Citrus Vinaigrette”. That was more of a mouthful than a bite of this yummy salad! Hmmm.

Both my husband and I agreed that THIS beautiful salad would be absolutely PERFECT to serve for Thanksgiving! We both said it would be a perfect Thanksgiving salad. That is exactly how the easy to remember name “Thanksgiving Salad” came into existence!

The colors, ingredients, and flavors… everything about this salad screams Fall, and would wonderfully compliment any Thanksgiving feast. So… guess what? This salad will be served proudly at our family Thanksgiving dinner this year, along with all of our traditional dishes! By the way- this is an absolutely delicious salad that can be served all year long, as a side dish, or a main dish salad! Here’s how to make it:

Scroll Down For A Printable Recipe Card At The Bottom Of The Page

Roast The Butternut Squash

The first thing you will need to do is get the butternut squash roasted! The process is fairly simple. You can multi-task and get the prep work done on the other ingredients while the squash is roasting in the oven! Preheat your oven to 425° F.

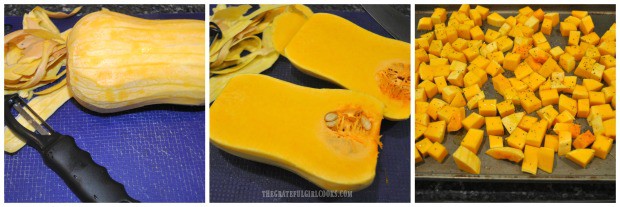
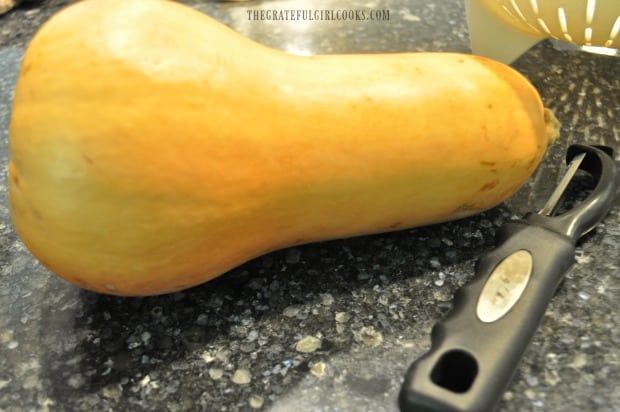
Use a vegetable peeler, and peel the skin off the squash. Cut a thin slice off both ends of the squash. Next, slice the squash in half, lengthwise, and scoop out the seeds. Cut the butternut squash into bite-sized cubes, trying to get them all about the same size.

Put the squash cubes on a large baking sheet, drizzle with olive oil, and season lightly with salt and pepper. Spread the squash cubes out into a single layer, and then roast the squash at 425° F. for 20-25 minutes. Flip the squash over, half way through the roasting time.

A butternut squash is peeled, sliced, and cubed before roasting.

Prepare Pearl Couscous And Toasted Pecans While Squash Bakes

While the butternut squash is roasting, prepare the pearl couscous. Follow package directions, omitting any butter if called for. The couscous will take between 8-10 minutes to finish cooking. When done, remove pan from the heat, and set couscous aside to cool down, for later.

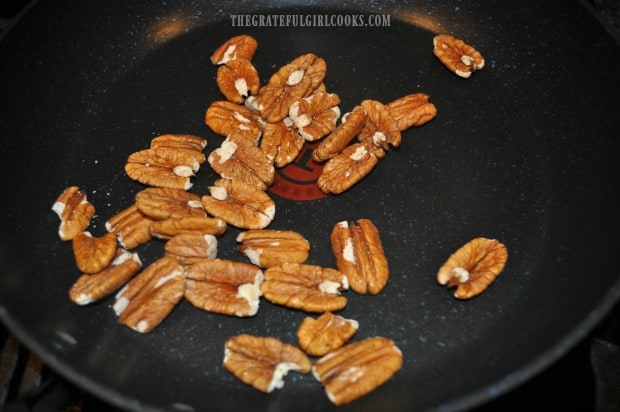
You can also dry toast the pecans while the squash (and couscous) are cooking.  Place the pecans in a dry skillet, and “toast” them over medium heat, stirring often. Toast the pecans for 3-5 minutes, and then remove pecans from the skillet. Set the toasted pecans aside to cool down, for later.

Pearl couscous is cooked according to package instructions.Pecans are lightly toasted in a dry skillet on medium heat.

Once the butternut squash has finished roasting, remove the pan from the oven, and transfer the squash to a plate or bowl to cool. Set the squash aside to cool down, for later.

The roasted butternut squash is baked, then set aside to cool.

Make A Simple Vinaigrette For The Thanksgiving Salad

Making the citrus and dijon vinaigrette is so easy!  Place orange juice, honey, dijon mustard, apple cider vinegar, olive oil and garlic powder in a bowl. Season lightly with a pinch of salt and pepper.

Whisk these salad dressing ingredients together until fully blended. The dressing goes PERFECTLY with this salad, and adds another layer of flavor! TIP: You can also mix the dressing up in a canning jar with a tight fitting lid. Shake the jar well, until the ingredients are fully mixed together.

A citrus dijon vinaigrette is made for the Thanksgiving salad.

Time To Create Your Thanksgiving Salad!

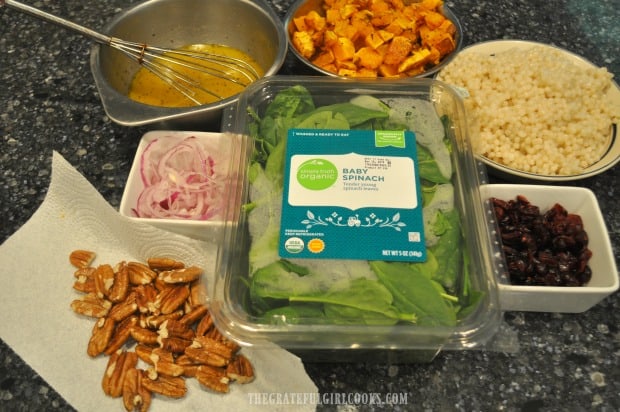
Okay… now the prep work is done and you are ready to build a delicious Thanksgiving salad! Gather all the ingredients together. You will have (clockwise) roasted squash, cooked couscous, dried cranberries, baby spinach, toasted pecans, thinly sliced red onions, and the citrus Dijon vinaigrette.

TIP FOR MAKING SALAD AHEAD OF TIME: If you wish to make the salad several hours BEFORE serving time, cover everything at this point with plastic wrap… and wait! All the work is now done, and you can EASILY put the salad together right before serving.

All the ingredients for the salad are prepped and ready to.

Time To Serve This Delicious Salad

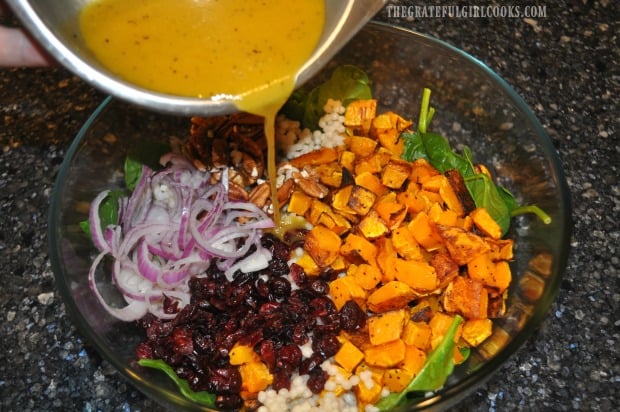
Right before serving, place all of the salad ingredients into a large bowl. Pour the vinaigrette over the Thanksgiving salad, and toss the salad well, to fully combine everything. Isn’t it beautiful with all the pretty Fall colors?

Vinaigrette is poured over the Thanksgiving salad, and salad is tossed before serving.

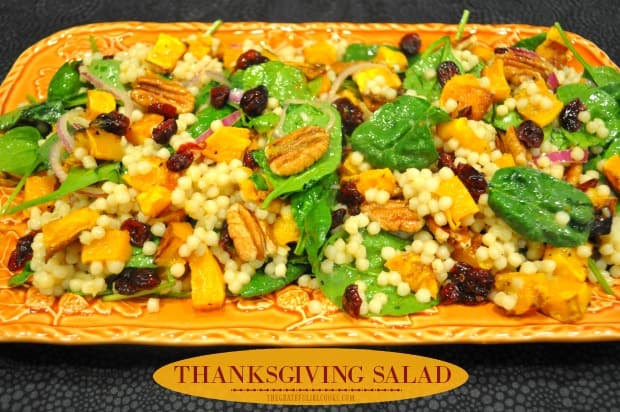
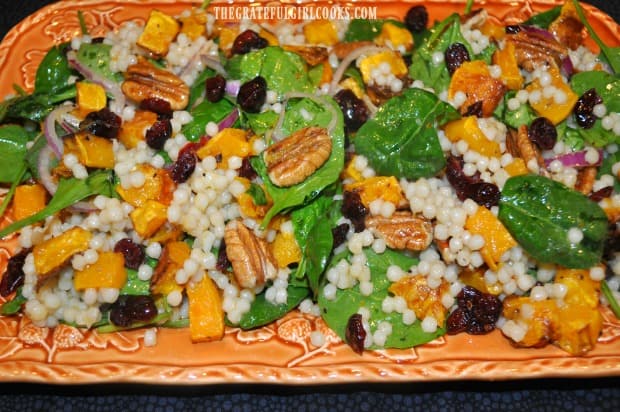
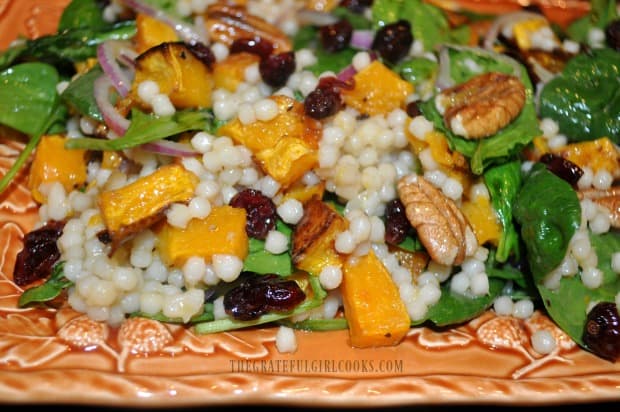
Once fully combined, arrange the salad on a pretty serving platter, or into a salad bowl for serving! (P.S. Only part of the salad is shown in the photo below). This is one pretty good looking Thanksgiving salad, right?  YUM!

You’re gonna enjoy the sweet chewy cranberries, the crunchy pecans, the soft (and creamy) roasted butternut squash, and that pearl couscous, all covered in a flavor-filled citrus vinaigrette!

A pretty platter is the backdrop for yummy Thanksgiving salad.This is a closeup photo of the pretty Thanksgiving salad, ready for serving.

I really hope you enjoy this gorgeous and DELICIOUS Thanksgiving salad. Even though it has an unusual name, this pearl couscous salad can be prepared and enjoyed any time of the year. The leftovers hold up really well, also. Place any leftovers in a well-sealed container, and the salad will keep for 2-3 more days! That’s a win-win, in my book!

If you’re looking for more recipes for Thanksgiving be sure to check out my blog post for “9 Easy Recipes For Thanksgiving Day”. Hopefully you’ll find a delicious recipe or two there to make for those you love. ENJOY, and have a GREAT day!

Looking For More SALAD Recipes?

You can find all of my salad recipes in the Recipe Index, located at the top of the page. A few favorites include:

Interested In More Recipes?

Thank you for visiting this website. I appreciate you using some of your valuable time to do soIf you’re interested, I publish a newsletter 2 times per month (1st and 15th) with all the latest recipes, and other fun info. I would be honored to have you join our growing list of subscribers, so you never miss a great recipe!
There is a Newsletter subscription box on the top right side (or bottom) of each blog post, depending on the device you use, where you can easily submit your e-mail address (only) to be included in my mailing list.

You Can Also Find Me On Social Media:
Facebook page: The Grateful Girl Cooks!
Pinterest: The Grateful Girl Cooks!
Instagram: jbatthegratefulgirlcooks

Author's signature

Original recipe source: https://littlespicejar.com/autumn-pearl-couscous-salad-with-roasted-butternut-squash/

0 from 0 votes
Thanksgiving Salad
Prep Time
15 mins
Cook Time
25 mins
Total Time
40 mins
 

Thanksgiving Salad is a delicious dish, w/ pearl couscous, roasted butternut squash, cranberries, pecans, spinach & red onion in a citrus vinaigrette.

Category: Salad/Side Dish
Cuisine: American
Keyword: thanksgiving salad
Servings: 7 small servings
Calories Per Serving: 430 kcal
Author: JB @ The Grateful Girl Cooks!
Ingredients
For Salad
  • 1 butternut squash , peeled and cubed
  • 2 Tablespoons olive oil
  • salt and pepper, to lightly season squash
  • cups dry pearl couscous , cooked according to pkg. directions
  • 4 cups baby spinach leaves (heaping cups)
  • ½ cup pecans , lightly toasted
  • ½ cup red onion , thinly sliced
  • ½ cup dried cranberries
For Vinaigrette
  • 3 Tablespoons orange juice
  • 3 Tablespoons honey
  • 1 Tablespoon Dijon mustard
  • 2 Tablespoons apple cider vinegar
  • cup olive oil
  • ¼ teaspoon garlic powder
  • 1 pinch salt and pepper
Instructions
  1. Preheat oven to 425° F. Use a vegetable peeler to peel squash. Cut a thin slice off both ends. Slice squash in half, lengthwise, and remove seeds. Cut squash into slices, then into bite-sized cubes, trying to keep them about the same size. Put the squash cubes on a large baking sheet, drizzle with olive oil, and season lightly with salt/pepper. Spread squash out in a single layer; roast at 425° F. for 20-25 minutes. Flip squash over, half way through roasting . When squash is done, remove from oven; transfer squash to a plate or bowl to cool. Set aside.

  2. Make Couscous: While squash cooks, prepare the pearl couscous. Follow package directions, omitting any butter (if called for). Couscous will take 8-10 minutes to cook. When done, remove pan from heat, and set couscous aside to cool.

  3. Toast Pecans: Toast the pecans while squash (and couscous) are cooking.  Place pecans in a dry skillet, and "toast" them over medium heat, stirring often. Toast for 3-5 minutes, and then remove pecans from skillet. Set pecans aside to cool.

  4. Make Vinaigrette: Place orange juice, honey, dijon mustard, apple cider vinegar, olive oil and garlic powder in a bowl. Season with a pinch of salt and pepper. Whisk until fully blended.

  5. Right before serving, place the salad ingredients into a large bowl. Pour vinaigrette over the salad, and toss the salad well, to fully combine everything. Serve, and enjoy! (Any leftovers can be stored for 2-3 days in covered container in refrigerator).

Nutrition Facts
Thanksgiving Salad
Amount Per Serving (1 g)
Calories 430 Calories from Fat 180
% Daily Value*
Fat 20g31%
Saturated Fat 3g19%
Sodium 53mg2%
Potassium 594mg17%
Carbohydrates 59g20%
Fiber 6g25%
Sugar 17g19%
Protein 7g14%
Vitamin A 13011IU260%
Vitamin C 32mg39%
Calcium 85mg9%
Iron 2mg11%
* Percent Daily Values are based on a 2000 calorie diet.

Here’s one more to pin on your Pinterest boards!Thanksgiving Salad is a delicious dish, w/ pearl couscous, roasted butternut squash, cranberries, pecans, spinach & red onion in a citrus vinaigrette.

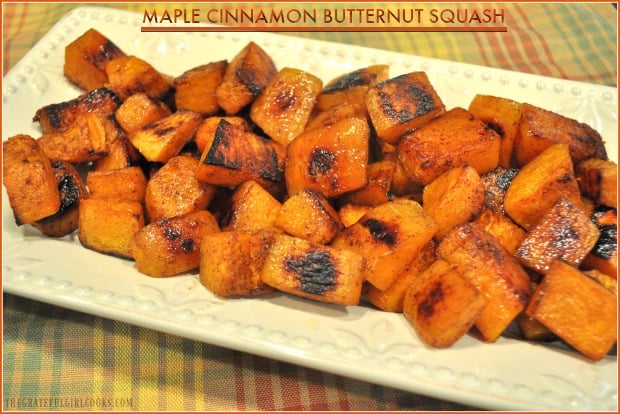
Maple Cinnamon Butternut Squash

Maple Cinnamon Butternut Squash is an easy to make, healthy and delicious roasted vegetable side dish – this is caramelized squash you’re gonna love!
Maple Cinnamon Butternut Squash is an easy to make, healthy and delicious roasted vegetable side dish - caramelized squash you're gonna love!

Do you like butternut squash? While it is not something I routinely fix in our home, I sure do enjoy this delicious veggie once made. A few years ago I made the best butternut squash soup (with bacon) that I’ve ever had. Now we routinely enjoy this soup, especially in the Fall and Winter. Seriously… YUM!

I’ve also used this versatile “winter” vegetable to make a couple other delicious recipes. The recipes include Roasted Butternut Squash with Cranberries, Honey & Feta, and Butternut Squash Ravioli with Browned Butter Sage Sauce. Both are delicious!

THIS recipe I am sharing today is for simple roasted maple cinnamon butternut squash. This dish is gluten-free, and doesn’t contain any refined sugar, for those of you that are interested. Crispy on the outside, soft and creamy on the inside, it’s easy to prepare, and is a GREAT side dish!

Scroll Down For A Printable Recipe Card At The Bottom Of The Page

How To Make Maple Cinnamon Butternut Squash

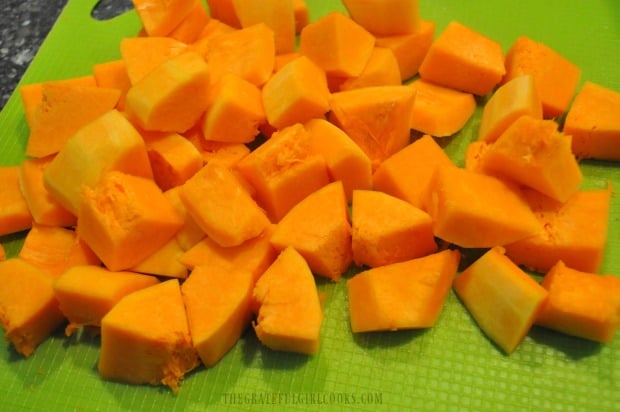
Before starting, preheat your oven to 400° F.  Peel a large butternut squash with a vegetable peeler. This is the “hardest” and “messiest part of the recipe (and it’s not really that bad). Once peeled, carefully slice the squash in half lengthwise.

Use a spoon (and maybe even your fingers) to remove all the seeds and “fibrous strings” from the inside. Once all seeds have been removed, cut the squash into bite sized cubes. Try to keep most of the pieces about the same size, for even baking.

Butternut squash is ready to be peeled, seeded and cubed, to make maple cinnamon butternut squash.

The butternut squash is peeled, seeded, then cut into bite sized pieces before baking.

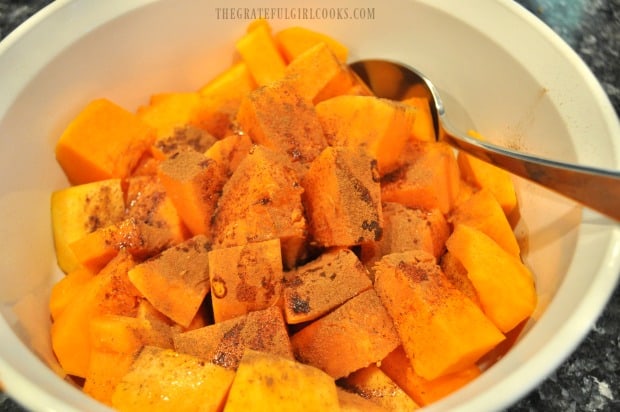
Place the butternut squash pieces into a large bowl, and drizzle them with the olive oil. Season the squash with a pinch of salt and pepper (to taste), then add the cinnamon, and maple syrup. Stir the ingredients, in order to fully combine and lightly season all the pieces of maple cinnamon butternut squash.

Maple syrup and cinnamon are mixed into the butternut squash pieces before baking.

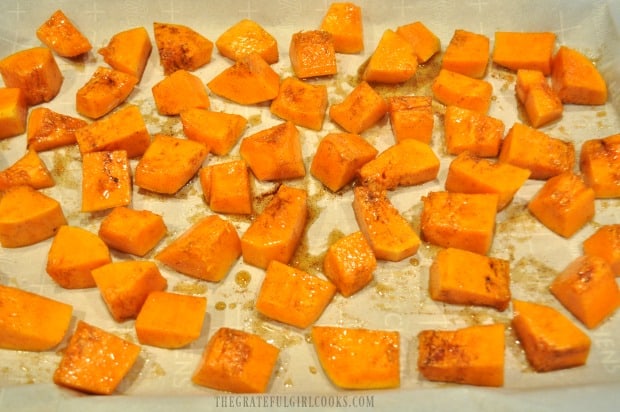
Line a large baking sheet with parchment paper. Spread the butternut squash cubes out in a single layer, leaving a bit of space between each piece.

The pieces of maple cinnamon butternut squash are placed on parchment paper to bake.

Roast The Maple Cinnamon Butternut Squash

Roast the maple cinnamon butternut squash in a preheated 400° F. oven for 35 minutes. HALFWAY through the baking time, rotate the pan in the oven to ensure even baking. When the 35 minutes is up, carefully flip each piece over so the bottom side is up, and put back in oven. Cook for 5 more minutes, to help caramelize the squash a bit on the other side.

Halfway through baking time, maple cinnamon butternut squash is turned to other side to finish cooking.

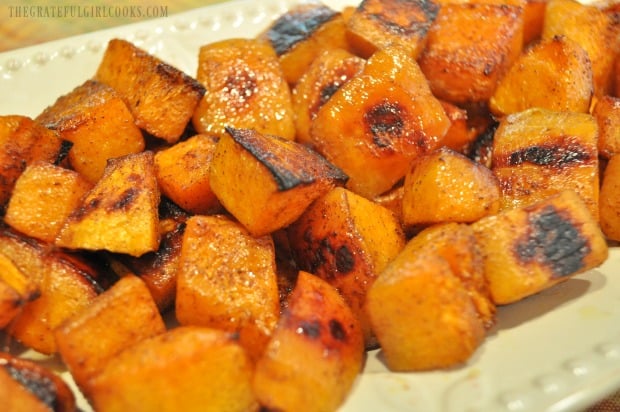
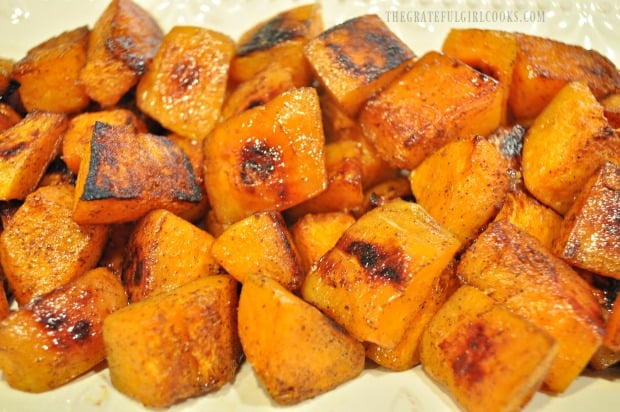
Once the maple cinnamon butternut squash has finished roasting, remove from oven; transfer squash to a serving platter. It is now ready to enjoy!  This time, we enjoyed it served alongside our main dish of grilled chicken!

Once done, the maple cinnamon butternut squash is transferred to serving platter before serving.

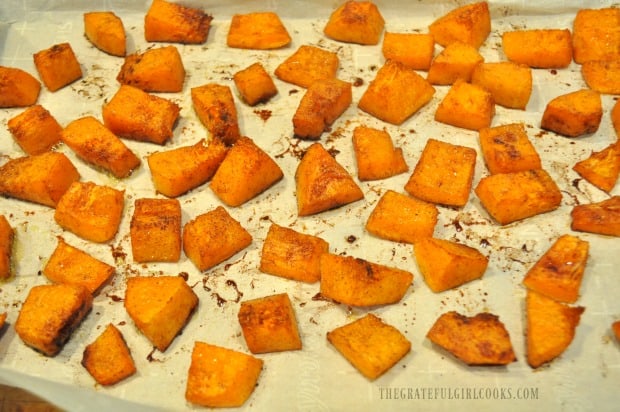
See the dark caramelized parts of the roasted maple cinnamon butternut squash? It tastes wonderful!  The natural sugars (and maple syrup) caramelize slightly while baking, which leaves the outside slightly crispy, while the inside is soft and creamy!

The maple cinnamon butternut squash is caramelized on the outside and soft on the inside.

This really is a GREAT tasting, simple side dish that pairs especially well with chicken, turkey or pork!  Maple cinnamon butternut squash would also be an easy veggie side dish for Thanksgiving or Christmas dinner!  If you prefer your butternut squash “mashed”, be sure to try my recipe for Creamy Mashed Butternut Squash, too! Sure hope you enjoy it! Have a GREAT day, friends.

Looking For More VEGETABLE SIDE DISH Recipes?

You can find all of my recipes in the Recipe Index, located at the top of the page. A few favorite vegetable dishes include:

Interested In More Recipes?

Thank you for visiting this website. I appreciate you using some of your valuable time to do soIf you’re interested, I publish a newsletter 2 times per month (1st and 15th) with all the latest recipes, and other fun info. I would be honored to have you join our growing list of subscribers, so you never miss a great recipe! 

There is a Newsletter subscription box on the top right side (or bottom) of each blog post, depending on the device you use, where you can easily submit your e-mail address (only) to be included in my mailing list.

You Can Also Find Me On Social Media:

Facebook page: The Grateful Girl Cooks!
Pinterest:
The Grateful Girl Cooks!
Instagram:
jbatthegratefulgirlcooks

Author's signature.

Original Recipe Source: https://lifemadesweeter.com/maple-cinnamon-roasted-butternut-squash/

0 from 0 votes
Maple Cinnamon Butternut Squash
Prep Time
10 mins
Cook Time
40 mins
Total Time
50 mins
 
Maple Cinnamon Butternut Squash is an easy to make, healthy and delicious roasted vegetable side dish - caramelized squash you're gonna love!
Category: Side Dishes, Vegetable Dish
Cuisine: American
Keyword: maple cinnamon butternut squash
Servings: 4
Calories Per Serving: 151 kcal
Author: JB @ The Grateful Girl Cooks!
Ingredients
  • 1 large butternut squash
  • Tablespoons extra virgin olive oil
  • Tablespoons pure maple syrup
  • 1/2 teaspoon ground cinnamon
  • 1 pinch salt and pepper, to taste
Instructions
  1. Preheat oven to 400° F.  Carefully peel a large butternut squash with a vegetable peeler (or sharp knife).  Once peeled, slice the squash in half lengthwise. Use a spoon to remove all the seeds and "fibrous strings" inside squash. Cut squash into bite sized cubes. Try to keep the pieces about the same size, for even baking.

  2. Place squash cubes into a large bowl; drizzle with olive oil. Season the squash with a pinch of salt and pepper (to taste), then add the cinnamon and maple syrup. Stir to combine ingredients, so all pieces are coated.

  3. Line a large baking sheet with parchment paper. Spread seasoned squash out in a single layer, leaving a bit of space between each piece. Roast in 400° F. oven for 35 minutes. HALFWAY through baking time, rotate the pan in the oven to ensure even baking. When 35 minutes is up, carefully flip each piece over so the bottom side is up, and put back in oven. Cook for 5 more minutes, to help caramelize the squash a bit on the other side. Once squash is done, remove from oven; transfer to a serving platter. Serve, and enjoy!

Nutrition Facts
Maple Cinnamon Butternut Squash
Amount Per Serving (1 (1/4 of total))
Calories 151 Calories from Fat 45
% Daily Value*
Fat 5g8%
Sodium 17mg1%
Potassium 676mg19%
Carbohydrates 27g9%
Fiber 3g13%
Sugar 8g9%
Protein 1g2%
Vitamin A 19930IU399%
Vitamin C 39.4mg48%
Calcium 98mg10%
Iron 1.3mg7%
* Percent Daily Values are based on a 2000 calorie diet.

Here’s one more to pin on your Pinterest boards!Maple Cinnamon Butternut Squash is an easy to make, healthy and delicious roasted vegetable side dish - caramelized squash you're gonna love!

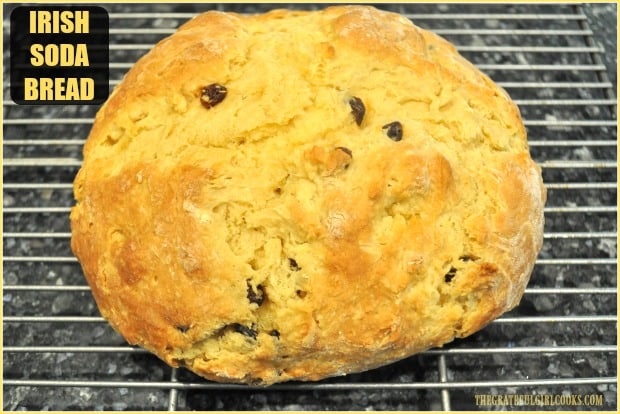
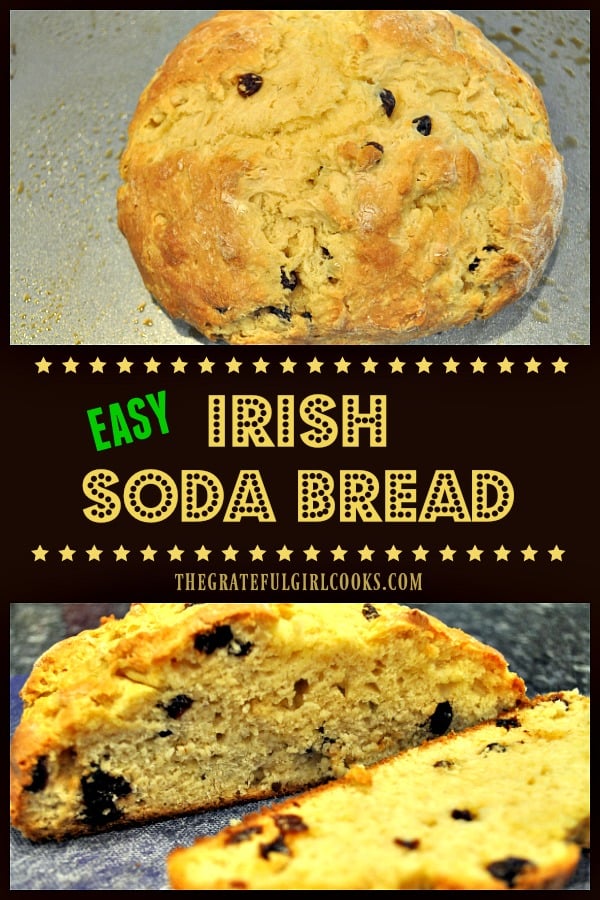
Irish Soda Bread

Irish Soda Bread is a classic St. Patrick’s Day treat! This high-rising bread is very easy to make, filled with sweet raisins, and tastes amazing!
Irish Soda Bread is a classic St. Patrick's Day treat! This high-rising bread is very easy to make, filled with sweet raisins, and tastes amazing!

I subscribed to Taste Of Home magazines for many, many years, and have kept all of my issues! Let me tell you, I have lots of those magazines in my office! I keep them for inspiration, and still look through some of these back issues for great ideas!

Many years ago I cut out a recipe from the pages for a classic Irish soda bread, and have kept it all these years in my trusty recipe box! The recipe card doesn’t indicate which magazine issue it was from (month/year), so I have no way of knowing WHICH of my MANY Taste of Home magazines I clipped it from. But, since the recipe is so good, I want to share it with you today!

St. Patrick’s Day is just around the corner, and Irish soda bread can EASILY be part of your traditional Irish dinner, or ANY meal, for that matter! This delicious bread is so easy to prepare, and the taste is wonderful!  Serve a loaf of this bread, along with some corned beef and cabbage, and you’ve got yourself a wonderful Irish meal!

Scroll Down For A Printable Recipe Card At The Bottom Of The Page

How To Make Irish Soda Bread

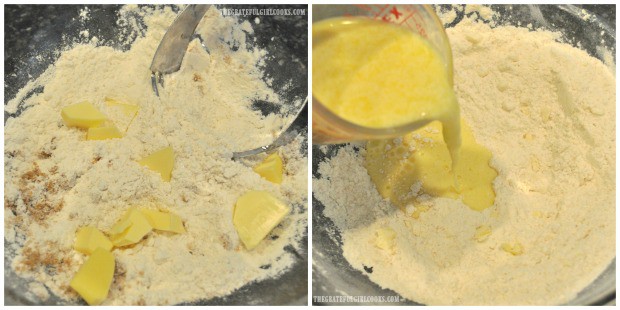
Preheat your oven to 375° F.  While the oven preheats, place flour, brown sugar, baking powder, baking soda and salt in a large mixing bowl. Whisk or stir the dry ingredients together.  Use a pastry blender (or two forks), to cut in very cold butter, until the mixture is crumbly, and the butter has been reduced almost to the size of peas.

In a separate container, mix together buttermilk and one egg, and pour it into the bowl with the dry ingredients. Stir to combine, but only until the flour mixture is just moistened. Be careful not to over mix the dough!

Butter, eggs, and buttermilk is added to dry ingredients to make Irish soda bread dough.

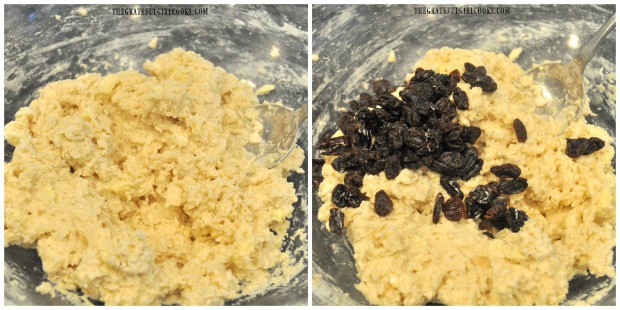
The batter will be fairly sticky/tacky. Add the raisins, and fold them into the dough.

Raisins are added to the Irish soda bread dough.

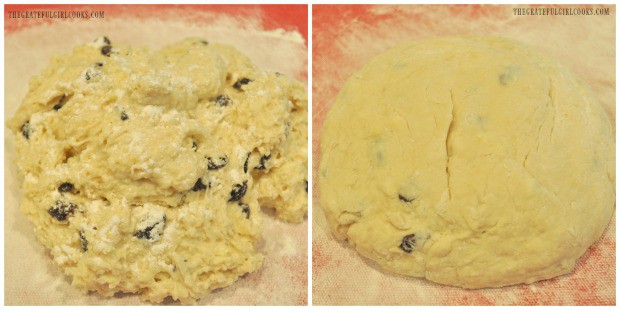
Transfer the dough onto a floured work surface. Lightly sprinkle with additional flour, and knead the dough for 1 minute, adding flour as necessary. Shape the Irish soda bread dough into a round circle.

The dough for the Irish soda bread is kneaded, then formed into a circle before baking.

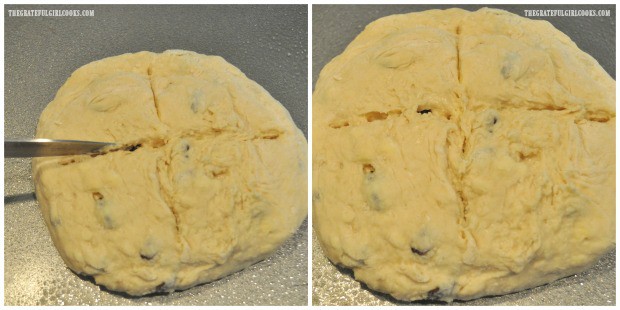
Place the round Irish soda bread loaf onto a well greased baking pan/sheet. Use a sharp knife, and cut a cross shape in the top of the loaf, cutting about 1/4″ deep.

A cross is cut into the top of the Irish soda bread before baking.

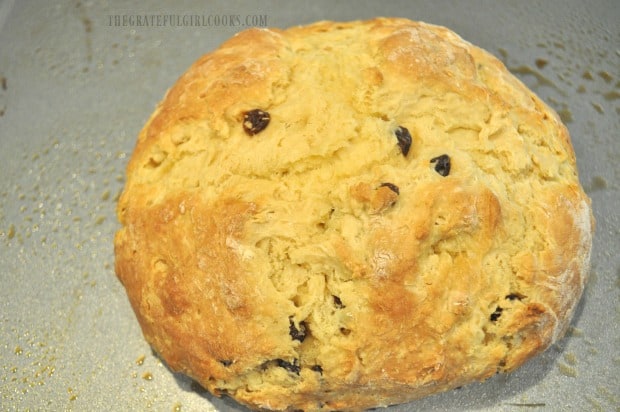
Lightly beat the one remaining egg, and brush it over the top of the loaf. Bake the Irish soda bread for 30-35 minutes in a preheated 375° F. oven.

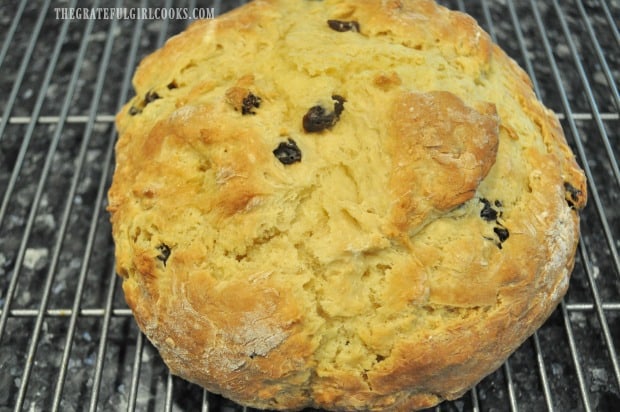
When done, the loaf should be gorgeous and golden brown and “set” in the top/middle of the loaf. Transfer the loaf to a wire rack to cool for several minutes before slicing.

Irish soda bread is baked for about 30 minutes until done and golden brown.

Here, the baked Irish soda bread is cooling down on a wire rack before slicing.

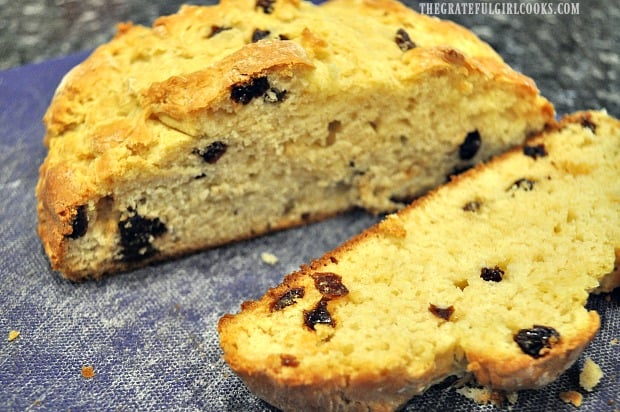
When ready to serve the Irish soda bread, use a sharp serrated knife, and cut the loaf into 8 slices. The bread tastes fantastic when eaten warm, with a little bit of butter on it! YUM!

A slice is cut out of the Irish soda bread, to reveal the inside of the loaf.

Hope you enjoy this Irish soda bread for St. Patrick’s Day or ANY time of year! It truly is quite an easy bread to make, and really does taste wonderful. Thanks for reading… have a GREAT day!

Looking For More BREAD Recipes?

You can find all of my recipes in the Recipe Index, located at the top of the page. A few of our family’s favorite homemade bread recipes include:

Interested In More Recipes?

Thank you for visiting this website. I appreciate you using some of your valuable time to do soIf you’re interested, I publish a newsletter 2 times per month (1st and 15th) with all the latest recipes, and other fun info. I would be honored to have you join our growing list of subscribers, so you never miss a great recipe! 

There is a Newsletter subscription box on the top right side (or bottom) of each blog post, depending on the device you use, where you can easily submit your e-mail address (only) to be included in my mailing list.

You Can Also Find Me On Social Media:

Facebook page: The Grateful Girl Cooks!
Pinterest:
The Grateful Girl Cooks!
Instagram:
jbatthegratefulgirlcooks

Author's signature

Recipe Source: Gloria Warczak (from Cedarburg, Wisconsin), on a recipe card cut out of one of my old “Taste Of Home” Magazines (original date unknown, recipe was on page 13).

0 from 0 votes
Irish Soda Bread
Prep Time
10 mins
Cook Time
30 mins
Total Time
40 mins
 
Irish Soda Bread is a classic St. Patrick's Day treat! This high-rising bread is very easy to make, filled with sweet raisins, and tastes amazing!
Category: Bread
Cuisine: Irish
Keyword: Irish soda bread
Servings: 8 servings
Calories Per Serving: 215 kcal
Author: JB @ The Grateful Girl Cooks!
Ingredients
  • 2 cups all purpose flour
  • 2 Tablespoons brown sugar
  • 1 teaspoon baking powder
  • 1/2 teaspoon baking soda
  • 1/4 teaspoon salt
  • 3 Tablespoons butter (very cold)
  • 2 large eggs , divided use
  • 3/4 cup buttermilk
  • 1/3 cup raisins
Instructions
  1. Preheat oven to 375° F.  Place flour, brown sugar, baking powder, baking soda and salt in a large mixing bowl. Whisk the dry ingredients together.  Use a pastry blender (or two forks), to cut in very cold butter, until the mixture is crumbly, and the butter is about the size of peas.

  2. In a separate container, mix together buttermilk and one egg, and pour it into the bowl with the dry ingredients. Stir to combine, but only until flour mixture is just moistened. Do not overmix! The batter will be fairly sticky/tacky. Add the raisins, and fold them into the dough.

  3. Transfer the dough onto a floured work surface. Lightly sprinkle with additional flour, and knead dough for 1 minute, adding flour as necessary. Shape the dough into a round loaf. Place the loaf onto a well greased baking pan/sheet. Use a sharp knife, and cut a cross shape in the top of the loaf, cutting about 1/4" deep.

  4. Lightly beat the one remaining egg, and brush it over the top of loaf. Bake for 30-35 minutes in a preheated 375° F. oven. When done, the bread should be golden brown and "set" in the top/middle of the loaf. Transfer the loaf to a wire rack to cool for a few minutes before slicing. Slice loaf into 8 slices, spread with softened butter, serve and enjoy!

Nutrition Facts
Irish Soda Bread
Amount Per Serving (1 (1/8th of loaf))
Calories 215 Calories from Fat 54
% Daily Value*
Fat 6g9%
Saturated Fat 3g19%
Cholesterol 66mg22%
Sodium 225mg10%
Potassium 183mg5%
Carbohydrates 32g11%
Fiber 1g4%
Sugar 4g4%
Protein 5g10%
Vitamin A 245IU5%
Vitamin C 0.3mg0%
Calcium 66mg7%
Iron 1.9mg11%
* Percent Daily Values are based on a 2000 calorie diet.

Here’s one more to pin on your Pinterest boards!Irish Soda Bread is a classic St. Patrick's Day treat! This high-rising bread is very easy to make, filled with sweet raisins, and tastes amazing!

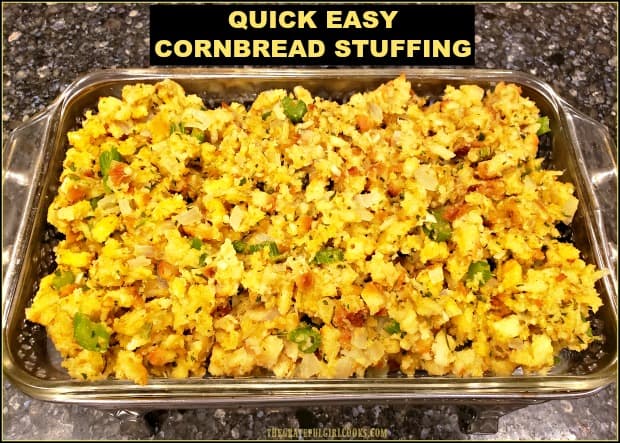
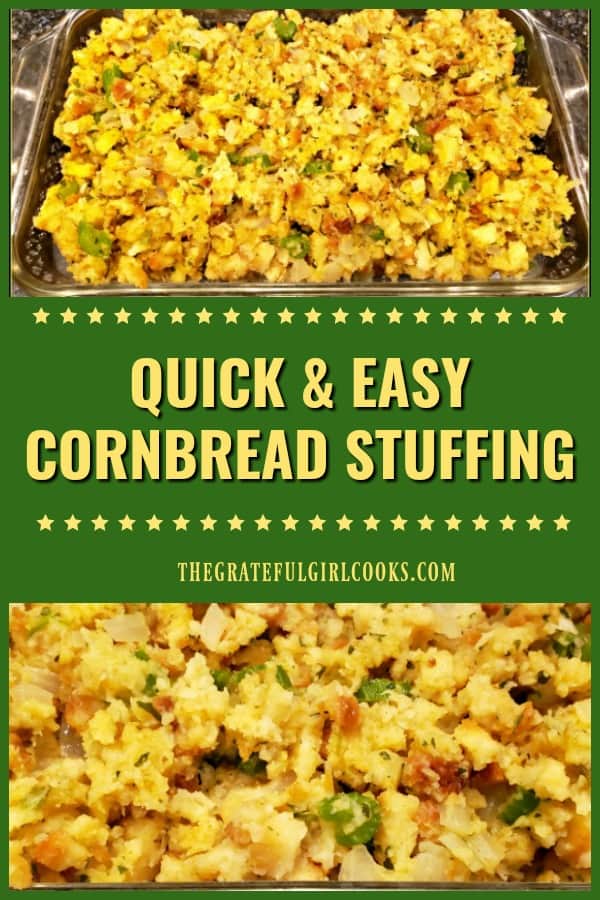
Quick Easy Cornbread Stuffing

Make this flavorful, quick easy cornbread stuffing as a side dish for the holidays (or any MEAL)! This savory dish, which pairs well with turkey, chicken, pork or fish can be made in 10 minutes, which is a real timesaver!
Make this flavorful, quick easy cornbread stuffing as a side dish for the holidays (or any MEAL)! This savory dish can be made in 10 minutes, a real timesaver!

Do you enjoy stuffing, served at Thanksgiving, Christmas or any other day of the year? We do!  Many people cook their Thanksgiving turkey with stuffing inside the bird, but many others serve stuffing as a side dish, cooked separately.

When I was growing up, we always had stuffing served as a separate side dish for Thanksgiving. No stuffed bird for our family! It was ALWAYS on the side!

Thanksgiving Day was full of excitement as the meal was lovingly prepared. My sisters and I would watch the Thanksgiving Day Parade on TV while our parents made the stuffing and got the turkey and yams ready to put into the oven. Oh, the yummy smells that came out of our kitchen as they cooked!

Scroll Down For A Printable Recipe Card At The Bottom Of The Page

My Mom and Dad Always Made HOMEMADE Cornbread Stuffing

I grew up with the cornbread stuffing cooked as a side dish. My Texas born and raised Mom and Dad called it “dressing”. There are some wonderful holiday memories of my Mom and Dad getting up early on Thanksgiving morning to make their “southern-style” dressing.

Mom would make homemade cornbread a few days before Thanksgiving and let it sit out to get dry and stale. My parents would break up all the dry homemade cornbread in pieces. They would mix up the dressing in a big plastic tub, because my Mom wanted a LOT of dressing for leftovers (it was her favorite dish)!

Mom BAKED Her Cornbread Stuffing

They would add the broth, celery, onions, eggs, and the many spices needed to the dry cornbread pieces. Mom and Dad would each take turns taste testing, mixing, and adding more spices and broth as needed. Once they got it “right”, and the mixture was the right consistency and taste, they would BAKE it for quite a while! Boy, did it smell good!

They did this every year together, and it remains one of my most vivid, wonderful memories! This process took quite a while, but the results were always delicious!

Why I Choose To Make Quick EASY Cornbread Stuffing

Once I started making stuffing for our family (and all the other dishes for the holidays), I realized I could save time by just as easily BUYING a box of inexpensive stuffing mix (with the bread already dried out and all the spices included).  I tried this one year to save time, and have never gone back!

I decided I could just as easily add celery and onions to the convenient box of stuffing mix ingredients.  Guess what? It ended up tasting very much like the traditional stuffing side dish I grew up with. Plus… it only takes a few minutes to make this easy cornbread stuffing! A WIN-WIN!

Because holidays can be so busy preparing traditional dishes, I like to think of it as a wonderful, timesaving “HACK” of a beloved traditional dish.

Here’s How Easy It Is To Make Quick Easy Cornbread Stuffing

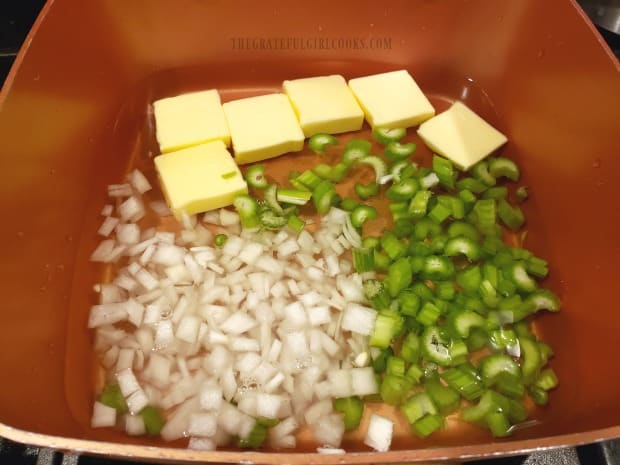
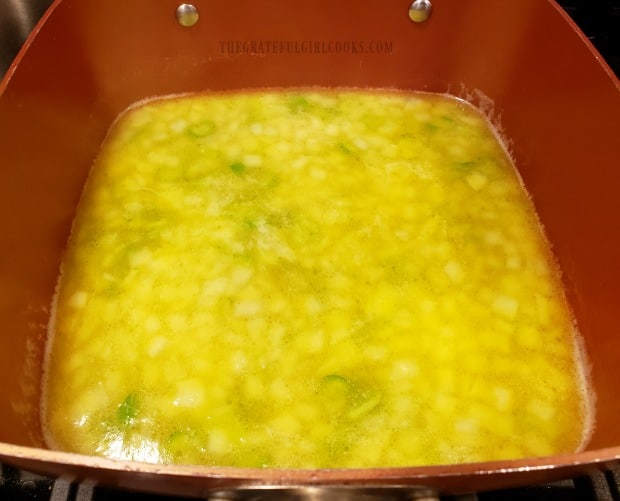
In a large sauce pan, place the water, butter, chopped onion and celery. Bring the water to a boil on medium high heat, which will melt the butter and cook the celery and onion. Cook on medium high for 4-5 minutes.

Cooking onions, butter and celery for quick easy cornbread stuffing.

Cooking the veggies and broth to add to the easy cornbread stuffing mix.

Adding The Stuffing Mix To The Liquid

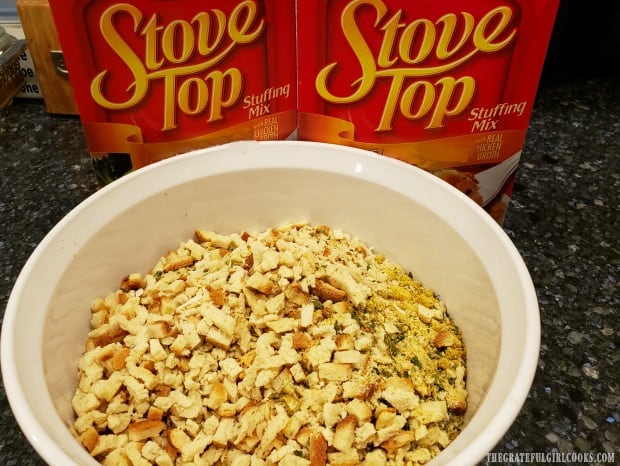
I use the Stove Top brand of stuffing mix, because I love the spices they use. The flavor also reminds me of my Mom’s homemade stuffing! No, I am not paid to endorse this product… I just really love the spices they use!

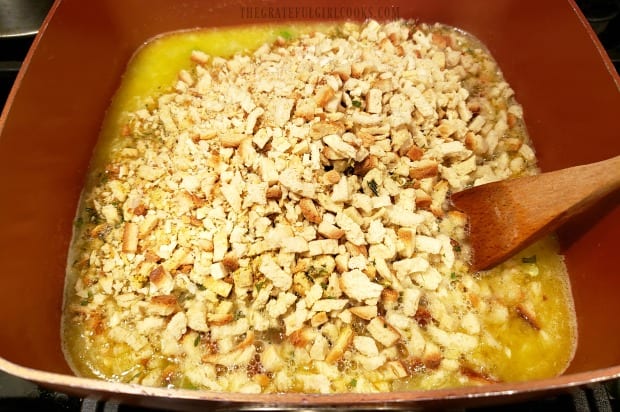
Add the stuffing mix to the liquid and veggies in the pan, and stir the ingredients to fully combine.  Remove the pan from the heat. Place a lid on the pan.

Using pre-dried stuffing mix makes this a really easy dish to prepare!

Two boxes of stuffing mix are stirred into the veggies and broth for easy cornbread stuffing.

Once the dry stuffing mix has been mixed into the liquid, you will see that it begins to rehydrate the dry cornbread pieces. Let stuffing stand (covered) for 5 minutes, because it takes a few minutes for the dry cornbread in the mix to fully rehydrate.

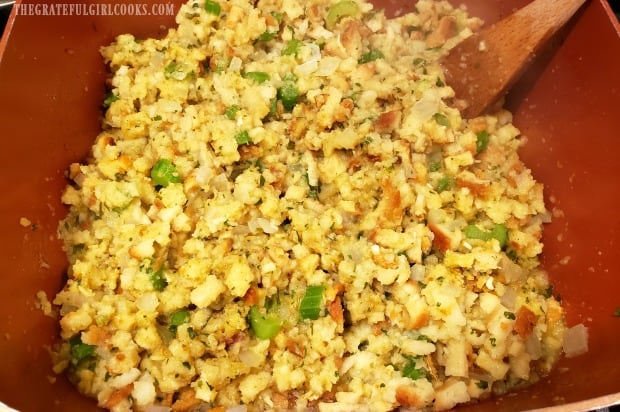
When the easy cornbread stuffing has rested for 5 minutes, fluff it up with a fork. The cornbread stuffing is now ready to serve! See how easy that was?

Easy cornbread stuffing is fluffed up in pan, after absorbing the broth.

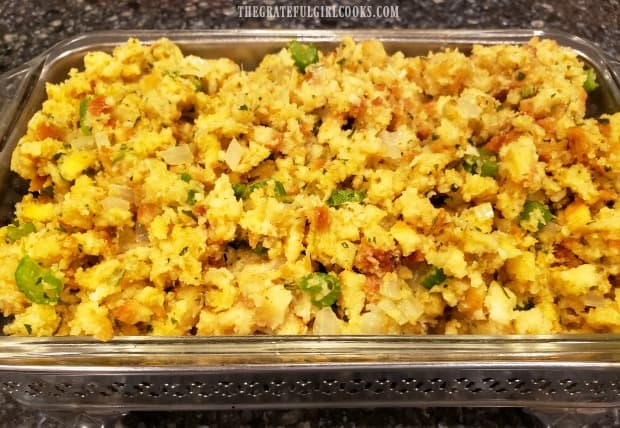
Transfer the easy cornbread stuffing to a serving dish, and serve!  The stuffing tastes great, because the celery and onions add color, texture and additional flavor to this simple side dish!

Easy cornbread stuffing is transferred to a serving dish.

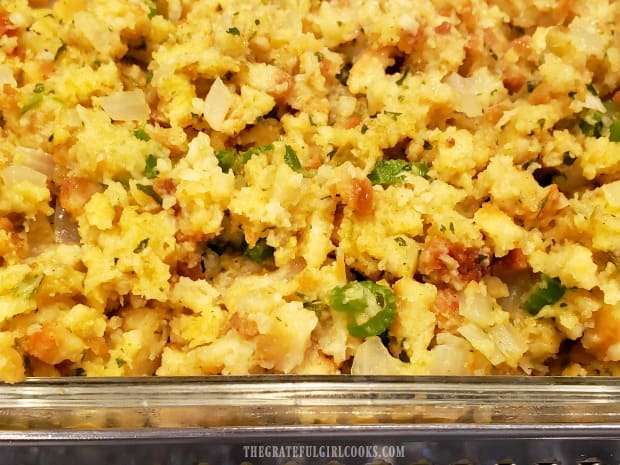
Close up photo of easy cornbread stuffing in serving dish.

Quick Easy Cornbread Stuffing Is A Great Side Dish!

We ALWAYS have quick easy cornbread stuffing for Thanksgiving (and often for Christmas, too). We have it occasionally through the year for other meals, as well. It is inexpensive and very easy and quick to prepare.

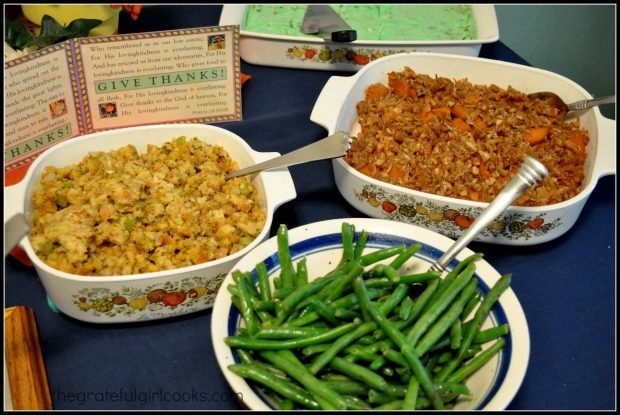
The cornbread stuffing is a perfect side dish, served alongside other traditional family favorites, like Pecan Praline Yams, Green Beans, and Strawberry or Lime Pineapple Jello Salad.

Easy cornbread stuffing is served, along with green beans, yams, and jello salad.

Easy Cornbread Stuffing Is NOT ONLY for The Holidays!

This easy cornbread stuffing is not just for the holidays, though! This can be served any time of the year, with turkey, chicken, pork or fish!  It’s a great tasting side dish, because the flavors of celery, onions, and spices in the stuffing mix pair with these variety of meats very well.

I hope you will consider trying this simple side dish! I posted it on my blog, so that long after I’m gone from this earth, my family will know how I made my easy cornbread stuffing each Thanksgiving! They’ll be surprised at just how easy it really was (wink, wink). Hope you enjoy a wonderful day, filled with encouragement, and love.

Looking For More Side Dish Recipes?

You can find all my side dish recipes in the Recipe Index at the top of the page. A few favorites include:

Interested In More Recipes?

Thank you for visiting this website. I appreciate you using some of your valuable time to do soIf you’re interested, I publish a newsletter 2 times per month (1st and 15th) with all the latest recipes, and other fun info. I would be honored to have you join our growing list of subscribers, so you never miss a great recipe! 

There is a Newsletter subscription box on the top right side (or bottom) of each blog post, depending on the device you use, where you can easily submit your e-mail address (only) to be included in my mailing list.

You Can Also Find Me On Social Media:

Facebook page: The Grateful Girl Cooks!
Pinterest:
The Grateful Girl Cooks!
Instagram:
jbatthegratefulgirlcooks

Author's signature

0 from 0 votes
Quick Easy Cornbread Stuffing
Prep Time
15 mins
Total Time
15 mins
 
Make this flavorful, quick easy cornbread stuffing as a side dish for the holidays (or any MEAL)! This savory dish can be made in 10 minutes, a real timesaver!
Category: Side Dish
Cuisine: American
Keyword: easy cornbread stuffing
Servings: 12 servings
Calories Per Serving: 162 kcal
Author: JB @ The Grateful Girl Cooks!
Ingredients
  • cups water
  • 6 Tablespoons butter
  • 1/2 cup celery , sliced
  • 1/2 cup onion , chopped
  • 12 ounces Stove Top Stuffing Mix (cornbread) , 2 (6 ounce) boxes
Instructions
  1. In a large sauce pan, place the water, butter, chopped onion and celery. Bring the water to a boil on medium high heat, which will melt the butter and cook the celery and onion. Cook on medium high for 4-5 minutes.

  2. Add the stuffing mix to the liquid and veggies in the pan, and stir the ingredients to fully combine.  Remove the pan from the heat. Cover the pan with a lid.

  3. Once the dry stuffing mix has been mixed into the liquid, you will see that it begins to rehydrate the dry cornbread pieces. Let stuffing stand (covered) for 5 minutes, because it takes a few minutes for the dry cornbread in the mix to fully rehydrate. When the easy cornbread stuffing has rested for 5 minutes, fluff it up with a fork. The cornbread stuffing is now ready to serve! Transfer to a serving dish, serve and enjoy!

Nutrition Facts
Quick Easy Cornbread Stuffing
Amount Per Serving (1 g)
Calories 162 Calories from Fat 54
% Daily Value*
Fat 6g9%
Saturated Fat 3g19%
Cholesterol 15mg5%
Sodium 451mg20%
Potassium 90mg3%
Carbohydrates 22g7%
Fiber 1g4%
Sugar 2g2%
Protein 3g6%
Vitamin A 195IU4%
Vitamin C 0.7mg1%
Calcium 32mg3%
Iron 1.1mg6%
* Percent Daily Values are based on a 2000 calorie diet.

Here’s one more to pin on your Pinterest boards!Make this flavorful, quick easy cornbread stuffing as a side dish for the holidays (or any MEAL)! This savory dish can be made in 10 minutes, a real timesaver!

Cranberry Pecan Goat Cheese Bites

Make these colorful & delicious Cranberry Pecan Goat Cheese Bites for your next party or get together! These EASY bite sized appetizers are made in 15 minutes!

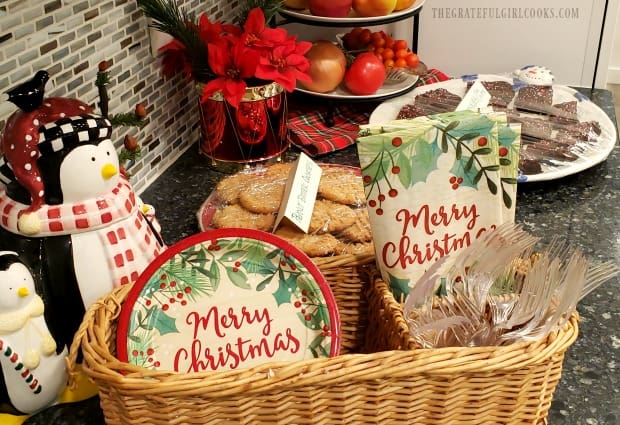
Recently I hosted a Christmas get together for former co-workers. Several of us hadn’t seen each other in 12 years! It always seems like the holidays are a great time to renew friendships and enjoy spending time with those you love!

I made a couple simple desserts, provided beverages, and asked everyone that came to the party to bring an appetizer to share! It was a lot of fun, and there were some nice food choices we all enjoyed!

Getting ready for Christmas party where Cranberry Pecan Goat Cheese Bites will be served.

The appetizer I decided to make was this recipe for Cranberry Pecan Goat Cheese Bites.  I originally found the recipe on Pinterest, from Jessica (at The Novice Chef), and decided to try it!

The recipe is super easy to make, and the results? Fantastic! Creamy, slightly sweet cheese balls, are coated in dried cranberries, fresh parsley, and chopped pecans. These colorful (green and red) tiny bite size treats were a perfect appetizer for the holiday season! YUM!

Scroll Down For A Printable Recipe Card At The Bottom Of The Page

How To Make Cranberry Pecan Goat Cheese Bites Filling

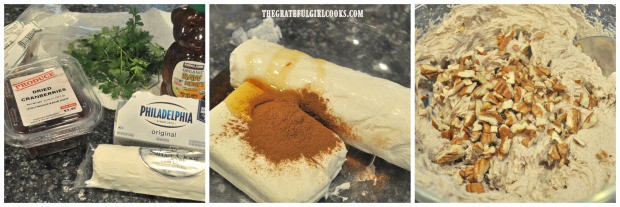
Place the goat cheese, cream cheese, honey and cinnamon into a large mixing bowl. Use an electric mixer to fully combine these ingredients until blended and smooth.

Once the goat cheese mixture is smooth, add 1/2 cup of the chopped pecans, reserving the remaining pecans (1 cup) for later. Stir the 1/2 cup of chopped pecans into the cheese mixture until combined. This will be the filling for your cranberry pecan goat cheese bites!

NOTE: I “dry-toasted” the pecans in a skillet (no oil, etc.), stirring for a few minutes to slightly toast them before using them in this recipe. I then let the pecans cool before adding them to the cheese mixture. THIS STEP IS COMPLETELY OPTIONAL (but good!).

Ingredients for cranberry pecan goat cheese bites are mixed together in bowl.

Covering The Cranberry Pecan Goat Cheese Bites

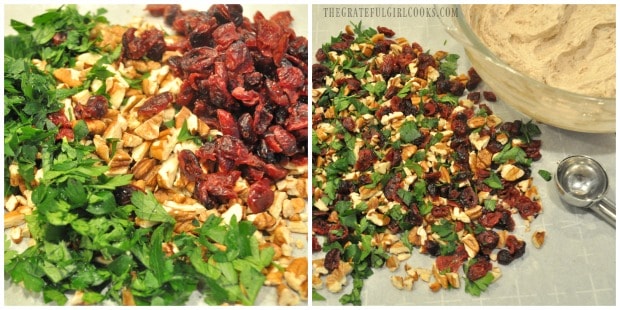
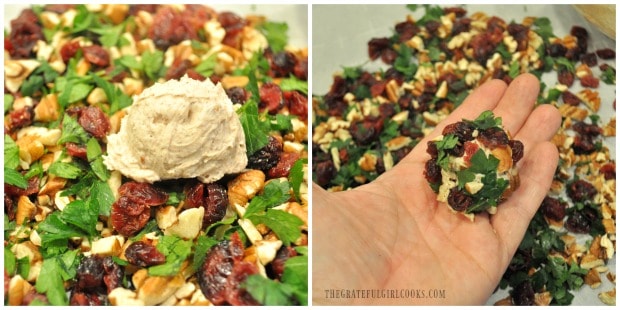
Place a sheet of parchment paper on kitchen counter. Put the remaining 1 cup of chopped pecans, dried cranberries and chopped fresh parsley on the paper.

Gently combine the pecans, cranberries and parsley. Spread them out a bit on the parchment paper.  Grab a cookie scoop (or a Tablespoon measuring spoon), and get ready to create these cute cranberry pecan goat cheese bites!

Chopped parsley, pecans, and dried cranberries are mixed to garnish cranberry pecan goat cheese bites.

Place a scoop of the goat cheese mixture on top of the cranberry/pecan/parsley mixture.  Make sure the cheese mixture is rounded into a ball. Roll it around in the topping, until the cheese ball is covered on all sides. When done, place the cranberry pecan goat cheese  ball on a large plate or platter.

Repeat this process (one at a time) until all the goat cheese mixture is gone. The recipe will yield about 18 cranberry pecan goat cheese bites!

Cranberry pecan goat cheese bites are rolled in parsley, cranberries and pecans, to cover.

The cheese balls will need to be refrigerated, for peak flavor and texture. They will firm up a bit as they chill. They are at their best, when served cold, right from the refrigerator! You can make these cute and festive little appetizers up to 3 days in advance, which is really a great timesaver! They need to be stored in the refrigerator in a sealed, airtight container.

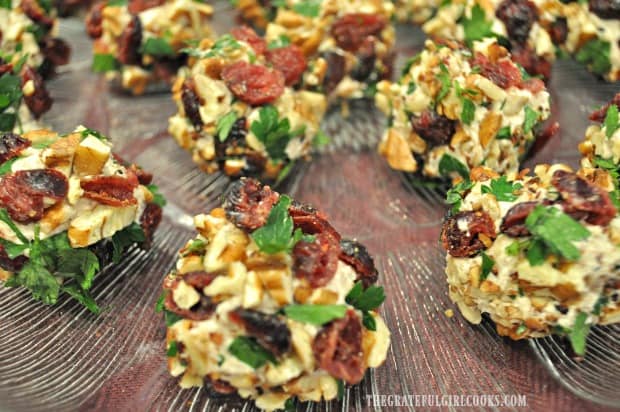
Close up photo of cranberry pecan goat cheese bites, on plate.

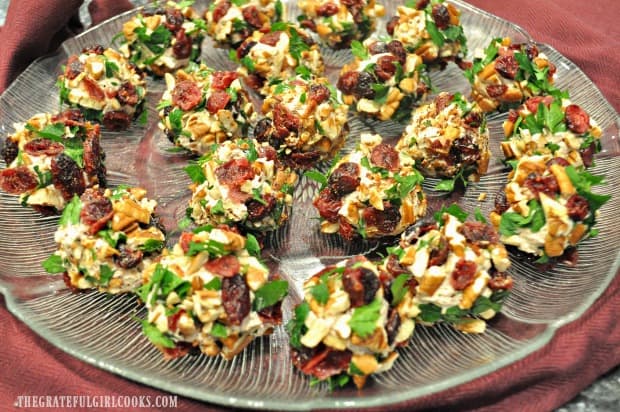
Don’t they look colorful? Perfect for the Christmas holidays! And… since they are so easy to make (and can be made ahead of time), this appetizer is PERFECT for such a busy time of year!

Cranberry pecan goat cheese bites are on a plate.

Serving The Cranberry Pecan Goat Cheese Bites

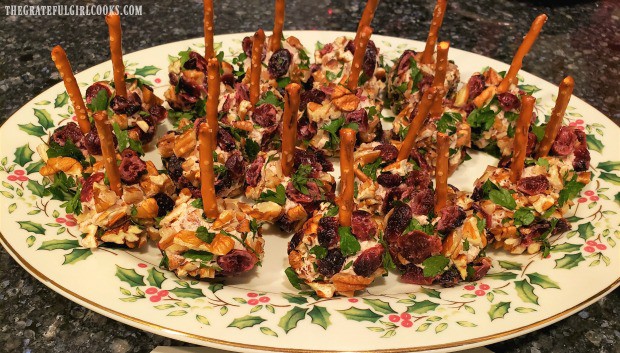
Right before serving the cranberry pecan goat cheese bites, I transferred them to a pretty Christmas serving platter. Gently insert a stick pretzel into the center of each cheese ball, to serve. That step is completely optional, but it made it very easy for my guests to pick up the cranberry pecan goat cheese bites to put on their plate!

A pretzel stick is inserted into cranberry pecan goat cheese bites, to serve.

I received several compliments on these colorful and yummy appetizers! They are GOOD! Sure do hope you will consider making these for your family, friends, a holiday party… or ANY time of the year! Have a wonderful day, friends. Make it a GOOD one!

Looking For More Appetizer Recipes?

You can find all of my recipes in the Recipe Index located at the top of the page.  A few favorite appetizers (that are wonderful for parties) are:

Interested In More Recipes?

Thank you for visiting this website. I appreciate you using some of your valuable time to do soIf you’re interested, I publish a newsletter 2 times per month (1st and 15th) with all the latest recipes, and other fun info. I would be honored to have you join our growing list of subscribers, so you never miss a great recipe!
There is a Newsletter subscription box on the top right side (or bottom) of each blog post, depending on the device you use, where you can easily submit your e-mail address (only) to be included in my mailing list.

You Can Also Find Me On Social Media:
Facebook page: The Grateful Girl Cooks!
Pinterest: The Grateful Girl Cooks!
Instagram: jbatthegratefulgirlcooks

Author's signature

Recipe Source: https://thenovicechefblog.com/cranberry-pecan-goat-cheese-truffles/

0 from 0 votes
Cranberry Pecan Goat Cheese Bites
Prep Time
15 mins
Cook Time
0 mins
Total Time
15 mins
 
Make these colorful & delicious Cranberry Pecan Goat Cheese Bites for your next party or get together! These EASY bite sized appetizers are made in 15 minutes!
Category: Appetizers
Cuisine: American
Keyword: cranberry pecan goat cheese bites
Servings: 18
Calories Per Serving: 150 kcal
Author: JB @ The Grateful Girl Cooks!
Ingredients
  • 10 ounces goat cheese (chevre)
  • 6 ounces cream cheese
  • 3 Tablespoons honey
  • 2 teaspoons ground cinnamon
  • cups pecans , chopped and divided
  • 1 cup dried cranberries
  • 1/2 cup finely chopped fresh flat leaf parsley
Instructions
  1. Place goat cheese, cream cheese, honey and cinnamon into a large mixing bowl. Use an electric mixer to fully combine ingredients until smooth. Add 1/2 cup of chopped pecans (reserve the rest for later). Stir the pecans into cheese mixture until combined.  NOTE: I "dry-toasted" the pecans in a skillet (no oil, etc.), stirring for a few minutes to slightly toast them before using them in this recipe. I then let the pecans cool before adding them to the cheese mixture. THIS STEP IS COMPLETELY OPTIONAL (but good!).

  2. Place a sheet of parchment paper on kitchen counter. Put remaining cup of chopped pecans, dried cranberries and chopped fresh parsley on the paper. Gently combine pecans, cranberries and parsley. Spread them out on the parchment paper.  

  3. Place a scoop (using cookie scoop or Tablespoon) of the goat cheese mixture on top of the cranberry/pecan/parsley mixture.  Make sure the cheese mixture is rounded into a ball. Roll it around in the topping, until the cheese ball is covered on all sides. When done, place the cranberry pecan goat cheese  ball on a large plate or platter. Repeat process (one at a time) until all the goat cheese mixture is gone. 

  4. The cheese balls will need to be refrigerated, for peak flavor and texture. They will firm up as they chill. They are at their best, when served cold, right from the refrigerator! You can make these appetizers up to 3 days in advance, which is a great timesaver! They need to be stored in the refrigerator in a sealed, airtight container. Serve as is, or gently insert a stick pretzel into the top of the cheese ball right before serving. Enjoy!

Nutrition Facts
Cranberry Pecan Goat Cheese Bites
Amount Per Serving (1 g)
Calories 150 Calories from Fat 90
% Daily Value*
Fat 10g15%
Saturated Fat 3g19%
Cholesterol 12mg4%
Sodium 103mg4%
Potassium 73mg2%
Carbohydrates 10g3%
Fiber 1g4%
Sugar 8g9%
Protein 4g8%
Vitamin A 360IU7%
Vitamin C 2.3mg3%
Calcium 47mg5%
Iron 0.7mg4%
* Percent Daily Values are based on a 2000 calorie diet.

Here’s one more to pin on your Pinterest boards!Make these colorful & delicious Cranberry Pecan Goat Cheese Bites for your next party or get together! These EASY bite sized appetizers are made in 15 minutes!

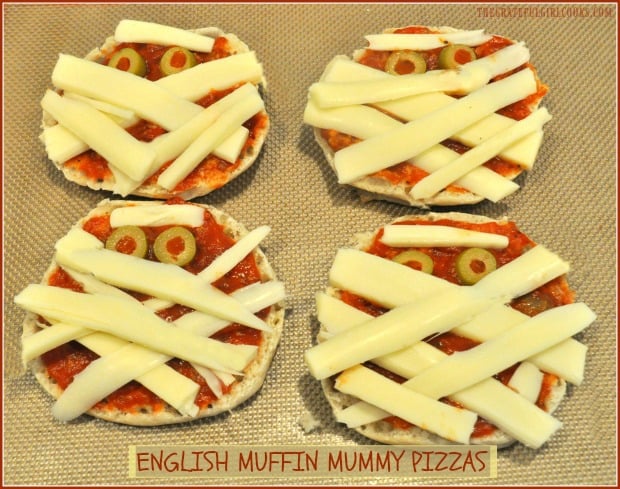
English Muffin Mummy Pizzas

English Muffin Mummy Pizzas are a perfect Halloween treat for kids (or adults)! They’re cute, yummy, and VERY EASY to make, with only a few ingredients!
English Muffin Mummy Pizzas are a perfect Halloween treat for kids (or adults)! They're cute, yummy, and VERY EASY to make, with only a few ingredients!

With Halloween fast approaching, these English muffin mummy pizzas would be a FUN way to enjoy a quick lunch treat with the kids or grandkids! These EASY, tasty mini YUMMY MUMMY pizzas would be a fun project to do with your kids for Halloween! The kids can decorate their own English muffin mummy pizzas. What fun!

Scroll Down For A Printable Recipe Card At The Bottom Of The Page

Halloween Memories

I remember how memorable it was when our two sons were little (they’re grown men now) and would get dressed up for Halloween festivities. They were always SO incredibly excited!

This would be a fun dinner to serve before going Trick or Treating, or to serve a group of kids at a Harvest Party!  They will be talking about making their own MUMMY PIZZAS long after they’ve eaten them!

All YOU will need to do is a TINY bit of prep work (slice cheese and olives), let the kids decorate their pizzas, and then YOU can bake them! That’s it! Then, before you can say “FUNNY YUMMY MUMMY”, a “spooky” tasty lunch is served!

Time to feed these boys some English muffin mummy pizzas for their Halloween treat!

It’s EASY To Make English Muffin Mummy Pizzas!

The first thing you will need to do is split the English muffins in half. Place them on a parchment paper or silicone baking mat, cut side UP, on a 13×9 inch baking sheet.

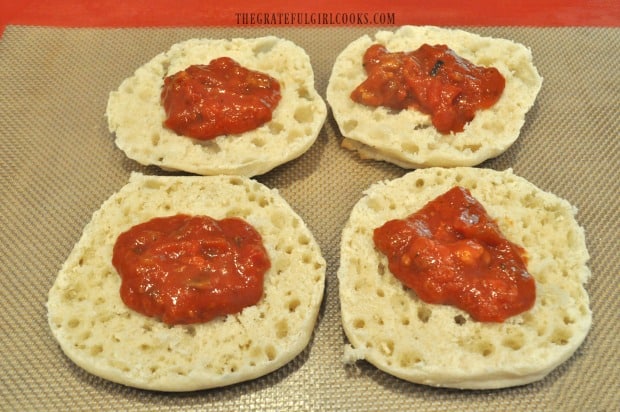
Place a HEAPING Tablespoon of prepared pizza or spaghetti sauce onto each English muffin half. I used my homemade spaghetti sauce. Spread the sauce with a spoon, to cover the English muffin.

By the way, if you are ever interested in learning how to make homemade English muffins, my recipe is right here.

Pizza sauce is spread onto split, untoasted English muffins for mummy pizzas.

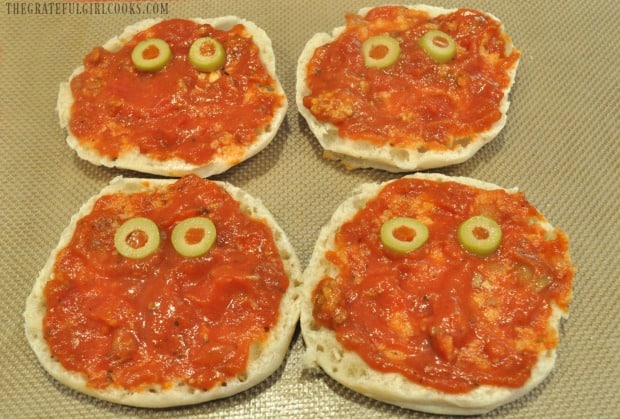
Since we ALL KNOW that mummies have eyes (right?), the next thing to do is slice the pimento-stuffed green olives into “eyeballs”. Position them toward the top of the English muffin mummy pizza.

Green olive eyes are added to English muffin mummy pizzas.

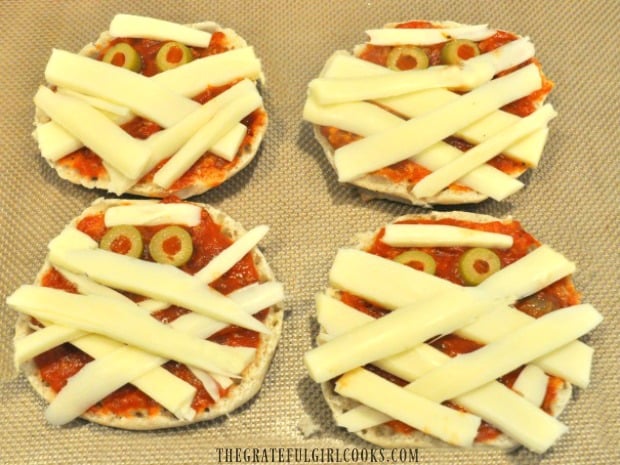
The next thing to do is position thin strips of mozzarella cheese on top, as if wrapping a mummy.  This is where the kids can really get creative! I used string cheese sticks, and carefully cut them into strips.

However, you can definitely use packaged mozzarella slices, or mozzarella slices cut from a large mozzarella ball (and then trimmed), to make this work for you. Best width is 1/4″.

Strips of mozzarella cheese are added to English muffin mummy pizzas.

Once the English muffin mummy pizzas are decorated and “mummified”, they are ready to put into the oven and bake!

Baking English Muffin Mummy Pizzas

Place the baking sheet in a preheated 400°F oven. The yummy mummies will need to bake between 8 and 12 minutes. They are done when the cheese has melted, and the muffins are heated through. Remove the baking sheet from the oven.

TIP: Let the English muffin mummy pizzas cool for a little bit before serving (especially to kids), because they will be very hot!

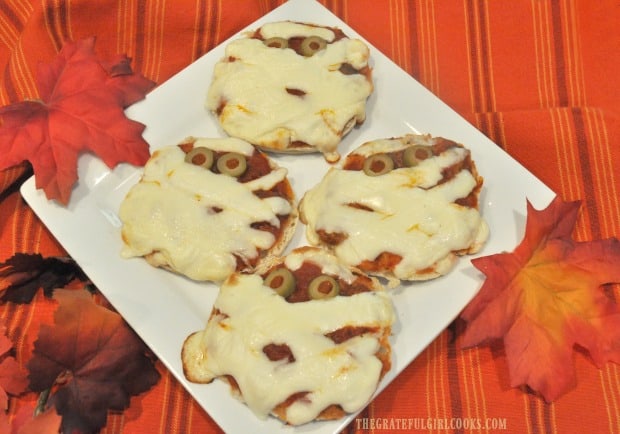
English muffin mummy pizzas on white plate, after baking in oven.

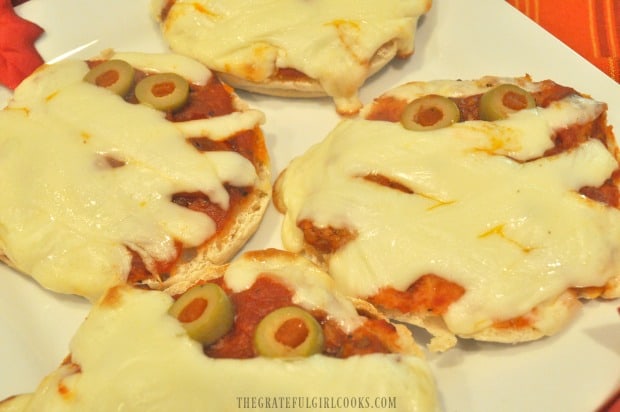
Here’s an up close photo of my English muffin mummy pizzas. I made the strips of cheese a bit wider than the recommended 1/4″ size, so a lot of the cheese melted together.

I think the pizza on the far left ended up looking a bit like Santa Claus, now that I think about it. Hmmm. Wrong season… wait your turn, Santa!

Close up picture of English muffin mummy pizzas on white plate, once baked.

Here’s hoping your family enjoys these cute little English muffin mummy pizzas! My hubby and I, (who are most definitely “big kids”) really do!

If you enjoy this cute treat, be sure and check out my recipes for Stuffed Jack O’ Lantern Peppers and Peanut Butter Rice Krispie Pumpkins! They are so cute, easy to make, and the kids will love them, too!

Have a GREAT day, and don’t forget- you can find ALL of my recipes in the Recipe Index, located at the top of the page.

Want More Recipes? Get My FREE Newsletter!

I publish a newsletter 2 times per month (1st and 15th) with lots of recipes, tips, etc..
Would you like to join our growing list of subscribers?

There is a Newsletter subscription box on the top right (or bottom) of each blog post, depending on the device you use.
You can submit your e-mail address there, to be added to my mailing list.

Find Me On Social Media:

Facebook page: The Grateful Girl Cooks!
Pinterest:
The Grateful Girl Cooks!
Instagram:
jbatthegratefulgirlcooks

Author's signature

Recipe Adapted From: https://www.veggiessavetheday.com/english-muffin-pizzas

↓↓ PRINTABLE RECIPE BELOW ↓↓

0 from 0 votes
English Muffin Mummy Pizzas
Prep Time
10 mins
Cook Time
10 mins
Total Time
20 mins
 
English Muffin Mummy Pizzas are a perfect Halloween treat for kids (or adults)! They're cute, yummy, and VERY EASY to make, with only a few ingredients!
Category: Lunch
Cuisine: Italian
Keyword: English muffin mummy pizzas
Servings: 4 (2 halves each)
Calories Per Serving: 211 kcal
Author: JB @ The Grateful Girl Cooks!
Ingredients
  • 4 English muffins , split in half
  • 6 Tablespoons pizza or spaghetti sauce , HEAPING Tablespoons
  • 8 green pimento-stuffed olives
  • 3 low fat mozzarella string cheese sticks SEE NOTE BELOW
Instructions
  1. Preheat oven to 400°F. Split English muffins in half. Place them on parchment paper or silicone baking mat, cut side UP, on a 13x9 inch baking sheet.

  2. Place a HEAPING Tablespoon of prepared pizza or spaghetti sauce onto each English muffin half. I used my homemade spaghetti sauce. Spread the sauce with a spoon, to cover muffin.
  3. Slice the pimento-stuffed green olives into "eyeballs". Position the sliced olives toward the top of the pizza.

  4. Position (layer) thin strips of mozzarella cheese on top, as if wrapping a mummy. Once decorated, they are ready to cook!

  5. Place the baking sheet in a preheated 400°F oven. The mummy pizzas will need to bake between 8 and 12 minutes. They are done when cheese has melted, and the muffins are heated through. Remove baking sheet from oven. Let pizzas cool for a little bit before serving (especially to kids), because they will be very hot! Enjoy!

Recipe Notes

NOTE: If using string cheese, carefully cut them into strips to fit.  You can also use packaged mozzarella slices, or slices from a large mozzarella ball. Recommendation is to slice mozzarella cheese strips 1/4" wide .

Nutrition Facts
English Muffin Mummy Pizzas
Amount Per Serving (1 )TWO halves))
Calories 211 Calories from Fat 54
% Daily Value*
Fat 6g9%
Saturated Fat 2g13%
Cholesterol 11mg4%
Sodium 671mg29%
Potassium 149mg4%
Carbohydrates 28g9%
Fiber 2g8%
Sugar 1g1%
Protein 9g18%
Vitamin A 130IU3%
Vitamin C 1.6mg2%
Calcium 52mg5%
Iron 0.7mg4%
* Percent Daily Values are based on a 2000 calorie diet.

Here’s one more to pin on your Pinterest boards!English Muffin Mummy Pizzas are a perfect Halloween treat for kids (or adults)! They're cute, yummy, and VERY EASY to make, with only a few ingredients!

Microwave Pecan Brittle

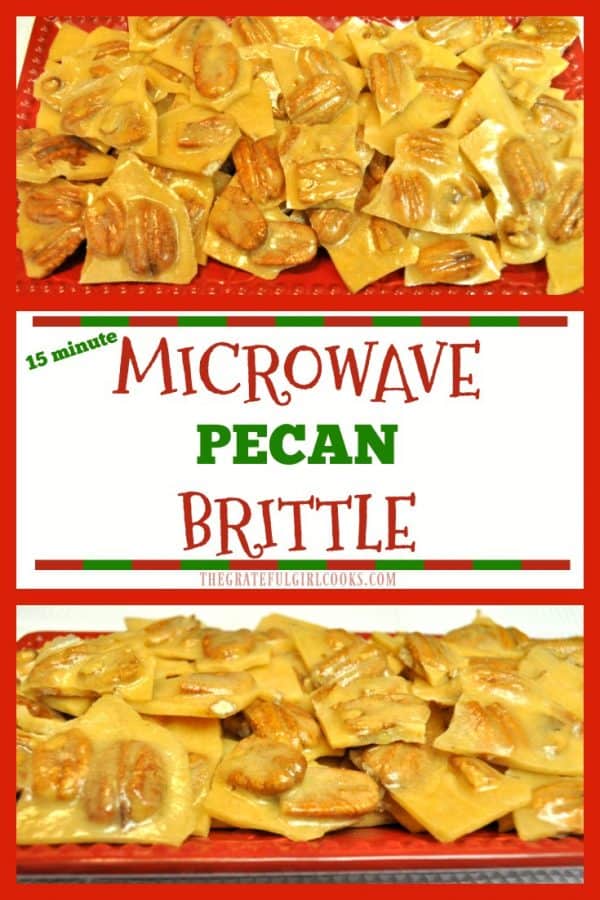
Microwave Pecan Brittle is a time-saving twist on a classic candy! This delicious, crunchy holiday treat is easy to make in 15 minutes, using a microwave!Microwave Pecan Brittle is a time-saving twist on a classic candy! This delicious, crunchy holiday treat is easy to make in 15 minutes, using a microwave!
Traditional peanut brittle gets an update and a time-saving twist in this simple recipe for Microwave Pecan Brittle! Yes… this buttery, crunchy candy is easy to make in 15 minutes, uses pecan halves instead of the customary Spanish or raw peanuts, and is made entirely IN THE MICROWAVE!

I grew up eating “traditionally made” peanut brittle every Christmas when my Mom would cook a large batch on our stovetop.  The process was a bit complicated, and involved using a candy thermometer, cooking the “syrup” portion to exactly the right temperature, and actually took a while to make.

Scroll Down For A Printable Recipe Card At The Bottom Of The Page

Who Knew You Could Make Microwave Pecan Brittle In A MICROWAVE?

When I saw this MICROWAVE time-saving recipe online from Chris Scheuer of The Café Sucré Farine a couple of months ago, I KNEW I wanted to try it (if you’ve never visited her blog, I highly recommend it)!

We were starting a complete kitchen remodel the first week in November, and I knew I wanted to make some Christmas goodies ahead of time so we could have some goodies to enjoy over the holidays or for gift-giving, even though we wouldn’t have any major appliances (or a kitchen, for that matter) during Thanksgiving OR Christmas.

Well, as I write this post, it’s almost Christmas, and we are in the final days of our remodel. It looks like I will have a working kitchen the second week of January! It’s been nice to pull this pecan brittle out of our freezer (yes, I froze it back in October) and thoroughly enjoy it! I am happy to report that this microwave pecan brittle recipe is wonderful… easy to prepare, and quite delicious! Here’s how to make it!

How To Make Microwave Pecan Brittle

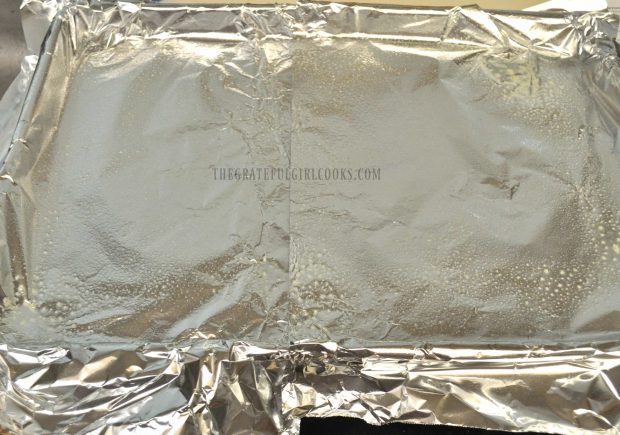
Cover a large cookie sheet with foil, making sure to leave an overhang of foil on all sides. Give the foil on the baking sheet a very generous spray of non-stick cooking spray.

Place the pan in a preheated 350 degree oven while you make the candy. This is done to make sure pan is really warm when you pour in the hot liquid mixture later on. A warm pan helps the pecan brittle to thin out and spread a bit easier.

Aluminum foil covered baking sheet is warmed in oven before adding pecan brittle mixture.

Spray a 2 qt. microwave-safe baking dish AND a heat-resistant spatula with non-stick cooking spray. Measure the sugar and corn syrup into the baking dish. Stir until this mixture is fully combined and thick. Put the dish in the microwave.

Cook The Brittle In Steps

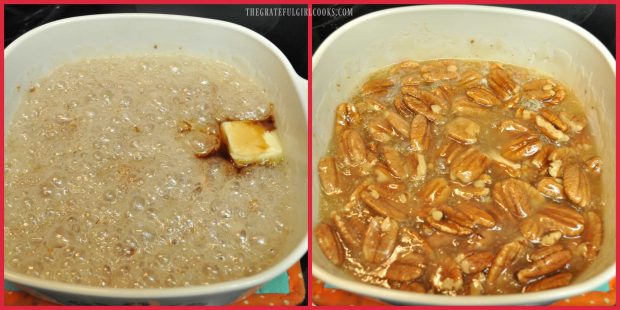
Cook mixture using HIGH power for 3½ minutes. As you can see from the photos, the mixture will be very hot, bubbly and light in color when done. Remove from microwave carefully – it is HOT!

Pecan Brittle syrup is heated in microwave oven until bubbly.

Stir in the pecan halves, then place dish back into microwave.  Cook mixture on HIGH power for an additional 3 minutes. Remove dish from microwave carefully (the color will be slighter darker).

Pecan halves are added to brittle mixture and microwaved.

Immediately add butter and the vanilla extract to the hot candy mixture. Stir the candy very well to combine all ingredients. Put the dish back in the microwave (last time). Cook on HIGH power for 1 minute.

Note: Since microwaves sometimes have different wattage levels, keep an eye on the color of the candy during the third microwaving. You may need to cook it an additional minute or so to achieve a medium brown color.

Butter added to pan, and pecan brittle is microwaved again until golden brown.

What To Do When Done Microwaving The Pecan Brittle

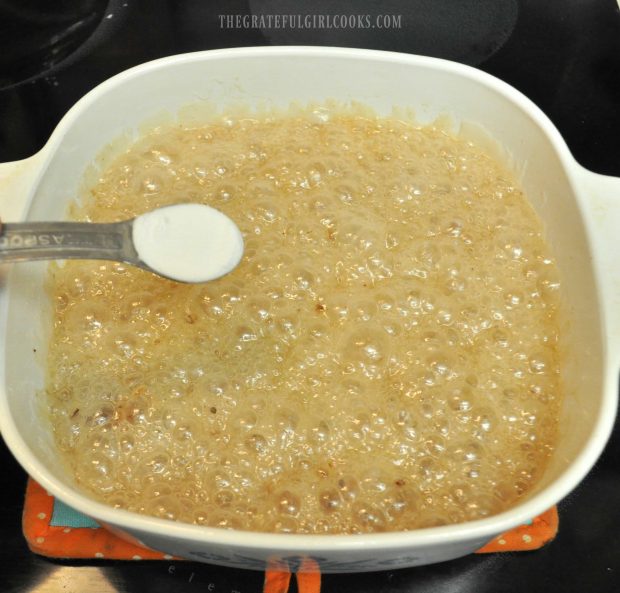
Remove the dish from microwave very carefully. It is HOT. Sprinkle the baking soda over the top of the candy mixture. Stir only until the baking soda has been mixed in. The candy will get foamy, rise up a bit in the dish, and turn from a slightly amber color to a more caramel color.

Baking soda is sprinkled over the top of the pecan brittle mixture.

Pour The Microwave Pecan Brittle Onto Warm Foil-Lined Baking Pan

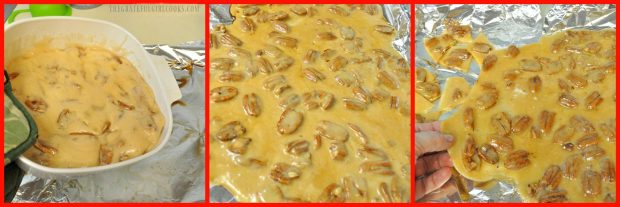
Immediately (and carefully- use those hot pads!) pour the hot liquid candy onto your warm foil-lined baking sheet, covering as much of the foil as you can. Use a sprayed, heat-resistant spatula to spread the candy out as much as possible on the sheet.

When you spread it out, you might have some holes or uneven areas appear in the candy… don’t worry about that, cause you will bust it up into pieces later! You really cannot mess this up, no matter how hard you may try!

Break Up The Brittle Once Totally Cooled

Once the brittle has cooled down completely, all you will need to do is lift the foil right off of the baking sheet using the overhanging pieces of foil, lift the candy right off the foil and break it up into small serving sized pieces! It’s EASY!

Microwave Pecan Brittle mixture is poured out onto covered baking sheet, to cool.

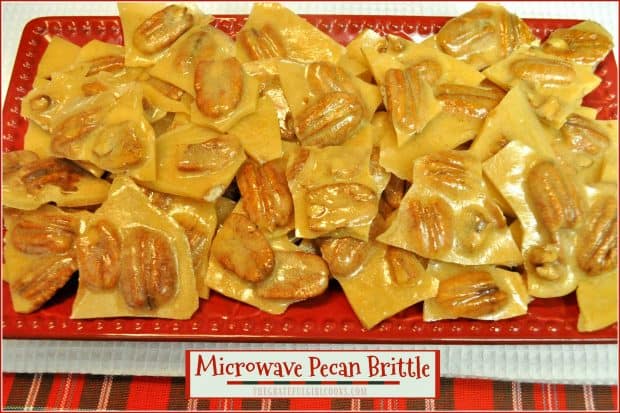
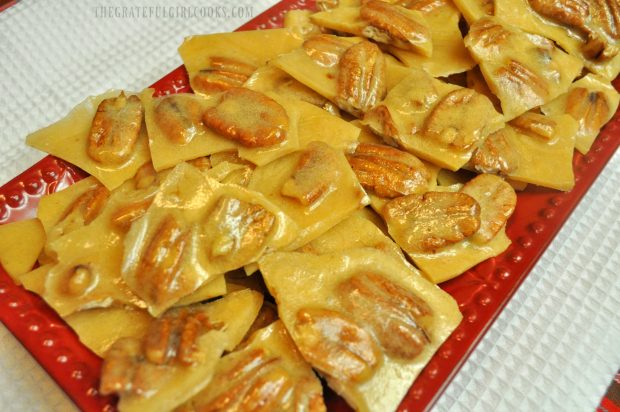
The microwave pecan brittle is ready to serve once it is broken up into pieces. Store the leftovers in an airtight sealed container. NOTE: I placed mine into a freezer storage bag and froze the candy for two months, due to our remodel. When I took it out of the freezer and let it thaw out, the candy tasted just as marvelous as the first day I made it! Yay!

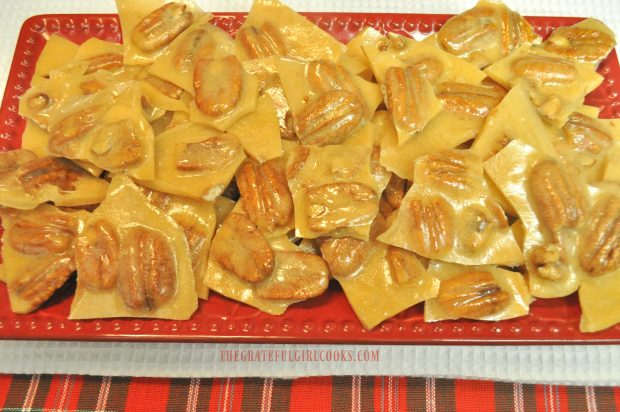
Microwave Pecan Brittle is broken into pieces and served, on red platter.

Microwave Pecan Brittle is served, once broken into small pieces.

I found this quick (and new to me) method for making microwave pecan brittle to be so easy, and the results taste fabulous! What a wonderful hostess gift this homemade pecan brittle would be, wrapped up in a cute decorated bag or container! Have a blessed Christmas and Hannukah, friends! Hope you will cherish and appreciate every minute of time spent with those you love!

Sure hope you will give this yummy Christmas treat a try. Your family and friends will LOVE it! Be sure to check out ALL my recipes in the Recipe Index, located at the top of the page. Have a great day.

You Might Also Enjoy These Other Holiday Treats

Candied Orange, Cinnamon & Clove Spiced Pecans
Chocolate Butterscotch Peanut Clusters
Cranberry Cashew Clusters
Microwave Rocky Road Fudge
Mom’s Refrigerator Fruitcake (it’s not THAT kind of fruitcake!)

Interested In More Recipes?

Thank you for visiting this website. I appreciate you using some of your valuable time to do soIf you’re interested, I publish a newsletter 2 times per month (1st and 15th) with all the latest recipes, and other fun info. I would be honored to have you join our growing list of subscribers, so you never miss a great recipe!
There is a Newsletter subscription box on the top right side (or bottom) of each blog post, depending on the device you use, where you can easily submit your e-mail address (only) to be included in my mailing list.

You Can Also Find Me On Social Media:

Facebook page: The Grateful Girl Cooks!
Pinterest:
The Grateful Girl Cooks!
Instagram:
jbatthegratefulgirlcooks

Author's signature

Recipe Source: https://thecafesucrefarine.com/15-minute-microwave-pecan-brittle/

0 from 0 votes
Microwave Pecan Brittle
Prep Time
7 mins
Cook Time
8 mins
Total Time
15 mins
 
Microwave Pecan Brittle is a time-saving twist on a classic candy! This delicious, crunchy holiday treat is easy to make in 15 minutes, using a microwave!
Category: Candy
Cuisine: American
Keyword: microwave pecan brittle
Servings: 30 pieces (approx.)
Calories Per Serving: 74 kcal
Author: JB @ The Grateful Girl Cooks!
Ingredients
  • Non-stick cooking spray
  • 1 cup granulated sugar
  • 1/2 cup corn syrup (light)
  • cups pecan halves
  • 1 Tablespoon butter
  • 1 teaspoon vanilla
  • 1 teaspoon baking soda
Instructions
  1. Cover a large cookie sheet with foil, making sure to leave an overhang on all sides. Give the foil a very generous spraying with non-stick spray. Place pan in a preheated 350 degree oven while you make the candy (this is done to make sure pan is really warm when you pour in the hot liquid candy mixture later on. Warm pan helps brittle to thin out and spread out a bit easier.)
  2. Spray a 2 qt. baking dish AND a heat-resistant spatula with non-stick cooking spray. Mix granulated sugar and corn syrup until fully combined and thick. Put dish in microwave. Cook mixture using HIGH power for 3½ minutes. The mixture will be very hot and light in color when done. Remove from microwave carefully - it is HOT!
  3. Stir in the pecan halves, then place dish back into microwave. Cook mixture on HIGH power for an additional 3 minutes. Remove dish from microwave carefully (the color will be a slighter darker).
  4. Immediately add butter and vanilla extract. Stir very well to combine all ingredients. Put the dish back in microwave (last time). Cook on HIGH power for 1 minute. NOTE: Since microwaves sometimes have different watt levels, keep an eye on the color of the candy during the third microwaving. You may need to cook it an additional minute or so to achieve a medium brown color.
  5. Remove dish from microwave. Sprinkle baking soda over the top of the candy mixture. Stir only until the baking soda has been mixed in. The candy will get foamy, rise up a bit in the dish, and turn from a slightly amber color to a caramel color.
  6. Immediately (and very carefully) pour the hot liquid onto your warm foil-lined baking sheet. Use your non-stick sprayed, heat-resistant spatula to spread the candy out as much as possible on the sheet. When you spread it out, you might see some holes or uneven areas... don't worry about that, cause you will bust it up later!
  7. Once the brittle has cooled down completely, all you need to do is lift the foil right out of the pan, then grab that candy, lifting it off the foil, and break it all up into small pieces!
Nutrition Facts
Microwave Pecan Brittle
Amount Per Serving (1 piece)
Calories 74 Calories from Fat 27
% Daily Value*
Fat 3g5%
Cholesterol 1mg0%
Sodium 43mg2%
Potassium 16mg0%
Carbohydrates 11g4%
Sugar 11g12%
Vitamin A 15IU0%
Vitamin C 0.1mg0%
Calcium 4mg0%
Iron 0.1mg1%
* Percent Daily Values are based on a 2000 calorie diet.

Here’s one more to pin on your Pinterest boards!Microwave Pecan Brittle is a time-saving twist on a classic candy! This delicious, crunchy holiday treat is easy to make in 15 minutes, using a microwave!

Chocolate Covered Peanut Butter Ritz Cookies

Crunchy, creamy, chocolate covered peanut butter Ritz cookies are quick, delicious, and totally EASY holiday treats to make, using only a few ingredients! Crunchy, creamy, chocolate covered peanut butter ritz cookies are quick, delicious, and totally EASY holiday treats to make, using only a few ingredients!

Chocolate Covered Peanut Butter Ritz® Cookies are an annual Christmas family tradition for us. The recipe has been handed down from my Aunt to my Mom, and then to me. These delectable treats are incredibly FAST and EASY to make, which is perfect for this busy time of year!

Many years ago (at least 15), my Mom shared these cookies with me and told me that her sister, my Aunt Theda in Texas made them for her, and Mom raved about how good they were! I tried a couple, and sure enough, they tasted fantastic.

When I asked my Mom how to make them she told me how incredibly easy it was.  I really loved my sweet Aunt… she passed away quite a few years ago, but I think of her whenever I make these goodies.

I’ve made these cookies so many times since then, but finally took pictures and decided to share the “recipe” on this blog.  I added a white glaze drizzled over the top, and some red and white sprinkles for the Christmas season, but really all you need to make these is 4 ingredients! Here’s how to make a quick dozen of these yummy stacked goodies.

Scroll Down For A Printable Recipe Card At The Bottom Of The Page

How To Make Chocolate Peanut Butter Ritz Cookies

Place 12 Ritz® crackers onto a piece of parchment paper.  Spread a teaspoon of creamy peanut butter onto each one. When done, top with another cracker.

Creamy peanut butter is spread on Ritz cracker for cookies.

Peanut Butter Ritz Cookies before being covered in chocolate.

Make The Dipping Chocolate

Melt 1½ cups semi-sweet chocolate chips with 1 HEAPING Tablespoon vegetable shortening in a microwave-safe bowl the microwave. Heat on High for 30 seconds. Remove the bowl and stir the chocolate. It will not be completely melted at this point.

Place the bowl back in microwave oven and heat an additional 30 seconds on High. Remove the bowl and stir the mixture again, until completely smooth.

Chocolate chips are melted with shortening to cover the peanut butter ritz cookies.

Time To Dip Some Chocolate Covered Peanut Butter Ritz Cookies!

Dip cookies, one at a time into melted chocolate mixture. I use a fork to hold the cookie, and sometimes use a spoon to help coat the entire cookie with chocolate. Let any excess chocolate drip back into bowl. Place the cookie back onto a piece of parchment paper.

Do not move the chocolate covered peanut butter Ritz cookies once you set them down.  Repeat process with all of the cookies. Once the chocolate has firmed up, they are ready to eat, unless you want to decorate them.

Each of the peanut butter ritz cookies are covered with melted chocolate

Decorating The Cookies More?

If you want to decorate the cookies, let the cookies sit, undisturbed, until the chocolate has firmed up completely.  To make an icing to decorate with, place powdered sugar in a small bowl.  Add only a couple drops of water at a time to the sugar, stirring well, until the glaze has reached a drizzling consistency.

Too thin? Add additional powder sugar. Too thick?  Add a drop or two of water.  Use a fork to drizzle the icing over each cookie.  Garnish with colored sprinkles, if desired, while glaze is still wet.

NOTE: You do not have to drizzle powdered sugar glaze on them. You can shorten the process even further by garnishing the fresh dipped chocolate cookies with candy colored sprinkles and leave off the white icing altogether if you want!

Chocolate Covered Peanut Butter Ritz Cookies are drizzled with a powdered sugar glaze.

Ready To Serve!

Let the icing completely firm up at room temperature.  Once chocolate and icing are totally firm, cookies can be transferred to a serving plate for everyone to enjoy!

Chocolate Covered Peanut Butter Ritz Cookies on a Christmas plate.

These delicious cookies can be decorated any way you wish. When I make these and it’s NOT Christmas time, I simply leave them plain, with only the chocolate covering them, and no powdered sugar drizzle. They taste good whether you fancy them up or not!

Chocolate Covered Peanut Butter Ritz Cookies can be decorated in various ways.
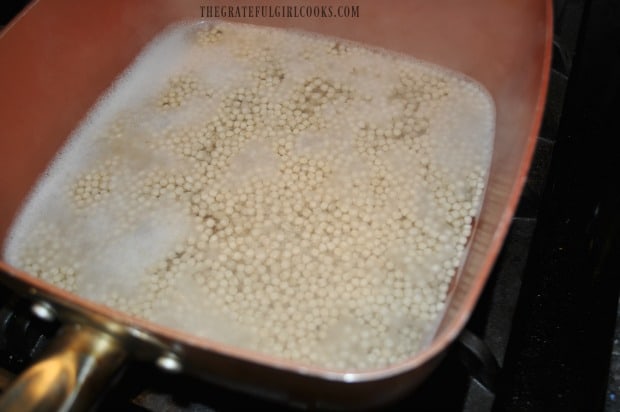
The flavor is wonderful in these treats, with the creamy peanut butter AND the chocolate coating going so well together. They remain crunchy from the cracker “shell”. The chocolate peanut butter Ritz cookies are so good it will be hard to stay out of them. Just remember to leave at least ONE left for good ol’ Santa Claus!

One of the Chocolate Covered Peanut Butter Ritz Cookies cut in half, on a Christmas plate.

I love to make these family favorites at Christmas time. They are made quickly without a lot of ingredients (a big plus), look good and taste even better! I hope you will consider making these chocolate covered peanut butter Ritz cookies a part of your holiday traditions, too!

Looking For More COOKIE Recipes?

You can find ALL of my recipes in the Recipe Index, located at the top of the page. I have lots of yummy cookie recipes, including:

Interested In More Recipes?

Thank you for visiting this website. I appreciate you using some of your valuable time to do soIf you’re interested, I publish a newsletter 2 times per month (1st and 15th) with all the latest recipes, and other fun info. I would be honored to have you join our growing list of subscribers, so you never miss a great recipe! 

There is a Newsletter subscription box on the top right side (or bottom) of each blog post, depending on the device you use, where you can easily submit your e-mail address (only) to be included in my mailing list.

You Can Also Find Me On Social Media:

Facebook page: The Grateful Girl Cooks!
Pinterest:
The Grateful Girl Cooks!
Instagram:
jbatthegratefulgirlcooks

Author's signature

Recipe Source: My Mom and Aunt Theda

0 from 0 votes
Chocolate Covered Peanut Butter Ritz Cookies
Prep Time
15 mins
Cook Time
0 mins
Total Time
15 mins
 
Crunchy, creamy, chocolate covered peanut butter ritz cookies are quick, delicious, and totally EASY holiday treats to make, using only a few ingredients!
Category: Cookies
Cuisine: American
Keyword: peanut butter ritz cookies
Servings: 12 cookies
Calories Per Serving: 255 kcal
Author: JB @ The Grateful Girl Cooks!
Ingredients
For Cookies:
  • 24 buttery crackers (I used Ritz® crackers)
  • 12 teaspoons creamy peanut butter
For Chocolate Coating:
  • cups semi-sweet chocolate chips
  • 1 Tablespoon vegetable shortening , use heaping Tablespoon!
For White Drizzle:
  • 1 cup powdered sugar
  • Water ( a couple drops at a time)
Instructions
  1. Place 12 crackers onto a piece of parchment paper. Carefully spread a teaspoon of creamy peanut butter onto each one . When done, top with another cracker.
  2. Melt semi-sweet chocolate chips and vegetable shortening in the microwave. Heat on High for 30 seconds. Remove bowl and stir chocolate. Place bowl back in microwave oven and heat an additional 30 seconds on High. Remove bowl and stir mixture until smooth.
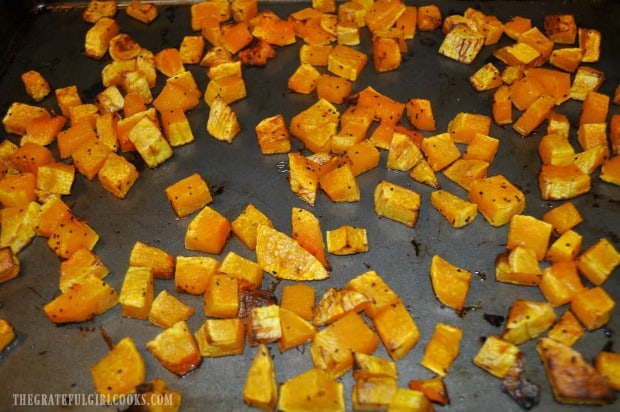
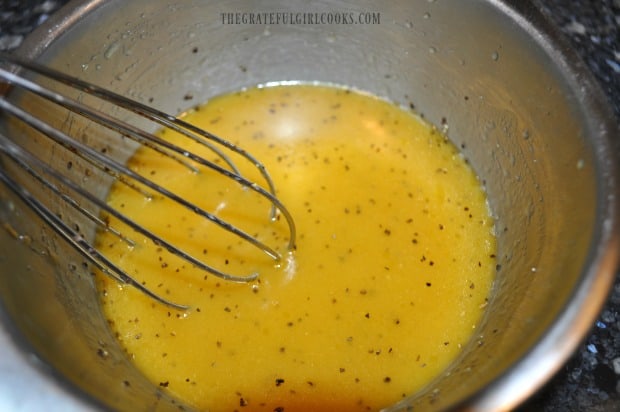
  3. Dip cookies, one at a time into melted chocolate mixture. Use a fork to hold the cookie, and a spoon to help coat entire cookie with chocolate. Let excess chocolate drip back into bowl, then set cookie onto parchment paper. Do not move cookie once you set it down. Repeat process with all cookies. Let the cookies sit, undisturbed, until chocolate has firmed up completely.
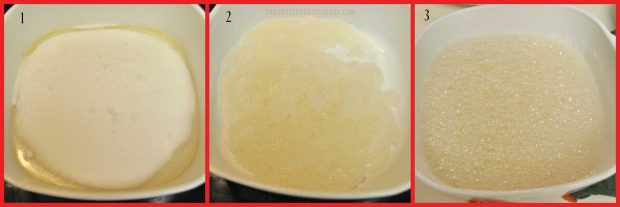
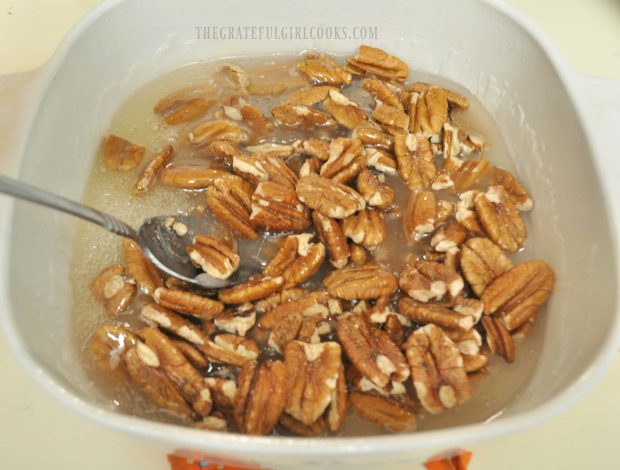
  4. Place powdered sugar in a small bowl. Add only a couple drops of water at a time to the sugar, stirring well, until the glaze has reached a drizzling consistency. Use a fork to drizzle the icing over each cookie. Garnish with colored sprinkles, if desired, while glaze is still wet.
  5. Let the icing completely firm up at room temperature. Once chocolate and icing are firm, cookies can be transferred to serving plate. Enjoy!
Nutrition Facts
Chocolate Covered Peanut Butter Ritz Cookies
Amount Per Serving (1 cookie)
Calories 255 Calories from Fat 135
% Daily Value*
Fat 15g23%
Saturated Fat 6g38%
Cholesterol 1mg0%
Sodium 92mg4%
Potassium 186mg5%
Carbohydrates 27g9%
Fiber 2g8%
Sugar 19g21%
Protein 3g6%
Vitamin A 10IU0%
Calcium 27mg3%
Iron 1.8mg10%
* Percent Daily Values are based on a 2000 calorie diet.

Here’s one more to pin to your Pinterest boards!Crunchy, creamy, chocolate covered peanut butter ritz cookies are quick, delicious, and totally EASY holiday treats to make, using only a few ingredients!