Category: Beef

Easy Stuffed Beef Rolls

You’ll love these Easy Stuffed Beef Rolls, featuring ground beef with a savory bread crumb, onion and spice stuffing inside, and baked with brown gravy on top!You'll love these Easy Stuffed Beef Rolls, featuring ground beef with a savory bread crumb, onion and spice stuffing inside, and baked with brown gravy on top!

I recently found an old recipe in my old, “practically ancient” recipe box.  This recipe for easy stuffed beef rolls is at least 15-20 years old (probably more than that!).

I used to write recipes down on 3×5 cards (back in the day before computers… ha ha), and came upon this one a couple weeks ago.

Not sure what the original source was (back then I was too ignorant to write it down), but I knew I wanted to modify the recipe slightly and try it.

I made the stuffed beef rolls for my husband and I, and then saved the leftovers for another meal (recipe makes 6!).  The recipe is VERY easy to make, and the results are very good!

Easy stuffed beef rolls are also quite economical to make (especially when it makes 6 servings), so it’s a “good on the ol’ family budget” recipe, as well! Hope you will consider making them for an easy dinner for family or friends.

Scroll Down For A Printable Recipe Card At The Bottom Of The Page

Here’s How To Make Stuffed Beef Rolls

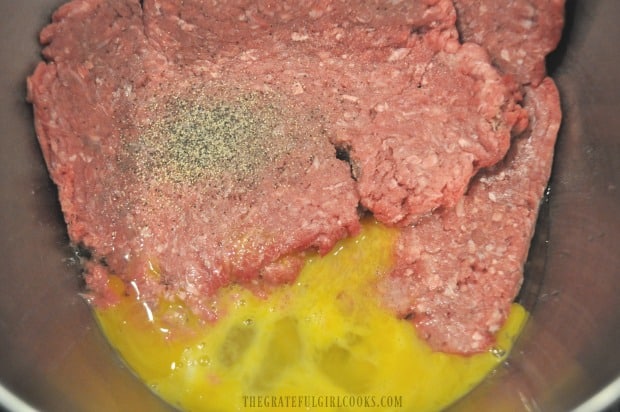
Mix ground beef, slightly beaten eggs, Worcestershire sauce, salt, pepper and garlic powder together in a large bowl until fully combined. Set aside.

Ground beef, eggs and spices in bowl before mixing

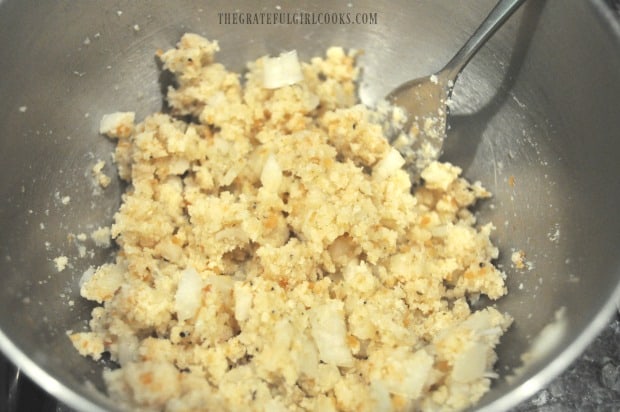
Combine the ingredients for stuffing in a small bowl (bread crumbs, onion, sage, pepper, marjoram and chicken broth). Set aside.

Bread crumb, onions and spices for beef roll stuffing, in bowl

Form The Meat Patties

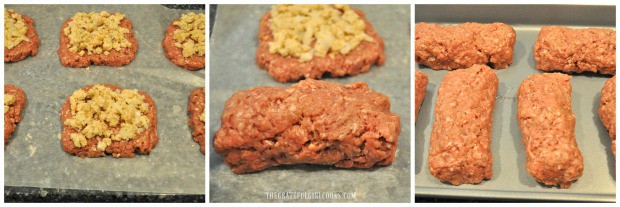
Divide the meat evenly into 6 portions. Place on wax paper, leaving space between each ball of meat.  Lay a piece of wax paper on top of the meat (enough to cover).

Use your hands to flatten out each piece of meat, shaping it into a 4 inch square.

Beef divided into 6 four inch squares

Add The Stuffing And Roll The Patties Up

Place 2 Tablespoons of stuffing mixture onto each meat square. Use your fingers to “spread”  the mixture out to within 1/2″ of each edge. Carefully roll up each square, one at a time, tucking filling in as you go.

If the stuffing falls out, just put it right back in, continuing until all 6 beef rolls are done. Make sure you seal up or tuck in the seam and ends of each roll to hold stuffing in while it bakes.

Bake The Stuffed Beef Rolls

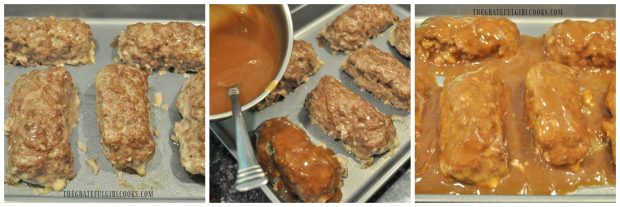
Spray a 13×9 inch baking dish with non-stick spray.  Place beef rolls, SEAM SIDE DOWN onto baking pan, leaving space between each roll. Bake in a preheated 375° oven (uncovered) for 20 minutes.

Stuffing is added to beef, then rolled up to seal it in

Make The Gravy

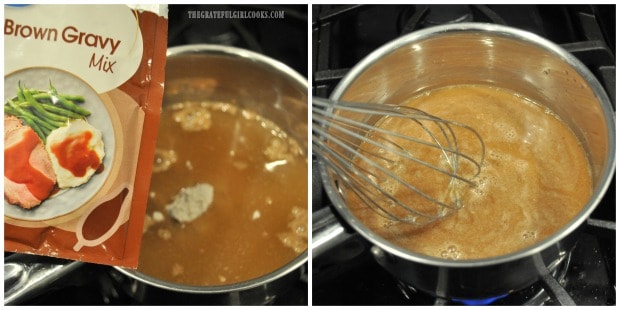
While the stuffed beef rolls are baking, make the gravy by combining an envelope of brown gravy mix with a cup of water. Bring the gravy mixture to a full boil, then reduce heat and simmer for one minute.

Brown gravy is cooked, to add to stuffed beef rolls

After the beef rolls have baked for 20 minutes, remove pan from oven.  Spoon the gravy over the top and sides of the meat. Place the pan back into the oven and continue cooking for an additional 25 minutes (uncovered).

Partially baked beef rolls are covered with gravy then baked again

When the stuffed beef rolls are done, carefully remove hot pan from oven.

Stuffed beef rolls with gravy, hot out of oven

Serve the Stuffed Beef Rolls!

Using a spatula, transfer a beef roll to individual serving plates.  If desired, you can always have more gravy on hand (by making a second batch) to spoon over meat and/or potatoes (if serving), but it is not necessary!

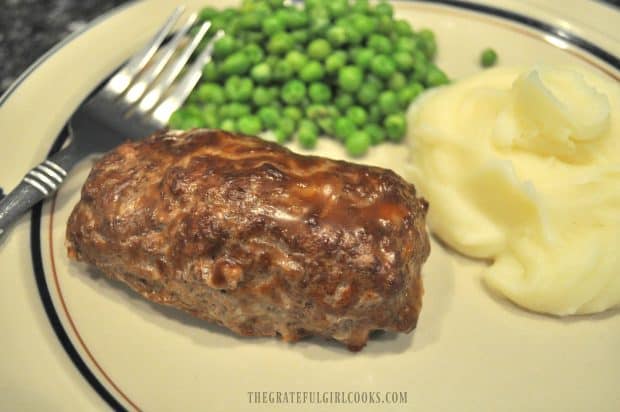
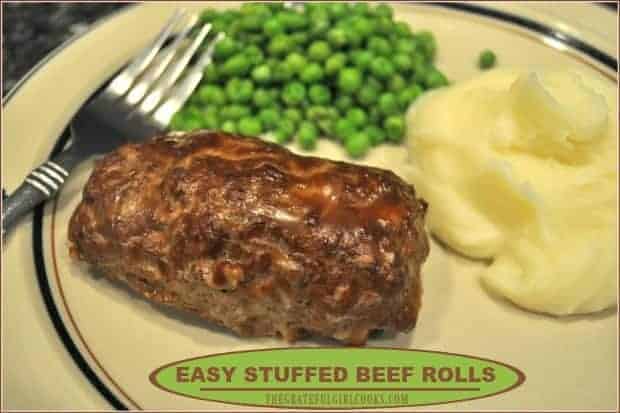
Easy Stuffed Beef Roll on plate, served with mashed potatoes and peas

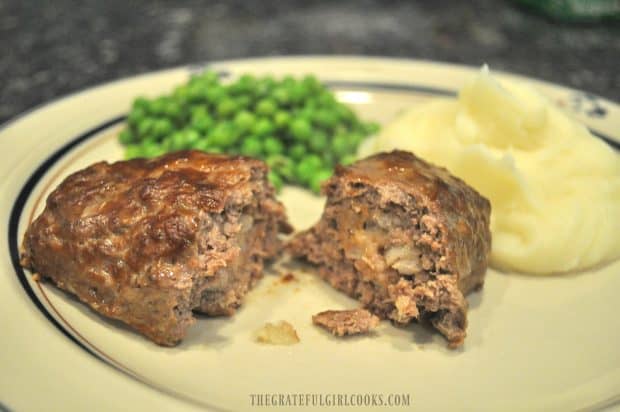
You can see some of the filling inside this stuffed beef roll that has been cut in half.

One of the stuffed beef rolls, cut in half to show inside.

This recipe is so simple… and yet it is delicious!  It’s a nice, easy way to present/serve individual beef portions to your family or guests.  If you enjoy this type of “old-school” dinner, you will enjoy this, and you might also love my recipe for Beef Tips And Gravy, or Really Good Meatloaf! YUM.

Have a great day, and remember, as always, to be KIND to those you cross paths with today. You just never know what pain or hurt someone may be going through, and all it takes is a simple kindness extended, to possibly ease the burden a little for them.

Looking For More BEEF Recipes?

You can find all of my recipes in the Recipe Index, located at the top of the page. I have some delicious recipes featuring ground beef you might enjoy, including:

Want More Recipes? Get My FREE Newsletter!

I publish a newsletter 2 times per month (1st and 15th) with lots of recipes, tips, etc..
Would you like to join our growing list of subscribers?

There is a Newsletter subscription box on the top right (or bottom) of each blog post, depending on the device you use.
You can submit your e-mail address there, to be added to my mailing list.

Find Me On Social Media:

Facebook page: The Grateful Girl Cooks!
Pinterest:
The Grateful Girl Cooks!
Instagram:
jbatthegratefulgirlcooks

Author's signature

Original recipe source: Unknown

↓↓ PRINTABLE RECIPE BELOW ↓↓

5 from 1 vote
Easy Stuffed Beef Rolls
Prep Time
10 mins
Cook Time
45 mins
Total Time
55 mins
 
You'll love these Easy Stuffed Beef Rolls, featuring ground beef with a savory bread crumb, onion and spice stuffing inside, and baked with brown gravy on top!
Category: Dinner
Cuisine: American
Keyword: stuffed beef rolls
Servings: 6 servings
Calories Per Serving: 350 kcal
Author: JB @ The Grateful Girl Cooks!
Ingredients
  • pounds ground beef
  • 2 eggs , slightly beaten
  • 1 Tablespoon Worcestershire sauce
  • 1/2 teaspon salt
  • 1/4 teaspoon black pepper
  • 1/4 teaspoon garlic powder
For Stuffing:
  • 1/2 cup dry bread crumbs
  • 2 Tablespoons onion , finely chopped
  • 1/4 teaspoon sage
  • 1/4 teaspoon marjoram , optional
  • 1/8 teaspoon black pepper
  • 1/3 cup chicken broth
For Gravy:
  • 1 envelope brown gravy mix
  • 1 cup water
Instructions
  1. Mix ground beef, slightly beaten eggs, Worchestershire sauce, salt, pepper and garlic powder together in a large bowl until fully combined. Set aside.

  2. Mix ingredients for stuffing in a small bowl (bread crumbs, onion, sage, pepper, and chicken broth). Set aside.
  3. Divide the meat evenly into 6 portions. Place on wax paper, leaving space between each ball of meat.  Lay a piece of wax paper on top of the meat (enough to cover). Use your hands to flatten out each piece of meat, shaping it into a 4 inch square. Place 2 Tablespoons of stuffing mixture onto each meat square. Use your fingers to "spread"  the mixture out to within 1/2" of each edge. Carefully roll up each square, one at a time, tucking filling in as you go (if stuffing falls out, just put it right back in), continuing until all 6 beef rolls are done. Make sure you seal up or tuck in the seam and ends of each roll to hold stuffing in while it bakes.

  4. Spray a 13x9 inch baking dish with non-stick spray. Place beef rolls, SEAM SIDE DOWN onto baking pan, leaving space between each roll. Bake in a preheated 375° oven (uncovered) for 20 minutes.
  5. While beef rolls are baking, make the gravy by combining an envelope of brown gravy mix with a cup of water. Bring the gravy mixture to a full boil, then reduce heat and simmer for one minute. After the beef rolls have baked for 20 minutes, remove pan from oven.  Spoon the gravy over the top and sides of the meat. Place the pan back into the oven and continue cooking for an additional 25 minutes (uncovered). When the stuffed beef rolls are done, carefully remove hot pan from oven. Using a spatula, transfer beef rolls to individual serving plates or a serving platter. Serve and enjoy!

Recipe Notes

*If you want additional gravy to pour over the FINISHED beef rolls (or to use on mashed potatoes, simply DOUBLE the amount of gravy you make, use half to bake beef rolls and the other half to spoon over finished beef rolls (or potatoes on the side)!

Nutrition Facts
Easy Stuffed Beef Rolls
Amount Per Serving (1 beef roll)
Calories 350 Calories from Fat 216
% Daily Value*
Fat 24g37%
Saturated Fat 9g56%
Cholesterol 135mg45%
Sodium 295mg13%
Potassium 356mg10%
Carbohydrates 7g2%
Protein 22g44%
Vitamin A 80IU2%
Vitamin C 1.2mg1%
Calcium 45mg5%
Iron 2.9mg16%
* Percent Daily Values are based on a 2000 calorie diet.

Here’s one more to pin on your Pinterest boards!You'll love these Easy Stuffed Beef Rolls, featuring ground beef with a savory bread crumb, onion and spice stuffing inside, and baked with brown gravy on top!


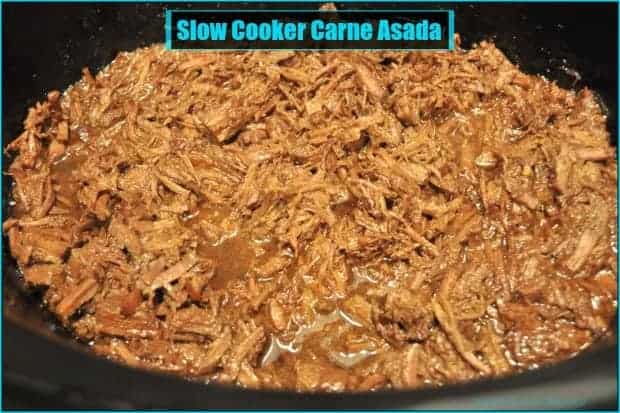
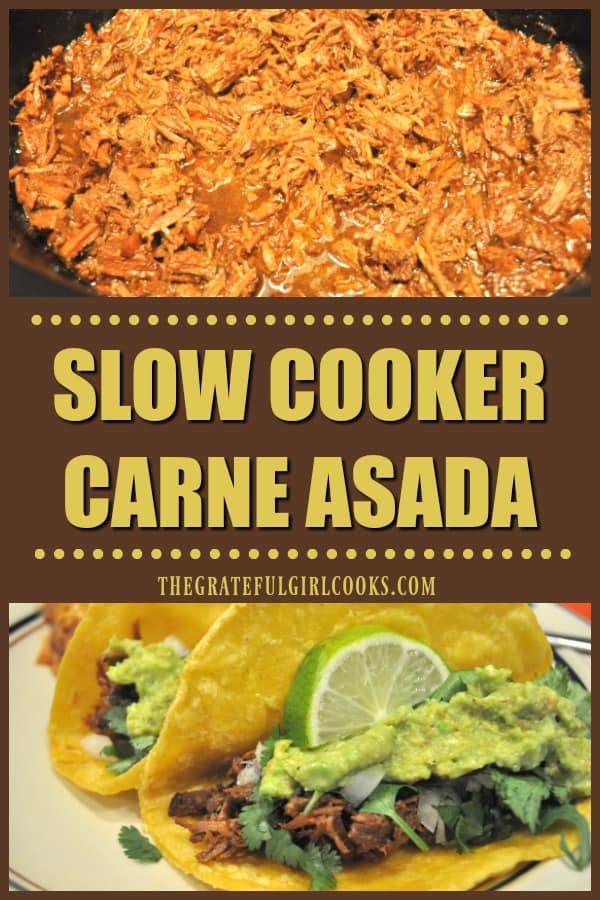
Slow Cooker Carne Asada

You’re gonna love delicious slow cooker carne asada style Mexican shredded beef! An easy filling for tacos, burritos, nachos, and enchiladas! The possibilities for using this tasty shredded beef are endless!You're gonna love this delicious slow cooker carne asada style Mexican shredded beef, an easy, perfect filling for tacos, burritos, nachos, and enchiladas!

Traditional carne asada (which means “grilled meat”) is typically made using flank steak or skirt steak.  I stumbled upon this variation recipe on Pinterest which uses stew meat (a less expensive type of beef). Since I had some already in our freezer, I decided to try this particular recipe.

Oh. My. Goodness. The Southwestern flavor of the meat is incredible, and the beef turns out so tender it shreds easily! The recipe is very easy to prepare and only involves a couple of simple “prep” steps.

After that, turn on your crock pot and let it do all the rest of the work for you, while you go about your day! Here’s how to make slow cooker carne asada.

Scroll Down for A Printable Recipe Card At The Bottom Of The Page

How To Make Slow Cooker Carne Asada

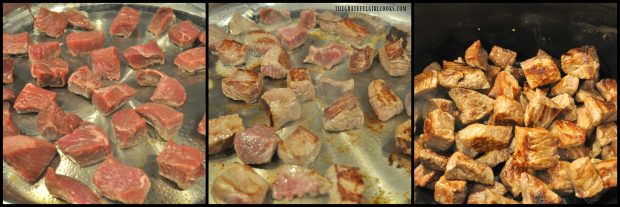
Heat a large skillet on medium-high heat (I lightly sprayed my skillet with non-stick spray before heating).  Cook the stew meat cubes on all sides.  This will usually take about 8-10 minutes.

If you need to, cook the beef in two batches, to not overcrowd the pan. Once beef is browned nicely, transfer it to slow cooker.

3 pictures of stew meat for carne asada, browning in skillet

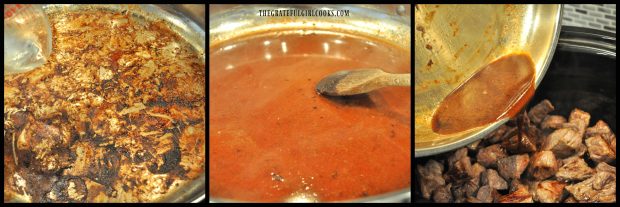
Once the meat has cooked, your skillet will probably look like the first photo below, with lots of remaining little bits of charred meat. Add 1/3 cup of water to skillet. Cook on medium heat for a couple minutes, to help de-glaze the skillet.

Be sure to scrape all the browned bits up off the bottom of the skillet into the water. It will blend into the water, to make a thin flavor-filled sauce.

Pour all of this liquid over the meat in the slow cooker. Stir well to combine. Set aside.

Skillet is de-glazed with water, then poured into slow cooker over beef

Make The Sauce

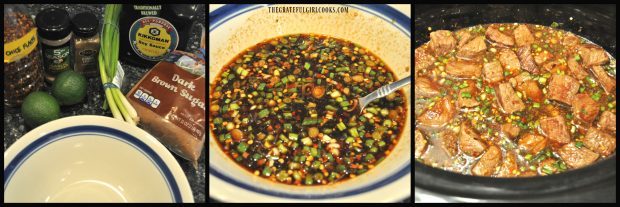
Mix up the carne asada sauce ingredients in a medium bowl with a fork or whisk until thoroughly combined and the brown sugar has dissolved. Pour the marinade over the beef. 

The meat should be almost completely submerged. If not, you can add a little bit more water to slow cooker. Stir the ingredients until they are combined.

Time For The Slow Cooker

Put lid on slow cooker, turn to the HIGH setting, and cook the meat for 4 hours, with the slow cooker covered.

TIP: Do not open lid of slow cooker during the cooking time, so you don’t lose any heat! Your kitchen should start to smell really good about halfway through the cooking time!

Marinade mixed for carne asada in bowl, then into slow cooker over beef

Shred The Slow Cooker Carne Asada

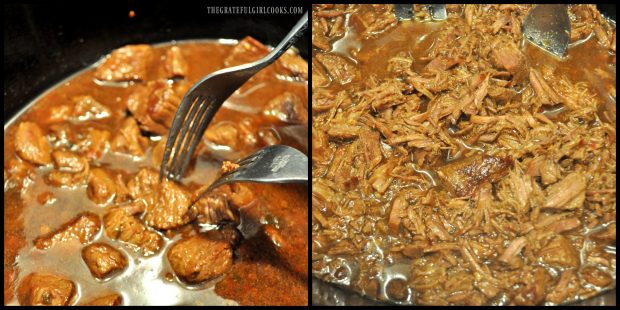
After meat has fully cooked, remove the lid of the slow cooker. Shred the meat (it should shred VERY easily) using two forks to pull the meat apart. Leave the shredded beef in the juices in the slow cooker.

Shredding beef for carne asada with two forks

The meat is now ready to serve!  Whatever you don’t eat right away can be frozen in food storage bags (once it’s cooled down), to save for other meals.

What Else Can The Shredded Meat Be Used For?  

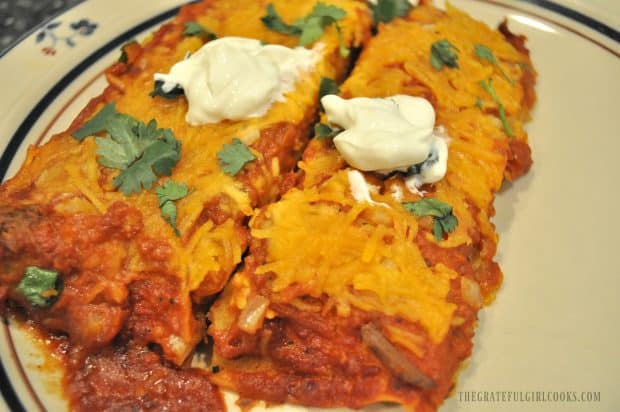
I’ve prepared several dishes with the meat (it went a long way since there are only two of us at home these days). I made shredded carne asada enchiladas (below). They were a HUGE hit with my husband and I.

The meat turns out so tender and it’s totally packed with flavor.  I also used the last bit of meat to make a big plate of nachos for my husband, myself and our son.

Nachos are another great way to use the shredded beef (sorry, no pics, they were eaten too fast)! YUMMO!

Carne asada meat used to make shredded beef enchiladas

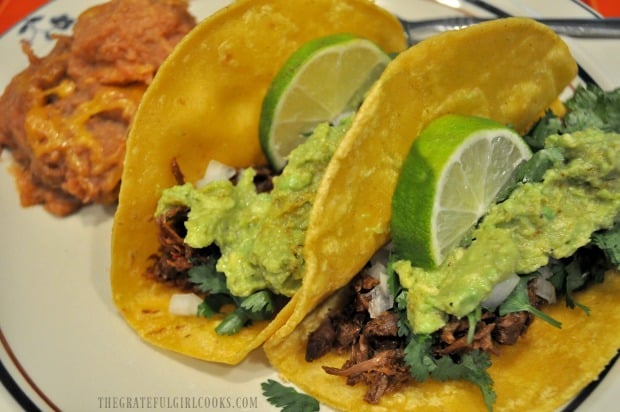
We also use the carne asada to make simple street tacos with chopped onion, cilantro, freshly made guacamole… and lime slices!

They are absolutely fantastic! I’m telling you, the flavor of this slow cooker carne asada is wonderful!

Shredded carne asada meat used to make tacos

There are so many ways to use this meat!  I’ve already bought more stew meat to make this recipe again.  I’m planning to make some shredded beef burritos and possibly a couple tostadas with it this time! I can hardly wait!

I hope you try this delicious version of carne asada.  The flavor is OUTSTANDING, and I think you will LOVE it. You may also enjoy my recipe for Easy Slow Cooker Pulled Pork too, because it’s really delicious!

Have a great day, and please come back soon for more great recipes.

Looking For More Mexican-Style Recipes?

You can find all of my recipes in the Recipe Index, located at the top of the page. I have quite a few Mexican-inspired recipes there, including:

Want More Recipes? Get My FREE Newsletter!

I publish a newsletter 2 times per month (1st and 15th) with lots of recipes, tips, etc..
Would you like to join our growing list of subscribers?

There is a Newsletter subscription box on the top right (or bottom) of each blog post, depending on the device you use.
You can submit your e-mail address there, to be added to my mailing list.

Find Me On Social Media:

Facebook page: The Grateful Girl Cooks!
Pinterest:
The Grateful Girl Cooks!
Instagram:
jbatthegratefulgirlcooks

Author's signature

Original recipe source: https://lifecurentsblog.com/crock-pot-carne-asada/

↓↓ PRINTABLE RECIPE BELOW ↓↓

0 from 0 votes
Slow Cooker Carne Asada
Prep Time
15 mins
Cook Time
4 hrs
Total Time
4 hrs 15 mins
 

You're gonna love this delicious slow cooker carne asada style Mexican shredded beef, an easy, perfect filling for tacos, burritos, nachos, and enchiladas!

Category: Dinner
Cuisine: Mexican
Keyword: carne asada
Servings: 12
Calories Per Serving: 244 kcal
Author: JB @ The Grateful Girl Cooks!
Ingredients
  • 3 pounds stew meat , cut in 2" cubes
  • 1 cup water , divided
Carne Asada Sauce
  • 2/3 cup soy sauce
  • 4 green onions , cut in thin slices
  • 2 limes (juice only)
  • 6 Tablespoons dark brown sugar
  • 1 teaspoon red pepper flakes , or more, if you like it spicy!
  • 1 teaspoon ground cumin
  • 1 teaspoon garlic powder
Instructions
  1. Heat a large skillet on medium-high heat (I lightly sprayed my skillet with non-stick spray before heating).  Cook the stew meat cubes on all sides.  This took about 10 minutes. If you need to, cook the beef in two batches, to not overcrowd the pan. Once beef is browned nicely, remove and transfer it to slow cooker.

  2. Add 1/3 cup of water to skillet you cooked the beef in. Cook on medium heat for a couple minutes, to de-glaze the skillet. Be sure to scrape all the browned bits up off the bottom of the skillet into the water. It will make a thin flavor-filled sauce. Pour this over the meat in the slow cooker. Stir well to combine. Set aside.

  3. Mix up the carne asada sauce ingredients in a medium bowl with a fork or whisk until thoroughly combined and the brown sugar has dissolved. Pour the marinade over the beef.  The meat should be almost completely submerged. If not, add a little bit more water to slow cooker. Stir to combine.
  4. Put lid on slow cooker, turn to the HIGH setting, and cook the meat for 4 hours, covered. After meat has fully cooked, remove lid. Shred the meat (it should shred VERY easily) using two forks to pull the meat apart. The meat is now ready to serve, and can be used for tacos, enchiladas, burritos, nachos, etc. Enjoy!!!

Recipe Notes

Caloric calculation is only for carne asada. Any other additions (tortillas, etc.) are not included.

Nutrition Facts
Slow Cooker Carne Asada
Amount Per Serving (1 serving (1/12th of total))
Calories 244 Calories from Fat 72
% Daily Value*
Fat 8g12%
Saturated Fat 3g19%
Cholesterol 88mg29%
Sodium 519mg23%
Potassium 311mg9%
Carbohydrates 8g3%
Sugar 6g7%
Protein 31g62%
Vitamin A 90IU2%
Vitamin C 2.2mg3%
Calcium 19mg2%
Iron 3.2mg18%
* Percent Daily Values are based on a 2000 calorie diet.

Here’s one more to pin on your Pinterest boards!You're gonna love this delicious slow cooker carne asada style Mexican shredded beef, an easy, perfect filling for tacos, burritos, nachos, and enchiladas!

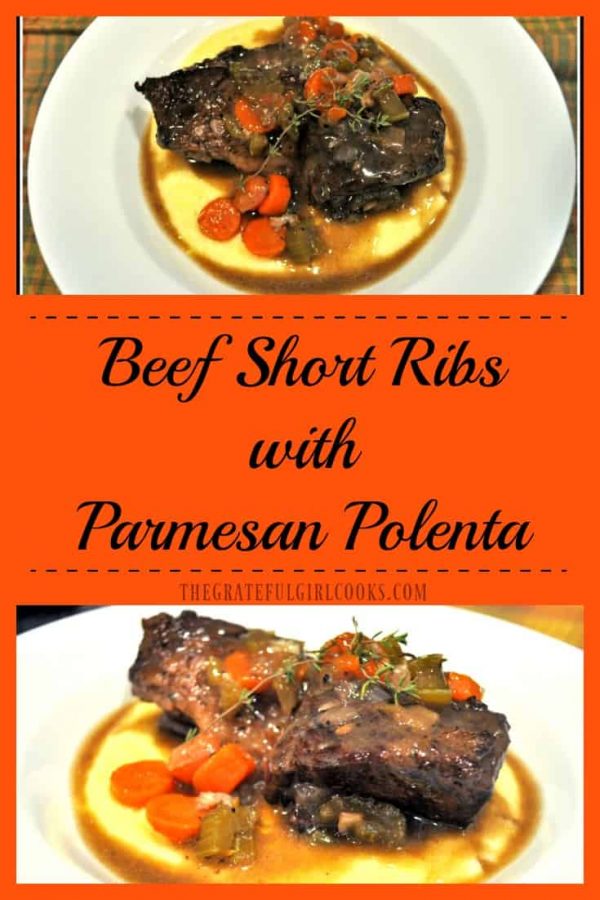
Beef Short Ribs With Parmesan Polenta

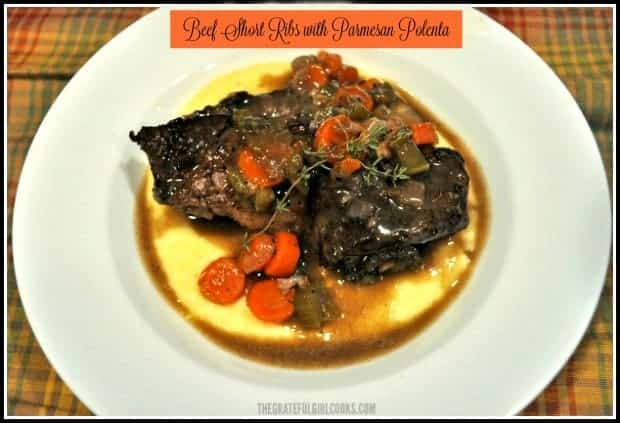
Beef Short Ribs with Parmesan Polenta taste amazing! The tender meat and veggies, on creamy Parmesan polenta, and drizzled with a pan sauce, is a perfect comfort food meal!Beef Short Ribs with Parmesan Polenta is an amazing tasting meal that will impress even the pickiest of guests! Your home will smell wonderful as the ribs braise in the oven for hours! The meat will simply fall off the bone onto creamy Parmesan polenta drizzled with a pan sauce, for a perfect comfort food meal!

Beef Short Ribs with Parmesan Polenta is an amazing tasting meal that will impress even the pickiest of guests! Your home will smell wonderful as the ribs braise in the oven for hours!

The meat will simply fall off the bone onto creamy Parmesan polenta drizzled with a pan sauce, for a perfect comfort food meal!

My husband picked up some short ribs at the grocery store that were on sale, so I went on the hunt for a new recipe to try. I found this recipe on Pinterest, made it, and we were blown away… really!

The ribs were so tender, flavored beautifully, and the creamy Parmesan polenta that they were served with was the perfect accompaniment to the dish! YUM. This would be a wonderful dish for entertaining… definitely restaurant quality!

Scroll Down For A Printable Recipe Card At The Bottom Of The Page

How To Make Beef Short Ribs With Parmesan Polenta

Here’s how to make this dish (you can do this – even if you’ve never made short ribs before!):  First thing to do is generously season the ribs on every side with salt and pepper.

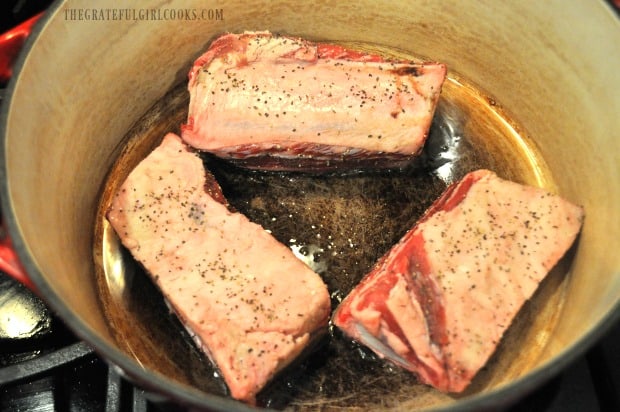
Heat oil in a large Dutch oven or stockpot on medium-high heat. You want the oil AND the pan to be really hot before adding the short ribs!

Add the short ribs (in batches, if necessary) and cook until they are browned on all sides (approximately 2-3 minutes per side). Remove the ribs to a platter to rest.

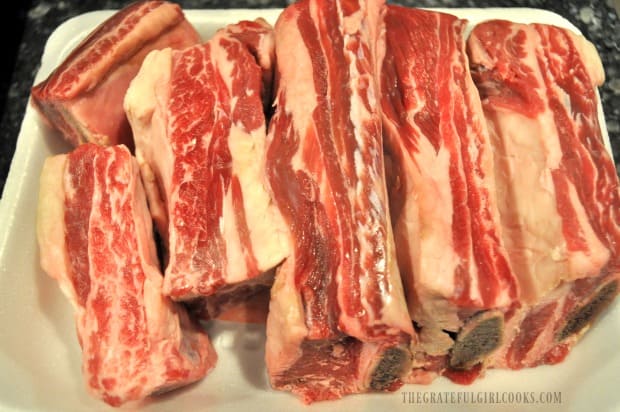
Raw beef short ribs unwrapped on white tray

Pan-searing ribs in oil, in red pan

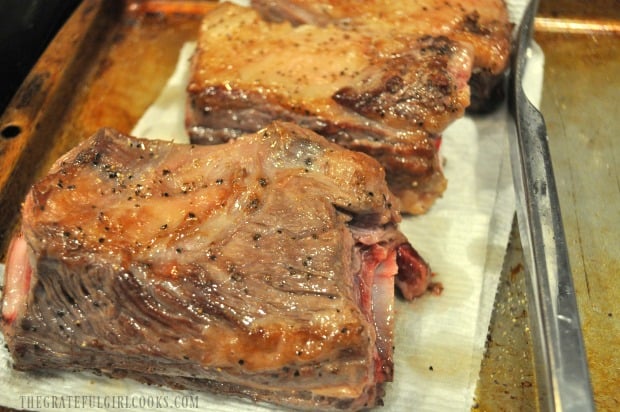
Browned meat resting on paper towels on baking sheet

Put the Dutch oven back on the heat.  Once the pan is hot, add the sliced carrots, celery and chopped onions to the pan.

Sautè the veggies, stirring often, for 3-4 minutes, scraping up any bits of browned beef bits left on bottom of pan (they will add flavor!). Pour in the red wine, and let it simmer for 2-3 minutes.

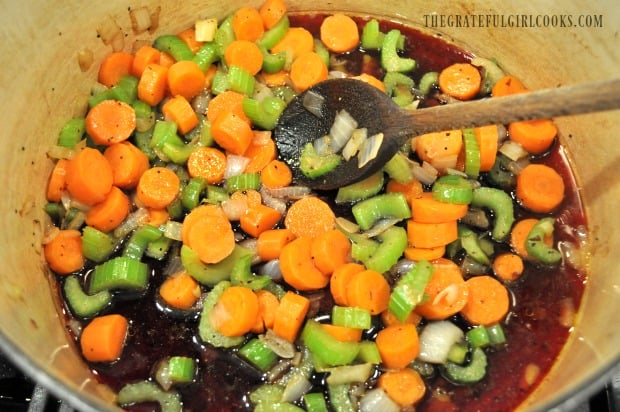
Cooking onions, celery, wine and carrots in large pot

Add beef stock and sprigs of fresh thyme.  Place the short ribs back into the pan. Make sure the ribs are mostly covered with liquid.

Add add more beef stock or water, if necessary, to ensure only the tops of the ribs are left uncovered.

How Long Do I Cook The Beef Short Ribs?

Cover the pot, place in preheated 325 degree oven, and bake for 2 1/2 – 3 hours. I let my short ribs cook for 2 hours, 45 minutes total.

When done, put the ribs (without liquid) on a sheet pan about 5 inches under the broiler for about 4-5 minutes to crisp up the outside.

NOTE: This is an optional step, but one I definitely recommend. Once done, cover the ribs with foil and keep them warm.

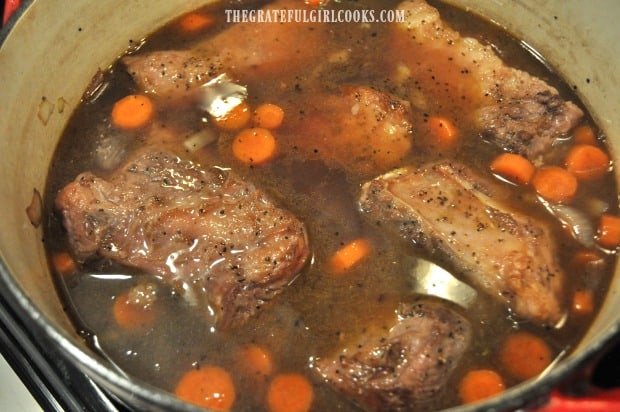
Braising short ribs and vegetables in liquid

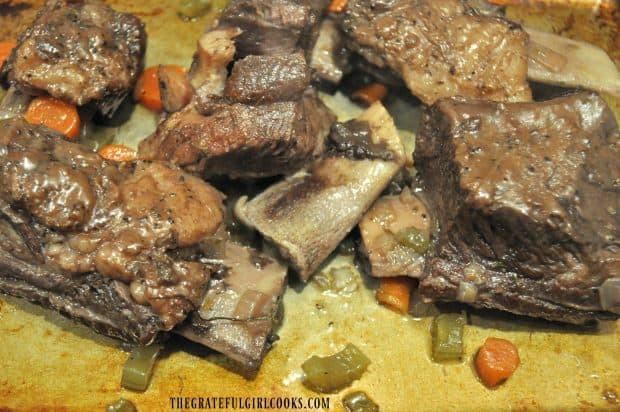
Short ribs on baking sheet

Make A Pan Sauce To Drizzle Over Beef Short Ribs With Parmesan Polenta

Another option (which I did while the ribs were under the broiler) is to make a pan sauce using the liquid from the dutch oven, after the short ribs baked.

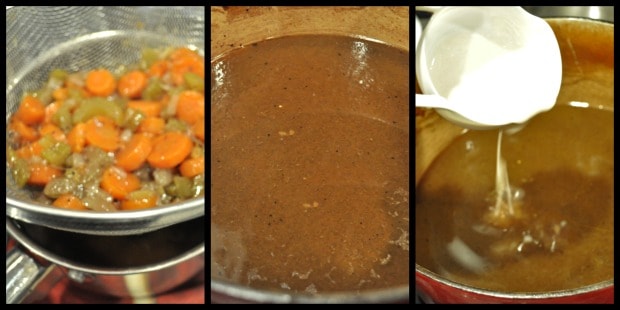
To make the pan sauce, pour the liquid and the veggies from pan into a large strainer which is sitting on top of a bowl or pan (to catch all the juice). 

Return the liquid to the pan. Cook on medium-low until the liquid reduces (about 8-10 minutes).

Whisk a couple Tablespoons of flour with some hot water (1/4 cup) and whisk it into the sauce, to thicken it a little bit.

Vegetables in strainer, liquid in pan, adding flour/water to pan sauce

Make The Parmesan Polenta

While the meat was resting and the gravy was reducing, make the polenta, by bringing water, milk and salt to a boil in a medium pan.

While whisking the liquid, slowly add the polenta (I used cornmeal- same thing). Continue to whisk the ingredients together and cook for 2-3 minutes, until polenta begins to thicken.

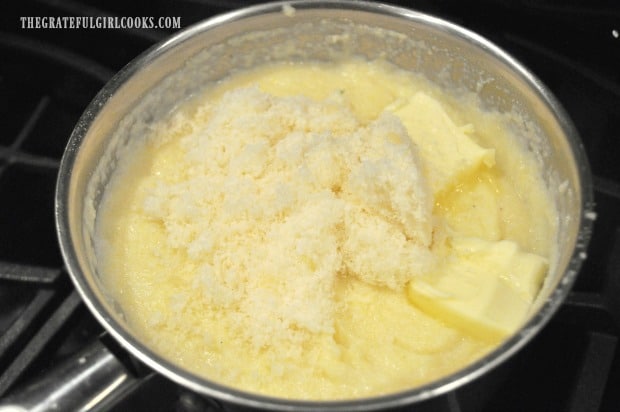
Turn the heat down, and simmer the polenta until it becomes thick, but still creamy in texture. Add grated Parmesan cheese and butter to the polenta, and stir to combine.

Continue to stir until the butter and cheese are completely melted and fully mixed into the polenta.

Adding Parmesan cheese and butter to polenta in pan

To Serve Beef Short Ribs With Parmesan Polenta

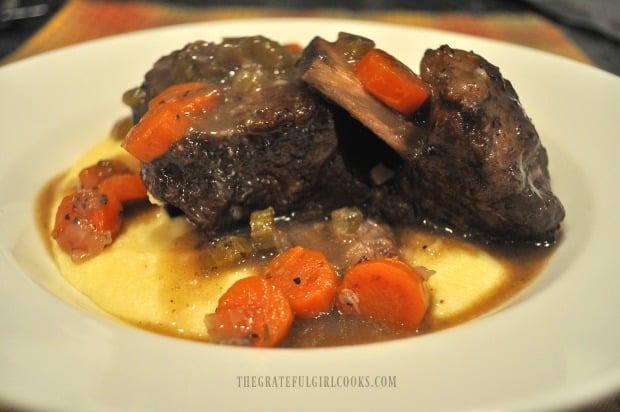
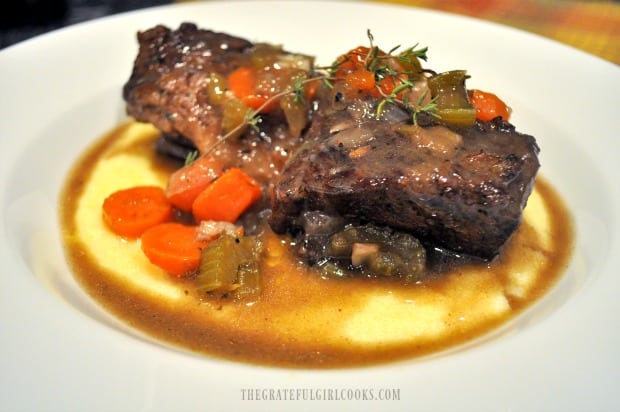
To serve this dish, spoon the hot polenta into individual serving bowls, then place 1-2 short ribs and a few of the cooked veggies on top.

Drizzle with some of the pan sauce over all to garnish, and top with a little sprig of fresh thyme, then serve! Ooh… this is sooooo good!

Close up of ribs and polenta with sauce

Short Ribs with Polenta, veggies and sauce in white bowl

I really cannot begin to tell you just how delicious this meal was!  Besides that, our kitchen smelled amazing, too!  There are a few steps that go into making such a wonderful dish, but they were completely worth every single minute!

Most of the prep time is simply waiting for the dish to come out of the oven (and the rest was EASY)! Sure hope you will consider trying this amazing recipe for beef short ribs!

We loved it – it was restaurant style quality, folks! Thanks for stopping by, and I hope you have the chance to make this delicious meal. Have a GREAT day!

Looking For More BEEF Recipes?

You can find all of my recipes in the Recipe Index, located at the top of the page. I have some great BEEF recipes, including:

Want More Recipes? Get My FREE Newsletter!

I publish a newsletter 2 times per month (1st and 15th) with lots of recipes, tips, etc..
Would you like to join our growing list of subscribers?

There is a Newsletter subscription box on the top right (or bottom) of each blog post, depending on the device you use.
You can submit your e-mail address there, to be added to my mailing list.

Find Me On Social Media:

Facebook page: The Grateful Girl Cooks!
Pinterest:
The Grateful Girl Cooks!
Instagram:
jbatthegratefulgirlcooks

Author's signature

Recipe source:  https://inquiringchef.com/braised-red-wine-beef-short-ribs-parmesan-polenta/

↓↓ PRINTABLE RECIPE BELOW ↓↓

0 from 0 votes
Beef Short Ribs With Parmesan Polenta
Prep Time
30 mins
Cook Time
3 hrs
Total Time
3 hrs 30 mins
 
Beef Short Ribs with Parmesan Polenta taste amazing! The tender meat, on creamy Parmesan polenta, drizzled with a pan sauce, is a perfect comfort food meal!
Category: Main Course
Cuisine: American
Keyword: beef short ribs
Servings: 4 Servings
Calories Per Serving: 656 kcal
Author: JB @ The Grateful Girl Cooks!
Ingredients
For Short Ribs:
  • 2 pounds Beef Short Ribs , 1 large or 2 small per person
  • 2 Tablespoons Vegetable oil
  • 3 ribs celery , chopped
  • 3 carrots , chopped or sliced
  • 1 small brown onion , chopped
  • 1/2 cup red wine , any variety
  • 4 cups beef stock , unsalted
  • 6 sprigs thyme
For Parmesan Polenta:
  • 3 cups milk
  • 2 cups water
  • 1/2 teaspoon salt
  • 1 cup polenta (or cornmeal)
  • 2 Tablespoons butter
  • 1/2 cup grated Parmesan cheese
Instructions
  1. Preheat oven to 325 degrees. Season short ribs generously with salt and pepper on every side. Heat oil in large dutch oven on medium-high heat. When oil is hot, add ribs (cook in batches, if necessary); cook until browned on all sides (approx. 2-3 minutes per side). Remove ribs to a platter.

  2. Place Dutch oven back on the heat. Once pan is hot, add carrots, celery and onions. Sautè veggies, stirring often, for 3-4 minutes, scraping up any bits of browned beef bits left on bottom of pan (they will add flavor!). Pour in red wine; simmer 2-3 minutes. Add beef stock and sprigs of thyme. Place short ribs back into pan. Make sure ribs are mostly covered with liquid (add more beef stock or water, if necessary) to ensure only the tops of the ribs are left uncovered. Cover pot, place in preheated 325 degree oven, and bake for 2 1/2 - 3 hours.

  3. OPTIONAL STEP 1: This is optional, but one I definitely recommend. When done baking, transfer ribs (without liquid) to a sheet pan; Place sheet pan 5 inches under broiler and broil for 4-5 minutes to crisp up the outside.  Watch ribs closely to make sure they don't burn! When done, cover ribs with foil; keep warm.

  4. OPTIONAL STEP 2: ( I did this while ribs were in broiler). Make a slightly thick pan sauce using liquid from the dutch oven. Pour liquid and veggies from pan into a large strainer which is sitting on top of a bowl or pan (to catch the juice). Return liquid to the Dutch oven (reserving veggies). Cook on medium-low until liquid reduces (8-10 minutes). Once reduced, whisk 2 Tbsp. flour w/ hot water (1/4 cup) in separate container; whisk this into sauce while cooking, to thicken it a bit.

  5. Make polenta, by bringing water, milk and salt to a boil in a medium pan. While whisking, SLOWLY add the polenta or corn meal; continue whisking ingredients together and cooking for 2-3 minutes, until polenta begins to thicken. Reduce heat to simmer and cook until it becomes thick, but still creamy in texture. Add butter and grated Parmesan cheese; stir them in until melted and fully combined.

  6. To serve, spoon hot polenta into individual serving bowls, then place 1-2 short ribs and a few of the cooked veggies on top. Garnish with a couple spoonfuls of pan sauce, and a sprig of fresh thyme over ribs, then serve, and enjoy! 

Nutrition Facts
Beef Short Ribs With Parmesan Polenta
Amount Per Serving (1 large short rib + 1/2 cup polenta)
Calories 656 Calories from Fat 369
% Daily Value*
Fat 41g63%
Saturated Fat 16g100%
Polyunsaturated Fat 21g
Cholesterol 72mg24%
Sodium 382mg17%
Carbohydrates 40g13%
Sugar 4g4%
* Percent Daily Values are based on a 2000 calorie diet.

Here’s one more to pin on your Pinterest boards!

Beef Short Ribs with Parmesan Polenta taste amazing! The tender meat, on creamy Parmesan polenta, drizzled with a pan sauce, is a perfect comfort food meal!

Grilled Patty Melt

Make a classic grilled patty melt from the comfort of home! Seasoned beef, rye bread, caramelized onions, and gooey cheese create a delicious grilled sandwich!Make classic grilled patty melts from the comfort of home! Seasoned beef, rye bread, caramelized onions, and gooey cheese create a delicious grilled sandwich!

Do you enjoy a good Patty Melt? I sure do – YUM!  Sometimes when we go out for hamburgers, I opt for a grilled patty melt, because I love the simplicity of this sandwich and I LOVE the taste! Did you know it’s EASY to make them from the comfort of your own home?

Seriously… I love grilled onions, I love cheese and I love burgers, so how could I not enjoy this simple classic grilled sandwich? A patty melt features all of those ingredients, and is a popular menu item at diners and Mom and Pop restaurants around the country!

Now, please note that I didn’t say they are the HEALTHIEST meal option, but I do believe life (including food choices) is all about balance.  Every now and then, a grilled patty melt with perfectly caramelized onions and gooey cheese on buttered rye bread makes me deliriously HAPPY.

I enjoyed eating this grilled patty melt. Every single bite… THEN I went for a 237 mile walk to work off the calories… Ha Ha!

Scroll Down for A Printable Recipe Card At The Bottom Of The Page

How To Make A Grilled Patty Melt

Patty melts are easy to make.  They do take a little bit of prep time, because you need to caramelize and brown the sliced onions really well!

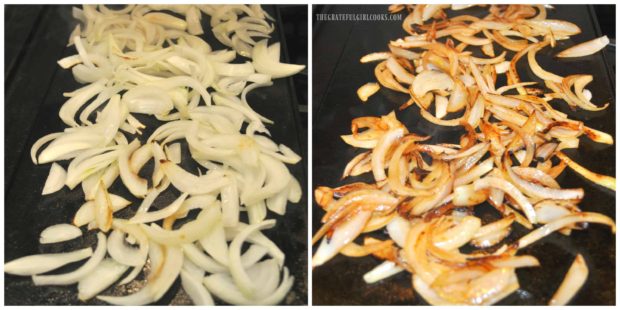
Slice the onions thin, then cook low and slow in a little butter for 20-25 minutes, stirring occasionally. If you are a multi-tasker, you can grill the patties at the same time.

You can also prepare the onions for the patty melt ahead of time, if you want. This could save you time later on when everyone is ravenous and starving.

Sliced onions are cooked until browned for the patty melt.

Lightly season the ground beef with salt, pepper, a touch of garlic powder and some Worcestershire sauce, then shape the meat into patties. 

Make the patties slightly oblong to fit better on a piece of Rye bread (the “traditional” bread used to make this sandwich).

Cooking The Beef For A Patty Melt

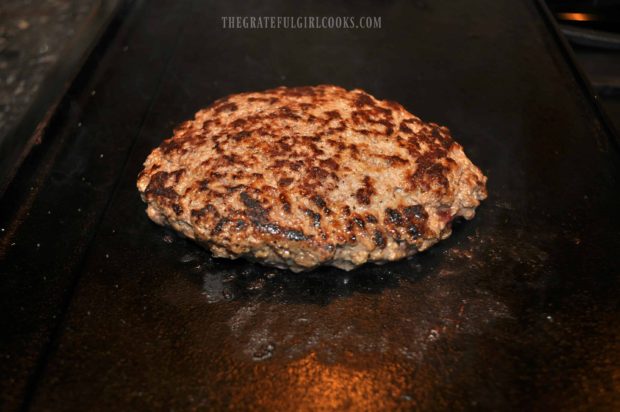
Grill the beef patties on both sides on medium-high heat until they reach the desired doneness (I am a medium-well gal, myself). I cook the meat on an indoor cast iron grill, but they are just as easily cooked on a BBQ grill.

Make sure the grill or pan you use is very hot before adding the meat. This helps to create a crusty “sear” on the outside.

Beef cooking on indoor cast iron grill for a patty melt.

Once ready to cook the grilled patty melt, spread butter on one side of each slice of bread (like making a grilled cheese sandwich).

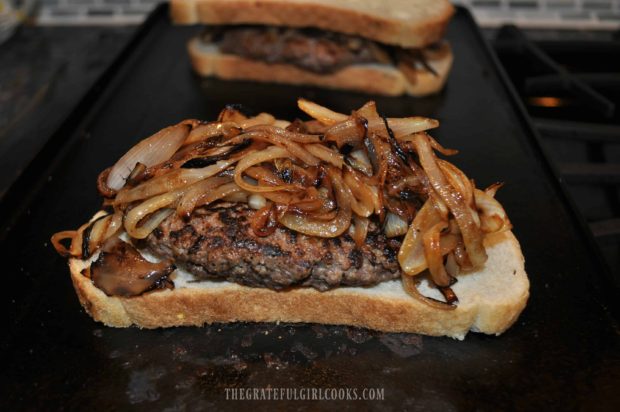
Place the cooked meat patty onto the non-buttered side, then pile on the caramelized onions.

Patty melt is piled high with cooked onion slices.

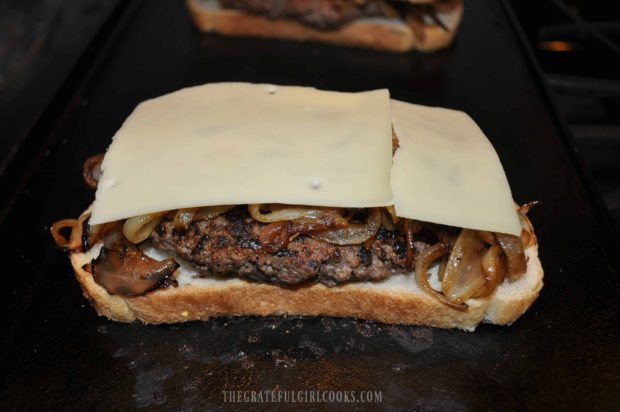
NOTE: If you want a LOT of cheese, place a piece of Swiss cheese on the bread before placing the patty on, then add another one to the top. I wanted just a small amount of cheese, so I put it only on top of the onions.

Swiss cheese slices are placed on top of onions on patty melt.

Top With Another Slice Of Bread

Place another slice of bread on top of the cheese (buttered side out).  If you wish to add Thousand Island dressing (a lot of restaurants serve it with this), spread it onto the unbuttered side of the top slice of bread. 

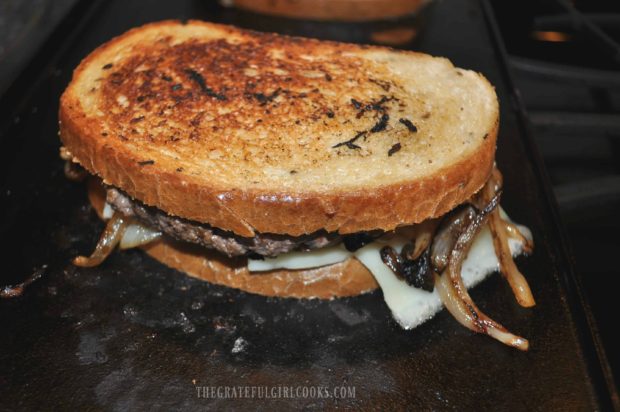
Cook the patty melt as you would a grilled cheese sandwich. Once the bottom slice of bread is golden brown and toasty, carefully flip the sandwich to the other side.

Continue cooking the grilled patty melt until the bread is crusty and golden brown, the cheese has melted, and the sandwich is heated through.

Grilled Patty Melt is flipped over to cook other side of bread on grill until golden brown.

Time to EAT!

Once done, carefully slice the patty melt in half, and serve with additional Thousand Island dressing or ketchup for dunking!

And, if you want MORE calories (cough, cough), add some fries! French fries are VEGETABLES, right?

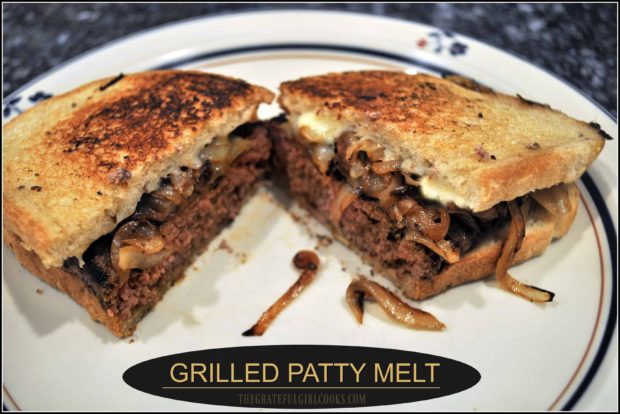
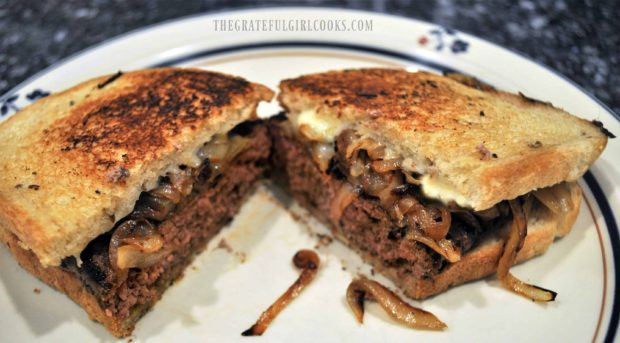
Grilled patty melt is cut in half on a plate.

That’s it! See how easy it is to make this classic sandwich?  Now you can make a delicious grilled patty melt  in the comfort of your own home!

The secret is getting the onions cooked just right, along with crispy rye bread, a well-seared beef patty, and ooey gooey melted cheese! This simple meal always make me happy!

I hope you will consider making these yummy sandwiches for lunch or dinner for friends or family! Have a fantastic day!

Looking For More SANDWICH Recipes?

You can find all my recipes in the Recipe Index, located at the top of the page. I have quite a few delicious sandwich recipes you might enjoy, including:

Interested In More Recipes?

Thank you for visiting this website. I appreciate you using some of your valuable time to do soIf you’re interested, I publish a newsletter 2 times per month (1st and 15th) with all the latest recipes, and other fun info. I would be honored to have you join our growing list of subscribers, so you never miss a great recipe! 

There is a Newsletter subscription box on the top right side (or bottom) of each blog post, depending on the device you use, where you can easily submit your e-mail address (only) to be included in my mailing list.

You Can Also Find Me On Social Media:

Facebook page: The Grateful Girl Cooks!
Pinterest:
The Grateful Girl Cooks!
Instagram:
jbatthegratefulgirlcooks

Author's signature

0 from 0 votes
Grilled Patty Melt
Prep Time
25 mins
Cook Time
5 mins
Total Time
30 mins
 
Make a classic grilled patty melt from the comfort of home! Seasoned beef, rye bread, caramelized onions, and gooey cheese create a delicious grilled sandwich!
Category: Entree, Sandwich
Cuisine: American
Keyword: patty melt
Servings: 4 servings
Calories Per Serving: 804 kcal
Author: JB @ The Grateful Girl Cooks!
Ingredients
  • 2 onions , peeled, sliced thin
  • 1 Tablespoon butter
  • pounds ground beef
  • 1 teaspoon salt
  • 1 teaspoon black pepper
  • 1/4 teaspoon garlic powder
  • 4-5 dashes Worchestershire sauce
  • 2 Tablespoons butter
  • 8 slices rye bread (can substitute sourdough)
  • 4 slices Swiss cheese (use more, if desired- can also substitute American cheese)
  • Thousand Island dressing (optional, if desired)
Instructions
  1. Trim ends off onions, peel, then slice thin. Melt 1 Tablespoon butter in skillet. Cook onions slices on medium heat for 20-25 minutes, stirring occasionally. When done, the caramelized onions should be softened and light brown. Set aside.
  2. Season ground beef with salt, pepper, garlic powder and Worchestershire sauce. Mix well. Shape meat into 4 slightly oblong patties (to fit shape of rye bread). Grill beef patties on grill or in skillet on medium-high heat (spray skillet with non-stick spray or use melted butter) until cooked through to your preferred done-ness. Make sure the grill or pan you use is very hot before adding the meat. This helps to create a quick, crusty "sear" on the outside. When done, set beef patties on paper towel to drain excess grease.
  3. When ready to cook sandwich, spread butter on one side of each slice of bread. Place cooked meat patty onto the non-buttered side, then piled on the caramelized onions. Top with slice of Swiss cheese. NOTE: If you want a LOT of cheese, place a piece of Swiss cheese on the bread before placing the patty on, then add another slice to the top.
  4. Place a slice of buttered bread on top of the cheese (butter side out). If you wish to add Thousand Island dressing, spread it onto the unbuttered side of the top slice of bread. Cook patty melt on low heat as you would a grilled cheese sandwich. Once the bottom is golden brown and toasty, carefully flip the sandwich (with a spatula) to the other side, and continue cooking until golden brown, cheese has melted, and sandwich is heated through. Once done, carefully slice patty melt in half, and serve with additional Thousand Island dressing or ketchup for dunking! Enjoy!
Nutrition Facts
Grilled Patty Melt
Amount Per Serving (1 sandwich)
Calories 804 Calories from Fat 468
% Daily Value*
Fat 52g80%
Saturated Fat 23g144%
Cholesterol 169mg56%
Sodium 1222mg53%
Potassium 667mg19%
Carbohydrates 38g13%
Fiber 4g17%
Sugar 5g6%
Protein 42g84%
Vitamin A 495IU10%
Vitamin C 4.3mg5%
Calcium 311mg31%
Iron 5.4mg30%
* Percent Daily Values are based on a 2000 calorie diet.

Here’s one more to pin on your Pinterest boards!Make a classic grilled patty melt from the comfort of home! Seasoned beef, rye bread, caramelized onions, and gooey cheese create a delicious grilled sandwich!

Mexican Stuffed Pasta Shells

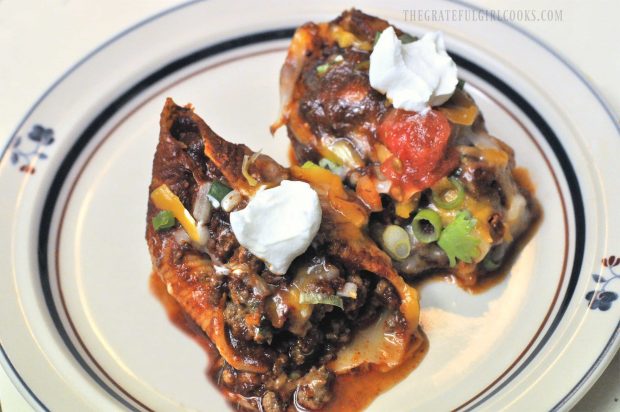
Mexican Stuffed Pasta Shells, with seasoned beef, cheese and onion, are baked and topped with cheese, cilantro, tomatoes, and sour cream!Mexican Stuffed Pasta Shells, with seasoned beef, cheese and onion, are baked and topped with cheese, cilantro, tomatoes, and sour cream!
Mexican Stuffed Pasta Shells are a delicious twist on traditional stuffed pasta. Ground beef, cheese and onion filled pasta shells are baked in enchilada sauce, then topped with cheese, cilantro, tomatoes, and garnished with a dollop of sour cream, for a flavor-filled dinner!

Last Spring I made Chicken and Broccoli Alfredo Stuffed Shells and we really enjoyed them.  Now fast forward to about 4 months later when I started thinking about how much my husband and I absolutely LOVE Mexican food. A light bulb went off in my head and I decided to experiment and make more stuffed shells, but this time create a recipe with a Mexican twist!  We really enjoyed them, so am sharing the details on the ol’ blog today.

Scroll Down For A Printable Recipe Card At The Bottom Of The Page

How Do You Make Mexican Stuffed Pasta Shells?

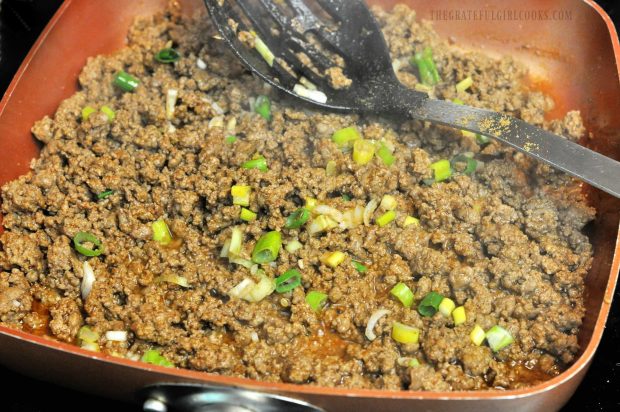
These Mexican stuffed pasta shells are really easy to prepare.  Start by cooking 1 pound of ground beef with sliced green onions in large skillet on medium heat. Once the meat is cooked, drain grease from pan (discard grease). Add one taco seasoning packet and cook according to seasoning package instructions.

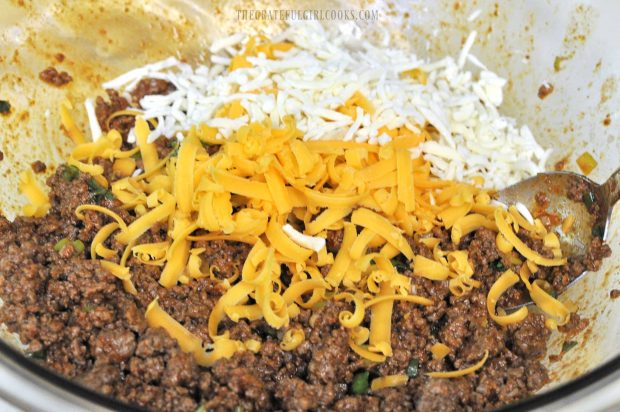
When the meat has been cooked and seasoned, transfer it to a large mixing bowl and let it cool for 4-5 minutes.  Add 3 Tablespoons of enchilada sauce, grated cheddar and jack cheeses; and stir to combine. Set aside.

Cooking ground beef and onions to stuff into pasta shells.

Grated cheeses are added to ground beef for the stuffed pasta shells.

Cook The Pasta Shells

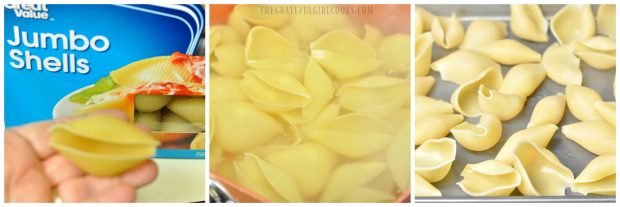
In a large pot of boiling salted water, cook the jumbo pasta shells according to package directions.  When the pasta shells are finished cooking, drain them well. Place the drained shells in a single layer on wax paper or parchment paper.

Jumbo pasta shells are cooked before being stuffed with Mexican flavored filling.

Prepare The Filled Mexican Stuffed Pasta Shells For Baking

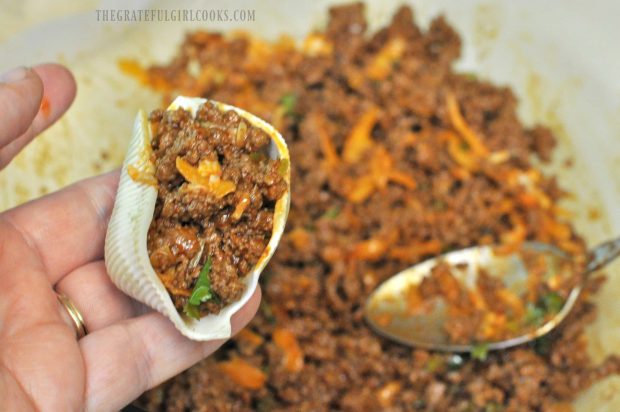
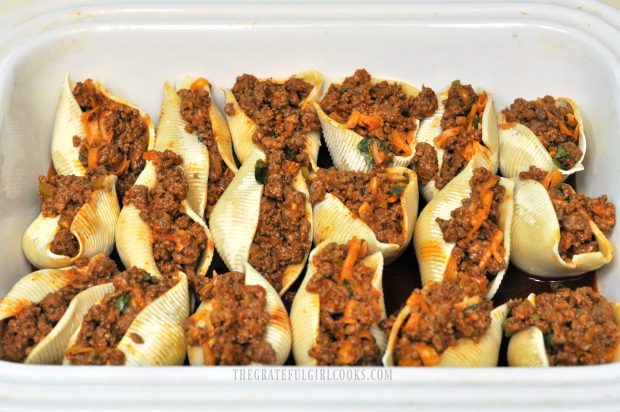
Place several heaping spoonfuls of enchilada sauce on the bottom of a baking dish (enough to just barely cover the bottom of dish). Fill the cooked pasta shells with the ground beef mixture, then place them into a baking dish in a single layer.

Seasoned meat is stuffed into cooked pasta shells.

Mexican Stuffed Pasta Shells are arranged in dish before baking.

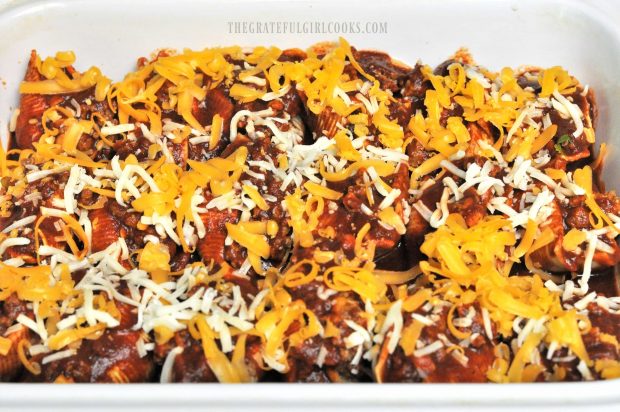
Once all shells are filled and in the baking dish, spoon the rest of the enchilada sauce over the shells to cover.  Sprinkle with the remaining half of the cheddar and jack cheeses.

Mexican Stuffed Pasta Shells are covered with grated cheese before baking.

Bake The Mexican Stuffed Pasta Shells

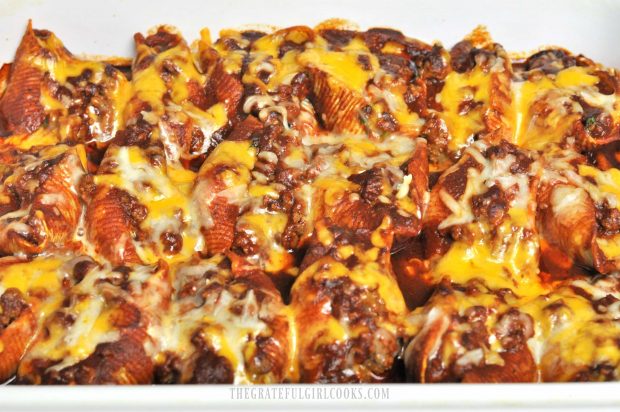
Cover dish with aluminum foil and bake in preheated 350 degree oven for 25-30 minutes total.  Remove the foil for the last 10 minutes of baking.  Sauce and cheese should be bubbly when done.  Remove dish from oven.

Mexican Stuffed Pasta Shells , right after removing them from oven.

Garnish And Serve The Stuffed Shells!

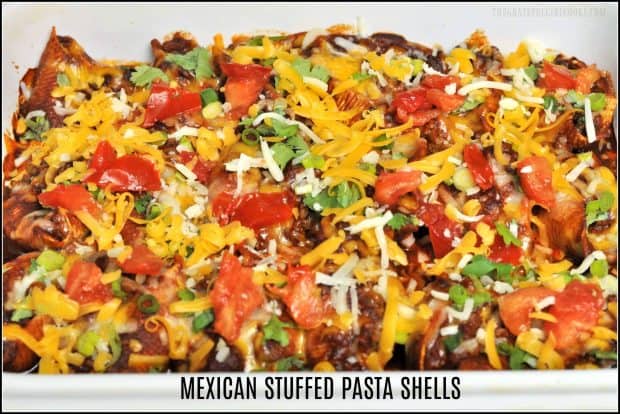
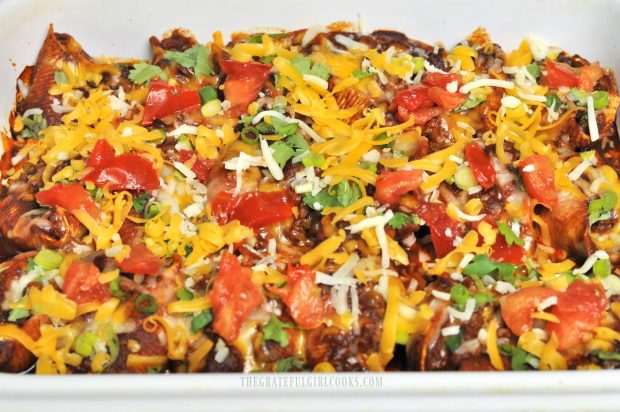
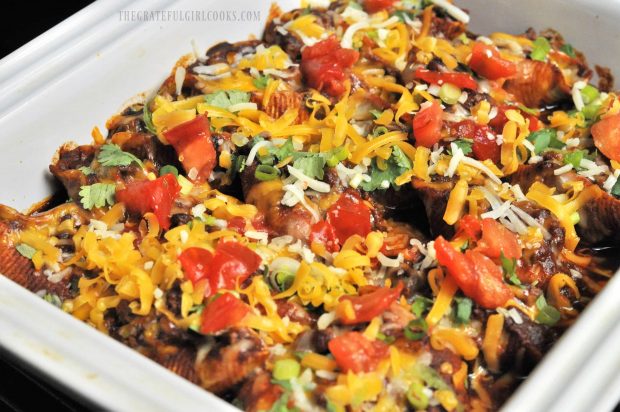
To serve, top with additional cheese, tomato, cilantro and green onions, for a great splash of color (and added flavor)! This dish will not only taste good… it will look good, too!

Mexican Stuffed Pasta Shells are garnished with tomatoes, cilantro before serving.

Mexican Stuffed Pasta Shells are ready to serve and eat!

Place 2-3 shells onto each individual serving plate, and top each shell with a small dollop of sour cream. Serve… and enjoy!

Mexican Stuffed Pasta Shells are served with a dollop of sour cream on top!

Hope you will consider making these flavor-filled Mexican stuffed pasta shells for an upcoming meal.  I served them with a simple mixed green salad on the side, and they were quite filling. Have a great day!

Looking For More Mexican-Inspired Recipes?

You can find ALL my recipes in the Recipe Index, located at the top of the page. I have lots of delicious, Mexican-inspired recipes you might want to check out, including:

Interested In More Recipes?

Thank you for visiting this website. I appreciate you using some of your valuable time to do soIf you’re interested, I publish a newsletter 2 times per month (1st and 15th) with all the latest recipes, and other fun info. I would be honored to have you join our growing list of subscribers, so you never miss a great recipe!
There is a Newsletter subscription box on the top right side (or bottom) of each blog post, depending on the device you use, where you can easily submit your e-mail address (only) to be included in my mailing list.

You Can Also Find Me On Social Media:

Facebook page: The Grateful Girl Cooks!
Pinterest:
The Grateful Girl Cooks!
Instagram:
jbatthegratefulgirlcooks

Author's signature

0 from 0 votes
Mexican Stuffed Pasta Shells
Prep Time
20 mins
Cook Time
25 mins
Total Time
45 mins
 
Mexican Stuffed Pasta Shells, with seasoned beef, cheese and onion, are baked and topped with cheese, cilantro, tomatoes, and sour cream!
Category: Entree
Cuisine: Mexican
Keyword: Mexican stuffed pasta shells
Servings: 6 servings (3 shells per serving)
Calories Per Serving: 445 kcal
Author: JB @ The Grateful Girl Cooks!
Ingredients
  • 1 pound ground beef
  • 2 green onions (sliced, use green stalk and white bulb)
  • 1 envelope taco seasoning
  • 3 Tablespoons chopped cilantro
  • 1/2 cup grated cheddar cheese , DIVIDED
  • 1/2 cup grated jack cheese , DIVIDED
  • 1 can (19 ounces) red enchilada sauce
  • Approx. 1/2 box jumbo pasta shells (I used 18 shells)
For Garnish (use as little or as much as you desire)
  • Chopped tomato, green onion, cilantro, grated cheddar, and sour cream
Instructions
  1. Preheat oven to 350 degrees. Place several large spoonfuls of enchilada sauce on the bottom of a baking dish (enough to just cover the bottom). Set aside.
  2. Cook ground beef with chopped green onions in large skillet on medium heat. When meat is cooked, drain and discard grease. Add taco seasoning packet and cook according to seasoning package instructions. Once meat has finished cooking, transfer it to a bowl, and let cool down for 4-5 minutes. Discard grease from pan. Add 3 Tablespoons enchilada sauce and HALF of the grated cheddar and jack cheeses to the meat; stir to combine. Set aside.
  3. In a large pot of boiling salted water, cook jumbo pasta shells according to package directions. When pasta is done cooking, drain, then place shells in a single layer on wax paper or parchment paper. Fill cooked pasta shells with the ground beef mixture, then place into baking dish (on top of sauce) in a single layer.
  4. Once all shells are filled and in baking dish, spoon the rest of the enchilada sauce over shells to cover. Sprinkle with the remaining half of the cheddar and jack cheeses.
  5. Cover dish with aluminum foil and bake in preheated 350 degree oven for 25-30 minutes total. Remove foil for the last 10 minutes of baking. Sauce and cheese should be bubbly when done. Remove dish from oven.
  6. To serve, garnish with additional cheese, chopped tomato, chopped cilantro, and green onions, for a great splash of color and flavor! Place 2-3 shells onto each person's plate; top each shell with a small dollop of sour cream. Serve and enjoy!
Nutrition Facts
Mexican Stuffed Pasta Shells
Amount Per Serving (1 serving)
Calories 445
* Percent Daily Values are based on a 2000 calorie diet.

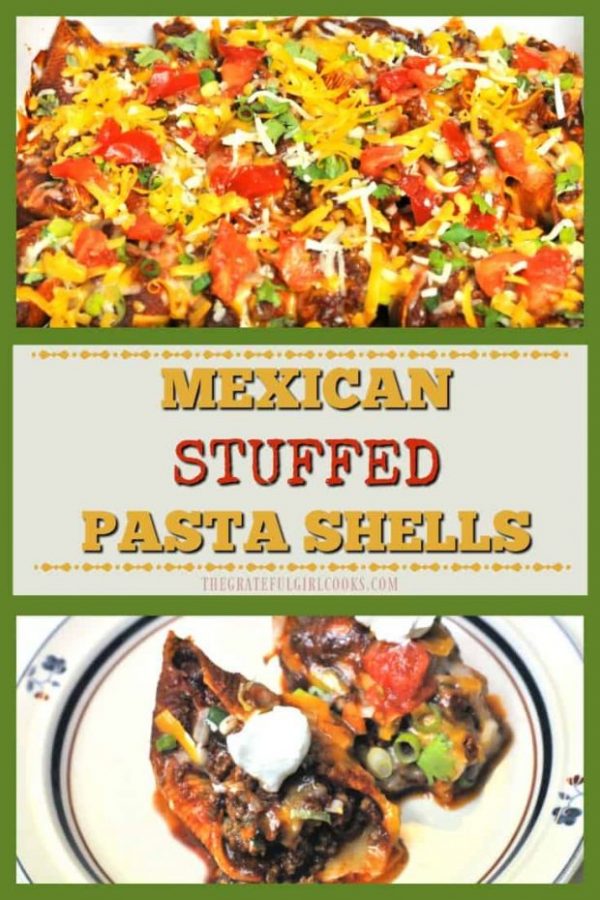
Here’s one more to pin on your Pinterest boards!Mexican Stuffed Pasta Shells, with seasoned beef, cheese and onion, are baked and topped with cheese, cilantro, tomatoes, and sour cream!


Save

Save

Save

Save

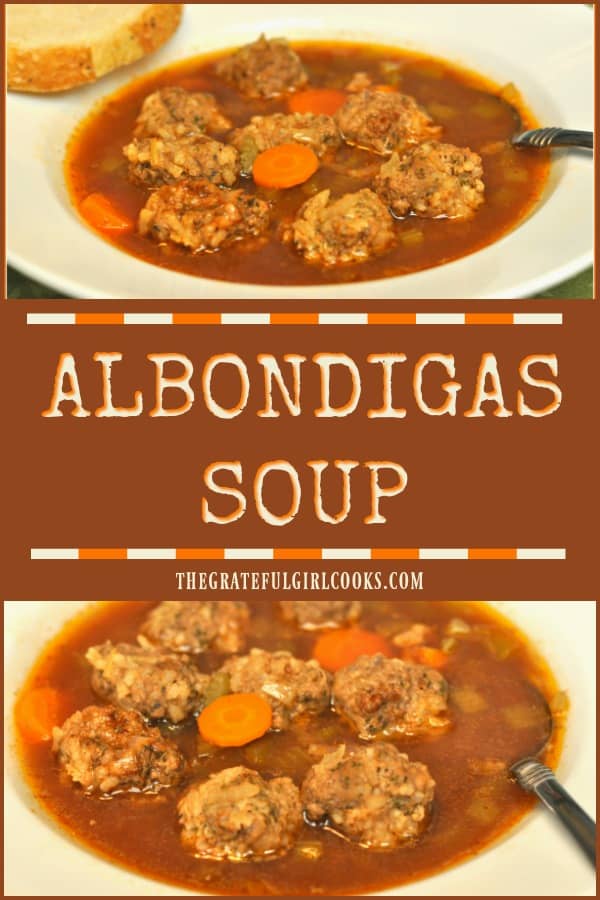
Albondigas Soup

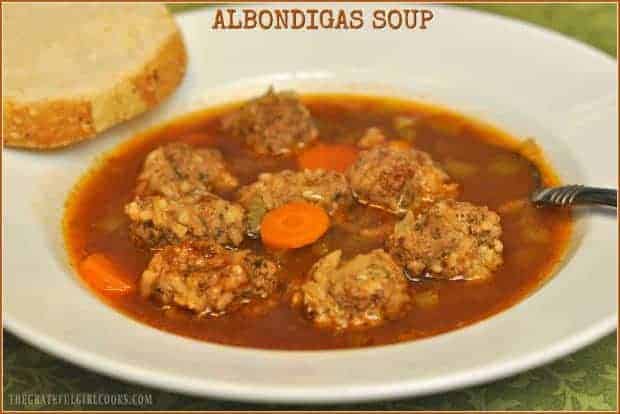
Delicious Albondigas Soup (“little meatball”) is an easy, inexpensive, Southwestern flavored dish, and can be served as a first course or an entree!Delicious Albondigas ("little meatball") Soup is an easy, inexpensive, Southwestern flavored dish to prepare, and can be served as a first course or an entree!
I made Albondigas Soup for dinner a couple of days ago… did you know that “Albondigas” simply means “little meatballs”? That’s right!

This is a yummy, Southwestern flavored “little meatball soup”.  It’s very simple to make… and it sure tastes good!

How I Got This Recipe

I was given this recipe at my bridal shower (almost 40 years ago) by the Mom of one of my bridesmaids.  This recipe for albondigas soup has been made so many times over the years, and we still enjoy it, to this day.

Simple and economical to make, the soup has a mild Southwestern flavor, due in small part to chili powder and other spices! The tiny meatballs made with ground beef, rice, and spices, really fill you up, too!

Albondigas soup is cooked all in one pan. Even the meatballs are added uncooked to the hot broth, and they cook in the pan.

No pre-browning of the meatballs is necessary, so it really doesn’t take much work at all to serve up a hot, steaming pot of albondigas soup! Here’s how to make it:

Scroll Down For A Printable Recipe Card At The Bottom Of The Page

How To Make Albondigas Soup

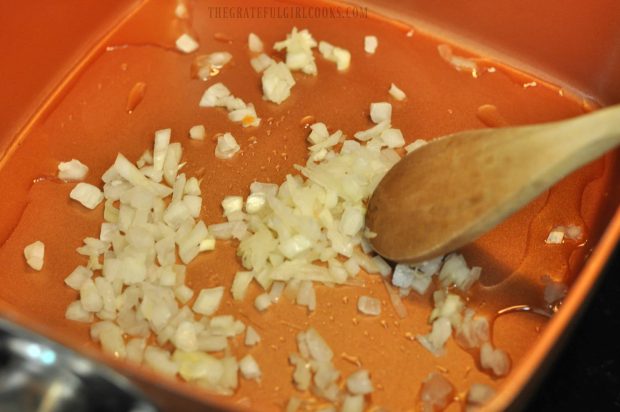
  Sauté chopped onions in a large soup pot in hot oil until the onions are translucent in color and tender, but not yet browned.

Cooking onions for the albondigas soup in a skillet.
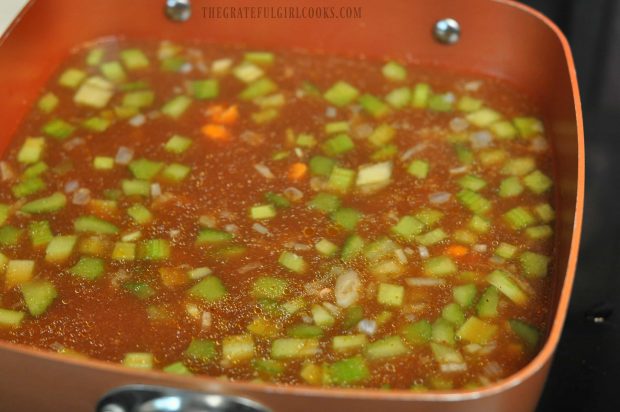
Add the rest of soup ingredients to the pan. These ingredients are chili powder, garlic powder, bisque of tomato soup, condensed beef consommé, water, sliced celery and carrots.

Simmer, uncovered, on medium-low heat for 20 minutes, stirring occasionally. While the albondigas soup is simmering, make the meatballs.

Carrots and celery cooking in broth for soup

Prepare The Meatballs

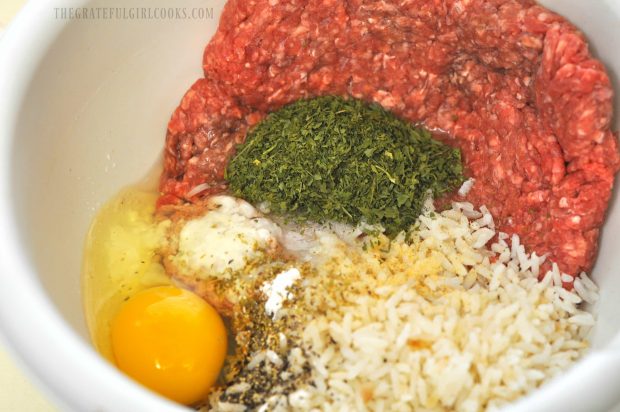
Make the meatballs while the soup is simmering. Place the ground beef, cooked rice, cornstarch, garlic powder, oregano, egg, salt, pepper, and dried parsley in a large bowl.

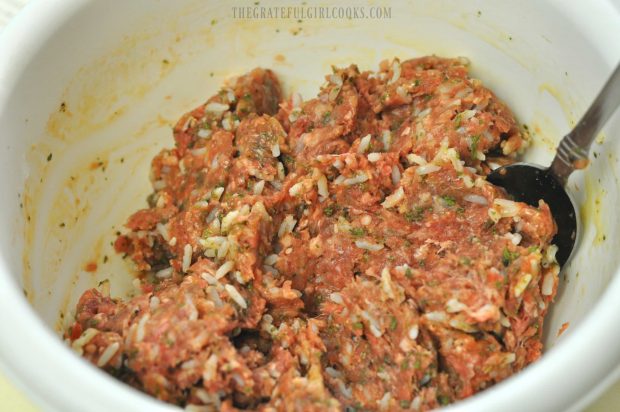
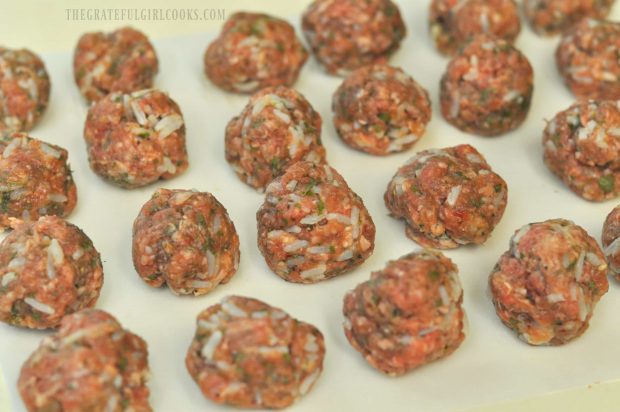
Stir (or use your hands) until the ingredients are fully mixed together. Form the meat mixture into small meatballs about the size of a walnut shell (about 1½” wide).

I was able to make 31 little meatballs with this mixture. Place the meatballs on parchment paper as they are formed.

Meat, egg, spices for albondigas soup in bowlMeatball ingredients ready to shape into ballsMeatballs formed on wax paper

Add The Meatballs To The Soup

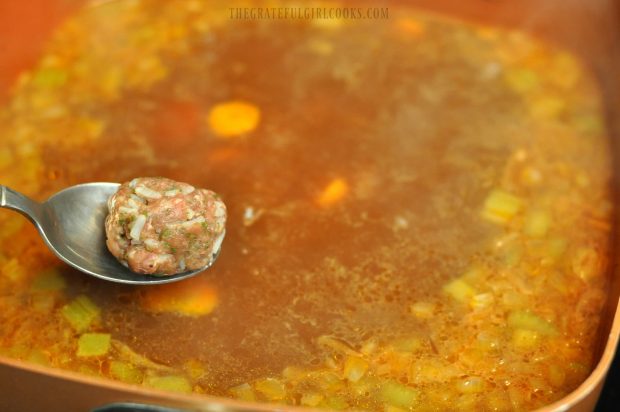
Carefully place the uncooked meatballs into the simmering broth.  They will sink to the bottom of the pot.  I took this first photo below, so you could see the meatballs go into the pot “uncooked”.

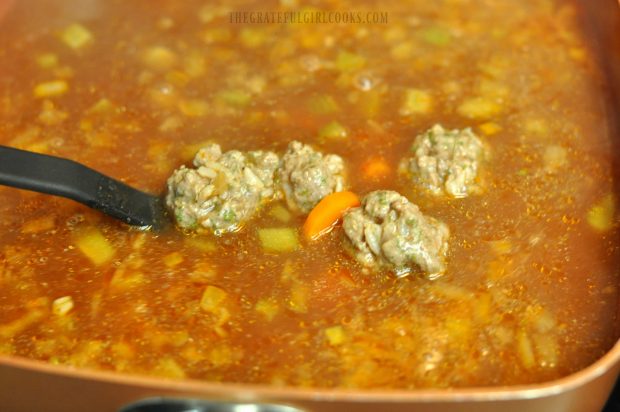
The meatballs will begin to cook immediately after putting them in. You can see this in the 2nd photo below, taken 30 seconds after adding the meatballs to the hot broth.

Putting the meatball into the soup potStirring meatballs in soup
Cook the Soup

Simmer the albondigas soup on low heat for 30 minutes after adding the meatballs. Do not put a lid on the saucepan.

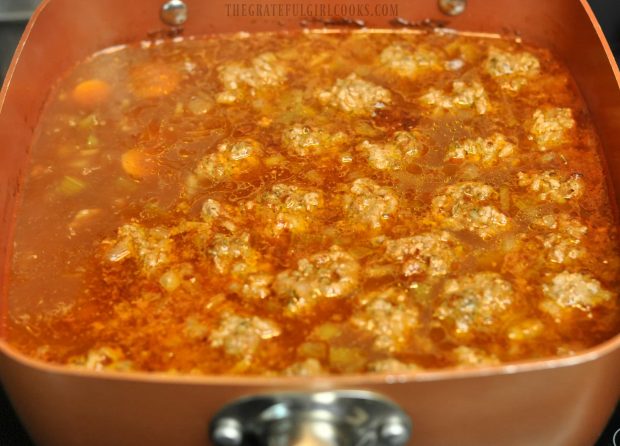
When done, the meatballs will float to the top of the soup, as shown below. They should be fully cooked through, as well.

Simmering albondigas soup

The Albondigas Soup Is Ready To Eat!

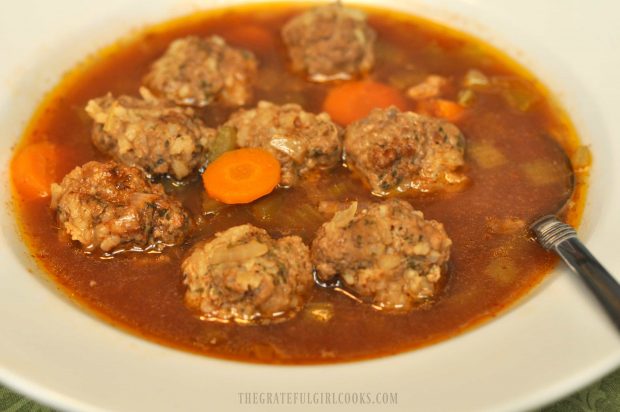
All that’s left to do is to ladle the hot soup into individual serving bowls. Serve albondigas soup hot with a slice of warm bread and a mixed green salad on the side. Enjoy!
A bowl of albondigas soup, with meatballs and carrots.

I hope you enjoy this simple to prepare, yet tasty albondigas soup! It is a family favorite, and I really think you will enjoy it!

Thanks for stopping by, and I invite you to come back again soon, for more family-friendly recipes. Take care, and have a GREAT day!

Looking For More SOUP Recipes?

You can find ALL of my recipes in the Recipe Index, located at the top of the page. I have lots of delicious soup recipes to choose from, including:

Want More Recipes? Get My FREE Newsletter!

I publish a newsletter 2 times per month (1st and 15th) with lots of recipes, tips, etc..
Would you like to join our growing list of subscribers?

There is a Newsletter subscription box on the top right (or bottom) of each blog post, depending on the device you use.
You can submit your e-mail address there, to be added to my mailing list.

Find Me On Social Media:

Facebook page: The Grateful Girl Cooks!
Pinterest:
The Grateful Girl Cooks!
Instagram:
jbatthegratefulgirlcooks

Author's signature

Recipe Source: Mrs. Phyllis Dean

0 from 0 votes
Albondigas Soup
Prep Time
25 mins
Cook Time
30 mins
Total Time
55 mins
 
Delicious Albondigas ("little meatball") Soup is easy and inexpensive Southwestern flavored soup to prepare, and can be served as a first course or an entree!
Category: Main Course, Soup
Cuisine: Southwestern
Keyword: albondigas soup
Servings: 6 servings
Calories Per Serving: 338 kcal
Author: JB @ The Grateful Girl Cooks!
Ingredients
For the broth:
  • 1/2 cup onion , chopped
  • 2 Tablespoons vegetable oil
  • 1/2 teaspoon chili powder
  • dash garlic powder
  • 1 can Campbells Bisque of Tomato Soup
  • 3 cans Campbells Condensed Beef Consomme soup
  • 3 cans water
  • cups carrots , sliced
  • cups celery , diced
For the meatballs:
  • 1 pound ground beef
  • 1/2 cup COOKED rice
  • 1 Tablespoons cornstarch
  • dash garlic powder
  • 1/4 teaspoon oregano
  • 1 teaspoon salt
  • 1/4 teaspoon black pepper
  • 1 egg
  • 1/4 cup parsley flakes
Instructions
  1. Heat oil in large soup pot. Saute onion until limp, but not browned. Add remainder of soup ingredients (chili powder, garlic powder, salt, tomato soup, beef consomme, water, sliced carrots and celery). Simmer uncovered on medium-low heat for 20 minutes, stirring occasionally. While soup simmers, make the meatballs.
  2. Combine all ingredients for meatballs in medium bowl (ground beef, cooked rice, cornstarch, garlic powder, oregano, salt, pepper, egg and parsley). Stir well, to fully combine. Form little meatballs with your hands (meatballs should be only about 1½ inches wide). Set formed meatballs on wax paper or parchment paper while you continue to make meatballs.
  3. When soup is done simmering (after 20 minutes), carefully add the uncooked meatballs to the hot broth. They will sink to bottom of pan, but will begin to cook immediately. Cook, uncovered, on a low simmer for 30 minutes. When done, the meatballs will be cooked through and will float to the surface of the soup. Ladle up the hot soup into individual bowls... serve and enjoy!
Nutrition Facts
Albondigas Soup
Amount Per Serving (1 serving)
Calories 338 Calories from Fat 189
% Daily Value*
Fat 21g32%
Saturated Fat 10g63%
Cholesterol 80mg27%
Sodium 1493mg65%
Potassium 822mg23%
Carbohydrates 18g6%
Fiber 2g8%
Sugar 6g7%
Protein 18g36%
Vitamin A 5760IU115%
Vitamin C 11.3mg14%
Calcium 73mg7%
Iron 2.7mg15%
* Percent Daily Values are based on a 2000 calorie diet.

Here’s one more to pin on your Pinterest boards!Delicious Albondigas ("little meatball") Soup is an easy, inexpensive, Southwestern flavored dish to prepare, and can be served as a first course or an entree!

Save

Save

Save

Save

Save

Save

Save

Save

Save

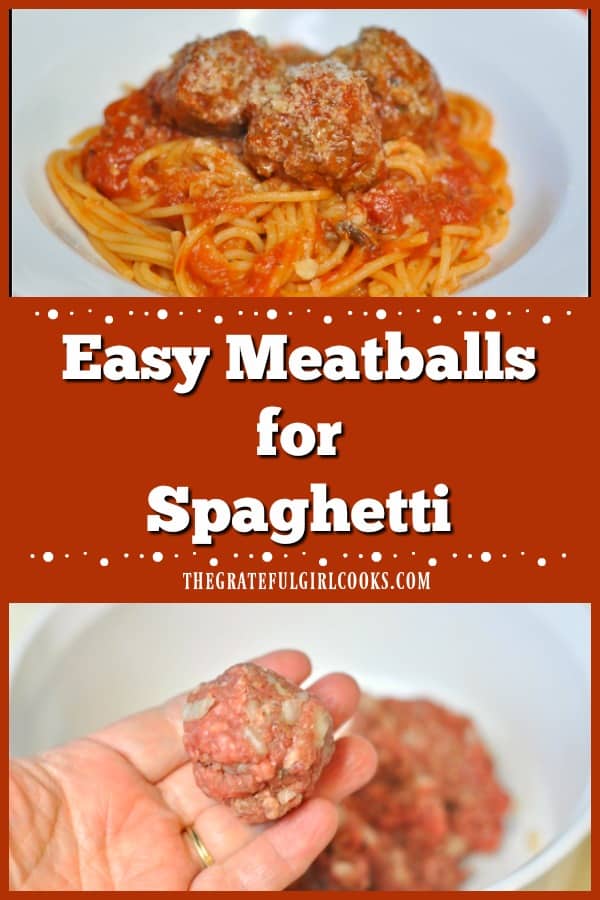
Easy Meatballs for Spaghetti

Learn how to make yummy, quick easy meatballs for spaghetti or other pasta (serves 4), using only one pound of ground beef!
I typically use Italian sausage links when I prepare spaghetti and sauce, but we also really enjoy our pasta with a fire roasted garlic marinara sauce and these easy meatballs, too!

Sometimes we just want spaghetti and meatballs- they really hit the spot! It’s completely easy to make 10-12 delicious Italian-seasoned meatballs using only one pound of hamburger meat and a few other readily available ingredients.

I’ve been making these easy meatballs for spaghetti this way for many, many years, and enjoy the minimal prep time involved!  You can even make a double batch of the meatballs and freeze them to use for another meal, which can save you precious time!  Here’s how easy it is to prepare them:

Scroll Down For A Printable Recipe Card At The Bottom Of The Page

Prepare The Easy Meatballs For Spaghetti

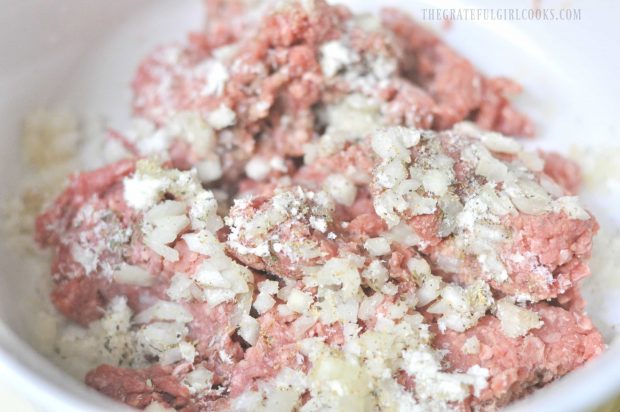
In medium sized bowl, combine ground beef, salt, pepper, garlic powder, oregano, diced onion, and freshly grated Parmesan cheese. Mix well, to combine ingredients.

Ground beef is mixed with Parmesan cheese, spices and onions.
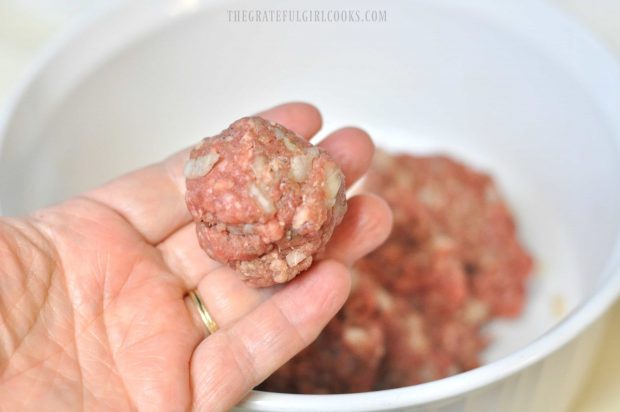
Using your (clean) hands, grab a portion of the meat mixture and form it into a ball, rolling it between your hands.  The ones I made were about 2 inches wide, so I was able to get 10 fairly good-sized easy meatballs out of one pound of meat.

If you make ’em just a tad smaller, you should be able to make 12 or more meatballs. Set the meatballs (once formed) onto a plate or wax paper.

Form the ground beef mixture into small balls before cooking.

Brown The Meatballs For Spaghetti

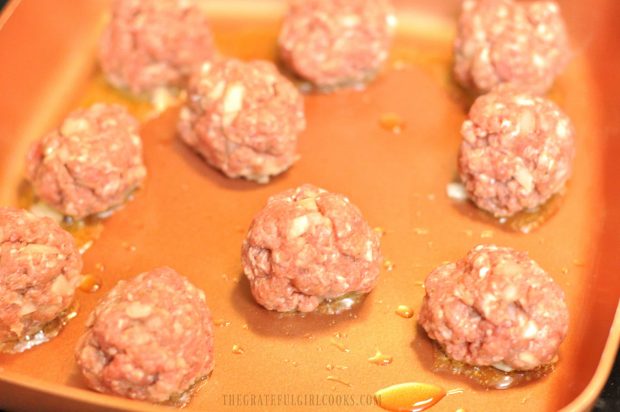
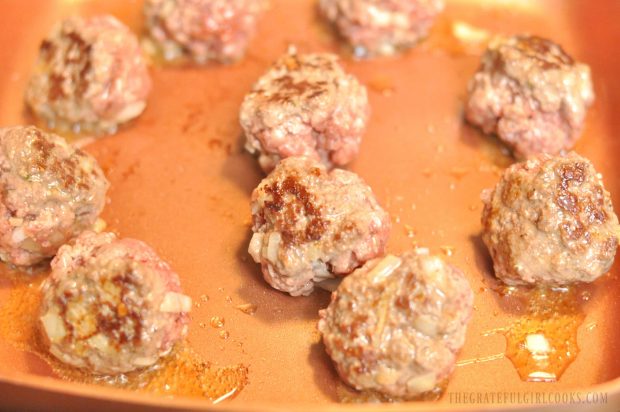
Heat 1 Tablespoon oil (vegetable or olive) in a large non-stick skillet on medium heat until oil and skillet are hot (but not smoking).  Add the meatballs carefully to the skillet. They should sizzle as they hit the hot oil.  Cook the meatballs until browned on the bottom, then carefully turn them over.

Continue to cook the meatballs until all sides are brown. They do NOT have to be completely cooked through – they will finish cooking in the sauce later. When done, transfer the meatballs to paper towels to absorb the grease.

Browning easy meatballs in skillet.The meat is browned on all sides in skillet.
Heat The Meatballs In Sauce

In a separate large saucepan, heat up spaghetti sauce (whatever kind of sauce you have on hand, whether it’s homemade or a purchased jar, just make sure you have enough sauce for 4 servings)!  Heat the sauce on medium-low.

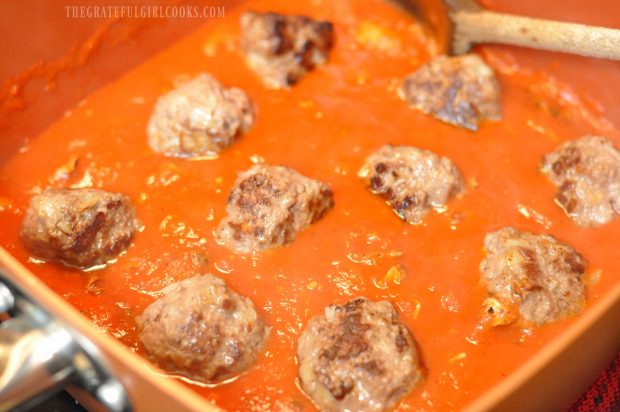
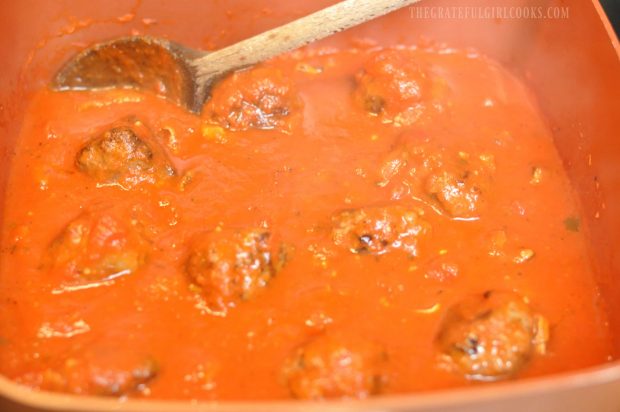
Carefully add the meatballs to the sauce. Spoon sauce over the top of each meatball. Let the meatballs and sauce continue to cook (uncovered) on medium-low for about 25-30 minutes, occasionally spooning sauce over them as they cook.

Meatballs are placed in spaghetti sauce to finish cooking.The easy meatballs are covered with spaghetti sauce in pan to finish cooking.

When meatballs are about halfway through cooking time, cook spaghetti noodles in separate pan, according to package directions. Drain pasta.  When they are done (and pasta is finished cooking), remove meatballs from spaghetti sauce (keep warm).

Serve Easy Meatballs For Spaghetti

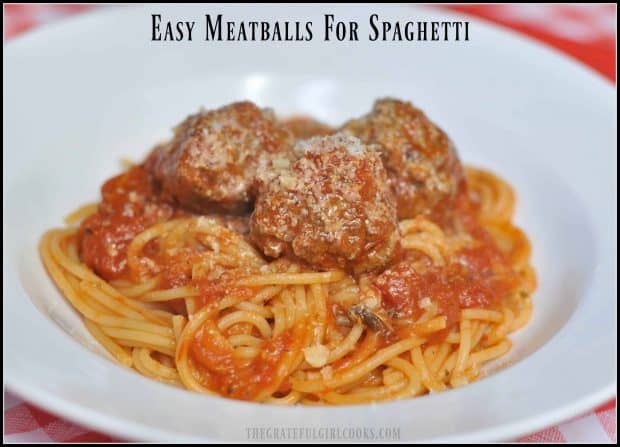
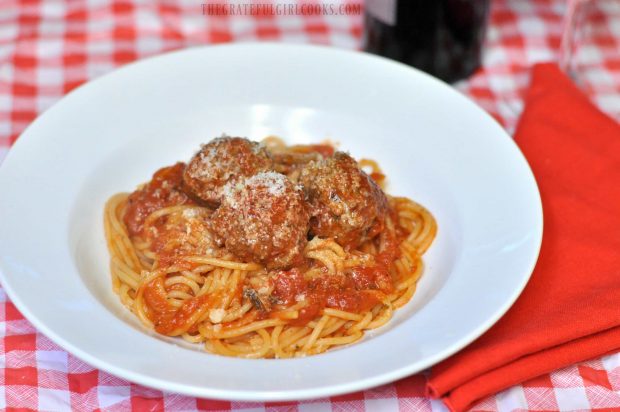
Mix the cooked and drained pasta noodles with the hot spaghetti sauce.  Serve the pasta onto individual plates or into bowls. Spoon any leftover sauce onto the top of the pasta.  Top each serving with a few of these easy meatballs.  BOOM! Sprinkle the meatballs with some finely grated Parmesan cheese, and serve!

Easy meatballs for spaghetti are served in white bowl, and are ready to eat.

This really is an economical and delicious classic meal, with 4 healthy sized portions of meatballs for spaghetti using only one pound of ground beef!  Our oldest son popped in for a visit the day after I made this meal, and he enjoyed a big plate of leftover spaghetti and meatballs for lunch!  Yay for leftovers!

Hope you’ll give these delicious, easy meatballs a try! Thank you for stopping by, and I trust you will come back soon. Have a great day.

Looking For More MEATBALL Recipes?

You can find all of my recipes in the Recipe Index, located at the top of the page. I have several recipes featuring meatballs, including:

Interested In More Recipes?

Thank you for visiting this website. I appreciate you using some of your valuable time to do soIf you’re interested, I publish a newsletter 2 times per month (1st and 15th) with all the latest recipes, and other fun info. I would be honored to have you join our growing list of subscribers, so you never miss a great recipe!
There is a Newsletter subscription box on the top right side (or bottom) of each blog post, depending on the device you use, where you can easily submit your e-mail address (only) to be included in my mailing list.

You Can Also Find Me On Social Media:
Facebook page: The Grateful Girl Cooks!
Pinterest: The Grateful Girl Cooks!
Instagram: jbatthegratefulgirlcooks

Author's signature

0 from 0 votes
Easy Meatballs for Spaghetti
Prep Time
10 mins
Cook Time
30 mins
Total Time
40 mins
 

Learn how to make yummy, quick easy meatballs for spaghetti or other pasta (serves 4), using only one pound of ground beef!

Category: Entree
Cuisine: Italian
Keyword: meatballs
Servings: 4 (3 meatballs per serving)
Calories Per Serving: 382 kcal
Author: JB @ The Grateful Girl Cooks!
Ingredients
  • 1 pound ground beef
  • 1/2 teaspoon salt
  • 1/4 teaspoon black pepper
  • 1/4 teaspoon garlic powder
  • 1/4 teaspoon dried oregano
  • 1/2 cup diced white onion
  • 1/2 cup finely grated Parmesan cheese
  • 1 Tablespoon olive oil
  • Spaghetti noodles (enough for 4 servings)
  • Prepared Spaghetti Sauce (enough for 4 servings)
  • Additional finely grated Parmesan cheese , for garnish
Instructions
  1. In medium sized bowl, combine ground beef, salt, pepper, garlic powder, oregano, diced onion, and finely grated Parmesan cheese. Mix well to combine ingredients.
  2. Using clean hands, grab a portion of the meat mixture and form it into a ball, rolling it between your hands. You should be able to make 12 or more small meatballs. Set meatballs (once formed) onto a plate or wax paper.

  3. Heat 1 Tablespoon oil (vegetable or olive) in a large non-stick skillet. Heat on medium until oil and skillet are hot (but not smoking). Add meatballs. They should sizzle as they hit skillet. Cook until brown on bottom, then carefully turn over. Continue to cook until all sides are brown (meatballs do NOT have to be completely cooked through - they will finish cooking in sauce later). Transfer to paper towels to drain.

  4. In a separate large saucepan, heat up spaghetti sauce (enough sauce for 4 servings) on medium-low. Carefully add meatballs to sauce. Spoon sauce over the top of each meatball. Let meatballs and sauce continue to cook on medium-low for about 30 minutes, occasionally spooning more sauce over the meatballs as they cook.

  5. When meatballs are halfway through cooking time, cook spaghetti noodles in separate pan, according to package directions. Drain. When done, remove meatballs from spaghetti sauce (keep warm). Mix cooked, drained noodles with the hot spaghetti sauce. Serve up the pasta onto individual plates or into bowls. Spoon any leftover sauce onto pasta. Top each serving with 3 meatballs. Garnish with grated Parmesan cheese, and serve!

Recipe Notes

*Caloric calculation is for meatballs only (3 per serving). 

Nutrition Facts
Easy Meatballs for Spaghetti
Amount Per Serving (3 meatballs)
Calories 382 Calories from Fat 261
% Daily Value*
Fat 29g45%
Saturated Fat 11g69%
Cholesterol 91mg30%
Sodium 558mg24%
Potassium 351mg10%
Carbohydrates 2g1%
Protein 24g48%
Vitamin A 110IU2%
Vitamin C 1.5mg2%
Calcium 164mg16%
Iron 2.4mg13%
* Percent Daily Values are based on a 2000 calorie diet.

Here’s one more to pin on your Pinterest boards!Learn how to make yummy, quick easy meatballs for spaghetti or other pasta (serves 4), using only one pound of ground beef!


Save

Save

Save

Save

Save

Save

Save

Save

Save

Save

Save

Save

Save

Save

Save

Save

Save

Save

Save

Smoked Sausage Veggie Rice Skillet

Smoked Sausage Veggie Rice Skillet is a delicious meal, with beef kielbasa, veggies and rice, and can be made in under 30 minutes!
Smoked Sausage Veggie Rice Skillet, is a delicious meal with beef kielbasa, veggies and rice is made in under 30 minutes in one pan, for easy cleanup!
Are you looking for an easy  “all in one pan” dish to prepare quickly after a busy day? How about this recipe for a Smoked Sausage Veggie Rice Skillet? This meal with meat, broccoli, onions, bell peppers and rice can be made in under 30 minutes!

A few months ago my husband and I had dinner with friends prior to their move to Japan for a new work assignment. I asked my friend Erin (who has tried other recipes of mine) what type of recipes she would like to see on my blog that would help her feed her family of 5. She said she loves easy One Pan meals.

Well, when I saw this recipe on Pinterest pop up, I knew it would fit the bill! S0 I tried it, and found this meal to be tasty, filling, and economical. This sausage veggie rice skillet is also EASY to make, so I am sharing it here on the old blog!

Scroll Down For A Printable Recipe Card At the Bottom Of The Page

How To Make The Sausage Veggie Rice Skillet:

First thing you will need to do is get all the veggies prepped/sliced and have the rice ready to cook before you begin.

Heat olive oil on medium heat in large skillet. When hot, add sliced sausage. Cook until sausage has lightly browned. Add the minced garlic to the pan. Cook for an additional minute, stirring often so the garlic won’t burn.
Smoked sausage slices are browned in a skillet.

Add The Colorful Veggies

Add the sliced bell peppers, onion, broccoli, chicken broth and tomato sauce to the skillet. Stir  well, to combine all the ingredients.

Broccoli, bell peppers and onions are added to smoked sausage veggie rice skillet.

Simmer the smoked sausage veggie rice skillet uncovered on low heat for 10-12 minutes. Cook until the liquid has been fully absorbed.

Smoked Sausage Veggie Rice Skillet is heated until liquid is absorbed.

Stir In the Rice

While sausage and veggies are cooking, cook the rice per package instructions. When done, stir the 2 cups of hot, cooked rice into sausage/veggie mixture.

Cooked white rice is added to sausage veggie rice skillet, and stirred to combine.

Season And Serve!

Season with salt and pepper, to taste.  Add any other additional spices you may want to add to the sausage veggie rice skillet. Immediately sprinkle the hot dish with grated mozzarella cheese. Continue cooking on low heat without stirring until heated through. Cheese on top should be melted. Serve sausage veggie rice skillet dish hot.

Shredded mozzarella cheese is added to top of smoked sausage veggie rice skillet.

That’s it! Not bad for an “all in one” smoked sausage veggie rice skillet, right? It really does fills you up, too! Depending on the portion size you choose, you can expect to get between 4 and 5 servings out of this meal. EASY PEASY, and it tastes GOOD!

An individual portion of smoked sausage veggie rice skillet dish is served in white bowl.

If you enjoy cooking with kielbasa an sausages and enjoy EASY dinners, then try my recipes for Simple Chicken Sausage Pasta, Italian Sausage & Potato Casserole, and Sweet n’ Sticky Polska Kielbasa (only 2 ingredients!).

Hope you will give this ridiculously easy smoked sausage veggie rice skillet recipe a try.  It’s very tasty!  Be sure to check out ALL of my recipes in the Recipe Index, which is located at the top of the page. Have a fantastic day, and God Bless You!

Interested In More Recipes?

Thank you for visiting this website. I appreciate you using some of your valuable time to do soIf you’re interested, I publish a newsletter 2 times per month (1st and 15th) with all the latest recipes, and other fun info. I would be honored to have you join our growing list of subscribers, so you never miss a great recipe!
There is a Newsletter subscription box on the top right side (or bottom) of each blog post, depending on the device you use, where you can easily submit your e-mail address (only) to be included in my mailing list.

You Can Also Find Me On Social Media:

Facebook page: The Grateful Girl Cooks!
Pinterest:
The Grateful Girl Cooks!
Instagram:
jbatthegratefulgirlcooks

Author's signature

Recipe Source:  http://www.hillshirefarm.com/recipes/easy-smoked-sausage-skillet

0 from 0 votes
Smoked Sausage, Veggie and Rice Skillet
Prep Time
15 mins
Cook Time
10 mins
Total Time
25 mins
 

Smoked Sausage Veggie Rice Skillet is a delicious meal, with beef kielbasa, veggies and rice, and can be made in under 30 minutes!

Category: Entree
Cuisine: American
Keyword: sausage veggie rice skillet
Servings: 5 servings
Calories Per Serving: 450 kcal
Author: JB @ The Grateful Girl Cooks!
Ingredients
  • 1 package smoked sausage link (I used Hillshire Farm), cut into 1/4 inch slices
  • ¼ cup olive oil
  • 2 garlic cloves , minced
  • ½ red bell pepper , thinly sliced
  • ½ yellow bell pepper , thinly sliced
  • 1 small yellow onion , thinly sliced
  • 1 small package frozen broccoli , thawed (approx. 1½-2 cups)
  • ½ cup chicken broth (can substitute water)
  • ½ cup tomato sauce
  • 2 cups pre-cooked rice (prepared according to package directions)
  • ½ cup grated mozzarella cheese
  • salt and pepper to taste
Instructions
  1. Heat olive oil in large skillet. When hot, add sliced sausage. Cook until sausage has lightly browned. Add minced garlic; cook for an additional minute, stirring often so that garlic will not burn.
  2. Add sliced peppers, onion, broccoli, chicken broth and tomato sauce to the skillet. Stir to combine ingredients and simmer on low heat for 10-12 minutes, until liquid has been absorbed.
  3. While sausage and veggies are cooking, cook rice per package instructions. Stir hot, prepared rice into sausage/veggie mixture when done.
  4. Season with salt and pepper, to taste.
  5. Immediately sprinkle with grated mozzarella cheese and serve while hot.
Recipe Notes

This dish (as written)is not highly seasoned (which is great for kids!). If desired, add additional spices (garlic powder, dried chili pepper flakes, etc.) to suit your personal taste. May also substitute Pepper Jack cheese (for the mozzarella) for a bit more spice!

Nutrition Facts
Smoked Sausage, Veggie and Rice Skillet
Amount Per Serving (1 (1/5 of total))
Calories 450 Calories from Fat 279
% Daily Value*
Fat 31g48%
Saturated Fat 9g56%
Cholesterol 54mg18%
Sodium 876mg38%
Potassium 430mg12%
Carbohydrates 26g9%
Fiber 2g8%
Sugar 3g3%
Protein 14g28%
Vitamin A 740IU15%
Vitamin C 66.7mg81%
Calcium 117mg12%
Iron 1.5mg8%
* Percent Daily Values are based on a 2000 calorie diet.

Here’s one more to pin on your Pinterest boards!Smoked Sausage Veggie Rice Skillet, is a delicious meal with beef kielbasa, veggies and rice is made in under 30 minutes in one pan, for easy cleanup!


Save

Save

Save

Save

Save

Save

Save

Save

Save

Save

Save

Save

Save

Save

Save

Beef and Barley Soup

You will love this simple, yet hearty Beef and Barley Soup, with tender beef chunks, barley, carrots, celery and onions! It will hit the spot on a cold day!You will love this simple, yet hearty Beef and Barley Soup, with tender beef chunks, barley, carrots, celery and onions! It will hit the spot on a cold day!We had snow, freezing rain, and below freezing temperatures in Oregon this weekend. Brrr.  We were stuck inside waiting for the ice and snow to melt, so I made a large pot of delicious Beef and Barley Soup. A big bowl of hot soup sounded perfect on such icy cold days!

When I was growing up, my Mom occasionally bought cans of a name brand’s Beef and Barley Soup. I always liked it, so it was a natural choice to try making my own. I found the recipe on Pinterest (from blogger and author Gina Homolka at Skinnytaste.com), and loved the SIMPLE ingredients it takes to make it.

The soup cooks on low for a couple hours, which allows the meat to become VERY TENDER. The addition of barley helps make it very filling – the soup tastes delicious… AND only has 336 calories per serving (1½ cups of soup). Interested?  Here’s how to make it:

Scroll Down For A Printable Recipe Card At The Bottom Of The Page

How To Make Beef And Barley Soup

Heat oil in a large heavy pot on medium heat.  Once oil is hot, add beef, which has been lightly seasoned with salt. Brown the meat on all sides (this will take 3-4 minutes).

Beef chunks cooking in pan

Once the meat is browned, drain grease. Add chopped carrots, onion, celery and minced garlic. Stir to combine.

Carrots, onion and beef cooking in pan

Time To Cook The Soup!

Add water, salt, and a couple of bay leaves to the pot. Stir well, and bring the mixture to a boil. Once it begins to boil, turn the heat down to LOW.  Put a cover on the pot. Let the soup simmer on low heat for 1½ to 2 hours (leaving the lid on the pot the entire time).

The long cooking time helps tenderize the beef. While it cooked, I worked on a puzzle, read, played with our dog, did some laundry, and enjoyed it as the amazing smell from the cooking soup began to fill our home.

Water being added to soup pot with meat

When the long cook time is done, add dry barley to the soup. Stir well. Taste the broth.  Season with ground black pepper.  Add additional salt, if needed (to taste). Stir well.

Barley being poured into soup pot

Let the soup simmer on LOW (uncovered) for an additional 35-40 minutes, while the barley cooks.  The barley will “plump” a bit as it cooks and will absorb some of the liquid.

Beef and barley soup simmering in red soup pot

Beef And Barley Soup Is Ready To Enjoy!
When done cooking, remember to take out the bay leaves, then ladle some of this delicious beef barley soup into individual bowls. If you want,  garnish each bowl of soup with a bit of dried or fresh chopped parsley, and serve!

Soup with beef, carrots and barley in white bowl

Hope you enjoy this simple, yet hearty and filling beef barley soup. My husband and I sure enjoyed it, served with a slice of crusty sourdough bread. I’m looking forward to the leftovers for lunch today!  The beef was incredibly tender, and the taste was wonderful. Best of all, it was a very simple soup to prepare!

Beef and Barley Soup with barley, meat, carrots and broth in white bowl with spoon.

Have a great day! The last report I heard on the news yesterday said that 47 of the 48 mainland states have snow in one part of them or another. That’s a whole lot of COLD WEATHER! Stay warm, make a big pot of hot beef and barley soup… and enjoy your day!

Looking For More SOUP Recipes?

You can find all of my recipes in the Recipe Index, which is located at the top of the page. I have LOTS of delicious soup recipes I’m confident you will enjoy, including:

Interested In More Recipes?

Thank you for visiting this website. I appreciate you using some of your valuable time to do soIf you’re interested, I publish a newsletter 2 times per month (1st and 15th) with all the latest recipes, and other fun info. I would be honored to have you join our growing list of subscribers, so you never miss a great recipe!
There is a Newsletter subscription box on the top right side (or bottom) of each blog post, depending on the device you use, where you can easily submit your e-mail address (only) to be included in my mailing list.

You Can Also Find Me On Social Media:
Facebook page: The Grateful Girl Cooks!
Pinterest: The Grateful Girl Cooks!
Instagram: jbatthegratefulgirlcooks

Author's signatureRecipe Source:  http://www.skinnytaste.com/beef-barley-soup/

0 from 0 votes
Beef and Barley Soup
Prep Time
10 mins
Cook Time
2 hrs 15 mins
Total Time
2 hrs 25 mins
 
You will love this simple, yet hearty soup with tender beef chunks, barley, carrots, celery and onions!
Category: Soup
Cuisine: American
Keyword: beef and barley soup
Servings: 7 ½ cup servings
Calories Per Serving: 266 kcal
Author: JB @ The Grateful Girl Cooks!
Ingredients
  • 1 teaspoon oil
  • pounds beef round stew meat (1-2 inch pieces)
  • 1 cup chopped carrots
  • 1 cup chopped onions
  • 1/2 cup chopped celery
  • 2 cloves garlic , minced
  • 6 cups water
  • 1-2 teaspoons salt (season to taste)
  • 2 bay leaves (in spice section-added for seasoning)
  • 2/3 cup dry barley
  • 1/2 teaspoon Ground black pepper (approx. 1/2 teaspoon)
  • Additional salt , to taste
  • Dried parsley (for garnish-optional)
Instructions
  1. Heat oil in a large heavy pot on medium heat. Once oil is hot, add beef, which has been lightly seasoned with salt. Brown meat on all sides (this will take 3-4 minutes). Drain grease from pan.
  2. Add chopped carrots, onion, celery and minced garlic. Stir to combine.
  3. Add water, salt, and a couple of bay leaves to the pot. Stir well. Bring the mixture to a boil. Once it begins to boil, turn the heat down to Low. Put a cover on the pot. Let the soup simmer on low heat for 1½ to 2 hours. The long cooking time helps to tenderize the beef. Meat should be tender when done.
  4. Add barley. Stir to combine. Season with ground black pepper. Taste the soup. Add additional salt, if needed. Let soup simmer on low (uncovered) an additional 35-40 minutes, while the barley cooks.
  5. When done cooking, remember to take out the bay leaves (!!!), then ladle some of this delicious soup into individual bowls, garnish with a bit of dried parsley, and serve!
Nutrition Facts
Beef and Barley Soup
Amount Per Serving (1 1/2 cup serving)
Calories 266 Calories from Fat 72
% Daily Value*
Fat 8g12%
Saturated Fat 3g19%
Cholesterol 75mg25%
Sodium 399mg17%
Potassium 405mg12%
Carbohydrates 17g6%
Fiber 4g17%
Sugar 2g2%
Protein 29g58%
Vitamin A 3085IU62%
Vitamin C 3.3mg4%
Calcium 34mg3%
Iron 3.1mg17%
* Percent Daily Values are based on a 2000 calorie diet.

Here’s one more to pin on your Pinterest boards!You will love this simple, yet hearty Beef and Barley Soup, with tender beef chunks, barley, carrots, celery and onions! It will hit the spot on a cold day!


Save

Save

Save

Save

Save

Save

Save

Save

Save

Save

Save

Save

Save

Save

Save

Save

Save

Save

Mom’s Swedish Meatballs and Rice

Mom’s Swedish Meatballs and Rice is a family and budget friendly dinner that feeds 6 with one pound of hamburger meat… and it’s delicious!Mom's Swedish Meatballs and Rice is a family and budget friendly dinner that feeds 6 with one pound of hamburger meat... and it's delicious!
When I was growing up, my mother sure knew how to stretch a dollar! Mom’s Swedish Meatballs and Rice was one of the meals she fed our family of 5. She did this using only 1 pound of hamburger meat, a few other ingredients and served these delicious meatballs and gravy with rice! We LOVED this meal!

Scroll Down For A Printable Recipe Card At The Bottom Of The Page

Fast forward over 40 years later, and I still make this scrumptious meal! Now… my Mom is about as far from being Swedish as one could imagine (she’s a Texas gal), yet this was the name given it when I copied down the recipe from her over 40 years ago! Trust me, Swedish meatballs, with gravy and rice is a fantastic tasting dinner (the leftovers are awesome, as well).

Swedish meatballs are super simple to make, the gravy is even easier, and it’s fairly impossible to mess up a pan of rice, right?  Trust me when I say this is simple meal to prepare; it’s a great way to feed several people a filling meal without breaking the bank! if you like meatballs, be sure and check out some of my other meatball recipes, including Easy Meatballs for Spaghetti, Meatballs Stroganoff, Hawaiian Meatballs, and Hoisin Asian Meatballs.

How To Make Swedish Meatballs

Here’s what you do:  Place the meatball ingredients in large bowl and mix well, to combine (ground beef, bread crumbs, milk, egg, onion, salt, pepper & nutmeg).

Hamburger meat, onions and spices ready to make Swedish meatballs.

Mixing ingredients for Swedish meatballs in large mixing bowl.

Scoop out a small portion of meat, and roll it between your clean hands to form 1 inch sized meatballs. A full pound of ground beef “should” yield about 24-25 small meatballs. I was using slightly less than a full pound and ended up with 22 Swedish meatballs. Set meatballs on waxed paper or foil until all have been formed.

Meatballs are formed out of hamburger meat and spices, etc.
Brown The Swedish Meatballs

Heat shortening in large skillet (may substitute oil, if necessary). When skillet is hot, add meatballs in single layer. Let brown on one side, then carefully turn to brown all sides (I use tongs). If necessary, add additional shortening or oil to prevent sticking.  When meatballs are browned on all sides, remove them to a large plate to rest.  Keep meatballs warm.

Swedish meatballs are browned in skillet.

The Swedish meatballs are browned on all sides.

Make The Gravy

Now it’s time to make the gravy!  Using the same pan (without cleaning it out), add hot water to meat drippings in skillet. Stir to mix and heat on low, scraping up the browned bits from the bottom of the skillet. This will help “de-glaze” the pan, and will incorporate all those yummy browned bits off the bottom of the skillet into your gravy.

Hot water is added to Swedish meatball drippings in skillet to begin making gravy.

The browned bits in skillet from cooking Swedish meatballs go into the gravy.

Now add the water/flour mixture to the hot water mixture in skillet. Whisk well as you pour, to fully combine ingredients. Bring the gravy to a boil. The gravy will begin to thicken as you heat and stir it. Once thickened, taste test, and season gravy with salt/pepper, if desired.

Water, flour, and seasonings poured into Swedish meatballs gravy.

Whisking ingredients for Swedish meatballs gravy in skillet.

Add Swedish Meatballs Back Into The Skillet

Once gravy has thickened, add the browned meatballs back into the skillet. Turn to coat each meatball with gravy. Put a lid on the skillet, and cook on low for 30 minutes. Check occasionally.

If necessary, add a bit more water to skillet and mix it in, to ensure you have enough gravy. You just gotta have enough gravy for Swedish meatballs, right?

Mom's Swedish meatballs are added back into gravy in skillet.

While meatballs are cooking, cook rice using your “normal” method (I use a rice cooker).  When meatballs and rice are done, the meal is ready. Make sure to coat the Swedish meatballs in gravy before placing on serving platter.

Mom's Swedish Meatballs finish cooking in the gravy.

Serve The Swedish Meatballs And Rice

To serve, arrange the cooked hot rice in a ring shape on a serving platter.  Place sprigs of fresh parsley around the rice. Carefully place the Swedish meatballs into the center of the ring. Pour remaining gravy over the meatballs.  Serve HOT, and enjoy this delicious meal!

Mom's Swedish Meatballs with gravy are served on top of a bed of rice.

I love recipes that don’t cost an arm and a leg to prepare for my family. This simple Swedish meatballs meal fits the bill perfectly, and tastes fantastic, too!  Hope you will consider making this “comfort food” dish for those you love. It really does taste wonderful! 

Blessings to you on this day. Thanks for stopping by, and please come back again soon. Also be sure to check out ALL my recipes in the Recipe Index, located at the top of the page.

Interested In More Recipes?

Thank you for visiting this website. I appreciate you using some of your valuable time to do soIf you’re interested, I publish a newsletter 2 times per month (1st and 15th) with all the latest recipes, and other fun info. I would be honored to have you join our growing list of subscribers, so you never miss a great recipe!
There is a Newsletter subscription box on the top right side (or bottom) of each blog post, depending on the device you use, where you can easily submit your e-mail address (only) to be included in my mailing list.

You Can Also Find Me On Social Media:
Facebook page: The Grateful Girl Cooks!
Pinterest: The Grateful Girl Cooks!
Instagram: jbatthegratefulgirlcooks

Author's signature

Recipe Source: My MOM (over 40 years ago)

0 from 0 votes
Mom's Swedish Meatballs and Rice
Prep Time
15 mins
Cook Time
30 mins
Total Time
45 mins
 

Mom's Swedish Meatballs and Rice is a family and budget friendly dinner that feeds 6 with one pound of hamburger meat... and it's delicious!

Category: Entree
Cuisine: Swedish
Keyword: Swedish meatballs
Servings: 6 servings
Calories Per Serving: 454 kcal
Author: JB @ The Grateful Girl Cooks!
Ingredients
For meatballs:
  • 1 pound ground beef
  • 1 cup bread crumbs
  • 1/2 cup milk
  • 1 egg , well beaten
  • 1 small brown onion (or 1/2 large), finely chopped
  • 2 teaspoons salt
  • 1/8 teaspoon black pepper
  • 1/4 teaspoon ground nutmeg
  • Shortening , approx. 2 Tablespoons (to cook meatballs in-may substitute oil)
For gravy:
  • 2 cups very hot water
  • 2 Tablespoons flour
  • 6 Tablespoons cold water
  • Salt and pepper (to season)
For accompaniment:
  • 4 cups hot cooked rice (I used 2 cups dry rice to start, for quantity shown)
  • Butter (for rice, if desired)
  • Fresh parsley sprigs , for garnish (optional)
Instructions
  1. Place ground beef, bread crumbs, milk, egg, onion, salt, pepper and nutmeg in large bowl. Mix well, to combine. Form mixture into 1 inch meatballs; set formed meatballs onto wax paper or foil.
  2. Heat shortening (or oil) in large skillet on medium heat. Add meatballs to hot oil in single layer. Brown on all sides (a minute or two per side). If necessary, add additional shortening (or oil) if necessary, to prevent sticking. When meatballs are fully browned, remove them to a plate, and keep warm.
  3. Add hot water back into skillet (DO NOT CLEAN OUT SKILLET). Stir while cooking on low, to deglaze the skillet and scrape up the flavorful browned bits off bottom of skillet. In a separate small bowl, combine cold water and flour. Mix really well, to remove lumps. Add this mixture to hot liquid in skillet, whisking well while adding. Continue to whisk gravy to remove any lumps. Bring mixture to a boil, stirring often until mixture thickens. Taste gravy... add salt and pepper to season, if desired.
  4. Add meatballs back into skillet. Turn to coat with gravy. Put a lid on the skillet; cook meatballs and gravy for 30 minutes, adding additional water to gravy, if necessary, to ensure there will be enough gravy (as gravy will cook down a bit).
  5. While meatballs are cooking, prepare rice (using the method you normally use to cook rice).
  6. When meatballs and rice are done, place cooked rice in a ring shape around outside of serving platter. Garnish rice with sprigs of fresh parsley. Carefully spoon the meatballs into center of ring, and pour gravy over the top of meatballs. Serve hot, and enjoy!
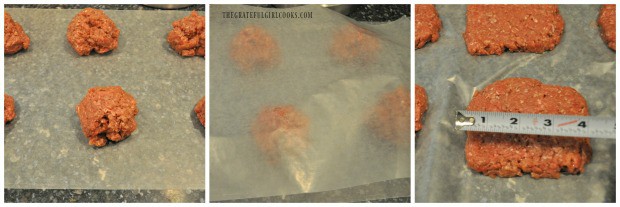
Nutrition Facts
Mom's Swedish Meatballs and Rice
Amount Per Serving (4 meatballs + rice)
Calories 454 Calories from Fat 171
% Daily Value*
Fat 19g29%
Saturated Fat 7g44%
Cholesterol 81mg27%
Sodium 978mg43%
Potassium 342mg10%
Carbohydrates 47g16%
Fiber 1g4%
Sugar 3g3%
Protein 20g40%
Vitamin A 80IU2%
Vitamin C 1.3mg2%
Calcium 90mg9%
Iron 2.8mg16%
* Percent Daily Values are based on a 2000 calorie diet.

Here’s one more to pin on your Pinterest boards!Mom's Swedish Meatballs and Rice is a family and budget friendly dinner that feeds 6 with one pound of hamburger meat... and it's delicious!
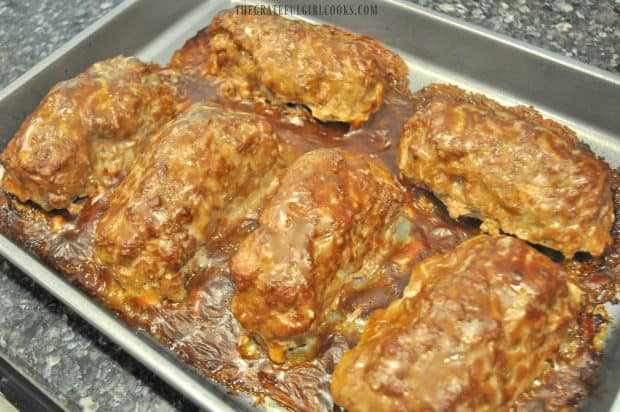
 

Save

Save

Save

Save

Save

Save

Save

Save

Save

Save

Save

Save

Save