Category: Chicken

Chicken Fried Chicken with Country Gravy

If you enjoy comfort food meals, (or chicken fried steak, which is a staple breakfast menu item at many restaurants), then you’ll want to try this recipe for Chicken Fried CHICKEN with creamy Country Gravy for a tasty dinner! If you enjoy comfort food meals (or chicken fried steak), then you'll absolutely want to try Chicken Fried CHICKEN with creamy Country Gravy for a tasty dinner!

I learned how to make this easy dish, after watching my Mom cook fried chicken for many years (and seeing how chicken fried steak is served in restaurants). I adapted this recipe from both of those methods by trial and error.  Typically this dish is made using beef in cubesteak form, lightly breaded and fried, and is called chicken-fried steak.

I actually prefer to make it with chicken breasts, but still cover it with that signature delicious, creamy country gravy! It’s very easy to prepare, with a shortcut I use for making the gravy a nice time saver, too! If you enjoy fried chicken, you will enjoy this dish!

Scroll Down For A Printable Recipe Card At The Bottom Of The Page

True Story!

One time, over 20 years ago, I made chicken fried chicken at dinnertime for our two young sons while my husband was out of state on business.  I flattened the chicken breasts out so much that when I put the finished, cooked piece of chicken on each of their plates, it nearly covered the entire plate.  You should have seen the look in their eyes when they first saw it and gasped!

To make it even more “perfect”, we watched the movie Jurassic Park while we ate our dinner. BIG crazy dinosaurs… BIG crazy-good chicken fried chicken. Our boys have never forgotten that dinner… ha ha!!!

While it definitely is not the “healthiest” dinner you could choose to eat, it sure tastes great every now and then!  It’s your typical “comfort food meal”, especially when served with creamy mashed potatoes.  Everything in moderation, right?  Here’s how easy it is to make:

How To Make Chicken Fried Chicken

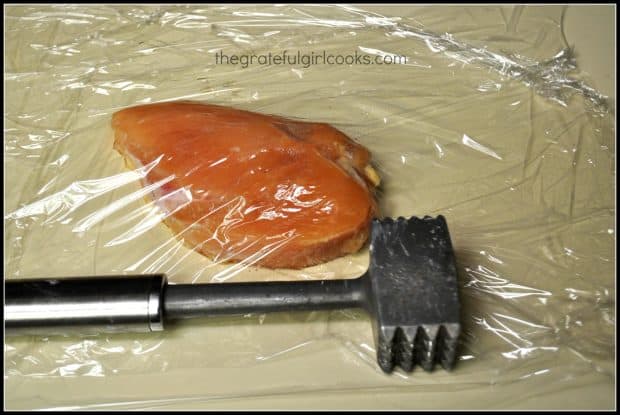
Place a boneless, skinless chicken breast in between two pieces of plastic wrap, sealing the edges. Pound the chicken out with the flat side of a meat mallet, until it has flattened out considerably to about 1/2 inch thick, like a cutlet. Think of all that pounding as very inexpensive therapy…

Chicken covered in plastic wrap, with meat mallet

Mix flour and seasonings in a small bowl.  Place buttermilk in a separate bowl. Dredge the chicken breast in flour mixture until completely covered on all sides. Dip chicken in buttermilk, coating all sides.

Let excess liquid drip back into bowl, then place chicken back into flour mixture, turning to cover completely. Set chicken onto dry platter, and repeat process for all pieces of chicken, coating one at a time.

Dipping poultry in flour, buttermilk, and back in flour

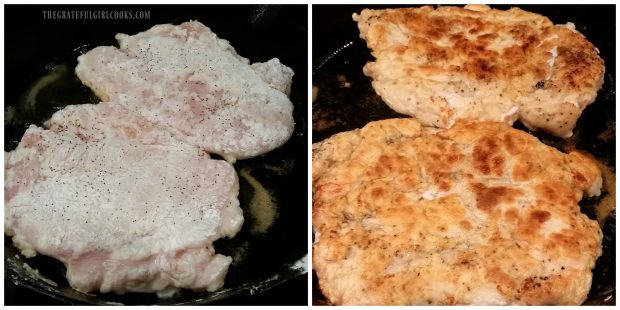
Heat vegetable oil on medium high heat, in large skillet. I like to use a cast iron skillet for this, but any type of skillet will work. When oil is hot (but not smoking), add chicken.  It should sizzle when chicken hits pan. You might need to cook the chicken in batches, due to the size of the flattened chicken.

Cooking times will vary, due to different thicknesses of meat, but you will need to cook one side (without moving it around-that tends to pull the breading off) until deep golden brown on bottom, then carefully turn chicken over and cook other side. Cook until chicken is fully cooked through (total time between 12-18 minutes, depending on thickness of chicken). Remove from heat.

Chicken cooking in skillet and browned

Prepare The Country Gravy

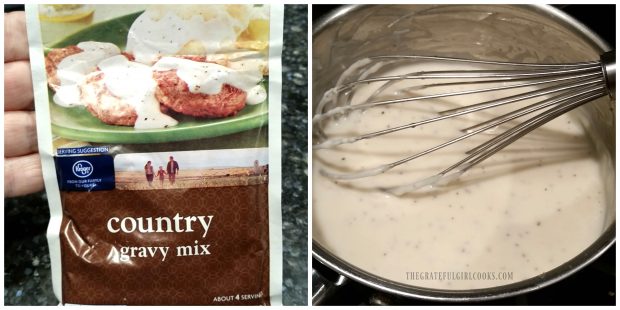
While chicken is cooking, prepare the gravy.  Most of the time I make gravy from scratch, BUT for a quick and easy way to make this creamy gravy for this recipe, I start with a “cheap” package of country gravy mix.

Prepare according to package directions, but also add a small chicken bouillon cube, a teaspoon of butter, some black pepper, onion powder and garlic powder, and stir until completely blended in. I find this really helps the gravy to have more “homemade” flavor!

Country gravy mix envelope and gravy in saucepan

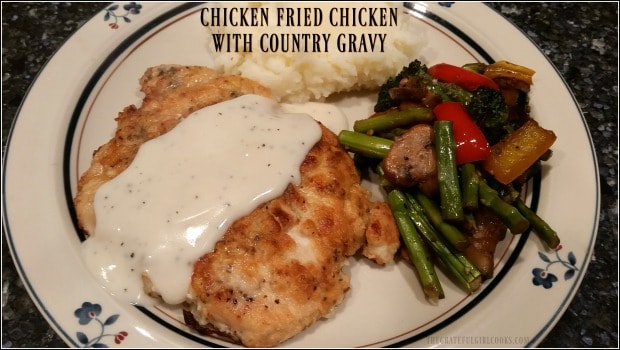
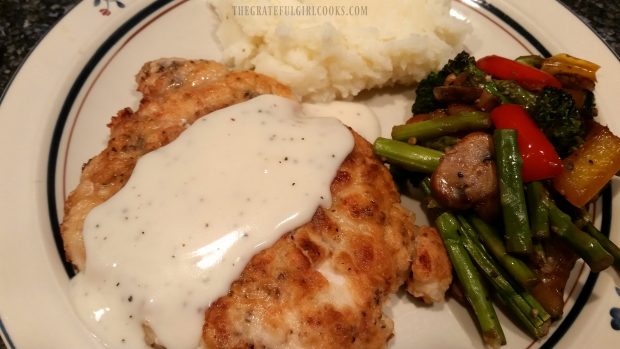
To serve this easy dish, I place the beautifully browned chicken cutlet onto each serving plate, then generously spoon some of the creamy country gravy over the top, and serve hot! See how big that one little chicken breast becomes when it’s flattened out… practically covers half the plate! P.S. The gravy is good on mashed potatoes, too!

Chicken fried chicken and gravy, on plate with vegetables

See how easy it is to make chicken fried chicken?  It really is a simple dish to prepare, and tastes delicious!  You might also want to check out my recipe for Crunchy Buttermilk Fried Chicken!  Hope you will consider trying this comfort food style recipe… and enjoy a little taste of the South!

Looking For More CHICKEN Recipes?

You can find all of my recipes in the Recipe Index, which is located at the top of the page. I have LOTS of chicken recipes you might enjoy, including:

Interested In More Recipes?

Thank you for visiting this website. I appreciate you using some of your valuable time to do soIf you’re interested, I publish a newsletter 2 times per month (1st and 15th) with all the latest recipes, and other fun info. I would be honored to have you join our growing list of subscribers, so you never miss a great recipe!
There is a Newsletter subscription box on the top right side (or bottom) of each blog post, depending on the device you use, where you can easily submit your e-mail address (only) to be included in my mailing list.

You Can Also Find Me On Social Media:

Facebook page: The Grateful Girl Cooks!
Pinterest:
The Grateful Girl Cooks!
Instagram:
jbatthegratefulgirlcooks

Author's signatureRecipe Source for chicken: My mom

↓↓ PRINTABLE RECIPE BELOW ↓↓

0 from 0 votes
Chicken Fried Chicken With Country Gravy
Prep Time
10 mins
Cook Time
15 mins
Total Time
25 mins
 
If you enjoy comfort food meals (or chicken fried steak), then you'll absolutely want to try Chicken Fried CHICKEN with creamy Country Gravy for a tasty dinner!
Category: Chicken, Dinner
Cuisine: American
Keyword: chicken fried chicken
Servings: 2 servings
Calories Per Serving: 465 kcal
Author: JB @ The Grateful Girl Cooks!
Ingredients
For Chicken:
  • 2 chicken breasts (boneless, skinless)
  • 1 cup all purpose flour
  • 1/2 cup buttermilk
  • 1/2 teaspoon salt
  • 1/8 teaspoon black pepper, paprika, garlic powder, onion powder (1/8 teaspoon each)
  • 2 Tablespoons vegetable oil
For Country Gravy
  • 1 envelope Country Gravy Mix (+ water indicated on pkg.)
  • 1 cube chicken bouillon (small cube, crumbled)
  • 1 teaspoon butter
  • 1/4 teaspoon black pepper
  • 1/8 teaspoon garlic powder and onion powder (1/8 teaspoon each)
Instructions
  1. Place a boneless, skinless chicken breast in between two pieces of plastic wrap, sealing the edges. Pound the chicken with the flat side of a meat mallet, until it has flattened out considerably to about 1/2 inch thick (like a cutlet).

  2. Mix flour and seasonings in a small bowl.  Put buttermilk in a separate bowl. Dredge the chicken breast in flour mixture until completely covered on all sides, and shake off excess flour. Dip floured chicken into buttermilk, coating all sides. Let excess liquid drip back into bowl, then place chicken back into flour mixture, turning to cover completely. Set chicken onto dry platter; repeat process for all pieces of chicken, one at a time.

  3. Heat vegetable oil on medium high heat, in large skillet. When oil is hot (but not smoking), add chicken.  It should sizzle when chicken hits pan. You might need to cook chicken in batches, due to the size of the flattened chicken. Cooking times will vary, due to different thicknesses of meat, but you will need to cook one side (without moving it around-that tends to pull the breading off) until deep golden brown on bottom, then carefully turn chicken over and cook other side. Cook until chicken is fully cooked through (total time estimated between 12-18 minutes, depending on thickness of chicken). Remove from heat.

  4. While chicken is cooking, prepare the gravy per pkg. instructions. Once thickened, add chicken bouillon cube (crumbled), butter, black pepper, onion powder and garlic powder. Stir and continue cooking until ingredients are completely blended into gravy.

  5. To serve, place a browned chicken cutlet onto each serving plate, then generously spoon some of the creamy country gravy over the top, and serve hot!

Nutrition Facts
Chicken Fried Chicken With Country Gravy
Amount Per Serving (1 piece (w/ gravy))
Calories 465
* Percent Daily Values are based on a 2000 calorie diet.

Here’s one more to pin on your Pinterest boards!If you enjoy comfort food meals (or chicken fried steak), then you'll absolutely want to try Chicken Fried CHICKEN with creamy Country Gravy for a tasty dinner!
 

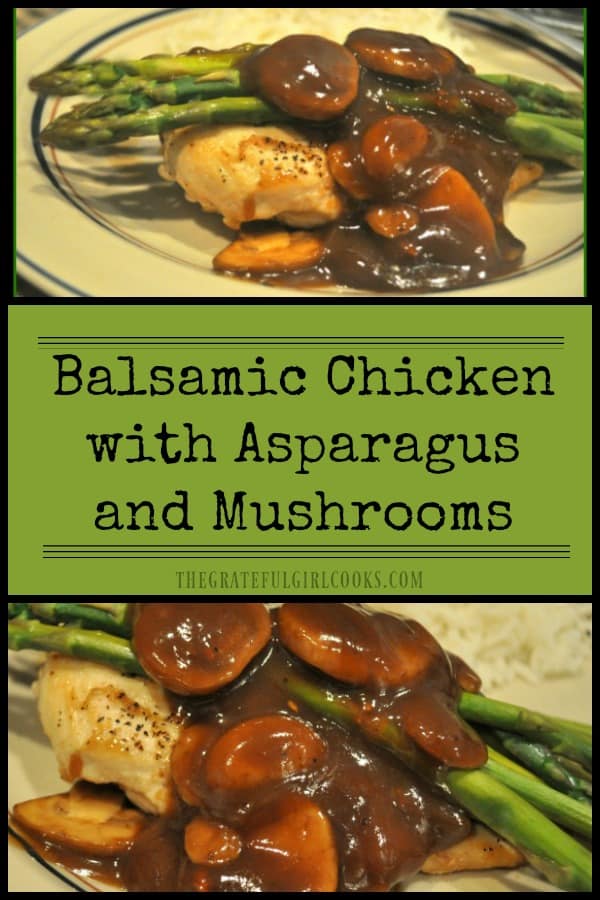
Balsamic Chicken with Asparagus and Mushrooms

Pan-seared balsamic chicken with grilled asparagus and mushrooms, topped with a flavorful pan sauce, is an easy, delicious, and healthy dinner!Pan-seared balsamic chicken with grilled asparagus and mushrooms, topped with a flavorful pan sauce, is an easy, delicious, and healthy dinner!

If you’re looking for a “new” chicken recipe that is healthy, packed with flavor and protein AND can be ready in about half an hour, check out this one for Balsamic Chicken with Asparagus and Mushrooms!

I found the recipe on Pinterest, and it sounded really good, was low in calories, but high in flavor! I made this for my husband and I a couple of weeks ago, and we really enjoyed it!  Boneless, skinless chicken breasts are pan-seared, asparagus is steamed in a balsamic glaze, and mushrooms are cooked then added to a creamy balsamic sauce which covers it all! YUM!

*NOTE: The recipe as posted serves 4, but I cut the recipe in half and only made two servings, so my photos reflect that. Here’s how to make this delicious dish:

Scroll Down for A Printable Recipe Card At The Bottom Of The Page

How To Make Balsamic Chicken

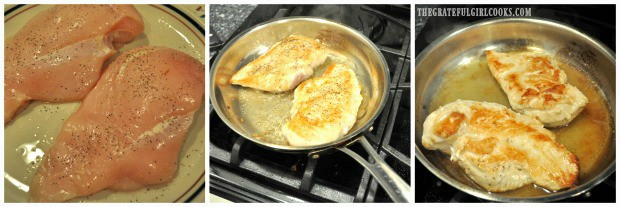
Heat oil on medium-high heat in skillet until hot, but not smoking. Lightly season chicken breasts with salt and pepper. Place chicken in hot skillet. Cook each side for about 7 minutes (per side), until nicely browned.

Add 1/3 cup chicken broth to skillet (reserve the rest for later); cook on low for 3-4 minutes, or until chicken is fully cooked through. Remove from heat; set aside (and cover, to keep warm).

3 picture collage of raw chicken, then cooking and browning in skillet

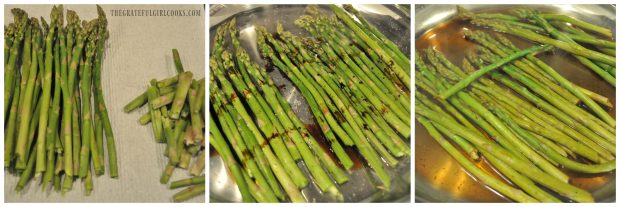
While chicken was cooking, I made the asparagus.  Trim ends off fresh asparagus (discard). Place asparagus onto a grill pan (or in a large skillet with 2 T. water). Drizzle with balsamic glaze, and season lightly with salt and pepper.

Cook on medium heat, turning occasionally, until asparagus are crisp-tender. I put a lid on skillet to help steam the asparagus (you can place aluminum foil over grill pan to do same). When done, remove asparagus from skillet, but leave liquid IN the skillet.

3 picture collage of asparagus, raw, and with sauce, cooking in skillet

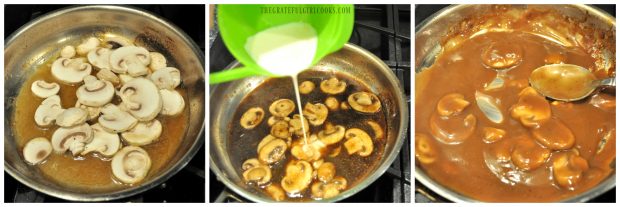
Once asparagus has been removed, add sliced mushrooms to balsamic sauce remaining in skillet.  Cook on medium-low to lightly brown mushrooms. Pour the reserved chicken broth into the skillet, and continue cooking.

In a small cup, mix together 1-2 Tablespoons cornstarch with 1-2 Tablespoons cold water until completely smooth. Pour this liquid into mushroom mixture, stirring as you add it. Cook for a couple of minutes to thicken the mushroom balsamic sauce.

3 picture collage of raw mushrooms, cooking with sauce added to skillet

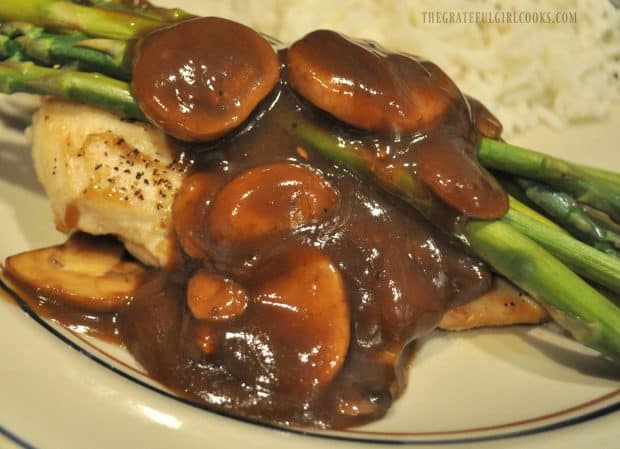
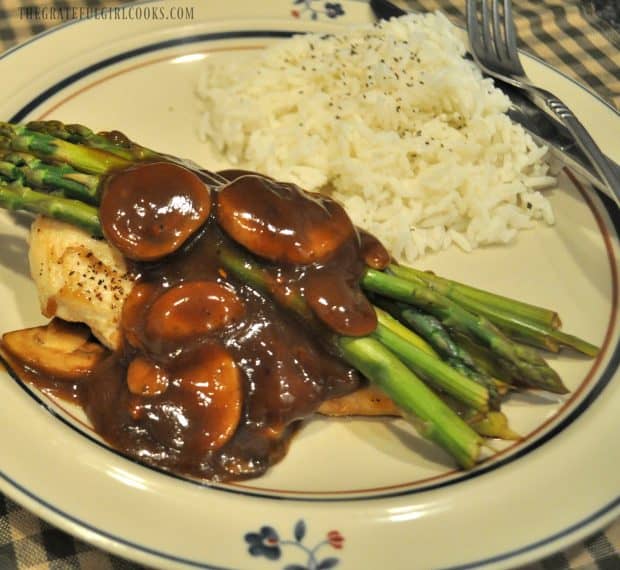
Place the cooked chicken onto individual serving plates; top with some of the cooked asparagus spears; then spoon some mushroom balsamic sauce over the top of it all.

Serve, and enjoy this delicious balsamic chicken dinner!  The chicken is tender, the asparagus is delicious, and those mushrooms in the balsamic sauce… amazing!

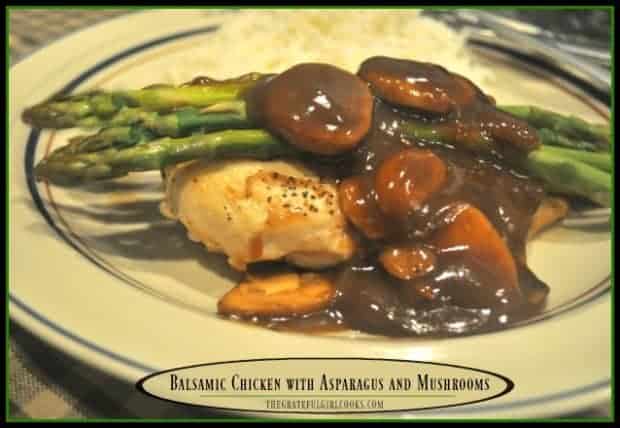
Chicken, covered with mushrooms and asparagus in balsamic sauce on plate

Balsamic Chicken, asparagus and mushrooms in sauce with rice, on plate

This balsamic chicken recipe is pretty straightforward and easy to prepare… I hope you will consider making this healthy meal for you and your loved ones!

As I sit here typing this blog post, I am reminded once again how very grateful I feel to live in this country, and how blessed I am to have food to cook available 24 hours a day in our pantry! Others in this big old world are not as fortunate, so I remain incredibly thankful to God for this blessing in our lives. I do not take it lightly. Hope you have a really good day.

Interested In More Recipes?

Thank you for visiting this website. I appreciate you using some of your valuable time to do soIf you’re interested, I publish a newsletter 2 times per month (1st and 15th) with all the latest recipes, and other fun info. I would be honored to have you join our growing list of subscribers, so you never miss a great recipe!
There is a Newsletter subscription box on the top right side (or bottom) of each blog post, depending on the device you use, where you can easily submit your e-mail address (only) to be included in my mailing list.

You Can Also Find Me On Social Media:
Facebook page: The Grateful Girl Cooks!
Pinterest: The Grateful Girl Cooks!
Instagram: jbatthegratefulgirlcooks

Author's signature

Recipe Source: http://fitnessfooddiva.com

0 from 0 votes
Balsamic Chicken with Asparagus and Mushrooms
Prep Time
20 mins
Cook Time
15 mins
Total Time
35 mins
 

Pan-seared balsamic chicken with grilled asparagus and mushrooms, topped with a flavorful pan sauce, is an easy, delicious, and healthy dinner!

Category: Entree
Cuisine: American
Keyword: balsamic chicken
Servings: 4 servings
Calories Per Serving: 226 kcal
Author: JB @ The Grateful Girl Cooks!
Ingredients
  • 4 chicken breasts , boneless and skinless
  • 1 Tablespoon olive oil
  • 14.5 ounces chicken broth , low sodium
  • 1 bunch asparagus , fresh (not frozen)
  • 2 Tablespoons balsamic glaze *see notes for substitute
  • 12 ounces button mushrooms , sliced
  • 1 Tablespoons corn starch , see Notes
  • Pinch salt and pepper , to taste
Instructions
  1. Heat oil on medium-high heat in skillet until hot, but not smoking. Lightly season chicken breasts with salt and pepper. Place chicken in hot skillet. Cook each side for about 7 minutes (per side), until nicely browned. Add 1/3 cup chicken broth to skillet (reserve the rest for later); cook on low for 3-4 minutes, or until chicken is fully cooked through. Remove from heat; set aside (and cover, to keep warm).
  2. While chicken is cooking, make asparagus.  Trim ends off asparagus (discard). Place asparagus onto a grill pan (or in a large skillet with 2 T. water). Drizzle with balsamic glaze; season lightly with salt and pepper. Cook on medium heat, turning occasionally, until asparagus are crisp-tender. Put a lid on skillet to help steam the asparagus (you can place aluminum foil over grill pan to do same). When done, remove asparagus from skillet, but leave liquid IN the skillet.

  3. Once asparagus has been removed, add sliced mushrooms to balsamic sauce remaining in skillet.  Cook on medium-low to lightly brown mushrooms. Pour  reserved chicken broth into the skillet, and continue cooking.  In a small cup, mix together 1-2 Tablespoons cornstarch with 1-2 Tablespoons cold water until completely smooth. Pour this liquid into mushroom mixture, stirring as you add it. Cook for a couple of minutes to thicken the mushroom balsamic sauce.

  4. Place the cooked chicken onto individual serving plates; top with some of the cooked asparagus spears; then spoon some mushroom balsamic sauce over the top of it all. Serve, and enjoy! 

Recipe Notes

Don't have access to balsamic glaze? Place 5 Tablespoons balsamic vinegar in saucepan. Heat over medium heat, stirring occasionally until sauce has reduced by half and has thickened slightly.

Nutrition Facts
Balsamic Chicken with Asparagus and Mushrooms
Amount Per Serving (1 serving)
Calories 226 Calories from Fat 63
% Daily Value*
Fat 7g11%
Saturated Fat 1g6%
Cholesterol 72mg24%
Sodium 513mg22%
Potassium 998mg29%
Carbohydrates 12g4%
Fiber 3g13%
Sugar 5g6%
Protein 29g58%
Vitamin A 885IU18%
Vitamin C 16.7mg20%
Calcium 41mg4%
Iron 3.5mg19%
* Percent Daily Values are based on a 2000 calorie diet.

Here’s one more to pin on your Pinterest boards!Pan-seared balsamic chicken with grilled asparagus and mushrooms, topped with a flavorful pan sauce, is an easy, delicious, and healthy dinner!

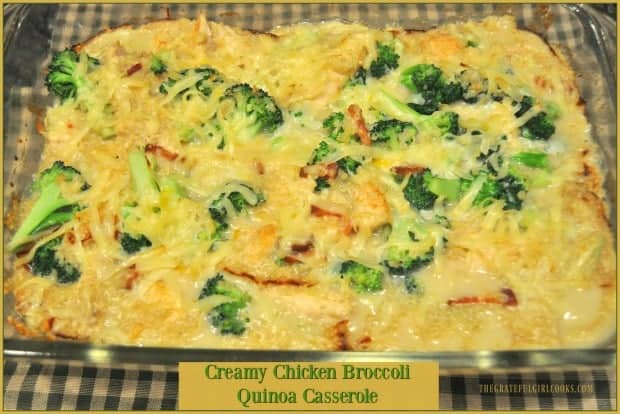
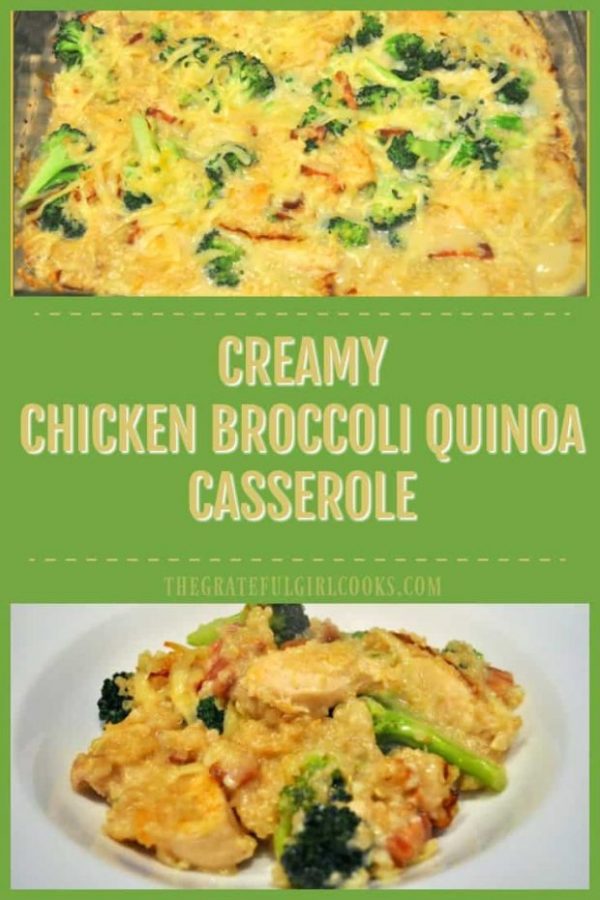
Creamy Chicken Broccoli Quinoa Casserole

You’ll love this family friendly creamy chicken broccoli quinoa casserole, with chicken, broccoli and quinoa in a creamy, cheesy sauce for dinner! Serves 6.You'll love this family friendly creamy chicken broccoli quinoa casserole, with chicken, broccoli and quinoa in a creamy, cheesy sauce for dinner! Serves 6.

If you are looking for an easy to prepare, totally yummy, family friendly dinner, look no further! You will LOVE this Creamy Chicken Broccoli Quinoa Casserole. It really is comfort food, at it’s very best!

I found the recipe for this chicken broccoli quinoa casserole online and made it for our family recently.  We really enjoyed it (and the leftovers, too!). Today I want to share with you how easy it is to make this delicious casserole.

Scroll Down For A Printable Recipe Card At The Bottom Of The Page

Having Fun Trying Quinoa Recipes!

I’ve been experimenting with several quinoa recipes over the past couple years, like a Mediterranean Quinoa Salad, an Quinoa Enchilada Casserole (meatless), and even a Shrimp, Quinoa & Veggie Bowl.  This experimentation has also now included a Thai Quinoa Salad with Peanut Sauce, and a Southwest Quinoa Salad. After this much experimentation I’ve decided I really love this “superfood”. This casserole recipe is fairly simple to prepare… here’s how!

How To Make Chicken Broccoli Quinoa Casserole

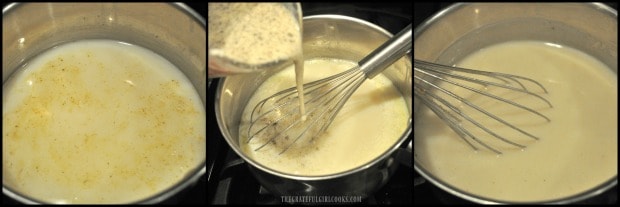
Start by placing chicken broth and half cup of milk in a saucepan; bring this to a low boil. In a separate cup, combine the remaining half cup milk with flour, salt, pepper, Parmesan cheese and poultry seasoning. Stir well, to remove lumps. Add this to the boiling milk mixture in saucepan. Whisk ingredients together until it thickens and forms a smooth sauce.

Cooking broth and milk for creamy casserole sauce

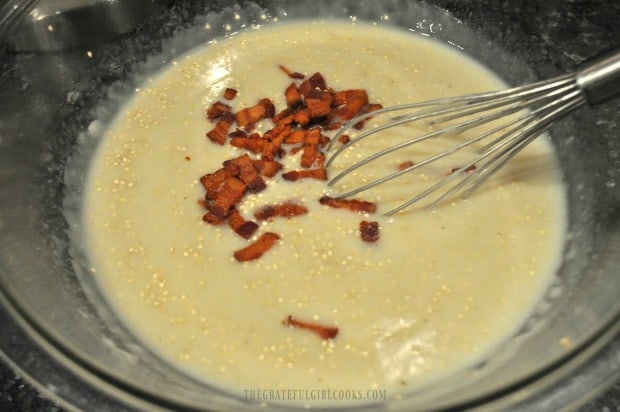
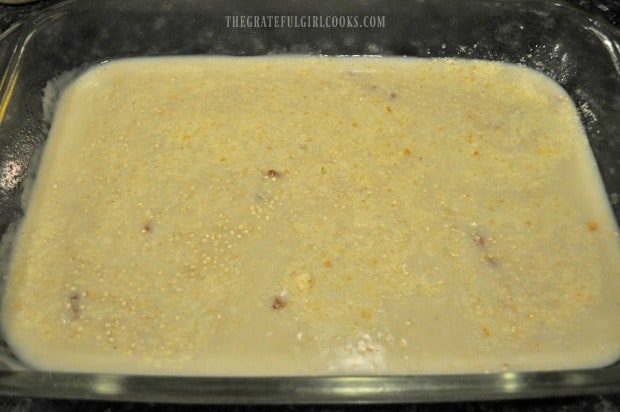
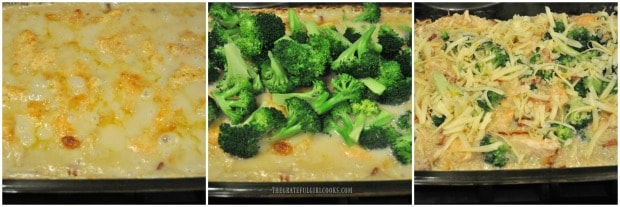
Pour the sauce into a large mixing bowl.  Add 1 cup of water, crumbled bacon and uncooked quinoa, and mix to combine ingredients. Pour mixture into a well-greased (bottom and sides)  13 x 9 inch baking dish.

Adding bacon and quinoa to creamy sauce

Creamy quinoa sauce placed in a casserole dish

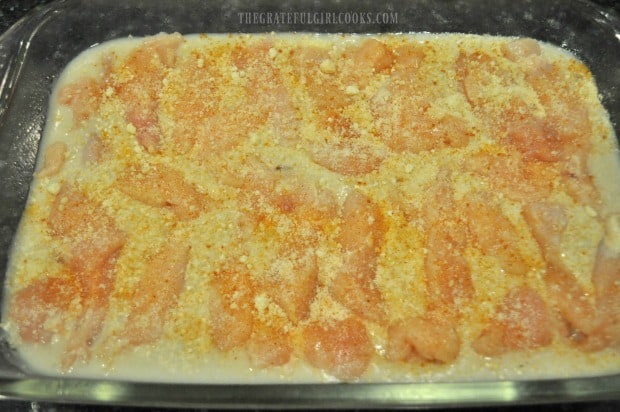
Slice the chicken breasts into thin strips. Lay the chicken strips over the surface of the quinoa sauce. Lightly sprinkle chicken with seasoning salt and additional Parmesan cheese.

Bake The Casserole

Place casserole in a preheated 400° oven. Bake for 30 minutes, uncovered.

Chicken strips added to quinoa casserole

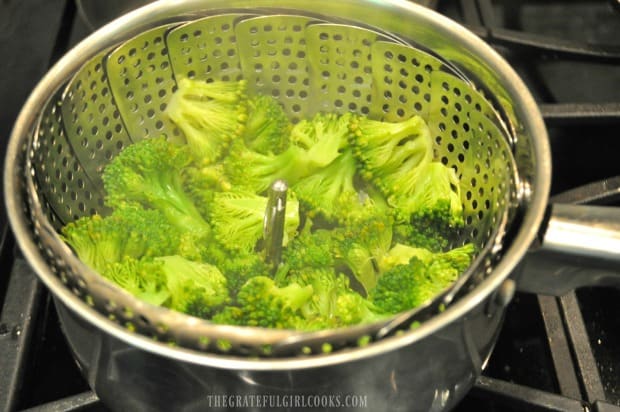
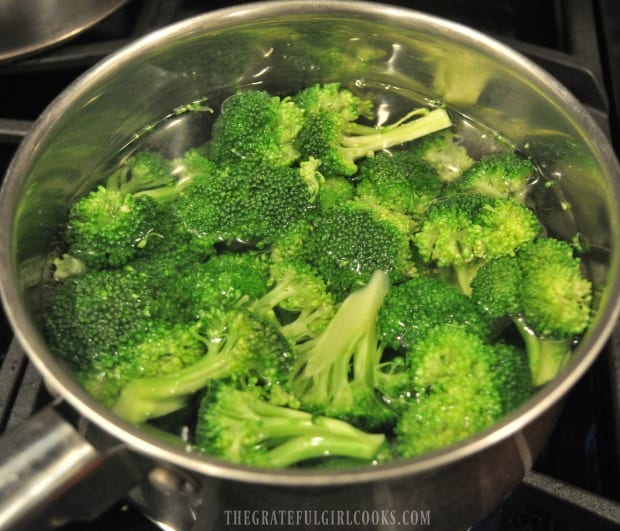
While casserole is baking, prepare the broccoli. Place the broccoli florets in a pan of boiling water for 1 minute.

Remove broccoli after 1 minute, drain, then immediately cool it down by running it under cold water (by doing this step, it will ensure the broccoli remains a bright green color when baked).  Drain and set aside.

Cooking broccoli in pan

Add The Cooked Broccoli to the Casserole

After the chicken broccoli quinoa casserole has cooked for 30 minutes, remove from oven. Give it a good stir. Place casserole back into the oven for 15 additional minutes until it is thick and creamy.

Add the broccoli florets, and stir to combine and distribute broccoli throughout the casserole. You want the sauce to be thick, smooth and creamy, so if you need to add a tiny bit of water to achieve this, do it at this time.

Garnish With Gruyere And Finish Baking

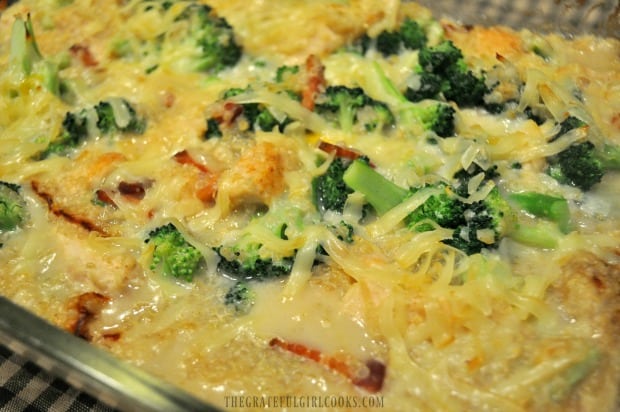
Garnish the top of the casserole with grated Gruyere cheese. Place casserole back into oven for about 5 minutes, to melt the cheese.

Broccoli and cheese added to dish

When done, remove casserole, let it cool for just a minute or two, then dish it up and serve!

Baked chicken broccoli quinoa out of oven

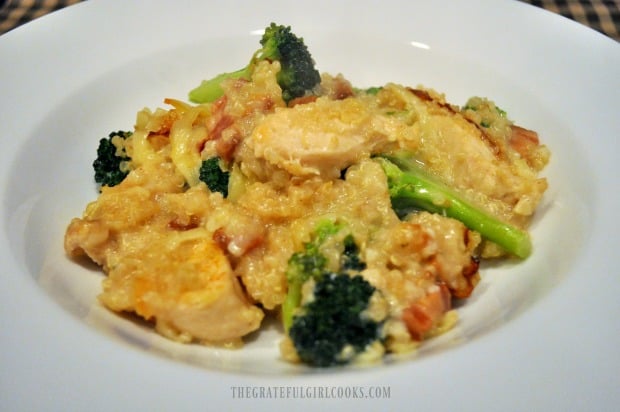
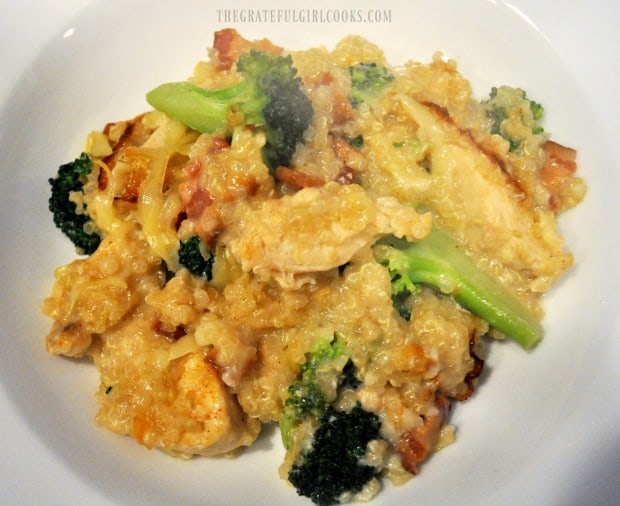
Baked chicken broccoli with quinoa casserole in white bowlHot serving of quinoa chicken casserole in white bowl

The chicken broccoli quinoa casserole is delicious and it’s an entire meal in one dish! Any leftovers you may have are wonderful heated up in the microwave, as well! The chicken is cooked perfectly in this dish, and the casserole is full of flavor from the bacon, creamy quinoa sauce and the cheese! It’s soooo good!

Hope you will consider trying this recipe for chicken broccoli quinoa casserole, and don’t forget to check out ALL of my recipes in the Recipe Index, located at the top of the page!

Interested In More Recipes?

Thank you for visiting this website. I appreciate you using some of your valuable time to do soIf you’re interested, I publish a newsletter 2 times per month (1st and 15th) with all the latest recipes, and other fun info. I would be honored to have you join our growing list of subscribers, so you never miss a great recipe!
There is a Newsletter subscription box on the top right side (or bottom) of each blog post, depending on the device you use, where you can easily submit your e-mail address (only) to be included in my mailing list.

You Can Also Find Me On Social Media:

Facebook page: The Grateful Girl Cooks!
Pinterest:
The Grateful Girl Cooks!
Instagram:
jbatthegratefulgirlcooks

Author's signature

Recipe Adapted From: Lindsay, at https://pinchofyum.com/creamy-chicken-quinoa-broccoli-casserole/

↓↓ PRINTABLE RECIPE BELOW ↓↓

0 from 0 votes
Creamy Chicken Broccoli Quinoa Casserole
Prep Time
15 mins
Cook Time
50 mins
Total Time
1 hr 5 mins
 
You'll love this family friendly creamy chicken broccoli quinoa casserole, with chicken, broccoli and quinoa in a creamy, cheesy sauce for dinner! Serves 6.
Category: Entree
Cuisine: American
Keyword: chicken broccoli quinoa casserole
Servings: 6 servings
Calories Per Serving: 350 kcal
Author: JB @ The Grateful Girl Cooks!
Ingredients
  • 2 cups chicken broth , reduced sodium
  • 1 cup milk 1%
  • 1/4 cup Parmesan cheese , grated
  • 1 teaspoon poultry seasoning
  • 1/2 cup all purpose flour
  • 2 cups water , divided
  • 1 cup quinoa , uncooked
  • 1/4 cup bacon , cooked, crumbled
  • 2 teaspoons seasoning salt
  • 1 pound chicken breasts , boneless, skinless
  • 3 Tablespoons Parmesan cheese , grated
  • 3 cups broccoli florets
  • 1/2 cup Gruyere cheese , shredded
Instructions
  1. Preheat oven to 400°. Spray or grease a 9x13 baking dish generously on bottom and sides.
  2. Place chicken broth 1/2 cup milk in a saucepan; bring this to a low boil. In a separate cup, combine remaining milk with flour, salt, pepper, Parmesan cheese and poultry seasoning. Stir well, to remove lumps. Whisk this into boiling milk mixture. Whisk until it thickens and forms a smooth sauce. Pour sauce into a large mixing bowl. Add 1 cup of water, crumbled bacon and uncooked quinoa; mix well.Pour mixture into prepared baking dish.
  3. Slice chicken into thin strips. Lay strips over the surface of the quinoa sauce. Lightly sprinkle pieces of chicken with seasoning salt and Parmesan cheese. Place casserole in 400° oven. Bake for 30 minutes, uncovered.
  4. While casserole is baking, prepare broccoli. Place broccoli florets in a pan of boiling water for 1 minute. Remove, drain, then immediately run it under cold water (this will ensure the broccoli remains a bright green color when baked). Drain and set aside.
  5. After casserole has cooked for 30 minutes, remove from oven. Give it a good stir. Place casserole back into the oven for 15 additional minutes until it is thick and creamy. Add broccoli florets; stir to combine and distribute broccoli throughout casserole. You want the sauce to be thick, smooth and creamy, so if you need to add a tiny bit of extra water to achieve this, do it at this time (optional).
  6. Garnish the top of the casserole with grated Gruyere cheese. Place casserole back into oven for about 5 minutes, to melt the cheese. Remove from oven, serve and enjoy!
Nutrition Facts
Creamy Chicken Broccoli Quinoa Casserole
Amount Per Serving (1 g)
Calories 350 Calories from Fat 99
% Daily Value*
Fat 11g17%
Saturated Fat 4g25%
Cholesterol 69mg23%
Sodium 1339mg58%
Potassium 719mg21%
Carbohydrates 31g10%
Fiber 3g13%
Sugar 2g2%
Protein 29g58%
Vitamin A 535IU11%
Vitamin C 46.9mg57%
Calcium 285mg29%
Iron 2.7mg15%
* Percent Daily Values are based on a 2000 calorie diet.

Here’s one more to pin on your Pinterest boards!You'll love this family friendly creamy chicken broccoli quinoa casserole, with chicken, broccoli and quinoa in a creamy, cheesy sauce for dinner! Serves 6.

Chicken Taco Salad Bowl

Make a Chicken Taco Salad in an edible tortilla bowl shell! Why go out when you can enjoy this yummy, filling Mexican salad from home?

Did you know it’s easy to make a delicious Chicken Taco Salad Bowl. Who doesn’t like this filling salad served in an edible tortilla shell? Taco salads are simple to create, and the edible tortilla bowls are very easy to make.

How Does The Tortilla Bowl Get Its Shape? 

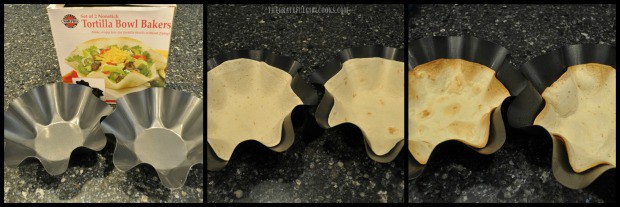
I use metal tortilla bowl forms that I bought on Amazon several years ago. I think it was about $10 dollars total for two of them.

No, I am not receiving compensation for mentioning this, just thought you might like to see what I used. They have been worth every single penny, and I’ve used them so many times I’ve lost count!

The metal forms are sprayed with non-stick spray and the tortillas are lightly pressed into the mold, then baked for 5 minutes. That’s it! It’s really simple (and you can store them in an airtight container for 2 days, so you can easily make them ahead of time)!

3 photo collage of baked tortilla bowls

**NOTE: If you don’t have access to tortilla bowl pans, you can still bake tortilla bowls without them. Spray medium sized oven safe bowls with cooking spray.  Press a “burrito-sized” tortilla into the bowl (creasing the edges to fit, if needed).

Bake for 10-15 minutes in a preheated 375 degree oven, or until light brown and crispy. Remove from oven. Let cool for a few minutes, then carefully remove crisp tortilla from bowl.

Cook And Season The Chicken

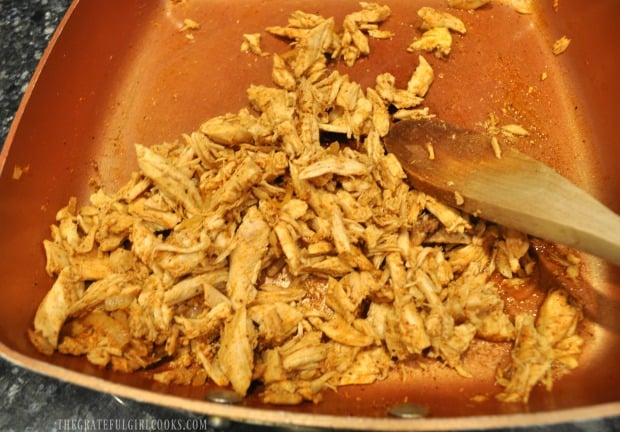
When I make a taco salad bowl I typically use shredded pork, ground beef or shredded cooked chicken. This time I used 2 cooked/shredded chicken breasts and added a little bit of onion.

I season the meat by using my own taco seasoning mix, OR you can use 1/2 an envelope of store-bought taco seasoning (following instructions on package), to season the chicken.

Chicken cooking in pan

“Building” A Chicken Taco Salad Bowl

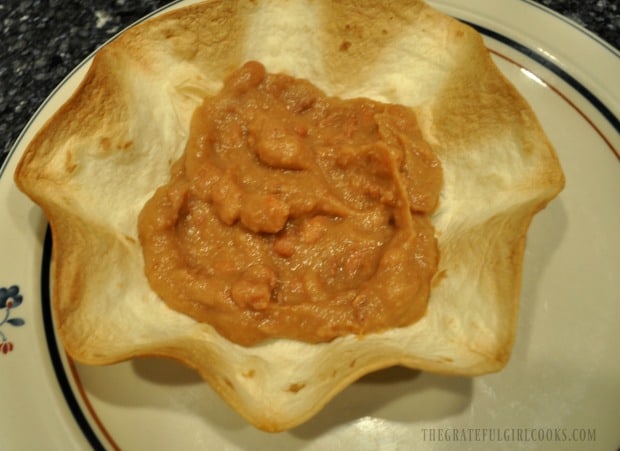
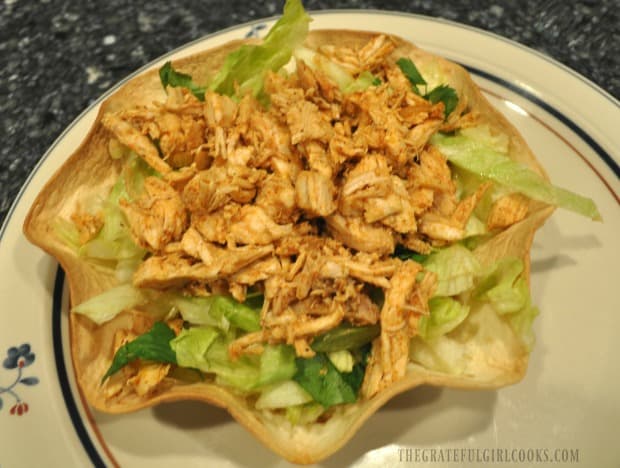
Spread warm refried beans across the bottom of the baked tortilla shell.  I usually try to use non-fat beans to cut down on calories.

After that I add lots of shredded lettuce, chopped cilantro, then top it with the seasoned shredded chicken and onion mixture.

Refried beans in tortilla bowl

Seasoned chicken in tortilla taco bowl

Finish Making The Chicken Taco Salad Bowl And Serve

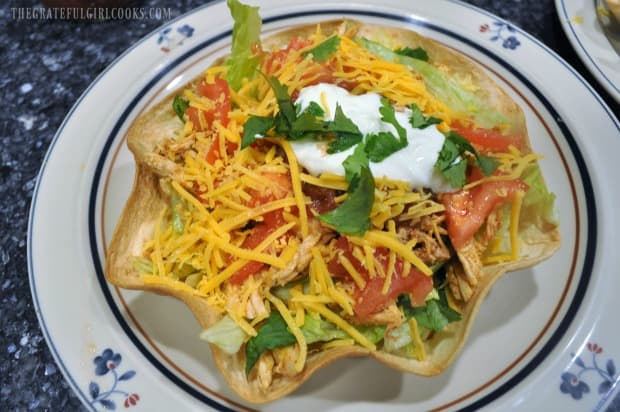
Top the chicken taco salad off with a nice chunky salsa, chopped tomatoes, grated cheddar cheese, a dollop of sour cream or non-fat plain yogurt, and a few sprigs of cilantro.

Use whatever suits your own personal preference. This is how we enjoy them! You can add any other garnishes you enjoy, such as guacamole, avocado slices or sliced black olives, too.

Chicken taco salad bowl completed

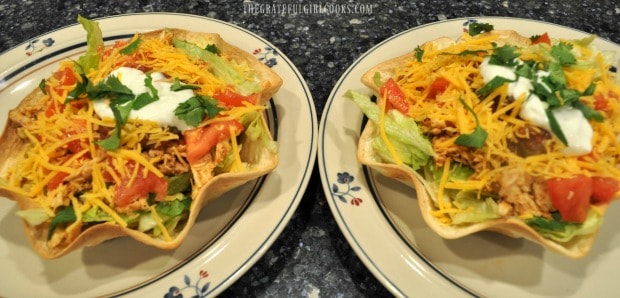
Here are the two chicken taco salad bowls I made for my husband and I.  They look festive, and the crisp tortilla bowls are completely EDIBLE!  This is one of our favorite dinners, because it fills you up, tastes fantastic, and because we LOVE any kind of Mexican food!

Another big plus is that we don’t have to go out to a restaurant, but can enjoy it from the comfort of our own home!

Two chicken taco salads on plates

Go ahead… pull up a chair, grab a fork and have a bite!  I just KNOW you will enjoy this meal!  And by all means, add any other ingredients you wish, to creatively make this salad your own!

At times I’ve added avocado slices, or guacamole, sliced olives, and even chopped green chilies to our salad… all are tasty additions!

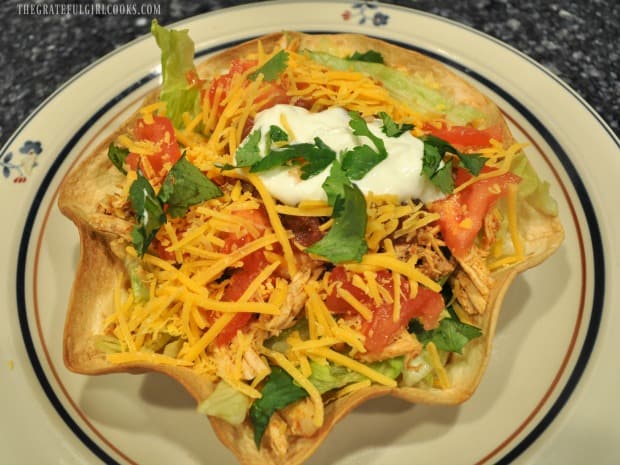
Chicken taco salad in tortilla bowl with cilantro

Sure hope you will try this recipe for a delicious chicken taco salad. As much as I enjoy going OUT for Mexican food , sometimes it’s easier, more convenient and less expensive to make these tasty salads at home! 

Thanks for stopping by, and I invite you to come back soon for more family-friendly recipes. Take care, may God bless you, and have a GREAT day.

Looking For More MAIN COURSE SALAD Recipes?

You can find all of my recipes in the Recipe Index, which is located at the top of the page. I have some wonderful tasting main course salad recipes you might enjoy, including:

Want More Recipes? Get My FREE Newsletter!

I publish a newsletter 2 times per month (1st and 15th) with lots of recipes, tips, etc..
Would you like to join our growing list of subscribers?

There is a Newsletter subscription box on the top right (or bottom) of each blog post, depending on the device you use.
You can submit your e-mail address there, to be added to my mailing list.

Find Me On Social Media:

Facebook page: The Grateful Girl Cooks!
Pinterest:
The Grateful Girl Cooks!
Instagram:
jbatthegratefulgirlcooks

Author's signature

↓↓ PRINTABLE RECIPE BELOW ↓↓

0 from 0 votes
Chicken Taco Salad Bowl
Prep Time
15 mins
Cook Time
0 mins
Total Time
15 mins
 

Make a Chicken Taco Salad in an edible tortilla bowl shell! Why go out when you can enjoy this yummy, filling Mexican salad from home?

Category: Dinner
Cuisine: Mexican
Keyword: chicken taco salad
Servings: 2 servings
Calories Per Serving: 348 kcal
Author: JB @ The Grateful Girl Cooks!
Ingredients
  • 2 burrito sized flour tortillas , baked into bowl shape and crisp (See NOTES below)
  • 2 cooked and shredded chicken breasts
  • 2 Tablespoons chopped onions
  • 1/2 package taco seasoning (plus water per pkg. instructions)
  • 1 can refried beans (I used non-fat)
  • 2 cups Iceberg lettuce , chopped
  • 2 Tablespoons cilantro , chopped, divided
  • Salsa (as desired)
  • 1 medium tomato , chopped, divided
  • 1/2 cup Cheddar cheese , grated, divided
  • Dollop of light sour cream (as desired)
  • Additional sprigs of cilantro
  • OPTIONAL GARNISH: guacamole , sliced avocados, sliced black olives, chopped green chilies
Instructions
  1. Bake tortilla bowls until crisp. Set aside. NOTE: If using metal tortilla bowl forms, spray pan with non-stick spray. Press tortilla into pan. Bake at 375 degrees for 5 minutes or until light brown and crispy. If you don't have access to the tortilla bowl forms, you can still bake tortilla bowls without them. Spray medium sized oven safe bowls with cooking spray. Press a "burrito-sized" tortilla into the bowl (creasing edges to fit, if needed). Bake 10-15 minutes in a 375 degree oven, or until light brown and crispy. Remove from oven. Let cool, then carefully remove crisp tortilla from bowl.
  2. Cook shredded chicken, onion and taco seasoning per package instructions. Set aside.
  3. To build salads, divide and layer ingredients into tortilla bowls: Refried beans, Shredded lettuce, cilantro, and seasoned shredded chicken, salsa, chopped tomato, grated cheddar cheese.
  4. Garnish with a dollop of sour cream and additional cilantro, if desired. Additional garnishes can include guacamole, avocado slices, sliced black olives or chopped green chilies. Serve, and enjoy this delicious Mexican salad.
Nutrition Facts
Chicken Taco Salad Bowl
Amount Per Serving (1 salad bowl)
Calories 348 Calories from Fat 126
% Daily Value*
Fat 14g22%
Saturated Fat 7g44%
Cholesterol 101mg34%
Sodium 539mg23%
Potassium 637mg18%
Carbohydrates 19g6%
Fiber 1g4%
Sugar 3g3%
Protein 34g68%
Vitamin A 855IU17%
Vitamin C 10.6mg13%
Calcium 247mg25%
Iron 1.8mg10%
* Percent Daily Values are based on a 2000 calorie diet.

Here’s one more to pin on your Pinterest boards!Make a Chicken Taco Salad in an edible tortilla bowl shell! Why go out when you can enjoy this yummy, filling Mexican salad from home?


Southwest Chicken Salad

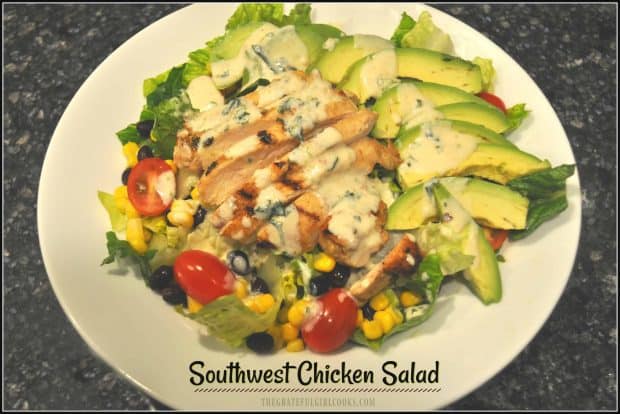
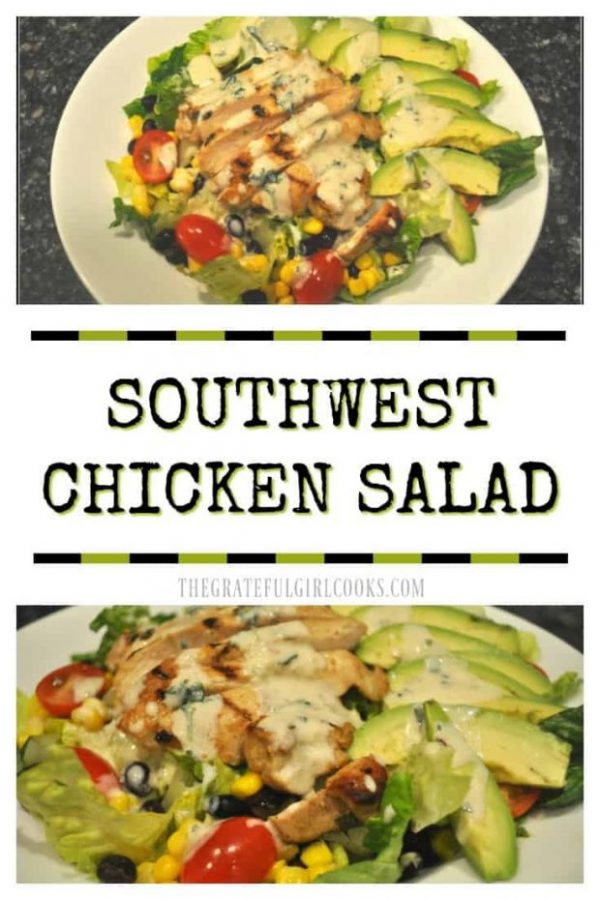
You’ll love this Southwest chicken salad with marinated chicken, beans, corn, tomatoes, avocados, and lettuce, topped w/ a creamy lime cilantro dressing!You'll love this Southwest-inspired salad with marinated chicken, beans, corn, tomatoes, avocados, and lettuce, topped w/ a creamy lime cilantro dressing!

If you enjoy flavor-filled main dish salads, you will love this Southwest Chicken Salad. It is a wonderful main dish salad, full of flavor!

I found this recipe for Southwest chicken salad on Pinterest, and it not only sounded HEALTHY, but DELICIOUS!  The original recipe serves 4, but I very slightly modified it to make two servings, for my husband and I to enjoy!

OH MY GOODNESS- this delicious salad is amazing, and I mean it is “we ate every single bite” amazing! Here’s how to make it.

Scroll Down For A Printable Recipe Card At The Bottom Of the Page

Making The Marinade

I made the marinade early in the day, and let the chicken “bathe” in it for hours, to soak up great flavor! When I was ready to fix dinner, all I had to do was grill the chicken on my stove top and assemble the salad. EASY!  

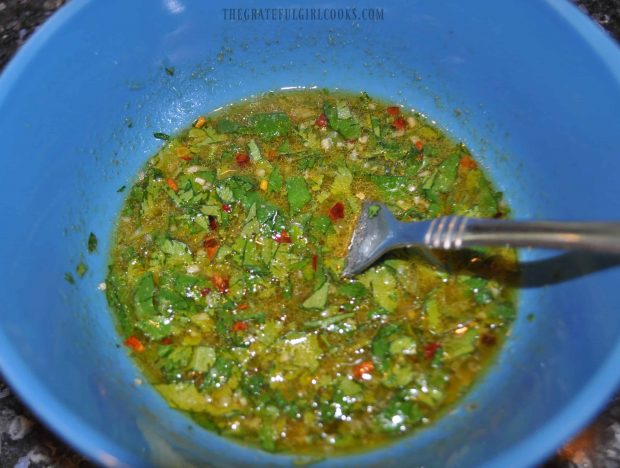
To make the marinade, combine the marinade/salad dressing ingredients in a medium bowl, EXCEPT FOR THE YOGURT! Mix together until all are well blended.

Pour HALF of the marinade (set aside the other half) into a rimmed dish and add the pieces of chicken.

Ingredients for the chicken marinade are combined in a bowl.

Marinate The Chicken

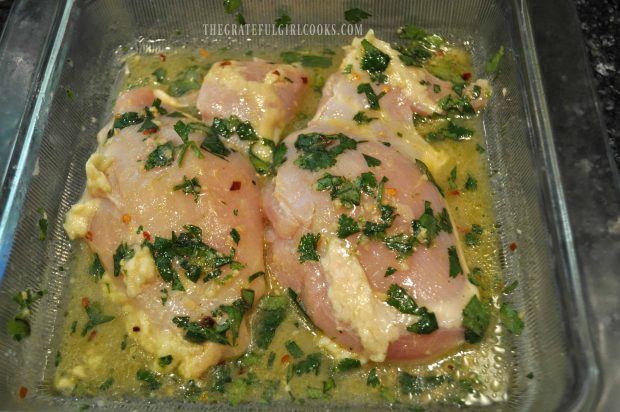
Turn the pieces of chicken over in the dish, to coat all sides of the meat well. Cover the chicken and place the dish in a refrigerator for 2 hours (or more, if time allows).

Cover the remaining half of the marinade and keep it refrigerated until it’s ready to be used.

The chicken is marinated in the refrigerator to add flavor.

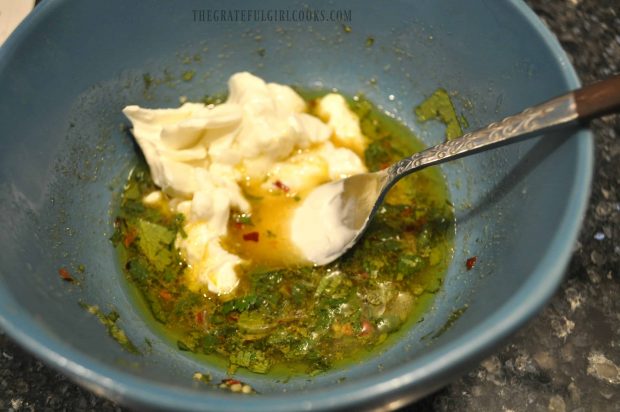
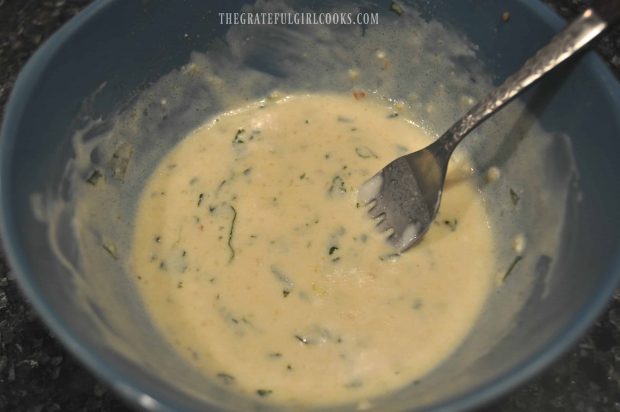
When you’re ready to assemble the salad for your meal, remove the reserved marinade from refrigerator. Blend in the Greek yogurt, until it’s fully incorporated and the sauce is creamy.

Greek yogurt is added to reserved marinade for the salad dressing.

Creamy salad dressing is ready to drizzle on the Southwest chicken salad.

Cook The Marinated Chicken

After the chicken has fully marinated, remove it from the refrigerator.  Heat a teaspoon of oil in a skillet or on a grill on medium-high heat until very hot, but not smoking.

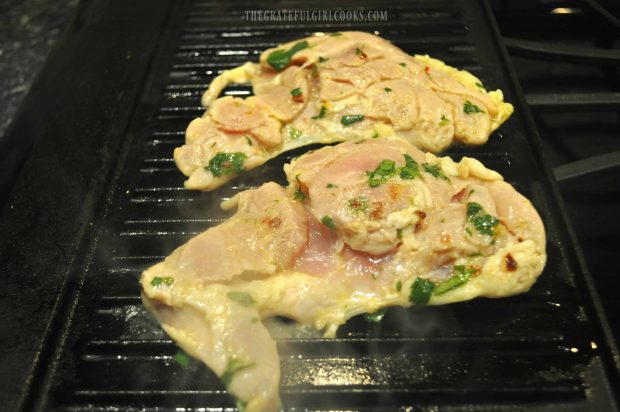
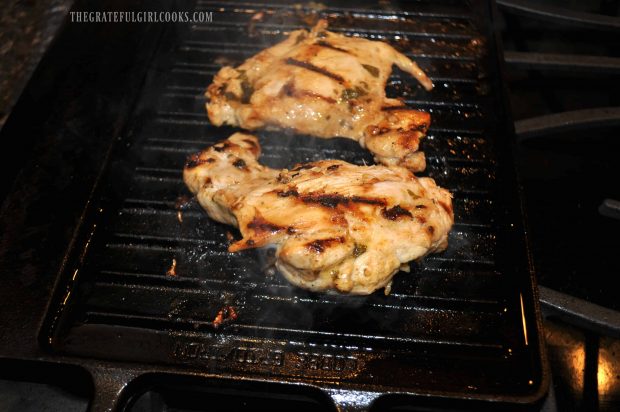
Sear the chicken on the first side (without moving it in the pan) until the bottom is golden brown and crispy. Flip the chicken over and cook other side until it is fully done (internal temp. of 165°F). 

I typically use an indoor cast iron grill to cook the chicken, and it takes about 8-10 minutes per side. If the chicken pieces are very thin, your cooking time may be less.

Once done, remove the chicken from the dish (and discard the chicken marinade).  Let the chicken rest for 5 minutes so the juices can redistribute internally, then cut each piece into thin slices,.

Marinated chicken is grilled until browned and cooked through.

The chicken pieces are fully cooked before slicing and adding to the salad.

Assemble The Southwest Chicken Salad

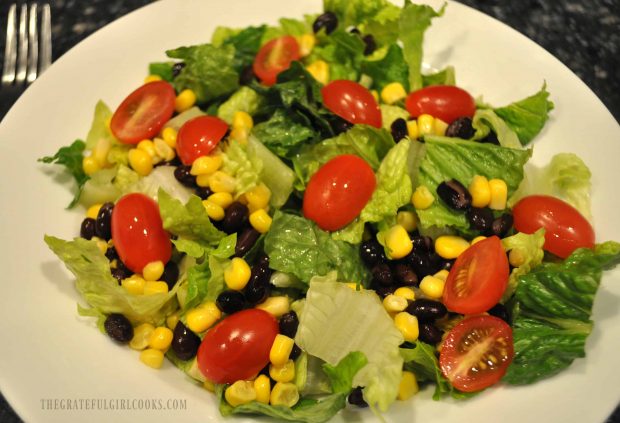
When you are ready to assemble salad, fill individual bowls or plates with cold, chopped romaine lettuce. Divide the corn, beans, and cherry tomato halves between servings.

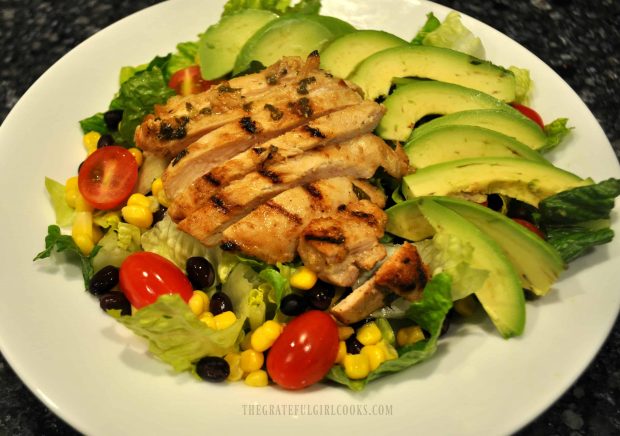
Top each Southwest chicken salad with avocado and chicken slices. It looks quite decorative if the chicken and avocado are fanned out slightly..

My husband wanted an entire half an avocado sliced on his salad, as you can tell from the 2nd photo below… ha ha!

Building the Southwest chicken salad with lettuce, corn, black beans and cherry tomatoes.

Grilled chicken strips and sliced avocados are added to the salad.

Time To EAT The Southwest Chicken Salad

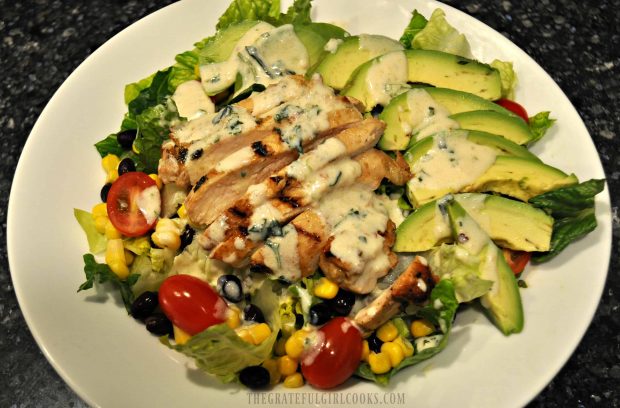
Drizzle the salad with the prepared cilantro lime salad dressing. Serve, and enjoy this absolutely amazing tasting meal!

NOTE: I made 2 large entree size salads for us. If making 4 large salads, increase chicken to 4 pieces, and double the amount of corn, beans, cherry tomatoes, and add additional lettuce. You will not need to double the marinade.

The Southwest chicken salad is drizzled with salad dressing, and is ready to eat.

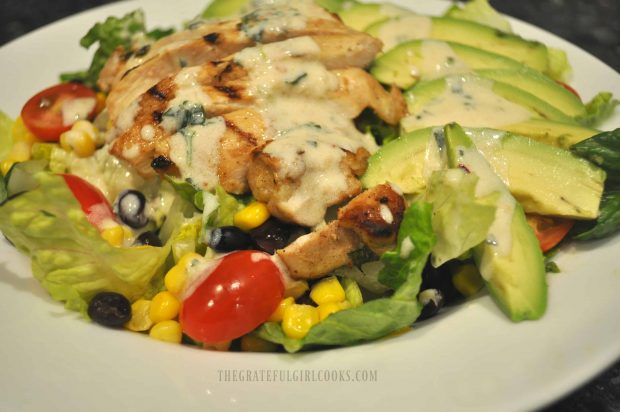
A close up view of this delicious salad, with grilled chicken and avocados.

We absolutely LOVED this Southwest chicken salad; we were very full and completely satisfied after eating!  The grilled chicken had great flavor, thanks  to the lime cilantro marinade, and the low fat flavor-filled dressing made this dish shine!

I sincerely hope you will consider trying this recipe and trust you’ll love it as much as we do! Southwest Chicken Salad is totally delicious, filling, and very colorful!

Thanks for stopping by, and I invite you to come back again soon for more family-friendly recipes. Take care, and have a fantastic day!

Looking for More MAIN COURSE SALAD Recipes?

You can find ALL my recipes in the Recipe Index, which is located at the top of the page. I have a nice variety of main course salads you might want to check out, including:

Want More Recipes? Get My FREE Newsletter!

I publish a newsletter 2 times per month (1st and 15th) with lots of recipes, tips, etc..
Would you like to join our growing list of subscribers?

There is a Newsletter subscription box on the top right (or bottom) of each blog post, depending on the device you use.
You can submit your e-mail address there, to be added to my mailing list.

Find Me On Social Media:

Facebook page: The Grateful Girl Cooks!
Pinterest:
The Grateful Girl Cooks!
Instagram:
jbatthegratefulgirlcooks

Author's signature

Recipe Adapted From: Karina, at https://cafedelites.com/southwestern-chicken-salad/

↓↓ PRINTABLE RECIPE BELOW ↓↓

0 from 0 votes
Southwest Chicken Salad
Prep Time
2 hrs
Cook Time
20 mins
Total Time
2 hrs 20 mins
 

You'll love this Southwest chicken salad with marinated chicken, beans, corn, tomatoes, avocados, and lettuce, topped w/ a creamy lime cilantro dressing!

Category: Dinner
Cuisine: Southwest
Keyword: Southwest chicken salad
Servings: 2
Calories Per Serving: 468 kcal
Author: JB @ The Grateful Girl Cooks!
Ingredients
  • 2 large chicken thighs (boneless, skinless)
For Marinade/Salad Dressing:
  • 2 Tablespoons olive oil
  • 1/3 cup fresh lime juice (approx. 2 large limes)
  • 1 teaspoon lime zest
  • 4 Tablespoons fresh cilantro (finely chopped)
  • 1 teaspoon brown sugar
  • 2 garlic cloves , minced
  • 1/2 teaspoon cumin (ground)
  • 1/2 teaspoon red chili pepper flakes
  • 1 teaspoon salt
  • 1/4 cup plain Greek yogurt (THIS IS USED FOR DRESSING ONLY!!!)
For Salad:
  • 4 cups romaine lettuce (torn or chopped)
  • 1/2 cup cherry tomatoes (cut in half)
  • 1/2 avocado , thinly sliced
  • 1/2 cup canned black beans (drained, rinsed)
  • 1/2 cup canned whole kernel corn (drained, rinsed)
Instructions
  1. In a medium sized bowl, combine all marinade/salad dressing ingredients EXCEPT FOR THE YOGURT! Mix together until well blended. Pour HALF of the marinade (set aside the other half) into a rimmed shallow dish and add the chicken. Toss to coat well. Cover chicken and place in refrigerator for 2 hours (or more, if time allows). Cover remaining marinade and refrigerate until ready to use.
  2. After chicken has fully marinated, remove it from refrigerator. Heat a teaspoon of oil in a skillet or on a grill on medium-high heat until very hot, but not smoking. Cook chicken on first side until bottom is golden brown and crispy, then flip and cook other side until chicken is fully cooked throughout. (I used an indoor cast iron grill and it took about 10 minutes per side). Once done, remove chicken, and let it rest so juices can settle internally. After chicken has rested for 5 minutes, cut each piece into thin slices. Discard chicken marinade.
  3. When ready to assemble salad, remove reserved marinade from refrigerator. Blend in the Greek yogurt, until completely incorporated and creamy.
  4. To assemble salads, fill individual bowls or plates with chopped romaine. Divide corn, beans, and cherry tomato halves between servings. Place avocado and chicken slices decoratively on top of salad. Drizzle each salad with reserved creamy cilantro lime dressing. Serve, and enjoy!
Recipe Notes

*NOTE: I made 2 large salads for us. If making 4 servings, increase chicken to 4 pieces, and double the amount of corn, beans, cherry tomatoes, and add additional lettuce, as desired. (Use same amounts written for marinade/dressing).

Nutrition Facts
Southwest Chicken Salad
Amount Per Serving (1 main course salad)
Calories 468 Calories from Fat 243
% Daily Value*
Fat 27g42%
Saturated Fat 4g25%
Cholesterol 108mg36%
Sodium 1525mg66%
Potassium 1092mg31%
Carbohydrates 28g9%
Fiber 8g33%
Sugar 5g6%
Protein 30g60%
Vitamin A 8670IU173%
Vitamin C 32.1mg39%
Calcium 101mg10%
Iron 3.5mg19%
* Percent Daily Values are based on a 2000 calorie diet.

Here’s one more to pin on your Pinterest boards!You'll love this Southwest chicken salad with marinated chicken, beans, corn, tomatoes, avocados, and lettuce, topped w/ a creamy lime cilantro dressing!

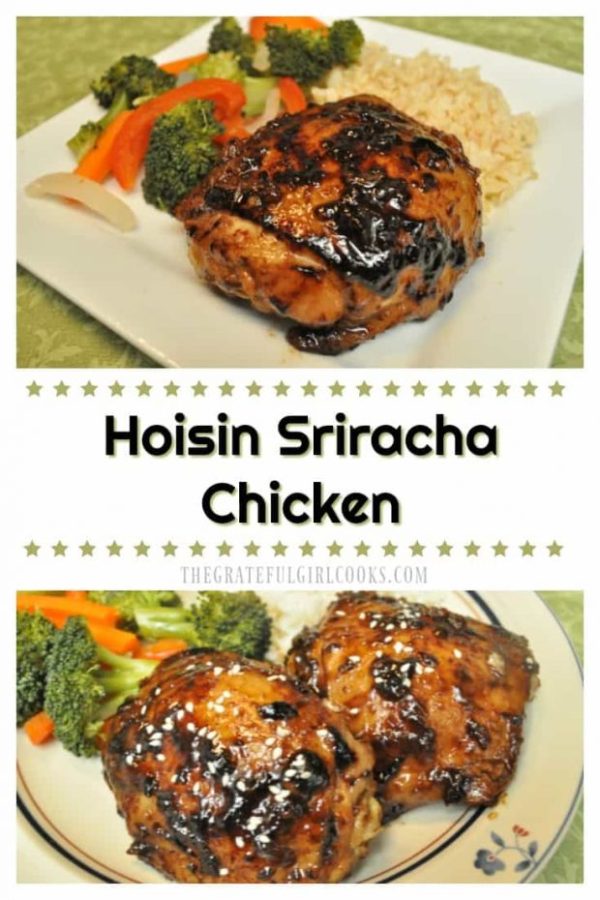
Hoisin Sriracha Chicken

Chicken thighs get an easy, Asian-inspired twist with sweet, mildly spicy Hoisin Sriracha Chicken! Chicken is quickly marinated, then pan-seared to finish.

I found this Hoisin sriracha chicken recipe on Pinterest and it sounded quite good, so I decided to try it! YUM! This delicious dish only takes about 25 minutes to cook!

Hoisin sauce, honey, soy sauce, and Sriracha sauce, garlic and ginger form the base for a slightly sweet, slightly spicy marinade for plump chicken thighs. Once marinated for 15 minutes, chicken is pan-cooked until done. That’s it! See how easy this recipe is? And wow, it sure tastes GOOD!

Scroll Down for A Printable Recipe Card At the Bottom Of The Page

How To Make Hoisin Sriracha Chicken

Bone-in and skin on chicken thighs were used for this recipe, but you are welcome to use boneless, skinless if you want. Usually I remove the skin from chicken, but found that for this particular recipe, the skin crisps up nicely and really added to the flavor!

If you are using boneless thighs, the cooking time might be a bit less, so keep that in mind while cooking the chicken!

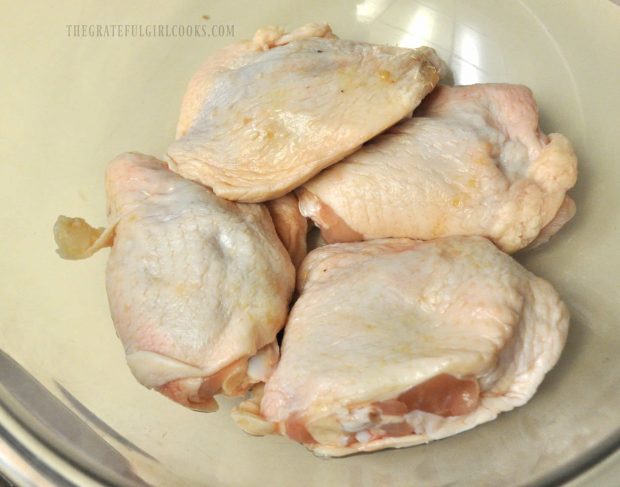
Chicken thighs are ready to go in marinade for Hoisin Sriracha Chicken.

Make Marinade For The Chicken

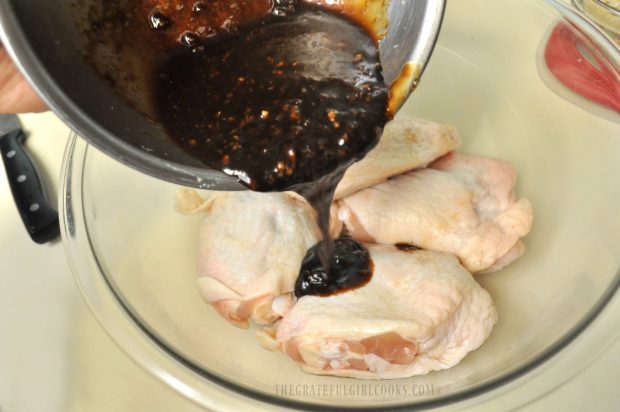
The Hoisin sriracha marinade is mixed up, and chicken is covered with the sauce.  Let the chicken marinade in the sauce for at least 15 minutes. TIP: Short on time at the end of the day? Mix up the marinade ahead of time. Let hoisin sriracha chicken marinate all day, to make it easier and quicker to prepare this dish at dinner time!

If you’re interested, you might also want to check out my blog post on how to make Homemade Hoisin Sauce (it’s easy, also!). I used it in this recipe!

Marinade for Hoisin sriracha chicken is poured over the thighs.

Cooking Hoisin Sriracha Chicken

Heat oil on MEDIUM heat in a large skillet. Once oil is very hot, remove the chicken from the  from marinade, and let the excess drain off. NOTE: MAKE SURE TO SAVE THE MARINADE!

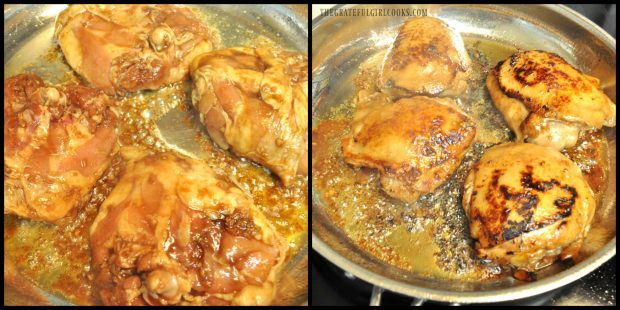
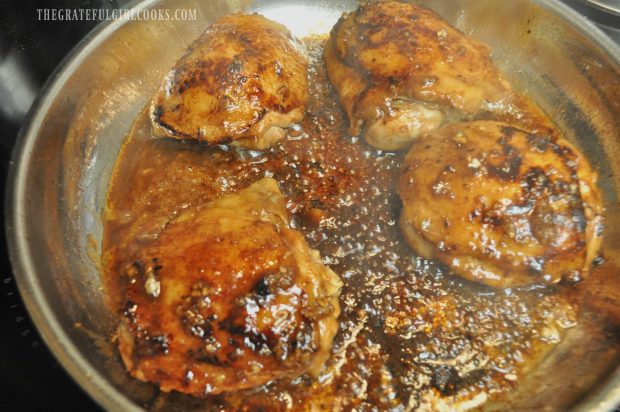
Add the marinated Hoisin sriracha chicken thighs to the hot skillet, with the skin side facing DOWN. Cook the chicken on both sides, making sure the skin side gets browned very well.

Hoisin Sriracha Chicken pieces are browned in a large skillet.

Add Reserved Marinade To the Skillet

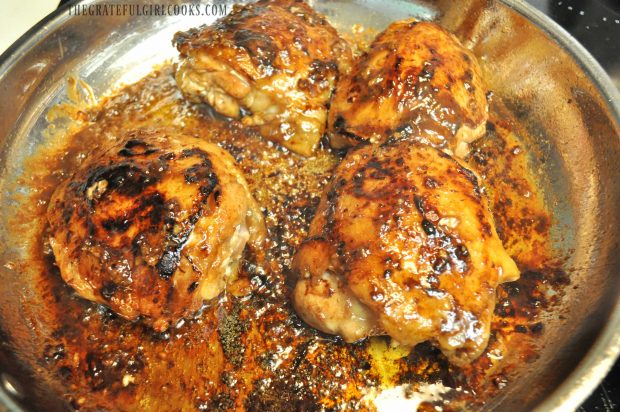
Once both sides of the hoisin sriracha chicken have browned, turn the heat on stove down to LOW. Pour the reserved marinade back into your skillet. Spoon this sauce over the chicken thighs, and continue to cook. As the hoisin sriracha chicken cooks, the sauce will slightly reduce in volume and thicken up  a bit.

Hoisin Sriracha Chicken thighs are cooked in sauce in skillet.

Cook hoisin sriracha chicken until fully cooked through or reaches an internal temp. of 165° F. If using bone-in thighs, the cooking time will be approximately 25 minutes total. The time is slightly less if you’re using boneless thighs. Occasionally spoon some of the sauce over each piece of chicken during the cooking process.

Hoisin Sriracha Chicken are finished cooking when they reach internal temperature of 165 degrees.

Serve The Hoisin Sriracha Chicken

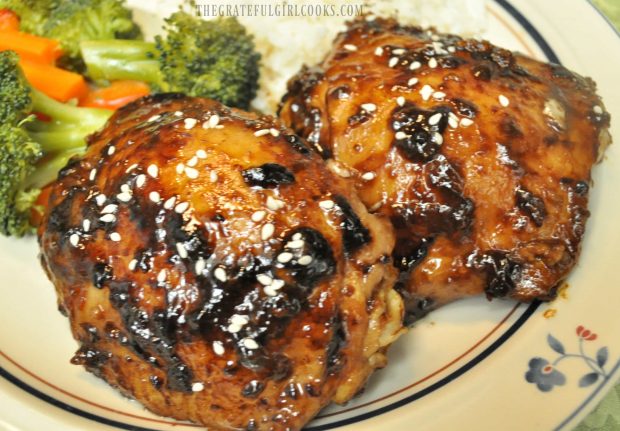
Once chicken is done, remove the pan from the heat. Transfer the chicken to individual serving dishes.  Sprinkle each piece of chicken with white sesame seeds, to garnish.

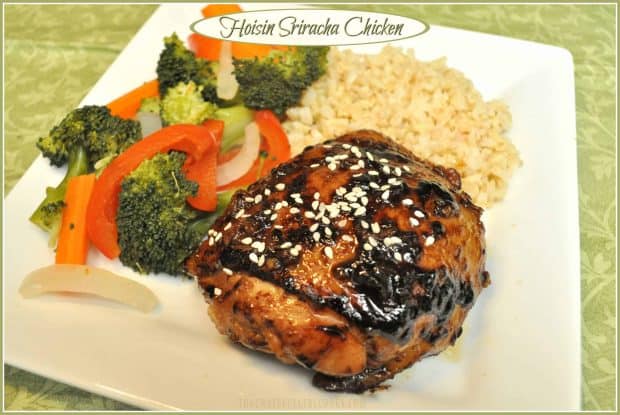
Two pieces of Hoisin Sriracha Chicken, on plate with broccoli on the side.

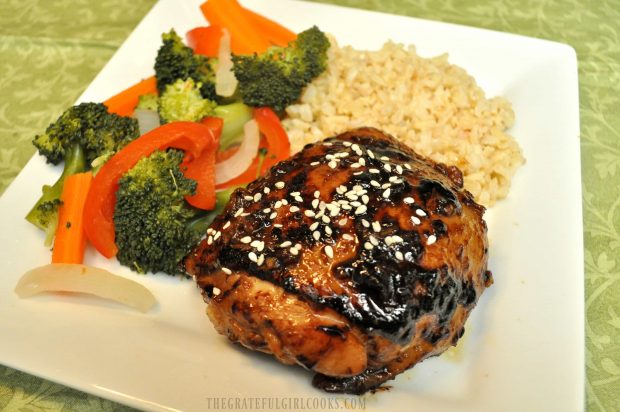
Serve immediately while hot, and enjoy the wonderful Asian-inspired flavors of this Hoisin Sriracha Chicken! We enjoy it with steamed brown rice and veggies on the side. YUM!

Hoisin Sriracha Chicken, served on plate with brown rice and steamed vegetables on the side.

I really hope you will consider making Hoisin Sriracha Chicken. The dish was easy to make and was REALLY tasty! I’ve added the Weight Watcher Smart Points per serving in the Notes section of the printable recipe below, for those following their nutrition plan.

We really did enjoy this meal!  Hope you and your family do, too! Have a wonderful day.

Looking For More CHICKEN Recipes?

You can find ALL my recipes in the Recipe Index, located at the top of the page. I have LOTS of delicious chicken recipes you might enjoy, including:

Interested In More Recipes?

Thank you for visiting this website. I appreciate you using some of your valuable time to do soIf you’re interested, I publish a newsletter 2 times per month (1st and 15th) with all the latest recipes, and other fun info. I would be honored to have you join our growing list of subscribers, so you never miss a great recipe!
There is a Newsletter subscription box on the top right side (or bottom) of each blog post, depending on the device you use, where you can easily submit your e-mail address (only) to be included in my mailing list.

You Can Also Find Me On Social Media:

Facebook page: The Grateful Girl Cooks!
Pinterest:
The Grateful Girl Cooks!
Instagram:
jbatthegratefulgirlcooks

Author's signature

Recipe Source:  http://rasamalaysia.com/hoisin-sriracha-chicken/

0 from 0 votes
Hoisin Sriracha Chicken
Prep Time
15 mins
Cook Time
25 mins
Total Time
40 mins
 
Chicken thighs get an easy, Asian-inspired twist with sweet, mildly spicy Hoisin Sriracha Chicken! Chicken is quickly marinated, then pan-seared to finish.
Category: Entree
Cuisine: Asian
Keyword: hoisin sriracha chicken
Servings: 4 servings
Calories Per Serving: 314 kcal
Author: JB @ The Grateful Girl Cooks!
Ingredients
  • 4 large chicken thighs , with bone in and skin on (optional-see note)
  • Tablespoons hoisin sauce
  • 1 Tablespoon soy sauce
  • 1/2 Tablespoon Sriracha sauce
  • 1 Tablespoon honey
  • 3 cloves garlic (minced)
  • 1 inch piece of fresh ginger (peeled, minced)
  • 1 pinch salt
  • 1 Tablespoon oil
  • White sesame seeds for garnish (optional)
Instructions
  1. Mix hoisin, soy, sriracha, honey, garlic, ginger and salt in a medium bowl; stir to fully combine ingredients. Add chicken to marinade and turn to fully cover; let chicken marinate for 15 minutes.
  2. Heat oil on MEDIUM heat in a large skillet. Once oil is very hot, remove chicken from marinade (**MAKE SURE TO SAVE THE MARINADE), and add to hot skillet with the skin side facing down. Cook chicken on both sides; make sure the skin side gets browned very well.
  3. Once both sides of the chicken have been browned, turn the heat down to LOW. Pour the reserved marinade into skillet. Spoon sauce over chicken thighs, and continue to cook. As chicken cooks, the sauce will slightly reduce in volume and thicken up a bit. Cook until chicken is fully cooked through, or reaches an internal temperature of 165° F. If using bone-in thighs, cooking time will be approximately 25 minutes total... slightly less if no bone. Occasionally spoon a bit of sauce over each piece of chicken during the cooking process.
  4. Once chicken is done, remove pan from heat, and transfer chicken to individual serving plates. Garnish chicken with white sesame seeds, if desired. Serve, and enjoy!
Recipe Notes

Boneless, skinless thighs may be substituted. Cooking time will be slightly less. Cook to internal temperature of 165 degrees (approx. 20 minutes).
Weight Watchers? Bone in with skin = 11 Smart Points per serving. Boneless skinless = 7 Smart Points

Nutrition Facts
Hoisin Sriracha Chicken
Amount Per Serving (1 piece)
Calories 314 Calories from Fat 198
% Daily Value*
Fat 22g34%
Saturated Fat 7g44%
Cholesterol 110mg37%
Sodium 479mg21%
Potassium 250mg7%
Carbohydrates 8g3%
Sugar 6g7%
Protein 19g38%
Vitamin A 90IU2%
Vitamin C 1.9mg2%
Calcium 13mg1%
Iron 0.9mg5%
* Percent Daily Values are based on a 2000 calorie diet.

Here’s one more to pin on your Pinterest boards!Chicken thighs get an easy, Asian-inspired twist with sweet, mildly spicy Hoisin Sriracha Chicken! Chicken is quickly marinated, then pan-seared to finish.

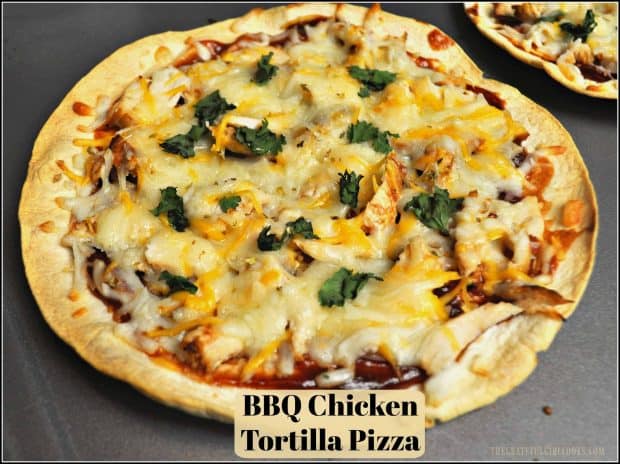
BBQ Chicken Tortilla Pizza

You’re gonna LOVE this BBQ Chicken Tortilla Pizza! Chicken, BBQ sauce, red onion, cilantro and cheese on a baked flour tortilla make a yummy thin crust pizza!You're gonna LOVE this BBQ Chicken Tortilla Pizza! Chicken, BBQ sauce, red onion, cilantro and cheese on a baked flour tortilla make a yummy thin crust pizza!

If you enjoy thin-crust pizza, chances are you will LOVE this BBQ Chicken Tortilla Pizza!  That’s right… the crust is a baked flour tortilla! Tender chunks of chicken, sweet and spicy  BBQ sauce, red onions, cilantro and cheeses combine to make this one amazing tasting dish!

Recently I had an idea to try using a flour tortilla to make a pizza.  I also knew I wanted to make a BBQ sauce based pizza with chicken, red onion, etc. There was no recipe for me to use, but I just made it up as I went along.

Guess what? This BBQ chicken tortilla pizza turned out ABSOLUTELY FANTASTIC! I’m not kidding, we LOVED this pizza! Who knew? Here’s how to make this yummy meal:

Scroll Down For A Printable Recipe Card At the Bottom Of The Page

How To Make A BBQ Chicken Tortilla Pizza

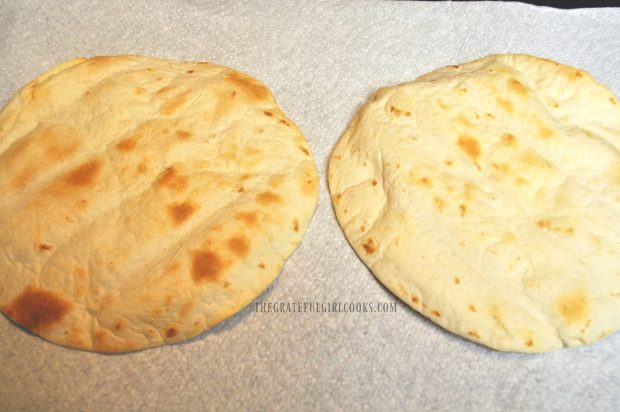
Begin by baking medium sized flour tortillas at 350 degrees on the middle rack of an oven until they are fairly crisp all over. This will take about 10 minutes. Make sure to flip each one over halfway through baking to ensure each tortilla is crisp all over, including in the middle.

Turn the oven to broil. Place the crisp tortillas on the middle rack, about 6 inches from the broiler for 1 minute to slightly brown them.

Tortillas are baked until crispy for pizza crust.

Assembling The BBQ Chicken Tortilla Pizza

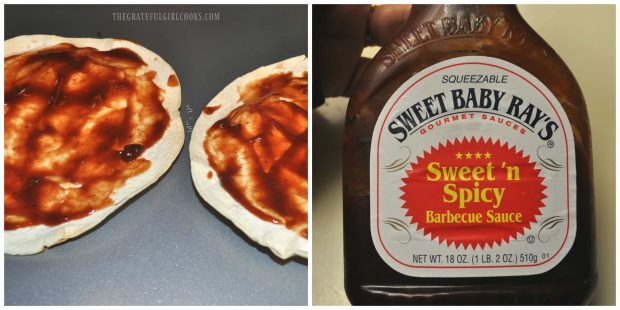
Once the tortillas are crisp, spread each tortilla with BBQ sauce (about 1½ to 2 Tablespoons sauce per tortilla). Spread the sauce to within an inch of the edge of the tortilla. This is the BBQ sauce I used to make the BBQ chicken tortilla pizza (photo below), but your favorite BBQ sauce  will be just fine!

Baked tortillas are spread with BBQ sauce first for pizza topping.

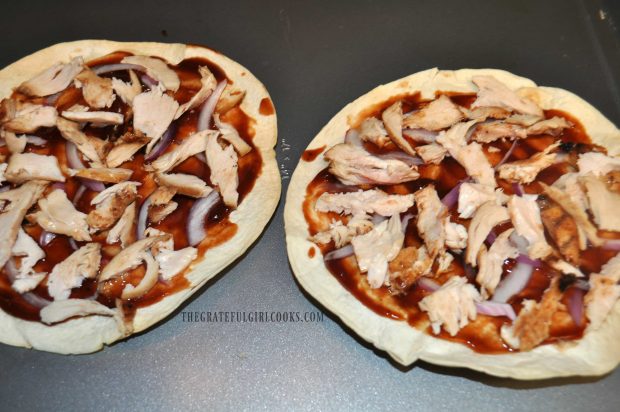
Place thin slices of cooked chicken and red onion slices on top of the BBQ sauce. I used leftover cooked chicken breast for the pizza (thighs would also be fantastic).

Cooked chicken pieces and red onion slices top the tortilla pizza.

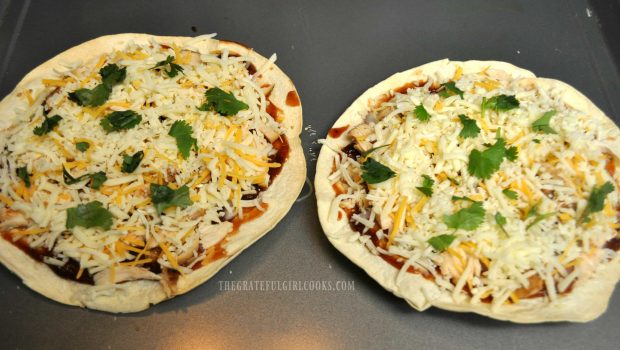
Sprinkle grated Mozzarella cheese and some sharp cheddar cheese on top of each BBQ chicken tortilla pizza, then garnish with a few cilantro leaves.

BBQ chicken tortilla pizza topped with cheeses and cilantro.

Bake The Pizza

Put the pizzas on a large baking sheet on the middle rack of a preheated 350 degree oven. Bake the BBQ chicken tortilla pizza for 5-6 minutes, until the cheese has melted.

BBQ Chicken Tortilla Pizza hot from the oven.

Carefully slide the pizzas off of the baking sheet, and slice each one into 4 pieces with a pizza cutter. Now the BBQ chicken tortilla pizza is ready to EAT!

We gobbled them up like little piggies because they were sooooo good! The slices will hold their shape easily if the tortillas are nice and crisp before baking.  Go ahead… grab a slice!

BBQ Chicken Tortilla Pizza is sliced with a pizza cutter.

The slightly sweet and spicy taste of the BBQ sauce lends itself well to chicken, red onions and cilantro.  My husband and I were both completely thrilled with the taste of this crazy tortilla pizza!

I really hope you will consider trying this simple recipe… for me it was ridiculously easy and super quick to make, due in part to leftover cooked chicken and extra flour tortillas!  I can hardly wait to make these again for a quick dinner! Have a GREAT day!

Looking For More Pizza Recipes?

You can find all of my recipes in the Recipe Index, located at the top of the page.  You may enjoy a few pizza recipes I have published on my blog, including:

Interested In More Recipes?

Thank you for visiting this website. I appreciate you using some of your valuable time to do soIf you’re interested, I publish a newsletter 2 times per month (1st and 15th) with all the latest recipes, and other fun info. I would be honored to have you join our growing list of subscribers, so you never miss a great recipe!
There is a Newsletter subscription box on the top right side (or bottom) of each blog post, depending on the device you use, where you can easily submit your e-mail address (only) to be included in my mailing list.

You Can Also Find Me On Social Media:

Facebook page: The Grateful Girl Cooks!
Pinterest:
The Grateful Girl Cooks!
Instagram:
jbatthegratefulgirlcooks

Author's signature

0 from 0 votes
BBQ Chicken Tortilla Pizza
Prep Time
10 mins
Cook Time
5 mins
Total Time
15 mins
 
You're gonna LOVE this BBQ Chicken Tortilla Pizza! Chicken, BBQ sauce, red onion, cilantro and cheese on a baked flour tortilla make a yummy thin crust pizza!
Category: Entree
Cuisine: Italian
Keyword: bbq chicken tortilla pizza
Servings: 2 servings
Calories Per Serving: 484 kcal
Author: JB @ The Grateful Girl Cooks!
Ingredients
  • 2 medium flour tortillas
  • 3-4 Tablespoons BBQ sauce , divided
  • 1 large COOKED chicken breast , seasoned with salt/pepper, cut in thin slices, divided
  • thin slices red onion (as many as desired)
  • 1 cup grated mozzarella cheese , divided
  • 1/2 cup grated sharp cheddar cheese , divided
  • 1/4 cup (approximately a handful) cilantro leaves, divided
Instructions
  1. Preheat oven to 350 degrees. Bake flour tortillas on middle rack of oven until fairly crisp all over (approx 10 min) Flip over halfway through baking to ensure each tortilla is crisp all over (especially the middle). Put them under broiler for 1 minute to slightly brown (keeping them on the middle rack not too close to heating element).
  2. Once crisp, remove from oven. Spread each tortilla with BBQ sauce to about an inch from the edge (about 1½-2 Tablespoons sauce per tortilla, or more if desired). Add thin slices of cooked chicken and red onion slices, add grated Mozzarella and cheddar cheese, then sprinkle with a few cilantro leaves.
  3. Place pizzas on a large baking sheet on middle rack of oven; bake at 350 degrees for 5-6 minutes, until cheese has melted. Remove from heat, and cut into slices. Serve and enjoy!
Recipe Notes

May substitute two cooked chicken thighs thinly sliced, for chicken breast.

Nutrition Facts
BBQ Chicken Tortilla Pizza
Amount Per Serving (1 pizza)
Calories 484 Calories from Fat 216
% Daily Value*
Fat 24g37%
Saturated Fat 12g75%
Cholesterol 96mg32%
Sodium 1085mg47%
Potassium 397mg11%
Carbohydrates 28g9%
Sugar 10g11%
Protein 36g72%
Vitamin A 820IU16%
Vitamin C 1.2mg1%
Calcium 657mg66%
Iron 1.7mg9%
* Percent Daily Values are based on a 2000 calorie diet.

Here’s one more to pin on your Pinterest boards!You're gonna LOVE this BBQ Chicken Tortilla Pizza! Chicken, BBQ sauce, red onion, cilantro and cheese on a baked flour tortilla make a yummy thin crust pizza!

Chicken Fajita Rice Bowl

Enjoy this yummy chicken fajita rice bowl, with seasoned chicken, bell peppers, onion, avocado, pico de gallo, cilantro and lime juice on a bed of brown rice.
Enjoy this yummy chicken fajita rice bowl, with seasoned chicken, bell peppers, onion, avocado, pico de gallo, cilantro and lime juice on brown rice.

I recently made a Chicken Fajita Rice Bowl… it was amazing, so I want to share the recipe with you!  I’m sure you’ll love this Weight Watchers meal, too! My favorite type of food is Mexican, so you can imagine how excited I was to try this chicken fajita rice bowl (with a few minor tweaks of my own!).  The best part? Knowing that a delicious, healthy meal can also be loaded with flavor, as this chicken fajita rice bowl is. It’s an entire meal in one bowl! We truly LOVED this dinner.

Seasoned chicken breast, grilled onions and bell peppers, avocado, pico de gallo, cilantro and a  squeeze of fresh lime juice on a bed of brown rice really puts this chicken fajita rice bowl over the top! Yum! There is a LOT of flavor going on here! The recipe has a few steps, but can be easily shortened by using leftover chicken breast and store bought salsa (in place of the homemade pico de gallo).

Scroll Down For A Printable Recipe Card At The Bottom Of The Page

How To Make A Chicken Fajita Rice Bowl

Lightly spray a skillet with non-stick spray.  Sauté the bell pepper and onion on medium-high heat; cook for 4-5 minutes, or until tender.

Cooking onions and peppers in a skillet, for the chicken fajita rice bowl.

Prepare brown rice according to the package directions and set aside, once fully cooked. If you have leftover rice, go ahead and use it (another timesaver!).

Brown rice is cooked for the chicken fajita rice bowl.

Mix the Southwestern spices for the chicken in a small bowl. These spices include chili powder, paprika, garlic powder, cumin, oregano, salt and pepper.

Sprinkle the spices evenly over the chicken slices, and toss to coat. Make sure the chicken is lightly seasoned with the spices on each side.

Spices mixed in bowl to coat chicken for the chicken fajita rice bowl.

Spices are added to chicken breast strips for the chicken fajita rice bowl.

Cook The Seasoned Chicken

Heat a teaspoon of olive oil in skillet on medium heat. When the oil is very hot, add the chicken strips. Cook the chicken for 4-5 minutes on medium heat, turning occasionally. Cook the chicken nicely browned on all sides, and is cooked through. Transfer the cooked chicken to a plate, and set aside.

Seasoned chicken strips are cooked in skillet for the chicken fajita rice bowl.

Make The Pico de Gallo

Prepare pico de gallo (if making homemade or NOT using salsa). I make a simple vesion easily by chopping tomatoes, brown onion, cilantro, a squeeze of lime juice. I season this mixture with salt and pepper, and it only takes a couple minutes to make.

TIMESAVER TIP: Looking to save a little time fixing this dish? Simply use store-bought chunky salsa or pico de gallo.

Pico de gallo in bowl, ready to add to the chicken fajita rice bowl.

When you’re ready to put the chicken fajita rice bowl together, gather the ingredients. You should have grilled peppers and onions, pan-seared chicken, brown rice, pico de gallo (or chunky salsa), avocado, cilantro, diced green chiles, and lime!

Ingredients (peppers, salsa, rice, chicken, avocado, chiles, and lime) are ready to build the chicken fajita rice bowl.

Assemble Each Chicken Fajita Rice Bowl In This Order

  1. Divide brown rice between two bowls.
  2. Top each with half the bell pepper and onions, and 1/4 of the avocado chunks.
  3. Top each bowl with half the chicken and 1 teaspoon chopped green chiles.
  4. Garnish each bowl with pico de gallo (or salsa), a couple lime wedges, and a couple sprigs fresh cilantro.

Photo showing the 4 steps to build the chicken fajita rice bowl.

Time To Eat!

That’s it!  Serve the chicken fajita rice bowl immediately, and enjoy this amazing tasting dinner entree! Doesn’t it look delicious?!

The chicken fajita rice bowl is served in a white bowl, with a lime and cilantro garnish.

This chicken fajita rice bowl tastes GREAT! Even better is knowing that this meal is a fairly low calorie one bowl meal, with chicken, rice and veggies! If you follow a Weight Watchers plan, this Chicken Fajita Rice Bowl (when prepared as written) has a Smart Point total of 7! You can’t beat that, especially when you see and taste how fantastic this dish really is!

Hope you enjoy your chicken fajita rice bowl, because we sure do. Have a GREAT day!

Looking For More ENTREE SALAD Recipes?

You can find all of my recipes in the Recipe Index, which is located at the top of the page. I have some delicious main course salad recipes you might enjoy, including:

Interested In More Recipes?

Thank you for visiting this website. I appreciate you using some of your valuable time to do soIf you’re interested, I publish a newsletter 2 times per month (1st and 15th) with all the latest recipes, and other fun info. I would be honored to have you join our growing list of subscribers, so you never miss a great recipe!
There is a Newsletter subscription box on the top right side (or bottom) of each blog post, depending on the device you use, where you can easily submit your e-mail address (only) to be included in my mailing list.

You Can Also Find Me On Social Media:
Facebook page: The Grateful Girl Cooks!
Pinterest: The Grateful Girl Cooks!
Instagram: jbatthegratefulgirlcooks

Author's signature

Recipe Adapted From:  https://cmx.weightwatchers.com/nui/explore/details2/WWRECIPE:58c0753485fb70cc179c5fb6

0 from 0 votes
Chicken Fajita Rice Bowl
Prep Time
20 mins
Cook Time
5 mins
Total Time
25 mins
 
Enjoy this yummy chicken fajita rice bowl, with seasoned chicken, bell peppers, onion, avocado, pico de gallo, cilantro and lime juice on a bed of brown rice.
Category: Entree
Cuisine: Southwestern
Keyword: chicken fajita rice bowl
Servings: 2 servings
Calories Per Serving: 326 kcal
Author: JB @ The Grateful Girl Cooks!
Ingredients
  • 1 large boneless , skinless chicken breast, halved horizontally, then cut into thin strips
  • 1 teaspoon olive oil
Spices For Chicken:
  • 1/2 teaspoon chili powder
  • 1/2 teaspoon paprika
  • 1/2 teaspoon ground cumin
  • 1/2 teaspoon garlic powder
  • 1/4 teaspoon dried oregano
  • 1/2 teaspoon salt
  • 1/8 teaspoon black pepper
For Salad:
  • 1 cup cooked brown rice
  • 1/4 cup thinly sliced brown onion
  • 1/4 cup EACH uncooked red and green bell pepper , chopped
  • 1/2 Hass avocado , diced
  • 2 teaspoons diced green chiles
  • 1/2 medium fresh lime , cut into 4 wedges
  • 1/2 cup pico de gallo OR fresh salsa
  • 4 sprigs fresh cilantro
Instructions
  1. Lightly spray a skillet with non-stick spray. Saute the bell pepper and onion on medium-high heat; cook for 4-5 minutes, or until tender.
  2. Mix spices for chicken in a small bowl (chili powder, paprika, garlic powder, cumin, oregano, salt and pepper). Sprinkle evenly over chicken slices, and toss to coat. Heat a teaspoon of olive oil in skillet on medium heat. When oil is very hot, add chicken. Cook chicken 4-5 minutes, turning occasionally, until done and nicely browned. Transfer chicken to a plate. Set aside.
  3. Prepare pico de gallo (if making homemade or NOT using salsa). I made some very easily by chopping tomatoes, brown onion, cilantro, a squeeze of lime juice, and seasoned with salt and pepper. Looking to save a little time? Simply use store-bought chunky salsa.
  4. Assemble bowls like this: 1) Divide brown rice between two bowls. 2) Top each with half the bell pepper and onions, and 1/2 of the avocado chunks. 3) Top each bowl with half the chicken and 1 teaspoon chopped green chiles. 4) Garnish each bowl with pico de gallo (or salsa), a couple lime wedges, and a couple sprigs fresh cilantro.
Recipe Notes

If you follow a Weight Watchers plan, this Chicken Fajita Rice Bowl (when prepared as written) has a Smart Point total of 7!

Nutrition Facts
Chicken Fajita Rice Bowl
Amount Per Serving (1 serving)
Calories 326 Calories from Fat 108
% Daily Value*
Fat 12g18%
Saturated Fat 1g6%
Cholesterol 36mg12%
Sodium 1083mg47%
Potassium 619mg18%
Carbohydrates 41g14%
Fiber 6g25%
Sugar 7g8%
Protein 16g32%
Vitamin A 1585IU32%
Vitamin C 41.8mg51%
Calcium 21mg2%
Iron 1.6mg9%
* Percent Daily Values are based on a 2000 calorie diet.

Here’s one more to pin on your Pinterest boards!Enjoy this yummy chicken fajita rice bowl, with seasoned chicken, bell peppers, onion, avocado, pico de gallo, cilantro and lime juice on a bed of brown rice.

Save

Save

Chicken Wild Rice and Bacon Soup

Chicken wild rice soup, w/ thick-cut bacon, carrots, onions and spices are the backdrop for this easy, delicious, creamy and filling dish!On a cool Fall day, nothing warms you up better than a hearty bowl of Chicken wild rice and bacon soup!  Chicken, wild rice, thick-cut bacon, carrots, onions and spices are the backdrop for this easy, delicious, creamy and filling meal!

On a cool Fall day, nothing warms you up better than a hearty bowl of Chicken wild rice and bacon soup!  Chicken, wild rice, thick-cut bacon, carrots, onions and spices are the backdrop for this easy, delicious, creamy and filling meal!

I found this recipe in a cookbook I bought for my friend Shari last Christmas!  I gave her the cookbook (she LOVES to cook), and cringed just a bit when she said her son had given her the exact same cookbook. It was funny (and kind of sad) when she gave it back to me and told me to keep it. Gadzooks!

Of course, I kept it (a small sacrifice, right?), and I have loved finding new soup recipes for our family in it, including THIS one.  My husband and I loved this amazing Chicken wild rice soup (with bacon)!

Scroll Down for A Printable Recipe Card At the bottom Of the Page

Is This An Easy Soup To Prepare?

The chicken wild rice soup has a rather long cook time (60 minutes) in order to soften the wild rice, but other than that, it was a simple soup to prepare. I recommend this recipe (AND the cookbook) whole-heartedly, and hope you will consider trying it!  Here’s how to make the soup:

How To Make Chicken Wild Rice and Bacon Soup

Cook bacon pieces in a large, heavy pot.  *TIP: I cut the bacon into 1″ strips with kitchen scissors before cooking, because it cooks faster. Simply stack the bacon, then cut through strips with scissors (or sharp knife).

Cook the bacon on medium-high heat until crisp (takes about 5-7 minutes). When done, transfer bacon with a slotted spoon to paper towels to drain. Set aside. Leave bacon grease in pot.

Cooking bacon for chicken wild rice soup.

Place butter, chopped carrot and onion into the pot. Cook on medium-high, stirring often, until carrot begins to soften (about 5-6 minutes).

Carrots and onions are cooked for chicken wild rice soup.

Add minced garlic and dried thyme. Cook for one minute, stirring, so the garlic doesn’t burn. Pour in the white wine. Cook for 3 minutes, stirring often to scrape up any bacon “bits” from bottom of pan (these will add flavor to soup).

Spices and white wine are cooked with vegetables for wild rice chicken soup.

Add Wild Rice And Cook Until Tender

Now add chicken broth and wild rice to pot. Stir to combine. Turn heat down to Low, put a lid on the pot and cook for 60 minutes or until rice is tender.

Wild rice and chicken broth is added to the soup pot.

Once rice is tender, add cooked bacon and chicken to soup. By the way, I quickly cooked the chicken while the soup was cooking, so it was ready to go once the rice was tender. TIP: You can also use rotisserie chicken or leftover baked or boiled chicken to save time, as well!

Chicken and bacon are added to the pot full of chicken wild rice soup.

Add the heavy whipping cream. Stir to combine. Return the chicken wild rice soup to a low simmer; cook soup, uncovered for 5 more minutes, until heated through, and soup has thickened a bit.

Heavy whipping cream is added to the chicken wild rice soup.

Once chicken wild rice soup has heated through, season with salt and black pepper, to taste. Now it’s ready to serve!

The chicken wild rice soup is heated through, then it's ready to eat.

Chicken Wild Rice Soup Is Ready To Serve!

This is how it looked when I ladled it into our soup bowls… doesn’t it look yummy?  Guess what… it TASTES yummy, too! Serve the soup with some crusty french bread, and enjoy!

A bowl full of chicken wild rice soup.

A white bowl, full of chicken wild rice soup, with bacon.

I really hope you will consider trying this soup!  I know it’s hard to look at a picture and wonder if it actually tastes good… but it does!  The kitchen smelled incredibly good, too, while this was cooking!

The leftovers were good for lunch the next day, as well.  You will notice with the leftovers (IF you have any leftovers… wink, wink) that the rice absorbs more of the broth if refrigerated overnight.  Simply add a bit more broth when you reheat the soup, and it will be as good as the first night you made it! Have a great day… and make some SOUP!

Looking for More SOUP Recipes?

You can find ALL of my recipes in the Recipe Index, which is located at the top of the page. I have lots of yummy, comforting homemade soup recipes, including:

Interested In More Recipes?

Thank you for visiting this website. I appreciate you using some of your valuable time to do soIf you’re interested, I publish a newsletter 2 times per month (1st and 15th) with all the latest recipes, and other fun info. I would be honored to have you join our growing list of subscribers, so you never miss a great recipe!
There is a Newsletter subscription box on the top right side (or bottom) of each blog post, depending on the device you use, where you can easily submit your e-mail address (only) to be included in my mailing list.

You Can Also Find Me On Social Media:

Facebook page: The Grateful Girl Cooks!
Pinterest:
The Grateful Girl Cooks!
Instagram:
jbatthegratefulgirlcooks

Author's signature

Recipe Adapted From: The cookbook “Williams-Sonoma Soup Of The Day”, published by Weldon Owen, Inc. and Williams-Sonoma, Inc., 2011, page 61.

0 from 0 votes
Chicken Wild Rice and Bacon Soup
Prep Time
20 mins
Cook Time
1 hr 5 mins
Total Time
1 hr 25 mins
 
Chicken, chewy wild rice, thick-cut bacon, carrots, onions and spices are the backdrop for this delicious, creamy and filling soup!
Category: Soup
Cuisine: American
Keyword: chicken wild rice soup
Servings: 4 servings
Calories Per Serving: 471 kcal
Author: JB @ The Grateful Girl Cooks!
Ingredients
  • 6-7 slices thick cut bacon , cut into 1" strips (use kitchen scissors or sharp knife to cut)
  • 1 Tablespoon butter
  • 1 carrot , peeled and chopped
  • 1 yellow onion (medium), chopped
  • 2 cloves garlic , minced
  • 1/2 teaspoon dried thyme
  • 1/4 cup dry white wine
  • 4 cups chicken broth
  • 1 cup uncooked wild rice
  • 1 chicken breast (skinless, boneless), cooked and chopped (1" chunks)
  • 3 Tablespoons heavy whipping cream
  • Salt and fresh ground black pepper , to taste
Instructions
  1. Cut bacon into 1" strips with kitchen scissors (stack bacon, then cut through strips with scissors or sharp knife). Cook bacon pieces in a large, heavy pot on medium-high heat until crisp (takes about 5-7 minutes). When done, transfer bacon with a slotted spoon to paper towels to drain. Set aside. Leave bacon grease in pot.

  2. Place butter, chopped carrot and onion into the pot. Cook on medium-high, stirring often, until carrot begins to soften (about 5-6 minutes). Add minced garlic and dried thyme. Cook for an additional minute, stirring, so the garlic doesn't burn. Add wine. Cook for 3 minutes, stirring often to scrape up any bacon "bits" from bottom of pan (these add flavor to soup). Add chicken broth and wild rice to pot. Stir to combine. Turn heat down to Low, put a lid on the pot and cook for 60 minutes or until rice is tender.
  3. Once rice is tender, add cooked bacon and chicken to soup. Add heavy whipping cream. Stir to combine. Return soup to a low simmer; cook soup, uncovered, for 5 minutes, until heated through, and soup has thickened a bit. Once soup is heated through, season with salt and pepper, to taste. Serve, and enjoy!
Nutrition Facts
Chicken Wild Rice and Bacon Soup
Amount Per Serving (1 serving)
Calories 471 Calories from Fat 234
% Daily Value*
Fat 26g40%
Saturated Fat 9g56%
Cholesterol 62mg21%
Sodium 1291mg56%
Potassium 669mg19%
Carbohydrates 36g12%
Fiber 3g13%
Sugar 3g3%
Protein 20g40%
Vitamin A 2655IU53%
Vitamin C 20.2mg24%
Calcium 39mg4%
Iron 1.8mg10%
* Percent Daily Values are based on a 2000 calorie diet.

Here’s one more to pin on your Pinterest boards! Chicken wild rice soup, w/ thick-cut bacon, carrots, onions and spices are the backdrop for this easy, delicious, creamy and filling dish!
Lemon Rosemary Chicken Breasts

Lemon Rosemary Chicken Breasts – low in calories, big in flavor! Marinated and grilled, with a lemon glaze, this easy, delicious chicken is sure to impress!Lemon Rosemary Chicken Breasts - low in calories, big in flavor! Marinated and grilled, with a lemon glaze, this easy, delicious chicken is sure to impress! / The Grateful Girl Cooks!
If you’re looking for a light chicken recipe, you should try Lemon Rosemary Chicken Breasts! Marinated, grilled, and served with a lemon glaze (made from the marinade), this simple, delicious chicken dish is sure to impress!
Scroll Down For A Printable Recipe Card At The Bottom Of The Page

Lemon Rosemary Chicken Breasts Are A Weight Watchers Recipe

I found this lemon rosemary chicken breasts recipe on the Weight Watchers website, and decided to give it a try.  My husband and I loved this dish! Lemon rosemary chicken breasts are low in calories, yet full of flavor, thanks to the incredible marinade and glaze! The recipe is incredibly easy, and the chicken (when prepared as written) counts as 2 WW Smart Points per serving!

TIP: I marinated the chicken EARLY in the day, so that when dinner time came around, all I had to do was grill the chicken and make the quick glaze while the chicken was cooking.  By doing it that way, it was EASY and quick to prepare our evening meal!

Preparing Lemon Rosemary Chicken Breasts

This recipe for lemon rosemary chicken breasts calls for thin chicken cutlets or tenderloins. If you don’t have those handy (which I did not, the day I took these photos), you can easily substitute a thick boneless, skinless chicken breast.

You can cut the chicken breast in half lengthwise horizontally, OR take a thick chicken breast, and cut it in half vertically. Once sliced in half, pound it out thin between two pieces of plastic wrap (see photo below).

Pounding chicken breast with mallet to make cutlet for lemon rosemary chicken.

Prepare Marinade For Chicken

In a medium-sized bowl, place the olive oil, lemon zest, minced garlic, rosemary, thyme, white wine and the chicken broth. Stir well, to combine all of the ingredients. Add the chicken breasts to the lemon marinade. Turn them over to make sure all sides are covered with the marinade.

Lemon marinade for lemon rosemary chicken breasts.

Chicken breast is coated in marinade for lemon rosemary chicken.

Cover the bowl with plastic wrap, and refrigerate the chicken pieces in the marinade for at least 6 hours. TIP: Turn the lemon rosemary chicken breasts a couple of times during the marinating time, to ensure great flavor on all sides of the chicken.

Lemon Rosemary Chicken Breasts in bowl with marinade.

Pan Grilling The Marinated Lemon Rosemary Chicken Breasts

When you’re ready to cook, generously spray a grill or grill pan with non-stick cooking spray (off the heat). Preheat the grill (or grill pan) to medium-high.

Once the grill is hot (but not smoking), transfer chicken pieces from marinade onto hot grill. Importantsave the remaining marinade sauce. Cook for 3-5 minutes per side, or until the lemon rosemary chicken breasts are done and reach an internal temperature of 165 degrees F.

Lemon Rosemary Chicken Breasts are grilled after marinating.

Making The Glaze For Lemon Rosemary Chicken Breasts

While the lemon rosemary chicken breasts are cooking, use the remaining marinade to make a glaze. To make the glaze, combine remaining marinade with 1/2 cup chicken broth in a small saucepan. Heat the sauce on high heat. Bring the lemon sauce to a boil. Continue cooking for about 5 minutes, until glaze has reduced a little in volume, and has slightly thickened.

Marinade is cooked to thicken it into a glaze for lemon rosemary chicken breasts.

Time To Serve The Chicken!

When the lemon rosemary chicken breasts are done, transfer them to a serving platter or plates.  Drizzle the lemon glaze over the cooked chicken, and serve!

Lemon Rosemary Chicken Breasts are served on a platter garnished with lemon wedges and rosemary sprig.

Close up photo of Lemon Rosemary Chicken Breasts on serving platter.

I hope you will consider trying this delicious recipe for lemon rosemary chicken breasts! Have a fantastic day.

Looking For More Chicken Recipes?

I have LOTS of chicken recipes on this website! You can search them by using the Recipe Index at the top of the page. The list includes these and many more chicken recipes:

Interested In More Recipes?

Thank you for visiting this website. I appreciate you using some of your valuable time to do soIf you’re interested, I publish a newsletter 2 times per month (1st and 15th) with all the latest recipes, and other fun info. I would be honored to have you join our growing list of subscribers, so you never miss a great recipe!
There is a Newsletter subscription box on the top right side (or bottom) of each blog post, depending on the device you use, where you can easily submit your e-mail address (only) to be included in my mailing list.

You Can Also Find Me On Social Media:
Facebook page: The Grateful Girl Cooks!
Pinterest: The Grateful Girl Cooks!
Instagram: jbatthegratefulgirlcooks

Author's signature

Original Recipe Source:  https://www.weightwatchers.com/us/recipe/rosemary-lemon-chicken-breasts-1/5626a646a6d5b396107020a6

0 from 0 votes
Lemon Rosemary Chicken Breasts
Prep Time
5 mins
Cook Time
8 mins
Marinating Time
6 hrs
Total Time
6 hrs 13 mins
 

Lemon Rosemary Chicken Breasts - low in calories, big in flavor! Marinated and grilled, with a lemon glaze, this easy, delicious chicken is sure to impress! 

Category: Entree
Cuisine: American
Keyword: lemon rosemary chicken breasts
Servings: 4 servings
Calories Per Serving: 173 kcal
Author: JB @ The Grateful Girl Cooks!
Ingredients
  • 2 Tablespoons olive oil
  • 2 teaspoons lemon zest
  • 2 teaspoons fresh squeezed lemon juice
  • 2 teaspoons fresh rosemary , minced
  • 1 Tablespoon minced garlic
  • 1 teaspoon fresh thyme , minced
  • 1 Tablespoon dry white wine
  • 1/4 cup low-sodium chicken broth
  • 4 boneless skinless chicken breasts , 3 ounces each (thin cutlets OR tenderloins)
  • Non-stick cooking spray
  • 1/2 cup chicken broth (for glaze)
Instructions
  1. In a medium-sized bowl, place olive oil, lemon zest, minced garlic, rosemary, thyme, white wine and the chicken broth. Stir well, to combine ingredients.
  2. Add chicken breasts to marinade. Turn them over to coat all sides. Cover bowl with plastic wrap, and refrigerate chicken in marinade for at least 6 hours.
  3. When ready to cook, generously spray a grill or grill pan with non-stick cooking spray (off the heat). Preheat the grill (or grill pan) to medium-high. Once grill is hot, transfer chicken pieces from marinade onto hot grill (save remaining marinade sauce). Cook 3-5 minutes per side, until chicken is done, and reaches an internal temperature of 165 degrees F.
  4. Use the remaining marinade to make a glaze while the chicken is cooking. To make the glaze, combine the remaining marinade with 1/2 cup chicken broth in a small saucepan. Heat the sauce on high heat. Bring glaze to a boil, and continue cooking for about 5 minutes, until glaze has reduced slightly, and thickened a bit.
  5. When chicken is done, drizzle the glaze over the cooked chicken, and serve!
Recipe Notes

Recipe calls for thin cutlets or tenderloins. If you don't have those handy, you can substitute a thick boneless, skinless chicken breast and cut it in half horizontally lengthwise, OR take a thick chicken breast, and cut it in half vertically, then pound it out thin between two pieces of plastic wrap. WW= 2 Smart Points (freestyle)

Nutrition Facts
Lemon Rosemary Chicken Breasts
Amount Per Serving (1 breast)
Calories 173 Calories from Fat 81
% Daily Value*
Fat 9g14%
Saturated Fat 1g6%
Cholesterol 54mg18%
Sodium 212mg9%
Potassium 366mg10%
Carbohydrates 2g1%
Fiber 1g4%
Sugar 1g1%
Protein 19g38%
Vitamin A 50IU1%
Vitamin C 7.3mg9%
Calcium 11mg1%
Iron 0.5mg3%
* Percent Daily Values are based on a 2000 calorie diet.

Here’s one more to pin on your Pinterest boards!Lemon Rosemary Chicken Breasts - low in calories, big in flavor! Marinated and grilled, with a lemon glaze, this easy, delicious chicken is sure to impress!

Save

Save

Save

Save

Save

Save

Save

Save

Save