Category: For The BBQ Grill

Honey Lime Grilled Chicken

Enjoy the Southwestern flavor of delicious Honey Lime Grilled Chicken. Chicken thighs are marinated, then grilled/basted with the easy to make sauce.
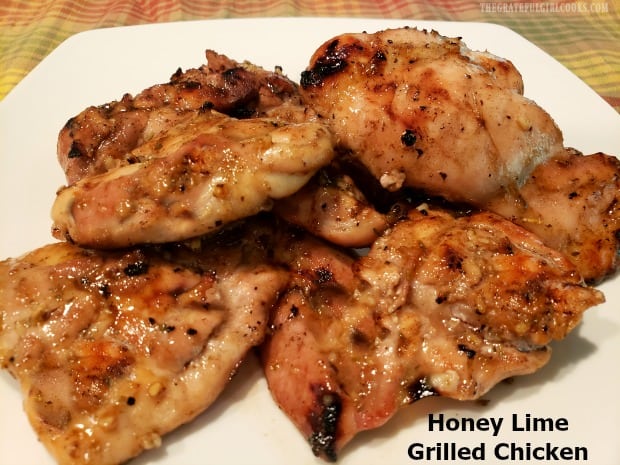

Looking for an easy to prepare, but full of flavor chicken recipe? May I recommend this one for honey lime grilled chicken? Chicken thighs are seasoned and flavored in a simple flavor-packed marinade. After marinating, the seasoned chicken thighs are grilled on a bbq (or cooked on stovetop), and are basted with a glaze (made using part of the reserved marinade)!

This simply marinated, glazed and grilled chicken taste wonderful. The chicken thighs are juicy, and are complimented by the tangy glaze they’re coated with, while grilling. The sweet honey, fresh lime juice, along with some Southwest-inspired spices result in some quite tasty pieces of chicken.

This is a perfect recipe for hot summer nights. To make it REALLY convenient, you can marinate the chicken early in the day, and then grill ’em up later in the evening, for a quick dinner! YUM. Here’s how to make this chicken:

What’s In The Marinade?

The marinade (which also doubles as a basting sauce later) is super easy to make, in hardly any time at all. The ingredients are olive oil, honey, lime juice, fresh ginger, cumin, coriander, oregano, minced garlic and salt.

The ingredients used for the honey lime marinade.

Prepare The Honey Lime Marinade

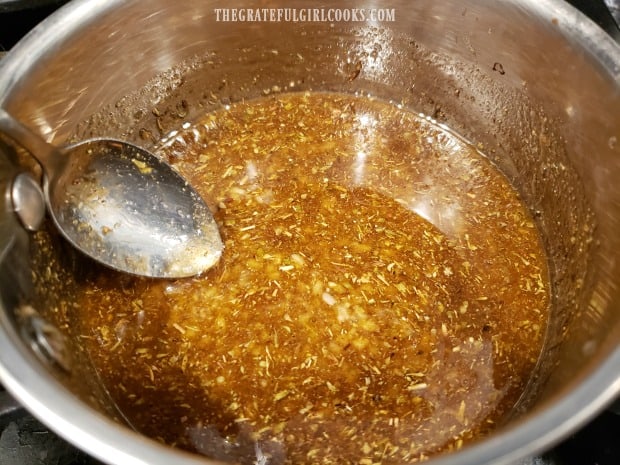
Measure the marinade ingredients into a medium saucepan. Stir the ingredients well, to fully combine. Put the ingredients into a saucepan, because you will remove some to use as a marinade, and then cook the remaining sauce into a slightly thickened basting glaze.

All the marinade ingredients are placed into a medium saucepan.Once mixed, some honey lime sauce is removed to marinate the chicken pieces.

Marinate The Chicken Thighs

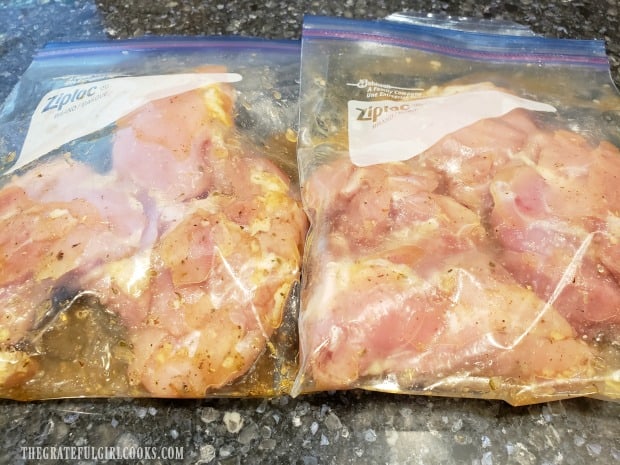
Measure out 4 Tablespoon of the marinade into a large gallon-sized re-sealable bag. NOTE: *I did not have a large gallon-sized bag available, but had 2 quart sized bags. I put 2 Tablespoons marinade into each of the 2 small bags. Add the chicken thighs, and “massage” the bag(s) well, to ensure all sides of the chicken are covered with marinade.

Place bag(s) in the refrigerator and marinate the chicken for at least 30 minutes. You can marinate the chicken for up to 12 hours, so this is easy to prepare early in the day. You can let the chicken hang out in the refrigerator until you’re ready to grill it. TIP: The longer the chicken marinates, the greater the flavor!

Chicken thighs marinating in honey lime sauce in re-sealable plastic bags.

Make A Basting Sauce For The Honey Lime Grilled Chicken

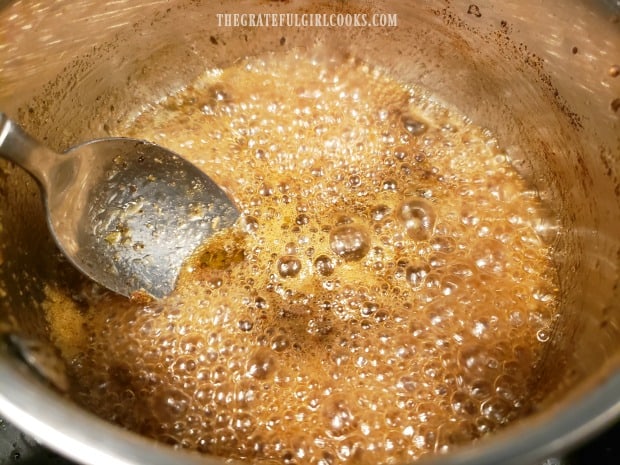
While the chicken is marinating, you can make the basting glaze, using the remaining marinade in the saucepan. Heat the sauce on Medium heat until it comes to a boil. Once it begins boiling, keep an eye on the sauce, stirring occasionally. It will bubble quite a bit (and you don’t want it to bubble up and out of your saucepan!).

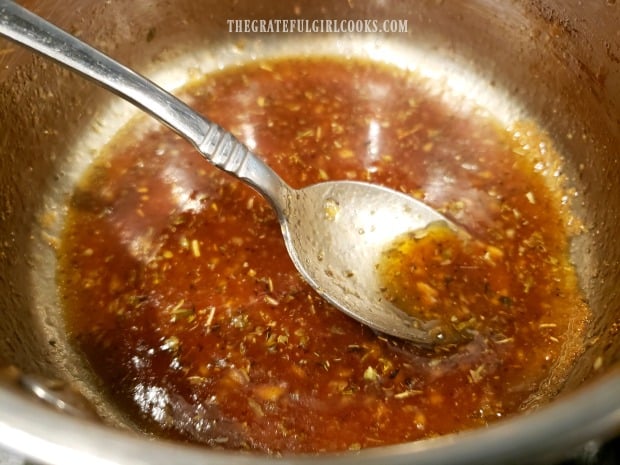
Continue to boil the sauce for between 1-2 minutes, or until the mixture becomes more like a slightly thicker syrup. As it continues to cook, the liquid will reduce in volume by about a half. Once done, remove the pan from the heat, and set aside, until you’re ready to grill the chicken.

Remaining honey lime marinade is cooked down into a basting glaze for grilling..the basting glaze has reduced in volume and is syrupy, for brushing on chicken.

Time To Cook The Honey Lime Grilled Chicken!

When ready to cook the honey lime grilled chicken, you have two options: you can grill it outside on a bbq OR you can cook it on the stove top in a large skillet. *Inside cooking directions can be found in the printable recipe card at the bottom of the post.

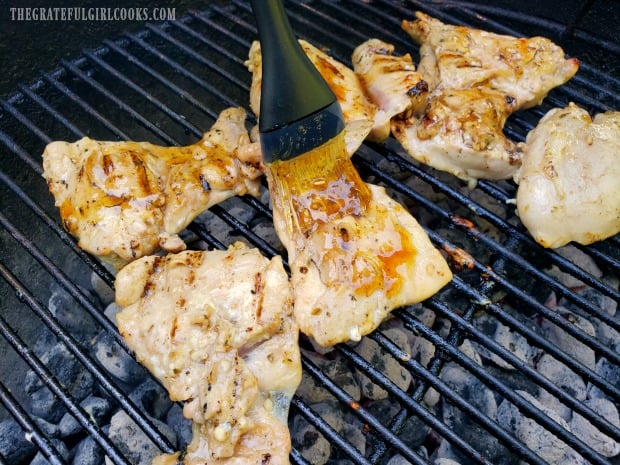
FOR OUTSIDE GRILLING: preheat grill (or charcoal briquettes) to a medium high heat. Once hot, transfer chicken pieces directly onto bbq grate. Sprinkle chicken lightly with salt and pepper (if desired). Baste the chicken thighs often with the honey lime glaze as it cooks (baste and grill on all sides).

The chicken will take about 15 minutes to cook (more or less, depending on heat source AND size of chicken pieces). The chicken is considered safely “done” when it’s internal temperature reaches 160°F. It should be nice and golden brown in color.

Marinated chicken thighs are grilled, and basted with honey lime glaze as they cook..

Ready To Enjoy

Once you remove the chicken from the grill, cover it (to keep it warm), and let it rest for about 4-5 minutes to let the juices redistribute inside the chicken.

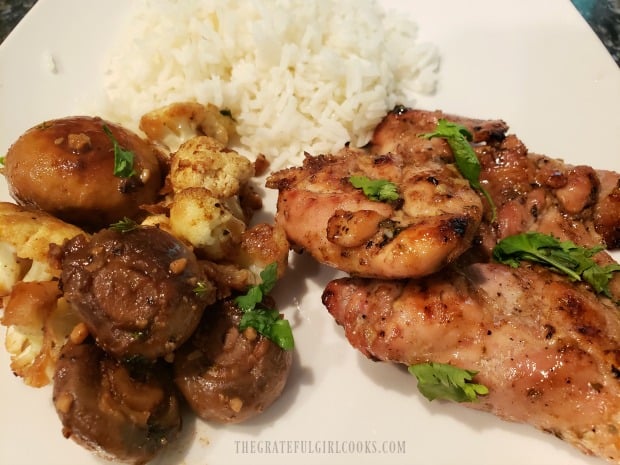
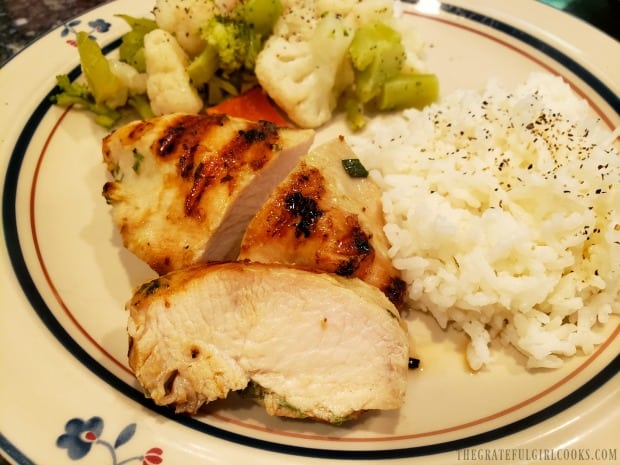
We enjoyed the honey lime grilled chicken, garnished with fresh parsley, and served with a cauliflower/mushroom side dish, and steamed rice. The chicken was moist, and very flavorful. I think you will love it, too!

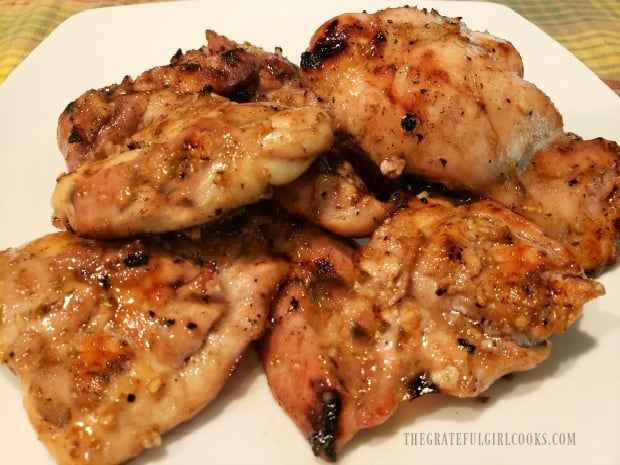
Honey lime grilled chicken pieces on a white platter, ready to be eaten.Rice and a veggie dish are served along with the honey lime grilled chicken.

Thank you so much for stopping by. I truly hope you will consider trying this easy, delicious honey lime grilled chicken recipe. Take care, and have a great day.

Looking For More CHICKEN Recipes?

You can find all of my chicken recipes in the Recipe Index, located at the top of the page. I have LOTS of delicious recipes using chicken, including:

Interested In More Recipes?

Thank you for visiting this website. I appreciate you using some of your valuable time to do soIf you’re interested, I publish a newsletter 2 times per month (1st and 15th) with all the latest recipes, and other fun info. I would be honored to have you join our growing list of subscribers, so you never miss a great recipe!
There is a Newsletter subscription box on the top right side (or bottom) of each blog post, depending on the device you use, where you can easily submit your e-mail address (only) to be included in my mailing list.

You Can Also Find Me On Social Media:
Facebook page: The Grateful Girl Cooks!
Pinterest: The Grateful Girl Cooks!
Instagram: jbatthegratefulgirlcooks

Author's signature

Original recipe source: Chris, at: thecafesucrefarine.com/mexican-honey-lime-grilled-chicken/

0 from 0 votes
Honey Lime Grilled Chicken
Prep Time
5 mins
Cook Time
15 mins
Marinating Time (inactive)
30 mins
Total Time
50 mins
 

Enjoy the Southwestern flavor of delicious Honey Lime Grilled Chicken. Chicken thighs are marinated, then grilled/basted with the easy to make sauce.

Category: Entree, Main Course
Cuisine: Southwest
Keyword: honey lime grilled chicken
Servings: 6
Calories Per Serving: 350 kcal
Author: JB @ The Grateful Girl Cooks!
Ingredients
  • 3 pounds boneless, skinless chicken thighs (6 pieces) , visible fat removed
  • salt/pepper (to lightly season chicken before grilling) , OPTIONAL-amount used as desired
Honey Lime Marinade & Basting Sauce:
  • ¼ cup fresh lime juice
  • 3 Tablespoons honey
  • 2 Tablespoons extra virgin olive oil
  • 3 cloves garlic , finely minced
  • 1 teaspoon finely grated fresh ginger
  • 1 teaspoon dried oregano
  • 1 teaspoon coriander
  • 1 teaspoon ground cumin
  • 1 teaspoon salt
Instructions
  1. Measure marinade ingredients into a medium saucepan. Stir well, to fully combine.

  2. Measure 4 Tablespoons of marinade out; transfer into a large re-sealable plastic bag (or divide evenly between 2 smaller bags). Add chicken thighs, and "massage" bag(s) well, to ensure each piece is covered with marinade. Place bag(s) in refrigerator; marinate chicken for at least 30 minutes, or up to 12 hours.

  3. While chicken marinates, make basting glaze. Cook remaining marinade in saucepan on Medium heat until it comes to a boil. Once boiling, keep an eye on it, stirring often, so it doesn't bubble up and out of the pan. Boil sauce for 1-2 minutes, until mixture becomes a slightly thick syrup. As it cooks, liquid will reduce in volume by about half. Once done, remove pan from heat; set aside.

Cooking Outside On Grill:
  1. Preheat gas grill (or charcoal briquettes) to medium high heat. Once hot, transfer chicken pieces directly onto bbq grate. Sprinkle chicken lightly with salt/pepper (if desired). Baste chicken often with honey lime glaze as it cooks (baste and grill on all sides). Chicken will take about 15 minutes to cook (more or less, depending on heat source AND size of chicken pieces). The chicken is safely "done" when it's internal temperature reaches 160°F. It should be nice and golden brown in color. Remove chicken when done, and let rest for 4-5 minutes before serving, to let juices redistribute through meat.

Cooking Inside On Stovetop:
  1. Heat oil in a large skillet on medium-high heat. When it is really hot (but not smoking), add chicken, but do not over-crowd the skillet. Season lightly with salt/pepper (if desired). Cook for about 10-12 minutes, basting with the glaze, and turning chicken frequently. Chicken is safely "done" when it reaches an internal temperate of 160°F. Remove chicken when done, and let rest for 4-5 minutes before serving, to let juices redistribute through meat.

Recipe Notes

NOTE: Caloric calculation is approximate, due to varying sizes of chicken thighs that might be used.
Nutrition Facts
Honey Lime Grilled Chicken
Amount Per Serving (1 thigh)
Calories 350 Calories from Fat 126
% Daily Value*
Fat 14g22%
Saturated Fat 3g19%
Cholesterol 215mg72%
Sodium 591mg26%
Potassium 579mg17%
Carbohydrates 10g3%
Fiber 1g4%
Sugar 9g10%
Protein 44g88%
Vitamin A 54IU1%
Vitamin C 3mg4%
Calcium 32mg3%
Iron 2mg11%
* Percent Daily Values are based on a 2000 calorie diet.

Here’s one more to pin on your Pinterest boards!Enjoy the Southwestern flavor of delicious Honey Lime Grilled Chicken. Chicken thighs are marinated, then grilled/basted with the easy to make sauce.

Grilled Lemon Chicken Breasts

Fire up your BBQ and make delicious, grilled lemon chicken breasts! A flavorful lemon marinade coats the chicken, then it’s grilled until done. EASY!
Fire up your BBQ and make delicious, grilled lemon chicken breasts! A flavorful lemon marinade coats the chicken, then it's grilled until done. EASY!

Summer is officially here in Oregon, and the temperatures have been slowly climbing upward. I don’t know about you, but we grill a lot of our dinners outside during the summer, to avoid heating up our kitchen. This recipe for grilled lemon chicken breasts is a fantastic, light and easy main dish, and I know you will love it like we do!

The recipe itself is super easy. I found it on a pellet grill/smoker blog, but decided instead of cooking it on our Traeger, to grill them on our trusty old charcoal-grill Weber. The good news? You only need to make a simple lemon marinade and let the chicken soak in it, before grilling. The bad news? YOU NEED TO PLAN AHEAD! The chicken breasts will need to marinate for 3-4 hours to soak up all that yummy flavor!

Since the marinade only takes a few minutes to make, it is easy to mix it up early in the day, and then toss chicken breasts in for a long swim, until you’re ready to grill them! See how easy it is? Here’s the “How-To’s”:

Scroll Down For A Printable Recipe Card At The Bottom Of The Page

Make The Lemon Marinade

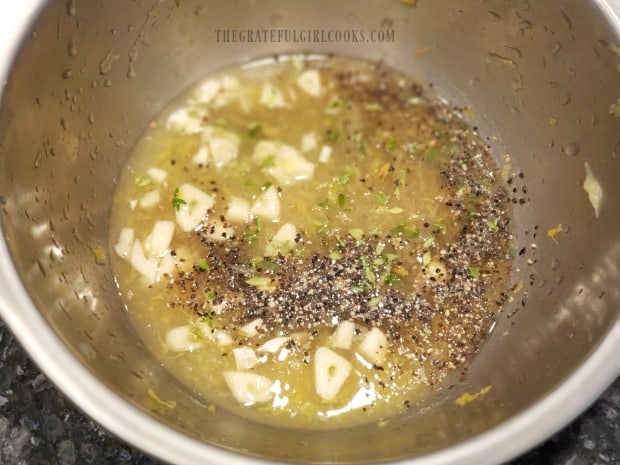
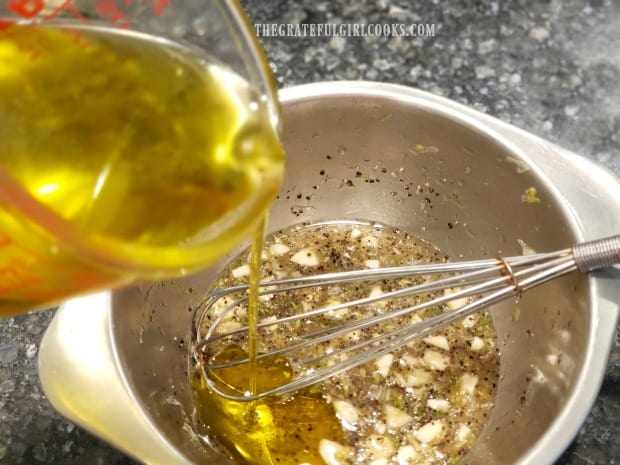
Making the lemon marinade is EASY. Combine lemon juice, lemon zest, honey, salt, pepper, fresh thyme leaves, and coarsely chopped fresh garlic in a small bowl. Slowly drizzle in the olive oil, whisking continuously as you add it in, until completely incorporated into the other ingredients.

Honey, Lemon juice and zest, garlic, and spices are mixed for the marinade.Olive oil is whisked into the lemon marinade until incorporated.

Marinade The Chicken

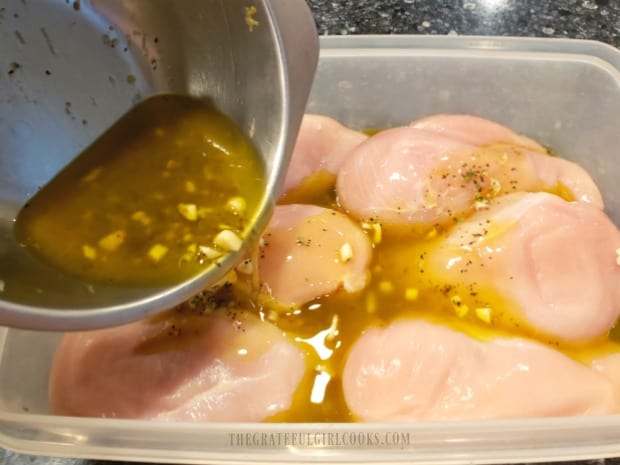
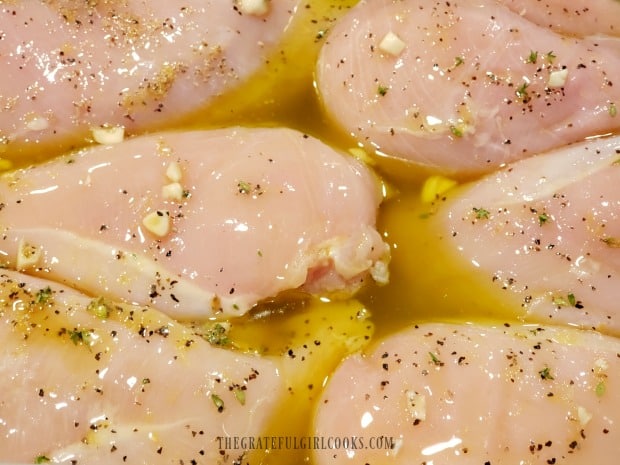
Place the chicken breasts in a LARGE zip-loc bag OR place in a single layer in a large container with a lid. Give the marinade a good stir, and then pour it over the chicken. If using a bag, gently massage the bag until chicken breasts are fully covered with marinade. If using a container (as I did), turn to fully coat the chicken with the marinade.

Place the sealed bag or container in the refrigerator for a minimum of 4 hours, turning the bag (or the chicken) over occasionally to keep the chicken coated. Letting the chicken fully marinade helps enfuse the meat with the delicious flavors of lemon, honey, garlic, and spices.

Chicken breasts are coated with the marinade, then refrigerated.Marinated chicken breasts are refrigerated for 3-4 hours before grilling.

Time To Make Grilled Lemon Chicken Breasts!

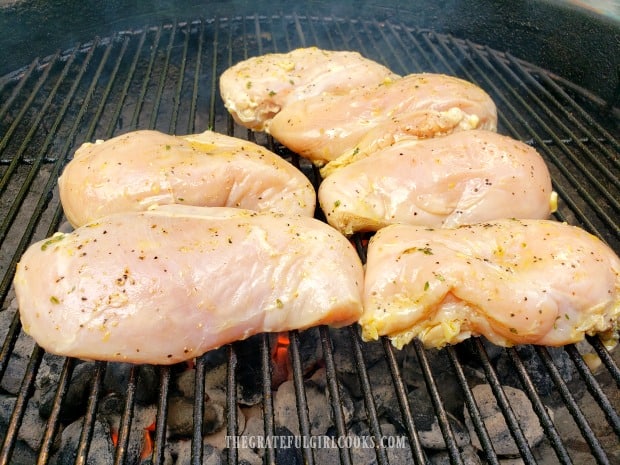
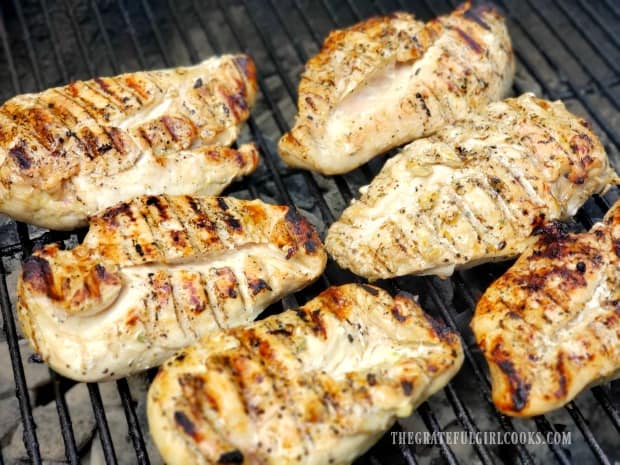
After the chicken is done marinating, it’s time to cook them. Prepare your bbq per manufacturer instructions. Once the coals or heat source is at a medium-high level, remove the chicken from the marinade (letting excess drip back into container). Place on hot grill and let them cook, flipping them to the other side half way through cooking time. If desired, baste the chicken while it cooks with some of the remaining marinade to keep it moist. Discard the rest.

The chicken (approx. 6 ounce pieces) will typically take between 20-30 minutes to fully cook through to a safe internal temperature of 165°F. Larger or smaller pieces of chicken will obviously require more OR less cooking time, because the weight of chicken breasts will vary. The temperatures on different types of bbq’s can vary widely as well.

Check the chicken for done-ness towards the end of the cooking time. A couple of our chicken breasts were much larger and thicker than the others (11 ounces), and took 35 minutes to reach 165°F.

Grilled Lemon Chicken Breasts cooking over hot coals on BBQ.The chicken is turned half way through grilling to brown both sides.

Serve The Grilled Lemon Chicken Breasts

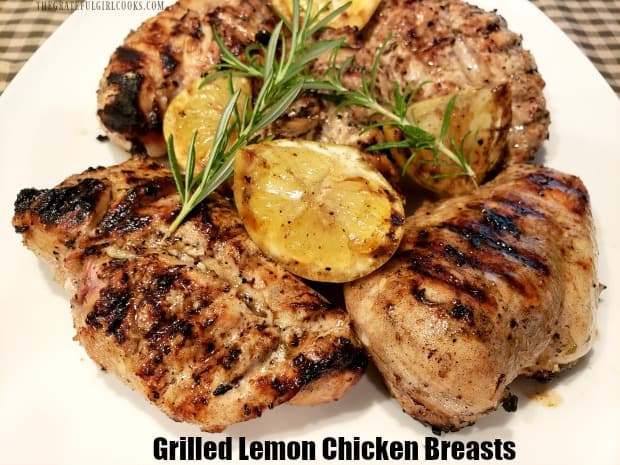
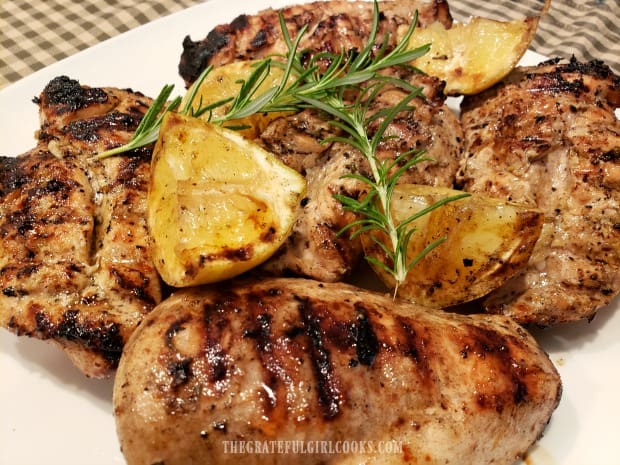
If you would like to garnish the finished chicken with grilled lemon wedges (it looks good!), you can. Simply cut a whole lemon into 4 wedges, and place on the grill, cut side down, for the last 5 minutes of cooking time for the chicken, to quickly char it on all cut sides. (See photo below).

Serve the grilled lemon chicken breasts with the charred lemon quarters and a sprig or two of fresh thyme or rosemary, as a beautiful presentation. You can squeeze more lemon juice from the charred wedges over the chicken, if desired.

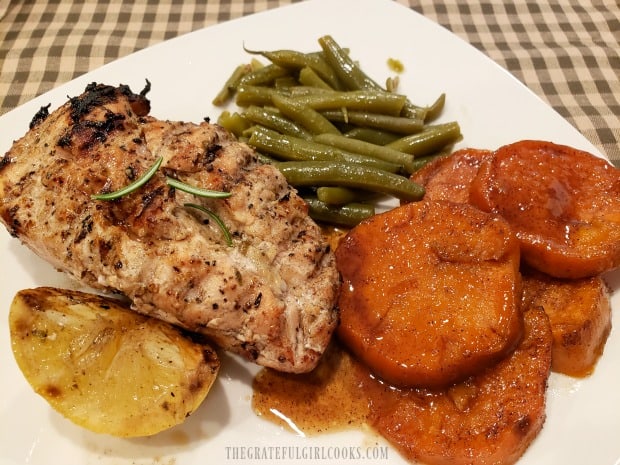
We enjoyed this delicious chicken along with some home-canned green beans from our garden, and some scrumptious candied sweet potatoes.. It was a delicious dinner (and I will use our leftover chicken with pasta, or on top of a mixed green salad).

Grilled Lemon Chicken Breasts are served, garnished with charred lemon wedges and rosemary sprigs.Sweet potatoes, & green beans served with grilled lemon chicken breasts.

I really hope you enjoy this recipe for grilled lemon chicken breasts. We LOVE it (especially the EASY part!), and hope you have the opportunity to make it for those you love. A complete, printable recipe card is at the bottom of this post, for your convenience.

Thank you for using some of your valuable time to stop by for a visit. Hope you will come back again. Take care, and have a GREAT day.

Looking For More CHICKEN Recipes?

You can find all of my chicken recipes in the Recipe Index, which is located at the top of the page. I have LOTS of them to explore, including:

Interested In More Recipes?

Thank you for visiting this website. I appreciate you using some of your valuable time to do soIf you’re interested, I publish a newsletter 2 times per month (1st and 15th) with all the latest recipes, and other fun info. I would be honored to have you join our growing list of subscribers, so you never miss a great recipe!
There is a Newsletter subscription box on the top right side (or bottom) of each blog post, depending on the device you use, where you can easily submit your e-mail address (only) to be included in my mailing list.

You Can Also Find Me On Social Media:
Facebook page: The Grateful Girl Cooks!
Pinterest: The Grateful Girl Cooks!
Instagram: jbatthegratefulgirlcooks

Author's signature

Original recipe source: https://www.traegergrills.com/recipes/lemon-chicken-breast

0 from 0 votes
Grilled Lemon Chicken Breasts
Prep Time
5 mins
Cook Time
35 mins
Marinating Time (inactive)
4 hrs
Total Time
4 hrs 40 mins
 

Fire up your BBQ and make delicious, grilled lemon chicken breasts! A flavorful lemon marinade coats the chicken, then it's grilled until done. EASY!

Category: Entree
Cuisine: American
Keyword: grilled lemon chicken breasts
Servings: 6
Calories Per Serving: 286 kcal
Author: JB @ The Grateful Girl Cooks!
Ingredients
  • 1 large lemon (juice + zest)
  • 2 teaspoons honey
  • 1 clove garlic large clove, coarsely chopped
  • 2 teaspoons kosher salt
  • 1 teaspoon coarse ground black pepper
  • 2 sprigs fresh thyme leaves , strip leaves from stems
  • ½ cup extra virgin olive oil , can substitute vegetable oil
  • 6 medium chicken breasts (boneless, skinless) approx. 6 ounces per chicken breast
For Garnish:
  • 1 large lemon , cut in 4 wedges, grilled for garnish (optional)
  • 2-3 sprigs fresh thyme or rosemary
Instructions
  1. Combine lemon juice, zest, honey, salt, pepper, thyme leaves, and chopped fresh garlic in a small bowl. Slowly drizzle in olive oil, whisking continuously as you add it, until incorporated into other ingredients.

  2. Place chicken in a LARGE zip-loc bag OR in a single layer in a large container with a lid. Pour marinade over chicken. If using sealed bag, gently massage bag until chicken is fully covered with marinade. If using a container, turn to fully coat chicken with marinade. Place bag or covered container in refrigerator for a minimum of 4 hours.

  3. Prepare BBQ grill per manufacturer instructions. Once coals or heat source is at a medium-high temperature, remove chicken from marinade. Place chicken directly on hot grill grate and cook without moving them. Half way through cooking time, turn chicken to the other side. If desired, baste chicken with remaining marinade while grilling. Discard leftover marinade. Chicken (approx. 6 ounces per piece) will typically take between 20-30 minutes to fully cook through to a safe internal temperature of 165°F. This time can vary, due to sizes/weight/thickness of chicken pieces, bbq temperature, etc. Be sure to check internal temperature of chicken towards end of cooking time. When done (165°F), remove from grill; let chicken rest for 3-4 minutes before serving, to allow internal juices to redistribute throughout meat.

  4. If you want grilled lemon wedges for serving with the grilled chicken, simply cut a whole lemon into 4 wedges, and place on the grill, cut side down, for the last 5 minutes of the chicken's grilling time, to quickly char it on all cut sides. Serve chicken breasts with charred lemon quarters on top and 1-2 sprigs of fresh thyme or rosemary, for a beautiful presentation. Enjoy!

Recipe Notes

Note: Caloric calculation was made using HALF the amount of marinade required for the recipe. This is because MOST of the marinade will be discarded AFTER marinating the chicken, and will not be consumed.

Nutrition Facts
Grilled Lemon Chicken Breasts
Amount Per Serving (1 g)
Calories 286 Calories from Fat 117
% Daily Value*
Fat 13g20%
Saturated Fat 2g13%
Cholesterol 109mg36%
Sodium 586mg25%
Potassium 667mg19%
Carbohydrates 4g1%
Fiber 1g4%
Sugar 2g2%
Protein 36g72%
Vitamin A 67IU1%
Vitamin C 17mg21%
Calcium 16mg2%
Iron 1mg6%
* Percent Daily Values are based on a 2000 calorie diet.

Here’s one more to pin on your Pinterest boards!Fire up your BBQ and make delicious, grilled lemon chicken breasts! A flavorful lemon marinade coats the chicken, then it's grilled until done. EASY!

Garlic Butter Grilled Trout

Have an avid fisherman in the family? Here’s a simple recipe for garlic butter grilled trout, with two methods given for preparing this fish on a BBQ.
Have an avid fisherman in the family? Here's a simple recipe for garlic butter grilled trout, with two methods given for preparing this fish on a BBQ.

Scroll Down For A Printable Recipe Card At The Bottom Of The Page

An Unexpected Surprise

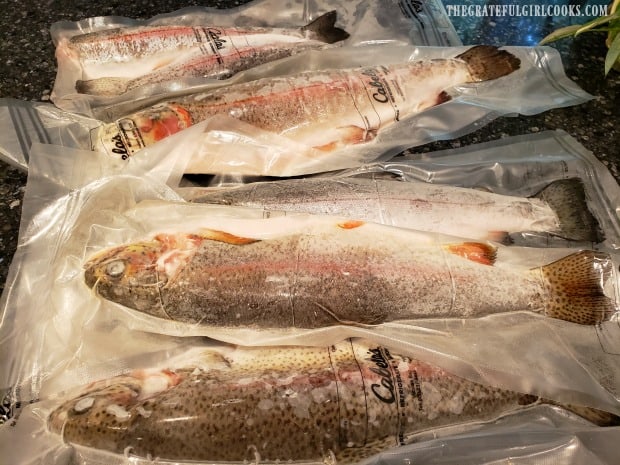
Last month one of our neighbors gave us some recently caught trout! The fish had already been cleaned professionally, packaged and frozen. Our friend mentioned that a relative gives him lots of trout, but he’s the only one in his family that likes it, so he has way too much in his freezer. Lucky for us, he decided to bless us with 5 of them!

These are the five beautiful trout we received from our friendly neighbor down the street! What an unexpected, lovely surprise! They had already been cleaned, prepped, and frozen, so all I needed to do was thaw them and cook them!

The trout have been cleaned, gutted, frozen, and packaged before we received them.

Discovering New Ways To Cook Trout

In the past, I have typically dredged whole trout in beaten egg and then covered the fish in a cornmeal spice mixture and pan-fried them. This time, my husband and I came up with a new way (to us) for cooking a couple of the trout on our grill.

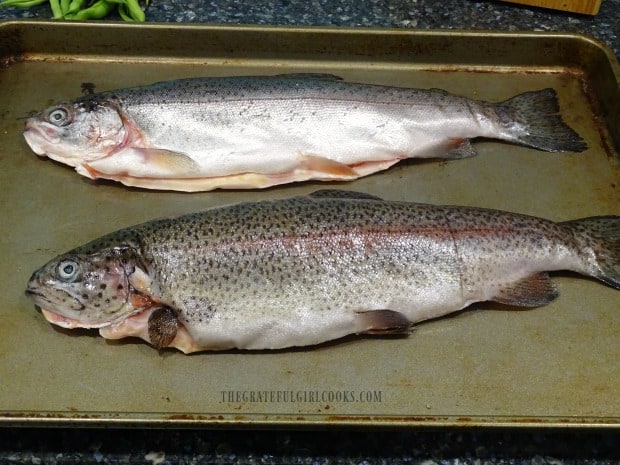
Shown below are the two trout we decided to grill on our Weber BBQ the FIRST time. Sometimes I think the only reason I don’t think I will enjoy trout is because of the eyes… just look at ’em. **Shudders.** Once I get past that, I’m good. Kinda.

Two trout are ready to be stuffed and then grilled.

Prepare The Garlic Butter Grilled Trout For Cooking

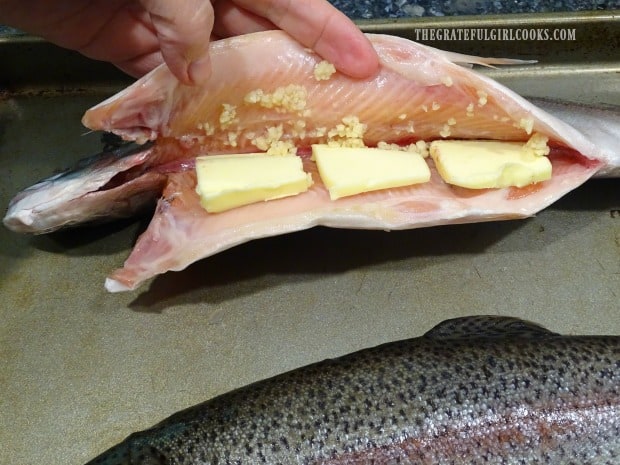
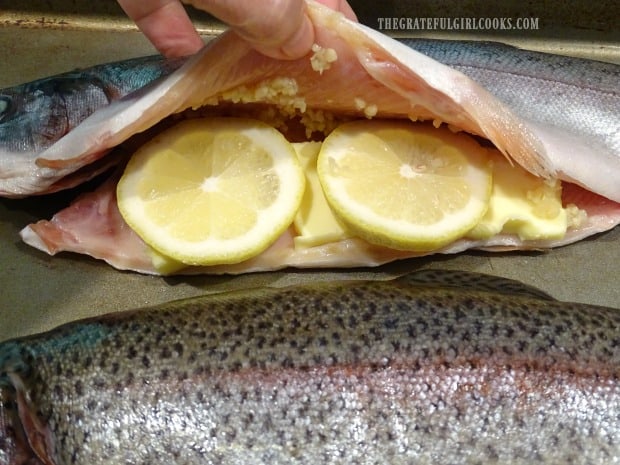
Anyways, here is how to make this dish. Spread the minced garlic inside the cavity of each fish, and place 2-3 thin slices of butter in there, as well.

Minced garlic and thin slices of butter are added to the fish cavity.

Place a couple thin slices of fresh lemon into the cavity of each trout, on top of the butter. Rub both sides of the trout generously with olive oil or vegetable oil.

Thin lemon slices are added to the garlic and butter in the fish cavity.

Making Sure The Fish Won’t Stick To The Foil Is Important

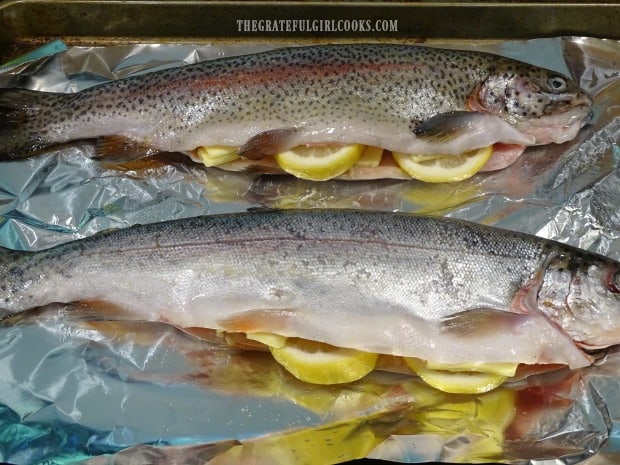
Place a large sheet of aluminum foil onto a large baking sheet. The baking sheet will hold the weight of the fish, until you slide the foil and fish onto the bbq grill. Spray the aluminum foil very generously all over with non-stick cooking spray or brush with oil, and then carefully transfer each stuffed trout onto the foil.

NOTE: Generously coating the foil with spray or oil is an important step, because you do not want the fish skin to stick to the foil as it cooks.

The trout is stuffed with garlic, lemon and butter before being grilled.

Two Methods For Cooking Garlic Butter Grilled Trout

There are two ways to cook the trout. My photos reflect method #1, but I will also explain how to cook via method #2. We’ve now cooked garlic butter grilled trout BOTH ways, with equally good results!

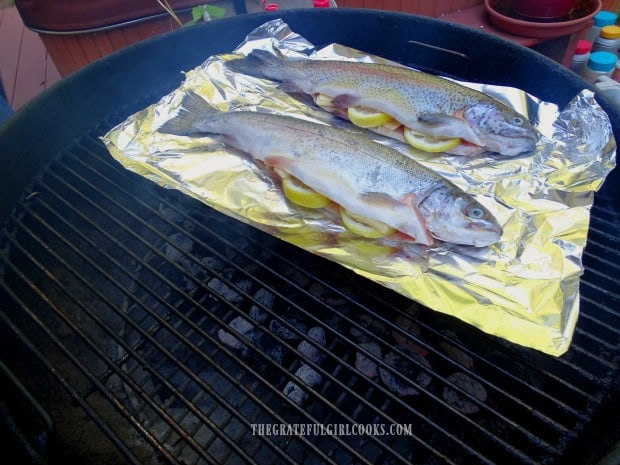
METHOD #1: Place the aluminum foil with both of the stuffed trout onto the grill grate directly over the hot coals. Cover the BBQ, and let the trout cook for 20 minutes. After 20 minutes, carefully transfer the trout off of the foil and directly onto the bbq grate. Cook 7 minutes (lid closed), and then flip to other side and cook for 7 more minutes (lid closed). Remove the fish from the grill.

METHOD #2: Do not stuff the trout before placing it on the bbq. Place generously oiled aluminum foil (one piece of foil for each trout) with the UNSTUFFED trout onto the grill grate, but NOT DIRECTLY over the hot coals. Cover the BBQ, and let the trout cook on indirect heat for 20 minutes. After 20 minutes, add the garlic, butter and lemon to each fish cavity. Add a top layer of foil, and wrap up each of the fish in foil, sealing foil packets tightly. Let the fish cook for 15 minutes (lid on the grill), then remove the foil packets from the grill.

The garlic butter grilled trout, cooked on foil, directly over hot coals on the bbq.

After Grilling, But Before Eating

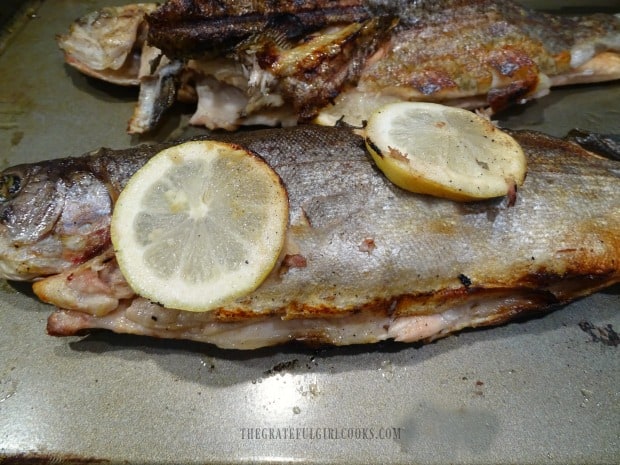
This is what the garlic butter grilled trout looked like (below) once we brought it into the house. These trout were cooked using Method #1, as described above.

Once the trout is fully cooked, open it up and slice all the way through the back of the fish, resulting in two pieces. Be sure and pull the bones out by lifting the bone section up and pulling it up and away form the fish. IMPORTANT! Trout is notorious for it’s small bones, so take care when eating, to ensure bones have been removed.

The fish skin is crisp, after removing it from the grill.

Time To Serve the Garlic Butter Grilled Trout!

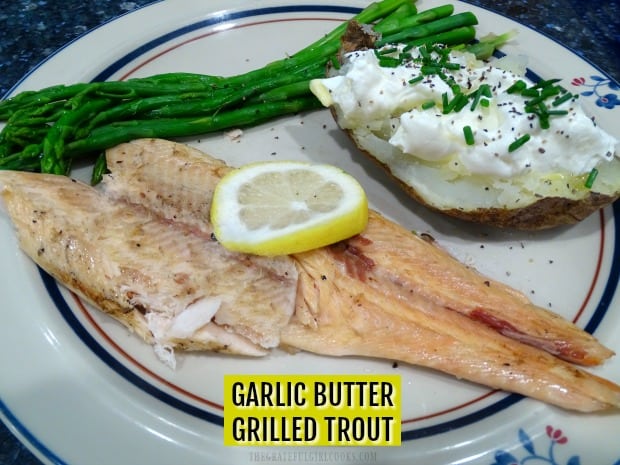
After de-boning and removing the skin (it pulls right off), the garlic butter grilled trout fillets are ready to serve! Remember to keep an eye out for any sneaky, hideaway, tiny little bones…

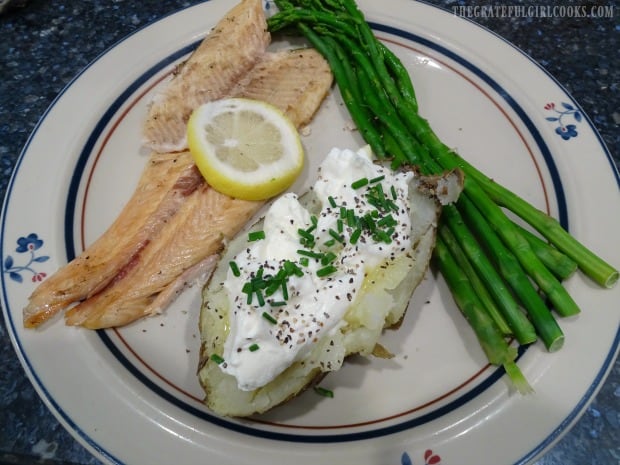
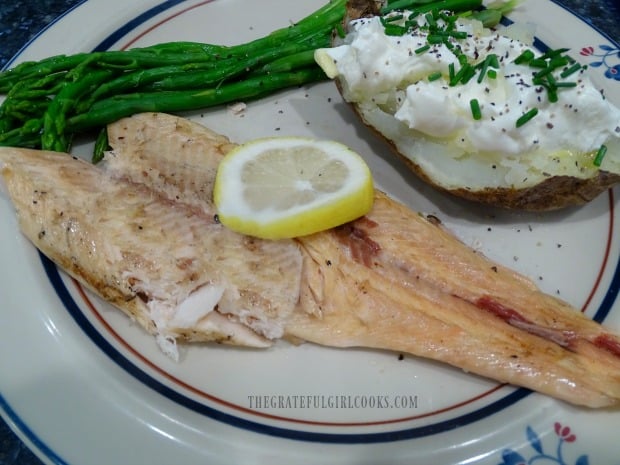
The grilled trout, on a plate with side veggies, ready to eat.Garlic butter grilled trout fillet, served with a baked potato and asparagus.

I hope you enjoy this simple recipe for garlic butter grilled trout! It tastes really yummy! Hope you have a great day, friends, and remember to show kindness to those you share this journey of life with. Thanks for reading!

Looking For More Fish Recipes?

You can find all of my fish recipes in the Recipe Index, located at the top of the page. A few you might enjoy include:

Interested In More Recipes?

Thank you for visiting this website. I appreciate you using some of your valuable time to do soIf you’re interested, I publish a newsletter 2 times per month (1st and 15th) with all the latest recipes, and other fun info. I would be honored to have you join our growing list of subscribers, so you never miss a great recipe!
There is a Newsletter subscription box on the top right side (or bottom) of each blog post, depending on the device you use, where you can easily submit your e-mail address (only) to be included in my mailing list.

You Can Also Find Me On Social Media:
Facebook page: The Grateful Girl Cooks!
Pinterest: The Grateful Girl Cooks!
Instagram: jbatthegratefulgirlcooks

Author's signature

0 from 0 votes
Garlic Butter Grilled Trout
Prep Time
10 mins
Cook Time
35 mins
Total Time
45 mins
 

Have an avid fisherman in the family? Here's a simple recipe for garlic butter grilled trout, with two methods given for preparing this fish on a BBQ.

Category: Main Course, Seafood
Cuisine: American
Keyword: garlic butter grilled trout
Servings: 4 (1/2 trout per serving)
Calories Per Serving: 307 kcal
Author: JB @ The Grateful Girl Cooks!
Ingredients
  • 2 trout , cleaned and gutted
  • teaspoons minced garlic
  • 2 Tablespoons butter (each Tablespoon cut into 3 thin slices)
  • 4 slices lemon (thin slices)
  • olive oil or vegetable oil , enough to brush on fish and coat aluminum foil
  • non-stick cooking spray
Instructions
  1. METHOD #1: Spread the minced garlic onto the inside of each fish, and place 2-3 thin slices of butter into the cavity, as well. Place a couple thin slices of fresh lemon into the cavity of each trout, on top of the butter. Brush both sides of the trout generously with olive oil or vegetable oil. Place a large sheet of aluminum foil onto a large baking sheet (the baking sheet helps hold the fish until you slide the foil and fish onto the grill. Spray the aluminum foil very generously all over with non-stick cooking spray or brush with oil, and then carefully transfer each stuffed trout onto the foil. Place the aluminum foil with the stuffed trout onto the grill grate directly over hot coals on the bbq. Cover the BBQ, and let the trout cook for 20 minutes. After 20 minutes, carefully transfer the trout off of the foil and directly onto the bbq grate. Cook 7 minutes (lid closed), then carefully flip trout to the other side and cook 7 more minutes (lid closed). Remove fish from grill. To serve: de-bone and skin the fish. Serve, and enjoy!

    NOTE: Generously coating the foil with spray or oil is an important step, because you do not want the fish skin to stick to the foil as it cooks.

  2. METHOD #2: Do not stuff the trout before placing it on the bbq. Place generously oiled aluminum foil (one piece of foil for each trout) with the UNSTUFFED trout onto the grill grate, but NOT DIRECTLY over the hot coals. Cover the BBQ, and let the trout cook on indirect heat for 20 minutes. After 20 minutes, add the garlic, butter and lemon to each fish cavity. Add a top layer of foil, and wrap up each of the fish in foil, sealing foil packets tightly. Let the fish cook for 15 minutes (lid on the grill), then remove the foil packets from the grill.

    NOTE: Generously coating the foil with spray or oil is an important step, because you do not want the fish skin to stick to the foil as it cooks.

Nutrition Facts
Garlic Butter Grilled Trout
Amount Per Serving (0.5 trout (half of 1 trout))
Calories 307 Calories from Fat 153
% Daily Value*
Fat 17g26%
Saturated Fat 6g38%
Cholesterol 114mg38%
Sodium 139mg6%
Potassium 623mg18%
Carbohydrates 1g0%
Fiber 1g4%
Sugar 1g1%
Protein 36g72%
Vitamin A 272IU5%
Vitamin C 5mg6%
Calcium 76mg8%
Iron 3mg17%
* Percent Daily Values are based on a 2000 calorie diet.

Here’s one more to pin on your Pinterest boards!Have an avid fisherman in the family? Here's a simple recipe for garlic butter grilled trout, with two methods given for preparing this fish on a BBQ.

Traeger BBQ Baby Back Ribs

Make BBQ baby back ribs in “3-2-1” on a pellet grill. Ribs are smoked 3 hours, cooked in foil 2 hours, & grilled with sauce 1 hour! Easy & delicious.
Make BBQ baby back ribs in "3-2-1" on a pellet grill. Ribs are smoked 3 hours, cooked in foil 2 hours, & grilled with sauce 1 hour! Easy & delicious.

This recipe for BBQ baby back ribs is fairly easy, especially with it’s easy to remember 3-2-1 game plan! My husband and I enjoyed these delicious ribs last month which were smoked, then cooked on our Traeger grill, and decided to share this recipe (also from Traeger) here on the blog.

Summer evenings and hot temperatures seem to pair very nicely with bbq ribs that are sloppy with sauce, and tender to the bite! YUM… BBQ baby back ribs are a definite favorite summer food of ours! Here’s how to make 3-2-1 bbq baby back ribs on a Traeger or pellet grill:

Scroll Down For A Printable Recipe Card At The Bottom Of The Page

Prepare The Baby Back Ribs For Smoking

The first part of Traeger’s 3-2-1- cooking method is to smoke the ribs for 3 hours, after seasoning them. Make sure to remove the silverskin (thin membrane) from the bone side of the ribs (if your grocery store butcher has not already done so). Pat the ribs dry with paper towels.

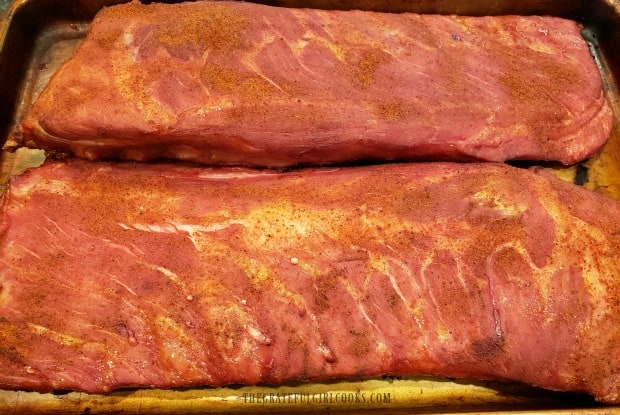
Two racks of baby back ribs ready for seasoning.

Mix mustard, ¼ cup apple juice, and worcestershire sauce together in a small bowl. Using a pastry brush, brush this sauce onto BOTH sides of each rib rack.

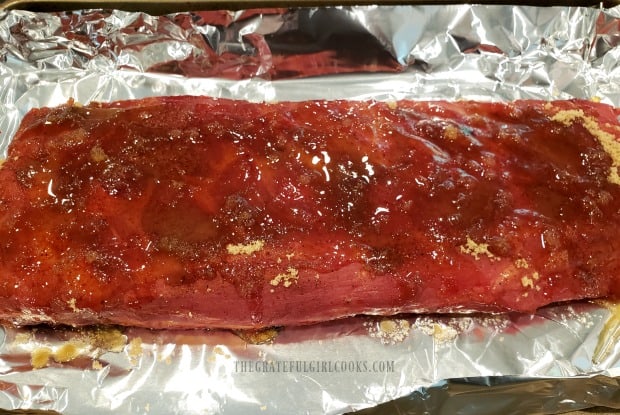
Lightly season (to taste) the racks of pork with your favorite pork and poultry rub spice mix. I used my homemade dry rub spice mix (for pork or chicken), and just sprinkled each rack with a decent covering of spice mix.

Simple sauce with mustard and apple juice, etc. is brushed onto both sides of the ribs.

The racks of ribs are lightly seasoned with pork/poultry spice mix.

Step #1- BBQ Baby Back Ribs In The Smoker

Prepare your pellet grill according to manufacturer instructions. For a Traeger, fill the pellet hopper, and turn the temperature gauge to SMOKE. Leave lid open. Once a fire has been established and grill is smoking (about 4-5 minutes), turn the temperature gauge to 180° F. Let the grill preheat for 15 minutes with the lid closed.

Place the racks of bbq baby back ribs directly onto the grill grate, with the meat side facing up. Smoke the ribs for 3 hours, with the lid closed. Once done, transfer ribs off the grill onto a rimmed baking sheet, and take them into kitchen. Turn temperature setting up to to 225° F.

Smoking the baby back ribs on a Traeger grill for 3 hours.Two racks of smoked ribs ready for the next step.

Prepare The Smoked Baby Back Ribs

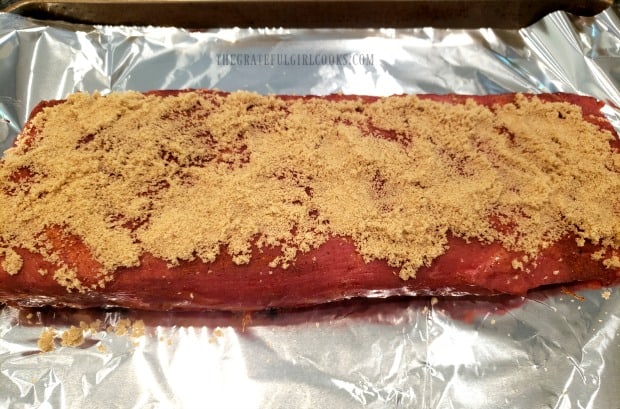
Now for the next step! Pull off 4 long sheets of heavy duty foil. Put a rack of smoked ribs on top in the middle. Pull up the sides to surround the meat, because you will be adding liquid in a moment. Evenly distribute HALF of the brown sugar on top of the ribs. Drizzle the brown sugar with HALF of the honey, and HALF of the remaining apple juice (¼ cup).

Put another long piece of aluminum foil on top of the ribs, and close up all the foil, crimping the edges, so the packet is securely sealed. You don’t want it to leak! Repeat the process with the other rack of ribs.

Each rib rack is sprinkled with brown sugar, and drizzled with honey and apple juice.BBQ Baby Back Ribs are covered in brown sugar and honey with apple juice in foil.

Step #2- Put Foil-Wrapped BBQ Baby Back Ribs Back On Grill

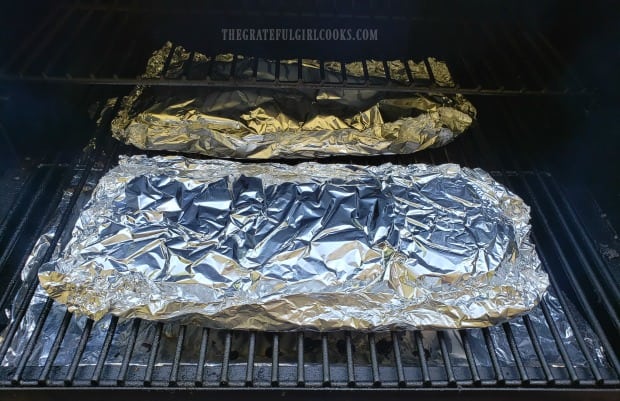
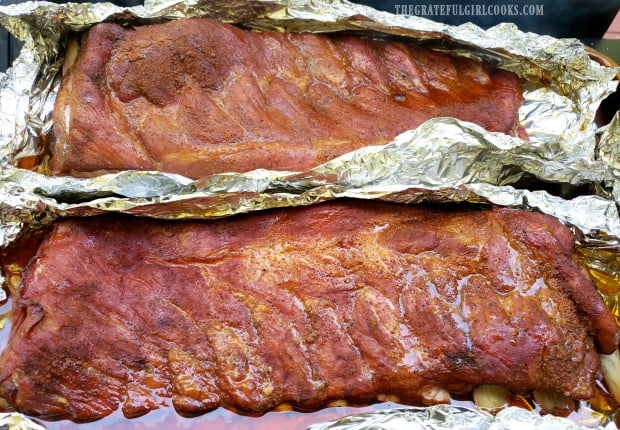
Place the foil-wrapped racks of ribs back directly onto the grill grate. Close the lid, and cook the ribs for 2 hours at 225° F. After 2 hours have passed, carefully remove the foil off of the ribs. I did this in our kitchen, because there is a lot of juice in the foil packets. Discard the foil. Keep the ribs (just sayin’).

Foil packets with the ribs are cooked on the grill for two hours.After two hours, the foil is removed from the racks of ribs.

Step #3- Grill The BBQ Baby Back Ribs

Okay, now we’re ready for the final step in the 3-2-1 method. Once you’ve discarded the foil, brush your favorite BBQ sauce on both sides of each rack of ribs.

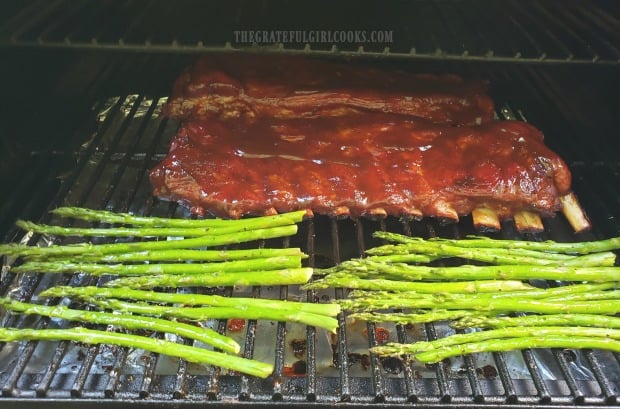
Place the ribs directly on the grill grate, and grill for 1 hour! They sure do look good right about now, right? Toward the end of the grilling time, we added asparagus (another recipe on the blog) to the grill, as well.

The ribs are coated with BBQ sauce, and grilled for one more hour until done!

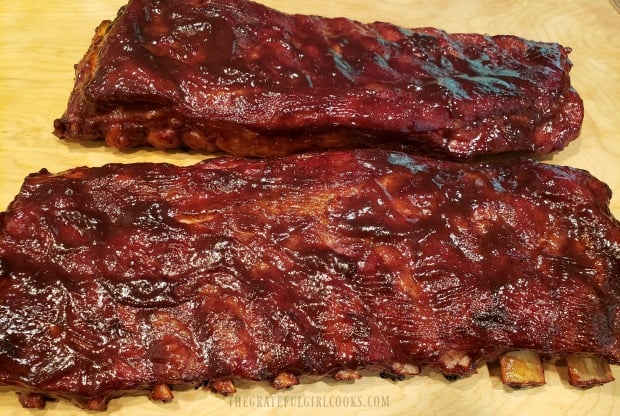
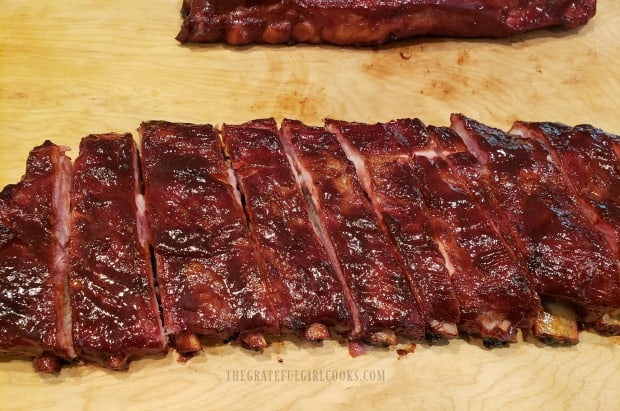
When done, transfer the bbq baby back ribs to a cutting board. Let them rest for about 5 minutes, then slice between the bones,  and serve!

BBQ Baby Back Ribs are finished cooking, and rest on cutting board for 5 minutes.The BBQ baby back ribs are sliced into individual portions, and are ready to EAT!

Sure hope you enjoy the ribs, cooked 3-2-1 Traeger style! We sure did. It’s an easy to remember method (smoke/braise/grill), and the bbq ribs were delicious! Have a nice day.

Looking for more TRAEGER Recipes?

You can find all of my recipes in the Recipe Index, located at the top of the page. I have several recipes for grilling meats (and desserts) on a Traeger, including:

Interested In More Recipes?

Thank you for visiting this website. I appreciate you using some of your valuable time to do soIf you’re interested, I publish a newsletter 2 times per month (1st and 15th) with all the latest recipes, and other fun info. I would be honored to have you join our growing list of subscribers, so you never miss a great recipe!
There is a Newsletter subscription box on the top right side (or bottom) of each blog post, depending on the device you use, where you can easily submit your e-mail address (only) to be included in my mailing list.

You Can Also Find Me On Social Media:
Facebook page: The Grateful Girl Cooks!
Pinterest: The Grateful Girl Cooks!
Instagram: jbatthegratefulgirlcooks

Author's signature

Original recipe source: https://www.traegergrills.com/recipes/pork/3-2-1-baby-back-ribs

↓↓ PRINTABLE RECIPE BELOW ↓↓

0 from 0 votes
Traeger BBQ Baby Back Ribs
Prep Time
15 mins
Cook Time
6 hrs
Total Time
6 hrs 15 mins
 

Make BBQ baby back ribs in "3-2-1" on a pellet grill. Ribs are smoked 3 hours, cooked in foil 2 hours, & grilled with sauce 1 hour! Easy & delicious.

Category: Dinner
Cuisine: American
Keyword: bbq baby back ribs
Servings: 6 people
Calories Per Serving: 653 kcal
Author: JB @ The Grateful Girl Cooks!
Ingredients
  • 2 racks baby back ribs
  • cup yellow mustard
  • ½ cup apple juice divided use
  • 1 Tablespoon worcestershire sauce
  • Pork and Poultry Spice Rub (or homemade, to taste)
  • ½ cup dark brown sugar
  • 1 cup BBQ sauce (your favorite)
  • cup honey (warmed)
Instructions
  1. Prepare your pellet grill according to manufacturer instructions. For a Traeger, fill the pellet hopper, and turn the temperature gauge to SMOKE. Leave lid open. Once a fire has been established and grill is smoking (about 4-5 minutes), turn the temperature gauge to 180° F. Let the grill preheat for 15 minutes with the lid closed.

  2. Step #1- BBQ Baby Back Ribs In The Smoker: Remove silverskin from ribs (if your grocery store butcher has not already done so). Pat ribs dry with paper towels. Mix mustard, ¼ cup apple juice, and worcestershire sauce together in a small bowl. Brush sauce onto BOTH sides of each rib rack. Lightly season (to taste) the ribs with your favorite pork and poultry rub spice mix. I used my homemade dry rub spice mix . Place racks of ribs directly onto the grill grate, with meat side facing up. Smoke ribs for 3 hours, with the lid closed. Once done, transfer ribs off of grill onto a rimmed baking sheet. Close lid. Turn temperature setting up to to 225° F.

  3. Step #2- For each rack: Pull off 4 long sheets of heavy duty foil. Stack them on top of each other. Put one rack of smoked ribs on top in the middle. Pull up the sides to surround the meat, because you will be adding liquid. Evenly distribute HALF of the brown sugar on top of the ribs. Drizzle with HALF of the honey, and remaining ¼ cup of apple juice. Put another long piece of aluminum foil on top of the ribs, and tightly close up foil, crimping the edges, so the packet is securely sealed. You don't want it to leak! Repeat the process with the other rack of ribs. Place foil-wrapped ribs back directly onto grill grate. Close lid, and cook ribs for 2 hours at 225° F. After 2 hours, carefully remove foil off of the ribs. Do this in your kitchen, because there is a lot of juice in the foil. Discard foil.

  4. Step #3- Brush your favorite BBQ sauce onto both sides of each rack of ribs. Place the ribs directly on the grill grate, and cook for 1 hour! When done, remove ribs from grill; let meat rest for 5 minutes, then slice, and enjoy!

Recipe Notes

Caloric calculation was based on 1/2 rack per serving (total of 4 servings). If you serve 6 with this recipe, the caloric calculation per serving comes out to approximately 653 calories per serving. These are best estimates, because the weight of each rack of ribs will vary, as well as the type of BBQ sauce used.

Nutrition Facts
Traeger BBQ Baby Back Ribs
Amount Per Serving (1 (1/3 rack))
Calories 653 Calories from Fat 288
% Daily Value*
Fat 32g49%
Saturated Fat 11g69%
Cholesterol 130mg43%
Sodium 845mg37%
Potassium 674mg19%
Carbohydrates 57g19%
Fiber 1g4%
Sugar 51g57%
Protein 37g74%
Vitamin A 158IU3%
Vitamin C 1mg1%
Calcium 101mg10%
Iron 2mg11%
* Percent Daily Values are based on a 2000 calorie diet.

Here’s one more to pin on your Pinterest boards!Make BBQ baby back ribs in "3-2-1" on a pellet grill. Ribs are smoked 3 hours, cooked in foil 2 hours, & grilled with sauce 1 hour! Easy & delicious.

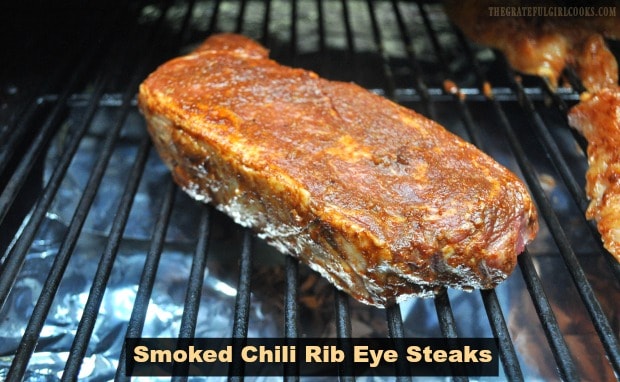
Smoked Chili Rib Eye Steaks

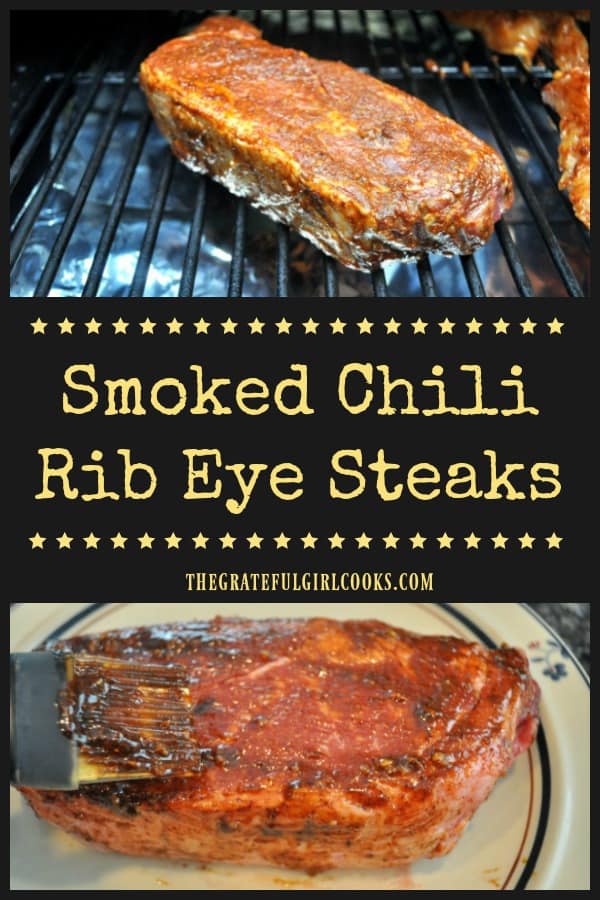
Use a Traeger, pellet smoker or BBQ to make delicious Smoked Chili Rib Eye Steaks. An easy, flavorful spice rub coats the smoked, then grilled steaks.

We really enjoyed these delicious smoked chili rib eye steaks recently! Thick juicy steaks are coated in a spice mixture, and the meat is refrigerated for several hours to let the flavors permeate fully!

Once the steaks are ready, they are first “smoked” on a pellet grill (we used our Traeger), and then cooked over high heat until perfectly done!

Scroll Down For A Printable Recipe Card At The Bottom Of The Page

Can I Still Make These Steaks If I Don’t Have a Smoker Grill?

The simple answer is YES! They will not have the depth of smoky flavor that “smoking” the meat with wood pellets will have, but they’re gonna still taste great! The’re going to taste wonderful because of the chili garlic seasoning mixture that coats the meat!

Make The Spice “Rub” For The Steaks

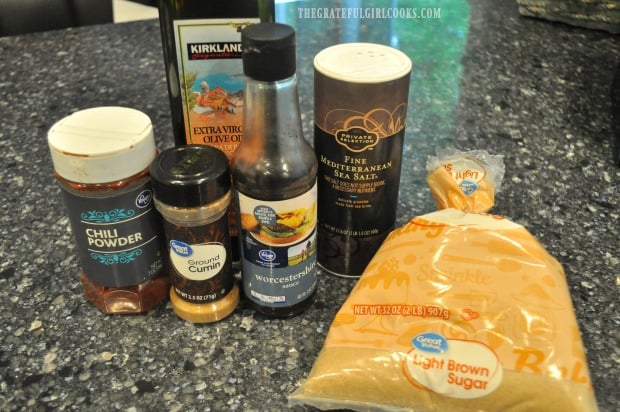
This spice “rub” or “paste” is very simple to make, and packs a lot of flavor onto the steaks. The ingredients are chili powder, cumin, brown sugar, salt, olive oil, worcestershire sauce, and garlic.

These ingredients plus garlic make the spice rub for the rib eyes.

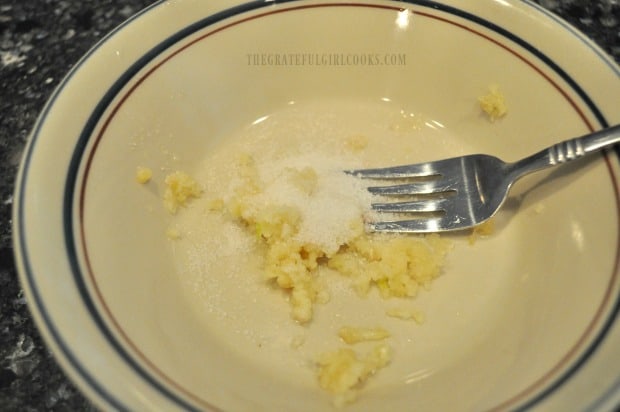
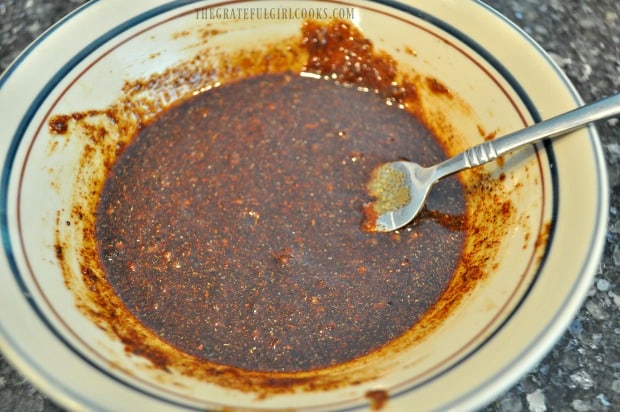
Mash the minced garlic into the salt in a bowl, until they form a paste like mixture. It’s easy to do, using a fork! Stir in the remaining ingredients until they are fully incorporated. The finished mix will be the consistency of a thin chili sauce.

Minced garlic and salt are mashed together to form a paste.Ingredients are mixed together to form a chili-based sauce rub for the steaks.

Prepare The Steaks And Refrigerate

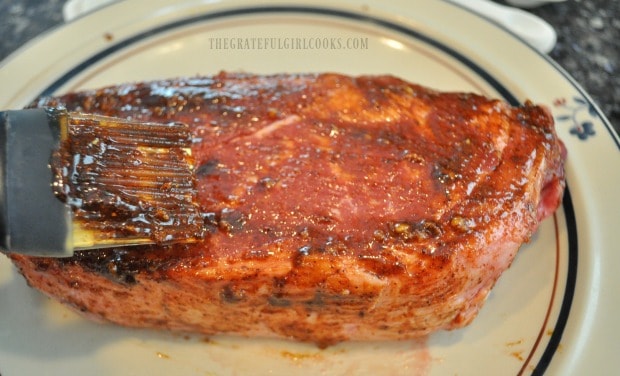
Brush the chili spice paste mixture over all sides of the steaks. I found using a pastry brush very easy, but you can certainly use your (clean) hands, if desired.

A pastry brush applies the chili rub to the rib eye steaks.

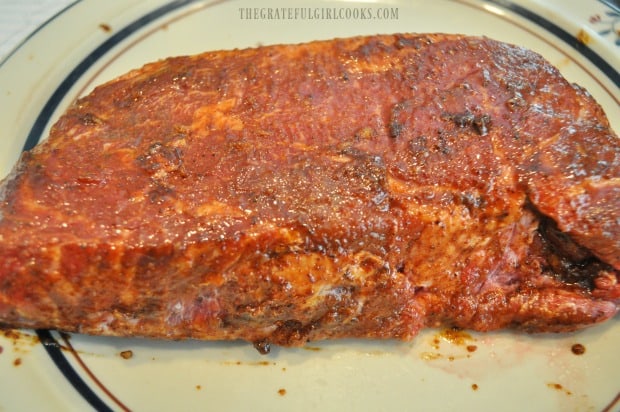
Once all four rib eyes are fully coated with the chili spice mixture, cover, and let them “chill” in the refrigerator for 4 hours. This lets the flavors really permeate the meat. NOTE: The seasoned steaks can be kept in the refrigerator for up to 2 days before cooking.

After the spice rub is applied, the steaks are refrigerated for 4 hours.

Using A Propane or Briquette BBQ Grill?

If using a propane or briquette BBQ, when you are ready to grill the steaks, prepare the grill, according to manufacturer instructions. When grilling the steaks (without smoking them), put the seasoned, marinated steaks on, and grill them to your preferred done-ness.

Time To Put the Smoked Chili Rib Eye Steaks On The Smoker!

If using a Traeger grill or other pellet smoker, turn the heat setting to SMOKE, and let the fire get established with the lid open. This usually takes 4-5 minutes. Once the fire is established and the grill is smoking, turn the temperature setting to 225° F, and close the lid. Let the grill preheat for 10-15 minutes, until temperature has been reached.

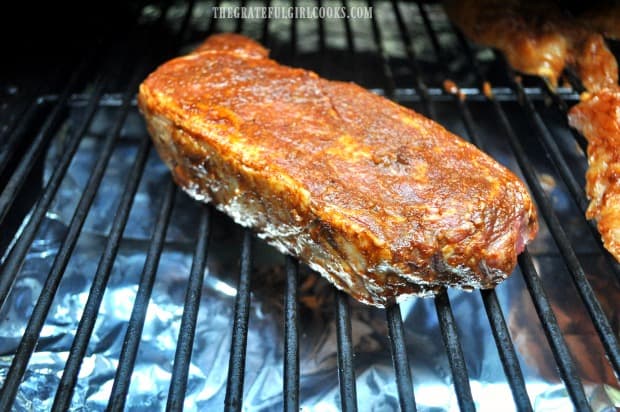
Place the steaks on the grill, and smoke them, (with lid closed) at 225° for 45 minutes, or until a probe inserted into the steak reaches an internal temperature of 120°.

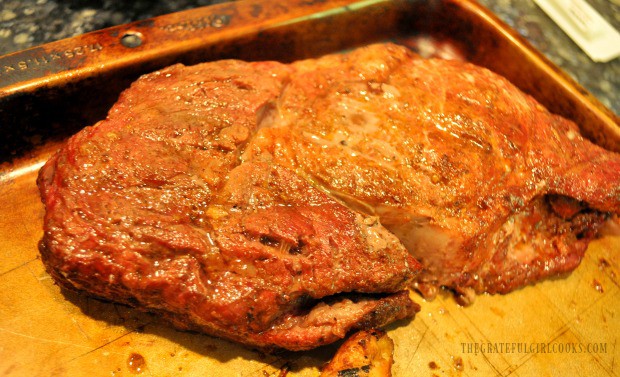
Smoked Chili Rib Eye Steaks are smoked for 45 minutes on grill.

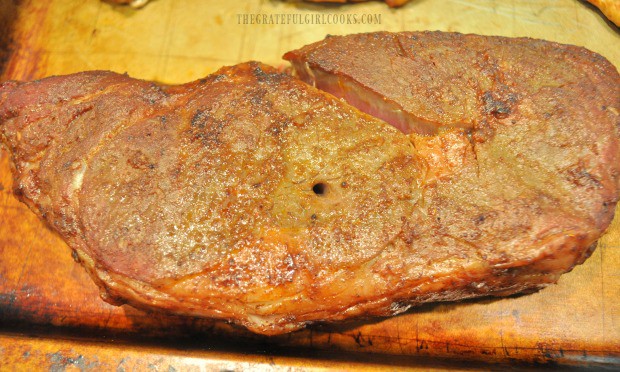
When the meat reaches an internal temperature of 120°, remove the steaks from grill. Cover them with foil and keep them warm. See where the temperature probe was in the steak, below?

The smoked chili rib eye steaks are removed to rest while grill is turned up to high grilling temp.

Time To GRILL The Smoked Chili Rib Eye Steaks!

Turn the temperature setting up to High (450° F), and preheat grill with the lid closed until it reaches temperature in about 10 minutes.

Return the smoked chili rib eye steaks back onto the grill. Insert a temperature probe back into one of the steaks. Cook until desired done-ness has been reached, turning them once. Cooking times will vary, depending on the type of grill you are using, hot spots, etc.  Remember that the temperature will continue to rise a bit after taking the steaks off the grill.

How Long Should I Grill The Steaks?

Grill 4-5 minutes on the first side, then flip and finish grilling the other side until temperature is reached. Here are the “recommended” benchmarks:

  • Rare Steaks: Take off grill at 130-135°. Final temp.= anywhere between 130° -140°.
  • Medium-rare steaks:  Take off grill between 135-140° F. Final temp. = 145°.
  • Medium steaks: Take off grill at 155°. Final temp. = 160° F.
  • Well done: Take off grill at 165°. Final temp. = 170°.

Let the smoked chili rib eye steaks rest for about 4-5 minutes after removing them from the grill to let juices redistribute inside the meat. Serve, and enjoy!

Smoked chili rib eye steaks are grilled on high temps after resting, to finish!

The smoked chili rib eye steaks turned out wonderfully, and flavor permeated the meat! These steaks are not too spicy! When my husband cut into his medium-rare steak, he said it was cooked perfectly! Hooray! Hope you will give this delicious recipe a try!

If you’re looking for another steak recipe that is NOT cooked on a pellet grill, check out my quick and simple recipe for Easy Garlic Butter Steak Bites! They’re delicious, too! Have a great day.

Looking For More TRAEGER GRILL Recipes?

You can find all of my recipes in the Recipe Index, located at the top of the page. I have several Traeger grill recipes, including:

Interested In More Recipes?

Thank you for visiting this website. I appreciate you using some of your valuable time to do soIf you’re interested, I publish a newsletter 2 times per month (1st and 15th) with all the latest recipes, and other fun info. I would be honored to have you join our growing list of subscribers, so you never miss a great recipe!
There is a Newsletter subscription box on the top right side (or bottom) of each blog post, depending on the device you use, where you can easily submit your e-mail address (only) to be included in my mailing list.

You Can Also Find Me On Social Media:
Facebook page: The Grateful Girl Cooks!
Pinterest: The Grateful Girl Cooks!
Instagram: jbatthegratefulgirlcooks

Author's signature

Original recipe source: https://www.traegergrills.com/recipes/beef/chili-rib-eye-steaks

0 from 0 votes
Smoked Chili Rib Eye Steaks
Prep Time
5 mins
Cook Time
55 mins
Marinating Time (inactive)
4 hrs
Total Time
5 hrs
 

Use a Traeger, pellet smoker or BBQ to make delicious Smoked Chili Rib Eye Steaks. An easy, flavorful spice rub coats the smoked, then grilled steaks.

Category: Entree
Cuisine: American
Keyword: smoked chili rib eye steaks
Servings: 4
Calories Per Serving: 677 kcal
Author: JB @ The Grateful Girl Cooks!
Ingredients
  • 4 rib eye steaks (10-12 ounces each)
  • 2 cloves garlic (large cloves) , minced
  • 1 teaspoon salt
  • 2 Tablespoons chili powder
  • 1 teaspoon ground cumin
  • 1 teaspoon packed brown sugar
  • 2 Tablespoons olive oil
  • 2 Tablespoons worcestershire sauce
Instructions
Make Spice Mixture:
  1. Place minced garlic and salt in a small bowl. Mash minced garlic into salt with a fork, until it forms a paste like mixture. Add the chili powder, cumin, brown sugar, olive oil, and worcestershire sauce. Stir well, to combine. Use a pastry brush (or clean hands) to fully cover all sides of the steaks with the spice mixture. Cover the steaks, and let them "chill" in the refrigerator for 4 hours. This lets the flavors permeate the meat. NOTE: If making ahead of time, the seasoned steaks can be kept in the refrigerator for up to 2 days before cooking.

Using A Propane Or Briquette BBQ:
  1. Remove seasoned steaks from refrigerator about 15 minutes before grilling. When ready to cook the steaks, prepare your grill, according to manufacturer instructions. Put the seasoned, steaks on, and cook them to your preferred done-ness.

Using A Traeger Grill Or Other Pellet Smoker To Smoke, Then Grill:
  1. Remove steaks from refrigerator while preheating grill. Turn the heat setting to SMOKE, and let the fire get established with the lid open. This usually takes 4-5 minutes. Once fire is established and the grill is smoking, turn temperature setting to 225° F, close the lid, and let the grill preheat for 10-15 minutes, until temperature has been reached. Place steaks on the grill, and smoke them, (with lid closed) at 225° for 45 minutes, or until a probe inserted into the steak reaches an internal temperature of 120°. Remove the steaks from grill. Cover with foil and keep them warm.

  2. Turn temperature setting up to HIGH (450° F), and preheat grill (lid closed) until it reaches temperature ( about 10 minutes). Return steaks to the grill. Insert temperature probe into a steak. Grill 4-5 minutes (lid open) on the first side, then flip and finish grilling the other side until temperature is reached, turning ONCE. Let the steaks rest 4-5 minutes after removing them from the grill to let juices redistribute inside the meat. Remember the temperature will continue to rise a bit after taking the meat off the grill. These are the commonly "recommended" temperatures for grilled steaks:

    Rare: Take off grill at 130-135°. Final temp.= anywhere between 130° -140°.

    Medium-rare:  Take off grill anywhere between 135-140° F. Final temp. = 145°.

    Medium: Take off grill at 155°. Final temp. = 160° F.

    Well done: Take off grill at 165°. Final temp. = 170°.

Nutrition Facts
Smoked Chili Rib Eye Steaks
Amount Per Serving (1 steak)
Calories 677 Calories from Fat 432
% Daily Value*
Fat 48g74%
Saturated Fat 19g119%
Cholesterol 173mg58%
Sodium 879mg38%
Potassium 915mg26%
Carbohydrates 5g2%
Fiber 1g4%
Sugar 2g2%
Protein 58g116%
Vitamin A 1230IU25%
Vitamin C 1.6mg2%
Calcium 50mg5%
Iron 6.4mg36%
* Percent Daily Values are based on a 2000 calorie diet.

Here’s one more to pin on your Pinterest boards!Use a Traeger, pellet smoker or BBQ to make delicious Smoked Chili Rib Eye Steaks. An easy, flavorful spice rub coats the smoked, then grilled steaks.

Garlic Ginger Sesame Marinated Chicken

Garlic Ginger Sesame Marinated Chicken is delicious and easy to make! Chicken breasts are marinated in sauce, and cooked on a BBQ or indoor grill pan!

We eat a lot of chicken in our home. It is such a versatile type of food, because it can be fixed in so many different ways, with so many different flavor combos!  Recently I made this delicious, but incredibly SIMPLE recipe for Garlic Ginger Sesame Marinated Chicken, and wanted to share it here.

This marinade I found in a cookbook was created for flank steak, but I thought it would taste great on chicken, as well, so I tried it! YUM! The recipe is super easy to make, and the end result is deliciously flavored chicken breasts! Boneless, skinless chicken breasts are marinated for at least an hour in an easy to make marinade.

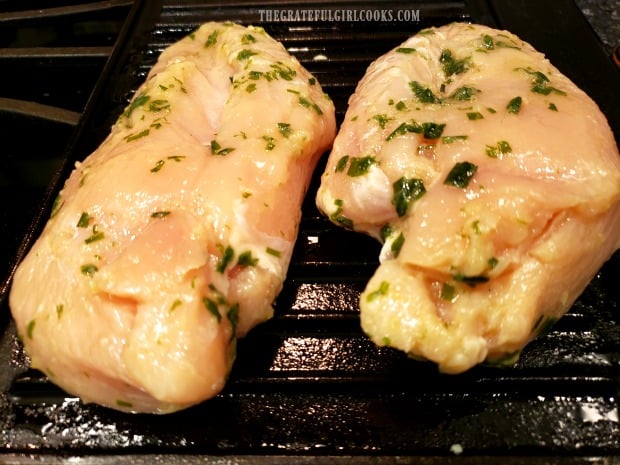
After the chicken has marinated, all you do is cook the chicken on a bbq grill or on a griddle pan in the kitchen. EASY PEASY, right? For the photos below, I cooked the marinated chicken on a cast iron grill that was placed directly over a flame on my stove.

Scroll Down For A Printable Recipe Card At The Bottom Of The Page

Make The Marinade For The Chicken

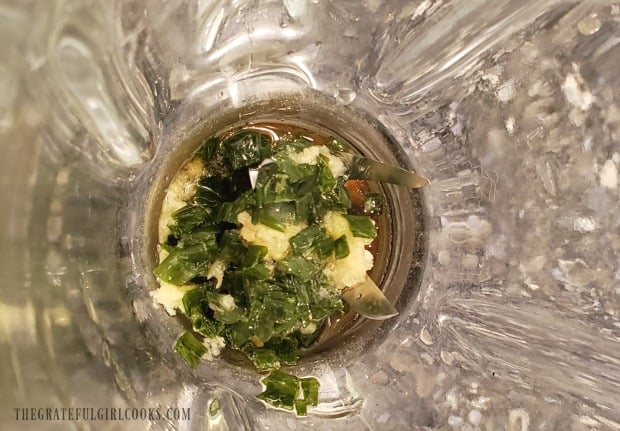
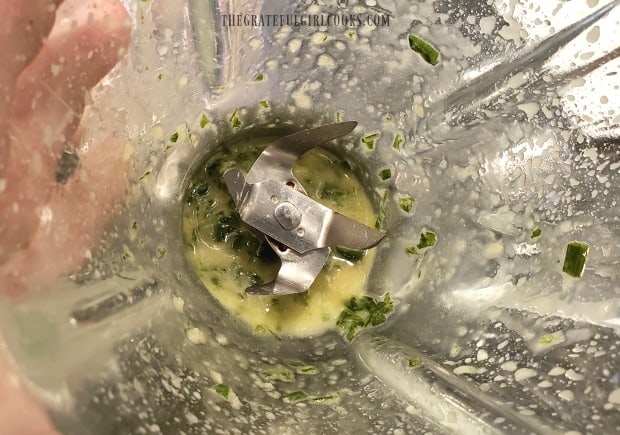
Making the marinade is very simple to do. Place grated fresh ginger, toasted sesame oil, vegetable oil, minced green onion (scallions), and minced garlic cloves into a blender. Blend these ingredients for about 30 seconds, or until the mixture is fully blended and fairly smooth.

The ingredients for the marinade are placed in a blender.Marinade ingredients for chicken are blended until well combined.

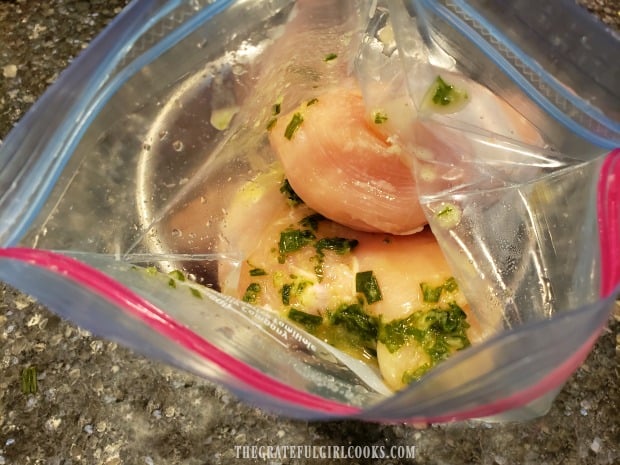
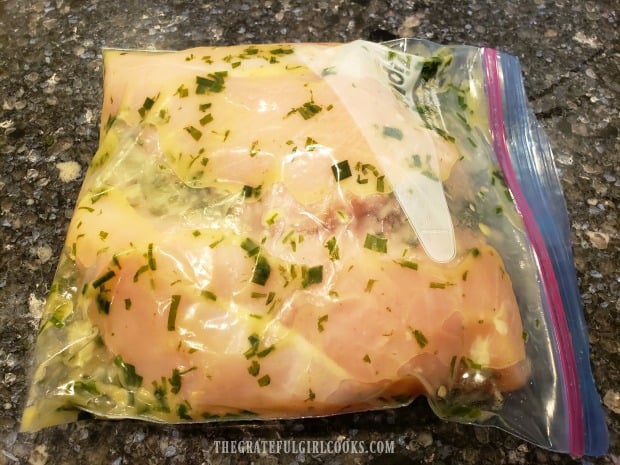
Pour (scraping the blender clean) the marinade into a large re-sealable bag or a shallow container.  Add the boneless, skinless chicken breasts to the marinade, and turn to coat them completely with marinade. Seal or cover chicken, and place in refrigerator to marinate for AT LEAST 1 hour. I made mine up in the morning, so it marinated all day!

NOTE: The recipe, as written below in the printable recipe card, makes enough for 4 chicken breasts. As you can see from my photos, I only cooked 2 pieces of chicken, so I cut the marinade amount in half.

Chicken pieces are place in zip loc bag, along with the marinade.The chicken pieces are coated with the marinade, then refrigerated.

Cooking The Marinated Chicken

After marinated chicken has been in the refrigerator for at least an hour (or when you’re ready to cook it), spray a grill (off heat) with non-stick baking spray or brush with vegetable oil generously. Heat grill on medium-high temperature until it’s really hot, but not smoking.

Once the grill is really hot, carefully transfer the marinated chicken to the grill. You should hear it sizzle when it hits the grill. Once you place the chicken on the grill, do not disturb or move it. After about 8-10 minutes, carefully flip the chicken over to the other side.

How Long Do I Cook The Garlic Ginger Sesame Marinated Chicken?

For THICK chicken breasts: After 8-10 minutes, the bottom of the chicken breast should be nice and golden brown. After you flip the chicken over, set a timer for 8 minutes and check for internal temperature. I used thick breasts and they took 18 minutes total to fully cook.

For THIN chicken breasts: Thin cutlet type chicken breasts will obviously cook a LOT faster than thicker ones (they may only take 3-4 minutes per side).

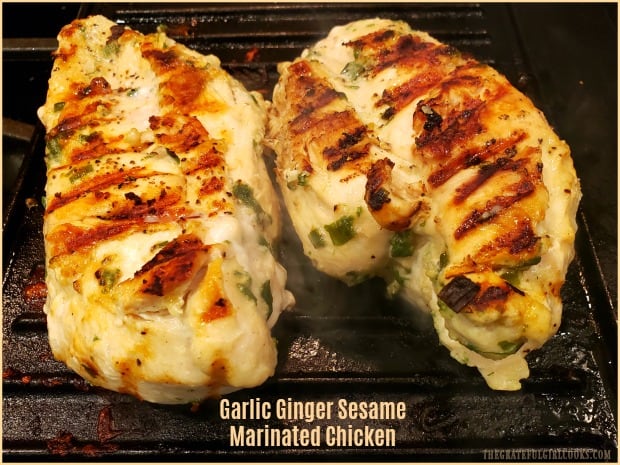
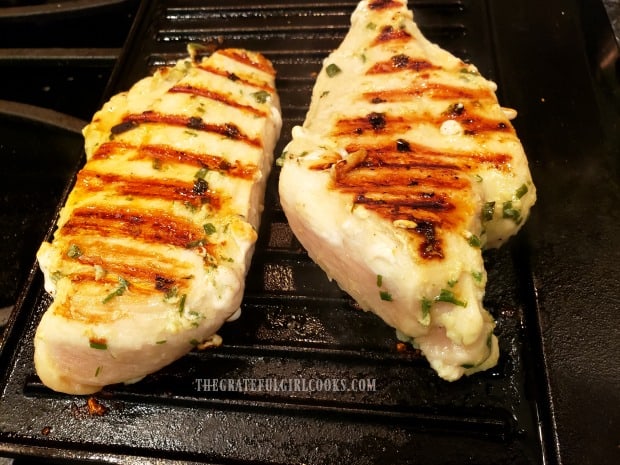
Marinated chicken is grilled on a hot, well-oiled grill pan.The garlic ginger sesame marinated chicken is turned over halfway through grilling time.

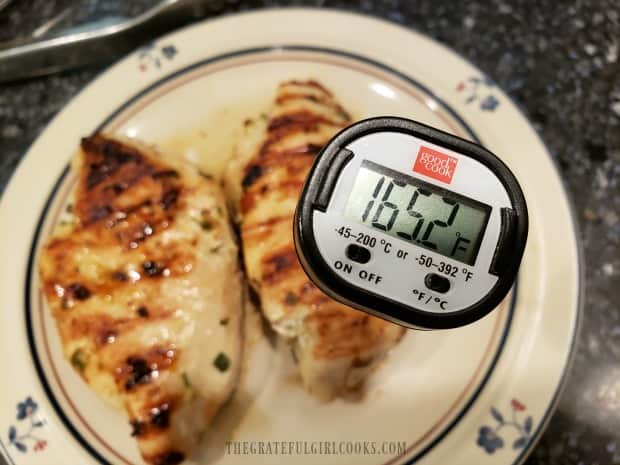
TIP:**Cooking times will vary due to different thicknesses of chicken breasts. Check the internal temperature by inserting a meat thermometer into the thickest part of the breast. Chicken is done when the internal temp. is at 165° F.

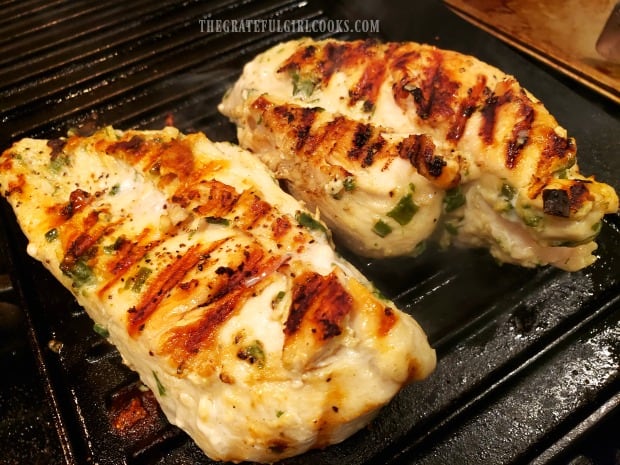
Two pieces of garlic ginger sesame marinated chicken cooking on indoor grill pan.The meat thermometer says the chicken is fully cooked at 165 degrees F.

Time To Enjoy This Delicious Chicken

Once the marinated chicken has fully cooked, Iet it “rest” for a couple minutes, to let the juices redistribute within the meat. this helps to keep the chicken “juicy”.

We enjoyed this chicken with steamed broccoli, red peppers, and cauliflower, and some rice on the side. The meal was simple, satisfying, and we loved the subtle marinade flavor on the chicken! It tasted delicious!

Flavorful garlic ginger sesame marinated chicken on plate with rice and steamed veggies.

I really hope you will consider trying this recipe for garlic ginger sesame marinated chicken. It’s an easy chicken dish to make, especially if you marinade the chicken early in the day! Hope you enjoy a truly wonderful day.

Looking For More CHICKEN Recipes?

If you’re looking for more chicken recipes, be sure to check them all out in the Recipe Index, located at the top of the page (there’s a LOT of them!). A few family favorites include:

Interested In More Recipes?

Thank you for visiting this website. I appreciate you using some of your valuable time to do soIf you’re interested, I publish a newsletter 2 times per month (1st and 15th) with all the latest recipes, and other fun info. I would be honored to have you join our growing list of subscribers, so you never miss a great recipe!
There is a Newsletter subscription box on the top right side (or bottom) of each blog post, depending on the device you use, where you can easily submit your e-mail address (only) to be included in my mailing list.

You Can Also Find Me On Social Media:
Facebook page: The Grateful Girl Cooks!
Pinterest: The Grateful Girl Cooks!
Instagram: jbatthegratefulgirlcooks

Author's signature

Original source for marinade recipe: Page 501 in “The Complete America’s Test Kitchen TV Show Cookbook 2001-2019”, copyright 2018, published by America’s Test Kitchen.

0 from 0 votes
Garlic Ginger Sesame Marinated Chicken
Prep Time
5 mins
Cook Time
16 mins
Marinating Time (minimum)
1 hr
Total Time
1 hr 21 mins
 

Garlic Ginger Sesame Marinated Chicken is delicious and easy to make! Chicken breasts are marinated in sauce, and cooked on a BBQ or indoor grill pan!

Category: Entree
Cuisine: Asian
Keyword: marinated chicken
Servings: 4
Calories Per Serving: 230 kcal
Author: JB @ The Grateful Girl Cooks!
Ingredients
  • 4 medium boneless, skinless chicken breasts
  • 1/4 cup toasted sesame oil
  • 2 Tablespoons vegetable oil
  • 3 Tablespoons fresh ginger , finely grated
  • 2 stems green onion , minced
  • 3 Tablespoons garlic cloves , minced
Instructions
  1. Place grated fresh ginger, toasted sesame oil, vegetable oil, minced green onion (scallions), and minced garlic cloves into a blender. Blend these ingredients for about 30 seconds, or until mixture is fully blended and fairly smooth.

  2. Pour (scraping blender clean) the marinade into a large re-sealable bag or shallow container.  Add the chicken breasts to the marinade, and turn to coat them completely with marinade. Seal bag or cover container, and place in refrigerator to marinate for AT LEAST 1 hour.

  3. After chicken has marinated for at least an hour, spray a grill (off heat) with non-stick baking spray or generously brush with oil. Heat grill on medium-high temperature until really hot, but not smoking. Transfer chicken to the grill. It should sizzle when it hits grill. Once chicken is on grill, do not disturb or move it. After about 8-10 minutes, flip chicken over to the other side. TIP:**Cooking times will vary due to different thicknesses of chicken breasts. Check the internal temperature by inserting a meat thermometer into thickest part of the breast. Chicken is done when internal temp. is 165° F. Remove chicken from grill and let it "rest" for a couple minutes, to let juices redistribute within the meat before serving.

    For THICK chicken breasts: After 8-10 minutes, the bottom of the chicken breast should be nice and golden brown. After you flip the chicken over, set a timer for 8 minutes and check for internal temperature. I used thick breasts and they took 18 minutes total to fully cook.

    For THIN chicken breasts: Thin cutlet type chicken breasts will obviously cook a LOT faster than thicker ones (they may only take 3-4 minutes per side).

  4. Serve... and enjoy!

Nutrition Facts
Garlic Ginger Sesame Marinated Chicken
Amount Per Serving (1 piece)
Calories 230 Calories from Fat 117
% Daily Value*
Fat 13g20%
Saturated Fat 4g25%
Cholesterol 72mg24%
Sodium 133mg6%
Potassium 464mg13%
Carbohydrates 3g1%
Fiber 1g4%
Sugar 1g1%
Protein 24g48%
Vitamin A 35IU1%
Vitamin C 3.5mg4%
Calcium 16mg2%
Iron 0.5mg3%
* Percent Daily Values are based on a 2000 calorie diet.

Here’s one more to pin on your Pinterest boards!Garlic Ginger Sesame Marinated Chicken is delicious and easy to make! Chicken breasts are marinated in sauce, and cooked on a BBQ or indoor grill pan!


Rosemary Wine Pork Chops

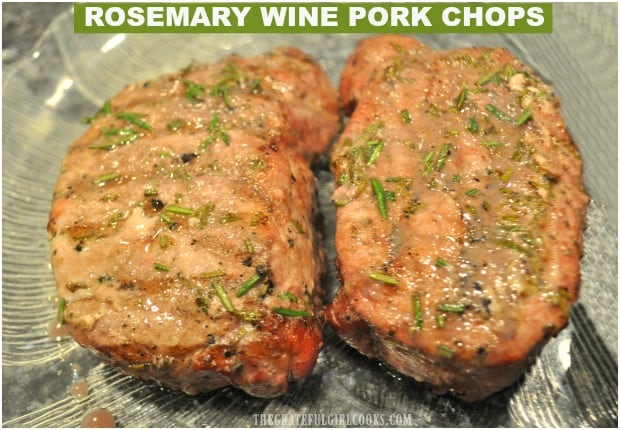
Rosemary Wine Pork Chops are marinated, boneless thick-cut chops that are grilled on a BBQ or a smoker. They’re tender, juicy & full of flavor!
Rosemary Wine Pork Chops are marinated, boneless thick-cut chops that are grilled on a BBQ or a smoker. They're tender, juicy & full of flavor!

Do you enjoy grilled pork chops? We sure do, and this recipe for rosemary wine pork chops is a real winner! Boneless pork chops marinate in a easy, simple sauce, and then are grilled on a traditional BBQ or a pellet smoker (we grilled them on our Traeger grill).

The recipe is so simple, but yields very tender and flavor-filled pork chops! For us, grilling is especially wonderful as the days get warmer and warmer. I don’t know about you, but we grill outside a LOT in late Spring and summer, to avoid getting our kitchen heated up. Here’s how to make this yummy dish!

Scroll Down For A Printable Recipe Card At The Bottom Of The Page

Make The Marinade For The Rosemary Wine Pork Chops

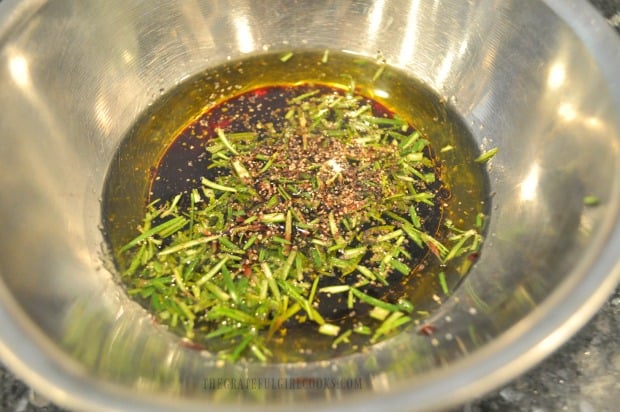
The marinade for the pork chops is super simple to make!  In a small bowl, combine olive oil, red wine, chopped rosemary, salt and Montreal seasoning. Mix well with a whisk or fork, until all ingredients are fully combined.

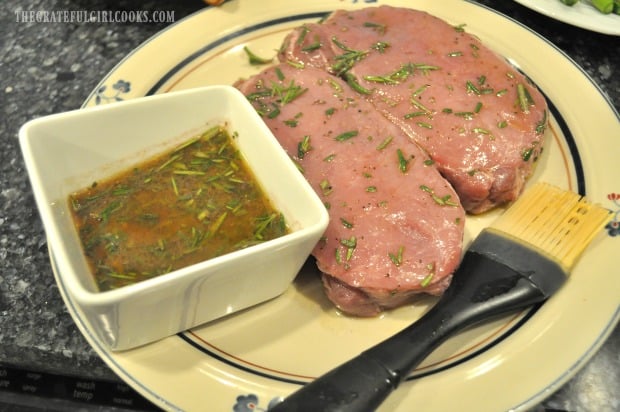
NOTE: Measure out a few Tablespoons of the marinade into a separate container and reserve for later. You will use this reserved marinade to brush on the pork chops while they are cooking!

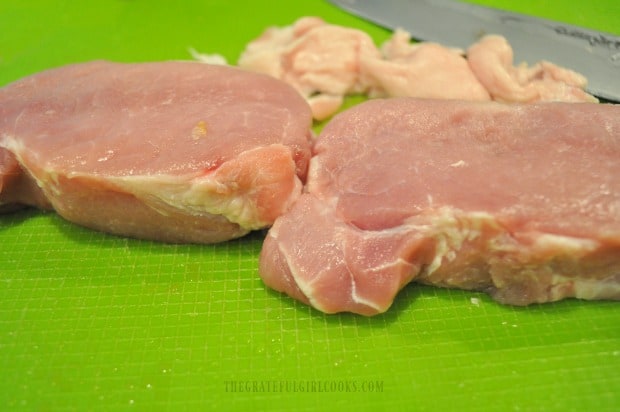
Trim as much fat off the pork chops as you can, and discard (discard the FAT, not the pork chops, ha ha!). Place the pork chops in a zip loc bag.

Marinate The Pork Chops

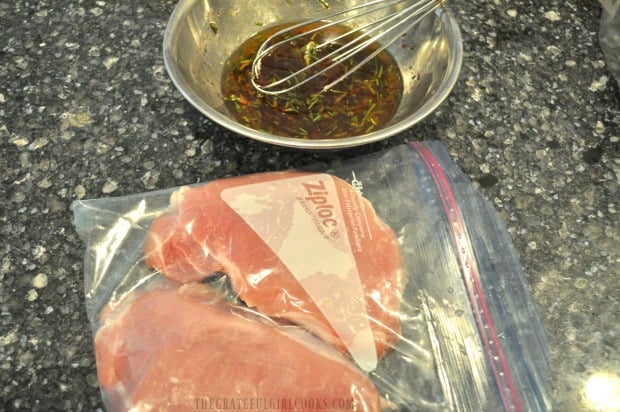
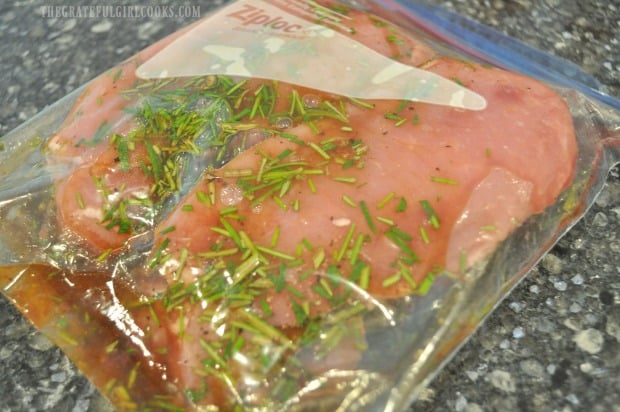
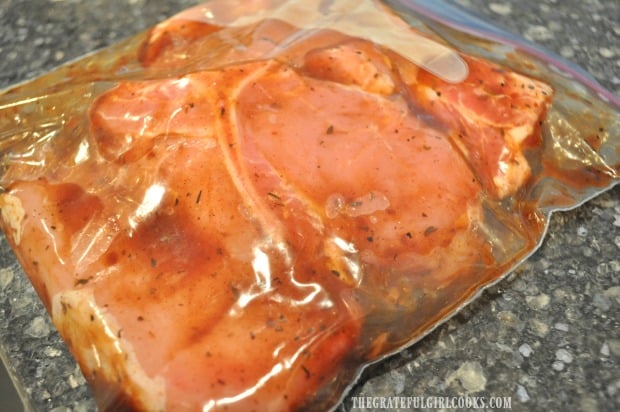
Pour the marinade for the rosemary wine pork chops into the plastic bag. Seal the bag, and then “smoosh” the bag around with your fingers to coat the pork chops on all sides with the marinade. Once the pork chops are fully coated in the marinade, place the bag into the refrigerator and let the meat marinate for 2 hours (minimum).

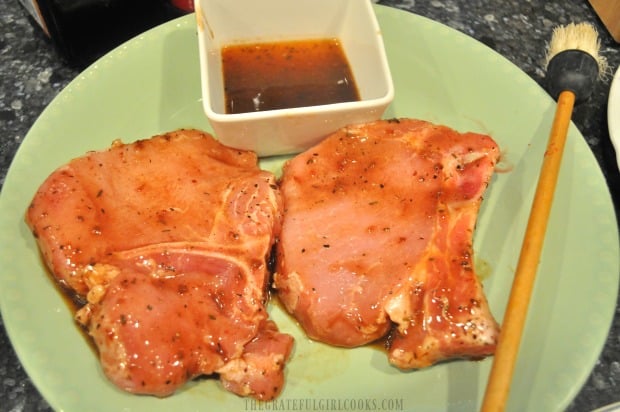
After the rosemary wine pork chops have finished marinating, remove the chops from the marinade. Discard the marinade in the bag (do not use it after being exposed to the raw pork). Grab the reserved marinade you set aside earlier. Now you are ready to put these tenderized, marinated pork chops on the bbq grill to cook!

Grilling The Rosemary Wine Pork Chops

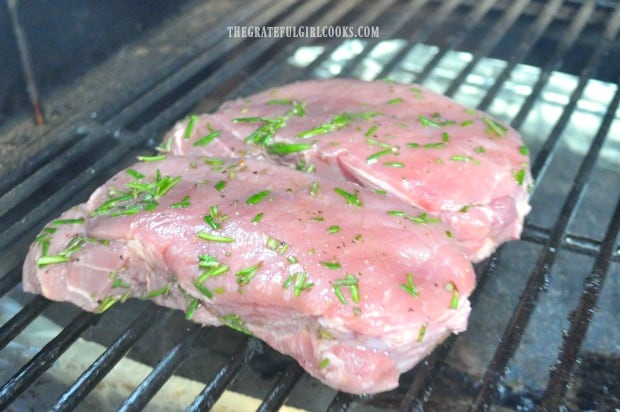
Place the pork chops directly onto the grill grate. There is no need to “oil” the grill, because the pork marinade has olive oil in it, which will help to prevent the meat from sticking!

Using a Standard BBQ Grill (propane or briquettes)?

Prepare grill as you normally would. Once briquettes are ready, or grill has pre-heated, place the rosemary wine pork chops directly over heat on the grill grate. Grill, turning once (and occasionally basting with marinade), until pork reaches an internal temperature of 145-160°F. This will take approximately 25-20 minutes.

Using a Traeger or Other Smoker/Pellet Grill?

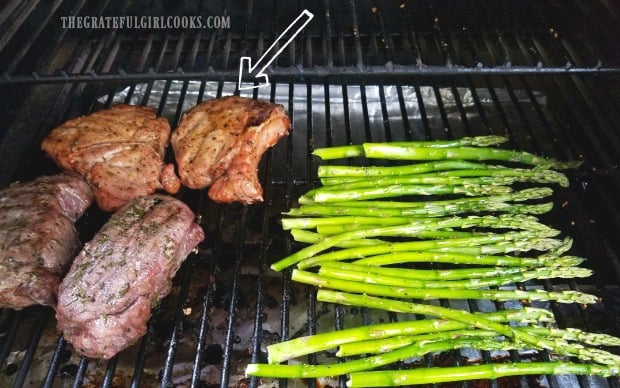
If using a Traeger grill (we were), follow the normal “start-up” process: let Traeger smoke then ignite (about 5 minutes). When the fire has ignited, set the temperature gauge to 450° F., and let the grill preheat for 10-15 minutes. Once preheated, cook the rosemary wine pork chops for 30 minutes, or until the pork reaches an internal temperature of 145-160° F. Baste the pork chops occasionally with the marinade while they cook.

A Real “Traegerpalooza”!

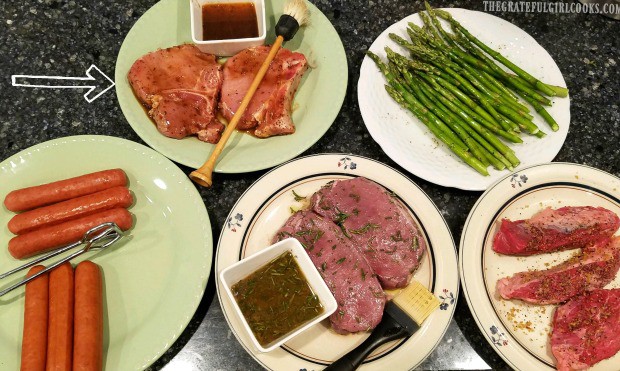
The evening we grilled these delicious pork chops, we cooked quite a few other dishes on our Traeger grill, including roasted turkey breast, hot dogs, and brat sausages (not pictured). I didn’t have to cook dinner for almost a week after this BBQ extravaganza, because we had so much great food to enjoy!

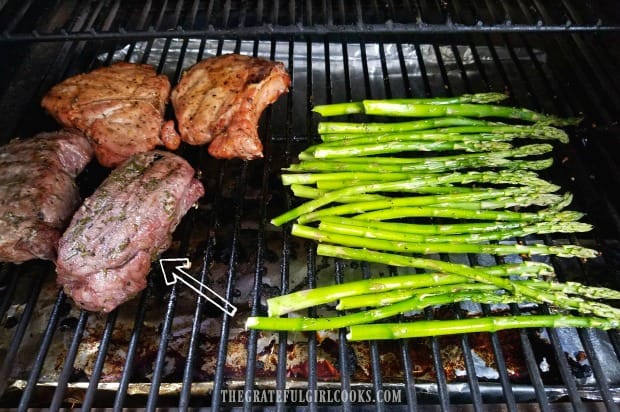
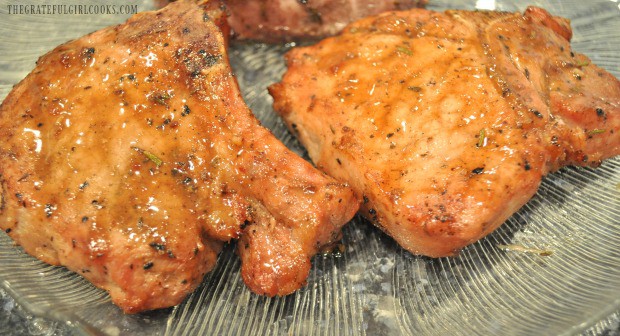
We also cooked Caribbean Jerk Pork Chops and Grilled Asparagus (with lemon and Parmesan), which are shown in the photo below by the rosemary wine pork chops (see arrow).

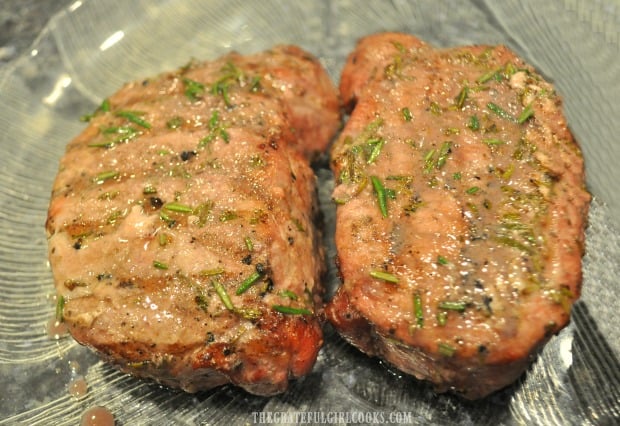
When they are done, remove the pork chops from the grill, and let them rest for 5 minutes to let the juices inside redistribute throughout the meat. Once you’ve done that, these delicious rosemary wine pork chops are ready to eat!

I really hope you enjoy this recipe for grilled rosemary wine pork chops! The pork is very tender, and the chops are wonderfully flavored! Have a fantastic day!

Looking For Other PORK CHOP Recipes?

You can find all of my pork recipes in the Recipe Index, located at the top of the page. A few favorite pork chop recipes you might want to check out include:

Interested In More Recipes?

Thank you for visiting this website. I appreciate you using some of your valuable time to do soIf you’re interested, I publish a newsletter 2 times per month (1st and 15th) with all the latest recipes, and other fun info. I would be honored to have you join our growing list of subscribers, so you never miss a great recipe!

There is a Newsletter subscription box on the top right side (or bottom) of each blog post, depending on the device you use, where you can easily submit your e-mail address (only) to be included in my mailing list.

You Can Also Find Me On Social Media:
Facebook page: The Grateful Girl Cooks!
Pinterest: The Grateful Girl Cooks!
Instagram: jbatthegratefulgirlcooks

Author's signature

Recipe Adapted From: www.traegergrills.com/recipes

0 from 0 votes
Rosemary Wine Pork Chops
Prep Time
10 mins
Cook Time
30 mins
Marinating (inactive time)
2 hrs
Total Time
2 hrs 40 mins
 
Rosemary Wine Pork Chops are marinated, boneless thick-cut chops that are grilled on a BBQ or a smoker. They're tender, juicy & full of flavor!
Category: Entree
Cuisine: American
Keyword: rosemary wine pork chops
Servings: 2
Calories Per Serving: 340 kcal
Author: JB @ The Grateful Girl Cooks!
Ingredients
  • 2 boneless pork chops (1½" thick) (approx. 4 ounces each)
For Rosemary Wine Marinade:
  • 1/4 cup extra virgin olive oil
  • 1/4 cup red wine
  • 2 Tablespoons fresh rosemary , chopped
  • 1/2 Tablespoon Montreal seasoning
  • 1/4 teaspoon salt
Instructions
  1. Make The Marinade: In a small bowl, combine olive oil, red wine, chopped rosemary, salt and Montreal seasoning. Mix well with a whisk or fork, until all ingredients are fully combined. NOTE: Measure out a few Tablespoons of marinade into a separate container and reserve for later. You will use this reserved marinade to brush on the pork chops while they are cooking!

  2. Trim as much fat off the pork chops as you can, and discard. Place pork chops in a zip loc bag (or covered container). Pour the marinade over the chops, to cover. Seal the bag, and then "smoosh" the bag around with your fingers to coat the chops on all sides with marinade. Once pork chops are fully coated, place bag (or container) in the refrigerator and let pork marinate for 2 hours (minimum).

  3. After chops have finished marinating, remove the chops from the marinade. Discard the marinade in the bag (do not use it after being exposed to the raw pork). Grab the reserved marinade you set aside earlier, and you're ready to grill!

Using a Traeger or Other Smoker/Pellet Grill?
  1. Prepare grill as you normally would. Once briquettes are ready, or grill has pre-heated, place pork chops directly over heat on the grill grate. Grill, turning once (occasionally basting with marinade), until pork reaches an internal temperature of 145-160°F. This will take approximately 25-20 minutes. When they are done, remove the pork chops from the grill, and let them rest for 5 minutes to let the juices inside redistribute throughout the meat. Serve, and enjoy!

Using a Standard BBQ Grill (propane or briquettes)?
  1. If using a Traeger grill (we were), follow the normal "start-up" process: Let Traeger smoke then ignite uncovered (about 5 minutes). When the fire has ignited, set the temperature gauge to 450° F., and let the grill preheat for 10-15 minutes (covered). Once preheated, cook the rosemary wine pork chops for 30 minutes, or until the pork reaches an internal temperature of 145-160° F. Baste pork chops occasionally with reserved marinade while they cook. When they are done, remove the pork chops from the grill, and let them rest for 5 minutes to let the juices inside redistribute throughout the meat. Serve, and enjoy!

Nutrition Facts
Rosemary Wine Pork Chops
Amount Per Serving (1 chop)
Calories 340 Calories from Fat 198
% Daily Value*
Fat 22g34%
Saturated Fat 5g31%
Cholesterol 89mg30%
Sodium 356mg15%
Potassium 518mg15%
Carbohydrates 1g0%
Protein 29g58%
Vitamin A 85IU2%
Vitamin C 0.4mg0%
Calcium 26mg3%
Iron 1.2mg7%
* Percent Daily Values are based on a 2000 calorie diet.

Here’s one more to pin on your Pinterest boards!Rosemary Wine Pork Chops are marinated, boneless thick-cut chops that are grilled on a BBQ or a smoker. They're tender, juicy & full of flavor!

Caribbean Jerk Pork Chops

Caribbean Jerk Pork Chops are bone-in pork chops, marinated in a 2 ingredient sauce, then grilled on a traditional BBQ or a smoker grill! Such a SIMPLE, delicious dish!
Caribbean Jerk Pork Chops are marinated in a 2 ingredient sauce, then grilled on a traditional BBQ or a smoker grill! Such a SIMPLE, delicious dish!

Are you looking for an EASY grilling recipe for bone-in pork chops? If so, then I hope you will continue reading! This recipe for Caribbean jerk pork chops is ridiculously simple to prepare, and the chops taste wonderful!

The prep time for these pork chops is only a couple minutes, then the chops are refrigerated for half an hour. After that, throw ’em on the grill or smoker, and enjoy the finished grilled pork chops. Anyone can make these flavorful pork chops, and I’m happy to show you just how very easy it is!

Scroll Down For A Printable Recipe Card At the Bottom Of The Page

Marinate The Caribbean Jerk Pork Chops Before Cooking

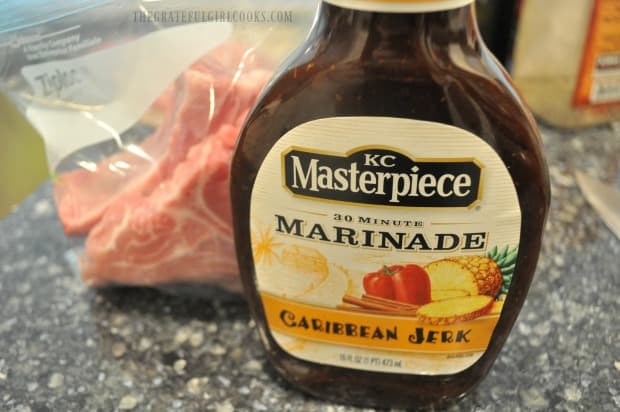
This is the marinade that we use to make these delicious pork chops. I am not sponsored by this company, but just want to show you what we used. We bought this sauce at our local grocery store, and it is also available on Amazon.

Mix the marinade with pineapple juice in a small container. Place two large bone-in pork chops in a resealable bag or container and pour in the marinade and pineapple juice blend.

This is the Caribbean-inspired marinade I used for the pork chops.

Seal the bag or container and then “smoosh” the bag around to distribute the marinade sauce, to fully cover the chops with sauce.

Once the pork chops are coated in sauce, place the container or bag in the refrigerator for 30 minutes, so they can absorb lots of flavor!

The bone-in pork chops marinate in the refrigerator for at least 30 minutes before cooking.

When ready to grill the pork chops, remove them from the refrigerator. Discard the excess sauce that had the raw pork in it.

Pour additional “fresh” Caribbean jerk sauce (without the pineapple juice) in a small container, so you can baste the chops with it, while they cook on the grill.

Marinated Caribbean jerk pork chops (and extra sauce) are ready to put on the grill.

We Had Quite The Grilling “Traegerpalooza”!

The same evening we enjoyed these delicious Caribbean jerk pork chops, we also grilled other items alongside them on our Traeger grill.

In the photo below you can see we also had grilled asparagus, brats and hot dogs, tri-tip steaks, and another batch of boneless pork chops, made with a different sauce. We also roasted a whole turkey breast on the Traeger (not pictured). As you can see, the Caribbean jerk pork chops were in great company!

These are some of the foods we grilled along with the pork chops.

Directions For Cooking Caribbean Jerk Pork Chops On A Traeger Grill

If using a Traeger smoker grill to cook the pork chops, follow manufacturer instructions to get the fire ignited. Once ignited and smoking, set the temperature control to 450° F. Close the cover, and let the grill preheat for 10-15 minutes.

Once the grill is preheated and at temperature, place the marinated pork chops directly on the grill grate. Cook the Caribbean jerk pork chops for about 30 minutes, or until the internal temperature reaches between 145-160° F.

Continue to baste with sauce while cooking. It is not necessary to turn the chops, because of the indirect heat feature (convection) present on a Traeger grill. Remove the pork chops once done, and let them “rest” for a few minutes to let the juices redistribute inside the meat, before serving.

Cooking The Pork Chops On A Traditional BBQ?

If you will be cooking the Caribbean pork chops on a traditional BBQ, place the chops directly on the grill grate. Continue to baste with sauce while cooking, turning as necessary during the cooking time.

The cooking time might vary slightly due to cooking them over a direct flame, so be sure to check the internal temperature of the pork chops. They are safely “done” when they reach an internal temperature of 145-160° F. Remove the pork chops once done, and let them rest for a few minutes to let the juices redistribute inside the meat, before serving.

We grilled the pork chops on our Traeger grill, along with other items.

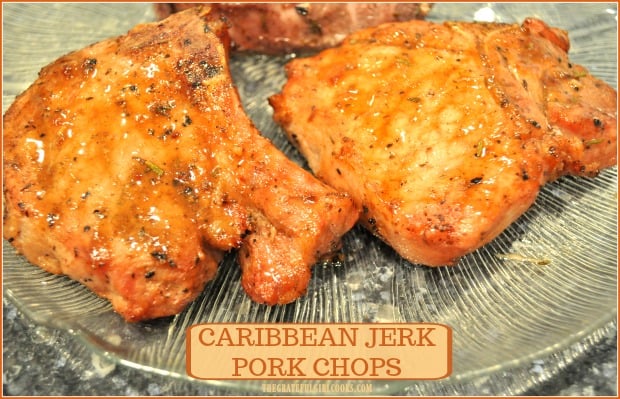
Here are the finished Traeger grilled Caribbean jerk pork chops! They are full of flavor, and are enhanced by the wood pellet smoker feature of the grill! We used mesquite wood pellets in our Traeger. NOTE: If cooking these on a traditional “over the flame” BBQ, the chops will be a lot browner and crispy on the outside.

The Caribbean jerk pork chops have come off the grill, and are ready to eat!

I really hope you will give this very simple recipe for Caribbean jerk pork chops a try! We really enjoyed them, and trust you will, too! Have a wonderful day!

Looking For More PORK CHOP Recipes?

You can find all of my recipes (over 700!) in the Recipe Index, located at the top of the page. A few of the pork chop recipes you might want to check out include:

Interested In More Recipes?

Thank you for visiting this website. I appreciate you using some of your valuable time to do soIf you’re interested, I publish a newsletter 2 times per month (1st and 15th) with all the latest recipes, and other fun info. I would be honored to have you join our growing list of subscribers, so you never miss a great recipe!

There is a Newsletter subscription box on the top right side (or bottom) of each blog post, depending on the device you use, where you can easily submit your e-mail address (only) to be included in my mailing list.

You Can Also Find Me On Social Media:
Facebook page: The Grateful Girl Cooks!
Pinterest: The Grateful Girl Cooks!
Instagram: jbatthegratefulgirlcooks

Author's signature

0 from 0 votes
Caribbean Jerk Pork Chops
Prep Time
3 mins
Cook Time
30 mins
Marinating
30 mins
Total Time
1 hr 3 mins
 
Caribbean Jerk Pork Chops are marinated in a 2 ingredient sauce, then grilled on a traditional BBQ or a smoker grill! Such a SIMPLE, delicious dish!
Category: Main Course
Cuisine: Caribbean
Keyword: Caribbean Jerk Pork Chops
Servings: 2
Calories Per Serving: 362 kcal
Author: JB @ The Grateful Girl Cooks!
Ingredients
  • 2 large pork chops (bone-in)
  • 1/2 cup KC Masterpiece Caribbean Jerk Marinade
  • 2 Tablespoons pineapple juice
  • Additional marinade for basting meat while grilling , as needed
Instructions
  1. Mix the marinade with pineapple juice in a small container. Place two large bone-in pork chops in a resealable bag or container and pour in the marinade and the pineapple juice blend.
  2. Seal the bag or container and then "smoosh" the bag around to distribute marinade sauce, to fully cover chops with sauce. Once the chops are coated in sauce, place container or bag in refrigerator for 30 minutes, so they can absorb lots of flavor!

If Cooking On A Traeger Or Smoker Grill:
  1. If using a Traeger or smoker grill to cook the pork chops, follow manufacturer instructions to get the fire ignited. Once ignited and smoking, set the temperature control to 450° F. Close the cover, and let the grill preheat for 10-15 minutes. Once the grill is preheated and at temperature, place the marinated pork chops directly on the grill grate. Cook the Caribbean jerk pork chops for about 30 minutes, or until the internal temperature reaches 145-160° F. Continue to baste with sauce while cooking. It is not necessary to turn the chops. Remove the pork chops once done, and let them "rest" for a few minutes to let the juices redistribute inside the meat, before serving. Enjoy!

If Cooking On Traditional BBQ Grill
  1. Once fire (or briquettes are ready) place the chops directly on the grill grate. Continue to baste with sauce while cooking, turning as necessary during the cooking time. The cooking time might vary slightly, due to cooking them over a direct flame, so be sure to check the internal temperature of the pork chops. They are safely "done" when they reach an internal temperature of 145-160° F. Remove the pork chops once done, and let them rest for a few minutes to let the juices redistribute inside the meat, before serving. Enjoy!

Nutrition Facts
Caribbean Jerk Pork Chops
Amount Per Serving (1 chop)
Calories 362 Calories from Fat 135
% Daily Value*
Fat 15g23%
Saturated Fat 5g31%
Cholesterol 116mg39%
Sodium 93mg4%
Potassium 600mg17%
Carbohydrates 1g0%
Sugar 1g1%
Protein 35g70%
Vitamin C 1.5mg2%
Calcium 32mg3%
Iron 1.1mg6%
* Percent Daily Values are based on a 2000 calorie diet.

Here’s one more to pin on your Pinterest boards!Caribbean Jerk Pork Chops are marinated in a 2 ingredient sauce, then grilled on a traditional BBQ or a smoker grill! Such a SIMPLE, delicious dish!

Traeger Roasted Turkey Breast

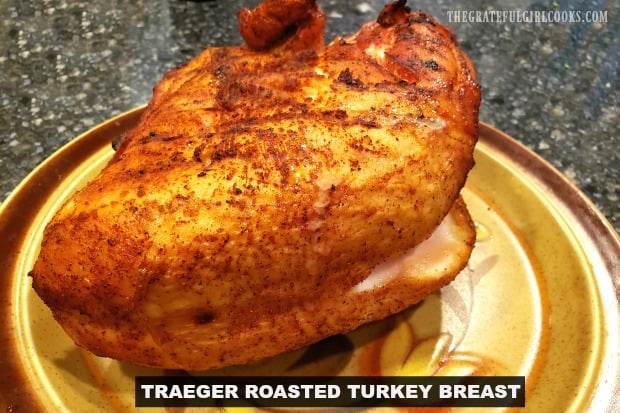
Traeger roasted turkey breast is an easy way to cook a delicious, well seasoned turkey breast on the smoker/grill, without heating up the kitchen!

Last summer we got a Traeger grill. I had saved and saved my money for a while, and purchased it for my husband’s birthday (and so I could use it for my blog, too!) We have enjoyed experimenting and learning how to grill and smoke meats, veggies and desserts on our grill!

A couple of weeks ago we had what we fondly call a “Traegerpalooza”! We cooked this Traeger roasted turkey breast, grilled asparagus with lemon and Parmesan, 2 types of pork chops, turkey sausages, tri-tip, and brats (sausages). It was so good (and I didn’t have to cook dinner for almost a week)! Ha Ha!

Scroll Down For A Printable Recipe Card At The Bottom Of The Page

How To Make A Traeger Roasted Turkey Breast

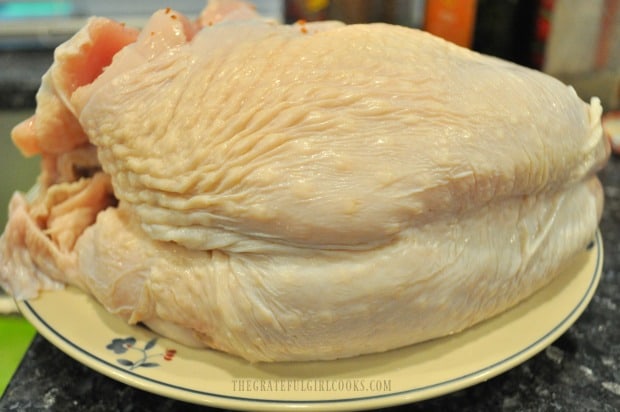
The roasted turkey breast turned out fantastic, so I wanted to share what we did with you today! We started out with an almost 5 pound turkey breast (bone in). The first thing I did was to rinse the turkey, and then pat it dry with paper towels.

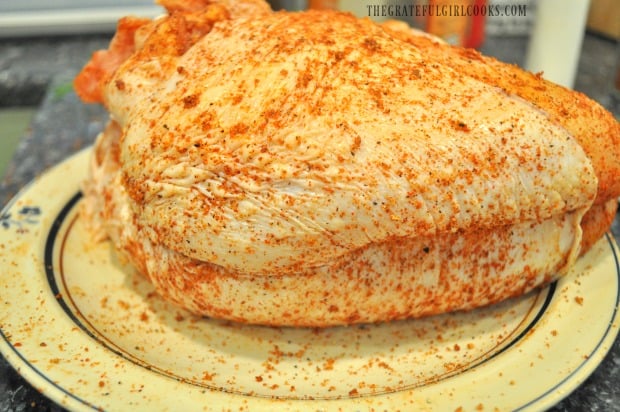
A whole turkey breast (bone-in) is rinsed, then patted dry before adding seasonings.

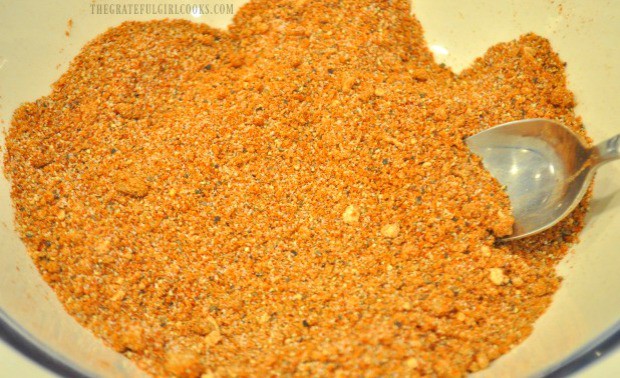
Make The Spice Rub Mix In Under 5 MInutes!

A dry rub spice mix was quickly mixed up.  It’s soooo easy to pull together, and I have used this same flavorful mix before on smoked pork loin roast , pork butt, and whole chickens that we have slow roasted on the Traeger.

The spice mix is made with brown sugar, paprika, garlic powder, onion powder, cayenne pepper, cumin, salt, pepper, and dry mustard. It is a fantastic spice rub, and you will have some leftover for your next grilling project, too! The turkey breast is generously sprinkled with the spice rub on all sides. I rubbed the spices into the turkey, and even rubbed some of the mix inside the turkey breast.

A dry rub spice mix is made to season the meat with, before cooking.

Dry rub spices are applied to the entire piece of meat, before putting it on the grill.

Cooking The Traeger Roasted Turkey Breast

Turn the Traeger to the SMOKE setting with the lid open. After about 4-5 minutes, you should see lots of smoke coming from the grill, meaning the pellets have ignited. Turn the temperature to 325° F and close the grill cover. Let the Traeger preheat for about 15 minutes. TIP: Prepare the spice rub and the turkey WHILE the Traeger is preheating, to save time!

Once the grill has preheated, place the seasoned turkey breast directly on the grill grate. Close the cover, and let the turkey breast cook for approximately 1 hour and 45 minutes. Cooking times will vary slightly because of varying weights of turkey breasts used. Check the internal temperature occasionally as it cooks, to ensure you don’t overcook or undercook the turkey breast.
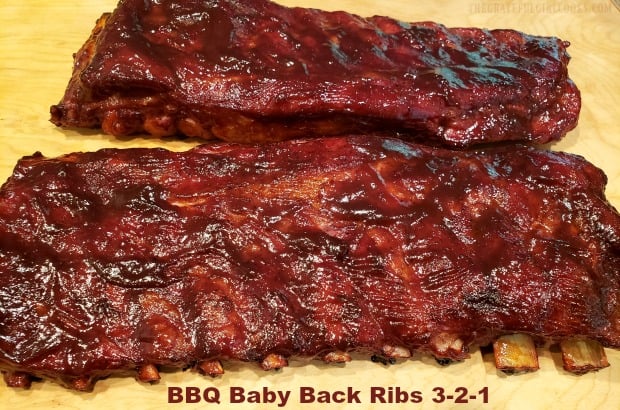
The Traeger roasted turkey breast is placed directly on the grill grate to cook.

How Will I Know When The Traeger Roasted Turkey Breast Is Done?

Continue to check the internal temperature using a probe inserted into the thickest part of the breast. When the turkey breast has reached an internal temperature of 165° F, pull it off the grill. Transfer the Traeger roasted turkey breast to a cutting board, and let it “rest” for about 15 minutes before slicing. This “resting time” helps the juices redistribute inside the meat.

The turkey breast rests after cooking, and before slicing.

Once the turkey breast has “rested”, it is ready to slice and eat! The turkey breast is juicy, and full of flavor, thanks in part to the dry rub spices, and the long smoking time! We LOVE having perfectly cooked slices of roasted turkey breast for quick dinners and sandwiches. It tastes so good! I froze half of the turkey breast to save for another time, too!

The roasted turkey is juicy, and slices well, which is perfect for sandwiches!

Hope you enjoy this recipe for Traeger roasted turkey breast. It’s awesome to be able to smoke a turkey breast and then have it around for easy dinners or a great tasting turkey sandwich throughout the week! If you are considering cooking an entire turkey on a pellet grill or smoker, be sure to check out my delicious recipe for Smoked Whole Turkey! Have a GREAT day!

Looking For More TRAEGER Recipes?

You can find ALL my recipes in the Recipe Index, located at the top of the page. I have some other delicious Traeger recipes you might be interested in, including:

Interested In More Recipes?

Thank you for visiting this website. I appreciate you using some of your valuable time to do soIf you’re interested, I publish a newsletter 2 times per month (1st and 15th) with all the latest recipes, and other fun info. I would be honored to have you join our growing list of subscribers, so you never miss a great recipe!

There is a Newsletter subscription box on the top right side (or bottom) of each blog post, depending on the device you use, where you can easily submit your e-mail address (only) to be included in my mailing list.

You Can Also Find Me On Social Media:
Facebook page: The Grateful Girl Cooks!
Pinterest: The Grateful Girl Cooks!
Instagram: jbatthegratefulgirlcooks

Author's signature

Recipe Adapted From Traeger Grill recipe booklet (that came with grill)

↓↓ PRINTABLE RECIPE BELOW ↓↓

0 from 0 votes
Traeger Roasted Turkey Breast
Prep Time
15 mins
Cook Time
1 hr 45 mins
Total Time
2 hrs
 
Traeger roasted turkey breast is an easy way to cook a delicious, well seasoned turkey breast on the smoker/grill, without heating up the kitchen!
Category: Entree, Grill
Cuisine: American
Keyword: Traeger roasted turkey breast
Servings: 10
Calories Per Serving: 251 kcal
Author: JB @ The Grateful Girl Cooks!
Ingredients
  • 4.5 pound turkey breast (approx,) , bone in, skin on
For Dry Rub Spice Mix (this will make MORE than you will use- enough for several uses)
  • 1/3 cup brown sugar
  • 1/2 cup paprika
  • 1/4 cup garlic powder
  • 1/4 cup salt
  • 2 Tablespoons pepper
  • 2 Tablespoons onion powder
  • 1 Tablespoon cayenne pepper
  • 1 Tablespoon ground cumin
  • 1 Tablespoon dry ground mustard
Instructions
  1. Rinse the turkey, and pat it dry with paper towels.

  2. Mix ingredients for spice rub in a small bowl. Generously sprinkle turkey breast with spice rub on all sides (and inside, if desired). Store extra spice rub mix in covered container for additional uses.

  3. Turn the Traeger to SMOKE setting with the lid open. After about 4-5 minutes, you should see lots of smoke coming from the grill, meaning the pellets have ignited. Turn temperature to 325° F and close grill cover. Let the Traeger preheat for about 15 minutes. Once preheated, place seasoned turkey breast directly on grill grate. Close the cover, and let it cook for approx. 1 hour and 45 minutes. Cooking times will vary slightly because of differing weights of turkey breasts used. Continue to check the internal temperature using a probe inserted into the thickest part of the breast, to ensure you don't overcook or undercook the turkey breast.
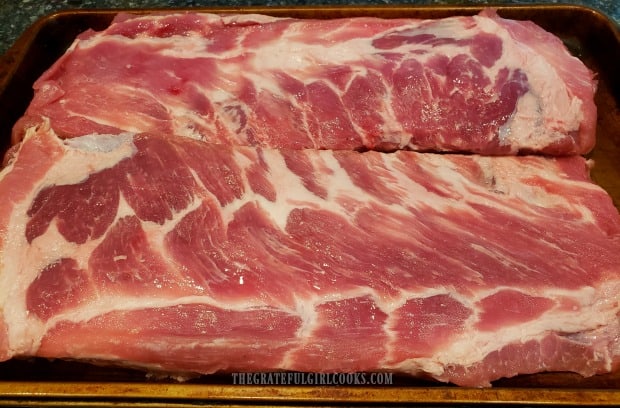
  4. When the turkey breast has reached an internal temperature of 165° F, pull it off the grill. Transfer turkey breast to a cutting board, and let it "rest" for about 15 minutes before slicing. This "resting time" helps the juices redistribute inside the meat. Once turkey has "rested", slice, and enjoy!

Recipe Notes

NOTE: The spice mix was NOT calculated into the caloric calculations. The spice mix (as written) will make enough mix for several additional uses beyond that of the turkey breast, so it was not included.
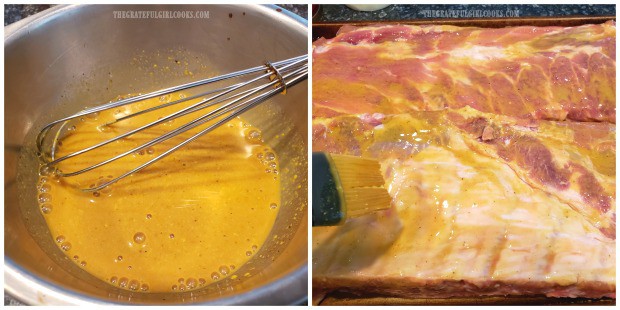
Nutrition Facts
Traeger Roasted Turkey Breast
Amount Per Serving (1 g)
Calories 251 Calories from Fat 90
% Daily Value*
Fat 10g15%
Saturated Fat 3g19%
Cholesterol 108mg36%
Sodium 368mg16%
Carbohydrates 1g0%
Protein 40g80%
* Percent Daily Values are based on a 2000 calorie diet.

Here’s one more to pin on your Pinterest boards!Traeger roasted turkey breast is an easy way to cook a delicious, well seasoned turkey breast on the smoker/grill, without heating up the kitchen!

Black Bean Burgers

Looking for a recipe for fantastic tasting black bean burgers, that vegetarians and meat lovers both will LOVE? Look no further – here it is!
Looking for a recipe for fantastic tasting black bean burgers, that vegetarians and meat lovers both will LOVE? Look no further - here it is!

I recently saw a recipe for the BEST black bean burgers ever on Pinterest. Being curious, I KNEW I just HAD TO TRY THEM!

So I pinned the recipe, made them, and the rest is history. Oh yeah… they truly just might be the BEST black bean burgers ever. Amen!

Scroll Down For A Printable Recipe Card At The Bottom Of The Page

What’s The Story Behind These Black Bean Burgers?

One of our grown sons is now a vegetarian. He used to be our STEAK eating guy… sigh. He is now a grown man who happens to be vegetarian.

What’s a meat-lovin’ mom supposed to do when he and his girlfriend (also a vegetarian) come over for a burger BBQ?

Well, up to this point, I would just buy those thin little veggie or vegetarian black bean burgers in the frozen section at the grocery store! That way I could offer them a vegetarian burger to eat, along with all of our traditional BBQ sides.

No longer! THIS will now be my new “go to” recipe for veggie burgers, because they’re delicious!

What Makes THESE Black Bean Burgers So “Special”?

These black bean burgers are special, I believe, in part due to one little bitty step that is taken before making the patties, that ensures the burgers will be firm and not MUSHY! 

What is this little bitty step, you ask? Popping the rinsed beans into the oven for a few minutes, which helps to partially dry out the canned beans. Yep, you heard that right! Brilliant tip!

The Secret To Making Nice, Firm, Black Bean Burgers

Preheat your oven to 325° F. Rinse, and then drain two cans of black beans in a colander. Pour the drained beans onto a couple layers of paper towels, and pat them dry.

Spread the beans out onto a parchment paper-lined large baking sheet. Bake the beans for 15 minutes, which will help to slightly dry them out. Trust me on this – don’t skip this step! This one little step will help those burger patties to really hold firmly together, and not break down into MUSH!!

Once done, remove the beans from the oven, and set aside.

Canned black beans are drained, blotted dry, then baked, to make black bean burgers.

While the beans are baking, place olive oil, chopped bell peppers, onion, and minced garlic in a skillet. Cook this mixture on medium heat, stirring occasionally, for 5-6 minutes, until the veggies have softened.
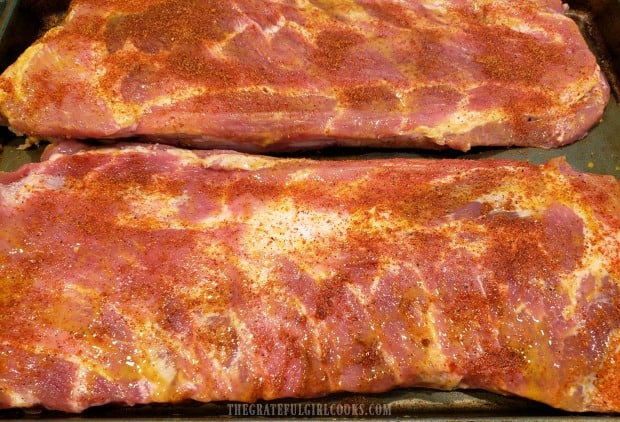
Once cooked, pat the veggies gently with a paper towel, to help absorb a bit of their moisture.
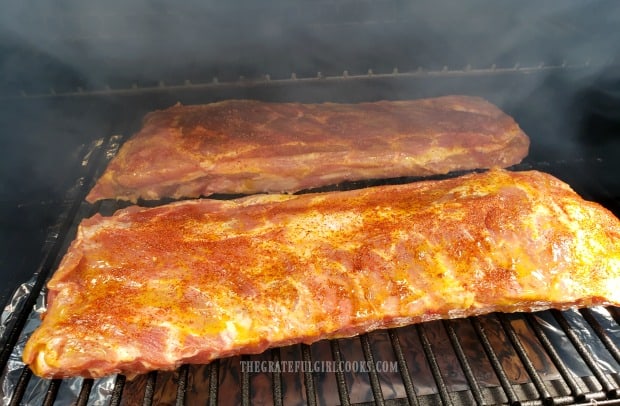
Onion, green peppers, and garlic is cooked in oil to add to black bean burgers mix.

Prepare The Patties For Black Bean Burgers

Place the cooked veggies into a large mixing bowl.  Add the remaining ingredients, except for the black beans. Give this mixture a good stir to fully combine the ingredients.

Eggs, feta cheese, bread crumbs, ketchup and spices added to black bean burgers mix.

Now add the baked black beans to the bowl. Use a potato masher or a fork to really “mash” this patty mixture together, making sure to leave some of the black beans intact.

NOTE: This step can also be done in a food processor. PULSE the ingredients, but do not fully blend.

The baked black beans are added to the black bean burgers mixture, and mashed to combine.

Form The Patties

For each patty, use 1/3 cup of bean mixture. Scoop out 1/3 cup, then transfer to a parchment paper lined baking sheet.

This recipe makes 6 thick black bean burgers. After placing all 6 scoopfuls on the paper, flatten them down and round out, using your hands.

Black bean burgers mix is portioned out into 6 (1/3 cup) patties, then flattened.
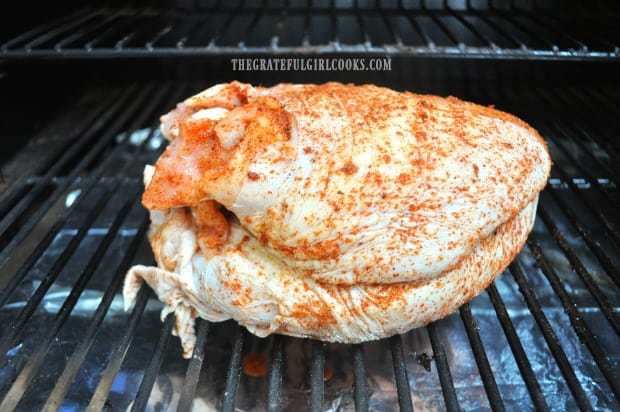
Cook The Black Bean Burgers

There are TWO ways to cook these burgers. 1) Bake at 375° F., and cook for 10 minutes on each side, OR 2) Lay the patties onto aluminum foil (on your BBQ grill), and grill each side for 8 minutes.

I chose to BAKE the black bean burgers. The photo below shows what the patties look like up close and personal before baking.  You can see there are some whole black beans in each one.

One of the black bean burgers, up close, before baking.

After the black bean burgers have cooked for 10 minutes on each side, they are done!  They hold together VERY well, and are nice and thick, firm burgers!

Six black bean burgers on parchment paper, after baking.

Black Bean Burgers Can Be Frozen, Too!

IMPORTANT NOTE: These burgers freeze well, too! Six burgers was way too many for just my hubby and I to eat, so I was able to freeze a few after cooking! You can also freeze the raw patties this way, also.

Once the burgers have cooled, stack the patties between sheets of parchment paper and place in freezer bags or freezer container. Perfect for future use (just thaw and reheat)!

The black bean burgers can be frozen between sheets of parchment paper in a freeze bag.

All that is left to do… is EAT one of these delicious, thick, black bean burgers!  The burgers were served on a toasted bun, with tomato slices, crisp lettuce, red onion slices and some homemade guacamole (as a condiment)!

That’s it!  Oh my goodness, such great flavor… this burger was soooo good! The guacamole was a perfect substitute for mayo, mustard or ketchup…never even missed them!

One of the black bean burgers, served on bun with tomato, red onion, lettuce and guacamole!

Believe me when I tell you… these black bean burgers taste fantastic! Hope you will consider trying them, too! This is a perfect dish for “Meatless Mondays” or any other day, for that matter!

If you’re looking for another “healthy” delicious burger recipe, be sure to check out my Turkey, Feta and Spinach Burgers! Have a GREAT day!

Looking for More SANDWICH Recipes?

You can find all of my recipes in the Recipe Index, located at the top of the page. I have some delicious sandwich recipes, including:

Interested In More Recipes?

Thank you for visiting this website. I appreciate you using some of your valuable time to do soIf you’re interested, I publish a newsletter 2 times per month (1st and 15th) with all the latest recipes, and other fun info. I would be honored to have you join our growing list of subscribers, so you never miss a great recipe!
There is a Newsletter subscription box on the top right side (or bottom) of each blog post, depending on the device you use, where you can easily submit your e-mail address (only) to be included in my mailing list.

You Can Also Find Me On Social Media:

Facebook page: The Grateful Girl Cooks!
Pinterest:
The Grateful Girl Cooks!
Instagram:
jbatthegratefulgirlcooks

Author's signature

Original Recipe Source: https://sallysbakingaddiction.com/best-black-bean-burgers/

0 from 0 votes
Black Bean Burgers
Prep Time
20 mins
Cook Time
20 mins
Total Time
40 mins
 
Looking for a recipe for fantastic tasting black bean burgers, that vegetarians and meat lovers both will LOVE? Look no further - here it is!
Category: Meatless Entree
Cuisine: American
Keyword: black bean burgers
Servings: 6 burgers
Calories Per Serving: 264 kcal
Author: JB @ The Grateful Girl Cooks!
Ingredients
  • 28 ounces canned black beans (two 14 oz. cans) , drained/rinsed/patted dry
  • 1 Tablespoon extra virgin olive oil
  • 3/4 cup green bell pepper , finely chopped
  • 1 cup yellow onion , finely chopped
  • 1 Tablespoon minced garlic cloves (approx. 3 cloves)
  • teaspoons ground cumin
  • 1 teaspoon chili powder
  • 1/2 teaspoon garlic powder
  • 1/4 teaspoon smoked paprika
  • 1/2 cup feta cheese , crumbled
  • 1/2 cup bread crumbs
  • 1 Tablespoon Worcestershire sauce
  • 2 large eggs
  • 2 Tablespoons ketchup or BBQ sauce
  • 1 pinch (each) salt and pepper
Instructions
  1. Preheat oven to 325° F. Rinse, and drain black beans. Blot the beans dry on paper towels. Spread beans out onto parchment paper-lined large baking sheet. Bake the beans for 15 minutes, to slightly dry them out. Don't skip this step! Once done, remove beans from oven, and set aside. NOTE: If you will be baking the burger patties, turn oven up to 375° once you remove the beans from oven.

  2. While beans bake, place olive oil, chopped bell peppers, onion, and minced garlic in a skillet. Cook on medium heat, stirring occasionally, for 5-6 minutes, until veggies have softened. Once cooked, pat the veggies gently with a paper towel, to absorb a bit of their moisture. 
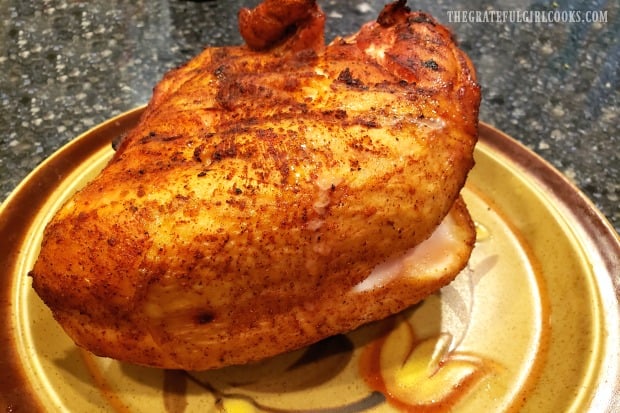
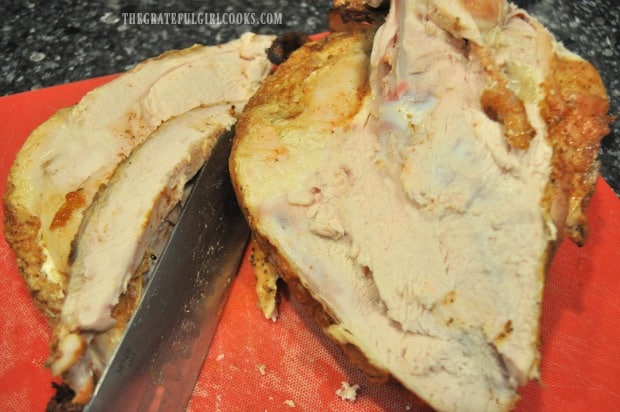
  3. Place cooked veggies into a large mixing bowl. Add remaining ingredients, except for the black beans. Stir to combine. Add the black beans. Use a potato masher or fork to "mash" this together, making sure to leave some black beans intact. NOTE: This step can also be done in a food processor. PULSE the ingredients, but do not fully blend.

  4. For each patty, use 1/3 cup of bean mixture. Scoop out 1/3 cup, then transfer to parchment paper lined baking sheet. After placing 6 scoopfuls on the paper, flatten them down and round out into thick patties, using your hands.

  5. There are TWO ways to cook these burgers. 1) Bake at 375° F., and cook for 10 minutes on each side, OR 2) Place the patties onto aluminum foil (on your BBQ grill), and grill each side for 8 minutes. After the black bean burgers have baked for 10 minutes on each side (or grilled for 8 on each side), they are done! Prepare burgers with your favorite toppings. Enjoy!

Recipe Notes

NOTE: The caloric calculation is for one black bean burger patty only. Any additions (bun, condiments, etc.) will need to be calculated separately, as they will differ for each person.

Nutrition Facts
Black Bean Burgers
Amount Per Serving (1 burger patty)
Calories 264 Calories from Fat 63
% Daily Value*
Fat 7g11%
Saturated Fat 3g19%
Cholesterol 81mg27%
Sodium 886mg39%
Potassium 584mg17%
Carbohydrates 35g12%
Fiber 10g42%
Sugar 4g4%
Protein 14g28%
Vitamin A 390IU8%
Vitamin C 21.5mg26%
Calcium 153mg15%
Iron 4mg22%
* Percent Daily Values are based on a 2000 calorie diet.

Here’s one more to pin on your Pinterest boards!Looking for a recipe for fantastic tasting black bean burgers, that vegetarians and meat lovers both will LOVE? Look no further - here it is!