Category: For The BBQ Grill

Lemon & Garlic Chicken Kabobs

Flavorful, yet light in calories, these tasty, marinated Lemon and Garlic Chicken Kabobs (with veggies), are an EASY meal to BBQ or broil for dinner!Lemon & Garlic Chicken Kabobs / The Grateful Girl Cooks!
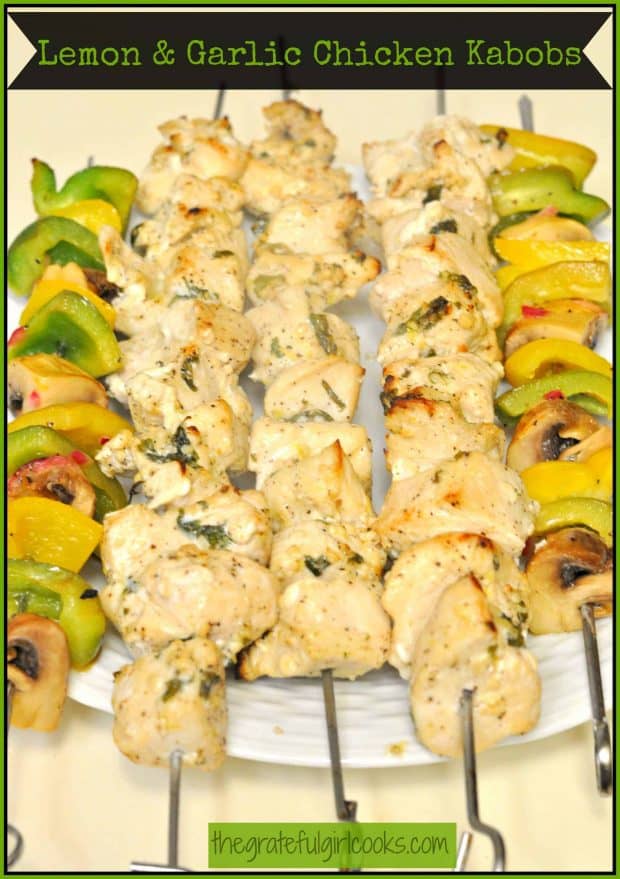
YUM! That was the reaction my husband and I had when we first tasted these Lemon & Garlic Chicken Kabobs! These chicken kabobs and the accompanying veggies combine for a delicious meal! The afternoon I was going to grill them outside on our BBQ, it started raining… hard. So, “Plan B” was put into effect, and I ended up broiling the chicken kabobs in my oven.

They still had a wonderful taste due to the marinating of the meat, but I think the smoky flavor from an outside BBQ grill would add even more flavor to the chicken. Next time I will try grilling them, if our Pacific Northwest weather will cooperate! Anyways, here’s what you do to make these kabobs:

How To Make Lemon & Garlic Chicken Kabobs

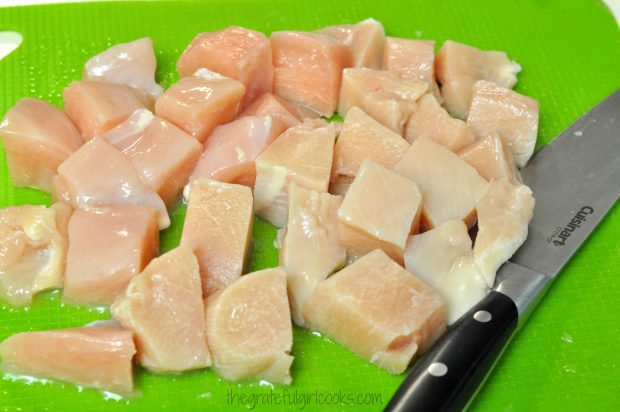
Cut chicken breast (skinless, boneless) into 3/4 inch chunks. Set aside.

Chicken breasts, cut into cubes for kabobs

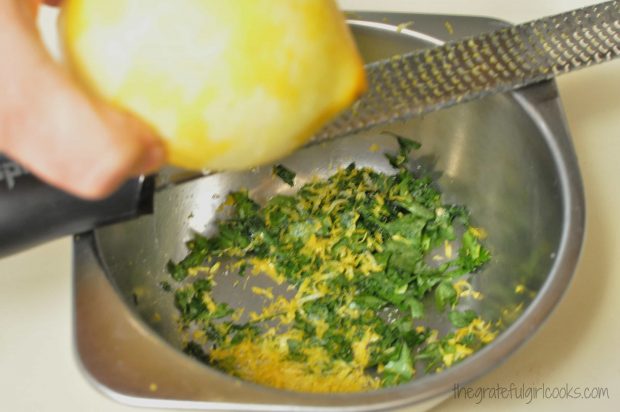
Mix up ingredients for marinade by combining lemon zest, garlic, flat leaf parsley, salt and pepper in a small bowl.

Lemon zest and parsley added to bowl for chicken marinade

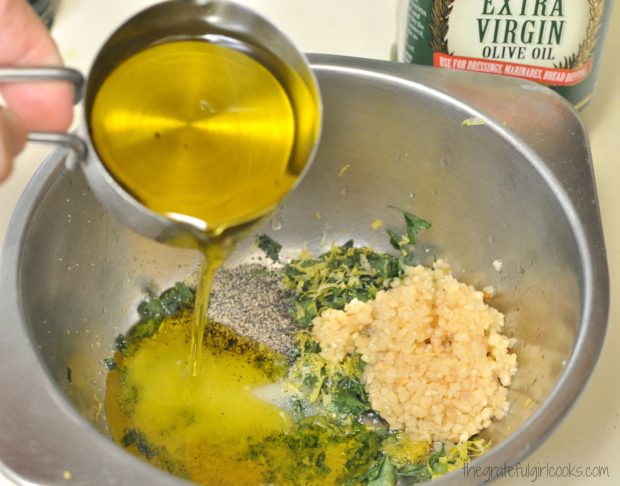
Add olive oil. Mix oil and spices together. Pour over chicken chunks and stir, to fully coat chicken pieces.

Olive oil is added to garlic, parsley and lemon zest for kabob marinade

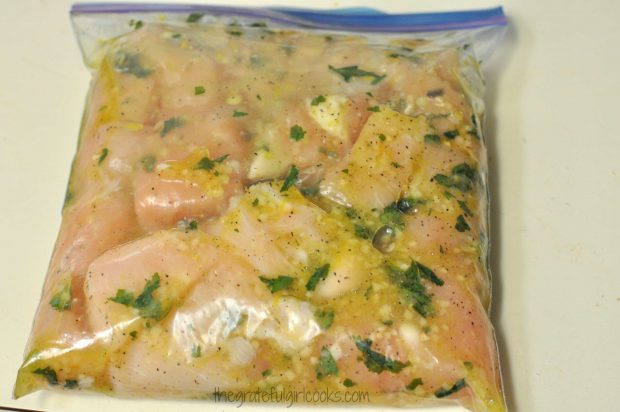
This can be put in a large resealable plastic bag, or into a covered container. Let chicken marinate in refrigerator for 2-8 hours… the longer the better for full flavor!

I mixed up the chicken and refrigerated it in the morning; by dinner time it was fully seasoned and ready to go, which made the prep time very quick!

Chicken cubes and kabob sauce, marinating in plastic bag

Cooking The Chicken Kabobs

When ready to grill (or oven broil), place chicken pieces onto metal or wooden skewers (Important note: If using wooden skewers, make sure to soak them in water for 30 minutes prior to cooking – you don’t want the skewers to burn).

Because the pouring rain destroyed my terrific plans to grill outside on our BBQ, I simply switched my plans and broiled them in our oven.

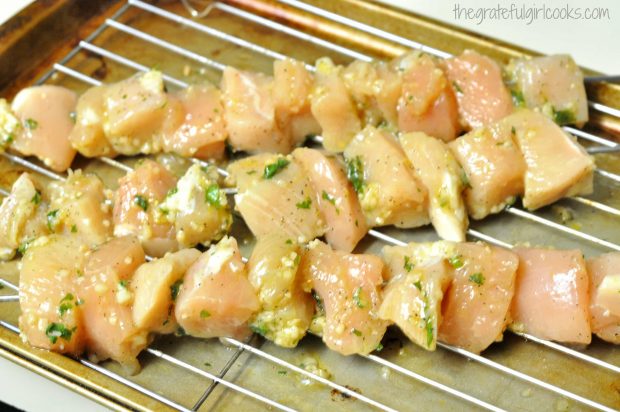
To broil kabobs (indoors in the oven), put the skewers on a rack, with a baking sheet underneath to catch the drips and put it on the middle rack in the oven. Halfway through the cooking time, turn the kabobs to the other side, and continue broiling until chicken is fully cooked.

Chicken kabobs with lemon and garlic sauce, on wire rack to broil in oven

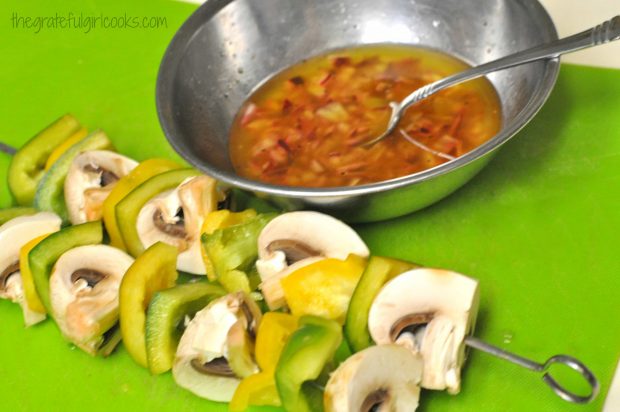
I also made skewers of some simple veggies to broil, to serve on the side with the chicken. I mixed up a simple sauce with lemon juice, olive oil, and chopped red onion, and threaded large mushroom quarters with yellow and green bell peppers. I used a pastry bush to brush on the sauce on all sides, and broiled the veggie skewers in the same way as the chicken.

Mushroom and pepper kabobs on skewers, with marinade in bowl

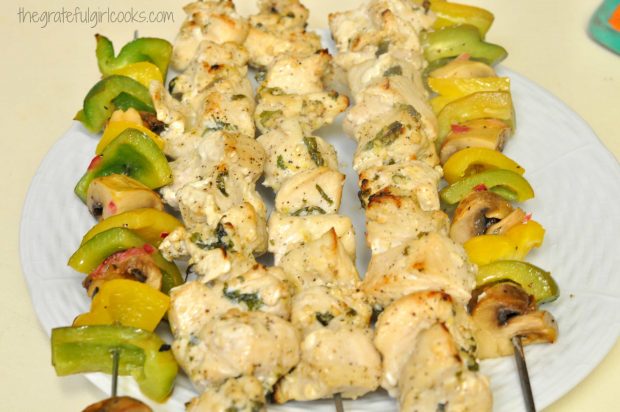
This is what they looked like (minus a couple other skewers) once they were cooked and out of the broiler. Had it not been raining and we went with “Plan A” (outdoor grilling), the meat would have been a bit browner, but let me tell you, “Plan B” (in the broiler) turned out to be a great backup solution. The chicken and veggies were flavored so well from their marinades/sauces, that they still tasted wonderful!

Cooked lemon and garlic chicken kabobs (with veggies) on plate

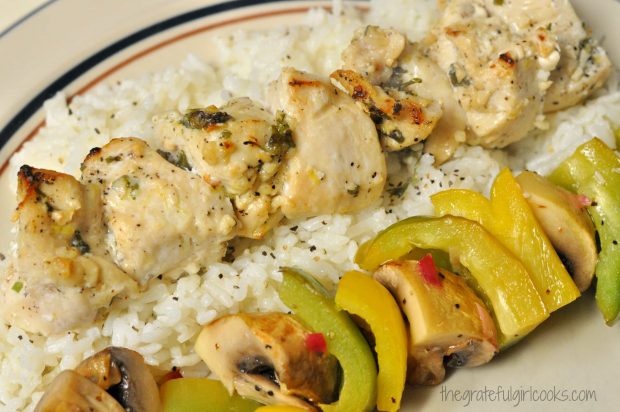
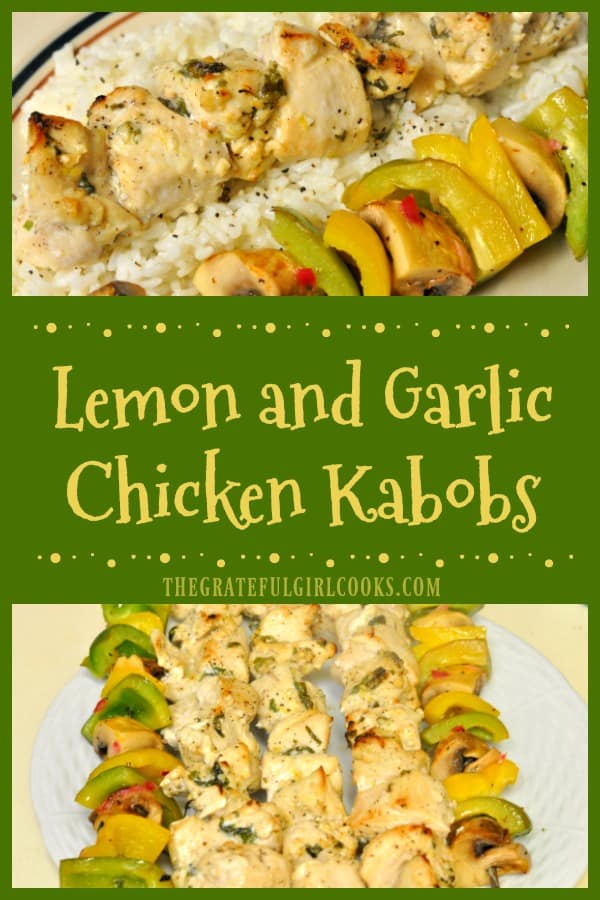
My husband and I really enjoyed this easy to prepare, delicious meal!  I served the chicken and veggies with rice. The chicken was light in calories and incredibly flavor-filled; the glazed mushrooms and peppers were a great little side dish, and complimented the chicken well.

Chicken kabobs and veggies with lemon & garlic marinade, served on rice

I hope you will consider trying this easy meal! I am looking forward to trying it on our Weber BBQ grill, once our weather warms up and dries out a bit! Until then, my good old oven broiler is a good option! Hope you have a wonderful day, and may God bless you!

Interested In More Recipes?

Thank you for visiting this website. I appreciate you using some of your valuable time to do soIf you’re interested, I publish a newsletter 2 times per month (1st and 15th) with all the latest recipes, and other fun info. I would be honored to have you join our growing list of subscribers, so you never miss a great recipe!
There is a Newsletter subscription box on the top right side (or bottom) of each blog post, depending on the device you use, where you can easily submit your e-mail address (only) to be included in my mailing list.

You Can Also Find Me On Social Media:

Facebook page: The Grateful Girl Cooks!
Pinterest:
The Grateful Girl Cooks!
Instagram:
jbatthegratefulgirlcooks

Author's signature Recipe (slightly adapted) from: http://oneperfectbite.blogspot.co.uk/2011/05/lemon-garlic-chicken-kabobs.html

0 from 0 votes
Lemon & Garlic Chicken Kabobs
Prep Time
2 hrs 15 mins
Cook Time
12 mins
Total Time
2 hrs 27 mins
 

Full of flavor, yet light in calories, these tasty, marinated Lemon and Garlic Chicken Kabobs (with veggies), are an EASY meal to BBQ or broil for dinner!

Category: Entree
Cuisine: American
Keyword: chicken kabobs
Servings: 4 servings
Calories Per Serving: 252 kcal
Author: JB @ The Grateful Girl Cooks!
Ingredients
For Chicken and Marinade:
  • zest of 1 lemon
  • 2 Tablespoons minced garlic
  • 2 Tablespoons chopped flat leaf parsley
  • 2 teaspoons salt
  • 1 teaspoon black pepper
  • 1/3 cup olive oil
  • 3 chicken breasts ,boneless, skinless
For Veggies And Marinade:
  • Juice of 1 lemon
  • 1/2 cup olive oil
  • 1/2 large red onion , minced (* see Notes section)
  • 4-5 large button mushrooms , quartered
  • 2 red, yellow and/or green bell peppers ,cut into 2" pieces
Instructions
  1. Cut the chicken breast into 3/4 inch chunks. Place in large bowl.

  2. In separate bowl, combine lemon zest, garlic, flat leaf parsley salt and pepper. Add olive oil and stir well, to combine. Pour marinade over chicken chunks; mix well to fully coat chicken. Place chicken and marinade in a covered container or a large resealable plastic storage bag. Refrigerate 2-8 hours (the longer chicken marinates, the better the flavor!). When done marinating, divide and thread chicken pieces onto 4 long metal or wood skewers (remember to soak wood skewers for 30 minutes prior to using so they don't burn). Discard remaining marinade.

  3. Mix the sauce for the veggies by combining juice of 1 lemon, olive oil, and minced red onion in small bowl. Cut mushrooms into quarters. Cut peppers into 1 inch thick slices. Thread veggie slices onto metal or wood skewers. Brush all sides of veggies with sauce.

  4. If grilling, cook chicken over hot grill, rotating to other side halfway through grilling time. Grill for 5-6 minutes per side or until chicken is fully cooked through.
  5. If broiling in oven, place skewers on a wire rack, which is on top of a baking sheet (to catch juices which drip). Place on middle rack in oven. Broil for 10-12 minutes, or until chicken is fully cooked through and golden brown, turning skewers over to other side halfway through cooking time. Keep an eye on the chicken to make sure it doesn't burn. Remove from broiler, when fully cooked through.

  6. Remove chicken and veggie from skewers, transfer to plate, and serve with a side of rice, for a great meal. Enjoy!

Recipe Notes

Note: I minced red onion and added it to veggie sauce. However, if you wish, you may leave the onion out of the sauce, and instead slice it into large pieces and thread it onto the skewers with the other veggies. Both ways work well.

Nutrition Facts
Lemon & Garlic Chicken Kabobs
Amount Per Serving (1 skewer (+ veggies))
Calories 252 Calories from Fat 144
% Daily Value*
Fat 16g25%
Saturated Fat 2g13%
Cholesterol 54mg18%
Sodium 1267mg55%
Potassium 549mg16%
Carbohydrates 7g2%
Fiber 1g4%
Sugar 3g3%
Protein 19g38%
Vitamin A 2055IU41%
Vitamin C 82.3mg100%
Calcium 22mg2%
Iron 1mg6%
* Percent Daily Values are based on a 2000 calorie diet.

Here’s one more to pin on your Pinterest boards!Long pin for lemon and garlic chicken kabobs

Save

Save

Grilled Summer Veggies

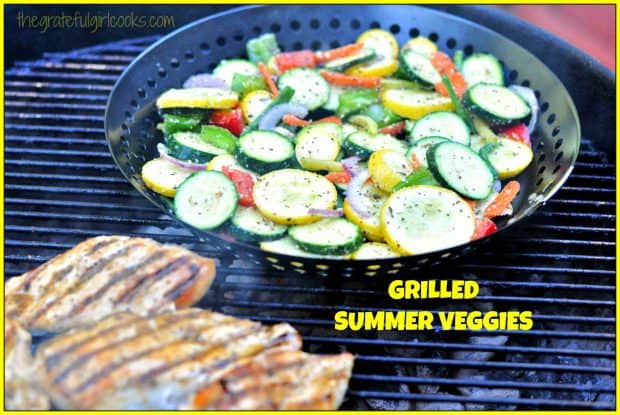
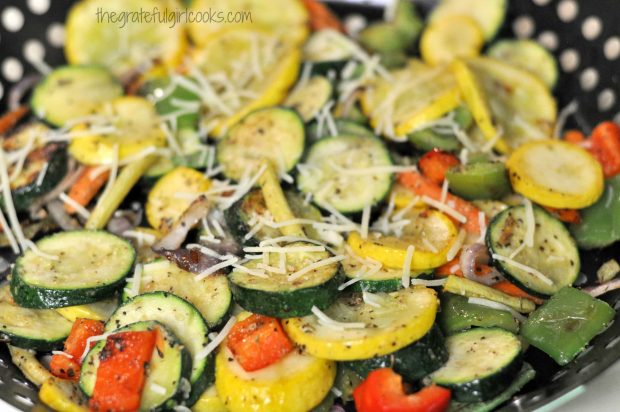
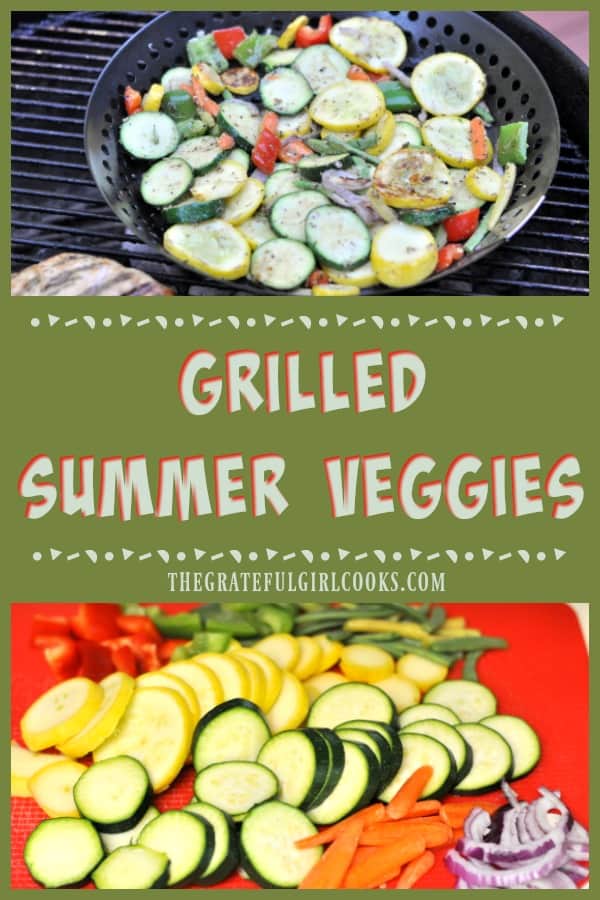
Grilled Summer Veggies, with zucchini, yellow squash, carrots, onion, green and red peppers and green beans are cooked on BBQ, then topped w/ Parmesan cheese!Grilled Summer Veggies, with zucchini, yellow squash, carrots, onion, green and red peppers and green beans are cooked on BBQ, then topped w/ Parmesan cheese!

The HOT summer continues here in the great Pacific Northwest! We are still using our BBQ grill a lot, as we try to keep our kitchen (and home) cool! Today I want to share a recipe I make quite frequently in the summertime- Grilled Summer Veggies!

Scroll Down For A Printable Recipe Card At The Bottom Of The Page

Making Grilled Summer Veggies Is EASY

This recipe is really, really easy.  All that is involved in the prep work for this delicious side dish is slicing and cutting up the veggies. I even was able to use some homegrown veggies from our garden as part of this dish (yee haw!)


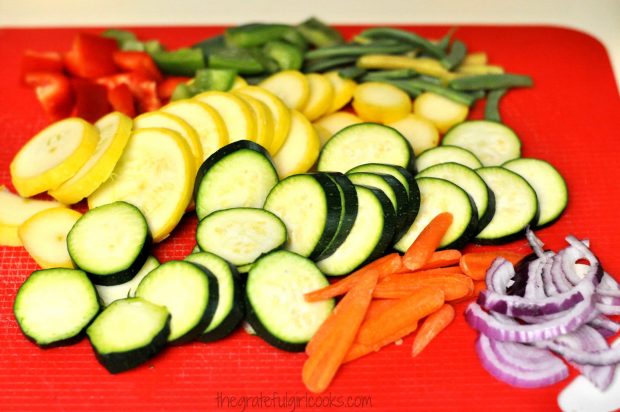
Summer veggies are sliced, and ready to be grilled.Once the veggies are sliced and chopped, put them into a large bowl. I used zucchini, yellow squash, red onion, green and red pepper, green beans (even a few yellow fillet beans from the garden), and baby carrots.

You can certainly add in additional veggies to make this dish “your own”. That’s the best way, right? You’ve got to like what you’re cooking!

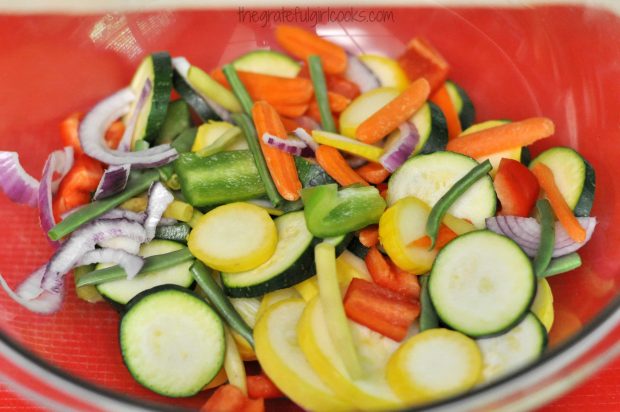
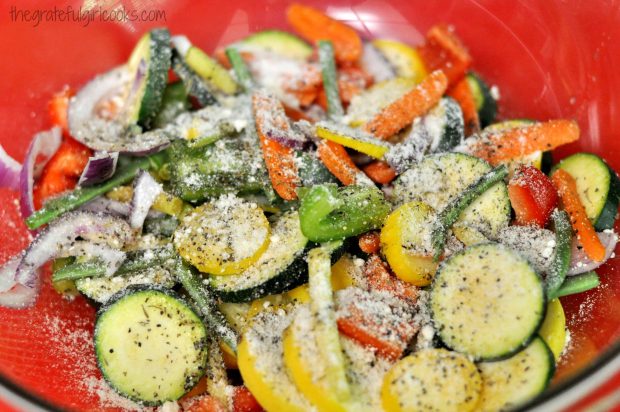
Cut veggies are placed in large bowl to mix with seasonings.Time To Season The Veggies

Season the veggies with olive oil, salt, pepper, Parmesan cheese, garlic powder, and Italian seasoning. Give them a good toss, to fully coat the veggies with the seasoning.

Summe veggies are seasoned with olive oil, Parmesan cheese and Italian spices before grilling.

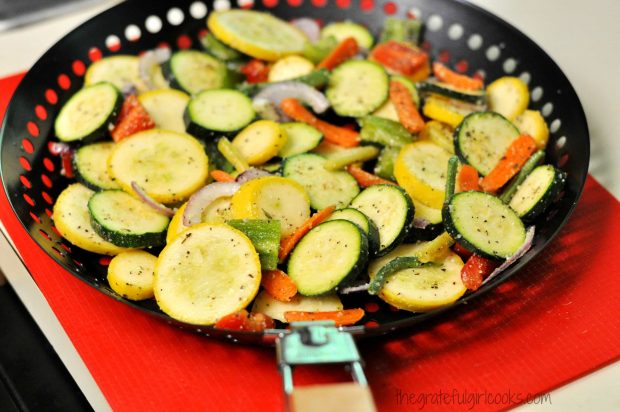
Use A BBQ Grill Safe Basket

After the veggies and seasonings are combined, put them into a BBQ-safe grill pan (we got one for about $8 at a home improvement warehouse). NOTE: If you don’t have access to a grill pan, use a cast iron skillet on your BBQ to cook these, but watch out… the skillet will get REALLY hot!).

The grill pan we used has a handle to carry it that detaches once you get it on the BBQ grill, then reattaches to lift pan off the grill once done. Pretty handy to use!

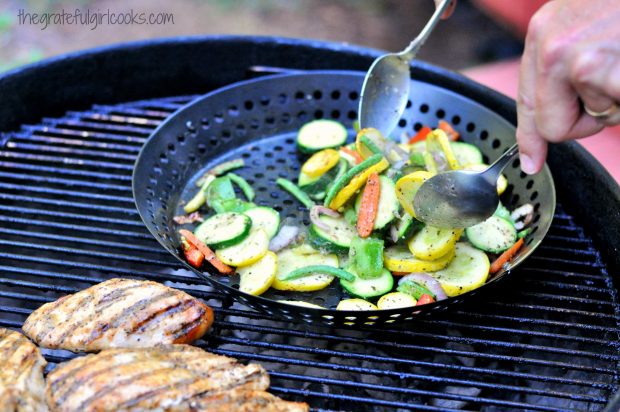
Veggies are placed into a BBQ-grill pan for cooking.Cook the veggies on a medium-hot grill for about 15 minutes or so, stirring often. My husband was the “Grill-Meister and Stirrer-Extraordinaire” for this dish!

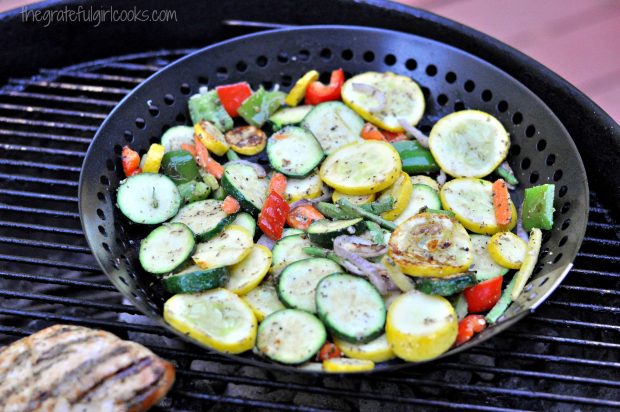
Grilled Summer Veggies on the BBQ, being stirred while they cook.Some of the veggies will get a nice char on them or get slightly golden brown… that’s great! Just remember to stir them occasionally so they don’t burn! We love cooking veggies on our Weber grill, cause the smoky smell permeates the vegetables, and gives them such a wonderful flavor!

Summer veggies grilling on the BBQ.Serve The Grilled Summer Veggies

Once the veggies are done (fork-tender), we bring them inside and top them with grated Parmesan cheese, and serve them up, straight out of the grill pan! YUM!

Grilled Summer Veggies are sprinkled with grated Parmesan cheese before serving.Sure hope you will give this EASY recipe a try. These grilled summer veggies are a wonderful accompaniment to most meat dishes. I think you and your family will love them! You might also like to see how to grill corn on the cob on the BBQ! That’s another easy way to cook veggies!

Have a great day!  Thanks for stopping by today, and come back soon. May you find beauty all around you today. Hope you’re looking for it!

Looking For More VEGGIE Recipes?

You can find all my recipes in the Recipe Index, located at the top of the page. I have a great variety of vegetable dishes, including:

Interested In More Recipes?

Thank you for visiting this website. I appreciate you using some of your valuable time to do soIf you’re interested, I publish a newsletter 2 times per month (1st and 15th) with all the latest recipes, and other fun info. I would be honored to have you join our growing list of subscribers, so you never miss a great recipe!
There is a Newsletter subscription box on the top right side (or bottom) of each blog post, depending on the device you use, where you can easily submit your e-mail address (only) to be included in my mailing list.

You Can Also Find Me On Social Media:

Facebook page: The Grateful Girl Cooks!
Pinterest:
The Grateful Girl Cooks!
Instagram:
jbatthegratefulgirlcooks

Author's signature

5 from 1 vote
Grilled Summer Veggies
Prep Time
10 mins
Cook Time
15 mins
Total Time
25 mins
 
Grilled Summer Veggies, with zucchini, yellow squash, carrots, onion, green and red peppers and green beans are cooked on BBQ, then topped w/ Parmesan cheese!
Category: Side Dish, Vegetable Dish
Cuisine: American
Keyword: grilled summer veggies
Servings: 4 servings
Calories Per Serving: 163 kcal
Author: JB @ The Grateful Girl Cooks!
Ingredients
  • 1 zucchini , sliced
  • 1 yellow squash , sliced
  • 3 slices red onion (then quartered
  • 1/2 green bell pepper , cut into chunks
  • 1/2 red bell pepper , cut into chunks
  • green beans (I used about 10), ends trimmed and beans cut in half
  • 6-8 baby carrots , cut in half lengthwise
  • 1/4 cup Parmesan cheese
  • Salt and Pepper to taste
  • 3 Tablespoons olive oil
  • 1/2 teaspoon garlic powder
  • 1/2 teaspoon Italian seasoning
  • 2 teaspoons Grated Parmesan cheese (for garnish once veggies are cooked)
Instructions
  1. Prepare all veggies. Place into a large bowl.  Add seasoning ingredients: Parmesan cheese (shaker can kind), salt, pepper, olive oil, garlic powder, and Italian seasoning, Mix well to combine.

  2. Place veggies into a sprayed BBQ grill saute pan or into a cast iron skillet. Place pan onto a medium high BBQ grill. Cook for 15-18 minutes, stirring occasionally so the veggies don't burn.  When done, remove from heat (if using cast iron skillet it will be HOT... be careful!).

  3. Sprinkle grated Parmesan cheese over the top of the hot vegetables, and serve.  Enjoy!

Nutrition Facts
Grilled Summer Veggies
Amount Per Serving (1 (1/4 of total))
Calories 163 Calories from Fat 117
% Daily Value*
Fat 13g20%
Saturated Fat 2g13%
Cholesterol 6mg2%
Sodium 156mg7%
Potassium 364mg10%
Carbohydrates 7g2%
Fiber 2g8%
Sugar 4g4%
Protein 4g8%
Vitamin A 2855IU57%
Vitamin C 49.3mg60%
Calcium 125mg13%
Iron 0.8mg4%
* Percent Daily Values are based on a 2000 calorie diet.

Here’s one more to pin on your Pinterest boards!Grilled Summer Veggies, with zucchini, yellow squash, carrots, onion, green and red peppers and green beans are cooked on BBQ, then topped w/ Parmesan cheese!


Save

Save

Grilled Lime-Cilantro Shrimp Kabobs

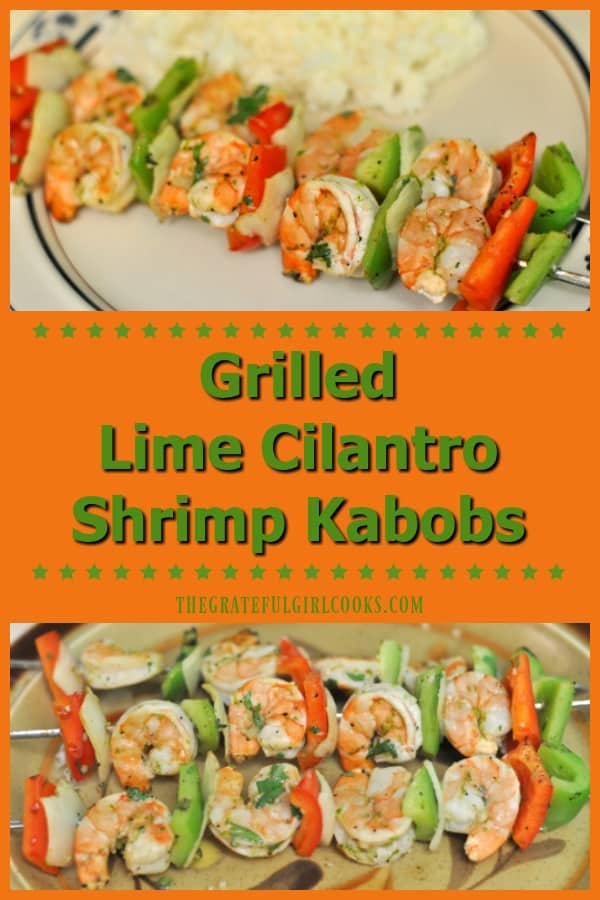
Delicious marinated and grilled lime cilantro shrimp kabobs, with peppers and onions are an easy, healthy and flavorful dish you’ll enjoy!Delicious marinated and grilled lime cilantro shrimp kabobs, with peppers and onions are an easy, healthy and flavorful dish you'll enjoy!
We’ve been grilling a lot of our evening meals outside this summer, because of the “above average” heat we’re having here in the Pacific Northwest. Who wants to bake and heat up the house at the end of a long day when it’s this hot? NOT THIS GIRL! That’s why I made these Grilled Lime-Cilantro Shrimp Kabobs for dinner this week.

I found the recipe for the marinade on Pinterest, then decided to add onions, plus red and green pepper slices, threaded them all onto skewers and threw ’em onto our trusty Weber BBQ grill. In practically no time at all we were enjoying these tasty shrimp kabobs and veggies! Who doesn’t like a good kabob? All in all, a QUICK, EASY, HEALTHY and DELICIOUS dinner on a very HOT evening!

Here’s how easy they are to make… honestly, the most time these took was the 30 minute marinating time. Other than that, they were a cinch!

Scroll Down For A Printable Recipe Card At The Bottom Of The Page

Prepare The Shrimp

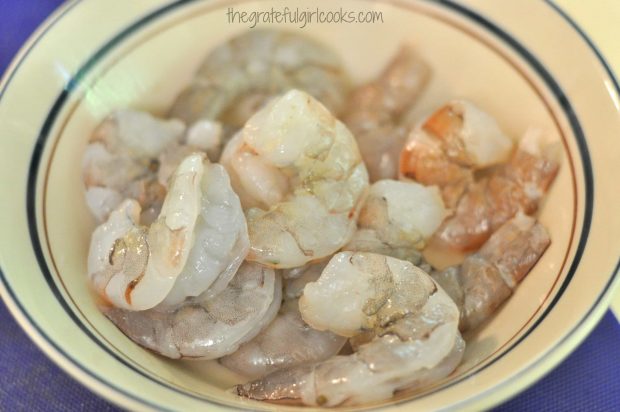
Clean, shell and de-vein all of the shrimp, and place them in a bowl. Discard the shells and veins, etc.

Shrimp are cleaned, shelled and de-veined before making kabobs.

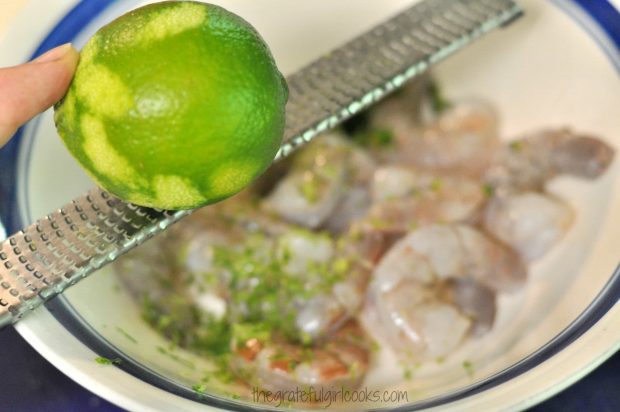
Use a microplane or a fine grater to add the zest of one lime to the shrimp in the bowl.

Lime zest is added to the raw shrimp in bowl.

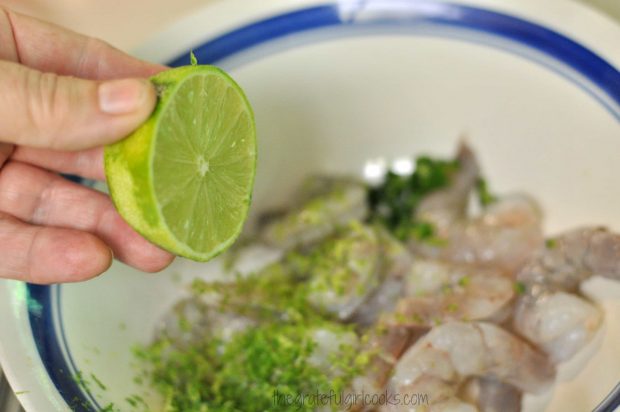
Now add the juice from the entire lime to the shrimp. The lime juice should be about the equivalent of about 1/4 cup liquid.

Fresh lime juice is added to the shrimp.

Marinate The Shrimp For The Kabobs

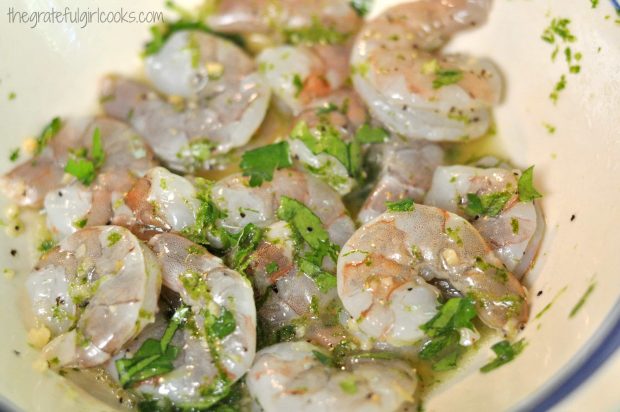
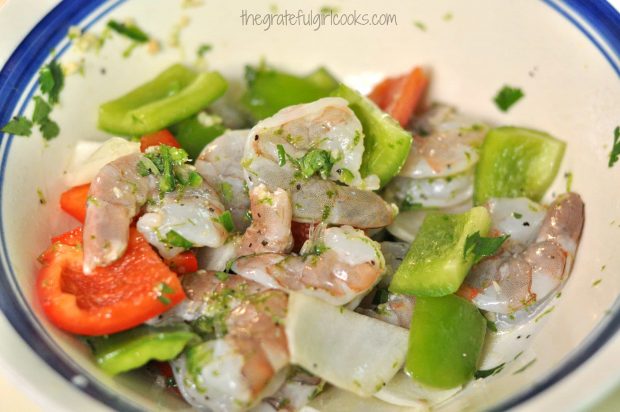
Add oil, chopped cilantro, finely chopped jalapeno, minced garlic, salt, and pepper to the shrimp. Stir, to fully cover the shrimp with the marinade ingredients. Cover the bowl with plastic wrap and let the shrimp marinate in the refrigerator for about 30 minutes.

The shrimp is marinated in the lime and cilantro sauce.

While the shrimp is marinating, cut up the red and green bell peppers and onion. When the shrimp is finished marinating, add sliced veggies to the bowl. Give them a quick stir, to coat with the marinade.

Make The Lime Cilantro Shrimp Kabobs

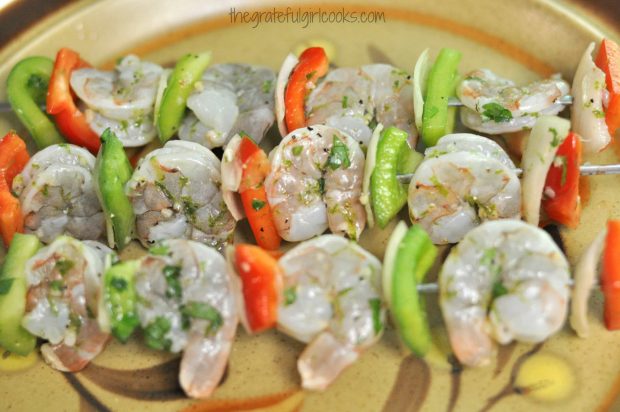
Thread the veggies and shrimp onto 4 skewers for grilling. Make sure to alternate colors and veggies with the shrimp. Note: I used metal skewers; if you are using wood skewers, be sure to soak them in water for about 30 minutes prior to using, so they won’t burn on the grill.

Red and green peppers and onions are mixed with the marinated shrimp.Shrimp kabobs are placed onto skewers before grilling.

Time To Grill The Shrimp Kabobs

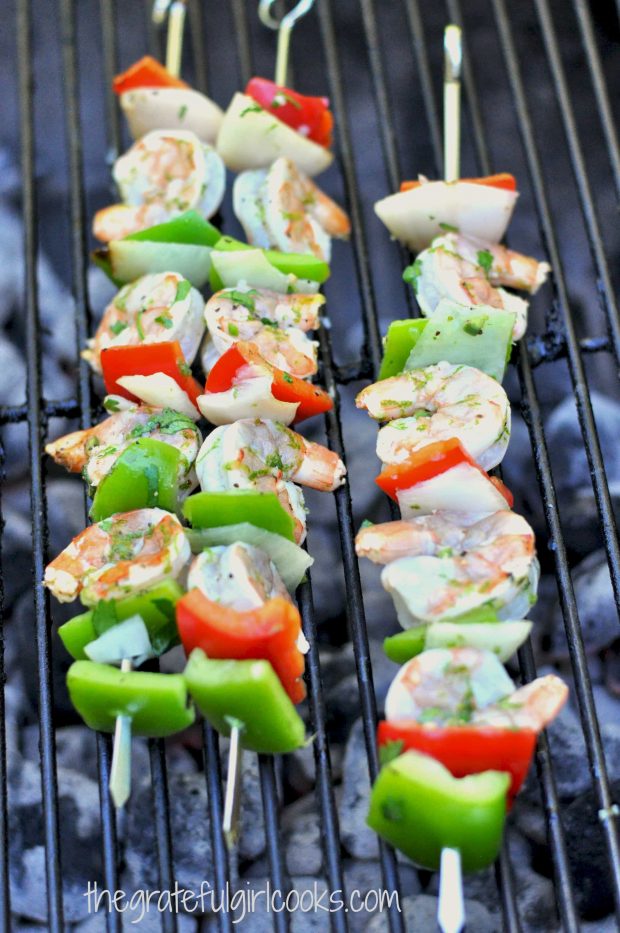
Cook the shrimp kabobs on a hot BBQ grill (medium-high heat). We grilled them about 3 minutes per side (maybe just a tad more, to ensure the veggies got some heat, too). Turn the shrimp kabobs at least once during the grilling time, to ensure all sides cook evenly.

Grilling lime cilantro shrimp kabobs on the BBQ.

Serve And Enjoy

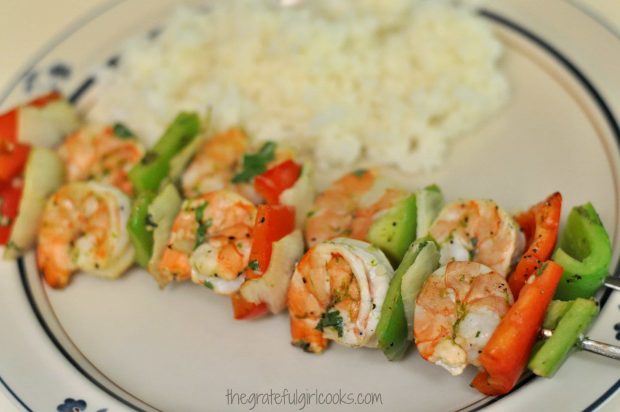
When done, remove the shrimp kabobs from the grill, and serve them right away while they’re hot! Each serving is 2 skewers of shrimp kabobs.

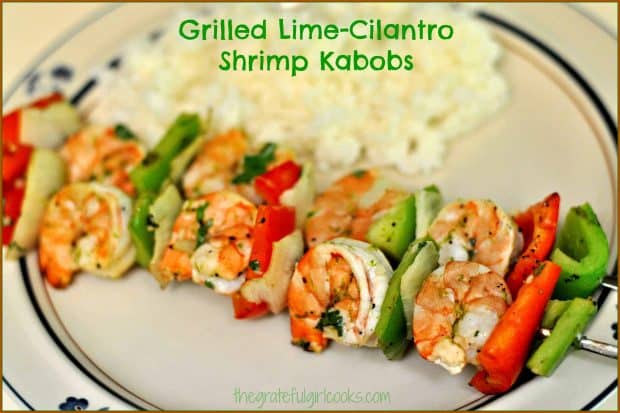
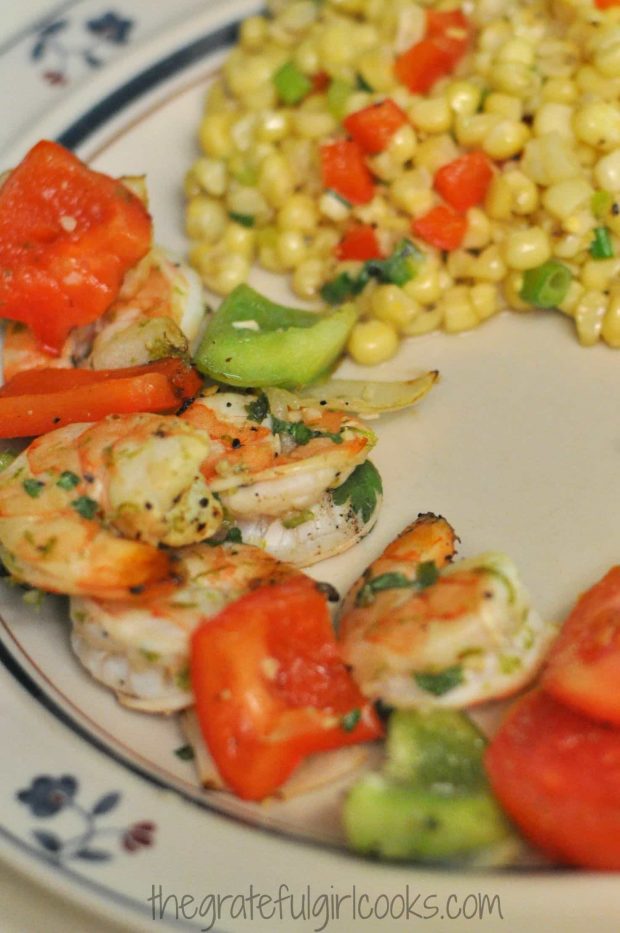
Grilled shrimp kabobs on a plate with rice on the side.I served the kabobs with my Fresh Corn Sauté with Red Pepper and Onions, some rice, and a couple slices of fresh tomatoes from our garden on the side. YUM!

The shrimp is removed from the skewers and served with some corn on the side.These grilled shrimp kabobs sure were good! Hope you’ll give these a try, too! I’m sure they would be just as good grilled on your indoor stovetop grill OR under a broiler (if you don’t have a BBQ grill).

This would also be a great recipe to take on a family camping trip. Just make everything up ahead of time (chopping veggies, marinating shrimp), then skewer them and cook over a campfire grill! The recipe I made (and am posting) serves two people, but can EASILY be doubled!!! Have a great day!

Looking For More KABOB Recipes?

You can find all of my recipes in the Recipe Index, located at the top of the page. A few kabob recipes you might enjoy include:

Interested In More Recipes?

Thank you for visiting this website. I appreciate you using some of your valuable time to do soIf you’re interested, I publish a newsletter 2 times per month (1st and 15th) with all the latest recipes, and other fun info. I would be honored to have you join our growing list of subscribers, so you never miss a great recipe!
There is a Newsletter subscription box on the top right side (or bottom) of each blog post, depending on the device you use, where you can easily submit your e-mail address (only) to be included in my mailing list.

You Can Also Find Me On Social Media:

Facebook page: The Grateful Girl Cooks!
Pinterest:
The Grateful Girl Cooks!
Instagram:
jbatthegratefulgirlcooks

Author's signatureShrimp Marinade Adapted From: http://www.closetcooking.com/2014/07/cilantro-lime-grilled-shrimp.html

0 from 0 votes
Grilled Lime-Cilantro Shrimp Kabobs
Prep Time
10 mins
Cook Time
6 mins
Marinating
30 mins
Total Time
46 mins
 

Delicious marinated and grilled lime cilantro shrimp kabobs, with peppers and onions are an easy, healthy and flavorful dish you'll enjoy!

Category: Entree
Cuisine: American
Keyword: shrimp kabobs
Servings: 4 kabobs
Calories Per Serving: 87 kcal
Author: JB @ The Grateful Girl Cooks!
Ingredients
  • 1/2 pound shrimp , cleaned, shelled, and deveined
  • 1 lime (zest AND juice)
  • 1/2 Tablespoon vegetable oil
  • 1 Tablespoon cilantro , chopped
  • 1/4 medium jalapeno , finely chopped
  • 1/2 clove minced garlic
  • salt and pepper (to taste)
  • 1/2 medium red bell pepper , cut into wedges (about the same size as the shrimp)
  • 1/2 medium green pepper , cut into wedges (about the same size as the shrimp)
  • 1/4 medium brown onion , cut into wedge slices (about the same size as the shrimp)
Instructions
  1. In a medium sized bowl, marinate the cleaned, shelled and deveined shrimp in the lime zest, lime juice, vegetable oil, cilantro, garlic, jalapeno, salt and pepper. Stir well, to combine and cover the shrimp with the marinade. Cover bowl with plastic wrap; refrigerate shrimp and marinade for 30 minutes
  2. While shrimp is marinating, cut up the red and green bell peppers, and the brown onion. Cut them into wedges about the same size as the shrimp.
  3. When shrimp has marinated for 30 minutes, add the peppers and onions to the bowl. Toss to coat. Thread the shrimp, peppers and onions onto 4 skewers, alternating items on the skewers.

  4. Grill on a medium-high heated BBQ grill (or under broiler, or on a stovetop grill). Cook shrimp about 3 minutes on each side, or until done. Serve while hot, and enjoy this simple dish! Each serving is 2 kabobs.

Recipe Notes

This recipe is EASILY doubled to serve 4!

Nutrition Facts
Grilled Lime-Cilantro Shrimp Kabobs
Amount Per Serving (2 kabobs)
Calories 87 Calories from Fat 18
% Daily Value*
Fat 2g3%
Saturated Fat 1g6%
Cholesterol 142mg47%
Sodium 442mg19%
Potassium 129mg4%
Carbohydrates 4g1%
Fiber 1g4%
Sugar 1g1%
Protein 12g24%
Vitamin A 520IU10%
Vitamin C 39.7mg48%
Calcium 88mg9%
Iron 1.4mg8%
* Percent Daily Values are based on a 2000 calorie diet.

Here’s one more to pin on your Pinterest boards!Delicious marinated and grilled lime cilantro shrimp kabobs, with peppers and onions are an easy, healthy and flavorful dish you'll enjoy!


Save

Save

Easy Grilled Chicken with Jerk Seasoning

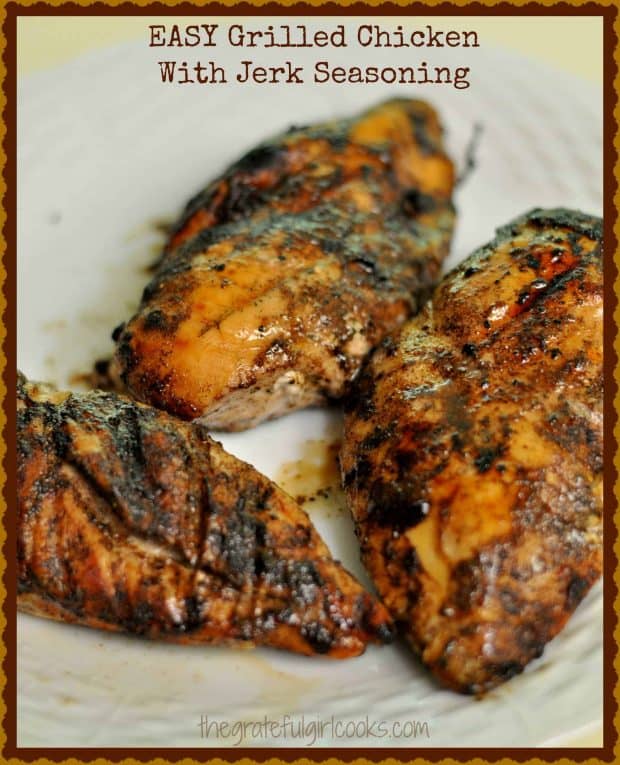
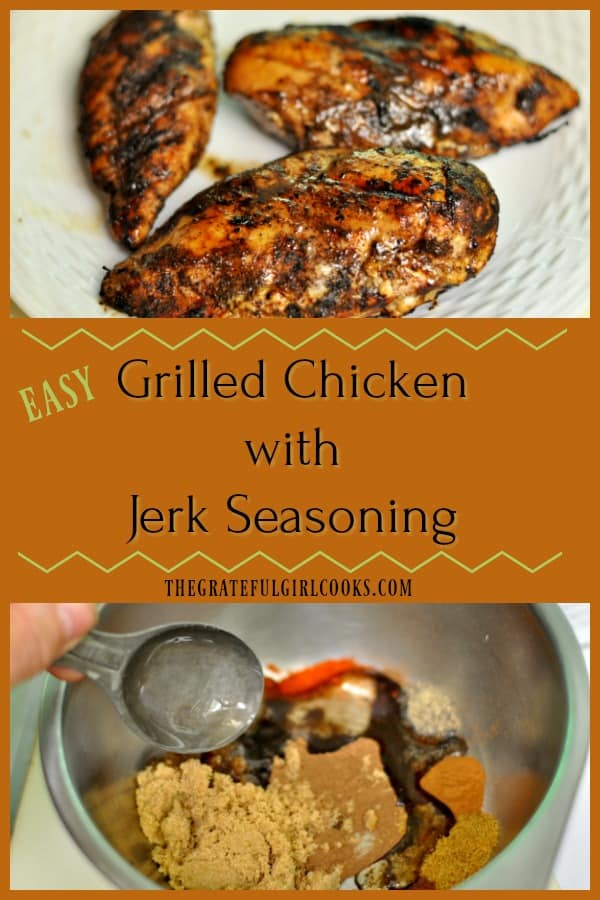
I found a new recipe for seasoning grilled chicken. It’s called EASY Grilled Chicken With Jerk Seasoning, and the jerk seasoning is made from scratch!  The recipe is really, really simple… and there are layers of flavors to the jerk spiced chicken that completely surprised me. EASY Grilled Chicken With Jerk Seasoning / The Grateful Girl Cooks!
Wanna know a little secret? Until I made this easy recipe, I had NEVER used Jerk seasoning before on anything. ANYTHING. I’d heard of chicken with jerk seasoning, but never had madeany meals that included this spice mix. Hmmm. What about you? Have you ever tried Jerk Seasoning? Well, here’s a simple recipe to give it a try!

All I had heard before trying this spice was that it is filled with layers of amazing flavors, was a dry rub for pork or chicken, and that it is thought to be native to Jamaica. So I decided to give it a try with this super easy recipe for mixing up the Jerk seasoning, and then grilling chicken with the spices on it. How hard can THAT be, right? NOT. This is ridiculously EASY.

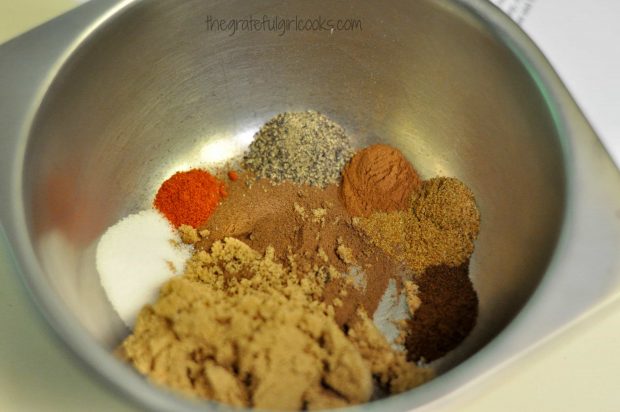
To make the Jerk spice rub, here’s what ya do… First you mix the spices  in a small bowl. (Easy, right?)

EASY Grilled Chicken With Jerk Seasoning / The Grateful Girl Cooks!
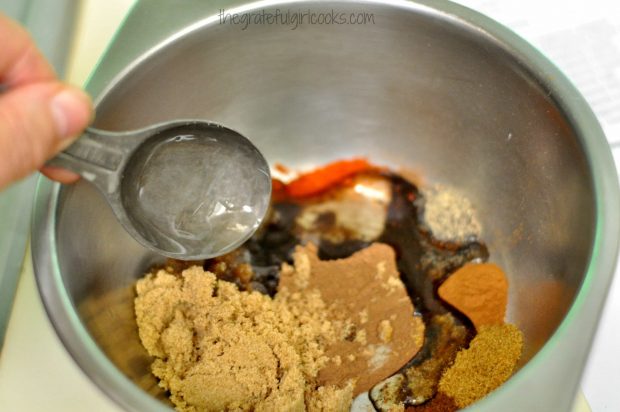
Add a tablespoon of oil to the spices.

EASY Grilled Chicken With Jerk Seasoning / The Grateful Girl Cooks!
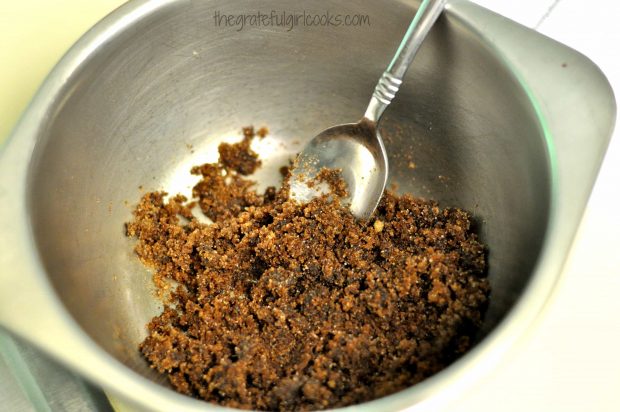
Give it a good stir to fully blend it all together. It will look like this (and it only took a second to make!)

EASY Grilled Chicken With Jerk Seasoning / The Grateful Girl Cooks!
Now use your hands and rub the spices onto both sides of the chicken. Coat it as thin or as thick as you like. I did a fairly thin layer, and the flavors were wonderful!

EASY Grilled Chicken With Jerk Seasoning / The Grateful Girl Cooks!Time To Cook The Chicken With Jerk Seasoning!

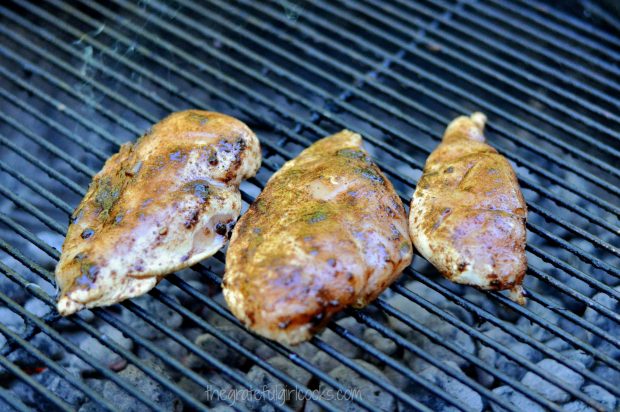
Put the chicken onto your hot BBQ grill (or you can also make this in a hot skillet in the kitchen). Note: Recipe makes enough spice for 4 chicken breasts; I only cooked 3 (FYI).

EASY Grilled Chicken With Jerk Seasoning / The Grateful Girl Cooks!
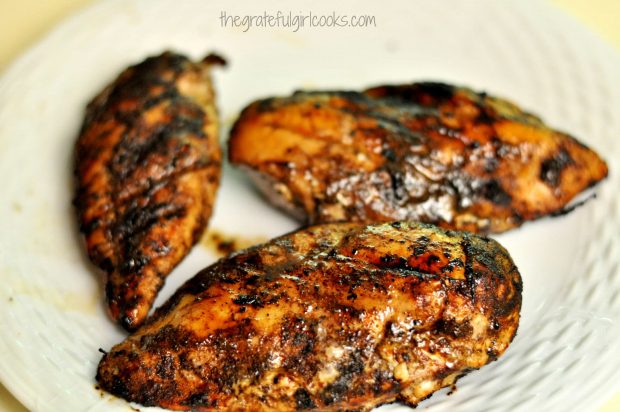
Cook the chicken (time will vary depending on size of pieces) until done, turning to cook both sides. (We cooked ours for about 10 minutes per side).

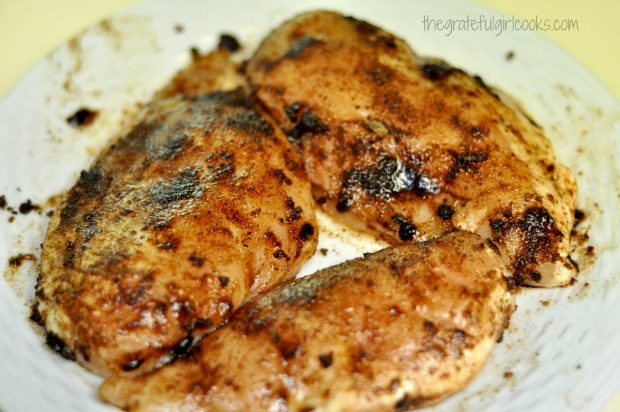
When the chicken is done, the outside will be a very deep brown color, and the insides will not be pink.

EASY Grilled Chicken With Jerk Seasoning / The Grateful Girl Cooks!
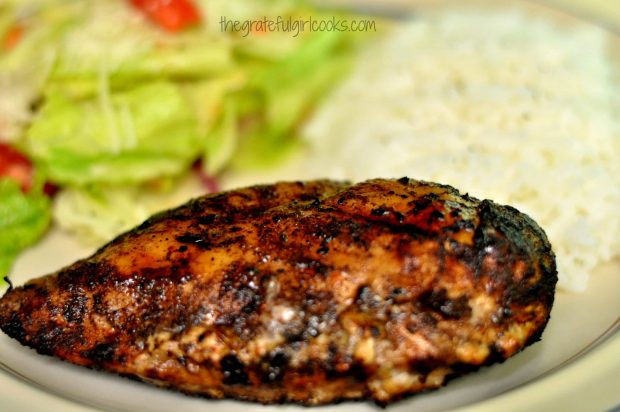
I served the chicken with a side of white rice (nice and bland went well with the flavorful and full of taste chicken, and a green salad. That’s it!  See how easy that was?

EASY Grilled Chicken With Jerk Seasoning / The Grateful Girl Cooks!
The chicken with jerk seasoning was delicious. It’s hard to describe, but each bite had many levels of flavor… at times a tiny bit spicy, other bites I got the sweet flavor of the brown sugar, and various spices that complimented the chicken well. I would definitely make this recipe again!

Hope you will give this recipe a try. Next time I’ll try this seasoning rub on pork, and see how that tastes, as well! Have a great day!

Interested In More Recipes?

Thank you for visiting this website. I appreciate you using some of your valuable time to do soIf you’re interested, I publish a newsletter 2 times per month (1st and 15th) with all the latest recipes, and other fun info. I would be honored to have you join our growing list of subscribers, so you never miss a great recipe!
There is a Newsletter subscription box on the top right side (or bottom) of each blog post, depending on the device you use, where you can easily submit your e-mail address (only) to be included in my mailing list.

You Can Also Find Me On Social Media:
Facebook page: The Grateful Girl Cooks!
Pinterest: The Grateful Girl Cooks!
Instagram: jbatthegratefulgirlcooks

EASY Grilled Chicken With Jerk Seasoning / The Grateful Girl Cooks!Recipe Source: http://pinchofyum.com/super-simple-jerk-chicken

0 from 0 votes
Easy Grilled Chicken with Jerk Seasoning
Prep Time
5 mins
Cook Time
20 mins
Total Time
25 mins
 
Enjoy the many levels of flavor of Jamaican Jerk Seasoning in this easy grilled chicken dish.
Category: Entree
Cuisine: Jamaican
Keyword: chicken with jerk seasoning
Servings: 4 servings
Calories Per Serving: 187 kcal
Author: JB @ The Grateful Girl Cooks!
Ingredients
For Jerk Seasoning:
  • 2 teaspoons allspice
  • 2 Tablespoons brown sugar
  • 1/2 teaspoon cumin
  • 1/4 teaspoon cloves
  • 1/4 teaspoon cinnamon
  • 1 teaspoon salt
  • 1/2 teaspoon ground black pepper
  • 1/8 teaspoon cayenne pepper
  • 1 Tablespoon canola oil (or vegetable oil)
  • 4 boneless, skinless chicken breasts , (4 oz. each)
Instructions
  1. Mix all the spices and oil in a small bowl.
  2. Using your hands, rub the spice mixture over both sides of each chicken breast to fully coat (spread spices thin or thick-your choice!).
  3. Preheat your BBQ grill or a skillet. You want both of them to be really hot when you add the chicken.
  4. Cook chicken on both sides until done (dark brown on outside, not pink on inside). Our chicken breasts which were fairly large, cooked for about 8-10 minutes on each side. Yours may take less time or more time, depending on how large or small the pieces of chicken are.
  5. Once chicken is done, remove it from heat, cover with foil and let it "rest" for about 5 minutes before serving. This will help the juices to stay in and soak in to the meat.
  6. Serve, and enjoy!
Nutrition Facts
Easy Grilled Chicken with Jerk Seasoning
Amount Per Serving (1 breast)
Calories 187 Calories from Fat 54
% Daily Value*
Fat 6g9%
Cholesterol 72mg24%
Sodium 716mg31%
Potassium 430mg12%
Carbohydrates 7g2%
Sugar 5g6%
Protein 24g48%
Vitamin A 60IU1%
Vitamin C 1.7mg2%
Calcium 17mg2%
Iron 0.6mg3%
* Percent Daily Values are based on a 2000 calorie diet.

Here’s one more to pin on your Pinterest boards!EASY Grilled Chicken With Jerk Seasoning / The Grateful Girl Cooks!
 

Save

Save

Save

Cedar Plank Grilled Salmon

Cedar Plank Grilled Salmon with butter, lemon and spices is a simple, easy way to BBQ outside on hot, summer days! Cedar Plank Grilled Salmon with butter, lemon and spices is a simple, easy way to BBQ outside on hot, summer days!
We’ve been enjoying much warmer than normal temperatures (can you say HOT???) in the Pacific Northwest this summer. Hot temps (in the high 90’s) have meant that I don’t use my oven as much to fix meals, so I don’t add to the heat in our home, PLUS it has meant more time outside on the deck, bonding with our Weber BBQ at dinner time. This Cedar Plank Grilled Salmon was our dinner last night.

Scroll Down For A Printable Recipe Card At The Bottom Of The Page

Last night my hubby (the “Grill-Meister”) grilled a salmon fillet on a cedar plank on our BBQ, and man oh man, it was so good! I typically pan-sear or bake salmon inside, in my kitchen, but there’s just something about grilled salmon in the summer, with the smokey smell from the BBQ and the cedar plank that you cook it on, that makes everything right with the world.

I had to remind my husband to put the lighter fluid on the charcoal briquets and NOT in his glass of wine, but after we got that sorted out, he took over the grilling duties! We cooked the salmon on our Weber BBQ on medium heat (lid closed, top vent open);  if you are using a gas grill, be sure the flames don’t reach the cedar plank or you might catch it on fire!

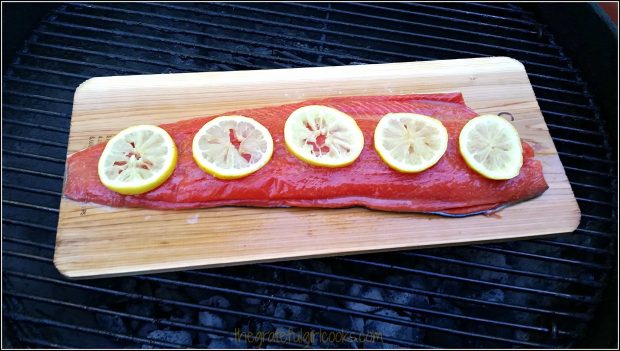
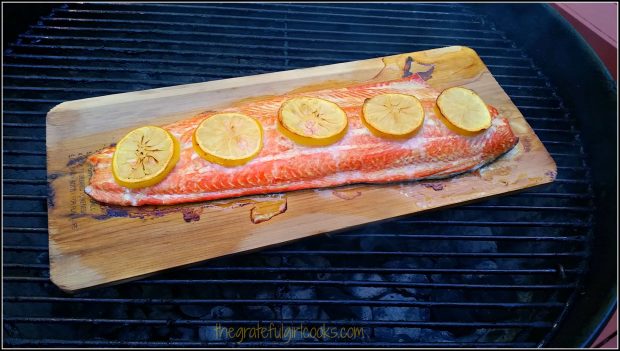
Cook, getting ready to grill salmon on cedar plank on BBQ
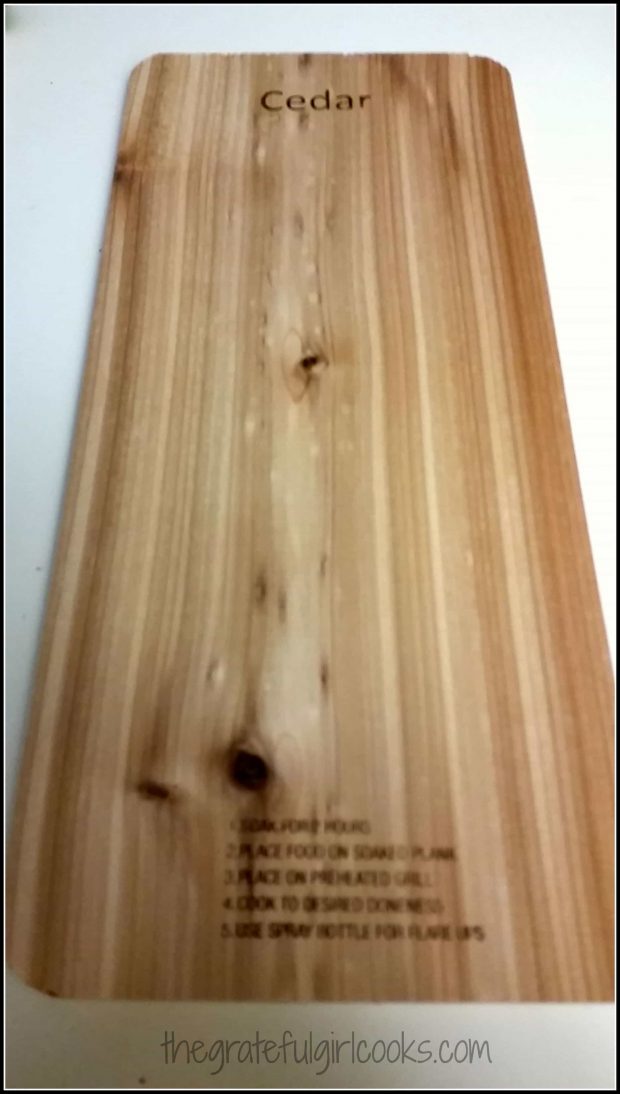
Have you ever grilled salmon fillets on cedar planks on your BBQ? Yum. It’s SO easy. First you buy a package of cedar planks at the grocery store (most stores carry them by the fish counter). They look like this, and usually a package contains 3-4 planks.

How To Prepare Cedar Plank So It Won’t Burn

You will need to soak the plank you are going to use in water for at least 30-40 minutes before putting on the grill. (I weigh mine down with filled pans of water in the sink, then cover board completely with water).

The wood plank needs to be soaked this long, so it doesn’t catch fire on the grill. As the fish cooks, the cedar board smokes and infuses flavor into the seafood. Makes sense, right?

Cedar plank used to grill salmon on BBQTime To Cook the Salmon
Once it is done “soaking”, you place a fresh salmon fillet on it  SKIN SIDE DOWN (we used one of two wild sockeye salmon fillets we bought at good old Costco).

Use a pastry brush to spread melted butter all over the top of the salmon. Sprinkle with salt, pepper, and garlic powder. Squeeze a bit of lemon juice over the top, also. I like to “garnish” the salmon fillet with thin slices of lemon while it cooks.

Once you have that done, you simply put the entire plank on the hot BBQ grill (with the top little vent open). Put the lid on the BBQ, and let it cook covered for about 35 minutes, until salmon is done (flaky). That’s it! No need to mess with it at all.

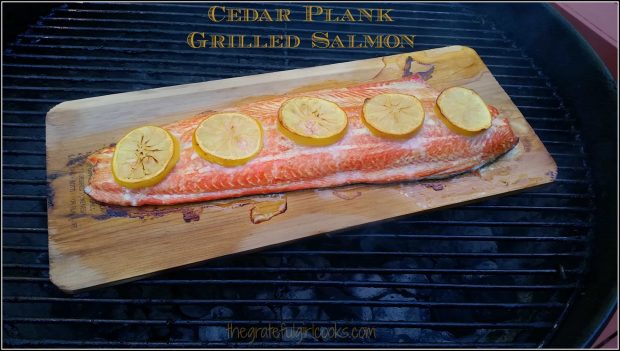
Cedar plank with salmon and lemon slices on grill
This is what it should look like when it is done. See? The soaked cedar plank didn’t burn up!

Grilled salmon is done cooking on cedar plank
Serving Cedar Plank Grilled Salmon
Remove the entire plank from the BBQ, take it inside, and cut salmon (not the cutting board!) into serving pieces (4-5 out of this piece of salmon). See how easy that is? When you realize how much 4-5 servings of cedar plank grilled salmon would cost in a restaurant, it REALLY is an inexpensive and easy way to make it yourself!!! Why not?

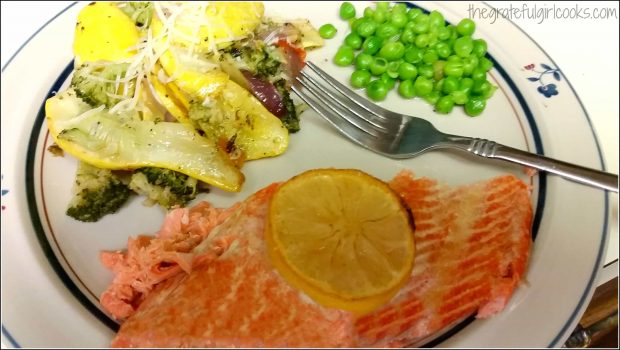
I served the salmon with some grilled mixed veggies (including yellow squash and peas from our garden), and we had a wonderful, healthy dinner that was incredibly delicious! AND we have a couple extra pieces of salmon for leftovers, too!

We really enjoy cedar plank grilled salmon; I have several other delicious recipes for this fish on my blog! You might want to check out the recipes for Salmon in a Lemon Butter Herb Sauce, Orange and Rosemary Glazed Salmon, or Pan-Seared Salmon with Cilantro Lime Sauce, to name a few. There are additional salmon recipes which you can find in the Recipe Index at the top of the page. YUM!
Grilled salmon served with mixed vegetables
Hope you will give this easy cedar plank grilled salmon a try this summer! Throw it on the grill, sit back and relax with a refreshing beverage, and let your BBQ do almost all the work for you!  Don’t forget to check out my Recipe Index, to see ALL my recipes. It’s located at the top of the page. Have a great week!
Interested In More Recipes?

Thank you for visiting this website. I appreciate you using some of your valuable time to do soIf you’re interested, I publish a newsletter 2 times per month (1st and 15th) with all the latest recipes, and other fun info. I would be honored to have you join our growing list of subscribers, so you never miss a great recipe!
There is a Newsletter subscription box on the top right side (or bottom) of each blog post, depending on the device you use, where you can easily submit your e-mail address (only) to be included in my mailing list.

You Can Also Find Me On Social Media:

Facebook page: The Grateful Girl Cooks!
Pinterest:
The Grateful Girl Cooks!
Instagram:
jbatthegratefulgirlcooks

Author's signature

↓↓ PRINTABLE RECIPE BELOW ↓↓

0 from 0 votes
Cedar Plank Grilled Salmon
Prep Time
30 mins
Cook Time
35 mins
Total Time
1 hr 5 mins
 
Cedar Plank Grilled Salmon with butter, lemon and spices is a simple, easy way to BBQ outside on hot, summer days! The smell from the cedar on the grill infuses smoky flavor into the fish for an amazing meal!
Category: Dinner
Cuisine: American
Keyword: cedar plank grilled salmon
Servings: 5 servings
Calories Per Serving: 301 kcal
Author: JB @ The Grateful Girl Cooks!
Ingredients
  • 2 pounds fresh salmon fillet (with skin on bottom)
  • 2 Tablespoons butter (melted)
  • 1/4 teaspoon salt
  • 1/4 teaspoon black pepper
  • 1/4 teaspoon garlic powder
  • 1/2 lemon (juice of)
  • 5 slices lemon (thinly sliced)
Instructions
  1. Soak the cedar plank you are going to use in water for at least 30-40 minutes before putting on the grill. (I weigh mine down with filled pans of water in the sink, then cover board completely with water). The wood plank needs to be soaked this long, so it doesn't catch fire on the grill. As the fish cooks, the cedar board smokes and infuses flavor into the seafood.

  2. Once it is done "soaking", remove from water. Place a fresh salmon fillet on it  SKIN SIDE DOWN.  Use a pastry brush to spread melted butter all over the top of the salmon. Sprinkle with salt, pepper, and garlic powder. Squeeze some lemon juice over the top, also. Garnish the salmon fillet with thin slices of lemon.

  3. Once BBQ is hot and ready, place wood plank directly onto BBQ rack. Cook salmon on medium heat (on our Weber grill we cooked it with lid closed, top vent open);  if you are using a gas grill, be sure the flames are set low enough to not reach the cedar plank directly or you might catch it on fire! Cook salmon (with lid on BBQ) for about 35 minutes, until done and fish flakes easily.

  4. Remove the entire plank from the BBQ, take it inside, and cut salmon (not the cutting board!) into serving pieces... serve, and enjoy! 

Nutrition Facts
Cedar Plank Grilled Salmon
Amount Per Serving (1 piece)
Calories 301 Calories from Fat 144
% Daily Value*
Fat 16g25%
Saturated Fat 4g25%
Cholesterol 111mg37%
Sodium 236mg10%
Potassium 898mg26%
Carbohydrates 1g0%
Protein 36g72%
Vitamin A 215IU4%
Vitamin C 4.9mg6%
Calcium 22mg2%
Iron 1.5mg8%
* Percent Daily Values are based on a 2000 calorie diet.

Here’s one more to pin on your Pinterest boards!Cedar Plank Grilled Salmon with butter, lemon and spices is a simple, easy way to BBQ outside on hot, summer days!

Save

Make Grilled Pizzas On Your BBQ!

Learn how easy it is to make grilled pizzas on your BBQ grill, which helps keep your kitchen cool in the Summer!Learn how easy it is to make grilled pizzas on your BBQ grill, which helps keep your kitchen cool this Summer!
Want to beat the heat in the kitchen this summer? Why not make grilled pizzas on your BBQ grill? That way you can kill two birds with one stone… keep the ol’ kitchen cool, AND enjoy a great homemade pizza!

I heard someone say they loved grilled pizzas right off the BBQ grill. Wait… What? It sounded like a great cooking experiment so I decided to give it a try. Result? Completely awesome!  It’s really much easier than I thought it would be! Get your hands on some pizza dough. Purchase it at the grocery store or make your own.

Scroll Down For A Printable Recipe Card At The Bottom Of The Page

Make Or Purchase Pizza Dough

I like to make my own grilled pizza dough. If you want to see the recipe for the dough I use, you can find it on my blog post for “Make It Yourself! Pepperoni Pizza”. The most important tip about this way of making pizza is to have all the pizza toppings ready to go (chopped, diced, etc.) before you put the dough on the grill!

Make the pizza dough (or open the package of pre-made dough – whatever). When done, divide dough into 6-8 little balls (if wanting small individual sized pizzas) OR (as in my pictures), divide dough into 2 medium sized dough balls. Roll or stretch dough out into a round shape (don’t worry if they’re not perfectly round shaped… no biggie).

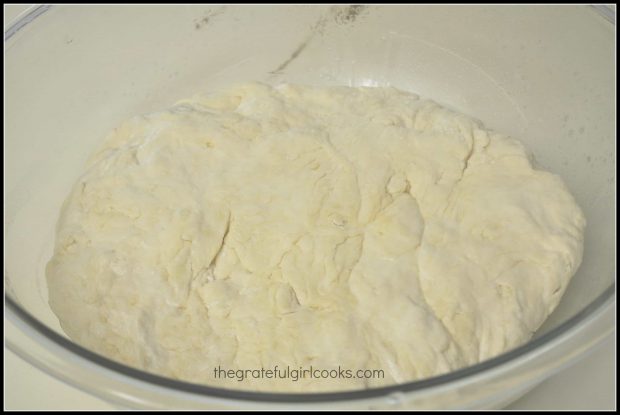
Pizza dough rising for grilled pizzas

Time To Make Grilled Pizzas On Your BBQ!

Heat your BBQ grill on medium high heat. Brush olive oil (important-don’t forget this step – this will keep dough from sticking to grill, and will crisp the dough up a bit!!!) on both sides of the circle-shaped pizza dough. Carefully slide the pizza dough onto the grill rack.

Cook dough for 3-4 minutes on the first side. The bottom should be lightly browned and have grill marks. The top of the dough will look done. Carefully remove dough and turn it upside down (*GRILLED SIDE UP) onto a cutting board.

Quickly add the sauce and toppings to your pizza. If you’re feeling brave, just flip the pizza over and add the sauce and toppings while it is on the grill. (that was too hot for me…I just had a wood cutting board outside and transferred it back and forth. Worked like a charm.

Pizza dough is removed from BBQ and toppings are added, then back onto BBQ grill
Carefully slide pizzas back onto grill and continue to cook for 3-4 minutes. We put the lid on the BBQ, which helped the cheese melt. The bottom of the dough should be lightly browned.

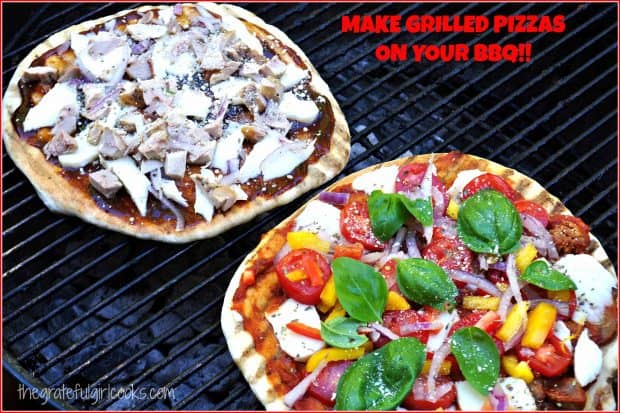
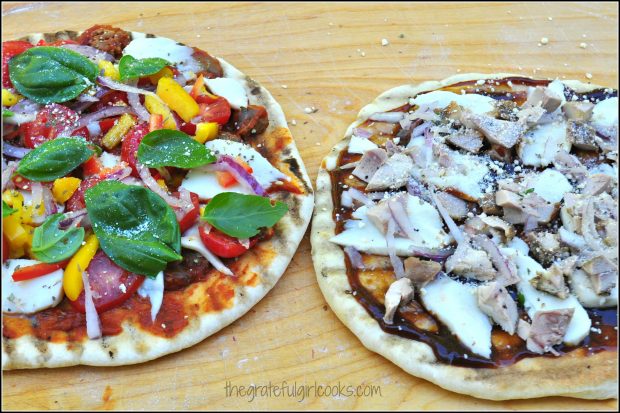
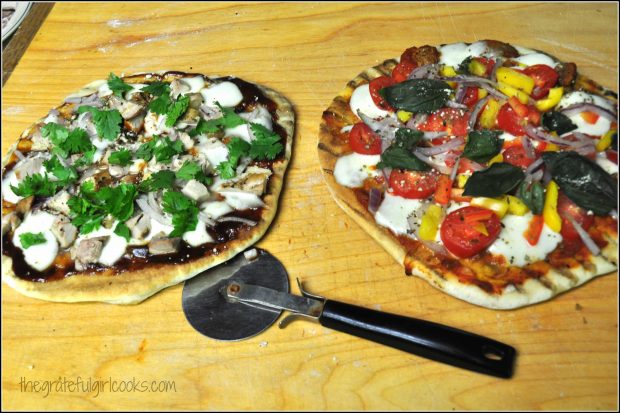
Grilled pizzas made on the BBQ are ready to slice and eat!

Remove pizzas from grill, slice and serve, with any last minute garnishes. Serve immediately… enjoy!

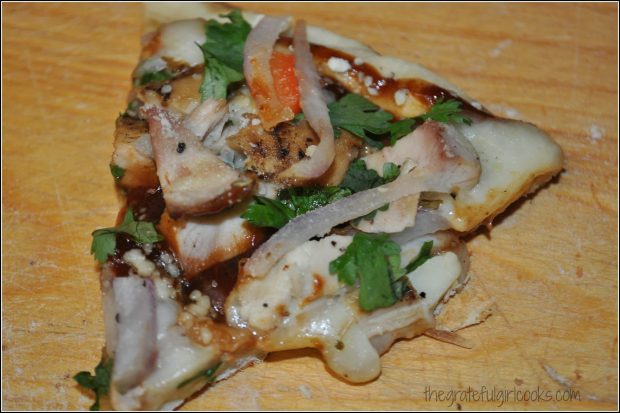
Grilled pizza sliced and served... straight off the BBQ grill!
We loved the taste of the grilled pizzas… and I personally loved the fact that our kitchen stayed cool! We loved our grilled BBQ chicken pizza, and our veggie delight pizza, and look forward to making this easy dinner again this summer. It sure helps to keep our kitchen cool!

I am not posting a printable recipe because everyone likes different kinds of pizza, toppings, sauces, AND pizza dough. I simply wanted to describe the “how-to’s” of grilling fresh pizzas on a BBQ so anyone could do it themselves! Hope you will give it a try!

Looking for More PIZZA Recipes?

You can find ALL my recipes in the Recipe Index, located at the top of the page. I have a variety of pizza recipes, which include:

Interested In More Recipes?

Thank you for visiting this website. I appreciate you using some of your valuable time to do soIf you’re interested, I publish a newsletter 2 times per month (1st and 15th) with all the latest recipes, and other fun info. I would be honored to have you join our growing list of subscribers, so you never miss a great recipe! 

There is a Newsletter subscription box on the top right side (or bottom) of each blog post, depending on the device you use, where you can easily submit your e-mail address (only) to be included in my mailing list.

You Can Also Find Me On Social Media:

Facebook page: The Grateful Girl Cooks!
Pinterest:
The Grateful Girl Cooks!
Instagram:
jbatthegratefulgirlcooks

Have a great day.

Author's signature

Here’s one more to pin on your Pinterest boards!Learn how easy it is to make grilled pizzas on your BBQ grill, which helps keep your kitchen cool this Summer!

Save

Save

Bacon-Wrapped Grilled Hot Dogs

Make your BBQ dinner go from ordinary to special with these yummy, easy bacon-wrapped grilled hot dogs! Remember, everything’s better with bacon!Make your BBQ dinner go from ordinary to special with these yummy, easy bacon-wrapped grilled hot dogs! Remember, everything's better with bacon!
Last night we grilled hamburgers for dinner. Right before we put the burgers on the grill, I decided to also throw on a few hot dogs, but hot dogs with a slight twist!

Oh my goodness… I took one taste of a bacon-wrapped grilled hot dog and knew it was a good decision to cook them this way! Bacon makes everything better… it even “classed up” an ordinary hot dog!

The smoky bacon flavor really adds to the grilled hot dog flavor. My husband raved about them! They were so very simple to make… here’s what I did, using 4 hot dogs and 4 pieces of bacon. Adjust the quantity to however many hot dogs you will be making.

How To Make Bacon-Wrapped Grilled Hot Dogs

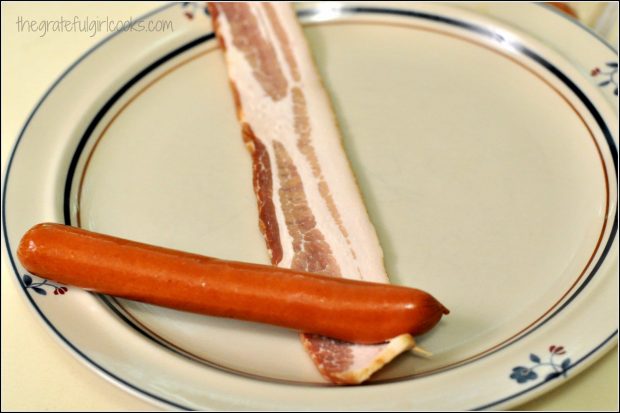
Fasten one end of the bacon into the end of a hot dog with a toothpick like this (shown below).

Wrapping a hot dog weiner with raw bacon
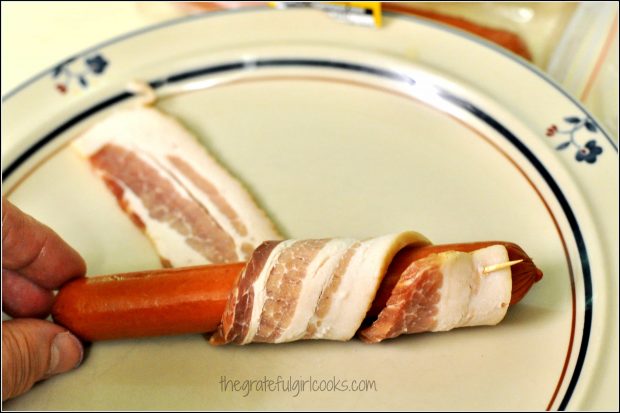
Tightly roll bacon around hot dog, covering the hot dog as much as possible.

Wrapping hot dog weiner with tightly wound raw bacon strip
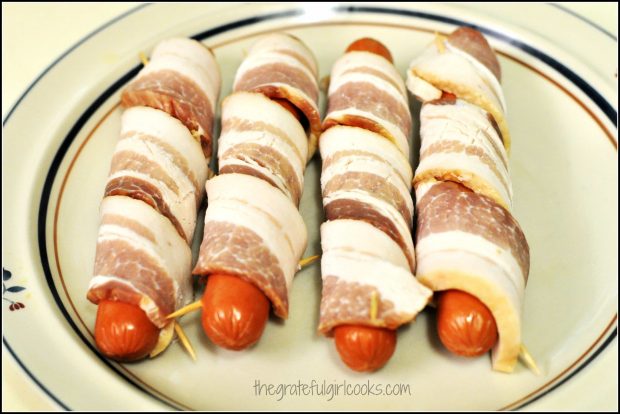
Attach the bacon to the hot dog using another toothpick. Repeat for each hot dog.

Four all beef weiners wrapped with bacon strip and secured with toothpicks
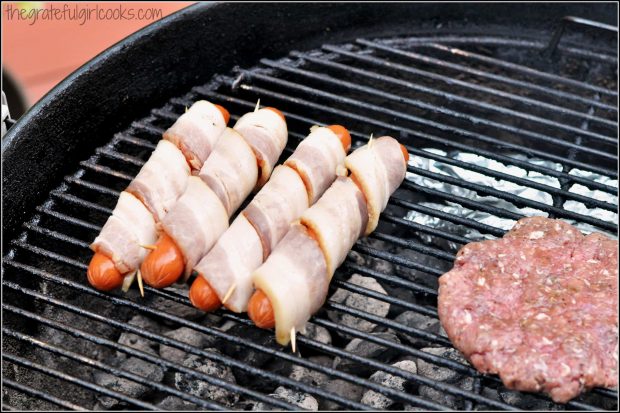
Cook the hot dogs on a really HOT side of the grill.

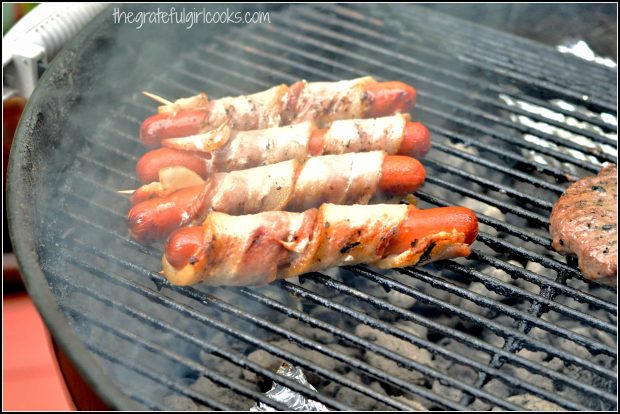
Four hot dogs wrapped in bacon cooking over hot coals.
How Long Do They Take To Cook?

Turn the hot dogs every couple of minutes (and spread ’em out a bit), to ensure that ALL the bacon has cooked. It will take about 25 minutes to cook the bacon completely through.

Four hot dogs grilled with bacon wrap.
When done, remove from heat, and serve. Put them in a hot dog bun, or just eat them as they are, fresh off the grill. They taste wonderful!

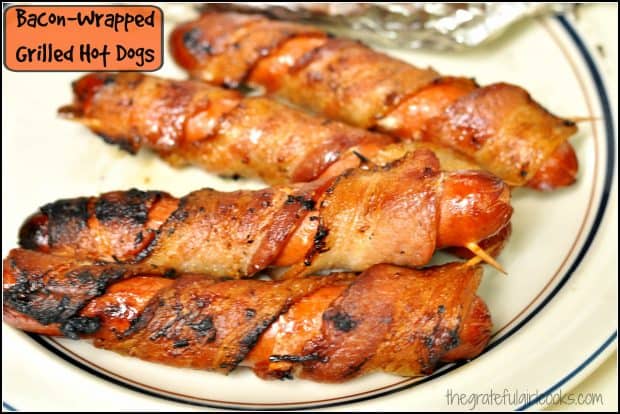
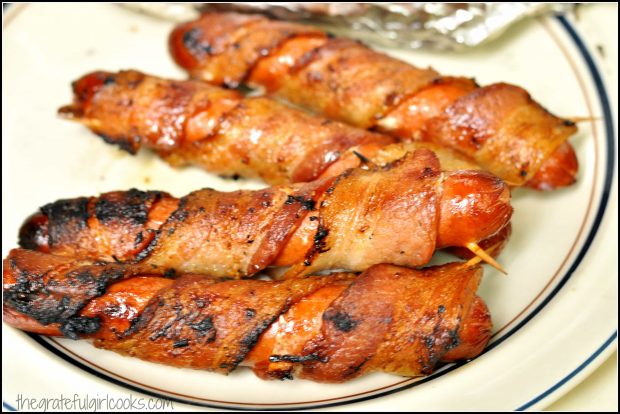
Four bacon-wrapped grilled hot dogs on plate, ready to eat.
That’s it! See how easy that was? My only tip is… REMEMBER TO REMOVE THE TOOTHPICKS FROM THE HOT DOGS BEFORE SERVING!  Nobody wants to eat a big ol’ toothpick, right?

Hope you enjoy these. They would be good on toasted hot dog buns, but my husband just cut one up with a knife and fork and ate it that way, and said it was DELICIOUS, without the bun. I guess bacon really does make everything tastes better… even hot dogs!

If you enjoy hot dogs, be sure to check out my recipe for yummy coney dogs! They’re absolutely delicious and are another simple meal to prepare! Thanks so much for stopping by, and I invite you to come back soon for more family-friendly recipes. Take care, and have a great day!

Interested In More Recipes?

Thank you for visiting this website. I appreciate you using some of your valuable time to do soIf you’re interested, I publish a newsletter 2 times per month (1st and 15th) with all the latest recipes, and other fun info. I would be honored to have you join our growing list of subscribers, so you never miss a great recipe!
There is a Newsletter subscription box on the top right side (or bottom) of each blog post, depending on the device you use, where you can easily submit your e-mail address (only) to be included in my mailing list.

You Can Also Find Me On Social Media:

Facebook page: The Grateful Girl Cooks!
Pinterest:
The Grateful Girl Cooks!
Instagram:
jbatthegratefulgirlcooks

Author's signature

Here’s one more to pin on your Pinterest boards!Make your BBQ dinner go from ordinary to special with these yummy, easy bacon-wrapped grilled hot dogs! Remember, everything's better with bacon!

Save

Save

Hawaiian “Huli Huli” Chicken

Hawaiian Huli Huli Chicken is absolutely delicious and SO EASY to make! Chicken is marinated in a simple Polynesian inspired sauce, then grilled on a BBQ. Hawaiian Huli Huli Chicken is absolutely delicious and SO EASY to make! Chicken is marinated in a simple Polynesian inspired sauce, then grilled on a BBQ.

The last thing I wanted to do, or had time for this week, was blogging, OR cooking anything that required using my brain and a lot of energy!  BUT… I tried this EASY recipe for Hawaiian “Huli Huli” Chicken (a Pinterest find) for dinner, and I’m sure glad I did! It was FANTASTIC!

Man oh man, it’s been crazy! My husband is working LONG hours and is also recovering from a back injury, so I spent a good part of the week tackling BIG home projects. My first project was pressure washing our brick patio and wood deck. UGH. Then I worked my tail off rolling 2 coats of paint onto our back (big) deck! DOUBLE UGH.

I needed something EASY to make at night for our dinner that didn’t require a lot of WORK. That’s where this delicious Hawaiian Huli Huli Chicken came in to the picture.

Scroll Down For A Printable Recipe Card At The Bottom Of The Page

What Does “Huli Huli” Mean?

Huli Huli is a very popular marinade or sauce in Hawaii. It is both slightly sweet and slightly savory! The words “huli huli” mean “to turn” in Hawaiian, referring to the turning of pork or chicken on the BBQ grill as it cooks.

It’s SO EASY To Make Hawaiian Huli Huli Chicken

The marinade for the Hawaiian Huli Huli chicken only takes 5-10 minutes to make!  Whisk the ingredients together, and it’s DONE! The only other prep step needed is to pour half of the marinade over some boneless, skinless chicken breasts and thighs. Once the chicken is covered with the marinade, it sits and bathes in it overnight (minimum of 4 hours for best flavor) in the fridge.

The other half of the marinade is refrigerated to baste the chicken with, as it grills. If you marinade the chicken ahead of time, this Hawaiian Huli Huli Chicken really is one quick dinner to make on a crazy, busy day!

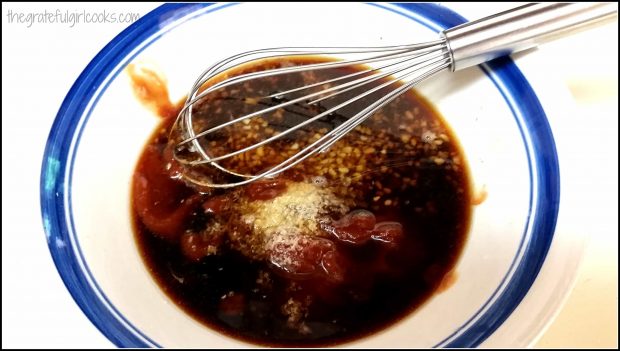
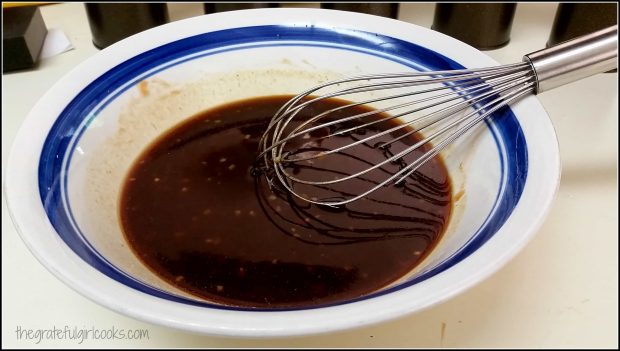
Ingredients for Hawaiian Huli Huli Chicken marinade are placed in small bowl.Hawaiian Huli Huli Chicken marinade is whisked to blend ingredients in bowl.
Time To Cook The Hawaiian Huli Huli Chicken

When you’re ready to cook the chicken, remove the chicken from the refrigerator.  I try to take it out of the fridge about half an hour before we cook it, to take the chill off. The marinade that the raw chicken has soaked in can be discarded so there is no cross contamination (nobody wants that bacteria in their meal).

My husband grilled the Hawaiian Huli Huli Chicken on our trusty Weber grill. He made sure to occasionally baste the chicken with the reserved “fresh” marinade and turn it, while it cooked. When the chicken was finished cooking, he brought it into the house so we could gobble it up!

Hawaiian Huli Huli Chicken is grilled on our BBQ

That’s it! See how incredibly EASY Hawaiian Huli Huli Chicken is to make?  When the chicken is done, garnish the pieces with sliced green onions before serving. I served the chicken with a side of steamed white rice, and a crisp green salad, and it was delicious!!!

My husband and I both think it tastes fantastic!  The Hawaiian Huli Huli chicken has a great Polynesian/teriyaki flavor going on, with just a teensy bit of heat from the cayenne pepper!

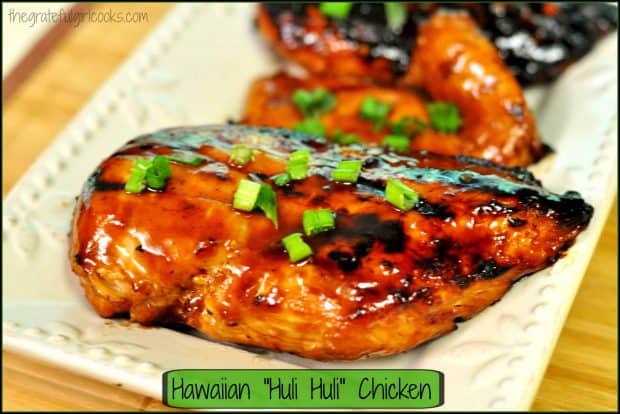
Hawaiian Huli Huli Chicken, garnished with green onions, ready to eat!

Next time I make this dish, I will also grill some pineapple  to serve alongside it. Don’t you think think grilled pineapple would be a perfect side dish for the chicken? YUM.

Hawaiian Huli Huli Chicken on white platter, ready to eat!
We absolutely loved this easy to prepare dish! Hawaiian Huli Huli Chicken was a perfect main course to serve on a very hot night. All you have to do is plan a little bit ahead to marinate the chicken. Make the marinade for the chicken at the beginning of the day (or before you leave for work). Then when you’re ready for dinner, throw the marinated chicken on the ol’ BBQ grill and keep your kitchen cool!

Sure hope you will try this recipe for Hawaiian Huli Huli Chicken. The original recipe calls for using all boneless chicken thighs, but I preferred the combo of chicken thighs and breasts! Have a great day!

Looking For More GRILLED CHICKEN Recipes?

You can find all my recipes in the Recipe Index, located at the top of the page. I have quite a few delicious grilled chicken recipes, including:

Interested In More Recipes?

Thank you for visiting this website. I appreciate you using some of your valuable time to do soIf you’re interested, I publish a newsletter 2 times per month (1st and 15th) with all the latest recipes, and other fun info. I would be honored to have you join our growing list of subscribers, so you never miss a great recipe!
There is a Newsletter subscription box on the top right side (or bottom) of each blog post, depending on the device you use, where you can easily submit your e-mail address (only) to be included in my mailing list.

You Can Also Find Me On Social Media:

Facebook page: The Grateful Girl Cooks!
Pinterest:
The Grateful Girl Cooks!
Instagram:
jbatthegratefulgirlcooks

Author's signatureRecipe Adapted From: http://cookinginstilettos.com/huli-huli-chicken/

0 from 0 votes
Hawaiian "Huli Huli" Chicken
Prep Time
5 mins
Cook Time
20 mins
Total Time
25 mins
 
Hawaiian Huli Huli Chicken is absolutely delicious and SO EASY to make! Chicken is marinated in a simple Polynesian inspired sauce, then grilled on a BBQ.
Category: Entree
Cuisine: Hawaiian
Keyword: Hawaiian huli huli chicken
Servings: 4 servings
Calories Per Serving: 287 kcal
Author: JB @ The Grateful Girl Cooks!
Ingredients
For tThe Marinade:
  • 1/2 cup soy sauce
  • 1/2 cup ketchup
  • 1/2 cup brown sugar
  • 1/4 cup chicken broth
  • 1 1/4 teaspoons fresh minced ginger
  • 1 1/4 teaspoons minced garlic
  • 1/8 teaspoon cayenne pepper
For The Chicken:
  • 4-5 boneless skinless chicken thighs and/or breasts
  • Olive oil (use to oil the grill before adding chicken)
  • 1 stalk green onion , chopped (use the green part), for garnish
Instructions
  1. Whisk the marinade ingredients together in a large covered container, until fully combined. Set aside about half of the marinade in a separate container (cover and refrigerate the reserved marinade until ready to grill).

  2. Add the thawed chicken pieces to the large container; turn to coat in the sauce. Make sure container is covered. Refrigerate chicken overnight, or at least 4-6 hours.
  3. Prepare BBQ. Lightly oil the grill with the olive oil. When coals are hot and ready to go, add the chicken pieces. Discard the marinade that the raw chicken was in. 

  4. Grill the chicken until done (larger pieces of chicken will require longer cooking time). Use the reserved marinade (from step #1) to baste the chicken continually while it cooks. When chicken is fully cooked (approx. 20-25 minutes or so, depending on size), remove chicken from grill to a serving platter. Garnish chicken with sliced green onions. Serve and enjoy!

Recipe Notes

REMEMBER!!!! The PREP time as indicated, does NOT include the time to marinade the chicken! Prepare ahead, and this will go quick!

Caloric calculation was determined using boneless, skinless chicken breasts.

Nutrition Facts
Hawaiian "Huli Huli" Chicken
Amount Per Serving (1 breast)
Calories 287 Calories from Fat 27
% Daily Value*
Fat 3g5%
Cholesterol 72mg24%
Sodium 1527mg66%
Potassium 618mg18%
Carbohydrates 38g13%
Sugar 33g37%
Protein 26g52%
Vitamin A 245IU5%
Vitamin C 4.5mg5%
Calcium 39mg4%
Iron 1.4mg8%
* Percent Daily Values are based on a 2000 calorie diet.

Here’s one more to pin on your Pinterest boards!Hawaiian Huli Huli Chicken is absolutely delicious and SO EASY to make! Chicken is marinated in a simple Polynesian inspired sauce, then grilled on a BBQ. YUM!


Save

Save

Save

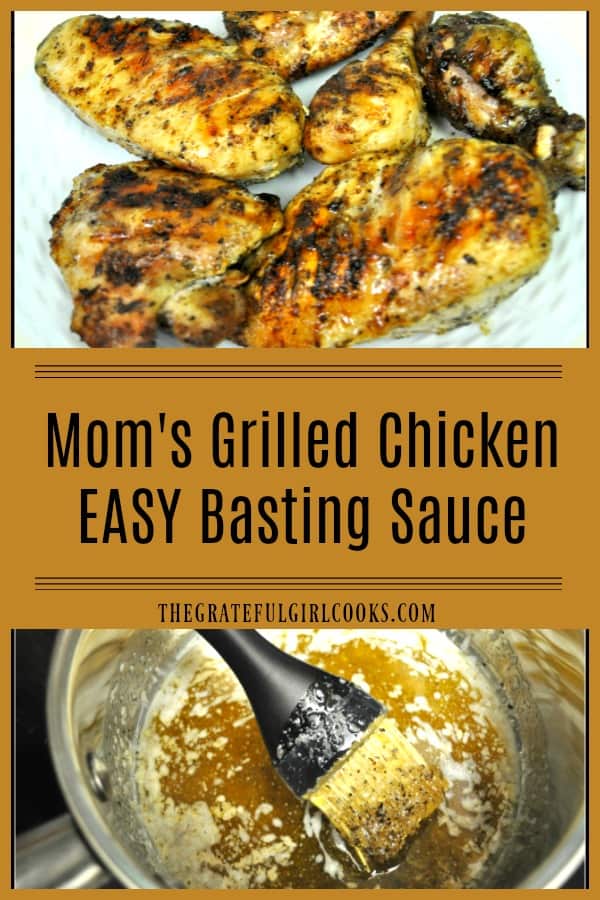
Mom’s Grilled Chicken Basting Sauce

You’re gonna LOVE this EASY grilled chicken basting sauce (only a few ingredients)! We’ve used the same recipe for over 50 years to grill fantastic chicken.You're gonna LOVE this EASY grilled chicken basting sauce (only a few ingredients)! We've used the same recipe for over 50 years to grill fantastic chicken.

Who doesn’t love a great grilled chicken dinner (well…aside from vegetarians, vegans…and chickens)? I know we sure do! My favorite way to grill chicken includes using this EASY recipe for Mom’s Grilled Chicken Basting Sauce!  It’s the BEST!

Once it gets warm enough to stand outside and fire up our BBQ, we routinely grill chicken THIS WAY!  My mom used this simple (yet packed with flavor) basting sauce on grilled chicken when I was growing up. I love grilling chicken with it to this very day! It’s probably the recipe from her that I use the most!

Scroll Down For A Printable Recipe Card At The Bottom Of The Page

How I Got This Simple Recipe

My Mom got the recipe from my Great Aunt a LONG LONG time ago (over 50 years ago), and who knows where my Great Aunt (a great cook) got the recipe from! You just need to know this recipe has been used faithfully by our family for well over 50 years!

Everyone seems to have their own favorite recipe for grilled chicken. This is mine, and it’s DELICIOUS!   This grilled chicken basting sauce is ridiculously EASY to make, completely FOOLPROOF, wildly INEXPENSIVE and completely LIP-SMACKIN’ DELICIOUS!

Does This Grilled Chicken Basting Sauce Have a LOT of Ingredients?

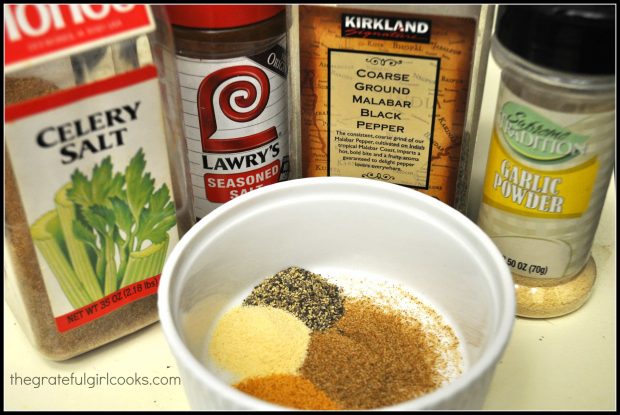
Thankfully, NO! The only spices you will need are celery salt, seasoning salt, coarse ground black pepper, and garlic powder. Once these common spices are mixed with melted butter… boom! You’ve got an absolutely incredible and EASY grilled chicken basting sauce!

Spices needed for grilled chicken basting sauce

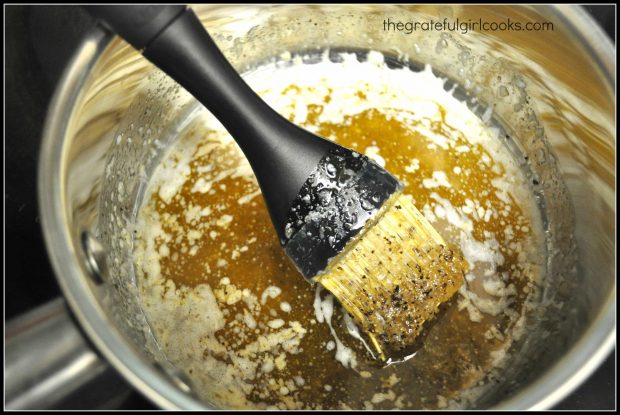
Melt the butter on low heat, and then add the spices, and stir, to combine. See how incredibly FAST that was? Grab a pastry brush to apply the sauce to the meat, and you’re ready to BBQ! See how easy that is? Easy is GOOD. This grilled chicken basting sauce is GREAT!

Spices added to melted butter to make easy basting sauce for chicken

Cooking With The Grilled Chicken Basting Sauce

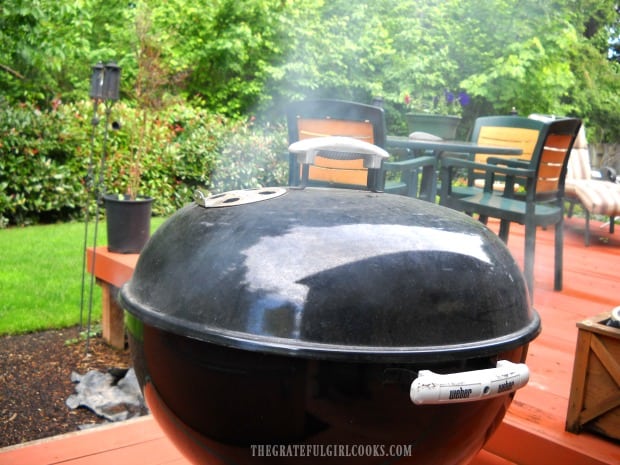
We like to cook our poultry using this grilled chicken basting sauce on our trusty Weber charcoal grill. The flavor from the sauce AND the briquettes are a winning combo!

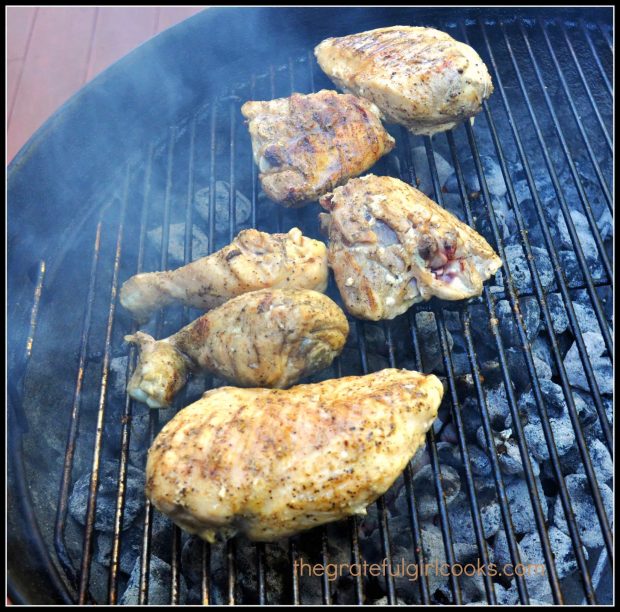
Brush the pieces with the grilled chicken basting sauce (all sides of the chicken). Turn the chicken several times while it cooks! Continue to baste the chicken pieces with the sauce as they cook. The chicken will begin to have a lovely brown color on the outside as it grills!

Grilling chicken with easy basting sauce on Weber BBQ .

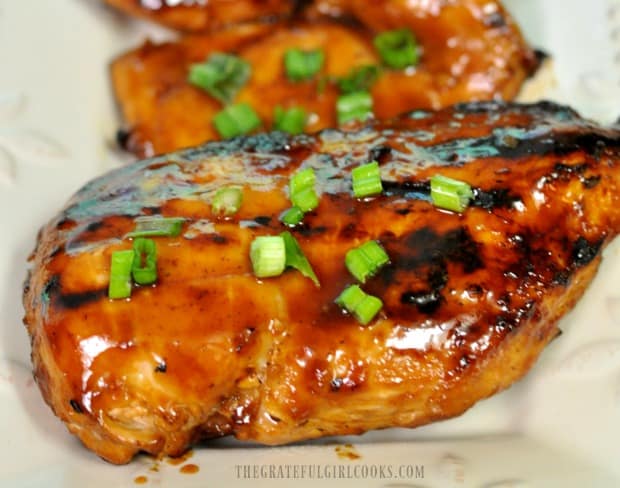
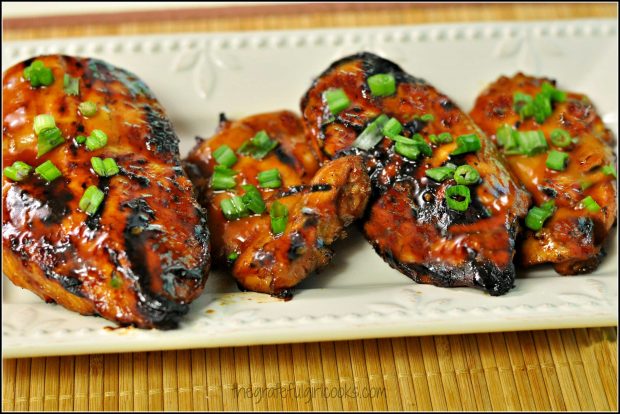
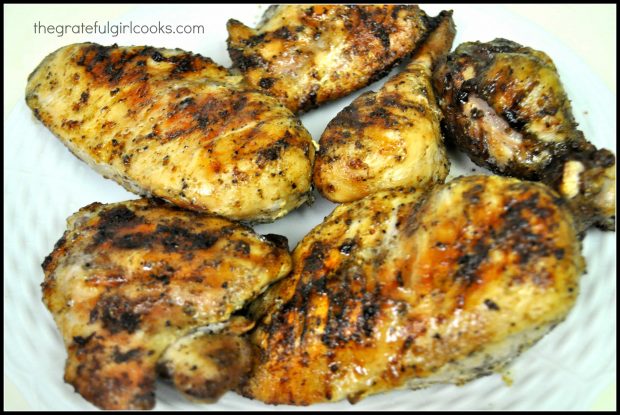
Once the chicken is fully cooked, remove it from the grill.  See the lovely color on those pieces of chicken? That is because of the butter in the grilled chicken basting sauce! You really cannot believe how simple this is to make and how absolutely DELICIOUS the chicken tastes!

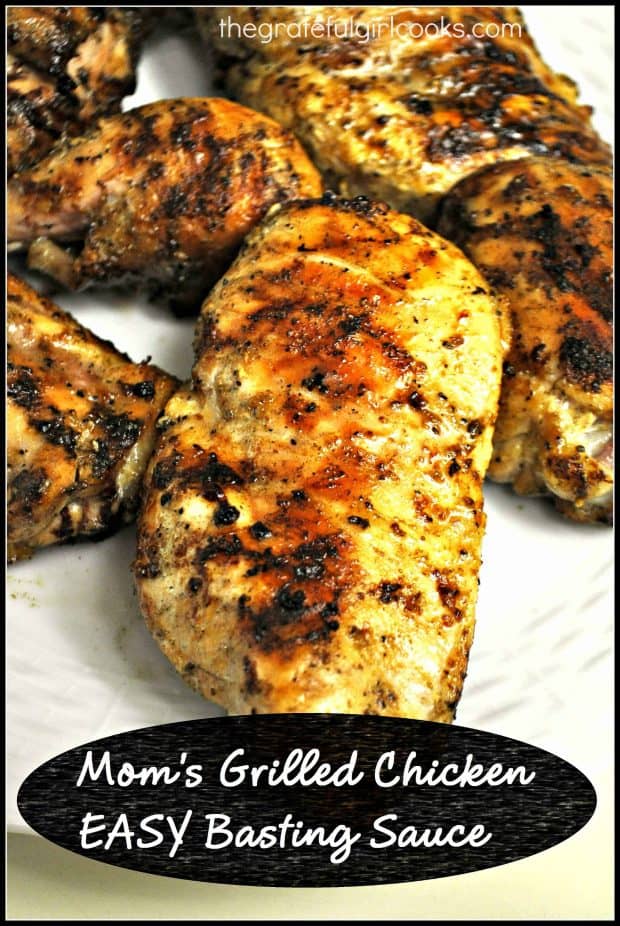
This poultry, seasoned with the grilled chicken basting sauce, is cooked and ready to eat!

Serve The Chicken – You’re Gonna LOVE It!

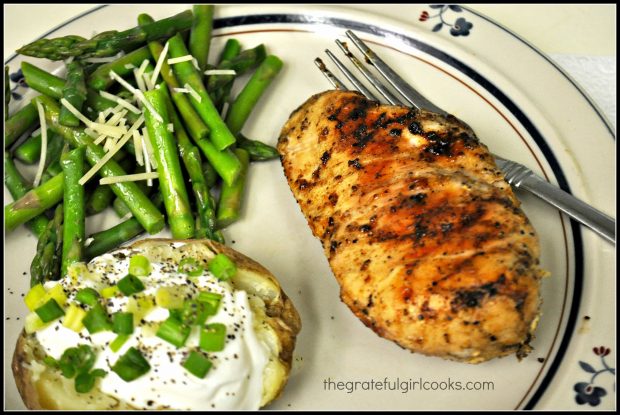
Now it’s time to serve a great tasting dinner! We had fresh asparagus and a nice baked potato with this delicious chicken dish. The chicken has tons of flavor, thanks to the yummy basting sauce, and pairs well with most side dishes!

Grilled chicken basting sauce covered chicken breast, served with baked potato and asparagus!

I really hope you will give this grilled chicken basting sauce a try. It’s fantastic (and did I mention just how easy it is)? Umm yeah, I did. Trust me…your grilled chicken dinner will be the better for it!

Looking For More Recipes For GRILLED MEAT?

You can find all of my recipes in the Recipe Index, located at the top of the page. A few grilling recipes you might be interested in include:

Interested In More Recipes?

Thank you for visiting this website. I appreciate you using some of your valuable time to do soIf you’re interested, I publish a newsletter 2 times per month (1st and 15th) with all the latest recipes, and other fun info. I would be honored to have you join our growing list of subscribers, so you never miss a great recipe!
There is a Newsletter subscription box on the top right side (or bottom) of each blog post, depending on the device you use, where you can easily submit your e-mail address (only) to be included in my mailing list.

You Can Also Find Me On Social Media:
Facebook page: The Grateful Girl Cooks!
Pinterest: The Grateful Girl Cooks!
Instagram: jbatthegratefulgirlcooks

Have a fantastic day! Make the most of each minute!

Author's signature

Recipe Source: My Mom

↓↓ PRINTABLE RECIPE BELOW ↓↓

0 from 0 votes
Mom's Grilled Chicken Basting Sauce
Prep Time
5 mins
Cook Time
0 mins
Total Time
5 mins
 
Absolutely fantastic grilled chicken basting sauce! This recipe has been used by our family for over 50 years for perfect grilled chicken.
Category: Grilling Sauce
Cuisine: American
Keyword: grilled chicken basting sauce
Servings: 8 servings (coats 8 pcs. chicken)
Calories Per Serving: 75 kcal
Author: JB @ The Grateful Girl Cooks!
Ingredients
  • 6 Tablespoons butter (3/4 stick) , melted
  • 1/4 tsp. garlic powder
  • 1/4 tsp. celery salt
  • 1/4 tsp. seasoned salt
  • 1/4 tsp coarse grind black pepper
Instructions
  1. Melt butter in small sauce pan (on low heat) until butter melts. Add remaining spices and stir until combined. Remove pan from heat.

  2. Using a pastry brush, spread sauce evenly over chicken pieces.
  3. Cook chicken pieces on grill, turning chicken and basting several times throughout the grilling process. Baste all sides of the chicken . Use all the sauce. Grill chicken until done. ENJOY!

Recipe Notes

The amount of sauce (as written) will coat approximately 8 pieces of chicken. The caloric calculation is for 1/8 of the total sauce (only).

Nutrition Facts
Mom's Grilled Chicken Basting Sauce
Amount Per Serving (1 serving)
Calories 75 Calories from Fat 72
% Daily Value*
Fat 8g12%
Saturated Fat 5g31%
Cholesterol 22mg7%
Sodium 194mg8%
Vitamin A 260IU5%
Calcium 3mg0%
* Percent Daily Values are based on a 2000 calorie diet.

Here’s one more to pin on your Pinterest boards!You're gonna LOVE this EASY grilled chicken basting sauce (only a few ingredients)! We've used the same recipe for over 50 years to grill fantastic chicken.


Save

Save

Save

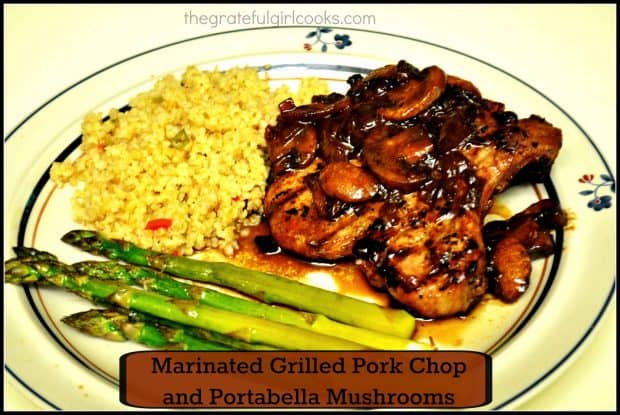
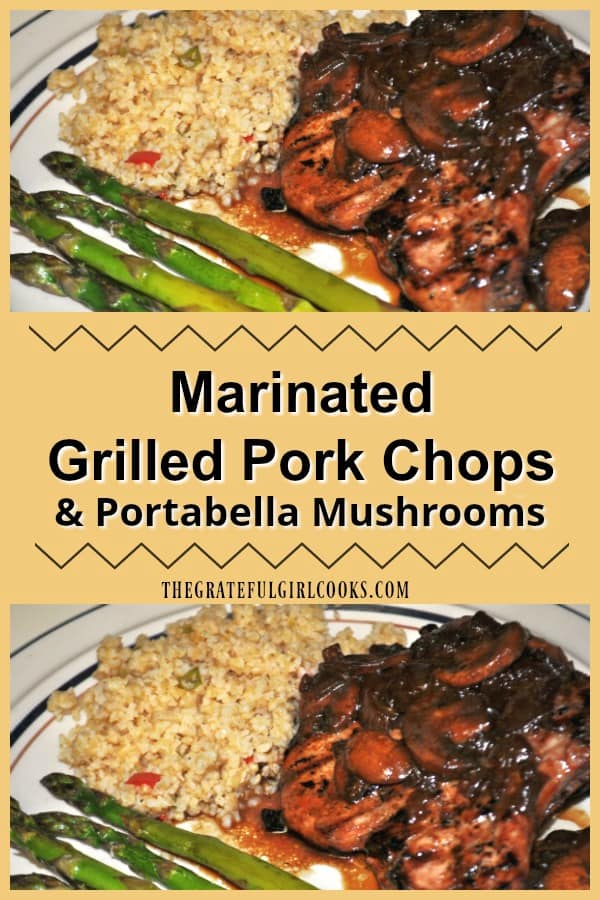
Marinated Grilled Pork Chops and Portabella Mushrooms

My husband is the “Grill-Master” in our family. He recently grilled these Marinated Grilled Pork Chops and Portabella Mushrooms, and the dish was outstanding! Marinated Grilled Pork Chops and Portabella Mushrooms / The Grateful Girl Cooks!
When the weather is decent (in Oregon that means “not raining heavily”), he loves to grill on our Weber BBQ.  He’ll stand out there (yes, sometimes even in the rain) with the smoke pouring out of that BBQ into his eyes and permeating his clothes…and grill our dinner! While I love to prepare the food, I am so grateful he loves to GRILL the food! Yay!
Scroll Down For A Printable Recipe Card At The Bottom Of The Page

I found this simple marinade recipe for pork chops online; then decided to use half of the marinade for the pork chops, and the other half to make a reduction sauce to saute baby portabella mushrooms in (to top the grilled pork chops with). Yum.  If you don’t eat mushrooms, then use the entire marinade for the chops. Fantastic, either way!

The Grill Master, busy at work (Should I tell him the lighter fluid goes on the briquets?)- ha ha.

The grillmeister at work, before making marinated grilled pork chops.

Hope you give these yummy pork chops a try. They are such a simple and delicious entree! Have a great day.

Looking For More PORK CHOP Recipes?

You can find ALL of my recipes in the Recipe Index, located at the top of the page. I have some really yummy pork chop recipes, including:

Interested In More Recipes?

Thank you for visiting this website. I appreciate you using some of your valuable time to do soIf you’re interested, I publish a newsletter 2 times per month (1st and 15th) with all the latest recipes, and other fun info. I would be honored to have you join our growing list of subscribers, so you never miss a great recipe!
There is a Newsletter subscription box on the top right side (or bottom) of each blog post, depending on the device you use, where you can easily submit your e-mail address (only) to be included in my mailing list.

You Can Also Find Me On Social Media:
Facebook page: The Grateful Girl Cooks!
Pinterest: The Grateful Girl Cooks!
Instagram: jbatthegratefulgirlcooks

Author's signatureMarinade Recipe adapted from: http://www.cooks.com/recipe/rc9vt5im/marinade-for-grilled-pork-chops.html

↓↓ PRINTABLE RECIPE BELOW ↓↓

0 from 0 votes
Marinated Grilled Pork Chops and Portabella Mushrooms
Prep Time
10 mins
Cook Time
50 mins
Marinating Time
4 hrs
Total Time
5 hrs
 
Marinated grilled pork chops, with portabella mushrooms in a delicious sauce.
Category: Entree
Cuisine: American
Keyword: marinated grilled pork chops
Servings: 4 servings
Calories Per Serving: 544 kcal
Author: JB @ The Grateful Girl Cooks!
Ingredients
For The Marinade:
  • 1 medium onion , finely chopped
  • 1/3 cup oil
  • 1/3 cup pineapple juice
  • 1/4 teaspoon garlic powder
  • 1/2 cup soy sauce
  • 2 Tablespoons brown sugar
  • 4 large pork chops , bone in
  • 1 package baby portabella mushrooms , sliced
  • 1 Tablespoon butter
Instructions
  1. Combine the first 6 ingredients (onion, oil, pineapple juice, garlic powder, soy sauce, and brown sugar) in a bowl. Whisk ingredients until fully blended. Pour HALF of the sauce over the pork chops to marinate. To marinade the chops, I use a gallon sized plastic resealable bag (you can also use a covered pan).
  2. Set aside the remaining 1/2 of the sauce (to cook the mushrooms in later).
  3. Marinate the chops in the refrigerator for at least 4 hours (overnight is even better), turning several times to make sure the chops are fully coated. Once BBQ is ready to go, grill chops until done, basting occasionally with sauce (from the bag or pan).
  4. While pork chops are cooking, add the reserved marinade (that you set aside earlier) to a skillet. Add the sliced mushrooms and saute on medium low for approximately 5-8 minutes. Sauce should reduce a bit as it cooks. Stir to coat the mushrooms. About a minute or so before the mushrooms are done, add the Tablespoon of butter to the sauce. Stir in and keep the sauce warm.
  5. When pork chops are done, place on serving plates and spoon some of the mushrooms and skillet sauce over the top of each chop. ENJOY!
Recipe Notes

PLEASE NOTE: Almost all of the prep time in INACTIVE prep time while the pork is marinating.

Nutrition Facts
Marinated Grilled Pork Chops and Portabella Mushrooms
Amount Per Serving (1 pork chop)
Calories 544 Calories from Fat 324
% Daily Value*
Fat 36g55%
Saturated Fat 21g131%
Cholesterol 124mg41%
Sodium 1188mg52%
Potassium 910mg26%
Carbohydrates 16g5%
Fiber 1g4%
Sugar 10g11%
Protein 38g76%
Vitamin A 90IU2%
Vitamin C 4mg5%
Calcium 51mg5%
Iron 2mg11%
* Percent Daily Values are based on a 2000 calorie diet.

Here’s one more to pin on your Pinterest boards!Marinated Grilled Pork Chops and Portabella Mushrooms / The Grateful Girl Cooks!

Save

Save