Category: Italian

Easy Fettucine Alfredo

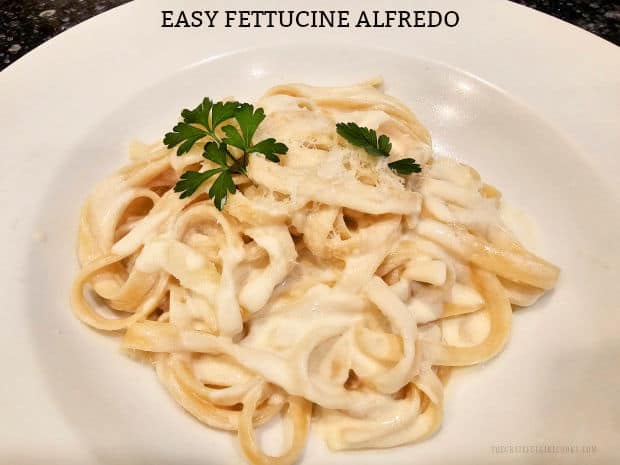
Make delicious, creamy and Easy Fettucine Alfredo for a special meal! It’s easy to make with only a few ingredients, and is a decadent dish!
Make delicious, creamy and Easy Fettucine Alfredo for a special meal! It's easy to make with only a few ingredients, and is a decadent dish!

Many, many years ago when I had our first son, we were invited to dinner at a dear friend Lona’s home to celebrate the birth of our first baby. Lona made us fettucine alfredo for dinner, and it was absolutely FABULOUS.

Before we left I asked her to please give me her recipe, and I’ve used this recipe ever since (over 40 years now). I was shocked to see how truly simple it was to make, but WOW… does it ever taste great!

Our sweet friend Lona passed away years ago, but her memory lives on in so many tangible ways in our lives. Every single time I make this

As most folks know, fettucine alfredo is definitely not a “diet friendly” meal, but every now and then ya just gotta go for it, right? The pasta is cheesy and delicious, and it really is simple to prepare. Here’s how to make it:

Scroll Down for A Printable Recipe Card At the Bottom Of The Page

Cook The Fettucine Pasta

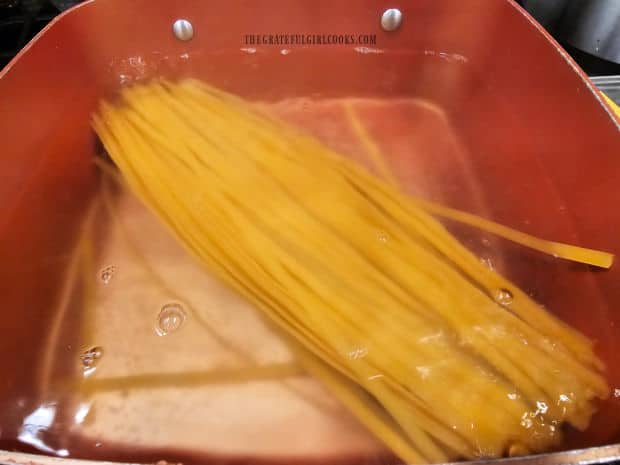
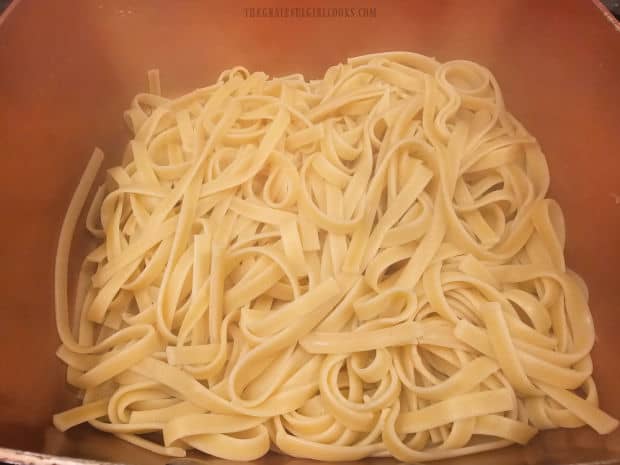
The first thing you will need to do is cook the fettucine pasta in a large saucepan, according to the package instructions. Once the pasta hits the boiling water it will cook for approximately 13 minutes.

While the pasta cooks, prepare the Alfredo sauce in a separate pan. That way the sauce will be done when the pasta is done!

Fettucine pasta is cooked in boiling water according to package instructions.

Make The Alfredo Sauce While Pasta Cooks

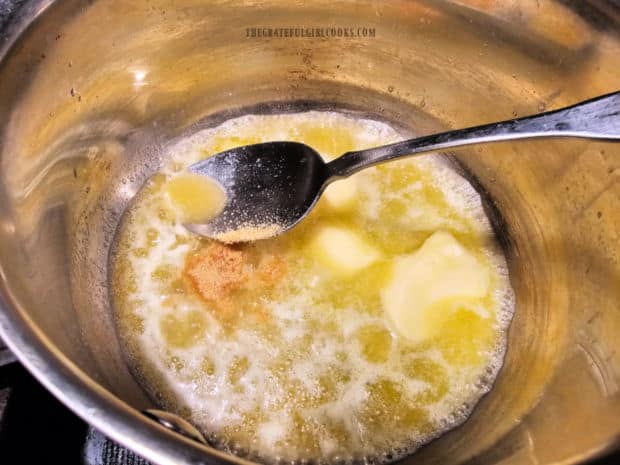
To make the Alfredo sauce, melt butter on LOW heat in a medium saucepan. Once the butter has melted, stir in garlic powder and a pinch of salt until combined.

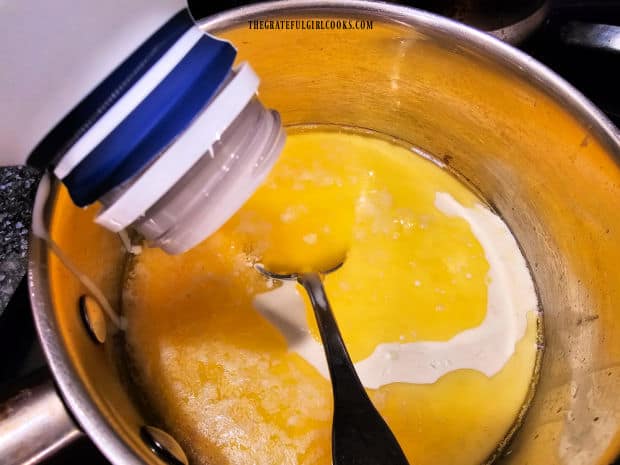
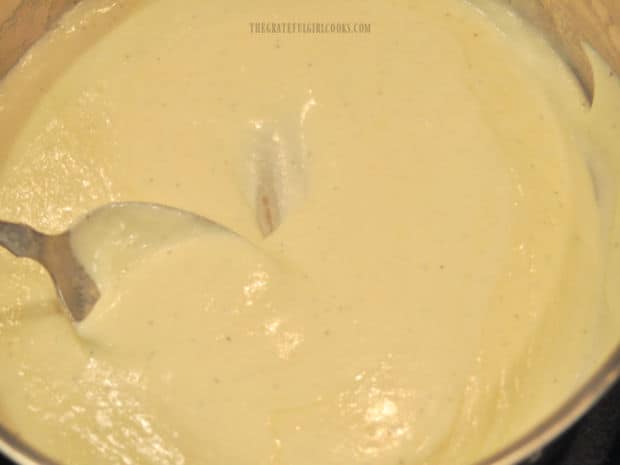
Pour a pint of heavy whipping cream into the melted butter mixture, and stir, until combined. Cook this on a LOW simmer for 4-5 minutes, stirring often, but don’t let it boil.

Melted butter in saucepan is combined with garlic powder.A pint of heavy whipping cream is poured into the melted butter in pan.

Add The Parmesan Cheese

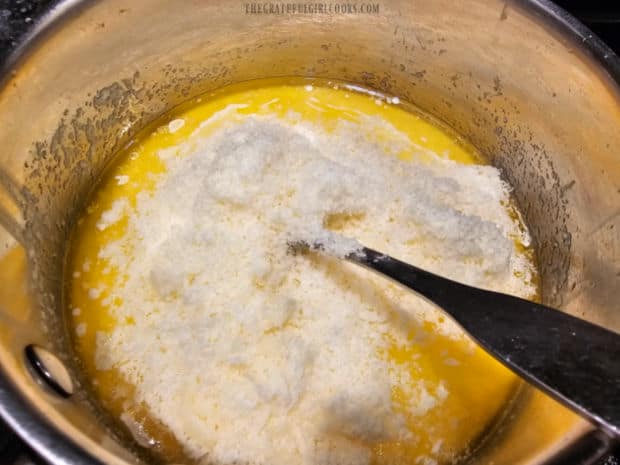
Add 1½ cups of fresh, finely grated Parmesan cheese and a small amount of salt into the Alfredo sauce mixture. I also add about ¼ cup of canned Parmesan cheese (i.e. “Kraft” green shaker container) to the mix.

TIP#1: If you don’t have (or like) canned Parmesan, simply add more freshly grated Parmesan cheese, to taste.

Stir these into the Alfredo sauce, and continue to cook on LOW heat, stirring often. Continue cooking until all the cheese has melted, but don’t let the sauce boil!

Tip #2: You can make the sauce ahead of time, then re-heat it (on LOW) in the pan right before the pasta is done cooking, to save time.

Lots of grated Parmesan cheese is added to the fettucine sauce in pan.A pan full of creamy sauce for the Easy Fettucine Alfredo.

Final Step

When the pasta is finished cooking and is tender to the bite, immediately drain off the hot water, then place the pasta back into the pan. DO NOT RINSE the pasta! You want it good and HOT!

Quickly pour all of the hot Alfredo sauce on top of the hot pasta. Use tongs to toss well and fully coat all the noodles with the sauce. Cook the fettucine and sauce for 1-2 minutes on low heat, until fully heated through.

Cooked fettucine pasta is drained after cooking and put back into hot pan.Thick alfredo sauce is poured over the hot pasta and tossed to combine.

Serve And Enjoy The Easy Fettucine Alfredo

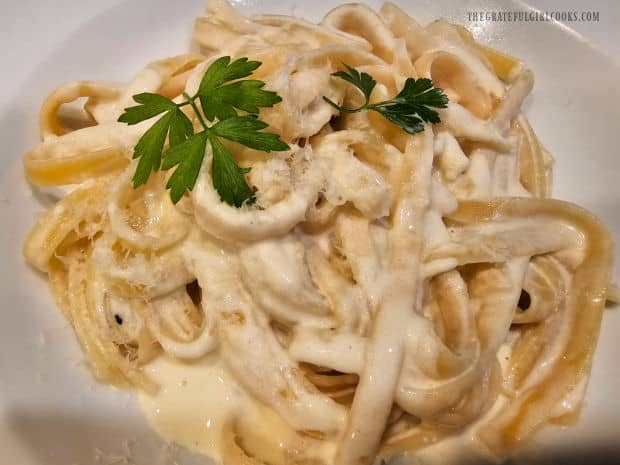
Immediately portion each serving onto plates or into serving bowls. If desired, finely grate additional Parmesan on top of each serving, and garnish with fresh parsley.

Serve the easy fettucine alfredo immediately while still hot, and enjoy this delicious dish.

A bowl of Easy Fettucine Alfredo, topped with Parmesan cheese and parsley.

I hope you enjoy this recipe for easy fettucine alfredo as much as our family does. Even though it is decadent and a high calorie meal, this is a dish we always look forward to!

Thank you for stopping by, and I invite you to come back again soon for more family-friendly recipes. Take care, have a GREAT day, and may God bless you.

Looking For More PASTA RECIPES?

You can find ALL of my recipes in the Recipe Index, which is located at the top of the page. I have a nice variety of pasta dishes to choose from, including:

Want More Recipes? Get My FREE Newsletter!

I publish a newsletter 2 times per month (1st and 15th) with lots of recipes, tips, etc..
Would you like to join our growing list of subscribers?

There is a Newsletter subscription box on the top right (or bottom) of each blog post, depending on the device you use.
You can submit your e-mail address there, to be added to my mailing list.

Find Me On Social Media:

Facebook page: The Grateful Girl Cooks!
Pinterest:
The Grateful Girl Cooks!
Instagram:
jbatthegratefulgirlcooks

Author's signature

Recipe adapted from: my dear friend Lona Wig (R.I.P.)

↓↓ PRINTABLE RECIPE BELOW ↓↓

0 from 0 votes
Easy Fettucine Alfredo
Prep Time
10 mins
Cook Time
13 mins
Total Time
23 mins
 

Make delicious, creamy and Easy Fettucine Alfredo for a special meal! It's easy to make with only a few ingredients, and is a decadent dish!

Category: Entree, Main Course
Cuisine: All Cuisines
Keyword: easy fettucine alfredo
Servings: 5
Calories Per Serving: 892 kcal
Author: JB @ The Grateful Girl Cooks!
Ingredients
  • 12 ounces dried fettucine pasta cooked according to pkg. instructions
For Alfredo Sauce:
  • 8 Tablespoons butter = 1 stick or ½ cup
  • ½ teaspoon garlic powder
  • ¼ teaspoon salt
  • 1 pint heavy whipping cream
  • cups fresh Parmesan cheese finely grated
  • ¼ cup canned Parmesan cheese (i.e. Kraft, Kroger, etc.)
(OPTIONAL) GARNISH: additional grated Parmesan and/or parsley if desired
    Instructions
    1. Cook fettucine in boiling water according to pkg. instructions (approx. 13 minutes). While pasta cooks, prepare Alfredo sauce in a separate pan.

    Make Alfredo Sauce:
    1. Melt butter on LOW heat in a medium saucepan. Once melted, stir in garlic powder and salt until combined. Pour in whipping cream; stir, until combined. Cook on a LOW simmer 4-5 minutes, stirring often, but don't let it boil.

    2. Add 1½ cups of fresh, finely grated Parmesan cheese and ¼ cup canned Parmesan cheese (i.e. "Kraft" green shaker container) to the mix. TIP#1: If you don't have (or like) canned Parmesan, add more fresh grated Parmesan cheese. Stir cheeses into the Alfredo sauce; cook on LOW heat, stirring often. Continue cooking until cheese has melted; do not let sauce boil! Tip #2: You can make sauce ahead of time, then re-heat it (on LOW) in the pan right before pasta is done cooking, to save time.

    Finish And Serve:
    1. When pasta is done, immediately drain the hot water. DO NOT RINSE PASTA! You want it HOT! Place drained pasta back into the pan. Quickly pour hot Alfredo sauce on top. Use tongs to toss well and fully coat pasta with sauce. Cook the fettucine and sauce 1-2 minutes on low heat, until heated through.

    2. Immediately portion each serving onto plates or into serving bowls. If desired, grate additional Parmesan on each serving, and garnish with fresh parsley. Serve easy fettucine alfredo immediately while hot, and enjoy!

    Nutrition Facts
    Easy Fettucine Alfredo
    Amount Per Serving (1 (1/5 of total))
    Calories 892 Calories from Fat 585
    % Daily Value*
    Fat 65g100%
    Saturated Fat 40g250%
    Trans Fat 1g
    Polyunsaturated Fat 3g
    Monounsaturated Fat 16g
    Cholesterol 243mg81%
    Sodium 913mg40%
    Potassium 329mg9%
    Carbohydrates 56g19%
    Fiber 2g8%
    Sugar 4g4%
    Protein 23g46%
    Vitamin A 2296IU46%
    Vitamin C 1mg1%
    Calcium 401mg40%
    Iron 2mg11%
    * Percent Daily Values are based on a 2000 calorie diet.

    Here’s one more to pin on your Pinterest boards!Make delicious, creamy and Easy Fettucine Alfredo for a special meal! It's easy to make with only a few ingredients, and is a decadent dish!
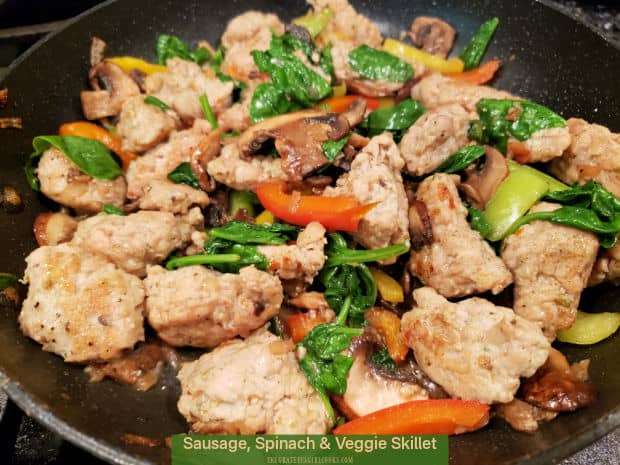
    Sausage, Spinach & Veggie Skillet

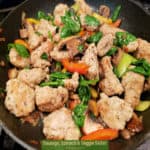
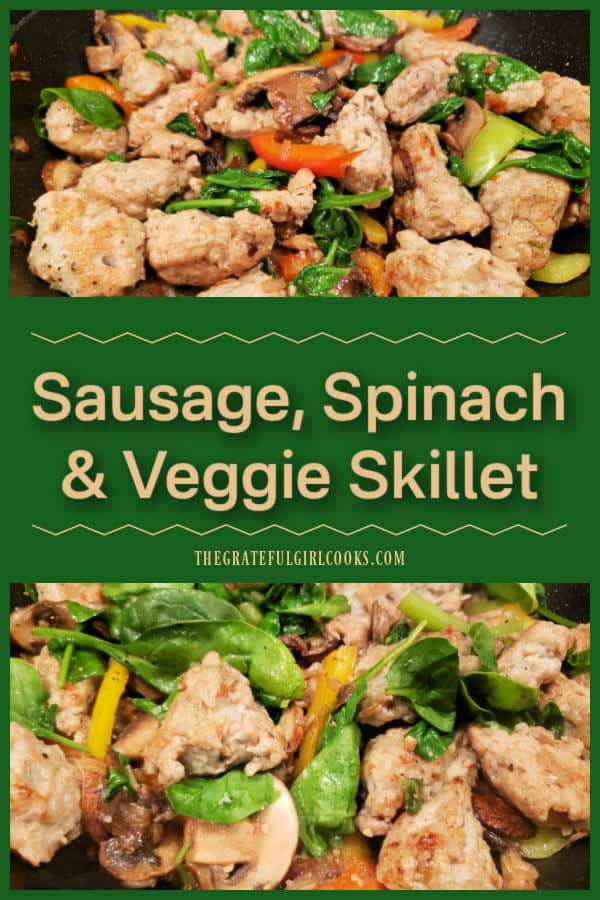
    Sausage, Spinach & Veggie Skillet is a tasty 1 pan meal, with chicken or Italian sausage, mushrooms, spinach, onions, garlic and bell peppers!
    Sausage, Spinach & Veggie Skillet is a tasty 1 pan meal, with chicken or Italian sausage, mushrooms, spinach, onions, garlic and bell peppers!

    If you’re looking for a delicious, yet healthy meal, you might want to check out this simple “one pan wonder” recipe! A sausage, spinach & veggie skillet comes together quickly, is easy to make, and tastes GREAT!

    The finished dish can be served AS IS, or can be served on a bed of rice or pasta, or served along with rice or pasta. We usually have this meal on its own, especially if we are watching our calories!

    There’s plenty of taste, texture, and color all on its own, to fill us, and to suit our taste buds! Here’s how to make this sausage, spinach & veggie skillet:
    Scroll Down For A Printable Recipe Card At The Bottom Of The Page

    Prepare And Cook The Sausage

    Whether you choose to use chicken sausage links (sliced), Italian sausage links (pork), or even ground Italian sausage, you can make this meal in one skillet. You can also remove the casing from the sausage links and cook the meat in bite sized pieces, if desired. 

    FYI- For this recipe (and photos), I used one pound of chicken Italian sausage, casings removed, and the meat divided into bite-sized chunks.

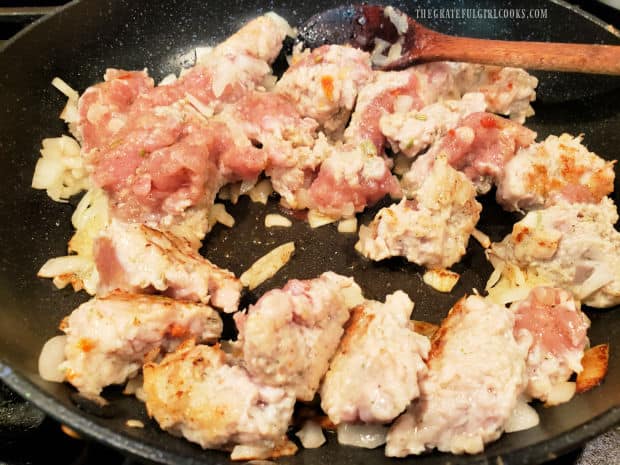
    Heat oil (avocado, olive, canola, or oil of choice) on medium-high heat in a large skillet until hot, but not smoking. Add one pound of sausage (sliced or in pieces) and half of a medium chopped yellow onion to the skillet.

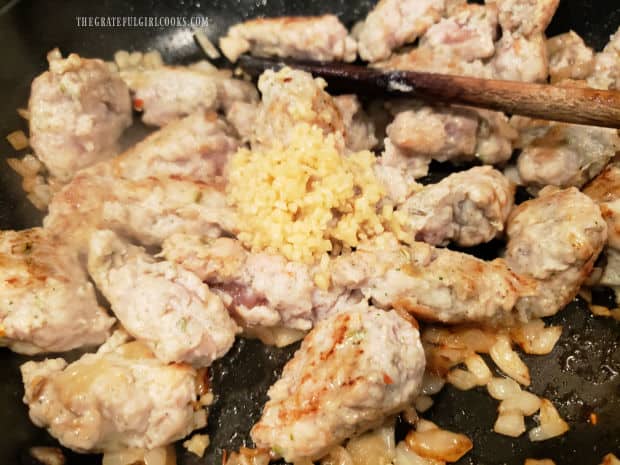
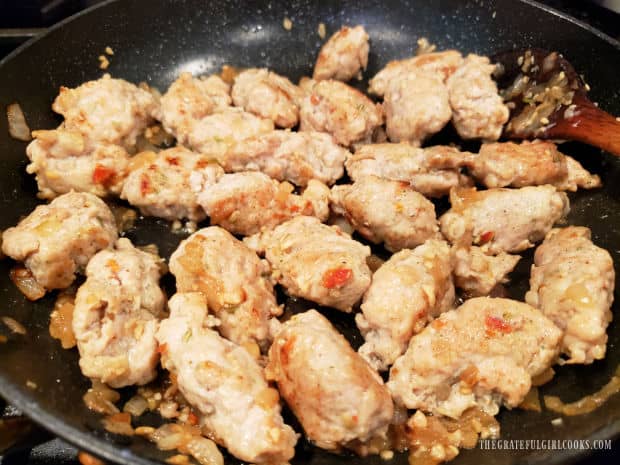
    Sauté this for 4-5 minutes, stirring often, until the sausage is lightly browned and almost fully cooked through. Add minced garlic to the skillet, and stir, to combine. Cook for 1 more minute, stirring often, so the garlic doesn’t burn and become bitter.

    Chicken Italian sausage is portioned in large chunks and browned in oil with onions.Four minced garlic cloves are added to the pan-seared sausage pieces (or slices).

    Add The Veggies

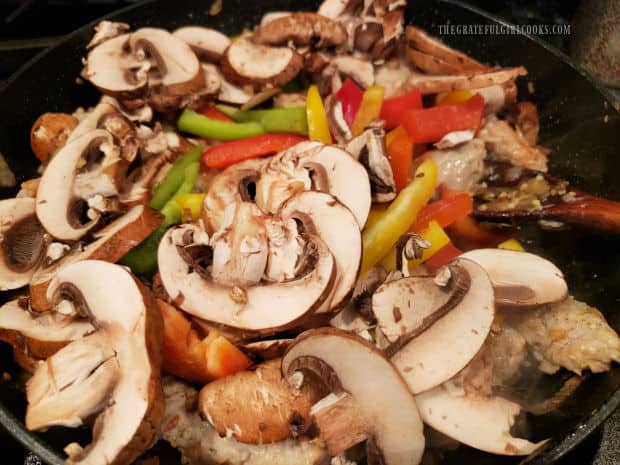
    Once the sausage is fully cooked, add sliced cremini mushrooms (baby portobellos) and sliced bell peppers (use a colorful combo of red, green, yellow or orange).

    Stir well, to combine, then cover the skillet, and turn the heat down to Medium. Cook for 3-4 minutes, stirring occasionally until vegies are tender.

    A skillet of fully cooked chicken Italian sausage chunks, with onions and minced garlic.Sliced mushrooms, red, yellow and green bell peppers are added to the skillet.

    Final Step Before It’s Ready To Serve

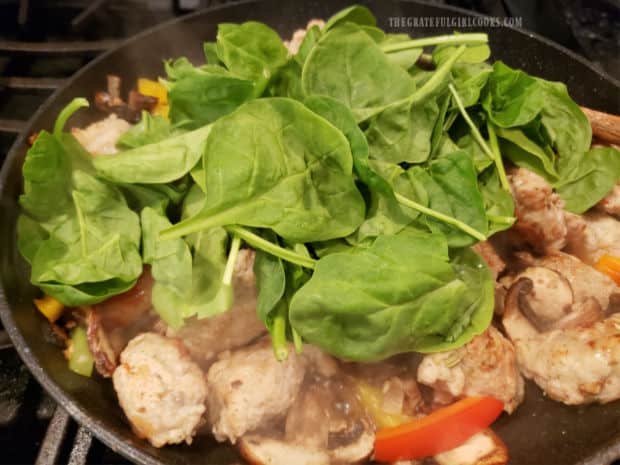
    Once the mushrooms and veggies have cooked until tender, add the baby spinach leaves, and carefully toss to incorporate them into the dish. Continue cooking ONLY until the spinach leaves have wilted, and have reduced considerably in size.

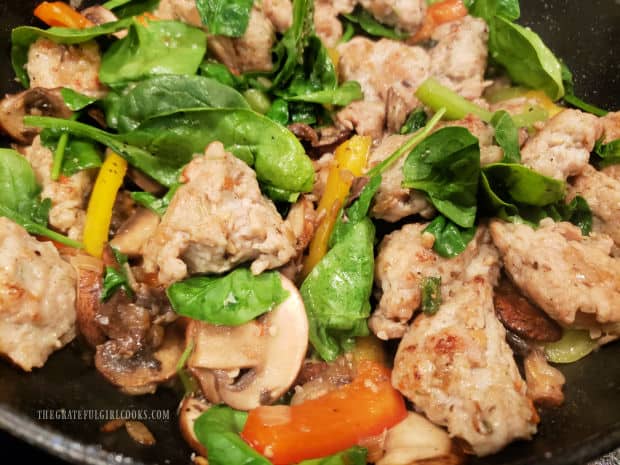
    When the spinach is fully wilted (and heated through), season with salt and black pepper to taste, and this dish is ready to be served.

    Fresh baby spinach is added to the skillet and cooked only until wilted.When the spinach wilts, the sausage, spinach & veggie skillet is ready to serve.

    Serving The Sausage, Spinach & Veggie Skillet

    The sausage, spinach & veggie skillet can be served on top of steamed rice or pasta (or on the side), or it can be eaten just as it is! We prefer to enjoy this dish without the extra calories from the rice or pasta, but that is completely your choice!
    The sausage pieces are full of flavor, and the colorful bell peppers, mushrooms, garlic, onions, and “good for you” spinach combine to make this a wonderful tasting, healthy meal!

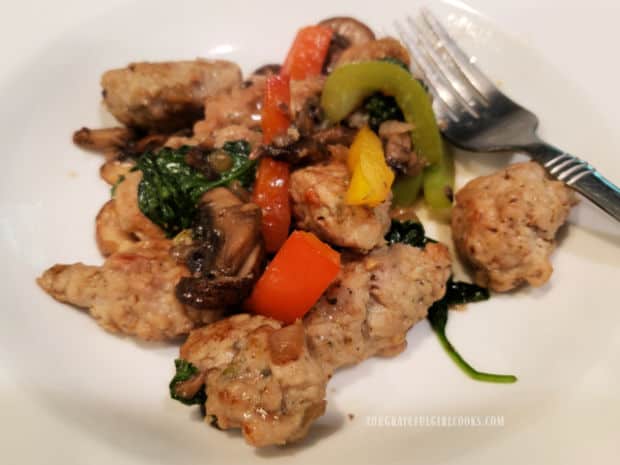
    Sausage, spinach & veggie skillet is served as is (less calories), OR with rice or pasta on the side.

    I hope you have the chance to try this delicious dish, and trust you will enjoy it, too! Thank you for stopping by, and I invite you to come back again soon for more yummy recipes! Take care, God bless you, and have a GREAT day!

    Looking For More Recipes Using CHICKEN or ITALIAN SAUSAGES?

    You can find ALL of my recipes in the Recipe Index, which is located at the top of the page. I have some delicious recipes that utilize either chicken sausages or traditional Italian sausages, including:

    Interested In More Recipes?

    Thank you for visiting this website. I appreciate you using some of your valuable time to do soIf you’re interested, I publish a newsletter 2 times per month (1st and 15th) with all the latest recipes, and other fun info. I would be honored to have you join our growing list of subscribers, so you never miss a great recipe!
    There is a Newsletter subscription box on the top right side (or bottom) of each blog post, depending on the device you use, where you can easily submit your e-mail address (only) to be included in my mailing list.

    You Can Also Find Me On Social Media:

    Facebook page: The Grateful Girl Cooks!
    Pinterest:
    The Grateful Girl Cooks!
    Instagram:
    jbatthegratefulgirlcooks

    Author's signature

    Recipe adapted from the book: “New Life Promise- Food Meets Faith”, by Isabel D. Price, page 76, published in 2019 by Live Smart Solutions, LLC

    ↓↓ PRINTABLE RECIPE BELOW ↓↓

    0 from 0 votes
    Sausage, Spinach & Veggie Skillet
    Prep Time
    10 mins
    Cook Time
    10 mins
    Total Time
    20 mins
     

    Sausage, Spinach & Veggie Skillet is a tasty 1 pan meal, with chicken or Italian sausage, mushrooms, spinach, onions, garlic and bell peppers!

    Category: Main Dish
    Cuisine: American
    Keyword: sausage spinach veggie skillet
    Servings: 4
    Calories Per Serving: 295 kcal
    Author: JB @ The Grateful Girl Cooks!
    Ingredients
    • 4 teaspoons extra virgin olive oil (or oil of choice)
    • 1 pound Italian Chicken Sausage (or mild Italian-pork) cut in bite sized chunks or slices
    • ½ medium yellow onion diced
    • 4 cloves garlic minced
    • medium green bell pepper
    • medium red bell pepper
    • medium yellow bell pepper or orange bell pepper
    • 8 ounces cremini mushrooms (baby portobellos) sliced
    • 2 cups fresh baby spinach
    • salt/pepper, to taste
    Instructions
    1. Heat oil on medium-high heat in a large skillet until hot, but not smoking. Add sausage (sliced or pieces) and chopped onion to skillet. Sauté for 4-5 minutes, stirring occasionally, until sausage is lightly browned and almost cooked through. Add minced garlic and stir, to combine. Cook for 1 minute, stirring often, so garlic doesn't burn/become bitter.

    2. Add mushrooms and bell peppers to skillet. Stir well, to combine, then cover skillet, and turn heat down to Medium. Cook for 3-4 minutes, stirring occasionally until veggies are tender.

    3. Add baby spinach to skillet; carefully toss to incorporate into other ingredients. Continue cooking ONLY until spinach leaves have fully wilted. Season with salt and pepper to taste. The dish is now ready to be served.

    4. Serve it hot, as is, or you can choose to serve it on top of steamed rice or pasta.

    Recipe Notes

    NOTE: Caloric calculation made using chicken sausage.

    Nutrition Facts
    Sausage, Spinach & Veggie Skillet
    Amount Per Serving (1 (1/4 of total))
    Calories 295 Calories from Fat 180
    % Daily Value*
    Fat 20g31%
    Saturated Fat 4g25%
    Polyunsaturated Fat 1g
    Monounsaturated Fat 3g
    Cholesterol 80mg27%
    Sodium 1177mg51%
    Potassium 429mg12%
    Carbohydrates 12g4%
    Fiber 1g4%
    Sugar 4g4%
    Protein 20g40%
    Vitamin A 2174IU43%
    Vitamin C 47mg57%
    Calcium 36mg4%
    Iron 2mg11%
    * Percent Daily Values are based on a 2000 calorie diet.

    Here’s one more to pin on your Pinterest boards!Sausage, Spinach & Veggie Skillet is a tasty 1 pan meal, with chicken or Italian sausage, mushrooms, spinach, onions, garlic and bell peppers!

    Garlic Penne Pasta And Veggies

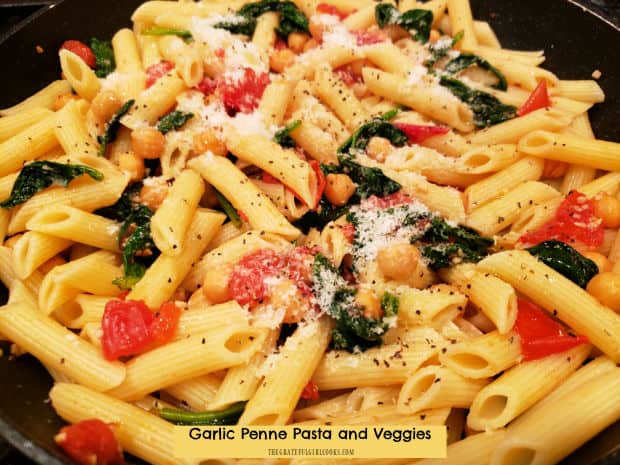
    Garlic Penne Pasta And Veggies is a meatless pasta dish with garlic, spinach, tomatoes, chickpeas and Parmesan. It’s ready in 20 minutes!
    Garlic Penne Pasta And Veggies is a meatless pasta dish with garlic, spinach, tomatoes, chickpeas and Parmesan. It's ready in 20 minutes!

    If you’re looking for a meatless main dish that is full of flavor and takes practically no time at all to prepare, I think you’ll enjoy this tasty meal! Penne pasta is paired with a light garlic, Parmesan and veggie sauce.

    This dish includes garbanzo beans (chickpeas) for added protein, fresh tomatoes, baby spinach and garlic, which bring color, texture, and flavor to the pasta.

    It’s a cinch to make, and is ready in 20 minutes, because you make the sauce and veggies while the pasta cooks! How’s that for convenience? Let me show you how to make this meal:

    Scroll Down For A Printable Recipe Card At The Bottom Of The Page

    Cook The Penne Pasta

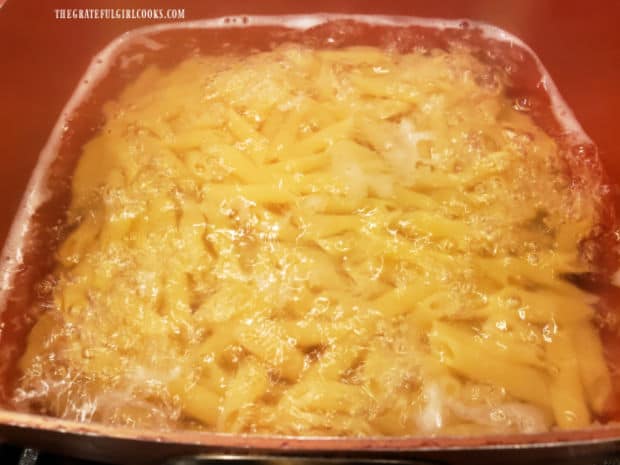
    The first thing you’ll need to do is cook the penne pasta in boiling water, according to the directions found on the package.

    While the pasta is cooking you prepare the rest of this dish, so it’s ready when the pasta is done! Once the penne is done cooking, drain the water off of the hot pasta.

    Penne pasta is cooked in boiling water according to package instructions.

    Prepare The Garlic Sauce And Veggies

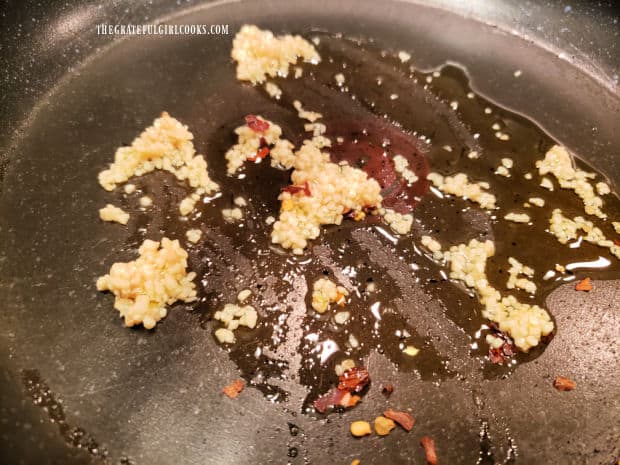
    While the pasta cooks, make the simple garlic sauce and veggies. Heat olive oil on medium heat in a large skillet. Add minced garlic and red pepper flakes to the hot oil.

    Stir to combine, and sauté them, stirring often for 30-45 seconds. Be careful to not burn the garlic or it may become bitter in taste (and you do NOT want that!).

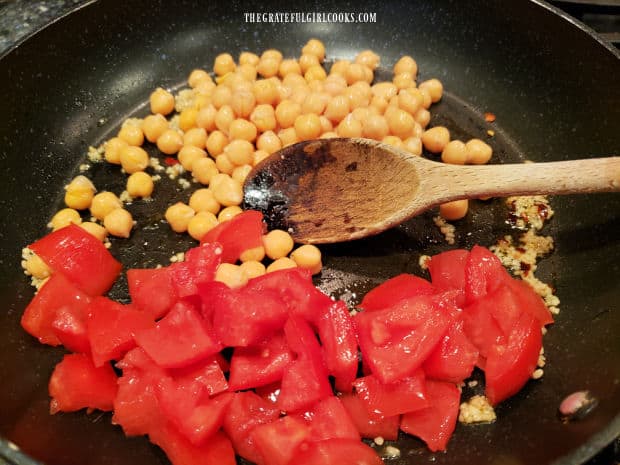
    Add chopped fresh tomatoes and a can of garbanzo beans (chickpeas) that have been rinsed and drained to the skillet.

    Stir to combine, and continue to cook and stir on medium heat for 2 more minutes.

    Minced garlic and red pepper flakes cook in hot oil in a large skillet.Chopped fresh tomatoes and drained chickpeas (garbanzo beans) are added to skillet.

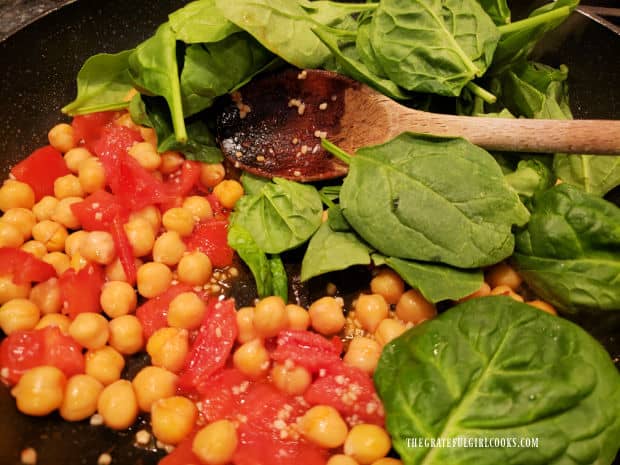
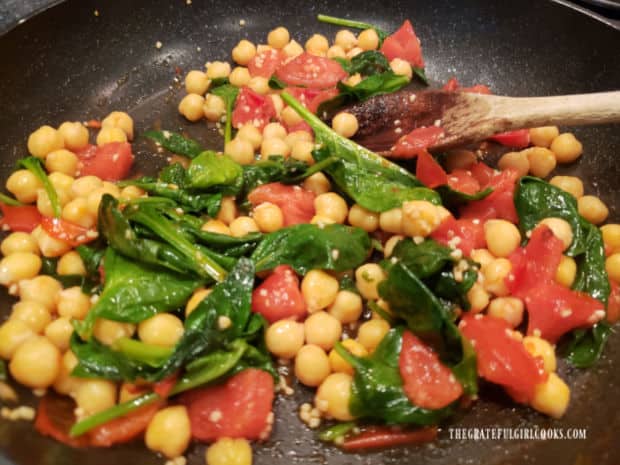
    Place the fresh baby spinach and salt into the skillet, and cook, stirring often until the spinach leaves have wilted from the heat.

    This is the garlic and veggie sauce you will add to the hot penne pasta, once it is done cooking. See how simple that was?

    Baby spinach and salt are added to the garlic, tomato and chickpeas in skillet and cooked.Once the spinach leaves have wilted from the heat, the garlic and veggie sauce is done.

    Serving The Garlic Penne Pasta And Veggies

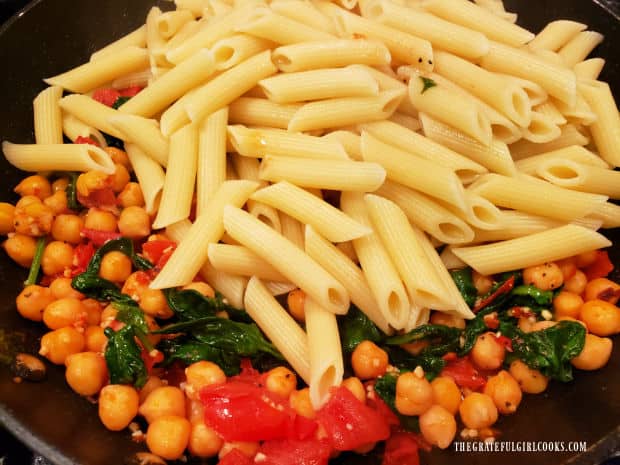
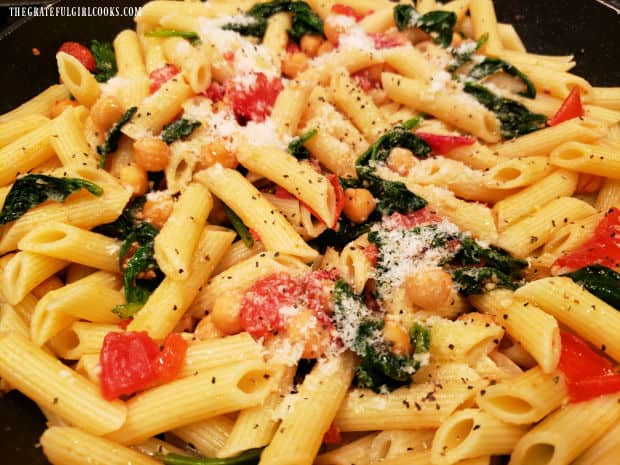
    Once the penne pasta has finished cooking, drain it and immediately add it to the skillet full of veggies. Add grated Parmesan cheese, and then toss the garlic penne pasta and veggies, to combine.

    Because there is not a thick sauce coating everything, the pasta will cool fairly quickly, so serve the pasta immediately while hot. If desired, you can add additional Parmesan cheese to the top as a garnish for serving.

    Cooked, drained penne pasta is added to the garlic and veggie sauce in skillet to combine.Grated Parmesan is added and combined with the Garlic Penne Pasta And Veggies, then served.

    I hope you have the chance to make this delicious dish for those you love, and trust you’ll enjoy it as much as we do.

    Thanks for stopping by, and I hope you’ll come back again soon for more family-friendly recipes. Take care, God bless you, and have a GREAT day!

    Looking For More PASTA Recipes?

    You can find ALL of my recipes in the Recipe Index, which is located at the top of the page. I have lots of wonderful pasta recipes for you to enjoy, including:

    Want More Recipes? Get My FREE Newsletter!

    I publish a newsletter 2 times per month (1st and 15th) with lots of recipes, tips, etc..
    Would you like to join our growing list of subscribers?

    There is a Newsletter subscription box on the top right (or bottom) of each blog post, depending on the device you use.
    You can submit your e-mail address there, to be added to my mailing list.

    Find Me On Social Media:

    Facebook page: The Grateful Girl Cooks!
    Pinterest:
    The Grateful Girl Cooks!
    Instagram:
    jbatthegratefulgirlcooks

    Author's signature

    Original recipe source: Doris Heath, via “Taste of Home Magazine”, Oct./Nov. 2022 edition, page 26, published by Reiman Publications

    ↓↓ PRINTABLE RECIPE BELOW ↓↓

    0 from 0 votes
    Garlic Penne Pasta and Veggies
    Prep Time
    20 mins
    Total Time
    20 mins
     

    Garlic Penne Pasta And Veggies is a meatless pasta dish with garlic, spinach, tomatoes, chickpeas and Parmesan. It's ready in 20 minutes!

    Category: Main Dish
    Cuisine: Italian
    Keyword: garlic penne pasta and veggies
    Servings: 6
    Calories Per Serving: 353 kcal
    Author: JB @ The Grateful Girl Cooks!
    Ingredients
    • 12 ounces uncooked penne pasta
    • 2 Tablespoons extra virgin olive oil
    • 6 cloves garlic minced
    • ¼ teaspoon red pepper flakes or more if you like it spicy
    • 15 ounce can garbanzo beans (chickpeas) rinsed and drained
    • 2 medium tomatoes , seeded, cut in ½" pieces
    • 9 ounces fresh baby spinach
    • ¼ teaspoon salt
    • ¼ cup grated Parmesan cheese + more for garnish, if desired
    Instructions
    1. Cook pasta in boiling water, according to directions on the package. Once pasta is done cooking, drain water off pasta.

    2. While pasta cooks, prepare sauce, so it's ready when pasta is done! Heat olive oil on medium heat in large skillet. Add garlic/red pepper flakes to hot oil. Stir to combine; cook stirring often for 30-45 seconds (don't let garlic burn or it becomes bitter).

    3. Add tomatoes and garbanzo beans (chickpeas). Stir to combine. Continue to cook and stir on medium heat for 2 minutes.

    4. Add spinach and salt to sauce; cook, stirring often until spinach has wilted from the heat. Sauce is now ready for hot, drained pasta.

    5. Once pasta is done, drain; immediately add it to skillet with veggies. Add grated Parmesan cheese; toss well, to combine ingredients. Serve immediately, sprinkled with additional Parmesan cheese, if desired.

    Nutrition Facts
    Garlic Penne Pasta and Veggies
    Amount Per Serving (1 (1½ cups per serving))
    Calories 353 Calories from Fat 72
    % Daily Value*
    Fat 8g12%
    Saturated Fat 2g13%
    Polyunsaturated Fat 2g
    Monounsaturated Fat 4g
    Cholesterol 4mg1%
    Sodium 408mg18%
    Potassium 584mg17%
    Carbohydrates 57g19%
    Fiber 6g25%
    Sugar 3g3%
    Protein 14g28%
    Vitamin A 4401IU88%
    Vitamin C 19mg23%
    Calcium 126mg13%
    Iron 3mg17%
    * Percent Daily Values are based on a 2000 calorie diet.

    Here’s one more to pin on your Pinterest boards!Garlic Penne Pasta And Veggies is a meatless pasta dish with garlic, spinach, tomatoes, chickpeas and Parmesan. It's ready in 20 minutes!

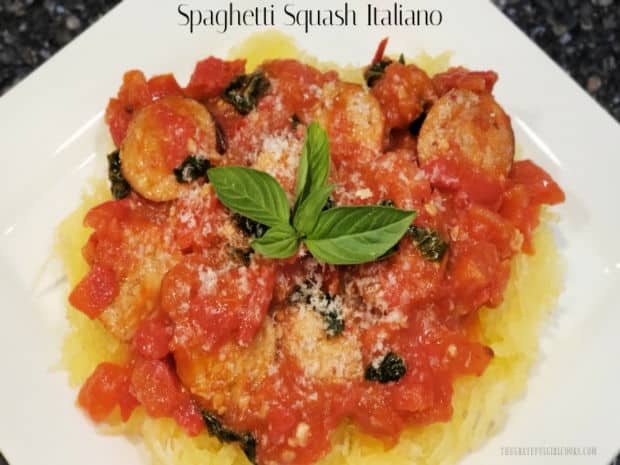
    Spaghetti Squash Italiano

    Enjoy delicious (and filling) Spaghetti Squash Italiano, with Italian sausage links, roasted spaghetti squash, tomatoes, garlic and basil.
    Enjoy delicious (and filling) Spaghetti Squash Italiano, with Italian sausage links, roasted spaghetti squash, tomatoes, garlic and basil.

    Spaghetti Squash Italiano is a delicious meal that uses strands of roasted spaghetti squash to act as a low carb (and low calorie) substitute for traditional pasta. If you want to enjoy a meal with delicious Italian flavors but are trying to cut calories, may I suggest this delicious main course?

    The only “downside” is that it takes about an hour to roast a medium-sized spaghetti squash, but if you’ve got the time, this is a GREAT recipe to try! You can use either traditional Italian PORK sausage OR Italian CHICKEN sausage (use chicken if you want to cut out even more calories!). It’s your choice, and either type of Italian sausage will be fabulous in this Italian dish. Here’s how to make Spaghetti Squash Italiano!

    Scroll Down For A Printable Recipe Card At The Bottom Of The Page

    Roast The Spaghetti Squash

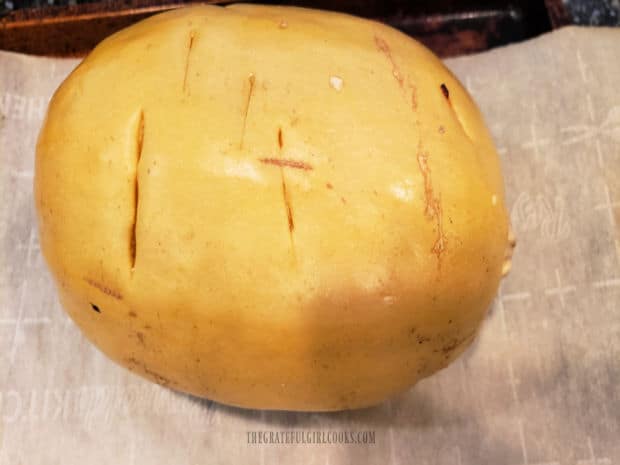
    Preheat your oven to 375°F before starting. Rinse the spaghetti squash, then pierce the skin (on all sides) a total of about 8-10 times using a sharp knife. Place the spaghetti squash on a parchment paper (or silpat lined) baking sheet. For this recipe I use a medium-sized spaghetti squash.

    Bake the spaghetti squash for 1 hour at 375°F, or until it can easily be pierced with a sharp knife. Baking times might be shorter or longer depending on the size squash you’re using and taking into account the temperature variations in various ovens. Know that if the squash can EASILY be pierced with a sharp knife stuck deep into it, it is done.

    A spaghetti squash is pierced several times with a knife before roasting in the oven.

    Pan Sear The Italian Sausage Links

    While the spaghetti squash is roasting, cook the Italian sausage links. I have prepared this meal using traditional Italian sausages (hot or mild) AND have also used Italian flavored chicken sausage links. Both taste wonderful in this dish, but I find that traditional Italian sausage links are more readily available in our local grocery stores.

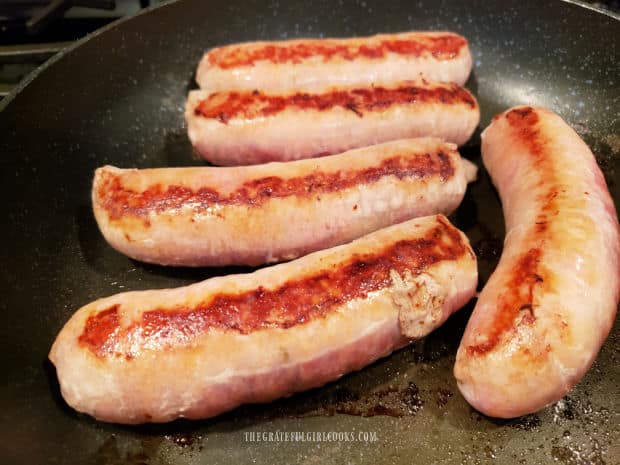
    Cook the sausages (you need 4 links, not 5 as shown below) in a little bit of olive oil in a large non-stick skillet. Cook the sausages on Medium-Low heat, turning to cook all sides, per package instructions, until fully cooked through. Let the sausages cool, then cut them into thin round slices. Set aside.

    Italian sausages are cooked through by pan-searing them in a skillet with oil.

    Prepare The Sauce

    NOTE: Try to prepare the tomato sauce about 15 minutes before the spaghetti squash is done cooling. That way the sauce is HOT when the squash is shredded for serving. 

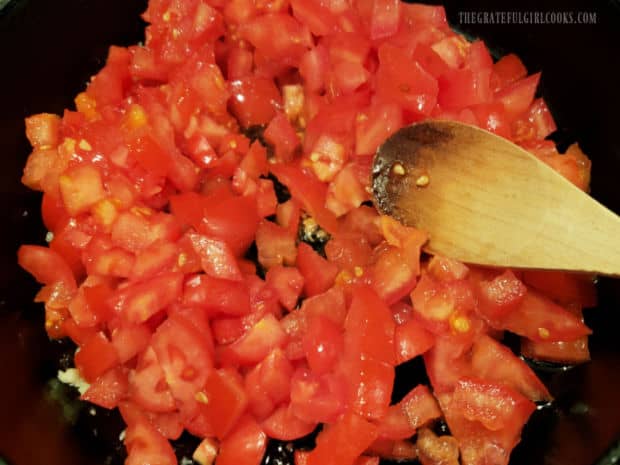
    Heat a large skillet on Medium-Low heat until quite hot. Add 1 Tablespoon of extra virgin olive oil to the skillet, and once it becomes hot, add 2 finely minced garlic cloves. Stir, and cook the garlic for about 30-45 seconds, then add fresh, chopped tomatoes.

    Stir well, to combine, then add dried oregano, a pinch of red chili pepper flakes, salt and black pepper to the tomato mixture. Cook on Medium-Low heat for 10 minutes, stirring occasionally. This will enable the tomatoes time to cook down into more of a sauce-like consistency.

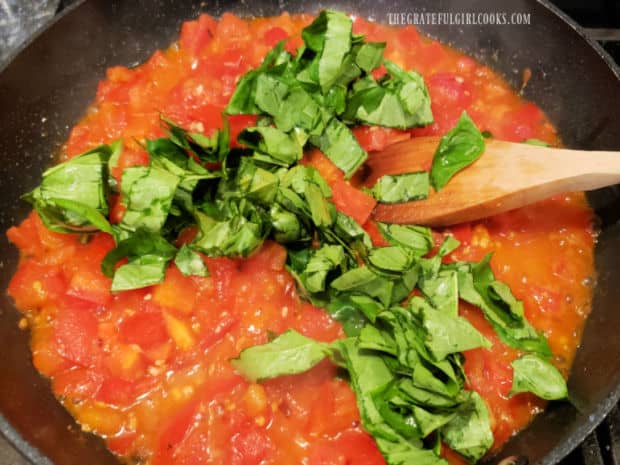
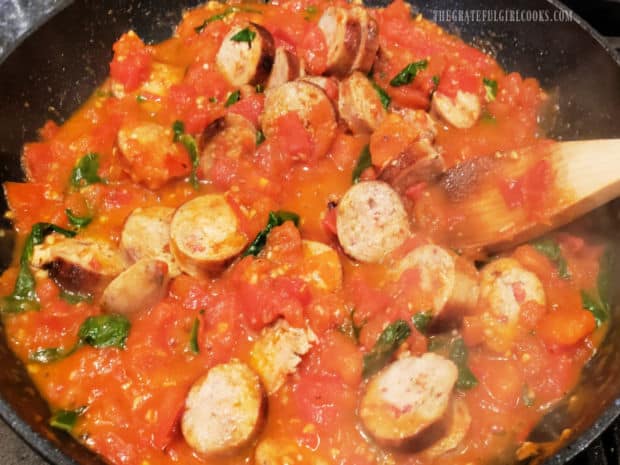
    Stir thinly sliced, fresh basil leaves and cooked sausage slices into the tomato sauce, until well combined. Cook for 5 minutes, stirring occasionally, until heated through and the basil leaves have wilted.

    Diced tomatoes, garlic and spices are cooked in a large skillet to make a sauce.Fresh chopped basil is added to tomatoes and garlic for Spaghetti Sauce Italiano.Cooked Italian sausage is added to the skillet with the tomato basil sauce and heated through.

    Prepare The Roasted Spaghetti Squash For Serving

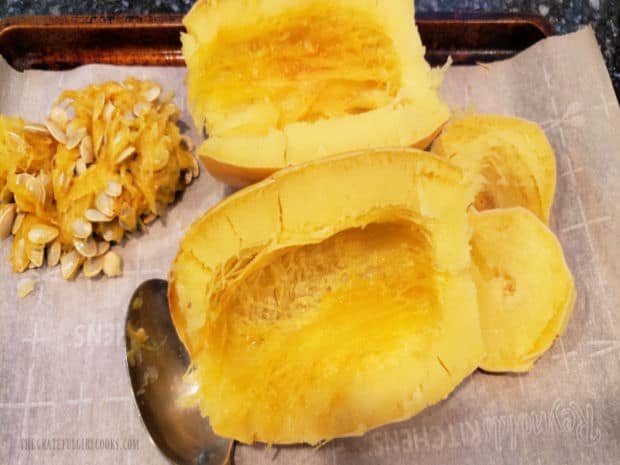
    After the spaghetti squash has cooled for about 30 minutes, cut a thin slice off of both ends, then carefully slice the squash lengthwise. Use a large spoon to remove all the seeds and pulp from the center of each squash half (and discard).

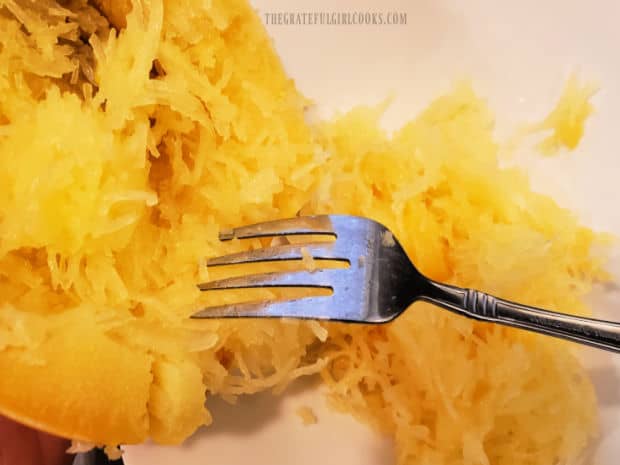
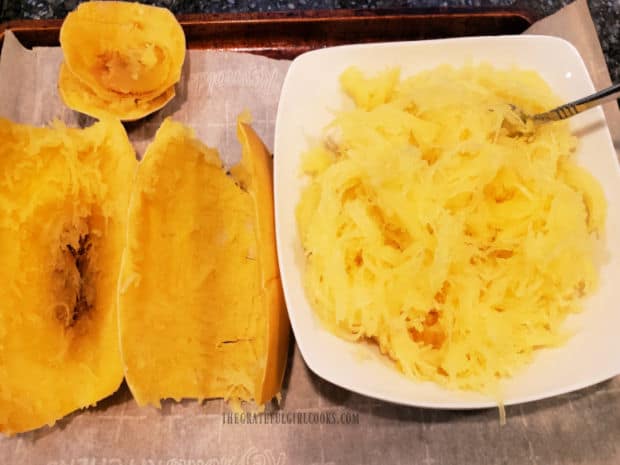
    Use a fork to gently scrape the squash lengthwise, which will remove the strands of spaghetti squash. Remove as many strands as you can from both halves, without breaking through the outer skin. Keep the spaghetti squash warm, and prepare the dish for serving.

    Seeds are removed from the spaghetti squash after it is roasted.

    A fork is used to pull long strands of spaghetti squash away from the squash peel.A large white bowl on the right, filled with roasted spaghetti squash strands.

    Serve The Spaghetti Squash Italiano

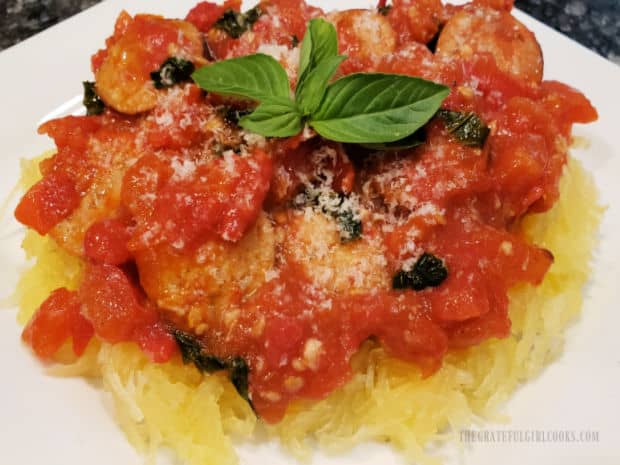
    To serve, place a portion of the warm spaghetti squash strands onto each serving plate (recipe serves 4). Top each portion with the hot tomato and sausage mixture. Sprinkle with finely grated Parmesan cheese and garnish with a fresh basil sprig on top (if desired). Serve while hot, and enjoy this wonderful meal!

    Spaghetti Squash Italiano is served with grated Parmesan and fresh basil sprig on top.

    I hope you have the chance to try this recipe for yourself and for those you love. It’s really quite delicious, and full of great Italian flavor! Thank you for stopping by, and I invite you to come back soon for more delicious, family-friendly recipes. Take care, and have a GREAT day.

    Looking For More ITALIAN Recipes?

    You can find ALL of my recipes in the Recipe Index, which is located at the top of the page. I have lots of yummy Italian recipes for you to choose from, including:

    Interested In More Recipes?

    Thank you for visiting this website. I appreciate you using some of your valuable time to do soIf you’re interested, I publish a newsletter 2 times per month (1st and 15th) with all the latest recipes, and other fun info. I would be honored to have you join our growing list of subscribers, so you never miss a great recipe!
    There is a Newsletter subscription box on the top right side (or bottom) of each blog post, depending on the device you use, where you can easily submit your e-mail address (only) to be included in my mailing list.

    You Can Also Find Me On Social Media:

    Facebook page: The Grateful Girl Cooks!
    Pinterest:
    The Grateful Girl Cooks!
    Instagram:
    jbatthegratefulgirlcooks

    Author's signature

    Recipe adapted from: Live Smart digital magazine, volume 1, page 35, New Life Promise by isabeldprice.com

    ↓↓ PRINTABLE RECIPE BELOW ↓↓

    0 from 0 votes
    Spaghetti Squash Italiano
    Prep Time
    10 mins
    Cook Time
    1 hr 10 mins
    Total Time
    1 hr 20 mins
     

    Enjoy delicious (and filling) Spaghetti Squash Italiano, with Italian sausage links, roasted spaghetti squash, tomatoes, garlic and basil.

    Category: Main Dish
    Cuisine: Italian
    Keyword: spaghetti squash Italiano
    Servings: 4
    Calories Per Serving: 348 kcal
    Author: JB @ The Grateful Girl Cooks!
    Ingredients
    • 1 medium spaghetti squash
    • ½ Tablespoon extra virgin olive oil for sausages
    • 4 links Italian chicken sausage OR Italian pork sausage (see note below)
    • 2 Tablespoons extra virgin olive oil for squash
    • 4 medium fresh tomatoes diced
    • 2 cloves garlic minced
    • ¼ teaspoon dried oregano
    • 1 pinch red chili flakes
    • salt and pepper (to taste)
    • 1 cup fresh basil leaves cut in thin strips
    For Garnish (optional but good): Grated Parmesan Cheese and fresh basil leaves
      Instructions
      1. Preheat oven to 375°F . Line a baking sheet with parchment paper OR silpat.

      2. Prepare Squash: Rinse squash; pierce its skin (on all sides) a total of 8-10 times using sharp knife. Put squash on prepared baking sheet. Bake for 1 hour at 375°F, or until it can easily be pierced with a sharp knife. Baking time may vary depending on the size squash. and oven temperature variations. Remove from oven; let cool 30 minutes.

      3. Cook Sausages While Squash Bakes: Cook Italian sausages in ½ T. olive oil on Medium-Low heat in a large skillet, turning to cook all sides until fully cooked. Remove sausages, let cool; cut into thin round slices. Set aside.

      4. Make Sauce (15 minutes before squash is done cooling): Heat 2 T. olive oil in a large skillet on Medium-Low heat. When oil is hot, add minced garlic. Stir and cook garlic for 30 seconds, then add tomatoes. oregano, red chili flakes, salt and pepper. Cook, stirring occasionally, on Medium-Low heat for 10 minutes. Stir basil leaves and sausage slices into the sauce, until combined. Cook 5 minutes, stirring occasionally, until heated through and basil leaves wilt.

      5. Shred Squash: After squash has cooled 30-40 minutes, cut slice off of both ends; slice squash lengthwise. Use large spoon to remove seeds and pulp from each half (discard). Use a fork to gently scrape squash lengthwise into strands of spaghetti squash. Remove squash strands from both halves, without breaking through outer skin.

      6. To Serve: Divide squash strands onto individual plates (recipe serves 4). Top each portion with hot tomato sauce and sausage mixture. If desired, garnish with grated Parmesan cheese and fresh basil leaves. Serve hot, Enjoy!

      Recipe Notes

      NOTE: I have used both Chicken and Pork Italian sausages at times, for this recipe. The caloric calculation indicated for this recipe was made using Italian CHICKEN sausage links. If PORK Italian sausage links are used, the caloric calculation would be approx. 550 calories per serving.

      Nutrition Facts
      Spaghetti Squash Italiano
      Amount Per Serving (1 (1/4 of total))
      Calories 348 Calories from Fat 198
      % Daily Value*
      Fat 22g34%
      Saturated Fat 4g25%
      Polyunsaturated Fat 2g
      Monounsaturated Fat 7g
      Cholesterol 60mg20%
      Sodium 1112mg48%
      Potassium 578mg17%
      Carbohydrates 26g9%
      Fiber 5g21%
      Sugar 11g12%
      Protein 16g32%
      Vitamin A 1940IU39%
      Vitamin C 25mg30%
      Calcium 83mg8%
      Iron 2mg11%
      * Percent Daily Values are based on a 2000 calorie diet.

      Here’s one more to pin on your Pinterest boards!Enjoy delicious (and filling) Spaghetti Squash Italiano, with Italian sausage links, roasted spaghetti squash, tomatoes, garlic and basil.


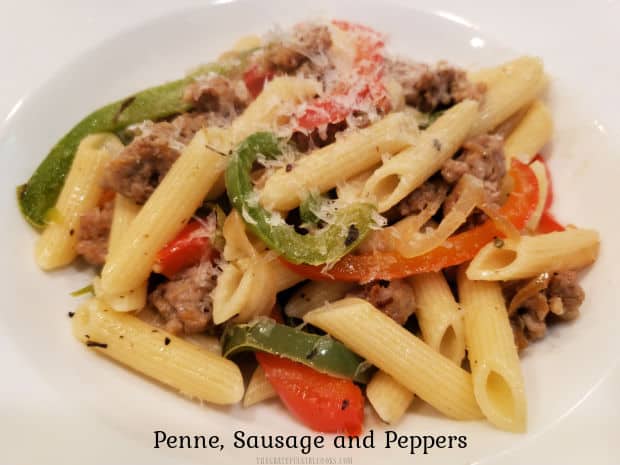
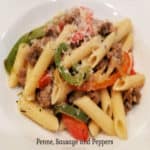
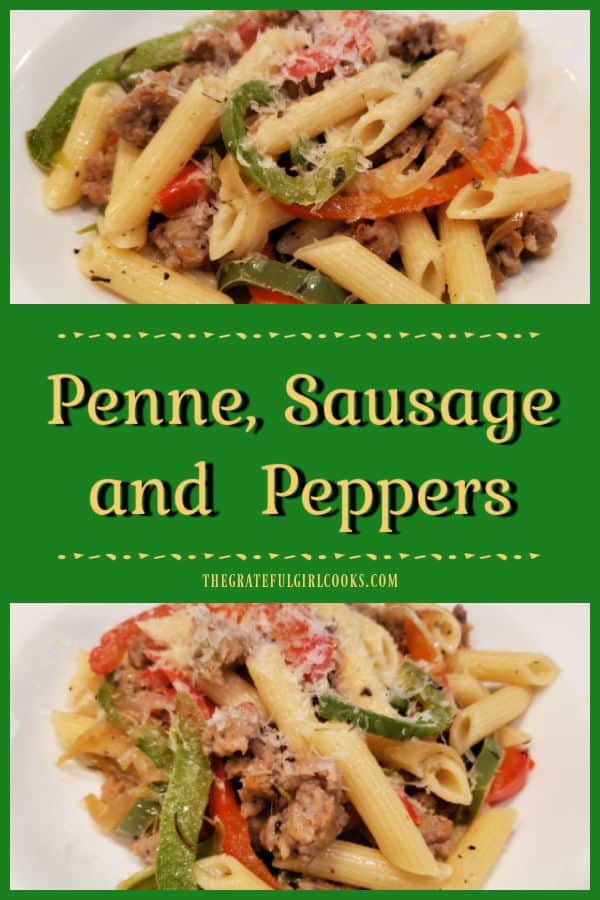
      Penne, Sausage and Peppers

      Penne, Sausage and Peppers is an easy, yummy meal! Italian sausage, onions, spices and red/green bell peppers in pasta, topped with Parmesan!
      Penne, Sausage and Peppers is an easy, yummy meal! Italian sausage, onions, spices and red/green bell peppers in pasta, topped with Parmesan!

      Simple and delicious is how I would describe this recipe for penne, sausage and peppers I’m sharing here today. I found this recipe almost 7 years ago in a magazine I subscribed to at the time. It’s filling, and my husband and I enjoy it a lot.

      Italian sausage is the star of this recipe, and you can use either sweet milk Italian sausage or spicy hot Italian sausage, whichever you prefer. The other ingredients are red and green bell peppers, onion, olive oil and a couple of Italian spices. That’s it! Here’s how to make this easy dish:

      Scroll Down For A Printable Recipe Card At The Bottom Of The Page

      Cook The Italian Sausage

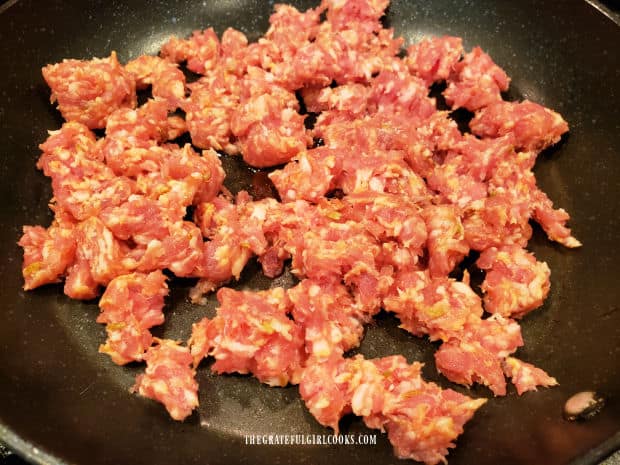
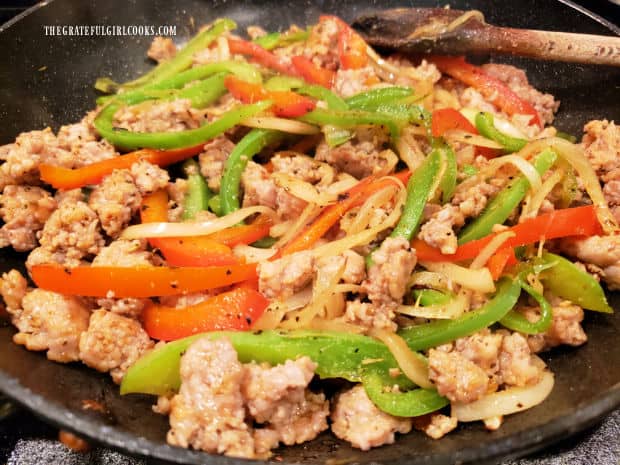
      Heat olive oil in a large skillet on medium heat. Remove the Italian sausage from their casings (if using links), and place the meat into the skillet. Cook the sausage for about 5-6 minutes, stirring to break up the chunks.

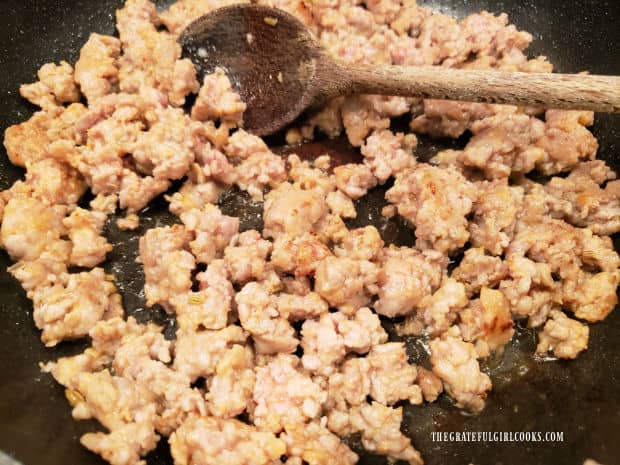
      Once the sausage is lightly browned and no longer pink, it is done cooking. Use a slotted spoon to transfer the meat to a plate (letting grease drain back into skillet). Leave 1 Tablespoon of the grease remaining in the skillet, and discard the rest.

      Italian sausage is crumbled and cooked in skillet.Once the Italian sausage is cooked and no longer pink, it is removed from the skillet.

      Cook The Onions And Bell Peppers

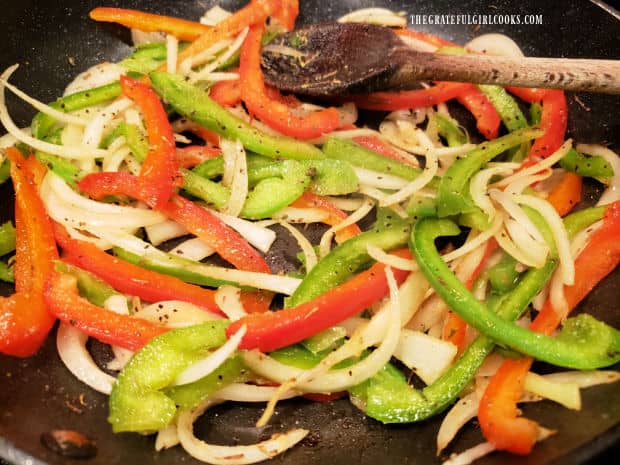
      On Medium heat, cook the onions, peppers and spices in reserved Tablespoon of oil/grease left in the skillet. Continue to cook, (stirring occasionally) for 10-12 minutes, or until the veggies are tender.

      Red and green bell peppers, onions and spices are cooked in the skillet.

      Add the cooked Italian sausage back into the skillet, and toss to combine all ingredients. Take a little bite, and season with salt and pepper, if desired.

      Cooked Italian sausage is added back into skillet with cooked peppers and onions.

      Prepare The Pasta And Finish The Dish

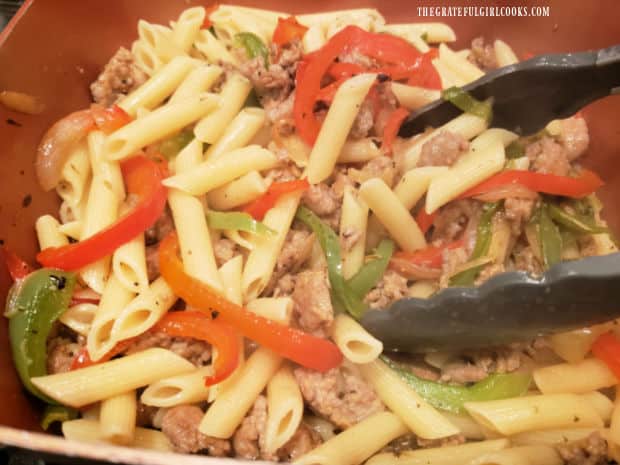
      Prepare the penne pasta according to the package directions (usually around 10-11 minutes). Once done, reserve and set aside 1/2 cup of the starchy pasta water, and drain off the rest. Place the drained pasta back into the pan, and add the sausage and peppers mixture.

      Pour in the reserved 1/2 cup of hot starchy pasta water, and toss, to combine all the ingredients. The water will help to moisten the pasta, because there is no sauce. Don’t worry… it won’t be “soupy”. That hot pasta will quickly absorb almost all the hot water as you toss the ingredients together. Cook, stirring often until heated through (about a minute).

      Penne pasta is cooked in large pan, according to package instructions, then drained.After draining pasta, the peppers, onions and sausage are added to the pasta in pan.

      Serving The Penne, Sausage and Peppers

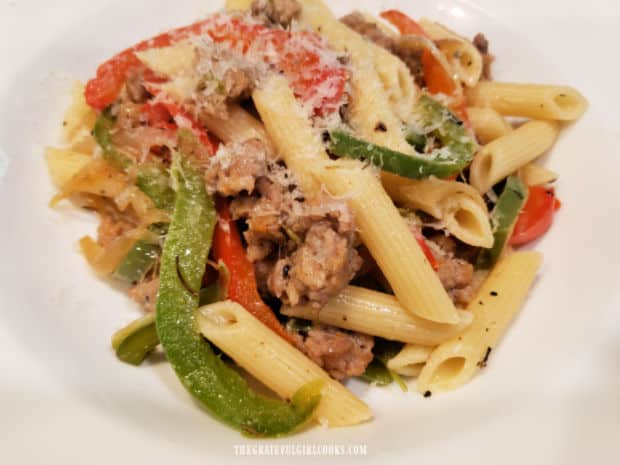
      Once heated through, place portions onto serving plates or into bowls. Top each portion of the penne, sausage and peppers with grated Parmesan cheese, and serve immediately while hot. 

      The onions, peppers and sausage provide great flavor to this simple dish, and I’m sure you will enjoy it. TIP: Leftovers can be easily microwaved, but you may need to add a tiny bit of olive oil or hot water to re-hydrate the pasta before re-heating.

      A portion of penne, sausage and peppers is topped with Parmesan cheese and served.

      I hope you have the opportunity to try this recipe for penne, sausage and peppers. It really is easy to make, and really does tastes wonderful. Thanks for stopping by, and I invite you to come back again soon for more recipes. Take care, and have a GREAT day!

      Looking For More PASTA Recipes?

      You can find ALL of my recipes in the Recipe Index, located at the top of the page. I have lots of yummy pasta dishes for you to enjoy, including:

      Interested In More Recipes?

      Thank you for visiting this website. I appreciate you using some of your valuable time to do soIf you’re interested, I publish a newsletter 2 times per month (1st and 15th) with all the latest recipes, and other fun info. I would be honored to have you join our growing list of subscribers, so you never miss a great recipe!
      There is a Newsletter subscription box on the top right side (or bottom) of each blog post, depending on the device you use, where you can easily submit your e-mail address (only) to be included in my mailing list.

      You Can Also Find Me On Social Media:

      Facebook page: The Grateful Girl Cooks!
      Pinterest:
      The Grateful Girl Cooks!
      Instagram:
      jbatthegratefulgirlcooks

      Author's signature

      Recipe adapted from: Jodi Braun, via “All You” magazine, November 2015 edition, page 64.

      ↓↓ PRINTABLE RECIPE BELOW ↓↓

      0 from 0 votes
      Penne, Sausage and Peppers
      Prep Time
      15 mins
      Cook Time
      20 mins
      Total Time
      35 mins
       

      Penne, Sausage and Peppers is an easy, yummy meal! Italian sausage, onions, spices and red/green bell peppers in pasta, topped with Parmesan!

      Category: Dinner, Pasta
      Cuisine: Italian
      Keyword: pasta, penne, sausage and peppers
      Servings: 4
      Calories Per Serving: 442 kcal
      Author: JB @ The Grateful Girl Cooks!
      Ingredients
      • 8 ounces penne pasta
      • 2 teaspoons olive oil
      • ½ pound Italian sausage (sweet or hot) removed from casings (approx. 3 links)
      • ½ large green bell pepper seeded, thinly sliced
      • ½ large red bell pepper seeded, thinly sliced
      • ½ medium yellow onion thinly sliced (top to bottom)
      • 1 teaspoon garlic powder
      • ½ teaspoon Italian seasoning
      • salt and pepper, to taste
      • Grated Parmesan for serving (optional)
      Instructions
      1. Heat oil in large skillet on medium heat. Remove sausage from casings (if using links); place meat in skillet. Cook 5-6 minutes, stirring to break up chunks, cooking until meat is no longer pink. Use slotted spoon to transfer sausage to a plate (let grease drain into skillet). Leave 1 Tablespoon of the grease in skillet; discard the rest.

      2. On Medium heat, cook onions, peppers and spices in reserved oil/grease in skillet. Cook, stirring occasionally for 10-12 minutes, until veggies are tender.

      3. Add cooked sausage to veggies; toss to combine. Take a taste; season with salt and pepper, if desired.

      4. Prepare pasta according to pkg. directions (usually 10-11 minutes). Once done, reserve/set aside 1/2 cup of starchy pasta water; drain off the rest. Place drained pasta back into pan; add sausage/peppers. Pour in reserved 1/2 cup of hot starchy pasta water. Toss to combine. Cook, stirring often until heated through (about a minute).

      5. Transfer to serving plates; garnish portions with grated Parmesan cheese, and serve hot. Enjoy!

      Recipe Notes

      Can substitute rotini, farfalle or bow-tie pasta for the penne, if desired.

      Nutrition Facts
      Penne, Sausage and Peppers
      Amount Per Serving (1 (1/4 of total))
      Calories 442 Calories from Fat 189
      % Daily Value*
      Fat 21g32%
      Saturated Fat 7g44%
      Polyunsaturated Fat 3g
      Monounsaturated Fat 10g
      Cholesterol 43mg14%
      Sodium 420mg18%
      Potassium 381mg11%
      Carbohydrates 47g16%
      Fiber 3g13%
      Sugar 3g3%
      Protein 16g32%
      Vitamin A 722IU14%
      Vitamin C 45mg55%
      Calcium 33mg3%
      Iron 2mg11%
      * Percent Daily Values are based on a 2000 calorie diet.

      Here’s one more to pin on your Pinterest boards!Penne, Sausage and Peppers is an easy, yummy meal! Italian sausage, onions, spices and red/green bell peppers in pasta, topped with Parmesan!

      Ham and Cheddar Gnocchi

      Ham and Cheddar Gnocchi is a delicious, creamy, easy, one skillet meal, with ham, potato gnocchi, green beans, cheese, onions and garlic!
      Ham and Cheddar Gnocchi is a delicious, creamy, easy, one skillet meal, with ham, potato gnocchi, green beans, cheese, onions and garlic!

      Do you enjoy eating gnocchi? I sure do… those little fluffy potato bundles can be combined with a number of sauces and/or meats for a delicious meal. Over the past few years I’ve enjoyed using them for a number of recipes, because they are easy and quick to cook!

      I found the original recipe for the ham and cheddar gnocchi online, and made several changes to suit our taste buds! This recipe is pretty straightforward in that you add ingredients to a skillet, cook, add more ingredients, and cook again. Cover it all with a blanket of cheddar cheese then eat. You get the picture. It doesn’t take a rocket scientist to make this yummy all-in-one-skillet dish! Here’s how to make it:
      Scroll Down for A Printable Recipe Card At The Bottom Of The Page

      Ready, Get Set… And Go!

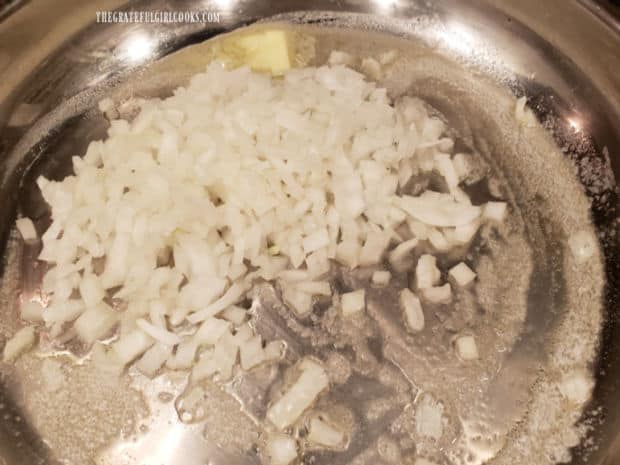
      You will need a large, oven-proof skillet for this dish. Melt a Tablespoon of butter over medium heat in the skillet. Add two cups of chopped onions to the butter, and sauté them for approximately 4-5 minutes, or until they become tender and are golden brown.

      Toss in the diced or shredded ham, and stir to combine. Cook the ham, onions and butter until heated through, approx. 2-3 minutes.

      Chopped onions are cooked in melted butter in a large skillet.
      Shredded (or cubed) ham is added to the cooked onions in the skillet.

      Stir in the water and the chicken broth, and bring this mixture to a simmer. Once the liquid is simmering, add the gnocchi and sliced green beans. Stir everything well, then put a lid on the skillet.

      Cook (covered) on medium-low heat for about 5 minutes, stirring once or twice during the cooking time. When done, the green beans AND the gnocchi should be tender to the bite.

      Chicken broth and water are stirred into the skillet with ham and onions.Potato gnocchi and sliced green beans are added to the skillet.

      Finishing The Ham And Cheddar Gnocchi

      Turn on the broiler in your oven. to preheat. Add garlic powder, and season to taste with salt and black pepper. Stir in the half and half (or whipping cream, if using), then stir to combine these ingredients.

      Sprinkle the gnocchi with grated cheddar cheese. If you don’t enjoy cheddar, you can use the cheese of your choice (such as Pepper Jack, Swiss, etc.). I use cheddar, because we always have it around, and it adds nice color to the dish. 

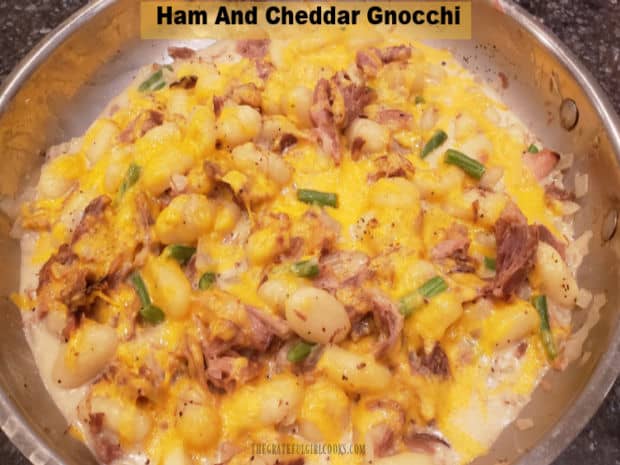
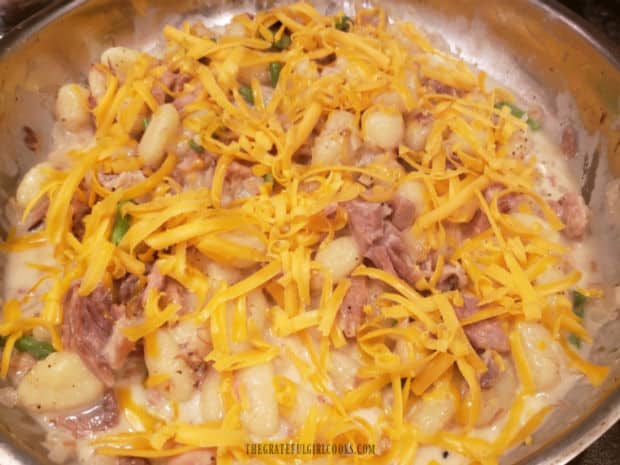
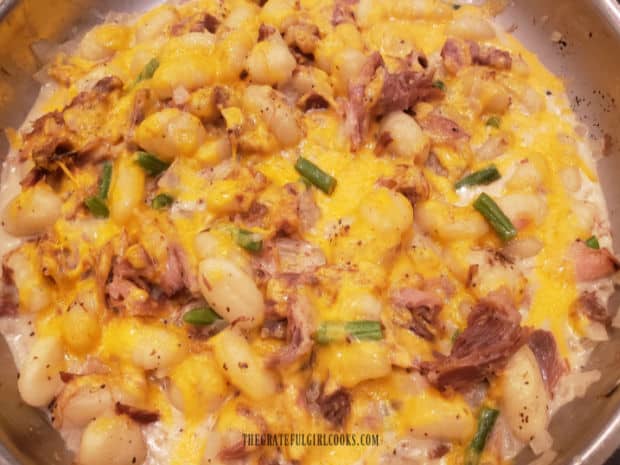
      Put the skillet on a rack, positioned about 4-5 inches from the broiler heating element. Let the ham and cheddar gnocchi heat under the broiler about 2-3 minutes, until the cheese has melted and is bubbly on top. Be sure to keep an eye on it, so you don’t burn it! When done, remove from the oven and it’s ready to serve!

      Seasonings and half and half are added to the ingredients for ham and cheddar gnocchi.Grated cheddar cheese is added to ham and cheddar gnocchi, then skillet is put under a broiler.

      Serve The Ham And Cheddar Gnocchi

      Serve the ham and cheddar gnocchi straight from the skillet. It is a rather rustic presentation, but it works! Besides, who needs one more serving dish to wash, right? Just grab a large spoon and dish it up onto individual serving plates Enjoy this flavorful all in one skillet meal!
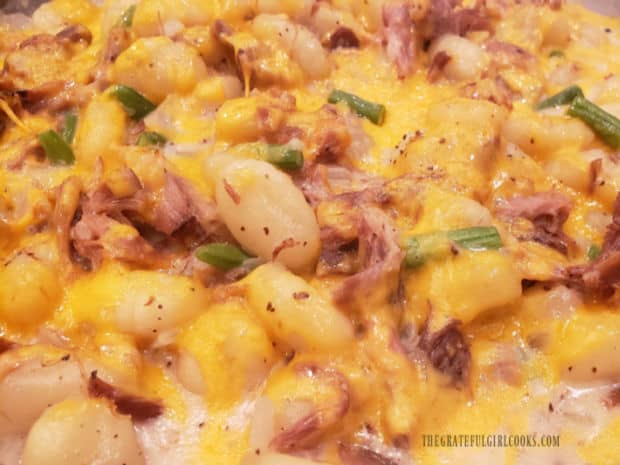
      Ham and cheddar gnocchi has been removed from broiler nd is ready to eat.A close up photo of the ham and cheddar gnocchi, ready for serving.

      I really hope you enjoy this dish. We sure do, and enjoy how simple it is to make. The leftovers can be easily reheated using a microwave. Thank you for stopping by today, and I hope you will come back soon for more family-friendly recipes. Have a wonderful day, friends.

      Looking For More Recipes Using GNOCCHI?

      You can find ALL of my recipes in the Recipe Index, which is located at the top of the page. I have several delicious gnocchi recipes you might enjoy, including:

      Interested In More Recipes?

      Thank you for visiting this website. I appreciate you using some of your valuable time to do soIf you’re interested, I publish a newsletter 2 times per month (1st and 15th) with all the latest recipes, and other fun info. I would be honored to have you join our growing list of subscribers, so you never miss a great recipe!
      There is a Newsletter subscription box on the top right side (or bottom) of each blog post, depending on the device you use, where you can easily submit your e-mail address (only) to be included in my mailing list.

      You Can Also Find Me On Social Media:

      Facebook page: The Grateful Girl Cooks!
      Pinterest:
      The Grateful Girl Cooks!
      Instagram:
      jbatthegratefulgirlcooks

      Author's signature

      Recipe adapted from: http://www.kevinandamanda.com/ham-and-cheese-gnocchi/

      0 from 0 votes
      Ham and Cheddar Gnocchi
      Prep Time
      5 mins
      Cook Time
      15 mins
      Total Time
      20 mins
       

      Ham and Cheddar Gnocchi is a delicious, creamy, easy, one skillet meal, with ham, potato gnocchi, green beans, cheese, onions and garlic!

      Category: Main Course
      Cuisine: American
      Keyword: ham and cheddar gnocchi
      Servings: 4
      Calories Per Serving: 593 kcal
      Author: JB @ The Grateful Girl Cooks!
      Ingredients
      • 1 Tablespoon butter
      • 2 cups diced yellow onion (approx. 1 large)
      • 12 ounces ham (diced or shredded)
      • ¾ cup water
      • ½ cup low-sodium chicken broth
      • 16 ounces potato gnocchi (1 pound pkg.)
      • ¾ cup sliced fresh green beans
      • ¼ cup half and half (or substitute heavy whipping cream)
      • ¼ teaspoon garlic powder
      • salt & pepper, to taste
      • 1 cup shredded cheddar cheese (sharp or mild)
      Instructions
      1. Melt butter over medium heat in a large (ovenproof) skillet. Add chopped onions to skillet; sauté approx. 4-5 minutes, or until tender and translucent. Stir in diced or shredded ham. Cook 2-3 minutes until heated through,

      2. Stir in water and chicken broth; bring this mixture to a simmer. Once simmering, add gnocchi and sliced green beans. Stir well, then put a lid on the skillet. Cook (covered) on medium-low heat for about 5 minutes, stirring once or twice. When done, green beans AND gnocchi should be tender. Remove skillet from heat. **Turn on oven broiler to preheat while you finish making the gnocchi.**

      3. To gnocchi add garlic powder, and then salt and pepper (to taste). Stir in half and half (or whipping cream, if using), combining all ingredients. Sprinkle gnocchi with grated cheddar cheese.

      4. Put skillet on a rack, positioned about 4-5 inches from the broiler heating element. Broil 2-3 minutes, or until cheese has melted and is bubbly on top. Be sure to keep an eye on it, so you don't burn it! When done, remove skillet from oven, serve immediately and enjoy!

      Nutrition Facts
      Ham and Cheddar Gnocchi
      Amount Per Serving (1 (1/4 of total))
      Calories 593 Calories from Fat 261
      % Daily Value*
      Fat 29g45%
      Saturated Fat 14g88%
      Trans Fat 1g
      Polyunsaturated Fat 2g
      Monounsaturated Fat 11g
      Cholesterol 96mg32%
      Sodium 1616mg70%
      Potassium 479mg14%
      Carbohydrates 51g17%
      Fiber 5g21%
      Sugar 4g4%
      Protein 32g64%
      Vitamin A 568IU11%
      Vitamin C 9mg11%
      Calcium 278mg28%
      Iron 5mg28%
      * Percent Daily Values are based on a 2000 calorie diet.

      Here’s one more to pin on your Pinterest boards!Ham and Cheddar Gnocchi is a delicious, creamy, easy, one skillet meal, with ham, potato gnocchi, green beans, cheese, onions and garlic!


      Italian Chicken Parmesan Meatballs

      It’s so easy to make Italian Chicken Parmesan Meatballs! Mix and bake delicious, healthy meatballs to serve as is, or with a favorite sauce.
      It's so easy to make Italian Chicken Parmesan Meatballs! Mix and bake delicious, healthy meatballs to serve as is, or with a favorite sauce.

      Today I want to share a quick and easy recipe for Italian Chicken Parmesan Meatballs. The recipe is simple to prepare, and the Italian-seasoned meatballs are really yummy, whether you enjoy them plain (even though there’s nothing “plain” about them!), or with a favorite sauce!

      I found the original recipe in a book I purchased from the New Life Promise healthy eating plan (from Isabel D. Price), and have made them quite a few times since. After a few minor tweaks (and adding more spices) to her original recipe, my husband and I fell in love with these meatballs. Honestly, they are seasoned so nicely, you can simply eat them straight out of the oven, and forget the pasta OR sauce. 

      So, if you are trying to eat a little more “healthy”, I would love to recommend these Italian Chicken Parmesan Meatballs to you. This recipe makes 4 servings, but I suggest doubling the recipe, because these little beauties freeze very well. Here’s how easy they are to make:

      Scroll Down For A Printable Recipe Card At The Bottom Of The Page

      Combine All The Ingredients

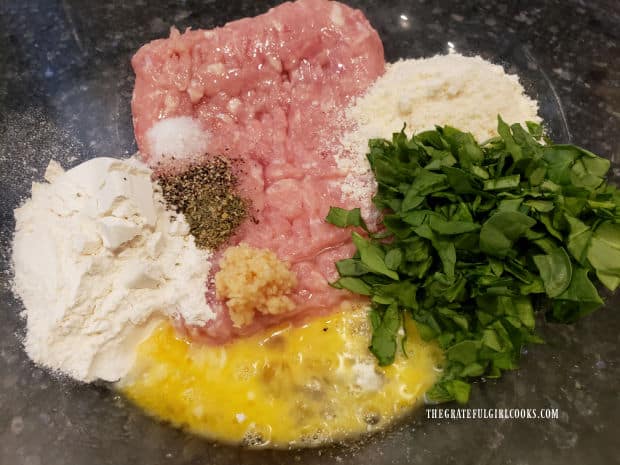
      Preparing the meatball mixture could not be any easier! Place all the ingredients in a large mixing bowl, and then mix them well, until fully combined. It is a bit messy, but I’ve found the easiest way to do this is to use my (clean) hands, and just get in there, and mix up the ingredients! You can also use a fork to do this… just sayin’.

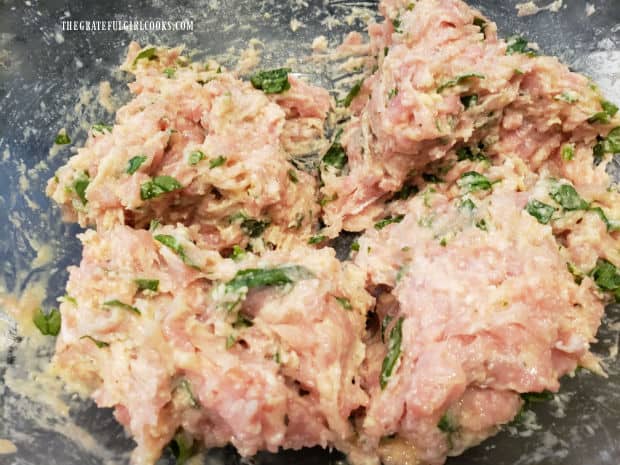
      The recipe calls for almond flour (which is gluten-free), but if that is not available, you can certainly use all purpose flour. Once the ingredients are well-combined, you will have a bowl of well-seasoned ground chicken, ready and waiting for you to shape into meatballs.

      Ingredients for the Italian Chicken Parmesan Meatballs are placed in a large bowl before combining.After combining the ingredients, the ground chicken mixture is ready to form meatballs.

      Time to Form The Italian Chicken Parmesan Meatballs

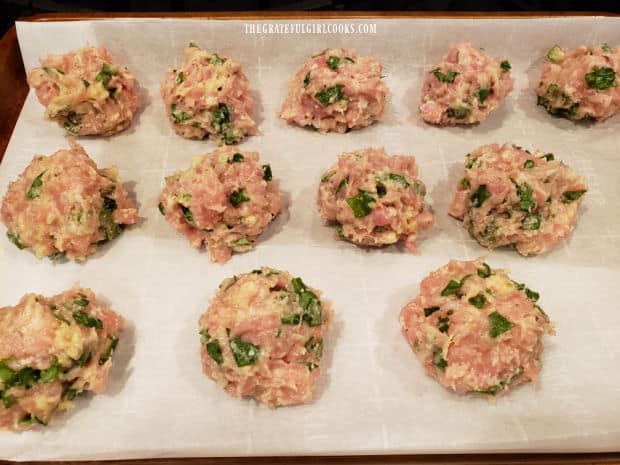
      Now it’s time to make Italian Chicken Parmesan Meatballs! Again, using your hands, roll the ground chicken mixture into 12 evenly shaped, round meatballs.

      Place the meatballs onto a parchment paper-lined baking sheet, leaving a small space in between each of them. Now they’re ready to bake! See how easy they are to make?

      Twelve meatballs are placed on a parchment paper-lined baking sheet to bake.

      Time To Bake!

      Place the baking sheet (and meatballs!) into a preheated 350°F. oven on a middle rack. Bake the Italian Chicken Parmesan Meatballs for approximately 22-25 minutes, until cooked through and lightly browned on top. Oven temperatures vary, so you might want to check them at the 22 minute mark.

      If you would like them browned a bit more after they’re done baking (we do!), simply switch the oven to the broiler setting. Place the baking sheet about 3-4″ from the broiler element, and broil the meatballs for 1-2 more minutes. Rotate the pan halfway through the broiling time. TIP: KEEP AN EYE ON THEM SO THEY DON’T BURN!

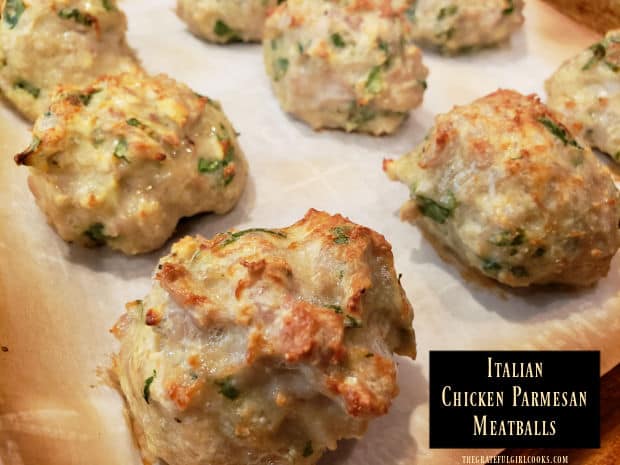
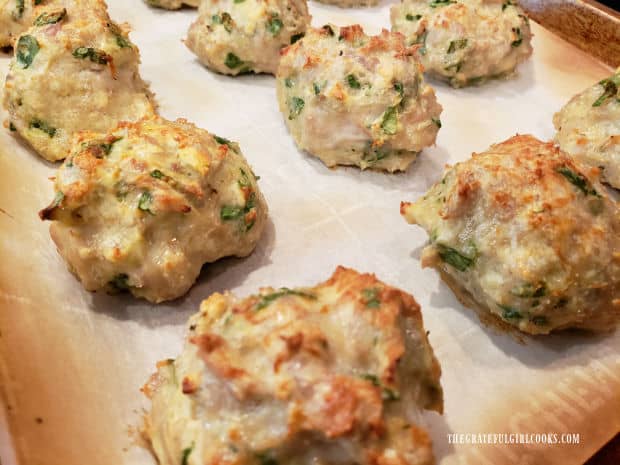
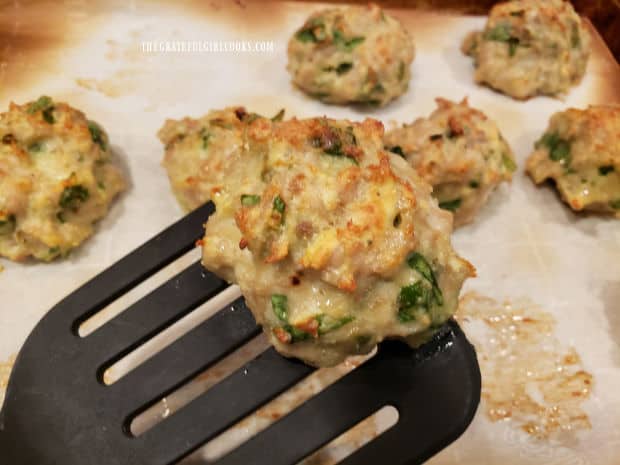
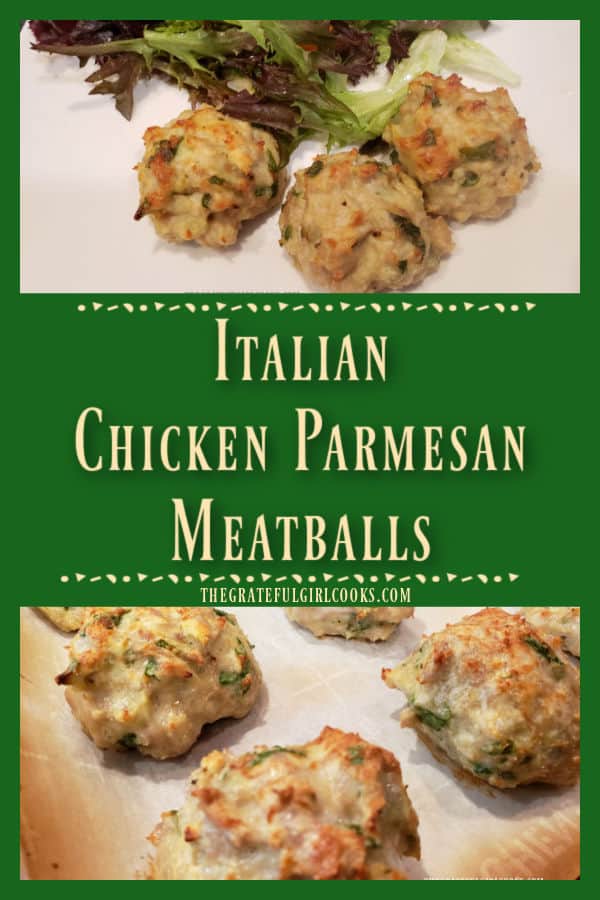
      Once baked, the Italian Chicken Parmesan Meatballs will be golden brown on top.A close up of one of the Italian Chicken Parmesan Meatballs on a spatula.

      Ready To Eat Italian Chicken Parmesan Meatballs!

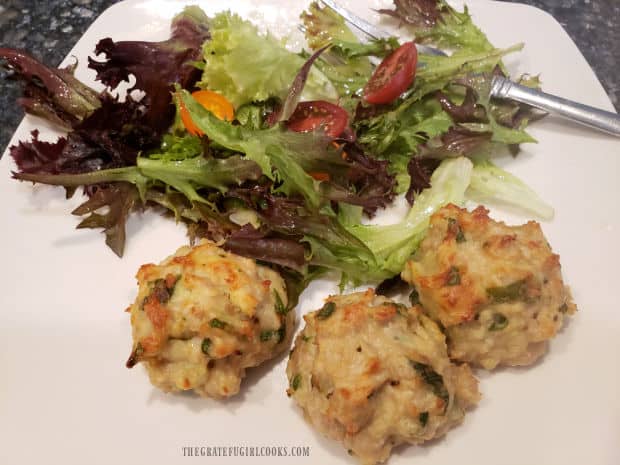
      When done, immediately serve the Italian Chicken Parmesan Meatballs while hot. If you want to go the all healthy route, simply place 3 meatballs per serving on a plate, and serve alongside a cool, crisp mixed green salad, or a favorite vegetable.

      You can also serve these delicious, healthy meatballs with your favorite sauce and pasta. It’s your choice! However you choose to serve them, I think you are gonna love these delicious meatballs. They also freeze well, so you can save a few for another meal, if desired.

      Three Italian Chicken Parmesan Meatballs on a plate with a mixed green salad on the side.

      I really hope you enjoy this simple recipe. We sure do! The meatballs are easy to make, so they are perfect for a busy day! Thanks for stopping by today. I hope you will come back again soon, for more family friendly recipes. Take care, and have a wonderful day.

      Looking For More MEATBALL Recipes?

      You can find ALL of my recipes in the Recipe Index, located at the top of the page. I have several meatball recipes you might enjoy, including:

      Interested In More Recipes?

      Thank you for visiting this website. I appreciate you using some of your valuable time to do soIf you’re interested, I publish a newsletter 2 times per month (1st and 15th) with all the latest recipes, and other fun info. I would be honored to have you join our growing list of subscribers, so you never miss a great recipe!
      There is a Newsletter subscription box on the top right side (or bottom) of each blog post, depending on the device you use, where you can easily submit your e-mail address (only) to be included in my mailing list.

      You Can Also Find Me On Social Media:

      Facebook page: The Grateful Girl Cooks!
      Pinterest:
      The Grateful Girl Cooks!
      Instagram:
      jbatthegratefulgirlcooks

      Author's signature

      Recipe adapted from: The book “Food Meets Faith- Total Trifecta of Weight Loss”, by Isabel D. Price, page 78, New Life Promise, published by Live Smart Solutions, LLC, 2019

      0 from 0 votes
      Italian Chicken Parmesan Meatballs
      Prep Time
      10 mins
      Cook Time
      22 mins
      Total Time
      32 mins
       

      It's so easy to make Italian Chicken Parmesan Meatballs! Mix and bake delicious, healthy meatballs to serve as is, or with a favorite sauce.

      Category: Dinner, Lunch
      Cuisine: Italian
      Keyword: Italian Chicken Parmesan Meatballs
      Servings: 4 (3 meatballs per serving)
      Calories Per Serving: 261 kcal
      Author: JB @ The Grateful Girl Cooks!
      Ingredients
      • 1 pound ground chicken
      • cups chopped, fresh spinach leaves
      • cup grated Parmesan cheese
      • cup all purpose flour can substitute almond flour for gluten-free
      • 3 cloves garlic minced
      • 1 large egg lightly beaten
      • ½ teaspoon sea salt
      • ¼ teaspoon ground black pepper
      • ¼ teaspoon Italian seasoning
      • ¼ teaspoon onion powder
      • ¼ teaspoon red chili pepper flakes (optional, but good)
      Instructions
      1. Preheat oven to 350°F. Line a rimmed baking sheet with parchment paper and set aside.

      2. Place all ingredients in a large mixing bowl. Mix ingredients well (you can use your hands or a fork), until they're fully combined.

      3. Using your hands, divide and roll ground chicken mixture into 12 evenly shaped, round meatballs. Place meatballs onto the parchment paper-lined baking sheet, leaving a small space between each one.

      4. Place baking sheet into preheated oven on the middle rack. Bake meatballs for approx. 22-25 minutes, until cooked through and lightly browned on top. Oven temperatures vary, so check them at the 22 minute mark. TIP: If you would like them browned a bit more after they're done, simply switch oven to the broiler setting. Place baking sheet about 3-4" from the broiler element. Broil meatballs for 1-2 more minutes. Rotate pan halfway through broiling time. TIP: KEEP AN EYE ON THEM SO THEY DON'T BURN!

      5. Remove from oven, and transfer the meatballs from baking sheet to plates. Serve as is, or with a favorite sauce or side dish. Enjoy!

      Recipe Notes

      NOTE: Caloric calculation made using all purpose flour

      Nutrition Facts
      Italian Chicken Parmesan Meatballs
      Amount Per Serving (1 3 meatballs)
      Calories 261 Calories from Fat 117
      % Daily Value*
      Fat 13g20%
      Saturated Fat 4g25%
      Trans Fat 1g
      Polyunsaturated Fat 2g
      Monounsaturated Fat 5g
      Cholesterol 151mg50%
      Sodium 514mg22%
      Potassium 699mg20%
      Carbohydrates 10g3%
      Fiber 1g4%
      Sugar 1g1%
      Protein 26g52%
      Vitamin A 1059IU21%
      Vitamin C 3mg4%
      Calcium 125mg13%
      Iron 2mg11%
      * Percent Daily Values are based on a 2000 calorie diet.

      Here’s one more to pin on your Pinterest boards!It's so easy to make Italian Chicken Parmesan Meatballs! Mix and bake delicious, healthy meatballs to serve as is, or with a favorite sauce.

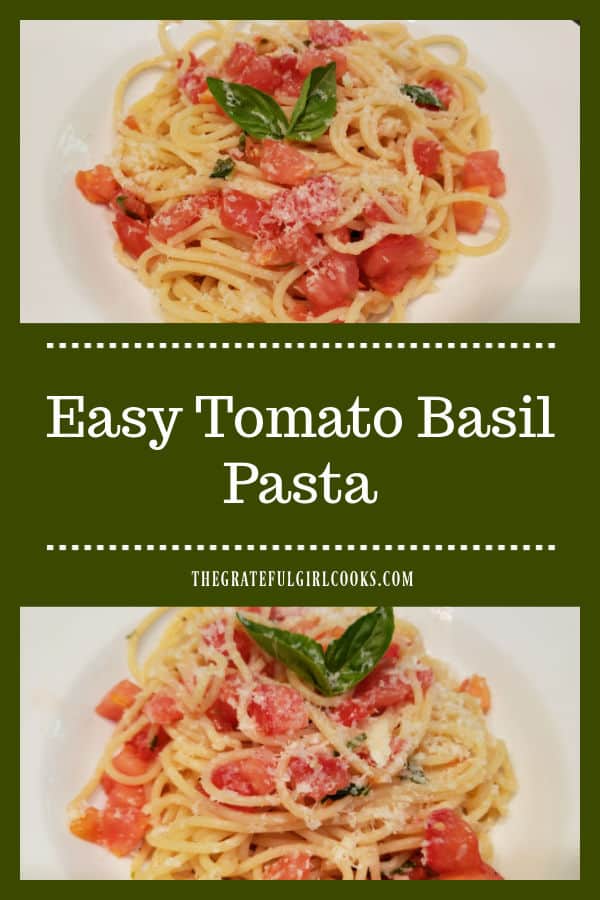
      Easy Tomato Basil Pasta

      Easy tomato basil pasta is yummy, and is a CINCH to make! Marinate fresh tomatoes, basil, garlic & spices, then add to cooked pasta, to serve!
      Easy tomato basil pasta is yummy, and is a CINCH to make! Marinate fresh tomatoes, basil, garlic & spices, then add to cooked pasta, to serve!

      As I write this blog post, we are in the middle of a record-shattering heat wave here in our part of Oregon. Temps yesterday were 113°F., and they are “expected to hit 115° F today. Even though we have air conditioning (most in the Portland metro do not), we are trying our best not to use the oven, or even cook a lot of hot food. That’s where this recipe comes in handy! I am making this again tonight for my husband, and my sister-in-law (who is staying with us and our air conditioning during this heat wave, to stay cool).

      I found this recipe (source unknown) many years ago in an old recipe box I’ve had for over 30 years. Not sure where I got the original recipe, but it’s a KEEPER! I’ve made it a few times way back when, but decided recently to make it again, photograph it, and post the recipe on the ol’ blog! Now you can enjoy it, too!

      It is totally simple meatless main dish, and light enough (yet filling) to enjoy on a hot OR cold day!. If you can boil spaghetti noodles, you can make this delicious pasta dish! I’ve now made this pasta twice in the past two weeks, and it is yummy! Here’s how to make easy tomato basil pasta.

      Scroll Down For A Printable Recipe Card At The Bottom Of The Page

      How To Make Easy Tomato Basil Pasta

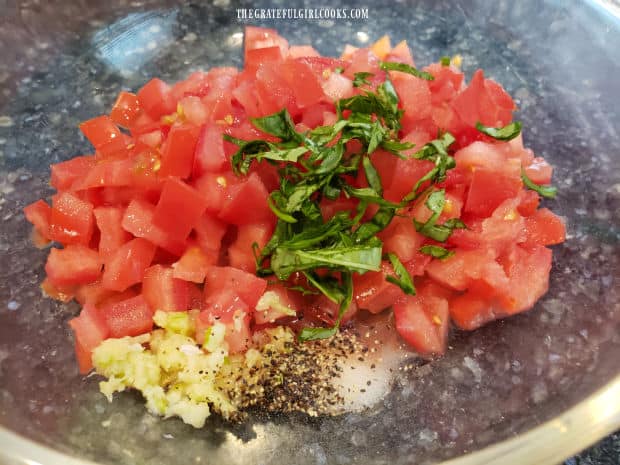
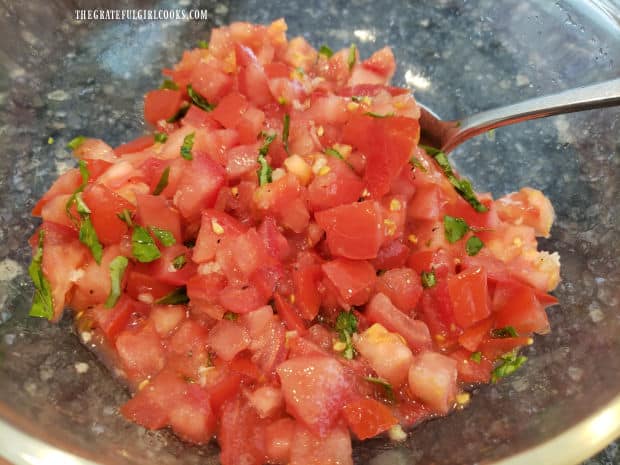
      In a medium sized bowl, combine chopped fresh tomatoes, thinly sliced fresh basil, minced garlic, and salt and pepper. Give them a good stir to fully combine ingredients together, and then cover the bowl with plastic wrap and let it sit on the counter for one hour (or more, if you have the time). Do NOT refrigerate the tomato mixture, and give it a stir a couple of times during the “marinating”.

      Chopped tomatoes, basil, garlic and spices are combined in a bowl.After stirring, the tomatoes and other ingredients sit undisturbed for at least an hour.

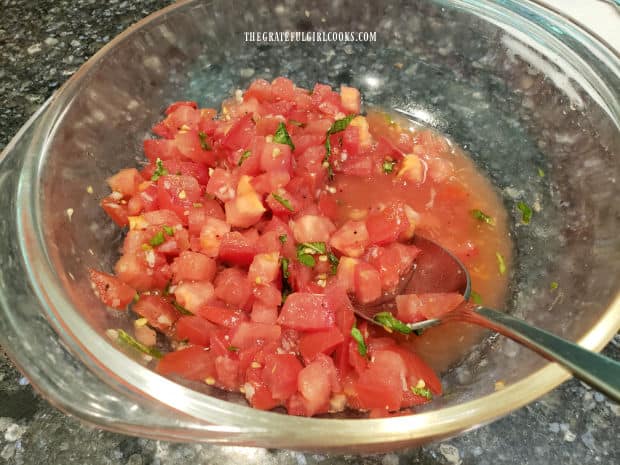
      After the tomato basil mixture has marinated for an hour, you will notice that the tomatoes have released some of their juice. That is perfect, and just what you want them to do. Set the tomato mixture aside while you cook the pasta.

      After resting for an hour, the ingredients for the tomato basil pasta are ready to use.

      Cook The Pasta

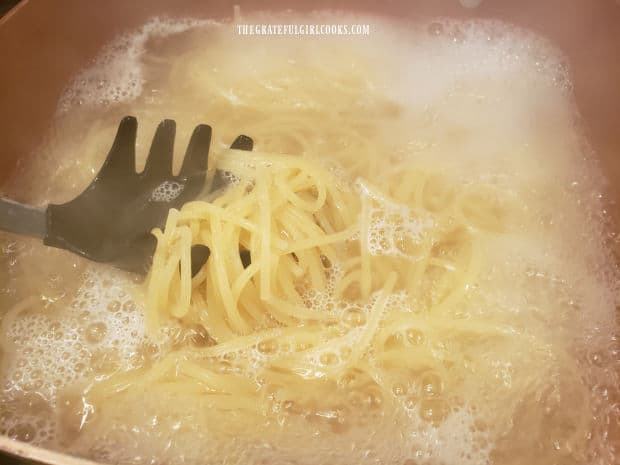
      Cook the spaghetti (or angel hair pasta) in boiling, lightly salted water according to the package instructions until done. Immediately pour the hot pasta into a colander to drain off water, BUT DO NOT RINSE! You want the pasta HOT.

      Spaghetti noodles (or angel hair pasta) is cooked in boiling water

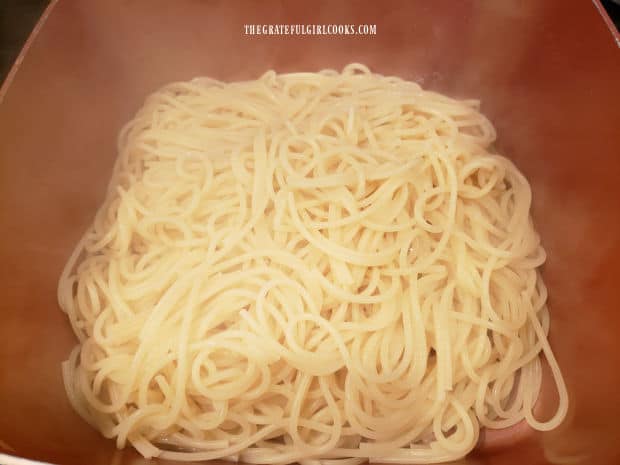
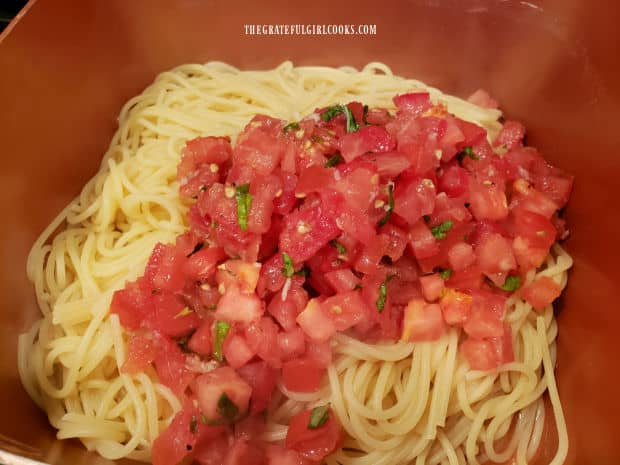
      As soon as the water is drained, pour the hot pasta noodles back into the cooking pan. Immediately add the room temperature tomato/basil/garlic mixture. YES, you add it (uncooked) to the hot pasta. Toss the pasta and tomato basil mixture (including all the accumulated juice) until fully combined. 

      The pasta is drained and immediately placed back into the cooking pan.The easy tomato basil pasta ingredients are combined and tossed until fully integrated.

      Garnish, Then Serve Easy Tomato Basil Pasta

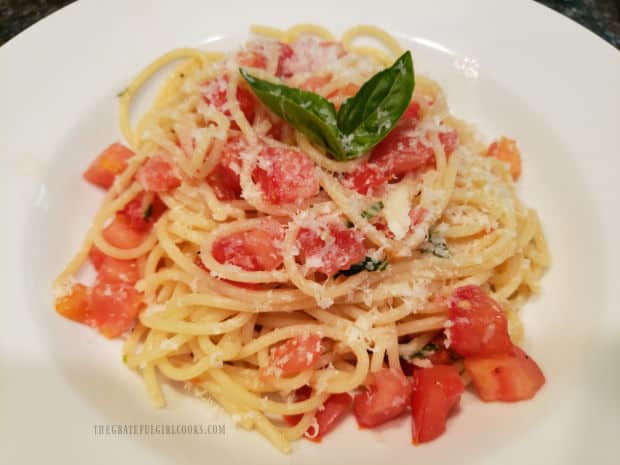
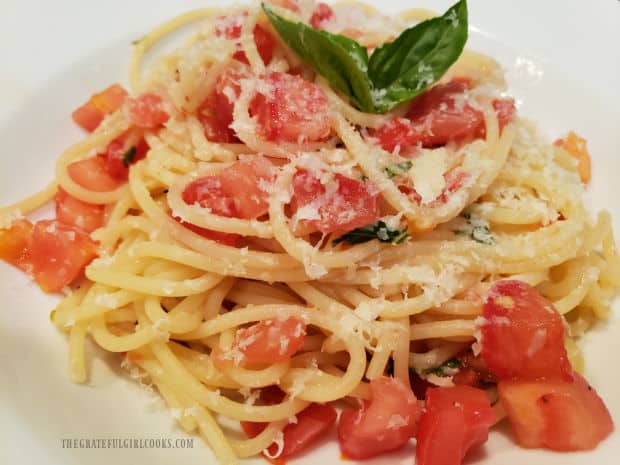
      While it is still hot, portion out the easy tomato basil pasta into serving bowls or onto plates. Grate fresh Parmesan cheese on top of the pasta, and garnish with a couple fresh basil leaves, if desired. Serve immediately!

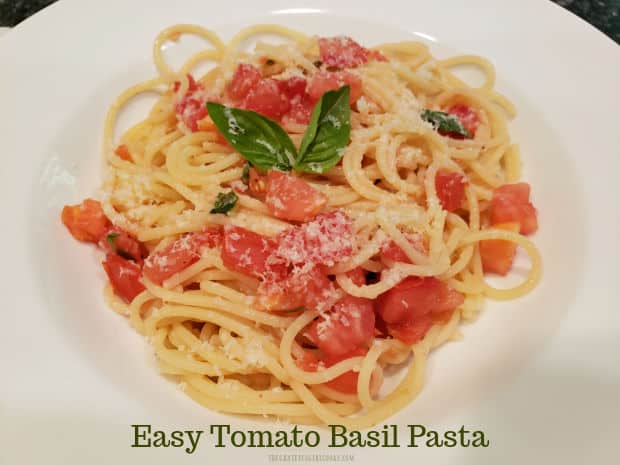
      The tomato basil pasta is garnished with grated Parmesan cheese and basil leaves before serving.A serving of easy tomato basil pasta in a white bowl is garnished and ready to enjoy!

      We love this simple pasta dish, and it truly tastes wonderful! I hope you have the opportunity to try this recipe, and trust you will enjoy it as much as we do. If you like meatless pasta, be sure to check out my recipe for Garlic Penne Pasta and Veggies! Thanks for stopping by, and I trust you will come back again soon! Take care, and may God bless you throughout this day.

      Looking For More PASTA Recipes?

      You can find ALL of my recipes in the Recipe Index, located at the top of the page. I have lots of yummy pasta recipes I think you’ll enjoy, including:

      Interested In More Recipes?

      Thank you for visiting this website. I appreciate you using some of your valuable time to do soIf you’re interested, I publish a newsletter 2 times per month (1st and 15th) with all the latest recipes, and other fun info. I would be honored to have you join our growing list of subscribers, so you never miss a great recipe!
      There is a Newsletter subscription box on the top right side (or bottom) of each blog post, depending on the device you use, where you can easily submit your e-mail address (only) to be included in my mailing list.

      You Can Also Find Me On Social Media:

      Facebook page: The Grateful Girl Cooks!
      Pinterest:
      The Grateful Girl Cooks!
      Instagram:
      jbatthegratefulgirlcooks

      Author's signature

      Original recipe source: unknown

      0 from 0 votes
      Easy Tomato Basil Pasta
      Prep Time
      5 mins
      Cook Time
      10 mins
      RESTING TIME (inactive prep)
      1 hr
      Total Time
      1 hr 15 mins
       

      Easy tomato basil pasta is yummy, & a CINCH to make! Marinate fresh tomatoes, basil, garlic & spices, then add to cooked pasta, to serve!

      Category: Main Dish
      Cuisine: Italian
      Keyword: easy tomato basil pasta
      Servings: 4
      Calories Per Serving: 249 kcal
      Author: JB @ The Grateful Girl Cooks!
      Ingredients
      • 2 cups diced, fresh tomatoes , approx. 2 large tomatoes
      • 2 teaspoons fresh basil , thinly sliced or chopped
      • 2 teaspoons minced garlic
      • ½ teaspoon salt
      • teaspoon ground black pepper
      • 8 ounces spaghetti or angel hair pasta
      • 4 Tablespoons finely grated Parmesan cheese , for garnish
      • 8 leaves fresh basil , for garnish
      Instructions
      1. In a medium bowl, combine chopped tomatoes, chopped or thinly sliced basil, minced garlic, salt and pepper. Stir to fully combine ingredients. Cover bowl with plastic wrap and let it sit on the counter for one hour (or more). Do NOT refrigerate tomato mixture; give it a stir a couple times during the "marinating". After mixture has marinated for an hour, you will notice the tomatoes have released some juice. That what you want them to do. Set the tomato mixture aside while you cook the pasta.

      2. Cook spaghetti (or angel hair pasta) in boiling, lightly salted water according to package instructions until done. Immediately pour hot pasta into a colander to drain off water, BUT DO NOT RINSE! You want the pasta HOT.

      3. As soon as water has drained off, pour hot pasta back into cooking pan. Immediately add room temperature tomato mixture. YES, add it (uncooked) to the hot pasta. Toss the pasta and tomato basil mixture (including accumulated juice) until fully combined.

      4. While still hot, portion pasta into serving bowls or onto plates. Grate fresh Parmesan cheese on top, and garnish with a couple fresh basil leaves, if desired. Serve immediately!

      Nutrition Facts
      Easy Tomato Basil Pasta
      Amount Per Serving (1 (1/4 of total))
      Calories 249 Calories from Fat 18
      % Daily Value*
      Fat 2g3%
      Saturated Fat 1g6%
      Polyunsaturated Fat 1g
      Monounsaturated Fat 1g
      Cholesterol 4mg1%
      Sodium 375mg16%
      Potassium 323mg9%
      Carbohydrates 46g15%
      Fiber 3g13%
      Sugar 4g4%
      Protein 10g20%
      Vitamin A 720IU14%
      Vitamin C 11mg13%
      Calcium 82mg8%
      Iron 1mg6%
      * Percent Daily Values are based on a 2000 calorie diet.

      Here’s one more to pin on your Pinterest boards!Easy tomato basil pasta is yummy, and is a CINCH to make! Marinate fresh tomatoes, basil, garlic & spices, then add to cooked pasta, to serve!

      Butternut Squash Risotto with Chicken

      If you’re looking for a delicious, filling dish, try this Butternut Squash Risotto with Chicken! It’s an “all in one bowl” meal you’ll enjoy!
      If you're looking for a delicious, filling dish, try this Butternut Squash Risotto with Chicken! It's an "all in one bowl" meal you'll enjoy!

      My husband and I really love risotto. It’s hot, filling, delicious, creamy, and to us, a wonderful “comfort food” meal. The best part is that it is an all-in-one dish, with veggies, chicken and rice, so it’s practically perfect… in every way! If you’re a vegetarian and want to make this meal, simply substitute vegetable broth (for chicken broth) and leave out the chicken to enjoy this yummy dish.

      I found the original recipe in one of my old cookbooks published in 2004, called “The Best Of Cooking Light”. After making a couple of tweaks (adding and changing ingredients a bit) to the original recipe, I made this delicious dinner and we’ve loved it ever since that first meal. Tender pieces of butternut squash, chicken, and onions, cooked with arborio rice, broth, butter and Parmesan cheese make this a risotto you’re gonna love! It is soooo good. Here’s how to make it:

      Scroll Down For A Printable Recipe Card At The Bottom Of The Page

      How To Make Butternut Squash Risotto with Chicken

      In a large saucepan, bring 1½ cups of water, 1/4 cup of dry white wine, and 2 cans (14.5 oz. each) of low sodium chicken broth to a simmer (do not boil). Keep this liquid broth simmering on low heat while you prepare the risotto.

      Heat olive oil on medium heat in a large Dutch oven. Once the oil is hot (but not smoking), add chopped onion, and cook them for 7-8 minutes, stirring often. When done, the onions should be golden brown and tender. Add additional 1/2 cup of water, butternut squash, salt, pepper and garlic powder to the pan, and stir to combine. Continue to cook for about 10 minutes, or until the squash has become tender and the liquid has almost evaporated.

      Chopped onions are cooked in olive oil until tender.Lightly seasoned butternut squash cubes for the risotto are cooked in water until tender.

      Making The Risotto

      Add the arborio rice and pre-cooked chicken cubes to the pan, stirring to combine these ingredients. Ladle ½ cup of the warm simmering broth into the pan, and stir.

      Cook this mixture on medium-low heat, stirring often, until almost all of the broth has been absorbed into the rice.

      Continue to add warm broth to the pan, ½ cup at a time, cooking and stirring constantly until almost all the liquid is absorbed, before adding the next ½ cup of broth. Repeat this step (½ cup at a time), stirring constantly, until all the broth has been absorbed into the rice.

      This should take about 30 minutes total to use up all the broth. Don’t rush this step, as the “low and slow” cooking of the liquid and rice is what will help make the finished risotto creamy and tender.

      Arborio rice and cooked chicken pieces are added to the butternut squash in pan.Chicken broth is added to the butternut squash risotto and cooked until it is absorbed.More chicken broth is added and stirred into the risotto as it cooks.

      Last Step Before The Butternut Squash Risotto Is Ready To Eat!

      Once the broth has been absorbed into the risotto (and the rice is creamy and tender to the bite), remove the pan from the heat. Immediately stir in butter and shredded Parmesan cheese.

      Continue stirring until the butter and cheese has melted and been incorporated into the butternut squash risotto.

      Butter and parmesan cheese are added to the butternut squash risotto

      Time To Serve The Butternut Squash Risotto with Chicken

      Now it’s time to serve the butternut squash risotto with chicken while it is HOT! Serve it immediately for best results. For six total servings, each portion should be approx. ¾ cup.

      If desired, top each portion with chopped fresh parsley and additional Parmesan cheese (this is optional, but nice!).

      The creamy butternut squash risotto is delicious, and will be a wonderful meal for you and those you love. It’s a yummy chicken, veggie and rice dish I’m certain you will enjoy serving to those you love.

      If you have any leftover risotto, it can be stored in an airtight container in the refrigerator. All you will need to do is microwave it, to reheat.

      Butternut Squash Risotto with Chicken, garnished with parsley, served in a white bowl.

      Thank you so much for stopping by my blog today. I truly hope you will have the opportunity to try this delicious Butternut Squash Risotto, and trust you will love it just as much as we do.

      If you enjoy butternut squash, you might also want to check out my recipes for Butternut Squash Coconut Curry, or Butternut Squash Soup with Bacon!

      Please come back again soon for more family-friendly recipes. Have a great day, and may God bless you with hope, the love of family and friends, and great joy.

      Looking For Other RISOTTO Recipes?

      You can find ALL of my recipes in the Recipe Index, which is located at the top of the page. I have a couple other delicious risotto recipes I’m confident you will also enjoy:

      Interested In More Recipes?

      Thank you for visiting this website. I appreciate you using some of your valuable time to do soIf you’re interested, I publish a newsletter 2 times per month (1st and 15th) with all the latest recipes, and other fun info. I would be honored to have you join our growing list of subscribers, so you never miss a great recipe!
      There is a Newsletter subscription box on the top right side (or bottom) of each blog post, depending on the device you use, where you can easily submit your e-mail address (only) to be included in my mailing list.

      You Can Also Find Me On Social Media:

      Facebook page: The Grateful Girl Cooks!
      Pinterest:
      The Grateful Girl Cooks!
      Instagram:
      jbatthegratefulgirlcooks

      Author's signature

      Recipe adapted from: The cookbook “The Best Of Cooking Light”, page 143, published by Oxmoor House, Inc., 2004.

      0 from 0 votes
      Butternut Squash Risotto with Chicken
      Prep Time
      15 mins
      Cook Time
      50 mins
      Total Time
      1 hr 5 mins
       

      If you're looking for a delicious, filling dish, try this Butternut Squash Risotto with Chicken! It's an "all in one bowl" meal you'll enjoy!

      Category: Entree
      Cuisine: Italian
      Keyword: butternut squash risotto
      Servings: 6 (approx. ¾ cup per serving)
      Calories Per Serving: 388 kcal
      Author: JB @ The Grateful Girl Cooks!
      Ingredients
      • 2 cups water (divided use)
      • 29 ounces low sodium chicken broth (two 14.5 oz. cans)
      • ¼ cup dry white wine
      • 2 teaspoons extra-virgin olive oil
      • ½ cup onion, finely chopped
      • 3 cups cubed, peeled butternut squash (cut in 3/4" cubes)
      • ½ teaspoon salt
      • ¼ teaspoon black pepper
      • ½ teaspoon garlic powder
      • cups arborio rice (or other short grain rice) (uncooked)
      • cups pre-cooked chicken breast ,(cut in 1" cubes)
      • ½ cup shredded Parmesan cheese
      • 3 Tablespoons unsalted butter
      Garnish (optional): additional Parmesan cheese and/or chopped parsley
        Instructions
        1. In large saucepan, bring 1½ cups of water, chicken broth and wine to a simmer (do not boil). Keep broth warming on low heat while you prepare risotto in a separate pan.

        2. Heat oil on medium heat in a Dutch oven (or large saucepan). Once hot (but not smoking), add onion; cook 7-8 minutes, stirring often. When done, onions should be golden brown and tender. Add remaining ½ cup water, butternut squash, salt, pepper and garlic powder; stir to combine. Cook 10 minutes, or until squash is tender and liquid has almost evaporated.

        3. Add arborio rice and cooked chicken cubes to pan, stirring to combine. Ladle ½ cup of warm broth into pan, and stir. Cook on medium-low heat, stirring often, until almost all of broth has been absorbed. Continue to add broth, ½ cup at a time, cooking and stirring often until almost all broth is absorbed, before adding the next ½ cup of broth. Repeat (½ cup at a time), stirring constantly, until all broth has been added and absorbed. This takes about 30 minutes. Don't rush this step- "low and slow" cooking will make risotto creamy and tender.

        4. Once all broth has been added (and absorbed), and rice is creamy/tender to the bite, remove pan from heat. Immediately stir in butter and shredded Parmesan cheese. Continue stirring until they've melted into the risotto.

        5. Serve immediately, garnishing each portion (if desired) with additional Parmesan cheese and/or chopped parsley. Enjoy!

        Nutrition Facts
        Butternut Squash Risotto with Chicken
        Amount Per Serving (1 (approx. 3/4 cup))
        Calories 388 Calories from Fat 108
        % Daily Value*
        Fat 12g18%
        Saturated Fat 6g38%
        Trans Fat 1g
        Cholesterol 46mg15%
        Sodium 415mg18%
        Potassium 584mg17%
        Carbohydrates 51g17%
        Fiber 3g13%
        Sugar 2g2%
        Protein 18g36%
        Vitamin A 7700IU154%
        Vitamin C 16mg19%
        Calcium 144mg14%
        Iron 3mg17%
        * Percent Daily Values are based on a 2000 calorie diet.

        Here’s one more to pin on your Pinterest boards!If you're looking for a delicious, filling dish, try this Butternut Squash Risotto with Chicken! It's an "all in one bowl" meal you'll enjoy!

        Mini Lasagna Bowls

        Mini Lasagna Bowls (for 2) are a delicious Italian meal (they’re easy to make). They’re the perfect size, when you don’t want to make an entire lasagna!
        Mini Lasagna Bowls (for 2) are a delicious Italian meal (they're easy to make). Perfect size, when you don't want to make an entire lasagna!

        Today I want to share a fun recipe for making individual-sized mini lasagna bowls. A couple of years ago I decided I wanted lasagna to eat, but I didn’t want to make an entire recipe, because it would be way too much for just my husband and I.

        I fiddled around in our kitchen until I came up with this “recipe”, which I’ve used several times since! Made in oven-safe ceramic ramekins, the finished mini lasagna bowls are individually sized for a filling meal. This recipe, as written will make enough for TWO mini lasagna bowls, but can easily be doubled or tripled. Here’s how to make them:

        Scroll Down for A Printable Recipe Card At The Bottom Of The Page

        Prepare The Pasta Noodles And Cheese Filling

        The first things you will need to do is cook the lasagna noodles and mix together the ricotta cheese filling. Cook six lasagna pasta noodles in boiling salted water according to the manufacturer’s instructions on the box. Once done cooking, drain the lasagna noodles and place them on paper towels in a single layer to finish draining.

        To make the cheese filling, combine ricotta cheese, Parmesan, parsley, salt, pepper, garlic powder and oregano In a medium-sized bowl. Stir until these ingredients are fully blended.

        Lasagna noodles are cooked, then drained on paper towels.Ricotta cheese is seasoned with spices and combined to make a cheese filling.

        Ready To Make Mini Lasagna Bowls

        Now you’re ready to build your mini lasagna bowls, one layer at a time! Make sure to use 8 ounce, oven-safe ramekins for this recipe. The key here is to get the right portion size. EACH RAMEKIN will require 3 pasta noodles, 4 generous Tablespoonfuls of pasta sauce, 2 generous dollops of the ricotta cheese mixture, and 3 generous sprinkles of shredded Mozzarella and Parmesan cheese. Plan accordingly… and divide these ingredients well, so you have enough for all the layers.

        Spoon a generous Tablespoon of pasta sauce into each ramekin (to cover the bottom). Lay a cooked lasagna noodle on top of the sauce. Top each lasagna noodle with a Tablespoon of pasta sauce. Place a generous Tablespoon of the seasoned riccotta cheese on top of the sauce, and GENTLY spread it out, as much as possible. Sprinkle with some of the shredded Mozzarella and Parmesan cheese.

        Mini lasagna bowls begin with a layer of marinara sauce, topped with a cooked lasagna noodle.Marinara sauce and a seasoned ricotta cheese mixture is layered into the lasagna bowls.

        Building A Second Layer

        Place another lasagna noodle (crosswise to the first noodle) on top of the Mozzarella and Parmesan cheese. Add spoonful of sauce, another dollop of ricotta, and then top again with shredded Mozzarella and Parmesan cheese.

        Another layer of cooked lasagna noodles is added to the dish.Grated cheese is added to each of the mini lasagna bowls in layers.

        The final step is to place the last lasagna noodle in each ramekin (crosswise to the last one). Add a spoonful of sauce, and then top with the remaining Mozzarella and Parmesan cheese. Trim off any extra pasta around the top of the ramekin.

        Why trim the pasta? You don’t have too, BUT… If large pieces of the pasta are left sticking up too far exposed, they can get overly browned and crispy while baking. You can use a knife or kitchen scissors to cut off the pasta so it is fairly even with the top rim of the ramekin.

        Two mini lasagna bowls, ready for baking in the oven.

        Bake Then Serve The Mini Lasagna Bowls

        Bake the mini lasagna bowls in a preheated 350°F. oven for approximately 25 minutes. When done and heated through, the cheese on top should be melted and the sauce will likely be bubbling around the edges. TIP: Place a sheet of aluminum foil or baking sheet under the lasagna bowls in order to catch any sauce that might drip over the top while cooking.

        Let the mini lasagna bowls cool for a minute or two before serving, because they will be quite hot. Grab a fork, and dig in… they are really good!

        One of the mini lasagna bowls, after baking, and ready to enjoy!An empty dish means the dinner is all gone... and it was delicious!

        I hope you will consider making these mini lasagna bowls. We really enjoy them, and trust you will, too. Thanks for stopping by, and I sincerely hope you will come back again soon. Have a GREAT day!

        Looking For More Recipes Using Lasagna Noodles?

        You can find all of my recipes in the Recipe Index, located at the top of the page. I have several recipes that use lasagna noodles you might enjoy, including:

        Interested In More Recipes?

        Thank you for visiting this website. I appreciate you using some of your valuable time to do soIf you’re interested, I publish a newsletter 2 times per month (1st and 15th) with all the latest recipes, and other fun info. I would be honored to have you join our growing list of subscribers, so you never miss a great recipe!
        There is a Newsletter subscription box on the top right side (or bottom) of each blog post, depending on the device you use, where you can easily submit your e-mail address (only) to be included in my mailing list.

        You Can Also Find Me On Social Media:

        Facebook page: The Grateful Girl Cooks!
        Pinterest:
        The Grateful Girl Cooks!
        Instagram:
        jbatthegratefulgirlcooks

        Author's signature

        0 from 0 votes
        Mini Lasagna Bowls
        Prep Time
        20 mins
        Cook Time
        25 mins
        Total Time
        45 mins
         

        Mini Lasagna Bowls (for 2) are a delicious Italian meal (they're easy to make). Perfect size, when you don't want to make an entire lasagna!

        Category: Entree, Main Course
        Cuisine: Italian
        Keyword: mini lasagna bowls
        Servings: 2
        Calories Per Serving: 614 kcal
        Author: JB @ The Grateful Girl Cooks!
        Ingredients
        For Ricotta Filling:
        • ½ cup ricotta cheese , drained
        • 2 teaspoons Parmesan cheese , grated
        • ¼ teaspoon garlic powder
        • ¼ teaspoon dried parsley
        • teaspoon EACH salt and pepper
        • teaspoon dried oregano
        For Rest of Recipe:
        • 6 lasagna noodles cooked, drained
        • 8 Tablespoons spaghetti sauce (generous Tablespoons)
        • cup shredded mozzarella cheese
        • ½ cup shredded Parmesan cheese
        Instructions
        1. Preheat oven to 350°F.

        2. Cook lasagna noodles in salted, boiling water according to instructions on package. Once done, drain in a single layer on paper towels.

        3. Combine ricotta cheese, Parmesan, parsley, salt, pepper, garlic powder and oregano In a medium-sized bowl. Stir until fully blended.

        4. For each oven-safe ramekin: 1st layer- Spoon a generous Tablespoon of pasta sauce into each dish (cover the bottom). Lay lasagna noodle on top of sauce. Top with a generous Tablespoon of sauce. Place a generous Tablespoon of ricotta mixture on top of sauce. GENTLY spread it out, as much as possible. Sprinkle with 1/3 of the shredded Mozzarella and Parmesan cheese.

        5. 2nd Layer- Repeat same as first layer-Place another lasagna noodle (crosswise to the first noodle) on top of the Mozzarella and Parmesan cheese. Add spoonful of sauce, another dollop of ricotta, and then top again with 1/3 of shredded Mozzarella and Parmesan cheese.

        6. Final Layer- Place last lasagna noodle in each ramekin (crosswise to the last one). Add a generous spoonful of sauce, and then top with remaining Mozzarella and Parmesan cheese. Trim off any extra pasta around the top of the ramekin.

        7. Bake in preheated 350°F. oven for approx. 25 minutes. When done, cheese on top should be melted and sauce will be bubbly around edges. TIP: Place a baking sheet or aluminum foil under lasagna bowls in order to catch any sauce that might bubble over the top while cooking. When done, let cool for 1-2 minutes before serving. Enjoy!

        Nutrition Facts
        Mini Lasagna Bowls
        Amount Per Serving (1 lasagna bowl)
        Calories 614 Calories from Fat 198
        % Daily Value*
        Fat 22g34%
        Saturated Fat 13g81%
        Cholesterol 72mg24%
        Sodium 1055mg46%
        Potassium 506mg14%
        Carbohydrates 70g23%
        Fiber 4g17%
        Sugar 5g6%
        Protein 34g68%
        Vitamin A 911IU18%
        Vitamin C 4mg5%
        Calcium 557mg56%
        Iron 2mg11%
        * Percent Daily Values are based on a 2000 calorie diet.

        Here’s one more to pin on your Pinterest boards!Mini Lasagna Bowls (for 2) are a delicious Italian meal (they're easy to make). Perfect size, when you don't want to make an entire lasagna!