Category: Italian

Mini Lasagna Bowls

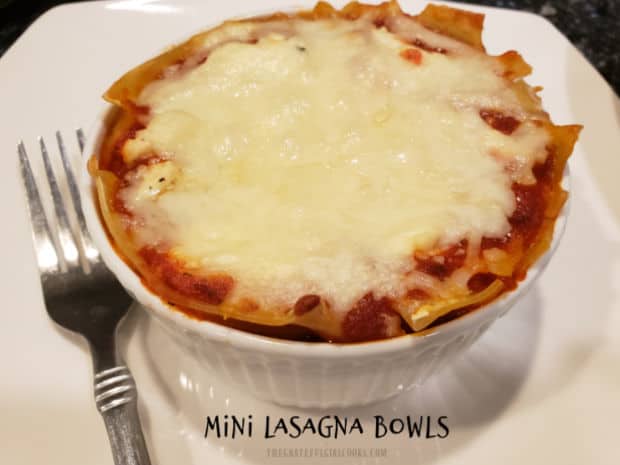
Mini Lasagna Bowls (for 2) are a delicious Italian meal (they’re easy to make). They’re the perfect size, when you don’t want to make an entire lasagna!
Mini Lasagna Bowls (for 2) are a delicious Italian meal (they're easy to make). Perfect size, when you don't want to make an entire lasagna!

Today I want to share a fun recipe for making individual-sized mini lasagna bowls. A couple of years ago I decided I wanted lasagna to eat, but I didn’t want to make an entire recipe, because it would be way too much for just my husband and I.

I fiddled around in our kitchen until I came up with this “recipe”, which I’ve used several times since! Made in oven-safe ceramic ramekins, the finished mini lasagna bowls are individually sized for a filling meal. This recipe, as written will make enough for TWO mini lasagna bowls, but can easily be doubled or tripled. Here’s how to make them:

Scroll Down for A Printable Recipe Card At The Bottom Of The Page

Prepare The Pasta Noodles And Cheese Filling

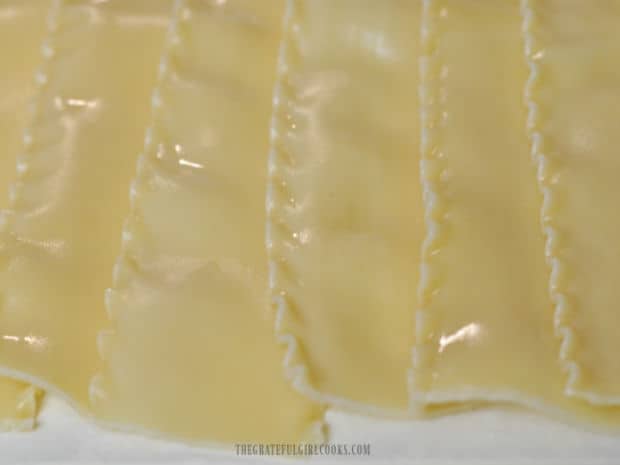
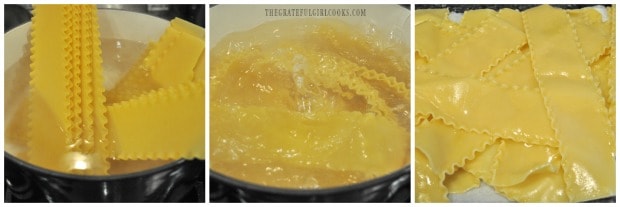
The first things you will need to do is cook the lasagna noodles and mix together the ricotta cheese filling. Cook six lasagna pasta noodles in boiling salted water according to the manufacturer’s instructions on the box. Once done cooking, drain the lasagna noodles and place them on paper towels in a single layer to finish draining.

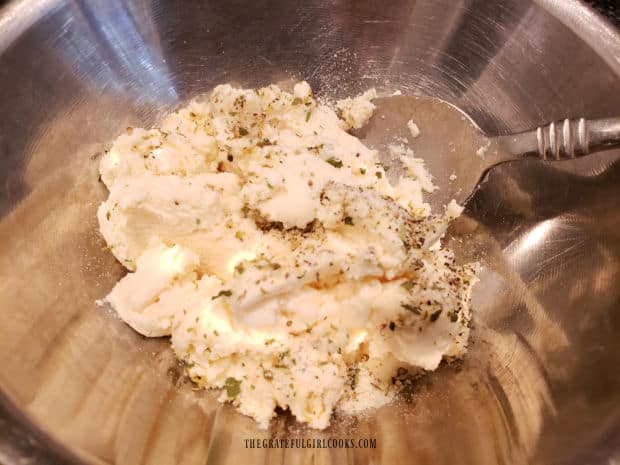
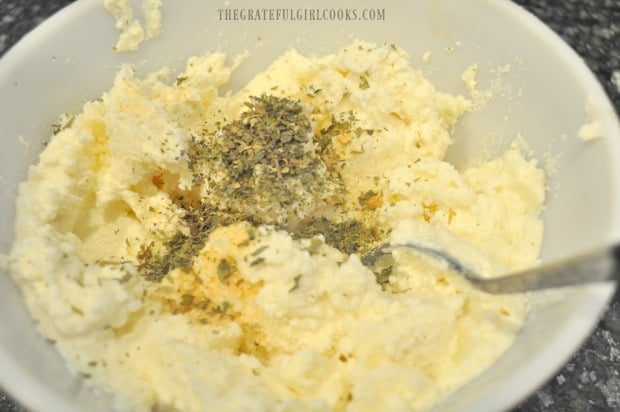
To make the cheese filling, combine ricotta cheese, Parmesan, parsley, salt, pepper, garlic powder and oregano In a medium-sized bowl. Stir until these ingredients are fully blended.

Lasagna noodles are cooked, then drained on paper towels.Ricotta cheese is seasoned with spices and combined to make a cheese filling.

Ready To Make Mini Lasagna Bowls

Now you’re ready to build your mini lasagna bowls, one layer at a time! Make sure to use 8 ounce, oven-safe ramekins for this recipe. The key here is to get the right portion size. EACH RAMEKIN will require 3 pasta noodles, 4 generous Tablespoonfuls of pasta sauce, 2 generous dollops of the ricotta cheese mixture, and 3 generous sprinkles of shredded Mozzarella and Parmesan cheese. Plan accordingly… and divide these ingredients well, so you have enough for all the layers.

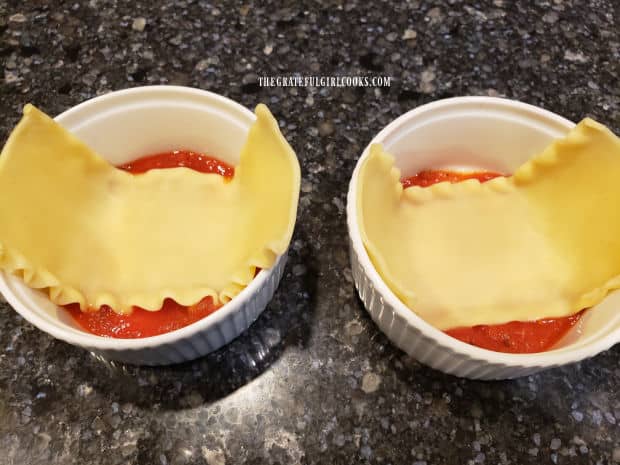
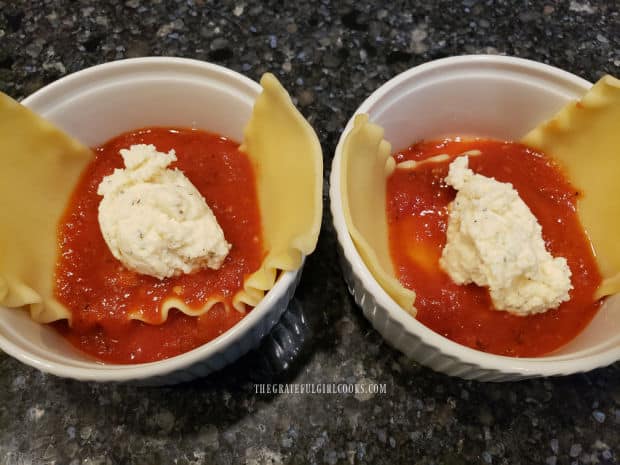
Spoon a generous Tablespoon of pasta sauce into each ramekin (to cover the bottom). Lay a cooked lasagna noodle on top of the sauce. Top each lasagna noodle with a Tablespoon of pasta sauce. Place a generous Tablespoon of the seasoned riccotta cheese on top of the sauce, and GENTLY spread it out, as much as possible. Sprinkle with some of the shredded Mozzarella and Parmesan cheese.

Mini lasagna bowls begin with a layer of marinara sauce, topped with a cooked lasagna noodle.Marinara sauce and a seasoned ricotta cheese mixture is layered into the lasagna bowls.

Building A Second Layer

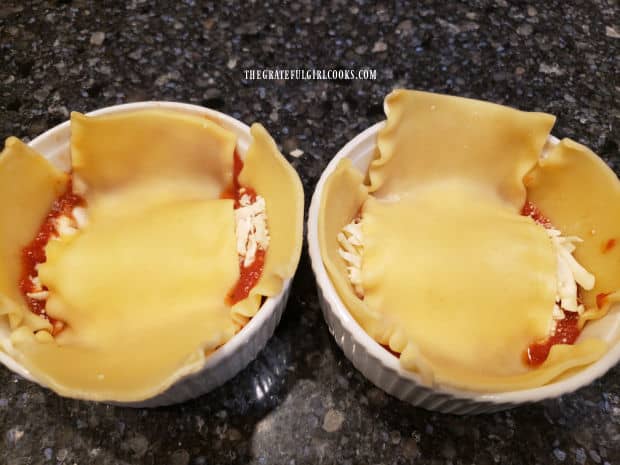
Place another lasagna noodle (crosswise to the first noodle) on top of the Mozzarella and Parmesan cheese. Add spoonful of sauce, another dollop of ricotta, and then top again with shredded Mozzarella and Parmesan cheese.

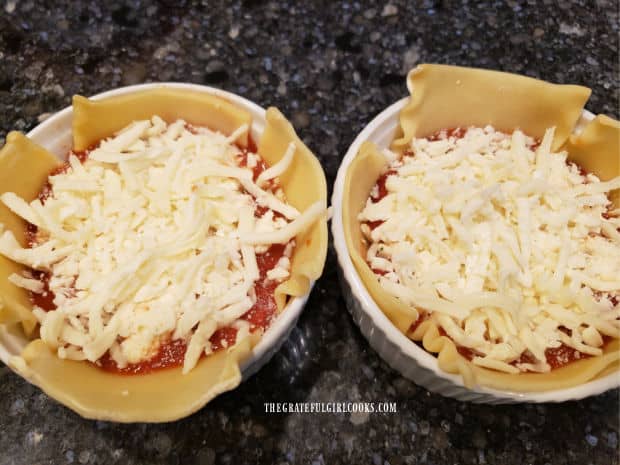
Another layer of cooked lasagna noodles is added to the dish.Grated cheese is added to each of the mini lasagna bowls in layers.

The final step is to place the last lasagna noodle in each ramekin (crosswise to the last one). Add a spoonful of sauce, and then top with the remaining Mozzarella and Parmesan cheese. Trim off any extra pasta around the top of the ramekin.

Why trim the pasta? You don’t have too, BUT… If large pieces of the pasta are left sticking up too far exposed, they can get overly browned and crispy while baking. You can use a knife or kitchen scissors to cut off the pasta so it is fairly even with the top rim of the ramekin.

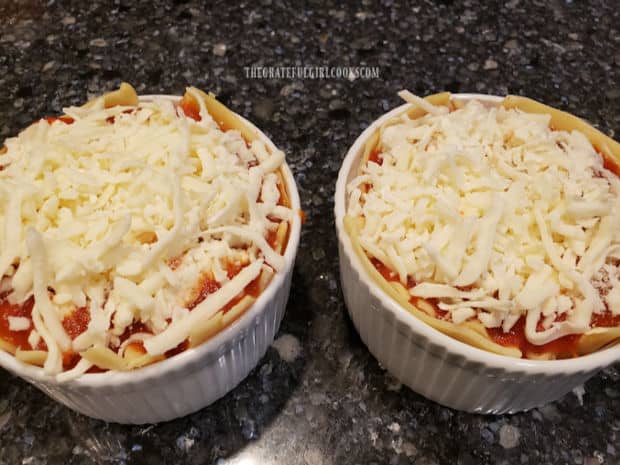
Two mini lasagna bowls, ready for baking in the oven.

Bake Then Serve The Mini Lasagna Bowls

Bake the mini lasagna bowls in a preheated 350°F. oven for approximately 25 minutes. When done and heated through, the cheese on top should be melted and the sauce will likely be bubbling around the edges. TIP: Place a sheet of aluminum foil or baking sheet under the lasagna bowls in order to catch any sauce that might drip over the top while cooking.

Let the mini lasagna bowls cool for a minute or two before serving, because they will be quite hot. Grab a fork, and dig in… they are really good!

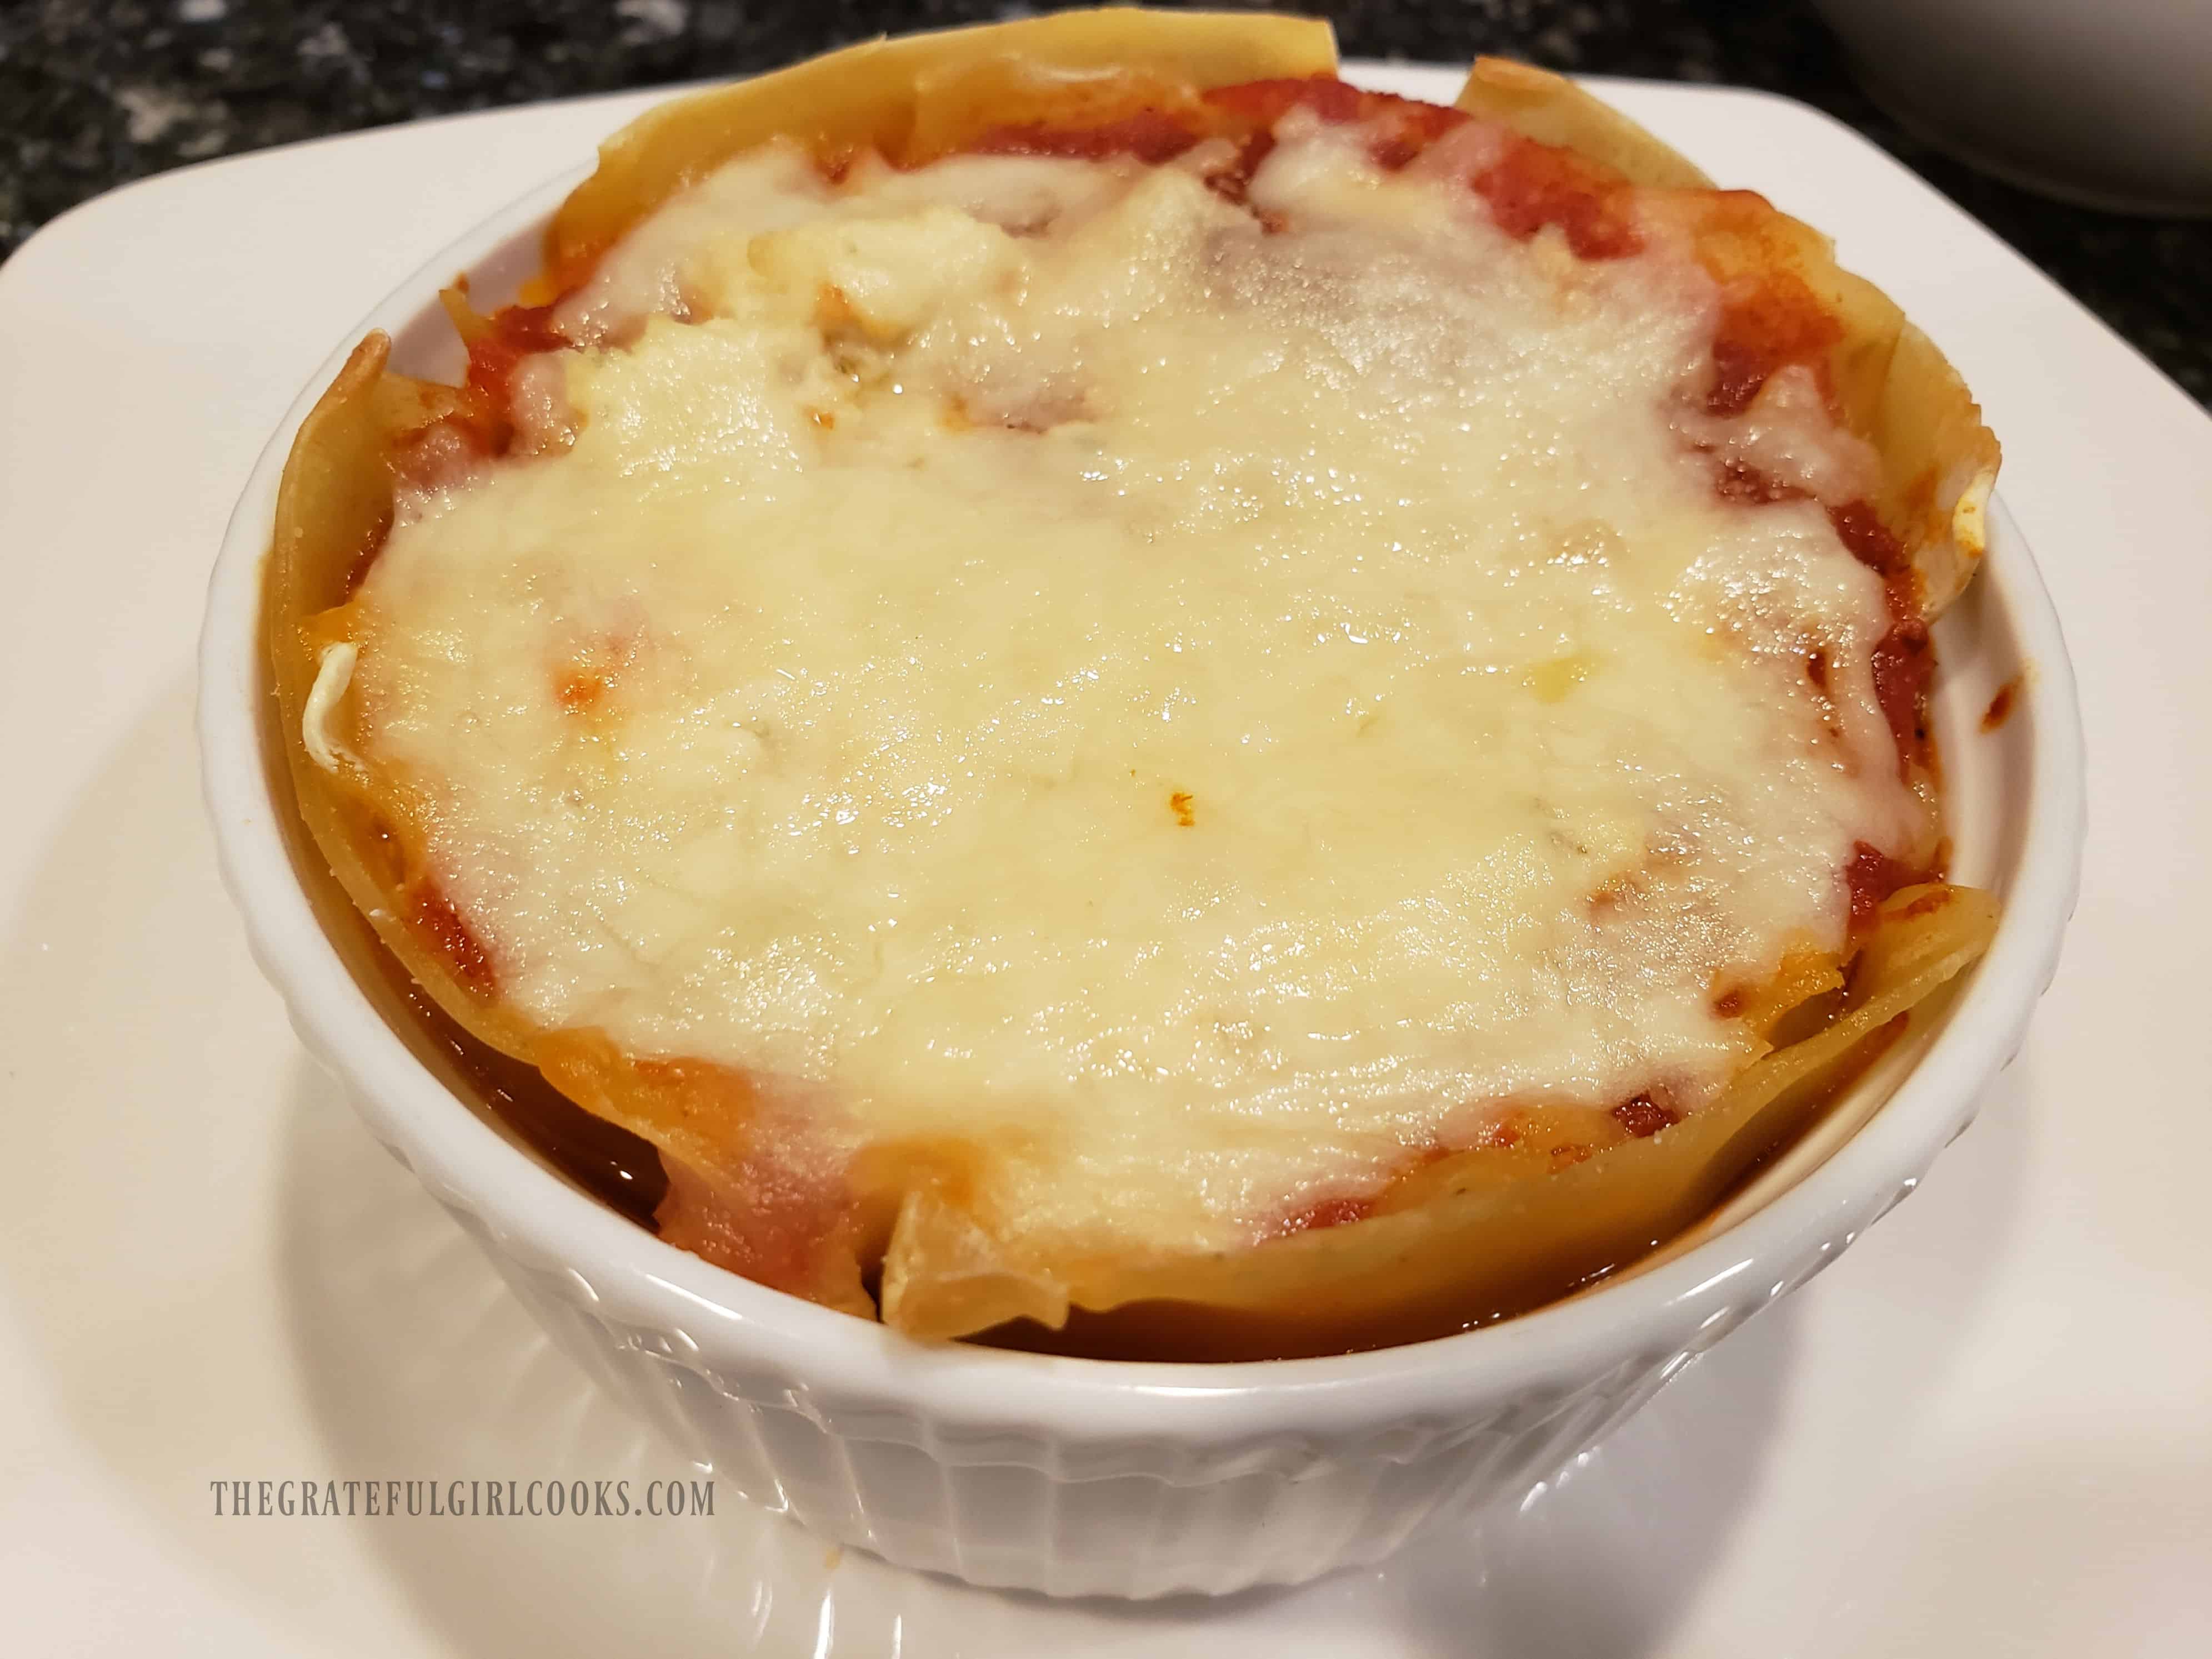
One of the mini lasagna bowls, after baking, and ready to enjoy!An empty dish means the dinner is all gone... and it was delicious!

I hope you will consider making these mini lasagna bowls. We really enjoy them, and trust you will, too. Thanks for stopping by, and I sincerely hope you will come back again soon. Have a GREAT day!

Looking For More Recipes Using Lasagna Noodles?

You can find all of my recipes in the Recipe Index, located at the top of the page. I have several recipes that use lasagna noodles you might enjoy, including:

Interested In More Recipes?

Thank you for visiting this website. I appreciate you using some of your valuable time to do soIf you’re interested, I publish a newsletter 2 times per month (1st and 15th) with all the latest recipes, and other fun info. I would be honored to have you join our growing list of subscribers, so you never miss a great recipe!
There is a Newsletter subscription box on the top right side (or bottom) of each blog post, depending on the device you use, where you can easily submit your e-mail address (only) to be included in my mailing list.

You Can Also Find Me On Social Media:

Facebook page: The Grateful Girl Cooks!
Pinterest:
The Grateful Girl Cooks!
Instagram:
jbatthegratefulgirlcooks

Author's signature

0 from 0 votes
Mini Lasagna Bowls
Prep Time
20 mins
Cook Time
25 mins
Total Time
45 mins
 

Mini Lasagna Bowls (for 2) are a delicious Italian meal (they're easy to make). Perfect size, when you don't want to make an entire lasagna!

Category: Entree, Main Course
Cuisine: Italian
Keyword: mini lasagna bowls
Servings: 2
Calories Per Serving: 614 kcal
Author: JB @ The Grateful Girl Cooks!
Ingredients
For Ricotta Filling:
  • ½ cup ricotta cheese , drained
  • 2 teaspoons Parmesan cheese , grated
  • ¼ teaspoon garlic powder
  • ¼ teaspoon dried parsley
  • teaspoon EACH salt and pepper
  • teaspoon dried oregano
For Rest of Recipe:
  • 6 lasagna noodles cooked, drained
  • 8 Tablespoons spaghetti sauce (generous Tablespoons)
  • cup shredded mozzarella cheese
  • ½ cup shredded Parmesan cheese
Instructions
  1. Preheat oven to 350°F.

  2. Cook lasagna noodles in salted, boiling water according to instructions on package. Once done, drain in a single layer on paper towels.

  3. Combine ricotta cheese, Parmesan, parsley, salt, pepper, garlic powder and oregano In a medium-sized bowl. Stir until fully blended.

  4. For each oven-safe ramekin: 1st layer- Spoon a generous Tablespoon of pasta sauce into each dish (cover the bottom). Lay lasagna noodle on top of sauce. Top with a generous Tablespoon of sauce. Place a generous Tablespoon of ricotta mixture on top of sauce. GENTLY spread it out, as much as possible. Sprinkle with 1/3 of the shredded Mozzarella and Parmesan cheese.

  5. 2nd Layer- Repeat same as first layer-Place another lasagna noodle (crosswise to the first noodle) on top of the Mozzarella and Parmesan cheese. Add spoonful of sauce, another dollop of ricotta, and then top again with 1/3 of shredded Mozzarella and Parmesan cheese.

  6. Final Layer- Place last lasagna noodle in each ramekin (crosswise to the last one). Add a generous spoonful of sauce, and then top with remaining Mozzarella and Parmesan cheese. Trim off any extra pasta around the top of the ramekin.

  7. Bake in preheated 350°F. oven for approx. 25 minutes. When done, cheese on top should be melted and sauce will be bubbly around edges. TIP: Place a baking sheet or aluminum foil under lasagna bowls in order to catch any sauce that might bubble over the top while cooking. When done, let cool for 1-2 minutes before serving. Enjoy!
Nutrition Facts
Mini Lasagna Bowls
Amount Per Serving (1 lasagna bowl)
Calories 614 Calories from Fat 198
% Daily Value*
Fat 22g34%
Saturated Fat 13g81%
Cholesterol 72mg24%
Sodium 1055mg46%
Potassium 506mg14%
Carbohydrates 70g23%
Fiber 4g17%
Sugar 5g6%
Protein 34g68%
Vitamin A 911IU18%
Vitamin C 4mg5%
Calcium 557mg56%
Iron 2mg11%
* Percent Daily Values are based on a 2000 calorie diet.

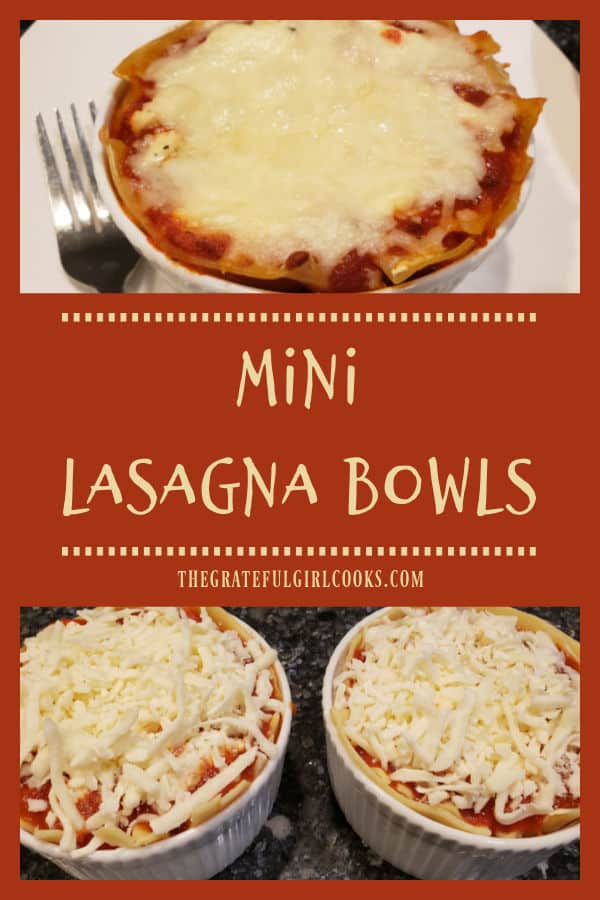
Here’s one more to pin on your Pinterest boards!Mini Lasagna Bowls (for 2) are a delicious Italian meal (they're easy to make). Perfect size, when you don't want to make an entire lasagna!


Lemon Pasta And Peas

Lemon Pasta and Peas is an easy, delicious, meatless dish. Pasta and peas, with lemon juice, olive oil, garlic and Parmesan will be a big hit!

I received two new cookbooks from my family this past Christmas to add to my cookbook collection. Both cookbooks were written by the same couple (Steve and Kathy Doocy), and had been on top of the best seller list at one time or another. It was fun to read the stories behind the foods and mark some of the recipes I wanted to try.

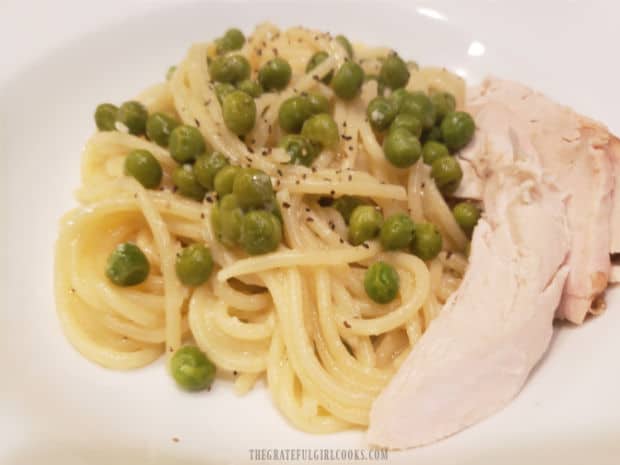
This recipe for lemon pasta and peas is the first one I tried from “The Happy In A Hurry Cook Book”. The Doocy’s originally got the recipe  from their friend Madeleine (it’s her “go to” pasta dish). It is a simple, meatless dish, can be made quickly (under 20 minutes), and has wonderful flavor. We enjoyed it with a slice of rotisserie chicken on the side (my hubby wanted some protein).

Once the pasta is almost fully cooked, you add frozen peas to the pasta water in the pan (which quickly cooks them!). The remaining ingredients (the flavor factor) are then added to the cooked, drained pasta and peas.  That’s it… see how EASY this meal is to make?! Here’s how to make this simple dish:

Scroll Down For A Printable Recipe At The Bottom Of The Page

Cook The Pasta And Peas

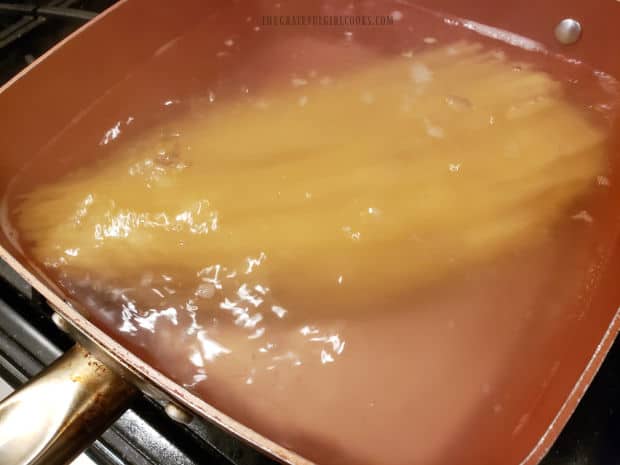
The first thing you need to do is bring a large pan of salted water to a boil. Once the water has come to a boil, add the pasta to the pan, and cook. TIP: You will need to cook the pasta for 1 minute less than the pkg. directions tell you for al dente.

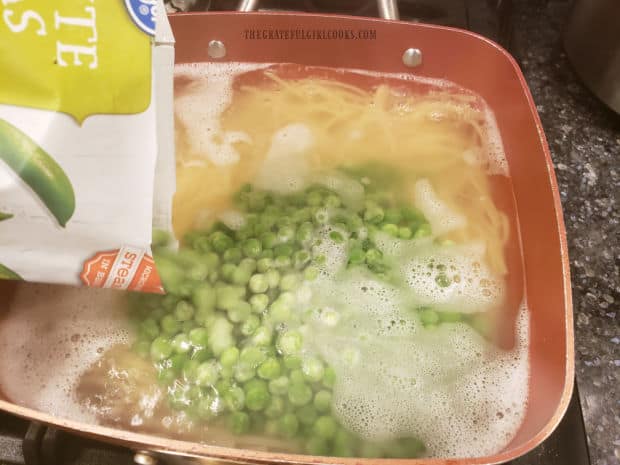
Add the frozen peas (yes, still FROZEN) to the pan of boiling pasta. Let them cook for 2 more minutes right in there with the pasta. NOTE: The recipe calls for using one (12 oz.) bag of frozen peas. If you would prefer LESS peas in this dish, simply add HALF the bag.

Spaghetti noodles cooking for the lemon pasta and peas dish.Frozen peas are added directly into the boiling pasta and water.

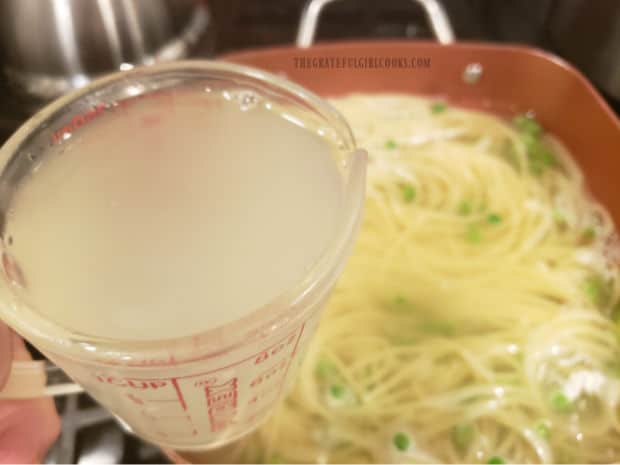
Remove one cup of the hot pasta water, and set it aside for later. Pour the pasta and peas into a strainer or colander, and drain the remaining water from the pan, but do not rinse. Return the hot drained pasta and peas to the pan, and immediately begin seasoning the dish (off of the heat).

A cup of boiling pasta water is reserved to use later in the dish.

Seasoning The Lemon Pasta And Peas For Serving

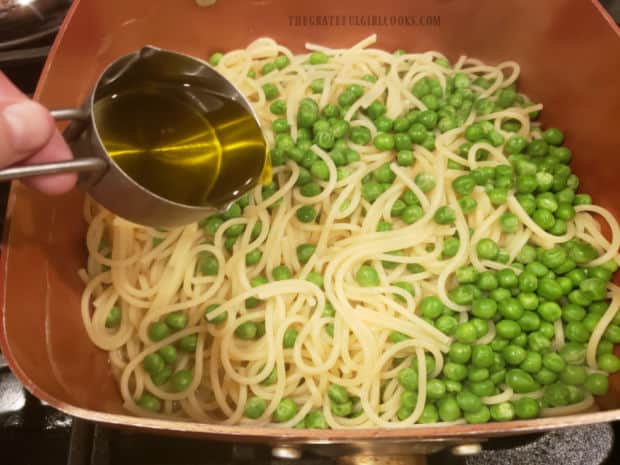
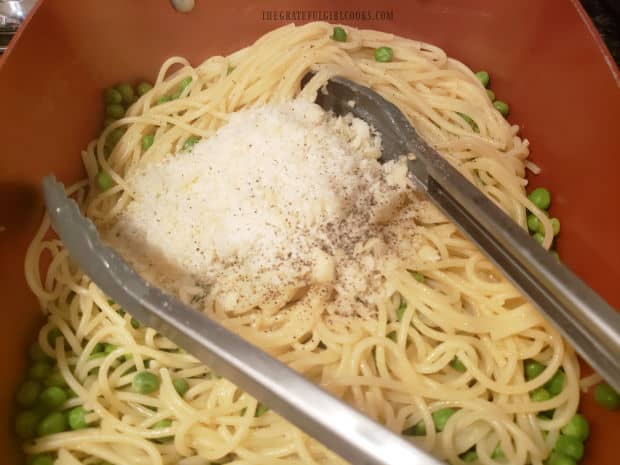
While the drained pasta is still hot, add olive oil, fresh lemon juice, and minced garlic, tossing to coat the pasta and peas well. Once combined, add the grated Parmesan cheese, salt and pepper, and give it another good toss to combine.

Now you will add a little bit of the reserved hot starchy pasta water. Give the pasta good stir as you add the water. This will help the pasta to not be dry, and help to melt the Parmesan cheese. You won’t need to use all of the pasta water… just use enough to coat the pasta to your liking, ok?

Olive oil, lemon juice and garlic are added to drained pasta and peas.Parmesan cheese, salt & pepper added to drained pasta and peas.

Time To Enjoy Lemon Pasta And Peas

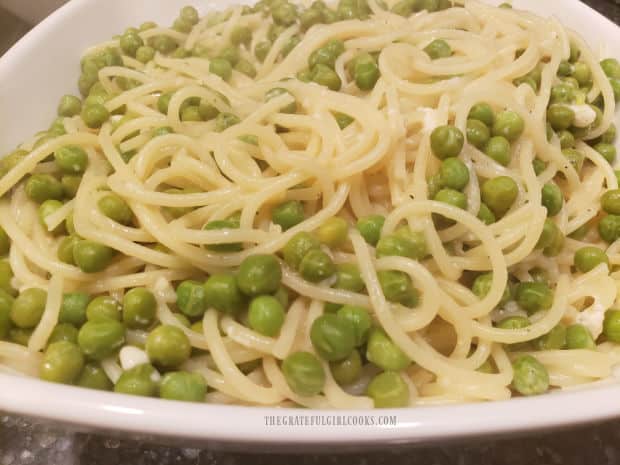
Now the lemon pasta and peas are ready to serve (while they’re still hot). If you find that the pasta has cooled down too much, simply reheat it quickly in the microwave. Serve immediately, and enjoy this easy, delicious pasta dish!

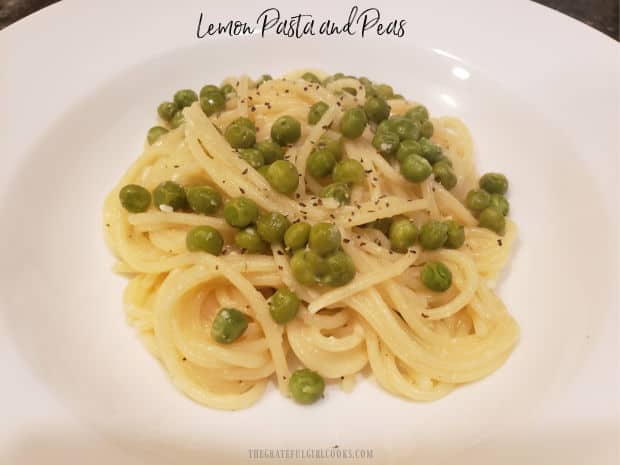
Lemon pasta and peas ready to serve while hot.

Don’t Want It To Be Meatless?

If you want to add protein to the dish, add a slice or two of rotisserie chicken on the side. You could also add cooked, cubed chicken or pork into the pasta as well. Whatever makes you happy! My hubby asked for some protein with his, so I added a slice of rotisserie chicken breast on the side.

A piece of rotisserie chicken, served on the side of lemon pasta and peas.

I hope you enjoy this recipe for lemon pasta and peas. Any leftovers will keep for several days in the refrigerator, stored in an airtight container, and can be reheated easily in a microwave. Thank you for stopping by, and I hope you will come back soon!

Looking For More PASTA Recipes?

You can find all of my blog recipes in the Recipe Index, located at the top of the page. I have quite a few delicious pasta recipes, including:

Interested In More Recipes?

Thank you for visiting this website. I appreciate you using some of your valuable time to do soIf you’re interested, I publish a newsletter 2 times per month (1st and 15th) with all the latest recipes, and other fun info. I would be honored to have you join our growing list of subscribers, so you never miss a great recipe!
There is a Newsletter subscription box on the top right side (or bottom) of each blog post, depending on the device you use, where you can easily submit your e-mail address (only) to be included in my mailing list.

You Can Also Find Me On Social Media:

Facebook page: The Grateful Girl Cooks!
Pinterest:
The Grateful Girl Cooks!
Instagram:
jbatthegratefulgirlcooks

Author's signature

Original recipe source: “The Happy In A Hurry Cook Book”, by Steve and Kathy Doocy, page 163, published by William Morrow, 2020

0 from 0 votes
Lemon Pasta and Peas
Prep Time
5 mins
Cook Time
15 mins
Total Time
20 mins
 

Lemon Pasta and Peas is an easy, delicious, meatless dish. Pasta and peas, with lemon juice, olive oil, garlic and Parmesan will be a big hit!

Category: Dinner, Pasta
Cuisine: Italian
Keyword: lemon pasta and peas
Servings: 6
Calories Per Serving: 449 kcal
Author: JB @ The Grateful Girl Cooks!
Ingredients
  • 1 pound spaghetti pasta
  • 12 ounces frozen sweet green peas
  • ½ cup fresh lemon juice approx. 2-3 lemons
  • 3 Tablespoons olive oil
  • 2 large garlic cloves minced
  • ¾ cup grated Parmesan cheese or Pecorino Romano
  • ½ teaspoon salt
  • ½ teaspoon ground black pepper
Instructions
  1. Bring a large pan of salted water to a boil on medium-high heat. Once water boils, add pasta and cook. Note: cook pasta for 1 minute less than pkg. directions tell you for al dente. Add frozen peas (yes, still FROZEN) and let them cook 2 minutes, in with the pasta.

  2. Remove 1 cup of hot pasta water; set aside. Pour pasta/peas into a strainer; drain remaining water from pan. Do not rinse pasta. Return hot drained pasta/peas to pan (off the heat).

  3. Add olive oil, fresh lemon juice, and minced garlic to pasta, tossing or stirring to coat. Now add Parmesan cheese, salt, black pepper, and toss to combine. pour in a little bit of reserved hot pasta water; stir, then add more as needed, to melt cheese and help pasta to not be dry. You won't need to use all of the pasta water.

  4. Serve immediately while hot, and enjoy this easy, delicious pasta dish!

Nutrition Facts
Lemon Pasta and Peas
Amount Per Serving (1 (1/6 of total))
Calories 449 Calories from Fat 108
% Daily Value*
Fat 12g18%
Saturated Fat 3g19%
Cholesterol 11mg4%
Sodium 393mg17%
Potassium 350mg10%
Carbohydrates 67g22%
Fiber 5g21%
Sugar 6g7%
Protein 18g36%
Vitamin A 544IU11%
Vitamin C 31mg38%
Calcium 173mg17%
Iron 2mg11%
* Percent Daily Values are based on a 2000 calorie diet.

Here’s one more to pin on your Pinterest boards!Lemon Pasta and Peas is an easy, delicious, meatless dish. Pasta and peas, with lemon juice, olive oil, garlic and Parmesan will be a big hit!

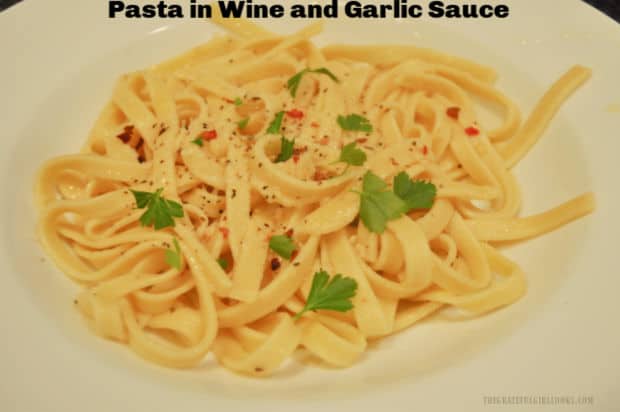
Pasta in Wine and Garlic Sauce

Make delicious pasta in wine and garlic sauce in under 15 minutes! SIMPLE to make, then garnish with Parmesan cheese for a tasty main dish!

Do you enjoy pasta dishes? We sure do… especially my husband! Today I want to share a super simple, but “oh so tasty” recipe for Pasta in Wine and Garlic Sauce. It is sooo good, and I’m confident you’re gonna enjoy it as much as we do.

I love this recipe, because while fresh (or dried) pasta is cooking, you whip up a flavorful, EASY sauce to coat the pasta with as soon as it is finished. We try to have a meatless meal about once a week, and this one is pretty amazing! The sauce truly only takes a couple minutes to make while the pasta cooks, so the recipe definitely is “LOW MAINTENANCE!”

That’s why this is such a great recipe. This pasta (and sauce) tastes wonderful, and is the perfect solution when you don’t have much time, motivation or energy to make dinner. We’ve all been there, right? You can even add cooked shrimp or chicken to this pasta if you need some added protein! Trust me, you really can’t hurt this dish!

Do I Have To Use Fettucine Noodles For This Recipe?

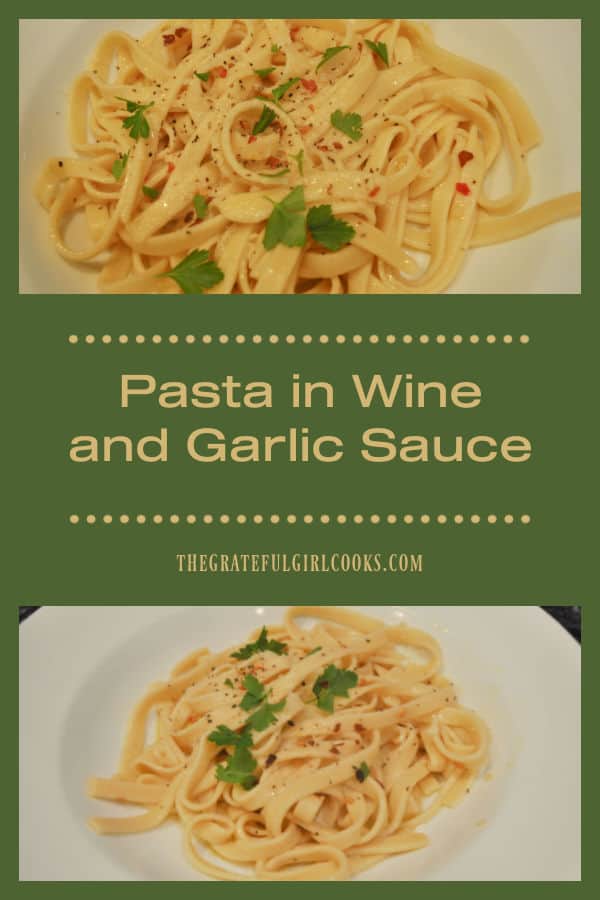
No. You do NOT have to use fettucine pasta. Use whatever type of pasta you have, fresh or dried. For these photos I used homemade fresh fettucine, but the recipe works perfectly with any type of fresh or dried pasta. I recently used a Christmas gift card to purchase pasta rolling attachments for my stand mixer, so I made some fettucine pasta to try the attachments out to “show off” this simple pasta in wine and garlic sauce recipe. Here’s how easy it is to make this dish:

Scroll Down For A Printable Recipe Card At The Bottom Of The Page

Prepare The Pasta

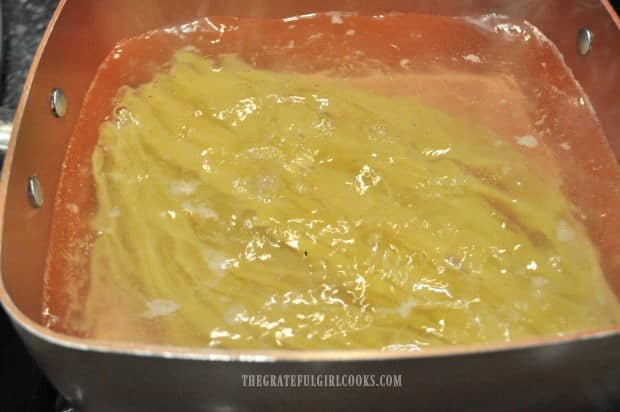
Cook the pasta you will be using (dried or fresh) in boiling, heavily salted water, according to package directions. Continue until the pasta is cooked al dente. Please remember that fresh pasta takes less time to cook than dried pasta. You can make the sauce quickly while the pasta is cooking.

Fresh homemade fettucine pasta cooking in salted, boiling water.

Make The Wine And Garlic Sauce While Pasta Cooks

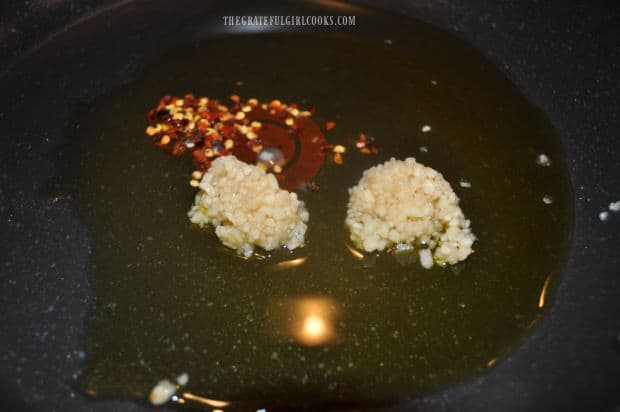
Using a large saucepan or skillet, heat olive oil on medium heat. To the oil, add minced garlic, and red pepper flakes, and stir to combine. Cook this mixture for one minute, stirring often so the garlic doesn’t burn. 

Garlic and red pepper flakes cook in hot oil before adding remaining ingredients.

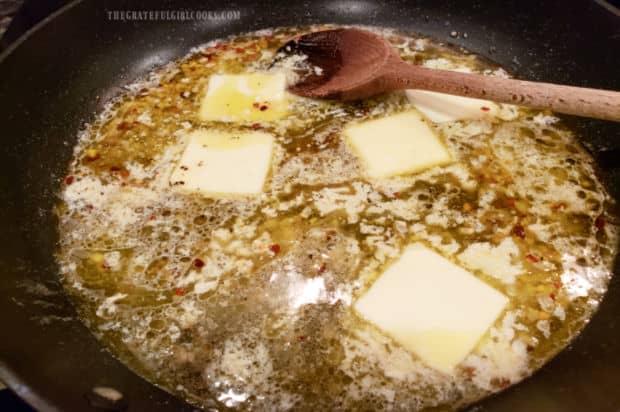
Add butter (cut into chunks), white wine, salt and black pepper. *NOTE: Use any type of dry white wine you want, including chardonnay, pinot grigio, sauvignon blanc, pinot gris, etc.

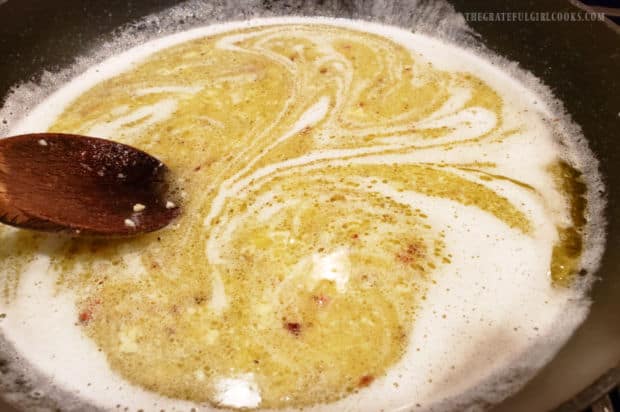
Stir well as the butter melts, to combine the ingredients. Cook the sauce for two minutes on medium heat, and then remove the pan from the heat. BOOM! It’s DONE!

A white wine, butter, and garlic sauce cooking in skillet.Sauce cooks for a couple minutes before adding it to hot cooked pasta.

Time To Serve The Pasta In Wine And Garlic Sauce

As soon as the pasta is done, drain off the water, and then pour the hot pasta back into the saucepan or skillet. Immediately pour the wine and garlic sauce over the hot pasta, and toss really well, to coat the noodles with the sauce.

The pasta will not be “swimming” in the sauce- just make sure it’s all coated, so mix it well. Place the pasta in wine and garlic sauce into (or onto) serving bowls (or plates). Sprinkle with grated Parmesan cheese and chopped fresh parsley to garnish. If desired, you can also sprinkle on a few more red pepper flakes (if you want more “heat”), but that is optional!

Pasta in wine and garlic sauce is served, garnished with Parmesan cheese and parsley.

Because the pasta is not “doused” in sauce, it will tend to cool fairly quickly, so serve it immediately. TIP: Once pasta has been garnished with Parmesan and parsley, I like to put each portion into the microwave for 20-30 seconds to make sure it is served HOT! 

Close up photo of pasta in wine and garlic sauce, served in a white bowl.

I sure hope you enjoy this delicious pasta dish. We really do, and my husband loves to request this for dinner. What more could you want in a simple, meatless recipe? Full of flavor, filling, and easy to make in a flash… it’s a keeper!

Looking For More PASTA Recipes?

You can find all of my recipes in the Recipe Index, located at the top of the page. I have quite a few pasta recipes you’ll enjoy, including:

Interested In More Recipes?

Thank you for visiting this website. I appreciate you using some of your valuable time to do soIf you’re interested, I publish a newsletter 2 times per month (1st and 15th) with all the latest recipes, and other fun info. I would be honored to have you join our growing list of subscribers, so you never miss a great recipe!
There is a Newsletter subscription box on the top right side (or bottom) of each blog post, depending on the device you use, where you can easily submit your e-mail address (only) to be included in my mailing list.

You Can Also Find Me On Social Media:

Facebook page: The Grateful Girl Cooks!
Pinterest:
The Grateful Girl Cooks!
Instagram:
jbatthegratefulgirlcooks

Author's signature

Original recipe source: julieblanner.com/white-wine-sauce/

0 from 0 votes
Pasta in Wine and Garlic Sauce
Prep Time
3 mins
Cook Time
4 mins
Total Time
7 mins
 

Make delicious pasta in wine and garlic sauce in under 15 minutes! SIMPLE to make, then garnish with Parmesan cheese for a tasty main dish!

Category: Main Course, Meatless Entree
Cuisine: Italian
Keyword: pasta in wine and garlic sauce
Servings: 6
Calories Per Serving: 488 kcal
Author: JB @ The Grateful Girl Cooks!
Ingredients
For Sauce:
  • ¼ cup olive oil
  • 2 teaspoons minced garlic (fresh or jarred)
  • ½ teaspoon crushed red pepper
  • 5 Tablespoons butter (salted or unsalted)
  • ½ cup dry white wine (chardonnay/pinot grigio/sauvignon blanc)
  • 1 teaspoon salt
  • ½ teaspoon black pepper
For Pasta:
  • 1 pound pasta (fresh or dried, any type) See NOTE below.
  • 1/3 cup freshly grated Parmesan cheese (for garnish)
  • ¼ cup fresh parsley, chopped (for garnish)
Instructions
  1. Cook pasta (dried or fresh) in boiling, heavily salted water according to package directions. Continue until pasta is cooked al dente.

Make Sauce While Pasta Cooks:
  1. Heat olive oil on medium in a large saucepan or skillet. Add garlic and red pepper flakes to the oil; stir to combine. Cook for 1 minute, stirring often so garlic doesn't burn. Add butter (cut in chunks), white wine, salt and black pepper. Stir as butter melts, to combine ingredients. Cook for 2 minutes on medium heat, then remove pan from heat.

To Serve:
  1. When pasta is done, drain off water; pour pasta back into saucepan/skillet. Immediately pour sauce over hot pasta; toss well to coat pasta with sauce. Portion pasta into (or onto) serving bowls (or plates). Sprinkle with Parmesan and parsley. You can also sprinkle with a few red pepper flakes (if you want more "heat"), but that's optional! Serve hot, and enjoy. *Store any leftover pasta in a sealed container for up to 5-7 days. Reheat in microwave.

Recipe Notes

NOTE: Fresh pasta cooks the quickest, and is reflected in the cooking time. Dried pasta (any type may be used) will take longer to cook to al dente firmness, but is perfectly okay to use!

Nutrition Facts
Pasta in Wine and Garlic Sauce
Amount Per Serving (1 (1/6th of total))
Calories 488 Calories from Fat 189
% Daily Value*
Fat 21g32%
Saturated Fat 8g50%
Cholesterol 30mg10%
Sodium 566mg25%
Potassium 210mg6%
Carbohydrates 58g19%
Fiber 3g13%
Sugar 2g2%
Protein 12g24%
Vitamin A 600IU12%
Vitamin C 4mg5%
Calcium 89mg9%
Iron 1mg6%
* Percent Daily Values are based on a 2000 calorie diet.

Here’s one more to pin on your Pinterest boards!Make delicious pasta in wine and garlic sauce in under 15 minutes! SIMPLE to make, then garnish with Parmesan cheese for a tasty main dish!

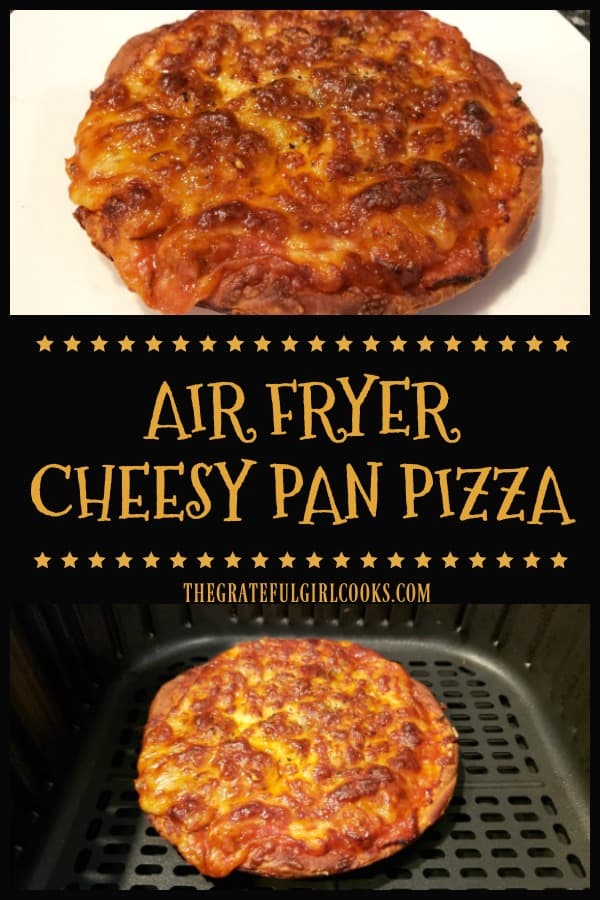
Air Fryer Cheesy Pan Pizza

Make a delicious Air Fryer Cheesy Pan Pizza for lunch/dinner. Use canned biscuit dough for crust & Mozzarella/Parmesan cheeses, pizza sauce & spices!

Do you have an air fryer? We are still enjoying experimenting with different recipes using the air fryer I got last year with a gift card. One of the quick meals I came up with (while experimenting) is this recipe for Air Fryer Cheesy Pan Pizza.  Guess what? To make it extra easy, you use refrigerated, canned biscuit dough to form the pan pizza crust! YEP!

Pizza Making Experiments

We love pizza, and occasionally use different methods to make it. I’ve made BBQ Chicken TORTILLA Pizzas, Pizzas Cooked On The BBQ, and of course, traditional pepperoni pizza! I’ve even made Apple Pie Dessert Pizza! But this one, using biscuit dough, once I thought of it, sounded like something I wanted to try.

We had a can of biscuits hanging out in the refrigerator, so I started thinking about the ingredients in the dough. Finally I decided to make a deep dish pizza crust with it, just to try it. The recipe I came up with uses 4 biscuits total, and yields two cute little 6″ pan pizzas, with hardly any effort. Perfect, and VERY convenient! Now we can eat them any time for a quick lunch or dinner. Here’s how to make ’em:

Scroll Down for A Printable Recipe Card At The Bottom Of The Page

Make The “Easy” Pizza Crust

NOTE:  This recipe makes two individual pizzas, so remember to divide the ingredients between two, and repeat this process for each pizza. My air fryer could only cook one 6″ pizza at a time, so I cooked them in two batches.

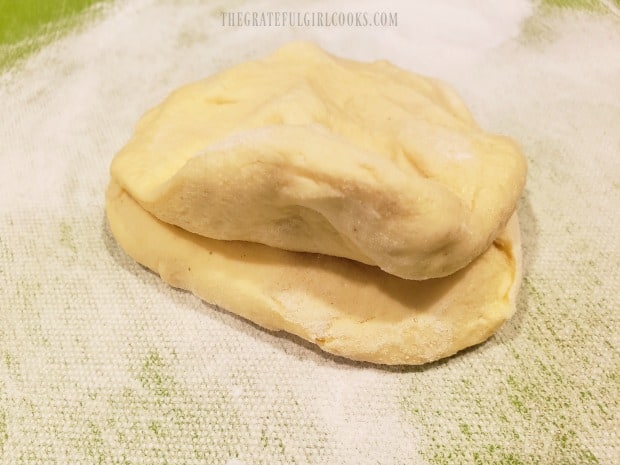
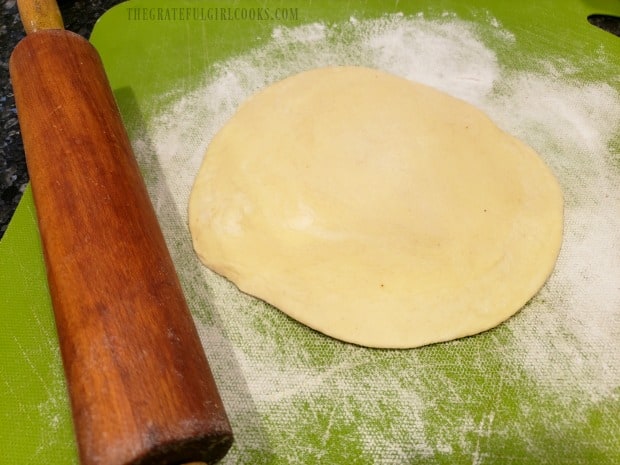
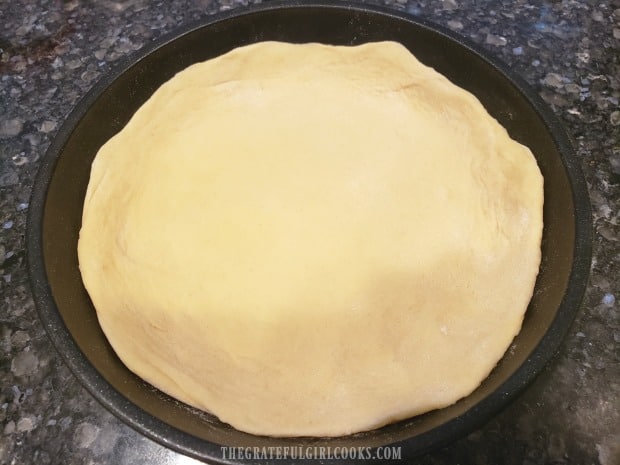
Place the dough for two biscuits onto a lightly floured surface, stacked on top of each other. Use a rolling pin, and roll the dough out into a 6″ circle. This will be the crust for your pizza. Easy peasy.

Two canned, refrigerated biscuits are used for the pizza crust dough.The biscuit dough is rolled out into a 6" circle for the pizza pan.

Prepare The Air Fryer Cheesy Pan Pizza

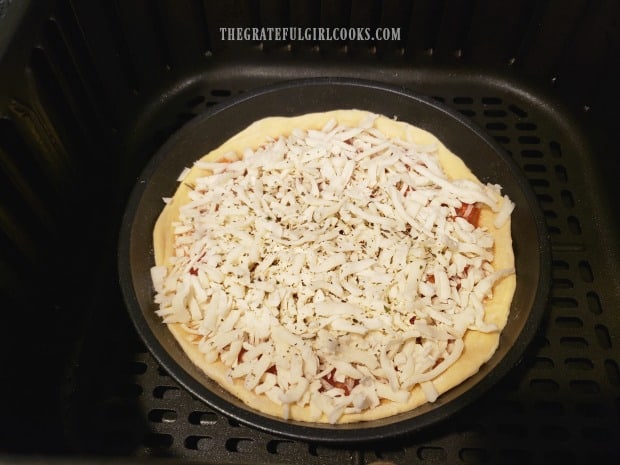
Lightly spray a 6″ oven-safe, rimmed round baking pan with non-stick spray (mine was in an air fryer accessory kit). Place the crust into the pan. Stretch and gently pull the dough to cover the bottom of the pan, and about an inch up the sides of the pan.

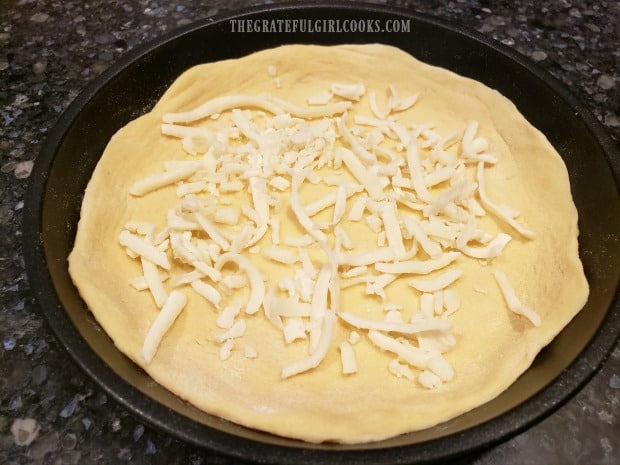
Sprinkle a small handful of the mozzarella cheese over the dough. The cheese (as it melts) will help form a barrier, so the bottom crust does not get soggy from the pizza sauce.

Place the dough into a 6" oven-proof pan, pulling dough up sides of pan to form rim.Sprinkle the bottom of the crust with some of the grated mozzarella cheese.

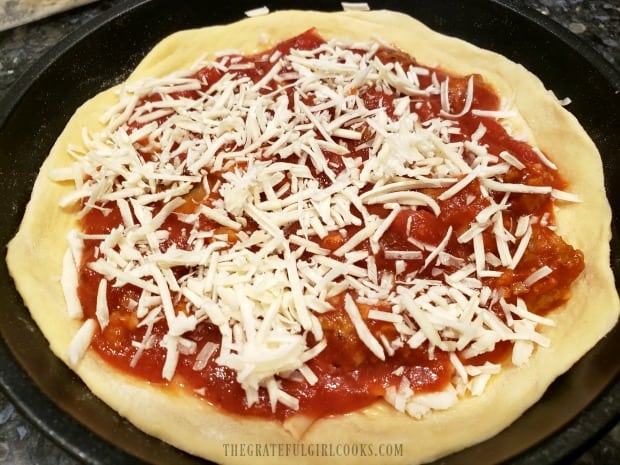
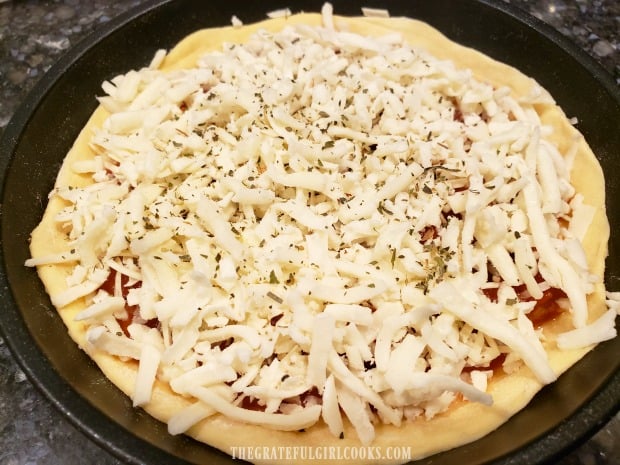
Now spoon the pizza (or spaghetti) sauce over the cheese, and top with shredded Parmesan cheese. Add grated mozzarella cheese, and sprinkle lightly with Italian seasoning (I make my own). The last step is to either lightly spray or drizzle olive oil over the top of the pizza.

Spoon sauce over pizza, then top with grated Parmesan.Top with mozzarella cheese, Italian seasoning and a drizzle/spray of olive oil.

Time To Cook Your Air Fryer Cheesy Pan Pizza

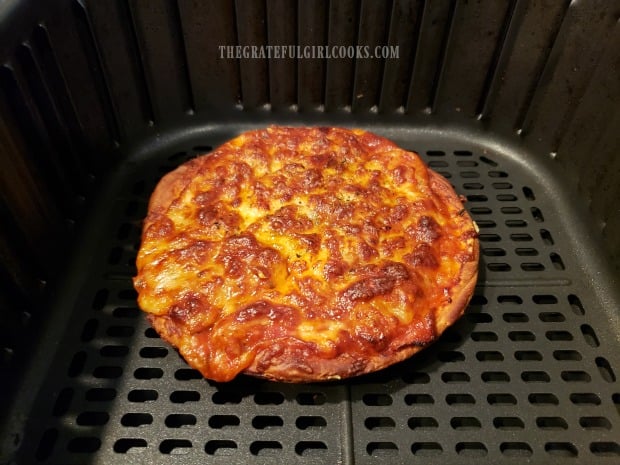
Now your air fryer cheesy pan pizza is ready to cook! Place the pan pizza into a preheated 380°F air fryer, and cook the pizza for 5 minutes. After 5 minutes, open the air fryer- carefully and quickly remove the pizza from the pan, and place it back in the air fryer (minus pan).

The pizza should have firmed up enough to hold its shape, and will be stable enough (without the pan) to continue cooking, so the bottom crust browns nicely and firms up. Pop the pizza back into the air fryer (directly on basket grate), and cook for an additional 3-4 minutes.

Cook the air fryer pizza for 5 minutes, before removing pizza from pan.The pizza is removed from pan and finishes cooking in the air fryer.

How Do I Know If It Is Done?

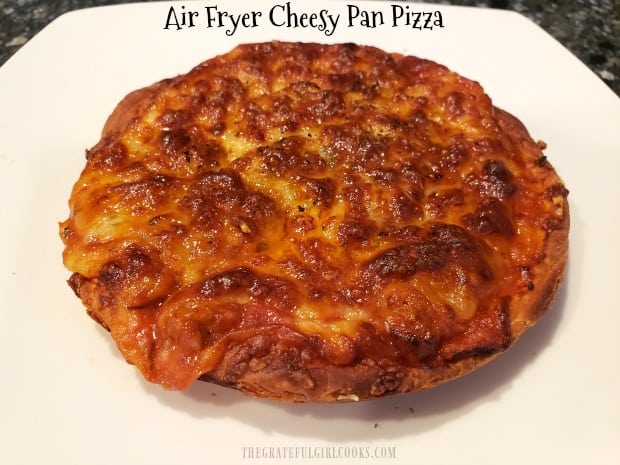
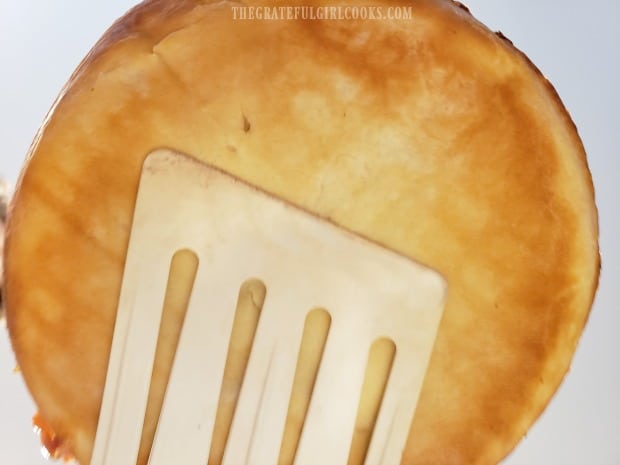
When done, the cheese should be bubbly and melted, and the pizza will be fully heated through. Take a quick peek at the bottom crust of your pizza – it should be browned, crispy and firm. The photo below shows how golden brown and firm the crust should be, too.

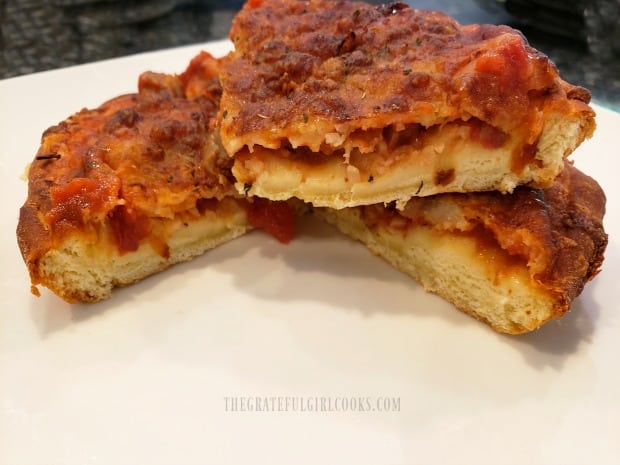
Transfer your air fryer cheesy pan pizza to a cutting board, let it sit for one minute, then slice it into 4 small pieces with a pizza cutter or sharp knife. Repeat process for the remaining pizza. Serve hot, and enjoy.

The bottom crust gets nice and golden brown when cooked in the air fryer.Slices of the air fryer cheesy pan pizza, on a plate, ready to eat.

I hope you will consider trying these little miniature pan pizzas. They really are good, and not too difficult at all to make. Thanks for stopping by, and have a great day.

Looking For More AIR FRYER Recipes?

You can find all of my air fryer recipes in the Recipe Index, which is located at the top of the page. I have several you might enjoy, including:

Interested In More Recipes?

Thank you for visiting this website. I appreciate you using some of your valuable time to do soIf you’re interested, I publish a newsletter 2 times per month (1st and 15th) with all the latest recipes, and other fun info. I would be honored to have you join our growing list of subscribers, so you never miss a great recipe!
There is a Newsletter subscription box on the top right side (or bottom) of each blog post, depending on the device you use, where you can easily submit your e-mail address (only) to be included in my mailing list.

You Can Also Find Me On Social Media:
Facebook page: The Grateful Girl Cooks!
Pinterest: The Grateful Girl Cooks!
Instagram: jbatthegratefulgirlcooks

Author's signature

0 from 0 votes
Air Fryer Cheesy Pan Pizza
Prep Time
6 mins
Cook Time
9 mins
Total Time
15 mins
 

Make a delicious Air Fryer Cheesy Pan Pizza for lunch/dinner. Use canned biscuit dough for crust & Mozzarella/Parmesan cheeses, pizza sauce & spices!

Category: Entree, Lunch, Snack
Cuisine: Italian
Keyword: air fryer cheesy pan pizza
Servings: 2 pizzas
Calories Per Serving: 492 kcal
Author: JB @ The Grateful Girl Cooks!
Ingredients
  • 4 refrigerated, canned biscuits (dough)
  • 1 cup mozzarella cheese , divided
  • 4-5 Tablespoons spaghetti or pizza sauce , divided
  • ½ cup grated Parmesan cheese , divided
  • ½ teaspoon Italian seasoning
  • 2 teaspoons olive oil , (approx.) to spray or drizzle
Instructions
REPEAT THIS PROCESS FOR EACH PIZZA
  1. Place 2 biscuit dough rounds onto a lightly floured surface, stacked on top of each other. Roll the dough out into a 6" circle using rolling pin. Lightly spray a 6" oven-safe, rimmed round baking pan with non-stick spray. Place dough circle into pan. Stretch and gently pull dough to cover bottom of pan, and about 1" inch up the sides of pan.

  2. Sprinkle ¼ cup mozzarella cheese over dough. Spoon 2 T. pizza sauce over cheese, then sprinkle with ¼ cup Parmesan cheese. Add ¼ cup grated mozzarella cheese, and sprinkle lightly with ¼ teaspoon Italian seasoning. Lightly spray or drizzle olive oil over top of pizza.

  3. Place pan pizza into basket of a preheated 380°F air fryer; cook for 5 minutes. After 5 minutes, open air fryer- carefully/quickly remove pizza from pan; place pizza back in air fryer directly onto basket grate (minus pan). Pizza should be firm enough to hold its shape, and will be stable enough (without pan) to continue cooking, so bottom crust browns nicely and firms up. Cook for an additional 3-4 minutes, until cooked through, cheese is bubbly, and the bottom crust is browned and firm.

  4. Remove pizza from air fryer once done; transfer to a cutting board. Let rest for one minute, then slice into 4 wedges, serve and enjoy! Repeat process for remaining pizza.

Nutrition Facts
Air Fryer Cheesy Pan Pizza
Amount Per Serving (1 pizza)
Calories 492 Calories from Fat 261
% Daily Value*
Fat 29g45%
Saturated Fat 12g75%
Cholesterol 59mg20%
Sodium 1398mg61%
Potassium 299mg9%
Carbohydrates 31g10%
Fiber 1g4%
Sugar 4g4%
Protein 27g54%
Vitamin A 618IU12%
Vitamin C 2mg2%
Calcium 754mg75%
Iron 3mg17%
* Percent Daily Values are based on a 2000 calorie diet.

Here’s one more to pin on your Pinterest boards!Make a delicious Air Fryer Cheesy Pan Pizza for lunch/dinner. Use canned biscuit dough for crust & Mozzarella/Parmesan cheeses, pizza sauce & spices!

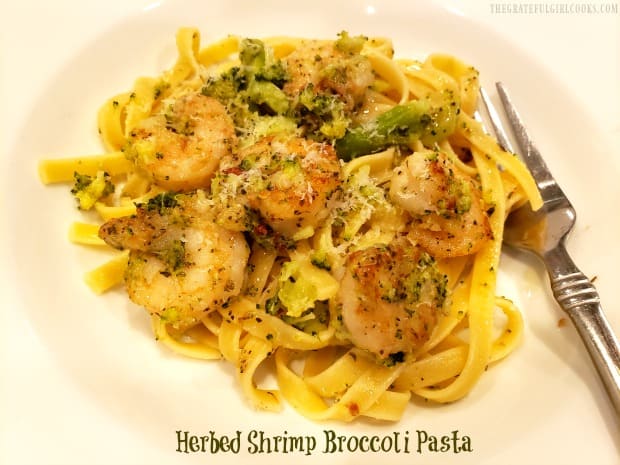
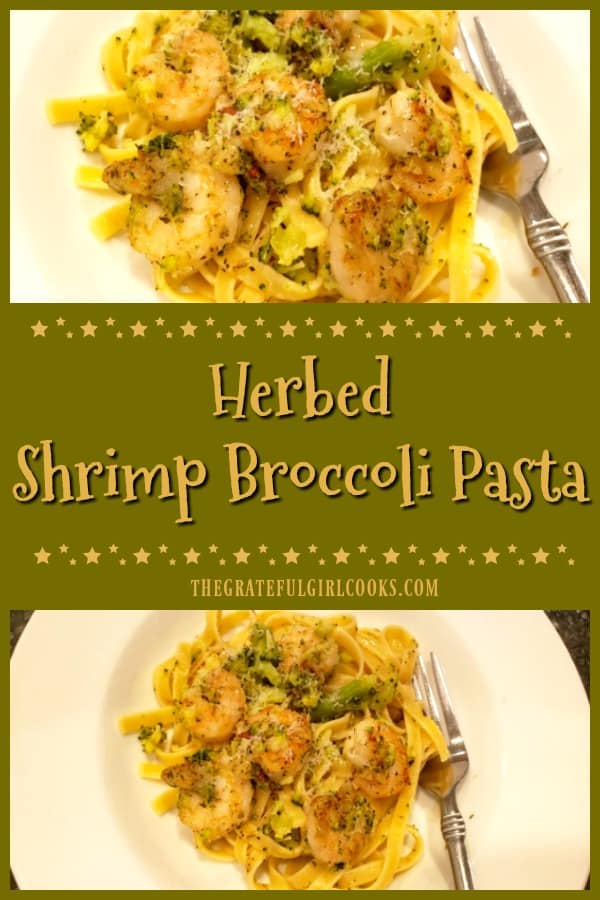
Herbed Shrimp Broccoli Pasta

Herbed Shrimp Broccoli Pasta is a delicious, Italian-inspired meal of pan-seared shrimp, broccoli, and pasta noodles w/ Parmesan, olive oil & spices.

If you enjoy shrimp and pasta dishes, may I suggest trying this delicious recipe for Herbed Shrimp Broccoli Pasta? My husband and I love this dish, and truly hope you will enjoy it, as well! I’ve been making it without any recipe, in one form or another for years, improvising as I went along with spices, ingredients, etc. This is the final version of this recipe from all my kitchen “experimenting”, and it sure is GOOD!

Lightly seasoned, pan-seared shrimp are complimented with pasta, coated with olive oil, butter, Parmesan cheese and Italian-inspired spices. Toss in some healthy broccoli, and you’ve got a wonderful, all-in-one meal I am confident you will enjoy.

Basically you will cook shrimp, cook broccoli, cook pasta, and then mix it all together with spices, cheese, butter and olive oil. It’s pretty easy to make (in just a few steps), so I want to share this yummy recipe with you.

Scroll Down For A Printable Recipe Card At The Bottom Of The Page

Season And Pan-Sear The Shrimp

The first step is to make sure your medium shrimp are peeled, and deveined. Place the shrimp in a medium sized bowl, and lightly season with Italian seasoning and garlic powder. The link is to my recipe for making Italian seasoning at home, if you do not have any.

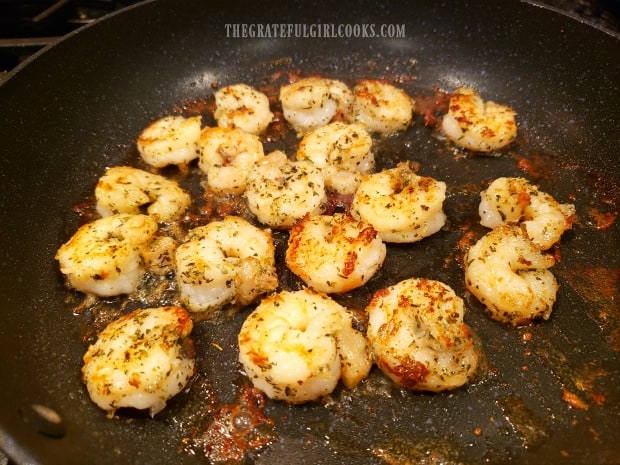
Melt butter in a large skillet. Add the seasoned shrimp, and cook in a single layer for 2-3 minutes, and then turn the shrimp over to the other side. The shrimp should be golden brown. Cook for 1-2 additional minutes, until the shrimp are cooked through.

Set the skillet with the shrimp aside, and cover, to keep the shrimp warm. Do not clean the skillet out, because you will use all the browned butter and leftover “crispy bits” later for added flavor!

Shrimp are lightly seasoned, then pan-seared in butter in a skillet.

Cook Pasta, Steam Broccoli, And Mix Pasta Seasoning

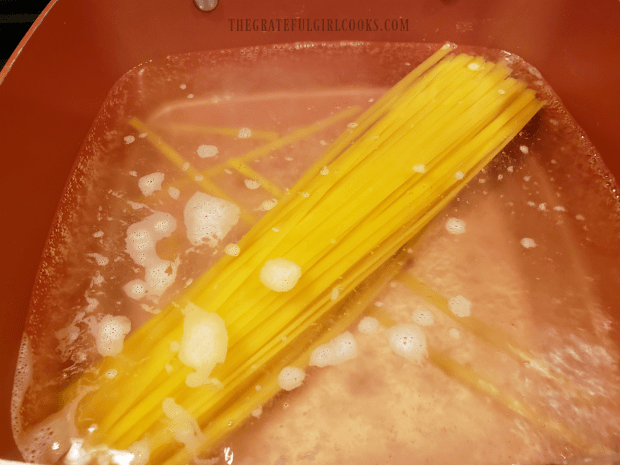
Okay… now you need to prepare the pasta in boiling water, according to package directions (approx. 12-13 minutes). TIP: Typically I start the pot of water heating while I cook the shrimp. That way, when I’m done cooking the shrimp, the water will already be boiling for the pasta (which saves time).

Fettucine pasta is cooked until al dente in boiling water.

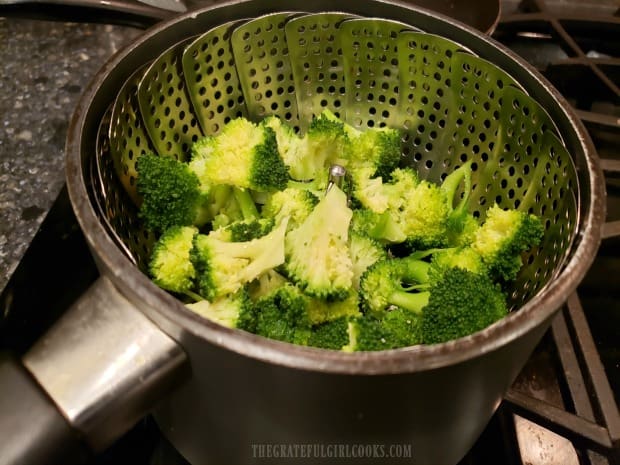
While the pasta is cooking, quickly steam the broccoli. Place the broccoli florets in a steamer basket over 2 inches of boiling water in a saucepan, and cover. Steam the broccoli for 4 minutes. Remove the florets from the basket, and add to the cooked shrimp set aside in the skillet (and keep warm).

Broccoli florets are quickly steamed before adding to the pasta.

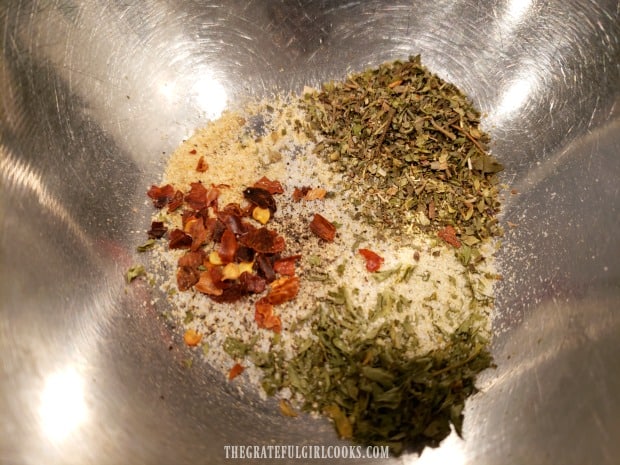
While the pasta is still cooking, take a minute to also mix together the spice ingredients for the pasta in a small bowl. The spices are onion powder, Italian seasoning, parsley, garlic powder, red pepper flakes, salt and pepper.

Spices are mixed together before adding to the pasta.

Putting The Herbed Shrimp Broccoli Pasta Together

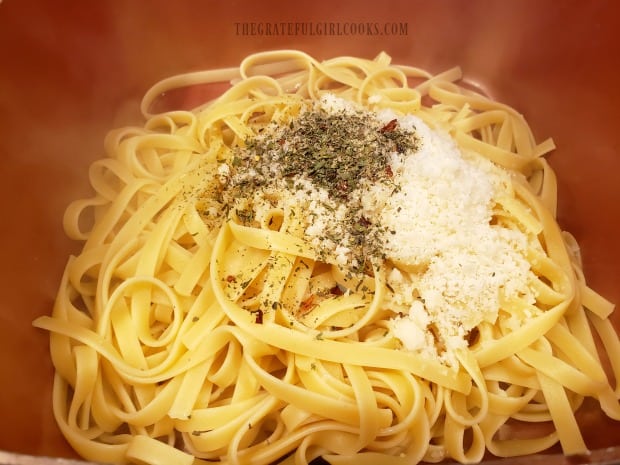
Now it’s time to put this meal together! As soon as the pasta is fully cooked, quickly drain it in a colander (but don’t rinse!). Place the butter and olive oil in the bottom of the empty pasta pan, and then pour the HOT drained pasta back in, on top. This will help to melt the butter underneath. Quickly add the spice mixture and grated Parmesan cheese to the pasta.

The herb mixture, butter, oil and Parmesan cheese are added to cooked pasta.

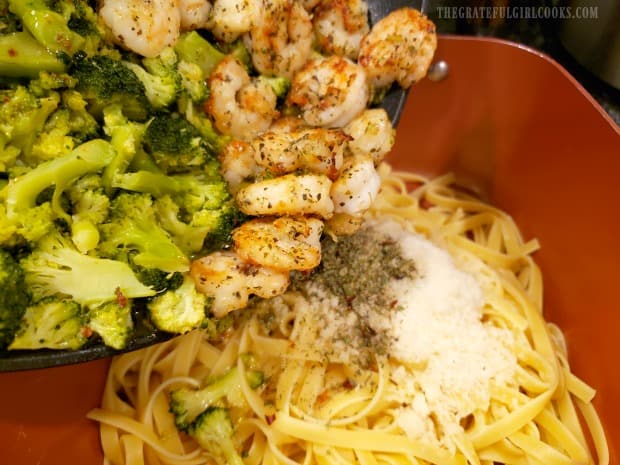
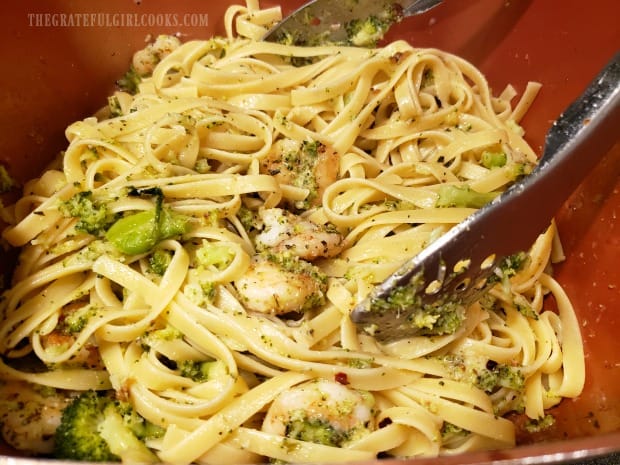
Now add the cooked shrimp and broccoli to the hot pasta, and gently toss it all together. The melted butter, olive oil, spices and Parmesan will flavor the pasta, along with the broccoli and seasoned shrimp. Give the pasta a quick taste, and add additional salt and pepper, if desired. Now the herbed shrimp broccoli pasta is ready to be served.

Cooked shrimp and broccoli are added to the pasta, then gently mixed together.The herbed shrimp broccoli pasta is gently tossed before serving.

Time To Serve Herbed Shrimp Broccoli Pasta!

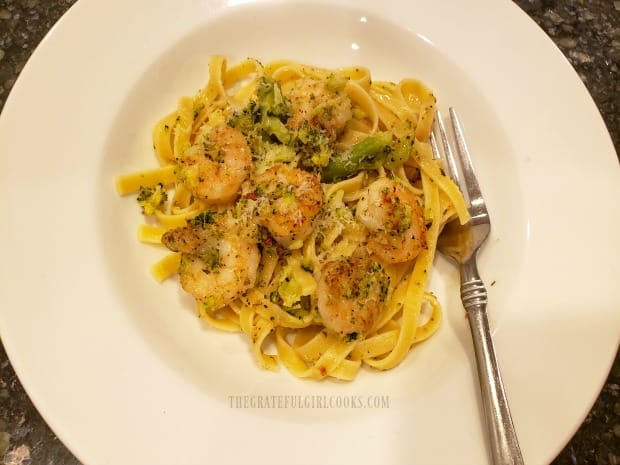
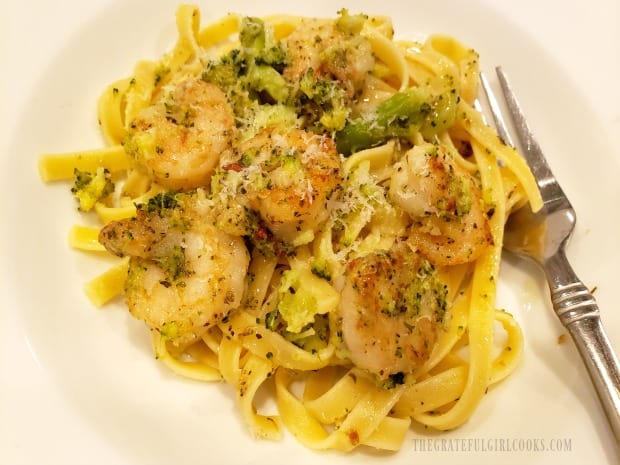
Place portions of pasta onto individual serving plates or bowls (I use tongs). Try to position the shrimp on top of each portion to make it look appealing. Add additional grated Parmesan cheese for garnish, if desired.

Note: Because this pasta dish is not fully coated with a thick sauce (like spaghetti sauce, for example), it will tend to lose heat rapidly . This is why it is important to serve it up fairly quickly… just sayin’.

A serving dish of herbed shrimp broccoli pasta, ready to enjoy!A close up of herbed shrimp broccoli pasta, with a fork on the side.

Hope you enjoy this delicious all-in-one pasta dinner! We always do and trust you will, too. Thanks for stopping by, and hope you will visit again soon. Take care, and have a great day.

Looking for more PASTA recipes?

You can find all of my recipes in the Recipe Index, located at the top of the page. I have quite a few, including:

Interested In More Recipes?

Thank you for visiting this website. I appreciate you using some of your valuable time to do soIf you’re interested, I publish a newsletter 2 times per month (1st and 15th) with all the latest recipes, and other fun info. I would be honored to have you join our growing list of subscribers, so you never miss a great recipe!
There is a Newsletter subscription box on the top right side (or bottom) of each blog post, depending on the device you use, where you can easily submit your e-mail address (only) to be included in my mailing list.

You Can Also Find Me On Social Media:
Facebook page: The Grateful Girl Cooks!
Pinterest:
The Grateful Girl Cooks!
Instagram:
jbatthegratefulgirlcooks

Author's signature

0 from 0 votes
Herbed Shrimp Broccoli Pasta
Prep Time
25 mins
Cook Time
0 mins
Total Time
25 mins
 

Herbed Shrimp Broccoli Pasta is a delicious, Italian-inspired meal of pan-seared shrimp, broccoli, and pasta noodles w/ Parmesan, olive oil & spices.

Category: Dinner, Entree
Cuisine: Italian
Keyword: herbed shrimp broccoli pasta
Servings: 3
Calories Per Serving: 600 kcal
Author: JB @ The Grateful Girl Cooks!
Ingredients
For Shrimp:
  • 18-20 medium shrimp , peeled, deveined
  • 2 Tablespoons butter
  • ½ teaspoon Italian seasoning
  • ¼ teaspoon garlic powder
For Pasta:
  • 7 ounces fettucine pasta , cooked according to pkg. directions
  • cups broccoli florets , lightly steamed
  • ¼ cup extra virgin olive oil
  • 2 teaspoons butter , room temp.
  • 1 Tablespoon Italian seasoning
  • 1 teaspoon dried parsley
  • ½ teaspoon garlic powder
  • teaspoon onion powder
  • ¼ teaspoon salt and pepper (EACH)
  • 1 pinch (generous) red pepper flakes
  • ¼ cup fresh grated Parmesan cheese , plus more for garnish, if desired
Instructions
  1. Prepare shrimp: Place shrimp in a bowl; sprinkle with Italian seasoning and garlic powder; toss to coat. Melt butter in a large skillet on medium heat. Add shrimp in a single layer. Cook 2-3 minutes; turn shrimp over and cook other side for 1-2 more minutes until cooked through. Set skillet of shrimp aside; cover, to keep warm. Don't clean skillet- you will use browned butter and leftover "crispy bits" later for added flavor!

  2. Prepare pasta according to package directions. TIP: Start pot of water heating while cooking shrimp in Step #1. When done cooking shrimp, water should be boiling for pasta (which saves time).

  3. While Pasta Cooks: #1: Steam broccoli. Place broccoli florets in a steamer basket over 2 inches of boiling water in a saucepan and cover. Steam for 4 minutes. Remove broccoli from steamer; add to shrimp set aside in skillet. #2: Mix together spices for the pasta (Italian seasoning, parsley, garlic powder, onion powder, salt, pepper, and red pepper flakes) in a small bowl. Set aside.

  4. When pasta is done, immediately drain it in a colander (but don't rinse!). Place butter and olive oil on the bottom of the empty pasta pan, and then pour HOT drained pasta back in, on top. This melts the butter underneath. Add spice mix, Parmesan cheese, shrimp and broccoli to pasta.

  5. Gently toss all ingredients together until fully combined. Taste pasta; add additional salt and pepper, if desired. Immediately serve (while still hot), and enjoy.

Nutrition Facts
Herbed Shrimp Broccoli Pasta
Amount Per Serving (1 (1/3 of total))
Calories 600 Calories from Fat 306
% Daily Value*
Fat 34g52%
Saturated Fat 11g69%
Cholesterol 181mg60%
Sodium 727mg32%
Potassium 355mg10%
Carbohydrates 53g18%
Fiber 4g17%
Sugar 2g2%
Protein 22g44%
Vitamin A 840IU17%
Vitamin C 42mg51%
Calcium 221mg22%
Iron 3mg17%
* Percent Daily Values are based on a 2000 calorie diet.

Here’s one more to pin on your Pinterest boards!Herbed Shrimp Broccoli Pasta is a delicious, Italian-inspired meal of pan-seared shrimp, broccoli, and pasta noodles w/ Parmesan, olive oil & spices.

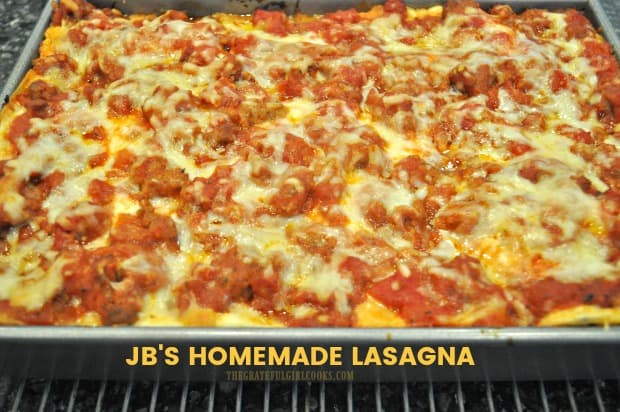
JB’s Homemade Lasagna

Enjoy delicious homemade lasagna (serves 12), with Italian sausage, ground beef, mozzarella, ricotta & Parmesan cheese, tomatoes & Italian spices.

About 40 years ago as a young bride I started making homemade lasagna from an old recipe I had been given. I made quite a few changes to the original classic Italian recipe, loved the results, and have been making lasagna this way ever since!

JB’s homemade lasagna is comfort food at its best. Layers of pasta, meat sauce, spices and lots of ooey gooey cheese make this a well loved meal in our home.

Many people think lasagna is too complicated to make, but truthfully, it is fairly easy. There are several steps involved to get the ingredients “ready”, but once that’s done, it’s just a matter of layering and baking! Here’s how to make this dish:

Scroll Down For A Printable recipe Card At The Bottom Of The Page

Prep #1: Prepare The Meat Sauce

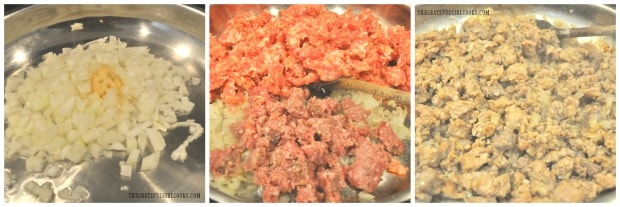
The first thing to do is to prepare the meat sauce, because it needs to cook for awhile to develop great flavor. In a large skillet, sauté onions and garlic powder in hot oil (medium heat) until the onions become tender (3-4 minutes).

Add crumbled Italian sausage, ground beef and salt to the skillet. Stir, and continue to cook until the meat is cooked through and browned. Discard any grease that accumulated, and then put the skillet back on the heat.

Onion, garlic powder, ground beef and Italian sausage are browned in large skillet.

Add canned tomatoes, tomato sauce, and Italian seasoning to the lasagna meat sauce, and stir, to combine. Cook the meat sauce on medium heat for about 50 minutes (stirring occasionally), to help develop the wonderful Italian flavor of the sauce. When done, remove the sauce from the heat and set aside.

Tomatoes, sauce and spices are added to the meat in the skillet and cooked.

Prep #2: Prepare The Ricotta Cheese Filling

While the meat sauce is cooking, I make the ricotta cheese filling. It’s EASY, and only takes a minute! Place ricotta cheese, garlic powder, dried parsley, and Italian seasoning in a medium bowl, and stir well, until fully incorporated. Set the ricotta filling aside.

Ricotta cheese is mixed with garlic powder, dried parsley and Italian seasoning.

Prep #3: Cook The Lasagna Noodles

Now it’s time to cook the pasta. Bring a large pot of water to a boil. Add the pasta, and cook according to package directions until al dente. Once done, drain the water, and place hot pasta into a strainer/colander, and rinse with cold water.

Once rinsed, lay the cooked pasta on paper towels to slightly dry, making sure each sheet of pasta doesn’t stick to the others.

A box of lasagna noodles is cooked and then drained.

Time To Assemble JB’s Homemade Lasagna

Now it’s time to create your homemade lasagna, by layering on the ingredients! Spread 1/3 of the meat sauce on the bottom of a 9″x13″ baking pan. Place a layer of lasagna noodles over the sauce to cover (about 5).

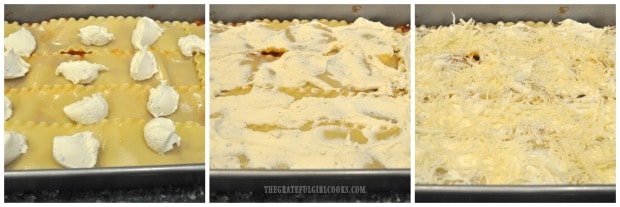
Place dollops of the ricotta filling (half of the ricotta filling) over the pasta, as shown in the photo below.

Gently spread out the ricotta filling with a spoon or spatula, to cover most of the lasagna noodles. Sprinkle half of the Parmesan cheese and 1/3 of the mozzarella cheese over the top of the ricotta filling to cover. This is shown in the second photo below.

First layers of lasagna are sauce, then noodles, and then ricotta filling.Ricotta filling is spread over noodles, then topped with shredded Parmesan and mozzarella..

Repeat Layers Then Bake

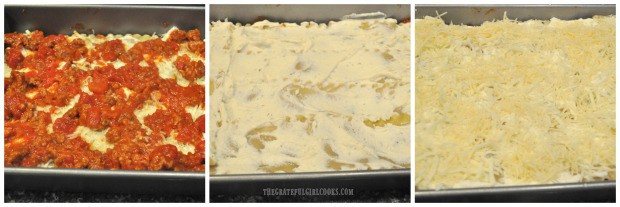
Spread another 1/3 of the meat sauce on top of the shredded cheeses. Add pasta noodles to cover, then add the remaining ricotta filling to cover. Sprinkle with the rest of the Parmesan cheese, and 1/3 of the mozzarella cheese (saving remaining 1/3 of mozzarella cheese for final topping).

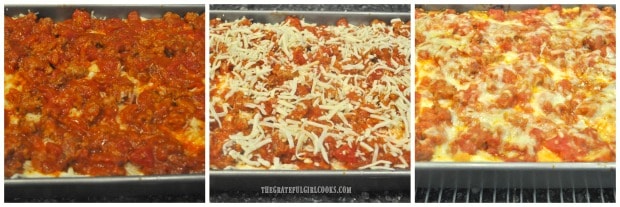
The final “to do” is a layer of meat sauce (use it all up). Top the meat sauce with the remaining mozzarella cheese, and now your homemade lasagna is finished and ready to bake!

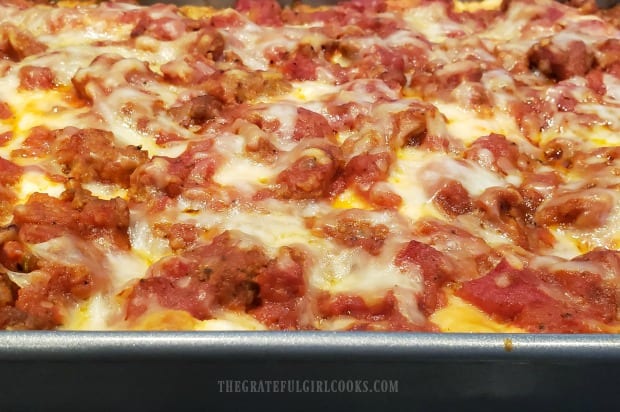
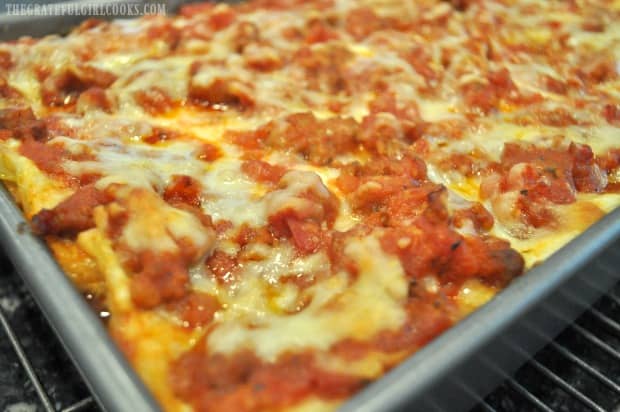
Bake JB’s homemade lasagna at 350°F for 50 minutes. When done, the top should be golden brown, the cheese melted, and the lasagna should be bubbling around the edges.

Layers of the lasagna are repeated - sauce, noodles, ricotta, then shredded cheeses.Final layer is sauce, then mozzarella cheese to top, and then lasagna is baked.

Getting Homemade Lasagna Ready To Serve

Once done, remove the HOT lasagna from the oven. Let it rest for 5 minutes, to let the hot gooey cheese firm up a bit, which will make cutting it a LOT easier.

While you wait, take a good sniff of that lasagna. YUMMO… it sure smells good! Once the lasagna has “cooled” slightly, cut it into 12 portions, and serve.

JB's homemade lasagna is done baking in 50 minutes, when bubbly around edges.A close up of the lasagna cooling for a couple minutes before slicing.

Time To Eat Some Homemade Lasagna

We really enjoy this delicious homemade lasagna, and it is full of flavor! There is a lot of sauce, cheese and meat, and it truly is a great meal. The leftovers are delicious, too!

Leftovers can be stored (tightly covered) in the refrigerator for up to 3-4 days. Just pop a piece of leftover lasagna in the microwave to reheat, and you’ve got yourself a quick meal.

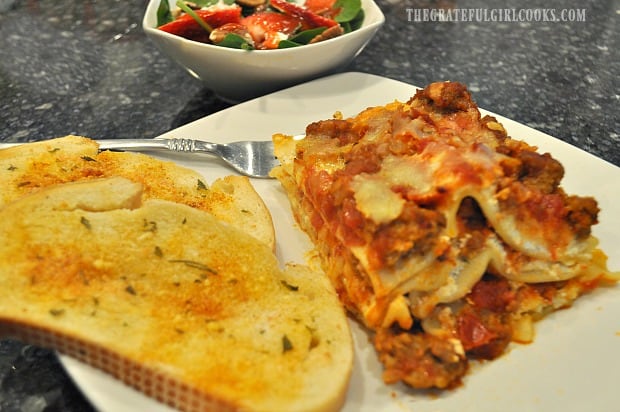
Our favorite way to enjoy my homemade lasagna is with garlic bread and a mixed green salad on the side. This scrumptious recipe has stood the test of time in our home, and I’m glad I finally got around to posting the recipe. Hope you enjoy it, too.

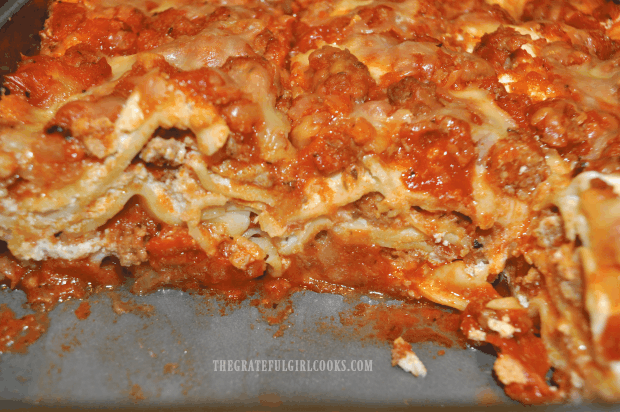
You can see layers of meat and cheese in JB's homemade lasagna after slicing.A piece of homemade lasagna served with green salad and garlic bread on the side.

Thank you for spending some of your valuable time stopping by today. Hope you will consider trying this delicious recipe in your home, and trust you will enjoy it as much as we do.

It’s a wonderful way to serve a large family, or have quite a few servings, if made for a smaller group. Take care, and have a great day.

Looking For More ITALIAN recipes?

You can find all of my recipes in the Recipe Index, located at the top of the page. We love Italian food, so there are quite a few Italian recipes there, including:

Want More Recipes? Get My FREE Newsletter!

I publish a newsletter 2 times per month (1st and 15th) with lots of recipes, tips, etc..
Would you like to join our growing list of subscribers?

There is a Newsletter subscription box on the top right (or bottom) of each blog post, depending on the device you use.
You can submit your e-mail address there, to be added to my mailing list.

Find Me On Social Media:

Facebook page: The Grateful Girl Cooks!
Pinterest:
The Grateful Girl Cooks!
Instagram:
jbatthegratefulgirlcooks

Author's signature

Original recipe source: unknown (been making lasagna this way for over 40 years)

↓↓ PRINTABLE RECIPE BELOW ↓↓

0 from 0 votes
JB's Homemade Lasagna
Prep Time
1 hr
Cook Time
50 mins
Total Time
1 hr 50 mins
 

Enjoy delicious homemade lasagna (serves 12), with Italian sausage, ground beef, mozzarella, ricotta & Parmesan cheese, tomatoes & Italian spices.

Category: Main Course
Cuisine: Italian
Keyword: homemade lasagna
Servings: 12
Calories Per Serving: 619 kcal
Author: JB @ The Grateful Girl Cooks!
Ingredients
For Meat Sauce:
  • ¼ cup oil
  • cups brown onion , chopped
  • ¾ teaspoon garlic powder
  • 1 pound Italian sausage , crumbled
  • ½ pound ground beef , crumbled
  • 29 ounces canned whole tomatoes
  • 32 ounces canned tomato sauce
  • 2 teaspoons salt
  • ¼ teaspoon ground black pepper
  • Tablespoons Italian seasoning
For Ricotta Cheese Mixture:
  • 24 ounces ricotta cheese
  • 1 teaspoon parsley (fresh or dried)
  • ½ teaspoon garlic powder
  • ½ teaspoon Italian seasoning
For Rest Of The Lasagna:
  • 1 pound lasagna noodles , cooked/drained per pkg. directions
  • 1 cup Parmesan cheese , shredded
  • 1 pound mozzarella cheese , shredded
Instructions
  1. MAKE MEAT SAUCE- In a large skillet, sauté onions and garlic powder in hot oil (medium heat) until they become tender. Add crumbled Italian sausage, ground beef and salt to skillet; continue cooking until meat is cooked through and browned. Discard any accumulated grease. Add canned tomatoes, tomato sauce, and Italian seasoning, and stir to combine. Cook sauce on medium heat for 50 minutes (stirring occasionally), Remove from heat; set aside.

  2. MAKE RICOTTA FILLING- Place ricotta cheese, garlic powder, dried parsley, and Italian seasoning in medium bowl, and stir well, until fully incorporated. Set aside.

  3. COOK PASTA- Cook lasagna noodles according to directions until al dente. Once done, drain water, and place pasta in a strainer, and rinse with cold water. Lay pasta on paper towels to dry slightly, making sure pasta sheets don't stick together .

  4. ASSEMBLE LASAGNA- Layer #1: Spread 1/3 of the meat sauce on the bottom of a 9x13" baking pan. Place a layer of lasagna noodles over the sauce. Place dollops of ricotta (half of ricotta) over pasta. Gently spread ricotta filling to cover lasagna noodles. Sprinkle half of the Parmesan cheese and 1/3 of the mozzarella cheese over ricotta to cover.

    Layer #2: Spread another 1/3 of the meat sauce on top of shredded cheeses. Add lasagna noodles, then remaining ricotta filling. Sprinkle with remaining Parmesan cheese, and another 1/3 of the mozzarella cheese (save remaining 1/3 of mozzarella cheese for final topping).

    Layer #3: Add layer of remaining meat sauce. Top sauce with the rest of the mozzarella cheese. Now lasagna is ready to bake. Preheat oven to 350°F.

  5. Bake lasagna at 350°F for 50 minutes. When done, the top should be golden brown, cheese topping is melted, and lasagna should be bubbling around edges. Remove from oven, let sit for 5 minutes to let cheese firm up a bit (makes cutting easier). Cut into 12 portions, and serve. Enjoy!
Nutrition Facts
JB's Homemade Lasagna
Amount Per Serving (1 g)
Calories 619 Calories from Fat 324
% Daily Value*
Fat 36g55%
Saturated Fat 19g119%
Cholesterol 100mg33%
Sodium 1589mg69%
Potassium 751mg21%
Carbohydrates 41g14%
Fiber 4g17%
Sugar 7g8%
Protein 34g68%
Vitamin A 917IU18%
Vitamin C 14mg17%
Calcium 576mg58%
Iron 3mg17%
* Percent Daily Values are based on a 2000 calorie diet.

Here’s one more to pin on your Pinterest boards!Enjoy delicious homemade lasagna (serves 12), with Italian sausage, ground beef, mozzarella, ricotta & Parmesan cheese, tomatoes & Italian spices.


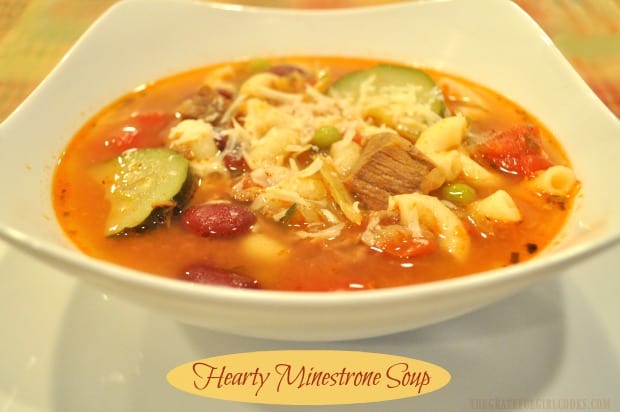
Hearty Minestrone Soup

Hearty Minestrone Soup is filling and DELICIOUS! This classic Italian soup, with meat, veggies, tomatoes, beans, and macaroni is sure to please.

The first time I had this hearty minestrone soup was when my Father-in-Law died over 40 years ago. A friend of the family was there for his memorial, and fixed a massive pot of this soup for the family at my in-laws home after the service.

The day of his memorial service was very cold and snowy (January), so this hot, delicious, filling meal was a God-send, as well as a sweet, thoughtful “gift” to our family!  A long-time family friend named Veda Quatro made the soup, gave me her recipe, and we’ve enjoyed this hearty, flavor-packed soup ever since that day!

The recipe makes 12 servings, and is CRAZY DELICIOUS. It takes a bit of time and prep work to make, but honestly, the results are wonderful, and will be worth your time! If you will only be serving a few people, you will enjoy having the leftovers for lunches or a quick meal! YUM!

Four Steps To Making Hearty Minestrone Soup!

There are basically 4 steps to making this soup. Cook the stew meat in broth, cook ground beef, onions and spices, cook the veggies, and add the final batch of veggies and pasta to the soup 30 minutes before serving!

It’s really not that hard to make… honest! Here’s how to cook a large batch of this yummy soup:

Step #1 – Cooking The Stew Meat

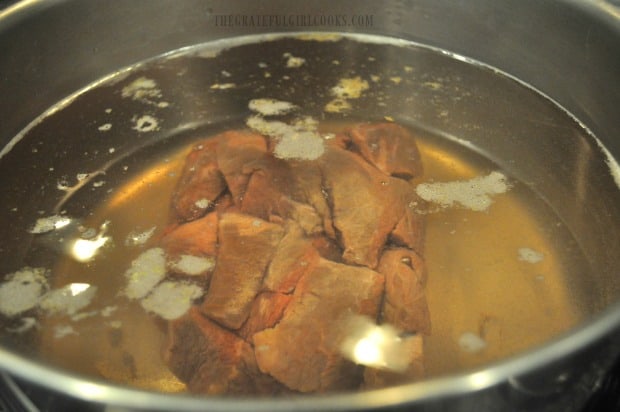
Place 5 quarts of water into a HUGE soup pot. Add the beef bouillon cubes and the stew meat. NOTE: You can substitute 5 quarts beef broth for water and bouillon, if more convenient. Cook on high for about 20 minutes, or until the stew meat is cooked through. Once done, turn off heat, and transfer the stew meat with a slotted spoon to a plate to rest.

NOTE: Trust me… you will want to use a LARGE soup pot or divide the recipe between two standard sized soup pots for this recipe, because it makes a LOT of soup, once completed!

Stew meat is cooked in beef broth in a large stock pot.

Step #2

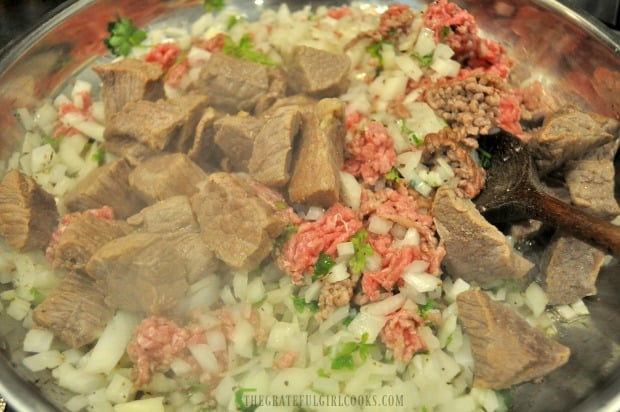
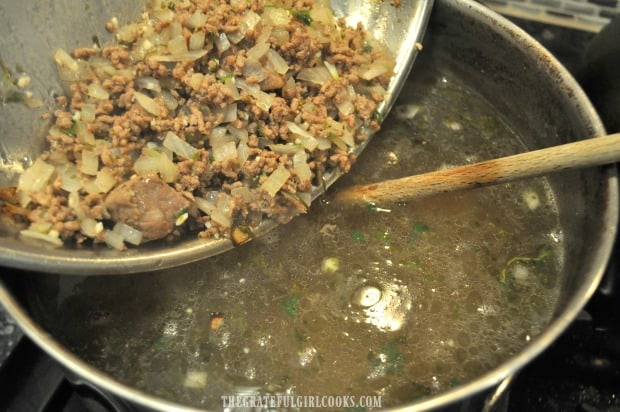
Heat the oil in a large skillet on medium heat. Add the ground beef, drained stew meat, chopped onion, pepper, and chopped parsley. Cook this mixture until the ground beef is browned and fully cooked through.

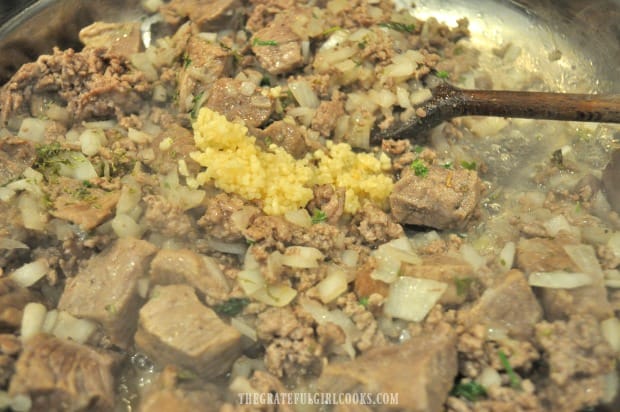
As soon as the ground beef is fully cooked, add the minced garlic, and continue to cook, stirring often, for one minute.

Stew meat, ground beef, onions, and parsley are browned in skillet.

Minced garlic is added to the browned meat mixture.

Drain the grease from the skillet (discard) and then add the cooked beef and onion mixture into the broth and stir, to combine.

Cooked beef and onion mixture is added to beef broth.

Step #3

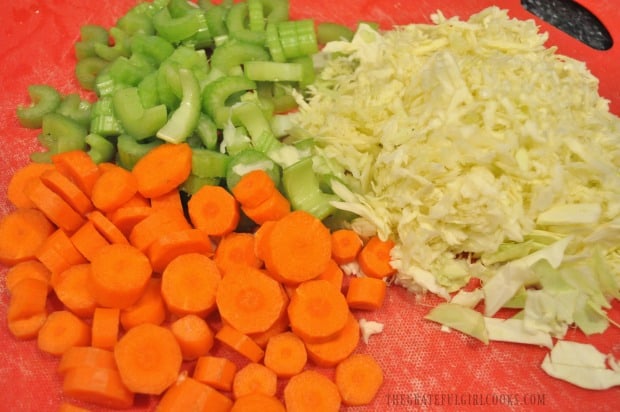
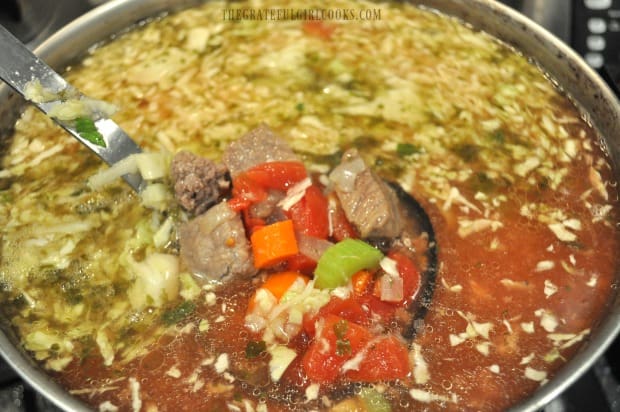
On to the next step! Gather the sliced celery, carrots and shredded cabbage, and add them to the pot of hearty minestrone soup! Pour in the canned diced tomatoes, Italian seasoning, and then give everything a good stir, to combine. Add the salt, stir then taste the soup, and add  additional salt, if desired, to suit your personal taste.

Continue to cook the hearty minestrone soup (uncovered) on medium heat for about 30 minutes, or until the veggies become tender. The soup liquid will reduce in volume slightly as the mixture cooks.

NOTE: If making soup ahead for serving later in the day… turn off the heat after this step, and let soup sit until 30 minutes before you want to serve, then go to Step #4.

Carrots, celery and green cabbage are prepped for the minestrone soup.Hearty minestrone soup is cooking away in a large stock pot.

Step #4 – The FINAL Step Before Serving

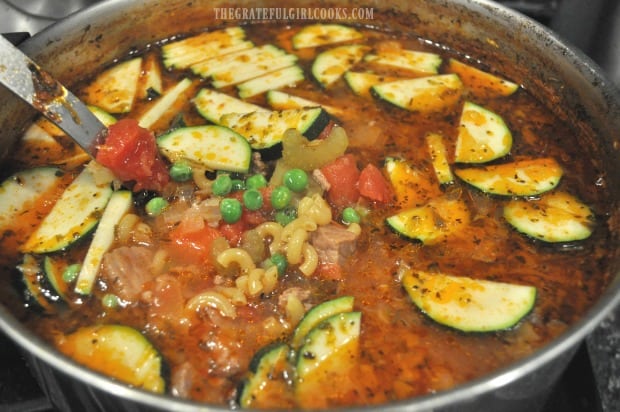
About 30 minutes BEFORE serving, add the uncooked macaroni noodles, frozen peas, kidney beans and zucchini slices to the pot of soup.

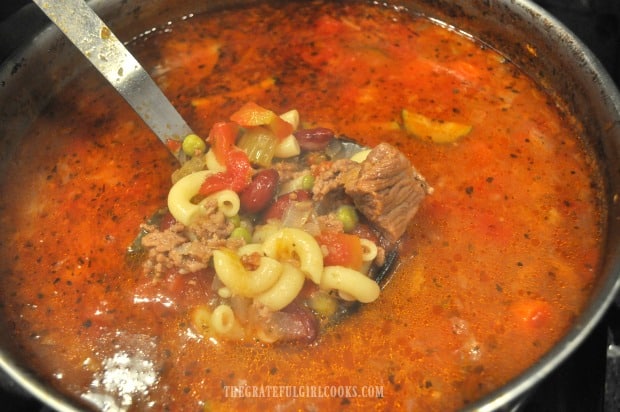
Cook the hearty minestrone soup on medium heat (still uncovered) for 30 minutes, and then it will be ready to serve! The broth will slightly reduce as it continues to cook, and the macaroni will fully cook in the soup!

Zucchini, peas, and uncooked macaroni noodles are added to the soup.The macaroni noodles cook fully in the hot minestrone soup.

Time To Serve Hearty Minestrone Soup!

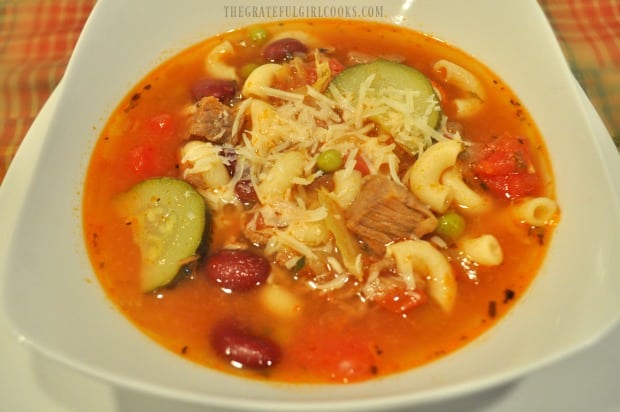
After 30 minutes your huge pot of homemade, hearty minestrone soup is ready to serve! Give it a final taste, and add additional salt, if desired. Ladle the steaming soup into bowls, sprinkle with grated Parmesan cheese, and serve!

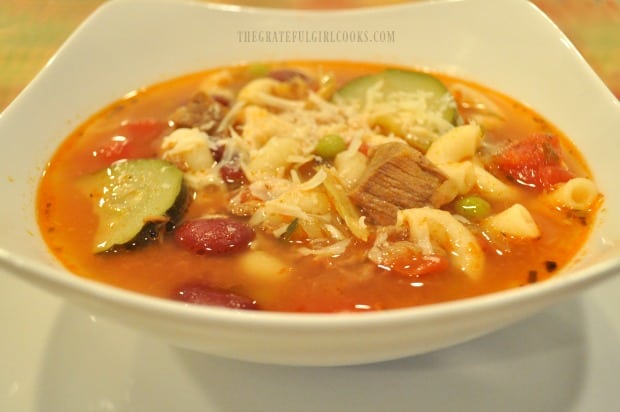
A bowl of hearty minestrone soup, topped with grated Parmesan cheese.Beef, veggies macaroni, tomatoes and beans are featured in hearty minestrone soup.

I really hope you will give this hearty minestrone soup a try! It is fabulous, and feeds a small village, or provides you with quite a few leftover bowls of delicious soup! YUM!!! Have a great day.

Looking For More SOUP Recipes?

You can find all of my soup recipes in the Recipe Index, located at the top of the page. I have many soup recipes on the blog, including:

Interested In More Recipes?

Thank you for visiting this website. I appreciate you using some of your valuable time to do soIf you’re interested, I publish a newsletter 2 times per month (1st and 15th) with all the latest recipes, and other fun info. I would be honored to have you join our growing list of subscribers, so you never miss a great recipe!
There is a Newsletter subscription box on the top right side (or bottom) of each blog post, depending on the device you use, where you can easily submit your e-mail address (only) to be included in my mailing list.

You Can Also Find Me On Social Media:
Facebook page: The Grateful Girl Cooks!
Pinterest: The Grateful Girl Cooks!
Instagram: jbatthegratefulgirlcooks

Author's signature

Recipe adapted from: Family friend Veda Quatro’s original recipe (1979)

0 from 0 votes
Hearty Minestrone Soup
Prep Time
30 mins
Cook Time
1 hr
Total Time
1 hr 30 mins
 

Hearty Minestrone Soup is filling and DELICIOUS! This classic Italian soup, with meat, veggies, tomatoes, beans, and macaroni is sure to please.

Category: Entree, Soup
Cuisine: Italian
Keyword: hearty minestrone soup
Servings: 12
Calories Per Serving: 241 kcal
Author: JB @ The Grateful Girl Cooks!
Ingredients
  • 5 quarts water
  • pounds beef stew meat , cut into cubes
  • 4 large beef bouillon cubes
  • 2 Tablespoons vegetable oil
  • ½ pound ground beef
  • 1 medium brown onion , chopped
  • ¼ teaspoon ground black pepper
  • ½ cup fresh parsley , finely chopped
  • 2 cloves garlic , minced
  • 1 cup celery , sliced
  • 2 cups green cabbage , shredded
  • cups carrots , sliced or diced
  • 43.5 ounces diced, canned tomatoes (=three 14.5 ounce cans)
  • teaspoons Italian seasoning
  • 2 teaspoons salt , plus additional, to desired taste
  • 1 cup zucchini , sliced thin, then cut slices in half
  • 1 cup frozen peas , do not thaw
  • 15.5 ounces kidney beans (canned) , rinsed and drained
  • 2 cups elbow macaroni , uncooked
  • grated Parmesan cheese for garnish (optional)
Instructions
  1. STEP #1: Place 5 quarts of water into a HUGE soup pot. Add the beef bouillon cubes and the stew meat. NOTE: Substitute 5 quarts beef broth for water and bouillon, if more convenient. Cook on high for 20 minutes, or until stew meat is cooked through. Once done, turn off heat, and transfer stew meat with a slotted spoon to a plate to rest.

  2. STEP #2: Heat oil in a large skillet on medium heat. Add ground beef, drained stew meat, chopped onions, black pepper, and parsley. Cook until ground beef is browned and cooked through. Add minced garlic, and cook, stirring often, for one minute. Drain grease from skillet (discard) and then add this mixture to the broth and stir to combine.

  3. STEP #3: Add celery, carrots and cabbage to the pot of soup. Pour in canned diced tomatoes and Italian seasoning; stir, to combine. Add salt, stir then taste the soup, and add additional salt, if desired. Continue to cook soup (uncovered) on medium heat for 30 minutes, or until the veggies become tender. The soup liquid will reduce in volume slightly as the mixture cooks. NOTE: If making soup ahead for serving later in the day -turn off heat after this step, and let soup sit until 30 minutes before you want to serve, then go to Step #4.

  4. STEP #4: 30 minutes BEFORE serving, add the uncooked macaroni noodles, frozen peas, kidney beans and zucchini slices to the soup. Cook on medium high heat (still uncovered) for 30 minutes, stirring occasionally, and then it's ready to serve! Give it a final taste; add additional salt, if desired. Ladle soup into bowls, sprinkle with grated Parmesan cheese, and serve! Enjoy!
Recipe Notes

TIP: The original author of this recipe (Veda) told me this tip: If you need to stretch out any leftover soup, just add another can of diced tomatoes or kidney beans, to make it go further!

Nutrition Facts
Hearty Minestrone Soup
Amount Per Serving (1 g)
Calories 241 Calories from Fat 54
% Daily Value*
Fat 6g9%
Saturated Fat 3g19%
Cholesterol 13mg4%
Sodium 974mg42%
Potassium 689mg20%
Carbohydrates 36g12%
Fiber 7g29%
Sugar 9g10%
Protein 12g24%
Vitamin A 3271IU65%
Vitamin C 26mg32%
Calcium 82mg8%
Iron 3mg17%
* Percent Daily Values are based on a 2000 calorie diet.

Here’s one more to pin on your Pinterest boards!Hearty Minestrone Soup is filling and DELICIOUS! This classic Italian soup, with meat, veggies, tomatoes, beans, and macaroni is sure to please.

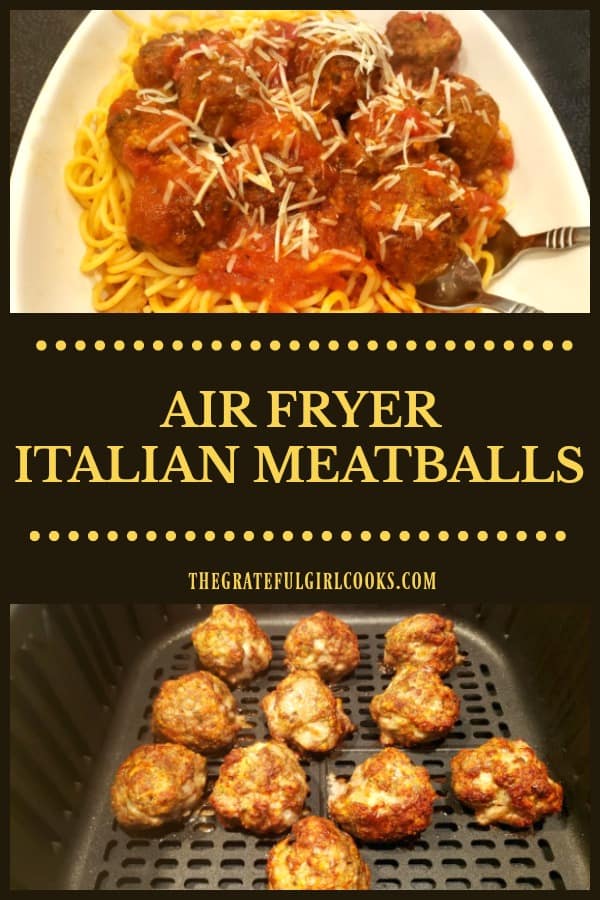
Air Fryer Italian Meatballs

It’s so EASY to make delicious Air Fryer Italian Meatballs, to add to a favorite sauce for pasta, or to make a yummy meatball sandwich!
It's so EASY to make delicious Air Fryer Italian Meatballs, to add to a favorite sauce for pasta, or to make a yummy meatball sandwich!

If you have an air fryer, then you know how many foods can be cooked or “fried” in them, without using a lot of oil. Normally I fry my meatballs for spaghetti in oil, in a large skillet on the stove, but wanted to give the old air fryer a go at it, too!

Using an air fryer has become a fun challenge for me, ever since I used birthday gift cards to purchase one last year. My husband and I have sure enjoyed using ours and trying new recipes. We appreciate this appliance that cooks with highly heated air rather than using a lot of oil to prepare food.

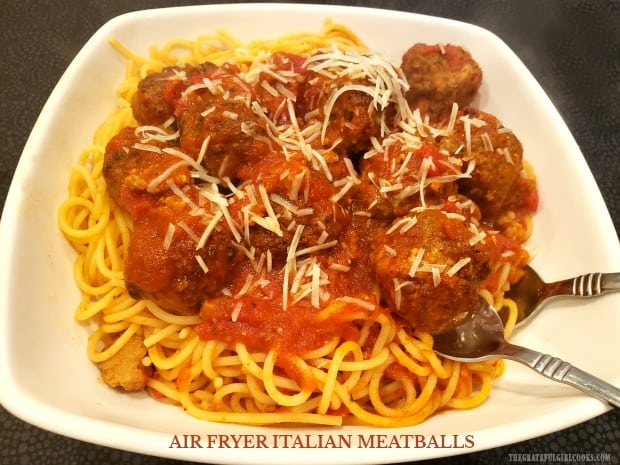
So… this time I made meatballs! The result was delicious tasting air fryer Italian meatballs, which were added to homemade spaghetti sauce, and then combined with hot cooked pasta! The process for making the meatballs was practically effortless, and I would whole-heartedly make them this way again!. Here’s how to make Italian meatballs in an air fryer.

Scroll Down For A Printable Recipe Card At The Bottom Of The Page

Prepare The Meatballs

This step is simple. Simply combine ground beef, breadcrumbs, egg, milk, spices (including salt and pepper), and Parmesan cheese in a medium sized bowl.

Ingredients for meatballs, ready to be combined in large bowl.The meat mixture is fully combined and ready to form into meatballs.

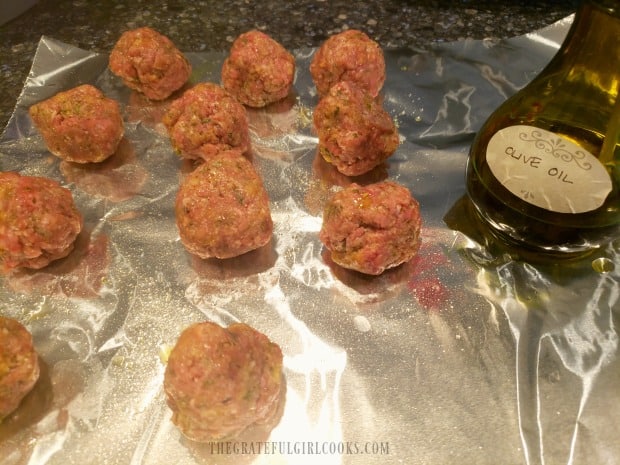
Measure out heaping Tablespoons of the meat mixture and roll each portion between the palms of you hands to form meatballs. Place them on aluminum foil or wax paper, and then lightly spritz them with non-stick baking spray or oil on top and bottom.

The air fryer Italian meatballs recipe calls for only a half pound of ground beef, so the recipe (as written below), should yield about 11-12 medium-sized meatballs, which yields approximately 3 servings.

Place the meatballs in the refrigerator for 10 minutes before cooking. Begin preheating your air fryer towards the end of the refrigeration time.

Meatballs are spritzed with cooking spray or oil before cooking.

Time To Cook the Air Fryer Italian Meatballs!

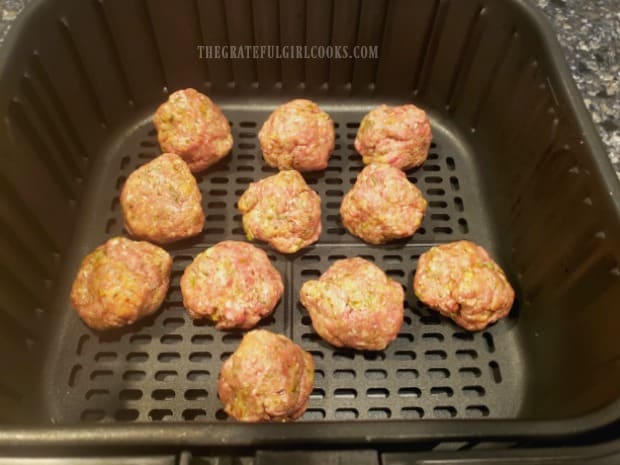
Okay, now you should have 11-12 lightly sprayed (and lightly chilled meatballs), right? Right! Preheat your air fryer to 400°F. Once the air fryer is pre-heated, place the meatballs into the basket, leaving a bit of space between each one.

I have a Cosori 5.8 quart air fryer, so all the meatballs fit nicely in the basket. If you are making a double portion, you may have to cook the air fryer Italian meatballs in two batches.

Air fryer Italian meatballs in the fryer, ready to be cooked.

Cooking Meatballs In An Air Fryer

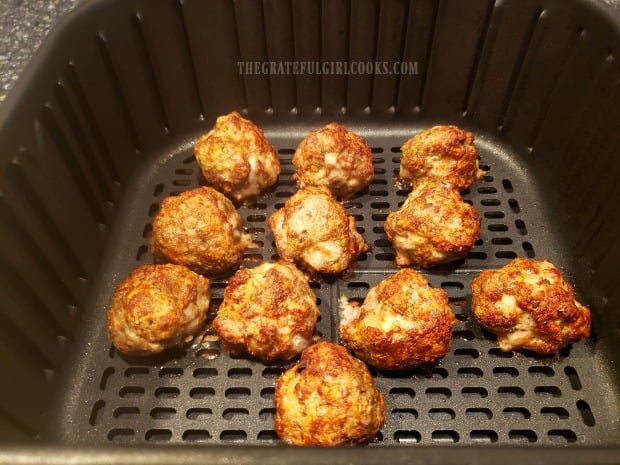
Cook the meatballs at 400°F. for approximately 8 minutes in the air fryer. Half way through the cooking time, gently flip the meatballs to the other side using tongs. I found this was so much easier than turning meatballs in a skillet where they sometimes stick to the oiled pan, regardless!

Since some air fryers tend to run really HOT, plan to check on the meatballs around the 7 minute mark, to ensure you don’t overcook them. Mine cooked perfectly in 8 minutes, but it is always best to keep an eye on them.

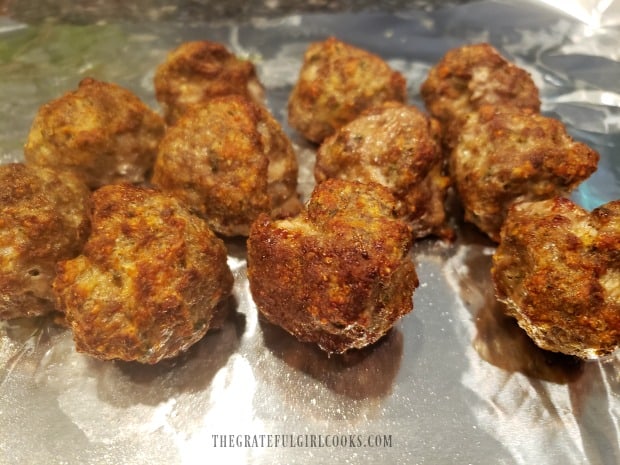
The cooked air fryer Italian meatballs are crispy and browned when done.Meatballs have been removed from fryer, and are ready to add to sauce.

Okay, They Are Fully Cooked – Now What?

You can eat the meatballs as soon as they are fully cooked, just the way they are. BUT… I think they are best added to a pot of spaghetti or marinara sauce!

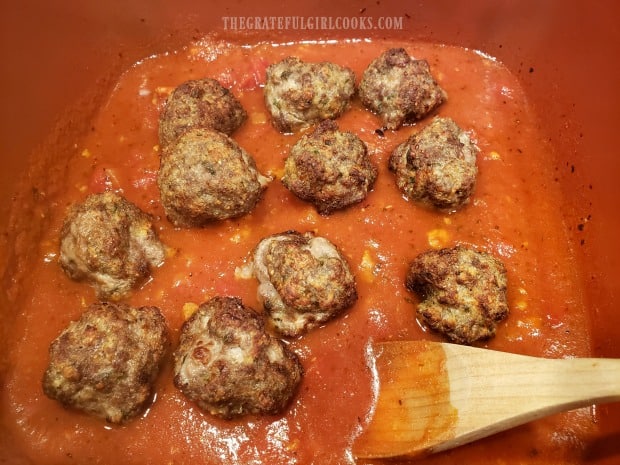
Just toss them into the pan, and spoon the sauce over the meatballs. Heat the sauce and meatballs through before serving.

Spaghetti sauce is heated, along with the air fryer cooked meatballs.

When done, add the meatballs and sauce to cooked pasta OR make a wonderful tasting meatball sandwich! Honestly, the meatballs aren’t hard at all to make! Using an air fryer to cook them let me work on other parts of the meal (hands free) while they were cooking!

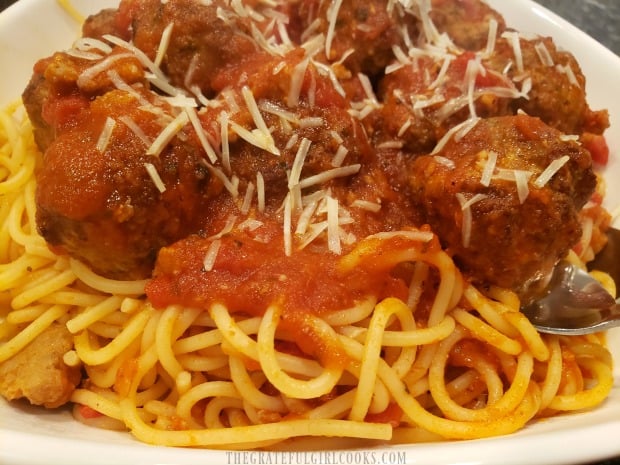
The air fryer Italian meatballs have good flavor (thanks to garlic powder, Parmesan, onion powder and oregano), and will be a wonderful addition to your meal! Throw some extra Parmesan cheese on top and dig In!

Air fryer Italian meatballs are served along with pasta and sauce!

I hope you will have an opportunity to try this recipe. We are really enjoying our air fryer, and are grateful for the many food items that can be prepared in it. Hope you have a wonderful day!

Looking For More AIR FRYER Recipes?

You can find all of my recipes in the Recipe Index, located at the top of the page. A few Air Fryer recipes include:

Interested In More Recipes?

Thank you for visiting this website. I appreciate you using some of your valuable time to do soIf you’re interested, I publish a newsletter 2 times per month (1st and 15th) with all the latest recipes, and other fun info. I would be honored to have you join our growing list of subscribers, so you never miss a great recipe!
There is a Newsletter subscription box on the top right side (or bottom) of each blog post, depending on the device you use, where you can easily submit your e-mail address (only) to be included in my mailing list.

You Can Also Find Me On Social Media:
Facebook page: The Grateful Girl Cooks!
Pinterest: The Grateful Girl Cooks!
Instagram: jbatthegratefulgirlcooks

Author's signature

Original recipe source:  The “Cosori Air Fryer Recipes” owner’s recipe book that came with the purchase of my air fryer. Page 22

0 from 0 votes
Air Fryer Italian Meatballs
Prep Time
15 mins
Cook Time
8 mins
Total Time
23 mins
 

It's so EASY to make delicious Air Fryer Italian Meatballs, to add to a favorite sauce for pasta, or to make a yummy meatball sandwich!

Category: Entree
Cuisine: Italian
Keyword: Air fryer Italian meatballs
Servings: 3 (3-4 meatballs per person)
Calories Per Serving: 246 kcal
Author: JB @ The Grateful Girl Cooks!
Ingredients
  • ½ pound ground beef (75/25 recommended)
  • ¼ cup panko breadcrumbs
  • 1 large egg
  • cup milk
  • 3 Tablespoons grated Parmesan cheese
  • 1 Tablespoon dried parsley
  • 2 teaspoons dried oregano
  • 1 teaspoon garlic powder
  • 1 teaspoon onion powder
  • ¼ teaspoon salt and pepper (¼ tsp. each)
  • non-stick cooking spray
Instructions
  1. Combine ground beef, breadcrumbs, egg, milk, salt, pepper, spices, and Parmesan cheese in a medium sized bowl. Mix until all ingredients are incorporated.

  2. Measure out heaping Tablespoons of the meat mixture and roll each portion between the palms of you hands to form meatballs. Place them on aluminum foil or wax paper, and then lightly spritz them with non-stick baking spray or oil on top and bottom. The mixture should make about 11-12 medium-sized meatballs, which yields approximately 3 servings. Place the meatballs in the refrigerator for 10 minutes before cooking. Begin preheating your air fryer towards the end of the refrigeration time.

  3. Preheat air fryer to 400°F. Once pre-heated, place meatballs into basket, leaving space between each one. If you are making a double portion, you may have to cook the meatballs in two batches. Cook the meatballs at 400°F. for approximately 8 minutes in the air fryer. Half way through cooking time, gently turn meatballs to other side using tongs. Check on meatballs around the 7 minute mark, to ensure you don't overcook them.

  4. Once meatballs are done, they're ready to eat. Eat them as is, or add them to a pot of spaghetti sauce to combine with cooked pasta, or make a meatball sandwich! Enjoy!
Nutrition Facts
Air Fryer Italian Meatballs
Amount Per Serving (1 (approx. 3-4 meatballs))
Calories 246 Calories from Fat 135
% Daily Value*
Fat 15g23%
Saturated Fat 6g38%
Cholesterol 127mg42%
Sodium 392mg17%
Potassium 310mg9%
Carbohydrates 7g2%
Fiber 1g4%
Sugar 1g1%
Protein 20g40%
Vitamin A 187IU4%
Vitamin C 1mg1%
Calcium 128mg13%
Iron 3mg17%
* Percent Daily Values are based on a 2000 calorie diet.

Here’s one more to pin on your Pinterest boards!It's so EASY to make delicious Air Fryer Italian Meatballs, to add to a favorite sauce for pasta, or to make a yummy meatball sandwich!

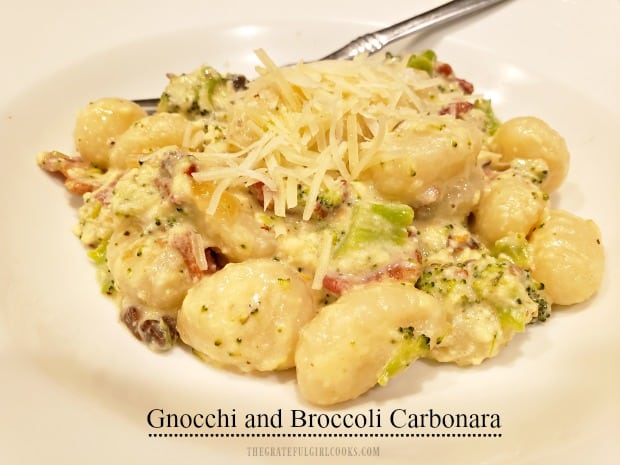
Gnocchi and Broccoli Carbonara

Gnocchi and Broccoli Carbonara is a delicious Italian dish, featuring potato dumplings coated in a bacon, Parmesan, mushroom and garlic creamy sauce.

Do you enjoy eating gnocchi? We really enjoy these soft Italian potato dumplings! Cooked gnocchi can be paired with a variety of sauces, for a simple to prepare meal. Gnocchi, in Italian, means “little lumps”, and that is exactly what they are. They are typically made with potatoes and flour, and cook very quickly.

Recently I decided to cook a package of gnocchi I had in our pantry. I decided to make up my own recipe that uses my tried and true pasta carbonara sauce (think BACON). Then I added steamed broccoli, cooked gnocchi, mushrooms, garlic and onions, and created this delicious recipe for gnocchi and broccoli carbonara! Here’s how to make it:

Scroll Down For A Printable Recipe Card At The Bottom Of The Page

Cook The Bacon

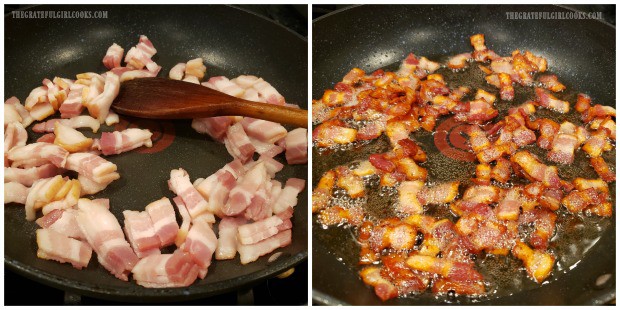
The first thing you should do is to fry the bacon until very crispy. I like to slice the bacon into small pieces, because it cooks faster that way! Stack a few slices of bacon on top of each other and then cut into 1/2 inch slices. Fry in a large skillet, stirring often until done.

Once the bacon is crisp, remove it from the skillet, and place the bacon pieces on paper towels to absorb grease. Drain MOST of the bacon grease from the pan, but leave approximately 2 Tablespoons bacon grease in the skillet. It will be used to add additional flavoring to the carbonara sauce later!


Bacon is cooked in large skillet until very crisp.

Cook The Rest Of The Veggies

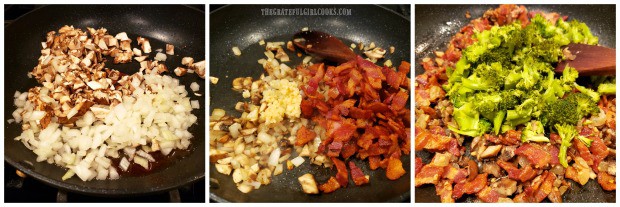
Return the skillet (with bacon grease) to the stove. Add the chopped onions and mushrooms to the skillet. Cook them on medium-low heat until they turn golden brown (3-4 minutes).

Now add the minced garlic and the crisp bacon crumbles to the skillet. Continue to cook, stirring often, for one more minute. Add the chopped and steamed broccoli to the skillet, and stir to combine. Set the skillet aside while you make the carbonara sauce.

Cooked onions, mushrooms, garlic, broccoli and crisp bacon are mixed together in skillet.

Make The Carbonara Sauce

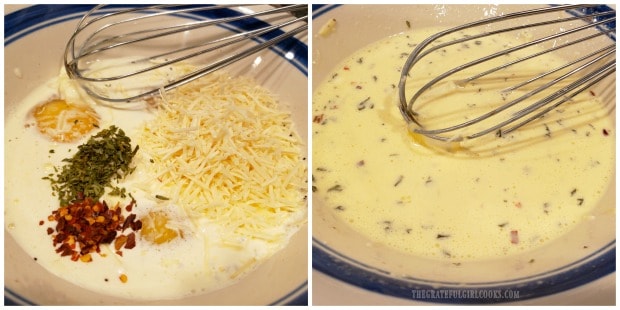
In a medium bowl, whisk together the eggs, whipping cream, parmesan cheese, parsley, salt, pepper and red pepper flakes until combined. Use a wire whisk or a fork to do this.

Once combined, it is time to “temper” the sauce. Set the sauce aside while you begin cooking the gnocchi. You will need hot, starchy water from cooking the gnocchi to help temper the sauce.The carbonara sauce is prepared by whisking ingredients together in bowl.

Temper The Carbonara Sauce

Tempering the sauce is important because there are fresh eggs in the sauce. If you add hot liquid too quickly to the sauce later, the eggs will probably scramble. We do NOT want scrambled eggs in the sauce, do we? NOPE!

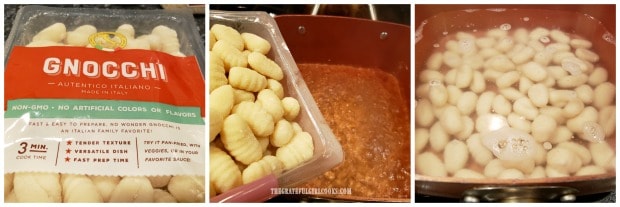
Before tempering the sauce, start the gnocchi cooking per the package instructions. You will need some of the starchy hot water from that pan to temper the sauce. OK? Basically you are going to boil the gnocchi for a few minutes, and use a bit of that boiling water in the carbonara sauce. Here is how easy it is to slowly temper the sauce:

Gnocchi (potato dumplings) are boiled for a few minutes in water, to cook fully.

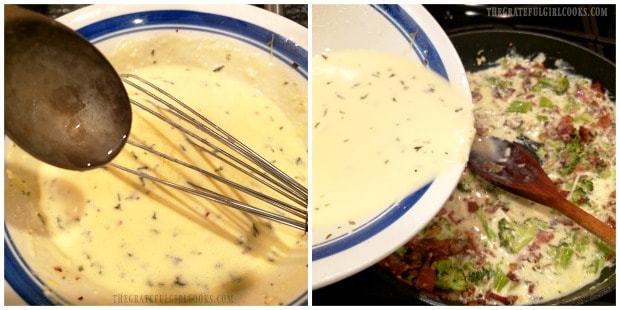
Take about 6 Tablespoons (ONE TABLESPOON AT A TIME) of the boiling starchy water from the gnocchi pan and SLOWLY drizzle it into the egg mixture, while whisking the sauce, to slowly disperse the hot water.

Continue to drizzle hot water and whisk continuously, until all 6 Tablespoons of gnocchi water have been added. Once this is done, pour the carbonara sauce over the veggies and bacon mixture in the skillet, and stir to combine.

Carbonara sauce is tempered, then added to the veggies and bacon in skillet.

Finishing The Gnocchi and Broccoli Carbonara

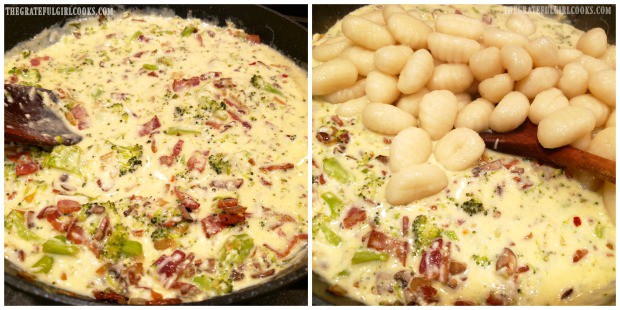
Once the sauce, bacon and veggies are combined, drain the cooked gnocchi. Add the cooked gnocchi to the skillet. Gently stir, to fully combine the ingredients. Cook on low heat for 1-2 minutes, or until heated through, but do not let the sauce boil.

Once the gnocchi are heated through, and fully coated with sauce, the gnocchi and broccoli carbonara is ready to serve!

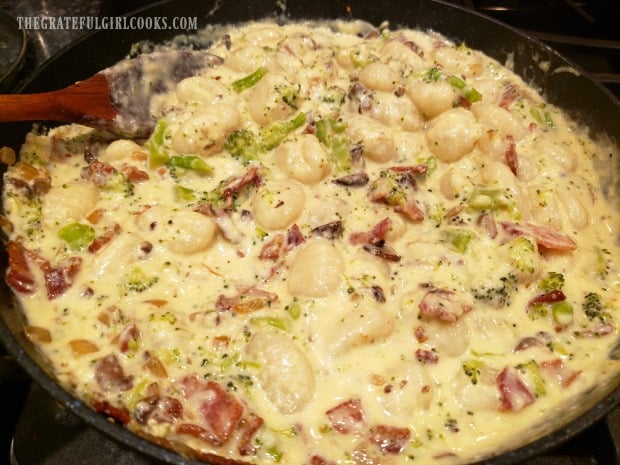
Heating the gnocchi and broccoli carbonara in a skillet before serving.After heating through, the gnocchi and broccoli carbonara is ready to be served.

Serve The Gnocchi And Broccoli Carbonara

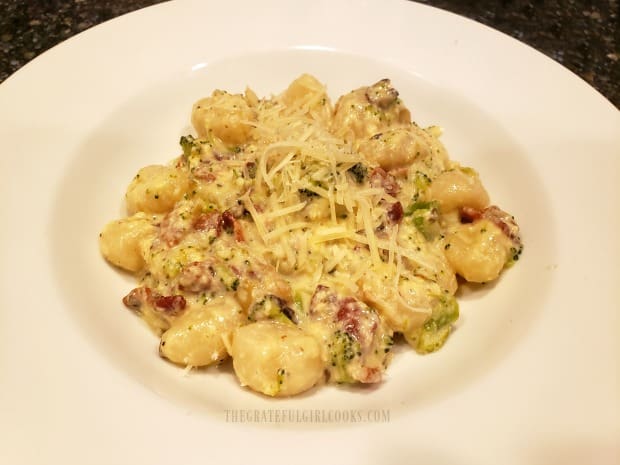
To serve, spoon out portions of the gnocchi onto plates or into bowls. Garnish each serving with additional shredded Parmesan cheese, if desired. Serve while hot, and enjoy!
The gnocchi and broccoli carbonara is garnished with grated Parmesan cheese.

Wow… was this dish yummy! Even the leftovers were good a couple days later! The gnocchi and broccoli carbonara can be easily microwaved on medium heat until re-heated to perfection! I sure hope you will give this recipe a try! It is soooo good! Have a GREAT day, and may God bless you in all you do today.

Looking For More Recipes That Use Gnocchi?

You can find all of my recipes in the Recipe Index. located at the top of the page. I have a few other gnocchi recipes, including:

Interested In More Recipes?

Thank you for visiting this website. I appreciate you using some of your valuable time to do soIf you’re interested, I publish a newsletter 2 times per month (1st and 15th) with all the latest recipes, and other fun info. I would be honored to have you join our growing list of subscribers, so you never miss a great recipe!
There is a Newsletter subscription box on the top right side (or bottom) of each blog post, depending on the device you use, where you can easily submit your e-mail address (only) to be included in my mailing list.

You Can Also Find Me On Social Media:
Facebook page: The Grateful Girl Cooks!
Pinterest: The Grateful Girl Cooks!
Instagram: jbatthegratefulgirlcooks

Author's signature

Recipe Source: My brain, and my hunger.

0 from 0 votes
Gnocchi and Broccoli Carbonara
Prep Time
15 mins
Cook Time
5 mins
Total Time
20 mins
 

Gnocchi and Broccoli Carbonara is a delicious Italian dish, featuring potato dumplings coated in a bacon, Parmesan, mushroom and garlic creamy sauce.

Category: Main Course
Cuisine: Italian
Keyword: gnocchi and broccoli carbonara
Servings: 5
Calories Per Serving: 523 kcal
Author: JB @ The Grateful Girl Cooks!
Ingredients
  • 6 slices bacon
  • ½ medium yellow onion , finely chopped
  • 4 mushrooms , button or baby portobello
  • 3 large eggs
  • ¾ cup shredded Parmesan cheese
  • ¾ cup heavy whipping cream
  • ½ teaspoon salt
  • ¼ teaspoon black pepper
  • 1 teaspoon parsley flakes
  • ½ teaspoon red pepper flakes
  • 1 cup steamed broccoli (pre-cooked and chopped)
  • 17.6 ounce potato gnocchi
  • additional Parmesan for garnish (optional)
Instructions
  1. Fry bacon in large skillet until very crisp. Stack a few slices of bacon on top of each other and then cut into 1/2 inch slices. Fry in a large skillet, stirring often until done. Remove bacon from skillet, and place on paper towels to absorb grease. Drain MOST of the grease from skillet, but leave approx. 2 Tablespoons bacon grease in the skillet.

  2. Return skillet (with bacon grease) to stove. Add onions and mushrooms. Cook on medium-low heat until golden brown (3-4 minutes). Add garlic and bacon crumbles to skillet. Continue to cook, stirring often, for one more minute. Add chopped and steamed broccoli to skillet, and stir to combine. Set the skillet aside while you make carbonara sauce.

  3. Make Sauce: In a medium bowl, whisk eggs, whipping cream, parmesan cheese, parsley, salt, pepper and red pepper flakes together until combined. Set the sauce aside while you begin cooking the gnocchi, according to package directions. You will need hot, starchy water from cooking the gnocchi to help temper the sauce.

  4. Tempering the sauce is important because there are fresh eggs in the sauce. If you add hot liquid too quickly to the sauce, the eggs will likely scramble. Take about 6 Tablespoons (ONE AT A TIME) of the boiling starchy water from gnocchi pan and SLOWLY drizzle it into the egg mixture, while whisking continuously, to slowly disperse hot water. Continue to drizzle hot water and whisk, until all 6 Tablespoons of hot water have been added. Once done, pour the carbonara sauce over the veggies and bacon mixture in the skillet, and stir to combine.

  5. Once sauce, bacon and veggies are combined, drain the cooked gnocchi. Add the gnocchi to the skillet. Gently stir, to fully combine ingredients. Cook on low heat for 1-2 minutes, or until heated through, but do not let it boil. Once heated through and gnocchi are fully coated with sauce, it is ready to serve! To serve, spoon out portions of gnocchi onto plates or into bowls. Garnish each serving with additional shredded Parmesan cheese, if desired. Serve while hot, and enjoy!
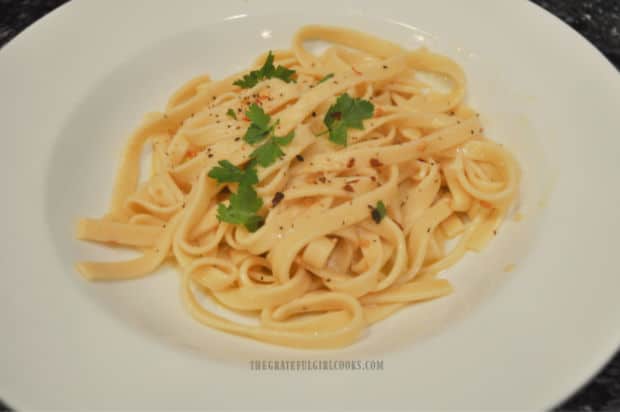
Nutrition Facts
Gnocchi and Broccoli Carbonara
Amount Per Serving (1 (1/5 of total))
Calories 523 Calories from Fat 288
% Daily Value*
Fat 32g49%
Saturated Fat 16g100%
Cholesterol 206mg69%
Sodium 1047mg46%
Potassium 269mg8%
Carbohydrates 41g14%
Fiber 3g13%
Sugar 1g1%
Protein 19g38%
Vitamin A 1011IU20%
Vitamin C 18mg22%
Calcium 240mg24%
Iron 5mg28%
* Percent Daily Values are based on a 2000 calorie diet.

Here’s one more to pin on your Pinterest boards!Gnocchi and Broccoli Carbonara is a delicious Italian dish, featuring potato dumplings coated in a bacon, Parmesan, mushroom and garlic creamy sauce.

Air Fryer Chicken Parmesan

Air Fryer Chicken Parmesan is a quick and easy way to make this classic Italian dish (cooks in 10 minutes)! Tender inside, & crispy on the outside.

Several months ago I purchased an air fryer (Cosori), using a gift card I received from my family. I’ve sure had fun trying out and experimenting with using this time saving (and calorie cutting) small appliance!

This recipe for an air fryer chicken parmesan is one of my experiments that tastes absolutely fantastic! The dish is delicious, and the cooking time is only 10 minutes! How can you beat that? I wanted to share the recipe for this simple dish with you today. I tweaked one of my own recipes and came up with this one, because it turned out pretty great!

Scroll Down For A Printable Recipe Card At The Bottom Of The Page

Prepare The Chicken Breasts For Cooking

Place a chicken breast between 2 pieces of plastic wrap. Use a meat mallet (flat side), to pound the breast in order to flatten it (this helps chicken to cook faster). When done, repeat process with the other chicken breast. Lightly season each piece of chicken with salt and pepper.

Boneless, skinless chicken breasts are flattened with a meat mallet before cooking.

Prepare The Chicken Parmesan For Cooking

Preheat your air fryer to 400° F.  While the air fryer is preheating, beat a large egg in a small bowl, and coat each of the chicken breasts in it, covering both sides. Let any excess egg mixture drip back into the bowl.

Place the chicken breasts, one at a time, into a small bowl filled with a bread crumb and Parmesan cheese mixture. Dredge the chicken through the bread crumbs, covering both sides of the breast. I used my homemade bread crumbs for this recipe!

Repeat with the other piece of chicken. You can also use your hands to press additional crumbs onto the chicken. You want all pieces for the air fryer chicken parmesan well-covered!

Each chicken breast is covered with a beaten egg mixture.Egg covered chicken breasts are dredged in bread crumbs before cooking.

Cooking The Air Fryer Chicken Parmesan

Once the air fryer is preheated, quickly remove the basket, and gently lay each of the chicken breasts in the basket, leaving some space between each piece. Cook the chicken parmesan for 5 minutes, then turn the chicken over to the other side. You can already see after 5 minutes, how golden brown and crispy the chicken is!

Bread crumb coated chicken breasts cook in an air fryer for 5 minutes.Chicken breasts are flipped over, after cooking in an air fryer for 5 minutes.

Quickly spread the marinara sauce over each piece of chicken. Top the sauce with grated Parmesan cheese, and then add the mozzarella cheese! You can use a whole slice of mozzarella for each piece OR you can thinly slice string cheese pieces to fit. I ended up using 2 string cheeses, thinly sliced, when I made this the first time and took photos.

Place the basket back into the air fryer, and continue to cook at 400° F. for 5 more minutes. When done, the chicken will be nice and crispy, and all that glorious cheese on top should be well-melted and bubbly!
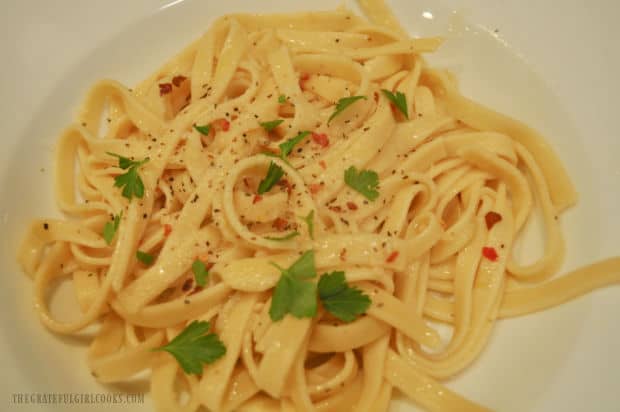
Air fryer chicken parmesan is topped with sauce, Parmesan and mozzarella cheeses.

Time To Eat The Air Fryer Chicken Parmesan

This is what the air fryer chicken parmesan looked like when it was done. Just look at that melted, gooey cheese on top!
The cheese has melted over the air fryer cooked chicken parmesan, and is ready to serve!

Carefully remove the chicken parmesan from the air fryer, serve, and enjoy! This dish goes especially well with a little pasta on the side! The chicken is moist and tender on the inside, crisp on the outside, and tastes wonderful!
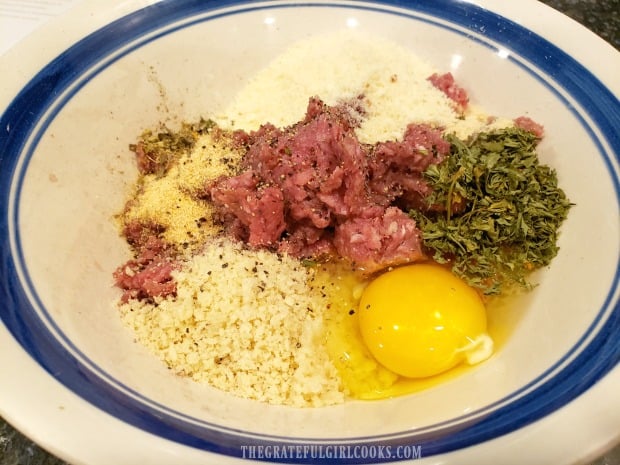
Two pieces of air fryer chicken parmesan on a plate, ready to eat!

Hope you have the opportunity to try this wonderful classic Italian air fryer chicken parmesan! We really enjoyed it, and trust you will, too! If you prefer a traditionally cooked chicken parmesan, I hope you will check out my recipe for Mom’s Chicken Parmigiana. It tastes amazing, as well!

Looking For More AIR FRYER Recipes?

You can find all of my recipes in the Recipe Index, located at the top of the page. I have quite a few air fryer recipes you might enjoy, including:

Interested In More Recipes?

Thank you for visiting this website. I appreciate you using some of your valuable time to do soIf you’re interested, I publish a newsletter 2 times per month (1st and 15th) with all the latest recipes, and other fun info. I would be honored to have you join our growing list of subscribers, so you never miss a great recipe!
There is a Newsletter subscription box on the top right side (or bottom) of each blog post, depending on the device you use, where you can easily submit your e-mail address (only) to be included in my mailing list.

You Can Also Find Me On Social Media:
Facebook page: The Grateful Girl Cooks!
Pinterest: The Grateful Girl Cooks!
Instagram: jbatthegratefulgirlcooks

Author's signature

0 from 0 votes
Air Fryer Chicken Parmesan
Prep Time
10 mins
Cook Time
10 mins
Total Time
20 mins
 

Air Fryer Chicken Parmesan is a quick and easy way to make this classic Italian dish (cooks in 10 minutes)! Tender inside, & crispy on the outside.

Category: Main Course
Cuisine: Italian
Keyword: air fryer chicken parmesan
Servings: 2
Calories Per Serving: 325 kcal
Author: JB @ The Grateful Girl Cooks!
Ingredients
  • 2 chicken breasts (boneless, skinless)
  • 1 pinch salt and pepper
  • 1 large egg , beaten
  • ½ cup breadcrumbs
  • 2 Tablespoons grated Parmesan cheese
  • 2 Tablespoons marinara sauce
  • 2 Tablespoons grated Parmesan cheese
  • 2 slices mozzarella cheese (or 2 pieces string cheese, cut into strips)
Instructions
  1. Place a chicken breast between 2 pieces of plastic wrap. Use a meat mallet (flat side), to pound the breast, to flatten it (this helps chicken to cook faster). When done, repeat process with the other chicken breast. Lightly season chicken with salt and pepper.

  2. Preheat air fryer to 400° F.  While it preheats, beat egg in a small bowl; coat each of the chicken breasts in it (one at a time), covering both sides. Let excess egg drip back into the bowl. Mix bread crumbs and 2 T. Parmesan cheese in a separate small bowl. Dredge egg-coated chicken through the bread crumbs, covering both sides. Repeat for remaining chicken, making sure all pieces are well-covered!

  3. Once air fryer is preheated, remove basket, and place each chicken breast in the basket, leaving a space between each piece. Cook the chicken at 400° F. for 5 minutes, then pause machine. Turn chicken over to the other side. Spread marinara sauce over top of each piece of chicken. Top the sauce with grated Parmesan cheese, and then finish with mozzarella cheese! Place the basket back into air fryer, and continue to cook chicken at 400° F. for 5 more minutes. When done, the chicken will be cooked through, nice and crispy, and all that glorious cheese on top should be well-melted and bubbly! Serve hot, and enjoy!
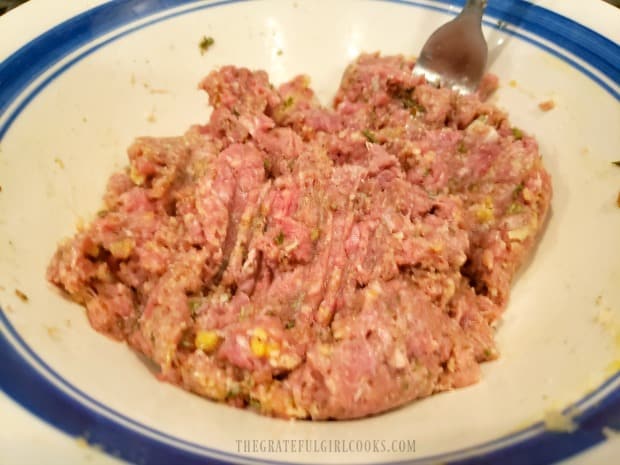
Nutrition Facts
Air Fryer Chicken Parmesan
Amount Per Serving (1 g)
Calories 325 Calories from Fat 90
% Daily Value*
Fat 10g15%
Saturated Fat 4g25%
Cholesterol 187mg62%
Sodium 626mg27%
Potassium 560mg16%
Carbohydrates 21g7%
Fiber 1g4%
Sugar 3g3%
Protein 35g70%
Vitamin A 338IU7%
Vitamin C 2mg2%
Calcium 190mg19%
Iron 2mg11%
* Percent Daily Values are based on a 2000 calorie diet.

Here’s one more to pin on your Pinterest boards!Air Fryer Chicken Parmesan is a quick and easy way to make this classic Italian dish (cooks in 10 minutes)! Tender inside, & crispy on the outside.