Category: Meatless Meals

Pumpkin Risotto

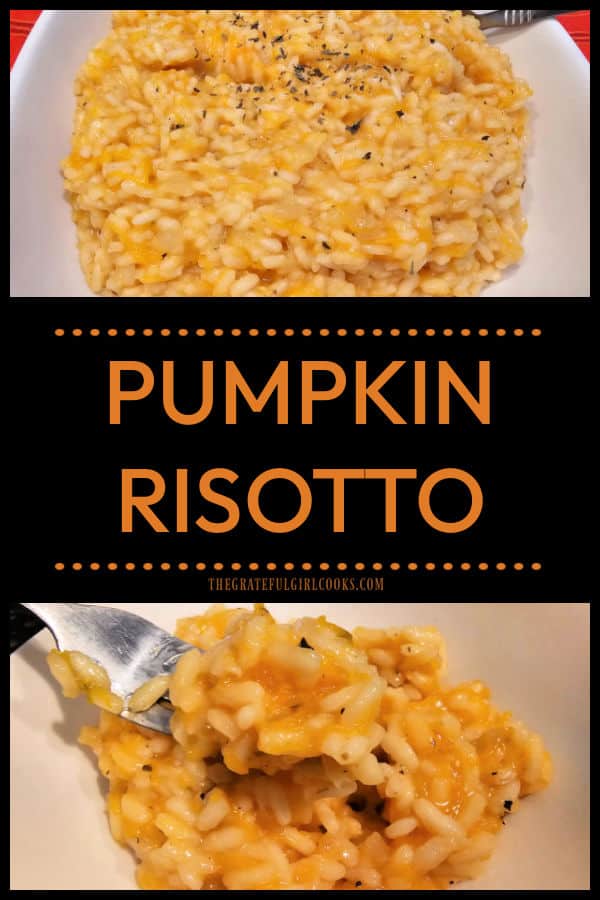
Creamy Pumpkin Risotto is a delicious, meatless dish made with Arborio rice, veggie broth, white wine, butter, pumpkin, ginger and basil.

Today I want to share a yummy recipe I found years ago for a creamy, meatless pumpkin risotto. I think it’s a fun meal to make during the Fall when everything seems to be pumpkin this, and pumpkin that!

However, since the pumpkin used to make the risotto is canned pumpkin puree which can be bought in almost any grocery store, it is a convenient dish that can be made and enjoyed as a MAIN dish or SIDE dish ANY TIME of the year! Whoo Hoo!

Even if you have never made risotto before, please give this recipe a try. You only need to be able to add ingredients and continuously stir the risotto as it cooks. It’s EASY! Here’s how to make pumpkin risotto.

Scroll Down For A Printable Recipe Card At The Bottom Of The Page

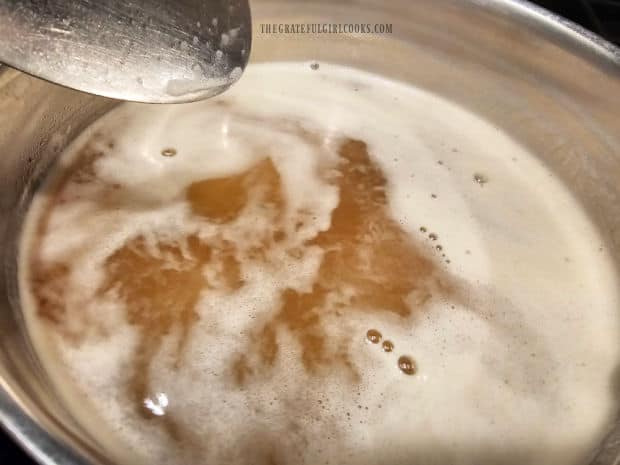
Heat The Veggie Broth

Place about 4 cups of vegetable broth in a large saucepan. Heat the broth on LOW heat and continue to simmer while you make the risotto.

You will be adding the hot vegetable broth a little at a time to the rice as it cooks, which is why you keep it simmering on the stove.

Vegetable broth simmering on a stove while cooking risotto.

Let’s Make The Risotto

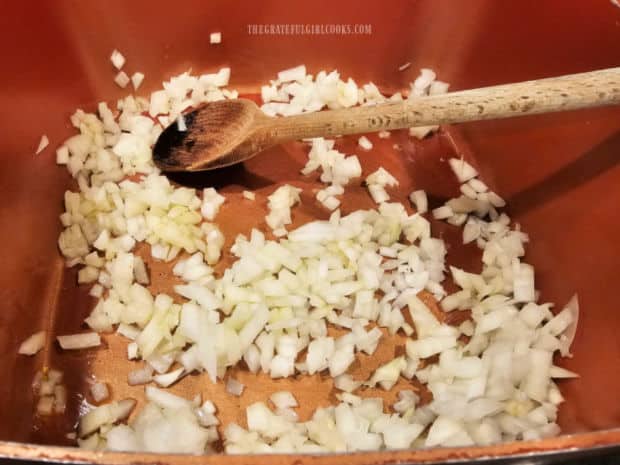
In a separate large saucepan, heat extra virgin olive oil on Medium heat, then add chopped onions. Cook the onions, stirring often, for about 3-4 minutes, until the onions are translucent and soft.

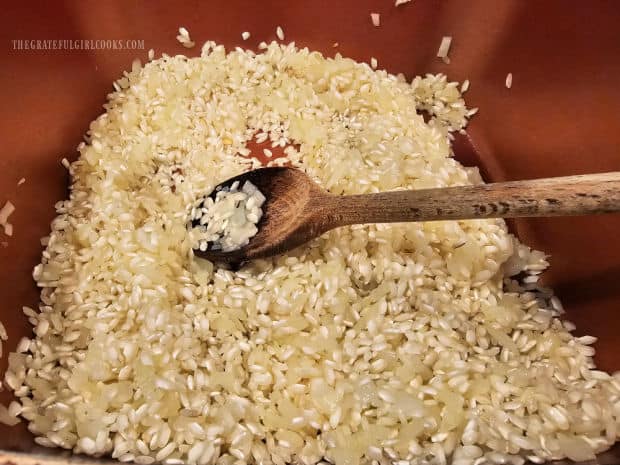
Stir in uncooked Arborio rice, and continue to cook on Medium heat for about 1-2 minutes until the rice is coated with the olive oil.

Chopped onions are cooked in olive oil in a large saucepan until tender.Arborio rice is added into the cooked onions and olive oil.

Adding Liquid When Making Risotto

The secret to making a good, creamy risotto is to add liquids a little at a time, then cook until that liquid is absorbed into the rice, then add more liquid.

To do this, add “some” of the vegetable broth (a couple of ladles) and half of the white wine to the rice and onion mixture. Only add enough liquid to just barely cover the rice.

Bring the liquid to a boil, then reduce the heat to LOW. Continue to stir constantly and cook, until the liquid has been absorbed.

A small amount of white wine and vegetable broth are added to the rice.

Add the remaining wine and a bit more of the veggie broth (a couple of ladles) again. Stir and continue cooking on LOW until this liquid has been absorbed.

Continue cooking the risotto, stirring constantly, until all the remaining veggie broth has been added in batches, cooking each “batch” until the liquid has been absorbed. This usually takes between 15-20 minutes, on average.

After liquid has been absorbed, a little more broth is added to rice and cooked.

Time To Make It “Pumpkin” Risotto

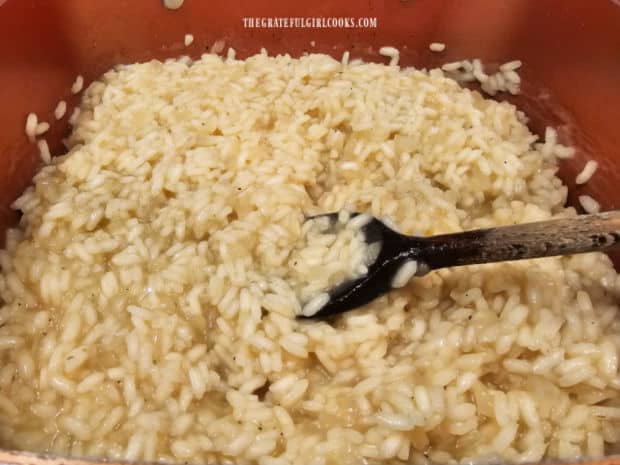
When all the remaining broth has been incorporated into the risotto, it should be fairly creamy in texture.

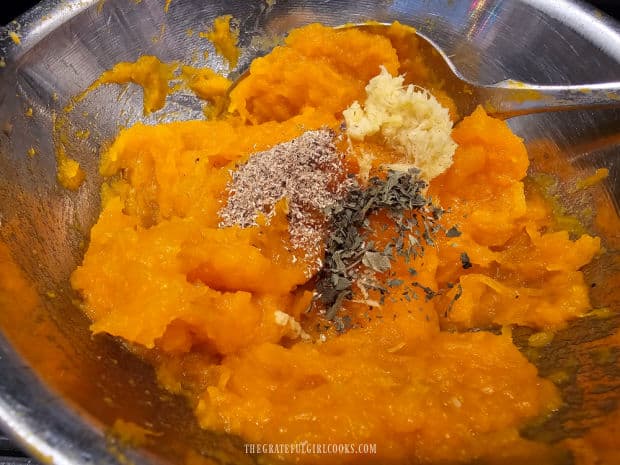
Stir in pumpkin puree, finely minced ginger, nutmeg, and dried basil. Stir to fully incorporate these ingredients into the risotto. Take a little taste, then season lightly with salt and black pepper (to suit your taste).

Risotto is creamy after all wine and broth has been cooked into the rice.Pumpkin puree, ginger, nutmeg, and dried basil are added to the risotto.

Simmer the pumpkin risotto on LOW heat, stirring constantly until everything is fully heated through.

Remove the pan from the heat, and stir in 2 Tablespoons of butter, to finish the dish. Stir until the butter is fully melted and incorporated into the pumpkin risotto.

Butter is added to hot pumpkin risotto and stirred until melted.

Serve The Pumpkin Risotto

Now the hot pumpkin risotto is ready to be served. Spoon portions of the risotto onto plates or into serving bowls.

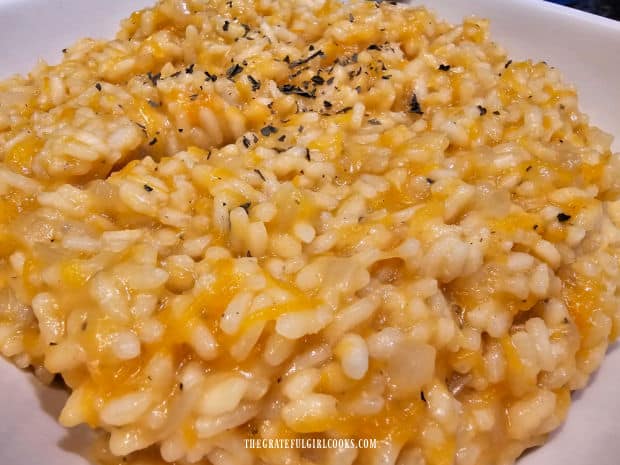
If desired, sprinkle a very small amount of dried basil over the top of each portion (optional). Serve the pumpkin risotto immediately while very hot… and enjoy!

Dried basil is sprinkled on top of the risotto before serving.A large white bowl, full of pumpkin risotto is served.

The risotto should be very creamy in texture, and it has great flavor! I really hope you enjoy this meatless main dish. It is very filling but is also absolutely delicious!

A fork lifting out a bite of the pumpkin risotto from a white bowl.

Thanks for stopping by, and I trust you (and those you love) will enjoy this meatless recipe. Please come back again soon for more family-friendly recipes. Take care, may God bless you… and have a wonderful day.

Looking For More MEATLESS MAIN DISH Recipes?

You can find ALL of my recipes in the Recipe Index, which is located at the top of the page. I have quite a few meatless meal recipes you can check out, including:

Want More Recipes? Get My FREE Newsletter!

I publish a newsletter 2 times per month (1st and 15th) with lots of recipes, tips, etc..
Would you like to join our growing list of subscribers?

There is a Newsletter subscription box on the top right (or bottom) of each blog post, depending on the device you use.
You can submit your e-mail address there, to be added to my mailing list.

Find Me On Social Media:

Facebook page: The Grateful Girl Cooks!
Pinterest:
The Grateful Girl Cooks!
Instagram:
jbatthegratefulgirlcooks

Author's signature

Recipe adapted from Patti, at: comfycook.com/2013/09/pumpkin-risotto.html

↓↓ PRINTABLE RECIPE BELOW ↓↓

0 from 0 votes
Pumpkin Risotto
Prep Time
10 mins
Cook Time
30 mins
Total Time
40 mins
 

Creamy Pumpkin Risotto is a delicious, meatless dish made with Arborio rice, veggie broth, white wine, butter, pumpkin, ginger and basil.

Category: Main Dish, Meatless Entree
Cuisine: All Cuisines
Keyword: pumpkin risotto
Servings: 6
Calories Per Serving: 377 kcal
Author: JB @ The Grateful Girl Cooks!
Ingredients
  • 4 cups vegetable broth (or more, if needed)
  • 1 Tablespoon extra virgin olive oil
  • 1 cup diced yellow onion
  • 2 cups arborio rice
  • 1 cup dry white wine
  • 1 cup canned pumpkin puree (NOT pie filling!)
  • 1 teaspoon finely minced fresh ginger
  • ½ teaspoon nutmeg
  • ¼ teaspoon dried basil
  • 2 Tablespoons butter
  • salt and black pepper, to taste
Instructions
  1. Heat vegetable broth on LOW heat in a large saucepan. Continue simmering- you add the hot liquid in small amounts as you cook the risotto.

  2. In a separate large saucepan, heat olive oil on Medium; add chopped onions. Cook onions, stirring often, for 3-4 minutes, until onions are translucent/soft.

  3. Stir in uncooked Arborio rice; cook on Medium heat 1-2 minutes until rice is coated with olive oil.

  4. Add "some" of the vegetable broth (a couple of ladles) and half the wine to the rice/onion mixture. Only add enough liquid to barely cover the rice. Bring liquid to a boil; reduce heat to LOW. Cook, stirring constantly, until liquid is absorbed.

  5. Add remaining wine and more veggie broth (a couple of ladles). Stir; continue cooking on LOW until liquid is absorbed. Continue cooking risotto, stirring constantly, until all veggie broth has been added in batches, cooking each "batch" until liquid is absorbed and risotto is soft/creamy in texture (15-20 minutes).

  6. Stir in pumpkin, ginger, nutmeg, and basil. Stir to fully incorporate them into the risotto. Take a taste; season with salt and black pepper (to suit your taste).

  7. Sprinkle risotto with additional basil (optional). Serve immediately while hot.

Nutrition Facts
Pumpkin Risotto
Amount Per Serving (1 (1/6 of total))
Calories 377 Calories from Fat 72
% Daily Value*
Fat 8g12%
Saturated Fat 3g19%
Trans Fat 0.2g
Polyunsaturated Fat 1g
Monounsaturated Fat 3g
Cholesterol 10mg3%
Sodium 83mg4%
Potassium 342mg10%
Carbohydrates 62g21%
Fiber 4g17%
Sugar 3g3%
Protein 8g16%
Vitamin A 6473IU129%
Vitamin C 4mg5%
Calcium 31mg3%
Iron 4mg22%
* Percent Daily Values are based on a 2000 calorie diet.

Here’s one more to pin on your Pinterest boards!Creamy Pumpkin Risotto is a delicious, meatless dish made with Arborio rice, veggie broth, white wine, butter, pumpkin, ginger and basil.

Refried Bean Tostadas

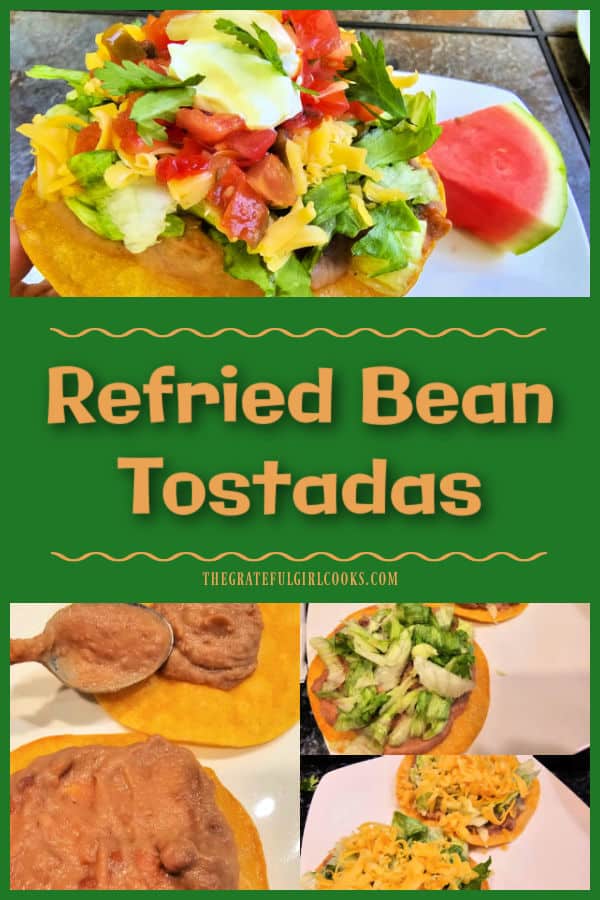
Refried Bean Tostadas are an easy, meatless meal! Corn tortillas are fried until crisp, then topped with beans, cheese, lettuce, salsa, etc.

Looking for a simple yet delicious meal that is perfect to serve any time of the year? We LOVE making homemade refried bean tostadas! I’ve been making this simple meatless dish for over 50 years, and think they are a wonderfully tasty meal!

It’s easy to prepare the toppings ahead of time (and refrigerate), then when you’re ready to make them, it’s as easy as frying the tortillas and heating refried beans on the stovetop! Here’s how to make refried bean tostadas.

Scroll Down For A Printable Recipe Card At The Bottom Of The Page

Prepare The Refried Beans And Tostada Toppings First

Combine a can of refried beans (regular or low-fat) with 2 Tablespoons of water in a small saucepan. I always add a little water to very slightly “thin” the refried beans to make them easier to spread on a cooked tortilla later.

NOTE: I use canned refried beans to make this a very convenient, quick recipe, but if you’re interested in making homemade refried beans, be sure to check out my recipe for Easy Crock Pot Refried Beans!

Stir and cook the refried beans (and water) on low heat until heated through. Keep the beans warm while you prepare the other ingredients.

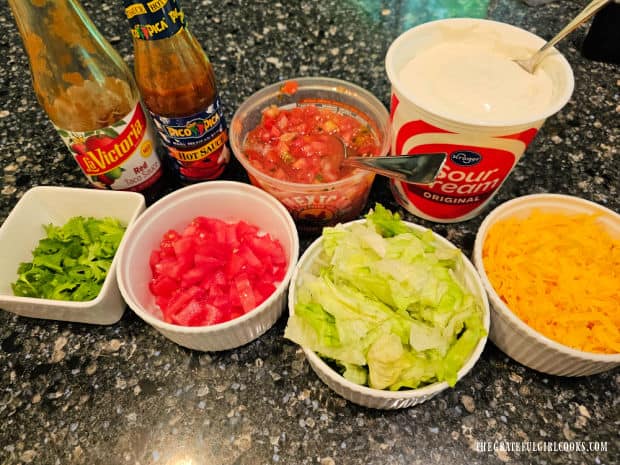
I find it helpful to get all the tostada toppings ready BEFORE beginning this recipe. Place the toppings in small bowls or containers and place them out on the counter. *If getting toppings ready early in the day, cover and refrigerate the bowls of toppings until ready to use. 

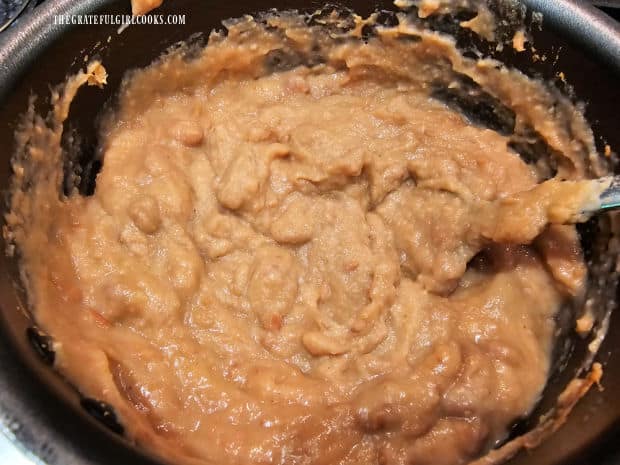
Refried beans and water are heated in a small saucepan.Toppings for refried bean tostadas are placed on counter in small bowls.

Fry The Tortillas Until Crispy

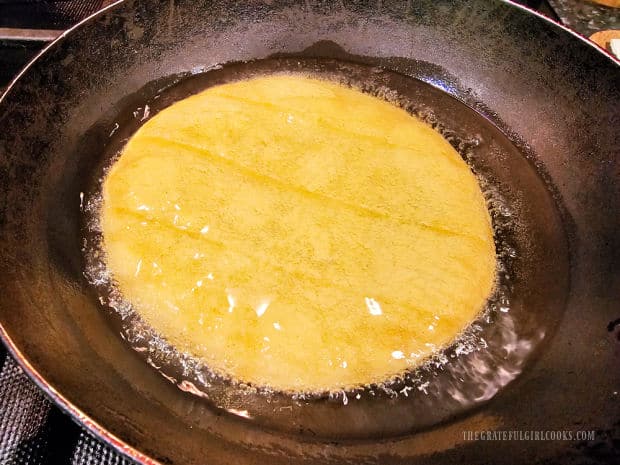
Pour oil about ½” deep in a medium sized skillet. Heat the oil on Medium temperature until very hot, but not smoking. A drop of water should sizzle when added to the hot oil, indicating the oil is ready.

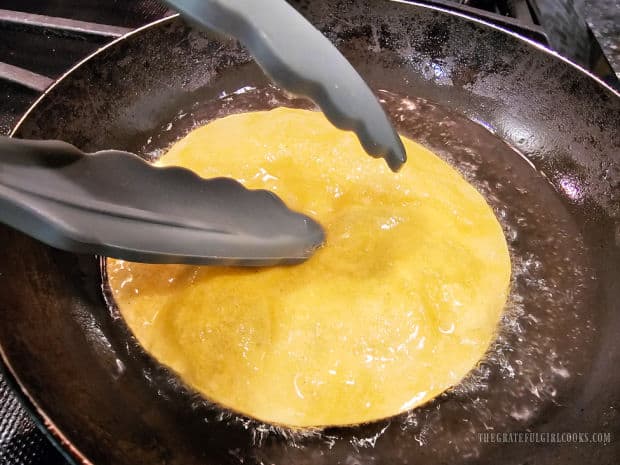
Carefully place one corn tortilla into the hot oil. The oil should instantly sizzle around the edges. Let it cook for about 30 seconds, then carefully turn it to the other side using tongs (remember that the oil is very HOT).

Continue to cook the tortilla until it is very crisp on both sides. Use the tongs to press the tortilla down in the center if it puffs up, because you want the middle of the tortilla very crisp to hold the weight of the toppings. If necessary, turn the tortilla back over to ensure the first side is crisp.

A corn tortilla is placed in hot oil and fried until crisp.Tongs are used to press center of tortilla down into hot oil for crispness.

When the tortilla is crisp all the way through on both sides, transfer it from the hot oil to several layers of paper towels using tongs. As you lift each tortilla out of the oil, let excess oil drip back into the skillet.

The paper towels will help absorb any excess oil. Repeat the cooking process with the remaining tortillas, until all are cooked, crispy, and well-drained.

A crispy fried tortilla is removed from skillet using tongs.Fried tortilla rests on paper towels used to absorb oil.

 “Build” The Tostadas

Now it’s time to “build” the refried bean tostadas. Place 2 big Tablespoons of hot refried beans onto each tortilla (there will be some beans leftover). Use the back of a spoon to GENTLY spread the beans over the surface of the tortilla without cracking it.

Add shredded lettuce on top of the beans, then add grated cheddar cheese (or Colby Jack), dividing these ingredients evenly between the tostadas.

Refried beans, then lettuce and grated cheese are added to crisp tortillas.

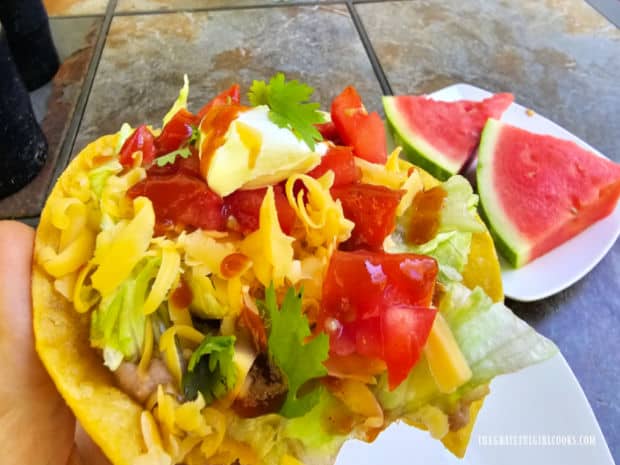
Top each tostada with diced fresh tomatoes. Add garnishes of your choosing to top off the tostadas before serving. We love to add taco sauce (or salsa), chopped cilantro, and a small dollop of sour cream to ours… yum!

The best part of putting out the bowls of toppings is everyone can build their own tostada the way they like it!

The recipe, as written, will yield enough for 4 tostadas, but can EASILY be doubled, tripled, or quadrupled to meet your needs. Some people may eat one tostada, and others may want to enjoy two, so plan accordingly!

TIP: *Remember that you will have some leftover refried beans, so adjust the amount of other ingredients to fit your needs, especially if you want more refried bean tostadas!

Diced fresh tomatoes are added to the top of the tostada.Taco sauce, sour cream and cilantro garnish the top of the tostada.

Serve And Enjoy The Refried Bean Tostadas

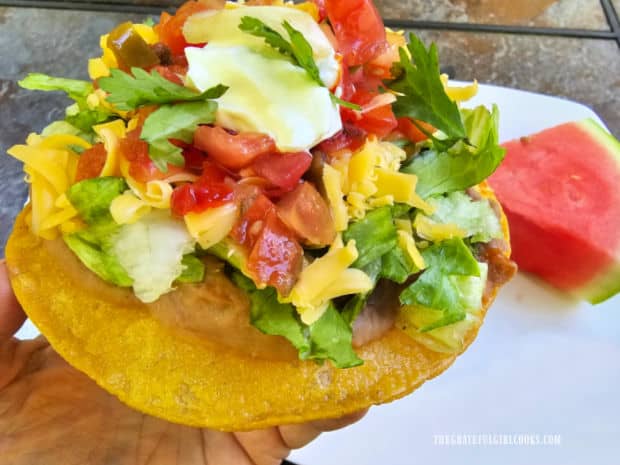
Serve and enjoy these delicious refried bean tostadas. they should be crisp enough to hold all those toppings safe and secure in your hands. Lift that beautiful tostada up using both hands, and take a big, crispy, delicious bite!

One of the refried bean tostadas, ready to be eaten and enjoyed!Holding a tostada, with a plate of watermelon slices in the background.

I really hope you have the chance to make some yummy refried bean tostadas! I think they’re a perfect meal for busy days because you can easily prepare the toppings ahead of time (cover and refrigerate), then all you need to do at dinner time is fry the tortillas and heat the beans!

Thanks for stopping by, and I invite you to come back soon for more family-friendly recipes. Take care, may God bless you… and have a wonderful day!

Looking For More MEXICAN-INSPIRED Recipes?

You can find ALL of my recipes in the Recipe Index, which is located at the top of the page. I have lots of Mexican-inspired recipes to check out, including:

Want More Recipes? Get My FREE Newsletter!

I publish a newsletter 2 times per month (1st and 15th) with lots of recipes, tips, etc..
Would you like to join our growing list of subscribers?

There is a Newsletter subscription box on the top right (or bottom) of each blog post, depending on the device you use.
You can submit your e-mail address there, to be added to my mailing list.

Find Me On Social Media:

Facebook page: The Grateful Girl Cooks!
Pinterest:
The Grateful Girl Cooks!
Instagram:
jbatthegratefulgirlcooks

Author's signature

↓↓ PRINTABLE RECIPE BELOW ↓↓

0 from 0 votes
Refried Bean Tostadas
Prep Time
15 mins
Cook Time
5 mins
Total Time
20 mins
 

Refried Bean Tostadas are an easy, meatless meal! Corn tortillas are fried until crisp, then topped with beans, cheese, lettuce, salsa, etc.

Category: Dinner, Lunch
Cuisine: Mexican
Keyword: refried bean tostadas
Servings: 4 tostadas
Calories Per Serving: 213 kcal
Author: JB @ The Grateful Girl Cooks!
Ingredients
  • 4 medium corn tortillas
  • vegetable oil, for frying ½" deep in small skillet
  • 8 ounces canned refried beans = approx. ½ of a 16 oz. can
  • 2 Tablespoons water
  • 1 cup shredded iceberg lettuce
  • 1 cup grated cheddar cheese or Colby Jack
  • 1 medium red tomato diced
OPTIONAL TOPPINGS: taco sauce or salsa, sour cream, chopped cilantro, sliced olives, as desired
    Instructions
    1. Prep and place tostada toppings (lettuce, cheese, tomatoes, etc.) in small bowls; place them on the counter. *If getting toppings ready early in the day, cover and refrigerate until ready to use.

    2. Combine refried beans and water in a small saucepan. Stir and cook on low heat until heated through. Keep beans warm while you prepare tortillas.

    3. Pour oil ½" deep in a medium skillet. Heat on Medium until very hot, but not smoking. A drop of water should sizzle when added. Carefully place a tortilla in the hot oil. The oil should instantly sizzle around the edges. Cook for 30 seconds, then turn tortilla to the other side using tongs. Continue to cook until tortilla is very crisp on both sides. Use tongs to press the tortilla down (in the center) in the oil, so the middle of the tortilla is very crisp to hold the weight of the toppings. Turn tortilla over again (if necessary) to ensure crispness on all sides.

    4. Transfer tortilla to several layers of paper towels, which will absorb excess oil as it drains. Repeat with remaining tortillas, until all are cooked, and well-drained.

    5. Spoon 2 big Tablespoons of hot refried beans on each tortilla (there'll be beans leftover). Gently use the back of a spoon to spread beans over the tortilla without cracking it.

    6. Add shredded lettuce on top of the beans, then grated cheese and diced tomatoes, dividing evenly between tostadas. Garnish with taco sauce, salsa, sour cream, cilantro and/or olives, if desired. Serve and enjoy!
    Recipe Notes

    NOTE: Optional toppings such as taco sauce, sour cream, cilantro, and/or olives were not considered in the caloric calculation.

    Nutrition Facts
    Refried Bean Tostadas
    Amount Per Serving (1 tostada)
    Calories 213 Calories from Fat 90
    % Daily Value*
    Fat 10g15%
    Saturated Fat 6g38%
    Polyunsaturated Fat 1g
    Monounsaturated Fat 2g
    Cholesterol 28mg9%
    Sodium 525mg23%
    Potassium 96mg3%
    Carbohydrates 19g6%
    Fiber 4g17%
    Sugar 2g2%
    Protein 11g22%
    Vitamin A 422IU8%
    Vitamin C 1mg1%
    Calcium 243mg24%
    Iron 1mg6%
    * Percent Daily Values are based on a 2000 calorie diet.

    Here’s one more to pin on your Pinterest boards!Refried Bean Tostadas are an easy, meatless meal! Corn tortillas are fried until crisp, then topped with beans, cheese, lettuce, salsa, etc.

    Lentil Potato Soup

    Lentil Potato Soup is a hearty and filling meatless soup that serves 6 and is easy to make. It’s also budget friendly and tastes delicious!
    Lentil Potato Soup is a hearty and filling meatless soup that serves 6 and is easy to make. It's also budget friendly and tastes delicious!

    Today I want to share a delicious recipe for a meatless soup that tastes great, and is really simple to prepare.  Even though I am not a vegetarian, my husband and I often enjoy meatless meals.

    I’m always on the lookout for meatless recipes, especially because one of our sons (and his girlfriend) are vegetarians. This recipe for lentil potato soup is a yummy recipe I’m positive they will enjoy!

    Even if you are NOT a vegetarian, I’m confident you are going to enjoy this delicious meatless soup, full of protein and fiber! 

    Lentils are such a wonderful source of protein and prebiotic fiber, and are low in fat, too! These wonderful legumes are available in grocery stores everywhere (found with the dried beans). Lentils are also quite inexpensive and are a great item for the pantry, because of their long shelf life.

    The addition of potatoes, carrots, onion, tomato sauce, garlic, celery and spices give this soup great flavor, as well. You’ll also love how simple it is to make, which is an added bonus! Here’s how to make lentil potato soup.

    Scroll Down For A Printable Recipe Card At The Bottom Of The Page

    A Word About The Lentils

    For this recipe I used a combination of three types of lentils I already had in our pantry: red lentils, green lentils and brown lentils. If you only have ONE type of lentils to use (preferably brown, black, or green) that will still be absolutely delicious, as well.

    I don’t recommend using all red lentils because they can become soft and “mushy” when cooked for a long time, more so than the other three varieties.

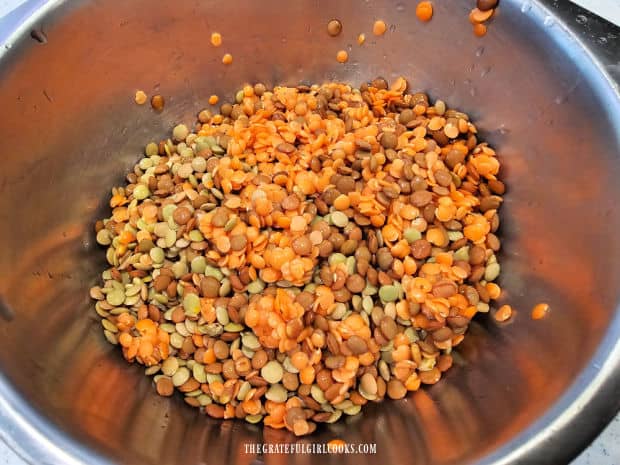
    Before beginning to cook this soup, rinse the raw, dried lentils and drain them very well. Repeat this 2-3 times, then set the rinsed and dried lentils aside, to be added later to the soup.

    Lentils (red, green and brown) are rinsed and drained, then set aside in bowl.

    How To Make The Soup

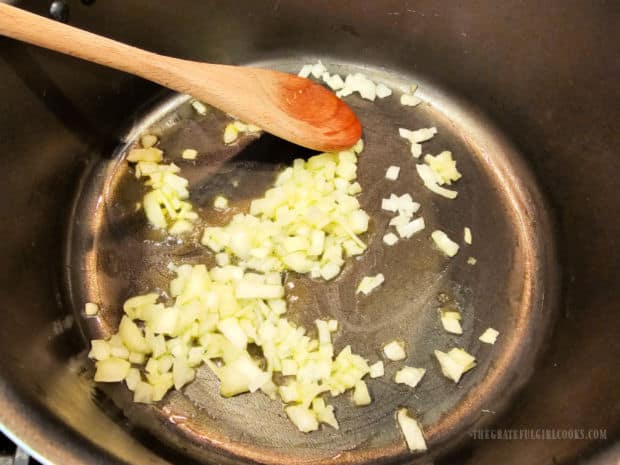
    Now it’s time to prepare the soup. In a large cooking pot (or Dutch oven), heat vegetable oil on medium heat. Stir in diced onion, and cook this for about 1 minute, stirring often.

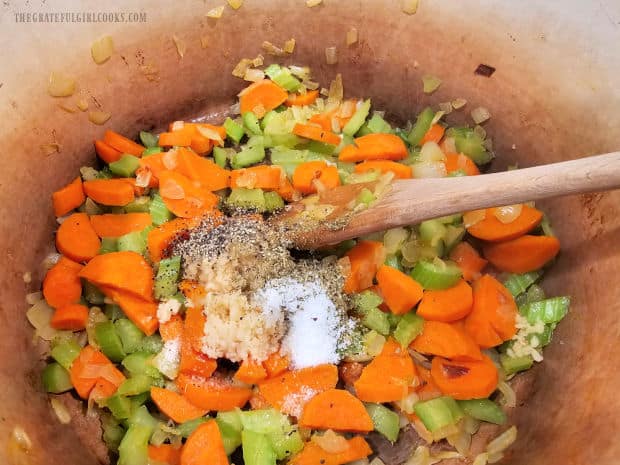
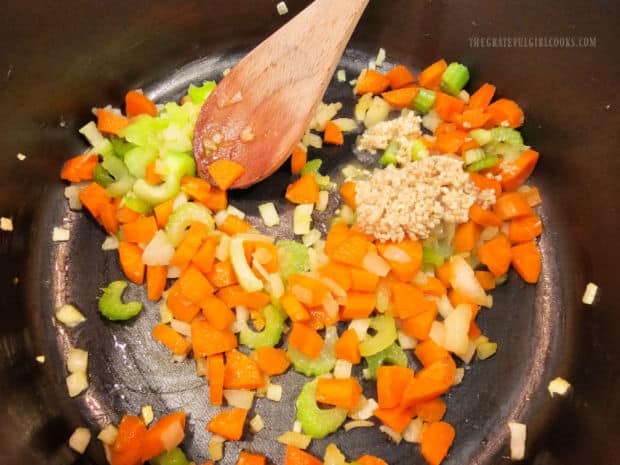
    Add diced carrots, celery, and minced garlic to the pot, and stir to combine. Continue to cook the veggies for 3 minutes, stirring often, so the garlic doesn’t burn and become bitter.

    Diced onions are cooked in oil in a large soup pot.Diced carrots, celery and minced garlic are added to the pan and cooked.

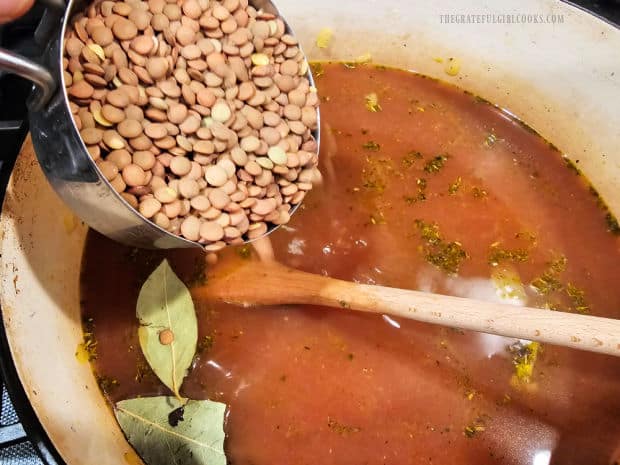
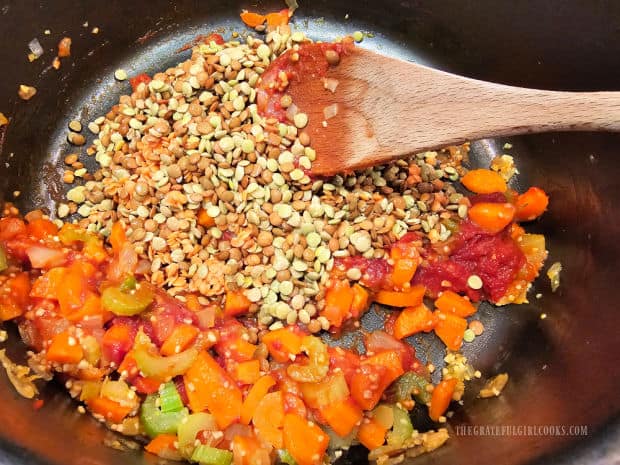
    Add the drained lentils, tomato paste and tomato sauce to the pot. Stir well, to combine these ingredients. Cook on medium heat for 1 minute, stirring often.

    Lentils, tomato paste and tomato sauce are added to the soup pot.

    Add The Potatoes And Spices

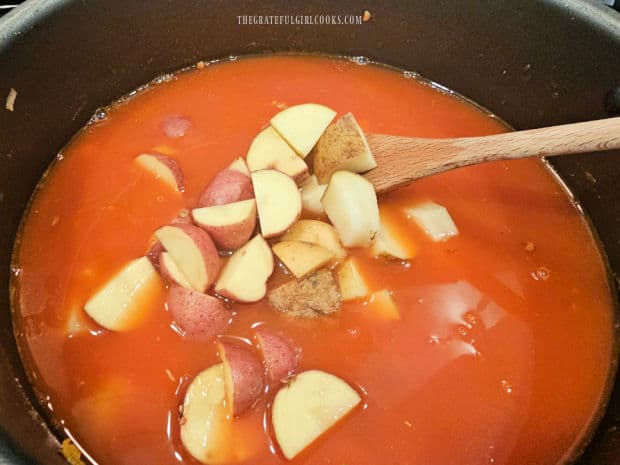
    Stir in 4 cups of water (or chicken broth) into the veggies, then add the potato chunks. The potatoes can either be peeled or not, depending on your personal preference. We leave them on (after washing them well).

    I also use a combination of russet potatoes, red potatoes and a couple yukon gold potatoes. You can use only one kind of potato if that’s what you have, just be sure to use ¾ pound total of bite-sized potato pieces.

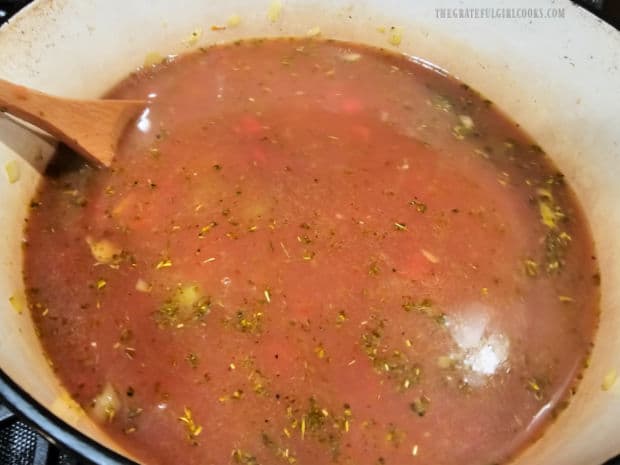
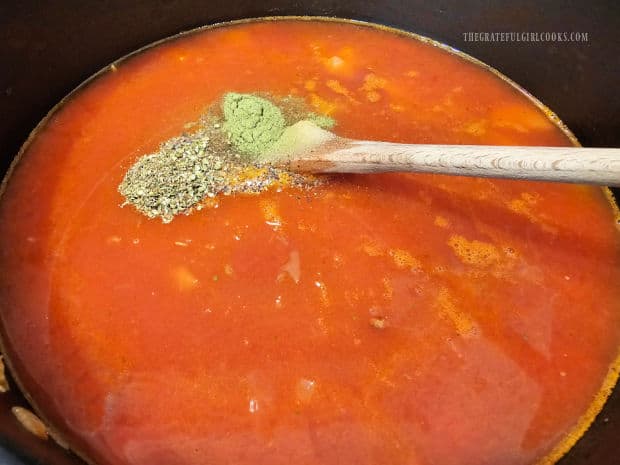
    Stir in salt, pepper, dried thyme and oregano until they’re incorporated into the soup.

    Water and bite-sized potatoes are added to the soup pot.Salt, pepper, oregano and thyme are stirred into the lentil potato soup.

    Time To Cook The Soup

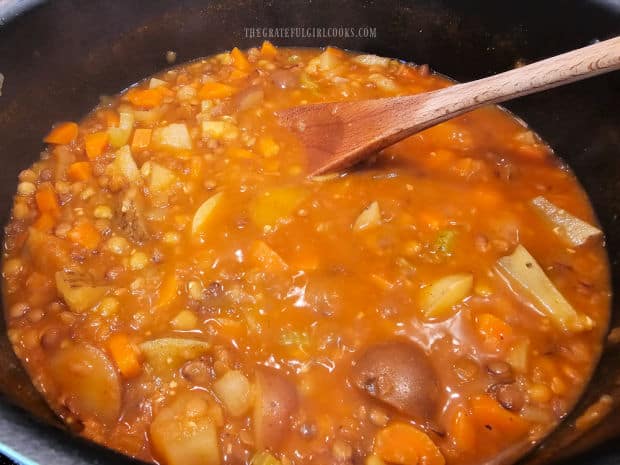
    Put a lid on the soup pot and let the soup come to a boil. Turn the heat down to Medium-Low. Continue cooking the soup (covered) on a low simmer for between 30-35 minutes, stirring occasionally.

    Take a taste. The lentil potato soup is done cooking when the lentils AND the potato chunks are soft and tender. Season the soup to taste with additional salt and pepper, if necessary.

    The lentil potato soup is fairly thick in density. If you want it to be more “soupy” in texture, stir in a bit more water (about ½ -1 cup), and make sure the soup is heated through before serving. 

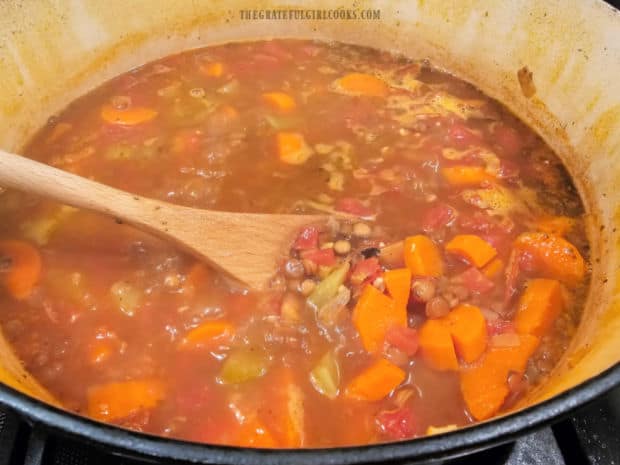
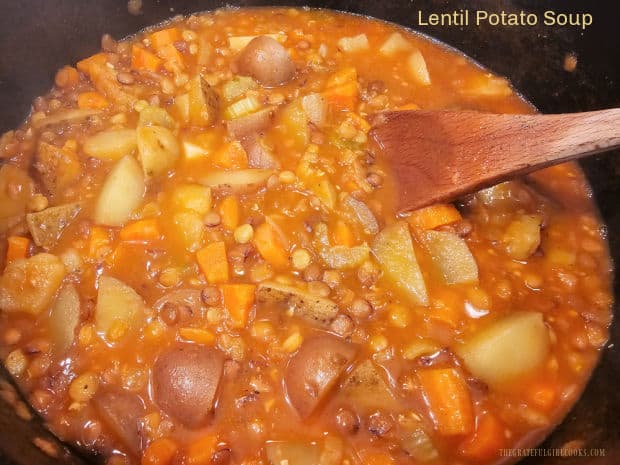
    A pot of lentil potato soup is ready to serve, after cooking for 35 minutes.

    Serve The Lentil Potato Soup

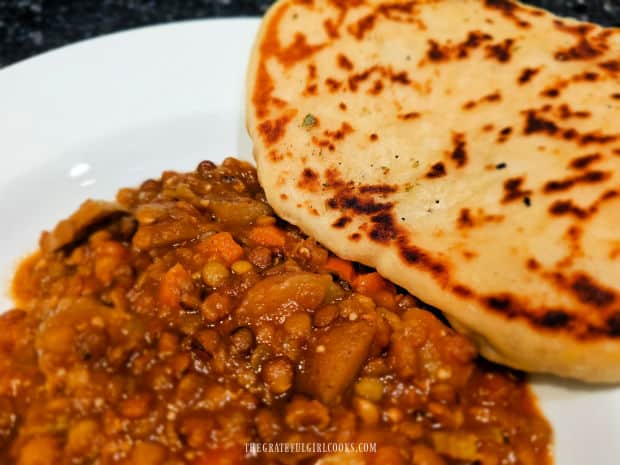
    Ladle the hot lentil potato soup into serving bowls, and serve this dish hot! We enjoyed the soup with a slice of homemade garlic butter naan bread on the side!

    The naan was perfect for this thick soup and we enjoyed dipping pieces of it into the soup and scooping up lentils and veggies. YUM!

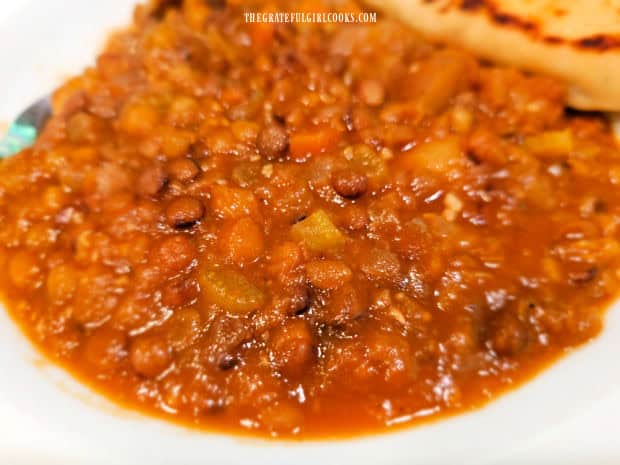
    A close up photo of the lentil potato soup, served in a white bowl.A white bowl of lentil potato soup, with garlic butter naan bread on the side.

    I hope you have the opportunity to try this delicious, meatless soup, and trust you will enjoy it as much as we do. It is a filling, hearty soup I am confident you’re going to like!

    Thanks for stopping by, and please come back again soon for more family-friendly recipes. Take care, may God bless you… and have a GREAT day!

    Looking For More SOUP Recipes?

    You can find ALL of my recipes in the Recipe Index, which is located at the top of the page. I have lots of delicious soup recipes to choose from, including:

    Want More Recipes? Get My FREE Newsletter!

    I publish a newsletter 2 times per month (1st and 15th) with lots of recipes, tips, etc..
    Would you like to join our growing list of subscribers?

    There is a Newsletter subscription box on the top right (or bottom) of each blog post, depending on the device you use.
    You can submit your e-mail address there, to be added to my mailing list.

    Find Me On Social Media:

    Facebook page: The Grateful Girl Cooks!
    Pinterest:
    The Grateful Girl Cooks!
    Instagram:
    jbatthegratefulgirlcooks

    Author's signature

    Recipe adapted from (and with thanks to): Mira, at cookinglsl.com/easy-lentil-potato-soup-recipe/

    ↓↓ PRINTABLE RECIPE BELOW ↓↓

    0 from 0 votes
    Lentil Potato Soup
    Prep Time
    10 mins
    Cook Time
    35 mins
    Total Time
    45 mins
     

    Lentil Potato Soup is a hearty and filling meatless soup that serves 6 and is easy to make. It's also budget friendly and tastes delicious!

    Category: Main Dish, Soup
    Cuisine: American
    Keyword: lentil potato soup
    Servings: 6
    Calories Per Serving: 234 kcal
    Author: JB @ The Grateful Girl Cooks!
    Ingredients
    • Tablespoons vegetable oil
    • cup yellow onion diced
    • 2 medium carrots peeled, diced
    • 1 stalk celery diced
    • 3 cloves garlic minced
    • ¼ cup tomato sauce
    • 2 Tablespoons tomato paste
    • cups lentils rinsed, drained well
    • 2 teaspoons salt
    • ½ teaspoon dried oregano
    • ¼ teaspoon black pepper
    • ¼ teaspoon dried thyme
    • 4 cups water OR chicken broth + more, as need to thin soup
    • ¾ pound potatoes (russet, red, Yukon- or combo) cut in bite-sized pieces
    Instructions
    1. Rinse lentils and drain 2-3 times. Set aside.

    2. In a large cooking pot, heat oil on Medium. When oil is hot, stir in onion; cook 1 minute, stirring often. Add diced carrots, celery, and minced garlic to the pot; stir to combine. Cook for 3 minutes, stirring often so garlic doesn't burn.

    3. Add drained lentils, tomato paste and tomato sauce. Stir well, to combine. Cook on Medium heat for 1 minute, stirring often.

    4. Stir in water (or chicken broth), then add potatoes, salt, pepper, dried thyme and oregano. Stir until they're incorporated into the soup.

    5. Cover the pot and let soup come to a boil. Turn heat down to Medium-Low. Continue cooking (covered) on a low simmer for 30-35 minutes; stir occasionally. Soup is done when lentils AND potatoes are soft/tender. Taste, then add additional salt and pepper, if desired. TIP: If you want soup to be less thick, stir in more water (½ -1 cup); make sure soup is heated through. 
    6. Ladle the hot soup into serving bowls, and serve immediately! Enjoy! Any leftovers can be easily re-heated.

    Nutrition Facts
    Lentil Potato Soup
    Amount Per Serving (1 (1/6 of total))
    Calories 234 Calories from Fat 36
    % Daily Value*
    Fat 4g6%
    Saturated Fat 1g6%
    Trans Fat 0.02g
    Polyunsaturated Fat 2g
    Monounsaturated Fat 1g
    Sodium 898mg39%
    Potassium 829mg24%
    Carbohydrates 38g13%
    Fiber 15g63%
    Sugar 4g4%
    Protein 12g24%
    Vitamin A 3577IU72%
    Vitamin C 11mg13%
    Calcium 50mg5%
    Iron 4mg22%
    * Percent Daily Values are based on a 2000 calorie diet.

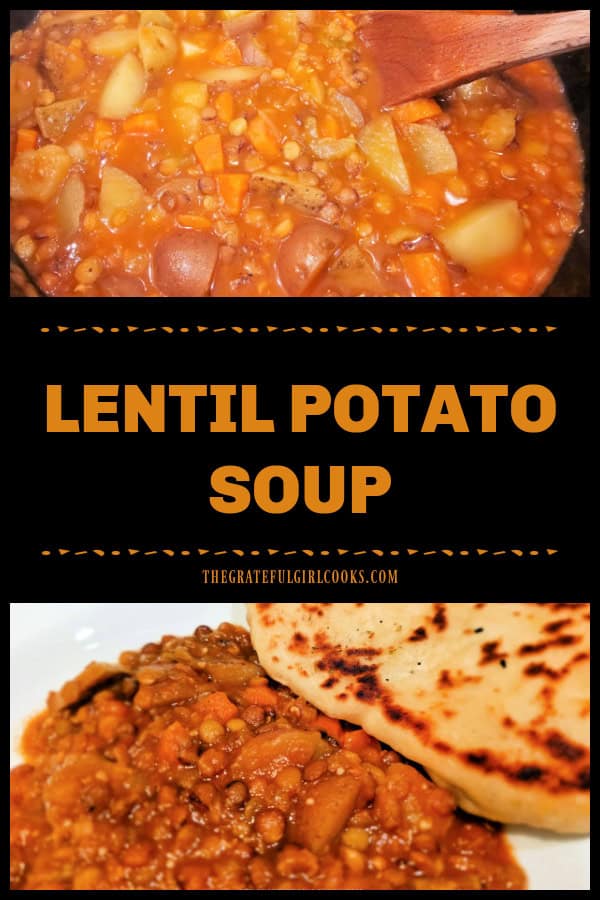
    Here’s one more to pin on your Pinterest boards!Lentil Potato Soup is a hearty and filling meatless soup that serves 6 and is easy to make. It's also budget friendly and tastes delicious!

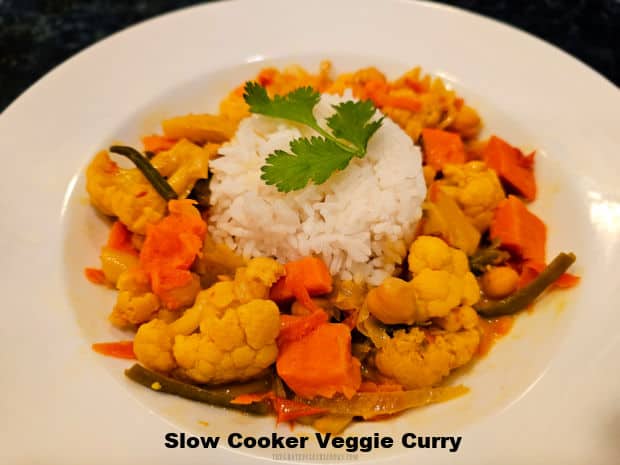
    Slow Cooker Veggie Curry

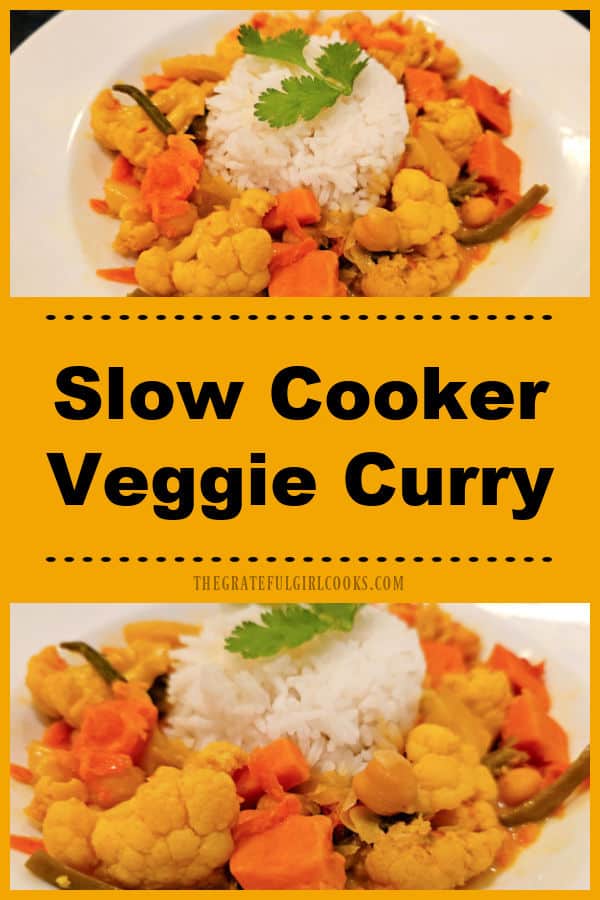
    Slow Cooker Veggie Curry is a meatless dish (with 7 veggies) cooked in a coconut/curry sauce. Serve with rice for a delicious, filling meal.
    Slow Cooker Veggie Curry is a meatless dish (with 7 veggies) cooked in a coconut/curry sauce. Serve with rice for a delicious, filling meal.

    Are you trying to eat more vegetables this year or are you looking for a new meatless dish with lots of flavor? Well today I want to share a recipe for vegetable curry that is cooked in a slow cooker.

    I originally saw the recipe in a monthly mailer that came through the mail to our home, and thought it sounded good. I only made a couple minor changes to suit our taste, and now we love this dish!

    Honestly this is such an EASY meal to make. The “hardest” part (if you want to call it that) is chopping and slicing the veggies. There’s seven different vegetables in this dish (2 are from cans), so if you can handle that little bit of prep, you’re good to go!

    After the veggies are prepped, the rest of the ingredients are combined with them in a slow cooker. The veggie curry cooks on LOW for 4 hours, and then it’s ready to be served (with rice). That’s it – you can paint your home, watch a movie, or crochet a keepsake quilt while it’s cooking (ha ha).

    I am not a vegetarian, but I LOVE this vegetable-based main dish. It’s easy to make, so that’s a win-win in my book. Here’s how to make slow cooker veggie curry.

    Prep Veggies For Crockpot

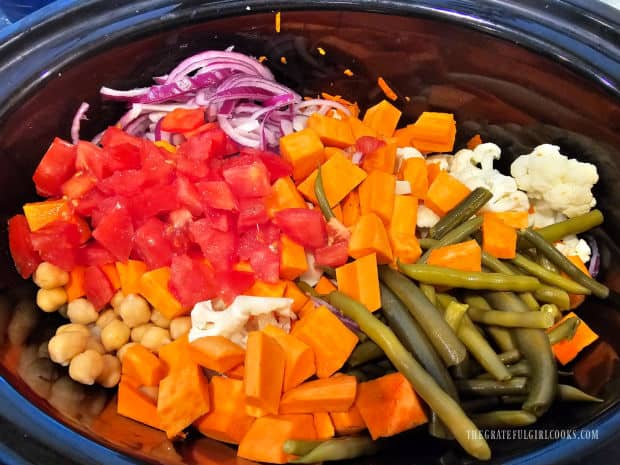
    You will use cauliflower, canned green beans, sweet potato, red onion, tomato, canned garbanzo beans (chickpeas), and shredded carrots for this veggie curry.

    Almost all of the prep work for this dish is simply chopping, slicing and shredding the vegetables! Toss them into your slow cooker after you prep each one.

    Even though this is a meatless dish, the addition of the garbanzo beans add a nice dose of plant-based protein, which is wonderful news!

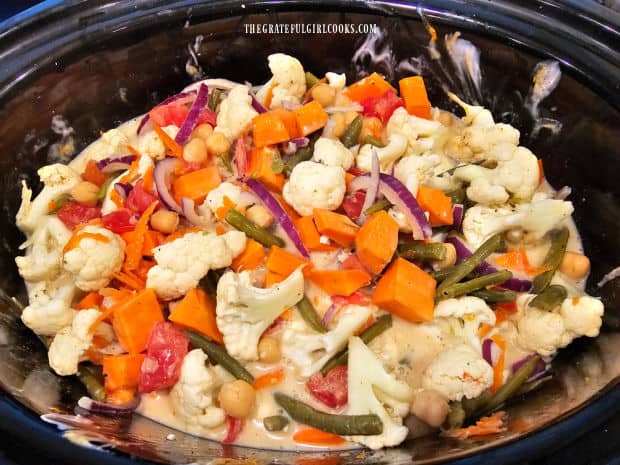
    Seven types of vegetables are prepped then put in a slow cooker.

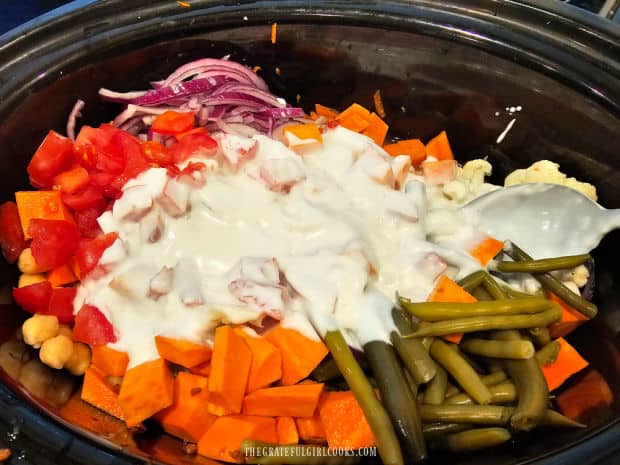
    Once the veggies have been added to the slow cooker, add one can of coconut milk and 3 cups of vegetable broth. TIP: Stir the thick coconut milk IN THE CAN before adding it to the slow cooker.

    NOTE: If you use vegetable broth in the curry sauce, this dish is entirely vegetarian. However, if that’s not an issue (or it’s more convenient), you can substitute 3 cups of chicken broth.

    Coconut milk and vegetable broth are added to the slow cooker.

    Build The Sauce

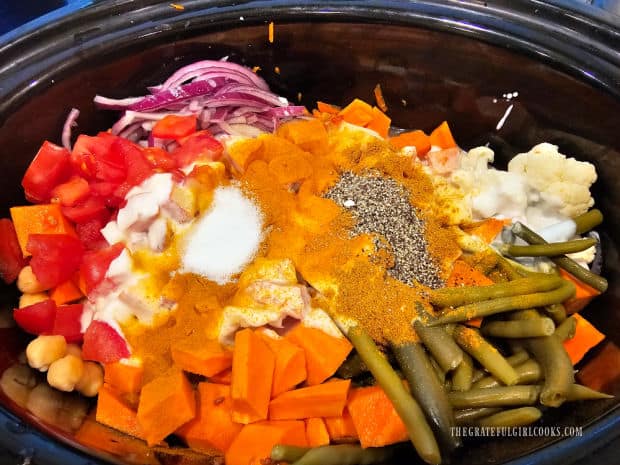
    Now it’s time to add the seasonings which give the slow cooker veggie curry GREAT flavor!  Add curry powder, ground turmeric, salt and pepper to the slow cooker.

    Stir all the ingredients together very well in the slow cooker. The coconut milk, broth and spices will combine to form a creamy, mildly spiced curry sauce.

    Curry powder, turmeric, salt and pepper are added to the slow cooker.

    Time To Let It Cook!

    Lock the lid in place, and cook the slow cooker veggie curry for 4 hours on LOW HEAT. This will cook it low and slow, so the vegetables become tender and well-seasoned with the curry sauce.

    All ingredients are combined in the slow cooker and cooked 4 hours.

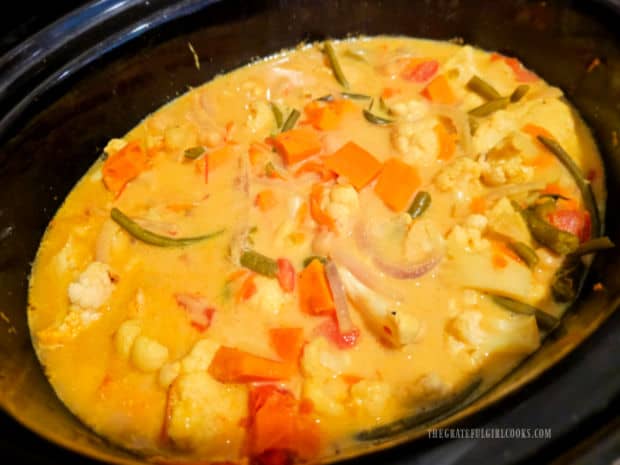
    When it is finished cooking, open the lid and give everything a stir. The sauce will have become golden in color and the veggies should be really hot and fork-tender.

    The slow cooker veggie curry is colorful when the dish is finished cooking.

    Serve The Slow Cooker Veggie Curry

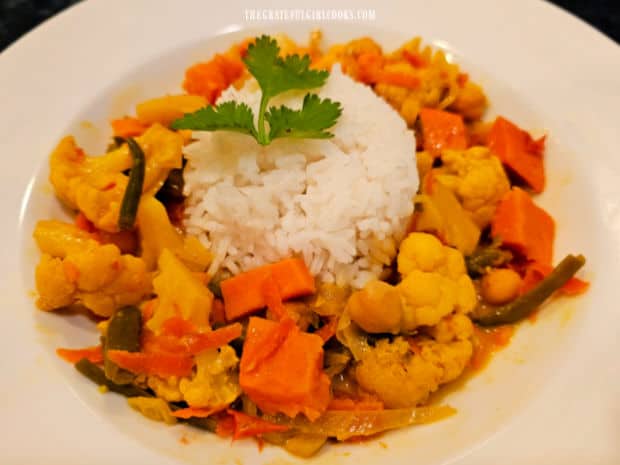
    I totally recommend serving this veggie curry with cooked rice (white or brown). For each serving, pack cooked rice into a half cup measuring cup, then carefully turn it over in the middle of an individual serving bowl. This forms a mound of rice in the center of each bowl.

    Use a slotted spoon to remove veggies from the slow cooker and arrange them around each mound of rice in the bowls. Spoon curry sauce over the veggies in each bowl, so there’s plenty of sauce to enjoy.

    Garnish the rice with fresh cilantro for a nice pop of added color! Serve hot, and enjoy this delicious meal.

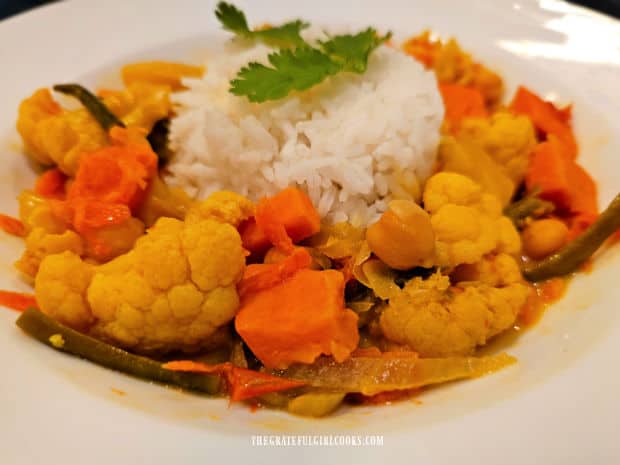
    Slow Cooker Veggie Curry is served with white rice in the middle of the bowl.A filling meal of slow cooker veggie curry, with white steamed rice.

    I really hope you give this recipe a try because it tastes wonderful, and with the added rice it is a filling main dish I believe you’ll enjoy.

    The leftovers can be stored for several days in an airtight container in the refrigerator. Any leftovers can also be easily reheated in a microwave.

    Thanks for stopping by, and I invite you to come back soon for more family-friendly recipes. Take care, may God bless you, and I hope you have a GREAT day!

    Looking For More Recipes For MEATLESS MEALS?

    You can find ALL of my recipes in the Recipe Index, which is located at the top of the page. I have some wonderfully delicious MEATLESS meals you might enjoy, including:

    Want More Recipes? Get My FREE Newsletter!

    I publish a newsletter 2 times per month (1st and 15th) with lots of recipes, tips, etc..
    Would you like to join our growing list of subscribers?

    There is a Newsletter subscription box on the top right (or bottom) of each blog post, depending on the device you use.
    You can submit your e-mail address there, to be added to my mailing list.

    Find Me On Social Media:

    Facebook page: The Grateful Girl Cooks!
    Pinterest:
    The Grateful Girl Cooks!
    Instagram:
    jbatthegratefulgirlcooks

    Author's signature

    Original source: Chef John, via Kroger’s monthly mailer “mymagazine” (January edition-cut out the recipe-year unknown)

    ↓↓ PRINTABLE RECIPE BELOW ↓↓

    0 from 0 votes
    Slow Cooker Veggie Curry
    Prep Time
    15 mins
    Cook Time
    4 hrs
    Total Time
    4 hrs 15 mins
     

    Slow Cooker Veggie Curry is a meatless dish (with 7 veggies) cooked in a coconut/curry sauce. Serve with rice for a delicious, filling meal.

    Category: Entree, Main Dish
    Cuisine: All Cuisines
    Keyword: slow cooker, veggie curry
    Servings: 4 servings
    Calories Per Serving: 324 kcal
    Author: JB @ The Grateful Girl Cooks!
    Ingredients
    • 1 head cauliflower cut in florets
    • 14 ounces canned garbanzo beans (chickpeas) =1 can, drained/rinsed
    • 14.5 ounces green beans (canned) = 1 can, drained
    • 1 medium sweet potato peeled, chopped in 1" pieces
    • 1 medium red onion cut in half, sliced thin
    • 1 medium tomato diced
    • ½ cup shredded carrot
    • 3 cups low sodium vegetable broth use chicken broth if desired
    • 13.5 ounces light coconut milk (canned) use full fat if desired
    • teaspoons curry powder
    • teaspoons turmeric
    • 1 teaspoon salt
    • 1 teaspoon black pepper
    • fresh cilantro (for garnish-optional)
    To serve: fresh cilantro and steamed rice (optional, but good!)
      Instructions
      1. Prep all 7 veggies and place them into a slow cooker.

      2. Add coconut milk and vegetable broth. TIP: Stir the thick coconut milk IN THE CAN before adding it to the slow cooker.

      3. Add curry powder, turmeric, salt and pepper. Stir all ingredients together very well. The coconut milk, broth and spices will form a creamy curry sauce.

      4. Lock lid in place; cook 4 hours on LOW HEAT. Stir once, halfway through the cooking time (if it is convenient for you to do so). When done, remove lid and give everything another good stir. Sauce will be golden in color and veggies should be tender.

      5. Serve with a side of rice, and garnish with a sprig of cilantro, if desired. (see blog post for suggested presentation). Enjoy!

      Recipe Notes

      NOTE: The caloric calculation does not include the rice.

      Nutrition Facts
      Slow Cooker Veggie Curry
      Amount Per Serving (1 (1/4 of total))
      Calories 324 Calories from Fat 81
      % Daily Value*
      Fat 9g14%
      Saturated Fat 7g44%
      Polyunsaturated Fat 1g
      Monounsaturated Fat 1g
      Sodium 1032mg45%
      Potassium 1181mg34%
      Carbohydrates 51g17%
      Fiber 14g58%
      Sugar 12g13%
      Protein 12g24%
      Vitamin A 11679IU234%
      Vitamin C 91mg110%
      Calcium 144mg14%
      Iron 4mg22%
      * Percent Daily Values are based on a 2000 calorie diet.

      Here’s one more to pin on your Pinterest boards!Slow Cooker Veggie Curry is a meatless dish (with 7 veggies) cooked in a coconut/curry sauce. Serve with rice for a delicious, filling meal.

      Easy Fettucine Alfredo

      Make delicious, creamy and Easy Fettucine Alfredo for a special meal! It’s easy to make with only a few ingredients, and is a decadent dish!
      Make delicious, creamy and Easy Fettucine Alfredo for a special meal! It's easy to make with only a few ingredients, and is a decadent dish!

      Many, many years ago when I had our first son, we were invited to dinner at a dear friend Lona’s home to celebrate the birth of our first baby. Lona made us fettucine alfredo for dinner, and it was absolutely FABULOUS.

      Before we left I asked her to please give me her recipe, and I’ve used this recipe ever since (over 40 years now). I was shocked to see how truly simple it was to make, but WOW… does it ever taste great!

      Our sweet friend Lona passed away years ago, but her memory lives on in so many tangible ways in our lives. Every single time I make this

      As most folks know, fettucine alfredo is definitely not a “diet friendly” meal, but every now and then ya just gotta go for it, right? The pasta is cheesy and delicious, and it really is simple to prepare. Here’s how to make it:

      Scroll Down for A Printable Recipe Card At the Bottom Of The Page

      Cook The Fettucine Pasta

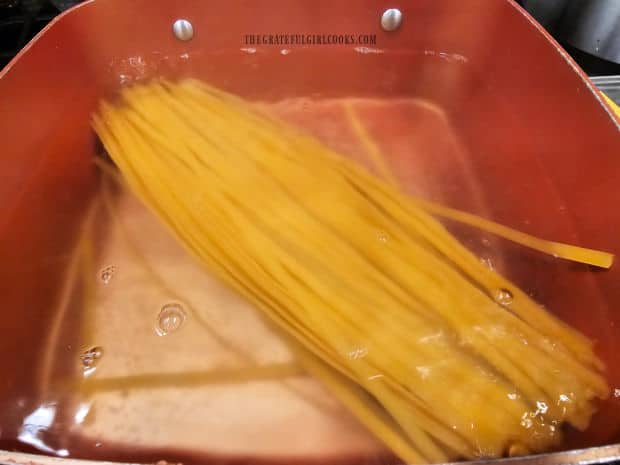
      The first thing you will need to do is cook the fettucine pasta in a large saucepan, according to the package instructions. Once the pasta hits the boiling water it will cook for approximately 13 minutes.

      While the pasta cooks, prepare the Alfredo sauce in a separate pan. That way the sauce will be done when the pasta is done!

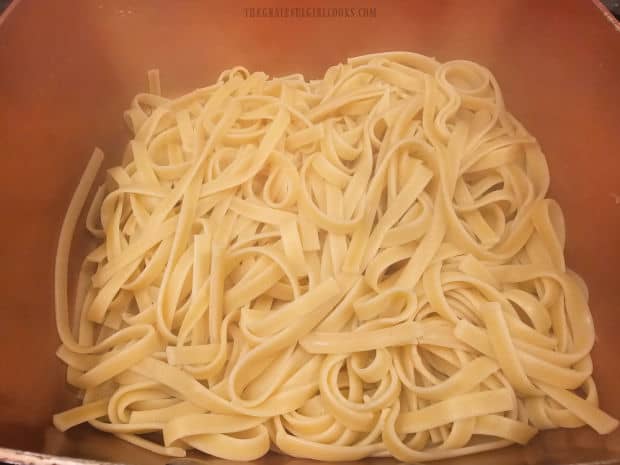
      Fettucine pasta is cooked in boiling water according to package instructions.

      Make The Alfredo Sauce While Pasta Cooks

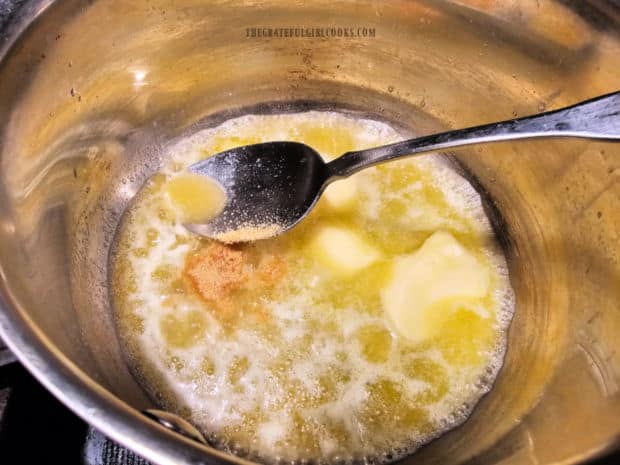
      To make the Alfredo sauce, melt butter on LOW heat in a medium saucepan. Once the butter has melted, stir in garlic powder and a pinch of salt until combined.

      Pour a pint of heavy whipping cream into the melted butter mixture, and stir, until combined. Cook this on a LOW simmer for 4-5 minutes, stirring often, but don’t let it boil.

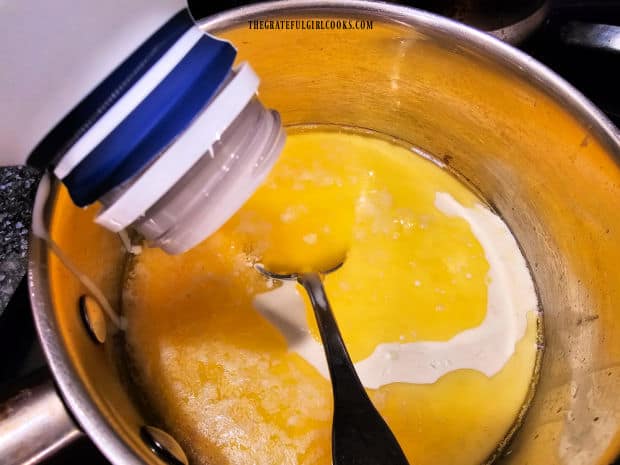
      Melted butter in saucepan is combined with garlic powder.A pint of heavy whipping cream is poured into the melted butter in pan.

      Add The Parmesan Cheese

      Add 1½ cups of fresh, finely grated Parmesan cheese and a small amount of salt into the Alfredo sauce mixture. I also add about ¼ cup of canned Parmesan cheese (i.e. “Kraft” green shaker container) to the mix.

      TIP#1: If you don’t have (or like) canned Parmesan, simply add more freshly grated Parmesan cheese, to taste.

      Stir these into the Alfredo sauce, and continue to cook on LOW heat, stirring often. Continue cooking until all the cheese has melted, but don’t let the sauce boil!

      Tip #2: You can make the sauce ahead of time, then re-heat it (on LOW) in the pan right before the pasta is done cooking, to save time.

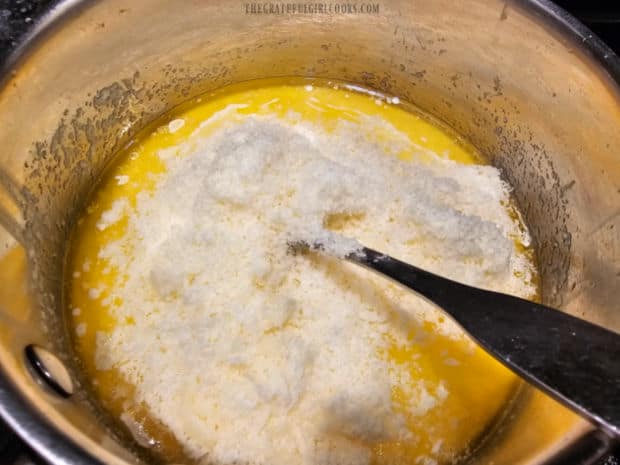
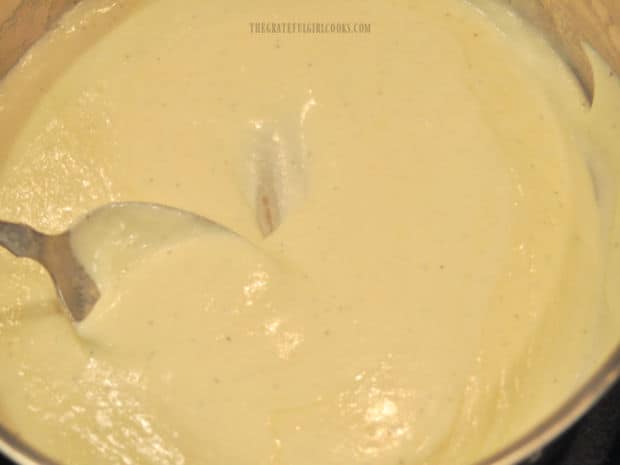
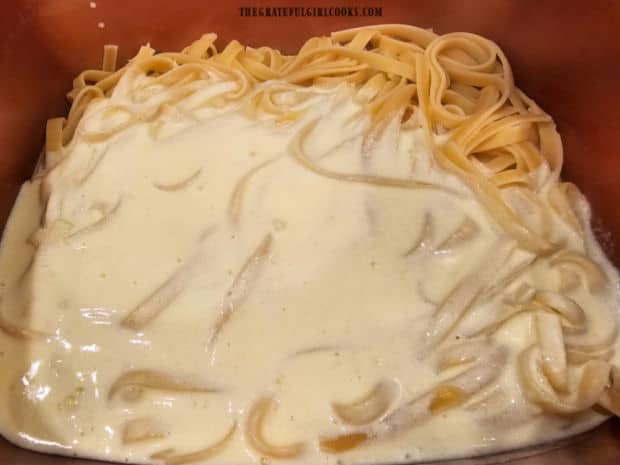
      Lots of grated Parmesan cheese is added to the fettucine sauce in pan.A pan full of creamy sauce for the Easy Fettucine Alfredo.

      Final Step

      When the pasta is finished cooking and is tender to the bite, immediately drain off the hot water, then place the pasta back into the pan. DO NOT RINSE the pasta! You want it good and HOT!

      Quickly pour all of the hot Alfredo sauce on top of the hot pasta. Use tongs to toss well and fully coat all the noodles with the sauce. Cook the fettucine and sauce for 1-2 minutes on low heat, until fully heated through.

      Cooked fettucine pasta is drained after cooking and put back into hot pan.Thick alfredo sauce is poured over the hot pasta and tossed to combine.

      Serve And Enjoy The Easy Fettucine Alfredo

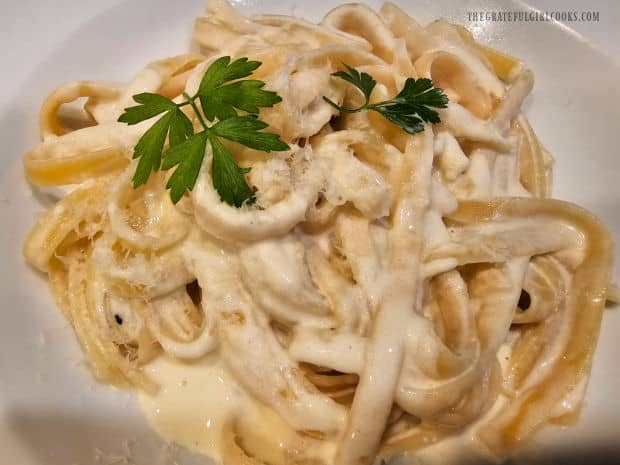
      Immediately portion each serving onto plates or into serving bowls. If desired, finely grate additional Parmesan on top of each serving, and garnish with fresh parsley.

      Serve the easy fettucine alfredo immediately while still hot, and enjoy this delicious dish.

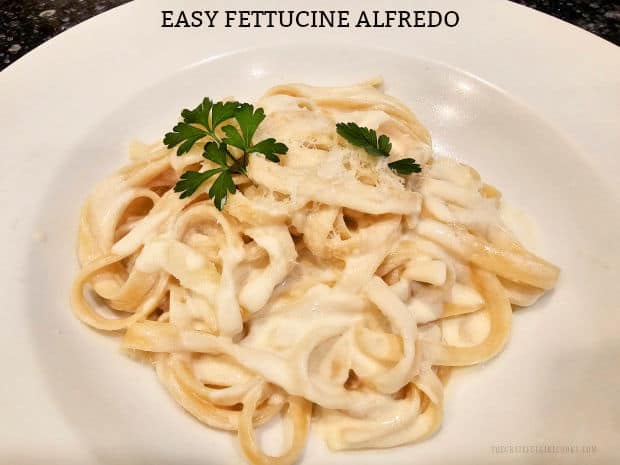
      A bowl of Easy Fettucine Alfredo, topped with Parmesan cheese and parsley.

      I hope you enjoy this recipe for easy fettucine alfredo as much as our family does. Even though it is decadent and a high calorie meal, this is a dish we always look forward to!

      Thank you for stopping by, and I invite you to come back again soon for more family-friendly recipes. Take care, have a GREAT day, and may God bless you.

      Looking For More PASTA RECIPES?

      You can find ALL of my recipes in the Recipe Index, which is located at the top of the page. I have a nice variety of pasta dishes to choose from, including:

      Want More Recipes? Get My FREE Newsletter!

      I publish a newsletter 2 times per month (1st and 15th) with lots of recipes, tips, etc..
      Would you like to join our growing list of subscribers?

      There is a Newsletter subscription box on the top right (or bottom) of each blog post, depending on the device you use.
      You can submit your e-mail address there, to be added to my mailing list.

      Find Me On Social Media:

      Facebook page: The Grateful Girl Cooks!
      Pinterest:
      The Grateful Girl Cooks!
      Instagram:
      jbatthegratefulgirlcooks

      Author's signature

      Recipe adapted from: my dear friend Lona Wig (R.I.P.)

      ↓↓ PRINTABLE RECIPE BELOW ↓↓

      0 from 0 votes
      Easy Fettucine Alfredo
      Prep Time
      10 mins
      Cook Time
      13 mins
      Total Time
      23 mins
       

      Make delicious, creamy and Easy Fettucine Alfredo for a special meal! It's easy to make with only a few ingredients, and is a decadent dish!

      Category: Entree, Main Course
      Cuisine: All Cuisines
      Keyword: easy fettucine alfredo
      Servings: 5
      Calories Per Serving: 892 kcal
      Author: JB @ The Grateful Girl Cooks!
      Ingredients
      • 12 ounces dried fettucine pasta cooked according to pkg. instructions
      For Alfredo Sauce:
      • 8 Tablespoons butter = 1 stick or ½ cup
      • ½ teaspoon garlic powder
      • ¼ teaspoon salt
      • 1 pint heavy whipping cream
      • cups fresh Parmesan cheese finely grated
      • ¼ cup canned Parmesan cheese (i.e. Kraft, Kroger, etc.)
      (OPTIONAL) GARNISH: additional grated Parmesan and/or parsley if desired
        Instructions
        1. Cook fettucine in boiling water according to pkg. instructions (approx. 13 minutes). While pasta cooks, prepare Alfredo sauce in a separate pan.

        Make Alfredo Sauce:
        1. Melt butter on LOW heat in a medium saucepan. Once melted, stir in garlic powder and salt until combined. Pour in whipping cream; stir, until combined. Cook on a LOW simmer 4-5 minutes, stirring often, but don't let it boil.

        2. Add 1½ cups of fresh, finely grated Parmesan cheese and ¼ cup canned Parmesan cheese (i.e. "Kraft" green shaker container) to the mix. TIP#1: If you don't have (or like) canned Parmesan, add more fresh grated Parmesan cheese. Stir cheeses into the Alfredo sauce; cook on LOW heat, stirring often. Continue cooking until cheese has melted; do not let sauce boil! Tip #2: You can make sauce ahead of time, then re-heat it (on LOW) in the pan right before pasta is done cooking, to save time.

        Finish And Serve:
        1. When pasta is done, immediately drain the hot water. DO NOT RINSE PASTA! You want it HOT! Place drained pasta back into the pan. Quickly pour hot Alfredo sauce on top. Use tongs to toss well and fully coat pasta with sauce. Cook the fettucine and sauce 1-2 minutes on low heat, until heated through.

        2. Immediately portion each serving onto plates or into serving bowls. If desired, grate additional Parmesan on each serving, and garnish with fresh parsley. Serve easy fettucine alfredo immediately while hot, and enjoy!

        Nutrition Facts
        Easy Fettucine Alfredo
        Amount Per Serving (1 (1/5 of total))
        Calories 892 Calories from Fat 585
        % Daily Value*
        Fat 65g100%
        Saturated Fat 40g250%
        Trans Fat 1g
        Polyunsaturated Fat 3g
        Monounsaturated Fat 16g
        Cholesterol 243mg81%
        Sodium 913mg40%
        Potassium 329mg9%
        Carbohydrates 56g19%
        Fiber 2g8%
        Sugar 4g4%
        Protein 23g46%
        Vitamin A 2296IU46%
        Vitamin C 1mg1%
        Calcium 401mg40%
        Iron 2mg11%
        * Percent Daily Values are based on a 2000 calorie diet.

        Here’s one more to pin on your Pinterest boards!Make delicious, creamy and Easy Fettucine Alfredo for a special meal! It's easy to make with only a few ingredients, and is a decadent dish!

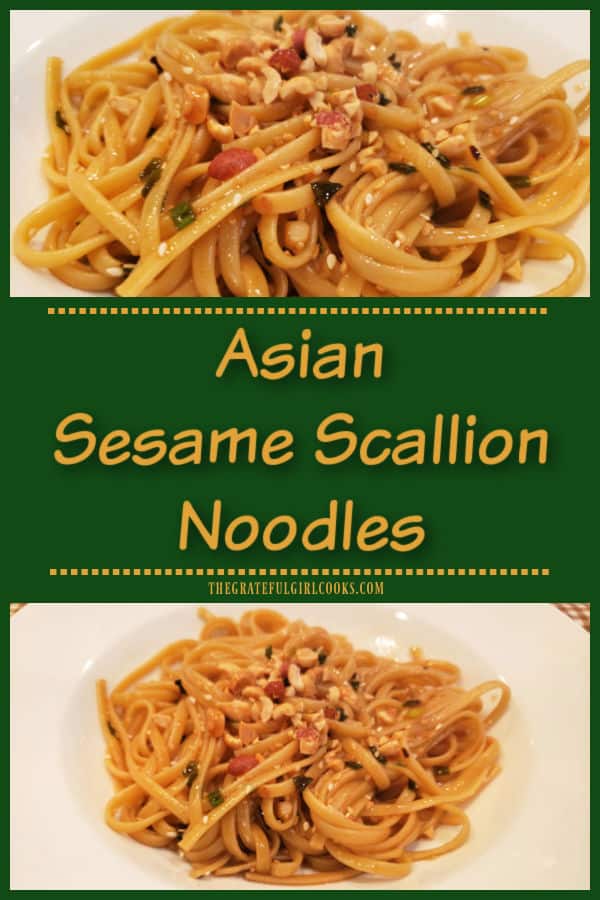
        Asian Sesame Scallion Noodles

        Asian Sesame Scallion Noodles is a meatless dish, with linguini, green onions and toasted sesame seeds, coated in a tasty Asian-style sauce.
        Asian Sesame Scallion Noodles is a meatless dish, with linguini, green onions and toasted sesame seeds, coated in a tasty Asian-style sauce.

        My husband and I love this delicious meatless meal! The Asian sesame scallion noodles are packed with great flavor, and the bonus is this dish is so very simple to make.

        I discovered this wonderful meal in a cookbook I had, and made only a couple very small changes. The results were outstanding, and we have enjoyed this dish several times! My sister in law is a vegan, and when I made this dish for her, she loved it, too.

        My next plan is to cook this meal for our son and his girlfriend, and see what they think. They are both vegetarians, and I’m confident they will love the amazing Asian flavors of this meatless dish.

        This is an easy meal to throw together at the end of a long day, because it doesn’t require too much effort or time to prepare. Here’s how to make Asian sesame scallion noodles.

        Scroll Down For A Printable Recipe Card At The Bottom Of The Page

        Cook The Noodles

        The original recipe calls for using Udon noodles (or linguini). I use linguini pasta, because I usually have that in our pantry at any given time.

        Cook the noodles in salted, boiling water according to the instructions on the package. When the noodles are done cooking, drain the noodles, but do not rinse them.

        While the noodles cook, prepare the Asian sauce, so when the noodles are done, all you need to do is combine them and serve!

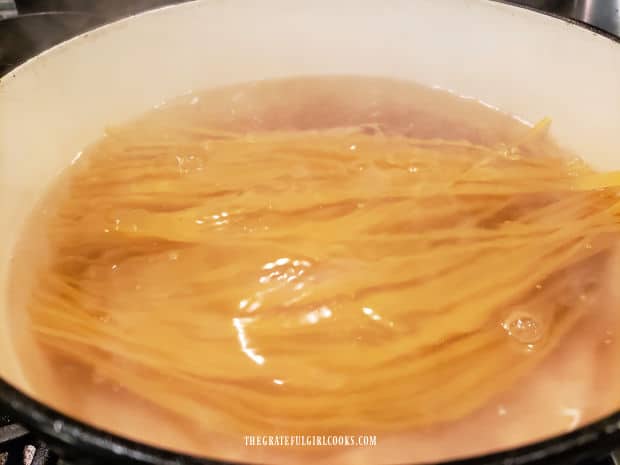
        Linguini is cooked in boiling, salted water in a large pot.

        Make The Asian Sauce

        While the noodles are cooking, prepare the Asian sauce. Whisk soy sauce, dark brown sugar, rice vinegar, 1T. vegetable oil, and sesame oil in a large bowl.

        Once these ingredients are well combined, set the bowl aside while you finish the second part of the sauce.

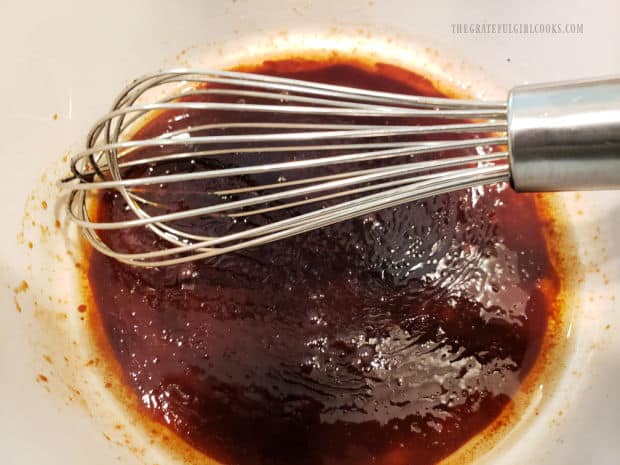
        Soy sauce, rice vinegar, veg. oil, brown sugar and sesame oil are whisked together.

        Toasting The Sesame Seeds And Chile Flakes

        Heat 2 T. vegetable oil in a large non-stick skillet on medium heat. Add white sesame seeds, and red pepper flakes. Stir to combine.

        Cook, stirring occasionally until the sesame seeds have begun to turn golden brown in color. This usually takes 3-4 minutes. Once the sesame seeds start browning, turn off the heat.

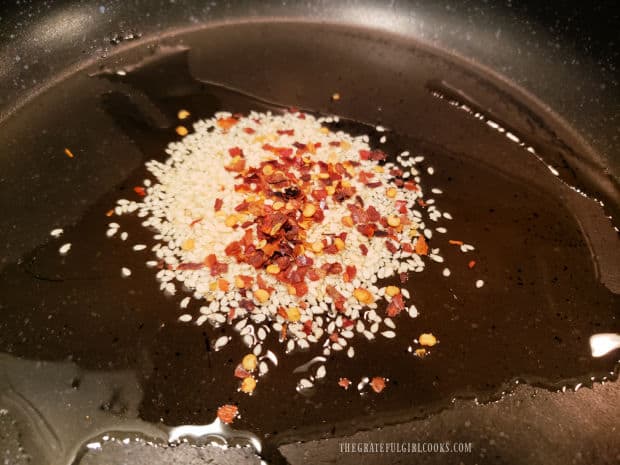
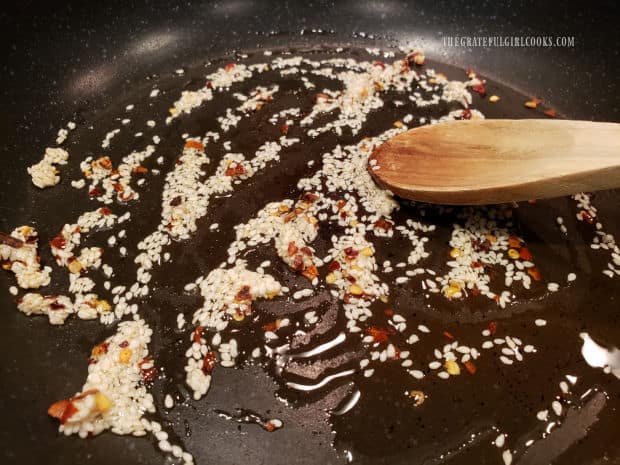
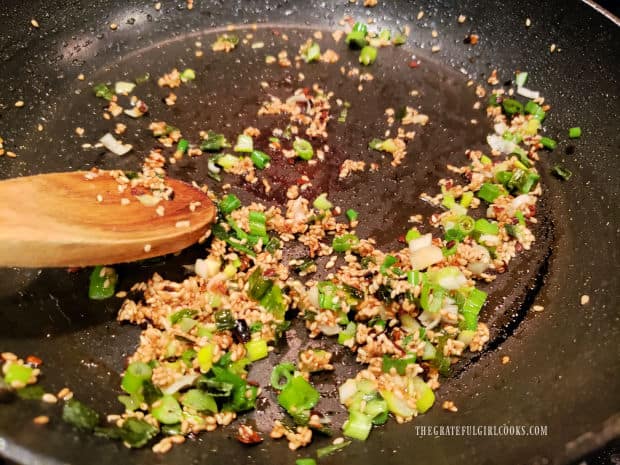
        Red pepper flakes and white sesame seeds in oil in skillet.Sesame seeds, oil and red pepper flakes are stirred while cooking in skillet.

        Add Garlic and Scallions

        Stir minced garlic and sliced scallions (green onions) into the sesame seed mixture in the skillet until combined.  The skillet will still be hot (even off the heat), so it will slightly cook the scallions (green onions) and the garlic.

        Pour this mixture into a large serving bowl. You will add the hot, cooked and drained noodles to this mixture once they’re done cooking.

        Minced garlic and green onions in skillet with toasted sesame seeds.

        Toss The Noodles In The Asian Sauce

        When the noodles are finished cooking, drain them (without rinsing). Immediately add them to the sesame/scallion mixture in the serving bowl.

        Use tongs to combine the sauce with the noodles until the noodles are fully coated with the sauce.

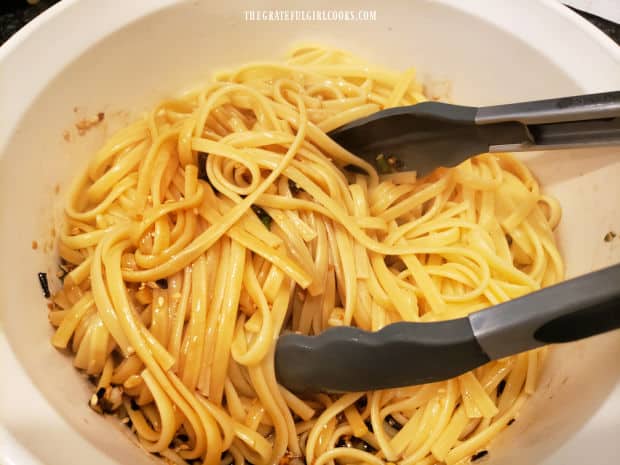
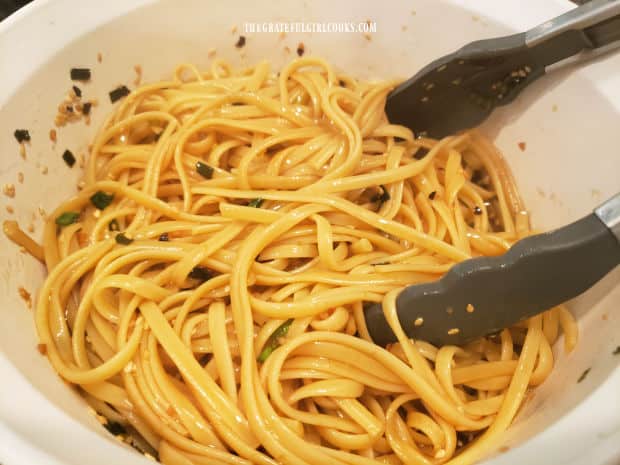
        Hot noodles are added to Asian sauce, and tossed to combine.Tongs being used to combine Asian sauce and hot linguini pasta in a bowl.

        Serve The Asian Sesame Scallion Noodles

        This recipe, as written will yield about three servings. Divide the hot Asian sesame scallion noodles into individual bowls (or plates).

        Garnish each serving with chopped peanuts (optional, but good!). You can also garnish the top of the noodles with additional sliced green onions for more color, if desired ( I didn’t this time).

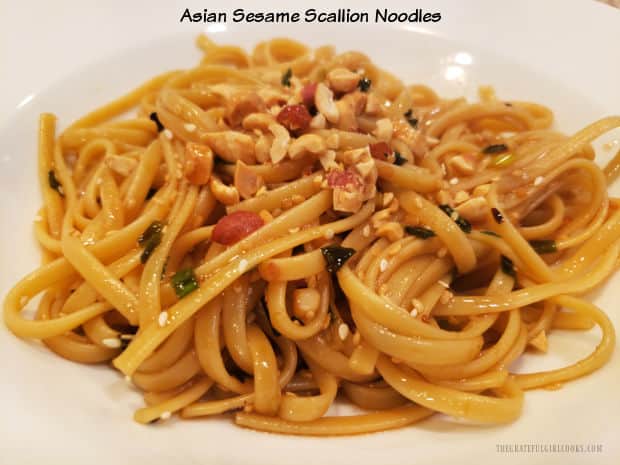
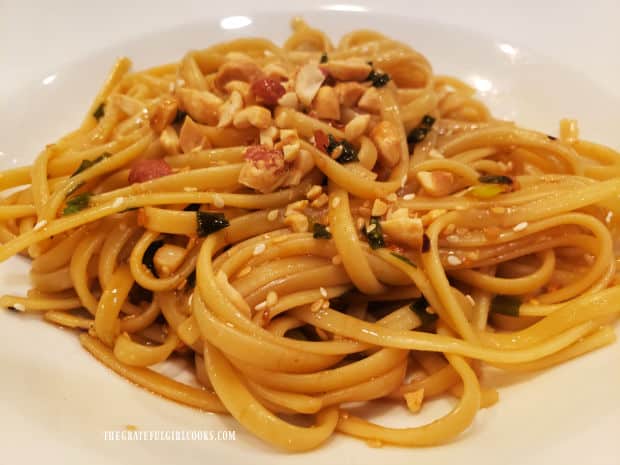
        A large white bowl, with a serving of Asian sesame scallion noodles in it.

        See how easy it is to make this meal? Serve the Asian sesame scallion noodles immediately while hot, and enjoy the amazing flavors!

        I am confident you’re going to enjoy this dish! Serve it with bread and/or a yummy green salad on the side, and you will have a fantastic tasting, meatless meal.

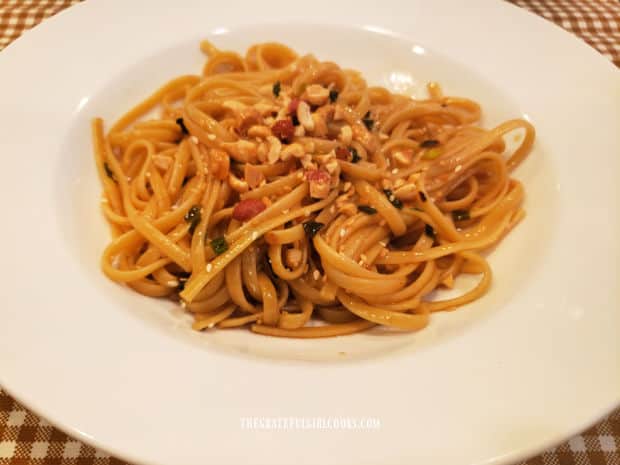
        A white bowl of Asian sesame scallion noodles, with chopped peanuts on top.

        I hope you have the chance to try these delicious Asian sesame scallion noodles soon, and hope you enjoy them as much as we do!

        Thanks for stopping by. Please come back again soon for more family-friendly recipes. Take care, may God bless you, and have a great day!

        Looking For More ASIAN Recipes?

        You can find ALL of my recipes in the Recipe Index, which is located at the top of the page. I have a great variety of Asian dishes to choose from, including:

        Want More Recipes? Get My FREE Newsletter!

        I publish a newsletter 2 times per month (1st and 15th) with lots of recipes, tips, etc..
        Would you like to join our growing list of subscribers?

        There is a Newsletter subscription box on the top right (or bottom) of each blog post, depending on the device you use.
        You can submit your e-mail address there, to be added to my mailing list.

        Find Me On Social Media:

        Facebook page: The Grateful Girl Cooks!
        Pinterest:
        The Grateful Girl Cooks!
        Instagram:
        jbatthegratefulgirlcooks

        Author's signature

        Recipe adapted from: “The Milk Street Cookbook”, by Christopher Kendall, page 199, published by Little Brown And Company, 2020

        ↓↓ PRINTABLE RECIPE BELOW ↓↓

        0 from 0 votes
        Asian Sesame Scallion Noodles
        Prep Time
        10 mins
        Cook Time
        15 mins
        Total Time
        25 mins
         

        Asian Sesame Scallion Noodles is a meatless dish, with linguini, green onions and toasted sesame seeds, coated in a tasty Asian-style sauce.

        Category: Main Dish
        Cuisine: Asian, Vegetarian
        Keyword: Asian sesame scallion noodles
        Servings: 3
        Calories Per Serving: 494 kcal
        Author: JB @ The Grateful Girl Cooks!
        Ingredients
        • ½ pound linguini pasta
        • Tablespoons soy sauce (low sodium, if available)
        • 2 Tablespoons packed dark brown sugar
        • 2 Tablespoons unseasoned rice vinegar
        • 3 Tablespoons vegetable oil (or other neutral oil) *DIVIDED USE*
        • ¾ Tablespoon toasted sesame oil
        • 1 Tablespoon white sesame seeds
        • 1 teaspoon red chili flakes
        • 4 stems scallions (green onions) white and green parts, sliced
        • 1 teaspoon minced garlic
        Optional Garnish: Additional sliced scallions and/or chopped dry roasted peanuts (about 2 T. total)
          Instructions
          1. Cook noodles in salted, boiling water according to instructions on package. When done cooking, drain noodles (do not rinse).

          2. While noodles are cooking, prepare Asian sauce. Whisk soy sauce, dark brown sugar, rice vinegar, 1T. vegetable oil, and sesame oil in a large bowl. Once well combined, set bowl aside.

          3. Heat 2 T. vegetable oil in a large non-stick skillet on medium heat. Add sesame seeds and red pepper flakes. Stir to combine. Cook, stirring occasionally until sesame seeds begin to turn golden brown. This usually takes 3-4 minutes. Once sesame seeds start browning, turn off the heat.

          4. Stir garlic and scallions into sesame seed mixture in skillet for about a minute until combined. Skillet will still be hot (even off the heat), so it will slightly cook scallions and garlic. Pour mixture into a large bowl.

          5. When noodles are done cooking, drain them (without rinsing). Immediately add linguini to the sesame/scallion mixture in bowl. Use tongs to combine sauce and linguini until noodles are fully coated in sauce.

          6. To serve, divide hot Asian sesame scallion noodles into individual bowls. Garnish each serving with chopped peanuts (optional, but good!). Add additional sliced green onions for more color, if desired. Serve, and enjoy!
          Nutrition Facts
          Asian Sesame Scallion Noodles
          Amount Per Serving (1 (1/3 of total amount))
          Calories 494 Calories from Fat 180
          % Daily Value*
          Fat 20g31%
          Saturated Fat 3g19%
          Trans Fat 0.1g
          Polyunsaturated Fat 10g
          Monounsaturated Fat 5g
          Sodium 691mg30%
          Potassium 278mg8%
          Carbohydrates 67g22%
          Fiber 3g13%
          Sugar 10g11%
          Protein 12g24%
          Vitamin A 211IU4%
          Vitamin C 1mg1%
          Calcium 60mg6%
          Iron 2mg11%
          * Percent Daily Values are based on a 2000 calorie diet.

          Here’s one more to pin on your Pinterest boards!Asian Sesame Scallion Noodles is a meatless dish, with linguini, green onions and toasted sesame seeds, coated in a tasty Asian-style sauce.

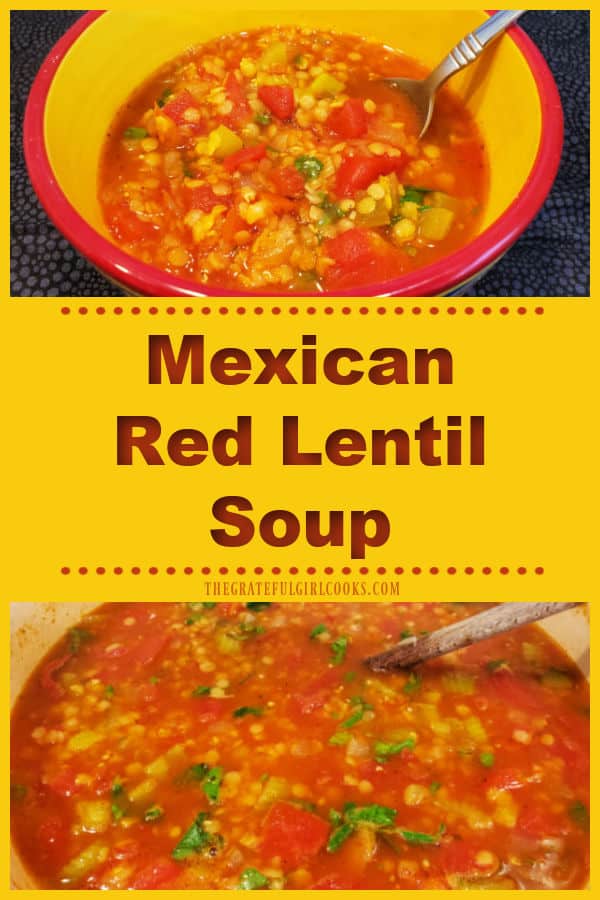
          Mexican Red Lentil Soup

          Mexican Red Lentil Soup has all the flavor of a good chili recipe, but it’s a meatless soup you’ll really love, with enough for 7 helpings!
          Mexican Red Lentil Soup has all the flavor of a good chili recipe, but it's a meatless soup you'll really love, with enough for 7 helpings!

          Mexican Red Lentil Soup is a yummy, meatless main dish that is packed with flavor! If you enjoy chili, I’m confident you will enjoy this recipe, as well. Whether you’re a vegetarian or not, this soup is wonderful, budget friendly, and it’s worth checking out.

          Red lentils (or other lentils) are an amazingly inexpensive, but high in protein superfood! Did you know that lentils have been around for thousands of years? Yes, they have!

          Lentils contain large amounts of vitamins, minerals, potassium, fiber and polyphenols (think antioxidants!), and are a wonderful source of protein in “meatless” dishes.

          If you’re not too familiar with lentils… what they are and to learn more about their history and nutritional value, check out the info on this amazing food source here

          Today I want to share this yummy recipe I found online many years ago online. So… here we go!

          Scroll Down For A Printable Recipe Card At The Bottom Of The Page

          Rinse And Drain, Rinse And Drain!

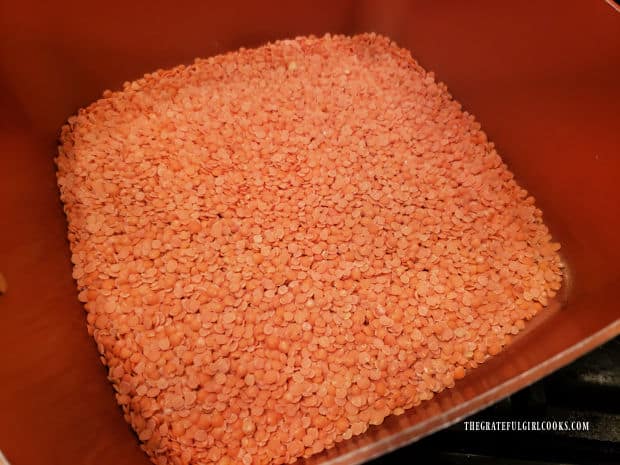
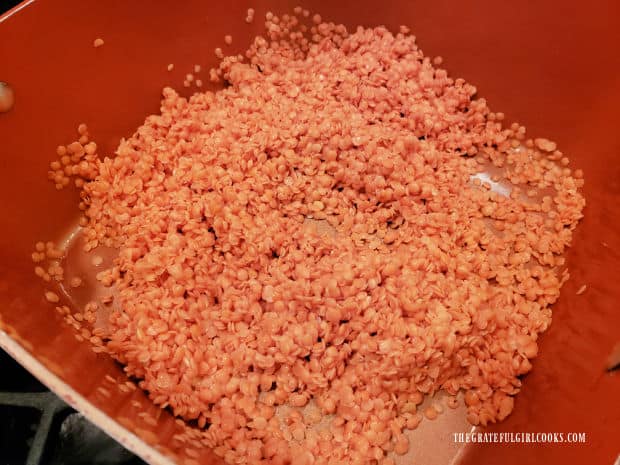
          Lentils need to be rinsed several times before cooking, to clean them. Pour the red lentils into a large saucepan (one that has a lid). Cover the lentils completely with water.

          Stir or swirl them around in the water, then cover the pan with the lid, and drain off the water. Be sure to hold the lid on tightly so the lentils can’t “escape” while draining!

          Repeat this process 1-2 more times or until the water becomes mostly clear, to ensure the lentils are cleaned and “good to go”.

          Red lentils are placed in saucepan, covered with water, then drained.After rinsing several times, the red lentils are ready to be cooked in more water.

          Cook The Lentils

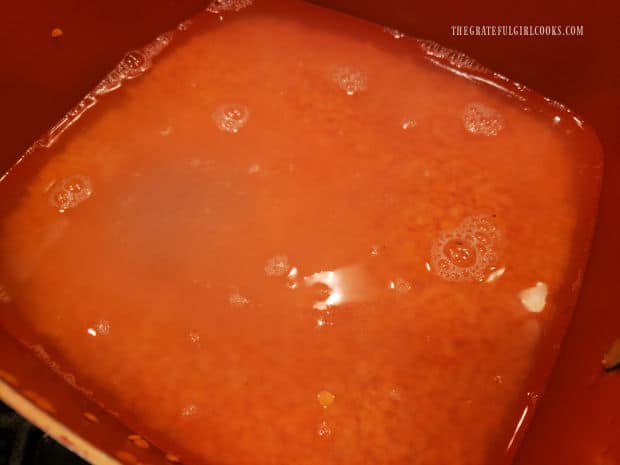
          Add 4 cups of fresh water back into the pan with the lentils, and cover the pan. Turn the heat to HIGH, and let the water come to a boil

          Once the water has begun boiling, turn off the heat, then remove the pan from the heat source. Keeping the lid on, let the lentils rest for 20 minutes, without disturbing.

          The red lentils are brought to a boil, then sit covered off the heat, for 20 minutes.

          Cook The Veggies While Lentils Are “Resting”

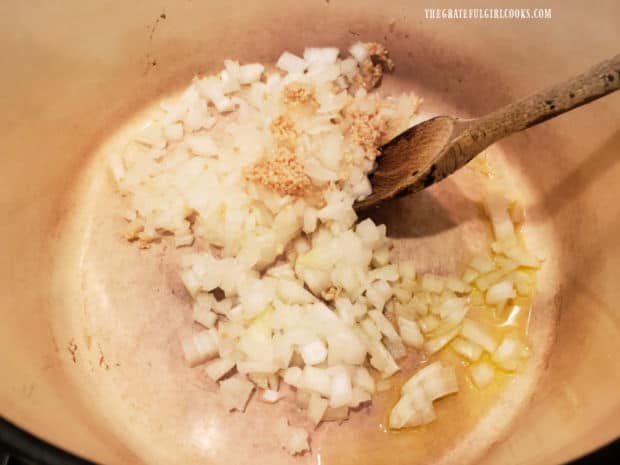
          Place a large soup pot on the stovetop, and add olive oil. Begin to heat the oil on medium-low, then add diced onions and minced garlic.

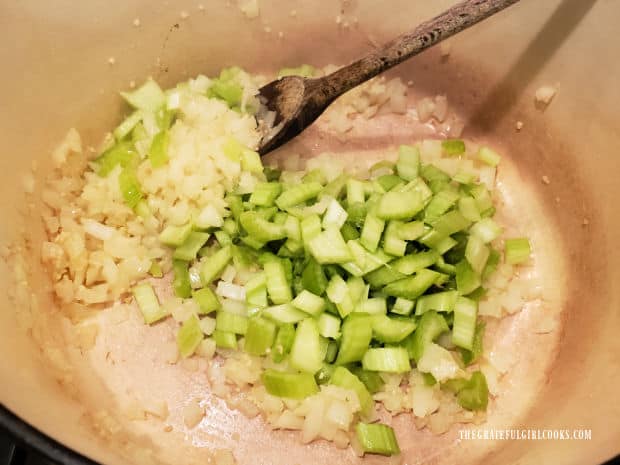
          Continue to cook, stirring often, until onions have become tender, then add diced celery, and stir to combine. Cook for a couple minutes until the celery starts to get soft.

          Chopped onion and minced garlic are cooked in olive oil in a large pot.Celery is added to the onions and garlic in the pan.

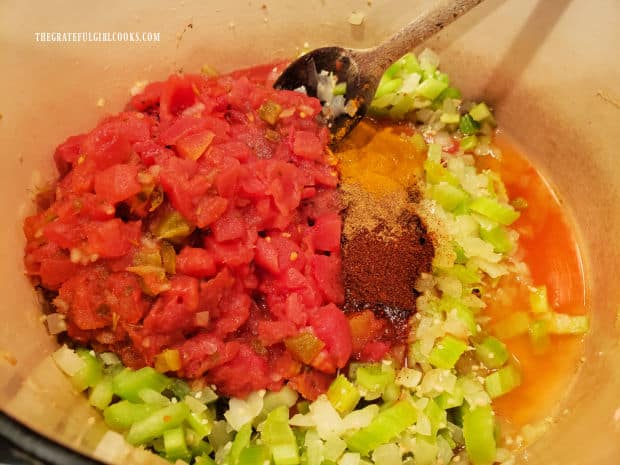
          The next ingredients to add to the pan are fire-roasted canned tomatoes, chili powder, turmeric, ground cumin and hot sauce.

          NOTE: For the hot sauce I use Tabasco sauce, and use between 6-8 dashes, but if you like it HOT, add 10-15 dashes.

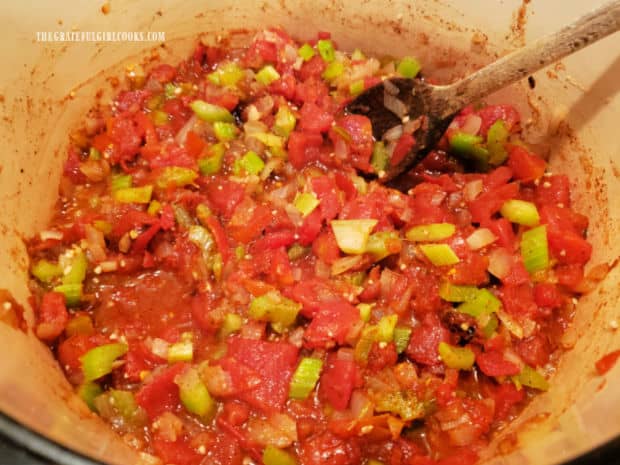
          Stir these ingredients until they are fully combined, and then you are ready to finish this soup with lentils and broth.

          Fire-roasted tomatoes, spices and hot sauce are added to the pan.The soup pot is now filled with vegetables, spices and tomatoes, all combined.

          Drain The Cooked Lentils

          Drain the remaining water off of the cooked red lentils, then add the lentils to the soup pan. Pour the vegetable broth into the soup pot, as well.

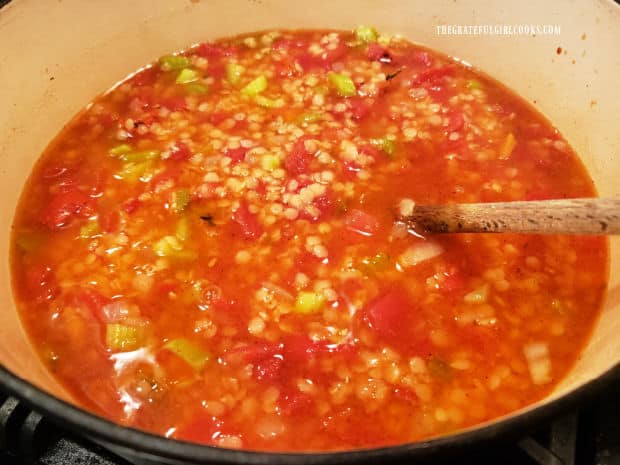
          Give the Mexican red lentil soup a stir to incorporate all the ingredients, then let the soup simmer (uncovered) on medium-low heat for 15 minutes.

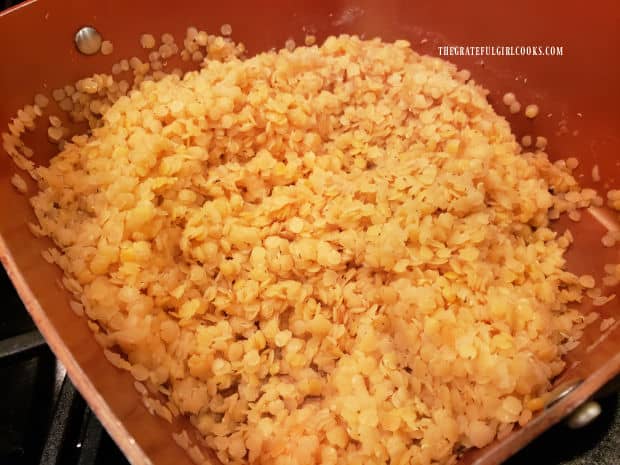
          After draining off water, the cooked lentils are ready to add to the soup.The red lentils and vegetable broth are added to the soup mixture already in the pot.

          Final Step Before Serving

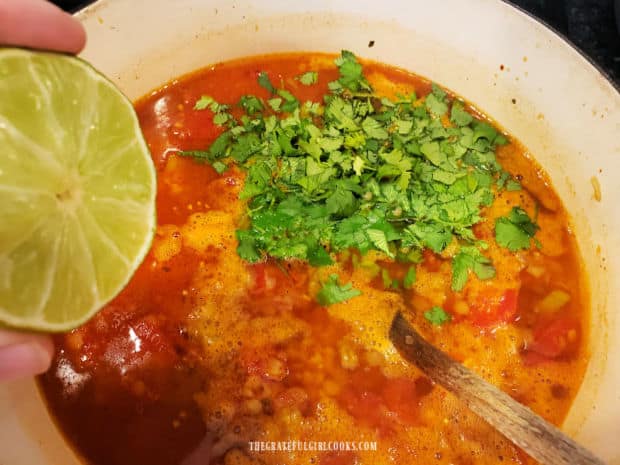
          After 15 minutes the soup will be nice and hot. Stir in chopped cilantro leaves, then squeeze in the the juice of one medium-sized lime.

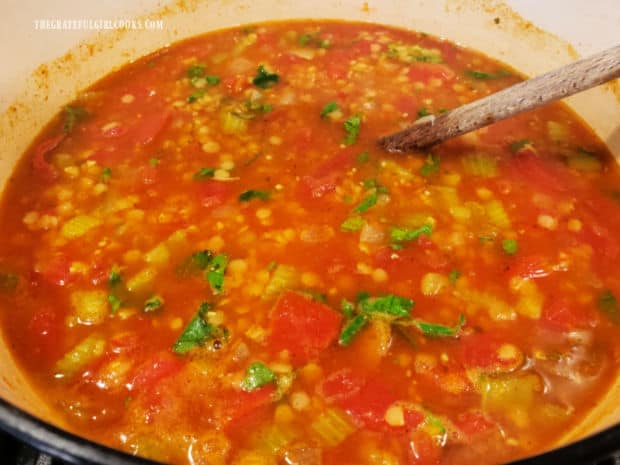
          Stir these ingredients into the soup, then take a little taste. Add salt or more hot sauce, if desired, to suit your taste. Now your Mexican Red Lentil Soup is ready to serve!

          Chopped cilantro and the juice from a lime are added to the Mexican red lentil soup.When hot, the Mexican red lentil soup is now ready to be served and enjoyed.

          Enjoy A Bowl Of Mexican Red Lentil Soup

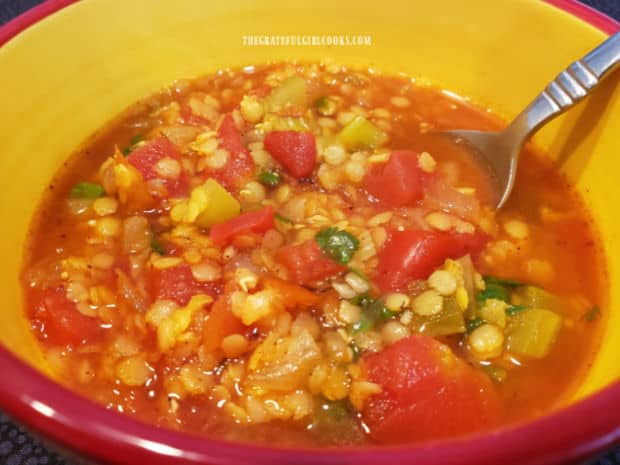
          This soup will yield about 7 servings in total. Ladle each portion (about 1½ cups per serving) into bowls, serve hot… and enjoy!

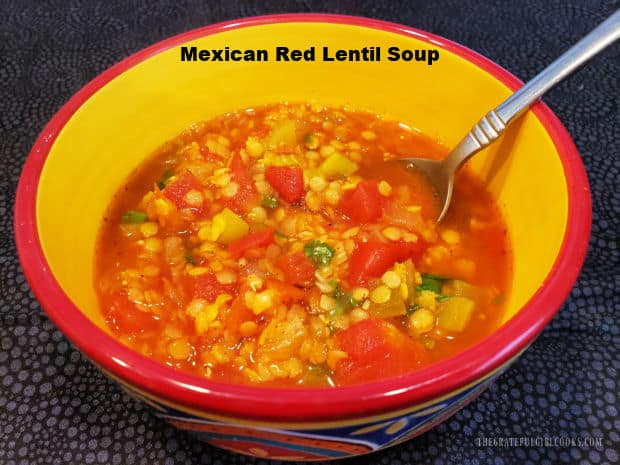
          A red and yellow bowl, filled with one serving of Mexican red lentil soup.

          I really hope you have the chance to make this delicious Mexican Red Lentil Soup for those you love. It’s REALLY good, and I’m sure you will enjoy it.

          Store any leftover soup in an airtight container in the refrigerator for up to 3-4 days. It can be easily reheated on the stovetop or in a microwave. It freezes fairly well, also. 

          Thank you for stopping by today. I invite you to come back again soon for more family-friendly recipes! Take care, may God bless you, and have a GREAT day!

          Looking For More SOUP Recipes?

          You can find ALL of my recipes in the Recipe Index, which is located at the top of the page. I have LOTS of delicious soup recipes, including:

          Want More Recipes? Get My FREE Newsletter!

          I publish a newsletter 2 times per month (1st and 15th) with lots of recipes, tips, etc..
          Would you like to join our growing list of subscribers?

          There is a Newsletter subscription box on the top right (or bottom) of each blog post, depending on the device you use.
          You can submit your e-mail address there, to be added to my mailing list.

          Find Me On Social Media:

          Facebook page: The Grateful Girl Cooks!
          Pinterest:
          The Grateful Girl Cooks!
          Instagram:
          jbatthegratefulgirlcooks

          Author's signature

          Original recipe source, and with thanks to Beth Moncel, at: https://www.budgetbytes.com/2009/12/mexican-lentil-stew/

          ↓↓ PRINTABLE RECIPE BELOW ↓↓

          0 from 0 votes
          Mexican Red Lentil Soup
          Prep Time
          10 mins
          Cook Time
          40 mins
          Total Time
          50 mins
           

          Mexican Red Lentil Soup has all the flavor of a good chili recipe, but it's a meatless soup you'll really love, with enough for 7 helpings!

          Category: Main Dish, Soup
          Cuisine: Mexican
          Keyword: Mexican red lentil soup
          Servings: 7 (1½ cups per serving)
          Calories Per Serving: 250 kcal
          Author: JB @ The Grateful Girl Cooks!
          Ingredients
          • 2 cups dry red lentils
          • 1 Tablespoon olive oil
          • 1 medium yellow onion peeled, diced
          • 4 stalks celery diced
          • 4 cloves garlic minced
          • 29 ounces canned fire-roasted diced tomatoes =two 14.5 ounce cans
          • ½ Tablespoon chili powder
          • 1 teaspoon ground cumin
          • ½ teaspoon ground turmeric
          • 4 cups vegetable broth
          • 6-8 dashes Tabasco sauce or other hot sauce + more if heat desired!
          • 1 medium lime (juice of)
          • ½ cup chopped cilantro stems removed
          Instructions
          1. Put lentils in a large pot (one with a lid). Cover completely with water. Stir or swirl them around in water; tightly cover pan with lid; drain water out. Repeat 1-2 more times until water is fairly clear.

          2. Add 4 cups water to pan with lentils; cover pan. Turn heat to HIGH; let water come to a boil. Once boiling, turn off heat. Keeping lid on, let lentils rest 20 minutes, undisturbed.

          3. Place large soup pot on stovetop; add olive oil. Heat oil on medium-low; add diced onions and minced garlic. Cook, stirring often, until onions are tender, then add celery; stir to combine. Cook 2-3 minutes until celery becomes tender.

          4. Add tomatoes, chili powder, turmeric, ground cumin and hot sauce into pot; stir until combined. NOTE: For hot sauce I use Tabasco sauce, and use between 6-8 dashes; if you like it HOT, add 10-15 dashes.

          5. Drain any remaining cooking water off lentils, then add lentils to soup pot. Stir in vegetable broth, until combined. Let soup simmer (uncovered) on medium-low heat for 15 minutes.

          6. Stir in chopped cilantro (discarding stems), and juice of one lime. Taste the soup. Add salt or more hot sauce, if desired.
          7. This soup will yield about 7 servings total. Ladle 1½ cups soup per serving into bowls. Serve hot... and enjoy!

          Nutrition Facts
          Mexican Red Lentil Soup
          Amount Per Serving (1 serving (about 1½ cups))
          Calories 250 Calories from Fat 27
          % Daily Value*
          Fat 3g5%
          Saturated Fat 0.4g3%
          Polyunsaturated Fat 1g
          Monounsaturated Fat 2g
          Sodium 753mg33%
          Potassium 611mg17%
          Carbohydrates 42g14%
          Fiber 18g75%
          Sugar 6g7%
          Protein 15g30%
          Vitamin A 1131IU23%
          Vitamin C 9mg11%
          Calcium 86mg9%
          Iron 5mg28%
          * Percent Daily Values are based on a 2000 calorie diet.

          Here’s one more to pin on your Pinterest boards!Mexican Red Lentil Soup has all the flavor of a good chili recipe, but it's a meatless soup you'll really love, with enough for 7 helpings!

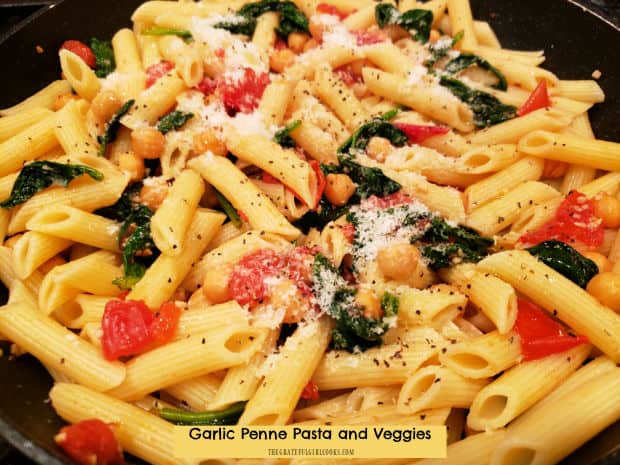
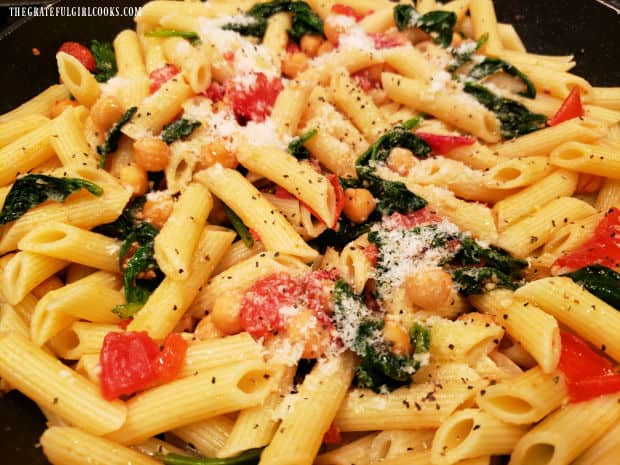
          Garlic Penne Pasta And Veggies

          Garlic Penne Pasta And Veggies is a meatless pasta dish with garlic, spinach, tomatoes, chickpeas and Parmesan. It’s ready in 20 minutes!
          Garlic Penne Pasta And Veggies is a meatless pasta dish with garlic, spinach, tomatoes, chickpeas and Parmesan. It's ready in 20 minutes!

          If you’re looking for a meatless main dish that is full of flavor and takes practically no time at all to prepare, I think you’ll enjoy this tasty meal! Penne pasta is paired with a light garlic, Parmesan and veggie sauce.

          This dish includes garbanzo beans (chickpeas) for added protein, fresh tomatoes, baby spinach and garlic, which bring color, texture, and flavor to the pasta.

          It’s a cinch to make, and is ready in 20 minutes, because you make the sauce and veggies while the pasta cooks! How’s that for convenience? Let me show you how to make this meal:

          Scroll Down For A Printable Recipe Card At The Bottom Of The Page

          Cook The Penne Pasta

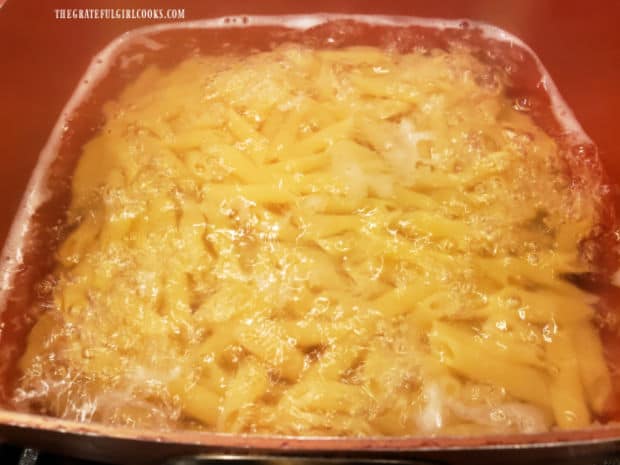
          The first thing you’ll need to do is cook the penne pasta in boiling water, according to the directions found on the package.

          While the pasta is cooking you prepare the rest of this dish, so it’s ready when the pasta is done! Once the penne is done cooking, drain the water off of the hot pasta.

          Penne pasta is cooked in boiling water according to package instructions.

          Prepare The Garlic Sauce And Veggies

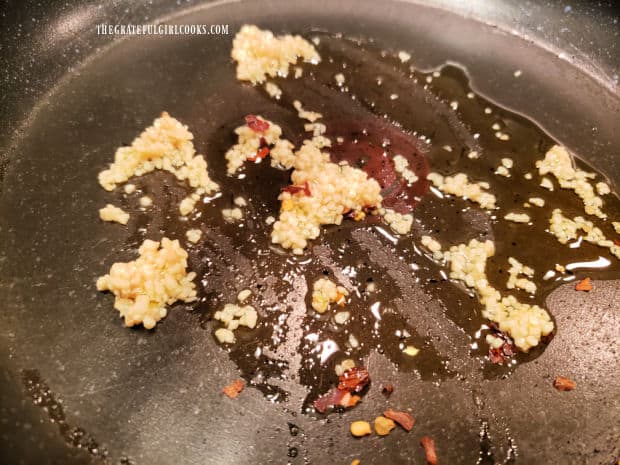
          While the pasta cooks, make the simple garlic sauce and veggies. Heat olive oil on medium heat in a large skillet. Add minced garlic and red pepper flakes to the hot oil.

          Stir to combine, and sauté them, stirring often for 30-45 seconds. Be careful to not burn the garlic or it may become bitter in taste (and you do NOT want that!).

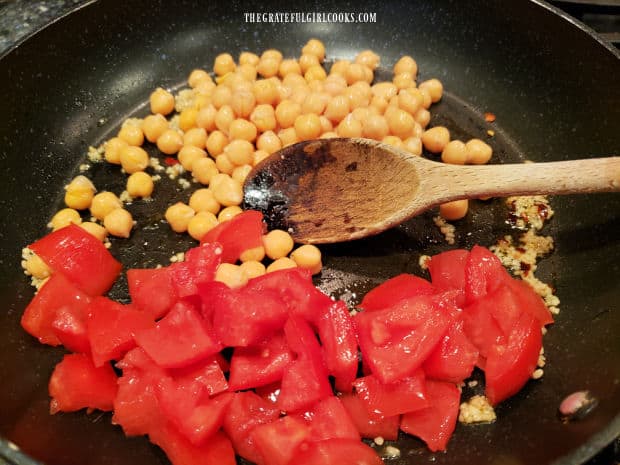
          Add chopped fresh tomatoes and a can of garbanzo beans (chickpeas) that have been rinsed and drained to the skillet.

          Stir to combine, and continue to cook and stir on medium heat for 2 more minutes.

          Minced garlic and red pepper flakes cook in hot oil in a large skillet.Chopped fresh tomatoes and drained chickpeas (garbanzo beans) are added to skillet.

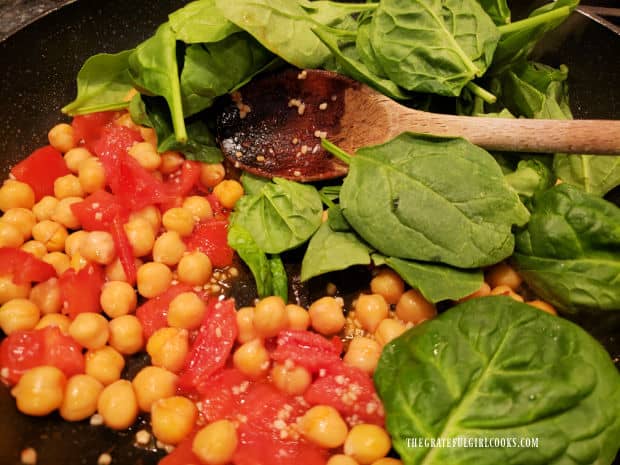
          Place the fresh baby spinach and salt into the skillet, and cook, stirring often until the spinach leaves have wilted from the heat.

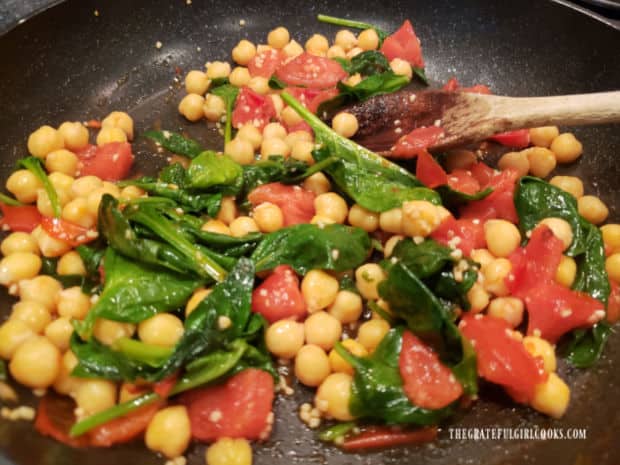
          This is the garlic and veggie sauce you will add to the hot penne pasta, once it is done cooking. See how simple that was?

          Baby spinach and salt are added to the garlic, tomato and chickpeas in skillet and cooked.Once the spinach leaves have wilted from the heat, the garlic and veggie sauce is done.

          Serving The Garlic Penne Pasta And Veggies

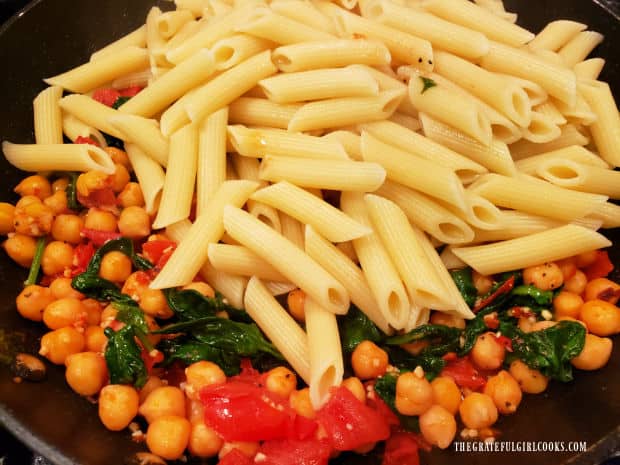
          Once the penne pasta has finished cooking, drain it and immediately add it to the skillet full of veggies. Add grated Parmesan cheese, and then toss the garlic penne pasta and veggies, to combine.

          Because there is not a thick sauce coating everything, the pasta will cool fairly quickly, so serve the pasta immediately while hot. If desired, you can add additional Parmesan cheese to the top as a garnish for serving.

          Cooked, drained penne pasta is added to the garlic and veggie sauce in skillet to combine.Grated Parmesan is added and combined with the Garlic Penne Pasta And Veggies, then served.

          I hope you have the chance to make this delicious dish for those you love, and trust you’ll enjoy it as much as we do.

          Thanks for stopping by, and I hope you’ll come back again soon for more family-friendly recipes. Take care, God bless you, and have a GREAT day!

          Looking For More PASTA Recipes?

          You can find ALL of my recipes in the Recipe Index, which is located at the top of the page. I have lots of wonderful pasta recipes for you to enjoy, including:

          Want More Recipes? Get My FREE Newsletter!

          I publish a newsletter 2 times per month (1st and 15th) with lots of recipes, tips, etc..
          Would you like to join our growing list of subscribers?

          There is a Newsletter subscription box on the top right (or bottom) of each blog post, depending on the device you use.
          You can submit your e-mail address there, to be added to my mailing list.

          Find Me On Social Media:

          Facebook page: The Grateful Girl Cooks!
          Pinterest:
          The Grateful Girl Cooks!
          Instagram:
          jbatthegratefulgirlcooks

          Author's signature

          Original recipe source: Doris Heath, via “Taste of Home Magazine”, Oct./Nov. 2022 edition, page 26, published by Reiman Publications

          ↓↓ PRINTABLE RECIPE BELOW ↓↓

          0 from 0 votes
          Garlic Penne Pasta and Veggies
          Prep Time
          20 mins
          Total Time
          20 mins
           

          Garlic Penne Pasta And Veggies is a meatless pasta dish with garlic, spinach, tomatoes, chickpeas and Parmesan. It's ready in 20 minutes!

          Category: Main Dish
          Cuisine: Italian
          Keyword: garlic penne pasta and veggies
          Servings: 6
          Calories Per Serving: 353 kcal
          Author: JB @ The Grateful Girl Cooks!
          Ingredients
          • 12 ounces uncooked penne pasta
          • 2 Tablespoons extra virgin olive oil
          • 6 cloves garlic minced
          • ¼ teaspoon red pepper flakes or more if you like it spicy
          • 15 ounce can garbanzo beans (chickpeas) rinsed and drained
          • 2 medium tomatoes , seeded, cut in ½" pieces
          • 9 ounces fresh baby spinach
          • ¼ teaspoon salt
          • ¼ cup grated Parmesan cheese + more for garnish, if desired
          Instructions
          1. Cook pasta in boiling water, according to directions on the package. Once pasta is done cooking, drain water off pasta.

          2. While pasta cooks, prepare sauce, so it's ready when pasta is done! Heat olive oil on medium heat in large skillet. Add garlic/red pepper flakes to hot oil. Stir to combine; cook stirring often for 30-45 seconds (don't let garlic burn or it becomes bitter).

          3. Add tomatoes and garbanzo beans (chickpeas). Stir to combine. Continue to cook and stir on medium heat for 2 minutes.

          4. Add spinach and salt to sauce; cook, stirring often until spinach has wilted from the heat. Sauce is now ready for hot, drained pasta.

          5. Once pasta is done, drain; immediately add it to skillet with veggies. Add grated Parmesan cheese; toss well, to combine ingredients. Serve immediately, sprinkled with additional Parmesan cheese, if desired.
          Nutrition Facts
          Garlic Penne Pasta and Veggies
          Amount Per Serving (1 (1½ cups per serving))
          Calories 353 Calories from Fat 72
          % Daily Value*
          Fat 8g12%
          Saturated Fat 2g13%
          Polyunsaturated Fat 2g
          Monounsaturated Fat 4g
          Cholesterol 4mg1%
          Sodium 408mg18%
          Potassium 584mg17%
          Carbohydrates 57g19%
          Fiber 6g25%
          Sugar 3g3%
          Protein 14g28%
          Vitamin A 4401IU88%
          Vitamin C 19mg23%
          Calcium 126mg13%
          Iron 3mg17%
          * Percent Daily Values are based on a 2000 calorie diet.

          Here’s one more to pin on your Pinterest boards!Garlic Penne Pasta And Veggies is a meatless pasta dish with garlic, spinach, tomatoes, chickpeas and Parmesan. It's ready in 20 minutes!

          Easy Black Bean Stew

          Easy Black Bean Stew is a hearty meatless dish, with black beans, pearl couscous, onions, and tomatoes in a savory Southwestern-style broth.
          Easy Black Bean Stew is a hearty meatless dish, with black beans, pearl couscous, onions, and tomatoes in a savory Southwestern-style broth.

          If you enjoy the flavor of chili, then I’m confident you will enjoy this easy black bean stew. The dish is incredibly simple to prepare, and is very filling, because of the black beans and pearl couscous used. Onions, diced tomatoes and spices round out the dish, and when garnished with sour cream and green onions, it’s a great meatless meal! 

          My husband and I are trying to eat a couple of meatless meals each week, and this one is always a big hit! With only a few minutes prep time and a short cooking time, this meatless meal is not only quick and simple, it tastes GREAT! Here’s how to make this easy black bean stew:

          Scroll Down For A Printable Recipe Card At The Bottom Of The Page

          The recipe calls for pearl couscous (also known as Israeli couscous), which is typically located near the rice at most grocery stores.. It is a round-shaped pasta, similar in size to a pearl, so you can see why it’s called “pearl” couscous. Pearl couscous cooks quickly and is a wonderful addition to this dish.

          Pearl couscous is used in this recipe, and is pearl-shaped pasta.

          First, heat 2 teaspoons of olive oil on medium heat in a large, non-stick saucepan. Once the oil is hot (but not smoking), add chopped onion and the pearl couscous (uncooked). Stir often, and cook for 5 minutes. The onions will soften and the couscous will become lightly “toasted”.

          Add chicken broth, minced garlic and ground cumin to the pan, then bring the liquid to a boil. Cover the saucepan with a lid once it begins boiling, and turn the heat down to low. Allow the broth to simmer (covered) for 5 minutes.

          Chopped onion and pearl couscous are cooked in pan for about 5 minutes.Chicken broth and spices are added to the onion and couscous in pan.

          Almost Finished Making The Stew

          Remove the lid and add black beans (drained, rinsed), diced tomatoes (including juice), and a teaspoon of minced chipotle pepper in adobo sauce. Stir the black bean stew until all the ingredients are combined. 

          Put a lid on the pan and let the stew simmer (covered) on low heat for 4 minutes, or until the pearl couscous is tender. The stew will be fairly thick when done. If you want it to be more “soup-like”, add a bit more broth or hot water, and stir it in. I usually tend to add a bit more broth to ours at the very end. See how easy it is to make black bean stew? Now you’re ready to serve it! 

          Chipotle pepper, black beans and diced tomatoes are added to the easy black bean stew.Easy black bean stew cooks and broth is added to thin it out, if desired.

          Serve The Easy Black Bean Stew

          When the stew is fully heated and the couscous is tender, it is ready to serve! Ladle the black bean stew into serving bowls. If desired, garnish each serving with a dollop of sour cream and some chopped green onions (scallions). The garnishes are optional, but provide great added color and flavor to the dish, and I heartily recommend it!

          You could also add avocado chunks or chopped cilantro, if desired, to “make it your own”. This soup really does taste great, for something so simple to make! I am confident you’re going to enjoy this meal. A big slice of crusty bread on the side goes well with the stew. It tastes great dipping it into the seasoned broth. YUM!

          The easy black bean stew is garnished with chopped green onions and sour cream to serve.A white bowl full of easy black bean stew is ready to be eaten and enjoyed.

          I sure hope you enjoy this delicious black bean stew, if you have the opportunity to try it. Thank you so much for stopping by today, and I invite you to come back soon for more delicious recipes. Take care, may God bless you, and have a great day.

          Looking For More SOUP Recipes?

          You can find ALL of my recipes in the Recipe Index, located at the top of the page. I have lots of fantastic soup recipes for you to check out, including:

          Interested In More Recipes?

          Thank you for visiting this website. I appreciate you using some of your valuable time to do soIf you’re interested, I publish a newsletter 2 times per month (1st and 15th) with all the latest recipes, and other fun info. I would be honored to have you join our growing list of subscribers, so you never miss a great recipe!
          There is a Newsletter subscription box on the top right side (or bottom) of each blog post, depending on the device you use, where you can easily submit your e-mail address (only) to be included in my mailing list.

          You Can Also Find Me On Social Media:

          Facebook page: The Grateful Girl Cooks!
          Pinterest:
          The Grateful Girl Cooks!
          Instagram:
          jbatthegratefulgirlcooks

          Author's signature

          Recipe adapted from the cookbook: “Cooking Light Annual Recipes 2004, page 273, published in 2003 by Oxmoor House

          ↓↓ PRINTABLE RECIPE BELOW ↓↓

          0 from 0 votes
          Easy Black Bean Stew
          Prep Time
          10 mins
          Cook Time
          15 mins
          Total Time
          25 mins
           

          Easy Black Bean Stew is a hearty meatless dish, with black beans, pearl couscous, onions, and tomatoes in a savory Southwestern-style broth.

          Category: Main Dish, Meatless, Soup
          Cuisine: American
          Keyword: black bean stew
          Servings: 4 small bowls
          Calories Per Serving: 211 kcal
          Author: JB @ The Grateful Girl Cooks!
          Ingredients
          • 2 teaspoons olive oil
          • ½ cup chopped yellow onion
          • cup uncooked Israeli (pearl) couscous
          • cups low-sodium chicken broth
          • 1 can black beans (14.25 oz.) rinsed, drained
          • 1 can diced tomatoes (14.25oz.) including juice
          • 1 teaspoon minced canned chipotle chili in adobo sauce
          • 1 teaspoon minced garlic
          • ¼ teaspoon ground cumin
          For Garnish: (optional, but recommended!)
          • 1 Tablespoon sliced green onions
          • 4 teaspoons low-fat sour cream
          Instructions
          1. Heat olive oil on medium heat in a large, non-stick saucepan. Once oil is hot (but not smoking), add chopped yellow onion and uncooked couscous.. Stir often, and cook for 5 minutes.

          2. Add chicken broth, garlic and cumin to the pan. Bring liquid to a boil. Cover pan with a lid once boiling and turn heat to low. Let stew simmer (covered) for 5 minutes.

          3. Remove lid; add black beans, tomatoes (including juice), and minced chipotle pepper in adobo sauce. Stir until all ingredients are combined. Cover pan; simmer (covered) on low heat for 4 minutes, or until couscous is tender. NOTE: Stew will be fairly thick. If you want it more "soup-like", add more broth or hot water, and stir it in.

          4. Ladle stew into serving bowls. If desired, garnish each serving with a dollop of sour cream and chopped green onions. Garnishes are optional, but provide added color and flavor, Serve hot, and enjoy!

          Recipe Notes

          NOTE: Caloric calculation includes sour cream and green onion garnish in total.

          Nutrition Facts
          Easy Black Bean Stew
          Amount Per Serving (1 (1/4 of total))
          Calories 211 Calories from Fat 36
          % Daily Value*
          Fat 4g6%
          Saturated Fat 1g6%
          Polyunsaturated Fat 1g
          Monounsaturated Fat 2g
          Cholesterol 1mg0%
          Sodium 581mg25%
          Potassium 648mg19%
          Carbohydrates 36g12%
          Fiber 9g38%
          Sugar 4g4%
          Protein 11g22%
          Vitamin A 215IU4%
          Vitamin C 14mg17%
          Calcium 87mg9%
          Iron 3mg17%
          * Percent Daily Values are based on a 2000 calorie diet.

          Here’s one more to pin on your Pinterest boards!Easy Black Bean Stew is a hearty meatless dish, with black beans, pearl couscous, onions, and tomatoes in a savory Southwestern-style broth.

          Butternut Squash Coconut Curry

          Butternut Squash Coconut Curry, served on a bed of rice, is a delicious, meatless dish, packed with flavor. This simple recipe makes 4 servings.
          Butternut Squash Coconut Curry, served on a bed of rice, is a delicious, meatless dish, packed with flavor. Simple recipe makes 4 servings.

          If you’re looking for a delicious, flavorful meatless meal, may I suggest trying this recipe for butternut squash coconut curry? It’s really delicious… and honestly, the most difficult thing about the recipe is peeling and cubing the squash! Even though my husband and I love meat, we try to have 1 or 2 “meatless meals” every week, and this recipe fits the bill. 

          I’m always on the lookout for vegetarian meals since our youngest son began following that eating path quite a few years ago. I prepared this recipe to see how it tasted, so I could possibly serve it to our son and his girlfriend (also a vegetarian) when they come for dinner in our home. After making this dish and enjoying it several times, I’m confident they would like it, too!

          The butternut squash coconut curry is big on flavor! Cubes of tender butternut squash pair well with onions, garlic, ginger, curry spices, vegetable broth and coconut milk for a tasty main dish.

          It tastes wonderful, served on a bed of steamed rice. I’m sure if you try it, you’ll enjoy it. Here’s how to make this recipe:

          Scroll Down For A Printable Recipe Card At The Bottom Of The Page

          Prepare The Butternut Squash

          Use a vegetable peeler to remove all the outside peel from a butternut squash. Carefully slice the squash in half lengthwise, from top to bottom.

          Remove the seeds and stringy pulp from each piece, then slice the squash into 1″ thick half-rings.

          Cut each slice into bite-sized cubes about 1″ in diameter. You will need a total of 4 cups of cubed butternut squash for this dish.

          Butternut squash is peeled, halved, de-seeded, then cut into cubes.

          Make The Curry Seasoning

          Heat coconut oil in a large skillet or saucepan on Medium-high heat. Add chopped onion, minced garlic and grated fresh ginger. Stir to combine, and cook for 3-4 minutes, stirring often, until the onion becomes tender and translucent. Continue stirring, to prevent the garlic from burning and becoming bitter.

          Stir curry powder, thyme, and paprika into the onion mixture in the skillet, and continue to cook (and stir), for one more minute.

          Chopped onions, garlic and grated ginger are cooked in hot oil in a large skillet.Curry powder, thyme and paprika are added to cooked onion/garlic mixture in skillet.Onions, ginger, garlic and curry spices cook together in skillet for 1 minute.

          Cook The Curry

          Now add a can of coconut milk (stirred before adding), vegetable broth, and the butternut squash cubes. Stir to combine these ingredients, then bring the liquid to a boil. Once it begins boiling, place a lid on the pan or skillet.

          Reduce the heat to LOW heat, and let the butternut squash coconut curry simmer for about 13-15 minutes. Cooking time might vary slightly depending on the size of the squash cubes you’ve added.

          When the squash is tender and a knife can easily be inserted without resistance, it is done. You do NOT want the squash to become “mushy”, so keep an eye on it while cooking.

          Cubes of butternut squash, canned coconut milk and vegetable broth are added to the skillet.The butternut squash coconut curry is cooked until the squash becomes tender.

          The last step is to add chopped cilantro, salt and cayenne pepper to the butternut squash coconut curry. Give it a good stir to combine, make sure it’s heated through, and then it’s ready to serve!

          Cilantro, cayenne pepper and salt are stirred into butternut squash coconut curry.

          Serving Butternut Squash Coconut Curry

          We enjoy this dish, especially when served on top of steamed rice. The blandness of the rice is a good balance to the slightly spicy curry flavor. To serve, divide the butternut squash over rice in serving bowls, then top with the sauce and more chopped cilantro.

          Typically curries are usually “swimming” or completely covered in sauce, which is great if you enjoy it that way. For this curry, I spoon lots of the sauce over the rice and butternut squash, but stop short of covering it all up with sauce.

          It’s your choice as to how you wish to serve this dish! All I know is which ever way you prefer to serve this butternut squash coconut curry, I believe you’ll enjoy it!

          Butternut Squash Coconut Curry is served on top of steamed rice, in a white bowl.The butternut squash is tender and is garnished with chopped cilantro for serving.

          Thanks for stopping by, and I hope you will come back again soon! If you enjoy butternut squash, I’m confident you’ll also enjoy Butternut Squash Soup with Bacon, and Maple Butternut Squash with Pecans and Cranberries! 

          Take care. Count your many blessings, thank God for them… and have a wonderful day.

          Looking For More MEATLESS MEAL Recipes?

          You can find ALL of my recipes in the Recipe Index, located at the top of the page. I have some wonderful meatless main dish recipes you might enjoy, including:

          Interested In More Recipes?

          Thank you for visiting this website. I appreciate you using some of your valuable time to do soIf you’re interested, I publish a newsletter 2 times per month (1st and 15th) with all the latest recipes, and other fun info. I would be honored to have you join our growing list of subscribers, so you never miss a great recipe!
          There is a Newsletter subscription box on the top right side (or bottom) of each blog post, depending on the device you use, where you can easily submit your e-mail address (only) to be included in my mailing list.

          You Can Also Find Me On Social Media:

          Facebook page: The Grateful Girl Cooks!
          Pinterest:
          The Grateful Girl Cooks!
          Instagram:
          jbatthegratefulgirlcooks

          Author's signature

          Original recipe source: Michelle Blackwood at: healthiersteps.com/recipe/butternut-squash-coconut-curry/

          ↓↓ PRINTABLE RECIPE BELOW ↓↓

          0 from 0 votes
          Butternut Squash Coconut Curry
          Prep Time
          15 mins
          Cook Time
          15 mins
          Total Time
          30 mins
           

          Butternut Squash Coconut Curry, served on a bed of rice, is a delicious meatless dish, packed with flavor.

          Category: Main Course
          Cuisine: American
          Keyword: butternut squash coconut curry
          Servings: 4
          Calories Per Serving: 202 kcal
          Author: JB @ The Grateful Girl Cooks!
          Ingredients
          • 4 cups butternut squash peeled, de-seeded, cut in 1" cubes
          • 1 Tablespoon coconut oil
          • 1 medium yellow onion finely chopped
          • 1 teaspoon fresh ginger finely grated
          • 4 cloves garlic minced
          • Tablespoons curry powder
          • 1 teaspoon dried thyme
          • ½ teaspoon paprika
          • 1 can light coconut milk (14 oz.) stirred before using
          • 1 cup vegetable broth
          • 1 teaspoon salt
          • ¼ teaspoon cayenne pepper (optional, but good)
          • 2 Tablespoons fresh cilantro leaves chopped + more for garnish, if desired
          Instructions
          1. Peel butternut squash, then slice in half lengthwise, from top to bottom. Remove seeds/stringy pulp. Slice into 1" thick half-rings. Cut each slice into 1" cubes.

          2. Heat coconut oil in a large skillet or pan on Medium-High. Add onion, garlic and ginger. Stir to combine; cook 3-4 minutes, stirring often, until onion becomes tender and translucent. Stirring prevents garlic from burning and becoming bitter. Add curry powder, thyme, and paprika to skillet; cook and stir for one minute.

          3. Stir in in coconut milk, vegetable broth, and cubed butternut squash. Stir to combine, then bring liquid to a boil. Place a lid on the pan or skillet. Reduce heat to LOW; let simmer for 13-15 minutes. Cooking time might vary slightly depending on size of the squash cubes. When squash is tender and a knife can be inserted without resistance, it is done. Don't let squash become "mushy", so keep an eye on it while cooking.

          4. Add cilantro, salt and cayenne pepper; stir to combine. It tastes great served on top of steamed rice. Garnish with more cilantro, if desired. Serve hot and enjoy!
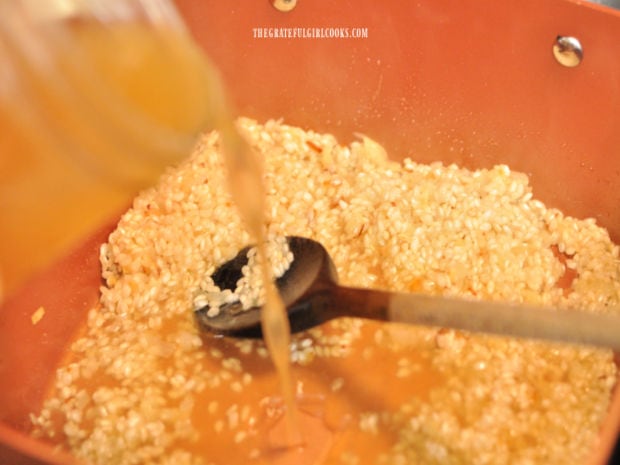
          5. Store leftovers up to 3-4 days (covered) in refrigerator. Microwave to reheat.
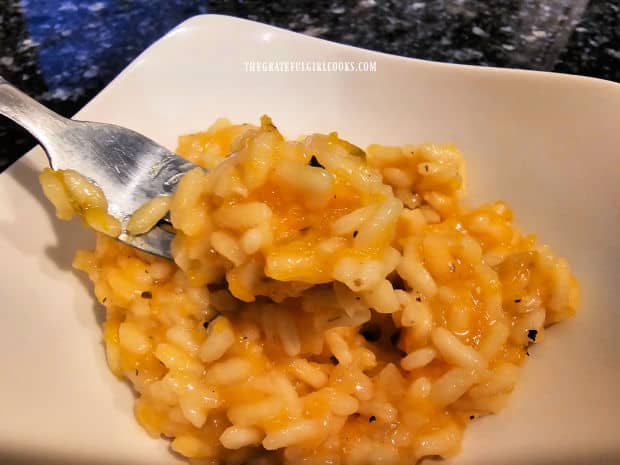
          Nutrition Facts
          Butternut Squash Coconut Curry
          Amount Per Serving (1 (1/4 of total))
          Calories 202 Calories from Fat 90
          % Daily Value*
          Fat 10g15%
          Saturated Fat 10g63%
          Polyunsaturated Fat 1g
          Monounsaturated Fat 1g
          Sodium 905mg39%
          Potassium 599mg17%
          Carbohydrates 26g9%
          Fiber 4g17%
          Sugar 5g6%
          Protein 2g4%
          Vitamin A 15232IU305%
          Vitamin C 33mg40%
          Calcium 98mg10%
          Iron 2mg11%
          * Percent Daily Values are based on a 2000 calorie diet.

          Here’s one more to pin on your Pinterest boards!Butternut Squash Coconut Curry, served on a bed of rice, is a delicious,meatless dish, packed with flavor. Butternut Squash Coconut Curry, served on a bed of rice, is a delicious, meatless dish, packed with flavor. Simple recipe makes 4 servings.