Category: Mexican / Southwestern

Chicken Veggie TexMex Skillet

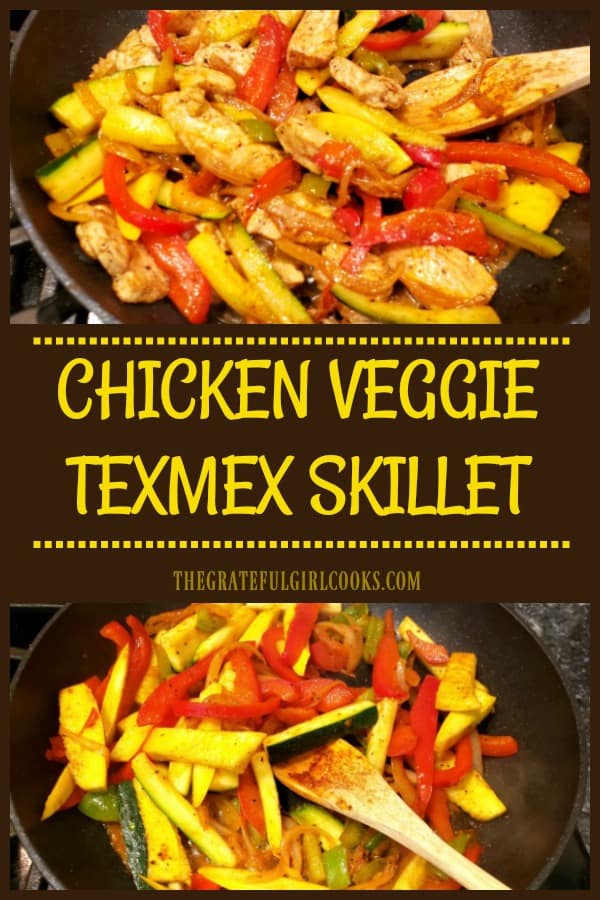
Southwest flavors shine in this deliciously seasoned, low-calorie Chicken Veggie TexMex Skillet, with zucchini, onion, yellow squash, & bell peppers!
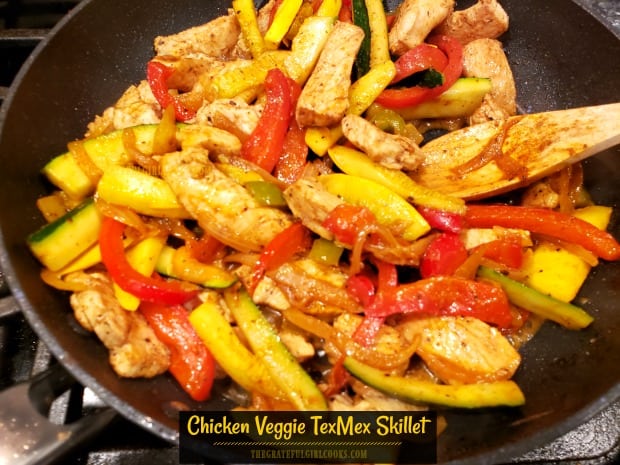

Anybody out there enjoy fajitas? I sure do, and chicken fajitas (in flour tortillas) are my favorite. This recipe for chicken veggie TexMex skillet is one I came up with while trying to cut out some carbs from my diet a few years ago. I wanted to enjoy the TASTE of fajitas, but with far less calories from tortillas, sour cream and guacamole!

Well… here’s a tasty solution! Southwestern-inspired spices, chicken breast strips, onions, peppers and green and yellow zucchini squash are featured in this simple dish! Everything can be eaten as is (no tortillas), for a “healthier” yet delicious TexMex meal!

It’s REALLY GOOD, and you get your protein (chicken) AND veggies, without a lot of extra calories! Here’s how to make a chicken veggie TexMex skillet:

Scroll down For A Printable Recipe Card At The Bottom Of The Page

Prepare The Chicken

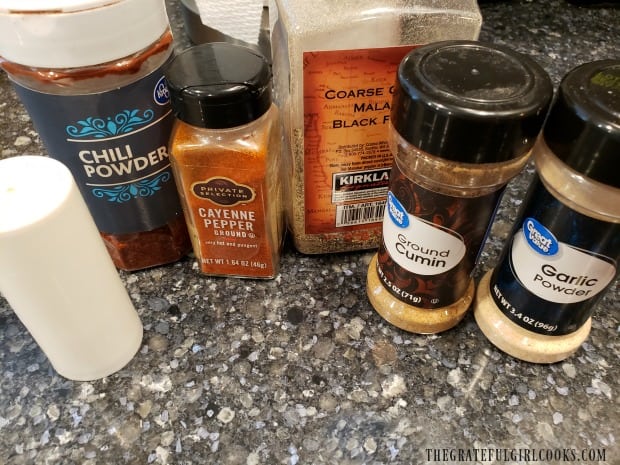
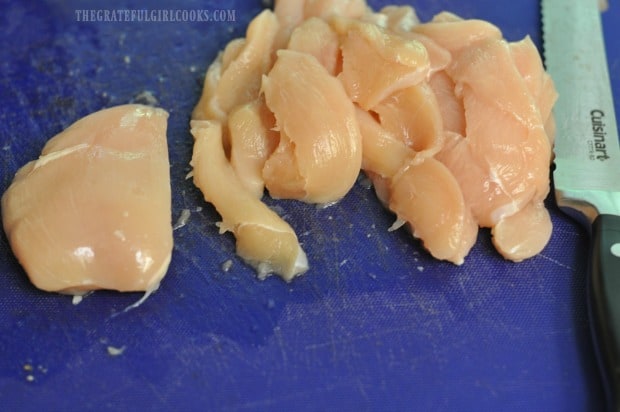
Pat two large boneless, skinless chicken breasts dry with paper towels. Slice into strips, about 2″ long and 1″ wide. Mix together the Southwest-inspired spices and sprinkle lightly over the chicken pieces. The spices used are ground cumin, garlic powder, chili powder, salt, pepper, and cayenne pepper.

Boneless, skinless chicken breasts are cut into strips before cooking.Salt, chili powder, cayenne pepper, pepper, cumin and garlic powder are the seasonings for chicken.

Pan-Sear The Seasoned Chicken

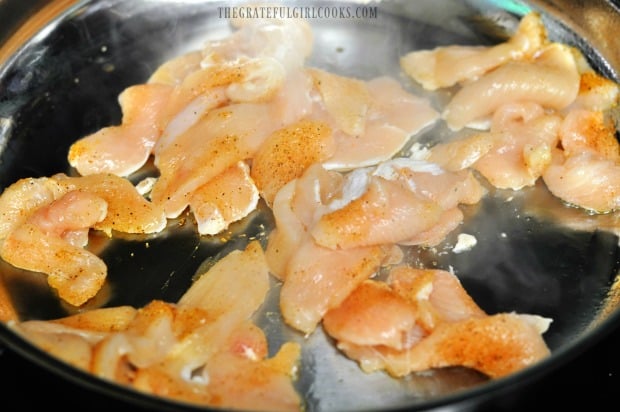
Heat 1½ Tablespoons vegetable oil in a large skillet, over medium-high heat. Once the oil is very hot (but NOT smoking), add the chicken pieces. They should sizzle when they hit the pan.

TexMex seasoned chicken is pan-seared in hot oil in a skillet.

Cook the chicken until the pieces are lightly browned on the bottom. This will take 2-3 minutes, depending on how hot the oil in the skillet is.

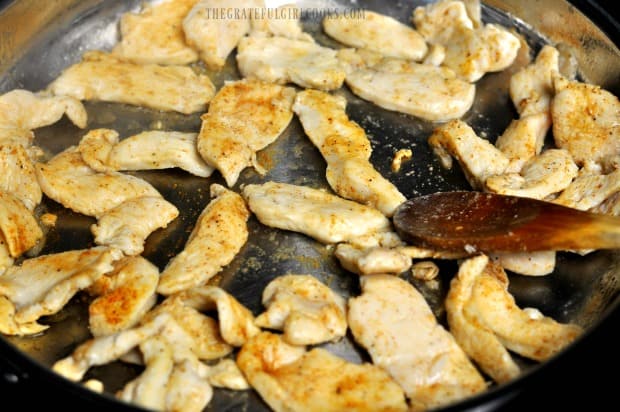
Turn each piece of chicken over, and finish cooking on the second side (a minute or two). Once the chicken is cooked all the way through and golden brown, remove the skillet from the heat, and set aside.

The chicken strips are turned halfway through cooking to brown the other side.

Prepare And Cook The Veggies

Prepare the veggies by slicing the onion and the red and green bell peppers into thin strips. Cut the squash into “planks”, as shown below, and then combine the all the veggies.

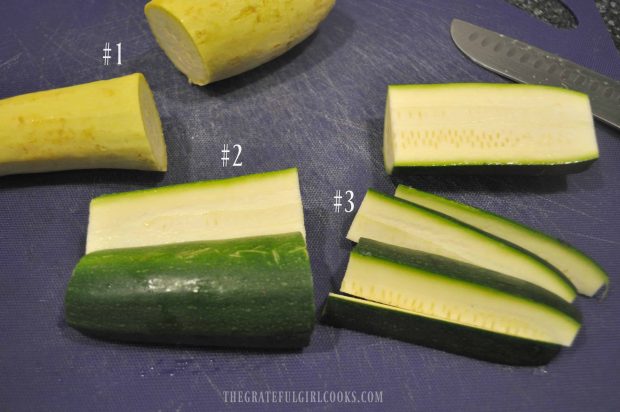
To cut the zucchini and yellow squash, remove both ends. Cut the squash in half, as shown in Step #1 below.  Now cut the half portion in half (step #2- below). Finally (step #3-below), slice each piece into planks, about 1/2″ wide.

Zucchini and yellow squash are cut into plank shapes using 3 steps, as shown.

Cook The Veggies

Heat the remaining 1½ Tablespoons of oil on medium-high heat in a large skillet. Once the oil is hot, but not smoking, add the prepared veggies, and stir. Lightly season with additional salt and pepper (if desired).

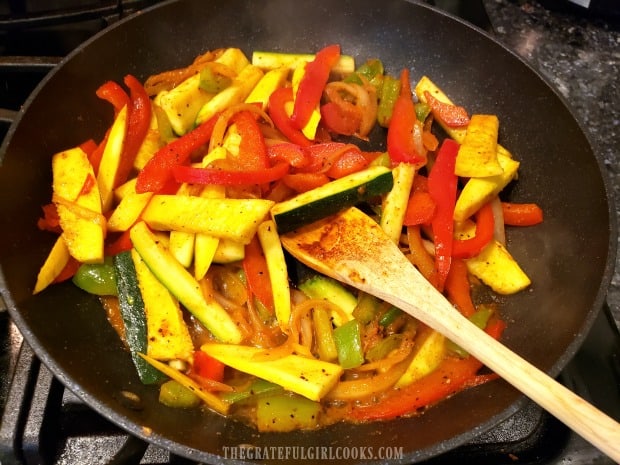
Continue to cook the veggies, stirring often, for 5-6 minutes, or until they have softened, and are fully heated through.

Veggies are cooked to add to the chicken veggie TexMex skillet.

Last Step For The Chicken Veggie TexMex Skillet!

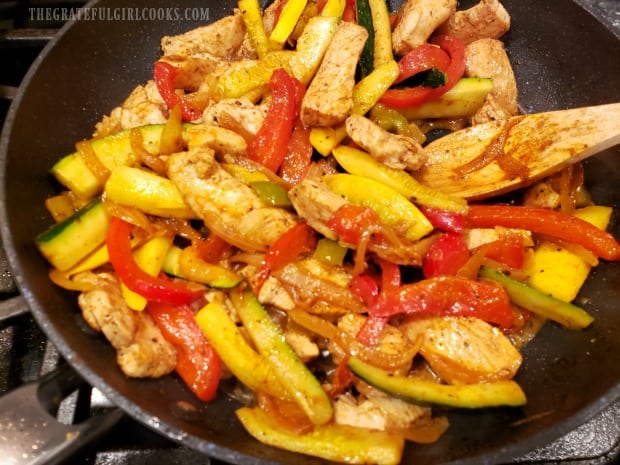
Once the veggies have cooked through, add the seasoned chicken pieces back into the pan. Stir to combine all the ingredients in the chicken veggie TexMex skillet, and cook until the entire dish is heated through. When ready to serve, portion out the chicken and veggies onto plates.

We enjoy eating it, as is, as a delicious low-calorie dish of meat and veggies. HOWEVER, if you really want something else to go with it, place it on top of steamed rice, or throw it in a warmed tortilla!

You can even go crazy and top it with grated cheese, sour cream or guacamole, if calories aren’t a concern! .

Chicken Veggie TexMex Skillet is fully cooked and ready to eat!

 I truly hope you enjoy this dish. Thank you for spending a bit of your valuable time on this blog today, friends. I appreciate it, and hope you have the opportunity to make this meal for those you love.

Have a wonderful day, take care, and may God bless you!

Looking For More CHICKEN Recipes?

You can find ALL of my recipes in the Recipe Index, located at the top of the page. I have LOTS of recipes featuring chicken, including:

Interested In More Recipes?

Thank you for visiting this website. I appreciate you using some of your valuable time to do soIf you’re interested, I publish a newsletter 2 times per month (1st and 15th) with all the latest recipes, and other fun info. I would be honored to have you join our growing list of subscribers, so you never miss a great recipe!
There is a Newsletter subscription box on the top right side (or bottom) of each blog post, depending on the device you use, where you can easily submit your e-mail address (only) to be included in my mailing list.

You Can Also Find Me On Social Media:
Facebook page: The Grateful Girl Cooks!
Pinterest: The Grateful Girl Cooks!
Instagram: jbatthegratefulgirlcooks

Author's signature

0 from 0 votes
Chicken Veggie TexMex Skillet
Prep Time
15 mins
Cook Time
15 mins
Total Time
30 mins
 

Southwest flavors shine in this deliciously seasoned, low-calorie Chicken Veggie TexMex Skillet, with zucchini, onion, yellow squash, & bell peppers!

Category: Entree
Cuisine: Southwestern
Keyword: chicken veggie texmex skillet
Servings: 3
Calories Per Serving: 245 kcal
Author: JB @ The Grateful Girl Cooks!
Ingredients
  • 2 large chicken breasts (boneless skinless) , cut into 2" strips
  • Tablespoons vegetable oil , for cooking chicken
  • ¼ teaspoon ground cumin
  • ¼ teaspoon chili powder
  • ¼ teaspoon salt and pepper (¼ tsp. EACH)
  • teaspoon cayenne pepper
  • teaspoon garlic powder
  • Tablespoons vegetable oil , for cooking veggies
  • 3 cups zucchini and yellow squash (1½ cups EACH) , cut into 2" long x 1" wide planks
  • ½ medium red bell pepper , seeded and cut in thin strips
  • ¼ medium green bell pepper , seeded and cut in thin strips
  • ½ medium brown onion , thinly sliced
Instructions
  1. Pat two large boneless, skinless chicken breasts dry with paper towels. Slice into strips approx. 2" long by 1" wide. Mix spices together and sprinkle lightly over chicken, to season. Mix by hand, to distribute spices onto chicken.

  2. Heat 1½ Tablespoons vegetable oil in a large skillet, on medium-high heat. Once oil is very hot (but NOT smoking), add chicken. Chicken should sizzle when it hits the pan. Cook until lightly browned on the bottom (approx. 2-3 minutes). Turn each piece of chicken over, and finish cooking for and additional 1-2 minutes. Once chicken is fully cooked through and golden brown, remove skillet from heat, and set aside.

  3. Slice onion and red and green bell peppers into thin strips. Cut squash into "planks", and then combine all veggies. Heat 1½ Tablespoons of oil on medium-high heat in large skillet. Once oil is hot, but not smoking, add veggies, and stir. Lightly season with additional salt and pepper (optional- if desired). Continue to cook, stirring often, for 5-6 minutes, or until veggies have softened, and are fully cooked through.

  4. Once the veggies have cooked, add the seasoned chicken pieces to the veggies. Stir to combine all ingredients, and cook on medium heat until heated through. To serve, portion out chicken and veggies onto plates. Enjoy!

Nutrition Facts
Chicken Veggie TexMex Skillet
Amount Per Serving (1 (1/3 of total))
Calories 245 Calories from Fat 153
% Daily Value*
Fat 17g26%
Saturated Fat 12g75%
Cholesterol 48mg16%
Sodium 296mg13%
Potassium 688mg20%
Carbohydrates 8g3%
Fiber 2g8%
Sugar 5g6%
Protein 18g36%
Vitamin A 1012IU20%
Vitamin C 58mg70%
Calcium 28mg3%
Iron 1mg6%
* Percent Daily Values are based on a 2000 calorie diet.

Here’s one more to pin on your Pinterest boards!Southwest flavors shine in this deliciously seasoned, low-calorie Chicken Veggie TexMex Skillet, with zucchini, onion, yellow squash, & bell peppers!
 

Air Fryer Chicken Chimichangas

Enjoy delicious, easy to make air fryer chicken chimichangas, with chicken, salsa, black beans & cheese! They cook in 10 minutes, using an air fryer!

I came up with this delicious recipe for air fryer chicken chimichangas while experimenting with our Cosori air fryer. I bought it using some gift cards I was given this summer, and have been having fun trying recipes using it, ever since!

NOTE: If you don’t have an air fryer, see my note at the bottom of the page for baking directions.

The first time I tried making chimichangas, it did NOT go well! I cooked them too long in the air fryer, and they came out ultra crispy, and hard as bricks! NO GOOD! Needless to say, I kept experimenting, until I got it right with this version, so I want to share it with you.

The chimichangas are very filling, and are stuffed with shredded chicken (homemade or rotisserie), black beans, jack cheese, spices and salsa, mixed with sour cream (or plain Greek yogurt).

Scroll Down for A Printable Recipe Card At The Bottom Of The Page

Prepare The Chimichanga Filling

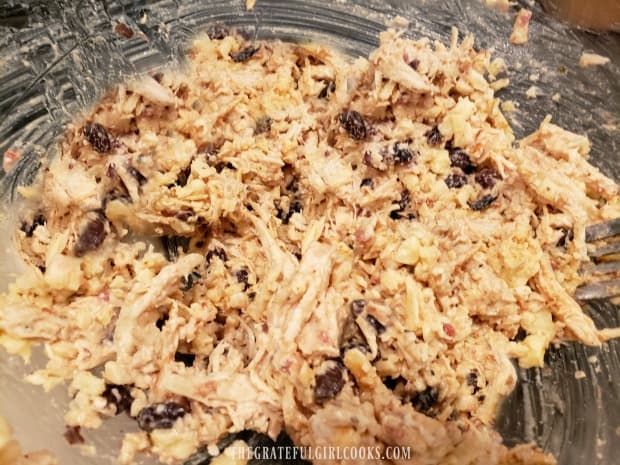
Stir the shredded cooked chicken, grated jack cheese, salsa, black beans, spices, and sour cream (or plain Greek yogurt) together, in a large bowl. Season the chicken to taste with salt and pepper, and then stir until the ingredients are fully combined.

Shredded chicken, beans, cheese, sour cream and seasonings are mixed together for chimichangas.

Filling The Tortillas

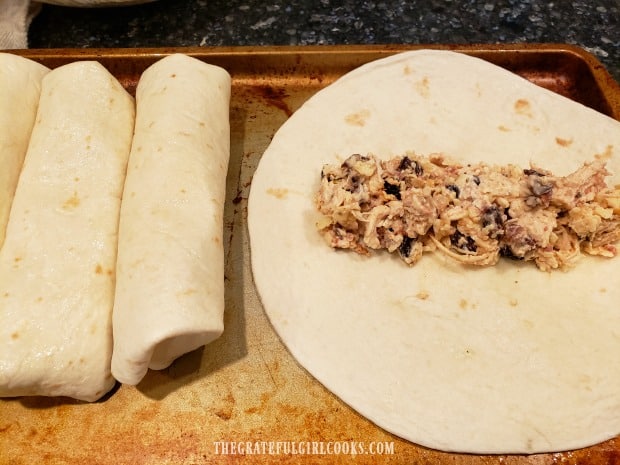
Fill the chimichangas one at a time, by spraying one side of a flour tortilla with non-stick cooking spray. Lay the sprayed side DOWN on a flat surface, and spoon the chicken chimichanga filling down the middle of the tortilla.

Roll the tortilla TIGHTLY around the filling, tucking in the edges, if desired. You MUST roll these tightly, so they don’t unroll during the air frying. Place them seam side DOWN, and repeat process for the remaining tortillas.

Chimichanga filling is placed in middle of a flour tortilla, and then tightly rolled up.

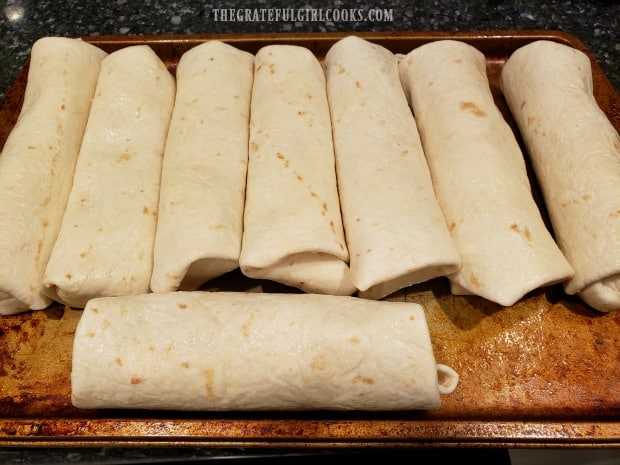
Here are all eight of the air fryer chimichangas, ready to be cooked. Once they are filled and rolled, the cooking oil sprayed side is now on the outside. This cooking spray is what will help the tortillas to crisp up in the air fryer.

Eight rolled chicken chimichangas on pan are ready to cook.

Cook The Chimichangas

Preheat your air fryer to 370° F. This usually takes about 5 minutes. Place 4 chimichangas (seam side down) into the basket of the air fryer.

Cook the air fryer chicken chimichangas in two batches, because you don’t want to overcrowd them.

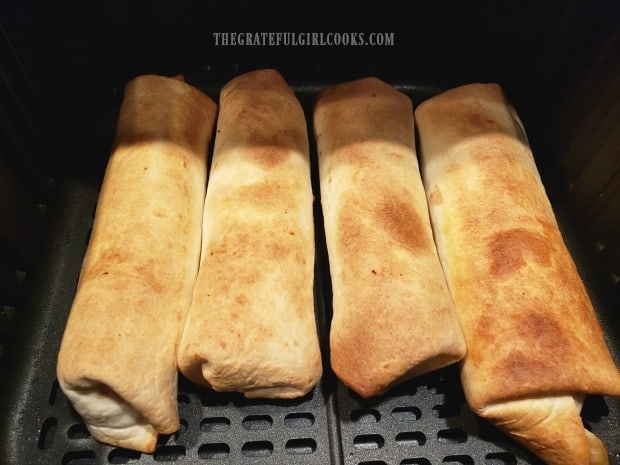
Let the chimichangas cook for 9-10 minutes, or until they are lightly browned and crispy on the outside. I recommend checking them at 8 minutes, because temps can vary quite a bit in these appliances.

The chimichangas are crispy and browned when done cooking.

Serve The Air Fryer Chicken Chimichangas

Once they are done (to your liking, color-wise), they’re ready to serve! Carefully remove the chimichangas from the air fryer, and add the remaining ones to the basket to cook them, too!

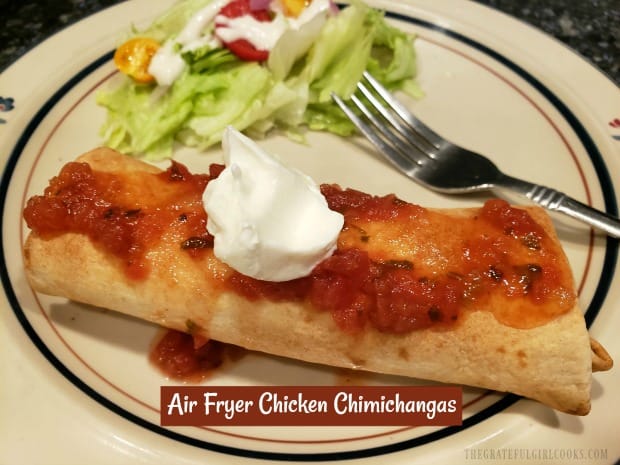
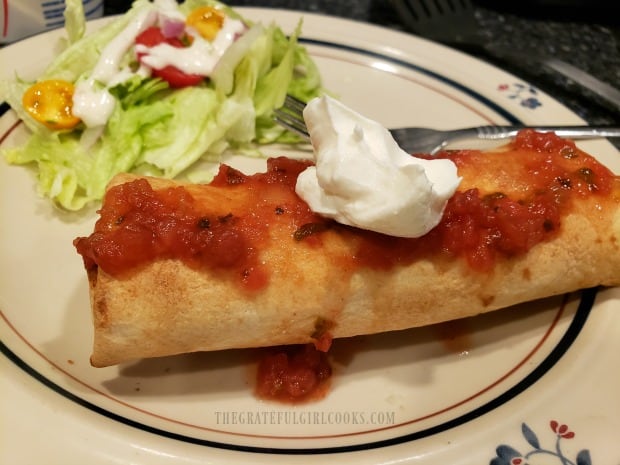
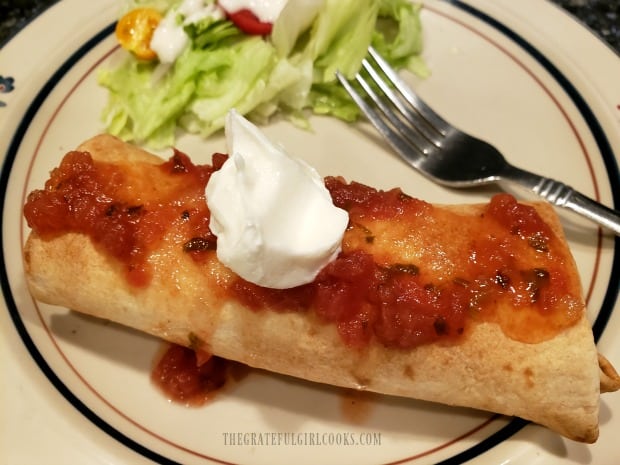
Place the the air fryer chicken chimichangas on individual plates, when you’re ready to eat. Garnish them with some salsa and a dollop of sour cream, for added color and flavor!

Salsa and sour cream garnish one of the air fryer chicken chimichangas.A chimichanga is served, topped with salsa and sour cream, and a side salad.

I sincerely hope that you enjoy these air fryer chicken chimichangas! We’ve had them several times already, and really love them! They are at their best when served immediately (while really crispy), but can be reheated in the air fryer or in a microwave.

NOTE: If you do not own an air fryer, you can still make these! Prepare the chimichangas exactly as written. Bake the chimichangas in a preheated 400° F. oven for about 20-25 minutes, until they are golden brown. Garnish and serve!

Looking For More Mexican Food Recipes?

You can find all of my Mexican food recipes in the Recipe Index, located at the top of the page. Several you might enjoy include:

Interested In More Recipes?

Thank you for visiting this website. I appreciate you using some of your valuable time to do soIf you’re interested, I publish a newsletter 2 times per month (1st and 15th) with all the latest recipes, and other fun info. I would be honored to have you join our growing list of subscribers, so you never miss a great recipe!
There is a Newsletter subscription box on the top right side (or bottom) of each blog post, depending on the device you use, where you can easily submit your e-mail address (only) to be included in my mailing list.

You Can Also Find Me On Social Media:
Facebook page: The Grateful Girl Cooks!
Pinterest: The Grateful Girl Cooks!
Instagram: jbatthegratefulgirlcooks

Author's signature

0 from 0 votes
Air Fryer Chicken Chimichangas
Prep Time
15 mins
Cook Time
10 mins
Total Time
25 mins
 

Enjoy delicious, easy to make air fryer chicken chimichangas, with chicken, salsa, black beans & cheese! They cook in 10 minutes, using an air fryer!

Category: Main Course
Cuisine: Mexican
Keyword: air fryer chicken chimichangas
Servings: 8
Calories Per Serving: 225 kcal
Author: JB @ The Grateful Girl Cooks!
Ingredients
  • cups cooked, shredded chicken breast
  • 1 cup canned black beans , rinsed and drained
  • cups jack cheese, shredded
  • cup salsa
  • cup light sour cream OR plain Greek yogurt
  • ½ teaspoon chili powder
  • ½ teaspoon ground cumin
  • salt/pepper, to taste
  • 8 medium flour tortillas
Instructions
  1. Stir shredded cooked chicken, grated jack cheese, salsa, black beans, chili powder, cumin, and sour cream (or plain Greek yogurt) together in a large bowl. Season filling to taste with salt and pepper, and then stir until ingredients are fully combined.

  2. Fill chimichangas one at a time, by spraying one side of flour tortilla with non-stick cooking spray. Lay sprayed side DOWN on a flat surface, and spoon chimichanga filling down the middle of the tortilla. Roll tortilla TIGHTLY around filling, tucking in edges, if desired. You MUST roll these tightly, so they don't unroll during the air frying. Place seam side DOWN, and repeat process for remaining tortillas.

  3. Preheat air fryer to 370° F. This takes about 5 minutes. Place 4 chimichangas (seam side down) into the basket of the air fryer. Cook the chimichangas in 2 batches, because you don't want to overcrowd them. Cook for 9-10 minutes, or until they are lightly browned and crispy on the outside. I recommend checking them at 8 minutes, because temps can vary in these appliances.

  4. When done, carefully remove chimichangas from the air fryer, and add remaining ones to the basket to cook them, too! To serve, place chimichangas on individual plates. Garnish with some salsa and a dollop of sour cream, for added color and flavor! Enjoy!

Nutrition Facts
Air Fryer Chicken Chimichangas
Amount Per Serving (1 chimichanga)
Calories 225 Calories from Fat 81
% Daily Value*
Fat 9g14%
Saturated Fat 5g31%
Cholesterol 37mg12%
Sodium 501mg22%
Potassium 282mg8%
Carbohydrates 21g7%
Fiber 2g8%
Sugar 2g2%
Protein 15g30%
Vitamin A 265IU5%
Vitamin C 1mg1%
Calcium 189mg19%
Iron 2mg11%
* Percent Daily Values are based on a 2000 calorie diet.

Here’s one more to pin on your Pinterest boards!Enjoy delicious, easy to make air fryer chicken chimichangas, with chicken, salsa, black beans & cheese! They cook in 10 minutes, using an air fryer!

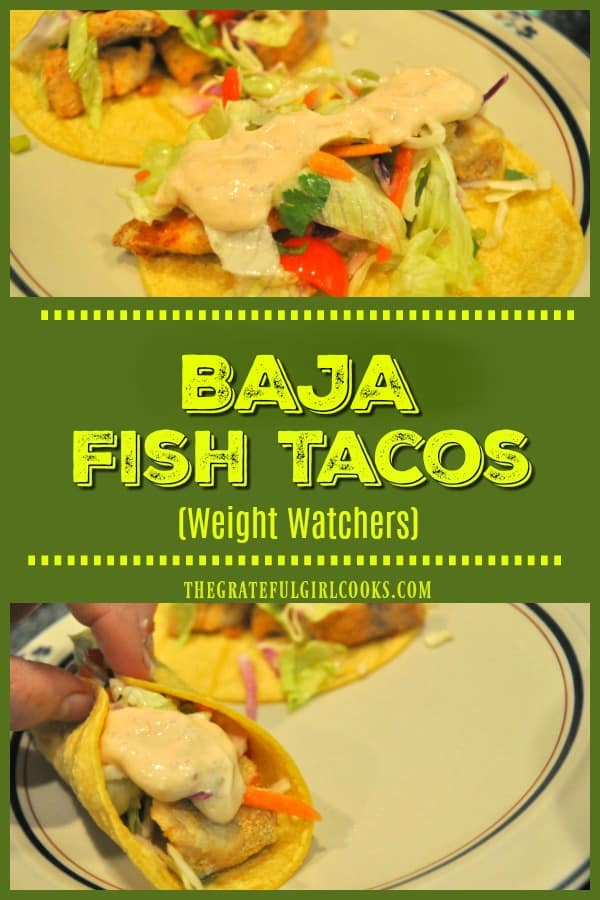
Baja Fish Tacos (Weight Watchers)

Baja Fish Tacos are a Weight Watchers dish, with seasoned broiled fish pieces in corn tortillas, topped with a crunchy slaw and creamy taco sauce!

Recently I tried a Weight Watchers recipe for baja fish tacos, and was pleasantly surprised! My husband and I both enjoy tacos (of any variety), and this recipe with broiled fish, sounded interesting, so I tried it! Broiling the fish helps cut calories, too, because it’s not fried!

Scroll Down For A Printable Recipe Card At The Bottom Of The Page

Low In WW Smart Points

This recipe for baja fish tacos has a fairly long ingredient list (mostly spices), but is actually VERY easy to prepare. Baked fish, is topped with fresh “slaw”, and creamy dressing, and served in warmed corn tortillas.

The recipe makes 8 tacos, serves 4 people ( 2 tacos per serving), and if following the WW Freestyle plan, is 6 Weight Watchers Smart Points per serving.

How To Make Baja Fish Tacos

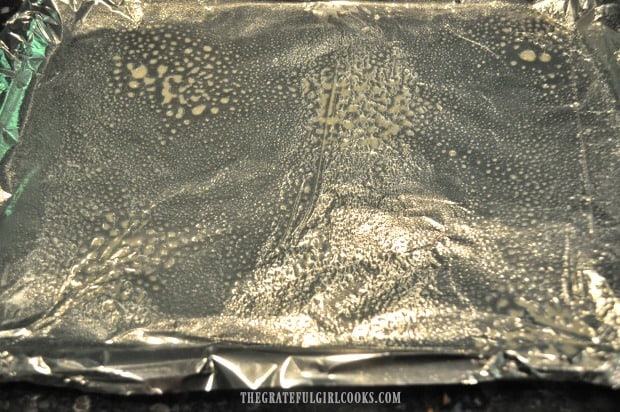
First things first. Cover a baking sheet with aluminum foil, and spray with non-stick cooking spray. The spray will help the broiled fish become crispy on the outside!

A baking sheet is covered with foil, and coated with non-stick baking spray.

Prepare Seasoning Mix And The Fish For Broiling

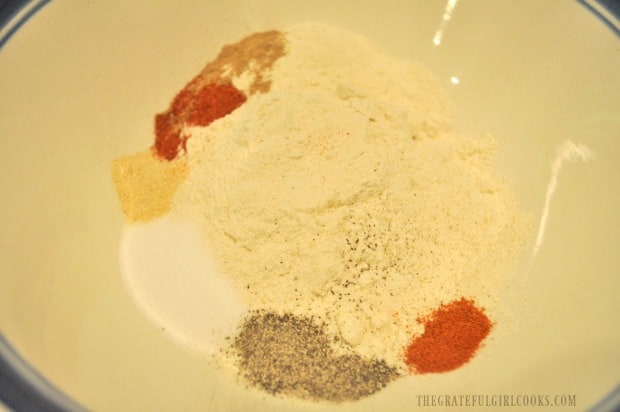
The seasoning mix for baja fish tacos is really easy to make. Simply place the ingredients in a medium bowl, and mix together. The seasonings include corn flour (masa), salt, cayenne pepper, black pepper, cumin, garlic powder, and paprika.

Spices in bowl are combined to make seasoning for the baja fish tacos.

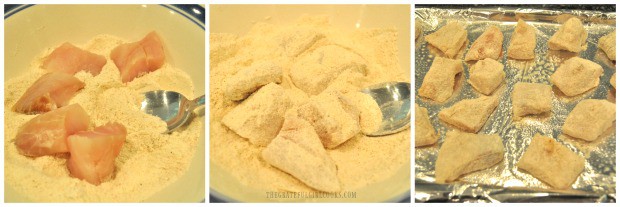
Cut the fish you are using into 2″ pieces. I used rockfish, but you can also use red snapper.  Place the fish, several at a time, into the bowl of seasonings, and toss to coat on all sides.

Place the coated fish pieces onto the sprayed foil on the baking sheet. Leave space between each piece of fish. Continue until all fish pieces are on baking sheet. Set aside, but preheat the broiler on the oven.

Fish is cut into 2" pieces, then tossed in seasoning before broiling.

Make The “Slaw”

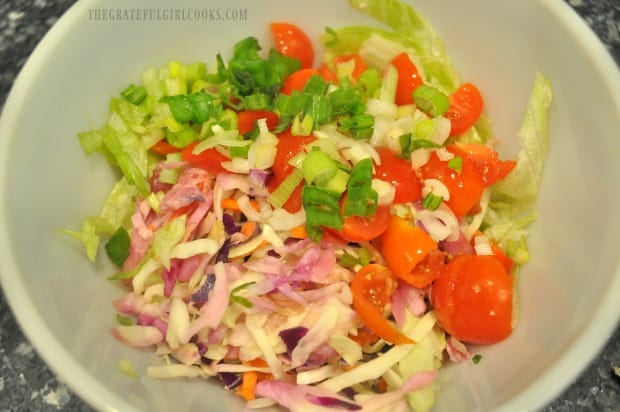
In a small bowl, mix together the lettuce (romaine or iceberg), green onions, cherry tomato quarters and cabbage. I used a coleslaw mix for the cabbage, so there are a few carrot shreds in there, also! Set aside.

Topping for the baja fish tacos includes cabbage, lettuce, tomatoes, and green onions.

Make The Sauce For Baja Fish Tacos

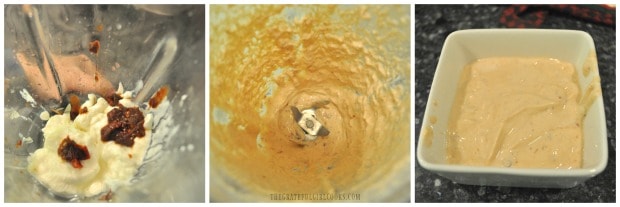
Place plain, lowfat yogurt in a blender. Add fresh squeezed lime juice and the chipotle peppers in adobo sauce. Blend these until you have a smooth sauce. Set aside.

A baja style sauce is mixed in a blender to put on finished tacos.

Cook The Fish And Warm The Corn Tortillas

Warm The Tortillas: At the same time you are broiling the fish, wrap the corn tortillas in aluminum foil, and put them in the oven. Place them on a rack that is the furthest away from the source of heat.

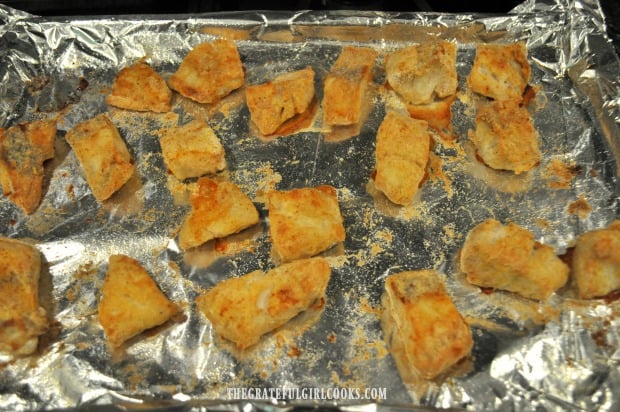
Right before you put the fish in the oven, give the pieces a light spray on top with cooking spray. This will help the top of the pieces to get crispy, also. Place the baking sheet under the broiler, and cook the fish for about 4 minutes. Remove sheet, and quickly turn each piece of fish over, and cook the other side for 3-4 minutes.

The pieces of broiled fish are golden brown and crispy when done cooking.

Assemble The Baja Fish Tacos

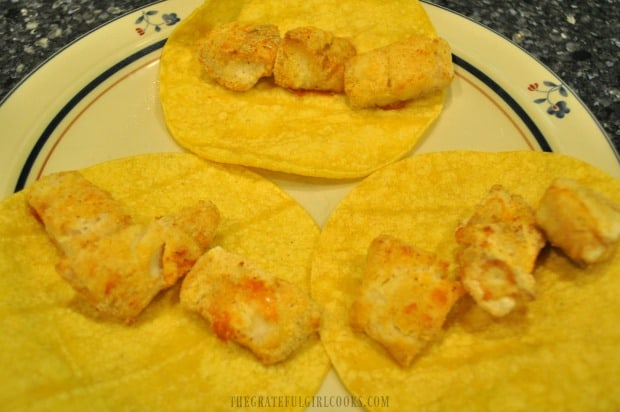
When ready to serve baja fish tacos, place the warmed corn tortillas onto the serving plates.  Place 2-3 pieces of the cooked fish onto each tortilla.

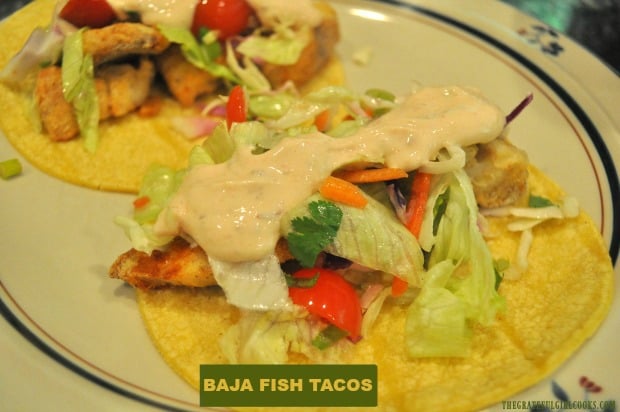
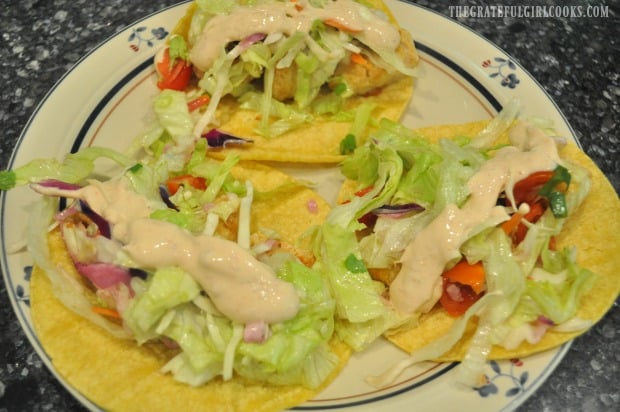
Top the fish with some of the slaw mixture, and then top with a couple Tablespoons of the baja sauce. Garnish with fresh cilantro and a lime wedge, if desired (optional). Repeat until all of the baja fish tacos are ready to eat.

A few pieces of broiled fish are placed in each corn tortilla.

Baja fish tacos are topped with slaw salad and sauce before serving.

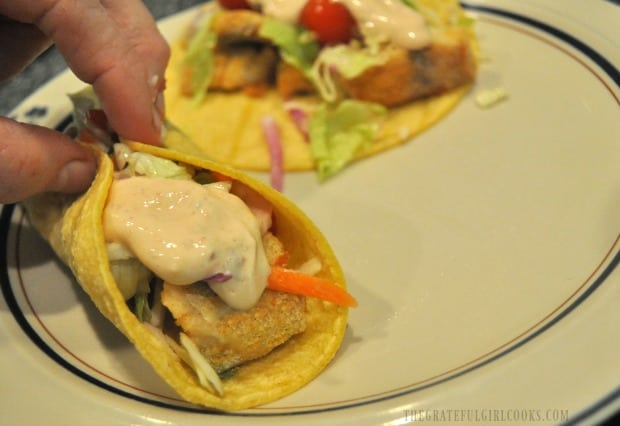
Now all that is left to do, is to pick up one of those big ol’ baja fish tacos, get a good grip on it, and take your first bite. YUM! They are delicious!

Time to eat a couple baja fish tacos!

Hope you will take the opportunity to make these delicious baja fish tacos sometime soon. We really enjoyed them! Have a great day.

Looking For More TACO Recipes?

You can find all of my recipes for Mexican food in the Recipe Index, located at the top of the page. A couple other taco recipes you might enjoy include:

Interested In More Recipes?

Thank you for visiting this website. I appreciate you using some of your valuable time to do soIf you’re interested, I publish a newsletter 2 times per month (1st and 15th) with all the latest recipes, and other fun info. I would be honored to have you join our growing list of subscribers, so you never miss a great recipe!
There is a Newsletter subscription box on the top right side (or bottom) of each blog post, depending on the device you use, where you can easily submit your e-mail address (only) to be included in my mailing list.

You Can Also Find Me On Social Media:
Facebook page: The Grateful Girl Cooks!
Pinterest: The Grateful Girl Cooks!
Instagram: jbatthegratefulgirlcooks

Author's signature

Recipe Adapted From: https://www.weightwatchers.com/us/recipe/baja-style-fish-tacos/5626a5f63d92b3c10eb8a514

0 from 0 votes
Baja Fish Tacos (Weight Watchers)
Prep Time
30 mins
Cook Time
8 mins
Total Time
38 mins
 

Baja Fish Tacos are a Weight Watchers dish, with seasoned broiled fish pieces in corn tortillas, topped with a crunchy slaw and creamy taco sauce!

Category: Entree-Seafood
Cuisine: Mexican, Southwestern
Keyword: baja fish tacos
Servings: 4 (2 tacos per serving)
Calories Per Serving: 332 kcal
Author: JB @ The Grateful Girl Cooks!
Ingredients
  • 1 pound rockfish or red snapper , cut into 2" chunks
  • 8 medium corn tortillas
  • 2 Tablespoons fresh cilantro sprigs (optional, for garnish)
  • 2 sprays cooking spray
For Seasoning Mix:
  • 1/2 cup yellow masa corn flour
  • 1 teaspoon table salt
  • 1/4 teaspoon ground black pepper
  • 1/8 teaspoon cayenne pepper
  • 1/4 teaspoon garlic powder
  • 1/2 teaspoon paprika
  • 1/8 teaspoon ground cumin
For Slaw:
  • 2 cups romaine lettuce or iceberg lettuce , outer leaves removed, cut in 1/4" strips
  • 2 stalks green onions (scallions) , thinly sliced
  • 10 small cherry tomatoes , quartered
  • 1/4 cup coleslaw mix OR purple cabbage , shredded
For Baja Sauce:
  • 3/4 cup plain, lowfat yogurt
  • 2 Tablespoons fresh lime juice
  • 1 teaspoon canned chipotle peppers , in adobo sauce, finely chopped
Instructions
PREP WORK:
  1. A) Cover a baking sheet with aluminum foil, and spray with non-stick cooking spray. The spray helps the fish become crispy! B) Place seasoning mix ingredients in medium sized bowl; stir to combine, and set aside. C) In a small bowl, mix together slaw ingredients. Set aside. D) Place plain, lowfat yogurt in a blender. Add fresh squeezed lime juice and chipotle peppers in adobo sauce. Blend until you have a smooth sauce. Set aside.

Prepare Fish Tacos:
  1. Cut fish into 2" pieces. Place the pieces, several at a time, into the bowl of seasoning mix, and toss to coat fish on all sides. Place the coated fish pieces onto baking sheet. Leave space between each piece. Continue until all pieces are on baking sheet. Set aside, and preheat your oven broiler.

  2. Warm The Tortillas: Wrap corn tortillas in aluminum foil, and put them in the oven to warm while you are broiling the fish. Place them on a rack that is the furthest away from the source of heat.

    Right before you put the fish in the oven, give fish a light spray on top with cooking spray. This helps top of the pieces get crispy, also. Place baking sheet under the broiler, and cook fish for about 3-4 minutes. Remove sheet, and quickly turn each piece of fish over, and cook the other side for 3-4 minutes. When done, remove fish and warmed tortillas from oven.

  3. When ready to serve, place warmed corn tortillas onto serving plates.  Place 2-3 pieces of broiled fish onto each tortilla. Top the fish with some slaw mixture, and then top with a couple Tablespoons of baja sauce. Garnish with cilantro sprigs and lime wedges, if desired. Repeat until all of the tacos are ready to eat. Serve, and enjoy!

Recipe Notes

Optional garnish: sprigs of fresh cilantro and lime wedge.
One serving = 2 tacos. For those following the Weight Watchers freestyle program, the total point value for 2 tacos (prepared as written) is 6 Smart Points.

Nutrition Facts
Baja Fish Tacos (Weight Watchers)
Amount Per Serving (1 2 tacos per serving)
Calories 332 Calories from Fat 45
% Daily Value*
Fat 5g8%
Saturated Fat 1g6%
Cholesterol 45mg15%
Sodium 736mg32%
Potassium 895mg26%
Carbohydrates 42g14%
Fiber 5g21%
Sugar 6g7%
Protein 31g62%
Vitamin A 2775IU56%
Vitamin C 19.4mg24%
Calcium 199mg20%
Iron 2.6mg14%
* Percent Daily Values are based on a 2000 calorie diet.

Here’s one more to pin on your Pinterest boards!Baja Fish Tacos are a Weight Watchers dish, with seasoned broiled fish pieces in corn tortillas, topped with a crunchy slaw and creamy taco sauce!

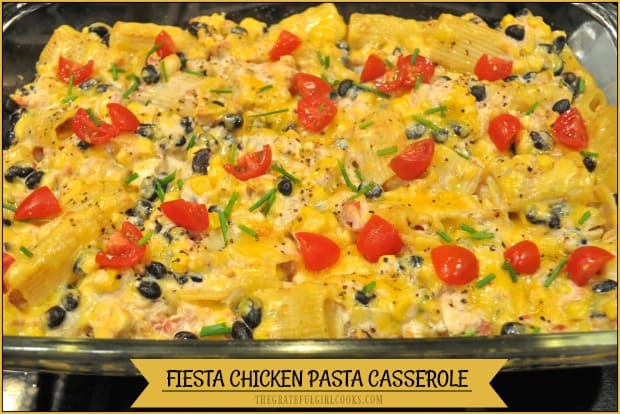
Fiesta Chicken Pasta Casserole

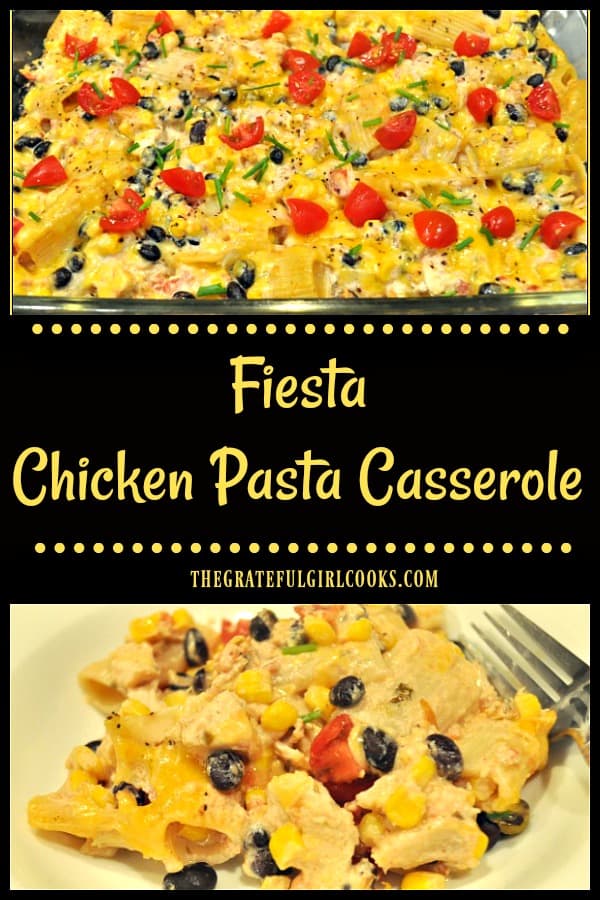
You’ll love this easy to make Fiesta Chicken Pasta Casserole, with rigatoni noodles, chicken, corn, black beans, and cheese, baked in a Southwestern flavored sauce!
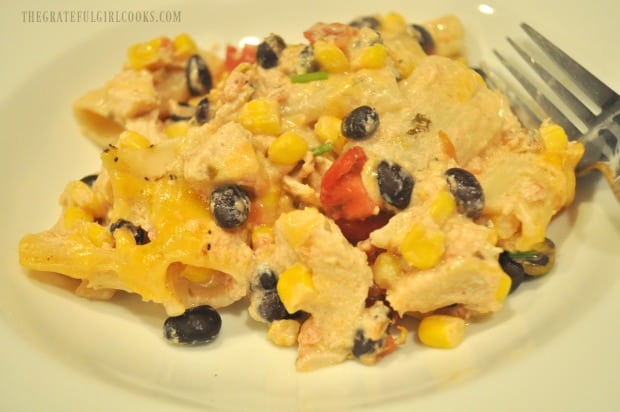
You'll love this easy Fiesta Chicken Pasta Casserole, with rigatoni, chicken, corn, black beans, and cheese, baked in a Southwestern flavored sauce!

Can I get a shout out for the humble, yet delicious casserole dishes that have made mealtimes easier for home cooks everywhere? This Fiesta Chicken Pasta Casserole is a perfectly simple but absolutely lip-smackin’ delicious casserole that will leave you smiling!

I found the original recipe on Pinterest, and loved that you can use pre-cooked (think rotisserie or leftover) chicken. By using pre-cooked chicken, and canned corn and black beans, you’ve already saved yourself some time!

Making this fiesta chicken pasta casserole recipe is as simple as cooking pasta, whisking together a simple Southwestern flavored sauce, stirring in the rest of the ingredients, then baking it! The recipe is really quite simple. Let me show you how to make this yummy meal!

Scroll Down for A Printable Recipe Card At The bottom Of The Page

How To Make Fiesta Chicken Pasta Casserole

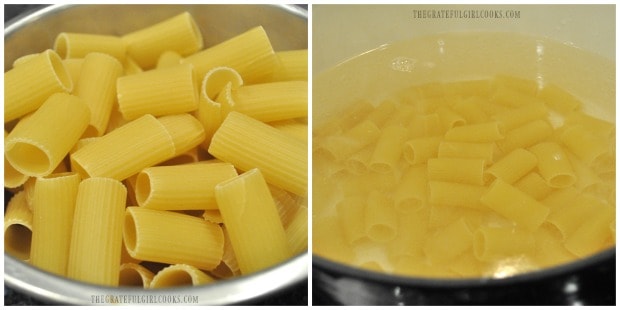
The first thing you will need to do is spray a 13×9 inch baking dish with non-stick spray, then set the dish aside.  Preheat your oven to 350°F. Cook the rigatoni pasta in 4 quarts of lightly salted water. Cook the pasta according to the package directions.

NOTE: No rigatoni? No problem! You can easily substitute rotini (spiral) pasta or penne pasta in this dish!

Cooking rigatoni for the fiesta chicken pasta casserole.

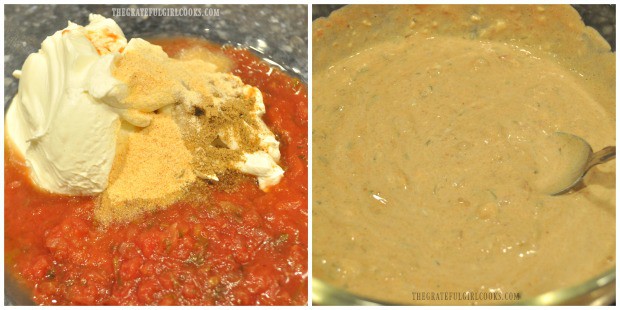
While the pasta noodles are cooking, mix together salsa, light sour cream, garlic powder, ground cumin, and onion powder in a medium sized bowl.

Mixing together the Southwestern sauce used in the fiesta chicken pasta casserole.

Building The Casserole

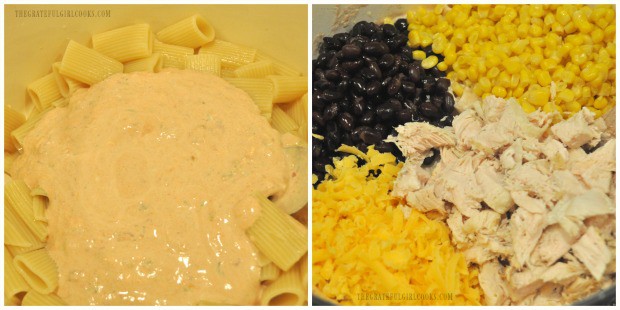
When the pasta is done cooking, drain it well, and pour it into a large mixing bowl.  Add the sauce to the pasta in the bowl, and give it a good stir to mix it together. Once the sauce and pasta are combined, add the drained corn, black beans, cooked chicken (shredded or cubed), and ONE CUP of grated cheddar cheese.

Reserve the remaining cup of grated cheddar cheese to use later. Gently stir the fiesta chicken pasta casserole together, until all ingredients are coated with sauce and are thoroughly combined.

Sauce, corn, black beans, cheese and chicken is added to the fiesta chicken pasta casserole.

Time To Bake The Casserole

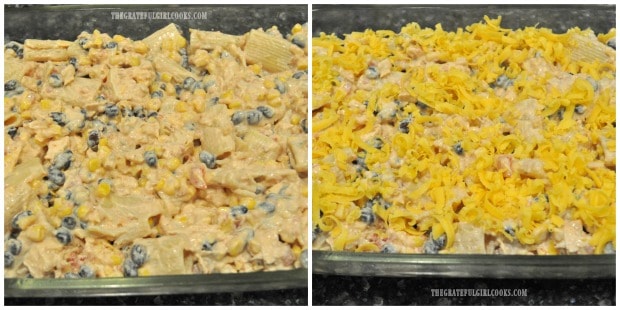
Pour the fiesta chicken pasta casserole ingredients evenly into the baking dish, and spread out, to cover. Evenly distribute the remaining cup of grated cheddar cheese across the top of the casserole. 

Cover the pan with aluminum foil, and bake in a preheated oven at 350°F for 25 minutes. About 10 minutes before the cooking time is done, remove the foil and finish cooking the fiesta chicken pasta casserole.

Fiesta Chicken Pasta Casserole is covered with grated cheese, then baked.

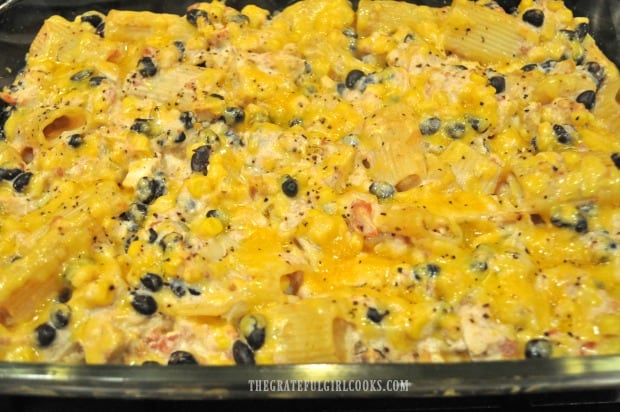
Once the casserole is finished cooking, remove it from the oven. The cheese will be melted, and the casserole will be slightly bubbly around the edges.

Fiesta chicken pasta casserole, right out of the oven, after baking.

To Serve Fiesta Chicken Pasta Casserole

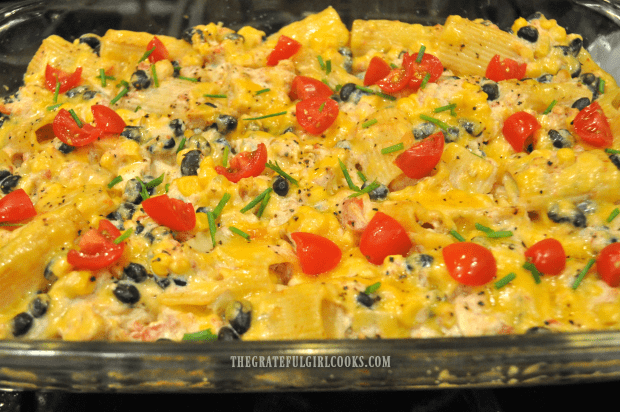
Garnish the fiesta chicken pasta casserole with some sliced green onions (or chives, as shown), and chopped tomatoes. If desired, you can also add avocado slices for flavor and color. The casserole is now ready to serve! The recipe serves 8 (modest portions), or 6, if serving larger portions!

The baked fiesta chicken pasta casserole is garnished with tomatoes and chives before serving.

The only thing left to do is dig into this absolutely delicious fiesta chicken pasta casserole! It has WONDERFUL flavor, and is not too spicy… trust me! The black beans add additional protein, and together with the corn, help to make this a well-rounded, nice and filling meal! It is SO GOOD!

An individual portion of fiesta chicken pasta casserole is served in a white bowl.

I really hope you will consider trying this fiesta chicken pasta casserole. My husband and I LOVED it! Guess what? The leftovers tasted fantastic, too! I really think you will love this easy to make recipe, too! Have a wonderful day!

Looking For More CASSEROLE Recipes?

You can find ALL of my recipes in the Recipe Index, located at the top of the page. I have a nice variety of casserole recipes you’ll enjoy, including:

Interested In More Recipes?

Thank you for visiting this website. I appreciate you using some of your valuable time to do soIf you’re interested, I publish a newsletter 2 times per month (1st and 15th) with all the latest recipes, and other fun info. I would be honored to have you join our growing list of subscribers, so you never miss a great recipe! 

There is a Newsletter subscription box on the top right side (or bottom) of each blog post, depending on the device you use, where you can easily submit your e-mail address (only) to be included in my mailing list.

You Can Also Find Me On Social Media:

Facebook page: The Grateful Girl Cooks!
Pinterest:
The Grateful Girl Cooks!
Instagram:
jbatthegratefulgirlcooks

Author's signature

Original Recipe Source: https://togetherasfamily.com/fiesta-chicken-casserole/

5 from 1 vote
Fiesta Chicken Pasta Casserole
Prep Time
15 mins
Cook Time
25 mins
Total Time
40 mins
 
You'll love this easy to make Fiesta Chicken Pasta Casserole, with rigatoni noodles, chicken, corn, black beans, and cheese, baked in a Southwestern flavored sauce!
Category: Entree - Casserole
Cuisine: Southwestern
Keyword: fiesta chicken pasta casserole
Servings: 8
Calories Per Serving: 385 kcal
Author: JB @ The Grateful Girl Cooks!
Ingredients
  • cups uncooked rigatoni pasta (can substitute spiral or penne pasta
  • 1 cup salsa
  • 1 cup light sour cream
  • 1 teaspoon garlic powder
  • 1 teaspoon ground cumin
  • 1 teaspoon onion powder
  • 15 ounces whole kernel corn (1 can) , drained
  • 15 ounces black beans (1 can) , drained and rinsed
  • 2 cups cooked chicken breasts , shredded or cubed
  • 2 cups grated cheddar cheese , divided
Instructions
  1. Spray a 9x13 baking dish with non-stick cooking spray, then set aside. Preheat your oven to 350°F.

  2. Cook pasta in 4 quarts of lightly salted water. Cook the pasta according to the package directions.

  3. While the pasta is cooking, mix together salsa, light sour cream, garlic powder, ground cumin, and onion powder in a medium sized bowl.

  4. When pasta is done, drain, and pour it into a large mixing bowl.  Add the sauce; stir to combine. Add drained corn, black beans, cooked chicken (shredded or cubed), and ONE CUP of the grated cheddar cheese. Reserve remaining cup of grated cheddar cheese to use later. Gently stir, until all ingredients are coated with sauce and are thoroughly combined. Pour into the baking dish, spreading to cover. Sprinkle remaining cup of grated cheddar cheese across the top of the casserole.  Cover dish with aluminum foil, and bake in a preheated 350°F oven for 25 minutes. About 10 minutes before the cooking time is done, remove the foil and finish cooking.

  5. Remove finished casserole from oven. Garnish with sliced green onions (or chives), and chopped tomatoes. If desired, you can also add avocado slices. Serve and enjoy!

Recipe Notes

Caloric calculation was calculated based on using light sour cream. Regular sour cream will work perfectly, but will increase calorie count for each portion.

Nutrition Facts
Fiesta Chicken Pasta Casserole
Amount Per Serving (1 (1/8 of total))
Calories 385 Calories from Fat 126
% Daily Value*
Fat 14g22%
Saturated Fat 8g50%
Cholesterol 69mg23%
Sodium 657mg29%
Potassium 597mg17%
Carbohydrates 37g12%
Fiber 6g25%
Sugar 4g4%
Protein 26g52%
Vitamin A 680IU14%
Vitamin C 5.2mg6%
Calcium 285mg29%
Iron 2.3mg13%
* Percent Daily Values are based on a 2000 calorie diet.

Here’s one more to pin on your Pinterest boards!You'll love this easy Fiesta Chicken Pasta Casserole, with rigatoni, chicken breast, corn, black beans, and cheese, baked in a Southwestern flavored sauce!

Chicken Black Bean Quesadilla

You’ll love this easy, tasty, grilled Chicken Black Bean Quesadilla with salsa verde, corn, and cheddar cheese, served with lettuce, tomatoes and sour cream.
You'll love this easy grilled Chicken Black Bean Quesadilla with salsa verde, corn & cheddar cheese, served with lettuce, tomatoes and sour cream.

I don’t know about you, but we LOVE Mexican food in our home. We especially love tacos, enchiladas and quesadillas!  Sometimes people tend to think of quesadillas only as melted cheese on a flour tortilla, and call that a quesadilla.

While that type of quesadilla tastes okay, we like to serve them loaded with more ingredients at our house, to really make it a MEAL!  We’ve enjoyed these so many times over the years I can’t even begin to count! The cooking process for cooking a plain or loaded quesadilla is the same. I really think you’re gonna like eating this filling chicken black bean quesadilla a whole lot MORE than a plain one!

Occasionally I change up the recipe a bit, depending on what we have in the pantry at the moment. However, the core recipe I came up with over 30 years ago almost always stays the same.  I am glad to share it with you today!

Scroll Down For A Printable Recipe Card At The Bottom Of The Page

How To Make This Chicken Black Bean Quesadilla

Quesadillas are simple to make, taste absolutely delicious, and are a super simple dinner to throw together after a busy day! You can save time by using leftover cooked chicken breasts or a rotisserie chicken!

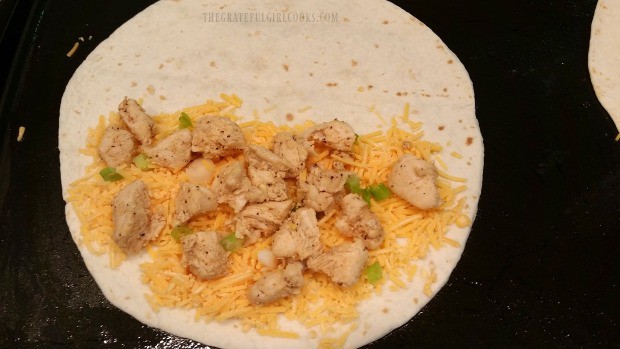
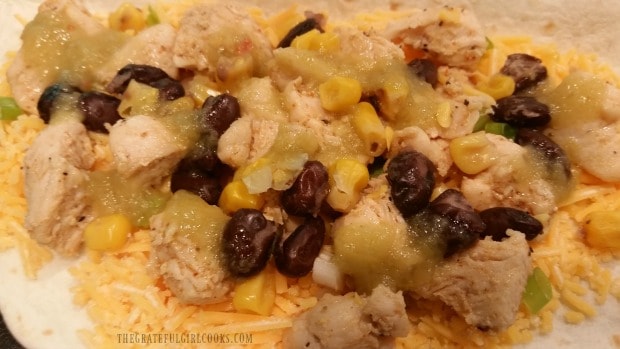
For each chicken black bean quesadilla, place grated cheddar cheese, sliced green onions and cooked chicken breast chunks onto ONE HALF of the flour tortilla. Once you have all the filling ingredients ready to go, it’s amazing how quickly you can throw several of these quesadillas together!

Cheese, chicken and green onions are placed on a flour tortilla half for chicken black bean quesadilla.

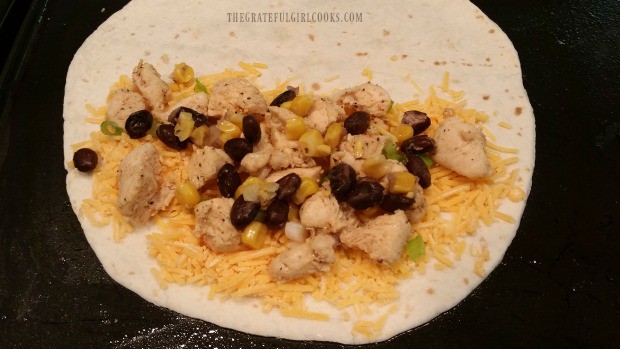
Evenly distribute the corn, black beans and a spoonful of the salsa verde sauce to each chicken black bean quesadilla.  Remember to leave one half of the tortilla bare.

Black beans and corn are added to tortilla for chicken black bean quesadilla.

Green sauce (salsa verde) is added to chicken black bean quesadilla.

Grilling The Chicken Black Bean Quesadilla

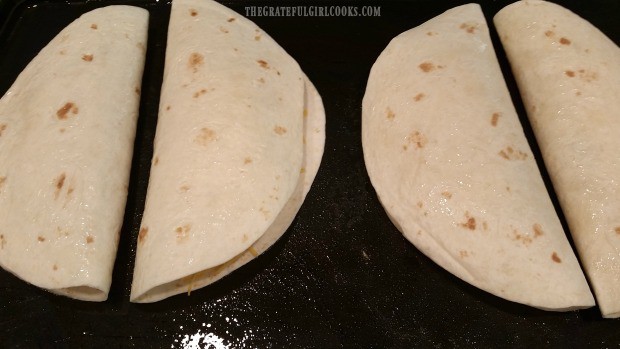
The empty half of the flour tortilla is folded up and over the toppings for the quesadilla. Each of the quesadilla halves are placed onto a lightly oiled grill (or large skillet) on medium low heat. NOTE: If using a large skillet, you may need to cook these in batches.

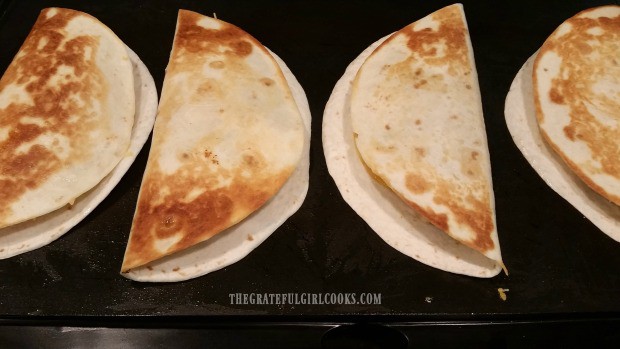
Cook each chicken black bean quesadilla for a few minutes on medium low heat until golden brown on the bottom.

Carefully turn each quesadilla to the other side using a spatula. Continue cooking until the bottom side has turned nice and golden brown as well. When done, the cheese should be melted and the other fillings should be heated through.

Each chicken black bean quesadilla is folded in half and place on griddle to cook.

Each chicken black bean quesadilla is turned to other side when golden brown during cooking.

Slicing The Chicken Black Bean Quesadilla

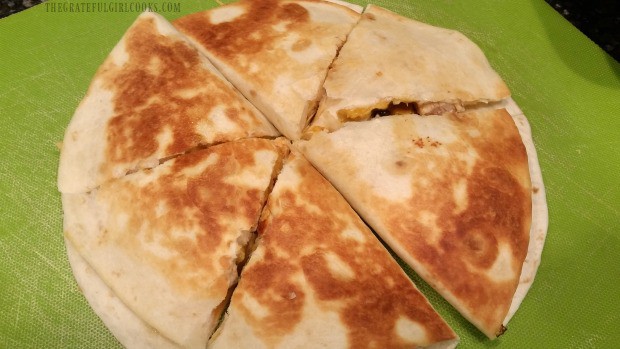
Once the chicken black bean quesadilla is done cooking, carefully remove two halves (at a time) to a cutting board or surface.

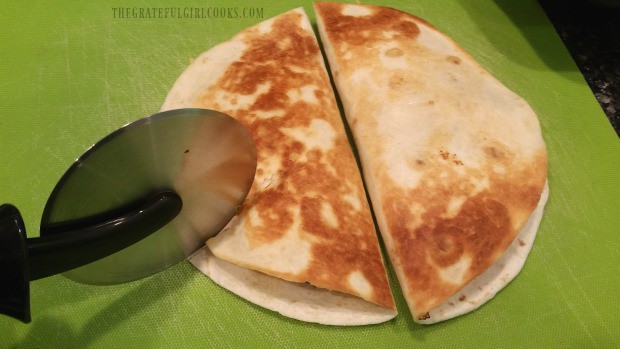
It’s been my experience that a pizza cutter (or a really sharp knife) works really well to slice the quesadilla into serving portions. Slice the quesadilla similar to how you would cut a pizza, into 3 slices per half.

Each chicken black bean quesadilla is sliced using a pizza cutter, when done.

Each chicken black bean quesadilla half is sliced into three pieces.

Garnishing The Chicken Black Bean Quesadilla For Serving

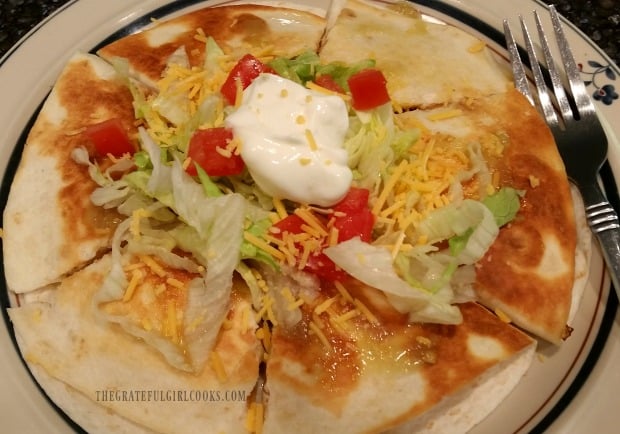
In the photo below I placed 2 quesadilla halves on a plate all together, to garnish and photograph the finished meal. It sure looks GOOD once it is “prettied up” a bit, right?

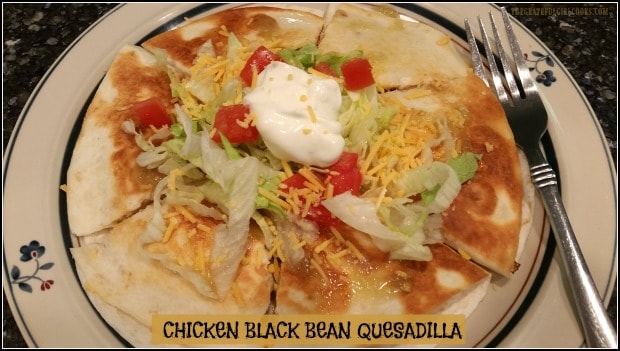
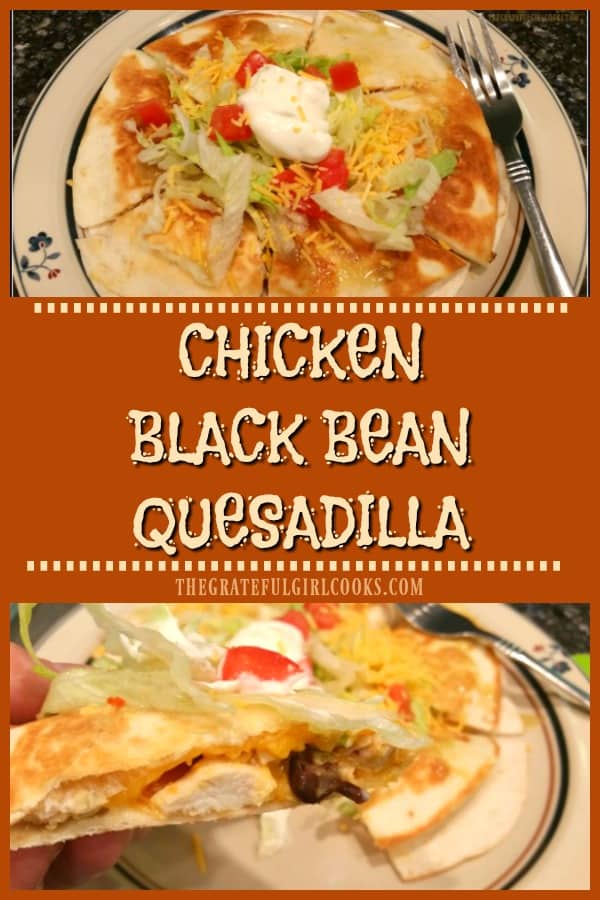
The grilled, sliced chicken black bean quesadilla is garnished with additional grated cheddar, shredded lettuce, diced fresh tomatoes, salsa verde sauce, and a dollop of sour cream! A typical serving would be 3 slices per person, but if you’re REALLY hungry (and don’t mind the extra calories), go for the whole thing!

Chicken black bean quesadilla is garnished with lettuce, tomato, sour cream and salsa verde.

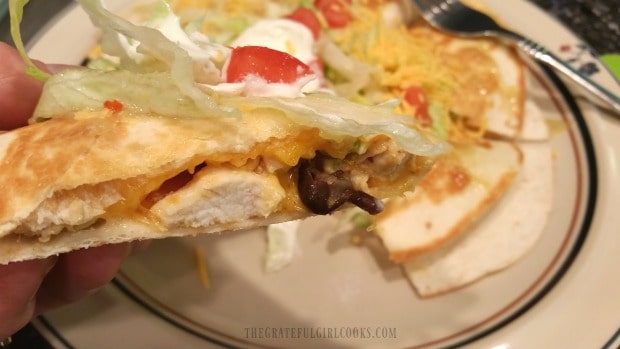
You can see the chunks of chicken breasts, melted cheese and black beans inside a slice of the chicken black bean quesadilla! This is one great tasting quesadilla, whether you pick up each slice like pizza OR use a fork for each bite! Yum!

Side view of a slice of chicken black bean quesadilla.

I really hope you will give this recipe for a delicious chicken black bean quesadilla a try! The quesadillas are really easy to make, and they sure do taste GREAT! Have a fantastic day, friends. Make it a good one!

Looking For More Tex-Mex Recipes?

You can ALL of my recipes using the Recipe Index, located at the top of the page. Some of our favorite Tex-Mex recipes include:

Interested In More Recipes?

Thank you for visiting this website. I appreciate you using some of your valuable time to do soIf you’re interested, I publish a newsletter 2 times per month (1st and 15th) with all the latest recipes, and other fun info. I would be honored to have you join our growing list of subscribers, so you never miss a great recipe!
There is a Newsletter subscription box on the top right side (or bottom) of each blog post, depending on the device you use, where you can easily submit your e-mail address (only) to be included in my mailing list.

You Can Also Find Me On Social Media:

Facebook page: The Grateful Girl Cooks!
Pinterest:
The Grateful Girl Cooks!
Instagram:
jbatthegratefulgirlcooks

Have a GREAT day!

Author's signature

Recipe Source: my hungry brain…

↓↓ PRINTABLE RECIPE BELOW ↓↓

5 from 1 vote
Chicken Black Bean Quesadilla
Prep Time
10 mins
Cook Time
6 mins
Total Time
16 mins
 
You'll love this easy grilled Chicken Black Bean Quesadilla with salsa verde, corn & cheddar cheese, served with lettuce, tomatoes and sour cream.
Category: Entree
Cuisine: Mexican
Keyword: chicken black bean quesadilla
Servings: 4
Calories Per Serving: 394 kcal
Author: JB @ The Grateful Girl Cooks!
Ingredients
  • 4 flour tortillas
  • 1 cup shredded cheddar cheese
  • 2 boneless, skinless chicken breasts , pre-cooked
  • 1 stalk green onions , white and green parts
  • 6 Tablespoons whole kernel corn (canned) , drained
  • 6 Tablespoons black beans (canned) , drained
  • 4 Tablespoons salsa verde sauce , or substitute red salsa
  • cooking spray or vegetable oil , for grill or skillet
For Garnish (OPTIONAL):
  • 1/2 cup shredded cheddar cheese
  • 1 cup shredded iceberg lettuce
  • 1/2 cup fresh tomato , diced
  • 4 teaspoons salsa verde sauce
  • 4 Tablespoons sour cream
Instructions
  1. For each quesadilla, place grated cheddar cheese, sliced green onions and cooked chicken breast chunks onto ONE HALF of a flour tortilla. Evenly distribute corn, black beans and a spoonful of the salsa verde sauce to each quesadilla.  Leave one half of each tortilla bare.

  2. Fold empty half of tortilla up and over the toppings. Place each quesadilla half on a lightly oiled or sprayed flat grill (or large skillet) on medium low heat. NOTE: If using a large skillet, you may need to cook these in batches. Cook for a few minutes on medium low heat until golden brown on the bottom. Carefully turn each quesadilla to the other side, and continue cooking until the bottom is golden brown. When done, cheese should be melted and filling heated through. 

  3. Transfer each quesadilla to a cutting board. Slice each half into 3 pieces. Garnish with cheese, lettuce, diced tomatoes, salsa verde, and a dollop of sour cream! Serve, and enjoy!

Recipe Notes

Caloric calculation is for three quesadilla slices, and includes all garnish toppings (salsa verde, lettuce, cheese, tomatoes and sour cream).

Nutrition Facts
Chicken Black Bean Quesadilla
Amount Per Serving (1 (3 slices))
Calories 394 Calories from Fat 171
% Daily Value*
Fat 19g29%
Saturated Fat 10g63%
Cholesterol 84mg28%
Sodium 822mg36%
Potassium 507mg14%
Carbohydrates 26g9%
Fiber 3g13%
Sugar 4g4%
Protein 27g54%
Vitamin A 795IU16%
Vitamin C 4.4mg5%
Calcium 368mg37%
Iron 2.1mg12%
* Percent Daily Values are based on a 2000 calorie diet.

Here’s one more to pin on your Pinterest boards!You'll love this easy, tasty, grilled Chicken Black Bean Quesadilla with salsa verde, corn, and cheddar cheese, served with lettuce, tomatoes and sour cream.

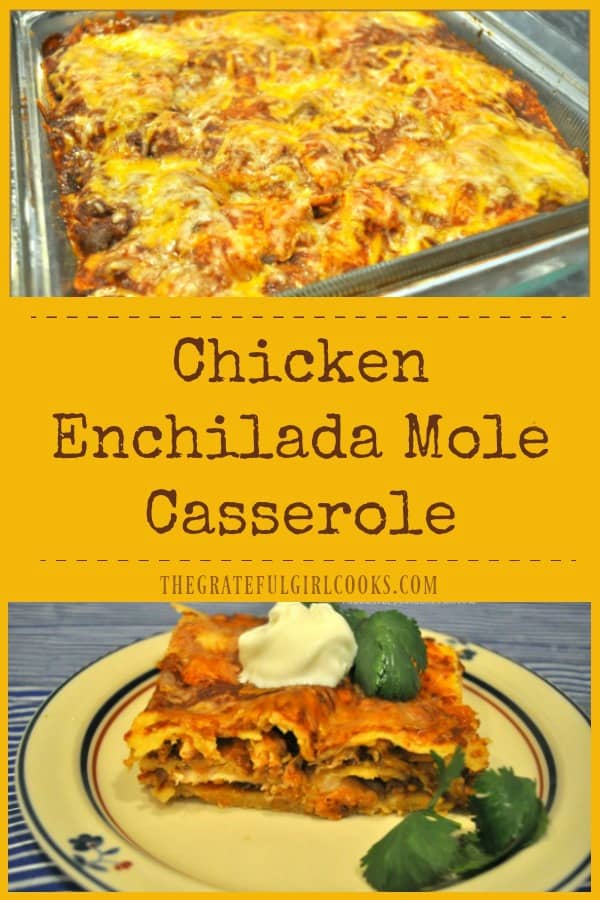
Chicken Enchilada Mole Casserole

Chicken Enchilada Mole Casserole is an easy to make dinner, with layers of corn tortillas, chicken breast strips, enchilada and mole sauce, onions and cheese, and is ready in 35 minutes!Chicken Enchilada Mole Casserole is an easy to make dinner, with layers of corn tortillas, chicken breast strips, enchilada and mole sauce, onions and cheese, and is ready in 35 minutes!

Ever have one of those days where you know you need to fix something for dinner, but don’t have a clue what that will be?  That is how I came up with this simple layered chicken enchilada casserole! I used my recipe for Layered Chicken Enchilada Casserole as inspiration (which uses a creamy green sauce). Then I started pulling things out of the refrigerator and pantry and then just started cooking!

I gathered two leftover grilled chicken breasts, some homemade red enchilada sauce (it was in our freezer, but I thawed it out!), a jar of mole sauce (check out this link to find out what is in this traditional Mexican sauce), onion, a few tortillas and some Mexican blend cheese and got busy creating this easy casserole dish that serves 6.

By the way… don’t worry about using homemade enchilada sauce… a large (28 oz.) can will do just fine… and mole sauce? You can pretty much find small 8.25 oz. jars of it in almost every grocery store in the Mexican Foods section. Mole sauce adds a rich depth of flavor to standard enchilada sauce and partners very well in this recipe.

Scroll Down For A Printable Recipe Card At The Bottom Of The Page

So… How Do I Make This Chicken Enchilada Casserole?

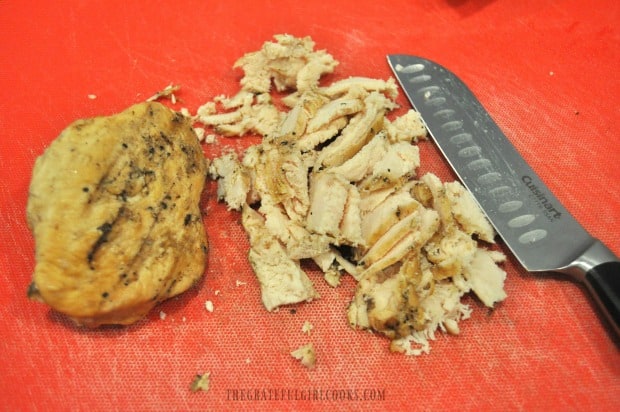
It’s easy. You will just be creating a layer of ingredients, then repeating the layers, etc.  Start by thinly slicing two grilled chicken breasts (I used leftovers). A quick and easy substitution would be to use two rotisserie chicken breasts, lightly seasoned with salt and pepper.

Slicing chicken breast for enchilada casserole

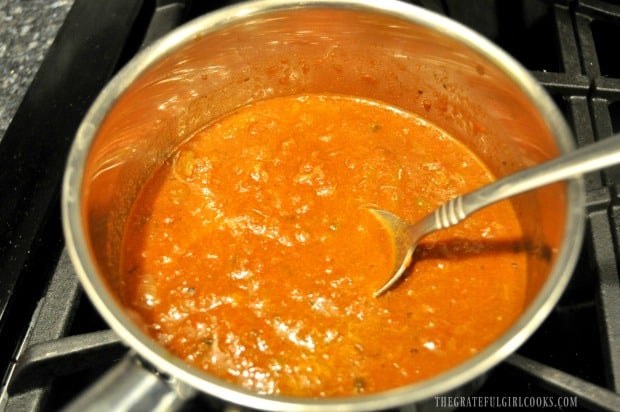
Mix enchilada sauce and mole sauce in pan. Stir until blended, then cook on low heat for 5 minutes. This allows the flavors to come together a bit! (Note: I used homemade enchilada sauce, so your version may look slightly different)

Cooking enchilada and mole sauces for casserole

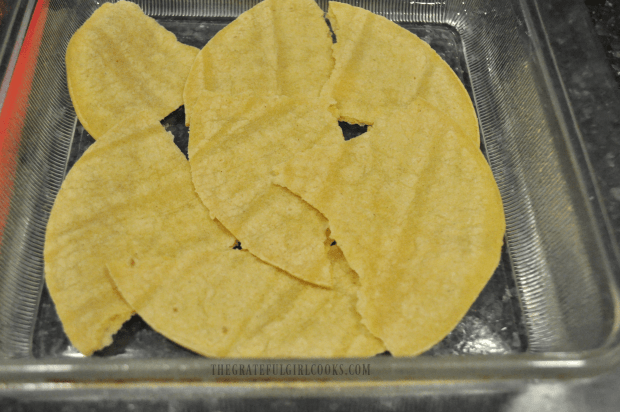
Spray an 8×8 inch pan with non-stick cooking spray. Rip two tortillas into large pieces and layer the bottom of the dish, trying to cover as much as possible.

Torn tortillas are layered into casserole dish

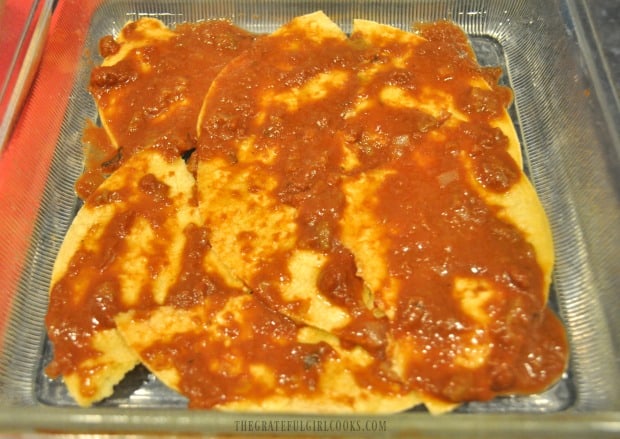
Spread 1/3 of the sauce over the tortilla pieces, spreading to cover.

Enchilada/mole sauce is spread over tortillas

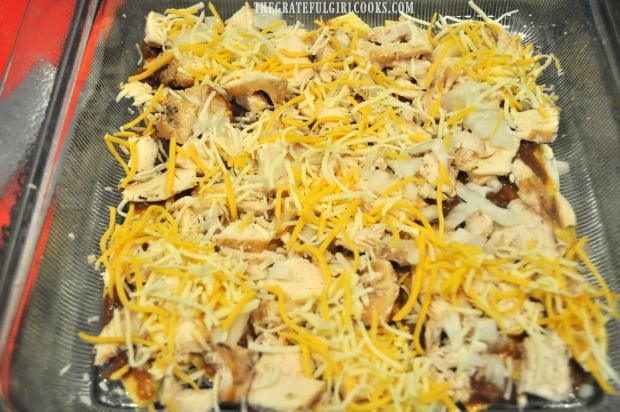
Cover the sauce with 1/2 of the chicken slices, 1/2 of the chopped onions and top them with 1/3 of the grated Mexican cheese blend.

Chicken, onions and cheese layered onto enchilada casserole

Repeat Layers

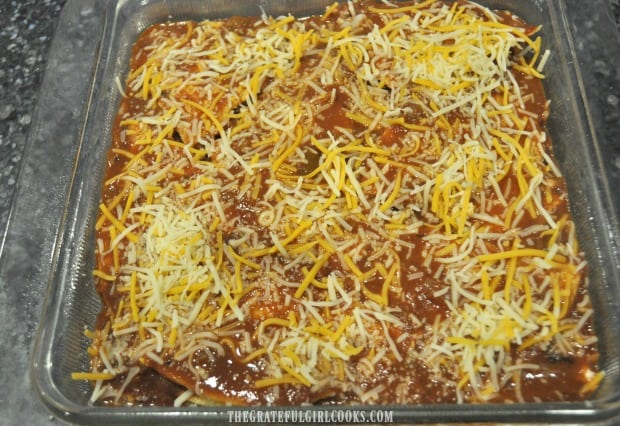
Repeat another layer in the same order:  2 torn tortillas, 1/3 of the sauce, remaining 1/2 of the chicken and onions, then top this second layer with 1/3 of the grated Mexican blend cheese. For the final layer, simply add the remaining two torn tortilla pieces, top with remaining sauce, then top it all off with the remaining grated cheese.

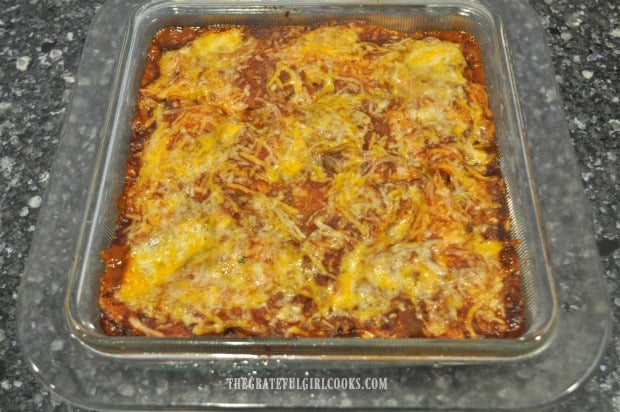
Chicken enchilada mole casserole is ready to bake

Time To Bake The Chicken Enchilada Mole Casserole

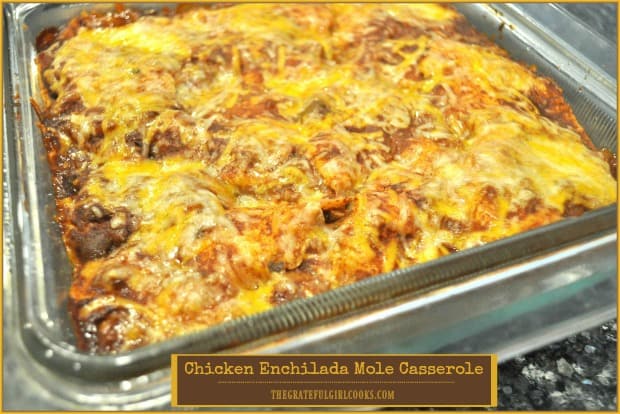
Bake the casserole (uncovered) in a 350° F. preheated oven for 20-25 minutes (mine was done in 20). The cheese and sauce should be bubbly when done. Remove chicken enchilada casserole from oven to a wire rack.

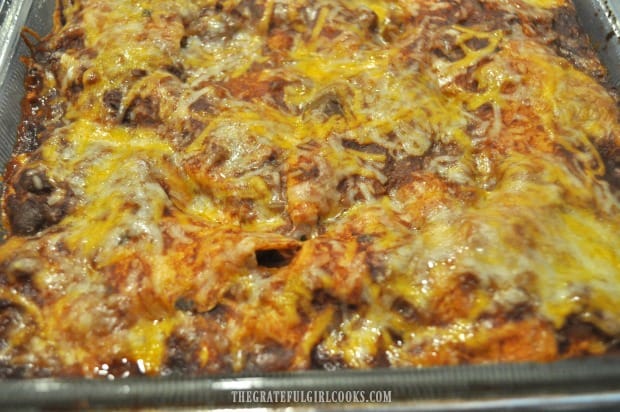
Chicken enchilada casserole, hot from the oven

Let the casserole rest for a  minute or two to let the cheese firm up, so it will be easier to slice.

Melted cheese on top of chicken enchilada casserole

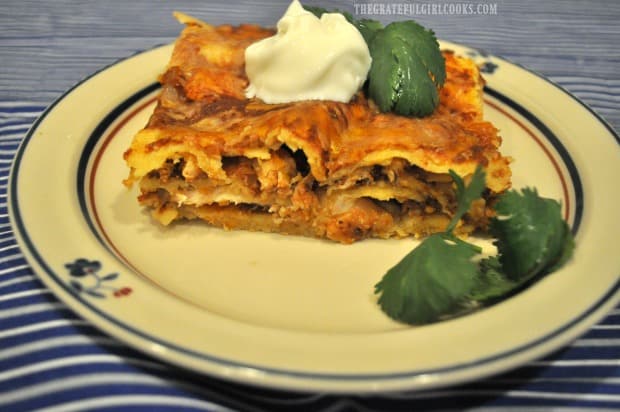
Slice the casserole into 6 pieces, and transfer to plates. Serve each piece with a dollop of sour cream and a cilantro leaf garnish, if desired.

Chicken Enchilada Mole Casserole on a plate, with sour cream and cilantro garnish

And that’s how this casserole came to be made and eaten at our house!  Hope you will give it a try! Since this yummy casserole can be on the table in about 35 minutes, it’s a great meal for busy weeknights!

Looking For More Mexican-Inspired Recipes?

You can find ALL of my recipes in the Recipe Index, which is located at the top of the page. I have quite a few Mexican-inspired recipes you might enjoy, including:

Interested In More Recipes?

Thank you for visiting this website. I appreciate you using some of your valuable time to do soIf you’re interested, I publish a newsletter 2 times per month (1st and 15th) with all the latest recipes, and other fun info. I would be honored to have you join our growing list of subscribers, so you never miss a great recipe!
There is a Newsletter subscription box on the top right side (or bottom) of each blog post, depending on the device you use, where you can easily submit your e-mail address (only) to be included in my mailing list.

You Can Also Find Me On Social Media:

Facebook page: The Grateful Girl Cooks!
Pinterest:
The Grateful Girl Cooks!
Instagram:
jbatthegratefulgirlcooks

Author's signature

0 from 0 votes
Chicken Enchilada Mole Casserole
Prep Time
15 mins
Cook Time
20 mins
Total Time
35 mins
 
Chicken Enchilada Mole Casserole is an easy to make dinner, with layers of corn tortillas, chicken breast strips, enchilada and mole sauce, onions and cheese, and is ready in 35 minutes!
Category: Dinner
Cuisine: Mexican
Keyword: chicken enchilada mole casserole
Servings: 6 servings
Calories Per Serving: 499 kcal
Author: JB @ The Grateful Girl Cooks!
Ingredients
  • 6 corn tortillas
  • 28 ounces Red enchilada sauce
  • 1/2 cup Mole sauce (found in Mexican food sections of grocery store)
  • 2 chicken breasts (cooked)
  • 1/2 cup white onion , finely chopped
  • 2 cups Mexican 4 blend cheese (or combo of cheddar/jack)
  • 4 Tablespoons sour cream
  • 4 cilantro leaves (optional)
Instructions
  1. Preheat oven to 350° F.

  2. Thinly slice two grilled chicken breasts for the casserole. A quick and easy substitution would be to use two rotisserie chicken breasts, lightly seasoned with salt and pepper.
  3. Mix enchilada sauce and mole sauce in pan. Stir until blended, then cook on low heat for 5 minutes.
  4. Spray an 8x8 inch baking dish with non-stick cooking spray. Rip two tortillas into large pieces and layer the bottom of the dish, trying to cover as much as possible. Spread 1/3 of sauce over the tortilla pieces. Cover sauce with 1/2 of the chicken, 1/2 of the onions and top them with 1/3 of the grated Mexican cheese blend. Repeat another layer in the same order:  2 torn tortillas, 1/3 of the sauce, remaining 1/2 of the chicken and onions, then top this second layer with 1/3 of the grated Mexican blend cheese. For the final layer, add remaining two torn tortilla pieces, cover with remaining sauce, then top it all off with the remaining grated cheese.

  5. Bake the casserole (uncovered) in a 350° F. preheated oven for 20-25 minutes (mine was done in 20). The cheese and sauce should be bubbly when done. Remove chicken enchilada casserole from oven to a wire rack. Let the casserole rest for a  minute or two to let the cheese firm up, so it will be easier to slice.

  6. Slice the casserole into 6 pieces, and transfer to plates. Serve each piece with a dollop of sour cream and a cilantro leaf garnish, if desired. Enjoy!

Nutrition Facts
Chicken Enchilada Mole Casserole
Amount Per Serving (1 serving)
Calories 499 Calories from Fat 144
% Daily Value*
Fat 16g25%
Saturated Fat 9g56%
Cholesterol 68mg23%
Sodium 1474mg64%
Potassium 274mg8%
Carbohydrates 24g8%
Fiber 3g13%
Sugar 9g10%
Protein 22g44%
Vitamin A 1445IU29%
Vitamin C 3.8mg5%
Calcium 336mg34%
Iron 1.6mg9%
* Percent Daily Values are based on a 2000 calorie diet.

Here’s one more to pin on your Pinterest boards!Chicken Enchilada Mole Casserole is an easy to make dinner, with layers of corn tortillas, chicken breast strips, enchilada and mole sauce, onions and cheese, and is ready in 35 minutes!

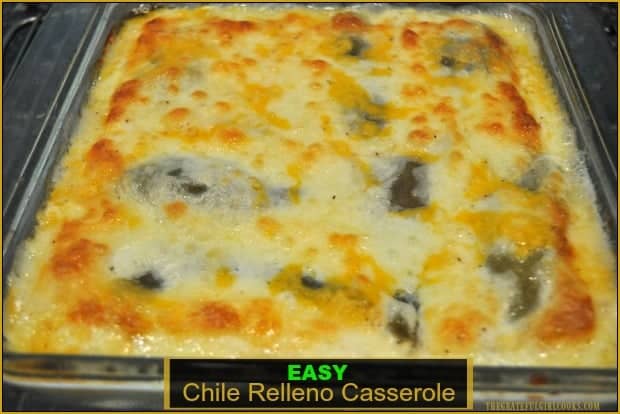
Easy Chile Relleno Casserole

This easy chile relleno casserole (vegetarian) has all the wonderful Southwest flavors of the traditional dish, but is baked not fried, and it’s DELICIOUS!
This scrumptious chile relleno casserole is easy to make, is vegetarian, and has all the Southwest flavors of the traditional dish, but is baked, not fried!

I received this wonderful, meatless chile relleno casserole recipe over 20 years ago from my friend Lanita, who I sang with in a church choir.  She’s an amazing, strong woman, and I love her dearly! I’ve made her recipe for this dish several times over the years, but hadn’t made in quite a while.

So, I decided to make it once again, tweaked her original recipe ever so slightly, made it, devoured it, and am sharing how you can make it, too! Now I’ve made it countless times, and we love it!

Scroll Down For A Printable Recipe Card At the Bottom Of The Page

The Origins of Chile Rellenos

Did you know that the words “chile relleno” actually mean “stuffed chile” in Spanish?  This popular dish had its origins in Puebla, Mexico, and showed up in recipe form over 150 years ago.  If you enjoy Tex-Mex food or enjoy eating chile rellenos at your favorite Mexican food spot, I’m confident you will enjoy this twist on the original in this delicious layered casserole.

This easy to prepare dish has lots of mild flavor from whole green chiles and gooey melted cheese, and all the taste commonly found in the original dish, but guess what? It is BAKED, not FRIED, so there’s much less prep work (and calories), and it’s in casserole form! Did I mention how simple it is to prepare?

So How Do I Make This Casserole?

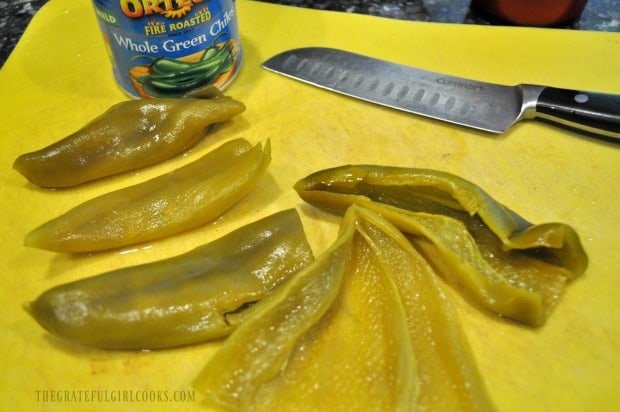
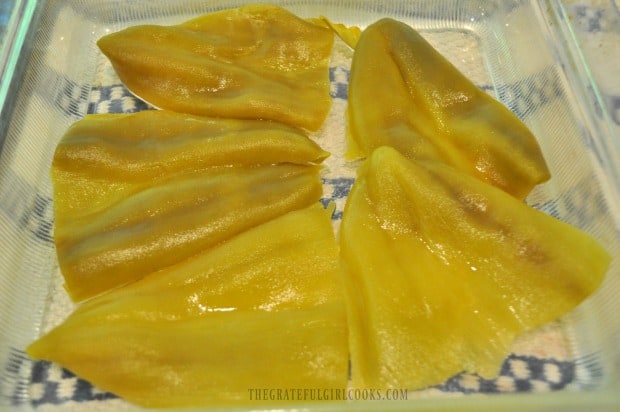
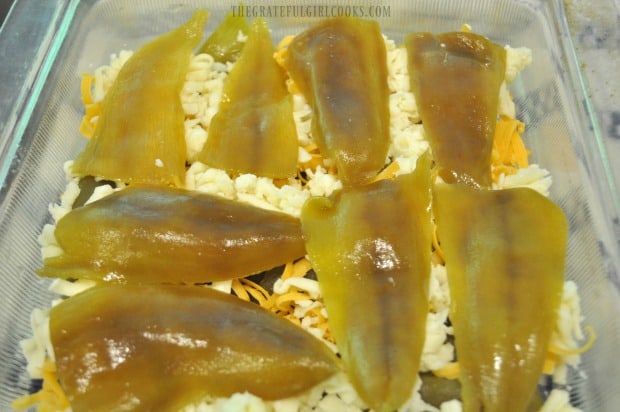
Start by spraying a 9×9 inch baking dish (bottom and sides) with non-stick spray. Slice whole canned green chiles open; rinse out any seeds, then drain. Using HALF of the chiles, place a first layer of chiles (spread open) on the bottom of an 9×9 inch baking dish.

Slicing and cleaning whole green chiles for casserole

Whole green chiles on bottom of glass baking dish

Sprinkle the chiles with HALF of the grated jack and cheddar cheeses, then add another layer of the remaining green chiles on top of the cheese.

Layers of green chiles and grated cheese for relleno casserole

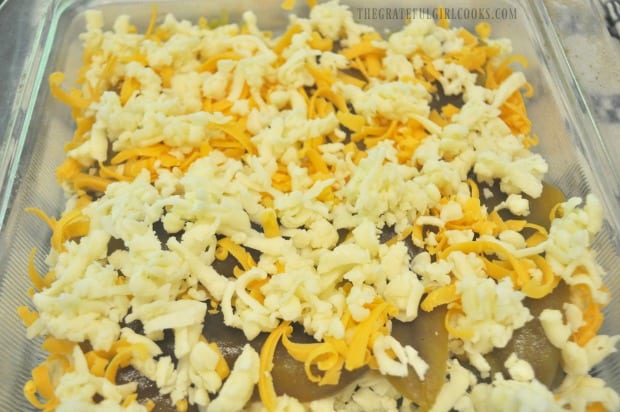
Top with the remaining jack and cheddar cheeses.

Grated jack and cheddar cheese on top of green chiles in glass baking dish

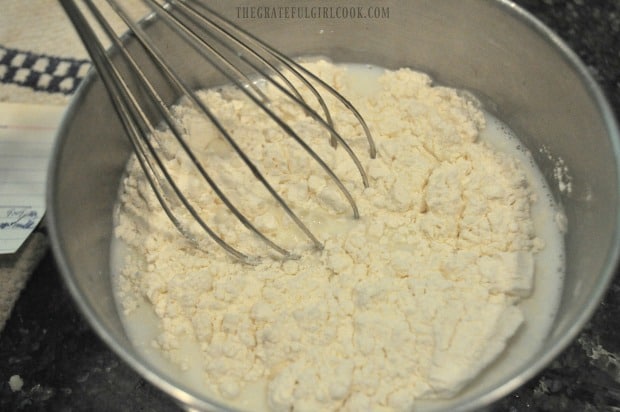
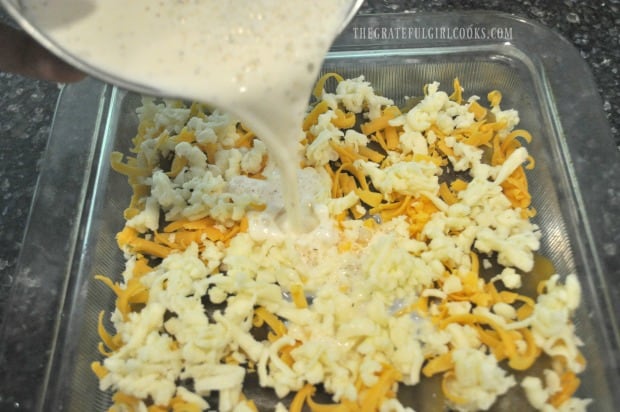
In a small bowl, whisk together eggs, flour, milk and salt until fully blended.  Pour this mixture over the casserole, distributing evenly.

Mixing flour, milk and salt for casserole

Pouring milk/flour mixture over chile relleno casserole before baking

Time To Bake The Easy Chili Relleno Casserole

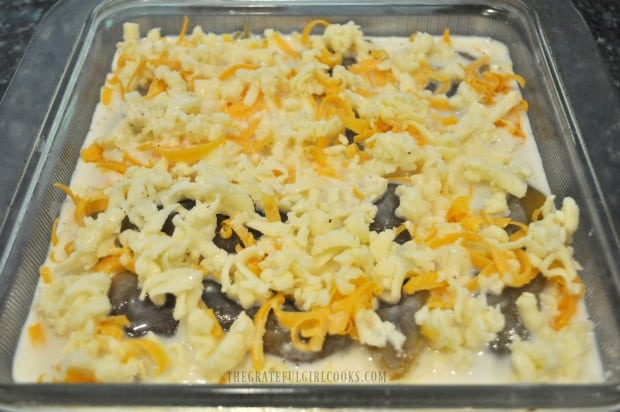
This is what the casserole looks like when it is ready to bake.  Bake the casserole at 350 degrees for 30-35 minutes (uncovered), until it’s golden brown on top. I baked mine for a total of 35 minutes.

Casserole with green chiles and cheese is ready to go into oven

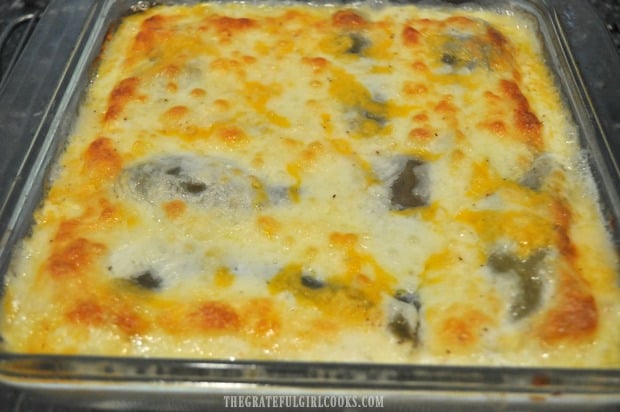
When done, the casserole should be golden brown in color on top.  Remove dish from oven and transfer to a wire rack. Let it cool and firm up for a few minutes, then slice the casserole with a sharp knife into 6 equal sized pieces, serve and enjoy!  See how simple it is to prepare?

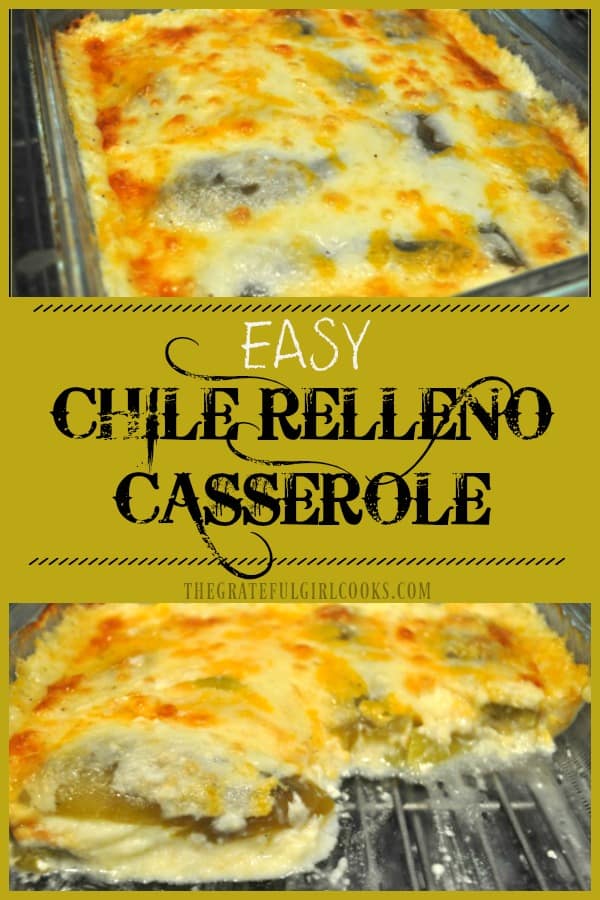
Easy chile relleno casserole, hot out of the oven!

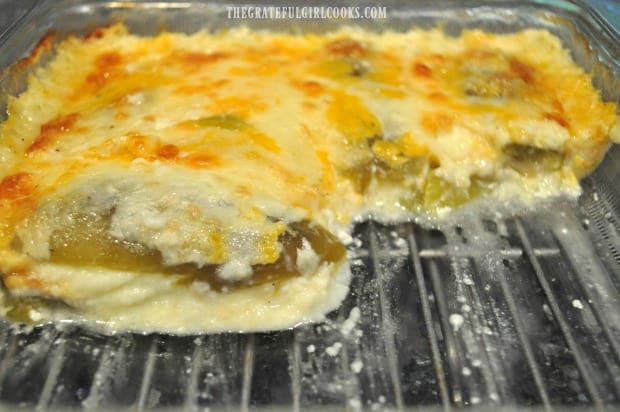
I took a photo after dinner so you could see what the INSIDE of the casserole looks like (after hungry humans had their fill).  See those chiles peeking out from under the cheese? Ooh- I’m telling you, this is one great tasting MEATLESS casserole! Truth is… it’s not only good for lunch or dinner… it’s even good for breakfast… yep!

A close up look at the inside of chili relleno casserole after baking

I hope you enjoy this recipe.  I have a similar recipe for a layered casserole on this blog that uses tortillas, green chiles and chicken, if you are interested in looking at that one. It’s called Layered Chicken Enchilada Casserole, and it also tastes fantastic.

Looking For More Southwestern-Style Recipes?

You can find ALL of my recipes in the Recipe Index, which is located at the top of the page. I have some delicious Southwest/Mexican-style recipes you might enjoy, including:

Interested In More Recipes?

Thank you for visiting this website. I appreciate you using some of your valuable time to do soIf you’re interested, I publish a newsletter 2 times per month (1st and 15th) with all the latest recipes, and other fun info. I would be honored to have you join our growing list of subscribers, so you never miss a great recipe! 

There is a Newsletter subscription box on the top right side (or bottom) of each blog post, depending on the device you use, where you can easily submit your e-mail address (only) to be included in my mailing list.

You Can Also Find Me On Social Media:

Facebook page: The Grateful Girl Cooks!
Pinterest:
The Grateful Girl Cooks!
Instagram:
jbatthegratefulgirlcooks

Hope to have you visit again soon. Have a GREAT day!

Author's signature

Recipe Adapted From: My sweet friend, Lanita Moen

0 from 0 votes
Easy Chile Relleno Casserole
Prep Time
10 mins
Cook Time
35 mins
Total Time
45 mins
 

This scrumptious chile relleno casserole is easy to make, is vegetarian, and has all the Southwest flavors of the traditional dish, but it is is baked, not fried!

Category: Dinner
Cuisine: Mexican, Southwestern
Keyword: chile, relleno
Servings: 6 servings
Calories Per Serving: 385 kcal
Author: JB @ The Grateful Girl Cooks!
Ingredients
  • 14 ounces whole green chiles , canned (2 -7 ounce cans)
  • 3/4 pound jack cheese , grated
  • 1 cup cheddar cheese , grated
  • 2 eggs
  • 1/2 cup all purpose flour
  • cups milk
  • 1 teaspoon salt
  • 1/2 teaspoon black pepper
Instructions
  1. Spray a 9x9 inch baking dish with non-stick spray. Slice whole canned green chiles wide open; rinse out any seeds, then drain. Arrange half of the chiles  in the bottom of the dish.

  2. Sprinkle chiles with HALF of the grated jack and cheddar cheeses.  Add remaining green chiles in another layer on top of the cheese. Top with remaining jack and cheddar cheeses.

  3. In a small bowl, whisk together eggs, flour, milk and salt until fully blended.  Pour this mixture over the casserole, distributing evenly.
  4. Bake casserole (uncovered) at 350 degrees for 30-35 minutes, until golden brown on top.  Remove dish from oven and transfer to a wire rack.  Let it cool and firm up for a few minutes, then slice casserole with sharp knife into 6 equal sized pieces, serve (a spatula works great) and enjoy!

Nutrition Facts
Easy Chile Relleno Casserole
Amount Per Serving (1 serving)
Calories 385 Calories from Fat 225
% Daily Value*
Fat 25g38%
Saturated Fat 15g94%
Cholesterol 127mg42%
Sodium 1118mg49%
Potassium 259mg7%
Carbohydrates 14g5%
Fiber 1g4%
Sugar 3g3%
Protein 23g46%
Vitamin A 905IU18%
Vitamin C 22.6mg27%
Calcium 665mg67%
Iron 2.2mg12%
* Percent Daily Values are based on a 2000 calorie diet.

Here’s one more to pin on your Pinterest boards!
This scrumptious chile relleno casserole is easy to make, is vegetarian, and has all the Southwest flavors of the traditional dish, but is baked, not fried!

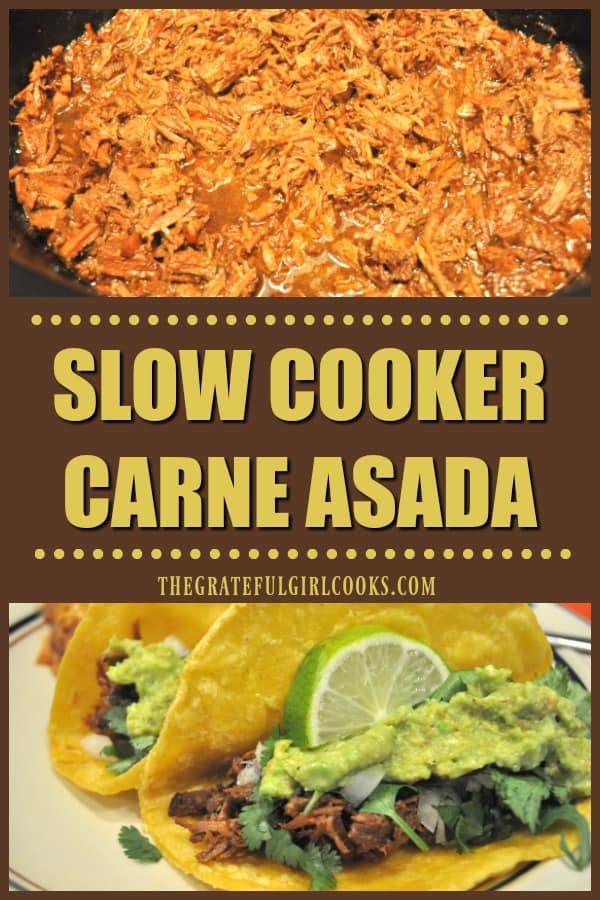
Slow Cooker Carne Asada

You’re gonna love delicious slow cooker carne asada style Mexican shredded beef! An easy filling for tacos, burritos, nachos, and enchiladas! The possibilities for using this tasty shredded beef are endless!You're gonna love this delicious slow cooker carne asada style Mexican shredded beef, an easy, perfect filling for tacos, burritos, nachos, and enchiladas!
Traditional carne asada (which means “grilled meat”) is typically made using flank steak or skirt steak.  I stumbled upon this variation recipe on Pinterest which uses stew meat (a less expensive type of beef). Since I had some already in our freezer, I decided to try this particular recipe.

Oh. My. Goodness. The Southwestern flavor of the meat is incredible, and the beef turns out so tender it shreds easily! The recipe is very easy to prepare and only involves a couple of simple “prep” steps.

After that, turn on your crock pot and let it do all the rest of the work for you, while you go about your day! Here’s how to make slow cooker carne asada.

Scroll Down for A Printable Recipe Card At The Bottom Of The Page

How To Make Slow Cooker Carne Asada

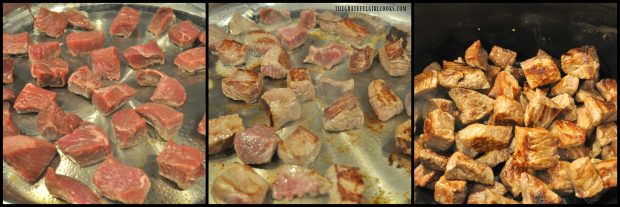
Heat a large skillet on medium-high heat (I lightly sprayed my skillet with non-stick spray before heating).  Cook the stew meat cubes on all sides.  This will usually take about 8-10 minutes.

If you need to, cook the beef in two batches, to not overcrowd the pan. Once beef is browned nicely, transfer it to slow cooker.

3 pictures of stew meat for carne asada, browning in skillet

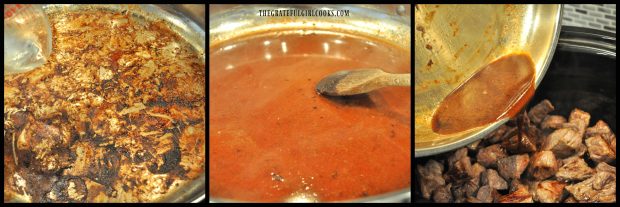
Once the meat has cooked, your skillet will probably look like the first photo below, with lots of remaining little bits of charred meat. Add 1/3 cup of water to skillet. Cook on medium heat for a couple minutes, to help de-glaze the skillet.

Be sure to scrape all the browned bits up off the bottom of the skillet into the water. It will blend into the water, to make a thin flavor-filled sauce.

Pour all of this liquid over the meat in the slow cooker. Stir well to combine. Set aside.

Skillet is de-glazed with water, then poured into slow cooker over beef

Make The Sauce

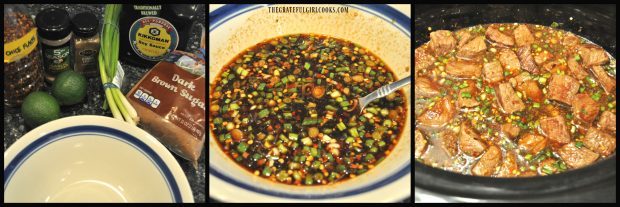
Mix up the carne asada sauce ingredients in a medium bowl with a fork or whisk until thoroughly combined and the brown sugar has dissolved. Pour the marinade over the beef. 

The meat should be almost completely submerged. If not, you can add a little bit more water to slow cooker. Stir the ingredients until they are combined.

Time For The Slow Cooker

Put lid on slow cooker, turn to the HIGH setting, and cook the meat for 4 hours, with the slow cooker covered.

TIP: Do not open lid of slow cooker during the cooking time, so you don’t lose any heat! Your kitchen should start to smell really good about halfway through the cooking time!

Marinade mixed for carne asada in bowl, then into slow cooker over beef

Shred The Slow Cooker Carne Asada

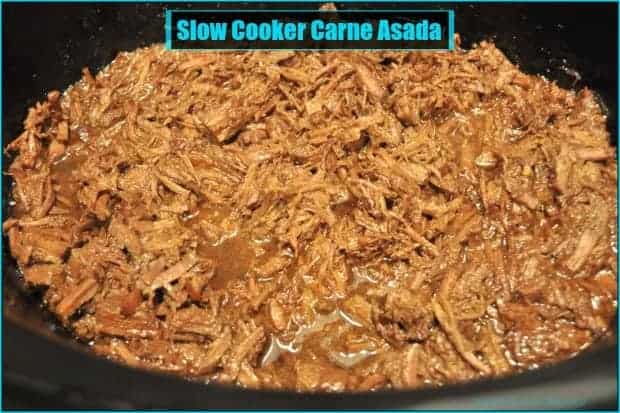
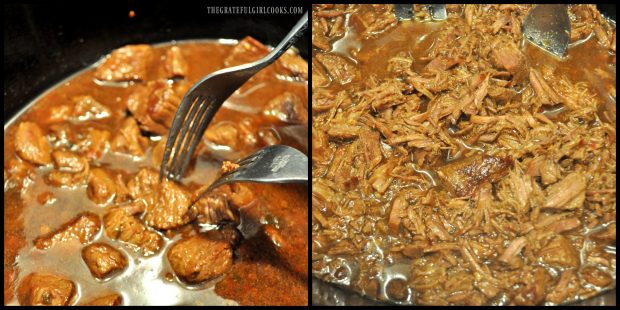
After meat has fully cooked, remove the lid of the slow cooker. Shred the meat (it should shred VERY easily) using two forks to pull the meat apart. Leave the shredded beef in the juices in the slow cooker.

Shredding beef for carne asada with two forks

The meat is now ready to serve!  Whatever you don’t eat right away can be frozen in food storage bags (once it’s cooled down), to save for other meals.

What Else Can The Shredded Meat Be Used For?  

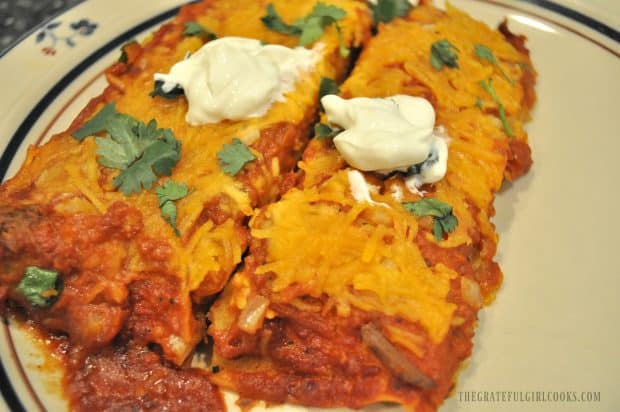
I’ve prepared several dishes with the meat (it went a long way since there are only two of us at home these days). I made shredded carne asada enchiladas (below). They were a HUGE hit with my husband and I.

The meat turns out so tender and it’s totally packed with flavor.  I also used the last bit of meat to make a big plate of nachos for my husband, myself and our son.

Nachos are another great way to use the shredded beef (sorry, no pics, they were eaten too fast)! YUMMO!

Carne asada meat used to make shredded beef enchiladas

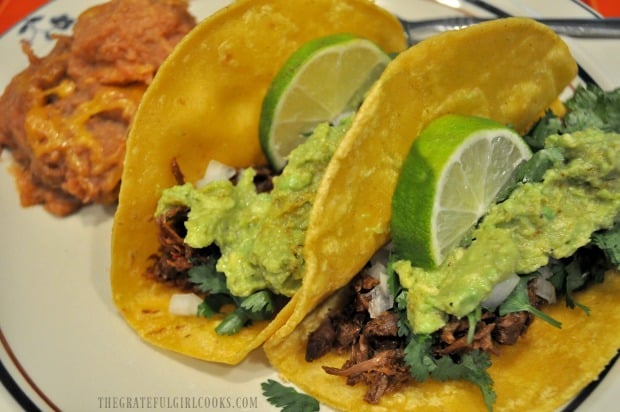
We also use the carne asada to make simple street tacos with chopped onion, cilantro, freshly made guacamole… and lime slices!
They are absolutely fantastic! I’m telling you, the flavor of this slow cooker carne asada is wonderful!
Shredded carne asada meat used to make tacos

There are so many ways to use this meat!  I’ve already bought more stew meat to make this recipe again.  I’m planning to make some shredded beef burritos and possibly a couple tostadas with it this time! I can hardly wait!

I hope you try this delicious version of carne asada.  The flavor is OUTSTANDING, and I think you will LOVE it. You may also enjoy my recipe for Easy Slow Cooker Pulled Pork too, because it’s really delicious!

Have a great day, and please come back soon for more great recipes.

Looking For More Mexican-Style Recipes?

You can find all of my recipes in the Recipe Index, located at the top of the page. I have quite a few Mexican-inspired recipes there, including:

Want More Recipes? Get My FREE Newsletter!

I publish a newsletter 2 times per month (1st and 15th) with lots of recipes, tips, etc..
Would you like to join our growing list of subscribers?

There is a Newsletter subscription box on the top right (or bottom) of each blog post, depending on the device you use.
You can submit your e-mail address there, to be added to my mailing list.

Find Me On Social Media:

Facebook page: The Grateful Girl Cooks!
Pinterest:
The Grateful Girl Cooks!
Instagram:
jbatthegratefulgirlcooks

Author's signature

Original recipe source: https://lifecurentsblog.com/crock-pot-carne-asada/

↓↓ PRINTABLE RECIPE BELOW ↓↓

0 from 0 votes
Slow Cooker Carne Asada
Prep Time
15 mins
Cook Time
4 hrs
Total Time
4 hrs 15 mins
 

You're gonna love this delicious slow cooker carne asada style Mexican shredded beef, an easy, perfect filling for tacos, burritos, nachos, and enchiladas!

Category: Dinner
Cuisine: Mexican
Keyword: carne asada
Servings: 12
Calories Per Serving: 244 kcal
Author: JB @ The Grateful Girl Cooks!
Ingredients
  • 3 pounds stew meat , cut in 2" cubes
  • 1 cup water , divided
Carne Asada Sauce
  • 2/3 cup soy sauce
  • 4 green onions , cut in thin slices
  • 2 limes (juice only)
  • 6 Tablespoons dark brown sugar
  • 1 teaspoon red pepper flakes , or more, if you like it spicy!
  • 1 teaspoon ground cumin
  • 1 teaspoon garlic powder
Instructions
  1. Heat a large skillet on medium-high heat (I lightly sprayed my skillet with non-stick spray before heating).  Cook the stew meat cubes on all sides.  This took about 10 minutes. If you need to, cook the beef in two batches, to not overcrowd the pan. Once beef is browned nicely, remove and transfer it to slow cooker.

  2. Add 1/3 cup of water to skillet you cooked the beef in. Cook on medium heat for a couple minutes, to de-glaze the skillet. Be sure to scrape all the browned bits up off the bottom of the skillet into the water. It will make a thin flavor-filled sauce. Pour this over the meat in the slow cooker. Stir well to combine. Set aside.

  3. Mix up the carne asada sauce ingredients in a medium bowl with a fork or whisk until thoroughly combined and the brown sugar has dissolved. Pour the marinade over the beef.  The meat should be almost completely submerged. If not, add a little bit more water to slow cooker. Stir to combine.
  4. Put lid on slow cooker, turn to the HIGH setting, and cook the meat for 4 hours, covered. After meat has fully cooked, remove lid. Shred the meat (it should shred VERY easily) using two forks to pull the meat apart. The meat is now ready to serve, and can be used for tacos, enchiladas, burritos, nachos, etc. Enjoy!!!

Recipe Notes

Caloric calculation is only for carne asada. Any other additions (tortillas, etc.) are not included.

Nutrition Facts
Slow Cooker Carne Asada
Amount Per Serving (1 serving (1/12th of total))
Calories 244 Calories from Fat 72
% Daily Value*
Fat 8g12%
Saturated Fat 3g19%
Cholesterol 88mg29%
Sodium 519mg23%
Potassium 311mg9%
Carbohydrates 8g3%
Sugar 6g7%
Protein 31g62%
Vitamin A 90IU2%
Vitamin C 2.2mg3%
Calcium 19mg2%
Iron 3.2mg18%
* Percent Daily Values are based on a 2000 calorie diet.

Here’s one more to pin on your Pinterest boards!You're gonna love this delicious slow cooker carne asada style Mexican shredded beef, an easy, perfect filling for tacos, burritos, nachos, and enchiladas!

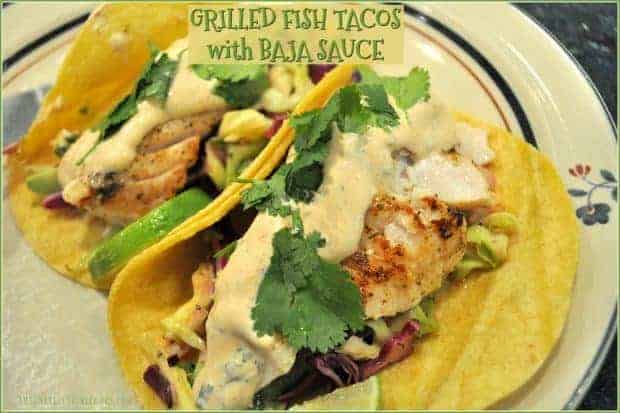
Grilled Fish Tacos with Baja Sauce

You’re gonna absolutely LOVE these grilled (no batter) fish tacos, with soft corn tortillas, crisp marinated slaw and avocado slices, topped with a creamy Southwestern flavored Baja sauce!
You're gonna LOVE these grilled fish tacos, w/ corn tortillas, crisp marinated slaw and avocado, topped with a creamy Southwestern flavored Baja sauce!

I recently searched for, and found several fish taco recipes on Pinterest that looked promising, and decided to try this one because the seafood is GRILLED, not dipped in batter (although those are good, too!).  I wanted to go with a slightly healthier option this time!  Wow!!! Let me tell you… this might be my new, absolute favorite recipe for fish tacos!

My husband and son RAVED about them! They LOVED them and said they were some of the best fish tacos they had ever tasted (and they’re both avowed fish taco connoisseurs!). Today I want to share the recipe with you, so you can enjoy them, too! Here’s how to make the:

Scroll Down For A Printable Recipe Card At The Bottom Of The Page

What Kind Of Fish Can Be Used?

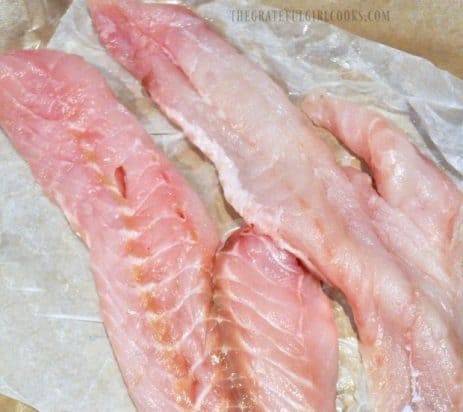
I used fresh rockfish for our tacos, but any mild flavored white fish will work just fine. Cooking times will vary slightly, based on the thickness of fish used.

Rockfish fillets, used to make Grilled Fish Tacos

TIP: The tacos are really easy to prepare… ESPECIALLY if you make the slaw and the Baja sauce ahead of time (best for infusing flavors, too!).  Then when you are ready to make dinner, all you need to do is grill the fish on the stove top, and assemble the tacos. EASY PEASY! Here’s how to make this absolutely DELICIOUS dish!

Make The Slaw

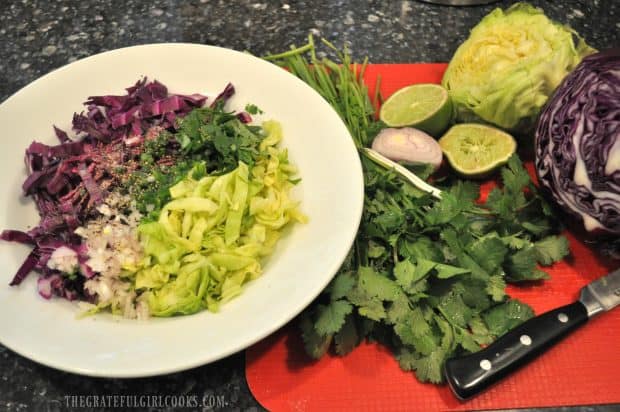
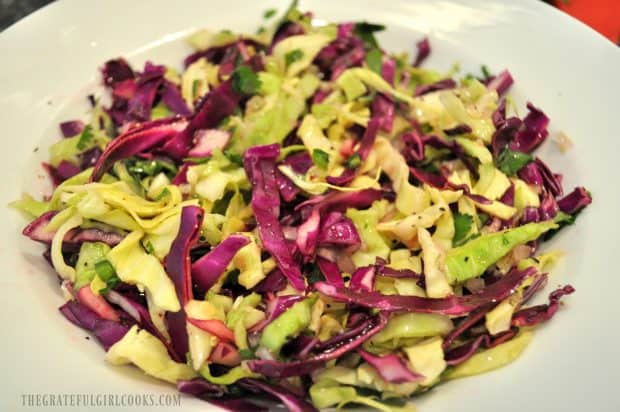
The slaw for the fish tacos is very simple to make.  All the slaw ingredients are mixed together in a bowl, then covered and refrigerated for at least 30 minutes to let the flavors combine and become infused with great flavor (Note: do not let slaw marinade for longer than 8 hours, to ensure it stays crisp).

Ingredients for cabbage slaw for fish tacos

Mixed cabbage slaw for fish tacos, in a white bowl

Make Baja Sauce For The Fish Tacos

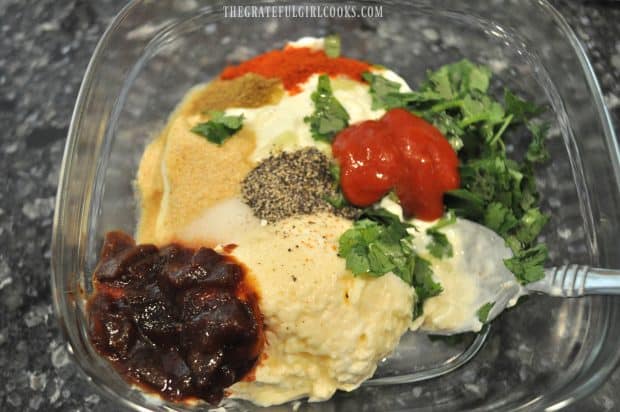
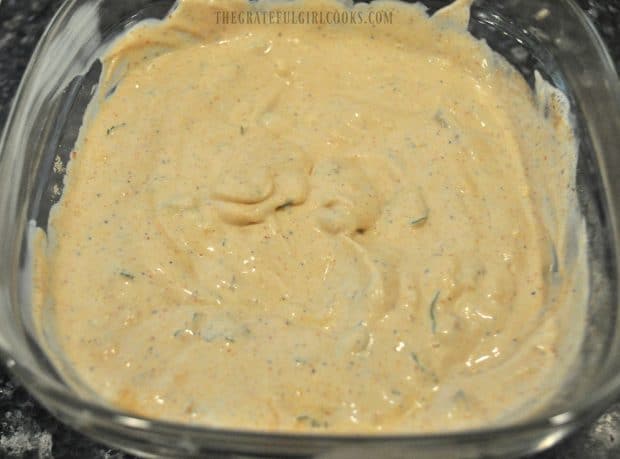
The Baja sauce is also very easy to make. Place the ingredients in a small bowl, then stir or whisk well, to fully combine.  Cover, and refrigerate for 1-2 hours, for best flavor.

I found it easy to make the Baja sauce and Slaw ahead of time, so they were ready to go when it was time to fix dinner! The recipe makes more than enough sauce for 8 tacos, so you can use the extra for other recipes (nachos, burritos, quesadillas, etc.), or another batch of tacos, if desired.

Ingredients for Baja sauce for tacos, in a clear bowl

Mixed Baja sauce for fish tacos, in a clear dish

Prepare And Grill The Fish

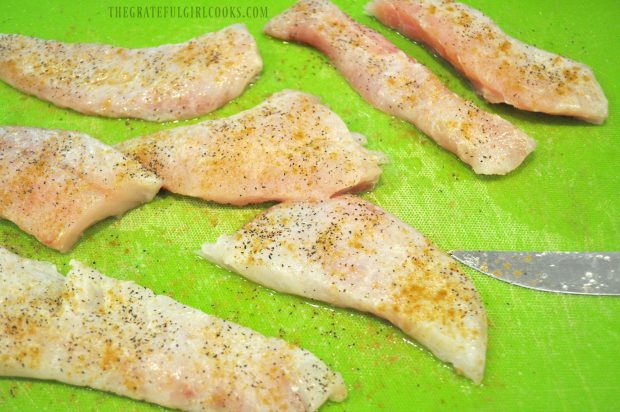
When you are ready to fix the tacos, here’s what you do: Cut fish into 8 pieces (approx. 4 ounces each). Pat each piece of fish dry (with paper towels).  Season BOTH sides of the fish with lime juice, cumin, salt and pepper.

Seasoned pieces of fish to grill for tacos

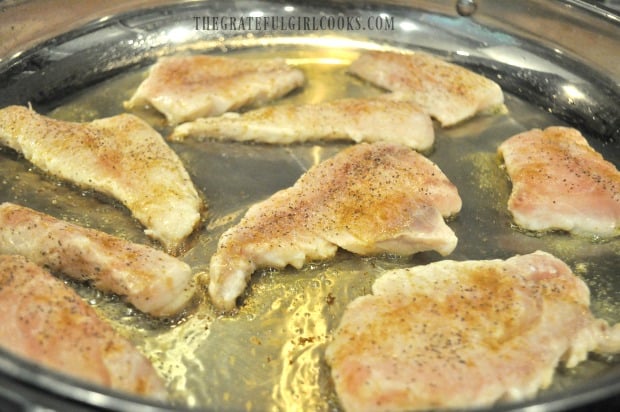
Heat oil in a large skillet on medium-high heat.  Once oil is hot, carefully place the pieces of fish in skillet.  Be careful to leave space between the pieces of fish (you may need to cook fish in two batches, so you don’t overcrowd the skillet).

Cooking fish for tacos in oil in skillet

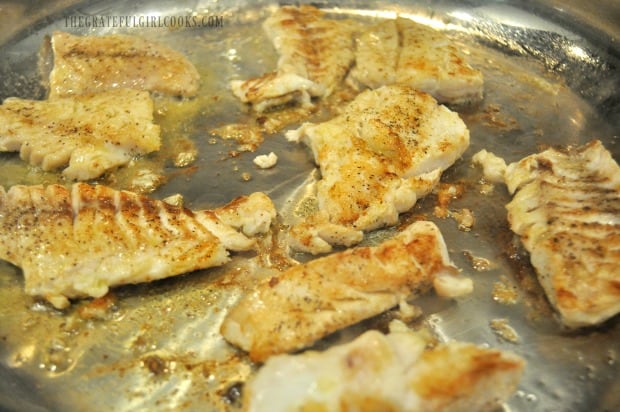
Cook fish for about 3 minutes, without moving pieces, until you can see the bottom turning golden brown, and the edges begin to turn white as they cook.  If you have thick pieces of fish, you might have to cook them a bit longer. Once the bottom side of the fish is “done”, it will be easy to move the fish in the skillet.

Using a spatula, carefully turn each piece of fish to other side and continue cooking an additional 3-4 minutes.  The fish will flake easily when done, and have a nice golden brown seared color to it! Transfer fish to a plate or platter, and keep it warm while you assemble tacos!

Fish pieces are grilled until lightly browned

Put The Fish Tacos Together

To put these delicious tacos together, here’s what you do… put a warmed corn tortilla onto plate (I warmed tortillas by wrapping the stack of 8 tortillas in paper towels and heating in microwave). Place 2 avocado slices down the middle of each tortilla. Now add a couple heaping Tablespoons of the slaw on top of the avocado slices.

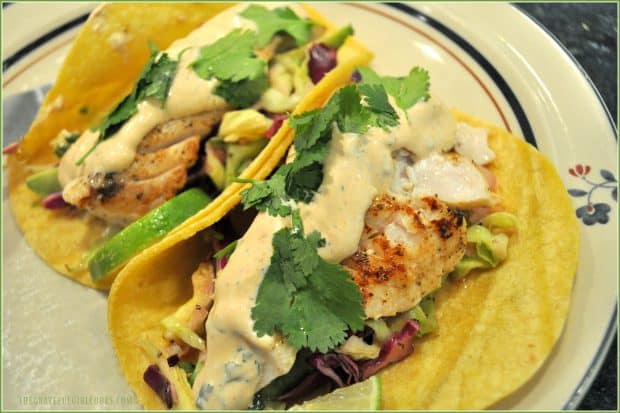
Place a piece of warm, grilled fish on top of the crunchy slaw, then spoon some of the creamy Baja sauce over the top. Garnish each taco with cilantro and a lime slice (optional), and serve.

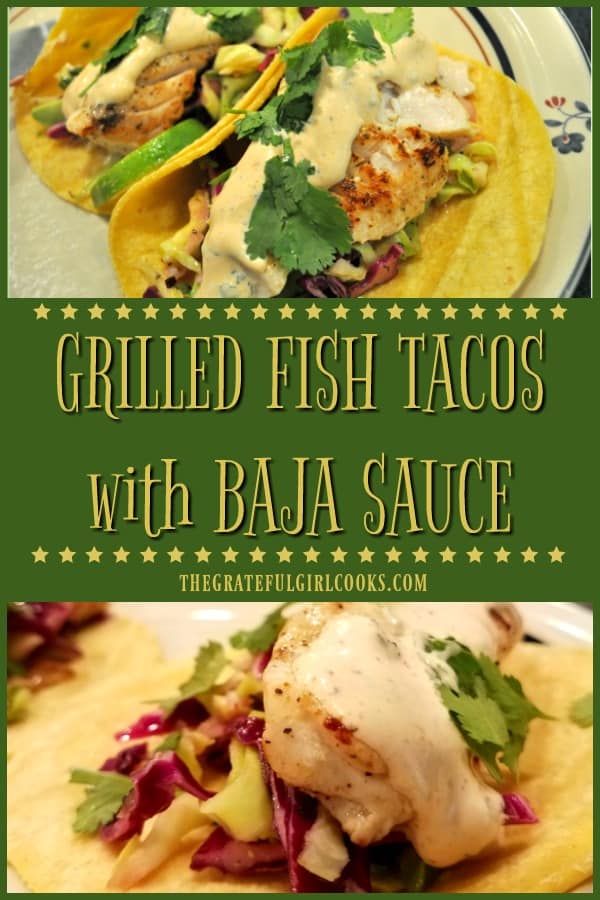
Grilled fish in tortilla with Baja sauce, slaw and cilantro, on plate

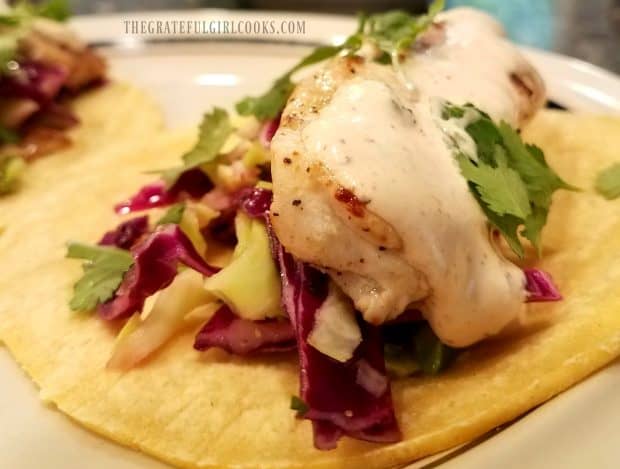
Take a look at that good looking piece of fresh, grilled fish in that taco!  Makes my mouth water just looking at it! Perfectly pan-seared fish, crunchy marinated slaw, cool avocado slices, and a creamy Southwestern sauce to top it all off… amazing and outrageously GOOD!

Close up photo of homemade grilled fish taco, with sauce

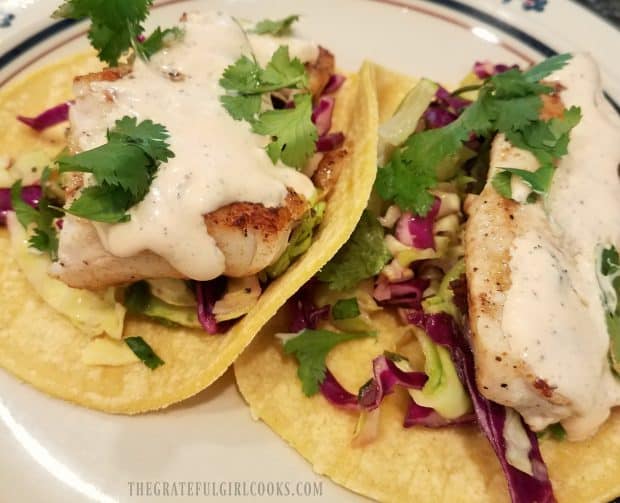
Two grilled fish tacos, with slaw and Baja sauce, on plate.

These truly were some of the best fish tacos I’ve ever had! The slaw and sauce taste amazing on the GRILLED fresh fish! YUM!  Our son and my husband have already asked me to make them again… SOON!

They went out to dinner recently, ordered fish tacos, and proudly came home and announced to me that my fish tacos were better than the ones they had at the restaurant!  Aw, shucks… (blushing).  I loved their compliments… and am only happy to oblige! Sure hope you will consider making these amazing, delicious tacos!  I think you will absolutely LOVE them! Have a wonderful day!

Looking For More Mexican Or Southwest-Inspired Recipes?

You can find all of my recipes in the Recipe Index, located at the top of the page. I have many Mexican or Southwest-inspired recipes you might enjoy, including:

Interested In More Recipes?

Thank you for visiting this website. I appreciate you using some of your valuable time to do soIf you’re interested, I publish a newsletter 2 times per month (1st and 15th) with all the latest recipes, and other fun info. I would be honored to have you join our growing list of subscribers, so you never miss a great recipe!
There is a Newsletter subscription box on the top right side (or bottom) of each blog post, depending on the device you use, where you can easily submit your e-mail address (only) to be included in my mailing list.

You Can Also Find Me On Social Media:

Facebook page: The Grateful Girl Cooks!
Pinterest:
The Grateful Girl Cooks!
Instagram:
jbatthegratefulgirlcooks

Author's signature

Recipe Source: www.thekitchenwhisperer.net/2015/03/12/grilled-fish-soft-tacos-with-baja-cream-sauce/

0 from 0 votes
Grilled Fish Tacos with Baja Sauce
Prep Time
15 mins
Cook Time
8 mins
Marinating
1 hr
Total Time
1 hr 23 mins
 
You're gonna LOVE these grilled (no batter) fish tacos, w/ corn tortillas, crisp marinated slaw and avocado, topped with a creamy Southwestern flavored Baja sauce!
Category: Dinner
Cuisine: Mexican, Southwestern
Keyword: fish tacos
Servings: 8 tacos
Calories Per Serving: 295 kcal
Author: JB @ The Grateful Girl Cooks!
Ingredients
For Fish:
  • 2 pounds white fish (I used rockfish) , cut into 4 ounce pieces (8 total)
  • 2 Tablespoons lime juice
  • 1 teaspoon ground cumin
  • teaspoons salt
  • 1 teaspoon black pepper
  • 3 Tablespoons olive oil
  • 8 corn tortillas (8" round) , warmed
For Slaw:
  • cups green cabbage , finely shredded
  • cups red cabbage , finely shredded
  • 2 teaspoons honey
  • 1 Tablespoon lime juice
  • 2 teaspoons jalapenos , minced
  • 1 Tablespoon (heaping) shallot , minced
  • 3 teaspoons cilantro , chopped
  • 1 teaspoon salt
  • 1/2 teaspoon black pepper
For Baja Sauce:
  • 3/4 cup light sour cream
  • 1/2 cup light mayonnaise
  • 3 Tablespoons lime juice
  • 1 teaspoon garlic powder
  • 2 teaspoons sriracha sauce
  • 1/4 cup (lightly packed) cilantro leaves , minced
  • 1 teaspoon salt
  • 1/2 teaspoon black pepper
  • 1/2 teaspoon ground cumin
  • 1/4 teaspoon cayenne pepper
  • teaspoons adobo sauce
Extra ingredients:
  • 2 large avocado , peeled, halved, sliced into 16 pieces
  • 8 teaspoons cilantro , chopped (for garnish)
Instructions
  1. Combine slaw ingredients in large bowl, then cover and refrigerate for at least 30 minutes to let it become infused with flavor. (Note: do not let slaw marinade for longer than 8 hours, to ensure slaw stays crisp).

  2. To make Baja sauce, place ingredients in a small bowl, then stir or whisk to fully blend.  Cover, and refrigerate 1-2 hours, for optimal flavor.

  3. When you are ready to prepare tacos, pat each piece of fish dry (with paper towels).  Season BOTH sides of the fish with lime juice, cumin, salt and pepper. Heat oil in a large skillet on medium-high heat.  Once oil is hot, carefully place pieces of fish in skillet.  Leave space between pieces of fish (might need to cook fish in two batches, so you don't overcrowd skillet). Cook fish portions for approx. 3 minutes, without moving them, until you can see the edges start to turn white as they cook (if using thick pieces of fish, you might have to cook them a bit longer). Once bottom side of the fish is "done", it will be easy to move in the skillet. Using a spatula, carefully turn fish to other side; continue cooking for another 3-4 minutes.  The fish will flake easily when done, and have a nice golden brown sear to it! Transfer fish to a plate; keep it warm while you assemble tacos!

  4. To assemble taco, put a warmed corn tortilla onto plate, then place 2 avocado slices in middle of tortilla. Add 2 heaping Tablespoons of slaw on top of the avocados.  Place a piece of grilled fish on top of slaw, then spoon some Baja sauce over the top. Garnish each taco with cilantro (and a small lime slice, if desired), and serve.  ENJOY!

Nutrition Facts
Grilled Fish Tacos with Baja Sauce
Amount Per Serving (1 taco)
Calories 295 Calories from Fat 117
% Daily Value*
Fat 13g20%
Saturated Fat 3g19%
Cholesterol 66mg22%
Sodium 1431mg62%
Potassium 654mg19%
Carbohydrates 20g7%
Fiber 2g8%
Sugar 3g3%
Protein 24g48%
Vitamin A 840IU17%
Vitamin C 22.3mg27%
Calcium 87mg9%
Iron 1.3mg7%
* Percent Daily Values are based on a 2000 calorie diet.

Here’s one more to pin on your Pinterest boards!You're gonna LOVE these grilled (no batter) fish tacos, w/ corn tortillas, crisp marinated slaw and avocado, topped with a creamy Southwestern flavored Baja sauce!

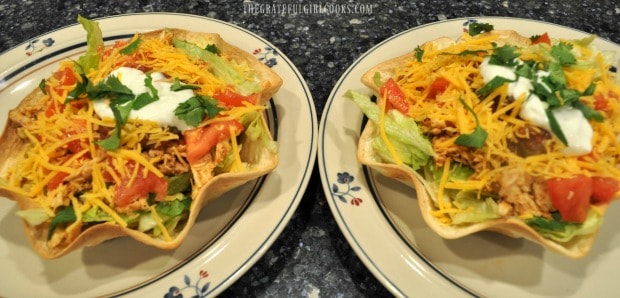
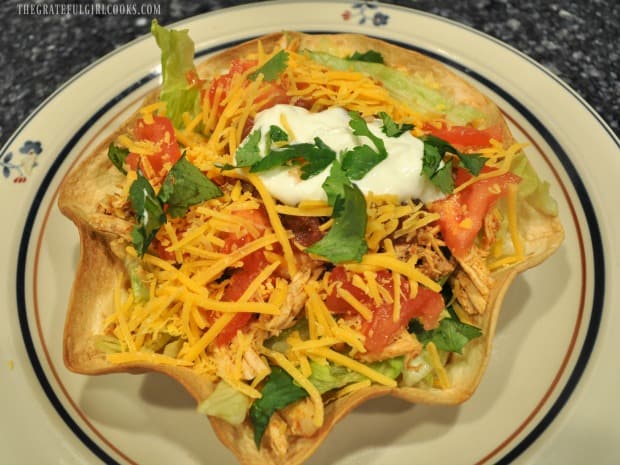
Chicken Taco Salad Bowl

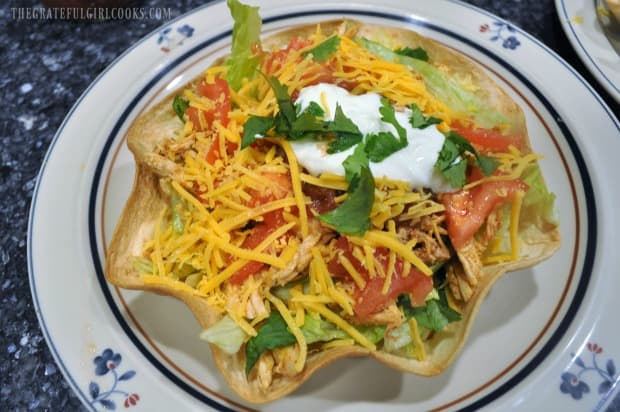
Make a Chicken Taco Salad in an edible tortilla bowl shell! Why go out when you can enjoy this yummy, filling Mexican salad from home?

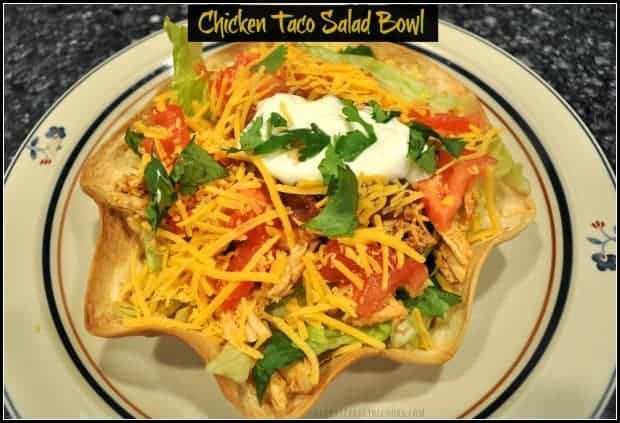
Did you know it’s easy to make a delicious Chicken Taco Salad Bowl. Who doesn’t like this filling salad served in an edible tortilla shell? Taco salads are simple to create, and the edible tortilla bowls are very easy to make.

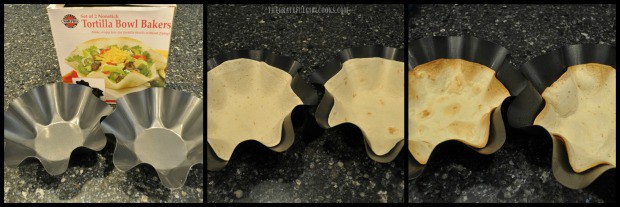
How Does The Tortilla Bowl Get Its Shape? 

I use metal tortilla bowl forms that I bought on Amazon several years ago. I think it was about $10 dollars total for two of them.

No, I am not receiving compensation for mentioning this, just thought you might like to see what I used. They have been worth every single penny, and I’ve used them so many times I’ve lost count!

The metal forms are sprayed with non-stick spray and the tortillas are lightly pressed into the mold, then baked for 5 minutes. That’s it! It’s really simple (and you can store them in an airtight container for 2 days, so you can easily make them ahead of time)!

3 photo collage of baked tortilla bowls

**NOTE: If you don’t have access to tortilla bowl pans, you can still bake tortilla bowls without them. Spray medium sized oven safe bowls with cooking spray.  Press a “burrito-sized” tortilla into the bowl (creasing the edges to fit, if needed).

Bake for 10-15 minutes in a preheated 375 degree oven, or until light brown and crispy. Remove from oven. Let cool for a few minutes, then carefully remove crisp tortilla from bowl.

Cook And Season The Chicken

When I make a taco salad bowl I typically use shredded pork, ground beef or shredded cooked chicken. This time I used 2 cooked/shredded chicken breasts and added a little bit of onion.

I season the meat by using my own taco seasoning mix, OR you can use 1/2 an envelope of store-bought taco seasoning (following instructions on package), to season the chicken.

Chicken cooking in pan

“Building” A Chicken Taco Salad Bowl

Spread warm refried beans across the bottom of the baked tortilla shell.  I usually try to use non-fat beans to cut down on calories.

After that I add lots of shredded lettuce, chopped cilantro, then top it with the seasoned shredded chicken and onion mixture.

Refried beans in tortilla bowl

Seasoned chicken in tortilla taco bowl

Finish Making The Chicken Taco Salad Bowl And Serve

Top the chicken taco salad off with a nice chunky salsa, chopped tomatoes, grated cheddar cheese, a dollop of sour cream or non-fat plain yogurt, and a few sprigs of cilantro.

Use whatever suits your own personal preference. This is how we enjoy them! You can add any other garnishes you enjoy, such as guacamole, avocado slices or sliced black olives, too.

Chicken taco salad bowl completed

Here are the two chicken taco salad bowls I made for my husband and I.  They look festive, and the crisp tortilla bowls are completely EDIBLE!  This is one of our favorite dinners, because it fills you up, tastes fantastic, and because we LOVE any kind of Mexican food!

Another big plus is that we don’t have to go out to a restaurant, but can enjoy it from the comfort of our own home!

Two chicken taco salads on plates

Go ahead… pull up a chair, grab a fork and have a bite!  I just KNOW you will enjoy this meal!  And by all means, add any other ingredients you wish, to creatively make this salad your own!

At times I’ve added avocado slices, or guacamole, sliced olives, and even chopped green chilies to our salad… all are tasty additions!

Chicken taco salad in tortilla bowl with cilantro

Sure hope you will try this recipe for a delicious chicken taco salad. As much as I enjoy going OUT for Mexican food , sometimes it’s easier, more convenient and less expensive to make these tasty salads at home! 

Thanks for stopping by, and I invite you to come back soon for more family-friendly recipes. Take care, may God bless you, and have a GREAT day.

Looking For More MAIN COURSE SALAD Recipes?

You can find all of my recipes in the Recipe Index, which is located at the top of the page. I have some wonderful tasting main course salad recipes you might enjoy, including:

Want More Recipes? Get My FREE Newsletter!

I publish a newsletter 2 times per month (1st and 15th) with lots of recipes, tips, etc..
Would you like to join our growing list of subscribers?

There is a Newsletter subscription box on the top right (or bottom) of each blog post, depending on the device you use.
You can submit your e-mail address there, to be added to my mailing list.

Find Me On Social Media:

Facebook page: The Grateful Girl Cooks!
Pinterest:
The Grateful Girl Cooks!
Instagram:
jbatthegratefulgirlcooks

Author's signature

↓↓ PRINTABLE RECIPE BELOW ↓↓

0 from 0 votes
Chicken Taco Salad Bowl
Prep Time
15 mins
Cook Time
0 mins
Total Time
15 mins
 

Make a Chicken Taco Salad in an edible tortilla bowl shell! Why go out when you can enjoy this yummy, filling Mexican salad from home?

Category: Dinner
Cuisine: Mexican
Keyword: chicken taco salad
Servings: 2 servings
Calories Per Serving: 348 kcal
Author: JB @ The Grateful Girl Cooks!
Ingredients
  • 2 burrito sized flour tortillas , baked into bowl shape and crisp (See NOTES below)
  • 2 cooked and shredded chicken breasts
  • 2 Tablespoons chopped onions
  • 1/2 package taco seasoning (plus water per pkg. instructions)
  • 1 can refried beans (I used non-fat)
  • 2 cups Iceberg lettuce , chopped
  • 2 Tablespoons cilantro , chopped, divided
  • Salsa (as desired)
  • 1 medium tomato , chopped, divided
  • 1/2 cup Cheddar cheese , grated, divided
  • Dollop of light sour cream (as desired)
  • Additional sprigs of cilantro
  • OPTIONAL GARNISH: guacamole , sliced avocados, sliced black olives, chopped green chilies
Instructions
  1. Bake tortilla bowls until crisp. Set aside. NOTE: If using metal tortilla bowl forms, spray pan with non-stick spray. Press tortilla into pan. Bake at 375 degrees for 5 minutes or until light brown and crispy. If you don't have access to the tortilla bowl forms, you can still bake tortilla bowls without them. Spray medium sized oven safe bowls with cooking spray. Press a "burrito-sized" tortilla into the bowl (creasing edges to fit, if needed). Bake 10-15 minutes in a 375 degree oven, or until light brown and crispy. Remove from oven. Let cool, then carefully remove crisp tortilla from bowl.
  2. Cook shredded chicken, onion and taco seasoning per package instructions. Set aside.
  3. To build salads, divide and layer ingredients into tortilla bowls: Refried beans, Shredded lettuce, cilantro, and seasoned shredded chicken, salsa, chopped tomato, grated cheddar cheese.
  4. Garnish with a dollop of sour cream and additional cilantro, if desired. Additional garnishes can include guacamole, avocado slices, sliced black olives or chopped green chilies. Serve, and enjoy this delicious Mexican salad.
Nutrition Facts
Chicken Taco Salad Bowl
Amount Per Serving (1 salad bowl)
Calories 348 Calories from Fat 126
% Daily Value*
Fat 14g22%
Saturated Fat 7g44%
Cholesterol 101mg34%
Sodium 539mg23%
Potassium 637mg18%
Carbohydrates 19g6%
Fiber 1g4%
Sugar 3g3%
Protein 34g68%
Vitamin A 855IU17%
Vitamin C 10.6mg13%
Calcium 247mg25%
Iron 1.8mg10%
* Percent Daily Values are based on a 2000 calorie diet.

Here’s one more to pin on your Pinterest boards!Make a Chicken Taco Salad in an edible tortilla bowl shell! Why go out when you can enjoy this yummy, filling Mexican salad from home?