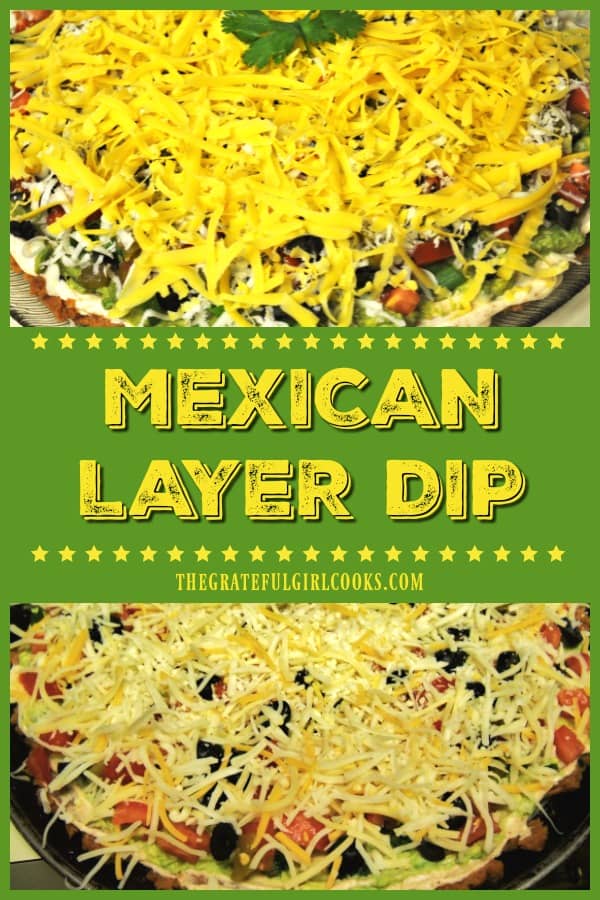
Category: Mexican / Southwestern

Marinated, Pan-Seared Mexican Chicken

Marinated, pan-seared Mexican chicken is a delicious, low-fat, easy to prepare dish. The chicken will surprise you with its depth of flavor.Marinated, pan-seared Mexican chicken is a delicious, low-fat, easy to prepare dish. The chicken will surprise you with its depth of flavor.
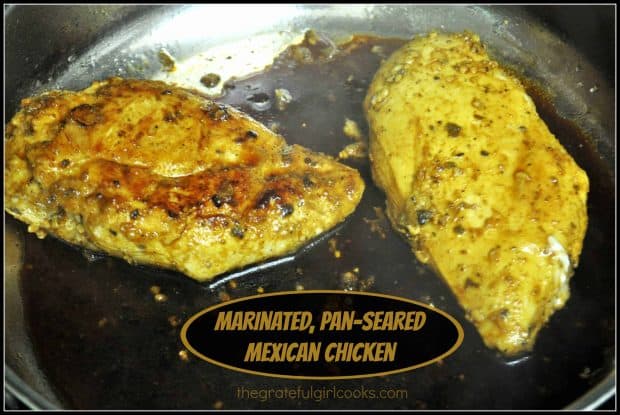
Do you cook with chicken often? I sure do!  The recipe I want to share today with you is for Marinated, Pan-Seared Mexican Chicken. This recipe is delightfully GOOD. An added benefit is that it’s low in calories (under 200 per serving), so it’s a win-win in my book!

My favorite food to eat is Mexican food. I love the flavors in most Mexican-inspired dishes, which is why I really like this one. Pan-seared Mexican chicken has great flavor, from spices like cumin, chili powder, garlic, oregano and lime juice. YUM!

The recipe for pan-seared Mexican chicken is easy to prepare. I have modified it slightly from a recipe I found on Skinnytaste.com a while ago.

If you can mix up a marinade, add chicken to the marinade, then cook it, you can make this delicious chicken! Here’s how to make it:

Scroll Down For A Printable Recipe Card At The Bottom Of The Page

It’s Easy To Make Marinated Pan-Seared Mexican Chicken!

Marinate the chicken breasts for at least half an hour. TIP: The chicken tastes even better if you let it marinate all day! If you have the time, go for all day marinating.

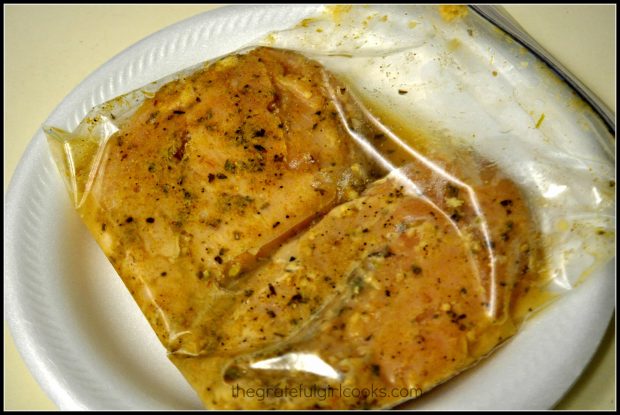
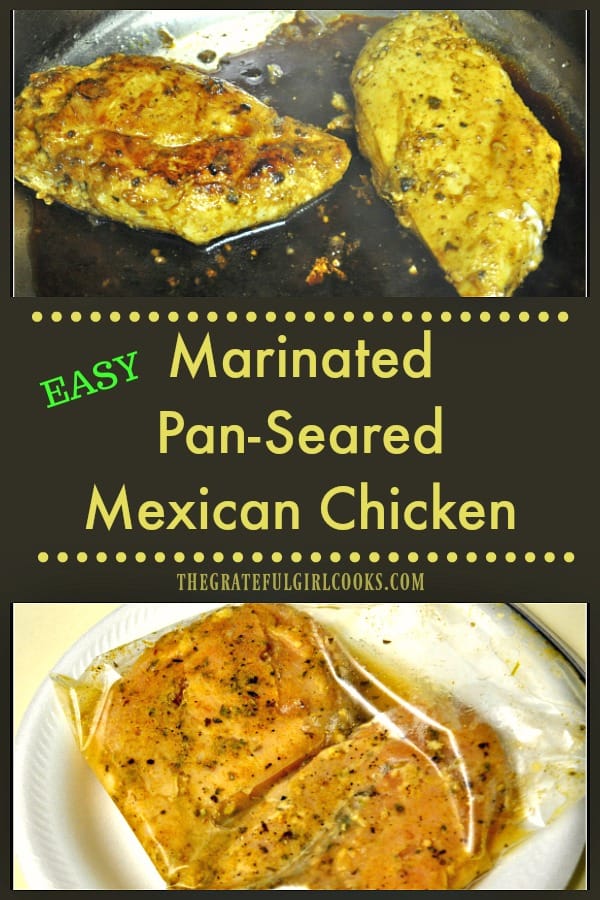
As you can see in the photo below, I only made two small chicken breasts, since there was only two of us eating this meal.

Chicken breasts are marinated before cooking.

Time To Cook The Pan-Seared Mexican Chicken Breasts!

Spray a large skillet with non-stick cooking spray OR add a Tablespoon of oil. Once the oil is hot, add the marinated chicken breasts.

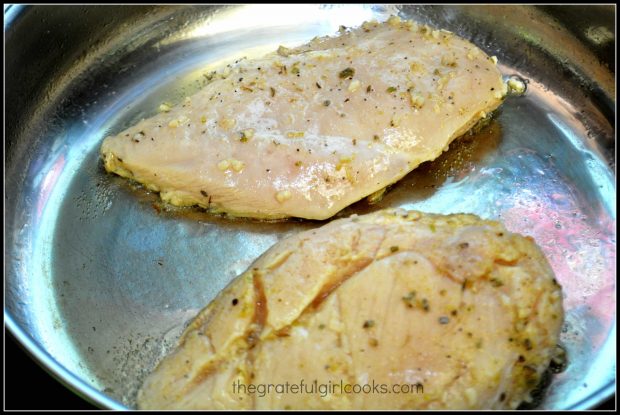
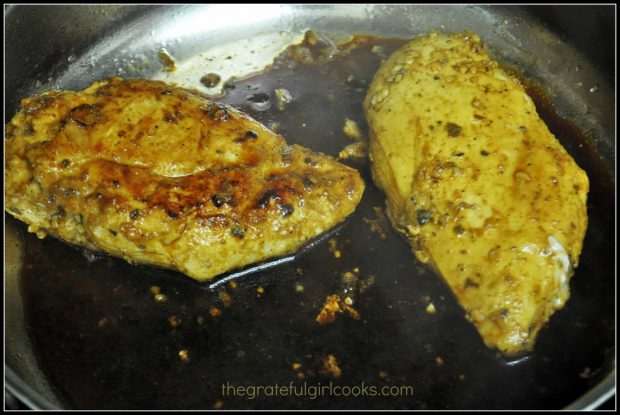
You can see in the photo below the little pieces of minced garlic on each piece. There’s a lot of flavor saturated on those chicken breasts!

The marinated chicken breasts are pan-seared in a hot skillet.

Cook each side of the pan-seared Mexican chicken until it is golden brown, and cooked through. This usually will take about 4-8 minutes per side depending on the chickens thickness.

The internal temperature of the cooked chicken should be at 165°F. when the chicken breasts are finished cooking.

Two of the marinated, pan-seared Mexican chicken breasts cook in a skillet.

Add the reserved batch of marinade plus 1/4 cup water to the skillet, halfway through cooking the second side of the chicken breasts.

Cook the pan-seared Mexican chicken in the marinade for 3-4 minutes (until cooked through). Spoon the pan drippings over the chicken as it cooks. Once done, the chicken is ready to serve!

Serve The Pan-Seared Marinated Chicken

This pan-seared Mexican chicken recipe is to prepare, and it’s delicious! We enjoy this chicken, and usually serve it with white steamed rice on the side.

You might also enjoy topping the cooked chicken breasts with some pico de gallo salsa as a garnish! That really takes the flavor up another notch!

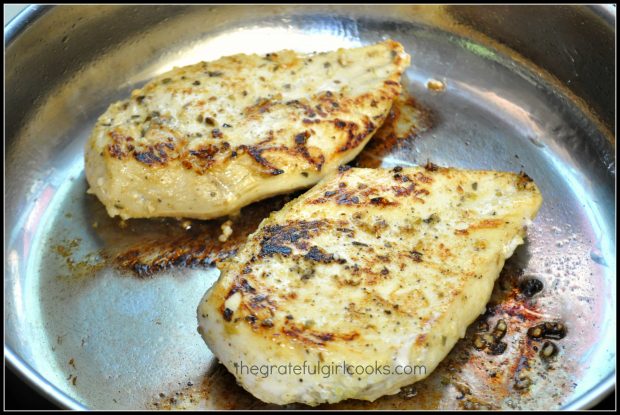
Finished cooking, the pan-seared Mexican chicken has darkened in color.

Hope you enjoy these tasty (and easy) pan-seared Mexican chicken breasts! They are really easy to prepare, and have good flavor!

Thanks for stopping by today, and I invite you to come back again soon for more family-friendly recipes. Take care, and have a GREAT day!

Looking For More CHICKEN Recipes?

You can find all of my chicken recipes in the Recipe Index, located at the top of the page. A few of those recipes include:

Want More Recipes? Get My FREE Newsletter!

I publish a newsletter 2 times per month (1st and 15th) with lots of recipes, tips, etc..
Would you like to join our growing list of subscribers?

There is a Newsletter subscription box on the top right (or bottom) of each blog post, depending on the device you use.
You can submit your e-mail address there, to be added to my mailing list.

Find Me On Social Media:

Facebook page: The Grateful Girl Cooks!
Pinterest:
The Grateful Girl Cooks!
Instagram:
jbatthegratefulgirlcooks

Author's signatureRecipe Adapted from: http://www.skinnytaste.com/2013/08/grilled-chicken-with-black-bean-mango.html

↓↓ PRINTABLE RECIPE BELOW ↓↓

0 from 0 votes
Marinated, Pan-Seared Mexican Chicken
Prep Time
5 mins
Cook Time
12 mins
Total Time
17 mins
 
Marinated, pan-seared Mexican chicken is a delicious, low-fat, easy to prepare dish. The chicken will surprise you with its depth of flavor.
Category: Entree
Cuisine: Mexican
Keyword: pan-seared Mexican chicken
Servings: 4 servings
Calories Per Serving: 140 kcal
Author: JB @ The Grateful Girl Cooks!
Ingredients
  • 4 boneless skinless chicken breasts (4 ounces each)
  • salt and pepper (to taste)
  • 6 cloves minced garlic
  • 2 teaspoons cumin
  • 1 teaspoon dried oregano
  • 2 limes, JUICE OF
  • 1/4 cup water
Instructions
  1. Season chicken breasts lightly with salt and pepper. Place chicken breasts in large bowl.

  2. In separate bowl, mix together minced garlic, cumin, oregano, and lime juice. Pour HALF of the marinade sauce over chicken. Reserve the other half of  marinade for later.

  3. Coat chicken with marinade. Cover and refrigerate for at LEAST half an hour. (The longer the chicken marinates, the better the flavor!)

  4. Spray skillet with non-stick cooking spray. Heat on medium high until very hot. Once skillet is hot, place marinated chicken into skillet. They should sizzle when added to skillet. Discard marinade that the chicken was in. Cook chicken 3-4 minutes, then turn to other side. Halfway through cooking second side of chicken, add the reserved marinade, plus 1/4 cup water to the skillet. Cook for 3-4 additional minutes, continually spooning sauce over the top of chicken breasts. This will coat the chicken and will help to darken the color. Cook chicken until cooked all the way through.

  5. When chicken is done, remove from skillet. If desired, serve with pico de gallo as a garnish. Serve chicken with rice, or your favorite side dish. Enjoy!

Recipe Notes

Caloric calculation was made based on using a 4 ounce small boneless, skinless chicken breast per serving. Larger portions of chicken will have more calories.

Nutrition Facts
Marinated, Pan-Seared Mexican Chicken
Amount Per Serving (1 (4 ounce) breast)
Calories 140 Calories from Fat 27
% Daily Value*
Fat 3g5%
Cholesterol 72mg24%
Sodium 134mg6%
Potassium 455mg13%
Carbohydrates 2g1%
Protein 24g48%
Vitamin A 45IU1%
Vitamin C 6.4mg8%
Calcium 26mg3%
Iron 1.3mg7%
* Percent Daily Values are based on a 2000 calorie diet.

Here’s one more to pin on your Pinterest boards!Marinated, pan-seared Mexican chicken is a delicious, low-fat, easy to prepare dish. The chicken will surprise you with its depth of flavor.


Save

Save

Save

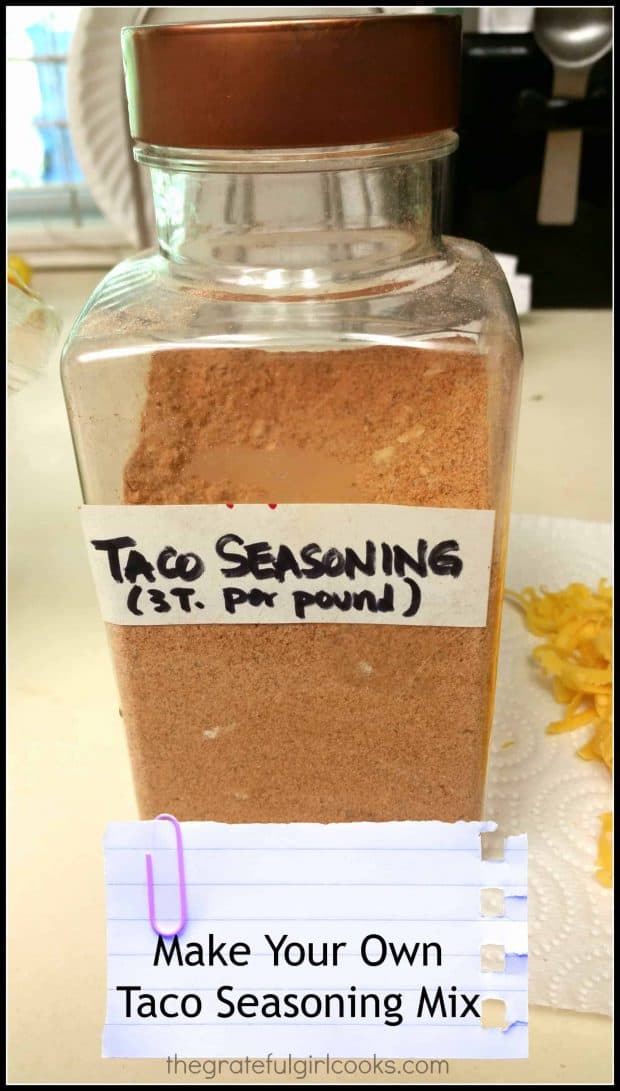
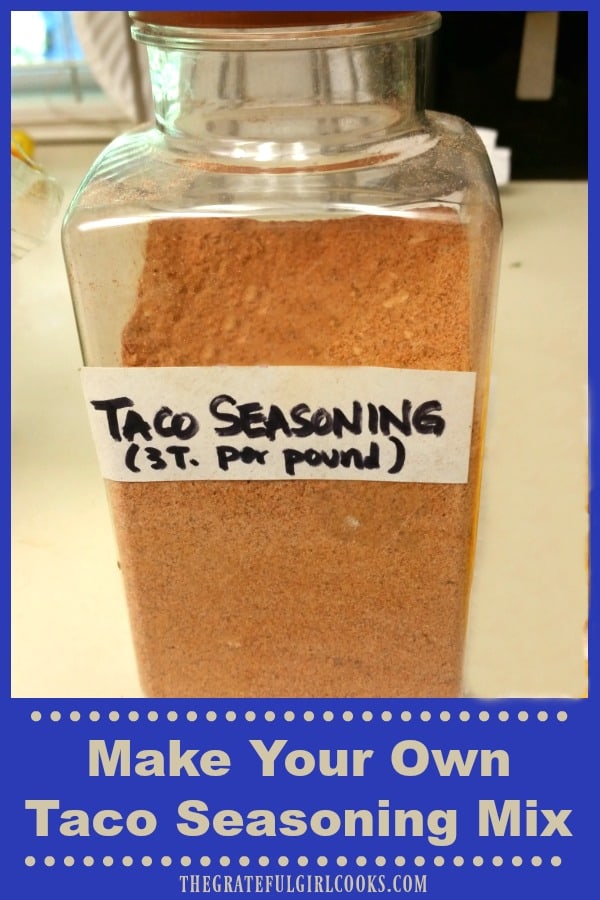
Make Your Own Taco Seasoning Mix

It’s easy to make up a large batch of taco seasoning mix- perfect Mexican spices for ground beef, chicken or pork to use in tacos, taco salads, etc. It's easy to make up a large batch of taco seasoning mix... perfect Mexican spices for ground beef, chicken or pork to use in tacos, taco salads, etc.
Years ago I got tired of buying the packages of commercially prepared seasoning mixes and started adding my own spices to ground beef, pork or chicken when we ate tacos or taco salads. Today I’d like show you how to make your own taco seasoning mix very easily.

I used to haul out various jars of spices each time I made it and then haul them all back to the cupboard when I was done. Then I found a “copycat” recipe (a copycat version of Lawry’s Taco Seasoning mix) in one of my “Top Secret Recipe” books by Todd Wilbur (I have several of his books and LOVE them).

I took his basic “recipe” for the mix, multiplied it by 12 and ended up with quite a nice supply of taco seasoning, which I store in an old spice canister.  Since we eat tacos quite often (they’re my FAVORITE), it’s handy to have a ready supply of seasoning mix around whenever I need it.

Scroll Down For A Printable Recipe Card At The Bottom Of The Page

How Do You Season Meat With The Taco Seasoning Mix?

It’s easy, because all you do when you want to use it is to add 2/3 cup water to 3 Tablespoons of the mix and the pound of meat, cook for 7-10 minutes and bam! You’re done… and the meat tastes GREAT!

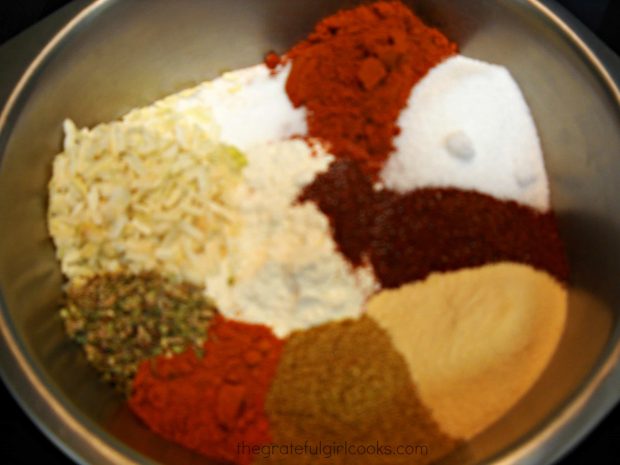
How easy is that? Sure is great to mix this taco seasoning mix all up ONCE and not have to haul all the spices out of the cupboard each and every time we have tacos! Hope you give it a try. It will save you some bucks and valuable time in the long run (and quite possibly a trip to the grocery store!) My photo is a bit blurry, but it’s the only one I took of the seasoning spices before mixing. Oh well.

Spices in bowl used to make the seasoning mix.

How Do You USE This Taco Seasoning Mix To Season Taco Meat?

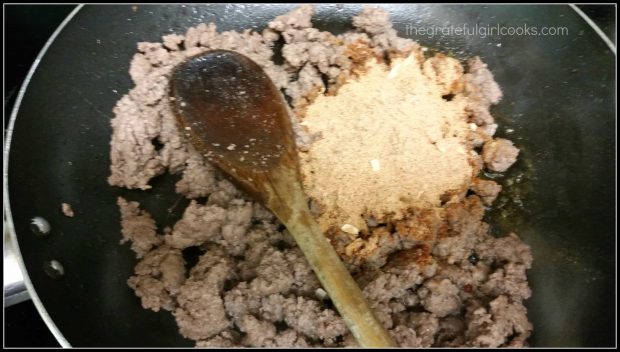
Add 3 Tablespoons of the taco seasoning mix to browned/drained meat. This photo is using hamburger meat, but the taco seasoning mix is delicious on shredded chicken or pork, too!

The taco seasoning mix is added to a pound of browned hamburger meat.

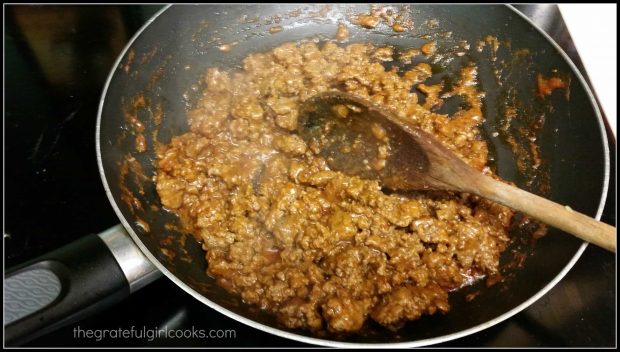
Add 2/3 cup of water. Cook the taco mixture for 7-10 minutes, until the water has cooked down and been absorbed into the meat.  Now your taco meat is fully seasoned and ready to use!

Cooking the seasoned meat in a skillet, for tacos.

Use Taco Seasoning Mix On A Variety Of Meals

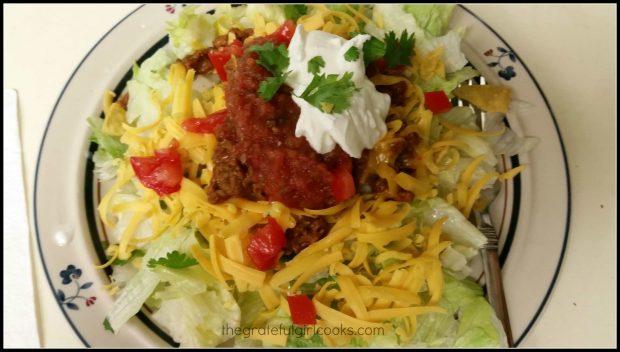
Ready to eat! This time we used the taco mix seasoning to make the seasoned ground beef for taco salads.YUM!

A taco salad was made, using the taco seasoning mix on the meat.

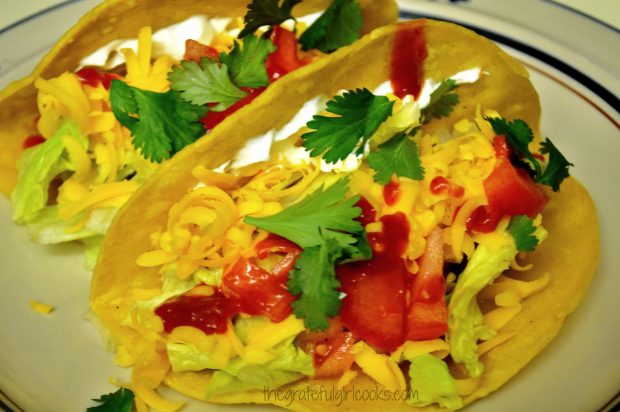
We use the taco seasoning mix all the time when we fix our tacos! The seasoning on the meat is wonderful, and I’m confident you’ll enjoy it, too.

The mix tastes great on the meat for homemade tacos.

I hope you will consider making up a batch of this taco seasoning mix to have around YOUR home. Truthfully, I’m pretty sure you will NOT regret it!

Looking For Other SPICE MIX Recipes?

You can find all of my recipes in the Recipe Index, located at the top of the page. A couple favorite spice mixes include:

Interested In More Recipes?

Thank you for visiting this website. I appreciate you using some of your valuable time to do soIf you’re interested, I publish a newsletter 2 times per month (1st and 15th) with all the latest recipes, and other fun info. I would be honored to have you join our growing list of subscribers, so you never miss a great recipe!
There is a Newsletter subscription box on the top right side (or bottom) of each blog post, depending on the device you use, where you can easily submit your e-mail address (only) to be included in my mailing list.

You Can Also Find Me On Social Media:

Facebook page: The Grateful Girl Cooks!
Pinterest:
The Grateful Girl Cooks!
Instagram:
jbatthegratefulgirlcooks

Make Your Own Taco Seasoning Mix / The Grateful Girl Cooks!Recipe Source: “Even More Top Secret Recipes”, by Todd Wilbur, published by the Penguin Group, 2002 (pages. 118-119)

**The recipe I am posting is the original recipe for enough seasoning mix for one pound of meat. Multiply it for the quantity you wish to have on hand. I found it easiest to make a whole bunch (for 12 meals) at one time.

↓↓ PRINTABLE RECIPE BELOW ↓↓

0 from 0 votes
Make Your Own Taco Seasoning Mix
Prep Time
5 mins
Cook Time
0 mins
Total Time
5 mins
 
It's easy to make up a large batch of taco seasong mix... perfect Mexican spices for ground beef, chicken or pork to use in tacos, taco salads, etc.
Category: Seasonings
Cuisine: Mexican
Keyword: taco seasoning mix
Servings: 1 (3 Tablespoons)
Calories Per Serving: 59 kcal
Author: JB @ The Grateful Girl Cooks!
Ingredients
  • 1 Tablespoon flour
  • 1 teaspoon chili powder
  • 1 teaspoon paprika
  • 3/4 teaspoon salt
  • 3/4 teaspoon minced onion
  • 1/2 teaspoon cumin
  • 1/4 teaspoon cayenne pepper
  • 1/4 teaspoon garlic powder
  • 1/8 teaspoon ground oregano
Instructions
  1. Mix all the ingredients together in a bowl.
  2. To prepare: Brown hamburger meat in a skillet until fully cooked. Drain the grease.
  3. Add the spice mix (or use 3 Tablespoons if you prepared quite a bit of the mix).
  4. Add 2/3 cup water to the meat and spice mixture. Stir to combine. Bring mixture to a boil, then reduce the heat to a low setting and cook, uncovered for 7-10 minutes. Stir occasionally.
  5. Remove from heat. Spoon the seasoned meat into warm tortillas, taco shells, or onto a salad.
  6. Enjoy!
Recipe Notes

NOTE: Quantity listed is equivalent to one envelope of store bought mix. Ingredients as listed when added to a pound of meat (hamburger meat, shredded pork or chicken) will make enough seasoned meat filling for 12 tacos (3 Tablespoons meat each).
*I multiplied the quantity by 12 to get a large quantity of seasoning mix.

Nutrition Facts
Make Your Own Taco Seasoning Mix
Amount Per Serving (1 (3 Tablespoons))
Calories 59
% Daily Value*
Sodium 1781mg77%
Potassium 144mg4%
Carbohydrates 12g4%
Fiber 1g4%
Sugar 1g1%
Protein 2g4%
Vitamin A 1785IU36%
Vitamin C 2.8mg3%
Iron 1.8mg10%
* Percent Daily Values are based on a 2000 calorie diet.

Here’s one more to pin on your Pinterest boards!It's easy to make a large batch of taco seasoning mix - the perfect Mexican spices for ground beef, chicken or pork to use in tacos, taco salads, etc.


Save

Save

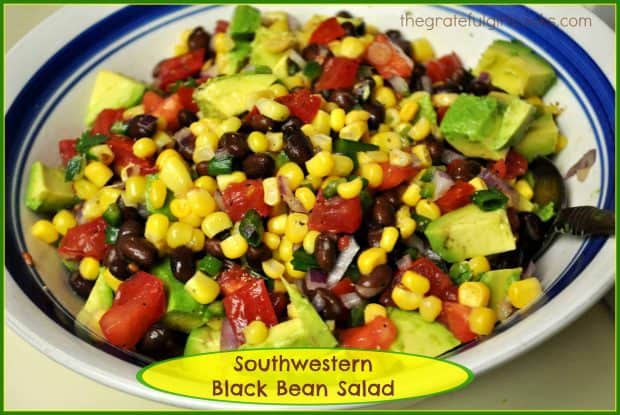
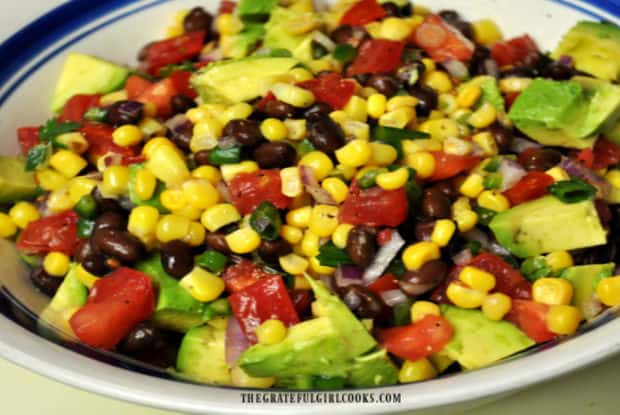
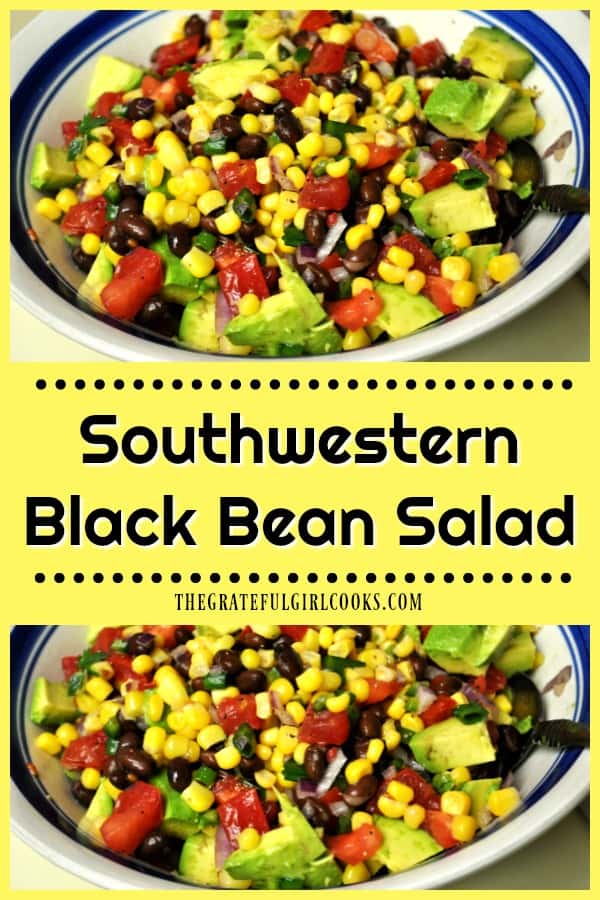
Southwestern Black Bean Salad

You’ll LOVE this fantastic Southwestern Black Bean Salad, with corn, tomatoes, and avocado! It’s easy, flavorful, and under 90 calories per serving!You'll LOVE this fantastic Southwestern Black Bean Salad, with corn, tomatoes, and avocado! It's easy, flavorful, and under 90 calories per serving!

Happy Cinco De Mayo! Yesterday our family celebrated our youngest son’s 27th birthday with a Taco and Enchilada Night. One of the side dishes I prepared was this Southwestern Black Bean and Corn Salad…it was the first time I had prepared it, and I am positive I will be making it again!

I found the original recipe for this Southwestern Black Bean Salad on Skinnytaste.com. If you’ve never visited this website, I would encourage you to do so. The blog author, Gina, creates wonderfully tasty, low-fat dishes that are sure to please every palate! Every recipe she posts has the caloric value, Weight Watcher Points, etc. so you know exactly what you are eating, calorie-wise! I love it!

Scroll Down For A Printable Recipe Card At The Bottom Of The Page

Some Quick Info On The Southwestern Black Bean Salad

I hope you will give this quick, easy to make (and full of fiber) dish a try. It is very versatile: great as a side salad, or could be used as an appetizer, with tortilla chips. The Southwestern black bean salad recipe makes 6 1/2 cups, which translates to 13 half cup servings at approximately 80-89 calories per serving.

The Southwestern black bean salad is served, covered in a lime and olive oil dressing.

The added bonus is that Southwestern black bean salad is so fresh tasting and DELICIOUS! I think you will enjoy it, especially on a warm Spring or Summer day!

Looking For More SALAD Recipes?

You can find all of my salad recipes in the Recipe Index, located at the top of the page. A few family favorites include:

Interested In More Recipes?

Thank you for visiting this website. I appreciate you using some of your valuable time to do soIf you’re interested, I publish a newsletter 2 times per month (1st and 15th) with all the latest recipes, and other fun info. I would be honored to have you join our growing list of subscribers, so you never miss a great recipe!
There is a Newsletter subscription box on the top right side (or bottom) of each blog post, depending on the device you use, where you can easily submit your e-mail address (only) to be included in my mailing list.

You Can Also Find Me On Social Media:
Facebook page: The Grateful Girl Cooks!
Pinterest: The Grateful Girl Cooks!
Instagram: jbatthegratefulgirlcooks

Author's SignatureRecipe Source: http://www.skinnytaste.com/2009/06/southwestern-black-bean-salad.html

↓↓ PRINTABLE RECIPE BELOW ↓↓

0 from 0 votes
Southwestern Black Bean Salad
Prep Time
15 mins
Cook Time
0 mins
Total Time
15 mins
 

You'll LOVE this fantastic Southwestern Black Bean Salad, with corn, tomatoes, and avocado! It's easy, flavorful, and under 90 calories per serving!

Category: Salads
Cuisine: Southwestern
Keyword: Southwestern black bean salad
Servings: 13 (1/2 cup servings)
Calories Per Serving: 89 kcal
Author: JB @ The Grateful Girl Cooks!
Ingredients
  • 15.5 ounces black beans , 1 can black beans, rinsed and drained
  • 9 oz. cooked corn , fresh (grilled), or frozen (thawed)
  • 1 medium tomato , chopped
  • 1/3 cup red onion , chopped
  • 1 stem scallion (green onion) , chopped
  • 1 small jalapeno , finely diced
  • 2 Tablespoons fresh minced cilantro (or more to taste)
  • Salt and pepper (to taste)
  • 2 limes (the juice from)
  • 1 Tablespoon extra virgin olive oil
  • 1 small avocado , diced
Instructions
  1. Combine the first 8 ingredients in a large bowl (beans, corn, tomato, onion, scallion, jalapeno, cilantro, salt and pepper).
  2. In a separate bowl, mix the lime juice and the olive oil together until blended. Pour over salad and mix well.
  3. Refrigerate for 30 minutes prior to serving.
  4. Add the diced avocado right before you serve the salad.
  5. ENJOY!
Nutrition Facts
Southwestern Black Bean Salad
Amount Per Serving (1 (1/2 cup per serving))
Calories 89 Calories from Fat 36
% Daily Value*
Fat 4g6%
Saturated Fat 1g6%
Sodium 132mg6%
Potassium 256mg7%
Carbohydrates 12g4%
Fiber 4g17%
Sugar 2g2%
Protein 3g6%
Vitamin A 170IU3%
Vitamin C 7.8mg9%
Calcium 16mg2%
Iron 0.8mg4%
* Percent Daily Values are based on a 2000 calorie diet.

Here’s one more to pin on your Pinterest boards!You'll LOVE this fantastic Southwestern Black Bean Salad, with corn, tomatoes, and avocado! It's easy, flavorful, and under 90 calories per serving!
 

Save

Save

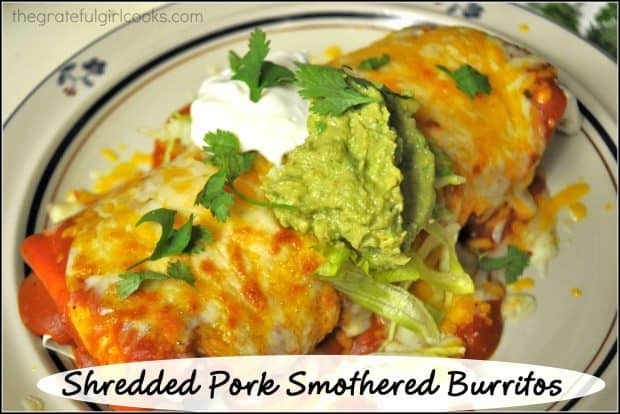
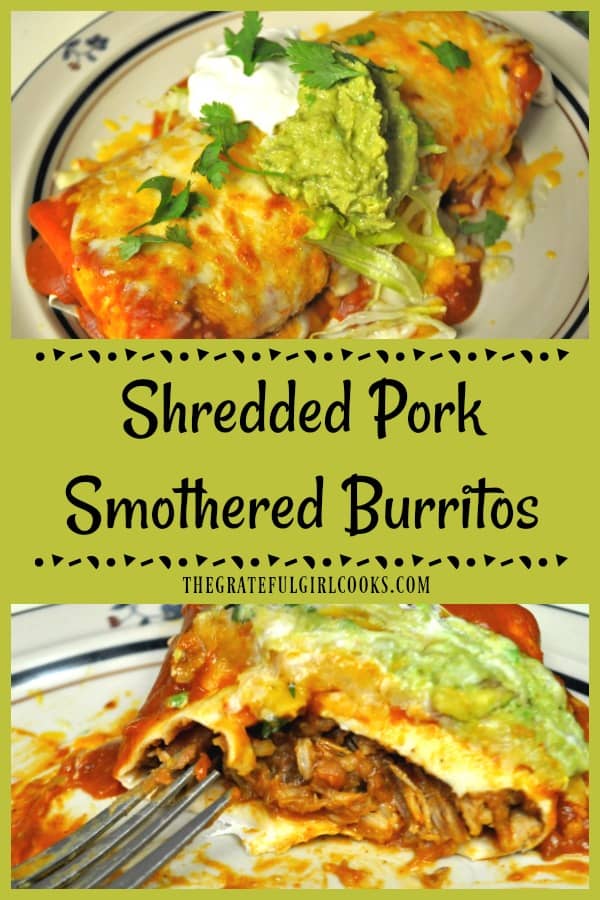
Shredded Pork Smothered Burritos

You’ll love these amazing shredded pork smothered burritos, covered in a homemade red sauce. They taste just like you ordered them at a Mexican restaurant!You'll love these amazing shredded pork smothered burritos, covered in a homemade red sauce. They taste just like you ordered them at a Mexican restaurant!
I love Mexican food… it’s my FAVORITE! Recently my son and his girlfriend got me “hooked” on Shredded Pork Smothered Burritos at a local restaurant!  When I saw a recipe on Pinterest for a recipe that looked similar, I was determined to try and make them at home!

A few days ago I made them! I ended up merging 2 recipes together, added a few tweaks of my own – and let me tell you…they were fantastic! Our oldest son joined us for dinner and we all agreed these were absolutely “restaurant quality” burritos!
My cooking experiment was a bit time-consuming, because I also made a homemade mole sauce (an ingredient in the sauce) instead of going to the store and purchasing it. I made enough of both sauces used in this recipe (mole and red) to make another batch of these delicious burritos in the future. My time investment will pay off next time I make these…and there will definitely be a next time!
Scroll Down For A Printable Recipe Card At The Bottom Of The Page

Tips To Save Time When Making These Burritos

If you want to make this meal quicker and easier to prepare:

  • Buy a can of mole sauce in the Hispanic section of your grocery store.
  • Use shredded rotisserie chicken or leftover pork or shredded roast beef, and it will shave down your prep time, with the same great results!
  • Prepare the red sauce ahead of time, then these will be really quick to prepare! 

Making Homemade Red Sauce For Shredded Pork Smothered Burritos

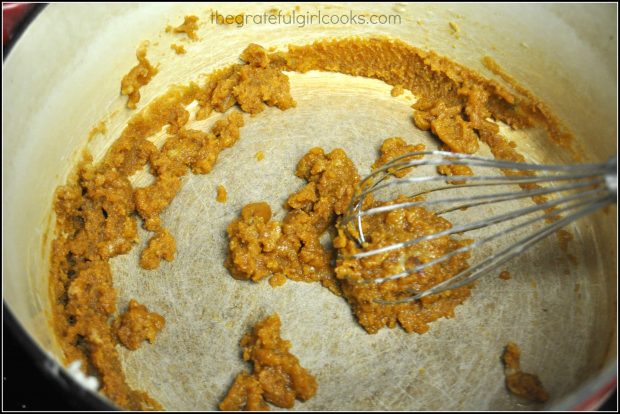
Melt vegetable shortening in large pan on medium heat. Sprinkle in flour and continue whisking while the shortening and flour melt together and slightly begin to bubble. Add the mole sauce. Here is a link to my recipe: DIY Mexican Mole Sauce.

Making homemade mole sauce in large pan, to add to shredded pork smothered burritos.

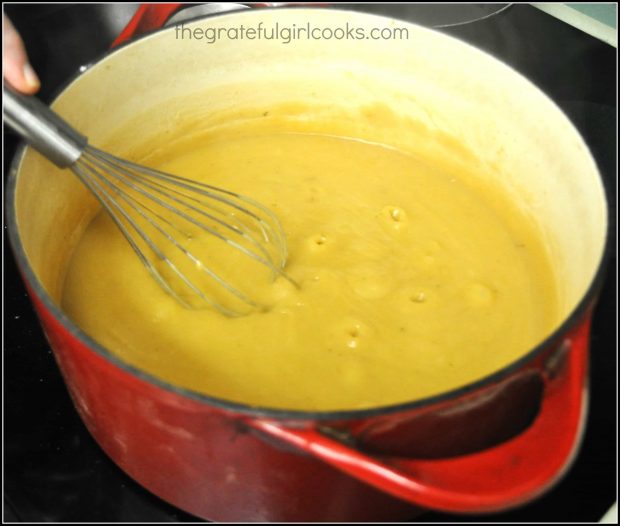
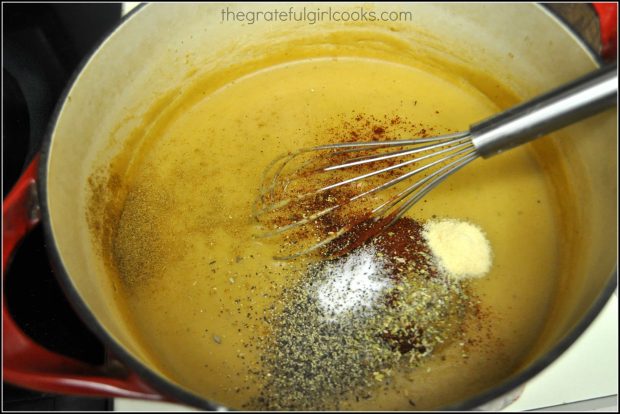
Once the mole sauce has been incorporated, add the beef stock and whisk until sauce is smooth. Add in the rest of the spices and mix again. Whisk in the milk.

Beef stock and milk are added to mole sauce for shredded pork burritos. It cooks until thickened.

Mexican spices are added to mole sauce in large pan, for burritos.
 
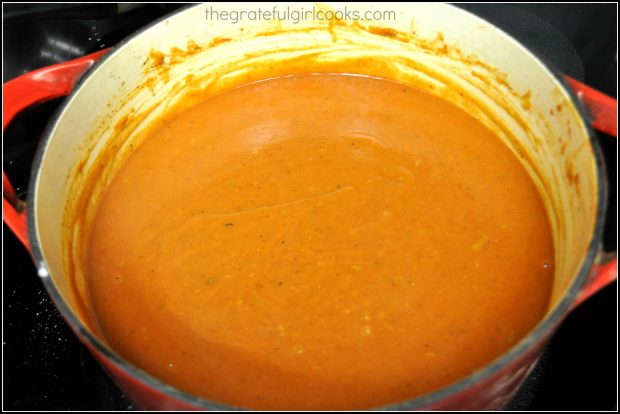
Pour in the tomato sauce, tomato paste and the water. Whisk sauce until completely smooth; cover pot and let simmer for about an hour. Make sure to stir the sauce about every 10-15 minutes to make sure it doesn’t stick to the bottom of the pan. Reheat the sauce when you are ready to assemble the shredded pork smothered burritos.
 
Homemade red sauce for shredded pork smothered burritos is complete after adding tomato paste and sauce to pan.

To Cook the Pork (or Chicken) For Burritos

For the sake of this recipe, I am going to start with the assumption that you already have cooked pork (or chicken or roast beef). I cooked a pork roast recently and found it easy to use the leftover pieces for this recipe. I threw the pieces of pork back into a crock pot with a little bit of water and salsa and let it cook for a couple extra hours to be tender enough to shred.

If you don’t have leftovers, then plan ahead! Put a small seasoned pork roast or chicken breasts in a slow cooker with some water and salsa early in the morning. Let it cook…all day, in order to be “shred-able” when you are ready to build the burritos.

Seasoning The Shredded Pork

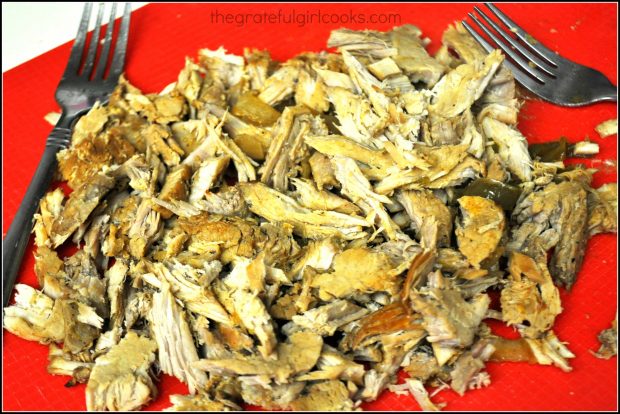
Saute the onions and peppers in a teaspoon of oil in a large skillet, then add the shredded meat, onions, peppers, taco seasoning, and 1/4 cup water. Cook over medium high heat until water has cooked away and meat is thoroughly seasoned.

Cooked pork and onions are shredded for burrito filling.

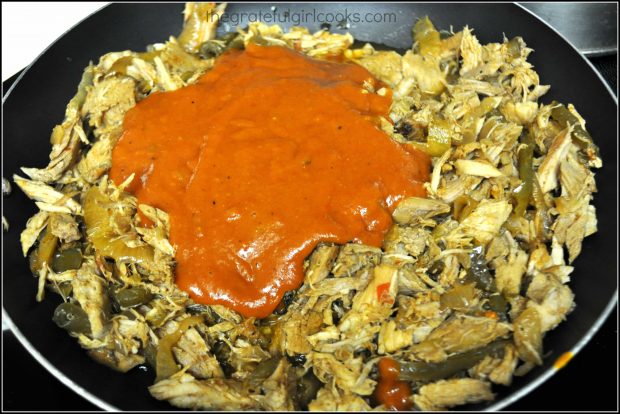
Add 3 ladles of the red sauce to the meat; mix well to combine. Stir in precooked rice. Heat to serving temp, then keep heat on low, while assembling the burritos.

Homemade red sauce is added to shredded pork burrito filling in skillet, to season.
Assemble The Shredded Pork Smothered Burritos

Preheat your oven’s broiler. (Make sure your plates are oven-proof– just sayin’). Warm the tortillas. Place a tortilla on each serving plate. Spread 2 heaping teaspoons of beans down the middle of each tortilla (don’t spread the beans all the way to the edges!).

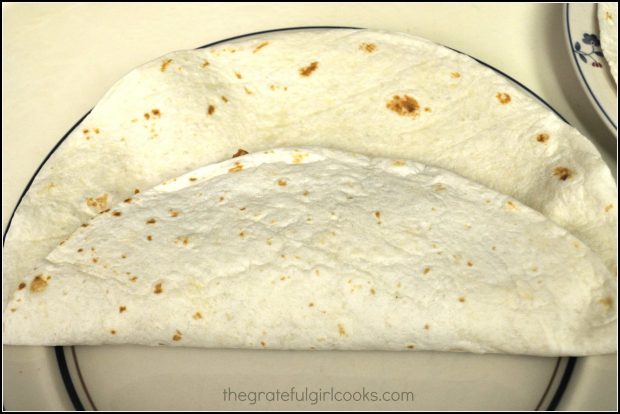
Place 2-3 large spoonfuls of pork mixture on top of beans. Sprinkle with a bit of the cheese (not a lot – most of the cheese will go on top!) Roll the burrito up. Make the first fold shown in the photo below. Fold both side edges up; finish rolling forward, then carefully flip the burrito over, seam side down onto serving plate.

Flour tortilla is folded over the shredded pork filling.

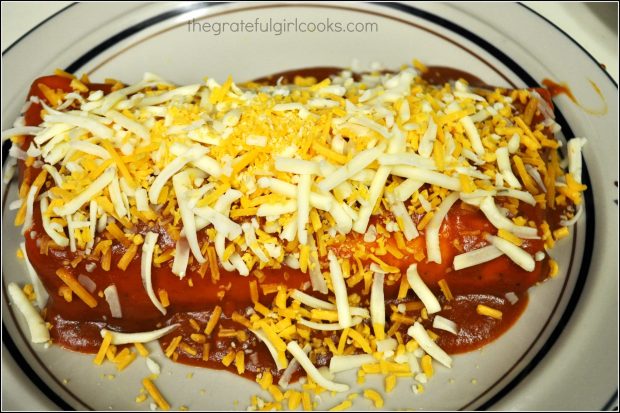
Ladle red sauce over the top of burrito; sprinkle with a good amount of cheese. Place the ovenproof plate a few inches from the broiler and heat until cheese has melted. Carefully remove plate (remember it will be HOT!).

Shredded Pork Smothered Burrito is covered with red sauce, then grated cheddar and jack cheese before heating.

 Garnish And Then EAT!

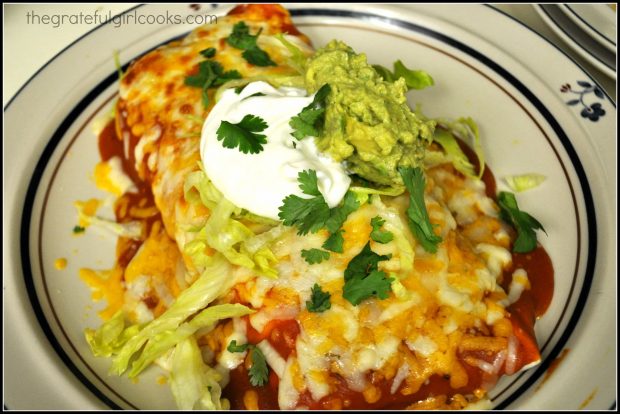
Garnish the top of each of the shredded pork smothered burritos with shredded lettuce, dollops of guacamole and sour cream, and cilantro.

Shredded Pork Smothered Burritos are garnished with sour cream, guacamole, lettuce and cilantro for serving.

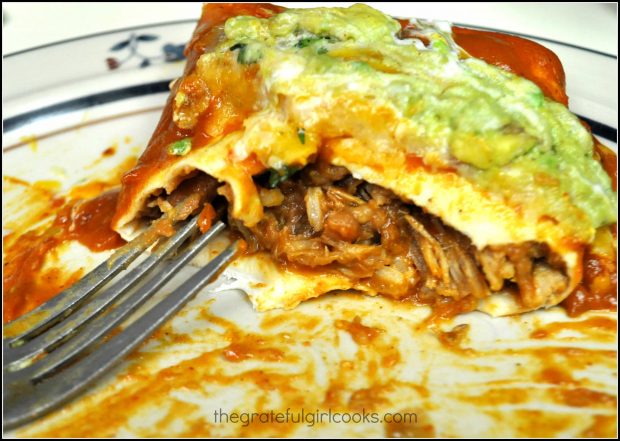
Serve (remember plates are hot) and ENJOY! These shredded pork smothered burritos are truly wonderful! They taste like they were ordered in a restaurant. The homemade red sauce tastes very authentic and awesome! It’s really worth the extra effort to make!

A look at the inside of shredded pork smothered burritos! YUM.
I really hope you enjoy these delicious shredded pork smothered burritos. Have a great day, and come back soon.

Looking for More MEXICAN FOOD Recipes?

You can find ALL my recipes in the Recipe Index, located at the top of the page. I have some delicious Mexican food recipes you’ll enjoy, including:

Interested In More Recipes?

Thank you for visiting this website. I appreciate you using some of your valuable time to do soIf you’re interested, I publish a newsletter 2 times per month (1st and 15th) with all the latest recipes, and other fun info. I would be honored to have you join our growing list of subscribers, so you never miss a great recipe! 

There is a Newsletter subscription box on the top right side (or bottom) of each blog post, depending on the device you use, where you can easily submit your e-mail address (only) to be included in my mailing list.

You Can Also Find Me On Social Media:

Facebook page: The Grateful Girl Cooks!
Pinterest:
The Grateful Girl Cooks!
Instagram:
jbatthegratefulgirlcooks

Author's signature
 
Recipe adapted from: http: www.nutmegnanny.com/2013/05/03/smothered-burritos-tortilla-land-giveaway/
 
0 from 0 votes
Shredded Pork Smothered Burritos
Prep Time
30 mins
Cook Time
3 mins
Total Time
33 mins
 
You'll love these amazing shredded pork smothered burritos, covered in a homemade red sauce. They taste just like you ordered them at a Mexican restaurant!
Category: Entree
Cuisine: Mexican
Keyword: shredded pork smothered burritos
Servings: 6 burritos
Calories Per Serving: 1012 kcal
Author: JB @ The Grateful Girl Cooks!
Ingredients
For Homemade Red Sauce
  • 1/2 cup vegetable shortening
  • 3/4 cup all purpose flour
  • 1 Tablespoon mole sauce (heaping Tablespoon) (found in Hispanic section)
  • 4 cups beef stock
  • 2 Tablespoons chili powder
  • 1-1/2 teaspoons cumin
  • 1/2 teaspoon oregano
  • 1 teaspoon kosher salt
  • 1/2 teaspoon ground pepper
  • 1/2 teaspoon garlic powder
  • 1/4-1/2 teaspoon red pepper flakes
  • 1/2 cup milk
  • 16 ounces tomato sauce (two 8 oz. cans)
  • 6 ounces tomato paste
  • 2 cups water
For Burritos
  • 3 cups precooked pork , shredded (can substitute shredded chicken or beef if you prefer)
  • 1 envelope taco seasoning
  • 1/2 medium onion , chopped
  • 1/2 green pepper , chopped
  • 1 1/2 cups cooked white rice
  • 16 oz. can spicy refried beans
  • 3 ladles prepared Red Sauce
  • 6 flour tortillas (burrito size)
  • 2 cups Pepper Jack cheese , grated
  • 2 cups Cheddar cheese , grated
  • 1/2 cup guacamole (for garnish)
  • 1/2 cup sour cream (for garnish)
  • 1/2 cup shredded lettuce (for garnish)
  • 1/4 cup Cilantro , chopped (for garnish)
Instructions
To Make Homemade Red Sauce:
  1. Melt vegetable shortening in large pan on medium heat. Sprinkle in flour and continue whisking while the shortening and flour melt together and slightly begin to bubble. Add the mole sauceOnce the mole sauce has been incorporated, add the beef stock and whisk until sauce is smooth. Add in the rest of the spices and mix again. Whisk in the milk.
  2. Pour in the tomato sauce, tomato paste and the water. Whisk sauce until completely smooth; cover pot and let simmer for about an hour. Make sure to stir the sauce about every 10-15 minutes to make sure it doesn't stick to the bottom of the pan. Reheat the sauce when you are ready to assemble burritos.
For Burrito Filling:
  1. For sake of this recipe, I am going to start with the assumption that you already have pre-cooked pork (chicken or beef). If not, then throw a small seasoned pork roast, beef roast or chicken breasts in the crock pot with some water and salsa...and let it cook...all day, in order to be "shred-able".

  2. Saute the onions and peppers in a tsp. of oil in a large skillet, then add the shredded meat, onions, peppers, taco seasoning, and 1/4 cup water. Cook over medium high heat until water has cooked away and meat is thoroughly seasoned.
  3. Add 3 ladles of the red sauce to the meat; mix well to combine. Stir in precooked rice. Heat to serving temp, then keep heat on low, while assembling the burritos.
To Assemble Burritos:
  1. Preheat your oven's broiler. (Make sure your plates are oven-proof). Warm the tortillas. Place a tortilla on each serving plate. Spread 2 heaping teaspoons of beans down the middle of each tortilla (don't spread the beans all the way to the edges!). Place 2-3 large spoonfuls of pork mixture on top of beans. Sprinkle with a bit of the cheese (not a lot - most of the cheese will go on top!) Roll the burrito up. Make the first fold like this (see below), then fold both side edges up; finish rolling forward, then carefully flip the burrito over, seam side down onto serving plate.

  2. Ladle red sauce over the top of burrito and sprinkle with a good amount of cheese. Place the ovenproof plate a few inches from the broiler and heat until cheese has melted. Carefully remove plate (remember it will be HOT!).

  3. Garnish the top of burrito with shredded lettuce, dollops of guacamole and sour cream, and cilantro. Serve (remember plates are hot) and ENJOY!

Recipe Notes

NOTE: The estimated caloric calculation does not include the optional garnishes of sour cream, guacamole, shredded lettuce, and cilantro. NOTE: The prep time does not include time to cook/shred pork. 

Nutrition Facts
Shredded Pork Smothered Burritos
Amount Per Serving (1 burrito)
Calories 1012 Calories from Fat 477
% Daily Value*
Fat 53g82%
Saturated Fat 23g144%
Cholesterol 125mg42%
Sodium 3632mg158%
Potassium 1087mg31%
Carbohydrates 87g29%
Fiber 9g38%
Sugar 31g34%
Protein 48g96%
Vitamin A 3100IU62%
Vitamin C 24.9mg30%
Calcium 744mg74%
Iron 7.2mg40%
* Percent Daily Values are based on a 2000 calorie diet.

Here’s one more to pin on your Pinterest boards!You'll love these amazing shredded pork smothered burritos, covered in a homemade red sauce. They taste just like you ordered them at a Mexican restaurant!


Save

Save

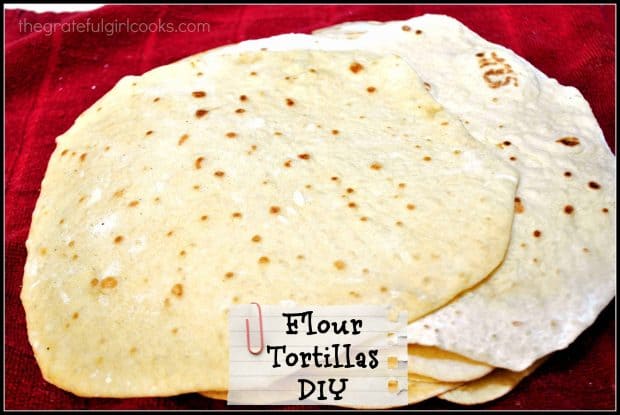
Flour Tortillas DIY

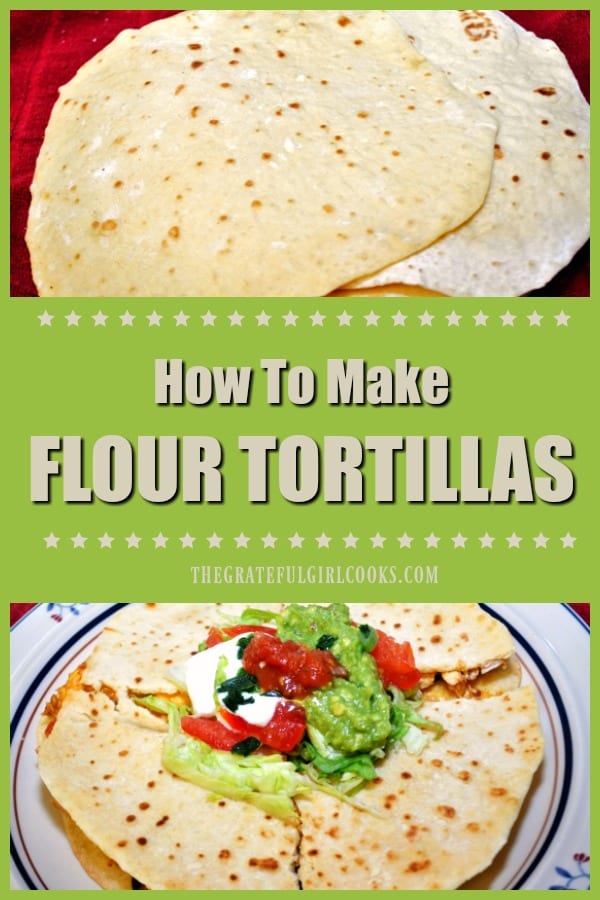
It’s EASY to make homemade flour tortillas with only a few common ingredients, and no special equipment! Great for quesadillas, enchiladas, or tacos!It's EASY to make homemade flour tortillas with only a few common ingredients, and no special equipment! Great for quesadillas, enchiladas, or tacos!Our family LOVES Mexican food! (It’s my favorite!) I am routinely cooking tacos, enchiladas or quesadillas, and we never seem to get tired of them.  Today I want to show you how to make flour tortillas, because it’s fairly easy!

I’m curious by nature, and love to try and figure out how to make things myself. Because of this, my quest to find a recipe for good homemade flour tortillas began a few years back.

It’s really true that fresh flour tortillas taste better than store-bought (plus you can control what is in them)! These flour tortillas are very easy to make. Why not experiment and give them a try, because there is no fancy equipment needed?

Scroll Down for A Printable Recipe Card At The Bottom Of The Page

Make The Dough For The Flour Tortillas

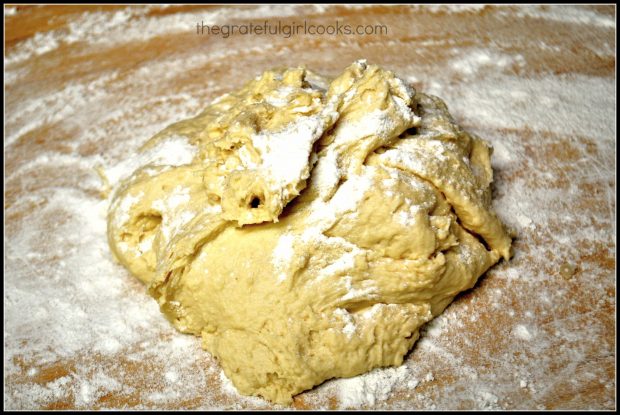
Make a simple dough for the flour tortillas by mixing flour, baking powder, shortening, salt and hot water. The photo below shows the dough, mixed and ready to knead.

The dough for the flour tortillas is mixed and ready to knead.

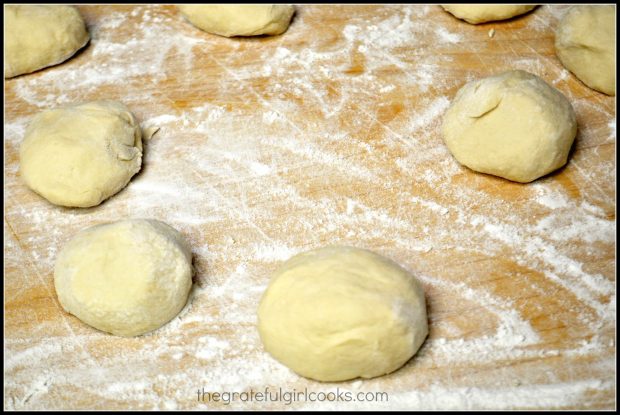
The tortilla dough is then formed into 8 balls, all about the same size.

The tortilla dough is shaped into 8 equal sized dough balls.

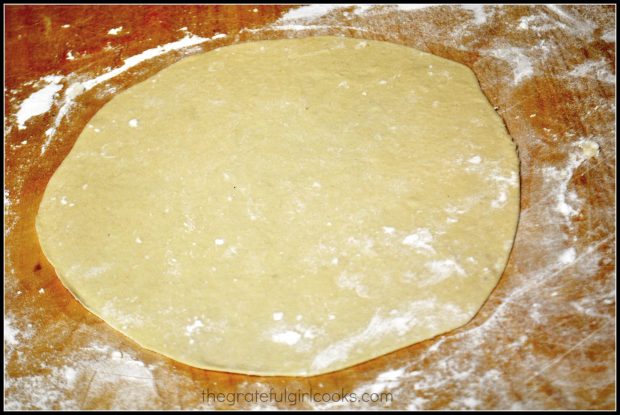
Each of the dough balls is rolled out into a tortilla shape, and then it is ready for the hot skillet, to cook.

Each of the dough balls is rolled out to form flour tortillas.

Cook the Flour Tortillas

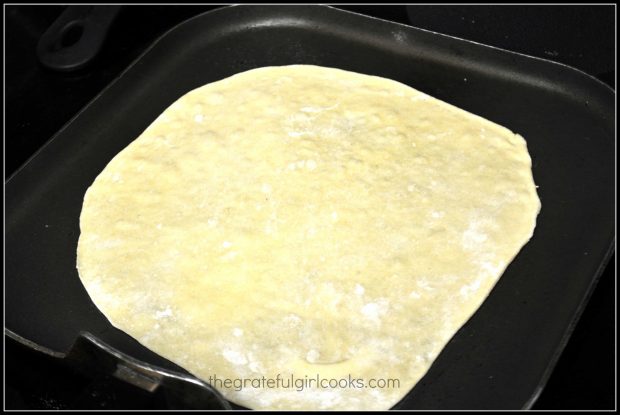
Cook the tortillas in a skillet, one at a time. When small bubbles appear on the surface, flip the tortilla over, to cook the other side.

The tortillas are cooked on a hot skillet until bubbles appear on top, then they are flipped.

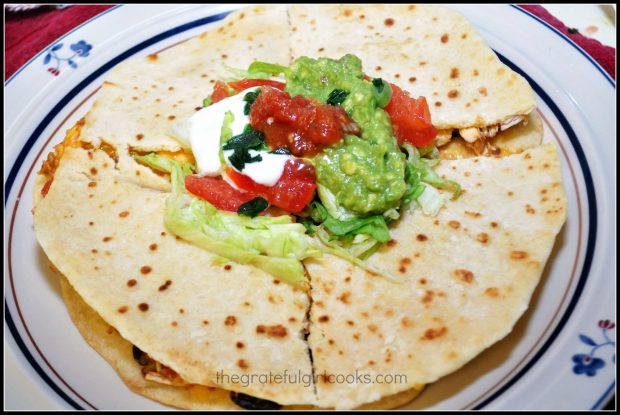
This batch of tortillas was used to make shredded chicken quesadillas. My only regret (see photo below) is that I apparently cannot cut a straight line… ha ha!

Flour tortillas can be used to make quesadillas and other dishes!

It’s actually very simple to make homemade flour tortillas from scratch. I really hope you will give it a try sometime! Have a wonderful day, and please come back again soon for more yummy recipes.

Looking For More Recipes Using TORTILLAS?

You can find all of my recipes in the Recipe Index, located at the top of the page. A few recipes that use tortillas include:

Interested In More Recipes?

Thank you for visiting this website. I appreciate you using some of your valuable time to do soIf you’re interested, I publish a newsletter 2 times per month (1st and 15th) with all the latest recipes, and other fun info. I would be honored to have you join our growing list of subscribers, so you never miss a great recipe!
There is a Newsletter subscription box on the top right side (or bottom) of each blog post, depending on the device you use, where you can easily submit your e-mail address (only) to be included in my mailing list.

You Can Also Find Me On Social Media:
Facebook page: The Grateful Girl Cooks!
Pinterest: The Grateful Girl Cooks!
Instagram: jbatthegratefulgirlcooks

Author's signatureRecipe Source: http://www.mennonitegirlscancook.ca/2013/02/homemade-flour-tortillas.html  

↓↓ PRINTABLE RECIPE BELOW ↓↓

0 from 0 votes
Flour Tortillas DIY
Prep Time
10 mins
Cook Time
17 mins
Total Time
27 mins
 

It's EASY to make homemade flour tortillas with only a few common ingredients, and no special equipment! Great for quesadillas, enchiladas, or tacos!

Category: Bread
Cuisine: Mexican
Keyword: flour tortillas
Servings: 8 tortillas
Calories Per Serving: 170 kcal
Author: JB @ The Grateful Girl Cooks!
Ingredients
  • 2 cups all-purpose flour
  • 1/2 teaspoons baking powder
  • 3/4 teaspoon salt
  • 1/4 cup vegetable shortening
  • 2/3 cup hot water
Instructions
  1. Whisk the flour, baking powder & salt together. Cut in the shortening with a pastry blender until crumbly. Pour in the hot water, a little at a time with a fork, and mix until the dough comes together. (I also have made this in the food processor with the dough blade on...works well, also!)
  2. Place dough on a lightly floured work surface, and knead a few minutes until smooth dough ball is formed (use your food processor for this, if using)
  3. Cover the dough with a towel and let it rest for approx. 45 minutes.
  4. Divide the dough into 8 equal pieces; roll it with your hands; shape into a ball. Cover the dough balls with plastic wrap.
  5. Using a rolling pin, roll each ball into a 6-7 inch circle. Don't freak out...they do not have to be "perfect" circles... (that gives them their personality!) You can cook one tortilla while you roll out the next one, if you want.
  6. Preheat your skillet (non-stick or cast iron-done it both ways...cast iron is my preference) on medium high heat. DO NOT ADD OIL.
  7. Place tortilla in the hot skillet; cook till small bubbles appear on the surface before flipping the tortilla to the other side. You will end up cooking each side for about a minute (typically).
  8. Stack and cover the cooked tortillas (with a tea towel) as you remove them from the skillet until all the tortillas are cooked.
Recipe Notes

Once done, you are ready to use them for your favorite recipe. They are even good served hot off the grill, with butter (just sayin'). These tortillas can be frozen to use later. If freezing, be sure to wrap them in plastic wrap, then in aluminum foil for best storage.

Nutrition Facts
Flour Tortillas DIY
Amount Per Serving (1 tortilla)
Calories 170 Calories from Fat 54
% Daily Value*
Fat 6g9%
Saturated Fat 1g6%
Sodium 219mg10%
Potassium 58mg2%
Carbohydrates 23g8%
Protein 3g6%
Calcium 16mg2%
Iron 1.5mg8%
* Percent Daily Values are based on a 2000 calorie diet.

Here’s one more to pin on your Pinterest boards!It's EASY to make homemade flour tortillas with only a few common ingredients, and no special equipment! Great for quesadillas, enchiladas, or tacos!


Save

Save

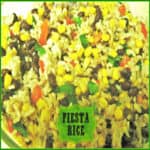
Fiesta Rice

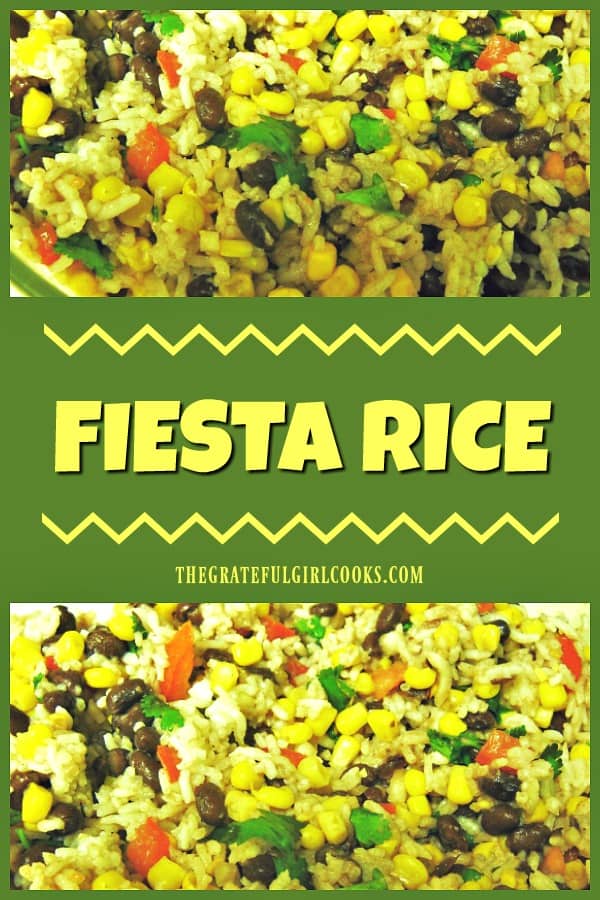
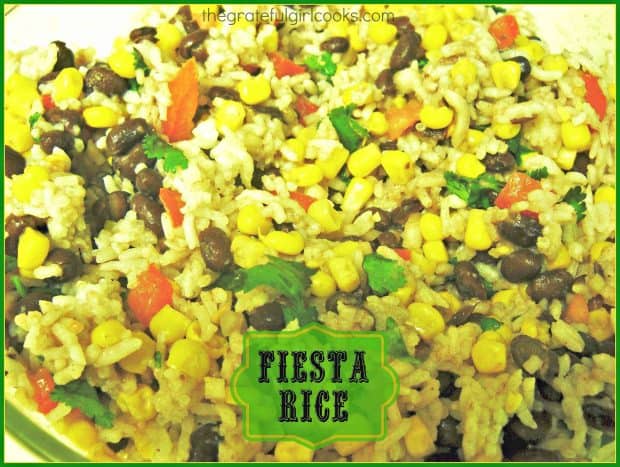
Fiesta Rice is a totally EASY, hearty, and delicious side dish made with white rice, black beans, corn, tomatoes, scallions, cilantro and lime juice.Fiesta Rice is a totally EASY, hearty, and delicious side dish made with white rice, black beans, corn, tomatoes, scallions, cilantro and lime juice.
This fiesta rice just might be one of the easiest side dishes ever created. Really. It’s almost too easy to call it a “recipe”, but yet it is! Guess what? It is DELICIOUS!

I discovered the recipe on Pinterest, and found it to be a perfect accompaniment for Taco Night! The flavors in the fiesta rice are a refreshingly nice change from my recipe for Spanish Rice that I have made and served over the years.

Scroll Down For A Printable Recipe Card At The Bottom Of The Page

Fiesta Rice Is So Easy To Make

Basically to make fiesta rice, all you will need to do is cook rice, and then add the remaining ingredients and mix them all together. That’s it!

This rice is so good, I suppose you COULD just eat it right out of the bowl before it gets to the table. Not that I would ever do such a despicable thing (*cough, cough). Didn’t take photos other than the finished product, because, honestly, it’s SO EASY!

Fiesta rice is a great side dish, and it’s super easy if you already have leftover cooked rice to use. This would be delicious paired with chicken, pork, shrimp.

You could also morph it into a yummy burrito bowl, and add some barbacoa shredded beef, etc.! Hope you enjoy it!

Looking For More Mexican-Style Dishes?

You can find all of my recipes in the Recipe Index, which is located at the top of the page. I have a good variety of Mexican-style dishes (and side dishes), including:

Want More Recipes? Get My FREE Newsletter!

I publish a newsletter 2 times per month (1st and 15th) with lots of recipes, tips, etc..
Would you like to join our growing list of subscribers?

There is a Newsletter subscription box on the top right (or bottom) of each blog post, depending on the device you use.
You can submit your e-mail address there, to be added to my mailing list.

Find Me On Social Media:

Facebook page: The Grateful Girl Cooks!
Pinterest:
The Grateful Girl Cooks!
Instagram:
jbatthegratefulgirlcooks

Author's signature

Recipe Source: http://www.skinnytaste.com/2011/04/fiesta-lime-rice.html

↓↓ PRINTABLE RECIPE BELOW ↓↓

0 from 0 votes
Fiesta Rice
Prep Time
10 mins
Cook Time
25 mins
Total Time
35 mins
 

Fiesta Rice is a totally EASY, hearty, and delicious side dish made with white rice, black beans, corn, tomatoes, scallions, cilantro and lime juice.

Category: Side Dish
Cuisine: Mexican
Keyword: fiesta rice
Servings: 6 servings
Calories Per Serving: 295 kcal
Author: JB @ The Grateful Girl Cooks!
Ingredients
  • 1 1/2 cups cooked , long-grain rice
  • 1 can black beans-rinsed and heated
  • 1 cup corn (canned or frozen), heated
  • 1 large tomato , diced
  • 1 large scallion , finely diced
  • 2-4 Tablespoons chopped cilantro (I used 4)
  • 1 heaping Tablespoon fresh squeezed lime juice (I added an extra Tablespoon)
  • Salt (to taste)
Instructions
  1. Cook the rice.
  2. In a large serving bowl, mix the hot rice with the remaining ingredients (salt to taste).
  3. Toss and Serve.
  4. The End. Wasn't that EASY? Enjoy!
Nutrition Facts
Fiesta Rice
Amount Per Serving (1 g)
Calories 295 Calories from Fat 9
% Daily Value*
Fat 1g2%
Saturated Fat 1g6%
Sodium 5mg0%
Potassium 437mg12%
Carbohydrates 61g20%
Fiber 8g33%
Sugar 2g2%
Protein 11g22%
Vitamin A 330IU7%
Vitamin C 6.4mg8%
Calcium 35mg4%
Iron 2.1mg12%
* Percent Daily Values are based on a 2000 calorie diet.

Here’s one more to pin on your Pinterest boards!Fiesta Rice is a totally EASY, hearty, and delicious side dish made with white rice, black beans, corn, tomatoes, scallions, cilantro and lime juice.

Save

Save

Save

Save

Mexican Layer Dip

Mexican Layer Dip is the perfect party appetizer! Set out a platter of this easy, layered dip with tortilla chips, and let the feeding frenzy begin!Super Bowl 2014 is coming up in a week and a half. Are you looking for a delicious appetizer that will feed the football loving masses, and is a real crowd-pleaser? Well, this Mexican Layer Dip is your answer!!!
Super Bowl 2014 is coming up in a week and a half. Are you looking for a delicious appetizer that will feed the football loving masses, and is a real crowd-pleaser? Well, this Mexican Layer Dip is your answer for football games, parties, New Years celebrations, birthdays, etc.!

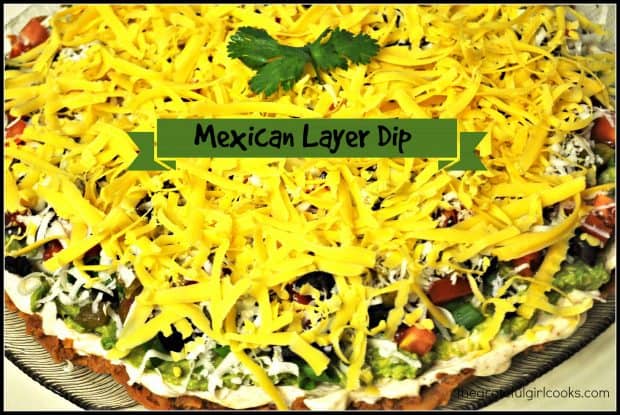
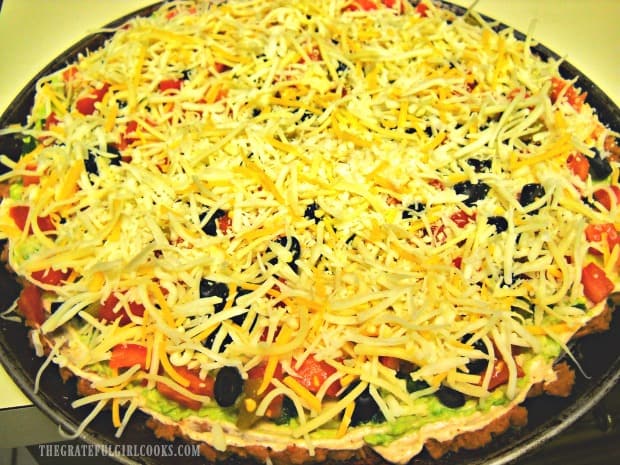
Mexican Layer Dip is layers of refried beans, green chilis, tomatoes, two cheeses, olives, avocados, and creamy spicy sour cream. I mean, how could this NOT taste fantastic! It’s got all the good stuff we LOVE to eat!

Scroll Down For A Printable Recipe Card At The Bottom Of The Page

We LOVE Mexican Layer Dip!

I’ve had this Mexican layer dip recipe on a little index card for over 30 years! Now I really don’t remember how or where I first received it, but I’ve made this countless times over the years. It is a family favorite!

This popular appetizer takes about 20 minutes to make, and then it’s refrigerated for about an hour OR until you’re ready to serve it!  It’s a winner recipe, and I’ve even made it the day before I want to serve it, with perfect results!

Our family loves this easy to assemble appetizer. Our oldest son even asked for a platter of this dip as part of his birthday present this past year.  What? Yes, that’s how good it is!

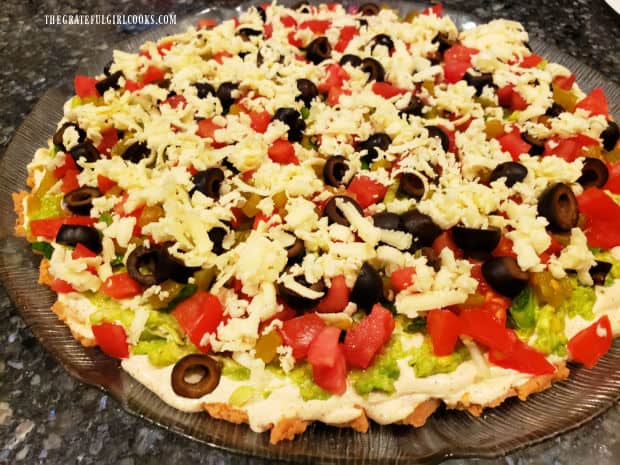
A pizza platter filled with the Mexican layer dip, ready to eat!

Prep the ingredients before you begin preparing the Mexican layer dip, then all you need to do is layer the ingredients in order! The dip is refrigerated for an hour after that! When you’re ready to serve, all that is left is to gobble it up with a handful of tortilla or corn chips! It’s so very easy – anyone can make this! Here’s how:

How To Prepare This Mexican Layer Dip, Step By Step

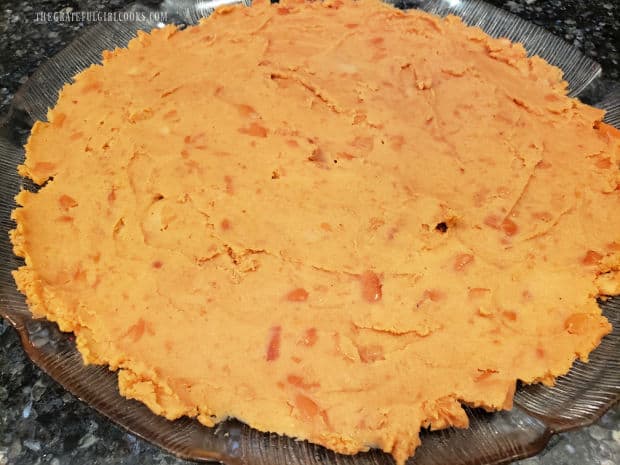
Spread a can of spicy (or regular) refried beans onto a large round serving platter or pizza pan, mashing it and spreading it out to cover almost the entire platter.

Refried beans are spread out onto a large round serving platter.

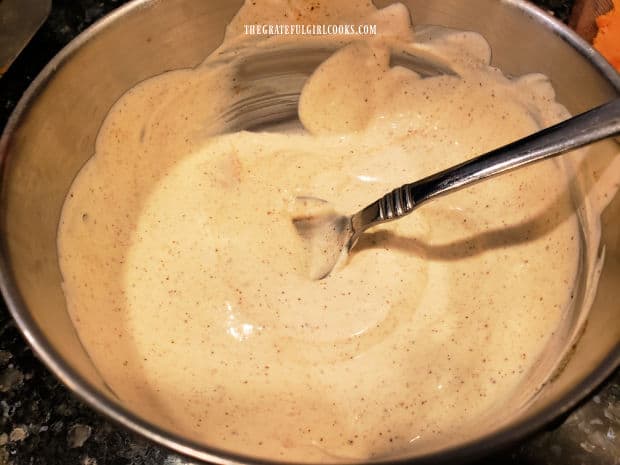
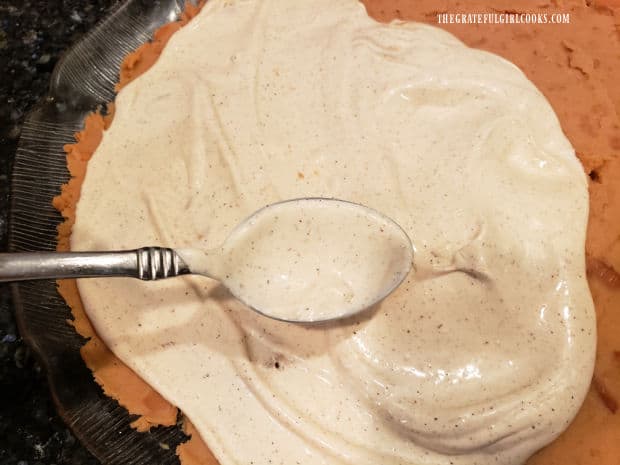
Stir together sour cream, mayonnaise and taco seasoning in a bowl until fully combined. Carefully spread this mixture out (using the back of a large spoon) to cover the refried bean layer. 

Sour cream, mayonnaise and taco seasoning are combined to make a spicy spread.The spicy sour cream mixture is spread over the top of the refried bean layer.

Now For The Creamy Avocado Layer

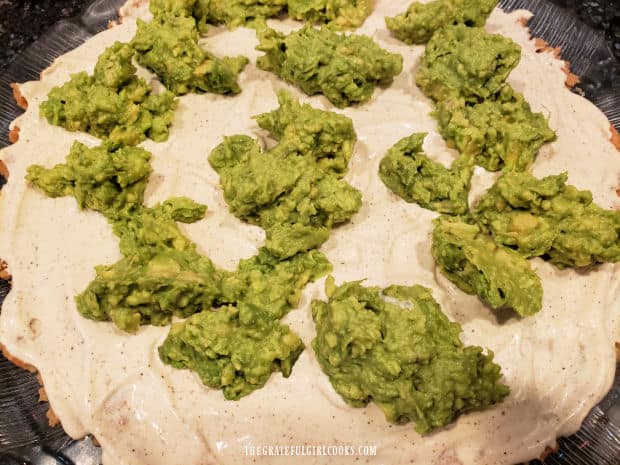
Peel and remove the seeds from three ripe avocados. Place the avocados in a bowl, and add fresh lemon juice. Mash with a fork until the avocados are fairly smooth in texture and the lemon juice has been incorporated. The lemon juice helps the avocados retain their pretty green color!

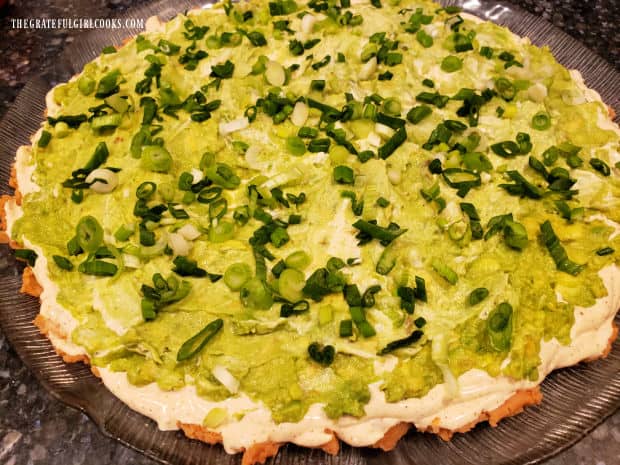
Dollop the avocado mixture over the sour cream layer, then carefully and gently spread the avocado layer to cover. Sprinkle the avocado layer evenly with sliced green onions.

Avocados mashed with lemon juice are spooned on top of sour cream mixture and spread out.Sliced green onions are sprinkled evenly on top of the avocado layer.

Okay… Let’s Layer The Remaining Ingredients!

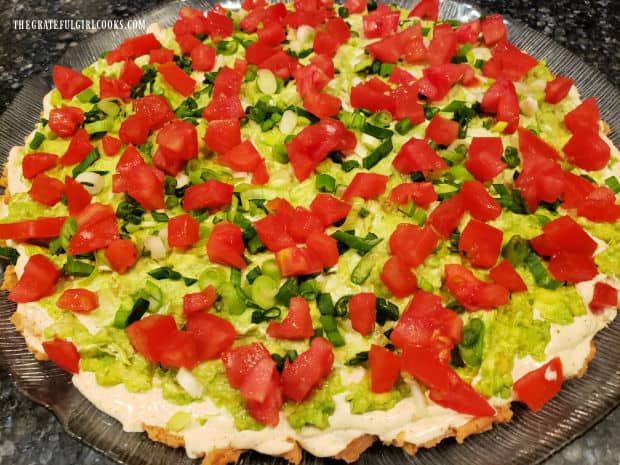
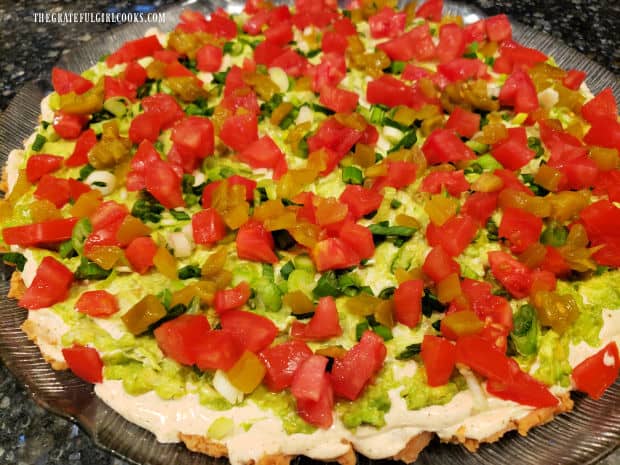
Distribute the chopped tomatoes evenly on top of the green onions. After that, evenly add a layer of chopped green chilis.

Chopped tomatoes are layered on top of the green onion layer.Chopped green chilis are evenly sprinkled on top of the tomato layer.

Ready For The Final Layers

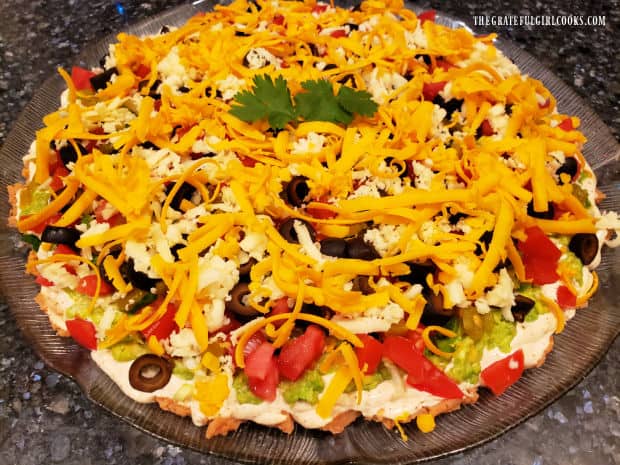
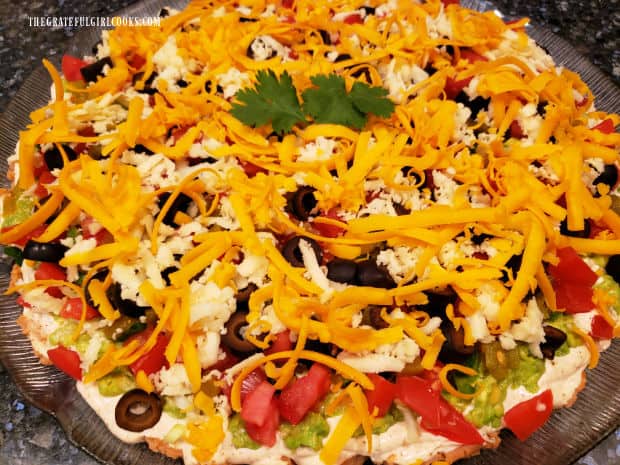
Sprinkle sliced black olives over the top of the tomatoes. The next layer to be added is grated Jack cheese, which is then followed by a final layer of grated Cheddar cheese. Be sure to evenly distribute the cheeses over the surface of the Mexican Layer Dip. If desired, add a garnish of fresh cilantro leaves, but that is totally OPTIONAL.

Cover the Mexican Layer Dip platter with plastic wrap, and refrigerate for at least one hour to let the flavors come together. You can also make this up the day before you want to serve it, too. How’s that for convenience?

Sliced black olives then grated jack cheese is sprinkled on top of the green chili layer..The final layer is grated cheddar cheese on top of the Mexican Layer Dip and a cilantro garnish.

Ready To Serve

I know you will love this Mexican Layer Dip. Isn’t it “pretty”? This is one appetizer that is perfect for scooping! Yum. Serve the Mexican Layer Dip with a big bag of tortilla chips (or corn chips), and watch how fast it disappears. Just wait till you TASTE it!

Mexican Layer Dip is always a family or party favorite appetizer, and it’s fun to watch everyone huddled around it, scooping this delicious dip up as fast as they can! It is wonderful!

Mexican Layer Dip is chilled and is ready to serve with tortilla chips for dipping!

I hope you enjoy this classic layered dip appetizer! We sure do. Thanks for taking time from your busy day to stop by this website today. Have a great day, and please come back again soon, for more family-friendly recipes.

Looking For More APPETIZER Recipes?

You can find all of my recipes in the Recipe Index, located at the top of the page. A few of our favorite appetizers include:

Interested In More Recipes?

Thank you for visiting this website. I appreciate you using some of your valuable time to do soIf you’re interested, I publish a newsletter 2 times per month (1st and 15th) with all the latest recipes, and other fun info. I would be honored to have you join our growing list of subscribers, so you never miss a great recipe!
There is a Newsletter subscription box on the top right side (or bottom) of each blog post, depending on the device you use, where you can easily submit your e-mail address (only) to be included in my mailing list.

You Can Also Find Me On Social Media:
Facebook page: The Grateful Girl Cooks!
Pinterest: The Grateful Girl Cooks!
Instagram: jbatthegratefulgirlcooks

Author's signatureRecipe source: Unknown (had this recipe on an index card for over 30 years)

↓↓ PRINTABLE RECIPE BELOW ↓↓

0 from 0 votes
Mexican Layer Dip
Prep Time
20 mins
Cook Time
0 mins
Refrigeration (inactive time)
1 hr
Total Time
1 hr 20 mins
 

Mexican Layer Dip is the perfect party appetizer! Set out a platter of this easy, layered dip with tortilla chips, and let the feeding frenzy begin!

Category: Appetizer
Cuisine: Mexican
Keyword: Mexican layer dip
Servings: 12
Calories Per Serving: 216 kcal
Author: JB @ The Grateful Girl Cooks!
Ingredients
  • 16 ounces spicy fat-free refried beans (1 can) (can use regular, too)
  • 6 Tablespoons sour cream
  • 4 Tablespoons mayonnaise
  • 1 ounce taco seasoning mix (1 envelope pkg.) (or use your own mix ☺)
  • 3 medium avocados peeled/pits removed
  • 2 teaspoons fresh lemon juice
  • 3 stems green onions , chopped (green and white parts)
  • 4.5 ounces diced green chiles (small can), drained
  • 1 large tomato or 2 Roma tomatoes , chopped
  • 2.25 ounces chopped black olives (small can), drained
  • 1 cup jack cheese , grated
  • 1 cup cheddar cheese , grated
  • Tortilla chips (or corn chips), for serving
Instructions
  1. Spread entire can of refried beans onto a large round serving platter or pizza pan, mashing it down as you spread it out, to cover platter or pan.

  2. In separate bowl, stir together sour cream, mayonnaise and taco seasoning. Spread this mixture on top of refried beans, to cover.

  3. Mash avocados with lemon juice in a bowl until fairly smooth. Drop avocado mixture by large spoonfuls on top of sour cream layer. Gently spread to cover.

  4. Add layer of sliced green onions.

    Add layer of diced green chiles.

    Add layer of chopped tomatoes.

    Add layer of black olives.

    Add layer of grated jack cheese.

    Top with layer of grated cheddar cheese.

  5. Cover platter with plastic wrap and refrigerate for at least one hour. Remove from refrigerator and DIG IN! Serve this with tortilla or corn chips!

Recipe Notes

Caloric calculation does not include tortilla chips!

Nutrition Facts
Mexican Layer Dip
Amount Per Serving (1 (1/12th of total))
Calories 216 Calories from Fat 144
% Daily Value*
Fat 16g25%
Saturated Fat 5g31%
Trans Fat 0.003g
Polyunsaturated Fat 2g
Monounsaturated Fat 7g
Cholesterol 21mg7%
Sodium 699mg30%
Potassium 324mg9%
Carbohydrates 12g4%
Fiber 6g25%
Sugar 2g2%
Protein 8g16%
Vitamin A 679IU14%
Vitamin C 12mg15%
Calcium 172mg17%
Iron 1mg6%
* Percent Daily Values are based on a 2000 calorie diet.

Here’s one more to pin on your Pinterest boards!Mexican Layer Dip is the perfect party appetizer! Set out a platter of this layered dip with tortilla chips, & let the feeding frenzy begin!


Save

Save