Category: Main Dishes

Awesome Grilled Pork Chops

Awesome Grilled Pork Chops are easy, flavorful & juicy! They’re brined in salt/water/sugar overnight, and coated with spices before grilling.
Awesome Grilled Pork Chops are easy, flavorful & juicy! They're brined in salt/water/sugar overnight, and coated with spices before grilling.

Do you enjoy pork chops? We do, and have them every two or three weeks! Today I want to share a recipe for grilled pork chops that are ridiculously EASY to make, juicy (not dry), and taste WONDERFUL!

The only catch is that you need to plan ahead, because the pork chops will need to soak overnight in a simple brine (which adds flavor, tenderness, and keeps ’em juicy).

The brine only takes a couple minutes to make, and then into the fridge they go. The next day, it only takes a minute or two to make a dry spice rub, and place on the brined chops. Then all that is necessary is someone to grill the pork chops on the ol’ BBQ!

It’s really a totally EASY recipe to make, and I’m confident you’ll enjoy these grilled pork chops! The recipe calls for bone-in chops, but you can substitute boneless if you want (we prefer the bone-in!) Here’s how to make them:

Scroll Down For A Printable Recipe Card At The Bottom Of The Page

Prepare The Brine For The Pork Chops

Making the brine solution is easy! Basically, brining is a technique where meats of all kinds are soaked for several hours in a water/salt (etc.) solution to increase flavor, tenderize, and keep meats juicy. For an interesting quick read on the pros of brining, check out this article.

For this brine, you will combine salt, water and sugar in a large saucepan. Stir and cook the brine on medium heat, until the sugar and salt particles have dissolved.

Take the pan off the heat, and add ice cubes. Let the ice cubes melt; once the brine is at room temperature, it’s ready for the pork chops! See how easy it is to make?

Place the pork chops in a large container with a lid, or in a gallon-sized resealable plastic bag. The container needs to be large enough so the pork chops are in a single layer (to soak up that brine!).

Turn to coat both sides. Let the chops brine overnight (covered) in the refrigerator.

A sweet/salty brine is prepared for the pork chops.The pork chops are refrigerated overnight in a sweet/salty brine.

Make The Spice Mix For The Easy Grilled Pork Chops

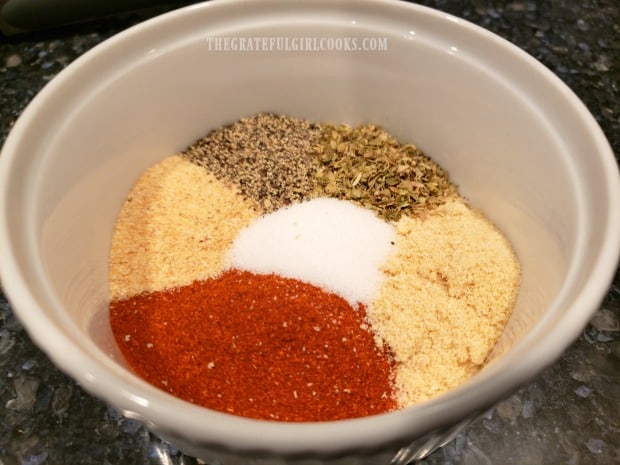
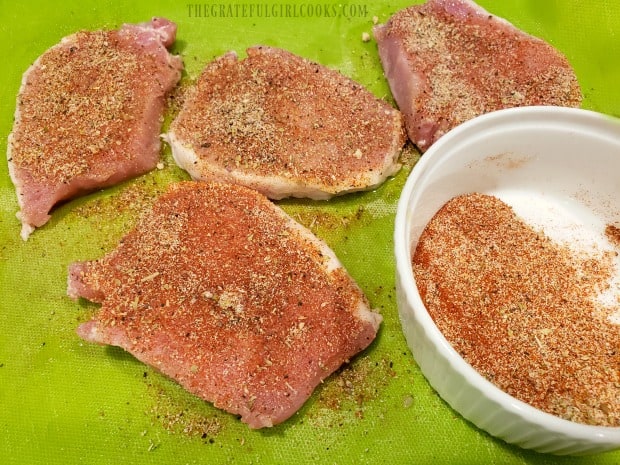
The pork chops are coated in a flavorful spice mixture on all sides, before putting them on the grill. The ingredients are paprika, garlic powder, cumin, onion powder, ground mustard, black pepper, and chili powder.

Combine the spices, and then set the spice mixture aside until you’re ready to cook the brined pork chops.

Spices are combined to make a dry rub for pork chops.Spice mix, ready to rub onto both sides of each pork chop before grilling.

Ready To Grill!

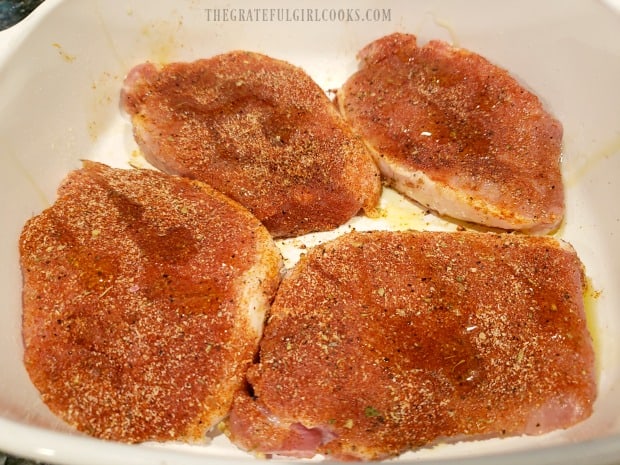
Rinse off the brine and then pat each pork chop dry with paper towels. Generously sprinkle each chop with the spice mixture (on all sides). Rub the spice mixture onto the surface of each pork chop so that it adheres to the meat.

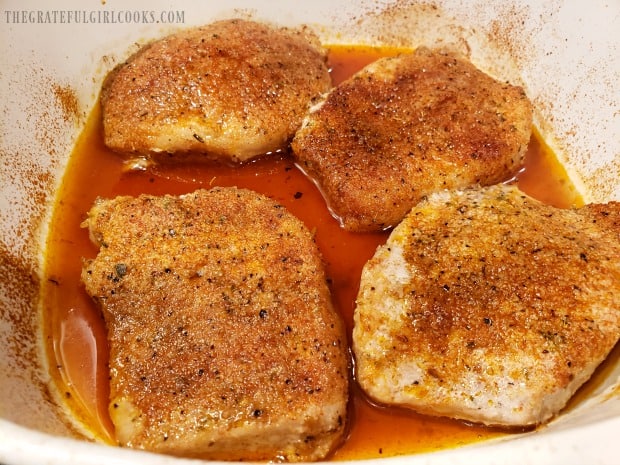
Place the pork chops onto a hot grill. Cook for approximately 10-11 minutes, and then turn chops over. Cook for an additional 10-11 minutes or until the pork reaches an internal temperature of 145°F.

Four bone-in pork chops coated with dry rub spice mix, and ready to grill.The chops are cooked on the bbq grill over hot coals.

The thickness of the chops used will determine the actual length of cooking time. **Our chops were about an inch thick, and took about 11 minutes per side**.

Once done, remove the pork chops from the grill and let them sit for 4-5 minutes, to let the juices redistribute throughout the meat.

Awesome grilled pork chops are cooking and well browned on the bbq.

Time To Eat Some Awesome Grilled Pork Chops!

Once done, transfer the meat to a serving platter, and get ready to enjoy these awesome grilled pork chops!

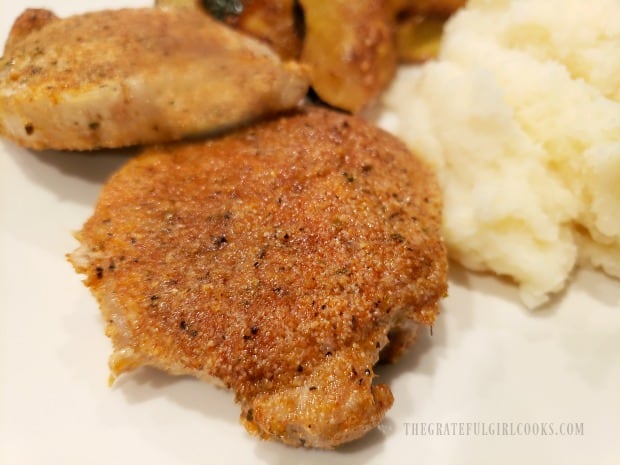
We enjoyed them served with green beans, garden fresh Sun-Gold cherry tomatoes and creamy scalloped potatoes on the side.

The chops are quite juicy, and taste absolutely wonderful!

Time to serve the awesome grilled pork chops (on a large platter).Awesome Grilled Pork Chops, served with scalloped potatoes, green beans, and tomatoes.

I hope you enjoy this recipe for awesome grilled pork chops! Pretty sure you’re really going to like them.

Thank you so much for stopping by, and please pop in again sometime for another visit, and some wonderful recipes! Have a GREAT day.

Looking For More PORK CHOP Recipes?

You can find all of my pork recipes in the Recipe Index, located at the top of the page. I have quite a few, including:

Want More Recipes? Get My FREE Newsletter!

I publish a newsletter 2 times per month (1st and 15th) with lots of recipes, tips, etc..
Would you like to join our growing list of subscribers?

There is a Newsletter subscription box on the top right (or bottom) of each blog post, depending on the device you use.
You can submit your e-mail address there, to be added to my mailing list.

Find Me On Social Media:

Facebook page: The Grateful Girl Cooks!
Pinterest:
The Grateful Girl Cooks!
Instagram:
jbatthegratefulgirlcooks

Author's signature

Original recipe source: Stephanie, at: https://www.plainchicken.com/the-ultimate-pork-chops/

↓↓ PRINTABLE RECIPE BELOW ↓↓

0 from 0 votes
Awesome Grilled Pork Chops
Prep Time
10 mins
Cook Time
22 mins
Brining Time (inactive)
8 hrs
Total Time
8 hrs 32 mins
 

Awesome Grilled Pork Chops are easy, flavorful & juicy! They're brined in salt/water/sugar overnight, and coated with spices before grilling.

Category: Entree
Cuisine: American
Keyword: awesome grilled pork chops
Servings: 4
Calories Per Serving: 291 kcal
Author: JB @ The Grateful Girl Cooks!
Ingredients
  • ¼ cup salt
  • ¼ cup granulated sugar
  • 2 cups water
  • 2 cups ice cubes
  • 4 1" thick bone-in pork chops (approx. 6 ounces per chop)
Spice Mixture:
  • 3 Tablespoons paprika
  • 1 teaspoon ground cumin
  • 1 teaspoon garlic powder
  • 1 teaspoon onion powder
  • 1 teaspoon ground mustard
  • 1 teaspoon chili powder
  • 1 teaspoon black pepper
Instructions
  1. Make Brine: Combine salt, water and sugar in large saucepan. Stir; cook brine on medium heat until sugar and salt dissolves. Remove pan from heat; add ice cubes. Let brine cool to room temp.

  2. Place pork chops in a large container in a single layer, or in a gallon-sized resealable plastic bag. Add the room temp. brine. Let the chops brine overnight, or 8-12 hours in the refrigerator (covered, if using container) .

  3. Make Spice Mix: Combine spices in bowl; set aside until ready to cook brined pork chops.

  4. When Ready To Grill: Rinse brine off chops; pat dry with paper towels. Generously sprinkle chops with spice mix (all sides). Rub spices onto each pork chop so it adheres. Place chops on hot grill. Grill approx. 10-11 minutes; turn chops over. Cook additional 10-11 minutes, or until pork reaches internal temperature of 145°F. Remove from grill. Let chops sit for 4-5 minutes before serving. Enjoy!

Recipe Notes

PLEASE NOTE: The salt/sugar in the brine is not included in the caloric calculation (for sodium or sugar content), since almost all of the brine is rinsed off the meat prior to cooking.

Nutrition Facts
Awesome Grilled Pork Chops
Amount Per Serving (1 g)
Calories 291 Calories from Fat 117
% Daily Value*
Fat 13g20%
Saturated Fat 4g25%
Cholesterol 88mg29%
Sodium 84mg4%
Potassium 585mg17%
Carbohydrates 17g6%
Fiber 2g8%
Sugar 13g14%
Protein 28g56%
Vitamin A 2734IU55%
Calcium 41mg4%
Iron 2mg11%
* Percent Daily Values are based on a 2000 calorie diet.

Here’s one more to pin on your Pinterest boards!Awesome Grilled Pork Chops are easy, flavorful & juicy! They're brined in salt/water/sugar overnight, and coated with spices before grilling.

Easy Cheesy Enchiladas

Make a yummy batch of Easy Cheesy Enchiladas in a flash, with cheddar and jack cheese, canned enchilada sauce, onions, and corn tortillas.

One of my lifetime friends gave me her family’s “recipe” for making basic cheese enchiladas over 42 years ago. I have been making them, in one form or another ever since! The recipe (as shown in the printable recipe card at the bottom of the page) is her recipe for basic cheese enchiladas, perfect for “Meatless Mondays” (or anytime, for that matter!).

My friend, Nadine, says lightly frying the corn tortillas in hot oil BEFORE filling them, is the secret to making them. Nadine says it’s because the slightly cooked tortillas won’t tear as easily as dry tortillas might when filling them.

I’ve always made our enchiladas this way, and now (42 years later), I’ve probably used this little basic recipe hundreds of times! You can even go WILD (ha ha) and add seasoned ground beef, chicken, turkey or shredded pork, if you want to add some “meat”.
We have enjoyed these little enchiladas so long now, I feel like they are part of our family! It really doesn’t take much effort to make a pan of eight enchiladas (and the recipe can be easily doubled). Here’s how to make them:
Scroll Down For A Printable Recipe Card At The Bottom Of The Page

Preparing To Make Enchiladas

Preheat your oven to 350° Place the chopped onion, and grated jack and cheddar cheeses into individual bowls. NOTE: Set aside about 1/4 cup each of the two cheeses and save for later. You will need this cheese to sprinkle on top of the filled enchiladas before baking.

I like to set the bowls close together, right next to where I will be filling the enchiladas, so it is easy for me to grab the ingredients.

Chopped onion, grated cheddar and jack cheese are ready to fill tortillas.

Quick Fry To Soften Tortillas

Heat the oil in a small skillet (large enough for the tortillas, though!). You only need a small amount of oil, (usually about 3 Tablespoons) to barely cover the bottom of the skillet. You amount may vary, based on the size skillet you are using.

Heat the oil on medium-high heat until it is very hot, but NOT smoking. Lay a tortilla in the hot oil, and let it cook for about 15 seconds, then flip it to the other side, using tongs.

Cook 15 more seconds, and then carefully (using tongs) lift the tortilla out of the hot oil, letting the excess oil drip back into skillet, and place tortilla on a paper towel.

Repeat process with all 8 tortillas. When done, carefully blot the tortillas with paper towels to soak up any extra oil. Stack the tortillas on top of each other. Now you’re ready to fill the tortillas, and they should be nice and pliable, so they don’t tear.

Corn tortillas are quickly fried in hot oil to soften before adding enchilada filling.Quickly fried tortillas are blotted dry with paper towels before adding enchilada filling.

Filling And Rolling Easy Cheesy Enchiladas

Before filling the enchiladas, spoon just enough of the enchilada sauce in a 9×13 baking dish to cover the bottom. Then, as you fill each enchilada, place it directly on top of the enchilada sauce.

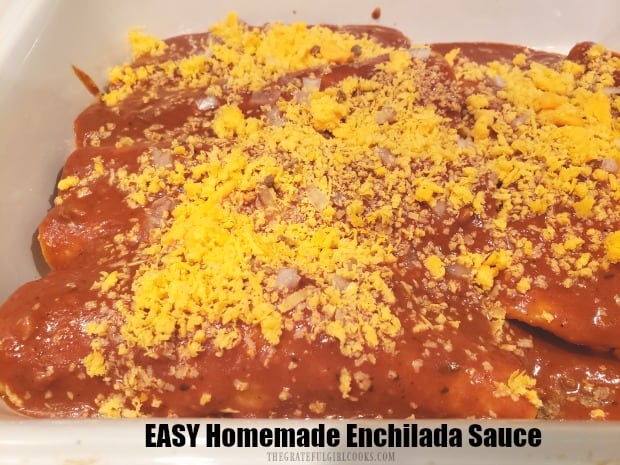
If you’re interested in making your own enchilada sauce (it’s a cinch!), check out my recipe for Easy Homemade Enchilada Sauce!

To fill the enchiladas, place a small handful of grated cheddar cheese right down the middle of the tortilla. Top with the grated jack cheese, and then sprinkle with chopped onion.

TIP: You will have to “guesstimate” on the amount of cheese used to fill each tortilla. Remember you need to divide the cheeses and onions evenly between 8 tortillas!
Once filled, roll the tortilla tightly up and over the filling. Place it in the prepared baking dish, with the seam side DOWN. Repeat this process for each enchilada. Your fingers can get a little messy, but who cares? It’s homemade enchiladas!
Each corn tortilla is filled with jack and cheddar cheese and chopped onions.Tortillas and filling are rolled, then placed on top of enchilada sauce in baking pan.

Finishing Enchiladas BEFORE Baking

Lay each remaining filled enchilada tightly next to the others. Pour or spoon the remaining enchilada sauce over the top of the enchiladas, until all are fully covered. Cover any exposed tortilla with the sauce (that will help them not dry out while baking).

Use all the sauce to cover those enchiladas! Once done, sprinkle the reserved cheddar and jack cheeses over the top of the enchiladas. If you want more, simply add as much as you wish. Sometimes I even add a bit more chopped onion or chopped black olives, too!

Additional enchilada sauce is put on top of the enchiladas in the baking pan.Grated cheeses are sprinkled on top of the easy cheesy enchiladas before baking.

Time To Bake

Easy cheesy enchiladas should be baked in a preheated 350°F. oven. Bake them for approximately 20 minutes. When done, the sauce and cheese should be bubbly around the edges, the cheese on top will be melted, and enchiladas will be heated through.

Transfer the baking dish to a wire rack, and let the easy cheesy enchiladas cool for just a couple minutes. This lets the cheese slightly firm up, so they are easier to remove from the dish for serving.

Enchiladas are baked for 20 minutes until cheese melts and they're heated through.

Serving Easy Cheesy Enchiladas

Use a spatula to remove each enchilada from the pan, and transfer to individual serving plates. These enchiladas go really well with my crock pot refried beans or Spanish rice.

Some of our favorite ways to serve cheesy enchiladas include adding chopped cilantro the the top of each enchilada. It’s really your own personal taste that will determine how you top them (and totally optional to add any extra topping at all!).

You can also just go with a dollop of sour cream on each one, OR you can go wild, and add fresh guacamole AND sour cream. However you serve these enchiladas, I’m pretty sure you will enjoy them. We sure do!

Easy cheesy enchiladas, garnished with chopped cilantro for serving.

The easy cheesy enchiladas can be garnished with sour cream for serving.Fresh guacamole and sour cream are another garnish for the baked cheese enchiladas.

I hope you enjoy these easy cheesy enchiladas. We sure do! It’s a perfectly delicious tasting “meatless meal”. Thank you for stopping by, and I sincerely hope you will stop by again. The printable recipe card is below.

Looking for for Mexican/Southwestern Main Dishes?

You can find all of my recipes in the Recipe Index, located at the top of the page. I have quite a few Mexican or Southwestern inspired recipes, including:

Want More Recipes? Get My FREE Newsletter!

I publish a newsletter 2 times per month (1st and 15th) with lots of recipes, tips, etc..
Would you like to join our growing list of subscribers?

There is a Newsletter subscription box on the top right (or bottom) of each blog post, depending on the device you use.
You can submit your e-mail address there, to be added to my mailing list.

Find Me On Social Media:

Facebook page: The Grateful Girl Cooks!
Pinterest:
The Grateful Girl Cooks!
Instagram:
jbatthegratefulgirlcooks

Author's signature

Original recipe source: my friend Nadine Massey, over 42 years ago

↓↓ PRINTABLE RECIPE BELOW ↓↓

0 from 0 votes
Easy Cheesy Enchiladas
Prep Time
15 mins
Cook Time
20 mins
Total Time
35 mins
 

Make a yummy batch of Easy Cheesy Enchiladas in a flash, with cheddar and jack cheese, canned enchilada sauce, onions, and corn tortillas.

Category: Main Dish
Cuisine: Mexican, Southwest
Keyword: easy cheesy enchiladas
Servings: 8 enchiladas
Calories Per Serving: 305 kcal
Author: JB @ The Grateful Girl Cooks!
Ingredients
  • 8 medium corn tortillas
  • 19 ounces red enchilada sauce (canned) , 1 lb. 3 ounce can
  • 2 cups grated cheddar cheese , divided
  • 2 cups grated jack cheese , divided
  • cup onion (yellow) , chopped
  • enough oil to cover bottom of small skillet (approx. 3 Tablespoons)
OPTIONAL GARNISH: sour cream, guacamole, chopped cilantro
    Instructions
    PREP:
    1. Preheat oven to 350° Place chopped onion, and grated jack and cheddar cheeses into individual bowls. NOTE: Set aside about 1/4 cup each of the two cheeses and save for later. You will need this cheese to sprinkle on top of the filled enchiladas before baking. Pour just enough of the enchilada sauce in a 9x13 baking dish to cover the bottom.

    Making Enchiladas:
    1. Heat oil in a small skillet (large enough for tortillas) on medium-high heat until very hot, but NOT smoking. Lay a tortilla in hot oil; let it cook for about 15 seconds, then flip it to other side, using tongs. Cook 15 seconds, and then carefully (using tongs) lift tortilla from oil, letting excess oil drip into skillet; place on a paper towel. Repeat process with all tortillas. Blot tortillas with paper towels to soak up oil.

    2. Fill enchiladas: place a small handful of grated cheddar cheese down the middle of the tortilla. Top with grated jack cheese, and then sprinkle with chopped onion, dividing cheeses and onion evenly between 8 tortillas. Once filled, roll tortilla tightly up and over the filling. Place in prepared baking dish, seam side DOWN. Repeat process with each enchilada.

    3. Pour or spoon remaining sauce over enchiladas, until fully covered. Once done, sprinkle reserved cheddar and jack cheeses over the top.

    4. Baked at 350°F. for approx. 20 minutes. When done, sauce and cheese should be bubbly around the edges, cheese melted, and enchiladas heated through. Transfer dish to a wire rack; let cool for 2 minutes, before serving. OPTIONAL: Serve, topped with sour cream, cilantro, guacamole or other toppings of your choice. Enjoy.

    Recipe Notes

    Oil used to quickly "fry" tortillas not included in caloric calculation. Most oil remains unused (and amount to cover skillet bottom will vary per user).

    Nutrition Facts
    Easy Cheesy Enchiladas
    Amount Per Serving (1 enchilada)
    Calories 305 Calories from Fat 171
    % Daily Value*
    Fat 19g29%
    Saturated Fat 11g69%
    Cholesterol 55mg18%
    Sodium 923mg40%
    Potassium 109mg3%
    Carbohydrates 18g6%
    Fiber 3g13%
    Sugar 5g6%
    Protein 17g34%
    Vitamin A 949IU19%
    Vitamin C 2mg2%
    Calcium 437mg44%
    Iron 1mg6%
    * Percent Daily Values are based on a 2000 calorie diet.

    Here’s one more to pin on your Pinterest pages!Make a yummy batch of Easy Cheesy Enchiladas in a flash, with cheddar and jack cheese, canned enchilada sauce, onions, and corn tortillas.

    Honey Lime Grilled Chicken

    Enjoy the Southwestern flavor of delicious Honey Lime Grilled Chicken. Chicken thighs are marinated, then grilled/basted with the easy to make sauce.
    Enjoy the Southwestern flavor of delicious Honey Lime Grilled Chicken. Chicken thighs are marinated, then grilled/basted with the easy to make sauce.

    Looking for an easy to prepare, but full of flavor chicken recipe? May I recommend this one for honey lime grilled chicken? Chicken thighs are seasoned and flavored in a simple flavor-packed marinade. After marinating, the seasoned chicken thighs are grilled on a bbq (or cooked on stovetop), and are basted with a glaze (made using part of the reserved marinade)!

    This simply marinated, glazed and grilled chicken taste wonderful. The chicken thighs are juicy, and are complimented by the tangy glaze they’re coated with, while grilling. The sweet honey, fresh lime juice, along with some Southwest-inspired spices result in some quite tasty pieces of chicken.

    This is a perfect recipe for hot summer nights. To make it REALLY convenient, you can marinate the chicken early in the day, and then grill ’em up later in the evening, for a quick dinner! YUM. Here’s how to make this chicken:

    What’s In The Marinade?

    The marinade (which also doubles as a basting sauce later) is super easy to make, in hardly any time at all. The ingredients are olive oil, honey, lime juice, fresh ginger, cumin, coriander, oregano, minced garlic and salt.

    The ingredients used for the honey lime marinade.

    Prepare The Honey Lime Marinade

    Measure the marinade ingredients into a medium saucepan. Stir the ingredients well, to fully combine. Put the ingredients into a saucepan, because you will remove some to use as a marinade, and then cook the remaining sauce into a slightly thickened basting glaze.

    All the marinade ingredients are placed into a medium saucepan.Once mixed, some honey lime sauce is removed to marinate the chicken pieces.

    Marinate The Chicken Thighs

    Measure out 4 Tablespoon of the marinade into a large gallon-sized re-sealable bag. NOTE: *I did not have a large gallon-sized bag available, but had 2 quart sized bags. I put 2 Tablespoons marinade into each of the 2 small bags. Add the chicken thighs, and “massage” the bag(s) well, to ensure all sides of the chicken are covered with marinade.

    Place bag(s) in the refrigerator and marinate the chicken for at least 30 minutes. You can marinate the chicken for up to 12 hours, so this is easy to prepare early in the day. You can let the chicken hang out in the refrigerator until you’re ready to grill it. TIP: The longer the chicken marinates, the greater the flavor!

    Chicken thighs marinating in honey lime sauce in re-sealable plastic bags.

    Make A Basting Sauce For The Honey Lime Grilled Chicken

    While the chicken is marinating, you can make the basting glaze, using the remaining marinade in the saucepan. Heat the sauce on Medium heat until it comes to a boil. Once it begins boiling, keep an eye on the sauce, stirring occasionally. It will bubble quite a bit (and you don’t want it to bubble up and out of your saucepan!).

    Continue to boil the sauce for between 1-2 minutes, or until the mixture becomes more like a slightly thicker syrup. As it continues to cook, the liquid will reduce in volume by about a half. Once done, remove the pan from the heat, and set aside, until you’re ready to grill the chicken.

    Remaining honey lime marinade is cooked down into a basting glaze for grilling..the basting glaze has reduced in volume and is syrupy, for brushing on chicken.

    Time To Cook The Honey Lime Grilled Chicken!

    When ready to cook the honey lime grilled chicken, you have two options: you can grill it outside on a bbq OR you can cook it on the stove top in a large skillet. *Inside cooking directions can be found in the printable recipe card at the bottom of the post.

    FOR OUTSIDE GRILLING: preheat grill (or charcoal briquettes) to a medium high heat. Once hot, transfer chicken pieces directly onto bbq grate. Sprinkle chicken lightly with salt and pepper (if desired). Baste the chicken thighs often with the honey lime glaze as it cooks (baste and grill on all sides).

    The chicken will take about 15 minutes to cook (more or less, depending on heat source AND size of chicken pieces). The chicken is considered safely “done” when it’s internal temperature reaches 160°F. It should be nice and golden brown in color.

    Marinated chicken thighs are grilled, and basted with honey lime glaze as they cook..

    Ready To Enjoy

    Once you remove the chicken from the grill, cover it (to keep it warm), and let it rest for about 4-5 minutes to let the juices redistribute inside the chicken.

    We enjoyed the honey lime grilled chicken, garnished with fresh parsley, and served with a cauliflower/mushroom side dish, and steamed rice. The chicken was moist, and very flavorful. I think you will love it, too!

    Honey lime grilled chicken pieces on a white platter, ready to be eaten.Rice and a veggie dish are served along with the honey lime grilled chicken.

    Thank you so much for stopping by. I truly hope you will consider trying this easy, delicious honey lime grilled chicken recipe. Take care, and have a great day.

    Looking For More CHICKEN Recipes?

    You can find all of my chicken recipes in the Recipe Index, located at the top of the page. I have LOTS of delicious recipes using chicken, including:

    Interested In More Recipes?

    Thank you for visiting this website. I appreciate you using some of your valuable time to do soIf you’re interested, I publish a newsletter 2 times per month (1st and 15th) with all the latest recipes, and other fun info. I would be honored to have you join our growing list of subscribers, so you never miss a great recipe!
    There is a Newsletter subscription box on the top right side (or bottom) of each blog post, depending on the device you use, where you can easily submit your e-mail address (only) to be included in my mailing list.

    You Can Also Find Me On Social Media:
    Facebook page: The Grateful Girl Cooks!
    Pinterest: The Grateful Girl Cooks!
    Instagram: jbatthegratefulgirlcooks

    Author's signature

    Original recipe source: Chris, at: thecafesucrefarine.com/mexican-honey-lime-grilled-chicken/

    0 from 0 votes
    Honey Lime Grilled Chicken
    Prep Time
    5 mins
    Cook Time
    15 mins
    Marinating Time (inactive)
    30 mins
    Total Time
    50 mins
     

    Enjoy the Southwestern flavor of delicious Honey Lime Grilled Chicken. Chicken thighs are marinated, then grilled/basted with the easy to make sauce.

    Category: Entree, Main Course
    Cuisine: Southwest
    Keyword: honey lime grilled chicken
    Servings: 6
    Calories Per Serving: 350 kcal
    Author: JB @ The Grateful Girl Cooks!
    Ingredients
    • 3 pounds boneless, skinless chicken thighs (6 pieces) , visible fat removed
    • salt/pepper (to lightly season chicken before grilling) , OPTIONAL-amount used as desired
    Honey Lime Marinade & Basting Sauce:
    • ¼ cup fresh lime juice
    • 3 Tablespoons honey
    • 2 Tablespoons extra virgin olive oil
    • 3 cloves garlic , finely minced
    • 1 teaspoon finely grated fresh ginger
    • 1 teaspoon dried oregano
    • 1 teaspoon coriander
    • 1 teaspoon ground cumin
    • 1 teaspoon salt
    Instructions
    1. Measure marinade ingredients into a medium saucepan. Stir well, to fully combine.

    2. Measure 4 Tablespoons of marinade out; transfer into a large re-sealable plastic bag (or divide evenly between 2 smaller bags). Add chicken thighs, and "massage" bag(s) well, to ensure each piece is covered with marinade. Place bag(s) in refrigerator; marinate chicken for at least 30 minutes, or up to 12 hours.

    3. While chicken marinates, make basting glaze. Cook remaining marinade in saucepan on Medium heat until it comes to a boil. Once boiling, keep an eye on it, stirring often, so it doesn't bubble up and out of the pan. Boil sauce for 1-2 minutes, until mixture becomes a slightly thick syrup. As it cooks, liquid will reduce in volume by about half. Once done, remove pan from heat; set aside.

    Cooking Outside On Grill:
    1. Preheat gas grill (or charcoal briquettes) to medium high heat. Once hot, transfer chicken pieces directly onto bbq grate. Sprinkle chicken lightly with salt/pepper (if desired). Baste chicken often with honey lime glaze as it cooks (baste and grill on all sides). Chicken will take about 15 minutes to cook (more or less, depending on heat source AND size of chicken pieces). The chicken is safely "done" when it's internal temperature reaches 160°F. It should be nice and golden brown in color. Remove chicken when done, and let rest for 4-5 minutes before serving, to let juices redistribute through meat.

    Cooking Inside On Stovetop:
    1. Heat oil in a large skillet on medium-high heat. When it is really hot (but not smoking), add chicken, but do not over-crowd the skillet. Season lightly with salt/pepper (if desired). Cook for about 10-12 minutes, basting with the glaze, and turning chicken frequently. Chicken is safely "done" when it reaches an internal temperate of 160°F. Remove chicken when done, and let rest for 4-5 minutes before serving, to let juices redistribute through meat.

    Recipe Notes

    NOTE: Caloric calculation is approximate, due to varying sizes of chicken thighs that might be used.

    Nutrition Facts
    Honey Lime Grilled Chicken
    Amount Per Serving (1 thigh)
    Calories 350 Calories from Fat 126
    % Daily Value*
    Fat 14g22%
    Saturated Fat 3g19%
    Cholesterol 215mg72%
    Sodium 591mg26%
    Potassium 579mg17%
    Carbohydrates 10g3%
    Fiber 1g4%
    Sugar 9g10%
    Protein 44g88%
    Vitamin A 54IU1%
    Vitamin C 3mg4%
    Calcium 32mg3%
    Iron 2mg11%
    * Percent Daily Values are based on a 2000 calorie diet.

    Here’s one more to pin on your Pinterest boards!Enjoy the Southwestern flavor of delicious Honey Lime Grilled Chicken. Chicken thighs are marinated, then grilled/basted with the easy to make sauce.

    Air Fryer Cheesy Pan Pizza

    Make a delicious Air Fryer Cheesy Pan Pizza for lunch/dinner. Use canned biscuit dough for crust & Mozzarella/Parmesan cheeses, pizza sauce & spices!
    Make a delicious Air Fryer Cheesy Pan Pizza for lunch/dinner. Use canned biscuit dough for crust & Mozzarella/Parmesan cheeses, pizza sauce & spices!

    Do you have an air fryer? We are still enjoying experimenting with different recipes using the air fryer I got last year with a gift card. One of the quick meals I came up with (while experimenting) is this recipe for Air Fryer Cheesy Pan Pizza.  Guess what? To make it extra easy, you use refrigerated, canned biscuit dough to form the pan pizza crust! YEP!

    Pizza Making Experiments

    We love pizza, and occasionally use different methods to make it. I’ve made BBQ Chicken TORTILLA Pizzas, Pizzas Cooked On The BBQ, and of course, traditional pepperoni pizza! I’ve even made Apple Pie Dessert Pizza! But this one, using biscuit dough, once I thought of it, sounded like something I wanted to try.

    We had a can of biscuits hanging out in the refrigerator, so I started thinking about the ingredients in the dough. Finally I decided to make a deep dish pizza crust with it, just to try it. The recipe I came up with uses 4 biscuits total, and yields two cute little 6″ pan pizzas, with hardly any effort. Perfect, and VERY convenient! Now we can eat them any time for a quick lunch or dinner. Here’s how to make ’em:

    Scroll Down for A Printable Recipe Card At The Bottom Of The Page

    Make The “Easy” Pizza Crust

    NOTE:  This recipe makes two individual pizzas, so remember to divide the ingredients between two, and repeat this process for each pizza. My air fryer could only cook one 6″ pizza at a time, so I cooked them in two batches.

    Place the dough for two biscuits onto a lightly floured surface, stacked on top of each other. Use a rolling pin, and roll the dough out into a 6″ circle. This will be the crust for your pizza. Easy peasy.

    Two canned, refrigerated biscuits are used for the pizza crust dough.The biscuit dough is rolled out into a 6" circle for the pizza pan.

    Prepare The Air Fryer Cheesy Pan Pizza

    Lightly spray a 6″ oven-safe, rimmed round baking pan with non-stick spray (mine was in an air fryer accessory kit). Place the crust into the pan. Stretch and gently pull the dough to cover the bottom of the pan, and about an inch up the sides of the pan.

    Sprinkle a small handful of the mozzarella cheese over the dough. The cheese (as it melts) will help form a barrier, so the bottom crust does not get soggy from the pizza sauce.

    Place the dough into a 6" oven-proof pan, pulling dough up sides of pan to form rim.Sprinkle the bottom of the crust with some of the grated mozzarella cheese.

    Now spoon the pizza (or spaghetti) sauce over the cheese, and top with shredded Parmesan cheese. Add grated mozzarella cheese, and sprinkle lightly with Italian seasoning (I make my own). The last step is to either lightly spray or drizzle olive oil over the top of the pizza.

    Spoon sauce over pizza, then top with grated Parmesan.Top with mozzarella cheese, Italian seasoning and a drizzle/spray of olive oil.

    Time To Cook Your Air Fryer Cheesy Pan Pizza

    Now your air fryer cheesy pan pizza is ready to cook! Place the pan pizza into a preheated 380°F air fryer, and cook the pizza for 5 minutes. After 5 minutes, open the air fryer- carefully and quickly remove the pizza from the pan, and place it back in the air fryer (minus pan).

    The pizza should have firmed up enough to hold its shape, and will be stable enough (without the pan) to continue cooking, so the bottom crust browns nicely and firms up. Pop the pizza back into the air fryer (directly on basket grate), and cook for an additional 3-4 minutes.

    Cook the air fryer pizza for 5 minutes, before removing pizza from pan.The pizza is removed from pan and finishes cooking in the air fryer.

    How Do I Know If It Is Done?

    When done, the cheese should be bubbly and melted, and the pizza will be fully heated through. Take a quick peek at the bottom crust of your pizza – it should be browned, crispy and firm. The photo below shows how golden brown and firm the crust should be, too.

    Transfer your air fryer cheesy pan pizza to a cutting board, let it sit for one minute, then slice it into 4 small pieces with a pizza cutter or sharp knife. Repeat process for the remaining pizza. Serve hot, and enjoy.

    The bottom crust gets nice and golden brown when cooked in the air fryer.Slices of the air fryer cheesy pan pizza, on a plate, ready to eat.

    I hope you will consider trying these little miniature pan pizzas. They really are good, and not too difficult at all to make. Thanks for stopping by, and have a great day.

    Looking For More AIR FRYER Recipes?

    You can find all of my air fryer recipes in the Recipe Index, which is located at the top of the page. I have several you might enjoy, including:

    Interested In More Recipes?

    Thank you for visiting this website. I appreciate you using some of your valuable time to do soIf you’re interested, I publish a newsletter 2 times per month (1st and 15th) with all the latest recipes, and other fun info. I would be honored to have you join our growing list of subscribers, so you never miss a great recipe!
    There is a Newsletter subscription box on the top right side (or bottom) of each blog post, depending on the device you use, where you can easily submit your e-mail address (only) to be included in my mailing list.

    You Can Also Find Me On Social Media:
    Facebook page: The Grateful Girl Cooks!
    Pinterest: The Grateful Girl Cooks!
    Instagram: jbatthegratefulgirlcooks

    Author's signature

    0 from 0 votes
    Air Fryer Cheesy Pan Pizza
    Prep Time
    6 mins
    Cook Time
    9 mins
    Total Time
    15 mins
     

    Make a delicious Air Fryer Cheesy Pan Pizza for lunch/dinner. Use canned biscuit dough for crust & Mozzarella/Parmesan cheeses, pizza sauce & spices!

    Category: Entree, Lunch, Snack
    Cuisine: Italian
    Keyword: air fryer cheesy pan pizza
    Servings: 2 pizzas
    Calories Per Serving: 492 kcal
    Author: JB @ The Grateful Girl Cooks!
    Ingredients
    • 4 refrigerated, canned biscuits (dough)
    • 1 cup mozzarella cheese , divided
    • 4-5 Tablespoons spaghetti or pizza sauce , divided
    • ½ cup grated Parmesan cheese , divided
    • ½ teaspoon Italian seasoning
    • 2 teaspoons olive oil , (approx.) to spray or drizzle
    Instructions
    REPEAT THIS PROCESS FOR EACH PIZZA
    1. Place 2 biscuit dough rounds onto a lightly floured surface, stacked on top of each other. Roll the dough out into a 6" circle using rolling pin. Lightly spray a 6" oven-safe, rimmed round baking pan with non-stick spray. Place dough circle into pan. Stretch and gently pull dough to cover bottom of pan, and about 1" inch up the sides of pan.

    2. Sprinkle ¼ cup mozzarella cheese over dough. Spoon 2 T. pizza sauce over cheese, then sprinkle with ¼ cup Parmesan cheese. Add ¼ cup grated mozzarella cheese, and sprinkle lightly with ¼ teaspoon Italian seasoning. Lightly spray or drizzle olive oil over top of pizza.

    3. Place pan pizza into basket of a preheated 380°F air fryer; cook for 5 minutes. After 5 minutes, open air fryer- carefully/quickly remove pizza from pan; place pizza back in air fryer directly onto basket grate (minus pan). Pizza should be firm enough to hold its shape, and will be stable enough (without pan) to continue cooking, so bottom crust browns nicely and firms up. Cook for an additional 3-4 minutes, until cooked through, cheese is bubbly, and the bottom crust is browned and firm.

    4. Remove pizza from air fryer once done; transfer to a cutting board. Let rest for one minute, then slice into 4 wedges, serve and enjoy! Repeat process for remaining pizza.

    Nutrition Facts
    Air Fryer Cheesy Pan Pizza
    Amount Per Serving (1 pizza)
    Calories 492 Calories from Fat 261
    % Daily Value*
    Fat 29g45%
    Saturated Fat 12g75%
    Cholesterol 59mg20%
    Sodium 1398mg61%
    Potassium 299mg9%
    Carbohydrates 31g10%
    Fiber 1g4%
    Sugar 4g4%
    Protein 27g54%
    Vitamin A 618IU12%
    Vitamin C 2mg2%
    Calcium 754mg75%
    Iron 3mg17%
    * Percent Daily Values are based on a 2000 calorie diet.

    Here’s one more to pin on your Pinterest boards!Make a delicious Air Fryer Cheesy Pan Pizza for lunch/dinner. Use canned biscuit dough for crust & Mozzarella/Parmesan cheeses, pizza sauce & spices!

    Black Bean Butternut Squash Chili

    Black Bean Butternut Squash Chili is a hearty meatless dish, with all the flavor of a traditional chili. It’s thick, delicious, and simple to prepare!
    Black Bean Butternut Squash Chili is a hearty meatless dish, with all the flavor of a traditional chili. It's thick, delicious, and simple to prepare!

    Do you enjoy chili? We sure do. Every couple of months I make my Mom’s old-fashioned chili, and it is my absolute favorite “go to” chili recipe. One of our sons and his girlfriend are vegetarians, and my sister-in-law is a vegan. When they come over for a chili dinner, I make my traditional chili recipe and simply leave the meat out. I am always on the “hunt” for vegetarian recipes I can fix for them.

    However, sometimes ya just gotta try new recipes, and for me, the thrill of the hunt for a “new” recipe is exciting. I found this yummy, meatless chili recipe on the app called My Fitness Pal. It’s a fiber and protein-filled dish, and is another GREAT alternative for anyone looking for a meatless chili, with all the flavors you know and love.

    It’s also low-calorie, easy to make, and I know my vegetarian and vegan family members will love it. I can’t wait for them to try it, too! Here’s how to make this yummy black bean butternut squash chili (a printable recipe card is at the bottom of this post):

    Scroll Down For A Printable Recipe Card At The Bottom Of The Page

    How To Prepare The Butternut Squash

    The first thing you will need to do is prepare the butternut squash. I prefer to use fresh, but you can substitute frozen butternut squash, if necessary. Preparing the fresh squash is not difficult at all (but it will take 4-5 minutes). HINT: You won’t need to use the entire squash for your chili. Perhaps you would enjoy using the leftover squash to make Maple Cinnamon Butternut Squash for another meal’s side dish?

    Use a vegetable peeler to remove the outer peel from the butternut squash. Once peeled, carefully slice off both ends of the squash. Slice the squash in half horizontally. Scoop out the seeds and “stringy pith” from the cavity of the squash, and discard.

    Slice the squash into half-moon shaped rings (1″ thickness), and then cut the rings into bite-sized cubes of butternut squash. Try to keep them around 1″, because they will cook faster than large chunks.

    Use a vegetable peeler to peel the butternut squash.Cut butternut squash in half length-wise, and remove seeds.Slice the squash, then cut into small cubes before cooking.

    Make The Black Bean Butternut Squash Chili

    Now it’s time to get the black bean butternut squash chili ready to cook. No worries… it’s simple! Place all the ingredients into a large stock pot. Add the water and give the chili a good stir, to fully combine ingredients. See how easy that is? Now the chili is ready to cook!

    The ingredients for the black bean butternut squash chili in a large stockpot.Water is added to the soup pot and then chili is cooked.

    Cook The Chili

    Cook the black bean butternut squash chili on medium-low heat for 30-40 minutes. Cover the pot of chili for the first 15 minutes, then uncover the pot for the rest of the cooking time.

    You will know it is done when the cubes of butternut squash become tender. Take a bite of the squash at the 30 minute mark, then continue cooking, if necessary until the squash is softened. The chili will thicken as the water reduces during the cooking time. Take a small sample bite, and add salt, if desired, to suit your taste.

    After cooking, the chili will thicken and butternut squash will be tender.

    Serve The Black Bean Butternut Squash Chili

    Once your chili is done cooking, it is ready to serve! Ladle the black bean butternut squash chili into serving bowls, and if desired, garnish each bowl of chili with a dollop of sour cream and/or fresh cilantro, for a pop of color and added flavor.

    A bowl of black bean butternut squash chili garnished with cilantro and sour cream.

    Hope you enjoy a nice hot bowl of this delicious black bean butternut squash chili.  The black beans and butternut squash provide a nice dose of fiber, which helps to fill the old tummy up! Plus, it really does taste wonderful, and I am confident you will really enjoy it.

    Black Bean Butternut Squash Chili, ready to enjoy!

    Hope you have the opportunity to try this recipe for yummy, meatless chili. You might also enjoy my recipe for Tasty Turkey Chili. Thank you so much for stopping by. I hope you will come by for a visit again. Take care, and have a great day!

    Looking For More MEATLESS MEALS?

    You can find all of my recipes in the Recipe Index, which is located at the top of the page. I have several meatless meals you might enjoy, including:

    Interested In More Recipes?

    Thank you for visiting this website. I appreciate you using some of your valuable time to do soIf you’re interested, I publish a newsletter 2 times per month (1st and 15th) with all the latest recipes, and other fun info. I would be honored to have you join our growing list of subscribers, so you never miss a great recipe!
    There is a Newsletter subscription box on the top right side (or bottom) of each blog post, depending on the device you use, where you can easily submit your e-mail address (only) to be included in my mailing list.

    You Can Also Find Me On Social Media:
    Facebook page: The Grateful Girl Cooks!
    Pinterest: The Grateful Girl Cooks!
    Instagram: jbatthegratefulgirlcooks

    Author's signature

    Recipe adapted from: https://blog.myfitnesspal.com/butternut-squash-black-bean-chili-recipe/

    0 from 0 votes
    Black Bean Butternut Squash Chili
    Prep Time
    15 mins
    Cook Time
    35 mins
    Total Time
    50 mins
     

    Black Bean Butternut Squash Chili is a hearty meatless dish, with all the flavor of a traditional chili. It's thick, delicious, and simple to prepare!

    Category: Entree, Soup
    Cuisine: Southwestern
    Keyword: black bean butternut squash chili
    Servings: 6
    Calories Per Serving: 224 kcal
    Author: JB @ The Grateful Girl Cooks!
    Ingredients
    • 30 ounces canned black beans (2 cans) , rinsed and drained
    • 2 cups butternut squash , peeled, cut into 1" cubes
    • 15 ounces canned diced tomatoes , including juice
    • 1 cup corn kernels , fresh or frozen
    • 1 medium red onion , diced
    • 2 Tablespoons chili powder
    • 2 Tablespoons ground cumin
    • 2 Tablespoons smoked paprika
    • 1 teaspoon minced garlic
    • 3 cups water
    • salt, to taste
    • Sour cream, cilantro (OPTIONAL for garnish)
    Instructions
    1. Remove peel from squash. Carefully slice off both ends; cut squash in half horizontally. Scoop out seeds and stringy pith; discard. Slice into half-moon shaped rings (1" thickness); cut rings into 1" bite-sized cubes, for a total of 2 cups. (you won't use the whole squash).

    2. Place ingredients into a large stock pot; stir well. Cook on medium-low heat for 30-40 minutes. **Cover pot of chili for the first 15 minutes, then uncover for the rest of the cooking time**. Taste a bite of squash after 30 minutes. If soft and tender, chili is done. If not, continue cooking until tender. Chili will thicken as water reduces while cooking. Taste; season with salt, as desired.

    3. Serve chili with a dollop of sour cream and fresh cilantro, if desired (optional, but good). Enjoy!

    Recipe Notes

    NOTE: I use fresh corn kernels (cut off one cob) and fresh butternut squash, but you can substitute frozen corn kernels or butternut squash, if necessary. If using frozen butternut squash, your cooking time may vary, as it might take less time to become tender.

    Nutrition Facts
    Black Bean Butternut Squash Chili
    Amount Per Serving (1 g)
    Calories 224 Calories from Fat 18
    % Daily Value*
    Fat 2g3%
    Saturated Fat 1g6%
    Sodium 740mg32%
    Potassium 1014mg29%
    Carbohydrates 44g15%
    Fiber 15g63%
    Sugar 6g7%
    Protein 12g24%
    Vitamin A 7091IU142%
    Vitamin C 22mg27%
    Calcium 133mg13%
    Iron 6mg33%
    * Percent Daily Values are based on a 2000 calorie diet.

    Here’s one more to pin on your Pinterest boards!Black Bean Butternut Squash Chili is a hearty meatless dish, with all the flavor of a traditional chili. It's thick, delicious, and simple to prepare!

    Grilled Lemon Chicken Breasts

    Fire up your BBQ and make delicious, grilled lemon chicken breasts! A flavorful lemon marinade coats the chicken, then it’s grilled until done. EASY!
    Fire up your BBQ and make delicious, grilled lemon chicken breasts! A flavorful lemon marinade coats the chicken, then it's grilled until done. EASY!

    Summer is officially here in Oregon, and the temperatures have been slowly climbing upward. I don’t know about you, but we grill a lot of our dinners outside during the summer, to avoid heating up our kitchen. This recipe for grilled lemon chicken breasts is a fantastic, light and easy main dish, and I know you will love it like we do!

    The recipe itself is super easy. I found it on a pellet grill/smoker blog, but decided instead of cooking it on our Traeger, to grill them on our trusty old charcoal-grill Weber. The good news? You only need to make a simple lemon marinade and let the chicken soak in it, before grilling. The bad news? YOU NEED TO PLAN AHEAD! The chicken breasts will need to marinate for 3-4 hours to soak up all that yummy flavor!

    Since the marinade only takes a few minutes to make, it is easy to mix it up early in the day, and then toss chicken breasts in for a long swim, until you’re ready to grill them! See how easy it is? Here’s the “How-To’s”:

    Scroll Down For A Printable Recipe Card At The Bottom Of The Page

    Make The Lemon Marinade

    Making the lemon marinade is EASY. Combine lemon juice, lemon zest, honey, salt, pepper, fresh thyme leaves, and coarsely chopped fresh garlic in a small bowl. Slowly drizzle in the olive oil, whisking continuously as you add it in, until completely incorporated into the other ingredients.

    Honey, Lemon juice and zest, garlic, and spices are mixed for the marinade.Olive oil is whisked into the lemon marinade until incorporated.

    Marinade The Chicken

    Place the chicken breasts in a LARGE zip-loc bag OR place in a single layer in a large container with a lid. Give the marinade a good stir, and then pour it over the chicken. If using a bag, gently massage the bag until chicken breasts are fully covered with marinade. If using a container (as I did), turn to fully coat the chicken with the marinade.

    Place the sealed bag or container in the refrigerator for a minimum of 4 hours, turning the bag (or the chicken) over occasionally to keep the chicken coated. Letting the chicken fully marinade helps enfuse the meat with the delicious flavors of lemon, honey, garlic, and spices.

    Chicken breasts are coated with the marinade, then refrigerated.Marinated chicken breasts are refrigerated for 3-4 hours before grilling.

    Time To Make Grilled Lemon Chicken Breasts!

    After the chicken is done marinating, it’s time to cook them. Prepare your bbq per manufacturer instructions. Once the coals or heat source is at a medium-high level, remove the chicken from the marinade (letting excess drip back into container). Place on hot grill and let them cook, flipping them to the other side half way through cooking time. If desired, baste the chicken while it cooks with some of the remaining marinade to keep it moist. Discard the rest.

    The chicken (approx. 6 ounce pieces) will typically take between 20-30 minutes to fully cook through to a safe internal temperature of 165°F. Larger or smaller pieces of chicken will obviously require more OR less cooking time, because the weight of chicken breasts will vary. The temperatures on different types of bbq’s can vary widely as well.

    Check the chicken for done-ness towards the end of the cooking time. A couple of our chicken breasts were much larger and thicker than the others (11 ounces), and took 35 minutes to reach 165°F.

    Grilled Lemon Chicken Breasts cooking over hot coals on BBQ.The chicken is turned half way through grilling to brown both sides.

    Serve The Grilled Lemon Chicken Breasts

    If you would like to garnish the finished chicken with grilled lemon wedges (it looks good!), you can. Simply cut a whole lemon into 4 wedges, and place on the grill, cut side down, for the last 5 minutes of cooking time for the chicken, to quickly char it on all cut sides. (See photo below).

    Serve the grilled lemon chicken breasts with the charred lemon quarters and a sprig or two of fresh thyme or rosemary, as a beautiful presentation. You can squeeze more lemon juice from the charred wedges over the chicken, if desired.

    We enjoyed this delicious chicken along with some home-canned green beans from our garden, and some scrumptious candied sweet potatoes.. It was a delicious dinner (and I will use our leftover chicken with pasta, or on top of a mixed green salad).

    Grilled Lemon Chicken Breasts are served, garnished with charred lemon wedges and rosemary sprigs.Sweet potatoes, & green beans served with grilled lemon chicken breasts.

    I really hope you enjoy this recipe for grilled lemon chicken breasts. We LOVE it (especially the EASY part!), and hope you have the opportunity to make it for those you love. A complete, printable recipe card is at the bottom of this post, for your convenience.

    Thank you for using some of your valuable time to stop by for a visit. Hope you will come back again. Take care, and have a GREAT day.

    Looking For More CHICKEN Recipes?

    You can find all of my chicken recipes in the Recipe Index, which is located at the top of the page. I have LOTS of them to explore, including:

    Interested In More Recipes?

    Thank you for visiting this website. I appreciate you using some of your valuable time to do soIf you’re interested, I publish a newsletter 2 times per month (1st and 15th) with all the latest recipes, and other fun info. I would be honored to have you join our growing list of subscribers, so you never miss a great recipe!
    There is a Newsletter subscription box on the top right side (or bottom) of each blog post, depending on the device you use, where you can easily submit your e-mail address (only) to be included in my mailing list.

    You Can Also Find Me On Social Media:
    Facebook page: The Grateful Girl Cooks!
    Pinterest: The Grateful Girl Cooks!
    Instagram: jbatthegratefulgirlcooks

    Author's signature

    Original recipe source: https://www.traegergrills.com/recipes/lemon-chicken-breast

    0 from 0 votes
    Grilled Lemon Chicken Breasts
    Prep Time
    5 mins
    Cook Time
    35 mins
    Marinating Time (inactive)
    4 hrs
    Total Time
    4 hrs 40 mins
     

    Fire up your BBQ and make delicious, grilled lemon chicken breasts! A flavorful lemon marinade coats the chicken, then it's grilled until done. EASY!

    Category: Entree
    Cuisine: American
    Keyword: grilled lemon chicken breasts
    Servings: 6
    Calories Per Serving: 286 kcal
    Author: JB @ The Grateful Girl Cooks!
    Ingredients
    • 1 large lemon (juice + zest)
    • 2 teaspoons honey
    • 1 clove garlic large clove, coarsely chopped
    • 2 teaspoons kosher salt
    • 1 teaspoon coarse ground black pepper
    • 2 sprigs fresh thyme leaves , strip leaves from stems
    • ½ cup extra virgin olive oil , can substitute vegetable oil
    • 6 medium chicken breasts (boneless, skinless) approx. 6 ounces per chicken breast
    For Garnish:
    • 1 large lemon , cut in 4 wedges, grilled for garnish (optional)
    • 2-3 sprigs fresh thyme or rosemary
    Instructions
    1. Combine lemon juice, zest, honey, salt, pepper, thyme leaves, and chopped fresh garlic in a small bowl. Slowly drizzle in olive oil, whisking continuously as you add it, until incorporated into other ingredients.

    2. Place chicken in a LARGE zip-loc bag OR in a single layer in a large container with a lid. Pour marinade over chicken. If using sealed bag, gently massage bag until chicken is fully covered with marinade. If using a container, turn to fully coat chicken with marinade. Place bag or covered container in refrigerator for a minimum of 4 hours.

    3. Prepare BBQ grill per manufacturer instructions. Once coals or heat source is at a medium-high temperature, remove chicken from marinade. Place chicken directly on hot grill grate and cook without moving them. Half way through cooking time, turn chicken to the other side. If desired, baste chicken with remaining marinade while grilling. Discard leftover marinade. Chicken (approx. 6 ounces per piece) will typically take between 20-30 minutes to fully cook through to a safe internal temperature of 165°F. This time can vary, due to sizes/weight/thickness of chicken pieces, bbq temperature, etc. Be sure to check internal temperature of chicken towards end of cooking time. When done (165°F), remove from grill; let chicken rest for 3-4 minutes before serving, to allow internal juices to redistribute throughout meat.

    4. If you want grilled lemon wedges for serving with the grilled chicken, simply cut a whole lemon into 4 wedges, and place on the grill, cut side down, for the last 5 minutes of the chicken's grilling time, to quickly char it on all cut sides. Serve chicken breasts with charred lemon quarters on top and 1-2 sprigs of fresh thyme or rosemary, for a beautiful presentation. Enjoy!

    Recipe Notes

    Note: Caloric calculation was made using HALF the amount of marinade required for the recipe. This is because MOST of the marinade will be discarded AFTER marinating the chicken, and will not be consumed.

    Nutrition Facts
    Grilled Lemon Chicken Breasts
    Amount Per Serving (1 g)
    Calories 286 Calories from Fat 117
    % Daily Value*
    Fat 13g20%
    Saturated Fat 2g13%
    Cholesterol 109mg36%
    Sodium 586mg25%
    Potassium 667mg19%
    Carbohydrates 4g1%
    Fiber 1g4%
    Sugar 2g2%
    Protein 36g72%
    Vitamin A 67IU1%
    Vitamin C 17mg21%
    Calcium 16mg2%
    Iron 1mg6%
    * Percent Daily Values are based on a 2000 calorie diet.

    Here’s one more to pin on your Pinterest boards!Fire up your BBQ and make delicious, grilled lemon chicken breasts! A flavorful lemon marinade coats the chicken, then it's grilled until done. EASY!

    Easy Tortellini Soup

    Enjoy a piping hot bowl of yummy, Italian-inspired, Easy Tortellini Soup, made in under 30 minutes with only a few key ingredients and spices.
    Enjoy a piping hot bowl of yummy, Italian-inspired, Easy Tortellini Soup, made in under 30 minutes with only a few key ingredients and spices.

    Even though the weather has been heating up this week, I want to share this soup recipe with you, cause it’s YUMMY, no matter what time of year it is. This recipe for easy tortellini soup is just that… EASY! It also happens to be delicious (in case that matters, too – ha ha!).

    If you enjoy Italian food, and the spices associated with it, you’re gonna enjoy this soup. It has a tomato-based broth, with Italian spices, fragrant garlic, cheese tortellini pasta, chopped spinach, and is topped with a sprinkling of grated Parmesan cheese. Because it doesn’t require a long cooking time, you’ll be slurping up this delicious soup in NO TIME! Here’s how simple it is to make:

    Scroll Down For A Printable Recipe Card At The Bottom Of The Page

    Prepare The Tortellini

    Cook the fresh, frozen, or dry tortellini in salted water, according to the package directions. Once done cooking, drain the tortellini, and set aside. I like to cook the tortellini AND the spinach (see below) at the same time, to save time.

    Cheese tortellini are cooked per package directions, and then drained.

    Prepare The Spinach

    Cook the chopped spinach according to the package instructions. Once cooked, put the spinach into a strainer which is placed on top of a bowl.  Press down with the back of a spoon to press out the spinach juice into the bowl below.

    The juice will collect in the bowl sitting underneath the strainer. Keep pressing (a lot) to drain off as much of the juice as you can. Discard the juice once finished. Set the spinach aside. Now it’s SOUP time, and it will come together REALLY quickly!

    Frozen chopped spinach is thawed, then drained of excess liquid in a strainer.

    How To Make Easy Tortellini Soup

    Place the butter into the saucepan you will be using. Melt the butter on medium heat, and then add the minced garlic. Cook on medium heat for about a minute, stirring constantly, so the garlic doesn’t burn. Burnt garlic has a bitter taste, and you do NOT want that in your tortellini soup!

    Now add the chicken broth to the pan, and heat it until it comes to a boil. Once boiling, reduce the heat to a low simmer, and then add the cooked, drained tortellini. Simmer for 5 minutes on low heat, stirring occasionally.

    Butter and garlic is cooked in the soup pan for about a minute.Cooked and drained tortellini is added to the broth in the soup pan.

    Finish Making This Easy Tortellini Soup

    Once the soup has simmered for 5 minutes, add the diced tomatoes (including juice), drained spinach, salt, and Italian seasoning. Stir well, to fully combine the ingredients. Continue to heat the tortellini soup on low heat for 5 more minutes, or until the soup is fully heated through.

    Drained spinach, tomatoes, and spices are added to the tortellini soup.The easy tortellini soup is cooked until heated through.

    Serving Easy Tortellini Soup

    Once the soup is fully heated through, it is ready to be served and gobbled up! Ladle the soup into individual bowls, and sprinkle grated Parmesan cheese on top. The Parmesan cheese garnish is optional, but trust me, it makes this Italian-inspired soup taste SO GOOD!

    This wonderfully easy tortellini soup tastes great, especially if you serve it with a nice piece of crusty garlic bread on the side! Yum… I really hope you enjoy it. Store any leftover soup (covered) in your refrigerator for up to 2-3 days.

    The finished tortellini soup is topped with finely grated Parmesan cheese.A close up photo of the easy tortellini soup.

    This truly is a simple soup to make, and it tastes wonderful. We were able to share some with one of our neighbors who lives alone, and he enjoyed it, too!  I hope you have the opportunity to make it for those you love, and trust you will enjoy it, too! Thanks for stopping by, take care, and have a great day.

    Looking For More TORTELLINI Recipes?

    You can find all of my recipes in the Recipe Index, located at the top of the page. I have several tortellini recipes, which include:

    Looking For More SOUP Recipes?

    You can find all of my soup recipes in the Recipe Index, located at the top of the page. I have quite a few delicious soup recipes I think you will enjoy, including:

    Interested In More Recipes?

    Thank you for visiting this website. I appreciate you using some of your valuable time to do soIf you’re interested, I publish a newsletter 2 times per month (1st and 15th) with all the latest recipes, and other fun info. I would be honored to have you join our growing list of subscribers, so you never miss a great recipe!
    There is a Newsletter subscription box on the top right side (or bottom) of each blog post, depending on the device you use, where you can easily submit your e-mail address (only) to be included in my mailing list.

    You Can Also Find Me On Social Media:
    Facebook page: The Grateful Girl Cooks!
    Pinterest: The Grateful Girl Cooks!
    Instagram: jbatthegratefulgirlcooks

    Author's signature

    0 from 0 votes
    Easy Tortellini Soup
    Prep Time
    15 mins
    Cook Time
    10 mins
    Total Time
    25 mins
     

    Enjoy a piping hot bowl of yummy, Italian-inspired, Easy Tortellini Soup, made in under 30 minutes with only a few key ingredients and spices.

    Category: Entree, Soup
    Cuisine: American, Italian
    Keyword: tortellini soup
    Servings: 6
    Calories Per Serving: 191 kcal
    Author: JB @ The Grateful Girl Cooks!
    Ingredients
    • 8 ounces fresh, frozen, or dried cheese tortellini
    • 10 ounces frozen chopped spinach
    • 1 Tablespoon butter
    • 2 cloves garlic , minced
    • 28 ounces chicken broth
    • 14.5 ounces diced tomatoes (canned) , undrained
    • 1 Tablespoon Italian seasoning
    • ½ teaspoon salt
    • 6 Tablespoons grated Parmesan cheese (optional, for garnish)
    Instructions
    1. Cook fresh, frozen, or dry tortellini in salted water, according to pkg. directions. Once done, drain tortellini; set aside.

    2. Cook spinach according to pkg. directions. When done, put spinach into a strainer placed on top of a bowl.  Press down with the back of a spoon to press out juice into bowl below. Drain off as much juice as possible. Discard juice, and set spinach aside.

    3. Melt butter on medium heat in large soup pan. Once melted, add minced garlic. Cook for 1 minute, stirring constantly, so garlic doesn't burn. Add chicken broth to pan, and heat until it comes to a boil. Once boiling, reduce heat to a low simmer. Add tortellini. Simmer for 5 minutes on low heat, stirring occasionally. Add diced tomatoes (including juice), spinach, salt, and Italian seasoning. Stir well, to combine ingredients. Continue to heat soup for 5 more minutes, or until fully heated through.

    4. Ladle hot soup into bowls, and sprinkle grated Parmesan cheese on each serving. Serve, and enjoy! Store any leftover soup (covered), in refrigerator, for up to 2-3 days.

    Nutrition Facts
    Easy Tortellini Soup
    Amount Per Serving (1 (1/6 of total))
    Calories 191 Calories from Fat 63
    % Daily Value*
    Fat 7g11%
    Saturated Fat 3g19%
    Cholesterol 24mg8%
    Sodium 1068mg46%
    Potassium 415mg12%
    Carbohydrates 23g8%
    Fiber 4g17%
    Sugar 3g3%
    Protein 11g22%
    Vitamin A 5736IU115%
    Vitamin C 19mg23%
    Calcium 214mg21%
    Iron 3mg17%
    * Percent Daily Values are based on a 2000 calorie diet.

    Here’s one more to pin on your Pinterest boards!Enjoy a piping hot bowl of yummy, Italian-inspired, Easy Tortellini Soup, made in under 30 minutes with only a few key ingredients and spices.

    Brown Sugar Pork Chops

    Brown Sugar Pork Chops are an easy and delicious dish, featuring seared pork chops baked in a simple garlic, butter, spices and brown sugar sauce!
    Brown Sugar Pork Chops are an easy and delicious dish, featuring seared pork chops baked in a simple garlic, butter, spices and brown sugar sauce!

    Do you enjoy pork chops? We do, even though we don’t eat them too often. We used to prefer thick boneless chops, but have slowly gravitated back toward using bone-in chops in most of my recipes.

    It’s good (for those who love to cook) to keep a few wonderful, “tried and true” recipes in “the old kitchen tool belt”. THIS is definitely one of those kind of recipes, so I’m happy to share it with you, and hope you enjoy it.

    Brown sugar pork chops are a favorite way we enjoy “the other white meat”. They are simple to prepare, and taste wonderful!

    Basically what you will do is brown the pork chops, make a simple sauce, and then bake the sauce-covered pork chops. It’s all so easy (and ready in about 35 minutes), so here’s how to make them:

    Scroll Down For A Printable Recipe Card At The Bottom Of The Page

    Season And Pan-Sear The Pork Chops

    For this recipe you can use either bone-in or boneless pork chops (about 1″ thick). We prefer the bone-in, because the meat seems to stay a bit more juicy. Regardless of which type (bone-in or boneless) you decide to use, you’ll still enjoy these yummy pork chops!

    NOTE: This recipe makes 4 pork chop servings- I was only making them for my husband and I this time, which is reflected in these photos.

    The first thing you will need to do (after preheating your oven) is to season and pan-sear the pork chops. Pat the chops dry with paper towels, then lightly season BOTH sides with salt and ground black pepper.

    Pork chops are seasoned with salt and pepper on both sides before pan-searing.

    Heat the olive oil on medium-high heat in a large oven-proof skillet. Once the oil is very hot (but not smoking), carefully add the pork chops in one layer. They should sizzle when they hit the hot oil in the skillet. The hot oil will serve to give the chops a nicely browned exterior.

    Cook the chops (without moving them) for 5-6 minutes. They should be well browned on the bottom. Carefully turn them to the other side, and continue cooking for another 5 minutes.

    Transfer the pork chops to a plate or platter, and cover with foil to help keep them warm while you make the sauce. Do NOT clean out the skillet, because any little browned bits left in there will help flavor the sauce!

    The meat is seasoned and then pan-seared in olive oil in a hot skillet.The pork chops are seared until browned, and then flipped to cook the other side.

    Prepare The Brown Sugar Sauce

    Now it’s time to quickly make the brown sugar sauce for the pork chops. Add butter to the skillet you cooked the pork chops in, and melt it on low heat.

    Once melted, add the brown sugar, Italian seasoning, and minced garlic. Stir well to combine, and cook for 1 minute, stirring constantly, so the garlic doesn’t burn.

    The brown sugar sauce will bubble quite a bit, but keep stirring! After one minute, add the pork chops back into the skillet, and turn off the heat.

    Melted butter, garlic, brown sugar and Italian seasoning combine to make sauce for pork chops.Brown sugar sauce for pork chops is cooked before adding pork chops.

    Bake The Pork Chops

    When the pork chops are back in the skillet, spoon enough of the sauce over each one to cover the top. Pop the skillet into a preheated 400°F. oven, and bake the chops (uncovered) for 12-15 minutes.

    The pork chops are safely cooked through once they reach an internal temperature of 145-160°F.

    Chops are added to sauce, and covered with sauce before baking.

    Serve The Brown Sugar Pork Chops

    Once the brown sugar pork chops are done baking, they’re ready to be served. Spoon more of the pan sauce over the top of each chop, and then garnish with lemon wedges, chopped chives (or parsley), if desired.

    Brown sugar pork chops are garnished with chives and lemon wedges before serving.

    Our favorite way to enjoy these yummy brown sugar pork chops is to serve them placed on top of a bed of mashed potatoes. The meat and slightly sweet sauce taste wonderful when paired with creamy, buttery potatoes!

    You can also serve these tasty chops with buttered orzo pasta or egg noodles, but mashed potatoes remain our favorite choice! We enjoyed fresh steamed asparagus served on the side, too! Gotta get those veggies in!

    My husband told me that this recipe for brown sugar pork chops is one of his favorites, and that makes me happy! I suspect these fantastic tasting pork chops will make your taste buds happy, too.

    The brown sugar pork chops are served on mashed potatoes, with asparagus on the side.

    Thanks for stopping by today. I sincerely hope you have the opportunity to make this delicious dish for yourself and those you love. Also, if you have an air fryer, be sure to try my recipe for Air Fryer Pork Chops For Two, a quick and delicious recipe you’ll love!

    Take care, and have a great day. A complete, printable recipe card is located below, for your convenience.

    Looking For More PORK CHOP Recipes?

    You can find all of my pork recipes in the Recipe Index, which is located at the top of the page. I have quite a few pork chop recipes, including:

    Want More Recipes? Get My FREE Newsletter!

    I publish a newsletter 2 times per month (1st and 15th) with lots of recipes, tips, etc..
    Would you like to join our growing list of subscribers?

    There is a Newsletter subscription box on the top right (or bottom) of each blog post, depending on the device you use.
    You can submit your e-mail address there, to be added to my mailing list.

    Find Me On Social Media:

    Facebook page: The Grateful Girl Cooks!
    Pinterest:
    The Grateful Girl Cooks!
    Instagram:
    jbatthegratefulgirlcooks

    Author's signature

    Original recipe source: dinneratthezoo.com/brown-sugar-pork-chops/

    ↓↓ PRINTABLE RECIPE BELOW ↓↓

    4.5 from 4 votes
    Brown Sugar Pork Chops
    Prep Time
    10 mins
    Cook Time
    25 mins
    Total Time
    35 mins
     

    Brown Sugar Pork Chops are an easy and delicious dish, featuring seared pork chops baked in a simple garlic, butter, spices and brown sugar sauce!

    Category: Entree
    Cuisine: American
    Keyword: brown sugar pork chops
    Servings: 4
    Calories Per Serving: 420 kcal
    Author: JB @ The Grateful Girl Cooks!
    Ingredients
    • 4 bone-in or boneless pork chops , approx. 1" thick
    • salt and pepper , enough to lightly season chops
    • 2 teaspoons extra-virgin olive oil
    • 3 Tablespoons butter
    • 3 Tablespoons brown sugar
    • 2 teaspoons minced garlic
    • 1 teaspoon Italian seasoning
    Optional Garnish: chopped chives (or parsley), lemon wedges
      Instructions
      1. Preheat oven to 400°F. Pat pork chops dry with paper towels; lightly season BOTH sides with salt and pepper.

      2. Heat olive oil on medium-high heat in a large oven-proof skillet. Once oil is very hot (but not smoking), carefully add pork chops in one layer. They should sizzle when they hit the hot oil. Cook chops for 5-6 minutes, without moving them. Turn them over, and continue cooking the other side for 5 minutes. Transfer pork chops to a platter, and cover with foil to keep them warm. Do NOT clean out the skillet.

      3. Make the sauce: Melt butter on low heat using the same skillet. Add brown sugar, Italian seasoning, and minced garlic. Stir well, and cook for 1 minute, stirring constantly, so the garlic doesn't burn. Add pork chops back into the skillet, and turn off the heat.

      4. Spoon enough sauce over each pork chop to cover. Place skillet into 400°F. oven and bake (uncovered) for 12-15 minutes. The pork is safely cooked once the chops reach an internal temperature of 145-160°F. When done, they are ready to be served.

      5. To serve, spoon pan sauce over pork chops; garnish with lemon wedges, chopped chives (or parsley) if desired. Serve chops on a bed of mashed potatoes, orzo pasta, or egg noodles. Enjoy!

      Nutrition Facts
      Brown Sugar Pork Chops
      Amount Per Serving (1 pork chop)
      Calories 420 Calories from Fat 234
      % Daily Value*
      Fat 26g40%
      Saturated Fat 11g69%
      Cholesterol 140mg47%
      Sodium 171mg7%
      Potassium 603mg17%
      Carbohydrates 10g3%
      Fiber 1g4%
      Sugar 9g10%
      Protein 35g70%
      Vitamin A 262IU5%
      Vitamin C 1mg1%
      Calcium 55mg6%
      Iron 1mg6%
      * Percent Daily Values are based on a 2000 calorie diet.

      Here’s one more to pin on your Pinterest boards!Brown Sugar Pork Chops are an easy and delicious dish, featuring seared pork chops baked in a simple garlic, butter, spices and brown sugar sauce!

      Air Fryer Bacon Cheeseburger

      Learn how easy it is to make a juicy good Air Fryer Bacon Cheeseburger, using this appliance. Can’t get outside to grill? Use an air fryer instead!
      Learn how easy it is to make a juicy good Air Fryer Bacon Cheeseburger, using this appliance. Can't get outside to grill? Use an air fryer instead!

      When it’s raining outside and we can’t grill burgers on our BBQ, we make ’em in our air fryer! My husband and I have made air fryer bacon cheeseburgers quite a few times now, and guess what? They’re really GOOD! They are also very easy to prepare with super heated hot air.

      Now that we have this recipe in our air fryer cooking tool belt, even the weather can’t stop us from enjoying a great burger whenever we want one. Here’s how we make ’em:

      Scroll Down For A Printable Recipe Card At The Bottom Of The Page

      Toast The Buns (optional)

      Before cooking the hamburger patties, if you would like to toast the hamburger buns, simply lightly spread each half with butter and cook on low heat in a large skillet until golden brown. We love them toasted, which helps keep the buns from getting too soggy. Set the buns aside once toasted. This is completely optional, but it makes an air fryer bacon cheeseburger even better, in our humble opinion.

      Hamburger buns, after being lightly toasted with butter in a skillet

      Season The Hamburger Patties

      We used 1/4 pound ground beef patties. To season the hamburger patties for air fryer cooking, lightly brush each patty on one side with melted butter and a tiny bit of liquid smoke flavoring. The liquid smoke is optional, but we find it really helps provide a smoky taste to the meat (like outside grilling does). Lightly sprinkle the patties on one side with salt and Montreal steak seasoning. You can substitute your own favorite seasonings, if desired, to suit your personal taste.

      Have the slices of cheddar (or American) cheese AND the precooked bacon nearby. Did you know you can even cook bacon in an air fryer? Yes you can… and it is fabulous! For each cheeseburger I use a strip of precooked bacon that has been cut in half. You will add these right at the end of the air frying time, so will need them nearby, ready to go!

      Hamburger patties are seasoned with spices, butter, and liquid smoke before cooking.Pre-cooked bacon and cheddar cheese slices ready to add to cooked burgers.

      Cooking An Air Fryer Bacon Cheeseburger

      Preheat your air fryer to 360°F. This will take 3-4 minutes typically. Place the patties in the air fryer basket, seasoned side down. Cook for 5 minutes, then turn the patties over, and continue cooking for 2 more minutes. Our burgers were medium-well once done.

      NOTE: Because air fryer temps for different models of air fryers, your cooking time may be a tiny bit less or a tiny bit longer. Check for your preferred done-ness. Once done, TURN OFF THE AIR FRYER (and quickly do the next step)!

      Burgers are cooked in air fryer, then flipped and cooked some more.


      Once the air fryer is turned off (but still really HOT), immediately place a slice of cheese onto each burger patty. Lay the bacon strips on top of the cheese (2 halves per burger). Close the air fryer and let the patties sit, in the still hot (but powered off) air fryer. After 2 minutes, remove the burger patties from the air fryer.

      The heat will have melted the cheese and re-heated the bacon. My husband decided at the last moment to leave the cheese off his air fryer bacon cheeseburger (how dare he!), and ate the cheese by itself, instead. Jeepers.

      Bacon slices, cheddar cheese added to air fryer bacon cheeseburger.Cheese has melted and bacon is hot. Time to build a burger.

      Build Your Air Fryer Bacon Cheeseburger and Eat!

      Place the burger patties onto toasted (or untoasted) buns. Add your favorite condiments, along with lettuce tomato, and pickles. We LOVE our air fryer bacon cheeseburgers with fresh avocado slices, too. YUM. Serve, and enjoy these delicious burgers.

      Air fryer bacon cheeseburger is assembled before eating.A juicy, hot air fryer bacon cheeseburger, ready to devour.

      We’ve made these air fryer burgers quite a few times, since we get our fair share of rain here in Oregon. We love to grill burgers outside on our Weber BBQ, but also love making them in our handy air fryer when rainy or snowy weather prohibits it!

      Hope you give this air fryer bacon cheeseburger recipe a try, and trust you will enjoy it as much as we do. Take care, and have a great day.

      Looking For More AIR FRYER recipes?

      You can find all of my recipes in the Recipe Index, located at the top of the page. I have several delicious air fryer recipes, including:

      Interested In More Recipes?

      Thank you for visiting this website. I appreciate you using some of your valuable time to do soIf you’re interested, I publish a newsletter 2 times per month (1st and 15th) with all the latest recipes, and other fun info. I would be honored to have you join our growing list of subscribers, so you never miss a great recipe!
      There is a Newsletter subscription box on the top right side (or bottom) of each blog post, depending on the device you use, where you can easily submit your e-mail address (only) to be included in my mailing list.

      You Can Also Find Me On Social Media:
      Facebook page: The Grateful Girl Cooks!
      Pinterest: The Grateful Girl Cooks!
      Instagram: jbatthegratefulgirlcooks

      Author's signature

      5 from 1 vote
      Air Fryer Bacon Cheeseburger
      Prep Time
      5 mins
      Cook Time
      7 mins
      Total Time
      12 mins
       

      Learn how easy it is to make a juicy good Air Fryer Bacon Cheeseburger, using this appliance. Can't get outside to grill? Use an air fryer instead!

      Category: Dinner, Entree, Lunch
      Cuisine: American
      Keyword: air fryer bacon cheeseburger
      Servings: 2
      Calories Per Serving: 399 kcal
      Author: JB @ The Grateful Girl Cooks!
      Ingredients
      • 2 medium hamburger buns , pan-toasted with melted butter (if using toasted buns)
      • 2 slices bacon, pre-cooked
      • 2 slices cheddar cheese (or American)
      • ½ pound ground beef burger patties ,two patties - 1/4 pound each
      • 1 teaspoon butter, melted
      • ½ teaspoon liquid smoke flavoring, divided (optional)
      • salt and Montreal steak seasoning to taste , or preferred seasonings
      • Condiments and Burger Toppings, as desired
      Instructions
      1. Before cooking hamburger patties, if you'd like to toast the hamburger buns, simply spread each half lightly with softened butter. Cook on low heat (butter side down) in a large skillet until golden brown. Set aside.

      2. Season hamburger patties by lightly brushing each on one side with melted butter and a tiny bit of liquid smoke flavoring. Lightly sprinkle patties with salt and Montreal steak seasoning. You can substitute your favorite seasonings, if desired, to suit your personal taste. Have cheese slices AND precooked bacon nearby. You will quickly add these at the end of the air frying time, so you'll need them close.

      3. Preheat air fryer to 360°F. This takes 3-4 minutes. Place patties in air fryer basket, seasoned side down. Cook for 5 minutes, then turn patties over, and continue cooking for 2 more minutes. NOTE: Because air fryer temps vary quite a bit, your cooking time may be a bit less or a bit longer. Once done, TURN OFF THE AIR FRYER! Immediately place a slice of cheese onto each burger patty. Lay bacon strips on top of the cheese (2 halves per burger). Close the air fryer and let the patties sit in the hot (but powered off) air fryer. After 2 minutes, remove the patties from the air fryer. The residual heat will have melted the cheese and heated the bacon.

      4. Place burger patties onto prepared buns, and garnish with your preferred condiments and toppings. Serve, and enjoy!

      Recipe Notes

      Caloric calculation was made using untoasted hamburger buns, lean ground beef, bacon and cheese for the burgers. No additional condiments or burger toppings were calculated as they may vary, by personal choice.

      Nutrition Facts
      Air Fryer Bacon Cheeseburger
      Amount Per Serving (1 burger (without condiments))
      Calories 399 Calories from Fat 162
      % Daily Value*
      Fat 18g28%
      Saturated Fat 9g56%
      Cholesterol 101mg34%
      Sodium 553mg24%
      Potassium 487mg14%
      Carbohydrates 22g7%
      Fiber 1g4%
      Sugar 3g3%
      Protein 36g72%
      Vitamin A 233IU5%
      Vitamin C 1mg1%
      Calcium 207mg21%
      Iron 4mg22%
      * Percent Daily Values are based on a 2000 calorie diet.

      Here’s one more to pin on your Pinterest boards!Learn how easy it is to make a juicy good Air Fryer Bacon Cheeseburger, using this appliance. Can't get outside to grill? Use an air fryer instead!

      Herbed Shrimp Broccoli Pasta

      Herbed Shrimp Broccoli Pasta is a delicious, Italian-inspired meal of pan-seared shrimp, broccoli, and pasta noodles w/ Parmesan, olive oil & spices.
      Herbed Shrimp Broccoli Pasta is a delicious, Italian-inspired meal of pan-seared shrimp, broccoli, and pasta noodles w/ Parmesan, olive oil & spices.

      If you enjoy shrimp and pasta dishes, may I suggest trying this delicious recipe for Herbed Shrimp Broccoli Pasta? My husband and I love this dish, and truly hope you will enjoy it, as well! I’ve been making it without any recipe, in one form or another for years, improvising as I went along with spices, ingredients, etc. This is the final version of this recipe from all my kitchen “experimenting”, and it sure is GOOD!

      Lightly seasoned, pan-seared shrimp are complimented with pasta, coated with olive oil, butter, Parmesan cheese and Italian-inspired spices. Toss in some healthy broccoli, and you’ve got a wonderful, all-in-one meal I am confident you will enjoy.

      Basically you will cook shrimp, cook broccoli, cook pasta, and then mix it all together with spices, cheese, butter and olive oil. It’s pretty easy to make (in just a few steps), so I want to share this yummy recipe with you.

      Scroll Down For A Printable Recipe Card At The Bottom Of The Page

      Season And Pan-Sear The Shrimp

      The first step is to make sure your medium shrimp are peeled, and deveined. Place the shrimp in a medium sized bowl, and lightly season with Italian seasoning and garlic powder. The link is to my recipe for making Italian seasoning at home, if you do not have any.

      Melt butter in a large skillet. Add the seasoned shrimp, and cook in a single layer for 2-3 minutes, and then turn the shrimp over to the other side. The shrimp should be golden brown. Cook for 1-2 additional minutes, until the shrimp are cooked through.

      Set the skillet with the shrimp aside, and cover, to keep the shrimp warm. Do not clean the skillet out, because you will use all the browned butter and leftover “crispy bits” later for added flavor!

      Shrimp are lightly seasoned, then pan-seared in butter in a skillet.

      Cook Pasta, Steam Broccoli, And Mix Pasta Seasoning

      Okay… now you need to prepare the pasta in boiling water, according to package directions (approx. 12-13 minutes). TIP: Typically I start the pot of water heating while I cook the shrimp. That way, when I’m done cooking the shrimp, the water will already be boiling for the pasta (which saves time).

      Fettucine pasta is cooked until al dente in boiling water.

      While the pasta is cooking, quickly steam the broccoli. Place the broccoli florets in a steamer basket over 2 inches of boiling water in a saucepan, and cover. Steam the broccoli for 4 minutes. Remove the florets from the basket, and add to the cooked shrimp set aside in the skillet (and keep warm).

      Broccoli florets are quickly steamed before adding to the pasta.

      While the pasta is still cooking, take a minute to also mix together the spice ingredients for the pasta in a small bowl. The spices are onion powder, Italian seasoning, parsley, garlic powder, red pepper flakes, salt and pepper.

      Spices are mixed together before adding to the pasta.

      Putting The Herbed Shrimp Broccoli Pasta Together

      Now it’s time to put this meal together! As soon as the pasta is fully cooked, quickly drain it in a colander (but don’t rinse!). Place the butter and olive oil in the bottom of the empty pasta pan, and then pour the HOT drained pasta back in, on top. This will help to melt the butter underneath. Quickly add the spice mixture and grated Parmesan cheese to the pasta.

      The herb mixture, butter, oil and Parmesan cheese are added to cooked pasta.

      Now add the cooked shrimp and broccoli to the hot pasta, and gently toss it all together. The melted butter, olive oil, spices and Parmesan will flavor the pasta, along with the broccoli and seasoned shrimp. Give the pasta a quick taste, and add additional salt and pepper, if desired. Now the herbed shrimp broccoli pasta is ready to be served.

      Cooked shrimp and broccoli are added to the pasta, then gently mixed together.The herbed shrimp broccoli pasta is gently tossed before serving.

      Time To Serve Herbed Shrimp Broccoli Pasta!

      Place portions of pasta onto individual serving plates or bowls (I use tongs). Try to position the shrimp on top of each portion to make it look appealing. Add additional grated Parmesan cheese for garnish, if desired.

      Note: Because this pasta dish is not fully coated with a thick sauce (like spaghetti sauce, for example), it will tend to lose heat rapidly . This is why it is important to serve it up fairly quickly… just sayin’.

      A serving dish of herbed shrimp broccoli pasta, ready to enjoy!A close up of herbed shrimp broccoli pasta, with a fork on the side.

      Hope you enjoy this delicious all-in-one pasta dinner! We always do and trust you will, too. Thanks for stopping by, and hope you will visit again soon. Take care, and have a great day.

      Looking for more PASTA recipes?

      You can find all of my recipes in the Recipe Index, located at the top of the page. I have quite a few, including:

      Interested In More Recipes?

      Thank you for visiting this website. I appreciate you using some of your valuable time to do soIf you’re interested, I publish a newsletter 2 times per month (1st and 15th) with all the latest recipes, and other fun info. I would be honored to have you join our growing list of subscribers, so you never miss a great recipe!
      There is a Newsletter subscription box on the top right side (or bottom) of each blog post, depending on the device you use, where you can easily submit your e-mail address (only) to be included in my mailing list.

      You Can Also Find Me On Social Media:
      Facebook page: The Grateful Girl Cooks!
      Pinterest:
      The Grateful Girl Cooks!
      Instagram:
      jbatthegratefulgirlcooks

      Author's signature

      0 from 0 votes
      Herbed Shrimp Broccoli Pasta
      Prep Time
      25 mins
      Cook Time
      0 mins
      Total Time
      25 mins
       

      Herbed Shrimp Broccoli Pasta is a delicious, Italian-inspired meal of pan-seared shrimp, broccoli, and pasta noodles w/ Parmesan, olive oil & spices.

      Category: Dinner, Entree
      Cuisine: Italian
      Keyword: herbed shrimp broccoli pasta
      Servings: 3
      Calories Per Serving: 600 kcal
      Author: JB @ The Grateful Girl Cooks!
      Ingredients
      For Shrimp:
      • 18-20 medium shrimp , peeled, deveined
      • 2 Tablespoons butter
      • ½ teaspoon Italian seasoning
      • ¼ teaspoon garlic powder
      For Pasta:
      • 7 ounces fettucine pasta , cooked according to pkg. directions
      • cups broccoli florets , lightly steamed
      • ¼ cup extra virgin olive oil
      • 2 teaspoons butter , room temp.
      • 1 Tablespoon Italian seasoning
      • 1 teaspoon dried parsley
      • ½ teaspoon garlic powder
      • teaspoon onion powder
      • ¼ teaspoon salt and pepper (EACH)
      • 1 pinch (generous) red pepper flakes
      • ¼ cup fresh grated Parmesan cheese , plus more for garnish, if desired
      Instructions
      1. Prepare shrimp: Place shrimp in a bowl; sprinkle with Italian seasoning and garlic powder; toss to coat. Melt butter in a large skillet on medium heat. Add shrimp in a single layer. Cook 2-3 minutes; turn shrimp over and cook other side for 1-2 more minutes until cooked through. Set skillet of shrimp aside; cover, to keep warm. Don't clean skillet- you will use browned butter and leftover "crispy bits" later for added flavor!

      2. Prepare pasta according to package directions. TIP: Start pot of water heating while cooking shrimp in Step #1. When done cooking shrimp, water should be boiling for pasta (which saves time).

      3. While Pasta Cooks: #1: Steam broccoli. Place broccoli florets in a steamer basket over 2 inches of boiling water in a saucepan and cover. Steam for 4 minutes. Remove broccoli from steamer; add to shrimp set aside in skillet. #2: Mix together spices for the pasta (Italian seasoning, parsley, garlic powder, onion powder, salt, pepper, and red pepper flakes) in a small bowl. Set aside.

      4. When pasta is done, immediately drain it in a colander (but don't rinse!). Place butter and olive oil on the bottom of the empty pasta pan, and then pour HOT drained pasta back in, on top. This melts the butter underneath. Add spice mix, Parmesan cheese, shrimp and broccoli to pasta.

      5. Gently toss all ingredients together until fully combined. Taste pasta; add additional salt and pepper, if desired. Immediately serve (while still hot), and enjoy.

      Nutrition Facts
      Herbed Shrimp Broccoli Pasta
      Amount Per Serving (1 (1/3 of total))
      Calories 600 Calories from Fat 306
      % Daily Value*
      Fat 34g52%
      Saturated Fat 11g69%
      Cholesterol 181mg60%
      Sodium 727mg32%
      Potassium 355mg10%
      Carbohydrates 53g18%
      Fiber 4g17%
      Sugar 2g2%
      Protein 22g44%
      Vitamin A 840IU17%
      Vitamin C 42mg51%
      Calcium 221mg22%
      Iron 3mg17%
      * Percent Daily Values are based on a 2000 calorie diet.

      Here’s one more to pin on your Pinterest boards!Herbed Shrimp Broccoli Pasta is a delicious, Italian-inspired meal of pan-seared shrimp, broccoli, and pasta noodles w/ Parmesan, olive oil & spices.