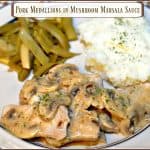
Category: Main Dishes

One Pan Greek Chicken And Orzo

Greek Chicken and Orzo is made in one pan, and is ready in 30 minutes, with thighs, orzo pasta, classic seasonings, kalamata olives and feta cheese.Greek Chicken and Orzo is made in one pan, and is ready in 30 minutes, with thighs, orzo pasta, classic seasonings, kalamata olives and feta cheese.
If you enjoy the convenience of one pot meals, and want something you can make in about half an hour, I’m sure you will LOVE this recipe for One Pan Greek Chicken And Orzo. It’s a delicious, one pan meal that is a delicious, and flavor-filled dish.

My husband and I just returned from a week’s vacation in Hawaii. Truthfully, I wasn’t too thrilled about preparing dinner, after being spoiled by eating out for a week!  I found this easy recipe for Greek chicken and orzo from Joanna Cismaru on Pinterest, and decided to try it!

I’m sure glad I did, because we loved this meal! Pan-seared, lightly seasoned chicken thighs cook alongside orzo pasta in white wine and chicken broth, then are topped with kalamata olives, crumbled feta cheese, fresh parsley, lemon wedges, and served. YUM!

Scroll Down For A Printable Recipe Card At The Bottom Of The Page

Prepare And Brown The Chicken

  1. Mix together all-purpose flour, smoked paprika, garlic powder, salt and black pepper in a medium bowl.
  2. Pat the chicken thighs dry using a paper towel.  Dredge chicken thighs in the seasoned flour mixture, coating all sides.
  3. Heat 1 Tablespoon olive oil in a large skillet (on medium-high heat). Carefully add the chicken thighs to hot oil. Cook them for 4 minutes, without moving them in skillet.
  4. Flip the chicken over and cook the other side for 3-4 minutes until crispy and well-browned.

Chicken thighs are coated in flour, then cooked until browned in skillet.

Remove the browned chicken to a plate and let it rest. Don’t worry if it’s not all the way done – the chicken will finish cooking later with the rest of the ingredients!

After browning in the skillet, chicken pieces rest on a plate.

Cook The Veggies And Orzo Pasta

Add 1 Tablespoon of olive oil back into the skillet you cooked the chicken in. Turn the heat to medium, and then add the chopped onion, minced garlic, red pepper flakes, thyme and oregano. Stir, and cook for this mixture for 1 minute, then add salt and pepper to lightly season.

Chopped onion, minced garlic and spices cook in skillet before adding other ingredients.
Pour the uncooked orzo into the pan with the onions, etc..

Uncooked orzo pasta is added to the cooked onions in skillet.

Add White Wine And Chicken Broth To The Pan

Add the white wine and chicken broth and stir, to combine these ingredients.  Once the ingredients are stirred, bring the liquid to a boil, and reduce the heat down to medium.

White wine and chicken broth is added to the skillet.Add The Chicken Back Into The Pan

Place the chicken thighs into the skillet on top of the orzo, and cover skillet with a lid. Cook the chicken and orzo for 10 minutes (or until the orzo is fully cooked).

Garnish The Greek Chicken and Orzo Before Serving

Remove the skillet from the heat, and remove the lid. Add the kalamata olives, crumbled feta cheese, chopped fresh parsley, and lemon wedges to the dish as a garnish.

The Greek chicken and orzo is finished cooking, then garnished with olives, lemon and parsley.

Serve The Greek Chicken and Orzo

Serve this delicious Greek chicken and orzo, and ENJOY!  This dish not only looks good, it tastes great!  The orzo is seasoned perfectly, and the chicken is juicy and delicious! Note:  The recipe as written, serves 4 (two thighs per serving). When I prepared this meal, I cut the recipe in half, since it was just my husband and I eating it!) 

One Pan Greek Chicken And Orzo is served, garnished with kalamata olives, parsley and lemon slices.

The one pan Greek chicken and orzo is served!

We really, really enjoyed this dish, and I know it will be made again and again in our home. It truly did only take 30 minutes, from start to finish! What a perfect dinner for those crazy busy evenings when you want something delicious for dinner, but don’t want to take too long to fuss over it!

The chicken and orzo, served on a plate with fresh cantaloupe and blueberries on the side.

I really hope you will consider trying this wonderful chicken “one pan wonder” recipe! My hope is that you find it just as delicious as we did!  Have a wonderful day, and make the most out of each minute you’ve been given!

Looking For More CHICKEN Recipes?

You can find ALL my recipes in the Recipe Index, located at the top of the page. I have LOTS of delicious chicken recipes to check out, including:

Interested In More Recipes?

Thank you for visiting this website. I appreciate you using some of your valuable time to do soIf you’re interested, I publish a newsletter 2 times per month (1st and 15th) with all the latest recipes, and other fun info. I would be honored to have you join our growing list of subscribers, so you never miss a great recipe!
There is a Newsletter subscription box on the top right side (or bottom) of each blog post, depending on the device you use, where you can easily submit your e-mail address (only) to be included in my mailing list.

You Can Also Find Me On Social Media:
Facebook page: The Grateful Girl Cooks!
Pinterest: The Grateful Girl Cooks!
Instagram: jbatthegratefulgirlcooks

Author's signature

Recipe Source: http://www.jocooks.com/recipes/one-pot-greek-chicken-orzo/

0 from 0 votes
One Pan Greek Chicken And Orzo
Prep Time
10 mins
Cook Time
20 mins
Total Time
30 mins
 
Greek Chicken and Orzo is made in one pan, and is ready in 30 minutes, with thighs, orzo pasta, classic seasonings, kalamata olives and feta cheese.
Category: Entree
Cuisine: Greek
Keyword: Greek chicken and orzo
Servings: servings (1 thigh per serving)
Calories Per Serving: 484 kcal
Author: JB @ The Grateful Girl Cooks!
Ingredients
  • 1/2 cup all purpose flour
  • 1 Tablespoon smoked paprika
  • 1 teaspoon garlic powder
  • Salt & Pepper , to taste (approx. 1/4 teaspoon of each)
  • 8 chicken thighs (boneless, skinless)
  • 2 Tablespoons olive oil , divided
  • 1 large white onion , chopped
  • 3 cloves garlic , minced
  • 1/4 teaspoon red pepper flakes
  • 1 Tablespoon fresh thyme , chopped
  • 1/2 Tablespoon dried oregano
  • cups orzo pasta (uncooked)
  • 1 cup white wine
  • 2 cups chicken broth
  • 3/4 cup kalamata olives (pitted and drained - room temp)
  • 1/4 cup feta cheese , crumbled (room temp)
  • 2 Tablespoons fresh parsley , chopped
  • 1/2 lemon , sliced into wedges
Instructions
  1. Mix together all-purpose flour, smoked paprika, garlic powder, salt and black pepper in a medium bowl. Pat chicken thighs dry using a paper towel. Dredge chicken thighs in the seasoned flour mixture, coating all sides.
  2. Heat 1 Tablespoon olive oil in a large skillet (on medium-high heat). Carefully add chicken thighs to hot oil. Cook them for 4 minutes, without moving them in skillet. Flip chicken over and cook the other side for 3-4 minutes until crispy and well-browned. Remove chicken to a plate and let rest. (Don't worry if it's not all the way done - the chicken will finish cooking later!).
  3. Add 1 Tablespoon olive oil back into the skillet you cooked the chicken in and turn heat to medium. Add chopped onion, minced garlic, red pepper flakes, thyme and oregano. Stir, and cook for 1 minute. Add salt and pepper to lightly season.
  4. Pour in the uncooked orzo. Pour in the white wine and the chicken broth, then stir to combine ingredients. Once the ingredients are stirred, bring liquid to a boil, then reduce the heat down to medium. Place the chicken thighs into the skillet on top of the orzo. Cover skillet with a lid; cook for 10 minutes (or until the orzo is fully cooked).
  5. Remove skillet from heat; remove lid. Add kalamata olives, crumbled feta cheese, chopped fresh parsley, and lemon wedges to the skillet as garnish. Serve, and enjoy!
Recipe Notes

Don't have boneless chicken thighs? Use chicken thighs with bones, but cook chicken about 1 minute longer per side when pan-searing.

Nutrition Facts
One Pan Greek Chicken And Orzo
Amount Per Serving (1 thigh)
Calories 484 Calories from Fat 234
% Daily Value*
Fat 26g40%
Saturated Fat 6g38%
Cholesterol 114mg38%
Sodium 558mg24%
Potassium 445mg13%
Carbohydrates 32g11%
Fiber 2g8%
Sugar 2g2%
Protein 24g48%
Vitamin A 735IU15%
Vitamin C 11.8mg14%
Calcium 70mg7%
Iron 2.4mg13%
* Percent Daily Values are based on a 2000 calorie diet.

Here’s one more to pin on your Pinterest boards!Greek Chicken and Orzo is made in one pan, and is ready in 30 minutes, with thighs, orzo pasta, classic seasonings, kalamata olives and feta cheese.

Save

Save

Save

Save

Save

Save

Save

Save

Save

Save

Swordfish In Lemon Garlic Sauce

Swordfish fillets in lemon garlic sauce are pan-seared, then baked fish fillets. They’re served, glazed with an easy lemon garlic sauce!
Swordfish fillets in lemon garlic sauce are pan-seared, then baked fish fillets. They're served, glazed with an easy lemon garlic sauce!
Looking for an easy and flavorful way to cook swordfish that doesn’t involve an outdoor BBQ grill?  Here’s a very simple way to make Swordfish In Lemon Garlic Sauce! This seafood dish is really quite simple to prepare, and tastes wonderful with the addition of the yummy butter, wine, garlic and lemon sauce on top! Here’s how to make this simple dish:

Scroll Down For A Printable Recipe Card At The Bottom Of The Page

Pan-Sear Swordfish Fillets

Preheat your oven to 400 degrees.  Heat olive oil in a large, OVEN-PROOF skillet until very hot (but not smoking). Add lightly seasoned swordfish fillets (at room temperature) to the hot oil. Cook the fish for 2-3 minutes, until golden brown on bottom. Turn the swordfish fillets over and cook the other side for 2-3 minutes.

A swordfish fillet is being pan-seared in oil in a large skillet.

Swordfish fillets are turned after pan-searing in olive oil.

Bake The Pan-Seared Swordfish

Place the ovenproof skillet and swordfish into a preheated oven. Continue to bake the fish for 7-12 minutes (time will vary based on thickness of swordfish). Begin checking on the fish after 6 minutes have passed. Once the fish flakes easily with a fork,  it is ready.  TIP: While the fish is baking, prepare the easy lemon garlic sauce.

Make The Lemon Garlic Sauce

While the swordfish is in oven, make the lemon garlic sauce. Place butter and olive oil in a small skillet. Heat over low heat until the butter is melted. Add the minced garlic and red pepper flakes. Stir and cook this on very low heat for about 1 minute (being careful NOT to burn the garlic).

Minced garlic and red pepper flakes are cooked in melted butter.

Add the white wine to the skillet, and using medium heat, bring the liquid to a simmer.  Cook the lemon garlic sauce for 3 minutes, stirring often.  The liquid will reduce a bit in volume, and the alcohol will cook off during this time.

White wine is added to lemon garlic sauce in pan.

Remove the skillet from the heat.  Add lemon juice and finely grated fresh lemon zest, and stir to combine.  The lemon garlic sauce will smell really good at this point.

Lemon zest and juice are added to the sauce for the swordfish.

Time To Serve The Swordfish In Lemon Garlic Sauce!

Transfer the baked swordfish out of the skillet and onto serving plates. Spoon the lemon garlic sauce over the top of the fish, and serve it, garnished with parsley, (if desired).  Grab a fork and dive into this delicious swordfish in lemon garlic sauce!

Swordfish with lemon garlic sauce, on plate with orzo and asparagus.

I love seafood grilled outdoors on our BBQ, but as is the case often here in Oregon, the rain prevents that many times. It’s nice to have this simple alternative cooking method for enjoying a wonderful piece of swordfish cooked right in the ol’ kitchen!  Have a great day.

Looking For More SEAFOOD Recipes?

You can find all of my seafood recipes in the Recipe Index, located at the top of the page. I have quite a few, including:

Interested In More Recipes?

Thank you for visiting this website. I appreciate you using some of your valuable time to do soIf you’re interested, I publish a newsletter 2 times per month (1st and 15th) with all the latest recipes, and other fun info. I would be honored to have you join our growing list of subscribers, so you never miss a great recipe!
There is a Newsletter subscription box on the top right side (or bottom) of each blog post, depending on the device you use, where you can easily submit your e-mail address (only) to be included in my mailing list.

You Can Also Find Me On Social Media:
Facebook page: The Grateful Girl Cooks!
Pinterest: The Grateful Girl Cooks!
Instagram: jbatthegratefulgirlcooks

Author's signature

Recipe Source: www.superseafoodrecipes.com/swordfish-recipe-with-lemon-garlic-sauce.html

↓↓ PRINTABLE RECIPE BELOW ↓↓

0 from 0 votes
Swordfish In Lemon Garlic Sauce
Prep Time
5 mins
Cook Time
15 mins
Total Time
20 mins
 

Swordfish fillets are pan-seared, then finish cooking in an oven. They're served, glazed with an easy to make, delicious lemon garlic sauce!

Category: Entree
Cuisine: American
Keyword: swordfish
Servings: servings (5 ounces each)
Calories Per Serving: 537 kcal
Author: JB @ The Grateful Girl Cooks!
Ingredients
  • 10 ounces swordfish steaks (2- 5 ounce pieces at least 1 inch thick)
  • 3 Tablespoons olive oil
  • Salt and black pepper
For Lemon Garlic Sauce:
  • 2 Tablespoons butter
  • 2 Tablespoons olive oil
  • 8 cloves garlic , minced
  • 1/4 teaspoon red pepper flakes
  • 1/2 cup dry white wine
  • Grated zest from 1 large lemon
  • 2 Tablespoons fresh squeezed lemon juice
  • 2 Tablespoons chopped parsley (for garnish-optional)
Instructions
  1. Preheat oven to 400 degrees. Let swordfish come to room temperature for 30 minutes before cooking. Pat fish really dry with a paper towel, then lightly season with salt and pepper.
  2. Heat olive oil in a large, OVEN-PROOF skillet until very hot (but not smoking). Carefully add swordfish fillets to skillet. Cook for 2-3 minutes, until golden brown on bottom. Turn fish over and cook the other side 2-3 minutes, as well. Place skillet (and swordfish) into hot oven. Bake swordfish for between 7 and 12 minutes (time will vary based on thickness of swordfish). Begin checking fish after 6 minutes have passed. Once the fish flakes easily with a fork, it will be ready.

  3. While swordfish is baking, make the lemon garlic sauce. Place butter and olive oil in a small skillet. Cook on low heat until butter is melted. Add minced garlic and red pepper flakes. Stir and cook mixture on very low heat for about a minute (being careful NOT to burn the garlic).
  4. Add white wine to the skillet, and using medium heat, bring the liquid to a simmer. Cook the sauce for 3 minutes, stirring often. The liquid will reduce a bit in volume as it cooks.
  5. Remove sauce from heat. Add lemon juice and finely grated fresh lemon zest. Stir to combine.
  6. Transfer cooked swordfish to serving plate. Spoon the lemon garlic sauce over the top of the fish, and garnish with parsley, if desired.
Nutrition Facts
Swordfish In Lemon Garlic Sauce
Amount Per Serving (1 5 ounce piece)
Calories 537 Calories from Fat 342
% Daily Value*
Fat 38g58%
Saturated Fat 11g69%
Cholesterol 123mg41%
Sodium 246mg11%
Potassium 705mg20%
Carbohydrates 7g2%
Sugar 1g1%
Protein 29g58%
Vitamin A 930IU19%
Vitamin C 18.7mg23%
Calcium 40mg4%
Iron 1.2mg7%
* Percent Daily Values are based on a 2000 calorie diet.

Here’s one more to pin on your Pinterest boards!Swordfish fillets in lemon garlic sauce are pan-seared, then baked fish fillets. They're served, glazed with an easy lemon garlic sauce!

Save

Save

Save

Save

Save

Save

Save

Save

Save

Save

Save

Save

Garlic & Herb Baked Salmon

Garlic Herb Baked Salmon is a delicious, quick and easy recipe featuring boneless, skinless salmon fillets topped with a seasoned lemon butter sauce.Garlic Herb Baked Salmon is a delicious, quick and easy recipe featuring boneless, skinless salmon fillets topped with a seasoned lemon butter sauce.
My husband and I really love salmon! In my never ending quest to find new recipes, I stumbled upon this simple one for garlic herb baked salmon, and it did not disappoint!

Scroll Down For A Printable Recipe Card At The Bottom Of The Page

This Is One EASY Recipe!

The process for making this salmon dish is extremely SIMPLE. A garlic, butter, lemon juice and herb mixture is prepared, and then salmon fillets are topped with it. Salmon goes into the oven where it is baked, and then it is DONE!  How’s THAT for EASY??? It’s quick and it tastes GOOD. From start to finish, it took under 20 minutes, which is perfect for crazy busy days!

How To Make Garlic Herb Baked Salmon

Preheat your oven to 400 degrees F.  Place the melted butter, garlic, parsley, salt, cayenne pepper, lemon juice and black pepper in a small bowl. Give it a good stir to fully combine ingredients. Now the sauce is READY! Hope you didn’t break a sweat doing all that hard work- wink, wink!

Butter, lemon juice, herbs and spices make up a sauce for the seafood.

Place the salmon fillets onto a parchment paper-lined baking sheet, leaving a bit of space between each fillet. The parchment paper helps cut down on the cleanup once the salmon is done. Use a spoon and divide the garlic herb sauce evenly between salmon fillets, covering the top and sides of the fish.

Salmon fillets are covered with the lemon butter herb sauce before baking.

 Time To Finish The Garlic Herb Baked Salmon

Bake the salmon in a preheated 400 degree oven for 12 minutes. Remove the baking sheet from oven, once done, and transfer fillets to individual plates.

Garlic Herb Baked Salmon only takes 12 minutes to cook in the oven!

Garnish And Serve The Garlic Herb Baked Salmon

Garnish each piece of salmon with a lemon wedge and serve immediately with your favorite side dish.  I served my garlic herb baked salmon on a bed of cooked sesame ginger slaw,  with green beans (from our garden) and steamed rice.

If you want, you can also drizzle the salmon with any leftover garlic herb mixture that remains on the baking sheet. Just spoon it up, and drizzle it on the fish.

The salmon on a bed of ginger slaw, with green beans and rice on side.

A lemon wedge garnishes a serving of the baked salmon.

This salmon recipe is really SO EASY!!! It really has a great flavor, as well. As always, I sure hope you will consider making this for yourself, your family or others you love!

Looking For More SALMON Recipes?

You can find all of my recipes in the Recipe Index, located at the top of the page. I have quite a few salmon recipes, including:

Interested In More Recipes?

Thank you for visiting this website. I appreciate you using some of your valuable time to do soIf you’re interested, I publish a newsletter 2 times per month (1st and 15th) with all the latest recipes, and other fun info. I would be honored to have you join our growing list of subscribers, so you never miss a great recipe!
There is a Newsletter subscription box on the top right side (or bottom) of each blog post, depending on the device you use, where you can easily submit your e-mail address (only) to be included in my mailing list.

You Can Also Find Me On Social Media:
Facebook page: The Grateful Girl Cooks!
Pinterest: The Grateful Girl Cooks!
Instagram: jbatthegratefulgirlcooks

Author's signatureRecipe Source:  http://rasamalaysia.com/garlic-herb-roasted-salmon/

0 from 0 votes
Garlic Herb Baked Salmon
Prep Time
5 mins
Cook Time
12 mins
Total Time
17 mins
 

Garlic Herb Baked Salmon is a delicious, quick and easy recipe featuring boneless, skinless salmon fillets topped with a seasoned lemon butter sauce.

Category: Entree
Cuisine: American
Keyword: garlic herb baked salmon
Servings: servings
Calories Per Serving: 364 kcal
Author: JB @ The Grateful Girl Cooks!
Ingredients
  • 2 6 ounce each salmon fillets
  • 2 Tablespoons melted butter
  • 3 cloves garlic , minced
  • 1 Tablespoon fresh Italian parsley , chopped
  • 1/8 teaspoon salt
  • 1 Pinch cayenne pepper
  • 1 teaspoon lemon juice
  • 3 dashes ground black pepper
  • 4 Lemon wedges (for garnish-optional)
Instructions
  1. Before beginning, preheat oven to 400 degrees F. Line a baking sheet with parchment paper.
  2. In a small bowl, stir together the melted butter, minced garlic, parsley, salt, cayenne pepper, lemon juice and black pepper until fully combined.
  3. Place salmon fillets onto parchment paper lined baking sheet, leaving space in between each fillet. Spoon the garlic and herb sauce evenly over the top and sides of the salmon (to cover).

  4. Bake salmon at 400 degrees F. for 12 minutes. Remove from oven. Serve immediately with lemon wedges for garnish, if desired. Enjoy!

Nutrition Facts
Garlic Herb Baked Salmon
Amount Per Serving (1 g)
Calories 364 Calories from Fat 198
% Daily Value*
Fat 22g34%
Saturated Fat 8g50%
Cholesterol 123mg41%
Sodium 323mg14%
Potassium 921mg26%
Carbohydrates 6g2%
Fiber 1g4%
Sugar 1g1%
Protein 34g68%
Vitamin A 585IU12%
Vitamin C 24.1mg29%
Calcium 45mg5%
Iron 1.9mg11%
* Percent Daily Values are based on a 2000 calorie diet.

Here’s one more to pin on your Pinterest boards!Garlic Herb Baked Salmon is a delicious, quick and easy recipe featuring boneless, skinless salmon fillets topped with a seasoned lemon butter sauce.

Save

Save

Save

Save

Save

Save

Save

Save

Save

Save

Save

Grilled Chili & Lime Chicken Fajita Salad

Grilled Chili Lime Chicken Fajita Salad is delicious, with marinated chicken, peppers, onions, black beans, avocado and lettuce, and a chili lime dressing!Grilled Chili Lime Chicken Fajita Salad is delicious, with marinated chicken, peppers, onions, black beans, avocado and lettuce, and a chili lime dressing!
Do you like fajitas? Well, I sure do, so I was excited to try a new recipe for Grilled Chili & Lime Chicken Fajita Salad! Wow… it tasted fantastic, and I can’t wait to share it with you today. This main dish salad is filled with marinated grilled chicken, romaine lettuce, black beans, grilled bell peppers and onion, and is topped with tortilla strips, cilantro, avocado and sour cream.

If that’s not enough, it is drizzled with an amazing chili and lime salad dressing (part of it serves as the marinade!).  If you like Southwestern food, chances are you will LOVE this filling salad.  We sure did!  It is one of my new favorites… will DEFINITELY make this chicken fajita salad again and again.

Scroll Down For A Printable Recipe Card At The Bottom Of The Page

Plan Ahead

The chicken will need to marinate for a couple hours (at least), so plan ahead. This marinating time is not included in the prep time in the printable recipe. I like to get things ready ahead of time, so early in the afternoon I marinated the chicken, then grilled the chicken and at the same time, (in a separate skillet) I grilled the onion and peppers.

When it was dinner time, all I had to do was slice the pre-cooked chicken, arrange the salad ingredients in 2 serving bowls, drizzle with the dressing and serve! EASY!

How To Cook This Chicken Fajita Salad

The day I made this salad it was pouring rain, so I cooked the chicken on my indoor George Foreman grill. You can cook the marinated chicken on the BBQ, an indoor grill. You can also cook it in a skillet on your stovetop! The recipe calls for boneless chicken thighs, but boneless chicken breasts are a great substitution, too!

Marinating The Chicken

In a small bowl, whisk the ingredients for the marinade together until fully blended.  Pour HALF (approx. 1/4 cup) of the marinade into a shallow dish.

Add the chicken, cover, and refrigerate/marinate chicken for at least 2 hours (turning occasionally to coat), for best taste results! Cover and set the remaining marinade (approx. 1/4 cup) aside until ready to serve (this is the salad dressing). There is no need to refrigerate.

Marinade for chicken fajita salad, in small metal bowl

Chicken thighs marinating in glass dish

Cooking the Chicken

After chicken has been marinated, grill the chicken until done and crispy on a BBQ or indoor grill. If using a skillet, heat a teaspoon of oil on medium-high heat until hot before adding meat. Once very hot (but not smoking), add chicken and cook until done. When cooked fully, remove chicken. Let rest for a few minutes, then cut chicken into thin slices.

TIP: When you cook the marinated chicken, discard and do NOT use the marinade that has been in contact with the chicken, to avoid cross contamination!

Grilled chicken thighs for salad

Grilled marinated chicken, cut into thin slices for salad

Cooking the Veggies

In a separate skillet, heat a teaspoon of oil on medium-high heat until hot. Add the sliced red and yellow bell peppers and onions to the skillet once it is hot (but not smoking).. Cook until tender (4-5 minutes), stirring occasionally. Remove the skillet from the heat and set it aside, to let the veggies cool.

Yellow and red bell pepper slices with onions grilled in skilletTime To Assemble The Salad

To assemble the salad, fill each serving dish with torn romaine leaves. Evenly distribute the black beans, peppers and onions over lettuce. Add some sliced avocado and crisp tortilla strips. TIP: I made my own tortilla strips. To see how to make them, check the notes section of printable recipe.

Sprinkle the salad with extra cilantro leaves.  Place a dollop of sour cream on top, and add a lime wedge (for garnish).  Finish it by drizzling reserved marinade over the top.

Enjoy This Delicious Chicken Fajita Salad

Serve… and ENJOY this amazing, flavor-filled chicken fajita salad! The recipe as written (below) makes two very generous sized main course salads.

Grilled Chili and Lime Chicken Fajita Salad on white serving plate.

I’m not kidding… this chili lime chicken fajita salad really is one delicious dinner!  I hope you will give it a try. My husband loved it, too.  One of his first comments after tasting it was, “wow, this has to be one of the best looking salads I’ve ever eaten”. Yes, it LOOKS good, but just wait until you TASTE it! Grab a fork and have a taste of this juicy chicken fajita salad!  YUM!

Close up photo of chicken fajita salad

Have a wonderful day! Thanks for stopping by. I hope you find some delicious recipes, (including this one for chicken fajita salad) to fix for those you love and cherish!

Looking For More ENTREE SALAD Recipes?

You can find ALL of my recipes in the Recipe Index, located at the top of the page. I have some delicious main course salad recipes you might enjoy, including:

Interested In More Recipes?

Thank you for visiting this website. I appreciate you using some of your valuable time to do soIf you’re interested, I publish a newsletter 2 times per month (1st and 15th) with all the latest recipes, and other fun info. I would be honored to have you join our growing list of subscribers, so you never miss a great recipe!
There is a Newsletter subscription box on the top right side (or bottom) of each blog post, depending on the device you use, where you can easily submit your e-mail address (only) to be included in my mailing list.

You Can Also Find Me On Social Media:

Facebook page: The Grateful Girl Cooks!
Pinterest:
The Grateful Girl Cooks!
Instagram:
jbatthegratefulgirlcooks

Author's signature

Recipe Adapted From:  https://cafedelites.com/2015/08/09/grilled-chilli-lime-chicken-fajita-salad/

0 from 0 votes
Grilled Chili & Lime Chicken Fajita Salad
Prep Time
15 mins
Cook Time
15 mins
Total Time
30 mins
 
Grilled Chili Lime Chicken Fajita Salad is delicious, with marinated chicken, peppers, onions, black beans, avocado and lettuce, and a chili lime dressing!
Category: Main Course Salad
Cuisine: Southwestern
Keyword: chicken fajita salad
Servings: Main Course Servings
Calories Per Serving: 544 kcal
Author: JB @ The Grateful Girl Cooks!
Ingredients
For Marinade:
  • 4 Tablespoons olive oil
  • 1/3 cup (+ 1 Tablespoon more) fresh squeezed lime juice
  • 2 Tablespoons fresh chopped cilantro
  • 2 cloves minced garlic
  • 1 teaspoon brown sugar
  • 3/4 teaspoon red chili flakes
  • 1/2 teaspoon ground Cumin
  • 1 teaspoon salt
For Salad:
  • 2 boneless , skinless chicken thighs (can substitute chicken breasts)
  • 1/2 yellow bell pepper , sliced thin (seeds removed)
  • 1/2 red bell pepper , sliced thin (seeds removed)
  • 1/2 medium onion , thinly sliced
  • 5 cups Romaine lettuce , roughly chopped
  • 1 avocado , sliced (divided)
  • 1/2 cup black beans (rinsed, drained)
For Garnish (Optional):
  • Sour cream and extra cilantro leaves
  • Crisp tortilla strips (see Notes section for "how to make" these).
Instructions
  1. In a small bowl, whisk ingredients for marinade together until fully blended. Pour HALF (approx. 1/4 cup) of the marinade into a shallow dish. Add chicken and let marinate in fridge for at least 2 hours, turning occasionally to coat. Cover remaining marinade and set aside until ready to serve (this is the salad dressing-you do not need to refrigerate).
  2. Heat a teaspoon of oil on medium-high heat in a skillet. Once oil is hot, add marinated chicken pieces; cook until done and crispy on outside (can also use indoor grill or outside BBQ). When fully cooked, remove chicken. Let rest for a few minutes, then cut into thin slices. Set aside. Discard and do NOT use the marinade that has been in contact with the chicken, to avoid cross contamination.
  3. In a separate skillet, heat a teaspoon of oil on medium-high heat. Add sliced onions and bell peppers. Cook until tender (4-5 minutes), stirring occasionally. Remove from heat; set aside.
To Assemble Salad: Fill serving dish with torn romaine leaves. Evenly distribute black beans, peppers and onions over lettuce. Add sliced avocado and crisp tortilla strips. Sprinkle with cilantro leaves. Place a dollop of sour cream on top and add a lime wedge (for garnish). Drizzle reserved marinade over salad. Serve... and ENJOY!
    Recipe Notes

    Caloric calculation does not include sour cream or tortilla strip garnish. Prep Time does not include marinating time for chicken.

    TO MAKE TORTILLA STRIPS: Cut 2 corn tortillas in half, then cut into thin strips. Coat strips with 1 Tablespoon of vegetable oil, then bake at 375 degrees for 5-6 minutes on each side (flipping midway through baking), until light brown and crispy.

    Nutrition Facts
    Grilled Chili & Lime Chicken Fajita Salad
    Amount Per Serving (1 serving)
    Calories 544 Calories from Fat 288
    % Daily Value*
    Fat 32g49%
    Saturated Fat 4g25%
    Cholesterol 72mg24%
    Sodium 1329mg58%
    Potassium 1561mg45%
    Carbohydrates 35g12%
    Fiber 14g58%
    Sugar 7g8%
    Protein 32g64%
    Vitamin A 11655IU233%
    Vitamin C 123.8mg150%
    Calcium 85mg9%
    Iron 3.7mg21%
    * Percent Daily Values are based on a 2000 calorie diet.

    Here’s one more to pin on your Pinterest boards!Grilled Chili Lime Chicken Fajita Salad is delicious, with marinated chicken, peppers, onions, black beans, avocado and lettuce, and a chili lime dressing!

    Save

    Save

    Save

    Save

    Save

    Save

    Save

    Save

    Save

    Save

    Save

    Save

    Save

    Save

    Save

    Save

    Chicken And Veggie Stir-Fry

    Chicken Veggie Stir Fry, with broccoli, carrots, bok choy, zucchini, onions,etc. in an Asian-inspired sauce, is served on rice in this delicious, 20 minute dish.Chicken Veggie Stir Fry, with broccoli, carrots, bok choy, zucchini, onions,etc. in an Asian-inspired sauce, is served on rice.
    Do you enjoy stir-fry meals?  We sure do… in fact, I’ve been making this delicious, Asian-inspired Chicken Veggie Stir Fry using the same process and “recipe” for over 20 years.

    This dish couldn’t be simpler to make! I came up with a simple Asian sauce after experimenting years ago, then simply added chicken and fresh veggies, cooked it together, and have been making chicken veggie stir fry like this ever since!

    The process is simple: stir-fry lightly seasoned, cubed chicken breasts and lots of fresh veggies.  Add a homemade Asian flavored sauce (so quick & easy to make), then serve on a bed of rice! The recipe is easy, packed with veggies, and is wonderfully delicious!

    Scroll Down For A Printable Recipe Card At The Bottom Of The Page

    How To Make Chicken Veggie Stir Fry

    TIMESAVING TIP: To save time, I cooked all three parts of this recipe at the same time (it’s easy to do).

    The first thing you will need to do is cook rice according to package directions, and prep the veggies and chicken while the rice is cooking. Make sure the veggies are cut into bite sized pieces. Cut boneless, skinless chicken breasts into 2 inch cubes.

    Fresh veggies are cut and prepped to add to chicken veggie stir fry.

    Chicken breasts are cut into cubes to cook for the chicken veggie stir fry.

    Make The Sauce For Chicken Veggie Stir Fry

    Prepare the stir-fry sauce by combining chicken broth, soy sauce, and ground ginger in a small bowl. Stir in the corn starch and mix well to dissolve any lumps, and set it aside when done.

    Asian sauce is made to coat the finished chicken veggie stir fry.

    Cook the Vegetables

    In a large skillet, heat HALF of the oil on medium-high heat until very hot, but not smoking.  Add all the veggies and cook for 6-7 minutes, stirring often until the veggies are crisp-tender.

    The veggies are cooked in a large skillet for the chicken veggie stir fry.

    Cook The Chicken

    In a separate medium skillet, heat the remaining half of the oil on medium-high until very hot, but not smoking.  Add the chicken pieces and cook, turning pieces over to cook through on all sides (about 3-4 minutes). To save time, cook the chicken while the veggies are cooking. Multi-tasking at it’s finest!

    Chicken breast is cooked before adding to the chicken veggie stir fry.

    When the chicken is finished cooking, add the pieces to the cooked veggies in the large skillet.

    The cooked chicken is added to the vegetables in large skillet.

    Add Sauce To Chicken Veggie Stir Fry

    Give the reserved sauce a good stir, then pour it over the chicken and veggies. Cook on medium-high heat, stirring often for about 2 minutes. The sauce will thicken as it cooks and will coat the chicken and veggies.

    An Asian-inspired sauce is added to the skillet full of chicken veggie stir fry.

    Once the sauce has thickened and coated everything, add the cashews, and stir to combine. Cook just for a minute, until the chicken veggie stir fry is heated through.

    Cashews are added to the chicken veggie stir fry, after sauce thickens.

    Serve The Chicken Veggie Stir Fry

    Serve the chicken veggie stir fry hot, on top of a bed of rice (brown or white).  Grab a fork (or chopsticks) and dig right in! It’s GOOD!

    Chicken veggie stir fry is served on a bed of white rice.White rice serves as the bed for the chicken veggie stir fry.

    Can I Change The Veggies OR Make This Dish Vegetarian?

    While you can adjust the veggies according to your taste and what you have available (I’ve done this many times), the basics you should have in this dish are onion, carrots, broccoli, and red peppers, because they add so much color (and flavor) to the dish. Any other veggies you choose to add will enhance the dish with additional flavor and color!!!

    If you are a Vegetarian, no problem! Simply omit the chicken from the dish!  Be creative… make it your own… and enjoy every bite! Have a wonderful day!

    Looking For More CHICKEN Recipes?

    You can find all of my recipes in the Recipe Index, which is located at the top of the page. I have LOTS of chicken recipes, including:

    Interested In More Recipes?

    Thank you for visiting this website. I appreciate you using some of your valuable time to do soIf you’re interested, I publish a newsletter 2 times per month (1st and 15th) with all the latest recipes, and other fun info. I would be honored to have you join our growing list of subscribers, so you never miss a great recipe! 

    There is a Newsletter subscription box on the top right side (or bottom) of each blog post, depending on the device you use, where you can easily submit your e-mail address (only) to be included in my mailing list.

    You Can Also Find Me On Social Media:

    Facebook page: The Grateful Girl Cooks!
    Pinterest:
    The Grateful Girl Cooks!
    Instagram:
    jbatthegratefulgirlcooks

    Author's signature

    0 from 0 votes
    Chicken And Veggie Stir Fry
    Prep Time
    10 mins
    Cook Time
    10 mins
    Total Time
    20 mins
     
    Chicken Veggie Stir Fry, with broccoli, carrots, bok choy, zucchini, onions,etc. in an Asian-inspired sauce, is served on rice in this delicious dish.
    Category: Entree
    Cuisine: Asian
    Keyword: chicken veggie stir fry
    Servings: servings
    Calories Per Serving: 483 kcal
    Author: JB @ The Grateful Girl Cooks!
    Ingredients
    For Stir-Fry
    • 3 boneless skinless chicken breasts , cut into 2 inch cubes
    • Ground ginger (to lightly season chicken with before cooking)
    • 6 cups fresh vegetables (total) *See NOTES section below.
    • 1/4 cup vegetable oil , divided
    • 1/3 cup roasted cashews
    For Stir-Fry sauce:
    • 1 cup chicken broth
    • 1/4 cup soy sauce
    • 2 Tablespoons corn starch
    • 1 teaspoon ground ginger
    For Serving: Cooked rice (prepared according to package directions)
      Instructions
      1. Cook rice according to pkg. directions.Cut veggies/chicken in bite size pieces while rice is cooking.
      2. Make stir-fry sauce by mixing chicken broth, soy sauce, and ground ginger in small bowl. Stir in corn starch and mix well. Set aside.
      3. In large skillet, heat HALF of the oil on medium-high heat until very hot, but not smoking. Add all veggies; continue cooking for about 6-7 minutes, stirring often until veggies are crisp-tender.
      4. In separate medium skillet, heat remaining half of the oil on medium-high until very hot, but not smoking. Add chicken; cook all sides until it turns white and is cooked through (about 3-4 minutes).
      5. Add cooked chicken to the veggies in large skillet.
      6. Give the sauce a stir, then pour it over chicken and veggies. Cook on medium-high heat, stirring often for about 2 minutes. The sauce will thicken as it cooks and will coat the chicken and veggies.
      7. When done, add the cashews, and stir to combine. Serve over hot cooked rice... and enjoy!
      Recipe Notes

      I used broccoli, onion, carrots, red & green bell peppers, bok choy, mushrooms, sugar snap peas, zucchini and yellow squash. Additional veggie add-ins might also include: fresh chopped asparagus, green onions, fresh green beans, celery, water chestnuts, canned/drained bean sprouts, etc.

      Nutrition Facts
      Chicken And Veggie Stir Fry
      Amount Per Serving (1 serving)
      Calories 483 Calories from Fat 198
      % Daily Value*
      Fat 22g34%
      Saturated Fat 12g75%
      Cholesterol 54mg18%
      Sodium 1253mg54%
      Potassium 1034mg30%
      Carbohydrates 45g15%
      Fiber 11g46%
      Protein 30g60%
      Vitamin A 13890IU278%
      Vitamin C 33.5mg41%
      Calcium 84mg8%
      Iron 4.2mg23%
      * Percent Daily Values are based on a 2000 calorie diet.

      Here’s one more to pin on your Pinterest boards!Chicken Veggie Stir Fry, with broccoli, carrots, bok choy, zucchini, onions, etc. in an Asian-inspired sauce, is served on rice.


      Save

      Save

      Save

      Save

      Save

      Save

      Save

      Save

      Save

      Save

      Save

      Save

      Save

      Save

      Save

      Save

      Save

      Cumin-Dusted Pork Cutlets With Citrus Sauce

      Cumin dusted pork cutlets are lightly seasoned with Southwestern spices, pan-seared, then served covered in a delicious, fresh citrus sauce.
      Cumin dusted pork cutlets are lightly seasoned with Southwestern spices, pan-seared, then served covered in a delicious, fresh citrus sauce.

      I recently made some delicious Cumin-Dusted Pork Cutlets with Citrus Sauce for our dinner and wanted to share this very simple recipe with you today. The recipe originated on the Epicurious website and sounded interesting, so I decided to try it, only making a couple tweaks to the original recipe. The pork cutlets are seasoned, then pan-seared.

      As soon as they are done, a quick and easy citrus sauce (with orange juice, lemon juice, and garlic) is made and then spooned over the cooked pork cutlets. The cutlets are then served. It really couldn’t be any easier!

      Scroll Down For A Printable Recipe Card At The Bottom Of The Page

      How To Make Cumin Dusted Pork Cutlets With Citrus Sauce

      If you are using thin, small cutlets, a serving size would be 2 cutlets per adult (and you will NOT need to pound them down).  You want to use fairly thin pork cutlets, so they will cook quickly.  Lightly season the pork with salt and pepper, and set aside.

      Raw pork cutlets on plate before pan-searing.

      **NOTE: I ended up using slightly larger and thicker boneless chops that I already had in my freezer for this meal, so I pounded each piece with a meat mallet between plastic wrap to flatten them out more (to about 1/2 inch). Since they were large pork chops to begin with, we had 1 cutlet per serving.

      Pork cutlets can be flattened with a meat mallet.

      Prepare Seasoning Mix For The Pork Chops

      Mix the flour, ground cumin, chili powder, garlic powder, salt and pepper on a large dinner plate until the ingredients are fully combined.

      Flour, cumin and other spices for pork cutlets, in bowl.

      Once mixed, coat both sides of each of the pork cutlets with seasoning. Make sure to shake off any excess flour from the pork cutlets.

      Pork cutlets are dredged in flour/spice mixture until covered, before cooking.

      Heat 1 Tablespoon of olive oil on medium-high heat in a large non-stick skillet. Once oil is very hot (but not smoking), add cutlets. They should sizzle when they hit the hot oil.

      Pork cutlets are seared in large skillet with oil.

      Cooking the Cumin Dusted Pork Cutlets

      Cook 3-4 minutes on first side, then turn over and cook other side for same amount of time (until fully cooked through and golden brown). Transfer the pork cutlets to a serving plate; keep them warm. If your pork cutlets are thicker, be sure to cook them longer. Chops should reach a safe, internal temperature of 145°F.

      Cumin dusted pork cutlets are browned on all sides.

      Making The Citrus Sauce For The Pork Cutlets

      Do not clean out the skillet (the brown bits on bottom of skillet help to flavor citrus sauce!). Add 2 Tablespoons olive oil to skillet; heat on medium.  Add minced garlic to skillet; cook for about 15-30 seconds, stirring constantly (don’t burn it!).

      Add fresh orange and lemon juices, and a few orange slices.  Bring this mixture to a boil, stirring occasionally. Cook the sauce until the liquid has reduced in volume and has thickened a bit. This will take about a minute or so. Taste the citrus sauce; add additional salt and pepper, if needed. Remove the sauce from the heat.

      Orange juice, garlic and orange slices in skillet for citrus sauce to top pork cutlets.

      Spoon the citrus sauce over the pork cutlets. Garnish each serving with thin orange slices and parsley (fresh or dried) if desired. Serve and enjoy!

      Cumin dusted pork cutlets on plate with rice, peas, and orange slices.

      The pork cutlets have a nice, slightly Southwestern flavor (the cumin does not overpower it).  There is enough sauce for 4 servings (single cutlet). If serving 2 cutlets per person, the recipe as written makes enough sauce for 2 servings.

      Hope you will consider making this easy, tasty pork cutlets meal. Have a great day, friends. Thanks for stopping by. I hope you will come back again soon.

      Looking For More PORK CHOP Recipes?

      You can find all of my recipes in the Recipe Index, located at the top of the page. I have quite a few delicious recipes featuring pork chops, including:

      Interested In More Recipes?

      Thank you for visiting this website. I appreciate you using some of your valuable time to do soIf you’re interested, I publish a newsletter 2 times per month (1st and 15th) with all the latest recipes, and other fun info. I would be honored to have you join our growing list of subscribers, so you never miss a great recipe!
      There is a Newsletter subscription box on the top right side (or bottom) of each blog post, depending on the device you use, where you can easily submit your e-mail address (only) to be included in my mailing list.

      You Can Also Find Me On Social Media:
      Facebook page: The Grateful Girl Cooks!
      Pinterest: The Grateful Girl Cooks!
      Instagram: jbatthegratefulgirlcooks

      Author's signature

      Recipe Adapted From:  http://www.epicurious.com/recipes/food/views/cumin-dusted-pork-cutlets-with-citrus-pan-sauce-105363

      0 from 0 votes
      Cumin Dusted Pork Cutlets With Citrus Sauce
      Prep Time
      10 mins
      Cook Time
      10 mins
      Total Time
      20 mins
       

      Cumin dusted pork cutlets are lightly seasoned with Southwestern spices, pan-seared, then served covered in a delicious, fresh citrus sauce.

      Category: Entree
      Cuisine: American
      Keyword: pork cutlets
      Servings: servings (1 per person)
      Calories Per Serving: 311 kcal
      Author: JB @ The Grateful Girl Cooks!
      Ingredients
      For Pork:
      • 4 boneless pork cutlets
      • 2 Tablespoons all purpose flour
      • 2 teaspoons ground cumin
      • 1/4 teaspoon garlic powder
      • 1/2 teaspoon chili powder
      • 1/2 teaspoon salt
      • 1/2 teaspoon ground black pepper
      • 1 Tablespoon olive oil
      For Citrus Sauce:
      • 2 Tablespoons olive oil
      • 2 garlic cloves , minced
      • 1/3 cup fresh orange juice
      • 3 Tablespoons fresh lemon juice
      • A few orange slices (see below)
      For garnish:
      • 1 orange , sliced into thin slices, then cut in half (divided)
      • Chopped fresh parsley or dried parsley
      Instructions
      1. Lightly season pork with salt and pepper, and set aside.
      2. On a plate, mix together flour, ground cumin, chili powder, garlic powder, salt and pepper. Once mixed, coat each pork cutlet (on both sides) with seasoning. Shake off excess flour.
      3. Heat 1 Tablespoon of olive oil on medium-high heat in a large non-stick skillet. Once oil is very hot (but not smoking), add cutlets. Cook 3-4 minutes on first side, then flip and cook other side for same amount of time (until cooked through and golden brown). Remove pork to serving plate; keep warm.
      4. Do not clean out the skillet. Add 2 Tablespoons olive oil to skillet; heat oil on medium. Add minced garlic to skillet; cook for about 15-30 seconds, stirring constantly (don't burn it!). Add fresh orange and lemon juices, and a few orange slices. Bring mixture to a boil, stirring occasionally, until liquid has reduced and thickened a bit (this will take about a minute or so). Taste sauce; add additional salt and pepper, if desired. Remove sauce from heat.
      5. Spoon sauce over the pork cutlets. Garnish with thin orange slices and parsley (fresh or dried) if desired. Serve and enjoy!
      Recipe Notes

      If a slightly sweeter citrus sauce is desired, add 1 teaspoon honey.

      Nutrition Facts
      Cumin Dusted Pork Cutlets With Citrus Sauce
      Amount Per Serving (1 piece)
      Calories 311 Calories from Fat 135
      % Daily Value*
      Fat 15g23%
      Saturated Fat 3g19%
      Cholesterol 88mg29%
      Sodium 363mg16%
      Potassium 648mg19%
      Carbohydrates 10g3%
      Fiber 1g4%
      Sugar 5g6%
      Protein 31g62%
      Vitamin A 200IU4%
      Vitamin C 32.6mg40%
      Calcium 32mg3%
      Iron 1.5mg8%
      * Percent Daily Values are based on a 2000 calorie diet.

      Here’s one more to pin on your Pinterest boards!Cumin dusted pork cutlets are lightly seasoned with Southwestern spices, pan-seared, then served covered in a delicious, fresh citrus sauce.

      Save

      Save

      Save

      Save

      Save

      Save

      Save

      Save

      Save

      Save

      Save

      Save

      Easy Meatballs for Spaghetti

      Learn how to make yummy, quick easy meatballs for spaghetti or other pasta (serves 4), using only one pound of ground beef!
      Learn how to make yummy, quick easy meatballs for spaghetti or other pasta (serves 4), using only one pound of ground beef!
      I typically use Italian sausage links when I prepare spaghetti and sauce, but we also really enjoy our pasta with a fire roasted garlic marinara sauce and these easy meatballs, too!

      Sometimes we just want spaghetti and meatballs- they really hit the spot! It’s completely easy to make 10-12 delicious Italian-seasoned meatballs using only one pound of hamburger meat and a few other readily available ingredients.

      I’ve been making these easy meatballs for spaghetti this way for many, many years, and enjoy the minimal prep time involved!  You can even make a double batch of the meatballs and freeze them to use for another meal, which can save you precious time!  Here’s how easy it is to prepare them:

      Scroll Down For A Printable Recipe Card At The Bottom Of The Page

      Prepare The Easy Meatballs For Spaghetti

      In medium sized bowl, combine ground beef, salt, pepper, garlic powder, oregano, diced onion, and freshly grated Parmesan cheese. Mix well, to combine ingredients.

      Ground beef is mixed with Parmesan cheese, spices and onions.
      Using your (clean) hands, grab a portion of the meat mixture and form it into a ball, rolling it between your hands.  The ones I made were about 2 inches wide, so I was able to get 10 fairly good-sized easy meatballs out of one pound of meat.

      If you make ’em just a tad smaller, you should be able to make 12 or more meatballs. Set the meatballs (once formed) onto a plate or wax paper.

      Form the ground beef mixture into small balls before cooking.

      Brown The Meatballs For Spaghetti

      Heat 1 Tablespoon oil (vegetable or olive) in a large non-stick skillet on medium heat until oil and skillet are hot (but not smoking).  Add the meatballs carefully to the skillet. They should sizzle as they hit the hot oil.  Cook the meatballs until browned on the bottom, then carefully turn them over.

      Continue to cook the meatballs until all sides are brown. They do NOT have to be completely cooked through – they will finish cooking in the sauce later. When done, transfer the meatballs to paper towels to absorb the grease.

      Browning easy meatballs in skillet.The meat is browned on all sides in skillet.
      Heat The Meatballs In Sauce

      In a separate large saucepan, heat up spaghetti sauce (whatever kind of sauce you have on hand, whether it’s homemade or a purchased jar, just make sure you have enough sauce for 4 servings)!  Heat the sauce on medium-low.

      Carefully add the meatballs to the sauce. Spoon sauce over the top of each meatball. Let the meatballs and sauce continue to cook (uncovered) on medium-low for about 25-30 minutes, occasionally spooning sauce over them as they cook.

      Meatballs are placed in spaghetti sauce to finish cooking.The easy meatballs are covered with spaghetti sauce in pan to finish cooking.

      When meatballs are about halfway through cooking time, cook spaghetti noodles in separate pan, according to package directions. Drain pasta.  When they are done (and pasta is finished cooking), remove meatballs from spaghetti sauce (keep warm).

      Serve Easy Meatballs For Spaghetti

      Mix the cooked and drained pasta noodles with the hot spaghetti sauce.  Serve the pasta onto individual plates or into bowls. Spoon any leftover sauce onto the top of the pasta.  Top each serving with a few of these easy meatballs.  BOOM! Sprinkle the meatballs with some finely grated Parmesan cheese, and serve!

      Easy meatballs for spaghetti are served in white bowl, and are ready to eat.

      This really is an economical and delicious classic meal, with 4 healthy sized portions of meatballs for spaghetti using only one pound of ground beef!  Our oldest son popped in for a visit the day after I made this meal, and he enjoyed a big plate of leftover spaghetti and meatballs for lunch!  Yay for leftovers!

      Hope you’ll give these delicious, easy meatballs a try! Thank you for stopping by, and I trust you will come back soon. Have a great day.

      Looking For More MEATBALL Recipes?

      You can find all of my recipes in the Recipe Index, located at the top of the page. I have several recipes featuring meatballs, including:

      Interested In More Recipes?

      Thank you for visiting this website. I appreciate you using some of your valuable time to do soIf you’re interested, I publish a newsletter 2 times per month (1st and 15th) with all the latest recipes, and other fun info. I would be honored to have you join our growing list of subscribers, so you never miss a great recipe!
      There is a Newsletter subscription box on the top right side (or bottom) of each blog post, depending on the device you use, where you can easily submit your e-mail address (only) to be included in my mailing list.

      You Can Also Find Me On Social Media:
      Facebook page: The Grateful Girl Cooks!
      Pinterest: The Grateful Girl Cooks!
      Instagram: jbatthegratefulgirlcooks

      Author's signature

      0 from 0 votes
      Easy Meatballs for Spaghetti
      Prep Time
      10 mins
      Cook Time
      30 mins
      Total Time
      40 mins
       

      Learn how to make yummy, quick easy meatballs for spaghetti or other pasta (serves 4), using only one pound of ground beef!

      Category: Entree
      Cuisine: Italian
      Keyword: meatballs
      Servings: (3 meatballs per serving)
      Calories Per Serving: 382 kcal
      Author: JB @ The Grateful Girl Cooks!
      Ingredients
      • 1 pound ground beef
      • 1/2 teaspoon salt
      • 1/4 teaspoon black pepper
      • 1/4 teaspoon garlic powder
      • 1/4 teaspoon dried oregano
      • 1/2 cup diced white onion
      • 1/2 cup finely grated Parmesan cheese
      • 1 Tablespoon olive oil
      • Spaghetti noodles (enough for 4 servings)
      • Prepared Spaghetti Sauce (enough for 4 servings)
      • Additional finely grated Parmesan cheese , for garnish
      Instructions
      1. In medium sized bowl, combine ground beef, salt, pepper, garlic powder, oregano, diced onion, and finely grated Parmesan cheese. Mix well to combine ingredients.
      2. Using clean hands, grab a portion of the meat mixture and form it into a ball, rolling it between your hands. You should be able to make 12 or more small meatballs. Set meatballs (once formed) onto a plate or wax paper.

      3. Heat 1 Tablespoon oil (vegetable or olive) in a large non-stick skillet. Heat on medium until oil and skillet are hot (but not smoking). Add meatballs. They should sizzle as they hit skillet. Cook until brown on bottom, then carefully turn over. Continue to cook until all sides are brown (meatballs do NOT have to be completely cooked through - they will finish cooking in sauce later). Transfer to paper towels to drain.

      4. In a separate large saucepan, heat up spaghetti sauce (enough sauce for 4 servings) on medium-low. Carefully add meatballs to sauce. Spoon sauce over the top of each meatball. Let meatballs and sauce continue to cook on medium-low for about 30 minutes, occasionally spooning more sauce over the meatballs as they cook.

      5. When meatballs are halfway through cooking time, cook spaghetti noodles in separate pan, according to package directions. Drain. When done, remove meatballs from spaghetti sauce (keep warm). Mix cooked, drained noodles with the hot spaghetti sauce. Serve up the pasta onto individual plates or into bowls. Spoon any leftover sauce onto pasta. Top each serving with 3 meatballs. Garnish with grated Parmesan cheese, and serve!

      Recipe Notes

      *Caloric calculation is for meatballs only (3 per serving). 

      Nutrition Facts
      Easy Meatballs for Spaghetti
      Amount Per Serving (3 meatballs)
      Calories 382 Calories from Fat 261
      % Daily Value*
      Fat 29g45%
      Saturated Fat 11g69%
      Cholesterol 91mg30%
      Sodium 558mg24%
      Potassium 351mg10%
      Carbohydrates 2g1%
      Protein 24g48%
      Vitamin A 110IU2%
      Vitamin C 1.5mg2%
      Calcium 164mg16%
      Iron 2.4mg13%
      * Percent Daily Values are based on a 2000 calorie diet.

      Here’s one more to pin on your Pinterest boards!Learn how to make yummy, quick easy meatballs for spaghetti or other pasta (serves 4), using only one pound of ground beef!


      Save

      Save

      Save

      Save

      Save

      Save

      Save

      Save

      Save

      Save

      Save

      Save

      Save

      Save

      Save

      Save

      Save

      Save

      Save

      Orange And Rosemary Glazed Salmon

      This EASY recipe for orange rosemary glazed salmon (inspired by Cooking Light) is topped with a fresh citrus glaze, and is ready in about 20 minutes!This EASY recipe for orange rosemary glazed salmon (inspired by Cooking Light) is topped with a fresh citrus glaze, and is ready in about 20 minutes!
      I tried a new recipe for Orange Rosemary Glazed Salmon the other evening for our dinner. Whoa! It tasted absolutely fantastic, so I want to share the recipe on my blog today. Hopefully you will be inspired to make this salmon for your own dinner… you won’t regret it!

      My husband and I love salmon, so I am constantly on the search for new ways to prepare it. I found this recipe on Pinterest, and it is now quite possibly one of my favorite recipes for  salmon.  It’s SOOOO good!

      The original recipe was inspired by Cooking Light, and features pan-seared salmon fillets covered with a fresh, thickened citrus glaze. It’s delicious, and so very easy to prepare!  The recipe makes 4 servings.

      Scroll Down For A Printable Recipe Card At the Bottom Of The Page

      How To Prepare Orange Rosemary Glazed Salmon

      I only cooked 2 salmon fillets since only two of us were eating, but I kept the sauce amount the same as written (and saved the extra sauce for another time).  Here’s how to make this delicious orange rosemary glazed salmon:

      Heat olive oil on medium-high heat in a large non-stick skillet. Salt and pepper salmon fillets on both sides. When olive oil is really hot (but not smoking), add the salmon to skillet (it should sizzle when it hits the pan).

      Two salmon fillets searing in copper skillet

      Cook the salmon fillets for 3-4 minutes, then carefully turn salmon over and cook the other side for 3-4 minutes until fully cooked.

      When done and golden brown, remove the browned salmon from the skillet (leaving the hot oil in the skillet). Keep the cooked salmon warm.

      Two golden brown seared salmon fillets in skillet

      Make The Sauce For Orange Rosemary Glazed Salmon

      Turn the heat under the skillet to medium-low. Add the minced garlic and rosemary, and cook, stirring often, for about 20-30 seconds.

      Minced garlic and rosemary cooking in copper skillet

      Pour 1/4 cup (4 Tablespoons) of chicken broth to the skillet. Stir the ingredients, to combine. Cook this on a low simmer until most of the liquid has reduced in volume.

      Chicken broth being poured into orange glaze sauce in skillet

      The next thing to do is to add the orange zest, lemon juice, honey and orange juice to the skillet. Stir to combine.

      Now the orange sauce will begin to smell wonderful!

      Orange juice being added to skillet for glaze

      In small cup, stir together the remaining Tablespoon of chicken broth with the cornstarch until smooth. 

      Pour this mixture into the skillet, stirring well, as it is added.  Season the sauce with salt and pepper, to taste.

      Cornstarch and broth being added to orange sauce in pan

      Bring the orange sauce to a boil. Boil it for one minute, stirring constantly. The sauce will thicken as it cooks.

      Cooking sauce for orange rosemary glazed salmon.

      Serve The Orange Rosemary Glazed Salmon

      Return the cooked salmon back into the skillet with the sauce. Spoon some of the sauce over each piece to cover the salmon.

      Two pieces of salmon with orange slices in skillet with sauce

      Carefully remove the orange rosemary glazed salmon from the pan, and transfer to serving plates.  Spoon additional sauce over each piece, if desired (it’s good- highly recommend).

      Garnish each orange rosemary glazed salmon fillet with a fresh rosemary sprig, and fresh orange slice, if desired. Serve, and enjoy this wonderful dinner!

      Orange rosemary glazed salmon, green beans and rice on a beige plate.

      A orange rosemary glazed salmon fillet on plate, with green beans and rice.

      I really hope you will try this recipe for orange rosemary glazed salmon. The fresh citrus glaze tastes absolutely delicious on the salmon, and really enhances it. 

      We said “this is REALLY good” several times while eating it, and I’m confident you will enjoy it, as well! Have a wonderful day.

      Looking For More SALMON Recipes?

      You can find all of my salmon recipes in the Recipe Index, located at the top of the page. I have lots of delicious recipes using salmon, including:

      Interested In More Recipes?

      Thank you for visiting this website. I appreciate you using some of your valuable time to do soIf you’re interested, I publish a newsletter 2 times per month (1st and 15th) with all the latest recipes, and other fun info. I would be honored to have you join our growing list of subscribers, so you never miss a great recipe!
      There is a Newsletter subscription box on the top right side (or bottom) of each blog post, depending on the device you use, where you can easily submit your e-mail address (only) to be included in my mailing list.

      You Can Also Find Me On Social Media:
      Facebook page: The Grateful Girl Cooks!
      Pinterest: The Grateful Girl Cooks!
      Instagram: jbatthegratefulgirlcooks

      Author's signature

      Recipe Source:  http://www.cookingclassy.com/orange-rosemary-glazed-salmon/

      0 from 0 votes
      Orange And Rosemary Glazed Salmon
      Prep Time
      5 mins
      Cook Time
      15 mins
      Total Time
      20 mins
       
      This EASY recipe for orange rosemary glazed salmon (inspired by Cooking Light) is topped with a fresh citrus glaze, and is ready in about 20 minutes!
      Category: Entree-Seafood
      Cuisine: American
      Keyword: orange rosemary glazed salmon
      Servings: servings
      Calories Per Serving: 336 kcal
      Author: JB @ The Grateful Girl Cooks!
      Ingredients
      • 2 teaspoons olive oil
      • 4 (6 ounce) skinless salmon fillets (about 1 inch thick)
      • Salt and ground black pepper
      • 2 cloves garlic , minced
      • teaspoons minced fresh rosemary
      • 5 Tablespoons chicken broth (divided-4 T. in one cup, 1 T. in another))
      • teaspoons orange zest
      • 2 teaspoons lemon juice
      • Tablespoons honey
      • 2/3 cup fresh squeezed orange juice
      • teaspoons cornstarch
      • 2 Oranges (thinly sliced) and sprigs of fresh rosemary for garnish (if desired)
      Instructions
      1. Heat olive oil on medium-high heat in large non-stick skillet. Salt and pepper salmon fillets on both sides. When olive oil is hot (but not smoking), add salmon to skillet (it should sizzle when it hits the pan). Cook salmon for 3-4 minutes, then carefully turn salmon over and cook other side for 3-4 minutes, until fully cooked. When done and golden brown, remove salmon from skillet (leaving hot oil in the skillet). Keep salmon warm.
      2. Turn heat under skillet to medium-low. Add minced garlic and rosemary; stir and cook for about 20 seconds. Add 1/4 cup chicken broth (4 Tablespoons of the original 5). Stir well. Cook on a low simmer until most of liquid has reduced. Add orange zest, lemon juice, honey and orange juice to skillet. Stir.
      3. In small cup, stir together remaining Tablespoon of chicken broth with cornstarch. Pour into skillet, stirring as you add it. Add salt and pepper to taste.
      4. Bring mixture to a boil. Boil for one minute, stirring constantly. The sauce will thicken as it cooks. Return cooked salmon to skillet. Spoon sauce over each piece to cover. Garnish each fillet with a thin orange slice, and a sprig of fresh rosemary (if desired). Carefully remove salmon and transfer to individual serving plates. Spoon additional sauce over each piece. Serve and enjoy!
      Nutrition Facts
      Orange And Rosemary Glazed Salmon
      Amount Per Serving (1 g)
      Calories 336 Calories from Fat 108
      % Daily Value*
      Fat 12g18%
      Saturated Fat 1g6%
      Cholesterol 93mg31%
      Sodium 144mg6%
      Potassium 1020mg29%
      Carbohydrates 19g6%
      Fiber 2g8%
      Sugar 15g17%
      Protein 34g68%
      Vitamin A 285IU6%
      Vitamin C 53.6mg65%
      Calcium 61mg6%
      Iron 1.4mg8%
      * Percent Daily Values are based on a 2000 calorie diet.

      Here’s one more to pin on your Pinterest boards!This EASY recipe for orange rosemary glazed salmon (inspired by Cooking Light) is topped with a fresh citrus glaze, and is ready in about 20 minutes!


      Save

      Save

      Save

      Save

      Save

      Save

      Save

      Save

      Save

      Save

      Save

      Save

      Save

      Save

      Save

      Save

      Chicken and Asparagus Risotto

      Creamy chicken and asparagus risotto, with Arborio rice, Parmesan cheese and mushrooms is a delicious, filling, “all in one” Italian inspired dish!Creamy chicken and asparagus risotto, with Arborio rice, Parmesan cheese and mushrooms is a delicious, filling, "all in one" Italian inspired dish!

      I recently made Chicken Asparagus Risotto for our dinner. And let me tell you… it tasted GOOD. Lip-smackin’ GOOD. Creamy Arborio rice, chicken breast, Parmesan cheese, asparagus and mushrooms all come together in this flavor-filled, delicious meal! We loved it!

      I couldn’t get enough of this chicken asparagus risotto! Even the leftovers for lunch the next day were wonderful! If you love risotto, you might also enjoy my recipes for Pumpkin Risotto and Mushroom Risotto with Pan-Seared Shrimp!

      Scroll Down For A Printable Recipe Card At The Bottom Of The Page

      What Kind Of Rice Is Used To Make Chicken Asparagus Risotto?

      Did you know that risotto is made with Arborio rice, which is shorter and fatter than most grains of rice?  Arborio rice is almost exclusively used to make risotto, which is a Northern Italian classic dish.

      To put it into very basic terms, risotto is rice which has been cooked in broth or stock with other ingredients to a creamy consistency.  It is one of the most common ways of cooking rice, and let me tell you, risotto is DELICIOUS!

      The recipe for making chicken asparagus risotto is pretty straightforward. If you do the prep work right at the beginning, then this chicken asparagus risotto is a breeze to put together.  I used some baked chicken leftovers, which also saved some prep time!

      Prepare The Asparagus

      The first thing you will need to do is remove the woody ends of the asparagus stalks, and discard. Cut each of the stalks into 2″ pieces.

      Place asparagus pieces into 1 inch of simmering water in skillet, and cook on medium high heat until asparagus is fork-tender, adding more water, if needed (about 10 minutes). Once cooked, you will need to drain the asparagus.

      Prepare the Mushrooms And The Chicken

      While the asparagus cooks, lightly sauté sliced the mushrooms in butter until tender, in a separate pan.

      Cut the chicken into small bite sized pieces and cook. You can boil, broil, or grill it OR use rotisserie chicken or  leftovers. I used leftover chicken from my recipe for Homemade Shake And Bake Chicken). Set aside the cooked asparagus, mushrooms and chicken pieces. See NOTES section of printable recipe (below)for a quick way to cook chicken for this recipe.

      Asparagus is cooked for risotto

      Make The Risotto

      Start the risotto by melting butter and olive oil in large saucepan over medium heat. Add chopped onion. Cook for 5 minutes, stirring the onions frequently.

      Chopped onion is cooked in butter and olive oil for risotto

      Add the Arborio rice to the cooked onions; stir frequently and continue cooking until the rice begins to turn a light golden brown color.

      Arborio rice is added to cooked onions for risotto

      Pour the white wine into the pan. Let this liquid come to a boil, then cook, stirring occasionally, until it has been absorbed into the rice.

      White wine is added to risotto mixture in skillet

      “Building In The Flavor” To The Risotto

      Yes… the flavor is slowly “built in” to the risotto! Pour 1 cup of chicken stock (or broth) into the pan. Stir the risotto frequently, and keep the heat at a medium simmer. 

      Continue cooking the risotto until almost all of the liquid has been absorbed, then add 1/4 cup more of the broth, stirring well. Repeat this process (rice absorbs liquid, add 1/4 cup more liquid) until all the broth is gone. 

      This should take between 20 and 25 minutes. (By adding the broth a little bit at a time then cooking until it has been absorbed, it allows the rice to get really creamy. Don’t rush this step!)

      Chicken broth is added to risotto mixture cooking in the skillet

      Finishing The Chicken Asparagus Risotto

      After you’ve added the last portion of broth, but just before it is fully absorbed, add the cooked asparagus and mushrooms to the risotto.

      Continue cooking the risotto, letting the liquid finish being absorbed into the rice. When finished, the risotto should be creamy and tender.

      Cooked asparagus and mushrooms added to risotto in skillet
      Remove the pan from the heat.  Add the cooked chicken pieces to the creamy risotto. Now the chicken asparagus is looking good, and is close to being done!

      Chicken breast chunks added to asparagus in creamy risotto
      Add the freshly grated Parmesan cheese to the chicken and asparagus risotto. Stir well, to combine all the ingredients fully.  Take a bite, and lightly season with salt and pepper, to suit your taste.

      Fresh grated Parmesan cheese is added to risotto

      Serve The Chicken and Asparagus Risotto!

      Make sure everything is fully heated through, then dish up the chicken asparagus risotto onto individual plates or into bowls. Garnish each serving with some finely grated Parmesan cheese and chopped fresh chives (or parsley), if desired.

      There you have it… a nice serving of chicken and asparagus risotto! Grab a fork, and prepare to be delighted! I really think you will love this creamy, flavor-filled risotto!

      Chicken asparagus risotto is served in white bowl

      Chicken and asparagus risotto is garnished with Parmesan cheese and chives

      Enjoy the creamy rice, chunks of chicken, Parmesan cheese, and the fresh asparagus in this comforting, filling dish. It truly tastes wonderful!  Sure hope you will consider trying this recipe for chicken asparagus risotto. We LOVE it, and hope you will, too!

      Be sure to check out ALL of my recipes in the Recipe Index, which is located at the top of the page. Have a great day, and come back soon!

      Want More Recipes? Get My FREE Newsletter!

      I publish a newsletter 2 times per month (1st and 15th) with lots of recipes, tips, etc..
      Would you like to join our growing list of subscribers?

      There is a Newsletter subscription box on the top right (or bottom) of each blog post, depending on the device you use.
      You can submit your e-mail address there, to be added to my mailing list.

      Find Me On Social Media:

      Facebook page: The Grateful Girl Cooks!
      Pinterest:
      The Grateful Girl Cooks!
      Instagram:
      jbatthegratefulgirlcooks

      Author's signatureRecipe Adapted From: http://www.thegratefulgirlcooks.com/mushroom-risotto-with-pan-seared-shrimp/

      ↓↓ PRINTABLE RECIPE BELOW ↓↓

      0 from 0 votes
      Chicken and Asparagus Risotto
      Prep Time
      15 mins
      Cook Time
      30 mins
      Total Time
      45 mins
       
      Creamy chicken asparagus risotto, with Arborio rice, Parmesan cheese and mushrooms is a delicious, filling, "all in one" Italian inspired dish!
      Category: Entree
      Cuisine: Italian
      Keyword: chicken asparagus risotto
      Servings: -4 servings
      Calories Per Serving: 539 kcal
      Author: JB @ The Grateful Girl Cooks!
      Ingredients
      For Add-ins:
      • 6-8 asparagus stalks (woody ends discarded, cut into 2 inch pieces), cooked until crisp-tender.
      • 2 pre-cooked lightly seasoned chicken breasts (baked, boiled, grilled,rotisserie), cut in 1-2" cubes.
      • 8 oz. package sliced mushrooms , (sautéed in 2 teaspoons butter)
      For risotto:
      • 2 Tablespoons butter
      • 2 Tablespoons olive oil
      • 1 cup diced white onion
      • 1 cup Arborio rice (no substitutes)
      • 1/3 cup dry white wine
      • cups chicken stock (or broth)
      • 3/4 cup finely grated Parmesan cheese
      • Salt and Pepper , to taste
      For garnish:
      • Additional Parmesan cheese
      • Fresh chives , sliced thin (may substitute chopped parsley, if desired)
      Instructions
      Do prep work first:
      1. Remove woody ends of the asparagus and discard. Cut remaining stalks into 2 inch pieces. Place asparagus pieces into 1 inch of simmering water in skillet, and cook on medium high heat until asparagus is fork-tender (about 10 minutes). Drain.
      2. While cooking asparagus, in separate pan lightly sauté sliced mushrooms in 2 teaspoons butter until tender.
      3. Cut and cook chicken into small bite sized pieces (boil, broil, grill OR use rotisserie chicken or leftovers. Set aside asparagus, mushrooms and cooked chicken.
      To Prepare Risotto:
      1. Melt olive oil and butter in large saucepan over medium heat. Add chopped onion. Cook for 5 minutes, stirring frequently. Add Arborio rice to onions; stir constantly and cook until rice turns a light golden brown color. Add white wine. Let the liquid come to a boil, then cook until it has been absorbed into rice.
      2. Pour 1 cup of chicken stock (or broth) into pan. Stir frequently, and keep heat at a medium simmer. Continue cooking until almost all of the liquid has been absorbed, then add 1/4 cup more broth, stirring well. Continue this process (rice absorbs liquid, add 1/4 cup more liquid) until all broth is gone. This will take between 20 and 25 minutes. (By adding the broth a little bit at a time then cooking until it has been absorbed, it allows the rice to get really creamy. Don't rush this step!)
      3. After you've added the last portion of broth, but just before it's fully absorbed, add cooked asparagus and mushrooms and stir. Continue cooking, letting liquid finish being absorbed into rice. When finished, rice should be tender.
      4. Remove pan from the heat. Add cooked chicken to rice. Add freshly grated Parmesan cheese to rice. Stir to combine all ingredients. Taste, and lightly season with salt and pepper.
      5. Make sure everything is warm, then serve onto individual plates or bowls. Garnish with additional finely grated Parmesan cheese and chopped fresh chives (or parsley), if desired. Enjoy this chicken asparagus risotto!

      Recipe Notes

      If you do not have pre-cooked or leftover chicken, a quick way to get this done is to cut chicken breast into cubes, lightly season with salt and pepper, then quickly cook in a hot skillet (with a Tablespoon of olive oil) on medium-high heat. Will only take a few minutes.

      Nutrition Facts
      Chicken and Asparagus Risotto
      Amount Per Serving (1 serving)
      Calories 539 Calories from Fat 189
      % Daily Value*
      Fat 21g32%
      Saturated Fat 8g50%
      Cholesterol 72mg24%
      Sodium 623mg27%
      Potassium 729mg21%
      Carbohydrates 52g17%
      Fiber 3g13%
      Sugar 6g7%
      Protein 29g58%
      Vitamin A 535IU11%
      Vitamin C 6.4mg8%
      Calcium 230mg23%
      Iron 3.7mg21%
      * Percent Daily Values are based on a 2000 calorie diet.

      Here’s one more to pin on your Pinterest boards!Creamy chicken and asparagus risotto, with Arborio rice, Parmesan cheese and mushrooms is a delicious, filling, "all in one" Italian inspired dish!


      Save

      Save

      Save

      Save

      Save

      Save

      Save

      Save

      Save

      Save

      Save

      Save

      Save

      Save

      Save

      Save

      Save

      Save

      Trout In Lemon Garlic Butter Sauce

      Fresh trout fillets are pan-seared and served with a light lemon, garlic, butter, and wine sauce for a delicious main course!Fresh trout fillets are pan-seared and served with a light lemon, garlic, butter, and wine sauce for a delicious main course!
      If you or someone in your family had a great day fishing and you’re looking for a new recipe to cook all that fish, why not try this recipe for Trout In Lemon Garlic Butter Sauce?!

      There are so many ways to cook trout. I decided to try this recipe I found on Pinterest, after my hubby bought a few trout at Costco. Ha Ha!  No fishing for him, except to fish through the seafood section, looking for fresh seafood.

      Once home, he had to fillet the fish, debone them and chop their little heads off for me— ugh. There are just some things I will NOT do. Ha Ha! The method for preparing this recipe is simple. Here’s how to make the trout:

      Scroll Down For A Printable Recipe Card At The Bottom Of The Page

      Prepare The Trout

        NOTE: You will want to use boneless trout fillets (with the skin on one side) for this recipe. With the skin side down, lightly season the trout with salt and Italian seasoning (only on one side). 

      Cook The Trout Fillets

      Heat olive oil on medium heat in a LARGE skillet until hot, but not smoking.  Add the trout fillets, skin side UP to the hot oil.

      The fish fillets are lightly seasoned before cooking.

      Cook the trout for 4-5 minutes on medium heat, then carefully flip the fillets over to skin side DOWN. You might need to add a little bit more oil before turning them over, because you don’t want them to stick to skillet.  Cook an additional 3-4 minutes.

      Let The Cooked Fish “Rest”

      Once the fish is cooked, remove your skillet from the heat source. Cover the skillet with a lid, and let the cooked trout “rest” for 5-10 minutes. Leave the lid on the skillet.

      Once the fish is done resting, carefully lift up each piece of trout and remove the skin from the bottom. It should peel off nicely. 

      Discard skin, and carefully place fillets on a piece of foil and keep warm.  Do not clean out the skillet, because you want all the little tidbits and oils left in there!

      Cooking the trout in oil, in a large skillet.

      The fish fillets are turned over, halfway through cooking time.

      Make A Lemon Garlic Butter Sauce For The Trout

      To the oils left in the skillet, add minced garlic, fresh lemon juice and white wine. Cook this liquid for 1 minute on medium-low heat, stirring occasionally. Turn off the heat.

      Add the butter and chopped fresh parsley to the skillet. Stir well, to combine, and continue cooking on low heat until the butter has melted.

      Garlic, lemon juice and white wine are added to skillet to make sauce for the fish.

      Butter and fresh parsley is added to the sauce in skillet.

      Add The Cooked Trout To The Lemon Butter Garlic Sauce

      Once the butter has melted and the sauce is creamy, gently add the trout fillets back into the skillet.  Spoon sauce over the top of the fish.

      If necessary, reheat on low, just until fish reaches serving temperature.

      Trout In Lemon Garlic Butter Sauce cooking in skillet.

      Serve The Trout In Lemon Garlic Butter Sauce

      Place the cooked trout onto individual serving plates.  Spoon a bit more of the sauce over each piece of fish. Sprinkle with the remaining chopped parsley for garnish… and serve!

      A piece of Trout In Lemon Garlic Butter Sauce on a plate, with peas.

      That’s it!  So now, whether you are fishing some of the great lakes in the United States OR fishing the seafood counter at a grocery store, you have a new way to prepare trout in lemon garlic butter sauce! 

      If you have a smoker or Traeger grill, be sure to check out my recipe for Traeger Grill Smoked Trout. You might also enjoy my recipe for Pan-Seared Steelhead Trout, because it is delicious, too!

      Thanks for stopping by today. I invite you to come back soon for more yummy recipes. Have a great day!

      Looking For More SEAFOOD Recipes?

      You can find all of my recipes in the Recipe Index, located at the top of the page. I have many recipes, including:

      Interested In More Recipes?

      Thank you for visiting this website. I appreciate you using some of your valuable time to do soIf you’re interested, I publish a newsletter 2 times per month (1st and 15th) with all the latest recipes, and other fun info. I would be honored to have you join our growing list of subscribers, so you never miss a great recipe!
      There is a Newsletter subscription box on the top right side (or bottom) of each blog post, depending on the device you use, where you can easily submit your e-mail address (only) to be included in my mailing list.

      You Can Also Find Me On Social Media:
      Facebook page: The Grateful Girl Cooks!
      Pinterest: The Grateful Girl Cooks!
      Instagram: jbatthegratefulgirlcooks

      Author's signature

      Recipe Source: http://juliasalbum.com/2015/10/trout-with-garlic-lemon-butter-herb-sauce/

      ↓↓ PRINTABLE RECIPE BELOW ↓↓

      0 from 0 votes
      Trout In Lemon Garlic Butter Sauce
      Prep Time
      10 mins
      Cook Time
      20 mins
      Total Time
      30 mins
       

      Fresh trout fillets are pan-seared and served with a light lemon, garlic, butter, and wine sauce for a delicious main course!

      Category: Entree
      Cuisine: American
      Keyword: trout
      Servings: servings
      Calories Per Serving: 379 kcal
      Author: JB @ The Grateful Girl Cooks!
      Ingredients
      • 3-4 Trout fillets (3-4 medium sized fillets, with skin on bottom or 2 LARGE)
      • 2 Tablespoons olive oil
      • Salt (to generously season fish)
      • teaspoons Italian seasoning
      • 4 cloves garlic , minced
      • 3 Tablespoons fresh squeezed lemon juice
      • 2-3 Tablespoons white wine
      • 2 Tablespoons butter (room temp)
      • 2 Tablespoons parsley (finely chopped), divided
      Instructions
      1. With skin side down, lightly season the trout with salt and Italian seasoning (only on one side). Heat olive oil on medium heat in a LARGE skillet until hot, but not smoking. Add trout fillets, skin side UP, flesh side DOWN to hot oil. Cook for 4-5 minutes on medium, then carefully flip fillets over to skin side DOWN. You might need to add a little bit more oil before turning them over (you don't want them to stick to skillet). Cook an additional 3-4 minutes. Once fish is cooked, remove skillet from the heat source, cover the skillet with a lid, and let trout rest for 5-10 minutes (leaving cover on).
      2. Once the fish is done resting, carefully lift up each piece of fish and remove the skin from the bottom of the fish. It should peel off easily. Discard skin, and carefully place fillets on a piece of foil and keep warm. Do not clean out the skillet (you want all the little tidbits and oils left in there!)
      3. To the oils left in the skillet, add minced garlic, fresh lemon juice and white wine. Cook this for 1 minute on medium-low heat, stirring occasionally. Turn off heat. Add butter and 1 Tablespoon chopped fresh parsley. Stir to combine, and continue cooking on low until butter has melted.
      4. Once the butter has melted and the sauce is creamy, gently add trout fillets back into skillet. Spoon sauce over the top of fish. If necessary, reheat in skillet, until fish reaches serving temp (on low).
      5. Place trout onto individual serving plates. Spoon a bit more sauce over fish, sprinkle with remaining chopped parsley for garnish... and serve!
      Nutrition Facts
      Trout In Lemon Garlic Butter Sauce
      Amount Per Serving (1 serving)
      Calories 379 Calories from Fat 216
      % Daily Value*
      Fat 24g37%
      Saturated Fat 6g38%
      Cholesterol 113mg38%
      Sodium 150mg7%
      Potassium 657mg19%
      Carbohydrates 2g1%
      Protein 35g70%
      Vitamin A 455IU9%
      Vitamin C 8.8mg11%
      Calcium 93mg9%
      Iron 3mg17%
      * Percent Daily Values are based on a 2000 calorie diet.

      Here’s one more to pin on your Pinterest boards!Fresh trout fillets are pan-seared and served with a light lemon, garlic, butter, and wine sauce for a delicious main course!


      Save

      Save

      Save

      Save

      Save

      Save

      Save

      Save

      Save

      Save

      Save