Chicken Divan is a delicious, easy to make casserole, with chicken breasts and broccoli, baked in a creamy cheese sauce, and served on a bed of fluffy rice.
Over 39 years ago, just before getting married, a friend gave me this recipe for Chicken Divan. At this point in my life it would be difficult to count how many times I have made this fantastic casserole recipe over the years. It has been a family favorite!
According to Wikipedia, Chicken Divan was named after the Divan Parisienne Restaurant in New York City where it was created for a contest their Chef entered. His recipe for a chicken casserole, with broccoli, in a creamy Mornay sauce won the contest and became the restaurant’s signature dish!
Scroll Down For A Printable Recipe Card At The Bottom Of The Page
How I Received This Recipe For Chicken Divan
Many years ago I was given the recipe by my friend Elnora when I was getting married. I worked for Elnora’s husband in the Music Department at the church I attended, and that is how we met. Now, over 40 years later, I am so grateful she gifted me with her recipe, because we truly LOVE this chicken divan.
The recipe makes a phenomenal tasting casserole that serves 8-10 people, and is VERY easy to prepare! Here’s how you make this: (by the way… when I took these photos I only made HALF the recipe, which is reflected in the photos).
Making Chicken Divan
Before assembling the casserole, cook boneless chicken breasts in boiling water until done. You can add onion, celery, and carrots to water for additional flavoring if desired. Remove the chicken pieces when done, and let them cool. Once chicken is cool, cut it into bite-size pieces, and set aside.
Spray a 9×13 baking pan with non-stick spray. Arrange thawed broccoli across bottom of baking pan. Sprinkle generously with grated Parmesan cheese.

Arrange the chicken cubes on top of the broccoli. Sprinkle the top of the casserole again with Parmesan cheese.

In a medium bowl, combine cream of mushroom soup, sour cream, mayonnaise, grated Cheddar, lemon juice, curry powder, salt and pepper. Mix these ingredients until they are fully combined. The sauce will be fairly thick.

Spoon or pour the sauce evenly over the top of the casserole, spreading it out, to cover. Generously sprinkle the top with additional Parmesan cheese, then lightly sprinkle with paprika.

Time To Bake The Chicken Divan!
Place several small pads of butter on the top of the chicken divan casserole. Bake, uncovered, in a 350 degree oven for 35-40 minutes, until golden in color. The cheese sauce should be bubbly around the edges of the pan.

When the chicken divan is done, remove the pan to a hot pad, and let it sit for 5-6 minutes. This will allow the casserole time to firm up a bit (the sauce is VERY hot!).

Time To Serve It And Eat!
When ready, serve hot over fluffy rice, and ENJOY this delicious chicken divan casserole! It’s wonderful, because you’ve got chicken, rice AND broccoli all in one dish. The leftovers are fabulous, as well.

Chunks of chicken breast taste magnificent with the sauce and broccoli. Placing it on a bed of rice provides a great medium to soak up some of the delicious sauce! It’s SOOOO delicious!

While I know this is not the most “health-conscious” or calorie-conscious meal, sometimes ya just gotta go for it and enjoy a great meal! Everything in moderation, right? Sure hope you will try this recipe… it’s a definite KEEPER!
Looking For Other CASSEROLE Recipes?
You can find all of my recipes in the Recipe Index, located at the top of the page. You might also enjoy my casserole recipes for:
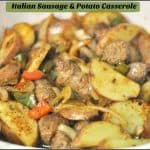
- Italian Sausage & Potato Casserole,
- Layered Chicken Enchilada Casserole,
- Creamy Chicken Broccoli Quinoa Casserole,
- Easy Chile Relleno Casserole.
Thank you for visiting this website. I appreciate you using some of your valuable time to do so. If you’re interested, I publish a newsletter 2 times per month with all the latest recipes, and other fun info. I would be honored to have you join our growing list of subscribers, so you never miss a great recipe! There is a Newsletter subscription box on the top right side (or bottom) of each blog post, depending on the device you use, where you can easily submit your e-mail address (only) to be included in my mailing list.
You can also follow me on social media:
Facebook page: The Grateful Girl Cooks!
Pinterest: The Grateful Girl Cooks!
Instagram: jbatthegratefulgirlcooks
Have a wonderful day, friends.
 Recipe Source: Elnora Hall

- 3 boneless , skinless chicken breasts
- 2 small packages frozen broccoli spears
- 2 cans cream of mushroom soup
- 1 cup mayonnaise
- 1 carton (8 ounces) sour cream
- 1 cup grated sharp cheddar cheese
- 1 Tablespoon fresh squeezed lemon juice
- 1 teaspoon curry powder
- Salt and pepper , to taste
- Parmesan cheese (fresh grated OR can use "green shaker can")
- Paprika (to sprinkle on top of casserole prior to baking)
- Butter (enough for small pads of butter on top of casserole)
- Rice , prepared according to instructions on package
- Cook chicken breasts in water (enough to cover); bring to a low boil, cook until chicken is done (about 25-30 mins.). See *NOTES. When done, remove chicken from water. Let cool, then cut into bite-sized cubes.
- Spray a 9x13 baking pan with non-stick spray. Place thawed broccoli evenly on bottom of baking pan. Sprinkle generously with Parmesan cheese. Evenly arrange the chicken pieces over the broccoli. Sprinkle again with Parmesan cheese.
- In a medium bowl, fully combine (with a spoon) cream of mushroom soup, sour cream, mayonnaise, grated cheddar cheese, lemon juice, curry powder, and salt and pepper (to taste). Pour or spoon sauce evenly over top of casserole. Spread out, to cover entire casserole. Generously sprinkle with Parmesan cheese, then lightly sprinkle with paprika. Dot the top of casserole with small pads of butter.
- Bake casserole, uncovered, at 350 degrees for 35-40 minutes, until casserole is bubbling all around the edges and is golden brown in color. Remove casserole. Let it sit for 5-6 minutes to allow time to firm up just a bit.
- Serve casserole hot over a bed of fluffy rice... and ENJOY!
Original recipe says to cook chicken with onion, celery & carrots for flavor. I have never done this, but include it in case you wish to do so. The original recipe also said to cook the frozen broccoli, but I find that if I thaw it out completely, then pat it dry, there is no need to cook it.
Here’s one more to pin on your Pinterest boards!


. Very easy to prep, then put dish in oven to bake! / The Grateful Girl Cooks!")


. Very easy to prep, then put dish in oven to bake! / The Grateful Girl Cooks!")


