Category: Main Dishes

Fully Loaded Potato Soup

Fully Loaded Potato Soup is thick and creamy, filled with bacon, cheese, sour cream and green onions…tastes like a fully stuffed baked potato! Fully Loaded Potato Soup is thick and creamy, filled with bacon, cheese, sour cream and green onions...tastes like a fully stuffed baked potato in SOUP form.
Do you love to make soup when it is cold outside? I sure do! One of the things I love about the crisp and cool weather in Fall is making Potato Soup… Fully Loaded Potato Soup!

Fully LOADED Potato Soup is packed with all the good things you would stuff a baked potato with, given the chance. Bacon, cheese, chives, sour cream… well, you get the picture! A hot bowl of this flavor-packed potato soup on a cold day is just what you need to satisfy a growling stomach.

Scroll Down For A Printable Recipe Card At The Bottom Of The Page

Trying Out This Soup Recipe On Friends

A couple of years ago I had about 9 ladies from a Bible Study group I was in, over for lunch. I made a big pot of fully loaded potato soup. No recipe was used, I just put it all together (had made it many times from scratch!) and it was wonderful! I received several compliments on the soup. My friend, Judy asked me where I got the recipe, and told her I just made it up as I went along. I couldn’t even give her the recipe because I didn’t write anything down as I cooked. Epic FAIL.

Sooo… it’s now two years later and I finally remembered to document with PHOTOS the making of this delicious and filling, fully loaded potato soup. I made a big batch recently on a rainy, cold, dismal day (aren’t those the BEST days for making a big pot of soup?)

It’s easier than you think to make fully loaded potato soup… and IT IS YUMMY! Perfect for a cool evening’s meal (very filling) and lunch leftovers the next day! Hope you will give this recipe a try… I am confident you will LOVE it!

Making Fully Loaded Potato Soup

Chop peeled Russet potatoes into planks, then cut into small cubes. Smaller potato cubes will cook a lot faster than large chunks!

Cubing potatoes for fully loaded soup

Cook the potatoes with green onions, salt, pepper, and part of the bacon pieces until the potatoes become tender. Let me tell you, it sure smells GOOD, because of those onions and bacon!

Potatoes are cooked with green onions, bacon, etc. for soup

Add a little bit of flour to the cooked potatoes. The ingredients will continue to cook and soften. This flour will act as a thickening agent for the fully loaded potato soup, making it thick and creamy!

Flour is added to potatoes to act as a thickening agent for soup.

Time To Turn The Ingredients Into Fully Loaded Potato Soup!

Pour milk and whipping cream into the pan with the fully loaded potato soup. Once the soup has thickened, add grated cheddar cheese. Continue to cook the fully loaded potato soup, and the cheese will melt into the thickened soup. This will add another layer of flavor and creaminess.

Milk, whipping cream and cheddar cheese are added to potato soup.

Here you can see the thickened fully loaded potato soup, with the bacon and potato chunks! It looks so good, but is not quite finished!

Fully loaded potato soup is thick and creamy.

Right before serving, stir sour cream into the hot, thick fully loaded potato soup! The sour cream will add yet another layer of flavor and creaminess to the soup.

Sour cream is added to fully loaded potato soup just before serving.

Serve The Fully Loaded Potato Soup

Ladle the hot, fully loaded potato soup into individual serving bowls. It looks good just like that, but the garnishes for the soup is what helps put it over the top! Garnish each bowl of soup with crispy bacon pieces, additional cheddar cheese, and chopped chives. That REALLY pretties this soup up, and adds even more flavor! ENJOY!

Fully Loaded Potato Soup is garnished with crisp bacon, cheddar and chives.

This fully loaded potato soup is one of our family’s all time favorite soups. I hope it will become one of your favorite soups, too! Have a great day!

Looking For More SOUP Recipes?

You can find all of my soup recipes in the Recipe Index, at the top of the page. A few of our favorites include:

Interested In More Recipes?

Thank you for visiting this website. I appreciate you using some of your valuable time to do soIf you’re interested, I publish a newsletter 2 times per month (1st and 15th) with all the latest recipes, and other fun info. I would be honored to have you join our growing list of subscribers, so you never miss a great recipe!
There is a Newsletter subscription box on the top right side (or bottom) of each blog post, depending on the device you use, where you can easily submit your e-mail address (only) to be included in my mailing list.

You Can Also Find Me On Social Media:

Facebook page: The Grateful Girl Cooks!
Pinterest:
The Grateful Girl Cooks!
Instagram:
jbatthegratefulgirlcooks

Author's signature

↓↓ PRINTABLE RECIPE BELOW ↓↓

0 from 0 votes
Fully Loaded Potato Soup
Prep Time
20 mins
Cook Time
35 mins
Total Time
55 mins
 
Fully Loaded Potato Soup is thick and creamy, filled with bacon, cheese, sour cream and green onions...tastes like a fully stuffed baked potato!
Category: Soup
Cuisine: American
Keyword: fully loaded potato soup
Servings: 8 servings
Calories Per Serving: 478 kcal
Author: JB @ The Grateful Girl Cooks!
Ingredients
  • 5 large Russet potatoes , cut into 1 inch cubes
  • 3 Tablespoons butter
  • Salt and Pepper , to taste
  • 2 heaping Tablespoons flour
  • 5 pieces bacon
  • 5 green onion stalks , sliced (green stem and white bulb),
  • 1 1/2 cups grated cheddar cheese (reserve a bit for garnish)
  • 5 cups milk
  • 3/4 cup whipping cream
  • 1/2 cup sour cream
  • 2 Tablespoons chives , chopped (for garnish)
Instructions
  1. Cook bacon in skillet. When half way cooked, remove 2 slices. Chop into small pieces and place into a large soup pot. Continue cooking the 3 pieces of bacon remaining in the skillet until crispy. Drain, crumble, and set aside (2 slices will go into the soup later, one will be used for garnish),
  2. Melt 3 Tablespoons butter in the soup pot with the 2 slices of chopped, half-cooked bacon. Add cubed potatoes, and chopped green onions,, and stir to combine. Cook potatoes, stirring frequently for about 7-8 minutes, or until softened slightly.
  3. Generously salt and pepper the potatoes. Sprinkle potatoes with 2 heaping Tablespoons of flour. Stir well to combine..
  4. Add milk to soup pot and stir well. Bring to a boil, then reduce heat to a simmer.
  5. Add whipping cream (do not boil), cheddar cheese, and 2 slices crispy, (chopped) bacon. Stir to combine.
  6. Simmer on low for 30-35 minutes, stirring occasionally. Taste and add additional salt and pepper, if needed.
  7. Right before you serve the soup, add the sour cream and mix well.
  8. Ladle the soup into serving bowls, and garnish with a bit of crumbled bacon, cheddar cheese, and the chopped chives. Enjoy!
Recipe Notes

**I usually add 2 slices of halfway cooked bacon to the soup pot to cook with the potatoes for extra flavor, BUT If you prefer, you can cook ALL the bacon until crispy. Add all but one piece to the soup at one time (saving one slice to crumble for garnish!)

Nutrition Facts
Fully Loaded Potato Soup
Amount Per Serving (1 g)
Calories 478 Calories from Fat 279
% Daily Value*
Fat 31g48%
Saturated Fat 17g106%
Cholesterol 93mg31%
Sodium 352mg15%
Potassium 872mg25%
Carbohydrates 34g11%
Fiber 1g4%
Sugar 8g9%
Protein 15g30%
Vitamin A 1075IU22%
Vitamin C 9.7mg12%
Calcium 384mg38%
Iron 1.5mg8%
* Percent Daily Values are based on a 2000 calorie diet.

Here’s one more to pin on your Pinterest boards!Fully Loaded Potato Soup is thick and creamy, filled with bacon, cheese, sour cream and green onions...tastes like a fully stuffed baked potato!

Save

Save

Save

Save

Crock Pot Parmesan Honey Pork Roast

Make a delicious Parmesan Honey Pork Roast in a crock pot, and enjoy tender meat coated in a flavorful soy, honey, garlic, and Parmesan sauce.Make a delicious Parmesan Honey Pork Roast in a crock pot, and enjoy tender meat coated in a flavorful soy, honey, garlic, and Parmesan sauce.
It’s a rainy morning here in Oregon. I’m sitting here in my home office writing the Pork Roast I cooked in my crock pot recently, and I’m getting hungry!

We loved this new pork roast recipe I found on Pinterest, from Six Sisters Stuff. What cracks me up about the picture I took of our meal is that, while I normally add color to our meal, with salad or veggies, this one is hysterical looking.

The night I made Parmesan honey pork roast, my husband asked for baked beans to go with the meat and mashed potatoes, so everything I served us that night was BROWN. I should have re-named this meal “The Entirely Brown Meal”. Oh well- even though the color scheme on our plates was beyond boring, at least it tasted fantastic!

The pork roast only took 10 minutes to get ready, then cooked all day in my crock pot. By dinnertime the house smelled wonderful and all I had to do was slice it, make a quick gravy with the juices, and serve it. How hard is that?

Scroll Down For A Printable Recipe Card At The Bottom Of The Page

Why We Enjoy This Crock Pot Parmesan Honey Pork Roast

The sauce is wonderful. It’s made with Parmesan cheese, honey, basil, garlic, soy sauce, etc. The meat is packed with flavor and is amazingly tender!

All the juice remaining in the crock pot is made into a wonderfully delicious gravy to spoon over the pork (and mashed potatoes on the side).

Sure think you’re gonna love this easy meal as much as we did. I hope you will give it a try! But for heaven’s sake… get some color on that plate!!! Here area few pics.

Making The Pork Roast

Here is the pork roast, already in the crock pot. Now all it needs is the spice mixture to give it some flavor!

The pork roast in the crock pot, waiting to be seasoned.

This a picture of all the spices and other sauce ingredients, ready to be combined.

A seasoning sauce made up of spices, honey, garlic, etc. is mixed to put on the pork roast.

the spices are all mixed together and are ready to put onto the pork roast before cooking…

Seasoning sauce is mixed, and ready to add to crock pot with pork roast.

Ready To Cook The Parmesan Honey Pork Roast

After being coated with spice mix, the Parmesan honey pork roast is cooked in a crock pot until fully cooked and nice and tender.

The parmesan honey pork roast is coated with the spice sauce.

The crock pot parmesan honey pork roast is almost fully cooked, and is looking good. It also smells quite wonderful!

Crock pot parmesan honey pork roast is almost done cooking.

Once fully cooked, the parmesan honey pork roast rests for a couple minutes, then it’s ready to slice. Yum!

Ready to slice and serve this tender parmesan honey pork roast.

Hope you will consider making this delicious parmesan honey pork roast! It definitely tastes very good, and is really tender, because of the slow cooking in the crock pot! Thanks for stopping by today- I hope you will come back soon.

Looking For More PORK Recipes?

You can find ALL of my pork recipes in the Recipe Index, located at the top of the page. I have some absolutely delicious pork recipes for you to enjoy, including:

Interested In More Recipes?

Thank you for visiting this website. I appreciate you using some of your valuable time to do soIf you’re interested, I publish a newsletter 2 times per month (1st and 15th) with all the latest recipes, and other fun info. I would be honored to have you join our growing list of subscribers, so you never miss a great recipe!
There is a Newsletter subscription box on the top right side (or bottom) of each blog post, depending on the device you use, where you can easily submit your e-mail address (only) to be included in my mailing list.

You Can Also Find Me On Social Media:

Facebook page: The Grateful Girl Cooks!
Pinterest:
The Grateful Girl Cooks!
Instagram:
jbatthegratefulgirlcooks

Author's signatureOriginal Recipe Source: http://www.sixsistersstuff.com/2011/12/slow-cooker-parmesan-honey-pork-roast.html

↓↓ PRINTABLE RECIPE BELOW ↓↓

0 from 0 votes
Crock Pot Parmesan Honey Pork Roast
Prep Time
10 mins
Cook Time
6 hrs
Total Time
6 hrs 10 mins
 

Make a delicious Parmesan Honey Pork Roast in a crock pot, and enjoy tender meat coated in a flavorful soy, honey, garlic, and Parmesan sauce.

Category: Entree
Cuisine: American
Keyword: pork roast
Servings: 5 servings
Calories Per Serving: 595 kcal
Author: JB @ The Grateful Girl Cooks!
Ingredients
  • 1 (2-3 pound) boneless pork roast
  • 2/3 cup grated Parmesan cheese
  • 1/2 cup honey
  • 3 Tablespoons soy sauce
  • 2 Tablespoons dried basil
  • 2 Tablespoons minced garlic
  • 2 Tablespoons olive oil
  • 1/2 teaspoon salt
  • 2 Tablespoons cornstarch
  • 1/4 cup cold water
Instructions
To prepare/cook the pork roast:
  1. Lightly spray a crock pot with a non-stick cooking spray. Place the pork roast in the crock pot.
  2. In a small bowl, place the Parmesan cheese, honey, soy sauce, basil, garlic, olive oil and salt. Mix these ingredients well until fully combined. Pour this mixture over the surface of the pork roast to cover.
  3. Place the lid on the crock pot. Cook the pork roast for 6-7 hours on LOW (or until meat thermometer reaches 160 degrees).
  4. Once the meat is done cooking, CAREFULLY remove the pork roast from crock pot and place it onto a serving dish. Place aluminum foil over top of the roast to keep it warm while you make the gravy.
To make the gravy:
  1. Skim the fat off the top of the cooking juice left in crock pot. Place the juices into a medium sized saucepan. Cook the juices on medium heat until they come to a boil. In a separate small bowl, mix the cornstarch into the cold water. Mix well to remove any lumps, until mixture is smooth. Whisk the cornstarch mixture into the boiling juices. Make sure the gravy comes to a boil again, then cook and stir it for approximately 2 minutes (or until it thickens up!).
  2. Remove foil from pork roast, then cut into slices. Place slices onto individual plates and spoon some of the gravy over the meat. (I also served mashed potatoes with the gravy on top...they were a delicious side dish with the pork, and especially with the flavorful gravy!)
  3. Enjoy!
Nutrition Facts
Crock Pot Parmesan Honey Pork Roast
Amount Per Serving (1 (1/5 of total))
Calories 595 Calories from Fat 180
% Daily Value*
Fat 20g31%
Saturated Fat 6g38%
Cholesterol 183mg61%
Sodium 893mg39%
Potassium 1124mg32%
Carbohydrates 34g11%
Sugar 28g31%
Protein 67g134%
Vitamin A 125IU3%
Vitamin C 1.2mg1%
Calcium 205mg21%
Iron 3.4mg19%
* Percent Daily Values are based on a 2000 calorie diet.

Here’s one more to pin on your Pinterest boards!Make a delicious Parmesan Honey Pork Roast in a crock pot, and enjoy tender meat coated in a flavorful soy, honey, garlic, and Parmesan sauce.


Save

Save

Pork Tenderloin With Apples And Apple Cider Sauce

Pork tenderloin with apples features tender pork cutlets with cooked apples, drizzled with a lovely apple cider sauce. Delicious!Pork tenderloin with apples features tender pork cutlets with cooked apples, drizzled with a lovely apple cider sauce. Delicious!
This recipe for Pork Tenderloin With Apples And Apple Cider Sauce has FALL written all over it! It’s surprising how well pork and apples go together! My husband and I had dinner recently at a friend’s home. Our friend Shari prepared a wonderful meal for us and it was FANTASTIC! It was absolutely delicious, and a wonderful recipe that was perfect for a cool, Fall evening.

This week we have a friend (a friend for 40 years) staying with us in our home. Her first night here, I decided to try making this recipe for our own dinner. I found the original recipe online at Epicurious, and prepared it for us. Miracle of miracles, it turned out GREAT (guess even little old me can’t hurt a good recipe, right?)

The original recipe from Bon Appétit, calls for Calvados, which is an apple brandy from France. I didn’t have any, and didn’t want to go buy an entire bottle for the small amount needed, so I substituted dry white wine (which I did have), and it turned out fine, as well. I followed the rest of the instructions as written, and was very pleased with the results (as was our guest).

Scroll Down For A Printable Recipe Card At The Bottom Of The Page

How To Make Pork Tenderloin With Apples

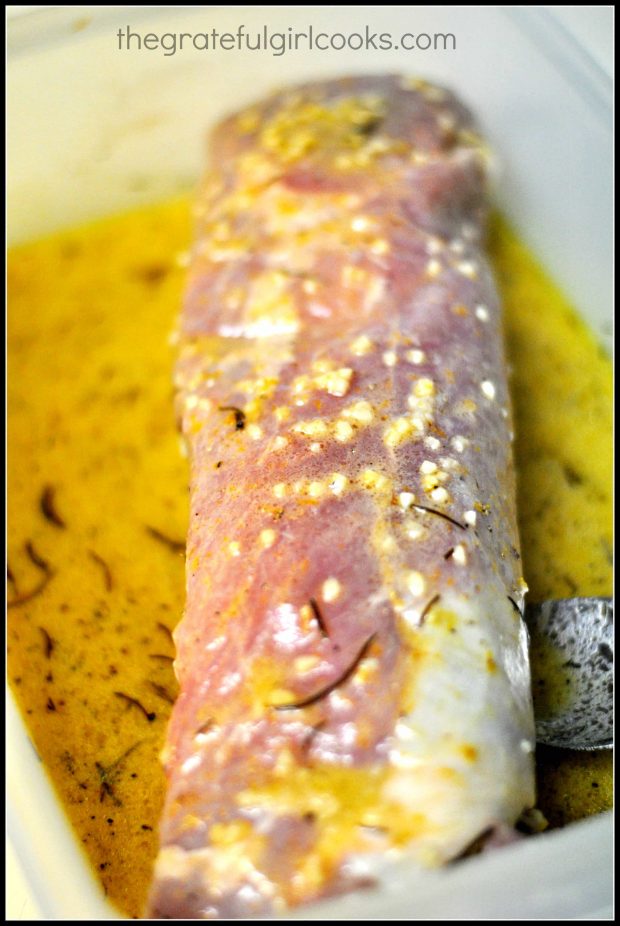
Pounding pork slices out with a meat mallet is a great stress reliever, yes? This helps to tenderize the pork.

Pounding the pork thin with a meat mallet helps tenderize the meat.

Peel and slice Golden Delicious apples, then they are ready to cook.

Golden delicious apples are peeled and sliced before cooking.

Apple slices are cooked in butter in a large skillet.

Cooking the apples in melted butter in a skillet.

When the apples are light golden brown, they are removed from the skillet.

Apples are cooked in a large skillet until golden brown on the outside.

Cooking The Pork Cutlets

Pork tenderloin cutlets are cooked in melted butter for a few minutes on each side.

The pork cutlets are cooked in melted butter in a hot skillet.

Halfway through the cooking time, they are turned to the other side to finish cooking. They are so thin, they only need to cook a few minutes on each side.

Pork cutlets are cooked on both sides in butter in a large skillet.

Preparing The Apple Cider Sauce

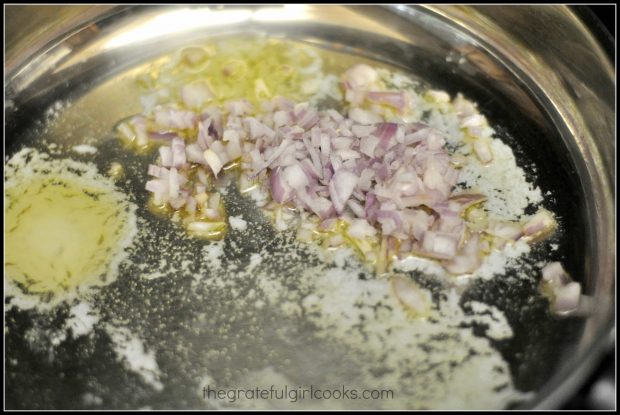
After removing the cooked pork cutlets, an apple cider sauce is made in the same skillet. Wine or Calvados is used to deglaze the skillet, then shallots and thyme are added to the mixture.

Shallots, thyme and wine are added to the sauce in the skillet.

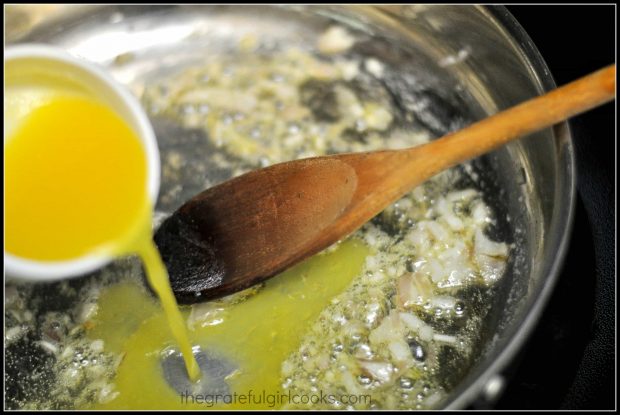
Apple cider and whipping cream are then added to the sauce, and stirred to incorporate them into the sauce. By now the sauce is looking  and smelling delicious!

Apple cider and whipping cream are added to the sauce for the pork cutlets.

The finished pork tenderloin with apples is surrounded by lots of cooked, tender apples. It is then covered with the apple cider sauce, and is now ready to serve.

Apple cider sauce is poured over the cooked pork tenderloin with apples.

Pork tenderloin with apples is served. We usually give a couple of slices per person. Spoon some of the sauce on top of the pork, and serve, accompanied by apples on the side. We also like this dish with mashed potatoes on the side (with some of the sauce on top). Dig In!

The pork tenderloin with apples is served with mashed potatoes and a salad.

Sure hope you will give this wonderful meal a try. I know I will definitely make this again and again. It’s really very simple to make, and is full of flavor!

Looking For More PORK Recipes?

You can find ALL of my recipes in the Recipe Index, located at the top of the page. I have many delicious pork recipes for you to enjoy, including:

Interested In More Recipes?

Thank you for visiting this website. I appreciate you using some of your valuable time to do soIf you’re interested, I publish a newsletter 2 times per month (1st and 15th) with all the latest recipes, and other fun info. I would be honored to have you join our growing list of subscribers, so you never miss a great recipe!
There is a Newsletter subscription box on the top right side (or bottom) of each blog post, depending on the device you use, where you can easily submit your e-mail address (only) to be included in my mailing list.

You Can Also Find Me On Social Media:

Facebook page: The Grateful Girl Cooks!
Pinterest:
The Grateful Girl Cooks!
Instagram:
jbatthegratefulgirlcooks

Author's signatureRecipe Slightly Adapted From: http://www.epicurious.com/recipes/food/views/Pork-with-Apples-Calvados-and-Apple-Cider-1797

↓↓ PRINTABLE RECIPE BELOW ↓↓

0 from 0 votes
Pork Tenderloin With Apples And Apple Cider Sauce
Prep Time
15 mins
Cook Time
20 mins
Total Time
35 mins
 

Pork tenderloin with apples features tender pork cutlets with cooked apples, drizzled with a lovely apple cider sauce. Delicious!

Category: Entree
Cuisine: American
Keyword: pork tenderloin
Servings: 4 servings
Calories Per Serving: 595 kcal
Author: JB @ The Grateful Girl Cooks!
Ingredients
For the pork and apples:
  • 1 lb. pork tenderloin , cut into 1 inch thick slices
  • Salt & pepper (to season pork)
  • 5 Tablespoons butter
  • 3 medium Golden Delicious apples , (peeled, cored, sliced into 1/3 inch thick slices)
  • 1 1/2 teaspoons granulated sugar
For the Apple Cider Sauce:
  • 2 large shallots , chopped
  • 1 Tablespoon fresh thyme , chopped (or use 1 teaspoon dried)
  • 1/4 cup Calvados or other apple brandy (I substituted 1/4 cup dry white wine)
  • 1 cup heavy whipping cream
  • 1/4 cup apple cider (not apple juice)
Instructions
  1. Put the pork slices between two sheets of plastic wrap. Pound them out, one at a time, until they are about 1/4 inch thick. Set aside.
  2. In a large skillet over medium-high heat, melt 2 Tablespoons of butter. Add the apple slices, then sprinkle the slices with the sugar. Saute the apple slices until they are golden brown, on both sides (approximately 5-6 minutes). Remove apples from skillet and set aside. Cover and keep warm.
  3. Add 2 Tablespoons butter back into the large skillet. Melt butter over high heat. Season the pork with salt and pepper. Add pork slices to the hot skillet. Cook the slices until they are lightly browned and cooked through (about 3 minutes per side). Cook pork in batches, if necessary. Once pork has cooked through on both sides, remove to a platter, cover and keep warm. DO NOT CLEAN SKILLET OUT!
  4. Melt 1 Tablespoon butter over medium heat in the same skillet you cooked the pork in. Add the chopped shallots and thyme; saute these for 2 minutes.
  5. Add the Calvados (if using) or the white wine to the shallots, butter and thyme. Boil until the liquid is reduced to a glaze like consistency, scraping up the browned bits into the sauce as you go.
  6. Stir in the apple cider and whipping cream. Cook until the mixture thickens to sauce consistency (about 2-3 minutes). Lightly season with salt and pepper, to taste.
  7. Reheat the apples in another skillet or microwave, if necessary.
  8. Place pork slices on platter. Spoon the sauce over the top of the pork slices. Top with the apple slices, or place the apple slices around the pork.
  9. Serve and enjoy. This dish is perfect with mashed potatoes on the side. Use some of the apple cider sauce on top (like gravy) of the mashed potatoes for a perfect entree!
Nutrition Facts
Pork Tenderloin With Apples And Apple Cider Sauce
Amount Per Serving (1 g)
Calories 595 Calories from Fat 360
% Daily Value*
Fat 40g62%
Saturated Fat 24g150%
Cholesterol 192mg64%
Sodium 210mg9%
Potassium 703mg20%
Carbohydrates 26g9%
Fiber 3g13%
Sugar 18g20%
Protein 25g50%
Vitamin A 1470IU29%
Vitamin C 10.4mg13%
Calcium 70mg7%
Iron 1.7mg9%
* Percent Daily Values are based on a 2000 calorie diet.

Here’s one more to pin on your Pinterest boards!Pork tenderloin with apples features tender pork cutlets with cooked apples, drizzled with a lovely apple cider sauce. Delicious!


Save

Save

Easy Crock Pot Refried Beans

Easy crock pot refried beans – It is EASY (and economical) to make your own delicious and inexpensive Mexican refried beans, using a slow cooker!Easy crock pot refried beans - It is EASY (and economical) to make your own delicious and inexpensive Mexican refried beans, using a slow cooker!
I made some Crock Pot Refried Beans recently. From scratch. No cans involved. Guess what? They were absolutely delicious!  Really… these refried beans taste fantastic, they are inexpensive to make, and EASY!

I have been reading through a great book I own called “100 Days Of Real Food”, by author Lisa Leake, and came across this recipe for non-fried, refried beans, made from scratch.

The recipe can be thrown together in about 10 minutes in a crock pot. The pinto beans and spices are slow-cooked for 8-10 hours, lightly mashed, then served. How easy is THAT???

Scroll Down For A Printable Recipe Card At The Bottom Of The Page

Crock Pot Refried Beans Are EASY To Prepare

I started my crock pot when I got my morning coffee, and we enjoyed them with our evening meal later that day. They were so good! When the beans were ready, I took out half of them, mashed them and served them with cheddar cheese melted on top.

I took the other half of the beans (which were still in the flavored broth and served them just as they were (un-mashed) to my husband (because that is his favorite way to eat pinto beans).

Pinto beans are used to make refried beans... very economical!

The cost of a bag of dry pinto beans is minimal, and this recipe produces just under 4 cups of refried beans, so it is a great budget item, too! And, seriously, these beans are amazingly good!

We have used crock pot refried beans with tacos, burritos and tostadas, all with fantastic results. Here are some pics from while I made them:

How To Make Crock Pot Refried Beans

Here are the ingredients in my crock pot with the onions and other spices. The beans are ready to start cooking. This step will only take about 10 minutes or less!

Let them cook all day (9 hours), because you won’t have to mess with them! You just need to start them cooking, then go about your business! EASY!

Refried beans cook in crock pot all day.

After 9 hours in the crock pot this is what the crock pot refried beans looked like. Drain the beans over the crock pot, removed, and then mash the beans, using a potato masher. You can add a little broth from the crock pot to the beans if you don’t want them too thick.

Refried beans are ready to mash after cooking all day in the crock pot

The Crock Pot Refried Beans Are Ready To Serve

This was such an easy, economical way to make refried beans, and I will make them this way quite often. I really hope you will try making refried beans from scratch. They are so inexpensive to make, and taste absolutely delicious!

Here are the finished crock pot refried beans ready to eat! They were garnished with a little grated cheddar cheese and cilantro leaves on top, to serve! Muy bueno!

Crock pot refried beans are garnished with cheese and are ready to ea!

Crock pot refried beans are served with a garnish of grated cheddar cheese and cilantro.

Hope you enjoy this recipe for crock pot refried beans. Have a great day, friends! Make it count for something GOOD and courageous!
Thanks for stopping by, and I hope you will come back soon for more family-friendly recipes. Take care, may God bless you… and have a GREAT day!
Looking For More Mexican-Style Recipes?

You can find all of my recipes in the Recipe Index, located at the top of the page. I have a good variety of Mexican-style recipes you might enjoy, including:

Interested In More Recipes?

Thank you for visiting this website. I appreciate you using some of your valuable time to do soIf you’re interested, I publish a newsletter 2 times per month (1st and 15th) with all the latest recipes, and other fun info. I would be honored to have you join our growing list of subscribers, so you never miss a great recipe! 

There is a Newsletter subscription box on the top right side (or bottom) of each blog post, depending on the device you use, where you can easily submit your e-mail address (only) to be included in my mailing list.

You Can Also Find Me On Social Media:

Facebook page: The Grateful Girl Cooks!

Pinterest:
The Grateful Girl Cooks!
Instagram:
jbatthegratefulgirlcooks

Author's signatureRecipe Source: “100 Days Of Real Food”, by Lisa Leake (page 155), Published 2014, William Morrow Publishers.

↓↓ PRINTABLE RECIPE BELOW ↓↓

0 from 0 votes
Easy Crock Pot Refried Beans
Prep Time
5 mins
Cook Time
8 hrs
Total Time
8 hrs 5 mins
 

Easy crock pot refried beans - It is EASY (and economical) to make your own delicious and inexpensive Mexican refried beans, using a slow cooker!

Category: Side Dishes
Cuisine: Mexican
Keyword: crock pot refried beans, refried beans
Servings: 8 (1/2 cup servings)
Calories Per Serving: 174 kcal
Author: JB @ The Grateful Girl Cooks!
Ingredients
  • 2 cups dried pinto beans , rinsed
  • 1 yellow onion , peeled, and cut in half
  • 1/2 medium jalapeno , cored, seeded, and diced
  • 2 garlic cloves , peeled and crushed
  • 1 1/4 teaspoons salt
  • 1/2 teaspoon ground black pepper
  • 1/8 teaspoon ground cumin
  • 6 cups water
Optional toppings:
  • Grated cheddar or monterey jack cheese , cilantro, or sour cream
Instructions
  1. Place all ingredients (except for optional toppings) into a crock pot.
  2. Cover pot and cook beans for 8-9 hours on high.
  3. When finished, remove beans from crock pot, drain, and mash them with a potato masher until they reach the correct consistency. Add a little broth from the crock pot to the beans while mashing, if they seem a bit dry. That's it! You just made refried beans from scratch!
  4. Serve with a garnish of grated cheese, cilantro, or sour cream, if desired. Enjoy!

Recipe Notes

NOTE: Caloric calculation does not include optional garnishes (sour cream, cheese or cilantro)

Nutrition Facts
Easy Crock Pot Refried Beans
Amount Per Serving (1 serving)
Calories 174
% Daily Value*
Sodium 369mg16%
Potassium 692mg20%
Carbohydrates 31g10%
Fiber 7g29%
Sugar 1g1%
Protein 10g20%
Vitamin A 10IU0%
Vitamin C 5.4mg7%
Calcium 59mg6%
Iron 2.5mg14%
* Percent Daily Values are based on a 2000 calorie diet.

Here’s one more to pin on your Pinterest boards!Easy crock pot refried beans - It is EASY (and economical) to make your own delicious and inexpensive Mexican refried beans, using a slow cooker!


Save

Save

Save

Hoisin Asian Meatballs

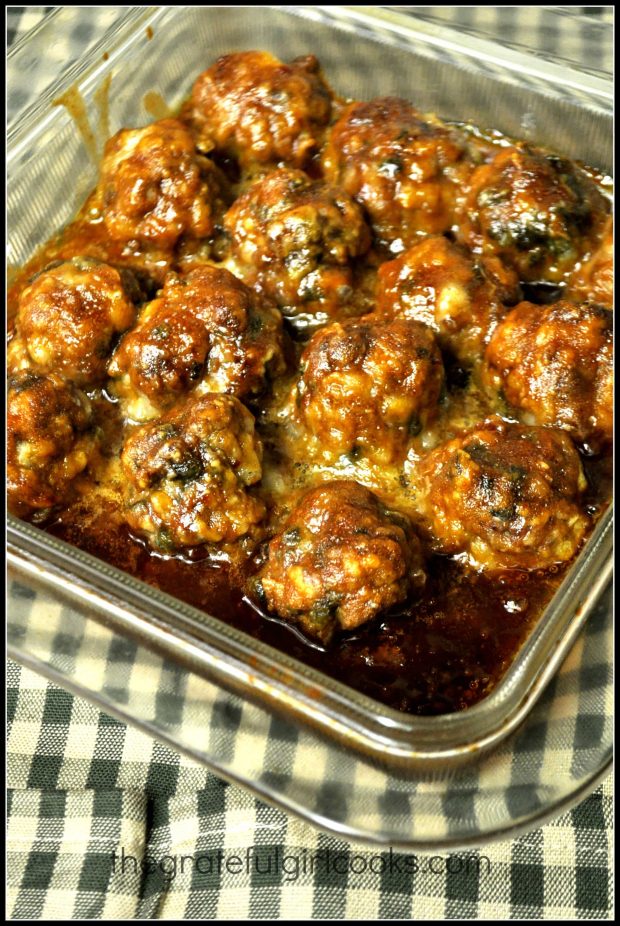
Hoisin Asian Meatballs are made using ground beef, baked not fried, and are covered with an Asian-inspired hoisin glaze. They are a great appetizer or main dish.Hoisin Asian Meatballs are made using ground beef, are baked not fried , and are covered with an Asian-inspired hoisin glaze. Great appetizer or main dish.

I found this recipe for Hoisin Asian Meatballs a couple of years ago on Pinterest and thought I’d give it a try. It didn’t disappoint!

The ground beef meatballs are easy to make. To make it even easier, they are cooked in the oven, so they are baked, not fried. The baked hoisin asian meatballs are then coated with a wonderful sweet and mildly spicy Asian-inspired Hoisin glaze before serving.

Scroll Down For A Printable Recipe Card At The Bottom Of The Page

What Is Hoisin Sauce?

Hoisin sauce is a commonly used Asian glaze for meat or as an addition to a stir-fry dish… think “Chinese BBQ Sauce”… a bit sweet and a bit spicy. It is commonly made from soybeans, peppers, garlic and sugar. This sauce is widely used in Chinese cooking. When used in this recipe as a base and combined with a few other Asian-inspired ingredients, creates a pretty tasty sauce for the meatballs.

Hoisin sauce is commonly found in most grocery stores in the Asian foods section.  It is also very easy to make at home. I’ve done it, and posted the recipe for hoisin sauce here.

How To Make Hoisin Asian Meatballs

This recipe could not be any easier!  Basically, you mix up the meatball ingredients, roll into meatballs, then bake them for about 15 minutes. While the meatballs bake, mix up the sauce.  Once the meatballs come out of the oven, you simply drizzle each of the meatballs with the hoisin sauce mix, then serve.

See how easy it is to make hoisin Asian meatballs? About 15 minutes total for the prep time, and 12-15 minutes to bake. That’s it!!

How Many Meatballs Does This Recipe Make?

The recipe yields approximately 18 one and a half inch meatballs. Because of the short cooking time, they can easily be ready to serve in 30 minutes, which is an added bonus, right? Right!

Hoisin Asian meatballs can be used solely as individual appetizers. Just stick a fancy toothpick into each one, and serve them on a pretty platter. You can also serve them as a main course (which is how I served them), paired with some rice and a vegetable.

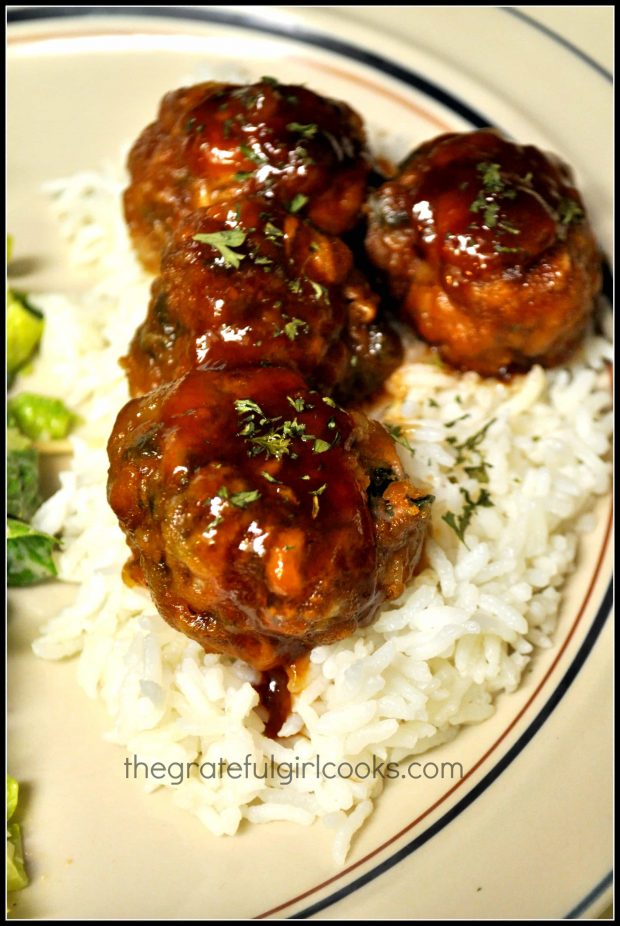
Hoisin Asian Meatballs are served as a main dish, on a bed of rice, with asparagus on the side.

Hope you will give these yummy Hoisin Asian Meatballs a try… I think you will like them! I know we did! Thanks for stopping by, and I hope you will come back soon. Have a great day.

Looking For More Meatball Recipes?

There are several other meatball recipes, using ground beef on this website!  They include:

Interested In More Recipes?

Thank you for visiting this website. I appreciate you using some of your valuable time to do soIf you’re interested, I publish a newsletter 2 times per month (1st and 15th) with all the latest recipes, and other fun info. I would be honored to have you join our growing list of subscribers, so you never miss a great recipe!
There is a Newsletter subscription box on the top right side (or bottom) of each blog post, depending on the device you use, where you can easily submit your e-mail address (only) to be included in my mailing list.

You Can Also Find Me On Social Media:

Facebook page: The Grateful Girl Cooks!
Pinterest:
The Grateful Girl Cooks!
Instagram:
jbatthegratefulgirlcooks

Author's signatureOriginal Recipe Source: http://damndelicious.net/2012/12/16/hoisin-asian-meatballs-sundaysupper/

↓↓ PRINTABLE RECIPE BELOW ↓↓

0 from 0 votes
Hoisin Asian Meatballs
Prep Time
15 mins
Cook Time
15 mins
Total Time
30 mins
 
Hoisin Asian Meatballs are made using ground beef, are baked not fried , and are covered with an Asian-inspired hoisin glaze. Great appetizer or main dish.
Category: Entree
Cuisine: Asian
Keyword: hoisin Asian meatballs
Servings: 18 meatballs
Calories Per Serving: 88 kcal
Author: JB @ The Grateful Girl Cooks!
Ingredients
FOR THE MEATBALLS:
  • 1 pound ground beef
  • 1 teaspoon sesame oil
  • 1/2 cup Panko bread crumbs
  • 1/4 teaspoon ground ginger
  • 1 large egg
  • 2 cloves garlic , finely minced
  • 4 green onions , thinly sliced (stem and bulb), divided (3 for meatballs, 1 for garnish)
  • Sesame seeds , for garnish
FOR THE HOISIN GLAZE:
  • 1/4 cup Hoisin sauce (found in ethnic section at grocery store)
  • 2 Tablespoons rice vinegar
  • 1 Tablespoon soy sauce
  • 1/2 teaspoon sesame oil
  • 2 cloves garlic , finely minced
  • 1/2 teaspoon ground ginger
Instructions
  1. Before making meatballs, preheat your oven to 400 degrees. Place a sheet of parchment paper onto a large baking sheet.
  2. Prepare the meatballs: Mix the ground beef, sesame oil, Panko bread crumbs, ginger, egg, garlic and green onion together in a large bowl. Make sure the ingredients are fully incorporated together. Once combined, use your (clean) hands to form the meat mixture into approximately 18 one and a half inch wide meatballs.
  3. As each meatball is formed, place it on the parchment-lined baking sheet. Bake the meatballs at 400 degrees for 12-15 minutes (meatballs should be browned and cooked through).
  4. Prepare hoisin glaze while meatballs are baking: Mix the glaze ingredients (hoisin sauce, rice vinegar, soy sauce, sesame oil, ginger and garlic) in a small bowl until fully combined.
  5. As soon as meatballs are done, drizzle hoisin glaze over the top of each meatball, garnish with reserved green onions and sesame seeds and serve while hot.
  6. If serving as appetizer, insert toothpicks or small skewers into each meatball on serving tray. If serving as main dish, serve it along with rice and a vegetable. ENJOY!

Nutrition Facts
Hoisin Asian Meatballs
Amount Per Serving (1 meatball)
Calories 88 Calories from Fat 45
% Daily Value*
Fat 5g8%
Saturated Fat 2g13%
Cholesterol 27mg9%
Sodium 124mg5%
Potassium 86mg2%
Carbohydrates 3g1%
Sugar 1g1%
Protein 5g10%
Vitamin A 40IU1%
Vitamin C 0.7mg1%
Calcium 13mg1%
Iron 0.7mg4%
* Percent Daily Values are based on a 2000 calorie diet.

Here’s one more to pin on your Pinterest boards!Hoisin Asian Meatballs are made using ground beef, baked not fried , and are covered with an Asian-inspired hoisin glaze. Great appetizer or main dish.


Save

Save

Tuscan Chicken & Vegetable Soup

Tuscan Chicken Vegetable Soup is a delicious, Italian-inspired soup. This hearty soup (with 7 veggies) is perfect anytime, especially on a cold day!Tuscan Chicken Vegetable Soup is a delicious, Italian-inspired soup. This hearty soup (with 7 veggies) is perfect anytime, especially on a cold day!
Fall is here! I am ready for cool, crisp mornings… and soup! I made a pot of Tuscan Chicken & Vegetable Soup yesterday, and it was really good!

We’re had a gorgeous summer here in the beautiful Pacific Northwest, but I am really enjoying the cooling air, the trees beginning to turn into their Fall colors, etc. There’s just something about Fall that calls for a large pot of delicious smelling soup cooking away on the stove.

Scroll Down For A Printable Recipe Card At The Bottom Of The Page

How I Came Up With This Recipe For Tuscan Chicken Vegetable Soup

Yesterday I was in the mood for a yummy, Italian-inspired Tuscan chicken vegetable soup. I’ve seen many recipes online for Tuscan Soup over the years (trust me, there’s a bazillion of them). Because of that, I had a basic idea of what items COULD go into this soup. I I ended up not using any ONE particular recipe, because I decided to simply create my own version. Guess what? We LOVED it!!!!

Seriously, people, we LOVED this Tuscan chicken vegetable soup! Success! Lots of “good-for you-veggies”, cannelini beans, chicken, and spices in a light Italian broth produces one great pot of soup!

Can You Make This Soup Vegetarian?

If you wish to make this a vegetarian friendly soup, it is easy! I typically use chicken broth and chicken in this soup when I make it. However, this soup tastes just as good using vegetable broth and NO chicken (if you’re vegetarian).

A bowl of the Tuscan chicken vegetable soup, ready to eat!

The Tuscan chicken vegetable soup was fun to make, because I was able to use some of the veggies I grew in our garden. These home-grown veggies included onion, garlic, oregano, thyme, basil, carrots, kale and spinach! Of course, all those ingredients can also be found at your local grocery store!

All that said, this Tuscan chicken vegetable soup is an easy recipe to prepare, and is absolutely delicious! I sure hope you’ll try it. Serious… you just gotta try this soup, because it is so yummy! Throw on a warm sweater, some sweatpants, turn on some great music, and make a pot of this soup. While you’re at it, enjoy the beauty of this glorious Fall season! Enjoy!

Looking For More SOUP Recipes?

You can find all of my soup recipes in the Recipe Index, located at the top of the page. These recipes include:

Interested In More Recipes?

Thank you for visiting this website. I appreciate you using some of your valuable time to do soIf you’re interested, I publish a newsletter 2 times per month (1st and 15th) with all the latest recipes, and other fun info. I would be honored to have you join our growing list of subscribers, so you never miss a great recipe!
There is a Newsletter subscription box on the top right side (or bottom) of each blog post, depending on the device you use, where you can easily submit your e-mail address (only) to be included in my mailing list.

You Can Also Find Me On Social Media:

Facebook page: The Grateful Girl Cooks!
Pinterest:
The Grateful Girl Cooks!
Instagram:
jbatthegratefulgirlcooks

Author's signatureRecipe Source: My brain. In “Fall” mode.

↓↓ PRINTABLE RECIPE BELOW ↓↓

0 from 0 votes
Tuscan Chicken & Vegetable Soup
Prep Time
15 mins
Cook Time
50 mins
Total Time
1 hr 5 mins
 

Tuscan Chicken Vegetable Soup is a delicious, Italian-inspired soup. This hearty soup (with 7 veggies) is perfect anytime, especially on a cold day!

Category: Soup
Cuisine: Italian
Keyword: Tuscan chicken vegetable soup
Servings: 6 servings
Calories Per Serving: 194 kcal
Author: JB @ The Grateful Girl Cooks!
Ingredients
  • 2 boneless chicken breasts , cooked and cubed
  • 7 cups chicken broth (may substitute vegetable broth, if desired)
  • 1/2 cup onion , chopped
  • 3 carrot stalks , sliced thinly
  • 3 celery stalks , sliced thinly
  • 1/2 cup sliced mushrooms
  • 1/2 small zucchini , sliced thinly
  • 2 Tablespoons olive oil
  • 1 cup kale , chopped (stems removed) (if omitting, double the spinach quantity!)
  • 1 cup baby spinach , chopped
  • 1 can cannellini beans , drained
  • 1/2 teaspoon Salt & pepper , to taste (may have to add more)
  • 1/2 teaspoon dried basil
  • 1/2 teaspoon dried oregano
  • 1/4 teaspoon dried thyme
  • 1/4 teaspoon garlic powder
  • 1/3 cup tomato paste
  • Parmesan cheese , grated (for garnish if desired)
Instructions
  1. In a large soup pot, saute the onion, carrots, celery, mushrooms, and zucchini in olive oil for 3-4 minutes. Add the chicken broth and cooked, cubed chicken to soup pot. Now add the salt & pepper, basil, oregano, thyme, and garlic powder to season the soup. Bring soup to a boil, then reduce heat to low.

  2. Add tomato paste, Mix well to combine. Add cannellini beans, kale and spinach. Season again with salt & pepper to taste, if necessary. Cook on low for 45 minutes, stirring occasionally.

  3. When ready, ladle hot soup into bowls, garnish with grated Parmesan cheese, and serve. Enjoy!

Recipe Notes

Tip: Use a pre-cooked rotisserie chicken for the fastest way to make this recipe.

*I boiled the chicken breasts in water for 45 minutes earlier in the day... then used them later in this recipe. Whatever works best for you is the bottom line.

Nutrition Facts
Tuscan Chicken & Vegetable Soup
Amount Per Serving (1 serving)
Calories 194 Calories from Fat 54
% Daily Value*
Fat 6g9%
Saturated Fat 1g6%
Cholesterol 24mg8%
Sodium 1556mg68%
Potassium 826mg24%
Carbohydrates 21g7%
Fiber 5g21%
Sugar 4g4%
Protein 15g30%
Vitamin A 7035IU141%
Vitamin C 44.1mg53%
Calcium 116mg12%
Iron 3.4mg19%
* Percent Daily Values are based on a 2000 calorie diet.

Here’s one more to pin on your Pinterest boards!Tuscan Chicken Vegetable Soup is a delicious, Italian-inspired soup. This hearty soup (with 7 veggies) is perfect anytime, especially on a cold day!


Save

Save

Marinated, Pan-Seared Mexican Chicken

Marinated, pan-seared Mexican chicken is a delicious, low-fat, easy to prepare dish. The chicken will surprise you with its depth of flavor.Marinated, pan-seared Mexican chicken is a delicious, low-fat, easy to prepare dish. The chicken will surprise you with its depth of flavor.

Do you cook with chicken often? I sure do!  The recipe I want to share today with you is for Marinated, Pan-Seared Mexican Chicken. This recipe is delightfully GOOD. An added benefit is that it’s low in calories (under 200 per serving), so it’s a win-win in my book!

My favorite food to eat is Mexican food. I love the flavors in most Mexican-inspired dishes, which is why I really like this one. Pan-seared Mexican chicken has great flavor, from spices like cumin, chili powder, garlic, oregano and lime juice. YUM!

The recipe for pan-seared Mexican chicken is easy to prepare. I have modified it slightly from a recipe I found on Skinnytaste.com a while ago.

If you can mix up a marinade, add chicken to the marinade, then cook it, you can make this delicious chicken! Here’s how to make it:

Scroll Down For A Printable Recipe Card At The Bottom Of The Page

It’s Easy To Make Marinated Pan-Seared Mexican Chicken!

Marinate the chicken breasts for at least half an hour. TIP: The chicken tastes even better if you let it marinate all day! If you have the time, go for all day marinating.

As you can see in the photo below, I only made two small chicken breasts, since there was only two of us eating this meal.

Chicken breasts are marinated before cooking.

Time To Cook The Pan-Seared Mexican Chicken Breasts!

Spray a large skillet with non-stick cooking spray OR add a Tablespoon of oil. Once the oil is hot, add the marinated chicken breasts.

You can see in the photo below the little pieces of minced garlic on each piece. There’s a lot of flavor saturated on those chicken breasts!

The marinated chicken breasts are pan-seared in a hot skillet.

Cook each side of the pan-seared Mexican chicken until it is golden brown, and cooked through. This usually will take about 4-8 minutes per side depending on the chickens thickness.

The internal temperature of the cooked chicken should be at 165°F. when the chicken breasts are finished cooking.

Two of the marinated, pan-seared Mexican chicken breasts cook in a skillet.

Add the reserved batch of marinade plus 1/4 cup water to the skillet, halfway through cooking the second side of the chicken breasts.

Cook the pan-seared Mexican chicken in the marinade for 3-4 minutes (until cooked through). Spoon the pan drippings over the chicken as it cooks. Once done, the chicken is ready to serve!

Serve The Pan-Seared Marinated Chicken

This pan-seared Mexican chicken recipe is to prepare, and it’s delicious! We enjoy this chicken, and usually serve it with white steamed rice on the side.

You might also enjoy topping the cooked chicken breasts with some pico de gallo salsa as a garnish! That really takes the flavor up another notch!

Finished cooking, the pan-seared Mexican chicken has darkened in color.

Hope you enjoy these tasty (and easy) pan-seared Mexican chicken breasts! They are really easy to prepare, and have good flavor!

Thanks for stopping by today, and I invite you to come back again soon for more family-friendly recipes. Take care, and have a GREAT day!

Looking For More CHICKEN Recipes?

You can find all of my chicken recipes in the Recipe Index, located at the top of the page. A few of those recipes include:

Want More Recipes? Get My FREE Newsletter!

I publish a newsletter 2 times per month (1st and 15th) with lots of recipes, tips, etc..
Would you like to join our growing list of subscribers?

There is a Newsletter subscription box on the top right (or bottom) of each blog post, depending on the device you use.
You can submit your e-mail address there, to be added to my mailing list.

Find Me On Social Media:

Facebook page: The Grateful Girl Cooks!
Pinterest:
The Grateful Girl Cooks!
Instagram:
jbatthegratefulgirlcooks

Author's signatureRecipe Adapted from: http://www.skinnytaste.com/2013/08/grilled-chicken-with-black-bean-mango.html

↓↓ PRINTABLE RECIPE BELOW ↓↓

0 from 0 votes
Marinated, Pan-Seared Mexican Chicken
Prep Time
5 mins
Cook Time
12 mins
Total Time
17 mins
 
Marinated, pan-seared Mexican chicken is a delicious, low-fat, easy to prepare dish. The chicken will surprise you with its depth of flavor.
Category: Entree
Cuisine: Mexican
Keyword: pan-seared Mexican chicken
Servings: 4 servings
Calories Per Serving: 140 kcal
Author: JB @ The Grateful Girl Cooks!
Ingredients
  • 4 boneless skinless chicken breasts (4 ounces each)
  • salt and pepper (to taste)
  • 6 cloves minced garlic
  • 2 teaspoons cumin
  • 1 teaspoon dried oregano
  • 2 limes, JUICE OF
  • 1/4 cup water
Instructions
  1. Season chicken breasts lightly with salt and pepper. Place chicken breasts in large bowl.

  2. In separate bowl, mix together minced garlic, cumin, oregano, and lime juice. Pour HALF of the marinade sauce over chicken. Reserve the other half of  marinade for later.

  3. Coat chicken with marinade. Cover and refrigerate for at LEAST half an hour. (The longer the chicken marinates, the better the flavor!)

  4. Spray skillet with non-stick cooking spray. Heat on medium high until very hot. Once skillet is hot, place marinated chicken into skillet. They should sizzle when added to skillet. Discard marinade that the chicken was in. Cook chicken 3-4 minutes, then turn to other side. Halfway through cooking second side of chicken, add the reserved marinade, plus 1/4 cup water to the skillet. Cook for 3-4 additional minutes, continually spooning sauce over the top of chicken breasts. This will coat the chicken and will help to darken the color. Cook chicken until cooked all the way through.

  5. When chicken is done, remove from skillet. If desired, serve with pico de gallo as a garnish. Serve chicken with rice, or your favorite side dish. Enjoy!

Recipe Notes

Caloric calculation was made based on using a 4 ounce small boneless, skinless chicken breast per serving. Larger portions of chicken will have more calories.

Nutrition Facts
Marinated, Pan-Seared Mexican Chicken
Amount Per Serving (1 (4 ounce) breast)
Calories 140 Calories from Fat 27
% Daily Value*
Fat 3g5%
Cholesterol 72mg24%
Sodium 134mg6%
Potassium 455mg13%
Carbohydrates 2g1%
Protein 24g48%
Vitamin A 45IU1%
Vitamin C 6.4mg8%
Calcium 26mg3%
Iron 1.3mg7%
* Percent Daily Values are based on a 2000 calorie diet.

Here’s one more to pin on your Pinterest boards!Marinated, pan-seared Mexican chicken is a delicious, low-fat, easy to prepare dish. The chicken will surprise you with its depth of flavor.


Save

Save

Save

Mom’s Chicken Parmigiana

Mom’s Chicken Parmigiana is a classic dish! Breaded chicken breasts are browned, then baked, topped w/ Italian sauce, Parmesan and mozzarella cheeses!Mom's Chicken Parmigiana is a classic dish! Breaded chicken breasts are browned, then baked, topped w/ Italian sauce, Parmesan and mozzarella cheeses!

I love my Mom’s recipe for Chicken Parmigiana. Really, really, really love it. I love my Mom more, but that’s a completely different story. Mom’s Chicken Parmigiana is an absolutely fantastic Italian dish!

My mom first made this classic Italian dish for me YEARS ago. I have no idea where she got the recipe… all I know is that it is fantastic! I’ve made Mom’s chicken parmigiana for years now, and it never disappoints!

About 10 years ago I prepared this delicious meal for about 35 hungry friends at a retreat, and it received rave reviews!

Mom’s chicken parmigiana is actually pretty easy to prepare, and the smell in the kitchen as the sauce is being cooked… oh my goodness! The chicken is “fork tender” and full of good old Italian flavor! The pasta sauce is totally easy to prepare, as well.

Scroll Down For A Printable Recipe Card At The Bottom Of The Page

Making Mom’s Chicken Parmigiana Is Fairly Easy

Flatten boneless, skinless chicken breasts to about 1/2″ thick, then season with salt and pepper. Dip the chicken pieces in an egg/milk mixture, then an Italian bread crumbs mixture. Brown the breaded chicken breasts in a skillet, in butter and olive oil.

Make a homemade Italian-style tomato sauce (it’s simple). Layer a bit of the sauce in the bottom of baking dish before adding the chicken on top. Spoon more sauce on top of each piece of chicken.

Top the chicken with Parmesan and mozzarella cheeses, and then bake Mom’s chicken parmigiana for about 20 minutes.

Combine the remaining Italian style tomato sauce with cooked angel hair pasta (or spaghetti noodles), and serve, alongside the chicken. Mom’s chicken parmigiana is perfectly cooked, tender, and tastes delicious!

Pasta and asparagus are served alongside Mom's chicken parmigiana.

I’ve never taken photos of Mom’s chicken parmigiana while actually preparing it (my bad), so unfortunately you only get to see the finished product. Trust me, this dish is easy to make! If you can follow basic directions, you can do this!

You just might thank me for the amazing aromas in your kitchen as you cook this meal. Hope you will “get your Italian on” and give this classic Italian dish a try. I think you’re gonna love Mom’s Chicken Parmigiana!

Looking For More CHICKEN Recipes?

You can find all of my recipes in the Recipe Index, located at the top of the page. I have LOTS of chicken recipes, including:

Want More Recipes? Get My FREE Newsletter!

I publish a newsletter 2 times per month (1st and 15th) with lots of recipes, tips, etc..
Would you like to join our growing list of subscribers?

There is a Newsletter subscription box on the top right (or bottom) of each blog post, depending on the device you use.
You can submit your e-mail address there, to be added to my mailing list.

Find Me On Social Media:

Facebook page: The Grateful Girl Cooks!
Pinterest:
The Grateful Girl Cooks!
Instagram:
jbatthegratefulgirlcooks

Author's signatureRecipe Source: Mom (original source is unknown)

↓↓ PRINTABLE RECIPE BELOW ↓↓

0 from 0 votes
Mom's Chicken Parmigiana
Prep Time
25 mins
Cook Time
20 mins
Total Time
45 mins
 

Mom's Chicken Parmigiana is a classic dish! Breaded chicken breasts are browned, then baked, topped w/ Italian sauce, Parmesan and mozzarella cheeses!

Category: Entree
Cuisine: Italian
Keyword: chicken parmigiana
Servings: 4 servings
Calories Per Serving: 924 kcal
Author: JB @ The Grateful Girl Cooks!
Ingredients
For the Sauce:
  • 28 ounces large can Italian chopped tomatoes ,do not drain
  • 1/2 medium brown onion , finely chopped
  • 5 garlic cloves , minced
  • 6-7 leaves fresh basil leaves (1/4 cup), chopped
  • 1 Tablespoon Italian seasoning (or more, to taste)
  • Salt , to taste
  • 8 ounces Angel Hair Pasta (enough for 4 small servings)
For Chicken Parmigiana:
  • 4 boneless chicken breasts
  • salt and pepper (to season chicken breasts)
  • 2 large eggs
  • 3/4 cup milk
  • 1 1/2 cups Italian bread crumbs
  • 3 Tablespoons olive oil
  • 2 Tablespoons butter
  • 1/4 cup grated parmesan cheese
  • cups mozzarella cheese , or four 1/2 inch slices
Instructions
  1. Preheat oven to 350 degrees.
  2. Prepare the sauce: Melt the butter and olive oil in a large skillet. Saute the chopped onion and crushed garlic in the olive oil and butter for a few minutes, being careful not to burn the garlic. Add the can of Italian tomatoes. Cook for approximately 10 minutes until heated through. Add the chopped basil and Italian seasoning. Remove from heat.

  3. Pound chicken breasts with a meat mallet between layers of plastic wrap or a large zip lock bag until thinner (the chicken, not YOU). They should end up being about 1/2 inch thick, if possible.
  4. Put two eggs in medium sized bowl; beat slightly. Add milk; stir to combine. Place Italian bread crumbs onto a dinner plate and spread to cover plate.

  5. Salt and pepper chicken breasts. Dredge one chicken breast at a time into the egg/milk mixture. Let excess egg mixture drip off back into bowl. Dredge each piece of chicken into Italian bread crumbs to coat all sides of chicken. Place each piece of chicken onto a baking sheet once completely coated.

  6. Heat butter and olive oil in large skillet. Once oil is very hot, add the chicken breasts (may have to do this in 2 batches due to size of chicken). Brown chicken for 3-4 minutes per side. Remove from skillet. Chicken does not have to be fully cooked at this point, because it will bake in oven.
  7. Place a thin layer of prepared pasta sauce on the bottom of a 9x13 baking pan (just enough to keep chicken from sticking... save the rest for the the top of chicken and the pasta!). Lay the browned chicken breasts in single layer on top of the sauce, then sprinkle chicken with grated parmesan cheese. Place a large spoonful of pasta sauce on top of the chicken breast, followed by the slice of mozzarella cheese. Bake in 350 degree oven for approximately 20 minutes, or until cheese is bubbly on top.

  8. While chicken is baking, prepare angel hair pasta, per package directions. Add remaining sauce to cooked pasta, and serve alongside the chicken parmigiana when done. Enjoy!

Nutrition Facts
Mom's Chicken Parmigiana
Amount Per Serving (1 breast + pasta)
Calories 924 Calories from Fat 342
% Daily Value*
Fat 38g58%
Saturated Fat 14g88%
Cholesterol 236mg79%
Sodium 1490mg65%
Potassium 1203mg34%
Carbohydrates 88g29%
Fiber 6g25%
Sugar 12g13%
Protein 56g112%
Vitamin A 1155IU23%
Vitamin C 23.2mg28%
Calcium 540mg54%
Iron 6.6mg37%
* Percent Daily Values are based on a 2000 calorie diet.

Here’s one more to pin on your Pinterest boards!Mom's Chicken Parmigiana is a classic dish! Breaded chicken breasts are browned, then baked, topped w/ Italian sauce, Parmesan and mozzarella cheeses!


Save

Save

Save

Save

Make Your Own Taco Seasoning Mix

It’s easy to make up a large batch of taco seasoning mix- perfect Mexican spices for ground beef, chicken or pork to use in tacos, taco salads, etc. It's easy to make up a large batch of taco seasoning mix... perfect Mexican spices for ground beef, chicken or pork to use in tacos, taco salads, etc.
Years ago I got tired of buying the packages of commercially prepared seasoning mixes and started adding my own spices to ground beef, pork or chicken when we ate tacos or taco salads. Today I’d like show you how to make your own taco seasoning mix very easily.

I used to haul out various jars of spices each time I made it and then haul them all back to the cupboard when I was done. Then I found a “copycat” recipe (a copycat version of Lawry’s Taco Seasoning mix) in one of my “Top Secret Recipe” books by Todd Wilbur (I have several of his books and LOVE them).

I took his basic “recipe” for the mix, multiplied it by 12 and ended up with quite a nice supply of taco seasoning, which I store in an old spice canister.  Since we eat tacos quite often (they’re my FAVORITE), it’s handy to have a ready supply of seasoning mix around whenever I need it.

Scroll Down For A Printable Recipe Card At The Bottom Of The Page

How Do You Season Meat With The Taco Seasoning Mix?

It’s easy, because all you do when you want to use it is to add 2/3 cup water to 3 Tablespoons of the mix and the pound of meat, cook for 7-10 minutes and bam! You’re done… and the meat tastes GREAT!

How easy is that? Sure is great to mix this taco seasoning mix all up ONCE and not have to haul all the spices out of the cupboard each and every time we have tacos! Hope you give it a try. It will save you some bucks and valuable time in the long run (and quite possibly a trip to the grocery store!) My photo is a bit blurry, but it’s the only one I took of the seasoning spices before mixing. Oh well.

Spices in bowl used to make the seasoning mix.

How Do You USE This Taco Seasoning Mix To Season Taco Meat?

Add 3 Tablespoons of the taco seasoning mix to browned/drained meat. This photo is using hamburger meat, but the taco seasoning mix is delicious on shredded chicken or pork, too!

The taco seasoning mix is added to a pound of browned hamburger meat.

Add 2/3 cup of water. Cook the taco mixture for 7-10 minutes, until the water has cooked down and been absorbed into the meat.  Now your taco meat is fully seasoned and ready to use!

Cooking the seasoned meat in a skillet, for tacos.

Use Taco Seasoning Mix On A Variety Of Meals

Ready to eat! This time we used the taco mix seasoning to make the seasoned ground beef for taco salads.YUM!

A taco salad was made, using the taco seasoning mix on the meat.

We use the taco seasoning mix all the time when we fix our tacos! The seasoning on the meat is wonderful, and I’m confident you’ll enjoy it, too.

The mix tastes great on the meat for homemade tacos.

I hope you will consider making up a batch of this taco seasoning mix to have around YOUR home. Truthfully, I’m pretty sure you will NOT regret it!

Looking For Other SPICE MIX Recipes?

You can find all of my recipes in the Recipe Index, located at the top of the page. A couple favorite spice mixes include:

Interested In More Recipes?

Thank you for visiting this website. I appreciate you using some of your valuable time to do soIf you’re interested, I publish a newsletter 2 times per month (1st and 15th) with all the latest recipes, and other fun info. I would be honored to have you join our growing list of subscribers, so you never miss a great recipe!
There is a Newsletter subscription box on the top right side (or bottom) of each blog post, depending on the device you use, where you can easily submit your e-mail address (only) to be included in my mailing list.

You Can Also Find Me On Social Media:

Facebook page: The Grateful Girl Cooks!
Pinterest:
The Grateful Girl Cooks!
Instagram:
jbatthegratefulgirlcooks

Make Your Own Taco Seasoning Mix / The Grateful Girl Cooks!Recipe Source: “Even More Top Secret Recipes”, by Todd Wilbur, published by the Penguin Group, 2002 (pages. 118-119)

**The recipe I am posting is the original recipe for enough seasoning mix for one pound of meat. Multiply it for the quantity you wish to have on hand. I found it easiest to make a whole bunch (for 12 meals) at one time.

↓↓ PRINTABLE RECIPE BELOW ↓↓

0 from 0 votes
Make Your Own Taco Seasoning Mix
Prep Time
5 mins
Cook Time
0 mins
Total Time
5 mins
 
It's easy to make up a large batch of taco seasong mix... perfect Mexican spices for ground beef, chicken or pork to use in tacos, taco salads, etc.
Category: Seasonings
Cuisine: Mexican
Keyword: taco seasoning mix
Servings: 1 (3 Tablespoons)
Calories Per Serving: 59 kcal
Author: JB @ The Grateful Girl Cooks!
Ingredients
  • 1 Tablespoon flour
  • 1 teaspoon chili powder
  • 1 teaspoon paprika
  • 3/4 teaspoon salt
  • 3/4 teaspoon minced onion
  • 1/2 teaspoon cumin
  • 1/4 teaspoon cayenne pepper
  • 1/4 teaspoon garlic powder
  • 1/8 teaspoon ground oregano
Instructions
  1. Mix all the ingredients together in a bowl.
  2. To prepare: Brown hamburger meat in a skillet until fully cooked. Drain the grease.
  3. Add the spice mix (or use 3 Tablespoons if you prepared quite a bit of the mix).
  4. Add 2/3 cup water to the meat and spice mixture. Stir to combine. Bring mixture to a boil, then reduce the heat to a low setting and cook, uncovered for 7-10 minutes. Stir occasionally.
  5. Remove from heat. Spoon the seasoned meat into warm tortillas, taco shells, or onto a salad.
  6. Enjoy!
Recipe Notes

NOTE: Quantity listed is equivalent to one envelope of store bought mix. Ingredients as listed when added to a pound of meat (hamburger meat, shredded pork or chicken) will make enough seasoned meat filling for 12 tacos (3 Tablespoons meat each).
*I multiplied the quantity by 12 to get a large quantity of seasoning mix.

Nutrition Facts
Make Your Own Taco Seasoning Mix
Amount Per Serving (1 (3 Tablespoons))
Calories 59
% Daily Value*
Sodium 1781mg77%
Potassium 144mg4%
Carbohydrates 12g4%
Fiber 1g4%
Sugar 1g1%
Protein 2g4%
Vitamin A 1785IU36%
Vitamin C 2.8mg3%
Iron 1.8mg10%
* Percent Daily Values are based on a 2000 calorie diet.

Here’s one more to pin on your Pinterest boards!It's easy to make a large batch of taco seasoning mix - the perfect Mexican spices for ground beef, chicken or pork to use in tacos, taco salads, etc.


Save

Save

Homemade Breakfast Sausage Patties

It’s EASY to make eight delicious Homemade Breakfast Sausage Patties for breakfast from scratch, using ground turkey or pork!It's EASY to make eight delicious Homemade Breakfast Sausage Patties for breakfast from scratch, using ground turkey or pork!
So… in my never ending quest experimenting with new recipes, I decided to try making Homemade Breakfast Sausage Patties from scratch. I found the recipe via Pinterest via Martha Stewart via Lucinda Scala Quinn’s book “Mad Hungry”. Did ya get all that? Ha Ha… it takes a village.

When I was growing up my Mom used to make eggs and sausage for us about once a week. She always made sausage patties by hand (using a one pound “chub” from her favorite “name brand”). As a “busy” adult, I usually end up buying link sausage instead of patties, the kind you simply “brown and serve”.

But, when I saw this recipe, I decided to see what making homemade breakfast sausage patties “from scratch” was all about. I knew I could control the ingredients and leave out some of the unpronounceable “add ins” typically found in mass produced name brand products for longer life.

Scroll Down For A Printable Recipe Card At The Bottom Of The Page

Okay… How Do I Make Homemade Breakfast Sausage?

The original recipe called for ground pork (which is my personal favorite), but I had a pound of ground turkey that I was itching to use, so I substituted turkey in this recipe for a healthier version. The sausage patties turned out very good, and I would definitely make this recipe again. Hope you will give it a try!

First things first… get all the ingredients (spices) together to add to the ground meat. Let’s do this!

Spices for homemade sausage patties

After mixing the ingredients, form the sausage patties (with clean hands, of course!). Place them onto foil or wax paper after making each one.

Breakfast sausage patties formed in palm of hand

Cooking Homemade Breakfast Sausage Patties

Place the homemade breakfast sausage patties in a lightly oiled, hot skillet. I cooked several sausages at a time, then repeated the process for the remaining sausage patties.

6 breakfast sausage patties cooking in skillet

Carefully turn the patties over about half way through cooking time and continue cooking until the homemade breakfast sausage patties are cooked all the way through..

Browned homemade breakfast sausage patties cooking in skillet.

Once done, transfer the cooked sausage patties to a paper towel so any extra grease is absorbed. Once they drain a bit, they are done, and ready to eat!

One of the homemade breakfast sausage patties, up close.

I prepared these homemade breakfast sausage patties one fine morning, and ended up using them to make sausage, egg and cheese biscuits. The sausage patty was added to a fluffy biscuit, along with sliced cheddar cheese and a fried egg. It was delicious!

If you enjoy breakfast sandwiches, I hope you will check out my recipes for:

How Many Homemade Breakfast Sausage Patties Does This Make?

The recipe made 8 small sausage patties and only took about 25 minutes or so to make from start to finish!  I ended up freezing half of the cooked sausage patties, to save for another breakfast.

Breakfast sausage patty on biscuit with egg and cheese

Hope you will give this easy recipe for homemade breakfast sausage a try. The calorie calculation was based on using ground turkey for the sausage. The recipe is easily adapted for using ground pork, but the calorie count will be slightly higher.  Have a fantastic day, and be sure to check out ALL my recipes in the Recipe Index, located at the top of the page.

Interested In More Recipes?

Thank you for visiting this website. I appreciate you using some of your valuable time to do soIf you’re interested, I publish a newsletter 2 times per month (1st and 15th) with all the latest recipes, and other fun info. I would be honored to have you join our growing list of subscribers, so you never miss a great recipe!
There is a Newsletter subscription box on the top right side (or bottom) of each blog post, depending on the device you use, where you can easily submit your e-mail address (only) to be included in my mailing list.

You Can Also Find Me On Social Media:
Facebook page: The Grateful Girl Cooks!
Pinterest: The Grateful Girl Cooks!
Instagram: jbatthegratefulgirlcooks

Author's signatureRecipe Adapted from: http://www.marthastewart.com/341904/simple-homemade-sausage-patties

↓↓ PRINTABLE RECIPE BELOW ↓↓

0 from 0 votes
Homemade Breakfast Sausage Patties
Prep Time
15 mins
Cook Time
10 mins
Total Time
25 mins
 

It's EASY to make eight delicious Homemade Breakfast Sausage Patties for breakfast from scratch, using ground turkey or pork!

Category: Breakfast
Cuisine: American
Keyword: homemade breakfast sausage
Servings: 8 sausage patties
Calories Per Serving: 72 kcal
Author: JB @ The Grateful Girl Cooks!
Ingredients
  • 1 pound ground turkey or ground pork
  • 1 clove garlic , minced
  • 1 Tablespoon dried sage , crumbled
  • 3/4 teaspoon dried thyme
  • 1/2 teaspoon dried fennel , crushed
  • 1 pinch of ground nutmeg
  • 1 1/2 teaspoons coarse salt
  • 1/2 teaspoon freshly ground black pepper
  • 1 large egg white
  • 2 teaspoons vegetable oil (for cooking the sausage patties in)
Instructions
  1. In a medium sized bowl, combine all the ingredients except vegetable oil. Mix thoroughly. Cover the bowl; refrigerate for 15 minutes.
  2. To make the patties: Rinse your hands in really cold water (this helps to make it easier to make the patties without it sticking as much). Divide the meat into 8 patties. Shape each patty into a 2 1/2 inch wide disk.
  3. If you don't want to cook all the patties at once, you can refrigerate the patties or freeze them until you want to use them.
  4. If cooking immediately, heat a large skillet or griddle over high heat. Add the vegetable oil and continue heating. Place the sausages in hot skillet or griddle. Fry them about 4 minutes on each side until golden brown. Carefully turn patties over and repeat until cooked through and lightly browned on both sides.
  5. When done, remove sausages to paper towels to briefly drain. Serve immediately.
  6. Cooked sausage patties can be cooled and wrapped and frozen for use at another time, if desired. Microwave sausage patties (in paper towels) to re-heat
Recipe Notes

NOTE:**Caloric calculation was based on the use of ground turkey.

Nutrition Facts
Homemade Breakfast Sausage Patties
Amount Per Serving (1 sausage pattie)
Calories 72 Calories from Fat 9
% Daily Value*
Fat 1g2%
Cholesterol 31mg10%
Sodium 471mg20%
Potassium 178mg5%
Protein 13g26%
Vitamin A 30IU1%
Vitamin C 0.1mg0%
Calcium 11mg1%
Iron 0.7mg4%
* Percent Daily Values are based on a 2000 calorie diet.

Here’s one more to pin on your Pinterest boards!It's EASY to make eight delicious Homemade Breakfast Sausage Patties for breakfast from scratch, using ground turkey or pork!


Save

Save