Category: Main Dishes

Pecan-Crusted Chicken (4 ingredients!)

Pecan-Crusted Chicken is a delicious entrée, with only 4 ingredients, 10 minutes prep, and in the oven it goes! A perfect dish for busy days!

If you’re like me, sometimes it’s hard to come up with a quick and easy dinner, especially when you’re tired from a long day!

Today I want to share a recipe that solves that problem… and it is absolutely yummy! Pecan-crusted chicken takes only about 10 minutes to “get ready”, then you pop it in the oven for about 18 minutes to bake. That’s it!

I originally found the recipe in one of my old cookbooks, and made a few minor changes to suit our taste, and this is the result. Tender chicken breasts, flavored with a honey mustard glaze, then topped with chopped pecans and baked. Yum!

The recipe makes two servings but can be easily doubled or tripled, to suit your needs. Here’s how to make pecan-crusted chicken. 

Scroll Down For A Printable Recipe At The Bottom Of The Page

Make The Honey Dijon Glaze

Making the honey Dijon mustard glaze for the chicken is a cinch! Place 1¾ Tablespoons of honey in a small bowl.

Add 1 Tablespoon of Dijon mustard, then stir well, to fully blend it into the honey. This is the simple glaze for the chicken. Set the bowl aside.

Dijon mustard and honey are placed in a small bowl.Honey mustard glaze is mixed together and ready for the chicken.

Prepare The Chicken Breasts For Baking

Pat each of the chicken breasts dry between a couple layers of paper towels. Set a cutting board on the kitchen counter.

Lay a large piece of plastic wrap (bigger than the chicken) on the cutting board. Lay one chicken breast at a time in the center of the wrap.

Cover the chicken with a second large piece of plastic wrap and make sure the edges are sealed. Use the flat side of a meat mallet to pound the chicken all over, until it has been flattened to about ½” thick.

A chicken breast is blotted dry with paper towels before basting.

A chicken breast in plastic wrap is pounded flat with a meat mallet.

Time For the Glaze And Chopped Pecans

After flattening the chicken, place each piece on a baking sheet. Brush the top using HALF the total amount of honey mustard glaze, divided between the two pieces.

Now prepare one chicken breast at a time. Spread HALF the chopped pecans on a dinner plate, then lay one chicken breast, glazed side down, on top of the pecans.

Brush HALF the remaining glaze on the chicken (the side facing up, without pecans). Dredge the chicken in the chopped pecans to adhere them to the glaze.

Place the chicken breast, pecan side UP onto baking sheet. Repeat this process with the other piece of chicken, remaining glaze and pecans.

Honey Dijon glaze is brushed over the chicken breasts.Honey mustard chicken is dredged in chopped pecans on a plate.

Bake The Pecan-Crusted Chicken

Place the chicken breasts (pecan side up) on a baking sheet. Press any remaining pecans on the plate into the chicken pieces so they adhere.

Bake the chicken at 350°F. for 16-18 minutes or until safely cooked through to an internal temperature of 165°F.

Pecan-crusted chicken, on a baking sheet, ready to be cooked.

When done, the chicken should be golden brown on top, and fully cooked through. The chopped pecans on top will be lightly “toasted”, which adds additional flavor and texture!

Pecan-crusted chicken rests on baking sheet after cooking.

Serve The Pecan-Crusted Chicken

Use a spatula to transfer the pecan-crusted chicken breasts to individual serving plates. Serve immediately, and enjoy!

The chicken has a wonderful flavor from the honey Dijon glaze and is very tender (thanks to the meat mallet pounding you gave it!).

Pecan-crusted chicken, with broccoli and baked potato on the side.A close up photo of the pecan-crusted chicken on a white plate.

I hope you enjoy this recipe for pecan-crusted chicken! It really is a super simple, delicious and satisfying main dish I am confident you’ll like.

Thanks for stopping by, and I invite you to come back soon for more family-friendly recipes. Take care, may God bless you, and have a GREAT day!

Looking For More CHICKEN Recipes?

You can find ALL of my recipes in the Recipe Index, which is located at the top of the page. I have a large variety of chicken recipes for you to check out, including:

Want More Recipes? Get My FREE Newsletter!

I publish a newsletter 2 times per month (1st and 15th) with lots of recipes, tips, etc..
Would you like to join our growing list of subscribers?

There is a Newsletter subscription box on the top right (or bottom) of each blog post, depending on the device you use.
You can submit your e-mail address there, to be added to my mailing list.

Find Me On Social Media:

Facebook page: The Grateful Girl Cooks!
Pinterest:
The Grateful Girl Cooks!
Instagram:
jbatthegratefulgirlcooks

Author's signature

Recipe adapted from: “Southern Living 2009 Annual Recipes” cookbook, page 309, published in 2009 by Oxmoor House, Inc.

↓↓ PRINTABLE RECIPE BELOW ↓↓

5 from 1 vote
Pecan-Crusted Chicken
Prep Time
10 mins
Cook Time
18 mins
Total Time
28 mins
 

Pecan-Crusted Chicken is a delicious entrée, with only 4 ingredients, 10 minutes prep, and in the oven it goes! A perfect dish for busy days!

Category: Main Dish
Cuisine: American
Keyword: pecan-crusted chicken
Servings: 2
Calories Per Serving: 429 kcal
Author: JB @ The Grateful Girl Cooks!
Ingredients
  • 2 boneless, skinless chicken breasts (5 ounces each)
  • Tablespoons honey
  • 1 Tablespoons Dijon mustard
  • 6 Tablespoons chopped pecans
Instructions
  1. Preheat oven to 350℉. Lightly grease baking dish or baking sheet.

  2. Stir honey and Dijon in a small bowl until combined. Set aside.

  3. Pat chicken dry with paper towels. Lay piece of plastic wrap (bigger than chicken) on a cutting board on kitchen counter. Lay one chicken breast in the center of the wrap. Cover chicken with more plastic wrap; make sure edges are sealed. Use flat side of a meat mallet to pound chicken, until flattened to about ½" thick.

  4. Place each piece on baking sheet. Brush top of each piece with ¼ of the total amount of glaze (reserving the rest). Doing 1 chicken breast at a time, spread HALF the pecans on a plate; lay chicken breast, glazed side down, on top of pecans. Brush top with ¼ more of the remaining glaze (side facing up, w/out pecans). Dredge chicken in pecans to adhere them to the glaze. Place chicken, pecan side UP on baking sheet. Repeat with other piece, remaining glaze and pecans. Press any remaining pecans on plate into chicken, to adhere.

  5. Bake chicken at 350°F. for 16-18 minutes or until golden brown and cooked through, to an internal temperature of 165°F.

  6. Transfer to serving plates using a spatula, and serve immediately. Enjoy!

Nutrition Facts
Pecan-Crusted Chicken
Amount Per Serving (1 chicken breast)
Calories 429 Calories from Fat 234
% Daily Value*
Fat 26g40%
Saturated Fat 3g19%
Trans Fat 0.01g
Polyunsaturated Fat 7g
Monounsaturated Fat 14g
Cholesterol 91mg30%
Sodium 248mg11%
Potassium 668mg19%
Carbohydrates 20g7%
Fiber 3g13%
Sugar 16g18%
Protein 33g66%
Vitamin A 65IU1%
Vitamin C 2mg2%
Calcium 34mg3%
Iron 1mg6%
* Percent Daily Values are based on a 2000 calorie diet.

Here’s one more to pin on your Pinterest boards!Pecan-Crusted Chicken is a delicious entrée, with only 4 ingredients, 10 minutes prep, and in the oven it goes! A perfect dish for busy days!

Classic Pot Roast

Classic Pot Roast is comfort food at it’s very best! Make this delicious, tender beef dish for those you love, using only a few ingredients!
Classic Pot Roast is comfort food at it's very best! Make this delicious, tender beef dish for those you love, using only a few ingredients!

When I was growing up I looked forward to my Mom’s pot roast. She would put the meat, along with carrots, onions AND potatoes in the pot and while it cooked, our little house would smell so good!

These days, I love cooking roast with carrots and onions only, and prefer to make mashed potatoes (and gravy) separately to serve on the side. YUM! Same great taste, and our home still smells amazing while it cooks!

To me, a tender pot roast is comfort food, and when I make it nowadays, it brings back warm memories from my childhood. I don’t make it as often now, because I’m only cooking for two. When I do make it, I buy a small roast which is enough for several servings and leftovers!

There are so many ways to season and prepare pot roast. I found the original recipe for this pot roast online a while ago, made some very minor changes, and this is how I make classic pot roast now.

Scroll Down For A Printable Recipe At The Bottom Of The Page

Pan-Sear The Veggies

The first thing to do is pan-sear the onions and carrots separately in a large Dutch oven. NOTE: You will use this pot for the roast as well, so it must be oven-safe.

Heat a couple Tablespoons of vegetable oil in a Dutch oven over Medium-High heat. When the oil is hot and shimmering, add the prepared onions. Each one of the onions should be peeled, ends trimmed, and then cut into 8 wedges (from top to bottom).

Cook the onions about 2-3 minutes, stirring occasionally until slightly browned and translucent. Carefully remove and transfer the onions to a plate.

Now add the carrots (2″ slices) to the hot pot and cook for 2-3 minutes, stirring occasionally until they’re slightly browned. Remove them and transfer to the plate, as well.

Onion wedges are lightly browned in hot oil.Carrot chunks are lightly browned in hot oil.

Now you should have a large plate with the pan-seared onions and carrots on it. Set these veggies aside while you brown the beef.

Lightly browned onions and carrots rest on a plate after being cooked.

Season And Pan-Sear The Pot Roast

Season the pot roast generously on all sides with salt and pepper. Add a bit more oil to the pan (if necessary), and heat it on Medium-High.

Chuck roast is seasoned on all sides with salt and pepper.

When the oil is very hot (but not smoking), add the seasoned pot roast. Pan-sear the meat for about 2 minutes without moving it, then turn to the other side and repeat, to ensure all sides of the meat are browned.

You will not cook the beef all the way through, but simply want all sides of the roast to be browned. When done, remove and transfer the browned roast to a plate.

Roast is pan-seared in hot oil in a Dutch oven.Pot roast is browned on all sides before it is baked.

De-Glaze The Pan

After browning the onions, carrots and beef, there will be little bits of them stuck to the bottom of the pot. They have lots of flavor, so it is time to de-glaze the pot!

To do this, add 1 cup of beef broth and minced garlic to the pot, and cook on Medium-High, for 1-2 minutes. Use a spoon to scrape those browned bits off the bottom of the pot as it cooks.

The browned bits add a LOT of flavor to the broth the roast will cook in, so don’t skip this step! Remove the pot from the heat.

Beef broth and minced garlic are added and used to deglaze the pot.

Bake The Classic Pot Roast

Place the roast back into the pot, then add the remaining 2 cups of beef broth. The broth should come about ½ way up the sides of the roast.

Surround and cover the roast with the carrots and onions. Add a couple sprigs of fresh rosemary and several sprigs of fresh thyme to the top.

Put a lid on the pot and bake the pot roast at 275° F. for 3 hours (low and slow!). Cooking the meat low and slow will produce a very tender roast!

NOTE: If you are using a larger roast (4-5 pounds), you will need to let it bake for about 4 hours at the same temperature.

Pot roast, onions, carrots and fresh herbs are ready to be baked.After baking for 3 hours, the classic pot roast is ready to be served.

Serve And Enjoy Classic Pot Roast

When the classic pot roast is finished baking, carefully transfer it to a serving platter. Be careful, the meat is usually falling-apart tender!

Arrange the carrots and onions on the platter, and spoon a bit of the broth from the pot over the top, if desired.  Slice the pot roast into individual portions, transfer to plates and add the onions and carrots. Serve with your favorite side dishes, and enjoy!

Our favorite way to enjoy this meal is with green beans from our garden, and mashed potatoes and gravy (made from the beef broth remaining in the pot). It’s such a comforting and delicious meal!

Classic pot roast on white platter, with onions and carrots on the side.The classic pot roast, served with green beans, mashed potatoes & gravy.

The pot roast, carrots and onions all have wonderful flavor, and are VERY tender! I hope you have the opportunity to make this dish for those you love, and trust you’ll enjoy it, too.

Thank you for taking time out of your day to stop by. I invite you to come back again soon for more family-friendly recipes. Take care, may God bless you, and have a GREAT day!

Looking For More BEEF Recipes?

You can find ALL of my recipes in the Recipe Index, which is located at the top of the page. I have quite a few delicious recipes featuring beef, including:

Want More Recipes? Get My FREE Newsletter!

I publish a newsletter 2 times per month (1st and 15th) with lots of recipes, tips, etc..
Would you like to join our growing list of subscribers?

There is a Newsletter subscription box on the top right (or bottom) of each blog post, depending on the device you use.
You can submit your e-mail address there, to be added to my mailing list.

Find Me On Social Media:

Facebook page: The Grateful Girl Cooks!
Pinterest:
The Grateful Girl Cooks!
Instagram:
jbatthegratefulgirlcooks

Author's signature

Recipe adapted from: https://www.foodnetwork.com/recipes/ree-drummond/perfect-pot-roast-recipe-2118771

↓↓ PRINTABLE RECIPE BELOW ↓↓

0 from 0 votes
Classic Pot Roast
Prep Time
15 mins
Cook Time
3 hrs
Total Time
3 hrs 15 mins
 

Classic Pot Roast is comfort food at it's very best! Make this delicious, tender beef dish for those you love, using only a few ingredients!

Category: Main Dish
Cuisine: American
Keyword: classic pot roast
Servings: 5 (from 3lb. roast + veggies)
Calories Per Serving: 597 kcal
Author: JB @ The Grateful Girl Cooks!
Ingredients
  • 3 pound pot roast (chuck roast)
  • salt and black pepper to season beef generously
  • 2 Tablespoons vegetable oil
  • 6 medium carrots peeled, cut in 2" round pieces
  • 2 medium yellow onions peeled, each cut in 8 wedges, top to bottom
  • teaspoons minced garlic
  • 3 cups beef broth
  • 4-6 sprigs fresh thyme
  • 2 sprigs fresh rosemary
Instructions
  1. Preheat oven to 275℉. (or 135℃.)

  2. Heat vegetable oil in a Dutch oven (oven-safe) over Medium-High heat. When oil is shimmering, add onion wedges. Cook 2-3 minutes, stirring occasionally until slightly browned and translucent. Remove/Transfer onions to a plate. Add carrots to the hot pot; cook 2-3 minutes on Medium-High until slightly browned. Remove/Transfer carrots to the plate, as well.

  3. Generously season roast with salt and pepper on all sides. Add more oil to the pot (if necessary); heat on Medium-High. When oil is hot, add roast. Cook meat for 1-2 minutes without moving it, then turn to the other side; repeat to ensure all sides are browned (but not cooked through). When done, remove/ transfer roast out of the pot to a plate.

  4. Add 1 cup beef broth and minced garlic to the pot; cook on Medium-High for 1-2 minutes. Use a spoon to scrape the browned bits off the bottom as it cooks. Remove pot from the heat.

  5. Place roast back into the pot; add remaining 2 cups beef broth. Broth should come about ½ way up the sides of the roast. Add carrots and onions. Place sprigs of fresh rosemary and fresh thyme on top. Put a lid on the pot and bake roast at 275° F. for 3 hours (low and slow!). NOTE: If using a larger roast (4-5 pounds), you will need to let it bake for about 4 hours.

  6. When finished baking, carefully transfer roast to a serving platter. Be careful, the meat is usually fall-apart tender! Discard thyme and rosemary. Arrange carrots and onions on platter; spoon a bit of broth over the top, if desired.  Slice pot roast into portions, transfer to plates; add onions and carrots. Serve, and enjoy!

Nutrition Facts
Classic Pot Roast
Amount Per Serving (1 (1/5 of total))
Calories 597 Calories from Fat 333
% Daily Value*
Fat 37g57%
Saturated Fat 15g94%
Trans Fat 2g
Polyunsaturated Fat 6g
Monounsaturated Fat 17g
Cholesterol 188mg63%
Sodium 809mg35%
Potassium 1287mg37%
Carbohydrates 12g4%
Fiber 3g13%
Sugar 5g6%
Protein 55g110%
Vitamin A 12304IU246%
Vitamin C 9mg11%
Calcium 94mg9%
Iron 6mg33%
* Percent Daily Values are based on a 2000 calorie diet.

Here’s one more to pin on your Pinterest boards!Classic Pot Roast is comfort food at it's very best! Make this delicious, tender beef dish for those you love, using only a few ingredients!


Stuffed Jack O’ Lantern Peppers

Make cute, delicious Stuffed Jack O’ Lantern Peppers for 4! Filled with chicken, rice, salsa and cheese, this is a fun idea for a Fall meal!
Make cute, delicious Stuffed Jack O' Lantern Peppers for 4! Filled with chicken, rice, salsa and cheese, this is a fun idea for a Fall meal!

If you’re looking for a unique, yet filling main dish to serve during the Fall, I hope you’ll check out this fun way to serve stuffed peppers!

The recipe for stuffed jack o’ lantern peppers is fairly simple to make, especially if you can use pre-cooked chicken and rice.

Each stuffed pepper also has Parmesan and mozzarella cheeses, as well as chunky salsa and spices, which give the filling a bit of a Southwest flavor.

I’m confident you’ll enjoy these cute little stuffed jack o’ lantern peppers. Here’s how to make them.

Scroll Down For A Printable Recipe At The Bottom Of The Page

Carve The Jack O’ Lantern Peppers

Preheat your oven to 425°F, so it will be at temperature and ready to go, as soon as the peppers have been stuffed.

Cut the tops off each bell pepper, then set the intact tops aside while you carve and decorate the peppers. Use a spoon to remove all the seeds from inside the bell peppers. 

Use a very small paring knife to carefully carve a pumpkin face out of each bell pepper. I make small triangles for the eyes and nose, then carve out a jagged “mouth” on each one. 

The tops of four orange bell peppers are sliced and removed.Pumpkin faces are carved out of each orange bell pepper.

Rub the inside of the peppers with a small amount of olive oil, then lightly season with a tiny bit of salt and pepper. Put the bell peppers in a baking dish, cut side facing up.

The inside of each bell pepper is seasoned with olive oil, salt and pepper.

Prepare The Chicken Filling

Place 2 cups of shredded cooked chicken breast into a large mixing bowl. Add cooked rice, chunky salsa, shredded mozzarella cheese, garlic powder, ground cumin, and salt.

Stir these ingredients well, until they’re fully combined. This is the filling you will use to stuff the Jack O’ Lantern bell peppers.

Chicken is shredded, then salsa, cheese, rice and seasonings are added.

Stuff The Jack O’ Lantern Peppers 

Use a spoon to fill each of the bell peppers with the chicken mixture. You should have enough chicken filling to reach the top of each pepper.

Sprinkle Panko breadcrumbs evenly over the top of the peppers, then add grated Parmesan cheese, to finish.

Carefully add enough water into the baking dish to cover the bottom of the dish with about ½” of water. Put the top back on each of the stuffed peppers.

Jack O' Lantern peppers are stuffed with the chicken and rice filling.Stuffed Jack O' Lantern peppers are covered with breadcrumbs and Parmesan.

Time to Bake!

Spray aluminum foil with non-stick baking spray, and cover the dish (sprayed side down). Be careful to not puncture the foil with the pumpkin stems!

Bake the stuffed jack o’ lantern peppers at 425°F. for about 40 minutes. When done, the bell peppers should be very tender and the chicken filling should be fully heated through.

Covered with aluminum foil, the stuffed peppers are baked for 40 minutes.After baking, the orange bell peppers are tender and heated through.

Serve The Stuffed Jack O’ Lantern Peppers

Carefully remove each stuffed pepper out of the baking dish using a spatula, and place them on individual serving plates.

Serve the stuffed jack o’ lantern peppers with the top ON or you can place it alongside the pepper to reveal the chicken filling inside.

Enjoy this filling chicken and rice dish with a favorite vegetable side or salad. We enjoyed the stuffed peppers, served with Grilled Herb Garlic Zucchini and Tomato Basil Drop Biscuits.

One of the stuffed jack o' lantern peppers, served on a white plate.Zucchini is served with one of the stuffed jack o' lantern peppers.

I hope you have the chance to make these cute, tasty stuffed jack o’ lantern peppers. They’re a fun dish to make during the Fall season, but are also a nice meal to make any time of the year!

Thanks for stopping by, and I invite you to come back soon for more family-friendly recipes. Take care, and have a GREAT day!

Looking For More FALL Recipes?

You can find ALL of my recipes in the Recipe Index, which is located at the top of the page. I have lots of delicious recipes, perfect for the Fall season, including:

Want More Recipes? Get My FREE Newsletter!

I publish a newsletter 2 times per month (1st and 15th) with lots of recipes, tips, etc..
Would you like to join our growing list of subscribers?

There is a Newsletter subscription box on the top right (or bottom) of each blog post, depending on the device you use.
You can submit your e-mail address there, to be added to my mailing list.

Find Me On Social Media:

Facebook page: The Grateful Girl Cooks!
Pinterest:
The Grateful Girl Cooks!
Instagram:
jbatthegratefulgirlcooks

Author's signature

Recipe adapted from: mymagazine.us (a mailer from Kroger), Fall issue, page 7

↓↓ PRINTABLE RECIPE BELOW ↓↓

0 from 0 votes
Stuffed Jack O' Lantern Peppers
Prep Time
15 mins
Cook Time
40 mins
Total Time
55 mins
 

Make cute, delicious Stuffed Jack O' Lantern Peppers for 4! Filled with chicken, rice, salsa and cheese, this is a fun idea for a Fall meal!

Category: Main Dish
Cuisine: American
Keyword: stuffed jack o' lantern peppers
Servings: 4
Calories Per Serving: 349 kcal
Author: JB @ The Grateful Girl Cooks!
Ingredients
  • 4 large orange bell peppers
  • 2 teaspoons olive oil
  • salt & pepper to season bell peppers
  • 2 cups shredded, pre-cooked chicken breast
  • 1 cup cooked white or brown rice
  • cups chunky salsa medium or mild
  • ½ teaspoon ground cumin
  • ½ teaspoon table salt
  • ¼ teaspoon garlic powder
  • ¼ cup Panko breadcrumbs
  • ¼ cup grated Parmesan cheese
  • ¾ cup shredded mozzarella cheese
Instructions
  1. Preheat oven to 425°F.

  2. Carefully slice the top off each bell pepper and set aside; remove all the seeds. Use a very small knife to carve a pumpkin face out of each bell pepper.

  3. Rub the inside of each pepper with a bit of olive oil, then lightly season each with a pinch of salt and pepper. Put peppers in a baking dish, cut side up.

  4. Place shredded chicken in a large mixing bowl. Add cooked rice, chunky salsa, shredded mozzarella, garlic powder, ground cumin, and salt. Stir until combined.

  5. Use a spoon to fill each pepper to the top with chicken filling. Sprinkle Panko breadcrumbs evenly on top, then add grated Parmesan cheese, to finish. Carefully add enough water to the baking dish to cover the bottom with ½" of water. Put the top back on each stuffed pepper.

  6. Spray aluminum foil with non-stick spray; cover baking dish (sprayed side down). Be careful to not puncture foil with the stems! Bake peppers at 425°F. for 40 minutes. When done, peppers should be tender and the filling should be completely heated through.

  7. Remove each stuffed pepper out of baking dish using a spatula, transfer to plates. Serve immediately, and enjoy!

Nutrition Facts
Stuffed Jack O' Lantern Peppers
Amount Per Serving (1 stuffed pepper)
Calories 349 Calories from Fat 108
% Daily Value*
Fat 12g18%
Saturated Fat 5g31%
Polyunsaturated Fat 1g
Monounsaturated Fat 4g
Cholesterol 82mg27%
Sodium 1256mg55%
Potassium 737mg21%
Carbohydrates 29g10%
Fiber 5g21%
Sugar 9g10%
Protein 32g64%
Vitamin A 4408IU88%
Vitamin C 154mg187%
Calcium 221mg22%
Iron 2mg11%
* Percent Daily Values are based on a 2000 calorie diet.

Here’s one more to pin on your Pinterest boards!Make cute, delicious Stuffed Jack O' Lantern Peppers for 4! Filled with chicken, rice, salsa and cheese, this is a fun idea for a Fall meal!

Pork Chops In Sour Cream Sauce

Pork Chops in Sour Cream Sauce is a delicious dish featuring browned, “bone-in” pork chops and onions baked in a sour cream wine sauce.
Pork Chops in Sour Cream Sauce is a delicious dish featuring browned, "bone-in" pork chops and onions baked in a sour cream wine sauce.

Today I want to share a recipe I discovered many, many years ago in one of my old cookbooks. The recipe was first published almost 30 years ago, but good recipes are timeless… right?

Making this dish is fairly simple. Basically, you will pan-sear pork chops until browned, cover with onion rings and an easy to make sour cream wine sauce, then bake until done.

The pork chops come out tender and juicy, and have great flavor from the onions and sauce they are baked in. I think you will enjoy this recipe. Here’s how to make it.

Scroll Down For A Printable Recipe Card At The Bottom Of The Page

Season The Pork Chops

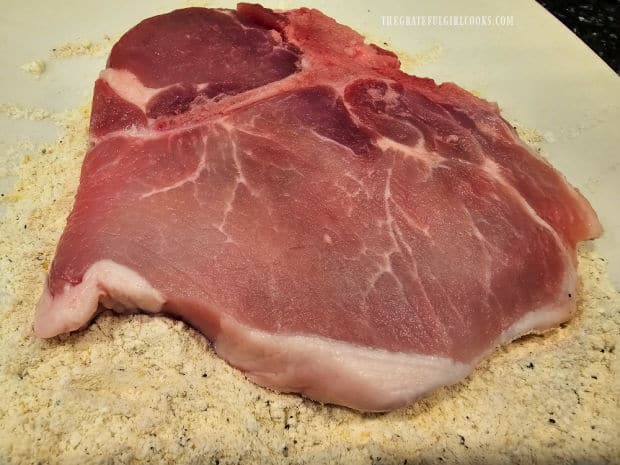
Dry the pork chops on both sides with paper towels to remove extra moisture. This will allow the pork chops to brown better when they are pan-seared.

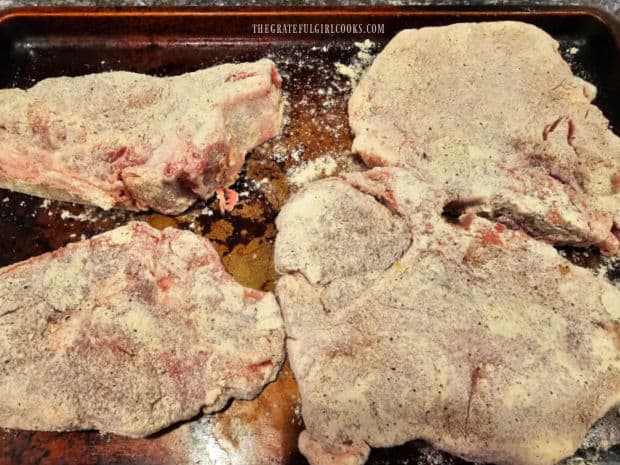
Season the pork chops on both sides with salt, pepper, and dried sage. Press the seasonings into the meat to help them adhere.

Pork chops are blotted dry, then lightly seasoned with salt, pepper and sage.

Pan-Sear The Seasoned Pork Chops

Heat a Tablespoon of vegetable oil on Medium heat in a large non-stick skillet, until very hot, but not smoking.

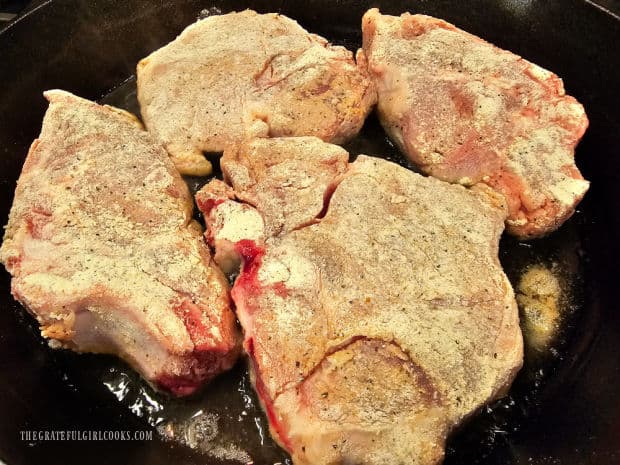
Place the pork chops in a single layer in the hot oil. You should hear them sizzle when they hit the hot oil in the skillet.

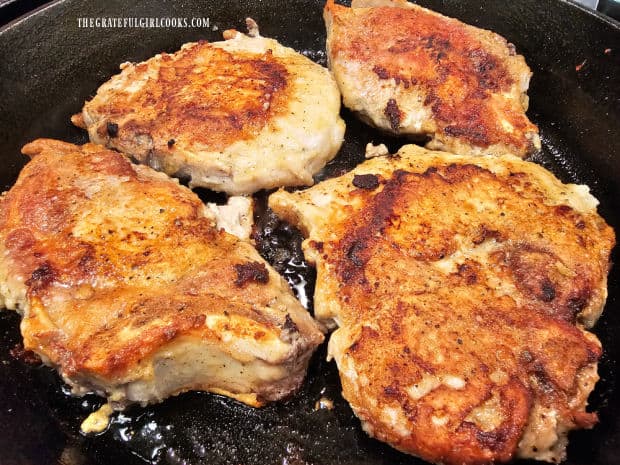
Brown the chops, without moving them in the skillet, for 5 minutes. Turn the pork chops over, and cook the other side for 5 minutes.

The pork chops should be nicely browned on both sides. They will finish cooking when they are baked later.

Four pork chops are pan-seared in hot oil in a large skillet.Both sides of the pork chops are pan-seared until browned.

Transfer the pork chops into a greased (or sprayed) 9″ x 9″ baking dish, keeping them in a single layer in the dish.

NOTE: Do not clean the skillet. You’ll use the drippings from cooking the chops later, when you make the sour cream sauce.

Spread thinly sliced onion rings on top of the pork chops, evenly distributing them. Set the dish aside.

The pan-seared pork chops are placed in a baking dish in single layer.Thin onion ring slices are placed on top of the pork chops.

Make The Sour Cream Sauce

Now it’s time o make the EASY sour cream sauce. Stir sour cream, Dijon mustard and flour in a small bowl until fully combined. Set aside.

Add chicken broth and dry white wine to the skillet you cooked the pork chops in. Bring the liquid to a boil, and let it boil for 1 minute.

Add the sour cream mixture and fresh, chopped parsley to the skillet. Stir well, to fully combine these ingredients.

Sour cream, flour and Dijon mustard are combined in a small bowl.A 4 photo collage showing how to make the sour cream sauce in a skillet.

Remove the skillet from the heat, and pour the sour cream sauce over the pork chops and onion rings, making sure the chops are covered.

Sour cream sauce is poured over the onion topped pork chops in dish.

Bake The Pork Chops In Sour Cream Sauce 

Place the pork chops (uncovered) in a preheated 350°F. oven. Bake them for 35 minutes, until the onions have slightly browned, and the sauce is bubbly.

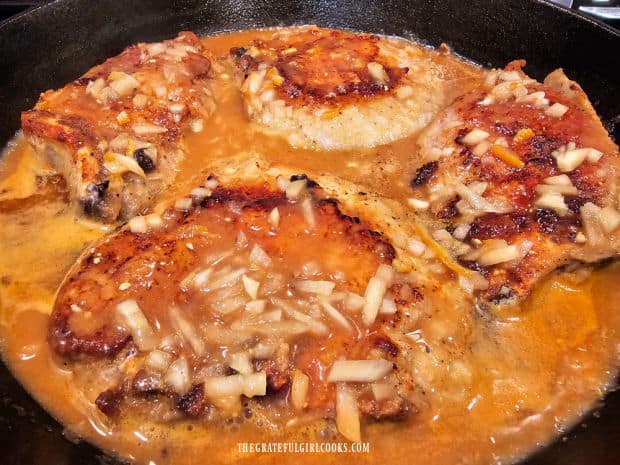
Pork Chops in Sour Cream Sauce are bubbly and browned, after baking.

Serve The Pork Chops in Sour Cream Sauce

When finished baking, the pork chops are ready to be served. Transfer the pork chops to individual serving plates.

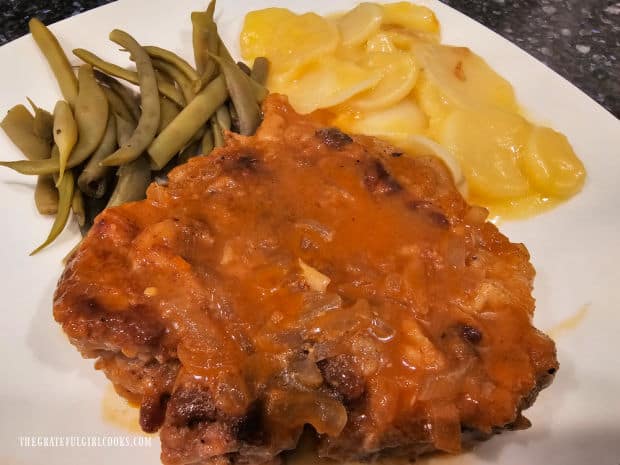
Spoon any remaining sour cream sauce left in the baking dish on top of the pork chops. Serve immediately with a favorite side dish, and enjoy!

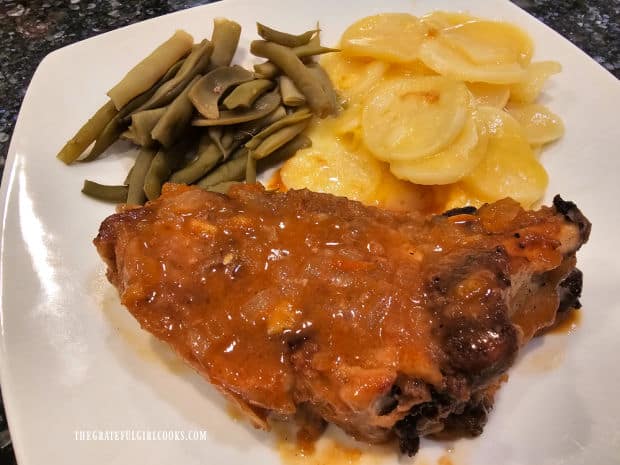
One of the pork chops in sour cream sauce, on plate with a baked sweet potato.

I hope you enjoy making (and eating) these yummy pork chops.  I appreciate you taking the time to check out this recipe, and trust you’ll enjoy this recipe.

Thank you for stopping by today. Please come back again soon for more family friendly recipes. Take care, may God bless you, and have a GREAT day!

Looking For More PORK CHOP Recipes?

You can find ALL of my recipes in the Recipe Index, which is located at the top of the page. I have some absolutely delicious pork chop recipes you might enjoy, including:

Want More Recipes? Get My FREE Newsletter!

I publish a newsletter 2 times per month (1st and 15th) with lots of recipes, tips, etc..
Would you like to join our growing list of subscribers?

There is a Newsletter subscription box on the top right (or bottom) of each blog post, depending on the device you use.
You can submit your e-mail address there, to be added to my mailing list.

Find Me On Social Media:

Facebook page: The Grateful Girl Cooks!
Pinterest:
The Grateful Girl Cooks!
Instagram:
jbatthegratefulgirlcooks

Author's signature

Original recipe source: “What’s For Dinner?”, by Maryana Vollstedt, page 155, published by Chronicle Books in 1997

↓↓ PRINTABLE RECIPE BELOW ↓↓

0 from 0 votes
Pork Chops in Sour Cream Sauce
Prep Time
15 mins
Cook Time
35 mins
Total Time
50 mins
 

Pork Chops in Sour Cream Sauce is a delicious dish featuring browned, "bone-in" pork chops and onions baked in a sour cream wine sauce.

Category: Main Course
Cuisine: All Cuisines
Keyword: pork chops in sour cream sauce
Servings: 4
Calories Per Serving: 387 kcal
Author: JB @ The Grateful Girl Cooks!
Ingredients
  • 4 large bone-in pork chops
  • 2 teaspoons dried sage
  • 1 teaspoon salt
  • 1 teaspoon pepper
  • 1 Tablespoon vegetable oil
  • ½ medium yellow onion sliced very thin, separated into rings
For Sour Cream Sauce:
  • ½ cup light sour cream
  • 1 Tablespoon all purpose flour
  • 1 teaspoon Dijon mustard
  • ½ cup chicken broth
  • ¼ cup dry white wine
  • ¼ cup chopped parsley
Instructions
  1. Preheat oven to 350℉. Grease or spray a 9" x 9" baking dish.

  2. Pat pork chops dry (both sides) with paper towels. Season both sides with salt, pepper, and sage. Press spices into the meat to adhere.

  3. Heat oil on Medium heat in large, non-stick skillet, until hot, but not smoking. Place pork chops in skillet in a single layer. Brown chops (without moving them) for 5 minutes. Turn pork chops over; cook other side for 5 minutes.

  4. Transfer chops to a greased/sprayed 9" x 9" baking dish in a single layer. NOTE: Do not clean skillet. You'll use drippings from chops later. Spread onion rings on top of pork chops, evenly distributing. Set dish aside.

  5. Make Sour Cream Sauce- In small bowl, stir to combine sour cream, Dijon, and flour. Set aside. Add chicken broth and white wine to the skillet you cooked the pork chops in. Bring to a boil; let boil for 1 minute. Add sour cream mixture and parsley. Stir well, to fully combine ingredients. Remove skillet from heat,

  6. Pour sour cream sauce over pork chops/onion rings. Bake pork chops (uncovered) for 35 minutes, until sauce is bubbly. Serve, and enjoy.

Nutrition Facts
Pork Chops in Sour Cream Sauce
Amount Per Serving (1 pork chop)
Calories 387 Calories from Fat 198
% Daily Value*
Fat 22g34%
Saturated Fat 8g50%
Trans Fat 0.2g
Polyunsaturated Fat 4g
Monounsaturated Fat 8g
Cholesterol 128mg43%
Sodium 825mg36%
Potassium 710mg20%
Carbohydrates 6g2%
Fiber 1g4%
Sugar 1g1%
Protein 37g74%
Vitamin A 428IU9%
Vitamin C 6mg7%
Calcium 88mg9%
Iron 2mg11%
* Percent Daily Values are based on a 2000 calorie diet.

Here’s one more to pin on your Pinterest boards!
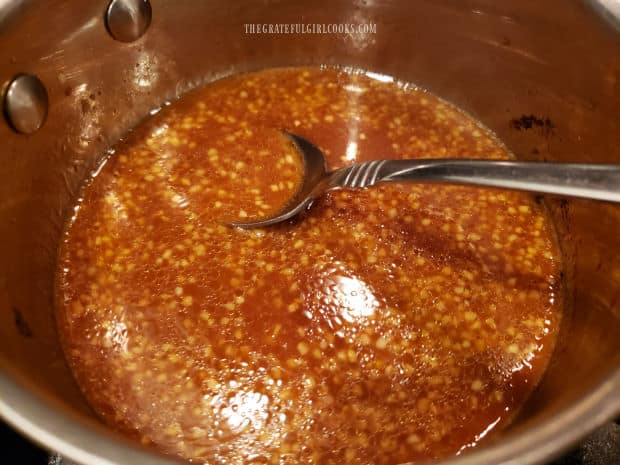
Pork Chops in Sour Cream Sauce is a delicious dish featuring browned, "bone-in" pork chops and onions baked in a sour cream wine sauce.

Baked Grilled Baby Back Ribs

Baked Grilled Baby Back Ribs are fall off the bone tender and delicious! Spice-coated and baked, then grilled with BBQ sauce, you’ll love ’em!
Baked Grilled Baby Back Ribs are fall off the bone tender and delicious! Spice-coated and baked, then grilled with BBQ sauce, you'll love 'em!

Do you enjoy eating BBQ ribs? We sure do! Today I am sharing a great recipe for baked grilled baby back ribs that are so tender, they practically fall right off the bone.

The ribs are covered in a wonderful spice rub, sealed tightly and baked for a couple hours until fully cooked (and tender!). Then they’re brushed generously with BBQ sauce, and grilled for several minutes until the sauce has nicely caramelized!

Thee ribs are delicious, EASY to make, and I’m confident you’re going to really, really enjoy them! Here’s how to make them.

Scroll Down For A Printable Recipe Card At The Bottom Of The Page

Make The Dry Spice Rub

The first thing you need to do is make a dry seasoning mix to rub onto the rack of ribs before baking them.

Stir together oregano, cumin, smoked paprika, parsley, onion powder, garlic powder, salt, pepper, ground mustard and brown sugar in a small bowl.

This is the spice rub for the ribs. See how easy it is to make? These seasonings add great flavor to the meat… yum!

Spices for the ribs are combined in a small metal bowl.Dry rub spice mixture is ready to season the baby back ribs.

Season And Bake The Ribs

Spray a large piece of heavy duty aluminum foil (on the dull side) with non-stick baking spray. Lay the foil on a very large rimmed baking sheet, greased side up. The piece of foil needs to be large enough to completely cover the ribs.

Lightly pat the pork ribs dry using paper towels. We used 1 full rack of ribs weighing 2¾ pounds, and it had about 15 ribs.

Carefully place the rib rack “bone side up” in the middle of the foil lined baking sheet. Season with about 1/3 of the spice mix, rubbing it into the meat and bones so it adheres.

Turn the ribs over and season the meaty part of the ribs using the remaining spice mix. Rub and pat it into the meat so it sticks as much as possible.

Light coating of seasoning covers the bone side of the rack of ribs.The meaty side of the rib rack is covered fully with dry rub seasonings.

Cover, Seal And Refrigerate The Ribs

Place another sprayed piece of foil on top (sprayed side down), and seal the foil packet tightly closed on all sides. You may need to put the rib packet corner to corner on the baking sheet so it fits .

TIP: For the best flavored ribs, place the ribs in the refrigerator for at least an hour at this point, to give the spices time to work their magic!

Seasoned ribs are sealed in foil packet on a baking sheet, then refrigerated.

Bake Then Prepare The Ribs For Grilling

Remove the ribs from the refrigerator 20 minutes before baking. Preheat your oven to 300°F (or 148.8°C) while you take the chill off the ribs.

Bake the ribs at 300°F (or 148.8°C) for 2 – 2½ hours, depending on the size rack of ribs you are using (we cook the “almost” 3 pounds of ribs for 2½ hours). This long baking time ensures the ribs come out of the oven “fall off the bone tender”.  

TIP: Light your gas or charcoal grill outside and get it hot, so it’s ready to go when the ribs are finished baking.

Unwrap the foil packet. Brush the ribs generously with your favorite BBQ sauce. Now they’re ready for the grill to caramelize the sauce!

After baking for 2 and a half hours, the ribs are fully cooked.BBQ sauce is liberally applied to the baked baby back ribs.

What If I Don’t Have A Grill?

A lot of people do not have access to a BBQ grill or are not allowed to have one, due to living arrangements (apartments, high rises, etc.). Where we live in Oregon it rains a lot, so sometimes it’s not even possible to light our charcoal grill.

This is not a problem. Simply coat the tender, slow-baked ribs generously with BBQ sauce (on both sides) after removing them from the oven, slice, serve and enjoy!

Onto The Grill They Go

Lightly oil the grill grate to prevent the meat from sticking. Place the ribs, BBQ sauce side down onto the hot grill, directly on the grate.

Brush the “bone side” facing up with additional BBQ sauce. Cook the ribs for 3-4 minutes until the bottom side gets a good char on it.

Carefully flip the ribs to the other side (we use 2 spatulas, one on each end), and continue grilling the ribs 3-4 more minutes, to char the other side.

NOTE: It’s important to remember the ribs are already fully cooked from baking. The grilling serves to caramelize the sauce and char the ribs for serving. Don’t overcook them on the grill!

Rack of ribs is placed, BBQ sauce side down on a hot BBQ grill.Baked grilled baby back ribs cooking over a hot BBQ grill.

Time To Serve The Baked Grilled Baby Back Ribs!

When done, remove the ribs from the BBQ. Carefully transfer the ribs to a cutting board, because they are so tender they may come off the bones.

Slice between the ribs (about 4-5 ribs per serving), then serve and enjoy! Serve with additional BBQ sauce on the side, so it can be drizzled on the ribs for even MORE flavor!

The baked grilled baby back ribs are done, and ready to be cut for serving.BBQ sauce on the baby back ribs, with fresh corn kernels on the side.

I really hope you have the chance to make these delicious baked grilled baby back ribs, and trust you (and those you love) will enjoy them as much as we do!

Thanks for stopping by. I invite you to come back again soon for more family-friendly recipes. Take care, may God bless you, and have a GREAT day!

Looking For More PORK Recipes?

You can find ALL of my recipes in the Recipe Index, which is locate at the top of the page. I have lots of delicious recipes featuring pork, including:

Want More Recipes? Get My FREE Newsletter!

I publish a newsletter 2 times per month (1st and 15th) with lots of recipes, tips, etc..
Would you like to join our growing list of subscribers?

There is a Newsletter subscription box on the top right (or bottom) of each blog post, depending on the device you use.
You can submit your e-mail address there, to be added to my mailing list.

Find Me On Social Media:

Facebook page: The Grateful Girl Cooks!
Pinterest:
The Grateful Girl Cooks!
Instagram:
jbatthegratefulgirlcooks

Author's signature

Recipe adapted from, and with thanks to Kori, at: seekinggoodeats.com

↓↓ PRINTABLE RECIPE BELOW ↓↓

0 from 0 votes
Baked Grilled Baby Back Ribs
Prep Time
10 mins
Cook Time
2 hrs 30 mins
Refrigeration Time
1 hr
Total Time
3 hrs 40 mins
 

Baked Grilled Baby Back Ribs are fall off the bone tender and delicious! Spice-coated and baked, then grilled with BBQ sauce, you'll love 'em!

Category: Main Dish
Cuisine: American
Keyword: baked grilled baby back ribs
Servings: 3 (4-5 ribs per serving)
Calories Per Serving: 647 kcal
Author: JB @ The Grateful Girl Cooks!
Ingredients
For Spice Rub:
  • Tablespoons smoked paprika
  • Tablespoons ground cumin
  • Tablespoons dried oregano
  • Tablespoons dried parsley
  • teaspoons garlic powder
  • teaspoons onion powder
  • 1 Tablespoon brown sugar
  • teaspoons ground mustard
  • 1 teaspoon kosher salt
  • ½ teaspoon ground black pepper
For Ribs:
  • pounds baby back pork ribs full rack- about 15 ribs
  • BBQ Sauce, to add and season to taste use your favorite brand
  • oil or baking spray for foil and BBQ grill grate
Instructions
  1. Spray a large piece of aluminum foil (on dull side) with non-stick baking spray. Lay foil on a large rimmed baking sheet, greased side up. Set aside.

  2. Stir spice rub ingredients together in a small bowl until combined.

  3. Pat ribs dry with paper towels. Lay rib rack "bone side up" in the middle of the foil. Season with ⅓ of the spice mix, rubbing it into the meat/bones so it adheres. Turn ribs over and season the meaty side with remaining spice mix. Rub/pat it into the meat so it adheres as much as possible. Place another sprayed piece of foil on top (sprayed side down), and seal the ribs in the foil packet, tightly closed on all sides. You may need to put the rib packet corner to corner on the baking sheet so it fits. TIP: For the best flavored ribs, place packet of ribs in refrigerator for at least an hour, to give the spices time to work their magic! Remove ribs from refrigerator 20 minutes before baking.

  4. Preheat oven to 300°F. (or 148.8°C.) when you remove ribs from refrigerator. Bake ribs at 300°F (or 148.8°C) for 2 - 2½ hours, depending on the size rack of ribs you're using (we cook "almost" 3 pounds of ribs for 2½ hours). This long baking time ensures ribs will be "fall off the bone tender".  TIP: Light your gas or charcoal grill (lightly oil the grates), so it's preheated and ready to go when ribs are finished baking.

  5. When done baking, unwrap foil packet. Brush ribs generously with BBQ sauce. Place ribs, meaty BBQ sauce side down onto hot grill, directly on metal grates. Brush "bone side" facing up with BBQ sauce. Cook ribs 3-4 minutes until slightly charred on bottom. Carefully turn ribs to the other side; continue cooking 3-4 more minutes, to char other side. NOTE: Remember- ribs are already fully cooked. Grilling caramelizes the sauce and chars them. Don't overcook ribs on the grill!

  6. Transfer ribs from BBQ to a cutting board. Slice between the ribs to serve (about 4-5 ribs per serving). Serve with additional BBQ sauce on the side. Enjoy!

Recipe Notes

NOTE: Caloric calculation does not include BBQ sauce because different brands may be used. Calorie count may also differ slightly based on total weight of ribs being used.

Nutrition Facts
Baked Grilled Baby Back Ribs
Amount Per Serving (1 (1/3 of total))
Calories 647 Calories from Fat 396
% Daily Value*
Fat 44g68%
Saturated Fat 15g94%
Trans Fat 0.4g
Polyunsaturated Fat 8g
Monounsaturated Fat 19g
Cholesterol 181mg60%
Sodium 1019mg44%
Potassium 884mg25%
Carbohydrates 12g4%
Fiber 3g13%
Sugar 5g6%
Protein 52g104%
Vitamin A 1884IU38%
Vitamin C 2mg2%
Calcium 181mg18%
Iron 6mg33%
* Percent Daily Values are based on a 2000 calorie diet.

Here’s one more to pin on your Pinterest boards!Baked Grilled Baby Back Ribs are fall off the bone tender and delicious! Spice-coated and baked, then grilled with BBQ sauce, you'll love 'em!


Grilled Herb Garlic Zucchini

Make Grilled Herb Garlic Zucchini on indoor or outdoor grills! Topped with a garlic herb dressing, this is a fresh way to enjoy this veggie.

Today I want to share a quick, delicious and simple way to cook zucchini on a BBQ grill or an indoor grill pan.

Summertime is typically when zucchini is in its prime! There are so many great ways to use this veggie in breads, soups, salads, a stir-fry, and more.

This recipe involves cooking the zucchini for a few minutes, then topping it with a light, flavorful dressing to serve. That’s it, and it really is THAT easy, and that good. Here’s how to make it.

Scroll Down For A Printable Recipe Card At The Bottom Of The Page

Make The Sauce To Garnish The Cooked Zucchini

Place olive oil, finely chopped onion (or shallots), minced garlic, salt, pepper, and chopped parsley and rosemary in a small bowl.

Stir these ingredients together into a light sauce, then set the bowl aside. This dressing will be drizzled over the grilled zucchini for serving. 

Olive oil, onion, garlic, parsley, rosemary, salt and pepper in a small white bowl.The savory dressing, ready to drizzle on the grilled zucchini for serving.

Prepare The Zucchini For Grilling

Cut the stem and bottom ends off a medium to large sized zucchini. Slice the zucchini into ½” thick slices.

Place the zucchini slices in a large bowl, drizzle with olive oil, and season with salt and black pepper. Toss until well-coated with oil, salt and pepper.

A zucchini is cut into slices before seasoning and grilling.Olive oil, salt and pepper is drizzled on the sliced zucchini and tossed to coat.

Grill The Zucchini

Heat a grill on Medium High heat until very hot. You can use an outdoor grill OR an indoor grill, but be sure the grill is lightly oiled and hot before adding the zucchini.

Note: For these photos, I cooked inside on a cast iron grill, set on top of two of our gas stove burners.

Lay the oiled and seasoned zucchini slices in a single layer on the hot grill using tongs. Cook for about 2 minutes (without moving them), and then turn them to the other side.

The bottom side should be slightly charred with grill marks. Cook the other side 2-3 minutes, or until slightly charred, and the zucchini is crisp-tender.

The zucchini slices are grilled on a hot indoor griddle.After 2 minutes, the zucchini slices are flipped over, revealing grill marks.

Drizzle The Grilled Zucchini With Sauce

When finished cooking, the zucchini should be slightly charred, and have grill marks on both sides. The slices should be crisp-tender to the bite, not overly soft!

Transfer the cooked zucchini from the grill to a serving platter. Drizzle the herb garlic dressing evenly over the zucchini.

Make sure the zucchini slices all get a bit of the dressing on them, as it provides wonderful flavor to the finished dish.

Grilled Herb Garlic Zucchini slices are transferred to a serving platter.Herb garlic dressing is drizzled over the grilled zucchini slices for serving.

Serve The Grilled Herb Garlic Zucchini

Serve the grilled herb garlic zucchini while hot. The recipe, as written below, will typically be about 3 servings, if using a medium-sized zucchini.

Of course, this recipe can EASILY be doubled or tripled, to end up with the quantity you require for your meal.

A platter of grilled herb garlic zucchini, ready to be served.Herb garlic dressing tops the hot, grilled herb garlic zucchini when served.

I hope you try this simple recipe for grilled herb garlic zucchini, and trust you will enjoy it, too. It’s a simple side dish I’m confident you will find quite delicious.

Thanks for stopping by today, I invite you to come back again soon for more family-friendly recipes. Take care, may God bless you, and have a GREAT day!

Looking For More Recipes Using Zucchini?

You can find ALL of my recipes in the Recipe Index, which is located at the top of the page. I have some wonderful recipes featuring zucchini you might enjoy, including:

Want More Recipes? Get My FREE Newsletter!

I publish a newsletter 2 times per month (1st and 15th) with lots of recipes, tips, etc..
Would you like to join our growing list of subscribers?

There is a Newsletter subscription box on the top right (or bottom) of each blog post, depending on the device you use.
You can submit your e-mail address there, to be added to my mailing list.

Find Me On Social Media:

Facebook page: The Grateful Girl Cooks!
Pinterest:
The Grateful Girl Cooks!
Instagram:
jbatthegratefulgirlcooks

Author's signature

Recipe adapted from: https://damndelicious.net/2018/07/20/grilled-garlic-herb-zucchini/

↓↓ PRINTABLE RECIPE BELOW ↓↓

0 from 0 votes
Grilled Herb Garlic Zucchini
Prep Time
10 mins
Cook Time
6 mins
Total Time
16 mins
 

Make Grilled Herb Garlic Zucchini on indoor or outdoor grills! Topped with a garlic herb dressing, this is a fresh way to enjoy this veggie.

Category: Side Dish, Vegetable Dish
Cuisine: All Cuisines
Keyword: grilled herb garlic zucchini
Servings: 3
Calories Per Serving: 160 kcal
Author: JB @ The Grateful Girl Cooks!
Ingredients
For Herb Garlic Dressing:
  • 2 Tablespoons olive oil
  • 2 Tablespoons finely chopped yellow onion or shallot
  • 1 clove minced garlic
  • ¾ Tablespoon chopped fresh parsley
  • ½ Tablespoon chopped fresh rosemary
  • salt and black pepper, to taste ( a pinch or two of each)
For Zucchini:
  • 1 medium zucchini 7-8" long, stem removed, discarded
  • Tablespoons olive oil
  • salt and black pepper, to taste
Instructions
  1. Place 2 T. olive oil, chopped onion, minced garlic, parsley, rosemary, and a pinch of salt/pepper in a small bowl. Stir to combine; set bowl aside.

  2. Slice zucchini into ½" thick round slices. Place slices in large bowl, drizzle with olive oil; season with salt and pepper to taste. Toss until coated with oil, salt and pepper.

  3. Heat indoor or outside grill on Medium High heat until hot. Put slices onto hot grill in a single layer. Cook for 2 minutes; turn them over. Bottom side should be slightly charred with grill marks. Cook other side 2-3 minutes. When done, zucchini should be slightly charred, have grill marks on both sides, and be crisp-tender to the bite, not overly soft!

  4. Transfer zucchini to serving platter. Drizzle herb garlic dressing evenly over the zucchini. Serve hot, and enjoy!

Recipe Notes

NOTE: Salt/Pepper were not included in caloric calculation, as the amount each cook uses to season the zucchini is subjective.

Nutrition Facts
Grilled Herb Garlic Zucchini
Amount Per Serving (1 (1/3 of total))
Calories 160 Calories from Fat 153
% Daily Value*
Fat 17g26%
Saturated Fat 2g13%
Polyunsaturated Fat 2g
Monounsaturated Fat 12g
Sodium 7mg0%
Potassium 192mg5%
Carbohydrates 3g1%
Fiber 1g4%
Sugar 2g2%
Protein 1g2%
Vitamin A 225IU5%
Vitamin C 14mg17%
Calcium 16mg2%
Iron 0.5mg3%
* Percent Daily Values are based on a 2000 calorie diet.

Here’s one more to pin on your Pinterest boards!
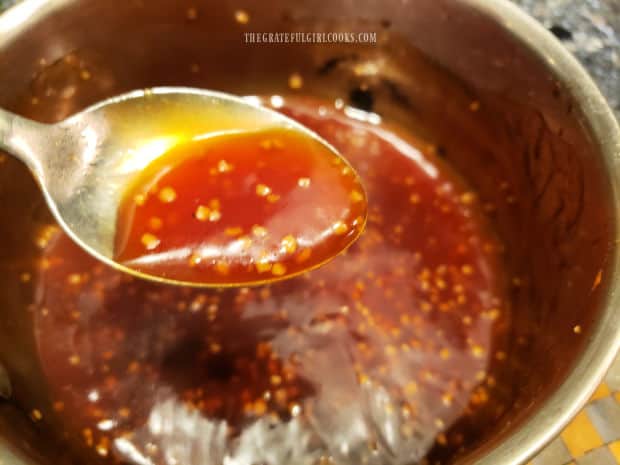
Make Grilled Herb Garlic Zucchini on indoor or outdoor grills! Topped with a garlic herb dressing, this is a fresh way to enjoy this veggie.

Grilled Garlic Butter Halibut

Grilled Garlic Butter Halibut is a simply seasoned, delicious dish cooked on a BBQ, and topped with mango peach salsa for serving.

Today I want to share a delicious halibut dish that we love. Now… given the price of halibut these days, I must tell you we don’t have this too often, but when we do… it is fantastic!

We love halibut, but unfortunately we don’t live in Alaska or go deep sea fishing to get it, so we must buy it at the store. Lately it is a fairly expensive piece of fish. My husband buys it at Costco (when we do buy it).

I cut a big piece into smaller portions, which are perfect for this dish. That way it becomes less expensive per serving, and ends up costing per portion about the same as getting a sub sandwich or burger these days!

It’s a treat to enjoy this delicious, firm and mild tasting white fish occasionally, and this is my favorite way I’ve come up with, to prepare it! We grill it outside, so summer is our favorite time to make grilled garlic butter halibut, especially if it’s NOT raining here in Oregon!

The cooking method is easy and the garlic butter seasoning sauce is simple. Fresh chunky salsa topping and fresh lime juice add color and flavor to this wonderful dish! Here’s how to make it.

Scroll Down For A Printable Recipe Card At The Bottom Of The Page

Sauce And Salsa

Melt butter in a small saucepan, then add garlic powder, seasoning salt, and black pepper. Stir to combine, then set the sauce aside. This will be used to season the fish on the grill.

Melted butter, garlic powder, seasoning salt, and pepper are combined for sauce.

You will also need a chunky salsa to garnish the fish for serving. I use store bought mango peach salsa to garnish the grilled halibut, because it has a mild, slightly fruity sweet taste.

It tastes fantastic on the fish, and is incredibly convenient (and quick) to have it already made. We can find mango peach salsa at our local Fred Meyer store (Kroger). If you can find it, use it, because it’s absolutely delicious!

You can also use your own favorite chunky homemade salsa or purchased chunky salsa, if desired, to garnish the fish. You will only need about 4 Tablespoons to spoon over the two halibut fillets.

TIP: The salsa garnish adds a pop of color and flavor to this dish, so don’t skip this step, even if you prefer a spicy, traditional salsa.

Mango peach salsa is used to garnish cooked halibut for serving.

Prepare The Halibut And BBQ Grill For Cooking

Pat the halibut fillets dry with a paper towel, to absorb any excess moisture. We use two boneless fillets, weighing a total of about 5 ounces each. They were also about 1″ thick.

Two halibut fillets on a white plate, after being patted dry.

Oil the BBQ grill grates to help keep the fish from sticking to the grill. My husband uses a wad of paper towels dipped in oil and tongs to quickly do this.

The BBQ should be heated to medium-high If using a gas grill) and the briquettes (if using) should be red hot before adding the halibut fillets.

The BBQ grill grates are lightly oiled before putting the halibut on the hot grill.

Time To Grill The Halibut

Lay the halibut fillets on the oiled, hot grill grates. Brush half the garlic butter sauce over the top of each fillet, then immediately cover the grill.

Two halibut fillets are placed over hot coals on the BBQ.Two halibut fillets, brushed with garlic butter sauce, cooking on BBQ.

Cook the halibut for 6-7 minutes without disturbing, then open the lid of the BBQ. Carefully turn the fish to the other side, using a spatula.

The surface should now be golden brown. Immediately brush the fish with the remaining sauce. Cover the BBQ again.

Cook the halibut for 3-5 more minutes, OR until the fish reaches an internal temperature of 145°F. Check the temperature after 3 minutes. Don’t overcook the halibut, as it can become dry.

The halibut fillets are flipped halfway through cooking, and brushed with sauce.

Serve The Grilled Garlic Butter Halibut

To serve Grilled Garlic Butter Halibut, transfer the cooked fillets to serving plates. Spoon salsa over the top of each piece, and add a lime wedge on the side, to squeeze the juice over the fish.

We enjoyed the grilled garlic butter halibut with fresh corn on the cob and Parmesan Crumb Sugar Snap Peas (from our garden) on the side.

It all tastes FABULOUS, and the flaky halibut is colorful, flavorful and amazing!

Grilled Garlic Butter Halibut served with mango peach salsa, and a lime wedge.Corn and snap peas served with Grilled Garlic Butter Halibut topped with salsa.

I hope you will consider trying this delicious grilled garlic butter halibut. We absolutely LOVE this way to prepare halibut, when we have the opportunity to make it.

Thanks for stopping by today, and I invite you to come back soon for more family-friendly recipes. Take care, may God bless you, and have a GREAT day!

Looking For More SEAFOOD Recipes?

You can find ALL of my recipes in the Recipe Index, which is located at the top of the page. I have some absolutely delicious seafood recipes you may enjoy, including:

Want More Recipes? Get My FREE Newsletter!

I publish a newsletter 2 times per month (1st and 15th) with lots of recipes, tips, etc..
Would you like to join our growing list of subscribers?

There is a Newsletter subscription box on the top right (or bottom) of each blog post, depending on the device you use.
You can submit your e-mail address there, to be added to my mailing list.

Find Me On Social Media:

Facebook page: The Grateful Girl Cooks!
Pinterest:
The Grateful Girl Cooks!
Instagram:
jbatthegratefulgirlcooks

Author's signature

↓↓ PRINTABLE RECIPE BELOW ↓↓

0 from 0 votes
Grilled Garlic Butter Halibut
Prep Time
5 mins
Cook Time
11 mins
Total Time
16 mins
 

Grilled Garlic Butter Halibut is a simply seasoned, delicious dish cooked on a BBQ, and topped with mango peach salsa for serving.

Category: Main Dish
Cuisine: All Cuisines
Keyword: grilled garlic butter halibut
Servings: 2
Calories Per Serving: 221 kcal
Author: JB @ The Grateful Girl Cooks!
Ingredients
  • 2 (5 ounce) halibut fillets 5 ounces each
  • Tablespoons butter
  • ¼ teaspoon garlic powder
  • ¼ teaspoon seasoning salt
  • teaspoon black pepper
To Serve:
  • 4 Tablespoons mango peach salsa to garnish cooked halibut
  • 2 lime wedges to squeeze juice on halibut
Instructions
  1. Oil BBQ grill grates to help keep the fish from sticking. My husband uses tongs and a wad of paper towels dipped in oil to quickly do this. BBQ should be heated to medium-high (If using gas grill), and briquettes (if using) should be red hot before adding halibut.

  2. Melt butter in a small saucepan; stir in garlic powder, seasoning salt, and black pepper until combined. Set sauce aside.

  3. Pat halibut fillets dry with a paper towel. Lay halibut on oiled, hot grill grates. Brush ½ the sauce over top of fillets; cover the grill.

  4. Cook for 6-7 minutes without disturbing, then open the lid. Carefully turn fish to other side, using a spatula. Brush surface with remaining sauce. Cover BBQ again. Cook 3-5 more minutes, OR until fish reaches an internal temperature of 145°F. Check temp. after 3 minutes; don't overcook halibut, (it becomes dry). When done, remove from grill for serving.

  5. To serve, transfer grilled fillets to plates. Spoon salsa over the top of each piece. Add a lime wedge on the side, to squeeze the juice over the fish. Serve, and enjoy!

Nutrition Facts
Grilled Garlic Butter Halibut
Amount Per Serving (1 fillet + salsa garnish)
Calories 221 Calories from Fat 99
% Daily Value*
Fat 11g17%
Saturated Fat 6g38%
Trans Fat 0.3g
Polyunsaturated Fat 1g
Monounsaturated Fat 3g
Cholesterol 92mg31%
Sodium 665mg29%
Potassium 726mg21%
Carbohydrates 4g1%
Fiber 1g4%
Sugar 2g2%
Protein 27g54%
Vitamin A 521IU10%
Vitamin C 6mg7%
Calcium 28mg3%
Iron 1mg6%
* Percent Daily Values are based on a 2000 calorie diet.

Here’s one more to pin on your Pinterest boards!Grilled Garlic Butter Halibut is a simply seasoned, delicious dish cooked on a BBQ, and topped with mango peach salsa for serving.


Grilled Marmalade Chicken

Grilled Marmalade Chicken is an easy to make dish, featuring chicken breasts basted with a flavorful orange marmalade, lime, and ginger sauce.

Looking for a simple, but delectable main dish? Read on, and see how easy it is to make flavorful grilled marmalade chicken!

Boneless chicken breasts get added flavor from an easy-to-make citrus sauce, which can be made in about a minute!

Place lightly seasoned chicken onto a BBQ or indoor grill, baste with the sauce, cook… and BOOM! About 12 minutes later, you will be sitting down to enjoy this delicious dish. Here’s how to make it.

Scroll Down For A Printable Recipe Card At The Bottom Of The Page

Make The Marmalade Sauce

The marmalade sauce is the real star of this show, and it only takes a minute to make using 3 items (orange marmalade, a lime, and fresh ginger), and it’s packed with flavor!

Place orange marmalade, fresh lime juice, finely grated lime zest, and grated fresh ginger in a small bowl. Stir well, to combine the ingredients.

That’s it! See how easy it is to make this sauce for the chicken? Set the sauce aside for a moment while you prep the chicken breasts.

Orange marmalade, lime juice, lime zest and grated ginger are mixed in a metal bowl.The orange marmalade sauce will be used to baste chicken breasts.

Prepare The Chicken Breasts

Pat four, thin (4 oz. each), boneless chicken breasts dry using paper towels, to absorb excess moisture.

Lightly season the chicken with salt and pepper. The next (and final) step is to grill the chicken.

Four boneless chicken breasts are seasoned with salt and pepper.

To Grill Outside Or Inside?

There are two ways to grill the chicken. You can grill it outside over medium-hot coals on a BBQ grill, OR you can cook them inside on a grill ridged pan (as shown below).

Either way will work, and the process is the same! The chicken cooks very quickly, so I find it more convenient to cook this dish inside, rather than taking extra time to heat charcoal briquettes on our BBQ grill outside. Whichever method you prefer, go for it!

Making Grilled Marmalade Chicken

If cooking inside, generously oil the grill pan (if using outside, lightly oil the grill grates). You don’t want the chicken to stick!

Turn the heat to Medium-High and add the seasoned chicken breasts once the grill is very hot (but not smoking).

Baste the top of each chicken breast with the marmalade sauce (use ½ the total amount), reserving the remaining sauce for later.

Cook the chicken breasts for 6 minutes, without moving them, on the hot grill.

Grilled marmalade chicken breasts cooking on indoor grill.

After the chicken has cooked for 6 minutes, flip the chicken breasts to the other side (shown below). Brush the remaining marmalade sauce over the top of each piece.

Continue to cook the chicken an additional 5-6 minutes, or until it’s cooked through, with an internal temperature of 165°F. 

After turning, the chicken is cooked on the second side.

TIP: During the last minute of cooking, you can turn the chicken back over to further brown the first side before serving.

When done, grilled marmalade chicken breasts are browned and coated with sauce.

Serve The Grilled Marmalade Chicken

Transfer the grilled marmalade chicken from the heat source and place on serving plates. Serve immediately, while hot.

I am confident you’ll enjoy the bright, tangy flavor of this citrus sauce-topped chicken! It’s such a simple recipe.

A piece of grilled marmalade chicken, served with baked potato and broccoli.

Thanks for stopping by today. I really hope you (and those you love) will enjoy this simple, grilled marmalade chicken. We sure do!

Take care, may God bless you, and I hope you have a GREAT day. Please come back again soon for more family-friendly recipes!

Looking For More CHICKEN Recipes?

You can find ALL of my recipes in the Recipe Index, which is located at the top of the page. I have LOTS of delicious chicken recipes to choose from, including:

Want More Recipes? Get My FREE Newsletter!

I publish a newsletter 2 times per month (1st and 15th) with lots of recipes, tips, etc..
Would you like to join our growing list of subscribers?

There is a Newsletter subscription box on the top right (or bottom) of each blog post, depending on the device you use.
You can submit your e-mail address there, to be added to my mailing list.

Find Me On Social Media:

Facebook page: The Grateful Girl Cooks!
Pinterest:
The Grateful Girl Cooks!
Instagram:
jbatthegratefulgirlcooks

Author's signature

Original recipe source: Beth Evins, in “Southern Living 1992 Annual Recipes”, page 123, published by Oxmoor House

↓↓ PRINTABLE RECIPE BELOW ↓↓

0 from 0 votes
Grilled Marmalade Chicken
Prep Time
3 mins
Cook Time
12 mins
Total Time
15 mins
 

Grilled Marmalade Chicken is an easy to make dish, featuring chicken breasts basted with a flavorful orange marmalade, lime, and ginger sauce.

Category: Main Course
Cuisine: All Cuisines
Keyword: grilled marmalade chicken
Servings: 4
Calories Per Serving: 169 kcal
Author: JB @ The Grateful Girl Cooks!
Ingredients
  • 4 boneless chicken breasts (thin, 4 ounces each)
  • ½ teaspoon salt to lightly season chicken
  • ¼ teaspoon black pepper to lightly season chicken
For Marmalade Sauce
  • 3 Tablespoons orange marmalade
  • 2 Tablespoons fresh lime juice
  • ¼ teaspoon lime zest finely grated green peel
  • ½ Tablespoon fresh grated ginger
Instructions
  1. Place marmalade, lime juice, lime zest, and grated ginger in a small bowl. Stir well, to combine.

  2. Pat chicken dry with paper towels. Lightly season with salt and pepper.

  3. If cooking inside, generously oil the grill pan (if using outside, lightly oil grates). Turn heat to Medium-High; add chicken once grill is hot (but not smoking). Baste top of each piece with sauce (use ½ the total amount), reserving remaining sauce for later. Cook chicken breasts 6 minutes, without moving them.

  4. Turn chicken breasts over. Brush remaining sauce on top of each piece. Continue to cook 5-6 more minutes, or until cooked to an internal temperature of 165°F. During last minute of cooking, you can turn chicken back over to further brown first side before serving. When done, remove chicken from heat source; transfer to plates, and serve hot. Enjoy!

Nutrition Facts
Grilled Marmalade Chicken
Amount Per Serving (1 piece)
Calories 169 Calories from Fat 27
% Daily Value*
Fat 3g5%
Saturated Fat 1g6%
Trans Fat 0.01g
Polyunsaturated Fat 0.5g
Monounsaturated Fat 1g
Cholesterol 73mg24%
Sodium 431mg19%
Potassium 439mg13%
Carbohydrates 11g4%
Fiber 0.2g1%
Sugar 9g10%
Protein 24g48%
Vitamin A 48IU1%
Vitamin C 4mg5%
Calcium 13mg1%
Iron 0.5mg3%
* Percent Daily Values are based on a 2000 calorie diet.

Here’s one more to pin on your Pinterest boards!
Grilled Marmalade Chicken is an easy to make dish, featuring chicken breasts basted with a flavorful orange marmalade, lime, and ginger sauce.

Parmesan Herb Baked Salmon

Parmesan Herb Baked Salmon is an easy, delicious main dish you’ll love! Salmon fillets are topped with cheese, spices and garlic, then baked!
Parmesan Herb Baked Salmon is an easy, delicious main dish you'll love! Salmon fillets are topped with cheese, spices and garlic, then baked!

If you’re looking for an easy main dish that doesn’t take a lot of time to prepare, then Parmesan Herb Baked Chicken might be a recipe you’ll want to check out!

We love salmon in our home, and make it about once a week, using various recipes and methods of cooking. It’s SO GOOD!

Making this yummy dish is as simple as stirring up a cheesy herb topping, spreading it on pieces of salmon, wrapping them in foil, then baking until done. That’s it!

The salmon fillets are covered with a topping that is made of Italian seasoning, Parmesan cheese, butter, lemon juice, garlic, salt, pepper, and fresh parsley. Cooking the salmon in foil pouches really helps to seal in flavor!

The topping ingredients give the baked salmon lots of deliciousness! Here’s how to make this easy main dish.
Scroll Down For A Printable Recipe Card At The Bottom Of The Page

Prepare The Salmon Fillets

Pat the salmon fillets dry, using paper towels to absorb excess moisture. I use skinless fillets when I make this recipe, but if you only have “skin-on”, that will be perfectly fine, too!
Set the “dried” fillets aside while you make the herb and cheese topping.

Two skinless salmon fillets laying on paper towels to absorb moisture.Using more paper towels to blot the excess moisture off the salmon fillets.

Make The Parmesan Herb Topping

To make the topping, place softened butter, lemon juice, minced garlic, Parmesan cheese, Italian seasoning, salt, pepper, and fresh chopped parsley in a small bowl.

TIP: You want to use butter that is really soft (but NOT melted!), to bind all the ingredients together EASILY!

Use a fork to mix these ingredients together. It should be easy to mix these ingredients together, thanks to the soft butter.

Soft butter, parsley, parmesan, garlic and spices are placed in a small bowl.A fork is used to fully combine all the topping ingredients in the bowl.

Keep combining the ingredients together until the butter has been completely blended in. The mixture will be thick and “slightly” crumbly.

Parmesan cheese, garlic herb topping is combined and ready for the salmon.

Add The Seasoned Topping To The Salmon 

Place a large sheet of aluminum foil on a baking sheet, then spray the foil lightly with non-stick baking spray.

NOTE: The foil will need to be large enough to completely cover and seal the fish inside when it’s time to bake.

Lay the pieces of salmon on the foil, leaving a little bit of space between the pieces. Cover the top of the fish with the cheesy herb topping, dividing the mixture evenly between the two fillets.

Two salmon fillets, laying on aluminum foil, covered with cheese herb topping.

Cooking The Parmesan Herb Baked Salmon

Bring the edges of the foil up and over the salmon, and crimp all edges tightly closed, to prevent air from escaping. 

Foil pouch, with herb topped salmon fillets inside is sealed before baking.

Place the baking sheet in a preheated oven. Bake the salmon at 425°F (218.3°C) for about 10-12 minutes.

When done, carefully open the foil pouch, fully exposing the parmesan herb baked salmon.

Turn the oven to BROIL, place the baking sheet about 6 inches from the broiler element, and broil for 1-2 minutes, to give the fish a nice light brown color.

Keep an eye on the salmon as it broils, to ensure it doesn’t burn or overcook. Remove the salmon from the oven, and serve immediately.

Two pieces of parmesan herb baked salmon, after baking.After broiling 1-2 minutes, the parmesan herb baked salmon is lightly browned.

Serve The Parmesan Herb Baked Salmon

Serve the parmesan herb baked salmon immediately after removing it from the oven. Transfer the salmon to individual plates. Drizzle with melted butter remaining in the foil pouch.

If desired, garnish each piece with a sprinkle of Parmesan cheese, fresh parsley, and a lemon wedge. We enjoy this pop of citrus flavor when we squeeze lemon juice on the salmon!

Parmesan herb baked salmon, served with rice and peas, on a white plate.

I really hope you have the chance to try this simple, delicious main dish, and trust you’ll enjoy it as much as we do.

The recipe (as written below) makes two servings, but can EASILY be doubled or tripled, to suit your needs.

Thanks for stopping by today, and I invite you to come back soon for more family-friendly recipes. Take care, may God bless you, and have a GREAT day!

Looking For More SALMON Recipes?

You can find ALL of my recipes in the Recipe Index, which is located at the top of the page. I have a nice variety of delicious salmon recipes for you to check out, including:

Want More Recipes? Get My FREE Newsletter!

I publish a newsletter 2 times per month (1st and 15th) with lots of recipes, tips, etc..
Would you like to join our growing list of subscribers?

There is a Newsletter subscription box on the top right (or bottom) of each blog post, depending on the device you use.
You can submit your e-mail address there, to be added to my mailing list.

Find Me On Social Media:

Facebook page: The Grateful Girl Cooks!
Pinterest:
The Grateful Girl Cooks!
Instagram:
jbatthegratefulgirlcooks

Author's signature

Recipe adapted from (and with thanks to) Alyssa Rivers at: https://therecipecritic.com/baked-parmesan-garlic-herb-salmon-in-foil/

↓↓ PRINTABLE RECIPE BELOW ↓↓

0 from 0 votes
Parmesan Herb Baked Salmon
Prep Time
10 mins
Cook Time
14 mins
Total Time
24 mins
 

Parmesan Herb Baked Salmon is an easy, delicious main dish you'll love! Salmon fillets are topped with cheese, spices and garlic, then baked!

Category: Entree-Seafood
Cuisine: American
Keyword: parmesan herb baked salmon
Servings: 2
Calories Per Serving: 335 kcal
Author: JB @ The Grateful Girl Cooks!
Ingredients
  • 10 ounces salmon fillets (2 fillets- 5 oz. each) with or without skin
  • Tablespoons butter (softened)
  • ¼ cup grated Parmesan cheese
  • teaspoons fresh lemon juice
  • teaspoons minced garlic
  • ¼ teaspoon salt
  • ¼ teaspoon Italian seasoning
  • teaspoon black pepper
  • Tablespoons fresh chopped Italian flat leaf parsley
For Garnish: (additional Parmesan cheese, parsley, and/or lemon wedge)
    Instructions
    1. Preheat oven to 425℉ (218.2℃). Place a large piece of foil on a baking sheet, and coat it with non-stick spray.

    2. Pat the salmon fillets dry, using paper towels to absorb moisture.

    3. Place softened butter, parmesan cheese, lemon juice, garlic, Italian seasoning, salt, pepper, and fresh chopped parsley in a small bowl. Use a fork to combine these ingredients well.

    4. Lay both salmon fillets in the middle of prepared foil, leaving space between the pieces. Cover top of fish with cheese/herb topping, dividing evenly between fillets. Bring edges of the foil up and over the salmon; crimp all edges closed, to prevent air from escaping. 

    5. Bake at 425°F (218.3°C) for 10-12 minutes. When done, carefully open foil pouch, exposing salmon. Turn oven to BROIL, place fish about 6 inches from the broiler element (still in foil on baking sheet). Broil 1-2 minutes, to lightly brown. Keep an eye on salmon as it broils, to ensure it doesn't burn.

    6. To serve, transfer salmon to serving plates. Drizzle with melted butter left in foil pouch. Serve immediately. If desired, garnish each piece with Parmesan cheese, fresh parsley, and a lemon wedge. Enjoy!

    Nutrition Facts
    Parmesan Herb Baked Salmon
    Amount Per Serving (1 g)
    Calories 335 Calories from Fat 189
    % Daily Value*
    Fat 21g32%
    Saturated Fat 9g56%
    Trans Fat 0.3g
    Polyunsaturated Fat 4g
    Monounsaturated Fat 6g
    Cholesterol 111mg37%
    Sodium 642mg28%
    Potassium 754mg22%
    Carbohydrates 3g1%
    Fiber 0.3g1%
    Sugar 0.2g0%
    Protein 32g64%
    Vitamin A 685IU14%
    Vitamin C 6mg7%
    Calcium 143mg14%
    Iron 2mg11%
    * Percent Daily Values are based on a 2000 calorie diet.

    Here’s one more to pin on your Pinterest boards!Parmesan Herb Baked Salmon is an easy, delicious main dish you'll love! Salmon fillets are topped with cheese, spices and garlic, then baked!

    Grilled Unshucked Corn On The Cob

    Make Grilled Unshucked Corn On The Cob on your BBQ grill! Soak them in water, then cook them on the grill, for delicious, fresh ears of corn!
    Make Grilled Unshucked Corn On The Cob on your BBQ grill! Soak them in water, then cook them on the grill, for delicious, fresh ears of corn!

    There are many ways to cook fresh corn on the cob, and all are absolutely wonderful! Today I would like to show you how to make grilled unshucked corn on the cob on a BBQ.

    This method is very simple, user friendly, the prep is minimal, and always yields delicious, juicy, fresh corn on the cob!

    The corn will need to soak in water first, then you can simply throw it on your BBQ with the meat(s) you are cooking, and let them cook, still in the husk.

    YUM! I think you’ll enjoy how easy it is to make corn this way. Here’s how to prepare this easy veggie side dish.

    Scroll Down For A Printable Recipe Card At The Bottom Of The Page

    Prepare The Corn

    It goes without saying that you should start with FRESH corn on the cob. Okay? It only takes a few minutes to get the corn “ready to roll”.

    You can make as many ears of corn you need using this method, however my photos will reflect using only two ears of corn. 

    Two ears of fresh corn, with the outer husks intact.

    Peel back the husks on the corn almost to the bottom, but do not remove them from the corn. Leave 1-2 inches of husk unopened.

    Once the husks on each piece are pulled back, remove as much of the stringy “corn silk” attached to the corn kernels as possible.

    Discard the “corn silks”, then carefully (and gently) pull the husks back up and around the corn cobs.

    Husks are peeled back on corn, and the corn silks are removed.Corn husk is pulled back almost to the bottom, and corn silk is removed.

    Time For The Corn To Go “Swimming”!

    If desired, use a thin outer husk to “tie” the husks back in place on the corn before soaking them. It helps close the husk around the corn, so the corn doesn’t char as much later, while cooking.

    This step is optional (I’ve tied them and left them untied- have done both ways). Place the unshucked corn in a LARGE bowl, then add enough water to cover the corn.

    TIP: I find it helpful to set a large heavy mug, filled with some water on top of the corn while it is soaking in the bowl.

    This acts as a weight to keep the corn submerged in the water, so it is fully immersed (and not floating on top).

    Corn husk is tied back in place using a thin piece of corn husk.White mug with water in it weighs down corn soaking in blue bowl of water.

    Soak, Soak, Soak

    Let the corn soak in the water for 1-2 hours, then drain the water from the bowl, leaving only the corn.

    Once drained, stand the ears of corn up (open side down) in the bowl. This allows excess water to continue draining off the corn before grilling.

    Two ears of unshucked corn, draining excess water off, after soaking in bowl.

    Cooking Grilled Unshucked Corn On The Cob

    Place the drained corn directly onto the BBQ grill over direct Medium-high heat, whether it is over hot coals or on a gas grill.

    Put a lid on the BBQ, and let the corn cook for between 12-14 minutes. Turn the corn over (using tongs) about halfway through the cooking time.

    The outer husks will begin to turn brown and get a bit charred as the corn cooks.

    Grilled unshucked corn on the cob, cooking on BBQ by a piece of chicken.Two pieces grilled unshucked corn on the cob, with chicken and hot dogs on BBQ.

    Ready To Eat!

    After the corn has cooked on all sides for between 13-14 minutes, it is ready to be served and enjoyed.

    NOTE: The time may vary slightly, due to the heat and temperature of YOUR BBQ. We usually take the corn off around the 14 minute mark.

    The outside husks will be browned, but the kernels of corn will be golden and juicy, with some slight browning where the open husk kernels were exposed to direct heat!

    Remove the grilled unshucked corn on the cob from the grill. You can serve them “as is” to your guests, OR you can pull off the husks yourself, before placing the corn onto plates.

    The outer husks will come off the grilled corn very easily. You shouldn’t have to mess with the corn “silks” inside, because you removed them previously!

    Serving The Corn

    Now it is time to season the ears of corn with butter, salt and pepper, serve it… and dig in!

    Three pieces of grilled unshucked corn, cooking with BBQ chicken on grill.A piece of the lightly browned grilled corn on the cob, on a plate with chicken.

    I hope you have a chance to try this method (one of many ways) to make grilled UNSHUCKED corn on the cob this summer.

    The prep is minimal, because it only takes about 5 minutes to prepare the corn, then the “soaking in water” time is inactive, which frees you up to do other things.

    Thanks for stopping by today, and I invite you to come back soon for more family-friendly recipes. Take care, and have a GREAT day!

    Looking For More CORN Recipes?

    You can find ALL of my recipes in the Recipe Index, which is located at the top of the page. I have a nice variety of recipes featuring corn you might enjoy, including:

    Want More Recipes? Get My FREE Newsletter!

    I publish a newsletter 2 times per month (1st and 15th) with lots of recipes, tips, etc..
    Would you like to join our growing list of subscribers?

    There is a Newsletter subscription box on the top right (or bottom) of each blog post, depending on the device you use.
    You can submit your e-mail address there, to be added to my mailing list.

    Find Me On Social Media:

    Facebook page: The Grateful Girl Cooks!
    Pinterest:
    The Grateful Girl Cooks!
    Instagram:
    jbatthegratefulgirlcooks

    Author's signature

    ↓↓ PRINTABLE RECIPE BELOW ↓↓

    0 from 0 votes
    Grilled Unshucked Corn On The Cob
    Prep Time
    5 mins
    Cook Time
    12 mins
    Inactive Prep Time (Soaking)
    1 hr
    Total Time
    1 hr 17 mins
     

    Make Grilled Unshucked Corn On The Cob on your BBQ grill! Soak them in water, then cook them on the grill, for delicious, fresh ears of corn!

    Category: Vegetable Dish
    Cuisine: All Cuisines
    Keyword: grilled unshucked corn
    Servings: 2
    Calories Per Serving: 123 kcal
    Author: JB @ The Grateful Girl Cooks!
    Ingredients
    • 2 large ears fresh corn
    Instructions
    1. Peel back corn husks almost to the bottom, but do not remove them from corn. Leave 1-2 inches of husk unopened. Remove as much stringy "corn silk" as possible. Discard "corn silks", then carefully pull husks back up/around the corn. *If desired (optional), use a thin outer husk to "tie" the husks back in place.

    2. Place corn in a LARGE bowl; add enough water to cover. TIP: It's helpful to set a large heavy mug, filled with some water on top of the corn. This acts as a weight to keep corn submerged in the water, so it is not floating on top.

    3. Let corn soak in water for 1-2 hours, then drain water from bowl. Stand corn up on end (open side down) in the bowl to continue draining off water.

    4. Place corn directly onto BBQ grill over Medium-high heat. Put a lid on the BBQ; let corn cook for 12-14 minutes. Turn corn over halfway through cooking time. The outer husks will begin to turn brown and get a bit charred as the corn cooks.

    5. Remove cooked corn from grill. You can serve them "as is", OR you can pull off the husks yourself, before placing corn on plates. Husks should come off easily. Season corn with butter, salt and pepper, and dig in! Enjoy!

    Nutrition Facts
    Grilled Unshucked Corn On The Cob
    Amount Per Serving (1 piece corn)
    Calories 123 Calories from Fat 18
    % Daily Value*
    Fat 2g3%
    Saturated Fat 0.5g3%
    Trans Fat 0.01g
    Polyunsaturated Fat 1g
    Monounsaturated Fat 1g
    Sodium 21mg1%
    Potassium 386mg11%
    Carbohydrates 27g9%
    Fiber 3g13%
    Sugar 9g10%
    Protein 5g10%
    Vitamin A 267IU5%
    Vitamin C 10mg12%
    Calcium 3mg0%
    Iron 1mg6%
    * Percent Daily Values are based on a 2000 calorie diet.

    Here’s one more to pin on your Pinterest boards!Make Grilled Unshucked Corn On The Cob on your BBQ grill! Soak them in water, then cook them on the grill, for delicious, fresh ears of corn!