Category: Main Dishes

Mexican Red Lentil Soup

Mexican Red Lentil Soup has all the flavor of a good chili recipe, but it’s a meatless soup you’ll really love, with enough for 7 helpings!
Mexican Red Lentil Soup has all the flavor of a good chili recipe, but it's a meatless soup you'll really love, with enough for 7 helpings!

Mexican Red Lentil Soup is a yummy, meatless main dish that is packed with flavor! If you enjoy chili, I’m confident you will enjoy this recipe, as well. Whether you’re a vegetarian or not, this soup is wonderful, budget friendly, and it’s worth checking out.

Red lentils (or other lentils) are an amazingly inexpensive, but high in protein superfood! Did you know that lentils have been around for thousands of years? Yes, they have!

Lentils contain large amounts of vitamins, minerals, potassium, fiber and polyphenols (think antioxidants!), and are a wonderful source of protein in “meatless” dishes.

If you’re not too familiar with lentils… what they are and to learn more about their history and nutritional value, check out the info on this amazing food source here

Today I want to share this yummy recipe I found online many years ago online. So… here we go!

Scroll Down For A Printable Recipe Card At The Bottom Of The Page

Rinse And Drain, Rinse And Drain!

Lentils need to be rinsed several times before cooking, to clean them. Pour the red lentils into a large saucepan (one that has a lid). Cover the lentils completely with water.

Stir or swirl them around in the water, then cover the pan with the lid, and drain off the water. Be sure to hold the lid on tightly so the lentils can’t “escape” while draining!

Repeat this process 1-2 more times or until the water becomes mostly clear, to ensure the lentils are cleaned and “good to go”.

Red lentils are placed in saucepan, covered with water, then drained.After rinsing several times, the red lentils are ready to be cooked in more water.

Cook The Lentils

Add 4 cups of fresh water back into the pan with the lentils, and cover the pan. Turn the heat to HIGH, and let the water come to a boil

Once the water has begun boiling, turn off the heat, then remove the pan from the heat source. Keeping the lid on, let the lentils rest for 20 minutes, without disturbing.

The red lentils are brought to a boil, then sit covered off the heat, for 20 minutes.

Cook The Veggies While Lentils Are “Resting”

Place a large soup pot on the stovetop, and add olive oil. Begin to heat the oil on medium-low, then add diced onions and minced garlic.

Continue to cook, stirring often, until onions have become tender, then add diced celery, and stir to combine. Cook for a couple minutes until the celery starts to get soft.

Chopped onion and minced garlic are cooked in olive oil in a large pot.Celery is added to the onions and garlic in the pan.

The next ingredients to add to the pan are fire-roasted canned tomatoes, chili powder, turmeric, ground cumin and hot sauce.

NOTE: For the hot sauce I use Tabasco sauce, and use between 6-8 dashes, but if you like it HOT, add 10-15 dashes.

Stir these ingredients until they are fully combined, and then you are ready to finish this soup with lentils and broth.

Fire-roasted tomatoes, spices and hot sauce are added to the pan.The soup pot is now filled with vegetables, spices and tomatoes, all combined.

Drain The Cooked Lentils

Drain the remaining water off of the cooked red lentils, then add the lentils to the soup pan. Pour the vegetable broth into the soup pot, as well.

Give the Mexican red lentil soup a stir to incorporate all the ingredients, then let the soup simmer (uncovered) on medium-low heat for 15 minutes.

After draining off water, the cooked lentils are ready to add to the soup.The red lentils and vegetable broth are added to the soup mixture already in the pot.

Final Step Before Serving

After 15 minutes the soup will be nice and hot. Stir in chopped cilantro leaves, then squeeze in the the juice of one medium-sized lime.

Stir these ingredients into the soup, then take a little taste. Add salt or more hot sauce, if desired, to suit your taste. Now your Mexican Red Lentil Soup is ready to serve!

Chopped cilantro and the juice from a lime are added to the Mexican red lentil soup.When hot, the Mexican red lentil soup is now ready to be served and enjoyed.

Enjoy A Bowl Of Mexican Red Lentil Soup

This soup will yield about 7 servings in total. Ladle each portion (about 1½ cups per serving) into bowls, serve hot… and enjoy!

A red and yellow bowl, filled with one serving of Mexican red lentil soup.

I really hope you have the chance to make this delicious Mexican Red Lentil Soup for those you love. It’s REALLY good, and I’m sure you will enjoy it.

Store any leftover soup in an airtight container in the refrigerator for up to 3-4 days. It can be easily reheated on the stovetop or in a microwave. It freezes fairly well, also. 

Thank you for stopping by today. I invite you to come back again soon for more family-friendly recipes! Take care, may God bless you, and have a GREAT day!

Looking For More SOUP Recipes?

You can find ALL of my recipes in the Recipe Index, which is located at the top of the page. I have LOTS of delicious soup recipes, including:

Want More Recipes? Get My FREE Newsletter!

I publish a newsletter 2 times per month (1st and 15th) with lots of recipes, tips, etc..
Would you like to join our growing list of subscribers?

There is a Newsletter subscription box on the top right (or bottom) of each blog post, depending on the device you use.
You can submit your e-mail address there, to be added to my mailing list.

Find Me On Social Media:

Facebook page: The Grateful Girl Cooks!
Pinterest:
The Grateful Girl Cooks!
Instagram:
jbatthegratefulgirlcooks

Author's signature

Original recipe source, and with thanks to Beth Moncel, at: https://www.budgetbytes.com/2009/12/mexican-lentil-stew/

↓↓ PRINTABLE RECIPE BELOW ↓↓

0 from 0 votes
Mexican Red Lentil Soup
Prep Time
10 mins
Cook Time
40 mins
Total Time
50 mins
 

Mexican Red Lentil Soup has all the flavor of a good chili recipe, but it's a meatless soup you'll really love, with enough for 7 helpings!

Category: Main Dish, Soup
Cuisine: Mexican
Keyword: Mexican red lentil soup
Servings: 7 (1½ cups per serving)
Calories Per Serving: 250 kcal
Author: JB @ The Grateful Girl Cooks!
Ingredients
  • 2 cups dry red lentils
  • 1 Tablespoon olive oil
  • 1 medium yellow onion peeled, diced
  • 4 stalks celery diced
  • 4 cloves garlic minced
  • 29 ounces canned fire-roasted diced tomatoes =two 14.5 ounce cans
  • ½ Tablespoon chili powder
  • 1 teaspoon ground cumin
  • ½ teaspoon ground turmeric
  • 4 cups vegetable broth
  • 6-8 dashes Tabasco sauce or other hot sauce + more if heat desired!
  • 1 medium lime (juice of)
  • ½ cup chopped cilantro stems removed
Instructions
  1. Put lentils in a large pot (one with a lid). Cover completely with water. Stir or swirl them around in water; tightly cover pan with lid; drain water out. Repeat 1-2 more times until water is fairly clear.

  2. Add 4 cups water to pan with lentils; cover pan. Turn heat to HIGH; let water come to a boil. Once boiling, turn off heat. Keeping lid on, let lentils rest 20 minutes, undisturbed.

  3. Place large soup pot on stovetop; add olive oil. Heat oil on medium-low; add diced onions and minced garlic. Cook, stirring often, until onions are tender, then add celery; stir to combine. Cook 2-3 minutes until celery becomes tender.

  4. Add tomatoes, chili powder, turmeric, ground cumin and hot sauce into pot; stir until combined. NOTE: For hot sauce I use Tabasco sauce, and use between 6-8 dashes; if you like it HOT, add 10-15 dashes.

  5. Drain any remaining cooking water off lentils, then add lentils to soup pot. Stir in vegetable broth, until combined. Let soup simmer (uncovered) on medium-low heat for 15 minutes.

  6. Stir in chopped cilantro (discarding stems), and juice of one lime. Taste the soup. Add salt or more hot sauce, if desired.

  7. This soup will yield about 7 servings total. Ladle 1½ cups soup per serving into bowls. Serve hot... and enjoy!

Nutrition Facts
Mexican Red Lentil Soup
Amount Per Serving (1 serving (about 1½ cups))
Calories 250 Calories from Fat 27
% Daily Value*
Fat 3g5%
Saturated Fat 0.4g3%
Polyunsaturated Fat 1g
Monounsaturated Fat 2g
Sodium 753mg33%
Potassium 611mg17%
Carbohydrates 42g14%
Fiber 18g75%
Sugar 6g7%
Protein 15g30%
Vitamin A 1131IU23%
Vitamin C 9mg11%
Calcium 86mg9%
Iron 5mg28%
* Percent Daily Values are based on a 2000 calorie diet.

Here’s one more to pin on your Pinterest boards!Mexican Red Lentil Soup has all the flavor of a good chili recipe, but it's a meatless soup you'll really love, with enough for 7 helpings!

Cajun-Seasoned Burger Patties

Cajun-Seasoned Burger Patties have great flavor, whether BBQ grilled or skillet-cooked. Eat them “as is”, or on a bun with all the fixin’s!
Cajun-Seasoned Burger Patties have great flavor, whether BBQ grilled or skillet-cooked. Eat them "as is", or on a bun with all the fixin's!

If you’re looking for a way to boost the flavor of cooked burgers, may I suggest this SIMPLE recipe for Cajun-seasoned burger patties?

Whether you enjoy eating burger patties PLAIN on a plate, OR eaten as a full-fledged burger on a bun with condiments, etc., I believe you’ll enjoy these patties.

You can pan-fry them, grill on a BBQ, cook in an air fryer, or broil them in the oven!  You can make them using your preferred method of cooking burgers!

As written, this recipe will yield two burger patties (which is enough for my husband and myself), but can easily be increased in quantity. Here’s how to make this simple recipe.

Scroll Down For A Printable Recipe Card At The Bottom Of The Page

What Spices Will I Need?

Spices are what give these Cajun-seasoned burger patties their wonderful taste! The burger patties have lots of flavor, and a tiny bit of “heat”, but not too much (in case you’re wondering).

The dried spices you will need are cumin, smoked paprika, garlic powder, salt and pepper, onion powder, cayenne pepper and thyme.

Bottles of dried spices used to flavor the ground beef burger patties.

Make The Cajun-Seasoned Burger Patties

Place the ground beef in a large mixing bowl. Add all of the spices, and then mix them together using a fork or your clean hands.

Combine until all the spices have been incorporated into the ground beef. Try not to overwork or compact the ground beef too much.

Spices are added to a half pound of ground beef in a bowl, and mixed, to combine.

Remember- this recipe will yield two burger patties (as written), but can easily be doubled or tripled to make the quantity you need.

Divide the meat into two balls, then use your hands to flatten and shape them into two round circles. Place each patty on wax paper or parchment paper.

Two Cajun-seasoned burger patties on wax paper, before being cooked.

To Grill Or Not To Grill?

We LOVE to grill our burger patties outside, however the weather here in Oregon can be hard to predict. NEWS ALERT: It rains a lot here!

Our crazy weather patterns make it difficult at times to plan a good old-fashioned BBQ! To grill or not to grill is a constant question. Cooking inside or outside is your choice!

When it’s nice outside we grill these burger patties on our Weber BBQ. If it is raining (often) or freezing cold outside, we cook them inside, in a large skillet (cast iron is the best).

Cooking The Burger Patties- BBQ or Skillet

NOTE: If grilling outside, prepare them as you would any burger on the BBQ grill. Cook them until they reach the desired “doneness” you prefer.

Cajun-seasoned burger patties can be cooked on an outside BBQ.

As you can see in the photo below, we cooked these in a large cast iron skillet. One patty is not seasoned, and the other two are the Cajun-seasoned burger patties from this recipe.

Heat a large cast iron skillet on medium heat until it is really hot (but not smoking). Place the patties into the hot skillet (they should sizzle when they hit the skillet).

NOTE: If using a NON cast iron skillet, lightly spray the skillet with non-stick spray before adding the patties.

The burger patties can be cooked in a large cast iron skillet.

Do not move or disturb them for about 3 minutes, while they sear (and set) in the skillet. When they have browned well on the bottom, carefully turn each patty over to the other side.

Continue to cook the Cajun-seasoned burger patties to your preferred doneness, turning (if desired) to further brown the outside.

The Cajun-seasoned burger patties are flipped over to cook the other side.Two fully cooked Cajun-seasoned burger patties in a cast iron skillet.

Time To Eat!

Once the burger patties are cooked to your taste, they are ready to be served. At times we enjoy them plain, served as is, on a plate with side dishes.

Our FAVORITE way to enjoy them is to go “full on burger” with the patties! Place them on toasted hamburger buns, and top with your favorite condiments. If you’re looking for a delicious, unique condiment for your hamburgers, check out my recipe for Bacon Jam for Burgers!

Now all you have to do is add some delicious sides (like potato salad or fruit salad) and dig in! The well-seasoned patties will add a nice pop of flavor to the burgers.

A hamburger made with one of the Cajun-seasoned burger patties, on plate with fruit and potato salad.

I hope you’ll have the chance to try these Cajun-seasoned burger patties. They’re a cinch to make, and I’m confident you’ll enjoy them.

Thanks for stopping by today, and I invite you to come back soon for more family-friendly recipes. Take care, and have a GREAT day!

Looking For More BEEF Recipes?

You can find ALL of my recipes in the Recipe Index, which is located at the top of the page. I have some delicious recipes using beef you can check out, including:

Want More Recipes? Get My FREE Newsletter!

I publish a newsletter 2 times per month (1st and 15th) with lots of recipes, tips, etc..
Would you like to join our growing list of subscribers?

There is a Newsletter subscription box on the top right (or bottom) of each blog post, depending on the device you use.
You can submit your e-mail address there, to be added to my mailing list.

Find Me On Social Media:

Facebook page: The Grateful Girl Cooks!
Pinterest:
The Grateful Girl Cooks!
Instagram:
jbatthegratefulgirlcooks

Author's signature

Recipe adapted from: Isabel D. Price, via the book “Food Meets Faith”, page 77, published in 2019 by Live Smart Solutions, LLC

↓↓ PRINTABLE RECIPE BELOW ↓↓

0 from 0 votes
Cajun-Seasoned Burger Patties
Prep Time
5 mins
Cook Time
10 mins
Total Time
15 mins
 

Cajun-Seasoned Burger Patties have great flavor, whether BBQ grilled or skillet-cooked. Eat them "as is", or on a bun with all the fixin's!

Category: Beef, Main Course
Cuisine: Cajun
Keyword: Cajun-seasoned burger patties
Servings: 2
Calories Per Serving: 253 kcal
Author: JB @ The Grateful Girl Cooks!
Ingredients
  • ½ pound ground beef (85%) see NOTE section below*
  • ½ teaspoon salt
  • ¾ teaspoon ground cumin
  • ½ teaspoon smoked paprika
  • ½ teaspoon garlic powder
  • ¼ teaspoon onion powder
  • ¼ teaspoon cayenne pepper
  • ¼ teaspoon black pepper
  • ¼ teaspoon ground thyme
Instructions
  1. Place ground beef in mixing bowl. Add all spices; mix together using a fork or clean hands, until spices are distributed in the meat. Don't overwork the beef.

  2. Divide meat into 2 balls; use your hands to flatten/shape them into 2 round circles. Place each patty on wax paper or parchment paper.

  3. BBQ: If grilling outside, cook as you would any burger on the BBQ grill. Cook until they reach your preferred "doneness".

    SKILLET: Heat a cast iron skillet on medium heat until really hot (but not smoking). Place patties into hot skillet (they should sizzle when they hit the skillet).

    NON CAST IRON SKILLET: If using NON cast iron skillet, lightly spray skillet with non-stick spray before adding patties.

  4. Do not move/disturb patties for about 3 minutes, while they sear (and set) in the skillet. Once nicely browned on the bottom, carefully flip each patty to the other side. Continue to cook to your preferred doneness, turning (if desired) to further brown the outside.

  5. Serve plain (as is), on a plate with side dishes OR place them on toasted hamburger buns, and top with your favorite burger condiments. Enjoy!

Recipe Notes

*NOTE: 85% ground beef was used for the caloric calculation of 253 calories per patty. If using LEAN ground beef, caloric calculation would lower to about 165 calories per patty.

Nutrition Facts
Cajun-Seasoned Burger Patties
Amount Per Serving (1 patty)
Calories 253 Calories from Fat 153
% Daily Value*
Fat 17g26%
Saturated Fat 7g44%
Trans Fat 1g
Polyunsaturated Fat 1g
Monounsaturated Fat 8g
Cholesterol 77mg26%
Sodium 659mg29%
Potassium 380mg11%
Carbohydrates 2g1%
Fiber 1g4%
Sugar 0.1g0%
Protein 22g44%
Vitamin A 366IU7%
Vitamin C 0.4mg0%
Calcium 31mg3%
Iron 3mg17%
* Percent Daily Values are based on a 2000 calorie diet.

Here’s one more to pin on your Pinterest boards!Cajun-Seasoned Burger Patties have great flavor, whether BBQ grilled or skillet-cooked. Eat them "as is", or on a bun with all the fixin's!

Asian Chicken Lettuce Wraps

Asian Chicken Lettuce Wraps are very EASY to make, and taste fantastic! With two wraps per serving, they are a great appetizer or main dish!

One of my favorite appetizers to order at a favorite local restaurant is Asian chicken lettuce wraps. I absolutely LOVE them, and enjoy scooping and wrapping the chicken filling in a big ol’ lettuce leaf!

There are many recipes that can be found online for chicken lettuce wraps. I found this recipe a while ago, and it’s my “go to”. It’s perfect for when I crave Asian chicken lettuce wraps and don’t want to go out, or pay for them in a restaurant!

This recipe, as written, will yield about 12 wraps. A suggested serving size is two wraps, and each serving comes in under 200 calories (total for TWO wraps). How’s that for a fantastic low calorie appetizer or main dish!

Asian chicken lettuce wraps may be LOW in calories, but they’re BIG on amazing flavors and are really delicious!.  Here’s how to make them. 

Scroll Down For A Printable Recipe Card At The Bottom Of The Page

Prepare The Bibb (aka Butter) Lettuce

Carefully separate lettuce leaves from the head of lettuce. Give them a rinse, then pat each leaf dry using paper towels to absorb excess moisture. Set them aside while you make the filling.

NOTE: Bibb lettuce, also known as butter lettuce is typically used. If you don’t have access to this variety, use large lettuce leaves of your choice that are sturdy enough to hold the filling when wrapped.

You can use one or two lettuce leaves for each wrap. We usually stack two leaves per wrap to make it sturdier for holding the filling, but that is YOUR choice.

Cook The Onions, Garlic And Ginger

Heat sesame oil on Medium heat in a large skillet. Once the oil is pretty hot (but not smoking), add chopped onions, and cook, stirring often for about 3 minutes.

When the onions have softened and become lightly browned, add minced garlic and grated fresh ginger to the skillet. Cook 1 more minute, stirring often so the garlic doesn’t burn (and become bitter).

Chopped onions are cooked in sesame oil in a large skillet.Minced garlic and ginger are added to the softened and lightly browned onions.

Add The Ground Chicken

Now you need to add a pound of ground chicken to the skillet. Cook the chicken on Medium heat, mixing it with the onions, and breaking the chicken up into small pieces as it cooks.

The chicken is finished cooking when it is fully cooked through (3-5 minutes), chopped in small pieces, and is very slightly browned.

Ground chicken is added to the skillet and broken up with a wooden spoon into small pieces.Seasoned with salt/pepper, the ground chicken continues cooking until fully cooked through.

Make The Asian Chili Sauce

While the chicken is cooking, whip up the Asian sauce that will be added to the chicken. It’s simple to make this flavorful sauce and only takes a minute!

Place soy sauce, Thai red chili sauce, maple syrup (or honey/agave) and lime juice in a small bowl, and whisk or stir, until fully combined. That’s it!

OPTIONAL NOTE: The sauce can be doubled if you want extra sauce for later! Also, if desired, whisk in a tiny bit (about ½ tsp.) of cornstarch if you want the sauce to be slightly thicker.

Add The Sauce To The Skillet

Turn the heat down to LOW. Pour the sauce over the cooked chicken, add chopped cashews (or peanuts), then stir well, to combine these ingredients.

Cook for 1-2 more minutes, then take the skillet off the heat source. Let the chicken “rest” and cool slightly for 1-2 minutes, before adding the fresh veggies.

Soy sauce, Thai chili sauce, lime juice and honey are combined in a small bowl.Asian sauce and chopped cashews are added to the skillet and stirred to combine.

Time For Some Veggie COLOR!

Once the chicken has cooled slightly, add grated carrots, chopped green onions, and chopped cilantro to the skillet. That pop of color really adds a nice touch, along with lots of flavor!

Stir, to fully combine the chicken, sauce and veggie mixture, which will be used for filling the Asian chicken lettuce wraps.

Grated carrots, chopped cilantro and green onions are added to the skillet.The meat mixture is now ready to make Asian chicken lettuce wraps.

Serve The Asian Chicken Lettuce Wraps!

Now it’s time to fill and serve these delicious Asian chicken lettuce wraps! Whoo Hoo! For each wrap, place a large spoonful of the chicken filling into the center of the Bibb (or butter) lettuce leaf.

Think of chicken lettuce wraps like you would a taco! You want to be able to wrap the edges of the lettuce leaf up and around the filling, so be careful not to overfill them!

Spoon leftover pan sauce over the filling, then sprinkle each wrap with sesame seeds (optional, but a nice touch!). Roll a lettuce wrap up, and eat it like a taco! DELICIOUS!

The Asian chicken lettuce wraps are filled with flavor, and are ready to enjoy!One of the Asian chicken lettuce wraps, with a closeup of the yummy chicken filling.

We really enjoy these Asian chicken lettuce wraps, and I hope you and those you love will, too! I think they are vey easy to make, and wow… do they ever taste great!

Thanks for stopping by today, and I invite you to come back soon for more delicious, family-friendly recipes. Take care, may God bless you, and have a great day!

Looking For More CHICKEN Recipes?

You can find ALL of my recipes in the Recipe Index, which is located at the top of the page. I have LOTS of fantastic chicken recipes to choose from, including:

Want More Recipes? Get My FREE Newsletter!

I publish a newsletter 2 times per month (1st and 15th) with lots of recipes, tips, etc..
Would you like to join our growing list of subscribers?

There is a Newsletter subscription box on the top right (or bottom) of each blog post, depending on the device you use.
You can submit your e-mail address there, to be added to my mailing list.

Find Me On Social Media:

Facebook page: The Grateful Girl Cooks!
Pinterest:
The Grateful Girl Cooks!
Instagram:
jbatthegratefulgirlcooks

Author's signature

Original recipe source, with thanks to Marjorie at: apinchofhealthy.com/thai-chicken-lettuce-wraps/

↓↓ PRINTABLE RECIPE BELOW ↓↓

0 from 0 votes
Asian Chicken Lettuce Wraps
Prep Time
10 mins
Cook Time
10 mins
Total Time
20 mins
 

Asian Chicken Lettuce Wraps are very EASY to make, and taste fantastic! With two wraps per serving, they are a great appetizer or main dish!

Category: Main Dish
Cuisine: Asian
Keyword: Asian chicken lettuce wraps
Servings: 6 (2 wraps per serving)
Calories Per Serving: 172 kcal
Author: JB @ The Grateful Girl Cooks!
Ingredients
  • 1 Tablespoon sesame oil
  • ¼ cup yellow onion diced
  • 1 Tablespoon fresh ginger finely minced
  • 2 cloves garlic minced
  • 10 ounces ground chicken
  • ¼ cup low sodium soy sauce can sub. coconut aminos/Tamari
  • Tablespoons Thai sweet red chili sauce
  • 1 medium lime (JUICE OF)
  • 1 teaspoon pure maple syrup or agave/honey
  • cup cashews (raw or roasted/salted) chopped (can sub. roasted peanuts)
  • ½ cup grated carrots
  • cup green onions (scallions) chopped
  • ¼ cup fresh cilantro chopped
  • 1 head Bibb (butter) lettuce leaves removed/rinsed/patted dry
  • sesame seeds (Optional) to sprinkle as a topping for wraps
Instructions
  1. Separate leaves from head of lettuce. Rinse/pat dry with paper towels. Set aside. Use 1 or 2 lettuce leaves for each wrap (sturdy enough to hold chicken filling).

  2. Heat sesame oil on Medium heat in large skillet. Once oil is hot (but not smoking), add yellow onions, and cook, stirring often, for about 3 minutes. When onions are softened and lightly browned, add garlic and ginger. Cook 1 minute, stirring often so garlic doesn't burn (and become bitter).

  3. Add ground chicken to skillet. Cook on Medium heat, combining it with the onions. Break up chicken into small pieces as it cooks with a spoon or spatula. It's done when cooked through (3-5 min.), in small pieces, and slightly browned.

  4. MAKE SAUCE: Place soy sauce, Thai red chili sauce, maple syrup and lime juice in a small bowl; whisk or stir, until combined. OPTIONAL NOTE: Sauce can be doubled if you want extra for later! Also, whisk in a tiny bit (½ tsp,) of cornstarch if you want sauce to be slightly thicker.

  5. Turn heat to LOW. Pour sauce over chicken; add cashews. Stir well, to combine. Cook 1-2 minutes, then take skillet off the heat source. Let chicken cool 1-2 minutes, before adding fresh veggies.

  6. Add carrots, green onions, and cilantro. Stir, to fully combine all ingredients.

  7. MAKE WRAPS: For each wrap, place large spoonful of chicken filling into center of lettuce leaf. You want to wrap edges of the lettuce leaf up and around the filling, so don't overfill. Spoon any remaining pan sauce over chicken. Sprinkle each wrap with sesame seeds (optional). Roll up lettuce wrap, and eat it like a taco! Enjoy!

Nutrition Facts
Asian Chicken Lettuce Wraps
Amount Per Serving (1 (two wraps))
Calories 172 Calories from Fat 90
% Daily Value*
Fat 10g15%
Saturated Fat 2g13%
Trans Fat 0.03g
Polyunsaturated Fat 2g
Monounsaturated Fat 5g
Cholesterol 41mg14%
Sodium 494mg21%
Potassium 472mg13%
Carbohydrates 11g4%
Fiber 1g4%
Sugar 6g7%
Protein 11g22%
Vitamin A 2785IU56%
Vitamin C 5mg6%
Calcium 32mg3%
Iron 1mg6%
* Percent Daily Values are based on a 2000 calorie diet.

Here’s one more to pin on your Pinterest boards!Asian Chicken Lettuce Wraps are very EASY to make, and taste fantastic! With two wraps per serving, they are a great appetizer or main dish!

Italian Meatball Sandwiches

Make delicious, hearty Italian Meatball Sandwiches using homemade meatballs (recipe included) or store-bought meatballs (for convenience).

If you’re on the lookout for a delicious new lunch or dinner sandwich to try, may I suggest this recipe for Italian Meatball Sandwiches?

These sandwiches are hearty, tasty and filling! Homemade Italian meatballs, with marinara sauce and mozzarella cheese are served on lightly toasted, garlic butter hoagie rolls! YUM!

I came up with this recipe using the recipe I use to make Italian meatballs for spaghetti. The rest was simply re-creating what I have seen on meatballs subs my husband has ordered from restaurants over the years.

Whether you use my simple recipe for homemade meatballs OR choose to use store-bought frozen meatballs, I’m confident you’ll love Italian Meatball Sandwiches. Here’s how to make them.

Scroll Down For A Printable Recipe Card At The Bottom Of The Page

Make The Italian Meatballs From Scratch

If you want to make homemade Italian meatballs instead of purchasing them (and baking), here is the way I prepare them. It’s really easy!

Place ground beef, salt, pepper, garlic powder, oregano, diced onion and finely grated Parmesan cheese in a mixing bowl. Stir, to combine the ingredients.

Shape the meatball mixture into 6 balls (each about the same size). To do this, roll the meat between the palms of your hands to form a cute, round meatball.

Lean ground beef is combined with onions, Parmesan and spices for meatballs.Meat mixture is shaped into meatballs, ready to be cooked.

Cook The Meatballs

Heat a Tablespoon of oil on medium heat in a large, non-stick skillet. When the oil is hot (but not smoking), add the meatballs, leaving space between each one.

Cook until browned on the bottom (without disturbing), then carefully turn to the other side. Continue cooking on all sides, until meatballs are well-browned and fully cooked through.

Place the meatballs on paper towels to absorb excess grease. Now you have fully cooked Italian meatballs, made in about the same time as it takes to bake store-bought meatballs!

NOTE: This recipe, as written, will yield 2 sandwiches and requires 6 medium-sized meatballs. Double or triple the recipe if desired, to have extras for another meal.

Italian meatballs cooking in hot oil in a skillet.Meatballs are turned and continue cooking, browning all sides and cooking through.

Place 6 cooked meatballs into a small skillet filled with your favorite Italian-seasoned marinara sauce. Heat the meatballs and sauce through when you’re ready to make the sandwiches.

Cooked meatballs are heated back up in a skillet of Italian-seasoned marinara sauce.

What If I Want To Use Store-Bought Frozen Meatballs?

Using frozen, store-bought meatballs is certainly fine, and makes this recipe slightly more convenient. Typically store bought meatballs will be smaller in size than the homemade ones (you might need 8 total to fill the two hoagie buns). If that doesn’t matter, then do what is most convenient for YOU.

If you are making these sandwiches using frozen, store bought meatballs, follow the instructions that are on the package for cooking them.

Once the meatballs have been fully cooked, proceed with the sauce, and then continue with the rest of the recipe.

Toast The Hoagie Rolls

I  toast the hoagie rolls in the oven (under the broiler), because it tends to keep the bread crisp and firm underneath the weight of the meatballs, sauce, and cheese.

To toast the rolls, first melt butter, then stir in garlic powder. Place the rolls on an aluminum foil covered baking sheet, and open the rolls, trying to keep them attached in the back, if possible.

Use a pastry brush to lightly brush the garlic butter onto the insides of each open roll.

Butter is melted and garlic powder is added before brushing it on rolls.Hoagie rolls are brushed with garlic butter before broiling in the oven.

Let’s Build  Italian Meatball Sandwiches

Turn on the broiler in your oven. When hot, place the baking sheet about 5-6 inches from the broiler’s heating element. Broil the buttered hoagies until they turn golden brown, keeping an eye on them so they don’t burn.

When done, remove the rolls from the oven. Place three hot meatballs on one side of each hoagie. Spoon a little of the remaining marinara sauce over the top of the meatballs.

After broiling, the garlic butter hoagie rolls are lightly browned and toasted.Each toasted hoagie roll is topped with 3 hot meatballs and marinara sauce.

Sprinkle the meatballs with shredded (or thinly sliced) mozzarella cheese, using just enough to cover the meatballs.

Place the baking sheet back under the broiler (5-6 inches from the heating element), and let the cheese broil ONLY until melted. This usually only takes a minute or less, so keep an eye on it!

Grated mozzarella cheese is added to the meatballs, and is broiled in oven until melted.

Time To Enjoy The Italian Meatball Sandwiches

Once the cheese has melted, remove the baking sheet with the Italian meatball sandwiches from the oven. Place the top of the hoagie roll onto the melted cheese.

Carefully transfer the sandwiches from the baking sheet to a serving plate, using a spatula. Serve the Italian meatball sandwiches immediately, while hot!


Top of the roll is added to the Italian meatball sandwiches, and they are ready to seve.One of the Italian meatball sandwiches is served hot, on a white plate.

I hope you will try these delicious Italian meatball sandwiches! They are so good, and this sandwich is quite filling! If you are serving this dish to kids, a half sandwich will usually be more than enough to fill their little tummies up!

Thanks so much for stopping by today, and I invite you to come back soon for more family-friendly recipes. Take care, may God bless you, and have a GREAT day!

Looking For More SANDWICH Recipes?

You can find ALL of my recipes in the Recipe Index, which is located at the top of the page. I have several great recipes for sandwiches to check out, including:

Want More Recipes? Get My FREE Newsletter!

I publish a newsletter 2 times per month (1st and 15th) with lots of recipes, tips, etc..
Would you like to join our growing list of subscribers?

There is a Newsletter subscription box on the top right (or bottom) of each blog post, depending on the device you use.
You can submit your e-mail address there, to be added to my mailing list.

Find Me On Social Media:

Facebook page: The Grateful Girl Cooks!
Pinterest:
The Grateful Girl Cooks!
Instagram:
jbatthegratefulgirlcooks

Author's signature

↓↓ PRINTABLE RECIPE BELOW ↓↓

0 from 0 votes
Italian Meatball Sandwiches
Prep Time
10 mins
Cook Time
10 mins
Total Time
20 mins
 

Make delicious, hearty Italian Meatball Sandwiches using homemade meatballs (recipe included) or store-bought meatballs (for convenience).

Category: Dinner, Lunch, Main Dish
Cuisine: Italian
Keyword: Italian meatball sandwiches
Servings: 2 sandwiches
Calories Per Serving: 614 kcal
Author: JB @ The Grateful Girl Cooks!
Ingredients
For Meatballs (6 homemade):
  • ½ pound lean ground beef
  • ¼ cup diced yellow onion
  • ¼ teaspoon salt
  • teaspoon black pepper
  • teaspoon garlic powder
  • teaspoon dried oregano
  • ¼ cup Parmesan cheese (shredded)
  • 1 Tablespoon vegetable oil
For Sandwiches (2):
  • ½ cup Italian-seasoned marinara sauce to heat cooked meatballs in
  • 2 Hoagie rolls
  • Tablespoons butter melted
  • ½ teaspoon garlic powder
  • ½ cup mozzarella cheese (shredded)
Instructions
If Making Homemade Meatballs:
  1. Place ground beef, salt, pepper, garlic powder, oregano, onion and Parmesan in mixing bowl. Stir until combined. Shape mixture into 6 balls, rolling meat between palms of hands to form meatballs.

  2. Heat oil on Medium in large, non-stick skillet. When hot, add meatballs. Cook without moving them, until browned on bottom, then turn, and cook on all sides, until meatballs are browned and cooked through. Transfer meatballs to paper towels to absorb grease.

  3. Place cooked meatballs into skillet filled with marinara sauce. Heat meatballs/sauce when ready to make sandwiches.

If Using Store-Bought Frozen Meatballs:
  1. Follow instructions on the package for cooking (if small meatballs, you may need 8 (4 per sandwich) to fill the hoagie). Once meatballs are fully cooked, proceed with sauce, and the rest of the recipe.

Building The Sandwiches:
  1. Melt butter, then stir in garlic powder. Place hoagie rolls on aluminum foil covered baking sheet. Open rolls: try to keep rolls attached in the back. Use a pastry brush to lightly brush garlic butter on insides of each open roll.

  2. Turn on oven broiler. When hot, place hoagies 5-6 inches from broiler's heating element. Broil until buttered hoagies turn golden brown; watch closely so they don't burn. When done, remove from oven. Place three hot meatballs on one side of each toasted hoagie. Spoon a little marinara sauce over the meatballs.

  3. Sprinkle meatballs with shredded (or thinly sliced) mozzarella cheese, to cover. Place sandwiches back under the broiler. Let broil ONLY until cheese has melted.

  4. Remove sandwiches from oven. Place top of hoagie roll on the melted cheese. Transfer sandwiches to serving plates, using a spatula. Serve immediately, while hot! Enjoy!

Nutrition Facts
Italian Meatball Sandwiches
Amount Per Serving (1 sandwich)
Calories 614 Calories from Fat 279
% Daily Value*
Fat 31g48%
Saturated Fat 14g88%
Trans Fat 1g
Polyunsaturated Fat 5g
Monounsaturated Fat 8g
Cholesterol 122mg41%
Sodium 1409mg61%
Potassium 667mg19%
Carbohydrates 41g14%
Fiber 2g8%
Sugar 8g9%
Protein 41g82%
Vitamin A 774IU15%
Vitamin C 6mg7%
Calcium 365mg37%
Iron 14mg78%
* Percent Daily Values are based on a 2000 calorie diet.

Here’s one more to pin on your Pinterest boards!Make delicious, hearty Italian Meatball Sandwiches using homemade meatballs (recipe included) or store-bought meatballs (for convenience).

Easy Baked Mahi Mahi

Easy Baked Mahi Mahi is delicious and is a cinch to make! Lightly seasoned fillets are served with browned butter, garlic, herb and lemon sauce.

Do you enjoy seafood dishes? We do at our home, and one of the varieties of fish we really enjoy is Mahi Mahi. Firm in texture and mild in flavor, this is a very versatile fish my husband and I enjoy whenever we can!

Curious about mahi mahi? To learn more interesting facts about Mahi Mahi, its source and nutritional info., etc., check out this info source here.

My husband picks up a big bag of frozen mahi mahi fillets every couple of months from Costco. Each boneless fillet is individually wrapped and the pieces vary in sizes. I’ve featured mahi mahi in other recipes on my blog over the years.

Once my husband brings it home, I know we will be enjoying mahi mahi in our dinner rotation. I found this particular recipe online, and when we want a simple seafood meal, this is one I easily choose. It’s a super easy recipe, requires only a few ingredients and it’s delicious. Here’s how to make easy baked mahi mahi.

Scroll Down For A Printable Recipe Card At The Bottom Of The Page

Prepare The Mahi Mahi For Baking

Pat boneless mahi mahi fillets dry using paper towels to absorb the excess moisture. Season each piece lightly with salt and black pepper, on both sides.

TIP: Cover a large baking sheet with aluminum foil, to help minimize your cleanup. This is an optional step, but one I recommend.

Spray the foil generously with non-stick baking spray. Cut a large lemon into 6 thin, round slices. Place two of the lemon slices together (for each piece of fish) on the aluminum foil.

Three boneless mahi mahi fillets are patted dry, then rest on plate before seasoning.

Time To Bake The Mahi Mahi

Place each piece of seasoned mahi mahi on top of two lemon slices. The shape of the fillets may vary slightly, but each piece should weigh about 4 ounces. If the fillet is long, length-wise, place a lemon slice under each end.

Bake the mahi mahi in a preheated 400° F. (204.4°C.) oven for 10-15 minutes. I recommend placing the baking pan on the middle rack in the oven for best heat circulation.

How Will I Know When The Fish Is Done?

The amount of time it takes to bake the fish will obviously depend on the thickness of the fish fillets you use. A “general rule” is that fish should be cooked about 10 minutes per inch of thickness.

A “safe” internal temperature for cooked mahi mahi is between 137°F-145°F. to ensure it is fully cooked through. If you have a meat thermometer, use it, to make sure you don’t undercook OR overcook the mahi mahi.

The fish will only be slightly browned on top, and can be easily flaked with a fork when fully cooked.

Seasoned mahi mahi fillets placed on top of lemon slices on a foil-covered baking sheet.

Make The Garlic Butter Sauce While the Fish Bakes

While the fish bakes, you can quickly make the simple garlic butter and lemon sauce to spoon or drizzle over the finished fish.

Melt butter in a medium-sized saucepan on Medium-Low heat. Continue to cook for a few minutes, stirring often, as you make browned butter.

The butter will begin bubbling, and will turn brown as the milk solids separate, due to the heat. It will also develop a slightly “nutty” aroma as it browns.

Once the butter has melted and browned, stir in minced garlic, and continue cooking for 30 seconds more. Be careful to not let the butter burn, or it becomes bitter in taste.

Butter sauce is made by first melting butter in a saucepan.Browned butter cooking in a saucepan, with minced garlic added for flavor.

Remove the pan from the heat, and stir in fresh lemon juice and fresh (or dried) chopped parsley, until incorporated into the browned butter.

Normally I use fresh parsley from our garden, but when I photographed this, our garden (and house) was covered with 4 inches of snow, so I had no fresh parsley (sigh).

TIP: If using fresh parsley, you will use 1 Tablespoon, but if using dried you will only need 1 teaspoon, because the flavor is more concentrated in dried herbs.

Lemon juice and dried (or fresh) parsley is stirred into the butter (off the heat).

Serve The Easy Baked Mahi Mahi

Once safely cooked to 137-145°F., remove the mahi mahi from the oven. Transfer the mahi mahi immediately (keeping the lemon slices underneath) to serving plates.

Spoon some of the garlic butter “sauce” over each piece of fish, making sure to get lots of minced garlic on each piece! If you have access to fresh parsley, add a couple sprigs to each piece of fish, for a pop of color!

Serve immediately while hot, and dig in! We enjoyed this easy baked mahi mahi served with brown rice and steamed broccoli on the side. It was a nice, light meal. YUM!

Easy baked mahi mahi, served with garlic butter sauce on top, brown rice and broccoli on the side.The easy baked mahi mahi fillet is served on top of lemon slices, on a white plate.

I hope you have the opportunity to try this yummy recipe for easy baked mahi mahi, and trust you’ll enjoy it as much as we do. It’s a simple recipe, but it’s really tasty.

Thank you for stopping by today, and I invite you to come back again soon, for more family-friendly recipes. Take care, may God bless you, and have a GREAT day!

Looking For More MAHI MAHI Or Other SEAFOOD Recipes?

You can find ALL of my recipes in the Recipe Index, which is located at the top of the page. I have a wonderful variety of seafood recipes for you to ch3ck out, including:

Want More Recipes? Get My FREE Newsletter!

I publish a newsletter 2 times per month (1st and 15th) with lots of recipes, tips, etc..
Would you like to join our growing list of subscribers?

There is a Newsletter subscription box on the top right (or bottom) of each blog post, depending on the device you use.
You can submit your e-mail address there, to be added to my mailing list.

Find Me On Social Media:

Facebook page: The Grateful Girl Cooks!
Pinterest:
The Grateful Girl Cooks!
Instagram:
jbatthegratefulgirlcooks

Author's signature

Original recipe source, and with thanks to Angela, at: https://bakeitwithlove.com/baked-mahi-mahi/

↓↓ PRINTABLE RECIPE BELOW ↓↓

4.5 from 2 votes
Easy Baked Mahi Mahi
Prep Time
10 mins
Cook Time
10 mins
Total Time
20 mins
 

Easy Baked Mahi Mahi is delicious and is a cinch to make! Lightly seasoned fillets are served with browned butter, garlic, herb and lemon sauce.

Category: Main Dish
Cuisine: American
Keyword: baked mahi mahi
Servings: 3
Calories Per Serving: 202 kcal
Author: JB @ The Grateful Girl Cooks!
Ingredients
  • 12 ounces mahi mahi boneless, approx. 4 oz. each
  • ½ teaspoon salt to season fish (approx.)
  • ½ teaspoon black pepper to season fish (approx.)
  • 6 thin slices lemon
  • 3 Tablespoons butter
  • teaspoons minced garlic
  • 1 Tablespoon fresh lemon juice
  • 1 Tablespoon fresh parsley (chopped) OR 1 teaspoon DRIED parsley
Instructions
  1. Preheat oven to 400°F (204.4 C). Line a baking sheet with aluminum foil. Spray foil generously with non-stick baking spray.

  2. Pat mahi mahi fillets dry using paper towels to absorb excess moisture. Season fish lightly on both sides with salt/pepper.

  3. Cut large lemon into 6 round slices. Place 2 slices together (for each piece of fish) on the aluminum foil. Place each piece of fish on top of 2 lemon slices.

  4. Bake at 400° F. (204.4°C.) for 10-15 minutes. **Time to fully cook depends on thickness of fillets. A "general rule" is fish should cook 10 minutes per inch of thickness. Fully cooked mahi mahi should have internal temperature between 137°F - 145°F. Use meat thermometer, so fish isn't undercooked OR overcooked. Fish should be slightly browned on top, and flake easily with a fork.

  5. Make Browned Butter Sauce While Fish Bakes: Melt butter in medium saucepan on Medium-Low heat. Cook 3-4 minutes, stirring often, until bubbly and browned; butter will turn brown as the milk solids separate. Stir in garlic; continue cooking for 30 seconds. Remove pan from heat; add lemon juice and parsley (fresh or dried). Stir until combined.

  6. To Serve: Remove fish from oven; Use spatula to transfer mahi mahi (keeping lemon slices underneath) to serving plates. Spoon butter sauce over each piece. Garnish with fresh parsley, if desired. Serve immediately.
Nutrition Facts
Easy Baked Mahi Mahi
Amount Per Serving (1 fillet + sauce)
Calories 202 Calories from Fat 108
% Daily Value*
Fat 12g18%
Saturated Fat 7g44%
Trans Fat 0.5g
Polyunsaturated Fat 1g
Monounsaturated Fat 3g
Cholesterol 113mg38%
Sodium 579mg25%
Potassium 501mg14%
Carbohydrates 1g0%
Fiber 0.2g1%
Sugar 0.2g0%
Protein 21g42%
Vitamin A 669IU13%
Vitamin C 5mg6%
Calcium 27mg3%
Iron 1mg6%
* Percent Daily Values are based on a 2000 calorie diet.

Here’s one more to pin on your Pinterest boards!Easy Baked Mahi Mahi is delicious and is a cinch to make! Lightly seasoned fillets are served with browned butter, garlic, herb and lemon sauce.

Chicken Pineapple Bacon Burger

Enjoy a Chicken Pineapple Bacon Burger tonight! Chicken patties, glazed with teriyaki-style sauce, & topped with grilled pineapple & bacon!

Do you enjoy chicken burgers? We occasional make them, and always enjoy them. Recently I came up with a delicious chicken burger which I am sharing with you today. I found the original recipe for the burger patties (using ground chicken) online.

I made the sauce by adapting an Asian-inspired recipe I found previously on another website. My thought was “Wow…if I combine the two separate recipes into one, that might taste really good.”

So I set about to make them! I modified the sauce recipe slightly, and used it to coat the chicken patties while cooking AND used it as a condiment on the finished burgers.

The result was a delicious chicken pineapple bacon burger, which was a happy surprise! As written, this recipe will make enough for 4 burgers. Here’s how to make them.

Scroll Down For A Printable Recipe Card At The Bottom Of The Page

Make The Sauce

Mix pineapple juice, soy sauce, BBQ sauce, honey and red pepper flakes in a medium sized saucepan. Stir until these ingredients have been combined.

Heat the sauce on Medium heat until it is bubbling. Once bubbling, turn the heat down to Medium-Low, and cook until the sauce has been reduced by about half.

Ingredients for the burger sauce are combined in a medium sized saucepan.

Sauce for the chicken burgers is cooked until bubbly and reduced in volume.

The sauce should also be slightly thickened at this point. Take the saucepan off of the heat, and stir in finely grated fresh ginger. Set the sauce aside to cool.

Fresh grated ginger is stirred into the sauce after the pan is removed from the heat.

Grill the Pineapple

The next thing to do is grill the pineapple slices. Dry 4 pineapple rings between paper towels to absorb moisture. Very lightly oil a large skillet, and turn the heat to Medium. 

 Once the skillet is hot, lay pineapple rings (you will need 4) in a single layer. Heat the pineapple only until the bottom begins to brown, then carefully flip them to the other side.

Continue to cook only until the bottoms again become lightly browned. Transfer the grilled pineapple slices out of the skillet and let them cool.

Canned pineapple rings are grilled in a skillet until golden brown on both sides.

Prepare The Burger Fixin’s

Before you grill the chicken patties, get all your burger toppings in place and be ready to build the burgers. Each chicken pineapple bacon burger will have a grilled pineapple ring, red onion slice, lettuce and crispy cooked bacon slice.

For the buns, you can serve them warmed, OR you can lightly toast them. My preference is to lightly toast them face down on medium heat in a large skillet, but it’s your choice.

Toasted hamburger buns, bacon, lettuce, onion and grilled pineapple ready for burgers.

Make The Chicken Patties

Place the ingredients for the chicken patties in a large bowl. The ingredients for the patties are ground chicken, egg yolk, green onion, sesame oil and spices.

Mix well with a fork until all the ingredients have been combined. Now it’s time to form the chicken patties. For each patty you will use ¼ of the meat mixture.

The ingredients for the chicken patties are combined in a bowl.


TIP: Wet your hands, then shape the meat into a ball. Wetting your hands helps the chicken mixture not stick  to your hands as much as if they were dry.

Flatten the chicken “ball” into the shape of a burger patty, then set it aside on wax paper. Repeat this process until you have four chicken burger patties.

Chicken burger mixture is shaped into round burger patties before cooking.

Cooking The Chicken Patties

Heat a large skillet on Medium-Low, and add 1 Tablespoon of vegetable oil (or an alternative). When the oil is hot, but not smoking, carefully add the patties to the skillet.

Let the chicken patties cook for about 2-3 minutes, without moving them. This allows the bottom side of the burger to get nicely browned.

Chicken burger patties cooking in a large, cast iron skillet.

Use a spatula to carefully turn the patties to the other side. Generously baste the top of each chicken patty with the reserved sauce.

Continue cooking for 2-3 more minutes OR until the patties are fully cooked through.

Flip the patties a final time and baste the other side with sauce. Now you are ready to build the chicken pineapple bacon burgers!

After the bottom of the patties brown, the burgers are flipped over in the skillet.Sauce is brushed onto the top of each of the chicken burger patties.

Who Wants A Chicken Pineapple Bacon Burger?

You can build your burger any way you wish, but this is how I build ours. Lightly brush sauce on the bottom bun, then top with the chicken patty.

Top the chicken with a grilled pineapple ring, then cut a cooked bacon slice in half and place the two pieces on top of the pineapple.

For the top bun, brush it lightly with more sauce, then add a red onion slice and a lettuce leaf. Place the top bun on the burger, and you’re ready to enjoy this delicious meal!

Layering on the condiments on top of the grilled chicken burger patty.A plate with a chicken pineapple bacon burger on it, ready to be eaten and enjoyed.

I hope you enjoy this recipe for chicken burgers. They have great flavor. and are very filling Yes… there is a fairly long ingredient list, but I think it’s worth it!

Thank you for stopping by today, and please come back soon for more family-friendly recipes. Take care, and have a GREAT day!

Looking For More BURGER Recipes?

You can find ALL of my recipes in the Recipe Index, which is located at the top of the page. I have lots of yummy recipes featuring chicken, including:

Want More Recipes? Get My FREE Newsletter!

I publish a newsletter 2 times per month (1st and 15th) with lots of recipes, tips, etc..
Would you like to join our growing list of subscribers?

There is a Newsletter subscription box on the top right (or bottom) of each blog post, depending on the device you use.
You can submit your e-mail address there, to be added to my mailing list.

Find Me On Social Media:

Facebook page: The Grateful Girl Cooks!
Pinterest:
The Grateful Girl Cooks!
Instagram:
jbatthegratefulgirlcooks

Author's signature

Chicken Patty recipe from Bee, at: rasamalaysia.com/chicken-patties/
Sauce recipe adapted from Tricia, at: savingdessert.com/grilled-hawaiian-chicken-sandwich/

↓↓ PRINTABLE RECIPE BELOW ↓↓

0 from 0 votes
Chicken Pineapple Bacon Burger
Prep Time
15 mins
Cook Time
8 mins
Total Time
23 mins
 

Enjoy a Chicken Pineapple Bacon Burger tonight! Chicken patties, glazed with teriyaki-style sauce, & topped with grilled pineapple & bacon!

Category: Main Course, Sandwich
Cuisine: All Cuisines
Keyword: chicken pineapple bacon burger
Servings: 4
Calories Per Serving: 583 kcal
Author: JB @ The Grateful Girl Cooks!
Ingredients
For Sauce:
  • 20 ounce can pineapple slices (Use JUICE ONLY for sauce) reserve pineapple slices
  • 2 Tablespoons low sodium soy sauce
  • ¼ cup BBQ sauce
  • 2 Tablespoons honey
  • ¼ teaspoon red chili flakes (optional, but good!)
  • 1 inch piece fresh ginger peeled, finely grated
For Chicken Patties:
  • 1 pound ground chicken
  • 1 egg yolk
  • 1 green onion (scallion) bulb & stem thinly sliced
  • ¼ teaspoon salt
  • ¼ teaspoon black pepper
  • teaspoon cayenne pepper
  • 1 teaspoon toasted sesame oil
  • 1 Tablespoon vegetable oil for cooking patties
For 4 Sandwiches:
  • 4 hamburger buns lightly toasted (if desired)
  • 4 slices bacon cooked until crisp
  • 4 iceberg lettuce leaves
  • 4 thin slices red onion
Instructions
  1. Make The Sauce: Mix pineapple juice, soy sauce, BBQ sauce, honey and red pepper flakes in medium saucepan. Stir until combined. Heat sauce on Medium heat until bubbling. Once bubbling, turn heat to Medium-Low; cook until sauce is reduced in volume by about half, and slightly thickened. Remove pan from heat: stir in grated fresh ginger. Set aside.

  2. Grill Pineapple: Dry 4 pineapple rings between paper towels to absorb moisture. Lightly oil large skillet; turn heat to Medium. Once skillet is hot, add pineapple rings in a single layer. Heat pineapple only until bottom begins to brown; flip them over to the other side. Continue to cook only until bottom side is lightly browned. Transfer pineapple out of skillet; let cool.

  3. Make Chicken Patties: Place ground chicken, egg yolk, green onion, sesame oil and spices in large bowl. Mix well with a fork until all combined. For each patty use ¼ of the meat mixture. Wet hands, then shape chicken into a ball. Flatten "ball" out into the shape of a burger patty; set aside on wax paper. Repeat to make 4 patties total.

  4. Cook Burgers: Heat large skillet on Medium-Low. Add vegetable oil. When oil is hot, but not smoking, add patties in single layer. Let patties cook for about 3-4 minutes, without moving them. This allows bottom of burger to brown. Use a spatula to turn patties over. Generously baste top of each patty with sauce. Continue cooking 3-4 more minutes OR until the patties are cooked through. Flip patties a final time and baste top with sauce.

  5. Assemble Each Burger: Lightly brush sauce on bottom bun; top with chicken patty. Add 1 grilled pineapple ring. Cut 1 cooked bacon slice in half; place both pieces on top of the pineapple. Brush top bun lightly with sauce. Add a red onion slice and lettuce leaf. Place top bun on burger, serve and enjoy!

Nutrition Facts
Chicken Pineapple Bacon Burger
Amount Per Serving (1 sandwich)
Calories 583 Calories from Fat 234
% Daily Value*
Fat 26g40%
Saturated Fat 7g44%
Trans Fat 0.1g
Polyunsaturated Fat 7g
Monounsaturated Fat 10g
Cholesterol 161mg54%
Sodium 1051mg46%
Potassium 973mg28%
Carbohydrates 61g20%
Fiber 3g13%
Sugar 38g42%
Protein 29g58%
Vitamin A 318IU6%
Vitamin C 15mg18%
Calcium 112mg11%
Iron 3mg17%
* Percent Daily Values are based on a 2000 calorie diet.

Here’s one more to pin on your Pinterest boards!Enjoy a Chicken Pineapple Bacon Burger tonight! Chicken patties, glazed with teriyaki-style sauce, & topped with grilled pineapple & bacon!

Pan-Seared Steelhead Trout

Pan-Seared Steelhead Trout is a delicious, easy to make dish! Trout fillets are cooked in a simple browned butter, shallot and garlic sauce!

Recently my husband bought some steelhead trout in the fish department at our local grocery store. He brought it home and told me he wanted to try it, because it looked good. When I saw the fillets he bought, I thought he was mistaken! I was absolutely convinced he had accidentally bought salmon fillets.

Well, I was WRONG! It turns out that steelhead trout, which is common to the West coast (and Alaska), LOOKS a lot like salmon. It has the same orange-pink color as salmon, and is similar in taste and texture, but it’s actually TROUT. Who knew? Certainly not me!

My decision was made to pan-sear them, and I knew I wanted to use sauce to add flavor. I ended up making a simple sauce with browned butter, minced garlic, dried dill weed and chopped shallots.

Pan-seared steelhead trout turned out to be delicious, low in calories, and quite easy to prepare. The cooking technique I used is similar to how I make Pan Seared Creole Salmon. Here’s how to make this dish using one pound of steelhead trout (approx. 3 servings).

Scroll Down For A Printable Recipe Card At The Bottom Of The Page

Prepare The Trout For Cooking

Pat the trout fillets dry with paper towels to remove any excess moisture before seasoning. Lightly season the fish (flesh side only) with salt and black pepper.

Three steelhead trout fillets are seasoned with salt and pepper before cooking.

Pan-Sear the Steelhead Trout

Melt 2 Tablespoons of butter in a large skillet on Medium heat. Once the butter melts, add chopped shallots, and cook for 2 minutes, stirring occasionally.
Place the steelhead trout in the hot skillet, with the skin side facing up. Cook the trout fillets on Medium heat for 3 minutes, without moving them in the skillet.

Stir minced garlic and dried dill weed into the butter sauce, and cook the fish and sauce 1 more minute. Be sure to stir the sauce often, so the garlic doesn’t burn. 

Chopped shallots are cooked in melted butter in a large skillet.Steelhead fillets are cooked, skin side up, in a skillet with melted butter and shallots.

The butter sauce will begin to brown as it is cooked, which gives it a wonderful, slightly nutty flavor! The fish is ready to flip over once the bottom side is nicely seared and browned.

Browned butter with shallots, garlic and herbs are cooked in skillet with 3 steelhead trout fillets.

Baste The Trout With Garlic Shallot Butter Sauce

Turn the steelhead trout fillets to the other side (flesh facing up). Use a spoon to scoop up the sauce, and drizzle it over each piece. Continue to cook the fish for 4-5 more minutes until cooked though. 

Spoon the sauce over the trout fillets continuously as they finish cooking. This basting adds wonderful flavor to the fish, because of the browned butter, shallots, dill weed and garlic!

Pan-seared steelhead trout fillets are browned and drizzled with brown butter sauce in skillet.

Time To Serve The Pan-Seared Steelhead Trout

Once the trout is fully cooked through and flakes easily, it is ready to serve. Use a large spatula to transfer the pan-seared steelhead trout onto individual plates.

To garnish the dish, squeeze lemon juice over each fillet, and top with fresh parsley and a lemon slice, if desired. This adds additional color and a pop of lemon flavor to the fish!

A white plate with pan-seared steelhead trout, broccoli and rice on it.A piece of steelhead trout, garnished with lemon slice and chopped fresh parsley to serve.

I hope you have a chance to try this delicious dish, and trust you’ll enjoy it as much as we do. It is a simple to make, yet scrumptious seafood entree!

Thanks for stopping by, and I invite you to come back again soon for more delicious recipes! Take care, God bless you, and have a wonderful day!

Looking For More TROUT Recipes?

You can find ALL of my recipes in the Recipe Index, which is located at the top of the page. I have several recipes for trout you might enjoy, including:

Interested In More Recipes? Get My FREE Newsletter!

I publish a newsletter 2 times per month (1st and 15th) with recipes, tips, etc..
 I would be honored to have you join our growing list of subscribers!

There is a Newsletter subscription box on the top right (or bottom) of each blog post, depending on the device you use, where you can submit your e-mail address to be added to my mailing list.

Find Me On Social Media:

Facebook page: The Grateful Girl Cooks!
Pinterest:
The Grateful Girl Cooks!
Instagram:
jbatthegratefulgirlcooks

Author's signature

↓↓ PRINTABLE RECIPE BELOW ↓↓

5 from 4 votes
Pan-Seared Steelhead Trout
Prep Time
7 mins
Cook Time
10 mins
Total Time
17 mins
 

Pan-Seared Steelhead Trout is a delicious, easy to make dish! Trout fillets are cooked in a simple browned butter, shallot and garlic sauce!

Category: Main Course
Cuisine: All Cuisines
Keyword: Pan-Seared Steelhead Trout
Servings: 3
Calories Per Serving: 266 kcal
Author: JB @ The Grateful Girl Cooks!
Ingredients
  • 1 pound steelhead trout, skin on cut in approx. three 5 oz. pieces
  • ¼ teaspoon salt
  • ¼ teaspoon black pepper
  • 2 Tablespoons butter
  • 2 teaspoons shallots chopped
  • 4 teaspoons minced garlic
  • ¾ teaspoon dried dill weed
  • 1 large lemon half for juice and half for garnish
  • 2 Tablespoons chopped fresh parsley
Instructions
  1. Cut fish into three portions. Pat fish dry with paper towels to remove excess moisture. Lightly season fish (flesh side only) with salt and pepper.

  2. Melt butter in large skillet on Medium heat. Add chopped shallots; cook for 2 minutes, stirring occasionally.
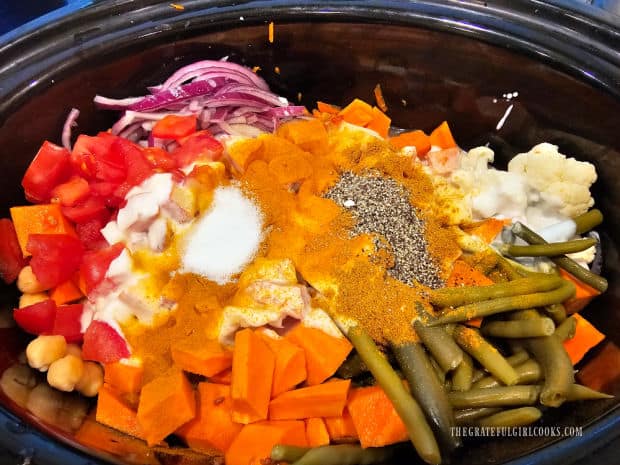
  3. Place trout fillets in skillet (skin side facing up). Cook on Medium heat for 3 minutes, without moving them in the skillet. Stir garlic and dill weed into butter sauce. Cook fish/sauce 1 more minute until bottom of fish is browned. Stir sauce often, so garlic doesn't burn. 
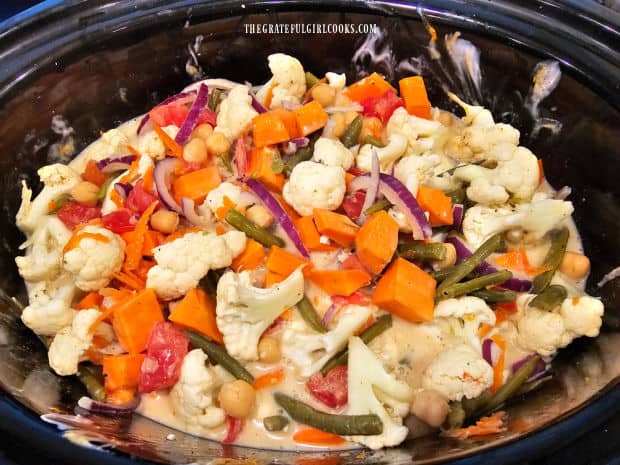
  4. Turn fillets to the other side (flesh facing up). Use spoon to scoop up sauce; drizzle it on each piece. Cook fish 4-5 more minutes until cooked though, spooning sauce over fish often, as it finishes cooking.

  5. When trout is cooked through and flakes easily, it's ready to serve. Transfer fillets to plates. To garnish, squeeze lemon juice over each fillet. Top with fresh parsley and a lemon slice, if desired. Enjoy!

Nutrition Facts
Pan-Seared Steelhead Trout
Amount Per Serving (1 portion (approx. 5 oz.))
Calories 266 Calories from Fat 117
% Daily Value*
Fat 13g20%
Saturated Fat 6g38%
Trans Fat 0.3g
Polyunsaturated Fat 2g
Monounsaturated Fat 4g
Cholesterol 109mg36%
Sodium 304mg13%
Potassium 822mg23%
Carbohydrates 5g2%
Fiber 1g4%
Sugar 1g1%
Protein 32g64%
Vitamin A 571IU11%
Vitamin C 28mg34%
Calcium 128mg13%
Iron 2mg11%
* Percent Daily Values are based on a 2000 calorie diet.

Here’s one more to pin on your Pinterest boards!Pan-Seared Steelhead Trout is a delicious, easy to make dish! Trout fillets are cooked in a simple browned butter, shallot and garlic sauce!

Chicken Cutlets in Pan Sauce

Chicken Cutlets In Pan Sauce is a simple, delicious meal! Pan-seared chicken breasts are topped with a wine, garlic, butter and herb sauce.

This recipe for chicken cutlets in pan sauce is a perfect recipe for busy days. Only 4-5 minutes of prep is needed before cooking this dish, and the final flavor is amazing!

We eat a lot of chicken at our house. I always keep chicken breasts in our freezer for quick meals. When a recipe calls for chicken cutlets, I slice a large chicken breast in half lengthwise to get 2 cutlets.

The star of this recipe is the pan sauce served on top of the pan-seared chicken. This sauce is quite simple to make and tastes wonderful. Here’s how to make chicken cutlets in pan sauce:

Scroll Down For A Printable Recipe Card At The Bottom Of The Page

Pan-Sear The Chicken Cutlets

Dry the chicken with paper towels to help absorb any excess moisture. Season the chicken on both sides with salt and black pepper. Heat olive oil in a large skillet on Medium-High heat until very hot, but not smoking.

Place the chicken cutlets in the skillet in a single layer and cook them 4-8 minutes without disturbing them. This allows time to develop a browned, seared texture on the bottom of each piece.

Chicken cutlets are seasoned with salt and pepper, then pan-seared in hot oil.

Turn Them Over!

After the chicken has cooked 4-8 minutes on the first side, it should be well browned on the bottom. Flip the chicken to the other side and continue cooking 4-8 more minutes.

The chicken is done when well-browned on both sides and cooked through to an internal temp. of 165°F. Remove the chicken from the pan, and cover tightly with foil, to keep the chicken warm. 

Chicken is turned over halfway through cooking, to brown both sides.Pan-seared chicken cutlets rest on a white plate and kept warm while sauce cooks.

Time To Make The Pan Sauce!

Use the same skillet (without cleaning it) to make the pan sauce. Pour additional olive oil into the skillet, and turn heat to Medium. Add chopped shallots and cook, stirring often, for 2 minutes.

Stir in minced garlic and cook for 30 seconds, stirring often so the garlic doesn’t burn. Pour white wine and chicken broth into the skillet.

This liquid helps deglaze the skillet, so scrape up the browned bits from the bottom as it cooks.

Bring the liquid to a gentle boil, then reduce the heat to Medium-Low. Let the sauce simmer (uncovered) 6-8 minutes, or until the liquid has been reduced by half.

Chopped shallots and minced garlic are cooked in hot oil in skillet.White wine and chicken broth are stirred into the skillet with garlic and shallots.

Final Step Before Serving

Turn the heat down to LOW once the liquid has been reduced in half. Add butter, fresh parsley and thyme to the sauce and stir to combine. Continue cooking ONLY until the butter has melted.

Sauce is reduced in volume, then fresh herbs and butter are added.Pan sauce is now ready to spoon on top of pan-seared chicken cutlets.

Serve The Chicken Cutlets in Pan Sauce

Transfer the chicken cutlets onto individual serving plates. Spoon 2-3 Tablespoons of pan sauce over the top of each piece of chicken, to cover. Serve the chicken cutlets in pan sauce immediately.
We typically serve this delicious chicken with mashed potatoes or steamed rice on the side. I also served the chicken with a Brussel sprout casserole for two. YUM!

Chicken cutlets in pan sauce, served with rice and Brussel sprout casserole on the side.A plate with one of the chicken cutlets in pan sauce, served with rice and a veggie.

I really hope you love this recipe for chicken cutlets in pan sauce! You can can easily double or triple the recipe to meet your needs by changing the amount of servings in the recipe card below!

Thank you for stopping by, and I invite you to come back soon for more family-friendly recipes. Take care, God bless, and have a great day!

Looking For More CHICKEN Recipes?

You can find ALL of my recipes in the Recipe Index, which is located at the top of the page. I have LOTS of delicious chicken recipes to check out, including:

Interested In More Recipes? Get My FREE Newsletter!

I publish a newsletter 2 times per month (1st and 15th) with recipes, tips, etc..
 I would be honored to have you join our growing list of subscribers!

There is a Newsletter subscription box on the top right (or bottom) of each blog post. You can submit your e-mail address there, to be added to my mailing list.

Find Me On Social Media:

Facebook page: The Grateful Girl Cooks!
Pinterest:
The Grateful Girl Cooks!
Instagram:
jbatthegratefulgirlcooks

Author's signature

Recipe Adapted From Maya Krampf at: https://www.wholesomeyum.com/pan-seared-chicken-breast/

↓↓ PRINTABLE RECIPE BELOW ↓↓

0 from 0 votes
Chicken Cutlets in Pan Sauce
Prep Time
5 mins
Cook Time
25 mins
Total Time
30 mins
 

Chicken Cutlets In Pan Sauce is a simple, delicious meal! Pan-seared chicken breasts are topped with a wine, garlic, butter and herb sauce.

Category: Main Course
Cuisine: All Cuisines
Keyword: chicken cutlets in pan sauce
Servings: 2
Calories Per Serving: 308 kcal
Author: JB @ The Grateful Girl Cooks!
Ingredients
For Chicken:
  • teaspoons olive oil
  • 2 chicken breast cutlets about 5 ounces each
  • ½ teaspoon salt
  • ¼ teaspoon black pepper
For Pan Sauce:
  • teaspoons olive oil
  • cloves garlic minced
  • ½ medium shallot finely chopped
  • ¼ cup dry white wine
  • ¼ cup low sodium chicken broth
  • 3 teaspoons unsalted butter
  • 2 teaspoons fresh parsley chopped
  • 2 teaspoons fresh thyme chopped
Instructions
  1. Dry chicken with paper towels to absorb excess moisture. Season chicken on both sides with salt and pepper.

  2. Heat olive oil in skillet on Medium-High heat until very hot, but not smoking. Put chicken in skillet in a single layer; cook cutlets 4-8 minutes without disturbing them.

  3. After chicken cooks 4-8 minutes, it should be well-browned on the bottom. Flip chicken over; cook 4-8 more minutes. Chicken is done when browned on both sides and cooked through to an internal temp. of 165°F. Remove chicken from pan; cover tightly with foil to keep chicken warm.

  4. Use same skillet (without cleaning it) to make pan sauce. Add olive oil to the skillet; turn heat to Medium. Add shallots; cook, stirring often, for 2 minutes. Stir in garlic; cook for 30 seconds, stirring so garlic doesn't burn. Add wine and chicken broth. Scrape browned bits up from bottom of pan as it cooks (more flavor). Bring liquid to a gentle boil. Reduce heat to Medium-Low. Let sauce simmer (uncovered) 6-8 minutes, or until liquid is reduced in half.

  5. Turn heat to LOW once liquid has been reduced. Add butter, parsley and thyme; stir to combine. Continue cooking ONLY until butter has melted.

  6. Transfer chicken to plates. Spoon 2-3 T. sauce over each piece to cover. Serve.

Nutrition Facts
Chicken Cutlets in Pan Sauce
Amount Per Serving (1 cutlet + 2-3 T. sauce)
Calories 308 Calories from Fat 144
% Daily Value*
Fat 16g25%
Saturated Fat 6g38%
Trans Fat 0.3g
Polyunsaturated Fat 1g
Monounsaturated Fat 7g
Cholesterol 107mg36%
Sodium 759mg33%
Potassium 619mg18%
Carbohydrates 4g1%
Fiber 1g4%
Sugar 1g1%
Protein 31g62%
Vitamin A 335IU7%
Vitamin C 6mg7%
Calcium 29mg3%
Iron 1mg6%
* Percent Daily Values are based on a 2000 calorie diet.

Here’s one more to pin on your Pinterest boards!Chicken Cutlets In Pan Sauce is a simple, delicious meal! Pan-seared chicken breasts are topped with a wine, garlic, butter and herb sauce.

Air Fryer Pork Chops For Two

Make Air Fryer Pork Chops For Two! This quick, easy recipe yields delicious, spice-rubbed, bone-in pork chops for two people in 20 minutes.

If you enjoy eating pork chops and have an air fryer, then I’m confident you will LOVE this recipe! The recipe makes two servings, which is convenient for my husband and I, since we’re the only ones left at home. Both of our grown sons live on their own, so it is a fun challenge to alter recipes at times to only make enough for the TWO of us.

Air Fryer Pork Chops For Two is a recipe I originally found online. I cut the recipe in half for the two of us, and gave it a try in our air fryer a few months ago. My husband and I loved the flavor of the air-fried pork chops, thanks to a flavorful, homemade spice rub mixture!

The pork chops were perfectly cooked and browned on the outside, juicy on the inside, and they tasted wonderful! We’ve enjoyed this dish several times since then!

It only takes about 10 minutes to prepare the spice mix and season the meat, then into a preheated air fryer they go. The pork chops cook for about 8-10 minutes, or until they reach temp. All you need to do is flip them over halfway through the cooking time! How’s that for EASY? Here’s how to make them:

Scroll Down For A Printable Recipe Card At The Bottom Of The Page

Preheat Your Air Fryer

Preheat your air fryer for five minutes at 400°F. If your machine doesn’t have a Preheat function, simply heat it for 5 minutes at that temperature (400°F). You want your air fryer hot when you add the seasoned pork chops, for best results.

I usually mix up the spices, and season the pork chops while the air fryer preheats, because that saves time! Try it… you’ll see what I mean!

An air fryer is preheated to 400°F. before cooking seasoned pork chops.

Make The Seasoning Mix

The spice mix is simple to make from scratch! You need brown sugar, salt, Italian seasoning, smoked paprika, garlic powder, onion powder, black pepper and sweet paprika.

Mix these spices together in a small bowl, until they are fully combined.

There are quite a few spices that make up the spice rub for the air fryer pork chops.A bowl with homemade spice mixture to rub onto the pork chops before they cook.

Season The Pork Chops

For this recipe you will need two bone-in pork chops, approx. 6-7 ounces each. Each pork chop should be about ¾ to 1″ thick, so they will cook evenly and for about the same amount of time.

Pat the chops dry using paper towels to absorb extra moisture. Use a pastry brush to cover BOTH SIDES of each pork chop with melted butter.

Cover BOTH SIDES of each pork chop with the spice mixture, rubbing it into the buttered pork chops so it adheres as much as possible. Use all of the spice mix, for the very best flavor on those chops!

Once the pork chops are coated with the spices, they are ready to pop into a preheated air fryer!

Two, six ounce bone-in pork chops, patted dry, and ready to be seasoned.Both sides of the pork chops are brushed with melted butter.Spice mixture is rubbed into both sides of the pork chops before cooking.

Cooking The Pork Chops In the Air Fryer

Place the seasoned chops in a single layer in the basket of the air fryer. Please note that if you are making more than two pork chops, you may have to work in batches to ensure they fit in the basket. This also allows the meat to “air fry” better as the hot air can circulate around the pork chops more efficiently!

Cook the air fryer pork chops for two at 400°F. for about 6 minutes. Remove the basket, and flip the pork chops over to the other side.

Re-insert basket into the air fryer and continue cooking for 2-4 more minutes OR until a meat thermometer inserted into the middle of a chop reaches 145°F. When done, the pork chops should be nicely browned on the surface, and cooked to 145°F.

The thickness of the pork chops used will ultimately determine how long they take to air fry. Typically, it should take between 8-10 minutes TOTAL time to cook them to temperature.

A couple of times, ours were fully cooked after 7 minutes total time. Keep an eye on them, so you do not overcook or undercook them!

Well seasoned pork chops are placed in basket of air fryer in one layer.Air fryer pork chops for two have been flipped over to finish cooking.

Serve The Air Fryer Pork Chops For Two

Once done, remove the pork chops from the air fryer, and let them rest for 4-5 minutes before serving. This “resting” time lets the juices inside have time to redistribute inside the meat, so the pork chops remain juicy.

Once they’ve rested, garnish the pork chops with fresh parsley, and serve! The pork chops are juicy, and have wonderful flavor, thanks to the homemade spice mix you used to season them.

Serve immediately, while hot! We enjoy air fryer pork chops for two served with mashed potatoes and a green veggie on the side. YUM!

The air fryer pork chops for two are served, garnished with fresh parsley.A close up of one of the air fryer pork chops, with parsley garnish, on a white plate.

Thanks for stopping by today, and I hope you enjoy this delicious recipe for air fryer pork chops for two! Take care, please come back again soon, and have a GREAT day!

Looking For More AIR FRYER Recipes?

You can find ALL of my recipes in the Recipe Index, which is located at the top of the page. I have quite a few Air Fryer recipes for to you check out, including:

Want More Recipes? Get My FREE Newsletter!

I publish a newsletter 2 times per month (1st and 15th) with lots of recipes, tips, etc..
Would you like to join our growing list of subscribers?

There is a Newsletter subscription box on the top right (or bottom) of each blog post, depending on the device you use.
You can submit your e-mail address there, to be added to my mailing list.

Find Me On Social Media:

Facebook page: The Grateful Girl Cooks!
Pinterest:
The Grateful Girl Cooks!
Instagram:
jbatthegratefulgirlcooks

Author's signature

Recipe adapted from (and with thanks to) Sara, at: dinneratthezoo.com/air-fryer-pork-chops/

↓↓ PRINTABLE RECIPE BELOW ↓↓

0 from 0 votes
Air Fryer Pork Chops For Two
Prep Time
5 mins
Cook Time
10 mins
Total Time
15 mins
 

Make Air Fryer Pork Chops For Two! This quick, easy recipe yields delicious, spice-rubbed, bone-in pork chops for two people in 20 minutes.

Category: Main Dish
Cuisine: American
Keyword: air fryer pork chops
Servings: 2
Calories Per Serving: 315 kcal
Author: JB @ The Grateful Girl Cooks!
Ingredients
  • 2 bone-in pork chops (6-7 oz. each) approx. ¾-1" thick
  • Tablespoons butter melted
For Spice Mix:
  • ¾ Tablespoon brown sugar
  • ½ teaspoon salt
  • ½ teaspoon smoked paprika
  • ½ teaspoon Italian seasoning
  • ½ teaspoon sweet paprika
  • teaspoon onion powder
  • teaspoon garlic powder
  • teaspoon black pepper
Garnish (optional):
  • 1 Tablespoon chopped fresh parsley
Instructions
  1. Preheat air fryer for five minutes at 400°F.

  2. Mix brown sugar, salt, smoked paprika, Italian seasoning, sweet paprika, onion and garlic powders, and pepper in a small bowl, until well combined.

  3. Pat pork chops dry with paper towels to absorb moisture. Use a pastry brush to cover BOTH SIDES of each pork chop with melted butter.

  4. Cover BOTH SIDES of each pork chop with spice mix, rubbing it into the buttered pork chops so it adheres as much as possible.

  5. Place chops in a single layer in air fryer basket. Cook at 400°F. for about 6 minutes. Flip pork chops over. Continue cooking 2-4 minutes OR until a meat thermometer inserted into a chop reaches 145°F. and chops are nicely browned. NOTE: *If making more than two chops, work in batches. This allows meat to "air fry" better as hot air can circulate around pork chops more efficiently!

  6. Once done, remove pork chops from air fryer. Let them rest 4-5 minutes before serving. This lets juices have time to redistribute inside, so the pork chops remain juicy. Garnish chops with parsley (optional), and serve!

Nutrition Facts
Air Fryer Pork Chops For Two
Amount Per Serving (1 pork chop)
Calories 315 Calories from Fat 180
% Daily Value*
Fat 20g31%
Saturated Fat 9g56%
Trans Fat 0.5g
Polyunsaturated Fat 2g
Monounsaturated Fat 7g
Cholesterol 111mg37%
Sodium 722mg31%
Potassium 492mg14%
Carbohydrates 6g2%
Fiber 1g4%
Sugar 5g6%
Protein 27g54%
Vitamin A 940IU19%
Vitamin C 3mg4%
Calcium 45mg5%
Iron 1mg6%
* Percent Daily Values are based on a 2000 calorie diet.

Here’s one more to pin on your Pinterest boards!Make Air Fryer Pork Chops For Two! This quick, easy recipe yields delicious, spice-rubbed, bone-in pork chops for two people in 20 minutes.

Easy Tamale Pie

Easy Tamale Pie is a delicious meal featuring ground beef, tomatoes, onions, corn and Mexican spices, topped with a cornbread-style crust.

Years ago I found a recipe for tamale pie in one of my old cookbooks. I made a couple slight changes to the original recipe, and this recipe for easy tamale pie was “born”. I recently cooked it again and took photos so I could share it here on my blog.

Tamale pie is very simple to prepare, and this recipe makes 8 servings. Since there’s only two of us at home now, the yummy leftovers can be enjoyed for several days!

My husband and I enjoy reheating a slice of tamale pie for a quick lunch, since we both work from home! Let me show you how to make this delicious meal. 

Scroll Down For A Printable Recipe Card At The Bottom Of The Page

Prepare The Filling for The Easy Tamale Pie

Heat oil in a large skillet on medium heat. Add ground beef and chopped yellow onion to the hot oil, and cook until the meat is fully cooked and browned, and the onions are tender.

Stir the meat and onions often as they cook. When the meat is cooked through, tilt the skillet and use a spoon to remove any accumulated grease from the skillet. Discard the grease. 

Ground beef and chopped onions are cooked in oil in a large skillet.Accumulated grease is removed and discarded from the ground beef in the skillet.

Add a can of corn (drained) and a can of diced tomatoes (including juice) to the skillet. Sprinkle with salt, chili powder, and ground cumin, and stir to combine them with the ground beef.

NOTE: If you want (optional) to add diced green chilis, sliced olives, or jalapeños to the dish to make it spicier, this is the time to add these ingredients!

Cook this mixture (uncovered) on medium-low heat for 15 minutes, then remove the skillet from the heat and set aside.

Corn, diced tomatoes and Mexican spices are added to the cooked meat in skillet.The ground beef filling for the easy tamale pie cooks for 15 minutes in skillet.

Prepare The Batter For The Cornbread-Style Topping

While the ground beef filling is cooking, make the batter to top the easy tamale pie. Whisk cornmeal, flour, sugar, baking powder, salt, milk, and egg in a large bowl until a lump-free batter is formed.

A batter is made to pour on the tamale pie to form a top crust.

Assemble The Tamale Pie

Lightly grease a 9″ pie pan with non-stick baking spray on the bottom and sides. TIP: **If you do not have access to a 9″ pie pan, you can make this in a greased 9 x 9 baking dish.**

Add the ground beef filling to the pie pan, spreading it out with a spoon to cover the pan. Slowly pour the cornmeal batter over the top of this mixture until the meat filling is covered

NOTE: You MAY have a few Tablespoons of batter left, depending on the dish you use. You do not have to use it all. However, make sure the pie dish is full and the batter covers the filling!

Time To Bake!

Bake the easy tamale pie at 425°F. for 25-30 minutes. It is done when a toothpick inserted into the top of the tamale pie comes out clean. The tamale pie should also be nicely browned on top.

NOTE: Sometimes people add grated cheese to the top of the tamale pie halfway through the baking time. We don’t add it, but I’m letting you know in case you’re interested.

Filling for the easy tamale pie is spread into a deep dish pie pan.Cornbread-style batter is poured on top of the beef tamale pie filling before baking.The easy tamale pie is nicely browned as it is removed from the oven after baking.

Time To Serve The Easy Tamale Pie

When the tamale pie is finished baking, remove it from the oven and transfer it to a wire rack. Let it cool for 5-6 minutes before slicing it for serving.

Once the tamale pie has cooled slightly, slice it into 8 pie-shaped wedges. Transfer the slices to plates, and serve immediately. This time, I served it with lemon garlic cauliflower rice on the side.
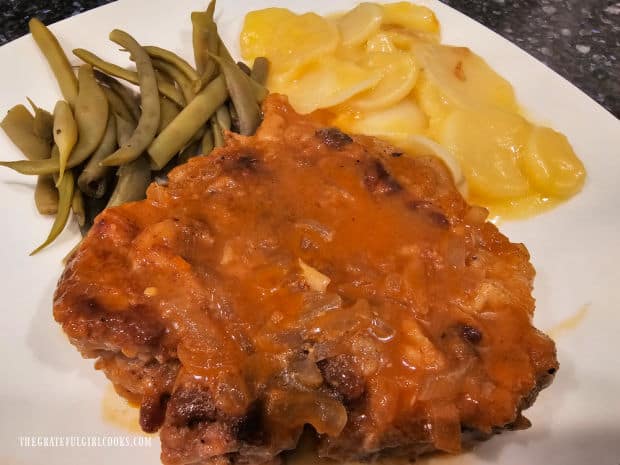
NOTE: The first time I made this, I wasn’t sure it would be “sliceable”  Yes… it will be, once cooled slightly! Use a spatula to transfer the slices to each plate. If desired, garnish each slice with a dollop of sour cream. 

Slices of the tamale pie have been cut and removed, revealing the beef filling inside.A slice of easy tamale pie on a white plate, with cauliflower rice on the side.

I really hope you enjoy easy tamale pie, and have the opportunity to make it for those you love. Thanks so much for stopping by, and I invite you to come back soon for more family-friendly recipes. Take care, may God bless you, and have a GREAT day!

Looking For More TexMex-Inspired Recipes?

You can find ALL of my recipes in the Recipe Index, which is located at the top of the page. I have quite a few TexMex-inspired meals for you to choose from, including:

Want More Recipes? Get My FREE Newsletter!

I publish a newsletter 2 times per month (1st and 15th) with lots of recipes, tips, etc..
Would you like to join our growing list of subscribers?

There is a Newsletter subscription box on the top right (or bottom) of each blog post, depending on the device you use.
You can submit your e-mail address there, to be added to my mailing list.

Find Me On Social Media:

Facebook page: The Grateful Girl Cooks!
Pinterest:
The Grateful Girl Cooks!
Instagram:
jbatthegratefulgirlcooks

Author's signature

Recipe adapted from: Jean O’Brien in the book “Church Suppers”, page 256, published in 2005 by Black Dog and Leventhal Publishers

↓↓ PRINTABLE RECIPE BELOW ↓↓

0 from 0 votes
Easy Tamale Pie
Prep Time
25 mins
Cook Time
25 mins
Total Time
50 mins
 

Easy Tamale Pie is a delicious meal featuring ground beef, tomatoes, onions, corn and Mexican spices, topped with a cornbread-style crust.

Category: Main Dish
Cuisine: Southwestern
Keyword: easy tamale pie
Servings: 8
Calories Per Serving: 292 kcal
Author: JB @ The Grateful Girl Cooks!
Ingredients
For Filling:
  • 2 teaspoons vegetable oil
  • 1 pound ground beef
  • ½ cup chopped yellow onion
  • 15.2 ounce can whole kernel corn drained
  • 14.5 ounce can diced tomatoes do NOT drain
  • 1 teaspoon chili powder
  • ¼ teaspoon ground cumin
  • ½ teaspoon salt
For Top Crust:
  • ½ cup yellow cornmeal
  • ½ cup all purpose flour
  • 1 cup milk
  • 1 large egg
  • 1 Tablespoon granulated sugar
  • 1 teaspoon baking powder
  • ½ teaspoon salt
Instructions
  1. Preheat oven to 425°F.  Lightly grease a 9" deep dish pie pan or a 9" x 9" baking dish

  2. Heat oil in a large skillet on medium heat. Add ground beef and onions: cook until meat is browned and fully cooked, stirring often Remove/discard accumulated grease.

  3. Add corn, tomatoes, salt, chili powder, and ground cumin to meat, stirring to combine. **If adding optional ingredients (olives, green chilis, jalapeños), do it now.** Cook (uncovered) on medium-low heat for 15 minutes, stirring occasionally. Remove from heat; set skillet aside.
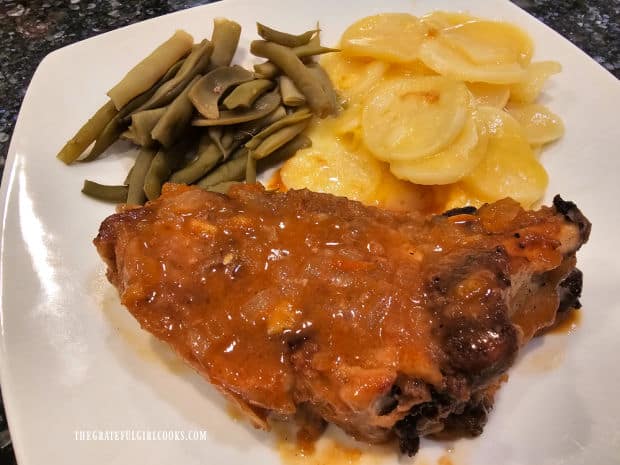
  4. In a large bowl, whisk cornmeal, flour, sugar, baking powder, salt, milk, and egg together until smooth and lump-free.

  5. Spoon beef mixture to greased pie pan, spreading evenly. Slowly pour cornmeal batter over the top until meat filling is covered NOTE: You MAY have a few Tablespoons of extra batter left, depending on dish you use. You do not have to use it all. Just make sure pie dish is full and batter covers the filling!

  6. Bake at 425°F. for 25-30 minutes. It's done when a toothpick inserted into the top/middle comes out clean, and top crust is nicely browned. **NOTE: If desired (OPTIONAL), add grated cheese on top of the pie halfway through baking time.

  7. When tamale pie is finished baking, remove it from oven; transfer to a wire rack. Let cool 5-6 minutes before slicing. Once slightly cooled, cut pie into 8 wedges. Transfer slices to individual plates, and serve. Enjoy!

Nutrition Facts
Easy Tamale Pie
Amount Per Serving (1 slice (1/8 of total))
Calories 292 Calories from Fat 108
% Daily Value*
Fat 12g18%
Saturated Fat 4g25%
Trans Fat 1g
Polyunsaturated Fat 2g
Monounsaturated Fat 5g
Cholesterol 63mg21%
Sodium 428mg19%
Potassium 548mg16%
Carbohydrates 31g10%
Fiber 3g13%
Sugar 7g8%
Protein 17g34%
Vitamin A 368IU7%
Vitamin C 8mg10%
Calcium 94mg9%
Iron 3mg17%
* Percent Daily Values are based on a 2000 calorie diet.

Here’s one more to pin on your Pinterest boards!Easy Tamale Pie is a delicious meal featuring ground beef, tomatoes, onions, corn and Mexican spices, topped with a cornbread-style crust.