Category: Turkey

Thai Turkey Meatballs and Zoodles

Thai turkey meatballs are baked, then combined with spiralized zucchini noodles, and covered with a soy/sriracha/lime/honey glaze in this yummy dish!
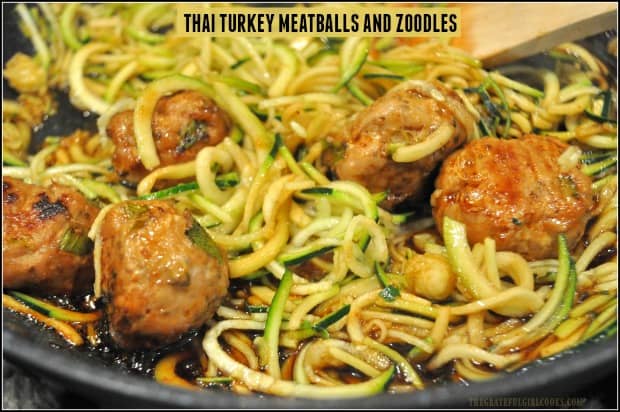

I saw this recipe on Pinterest recently, and though it sounded really good!  Sometimes cooking with ground turkey can be rather “bland”, but these Thai turkey meatballs, zoodles, and glaze were packed with flavor! Hooray! They are delicious, and one serving comes in at about 300 calories!

The turkey meatballs are filled with green onions, garlic, soy sauce, sesame oil, cilantro and fresh grated ginger, so you KNOW they will be good! Knowing these Thai turkey meatballs are baked, not fried, and also accompanied zucchini noodles, helped me decide to try this simple yet delicious recipe!

Scroll Down For A Printable Recipe Card At The Bottom Of The Page

How To Make Thai Turkey Meatballs and Zoodles

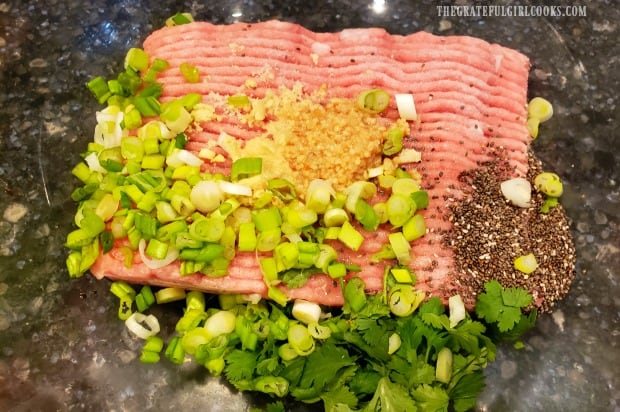
The first thing you will need to do is make the meatballs. Place ground turkey, garlic, ginger, green onions, cilantro, soy sauce, sesame oil, and chia seeds into a large mixing bowl. NOTE: The chia seeds will help the meatballs to hold together (without having to use eggs).

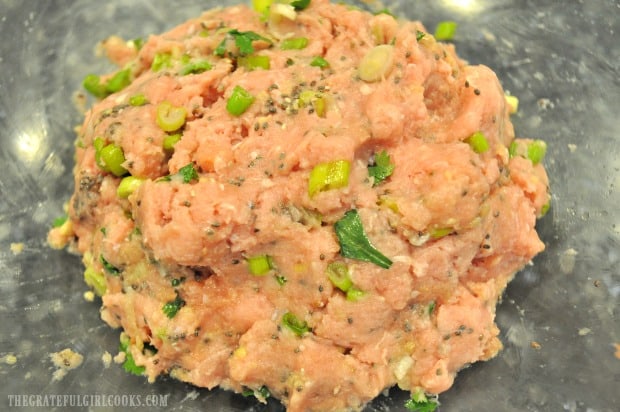
Mix all of the ingredients together using your (clean) hands or a fork. You want this Thai turkey meatballs mixture to be very well combined. Cover the bowl, and refrigerate the mixture for 30 minutes (this helps the chia seeds to work as a gel to firmly hold ingredients together).

Ground turkey with chopped onions, cilantro and spices, ready to make Thai turkey meatballs.

Meat mixture is ready to form Thai turkey meatballs for baking.

Form The Meatballs

Before shaping the Thai turkey meatballs, preheat your oven to 400° F. and line a 13×9 inch baking sheet with parchment paper. To form the meatballs, place a heaping Tablespoon of the turkey mixture into your hands, and gently roll the meat into a meatball.  This recipe will make approximately 18 meatballs.

PLEASE NOTE:  This recipe, as written, yields 3 servings (with 3 meatballs per serving). You, obviously will have leftover meatballs. You can freeze leftover baked meatballs OR you can double the amount of zucchini and sauce used, in order to make 6 servings.

As you finish rolling each meatball, place it onto the parchment paper lined baking sheet. Be sure to leave space between each meatball.

Bake The Thai Turkey Meatballs

Place the meatballs into the preheated 400° F oven.  Set a timer for 10 minutes, and bake.

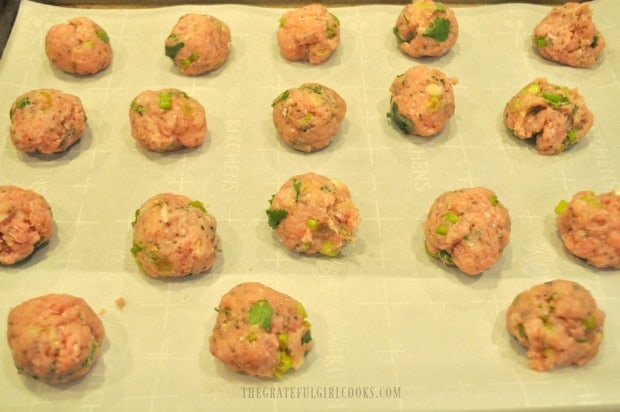
The Thai turkey meatballs on parchment paper lined baking sheet before baking.

Prepare The Glaze and Zoodles While Meatballs Bake

While the meatballs are baking, whisk together the ingredients for the Asian-inspired glaze. These ingredients are soy sauce, fresh squeezed lime juice, honey and sriracha sauce. Set aside.

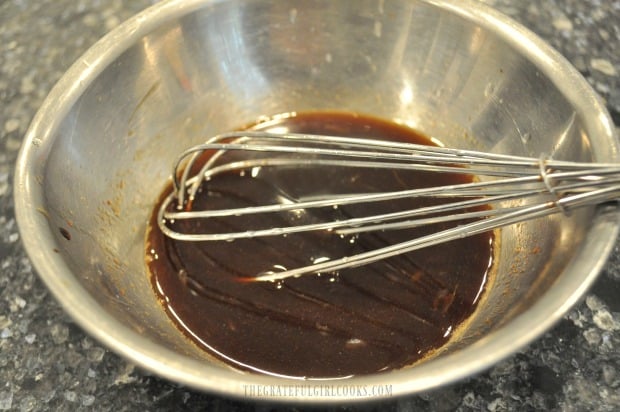
The ingredients for Asian sauce to coat the Thai turkey meatballs after baking is whisked in bowl.

While the meatballs are baking, spiralize the 3 zucchini into spaghetti-style noodles, then “trim” the noodles into smaller lengths. If you don’t own a spiralizer, use a vegetable peeler to peel the length of the zucchini into long strips, then cut into thin strands.

I like to blot the noodles semi-“dry”, using paper towels. This helps to absorb a lot of their natural moisture. When done, set zoodles aside.

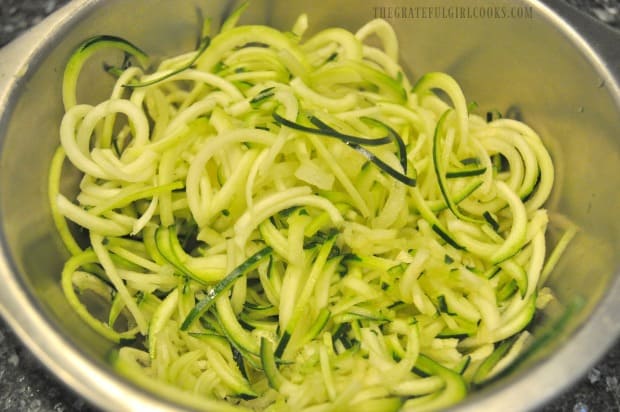
Spiralized zucchini noodles are ready to add to the Thai turkey meatballs and sauce.

Flip Meatballs

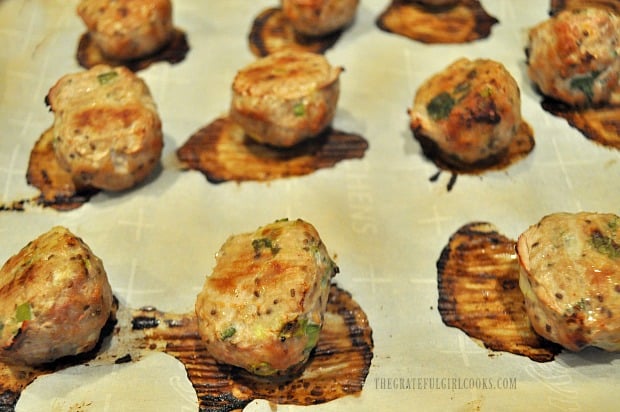
After the Thai turkey meatballs have baked for 10 minutes, remove from oven and quickly flip each one to other side. The first photo below, shows what they looked like after 10 minutes.

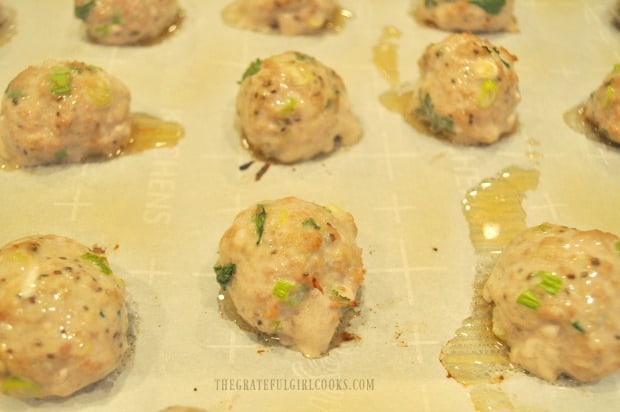
Pop ’em back into the oven and continue baking for another 10 minutes. When done, the meatballs should be cooked all the way through, and will be nice and golden brown on the outside. The second photo below shows what they looked like when done baking.

When the Thai turkey meatballs are halfway through baking, they are flipped to other side.

When the Thai turkey meatballs are done baking, they will be golden brown.

To Finish Making Thai Turkey Meatballs and Zoodles

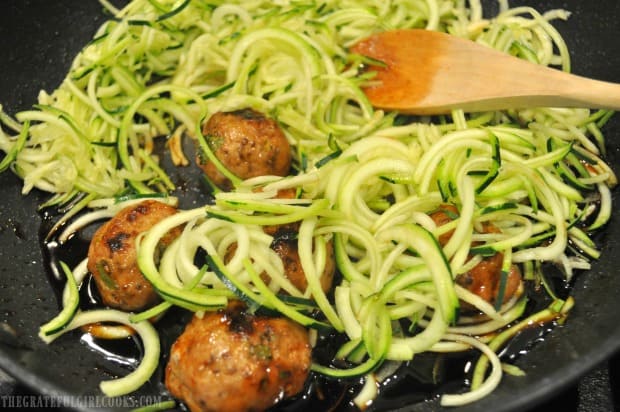
Pour the glaze into a large skillet. Bring the glaze to a boil over medium-high heat. Let it cook until it thickens a bit (usually about a minute), stirring often. Add half of the meatballs (9) to the skillet, and stir to cover them with the glaze. Push the Thai turkey meatballs to one side of skillet, then add the zucchini noodles. Stir to cover with glaze.

Cook for 4-5 minutes (al dente), then the Thai turkey meatballs and zoodles are ready to serve!

Thai turkey meatballs and zucchini noodles are added to glaze in skillet to cook for a few minutes.

To Serve This Dish

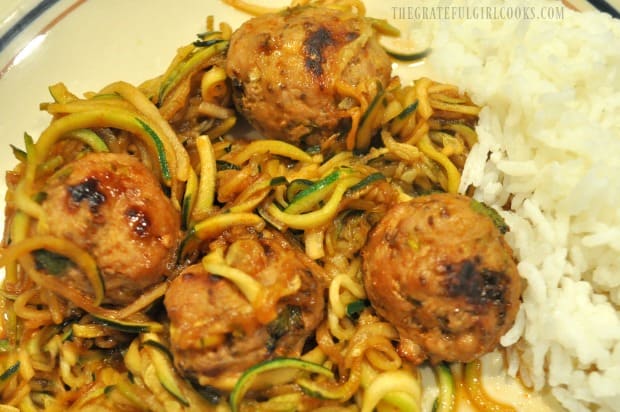
This recipe is written to yield THREE servings, with 3 meatballs per serving . Portion out the zucchini onto three individual plates, and top each with three meatballs (or 4, if you’re feeling quite hungry!). Since the recipe only utilizes HALF of the meatballs made, it is very easy to freeze them, to use the next time you make this recipe!

The zucchini noodles, sauce and Thai turkey meatballs are served, along with rice on the side.

I really hope you will try this recipe for Thai turkey meatballs and zucchini noodles. Pretty sure you will really like it! By the way… you can also substitute ground chicken breast for the turkey, too, if you prefer!

Looking For Other MEATBALL Recipes?

You can find all of my recipes in the Recipe Index. located at the top of the page. A few favorite meatball recipes include:

Interested In More Recipes?

Thank you for visiting this website. I appreciate you using some of your valuable time to do soIf you’re interested, I publish a newsletter 2 times per month (1st and 15th) with all the latest recipes, and other fun info. I would be honored to have you join our growing list of subscribers, so you never miss a great recipe!
There is a Newsletter subscription box on the top right side (or bottom) of each blog post, depending on the device you use, where you can easily submit your e-mail address (only) to be included in my mailing list.

You Can Also Find Me On Social Media:

Facebook page: The Grateful Girl Cooks!
Pinterest:
The Grateful Girl Cooks!
Instagram:
jbatthegratefulgirlcooks

Author's signature.

Recipe Adapted From: https://inspiralized.com/thai-chicken-meatballs-with-zucchini-noodles/
0 from 0 votes
Thai Turkey Meatballs and Zoodles
Prep Time
45 mins
Cook Time
30 mins
Total Time
1 hr 15 mins
 
Thai turkey meatballs are baked, then combined with spiralized zucchini noodles, and covered with a soy/sriracha/lime/honey glaze in this yummy dish!
Category: Dinner, Entree
Cuisine: Thai
Keyword: Thai turkey meatballs
Servings: 3 (3 meatballs each)
Calories Per Serving: 303 kcal
Author: JB @ The Grateful Girl Cooks!
Ingredients
For meatballs:
  • 1 pound ground turkey breast
  • 3 cloves garlic , finely minced
  • teaspoons fresh ginger , peeled and grated
  • 3 stems green onions (scallions) , chopped (white/light green parts only)
  • 1/4 cup fresh cilantro leaves , finely chopped
  • 2 teaspoons sesame oil
  • teaspoons low-sodium soy sauce
  • 2 Tablespoons chia seeds
For Zoodles:
  • 3 medium zucchinis
For Glaze:
  • 3 Tablespoons low-sodium soy sauce
  • 1/2 large lime (juice of)
  • 1 Tablespoon honey
  • 1 Tablespoon sriracha sauce
Instructions
  1. Place meatball ingredients into a large mixing bowl. NOTE: Chia seeds help meatball ingredients bind together (without using eggs). Mix all the ingredients together using your hands (or fork), until fully combined. Cover bowl, and refrigerate for 30 minutes, to let chia seeds "gel" ingredients.

  2. Preheat oven to 400° F. and line a 13x9 inch baking sheet with parchment paper. To make meatballs: place a heaping Tablespoon of turkey mixture into your hands, and gently roll between both hands into a meatball. As you finish rolling each meatball, place it onto the parchment paper lined baking sheet. Be sure to leave space between meatballs. This recipe yields about 18 meatballs. PLEASE NOTE:  Recipe, as written, yields 3 servings (with 3 meatballs per serving). You will have leftover meatballs. You can freeze leftover baked meatballs OR you can double the amount of zucchini and glaze used, in order to make 6 servings (3 meatballs each). 

  3. Place the meatballs into preheated 400° F oven.  Set a timer for 10 minutes, and bake. After meatballs have baked for 10 minutes, remove from oven and quickly turn each one to other side. Pop 'em back into oven and continue baking for another 10 minutes. When done, meatballs should be cooked all the way through, and will be nice and golden brown on the outside. Remove from oven.

  4. While meatballs are baking, whisk glaze ingredients in a small bowl. Set aside. While meatballs are baking, spiralize 3 zucchini into spaghetti-style noodles, then "trim" the noodles into smaller lengths. Blot the zoodles semi-"dry", using paper towels. This helps absorb a lot of their natural moisture. Set aside.

  5. Pour glaze into a large skillet. Bring to a boil over medium-high heat. Let it cook until it thickens a bit (about a minute), stirring often. Add half of the meatballs (9) to skillet, and stir gently, to cover with glaze. Push meatballs to one side of skillet, then add zucchini noodles. Stir, to cover with glaze. Cook for 4-5 minutes (al dente), then it's ready to serve!

  6. To serve, divide zucchini noodles onto 3 plates; top each serving with 3 meatballs. ENJOY! 

Recipe Notes

NOTE: Since the recipe only utilizes HALF of the meatballs made, it is very easy to freeze them, to use the next time you make this recipe!
Nutrition Facts
Thai Turkey Meatballs and Zoodles
Amount Per Serving (1 (3 meatballs + 1/3 of zoodles))
Calories 303 Calories from Fat 72
% Daily Value*
Fat 8g12%
Saturated Fat 1g6%
Cholesterol 83mg28%
Sodium 827mg36%
Potassium 1030mg29%
Carbohydrates 18g6%
Fiber 4g17%
Sugar 11g12%
Protein 40g80%
Vitamin A 520IU10%
Vitamin C 41.1mg50%
Calcium 92mg9%
Iron 2.8mg16%
* Percent Daily Values are based on a 2000 calorie diet.

Here’s one more to pin on your Pinterest boards!Thai turkey meatballs are baked, then combined with spiralized zucchini noodles, and covered with a soy/sriracha/lime/honey glaze in this yummy dish!

Roast Turkey Breast with Herbs and Garlic

It’s easy to cook a healthy, lean, delicious roast turkey breast with a coating of olive oil and a spice mix of herbs and garlic in under an hour!It's easy to cook a healthy, lean, delicious roast turkey breast with a coating of olive oil and a spice mix of herbs and garlic in under an hour!

I usually roast a whole turkey at Thanksgiving, but at other times of the year… I don’t want to mess with it!  However, I will occasionally cook a roast turkey breast, since it takes far less time to prepare than an entire 20 pound bird. This recipe for Roast Turkey Breast with Herbs and Garlic is quite simple to make (in under an hour), and is very delicious!

Now that our sons are grown and living on their own, I only cook for my husband and myself. We have discovered that a small roast turkey breast is the perfect size for the two of us!  This roasted turkey was perfect – low calorie, but full of flavor!

I normally prepare this recipe with a whole, bone-in turkey breast. This time, after I had coated the meat with my herb and garlic seasoning, I decided to split it right down the middle. That way I could cook the roast turkey breast in TWO portions (so I could freeze one after roasting, to save for another meal). That’s the method I’m sharing today.

Scroll Down For A Printable Recipe Card At The Bottom Of The Page

How To Make Roast Turkey Breast

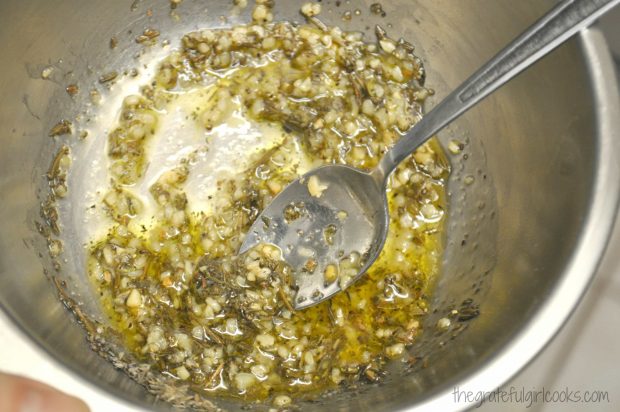
The recipe is so easy. You mix up a spice “rub”, coat the turkey with it, then roast it. That’s it… easy, right? First, put the minced garlic, thyme, rosemary, sage, salt, pepper, and olive oil into a small bowl. Stir these ingredients well, so they are fully mixed together.

Spice rub for roast turkey breast is mixed in small bowl

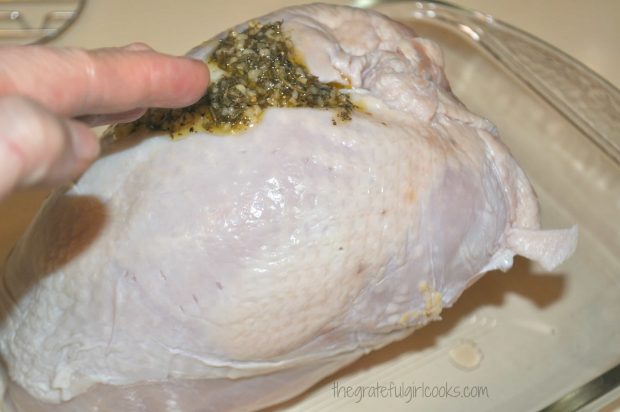
Rinse the turkey, then pat it dry with paper towels. Place the “rub” mixture onto the turkey, and spread it all over the surface of the turkey breast (for this recipe, leave the skin “on”). Try to separate the skin a little bit from the meat. Place some of the “rub” mixture under the skin.

Notice that this is a WHOLE turkey breast. I started to make this roast turkey breast the “normal way”, then changed my mind, at the last minute!

Spices with garlic and herbs are rubbed onto turkey breast before roasting

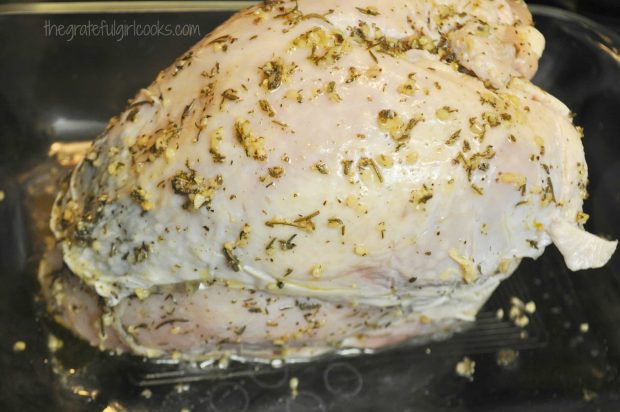
Roast turkey breast with herbs and garlic is ready for the oven.

Once the turkey breast is covered with the herb and garlic rub, you roast the turkey breast until it is done  (**unless you are like me, and change your mind**).

Last Minute Changes To Roast Turkey Breast Aren’t ALL Bad, Right?

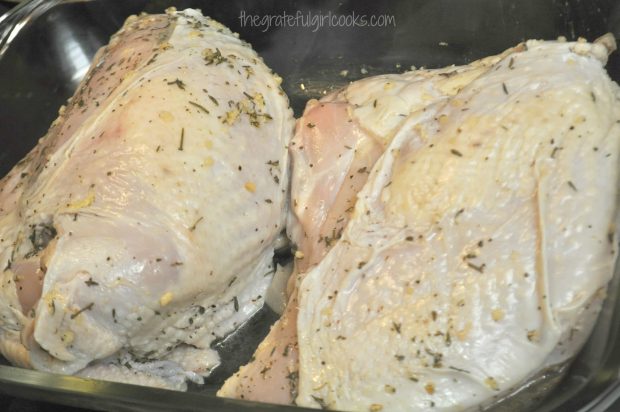
Because I decided in a moment of whimsy to NOT cook an entire turkey breast in one piece,  I took a humongous sharp knife and carefully split that whole turkey breast right through the breast bone, splitting it into 2 half turkey breasts .  NOTE TO SELF:  – do this BEFORE applying rub next time. It’s MUCH easier to cut the turkey breast in half BEFORE adding the slippery oil and herbs… just sayin’. That will teach me to NOT make a mid-recipe change next time! Ha Ha.

However you prefer your roast turkey breast (either WHOLE or CUT IN HALF), roast the turkey breast, and all will be right in the universe!!! Place the turkey breasts in a roasting pan, or onto a baking sheet with rimmed edges. You do not need to put the turkey onto a rack for this recipe

IMPORTANT NOTE: The time cooking  in the detailed recipe below is for cooking 2 half breasts. If you leave the turkey breast whole, then your roasting time will differ slightly, as it will need more time to cook it all the way through.

Roast turkey breast is split in half before putting into oven.

How Long Do I Roast Turkey Breast?

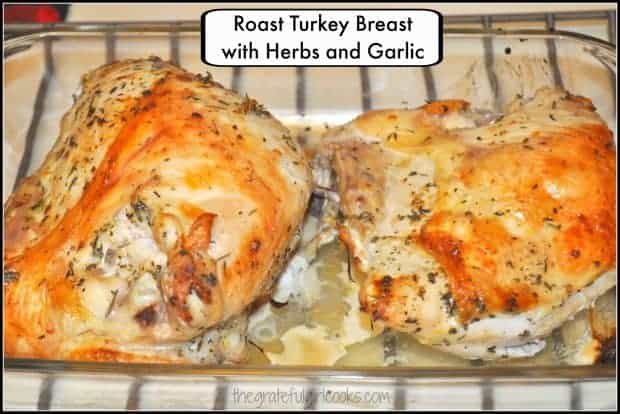
Roast the split turkey breasts at 350 degrees for 45-60 minutes (oven temperatures vary). Remember a whole turkey breast will need to cook longer!

Use a digital thermometer to test for “done-ness”, and to ensure internal temperature is 165 degrees, for safety. When the internal temperature of the roast turkey breast reaches 165 degrees, remove it from the oven. Cover the turkey with aluminum foil for 10 minutes, and let it rest, to let the juices redistribute through the meat.

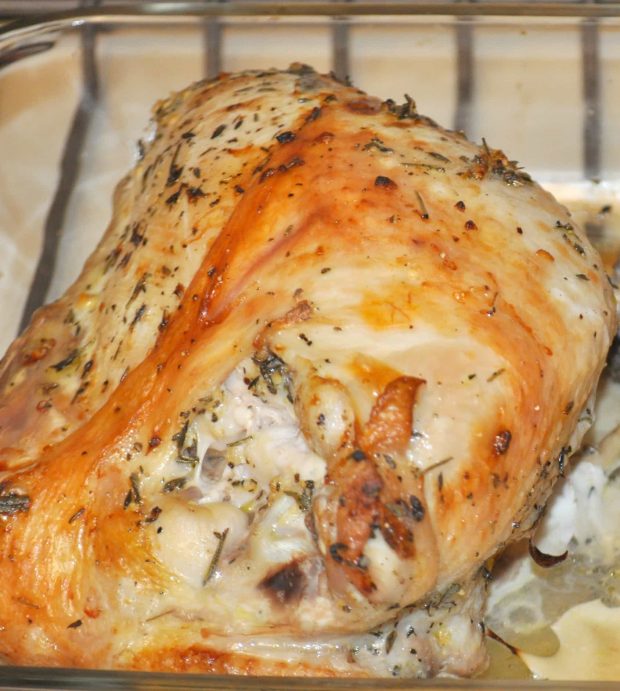
Roast turkey breast is golden brown after baking.

Time To EAT!

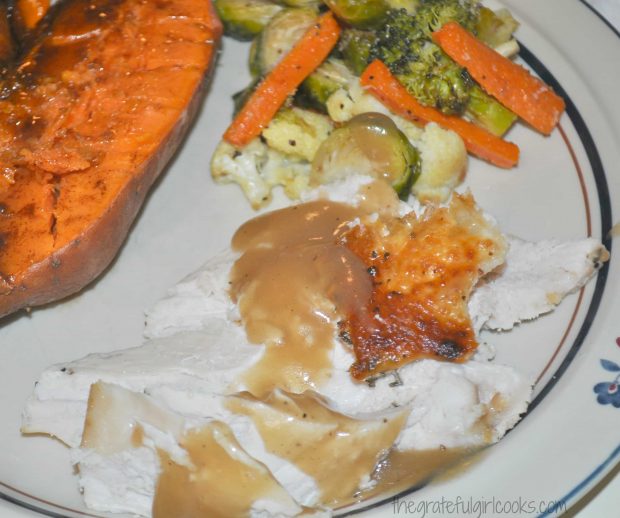
Once the roast turkey breast has “rested”, slice the roast turkey breast up, and serve! I mixed up a little gravy using the turkey juices and a bit of flour, salt and pepper. The gravy was then used to drizzle on the roast turkey breast slices. That tastes fantastic, but is optional.

Sliced roast turkey breast is served with gravy, and vegetables on the side.

Hope you will consider trying this easy recipe for roast turkey breast, with herbs and garlic. The only time it takes “hands on” is to mix the spice rub, split the breast into two pieces and apply the spices to the turkey. The rest of the “cooking” time was simply that… “cooking” time.

Have a great day. May you find MUCH to be thankful for as you go about your day! Thank you for stopping by, and I hope you will come back soon.

Looking For More TURKEY Recipes?

You can find ALL my recipes in the Recipe Index, located at the top of the page. I have some wonderful turkey recipes, including:

Interested In More Recipes?

Thank you for visiting this website. I appreciate you using some of your valuable time to do soIf you’re interested, I publish a newsletter 2 times per month (1st and 15th) with all the latest recipes, and other fun info. I would be honored to have you join our growing list of subscribers, so you never miss a great recipe!
There is a Newsletter subscription box on the top right side (or bottom) of each blog post, depending on the device you use, where you can easily submit your e-mail address (only) to be included in my mailing list.

You Can Also Find Me On Social Media:

Facebook page: The Grateful Girl Cooks!
Pinterest:
The Grateful Girl Cooks!
Instagram:
jbatthegratefulgirlcooks

Author's signatureRecipe Source: http://flavorthemoments.com/simple-herb-garlic-roasted-turkey-breast/

0 from 0 votes
Roast Turkey Breast with Herbs and Garlic
Prep Time
5 mins
Cook Time
45 mins
Total Time
50 mins
 

It's easy to cook a healthy, lean, delicious roast turkey breast with a coating of olive oil and a spice mix of herbs and garlic in under an hour!

Category: Entree
Cuisine: American
Keyword: roast turkey breast
Servings: 6 servings
Calories Per Serving: 272 kcal
Author: JB @ The Grateful Girl Cooks!
Ingredients
  • 3 pound turkey breast (with the bone in, and the skin on)
  • 2 cloves garlic , minced
  • 1 teaspoon dried thyme
  • 1 teaspoon dried sage leaves
  • 1 teaspoon dried rosemary
  • 1 teaspoon salt
  • 1/2 teaspoon ground black pepper
  • 2 Tablespoons olive oil
Instructions
  1. Preheat your oven to 350 degrees. Before beginning, rinse turkey breast. Pat it dry with paper towels.  Carefully (using a very sharp knife), cut the turkey breast in half, right through the top side middle cartillage. Set aside both sections.

  2. Make the herb and garlic rub, by mixing garlic, thyme, sage, rosemary, salt, pepper and olive oil together in a small bowl.

  3. Rub the herb and garlic mixture over the entire surface of the turkey (bottom and top). Separate skin a bit from the meat, and rub some of the mixture under the skin, as well. Place the turkey breast(s) in a roasting pan (or baking sheet with edges).

  4. Bake the turkey breast(s) at 350 degrees for 45-60 minutes. Since oven temps vary, be sure and test for "done-ness", using a digital thermometer in thick part of breast. When properly/safely cooked, the thermometer should show an internal temperature of 165 degrees. If it is not to temp, continue cooking and checking temperature every few minutes. NOTE: If cooking whole turkey breast, longer roasting time will be necessary. Cook to 165 degrees internally.

  5. Once turkey is "done", remove it from oven. Cover with foil, and let the meat rest for about 10 minutes. This will help keep the turkey juicy! After turkey has rested, slice, serve, and enjoy!

Recipe Notes

Note: Turkey breast will freeze well, if wrapped very well in plastic wrap AND aluminum foil.

Nutrition Facts
Roast Turkey Breast with Herbs and Garlic
Amount Per Serving (1 serving)
Calories 272 Calories from Fat 72
% Daily Value*
Fat 8g12%
Saturated Fat 1g6%
Cholesterol 122mg41%
Sodium 855mg37%
Potassium 548mg16%
Protein 48g96%
Vitamin A 45IU1%
Vitamin C 0.3mg0%
Calcium 37mg4%
Iron 1.4mg8%
* Percent Daily Values are based on a 2000 calorie diet.

Here’s one more to pin on your Pinterest boards!It's easy to cook a healthy, lean, delicious roast turkey breast with a coating of olive oil and a spice mix of herbs and garlic in under an hour!

Save

Save

Creamy Turkey Wild Rice Soup

Make this delicious, creamy turkey wild rice soup with wild rice, carrots, and onions in your slow cooker, using your Thanksgiving turkey leftovers!Make this delicious, creamy turkey wild rice soup with wild rice, carrots, and onions in your slow cooker, using your Thanksgiving turkey leftovers!

Another Thanksgiving has come and gone, and we still have some leftovers, thankfully! Speaking of LEFTOVERS…today I’m posting a recipe for Creamy Turkey Wild Rice Soup. I’ve been making this soup for years (using good old turkey leftovers!).

I found the original recipe in an old Taste Of Home Magazine years ago and tried it. The creamy turkey wild rice soup was so good!  I’ve been making it ever since, with a few slight changes to the original recipe.

Why NOT use the leftover turkey and carcass to make a huge pot of delicious soup? If you’re gonna go to the trouble of roasting a huge turkey, then make it “go the distance” for you.

The original recipe for creamy turkey wild rice soup was made on the stove top, but I adapted it for crock pot cooking. I’ve included both sets of instructions in the printable recipe below.

Scroll Down For A Printable Recipe Card At the Bottom Of The Page

Could I Make This Recipe With A Whole CHICKEN Instead Of A Turkey?

Yes. You can also substitute a whole chicken, if desired. Remember to make sure you have at least 2 cups of shredded meat for the soup. Prepare the recipe the same exact way.

How To Make Creamy Turkey Wild Rice Soup

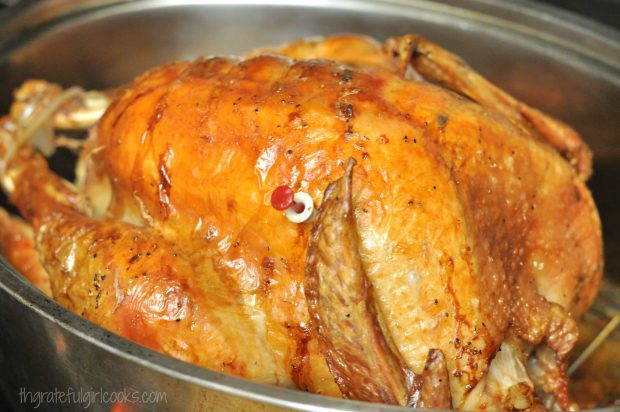
Start with that leftover turkey. Yeah. Use that beast you fixed for Thanksgiving. Our 15 pounder looked like this when it came out of the oven on Thanksgiving.

Roast turkey is used to make creamy turkey wild rice soup.

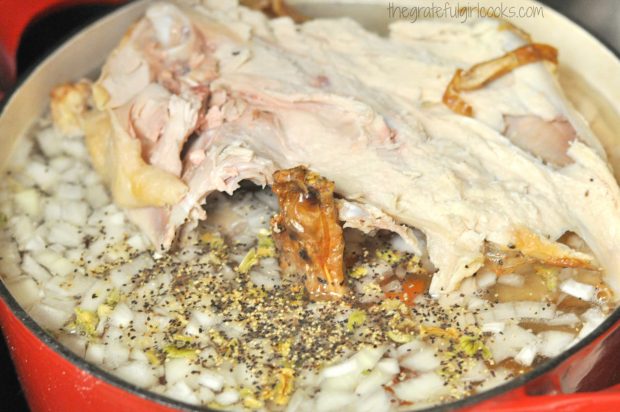
The next morning, the leftover turkey looked like this photo below… in a huge pot of water, with onions, celery, carrots, spices, etc. I’m telling you, that turkey never knew what hit it!

The turkey carcass (with some meat still attached) cooks for about 1½ hours (covered). Chopped onions, carrots, celery, salt and pepper are also added to the large pot of water.

When done, let the turkey cool. Once the turkey has cooled,  cut or pull all the turkey meat you can get off the bones. You will need about 2 cups of turkey for this soup.

Turkey carcass is cooked with onions, celery and carrots in water to make creamy turkey wild rice soup.

Add Ingredients To A Slow Cooker (crock pot)

Put the broth from the turkey (and the veggies, too) into a large crock pot. The total mount of broth should be at least 4 cups. If making the turkey the way shown, you can use the strained broth created by cooking the turkey as replacement for store bought broth.

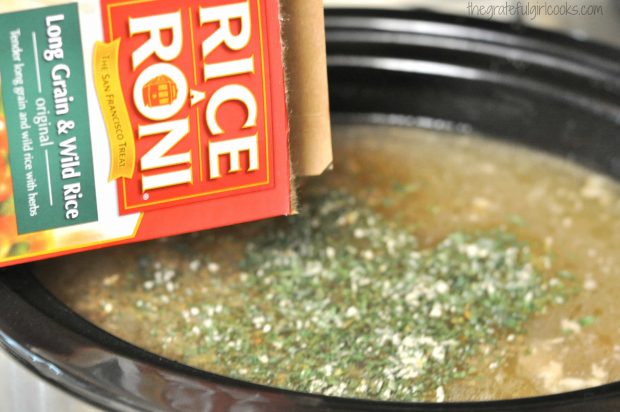
Add 2 cups of shredded turkey to the slow cooker. Add one box of Long Grain and Wild Rice (and seasoning packet) and butter to the soup.

The original recipe called for 2 cups of wild rice. Using all wild rice is really tasty, but I found this package and seasonings to be perfectly easy (and a bit more economical).

Rice and seasonings are added to slow cooker full of creamy turkey wild rice soup.

Cook the creamy turkey wild rice soup on low temperature for 4 hours. After that, add some flour, whisked well with cool water to help thicken the soup broth slightly.

Put the lid back on slow cooker, and let the soup cook for another hour. Add light cream to the soup, and cook for 15 minutes.

The Creamy Turkey Wild Rice Soup Is Ready To Serve

Taste test the soup before you ladle it into bowls. Add salt or pepper, if desired, to suit your taste buds. The creamy turkey wild rice soup is now ready to be served!

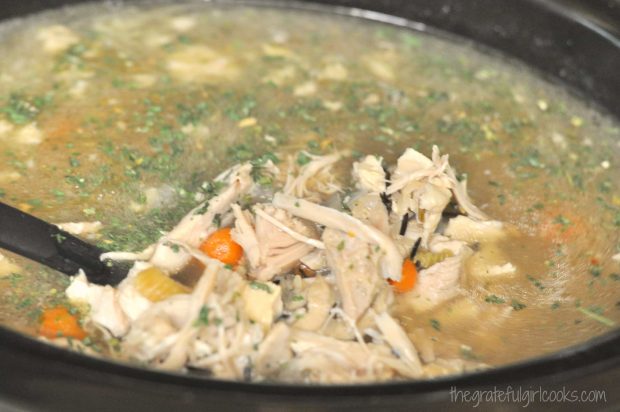
Lots of turkey in this delicious creamy turkey wild rice soup.

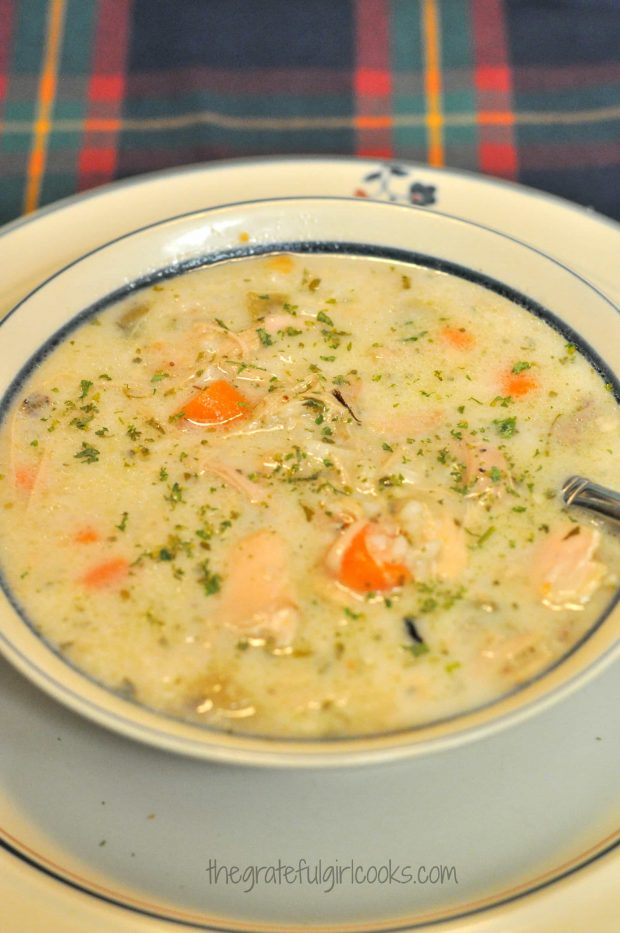
Here is the finished creamy turkey wild rice soup, after the cream has been added. It looks great, and is ready to eat!

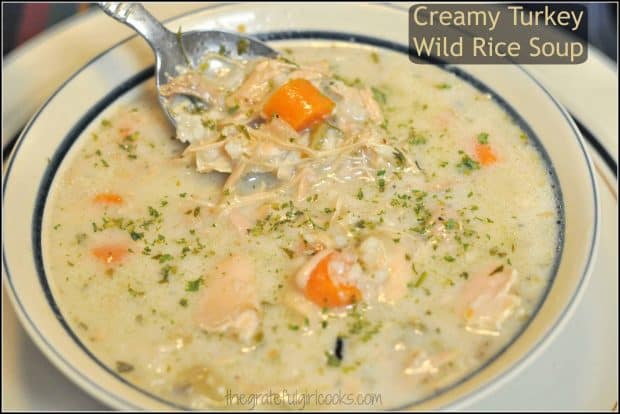
Creamy turkey wild rice soup is served in bowl.

This creamy turkey wild rice soup is a really easy soup to make, and tastes absolutely delicious. I sure hope you will give this recipe a try next time you want to make something with Thanksgiving leftovers.

Don’t throw that turkey carcass away… make a huge pot of delicious hot and filling soup! Thanks for stopping by, and I sincerely hope you will come back again soon for more recipes. Have a great day.

Looking For More SOUP Recipes?

You can find all of my recipes in the Recipe Index, located at the top of the page. I have lots of delicious soup recipes, including:

Interested In More Recipes?

Thank you for visiting this website. I appreciate you using some of your valuable time to do soIf you’re interested, I publish a newsletter 2 times per month (1st and 15th) with all the latest recipes, and other fun info. I would be honored to have you join our growing list of subscribers, so you never miss a great recipe!
There is a Newsletter subscription box on the top right side (or bottom) of each blog post, depending on the device you use, where you can easily submit your e-mail address (only) to be included in my mailing list.

You Can Also Find Me On Social Media:
Facebook page: The Grateful Girl Cooks!
Pinterest: The Grateful Girl Cooks!
Instagram: jbatthegratefulgirlcooks

Author's signature

Recipe Adapted From: Taste Of Home Magazine, submitted by Terri Holmgren, Swanville, Minnesota (magazine issue unknown – I cut out her recipe years ago and couldn’t find it online)

0 from 0 votes
Creamy Turkey Wild Rice Soup
Prep Time
1 hr 30 mins
Cook Time
5 hrs 15 mins
Total Time
6 hrs 45 mins
 
Make this delicious, creamy turkey wild rice soup with wild rice, carrots, and onions in your slow cooker, using your Thanksgiving turkey leftovers!
Category: Soup
Cuisine: American
Keyword: turkey wild rice soup
Servings: 12 cups (approx. 3 quarts)
Calories Per Serving: 179 kcal
Author: JB @ The Grateful Girl Cooks!
Ingredients
  • 1 turkey "carcass" (with some meat still attached)
  • 1 medium onion , chopped
  • 2 celery ribs , diced
  • 2 carrots , diced
  • 1 Tablespoon butter
  • 1/2 cup all purpose flour
  • 1/4 cup water
  • 4 cups turkey or chicken broth
  • 1 box wild rice OR 1 box Long Grain and Wild Rice Mix + seasoning packet (Rice A Roni)
  • 2 cups light cream
  • 2 cups diced turkey (or chicken)
  • 1 teaspoon dried parsley flakes
  • 1/2 teaspoon salt
  • 1/4 teaspoon black pepper
  • 1/4 teaspoon garlic powder
  • Additional salt & pepper , to taste (if desired)
Instructions
  1. Place leftover turkey "carcass" in large stock pot. Cover with water. Add onion, celery, carrots, salt and pepper. Cover pot and boil for 1 1/2 hours on medium-low. Remove turkey; let cool, then cut all the meat off the bones. Discard bones. Pour 4 cups of the broth (with veggies) into a crock pot. Shred turkey meat, then add at least 2 cups of the meat back into the crock pot. Add entire box of rice (plus seasoning packet). Add salt, pepper, dried parsley, and butter to soup. Cook on Low for 4 hours.
  2. After 4 hours, mix together the flour and water until smooth. Stir this mixture into the soup in the crock pot until combined. Let soup cook for another hour.
  3. Stir in cream, and cook on LOW for another 15 minutes.
  4. Taste test; add additional salt/pepper, if desired, then serve!
Recipe Notes

If cooking on stove top: Saute onions, celery and carrots in butter 3-4 minutes. Reduce heat; add in flour-cook until it is bubbly. Add in broth, stirring constantly. Bring to boil; reduce heat. Add rice, turkey, cream, salt, pepper, garlic powder, etc. Simmer for about 20 minutes. Serve.
Another way to make this quicker, use store bought broth and shred up a rotisserie chicken or use pre-cooked turkey.

Nutrition Facts
Creamy Turkey Wild Rice Soup
Amount Per Serving (1 cup)
Calories 179 Calories from Fat 126
% Daily Value*
Fat 14g22%
Saturated Fat 8g50%
Cholesterol 58mg19%
Sodium 431mg19%
Potassium 189mg5%
Carbohydrates 7g2%
Protein 5g10%
Vitamin A 2140IU43%
Vitamin C 7mg8%
Calcium 39mg4%
Iron 0.6mg3%
* Percent Daily Values are based on a 2000 calorie diet.

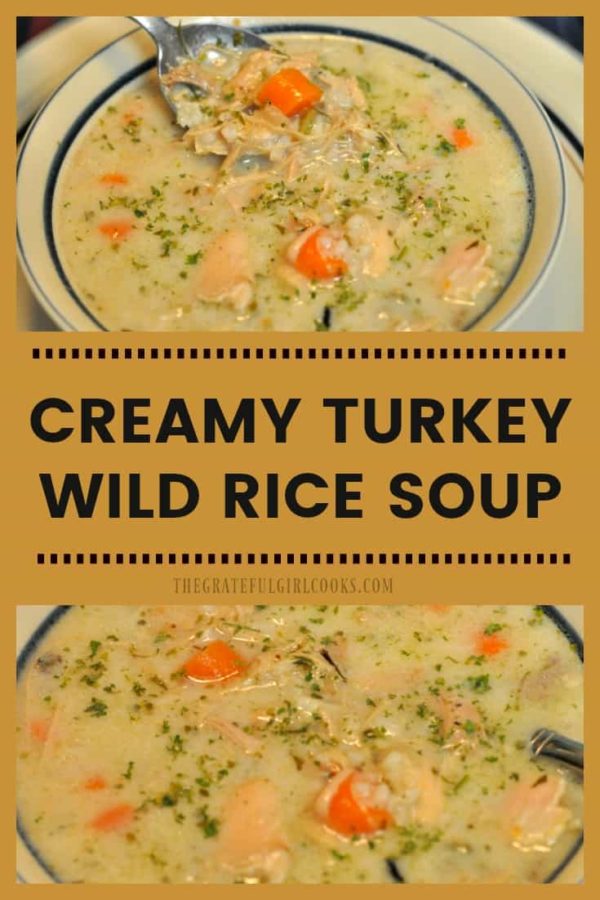
Here’s one more to pin on your Pinterest boards!Make this delicious, creamy turkey wild rice soup with wild rice, carrots, and onions in your slow cooker, using your Thanksgiving turkey leftovers!


Save

Save

Quick n’ Easy Chef’s Salad

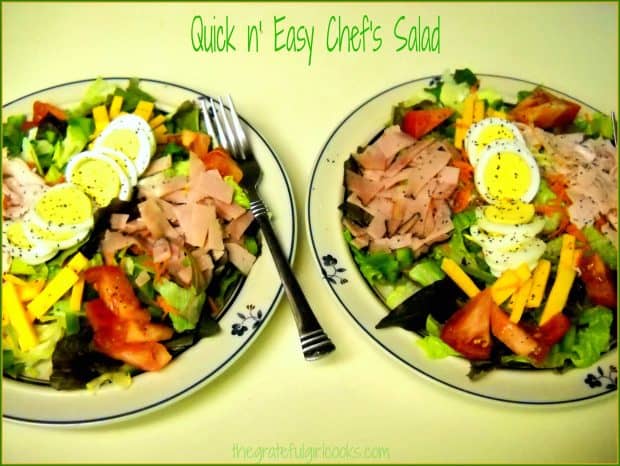
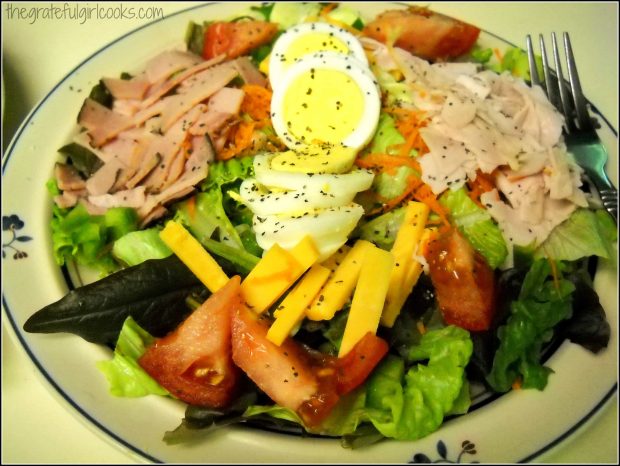
Summertime. Heat. Hot. UGH. What better time to make a Quick n’ Easy Chef’s Salad for dinner? This is a great idea for those HOT, HOT, summer days when you don’t really want to heat up the kitchen or cook a lot. Quick n' Easy Chef's Salad / The Grateful Girl Cooks!
My husband and I love to have lighter meals at times when it is so hot outside that all you want to do is fill your tummy or feed your family, without exerting too much energy. Ever have days like that? I do, occasionally. Well, why not throw together a healthy, delicious entree salad, filled with lots of veggies AND protein and make THAT your meal? The bonus is that it’s quick, easy, and delicious!

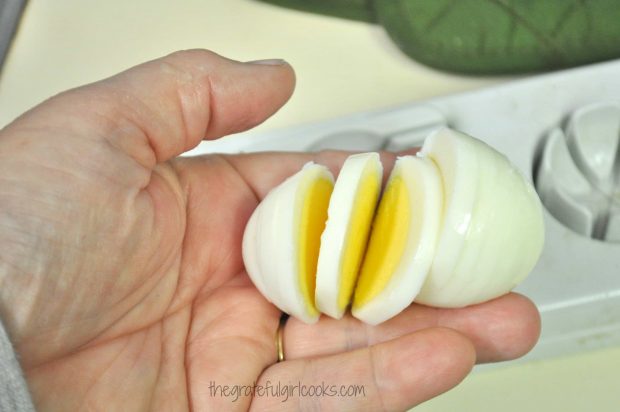
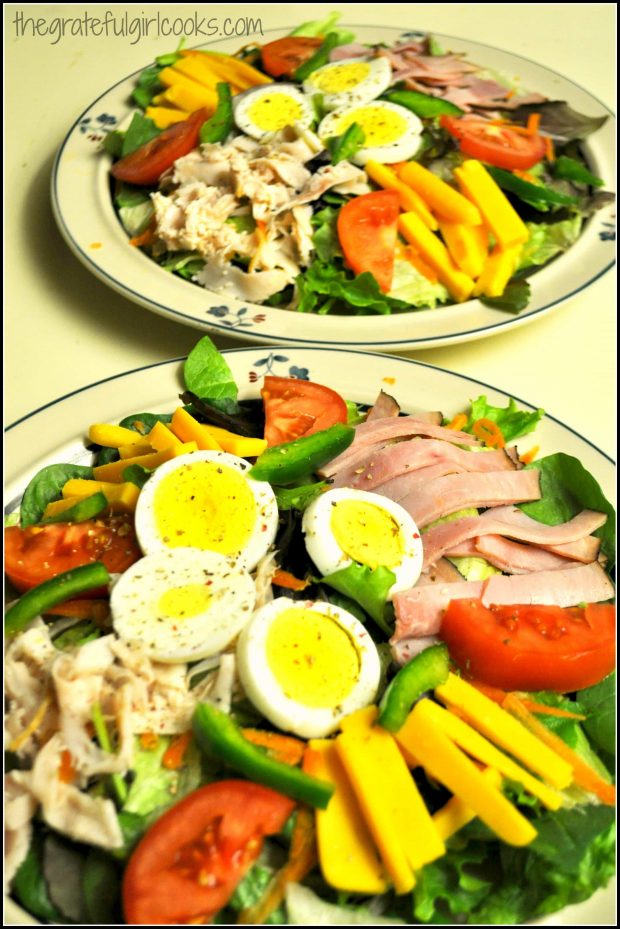
Chef Salads are kind of like that. You just “build” them as you like them. Usually I start with a bed of mixed greens. I slice up some hard-boiled eggs (see my cute little egg picture below?), slice cheese into stick-like portion sizes (I’ve used cheddar in these photos, but have also used cheddar and pepper jack combo before), chop a few tomatoes and/or other veggies like green/red peppers, cucumber chunks, red onions, etc, and slice up some deli-bought ham and turkey slices.

Then I assemble it all (as decoratively as my little old hands can), on a dinner plate, and top it with my favorite salad dressing. **In case you’re wondering, my favorite salad dressing is bleu cheese. (I posted that in case you want to send me a case of bleu cheese dressing for my birthday).

Really the “hardest” thing about making this salad  is just hard-boiling the eggs ahead of time. No biggie.

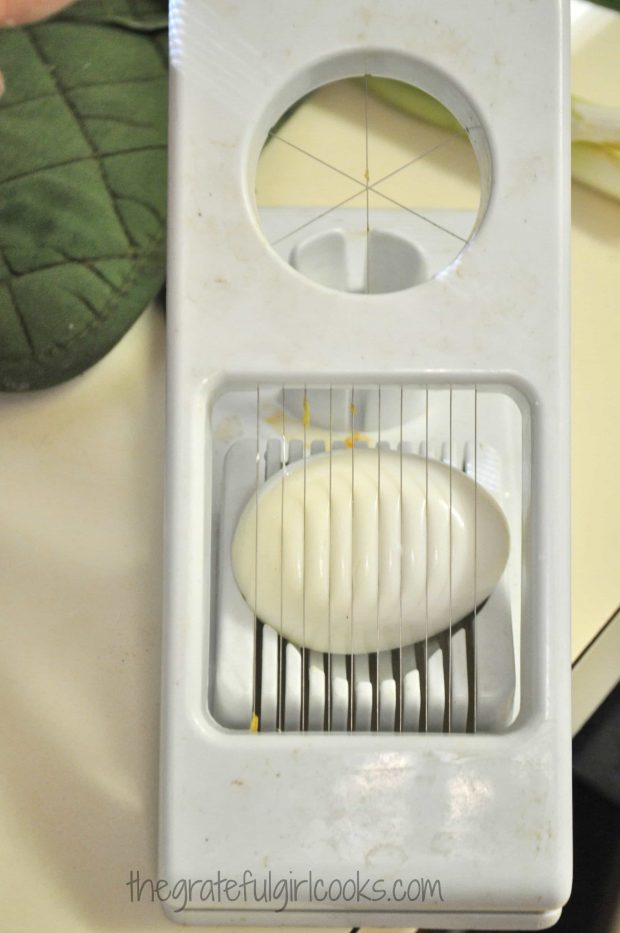
By the way, speaking of eggs… I love my handy-dandy little ol’ egg slicer I’ve had for over 30 years. Still works like a charm to make even slices of hard boiled egg to garnish this salad or potato salad with. Just sayin’. From the looks of this picture, it looks like it needs a good cleaning!

Quick n' Easy Chef's Salad / The Grateful Girl Cooks!Quick n' Easy Chef's Salad / The Grateful Girl Cooks!
Anyways… just build the salad the way you or your family likes it. This is just the way I do it. Nothing too fancy… just GOOD. You really can’t go wrong with hard-boiled eggs, ham/turkey, cheese, and whatever veggies you want.

Just try to make it look good. Remember… we eat with our eyes, right? (something like that… I do tend to use a fork for this meal).

Quick n' Easy Chef's Salad / The Grateful Girl Cooks!
It’s as simple as that! You really can make a quick, healthy, entree Chef’s Salad for much less than you would spend to buy one in a restaurant. Hope you will consider making a Chef’s Salad for you and your significant others sometime this summer.

Quick n' Easy Chef's Salad / The Grateful Girl Cooks!
Hope you will be inspired to make a Chef’s Salad this summer, and make it your OWN way. Have a great summer. Enjoy the beauty all around (look closely- you can find it everywhere); practice thankfulness, and try to make the most out of each day you are given.

God Bless You!

Interested In More Recipes?

Thank you for visiting this website. I appreciate you using some of your valuable time to do soIf you’re interested, I publish a newsletter 2 times per month (1st and 15th) with all the latest recipes, and other fun info. I would be honored to have you join our growing list of subscribers, so you never miss a great recipe! 
There is a Newsletter subscription box on the top right side (or bottom) of each blog post, depending on the device you use, where you can easily submit your e-mail address (only) to be included in my mailing list.

You Can Also Find Me On Social Media:

Facebook page: The Grateful Girl Cooks!
Pinterest:
The Grateful Girl Cooks!
Instagram:
jbatthegratefulgirlcooks

Quick n' Easy Chef's Salad / The Grateful Girl Cooks!


Here’s one more to pin on your Pinterest boards!Quick n' Easy Chef's Salad / The Grateful Girl Cooks!

Save

Save

Homemade Breakfast Sausage Patties

It’s EASY to make eight delicious Homemade Breakfast Sausage Patties for breakfast from scratch, using ground turkey or pork!It's EASY to make eight delicious Homemade Breakfast Sausage Patties for breakfast from scratch, using ground turkey or pork!
So… in my never ending quest experimenting with new recipes, I decided to try making Homemade Breakfast Sausage Patties from scratch. I found the recipe via Pinterest via Martha Stewart via Lucinda Scala Quinn’s book “Mad Hungry”. Did ya get all that? Ha Ha… it takes a village.

When I was growing up my Mom used to make eggs and sausage for us about once a week. She always made sausage patties by hand (using a one pound “chub” from her favorite “name brand”). As a “busy” adult, I usually end up buying link sausage instead of patties, the kind you simply “brown and serve”.

But, when I saw this recipe, I decided to see what making homemade breakfast sausage patties “from scratch” was all about. I knew I could control the ingredients and leave out some of the unpronounceable “add ins” typically found in mass produced name brand products for longer life.

Scroll Down For A Printable Recipe Card At The Bottom Of The Page

Okay… How Do I Make Homemade Breakfast Sausage?

The original recipe called for ground pork (which is my personal favorite), but I had a pound of ground turkey that I was itching to use, so I substituted turkey in this recipe for a healthier version. The sausage patties turned out very good, and I would definitely make this recipe again. Hope you will give it a try!

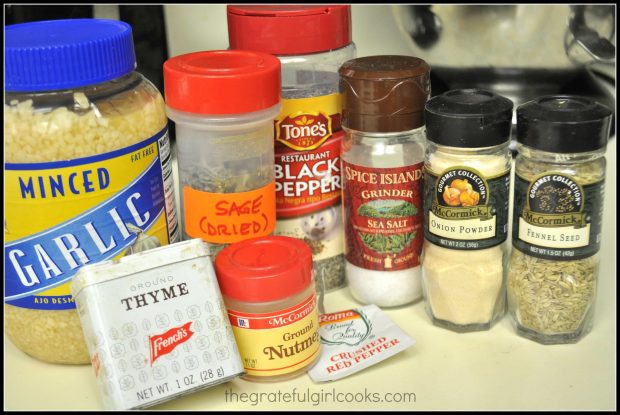
First things first… get all the ingredients (spices) together to add to the ground meat. Let’s do this!

Spices for homemade sausage patties

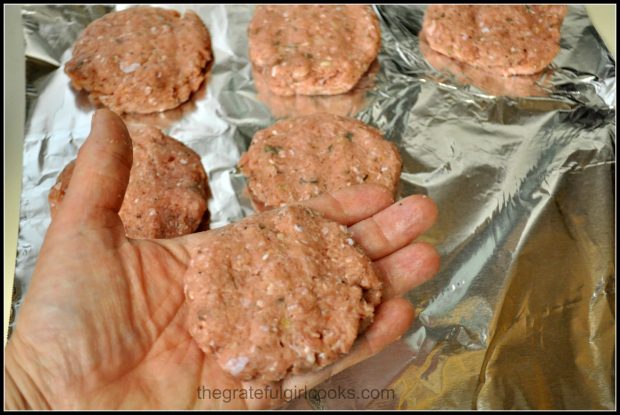
After mixing the ingredients, form the sausage patties (with clean hands, of course!). Place them onto foil or wax paper after making each one.

Breakfast sausage patties formed in palm of hand

Cooking Homemade Breakfast Sausage Patties

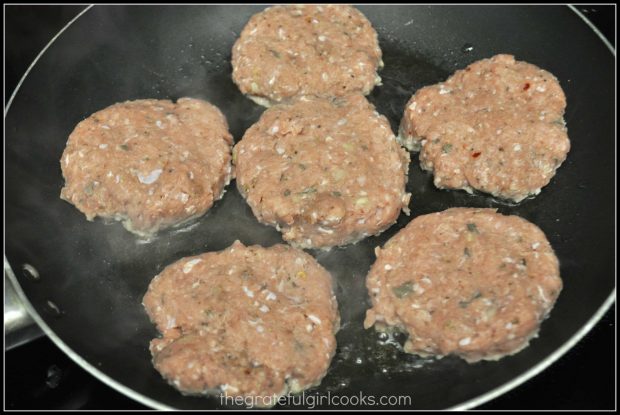
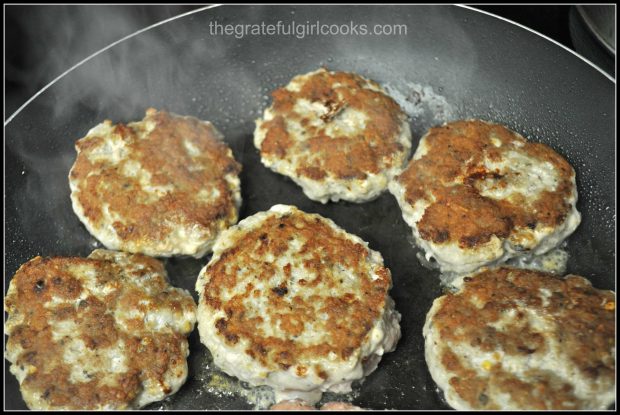
Place the homemade breakfast sausage patties in a lightly oiled, hot skillet. I cooked several sausages at a time, then repeated the process for the remaining sausage patties.

6 breakfast sausage patties cooking in skillet

Carefully turn the patties over about half way through cooking time and continue cooking until the homemade breakfast sausage patties are cooked all the way through..

Browned homemade breakfast sausage patties cooking in skillet.

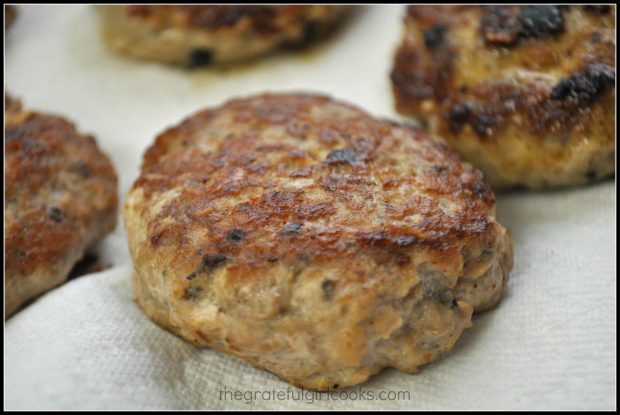
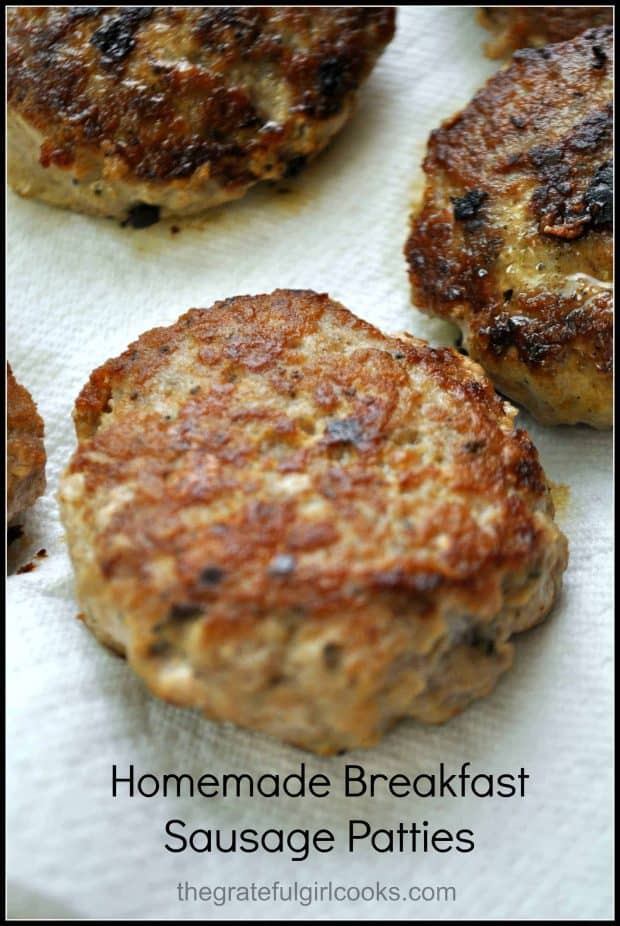
Once done, transfer the cooked sausage patties to a paper towel so any extra grease is absorbed. Once they drain a bit, they are done, and ready to eat!

One of the homemade breakfast sausage patties, up close.

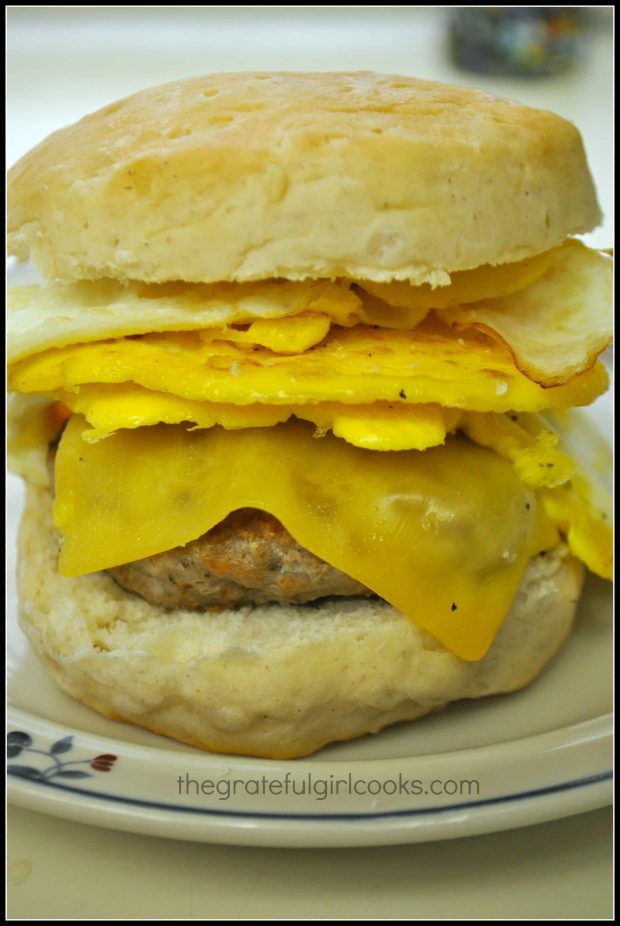
I prepared these homemade breakfast sausage patties one fine morning, and ended up using them to make sausage, egg and cheese biscuits. The sausage patty was added to a fluffy biscuit, along with sliced cheddar cheese and a fried egg. It was delicious!

If you enjoy breakfast sandwiches, I hope you will check out my recipes for:

How Many Homemade Breakfast Sausage Patties Does This Make?

The recipe made 8 small sausage patties and only took about 25 minutes or so to make from start to finish!  I ended up freezing half of the cooked sausage patties, to save for another breakfast.

Breakfast sausage patty on biscuit with egg and cheese

Hope you will give this easy recipe for homemade breakfast sausage a try. The calorie calculation was based on using ground turkey for the sausage. The recipe is easily adapted for using ground pork, but the calorie count will be slightly higher.  Have a fantastic day, and be sure to check out ALL my recipes in the Recipe Index, located at the top of the page.

Interested In More Recipes?

Thank you for visiting this website. I appreciate you using some of your valuable time to do soIf you’re interested, I publish a newsletter 2 times per month (1st and 15th) with all the latest recipes, and other fun info. I would be honored to have you join our growing list of subscribers, so you never miss a great recipe!
There is a Newsletter subscription box on the top right side (or bottom) of each blog post, depending on the device you use, where you can easily submit your e-mail address (only) to be included in my mailing list.

You Can Also Find Me On Social Media:
Facebook page: The Grateful Girl Cooks!
Pinterest: The Grateful Girl Cooks!
Instagram: jbatthegratefulgirlcooks

Author's signatureRecipe Adapted from: http://www.marthastewart.com/341904/simple-homemade-sausage-patties

↓↓ PRINTABLE RECIPE BELOW ↓↓

0 from 0 votes
Homemade Breakfast Sausage Patties
Prep Time
15 mins
Cook Time
10 mins
Total Time
25 mins
 

It's EASY to make eight delicious Homemade Breakfast Sausage Patties for breakfast from scratch, using ground turkey or pork!

Category: Breakfast
Cuisine: American
Keyword: homemade breakfast sausage
Servings: 8 sausage patties
Calories Per Serving: 72 kcal
Author: JB @ The Grateful Girl Cooks!
Ingredients
  • 1 pound ground turkey or ground pork
  • 1 clove garlic , minced
  • 1 Tablespoon dried sage , crumbled
  • 3/4 teaspoon dried thyme
  • 1/2 teaspoon dried fennel , crushed
  • 1 pinch of ground nutmeg
  • 1 1/2 teaspoons coarse salt
  • 1/2 teaspoon freshly ground black pepper
  • 1 large egg white
  • 2 teaspoons vegetable oil (for cooking the sausage patties in)
Instructions
  1. In a medium sized bowl, combine all the ingredients except vegetable oil. Mix thoroughly. Cover the bowl; refrigerate for 15 minutes.
  2. To make the patties: Rinse your hands in really cold water (this helps to make it easier to make the patties without it sticking as much). Divide the meat into 8 patties. Shape each patty into a 2 1/2 inch wide disk.
  3. If you don't want to cook all the patties at once, you can refrigerate the patties or freeze them until you want to use them.
  4. If cooking immediately, heat a large skillet or griddle over high heat. Add the vegetable oil and continue heating. Place the sausages in hot skillet or griddle. Fry them about 4 minutes on each side until golden brown. Carefully turn patties over and repeat until cooked through and lightly browned on both sides.
  5. When done, remove sausages to paper towels to briefly drain. Serve immediately.
  6. Cooked sausage patties can be cooled and wrapped and frozen for use at another time, if desired. Microwave sausage patties (in paper towels) to re-heat
Recipe Notes

NOTE:**Caloric calculation was based on the use of ground turkey.

Nutrition Facts
Homemade Breakfast Sausage Patties
Amount Per Serving (1 sausage pattie)
Calories 72 Calories from Fat 9
% Daily Value*
Fat 1g2%
Cholesterol 31mg10%
Sodium 471mg20%
Potassium 178mg5%
Protein 13g26%
Vitamin A 30IU1%
Vitamin C 0.1mg0%
Calcium 11mg1%
Iron 0.7mg4%
* Percent Daily Values are based on a 2000 calorie diet.

Here’s one more to pin on your Pinterest boards!It's EASY to make eight delicious Homemade Breakfast Sausage Patties for breakfast from scratch, using ground turkey or pork!


Save

Save