Category: Sandwiches

Easy Chicken Salad For Sandwiches

This easy copycat version of a famous East Coast chicken salad for sandwiches is convenient to have in the refrigerator for a quick meal!
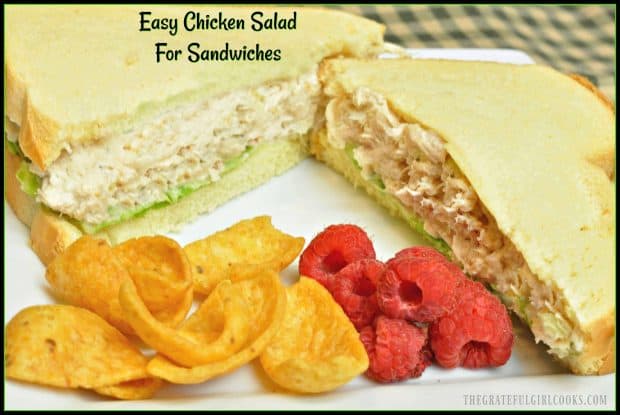
This easy and delicious copycat version of a famous East Coast chicken salad is convenient to have in the refrigerator for a quick sandwich for lunch or dinner!
Do you enjoy chicken salad?  Today I want to share with you a wonderful recipe for Easy Chicken Salad For Sandwiches! It’s really yummy!

I enjoy having chicken salad made up and ready in the fridge during hot summers, so I can make chicken salad sandwiches for my family any time I want!

The original recipes comes from a website I enjoy called “A Family Feast”.  Martha and her husband Jack (the bloggers/cooks) have a wonderful website, Facebook and Pinterest pages that feature some fantastic recipes. I highly recommend their website (see recipe source below)!

Here’s how to make this delicious chicken salad for sandwiches.

Scroll Down For A Printable Recipe Card At The Bottom Of The Page

Why This Is Called A “Copycat” Recipe

The recipe is a copycat version of a brand of chicken salad for sandwiches marketed and sold on the East Coast.  While I have never tasted the original Willow Tree Chicken Salad, I found this recipe almost identical (minus the brown sugar/garlic powder) to the recipe my Mom’s been making for years.

That was enough for me to try it. so I decided to test this version out!  YUM! The chicken salad is very flavorful, and not too “mayonnaise-y” (new word!) once ingredients are combined.

It’s also fairly inexpensive to make, and very easy to prepare.  The recipe makes 4-6 servings, depending on how much chicken salad you use for each sandwich, and it tastes GOOD.

If you want to cut out some carbs and not use bread, simply place the chicken salad between lettuce leaves and roll up like a burrito to eat!   Here’s how to make this tasty chicken salad:

Shred The Meat For The Chicken Salad For Sandwiches

The recipe calls for cooked boneless, skinless chicken breast.  I simply boil the chicken breasts in water until done (the easy way), but however you cook the chicken is up to you.

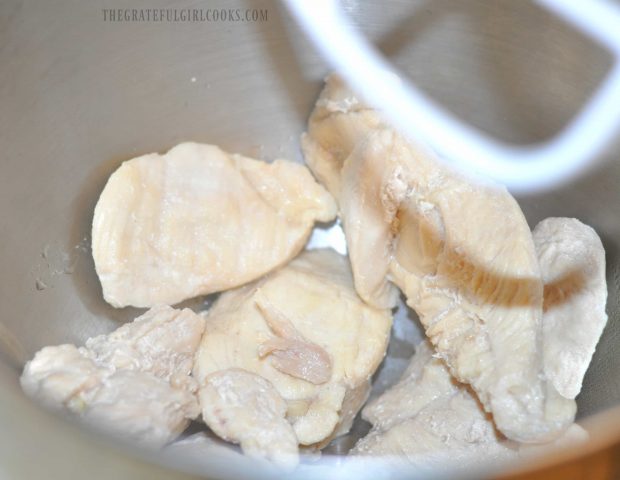
Once the chicken is cooked, place the chicken breasts in a stand mixer (with the paddle attachment on). Shred the chicken on medium speed until it’s finely shredded.

If you want to shred the chicken by hand instead of using a mixer, simply use two forks.

Shredding chicken for salad in electric mixer

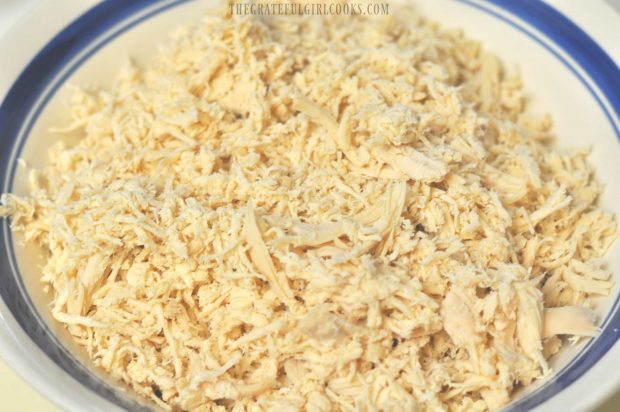
This is how it looks once done. You will have a nice big bowl of finely shredded chicken, and it only takes a couple of minutes!

Shredded chicken for sandwiches

Add The Rest Of The Ingredients

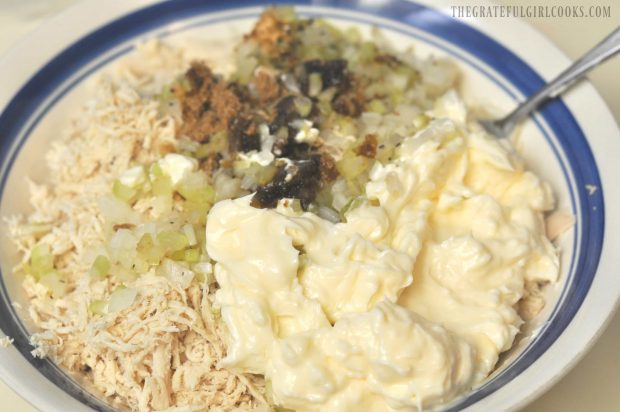
Add the rest of the ingredients to the shredded chicken (mayonnaise, celery, onion, brown sugar, garlic powder, salt and pepper).

Mayonnaise, onion, celery and spices added to shredded chicken

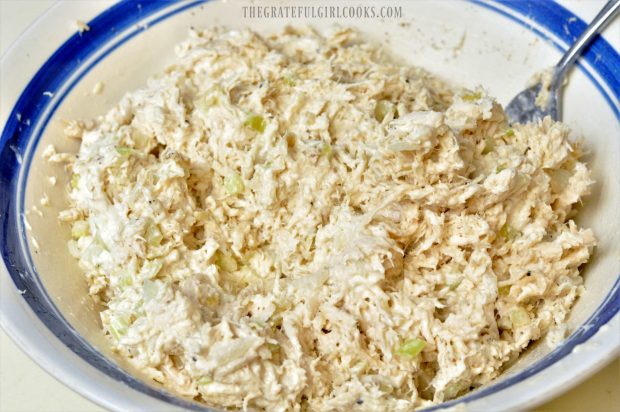
Stir all of the chicken salad ingredients well, until thoroughly blended. Take a bite, and add additional salt and/or pepper, to suit your taste.

Cover the chicken salad with plastic wrap, and keep it refrigerated until you are ready to make and serve the sandwiches.

Easy chicken salad ready for sandwiches

Chicken Salad For Sandwiches Is Now Ready To Eat!

When you’re ready to make sandwiches, place the chicken salad on top of lettuce leaves on sandwich bread, cut in half, and serve! That’s it!  Pretty easy, right?

Keep any leftovers covered in the refrigerator for up to 3-4 days. Now you can make delicious chicken salad sandwiches whenever you want!

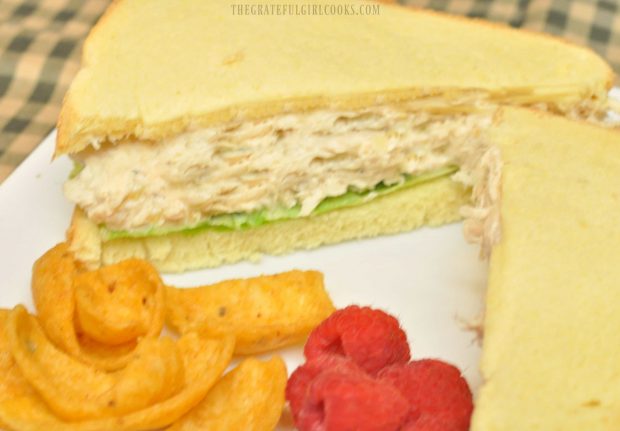
Chicken salad sandwiches, served with corn chips and raspberries

I sure do love summer in Oregon!  It is such a blessing to have warmth, sunshine, and blue skies, especially after the wettest, gloomiest Winter and Spring I can recall in several years!

Having this chicken salad for sandwiches pre-made and ready is a welcome thing, so we can be outside enjoying the beauty of the Pacific Northwest! Thanks for stopping by, and have a great day!

Looking For More SANDWICH Recipes?

You can find ALL of my recipes in the Recipe Index, which is located at the top of the page. I have some wonderful and delicious sandwich recipes to check out, including:

Want More Recipes? Get My FREE Newsletter!

I publish a newsletter 2 times per month (1st and 15th) with lots of recipes, tips, etc..
Would you like to join our growing list of subscribers?

There is a Newsletter subscription box on the top right (or bottom) of each blog post, depending on the device you use.
You can submit your e-mail address there, to be added to my mailing list.

Find Me On Social Media:

Facebook page: The Grateful Girl Cooks!
Pinterest:
The Grateful Girl Cooks!
Instagram:
jbatthegratefulgirlcooks

Author's signature

Recipe Source: www.afamilyfeast.com/copycat-willow-tree-chicken-salad/

↓↓ PRINTABLE RECIPE BELOW ↓↓

0 from 0 votes
Easy Chicken Salad For Sandwiches
Prep Time
10 mins
Cook Time
0 mins
Total Time
10 mins
 

This easy and delicious copycat version of a famous East Coast chicken salad is convenient to have in the refrigerator for a quick sandwich for lunch or dinner!

Category: Sandwich
Cuisine: American
Keyword: chicken salad
Servings: 4 -6 servings
Calories Per Serving: 325 kcal
Author: JB @ The Grateful Girl Cooks!
Ingredients
  • 1 pound cooked chicken breast (boneless/skinless), shredded
  • 3/4 cup mayonnaise
  • 3 Tablespoons finely minced celery
  • 3 Tablespoons finely minced onion
  • 1 Tablespoon brown sugar
  • 1/8 teaspoon garlic powder
  • 1/4 teaspoon ground black pepper
  • 1/4 teaspoon salt (+ more to taste, as desired)
Instructions
  1. Place cooked boneless, skinless chicken breasts in a stand mixer (with paddle attachment on). Shred chicken on medium speed until finely shredded. If you want to shred by hand instead of using a mixer, use two forks.
  2. Add the rest of the ingredients to the shredded chicken (celery, onion, brown sugar, garlic powder, salt and pepper). Stir all ingredients well, until thoroughly blended. Take a bite; add additional salt and/or pepper, as desired. Cover salad with plastic wrap, and refrigerate until ready to serve.
  3. When ready to make sandwiches, place the chicken salad on top of lettuce leaves on sandwich bread, and serve! Keep leftover chicken salad covered in refrigerator for up to 3-4 days.
Recipe Notes

NOTE: Caloric calculation is based on 6 servings.
*Prep time does not include cooking time for chicken. I simply boiled the chicken in water until done, but however you pre-cook chicken is your choice.

Nutrition Facts
Easy Chicken Salad For Sandwiches
Amount Per Serving (1 serving)
Calories 325 Calories from Fat 207
% Daily Value*
Fat 23g35%
Saturated Fat 4g25%
Cholesterol 76mg25%
Sodium 334mg15%
Potassium 211mg6%
Carbohydrates 2g1%
Sugar 2g2%
Protein 23g46%
Vitamin A 50IU1%
Vitamin C 0.3mg0%
Calcium 14mg1%
Iron 0.8mg4%
* Percent Daily Values are based on a 2000 calorie diet.

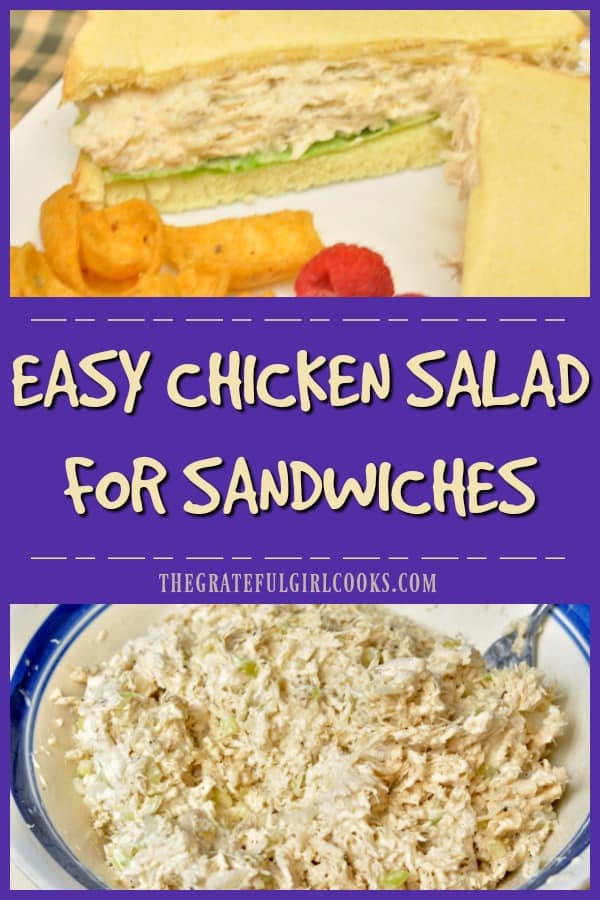
Here’s one more to pin on your Pinterest boards!This easy and delicious copycat version of a famous East Coast chicken salad is convenient to have in the refrigerator for a quick sandwich for lunch or dinner!
Save

Save

Save

Save

Save

Save

Save

Save

Save

Save

Save

Save

Save

Save

Save

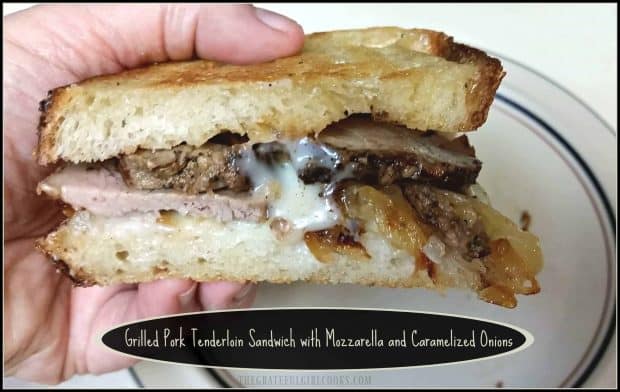
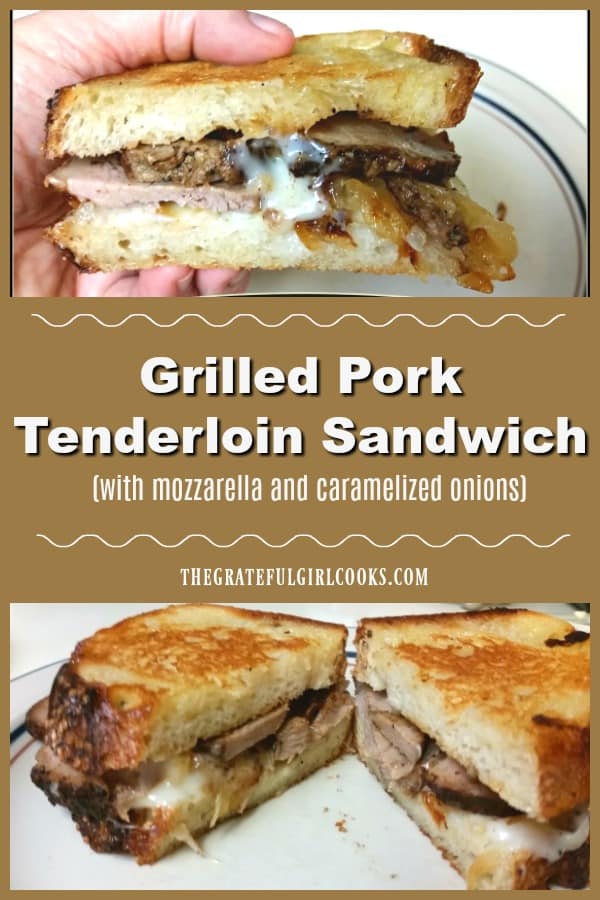
Grilled Pork Tenderloin Sandwich with Mozzarella and Caramelized Onions

Have leftover pork roast and need a tip on how to use it up? Make a delicious grilled pork tenderloin sandwich with mozzarella and caramelized onions!Have leftover pork roast and need a tip on how to use it up? Make a delicious grilled pork tenderloin sandwich with mozzarella and caramelized onions!
Ever have leftover pork roast or pork tenderloin and wonder what you can do to use it up creatively?  Recently I had leftover pork from dinner, so I made a Grilled Pork Tenderloin Sandwich with Mozzarella and Caramelized Onions for lunch!  It tasted wonderful!
I enjoy having leftovers in the fridge, unlike my little sister Joni, who hates having them around. My personal theory is it’s awesome when you can cook once, then take some of the leftovers and “morph” them into a completely different meal.  That was how this sandwich came into existence.

I was looking for something in our refrigerator for lunch, but didn’t want to have leftover pork… unless I could transform it into something else! 

So… I put my thinking cap on and came up with the idea for this pork tenderloin sandwich!  Here’s how to make it:

Scroll Down For A Printable Recipe Card At The bottom Of The Page

Caramelize The Onions

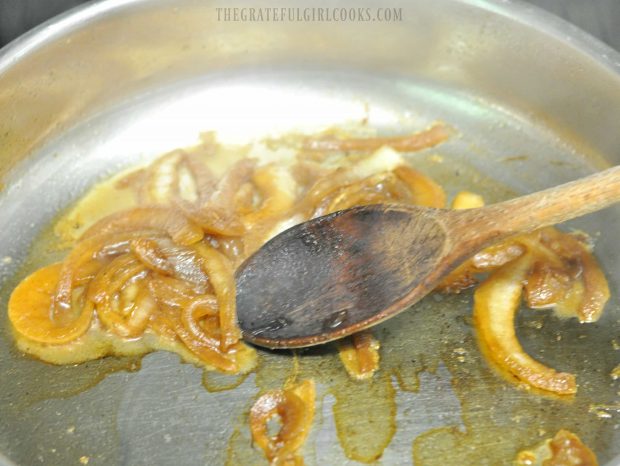
Cook the sliced onions slowly in a skillet with a bit of olive oil for several minutes. Continue to cook until the onions have browned and caramelized.

Sliced onions are caramelized in skillet before adding to sandwich.

“Build” The Pork Tenderloin Sandwich

Melt the butter in a large skillet on medium-low heat.  Butter one side of a large piece of sourdough bread and place it butter side DOWN in skillet.

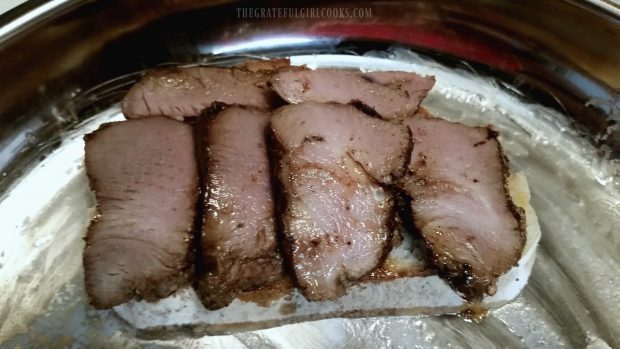
Generously layer the bread with thin slices of leftover cooked pork tenderloin. If necessary, lightly season the pork slices with salt and pepper.

Thin slices of pork tendeloin are arranged on buttered bread in skillet.
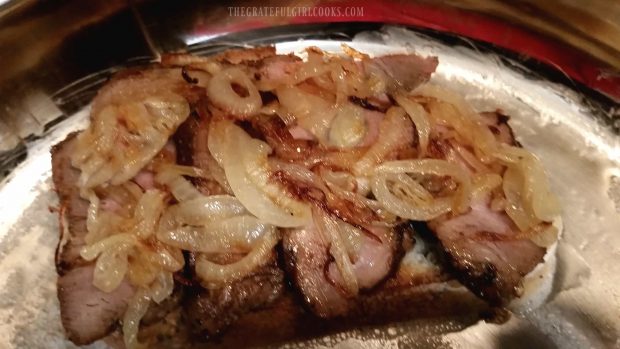
Arrange the caramelized onions on top of the pork slices.

Caramelized onion slices are added to the pork tenderloin sandwich.
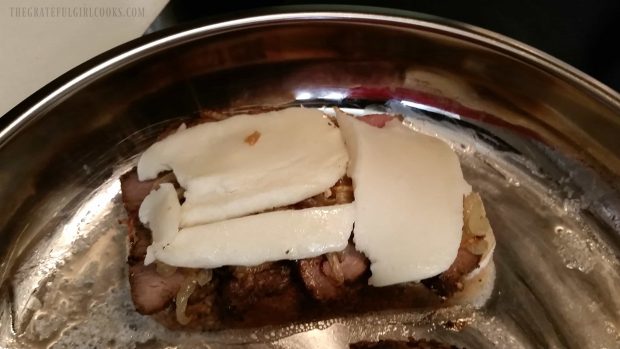
Spread a thin layer of sliced mozzarella (or grated) on top of the onions.

Mozzarella cheese slices are placed on top of the caramelized onions.

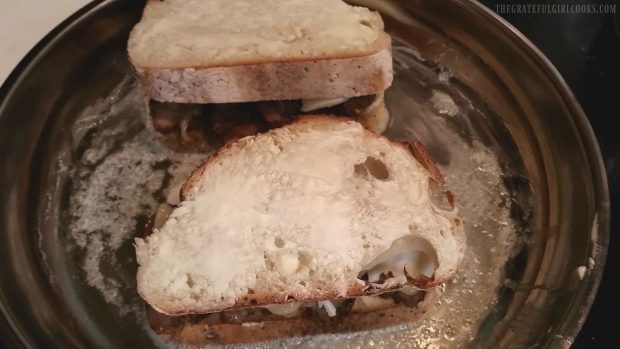
Butter one side of the other pieces of sourdough bread, and place them on top of the sandwich, butter side UP.

Time To Cook The Grilled Pork Tenderloin Sandwich

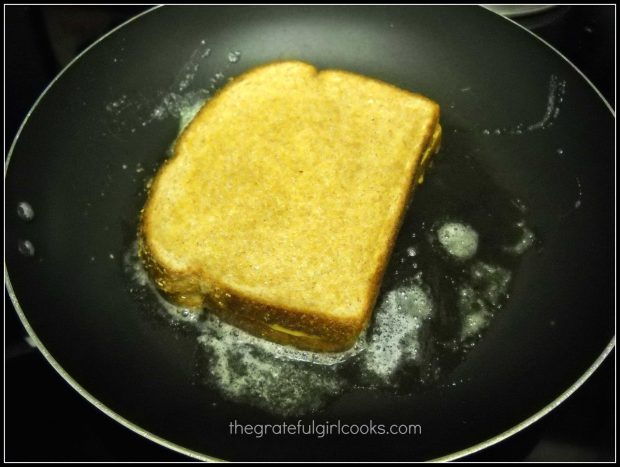
Cook the sandwich on medium-low heat until the bottom side of the bread has lightly browned.

The pork tenderloin sandwich is grilled in a skillet.
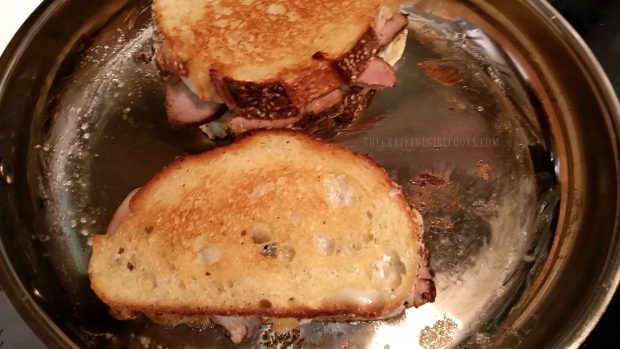
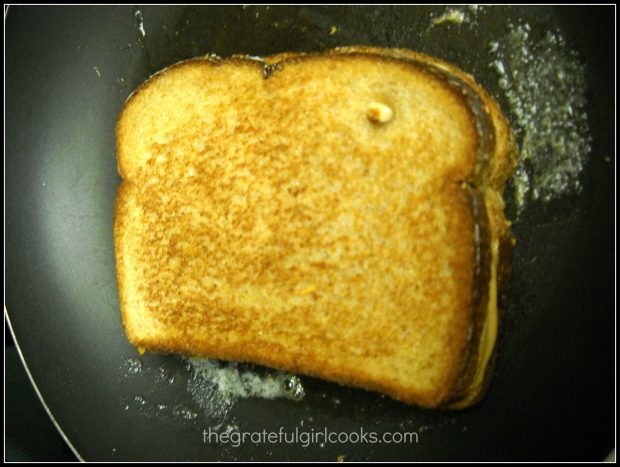
Carefully turn sandwich over and cook the other side (like a grilled cheese sandwich).  See how nice and golden brown the sourdough bread is now?

Continue cooking slowly until cheese has melted. You want the grilled pork tenderloin sandwich to be heated all the way through (low and slow!).

The pork tenderloin sandwich is flipped to other side once golden and toasted.

When the sandwich is done cooking, remove it from the skillet. Transfer it to a plate, and get ready to enjoy this sandwich!

It’s Time To Eat The Grilled Pork Tenderloin Sandwich!

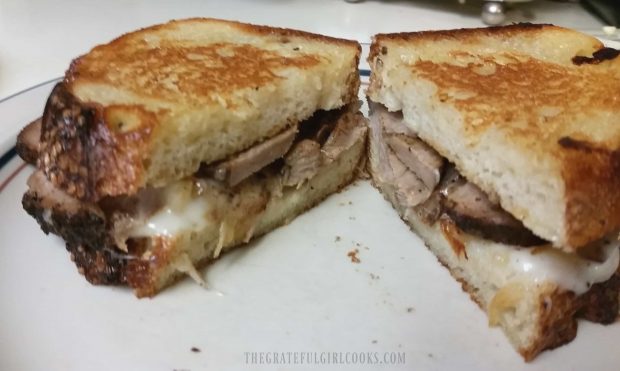
Carefully cut the grilled sandwich in half… and enjoy!  The tender pork slices, crunchy buttery sourdough bread, gooey melted mozzarella cheese and slight sweetness of the caramelized onions really make this sandwich special.

An entire grilled pork tenderloin sandwich is very filling! A half of this sandwich was all I could eat! If you don’t want to eat a whole sandwich, you can get 4 servings when you make two sandwiches.

The grilled pork tenderloin sandwich, cut in half to serve.

Hope you will consider creating a delicious pork tenderloin sandwich when you have leftover pork roast or tenderloin!  The sandwich was very good!

Looking For More SANDWICH Recipes?

You can find all of my sandwich recipes in the Recipe Index, located at the top of the page. A few of them include:

Interested In More Recipes?

Thank you for visiting this website. I appreciate you using some of your valuable time to do soIf you’re interested, I publish a newsletter 2 times per month (1st and 15th) with all the latest recipes, and other fun info. I would be honored to have you join our growing list of subscribers, so you never miss a great recipe!
There is a Newsletter subscription box on the top right side (or bottom) of each blog post, depending on the device you use, where you can easily submit your e-mail address (only) to be included in my mailing list.

You Can Also Find Me On Social Media:
Facebook page: The Grateful Girl Cooks!
Pinterest: The Grateful Girl Cooks!
Instagram: jbatthegratefulgirlcooks

Author's signature

5 from 1 vote
Grilled Pork Tenderloin Sandwich w/ Mozzarella & Caramelized Onions
Prep Time
10 mins
Cook Time
10 mins
Total Time
20 mins
 

Have leftover pork roast and need a tip on how to use it up? Make a delicious grilled pork tenderloin sandwich with mozzarella and caramelized onions!

Category: Sandwich
Cuisine: Sandwich
Keyword: pork tenderloin sandwich
Servings: 2 servings
Calories Per Serving: 666 kcal
Author: JB @ The Grateful Girl Cooks!
Ingredients
  • 4 slices sourdough bread
  • 1 Tablespoon butter (for skillet)
  • 2 Tablespons enough butter to spread on bread (for grilling)
  • 8 thin slices precooked pork tenderloin (enough to cover each sandwich)
  • 1/2 onion , thinly sliced
  • 1 Tablespoon olive oil
  • thin slices mozzarella cheese (enough to cover sandwich)
Instructions
  1. Heat olive oil in skillet on medium heat. Add sliced onions; cook slowly, stirring occasionally, for several minutes, until they have browned and caramelized.
  2. Melt butter in a skillet on medium-low heat. For each sandwich, butter one side of bread and place it butter side DOWN in skillet.
  3. Cover bread with thin slices of leftover cooked pork tenderloin. Lightly season pork with salt and pepper. Divide and spread caramelized onions on top of pork. Spread a thin layer of sliced mozzarella (or grated) on top of onions. Butter one side of remaining pieces of sourdough bread, and place on top of the sandwich, butter side UP.

  4. Cook on medium-low until bottom side has lightly browned.Carefully turn sandwich over. Continue cooking slowly until cheese has melted and sandwich is heated through (low and slow!). When sandwiches are done cooking, remove from skillet. Slice sandwich in half... and enjoy!

Nutrition Facts
Grilled Pork Tenderloin Sandwich w/ Mozzarella & Caramelized Onions
Amount Per Serving (1 sandwich)
Calories 666 Calories from Fat 207
% Daily Value*
Fat 23g35%
Saturated Fat 9g56%
Cholesterol 88mg29%
Sodium 932mg41%
Potassium 524mg15%
Carbohydrates 75g25%
Fiber 3g13%
Sugar 4g4%
Protein 37g74%
Vitamin A 365IU7%
Vitamin C 2.1mg3%
Calcium 206mg21%
Iron 5.5mg31%
* Percent Daily Values are based on a 2000 calorie diet.

Here’s one more to pin on your Pinterest boards!Have leftover pork roast and need a tip on how to use it up? Make a delicious grilled pork tenderloin sandwich with mozzarella and caramelized onions!


Save

Save

Save

Save

Save

Save

Save

Ham, Egg & Cheese Bagel Breakfast Sandwich

You’ll love this hearty, delicious and filling bagel breakfast sandwich, with egg, ham and cheese, which can be ready in under 10 minutes!You'll love this hearty, delicious and filling bagel breakfast sandwich, with egg, ham and cheese, which can be ready in under 10 minutes!
I stared and stared at a bagel calling to me this morning from it’s shelf in our pantry. It looked so forlorn just sitting there, so I decided to turn it into something beautiful. I “morphed” it into a delicious Ham, Egg & Cheese Bagel Breakfast Sandwich (try saying that in one mouthful)!

Being the nice wife that I am (*cough, cough), I asked my husband if he wanted to have one also, since there were actually 2 bagels left in the bag. Of course he said yes (he hardly ever turns down food), so off into the kitchen I went to play… I mean cook us breakfast! Guess what? It tasted fantastic!

Less than 10 minutes later, we were chowing down on these hearty breakfast sandwiches… delicious and filling! And truthfully, they were so easy to make! Here’s how to make them:

Scroll Down For A Printable Recipe Card At The Bottom Of The Page

How To Make This Bagel Breakfast Sandwich

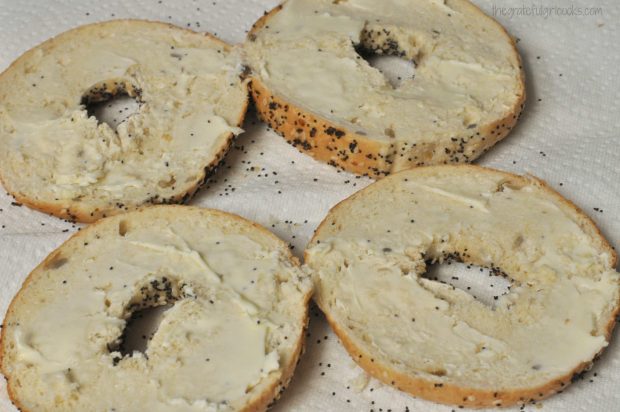
Split a bagel in half. Lightly butter both sides. Place on wire rack under oven broiler (about 5-6 inches away from heating element) and broil, only until they are light golden brown.

Bagels are sliced in half and buttered for broiling.

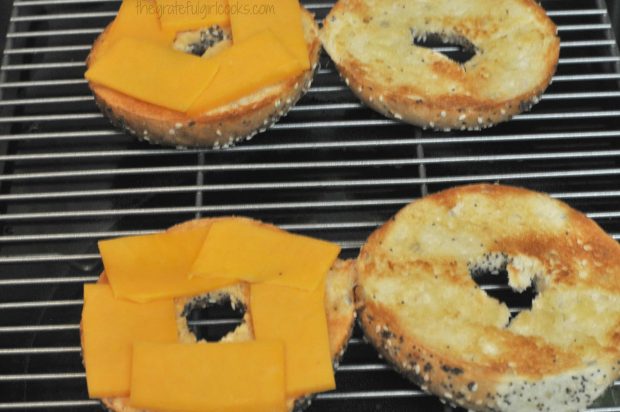
Buttered bagels are broiled until golden brown.

Once you take them out, place sliced cheddar cheese on one half of the bagel (while bagel is still hot). Put on enough thin slices of cheese to cover.

Thin cheese slices are placed on bagel halves.

Fry The Eggs

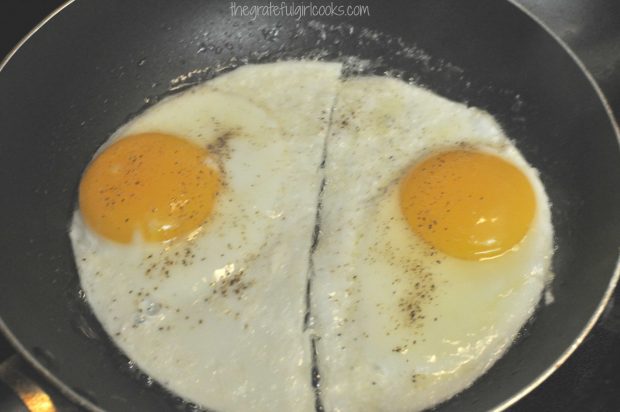
In a skillet, fry one egg (per sandwich) however you like them cooked (over medium, over easy or hard). Salt and pepper egg, to taste.

Eggs are fried for bagel breakfast sandwich.

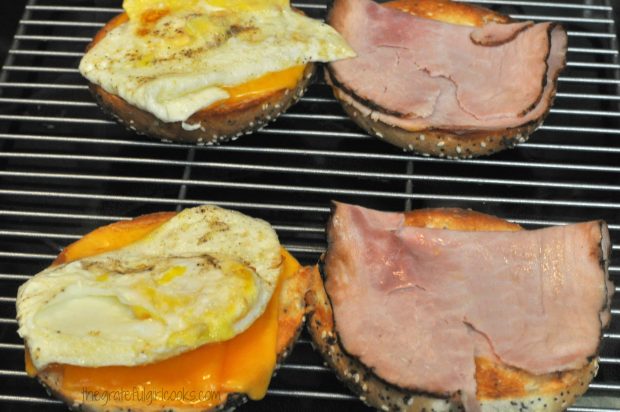
When egg is done, place it on top of the cheese half.  Place a thin slice of deli ham onto the other half, folding the ham to make it cover bagel.

Broil The Bagel Breakfast Sandwich

Place the bagel halves back into the oven under the broiler (about 5-6 inches away from broiler). Re-heat only until cheese begins to melt, and the bagel breakfast sandwich is re-heated.

Fried egg and ham slices are added to breakfast sandwich.

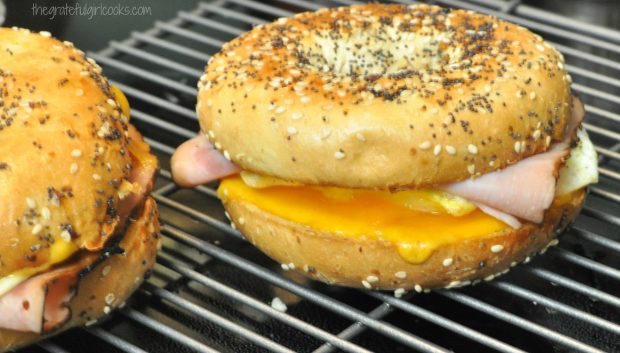
Remove bagel halves from oven. Place the half bagel with the ham on top of the other half. Ta-Da!  Your breakfast sandwich is now ready to devour!

Ham, Egg & Cheese Bagel Breakfast Sandwich is ready to eat!

I cut mine in half, just so I could show you the inside of the bagel breakfast sandwich in all of it’s glorious “bagely-eggy-cheesy-hammy” goodness!

Bagel breakfast sandwich, cut in half, on plate.

This bagel breakfast sandwich was so good… don’t think I will be eating lunch, because it was pretty filling!  Hope you’ll consider making these for your family.  My hunch is that these would be great made up, then frozen (wrapped very tightly). It would be fantastic to have some of these breakfast sandwiches around for a quick re-heating in a microwave on a busy morning!

Have a fantastic day!  Try to find time (in this crazy, busy day) to stop pedaling for just a minute and recharge your soul (and body!). I am always glad for those stolen moments of rest.

Looking For More BREAKFAST Recipes?

You can find ALL my recipes in the Recipe Index, located at the top of the page. I have lots of delicious breakfast recipes you might enjoy, including:


Interested In More Recipes?

Thank you for visiting this website. I appreciate you using some of your valuable time to do soIf you’re interested, I publish a newsletter 2 times per month (1st and 15th) with all the latest recipes, and other fun info. I would be honored to have you join our growing list of subscribers, so you never miss a great recipe!
There is a Newsletter subscription box on the top right side (or bottom) of each blog post, depending on the device you use, where you can easily submit your e-mail address (only) to be included in my mailing list.

You Can Also Find Me On Social Media:
Facebook page: The Grateful Girl Cooks!
Pinterest: The Grateful Girl Cooks!
Instagram: jbatthegratefulgirlcooks

Author's signature

Recipe Source: My hungry brain.

0 from 0 votes
Ham, Egg & Cheese Bagel Breakfast Sandwich
Prep Time
7 mins
Cook Time
0 mins
Total Time
7 mins
 
You'll love this hearty, delicious and filling bagel breakfast sandwich, with egg, ham and cheese, which can be ready in under 10 minutes!
Category: Breakfast Sandwich
Cuisine: American
Keyword: bagel breakfast sandwich
Servings: 1 sandwich
Calories Per Serving: 568 kcal
Author: JB @ The Grateful Girl Cooks!
Ingredients
  • 1 bagel (I used an "Everything" bagel)
  • 1 teaspoon Butter (enough to spread on bagel for broiling)
  • 1 slice Cheddar cheese slices (cut into enough pieces to cover bagel)
  • 1 slice deli ham (thin slice)
  • 1 egg , fried the way you like it!
  • 1 pinch Salt and pepper , to taste (for egg)
Instructions
  1. Slice bagel in half. Lightly butter bagel. Place bagel halves (on a rack) under oven broiler until golden brown. Remove.
  2. Place cheddar cheese on top of one half of the bagel (enough to cover). Fold slice of ham and place on other half of bagel, to cover.

  3. Fry one egg (however your like it). Salt and pepper egg to taste. Remove from skillet and place on top of cheddar cheese.
  4. Place both halves back under oven broiler again to heat it all back up and slightly melt the cheese. Remove from oven, put the two halves together... and enjoy!
Nutrition Facts
Ham, Egg & Cheese Bagel Breakfast Sandwich
Amount Per Serving (1 sandwich)
Calories 568 Calories from Fat 207
% Daily Value*
Fat 23g35%
Saturated Fat 11g69%
Cholesterol 221mg74%
Sodium 1203mg52%
Potassium 246mg7%
Carbohydrates 56g19%
Fiber 2g8%
Protein 29g58%
Vitamin A 645IU13%
Calcium 245mg25%
Iron 2.6mg14%
* Percent Daily Values are based on a 2000 calorie diet.

Here’s one more to pin on your Pinterest boards!You'll love this hearty, delicious and filling bagel breakfast sandwich, with egg, ham and cheese, which can be ready in under 10 minutes!


Save

Save

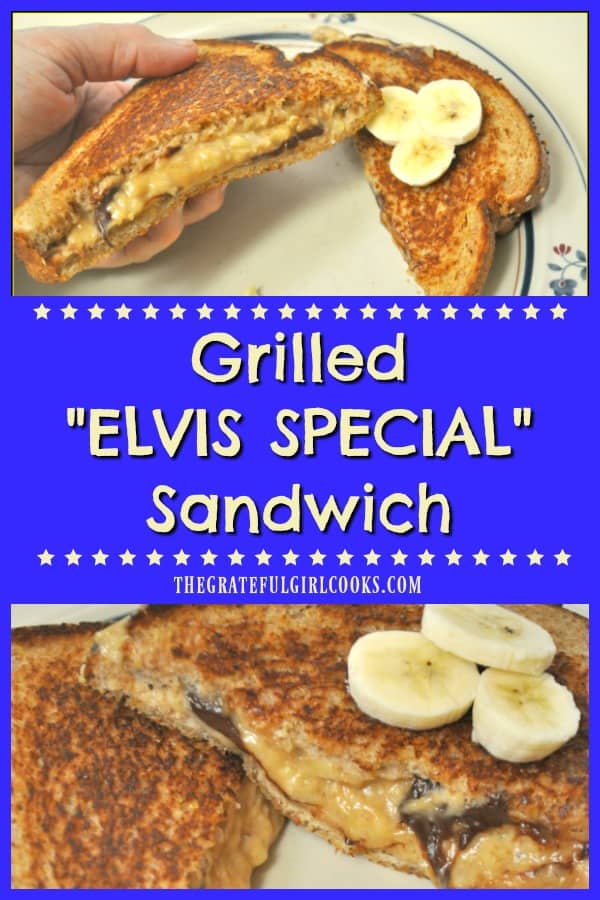
Grilled “Elvis Special” Sandwich

A Grilled “Elvis Special” Sandwich is a hunk, a hunk of burnin’ love! Peanut butter, banana, and chocolate cooked on buttered bread would even make Elvis proud!A Grilled "Elvis Special" Sandwich is a hunk, a hunk of burnin' love! Peanut butter, banana, and chocolate cooked on buttered bread would even make Elvis proud!
Fact:  Elvis Presley loved peanut butter and banana sandwiches. I decided to morph that combo and make a Grilled Elvis Special Sandwich – a grilled banana, peanut butter AND chocolate sandwich.

If Elvis were still around he would probably say “Thank You…Thank You Very Much“.  Then he’d take a big bite, and swivel his hips (to work off the calories, no doubt).

Scroll Down For A Printable Recipe Card At The Bottom Of The Page

Experimenting With This Sandwich!

I wasn’t sure just HOW this sandwich would taste, but I was in an experimenting mood one day. Creamy peanut butter and “smashed” banana is something my grandma used to eat all the time. Trust me, she ate this all the time (especially when she took out her false teeth, ha ha).

I was thinking about that when it hit me (an idea, NOT the sandwich). My thought was “what if I GRILLED the sandwich AND added a few chocolate chips to really take it to the next level”?  I mean… chocolate goes good with bananas and chocolate goes good with peanut butter, so how could this NOT work?

Well, thankfully… it DID WORK. It actually was VERY GOOD! Who knew?  In the words of Elvis… “I’m All Shook Up”!  So that’s how this goofy good, Grilled Elvis Special Sandwich came to be. Truth. Amen. And now… you can make this sandwich, too!

How To Make A Grilled Elvis Special Sandwich

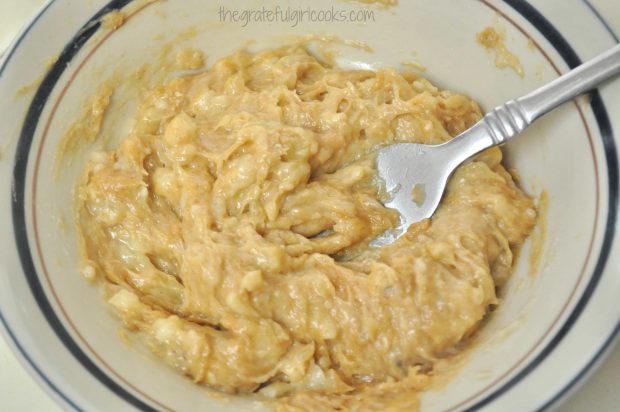
Start with a large ripe banana (this recipe makes TWO sandwiches). Cut the banana into chunks and put it into a bowl with the peanut butter. Use a fork to smash the banana and mix the two ingredients together.  The banana should be smashed until it is almost creamy, with little pieces.

Ripe banana and peanut butter are mashed together for this "Elvis Special" Sandwich.

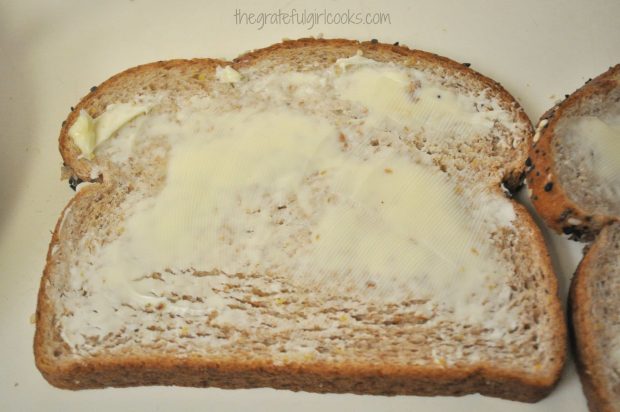
Butter the slices of bread just like you’re going to make a grilled cheese sandwich. Butter one side of each piece of bread.

Bread is buttered on one side before grilling the "Elvis Special" sandwich.

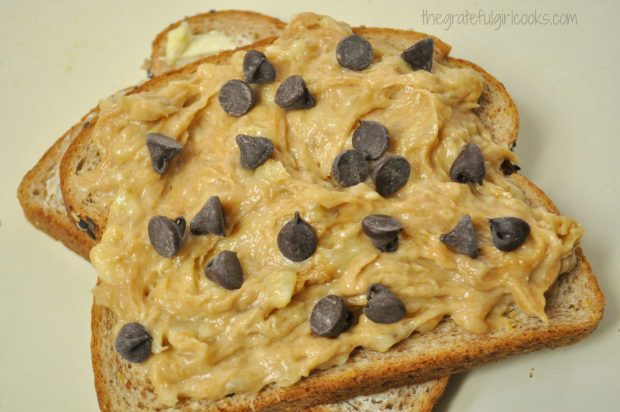
Spread half of the peanut butter/banana mixture onto the UNBUTTERED side of a piece of bread.  Sprinkle with a small amount of chocolate chips (15-20).

Peanut butter banana mixture with chocolate chips on this "Elvis Special" sandwich before grilling.

Time For The Grill

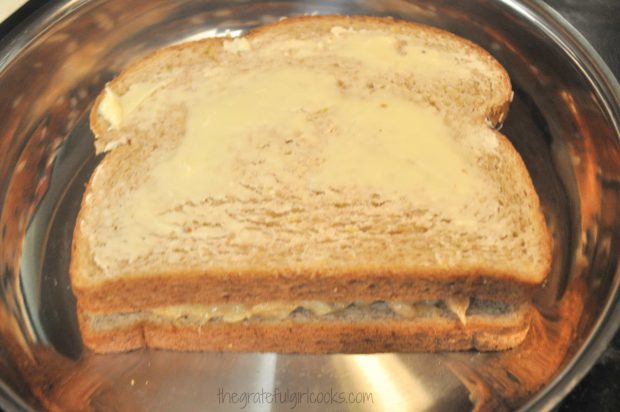
Place the sandwich buttered side down into a hot skillet on medium low heat. Cover the sandwich with the other piece of bread (buttered side facing UP).

Grilled "Elvis Special" Sandwich is cooked in a small skillet.

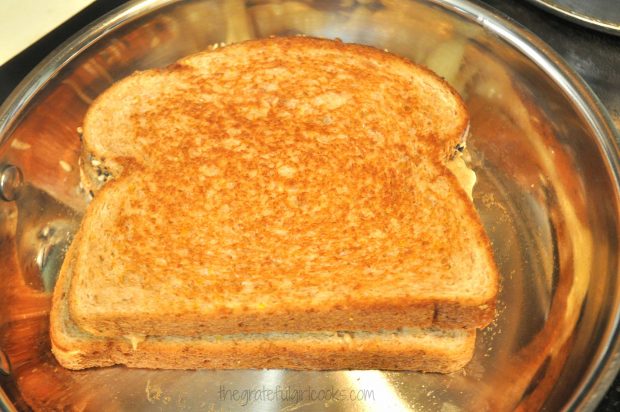
Grill until the bottom side of the sandwich is golden brown. Carefully turn the sandwich over with a spatula. Cook the other side until it is golden brown, also.

Grilled "Elvis Special" Sandwich is cooked until golden brown on both sides.

Time to Eat The Grilled “Elvis Special” Sandwich!

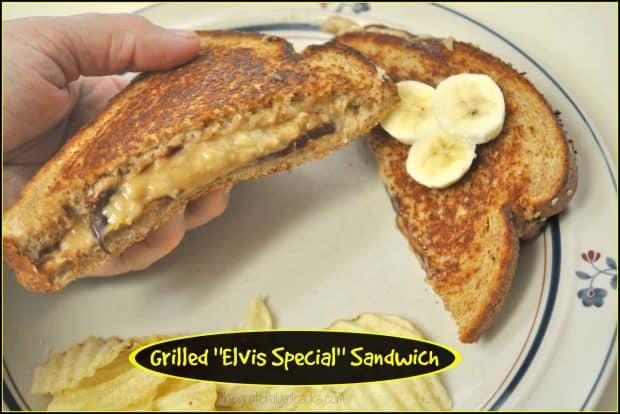
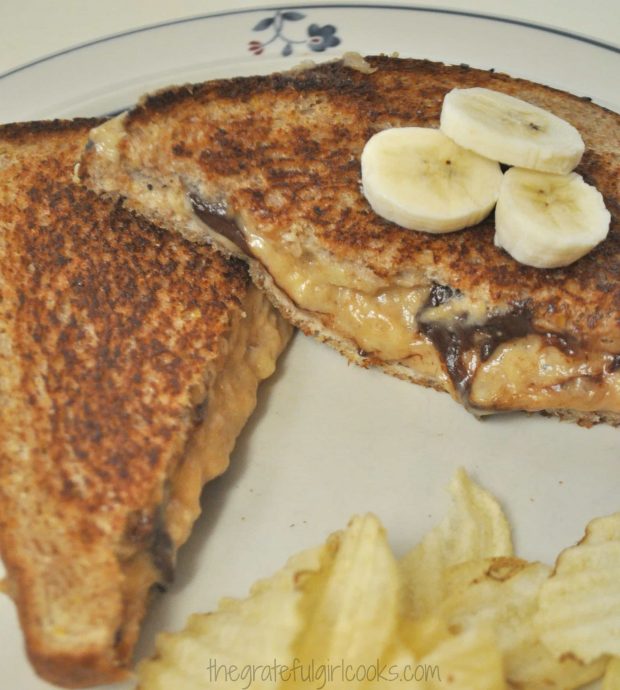
Remove the grilled sandwich from skillet. Cut it in half diagonally… and serve! Grab a cup of milk to drink, and a paper napkin! This Elvis Special Sandwich might get messy – but it’s a GOOD messy! Enjoy!

Grilled "Elvis Special" Sandwich is sliced in half, and topped with sliced bananas to serve.

Looking For More SANDWICH Recipes?

I sincerely hope you enjoy this Grilled Elvis Special Sandwich! If you are interested in other sandwich recipes, I hope you will check out Grilled Patty Melts, BBQ Shredded Pork, and Mediterranean Chicken Sandwiches. You might also enjoy my Grilled Thai PB & J Sandwich, or a Fried Chicken Spicy Mayo & Slaw Sandwich.

You can find ALL of my recipes in the Recipe Index, which is located at the top of the page. Hope you have a wonderful day. I sincerely hope you find moments of peace and encouragement in your day. May you also seek to be a peacemaker, and encourager of others, as well.

Interested In More Recipes?

Thank you for visiting this website. I appreciate you using some of your valuable time to do soIf you’re interested, I publish a newsletter 2 times per month (1st and 15th) with all the latest recipes, and other fun info. I would be honored to have you join our growing list of subscribers, so you never miss a great recipe!
There is a Newsletter subscription box on the top right side (or bottom) of each blog post, depending on the device you use, where you can easily submit your e-mail address (only) to be included in my mailing list.

You Can Also Find Me On Social Media:

Facebook page: The Grateful Girl Cooks!
Pinterest:
The Grateful Girl Cooks!
Instagram:
jbatthegratefulgirlcooks

Grilled "Elvis Special" Sandwich / The Grateful Girl Cooks!

0 from 0 votes
Grilled "Elvis Special" Sandwich
Prep Time
5 mins
Cook Time
5 mins
Total Time
10 mins
 
A Grilled "Elvis Special" Sandwich is a hunk, a hunk of burnin' love! Peanut butter, banana, and chocolate cooked on buttered bread would even make Elvis proud!
Category: Sandwich
Cuisine: American
Keyword: Elvis special sandwich
Servings: 2 sandwiches
Calories Per Serving: 511 kcal
Author: JB @ The Grateful Girl Cooks!
Ingredients
  • 1 large banana (or two small)
  • 2 Tablespoons creamy peanut butter (generous Tablespoons)
  • 1/4 cup Chocolate chips ( approx 15-20 per sandwich)
  • 4 slices good quality bread
  • 2 Tablespoons Butter , softened (to spread on one side of each piece of bread)
Instructions
  1. In a small bowl, mash banana and peanut butter together, using a fork, until mixture is creamy with small pieces of banana.

  2. Spread one side of each of piece of bread with soft (room temp) butter. Place two pieces of bread, butter side down in a skillet (on medium heat).

  3. Spread the peanut butter/banana mixture onto bread in skillet. Sprinkle chocolate chips on top of peanut butter/banana mixture. Place remaining piece of bread on top of each sandwich, butter side UP.
  4. Grill sandwich on medium heat until bottom of sandwich is golden brown. Carefully turn each sandwich over using a spatula, and continue cooking until other side is golden brown.
  5. Remove sandwich to serving plate. Cut diagonally, and serve! Can garnish sandwich with sliced bananas, if desired.

Nutrition Facts
Grilled "Elvis Special" Sandwich
Amount Per Serving (1 sandwich)
Calories 511 Calories from Fat 234
% Daily Value*
Fat 26g40%
Saturated Fat 12g75%
Cholesterol 33mg11%
Sodium 479mg21%
Potassium 416mg12%
Carbohydrates 59g20%
Fiber 5g21%
Sugar 26g29%
Protein 11g22%
Vitamin A 440IU9%
Vitamin C 5.1mg6%
Calcium 110mg11%
Iron 2.7mg15%
* Percent Daily Values are based on a 2000 calorie diet.

Here’s one more to pin on your Pinterest boards!A Grilled "Elvis Special" Sandwich is a hunk, a hunk of burnin' love! Peanut butter, banana, and chocolate cooked on buttered bread would even make Elvis proud!


Save

Save

Save

Spicy Fish Sandwich w/Chili Mayo

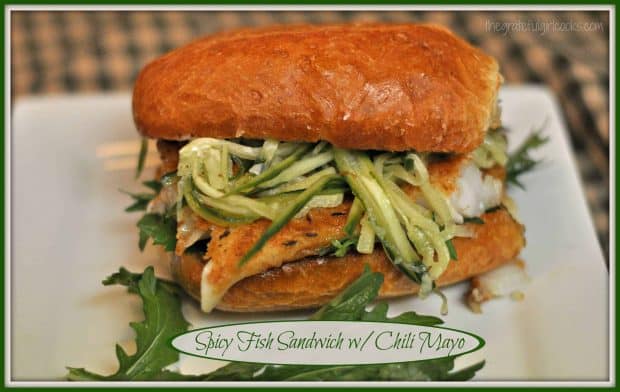
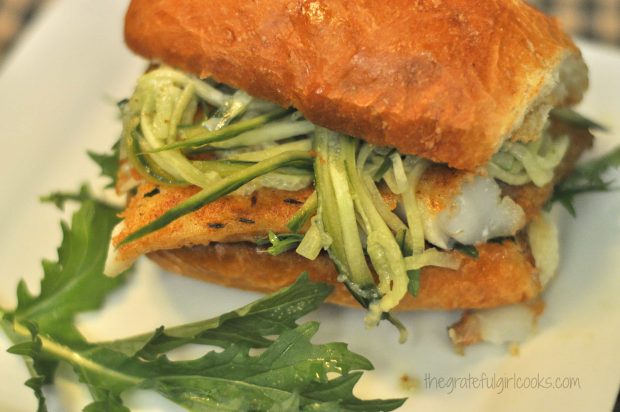
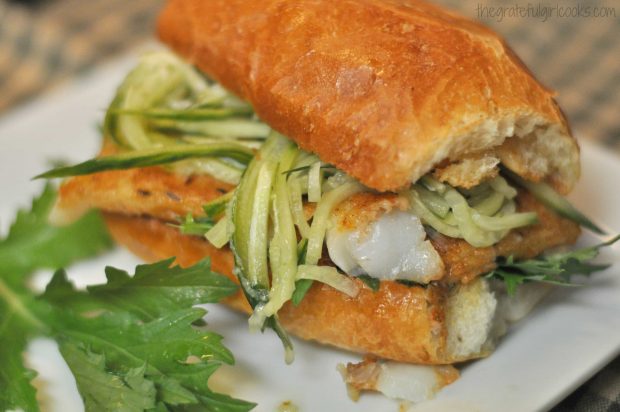
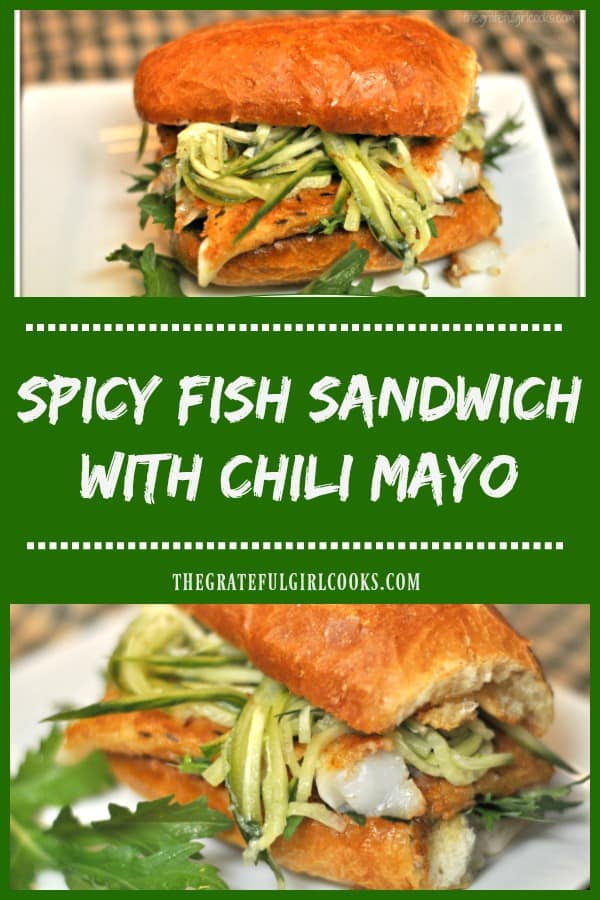
Spicy Fish Sandwich with Chili Mayo is a delicious meal, w/ pan-seared cod, peppery arugula and marinated cucumber strips, on a toasted roll!Spicy Fish Sandwich with Chili Mayo is an incredible meal, featuring pan-seared cod, peppery arugula and marinated cucumber strips, served on a toasted roll!
I made my hubby an amazing fish sandwich for dinner recently. It’s a Spicy Fish Sandwich with Chili Mayo recipe that I found on Pinterest. It was quite delicious, and I know this because I begged him for a couple bites! WOW- this fish sandwich tastes GREAT!

I found a piece of cod in our freezer that I wanted to use, so I fed the hubby AND tried a new recipe at the same time! It really DID taste good, and I will make it again (except this time I will make one for me, too!).  Here’s how you make this yummy fish sandwich (recipe is for 2 sandwiches):

Scroll Down For A Printable Recipe Card At The Bottom Of The Page

Prepare The Cucumber Topping

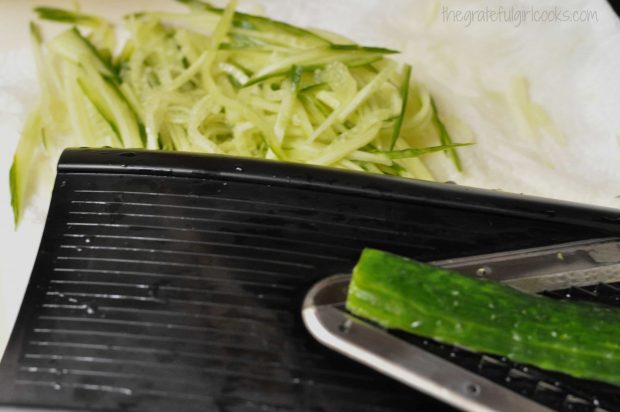
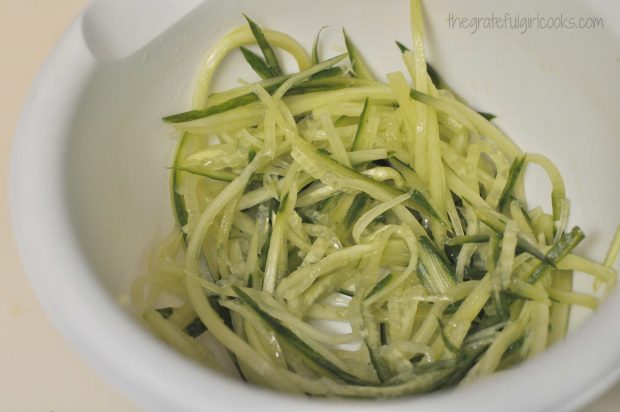
Thinly slice 1/2 of a cucumber lengthwise and add it to a bowl with some white wine vinegar and a small touch of sugar. I used a mandoline and julienned the cucumber into long thin strips, but you could also use a vegetable peeler and thinly slice the cucumber lengthwise to make wide “ribbons”. Once mixed, cover until ready to use on sandwich.

Cucumber is julienne sliced on a mandoline.

Thinly sliced cucumber for fish sandwich.

Make The Chili Mayo

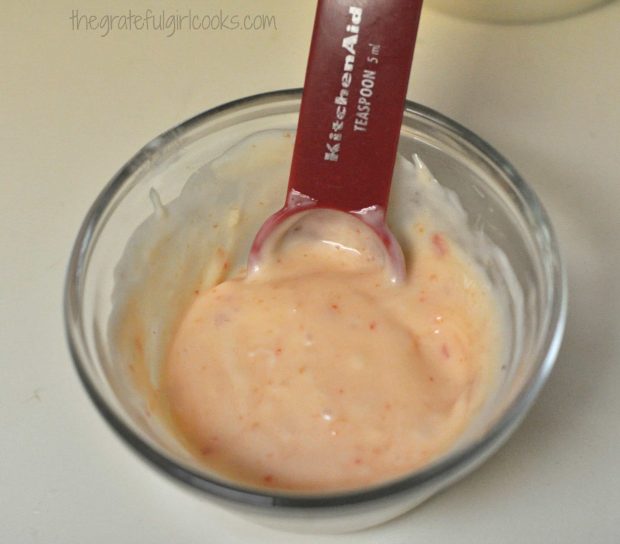
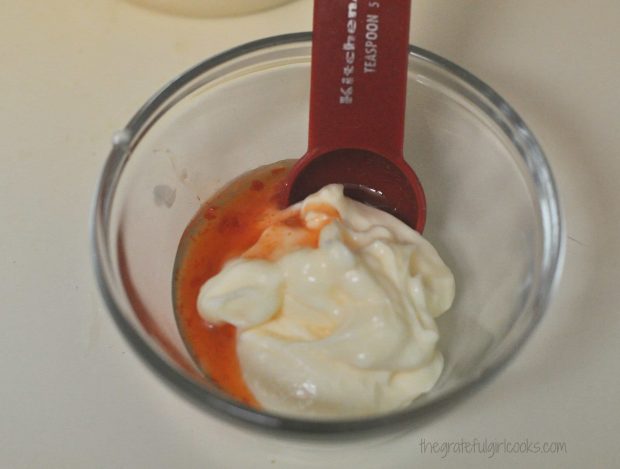
Make the chili mayo by combining mayo and sweet chili sauce (I use Mae Ploy). Mix together and keep refrigerated until ready to use. Try to mix it up early in the day so flavors have time to mingle.

The chili mayo sauce does not have too much heat but just enough that I called this a spicy fish sandwich! If you like it hot, then by all means, simple add more chili sauce.

Making the chili mayo for the fish sandwich.

Chili mayo is ready for spicy fish sandwich!

Toast the Bread In A Skillet

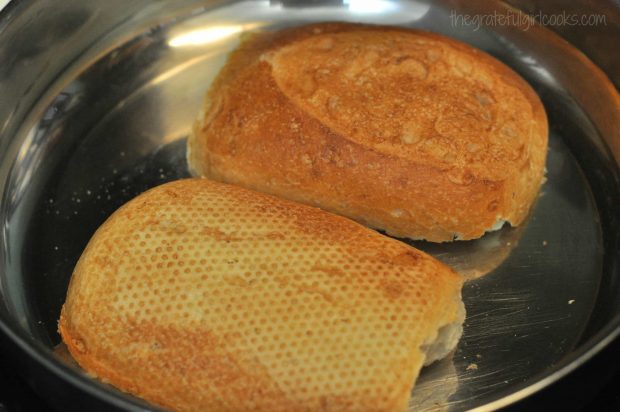
Lightly toast a French bread roll in a skillet. (You can also broil it a bit, to toast the surface of the roll before adding the rest of the ingredients to it). A ciabatta roll would also be wonderful for the sandwich (per the original author). They have enough sturdiness to hold the ingredients without getting soggy.

Toasting french roll in skillet before making sandwich.

How To Cook The Fish

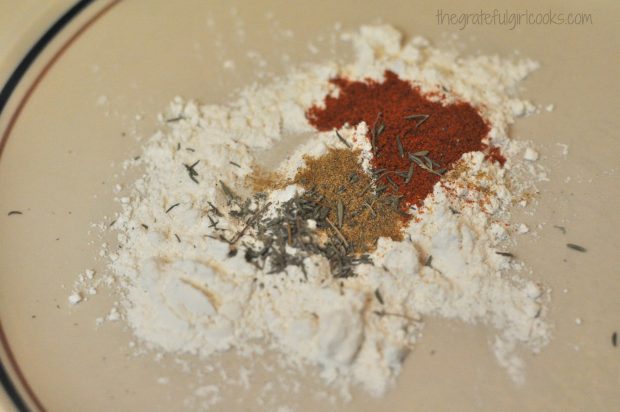
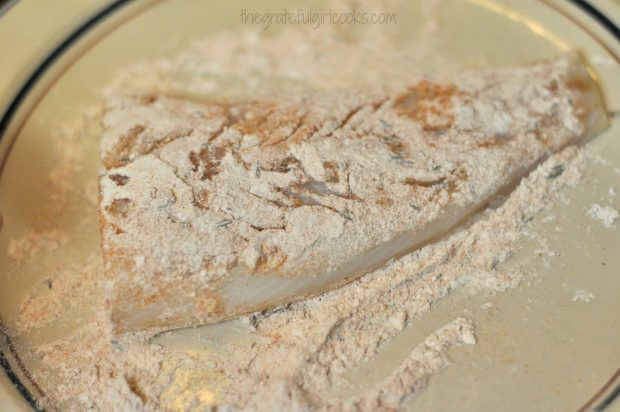
Mix up flour, smoked paprika, cumin, and dried thyme on a plate. Spread it out so you can dredge the piece of fish in it. This is enough spices for TWO pieces of fish. Dredge the fish in the spice/flour mixture, turning to coat it on both sides.

Flour and spices are mixed together for fish coating

Cod fillets are dredged in flour/spice mixture before cooking

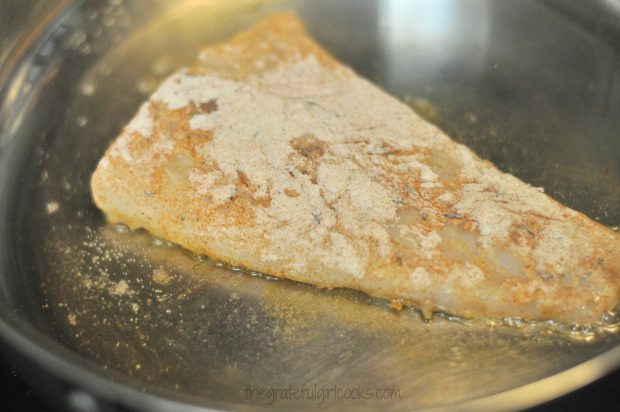
Heat oil on medium high in non-stick skillet. Let it get hot, then place the piece (or pieces) of fish into the hot oil. DO NOT MOVE THE FISH after placing in the skillet initially (or it may stick). As it cooks for 2-3 minutes it will develop a “crust” on the bottom side and will be fine.

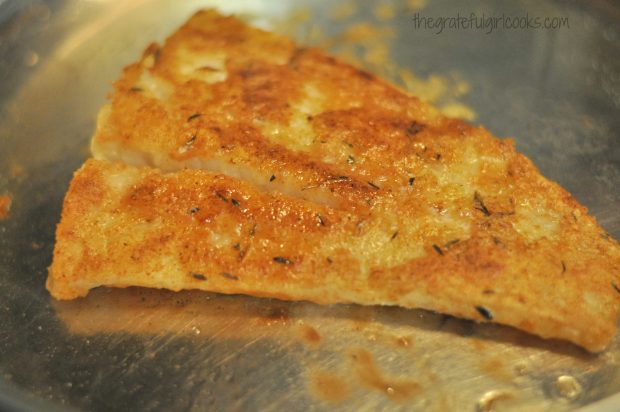
After 2-3 minutes, carefully turn the fish over and continue cooking for another 2-3 minutes, until done and golden brown.

Dredged fish is pan-seared in skillet for sandwich.

Pan-seared fish is cooked and ready to put on sandwich!

Putting The Spicy Fish Sandwich Together For Serving

To serve, slice the toasted rolls in half horizontally.  Spread a generous amount of the chili mayo sauce onto both sides of the toasted roll.

Chili mayo is spread on toasted french rolls for sandwich

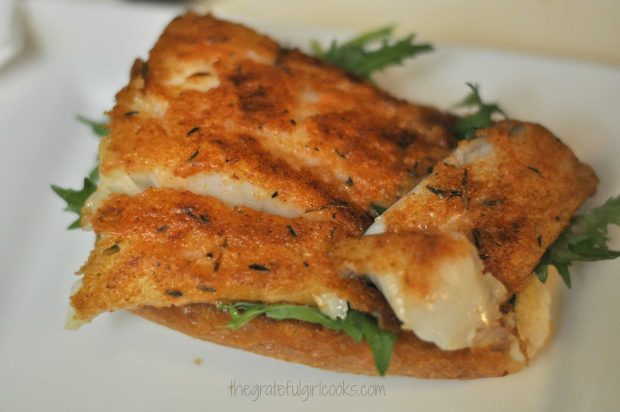
Place some arugula leaves on top of the sauce on the bottom half of the roll, then place the cooked fish on top of the arugula.

Arugula and pan-seared fish are placed onto sandwich roll.

Add a generous helping of the sliced cucumbers (letting any juices drain off before adding). Top with the other half of the toasted roll, and serve!

Thinly sliced marinated cucumbers are added to spicy fish sandwich

Time To EAT!

Take a BIG bite! The seasoned, semi-crunchy fish, paired with peppery arugula, the crunch of marinated cucumbers, toasty roll, and the chili mayo combine to make this a WONDERFUL spicy fish sandwich!

Spicy Fish Sandwich w/Chili Mayo is served!

Sure hope you will give this spicy fish sandwich recipe a try! I know we will have this again in our home!  Have a wonderful day, friends. May you find moments of refreshment and encouragement throughout your day.

Looking for More SANDWICH Recipes?

You can find ALL my recipes in the Recipe Index, located at the top of the page. I have some delicious sandwich recipes, including:

Interested In More Recipes?

Thank you for visiting this website. I appreciate you using some of your valuable time to do soIf you’re interested, I publish a newsletter 2 times per month (1st and 15th) with all the latest recipes, and other fun info. I would be honored to have you join our growing list of subscribers, so you never miss a great recipe!
There is a Newsletter subscription box on the top right side (or bottom) of each blog post, depending on the device you use, where you can easily submit your e-mail address (only) to be included in my mailing list.

You Can Also Find Me On Social Media:
Facebook page: The Grateful Girl Cooks!
Pinterest: The Grateful Girl Cooks!
Instagram: jbatthegratefulgirlcooks

Author's signature

Recipe Source: http://www.olivemagazine.com/recipes/spicy-fish-burger-with-chilli-mayo/10084.html

0 from 0 votes
Spicy Fish Sandwich w/ Chili Mayo
Prep Time
10 mins
Cook Time
6 mins
Total Time
16 mins
 

Spicy Fish Sandwich with Chili Mayo is an incredible meal, featuring pan-seared cod, peppery arugula and marinated cucumber strips, served on a toasted roll!

Category: Sandwich
Cuisine: American
Keyword: spicy fish sandwich
Servings: 2 sandwiches
Calories Per Serving: 401 kcal
Author: JB @ The Grateful Girl Cooks!
Ingredients
For cucumbers and marinade:
  • 1/2 cucumber , sliced thinly lengthwise (using mandoline to julienne or veg. peeler to slice ribbons)
  • 1 teaspoon white wine vinegar
  • 1/3 teaspoon granulated sugar
For chili-mayo sauce:
  • 2 Tablespoons mayonnaise
  • 1 teaspoon sweet chili sauce (I used Mae Ploy), add more sauce to taste, if desired.
For fish:
  • 1 Tablespoon flour
  • 1/4 teaspoon smoky paprika
  • 1/4 teaspoon cumin
  • 1/4 teaspoon dried thyme
  • 2 Tablespoons oil
  • 2 pieces cod (bun sized)
  • 2 crusty French rolls or ciabatta rolls
  • Arugula (a small handful)
Instructions
  1. Prepare cucumbers, by thinly slicing or julienning into very thin strips lengthwise. Place in bowl with white wine vinegar and granulated sugar. Mix. Cover and set aside.
  2. Mix the mayonnaise and chili sauce together in a small container. Refrigerate until needed.
  3. Slice rolls in half. Lightly "toast" the cut sides of rolls in a dry skillet or under the broiler until slightly crispy. Set aside.
  4. Combine flour, paprika, cumin and thyme on a plate. Mix, then spread out on plate. Dredge the pieces of fish through the flour mixture, turning to coat both sides.
  5. Heat oil on medium-high in a non-stick skillet until hot. Carefully place the fish into the hot oil. Do not move the fish once in skillet or it might stick. It will form a crust as it cooks. Let fish cook for 2-3 minutes, then carefully turn fish over and continue cooking other side for 2-3 minutes, until done and golden brown.
  6. To assemble sandwich, slice rolls in half horizontally. Generously spread chili-mayo sauce on both sides of each sandwich roll. Place arugula on top of sauce on bottom of roll. Place fish on top of arugula. Place marinated cucumber slices (drain liquid first) on top of fish, then place top of roll on. Serve... and enjoy!
Nutrition Facts
Spicy Fish Sandwich w/ Chili Mayo
Amount Per Serving (1 sandwich)
Calories 401 Calories from Fat 180
% Daily Value*
Fat 20g31%
Saturated Fat 12g75%
Cholesterol 51mg17%
Sodium 442mg19%
Potassium 656mg19%
Carbohydrates 29g10%
Fiber 2g8%
Sugar 3g3%
Protein 25g50%
Vitamin A 460IU9%
Vitamin C 5mg6%
Calcium 84mg8%
Iron 2.4mg13%
* Percent Daily Values are based on a 2000 calorie diet.

Here’s one more to pin on your Pinterest boards!Spicy Fish Sandwich with Chili Mayo is an incredible meal, featuring pan-seared cod, peppery arugula and marinated cucumber strips, served on a toasted roll!


Save

Save

Save

Quick and Easy Open Faced Tuna Melts

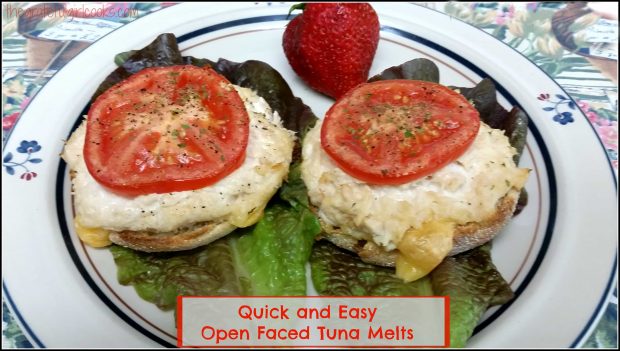
It’s been unusually HOT in the Pacific Northwest for the past several weeks. Temps are supposed to hover near 100 degrees this coming weekend, which is “not the norm” for late June in Oregon. We want quick  and easy meals (don’t want to heat up the kitchen cooking). Enter our “go-to” standby… Quick and Easy Open Faced Tuna Melts!!!!Quick and Easy Open Faced Tuna Melts / The Grateful Girl Cooks!
These open faced tuna melts are ridiculously easy… so easy in fact, that I’m not even gonna post the “recipe”. They actually are delicious, and are very quick to prepare!

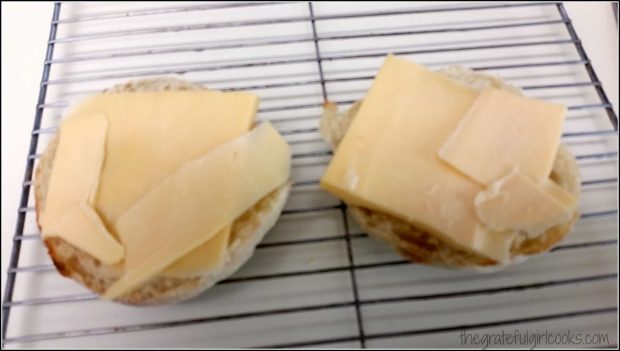
First you toast some English muffins. I used sourdough (delicious!). Allow for one half or two halves per serving. Once toasted, place some cheese (gruyere, smoky gouda, or cheddar) on top of the muffin. (I have used all of these cheeses in the past. Pictures are with Smoky Gouda.

Quick and Easy Open Faced Tuna Melts / The Grateful Girl Cooks!
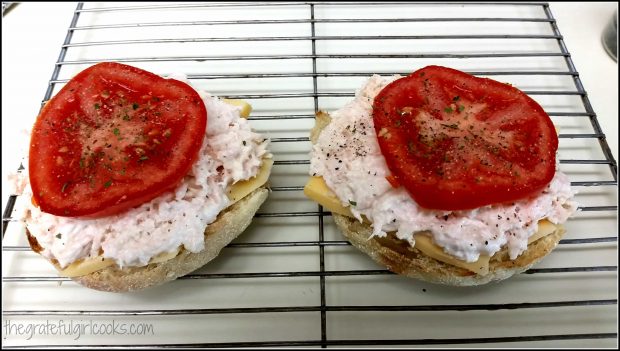
Put some tuna on top to cover the muffin. (Use the tuna you prefer, mixed up with whatever you like in your tuna salad). All I used for mine was one can (one can is enough for 4 half muffins) of albacore tuna, mixed with mayonnaise. That’s it!  But for goodness sake, make your tuna the way you like it!

Quick and Easy Open Faced Tuna Melts / The Grateful Girl Cooks!
Slice some really good ripe tomatoes and put a slice on top of each muffin. Sprinkle with a pinch of salt, pepper, dried parsley and dried basil. Just a touch.

Quick and Easy Open Faced Tuna Melts / The Grateful Girl Cooks!
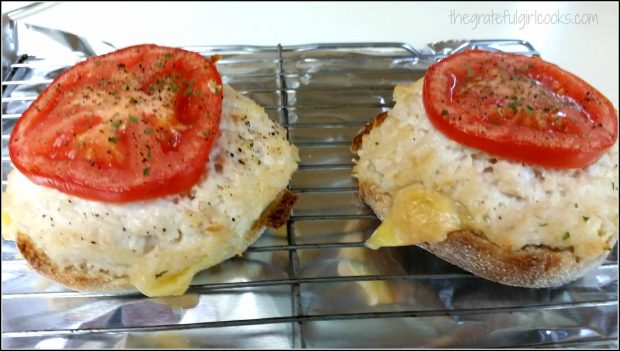
Put the english muffins on a wire rack and place under a broiler. DO NOT put them directly under the broiler. Put them on the middle rack of your oven.

It will take a few minutes to broil them, but by putting them on the middle rack, instead of directly under the broiler, all the ingredients will have a chance to get hot, and that cheese on the bottom will melt.

Remove from broiler when cheese is bubbly and the tuna has just started to lightly turn golden.

Quick and Easy Open Faced Tuna Melts / The Grateful Girl Cooks!
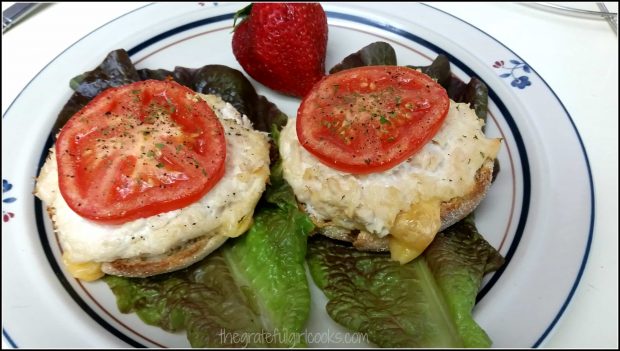
Remove tuna melts from wire rack with a spatula. Place on serving plates. I like to put some red leaf lettuce leaves under the tuna melts just for some added color, to make it look good, but that is totally optional.

You can either pick them up and eat them or cut them with knife and fork… whatever suits you! They’re really delicious! Sure hope you’ll give ’em a try. Good for a quick, filling lunch, or dinner on a really HOT evening! Been making these for years and years, and have never been disappointed!

Quick and Easy Open Faced Tuna Melts / The Grateful Girl Cooks!Have a wonderful week… may you feel gratitude for all you experience this week, and above all else…may you deeply know just how much God loves you!

Interested In More Recipes?

Thank you for visiting this website. I appreciate you using some of your valuable time to do soIf you’re interested, I publish a newsletter 2 times per month (1st and 15th) with all the latest recipes, and other fun info. I would be honored to have you join our growing list of subscribers, so you never miss a great recipe!

There is a Newsletter subscription box on the top right side (or bottom) of each blog post, depending on the device you use, where you can easily submit your e-mail address (only) to be included in my mailing list.

You Can Also Find Me On Social Media:
Facebook page: The Grateful Girl Cooks!
Pinterest: The Grateful Girl Cooks!
Instagram: jbatthegratefulgirlcooks

Quick and Easy Open Faced Tuna Melts / The Grateful Girl Cooks!


Here’s one more to pin on your Pinterest boards!Quick and Easy Open Faced Tuna Melts / The Grateful Girl Cooks!

Save

Save

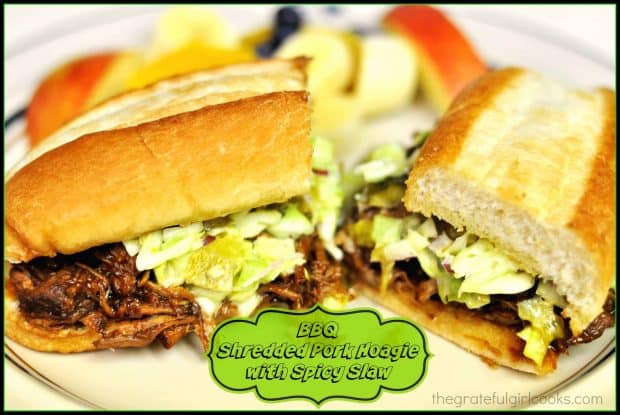
BBQ Shredded Pork Hoagies with Spicy Slaw

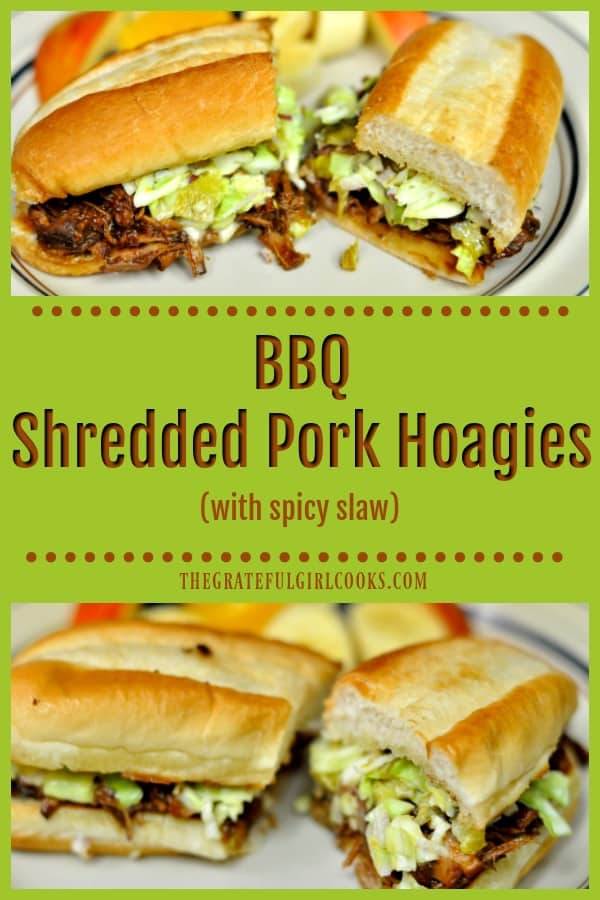
Classic BBQ Shredded Pork Hoagies, topped with a slightly spicy and crunchy slaw. This is a great way to use leftover pork to make a new lunch or dinner!Classic BBQ Shredded Pork Hoagies, topped with a slightly spicy and crunchy slaw. This is a great way to use leftover pork to make a new lunch or dinner!
Do you like leftovers? We like them, but sometimes it can get “old” eating leftovers (even if original recipe was fantastic!). Such was the case a few weeks ago, so I “morphed” the leftovers from a pork roast into  BBQ Shredded Pork Hoagies with Spicy Slaw. YUM.

We had leftovers from a  Pork Tenderloin with Cranberry-Raspberry Sauce recently.  Since there was a bit of pork still waiting to be eaten (there’s only 2 of us), I decided to morph the leftover pork into a completely new meal!

That’s how we ended up with these delicious BBQ Shredded Pork Hoagies with Spicy Slaw. The spicy slaw recipe is from a previous recipe I posted for a Fried Chicken, Spicy Mayo and Slaw Sandwich.

Scroll Down For A Printable Recipe Card At the Bottom Of the Page

How I Made The BBQ Shredded Pork Hoagies

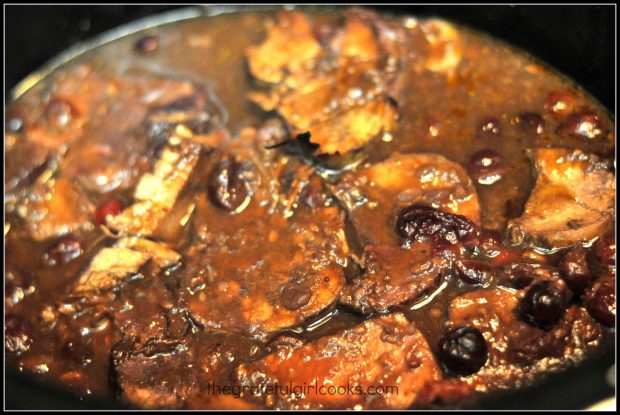
I took the leftover pork slices and added lots of BBQ sauce. Then I threw it all back into my slow cooker and let it cook all day (at least 5-6 hours).

Note: ANY leftover boneless pork chops or pork roast will work fine!  You can also BUY precooked BBQ pork if you want. This would allow you to skip this next part, but this is how I did it (to use up our leftovers).

The leftover pork had some of the sauce from the pork tenderloin left on it. You can also see some of the leftover cranberries, too. I threw the pork slices into the crock pot, along with the BBQ sauce and a tiny bit of water. You can see a few of the cranberries floating around in this photo.

Pieces of pork for BBQ shredded pork hoagies, cooking in crock pot.

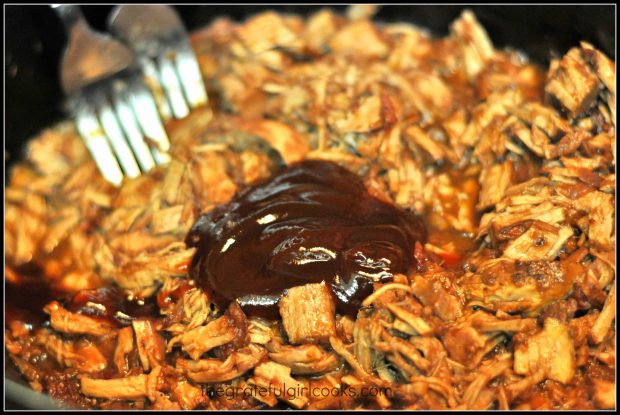
After the meat and sauce had cooked for 5-6 hours I easily shredded the pork (with two forks) and added even more BBQ sauce.

Shredding meat and bbq sauce for BBQ shredded pork hoagies with two forks

Another Way To Make The Shredded Pork Without Using A Crock Pot

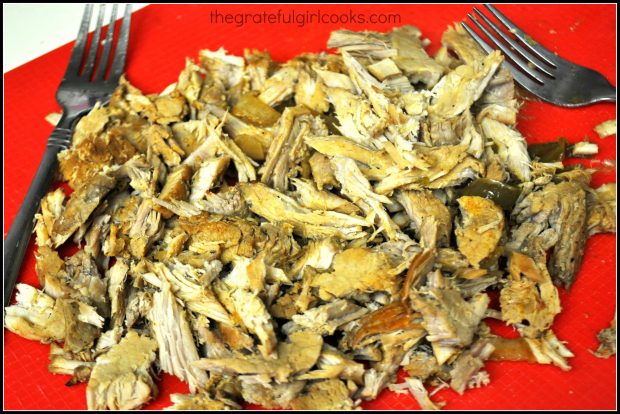
You can always shred leftover pieces of tender pork roast (without any sauce on it), THEN add the BBQ sauce. That way, you don’t have to use a crock pot.

All you need to do is mix the plain shredded pork with BBQ sauce and heat, before making the hoagies. The picture below shows this plain, unadorned shredded pork.

Shredded pieces of pork roast for BBQ shredded pork hoagies

Making The Spicy Slaw For Sandwich

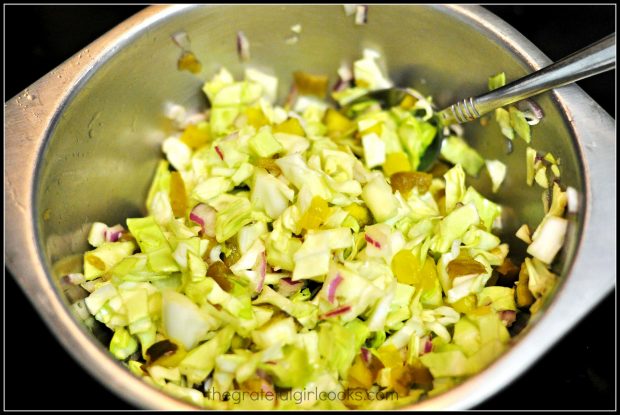
Once pork is shredded, coated with BBQ sauce and reheated, all you need to do is prepare the spicy slaw mixture. Make the spicy slaw by mixing ingredients in a small bowl. There are only 5 simple ingredients, and it is EASY to make! Refrigerate slaw until you’re ready to put it on the hoagies!

Spicy coleslaw for BBQ shredded pork hoagies, in small metal bowl

To Make BBQ Shredded Pork Hoagies

Spread some hoagie rolls with butter, then lightly grill them until golden brown and slightly crisp.  This will help the bread to not get too soggy, once you add the BBQ shredded pork.

Grilling hoagie rolls in skillet, for BBQ shredded pork hoagies.

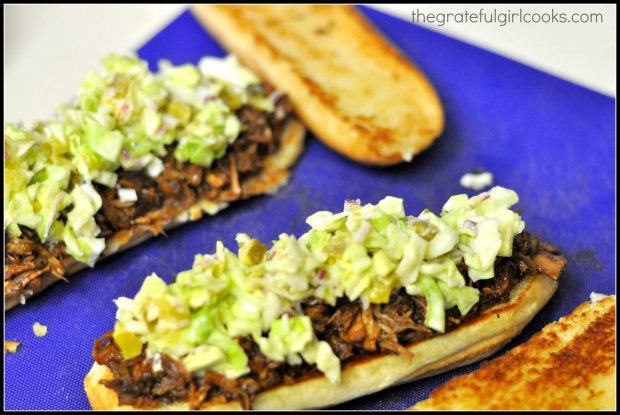
Top the toasted hoagie rolls with hot shredded BBQ pork, then add the cold, spicy slaw.

BBQ shredded pork hoagies with spicy slaw.

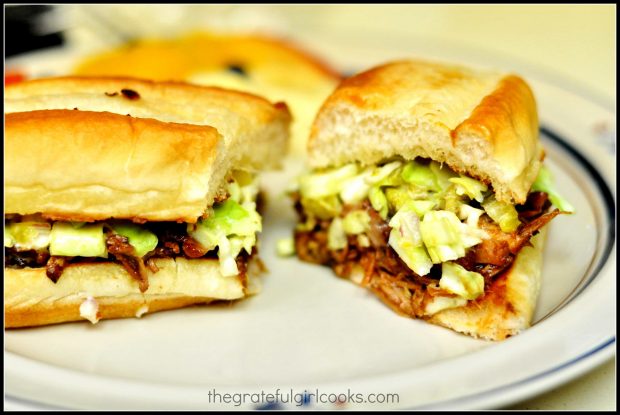
If desired, you can slice the BBQ shredded pork hoagies in half.  Serve this delicious sandwich hot, and enjoy!!!

BBQ shredded pork hoagies, cut in half on a plate

Hope you enjoy these BBQ shredded pork hoagies! It’s a great way to use leftover pork, without having to toss it or have it dry out in the refrigerator!

Looking For More SANDWICH Recipes?

You can find ALL of my recipes in the Recipe Index, located at the top of the page. I have some sandwich recipes that you’ll enjoy, including:

Interested In More Recipes?

Thank you for visiting this website. I appreciate you using some of your valuable time to do soIf you’re interested, I publish a newsletter 2 times per month (1st and 15th) with all the latest recipes, and other fun info. I would be honored to have you join our growing list of subscribers, so you never miss a great recipe!
There is a Newsletter subscription box on the top right side (or bottom) of each blog post, depending on the device you use, where you can easily submit your e-mail address (only) to be included in my mailing list.

You Can Also Find Me On Social Media:

Facebook page: The Grateful Girl Cooks!
Pinterest:
The Grateful Girl Cooks!
Instagram:
jbatthegratefulgirlcooks

Author's signature

0 from 0 votes
BBQ Shredded Pork Hoagies with Spicy Slaw
Prep Time
20 mins
Cook Time
15 mins
Total Time
35 mins
 
Classic BBQ Shredded Pork Hoagies, topped with a slightly spicy and crunchy slaw. This is a great way to use leftover pork to make a new lunch or dinner!
Category: Sandwich
Cuisine: American
Keyword: BBQ shredded pork hoagies
Servings: 4 sandwiches
Calories Per Serving: 615 kcal
Author: JB @ The Grateful Girl Cooks!
Ingredients
  • Shredded pork (quantity-as much or as little as you wish)
  • BBQ sauce (enough to fully saturate the amount of shredded pork you will use)
  • 4 Hoagie rolls (one per sandwich)
  • 4 Tablespoons Butter (to spread on rolls before grilling)
For spicy slaw:
  • 1 garlic clove , finely chopped
  • 1/2 small red onion , thinly sliced, chopped
  • 1 jalapeno , finely chopped
  • 4 cups thinly sliced green cabbage
  • 1/2 cup Bread and Butter pickle slices , plus 1/4 cup pickle juice from jar
Instructions
  1. Cook pork or leftover pork in slow cooker for several hours until completely tender. Using two forks, shred the pork. Put back into slow cooker and add sufficient BBQ sauce to completely coat meat. Heat thoroughly (can also heat the shredded BBQ pork in microwave, if desired).
  2. Make spicy slaw while pork is heating: Mix all slaw ingredients in a small bowl; toss to combine, then cover and refrigerate until ready to build the sandwiches.
  3. Spread each half of the hoagie rolls with butter. Grill until they are golden brown.
  4. Place grilled roll on serving dish. Spread hot BBQ shredded pork on top of one half of the roll. Spoon some cold spicy slaw evenly over the pork. Place top bun on the hoagie, and serve!
  5. Enjoy!
Recipe Notes

Cook time varies. Cooking time shown is based on having pre-cooked pork available when you start this recipe. Once you have the precooked, shredded pork coated with BBQ sauce and hot, you can have the sandwiches finished in about 10 minutes.
My other advice is to try and make the spicy slaw several hours before serving. The flavors really develop well, the longer it is refrigerated!

Nutrition Facts
BBQ Shredded Pork Hoagies with Spicy Slaw
Amount Per Serving (1 sandwich)
Calories 615
* Percent Daily Values are based on a 2000 calorie diet.

Here’s one more to pin on your Pinterest boards!Classic BBQ Shredded Pork Hoagies, topped with a slightly spicy and crunchy slaw. This is a great way to use leftover pork to make a new lunch or dinner!


Save

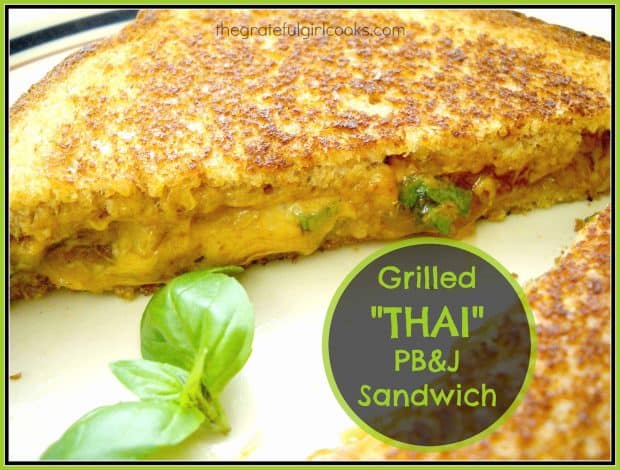
Grilled “THAI” PB&J Sandwich

A Grilled “Thai” PB&J Sandwich is a delicious, grown up, gourmet version of the classic peanut butter and jelly sandwich. Sounds strange, but tastes GREAT!A Grilled "Thai" PB & J Sandwich is a delicious, grown up, gourmet version of the classic peanut butter and jelly sandwich. Sounds strange, but tastes GREAT!

Look at this Grilled THAI Peanut Butter & Jelly Sandwich. What kind of crazy, weird sandwich is that anyways? A REALLY GOOD ONE.  YES. It’s really THAT good.

Scroll Down For A Printable Recipe Card At The Bottom Of The Page

How I First Discovered this Amazing Sandwich

The first I ever heard of such a crazy sounding sandwich was when my sister Joni (who was visiting from California) ordered one at our local Farmer’s Market last summer. One of the food vendors were selling these sandwiches, along with a few other gourmet grilled sandwiches.

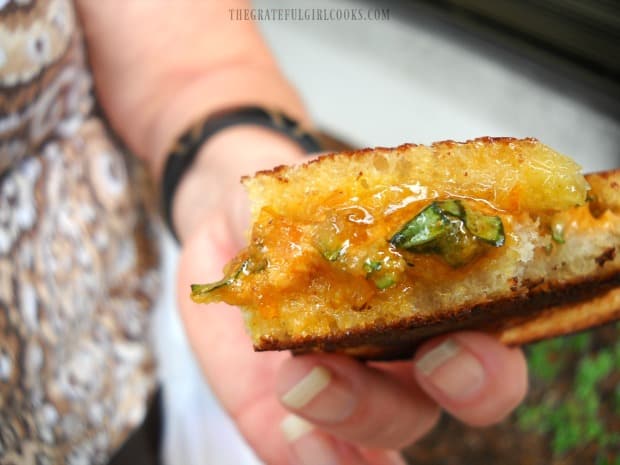
Truth is, It sounded horrible to me, UNTIL she forced me to try a bite of her sandwich. I didn’t think it would be good a all.  GULP… Here is the actual picture I took of her handing me the grilled Thai PB&J sandwich to taste for the first time (shown below).

My sister offering me a bite of Thai PB & J sandwich from the farmer's market.

May I just tell you truthfully that this grilled “Thai” PB&J sandwich was absolutely 100% AMAZING!!!!! That’s right… you heard me. Who ever would have believed that an ordinary old PB&J sandwich could go from “normal” to “over the top” just by adding a few…interesting…Thai-inspired ingredients!

So What Exactly Is IN This Grilled Thai PB&J Sandwich Sandwich?

Because I was curious, I decided to try and make a copycat grilled Thai PB & J sandwich myself in the comfort of my own kitchen and so I did! We have a WINNER! I have made this sandwich MANY times now, for friends and family, and they have always been surprised at how good it is!

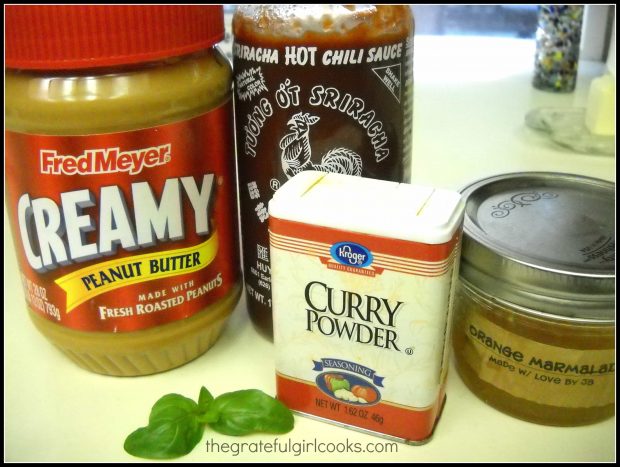
Here’s the partial cast of characters: Peanut Butter, Orange Marmalade, Curry Powder, Sriracha Sauce, and fresh Basil. I know…weird, huh?  Sounds like some definite Thai inspired flavor combos going on. You will also need some good bread and some butter for grilling, of course!

Some of the key ingredients for the Thai PB & J sandwich.
Crazy, huh? But trust me, this is an absolutely delicious “Gourmet Grown Up Version” of the traditional PB&J Sandwich that you will LOVE if you like Thai flavors. You just have to try this at least once. This is definitely NOT YOUR MAMA’S PB&J sandwich!!!!

Making it is super easy (the pictures aren’t glamorous, but how do you class up a peanut butter and jelly sandwich? Here’s how:

How To Make A Grilled Thai PB&J Sandwich

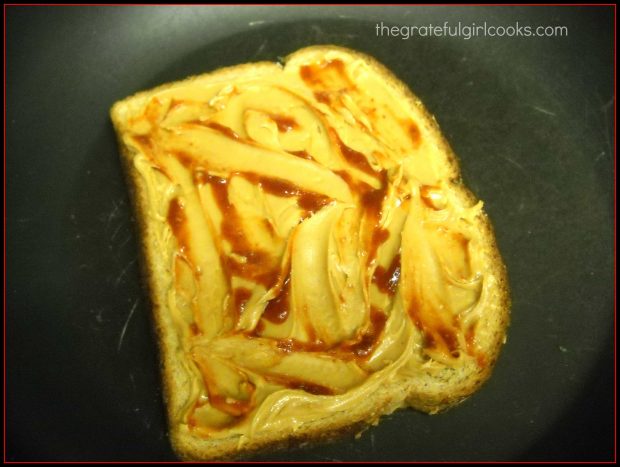
First, spread one piece of bread with butter on one side, then coat the other side of the bread with peanut butter. Spread some of the sriracha sauce on top of the peanut butter. Place the bread, butter side down, in a large skillet on medium heat.

Peanut butter and sriracha sauce are spread on one side of bread.

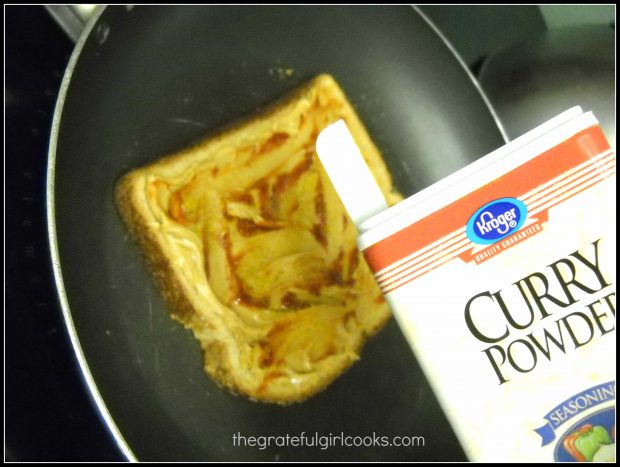
Lightly sprinkle on some curry powder. I never measure it. Just be careful to sprinkle lightly. You don’t need a lot.

Curry powder is lightly sprinkled onto peanut butter.

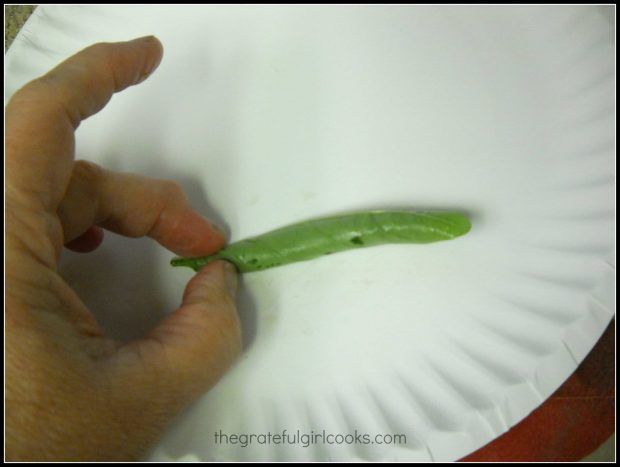
Roll up a couple of large fresh basil leaves into a tight roll like this…

Fresh basil leaves are rolled before cutting to add to sandwich.

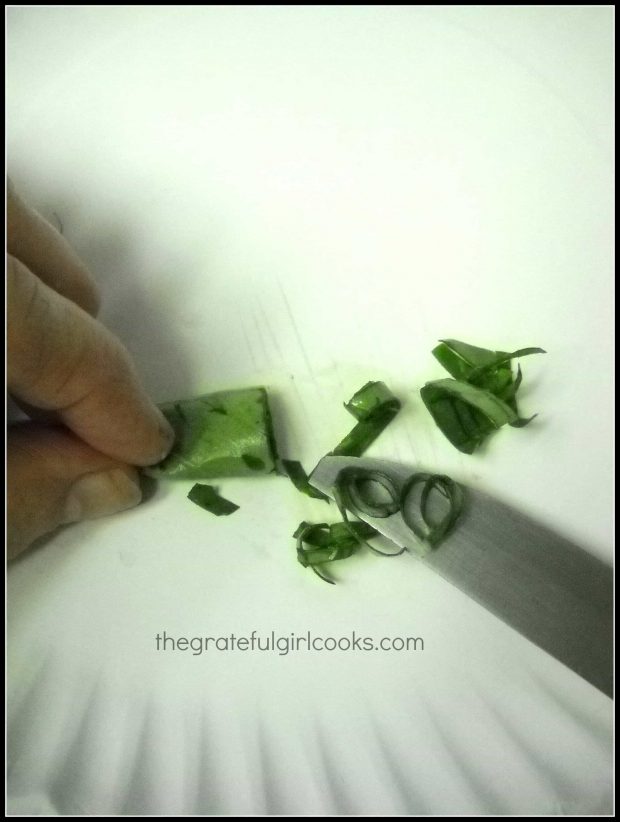
Then slice the rolled basil into thin strips. The technical term for this is to “chiffonade” the basil.

Basil is sliced into thin strips before adding to sandwich.

Add Basil And Marmalade!

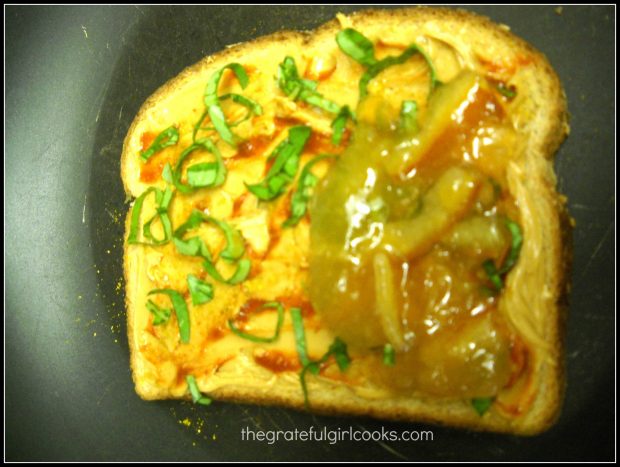
Evenly sprinkle the basil over the peanut butter side. Spread a layer of orange marmalade (I used my own homemade marmalade!) over the basil. The photo below shows the marmalade halfway spread on the sandwich. Spread the entire slice of bread with the marmalade.

Sliced basil leaves and orange marmalade added to PB&J sandwich.

Ready To Grill!

Butter one side of the second piece of bread and place it on top of the sandwich, butter side up. Grill the sandwich on both sides (just like you would a grilled cheese sandwich). I usually grill it on medium-low heat.

Grilled THAI PB&J Sandwich cooking in skillet.

Grill until both sides of the sandwich are toasted and golden brown. Transfer the sandwich from the skillet onto a serving plate.

Grilled THAI PB&J Sandwich is cooked until golden brown on both sides.

Time To Eat!

Slice the Grilled Thai PB&J Sandwich diagonally across to form two triangles. Yes, it might be a bit messy…but that’s great, because the sandwich is so GOOD! Take a bite, and enjoy this delicious sandwich.

Grilled THAI PB&J Sandwich is sliced in half and served. Messy, but good!

It’s still hard to believe that this crazy sounding grilled “Thai” PB&J sandwich is so amazingly GOOD, but it’s true! I’ve made this sandwich at least twenty times since I took that first tentative bite, and it never fails to be ridiculously delicious! I hope you will give it a try. 

Thanks for stopping by today! I hope you will be able to come back again soon for more recipes. Don’t forget to check out the Recipe Index, located at the top of the page to see ALL of my recipes. Have a great day.

Interested In More Recipes?

Thank you for visiting this website. I appreciate you using some of your valuable time to do soIf you’re interested, I publish a newsletter 2 times per month (1st and 15th) with all the latest recipes, and other fun info. I would be honored to have you join our growing list of subscribers, so you never miss a great recipe!
There is a Newsletter subscription box on the top right side (or bottom) of each blog post, depending on the device you use, where you can easily submit your e-mail address (only) to be included in my mailing list.

You Can Also Find Me On Social Media:

Facebook page: The Grateful Girl Cooks!
Pinterest:
The Grateful Girl Cooks!
Instagram:
jbatthegratefulgirlcooks

Author's signature

↓↓ PRINTABLE RECIPE BELOW ↓↓

0 from 0 votes
Grilled "THAI" PB&J Sandwich
Prep Time
5 mins
Cook Time
5 mins
Total Time
10 mins
 
A Grilled "Thai" PB & J Sandwich is a delicious, grown up, gourmet version of the classic peanut butter and jelly sandwich. Sounds strange, but tastes GREAT!
Category: Sandwich
Cuisine: Thai
Keyword: thai pb&j sandwich
Servings: 1 sandwich
Calories Per Serving: 366 kcal
Author: JB @ The Grateful Girl Cooks!
Ingredients
  • 2 slices good quality bread
  • butter (to spread on one side of each piece of bread)
  • peanut butter (enough to cover one piece of bread
  • orange marmalade (enough to cover one slice of bread)
  • 1/2 - 1 teaspoon sriracha sauce (hot chile sauce found in Asian section of grocery store)
  • curry powder (I don't measure...just light sprinkle over one side of bread)
  • 2 large , fresh basil leaves
Instructions
  1. Spread one side of one piece of bread with butter. Place butter side down in skillet.
  2. Spread peanut butter on top of the slice of bread in skillet to cover. Spread sriracha sauce over the peanut butter evenly. Lightly sprinkle with curry powder. Roll and slice the fresh basil leaves. Sprinkle evenly over peanut butter. Carefully spread orange marmalade over sliced basil leaves. Butter one side of the second piece of bread. Put on top of marmalade, butter side up.

  3. Grill sandwich on medium heat, turning during cooking. Grill until each side is toasted and golden brown. Remove hot sandwich to serving plate. Cut on the diagonal, and serve! Enjoy!
Nutrition Facts
Grilled "THAI" PB&J Sandwich
Amount Per Serving (1 sandwich)
Calories 366 Calories from Fat 144
% Daily Value*
Fat 16g25%
Saturated Fat 6g38%
Cholesterol 21mg7%
Sodium 576mg25%
Potassium 222mg6%
Carbohydrates 47g16%
Fiber 3g13%
Sugar 17g19%
Protein 10g20%
Vitamin A 250IU5%
Vitamin C 4mg5%
Calcium 77mg8%
Iron 2.3mg13%
* Percent Daily Values are based on a 2000 calorie diet.

Here’s one more to pin on your Pinterest boards!A Grilled "Thai" PB & J Sandwich is a delicious, grown up, gourmet version of the classic peanut butter and jelly sandwich. Sounds strange, but tastes GREAT!


Save

Save

Save

Fully Stuffed Calzones

Fully stuffed calzones are yummy baked “Italian hand pies”, filled with Italian sausage, pepperoni, green peppers, mushrooms, mozzarella cheese, etc.
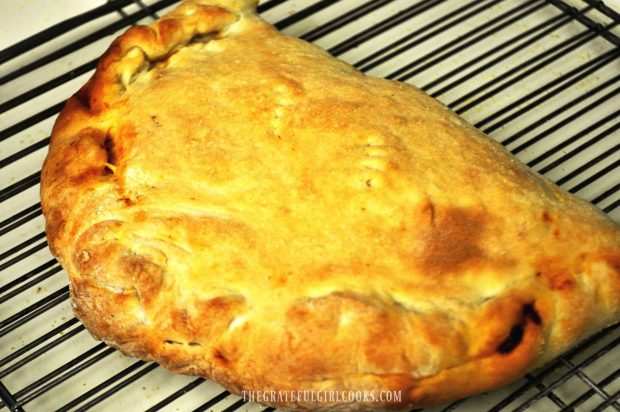
Fully stuffed calzones are yummy baked "Italian hand pies", filled with Italian sausage, pepperoni, green peppers, mushrooms, mozzarella cheese, etc.
Ever eaten Fully Stuffed Calzones? Maybe you’re saying, “Ever EATEN  fully stuffed calzones? I don’t even know WHAT a calzone is!” Well, here is the answer some of you have been waiting for.

Webster’s Dictionary offers this definition of a calzone: “a food originally from Italy that consists of baked or fried dough folded over and filled with tomato sauce, cheese, etc.”. Ugh…that’s okay, IF you know what etc. means. MY rookie definition is: a calzone is a baked pizza dough “handpie”, filled with all of our favorite pizza toppings!

Scroll Down For A Printable Recipe Card At The Bottom Of The Page

How I Came Up With This Recipe For Fully Stuffed Calzones

A year or two ago I made some homemade pizza dough (thinking I would throw together a pizza for dinner). Once the dough was prepared, I decided to switch it up and try my hand at creating FULLY STUFFED calzones, without using a recipe. Note: if you use purchased pizza dough, you will save some time!

I gathered up the toppings our family loves on a great tasting pizza, cooked it, and then made 6 pizza dough balls. Each of the dough balls was rolled into a circle, and I put the filling and sauce inside, and sealed them all up. The dough was then brushed with egg, and I added a couple garnishes. My final act was to put them in the oven and cross my fingers while they baked.

Beginning to cook some of the calzone filling ingredients in skillet.

Boy, was I surprised at how great looking these fully stuffed calzones turned out! And guess what?  Once we tasted them, we were amazed at how delicious they were. Who knew? So that’s my story of creating these…and now YOU know.

You can either crimp the edges of the pastry dough with a fork, or you can roll the edges, like shown in this photo below.

 Fully stuffed calzone, hot from the oven!

Even though there are quite a few ingredients, the directions for these fully stuffed calzones are pretty simple…I hope you’ll give them a try!

If you enjoy these Italian handpies, you will probably also be interested in making grilled pizzas on your BBQ or making a simple pepperoni pizza from scratch! Have a great day, and don’t forget to check out ALL of my recipes in the Recipe Index, located at the top of the page.

Interested In More Recipes?

Thank you for visiting this website. I appreciate you using some of your valuable time to do soIf you’re interested, I publish a newsletter 2 times per month (1st and 15th) with all the latest recipes, and other fun info. I would be honored to have you join our growing list of subscribers, so you never miss a great recipe!
There is a Newsletter subscription box on the top right side (or bottom) of each blog post, depending on the device you use, where you can easily submit your e-mail address (only) to be included in my mailing list.

You Can Also Find Me On Social Media:

Facebook page: The Grateful Girl Cooks!
Pinterest:
The Grateful Girl Cooks!
Instagram:
jbatthegratefulgirlcooks

Have a GREAT day!

Author's signature

Dough Recipe Source: The Oster Deluxe Bread And Dough Maker Owner’s Handbook (c. 1994 Sunbeam-Oster Household Products) Calzone Filling Source: My brain.

↓↓ PRINTABLE RECIPE BELOW ↓↓

0 from 0 votes
Fully Stuffed Calzones
Prep Time
1 hr 30 mins
Cook Time
25 mins
Total Time
1 hr 55 mins
 
Fully stuffed calzones are yummy baked "Italian hand pies", filled with Italian sausage, pepperoni, green peppers, mushrooms, mozzarella cheese, etc.
Category: Main Dishes
Cuisine: Italian
Keyword: fully stuffed calzones
Servings: 6 calzones
Calories Per Serving: 680 kcal
Author: JB @ The Grateful Girl Cooks!
Ingredients
For the dough: (or use your favorite pizza dough recipe)
  • 1 cup water
  • 1 Tablespoon olive oil (or vegetable oil)
  • 2 1/2 cups all-purpose flour
  • 1 teaspoon granulated sugar
  • 1 teaspoon salt
  • 2 1/4 teaspoons regular active dry yeast (or quick acting active dry yeast)
For The Filling:(or use your favorite pizza ingredients)
  • 3/4 cup spaghetti sauce
  • 1 1/2 cups mozzarella cheese , grated
  • 1/2 cup parmesan cheese
  • 1 Tablespoon olive oil
  • 3 Italian sausage links (casings removed)
  • 1 cup mushrooms , sliced
  • 1/2 cup brown onion , chopped
  • 1/2 cup green pepper , chopped
  • 1 cup pepperoni slices
  • 1 egg , slightly beaten (to brush on tops of calzones, prior to baking)
  • Oregano (dried) and Parmesan Cheese (to sprinkle on tops of calzones, prior to baking)
Instructions
Using bread machine:
  1. Put all the dough ingredients into the bread pan in the order listed. Select DOUGH cycle.
  2. When dough is done, preheat the oven to 375 degrees.
  3. Divide dough into 6 equal dough balls. Roll each dough ball into a 7 inch circle on a lightly floured work surface.
If making by hand:
  1. Mix the yeast and water in a large bowl or base of a stand mixer. Stir well, then let it sit for 5 minutes to "proof".
  2. Add oil, sugar and salt. Stir well to combine.
  3. Add the flour and mix well with your (clean) hands or use the dough hook on your stand mixer.
  4. Knead dough (either by hand on a lightly floured surface or stand mixer) for 5-8 minutes, until the dough ball is smooth and elastic (you don't want it to be sticky).
  5. When dough ball is ready, place it in a lightly oiled large bowl. Flip it over to the other side, making sure the dough is coated with oil. Place a slightly damp dish towel over the top of the bowl.
  6. Put the covered bowl in a warm place and let the dough rise until it has doubled in size. This usually takes about an hour. Follow instructions above (under bread machine instructions) for forming the dough into individual circles
Make filling for the calzones while dough is rising:
  1. Heat the olive oil in a large skillet.
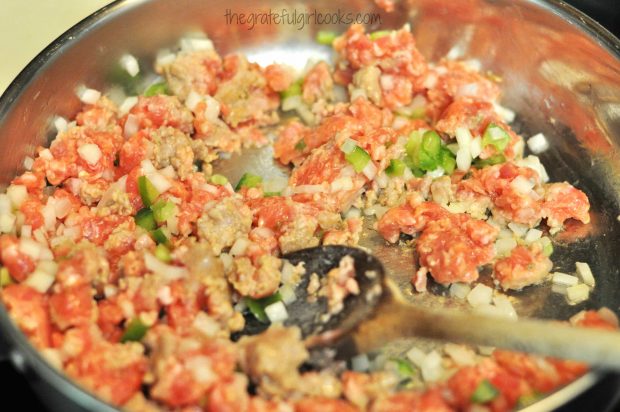
  2. When skillet is hot, add the Italian sausage (casings removed), mushrooms, onions, and green peppers. Saute, crumbling the sausage into small pieces with a spoon as it cooks. Right before sausage mixture is fully cooked, add the minced garlic. When done, remove from heat to cool.
To fill the calzones:
  1. Spread one heaping Tablespoon of the spaghetti sauce on each dough circle to within 1 inch of edge. (Don't go all the way to the edge because the sauce will leak out while cooking)
  2. Place the sausage/mushroom/onion/pepper filling on top of the sauce but only on HALF of each circle, to within 1 inch of the edge. (Remember the filling is for 6 calzones - disperse evenly!)
  3. Add the pepperoni slices. (again...disperse evenly to within 1 inch of edge). Add the mozzarella cheese (same instructions as above). Add Parmesan cheese (same instructions as above)

To seal the calzones and prepare for baking:
  1. Carefully fold the dough over the filling to form a half circle. Makes sure edges touch.  Pinch edges securely with your fingers (to seal), then use the tines of a fork to crimp the dough all the way around the edge to securely seal. You want the edges sealed well to prevent leakage.

  2. Gently lift and place the calzones on a large cookie sheet (or sheets). Brush the tops of the calzones with the beaten egg. Sprinkle tops of calzones with crushed dried oregano and parmesan cheese.

  3. Bake at 375 degrees for 25-30 minutes or until they are golden brown. Remove from oven to a wire rack, and let cool for a couple minutes. Serve and enjoy!

Recipe Notes

**Use whatever pizza ingredients you like for filling!

Nutrition Facts
Fully Stuffed Calzones
Amount Per Serving (1 calzone)
Calories 680 Calories from Fat 360
% Daily Value*
Fat 40g62%
Saturated Fat 15g94%
Cholesterol 117mg39%
Sodium 1613mg70%
Potassium 525mg15%
Carbohydrates 47g16%
Fiber 3g13%
Sugar 3g3%
Protein 30g60%
Vitamin A 470IU9%
Vitamin C 14.6mg18%
Calcium 273mg27%
Iron 4.2mg23%
* Percent Daily Values are based on a 2000 calorie diet.

Here’s one more to pin on your Pinterest boards!Fully stuffed calzones are yummy baked "Italian hand pies", filled with Italian sausage, pepperoni, green peppers, mushrooms, mozzarella cheese, etc.


Save

Save

Save

Save

Save

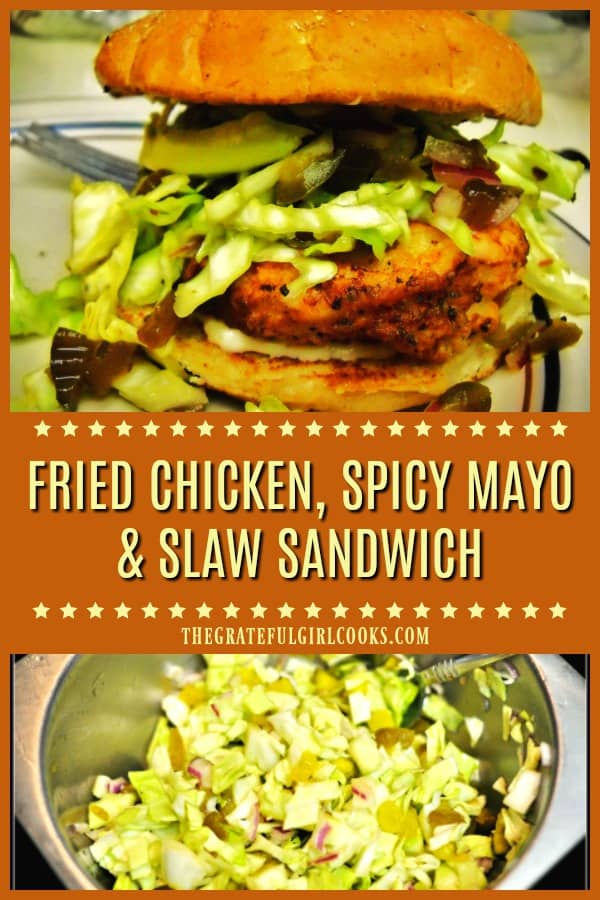
Fried Chicken, Spicy Mayo and Slaw Sandwich

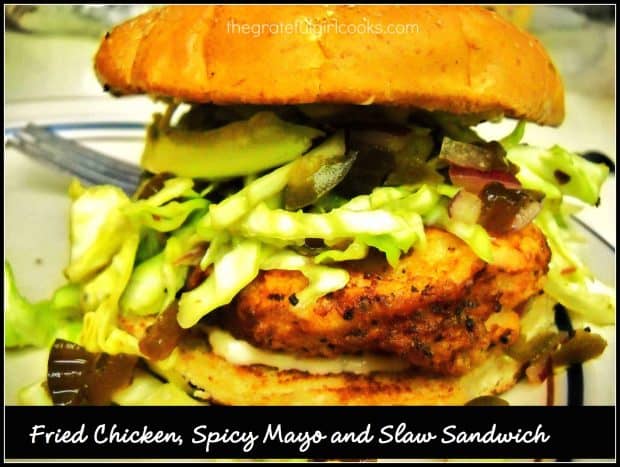
You’re going to love this fried chicken sandwich on a toasted bun, with spicy mayo and slaw. Recipe is from Bon Appétit magazine, and tastes fantastic!You're going to love this fried chicken sandwich on a toasted bun, with spicy mayo and slaw. Recipe from Bon Appétit magazine, and tastes fantastic!

So here’s the story… my friend gave me a subscription to Bon Appétit magazine last year. My husband was looking through one of the issues and came upon this recipe for a Fried Chicken, Spicy Mayo and Slaw Sandwich.

Being the nice guy that he is, he hinted mentioned to me (of course rather casually) that it sure sounded good, and was wondering if I thought I could make this recipe. It sounded pretty straightforward, so I made it! Wow! This fried chicken sandwich tastes amazing… let me show you how to make it:

Scroll Down For A Printable Recipe Card At The Bottom Of The Page

Preparing The Fried Chicken Sandwich

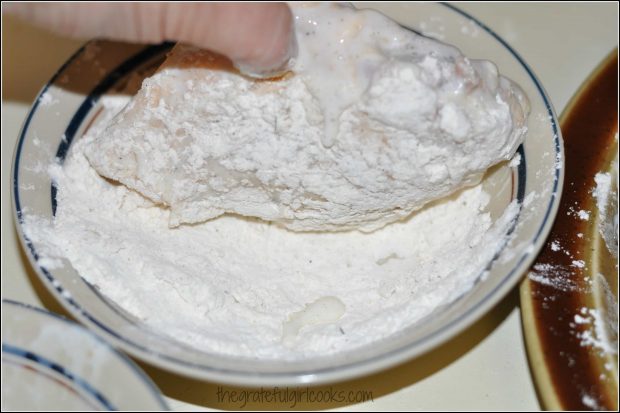
The sandwich calls for fried chicken. I used boneless, skinless chicken breasts which were coated in flour, and buttermilk, and then fried in a skillet (in oil) until done. Large chicken breasts are cut in half, so they cook faster than normal.

Chicken breasts are dredged in flour, buttermilk, and then flour again, before frying. Dredging the chicken in buttermilk before frying.

The Spicy Slaw

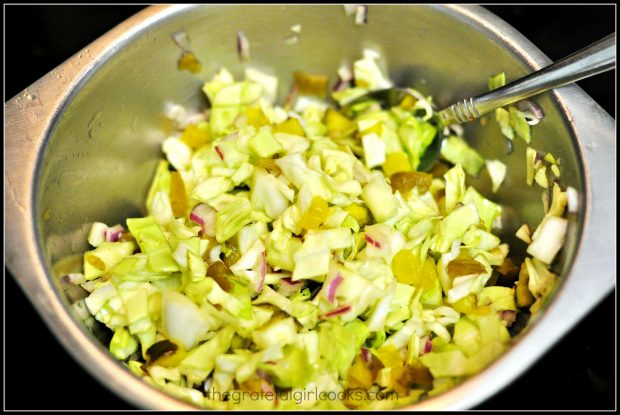
A very easy to make spicy slaw is mixed together to go on the fried chicken sandwich. The slaw has cabbage, hot pepper sauce, garlic, jalapeno, bread and butter pickles and red onions. It’s not too spicy, but it does have a tiny kick to it!

Slaw is mixed to add to the sandwich.

Making The Fried Chicken Sandwich

The fried chicken is placed on a lightly toasted bun which has been spread with a spicy mayonnaise. The fried chicken breast is then added, and is topped with the slaw. Put the top bun on, and you’re ready to enjoy your sandwich! So I did. End of story. Did you enjoy it? Actually, it was fairly easy, and really tastes GOOD! Seriously good. The fried chicken sandwich was fairly easy to prepare, and the taste is unexpectedly wonderful!

My husband and I LOVED it and I have prepared this sandwich a few times since then. Hope you will give it a try, because I think you will really like this delicious fried chicken sandwich. Thanks for stopping by, and I hope you come back again really soon. Have a GREAT day!

Looking For More SANDWICH Recipes?

You can find all of my sandwich recipes in the Recipe Index, located at the top of the page. I have several you’ll enjoy, including:

Interested In More Recipes?

Thank you for visiting this website. I appreciate you using some of your valuable time to do soIf you’re interested, I publish a newsletter 2 times per month (1st and 15th) with all the latest recipes, and other fun info. I would be honored to have you join our growing list of subscribers, so you never miss a great recipe!
There is a Newsletter subscription box on the top right side (or bottom) of each blog post, depending on the device you use, where you can easily submit your e-mail address (only) to be included in my mailing list.

You Can Also Find Me On Social Media:
Facebook page: The Grateful Girl Cooks!
Pinterest: The Grateful Girl Cooks!
Instagram: jbatthegratefulgirlcooks

Author's signature

Recipe Source: http://www.bonappetit.com/recipe/fried-chicken-sandwiches-with-slaw-and-spicy-mayo

↓↓ PRINTABLE RECIPE BELOW ↓↓

0 from 0 votes
Fried Chicken, Spicy Mayo and Slaw Sandwich
Prep Time
20 mins
Cook Time
15 mins
Total Time
35 mins
 

You're going to love this fried chicken sandwich on a toasted bun, with spicy mayo and slaw. Recipe from Bon Appétit magazine, and tastes fantastic!

Category: Entree
Cuisine: American
Keyword: fried chicken sandwich
Servings: 4
Calories Per Serving: 845 kcal
Author: JB @ The Grateful Girl Cooks!
Ingredients
For Spicy Mayo:
  • 1 garlic clove , finely chopped
  • 1/2 cup light mayonnaise (can use regular mayo too, of course)
  • 1 Tablespoon Louisiana-style hot pepper sauce
For Slaw:
  • 1/2 small red onion , thinly sliced
  • 1 jalapeno , finely chopped
  • 4 C. thinly sliced green cabbage
  • 1/2 cup Bread and Butter pickle slices , plus 1/4 cup pickle juice from jar
For Fried Chicken and Assembly:
  • 2 cups all purpose flour
  • 1 Tablespoon ground black pepper
  • 1/2 teaspoon salt (plus more for later)
  • 1 cup buttermilk
  • 2 . large chicken breasts (8 ounces each) , cut in half lengthwise
  • Vegetable or Peanut oil enough to cover bottom of skillet with ½ inch of oil.
  • 4 sandwich rolls (I used Kaiser rolls)
  • 2 TBSP unsalted butter , room temperature (I used regular...whatever!)
Instructions
  1. Make spicy mayo: Mix garlic, mayo and pepper sauce in small bowl. Cover and refrigerate.

  2. Make slaw: In a separate bowl, toss red onion, jalapeno, cabbage, and pickles to combine. Cover and refrigerate.

  3. To make chicken: In a small bowl, whisk flour, black pepper and salt. Set aside. In separate shallow bowl, pour buttermilk. Working with 1 piece of chicken at a time, dredge chicken in flour mixture, shaking off the excess. Then dip the chicken in the buttermilk, letting excess drip back into bowl. Dredge the chicken again in flour mixture, shaking off excess. Set chicken onto a piece of foil while you coat the remaining chicken pieces.

  4. Pour oil into a large, heavy skillet to a depth of at least ½ inch. Place the deep-fry thermometer into the oil so that the bulb is submerged. Heat over medium heat until the thermometer registers 350°. Carefully place the 4 chicken breasts into hot oil. Fry chicken until golden brown and cooked through (approximately 3-4 minutes per side). When done, remove chicken and transfer to a wire rack. Season with additional salt to taste.

  5. Spread the cut sides of the rolls with butter. Heat a large skillet or griddle over medium heat. Working in batches, grill rolls, butter-side down, till lightly brown and crisp (about 1 minute).

  6. To "build" sandwich: Spread bottom of the toasted sandwich roll with 1/4 of the spicy mayo. Then add fried chicken breast, followed by 1/4 of the slaw. Top with other half of roll, and enjoy!

Recipe Notes

You will need a deep-fry thermometer for this recipe.

Nutrition Facts
Fried Chicken, Spicy Mayo and Slaw Sandwich
Amount Per Serving (1 sandwich)
Calories 845 Calories from Fat 306
% Daily Value*
Fat 34g52%
Saturated Fat 18g113%
Cholesterol 98mg33%
Sodium 1192mg52%
Potassium 807mg23%
Carbohydrates 94g31%
Fiber 5g21%
Sugar 11g12%
Protein 39g78%
Vitamin A 580IU12%
Vitamin C 34.8mg42%
Calcium 188mg19%
Iron 5.7mg32%
* Percent Daily Values are based on a 2000 calorie diet.

Here’s one more to pin on your Pinterest boards!You're going to love this fried chicken sandwich on a toasted bun, with spicy mayo and slaw. Recipe from Bon Appétit magazine, and tastes fantastic!


Save

Save

Save