Category: Sauces and Dressings

Easy Spaghetti Sauce With Italian Sausage

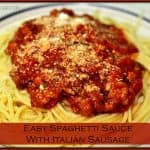
Spaghetti Sauce with Italian Sausage is a delicious, quick and easy meal to make, with tomatoes, sausage, mushrooms, green peppers, onions, and Italian spices. Spaghetti Sauce with Italian Sausage is a delicious, quick and easy meal to make, with tomatoes, sausage, mushrooms, green peppers, onions, and Italian spices.
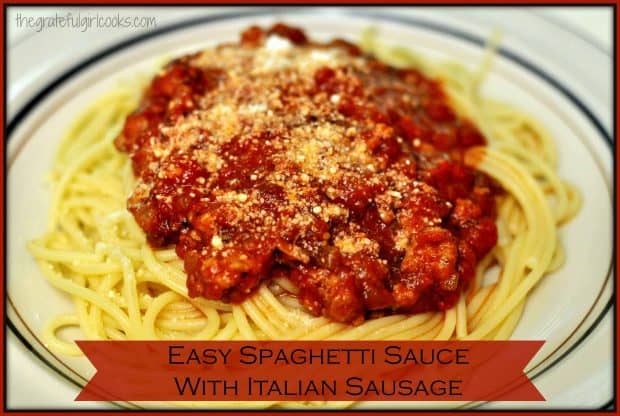
When I make spaghetti sauce, I typically cook the sauce for several hours. However, sometimes I don’t have time to spare, so I make this EASY and quick spaghetti sauce. The sauce is is flavored with Italian sausage, mushrooms, green peppers, onions, and lots of spices. It’s delicious and filling, especially on a “cool weather” kind of day, like today in the Pacific Northwest.

I grew up eating my Mom’s spaghetti sauce, which she cooked with ground beef in the sauce. While that is good, my husband and I prefer the taste of Italian sausage in our sauce. I’ve been making it this way for YEARS! If you’ve never made sauce with Italian sausage, I hope you will consider it. The spaghetti sauce only takes about 10 minutes of prep work, then the rest of the time (30 minutes) is inactive “simmering” time. Not too much time to invest, and the results are wonderful!

I like to make extra spaghetti sauce to freeze for another day! The recipe serves 4-6 depending on serving size. Even if you can’t use that many servings in a single meal, it’s nice to have extra sauce available, for other meals).

Scroll Down For A Printable Recipe Card At The Bottom Of The Page

How To Make Spaghetti Sauce With Italian Sausage

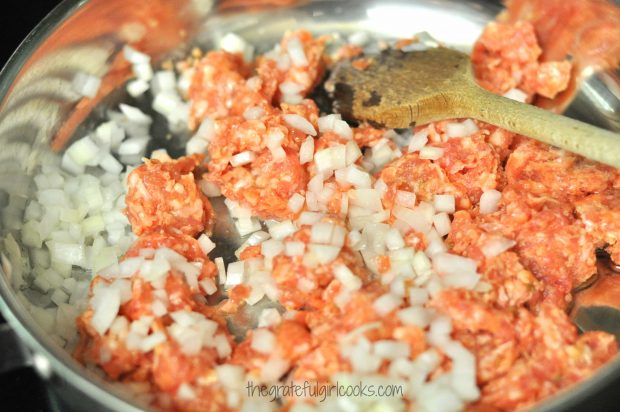
Start the party off by sautéing Italian sausage (which has been removed from the casing) with chopped onion. The meat and onions are cooked on medium heat in a large skillet.

Cooking Italian sausage and onions in skillet for spaghetti sauce.

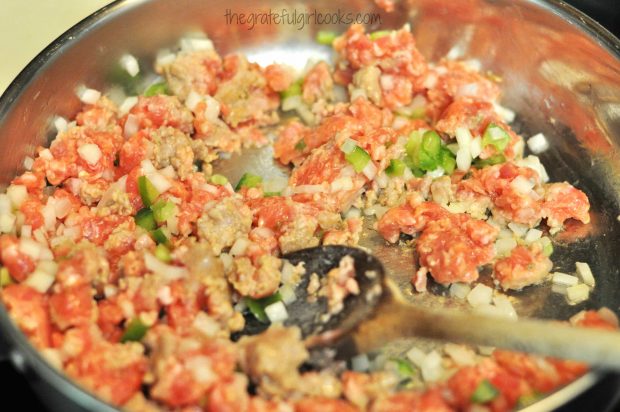
Add chopped green pepper, and continue cooking until the Italian sausage is fully cooked.

Chopped green peppers are added to sausage, and onions for spaghetti sauce.

Drain the grease from the skillet, then add tomato paste, a large can of diced tomatoes, and water. Sometimes I add in 1/2 cup red wine, if I have an open bottle (optional, though).
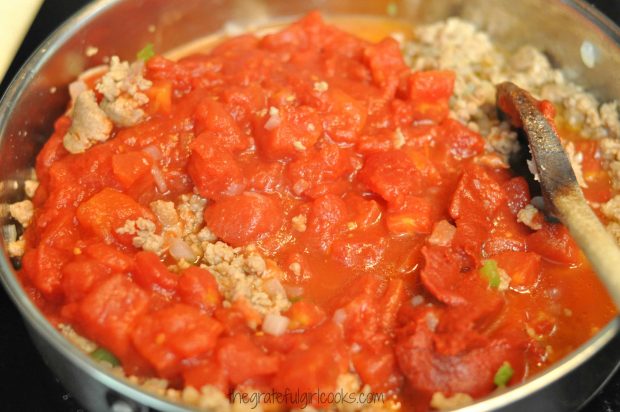
Tomato paste, diced tomatoes and water are added to skillet with spaghetti sauce.
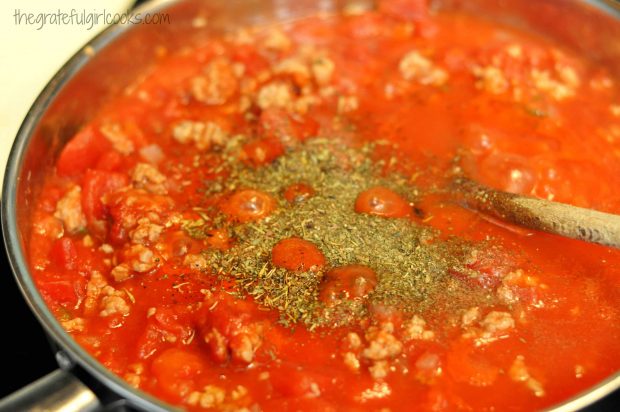
Next add the spices (oregano, basil, Italian seasoning, garlic powder, red pepper flakes, salt & pepper). Stir the spaghetti sauce well, to combine.

Dried Italian spices are added to skillet to season spaghetti sauce.

Add mushrooms. I used some of my dehydrated mushrooms (they ARE kind of handy to have around and re-hydrate wonderfully in the sauce).

Of course, you can use the same amount of fresh, sliced mushrooms. If you don’t like mushrooms, just leave ’em out!
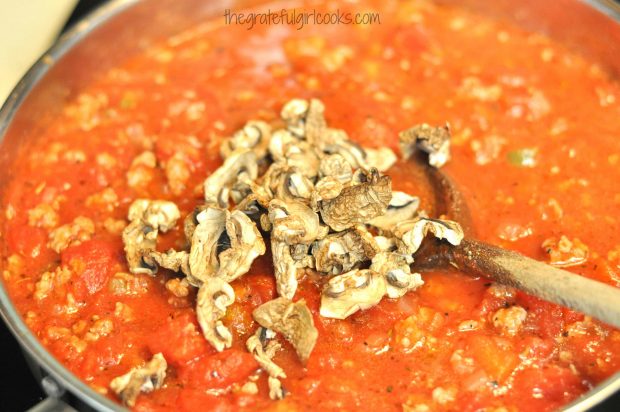
Mushrooms (dehydrated or fresh) are added to spaghetti sauce.
Cook the Spaghetti Sauce

Bring the spaghetti sauce to a boil, then reduce heat to a low simmer. Cook for about 30 minutes or so. The sauce will reduce a bit, and all those yummy flavors will permeate the sauce.

While the sauce is cooking, cook the spaghetti noodles (or any other pasta). Drain the cooked pasta, then place the spaghetti noodles onto individual serving plates. Top pasta with a ladle of this yummy spaghetti sauce, then garnish with grated Parmesan cheese.
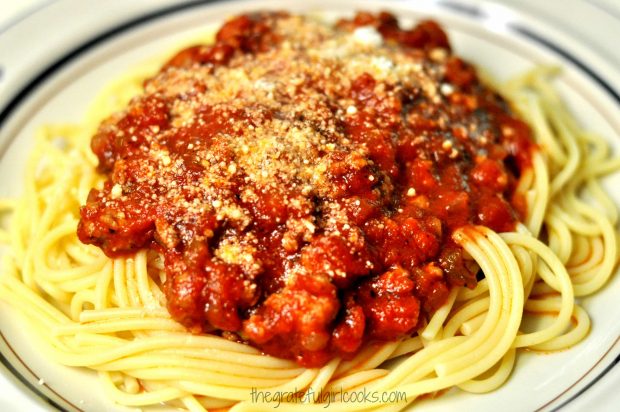
Easy Spaghetti Sauce With Italian Sausage is served on top of pasta!
That’s it! It’s such an inexpensive and delicious hearty meal, with an amazing tasting Italian spaghetti sauce! Thanks for stopping by, and I hope you will come back again soon. Have a GREAT day!

Looking For More PASTA Recipes?

You can find all of my pasta recipes in the Recipe Index, located at the top of the page. I have lots of them, including:

You can find many other pasta recipes in my Recipe Index at the top of each post. Have a great day, and Buon Appetito (Italian, for “enjoy your meal!)!

Interested In More Recipes?

Thank you for visiting this website. I appreciate you using some of your valuable time to do soIf you’re interested, I publish a newsletter 2 times per month (1st and 15th) with all the latest recipes, and other fun info. I would be honored to have you join our growing list of subscribers, so you never miss a great recipe!
There is a Newsletter subscription box on the top right side (or bottom) of each blog post, depending on the device you use, where you can easily submit your e-mail address (only) to be included in my mailing list.

You Can Also Find Me On Social Media:

Facebook page: The Grateful Girl Cooks!
Pinterest:
The Grateful Girl Cooks!
Instagram:
jbatthegratefulgirlcooks

Author's signatureRecipe source: My brain, in Italian mode.

0 from 0 votes
Easy Spaghetti Sauce With Italian Sausage
Prep Time
10 mins
Cook Time
30 mins
Total Time
40 mins
 
Spaghetti Sauce with Italian Sausage is a delicious, quick and easy meal to make, with tomatoes, sausage, mushrooms, green peppers, onions, and Italian spices.
Category: Entree
Cuisine: Italian
Keyword: spaghetti sauce
Servings: 6
Calories Per Serving: 278 kcal
Author: JB @ The Grateful Girl Cooks!
Ingredients
  • 3 Italian sausage links (mild or hot), casings removed.
  • 3/4 cup chopped brown onion
  • 1/3 cup chopped green pepper
  • 1 can (6 oz.) tomato paste
  • 1 large can (28 oz.) diced tomatoes
  • 1 cup water (or substitute 1/2 cup water and 1/2 cup red wine, if desired)
  • 1 1/2 teaspoons oregano (dried)
  • 1 teaspoon Italian seasoning
  • 1/2 teaspoon basil (dried)
  • 1 1/4 teaspoons garlic powder
  • 1 teaspoon salt
  • 1/4 teaspoon black pepper
  • 1/4 teaspoon red pepper flakes (dried)
  • 1 1/2 cups sliced mushrooms
  • Grated Parmesan cheese , for garnish (if desired)
Instructions
  1. Remove casing from sausage links by cutting with a knife down the length of the link, and removing the sausage. Discard the casing. Crumble the sausage into a large skillet.
  2. Sauté the sausage and chopped onion on medium heat. Add the green pepper; cook until sausage is fully cooked. Drain the grease out of the pan (discard), and return skillet to stovetop.
  3. Add tomato paste, can of diced tomatoes (including juice), and water to skillet. Add oregano, Italian seasoning, basil, garlic powder, salt, pepper and red pepper flakes. Add sliced mushrooms. Stir all ingredients well, to combine.

  4. Bring sauce to a boil, then reduce heat to low and continue to cook for about 30 minutes. The sauce will reduce down a bit, and the flavors will permeate the sauce. Taste test the sauce and add additional salt or spices as desired.
  5. While sauce is cooking, prepare the pasta of your choice according to package directions. Drain pasta, then serve with spaghetti sauce ladled over the top. Garnish with Parmesan cheese, if desired, and serve HOT!

Recipe Notes

Caloric calculation does not include pasta of your choice. It also does not include optional Parmesan cheese topping (optional).

Nutrition Facts
Easy Spaghetti Sauce With Italian Sausage
Amount Per Serving (1 g)
Calories 278 Calories from Fat 162
% Daily Value*
Fat 18g28%
Saturated Fat 6g38%
Cholesterol 42mg14%
Sodium 1199mg52%
Potassium 950mg27%
Carbohydrates 19g6%
Fiber 4g17%
Sugar 10g11%
Protein 12g24%
Vitamin A 780IU16%
Vitamin C 28.1mg34%
Calcium 83mg8%
Iron 3.7mg21%
* Percent Daily Values are based on a 2000 calorie diet.

Here’s one more to pin on your Pinterest boards!Spaghetti Sauce with Italian Sausage is a delicious, quick and easy meal to make, with tomatoes, sausage, mushrooms, green peppers, onions, and Italian spices.


Save

Save

Homemade Bleu Cheese Dressing

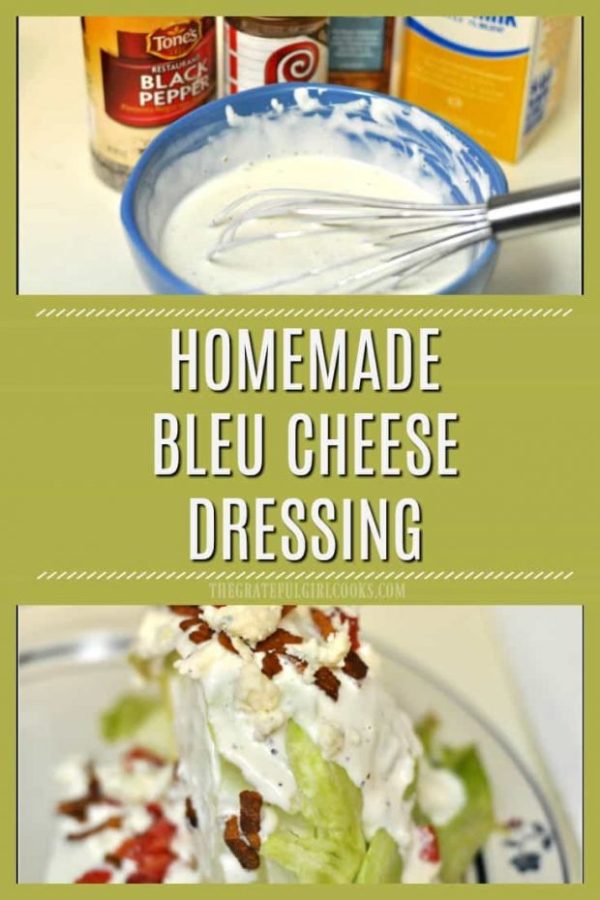
Make delicious, creamy homemade bleu cheese dressing from scratch, with only a few ingredients (a Morton’s Steakhouse copycat recipe).
Make delicious, creamy homemade bleu cheese dressing from scratch, with only a few ingredients (a Morton's Steakhouse copycat recipe).

Do you like Bleu Cheese Dressing? We sure do. A couple of months ago I made this recipe for the very first time. It was so simple to make and tasted terrific, so I thought I would share the “how to’s” with you today!

Not sure about you, but I’m always glad to be able to make something delicious from scratch, and not be dependent on “having” to go to the store to buy a pre-processed item. I really do like knowing what is in my salad dressing, for example.

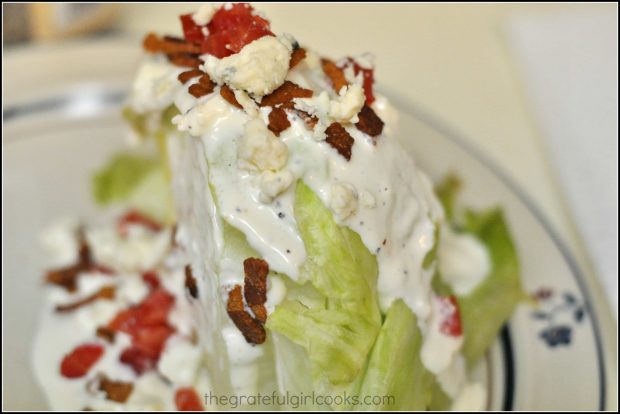
Recently I made homemade bleu cheese dressing from scratch, and used it to top a BLT Wedge Salad that I made for my husband and myself. It was FANTASTIC, and I mean the dressing AND the salad!

Scroll Down For A Printable Recipe Card At The Bottom Of The Page

Make The Salad Dressing Ahead Of Time!

You will need to make up this salad dressing a few hours before you want to serve it, so the flavors have time to fully develop in the refrigerator. The BLT Wedge Salad was so good (and so was this dressing), we actually had it a couple nights in a row.

I then used the dressing for several other mixed green salads in the coming week, so this one batch totally “went the distance” for us! If you like bleu cheese dressing like we do (I think LOVE is a better word here), then you’ll enjoy this simple recipe.

How To Make Bleu Cheese Dressing

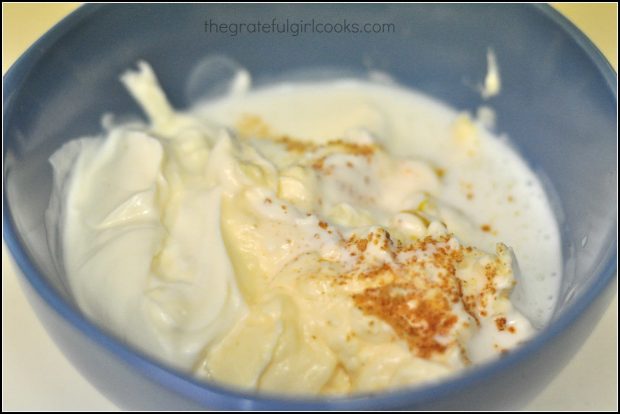
In a medium sized-bowl, whisk together mayonnaise, sour cream, buttermilk, Worcestershire sauce, minced garlic, and seasoning salt. Season this mixture with salt and pepper.

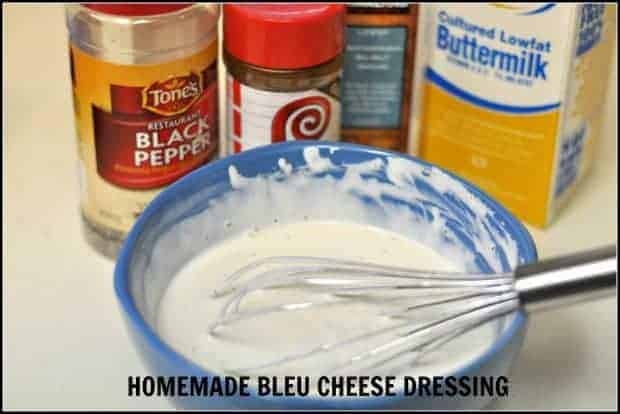
Ingredients for homemade bleu cheese dressing in a medium blue bowl.
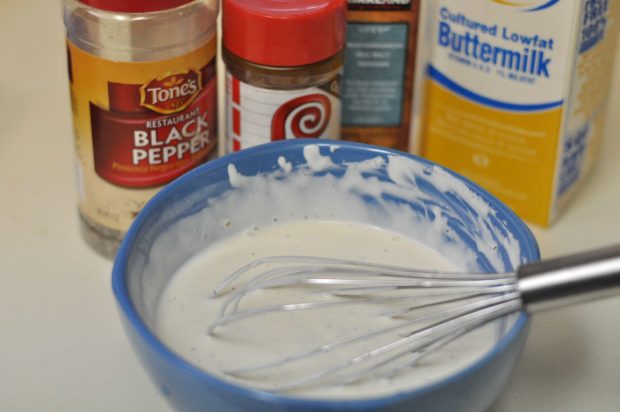
After you whisk the ingredients for bleu cheese dressing together, it will look like this. See how easy it is so far to make homemade salad dressing?

A whisk is used to combine the ingredients for bleu cheese dressing.
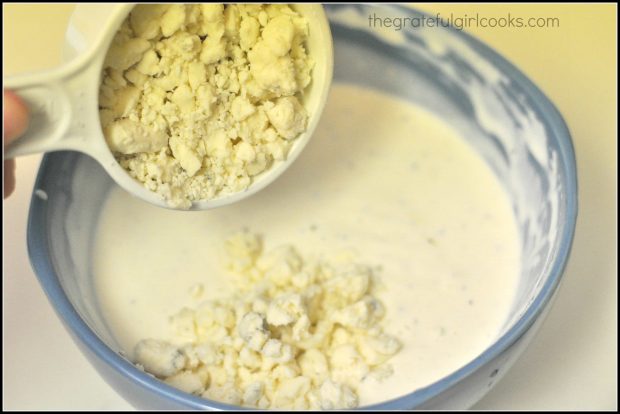
Now it is time to add in the GOOD stuff! Gently fold in the bleu cheese crumbles, and stir until they have been combined.

You are going to want nice little pieces of bleu cheese to stay intact in the bleu cheese dressing, so don’t completely obliterate them. Be gentle. Thank You.

Bleu cheese crumbles are added to the homemade salad dressing in bowl.
Cover the bleu cheese dressing with plastic wrap, and refrigerate for a few hours, so the flavors can have time to mingle, and fully develop. BOOM! You just made this salad dressing!

Serve Homemade Bleu Cheese Dressing Once Chilled

Once the bleu cheese salad dressing is very cold, transfer it to an empty bottle (for easy pouring). When you’re ready to serve, pour over the green salad of your choice, and enjoy!

We really enjoyed this bleu cheese dressing on my homemade wedge salad! Boy, oh boy… was it GOOD! This salad dressing will taste wonderful on any type of mixed green salad!

Homemade bleu cheese dressing is drizzled on on a BLT Wedge Salad.

I really hope you will consider trying this EASY recipe for homemade bleu cheese salad dressing! You may never want to purchase store-bought again!

Thank you for stopping by, and I invite you to come back soon for more family-friendly recipes. Take care, may God bless you… and have a wonderful day!

Looking For More SALAD DRESSING Recipes?

All of my recipes can be found in the Recipe Index, located at the top of the page. I have a nice variety of homemade salad dressings to choose from, including:

Want More Recipes? Get My FREE Newsletter!

I publish a newsletter 2 times per month (1st and 15th) with lots of recipes, tips, etc..
Would you like to join our growing list of subscribers?

There is a Newsletter subscription box on the top right (or bottom) of each blog post, depending on the device you use.
You can submit your e-mail address there, to be added to my mailing list.

Find Me On Social Media:

Facebook page: The Grateful Girl Cooks!
Pinterest:
The Grateful Girl Cooks!
Instagram:
jbatthegratefulgirlcooks

Author's signature

Recipe Source: http://pattycakescooking.blogspot.com.au/2012/01/mortons-steak-house-iceberg-blue-cheese.html

↓↓ PRINTABLE RECIPE BELOW ↓↓

0 from 0 votes
Homemade Bleu Cheese Dressing
Prep Time
5 mins
Cook Time
0 mins
Total Time
5 mins
 

Make delicious, creamy homemade bleu cheese dressing from scratch, with only a few ingredients (a Morton's Steakhouse copycat recipe).

Category: Salad Dressing
Cuisine: American
Keyword: bleu cheese dressing
Servings: 24 servings (1.5 cups-approx. 1 Tablespoon each)
Calories Per Serving: 74 kcal
Author: JB @ The Grateful Girl Cooks!
Ingredients
  • 1 cup real mayonnaise
  • ½ cup sour cream + 1 Tablespoon
  • 2 Tablespoons buttermilk (more if needed, for desired consistency)
  • ¼ teaspoon Worcestershire sauce
  • ¾ teaspoon minced garlic
  • ¼ teaspoon seasoning salt
  • Salt and pepper (to taste)
  • ½ cup crumbled bleu cheese
Instructions
  1. In a medium sized bowl, whisk together the mayonnaise, sour cream, buttermilk, Worcestershire sauce, minced garlic, and seasoning salt.
  2. Season the dressing with salt and pepper, to taste.
  3. Gently fold in the bleu cheese crumbles; stir to combine (leaving the crumbles intact).
  4. If you prefer a thinner dressing, add a bit more buttermilk, then stir to combine.
  5. Cover bowl with plastic wrap. Refrigerate dressing for several hours before serving, to allow the flavors to fully develop.
  6. Serve over your favorite green salad... and enjoy!
Nutrition Facts
Homemade Bleu Cheese Dressing
Amount Per Serving (1 Tablespoon)
Calories 74 Calories from Fat 63
% Daily Value*
Fat 7g11%
Saturated Fat 1g6%
Cholesterol 6mg2%
Sodium 124mg5%
Potassium 10mg0%
Vitamin A 30IU1%
Calcium 17mg2%
* Percent Daily Values are based on a 2000 calorie diet.

Here’s one more to pin on your Pinterest boards!Make delicious, creamy homemade bleu cheese dressing from scratch, with only a few ingredients (a Morton's Steakhouse copycat recipe).

Save

Save

Save

Citrus Vinaigrette

It’s easy to make this delicious citrus vinaigrette in under 5 minutes! It’s a wonderful dressing you’ll enjoy on your mixed green salads!
It's easy to make this delicious citrus vinaigrette in under 5 minutes! It's a wonderful dressing you'll enjoy on your mixed green salads!
If you’re looking for a delicious, light and ridiculously EASY Vinaigrette, bursting with citrus flavor, then may I suggest this Citrus Vinaigrette? I made this easy salad dressing from scratch, to use on a mixed green salad I made last year. It’s so easy to make, and has a light, refreshing citrus flavor that paired well with the salad.

Scroll Down For A Printable Recipe Card At the Bottom Of The Page

How To Make Citrus Vinaigrette

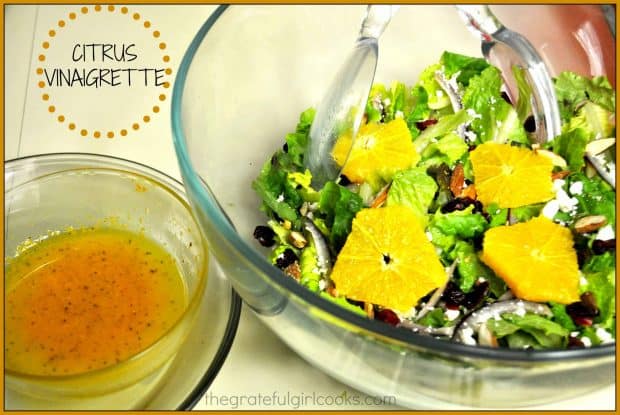
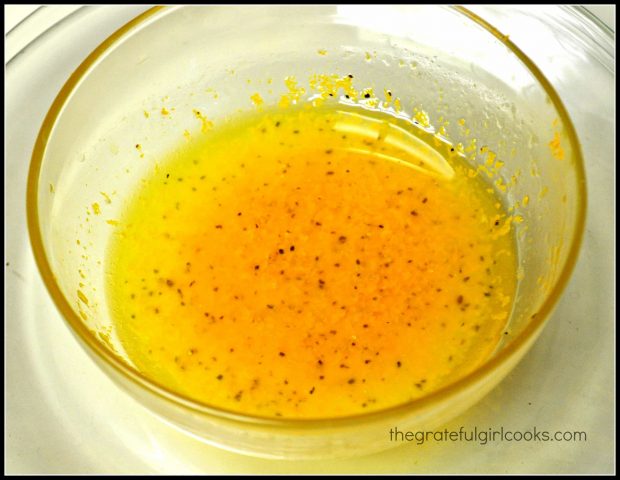
Whisk olive oil, fresh squeezed orange juice, white wine vinegar, garlic powder, orange zest, salt and pepper in a small bowl until fully combined. Cover the bowl with plastic wrap, and refrigerate the dressing for a couple hours to let the flavors fully develop.

Once that is done, simply give the dressing a good stir, and drizzle the citrus vinaigrette over a great tasting mixed green salad. See how EASY it is to make this salad dressing?

Maybe you would like to try my recipe for Spring Greens with Citrus Vinaigrette. The salad features fresh orange slices, feta cheese, roasted almonds, cranberries, and red onions. The pairing of the salad with this citrus vinaigrette is lovely,

The citrus vinaigrette is so easy to make, in under 5 minutes!
Sure hope you will try making this citrus vinaigrette salad dressing.  It’s a great dressing – using fresh ingredients, and without all the chemicals and shelf-stabilizers typically found in processed salad dressings. I think you will really like this!

Thank you for stopping by today. I hope you will come back soon for more delicious, family-friendly recipes. Have a wonderful day.

Looking For More SALAD DRESSING Recipes?

You can find all of my recipes in the Recipe Index, located at the top of the page. I have quite a few salad dressings listed there, including:

Interested In More Recipes?

Thank you for visiting this website. I appreciate you using some of your valuable time to do soIf you’re interested, I publish a newsletter 2 times per month (1st and 15th) with all the latest recipes, and other fun info. I would be honored to have you join our growing list of subscribers, so you never miss a great recipe! 

There is a Newsletter subscription box on the top right side (or bottom) of each blog post, depending on the device you use, where you can easily submit your e-mail address (only) to be included in my mailing list.

You Can Also Find Me On Social Media:

Facebook page: The Grateful Girl Cooks!
Pinterest:
The Grateful Girl Cooks!
Instagram:
jbatthegratefulgirlcooks

Author's signatureRecipe Adapted From: Kristin Bataille, Taste of Home Magazine, Feb./March 2012 Issue

0 from 0 votes
Citrus Vinaigrette
Prep Time
5 mins
Cook Time
0 mins
Total Time
5 mins
 
It's easy to make this delicious citrus vinaigrette in under 5 minutes! It's a wonderful dressing you'll enjoy on your mixed green salads!
Category: Salad Dressing
Cuisine: American
Keyword: citrus vinaigrette
Servings: 4 servings
Calories Per Serving: 67 kcal
Author: JB @ The Grateful Girl Cooks!
Ingredients
  • 2 Tablespoons olive oil
  • 2 Tablespoons fresh squeezed orange juice
  • 1 Tablespoon white wine vinegar
  • 1/8 teaspoon garlic powder
  • 1 teaspoon orange zest (approx. amount from 1 orange)
  • dash salt (to taste)
  • dash pepper (to taste)
Instructions
  1. In a small bowl, mix together all ingredients until fully blended.
  2. Cover the bowl with plastic wrap and refrigerate for several hours so the flavors can fully develop.
  3. When ready to serve, uncover, stir well to re-combine ingredients, and pour over salad. Enjoy!
Recipe Notes

The amount of dressing this makes is enough for a family sized salad (4 servings). The recipe is easily doubled or tripled to make the quantity you wish.

Nutrition Facts
Citrus Vinaigrette
Amount Per Serving (1 g)
Calories 67 Calories from Fat 63
% Daily Value*
Fat 7g11%
Sodium 10mg0%
Potassium 17mg0%
Carbohydrates 1g0%
Vitamin A 15IU0%
Vitamin C 5mg6%
* Percent Daily Values are based on a 2000 calorie diet.

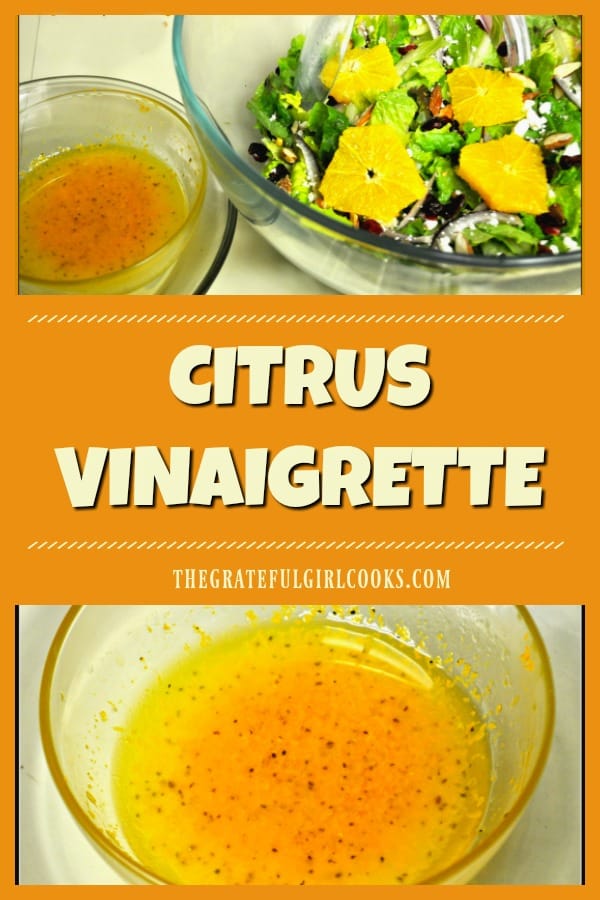
Here’s one more to pin on your Pinterest boards!It's easy to make this delicious citrus vinaigrette in under 5 minutes! It's a wonderful dressing you'll enjoy on your mixed green salads!


Save

Save

Save

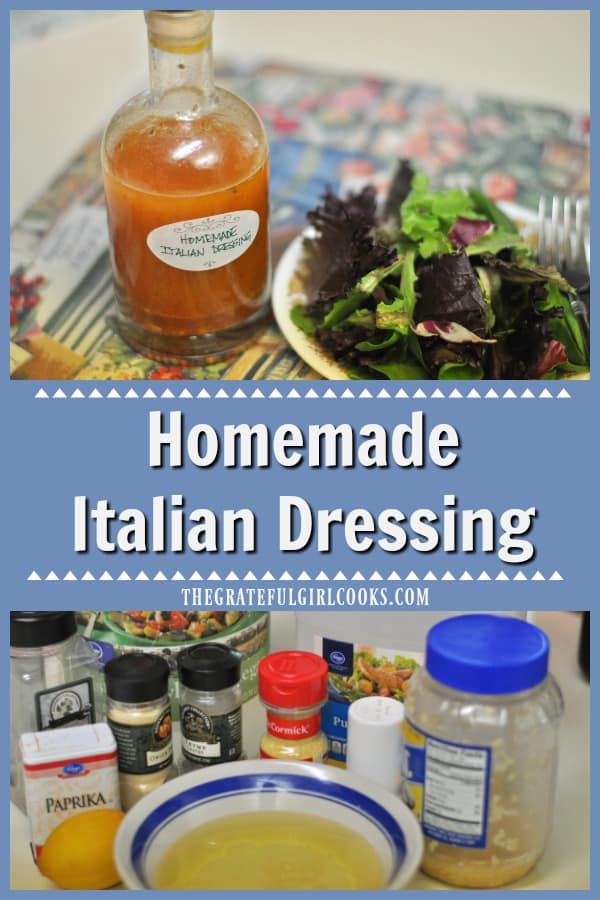
Homemade Italian Dressing

Make an absolutely delicious homemade Italian dressing from scratch in about 5 minutes, to flavor your favorite mixed green salads.Make an absolutely delicious homemade Italian dressing from scratch in about 5 minutes, to flavor your favorite mixed green salads.
I found this recipe for homemade Italian dressing years and years ago (can’t remember where), and wrote it down on a 3×5 card. The only writing on the index card other than the recipe is my description: “GOOD!” Super simple to make, and FULL of flavor, this Homemade Italian Dressing recipe is my “go to” when I want to make a quick “from scratch” salad dressing.

Seriously… from start to finish, this tasty homemade Italian dressing takes less than 5 minutes to make! As an added bonus… there are no weird “shelf-stabilizing” ingredients in it (with names I can’t pronounce) to be found. Most ingredients are basic ingredients and spices I always have in my home. Can’t beat that! Here’s how you make this lickety-split!

Scroll Down For A Printable Recipe Card At The Bottom Of The Page

How To Make Homemade Italian Dressing

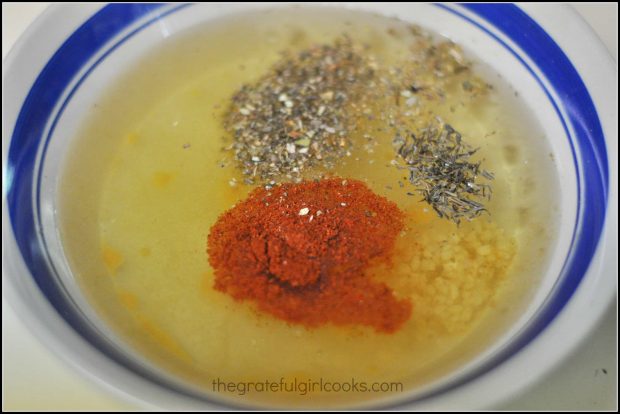
To make this homemade Italian dressing, measure the oil, lemon juice and white vinegar into a bowl. Add the rest of the dry ingredients (salt, sugar, dry mustard, onion powder, paprika, oregano, thyme), and 2 minced garlic cloves.

Whisk these ingredients together until the sugar and salt have dissolved and the mixture is fully blended.

The ingredients for the salad dressing in a bowl, before blending them together.
Why Is This Homemade Italian Dressing Red In Color?

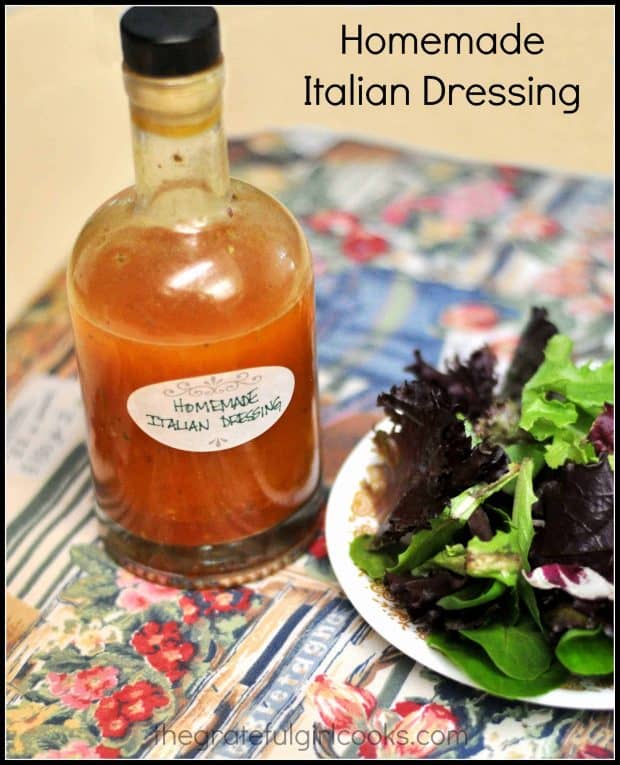
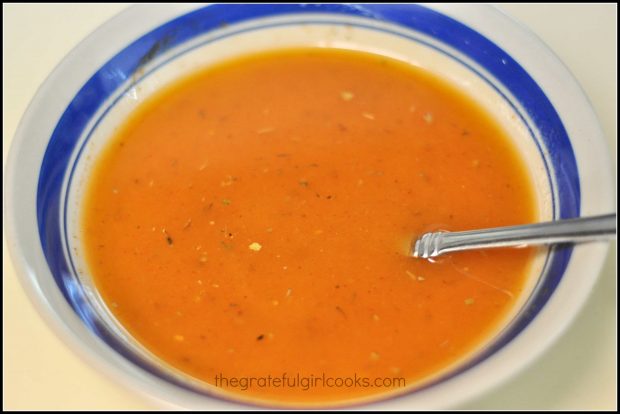
Once blended, the homemade Italian dressing will look like this photo below. The red color does NOT come from ketchup, but from the addition of the paprika!

Homemade Italian Dressing is red in color, due to the paprika in it.
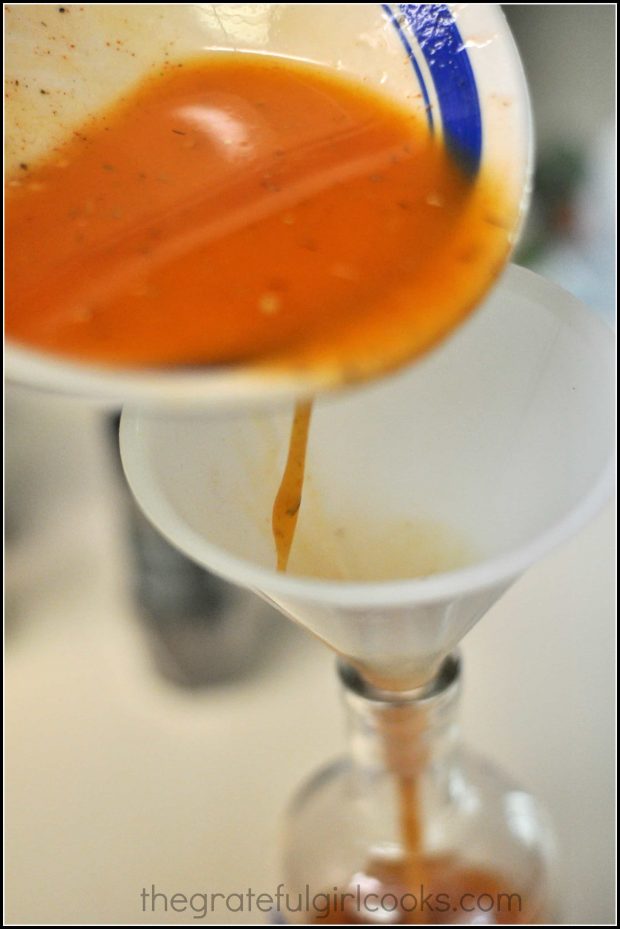
Pour the salad dressing into a bottle or jar that can be sealed. I usually pour it through a funnel for less spills.

Pour the salad dressing into bottle using a funnel.For BEST Homemade Italian Dressing Flavor

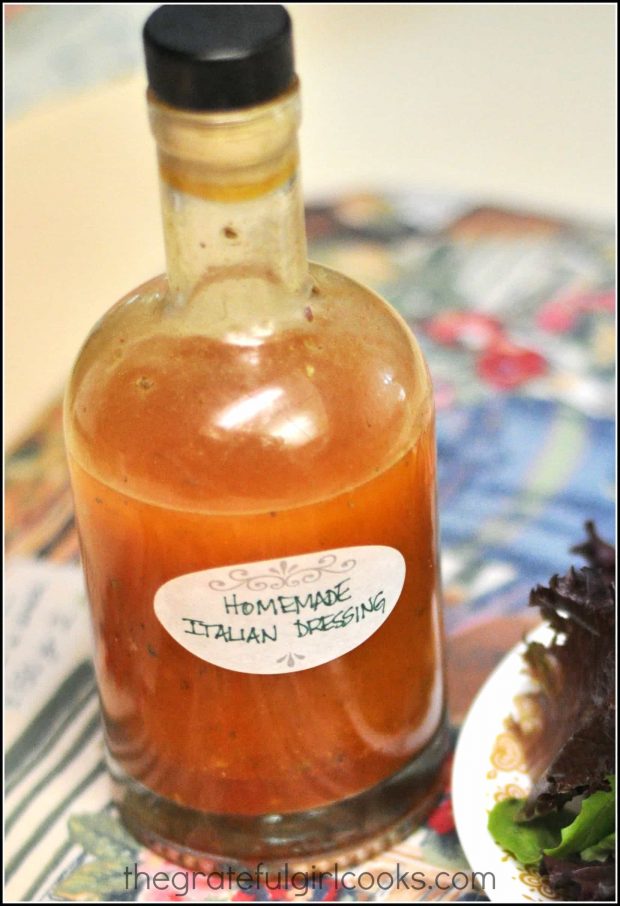
Put a lid on the bottle and refrigerate for at least 2 hours. This helps the flavors to become fully incorporated. Once you’re ready to dress your salad, be sure to shake the homemade Italian dressing well, before serving.

The homemade Italian dressing can be stored in a bottle with a lid.
That’s IT!!! I think it took longer to write this blog post than it did to make this delicious homemade Italian  dressing. Hope you’ll give it a try on your next mixed green salad. I think you will really like it! Have a great day.

Looking For More SALAD DRESSING Recipes?

You can find all of my salad dressing recipes in the Recipe Index, located at the top of the page. A few of our family favorites are:

Interested In More Recipes?

Thank you for visiting this website. I appreciate you using some of your valuable time to do soIf you’re interested, I publish a newsletter 2 times per month (1st and 15th) with all the latest recipes, and other fun info. I would be honored to have you join our growing list of subscribers, so you never miss a great recipe!
There is a Newsletter subscription box on the top right side (or bottom) of each blog post, depending on the device you use, where you can easily submit your e-mail address (only) to be included in my mailing list.

You Can Also Find Me On Social Media:

Facebook page: The Grateful Girl Cooks!
Pinterest:
The Grateful Girl Cooks!
Instagram:
jbatthegratefulgirlcooks

Author's signatureRecipe Source: unknown

0 from 0 votes
Homemade Italian Dressing
Prep Time
5 mins
Cook Time
0 mins
Total Time
5 mins
 

Make an absolutely delicious homemade Italian dressing from scratch in about 5 minutes, to flavor your favorite mixed green salads.

Category: Salad Dressing
Cuisine: Italian
Keyword: Italian dressing
Servings: 24 (1½ cups total)
Calories Per Serving: 122 kcal
Author: JB @ The Grateful Girl Cooks!
Ingredients
  • 1 cup vegetable oil
  • 1/4 cup fresh squeezed lemon juice
  • 1/4 cup white vinegar
  • 1 teaspoon salt
  • 1 teaspoon granulated sugar
  • 1/2 teaspoon dry mustard
  • 1/2 teaspoon onion powder
  • 1/2 teaspoon paprika
  • 1/2 teaspoon oregano
  • 1/8 teaspoon thyme
  • 2 garlic cloves , minced
Instructions
  1. Measure oil, lemon juice and vinegar into bowl. Add the rest of the ingredients. Whisk well to fully combine. Pour into a container that can be sealed well. Refrigerate salad dressing for at least 2 hours for BEST flavor.
  2. Shake bottle well, before serving.
  3. Serve, and enjoy!
Nutrition Facts
Homemade Italian Dressing
Amount Per Serving (1 Tablespoons)
Calories 122
% Daily Value*
Sodium 97mg4%
Potassium 2mg0%
Vitamin A 20IU0%
Vitamin C 1.1mg1%
Calcium 1mg0%
* Percent Daily Values are based on a 2000 calorie diet.

Here’s one more to pin on your Pinterest boards!Make an absolutely delicious homemade Italian dressing from scratch in about 5 minutes, to flavor your favorite mixed green salads.


Save

Save

Save

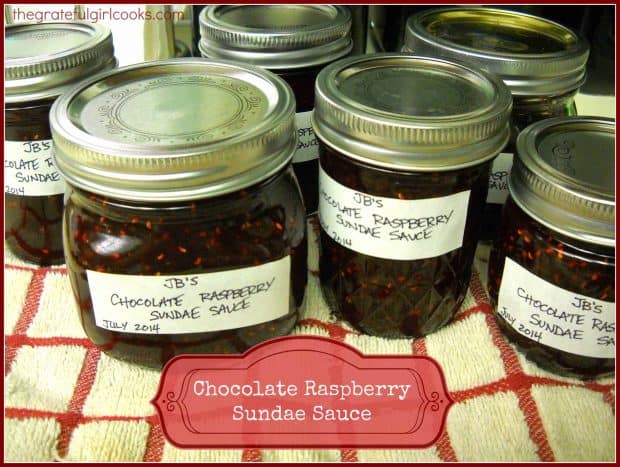
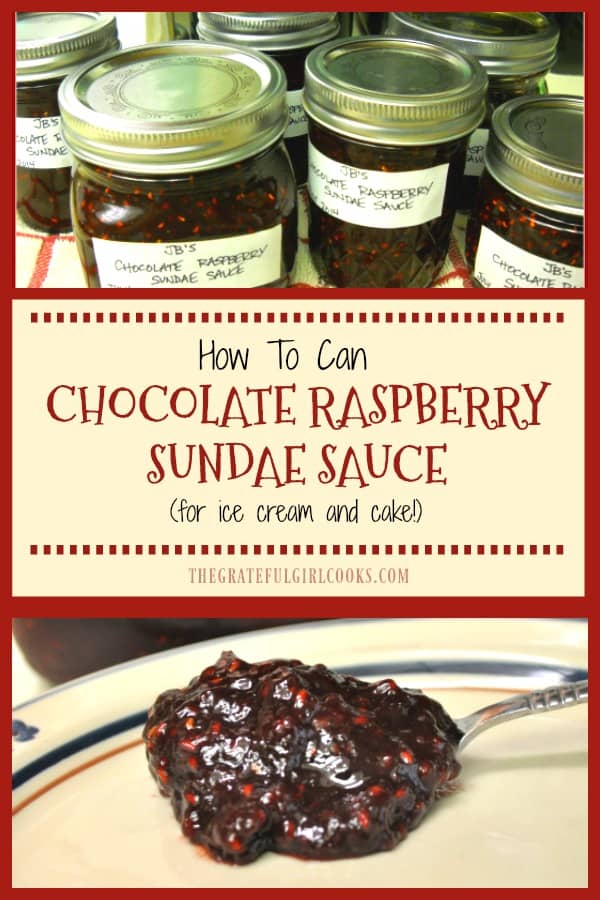
Chocolate Raspberry Sundae Sauce

Chocolate Raspberry Sundae Sauce is a great topping for ice cream or cake! Learn how to can this thick chocolate sauce for long term storage!Chocolate Raspberry Sundae Sauce is a perfect topping for ice cream or cake! Learn how to can this thick chocolate flavored sauce for long term storage!
Last year I found this recipe for Chocolate Raspberry Sundae Sauce in a book I received as a gift from my husband, called “Ball Complete Book of Home Preserving”.  It’s where I found this absolutely DELICIOUS recipe for this yummy dessert topping! The book has 400 different recipes for home canning that I am so excited about, since I love to make jams and jellies, and have now also begun pressure canning veggies from our garden. This chocolate raspberry sundae sauce is one of my more recent finds!

One of the recipes that caught my eye was this one. Chocolate Raspberry Sundae Sauce. Are you kidding me? I could hardly wait to try it out.  I made a batch last summer, after going raspberry picking at a local U-Pick farm. The recipe did not disappoint!

Scroll Down for A Printable Recipe Card At The Bottom Of The Page

Picking raspberries at a local farm to make chocolate raspberry sundae sauce!

Chocolate And Raspberry Flavors Are A Winning Combination!

The flavors of the raspberries and the chocolate come together well in this thick, sweet sauce. The sauce is fantastic served on top of ice cream, brownies, pound cake, cheesecake, etc. When serving it over ice cream, I warmed it up just a bit, and it was perfect!

I gave away several jars of this chocolate raspberry sundae sauce for birthdays and Christmas last year… guess I will need to make some more very soon!  If you are NOT canning it for long term storage, then make sure you keep the jars of sauce stored in refrigerator. It will only last short-term, but could still be given as gifts, or enjoyed with dessert!

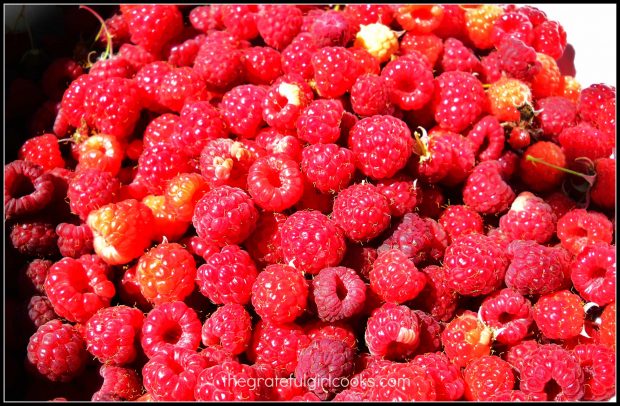
I used some of these fresh raspberries that I picked for the sauce. Nothing beats the flavor of sun-kissed fresh raspberries!

Fresh raspberries ready to make sundae sauce!

Chocolate Raspberry Sundae Sauce Is Canned In A Water Bath Canner

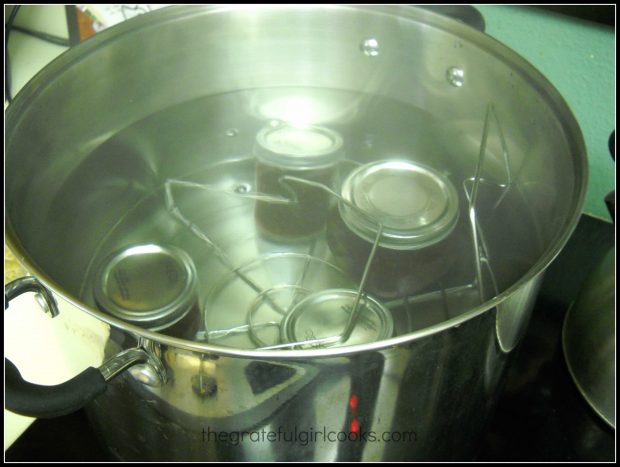
Once the jars are filled per instructions (see printable recipe below), they are canned. This is a photo of the jars in my water bath canner, ready for processing. The process is simple and doesn’t take too much time to process jars of this sauce to make them stable enough for long term storage.

Loading jars of chocolate raspberry sauce into canner for processing.

Ready To Enjoy!

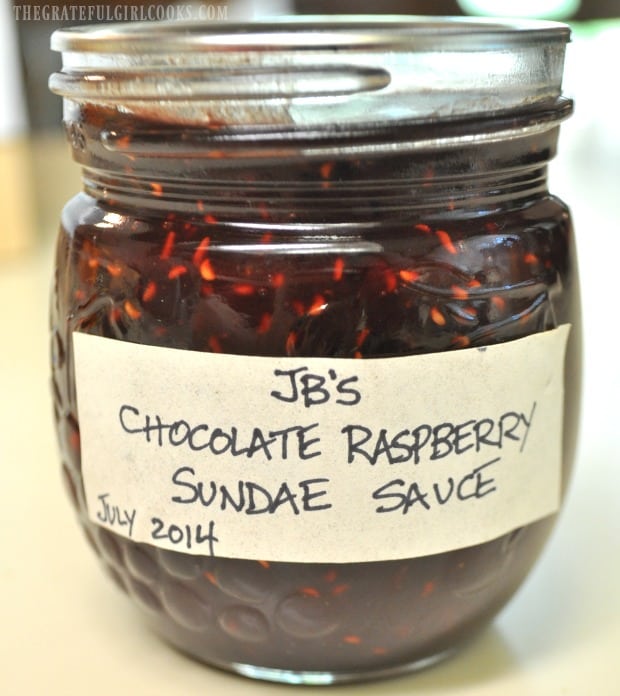
And there you have it… cute little jars of chocolate raspberry sundae sauce. It’s a perfect topping for ice cream or cake! I’ve even used it on cheesecake, with great results! You could even eat it straight from the jar (not that I have any experience with THAT- wink wink).

This chocolate raspberry sundae sauce is packed with decadent flavor, and I am sure you will love it!

Jar of chocolate raspberry sundae sauce ready to store in pantry.

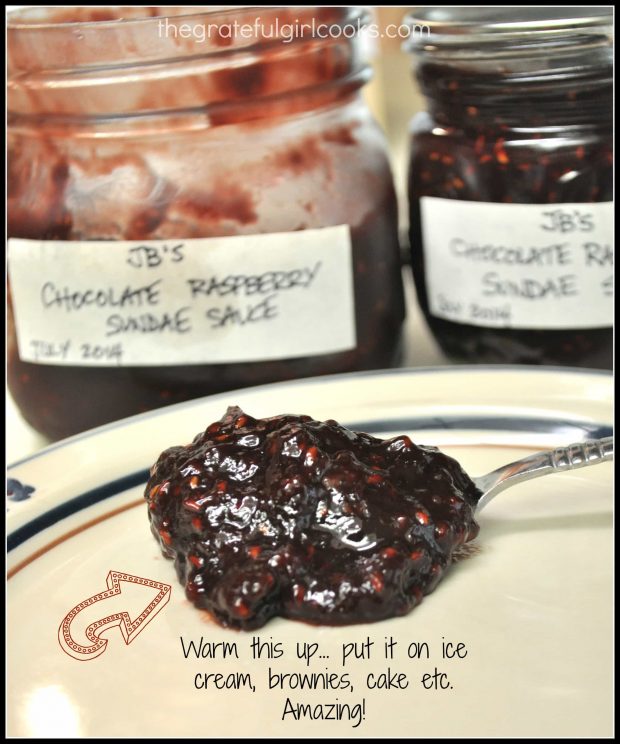
See how thick the chocolate raspberry sundae sauce turns out? It really is delicious!!!

Sundae sauce is thick and rich, and tastes great on ice cream and cake.

Hope you will give this recipe for chocolate raspberry sundae sauce a try. You will love it! Thank you for stopping by, and I hope you will come back soon.

Looking For More SAUCE Recipes?

You can find all of my recipes in the Recipe Index, which is located at the top of the page. I have some wonderful recipes for a variety of sauces, including:

Interested In More Recipes?

Thank you for visiting this website. I appreciate you using some of your valuable time to do soIf you’re interested, I publish a newsletter 2 times per month (1st and 15th) with all the latest recipes, and other fun info. I would be honored to have you join our growing list of subscribers, so you never miss a great recipe!
There is a Newsletter subscription box on the top right side (or bottom) of each blog post, depending on the device you use, where you can easily submit your e-mail address (only) to be included in my mailing list.

You Can Also Find Me On Social Media:

Facebook page: The Grateful Girl Cooks!
Pinterest:
The Grateful Girl Cooks!
Instagram:
jbatthegratefulgirlcooks

Have a fantastic day!

Author's signatureRecipe Source: “Ball Complete Book of Home Preserving”, page 188, published by Robert Rose, Inc.

↓↓ PRINTABLE RECIPE BELOW ↓↓

0 from 0 votes
Chocolate Raspberry Sundae Sauce
Prep Time
15 mins
Cook Time
10 mins
Total Time
25 mins
 
Chocolate Raspberry Sundae Sauce is a perfect topping for ice cream or cake! Learn how to can this thick chocolate flavored sauce for long term storage!
Category: Dessert Sauce
Cuisine: American
Keyword: chocolate raspberry sundae sauce
Servings: 6 8 oz. jars
Calories Per Serving: 60 kcal
Author: JB @ The Grateful Girl Cooks!
Ingredients
  • 1/2 cup unsweetened cocoa powder
  • 1 package powdered pectin (1.75 ounces)
  • 4 1/2 cups crushed red raspberries
  • 4 Tablespoons fresh squeezed lemon juice
  • 6 3/4 cups granulated sugar
Instructions
  1. First, get your water bath canner, lids, and canning jars ready to go (per normal canning procedures for cleaning/heating jars and lids).
  2. Mix together the cocoa and pectin in a medium sized bowl until well combined. Set aside.
  3. Put the crushed raspberries and the lemon juice in a large stainless steel saucepan. Whisk in the pectin/cocoa mixture, until it dissolves. Turn your stovetop heat to high; bring this mixture to a full boil. Stir frequently.
  4. Once the fruit mixture is boiling, add the sugar all at one time. Stir to blend. Bring mixture to a full rolling boil; stir constantly so it doesn't burn. Boil it (a full, rolling boil) for 1 minute, then remove pan from heat, skim off any foam that has collected on top of the sauce, and discard.
  5. Ladle the HOT sauce into your hot, prepared jars. Be sure to leave 1/4 inch headspace. Remove any air bubbles that may be trapped in jar. Adjust the headspace (if needed). Add additional sauce if necessary to maintain 1/4' headspace. Wipe the rim of the jar to remove any residual sauce (to ensure a good seal). Center the lid on the jar, then screw the jar band down to finger-tip tight resistance.
  6. Carefully place the jars into your canner. Make sure the jars are completely covered with water (fill about an inch over the top of the jars). Bring the water in the canner to a boil, then cover, and process jars for 10 minutes. After 10 minutes, remove the canner lid. Wait an additional 5 minutes, then remove the jars to a dish towel to cool. Do not move the jars around while they cool. You should hear the jars make a "ping" sound several minutes later, as they seal.
  7. Once jars have sealed and are completely cooled, place them in storage or pantry.
Nutrition Facts
Chocolate Raspberry Sundae Sauce
Amount Per Serving (1 Tablespoon)
Calories 60
% Daily Value*
Sodium 1mg0%
Potassium 15mg0%
Carbohydrates 15g5%
Sugar 14g16%
Vitamin C 1.7mg2%
Calcium 2mg0%
Iron 0.1mg1%
* Percent Daily Values are based on a 2000 calorie diet.

Here’s one more to pin on your Pinterest boards!Chocolate Raspberry Sundae Sauce is a perfect topping for ice cream or cake! Learn how to can this thick chocolate flavored sauce for long term storage!


Save

Save

Save

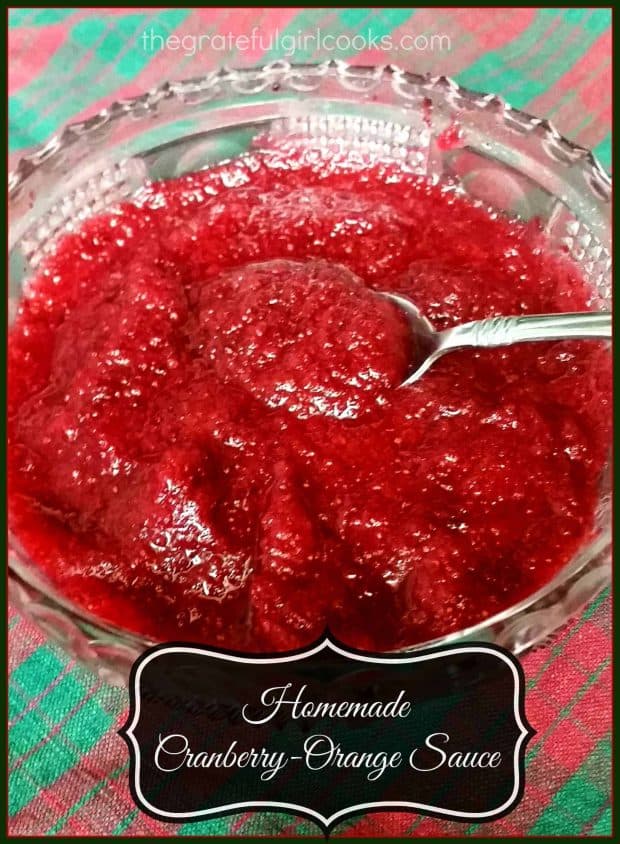
Homemade Cranberry-Orange Sauce

Four ingredients and a food processor are all you need to make delicious, fresh, homemade cranberry-orange sauce in just a few minutes!4 ingredients and a food processor are all you need to make delicious, fresh, homemade cranberry-orange sauce in just a few minutes!
The Thanksgiving and Christmas holidays are now in the history books, but I want to publish this recipe for Homemade Cranberry-Orange Sauce on my blog, so I will have it handy for the future.

My mom used to make this cranberry sauce (in a chunky version) as I was growing up, but I’d never made the recipe for our family until this Christmas. I found the index card the recipe was written on years ago in an old recipe box, so I decided to give it a try!

No More Gelatinous Blobs Of Cranberry Sauce For Us!

For years my “go to” for cranberry sauce was the blob found in a can (cranberry jelly), or the whole cranberry sauce (also found in the can). Guess I was just in the habit of grabbing a can while doing my grocery shopping for holiday meals and never gave it another thought.

Truthfully, I was always a bit grossed out as that gelatinous blob of cranberry jelly came sliding and wobbling out of the can… but that’s another story. I still bought it, and would always add just a tiny bit to my plate, because that’s what you’re supposed to do at Thanksgiving, right? Until NOW!

Making Fresh, Homemade Cranberry-Orange Sauce Is EASY To Prepare!

Well, my tastes have certainly changed. Enter this amazing, fresh, homemade cranberry-orange sauce. Did I mention FRESH? Plus, there are only a few ingredients necessary to make it, which is a win-win, in my book.

The cranberry sauce is ridiculously easy to prepare (using a food processor), and the taste is light-years ahead of the canned stuff. No  comparison! I LOVE IT, and can eat it right out of the bowl (shhh… my little secret!)

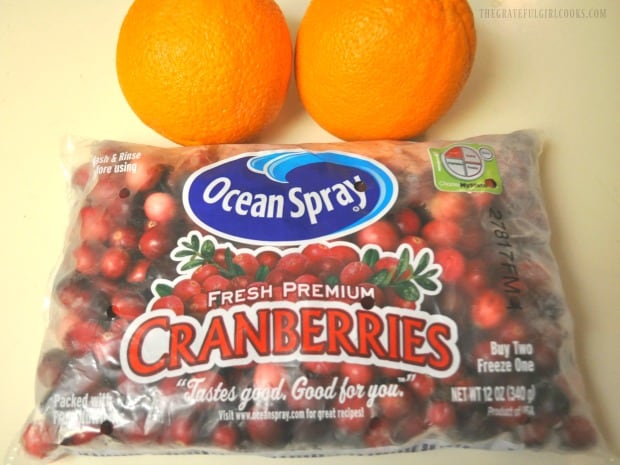
Fresh cranberries and oranges are two of four ingredients needed to make sauce.

You don’t have to wait for the Thanksgiving or Christmas holidays to make this sauce. It would be a delicious accompaniment to top off pork or chicken dishes. It’s vibrant flavors will add to the taste of the meal!

Truthfully, I don’t know what took me so long to get on board with this, but now that I have, I don’t think I will ever buy canned cranberry sauce for a holiday meal ever again. EVER!

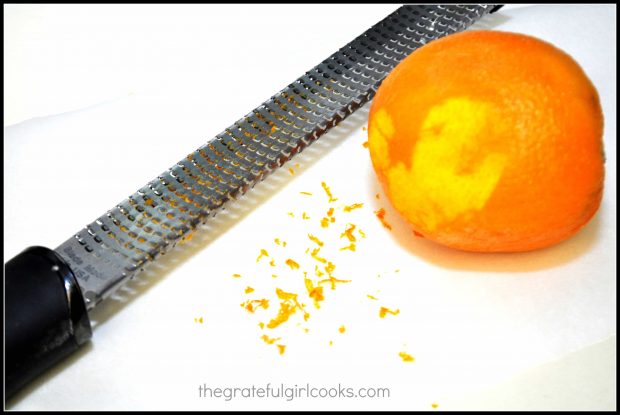
The zest of an orange is used to make homemade cranberry-orange sauce.

Use A Food Processor To Make Homemade Cranberry-Orange Sauce

This sauce can be made chunky or semi-smooth, using a food processor or heavy duty blender. All you do is process the ingredients together until it reaches your desired consistency!

It’s so simple, and so delicious! Once you make this cranberry sauce once, I’ll bet you will never go back to canned cranberry gelatinous blobs, either! Ha Ha!

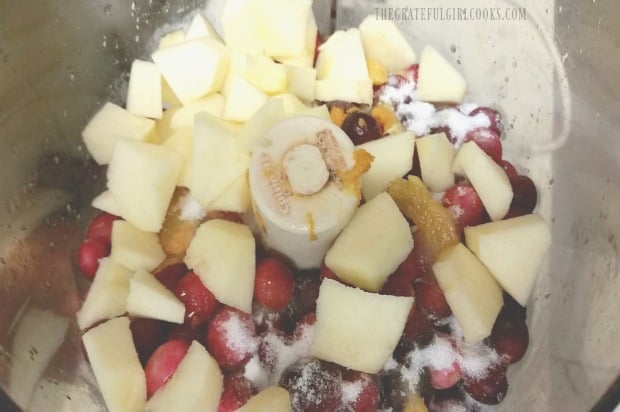
Ingredients for homemade cranberry-orange sauce are pulverized in a food processor.

Fresh cranberries, an apple, an orange and a bit of sugar are the only ingredients necessary to make this delicious, homemade cranberry-orange sauce! And boy… does it ever taste GOOD!

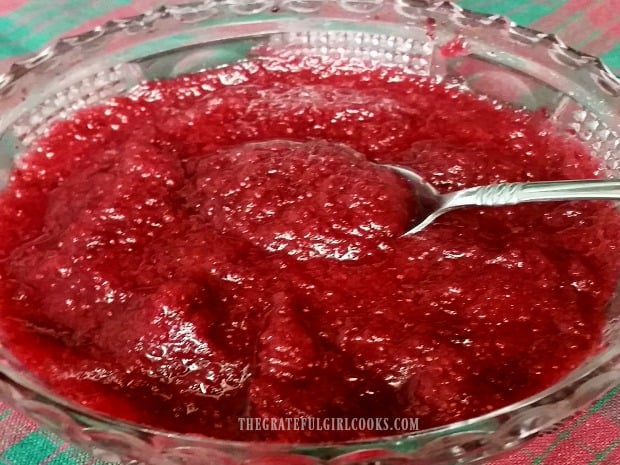
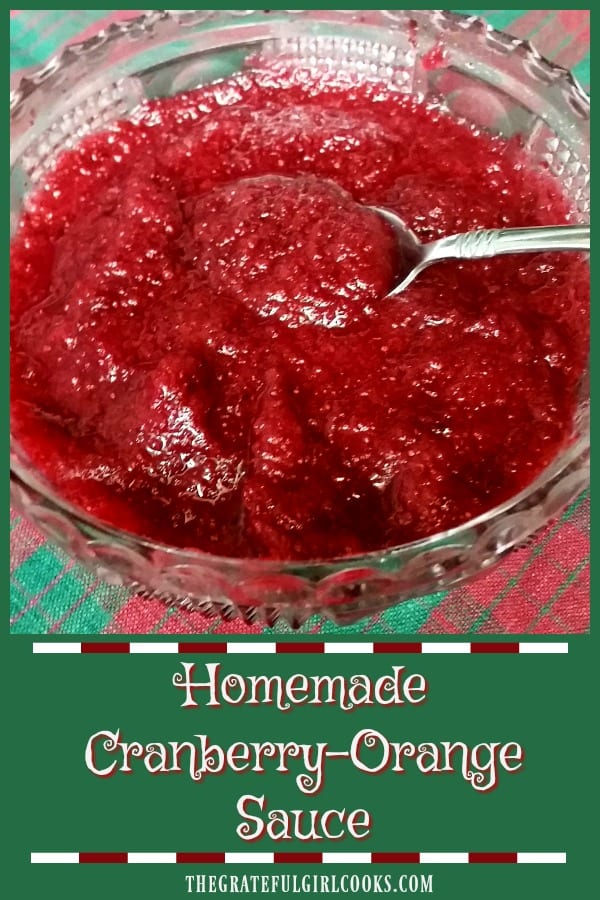
The homemade cranberry-orange sauce is ready to serve!

Sure hope you’ll give this yummy homemade cranberry-orange sauce a try, and trust you will enjoy it, too!  If you enjoy this sauce, you might also be interested in my recipe for whole berry cranberry-orange sauce! Have a great day!

Interested In More Recipes?

Thank you for visiting this website. I appreciate you using some of your valuable time to do soIf you’re interested, I publish a newsletter 2 times per month (1st and 15th) with all the latest recipes, and other fun info. I would be honored to have you join our growing list of subscribers, so you never miss a great recipe! 

There is a Newsletter subscription box on the top right side (or bottom) of each blog post, depending on the device you use, where you can easily submit your e-mail address (only) to be included in my mailing list.

You Can Also Find Me On Social Media:

Facebook page: The Grateful Girl Cooks!
Pinterest:
The Grateful Girl Cooks!
Instagram:
jbatthegratefulgirlcooks

Author's signatureRecipe Source: My Mom

↓↓ PRINTABLE RECIPE BELOW ↓↓

0 from 0 votes
Homemade Cranberry-Orange Sauce
Prep Time
10 mins
Cook Time
0 mins
Total Time
10 mins
 

Four ingredients and a food processor are all you need to make delicious, fresh, homemade cranberry-orange sauce in just a few minutes!

Category: Side Dish
Cuisine: American
Keyword: cranberry-orange sauce
Servings: 8 1/4 cups per serving
Calories Per Serving: 60 kcal
Author: JB @ The Grateful Girl Cooks!
Ingredients
  • 12 ounces fresh cranberries (1 bag)
  • Zest of 1 orange
  • Juice of 1 orange
  • 1 medium apple (any variety), peeled, cored, seeded, and cut into chunks
  • 1/4 cup granulated sugar (plus more to taste, if desired)
Instructions
  1. Place all ingredients into a food processor (or heavy duty blender). Process until all ingredients are mixed and consistency is to your liking... chunky or semi-smooth.

  2. Taste. Add additional sugar, if desired.
  3. Place sauce into serving bowl; Cover and keep refrigerated until ready to serve. Enjoy!

Nutrition Facts
Homemade Cranberry-Orange Sauce
Amount Per Serving (1 (1/4 cup per serving))
Calories 60 Calories from Fat 9
% Daily Value*
Fat 1g2%
Saturated Fat 1g6%
Sodium 1mg0%
Potassium 75mg2%
Carbohydrates 16g5%
Fiber 3g13%
Sugar 11g12%
Protein 1g2%
Vitamin A 59IU1%
Vitamin C 12mg15%
Calcium 7mg1%
Iron 1mg6%
* Percent Daily Values are based on a 2000 calorie diet.

Here’s one more to pin on your Pinterest boards!Four ingredients and a food processor are all you need to make delicious, fresh, homemade cranberry-orange sauce in just a few minutes!


Save

Save

Save

Save

Save

Save

Marinated, Pan-Seared Mexican Chicken

Marinated, pan-seared Mexican chicken is a delicious, low-fat, easy to prepare dish. The chicken will surprise you with its depth of flavor.Marinated, pan-seared Mexican chicken is a delicious, low-fat, easy to prepare dish. The chicken will surprise you with its depth of flavor.

Do you cook with chicken often? I sure do!  The recipe I want to share today with you is for Marinated, Pan-Seared Mexican Chicken. This recipe is delightfully GOOD. An added benefit is that it’s low in calories (under 200 per serving), so it’s a win-win in my book!

My favorite food to eat is Mexican food. I love the flavors in most Mexican-inspired dishes, which is why I really like this one. Pan-seared Mexican chicken has great flavor, from spices like cumin, chili powder, garlic, oregano and lime juice. YUM!

The recipe for pan-seared Mexican chicken is easy to prepare. I have modified it slightly from a recipe I found on Skinnytaste.com a while ago.

If you can mix up a marinade, add chicken to the marinade, then cook it, you can make this delicious chicken! Here’s how to make it:

Scroll Down For A Printable Recipe Card At The Bottom Of The Page

It’s Easy To Make Marinated Pan-Seared Mexican Chicken!

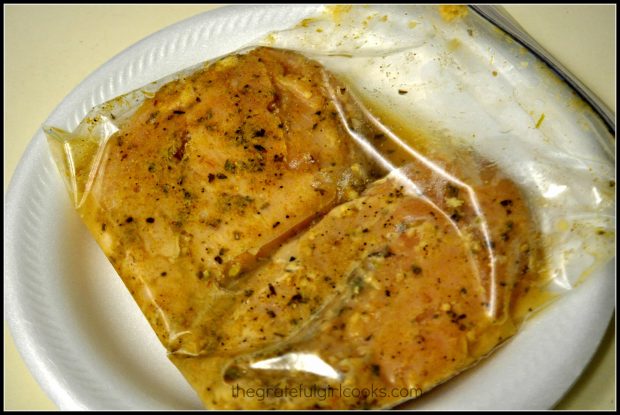
Marinate the chicken breasts for at least half an hour. TIP: The chicken tastes even better if you let it marinate all day! If you have the time, go for all day marinating.

As you can see in the photo below, I only made two small chicken breasts, since there was only two of us eating this meal.

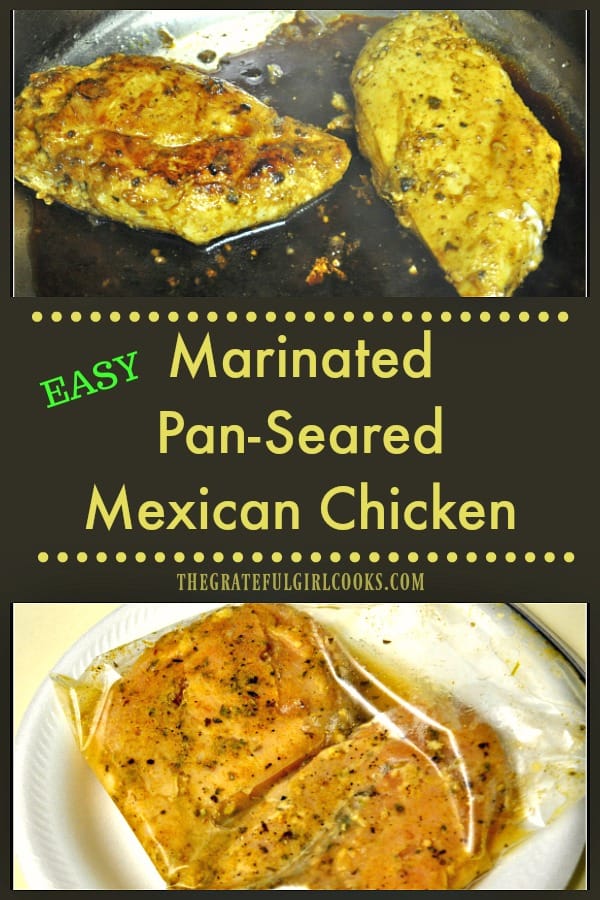
Chicken breasts are marinated before cooking.

Time To Cook The Pan-Seared Mexican Chicken Breasts!

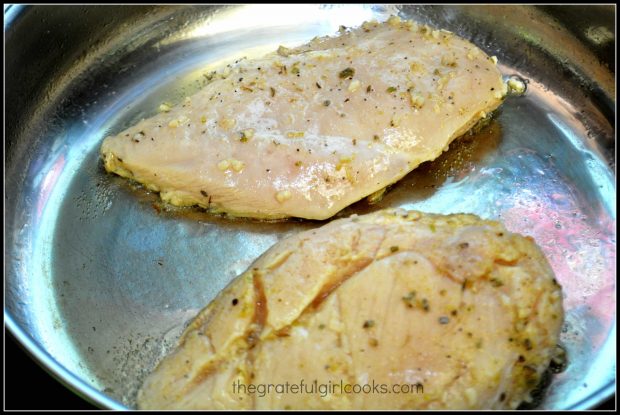
Spray a large skillet with non-stick cooking spray OR add a Tablespoon of oil. Once the oil is hot, add the marinated chicken breasts.

You can see in the photo below the little pieces of minced garlic on each piece. There’s a lot of flavor saturated on those chicken breasts!

The marinated chicken breasts are pan-seared in a hot skillet.

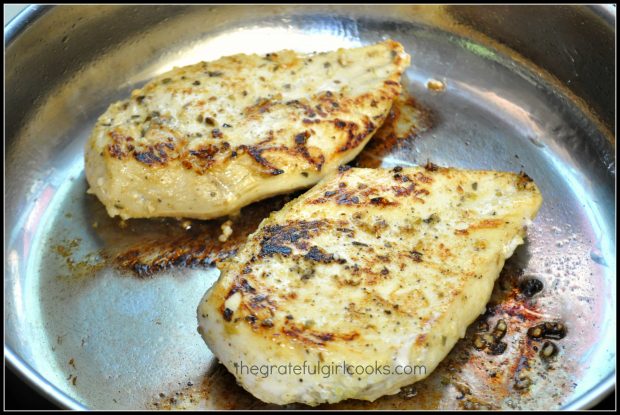
Cook each side of the pan-seared Mexican chicken until it is golden brown, and cooked through. This usually will take about 4-8 minutes per side depending on the chickens thickness.

The internal temperature of the cooked chicken should be at 165°F. when the chicken breasts are finished cooking.

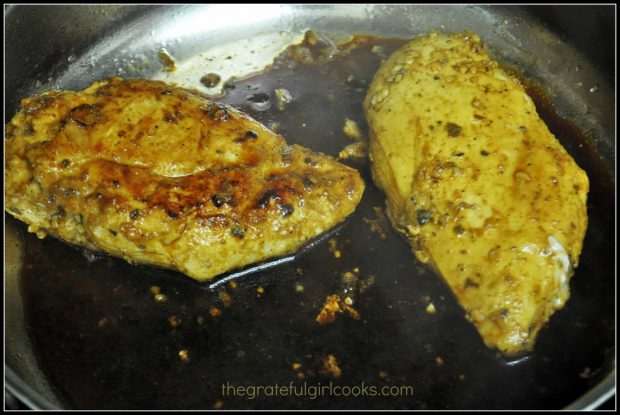
Two of the marinated, pan-seared Mexican chicken breasts cook in a skillet.

Add the reserved batch of marinade plus 1/4 cup water to the skillet, halfway through cooking the second side of the chicken breasts.

Cook the pan-seared Mexican chicken in the marinade for 3-4 minutes (until cooked through). Spoon the pan drippings over the chicken as it cooks. Once done, the chicken is ready to serve!

Serve The Pan-Seared Marinated Chicken

This pan-seared Mexican chicken recipe is to prepare, and it’s delicious! We enjoy this chicken, and usually serve it with white steamed rice on the side.

You might also enjoy topping the cooked chicken breasts with some pico de gallo salsa as a garnish! That really takes the flavor up another notch!

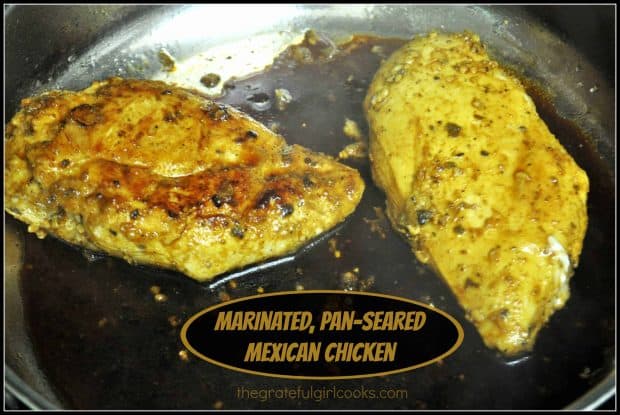
Finished cooking, the pan-seared Mexican chicken has darkened in color.

Hope you enjoy these tasty (and easy) pan-seared Mexican chicken breasts! They are really easy to prepare, and have good flavor!

Thanks for stopping by today, and I invite you to come back again soon for more family-friendly recipes. Take care, and have a GREAT day!

Looking For More CHICKEN Recipes?

You can find all of my chicken recipes in the Recipe Index, located at the top of the page. A few of those recipes include:

Want More Recipes? Get My FREE Newsletter!

I publish a newsletter 2 times per month (1st and 15th) with lots of recipes, tips, etc..
Would you like to join our growing list of subscribers?

There is a Newsletter subscription box on the top right (or bottom) of each blog post, depending on the device you use.
You can submit your e-mail address there, to be added to my mailing list.

Find Me On Social Media:

Facebook page: The Grateful Girl Cooks!
Pinterest:
The Grateful Girl Cooks!
Instagram:
jbatthegratefulgirlcooks

Author's signatureRecipe Adapted from: http://www.skinnytaste.com/2013/08/grilled-chicken-with-black-bean-mango.html

↓↓ PRINTABLE RECIPE BELOW ↓↓

0 from 0 votes
Marinated, Pan-Seared Mexican Chicken
Prep Time
5 mins
Cook Time
12 mins
Total Time
17 mins
 
Marinated, pan-seared Mexican chicken is a delicious, low-fat, easy to prepare dish. The chicken will surprise you with its depth of flavor.
Category: Entree
Cuisine: Mexican
Keyword: pan-seared Mexican chicken
Servings: 4 servings
Calories Per Serving: 140 kcal
Author: JB @ The Grateful Girl Cooks!
Ingredients
  • 4 boneless skinless chicken breasts (4 ounces each)
  • salt and pepper (to taste)
  • 6 cloves minced garlic
  • 2 teaspoons cumin
  • 1 teaspoon dried oregano
  • 2 limes, JUICE OF
  • 1/4 cup water
Instructions
  1. Season chicken breasts lightly with salt and pepper. Place chicken breasts in large bowl.

  2. In separate bowl, mix together minced garlic, cumin, oregano, and lime juice. Pour HALF of the marinade sauce over chicken. Reserve the other half of  marinade for later.

  3. Coat chicken with marinade. Cover and refrigerate for at LEAST half an hour. (The longer the chicken marinates, the better the flavor!)

  4. Spray skillet with non-stick cooking spray. Heat on medium high until very hot. Once skillet is hot, place marinated chicken into skillet. They should sizzle when added to skillet. Discard marinade that the chicken was in. Cook chicken 3-4 minutes, then turn to other side. Halfway through cooking second side of chicken, add the reserved marinade, plus 1/4 cup water to the skillet. Cook for 3-4 additional minutes, continually spooning sauce over the top of chicken breasts. This will coat the chicken and will help to darken the color. Cook chicken until cooked all the way through.

  5. When chicken is done, remove from skillet. If desired, serve with pico de gallo as a garnish. Serve chicken with rice, or your favorite side dish. Enjoy!

Recipe Notes

Caloric calculation was made based on using a 4 ounce small boneless, skinless chicken breast per serving. Larger portions of chicken will have more calories.

Nutrition Facts
Marinated, Pan-Seared Mexican Chicken
Amount Per Serving (1 (4 ounce) breast)
Calories 140 Calories from Fat 27
% Daily Value*
Fat 3g5%
Cholesterol 72mg24%
Sodium 134mg6%
Potassium 455mg13%
Carbohydrates 2g1%
Protein 24g48%
Vitamin A 45IU1%
Vitamin C 6.4mg8%
Calcium 26mg3%
Iron 1.3mg7%
* Percent Daily Values are based on a 2000 calorie diet.

Here’s one more to pin on your Pinterest boards!Marinated, pan-seared Mexican chicken is a delicious, low-fat, easy to prepare dish. The chicken will surprise you with its depth of flavor.


Save

Save

Save

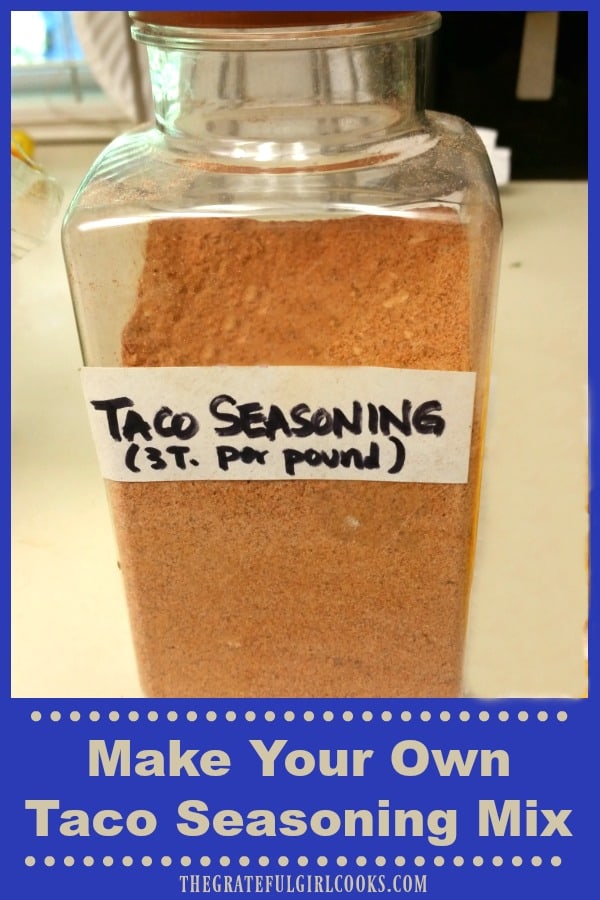
Make Your Own Taco Seasoning Mix

It’s easy to make up a large batch of taco seasoning mix- perfect Mexican spices for ground beef, chicken or pork to use in tacos, taco salads, etc. It's easy to make up a large batch of taco seasoning mix... perfect Mexican spices for ground beef, chicken or pork to use in tacos, taco salads, etc.
Years ago I got tired of buying the packages of commercially prepared seasoning mixes and started adding my own spices to ground beef, pork or chicken when we ate tacos or taco salads. Today I’d like show you how to make your own taco seasoning mix very easily.

I used to haul out various jars of spices each time I made it and then haul them all back to the cupboard when I was done. Then I found a “copycat” recipe (a copycat version of Lawry’s Taco Seasoning mix) in one of my “Top Secret Recipe” books by Todd Wilbur (I have several of his books and LOVE them).

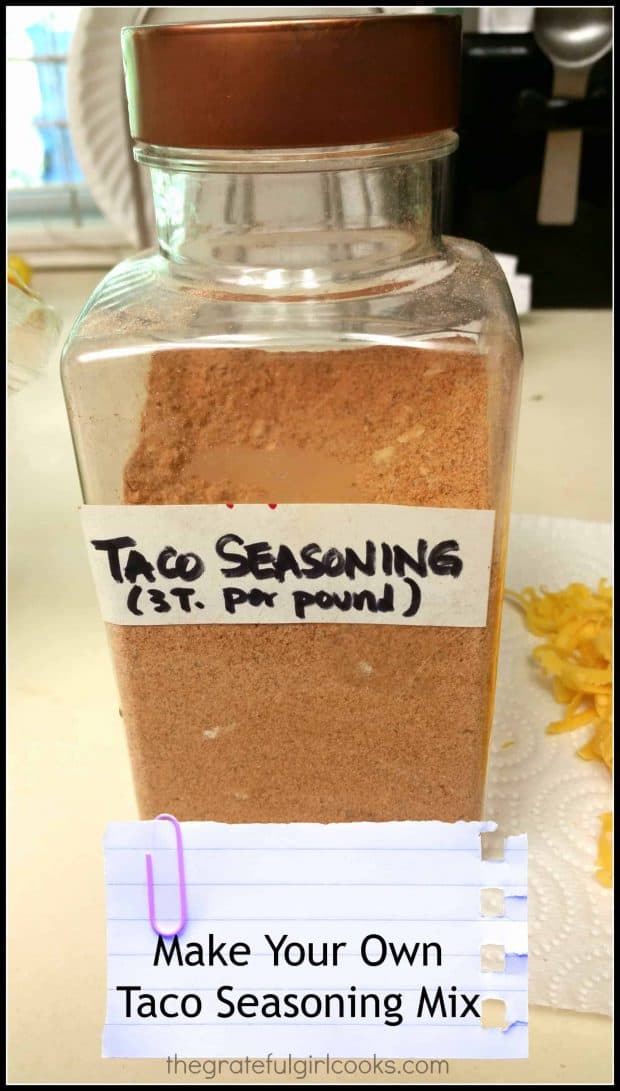
I took his basic “recipe” for the mix, multiplied it by 12 and ended up with quite a nice supply of taco seasoning, which I store in an old spice canister.  Since we eat tacos quite often (they’re my FAVORITE), it’s handy to have a ready supply of seasoning mix around whenever I need it.

Scroll Down For A Printable Recipe Card At The Bottom Of The Page

How Do You Season Meat With The Taco Seasoning Mix?

It’s easy, because all you do when you want to use it is to add 2/3 cup water to 3 Tablespoons of the mix and the pound of meat, cook for 7-10 minutes and bam! You’re done… and the meat tastes GREAT!

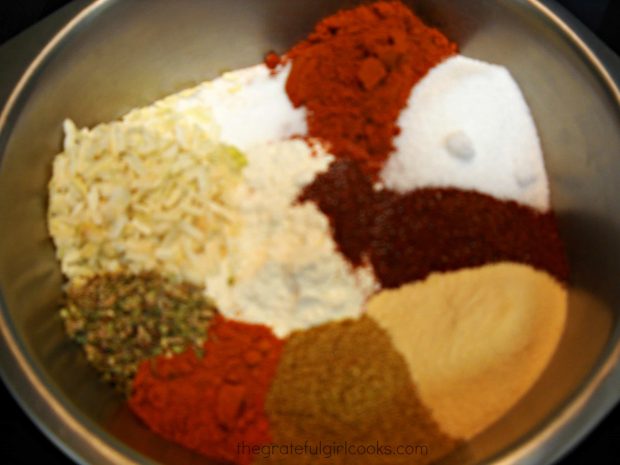
How easy is that? Sure is great to mix this taco seasoning mix all up ONCE and not have to haul all the spices out of the cupboard each and every time we have tacos! Hope you give it a try. It will save you some bucks and valuable time in the long run (and quite possibly a trip to the grocery store!) My photo is a bit blurry, but it’s the only one I took of the seasoning spices before mixing. Oh well.

Spices in bowl used to make the seasoning mix.

How Do You USE This Taco Seasoning Mix To Season Taco Meat?

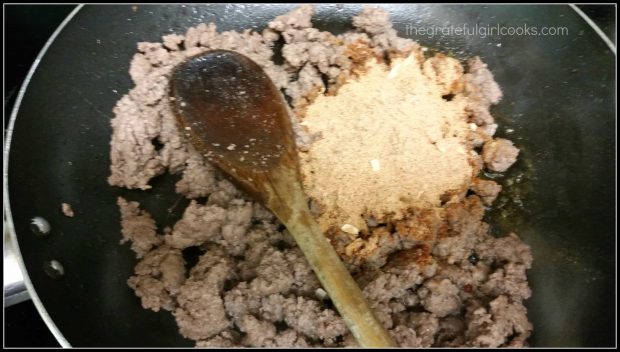
Add 3 Tablespoons of the taco seasoning mix to browned/drained meat. This photo is using hamburger meat, but the taco seasoning mix is delicious on shredded chicken or pork, too!

The taco seasoning mix is added to a pound of browned hamburger meat.

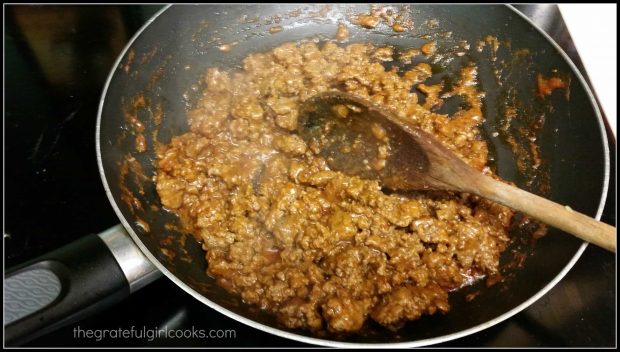
Add 2/3 cup of water. Cook the taco mixture for 7-10 minutes, until the water has cooked down and been absorbed into the meat.  Now your taco meat is fully seasoned and ready to use!

Cooking the seasoned meat in a skillet, for tacos.

Use Taco Seasoning Mix On A Variety Of Meals

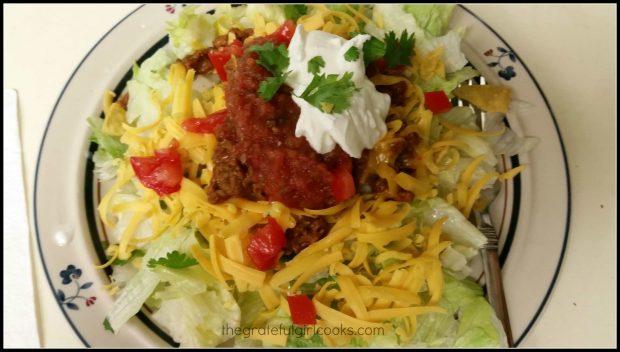
Ready to eat! This time we used the taco mix seasoning to make the seasoned ground beef for taco salads.YUM!

A taco salad was made, using the taco seasoning mix on the meat.

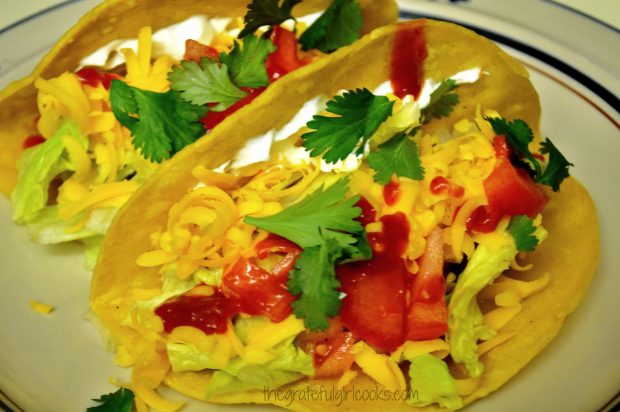
We use the taco seasoning mix all the time when we fix our tacos! The seasoning on the meat is wonderful, and I’m confident you’ll enjoy it, too.

The mix tastes great on the meat for homemade tacos.

I hope you will consider making up a batch of this taco seasoning mix to have around YOUR home. Truthfully, I’m pretty sure you will NOT regret it!

Looking For Other SPICE MIX Recipes?

You can find all of my recipes in the Recipe Index, located at the top of the page. A couple favorite spice mixes include:

Interested In More Recipes?

Thank you for visiting this website. I appreciate you using some of your valuable time to do soIf you’re interested, I publish a newsletter 2 times per month (1st and 15th) with all the latest recipes, and other fun info. I would be honored to have you join our growing list of subscribers, so you never miss a great recipe!
There is a Newsletter subscription box on the top right side (or bottom) of each blog post, depending on the device you use, where you can easily submit your e-mail address (only) to be included in my mailing list.

You Can Also Find Me On Social Media:

Facebook page: The Grateful Girl Cooks!
Pinterest:
The Grateful Girl Cooks!
Instagram:
jbatthegratefulgirlcooks

Make Your Own Taco Seasoning Mix / The Grateful Girl Cooks!Recipe Source: “Even More Top Secret Recipes”, by Todd Wilbur, published by the Penguin Group, 2002 (pages. 118-119)

**The recipe I am posting is the original recipe for enough seasoning mix for one pound of meat. Multiply it for the quantity you wish to have on hand. I found it easiest to make a whole bunch (for 12 meals) at one time.

↓↓ PRINTABLE RECIPE BELOW ↓↓

0 from 0 votes
Make Your Own Taco Seasoning Mix
Prep Time
5 mins
Cook Time
0 mins
Total Time
5 mins
 
It's easy to make up a large batch of taco seasong mix... perfect Mexican spices for ground beef, chicken or pork to use in tacos, taco salads, etc.
Category: Seasonings
Cuisine: Mexican
Keyword: taco seasoning mix
Servings: 1 (3 Tablespoons)
Calories Per Serving: 59 kcal
Author: JB @ The Grateful Girl Cooks!
Ingredients
  • 1 Tablespoon flour
  • 1 teaspoon chili powder
  • 1 teaspoon paprika
  • 3/4 teaspoon salt
  • 3/4 teaspoon minced onion
  • 1/2 teaspoon cumin
  • 1/4 teaspoon cayenne pepper
  • 1/4 teaspoon garlic powder
  • 1/8 teaspoon ground oregano
Instructions
  1. Mix all the ingredients together in a bowl.
  2. To prepare: Brown hamburger meat in a skillet until fully cooked. Drain the grease.
  3. Add the spice mix (or use 3 Tablespoons if you prepared quite a bit of the mix).
  4. Add 2/3 cup water to the meat and spice mixture. Stir to combine. Bring mixture to a boil, then reduce the heat to a low setting and cook, uncovered for 7-10 minutes. Stir occasionally.
  5. Remove from heat. Spoon the seasoned meat into warm tortillas, taco shells, or onto a salad.
  6. Enjoy!
Recipe Notes

NOTE: Quantity listed is equivalent to one envelope of store bought mix. Ingredients as listed when added to a pound of meat (hamburger meat, shredded pork or chicken) will make enough seasoned meat filling for 12 tacos (3 Tablespoons meat each).
*I multiplied the quantity by 12 to get a large quantity of seasoning mix.

Nutrition Facts
Make Your Own Taco Seasoning Mix
Amount Per Serving (1 (3 Tablespoons))
Calories 59
% Daily Value*
Sodium 1781mg77%
Potassium 144mg4%
Carbohydrates 12g4%
Fiber 1g4%
Sugar 1g1%
Protein 2g4%
Vitamin A 1785IU36%
Vitamin C 2.8mg3%
Iron 1.8mg10%
* Percent Daily Values are based on a 2000 calorie diet.

Here’s one more to pin on your Pinterest boards!It's easy to make a large batch of taco seasoning mix - the perfect Mexican spices for ground beef, chicken or pork to use in tacos, taco salads, etc.


Save

Save

Mom’s Grilled Chicken Basting Sauce

You’re gonna LOVE this EASY grilled chicken basting sauce (only a few ingredients)! We’ve used the same recipe for over 50 years to grill fantastic chicken.You're gonna LOVE this EASY grilled chicken basting sauce (only a few ingredients)! We've used the same recipe for over 50 years to grill fantastic chicken.

Who doesn’t love a great grilled chicken dinner (well…aside from vegetarians, vegans…and chickens)? I know we sure do! My favorite way to grill chicken includes using this EASY recipe for Mom’s Grilled Chicken Basting Sauce!  It’s the BEST!

Once it gets warm enough to stand outside and fire up our BBQ, we routinely grill chicken THIS WAY!  My mom used this simple (yet packed with flavor) basting sauce on grilled chicken when I was growing up. I love grilling chicken with it to this very day! It’s probably the recipe from her that I use the most!

Scroll Down For A Printable Recipe Card At The Bottom Of The Page

How I Got This Simple Recipe

My Mom got the recipe from my Great Aunt a LONG LONG time ago (over 50 years ago), and who knows where my Great Aunt (a great cook) got the recipe from! You just need to know this recipe has been used faithfully by our family for well over 50 years!

Everyone seems to have their own favorite recipe for grilled chicken. This is mine, and it’s DELICIOUS!   This grilled chicken basting sauce is ridiculously EASY to make, completely FOOLPROOF, wildly INEXPENSIVE and completely LIP-SMACKIN’ DELICIOUS!

Does This Grilled Chicken Basting Sauce Have a LOT of Ingredients?

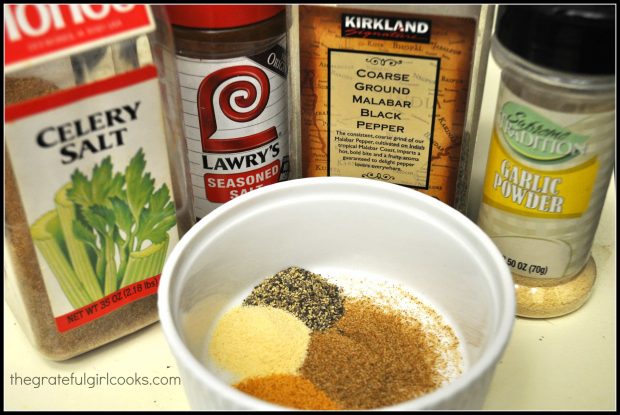
Thankfully, NO! The only spices you will need are celery salt, seasoning salt, coarse ground black pepper, and garlic powder. Once these common spices are mixed with melted butter… boom! You’ve got an absolutely incredible and EASY grilled chicken basting sauce!

Spices needed for grilled chicken basting sauce

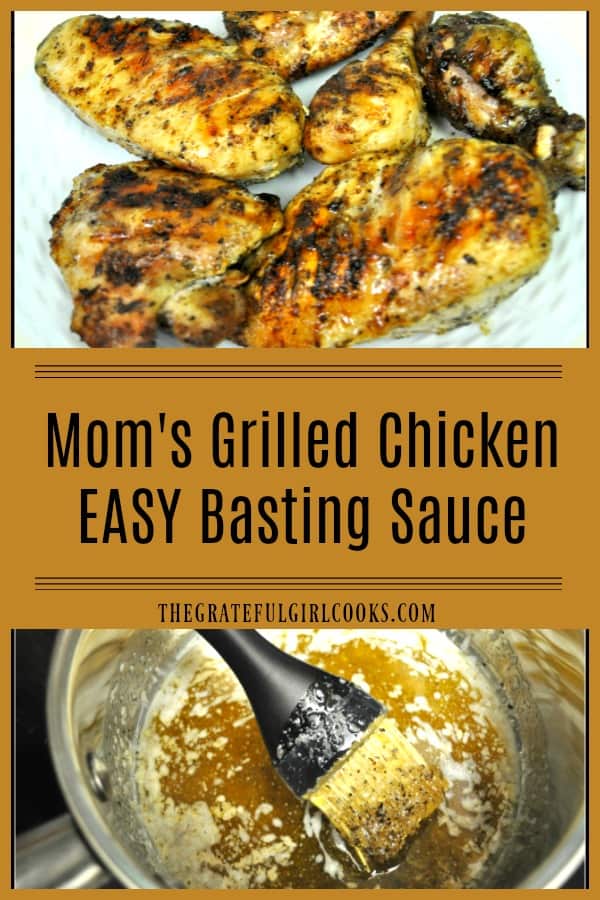
Melt the butter on low heat, and then add the spices, and stir, to combine. See how incredibly FAST that was? Grab a pastry brush to apply the sauce to the meat, and you’re ready to BBQ! See how easy that is? Easy is GOOD. This grilled chicken basting sauce is GREAT!

Spices added to melted butter to make easy basting sauce for chicken

Cooking With The Grilled Chicken Basting Sauce

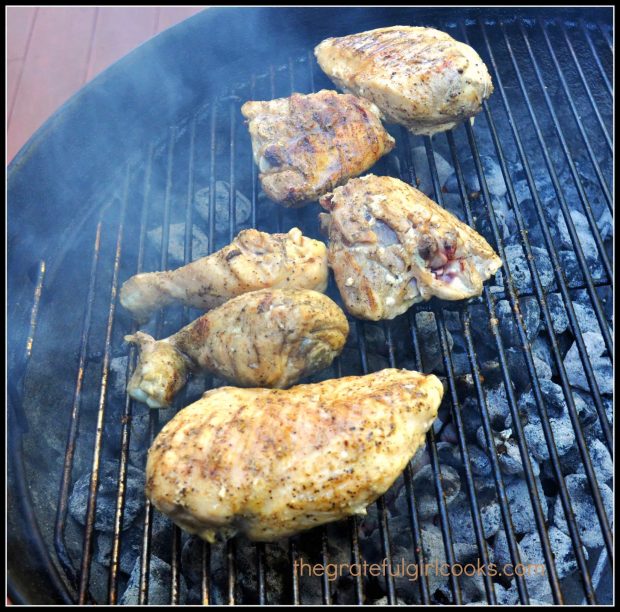
We like to cook our poultry using this grilled chicken basting sauce on our trusty Weber charcoal grill. The flavor from the sauce AND the briquettes are a winning combo!

Brush the pieces with the grilled chicken basting sauce (all sides of the chicken). Turn the chicken several times while it cooks! Continue to baste the chicken pieces with the sauce as they cook. The chicken will begin to have a lovely brown color on the outside as it grills!

Grilling chicken with easy basting sauce on Weber BBQ .

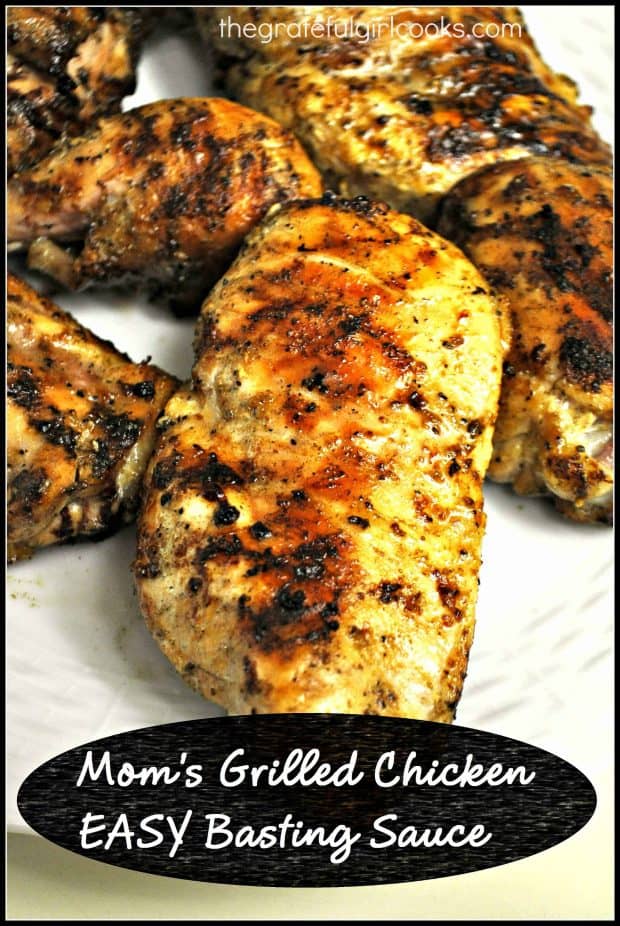
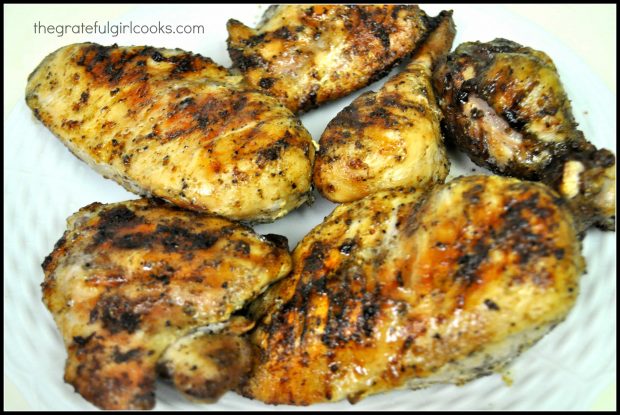
Once the chicken is fully cooked, remove it from the grill.  See the lovely color on those pieces of chicken? That is because of the butter in the grilled chicken basting sauce! You really cannot believe how simple this is to make and how absolutely DELICIOUS the chicken tastes!

This poultry, seasoned with the grilled chicken basting sauce, is cooked and ready to eat!

Serve The Chicken – You’re Gonna LOVE It!

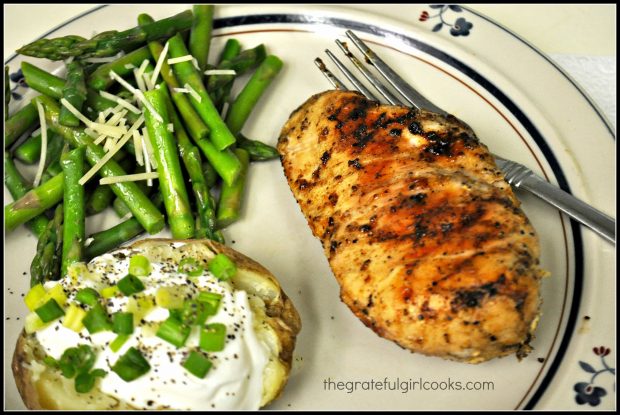
Now it’s time to serve a great tasting dinner! We had fresh asparagus and a nice baked potato with this delicious chicken dish. The chicken has tons of flavor, thanks to the yummy basting sauce, and pairs well with most side dishes!

Grilled chicken basting sauce covered chicken breast, served with baked potato and asparagus!

I really hope you will give this grilled chicken basting sauce a try. It’s fantastic (and did I mention just how easy it is)? Umm yeah, I did. Trust me…your grilled chicken dinner will be the better for it!

Looking For More Recipes For GRILLED MEAT?

You can find all of my recipes in the Recipe Index, located at the top of the page. A few grilling recipes you might be interested in include:

Interested In More Recipes?

Thank you for visiting this website. I appreciate you using some of your valuable time to do soIf you’re interested, I publish a newsletter 2 times per month (1st and 15th) with all the latest recipes, and other fun info. I would be honored to have you join our growing list of subscribers, so you never miss a great recipe!
There is a Newsletter subscription box on the top right side (or bottom) of each blog post, depending on the device you use, where you can easily submit your e-mail address (only) to be included in my mailing list.

You Can Also Find Me On Social Media:
Facebook page: The Grateful Girl Cooks!
Pinterest: The Grateful Girl Cooks!
Instagram: jbatthegratefulgirlcooks

Have a fantastic day! Make the most of each minute!

Author's signature

Recipe Source: My Mom

↓↓ PRINTABLE RECIPE BELOW ↓↓

0 from 0 votes
Mom's Grilled Chicken Basting Sauce
Prep Time
5 mins
Cook Time
0 mins
Total Time
5 mins
 
Absolutely fantastic grilled chicken basting sauce! This recipe has been used by our family for over 50 years for perfect grilled chicken.
Category: Grilling Sauce
Cuisine: American
Keyword: grilled chicken basting sauce
Servings: 8 servings (coats 8 pcs. chicken)
Calories Per Serving: 75 kcal
Author: JB @ The Grateful Girl Cooks!
Ingredients
  • 6 Tablespoons butter (3/4 stick) , melted
  • 1/4 tsp. garlic powder
  • 1/4 tsp. celery salt
  • 1/4 tsp. seasoned salt
  • 1/4 tsp coarse grind black pepper
Instructions
  1. Melt butter in small sauce pan (on low heat) until butter melts. Add remaining spices and stir until combined. Remove pan from heat.

  2. Using a pastry brush, spread sauce evenly over chicken pieces.
  3. Cook chicken pieces on grill, turning chicken and basting several times throughout the grilling process. Baste all sides of the chicken . Use all the sauce. Grill chicken until done. ENJOY!

Recipe Notes

The amount of sauce (as written) will coat approximately 8 pieces of chicken. The caloric calculation is for 1/8 of the total sauce (only).

Nutrition Facts
Mom's Grilled Chicken Basting Sauce
Amount Per Serving (1 serving)
Calories 75 Calories from Fat 72
% Daily Value*
Fat 8g12%
Saturated Fat 5g31%
Cholesterol 22mg7%
Sodium 194mg8%
Vitamin A 260IU5%
Calcium 3mg0%
* Percent Daily Values are based on a 2000 calorie diet.

Here’s one more to pin on your Pinterest boards!You're gonna LOVE this EASY grilled chicken basting sauce (only a few ingredients)! We've used the same recipe for over 50 years to grill fantastic chicken.
 

Save

Save

Save

Spring Greens with Citrus Vinaigrette

You will enjoy this light and refreshing spring greens salad, with oranges, cranberries and feta, and a citrus vinaigrette dressing!You will enjoy this light and refreshing spring greens salad, with oranges, cranberries and feta, and a citrus vinaigrette dressing!
 
I am always on the lookout for new salad dressings and salad ideas, and recently found a recipe for a delicious sounding salad dressing, so I paired it along with some other ingredients to make Spring Greens with Citrus Vinaigrette!
 
You can use any type of fresh lettuces for this lovely salad, which makes it very convenient to prepare. With some flavorful additions and topped with an amazing orange citrus vinaigrette, this will be a tasty salad I’m sure you’ll enjoy! Here’s how to make it!
 
Scroll Down For A Printable Recipe Card At The Bottom Of The Page

I Love To Grow Lettuces And Other Spring Greens!

I love to grow vegetables and a few fruits in raised beds and containers in our backyard. Last year was a bumper crop for my Garden Of Eatin’ (as I like to call it!).
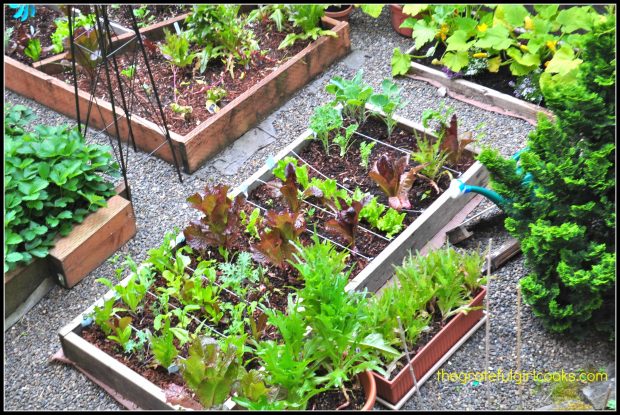
Our little beds produced tasty, leafy greens, including red leaf lettuce, romaine lettuce, rainbow chard, mustard greens, spinach, oakleaf lettuce, and kale.

By the time our lettuce beds are fully mature, my husband and I are eating salads with just about every meal. We are also giving away salad greens to our sons, neighbors and friends by the bagful! I feel so blessed to usually have “more than enough” to share with others.

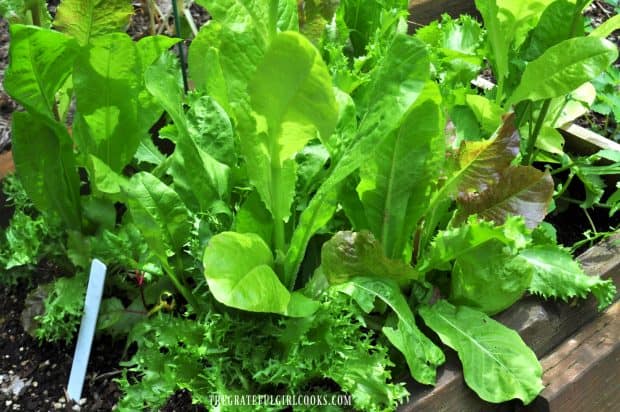
Our backyard raised beds full of lettuces and spring greens.

A while ago I found a recipe for a salad dressing in one of my old “Taste of Home” magazines for an orange juice vinaigrette, and it really piqued my interest.

This interest led to me playing around with the recipe a bit. Eventually I came up with this delicious spring greens salad and dressing “recipe”.

Use Any Variety Spring Greens!

Basically you can use any types of spring lettuces available (romaine, iceberg, red leaf, bibb, etc.) and make a big salad with them.

Whether you grow them yourself or purchase them at the store or farmer’s market, there are so many different types of colorful lettuces available to choose from! Use your favorites!

Spring greens growing, to use in salad recipe.

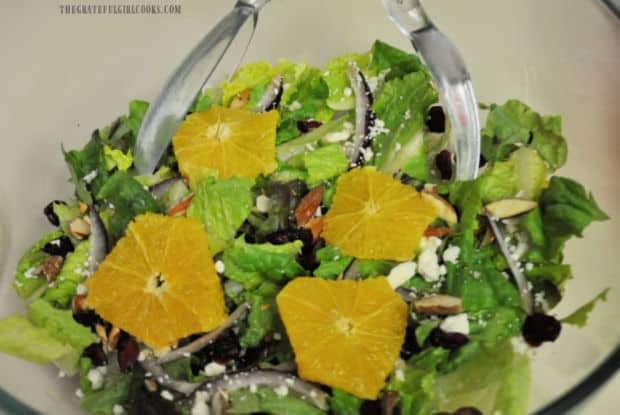
For this particular salad, I like to pair it with a citrus based salad dressing, I add crumbled feta cheese, red onions, dried cranberries, and sliced almonds to the chilled spring greens. This really helps to kick up the colors and flavors a notch!

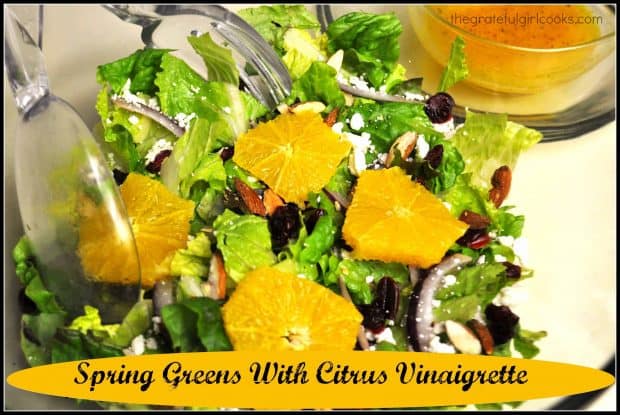
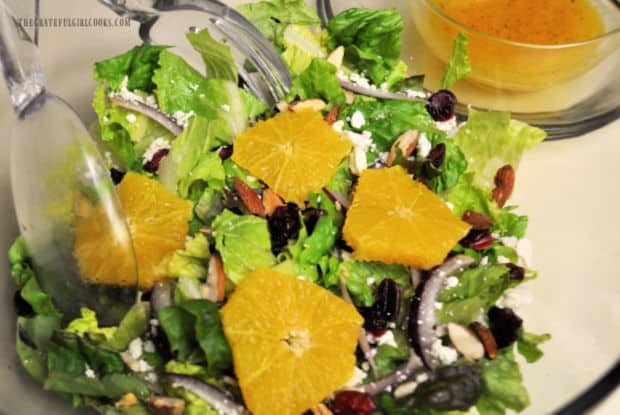
Then the spring greens are topped with beautiful juicy orange slices, and an amazing tasting citrus vinaigrette was drizzled over the top, to serve!

Make A Citrus Vinaigrette Dressing For The Spring Greens

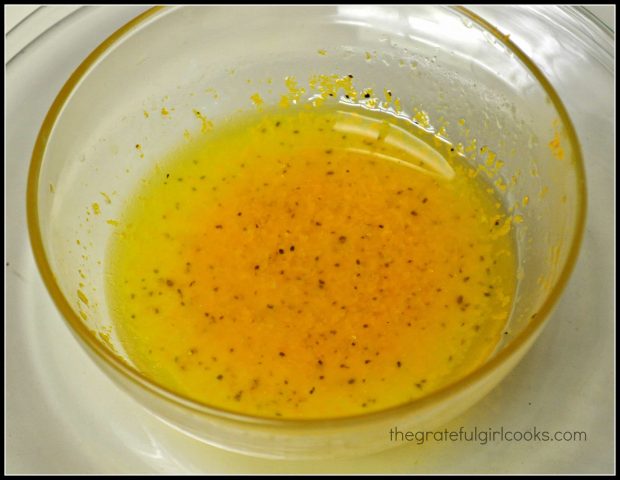
This salad dressing is an easy to make “light and fresh” tasting vinaigrette. The orange flavor shines and compliments just about any green salad nicely! Making it is as simple as whisking the ingredients together… easy peasy!
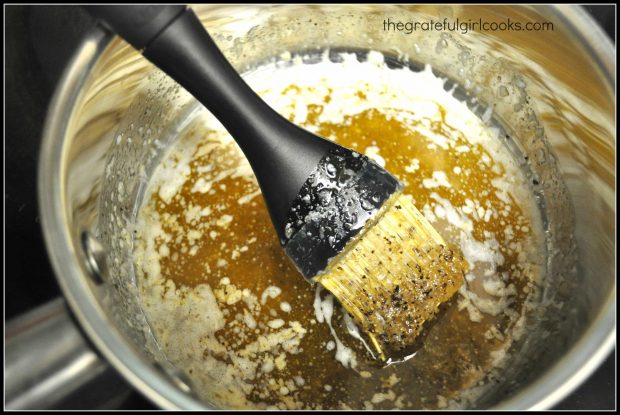
The citrus vinaigrette, used to dress the salad.

Serve The Spring Greens With Citrus Vinaigrette

Place chilled salad greens in a serving bowl. Top with feta cheese, dried cranberries, red onion, sliced roasted almonds, and top with round orange slices.

To serve the Spring Greens With Citrus Vinaigrette, give the vinaigrette a quick stir, then drizzle over the chilled salad, using as much as you prefer. Toss ingredients until the vinaigrette has been distributed well, then serve!

This really is a refreshing and delicious spring greens salad, and we enjoyed it VERY much!  Hope you will give it a try, and trust you’ll enjoy it as much as we do!

Thanks for stopping by, and I invite you to come back soon for more family-friendly recipes. Take care, may God bless you, and have a wonderful day!

Looking For More SALAD Recipes?

You can find all of my salad recipes in the Recipe Index, located at the top of the page. I have quite a few, including

Want More Recipes? Get My FREE Newsletter!

I publish a newsletter 2 times per month (1st and 15th) with lots of recipes, tips, etc..
Would you like to join our growing list of subscribers?

There is a Newsletter subscription box on the top right (or bottom) of each blog post, depending on the device you use.
You can submit your e-mail address there, to be added to my mailing list.

Find Me On Social Media:

Facebook page: The Grateful Girl Cooks!
Pinterest:
The Grateful Girl Cooks!
Instagram:
jbatthegratefulgirlcooks

Author's signatureRecipe adapted from: Kristin Bataille, Taste of Home Magazine, Feb/March 2012 Issue

↓↓ PRINTABLE RECIPE BELOW ↓↓

0 from 0 votes
Spring Greens with Citrus Vinaigrette
Prep Time
15 mins
Cook Time
0 mins
Total Time
15 mins
 
You will enjoy this light and refreshing spring greens salad, with oranges, cranberries and feta, bursting with fresh flavor from a citrus vinaigrette dressing!
Category: Salad
Cuisine: American
Keyword: spring greens
Servings: 4 servings
Calories Per Serving: 151 kcal
Author: JB @ The Grateful Girl Cooks!
Ingredients
For the vinaigrette:
  • 2 Tablespoons olive oil
  • 2 Tablespoons fresh squeezed orange juice
  • 1 Tablespoon white wine vinegar
  • 1/8 teaspoon garlic powder
  • 1 teaspoon orange zest (approx.amount from 1 orange)
  • dash salt
  • dash pepper
For the salad:
  • 4 cups fresh spring greens (I used mixed variety and romaine)
  • 1/4 cup crumbled feta cheese
  • sliced red onion (to taste-I use 2 thin slices, chopped into smaller pieces)
  • 10-15 roasted almonds , sliced lengthwise
  • 1/4 cup dried cranberries
  • 1 small orange (cut from top to bottom all around the outside to remove peel and white "pith" completely). Once peeled, slice horizontally
Instructions
  1. Make vinaigrette: In a small bowl, whisk together the vinaigrette ingredients until fully blended. If making vinaigrette ahead of serving time, cover and chill until ready to use.
  2. Place chilled salad greens in serving bowl.
  3. Sprinkle salad greens with feta, red onion, sliced almonds,cranberries and top with orange slices. When ready to serve, whisk the vinaigrette well to mix, then drizzle over salad, and toss to coat. Enjoy!
Nutrition Facts
Spring Greens with Citrus Vinaigrette
Amount Per Serving (1 serving)
Calories 151 Calories from Fat 90
% Daily Value*
Fat 10g15%
Saturated Fat 2g13%
Cholesterol 8mg3%
Sodium 125mg5%
Potassium 162mg5%
Carbohydrates 13g4%
Fiber 1g4%
Sugar 9g10%
Protein 2g4%
Vitamin A 585IU12%
Vitamin C 31.6mg38%
Calcium 71mg7%
Iron 0.4mg2%
* Percent Daily Values are based on a 2000 calorie diet.

Here’s one more to pin on your Pinterest boards!You will enjoy this light and refreshing spring greens salad, with oranges, cranberries and feta, and a citrus vinaigrette dressing!


Save

Save

Save