Category: Side Dishes

Pan-Seared Green Beans and Bacon

Pan-Seared Green Beans and Bacon is a simple, fresh veggie side dish you’ll enjoy! Green beans are seasoned with garlic, onion, and BACON!
Pan-Seared Green Beans and Bacon is a simple, fresh veggie side dish you'll enjoy! Green beans are seasoned with garlic, onion, and BACON!

Bacon seems to make everything better, right? In this simple, delicious recipe, fresh green beans are enhanced by the addition of crisp bacon pieces. YUM.

Everything is cooked in one skillet for convenience and easy cleanup, so this is a “win-win” recipe. Fresh green beans are pan-seared until they blister and brown slightly, before adding 2-3 more ingredients.

All in all, this recipe is easy to make, and I’m confident you will enjoy it, paired with a favorite meat main dish. Here’s how to make this veggie side dish.

Scroll Down For A Printable Recipe Card At The Bottom Of The Page

Prepare The Green Beans For Cooking

I enjoy making this recipe using fresh green beans from our garden in the summer. When my garden is not in season, I buy them fresh at our grocery store, year-round.

Trim or snap off the stem ends of each of the green beans (and discard). Set the green beans aside while you cook the bacon.

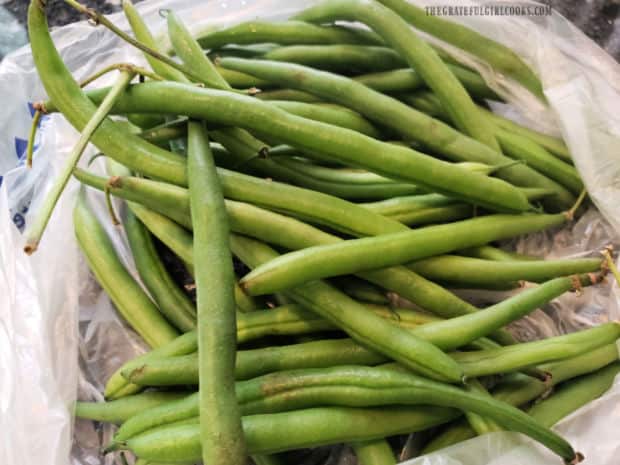
Fresh green beans will need stem ends trimmed off before cooking.

Cook The Bacon, Onion And Garlic

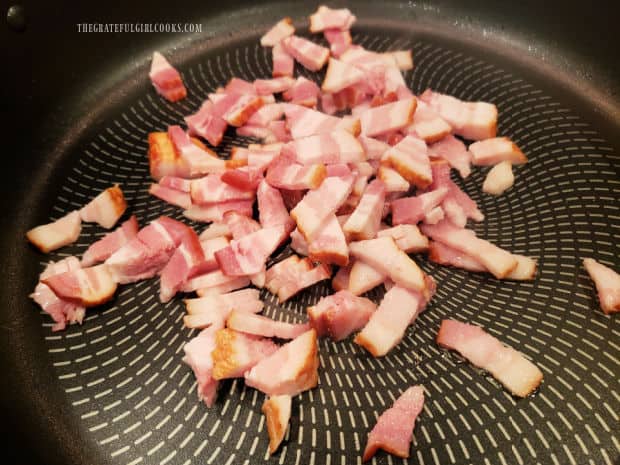
Cut 3 slices of bacon into small pieces. I stack the slices on top of each other, then use kitchen shears to cut the bacon into small pieces. Cooking the bacon into small pieces is a timesaver, because it will cook faster.

Cook the bacon in a non-stick pan on medium heat until it is mostly cooked through. DO NOT let it get crispy at this point.

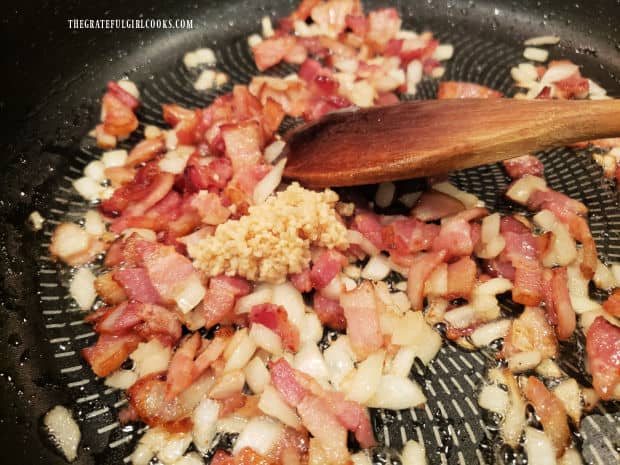
Add chopped onions to the bacon, and cook for 3 minutes, stirring often until the onions become tender. Stir in minced garlic, and cook 1 more minute, stirring often so the garlic doesn’t burn.

Small pieces of bacon are cooked until mostly done in large skillet.Chopped onions and minced garlic are added to the cooked bacon in skillet.

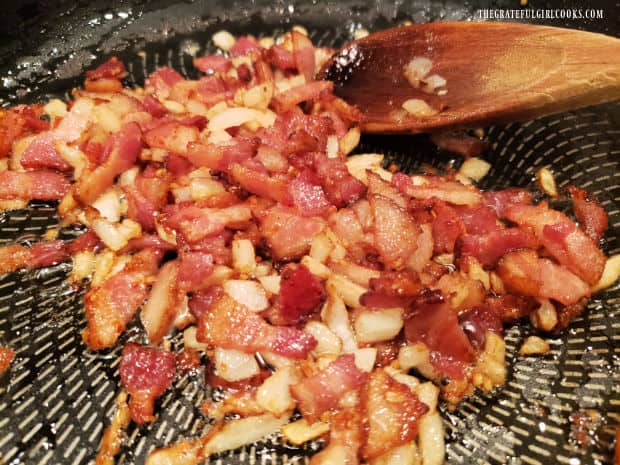
At this point, the bacon will be fairly crispy, and the onions should be fully cooked. Transfer this mixture out of the skillet onto a plate, and cover. Do NOT wipe out the skillet.

Bacon, onions and garlic, fully cooked, are transferred out of the skillet.

Pan-Sear The Green Beans

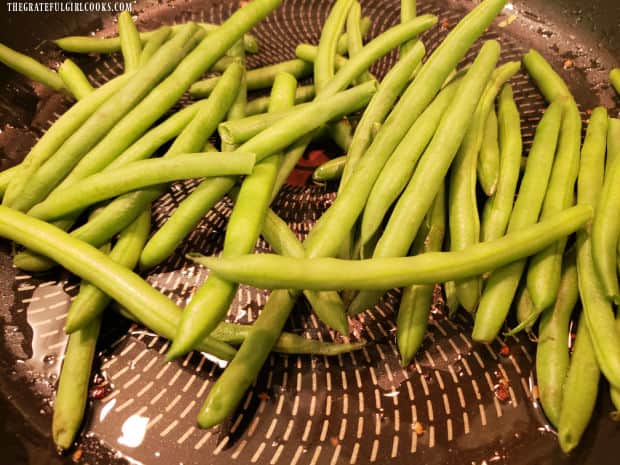
Add the green beans to the skillet without wiping out the bacon drippings left in the skillet. They will cook in any leftover bacon drippings, which adds flavor.

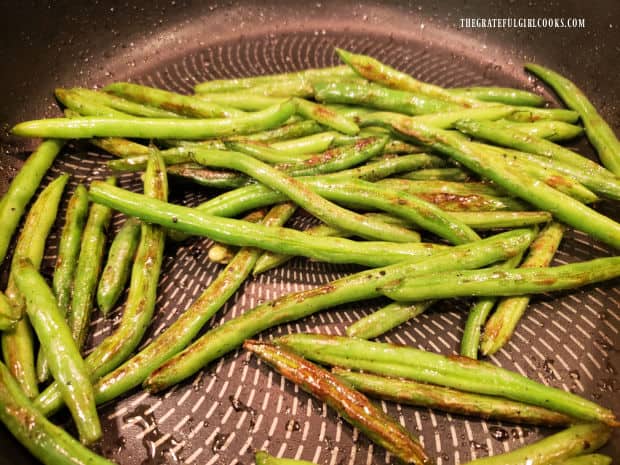
Pan-sear the green beans on Medium heat, stirring occasionally, for 7-8 minutes. The beans will slowly blister and brown on the outside while they cook.

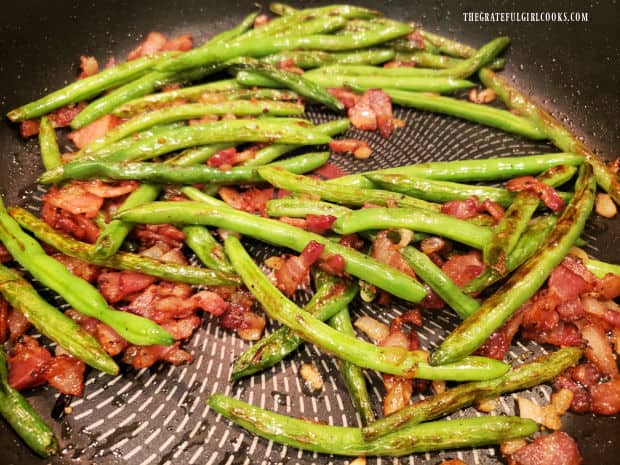
Fresh green beans are pan-seared in bacon drippings left in skillet.As they cook, the green beans will blister and brown on the outside.

Time To Add the BACON!

 Add the bacon, onion and garlic mixture back into the skillet, and stir to combine. Taste a green bean, then season the beans to taste with salt and pepper, if desired.

Cook, stirring often, until the beans and bacon are heated through (about a minute). The pan-seared green beans and bacon are ready to serve, once they’re fully heated through.

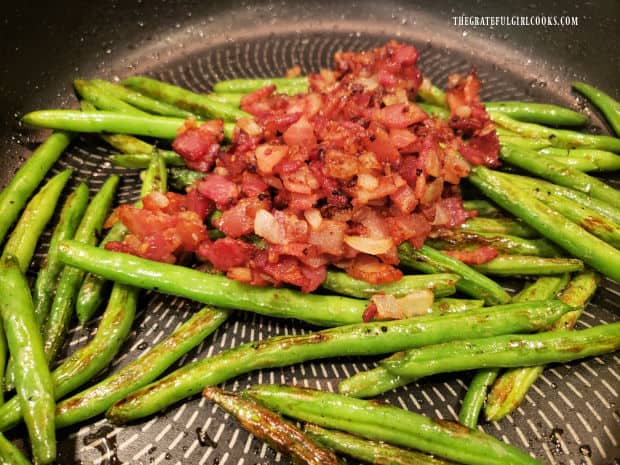
Bacon, onion and garlic mixture is added back into the skillet of green beans.After heating them though, pan-seared green beans and bacon are ready to serve.

Serve The Pan-Seared Green Beans And Bacon

Transfer the pan-seared green beans and bacon from the skillet to a serving bowl, and serve immediately, while hot.

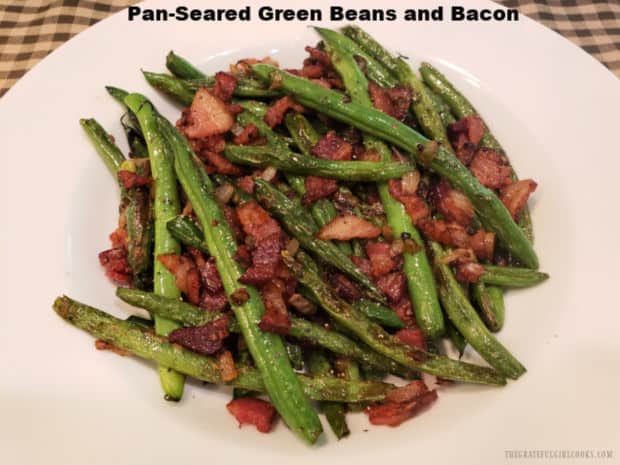
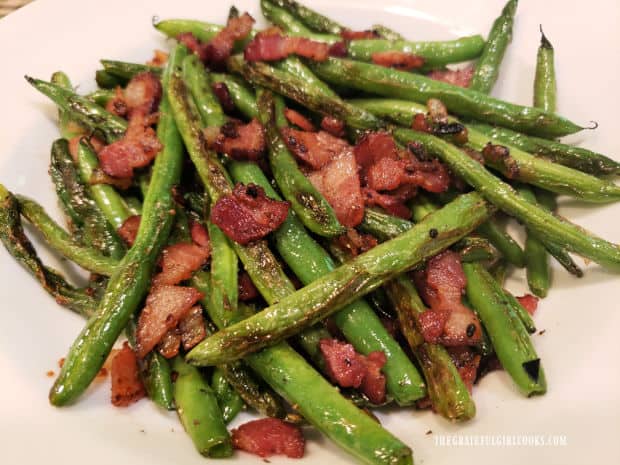
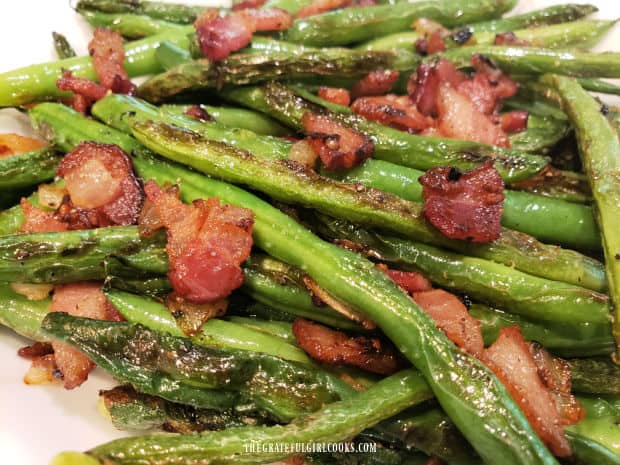
A white bowl, filled with pan-seared green beans and bacon.Crispy pieces of bacon mixed in with the pan-seared green beans.

The recipe will yield enough green beans for three servings (four, if smaller portions are desired). Serve with a favorite main dish, and enjoy!

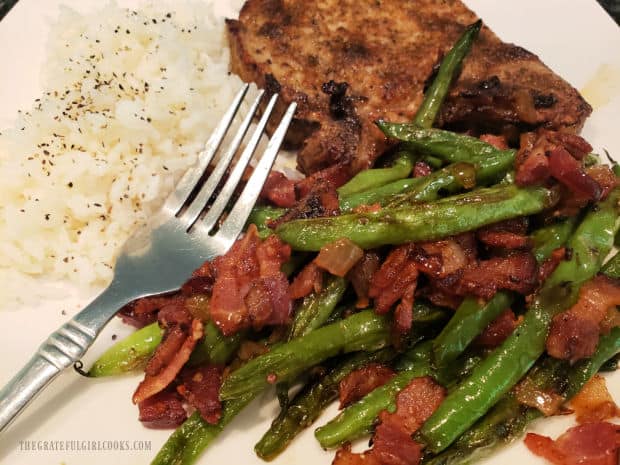
Pan-seared green beans and bacon, with pork chop and rice on the plate.

I hope you have the chance to make pan-seared green beans and bacon. We really enjoy them, and trust you will, too. You can easily double or triple this recipe to suit your needs.

Thanks for stopping by, and I hope you’ll come back soon for more family-friendly recipes. Take care, may God bless you, and have a GREAT day!

Looking For More GREEN BEAN Recipes?

You can find ALL of my recipes in the Recipe Index, which is located at the top of the page. I have a nice variety of green bean recipes to enjoy, including:

Want More Recipes? Get My FREE Newsletter!

I publish a newsletter 2 times per month (1st and 15th) with lots of recipes, tips, etc..
Would you like to join our growing list of subscribers?

There is a Newsletter subscription box on the top right (or bottom) of each blog post, depending on the device you use.
You can submit your e-mail address there, to be added to my mailing list.

Find Me On Social Media:

Facebook page: The Grateful Girl Cooks!
Pinterest:
The Grateful Girl Cooks!
Instagram:
jbatthegratefulgirlcooks

Author's signature

↓↓ PRINTABLE RECIPE BELOW ↓↓

0 from 0 votes
Pan-Seared Green Beans and Bacon
Prep Time
8 mins
Cook Time
12 mins
Total Time
20 mins
 

Pan-Seared Green Beans and Bacon is a simple, fresh veggie side dish you'll enjoy! Green beans are seasoned with garlic, onion, and BACON!

Category: Vegetable Dish
Cuisine: American
Keyword: pan-seared green beans
Servings: 3
Calories Per Serving: 125 kcal
Author: JB @ The Grateful Girl Cooks!
Ingredients
  • ½ pound fresh green beans ends trimmed
  • ½ medium yellow onion peeled/diced
  • 2 cloves garlic (minced)
  • 3 slices bacon chopped
  • salt and black pepper, to taste
Instructions
  1. Trim or snap off stem ends of the green beans (and discard). Set beans aside.

  2. Cut bacon into small pieces, so it cooks faster. Cook bacon in a non-stick pan on medium heat until mostly cooked through. DO NOT let it get crispy. Add chopped onions; cook for 3 minutes, stirring often. Stir in garlic; cook 1 minute, stirring often so garlic doesn't burn. Transfer bacon mixture out of the skillet onto a plate. Do NOT wipe or clean out the skillet.

  3. Add the green beans to the skillet. They'll cook in the bacon drippings, which adds flavor. Pan-sear beans on Medium heat, stirring occasionally, for 7-8 minutes. Beans will slowly blister and brown on the outside as they cook.

  4. Add bacon mixture back into skillet; stir to combine. Taste a green bean; season lightly with salt/pepper, if desired. Cook, stirring often, until beans/bacon are heated through (about a minute). Transfer to serving dish; serve immediately.

Recipe Notes

NOTE: Nutritional calculation does not include amounts for salt and pepper, as some may season the green beans lightly or not at all, and some may desire more seasoning, to taste.

Nutrition Facts
Pan-Seared Green Beans and Bacon
Amount Per Serving (1 (1/3 of total))
Calories 125 Calories from Fat 81
% Daily Value*
Fat 9g14%
Saturated Fat 3g19%
Trans Fat 0.03g
Polyunsaturated Fat 2g
Monounsaturated Fat 4g
Cholesterol 15mg5%
Sodium 151mg7%
Potassium 238mg7%
Carbohydrates 8g3%
Fiber 2g8%
Sugar 3g3%
Protein 4g8%
Vitamin A 530IU11%
Vitamin C 11mg13%
Calcium 37mg4%
Iron 1mg6%
* Percent Daily Values are based on a 2000 calorie diet.

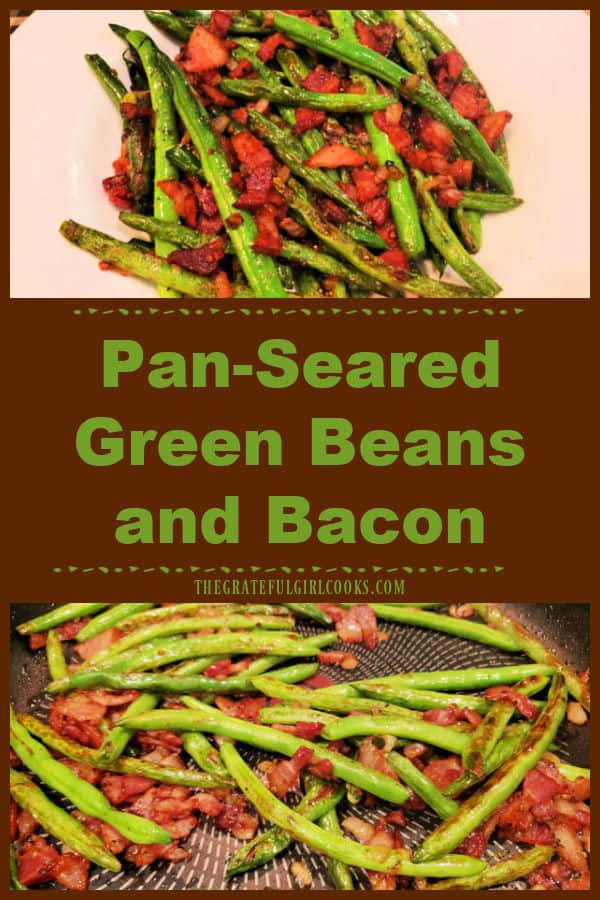
Here’s one more to pin on your Pinterest boards!Pan-Seared Green Beans and Bacon is a simple, fresh veggie side dish you'll enjoy! Green beans are seasoned with garlic, onion, and BACON!

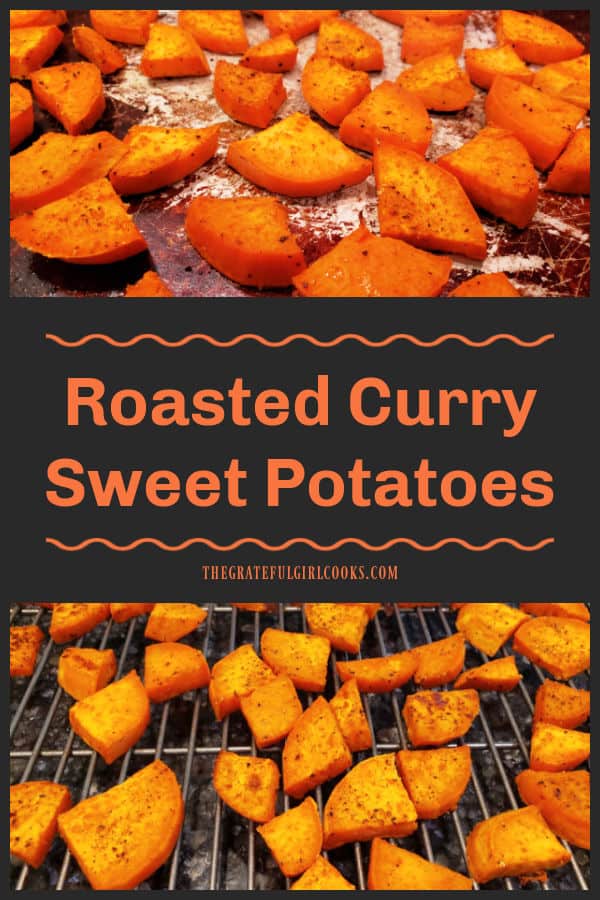
Roasted Curry Sweet Potatoes

Roasted Curry Sweet Potatoes are a delicious and EASY side dish! Full of flavor from a simple spice mix, this recipe will yield 3-4 servings.

Do you like eating sweet potatoes? As an adult, I have come to LOVE them, but really did not like them as a kid, and avoided them like the plague.

My grandmother, who in her later life lived with us for several months each year, ate a sweet potato every single day. EVERY. SINGLE. DAY.

Frankly, as a kid I didn’t understand her unrequited love of this orange colored vegetable. I mean… it’s just a potato, right?

Now, as a sensible older woman with a much broader flavor palette, I love them too! It must be hereditary, right? Ha Ha.

Behold The Humble Sweet Potato

There’s a lot to love about this filling, nutritious veggie I didn’t appreciate back then. Sweet potatoes are sweet “root” vegetables that are packed with Vitamin C, Vitamin A, and other minerals. They’re also a wonderful source of fiber, which is good for the ol’ gut.

They have some antioxidant properties, which is another reason they are “good for you”. The orange color of sweet potatoes is produced by beta carotene, which we know is good for our overall eye health.

Besides all of this… SWEET POTATOES ARE DELICIOUS! Here’s how to make this simple recipe for roasted curry sweet potatoes. They have great taste and color, and are a cinch to make. 

Scroll Down For A Printable Recipe Card At The Bottom Of The Page

Prepare The Sweet Potatoes For Roasting

You will need about half a pound of sweet potatoes for this recipe. This typically is the equivalent of 2 medium to large sized sweet potatoes.

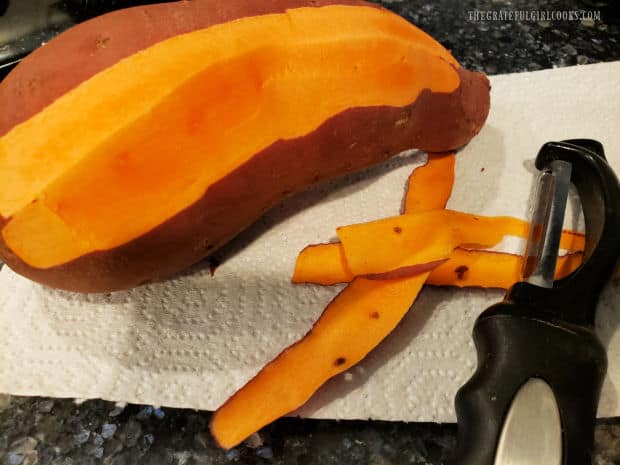
Use a vegetable peeler or a sharp knife to remove the peel from the sweet potatoes. Discard the peels.

The outer peel is removed from a medium to large sweet potato before slicing.

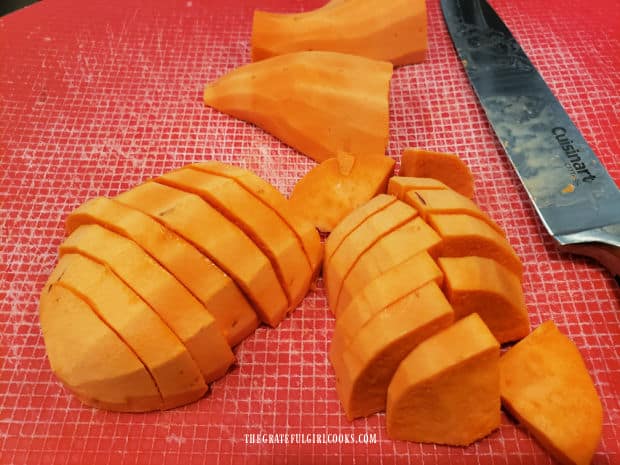
Cut the sweet potatoes in half lengthwise first, then slice each half cross-wise into 1″ slices that resemble half circles (on left side of first photo below).

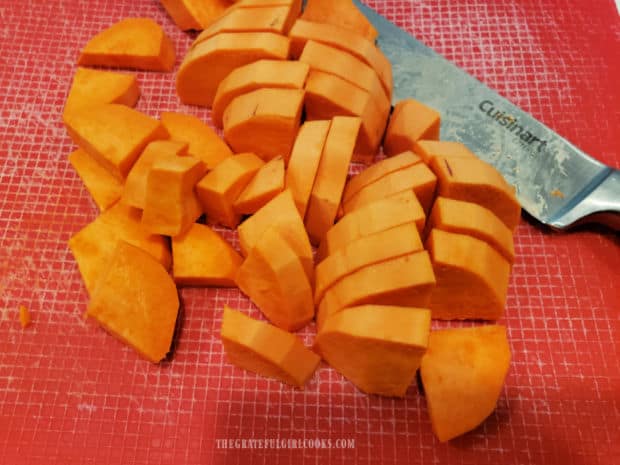
Now cut each of those slices in half (on right side of first photo below). Continue slicing until both sweet potatoes are cut, and each piece is wedge shaped (bottom photo below). Set aside.

Two peeled sweet potatoes are cut in half, then sliced into pieces.Sweet potatoes are sliced into quarter-sized wedges before baking.

Make The Spice Mix

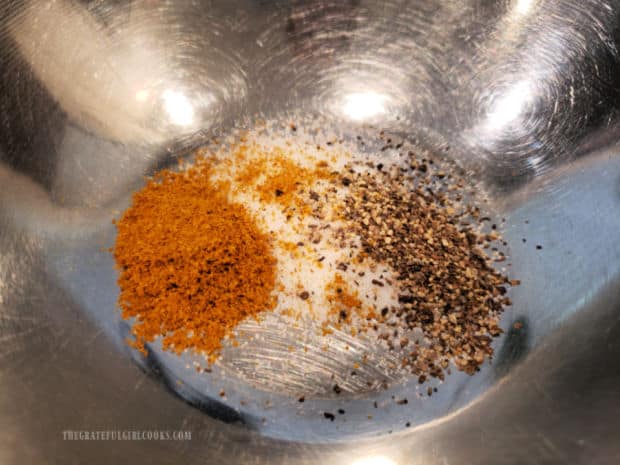
Place salt, curry powder, ground black pepper and onion powder in a small bowl. Stir to combine these spices.

See? Just like that you have an easy seasoning mix you will use to season the sweet potatoes!

Curry powder, salt, onion powder and black pepper are combined in a bowl.

Season The Sweet Potato Wedges

Spray a large baking sheet with non-stick spray, then add the sweet potato wedges onto the pan in a single layer.

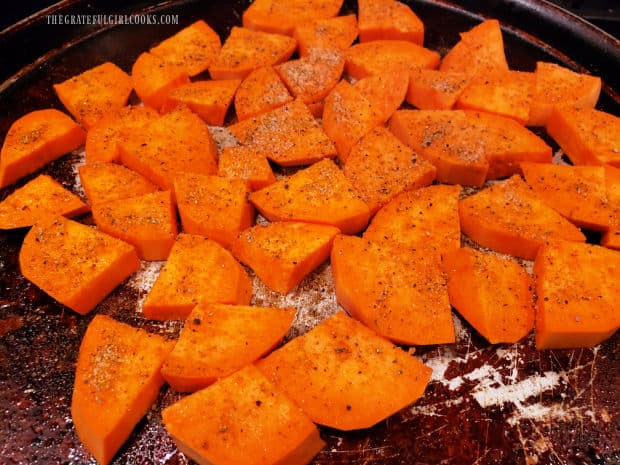
Lightly spray the sweet potatoes with additional baking spray (helps the spice mix to adhere). Sprinkle the sweet potatoes with the spice mix, dividing it evenly over the potatoes.

Sweet potato slices on pan are sprinkled with spice mix before baking.

Ready For The Oven

Once the sweet potatoes have been seasoned, they are ready for the oven. Place the pan on the oven’s middle rack.

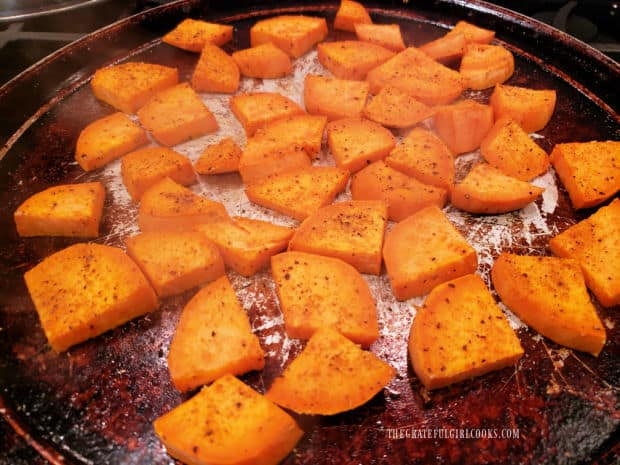
Bake at 425°F for 20-25 minutes. The time may vary a bit as oven temps can fluctuate. I usually check the roasted curry sweet potatoes for doneness after 20 minutes.

When fully done, the outside should be slightly browned, and the inside should be soft. A butter knife can be easily inserted into the middle of a piece of sweet potato without resistance.

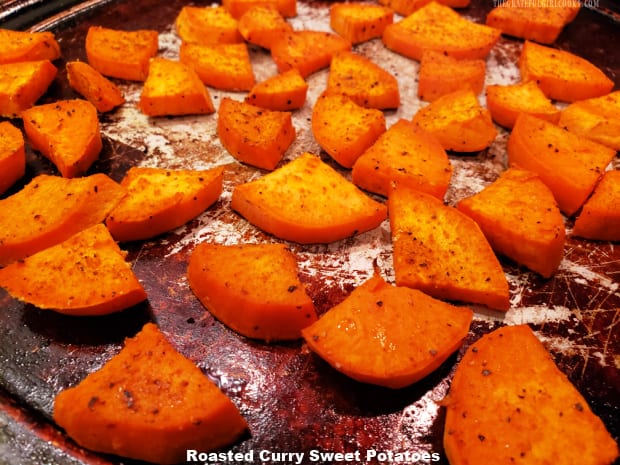
A pan of roasted curry sweet potatoes, hot out of the oven.

Serve The Roasted Curry Sweet Potatoes

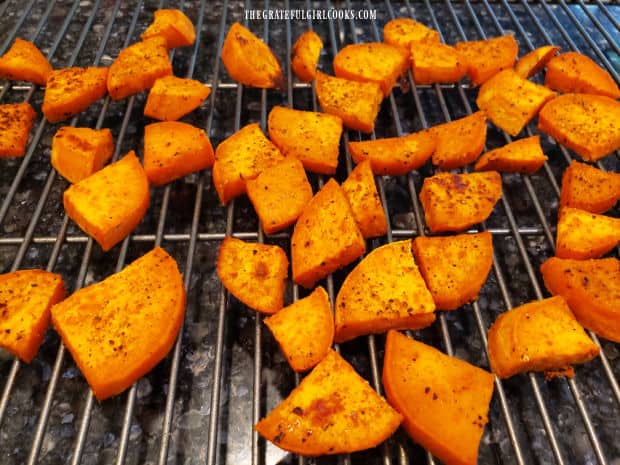
Transfer the hot, roasted curry sweet potatoes from the pan to a wire rack with a spatula. Let them cool for about one minute before serving.

These delicious sweet potatoes can be served alongside a favorite meat, and will be a delicious side dish. The recipe will yield enough for 3 moderate portions or 4 small portions.

The roasted sweet potatoes are cooled slightly on a wire rack before serving.

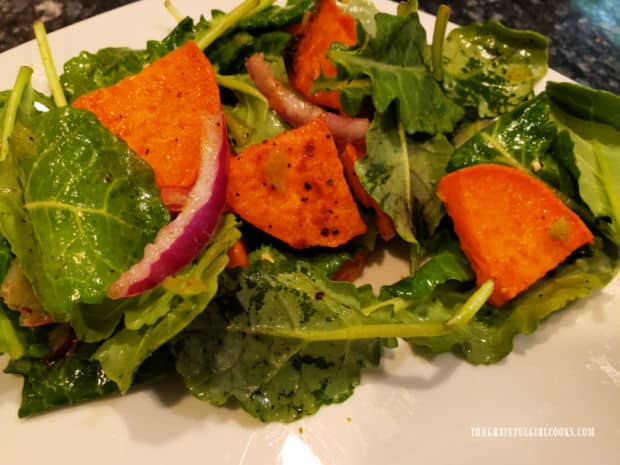
The roasted curry sweet potatoes also taste fantastic in Kale and Sweet Potato Salad, because they add such great flavor to the dish.

Roasted curry sweet potatoes are added to a kale green salad.

I hope you enjoy this delicious side dish as much as we do. The smell in the kitchen while the roasted curry sweet potatoes cook is also really terrific!

Thank you for stopping by today, and I invite you to come back soon for more family-friendly recipes. Take care, may God bless you, and have a GREAT day!

Looking For More SWEET POTATO Recipes?

You can find ALL of my recipes in the Recipe Index, which is located at the top of the page. I have a variety of delicious sweet potato recipes to choose from, including:

Want More Recipes? Get My FREE Newsletter!

I publish a newsletter 2 times per month (1st and 15th) with lots of recipes, tips, etc..
Would you like to join our growing list of subscribers?

There is a Newsletter subscription box on the top right (or bottom) of each blog post, depending on the device you use.
You can submit your e-mail address there, to be added to my mailing list.

Find Me On Social Media:

Facebook page: The Grateful Girl Cooks!
Pinterest:
The Grateful Girl Cooks!
Instagram:
jbatthegratefulgirlcooks

Author's signature

Recipe Adapted From: “Year Round Fresh”, page 184, published in 2018 by WW International, Inc.

↓↓ PRINTABLE RECIPE BELOW ↓↓

0 from 0 votes
Roasted Curry Sweet Potatoes
Prep Time
10 mins
Cook Time
20 mins
Total Time
30 mins
 

Roasted Curry Sweet Potatoes are a delicious and EASY side dish! Full of flavor from a simple spice mix, this recipe will yield 3-4 servings.

Category: Side Dish, Vegetable Dish
Cuisine: All Cuisines
Keyword: roasted curry sweet potatoes
Servings: 4 small servings
Calories Per Serving: 50 kcal
Author: JB @ The Grateful Girl Cooks!
Ingredients
  • ½ pound sweet potatoes (approx. 2 medium-large)
  • ½ teaspoon kosher salt
  • ¼ teaspoon curry powder
  • ¼ teaspoon ground black pepper
  • ¼ teaspoon onion powder
  • non-stick baking spray (for pan and sweet potatoes)
Instructions
  1. Preheat oven to 425℉ (218.3℃) Spray a baking sheet with non-stick baking spray.

  2. Use vegetable peeler or sharp knife to peel sweet potatoes. Discard peels. Cut sweet potatoes in half, lengthwise. Slice each half cross-wise into 1" thick half- circle slices. Cut each of those slices in half (wedge-shaped) Set aside.

  3. Place salt, curry powder, black pepper, onion powder in a bowl; stir to combine.

  4. Place sweet potato wedges on prepared pan in a single layer. Lightly spritz potatoes with baking spray, then sprinkle with spice mix, distributing it evenly over potatoes.

  5. Bake on middle rack of oven at 425°F for 20-25 minutes. When fully done, outside of potatoes will be lightly browned; inside should be soft. A butter knife can be easily inserted into sweet potatoes without resistance. Transfer sweet potatoes to wire rack; cool for 1 minute, then serve. Enjoy!

Nutrition Facts
Roasted Curry Sweet Potatoes
Amount Per Serving (1 (1/4 of total))
Calories 50 Calories from Fat 1
% Daily Value*
Fat 0.1g0%
Saturated Fat 0.02g0%
Polyunsaturated Fat 0.01g
Monounsaturated Fat 0.01g
Sodium 322mg14%
Potassium 196mg6%
Carbohydrates 12g4%
Fiber 2g8%
Sugar 2g2%
Protein 1g2%
Vitamin A 8046IU161%
Vitamin C 1mg1%
Calcium 19mg2%
Iron 0.4mg2%
* Percent Daily Values are based on a 2000 calorie diet.

Here’s one more to pin on your Pinterest boards!Roasted Curry Sweet Potatoes are a delicious and EASY side dish! Full of flavor from a simple spice mix, this recipe will yield 3-4 servings.

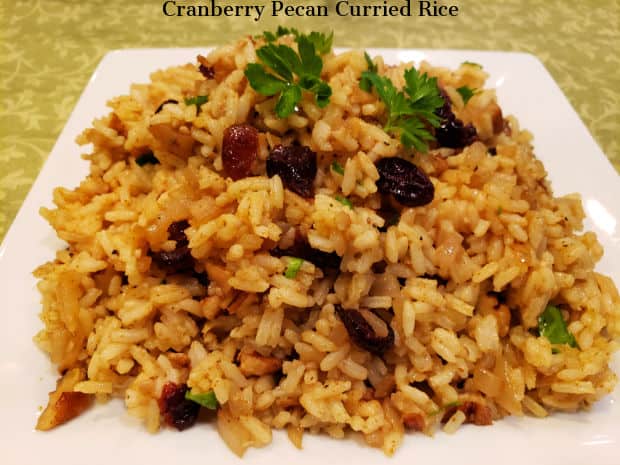
Cranberry Pecan Curried Rice

Cranberry Pecan Curried Rice is a flavorful dish that’s easy to make! Recipe yields 4 servings and is a delicious side dish for many entrees.
Cranberry Pecan Curried Rice is a flavorful dish that's easy to make! Recipe yields 4 servings and is a delicious side dish for many entrees.

If you’re looking for a delicious, flavor-packed side dish to accompany a favorite meal, may I suggest you try cranberry pecan curried rice?

I found the original recipe online, and made only a couple very slight changes to suit our taste and needs. Let me tell you- it’s yummy!

From start to finish, this recipe takes only about 30-35 minutes, and is really easy to prepare! The rice is flavored with onion, garlic, butter, chicken broth, dried cranberries and toasted pecans, and seasoned with curry powder, ground ginger, salt and pepper.

These ingredients combine wonderfully, and create a simply fantastic tasting rice side dish! Here’s how to make cranberry pecan curried rice:

Scroll Down For A Printable Recipe Card At The Bottom Of The Page

Cook The Rice

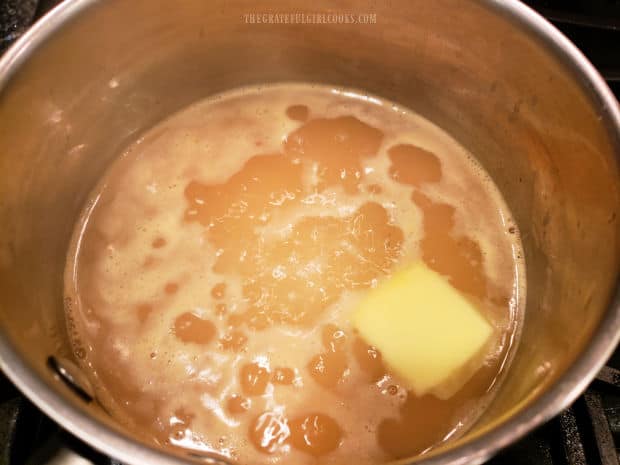
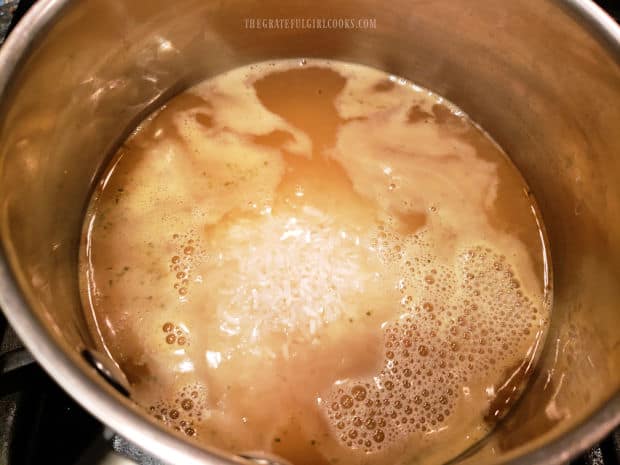
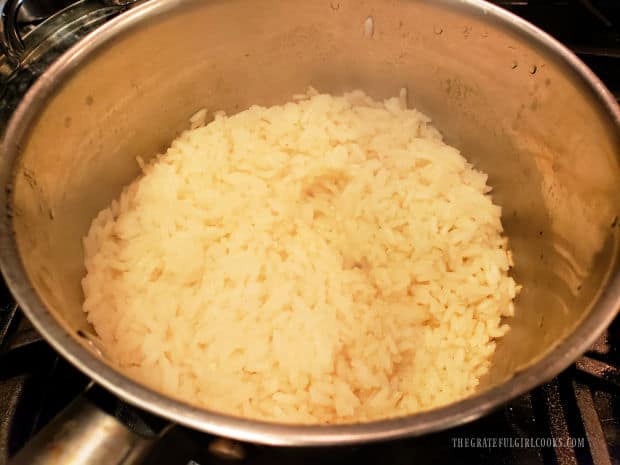
Bring chicken broth and butter to a boil in a large saucepan over medium heat. Add rice to the broth, and stir to combine these ingredients. Now bring the liquid in the pan back to a boil again. 

 Once boiling, turn the heat down to a low simmer, and cover the pan. Let the rice cook (covered) without disturbing it, for about 20 minutes. When done, remove the pan from the heat.

Chicken broth is heated with butter until the butter melts.Rice is added to the butter and broth mixture and cooked for 20 minutes.

While The Rice Cooks…

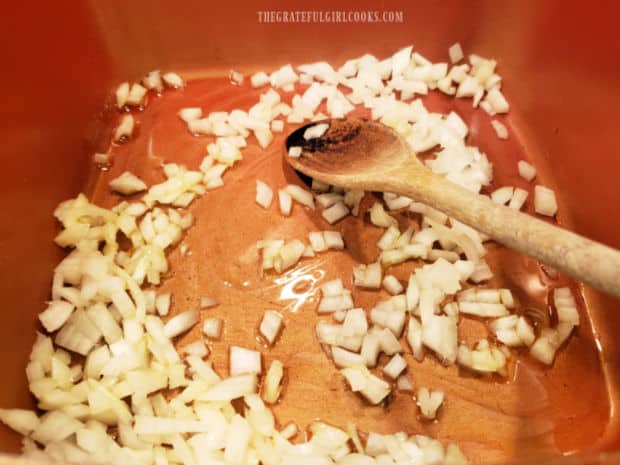
Use the time the rice is cooking to finish the rest of the recipe. Measure oil into a large (separate) saucepan, and heat it on Medium.

Once hot, add chopped onions, and stir to combine. Cook the onions, stirring often, for 5-6 minutes. When done, the onions should be tender, translucent, and very lightly browned.

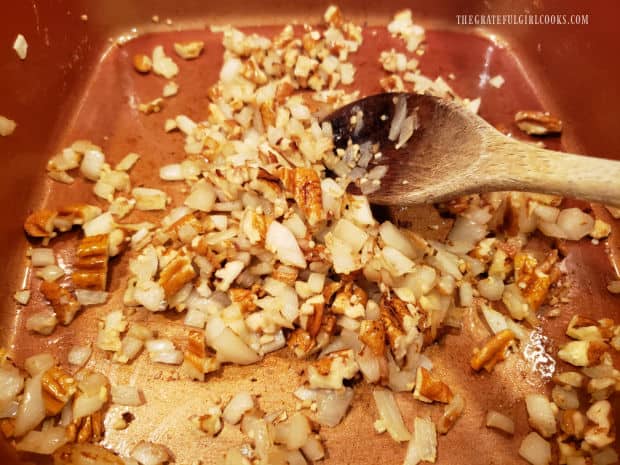
Stir chopped pecans and minced garlic into the onion mixture, and let them cook for 2 more minutes on medium heat. Stir this often, so you don’t burn the garlic!

Chopped onion is cooked in hot oil in a large saucepan for about 5 minutes.Minced garlic and chopped pecans are added to the cooked onion in the pan.

Now For The Spices…

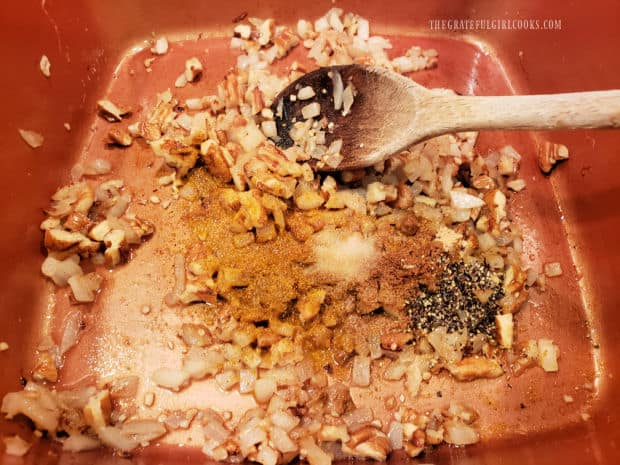
Stir curry powder, ground ginger, salt and black pepper into the onion and pecan mixture in the pan. It smells fantastic right at this point, when those aromatic spices hit the hot pan.

Curry powder, ground ginger, salt and pepper are added to the onion and pecan mixture.

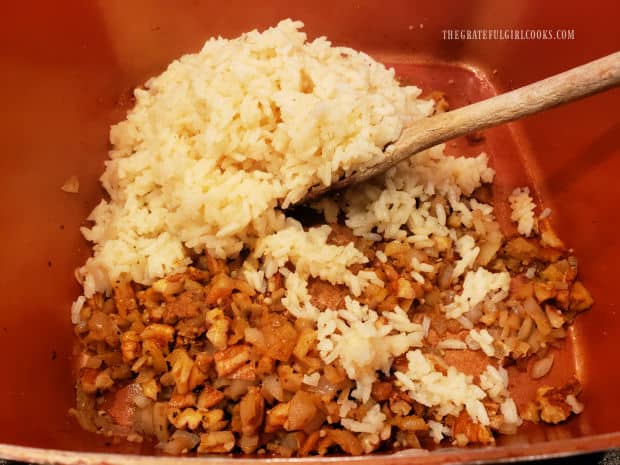
The rice should be finished cooking right around this time. Once done, remove the pan from the heat, use a fork to fluff the rice, then add the hot rice to the saucepan with the onion mixture.

Stir everything together, until the spices and other ingredients are well combined with the hot rice. Now you’re ready for the final step!

Once fully cooked, the pan of rice is fluffed using a fork.Cooked rice and water are added to the saucepan, and combined with the onion mixture.

Final Step

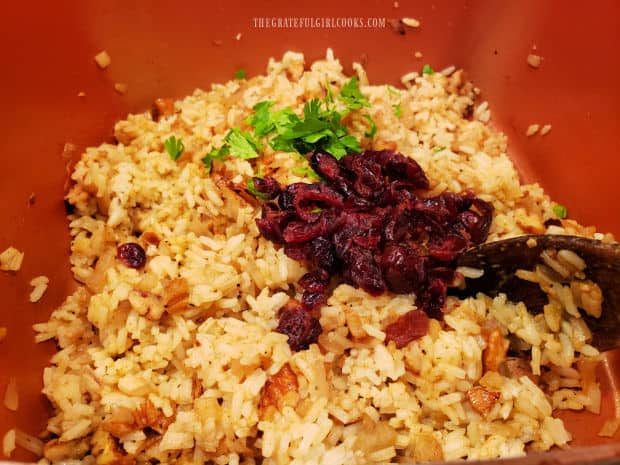
The last step is to add dried cranberries and chopped, fresh parsley into the hot spiced rice! This gives the rice a pop of color, too.

Give the rice a good stir until everything is combined. Now this yummy cranberry pecan curried rice is hot, and ready to be served and enjoyed.

Dried cranberries and chopped parsley are added to the rice and stirred to combine.

Serve The Cranberry Pecan Curried Rice

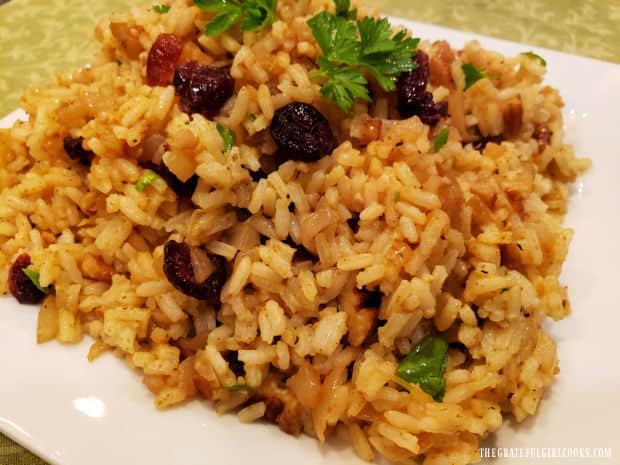
Transfer the cranberry pecan curried rice onto a serving plate or into a serving bowl. Garnish the top with sprigs of fresh parsley, if desired, and serve!

The rice has WONDERFUL flavor, thanks to the warming spices of curry powder and ground ginger. When I made this dish the first time, I couldn’t stay out of it, because it is SO GOOD! 

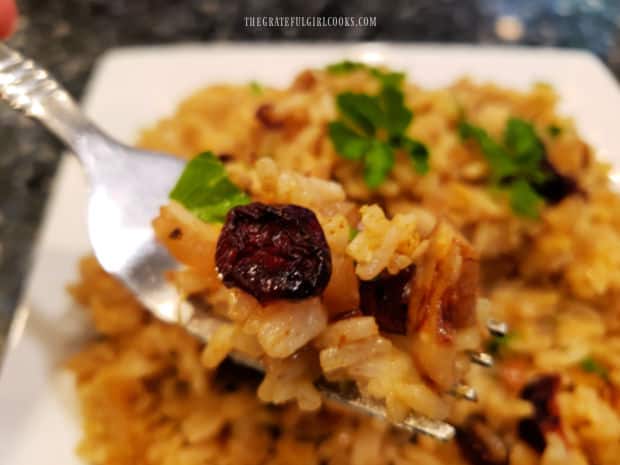
Cranberry Pecan Curried Rice is garnished with fresh parsley and served on a platter.A forkful of the cranberry pecan curried rice, with the remaining rice in the background.

Every bite of the cranberry pecan curried rice is packed with warm flavors, and I think you’ll love it! The rice pairs well with many different meat dishes.

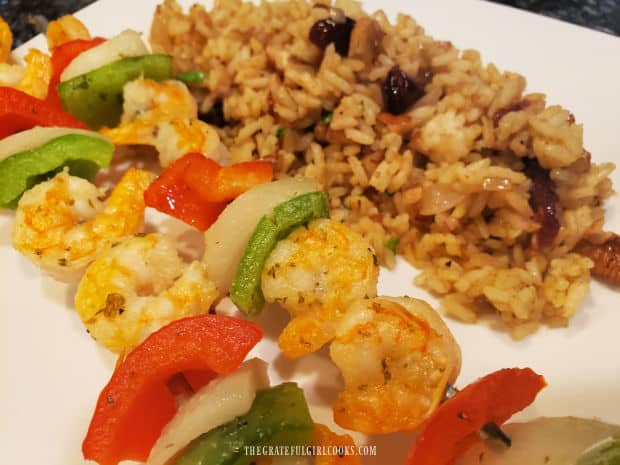
We enjoy it with shrimp kabobs, but it’s a great accompaniment for chicken, beef, pork and other seafood dishes, as well. It is so versatile, and is really quite simple to prepare.

I’m confident you, your family members and other dinner guests will really enjoy this dish! The recipe can be doubled or tripled to suit your needs, too!

Cranberry pecan curried rice can be a simple weeknight side dish, or you can go all out and serve it for holidays like Christmas or Thanksgiving! YUM!

Shrimp kabobs on a plate, with the cranberry pecan curried rice on the side.

I hope you have the chance to try this no-fuss recipe for cranberry pecan curried rice, because it is truly delicious! It’s a very versatile side dish that will pair well with lots of main dishes.

Thanks for stopping by, and I invite you to come back again soon for more family-friendly recipes. Take care, may God bless you, and have a GREAT day!

Looking For More RICE SIDE DISH Recipes?

You can find ALL of my recipes in the Recipe Index, which is located at the top of the page. I have a wonderful variety of side dishes featuring rice you might want to check out, including:

Want More Recipes? Get My FREE Newsletter!

I publish a newsletter 2 times per month (1st and 15th) with lots of recipes, tips, etc..
Would you like to join our growing list of subscribers?

There is a Newsletter subscription box on the top right (or bottom) of each blog post, depending on the device you use.
You can submit your e-mail address there, to be added to my mailing list.

Find Me On Social Media:

Facebook page: The Grateful Girl Cooks!
Pinterest:
The Grateful Girl Cooks!
Instagram:
jbatthegratefulgirlcooks

Author's signature

Original recipe source, (and with thanks to Jillian Wade) at: foodfolksandfun.net/cranberry-pecan-curry-rice/

↓↓ PRINTABLE RECIPE BELOW ↓↓

0 from 0 votes
Cranberry Pecan Curried Rice
Prep Time
10 mins
Cook Time
25 mins
Total Time
35 mins
 

Cranberry Pecan Curried Rice is a flavorful dish that's easy to make! Recipe yields 4 servings and is a delicious side dish for many entrees.

Category: Side Dish
Cuisine: All Cuisines
Keyword: cranberry pecan curried rice
Servings: 4 servings
Calories Per Serving: 327 kcal
Author: JB @ The Grateful Girl Cooks!
Ingredients
  • cups chicken broth
  • 1 cup Basmati rice or long grain white rice
  • ½ Tablespoon butter
  • 1 Tablespoon olive oil
  • ½ medium yellow onion peeled, diced
  • 2 large garlic cloves minced
  • cup chopped pecans
  • Tablespoons water
  • 1 Tablespoon curry powder
  • 1 teaspoon ground ginger
  • ¼ teaspoon salt
  • teaspoon black pepper
  • cup dried cranberries
  • 1 Tablespoon chopped fresh parsley (+ more for garnish, if desired)
Instructions
  1. Bring chicken broth and butter to a boil in a large saucepan over Medium heat. Add rice; stir to combine. Bring liquid back to a boil again, then reduce heat to a low simmer; cover pan. Cook rice (covered) for about 20 minutes. When done, remove pan from heat.

  2. While rice cooks, heat oil on Medium heat in a separate large saucepan on Medium. Once hot, add onions; stir to combine. Cook onions, stirring often, for 5-6 minutes. Onions should become tender, translucent, and very lightly browned.

  3. Stir pecans and garlic into onion mixture; cook 2 minutes on Medium heat, stirring often to not burn the garlic. Add curry powder, ginger, salt and pepper to pan; stir to combine.

  4. Once rice is done cooking, remove pan from heat. Use a fork to fluff the rice, then stir hot rice into the onion mixture. Add dried cranberries and chopped, fresh parsley to hot rice; stir to fully combine all ingredients.

  5. Transfer rice to serving dish. Top with more parsley, if desired. Serve and enjoy!
Nutrition Facts
Cranberry Pecan Curried Rice
Amount Per Serving (1 (1/4 of total))
Calories 327 Calories from Fat 108
% Daily Value*
Fat 12g18%
Saturated Fat 2g13%
Trans Fat 0.1g
Polyunsaturated Fat 3g
Monounsaturated Fat 7g
Cholesterol 6mg2%
Sodium 544mg24%
Potassium 177mg5%
Carbohydrates 50g17%
Fiber 3g13%
Sugar 9g10%
Protein 5g10%
Vitamin A 151IU3%
Vitamin C 3mg4%
Calcium 40mg4%
Iron 1mg6%
* Percent Daily Values are based on a 2000 calorie diet.

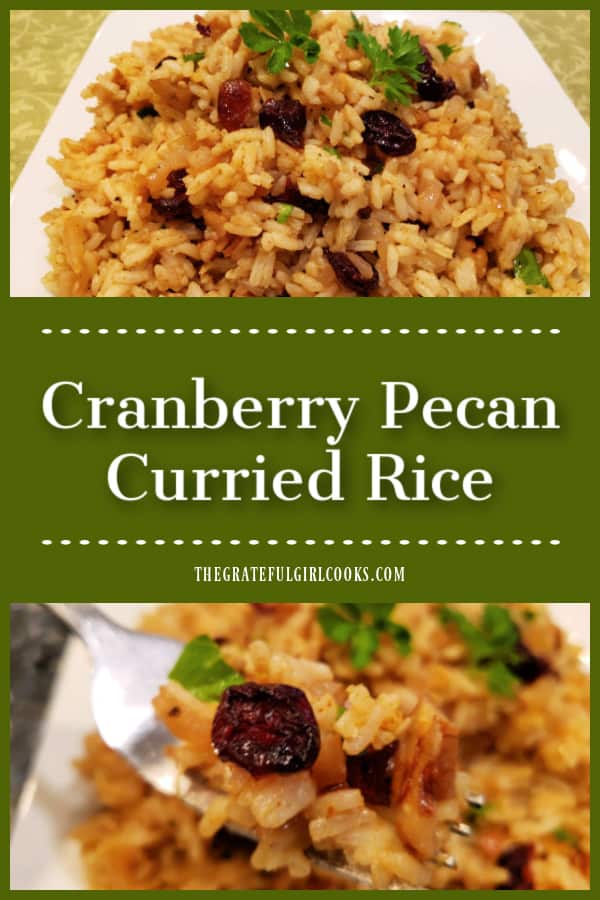
Here’s one more to pin on your Pinterest boards!Cranberry Pecan Curried Rice is a flavorful dish that's easy to make! Recipe yields 4 servings and is a delicious side dish for many entrees.

Bacon Apple Cheddar Scones

Bacon Apple Cheddar Scones are delicious! Recipe makes 8 buttery, savory scones, filled with diced apples, cheddar cheese and crisp bacon!

Today I would like to share this recipe for Bacon Apple Cheddar Scones with you. Many years ago I found a recipe in a magazine for apple cheese scones, and thought they sounded pretty tasty. I made a few changes to the original recipe and also added cooked, crispy bacon! YUM!

These savory scones are not sweet like a typical scone, but they sure have great flavor! We love to serve them as a side dish for a big pot of chili or soup, or with a large mixed green salad.

We know that apples and cheese compliment each other, but when you add crisp bacon to the party… wow! These soft, buttery scones are a wonderful addition to any meal.

My husband and I think these scones are the best when served warm, with some soft butter spread on them. Here’s how to make these yummy scones.

Scroll Down For A Printable Recipe Card At The Bottom Of The Page

Let’s Make Some Scones!

The scones come together fairly quickly, so preheat your oven to 450°F. before beginning. By the time you have cut out the scones, your oven should be ready to go!

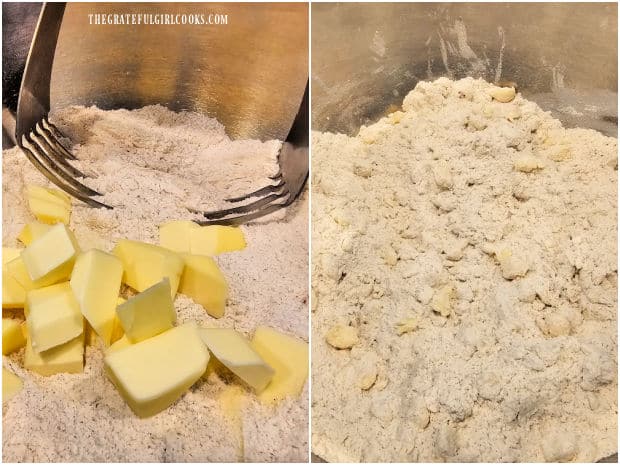
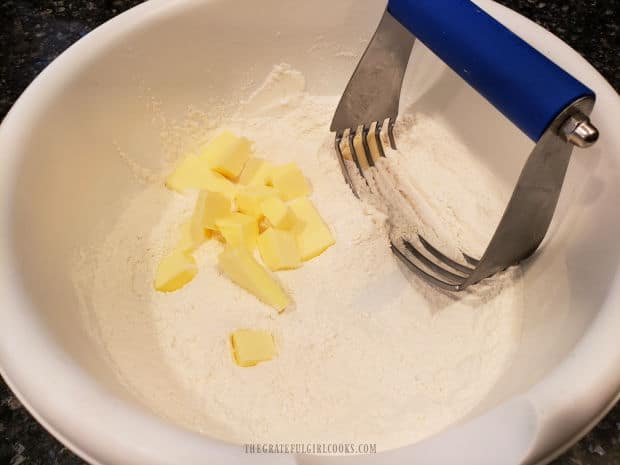
Place flour, sugar, baking powder, salt and baking soda in a medium sized bowl, and stir or whisk to combine these ingredients. Add small chunks of COLD butter.

Cut the butter into the dry ingredients using a pastry blender (as shown) or two forks. Do this until the butter has been reduced to the size of peas.

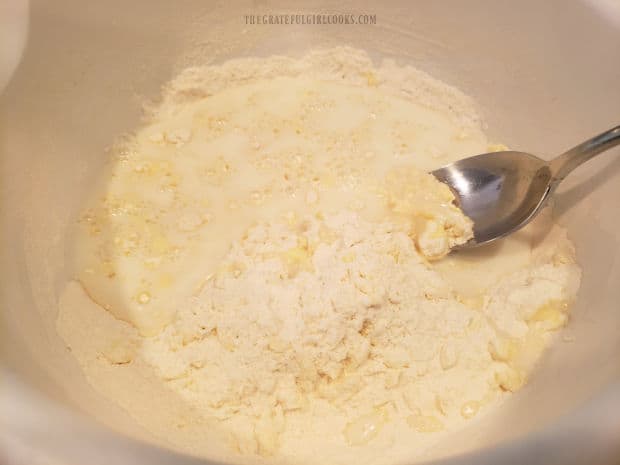
Stir buttermilk into the mixture, but only until all the dough is moistened. Do not overmix the dough, because that can lead to dense (heavy) scones.

Cold butter is cut into the dry scone ingredients using a pastry blender.Buttermilk is stirred into the bowl of scone batter until just combined.

Add The “Good Stuff”

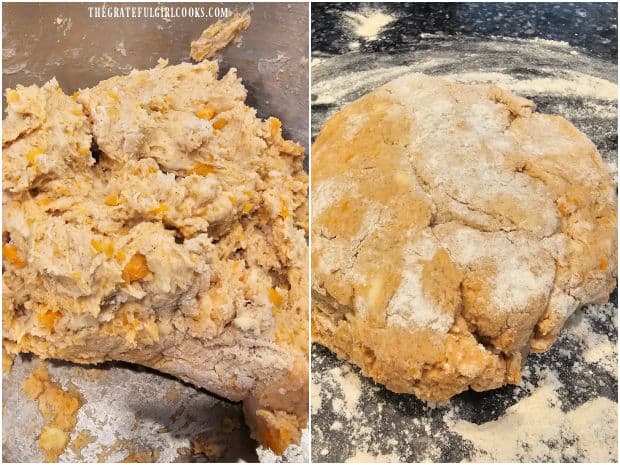
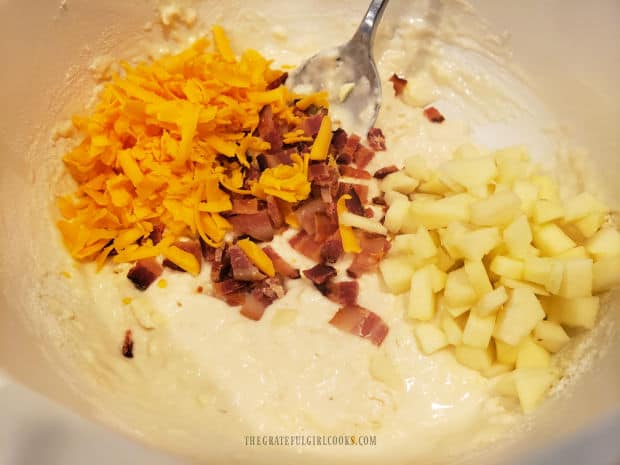
Now add grated cheddar cheese, precooked, chopped crispy bacon, and pealed/chopped apples to the dough batter. Stir these into the batter until fully incorporated.

The scone dough will be a fairly “wet” and chunky dough at this point. Now it’s time to roll out the dough and cut the scones for baking.

Grated cheese, bacon, and diced apples are stirred into the scone batter.

Knead, Shape, And Cut The Dough

It’s time to get that scone dough into shape. Generously spread a work surface with flour. Because this is a sticky dough, do not skip this step!

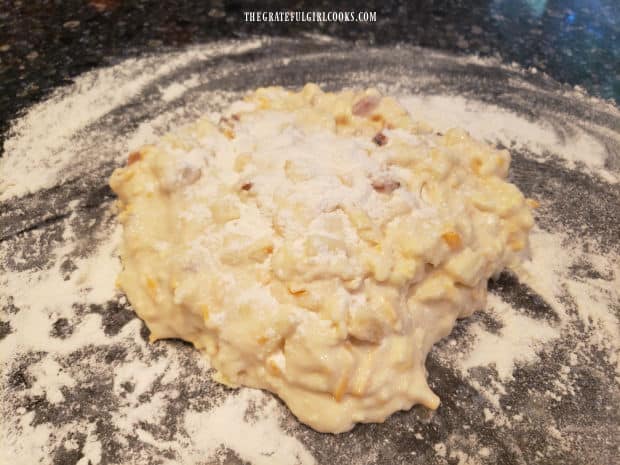
Pour the dough onto the floured surface. Sprinkle the dough with additional flour, then coat your hands with flour, too. Keep the flour handy, because you will more than likely need to sprinkle it on the dough as you knead it.

Knead the dough about 8-10 times with your well-floured hands, adding more flour if necessary, until it comes together in a ball. The dough should not be sticky and wet at this point.

Dusted with flour, the scone dough is ready to be kneaded, then shaped.

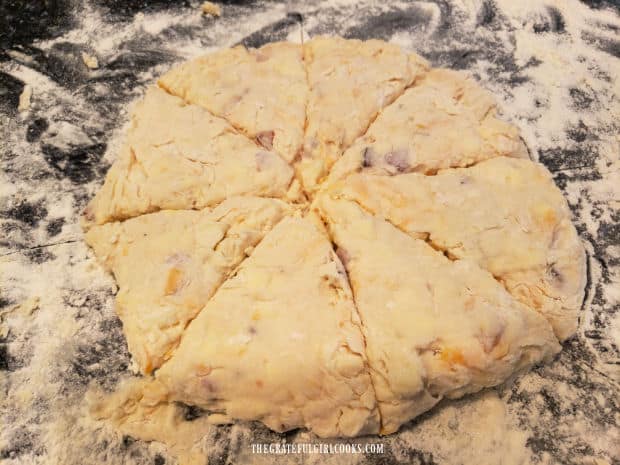
Shape the dough into a 9″ wide circle with your hands. Use a very sharp knife or pizza cutter to slice the scone dough into eight pie-shaped wedges.

Scone dough is shaped into a 9" circle, and cut into eight wedges.

Time To Bake The Scones

Place the scones on a parchment paper lined baking sheet. NOTE: If you do not have parchment paper, grease the baking sheet with non stick cooking spray.

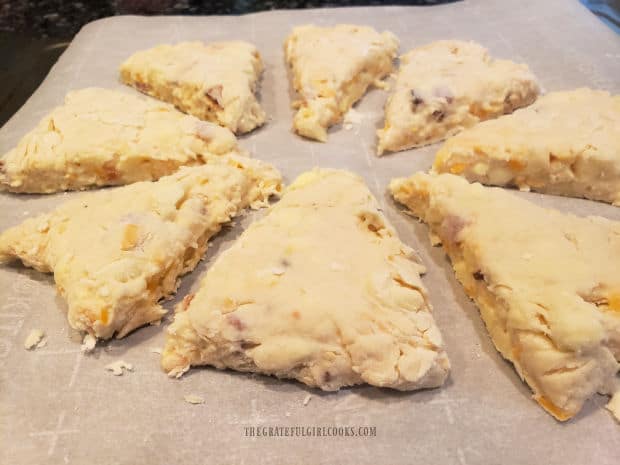
Place the scone wedges in a circle on the parchment paper (or greased baking sheet), leaving about an inch between each slice, as pictured below.

Bake at 450°F. on a middle rack in the oven for 13-15 minutes. When done, the bacon apple cheddar scones should be golden brown on top.

TIP: Because oven temps can vary quite a bit, check them after 13 minutes, then continue cooking until done. A toothpick inserted into the middle of a scone should come out clean.

Scone dough, sliced in 8 wedges and placed on parchment paper-lined pan for baking.Baked bacon apple cheddar scones on parchment paper after coming out of the oven.

Serve the Bacon Apple Cheddar Scones

Transfer the scones to a wire rack and let them cool for a few minutes before serving. We think they taste best when served warm, and not hot! 

Serve these delicious bacon apple cheddar scones alongside any meal you would normally serve bread or rolls with. They pair well with meats, and are wonderful with soups or stews.

The bacon apple cheddar scones cool on a wire rack after baking.Bacon apple cheddar scones, served on a white plate.

I really am confident you’ll enjoy these delicious scones. I think you’ll be surprised how good they are! Thanks for stopping by, and I invite you to come back soon for more family-friendly recipes.

Take care, may God bless you, and I hope you have a GREAT day!

Looking For More BREAD Recipes?

You can find ALL of my recipes in the Recipe Index, which is located at the top of the page. I have some wonderful bread recipes you can check out, including:

Want More Recipes? Get My FREE Newsletter!

I publish a newsletter 2 times per month (1st and 15th) with lots of recipes, tips, etc..
Would you like to join our growing list of subscribers?

There is a Newsletter subscription box on the top right (or bottom) of each blog post, depending on the device you use.
You can submit your e-mail address there, to be added to my mailing list.

Find Me On Social Media:

Facebook page: The Grateful Girl Cooks!
Pinterest:
The Grateful Girl Cooks!
Instagram:
jbatthegratefulgirlcooks

Author's signature

Recipe adapted from: “Taste of Home” magazine, August/September 2003 edition, page 9

↓↓ PRINTABLE RECIPE BELOW ↓↓

0 from 0 votes
Bacon Apple Cheddar Scones
Prep Time
15 mins
Cook Time
15 mins
Total Time
30 mins
 

Bacon Apple Cheddar Scones are delicious! Recipe makes 8 buttery, savory scones, filled with diced apples, cheddar cheese and crisp bacon!

Category: Bread, Side Dish
Cuisine: American
Keyword: bacon apple cheddar scones
Servings: 8 scones
Calories Per Serving: 253 kcal
Author: JB @ The Grateful Girl Cooks!
Ingredients
  • 2 cups all purpose flour
  • 2 Tablespoons granulated sugar
  • teaspoons baking powder
  • ½ teaspoon salt
  • ¼ teaspoon baking soda
  • Tablespoons butter (COLD)
  • ¾ cup buttermilk
  • ¾ cup chopped apples (sweet, not tart) peeled, chopped
  • ½ cup grated cheddar cheese
  • 2 slices cooked bacon chopped, cooked crisp
Instructions
  1. Preheat oven to 450°F. Line a baking sheet with parchment paper OR spray with non stick cooking spray.

  2. Stir or whisk flour, sugar, baking powder, salt and baking soda in a medium bowl, Add small chunks of COLD butter. Cut butter in with pastry blender or 2 forks, until butter's reduced to size of peas. Stir in buttermilk, only until dough is moistened. Do not overmix, as that can lead to dense (heavy) scones.

  3. Add cheese, bacon, and apples to dough. Stir into batter until fully incorporated. Dough will be fairly "wet" and chunky at this point.

  4. Generously spread work surface with flour. Pour dough onto floured surface. Sprinkle dough with additional flour, then coat your hands with flour. Knead dough 8-10 times with well-floured hands, adding more flour if necessary, until it comes together in a ball. The dough should not be sticky and wet at this point.

  5. Shape dough into 9" circle. Use knife or pizza cutter to slice dough into 8 pie-shaped wedges. Place scones on prepared baking sheet in a circle, leaving an inch between each slice.

  6. Bake at 450°F. (on middle oven rack) for 13-15 minutes. When done, scones should be golden brown. TIP: Because oven temps vary, check them at 13 minutes; continue cooking until done. A toothpick inserted into scone should come out clean. Transfer scones to wire rack to cool slightly . Serve warm.

Recipe Notes

TIP: Out of buttermilk? Here's an easy substitute to make 1 cup of buttermilk (you will only use 3/4 cup): Measure out 1 cup milk. Remove 1 Tablespoon milk from the cup. Add 1 Tablespoon white vinegar to the cup. Stir, then let the milk sit for 5 full minutes. Use 3/4 cup of it in recipe.

Nutrition Facts
Bacon Apple Cheddar Scones
Amount Per Serving (1 scone)
Calories 253 Calories from Fat 108
% Daily Value*
Fat 12g18%
Saturated Fat 7g44%
Trans Fat 0.3g
Polyunsaturated Fat 1g
Monounsaturated Fat 3g
Cholesterol 32mg11%
Sodium 346mg15%
Potassium 170mg5%
Carbohydrates 30g10%
Fiber 1g4%
Sugar 5g6%
Protein 6g12%
Vitamin A 355IU7%
Vitamin C 1mg1%
Calcium 116mg12%
Iron 2mg11%
* Percent Daily Values are based on a 2000 calorie diet.

Here’s one more to pin on your Pinterest boards!Bacon Apple Cheddar Scones are delicious! Recipe makes 8 buttery, savory scones, filled with diced apples, cheddar cheese and crisp bacon!


Roasted Brussel Sprouts For Two

It’s simple to make Roasted Brussel Sprouts For Two! This delicious, baked vegetable side dish only requires a few common ingredients.It's simple to make Roasted Brussel Sprouts For Two! This delicious, baked vegetable side dish only requires a few common ingredients.

Have you ever roasted Brussel sprouts in the oven? They turn out DELICIOUS! After roasting, they look a bit “charred” and crispy looking on the outside, but are soft and tender on the inside!

The recipe I am sharing today is ideal for two servings, but can EASILY be doubled, tripled, or multiplied into the quantity you need.

TIP: You can enter the # of servings you need into the printable recipe card at the bottom of the page (in the box by SERVINGS). The software will then re-calculate the quantity of ingredients you will need.

I think you’ll be surprised at how really EASY it is to make delicious, roasted Brussel sprouts for two people. Here’s how to make them!

Scroll Down For A Printable Recipe Card At The Bottom Of The Page

Prepare The Brussel Sprouts

Preheat your oven to 425°F. For this recipe as written (for two servings), you will need about ¾ pound of fresh Brussel spouts. Typically this will be about 10-12 whole Brussel sprouts, depending on their size.

Trim off the stem ends (seen in the 2nd photo below). Some of the small outer leaves may fall off, but don’t worry! That is to be expected.

Once the stem end has been trimmed off, slice each Brussel sprout in half length-wise. Discard the stem and any of the outer leaves that have fallen off.

Brussel sprouts are sliced lengthwise before seasoning.The stems are trimmed off of the Brussel sprouts before seasoning and slicing.

Place the Brussel sprout halves in a medium sized bowl. Drizzle 1½ Tablespoons of olive oil over them, and gently toss, to coat them with the oil.

Olive oil is drizzled over the Brussel sprout halves in a mixing bowl.

A Little Seasoning

Once coated with the olive oil, sprinkle the Brussel sprouts with salt, pepper, garlic powder and a bit of onion powder. Stir gently, to evenly distribute the seasoning over the veggies.

Seasonings are added to the oil-tossed Brussel sprouts before baking.

Bake The Brussel Sprouts

Place the seasoned Brussel sprouts, cut side down, on a parchment paper-lined baking sheet. This will also help to create less mess to clean up!

However, if you don’t have access to parchment paper, place the Brussel sprouts directly on a baking sheet, leaving a small space between each one.

NOTE: I don’t recommended using a silpat or a silicon mat, because you want the charring that occurs on the sprouts when in contact with parchment paper or a metal baking sheet.

Seasoned Brussel sprout halves are roasted, cut side down on parchment lined baking sheet.

Bake the Brussel sprouts at 425°F. for 23-25 minutes. When done, the Brussel sprouts will be slightly “charred” and crispy on the outside, but very tender on the inside!

After roasting, the Brussel sprouts are charred on the outside and tender inside.Crispy, charred outer leaves cover the green, tender roasted Brussel sprouts.

Serve The Roasted Brussel Sprouts For Two

Use a spatula to transfer the roasted Brussel sprouts for two onto a platter or individual serving plates. See how browned they are?

We enjoy them this way, but if you prefer them less browned on the outside, simply peel off the outer leaf before serving or remove from the oven a bit early.

The flavor is quite nice as well, thanks to the simple seasoning on them. They may look browned on the outside, but they cut easily, because they’re quite soft inside.

This Brussel sprout side dish can be served with a variety of main dish meats. We enjoyed them (this time), served alongside pork chops and sweet potatoes. YUM! 

Roasted Brussel Sprouts For Two, served with a sweet potato and pork chop.

I hope you have the chance to try this simple recipe for Roasted Brussel Sprouts For Two. You can easily change the amount of the servings in the printable recipe below, if necessary.

Thank you for stopping by, and I hope you’ll come back again soon for more family-friendly recipes. Take care, may God bless you, and have a GREAT day!

Looking For More VEGGIE Recipes?

You can find ALL of my recipes in the Recipe Index, which is located at the top of the page. I have LOTS of yummy vegetable recipes to choose from, including:

Want More Recipes? Get My FREE Newsletter!

I publish a newsletter 2 times per month (1st and 15th) with lots of recipes, tips, etc..
Would you like to join our growing list of subscribers?

There is a Newsletter subscription box on the top right (or bottom) of each blog post, depending on the device you use.
You can submit your e-mail address there, to be added to my mailing list.

Find Me On Social Media:

Facebook page: The Grateful Girl Cooks!
Pinterest:
The Grateful Girl Cooks!
Instagram:
jbatthegratefulgirlcooks

Author's signature

↓↓ PRINTABLE RECIPE BELOW ↓↓

0 from 0 votes
Roasted Brussel Sprouts For Two
Prep Time
10 mins
Cook Time
25 mins
Total Time
35 mins
 

It's simple to make Roasted Brussel Sprouts For Two! This delicious, baked vegetable side dish only requires a few common ingredients.

Category: Side Dish, Vegetable Dish
Cuisine: All Cuisines
Keyword: roasted Brussel Sprouts
Servings: 2
Calories Per Serving: 170 kcal
Author: JB @ The Grateful Girl Cooks!
Ingredients
  • ¾ pound fresh Brussel sprouts (about 10-12)
  • Tablespoons olive oil
  • ½ teaspoon salt
  • ½ teaspoon ground black pepper
  • ½ teaspoon garlic powder
  • teaspoon onion powder
Instructions
  1. Preheat oven to 425°F. Line a baking sheet with parchment paper (optional).

  2. Trim off stem ends of Brussel sprouts. Some outer leaves may fall off, that's okay. Slice each Brussel sprout in half length-wise. Discard stem/leaves that fell off.

  3. Place Brussel sprout halves in a medium bowl. Drizzle with olive oil; gently toss, to coat with oil. Sprinkle sprouts with salt, pepper, garlic powder and onion powder. Stir gently, to evenly distribute seasoning.

  4. Put Brussel sprouts, cut side down, on parchment paper-lined baking sheet (or directly on baking sheet), leaving space between each one. NOTE: It is NOT recommended to use silpat or silicone mats to roast the Brussel sprouts.

  5. Bake at 425°F. for 23-25 minutes. When done, Brussel sprouts will be slightly "charred"/crispy on the outside, but tender on the inside! Serve and enjoy!

Nutrition Facts
Roasted Brussel Sprouts For Two
Amount Per Serving (1 (1/2 of total))
Calories 170 Calories from Fat 99
% Daily Value*
Fat 11g17%
Saturated Fat 2g13%
Polyunsaturated Fat 1g
Monounsaturated Fat 8g
Sodium 625mg27%
Potassium 679mg19%
Carbohydrates 16g5%
Fiber 7g29%
Sugar 4g4%
Protein 6g12%
Vitamin A 1285IU26%
Vitamin C 145mg176%
Calcium 75mg8%
Iron 3mg17%
* Percent Daily Values are based on a 2000 calorie diet.

Here’s one more to pin on your Pinterest boards!It's simple to make Roasted Brussel Sprouts For Two! This delicious, baked vegetable side dish only requires a few common ingredients.

Southwest-Style Blackeyed Peas

Southwest-Style Blackeyed Peas are a delicious side dish! Blackeyed peas are cooked with bacon, onions, green chiles, and Mexican spices.

Do you like blackeye peas? I’m not referring to the MUSIC BAND, but the VEGETABLE! I grew up eating them fairly often, because my parents really enjoyed them. We’ve always called them blackeyed peas (rather than blackeye peas-without the D at the end), so that’s what I’ll call them in this post. Tradition!

My mom bought cans of blackeyed peas, heated them, added salt and pepper, and that was it (my Dad added hot pepper sauce)! Blackeyed peas may be purchased CANNED, DRIED (soaked overnight to soften), or FROZEN (then thawed).

This recipe I came up with uses FROZEN (and thawed) blackeyed peas. We keep bags of veggies in our deep freezer, so we usually have a bag or two on hand. I added other ingredients to add a Southwest-type flavor, and created this veggie dish.

When you combine tender blackeyed peas with spices, onion, BACON and garlic, how can you go wrong? Here’s how to make Southwest-Style Blackeyed Peas, a tasty little side dish: 

Scroll Down for A Printable Recipe Card At The Bottom Of The Page

Why I Use Frozen Blackeyed Peas For This Recipe

I use frozen blackeyed peas in this recipe, because truthfully, it’s convenient. When dried peas are used, it can take all night long soaking in water to get them to soften.

Canned and drained blackeyed peas seem to get a bit too mushy when cooked in the flavorful broth. So frozen (and thawed) is convenient, and what I prefer to use!

A bag of frozen blackeyed peas is what is used for this recipe.

Cook The Blackeyed Peas

After thawing the blackeyed peas, cook them according to the instructions on the bag. Typically they need to be cooked about 40 minutes or so, until they become tender.

Once they’re fully cooked and tender to the bite, drain the blackeyed peas. Set them aside until later, while you prepare the rest of the dish.

Blackeyed peas are cooked in boiling water according to package directions.

Let’s Add Some Flavor!

Cut 3 slices of bacon in small pieces and place them in a large non-stick skillet. Add chopped onion, and cook on Medium heat for 3-5 minutes, until the onions are tender, and the bacon is fully cooked (but not crispy).

Leave any grease the bacon produces in the skillet. Stir in minced garlic and cook an additional 30 seconds, stirring often so the garlic doesn’t burn.

Add salt, pepper, ground cumin and cayenne pepper to the skillet. Stir to incorporate the spices with the bacon, onion and garlic.

Chopped onions and small pieces of bacon, cooking in a skillet.Spices and minced garlic are combined with cooked bacon and onions in skillet.

Add More Flavor!

Now it’s time to add the drained, tender blackeyed peas to the skillet. Dump them in, and give them a good stir to combine them with the other ingredients.

Add diced green chilis and chicken broth to the blackeyed peas and stir again, until well combined in the skillet. The added broth acts as a conduit to get all the flavor of the spices infused into the peas.

Cooked blackeyed peas are stirred into bacon and onion mixture in the skillet.Shicken broth and diced green chiles are added to the blackeyed peas.

Simmer Until Broth Is Absorbed

Bring the liquid to a boil, then turn the heat to a low simmer. Let the Southern-Style Blackeyed Peas cook on Low for 8-10 minutes (uncovered), OR until almost all the broth has been absorbed.

Southwest-Style Blackeyed Peas are cooked on Low heat until broth is absorbed.

Serve The Southwest-Style Blackeyed Peas

Remove the skillet from the heat source, and stir chopped cilantro into the blackeyed peas. If desired, garnish the dish with more cilantro for serving.

Serve this veggie side dish straight from the skillet, if desired, OR transfer to a medium sized serving bowl. Serve immediately while hot… and enjoy!

The Southwest-style blackeyed peas are garnished with cilantro before serving.A white bowl, filled with Southwest-style blackeyed peas ready to be served.

I hope you have the opportunity to make these delicious Southwest-Style Blackeyed Peas soon. They’re so tasty, and I am confident you will enjoy them! The peas can be easily reheated in a microwave.

Thank you for stopping by today, and I invite you to come back again soon for more family-friendly recipes. Take care, and have a GREAT day.

Looking For More VEGGIE SIDE DISH Recipes?

You can find ALL of my recipes in the Recipe Index, which is located at the top of the page. I have a wonderful variety of veggie recipes for you to check out, including:

Want More Recipes? Get My FREE Newsletter!

I publish a newsletter 2 times per month (1st and 15th) with lots of recipes, tips, etc..
Would you like to join our growing list of subscribers?

There is a Newsletter subscription box on the top right (or bottom) of each blog post, depending on the device you use.
You can submit your e-mail address there, to be added to my mailing list.

Find Me On Social Media:

Facebook page: The Grateful Girl Cooks!
Pinterest:
The Grateful Girl Cooks!
Instagram:
jbatthegratefulgirlcooks

Author's signature

↓↓ PRINTABLE RECIPE BELOW ↓↓

0 from 0 votes
Southwest-Style Blackeyed Peas
Prep Time
5 mins
Cook Time
8 mins
Inactive cooking time for blackeyed peas
40 mins
Total Time
53 mins
 

Southwest-Style Blackeyed Peas are a delicious side dish! Blackeyed peas are cooked with bacon, onions, green chiles, and Mexican spices.

Category: Side Dish, Vegetable Dish
Cuisine: Southwest
Keyword: southwest-style blackeyed peas
Servings: 4
Calories Per Serving: 177 kcal
Author: JB @ The Grateful Girl Cooks!
Ingredients
  • 12 ounces frozen blackeyed peas thawed
  • 3 slices bacon chopped in small pieces
  • ¼ medium yellow onion diced
  • 2 cloves garlic minced
  • ¾ teaspoon salt
  • ½ teaspoon black pepper
  • ½ cup chicken broth
  • ¼ teaspoon ground cumin
  • teaspoon cayenne pepper
  • 2 Tablespoons green chilis (diced/canned)
  • 2 Tablespoons fresh cilantro chopped
Instructions
  1. Thaw blackeyed peas; cook according to package directions (about 40 minutes until tender). Drain and set aside.

  2. Cut bacon in small pieces; place in large non-stick skillet, along with chopped onion. Cook on Medium heat 3-5 minutes, until onions are tender and bacon is fully cooked (but not crispy). Leave any bacon grease in the skillet. Stir in garlic; cook for 30 seconds, stirring often so garlic doesn't burn.

  3. Add salt, pepper, cumin and cayenne pepper to skillet. Stir to incorporate spices. Add blackeyed peas. Stir to combine. Add diced green chiles and chicken broth. Stir again, to combine.

  4. Bring broth to a boil; turn heat down to a low simmer. Cook on Low 8-10 minutes (uncovered), OR until almost all broth has been absorbed.

  5. Remove skillet from heat source. Stir in chopped cilantro. Serve straight from the skillet OR transfer to serving bowl. Garnish with more cilantro, if desired. Serve immediately. Enjoy!

Nutrition Facts
Southwest-Style Blackeyed Peas
Amount Per Serving (1 (1/4 of total))
Calories 177 Calories from Fat 63
% Daily Value*
Fat 7g11%
Saturated Fat 2g13%
Trans Fat 0.02g
Polyunsaturated Fat 1g
Monounsaturated Fat 3g
Cholesterol 11mg4%
Sodium 688mg30%
Potassium 307mg9%
Carbohydrates 20g7%
Fiber 6g25%
Sugar 3g3%
Protein 9g18%
Vitamin A 72IU1%
Vitamin C 4mg5%
Calcium 32mg3%
Iron 2mg11%
* Percent Daily Values are based on a 2000 calorie diet.

Here’s one more to pin on your Pinterest boards!Southwest-Style Blackeyed Peas are a delicious side dish! Blackeyed peas are cooked with bacon, onions, green chiles, and Mexican spices.

Asian-Inspired Couscous

 Asian-Inspired Couscous is a simple, flavor-filled side dish to make, with green onions, soy sauce, and a few spices (ginger, garlic, etc.).
Asian-Inspired Couscous is a simple, flavor-filled side dish to make, with green onions, soy sauce, and a few spices (ginger, garlic, etc.).

If you’re like me, you’re probably constantly on the lookout for a new recipe or two that are easy to make and taste great. Simple, right?

Well, this recipe for Asian-Inspired Couscous fits that bill. It is VERY simple to make, and has wonderful flavor. Green onions, soy sauce, garlic, ginger, and a smidge of cayenne pepper give this versatile couscous side dish it’s great taste.

Couscous is a fairly bland variety of pasta made with semolina flour, but it absorbs flavors very well. It is low in fat, but also contains more protein, minerals and vitamins than white rice.

Because couscous absorbs flavors well, it’s perfect used in this recipe, because it takes on Asian-inspired flavors from the spices, soy sauce and green onions. Here’s how to make this side dish.

Scroll Down For A Printable Recipe Card At The Bottom Of The Page

Prepare The Asian-Inspired Sauce

Spray a large skillet with non-stick baking spray. Heat the skillet on Medium-High heat until it is very hot. Add chopped green onions to the skillet and cook, stirring often, until they become tender (2-3 minutes).

Now add water, soy sauce, sugar, garlic powder, ground ginger, and cayenne pepper to the skillet. Stir until the ingredients are well-combined, then bring the liquid to a full boil.

Chopped green onions are cooked in a lightly sprayed skillet on Medium-High heat.Water, soy sauce, and spices are added to the cooked green onions in the skillet.

Cook The Couscous

Pour uncooked couscous into the boiling liquid in the skillet. Stir well, to fully combine the liquid and the couscous.

A cup of uncooked couscous is added to the boiling liquid in the skillet.Couscous, ready to be stirred into the Asian-inspired sauce and cooked.

Put a lid on the skillet, and turn the heat down to Low. Simmer the Asian-inspired couscous COVERED on low heat for 10-12 minutes, or until the liquid has been absorbed. Stir occasionally.

Asian-inspired couscous cooks in a covered skillet on low heat in sauce until liquid is absorbed.

Fluff And Serve Asian-Inspired Couscous

When all the liquid has been absorbed into the couscous, it should be ready to serve. The couscous should be tender to the bite. Use a fork to “fluff” up the couscous before serving.

Asian-inspired couscous is fluffed with a fork before serving, once liquid has been absorbed.

Serve the Asian-inspired couscous right out of the skillet, or transfer to a serving bowl. Serve this dish immediately while the couscous is still hot!

This recipe for Asian-inspired couscous will yield enough for six small side dish servings. It pairs well with beef, chicken, pork or lamb, and I’m confident you’ll like it.

A white bowl filled with hot Asian-inspired couscous, ready to be served.,

I hope you have the opportunity to make this versatile side dish, and trust you’ll enjoy it as much as we do. It is a very handy recipe to have because it’s so yummy, and is a cinch to make!

Thanks for stopping by, and I invite you to come back again soon for more family-friendly recipes. Take care, God bless, and have a GREAT day!

Looking For More SIDE DISH Recipes?

You can find ALL of my recipes in the Recipe Index, which is located at the top of the page. I have lots of delicious side dishes for you to choose from, including:

Want More Recipes? Get My FREE Newsletter!

I publish a newsletter 2 times per month (1st and 15th) with lots of recipes, tips, etc..
Would you like to join our growing list of subscribers?

There is a Newsletter subscription box on the top right (or bottom) of each blog post, depending on the device you use.
You can submit your e-mail address there, to be added to my mailing list.

Find Me On Social Media:

Facebook page: The Grateful Girl Cooks!
Pinterest:
The Grateful Girl Cooks!
Instagram:
jbatthegratefulgirlcooks

Author's signature

Original recipe source: ” Cooking Light” Cookbook 1994, pages 132-133, published in 1993 by Oxmoor House

↓↓ PRINTABLE RECIPE BELOW ↓↓

0 from 0 votes
Asian-Inspired Couscous
Prep Time
10 mins
Cook Time
12 mins
Total Time
22 mins
 

Asian-Inspired Couscous is a simple, flavor-filled side dish to make, with green onions, soy sauce, and a few spices (ginger, garlic, etc.).

Category: Side Dish
Cuisine: Asian
Keyword: Asian-inspired couscous
Servings: 6
Calories Per Serving: 116 kcal
Author: JB @ The Grateful Girl Cooks!
Ingredients
  • cooking spray (enough for skillet)
  • ½ cup sliced green onions (use green and white parts)
  • cups water
  • 2 Tablespoons low sodium soy sauce
  • ½ teaspoon granulated sugar
  • ¼ teaspoon garlic powder
  • ¼ teaspoon ground ginger
  • ¼ teaspoon ground cayenne pepper OR ⅛ teaspoon for less heat
  • 1 cup couscous uncooked
Instructions
  1. Spray large skillet with non-stick baking spray. Heat skillet on Medium-High heat until very hot. Add chopped green onions; cook, stirring often until they become tender (2-3 minutes).

  2. Add water, soy sauce, sugar, garlic, ginger, and cayenne pepper to skillet. Stir until well-combined. Bring liquid to a full boil.

  3. Pour uncooked couscous into boiling liquid in skillet. Stir well.

  4. Put a lid on the skillet; turn heat down to Low. Simmer couscous COVERED on low heat for 10-12 minutes, or until liquid has been absorbed. Stir occasionally.

  5. When liquid has been fully absorbed into couscous, it should be ready to serve. Couscous should be tender to the bite. Use a fork to "fluff" up couscous before serving hot. Enjoy!

Nutrition Facts
Asian-Inspired Couscous
Amount Per Serving (1 (1/6 of total))
Calories 116 Calories from Fat 2
% Daily Value*
Fat 0.2g0%
Saturated Fat 0.04g0%
Polyunsaturated Fat 0.1g
Monounsaturated Fat 0.03g
Sodium 196mg9%
Potassium 94mg3%
Carbohydrates 24g8%
Fiber 2g8%
Sugar 1g1%
Protein 4g8%
Vitamin A 118IU2%
Vitamin C 2mg2%
Calcium 15mg2%
Iron 1mg6%
* Percent Daily Values are based on a 2000 calorie diet.

Here’s one more to pin on your Pinterest boards!

Asian-Inspired Couscous is a simple, flavor-filled side dish to make, with green onions, soy sauce, and a few spices (ginger, garlic, etc.).

Southwest Veggie Skillet

Southwest Veggie Skillet is a yummy side dish, with corn, zucchini, bell peppers, onion and tomatoes! Add black beans to make it a meatless meal!
Southwest Veggie Skillet is a yummy side dish, with corn, zucchini, bell peppers, onion and tomatoes! Add black beans to make a meatless meal!

If you’re on the lookout for a great tasting, easy to make side dish, may I suggest this Southwest Veggie Skillet? This dish features a lot of yummy vegetables and a few Southwest-inspired spices that combine to make a fantastic side dish!

The vegetables are low in calories, but have a lot of flavor! Guess what? If you add a rinsed, drained can of black beans to this recipe, you can also enjoy this as a MEATLESS main dish! How’s that for versatile?

 I’m confident you’ll enjoy this simple dish, whether eaten as a side dish or as a vegetarian main course. Here’s how to make it, in about 25 minutes!

Scroll Down for A Printable Recipe Card At The Bottom Of The Page

How To Make The Southwest Veggie Skillet

Heat olive oil over Medium-high heat in a large skillet (I use cast iron). Once the oil is very hot, but not smoking, add chopped onions and a chopped jalapeño pepper to the skillet.

Cook these ingredients for approximately 4 minutes, and then add minced garlic to the skillet. Continue to cook, stirring the veggies often for 1 more minute (don’t burn the garlic!). The veggies should be tender at this point.

Chopped onion and jalapeño pepper are cooked in hot oil in a cast iron skillet.Minced garlic is added to the onions and jalapeños in skillet.

Add More Veggies!

Now add frozen corn (or fresh, if available), chopped bell pepper and zucchini to the skillet. NOTE: I use a combination of red, orange and green bell peppers for added color, but that is optional.

TIP: If you are adding black beans to make this a meatless main dish, this is when to add them!

Sprinkle the veggies with ground cumin and chili powder, then stir until the spices have been mixed in. Cook the veggies, stirring often, for 7-8 minutes, until the veggies have softened and are heated through.

Frozen corn, bell peppers, zucchini and spices are added to the hot skillet.The Southwest flavored veggies cook in the skillet for 7-8 minutes, until tender.

Last Steps Before Serving

Stir cherry tomato halves (I use red and yellow) into the skillet, and cook ONLY until they are barely heated through. This will only take a minute or less! Remove the skillet from the heat source.

Once the skillet is off the heat, add chopped cilantro, fresh lime juice, salt and black pepper to the veggies. Stir to combine, and then the Southwest Veggie Skillet is ready to be served.

Halved cherry tomatoes (red and yellow) are added to the Southwest Veggie Skillet.Skillet is removed from heat, and lime juice, salt/pepper, and chopped cilantro are added.

Serve The Southwest Veggie Skillet

The Southwest Veggie Skillet is now ready to be enjoyed! Transfer the dish to a serving bowl OR serve it hot, right from the skillet.

This is a very tasty side dish that pairs well with chicken, pork, beef or fish! Serve it next to the meat, or place the meat on top of the veggies, serve and enjoy!
After stirring to combine ingredients, the Southwest Veggie Skillet is ready to serve.Southwest Veggie Skillet side dish is served with a cooked chicken breast, on a white plate.

I hope you enjoy this delicious vegetable side dish as much as we do! The veggies have great flavor, and it really is a simple dish to prepare in a short amount of time.

Thanks for stopping by, and I invite you to come back soon for more family-friendly recipes. Take care, may God bless you, and have a wonderful day.

Looking For More VEGGIE Recipes?

You can find ALL of my recipes in the Recipe index, which is located at the top of the page. I have LOTS of delicious vegetable dishes for you to check out, including:

Want More Recipes? Get My FREE Newsletter!

I publish a newsletter 2 times per month (1st and 15th) with lots of recipes, tips, etc..
Would you like to join our growing list of subscribers?

There is a Newsletter subscription box on the top right (or bottom) of each blog post, depending on the device you use.
You can submit your e-mail address there, to be added to my mailing list.

Find Me On Social Media:

Facebook page: The Grateful Girl Cooks!
Pinterest:
The Grateful Girl Cooks!
Instagram:
jbatthegratefulgirlcooks

Author's signature

Recipe adapted from a recipe found in : “The Essential WW Freestyle Cookbook”, page 196, published in 2018 by Weight Watchers International, Inc.

↓↓ PRINTABLE RECIPE BELOW ↓↓

0 from 0 votes
Southwest Veggie Skillet
Prep Time
10 mins
Cook Time
15 mins
Total Time
25 mins
 

Southwest Veggie Skillet is a yummy side dish, with corn, zucchini, bell peppers, onion and tomatoes! Add black beans to make a meatless meal!

Category: Side Dish, Vegetables
Cuisine: Southwest
Keyword: Southwest veggie skillet
Servings: 4 (1 cup per serving)
Calories Per Serving: 142 kcal
Author: JB @ The Grateful Girl Cooks!
Ingredients
  • 1 Tablespoon olive oil
  • 1 medium yellow onion chopped
  • large garlic cloves finely minced
  • 1 medium jalapeño pepper seeds removed, finely minced
  • 10 ounces frozen corn kernels OR 1¾ cup fresh
  • 1 medium zucchini chopped
  • 1 medium red bell pepper (or color combo) chopped (I use red/orange/green)
  • teaspoons ground cumin
  • ¼ teaspoon chili powder
  • 1 cup cherry tomatoes cut in half (I use red/yellow)
  • 2 Tablespoons chopped cilantro
  • Tablespoons fresh lime juice
  • ¾ teaspoon salt
  • ½ teaspoon ground black pepper
Instructions
  1. Heat olive oil on Medium-high heat in a large skillet. Once oil is very hot, but not smoking, add onions and jalapeño pepper. Cook approx. 4 minutes; add garlic. Continue to cook, stirring often for 1 minute (don't burn the garlic!).

  2. Add frozen corn (or fresh, if using), red bell pepper and zucchini to skillet. NOTE: I use a combo of red, orange and green bell peppers for color, but that is optional. TIP: If adding a can of black beans to make this a meatless main dish, this is when to add them!

  3. Sprinkle veggies with cumin and chili powder; stir until combined. Cook, stirring often, for 7-8 minutes, until veggies have softened and are heated through.

  4. Gently stir cherry tomato halves into veggies; cook ONLY until heated through. This will only take a minute or less! Remove skillet from heat source.

  5. Off heat, add cilantro, lime juice, salt and pepper to the veggies; stir to combine. Serve immediately. Enjoy!

Recipe Notes

NOTE: If you wish to make this a MEATLESS main dish, add 1 can of rinsed/drained black beans.

Nutrition Facts
Southwest Veggie Skillet
Amount Per Serving (1 cup)
Calories 142 Calories from Fat 45
% Daily Value*
Fat 5g8%
Saturated Fat 1g6%
Polyunsaturated Fat 1g
Monounsaturated Fat 3g
Sodium 454mg20%
Potassium 558mg16%
Carbohydrates 26g9%
Fiber 4g17%
Sugar 5g6%
Protein 4g8%
Vitamin A 1316IU26%
Vitamin C 69mg84%
Calcium 34mg3%
Iron 2mg11%
* Percent Daily Values are based on a 2000 calorie diet.

Here’s one more to pin on your Pinterest boards!Southwest Veggie Skillet is a yummy side dish, with corn, zucchini, bell peppers, onion and tomatoes! Add black beans to make a meatless meal!

Brussel Sprout Casserole For Two

Brussel Sprout Casserole For Two is a tasty side dish! Sliced Brussel sprouts, cheddar and bacon are baked, topped with cheese and breadcrumbs.

If you’re on the lookout for a new veggie side dish OR a new way to prepare Brussel sprouts, check out this recipe! As written, this delicious side dish will serve two people, but it can easily be adapted to double or triple the quantity.

Cheddar cheese, bacon and crispy Panko breadcrumbs compliment the tender Brussel sprouts wonderfully in this dish! My personal feeling is that everything is better with bacon, right? YEP!

This recipe is quite simple to make, and is a tasty way to enjoy Brussel sprouts, even if you’re not usually a fan. The Brussel sprouts are par-boiled first (to tenderize them), then the casserole is quickly assembled and baked. 

Here’s how to make this scrumptious vegetable side dish!

Scroll Down for A Printable Recipe Card At The Bottom Of The Page

Preparing The Brussel Sprouts

To make this dish for two, you will need about 10 fresh Brussel sprouts. Trim the end stem off of the Brussel sprouts, then slice them in half length-wise.

Fill a Medium sized saucepan with water, and bring it to a boil. Add the Brussel sprout halves, and boil them for 7-8 minutes or until the Brussel sprouts have become slightly tender.

Remove the pan from the stove, and drain off the water. Let the Brussel sprouts cool.

Brussels sprout ends are trimmed, then the sprouts are sliced in half.Halved brussel sprouts are boiled in water for 7 minutes, or until tender.

Preparing The Bacon

You will need crisp, cooked bacon for this casserole. I find it’s best to cook it at the same time the Brussel sprouts are cooking, to save time.

Cut the bacon into small pieces, then cook, stirring often until browned, cooked through, and crispy. Use a slotted spoon to transfer the cooked bacon to paper towels to absorb any excess grease.

Two slices of bacon are cut in small pieces, then cooked until crispy in skillet.Crisp, browned bacon slices drain on paper towels after being removed from skillet.

Assembling The Brussel Sprout Casserole For Two

Once the Brussel sprouts have cooled enough to handle, cut them into thin slices with a sharp knife. Place the slices into a medium-sized bowl.

Add grated cheddar cheese (half the total amount), bacon, half and half, salt and black pepper to the bowl. Gently toss these ingredients together until they’re fully combined.

Tender-cooked brussel sprouts are cut into thin slices for the casserole.Sliced brussel sprouts, cheese, bacon, salt, pepper and half and half are mixed in bowl.

Place the combined Brussel sprout mixture into a lightly greased small baking dish. Now the casserole is ready for the final step before baking!

The combined brussel sprout mixture is placed in small, greased baking dish.

Topping And Then Baking The Casserole 

Sprinkle the top of the Brussel sprout casserole with the remaining grated cheddar cheese. Top this with the crispy Panko breadcrumbs.

Place the Brussel sprout casserole for two into a preheated 400°F. oven, and bake for 14-16 minutes. When done, the top should be lightly browned and crusted, and the casserole will be fully heated through.

Grated cheddar and Panko breadcrumbs top the Brussel Sprout Casserole For Two.After baking, the brussel sprout casserole for two is lightly browned on top.

Serving The Brussel Sprout Casserole For Two

Transfer the baking dish from the oven to a wire rack. Let the casserole cool 1-2 minutes before serving. Scoop out a portion (recipe yields 2 servings), transfer to plates… serve and enjoy!
We enjoyed the Brussel sprout casserole for two, served with chicken cutlets in pan sauce, and steamed rice on the side. It tastes fantastic!

This veggie side dish is absolutely delicious, and has wonderful flavor! I’m confident you will enjoy this lovely Brussel sprout side dish served with a favorite main dish.

Brussel Sprout Casserole For Two cools on a wire rack after being removed from oven.A serving of the brussel sprout casserole for two, served on a white plate.

I hope you will have the opportunity to make this Brussel sprout recipe, and trust you’ll enjoy it like we do! It really is a delicious veggie side dish.

Thanks for stopping by, and please come back soon for more family-friendly recipes. Take care, and have a great day!

Looking For More VEGETABLE Side Dish Recipes?

You can find ALL of my recipes in the Recipe Index, which is located at the top of the page. I have a large variety of delicious vegetable recipes for you to check out, including:

Want More Recipes? Get My FREE Newsletter!

I publish a newsletter 2 times per month (1st and 15th) with lots of recipes, tips, etc..
Would you like to join our growing list of subscribers?

There is a Newsletter subscription box on the top right (or bottom) of each blog post, depending on the device you use.
You can submit your e-mail address there, to be added to my mailing list.

Find Me On Social Media:

Facebook page: The Grateful Girl Cooks!
Pinterest:
The Grateful Girl Cooks!
Instagram:
jbatthegratefulgirlcooks

Author's signature

Recipe adapted from: mantitlement.com/the-best-brussels-sprouts-casserole

↓↓ PRINTABLE RECIPE BELOW ↓↓

0 from 0 votes
Brussel Sprout Casserole For Two
Prep Time
15 mins
Cook Time
15 mins
Total Time
30 mins
 

Brussel Sprout Casserole For Two is a tasty side dish! Sliced Brussel sprouts, cheddar and bacon are baked, topped with cheese and breadcrumbs.

Category: Side Dish, Vegetable
Cuisine: American
Keyword: brussel sprout casserole
Servings: 2
Calories Per Serving: 318 kcal
Author: JB @ The Grateful Girl Cooks!
Ingredients
  • ½ pound fresh brussel sprouts
  • 2 slices bacon cooked till crispy, crumbled
  • ½ cup cheddar cheese divided use, GRATED
  • 3 Tablespoons half and half (or heavy whipping cream)
  • 1 teaspoon butter melted
  • cup Panko breadcrumbs
  • ¼ teaspoon salt
  • teaspoon black pepper
Instructions
  1. Preheat oven to 400°F. Lightly grease/spray a small baking dish; set aside.

  2. Trim stem end off Brussel sprouts; slice Brussel sprouts in half length-wise. Fill medium saucepan with water; bring it to a boil. Add Brussel sprouts; boil them 7-8 minutes or until slightly tender. Drain water; let Brussel sprouts rest until cool enough to handle.

  3. Cut bacon into small pieces. Cook, stirring often until browned/crispy. Place bacon on paper towels to absorb grease.

  4. Cut Brussel sprouts into thin slices (lengthwise). Transfer slices to a medium bowl. Add ¼ cup cheddar cheese (reserve remaining ¼ C.), bacon, half and half, salt and pepper. Gently toss to combine. Place mixture in prepared baking dish. Sprinkle casserole with remaining ¼ C. cheese; top with Panko breadcrumbs.

  5. Bake casserole at 400°F. for 14-16 minutes. When done, casserole should be lightly browned/crusted on top, and heated through.

  6. Transfer baking dish to a wire rack. Let casserole cool 1-2 minutes before serving. Scoop out a portion, transfer to plates... serve and enjoy!
Nutrition Facts
Brussel Sprout Casserole For Two
Amount Per Serving (1 g)
Calories 318 Calories from Fat 207
% Daily Value*
Fat 23g35%
Saturated Fat 11g69%
Trans Fat 0.1g
Polyunsaturated Fat 2g
Monounsaturated Fat 7g
Cholesterol 56mg19%
Sodium 707mg31%
Potassium 546mg16%
Carbohydrates 15g5%
Fiber 5g21%
Sugar 4g4%
Protein 14g28%
Vitamin A 1289IU26%
Vitamin C 97mg118%
Calcium 281mg28%
Iron 2mg11%
* Percent Daily Values are based on a 2000 calorie diet.

Here’s one more to pin on your Pinterest boards!

Brussel Sprout Casserole For Two is a tasty side dish! Sliced Brussel sprouts, cheddar and bacon are baked, topped with cheese and breadcrumbs.

Maple Butternut Squash with Pecans and Cranberries

Maple Butternut Squash, roasted with pecans and cranberries and drizzled with maple syrup is a fantastic, delicious veggie side dish for 4!Maple Butternut Squash, roasted with pecans and cranberries and drizzled with maple syrup is a fantastic, delicious veggie side dish for 4!

This summer I grew several small butternut squash in our little backyard raised bed garden, and was thrilled with the results. I had fun cooking them in various ways, using both new and older recipes to enjoy this delicious “winter” squash. I’ve posted a couple of those recipes here on the blog.

Today I want to share with you one of the ways we enjoyed eating butternut squash this Fall where I used a larger, store bought squash. This recipe for maple butternut squash is delicious, easy to prepare, and is wonderful to serve for a simple weeknight meal or a holiday feast!

The dish can be made using either a bag of (store bought) fresh butternut squash cubes (peeled, cubed), OR by using a fresh, large butternut squash.

Already cubed store bought squash is convenient and saves time, but I prefer fresh butternut squash, and peel and cut it myself. Do whatever is most convenient, budget friendly, or time-saving for you! Here’s how to make this dish (shown using whole, fresh butternut squash):

Scroll Down For A Printable Recipe Card At The Bottom Of The Page

Prepare The Butternut Squash

Make sure to preheat your oven to 400°F. This recipe doesn’t take too long at all to prep, so you want your oven hot, and ready to go! You will also need to line a large baking sheet with parchment paper.

If you prefer to use already peeled and cut squash, you will need to purchase a 20 oz. bag. When using a fresh, whole butternut squash, buy a rather large one, as you will need 4 cups of the peeled, cubed squash.

Use a vegetable peeler to completely peel the squash. Cut thin slices off of both ends, then carefully slice the squash in half, lengthwise.

Scoop out the seeds (discard), then turn the squash halves over (seed hole facing down). Slice the squash halves into 1″ wide pieces across the width, then cut into bite sized cubes (about 1″ each).

Butternut squash is peeled, seeds removed, sliced into half-rings, then into bite-sized cubes.

Place four cups of the butternut squash cubes (or the 20 oz. bagged cubes) into a large bowl. Drizzle with oil, pure maple syrup, and then add ground cinnamon, sea salt and cayenne pepper.

Stir these ingredients well, to make sure all the squash cubes are well-coated with oil, syrup and spices.

Spices, maple syrup and oil are added to the cubed butternut squash in a large bowl.Seasonings, oil and maple syrup are stirred with the butternut squash until coated.

Bake The Maple Butternut Squash

Transfer the squash cubes to the parchment paper-lined baking sheet, and spread them out, so they’re in a single layer for baking.

Bake the butternut squash at 400°F for 15 minutes, then remove the pan from the oven.

Seasoned maple butternut squash cubes are spread in single layer on parchment paper for baking.

Immediately sprinkle the squash with pecan halves and the dried cranberries. Toss these ingredients, then re-spread them back out in a single layer. Continue baking (at 400°F) for 12-15 more minutes.

The maple butternut squash is done when a knife can be easily inserted into the squash (soft inside). It should have also begun to caramelize on the outside. Remove the pan from the oven once done, and prepare to serve this dish.

Dried cranberries and pecan halves are stirred into butternut squash halfway through baking time.

Serve The Maple Butternut Squash With Pecans And Cranberries

Transfer the roasted maple butternut squash, pecans and cranberries onto a serving platter or into a serving bowl. Drizzle the squash with the remaining amount of maple syrup, if desired.

This final drizzle of syrup is optional, but I highly recommend it. This final touch of syrup gives the veggie dish a perfect finishing touch of sweetness! Serve while the squash is hot.

You’ll enjoy soft, tender, cinnamon scented butternut squash, and crunchy roasted pecans. With the tangy sweetness of dried cranberries and slight heat from the cayenne, you’ll have a delicious dish. It’s a wonderful blend of flavor and texture!

The maple butternut squash with pecans and cranberries is served on a white platter.Roasted maple butternut squash is drizzled with additional maple syrup before serving.

I really hope you have the chance to try this yummy side dish, and trust you’ll enjoy it as much as we do! It’s a wonderful vegetable dish that can be made and enjoyed year round!

Thanks for visiting this website today, and I invite you to come back soon for more family-friendly recipes. Take care, and have a GREAT day!

Looking For More BUTTERNUT SQUASH Recipes?

You can find ALL of my recipes in the Recipe Index, which is located at the top of the page. I have a nice variety of butternut squash recipes for you to enjoy, including:

Interested In More Recipes? Get My FREE Newsletter!

I publish a newsletter 2 times per month (1st and 15th) with recipes, tips, etc..
 I would be honored to have you join our growing list of subscribers!

There is a Newsletter subscription box on the top right (or bottom) of each blog post, depending on the device you use, where you can submit your e-mail address to be added to my mailing list.

Find Me On Social Media:

Facebook page: The Grateful Girl Cooks!
Pinterest:
The Grateful Girl Cooks!
Instagram:
jbatthegratefulgirlcooks

Author's signature

Recipe adapted from: https://www.theendlessmeal.com/maple-roasted-butternut-squash/

↓↓ PRINTABLE RECIPE BELOW ↓↓

0 from 0 votes
Maple Butternut Squash with Pecans and Cranberries
Prep Time
15 mins
Cook Time
30 mins
Total Time
45 mins
 

Maple Butternut Squash, roasted with pecans and cranberries and drizzled with maple syrup is a fantastic, delicious veggie side dish for 4!

Category: Side Dish, Vegetable Dish
Cuisine: American
Keyword: maple butternut squash
Servings: 4
Calories Per Serving: 232 kcal
Author: JB @ The Grateful Girl Cooks!
Ingredients
  • 4 cups cubed butternut squash
  • 1 Tablespoon vegetable oil or other neutral oil
  • Tablespoons pure maple syrup
  • ½ teaspoon ground cinnamon
  • ½ teaspoon sea salt
  • ¼ teaspoon cayenne pepper
  • ½ cup pecan halves
  • cup dried cranberries
Additional For Finished Dish: (OPTIONAL, but good to drizzle on top! This is included in caloric calculation)
  • Tablespoons pure maple syrup
Instructions
  1. Preheat oven to 400°F.. Line a large baking sheet with parchment paper.

  2. Use vegetable peeler to remove peel from squash. Cut thin slices from both ends, then slice squash in half lengthwise. Scoop out/discard seeds. Turn squash over (seed hole face down). Slice squash into 1" wide pieces across width, then cut into bite sized cubes (about 1" each).

  3. Place 4 cups of cubes (or 20 oz. bagged cubes) into a large bowl. Drizzle with oil, maple syrup, ground cinnamon, sea salt and cayenne pepper. Stir well, to ensure squash cubes are well-coated with oil, syrup and spices. 

  4. Transfer squash to prepared baking sheet. Spread them out, so they're in a single layer for baking. Bake squash at 400°F for 15 minutes; remove pan from oven.

  5. Immediately add pecans and cranberries. Toss to combine, then spread in single layer; place pan back into oven. Continue baking 12-15 more minutes. Squash is done when a knife can be easily inserted (soft inside), and squash is slightly caramelized on the outside. Remove from oven.

  6. Transfer roasted maple butternut squash, pecans and cranberries onto a serving platter or into a serving bowl. Drizzle squash with remaining maple syrup, if desired. Serve hot, and enjoy!
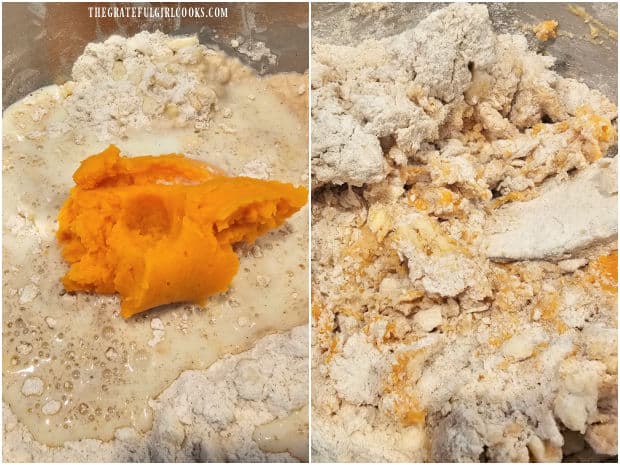
Nutrition Facts
Maple Butternut Squash with Pecans and Cranberries
Amount Per Serving (1 (1/4 of total))
Calories 232 Calories from Fat 117
% Daily Value*
Fat 13g20%
Saturated Fat 1g6%
Trans Fat 0.02g
Polyunsaturated Fat 5g
Monounsaturated Fat 6g
Sodium 298mg13%
Potassium 570mg16%
Carbohydrates 32g11%
Fiber 5g21%
Sugar 16g18%
Protein 3g6%
Vitamin A 14942IU299%
Vitamin C 30mg36%
Calcium 88mg9%
Iron 1mg6%
* Percent Daily Values are based on a 2000 calorie diet.

Here’s one more to pin on your Pinterest boards!Maple Butternut Squash, roasted with pecans and cranberries and drizzled with maple syrup is a fantastic, delicious veggie side dish for 4!