Category: Side Dishes

Brussel Sprout Casserole For Two

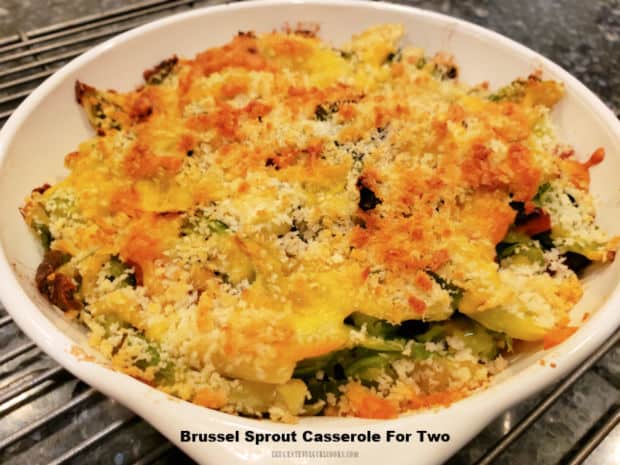
Brussel Sprout Casserole For Two is a tasty side dish! Sliced Brussel sprouts, cheddar and bacon are baked, topped with cheese and breadcrumbs.

If you’re on the lookout for a new veggie side dish OR a new way to prepare Brussel sprouts, check out this recipe! As written, this delicious side dish will serve two people, but it can easily be adapted to double or triple the quantity.

Cheddar cheese, bacon and crispy Panko breadcrumbs compliment the tender Brussel sprouts wonderfully in this dish! My personal feeling is that everything is better with bacon, right? YEP!

This recipe is quite simple to make, and is a tasty way to enjoy Brussel sprouts, even if you’re not usually a fan. The Brussel sprouts are par-boiled first (to tenderize them), then the casserole is quickly assembled and baked. 

Here’s how to make this scrumptious vegetable side dish!

Scroll Down for A Printable Recipe Card At The Bottom Of The Page

Preparing The Brussel Sprouts

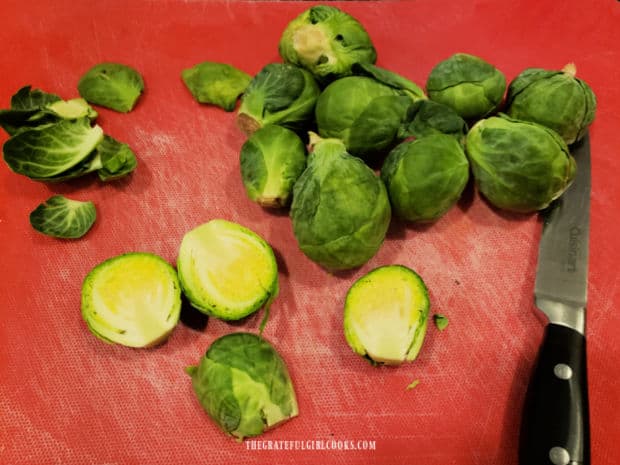
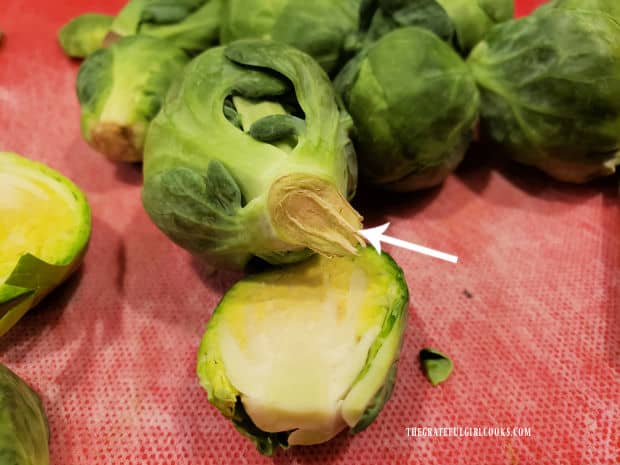
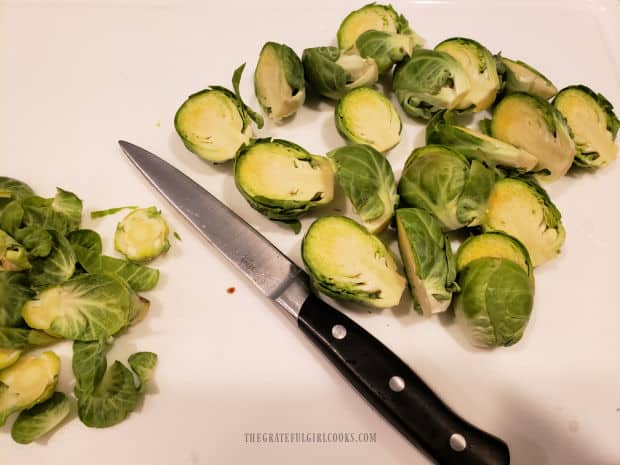
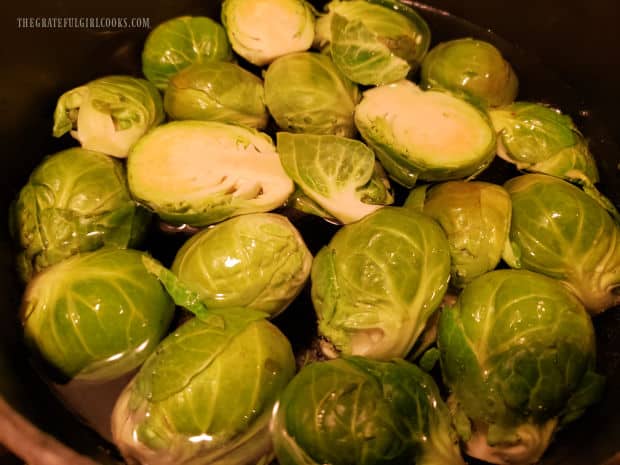
To make this dish for two, you will need about 10 fresh Brussel sprouts. Trim the end stem off of the Brussel sprouts, then slice them in half length-wise.

Fill a Medium sized saucepan with water, and bring it to a boil. Add the Brussel sprout halves, and boil them for 7-8 minutes or until the Brussel sprouts have become slightly tender.

Remove the pan from the stove, and drain off the water. Let the Brussel sprouts cool.

Brussels sprout ends are trimmed, then the sprouts are sliced in half.Halved brussel sprouts are boiled in water for 7 minutes, or until tender.

Preparing The Bacon

You will need crisp, cooked bacon for this casserole. I find it’s best to cook it at the same time the Brussel sprouts are cooking, to save time.

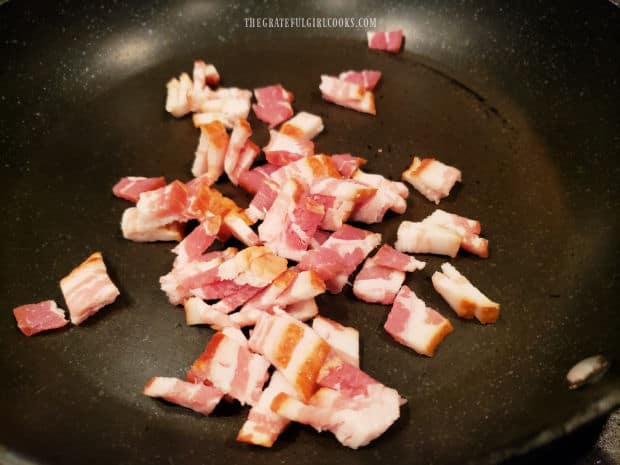
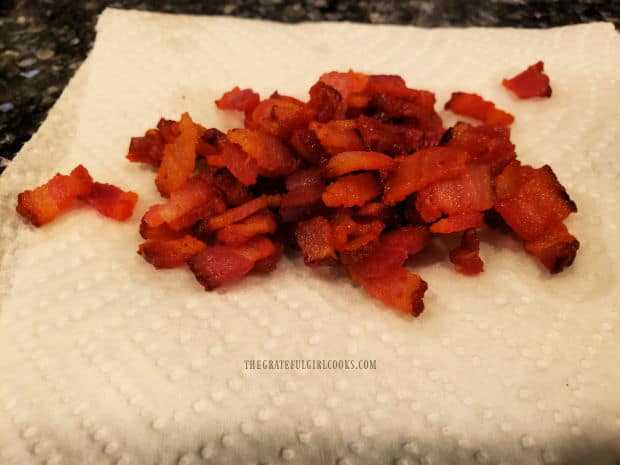
Cut the bacon into small pieces, then cook, stirring often until browned, cooked through, and crispy. Use a slotted spoon to transfer the cooked bacon to paper towels to absorb any excess grease.

Two slices of bacon are cut in small pieces, then cooked until crispy in skillet.Crisp, browned bacon slices drain on paper towels after being removed from skillet.

Assembling The Brussel Sprout Casserole For Two

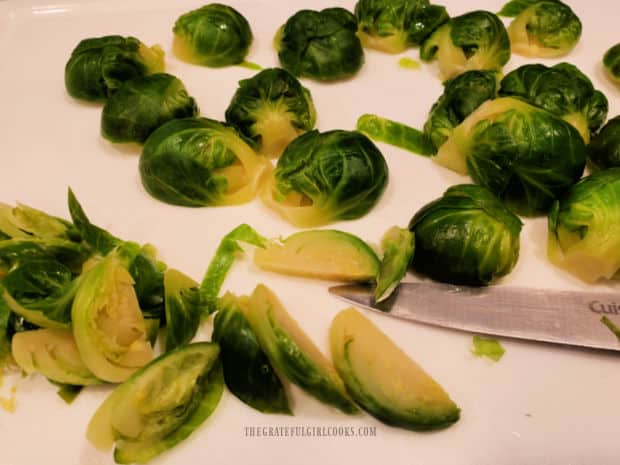
Once the Brussel sprouts have cooled enough to handle, cut them into thin slices with a sharp knife. Place the slices into a medium-sized bowl.

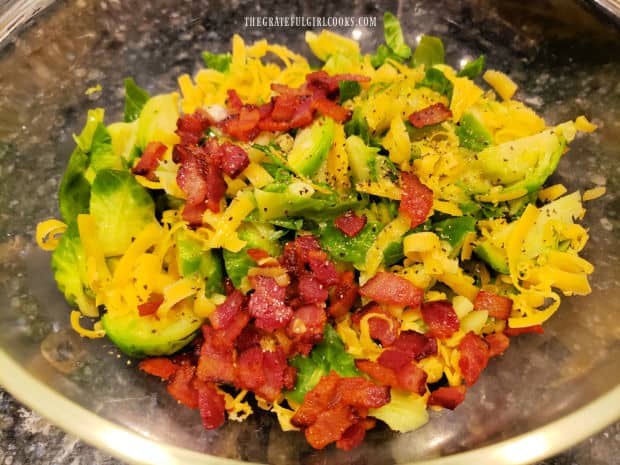
Add grated cheddar cheese (half the total amount), bacon, half and half, salt and black pepper to the bowl. Gently toss these ingredients together until they’re fully combined.

Tender-cooked brussel sprouts are cut into thin slices for the casserole.Sliced brussel sprouts, cheese, bacon, salt, pepper and half and half are mixed in bowl.

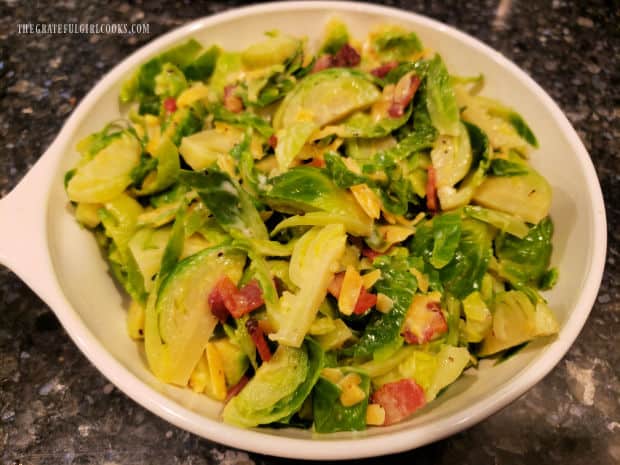
Place the combined Brussel sprout mixture into a lightly greased small baking dish. Now the casserole is ready for the final step before baking!

The combined brussel sprout mixture is placed in small, greased baking dish.

Topping And Then Baking The Casserole 

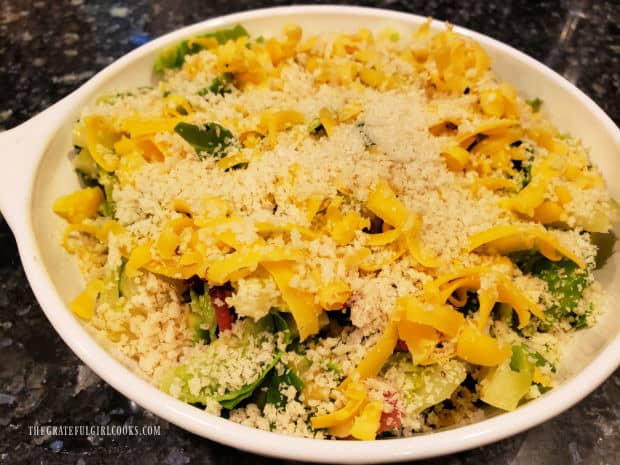
Sprinkle the top of the Brussel sprout casserole with the remaining grated cheddar cheese. Top this with the crispy Panko breadcrumbs.

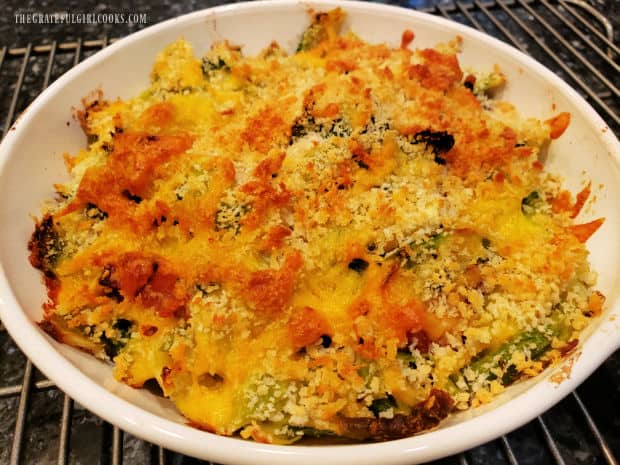
Place the Brussel sprout casserole for two into a preheated 400°F. oven, and bake for 14-16 minutes. When done, the top should be lightly browned and crusted, and the casserole will be fully heated through.

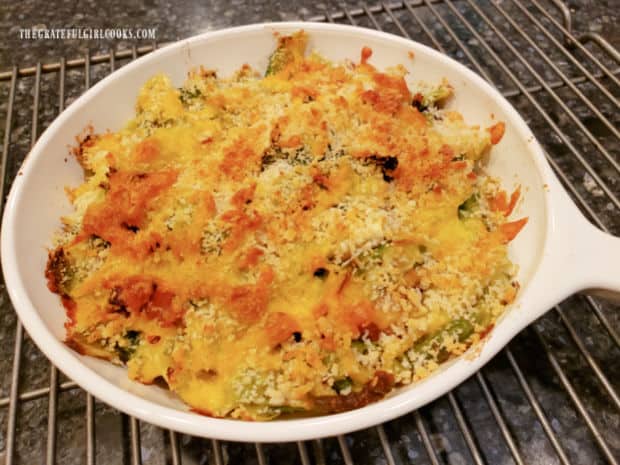
Grated cheddar and Panko breadcrumbs top the Brussel Sprout Casserole For Two.After baking, the brussel sprout casserole for two is lightly browned on top.

Serving The Brussel Sprout Casserole For Two

Transfer the baking dish from the oven to a wire rack. Let the casserole cool 1-2 minutes before serving. Scoop out a portion (recipe yields 2 servings), transfer to plates… serve and enjoy!
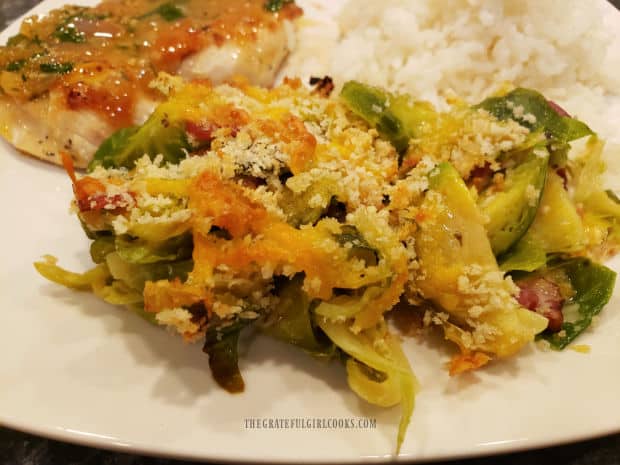
We enjoyed the Brussel sprout casserole for two, served with chicken cutlets in pan sauce, and steamed rice on the side. It tastes fantastic!

This veggie side dish is absolutely delicious, and has wonderful flavor! I’m confident you will enjoy this lovely Brussel sprout side dish served with a favorite main dish.

Brussel Sprout Casserole For Two cools on a wire rack after being removed from oven.A serving of the brussel sprout casserole for two, served on a white plate.

I hope you will have the opportunity to make this Brussel sprout recipe, and trust you’ll enjoy it like we do! It really is a delicious veggie side dish.

Thanks for stopping by, and please come back soon for more family-friendly recipes. Take care, and have a great day!

Looking For More VEGETABLE Side Dish Recipes?

You can find ALL of my recipes in the Recipe Index, which is located at the top of the page. I have a large variety of delicious vegetable recipes for you to check out, including:

Want More Recipes? Get My FREE Newsletter!

I publish a newsletter 2 times per month (1st and 15th) with lots of recipes, tips, etc..
Would you like to join our growing list of subscribers?

There is a Newsletter subscription box on the top right (or bottom) of each blog post, depending on the device you use.
You can submit your e-mail address there, to be added to my mailing list.

Find Me On Social Media:

Facebook page: The Grateful Girl Cooks!
Pinterest:
The Grateful Girl Cooks!
Instagram:
jbatthegratefulgirlcooks

Author's signature

Recipe adapted from: mantitlement.com/the-best-brussels-sprouts-casserole

↓↓ PRINTABLE RECIPE BELOW ↓↓

0 from 0 votes
Brussel Sprout Casserole For Two
Prep Time
15 mins
Cook Time
15 mins
Total Time
30 mins
 

Brussel Sprout Casserole For Two is a tasty side dish! Sliced Brussel sprouts, cheddar and bacon are baked, topped with cheese and breadcrumbs.

Category: Side Dish, Vegetable
Cuisine: American
Keyword: brussel sprout casserole
Servings: 2
Calories Per Serving: 318 kcal
Author: JB @ The Grateful Girl Cooks!
Ingredients
  • ½ pound fresh brussel sprouts
  • 2 slices bacon cooked till crispy, crumbled
  • ½ cup cheddar cheese divided use, GRATED
  • 3 Tablespoons half and half (or heavy whipping cream)
  • 1 teaspoon butter melted
  • cup Panko breadcrumbs
  • ¼ teaspoon salt
  • teaspoon black pepper
Instructions
  1. Preheat oven to 400°F. Lightly grease/spray a small baking dish; set aside.

  2. Trim stem end off Brussel sprouts; slice Brussel sprouts in half length-wise. Fill medium saucepan with water; bring it to a boil. Add Brussel sprouts; boil them 7-8 minutes or until slightly tender. Drain water; let Brussel sprouts rest until cool enough to handle.

  3. Cut bacon into small pieces. Cook, stirring often until browned/crispy. Place bacon on paper towels to absorb grease.

  4. Cut Brussel sprouts into thin slices (lengthwise). Transfer slices to a medium bowl. Add ¼ cup cheddar cheese (reserve remaining ¼ C.), bacon, half and half, salt and pepper. Gently toss to combine. Place mixture in prepared baking dish. Sprinkle casserole with remaining ¼ C. cheese; top with Panko breadcrumbs.

  5. Bake casserole at 400°F. for 14-16 minutes. When done, casserole should be lightly browned/crusted on top, and heated through.

  6. Transfer baking dish to a wire rack. Let casserole cool 1-2 minutes before serving. Scoop out a portion, transfer to plates... serve and enjoy!
Nutrition Facts
Brussel Sprout Casserole For Two
Amount Per Serving (1 g)
Calories 318 Calories from Fat 207
% Daily Value*
Fat 23g35%
Saturated Fat 11g69%
Trans Fat 0.1g
Polyunsaturated Fat 2g
Monounsaturated Fat 7g
Cholesterol 56mg19%
Sodium 707mg31%
Potassium 546mg16%
Carbohydrates 15g5%
Fiber 5g21%
Sugar 4g4%
Protein 14g28%
Vitamin A 1289IU26%
Vitamin C 97mg118%
Calcium 281mg28%
Iron 2mg11%
* Percent Daily Values are based on a 2000 calorie diet.

Here’s one more to pin on your Pinterest boards!

Brussel Sprout Casserole For Two is a tasty side dish! Sliced Brussel sprouts, cheddar and bacon are baked, topped with cheese and breadcrumbs.

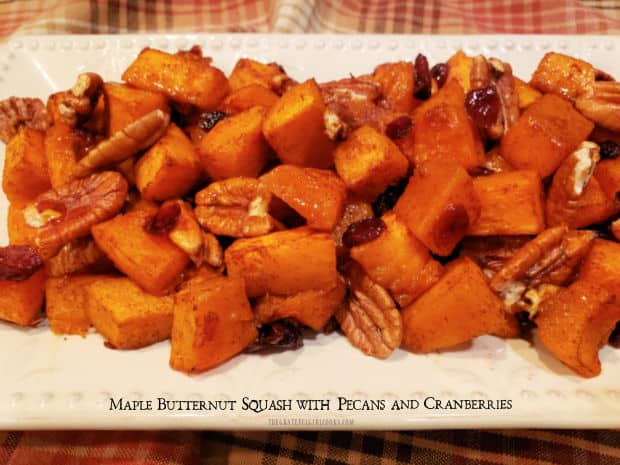
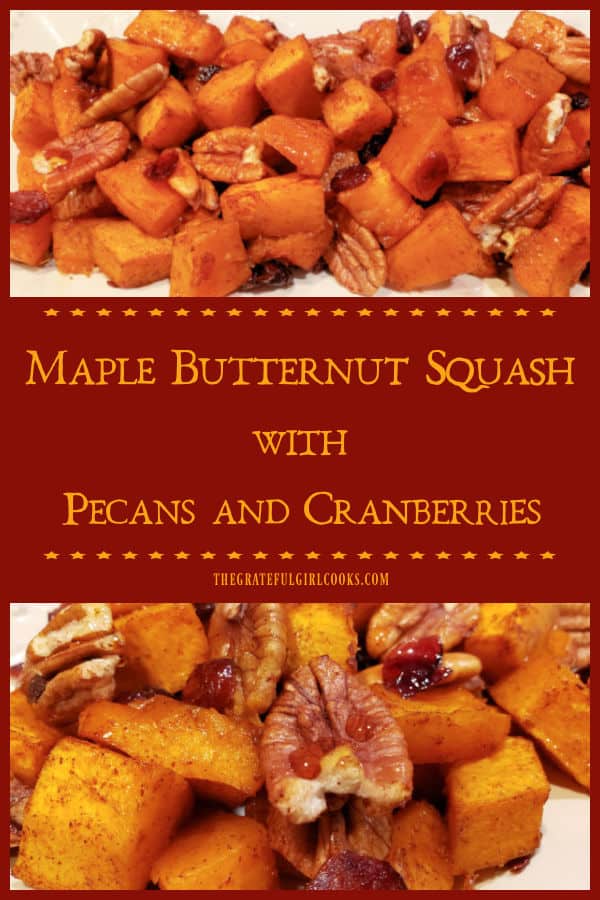
Maple Butternut Squash with Pecans and Cranberries

Maple Butternut Squash, roasted with pecans and cranberries and drizzled with maple syrup is a fantastic, delicious veggie side dish for 4!Maple Butternut Squash, roasted with pecans and cranberries and drizzled with maple syrup is a fantastic, delicious veggie side dish for 4!

This summer I grew several small butternut squash in our little backyard raised bed garden, and was thrilled with the results. I had fun cooking them in various ways, using both new and older recipes to enjoy this delicious “winter” squash. I’ve posted a couple of those recipes here on the blog.

Today I want to share with you one of the ways we enjoyed eating butternut squash this Fall where I used a larger, store bought squash. This recipe for maple butternut squash is delicious, easy to prepare, and is wonderful to serve for a simple weeknight meal or a holiday feast!

The dish can be made using either a bag of (store bought) fresh butternut squash cubes (peeled, cubed), OR by using a fresh, large butternut squash.

Already cubed store bought squash is convenient and saves time, but I prefer fresh butternut squash, and peel and cut it myself. Do whatever is most convenient, budget friendly, or time-saving for you! Here’s how to make this dish (shown using whole, fresh butternut squash):

Scroll Down For A Printable Recipe Card At The Bottom Of The Page

Prepare The Butternut Squash

Make sure to preheat your oven to 400°F. This recipe doesn’t take too long at all to prep, so you want your oven hot, and ready to go! You will also need to line a large baking sheet with parchment paper.

If you prefer to use already peeled and cut squash, you will need to purchase a 20 oz. bag. When using a fresh, whole butternut squash, buy a rather large one, as you will need 4 cups of the peeled, cubed squash.

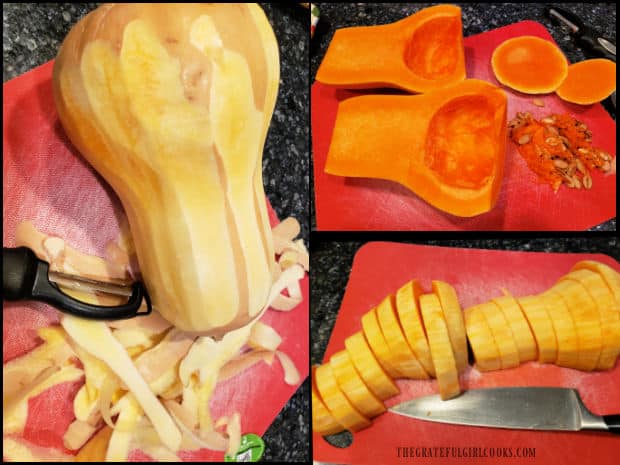
Use a vegetable peeler to completely peel the squash. Cut thin slices off of both ends, then carefully slice the squash in half, lengthwise.

Scoop out the seeds (discard), then turn the squash halves over (seed hole facing down). Slice the squash halves into 1″ wide pieces across the width, then cut into bite sized cubes (about 1″ each).

Butternut squash is peeled, seeds removed, sliced into half-rings, then into bite-sized cubes.

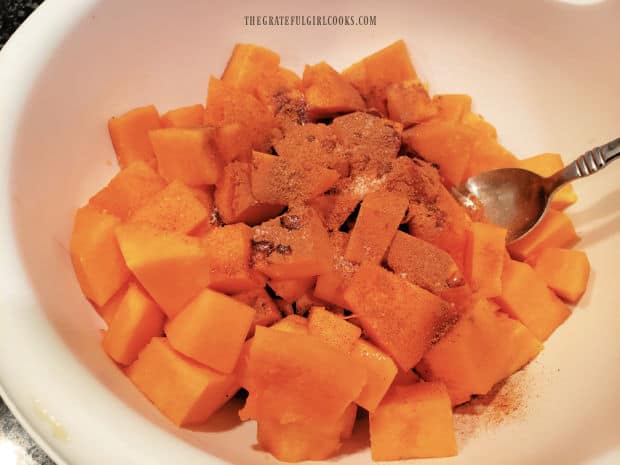
Place four cups of the butternut squash cubes (or the 20 oz. bagged cubes) into a large bowl. Drizzle with oil, pure maple syrup, and then add ground cinnamon, sea salt and cayenne pepper.

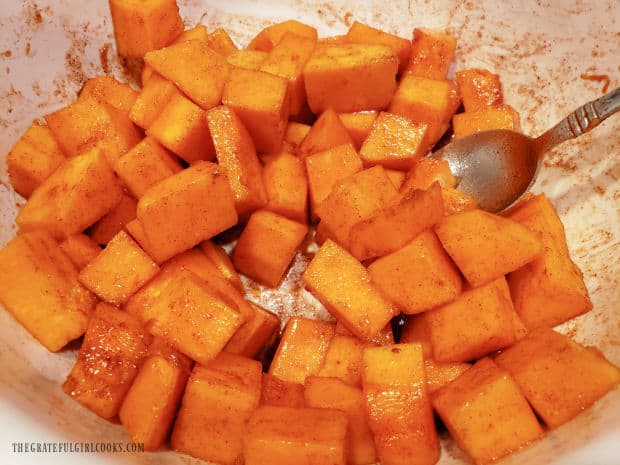
Stir these ingredients well, to make sure all the squash cubes are well-coated with oil, syrup and spices.

Spices, maple syrup and oil are added to the cubed butternut squash in a large bowl.Seasonings, oil and maple syrup are stirred with the butternut squash until coated.

Bake The Maple Butternut Squash

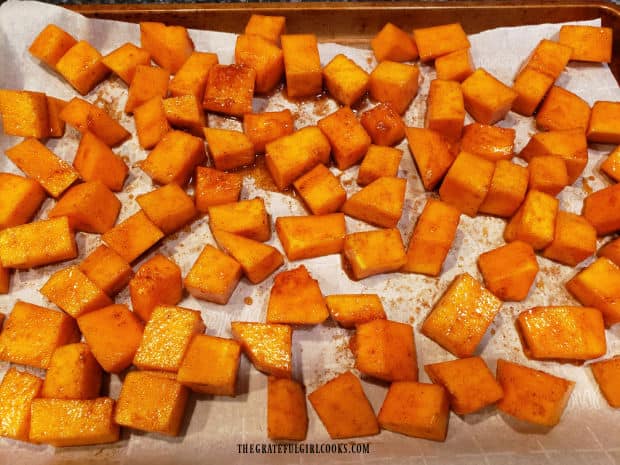
Transfer the squash cubes to the parchment paper-lined baking sheet, and spread them out, so they’re in a single layer for baking.

Bake the butternut squash at 400°F for 15 minutes, then remove the pan from the oven.

Seasoned maple butternut squash cubes are spread in single layer on parchment paper for baking.

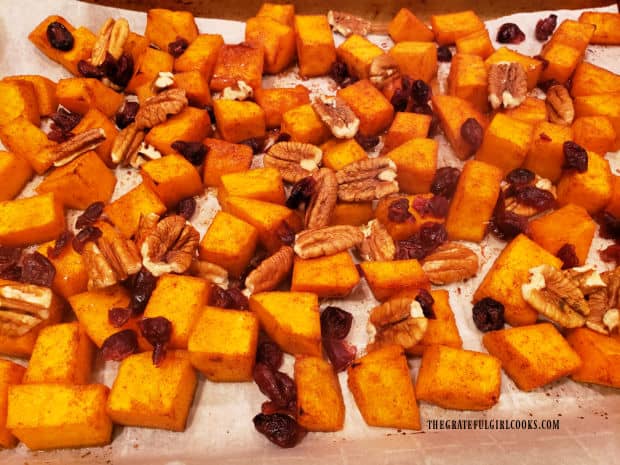
Immediately sprinkle the squash with pecan halves and the dried cranberries. Toss these ingredients, then re-spread them back out in a single layer. Continue baking (at 400°F) for 12-15 more minutes.

The maple butternut squash is done when a knife can be easily inserted into the squash (soft inside). It should have also begun to caramelize on the outside. Remove the pan from the oven once done, and prepare to serve this dish.

Dried cranberries and pecan halves are stirred into butternut squash halfway through baking time.

Serve The Maple Butternut Squash With Pecans And Cranberries

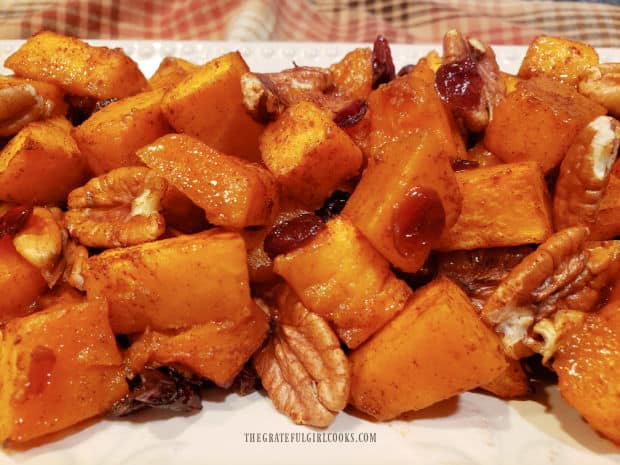
Transfer the roasted maple butternut squash, pecans and cranberries onto a serving platter or into a serving bowl. Drizzle the squash with the remaining amount of maple syrup, if desired.

This final drizzle of syrup is optional, but I highly recommend it. This final touch of syrup gives the veggie dish a perfect finishing touch of sweetness! Serve while the squash is hot.

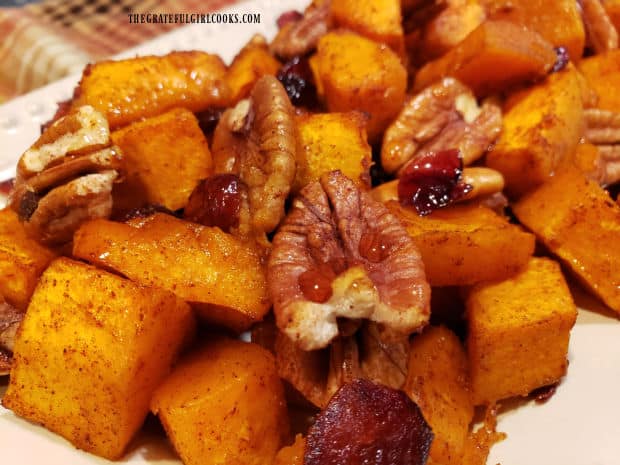
You’ll enjoy soft, tender, cinnamon scented butternut squash, and crunchy roasted pecans. With the tangy sweetness of dried cranberries and slight heat from the cayenne, you’ll have a delicious dish. It’s a wonderful blend of flavor and texture!

The maple butternut squash with pecans and cranberries is served on a white platter.Roasted maple butternut squash is drizzled with additional maple syrup before serving.

I really hope you have the chance to try this yummy side dish, and trust you’ll enjoy it as much as we do! It’s a wonderful vegetable dish that can be made and enjoyed year round!

Thanks for visiting this website today, and I invite you to come back soon for more family-friendly recipes. Take care, and have a GREAT day!

Looking For More BUTTERNUT SQUASH Recipes?

You can find ALL of my recipes in the Recipe Index, which is located at the top of the page. I have a nice variety of butternut squash recipes for you to enjoy, including:

Interested In More Recipes? Get My FREE Newsletter!

I publish a newsletter 2 times per month (1st and 15th) with recipes, tips, etc..
 I would be honored to have you join our growing list of subscribers!

There is a Newsletter subscription box on the top right (or bottom) of each blog post, depending on the device you use, where you can submit your e-mail address to be added to my mailing list.

Find Me On Social Media:

Facebook page: The Grateful Girl Cooks!
Pinterest:
The Grateful Girl Cooks!
Instagram:
jbatthegratefulgirlcooks

Author's signature

Recipe adapted from: https://www.theendlessmeal.com/maple-roasted-butternut-squash/

↓↓ PRINTABLE RECIPE BELOW ↓↓

0 from 0 votes
Maple Butternut Squash with Pecans and Cranberries
Prep Time
15 mins
Cook Time
30 mins
Total Time
45 mins
 

Maple Butternut Squash, roasted with pecans and cranberries and drizzled with maple syrup is a fantastic, delicious veggie side dish for 4!

Category: Side Dish, Vegetable Dish
Cuisine: American
Keyword: maple butternut squash
Servings: 4
Calories Per Serving: 232 kcal
Author: JB @ The Grateful Girl Cooks!
Ingredients
  • 4 cups cubed butternut squash
  • 1 Tablespoon vegetable oil or other neutral oil
  • Tablespoons pure maple syrup
  • ½ teaspoon ground cinnamon
  • ½ teaspoon sea salt
  • ¼ teaspoon cayenne pepper
  • ½ cup pecan halves
  • cup dried cranberries
Additional For Finished Dish: (OPTIONAL, but good to drizzle on top! This is included in caloric calculation)
  • Tablespoons pure maple syrup
Instructions
  1. Preheat oven to 400°F.. Line a large baking sheet with parchment paper.

  2. Use vegetable peeler to remove peel from squash. Cut thin slices from both ends, then slice squash in half lengthwise. Scoop out/discard seeds. Turn squash over (seed hole face down). Slice squash into 1" wide pieces across width, then cut into bite sized cubes (about 1" each).

  3. Place 4 cups of cubes (or 20 oz. bagged cubes) into a large bowl. Drizzle with oil, maple syrup, ground cinnamon, sea salt and cayenne pepper. Stir well, to ensure squash cubes are well-coated with oil, syrup and spices. 

  4. Transfer squash to prepared baking sheet. Spread them out, so they're in a single layer for baking. Bake squash at 400°F for 15 minutes; remove pan from oven.

  5. Immediately add pecans and cranberries. Toss to combine, then spread in single layer; place pan back into oven. Continue baking 12-15 more minutes. Squash is done when a knife can be easily inserted (soft inside), and squash is slightly caramelized on the outside. Remove from oven.

  6. Transfer roasted maple butternut squash, pecans and cranberries onto a serving platter or into a serving bowl. Drizzle squash with remaining maple syrup, if desired. Serve hot, and enjoy!
Nutrition Facts
Maple Butternut Squash with Pecans and Cranberries
Amount Per Serving (1 (1/4 of total))
Calories 232 Calories from Fat 117
% Daily Value*
Fat 13g20%
Saturated Fat 1g6%
Trans Fat 0.02g
Polyunsaturated Fat 5g
Monounsaturated Fat 6g
Sodium 298mg13%
Potassium 570mg16%
Carbohydrates 32g11%
Fiber 5g21%
Sugar 16g18%
Protein 3g6%
Vitamin A 14942IU299%
Vitamin C 30mg36%
Calcium 88mg9%
Iron 1mg6%
* Percent Daily Values are based on a 2000 calorie diet.

Here’s one more to pin on your Pinterest boards!Maple Butternut Squash, roasted with pecans and cranberries and drizzled with maple syrup is a fantastic, delicious veggie side dish for 4!

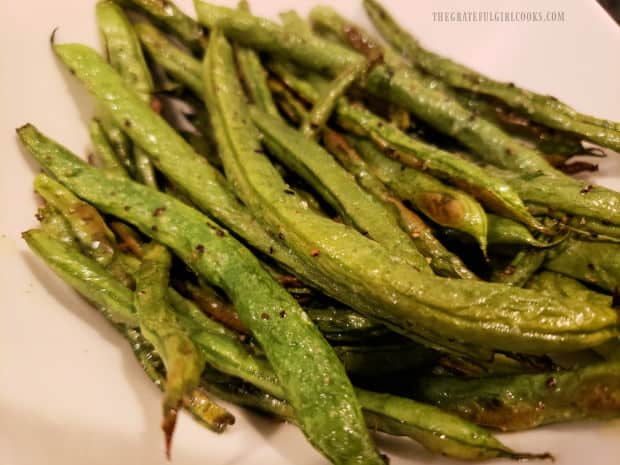
Oven Roasted Green Beans

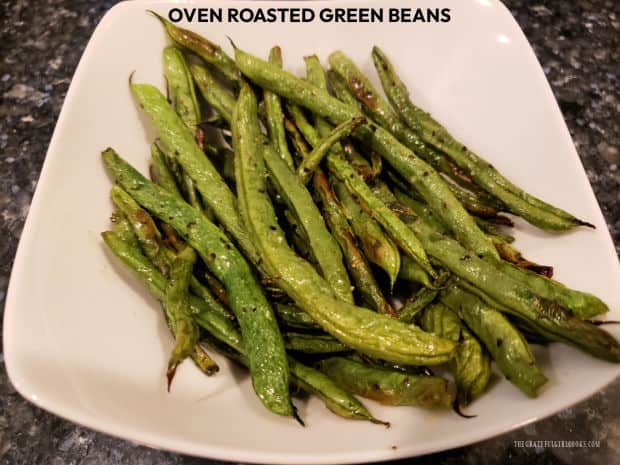
Oven roasted green beans are a delicious side dish that’s simple to prepare. Fresh green beans and 3 other ingredients are all you need!Oven roasted green beans are a delicious side dish that's simple to prepare. Fresh green beans and 3 other ingredients are all you need!

Today I want to share with you a simple way to make and serve oven roasted green beans. I grow a lot of green beans in our little backyard raised bed garden, so we eat a lot of them.

Oven roasting green beans is a super easy, but delicious way to serve fresh green beans with minimal effort involved.

The recipe as written will yield four servings, but can easily be cut in half, doubled or tripled for your needs. Here’s how to make this simple veggie side dish.

Scroll Down For A Printable Recipe Card At The Bottom Of The Page

What Will I Need For This Recipe?

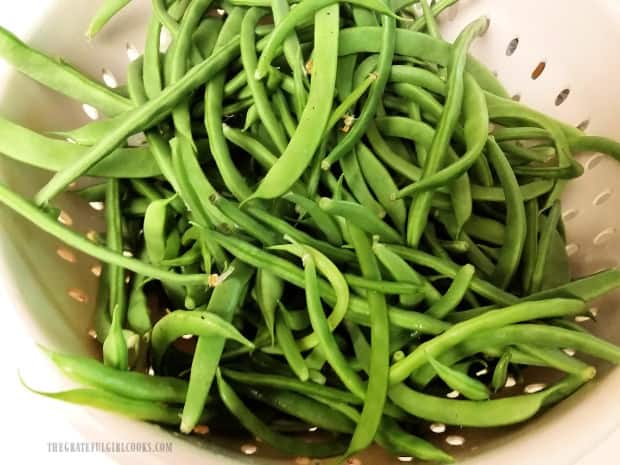
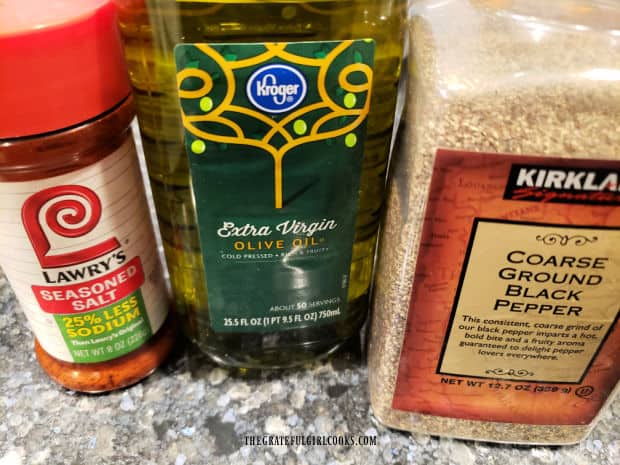
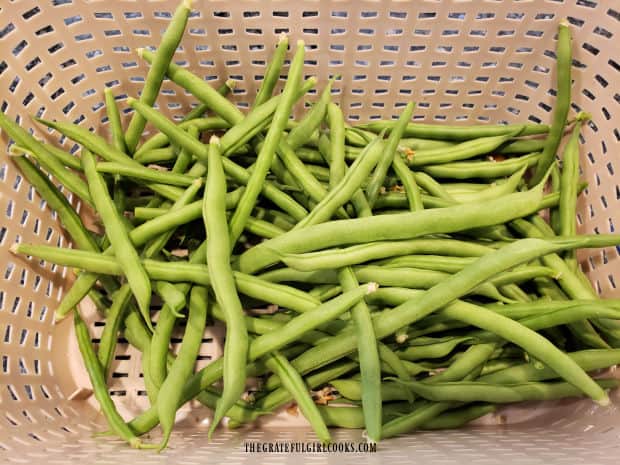
This recipe, as written to serve four people, calls for one pound of fresh green beans, olive oil, seasoning salt, and coarse black pepper.

NOTE: When I photographed this recipe, I only made HALF of the amount called for, as my husband and I were the only ones that would be eating.

Fresh green beans are trimmed, then are ready to be seasoned.Seasoning salt, olive oil and black pepper are used to season oven roasted green beans.

A Quick Toss With The Seasonings Before Oven Roasting

Preheat your oven to 375°F before starting on the green beans. It won’t take long at all to get the green beans ready, and you want that oven hot and ready to go!

Trim the stem ends off of the green beans (by cutting or snapping), and then place the beans in a large mixing bowl.

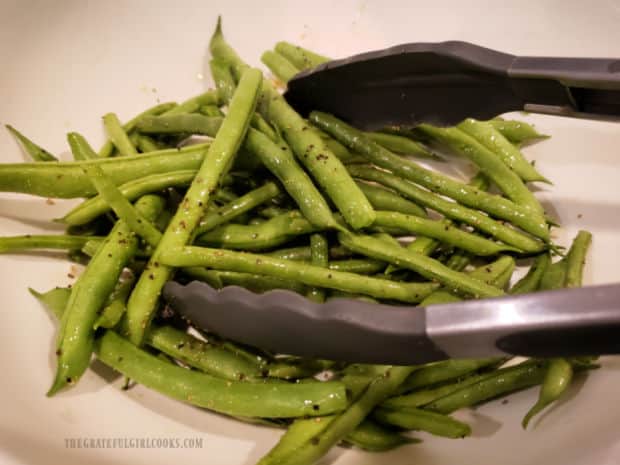
Add the olive oil, seasoning salt, and pepper, and toss them together until the beans are well coated on all sides.

Fresh green beans are tossed with olive oil, seasoning salt and pepper until coated.

Time For The Oven!

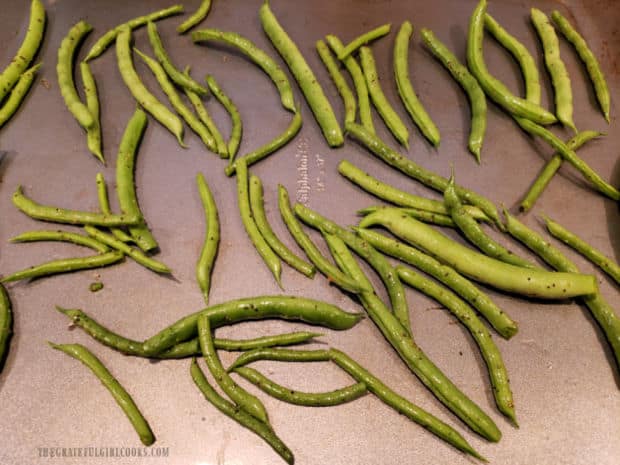
Spread the seasoned green beans out on a large baking sheet in a single layer. Place the baking sheet on the middle rack of the preheated oven.

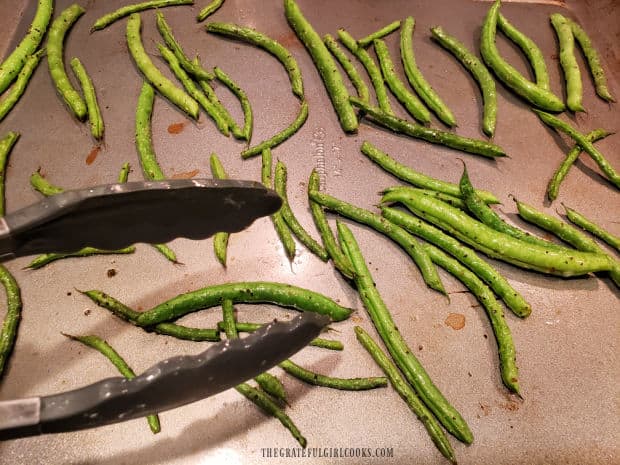
Bake at 375°F. for about 15-20 minutes total, turning the beans over, halfway through the baking time.

Keep an eye on the beans as they bake. Larger beans may take a minute or two more to cook through. When I oven roast green beans, ours usually take about 15 minutes total, but your oven time may vary.

Oven roasted green beans are placed on baking sheet in a single layer for baking.Halfway through baking time, the oven roasted green beans are flipped to other side.

Serve The Oven Roasted Green Beans

When done, the green beans will look a little bit “wrinkly or blistered” on the outside and may have some lightly browned spots. That is wonderful! That’s how they should look once they’re fully roasted!

Remove oven roasted green beans, and transfer them to a serving bowl. Serve immediately, while hot! This is a perfect side dish for an endless amount of main dishes, and it’s truly is a simple recipe to prepare.

I’m pretty confident you will enjoy having this easy recipe conveniently stored in your “kitchen toolbag” for future use. Here’s to many more meals, accompanied by delicious oven roasted green beans!

Oven roasted green beans, are served hot in a white bowl, after baking is done.

I hope you enjoy making (and eating!) oven roasted green beans. They could not be any easier to make, and trust you and those you love will enjoy them as much as we do!

Thanks for stopping by- please come back again soon for more family-friendly recipes. Have a GREAT day!

Looking For More Veggie Side Dish Recipes?

You can find all of my recipes in the Recipe Index, which is located at the top of the page. I have lots of delicious veggie side dish recipes for you to check out, including:

Want More Recipes? Get My FREE Newsletter!

I publish a newsletter 2 times per month (1st and 15th) with lots of recipes, tips, etc..
Would you like to join our growing list of subscribers?

There is a Newsletter subscription box on the top right (or bottom) of each blog post, depending on the device you use.
You can submit your e-mail address there, to be added to my mailing list.

Find Me On Social Media:

Facebook page: The Grateful Girl Cooks!
Pinterest:
The Grateful Girl Cooks!
Instagram:
jbatthegratefulgirlcooks

Author's signature

↓↓ PRINTABLE RECIPE BELOW ↓↓

0 from 0 votes
Oven Roasted Green Beans
Prep Time
5 mins
Cook Time
15 mins
Total Time
20 mins
 

Oven roasted green beans are a delicious side dish that's simple to prepare. Fresh green beans and 3 other ingredients are all you need!

Category: Side Dishes, Vegetable Dish
Cuisine: American
Keyword: oven roasted green beans
Servings: 4
Calories Per Serving: 98 kcal
Author: JB @ The Grateful Girl Cooks!
Ingredients
  • 1 pound fresh green beans stem ends trimmed
  • 2 Tablespoons extra virgin olive oil
  • 1 teaspoon seasoning salt
  • ½ teaspoon black pepper
Instructions
  1. Preheat oven to 375°F.

  2. Trim stem end off of green beans (by cutting or snapping). Place beans in large bowl. Add olive oil, seasoning salt, and pepper; toss until beans are coated on all sides.

  3. Spread beans on large baking sheet in a single layer. Bake at 375°F. for 15-20 minutes total, flipping beans over, halfway through the baking time.

  4. When done, beans will look "wrinkly or blistered" on the outside and may have lightly browned spots. Transfer beans to serving bowl; serve immediately, Enjoy!

Nutrition Facts
Oven Roasted Green Beans
Amount Per Serving (1 (1/4 of total))
Calories 98 Calories from Fat 63
% Daily Value*
Fat 7g11%
Saturated Fat 1g6%
Polyunsaturated Fat 1g
Monounsaturated Fat 5g
Sodium 588mg26%
Potassium 243mg7%
Carbohydrates 8g3%
Fiber 3g13%
Sugar 4g4%
Protein 2g4%
Vitamin A 784IU16%
Vitamin C 14mg17%
Calcium 43mg4%
Iron 1mg6%
* Percent Daily Values are based on a 2000 calorie diet.

Here’s one more to pin on your Pinterest boards!Oven roasted green beans are a delicious side dish that's simple to prepare. Fresh green beans and 3 other ingredients are all you need!

Crispy Green Bean Fries

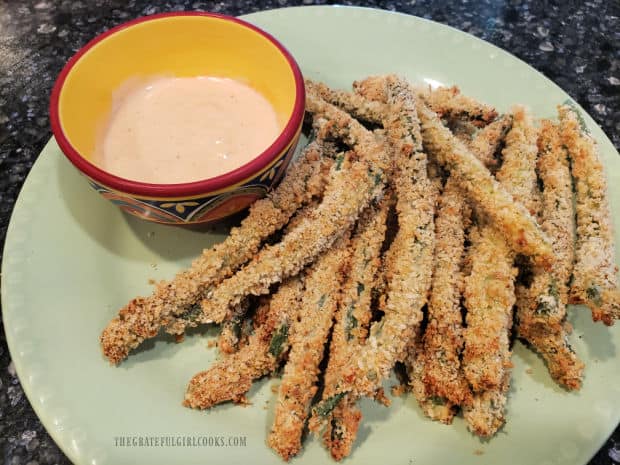
Watch how fast a plate of Crispy Green Bean Fries with Ranch/Sriracha dipping sauce disappears at a get together! They’re easy and delicious!
Watch how fast a plate of Crispy Green Bean Fries with Ranch/Sriracha dipping sauce disappears at a get together! They're easy and delicious!

Looking for a yummy recipe that can be served as an appetizer OR as a veggie side dish for a meal? Check out these crispy green bean fries! Fresh green beans are coated in egg and flour, then rolled in a crunchy, well-seasoned Panko breadcrumb mixture. After that, they’re baked for 10 minutes, and served hot, along with a creamy Ranch and Sriracha dipping sauce!

They’re so good! Perfect for a small meal (get the kids to eat their veggies!) or a small get together, these crunchy green beans will be a big hit! They don’t take too much effort to prepare, and then you can serve them with pride… because your family or friends will love this dish!

Scroll Down For A Printable Recipe Card At The Bottom Of The Page

Prepare The Green Beans

You will need a pound of fresh green beans to make this dish, and the recipe, as written, will make 4 servings. Cut off the very tip ends of the green beans with a sharp knife, then set them aside while you get the rest of the ingredients ready to go.

Fresh green beans ready to have their ends trimmed for this dish.

A Tiny Bit Of Prep Work

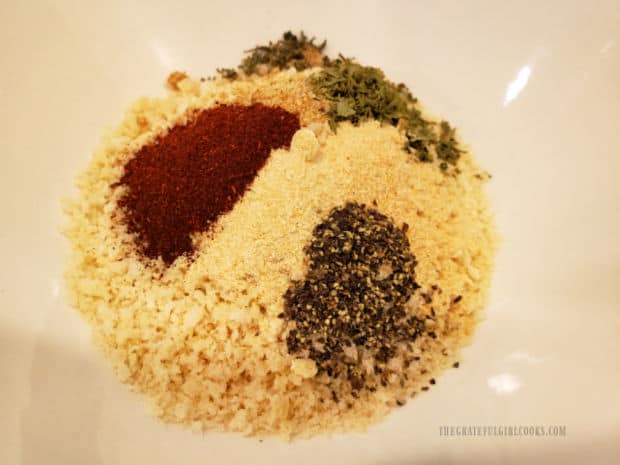
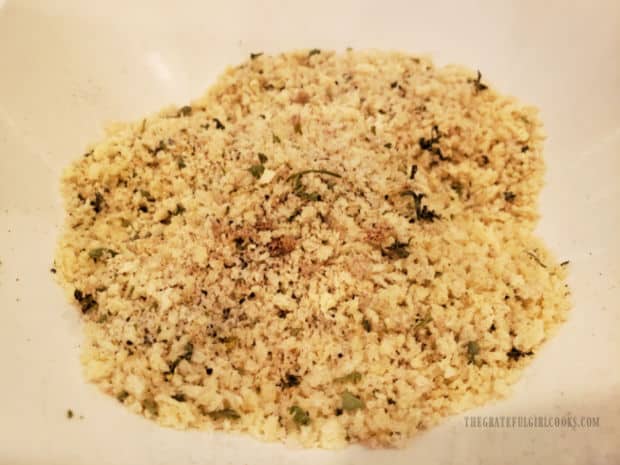
Preheat your oven to 425°F. and lightly spray a large baking sheet with non-stick spray. Stir Panko breadcrumbs, parsley, seasoning salt, garlic powder, chili powder, black pepper and onion powder together in a bowl or on a large plate. Set the bowl or plate aside.

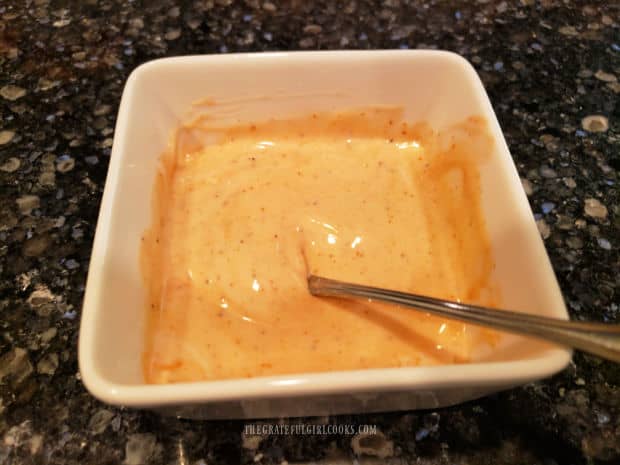
In a small separate dish, combine Ranch salad dressing with a teaspoon of Sriracha sauce. This will be the dipping sauce for the finished green beans. Taste it, and add more Sriracha sauce if you want it “hotter”. Set the sauce aside or refrigerate it until serving time.

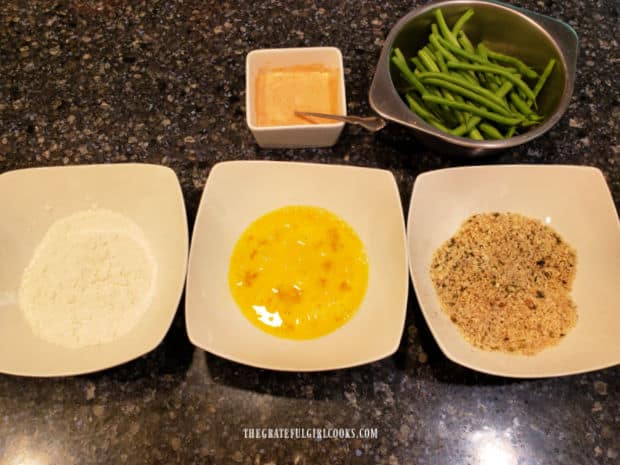
Okay… now measure all purpose flour into a medium bowl. In a separate medium bowl, beat two eggs. Now you’re ready for the “Green Bean Dipping Station”. Place the various bowls on the kitchen counter in this order (L to R): Green beans, Flour, Eggs, and the Panko breadcrumb mixture last.

Panko bread crumbs and a variety of spices are combined in a bowl.A dipping sauce is made with Ranch and Sriracha for the crispy green bean fries.Dipping station with bowls of flour, egg, and panko mixture for dredging fresh green beans.

Let’s Get Those Green Beans Ready For The Oven!

Before you start dipping those green beans, I must tell you your fingers will probably get messy! I find it helpful to use one hand for the flour and a fork for the egg mixture. Okay, now that’s off the table, so here’s how to get those green beans ready for the oven. By the way, once you get the rhythm of it, this step will go quicker:

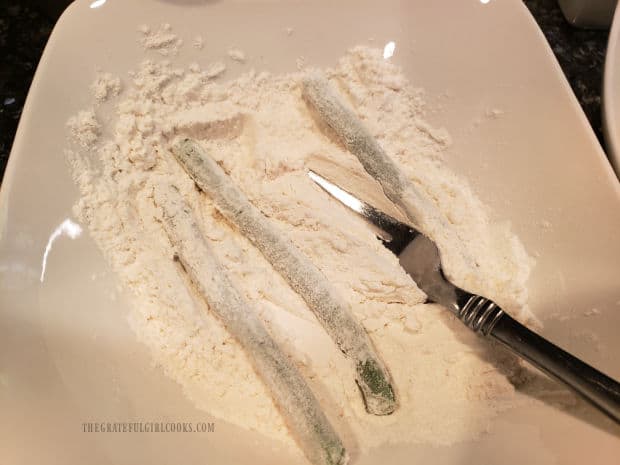
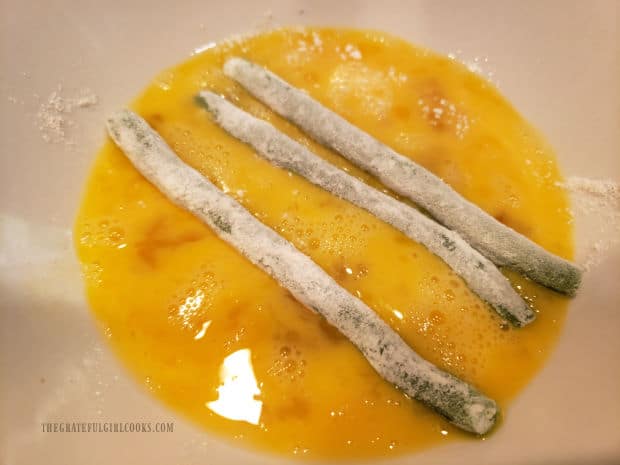
Step #1: Dip the green beans (one at a time or a few at a time-your choice) in the flour, coating all sides. You can use your fingers and/or a fork to do this.
Step #2: Dip flour covered beans in the egg mixture to coat all sides, letting excess egg drip back into the bowl. TIP: It’s helpful to lift them out using a fork.
Step #3: REPEAT Steps 1 and 2. (That’s right… flour, egg, flour, egg).
Step #4: Roll the green beans in the seasoned Panko breadcrumb mixture until coated on all sides.

Repeat this process for all remaining green beans, and place them on a large baking sheet in a single layer (don’t overcrowd) as you finish each “batch”.

Green beans are dredged in flour mixture to cover.Flour coated green beans are coated in egg, then process is repeated.The flour and egg coated green beans will be rolled in a panko breadcrumb/spice mixture.

Ready, Set… BAKE!

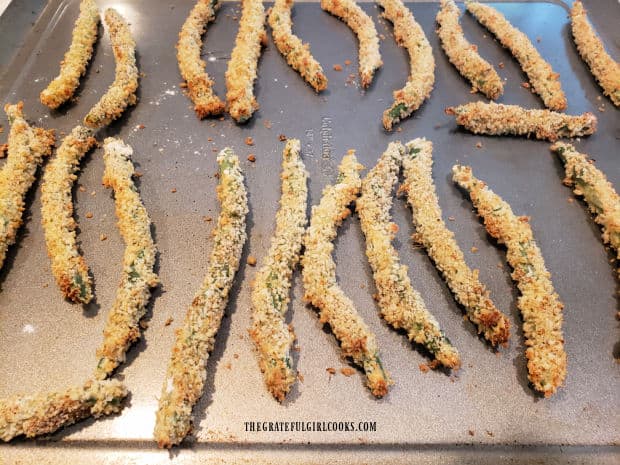
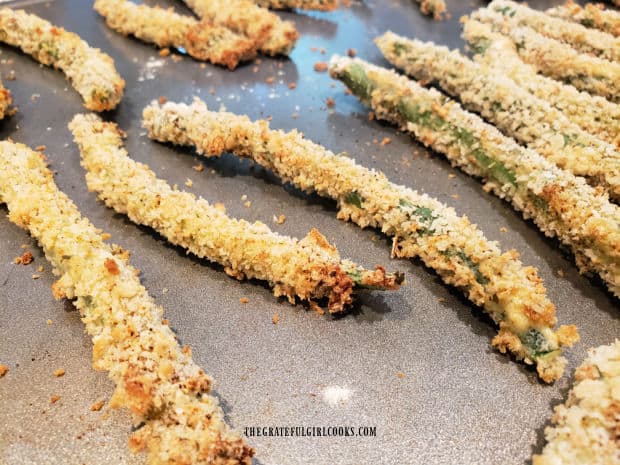
Bake at 425°F. for 10 minutes. Halfway through the baking time, turn the beans to the other side, then finish cooking. When done, the Panko coated green beans should be golden brown in color and crispy on the outside.

Remove the baking sheet from the oven and serve the crispy green bean fries immediately, while hot. Be sure to serve the dipping sauce on the side, too… yum!

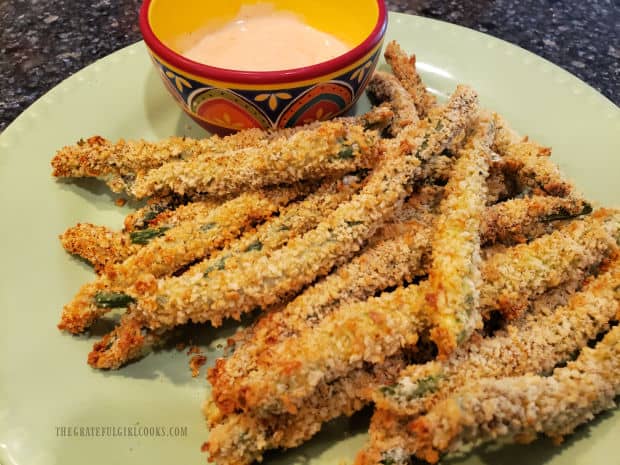
Coated green beans are baked in a single layer on a large baking sheet for 10 minutes.Crispy green bean fries are golden brown once baked.

Time To Enjoy Some Crispy Green Bean Fries

Transfer the hot, crispy green bean fries to a serving plate with a spatula, and serve with the dipping sauce on the side. Serve immediately, and enjoy them with those you love.

The dipping sauce isn’t too spicy, so don’t be afraid to try it! P.S. If you prefer a more spicy sauce, simply add additional Sriracha (or hot sauce) to suit your personal taste.

The crispy green bean fries are served hot, with a Ranch and Sriracha dipping sauce.

A Ranch and Sriracha dipping sauce is served along with the crispy green bean fries.

Use The Green Beans As A Side Dish, Too!

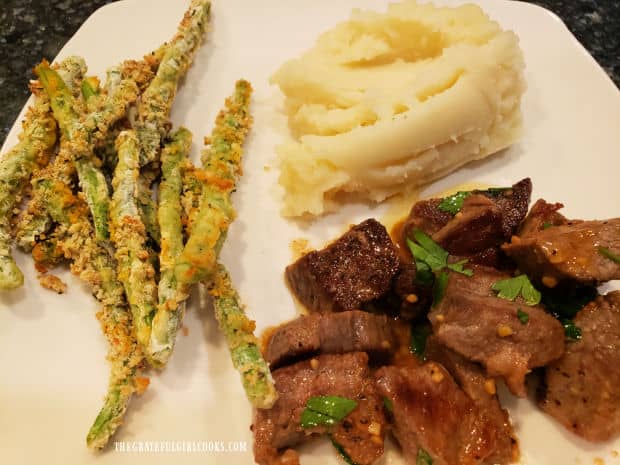
Crispy Green Bean Fries are also great used as a side dish for a variety of meats. We especially love them served with chicken, pork and beef. Below is a photo of them served as a side dish for Easy Garlic Butter Steak Bites (with mashed potatoes also on the side)! YUM… they’re so good!

Crispy green bean fries make a great side dish for meats, as well!


I really hope you have the opportunity to make these crispy green bean fries, and trust you will enjoy them, too! Thanks so much for stopping by, and I invite you to come back again for more delicious recipes. Take care, may God bless you, and have a GREAT day!

Looking For More VEGGIE Recipes?

You can find ALL of my recipes in the Recipe Index, which is located at the top of the page. I have LOTS of delicious recipes featuring veggies, including:

Interested In More Recipes?

Thank you for visiting this website. I appreciate you using some of your valuable time to do soIf you’re interested, I publish a newsletter 2 times per month (1st and 15th) with all the latest recipes, and other fun info. I would be honored to have you join our growing list of subscribers, so you never miss a great recipe!
There is a Newsletter subscription box on the top right side (or bottom) of each blog post, depending on the device you use, where you can easily submit your e-mail address (only) to be included in my mailing list.

You Can Also Find Me On Social Media:

Facebook page: The Grateful Girl Cooks!
Pinterest:
The Grateful Girl Cooks!
Instagram:
jbatthegratefulgirlcooks

Author's signature

Original recipe source: Jamie Sherman at lovebakesgoodcakes.com

↓↓ PRINTABLE RECIPE BELOW ↓↓

0 from 0 votes
Crispy Green Bean Fries
Prep Time
15 mins
Cook Time
10 mins
Total Time
25 mins
 

Watch how fast a plate of Crispy Green Bean Fries with Ranch/Sriracha dipping sauce disappears at a get together! They're easy and delicious!

Category: Appetizer/Snack, Vegetable Dish
Cuisine: American
Keyword: crispy green bean fries
Servings: 4
Calories Per Serving: 239 kcal
Author: JB @ The Grateful Girl Cooks!
Ingredients
  • 1 pound fresh green beans tips trimmed off both ends
  • ¾ cup Panko breadcrumbs
  • ¼ teaspoon garlic powder
  • ¼ teaspoon onion powder
  • ¼ teaspoon seasoning salt
  • ¼ teaspoon dried parsley
  • ¼ teaspoon chili powder
  • ¼ teaspoon ground black pepper
  • 2 large eggs beaten
  • ½ cup all purpose flour
For Dipping Sauce:
  • ¼ cup Ranch salad dressing
  • 1 teaspoon Sriracha sauce or other hot sauce
Instructions
  1. Preheat oven to 425°F. Spray a large baking sheet lightly with non-stick spray.

  2. Cut tip off of both ends of the green beans. Place in bowl; set aside.

  3. Combine Panko breadcrumbs, parsley, seasoning salt, garlic powder, chili powder, black pepper and onion powder in a bowl or on a large dinner plate. Set aside.

  4. In a separate small dish, combine Ranch dressing with Sriracha sauce. Set sauce aside or refrigerate until serving time.

  5. Place flour into a medium bowl. Set aside.

  6. In a separate medium bowl, beat two eggs. Now you're ready for the "Green Bean Dipping Station". Place bowls on counter in this order (L to R): Green beans, Flour, Eggs, and Panko mix last.

  7. Step #1: Dip green beans (one. or a few at a time) in flour, coating all sides. You can use fingers and/or a fork for this.

    Step #2: Dip flour covered beans in the egg mixture, coating all sides, letting excess egg drip back into bowl. TIP: It's helpful to lift them out using a fork.

    Step #3: REPEAT Steps 1 and 2. (That's right... flour, egg, flour, egg).

    Step #4: Coat green beans in Panko mixture until all sides covered.

    Repeat process for remaining beans. Place them in a single layer (don't overcrowd) on large baking sheet as you finish each "batch".

  8. Bake at 425°F. for 10 minutes total. **After 5 minutes, flip the beans to the other side, then finish cooking**. When done, coating should be golden brown and crispy on the outside. Remove from oven; transfer beans to serving plate and serve immediately while hot, with dipping sauce on the side.

Recipe Notes

Caloric calculation is formulated on consuming 1/4 of the crispy green bean fries and 1/4 of the dipping sauce.

Nutrition Facts
Crispy Green Bean Fries
Amount Per Serving (1 (1/4 of total))
Calories 239 Calories from Fat 90
% Daily Value*
Fat 10g15%
Saturated Fat 2g13%
Trans Fat 0.01g
Polyunsaturated Fat 5g
Monounsaturated Fat 2g
Cholesterol 97mg32%
Sodium 434mg19%
Potassium 331mg9%
Carbohydrates 29g10%
Fiber 4g17%
Sugar 5g6%
Protein 9g18%
Vitamin A 963IU19%
Vitamin C 15mg18%
Calcium 85mg9%
Iron 3mg17%
* Percent Daily Values are based on a 2000 calorie diet.

Here’s one more to pin on your Pinterest boards!Watch how fast a plate of Crispy Green Bean Fries with Ranch/Sriracha dipping sauce disappears at a get together! They're easy and delicious!

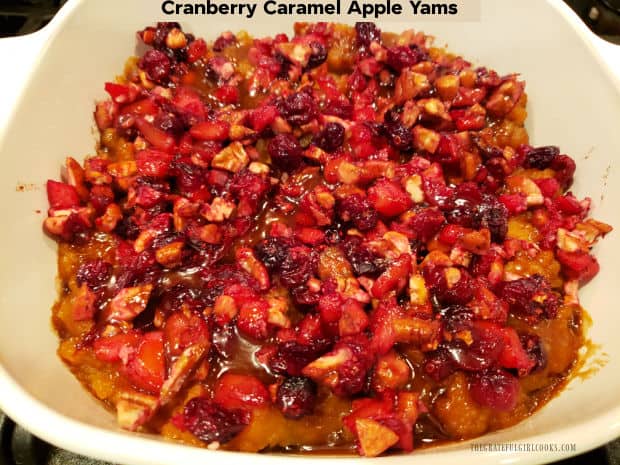
Cranberry Caramel Apple Yams

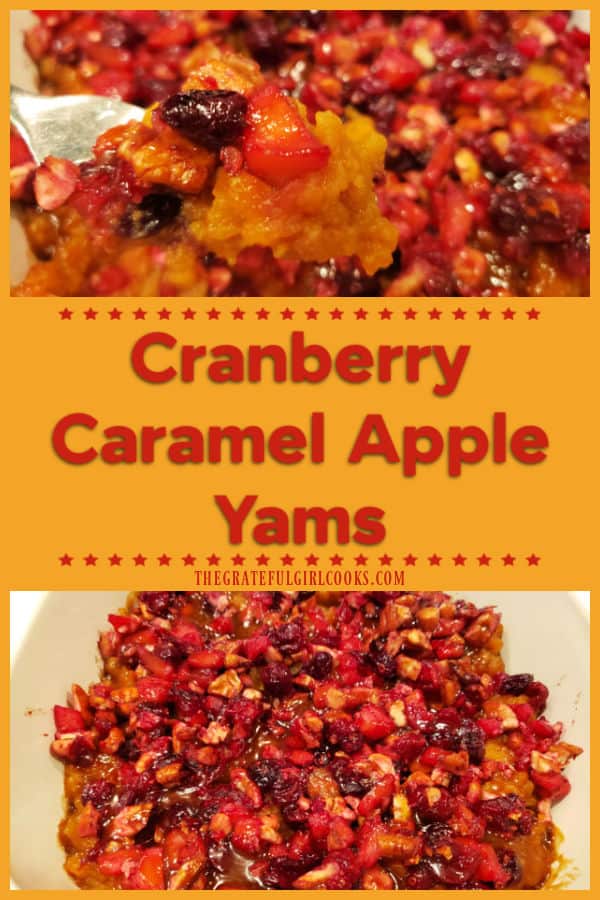
Baked Cranberry Caramel Apple Yams are amazing! Canned yams are mashed, topped with cranberries, apples & pecans, then drizzled with caramel.Baked Cranberry Caramel Apple Yams are amazing! Canned yams are mashed, topped with cranberries, apples & pecans, then drizzled with caramel.

Looking for an amazing side dish that is delicious enough to serve for the holidays? Or are you looking for a side dish recipe that goes well with a chicken, beef or pork dinner, any time of year?

Guess what? I think you will LOVE this recipe for cranberry caramel apple yams! This recipe will make 8 small servings or 6 slightly larger servings.

This is an easy to prepare layered side dish that tastes wonderful! The bottom layer is creamy mashed yams (with brown sugar), the middle layer is cranberries, apples, walnuts or pecans, and the top is drizzled with caramel sauce!

This recipe uses canned yams, which makes it convenient, practically effortless to make, and saves a lot of preparation time, too!

Put those layers of goodness together and you have a colorful, lip-smackin’ delicious side dish! The recipe for cranberry caramel apple yams originated in an old cookbook I had, and now I can’t wait to share it with you. Here’s how to make this dish.

Scroll Down For A Printable Recipe Card At The Bottom Of The Page

Prepare The Yams (Layer #1)

Before beginning, preheat your oven to 350°F., and lightly spray or grease the bottom and sides of a 2 quart baking dish.

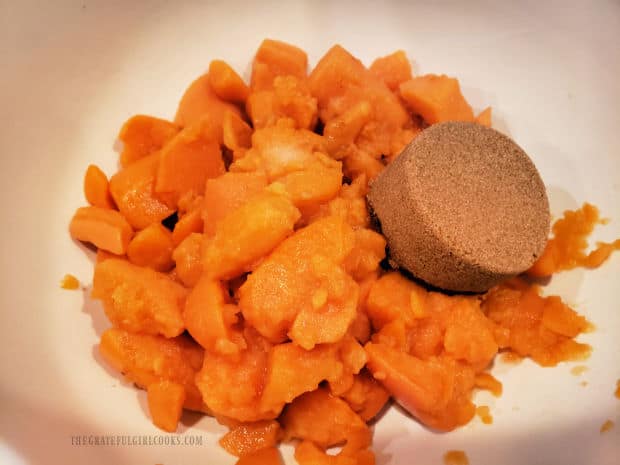
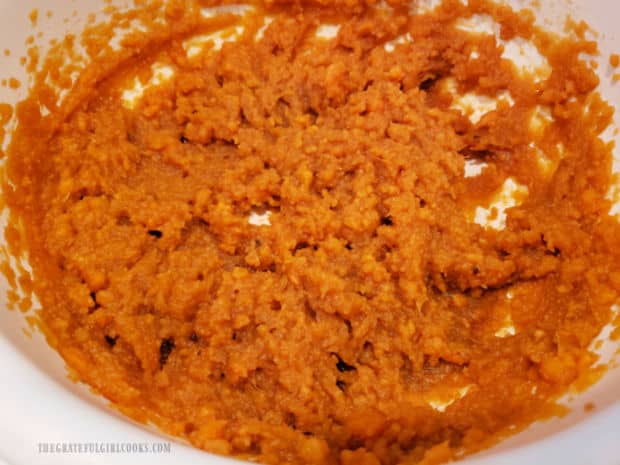
Drain the liquid from a large can of yams, then place them in a mixing bowl, along with packed brown sugar and salt. Use an electric mixer to combine these ingredients until thoroughly “mashed” and smooth in texture.

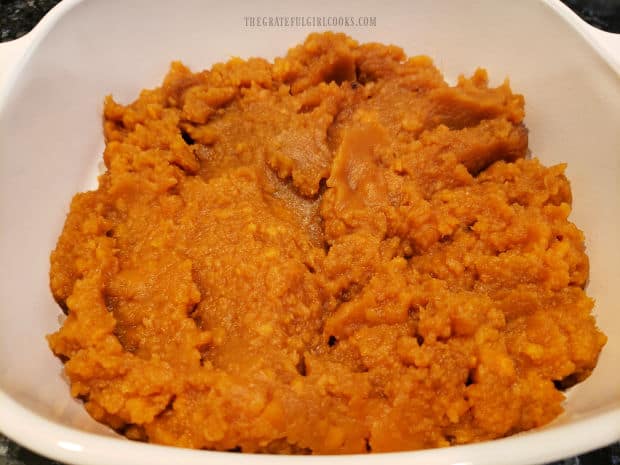
Spread the mashed yam mixture evenly in the prepared baking dish. Set the dish aside while you prepare the cranberry apple layer.

Drained canned yams, salt and brown sugar are combined in a medium bowl.An electric mixer is used to mash the yams until smooth in texture.Mashed brown sugar yams are spread in a greased 2 quart baking dish.

Cook The Cranberry Apple Mixture (Layer #2)

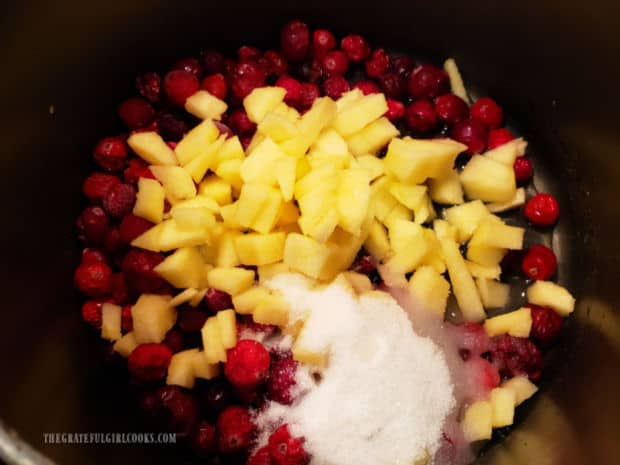
Place fresh or frozen (unthawed) cranberries, chopped apple, granulated sugar and water in a medium saucepan.

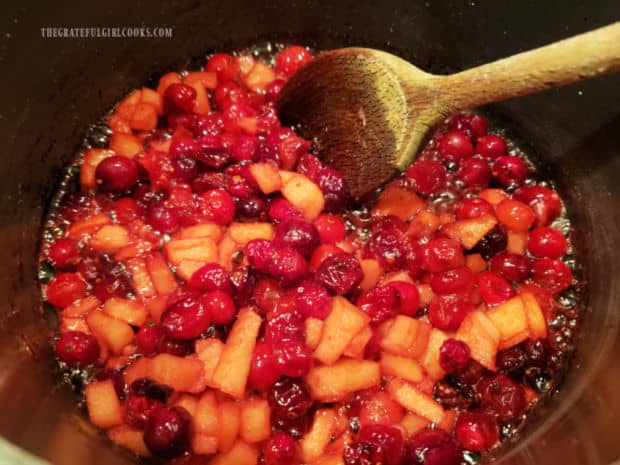
Cook the fruit mixture on Medium heat for about 7-10 minutes, stirring often, until most of the cranberries have popped and burst open. As the cranberries “pop”, this fruit mixture will thicken slightly.

Cranberries, chopped apple, granulated sugar and water are placed in a medium saucepan.Cranberry/apple mixture is cooked 7-10 minutes or until cranberries pop or burst open.

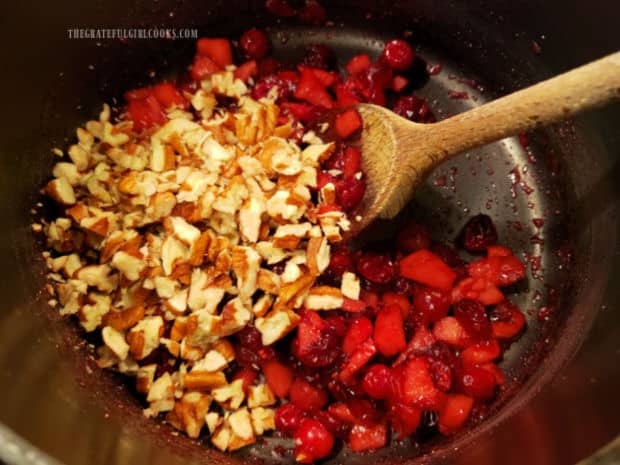
Remove the saucepan from the heat source and stir in chopped walnuts or pecans (whichever you prefer or have available).

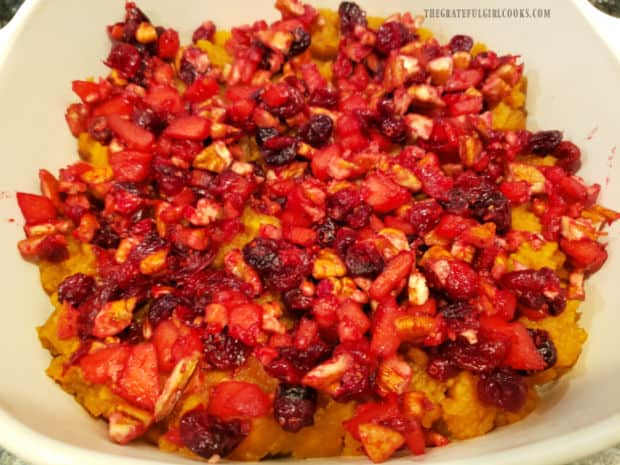
Spoon the cranberry/apple mixture over the top of the yams in the baking dish, covering as much of the surface as possible.

Chopped nuts (walnuts or pecans) are stirred into cranberry/apple mixture in pan.The cranberry/apple/nut mixture is spread on top of the mashed yams in baking dish.

Make The Simple Caramel Topping (Layer #3)

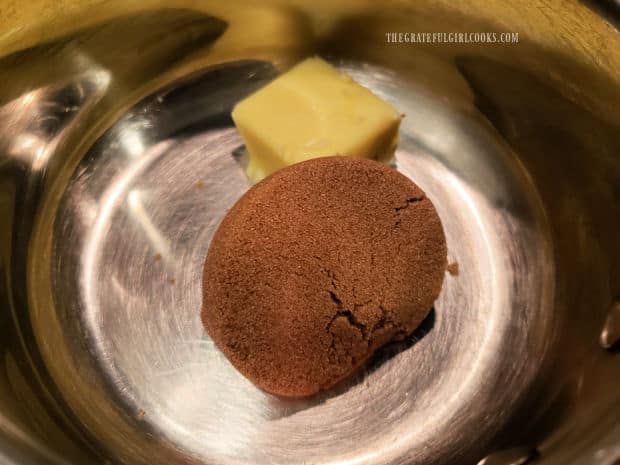
Now it’s time to make a simple caramel sauce to drizzle over the top of this dish! It’s EASY! Stir brown sugar, butter and 1 Tablespoon water together in a small saucepan. Bring this mixture to a boil on medium-low heat.

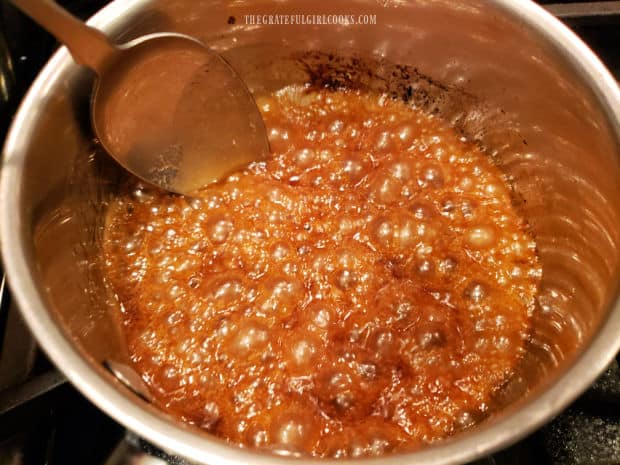
Continue to let the sauce boil for 2 minutes, stirring constantly while it cooks. After it has boiled for two minutes, remove the pan from the heat. IMMEDIATELY drizzle the caramel sauce evenly over the top of the cranberry/apple layer. Now the cranberry caramel apple yams are ready to bake!

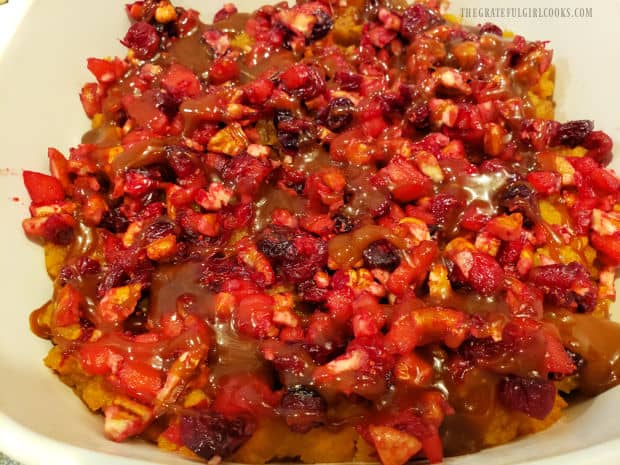
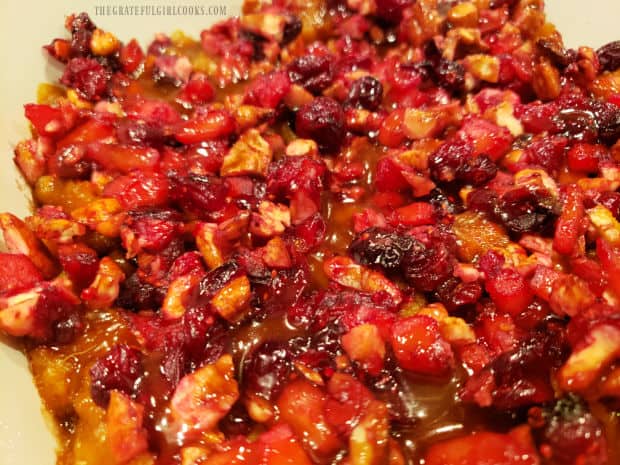
Butter, brown sugar and a Tablespoon of water are placed in pan to make caramel sauce.Caramel sauce is boiled for two minutes before being removed from heat.Hot caramel sauce is drizzled over the top of the cranberry/apple/nut layer.

Time To Enjoy The Cranberry Caramel Apple Yams

Bake the yams (uncovered) at 350°F. for 15-17 minutes. They are done when fully heated through! Serve the cranberry caramel apple yams while hot, and enjoy the creamy yams, tangy and sweet fruit, crunchy nuts, and sweet caramel sauce on top.

This dish goes GREAT with chicken, beef and pork, and would be a great addition to any holiday feast! The recipe can easily be doubled or tripled, and is truly a delicious yet simple dish to prepare.

YUM! I even enjoy grabbing a spoonful of the leftovers at room temperature. This dish is so good I can’t help myself. We enjoyed the yams this time, served alongside Classic Turkey Croquettes!

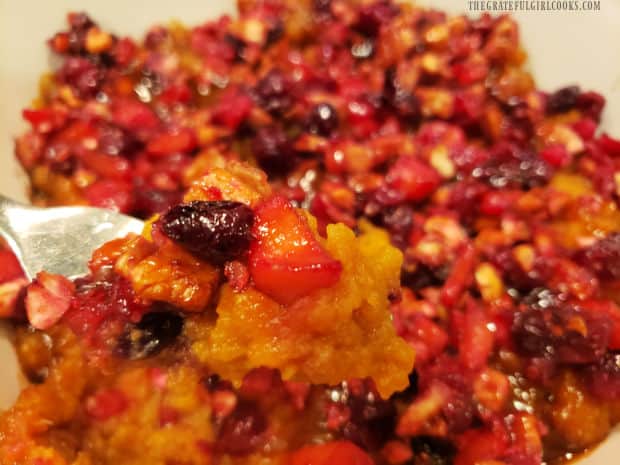
The cranberry caramel apple yams are baked for 15 minutes to fully heat them through.A fork, holding a bite of the cranberry caramel apple yams, ready to be eaten.

I really hope you’ll give these cranberry caramel apple yams a try, and am confident you’ll enjoy them as much we do! We love the colors, flavors, and textures of this wonderful side dish!

Thanks so much for stopping by, and please come back soon for more family-friendly recipes. Take care, and have a GREAT day!

Looking For More YAM OR SWEET POTATO Recipes?

You can find ALL of my recipes in the Recipe Index, which is located at the top of the page. I have some wonderful yam and sweet potato recipes for you to choose from, including:

Want More Recipes? Get My FREE Newsletter!

I publish a newsletter 2 times per month (1st and 15th) with lots of recipes, tips, etc..
Would you like to join our growing list of subscribers?

There is a Newsletter subscription box on the top right (or bottom) of each blog post, depending on the device you use.
You can submit your e-mail address there, to be added to my mailing list.

Find Me On Social Media:

Facebook page: The Grateful Girl Cooks!
Pinterest:
The Grateful Girl Cooks!
Instagram:
jbatthegratefulgirlcooks

Author's signature

Original recipe source:  Gooseberry Patch “Big Book Of Holiday Cooking”, page 245, published in 2012 by Time Home Entertainment, Inc.

↓↓ PRINTABLE RECIPE BELOW ↓↓

0 from 0 votes
Cranberry Caramel Apple Yams
Prep Time
15 mins
Cook Time
15 mins
Total Time
30 mins
 

Baked Cranberry Caramel Apple Yams are amazing! Canned yams are mashed, topped with cranberries, apples & pecans, then drizzled with caramel.

Category: Side Dish, Vegetable Dish
Cuisine: American
Keyword: cranberry caramel apple yams
Servings: 8 small servings
Calories Per Serving: 273 kcal
Author: JB @ The Grateful Girl Cooks!
Ingredients
  • 29 ounces canned yams drained
  • cup brown sugar packed
  • teaspoon salt
For Fruit Layer:
  • 1 cup fresh or frozen cranberries
  • ½ large apple (any variety) cored/peeled/chopped
  • 3 Tablespoons granulated sugar
  • cup water
For Caramel Drizzle:
  • ½ cup chopped walnuts or pecans
  • ¼ cup brown sugar packed
  • 1 Tablespoon butter
  • 1 Tablespoon water
Instructions
  1. Preheat oven to 350°F. Lightly spray/grease bottom/sides of a 2 qt. baking dish.

  2. Drain liquid from canned yams, then place yams in a large bowl, with packed brown sugar and salt. Use electric mixer to combine, until mashed/smooth in texture. Spread yams evenly in baking dish. Set aside.

  3. Place cranberries, apple, granulated sugar and water in a medium saucepan. Cook on Medium heat 7-10 minutes, stirring often, until most cranberries have popped/burst open. As it cooks, fruit mixture will thicken slightly. Remove pan from heat; stir in chopped walnuts or pecans. Spoon cranberry/apple mixture evenly over yams in baking dish. Set aside.

  4. Combine brown sugar, butter and 1 T. water in a small saucepan. Bring to a boil on medium-low heat. Continue to let sauce boil for 2 minutes, stirring constantly. Remove pan from the heat. IMMEDIATELY drizzle caramel evenly over cranberry/apple layer.

  5. Bake (uncovered) at 350°F. for 15-17 minutes. The yams are done when fully heated through. Serve hot, and enjoy!
Nutrition Facts
Cranberry Caramel Apple Yams
Amount Per Serving (1 (1/8 of total))
Calories 273 Calories from Fat 54
% Daily Value*
Fat 6g9%
Saturated Fat 1g6%
Trans Fat 0.1g
Polyunsaturated Fat 4g
Monounsaturated Fat 1g
Cholesterol 4mg1%
Sodium 62mg3%
Potassium 918mg26%
Carbohydrates 53g18%
Fiber 5g21%
Sugar 23g26%
Protein 3g6%
Vitamin A 202IU4%
Vitamin C 20mg24%
Calcium 40mg4%
Iron 1mg6%
* Percent Daily Values are based on a 2000 calorie diet.

Here’s one more to pin on your Pinterest boards!Baked Cranberry Caramel Apple Yams are amazing! Canned yams are mashed, topped with cranberries, apples & pecans, then drizzled with caramel.

Lemon Garlic Cauliflower Rice

Lemon Garlic Cauliflower Rice is a tasty, low calorie vegetable side dish that goes well with chicken, beef and pork, and is simple to make!

If you’re looking for an easy to prepare veggie side dish that is very low calorie and still tastes good, how about trying this recipe for lemon garlic cauliflower rice? The recipe makes enough for about four (1/3 cup) servings. Of course, if you’re really hungry, this dish can be split between two servings, and no one will be the wiser… wink wink!

Cauliflower is a vey versatile vegetable to cook. I’ve mashed it, grilled it, used it in casseroles, soups, appetizers, and a variety of main and side dishes. Today I am sharing this recipe for riced cauliflower which is used as a side dish.

Cauliflower rice LOOKS a bit like long grain white rice, so if you’re trying to cut out carbs or calories, it is considered a viable substitute that is far lower in calories. Typically I use a frozen bag of cauliflower rice (found in most grocery stores), and thaw it before using. That makes it VERY convenient to make, with a lot less prep time. Of course, you can also finely grate fresh cauliflower by hand, if desired! Here’s how to make lemon garlic cauliflower rice.

Scroll Down For A Printable Recipe Card At The Bottom Of The Page

How To Make Lemon Garlic Cauliflower Rice

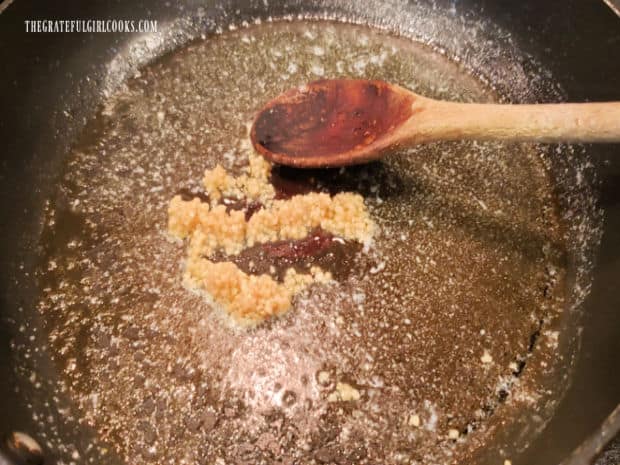
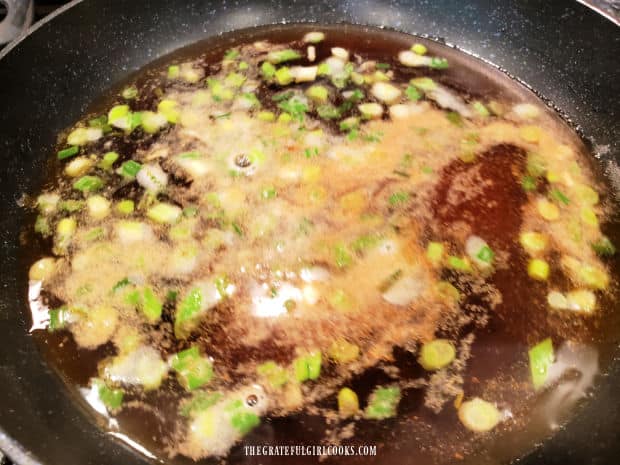
Melt a Tablespoon of butter in a large skillet on LOW heat. Add minced garlic to the melted butter, and stir, while cooking the garlic for about 45 seconds to 1 minute. Make sure to not burn the garlic, because garlic becomes bitter when that happens.

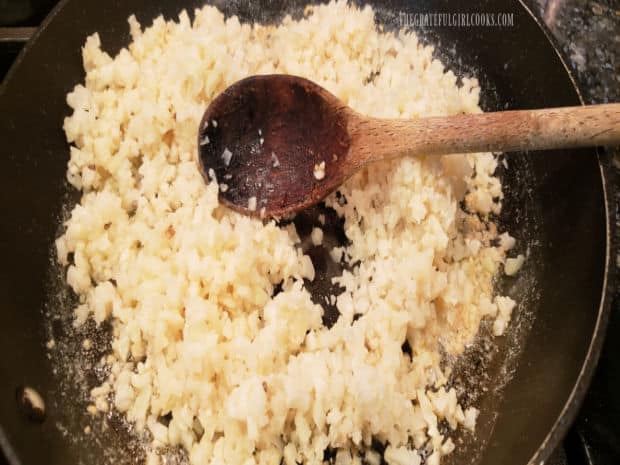
Add the cauliflower rice to the skillet. Mix these ingredients together until combined, and cook, stirring often, for 2 minutes. NOTE: If you’re using frozen cauliflower rice, make sure it has been fully thawed and drained before adding it to the skillet.

Minced garlic is cooked in melted butter in a large skillet.Riced cauliflower is added to melted butter and garlic and cooked for a couple minutes.

Final Steps To Finish This Dish

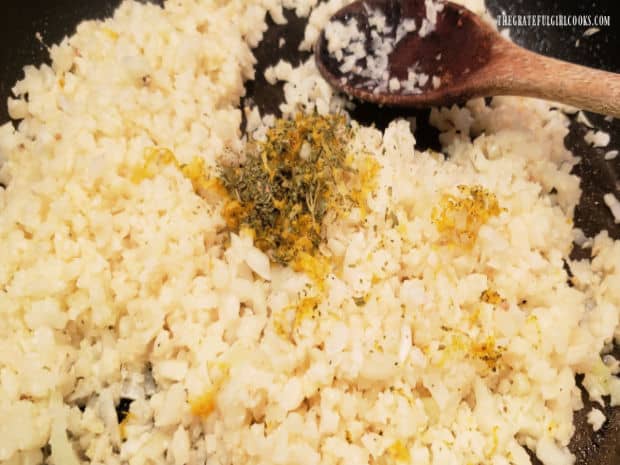
Stir chicken broth, dried parsley, Italian seasoning and lemon zest into the cauliflower rice. Mix well, to ensure the spices and grated lemon zest are distributed well throughout the cauliflower rice.

Chicken broth, dried parsley, Italian seasoning, and lemon zest is added to season the cauliflower rice.

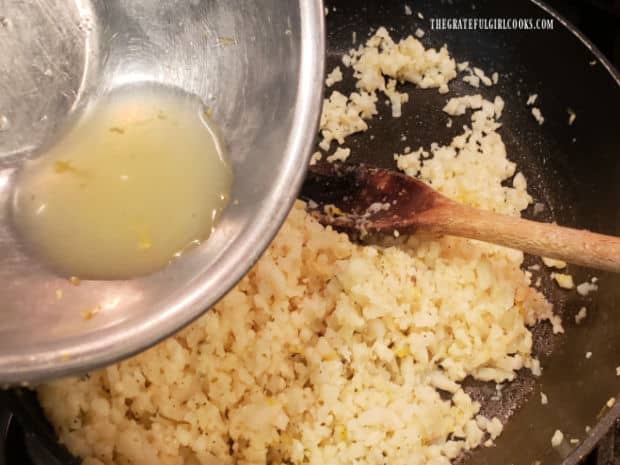
Pour lemon juice over the cauliflower, and stir until it has been fully incorporated into the lemon garlic cauliflower rice. Cook on medium heat, stirring often for 1-2 minutes, or until the cauliflower rice is completely heated through. That’s it… now it’s ready to be served!

Fresh lemon juice is added to the seasoned riced cauliflower and stirred to combine.

Serving The Lemon Garlic Cauliflower Rice

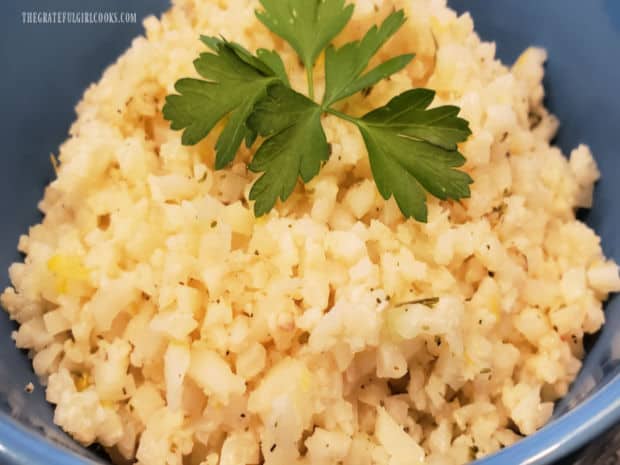
Transfer the lemon garlic cauliflower rice to a small serving bowl, and garnish with fresh parsley, if desired (optional). Serve the hot rice alongside a favorite main dish, and enjoy this delicious, low calorie veggie dish!

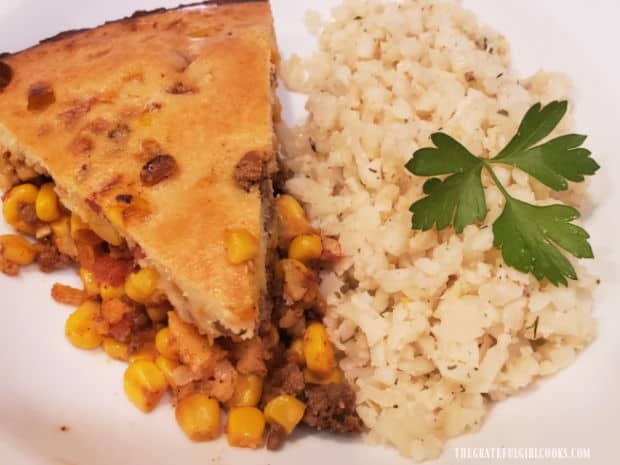
The lemon garlic cauliflower rice pairs especially well with chicken, beef and pork! It has a bit of a garlic and citrus “pop” when eaten, which is a nice feature. When I photographed the preparation of the rice, I served it with a wedge of Tamale Pie (recipe coming soon), and they actually “played well” together.

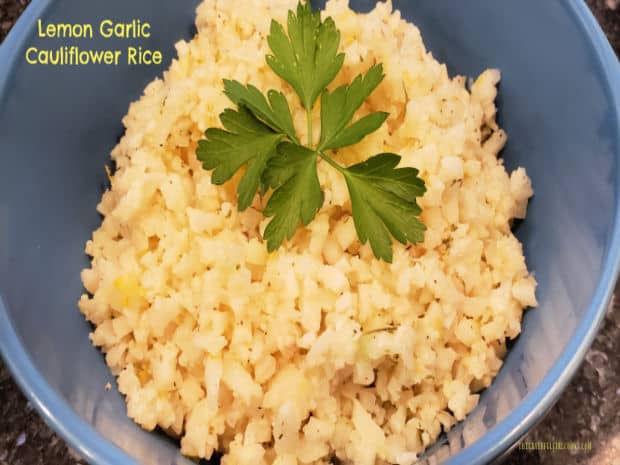
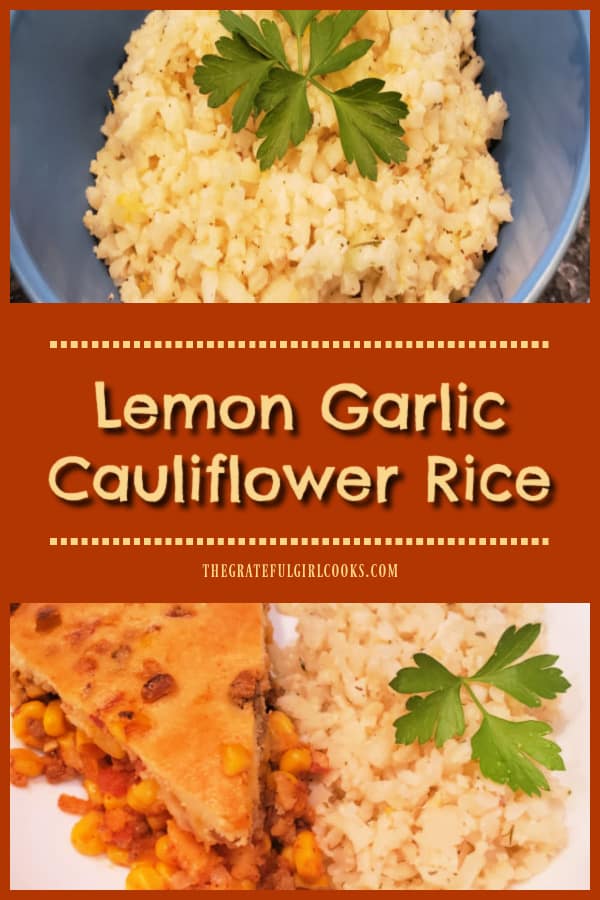
Lemon Garlic Cauliflower Rice is served in a blue bowl, and garnished with fresh parsley.Shown, served alongside Tamale Pie, the lemon garlic cauliflower rice is a great side dish!

I hope you have the opportunity to prepare this simple side dish for yourself or for those you love, and hope you enjoy it. Thank you very much for stopping by, and I invite you to come back soon for more family-friendly recipes. Take care, and have a blessed day.

Looking For More CAULIFLOWER Recipes?

You can find ALL of my recipes in the Recipe Index, which is located at the top of the page. I have lots of delicious vegetable side dish recipes for you to enjoy, including:

Interested In More Recipes?

Thank you for visiting this website. I appreciate you using some of your valuable time to do soIf you’re interested, I publish a newsletter 2 times per month (1st and 15th) with all the latest recipes, and other fun info. I would be honored to have you join our growing list of subscribers, so you never miss a great recipe!
There is a Newsletter subscription box on the top right side (or bottom) of each blog post, depending on the device you use, where you can easily submit your e-mail address (only) to be included in my mailing list.

You Can Also Find Me On Social Media:

Facebook page: The Grateful Girl Cooks!
Pinterest:
The Grateful Girl Cooks!
Instagram:
jbatthegratefulgirlcooks

Author's signature

Recipe adapted from: The online magazine called “LiveSmart”, volume 11, page 34, available through isabeldprice.com 

↓↓ PRINTABLE RECIPE BELOW ↓↓

0 from 0 votes
Lemon Garlic Cauliflower Rice
Prep Time
5 mins
Cook Time
4 mins
Total Time
9 mins
 

Lemon Garlic Cauliflower Rice is a tasty, low calorie vegetable side dish that goes well with chicken, beef and pork, and is simple to make!

Category: Side Dish, Vegetable Dish
Cuisine: American
Keyword: lemon garlic cauliflower rice
Servings: 4 approx. (1/2 cup per serving)
Calories Per Serving: 59 kcal
Author: JB @ The Grateful Girl Cooks!
Ingredients
  • 1 Tablespoon butter
  • 3 cloves garlic minced
  • 16 ounces cauliflower rice thawed, if frozen
  • 2 Tablespoons chicken broth
  • 1 teaspoon dried parsley
  • teaspoon Italian seasoning
  • 1 teaspoon grated lemon zest (yellow peel)
  • 1 Tablespoon lemon juice
  • fresh parsley for garnish, if desired
Instructions
  1. Melt butter in a large skillet on LOW heat. Add minced garlic; cook about 45 seconds to 1 minute. Stir often, to not burn garlic, or it becomes bitter.

  2. Add cauliflower rice to the skillet. Mix with butter/garlic until combined. Cook on Medium-Low,, stirring often, for 2 minutes. NOTE: If using frozen cauliflower rice, make sure it's fully thawed/drained before adding to skillet.

  3. Stir chicken broth, seasonings (parsley and Italian seasoning), and lemon zest into the cauliflower rice. Add lemon juice; stir until combined with other ingredients.

  4. Cook on Medium-Low heat for 1-2 minutes, stirring often, until the cauliflower rice is heated through.

  5. Transfer lemon garlic cauliflower rice to serving bowl; garnish with fresh parsley, if desired. Enjoy.

Nutrition Facts
Lemon Garlic Cauliflower Rice
Amount Per Serving (1 (1/2 cup per serving))
Calories 59 Calories from Fat 27
% Daily Value*
Fat 3g5%
Saturated Fat 2g13%
Trans Fat 0.1g
Polyunsaturated Fat 0.1g
Monounsaturated Fat 1g
Cholesterol 8mg3%
Sodium 85mg4%
Potassium 357mg10%
Carbohydrates 7g2%
Fiber 2g8%
Sugar 2g2%
Protein 2g4%
Vitamin A 90IU2%
Vitamin C 57mg69%
Calcium 33mg3%
Iron 1mg6%
* Percent Daily Values are based on a 2000 calorie diet.

Here’s one more to pin on your Pinterest boards!Lemon Garlic Cauliflower Rice is a tasty, low calorie vegetable side dish that goes well with chicken, beef and pork, and is simple to make!


Cheesy Bread Wedges

Cheesy Bread Wedges are an easy to make side dish using biscuit mix! They’re buttery, and filled with cheddar cheese, onions, and parsley.
Cheesy Bread Wedges are an easy to make side dish using biscuit mix! They're buttery, and filled with cheddar cheese, onions, and parsley.

If you’re looking for an easy side dish to serve with a favorite salad or main dish, may I suggest these yummy, cheesy bread wedges? They are incredibly simple to make, and have great flavor! With only 10 minutes of prep time needed before baking, they’re a perfectly easy side dish to whip up after a long, busy day.

The recipe utilizes biscuit mix which helps cut down on the number of ingredients needed. Cheddar cheese is used IN the bread batter, and is added to the top of the batter also, so there is plenty of cheesy goodness in each bite. Here’s how to make eight delicious, cheesy bread wedges.

Scroll Down For A Printable Recipe Card At The Bottom Of The Page

Make The Batter

Preheat your oven to 350°F before mixing the batter, and spray or grease the sides/bottom of an 8″ or 9″ round cake pan. This batter doesn’t take long at all to make, and you’ll want your oven and prepared baking pan ready to go, once the batter is done!

Whisk together an egg and milk in a large mixing bowl. Add biscuit mix (like Bisquick), minced onion, ½ cup of grated cheese, and chopped fresh parsley. Stir well, just until the ingredients have been combined.

Egg and milk are whisked together in a large mixing bowl.Cheddar cheese, chopped parsley, minced onion, and biscuit mix are combined with egg mixture. Pour the batter into the prepared pan, and spread it out evenly in the dish. Sprinkle the batter with the remaining ½ cup of grated cheddar cheese.

After batter for the cheesy bread wedges is combined, it's placed in a greased cake pan.More grated cheese is added to the top of the bread batter in pan.

Bake The Cheesy Bread

Melt a half stick of butter (4 T.) in a pan or microwave, and pour it evenly over the top of the grated cheese. Place the baking pan on the middle rack in a preheated oven.

Bake the cheesy bread wedges at 350°F. for 25 minutes, or until the surface of the bread becomes set and golden brown in color. Transfer the baking pan to a wire rack and let the bread cool slightly before slicing.

Melted butter is added to the top of the batter for the cheesy bread wedges.When finished baking, the bread is set and golden brown in color on the top.

Time To Enjoy Some Cheesy Bread Wedges!

Cut the cheesy bread into eight wedges, and serve hot. NOTE: You can cut the cheesy bread wedges IN the pan OR you can remove the entire round loaf to a cutting board and slice it on the board.

You probably will NOT need additional butter, because the melted butter has already been added! That’s it… see how easy this recipe is to prepare? Now you can go ahead and serve the cheesy bread wedges with your favorite salads and/or main dishes.

One of the pieces of cheesy bread wedges is sliced, and is ready to eat.A side view of one of the cheesy bread wedges, showing cheese and parsley inside.

I really hope you enjoy this recipe for cheesy bread wedges, and know you’ll see just how easy it is to make. Thank you for stopping by today, and I hope you will come back again soon for more yummy recipes. Take care, and have a GREAT day!

Looking For More BREAD Recipes?

You can find ALL of my recipes in the Recipe Index, which is located at the top of the page. I have some delicious bread recipes for you to check out, including:

Interested In More Recipes?

Thank you for visiting this website. I appreciate you using some of your valuable time to do soIf you’re interested, I publish a newsletter 2 times per month (1st and 15th) with all the latest recipes, and other fun info. I would be honored to have you join our growing list of subscribers, so you never miss a great recipe!
There is a Newsletter subscription box on the top right side (or bottom) of each blog post, depending on the device you use, where you can easily submit your e-mail address (only) to be included in my mailing list.

You Can Also Find Me On Social Media:

Facebook page: The Grateful Girl Cooks!
Pinterest:
The Grateful Girl Cooks!
Instagram:
jbatthegratefulgirlcooks

Author's signature

Original recipe source: “Church Suppers” Cookbook, page 94, published by Black Dog & Leventhal Publishers, Inc. in 2005

↓↓ PRINTABLE RECIPE BELOW ↓↓

0 from 0 votes
Cheesy Bread Wedges
Prep Time
10 mins
Cook Time
25 mins
Total Time
35 mins
 

Cheesy Bread Wedges are an easy to make side dish using biscuit mix! They're buttery, and filled with cheddar cheese, onions, and parsley.

Category: Bread, Side Dishes
Cuisine: American
Keyword: cheesy bread wedges
Servings: 8 wedges
Calories Per Serving: 221 kcal
Author: JB @ The Grateful Girl Cooks!
Ingredients
  • 1 large egg lightly beaten
  • ½ cup milk
  • cups biscuit mix like Bisquick
  • 2 Tablespoons chopped parsley
  • 1 Tablespoon minced yellow onion
  • 1 cup grated cheddar DIVIDED USE!
  • ¼ cup butter = 4 Tablespoons, melted
Instructions
  1. Preheat oven to 350°F. Spray or grease sides/bottom of 8" or 9" round cake pan.

  2. Whisk egg and milk together in large mixing bowl. Add biscuit mix, onion, ½ cup grated cheese, and parsley. Stir well just until ingredients are combined. Don't overmix. Pour batter into prepared pan; spread it evenly.

  3. Sprinkle batter with remaining ½ cup grated cheese. Melt butter (4 T.) in pan or microwave. Pour it evenly over the top of the cheese.

  4. Place pan on middle rack in oven. Bake at 350°F. for 25 minutes, or until surface of bread is set and golden brown in color. Transfer baking pan to a wire rack; let bread cool slightly before slicing.

  5. Cut bread into eight wedges, and serve hot. You probably will NOT need additional butter, because melted butter has already been added! Enjoy!
Nutrition Facts
Cheesy Bread Wedges
Amount Per Serving (1 wedge)
Calories 221 Calories from Fat 135
% Daily Value*
Fat 15g23%
Saturated Fat 8g50%
Trans Fat 0.2g
Polyunsaturated Fat 1g
Monounsaturated Fat 5g
Cholesterol 54mg18%
Sodium 440mg19%
Potassium 89mg3%
Carbohydrates 16g5%
Fiber 1g4%
Sugar 3g3%
Protein 6g12%
Vitamin A 467IU9%
Vitamin C 1mg1%
Calcium 166mg17%
Iron 1mg6%
* Percent Daily Values are based on a 2000 calorie diet.

Here’s one more to pin on your Pinterest boards!Cheesy Bread Wedges are an easy to make side dish using biscuit mix! They're buttery, and filled with cheddar cheese, onions, and parsley.

Pineapple Topped Sweet Potato Puff

Pineapple Topped Sweet Potato Puff is a delicious side dish featuring cinnamon vanilla mashed sweet potatoes, with a pineapple crumb topping!

Today I want to share a yummy recipe for a fruit topped veggie side dish! I found the original recipe in an old cookbook, and we loved the taste of this simple dish. The recipe, as written, makes 8 servings, so it’s not only great for dinner (and leftovers!), but would be a wonderful addition to a holiday table, as well.

The recipe uses fresh sweet potatoes (also known as yams), and I typically use the red-skinned variety. This side dish does require a bit of planning ahead because it is necessary to boil the fresh sweet potatoes for about 40 minutes to get them soft enough to mash. Once you get past that part, the rest of the dish is easy! This dish has two distinct layers of flavor… a bottom layer of cinnamon vanilla seasoned mashed sweet potatoes, and a final layer of crumbly pineapple topping. Here’s how to make this delicious veggie side dish.
Scroll Down For A Printable Recipe Card At The Bottom Of The Page

Prepare The Sweet Potatoes

Wash the sweet potatoes, then piece each potato 5-6 times with the tines of a fork, or with a sharp knife. Place them in a large pan of boiling water and cook them on medium high heat for about 40 minutes or until softened. To test for doneness, simply insert a knife into the middle of a sweet potato. The knife should be able to pierce the potato very easily once done.

Remove potatoes from the water, and let them cool for 1-2 minutes, then remove the peel (discard the peels). Cut the peeled sweet potatoes into slices or chunks, and place them in a medium sized bowl. At this point, you should also preheat your oven to 350°F. so it is ready to go, once the dish is assembled.

Three medium sized sweet potatoes cooking in boiling water in a large saucepan.After cooking, sweet potatoes are peeled and then mashed using an electric mixer.

Make The Sweet Potato Filling

Use an electric mixer to “mash” the sweet potatoes until mostly smooth and lump-free. Add sugar, softened butter, eggs, milk, cinnamon, vanilla and salt, and mix these ingredients together, until fully incorporated. Pour the sweet potato mixture into an UNGREASED 2 quart baking dish, then set the dish aside while making the pineapple topping.

The sweet potatoes are mashed to remove chunks before adding other ingredients.Sugar, eggs, milk, vanilla, butter, cinnamon and salt are mixed with the mashed sweet potatoes.Sweet potato mixture is poured into an ungreased, 2 quart casserole dish.

Make The Pineapple Topping

Measure all purpose flour, sugar, egg and softened butter into a medium sized bowl. Stir the ingredients together until it becomes a thick, “wet” looking batter. Fold an 8 oz. can of well-drained crushed pineapple into the batter until combined. This is the pineapple topping for the sweet potatoes, and it will be slightly “lumpy” in texture..

Flour, sugar, softened butter and an egg are combined in a medium bowl.A well-drained 8 ounce can of crushed pineapple is added to the topping mixture.

Ready… Set… Bake!
Drop the pineapple topping (by the spoonful) over the top of the sweet potatoes, trying to cover as much of the surface as possible. Place the casserole dish on the middle rack of your preheated oven.

Bake the pineapple topped sweet potato puff at 350°F for 30-35 minutes. When done, the top will be light golden brown in color, and the sweet potato filling will have “puffed up” a bit as it was baking. Remove the dish from the oven and let it rest for 1-2 minutes before serving (it’s quite HOT).

A layer of pineapple topping is added to the top of the sweet potato mixture in casserole dish.Once baked, the pineapple topped sweet potato puff is golden brown and rises slightly in dish.

Serve The Pineapple Topped Sweet Potato Puff

To serve this dish, spoon up the pineapple topped sweet potato puff and place on individual serving dishes. The sweet potato puff is so colorful, sweet and buttery, and pairs wonderfully with the sweet pineapple topping!

The day I photographed this recipe, we enjoyed this vegetable dish served alongside yummy Air Fryer Crusted Mahi Mahi. This dish would also compliment a variety of main dishes, such as beef, pork, turkey or chicken, etc. Any leftovers can be easily reheated in the oven or in a microwave, so don’t worry about having too much!

A look at the insides of the pineapple topped sweet potato puff in the serving dish.The pineapple topped sweet potato puff was served alongside a piece of crusty, air fried fish.

I hope you have the opportunity to make this tasty vegetable side dish for yourself and/or for those you love. Thanks for stopping by, and I invite you to come back soon for more family friendly recipes. Take care, and have a GREAT day!
Looking For More SWEET POTATO (OR YAM) Recipes?

You can find ALL of my recipes in the Recipe Index, which is located at the top of the page. I have some really delicious sweet potato/yam recipes you might enjoy, including:

Interested In More Recipes?

Thank you for visiting this website. I appreciate you using some of your valuable time to do soIf you’re interested, I publish a newsletter 2 times per month (1st and 15th) with all the latest recipes, and other fun info. I would be honored to have you join our growing list of subscribers, so you never miss a great recipe!
There is a Newsletter subscription box on the top right side (or bottom) of each blog post, depending on the device you use, where you can easily submit your e-mail address (only) to be included in my mailing list.

You Can Also Find Me On Social Media:

Facebook page: The Grateful Girl Cooks!
Pinterest:
The Grateful Girl Cooks!
Instagram:
jbatthegratefulgirlcooks

Author's signature

Recipe adapted from: Gooseberry Patch “Big Book of Holiday Cooking”, page 199, submitted by Linda Littlejohn, published in 2012 by Oxmoor House and Time Home Entertainment, Inc.

↓↓ PRINTABLE RECIPE BELOW ↓↓

5 from 1 vote
Pineapple Topped Sweet Potato Puff
Prep Time
40 mins
Cook Time
30 mins
Total Time
1 hr 10 mins
 

Pineapple Topped Sweet Potato Puff is a delicious side dish featuring cinnamon vanilla mashed sweet potatoes, with a pineapple crumb topping!

Category: Side Dish, Vegetable Dish
Cuisine: American
Keyword: pineapple topped sweet potato puff
Servings: 8
Calories Per Serving: 338 kcal
Author: JB @ The Grateful Girl Cooks!
Ingredients
For Sweet Potato Filling:
  • 2 cups sweet potatoes boiled, peeled, mashed
  • 1 cup granulated sugar
  • ¼ cup butter softened
  • 2 large eggs
  • ¼ cup milk
  • 1 teaspoon vanilla extract
  • ¼ teaspoon ground cinnamon
  • ¼ teaspoon salt
For Pineapple Topping:
  • ¼ cup all purpose flour
  • ½ cup granulated sugar
  • 1 large egg slightly beaten
  • ¼ cup butter softened
  • 8 ounces crushed pineapple (canned) well drained
Instructions
  1. Wash sweet potatoes; piece each potato 5-6 times with the tines of a fork, or with a sharp knife. Place them in large pan of boiling water; cook on medium high heat for 40 minutes or until softened. To test for doneness, insert a knife into the middle of a sweet potato. Knife should easily pierce potato very once done. Remove potatoes from water; let cool 1-2 minutes. Remove peel (discard peels). Cut sweet potatoes into slices or chunks; place in medium bowl.

  2. Preheat oven to 350°F. so it's ready to go, once dish is assembled.

  3. Use electric mixer to "mash" sweet potatoes until smooth and lump-free. Add sugar, butter, eggs, milk, cinnamon, vanilla and salt. Mix until fully incorporated. Pour in UNGREASED 2 qt. baking dish. Set aside while making pineapple topping.

  4. Measure flour, sugar, egg and softened butter into medium bowl. Stir together until it becomes a thick, wet batter. Fold pineapple into batter until combined. Drop pineapple topping (by the spoonful) over the top of the sweet potatoes; cover as much of the surface as possible.

  5. Place baking dish on middle rack of oven. Bake at 350°F for 30-35 minutes. When done, the top will be light golden brown in color, and sweet potato filling will have "puffed up". Remove from the oven; let rest 1-2 minutes before serving.

Nutrition Facts
Pineapple Topped Sweet Potato Puff
Amount Per Serving (1 (1/8 of total))
Calories 338 Calories from Fat 126
% Daily Value*
Fat 14g22%
Saturated Fat 8g50%
Trans Fat 0.5g
Polyunsaturated Fat 1g
Monounsaturated Fat 4g
Cholesterol 101mg34%
Sodium 212mg9%
Potassium 194mg6%
Carbohydrates 52g17%
Fiber 2g8%
Sugar 43g48%
Protein 4g8%
Vitamin A 5202IU104%
Vitamin C 3mg4%
Calcium 39mg4%
Iron 1mg6%
* Percent Daily Values are based on a 2000 calorie diet.

Here’s one more to pin on your Pinterest boards!Pineapple Topped Sweet Potato Puff is a delicious side dish featuring cinnamon vanilla mashed sweet potatoes, with a pineapple crumb topping!

Roasted Parmesan Acorn Squash

Roasted Parmesan Acorn Squash is a tasty veggie side dish! Squash is seasoned with butter, spices, and Parmesan, and it’s ready in 30 minutes!
Roasted Parmesan Acorn Squash is a tasty veggie side dish! Squash is seasoned with butter, spices, and Parmesan, and it's ready in 30 minutes!

Tender and seasoned well with butter, spices and Parmesan cheese, this simple acorn squash recipe is delicious, and I think you’ll enjoy it! I’ve been experimenting with acorn squash recipes for the past couple of years, have enjoyed the process!

I’ve already posted delicious “sweet” recipes for Apple Pecan Stuffed Acorn Squash and Baked Praline Acorn Squash on my blog. Now it’s time for a “SAVORY” recipe for this versatile winter squash! It is ready in 30 minutes from start to finish, so you can’t go wrong with this recipe! Here’s how easy it is to make:

Scroll Down For A Printable Recipe Card At The Bottom Of The Page

Prepare The Acorn Squash For Baking

Before beginning, remember to preheat your oven to 400°F. Okay- here we go:  Start with a 1½ to 2 pound acorn squash. This is considered a medium sized squash, since they can get as large as 5 pounds! Carefully slice the squash in half through the middle (NOT stem to bottom!) then scoop out and discard the seeds and pulp from each half.

Place the squash, cut side down, and slice each half into 1″ wide slices, creating a half moon-shaped slice. Place all the slices into a large mixing bowl, and set aside.

A medium sized acorn squash ready to slice in half for this recipe.Seeds and pulp need to be removed from each of the acorn squash halves.One inch slices are cut from each of the acorn squash halves.

This is what the slices will look like after they have been cut.

The acorn squash slices resemble a half-moon in shape after being cut.

Seasoning The Acorn Squash

Now it’s time to make the seasoning sauce for the squash. Melt butter in a small saucepan. When melted, add garlic powder, oregano, thyme, salt and pepper, and stir to combine. Pour the sauce over the acorn squash slices, and toss gently, until the squash is covered on all sides with the buttery spice mixture.

Spices are combined with melted butter in a small saucepan.

All the acorn squash slices are gently tossed to coat them with butter/spice mixture.

Bake The Acorn Squash

Lay the seasoned acorn squash slices in a single layer on a large baking sheet. Sprinkle each slice on top with a little grated Parmesan cheese (either fresh grated or the kind you get in a green shaker can). Bake them at 400°F. for 20 minutes, or until the squash is tender.

Test for doneness by inserting a knife into the middle of a slice. It should glide in smoothly, showing you the squash is tender. Remove the pan from the oven, and serve the roasted Parmesan acorn squash while hot.

Acorn squash is sprinkled with Parmesan cheese and baked in a single layer for 20 minutes.


Serve The Roasted Parmesan Acorn Squash

To serve, arrange the roasted Parmesan acorn squash slices on a serving platter or onto individual plates. Garnish with fresh parsley, if desired. Serve immediately and enjoy this savory vegetable side dish. A butter knife can easily be used to separate (cut away) the tender squash from the peel.

The roasted Parmesan acorn squash is garnished with fresh parsley and served.Roasted Parmesan acorn squash is served hot, and is very tender to the bite

I hope you have the opportunity to try this easy to prepare side dish, and trust you will enjoy it as much as we do. Thank you for stopping by today, and I invite you to come back soon for more family-friendly recipes. Take care, and have a GREAT day!

Looking For More VEGGIE SIDE DISH Recipes?

You can find ALL of my recipes in the Recipe Index, which is located at the top of the page. I have a wonderful variety of vegetable side dish recipes for you to choose from, including:

Interested In More Recipes?

Thank you for visiting this website. I appreciate you using some of your valuable time to do soIf you’re interested, I publish a newsletter 2 times per month (1st and 15th) with all the latest recipes, and other fun info. I would be honored to have you join our growing list of subscribers, so you never miss a great recipe!
There is a Newsletter subscription box on the top right side (or bottom) of each blog post, depending on the device you use, where you can easily submit your e-mail address (only) to be included in my mailing list.

You Can Also Find Me On Social Media:

Facebook page: The Grateful Girl Cooks!
Pinterest:
The Grateful Girl Cooks!
Instagram:
jbatthegratefulgirlcooks

Author's signature

↓↓ PRINTABLE RECIPE BELOW ↓↓

0 from 0 votes
Roasted Parmesan Acorn Squash
Prep Time
10 mins
Cook Time
20 mins
Total Time
30 mins
 

Roasted Parmesan Acorn Squash is a tasty veggie side dish! Squash is seasoned with butter, spices, and Parmesan, and it's ready in 30 minutes!

Category: Side Dish, Vegetable
Cuisine: American
Keyword: roasted Parmesan acorn squash
Servings: 4
Calories Per Serving: 161 kcal
Author: JB @ The Grateful Girl Cooks!
Ingredients
  • 1 medium acorn squash between 1½-2 pounds
  • 3 Tablespoons butter
  • ¼ teaspoon garlic powder
  • ¼ teaspoon oregano
  • ¼ teaspoon thyme
  • ¼ teaspoon salt
  • ¼ teaspoon black pepper
  • 3 Tablespoons grated Parmesan cheese fresh or shaker container
  • fresh parsley (optional for garnish)
Instructions
  1. Preheat oven to 400°F.

  2. Carefully slice squash in half through the middle (NOT stem to bottom!). Scoop out/discard seeds and pulp. Place squash cut side down, and slice each half into 1" wide slices, creating half moon-shaped slices. Place into large bowl; set aside.

  3. Melt butter in a small saucepan. Add garlic powder, oregano, thyme, salt and pepper; stir to combine. Pour sauce over acorn squash; toss gently, until squash is covered on all sides with sauce. Lay slices in single layer on large baking sheet. Sprinkle slices with grated Parmesan (fresh grated or green shaker can type).

  4. Bake at 400°F. for 20 minutes, or until the squash is fork-tender. Test for doneness by inserting knife into the middle of a slice. It should glide in smoothly. Remove from the oven; serve roasted Parmesan acorn squash immediately, garnishing with fresh parsley, if desired.

Nutrition Facts
Roasted Parmesan Acorn Squash
Amount Per Serving (1 (1/4 of total))
Calories 161 Calories from Fat 90
% Daily Value*
Fat 10g15%
Saturated Fat 6g38%
Trans Fat 0.3g
Polyunsaturated Fat 0.4g
Monounsaturated Fat 2g
Cholesterol 26mg9%
Sodium 284mg12%
Potassium 606mg17%
Carbohydrates 19g6%
Fiber 3g13%
Sugar 0.02g0%
Protein 3g6%
Vitamin A 928IU19%
Vitamin C 19mg23%
Calcium 95mg10%
Iron 1mg6%
* Percent Daily Values are based on a 2000 calorie diet.

Here’s one more to pin on your Pinterest boards!Roasted Parmesan Acorn Squash is a tasty veggie side dish! Squash is seasoned with butter, spices, and Parmesan, and it's ready in 30 minutes!


Spicy Sweet Potato Bites

Spicy Sweet Potato Bites (2 servings) are an easy to make, oven-roasted side dish. Seasoned with Southwestern spices, you’ll enjoy them!
Spicy Sweet Potato Bites (2 servings) are an easy to make, oven-roasted side dish. Seasoned with Southwestern spices, you'll enjoy them!

If you enjoy sweet potatoes, then I am pretty sure you’ll enjoy these yummy, oven-roasted spicy sweet potato bites! They have a tiny little “kick” from the Southwestern-inspired spices, but honestly, they are not TOO spicy for most folks.

The recipe, as written, is enough for two servings (or three, if serving a smaller portion). A medium-sized fresh sweet potato is sliced, cubed, seasoned with oil and spices, then roasted until soft and tender. It really is a simple dish to make, and tastes great, especially when paired with beef, chicken or pork! Let me show you how easy it is to make this delicious veggie side dish!

Scroll Down For A Printable Recipe Card At The Bottom Of The Page

Preparing The Sweet Potatoes

Before beginning, preheat your oven to 350°F. It doesn’t take long to prepare the sweet potatoes, and you want the oven preheated once they’re ready to go! Okay? Okay. Now let’s get the sweet potatoes ready to be roasted.

Clean the unpeeled sweet potatoes well with water to remove any dirt present, then pat dry. Carefully cut the UNPEELED sweet potato into  1″ long wedges (the length of the sweet potato). Cut each wedge into thirds, lengthwise (like a long French fry). Now cut each piece into small cubes (a width of about an inch or so). Place the sweet potato cubes into a mixing bowl.

Fresh, unpeeled sweet potatoes are cut in wedges, then diced into cubes.Diced sweet potatoes in a large glass bowl, ready for seasoning.

Seasoning The Sweet Potatoes

The spicy seasoning mix is a cinch to make. Simply measure garlic powder, chili powder, cumin, cayenne pepper, salt and black pepper into a small bowl or container. Stir to mix, then set aside. See how easy that was? Now it’s time to season the sweet potatoes before roasting.

Spices are combined in small dish to season the Spicy Sweet Potato Bites.

Add 2 teaspoons of extra virgin olive oil to the sweet potato cubes, then stir or toss them, to lightly coat them with the oil. Lightly coating the sweet potatoes with oil helps the spices to “stick” to the potatoes for baking.

Sprinkle the spice mix over the sweet potatoes, and then stir or toss them well, making sure all potatoes are covered with the oil and spices. Now the sweet potatoes are ready to roast in the oven.

Olive oil is added to sweet potato cubes, then tossed to combine.Seasoning mixture is added to oil-covered sweet potato cubes before cooking.

Time To Bake!

Line a baking sheet with a piece of parchment paper or a Silpat liner, then add the seasoned sweet potatoes in a single layer. Bake the spicy sweet potato bites in a 350°F. preheated oven for 45-50 minutes. Your total baking time may vary slightly, due to the size of the potato cubes you’re using, or temperature variations in different ovens.

When done, the spicy sweet potato bites should be slightly crispy on the outside, yet soft and tender on the inside. You can test for doneness by inserting a knife into a piece to see if it is soft inside. If nice and tender, they’re ready to serve. If still a bit firm, place them back in the oven for 2-3 more minutes, then check again.

Single layer of spicy sweet potato bites on parchment paper, ready to bake.

Who’s Ready For Some Spicy Sweet Potato Bites?

Once done, transfer the hot, roasted sweet potatoes to a serving bowl or individual plates, and serve hot. This recipe (as written below) will yield 2 good sized servings (or 3 small servings). The recipe can easily be doubled or tripled to make the quantity you need, if necessary!

Spicy Sweet Potato Bites are served as a side dish, on a white plate.

I hope you enjoy this simple recipe for spicy sweet potato bites… we sure do! Thanks for stopping by this blog today, and I invite you to come back again soon for more yummy recipes! Take care, and have a GREAT day!

Looking For More SWEET POTATO Recipes?

You can find ALL of my recipes in the Recipe Index, located at the top of the page. I have a nice variety of sweet potato and yam recipes for you to enjoy, including:

Interested In More Recipes?

Thank you for visiting this website. I appreciate you using some of your valuable time to do soIf you’re interested, I publish a newsletter 2 times per month (1st and 15th) with all the latest recipes, and other fun info. I would be honored to have you join our growing list of subscribers, so you never miss a great recipe!
There is a Newsletter subscription box on the top right side (or bottom) of each blog post, depending on the device you use, where you can easily submit your e-mail address (only) to be included in my mailing list.

You Can Also Find Me On Social Media:

Facebook page: The Grateful Girl Cooks!
Pinterest:
The Grateful Girl Cooks!
Instagram:
jbatthegratefulgirlcooks

Author's signature

↓↓ PRINTABLE RECIPE BELOW ↓↓

0 from 0 votes
Spicy Sweet Potato Bites
Prep Time
5 mins
Cook Time
45 mins
Total Time
50 mins
 

Spicy Sweet Potato Bites (2 servings) are an easy to make, oven-roasted side dish. Seasoned with Southwestern spices, you'll enjoy them!

Category: Side Dish, Vegetable Dish
Cuisine: American
Keyword: spicy sweet potato bites
Servings: 2 (or 3 smaller portions)
Calories Per Serving: 142 kcal
Author: JB @ The Grateful Girl Cooks!
Ingredients
  • 1 medium sweet potato unpeeled
  • 2 teaspoons extra virgin olive oil
  • 1 teaspoon garlic powder
  • ¾ teaspoon chili powder
  • ¼ teaspoon cumin
  • teaspoon cayenne pepper
  • ¼ teaspoon salt
  • ¼ teaspoon black pepper
Instructions
  1. Preheat oven to 350°F. Line a baking sheet with parchment paper OR Silpat liner.

  2. Clean sweet potatoes with water to remove any dirt present; pat dry. Carefully cut UNPEELED sweet potato into 1" long wedges (length of the sweet potato). Cut each wedge into thirds lengthwise (like a French fry). Now cut each piece into small cubes (width of about 1"). Place sweet potatoes in a mixing bowl.

  3. Measure garlic powder, chili powder, cumin, cayenne pepper, salt and pepper into a small bowl. Stir to mix; set aside.

  4. Add olive oil to sweet potatoes; stir or toss, to lightly coat them with oil. Sprinkle potatoes with spice mix; stir or toss well, making sure potatoes are covered with oil/spices.

  5. Place sweet potatoes onto prepared baking sheet in a single layer. Bake at 350°F. for 45-50 minutes. When done, potatoes should be slightly crunchy on the outside and soft on the inside. Test for doneness by inserting a knife into a piece. If soft inside, they're ready to serve. If still a bit firm, place back in oven for 2-3 more minutes, then check again. Serve hot.

Nutrition Facts
Spicy Sweet Potato Bites
Amount Per Serving (1 (1/2 of total))
Calories 142 Calories from Fat 36
% Daily Value*
Fat 4g6%
Saturated Fat 1g6%
Polyunsaturated Fat 1g
Monounsaturated Fat 3g
Sodium 367mg16%
Potassium 424mg12%
Carbohydrates 25g8%
Fiber 4g17%
Sugar 5g6%
Protein 2g4%
Vitamin A 16310IU326%
Vitamin C 3mg4%
Calcium 41mg4%
Iron 1mg6%
* Percent Daily Values are based on a 2000 calorie diet.

Here’s one more to pin on your Pinterest boards!Spicy Sweet Potato Bites (2 servings) are an easy to make, oven-roasted side dish. Seasoned with Southwestern spices, you'll enjoy them!