Category: Side Dishes

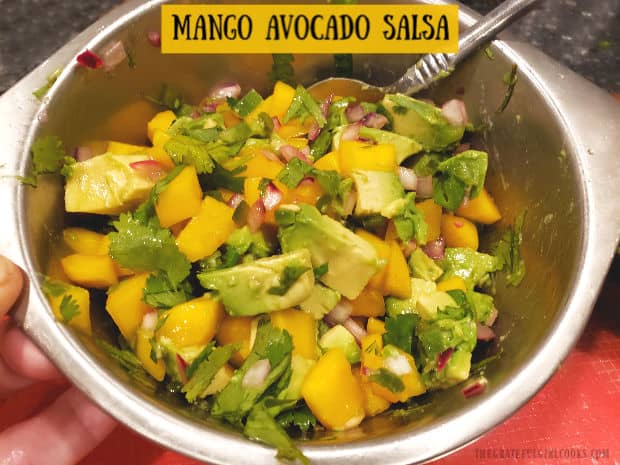
Mango Avocado Salsa

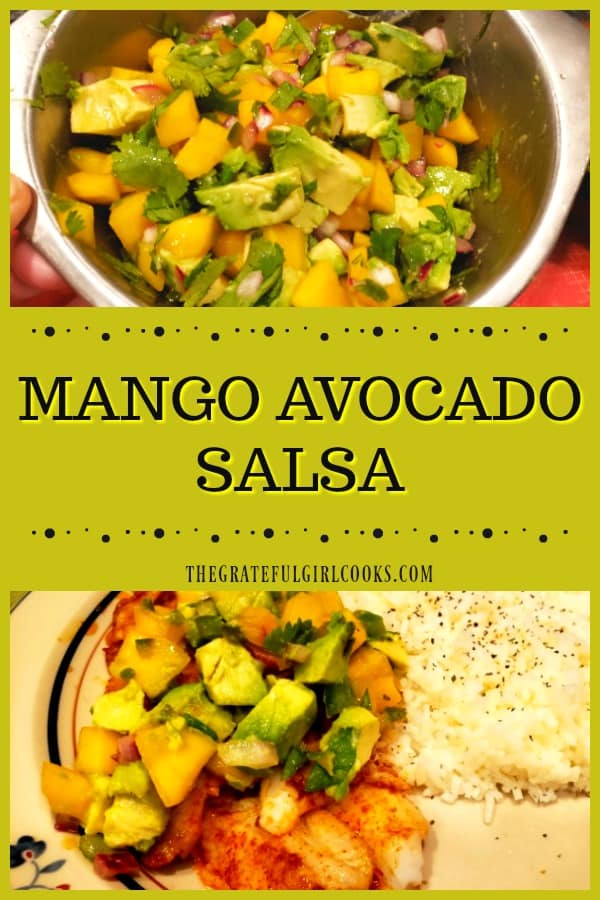
Make delicious mango avocado salsa in 10 minutes! It’s a perfect topping for fish, chicken & pork, or can be served as an appetizer w/ tortilla chips!
Make delicious mango avocado salsa in 10 minutes! It's a perfect topping for fish, chicken & pork, or can be served as an appetizer w/ tortilla chips!

Do you enjoy salsa? We sure do! I always keep jars of home canned salsa in our pantry, including traditional salsa and peach salsa. It’s also very easy to whip up a batch of fresh peach salsa in the summer for a quick appetizer, when peaches are ripe and plentiful.

If you have never tried fresh mango avocado salsa, then hopefully this post will show you how easy it is to make, in just under 10 minutes! This salsa tastes wonderful as an appetizer or snack (served with crunchy tortilla chips!). It also is fantastic as a topping for chicken, fish and pork, because it adds so much flavor to the meat! Here’s how to make it:

Scroll Down For A Printable Recipe Card At The Bottom Of The Page

Prepare The Mango For The Salsa

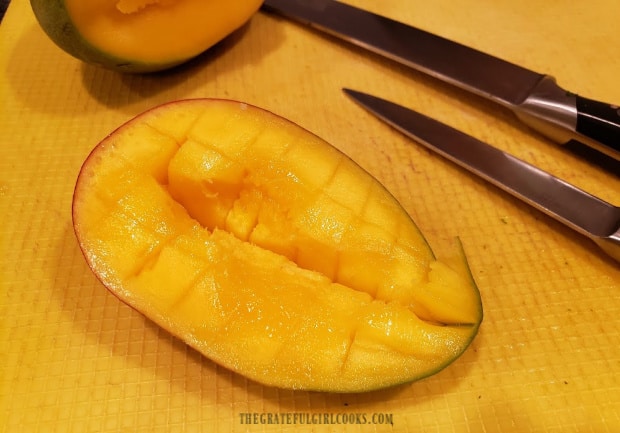
If you have never cubed a fresh mango before, have no fear… it’s easier than you might think! There is a huge pit (seed) in the middle of a mango, so you will not be able to cut straight through the middle. Instead, slice the mango from top to bottom on all sides of the pit.

Once that is done, take a sharp paring knife and make gridline cuts from top to bottom on each mango section, and side to side, forming small cubes. Be careful not to cut all the way through the peel (or your fingers).

Mango is sliced into cubes before adding them to salsa.

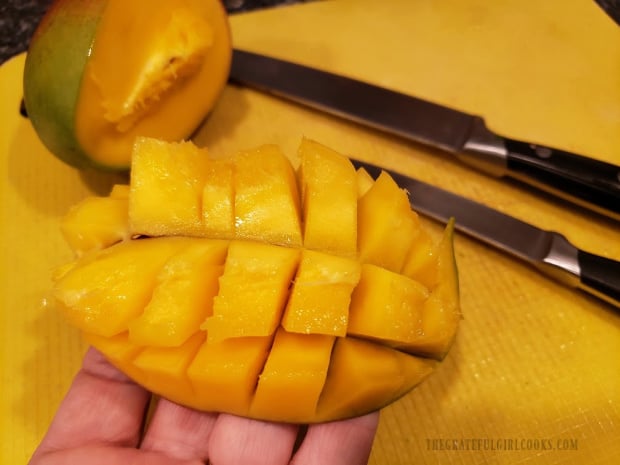
Repeat with all sections. To remove the cubes easily from the mango peel, use your hands to hold both ends of the section and “flip”, pushing up from the bottom peel in the middle, until the mango cubes are fully exposed (see photo below).

Run a knife along the bottom of the cubes, along the peel to cut them away. Repeat this until all sections of the mango are cubed and cut away from the fruit. See the huge pit in the mango, seen below in the upper left corner?

The mango is flipped to expose the cubes, and then they are cut away from the peel.

Prepare The Mango Avocado Salsa

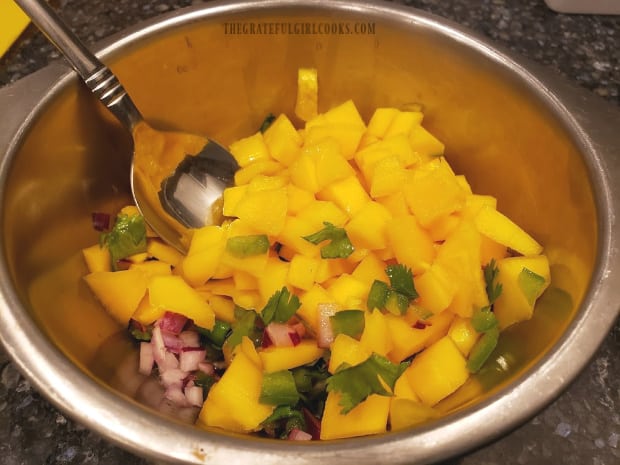
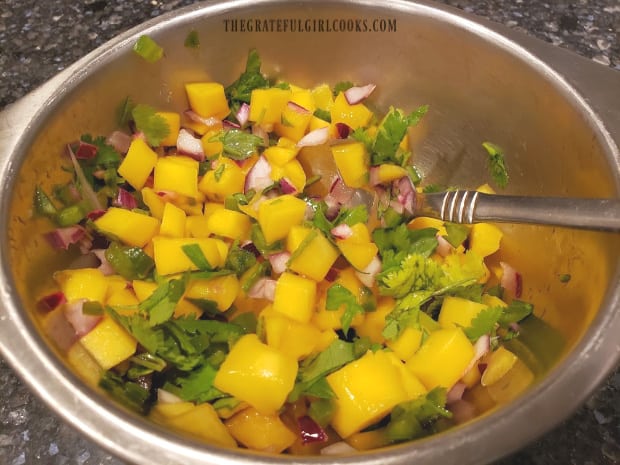
Place chopped cilantro, red onion, and a finely chopped jalapeno (seeds removed) into a medium mixing bowl. Squeeze the juice of half of a large lime into the mixture. Add the cubed mango and stir to combine. NOTE: If you will be making this mango avocado salsa several hours ahead of serving time, cover and refrigerate (without adding the avocado) until just before serving!

Salsa ingredients are stirred together before adding the avocado.Cilantro, red onion, mango, jalapeno and lime juice are mixed together for salsa.

Add Avocado Just Before Serving!

Right before serving, cut and cube the avocado. The avocado is best cut and cubed at this point because, it will have less time to turn brown in the salsa.

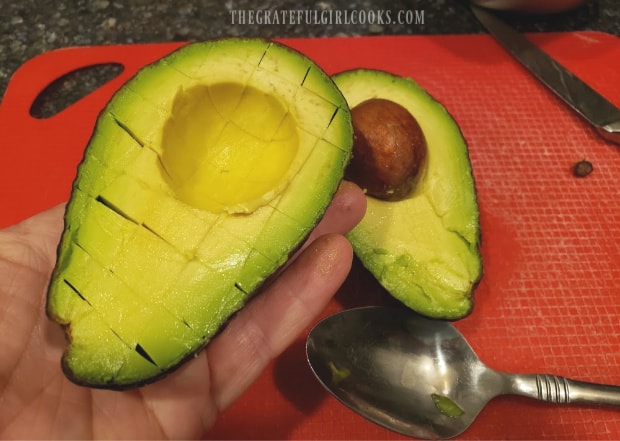
Cubing the avocado is done almost the same way as the mango. Slice the avocado in half, and remove the seed. Slice from top to bottom and side to side in small gridline cubes, without cutting all the way through the peel.

Avocados are halved, then cut into cubes to add to the salsa.

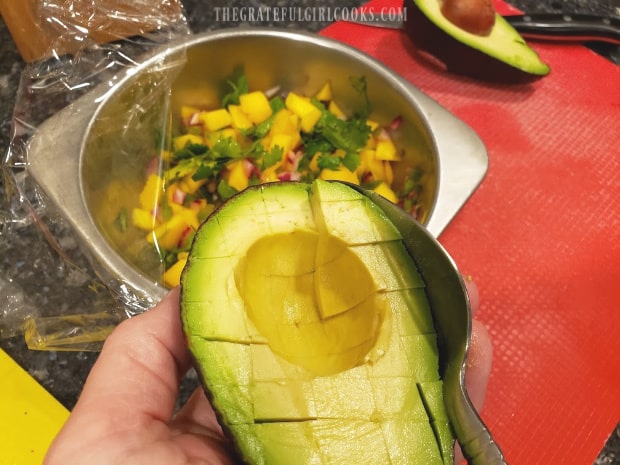
Take a large spoon and guide it all along the the inside of the avocado peel, which will remove the cubes easily. You can place the chunks of avocado directly into the bowl with the rest of the mango avocado salsa!

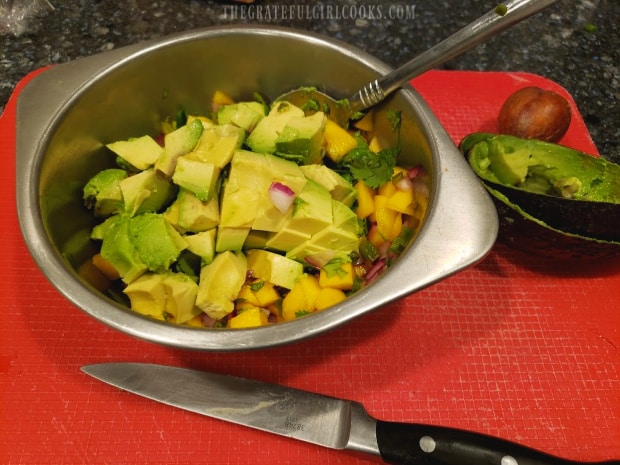
Once all avocado cubes have been added, gently stir the mango avocado salsa to combine ingredients. Ta Da! You just made a really great tasting salsa.

Once cubed, a spoon is used to remove the cubes from the avocado.Ingredients for the mango avocado salsa are gently combined before serving.

Serving Mango Avocado Salsa

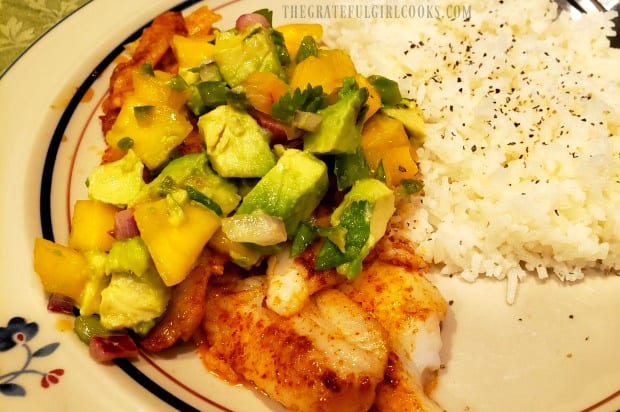
You’re now ready to serve the salsa! Enjoy it with crisp tortilla chips to your heart’s content OR use it to top a nice piece of grilled chicken, fish or pork! The creamy avocado and the sweet mango (and other ingredients) add so much flavor to dishes like this seafood dish below (Dover Sole).

The mango avocado salsa is used as a topping for grilled fish fillets.

I truly hope you will have the opportunity to make this delicious salsa for those you love. It’s fresh, tastes delicious, can be doubled easily, and is super easy to make!  Have a wonderful day! Don’t forget to check out ALL my recipes in the Recipe Index, located at the top of the page. Thanks for stopping by, and come back soon.

Interested In More Recipes?

Thank you for visiting this website. I appreciate you using some of your valuable time to do soIf you’re interested, I publish a newsletter 2 times per month (1st and 15th) with all the latest recipes, and other fun info. I would be honored to have you join our growing list of subscribers, so you never miss a great recipe!
There is a Newsletter subscription box on the top right side (or bottom) of each blog post, depending on the device you use, where you can easily submit your e-mail address (only) to be included in my mailing list.

You Can Also Find Me On Social Media:

Facebook page: The Grateful Girl Cooks!
Pinterest:
The Grateful Girl Cooks!
Instagram:
jbatthegratefulgirlcooks

Author's signature

0 from 0 votes
Mango Avocado Salsa
Prep Time
10 mins
Cook Time
0 mins
Total Time
10 mins
 

Make delicious mango avocado salsa in 10 minutes! It's a perfect topping for fish, chicken & pork, or can be served as an appetizer w/ tortilla chips!

Category: Appetizer, Topping
Cuisine: American
Keyword: mango avocado salsa
Servings: 4
Calories Per Serving: 112 kcal
Author: JB @ The Grateful Girl Cooks!
Ingredients
  • 1 large mango , cut into cubes
  • cup cilantro , chopped
  • ¼ cup red onion , chopped
  • ¼ cup fresh jalapeno , seeds removed and finely chopped
  • ½ large lime (juice of)
  • 1 large avocado , cut into cubes
Instructions
  1. Place peeled and cubed mango, chopped cilantro, red onion, and jalapeno in a medium sized mixing bowl. Squeeze the juice of half of a large lime over the ingredients and stir to combine.

    NOTE: If preparing this salsa a few hours before using it, cover and refrigerate the salsa at this point (without adding the avocado).

  2. Just before you plan to serve the salsa, add the avocado cubes, and "gently" stir, to combine salsa ingredients. Serve, and enjoy, as an appetizer or as a topping for various main dishes!

Tips For Cubing Mango and Avocado:
  1. Mango: Cut from top to bottom on all sides of the pit. Take a sharp paring knife and make cuts from top to bottom, and side to side, forming small cubes. Be careful not to cut all the way through the peel. Repeat with all sections. To remove the cubes easily from the mango peel, use your hands to hold both ends of the section and "flip", pushing up from the bottom peel in the middle, until the mango cubes are fully exposed. Run a knife along the bottom of the cubes, along the peel to cut them away. Repeat this until all sections of the mango are cubed and cut away from the fruit.

  2. Avocado: Slice the avocado in half, and remove the seed. Slice from top to bottom and side to side, in small cubes, without cutting all the way through the peel. Take a large spoon and guide it all along the the inside of the avocado peel, which will remove the cubes easily.

Nutrition Facts
Mango Avocado Salsa
Amount Per Serving (1 (1/4 of total))
Calories 112 Calories from Fat 72
% Daily Value*
Fat 8g12%
Saturated Fat 1g6%
Sodium 5mg0%
Potassium 342mg10%
Carbohydrates 12g4%
Fiber 4g17%
Sugar 7g8%
Protein 2g4%
Vitamin A 670IU13%
Vitamin C 29mg35%
Calcium 11mg1%
Iron 1mg6%
* Percent Daily Values are based on a 2000 calorie diet.

Here’s one more to pin on your Pinterest boards!Make delicious mango avocado salsa in 10 minutes! It's a perfect topping for fish, chicken & pork, or can be served as an appetizer w/ tortilla chips!

Wild Rice Salad in Pumpkin Vinaigrette

Enjoy this wild rice salad, with dried cranberries, cauliflower, green onions, and toasted pecans, seasoned with an easily made pumpkin vinaigrette!

Do you enjoy chilled rice salads? The only time in my life I’ve ever had a rice salad was on a houseboating adventure about 20 years ago with another family and we were served one with dinner! I remember it well, because it was so good!

Fast forward to THIS rice salad, which comes from a recipe I stumbled upon while looking through some old cookbooks of mine. Wild rice salad in pumpkin vinaigrette sounded very interesting to me, so I made it, with only a couple slight changes.

WOW! It is delicious, and very easy to make! Here’s how to make this great salad or side dish:

Scroll Down For A Printable Recipe Card At The Bottom Of The Page  

Prepare The Long Grain and Wild Rice

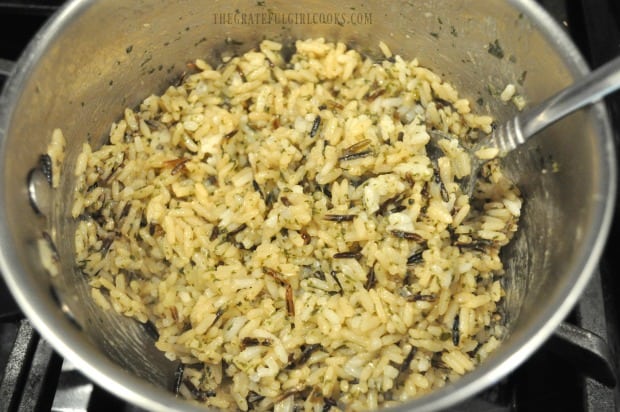
The rice is made using a long grain and wild rice boxed mix (4.35 ounce or 6 ounce box). I used a Rice-a-Roni Long Grain and Wild Rice box mix that came with the seasoning mix in the box. It is easily found in grocery stores nationwide.

Prepare the rice exactly according to the package directions, and then set it aside, once done, until it cools completely (approx. 25 minutes).

Wild rice is prepared according to box instructions.

Toast The Pecans While Rice Cools

While the rice is cooling, toast the chopped pecans. There are two ways to do this. Choose which method works best for you:

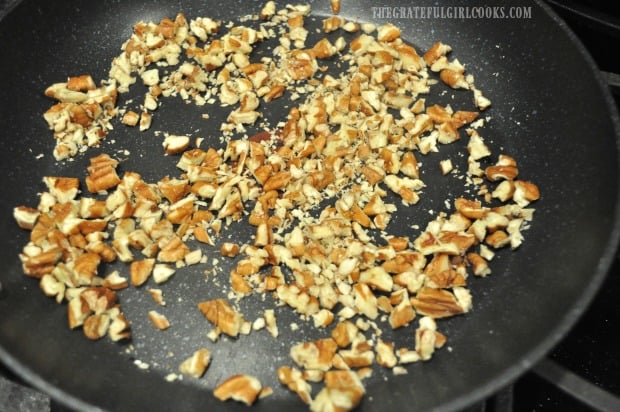
  • #1- Place chopped pecans in a dry skillet, and cook over low heat for 5-6 minutes, stirring often, until lightly toasted and fragrant. Remove from heat. Let cool.
  • #2- Lay chopped pecans in a single layer on baking sheet. Bake in 350° F oven for 8-10 minutes until lightly toasted and fragrant. Remove from heat. Let cool.

Pecans can be toasted in a skillet or in the oven.

Make The Pumpkin Vinaigrette For The Wild Rice Salad

While the rice is still cooling, whip up the easy to make pumpkin vinaigrette, which will dress the wild rice salad!

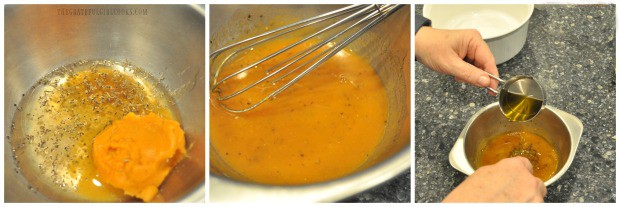
In a medium bowl, whisk together pumpkin puree, white wine vinegar, honey, salt, pepper, and dried thyme. Whisk until fully blended, and then slowly drizzle in the olive oil, while still whisking. Continue to whisk until all ingredients are fully blended and emulsified.

Preparing the pumpkin vinaigrette for the wild rice salad is easy!

Make The Wild Rice Salad

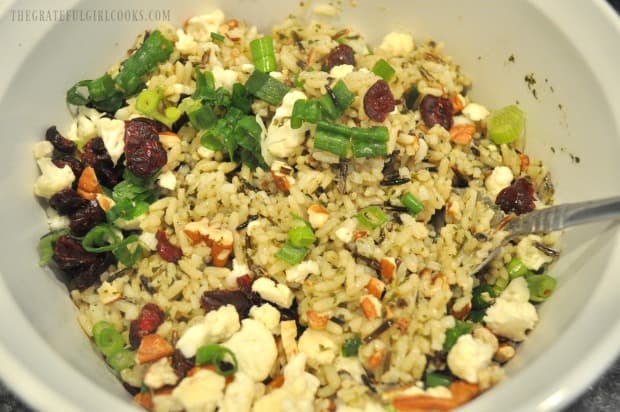
Place the cooled wild rice into a salad bowl. Add the toasted pecans, dried cranberries, cauliflower, and chopped green onions to the rice. Gently stir to combine.

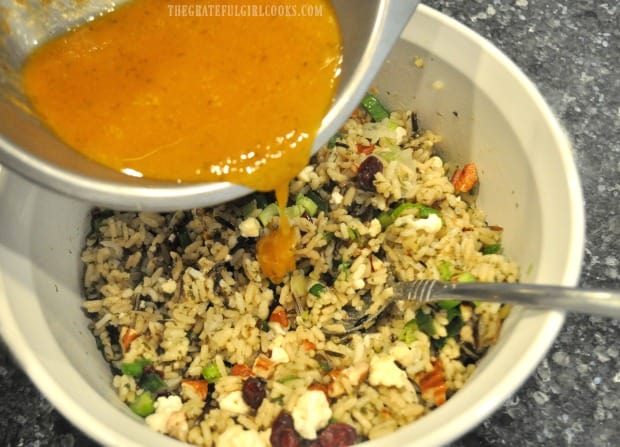
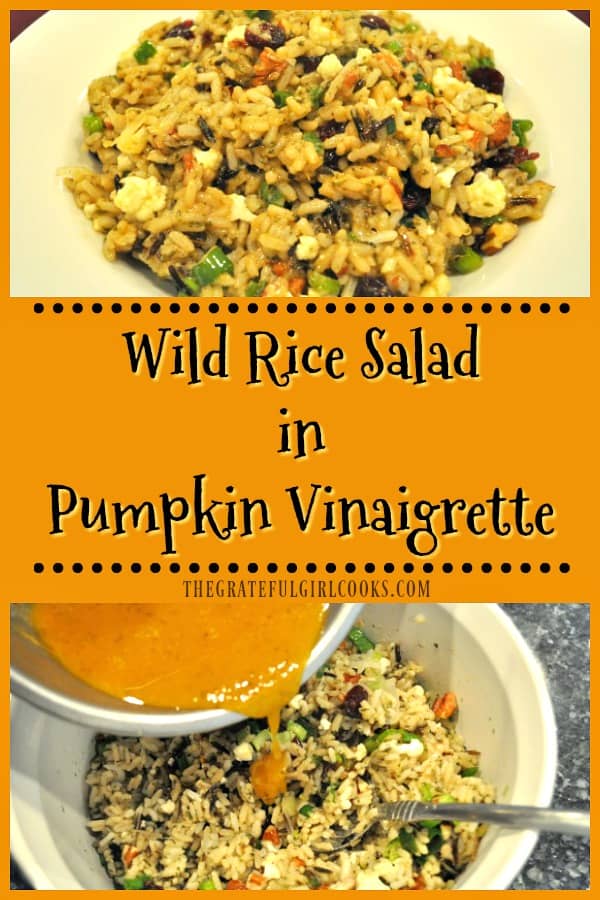
Pour all of the pumpkin vinaigrette over the salad, and gently stir well, to fully combine all the wild rice salad ingredients with the vinaigrette.

Cover the bowl with plastic wrap, and refrigerate for 2-3 hours. This allows time for the flavors in this salad to really intermingle for best taste!

Wild rice, pecans, green onions, cranberries and cauliflower are combined in bowl.The pumpkin vinaigrette is poured over the wild rice salad, then stirred in.

Serve The Wild Rice Salad in Pumpkin Vinaigrette

After the wild rice salad in pumpkin vinaigrette has been fully chilled, it is time to serve and enjoy it! Fluff the salad up a little bit with a fork, and it’s ready to serve!

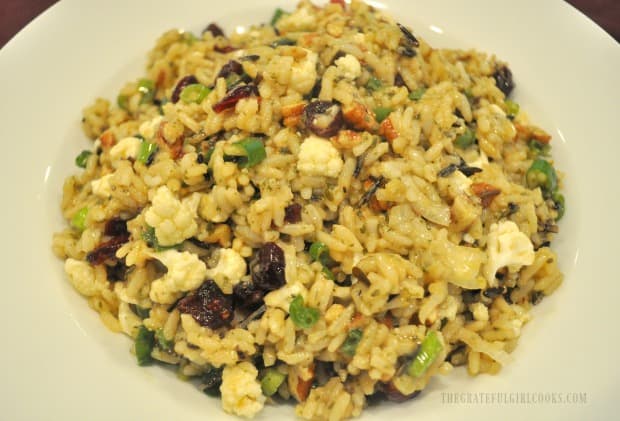
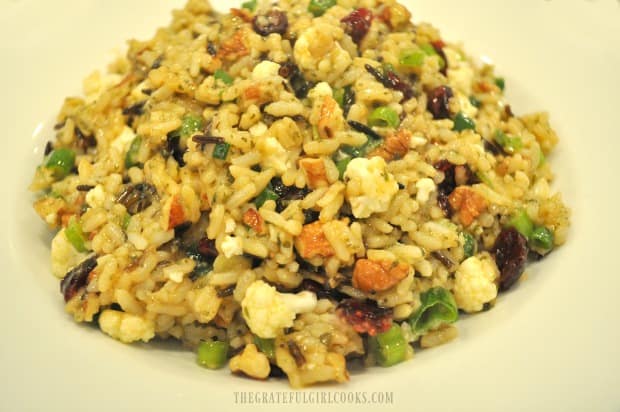
The wild rice salad is ready to eat!

All that is left to do is grab a fork… and dig in! I really think you will love this wild rice salad as much as we do! It’s delicious!

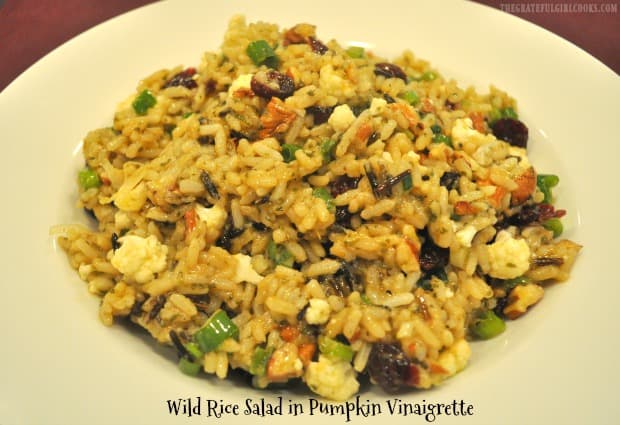
Crunchy toasted pecans, cauliflower, chewy dried cranberries and pumpkin vinaigrette combine to make a fantastic tasting wild rice salad you’ll be proud to serve!

Wild rice salad in pumpkin vinaigrette served in a white bowl.

We loved this salad, and enjoyed it for several days afterwards as leftovers! One of our sons stopped by for a visit, and he sampled it (many times-ha ha!), and loved it, as well.

Hope you will enjoy making and eating this delicious wild rice salad, too! Thanks for stopping by and please come back again soon for more family-friendly recipes. Take care, and have a great day.

Looking For More Recipes Featuring RICE?

You can find all of my recipes in the Recipe Index, located at the top of the page. A few you might enjoy include:

Want More Recipes? Get My FREE Newsletter!

I publish a newsletter 2 times per month (1st and 15th) with lots of recipes, tips, etc..
Would you like to join our growing list of subscribers?

There is a Newsletter subscription box on the top right (or bottom) of each blog post, depending on the device you use.
You can submit your e-mail address there, to be added to my mailing list.

Find Me On Social Media:

Facebook page: The Grateful Girl Cooks!
Pinterest:
The Grateful Girl Cooks!
Instagram:
jbatthegratefulgirlcooks

Author's signature

Original recipe source: “Southern Living 2009 Annual Recipes Cookbook”, published in 1999 by Oxmoor House, Inc., page 195.

↓↓ PRINTABLE RECIPE BELOW ↓↓

5 from 1 vote
Wild Rice Salad in Pumpkin Vinaigrette
Prep Time
30 mins
Cook Time
0 mins
Chilling Time (Inactive)
2 hrs
Total Time
2 hrs 30 mins
 

Enjoy this wild rice salad, with dried cranberries, cauliflower, green onions, and toasted pecans, seasoned with an easily made pumpkin vinaigrette!

Category: Salad/Side Dish
Cuisine: American
Keyword: wild rice salad
Servings: 8 (1/2 cup per serving)
Calories Per Serving: 223 kcal
Author: JB @ The Grateful Girl Cooks!
Ingredients
For Salad:
  • 4.35 ounce Long grain and wild rice mix (boxed mix w/ spices)
  • ½ cup chopped pecans , toasted
  • 1 cup cauliflower , chopped into tiny 1" florets
  • ½ cup dried cranberries
  • ¾ cup green onions , chopped
For Pumpkin Vinaigrette:
  • ¼ cup canned pumpkin puree (NOT pumpkin pie mix)
  • ¼ cup white wine vinegar
  • 1 Tablespoon honey
  • ½ teaspoon salt
  • ¼ teaspoon ground black pepper
  • ¼ teaspoon dried thyme
  • cup olive oil
Instructions
  1. Prepare the wild rice mix according to package directions, and set aside once done, until it cools completely (approx. 25 minutes).

  2. While the rice is cooling, toast the chopped pecans. There are two ways to do this:

    #1- Place chopped pecans in a dry skillet, and cook over low heat for 5-6 minutes, stirring often, until lightly toasted and fragrant. Remove from heat. Let cool.

    #2- Lay chopped pecans in a single layer on baking sheet. Bake in 350° F oven for 8-10 minutes until lightly toasted and fragrant. Remove from heat. Let cool.

  3. While rice is still cooling, make the vinaigrette. In a medium bowl, whisk together pumpkin puree, white wine vinegar, honey, salt, pepper, and dried thyme. Whisk until fully blended, and then slowly drizzle in the olive oil, while still whisking. Continue to whisk until all ingredients are fully blended and emulsified.

  4. Place cooled wild rice into a salad bowl. Add pecans, cranberries, cauliflower, and green onions. Gently stir to combine. Pour all of the pumpkin vinaigrette over the salad. Gently stir , to fully combine all salad ingredients with vinaigrette. Cover bowl with plastic wrap, and refrigerate for 2-3 hours. This refrigeration allows time for the flavors in salad to really intermingle for best taste! After refrigerating, fluff the salad up with a fork, and serve. Enjoy chilled OR at room temp!

Nutrition Facts
Wild Rice Salad in Pumpkin Vinaigrette
Amount Per Serving (1 (1/2 cup per serving))
Calories 223 Calories from Fat 126
% Daily Value*
Fat 14g22%
Saturated Fat 2g13%
Sodium 153mg7%
Potassium 173mg5%
Carbohydrates 23g8%
Fiber 3g13%
Sugar 8g9%
Protein 3g6%
Vitamin A 1285IU26%
Vitamin C 8mg10%
Calcium 19mg2%
Iron 1mg6%
* Percent Daily Values are based on a 2000 calorie diet.

Here’s one more to pin on your Pinterest boards!Enjoy this wild rice salad, with dried cranberries, cauliflower, green onions, and toasted pecans, seasoned with an easily made pumpkin vinaigrette!

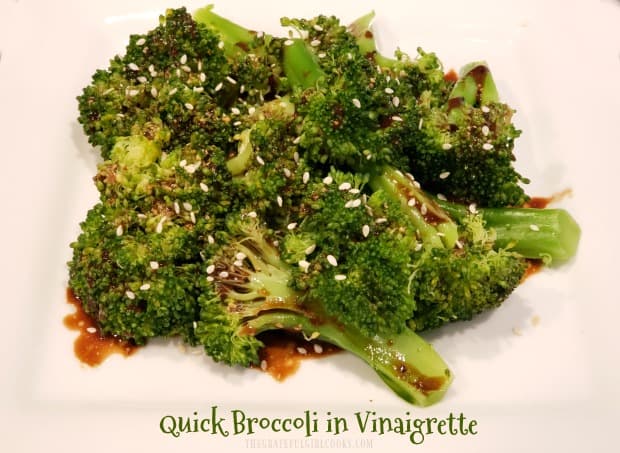
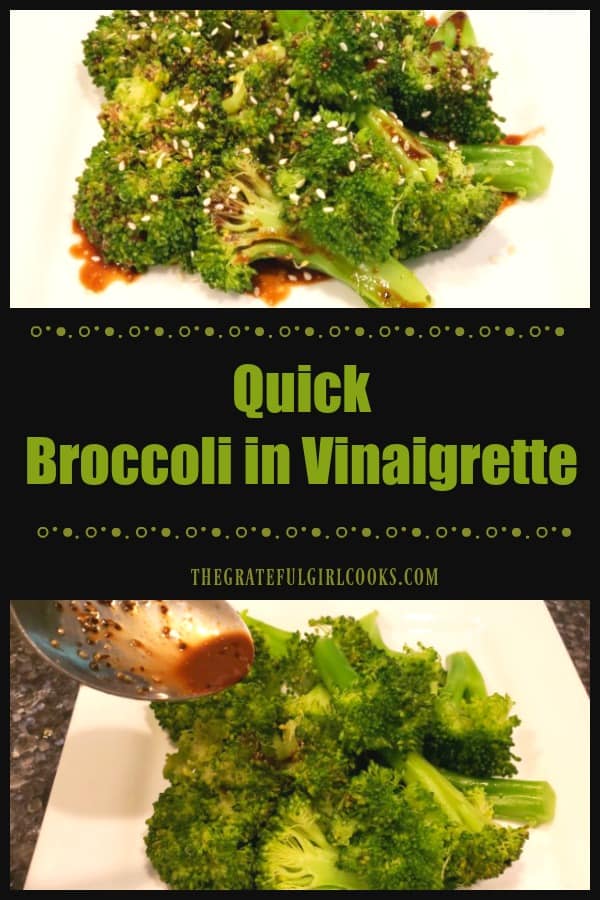
Quick Broccoli in Vinaigrette

Quick broccoli in vinaigrette is a fast, easy way to serve a tasty veggie side dish! Enjoy steamed broccoli, drizzled with a tangy balsamic dressing.

Do you ever get tired of the same old vegetable side dishes, and long for something that’s not too difficult to make, but tastes good? I do, so when I saw this recipe for quick broccoli in vinaigrette in a really old “Cooking Light” cookbook, I knew I had to give it a try!

This recipe is so incredibly easy! Broccoli spears are steamed, and then are enhanced, flavor-wise, by topping them with a homemade balsamic vinaigrette. The vinaigrette only takes a few minutes to whip up, with very common ingredients. The tangy addition of this vinaigrette imparts unique flavor to otherwise “routine” broccoli!

Scroll Down For A Printable Recipe Card At the Bottom Of The Page

Making A Dressing For The Broccoli in Vinaigrette Is EASY!

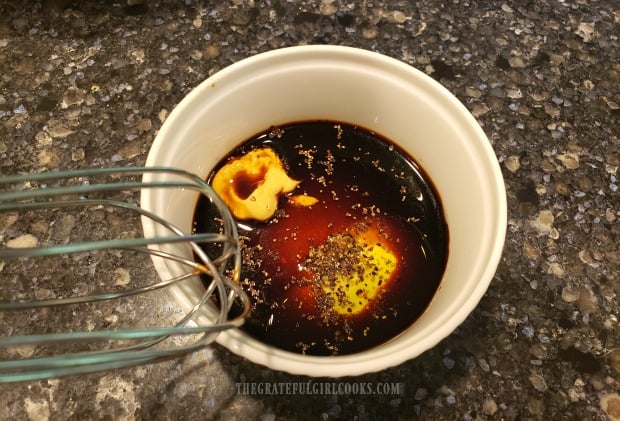
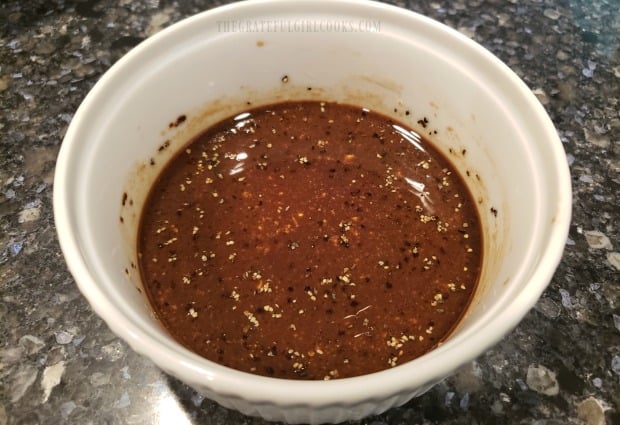
To make the easy vinaigrette, measure balsamic vinegar, dijon mustard, olive oil, salt and pepper into a small bowl. Use a whisk or a fork to blend these ingredients together, until completely blended. Set vinaigrette aside while you steam the broccoli.

Ingredients for balsamic dressing in small bowl.The balsamic vinaigrette which will be drizzled over the steamed vegetable.

Prepare The Broccoli

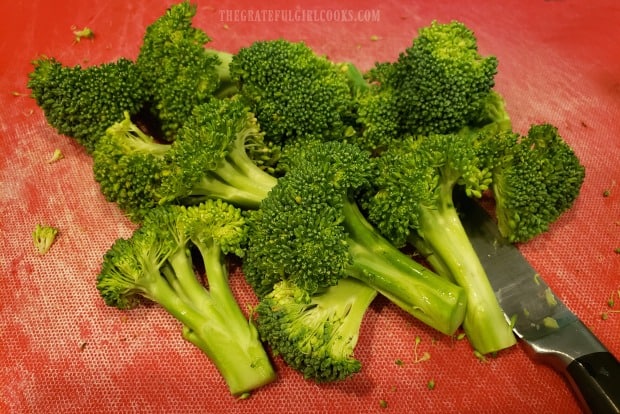
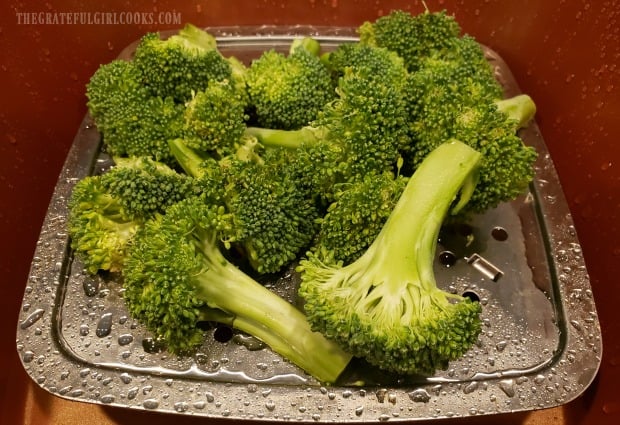
Trim the leaves, and cut off the really tough ends of the broccoli. Give the broccoli a quick rinse, then cut the broccoli into spears. Place the broccoli spears into a steamer basket or rack, and steam (covered) over boiling water for 5 minutes. When done, the broccoli should be crisp/tender in texture.

NOTE: My photos only show HALF of the broccoli the recipe calls for – only my hubby and I were going to eat this! The recipe (as written in the printable recipe card at the bottom) will serve 6.

Broccoli is cleaned, then cut into long spears before cooking.The spears are steamed on a rack over water, in a saucepan.

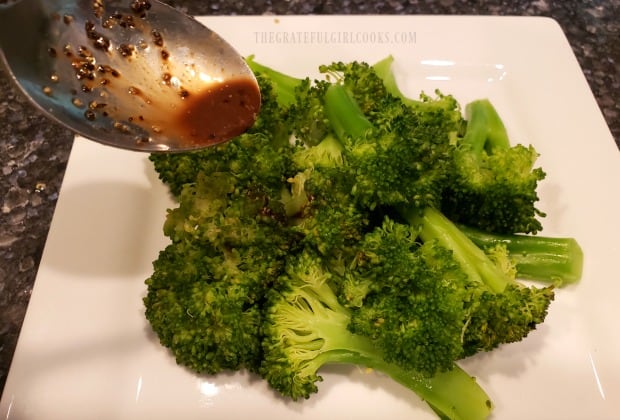
Immediately transfer the steamed broccoli out of the steamer and onto a serving plate. Drizzle the broccoli spears with the balsamic vinaigrette, using all of it.

The balsamic vinaigrette is drizzled over the steamed broccoli.

Serve The Quick Broccoli in Vinaigrette

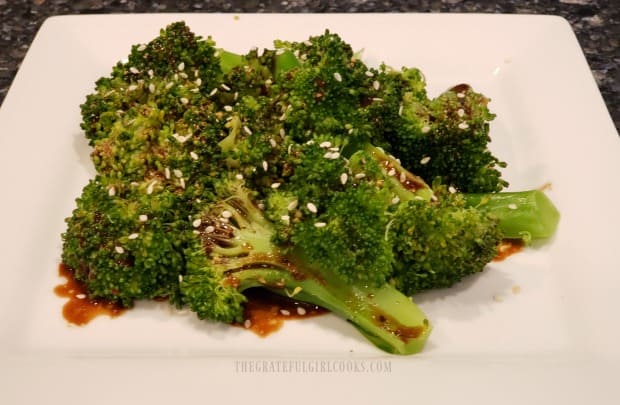
Sprinkle the broccoli with white sesame seeds for garnish, if desired. Serve the broccoli in vinaigrette immediately. Hope you enjoy it!

Quick broccoli in vinaigrette is garnished with sesame seeds before serving.Tangy balsamic dressing adds flavor to the cooked broccoli spears.

I hope you will consider trying this totally EASY vegetable side dish! If you enjoy broccoli like we do, be sure to check out my recipes for Broccoli Salad, Bacon Broccoli Quiche, and Broccoli Cauliflower Bake! Have a GREAT day!

Looking For More VEGGIE SIDE DISH Recipes?

You can find all of my veggie side dish recipes in the Recipe Index, located at the top of the page. A few you might enjoy include:

Interested In More Recipes?

Thank you for visiting this website. I appreciate you using some of your valuable time to do soIf you’re interested, I publish a newsletter 2 times per month (1st and 15th) with all the latest recipes, and other fun info. I would be honored to have you join our growing list of subscribers, so you never miss a great recipe!
There is a Newsletter subscription box on the top right side (or bottom) of each blog post, depending on the device you use, where you can easily submit your e-mail address (only) to be included in my mailing list.

You Can Also Find Me On Social Media:
Facebook page: The Grateful Girl Cooks!
Pinterest: The Grateful Girl Cooks!
Instagram: jbatthegratefulgirlcooks

Author's signature

Original recipe source: “Cooking Light 1994 Cookbook”, published by Oxmoor House, Inc., 1993, page 49

0 from 0 votes
Quick Broccoli in Vinaigrette
Prep Time
10 mins
Cook Time
5 mins
Total Time
15 mins
 

Quick broccoli in vinaigrette is a fast, easy way to serve a tasty veggie side dish! Enjoy steamed broccoli, drizzled with a tangy balsamic dressing.

Category: Side Dish, Vegetable Dish
Cuisine: American
Keyword: broccoli in vinaigrette
Servings: 6
Calories Per Serving: 55 kcal
Author: JB @ The Grateful Girl Cooks!
Ingredients
  • pounds fresh broccoli
  • 2 Tablespoons balsamic vinegar
  • 1 teaspoon dijon mustard
  • ½ teaspoon olive oil
  • ¼ teaspoon ground black pepper
  • teaspoon salt
  • 1 Tablespoon sesame seeds (optional, for garnish)
Instructions
  1. To make vinaigrette, measure balsamic vinegar, dijon mustard, olive oil, salt and pepper into a small bowl. Use a whisk or a fork to blend ingredients together, until completely blended. Set vinaigrette aside while you steam broccoli.

  2. Trim the leaves, and cut off really tough ends of the broccoli. Give broccoli a quick rinse, then cut into spears. Place broccoli spears into a steamer basket or rack, and steam (covered) over boiling water for 5 minutes. When done, the broccoli should be crisp/tender in texture.

  3. Immediately transfer the steamed broccoli out of steamer and onto a serving plate. Drizzle the broccoli spears with the balsamic vinaigrette, using all of it. Sprinkle with sesame seeds, if using. Serve hot, and enjoy!

Nutrition Facts
Quick Broccoli in Vinaigrette
Amount Per Serving (1 g)
Calories 55 Calories from Fat 9
% Daily Value*
Fat 1g2%
Saturated Fat 1g6%
Sodium 97mg4%
Potassium 371mg11%
Carbohydrates 9g3%
Fiber 3g13%
Sugar 3g3%
Protein 4g8%
Vitamin A 706IU14%
Vitamin C 101mg122%
Calcium 66mg7%
Iron 1mg6%
* Percent Daily Values are based on a 2000 calorie diet.

Here’s one more to pin on your Pinterest boards!Quick broccoli in vinaigrette is a fast, easy way to serve a tasty veggie side dish! Enjoy steamed broccoli, drizzled with a tangy balsamic dressing.

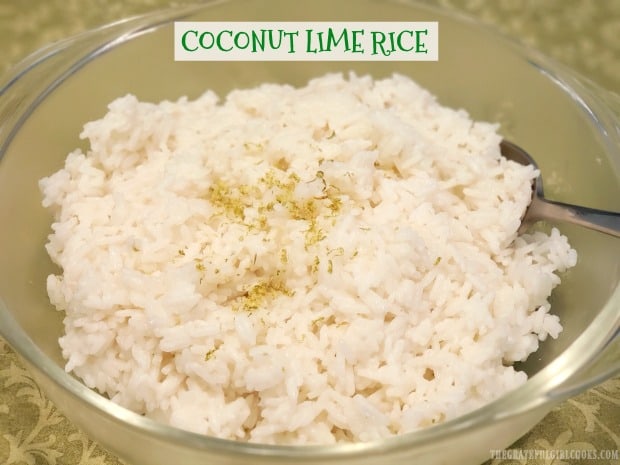
Coconut Lime Rice

It’s easy to make coconut lime rice! Jasmine rice is cooked in coconut milk, w/ lime juice & zest. A tasty side dish for chicken, fish, pork & steak!
It's easy to make coconut lime rice! Jasmine rice is cooked in coconut milk, w/ lime juice & zest. A tasty side dish for chicken, fish, pork & steak!

Do you enjoy eating RICE? We do, and enjoy it often with our meals. Have you ever tried COCONUT LIME RICE? If you haven’t tried this delicious “Asian-inspired” side dish, I am sharing this easy recipe (from one of my OLD cookbooks), so you can whip some up for your next dinner!

Jasmine rice is cooked in light coconut milk (canned) until all the coconut milk is absorbed into the rice, giving it a very mild coconut taste and a creamy texture. Once cooked, the flavor of this long grain rice is enhanced by adding fresh lime juice and lime zest. That’s it!

The resulting coconut lime rice is very mild in flavor, and pairs perfectly with chicken, fish or pork! You lightly taste coconut and lime in the rice, but it is not an “in your face” hard-hitting flavor. Here’s how easy it is to make:

Scroll Down For A Printable Recipe Card At the Bottom Of The Page

How To Make Coconut Lime Rice

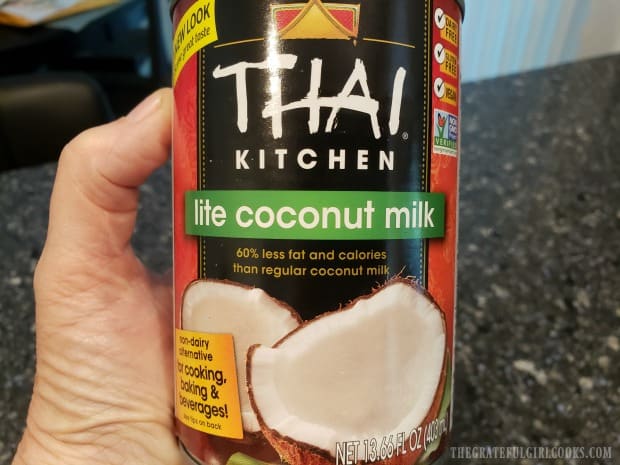
It’s important to use CANNED light coconut milk for this recipe. You can certainly use regular canned coconut milk, but that has a LOT more calories, if counting! Below is a photo of the kind I use to make this recipe (just so you can “eyeball” it!). It is usually found in the Asian foods section of the grocery store.

Canned coconut milk (light) is used for this dish.

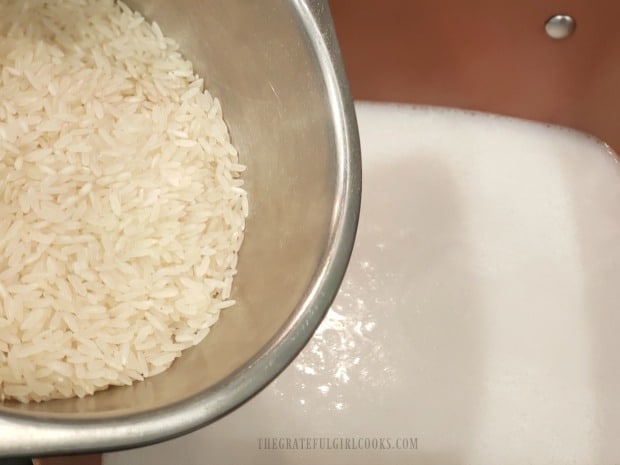
Measure the canned coconut milk, water and salt into a medium saucepan (that has a lid). Bring this liquid to a boil over MEDIUM heat. Add the jasmine rice, give it a stir, reduce the heat to LOW, and put a lid on the pan.

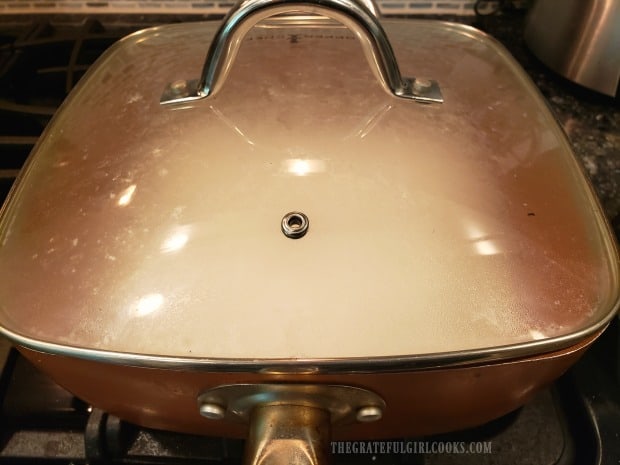
Jasmine rice is added to boiling coconut milk and water in pan.Pan is covered while rice cooks.

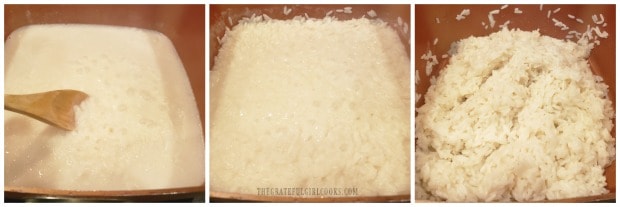
Let the rice simmer (covered) for 23-25 minutes on LOW heat, stirring occasionally. You can see in the collage of photos below, how the rice absorbs the coconut milk as it cooks.

Cook the rice until the liquid has been absorbed and the rice is tender and cooked through. When done, remove the pan from the heat.

The rice is stirred occasionally while it cooks and coconut milk is absorbed.

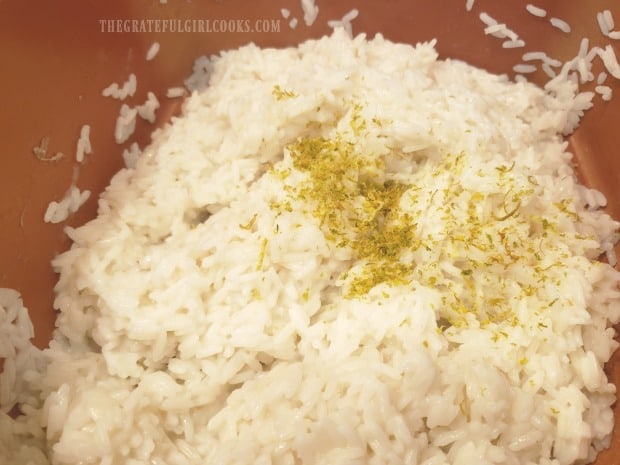
Add the fresh squeezed lime juice and lime zest to the rice, and stir, to combine ingredients.

Lime juice and zest are added to pan, and combined to make coconut lime rice!

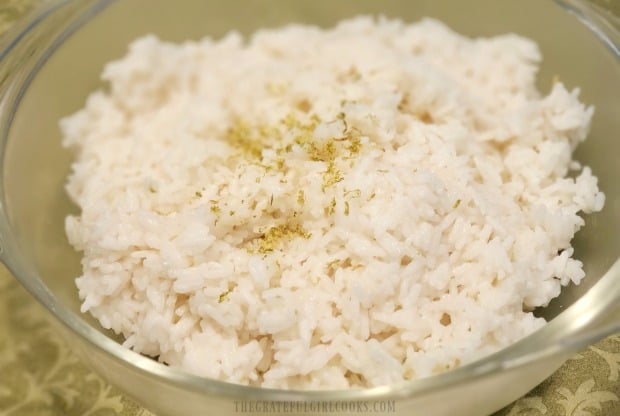
Transfer the coconut lime rice to a serving bowl (if desired), and serve while hot. We enjoyed this rice alongside some juicy grilled chicken breasts. YUM! The rice is delicious!

Time to serve the hot coconut lime rice with some chicken or shrimp on top!

See how easy it is to make coconut lime rice? Sometimes just a slight twist to making something as common as white rice, can lead to a new taste treat! Sure hope you will consider making this yummy side dish recipe for those you love. You might also want to check out my delicious recipe for Creamy Coconut Rice. Have a GREAT day!

Looking For More RICE Recipes?

You can find all of my recipes in the Recipe Index, located at the top of the page. A few side dish recipes (featuring rice) you might enjoy include:

Interested In More Recipes?

Thank you for visiting this website. I appreciate you using some of your valuable time to do soIf you’re interested, I publish a newsletter 2 times per month (1st and 15th) with all the latest recipes, and other fun info. I would be honored to have you join our growing list of subscribers, so you never miss a great recipe!
There is a Newsletter subscription box on the top right side (or bottom) of each blog post, depending on the device you use, where you can easily submit your e-mail address (only) to be included in my mailing list.

You Can Also Find Me On Social Media:
Facebook page: The Grateful Girl Cooks!
Pinterest: The Grateful Girl Cooks!
Instagram: jbatthegratefulgirlcooks

Author's signature

Recipe adapted slightly from: “Southern Living 2009 Annual Recipes” cookbook, published 2009, Oxmoor House, Inc., page 55

0 from 0 votes
Coconut Lime Rice
Prep Time
10 mins
Cook Time
25 mins
Total Time
35 mins
 

It's easy to make coconut lime rice! Jasmine rice is cooked in coconut milk, w/ lime juice & zest. A tasty side dish for chicken, fish, pork & steak!

Category: Side Dish
Cuisine: Asian
Keyword: coconut lime rice
Servings: 6 (1/2 cup servings)
Calories Per Serving: 198 kcal
Author: JB @ The Grateful Girl Cooks!
Ingredients
  • 1 cup canned light coconut milk
  • 2 cups water
  • ½ teaspoon salt
  • cups uncooked jasmine rice
  • 2 Tablespoons fresh lime juice
  • teaspoons lime zest (finely grated lime peel) , plus additional for garnish, if desired
Instructions
  1. Measure canned coconut milk, water and salt into a medium saucepan (that has a lid). Bring this liquid to a boil over MEDIUM heat. Add the jasmine rice, give it a good stir, reduce the heat to LOW, and put a lid on the pan.

  2. Let the rice simmer (covered) for 23-25 minutes on LOW heat, stirring occasionally. Cook rice until the liquid has been absorbed and the rice is tender and cooked through. When done, remove pan from the heat.

  3. Add fresh squeezed lime juice and lime zest to the rice, and stir, to combine ingredients. Transfer rice to serving bowl (if desired). Garnish with additional lime zest (if desired), and serve rice while hot. Enjoy!

Nutrition Facts
Coconut Lime Rice
Amount Per Serving (1 (half cup))
Calories 198 Calories from Fat 27
% Daily Value*
Fat 3g5%
Saturated Fat 2g13%
Sodium 224mg10%
Potassium 53mg2%
Carbohydrates 39g13%
Fiber 1g4%
Sugar 1g1%
Protein 3g6%
Vitamin C 2mg2%
Calcium 13mg1%
Iron 1mg6%
* Percent Daily Values are based on a 2000 calorie diet.

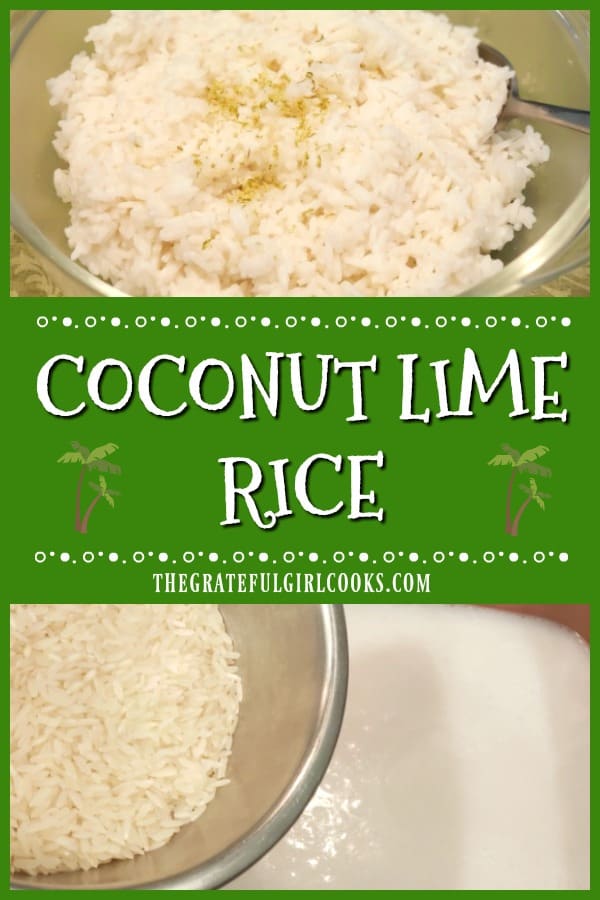
Here’s one more to pin on your Pinterest boards!It's easy to make coconut lime rice! Jasmine rice is cooked in coconut milk, w/ lime juice & zest. A tasty side dish for chicken, fish, pork & steak!

Grilled Pineapple with Brown Sugar & Cinnamon

Delicious grilled pineapple features fresh pineapple spears, brushed with a brown sugar, butter, honey & cinnamon glaze, & grilled until caramelized.

Have you ever had grilled pineapple? If you haven’t tried this simple side dish (or dessert), I would recommend it to you. Next time you prepare a family bbq, why not throw on a few skewers of this glazed fruit as an extra side dish? Let me show you how easy it is to make!

Scroll Down For A Printable Recipe Card At The Bottom Of The Page

Prepare The Pineapple

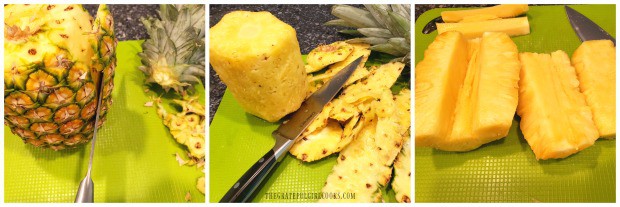
To prepare the pineapple for grilling, it needs to be peeled, cored and sliced into spears. To do this, first remove the top of the pineapple by twisting it off.

Cut off a slice from both ends of the pineapple and stand the pineapple up on one end. Place one hand on top of the pineapple to hold it steady, and use a sharp knife and slice the peel off. Slice from top to bottom, following the curve of the fruit. Continue around the outside until all peel is off. Remove any brown “eyes” left on the pineapple.

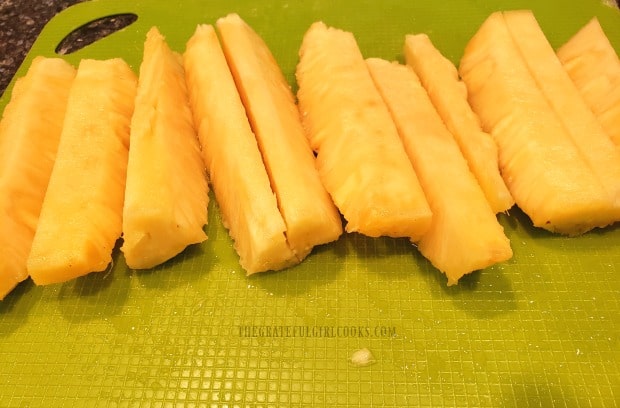
Slice the pineapple in half lengthwise, and remove core from the middle. Once the core is gone, slice the pineapple into spears, trying to get them all approximately the same size. Set the pineapple aside (we saved a couple pieces to eat fresh the next day!).

Peeling and slicing the fresh pineapple for grilling.The pineapple is cut into spears to be grilled.

Make A Brown Butter Glaze For The Grilled Pineapple

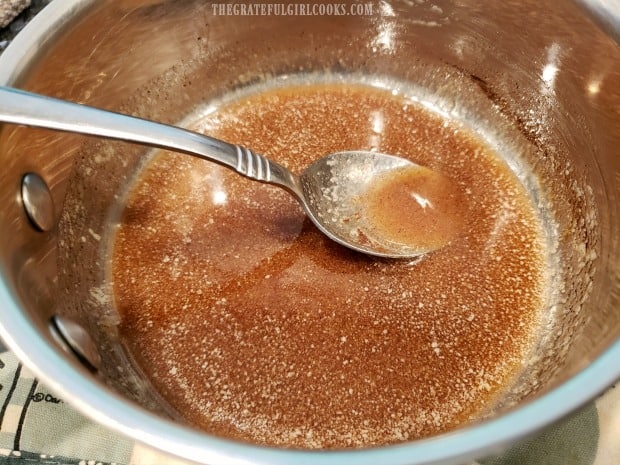
Now it’s time to make the simple brown sugar cinnamon glaze. Melt 1/4 cup of butter (4 Tablespoons) in a pan. Remove pan from stove, and stir in the brown sugar, vanilla extract, honey, and cinnamon.

A brown sugar, butter, honey & cinnamon glaze is mixed to brush onto the pineapple spears.

This Dish Can Also Be Made Entirely On The Stove!

NOTE: If you wish to make this grilled pineapple dish on the stove (without using a BBQ), simply follow the instructions I have provided in the printable recipe card (at bottom of post).

Make The Grilled Pineapple

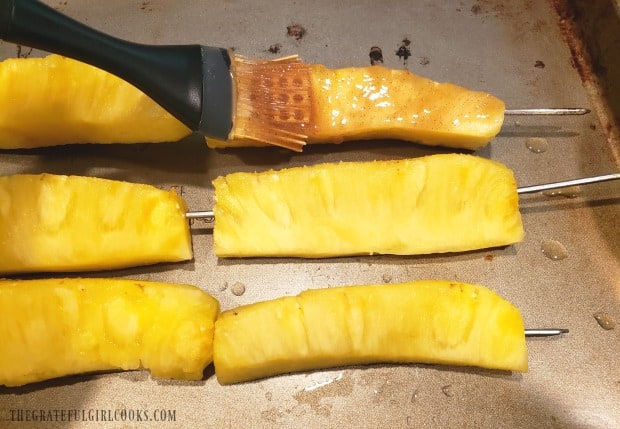
Thread the pineapple spears onto metal skewers, and place them on a baking sheet. TIP: You can use wood skewers, but they must be soaked for 1/2 hour in water first, so they don’t burn on the grill.

Brush the pineapple on all sides with the brown sugar cinnamon glaze. Use all of the glaze to coat the fruit well.

The brown sugar & cinnamon glaze is brushed onto pineapple spears before cooking.

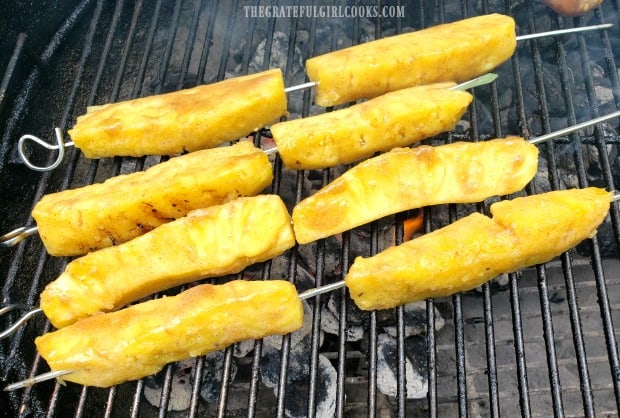
Place the pineapple skewers directly onto the grill grate over medium-high heat source. Cook the grilled pineapple for 5-10 minutes. Turn them to other side once or twice while grilling to ensure even heating and grill marks. We cooked the grilled pineapple right alongside some cheddar bacon brats we were having for dinner.

Grilled pineapple skewers cooking over hot coals.We cooked the pineapple on our BBQ with some brats!

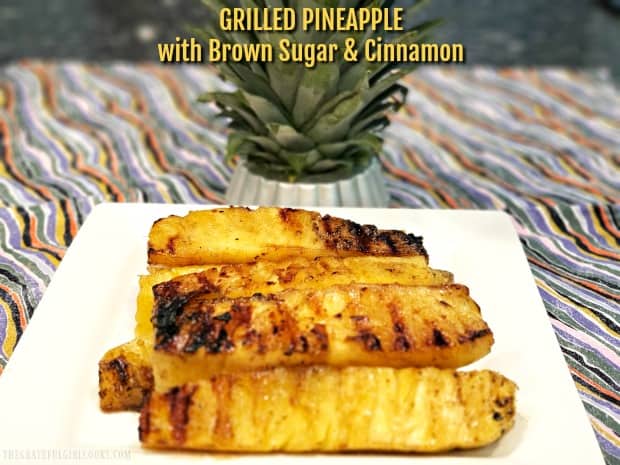
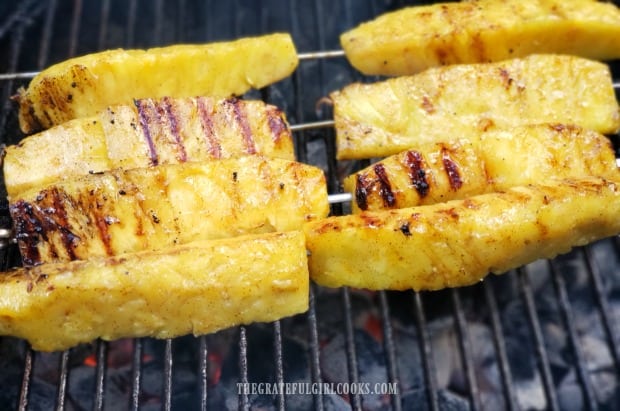
As the grilled pineapple cooks, the brown sugar cinnamon glaze caramelizes on the fruit. Once the pineapple has lightly browned, and is heated through, it is time to remove it from the grill.

Grill marks beginning to show up after pineapple spears are rotated on grill.

Serve The Grilled Pineapple!

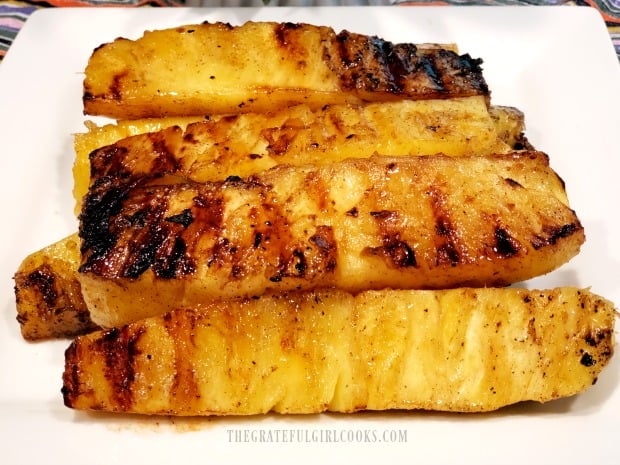
When ready to serve, carefully remove the grilled pineapple from the skewers and place onto a serving plate. The pineapple spears are now ready to serve as a delicious side dish!

If you are interested in serving this dish as a dessert, simply place a couple warm pineapple spears onto a plate or in a bowl. Top each portion with a scoop of vanilla ice cream, and dust with cinnamon! YUM!

A serving plate with the warm grilled pineapple spears, ready to eat!

Grilled pineapple with a brown sugar cinnamon glaze is a really easy and unique dish to serve to friends or family! The juicy, sweet pineapple is enhanced by the simple flavors of the glaze, and the slight smoky taste from the BBQ. Hope you will give this dish a try! Have a great day.

Looking For Other SIDE DISH Recipes To Grill?

You can find all of my recipes in the Recipe Index, located at the top of the page. A few side dishes you can throw on the grill include:

Interested In More Recipes?

Thank you for visiting this website. I appreciate you using some of your valuable time to do soIf you’re interested, I publish a newsletter 2 times per month (1st and 15th) with all the latest recipes, and other fun info. I would be honored to have you join our growing list of subscribers, so you never miss a great recipe!
There is a Newsletter subscription box on the top right side (or bottom) of each blog post, depending on the device you use, where you can easily submit your e-mail address (only) to be included in my mailing list.

You Can Also Find Me On Social Media:
Facebook page: The Grateful Girl Cooks!
Pinterest: The Grateful Girl Cooks!
Instagram: jbatthegratefulgirlcooks

Author's signature

Original recipe source: https://www.sixsistersstuff.com/recipe/grilled-caramelized-pineapple/

0 from 0 votes
Grilled Pineapple with Brown Sugar & Cinnamon
Prep Time
10 mins
Cook Time
8 mins
Total Time
18 mins
 

Delicious grilled pineapple features fresh pineapple spears, brushed with a brown sugar, butter, honey & cinnamon glaze, & grilled until caramelized.

Category: Fruit, Side Dish
Cuisine: American
Keyword: grilled pineapple
Servings: 4 (2 spears per serving)
Calories Per Serving: 128 kcal
Author: JB @ The Grateful Girl Cooks!
Ingredients
  • 1 large pineapple
  • ¼ cup butter (4 Tablespoons)
  • ¼ cup brown sugar (light or dark)
  • 1 Tablespoon honey
  • ½ teaspoon vanilla extract
  • ½ teaspoon ground cinnamon
Instructions
  1. Prepare Pineapple: Remove the top of the pineapple. Cut a slice from both ends of pineapple and stand it up on one end. Place one hand on top of pineapple to hold it steady; use a sharp knife and slice peel off, cutting from top to bottom, following the curve of the fruit. Continue around outside until all peel is off. Remove any brown "eyes" left on pineapple. Slice pineapple in half lengthwise, and remove core. Slice pineapple into spears, trying to get them all approximately the same size. Set aside.

  2. Make Glaze: Melt butter in a pan. Remove pan from heat, and stir in the brown sugar, vanilla extract, honey, and cinnamon until combined.

  3. Thread the pineapple spears onto metal skewers, and place them on a baking sheet. TIP: You can use wood skewers, but they must be soaked for 1/2 hour in water so they don't burn. Brush pineapple spears on all sides with the brown sugar cinnamon glaze. Use all the glaze to coat well.

  4. Place the pineapple skewers directly onto the grill grate over medium-high heat source. Cook the grilled pineapple for 5-10 minutes. Turn once or twice during grilling to ensure even heating and grill marks. When done, remove from heat; transfer pineapple from skewers to a plate, and serve.

IF MAKING ENTIRELY ON STOVE (NOT ON BBQ) :
  1. Prepare pineapple, but cut into bite sized pieces. Melt the butter in a large, non stick skillet, and add the pineapple. Pour the brown sugar glaze over the top, and then stir well, to ensure all the pineapple pieces are fully coated in glaze. Cook for 8-10 minutes total, stirring often (so it won't burn). When done, the pineapple should be well caramelized. Remove from heat, and serve.

Recipe Notes

NOTE: You can substitute canned pineapple rings, if desired. Drain well and pat dry BEFORE adding glaze. Do NOT put on skewers. Grill only 2-3 minutes per side, because they are thinner than pineapple spears and will cook a lot faster.

Nutrition Facts
Grilled Pineapple with Brown Sugar & Cinnamon
Amount Per Serving (2 g)
Calories 128 Calories from Fat 54
% Daily Value*
Fat 6g9%
Saturated Fat 4g25%
Cholesterol 15mg5%
Sodium 54mg2%
Potassium 102mg3%
Carbohydrates 20g7%
Fiber 1g4%
Sugar 17g19%
Protein 1g2%
Vitamin A 226IU5%
Vitamin C 41mg50%
Calcium 18mg2%
Iron 1mg6%
* Percent Daily Values are based on a 2000 calorie diet.

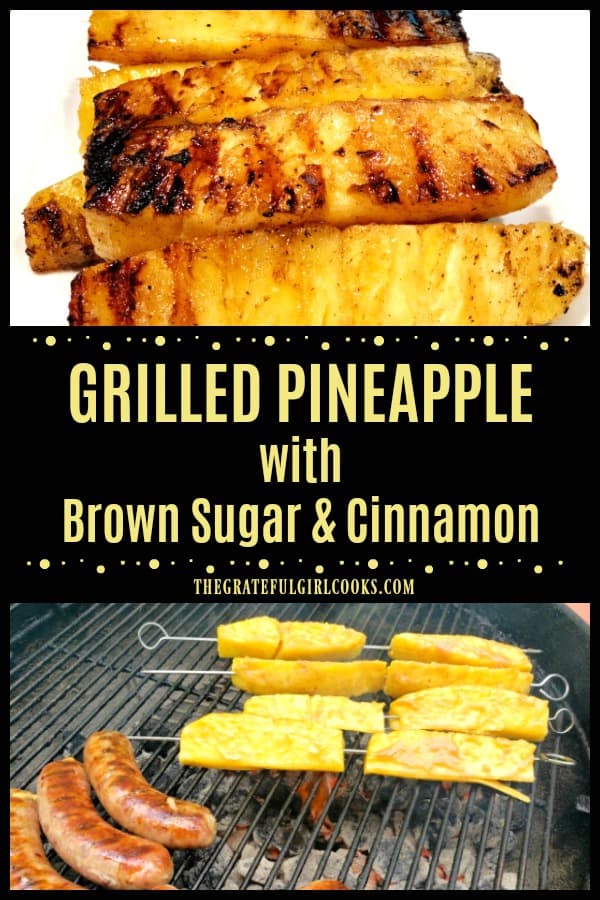
Here’s one more to pin on your Pinterest boards!Delicious grilled pineapple features fresh pineapple spears, brushed with a brown sugar, butter, honey & cinnamon glaze, & grilled until caramelized.

Greek Garbanzo Salad

Delicious Greek garbanzo salad, with kalamata olives, feta cheese, cucumbers, peppers & light dressing, is vegetarian, gluten-free, and super easy to make!
Delicious Greek garbanzo salad, with kalamata olives, feta cheese, cucumbers, peppers & light dressing, is vegetarian, gluten-free, and super easy!

Do you enjoy garbanzo beans? If you do, then you will love this absolutely yummy Greek garbanzo salad! This little legume (also called a chickpea) is a protein packed, and fiber filled super food in my book! This delicious salad can be served as a side salad OR as a meatless option for a main course.

Scroll Down For A Printable Recipe Card At The Bottom Of The Page

Other Salads Using Garbanzo Beans

Two other dishes I really enjoy using garbanzo beans in are Nanci’s 4-Bean Salad, and Lemony Chickpea Salad. They are so light, and flavorful, and I hope you will consider checking out these recipes, as well. Both of these salads take only minutes to pull together, so they are perfect, convenient dishes to prepare on busy days!

How To Make This Greek Garbanzo Salad

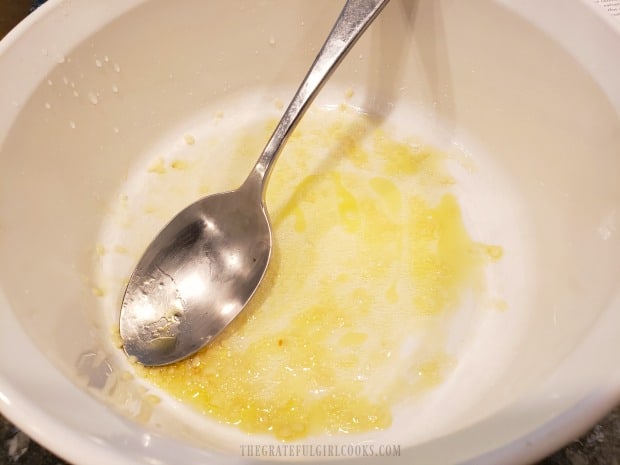
The first thing you need to do is prepare the (totally EASY) dressing for the Greek garbanzo salad. Place minced garlic, olive oil, lemon juice and a small amount of salt in a medium sized salad bowl, and mix until combined. See how easy that was?

Lemon juice, olive oil, salt and minced garlic are blended to make dressing for salad.

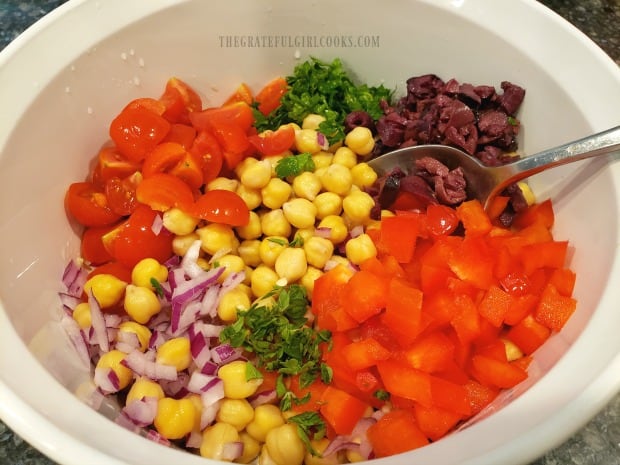
Add the drained garbanzo beans, bell peppers (orange or red), cherry tomatoes, red onion, kalamata olives, and fresh parsley and oregano (can substitute dried oregano).

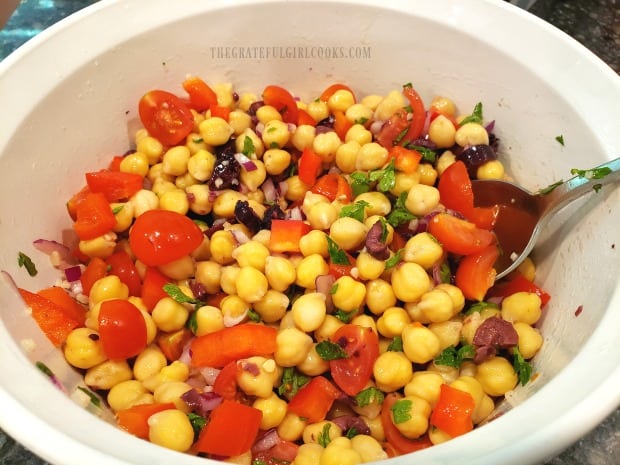
Give the ingredients a good stir, so they are fully combined with the dressing on the bottom of bowl. **Do not add the cucumber and feta cheese at this time, unless you are serving the salad right away.**

For Best Flavor, Let Salad Marinate In Refrigerator

For the very best flavor, I recommend placing the salad (covered) in the refrigerator for a couple hours minimum. This will give the salad a good chill, AND let the flavors mingle and get to know each other! You can even let the salad marinate overnight, if desired!

Tomatoes, bell peppers, garbanzo beans, red onion, kalamata olives & fresh herbs in bowl.The salad ingredients are mixed to coat with the lemon/olive oil dressing.

Before Serving The Greek Garbanzo Salad, Add Final Ingredients

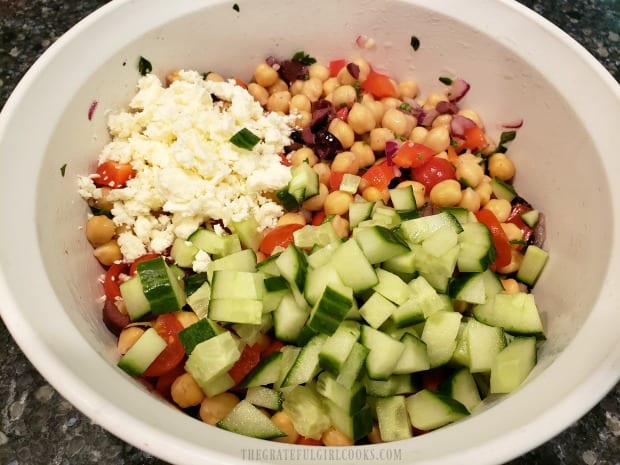
Right before you serve the salad, add the chopped cucumber (they should be nice and crunchy), and the crumbled feta cheese. Toss, to combine.

NOTE: I mixed both the feta and cucumbers into the Greek garbanzo salad, but you can also mix in the crunchy cucumbers, toss to combine, and then top the salad with the feta, if desired.

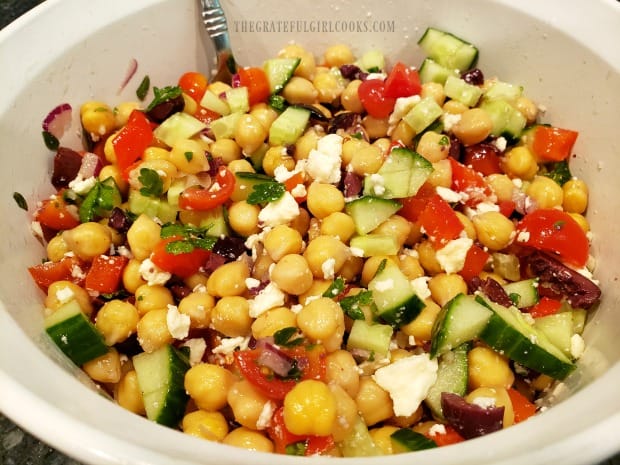
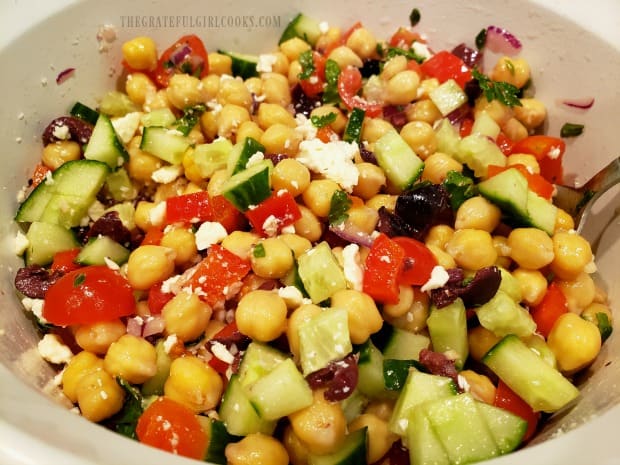
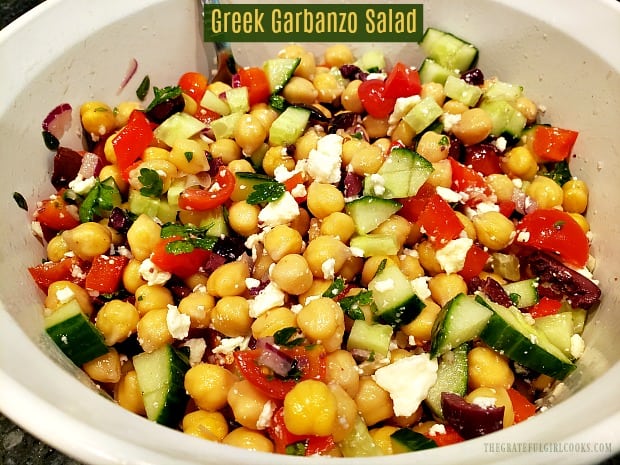
Feta cheese and diced cucumbers are added to the Greek garbanzo salad before serving.A bowl full of the Greek garbanzo salad, ready to eat!

Now you’re ready to serve this cool, crispy, colorful, and flavor-filled Greek garbanzo salad! The salad has a wonderful taste thanks in part to the feta cheese, simple lemon dressing and tangy kalamata olives. YUM!

Greek garbanzo salad is chilled, then served!

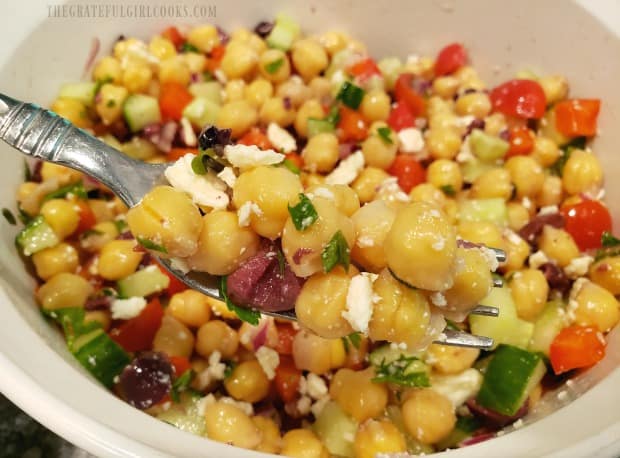
Here is a close up view (below) of a forkful of the Greek garbanzo salad… ready to eat! My husband and I loved this simple salad. Our grown son (a vegetarian) popped in for a visit, and tried this salad. He loved it, too!

A bite of the Greek garbanzo salad on a fork, ready to eat.

Hope you will consider trying this delicious Greek garbanzo salad. It truly is very good, and would be a perfect side dish to serve on a hot, summer evening! The salad will keep well for several days, covered in the refrigerator! Have a great day, friends.

Looking For More SALAD Recipes?

You can find ALL of my recipes in the Recipe Index, located at the top of the page. I have a nice variety of delicious salad recipes for you to enjoy, including:

Interested In More Recipes?

Thank you for visiting this website. I appreciate you using some of your valuable time to do soIf you’re interested, I publish a newsletter 2 times per month (1st and 15th) with all the latest recipes, and other fun info. I would be honored to have you join our growing list of subscribers, so you never miss a great recipe!
There is a Newsletter subscription box on the top right side (or bottom) of each blog post, depending on the device you use, where you can easily submit your e-mail address (only) to be included in my mailing list.

You Can Also Find Me On Social Media:
Facebook page: The Grateful Girl Cooks!
Pinterest: The Grateful Girl Cooks!
Instagram: jbatthegratefulgirlcooks

Author's signature

Original recipe source: “The Skinnytaste Cookbook”, by Gina Homolka, published 2014 by Clarkson-Potter Publishers, page 146.

0 from 0 votes
Greek Garbanzo Salad
Prep Time
15 mins
Cook Time
0 mins
Total Time
15 mins
 

Delicious Greek garbanzo salad, with kalamata olives, feta cheese, cucumbers, peppers & light dressing, is vegetarian, gluten-free, and super easy!

Category: Salad/Side Dish
Cuisine: Greek
Keyword: Greek Garbanzo Salad
Servings: 5 (1 cup servings)
Calories Per Serving: 141 kcal
Author: JB @ The Grateful Girl Cooks!
Ingredients
For Salad Dressing
  • 2 garlic cloves , minced
  • 3 Tablespoons lemon juice , fresh squeezed
  • 1 Tablespoon olive oil
  • ½ teaspoon salt
For Salad
  • 2 cups canned garbanzo beans (chickpeas) , rinsed and drained (gluten free)
  • 1 cup cherry tomatoes , quartered
  • ½ cup red (or orange) bell pepper , chopped
  • ¼ cup red onion , chopped
  • ¼ cup kalamata olives , pitted and chopped
  • 2 Tablespoons fresh parsley , chopped
  • ½ teaspoon fresh oregano leaves , chopped (OR 1/4 tsp. dried)
  • cups English cucumber , chopped ( or regular cucumber, seeded)
  • cup feta cheese , crumbled
Instructions
  1. Place minced garlic, olive oil, lemon juice and salt in a medium sized salad bowl, and mix together until combined.

  2. Add the drained garbanzo beans, bell peppers (orange or red), cherry tomatoes, red onion, kalamata olives, fresh parsley and oregano (can substitute dried oregano). Give the ingredients a good stir, so they are fully combined with the dressing on bottom of bowl. For the very best flavor, I recommend placing the salad (covered) in the refrigerator for a couple hours minimum. This will give the salad a good chill, AND let the flavors mingle and get to know each other! You can even let the salad marinate overnight, if desired!

  3. Right before you serve the salad, add in the chopped cucumber (it should be nice and crunchy!), and crumbled feta cheese, and toss to combine. NOTE: I mixed both the feta and cucumbers into the salad- you can also mix in the crunchy cucumbers, toss to combine, and then top the salad with the feta, if desired. Serve, and enjoy! Refrigerate any leftovers.

Nutrition Facts
Greek Garbanzo Salad
Amount Per Serving (1 cup)
Calories 141 Calories from Fat 63
% Daily Value*
Fat 7g11%
Saturated Fat 2g13%
Cholesterol 9mg3%
Sodium 638mg28%
Potassium 267mg8%
Carbohydrates 15g5%
Fiber 4g17%
Sugar 3g3%
Protein 6g12%
Vitamin A 850IU17%
Vitamin C 33.2mg40%
Calcium 92mg9%
Iron 1.4mg8%
* Percent Daily Values are based on a 2000 calorie diet.

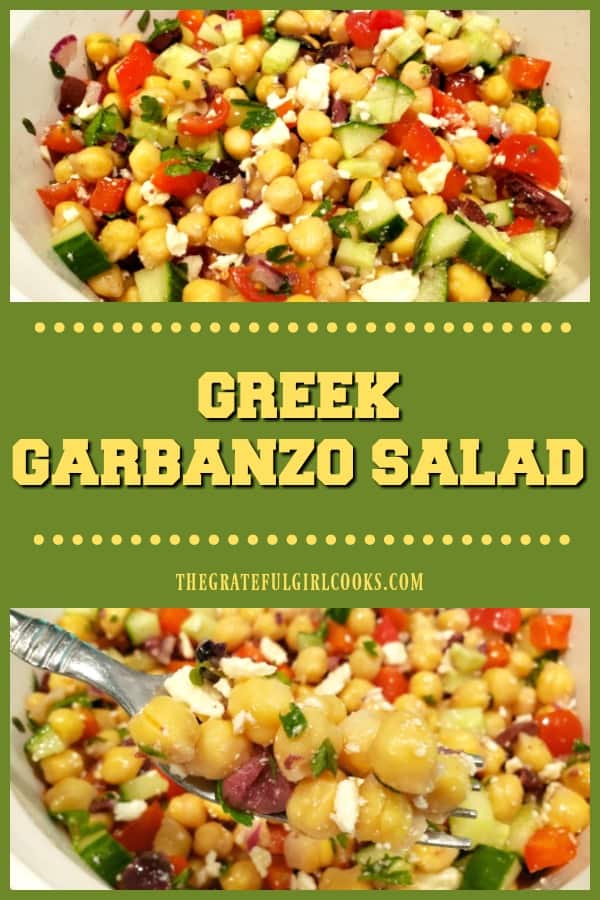
Here’s one more to pin on your Pinterest boards!Delicious Greek garbanzo salad, with kalamata olives, feta cheese, cucumbers, peppers & light dressing, is vegetarian, gluten-free, and super easy!

Oven Roasted Veggies

Oven roasted veggies are lightly seasoned with olive oil and a few spices, then baked. It’s a great way to cook a variety of veggies, & it’s ready in 20 minutes!
Oven roasted veggies are lightly seasoned with olive oil and a few spices, then baked. Great way to cook a variety of veggies, & ready in 20 minutes!

For many years I steamed almost all of our vegetables for our meals. It was so easy to just pop them into a steamer and heat them on the stove top. However, for the past couple of years I’ve begun oven roasting them, and have discovered we love them even more prepared this way!

Truthfully, both ways of cooking vegetables (steaming or oven roasting) are very simple cooking methods to prepare a variety of fresh veggies. Oven roasted veggies, though, have a slightly “caramelized” look and taste to them, due to a bit of olive oil and seasonings! YUM!

If you have never oven roasted veggies before, it’s SO EASY!  Obviously you can roast the types of veggies you and your loved ones enjoy the most, but for purposes of this blog post, I am showing the veggies we used THIS time (when I took pics!). Let me show you how simple this method is.

Scroll Down For A Printable Recipe Card At The Bottom Of The Page

Prep The Veggies

Begin by preheating the oven to 425° and prepping the baking pan. Cover a large baking sheet (with edges) with aluminum foil. Give it a light spray of non-stick baking spray. Cut and slice the veggies you are going to use. For this meal, I roasted fresh asparagus spears, mini carrots, russet potato slices, and fresh broccoli florets.

The asparagus spears are snapped at the bottom, to remove the “woody” part of the stem, and the mini carrots are sliced in half lengthwise.  Broccoli is cut into bite-sized florets, and the russet potato is cut into approximately 3/4 inch round slices, then each slice was quartered. Place veggies onto foil covered baking sheet in a single layer.

NOTE: It’s important to not cut the potatoes too thick, to enable them to roast fully in the same amount of time that the other veggies take to cook.
Veggies are placed on aluminum foil on baking sheet, then seasoned before roasting.
Season The Veggies

Drizzle the veggies with olive oil, then lightly sprinkle with salt, pepper, and garlic powder. I gently turned veggies over a bit to ensure they were all lightly covered with the oil and seasonings, then placed them back into a single layer.

Cook the Oven Roasted Veggies

Once the veggies are seasoned, place them into a preheated 425° F. oven (preferably on the middle rack of the oven, for most even heat).

Bake the oven roasted veggies for about 18-20 minutes. About half way through the cooking time rotate the pan in the oven, to ensure consistent cooking on all sides. If you want, you can also flip the veggies over to the other side before placing them back in oven, but this is optional.

Oven roasted veggies, cooking away in the oven.

This is what the oven roasted veggies looked like once they were done. The veggies should be tender, very lightly browned on the outside, and smell wonderful!

The vegetables are flipped to other side half way through roasting time.

Here’s a couple closeup photos, so you can see the carrots and asparagus up close and personal! Below the first photo is a pic of the broccoli, potatoes and carrots up close!

The oven roasted carrots and asparagus are finished cooking and are ready to serve.Potato slices, broccoli and carrots are done being oven roasted and are ready to eat!

We really enjoyed this delicious and colorful variety of seasoned, oven roasted veggies with our dinner!

The oven roasted veggies are served hot, alongside the main dish.

An overhead view of some of the oven roasted veggies on a dinner plate.

I sure hope you will try oven roasted veggies, if you have never prepared them this way before. I think you will be surprised at how easy it is, and how delicious the vegetables are! Hope you have a wonderful day. I trust you will find great joy in the simple things you experience today. Be blessed, friends.

Looking For More VEGGIE Recipes?

You can find all of my vegetable recipes in the Recipe Index, located at the top of the page.  A few family favorites include:

Interested In More Recipes?

Thank you for visiting this website. I appreciate you using some of your valuable time to do soIf you’re interested, I publish a newsletter 2 times per month (1st and 15th) with all the latest recipes, and other fun info. I would be honored to have you join our growing list of subscribers, so you never miss a great recipe!
There is a Newsletter subscription box on the top right side (or bottom) of each blog post, depending on the device you use, where you can easily submit your e-mail address (only) to be included in my mailing list.

You Can Also Find Me On Social Media:
Facebook page: The Grateful Girl Cooks!
Pinterest: The Grateful Girl Cooks!
Instagram: jbatthegratefulgirlcooks

Author's signature

0 from 0 votes
Oven Roasted Veggies
Prep Time
10 mins
Cook Time
20 mins
Total Time
30 mins
 

Oven roasted veggies are lightly seasoned with olive oil and a few spices, then baked. Great way to cook a variety of veggies, & ready in 20 minutes!

Category: Side Dish, Vegetable Dish
Cuisine: American
Keyword: oven roasted veggies
Servings: 4
Calories Per Serving: 91 kcal
Author: JB @ The Grateful Girl Cooks!
Ingredients
  • 2 cups broccoli florets (fresh) , in bite sized pieces
  • 1 medium russet potato , unpeeled, cut in 1/2" rounds, then quartered
  • 15 baby carrots , sliced in half lengthwise
  • 25 spears asparagus (fresh) , bottom ends trimmed
  • 2 teaspoons extra virgin olive oil , approximate
  • 1/2 teaspoon salt and pepper (each) , or more to taste
  • 1/2 teaspoon garlic powder
  • non-stick spray for aluminum foil
Instructions
  1. Preheat oven to 425 and spray an aluminum foil covered baking sheet with non-stick spray.

  2. Prepare veggies: Snap asparagus spears at the bottom, to remove the "woody" part of the stem. Slice baby carrots in half lengthwise.  Cut broccoli into bite-sized florets. Slice russet potato into approx. 3/4" round slices, then cut each slice into quarters. Place veggies onto prepared baking sheet in a single layer. Drizzle veggies with olive oil, then lightly sprinkle with salt, pepper, and garlic powder. Gently turn veggies over a bit to lightly cover with oil and seasonings, then reposition them in a single layer.

  3. Bake on medium rack in a preheated 425° F. oven for 18-20 minutes. About half way through cooking time, rotate the pan to ensure consistent cooking on all sides. If you want, you can also flip the veggies over to the other side before placing them back in oven, but this is optional. When done, veggies should be slightly caramelized on outside and tender. Remove from oven, serve, and enjoy!

Nutrition Facts
Oven Roasted Veggies
Amount Per Serving (1 (1/4 of total))
Calories 91 Calories from Fat 18
% Daily Value*
Fat 2g3%
Saturated Fat 1g6%
Sodium 338mg15%
Potassium 467mg13%
Carbohydrates 16g5%
Fiber 3g13%
Sugar 3g3%
Protein 3g6%
Vitamin A 5500IU110%
Vitamin C 45mg55%
Calcium 40mg4%
Iron 1.3mg7%
* Percent Daily Values are based on a 2000 calorie diet.

Here’s one more to pin on your Pinterest boards!Oven roasted veggies are lightly seasoned with olive oil and a few spices, then baked. Great way to cook a variety of veggies, & ready in 20 minutes!

Broccoli Cauliflower Bake

Broccoli Cauliflower Bake is a yummy veggie side dish with vegetables baked in a creamy Parmesan white sauce, topped with Parmesan garlic herb crumbs!

I don’t know about you, but I am always looking for new recipes for vegetable dishes. Most of the time I steam, bake or pan-sear fresh vegetables just as they are, with a minimal amount of spices to add flavor.

Every now and then I want something different than “plain” vegetables to serve. This delicious broccoli cauliflower bake fits that bill. It seems more like a vegetable “casserole”, than a side dish. Fresh (or frozen vegetables are cooked in a  simple white sauce, and baked with a seasoned bread crumb topping. EASY PEASY! Here’s how to make this dish:

Scroll Down For A Printable Recipe Card At The Bottom Of The Page

Make The Bread Crumb Topping

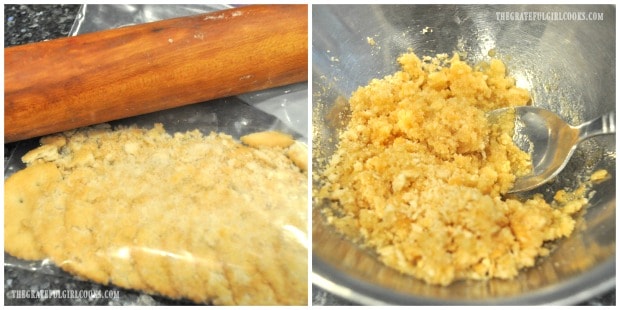
The bread crumb topping for the dish is very easy to make. Place bread crumbs, melted butter, two Tablespoons of grated Parmesan cheese and the three spices (garlic powder, onion powder, and dried parsley) in a small bowl, and stir to combine. Set this mixture aside.

NOTE: There is a product from Progresso called “herb & garlic bread crumbs”. If you want to use those, simply omit the spices from the topping mix. You will still need to add the Parmesan cheese and melted butter.

A simple bread crumb mixture is made to top the broccoli cauliflower bake.

Cut the fresh (or frozen, but thawed) cauliflower and broccoli into small bite-sized florets. I used fresh cauliflower and frozen (but thawed) broccoli for this dish.

Cauliflower and broccoli are cut into bite sized florets for the veggie dish.

Prepare The Creamy Sauce For The Broccoli Cauliflower Bake

Spray a very large skillet with non-stick baking spray. Add the chopped onions to the skillet and heat on medium heat until they are softened and golden brown. Stir often while they cook.
A chopped onion is cooked and browned to add to the sauce for the veggie dish.
Stir the flour into the onions, and then add the milk to the skillet. Give it a good stir, and you will see the sauce beginning to thicken fairly quickly as it cooks.

Flour is added to cooked onions, then milk, to make sauce for the broccoli cauliflower bake.

Once the sauce has begun to noticeably thicken, add the remaining grated Parmesan cheese and the cream cheese. If you cut the cream cheese into chunks it will melt much faster! Continue to cook, stirring often, until all of the cream cheese has melted.

Cream cheese and Parmesan cheese is added to the sauce for the broccoli cauliflower bake..

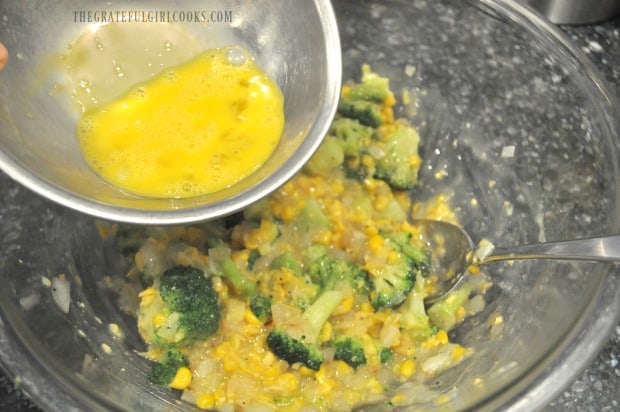
Add the broccoli and cauliflower florets to the sauce, and stir to fully cover the veggies with the sauce.

TIP: At this point, I recommend taste-testing the sauce. Season it with a little garlic powder, salt and pepper, to suit your personal taste buds!

The broccoli and cauliflower florets are added to the sauce, and stirred to combine.

Finish Preparing The Broccoli Cauliflower Bake

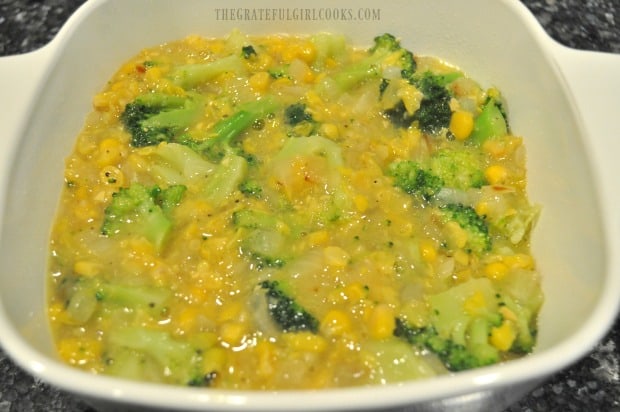
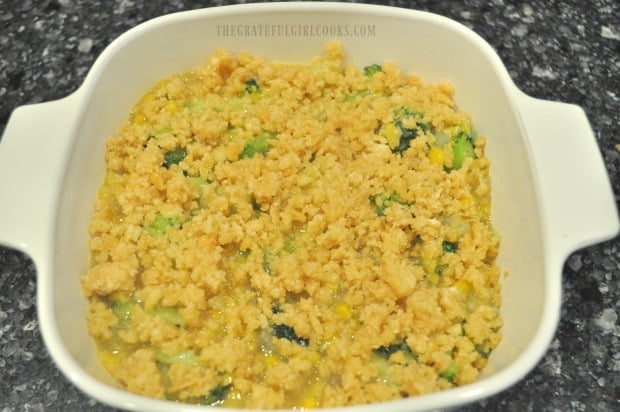
Spray a 2 quart baking dish with non-stick spray. Pour the veggies and sauce into the dish.  Top the surface of the broccoli cauliflower bake with the bread crumb mixture. It’s looking pretty good, right? Now, all you have to do is BAKE it!

The veggies and sauce are put in baking dish, and topped with bread crumb mixture.

Bake in a preheated 350° F oven for 45 minutes. Once the broccoli cauliflower bake is done, the top will be nice and golden brown, and some of the sauce should be bubbling around the edges.

Transfer from the oven to a wire rack, and let this steaming hot veggie dish cool for just a couple minutes before serving.

The broccoli cauliflower bake is cooked, and then served.

We enjoyed our broccoli cauliflower bake as a side dish accompanying a nice juicy slice of Traeger roasted turkey breast. YUM!

A serving of the veggie dish, on plate with slice of roast turkey.

We really enjoyed this EASY broccoli cauliflower bake, and hope you will consider trying this delicious side dish! Have a wonderful day, and may God bless you!

Looking For More VEGETABLE SIDE DISH Recipes?

You can find all of my recipes in the Recipe Index, located at the top of the page.  There are a number of veggie side dishes you might enjoy, including:

Interested In More Recipes?

Thank you for visiting this website. I appreciate you using some of your valuable time to do soIf you’re interested, I publish a newsletter 2 times per month (1st and 15th) with all the latest recipes, and other fun info. I would be honored to have you join our growing list of subscribers, so you never miss a great recipe!

There is a Newsletter subscription box on the top right side (or bottom) of each blog post, depending on the device you use, where you can easily submit your e-mail address (only) to be included in my mailing list.

You Can Also Find Me On Social Media:
Facebook page: The Grateful Girl Cooks!
Pinterest: The Grateful Girl Cooks!
Instagram: jbatthegratefulgirlcooks

Author's signature

Original Recipe Source: https://bitzngiggles.com/broccoli-cauliflower-parmesan-bake/

0 from 0 votes
Broccoli Cauliflower Bake
Prep Time
15 mins
Cook Time
45 mins
Total Time
1 hr
 
Broccoli Cauliflower Bake is a yummy veggie side dish with vegetables baked in a creamy Parmesan white sauce, topped with Parmesan garlic herb crumbs!
Category: Side Dish, Vegetable Dish
Cuisine: American
Keyword: broccoli cauliflower bake
Servings: 8
Calories Per Serving: 175 kcal
Author: JB @ The Grateful Girl Cooks!
Ingredients
For Bread Crumb Topping: (can substitute Progresso herb & garlic bread crumbs-but omit spices)
  • 1/2 cup bread crumbs
  • 2 Tablespoons melted butter
  • 2 Tablespoons grated Parmesan cheese
  • 1/4 teaspoon garlic powder
  • 1/4 teaspoon onion powder
  • 1/4 teaspoon dried parsley flakes
For Rest of Dish:
  • 16 ounces fresh broccoli florets (or frozen, but thawed) , cut in bite sized pieces
  • 16 ounces fresh cauliflower florets (or frozen, but thawed) , cut in bite sized pieces
  • 1 large yellow onion , chopped
  • garlic powder, salt, pepper (to taste)
  • 2 Tablespoons all purpose flour
  • cups milk
  • 1/3 cup grated Parmesan cheese
  • 4 ounces cream cheese , room temperature
Instructions
  1. Preheat oven to 350° F.

  2. Place bread crumbs, melted butter, two Tablespoons Parmesan cheese, garlic powder, onion powder and parsley in a small bowl, and stir to combine. Set aside.

  3. Spray a large skillet with non-stick spray. Add chopped onions and cook on medium heat until softened and golden brown, stirring often. Stir flour into onions, and then add milk to skillet. Give it a good stir; the sauce will begin to thicken as it cooks. Once sauce begins to thicken, add remaining grated Parmesan cheese and cream cheese (cut cream cheese into chunks- it will melt faster). Continue to cook, stirring often, until all the cream cheese has melted.

  4. Add broccoli and cauliflower florets to the sauce; stir to fully coat veggies with sauce. TIP: At this point, I recommend taste-testing the sauce. Season with a little garlic powder, salt and pepper, to suit your personal taste buds!

  5. Spray a 2 quart baking dish with non-stick spray. Pour veggies and sauce into dish.  Top  the dish with the  reserved bread crumb mixture. Bake at 350° F for 45 minutes, until top is golden brown, and sauce is bubbling around the edges. Let cool for a couple minutes, then serve and enjoy!

Nutrition Facts
Broccoli Cauliflower Bake
Amount Per Serving (1 (1/8th of total))
Calories 175 Calories from Fat 72
% Daily Value*
Fat 8g12%
Saturated Fat 4g25%
Cholesterol 23mg8%
Sodium 276mg12%
Potassium 479mg14%
Carbohydrates 17g6%
Fiber 3g13%
Sugar 6g7%
Protein 8g16%
Vitamin A 630IU13%
Vitamin C 79.3mg96%
Calcium 180mg18%
Iron 1.2mg7%
* Percent Daily Values are based on a 2000 calorie diet.

Here’s one more to pin on your Pinterest boards!Broccoli Cauliflower Bake is a yummy veggie side dish with vegetables baked in a creamy Parmesan white sauce, topped with Parmesan garlic herb crumbs!

Grilled Asparagus with Lemon and Parmesan

It’s easy to prepare grilled asparagus on the BBQ in only a few minutes! Garnished with lemon zest and Parmesan cheese, this is a delicious, low calorie side dish!
It's easy to prepare grilled asparagus on the BBQ in only a few minutes! Garnished with lemon zest and Parmesan cheese, this is a delicious side dish!

Do you enjoy fresh asparagus? We sure do, and look forward to it, especially in the spring, when fresh asparagus hits the grocery stores in all it’s glory! We enjoy pan-cooking or baking asparagus inside in our kitchen, but one of our favorite ways to prepare it is to grill it on a BBQ!

Last week we had what my husband and I call a “Traegerpalooza”, where we smoked/grilled lots of different meats on our Traeger grill. We cooked enough to provide our meals for almost a week! Another dish we made was this delicious grilled asparagus with lemon and Parmesan cheese! Asparagus is very easy to grill. Let me show you just how simple it is!

Scroll Down For A Printable Recipe Card At The Bottom Of The Page

How To Make Grilled Asparagus

Before grilling the asparagus, you need to get it ready! Snap the “woody” ends of each asparagus spear off, at the bottom. It should easily snap off between your fingers. You can discard the end pieces.

Lightly drizzle the asparagus with olive oil, and then lightly season with salt and pepper. I also squeezed a tiny bit of fresh lemon juice over the asparagus. Mix this all together with your fingers until the asparagus spears are well coated. Now it is ready to grill. You will need your Traeger OR traditional BBQ preheated and ready to go!

Fresh asparagus is drizzled with lemon juice and olive oil, and seasoned before grilling.

I’m showing you a photo (below) of the items we smoked and grilled on our Traeger along with the grilled asparagus. We cooked two different recipes for pork chops, some brats and turkey sausages, tri-tip steaks, the asparagus, and a bone-in turkey breast (not in photo).

The seasoned asparagus is ready to grill, along with other meats.

The grilled asparagus can be prepared this way on any kind of BBQ. When we grilled them on our Traeger, we went through all the normal preheating necessary, and then heated the grill to 450° F. to prepare the asparagus.

Cooking The Grilled Asparagus On The BBQ

The seasoned asparagus spears are placed directly on the grill grate in a single layer.  Cook the grilled asparagus for 4-5 minutes at 450° (high heat). Once done, the asparagus spears will be slightly tender and still slightly crisp after this time. If you want them a tiny bit softer, cook them just a tiny bit longer. Be sure to NOT overcook the asparagus!

On a Traeger grill, there is no need to turn the asparagus, because there is no direct flame underneath the grill grate. If making this on a traditional BBQ (with propane or briquettes), you will need to keep a close eye on the veggies. Turn them once during the cooking. Once done, remove the grilled asparagus to a serving plate.

Grilled asparagus is placed directly on the BBQ grill, to cook.

To Serve The Grilled Asparagus

Immediately after transferring the hot grilled asparagus to a serving plate, garnish with shredded Parmesan cheese, a squeeze of fresh lemon juice and lemon zest.

Grilled asparagus is garnished with lemon zest and grated Parmesan cheese, to serve.

The heat from the asparagus should slightly melt the Parmesan cheese you have added to the top of the dish. A little lemon juice and zest help to give the finished grilled asparagus a nice fresh “pop” of extra flavor! Serve immediately, and enjoy this simple vegetable dish!

Grated Parmesan cheese and lemon zest help flavor and garnish the grilled asparagus.

Grilled asparagus with lemon and Parmesan is a delicious, and totally simple side dish, and I really hope you enjoy it! If you enjoy grilling fresh vegetables dishes, you might also enjoy my recipes for Grilled Summer Veggies or Grilled Corn on The Cob. YUM.

Thank you for stopping by today, and I truly hope you will come back again soon for more family-friendly recipes. Be sure to check out ALL of my recipes in the Recipe Index, located at the top of the page. Have a wonderful day!

Interested In More Recipes?

Thank you for visiting this website. I appreciate you using some of your valuable time to do soIf you’re interested, I publish a newsletter 2 times per month (1st and 15th) with all the latest recipes, and other fun info. I would be honored to have you join our growing list of subscribers, so you never miss a great recipe!
There is a Newsletter subscription box on the top right side (or bottom) of each blog post, depending on the device you use, where you can easily submit your e-mail address (only) to be included in my mailing list.

You Can Also Find Me On Social Media:
Facebook page: The Grateful Girl Cooks!
Pinterest: The Grateful Girl Cooks!
Instagram: jbatthegratefulgirlcooks

Author's signature

0 from 0 votes
Grilled Asparagus with Lemon and Parmesan
Prep Time
5 mins
Cook Time
5 mins
Total Time
10 mins
 
It's easy to prepare grilled asparagus on the BBQ in only a few minutes! Garnished with lemon zest and Parmesan cheese, this is a delicious side dish!
Category: Side Dishes, Vegetable Dish
Cuisine: American
Keyword: grilled asparagus
Servings: 2 servings
Calories Per Serving: 81 kcal
Author: JB @ The Grateful Girl Cooks!
Ingredients
  • 1/2 pound asparagus (fresh)
  • 2 teaspoons olive oil
  • salt & pepper, to taste
  • 1/8 teaspoon garlic powder
  • 1/2 teaspoon fresh lemon juice
To Garnish Asparagus
  • 1 teaspoon lemon juice (fresh)
  • 1 teaspoon lemon zest
  • 2 Tablespoons Parmesan cheese (grated)
Instructions
  1. Snap the "woody" ends of each asparagus spear off, at the bottom. It should easily snap off between your fingers.  Lightly drizzle asparagus with olive oil, and then lightly season with salt and pepper. Squeeze fresh lemon juice over the asparagus. Mix together with your fingers until the asparagus spears are well coated.

  2. If cooking on a Traeger grill, complete all the normal preheating necessary, and then heat the grill to 450° F. to prepare the asparagus. Place seasoned asparagus spears directly on the grill grate in a single layer.  Cook asparagus for 4-5 minutes at 450° (high heat). Once done, the asparagus spears will be slightly tender and still slightly crisp after this time. If you want them a tiny bit softer, cook it just a bit longer. Be sure to NOT overcook the asparagus!  On a Traeger, there is no need to turn the asparagus, because there is no direct flame underneath the grill grate. If making this on a traditional BBQ (with propane or briquettes), you will need to keep a close eye on the veggies. Turn them once during the cooking. Once done, remove the grilled asparagus to a serving plate.

  3. Immediately after transferring the hot grilled asparagus to a serving plate, garnish with shredded Parmesan cheese, a squeeze of fresh lemon juice and lemon zest. Serve, and enjoy!

Nutrition Facts
Grilled Asparagus with Lemon and Parmesan
Amount Per Serving (1 (1/2 of total))
Calories 81 Calories from Fat 45
% Daily Value*
Fat 5g8%
Saturated Fat 1g6%
Cholesterol 4mg1%
Sodium 79mg3%
Potassium 229mg7%
Carbohydrates 5g2%
Fiber 2g8%
Sugar 2g2%
Protein 4g8%
Vitamin A 900IU18%
Vitamin C 9.1mg11%
Calcium 83mg8%
Iron 2.4mg13%
* Percent Daily Values are based on a 2000 calorie diet.

Here’s one more to pin on you Pinterest boards!It's easy to prepare grilled asparagus on the BBQ in only a few minutes! Garnished with lemon zest and Parmesan cheese, this is a delicious side dish!


Maple Cinnamon Butternut Squash

Maple Cinnamon Butternut Squash is an easy to make, healthy and delicious roasted vegetable side dish – this is caramelized squash you’re gonna love!
Maple Cinnamon Butternut Squash is an easy to make, healthy and delicious roasted vegetable side dish - caramelized squash you're gonna love!

Do you like butternut squash? While it is not something I routinely fix in our home, I sure do enjoy this delicious veggie once made. A few years ago I made the best butternut squash soup (with bacon) that I’ve ever had. Now we routinely enjoy this soup, especially in the Fall and Winter. Seriously… YUM!

I’ve also used this versatile “winter” vegetable to make a couple other delicious recipes. The recipes include Roasted Butternut Squash with Cranberries, Honey & Feta, and Butternut Squash Ravioli with Browned Butter Sage Sauce. Both are delicious!

THIS recipe I am sharing today is for simple roasted maple cinnamon butternut squash. This dish is gluten-free, and doesn’t contain any refined sugar, for those of you that are interested. Crispy on the outside, soft and creamy on the inside, it’s easy to prepare, and is a GREAT side dish!

Scroll Down For A Printable Recipe Card At The Bottom Of The Page

How To Make Maple Cinnamon Butternut Squash

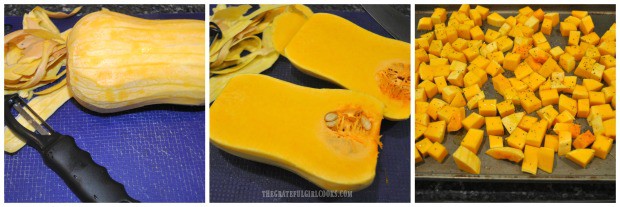
Before starting, preheat your oven to 400° F.  Peel a large butternut squash with a vegetable peeler. This is the “hardest” and “messiest part of the recipe (and it’s not really that bad). Once peeled, carefully slice the squash in half lengthwise.

Use a spoon (and maybe even your fingers) to remove all the seeds and “fibrous strings” from the inside. Once all seeds have been removed, cut the squash into bite sized cubes. Try to keep most of the pieces about the same size, for even baking.

Butternut squash is ready to be peeled, seeded and cubed, to make maple cinnamon butternut squash.

The butternut squash is peeled, seeded, then cut into bite sized pieces before baking.

Place the butternut squash pieces into a large bowl, and drizzle them with the olive oil. Season the squash with a pinch of salt and pepper (to taste), then add the cinnamon, and maple syrup. Stir the ingredients, in order to fully combine and lightly season all the pieces of maple cinnamon butternut squash.

Maple syrup and cinnamon are mixed into the butternut squash pieces before baking.

Line a large baking sheet with parchment paper. Spread the butternut squash cubes out in a single layer, leaving a bit of space between each piece.

The pieces of maple cinnamon butternut squash are placed on parchment paper to bake.

Roast The Maple Cinnamon Butternut Squash

Roast the maple cinnamon butternut squash in a preheated 400° F. oven for 35 minutes. HALFWAY through the baking time, rotate the pan in the oven to ensure even baking. When the 35 minutes is up, carefully flip each piece over so the bottom side is up, and put back in oven. Cook for 5 more minutes, to help caramelize the squash a bit on the other side.

Halfway through baking time, maple cinnamon butternut squash is turned to other side to finish cooking.

Once the maple cinnamon butternut squash has finished roasting, remove from oven; transfer squash to a serving platter. It is now ready to enjoy!  This time, we enjoyed it served alongside our main dish of grilled chicken!

Once done, the maple cinnamon butternut squash is transferred to serving platter before serving.

See the dark caramelized parts of the roasted maple cinnamon butternut squash? It tastes wonderful!  The natural sugars (and maple syrup) caramelize slightly while baking, which leaves the outside slightly crispy, while the inside is soft and creamy!

The maple cinnamon butternut squash is caramelized on the outside and soft on the inside.

This really is a GREAT tasting, simple side dish that pairs especially well with chicken, turkey or pork!  Maple cinnamon butternut squash would also be an easy veggie side dish for Thanksgiving or Christmas dinner!  If you prefer your butternut squash “mashed”, be sure to try my recipe for Creamy Mashed Butternut Squash, too! Sure hope you enjoy it! Have a GREAT day, friends.

Looking For More VEGETABLE SIDE DISH Recipes?

You can find all of my recipes in the Recipe Index, located at the top of the page. A few favorite vegetable dishes include:

Interested In More Recipes?

Thank you for visiting this website. I appreciate you using some of your valuable time to do soIf you’re interested, I publish a newsletter 2 times per month (1st and 15th) with all the latest recipes, and other fun info. I would be honored to have you join our growing list of subscribers, so you never miss a great recipe! 

There is a Newsletter subscription box on the top right side (or bottom) of each blog post, depending on the device you use, where you can easily submit your e-mail address (only) to be included in my mailing list.

You Can Also Find Me On Social Media:

Facebook page: The Grateful Girl Cooks!
Pinterest:
The Grateful Girl Cooks!
Instagram:
jbatthegratefulgirlcooks

Author's signature.

Original Recipe Source: https://lifemadesweeter.com/maple-cinnamon-roasted-butternut-squash/

0 from 0 votes
Maple Cinnamon Butternut Squash
Prep Time
10 mins
Cook Time
40 mins
Total Time
50 mins
 
Maple Cinnamon Butternut Squash is an easy to make, healthy and delicious roasted vegetable side dish - caramelized squash you're gonna love!
Category: Side Dishes, Vegetable Dish
Cuisine: American
Keyword: maple cinnamon butternut squash
Servings: 4
Calories Per Serving: 151 kcal
Author: JB @ The Grateful Girl Cooks!
Ingredients
  • 1 large butternut squash
  • Tablespoons extra virgin olive oil
  • Tablespoons pure maple syrup
  • 1/2 teaspoon ground cinnamon
  • 1 pinch salt and pepper, to taste
Instructions
  1. Preheat oven to 400° F.  Carefully peel a large butternut squash with a vegetable peeler (or sharp knife).  Once peeled, slice the squash in half lengthwise. Use a spoon to remove all the seeds and "fibrous strings" inside squash. Cut squash into bite sized cubes. Try to keep the pieces about the same size, for even baking.

  2. Place squash cubes into a large bowl; drizzle with olive oil. Season the squash with a pinch of salt and pepper (to taste), then add the cinnamon and maple syrup. Stir to combine ingredients, so all pieces are coated.

  3. Line a large baking sheet with parchment paper. Spread seasoned squash out in a single layer, leaving a bit of space between each piece. Roast in 400° F. oven for 35 minutes. HALFWAY through baking time, rotate the pan in the oven to ensure even baking. When 35 minutes is up, carefully flip each piece over so the bottom side is up, and put back in oven. Cook for 5 more minutes, to help caramelize the squash a bit on the other side. Once squash is done, remove from oven; transfer to a serving platter. Serve, and enjoy!

Nutrition Facts
Maple Cinnamon Butternut Squash
Amount Per Serving (1 (1/4 of total))
Calories 151 Calories from Fat 45
% Daily Value*
Fat 5g8%
Sodium 17mg1%
Potassium 676mg19%
Carbohydrates 27g9%
Fiber 3g13%
Sugar 8g9%
Protein 1g2%
Vitamin A 19930IU399%
Vitamin C 39.4mg48%
Calcium 98mg10%
Iron 1.3mg7%
* Percent Daily Values are based on a 2000 calorie diet.

Here’s one more to pin on your Pinterest boards!Maple Cinnamon Butternut Squash is an easy to make, healthy and delicious roasted vegetable side dish - caramelized squash you're gonna love!