Category: Soups

Turkey Black Bean Soup (Instant Pot)

Make delicious Turkey Black Bean Soup using an Instant Pot and leftover turkey! The recipe yields six servings of this hearty, filling soup.

Today I want to share a delicious recipe for Turkey Black Bean Soup, which is made using a pressure cooker. I found the original recipe in a cookbook I own (from author Coco Morante), made a couple slight changes, and the soup is scrumptious.

I don’t know about you, but when I make a turkey, there are always leftovers! A cooked turkey leg (drumstick) and wing are used in this recipe to provide flavor and meat for the soup, so it’s a wonderful way to use those leftovers.

Dried black beans are cooked with the soup in the Instant Pot, so there’s no need to pre-soak them, which is a real time-saver! The soup itself takes a little longer than an hour to cook, but almost all of it is “hands-off” time!

Here’s how to make this yummy turkey black bean soup in a pressure cooker. I’m really confident you’re going to enjoy it!

Scroll Down For A Printable Recipe Card At The Bottom Of The Page

Sauté The Veggies

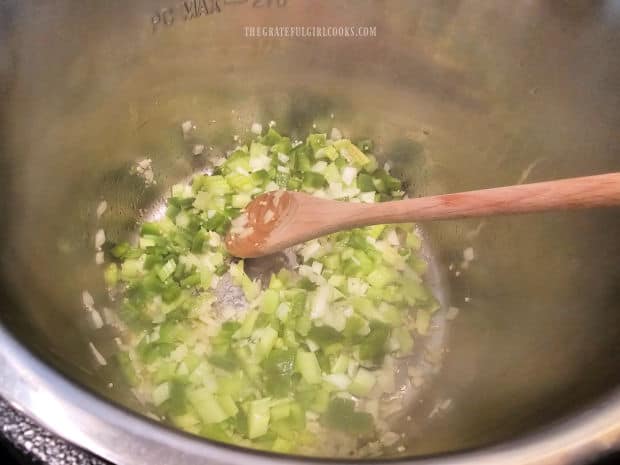
Measure olive oil into the inner pot and press the SAUTÉ button to heat the olive oil. Once the oil is hot (but not smoking), add diced onion, bell pepper, celery, salt, pepper, and red chili pepper flakes.

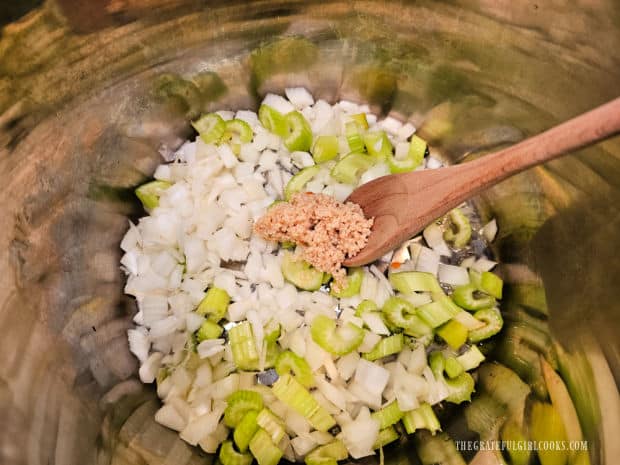
Stir to combine these ingredients, and sauté them for about 4 minutes until they have become tender. Stir in minced garlic, and cook an additional minute, stirring often, and being careful not to burn the garlic.

Chopped onion, bell pepper and celery are sautéed in oil in the Instant Pot.

Add Black Beans, Turkey, And Water

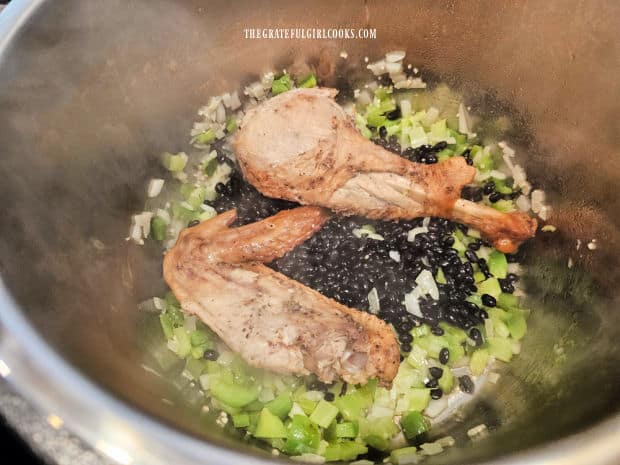
Put the dried black beans and turkey into the pot. I use a large cooked turkey drumstick and one wing, with a total weight of about 12-14 ounces (including the bones).

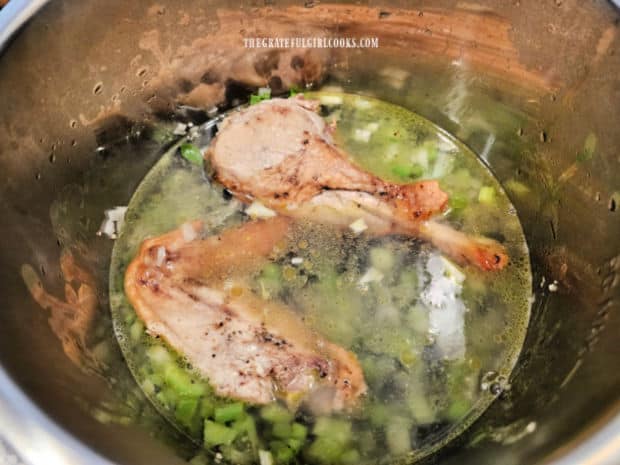
Pour in 4 cups of water. This should be enough water to slightly submerge the veggies and beans. Once that is done, you are ready to cook!

A cooked turkey leg, wing and dried black beans are added to the pot.Four cups of water is added to the pot, submerging the veggies and beans.

Time To Cook!

Lock the lid of the pressure cooker in place, and flip the Pressure Release knob to SEALING. Press the CANCEL button to stop the Sauté function.

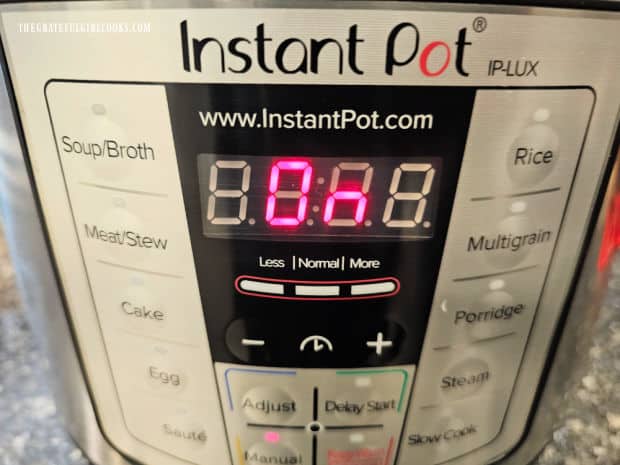
Select the MANUAL button (or the Bean/Chili or Pressure Cook button). Set the cooking timer for 1 hour and 15 minutes on HIGH pressure. Once the Instant Pot has reached full internal pressure (takes about 15 minutes), the cooking time will begin.

Once the cooking program has ended, let the pressure release NATURALLY for 25 minutes (you do nothing!). After 25 minutes, flip the Pressure Release knob to VENTING, which will let any remaining steam escape.

Once the pressure gauge has dropped back down (indicating no remaining internal pressure), it is safe to open the Instant Pot.

An Instant Pot is used to prepare this recipe for turkey black bean soup.

Shred Turkey And Finish Seasoning Soup

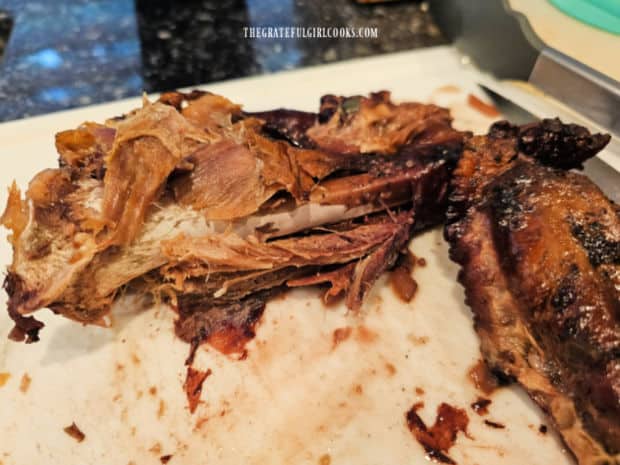
Use a large slotted spoon (or tongs) to remove the turkey from the pot and onto a cutting board. It will be VERY tender, and may fall apart!

Remove the turkey meat from the bones, discarding any skin or bones. Cut the turkey into small bite-sized pieces (or shred it, if you prefer it that way).

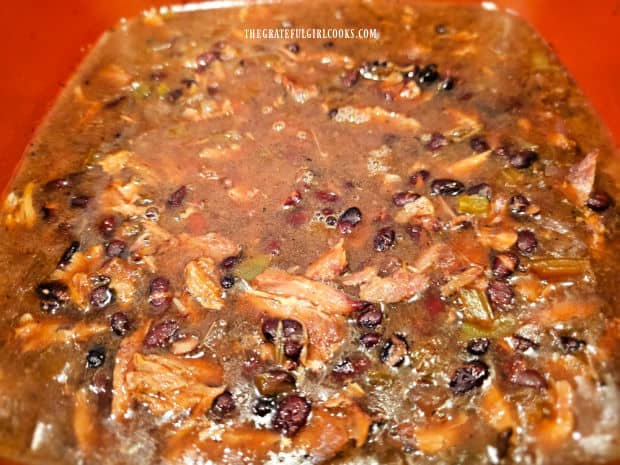
Place the turkey meat back into the pot, then add apple cider vinegar and stir until it has been incorporated into the turkey black bean soup. Take a little bite of the soup, and add more salt and pepper, to suit your taste.

After cooking, the turkey meat is removed, and bones and skin are discarded.Bite-sized pieces of turkey meat are added back into the soup.

Enjoy A Bowl Of Turkey Black Bean Soup

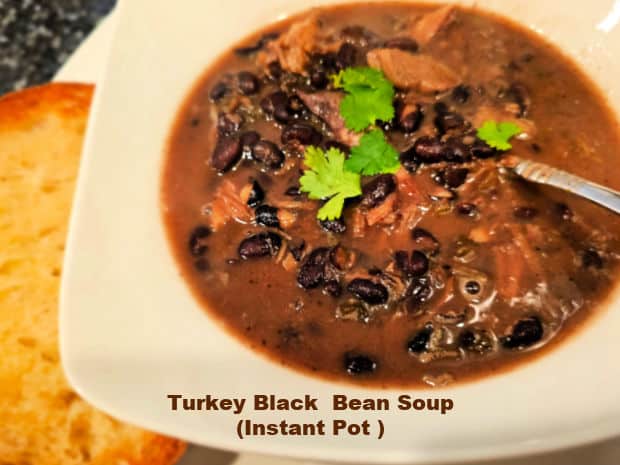
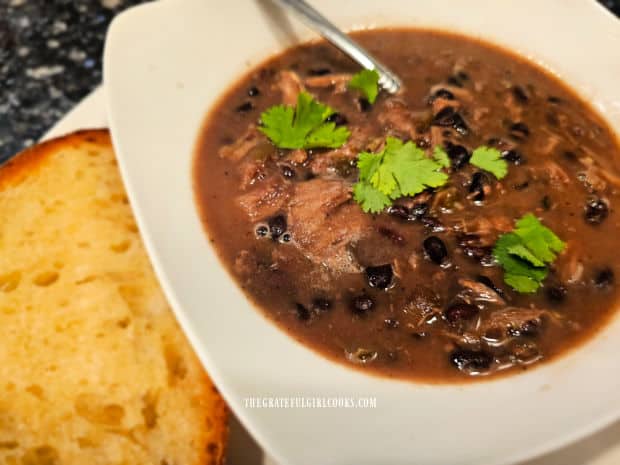
Now it’s time to enjoy a big, hot bowl of turkey black bean soup! Ladle portions of the hot soup into serving bowls, and serve immediately! If desired, garnish with cilantro and/or sour cream.

We love this soup when served with toasted garlic bread on the side, because we can dip the bread in the hot soup… it’s so good!

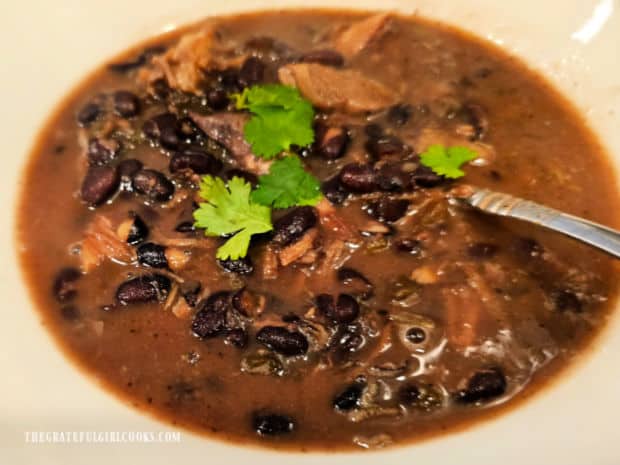
The black beans are tender, the broth is seasoned well, and the turkey helps add more protein and flavor to this delicious soup! 

Turkey black bean soup, topped with cilantro, served with bread on the side.A bowl of the turkey black bean soup, garnished with cilantro leaves.

I hope you have the opportunity to try this wonderful soup. It is filing and delicious, and is a fantastic way to use up leftover turkey!

If you enjoy using an Instant Pot, be sure to check out my other recipes, including Instant Pot Beef Stew, Ground Beef Stroganoff, Pork Carnitas, and Rice Pudding!

Thank you for stopping by, and I invite you to come back again soon for more family-friendly recipes. Take care, may God bless you… and have a great day!

Looking For More SOUP Recipes?

You can find ALL of my recipes in the Recipe Index, which is located at the top of the page. I have lots of delicious soups (and other Instant Pot recipes) to enjoy, including:

Want More Recipes? Get My FREE Newsletter!

I publish a newsletter 2 times per month (1st and 15th) with lots of recipes, tips, etc..
Would you like to join our growing list of subscribers?

There is a Newsletter subscription box on the top right (or bottom) of each blog post, depending on the device you use.
You can submit your e-mail address there, to be added to my mailing list.

Find Me On Social Media:

Facebook page: The Grateful Girl Cooks!
Pinterest:
The Grateful Girl Cooks!
Instagram:
jbatthegratefulgirlcooks

Author's signature

Recipe adapted from: “The Ultimate Instant Pot Cookbook”, by Coco Morante, page 85, published by TenSpeed Press, 2018

↓↓ PRINTABLE RECIPE BELOW ↓↓

0 from 0 votes
Turkey Black Bean Soup (Instant Pot)
Prep Time
15 mins
Cook Time
1 hr 15 mins
Natural Pressure Release Time
25 mins
Total Time
1 hr 55 mins
 

Make delicious Turkey Black Bean Soup using an Instant Pot and leftover turkey! The recipe yields six servings of this hearty, filling soup.

Category: Main Dish, Soup
Cuisine: All Cuisines
Keyword: Instant pot, turkey black bean soup
Servings: 6
Calories Per Serving: 277 kcal
Author: JB @ The Grateful Girl Cooks!
Ingredients
  • 3 Tablespoons olive oil
  • 1 medium yellow onion peeled, diced
  • 1 medium green bell pepper seeded, diced
  • 2 medium celery stalks diced
  • teaspoons minced garlic
  • 1 teaspoon salt
  • ½ teaspoon black pepper
  • teaspoon red chili pepper flakes
  • cups dried black beans
  • 14 ounces cooked turkey drumstick (and 1 wing) bone in total amount = 14 ounces
  • 4 cups water
  • 1 Tablespoon apple cider vinegar
Optional Garnish: cilantro/sour cream
    Instructions
    1. Measure olive oil into the inner pot and press SAUTÉ button to heat the olive oil. Once oil is hot (but not smoking), add onion, bell pepper, celery, salt, pepper, and red chili pepper flakes. Stir to combine; sauté for 4 minutes or until tender. Stir in garlic. Cook 1 minute, stirring often (to not burn the garlic).

    2. Put dried beans and turkey into the pot. Pour in 4 cups of water, which should slightly submerge veggies and beans.

    3. Lock the lid in place; flip Pressure Release knob to SEALING. Press the CANCEL button to stop the Sauté function. Select the MANUAL button (or the Bean/Chili or Pressure Cook button). Set cooking timer for 1 hour and 15 minutes at HIGH pressure. Once the Instant Pot has reached full pressure (takes about 15 minutes), the cooking time will begin.

    4. Once cooking program has ended, let the pressure release NATURALLY for 25 minutes (do nothing!). After 25 minutes, flip the Pressure Release knob to VENTING, which lets any remaining steam escape. Once pressure gauge has dropped back down (indicating no remaining internal pressure), it is safe to open the Instant Pot.

    5. Use a large slotted spoon (or tongs) to transfer turkey from the pot to a cutting board. Remove meat from the bones, discarding skin/bones. Cut turkey into small pieces (or shred it). Place meat back into the pot. Add apple cider vinegar; stir until incorporated. Taste soup; add more salt/pepper, if desired.

    6. Serve soup immediately; garnish portions with cilantro or sour cream, if desired.

    Nutrition Facts
    Turkey Black Bean Soup (Instant Pot)
    Amount Per Serving (1 (1/6 of total))
    Calories 277 Calories from Fat 99
    % Daily Value*
    Fat 11g17%
    Saturated Fat 2g13%
    Polyunsaturated Fat 2g
    Monounsaturated Fat 6g
    Cholesterol 31mg10%
    Sodium 443mg19%
    Potassium 821mg23%
    Carbohydrates 29g10%
    Fiber 7g29%
    Sugar 2g2%
    Protein 18g36%
    Vitamin A 155IU3%
    Vitamin C 18mg22%
    Calcium 76mg8%
    Iron 3mg17%
    * Percent Daily Values are based on a 2000 calorie diet.

    Here’s one more to pin on your Pinterest boards!Make delicious Turkey Black Bean Soup using an Instant Pot and leftover turkey! The recipe yields six servings of this hearty, filling soup.

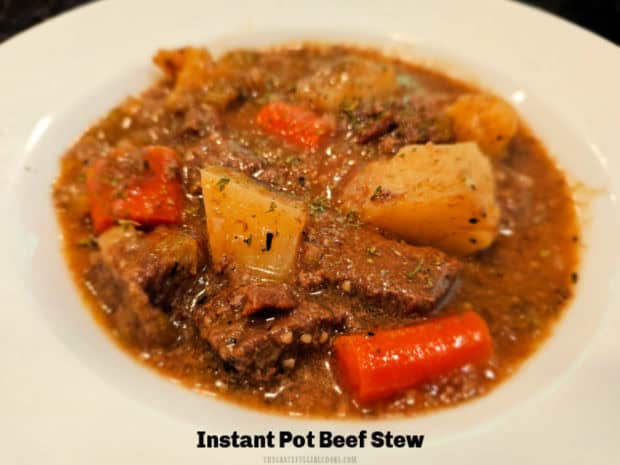
    Instant Pot Beef Stew

    Instant Pot Beef Stew is delicious, satisfying, and full of tender beef, potatoes, carrots, celery and onions in a savory thick broth.
    Instant Pot Beef Stew is delicious, satisfying, and full of tender beef, potatoes, carrots, celery and onions in a savory thick broth.

    I have really enjoyed using the Instant Pot I received this year from our son! It’s been pretty HOT here in Oregon this summer, so I’ve loved not having to heat up our house by using our oven much, because I’m using this handy appliance!

    I grew up eating my Mom’s beef stew and I’ve been making Classic Beef Stew (oven-baked) for many, many years. It’s such a comforting and filling meal! When I saw a recipe in one of the cookbooks I own for Instant Pot Beef Stew, I KNEW I had to try it!

    After making several changes to the original recipe, this recipe for Instant Pot Beef Stew was the final result. It’s delicious, and I hope you enjoy it, too. Here’s how to make it.

    Scroll Down For A Printable Recipe Card At The Bottom Of The Page

    A Little Prep

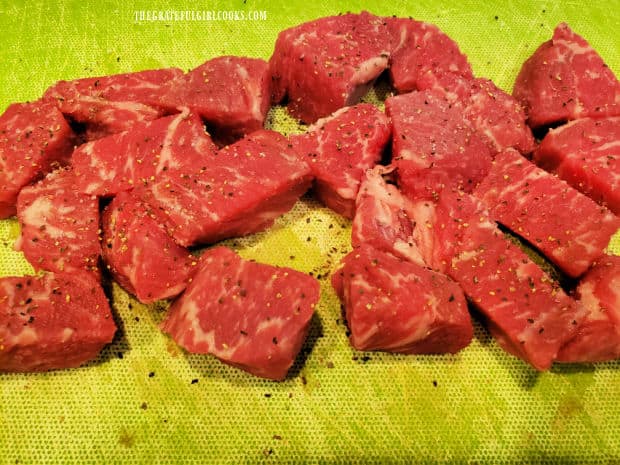
    Pat two pounds of beef stew meat dry using paper towels, then lightly season the meat on all sides with salt and pepper. Set the beef aside.

    Beef stew meat is lightly seasoned with salt and pepper.

    Press the SAUTÉ button on your Instant Pot. Heat the oil, then once it is hot add chopped onions, celery, and minced garlic. Cook these ingredients, stirring often for 4-5 minutes, until the onions become translucent in color and have softened.

    Chopped onions, celery and minced garlic are sautéed in the Instant Pot.

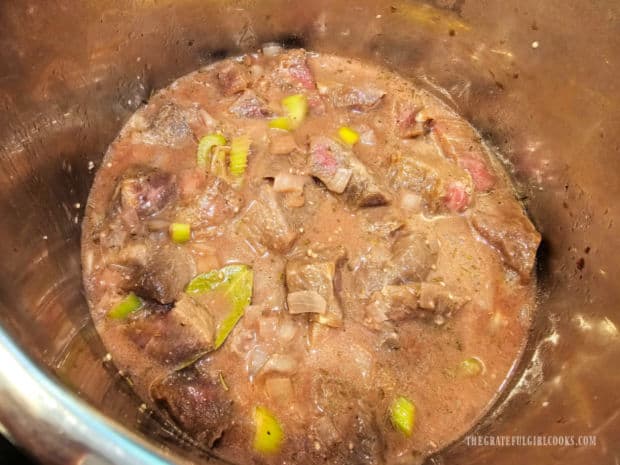
    Add beef broth, red wine, Dijon mustard, tomato sauce, dried rosemary and one bay leaf to the vegetables in the pot. Stir in the seasoned stew meat until all ingredients have been combined.

    Beef broth, red wine, etc. are added to the cooked veggies in the Instant Pot.Seasoned beef stew meat is added to the pot and stirred until combined.

    Cooking Instant Pot Beef Stew

    Lock the lid on the Instant Pot and turn the Pressure Release knob on top to SEALING. Press the CANCEL button to turn off the sauté function.

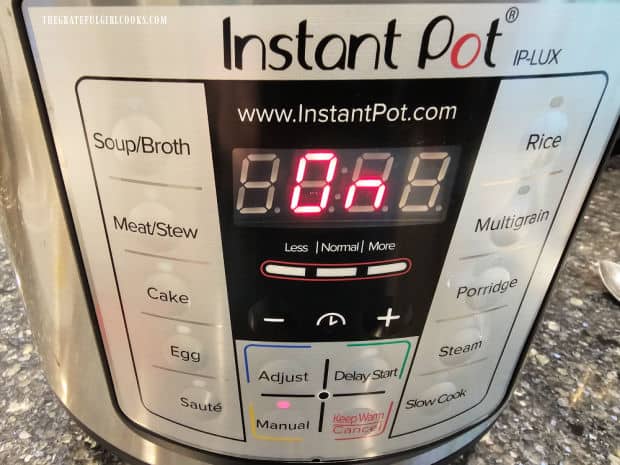
    Press the MANUAL (high heat) button (or the MEAT/STEW button, if your machine has one). Set the timer for 30 minutes of cooking at high pressure.

    The Instant Pot will take between 10-15 minutes to reach full internal pressure. The Pressure valve/button on top will pop up, and the cooking timer will begin.

    Instant Pot cooks the stew in a short amount of time.

    Add Potatoes And Carrots

    When the beef stew has cooked for 30 minutes, carefully flip the Pressure Release knob to VENTING to do a quick release of pressure/steam. **Once all the pressure has been released, the pressure valve/button on top will drop back down, indicating it is safe to remove the lid**.

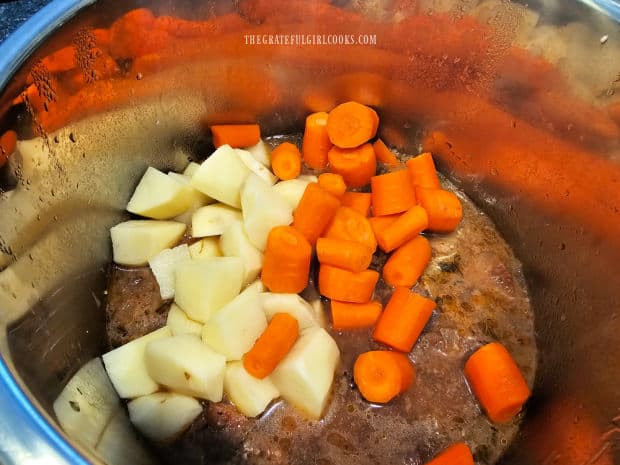
    Open the lid, find and discard the bay leaf. Add the potatoes and carrots to the pot, and quickly stir them in, until combined.

    Lock the lid back on again. Turn the pressure release knob on top to SEALING. Press the CANCEL button to reset the timer, then press the MANUAL button (or Pressure Cook button) and re-set the cooking time for 4 minutes on High pressure. You will need to wait another 10-15 minutes for the Instant Pot to reach full pressure again and the cooking time to begin.

    Once the cooking time has ended (again), turn the Pressure Release knob to VENTING to quickly release the pressure/steam from the pot. Keep the lid ON, once all pressure has been released.

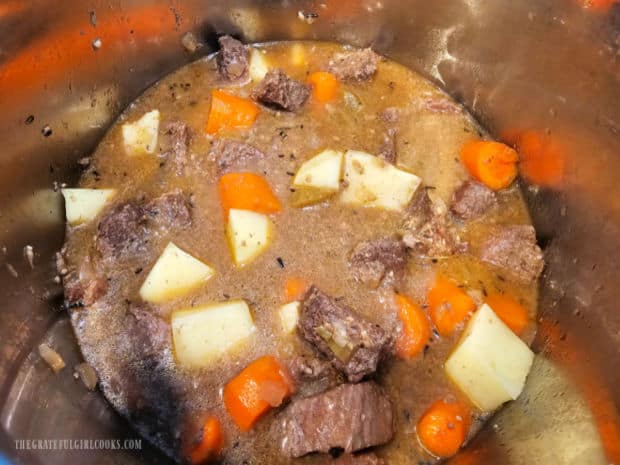
    Raw carrot chunks and potatoes are added into the stew and then cooked.Potatoes and carrot chunks have now been cooked with the stew.

    Add A “Slurry” To Help Thicken The Stew

    The final step is to slightly thicken the stew. Make a “slurry” by mixing cornstarch and water in a small bowl or container until it is smooth and lump-free.

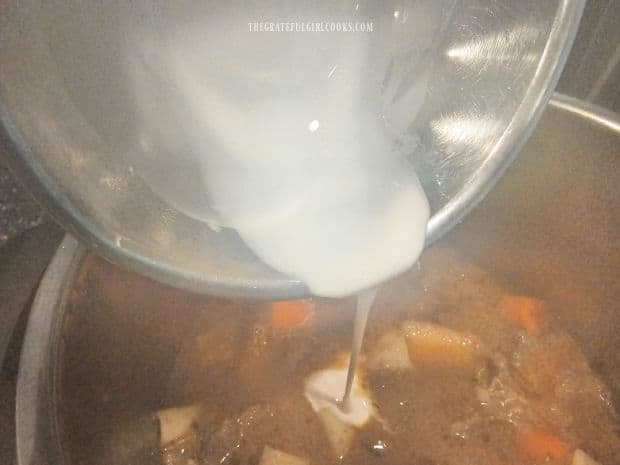
    Remove the lid from the stew, and very quickly stir the “slurry” into the liquid in the pot. Put the lid back on the pot and let the Instant Pot Beef Stew stand for 5 minutes (covered), in order for the stew liquid to thicken.

    Open the lid and take a tiny bite. Add additional salt and/or pepper, if necessary, to suit your taste.

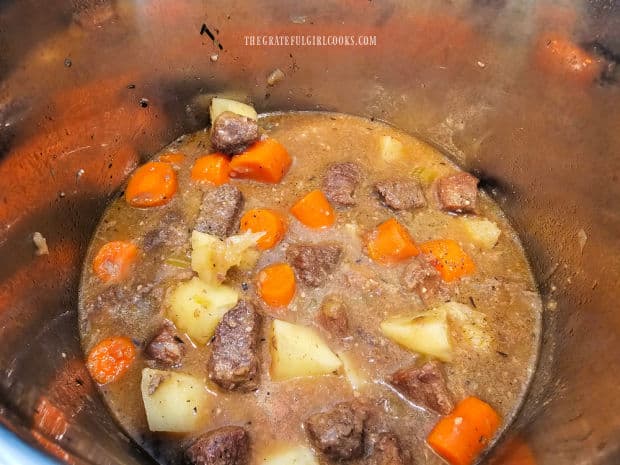
    A slurry of water and cornstarch is added to the beef stew, to thicken sauce.After slurry has been added, the beef stew is ready to be served.

    Time To Enjoy Instant Pot Beef Stew

    Use a ladle to scoop out portions of the beef stew into serving bowls while it is really hot. There should be enough stew for 6 servings.

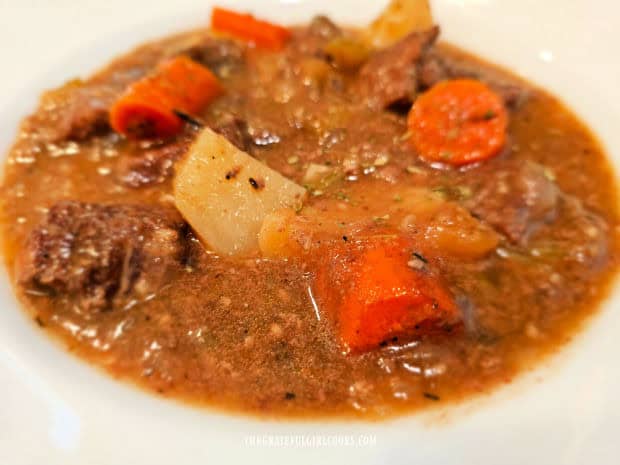
    White bowl, filled with hot and delicious beef stew.

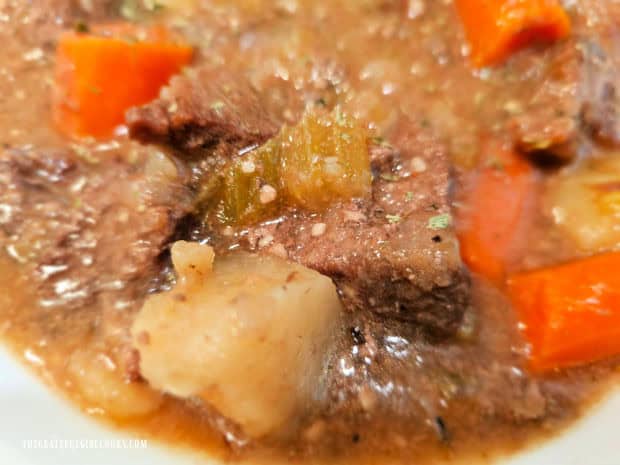
    The beef, potatoes and carrots should be incredibly tender, and the flavor of the sauce is wonderful! Any alcohol that was in the red wine will have cooked off, so no worries for your children there!

    Enjoy this hearty, delicious Instant Pot Beef Stew with those you love! Any leftovers will keep up to 3-4 days in the refrigerator, if stored in an airtight container. Microwave the stew to reheat.

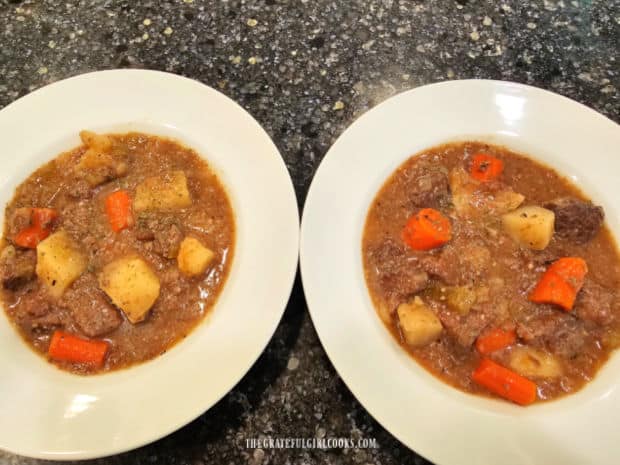
    A close up photo of the beef, potatoes and carrots in the beef stew.Two white bowls, filled with Instant Pot Beef Stew, ready to be enjoyed.

    I hope you have the chance to make this Instant Pot Beef Stew, and trust you (and those you love) will enjoy it as much as we do. 

    Thank you for stopping by, and I invite you to come back again soon for more family-friendly recipes. Take care, may God bless you… and have a wonderful day!

    Looking For More INSTANT POT Recipes?

    You can find ALL of my recipes in the Recipe Index, which is located at the top of the page. I have begun adding Instant Pot recipes to my website, and already have already published several you may enjoy, including:

    Want More Recipes? Get My FREE Newsletter!

    I publish a newsletter 2 times per month (1st and 15th) with lots of recipes, tips, etc..
    Would you like to join our growing list of subscribers?

    There is a Newsletter subscription box on the top right (or bottom) of each blog post, depending on the device you use.
    You can submit your e-mail address there, to be added to my mailing list.

    Find Me On Social Media:

    Facebook page: The Grateful Girl Cooks!
    Pinterest:
    The Grateful Girl Cooks!
    Instagram:
    jbatthegratefulgirlcooks

    Author's signature

    Recipe adapted from: “The Ultimate Instant Pot Cookbook”, by Coco Morante, page 207, published in 2018 by TenSpeed Press

    ↓↓ PRINTABLE RECIPE BELOW ↓↓

    0 from 0 votes
    Instant Pot Beef Stew
    Prep Time
    10 mins
    Cook Time
    40 mins
    Time To Reach Full Pressure (inactive)
    30 mins
    Total Time
    1 hr 20 mins
     

    Instant Pot Beef Stew is delicious, satisfying, and full of tender beef, potatoes, carrots, celery and onions in a savory thick broth.

    Category: Main Dish
    Cuisine: American
    Keyword: instant pot, beef stew
    Servings: 6
    Calories Per Serving: 378 kcal
    Author: JB @ The Grateful Girl Cooks!
    Ingredients
    • 2 pounds beef stew meat
    • 1 teaspoon salt
    • 1 teaspoon black pepper
    • 2 Tablespoons vegetable oil
    • 1 medium yellow onion finely chopped
    • 2 stalks celery diced
    • Tablespoons minced garlic
    • ¾ cup beef broth
    • ¾ cup red wine
    • Tablespoons Worcestershire sauce
    • ¾ Tablespoon Dijon mustard
    • 2 Tablespoons tomato sauce
    • ¾ teaspoons dried rosemary crumbled
    • 1 bay leaf
    • 4 medium carrots peeled, sliced in 1" rounds
    • 2 medium russet potatoes (or Yukon Gold) peeled, cut in 1" cubes
    • 1 Tablespoon cornstarch
    • 1 Tablespoon water
    Instructions
    1. Pat beef dry with paper towels; season on all sides with salt and pepper. Set aside.

    2. Press SAUTÉ button on Instant Pot. Heat oil; once hot add onions, celery, garlic. Cook, stirring often for 4-5 minutes, until onions are translucent and soft. Add broth, wine, Dijon, tomato sauce, rosemary, bay leaf and the beef. Stir to combine.

    3. Lock lid on; turn Pressure Release knob on top to SEALING. Press CANCEL button to turn off Sauté setting. Press the MANUAL (high heat) button (or MEAT/STEW button, if your machine has one). Set timer for 30 minutes at high pressure. The Instant Pot will take between 10-15 minutes to reach full pressure, then pressure valve/button on top will pop up, and cooking timer will begin.

    4. When cooking time ends, carefully flip Pressure Release knob on top to VENTING to do a quick release of pressure/steam. *Once all pressure is released, the pressure valve/button on top will drop down, indicating it's safe to remove the lid.* Open the lid, find/discard bay leaf. Add potatoes and carrots; quickly stir until combined. Lock lid on again. Turn pressure release knob to SEALING. Press CANCEL button to reset timer, then press MANUAL button (or Pressure Cook button) and re-set cooking time for 4 minutes on High pressure. You'll need to wait 10-15 minutes for the Instant Pot to reach full pressure again and cooking time to begin. Once cooking program ends, flip Pressure Release knob to VENTING to quickly release pressure/steam. Keep the lid ON, once all pressure is released.

    5. Mix cornstarch and water in a small bowl until it's smooth/lump-free. Remove Instant Pot lid; quickly stir cornstarch mixture into stew. Put the lid back on the pot. Let the stew rest for 5 minutes (covered), in order for sauce to thicken. Open lid; taste stew. Add additional salt and/or pepper if necessary.

    6. Ladle stew into individual bowls. Serve immediately, while hot. Enjoy!

    Recipe Notes

    NOTE: You can substitute boneless beef chuck, cut into 1" cubes and trimmed of excess fat, if desired.

    Nutrition Facts
    Instant Pot Beef Stew
    Amount Per Serving (1 (1/6 of total))
    Calories 378 Calories from Fat 108
    % Daily Value*
    Fat 12g18%
    Saturated Fat 3g19%
    Trans Fat 0.03g
    Polyunsaturated Fat 3g
    Monounsaturated Fat 4g
    Cholesterol 94mg31%
    Sodium 765mg33%
    Potassium 1145mg33%
    Carbohydrates 23g8%
    Fiber 3g13%
    Sugar 4g4%
    Protein 36g72%
    Vitamin A 6887IU138%
    Vitamin C 10mg12%
    Calcium 80mg8%
    Iron 5mg28%
    * Percent Daily Values are based on a 2000 calorie diet.

    Here’s one more to pin on your Pinterest boards!Instant Pot Beef Stew is delicious, satisfying, and full of tender beef, potatoes, carrots, celery and onions in a savory thick broth.

    Lentil Potato Soup

    Lentil Potato Soup is a hearty and filling meatless soup that serves 6 and is easy to make. It’s also budget friendly and tastes delicious!
    Lentil Potato Soup is a hearty and filling meatless soup that serves 6 and is easy to make. It's also budget friendly and tastes delicious!

    Today I want to share a delicious recipe for a meatless soup that tastes great, and is really simple to prepare.  Even though I am not a vegetarian, my husband and I often enjoy meatless meals.

    I’m always on the lookout for meatless recipes, especially because one of our sons (and his girlfriend) are vegetarians. This recipe for lentil potato soup is a yummy recipe I’m positive they will enjoy!

    Even if you are NOT a vegetarian, I’m confident you are going to enjoy this delicious meatless soup, full of protein and fiber! 

    Lentils are such a wonderful source of protein and prebiotic fiber, and are low in fat, too! These wonderful legumes are available in grocery stores everywhere (found with the dried beans). Lentils are also quite inexpensive and are a great item for the pantry, because of their long shelf life.

    The addition of potatoes, carrots, onion, tomato sauce, garlic, celery and spices give this soup great flavor, as well. You’ll also love how simple it is to make, which is an added bonus! Here’s how to make lentil potato soup.

    Scroll Down For A Printable Recipe Card At The Bottom Of The Page

    A Word About The Lentils

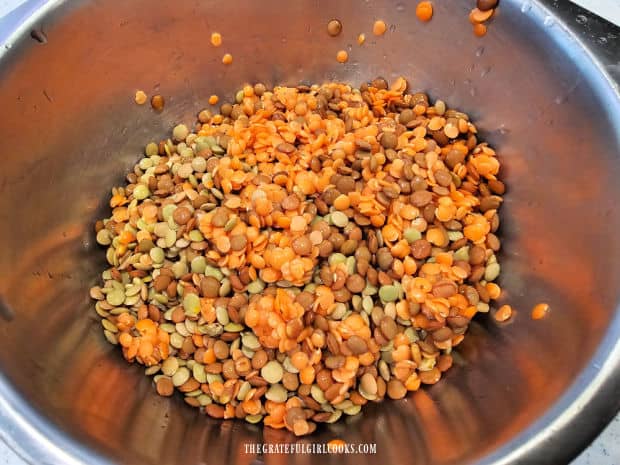
    For this recipe I used a combination of three types of lentils I already had in our pantry: red lentils, green lentils and brown lentils. If you only have ONE type of lentils to use (preferably brown, black, or green) that will still be absolutely delicious, as well.

    I don’t recommend using all red lentils because they can become soft and “mushy” when cooked for a long time, more so than the other three varieties.

    Before beginning to cook this soup, rinse the raw, dried lentils and drain them very well. Repeat this 2-3 times, then set the rinsed and dried lentils aside, to be added later to the soup.

    Lentils (red, green and brown) are rinsed and drained, then set aside in bowl.

    How To Make The Soup

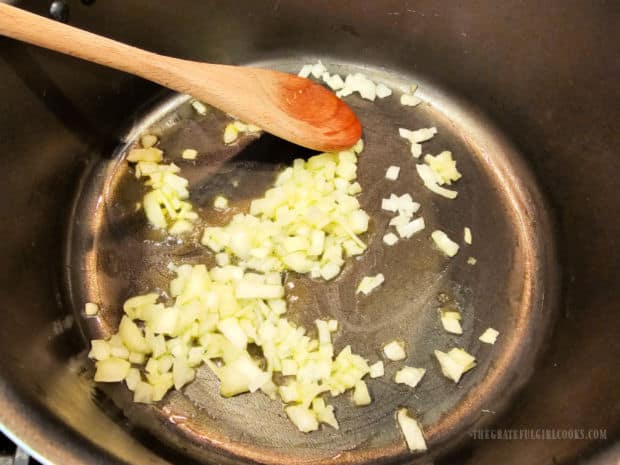
    Now it’s time to prepare the soup. In a large cooking pot (or Dutch oven), heat vegetable oil on medium heat. Stir in diced onion, and cook this for about 1 minute, stirring often.

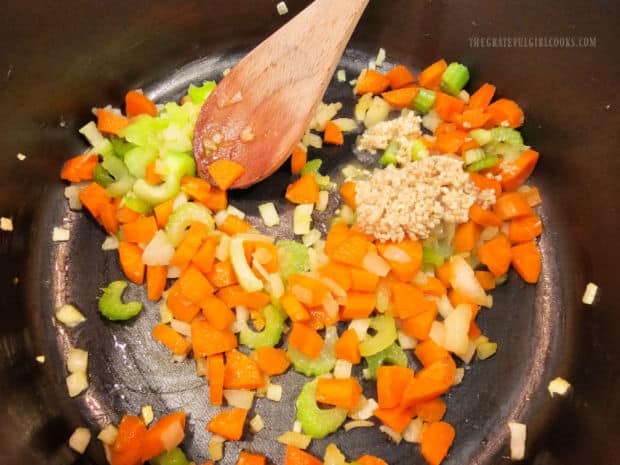
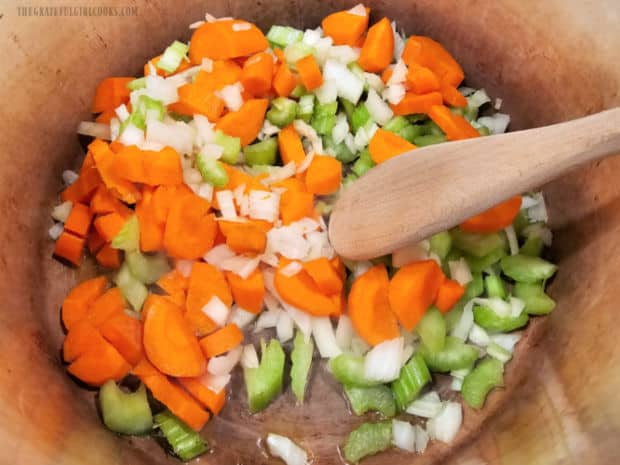
    Add diced carrots, celery, and minced garlic to the pot, and stir to combine. Continue to cook the veggies for 3 minutes, stirring often, so the garlic doesn’t burn and become bitter.

    Diced onions are cooked in oil in a large soup pot.Diced carrots, celery and minced garlic are added to the pan and cooked.

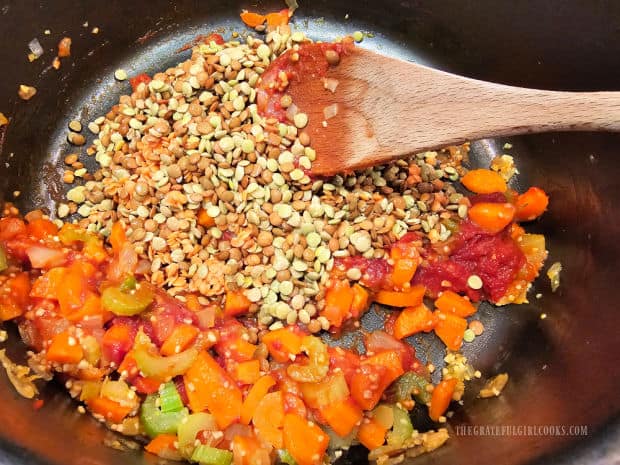
    Add the drained lentils, tomato paste and tomato sauce to the pot. Stir well, to combine these ingredients. Cook on medium heat for 1 minute, stirring often.

    Lentils, tomato paste and tomato sauce are added to the soup pot.

    Add The Potatoes And Spices

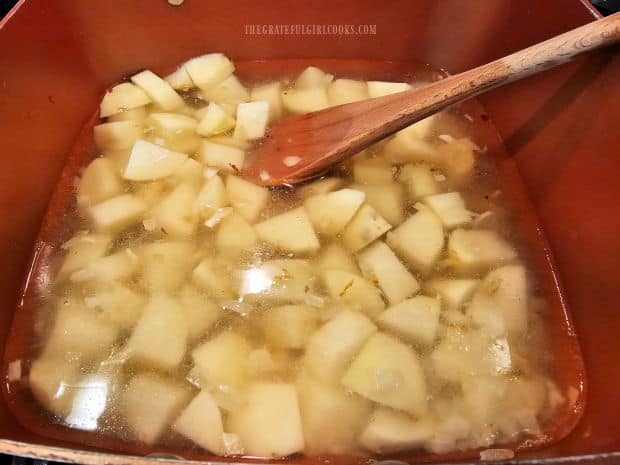
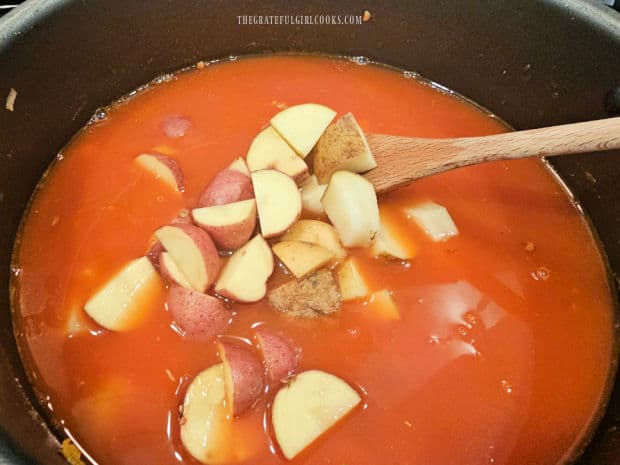
    Stir in 4 cups of water (or chicken broth) into the veggies, then add the potato chunks. The potatoes can either be peeled or not, depending on your personal preference. We leave them on (after washing them well).

    I also use a combination of russet potatoes, red potatoes and a couple yukon gold potatoes. You can use only one kind of potato if that’s what you have, just be sure to use ¾ pound total of bite-sized potato pieces.

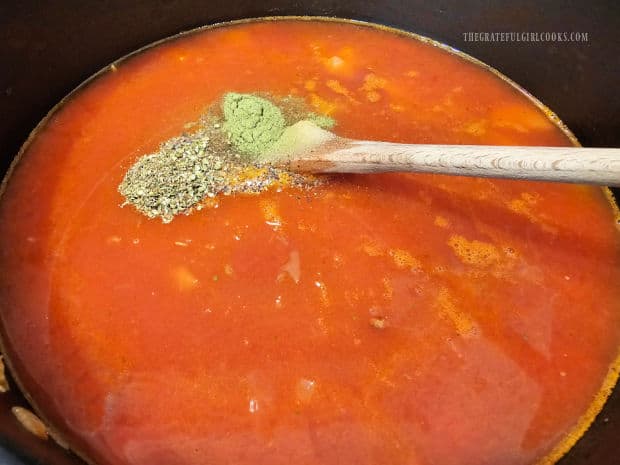
    Stir in salt, pepper, dried thyme and oregano until they’re incorporated into the soup.

    Water and bite-sized potatoes are added to the soup pot.Salt, pepper, oregano and thyme are stirred into the lentil potato soup.

    Time To Cook The Soup

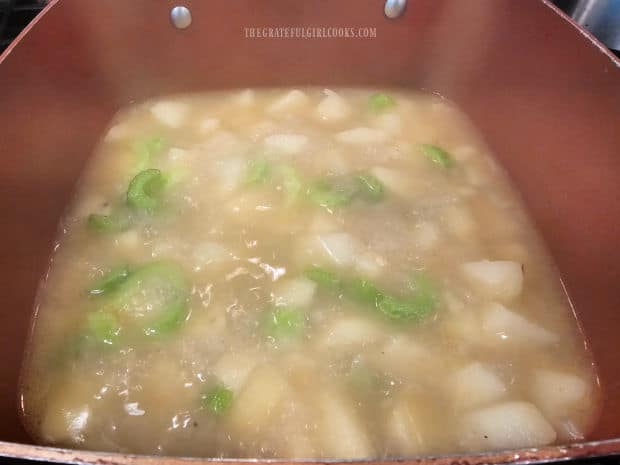
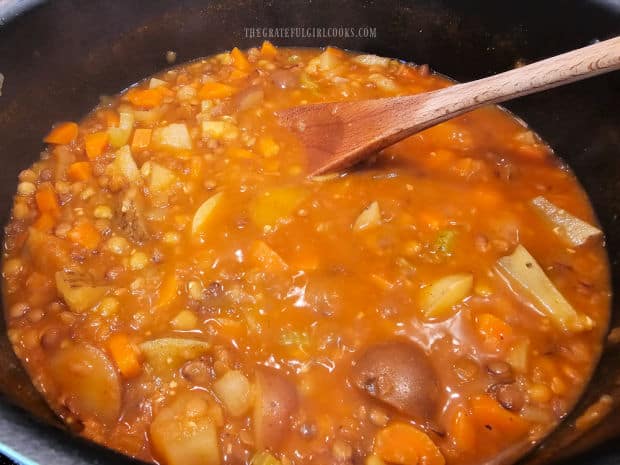
    Put a lid on the soup pot and let the soup come to a boil. Turn the heat down to Medium-Low. Continue cooking the soup (covered) on a low simmer for between 30-35 minutes, stirring occasionally.

    Take a taste. The lentil potato soup is done cooking when the lentils AND the potato chunks are soft and tender. Season the soup to taste with additional salt and pepper, if necessary.

    The lentil potato soup is fairly thick in density. If you want it to be more “soupy” in texture, stir in a bit more water (about ½ -1 cup), and make sure the soup is heated through before serving. 

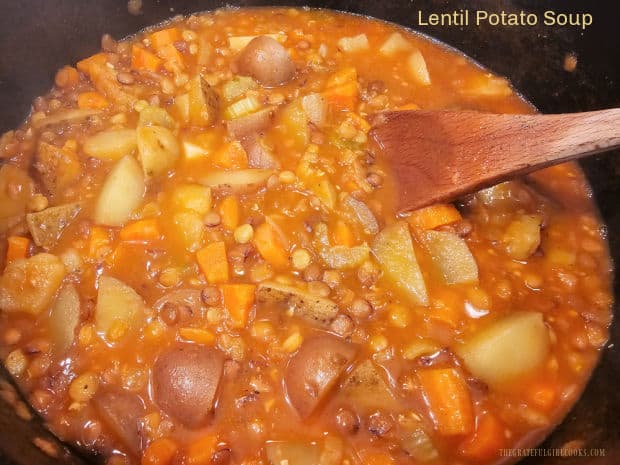
    A pot of lentil potato soup is ready to serve, after cooking for 35 minutes.

    Serve The Lentil Potato Soup

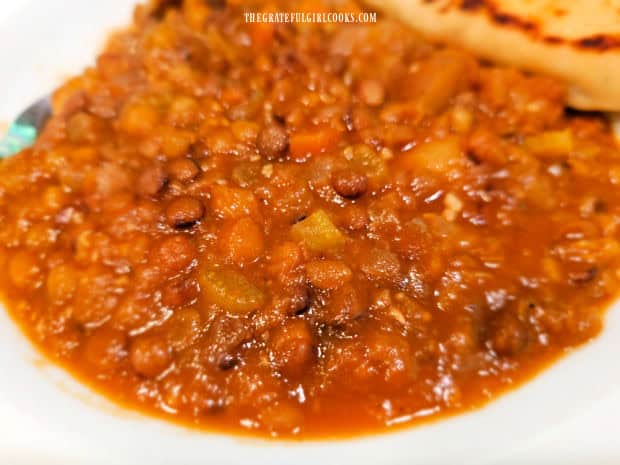
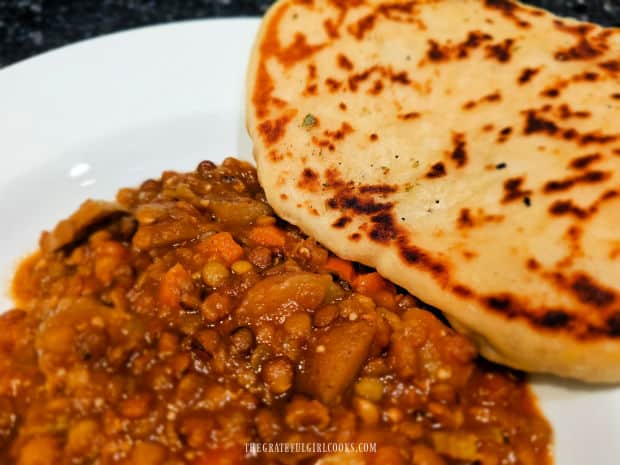
    Ladle the hot lentil potato soup into serving bowls, and serve this dish hot! We enjoyed the soup with a slice of homemade garlic butter naan bread on the side!

    The naan was perfect for this thick soup and we enjoyed dipping pieces of it into the soup and scooping up lentils and veggies. YUM!

    A close up photo of the lentil potato soup, served in a white bowl.A white bowl of lentil potato soup, with garlic butter naan bread on the side.

    I hope you have the opportunity to try this delicious, meatless soup, and trust you will enjoy it as much as we do. It is a filling, hearty soup I am confident you’re going to like!

    Thanks for stopping by, and please come back again soon for more family-friendly recipes. Take care, may God bless you… and have a GREAT day!

    Looking For More SOUP Recipes?

    You can find ALL of my recipes in the Recipe Index, which is located at the top of the page. I have lots of delicious soup recipes to choose from, including:

    Want More Recipes? Get My FREE Newsletter!

    I publish a newsletter 2 times per month (1st and 15th) with lots of recipes, tips, etc..
    Would you like to join our growing list of subscribers?

    There is a Newsletter subscription box on the top right (or bottom) of each blog post, depending on the device you use.
    You can submit your e-mail address there, to be added to my mailing list.

    Find Me On Social Media:

    Facebook page: The Grateful Girl Cooks!
    Pinterest:
    The Grateful Girl Cooks!
    Instagram:
    jbatthegratefulgirlcooks

    Author's signature

    Recipe adapted from (and with thanks to): Mira, at cookinglsl.com/easy-lentil-potato-soup-recipe/

    ↓↓ PRINTABLE RECIPE BELOW ↓↓

    0 from 0 votes
    Lentil Potato Soup
    Prep Time
    10 mins
    Cook Time
    35 mins
    Total Time
    45 mins
     

    Lentil Potato Soup is a hearty and filling meatless soup that serves 6 and is easy to make. It's also budget friendly and tastes delicious!

    Category: Main Dish, Soup
    Cuisine: American
    Keyword: lentil potato soup
    Servings: 6
    Calories Per Serving: 234 kcal
    Author: JB @ The Grateful Girl Cooks!
    Ingredients
    • Tablespoons vegetable oil
    • cup yellow onion diced
    • 2 medium carrots peeled, diced
    • 1 stalk celery diced
    • 3 cloves garlic minced
    • ¼ cup tomato sauce
    • 2 Tablespoons tomato paste
    • cups lentils rinsed, drained well
    • 2 teaspoons salt
    • ½ teaspoon dried oregano
    • ¼ teaspoon black pepper
    • ¼ teaspoon dried thyme
    • 4 cups water OR chicken broth + more, as need to thin soup
    • ¾ pound potatoes (russet, red, Yukon- or combo) cut in bite-sized pieces
    Instructions
    1. Rinse lentils and drain 2-3 times. Set aside.

    2. In a large cooking pot, heat oil on Medium. When oil is hot, stir in onion; cook 1 minute, stirring often. Add diced carrots, celery, and minced garlic to the pot; stir to combine. Cook for 3 minutes, stirring often so garlic doesn't burn.

    3. Add drained lentils, tomato paste and tomato sauce. Stir well, to combine. Cook on Medium heat for 1 minute, stirring often.

    4. Stir in water (or chicken broth), then add potatoes, salt, pepper, dried thyme and oregano. Stir until they're incorporated into the soup.

    5. Cover the pot and let soup come to a boil. Turn heat down to Medium-Low. Continue cooking (covered) on a low simmer for 30-35 minutes; stir occasionally. Soup is done when lentils AND potatoes are soft/tender. Taste, then add additional salt and pepper, if desired. TIP: If you want soup to be less thick, stir in more water (½ -1 cup); make sure soup is heated through. 

    6. Ladle the hot soup into serving bowls, and serve immediately! Enjoy! Any leftovers can be easily re-heated.

    Nutrition Facts
    Lentil Potato Soup
    Amount Per Serving (1 (1/6 of total))
    Calories 234 Calories from Fat 36
    % Daily Value*
    Fat 4g6%
    Saturated Fat 1g6%
    Trans Fat 0.02g
    Polyunsaturated Fat 2g
    Monounsaturated Fat 1g
    Sodium 898mg39%
    Potassium 829mg24%
    Carbohydrates 38g13%
    Fiber 15g63%
    Sugar 4g4%
    Protein 12g24%
    Vitamin A 3577IU72%
    Vitamin C 11mg13%
    Calcium 50mg5%
    Iron 4mg22%
    * Percent Daily Values are based on a 2000 calorie diet.

    Here’s one more to pin on your Pinterest boards!Lentil Potato Soup is a hearty and filling meatless soup that serves 6 and is easy to make. It's also budget friendly and tastes delicious!

    Broccoli Cheese Soup (Instant Pot)

    Whip up delicious Broccoli Cheese Soup using an Instant Pot in about 30 minutes! This soup recipe is easy to make and yields 6 servings.
    Whip up delicious Broccoli Cheese Soup using an Instant Pot in about 30 minutes! This soup recipe is easy to make and yields 6 servings.

    Last summer, our oldest son gave me his Instant Pot, after moving out of his apartment, getting married in Portugal and moving to Portugal.

    After researching how to use an Instant Pot since he didn’t have the instruction manual, I figured it out and have been using it ever since. True story!

    So now, almost a year after receiving my Instant Pot, I’m finally getting around to posting the first IP recipe on my blog! I’ve made quite a few meals already using the Instant Pot, but this is the first “OFFICIAL” recipe I’m adding to the blog, with more to come in the days ahead.

    This original recipe came from a wonderful cookbook I purchased by author Coco Morante, and I highly recommend her book, referenced below.

    So… if you have an Instant Pot and would like to make some delicious Broccoli Cheese Soup using it, here’s how to do that.

    Scroll Down For A Printable Recipe Card At The Bottom Of The Page

    How To Make Broccoli Cheese Soup In An Instant Pot

    The first thing you need to do is remove the lid and then program the Instant Pot to SAUTÉ. Place 2 Tablespoons butter in the inner pot and heat, stirring often, until the butter has melted.

    Instant pot is ready to cook some broccoli cheese soup!

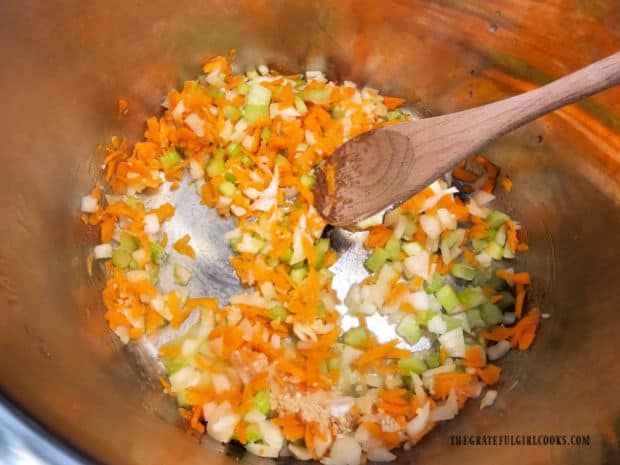
    To the melted butter add finely diced onion, diced celery, shredded carrot, minced garlic and salt, and stir to combine these ingredients.

    Sauté the veggies for about 4-5 minutes, stirring often. When done, the onion should have softened considerably, but should still be translucent in color (not browned or crispy).

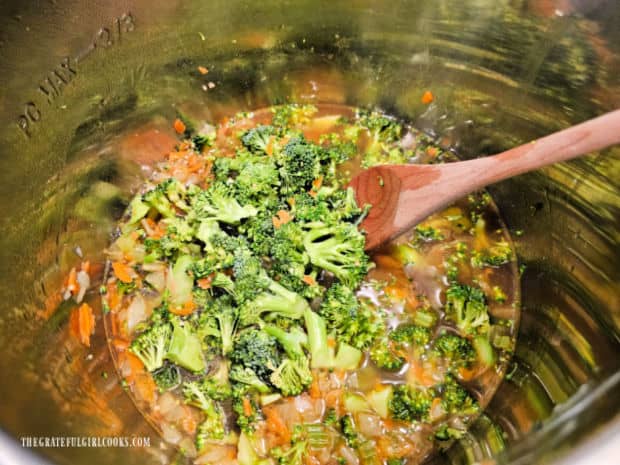
    Now stir in one pound of small broccoli florets and 3 cups of vegetable broth. Stir until combined, pushing the broccoli down into the liquid.

    Onion, carrots, celery, and garlic are sautéed in melted butter.Broccoli florets and vegetable broth are added to the Instant Pot.

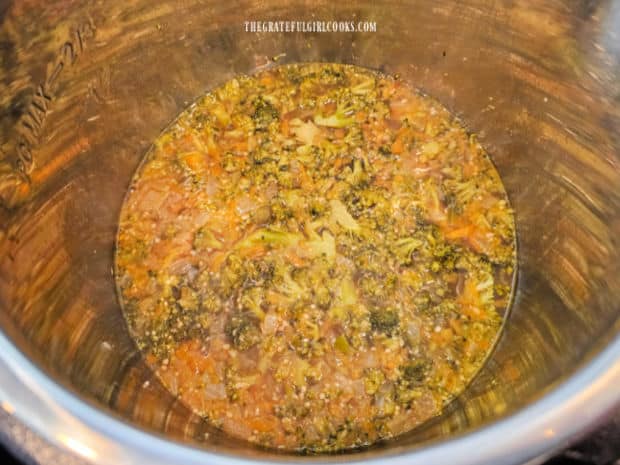
    Put the cover on the Instant Pot, and make sure it is securely locked in place. Flip the pressure release knob to SEALING. Push the CANCEL button to clear the cooking program, then press either the MANUAL or PRESSURE COOK button (depending on your machine).

    Set the cooking time for 1 minute at High pressure. Now the machine will start heating up before the pressure cooking begins. It will take about 8-10 minutes before the Instant Pot reaches full pressure and the 1 minute cooking timer starts.


    Make A “Slurry”

    During the time the soup is coming to pressure and cooking, you can make the “slurry” which will be used to slightly thicken the soup once cooked.

    In a bowl or medium-sized measuring cup, combine half and half, hot sauce and cornstarch, and stir until fully combined, with no lumps. Set aside until the soup has finished cooking.

    Finish Making The Broccoli Cheese Soup

    Once the timed cooking ends for the soup, let the pressure release NATURALLY for 5 minutes (do nothing). After 5 minutes, flip the pressure release knob to VENTING, which will allow any remaining steam inside to release immediately.

    Carefully remove the lid, then press the CANCEL button, to again reset your Instant Pot. Now push the SAUTÉ button again.

    After pressure cooking the soup is ready to be thickened.

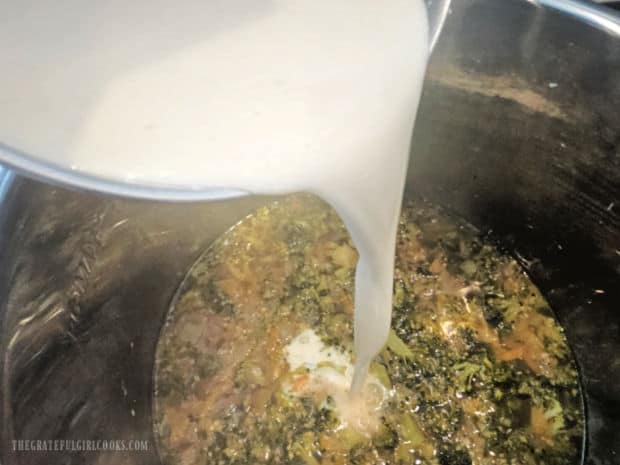
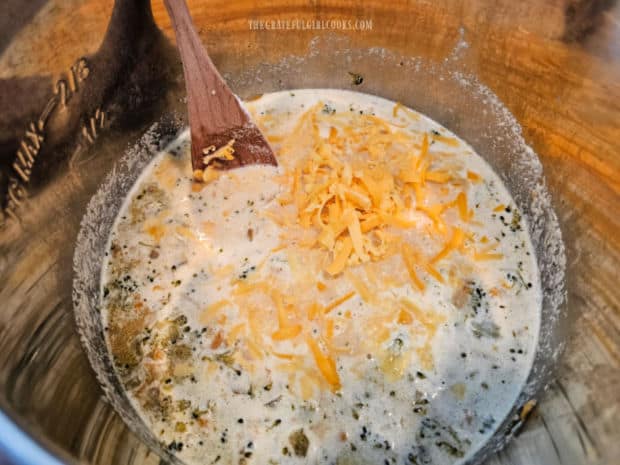
    Give the “slurry” you made a quick stir once again, then add it to the soup. Now toss in all that beautiful shredded cheddar cheese, and stir to combine.

    A "slurry" of half and half, cornstarch and hot sauce is added to the soup.Lots of shredded cheddar cheese is stirred into the hot soup until melted.

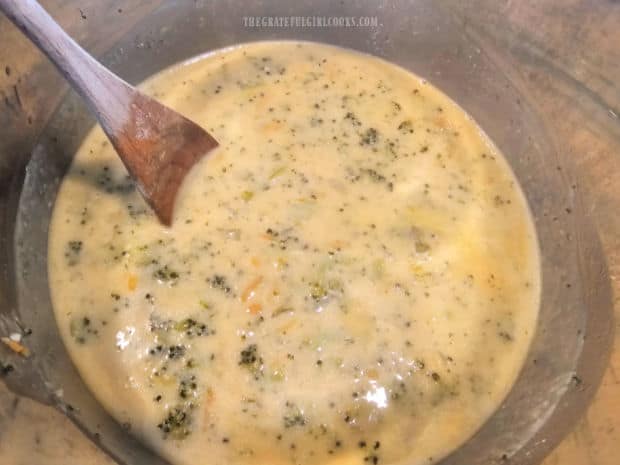
    Continue to stir and cook the soup at a low simmer (not boiling) until the cheese has melted and the slurry mixture has slightly thickened the broccoli cheese soup.

    Once the soup is fully heated through, it is done. However, I suggest taking a bite and then adding more salt (if desired), to suit your taste. If you want the soup spicier, by all means, add some more hot sauce!

    After the broccoli cheese soup has thickened slightly, it is ready to serve.

    Serve The Broccoli Cheese Soup

    Ladle the broccoli cheddar soup into serving bowls, and garnish the top with additional shredded cheese (optional, but good).

    Serve this delicious soup with a nice warm piece of bread or a green salad on the side. We enjoyed our soup with warm slices of homemade Oatmeal Molasses Bread on the side, and it was a great combination!

    Bowl of broccoli cheese soup topped with cheese, and bread on the side.Grated cheddar cheese on top of a hot bowl of broccoli cheese soup.

    I hope you have the chance to make this Instant Pot recipe for Broccoli Cheese Soup, and trust you’ll enjoy it as much as we do. We like the convenience of using the Instant Pot for making soup in a short amount of time!

    Thanks for stopping by, and I invite you to come back again soon for more family-friendly recipes. Take care, may God bless you… and have a GREAT day.

    Looking For More SOUP Recipes?

    You can find all of my recipes in the Recipe Index, which is located at the top of the page. I have some wonderful soup recipes to choose from, including:

    Want More Recipes? Get My FREE Newsletter!

    I publish a newsletter 2 times per month (1st and 15th) with lots of recipes, tips, etc..
    Would you like to join our growing list of subscribers?

    There is a Newsletter subscription box on the top right (or bottom) of each blog post, depending on the device you use.
    You can submit your e-mail address there, to be added to my mailing list.

    Find Me On Social Media:

    Facebook page: The Grateful Girl Cooks!
    Pinterest:
    The Grateful Girl Cooks!
    Instagram:
    jbatthegratefulgirlcooks

    Author's signature

    Original Recipe Source: “The Ultimate Instant Pot Cookbook” by Coco Morante, page 91, published in 2018 by TenSpeed Press

    ↓↓ PRINTABLE RECIPE BELOW ↓↓

    0 from 0 votes
    Broccoli Cheese Soup (Instant Pot)
    Prep Time
    10 mins
    Cook Time
    20 mins
    Total Time
    30 mins
     

    Whip up delicious Broccoli Cheese Soup using an Instant Pot in about 30 minutes! This soup recipe is easy to make and yields 6 servings.

    Category: Main Dish, Soup
    Cuisine: American
    Keyword: broccoli cheese soup, Instant pot
    Servings: 6
    Calories Per Serving: 297 kcal
    Author: JB @ The Grateful Girl Cooks!
    Ingredients
    • 2 Tablespoons butter
    • 1 medium yellow onion peeled/finely diced
    • 1 large stalk celery finely diced
    • 1 large carrot peeled/shredded
    • 2 cloves minced garlic
    • teaspoon salt
    • 1 pound broccoli florets bite sized florets
    • 3 cups vegetable broth
    • 1 cup half and half
    • 2 Tablespoons corn starch
    • 2 teaspoons hot sauce (Frank's red hot or Crystal)
    • 2 cups shredded cheddar cheese tightly packed
    OPTIONAL GARNISH: additional shredded cheese to sprinkle on top of soup, for serving
      Instructions
      1. Remove IP lid; press SAUTÉ button. Put butter in the inner pot and cook, stirring often, until butter melts.

      2. Add onion, celery, carrot, garlic and salt; stir to combine. Sauté veggies for 4-5 minutes, stirring often. When done, onion should have softened , but still be translucent in color. Stir in broccoli and vegetable broth, pushing the broccoli down into the broth.

      3. Lock the lid securely on the IP. Flip the pressure release knob to SEALING. Push the CANCEL button to clear the cooking program, then press the MANUAL or PRESSURE COOK button (depending on your machine). Set cooking time for 1 minute at High pressure. Now the machine will start heating up and will take about 8-10 minutes before the Instant Pot reaches full pressure and the 1 minute cooking timer starts.

      4. While soup is coming to pressure/cooking, make the "slurry" which will be used to thicken the soup. Stir half and half, corn starch and hot sauce in a bowl or measuring cup until combined (no lumps). Set aside until soup is done cooking.

      5. Once timed cooking is completed, let the pressure release NATURALLY for 5 minutes (do nothing). After 5 minutes, flip the pressure release knob to VENTING, which allows any remaining steam to release immediately. After all steam has released, carefully remove the lid. Press the CANCEL button, to again reset your Instant Pot, then push the SAUTÉ button again.

      6. Give the "slurry" another quick stir, then add it to the soup. Add cheese, and stir to combine. Continue to stir/simmer soup until cheese melts and soup has slightly thickened. Take a bite, then add more salt or hot sauce, if desired.

      7. Ladle hot soup into serving bowls; garnish with more cheese, if desired. Serve!

      Recipe Notes

      NOTE: The caloric calculation was made without the additional shredded cheese used as a garnish, as this is an optional topping.

      Nutrition Facts
      Broccoli Cheese Soup (Instant Pot)
      Amount Per Serving (1 (1/6 of total))
      Calories 297 Calories from Fat 198
      % Daily Value*
      Fat 22g34%
      Saturated Fat 13g81%
      Trans Fat 0.2g
      Polyunsaturated Fat 1g
      Monounsaturated Fat 5g
      Cholesterol 62mg21%
      Sodium 913mg40%
      Potassium 419mg12%
      Carbohydrates 15g5%
      Fiber 3g13%
      Sugar 6g7%
      Protein 13g26%
      Vitamin A 3411IU68%
      Vitamin C 71mg86%
      Calcium 360mg36%
      Iron 1mg6%
      * Percent Daily Values are based on a 2000 calorie diet.

      Here’s one more to pin on your Pinterest boards!Whip up delicious Broccoli Cheese Soup using an Instant Pot in about 30 minutes! This soup recipe is easy to make and yields 6 servings.

      Greek Cannellini Bean Stew

      Greek Cannellini Bean Stew is an easy to make, meatless hearty stew with carrots, onion, garlic, celery and a hint of orange! It’s DELICIOUS!
      Greek Cannellini Bean Stew is an easy to make, meatless hearty stew with carrots, onion, garlic, celery and a hint of orange! It's DELICIOUS!

      If you’re looking for a healthy, filling dish that is scrumptious and has lots of healthy ingredients (and fiber) in it, may I suggest this recipe for Greek Cannellini Bean Stew? It’s a wonderful meatless dish that vegetarians AND meat-lovers will surely enjoy!

      Greeks call this bean stew “Fasolada”, and it is a much-loved national dish that is considered “comfort food”. This simple stew has its origins in ancient Greece and was typically made using dried cannellini beans.

      This version of the bean stew uses canned beans, which is very convenient, because it dramatically reduces the time needed to make this dish.

      The stew only takes 15 minutes of prep, and then it is simmered on the stove for 30-35 minutes. When it’s done cooking, you will be left with a creamy, thick stew I’m confident you’ll enjoy!

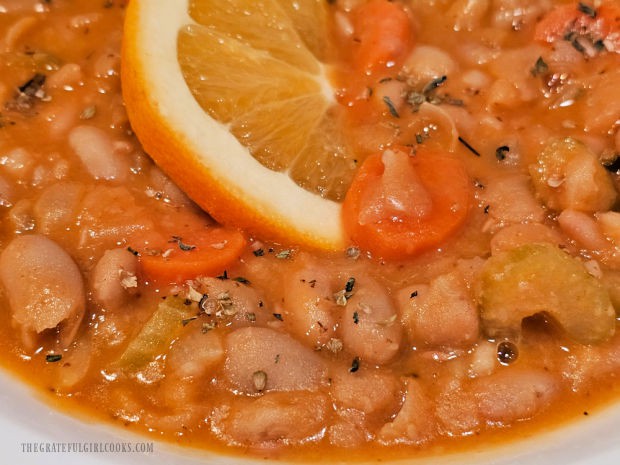
      The surprising ingredient in this soup is the addition of fresh orange slices while it cooks! The natural oils in the orange peel and the fruit itself provide a hint of orange flavor (not overpowering at all!), which is a nice touch. Here’s how to make the stew.

      Scroll Down For A Printable Recipe Card At The Bottom Of The Page

      Prepare The Veggies

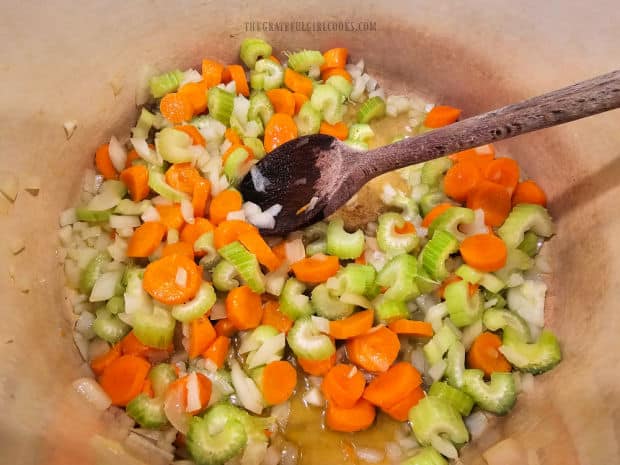
      Heat olive oil on Medium heat in a large soup pot. Add the chopped onion, and carrot and celery slices to the hot oil.

      Cook the veggies 8-10 minutes in the hot oil, stirring occasionally, until they become soft and tender (especially the carrots).

      Onion, carrots and celery are cooked in hot olive oil in large soup pot.

      Building The Stew

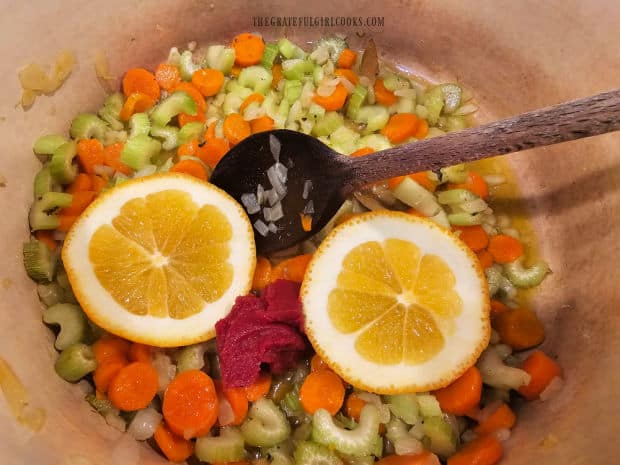
      Once the onions, carrots and celery have softened, add dried oregano, 1 bay leaf, tomato paste and two slices of fresh orange (including peel) to the soup pot.

      Stir to combine these ingredients, then let them cook 2 more minutes on Medium heat, stirring occasionally.

      Orange slices, oregano, tomato paste and bay leaf are added to soup pot.

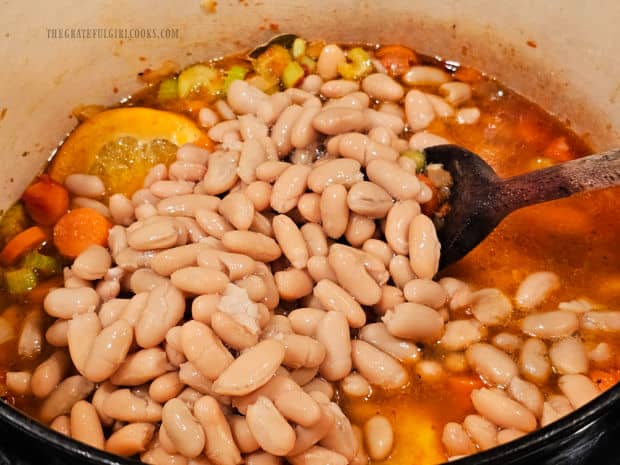
      Now it’s time to add the canned cannellini beans to the soup pot. You will use a total of 2 cans of beans, following the instructions below.

      Drain ONLY 1 CAN of cannellini beans and then add the beans (without liquid) to the stew. The remaining can of beans should be added to the stew INCLUDING THE LIQUID.

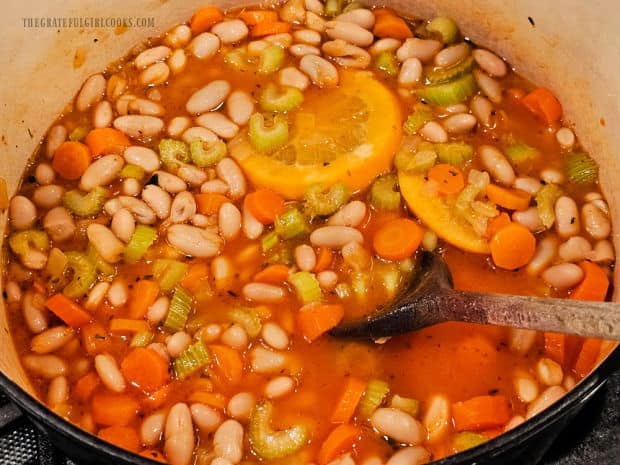
      Stir in 1 cup of water to the soup pot, salt and pepper, then stir to combine all the ingredients. 

      Cannellini beans, water, salt and pepper are now added to the stew.

      Cook The Stew

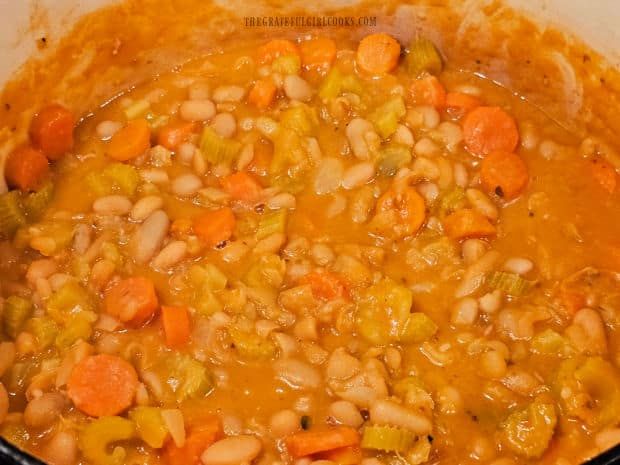
      Cook the Greek Cannellini Bean Stew (uncovered) for 30-35 minutes on a LOW simmer, stirring occasionally. The stew will thicken considerably as it cooks, which is a GOOD thing!

      If at any point, you notice the stew is cooking too fast or begins sticking to the bottom of the pan, make sure the heat is very low. You may wish to add a tiny bit of water.

      When the stew has finished cooking, and it’s thick and creamy, it is done. Remove the bay leaf and orange slices from the pot before serving.

      The Greek Cannellini Bean Stew cooks 30 minutes, or until thickened.The thickened bean stew is ready to be served once hot and thickened.

      Serve The Greek Cannellini Bean Stew

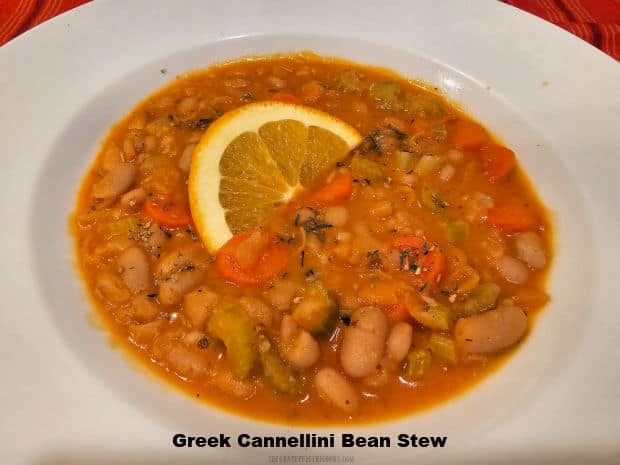
      Ladle the Greek Cannellini Bean Stew into 4 bowls, dividing evenly. If desired, garnish each serving with half an orange slice (this is optional).

      Serve the stew hot, and enjoy the wonderful flavor of this vegetarian dish. We especially enjoy eating the stew with a thick, crusty piece of garlic bread on the side. YUM!

      The Greek Cannellini Bean Stew is served with an orange slice as garnish.A spoonful of the thick, creamy Greek Cannellini Bean Stew.

      I really hope you enjoy this hearty cannellini bean stew. Even though it is meatless, it has lots of protein (from the beans) and vegetables, and always fills us up!

      Thank you for taking time out of your busy day to visit my blog. I appreciate it, and invite you to come back again soon for more family-friendly recipes. Take care, and have a GREAT day!

      Looking For More SOUP And STEW Recipes?

      You can find ALL of my recipes in the Recipe Index, which is located at the top of the page. I have lots of soup and stew recipes, including:

      Want More Recipes? Get My FREE Newsletter!

      I publish a newsletter 2 times per month (1st and 15th) with lots of recipes, tips, etc..
      Would you like to join our growing list of subscribers?

      There is a Newsletter subscription box on the top right (or bottom) of each blog post, depending on the device you use.
      You can submit your e-mail address there, to be added to my mailing list.

      Find Me On Social Media:

      Facebook page: The Grateful Girl Cooks!
      Pinterest:
      The Grateful Girl Cooks!
      Instagram:
      jbatthegratefulgirlcooks

      Author's signature

      Recipe adapted from: Koula Barydakis at: mediterraneanliving.com/white-bean-soup/

      ↓↓ PRINTABLE RECIPE BELOW ↓↓

      0 from 0 votes
      Greek Cannellini Bean Stew
      Prep Time
      15 mins
      Cook Time
      30 mins
      Total Time
      45 mins
       

      Greek Cannellini Bean Stew is an easy to make, meatless hearty stew with carrots, onion, garlic, celery and a hint of orange! It's DELICIOUS!

      Category: Main Dish, Soup
      Cuisine: Greek
      Keyword: Greek Cannellini Bean Stew
      Servings: 4
      Calories Per Serving: 405 kcal
      Author: JB @ The Grateful Girl Cooks!
      Ingredients
      • ¼ cup extra virgin olive oil
      • ½ large yellow onion chopped
      • 3 medium carrots , peeled, thinly sliced
      • 3 stalks celery thinly sliced
      • ¼ teaspoon dried oregano
      • 1 bay leaf
      • 1 Tablespoon tomato paste
      • 2 thin slices orange round slices, include peel and flesh
      • 31 ounces canned cannellini beans =2 (15.5 oz. cans), DO NOT DRAIN
      • cup water
      • ¼ teaspoon salt or more, to taste
      • ¼ teaspoon ground black pepper or more, to taste
      Instructions
      1. Heat olive oil on Medium heat in a large soup pot or Dutch oven. Add chopped onion, carrot and celery slices to the hot oil. Cook 8-10 minutes, stirring occasionally, until they become soft/tender (especially the carrots).

      2. Add oregano, 1 bay leaf, tomato paste and two slices of orange (including peel) to soup pot. Stir to combine, then let them cook 2 more minutes on Medium heat, stirring occasionally.

      3. Drain 1 CAN of cannellini beans and then add the beans (without liquid) to the stew. The remaining can of beans should then be added to the stew INCLUDING THE LIQUID. Add water, salt and pepper to the stew; stir to combine ingredients. 

      4. Cook for 30-35 minutes on a LOW simmer, stirring occasionally. The stew will thicken considerably as it cooks. If at any point, you notice stew cooking too fast or sticking to the bottom of the pan, make sure the heat is very low. You may add just a tiny bit of water. When the stew has finished cooking, and it's thick and creamy, it is done. Remove bay leaf and orange slices from stew before serving.

      5. Ladle stew into 4 bowls, dividing evenly. Garnish each serving with a fresh half of an orange slice (OPTIONAL). Serve hot, and enjoy!

      Nutrition Facts
      Greek Cannellini Bean Stew
      Amount Per Serving (1 (1/4 of total))
      Calories 405 Calories from Fat 126
      % Daily Value*
      Fat 14g22%
      Saturated Fat 2g13%
      Polyunsaturated Fat 2g
      Monounsaturated Fat 10g
      Sodium 248mg11%
      Potassium 1294mg37%
      Carbohydrates 55g18%
      Fiber 13g54%
      Sugar 5g6%
      Protein 17g34%
      Vitamin A 7845IU157%
      Vitamin C 6mg7%
      Calcium 199mg20%
      Iron 7mg39%
      * Percent Daily Values are based on a 2000 calorie diet.

      Here’s one more to pin on your Pinterest boards!Greek Cannellini Bean Stew is an easy to make, meatless hearty stew with carrots, onion, garlic, celery and a hint of orange! It's DELICIOUS!

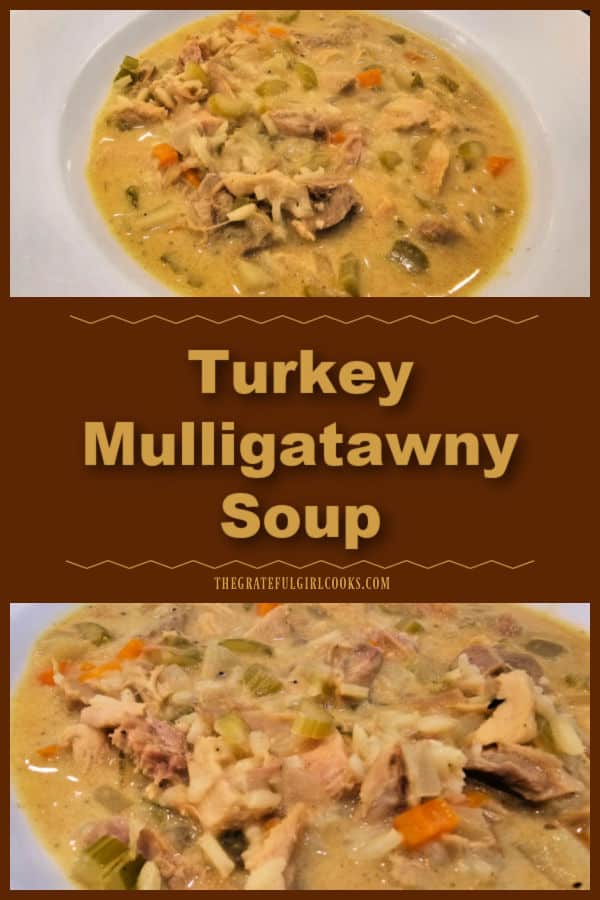
      Turkey Mulligatawny Soup

      Leftover turkey? Make Turkey Mulligatawny Soup with turkey, rice, carrots, celery, onion, apple & curry powder. It’s hearty and satisfying!
      Leftover turkey? Make Turkey Mulligatawny Soup with turkey, rice, carrots, celery, onion, apple & curry powder. It's hearty and satisfying!

      The first time I tried mulligatawny soup was about 20 years ago. A friend and I were invited to another friends home for lunch, and she served mulligatawny soup to us.

      My first reaction was “Mulliga-WHAT?”, because I had never heard of this soup before. When she told me there was a combination of vegetables, meat and green apples in it, truthfully I had my doubts whether it would be something I would enjoy.

      However… it was fantastic, and all was well in the soup world. True story! Who knew that a thick soup with VEGETABLES and APPLES in it could taste so good? 

      Mulliga-WHAT?

      In researching more about this soup, I discovered there are many variations and recipes available. I learned mulligatawny soup was fairly common around the end of the 18th century in India, but tended to be more of a spicy, thin broth, which its original name was translated in English to “pepper water”.

      Apparently, as the British gained more influence and prevalence over the years in India, their version of this soup began to include meat or mutton, more vegetables, and a creamier consistency. That is why mulligatawny soup is often commonly referred to as an Indian-British soup.

      Years later, I found a recipe for a wonderful mulligatawny soup in one of my cookbooks. After making a few changes, it brings back memories of the soup my friend served me. This modified version is the recipe I am sharing today. Here’s how to prepare it.

      Scroll Down For A Printable Recipe Card At The Bottom Of The Page

      Prep The Vegetables

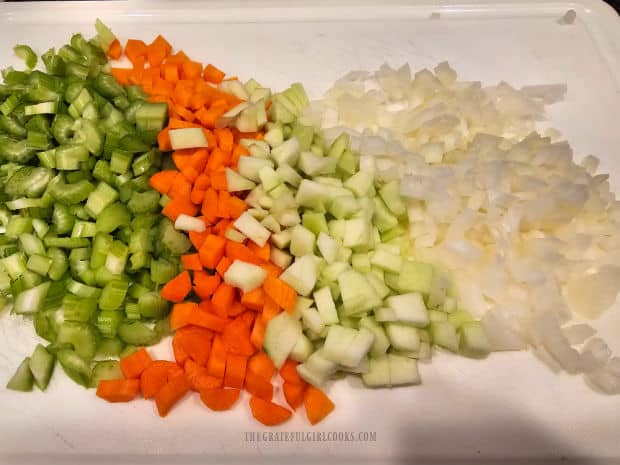
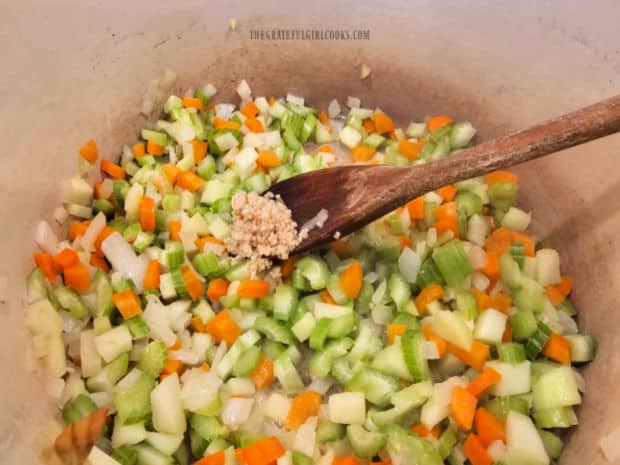
      The first thing you will need to do is prep the veggies and fruit. Finely chop 3 ribs of celery and peel and chop a yellow onion.

      Peel, and finely chop carrots, then peel, core and finely chop a green Granny Smith apple. These are the veggies (and fruit) that will help to bring flavor and texture to the mulligatawny soup.

      Onion, green apple, celery and carrots are finely chopped for the soup.

      Melt 2 Tablespoons of butter (on Medium heat)in a large soup pot, then add the prepared ingredients (celery, onion, carrots and apple). 

      Cook the veggies (and apple) on Medium heat for 4 minutes, stirring occasionally. The onions should become tender and translucent.

      Stir in 2 cloves of minced garlic, and continue to cook for 1 more minute, stirring often so the garlic doesn’t burn.

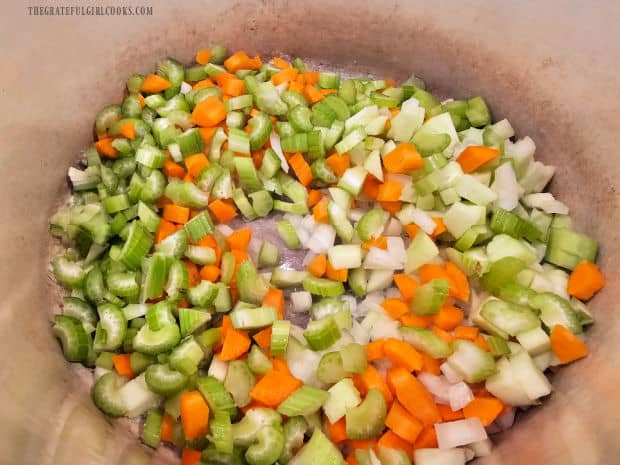
      The chopped vegetables are cooked in butter in a large soup pot.Minced garlic is added to the cooked veggies in the soup pot.

      Prepare The Turkey Mulligatawny Soup

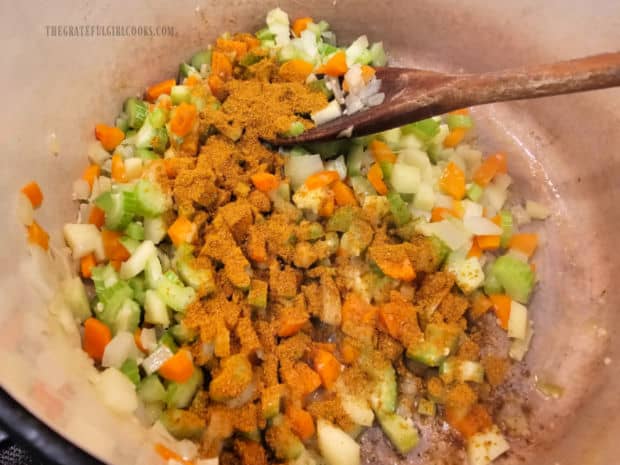
      Now it’s time to “build” the soup. Add a Tablespoon of curry powder to the veggies, and stir to combine. Continue to cook, (stirring often) for 1-2 minutes so the spices “bloom and develop” and are integrated into the veggies.

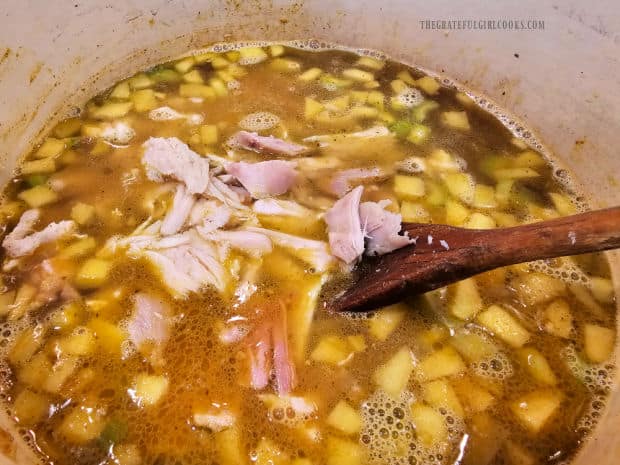
      Pour 4 cups of chicken broth into the pan, then add 2½ cups of cooked, shredded turkey. Stir to combine, and turn the heat up to High. Bring the soup up to a simmer (not boiling).

      Curry powder is stirred into the sautéed vegetables in the soup pot.Shredded cooked turkey and chicken broth is stirred into the soup.

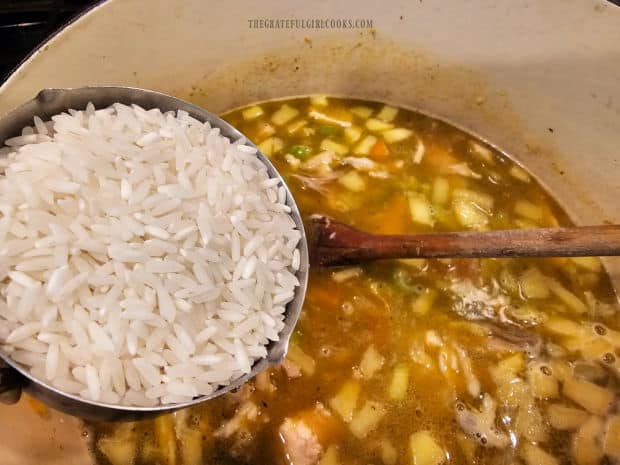
      Reduce the heat back down to Medium, and stir in ½ cup of uncooked long grain white rice. Cover the soup pot and cook for 15-20 minutes, or until the rice has become tender (taste it to check).

      Uncooked long grain white rice is added to the turkey mulligatawny soup.

      Final Step Before Serving The Mulligatawny Soup

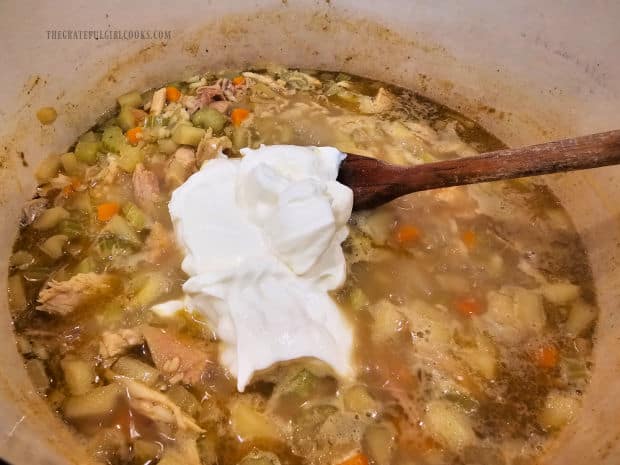
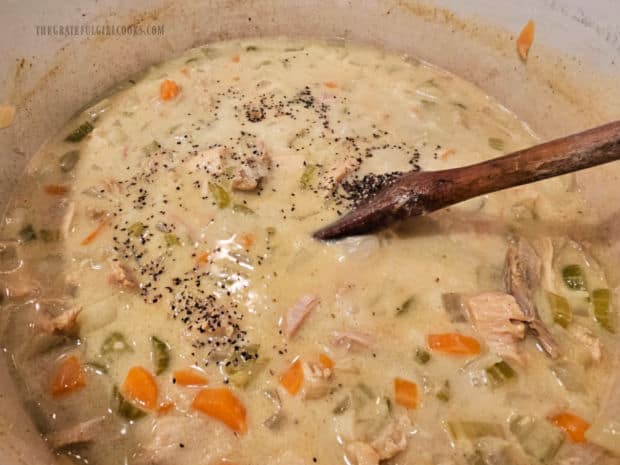
      Once the rice is tender, stir ¾ cup of low-fat sour cream (or plain, unsweetened yogurt) into the soup. Once incorporated, take a bite, then season to taste with salt and pepper.

      Turn the heat to Low and let the soup simmer for 7-8 minutes, or until it’s heated through, then the soup is ready to serve.

      Once rice is tender, sour cream is stirred into the soup and simmered.Salt and pepper is added to turkey mulligatawny soup before serving.

      Serve The Turkey Mulligatawny Soup

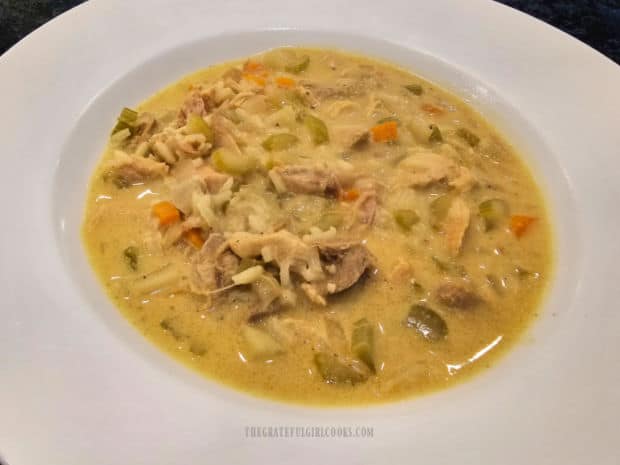
      Ladle the hot turkey mulligatawny soup into serving bowls, and serve, with a favorite green salad or crusty bread on the side!

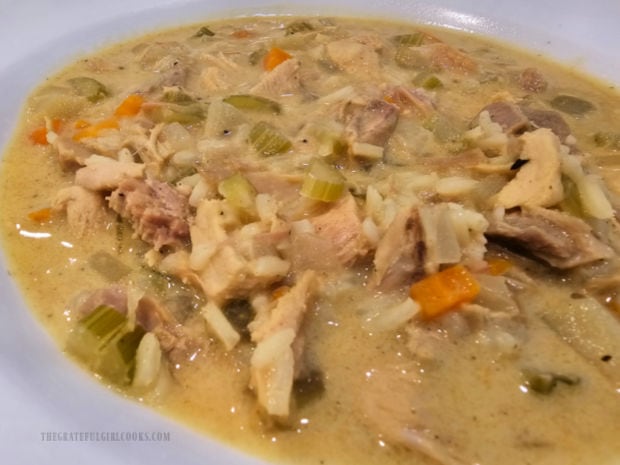
      The mulligatawny soup is creamy AND chunky, thanks to the sour cream and amount of veggies and turkey. It has wonderful curry flavor, but it is definitely NOT overpowering.

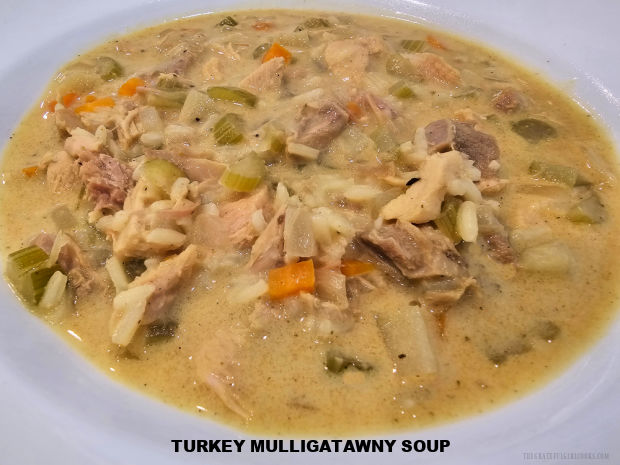
      A big bowl of hot turkey mulligatawny soup is served.Lots of veggies and meat in a bowl of turkey mulligatawny soup.

      I really hope you enjoy this mouth-watering soup as much as we do! It is savory, full-flavored, and will warm you up on a cold and chilly day!

      Thanks for stopping by, and I invite you to come back soon for more family-friendly recipes. Take care, have a GREAT day, and may God bless you.

      Looking For More SOUP Recipes?

      You can find ALL of my recipes in the Recipe Index, which is located at the top of the page. I have lots of fabulous soup recipes to choose from, including:

      Want More Recipes? Get My FREE Newsletter!

      I publish a newsletter 2 times per month (1st and 15th) with lots of recipes, tips, etc..
      Would you like to join our growing list of subscribers?

      There is a Newsletter subscription box on the top right (or bottom) of each blog post, depending on the device you use.
      You can submit your e-mail address there, to be added to my mailing list.

      Find Me On Social Media:

      Facebook page: The Grateful Girl Cooks!
      Pinterest:
      The Grateful Girl Cooks!
      Instagram:
      jbatthegratefulgirlcooks

      Author's signature

      Recipe adapted from: “Williams Sonoma- Soup Of The Day”, page 286, published by Weldonowen in 2011

      ↓↓ PRINTABLE RECIPE BELOW ↓↓

      0 from 0 votes
      Turkey Mulligatawny Soup
      Prep Time
      15 mins
      Cook Time
      40 mins
      Total Time
      55 mins
       

      Leftover turkey? Make Turkey Mulligatawny Soup with turkey, rice, carrots, celery, onion, apple & curry powder. It's hearty and satisfying!

      Category: Main Dish, Soup
      Cuisine: All Cuisines
      Keyword: turkey mulligatawny soup
      Servings: 6
      Calories Per Serving: 260 kcal
      Author: JB @ The Grateful Girl Cooks!
      Ingredients
      • 2 Tablespoons butter
      • 1 medium yellow onion peeled, finely chopped
      • 1 medium Granny Smith apple peeled, cored, finely chopped
      • 3 large celery ribs finely chopped
      • 2 medium carrots peeled, finely chopped
      • 2 cloves garlic minced
      • 1 Tablespoon curry powder
      • 4 cups chicken broth
      • cups cooked, shredded turkey
      • ½ cup long grain rice (uncooked)
      • ¾ cup low-fat sour cream or plain unsweetened yogurt
      • salt and black pepper, to taste
      Instructions
      1. Melt butter on Medium heat in a large soup pot. Add onion, apple, celery and carrots. Cook for 4 minutes, stirring occasionally, until onions become tender/translucent. Add garlic; cook 1 minute, stirring often so it doesn't burn.

      2. Stir curry powder into the veggies until combined. Cook, stirring often, for 1-2 minutes. Add chicken broth and turkey. Stir to combine ingredients. Turn heat up to High and cook until soup is simmering (not boiling).

      3. Reduce heat to Medium. Stir in uncooked rice. Cover soup pot and cook for 15-20 minutes, or until rice is tender (taste it to check).

      4. Stir sour cream into the soup until incorporated. Take a bite- season to taste with salt and pepper. Turn heat to Low; let soup simmer (do not boil) for 7-8 minutes, or until heated through.

      5. Ladle hot soup into bowls, serve, and enjoy!

      Nutrition Facts
      Turkey Mulligatawny Soup
      Amount Per Serving (1 (1/6 of total))
      Calories 260 Calories from Fat 81
      % Daily Value*
      Fat 9g14%
      Saturated Fat 5g31%
      Trans Fat 0.2g
      Polyunsaturated Fat 1g
      Monounsaturated Fat 2g
      Cholesterol 62mg21%
      Sodium 722mg31%
      Potassium 394mg11%
      Carbohydrates 24g8%
      Fiber 2g8%
      Sugar 6g7%
      Protein 17g34%
      Vitamin A 3664IU73%
      Vitamin C 5mg6%
      Calcium 79mg8%
      Iron 1mg6%
      * Percent Daily Values are based on a 2000 calorie diet.

      Here’s one more to pin on your Pinterest boards!Leftover turkey? Make Turkey Mulligatawny Soup with turkey, rice, carrots, celery, onion, apple & curry powder. It's hearty and satisfying!


      Creamy Pumpkin Coconut Soup

      Creamy Pumpkin Coconut Soup is a delicious, comforting meal to enjoy on a cold day! This easy to make recipe serves 4 and has great flavor.
      Creamy Pumpkin Coconut Soup is a delicious, comforting meal to enjoy on a cold day! This easy to make recipe serves 4 and has great flavor.

      Fall is here, and I’ve begun making more soups as our weather is transitioning from the heat of summer to cooler, crisp days! One of the soups we enjoy is creamy pumpkin coconut soup. The recipe is a compilation of other soups I make, using ingredients from several recipes. 

      This creamy soup is simply seasoned with butter, onions, garlic, curry powder, chicken broth (*see note below), salt and pepper. They’re all pretty basic, but they make this soup wonderful!

      NOTE: If you are vegetarian, you can substitute vegetable broth for the chicken broth. It will slightly alter the taste, but will still be delicious!

      The soup gets its color and creaminess from a can of coconut milk and 2 cups of pumpkin puree (homemade or canned). Both these items can be found in most grocery stores.

      This recipe will yield four servings and is incredibly EASY to prepare in about 20 minutes. Here’s how to make it.

      Scroll Down For A Printable Recipe Card At The Bottom Of The Page

      How To Make Creamy Pumpkin Coconut Soup

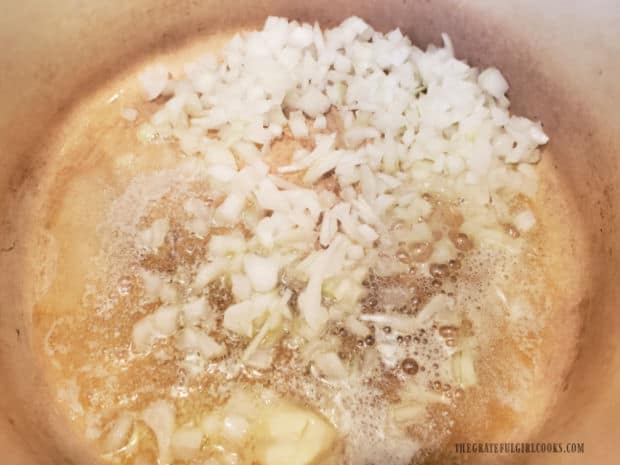
      The first thing you will need to do is cook the onions until they are tender. Melt butter on MEDIUM heat in a large saucepan or soup pot.

      Add chopped onions to the pot, and cook them for 2-3 minutes, stirring often, until they become tender and translucent. 

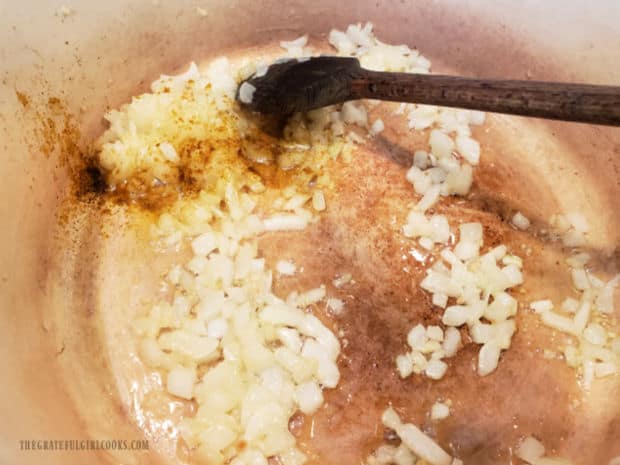
      Chopped onions are cooked in melted butter until they've softened.

      Stir minced garlic and curry powder into the onions, and cook 2 more minutes, stirring often so the garlic does not burn.

      NOTE: I use ¾ tsp. of curry powder when I make this, but if you really, really enjoy curry flavor, add a full teaspoon! 

      Minced garlic and curry powder are stirred into the cooked onions.

      Time For The Pumpkin Puree

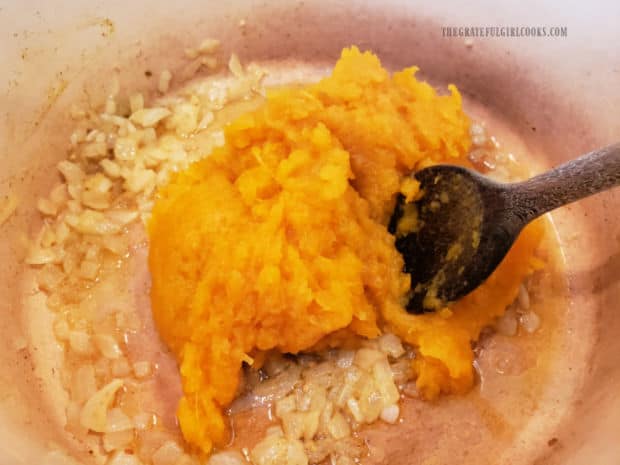
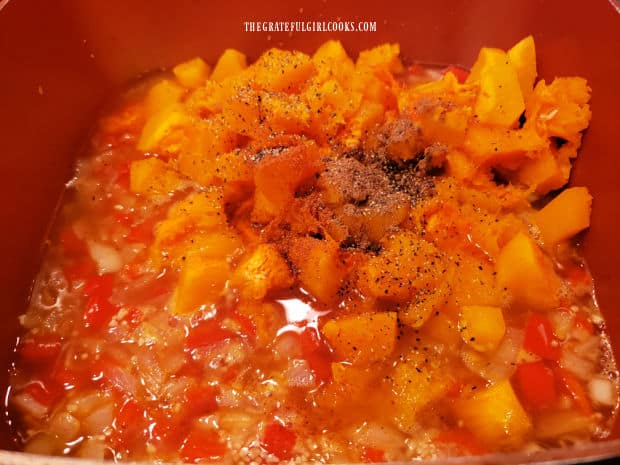
      Add 2 cups of pumpkin puree (not pie filling!) and 1 cup of chicken broth to the soup pot. Stir until combined, and cook 2 more minutes to blend and heat the ingredients.

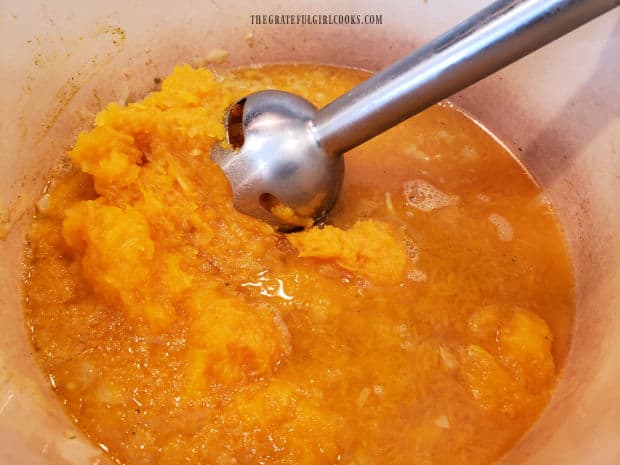
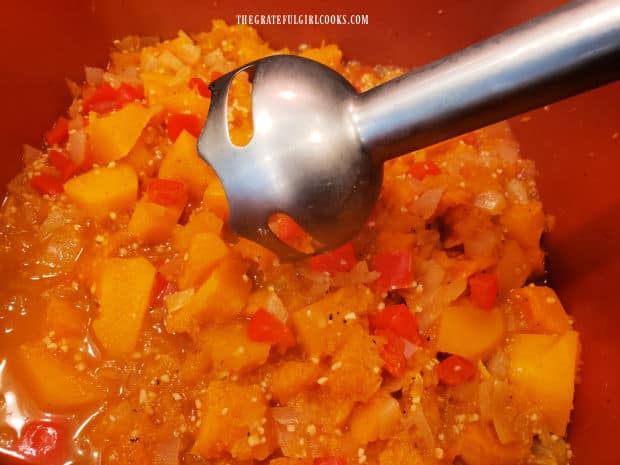
      Use an immersion blender to thoroughly blend the soup ingredients. Place it right into the soup and blend away!

      NOTE: If you do not have access to an immersion blender, you can process these ingredients in a blender. You may have to do this in two batches, however! After blending, pour the soup back into the pot.

      Pumpkin puree is added to the seasoned onions in the soup pot.An immersion blender is used to puree the soup ingredients.

      Add Creamy Coconut Milk To The Soup

      Process the soup until it is lump free and smooth in texture. Add remaining 2 cups of chicken stock, salt and pepper to the soup, and stir, to combine. Continue heating the soup on LOW heat.

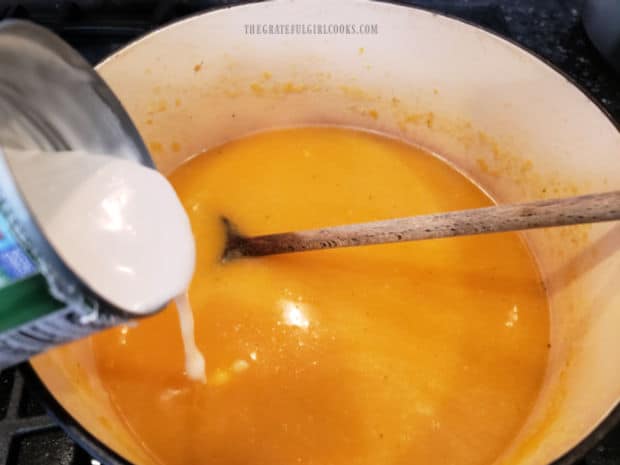
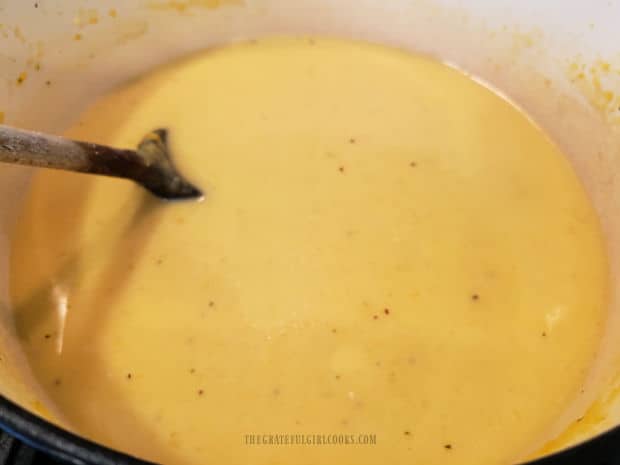
      Pour one can (13.5 ounces) of coconut milk into the creamy pumpkin coconut soup. TIP: Open the can of coconut milk and stir it (in the can) until smooth, before adding it to the soup.

      Canned coconut milk is stirred into the creamy pumpkin coconut soup.The pumpkin soup is stirred until the coconut milk is incorporated.

      Serve The Creamy Pumpkin Coconut Soup

      Stir well to combine, and continue cooking the soup on LOW heat until it is fully heated through. Once it’s heated through, the creamy pumpkin coconut soup is ready to be served.

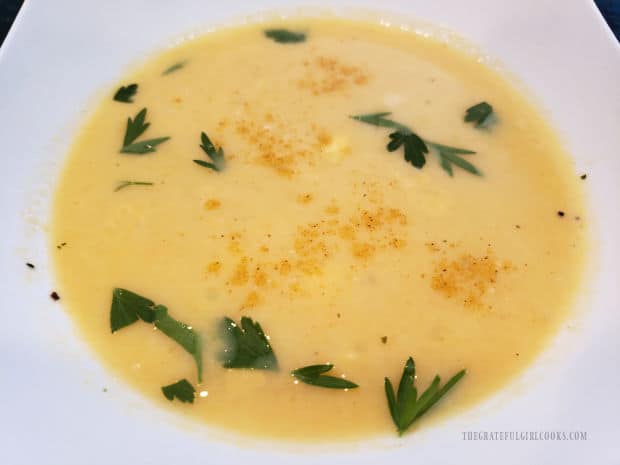
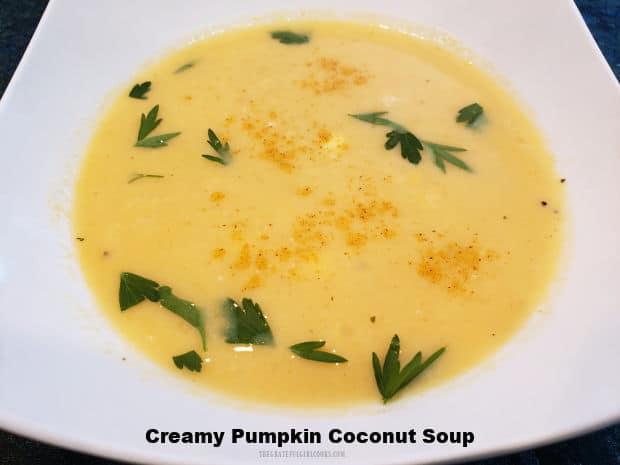
      To serve, ladle the hot soup into four serving bowls. Garnish each serving with a sprinkle of curry powder and parsley, if desired (optional).

      Serve this delicious, hot soup with large slices of garlic bread or crusty bread of your choice. Enjoy this flavorful soup!

      The soup pot with creamy pumpkin coconut soup heating in it.Creamy pumpkin coconut soup, garnished with curry powder and parsley.

      I hope you have the opportunity to make this creamy soup for yourself and those you love. It’s a delicious, comforting soup, and I really hope you enjoy it!

      Thanks for stopping by, and I invite you to come back soon for more family-friendly recipes. Take care, may God bless you, and have a GREAT day!

      Looking For More SOUP Recipes?

      You can find ALL of my recipes in the Recipe Index, which is located at the top of the page. I have lots of wonderful soup recipes to check out, including:

      Want More Recipes? Get My FREE Newsletter!

      I publish a newsletter 2 times per month (1st and 15th) with lots of recipes, tips, etc..
      Would you like to join our growing list of subscribers?

      There is a Newsletter subscription box on the top right (or bottom) of each blog post, depending on the device you use.
      You can submit your e-mail address there, to be added to my mailing list.

      Find Me On Social Media:

      Facebook page: The Grateful Girl Cooks!
      Pinterest:
      The Grateful Girl Cooks!
      Instagram:
      jbatthegratefulgirlcooks

      Author's signature

      ↓↓ PRINTABLE RECIPE BELOW ↓↓

      0 from 0 votes
      Creamy Pumpkin Coconut Soup
      Prep Time
      10 mins
      Cook Time
      10 mins
      Total Time
      20 mins
       

      Creamy Pumpkin Coconut Soup is a delicious, comforting meal to enjoy on a cold day! This easy to make recipe serves 4 and has great flavor.

      Category: Main Dish, Soup
      Cuisine: All Cuisines
      Keyword: creamy pumpkin coconut soup
      Servings: 4
      Calories Per Serving: 334 kcal
      Author: JB @ The Grateful Girl Cooks!
      Ingredients
      • 2 Tablespoons butter
      • ¾ medium yellow onion finely chopped
      • ¾ teaspoon curry powder
      • 1 teaspoon minced garlic
      • 2 cups pumpkin puree NOT pie filling
      • 3 cups chicken broth *DIVIDED USE
      • 13.5 ounces coconut milk (canned) stir in can before adding
      • ½ teaspoon salt
      • ¼ teaspoon pepper
      • 2 Tablespoons fresh chopped parsley** **optional (for garnish)
      Instructions
      1. Melt butter on MEDIUM heat in a large saucepan or soup pot. Add onions; cook them 2-3 minutes, stirring often, until they become tender and translucent. 

      2. Stir garlic and curry powder into the onions. Cook 2 more minutes, stirring often.

      3. Add pumpkin puree and 1 cup chicken broth. Stir and cook 2 minutes (on MEDIUM) until blended and heated. Use an immersion blender to puree the soup. Process soup until it is lump free/smooth in texture. NOTE: No immersion blender? Process in a blender in batches. After blending, pour puree back into the pot.

      4. Add remaining 2 cups chicken broth, salt and pepper to soup; stir, to combine. Continue heating soup on LOW. Open coconut milk; stir it (in the can) until smooth. Pour it into the soup; stir until combined. Cook on LOW until heated through.

      5. Taste soup. Add more salt/pepper, if desired. Ladle hot soup into 4 bowls. Garnish each serving with parsley, if desired (optional). Serve, and enjoy!

      Nutrition Facts
      Creamy Pumpkin Coconut Soup
      Amount Per Serving (1 (1/4 of total))
      Calories 334 Calories from Fat 261
      % Daily Value*
      Fat 29g45%
      Saturated Fat 24g150%
      Trans Fat 0.2g
      Polyunsaturated Fat 1g
      Monounsaturated Fat 3g
      Cholesterol 19mg6%
      Sodium 1012mg44%
      Potassium 588mg17%
      Carbohydrates 18g6%
      Fiber 6g25%
      Sugar 9g10%
      Protein 5g10%
      Vitamin A 19416IU388%
      Vitamin C 12mg15%
      Calcium 67mg7%
      Iron 4mg22%
      * Percent Daily Values are based on a 2000 calorie diet.

      Here’s one more to pin on your Pinterest boards!
      Creamy Pumpkin Coconut Soup is a delicious, comforting meal to enjoy on a cold day! This easy to make recipe serves 4 and has great flavor.

      Creamy Butternut Squash Bisque

      Creamy Butternut Squash Bisque is a delicious hot soup, perfect to serve for lunch OR dinner! The recipe, as written, yields 4 servings.
      Creamy Butternut Squash Bisque is a delicious hot soup, perfect to serve for lunch OR dinner! The recipe, as written, yields 4 servings.

      Do you like butternut squash? We sure do, and today I want to share with you a recipe for creamy butternut squash bisque I am confident you’ll like.

      A bisque is a thick soup (usually made with cream), that is cooked and then pureed. This low calorie recipe uses nonfat plain yogurt as a garnish/add-in for creaminess without actually using CREAM.

      As you may know, butternut squash takes a while to oven-roast until tender, BUT this recipe cooks the squash in a MICROWAVE! What a fantastic timesaver!

      The tender squash is then cooked with red bell peppers, onions and garlic, chicken broth, and a few spices. This delicious soup is then pureed until smooth, then topped with creamy nonfat yogurt to serve.

      It’s delicious, very low in calories, and truthfully, it’s a cinch to make enough for 4 servings. Here’s how to make creamy butternut squash bisque.

      Scroll Down For A Printable Recipe Card At The Bottom Of The Page

      A Word About The Butternut Squash

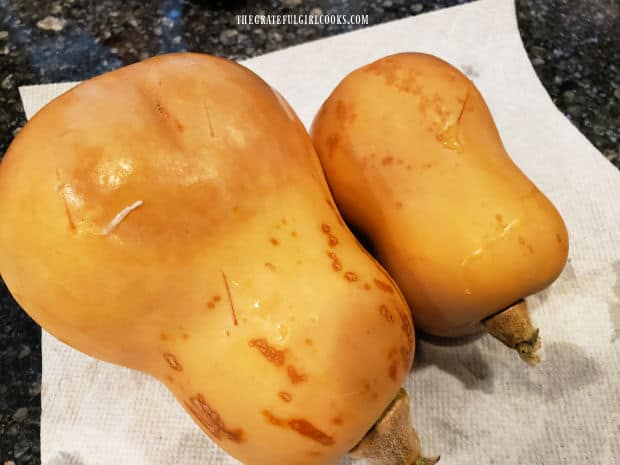
      You will need a LARGE butternut squash for this recipe (or two small ones). NOTE: Last year I grew butternut squash in our little raised bed garden, so I used two of the smaller home grown ones when I photographed the recipe prep.

      All told, you will need between 4-5 cups of cubed squash, and I’ve found that if I buy a nice, large one, it’s enough.

      Cook The Butternut Squash In The Microwave

      Pierce the butternut squash 2-3 times with a knife on each side. Place the butternut squash on a paper towel in the microwave.

      Cook the squash on HIGH heat for 5 minutes. Carefully remove the squash from the microwave (it’s hot). Slice the squash in half, lengthwise.

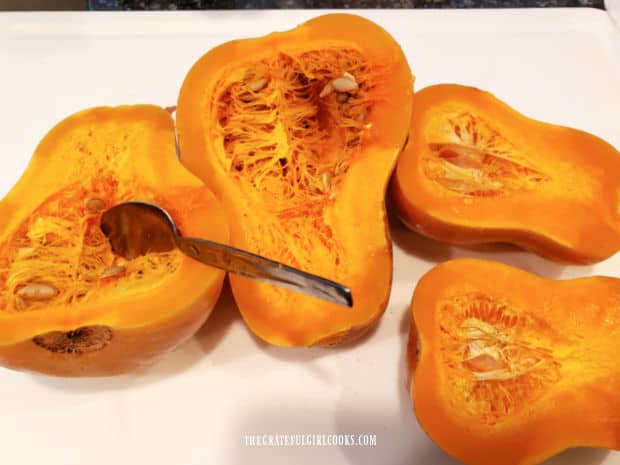
      Use a large spoon to remove (and discard) the seeds and the stringy pulp inside the cavity of the squash.

      Place the squash halves back in the microwave and cook on HIGH heat for 5 additional minutes. Carefully remove, and set the squash aside to cool.

      Butternut squash is pierced with a knife before microwaving.After microwaving, the seeds and pulp are removed from the squash.

      Cook The Onions, Garlic And Red Bell Peppers

      Heat a large soup pan on MEDIUM-HIGH. Add olive oil and ¼ cup of chicken broth to the pan. Bring these ingredients to a boil.

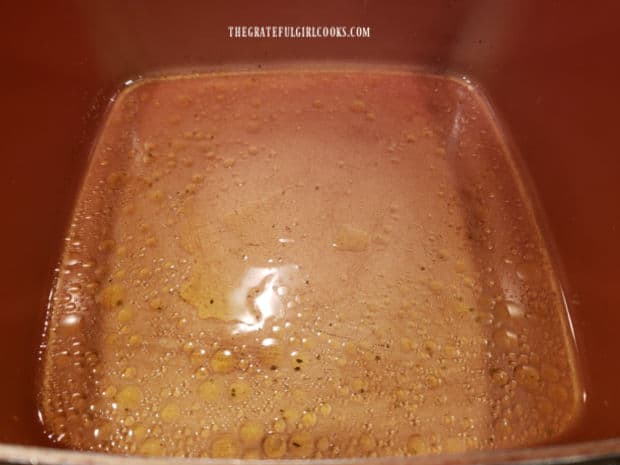
      Olive oil and chicken broth are brought to a boil in large soup pan.

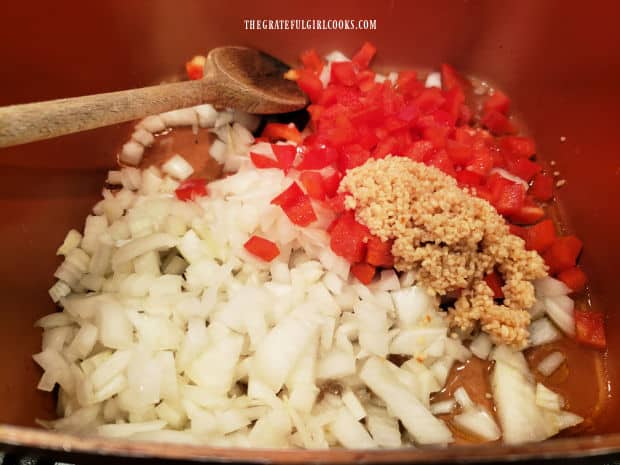
      Add chopped onions, chopped red bell pepper and minced garlic to the broth, then stir well, to combine these ingredients.

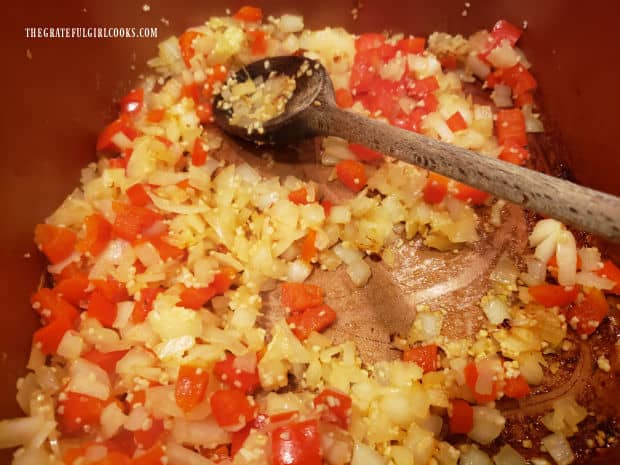
      Cook, stirring often, for 5 minutes. The peppers and onions should be tender and cooked through at the end of this time.

      Chopped red bell peppers, onions and minced garlic cook in the pan.Onions, garlic and red bell peppers are cooked until tender in pan.

      Add The Butternut Squash And Spices

      The reserved butternut squash should have cooled slightly at this point. Scoop the squash out of the shells, and then cut it into small chunks.

      Add the squash pieces, ground cumin, cayenne pepper, and reserved 2 cups chicken broth to the pan. Stir to combine. Reduce the heat to MEDIUM, and bring this entire mixture to a boil.

      Once it begins boiling, put a lid on the pan, and reduce the heat to a LOW SIMMER. Let the bisque cook (covered) for 15 minutes. 

      Butternut squash, chicken broth and spices are added to the soup pan.

      Blend The Soup

      After it has cooked for 15 minutes, it is time to puree it into a smooth, velvety bisque. There are three ways to do this…

      You can use a blender or food processor, and blend the bisque in batches, OR you can use an immersion blender (shown below) to puree  the bisque right in the pan.

      An immersion blender is used to puree the soup until smooth.

      Process until the soup is smooth and the veggies have been fully blended together. If you pureed it in a food processor or blender, return the bisque to the soup pan, then repeat process with remaining veggies, etc.

      The bisque will be fairly thick, and should be “lump-free”. Turn the heat to Medium, and cook until the creamy butternut squash bisque is fully heated through.

      Season the bisque with salt and black pepper, to suit your taste. Now the bisque is ready to serve.

      Once pureed, creamy butternut squash bisque is heated through before serving.

      Serve The Creamy Butternut Squash Bisque

      Ladle the creamy butternut squash bisque into 4 bowls. Place a spoonful of nonfat plain yogurt on top of each serving.

      Use a knife to swirl the yogurt around decoratively on top of the soup. Serve immediately while hot, and enjoy!

      Plain yogurt is swirled on top of the creamy butternut squash bisque for serving.

      I hope you enjoy this delicious, creamy butternut squash bisque! We really like it, and trust you will, too!

      Thanks for stopping by, and I invite you to come back soon for more family-friendly recipes. Take care, may God bless you, and have a GREAT day!

      Looking For More VEGETABLE SOUP Recipes?

      You can find ALL of my recipes in the Recipe Index, which is located at the top of the page. I have a nice variety of delicious vegetable soup recipes for you to enjoy, including:

      Want More Recipes? Get My FREE Newsletter!

      I publish a newsletter 2 times per month (1st and 15th) with lots of recipes, tips, etc..
      Would you like to join our growing list of subscribers?

      There is a Newsletter subscription box on the top right (or bottom) of each blog post, depending on the device you use.
      You can submit your e-mail address there, to be added to my mailing list.

      Find Me On Social Media:

      Facebook page: The Grateful Girl Cooks!
      Pinterest:
      The Grateful Girl Cooks!
      Instagram:
      jbatthegratefulgirlcooks

      Author's signature

      Recipe adapted from: Noom, an online weight loss/behavioral app.

      ↓↓ PRINTABLE RECIPE BELOW ↓↓

      0 from 0 votes
      Creamy Butternut Squash Bisque
      Prep Time
      20 mins
      Cook Time
      15 mins
      Total Time
      35 mins
       

      Creamy Butternut Squash Bisque is a delicious hot soup, perfect to serve for lunch OR dinner! The recipe, as written, yields 4 servings.

      Category: Main Dish, Side Dish, Soup
      Cuisine: All Cuisines
      Keyword: creamy butternut squash bisque
      Servings: 4
      Calories Per Serving: 166 kcal
      Author: JB @ The Grateful Girl Cooks!
      Ingredients
      • 1 large butternut squash or 2 small
      • teaspoons extra virgin olive oil
      • cups chicken broth *DIVIDED USE
      • 2 cups chopped yellow onions
      • cups chopped red bell pepper
      • 2 Tablespoons minced garlic
      • ½ teaspoon ground cumin
      • ¼ teaspoon cayenne pepper
      • salt and pepper, to taste
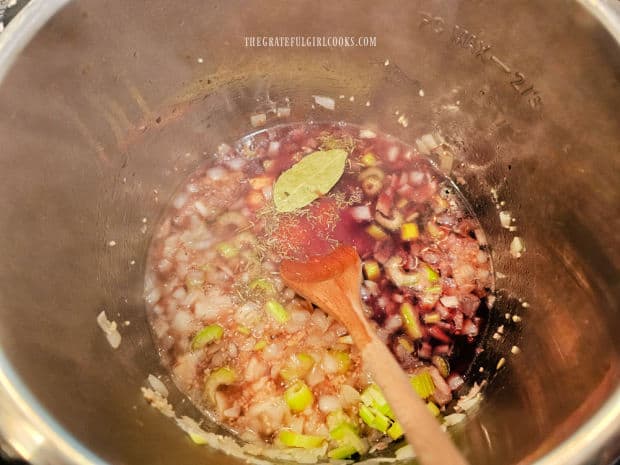
      • ¼ cup nonfat plain unsweetened yogurt
      Instructions
      1. Pierce squash 2-3 times with a knife, on each side. Place squash on a paper towel in microwave. Cook on HIGH for 5 minutes. Remove squash from microwave (it's hot). Slice squash in half, lengthwise. Use spoon to remove (and discard) seeds and pulp inside squash. Place squash back in microwave; cook on HIGH 5 more minutes. Remove; set squash aside.

      2. Heat a large soup pan on MEDIUM-HIGH. Add olive oil and ¼ cup of chicken broth. Bring to a boil.

      3. Add onions, red bell pepper and garlic to the broth; stir to combine. Cook, stirring often, for 5 minutes.

      4. Scoop squash out of the shells; cut into chunks. Add squash pieces, cumin, cayenne, and remaining 2 cups chicken broth to the pan. Stir to combine. Reduce heat to MEDIUM; bring to a boil. Once boiling, cover pan; reduce heat to a LOW SIMMER. Cook (covered) for 15 minutes. 

      5. Puree mixture until smooth. There are three ways to do this. Use a blender or food processor, and blend in batches, OR use an immersion blender to puree bisque right in the pan. Process until smooth. If you used food processor or blender, return bisque to pan. Bisque should be fairly thick, and "lump-free".

      6. Turn heat to Medium; cook until bisque is heated through. Take a bite; season to taste with salt and pepper.

      7. Divide bisque evenly between 4 bowls. Place a spoonful of plain yogurt on top of each serving. Use knife to swirl through yogurt decoratively on top of the soup. Serve immediately, and enjoy!
      Nutrition Facts
      Creamy Butternut Squash Bisque
      Amount Per Serving (1 (1/4 of total))
      Calories 166 Calories from Fat 18
      % Daily Value*
      Fat 2g3%
      Saturated Fat 0.4g3%
      Polyunsaturated Fat 0.4g
      Monounsaturated Fat 1g
      Cholesterol 3mg1%
      Sodium 710mg31%
      Potassium 961mg27%
      Carbohydrates 35g12%
      Fiber 6g25%
      Sugar 11g12%
      Protein 5g10%
      Vitamin A 21450IU429%
      Vitamin C 106mg128%
      Calcium 157mg16%
      Iron 2mg11%
      * Percent Daily Values are based on a 2000 calorie diet.

      Here’s one more to pin on your Pinterest boards!Creamy Butternut Squash Bisque is a delicious hot soup, perfect to serve for lunch OR dinner! The recipe, as written, yields 4 servings.

      Mexican Red Lentil Soup

      Mexican Red Lentil Soup has all the flavor of a good chili recipe, but it’s a meatless soup you’ll really love, with enough for 7 helpings!
      Mexican Red Lentil Soup has all the flavor of a good chili recipe, but it's a meatless soup you'll really love, with enough for 7 helpings!

      Mexican Red Lentil Soup is a yummy, meatless main dish that is packed with flavor! If you enjoy chili, I’m confident you will enjoy this recipe, as well. Whether you’re a vegetarian or not, this soup is wonderful, budget friendly, and it’s worth checking out.

      Red lentils (or other lentils) are an amazingly inexpensive, but high in protein superfood! Did you know that lentils have been around for thousands of years? Yes, they have!

      Lentils contain large amounts of vitamins, minerals, potassium, fiber and polyphenols (think antioxidants!), and are a wonderful source of protein in “meatless” dishes.

      If you’re not too familiar with lentils… what they are and to learn more about their history and nutritional value, check out the info on this amazing food source here

      Today I want to share this yummy recipe I found online many years ago online. So… here we go!

      Scroll Down For A Printable Recipe Card At The Bottom Of The Page

      Rinse And Drain, Rinse And Drain!

      Lentils need to be rinsed several times before cooking, to clean them. Pour the red lentils into a large saucepan (one that has a lid). Cover the lentils completely with water.

      Stir or swirl them around in the water, then cover the pan with the lid, and drain off the water. Be sure to hold the lid on tightly so the lentils can’t “escape” while draining!

      Repeat this process 1-2 more times or until the water becomes mostly clear, to ensure the lentils are cleaned and “good to go”.

      Red lentils are placed in saucepan, covered with water, then drained.After rinsing several times, the red lentils are ready to be cooked in more water.

      Cook The Lentils

      Add 4 cups of fresh water back into the pan with the lentils, and cover the pan. Turn the heat to HIGH, and let the water come to a boil

      Once the water has begun boiling, turn off the heat, then remove the pan from the heat source. Keeping the lid on, let the lentils rest for 20 minutes, without disturbing.

      The red lentils are brought to a boil, then sit covered off the heat, for 20 minutes.

      Cook The Veggies While Lentils Are “Resting”

      Place a large soup pot on the stovetop, and add olive oil. Begin to heat the oil on medium-low, then add diced onions and minced garlic.

      Continue to cook, stirring often, until onions have become tender, then add diced celery, and stir to combine. Cook for a couple minutes until the celery starts to get soft.

      Chopped onion and minced garlic are cooked in olive oil in a large pot.Celery is added to the onions and garlic in the pan.

      The next ingredients to add to the pan are fire-roasted canned tomatoes, chili powder, turmeric, ground cumin and hot sauce.

      NOTE: For the hot sauce I use Tabasco sauce, and use between 6-8 dashes, but if you like it HOT, add 10-15 dashes.

      Stir these ingredients until they are fully combined, and then you are ready to finish this soup with lentils and broth.

      Fire-roasted tomatoes, spices and hot sauce are added to the pan.The soup pot is now filled with vegetables, spices and tomatoes, all combined.

      Drain The Cooked Lentils

      Drain the remaining water off of the cooked red lentils, then add the lentils to the soup pan. Pour the vegetable broth into the soup pot, as well.

      Give the Mexican red lentil soup a stir to incorporate all the ingredients, then let the soup simmer (uncovered) on medium-low heat for 15 minutes.

      After draining off water, the cooked lentils are ready to add to the soup.The red lentils and vegetable broth are added to the soup mixture already in the pot.

      Final Step Before Serving

      After 15 minutes the soup will be nice and hot. Stir in chopped cilantro leaves, then squeeze in the the juice of one medium-sized lime.

      Stir these ingredients into the soup, then take a little taste. Add salt or more hot sauce, if desired, to suit your taste. Now your Mexican Red Lentil Soup is ready to serve!

      Chopped cilantro and the juice from a lime are added to the Mexican red lentil soup.When hot, the Mexican red lentil soup is now ready to be served and enjoyed.

      Enjoy A Bowl Of Mexican Red Lentil Soup

      This soup will yield about 7 servings in total. Ladle each portion (about 1½ cups per serving) into bowls, serve hot… and enjoy!

      A red and yellow bowl, filled with one serving of Mexican red lentil soup.

      I really hope you have the chance to make this delicious Mexican Red Lentil Soup for those you love. It’s REALLY good, and I’m sure you will enjoy it.

      Store any leftover soup in an airtight container in the refrigerator for up to 3-4 days. It can be easily reheated on the stovetop or in a microwave. It freezes fairly well, also. 

      Thank you for stopping by today. I invite you to come back again soon for more family-friendly recipes! Take care, may God bless you, and have a GREAT day!

      Looking For More SOUP Recipes?

      You can find ALL of my recipes in the Recipe Index, which is located at the top of the page. I have LOTS of delicious soup recipes, including:

      Want More Recipes? Get My FREE Newsletter!

      I publish a newsletter 2 times per month (1st and 15th) with lots of recipes, tips, etc..
      Would you like to join our growing list of subscribers?

      There is a Newsletter subscription box on the top right (or bottom) of each blog post, depending on the device you use.
      You can submit your e-mail address there, to be added to my mailing list.

      Find Me On Social Media:

      Facebook page: The Grateful Girl Cooks!
      Pinterest:
      The Grateful Girl Cooks!
      Instagram:
      jbatthegratefulgirlcooks

      Author's signature

      Original recipe source, and with thanks to Beth Moncel, at: https://www.budgetbytes.com/2009/12/mexican-lentil-stew/

      ↓↓ PRINTABLE RECIPE BELOW ↓↓

      0 from 0 votes
      Mexican Red Lentil Soup
      Prep Time
      10 mins
      Cook Time
      40 mins
      Total Time
      50 mins
       

      Mexican Red Lentil Soup has all the flavor of a good chili recipe, but it's a meatless soup you'll really love, with enough for 7 helpings!

      Category: Main Dish, Soup
      Cuisine: Mexican
      Keyword: Mexican red lentil soup
      Servings: 7 (1½ cups per serving)
      Calories Per Serving: 250 kcal
      Author: JB @ The Grateful Girl Cooks!
      Ingredients
      • 2 cups dry red lentils
      • 1 Tablespoon olive oil
      • 1 medium yellow onion peeled, diced
      • 4 stalks celery diced
      • 4 cloves garlic minced
      • 29 ounces canned fire-roasted diced tomatoes =two 14.5 ounce cans
      • ½ Tablespoon chili powder
      • 1 teaspoon ground cumin
      • ½ teaspoon ground turmeric
      • 4 cups vegetable broth
      • 6-8 dashes Tabasco sauce or other hot sauce + more if heat desired!
      • 1 medium lime (juice of)
      • ½ cup chopped cilantro stems removed
      Instructions
      1. Put lentils in a large pot (one with a lid). Cover completely with water. Stir or swirl them around in water; tightly cover pan with lid; drain water out. Repeat 1-2 more times until water is fairly clear.

      2. Add 4 cups water to pan with lentils; cover pan. Turn heat to HIGH; let water come to a boil. Once boiling, turn off heat. Keeping lid on, let lentils rest 20 minutes, undisturbed.

      3. Place large soup pot on stovetop; add olive oil. Heat oil on medium-low; add diced onions and minced garlic. Cook, stirring often, until onions are tender, then add celery; stir to combine. Cook 2-3 minutes until celery becomes tender.

      4. Add tomatoes, chili powder, turmeric, ground cumin and hot sauce into pot; stir until combined. NOTE: For hot sauce I use Tabasco sauce, and use between 6-8 dashes; if you like it HOT, add 10-15 dashes.

      5. Drain any remaining cooking water off lentils, then add lentils to soup pot. Stir in vegetable broth, until combined. Let soup simmer (uncovered) on medium-low heat for 15 minutes.

      6. Stir in chopped cilantro (discarding stems), and juice of one lime. Taste the soup. Add salt or more hot sauce, if desired.

      7. This soup will yield about 7 servings total. Ladle 1½ cups soup per serving into bowls. Serve hot... and enjoy!

      Nutrition Facts
      Mexican Red Lentil Soup
      Amount Per Serving (1 serving (about 1½ cups))
      Calories 250 Calories from Fat 27
      % Daily Value*
      Fat 3g5%
      Saturated Fat 0.4g3%
      Polyunsaturated Fat 1g
      Monounsaturated Fat 2g
      Sodium 753mg33%
      Potassium 611mg17%
      Carbohydrates 42g14%
      Fiber 18g75%
      Sugar 6g7%
      Protein 15g30%
      Vitamin A 1131IU23%
      Vitamin C 9mg11%
      Calcium 86mg9%
      Iron 5mg28%
      * Percent Daily Values are based on a 2000 calorie diet.

      Here’s one more to pin on your Pinterest boards!Mexican Red Lentil Soup has all the flavor of a good chili recipe, but it's a meatless soup you'll really love, with enough for 7 helpings!

      Southwestern Chicken Lime Soup

      Southwestern Chicken Lime Soup is a filling and delicious soup, with shredded chicken, onions, jalapeño, lime, and avocado in seasoned broth.
      Southwestern Chicken Lime Soup is a filling and delicious soup, with shredded chicken, onions, jalapeño, lime, and avocado in seasoned broth.

      If you’re looking for a low calorie, yet delicious and flavor-filled meal, how about this recipe for Southwestern chicken lime soup? Packed with shredded chicken and full of TexMex flavors, this is a tasty soup I really believe you’re going to enjoy!

      This recipe, as written, makes 4 servings, and is a perfect dish for any time of the year! Whether it’s cool, hot, pleasant, or downright freezing outside, this hearty soup will fill you up and satisfy your hungry stomach! Here’s how to make this flavorful soup!

      Scroll Down For A Printable Recipe Card At The Bottom Of The Page

      Season And Pan-Sear The Chicken Breasts

      This recipe calls for one pound of boneless, skinless chicken breasts. I’ve found that using 3 medium sized chicken breasts usually works out perfectly. On average they will weigh about one pound, give or take a bit.

      First, pat the chicken breasts dry with paper towels, to remove excess moisture. Trim off as much of the visible fat as possible. Sprinkle the chicken breasts on both sides with salt and black pepper, to lightly season.

      Heat oil in a large saucepan on Medium heat, until very hot, but not smoking. Add the chicken in a single layer, and cook until browned on both sides. You do not need to cook the chicken all the way through, because that will happen later as the soup cooks.

      You only will need to make sure to get both sides of the chicken nicely browned! This will take about 2-3 minutes per side. NOTE: The chicken will not be cooked all the way through, as this will happen later, once added to the soup.  Transfer the chicken out of the pan onto a plate, cover it, and then set it aside.

      Chicken breasts are patted dry, then seasoned with salt and pepper before cooking.The chicken breasts are cooked in hot oil only until both sides are nicely browned.

      Sauté The Aromatics!

      Using the same saucepan, cook chopped onions for 3-5 minutes, or until they become tender and translucent. Stir often as they cook. Add diced jalapeño and minced garlic to the onions. Cook, stirring often, for about 45 seconds, making sure to not burn the garlic!

      Chopped onions are cooked in saucepan until translucent and tender.Minced garlic and diced jalapeños are added to onions in pan and cooked.

      Okay- Let’s Make This Soup!

      Place chicken broth, water, lime juice, oregano and cumin into the saucepan, and stir to combine. Now add the three chicken breasts back into the pan. Increase the heat to High, and let the broth come to a boil. If any foam accumulates on the surface of the soup, skim it off and discard.

      Once the liquid begins boiling, turn the heat down to Medium-Low. Put a lid PARTIALLY on top of the pan (leave part uncovered). Cook the Southwestern chicken lime soup on Medium-Low heat for 30 minutes. The chicken will finish cooking during this step, so don’t cut corners on the time!

      Chicken broth, water, lime juice and spices are added to the soup in saucepan.Lightly browned chicken breasts are added into soup to finish cooking.

      Shred The Chicken!

      Transfer the cooked chicken out of the pan to a cutting board, but let the soup continue to simmer on the stove. Use two forks to shred the chicken into small pieces (or use a kitchen aid stand mixer to do this, as well).

      Once the chicken has been shredded, carefully place it back into the hot soup, and stir, to combine. Continue to cook for a couple minutes, stirring occasionally, until the chicken and soup have been heated through. Now the Southwestern chicken lime soup is ready to garnish and serve

      After cooking through, chicken is removed, shredded, and then added back into soup.Southwestern chicken lime soup finishes heating through before serving.

      Serve The Southwestern Chicken Lime Soup

      To serve, ladle the hot soup into individual bowls. Garnish each serving with 1-2 lime wedges, diced avocado, and fresh cilantro sprigs. Serve the Southwestern chicken lime soup while hot, and enjoy this delicious, flavor-filled meal. We enjoy this soup served with warmed corn tortillas or crusty sourdough bread on the side. YUM!

      A bowl full of Southwestern chicken lime soup, topped with lime wedges, avocado and cilantro.

      I hope you have the opportunity to make this filling, healthy and delicious soup. Thank you for stopping by, and I invite you to come back soon for more family-friendly recipes. Take care, may God bless you, and have a GREAT day.

      Looking For More SOUP Recipes?

      You can find ALL of my recipes in the Recipe Index, which is located at the top of the page. I have a wonderful variety of soup recipes I’m confident you’ll enjoy, including:

      Interested In More Recipes?

      Thank you for visiting this website. I appreciate you using some of your valuable time to do soIf you’re interested, I publish a newsletter 2 times per month (1st and 15th) with all the latest recipes, and other fun info. I would be honored to have you join our growing list of subscribers, so you never miss a great recipe!
      There is a Newsletter subscription box on the top right side (or bottom) of each blog post, depending on the device you use, where you can easily submit your e-mail address (only) to be included in my mailing list.

      You Can Also Find Me On Social Media:

      Facebook page: The Grateful Girl Cooks!
      Pinterest:
      The Grateful Girl Cooks!
      Instagram:
      jbatthegratefulgirlcooks

      Author's signature

      Recipe adapted from the book- “Food Meets Faith”, by Isabel D. Price, page 90, published by LiveSmart Solutions, LLC in 2019

      ↓↓ PRINTABLE RECIPE BELOW ↓↓

      5 from 1 vote
      Southwestern Chicken Lime Soup
      Prep Time
      15 mins
      Cook Time
      35 mins
      Total Time
      50 mins
       

      Southwestern Chicken Lime Soup is a filling and delicious soup, with shredded chicken, onions, jalapeño, lime, and avocado in seasoned broth.

      Category: Main Dish, Soup
      Cuisine: Southwestern
      Keyword: Southwestern chicken lime soup
      Servings: 4
      Calories Per Serving: 274 kcal
      Author: JB @ The Grateful Girl Cooks!
      Ingredients
      • 1 pound boneless, skinless chicken breasts approx. 3 small chicken breasts
      • ½ teaspoon salt
      • ½ teaspoon black pepper
      • 2 teaspoons vegetable oil (or other neutral cooking oil)
      • ½ medium yellow onion peeled, chopped
      • 1 medium fresh jalapeño pepper diced
      • 4 garlic cloves minced
      • cups low sodium chicken broth
      • cups water
      • 1 lime (juice of)
      • 1 teaspoon dried oregano
      • ¼ teaspoon ground cumin
      For Garnish:
      • 1 avocado peeled, pitted and diced
      • 1 lime cut in 8 wedges
      • ¼ cup fresh cilantro leaves
      Instructions
      1. Pat chicken breasts dry with paper towels. Trim off as much visible fat as possible. Lightly season chicken on both sides with salt and pepper.

      2. Heat oil in large saucepan on Medium heat until very hot, but not smoking. Add chicken in a single layer; cook only until well browned on both sides (about 3 minutes per side). Chicken will NOT be all the way cooked through! Remove chicken from pan; transfer to plate; cover and set aside.

      3. In same pan, cook onions, stirring often for 3-5 minutes, or until tender and translucent. Add jalapeños and garlic. Cook, stirring often, for 45 seconds, making sure not to burn the garlic!

      4. Add broth, water, lime juice, oregano and cumin to pan; stir to combine. Transfer chicken to pan. Turn heat to High; let broth come to a boil. Skim/discard discard foam that appears on top of soup. Once broth boils, turn heat down to Medium-Low. Put a lid PARTIALLY on top of pan (leave part uncovered). Cook soup for 30 minutes. Chicken will finish cooking during this time.

      5. Transfer chicken out of the pan to a cutting board, but let soup continue to simmer. Use two forks (or a Kitchen Aid) to shred chicken into small pieces. Transfer shredded chicken back into soup. Continue to cook for 2-3 minutes, stirring occasionally, until chicken and broth are heated through.

      6. To serve, ladle hot soup into bowls. Garnish each serving with 1-2 lime wedges, diced avocado, and fresh cilantro. Serve hot, and enjoy!

      Nutrition Facts
      Southwestern Chicken Lime Soup
      Amount Per Serving (1 (1/4 of total))
      Calories 274 Calories from Fat 126
      % Daily Value*
      Fat 14g22%
      Saturated Fat 2g13%
      Trans Fat 0.03g
      Polyunsaturated Fat 3g
      Monounsaturated Fat 7g
      Cholesterol 73mg24%
      Sodium 477mg21%
      Potassium 874mg25%
      Carbohydrates 12g4%
      Fiber 5g21%
      Sugar 2g2%
      Protein 29g58%
      Vitamin A 237IU5%
      Vitamin C 20mg24%
      Calcium 47mg5%
      Iron 2mg11%
      * Percent Daily Values are based on a 2000 calorie diet.

      Here’s one more to pin on your Pinterest boards!Southwestern Chicken Lime Soup is a filling and delicious soup, with shredded chicken, onions, jalapeño, lime, and avocado in seasoned broth.