Category: Vegetable Dishes

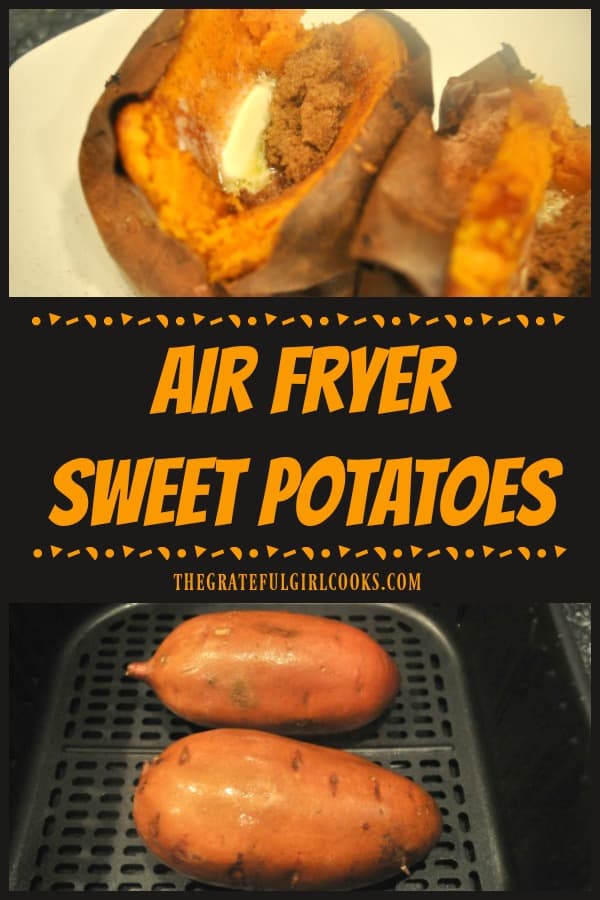
Air Fryer Sweet Potatoes

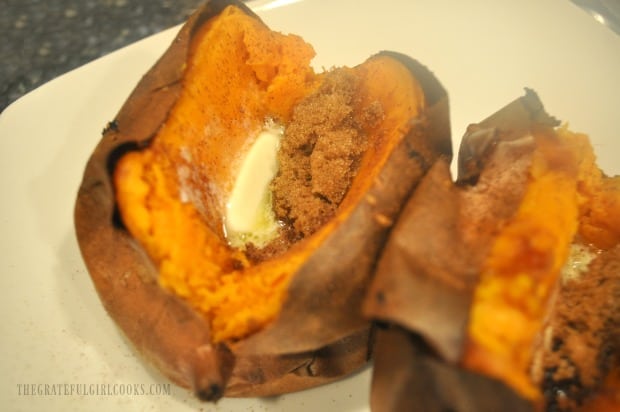
It’s EASY to make absolutely delicious air fryer sweet potatoes! Topped with cinnamon, brown sugar, and butter, this filling veggie tastes amazing!
It's EASY to make absolutely delicious air fryer sweet potatoes! Topped with cinnamon, brown sugar, and butter, this filling veggie tastes amazing!

Do you enjoy sweet potatoes? We’ve been enjoying them recently, especially since I began cooking them in our Cosori air fryer. Sweet potatoes are incredibly high in Vitamin A, and loaded with beta carotene and fiber, so they’re not only filling, but delicious, too!

Sweet potatoes taste wonderful just the way they are… plainly cooked and unadorned. BUT we like to “spruce ’em up” with a couple of “add-ons” (butter, cinnamon and brown sugar) after they cook for even more great flavor! YUM!

My Grandma And Her Sweet Potatoes!

When I think about sweet potatoes, I ALWAYS think of my Grandma Viola. My grandma lived in Texas until her death, but used to come spend a couple months at a time at my parents home in California in her later years.

I remember my mom telling me that my elderly Grandma would eat a baked sweet potato or yam every night for dinner. She did that because she’d take out her dentures each evening, so a baked sweet potato would be soft enough to eat “without her teeth”. Ha Ha! True story!

Scroll Down For A Printable Recipe Card At the Bottom Of The Page

Preparing Air Fryer Sweet Potatoes For Cooking

Making sweet potatoes in an air fryer is SUPER EASY and a bit quicker than baking them! NOTE: See the NOTES section of the printable recipe card below for instructions for baking them, if you do not have access to an air fryer.

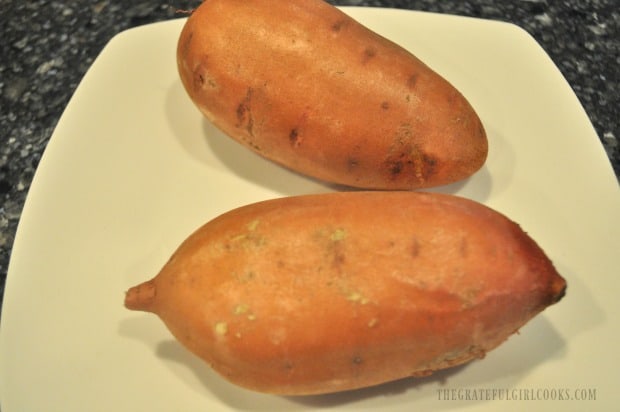
Pick out sweet potatoes that are medium-sized, and both similar in weight. I made two, since I was only making them for my husband and myself. Scrub the potatoes very well, to remove any dirt. Once you’ve finished washing them, pat them dry with paper towels or a dish towel.

The sweet potatoes are washed, dried, and pieced with a fork before cooking.

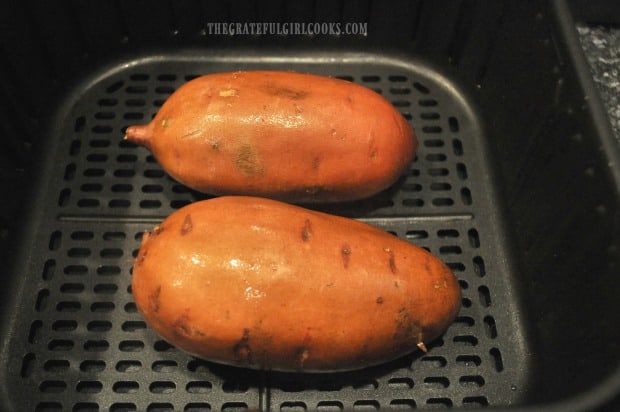
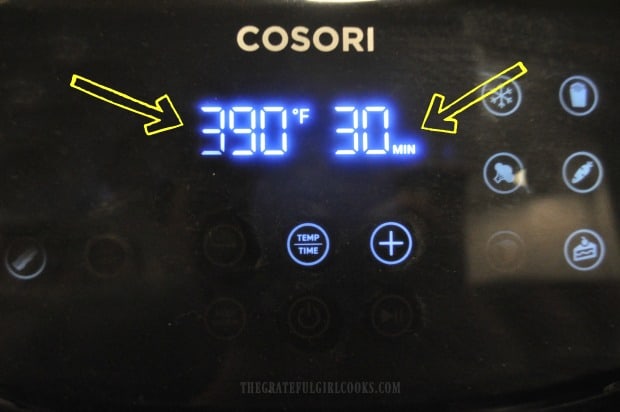
Preheat your air fryer to 390°F. This typically takes 4-5 minutes. While the machine is preheating, lightly spritz or rub each sweet potato with vegetable or olive oil on all sides. Pierce the potatoes in several places (top and bottom) with a fork, because this helps them not to burst open during cooking!

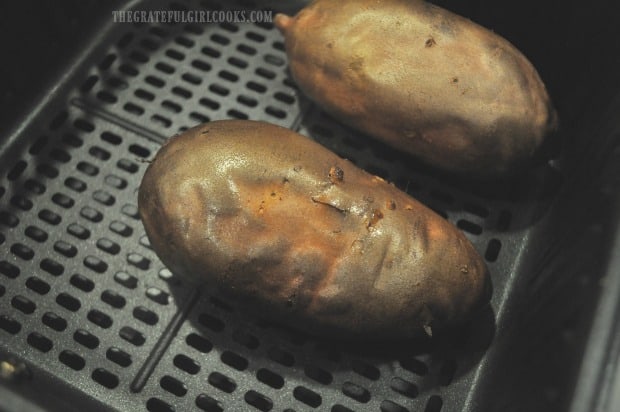
When the air fryer is finished preheating, place the oiled and fork-pierced sweet potatoes into the basket.

Each sweet potato is rubbed or spritzed with oil lightly, before cooking.

Time To Cook Air Fryer Sweet Potatoes!

Cook the air fryer sweet potatoes at a temperature of 390°F for 30-35 minutes. Your cooking time may vary, due to differing weights of potatoes used. Each of the potatoes shown weighed about 9 ounces, and ended up taking 35 minutes to fully cook. If using larger or smaller potatoes, your cooking time will need to be altered slightly to adapt.

Check them at the 30 minute mark by pausing the machine and inserting a butter knife into the middle of the potatoes. When the knife meets no resistance, and the sweet potatoes are soft, they are fully cooked. If not quite done, place them back in the air fryer and continue cooking until ready.

Cook air fryer sweet potatoes at 390°F for 30 minutes, then check for doneness.

Once The Sweet Potatoes Are Fully Cooked

Once the potatoes are fully cooked, the skins will have darkened considerably, and be slightly crispy on the outside. Some of the juices may have also oozed out of the fork-punctures. Transfer the HOT potatoes directly to your serving plates.

When done, the skin on the sweet potatoes is very crisp and darkened in color.

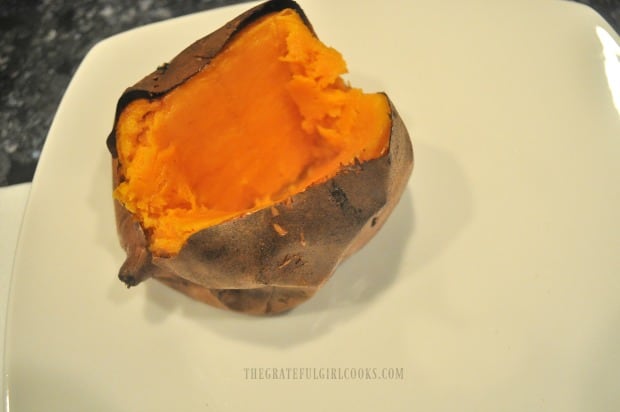
Slice the sweet potatoes from top to bottom, and squeeze both ends of the potato to fluff up the insides.

Cut the sweet potato open, and fluff the insides with a fork.

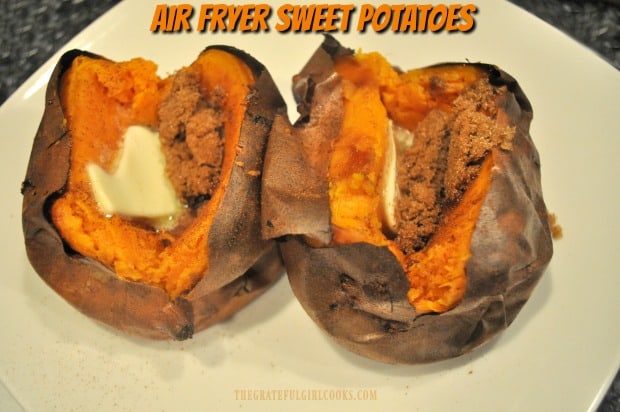
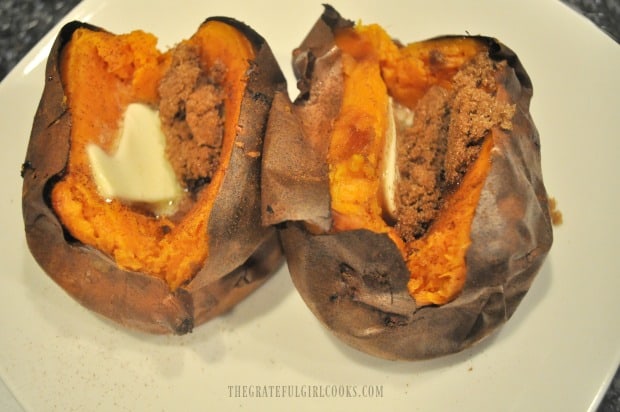
Add 1 teaspoon butter and 1 heaping teaspoon brown sugar to each of the air fryer sweet potatoes, and then sprinkle lightly with cinnamon. Mix the toppings into the fluffed sweet potato, and then dig in! They are SO GOOD!

Two of the air fryer sweet potatoes, filled with butter, cinnamon and brown sugar.Mix the butter, brown sugar and cinnamon into the sweet potato and serve.

I hope you enjoy this recipe for air fryer sweet potatoes! We sure do. Have a wonderful day, friends, and thank you for taking the time to visit. Come back soon!

Looking For More AIR FRYER Recipes?

You can find all of my Air Fryer recipes in the Recipe Index, located at the top of the page. I have several, including:

Interested In More Recipes?

Thank you for visiting this website. I appreciate you using some of your valuable time to do soIf you’re interested, I publish a newsletter 2 times per month (1st and 15th) with all the latest recipes, and other fun info. I would be honored to have you join our growing list of subscribers, so you never miss a great recipe!
There is a Newsletter subscription box on the top right side (or bottom) of each blog post, depending on the device you use, where you can easily submit your e-mail address (only) to be included in my mailing list.

You Can Also Find Me On Social Media:
Facebook page: The Grateful Girl Cooks!
Pinterest: The Grateful Girl Cooks!
Instagram: jbatthegratefulgirlcooks

Author's signature

0 from 0 votes
Air Fryer Sweet Potatotes
Prep Time
5 mins
Cook Time
30 mins
Total Time
35 mins
 

It's EASY to make absolutely delicious air fryer sweet potatoes! Topped with cinnamon, brown sugar, and butter, this filling veggie tastes amazing!

Category: Vegetable Dish
Cuisine: American
Keyword: air fryer sweet potatoes
Servings: 2
Calories Per Serving: 288 kcal
Author: JB @ The Grateful Girl Cooks!
Ingredients
For Potatoes:
  • 18 ounces sweet potatoes , approx. 9 ounces each
  • vegetable oil or olive oil , to rub on sweet potato skin before cooking
To Serve:
  • 2 teaspoons butter , or more to taste
  • 2 teaspoons brown sugar , a heaping teaspoon
  • cinnamon , a light sprinkling over each potato
Instructions
  1. Pick sweet potatoes that are medium-sized, and similar in weight. Scrub potatoes well, to remove any dirt. Pat them dry with paper towels or a dish towel.

  2. Preheat air fryer to 390°F. Lightly spritz or rub each sweet potato with vegetable or olive oil on all sides. Pierce potatoes in several places (top and bottom) with a fork. When machine is preheated, place sweet potatoes into air fryer basket.

  3. Cook at 390°F for 30-35 minutes. Your cooking time may vary, due to differing weights of potatoes used. Check them at the 30 minute mark. Insert a butter knife into the middle of the potatoes. If knife meets no resistance, they are fully cooked. If not done, place them back in the air fryer and continue cooking until ready. Transfer potatoes to serving plates.

To Serve:
  1. Slice potatoes open lengthwise, and squeeze both ends of the potato to fluff up the insides. Add 1 teaspoon butter and 1 heaping teaspoon brown sugar to each potato, and then sprinkle lightly with cinnamon. Mix the toppings into the fluffed sweet potato, and then dig in! Enjoy!

Recipe Notes

Caloric calculations and cooking time for this recipe were made using one 9 ounce sweet potato per serving. Please note: As the weight of potatoes can vary widely, calories per serving and cooking times will tend to vary, as well.

NO AIR FRYER? NO PROBLEM! Follow all directions, but place prepared sweet potatoes on a foil or parchment paper-lined baking sheet. Bake at 425°F for between 45-60 minutes, time dependent on the weight of the potatoes.

Nutrition Facts
Air Fryer Sweet Potatotes
Amount Per Serving (1 potato + toppings)
Calories 288 Calories from Fat 54
% Daily Value*
Fat 6g9%
Saturated Fat 4g25%
Cholesterol 11mg4%
Sodium 177mg8%
Potassium 860mg25%
Carbohydrates 55g18%
Fiber 8g33%
Sugar 15g17%
Protein 4g8%
Vitamin A 36322IU726%
Vitamin C 6mg7%
Calcium 77mg8%
Iron 2mg11%
* Percent Daily Values are based on a 2000 calorie diet.

Here’s one more to pin on your Pinterest boards!It's EASY to make absolutely delicious air fryer sweet potatoes! Topped with cinnamon, brown sugar, and butter, this filling veggie tastes amazing!


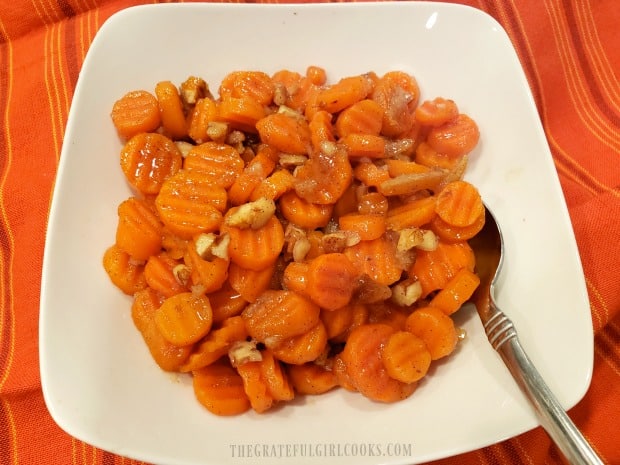
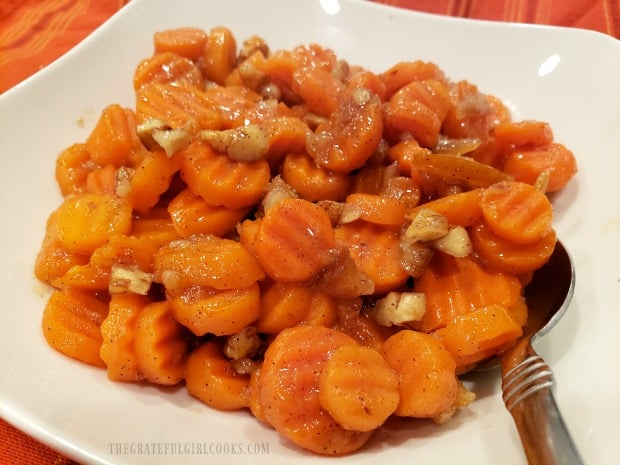
Orange Glazed Carrots

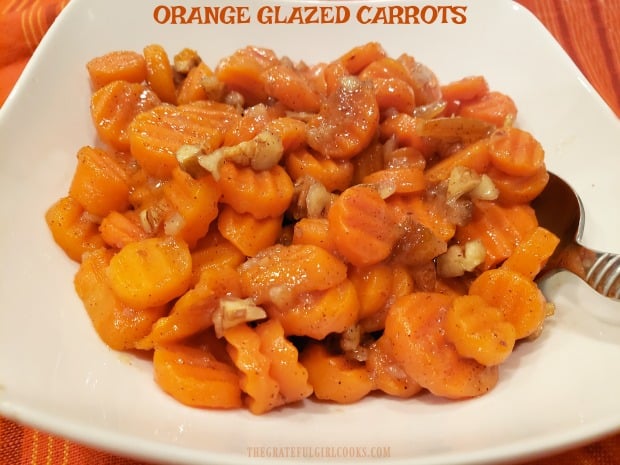
Orange Glazed Carrots are a simple but delicious side dish, featuring buttery, marmalade coated carrots, pecans, fresh ginger and cinnamon!
Orange Glazed Carrots are a simple but delicious side dish, featuring buttery, marmalade glazed carrots, pecans, fresh ginger and cinnamon!

Most of my life I have not been a huge fan of cooked carrots. We enjoy them in casseroles, or cooked with a pot roast, and have occasionally oven-roasted them (see here for my recipe). I think they taste pretty good cooked or roasted, it’s just not my favorite way to eat them.

Well, my opinion of cooked carrots changed recently because of THIS recipe for orange glazed carrots! The recipe uses frozen carrots, which is really convenient, too!

Oh. My. Goodness. These little orange things are so good I could have eaten the entire bowl of ’em by myself! But I didn’t (thank goodness!).

Cooked sliced carrots are coated in a simple marmalade glaze that also has cinnamon, butter, pecans, and finely grated ginger. Whoa… this veggie side dish is a treat for the taste buds! Here’s how to make this dish:

Scroll Down For A Printable Recipe Card At The Bottom Of The Page

First Things First – Cook the Carrots!

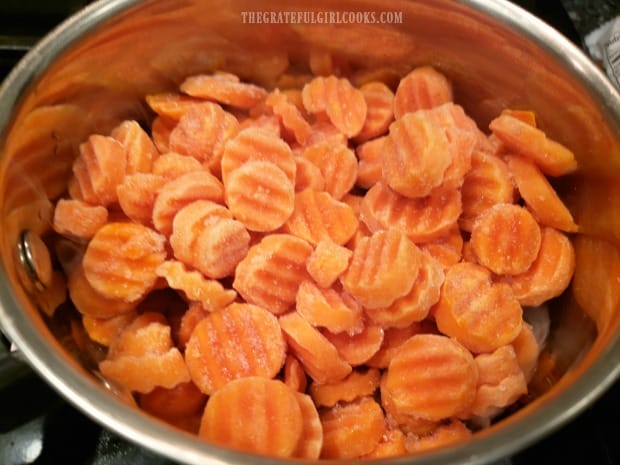
Cook the frozen sliced carrots, according to the package instructions. Using frozen sliced carrots makes this recipe sooo easy! When done, drain the water out of the pan. Set the carrots aside while you cook the marmalade glaze.

Frozen carrots are cooked before adding them to a marmalade glaze.

Making The Orange Marmalade Glaze Is EASY!

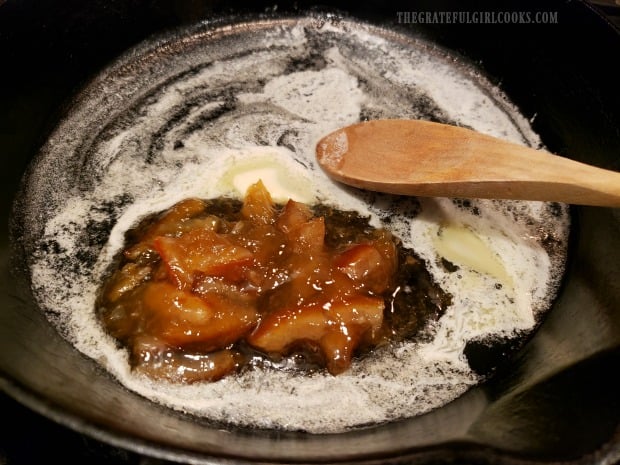
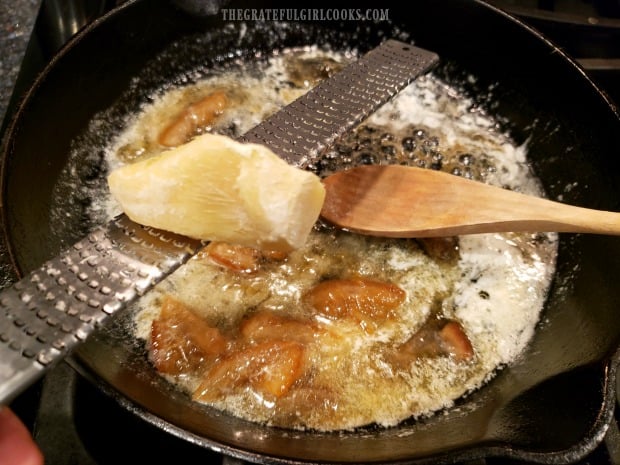
Melt the butter in a skillet on low heat. Add orange marmalade to the melted butter (I used my homemade!), and stir to combine. Continue to keep the heat on very low while you make the orange marmalade glaze.

Once the two ingredients are combined, grate fresh ginger into the glaze. Use a micro-plane or the very small section of your hand held box grater to do this.

Orange marmalade and melted butter are combined in skillet.Fresh ginger is finely grated and added to marmalade and butter in skillet.

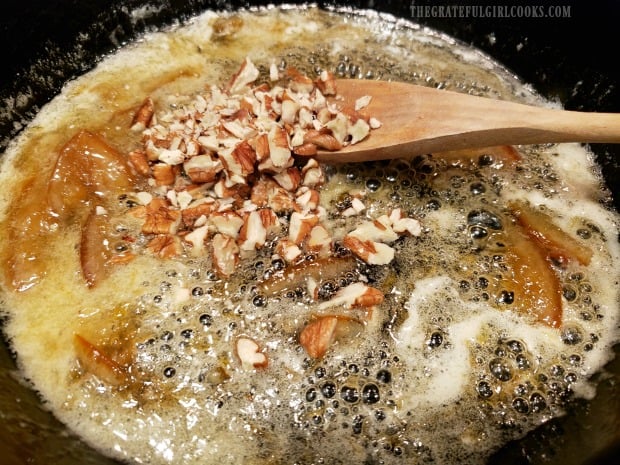
Now add the chopped pecans, and stir everything to combine, while still cooking on low heat.

Add the cooked, well-drained carrots to the skillet. Stir well, to coat the carrots with the sweet, sticky orange glaze.

Chopped pecans are added to marmalade glaze in skillet.The cooked carrots are now added to the orange glaze in skillet.

Final Step!

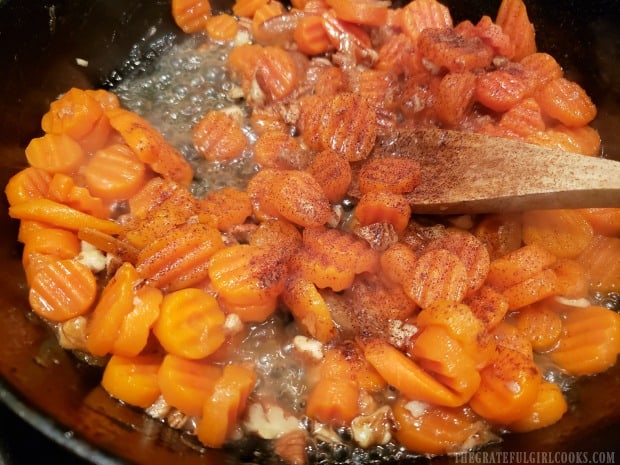
The last thing you need to do is sprinkle the cinnamon over the carrots and stir well, to combine all the ingredients with that wonderful glaze.

Cook the orange glazed carrots until everything is fully heated through, and then it’s ready to eat! The glaze should be covering all the carrots, and be really hot at this point!

A light sprinkling of cinnamon adds to the flavor of the orange glazed carrots.

Time To Serve The Orange Glazed Carrots!

Carefully transfer the hot, orange glazed carrots to a serving bowl. Now this simple side dish is ready to dig into, alongside your favorite dinner entree! We enjoyed it alongside juicy pork tenderloin slices.

The buttery carrots will be tender, slightly sweet from the orange marmalade, and those yummy pecans give them a bit of crunch! Fresh ginger and cinnamon provide extra flavor to this yummy vegetable dish!

The orange glazed carrots with pecans are served in a white bowl.A close up view of a bowl of orange glazed carrots, ready to eat!

This Recipe Can Also Be Made In A Slow Cooker

This recipe can also be adapted to prepare in a slow cooker, using fresh, sliced carrots. I have included those instructions in the NOTES section of the printable recipe card at the bottom of this page, for your convenience!

Well, I trust you enjoy making and eating these yummy orange glazed carrots. They compliment many main dishes, and I hope you (and those you love), will really like them. Have a wonderful day, and may God bless you.

Looking For More VEGGIE SIDE DISHES?

You can find all of my side dish recipes in the Recipe Index, located at the top of the page. A few favorite veggie side dishes include:

Want More Recipes? Get My FREE Newsletter!

I publish a newsletter 2 times per month (1st and 15th) with lots of recipes, tips, etc..
Would you like to join our growing list of subscribers?

There is a Newsletter subscription box on the top right (or bottom) of each blog post, depending on the device you use.
You can submit your e-mail address there, to be added to my mailing list.

Find Me On Social Media:

Facebook page: The Grateful Girl Cooks!
Pinterest:
The Grateful Girl Cooks!
Instagram:
jbatthegratefulgirlcooks

Author's signature

Original recipe source: Unknown (found handwritten on a 3×5 card in an OLD recipe box)

↓↓ PRINTABLE RECIPE BELOW ↓↓

0 from 0 votes
Orange Glazed Carrots
Prep Time
8 mins
Cook Time
5 mins
Total Time
13 mins
 

Orange Glazed Carrots are a simple but delicious side dish, featuring buttery, marmalade glazed carrots, pecans, fresh ginger and cinnamon!

Category: Side Dish, Vegetable Dish
Cuisine: American
Keyword: orange glazed carrots
Servings: 4
Calories Per Serving: 180 kcal
Author: JB @ The Grateful Girl Cooks!
Ingredients
  • 12 ounces frozen sliced carrots
  • 3 Tablespoons butter
  • 3 Tablespoons orange marmalade
  • 1 teaspoon finely grated fresh ginger
  • 2 Tablespoons chopped pecans (or walnuts)
  • teaspoon cinnamon
Instructions
  1. Cook frozen sliced carrots until tender, according to package instructions (usually 6-8 minutes). When done, drain water from pan. Set carrots aside.

  2. Make The Glaze: Melt butter in a skillet, on very low heat. Add orange marmalade, and stir to combine. Continue to cook on low heat. Add finely grated fresh ginger, followed by the chopped pecans, stirring to combine.

  3. Now add the cooked, drained carrots to the skillet. Stir well, to coat carrots with glaze. Sprinkle with cinnamon. Stir to combine, and heat on low until the carrots are fully heated through. Serve hot, and enjoy!

Recipe Notes

NOTE: This recipe can also be made in a slow cooker. Place 6 peeled, sliced FRESH carrots with other ingredients into slow cooker, and cook on LOW HEAT for 2-3 hours, or until carrots have become tender.

Nutrition Facts
Orange Glazed Carrots
Amount Per Serving (1 g)
Calories 180 Calories from Fat 108
% Daily Value*
Fat 12g18%
Saturated Fat 6g38%
Cholesterol 23mg8%
Sodium 142mg6%
Potassium 294mg8%
Carbohydrates 19g6%
Fiber 3g13%
Sugar 13g14%
Protein 2g4%
Vitamin A 14471IU289%
Vitamin C 6mg7%
Calcium 41mg4%
Iron 1mg6%
* Percent Daily Values are based on a 2000 calorie diet.

Here’s one more to pin on your Pinterest boards!Orange Glazed Carrots are a simple but delicious side dish, featuring buttery, marmalade glazed carrots, pecans, fresh ginger and cinnamon!

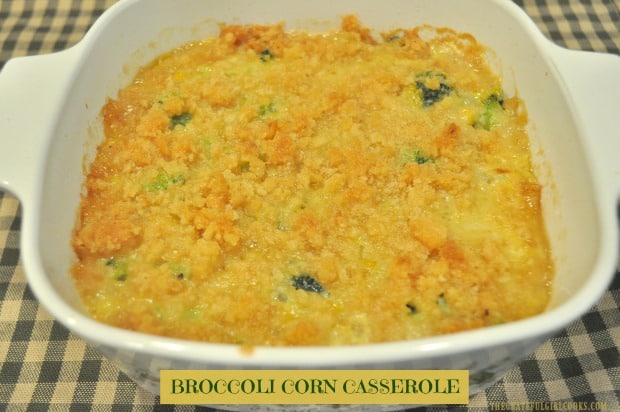
Broccoli Corn Casserole

Broccoli Corn Casserole is a delicious, easy to prepare, baked veggie side dish, with corn, broccoli, onions, spices, and a buttery crumb topping!

Over 40 years ago I got a recipe box, and started keeping track of ideas I found in magazines, books, etc. I would quickly scrawl them out on a 3×5 index card, and then file them away to cook “someday”.

Well… this recipe for broccoli corn casserole is one of those recipes! Recently I went rooting around in this very old recipe box, looking for ideas, and found this one.

Now it didn’t have the recipe source on it (had no idea so many years ago that I would blog about food), so I don’t know where it came from.

What I CAN tell you is that this broccoli corn casserole is EASY TO MAKE AND YUMMY. Cream-style corn, frozen or fresh broccoli, onion, egg, and simple spices are the foundation of this simple side dish!

The ingredients are mixed together, then the casserole is topped with a buttery topping and baked until done. It’s delicious! Here’s how to make it:

Scroll Down For A Printable Recipe Card At The Bottom Of The Page

A Little Bit Of Prep

Two things need to be done before assembling the casserole. I found it easy to do both at the same time, which shaved some time off the prep.

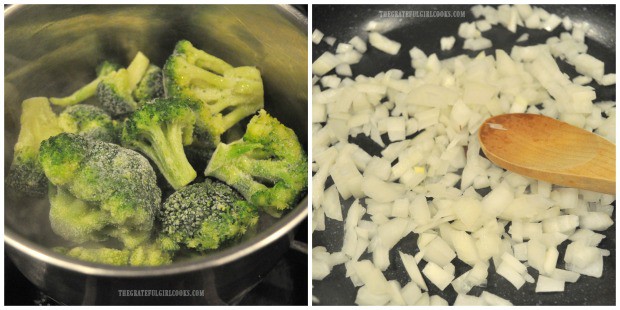
Cook broccoli florets whether you will be using frozen or fresh. EASY. Once cooked, you can cut them into smaller pieces.

In a separate skillet, cook the chopped onions for about 4-5 minutes until cooked through (no need for oil or anything!). Set broccoli and onions aside.

Broccoli and chopped onions are cooked before assembling casserole.

Assemble The Broccoli Corn Casserole

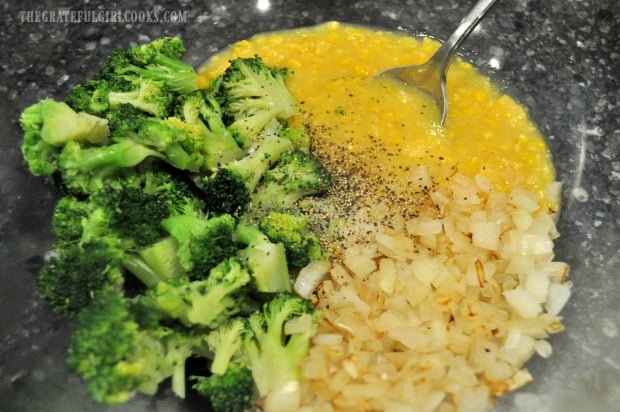
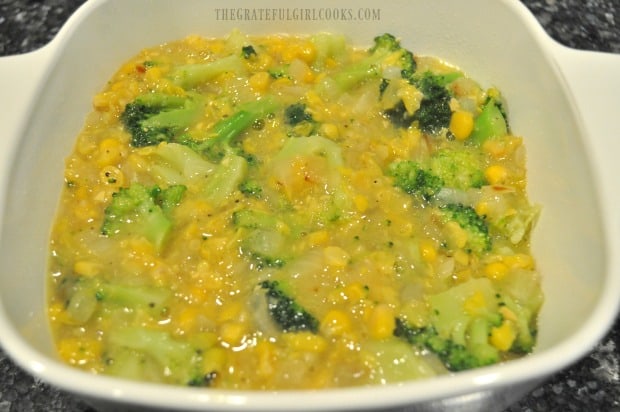
Okay… now it’s time to put this simple casserole together! Grab a medium sized mixing bowl, and add a can of cream-style corn, the cooked broccoli, onions, salt, pepper, and garlic powder.

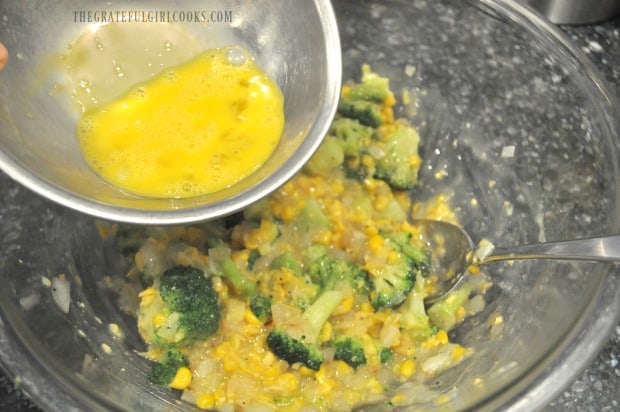
Stir these ingredients together until fully combined. Once combined, add a well-beaten egg to the mixture, and stir, to incorporate.

NOTE: The reason to add the egg AFTER everything else is combined is so the onions and broccoli have cooled a bit, so the egg won’t scramble when added.

Creamed corn, onions, broccoli and spices are combined in bowl.Beaten egg is added to the broccoli corn casserole ingredients.

Spray a 1½ quart oven-safe dish with non-stick cooking spray. Pour the broccoli corn casserole ingredients into the dish.

The casserole is poured into a greased oven-safe dish before baking.

Add The Buttery Crumb Topping

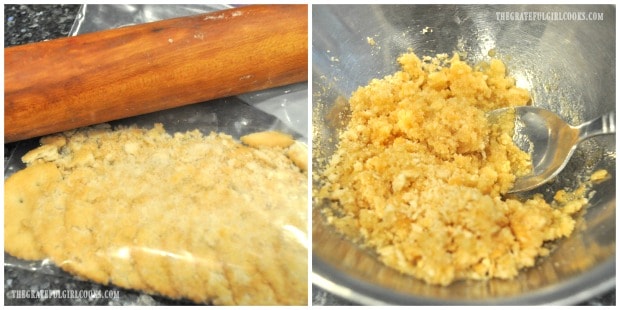
Place crackers in a resealable plastic bag, and finely crush them using a rolling pin or mallet. I used Ritz crackers, but you can certainly use what you have available.

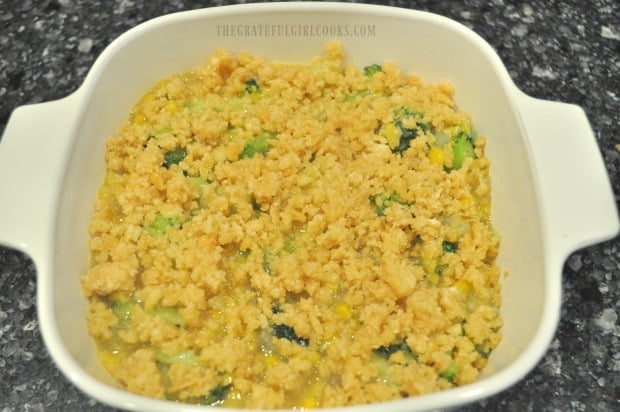
Once the crackers are crushed well, mix the crumbs with melted butter until a nice topping comes together. Sprinkle the crumb topping evenly over the surface of the casserole.

Crackers are smashed into crumbs and combined with melted butter for topping.Buttery crumb topping is added to top of broccoli corn casserole before cooking.

Bake The Bacon Corn Casserole

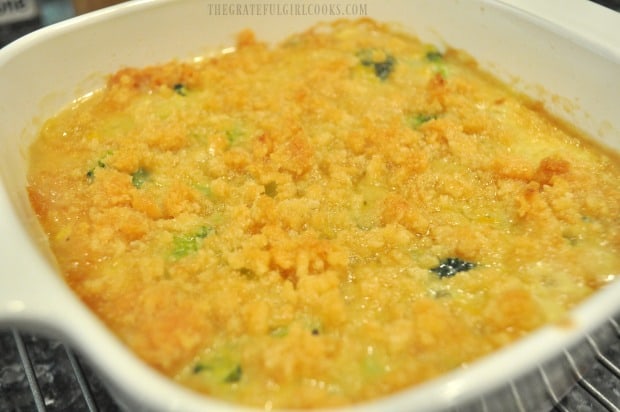
Place the dish onto the middle rack of a preheated 350°F oven, and let the veggie casserole bake for 30-35 minutes. When done, the crumb topping should be light golden brown and any liquid should be bubbly around the edges.

If you want the topping to be more deeply browned, leave the dish on the middle rack and turn the oven broiler on for just a couple minutes. Keep an eye on it!

After baking, the casserole cools for a couple minutes before serving.

Time To EAT!

Once the broccoli corn casserole is finished baking, remove it from the oven. Place the dish on a wire rack and let it cool for about 5 minutes before serving. This allows time for the casserole to firm up just a bit after cooking.

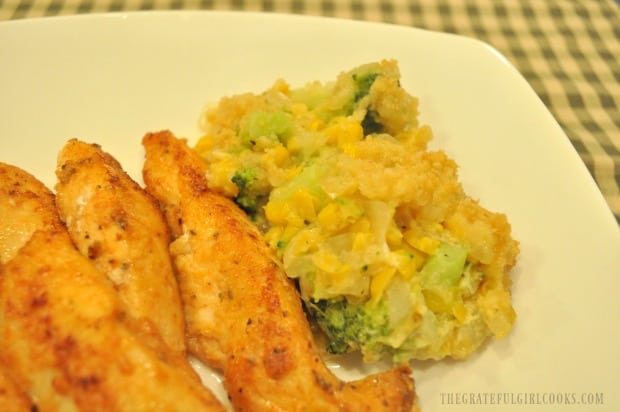
The veggie casserole will pair nicely with chicken, pork beef or fish. I served it with some simple Cajun chicken strips this time, and it was a wonderful side dish!

Leftovers can be stored (covered) in the refrigerator for several days. The casserole can be reheated in the oven or the microwave.

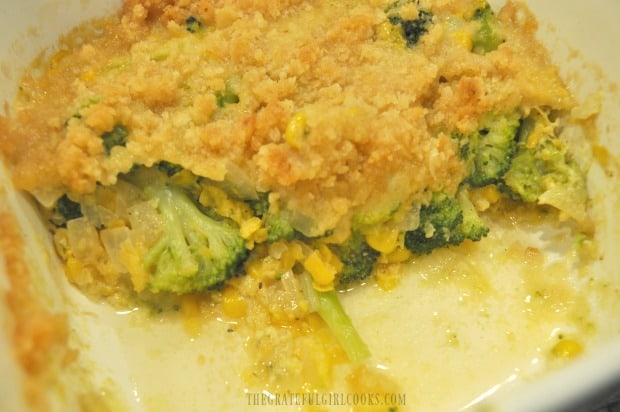
A peek at the insides of the broccoli corn casserole.Chicken strips are served with the broccoli corn casserole.

Hope you enjoy this simple side dish! We really did, and love the fact that it is so very easy to make! Have a wonderful day, and thanks for visiting. Come back soon!

Looking For More Vegetable Dishes?

You can find all of my recipes in the Recipe Index, located at the top of the page. I have lots of yummy vegetable recipes for you to choose from, including:

Want More Recipes? Get My FREE Newsletter!

I publish a newsletter 2 times per month (1st and 15th) with lots of recipes, tips, etc..
Would you like to join our growing list of subscribers?

There is a Newsletter subscription box on the top right (or bottom) of each blog post, depending on the device you use.
You can submit your e-mail address there, to be added to my mailing list.

Find Me On Social Media:

Facebook page: The Grateful Girl Cooks!
Pinterest:
The Grateful Girl Cooks!
Instagram:
jbatthegratefulgirlcooks

Author's signature

Original recipe source: unknown (recipe found on a 3×5 index card in an old recipe box).

↓↓ PRINTABLE RECIPE BELOW ↓↓

0 from 0 votes
Broccoli Corn Casserole
Prep Time
15 mins
Cook Time
30 mins
Total Time
45 mins
 

Broccoli Corn Casserole is a delicious, easy to prepare, baked veggie side dish, with corn, broccoli, onions, spices, and a buttery crumb topping!

Category: Side Dish, Vegetable Dish
Cuisine: American
Keyword: broccoli corn casserole
Servings: 6
Calories Per Serving: 143 kcal
Author: JB @ The Grateful Girl Cooks!
Ingredients
  • 14.75 ounces cream style corn (canned)
  • 10 ounces broccoli, cooked , fresh OR frozen
  • 1 large egg , beaten
  • 1 small brown onion , chopped and sauteed
  • ½ teaspoon salt
  • ¼ teaspoon pepper
  • ¼ teaspoon garlic powder
  • 2 Tablespoons butter , melted
  • ½ cup crackers (crushed) , I used 10 Ritz crackers
Instructions
  1. Cook broccoli florets (frozen or fresh). Once cooked, cut them into smaller pieces. In separate skillet, cook onions for 4-5 minutes until cooked through (no need for oil). Set broccoli and onions aside.

  2. In a medium bowl, add corn, broccoli, onions, salt, pepper, and garlic powder. Stir these ingredients together until combined. Add a beaten egg to the mixture, and stir until incorporated. NOTE: Add egg AFTER everything else is combined so onions and broccoli have cooled a bit, so the egg won't scramble when added. Spray a 1½ quart oven-safe dish with non-stick cooking spray, and then pour casserole ingredients into dish.

  3. Place crackers in a resealable plastic bag, and finely crush them using a rolling pin or mallet. Once crushed well, mix crumbs with melted butter to combine. Sprinkle crumb topping evenly over surface of casserole.

  4. Place dish onto the middle rack of a preheated 350°F oven, and bake for 30-35 minutes. When done, crumb topping should be golden brown and casserole should be bubbly around the edges. TIP: If you want topping to be deeply browned, leave the dish on middle rack and turn broiler on for a couple minutes. Keep an eye on it! Remove dish from oven. Place dish on wire rack to cool for 5 minutes before serving. This allows time for the casserole to firm up just a bit after cooking. Serve, and enjoy! Store leftovers (covered) in refrigerator.

Recipe Notes

For the cracker topping, I used Ritz crackers, but almost any type of cracker will work.

Nutrition Facts
Broccoli Corn Casserole
Amount Per Serving (1 g)
Calories 143 Calories from Fat 54
% Daily Value*
Fat 6g9%
Saturated Fat 3g19%
Cholesterol 45mg15%
Sodium 499mg22%
Potassium 279mg8%
Carbohydrates 20g7%
Fiber 2g8%
Sugar 4g4%
Protein 4g8%
Vitamin A 514IU10%
Vitamin C 46mg56%
Calcium 40mg4%
Iron 1mg6%
* Percent Daily Values are based on a 2000 calorie diet.

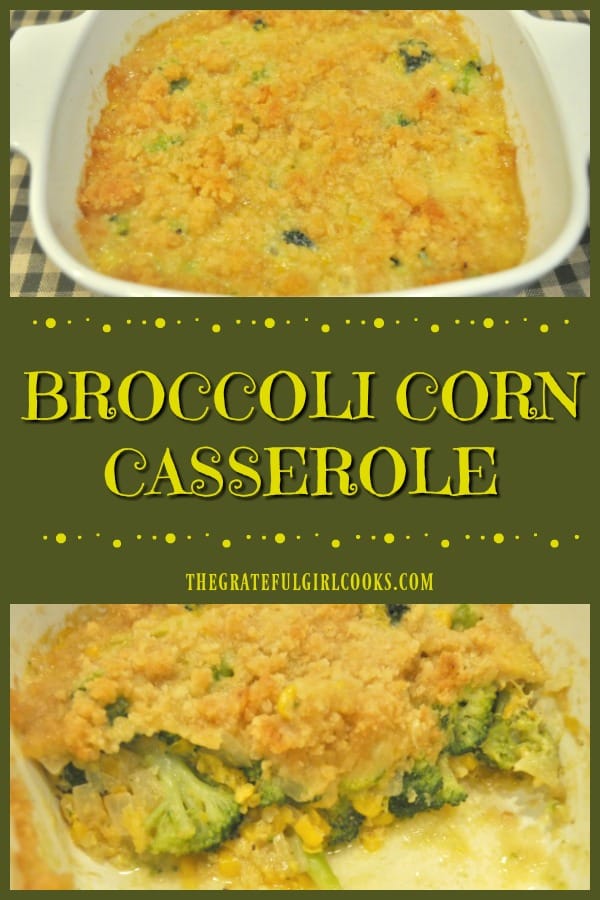
Here’s one more to pin on your Pinterest boards!Broccoli Corn Casserole is a delicious, easy to prepare, baked veggie side dish, with corn, broccoli, onions, spices, and a buttery crumb topping!

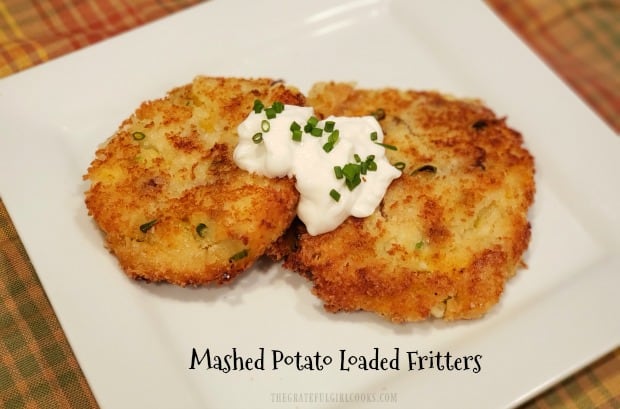
Mashed Potato Loaded Fritters

Use your leftovers to make yummy Mashed Potato Loaded Fritters, filled with bacon, green onions, cheddar cheese, & coated with crispy panko crumbs!

I love potatoes! We always enjoy baked potatoes, mashed potatoes, chili and cheese stuffed spuds, potato hash with rosemaryloaded hash browns-waffle-style, au gratin potatoes, and our family favorite, potato salad!

The question is… what can you make with mashed potato leftovers? We usually have a small amount left over after a big meal. Well, I was wondering the same thing when I had some leftovers a while ago. I put on my thinking cap, and came up with this recipe for mashed potato loaded fritters, made them, and thought they were fantastic!

Here’s how easy it is to make this tasty side dish using leftover mashed potatoes. I even used leftover cooked bacon, too! The results were worth it, because the fritters turned out to be quite delicious!

Scroll Down For A Printable Recipe Card At The Bottom Of The Page

Prepare The Mashed Potato Loaded Fritters

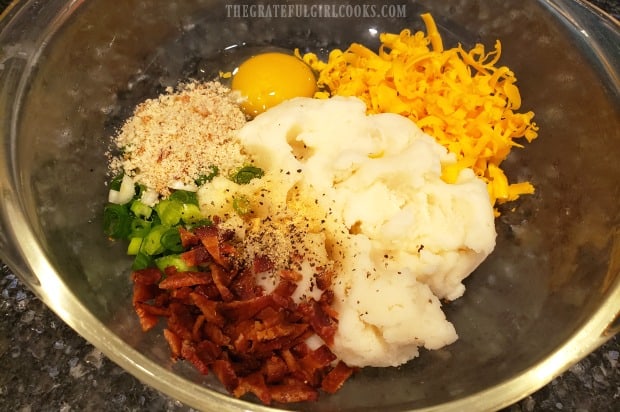
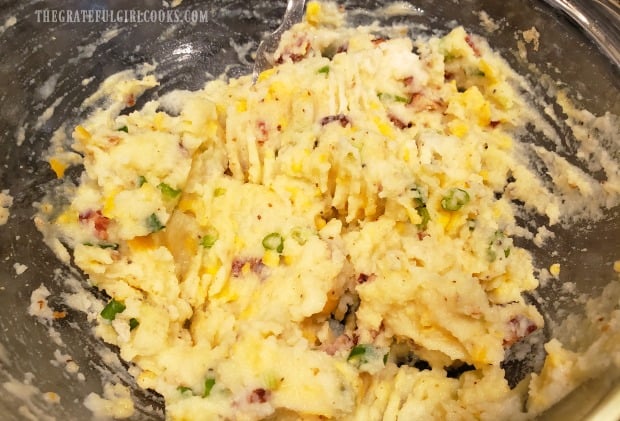
Place mashed potatoes, crumbled bacon, green onions, regular bread crumbs, flour, egg, salt, pepper, garlic powder and cheddar cheese in a medium sized mixing bowl. Stir these ingredients together until all have been fully blended into the mashed potatoes.

Bacon, cheese, onion, egg,bread crumbs and mashed potatoes ready to make fritters.Ingredients are combined before forming into fritter patties.

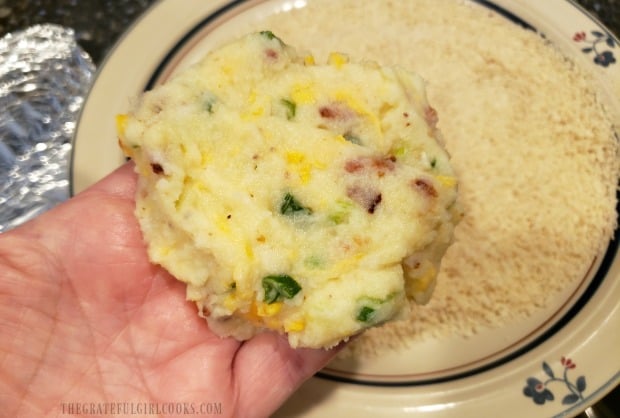
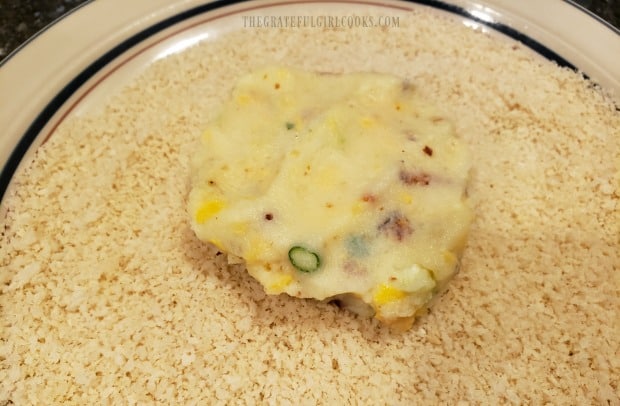
Pour the panko crumbs out onto a dinner plate. Divide the potato mixture into 4 equal sized balls, and then shape and flatten them out in your hands to form a patty.

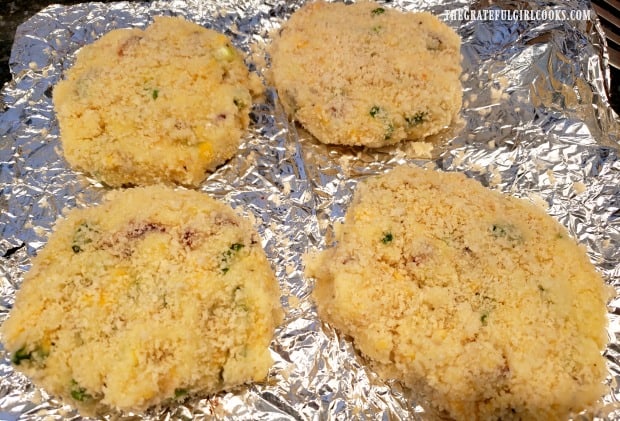
Place the potato patties, one at a time in the panko crumbs on plate, and gently cover all sides with the crumbs, lightly pressing them onto patty to adhere. Once fully coated, set aside and repeat until all 4 potato fritters are covered with panko crumbs.

The loaded potato fritters are shaped into patties.Each fritter is coated in panko crumbs before frying.Four mashed potato loaded fritters ready to be fried.

Time To Cook The Mashed Potato Loaded Fritters!

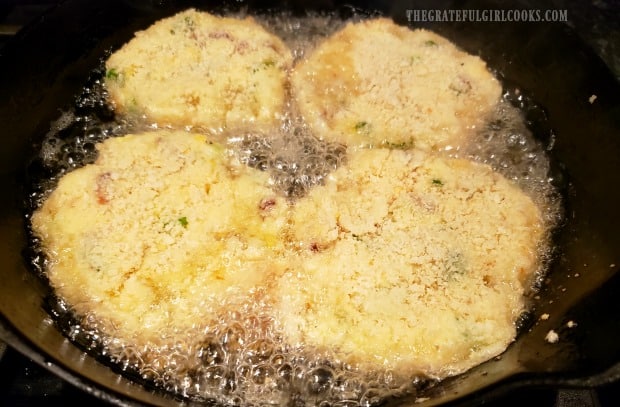
Now you’re ready to cook them until crispy! Pour enough oil into a large skillet to cover the bottom with about 1/2″ of oil. Heat oil on medium-high heat until very hot (but not smoking!).

Carefully (use a spatula) place each of the mashed potato loaded fritters into the hot oil. You should hear it sizzle when the fritters go into the hot oil. Do not move them once they hit the skillet, to ensure a good pan-searing.

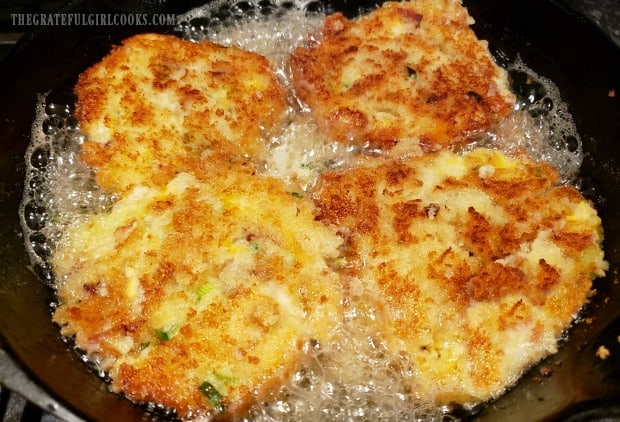
Let the fritters cook for approximately 3 minutes in the hot oil, until the bottom side is deep golden brown and crispy! Carefully turn the fritters to the other side, and continue cooking for an additional 3-4 minutes until golden brown and crispy on the bottom side again.

They cook for 3-4 minutes in hot oil before turning to other side.You can see how golden brown the fritters are, after turning to other side.

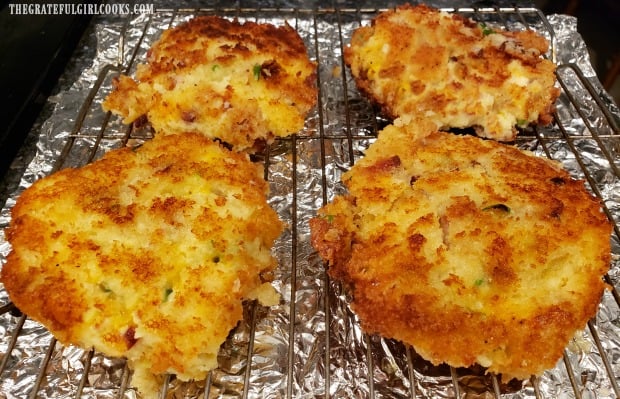
Once done (and crispy brown on all sides), transfer the mashed potato loaded fritters to a wire rack to drain off any remaining oil. I placed a sheet of aluminum foil under the rack for easy cleanup. Let them drain for just a minute, and then they are ready to serve!

Mashed potato loaded fritters draining on wire rack after removing from hot oil.

Serve The Mashed Potato Loaded Fritters

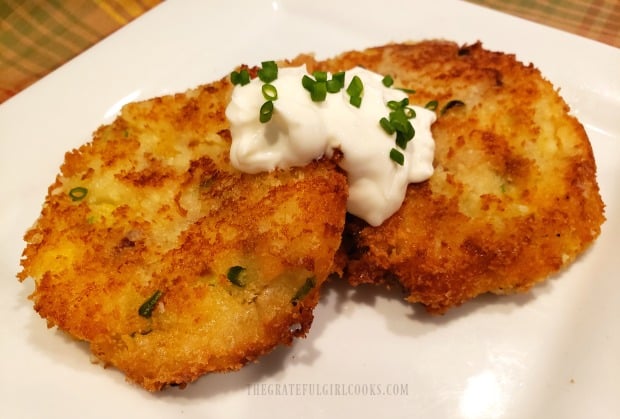
To serve these delicious, crispy potato fritters, transfer them to a platter or individual plates. This recipe makes 4 fritters total (1 fritter per serving). Serve hot, and dollop the fritters with sour cream and chopped chives or green onions before serving, if desired.

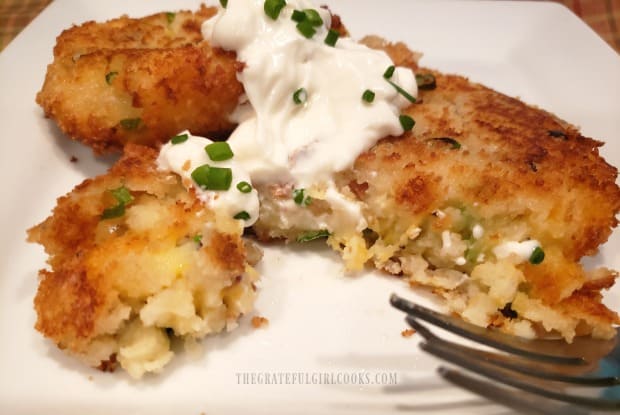
I definitely recommend topping them with sour cream and chives, because that adds more delicious flavor to this veggie side dish! Grab a fork and dig in! These mashed potato loaded fritters are delicious! They’re crispy on the outside and soft on the inside!

Dollop the mashed potato loaded fritters with sour cream and chopped chives to serve.Cut into the crunchy outside of the fritter to see inside this delicious side dish!

TIP: Be sure to serve these fritters immediately after making them, because they are BEST, when served fresh! They still will taste good, but will lose their crispy crunchiness if allowed to sit for hours or are refrigerated.

Hope you will consider trying these mashed potato loaded fritters! They are a GREAT way to use up those leftover mashed potatoes! Have a GREAT day!

Looking For More POTATO Recipes?

You can find ALL my recipes in the Recipe Index, located at the top of the page. I have some delicious recipes featuring potatoes you might enjoy, including:

Interested In More Recipes?

Thank you for visiting this website. I appreciate you using some of your valuable time to do soIf you’re interested, I publish a newsletter 2 times per month (1st and 15th) with all the latest recipes, and other fun info. I would be honored to have you join our growing list of subscribers, so you never miss a great recipe!
There is a Newsletter subscription box on the top right side (or bottom) of each blog post, depending on the device you use, where you can easily submit your e-mail address (only) to be included in my mailing list.

You Can Also Find Me On Social Media:
Facebook page: The Grateful Girl Cooks!
Pinterest: The Grateful Girl Cooks!
Instagram: jbatthegratefulgirlcooks

Author's signature

0 from 0 votes
Mashed Potato Loaded Fritters
Prep Time
10 mins
Cook Time
6 mins
Total Time
16 mins
 

Use your leftovers to make yummy Mashed Potato Loaded Fritters, filled with bacon, green onions, cheddar cheese, & coated with crispy panko crumbs!

Category: Side Dish, Vegetable Dish
Cuisine: American
Keyword: mashed potato loaded fritters
Servings: 4 fritters
Calories Per Serving: 290 kcal
Author: JB @ The Grateful Girl Cooks!
Ingredients
  • cups mashed potatoes (prepared)
  • 2 slices bacon (pre-cooked) , crisp and crumbled
  • 1 large egg
  • 1 stem scallion (green onion) , sliced (green & white parts)
  • ¼ cup cheddar cheese
  • 3 Tablespoons dry bread crumbs (regular)
  • 1 Tablespoon all purpose flour
  • teaspoon salt, pepper, and garlic powder ( ⅛ tsp. each)
  • vegetable oil , enough to cover skillet with 1/2 inch
  • 1 cup PANKO bread crumbs , to roll fritters in
  • sour cream and chopped chives (OPTIONAL, for garnish)
Instructions
  1. Place mashed potatoes, crumbled bacon, green onions, regular bread crumbs, flour, egg, salt, pepper, garlic powder and cheddar cheese in a medium sized mixing bowl. Stir together until all ingredients have been fully blended into mashed potatoes.

  2. Pour panko crumbs out on a dinner plate. Divide the potato mixture into 4 equal sized balls, and then shape/flatten them out in your hands to form a patty. Place patties, one at a time in the panko crumbs, and gently cover all sides, turning and lightly pressing them onto patty to adhere. Once fully coated, set aside. Repeat until all fritters are covered with panko crumbs.

  3. Pour enough oil into a large skillet to cover the bottom with about 1/2" of oil. Heat oil on medium-high heat until very hot (but not smoking!). Carefully (use a spatula) place each of the mashed potato loaded fritters into the hot oil. You should hear it sizzle.. Do not move them once they hit the skillet, to ensure a seared crust on the outside. Let fritters cook for approx. 3 minutes, until the bottom is deep golden brown and crispy! Carefully turn the fritters to other side, and continue cooking an additional 3-4 minutes until golden brown and crispy on the bottom. Once done (and crispy brown on all sides), transfer fritters to a wire rack to drain off any excess oil. I placed a sheet of aluminum foil under the rack for easy cleanup. Let them drain for just a minute, and then they are ready to serve!

  4. Place potato fritters on a platter or individual plates. Serve hot, and dollop each fritter with sour cream and some chopped chives or green onions, if desired (recommended). Enjoy!
Recipe Notes

Caloric calculation does not include optional garnish of sour cream and chives.

Nutrition Facts
Mashed Potato Loaded Fritters
Amount Per Serving (1 fritter)
Calories 290 Calories from Fat 117
% Daily Value*
Fat 13g20%
Saturated Fat 8g50%
Cholesterol 64mg21%
Sodium 390mg17%
Potassium 290mg8%
Carbohydrates 33g11%
Fiber 2g8%
Sugar 2g2%
Protein 10g20%
Vitamin A 147IU3%
Vitamin C 15mg18%
Calcium 105mg11%
Iron 2mg11%
* Percent Daily Values are based on a 2000 calorie diet.

Here’s one to pin on your Pinterest boards!Use your leftovers to make yummy Mashed Potato Loaded Fritters, filled with bacon, green onions, cheddar cheese, & coated with crispy panko crumbs!

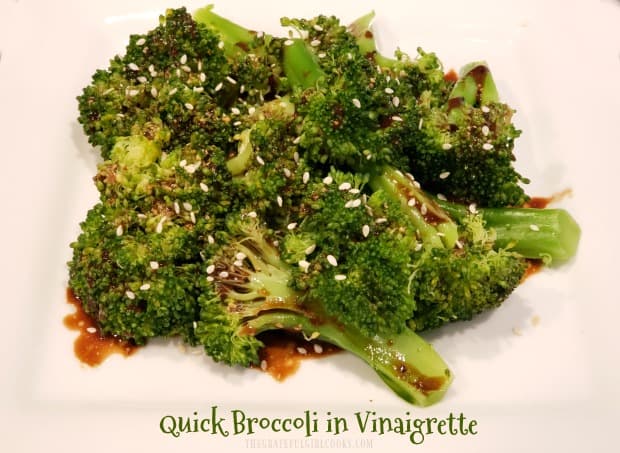
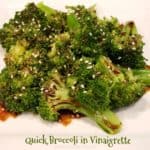
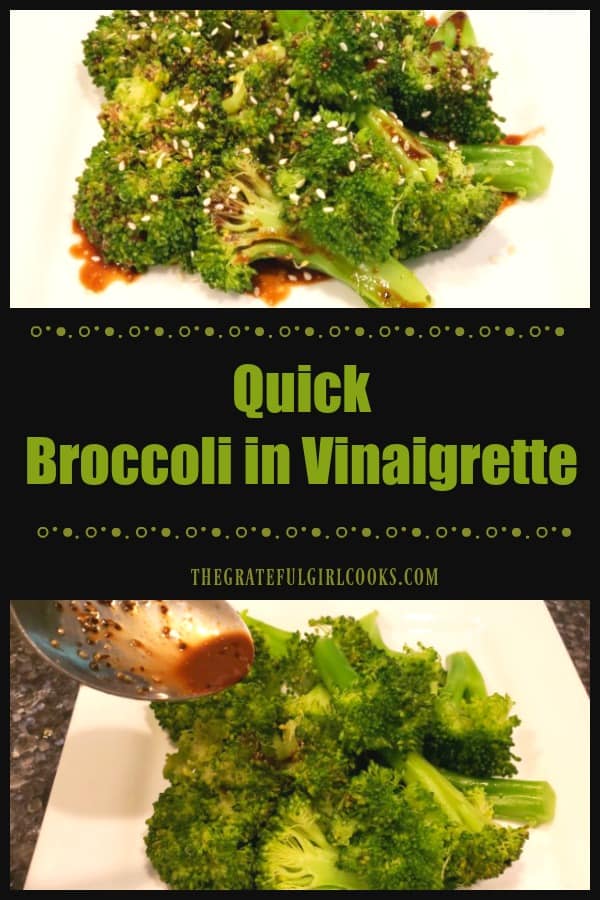
Quick Broccoli in Vinaigrette

Quick broccoli in vinaigrette is a fast, easy way to serve a tasty veggie side dish! Enjoy steamed broccoli, drizzled with a tangy balsamic dressing.

Do you ever get tired of the same old vegetable side dishes, and long for something that’s not too difficult to make, but tastes good? I do, so when I saw this recipe for quick broccoli in vinaigrette in a really old “Cooking Light” cookbook, I knew I had to give it a try!

This recipe is so incredibly easy! Broccoli spears are steamed, and then are enhanced, flavor-wise, by topping them with a homemade balsamic vinaigrette. The vinaigrette only takes a few minutes to whip up, with very common ingredients. The tangy addition of this vinaigrette imparts unique flavor to otherwise “routine” broccoli!

Scroll Down For A Printable Recipe Card At the Bottom Of The Page

Making A Dressing For The Broccoli in Vinaigrette Is EASY!

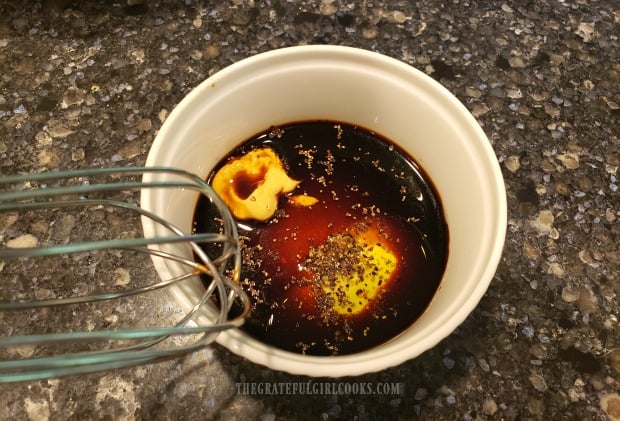
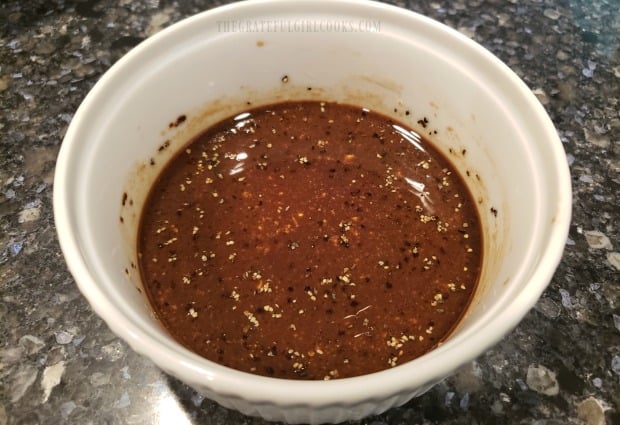
To make the easy vinaigrette, measure balsamic vinegar, dijon mustard, olive oil, salt and pepper into a small bowl. Use a whisk or a fork to blend these ingredients together, until completely blended. Set vinaigrette aside while you steam the broccoli.

Ingredients for balsamic dressing in small bowl.The balsamic vinaigrette which will be drizzled over the steamed vegetable.

Prepare The Broccoli

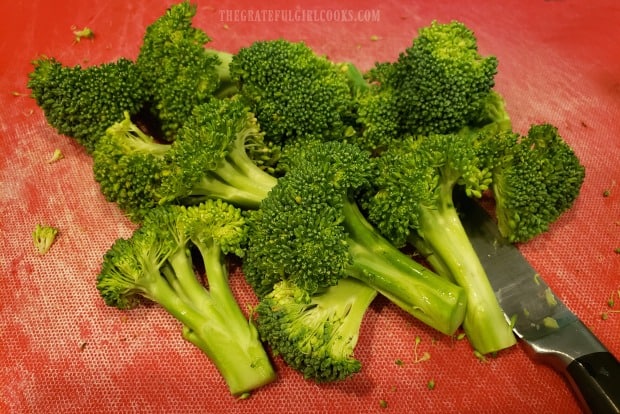
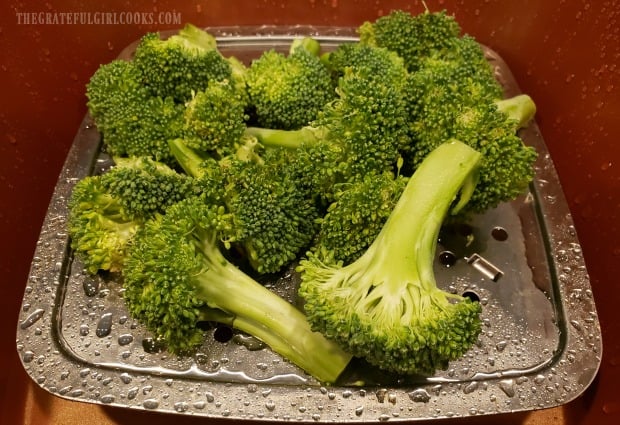
Trim the leaves, and cut off the really tough ends of the broccoli. Give the broccoli a quick rinse, then cut the broccoli into spears. Place the broccoli spears into a steamer basket or rack, and steam (covered) over boiling water for 5 minutes. When done, the broccoli should be crisp/tender in texture.

NOTE: My photos only show HALF of the broccoli the recipe calls for – only my hubby and I were going to eat this! The recipe (as written in the printable recipe card at the bottom) will serve 6.

Broccoli is cleaned, then cut into long spears before cooking.The spears are steamed on a rack over water, in a saucepan.

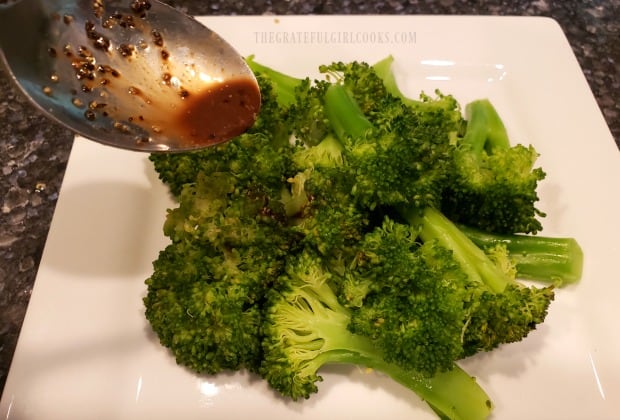
Immediately transfer the steamed broccoli out of the steamer and onto a serving plate. Drizzle the broccoli spears with the balsamic vinaigrette, using all of it.

The balsamic vinaigrette is drizzled over the steamed broccoli.

Serve The Quick Broccoli in Vinaigrette

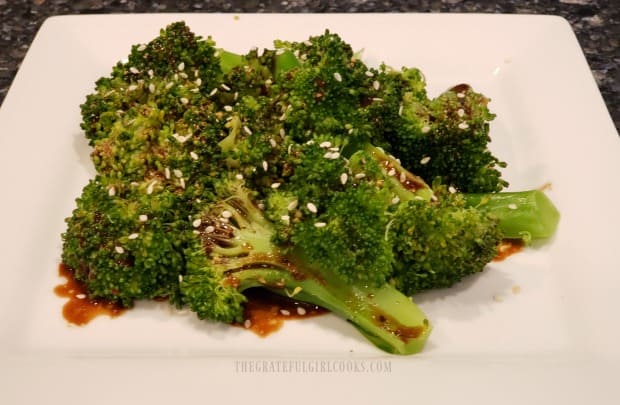
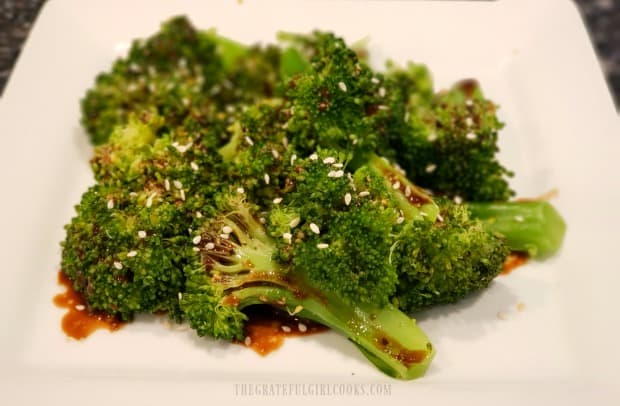
Sprinkle the broccoli with white sesame seeds for garnish, if desired. Serve the broccoli in vinaigrette immediately. Hope you enjoy it!

Quick broccoli in vinaigrette is garnished with sesame seeds before serving.Tangy balsamic dressing adds flavor to the cooked broccoli spears.

I hope you will consider trying this totally EASY vegetable side dish! If you enjoy broccoli like we do, be sure to check out my recipes for Broccoli Salad, Bacon Broccoli Quiche, and Broccoli Cauliflower Bake! Have a GREAT day!

Looking For More VEGGIE SIDE DISH Recipes?

You can find all of my veggie side dish recipes in the Recipe Index, located at the top of the page. A few you might enjoy include:

Interested In More Recipes?

Thank you for visiting this website. I appreciate you using some of your valuable time to do soIf you’re interested, I publish a newsletter 2 times per month (1st and 15th) with all the latest recipes, and other fun info. I would be honored to have you join our growing list of subscribers, so you never miss a great recipe!
There is a Newsletter subscription box on the top right side (or bottom) of each blog post, depending on the device you use, where you can easily submit your e-mail address (only) to be included in my mailing list.

You Can Also Find Me On Social Media:
Facebook page: The Grateful Girl Cooks!
Pinterest: The Grateful Girl Cooks!
Instagram: jbatthegratefulgirlcooks

Author's signature

Original recipe source: “Cooking Light 1994 Cookbook”, published by Oxmoor House, Inc., 1993, page 49

0 from 0 votes
Quick Broccoli in Vinaigrette
Prep Time
10 mins
Cook Time
5 mins
Total Time
15 mins
 

Quick broccoli in vinaigrette is a fast, easy way to serve a tasty veggie side dish! Enjoy steamed broccoli, drizzled with a tangy balsamic dressing.

Category: Side Dish, Vegetable Dish
Cuisine: American
Keyword: broccoli in vinaigrette
Servings: 6
Calories Per Serving: 55 kcal
Author: JB @ The Grateful Girl Cooks!
Ingredients
  • pounds fresh broccoli
  • 2 Tablespoons balsamic vinegar
  • 1 teaspoon dijon mustard
  • ½ teaspoon olive oil
  • ¼ teaspoon ground black pepper
  • teaspoon salt
  • 1 Tablespoon sesame seeds (optional, for garnish)
Instructions
  1. To make vinaigrette, measure balsamic vinegar, dijon mustard, olive oil, salt and pepper into a small bowl. Use a whisk or a fork to blend ingredients together, until completely blended. Set vinaigrette aside while you steam broccoli.

  2. Trim the leaves, and cut off really tough ends of the broccoli. Give broccoli a quick rinse, then cut into spears. Place broccoli spears into a steamer basket or rack, and steam (covered) over boiling water for 5 minutes. When done, the broccoli should be crisp/tender in texture.

  3. Immediately transfer the steamed broccoli out of steamer and onto a serving plate. Drizzle the broccoli spears with the balsamic vinaigrette, using all of it. Sprinkle with sesame seeds, if using. Serve hot, and enjoy!

Nutrition Facts
Quick Broccoli in Vinaigrette
Amount Per Serving (1 g)
Calories 55 Calories from Fat 9
% Daily Value*
Fat 1g2%
Saturated Fat 1g6%
Sodium 97mg4%
Potassium 371mg11%
Carbohydrates 9g3%
Fiber 3g13%
Sugar 3g3%
Protein 4g8%
Vitamin A 706IU14%
Vitamin C 101mg122%
Calcium 66mg7%
Iron 1mg6%
* Percent Daily Values are based on a 2000 calorie diet.

Here’s one more to pin on your Pinterest boards!Quick broccoli in vinaigrette is a fast, easy way to serve a tasty veggie side dish! Enjoy steamed broccoli, drizzled with a tangy balsamic dressing.

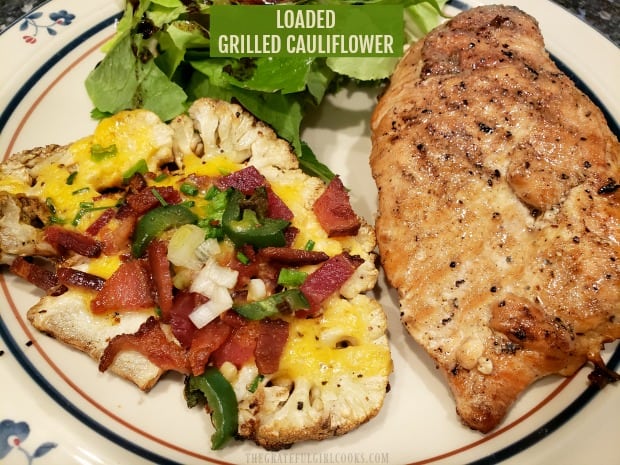
Loaded Grilled Cauliflower

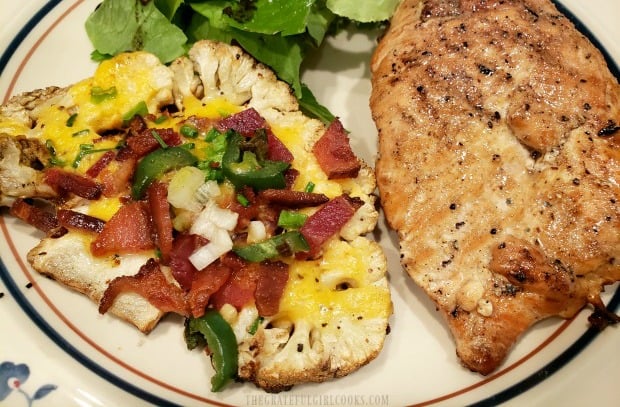
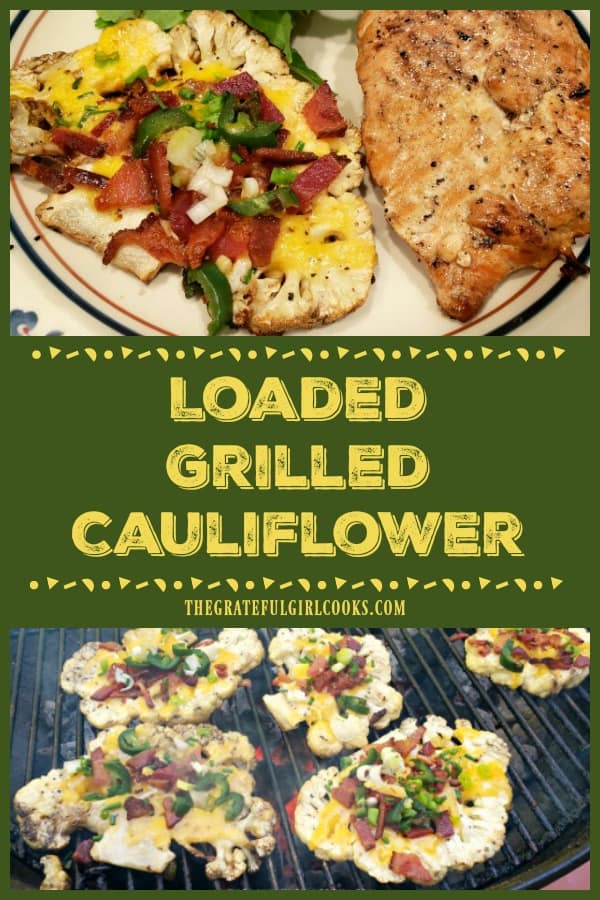
You’re gonna love this loaded grilled cauliflower! Cauliflower steaks cooked on the BBQ, loaded with cheese, crisp bacon, green onions, and jalapeños!
You're gonna love this loaded grilled cauliflower! Cauliflower steaks cooked on the BBQ, loaded with cheese, crisp bacon, green onions, and jalapeños!

So… I had a head of cauliflower hangin’ out in the fridge, and wanted to try something a little “different” with it! This recipe for loaded grilled cauliflower is the result! Cauliflower is grilled on the BBQ, and topped with all kinds of yummy goodies.

We LOVED this dish! If you enjoy recipes for grilling veggies (or fruit) like this, you might also enjoy my recipe for grilled pineapple with brown sugar and cinnamon. Soooo yummy! Making grilled cauliflower is also a fairly easy thing to do, as well… hooray! Let me show you just how easy it is to make this delicious vegetable side dish.

Scroll Down For A Printable Recipe Card At the Bottom Of The Page

How To Make Loaded Grilled Cauliflower

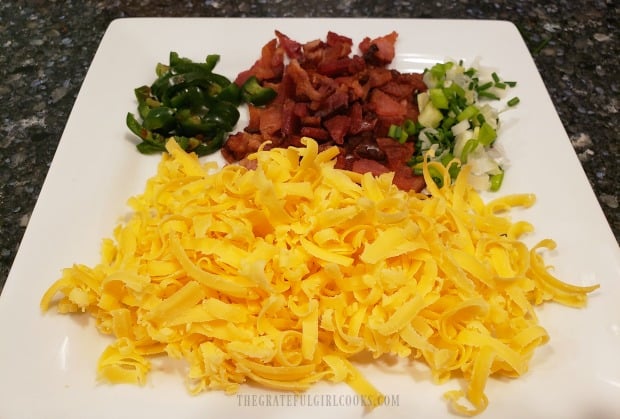
As always, it is “first things first”! Grate the cheddar cheese, slice and de-seed jalapeños, slice green onions, and cook bacon until crispy, then crumble! Set aside. Once the add-ons are prepped, the rest of the dish is a cinch to make. TIP: Be sure to have all of these add-ons ready to go BEFORE you put the cauliflower on the grill, cause this dish cooks fast and you will need these!

Grated cheese, jalapenos, green onions and crisp bacon are ready to add to grilled cauliflower.

Prepare The Cauliflower

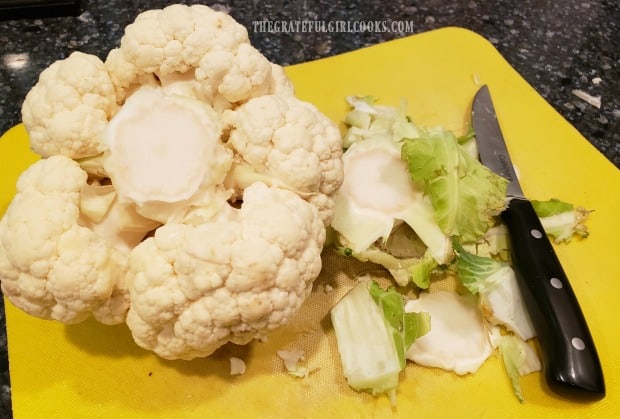
Trim an entire head of cauliflower. This means remove all the green leaves that protrude from the bottom. Slightly trim the stem a little bit, but make sure to leave the rest of the steam intact!

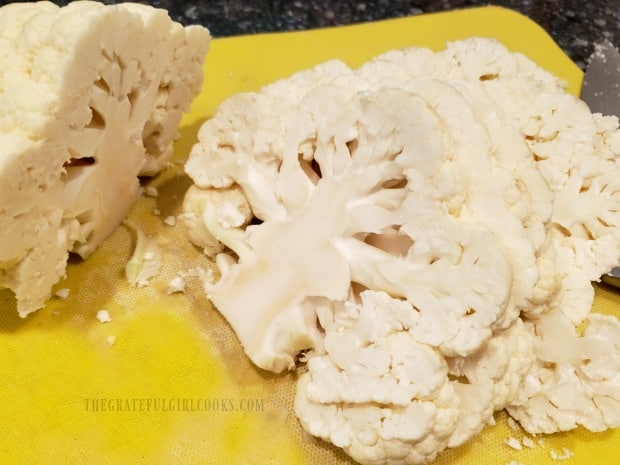
Slice through the cauliflower from top to bottom, cutting each piece into 3/4″ thick slices. Some of the florets will fall off. Save those to use another time! You want to end up with 4 thick (3/4″) slices of cauliflower (as shown below). I had leftover cauliflower, which was used for another dish.

The leaves of the cauliflower and part of the stem are trimmed.Cauliflower is sliced from top to bottom into 3/4" wide "steaks".

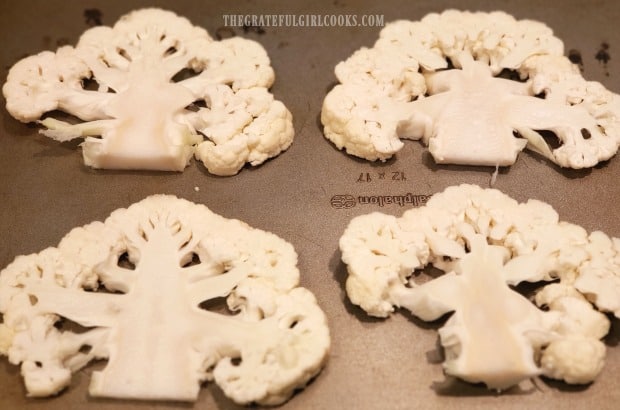
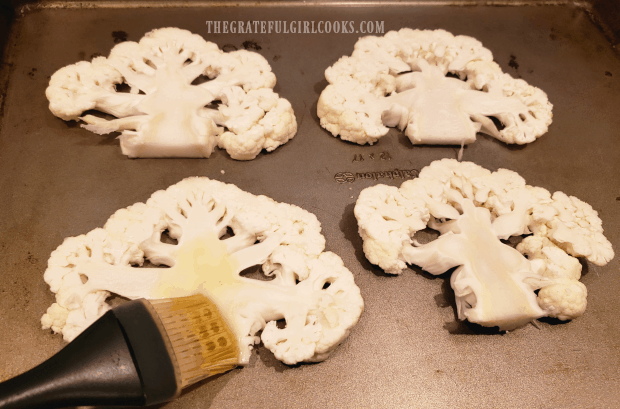
The cauliflower is delicate, so take care not to break off the florets during preparation. Use a spatula to place each cauliflower “steak” onto a baking sheet. Brush both sides of each piece with olive oil, and then lightly season with salt and pepper.

Four cauliflower steaks are placed onto a baking sheet.Each piece of cauliflower is basted with olive oil on both sides.

Time To Make Loaded Grilled Cauliflower!

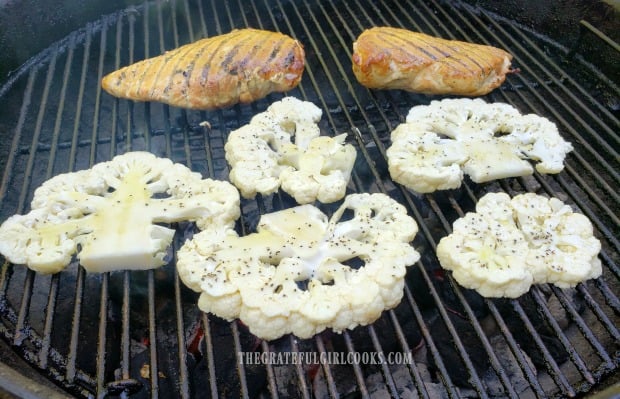
Now the cauliflower is ready to grill. We cooked our loaded grilled cauliflower with some grilled chicken with my Mom’s easy basting sauce! Use a spatula to transfer the four cauliflower steaks onto the hot grill. Cook for about 3 minutes (lid open), and then carefully turn the grilled cauliflower over.


Cauliflower steaks are grilled on one side, then flipped over.Load “Em” Up!

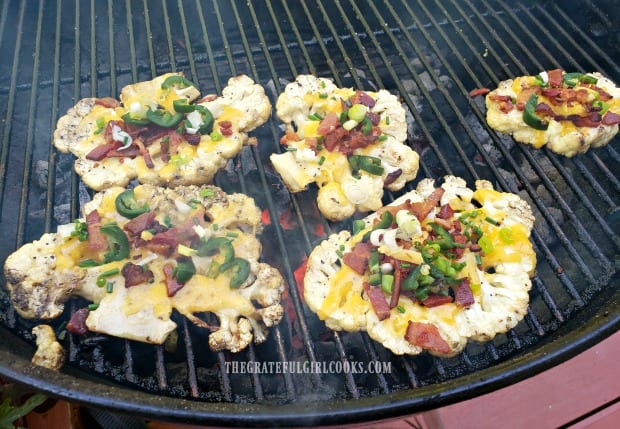
As soon as you turn the cauliflower over, add the toppings. Cover with the grated cheese first, and then top with the green onions, bacon, and jalapeños. If the fire is too hot, move the cauliflower away from direct contact with the flames, and continue cooking.

Put the cover on your grill, and let the loaded grilled cauliflower cook for 4-5 minutes longer. When done, the cheese should be melted, and the cauliflower should be “fork tender”. Remove from grill carefully, using a spatula, and transfer to a serving platter.

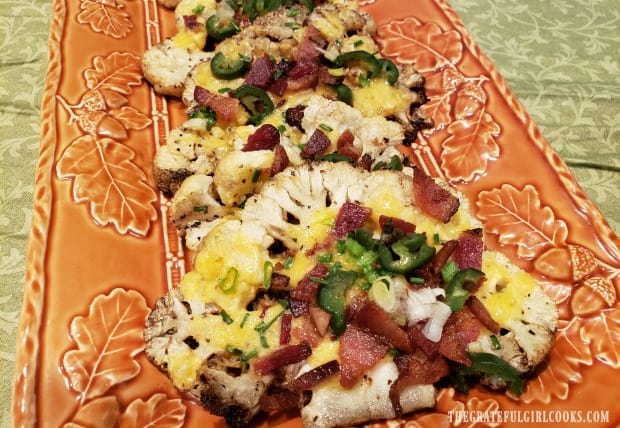
Loaded grilled cauliflower is topped with cheese, bacon, green onions, and jalapeños.

Serve the loaded grilled cauliflower immediately, while it is still hot! It is a colorful, and flavor-filled side dish, and we loved it alongside our grilled chicken!

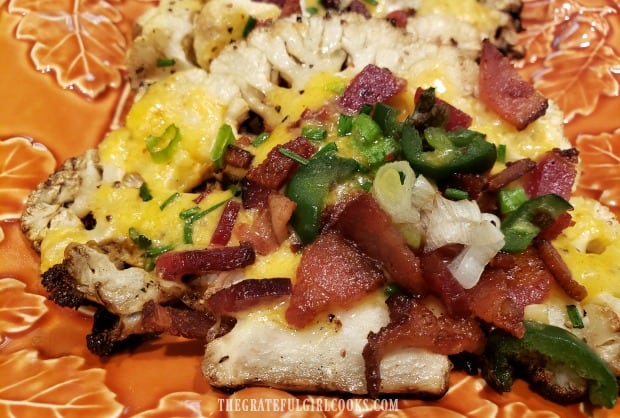
All of the loaded grilled cauliflower on a serving platter.Close up view of one piece of grilled cauliflower with all the add-ons!Chicken and green salad were served with the loaded grilled cauliflower.

I can’t say enough great things about this simple dish! My husband wasn’t so sure when I first told him what I was planning to have him add to the grill! However, he raved about the loaded grilled cauliflower after tasting it! Hope you enjoy it, too!

Looking For More Grilled Veggie Recipes?

You can find all of my grilled veggie recipes in the Recipe Index, located at the top of the page. A few of these recipes are:

Interested In More Recipes?

Thank you for visiting this website. I appreciate you using some of your valuable time to do soIf you’re interested, I publish a newsletter 2 times per month (1st and 15th) with all the latest recipes, and other fun info. I would be honored to have you join our growing list of subscribers, so you never miss a great recipe!
There is a Newsletter subscription box on the top right side (or bottom) of each blog post, depending on the device you use, where you can easily submit your e-mail address (only) to be included in my mailing list.

You Can Also Find Me On Social Media:
Facebook page: The Grateful Girl Cooks!
Pinterest: The Grateful Girl Cooks!
Instagram: jbatthegratefulgirlcooks

Author's signature

Original recipe source: fredmeyer.com

0 from 0 votes
Loaded Grilled Cauliflower
Prep Time
10 mins
Cook Time
8 mins
Total Time
18 mins
 

You're gonna love this loaded grilled cauliflower! Cauliflower steaks cooked on the BBQ, loaded with cheese, crisp bacon, green onions, and jalapeños!

Category: Side Dish, Vegetable
Cuisine: American
Keyword: loaded grilled cauliflower
Servings: 4
Calories Per Serving: 216 kcal
Author: JB @ The Grateful Girl Cooks!
Ingredients
  • 1 head cauliflower , trimmed
  • 4 teaspoons olive oil
  • salt and pepper , to season cauliflower
  • 2 slices bacon , cooked crisp and crumbled
  • 1 cup shredded cheddar cheese
  • ¼ cup green onion (scallions) , sliced (white and green parts)
  • 1 medium jalapeno pepper , seeds removed, sliced
Instructions
  1. Prep: Preheat BBQ grill. Grate the cheddar cheese, slice and de-seed jalapeños, slice green onions, and cook bacon until crispy, then crumble! Set aside. TIP: Be sure to have all of these add-ons ready to go BEFORE you put the cauliflower on the grill, cause this dish cooks fast and you will need them quickly!

  2. Trim cauliflower. Remove all green leaves that protrude from bottom. Slightly trim stem a little bit, but make sure to leave the rest of the steam intact! Slice through the cauliflower from top to bottom, cutting each piece into 3/4" thick slices. Some of the florets will fall off. Save those to use another time! You want to end up with 4 thick (3/4") slices of cauliflower. Use a spatula to place the 4 cauliflower "steaks" onto a baking sheet. Brush both sides of each piece with olive oil, and then lightly season with salt and pepper.

  3. Use a spatula to transfer the four cauliflower steaks onto the preheated, hot grill. Cook for about 3 minutes (lid open unless flame gets too hot), and then carefully turn the grilled cauliflower over. As soon as you turn the cauliflower over, add the toppings. Cover with grated cheese first, and then top with green onions, bacon, and jalapeños. If the fire is too hot, move cauliflower away from direct contact with the flames, and continue cooking. Put the lid on your grill, and let the loaded grilled cauliflower cook for 4-5 minutes longer.

  4. When done, the cheese should be melted, and the cauliflower should be "fork tender". Remove from grill carefully, using a spatula. Transfer to serving platter, and serve while hot. Enjoy!
Recipe Notes

NOTE: Remove the seeds from the jalapeños if you don't want them too hot. If you don't mind the heat, just leave 'em in!

Nutrition Facts
Loaded Grilled Cauliflower
Amount Per Serving (1 g)
Calories 216 Calories from Fat 162
% Daily Value*
Fat 18g28%
Saturated Fat 8g50%
Cholesterol 37mg12%
Sodium 271mg12%
Potassium 282mg8%
Carbohydrates 5g2%
Fiber 2g8%
Sugar 2g2%
Protein 10g20%
Vitamin A 383IU8%
Vitamin C 40mg48%
Calcium 224mg22%
Iron 1mg6%
* Percent Daily Values are based on a 2000 calorie diet.

Here’s one more to pin on your Pinterest boards!You're gonna love this loaded grilled cauliflower! Cauliflower steaks cooked on the BBQ, loaded with cheese, crisp bacon, green onions, and jalapenos!

How To Can Asparagus

Learn how to can asparagus for long term storage, using a pressure canner. Once fresh asparagus is canned, it’s shelf stable, & ready for your pantry!
Learn how to can asparagus for long term storage, using a pressure canner. Once fresh asparagus is canned, it's shelf stable, & ready for your pantry!

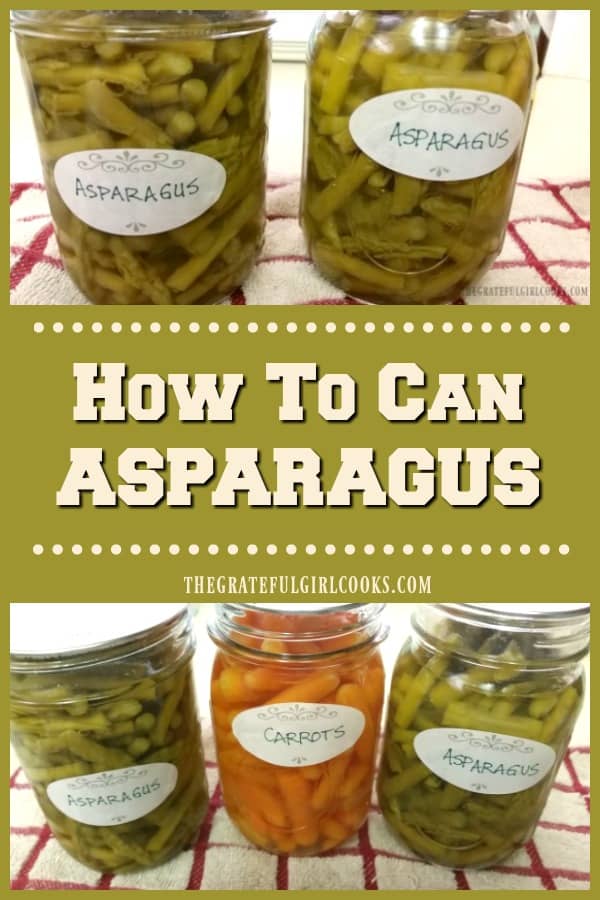
It has been such a fun project, learning how to can different soups, vegetables, jams, and fruits since learning basic canning techniques.  This “recipe” for how to can asparagus is a pressure canning recipe, and I am happy to share it with you today.

Please note that you will need a pressure canner to do this, since asparagus is a low-acid food. Low acid foods (most veggies, meats, and soups) require higher temps, achieved through pressure canning, to be safely canned for storage.

Scroll Down For A Printable Recipe Card At The Bottom Of The Page

Prepare Canning Equipment Before Beginning

Before beginning, make sure to have your pressure canner, canning jars, flat lids and screw bands prepped and ready, according to manufacturer instructions and USDA guidelines. If you are at higher altitudes (above 1,000 feet), or are using a dial gauge pressure canner, make sure to refer to the instruction manual for your pressure canner for additional info.

Prepare The Fresh Asparagus For Canning

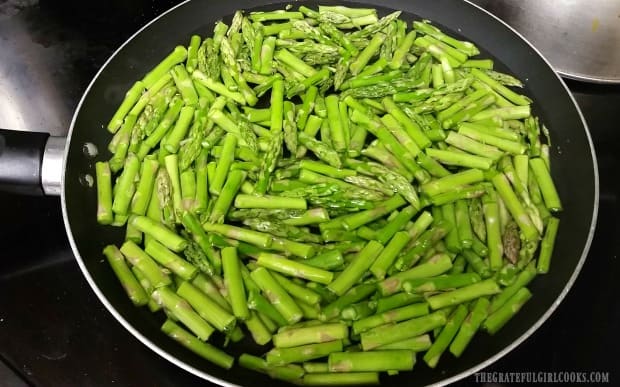
Rinse the asparagus really well, and then drain. Snap off the tough (woody) ends of each stalk (discard ends). There are two methods to can asparagus. I prefer the hot pack method, but the choice is yours:

RAW PACK METHOD: You can either leave asparagus whole and tightly pack them, stem down into jar, or cut into 1″ pieces and tightly pack jar. Leave 1″ headspace in the jars. Raw veggies will shrink more during the canning process, so pack ’em in there.

HOT PACK METHOD: This is the method shown below.  Cut each asparagus stalk into 1″ long pieces. Place in large pot or skillet and add water, to fully cover asparagus. Turn the heat to medium-high, and bring the water to a boil. Boil for 3 minutes, and the asparagus should be tender-crisp.

Drain the asparagus, but save the cooking water for the jars (if desired). Pack the asparagus tightly into jars, leaving 1″ of headspace in the jars.

Fresh asparagus is cut and then quick boiled, before placing into canning jars.

Filling The Jars

If you want to add canning salt to the asparagus, add 1/2 teaspoon canning salt to each PINT jar, and 1 teaspoon canning salt to each QUART jar.

Carefully ladle the boiling water into each jar to cover the asparagus (and still leave a 1″ headspace). Remove the air bubbles from each jar, by inserting a knife or plastic utensil into jars in several places. Adjust the headspace, if necessary. Wipe the rims of the jars clean, and then place flat lids and screw band onto jars. Tighten bands to fingertip tightness.

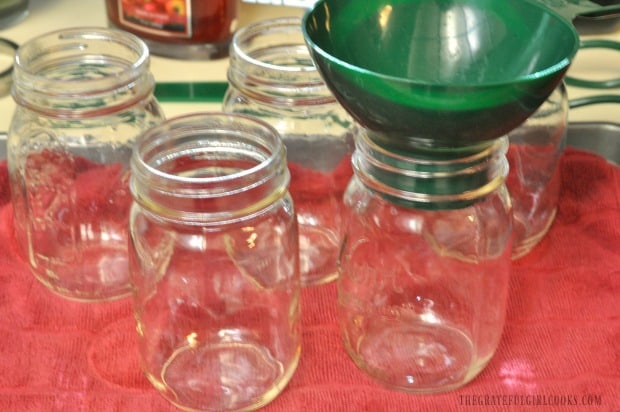
Canning jars and funnel used to pour asparagus into jars.

How To Can Asparagus – Processing Times

Once jars of asparagus are sealed, place them into your pressure canner. Make sure to adjust the water level if necessary, according to your canner’s manufacturer instructions. Lock the lid, and then bring the water to a boil, on medium-high heat. Vent the steam (vent open) for 10 minutes once boiling, and THEN close the vent or add vent cover.

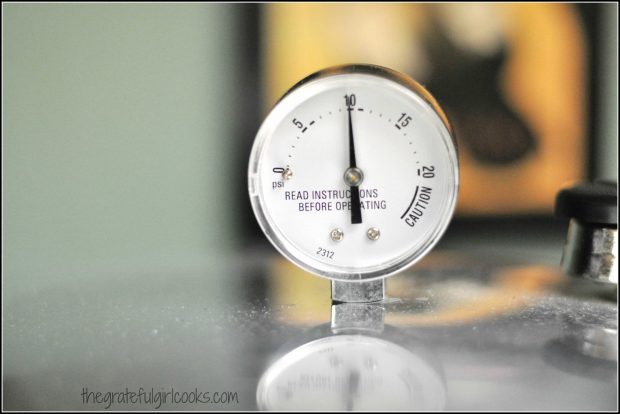
Continue to heat the canner until it reaches 10# (pounds) pressure. You need to maintain 10# pressure the entire processing time. Process PINTS for 30 minutes, and QUARTS for 40 minutes.

Canned asparagus is processed at 10 pounds pressure, as shown on the canner gauge.

Processing Time Is Complete – Now What?

Once processing time is complete, turn off the heat, and let the pressure in the canner drop NATURALLY until it reaches 0 (zero pressure). Open the vent (or remove vent cover), and let the steam vent for 2 more minutes.

Carefully open lid. Wait for 10 more minutes, and then carefully remove jars of canned asparagus with canning tongs. Set the hot jars onto a dish towel, to avoid jars cracking due to temperature variances of various types of countertops.

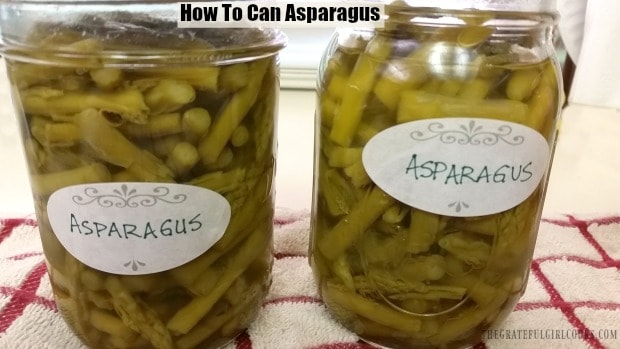
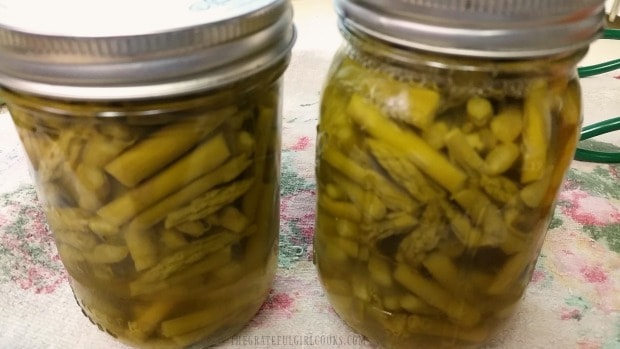
I'm glad I learned how to can asparagus so I can keep it on hand in our pantry!

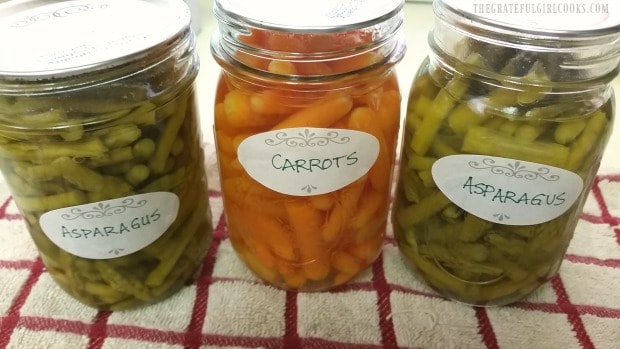
Let the jars cool completely (12 hours or overnight) without disturbing. Once cool, check to ensure the jars have sealed properly, wipe jars clean, and label them. You have now learned how to can asparagus, and the properly sealed jars are now ready for long term storage in your pantry! Congratulations!

Jars of canned asparagus are labeled and ready to store in pantry.

I hope you will consider canning fresh asparagus. It’s very convenient to pull a jar out of the pantry and whip up asparagus soup or add the asparagus to another dish!

The recipe, as written below, will make 2 pint jars, but the recipe below has a feature to let you calculate the exact amount of jars you wish to make. Once you add the number you want, it will adjust the ingredient amount automatically.

Looking For More PRESSURE CANNING Recipes?

You can find all of my recipes in the Recipe Index, located at the top of the page. A few pressure canning recipes you might be interested in include:

Interested In More Recipes?

Thank you for visiting this website. I appreciate you using some of your valuable time to do soIf you’re interested, I publish a newsletter 2 times per month (1st and 15th) with all the latest recipes, and other fun info. I would be honored to have you join our growing list of subscribers, so you never miss a great recipe!
There is a Newsletter subscription box on the top right side (or bottom) of each blog post, depending on the device you use, where you can easily submit your e-mail address (only) to be included in my mailing list.

You Can Also Find Me On Social Media:
Facebook page: The Grateful Girl Cooks!
Pinterest: The Grateful Girl Cooks!
Instagram: jbatthegratefulgirlcooks

Author's signature

Original recipe source: The Ball Complete book of Home Preserving, copyright 2006, published by The Jarden Corporation, page 386

↓↓ PRINTABLE RECIPE BELOW ↓↓

0 from 0 votes
How To Can Asparagus
Prep Time
15 mins
Cook Time
30 mins
Total Time
45 mins
 

Learn how to can asparagus for long term storage, using a pressure canner. Once fresh asparagus is canned, it's shelf stable, & ready for your pantry!

Category: Canning and Preserving, Vegetables
Cuisine: American
Keyword: how to can asparagus
Servings: 2 pints
Calories Per Serving: 91 kcal
Author: JB @ The Grateful Girl Cooks!
Ingredients
  • 2 pounds fresh asparagus
  • Boiling Water
  • canning salt (OPTIONAL)
Instructions
  1. Have pressure canner, canning jars, flat lids and screwbands prepped and ready, according to manufacturer instructions and USDA guidelines. If at higher altitudes (above 1,000 feet), or are using a dial gauge pressure canner, make sure to refer to instruction manual for your pressure canner for additional info.

  2. Rinse asparagus well, and then drain. Snap off tough (woody) ends and discard. There are two methods to can asparagus. RAW PACK METHOD: You can either leave asparagus whole and tightly pack them, stem down into jar, or cut into 1" pieces and tightly pack jar. Leave 1" headspace. HOT PACK METHOD: This is the method I use. Cut each asparagus stalk into 1" long pieces. Place in large pot or skillet and add water, to fully cover asparagus. Turn heat to medium-high, and bring water to a boil. Boil for 3 minutes; asparagus should be tender-crisp. Drain asparagus, but save the cooking water for jars (if desired). Pack asparagus tightly into jars, leaving 1" of headspace.

  3. If adding canning salt to the asparagus, add 1/2 teaspoon to each PINT jar, and 1 teaspoon to each QUART jar. Carefully ladle boiling water into each jar to cover asparagus (still leaving 1" headspace). Remove air bubbles from each jar. Adjust headspace, if necessary. Wipe rims of the jars clean, and place flat lids and screwband onto jars. Tighten bands to fingertip tightness.

  4. Once jars are sealed, place them into prepared pressure canner. Adjust the water level if necessary, according to your canner's manufacturer instructions. Lock lid, and bring water to a boil, on medium-high heat. Vent the steam (vent open) for 10 minutes once boiling, and THEN close vent or add vent cover. Continue to heat until it reaches 10# (pounds) pressure. You need to maintain 10# pressure the entire processing time. Process PINTS for 30 minutes, and QUARTS for 40 minutes after pressure has been reached.

  5. When processing is complete, turn off heat, and let the pressure in the canner drop NATURALLY until it reaches 0 (zero pressure). Open the vent (or remove vent cover), and let steam vent for 2 more minutes. Carefully unlock and open lid. Wait for 10 more minutes, and then remove hot jars with canning tongs. Set the hot jars onto a dish towel, to avoid jars cracking due to countertop temperature variances. Let jars cool completely (12 hours or overnight) without disturbing. Once cool, check to ensure the jars have sealed properly, wipe jars clean, and label them. Store in pantry.

Recipe Notes

NOTE: If using QUART sized jars, please know that EACH quart jar will require about 3 1/2 pounds of asparagus.

Nutrition Facts
How To Can Asparagus
Amount Per Serving (1 pint jar)
Calories 91 Calories from Fat 9
% Daily Value*
Fat 1g2%
Saturated Fat 1g6%
Sodium 9mg0%
Potassium 916mg26%
Carbohydrates 18g6%
Fiber 10g42%
Sugar 9g10%
Protein 10g20%
Vitamin A 3430IU69%
Vitamin C 25.4mg31%
Calcium 109mg11%
Iron 9.7mg54%
* Percent Daily Values are based on a 2000 calorie diet.

Here’s one more to pin on your Pinterest boards!Learn how to can asparagus for long term storage, using a pressure canner. Once fresh asparagus is canned, it's shelf stable, & ready for your pantry!

Greek Garbanzo Salad

Delicious Greek garbanzo salad, with kalamata olives, feta cheese, cucumbers, peppers & light dressing, is vegetarian, gluten-free, and super easy to make!
Delicious Greek garbanzo salad, with kalamata olives, feta cheese, cucumbers, peppers & light dressing, is vegetarian, gluten-free, and super easy!

Do you enjoy garbanzo beans? If you do, then you will love this absolutely yummy Greek garbanzo salad! This little legume (also called a chickpea) is a protein packed, and fiber filled super food in my book! This delicious salad can be served as a side salad OR as a meatless option for a main course.

Scroll Down For A Printable Recipe Card At The Bottom Of The Page

Other Salads Using Garbanzo Beans

Two other dishes I really enjoy using garbanzo beans in are Nanci’s 4-Bean Salad, and Lemony Chickpea Salad. They are so light, and flavorful, and I hope you will consider checking out these recipes, as well. Both of these salads take only minutes to pull together, so they are perfect, convenient dishes to prepare on busy days!

How To Make This Greek Garbanzo Salad

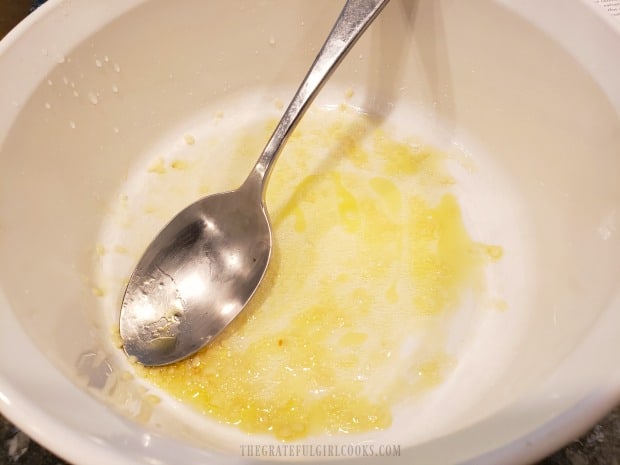
The first thing you need to do is prepare the (totally EASY) dressing for the Greek garbanzo salad. Place minced garlic, olive oil, lemon juice and a small amount of salt in a medium sized salad bowl, and mix until combined. See how easy that was?

Lemon juice, olive oil, salt and minced garlic are blended to make dressing for salad.

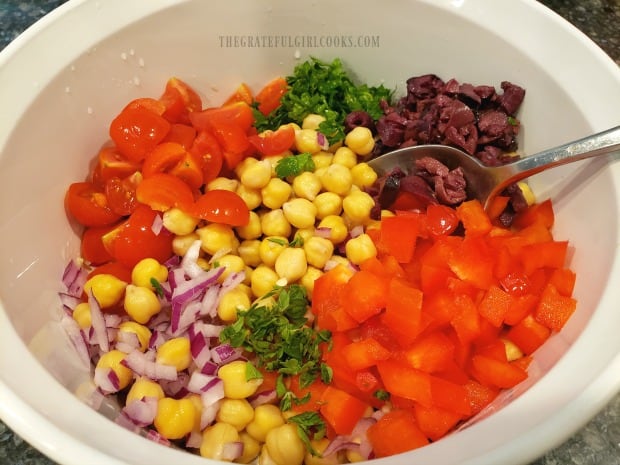
Add the drained garbanzo beans, bell peppers (orange or red), cherry tomatoes, red onion, kalamata olives, and fresh parsley and oregano (can substitute dried oregano).

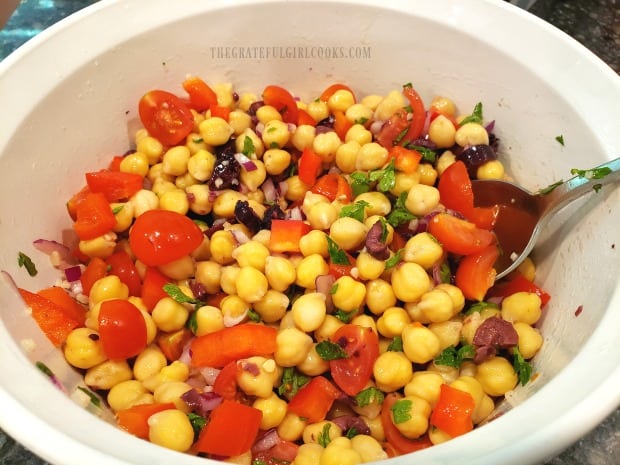
Give the ingredients a good stir, so they are fully combined with the dressing on the bottom of bowl. **Do not add the cucumber and feta cheese at this time, unless you are serving the salad right away.**

For Best Flavor, Let Salad Marinate In Refrigerator

For the very best flavor, I recommend placing the salad (covered) in the refrigerator for a couple hours minimum. This will give the salad a good chill, AND let the flavors mingle and get to know each other! You can even let the salad marinate overnight, if desired!

Tomatoes, bell peppers, garbanzo beans, red onion, kalamata olives & fresh herbs in bowl.The salad ingredients are mixed to coat with the lemon/olive oil dressing.

Before Serving The Greek Garbanzo Salad, Add Final Ingredients

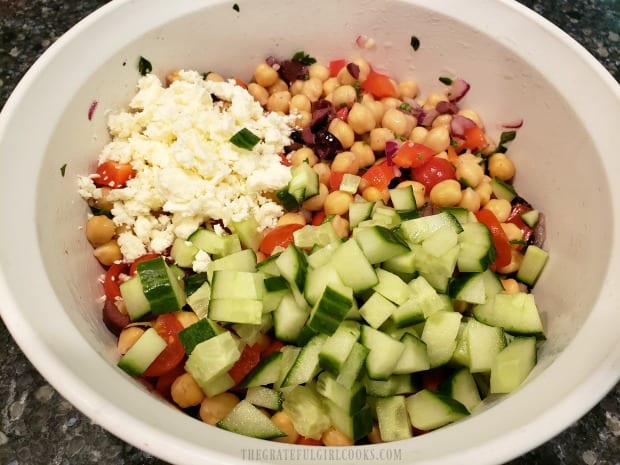
Right before you serve the salad, add the chopped cucumber (they should be nice and crunchy), and the crumbled feta cheese. Toss, to combine.

NOTE: I mixed both the feta and cucumbers into the Greek garbanzo salad, but you can also mix in the crunchy cucumbers, toss to combine, and then top the salad with the feta, if desired.

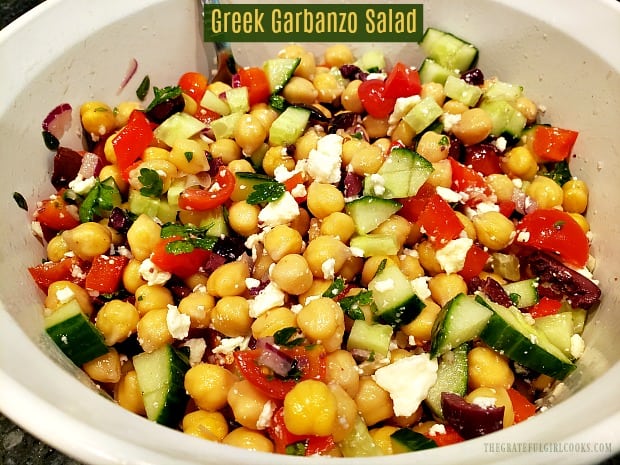
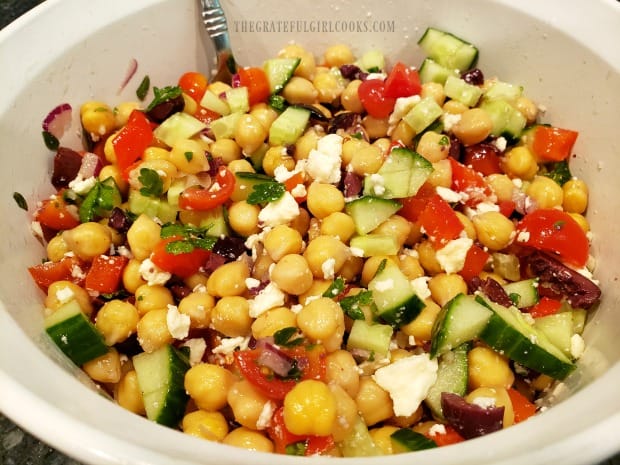
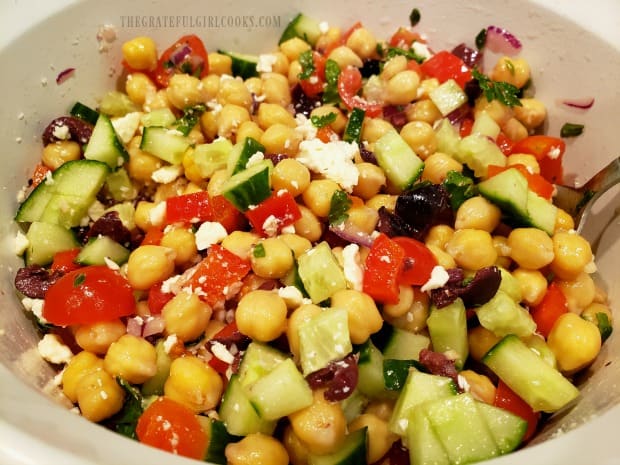
Feta cheese and diced cucumbers are added to the Greek garbanzo salad before serving.A bowl full of the Greek garbanzo salad, ready to eat!

Now you’re ready to serve this cool, crispy, colorful, and flavor-filled Greek garbanzo salad! The salad has a wonderful taste thanks in part to the feta cheese, simple lemon dressing and tangy kalamata olives. YUM!

Greek garbanzo salad is chilled, then served!

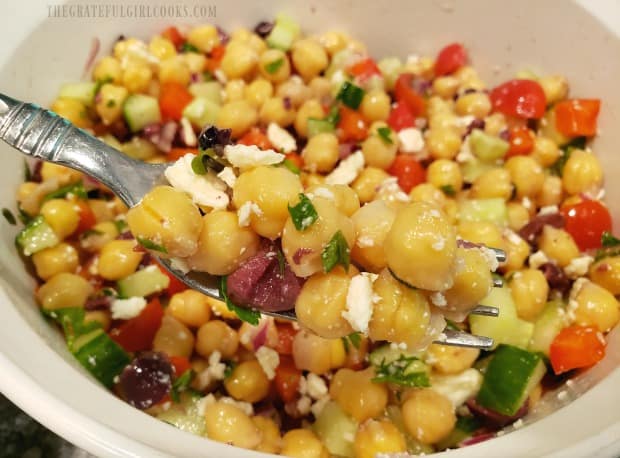
Here is a close up view (below) of a forkful of the Greek garbanzo salad… ready to eat! My husband and I loved this simple salad. Our grown son (a vegetarian) popped in for a visit, and tried this salad. He loved it, too!

A bite of the Greek garbanzo salad on a fork, ready to eat.

Hope you will consider trying this delicious Greek garbanzo salad. It truly is very good, and would be a perfect side dish to serve on a hot, summer evening! The salad will keep well for several days, covered in the refrigerator! Have a great day, friends.

Looking For More SALAD Recipes?

You can find ALL of my recipes in the Recipe Index, located at the top of the page. I have a nice variety of delicious salad recipes for you to enjoy, including:

Interested In More Recipes?

Thank you for visiting this website. I appreciate you using some of your valuable time to do soIf you’re interested, I publish a newsletter 2 times per month (1st and 15th) with all the latest recipes, and other fun info. I would be honored to have you join our growing list of subscribers, so you never miss a great recipe!
There is a Newsletter subscription box on the top right side (or bottom) of each blog post, depending on the device you use, where you can easily submit your e-mail address (only) to be included in my mailing list.

You Can Also Find Me On Social Media:
Facebook page: The Grateful Girl Cooks!
Pinterest: The Grateful Girl Cooks!
Instagram: jbatthegratefulgirlcooks

Author's signature

Original recipe source: “The Skinnytaste Cookbook”, by Gina Homolka, published 2014 by Clarkson-Potter Publishers, page 146.

0 from 0 votes
Greek Garbanzo Salad
Prep Time
15 mins
Cook Time
0 mins
Total Time
15 mins
 

Delicious Greek garbanzo salad, with kalamata olives, feta cheese, cucumbers, peppers & light dressing, is vegetarian, gluten-free, and super easy!

Category: Salad/Side Dish
Cuisine: Greek
Keyword: Greek Garbanzo Salad
Servings: 5 (1 cup servings)
Calories Per Serving: 141 kcal
Author: JB @ The Grateful Girl Cooks!
Ingredients
For Salad Dressing
  • 2 garlic cloves , minced
  • 3 Tablespoons lemon juice , fresh squeezed
  • 1 Tablespoon olive oil
  • ½ teaspoon salt
For Salad
  • 2 cups canned garbanzo beans (chickpeas) , rinsed and drained (gluten free)
  • 1 cup cherry tomatoes , quartered
  • ½ cup red (or orange) bell pepper , chopped
  • ¼ cup red onion , chopped
  • ¼ cup kalamata olives , pitted and chopped
  • 2 Tablespoons fresh parsley , chopped
  • ½ teaspoon fresh oregano leaves , chopped (OR 1/4 tsp. dried)
  • cups English cucumber , chopped ( or regular cucumber, seeded)
  • cup feta cheese , crumbled
Instructions
  1. Place minced garlic, olive oil, lemon juice and salt in a medium sized salad bowl, and mix together until combined.

  2. Add the drained garbanzo beans, bell peppers (orange or red), cherry tomatoes, red onion, kalamata olives, fresh parsley and oregano (can substitute dried oregano). Give the ingredients a good stir, so they are fully combined with the dressing on bottom of bowl. For the very best flavor, I recommend placing the salad (covered) in the refrigerator for a couple hours minimum. This will give the salad a good chill, AND let the flavors mingle and get to know each other! You can even let the salad marinate overnight, if desired!

  3. Right before you serve the salad, add in the chopped cucumber (it should be nice and crunchy!), and crumbled feta cheese, and toss to combine. NOTE: I mixed both the feta and cucumbers into the salad- you can also mix in the crunchy cucumbers, toss to combine, and then top the salad with the feta, if desired. Serve, and enjoy! Refrigerate any leftovers.
Nutrition Facts
Greek Garbanzo Salad
Amount Per Serving (1 cup)
Calories 141 Calories from Fat 63
% Daily Value*
Fat 7g11%
Saturated Fat 2g13%
Cholesterol 9mg3%
Sodium 638mg28%
Potassium 267mg8%
Carbohydrates 15g5%
Fiber 4g17%
Sugar 3g3%
Protein 6g12%
Vitamin A 850IU17%
Vitamin C 33.2mg40%
Calcium 92mg9%
Iron 1.4mg8%
* Percent Daily Values are based on a 2000 calorie diet.

Here’s one more to pin on your Pinterest boards!Delicious Greek garbanzo salad, with kalamata olives, feta cheese, cucumbers, peppers & light dressing, is vegetarian, gluten-free, and super easy!

Oven Roasted Veggies

Oven roasted veggies are lightly seasoned with olive oil and a few spices, then baked. It’s a great way to cook a variety of veggies, & it’s ready in 20 minutes!
Oven roasted veggies are lightly seasoned with olive oil and a few spices, then baked. Great way to cook a variety of veggies, & ready in 20 minutes!

For many years I steamed almost all of our vegetables for our meals. It was so easy to just pop them into a steamer and heat them on the stove top. However, for the past couple of years I’ve begun oven roasting them, and have discovered we love them even more prepared this way!

Truthfully, both ways of cooking vegetables (steaming or oven roasting) are very simple cooking methods to prepare a variety of fresh veggies. Oven roasted veggies, though, have a slightly “caramelized” look and taste to them, due to a bit of olive oil and seasonings! YUM!

If you have never oven roasted veggies before, it’s SO EASY!  Obviously you can roast the types of veggies you and your loved ones enjoy the most, but for purposes of this blog post, I am showing the veggies we used THIS time (when I took pics!). Let me show you how simple this method is.

Scroll Down For A Printable Recipe Card At The Bottom Of The Page

Prep The Veggies

Begin by preheating the oven to 425° and prepping the baking pan. Cover a large baking sheet (with edges) with aluminum foil. Give it a light spray of non-stick baking spray. Cut and slice the veggies you are going to use. For this meal, I roasted fresh asparagus spears, mini carrots, russet potato slices, and fresh broccoli florets.

The asparagus spears are snapped at the bottom, to remove the “woody” part of the stem, and the mini carrots are sliced in half lengthwise.  Broccoli is cut into bite-sized florets, and the russet potato is cut into approximately 3/4 inch round slices, then each slice was quartered. Place veggies onto foil covered baking sheet in a single layer.

NOTE: It’s important to not cut the potatoes too thick, to enable them to roast fully in the same amount of time that the other veggies take to cook.

Veggies are placed on aluminum foil on baking sheet, then seasoned before roasting.

Season The Veggies

Drizzle the veggies with olive oil, then lightly sprinkle with salt, pepper, and garlic powder. I gently turned veggies over a bit to ensure they were all lightly covered with the oil and seasonings, then placed them back into a single layer.

Cook the Oven Roasted Veggies

Once the veggies are seasoned, place them into a preheated 425° F. oven (preferably on the middle rack of the oven, for most even heat).

Bake the oven roasted veggies for about 18-20 minutes. About half way through the cooking time rotate the pan in the oven, to ensure consistent cooking on all sides. If you want, you can also flip the veggies over to the other side before placing them back in oven, but this is optional.

Oven roasted veggies, cooking away in the oven.

This is what the oven roasted veggies looked like once they were done. The veggies should be tender, very lightly browned on the outside, and smell wonderful!

The vegetables are flipped to other side half way through roasting time.

Here’s a couple closeup photos, so you can see the carrots and asparagus up close and personal! Below the first photo is a pic of the broccoli, potatoes and carrots up close!

The oven roasted carrots and asparagus are finished cooking and are ready to serve.Potato slices, broccoli and carrots are done being oven roasted and are ready to eat!

We really enjoyed this delicious and colorful variety of seasoned, oven roasted veggies with our dinner!

The oven roasted veggies are served hot, alongside the main dish.

An overhead view of some of the oven roasted veggies on a dinner plate.

I sure hope you will try oven roasted veggies, if you have never prepared them this way before. I think you will be surprised at how easy it is, and how delicious the vegetables are! Hope you have a wonderful day. I trust you will find great joy in the simple things you experience today. Be blessed, friends.

Looking For More VEGGIE Recipes?

You can find all of my vegetable recipes in the Recipe Index, located at the top of the page.  A few family favorites include:

Interested In More Recipes?

Thank you for visiting this website. I appreciate you using some of your valuable time to do soIf you’re interested, I publish a newsletter 2 times per month (1st and 15th) with all the latest recipes, and other fun info. I would be honored to have you join our growing list of subscribers, so you never miss a great recipe!
There is a Newsletter subscription box on the top right side (or bottom) of each blog post, depending on the device you use, where you can easily submit your e-mail address (only) to be included in my mailing list.

You Can Also Find Me On Social Media:
Facebook page: The Grateful Girl Cooks!
Pinterest: The Grateful Girl Cooks!
Instagram: jbatthegratefulgirlcooks

Author's signature

0 from 0 votes
Oven Roasted Veggies
Prep Time
10 mins
Cook Time
20 mins
Total Time
30 mins
 

Oven roasted veggies are lightly seasoned with olive oil and a few spices, then baked. Great way to cook a variety of veggies, & ready in 20 minutes!

Category: Side Dish, Vegetable Dish
Cuisine: American
Keyword: oven roasted veggies
Servings: 4
Calories Per Serving: 91 kcal
Author: JB @ The Grateful Girl Cooks!
Ingredients
  • 2 cups broccoli florets (fresh) , in bite sized pieces
  • 1 medium russet potato , unpeeled, cut in 1/2" rounds, then quartered
  • 15 baby carrots , sliced in half lengthwise
  • 25 spears asparagus (fresh) , bottom ends trimmed
  • 2 teaspoons extra virgin olive oil , approximate
  • 1/2 teaspoon salt and pepper (each) , or more to taste
  • 1/2 teaspoon garlic powder
  • non-stick spray for aluminum foil
Instructions
  1. Preheat oven to 425 and spray an aluminum foil covered baking sheet with non-stick spray.

  2. Prepare veggies: Snap asparagus spears at the bottom, to remove the "woody" part of the stem. Slice baby carrots in half lengthwise.  Cut broccoli into bite-sized florets. Slice russet potato into approx. 3/4" round slices, then cut each slice into quarters. Place veggies onto prepared baking sheet in a single layer. Drizzle veggies with olive oil, then lightly sprinkle with salt, pepper, and garlic powder. Gently turn veggies over a bit to lightly cover with oil and seasonings, then reposition them in a single layer.

  3. Bake on medium rack in a preheated 425° F. oven for 18-20 minutes. About half way through cooking time, rotate the pan to ensure consistent cooking on all sides. If you want, you can also flip the veggies over to the other side before placing them back in oven, but this is optional. When done, veggies should be slightly caramelized on outside and tender. Remove from oven, serve, and enjoy!
Nutrition Facts
Oven Roasted Veggies
Amount Per Serving (1 (1/4 of total))
Calories 91 Calories from Fat 18
% Daily Value*
Fat 2g3%
Saturated Fat 1g6%
Sodium 338mg15%
Potassium 467mg13%
Carbohydrates 16g5%
Fiber 3g13%
Sugar 3g3%
Protein 3g6%
Vitamin A 5500IU110%
Vitamin C 45mg55%
Calcium 40mg4%
Iron 1.3mg7%
* Percent Daily Values are based on a 2000 calorie diet.

Here’s one more to pin on your Pinterest boards!Oven roasted veggies are lightly seasoned with olive oil and a few spices, then baked. Great way to cook a variety of veggies, & ready in 20 minutes!

Broccoli Cauliflower Bake

Broccoli Cauliflower Bake is a yummy veggie side dish with vegetables baked in a creamy Parmesan white sauce, topped with Parmesan garlic herb crumbs!

I don’t know about you, but I am always looking for new recipes for vegetable dishes. Most of the time I steam, bake or pan-sear fresh vegetables just as they are, with a minimal amount of spices to add flavor.

Every now and then I want something different than “plain” vegetables to serve. This delicious broccoli cauliflower bake fits that bill. It seems more like a vegetable “casserole”, than a side dish. Fresh (or frozen vegetables are cooked in a  simple white sauce, and baked with a seasoned bread crumb topping. EASY PEASY! Here’s how to make this dish:

Scroll Down For A Printable Recipe Card At The Bottom Of The Page

Make The Bread Crumb Topping

The bread crumb topping for the dish is very easy to make. Place bread crumbs, melted butter, two Tablespoons of grated Parmesan cheese and the three spices (garlic powder, onion powder, and dried parsley) in a small bowl, and stir to combine. Set this mixture aside.

NOTE: There is a product from Progresso called “herb & garlic bread crumbs”. If you want to use those, simply omit the spices from the topping mix. You will still need to add the Parmesan cheese and melted butter.

A simple bread crumb mixture is made to top the broccoli cauliflower bake.

Cut the fresh (or frozen, but thawed) cauliflower and broccoli into small bite-sized florets. I used fresh cauliflower and frozen (but thawed) broccoli for this dish.

Cauliflower and broccoli are cut into bite sized florets for the veggie dish.

Prepare The Creamy Sauce For The Broccoli Cauliflower Bake

Spray a very large skillet with non-stick baking spray. Add the chopped onions to the skillet and heat on medium heat until they are softened and golden brown. Stir often while they cook.

A chopped onion is cooked and browned to add to the sauce for the veggie dish.

Stir the flour into the onions, and then add the milk to the skillet. Give it a good stir, and you will see the sauce beginning to thicken fairly quickly as it cooks.

Flour is added to cooked onions, then milk, to make sauce for the broccoli cauliflower bake.

Once the sauce has begun to noticeably thicken, add the remaining grated Parmesan cheese and the cream cheese. If you cut the cream cheese into chunks it will melt much faster! Continue to cook, stirring often, until all of the cream cheese has melted.

Cream cheese and Parmesan cheese is added to the sauce for the broccoli cauliflower bake..

Add the broccoli and cauliflower florets to the sauce, and stir to fully cover the veggies with the sauce.

TIP: At this point, I recommend taste-testing the sauce. Season it with a little garlic powder, salt and pepper, to suit your personal taste buds!

The broccoli and cauliflower florets are added to the sauce, and stirred to combine.

Finish Preparing The Broccoli Cauliflower Bake

Spray a 2 quart baking dish with non-stick spray. Pour the veggies and sauce into the dish.  Top the surface of the broccoli cauliflower bake with the bread crumb mixture. It’s looking pretty good, right? Now, all you have to do is BAKE it!

The veggies and sauce are put in baking dish, and topped with bread crumb mixture.

Bake in a preheated 350° F oven for 45 minutes. Once the broccoli cauliflower bake is done, the top will be nice and golden brown, and some of the sauce should be bubbling around the edges.

Transfer from the oven to a wire rack, and let this steaming hot veggie dish cool for just a couple minutes before serving.

The broccoli cauliflower bake is cooked, and then served.

We enjoyed our broccoli cauliflower bake as a side dish accompanying a nice juicy slice of Traeger roasted turkey breast. YUM!

A serving of the veggie dish, on plate with slice of roast turkey.

We really enjoyed this EASY broccoli cauliflower bake, and hope you will consider trying this delicious side dish! Have a wonderful day, and may God bless you!

Looking For More VEGETABLE SIDE DISH Recipes?

You can find all of my recipes in the Recipe Index, located at the top of the page.  There are a number of veggie side dishes you might enjoy, including:

Interested In More Recipes?

Thank you for visiting this website. I appreciate you using some of your valuable time to do soIf you’re interested, I publish a newsletter 2 times per month (1st and 15th) with all the latest recipes, and other fun info. I would be honored to have you join our growing list of subscribers, so you never miss a great recipe!

There is a Newsletter subscription box on the top right side (or bottom) of each blog post, depending on the device you use, where you can easily submit your e-mail address (only) to be included in my mailing list.

You Can Also Find Me On Social Media:
Facebook page: The Grateful Girl Cooks!
Pinterest: The Grateful Girl Cooks!
Instagram: jbatthegratefulgirlcooks

Author's signature

Original Recipe Source: https://bitzngiggles.com/broccoli-cauliflower-parmesan-bake/

0 from 0 votes
Broccoli Cauliflower Bake
Prep Time
15 mins
Cook Time
45 mins
Total Time
1 hr
 
Broccoli Cauliflower Bake is a yummy veggie side dish with vegetables baked in a creamy Parmesan white sauce, topped with Parmesan garlic herb crumbs!
Category: Side Dish, Vegetable Dish
Cuisine: American
Keyword: broccoli cauliflower bake
Servings: 8
Calories Per Serving: 175 kcal
Author: JB @ The Grateful Girl Cooks!
Ingredients
For Bread Crumb Topping: (can substitute Progresso herb & garlic bread crumbs-but omit spices)
  • 1/2 cup bread crumbs
  • 2 Tablespoons melted butter
  • 2 Tablespoons grated Parmesan cheese
  • 1/4 teaspoon garlic powder
  • 1/4 teaspoon onion powder
  • 1/4 teaspoon dried parsley flakes
For Rest of Dish:
  • 16 ounces fresh broccoli florets (or frozen, but thawed) , cut in bite sized pieces
  • 16 ounces fresh cauliflower florets (or frozen, but thawed) , cut in bite sized pieces
  • 1 large yellow onion , chopped
  • garlic powder, salt, pepper (to taste)
  • 2 Tablespoons all purpose flour
  • cups milk
  • 1/3 cup grated Parmesan cheese
  • 4 ounces cream cheese , room temperature
Instructions
  1. Preheat oven to 350° F.

  2. Place bread crumbs, melted butter, two Tablespoons Parmesan cheese, garlic powder, onion powder and parsley in a small bowl, and stir to combine. Set aside.

  3. Spray a large skillet with non-stick spray. Add chopped onions and cook on medium heat until softened and golden brown, stirring often. Stir flour into onions, and then add milk to skillet. Give it a good stir; the sauce will begin to thicken as it cooks. Once sauce begins to thicken, add remaining grated Parmesan cheese and cream cheese (cut cream cheese into chunks- it will melt faster). Continue to cook, stirring often, until all the cream cheese has melted.

  4. Add broccoli and cauliflower florets to the sauce; stir to fully coat veggies with sauce. TIP: At this point, I recommend taste-testing the sauce. Season with a little garlic powder, salt and pepper, to suit your personal taste buds!

  5. Spray a 2 quart baking dish with non-stick spray. Pour veggies and sauce into dish.  Top  the dish with the  reserved bread crumb mixture. Bake at 350° F for 45 minutes, until top is golden brown, and sauce is bubbling around the edges. Let cool for a couple minutes, then serve and enjoy!
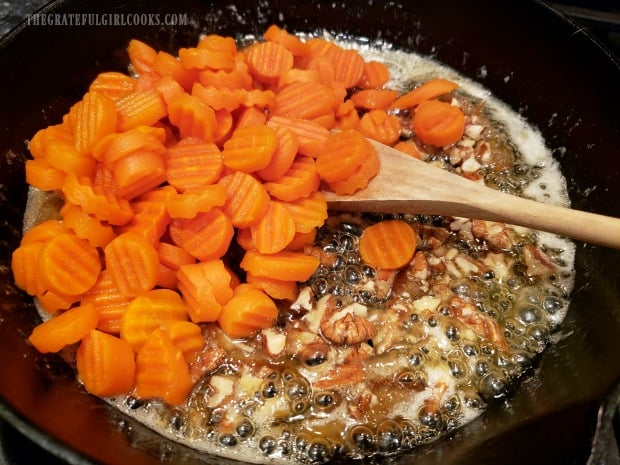
Nutrition Facts
Broccoli Cauliflower Bake
Amount Per Serving (1 (1/8th of total))
Calories 175 Calories from Fat 72
% Daily Value*
Fat 8g12%
Saturated Fat 4g25%
Cholesterol 23mg8%
Sodium 276mg12%
Potassium 479mg14%
Carbohydrates 17g6%
Fiber 3g13%
Sugar 6g7%
Protein 8g16%
Vitamin A 630IU13%
Vitamin C 79.3mg96%
Calcium 180mg18%
Iron 1.2mg7%
* Percent Daily Values are based on a 2000 calorie diet.

Here’s one more to pin on your Pinterest boards!Broccoli Cauliflower Bake is a yummy veggie side dish with vegetables baked in a creamy Parmesan white sauce, topped with Parmesan garlic herb crumbs!