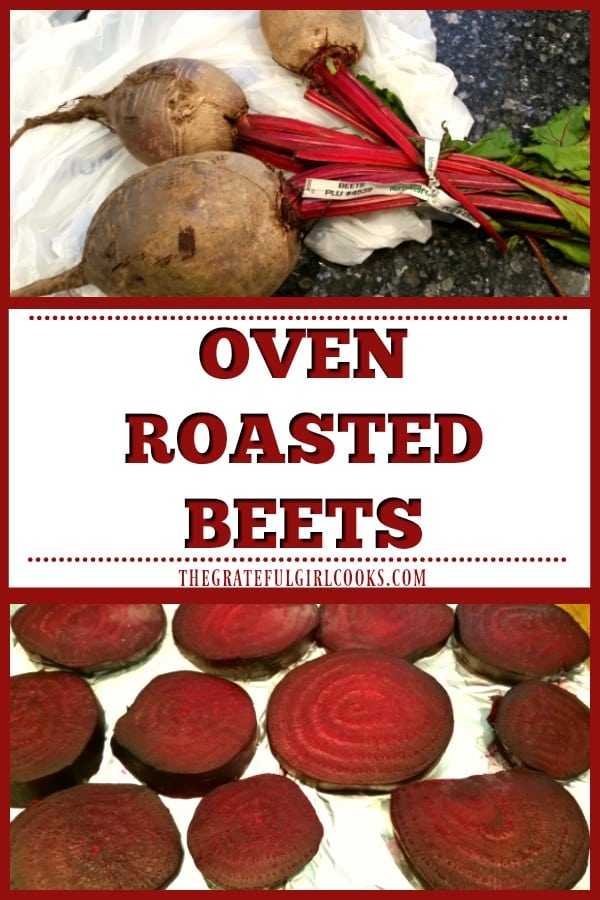
Category: Vegetable Dishes

Grilled Asparagus with Lemon and Parmesan

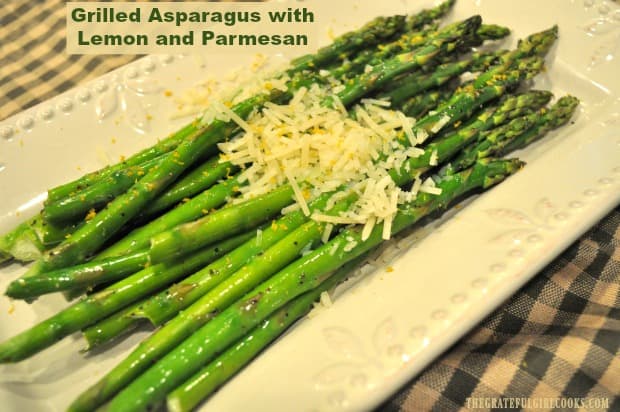
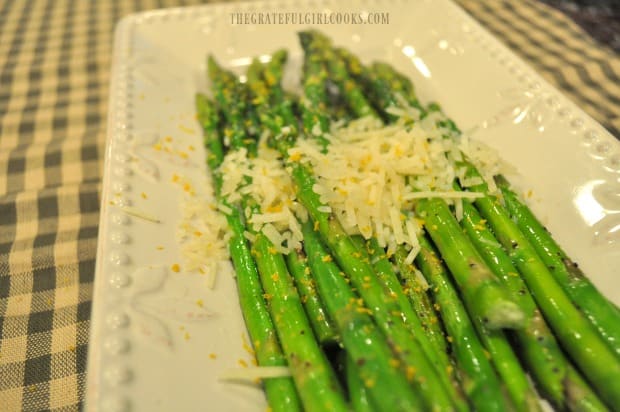
It’s easy to prepare grilled asparagus on the BBQ in only a few minutes! Garnished with lemon zest and Parmesan cheese, this is a delicious, low calorie side dish!
It's easy to prepare grilled asparagus on the BBQ in only a few minutes! Garnished with lemon zest and Parmesan cheese, this is a delicious side dish!

Do you enjoy fresh asparagus? We sure do, and look forward to it, especially in the spring, when fresh asparagus hits the grocery stores in all it’s glory! We enjoy pan-cooking or baking asparagus inside in our kitchen, but one of our favorite ways to prepare it is to grill it on a BBQ!

Last week we had what my husband and I call a “Traegerpalooza”, where we smoked/grilled lots of different meats on our Traeger grill. We cooked enough to provide our meals for almost a week! Another dish we made was this delicious grilled asparagus with lemon and Parmesan cheese! Asparagus is very easy to grill. Let me show you just how simple it is!

Scroll Down For A Printable Recipe Card At The Bottom Of The Page

How To Make Grilled Asparagus

Before grilling the asparagus, you need to get it ready! Snap the “woody” ends of each asparagus spear off, at the bottom. It should easily snap off between your fingers. You can discard the end pieces.

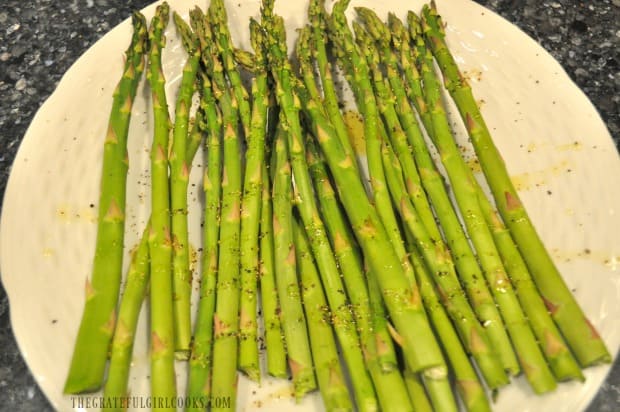
Lightly drizzle the asparagus with olive oil, and then lightly season with salt and pepper. I also squeezed a tiny bit of fresh lemon juice over the asparagus. Mix this all together with your fingers until the asparagus spears are well coated. Now it is ready to grill. You will need your Traeger OR traditional BBQ preheated and ready to go!

Fresh asparagus is drizzled with lemon juice and olive oil, and seasoned before grilling.

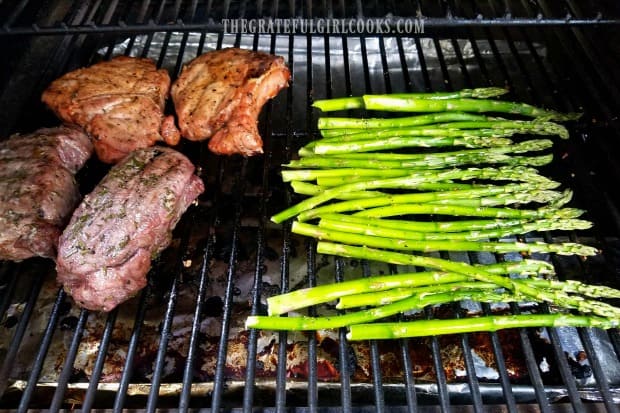
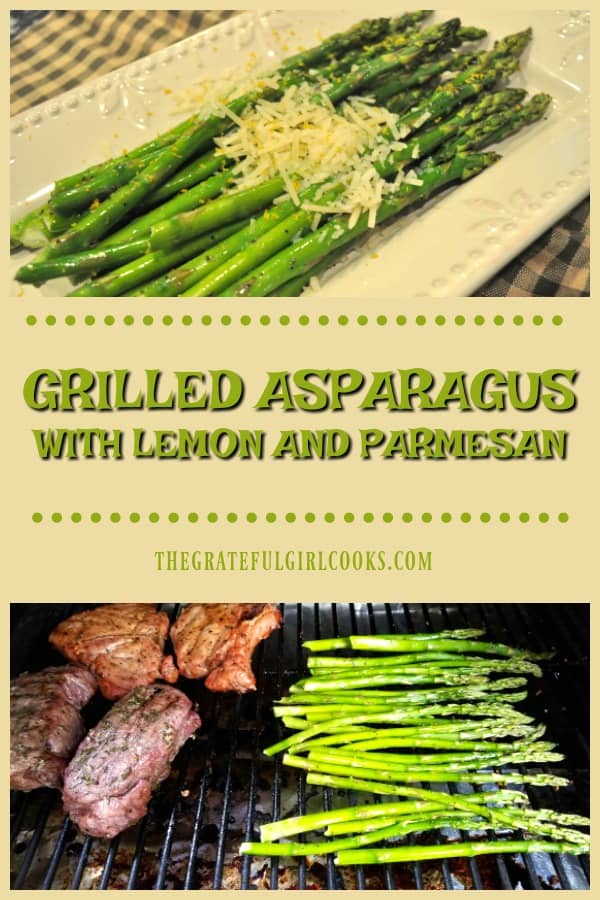
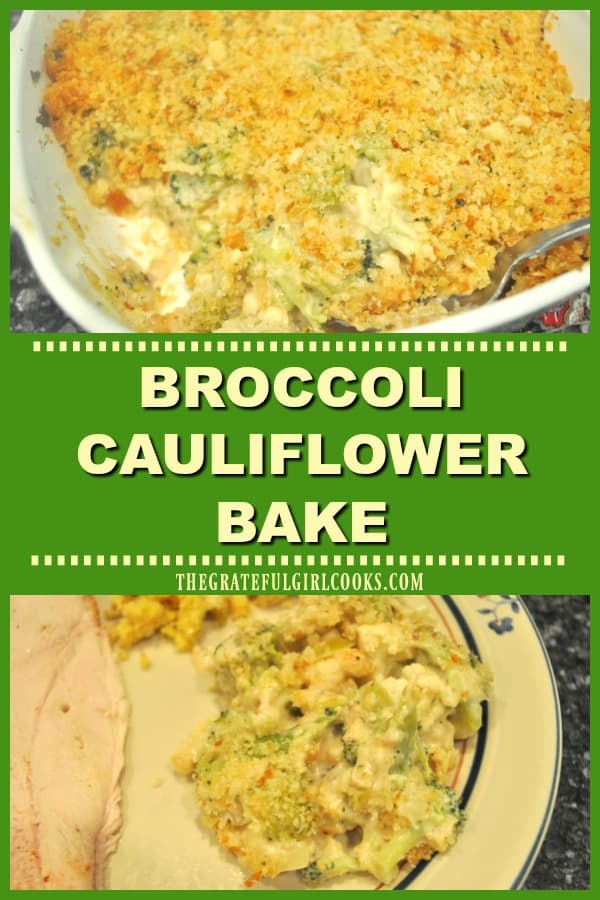
I’m showing you a photo (below) of the items we smoked and grilled on our Traeger along with the grilled asparagus. We cooked two different recipes for pork chops, some brats and turkey sausages, tri-tip steaks, the asparagus, and a bone-in turkey breast (not in photo).

The seasoned asparagus is ready to grill, along with other meats.

The grilled asparagus can be prepared this way on any kind of BBQ. When we grilled them on our Traeger, we went through all the normal preheating necessary, and then heated the grill to 450° F. to prepare the asparagus.

Cooking The Grilled Asparagus On The BBQ

The seasoned asparagus spears are placed directly on the grill grate in a single layer.  Cook the grilled asparagus for 4-5 minutes at 450° (high heat). Once done, the asparagus spears will be slightly tender and still slightly crisp after this time. If you want them a tiny bit softer, cook them just a tiny bit longer. Be sure to NOT overcook the asparagus!

On a Traeger grill, there is no need to turn the asparagus, because there is no direct flame underneath the grill grate. If making this on a traditional BBQ (with propane or briquettes), you will need to keep a close eye on the veggies. Turn them once during the cooking. Once done, remove the grilled asparagus to a serving plate.

Grilled asparagus is placed directly on the BBQ grill, to cook.

To Serve The Grilled Asparagus

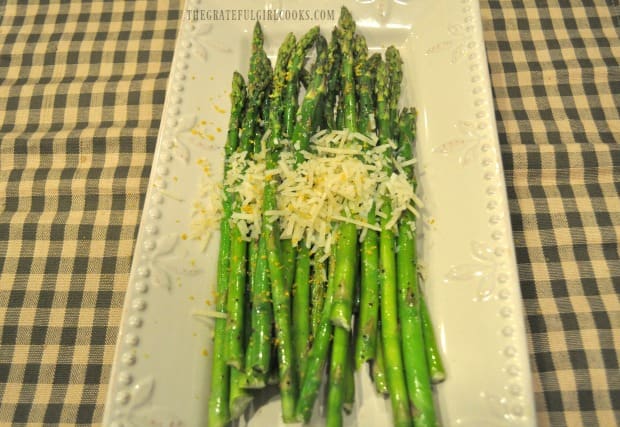
Immediately after transferring the hot grilled asparagus to a serving plate, garnish with shredded Parmesan cheese, a squeeze of fresh lemon juice and lemon zest.

Grilled asparagus is garnished with lemon zest and grated Parmesan cheese, to serve.

The heat from the asparagus should slightly melt the Parmesan cheese you have added to the top of the dish. A little lemon juice and zest help to give the finished grilled asparagus a nice fresh “pop” of extra flavor! Serve immediately, and enjoy this simple vegetable dish!

Grated Parmesan cheese and lemon zest help flavor and garnish the grilled asparagus.

Grilled asparagus with lemon and Parmesan is a delicious, and totally simple side dish, and I really hope you enjoy it! If you enjoy grilling fresh vegetables dishes, you might also enjoy my recipes for Grilled Summer Veggies or Grilled Corn on The Cob. YUM.

Thank you for stopping by today, and I truly hope you will come back again soon for more family-friendly recipes. Be sure to check out ALL of my recipes in the Recipe Index, located at the top of the page. Have a wonderful day!

Interested In More Recipes?

Thank you for visiting this website. I appreciate you using some of your valuable time to do soIf you’re interested, I publish a newsletter 2 times per month (1st and 15th) with all the latest recipes, and other fun info. I would be honored to have you join our growing list of subscribers, so you never miss a great recipe!
There is a Newsletter subscription box on the top right side (or bottom) of each blog post, depending on the device you use, where you can easily submit your e-mail address (only) to be included in my mailing list.

You Can Also Find Me On Social Media:
Facebook page: The Grateful Girl Cooks!
Pinterest: The Grateful Girl Cooks!
Instagram: jbatthegratefulgirlcooks
Author's signature

0 from 0 votes
Grilled Asparagus with Lemon and Parmesan
Prep Time
5 mins
Cook Time
5 mins
Total Time
10 mins
 
It's easy to prepare grilled asparagus on the BBQ in only a few minutes! Garnished with lemon zest and Parmesan cheese, this is a delicious side dish!
Category: Side Dishes, Vegetable Dish
Cuisine: American
Keyword: grilled asparagus
Servings: 2 servings
Calories Per Serving: 81 kcal
Author: JB @ The Grateful Girl Cooks!
Ingredients
  • 1/2 pound asparagus (fresh)
  • 2 teaspoons olive oil
  • salt & pepper, to taste
  • 1/8 teaspoon garlic powder
  • 1/2 teaspoon fresh lemon juice
To Garnish Asparagus
  • 1 teaspoon lemon juice (fresh)
  • 1 teaspoon lemon zest
  • 2 Tablespoons Parmesan cheese (grated)
Instructions
  1. Snap the "woody" ends of each asparagus spear off, at the bottom. It should easily snap off between your fingers.  Lightly drizzle asparagus with olive oil, and then lightly season with salt and pepper. Squeeze fresh lemon juice over the asparagus. Mix together with your fingers until the asparagus spears are well coated.

  2. If cooking on a Traeger grill, complete all the normal preheating necessary, and then heat the grill to 450° F. to prepare the asparagus. Place seasoned asparagus spears directly on the grill grate in a single layer.  Cook asparagus for 4-5 minutes at 450° (high heat). Once done, the asparagus spears will be slightly tender and still slightly crisp after this time. If you want them a tiny bit softer, cook it just a bit longer. Be sure to NOT overcook the asparagus!  On a Traeger, there is no need to turn the asparagus, because there is no direct flame underneath the grill grate. If making this on a traditional BBQ (with propane or briquettes), you will need to keep a close eye on the veggies. Turn them once during the cooking. Once done, remove the grilled asparagus to a serving plate.

  3. Immediately after transferring the hot grilled asparagus to a serving plate, garnish with shredded Parmesan cheese, a squeeze of fresh lemon juice and lemon zest. Serve, and enjoy!

Nutrition Facts
Grilled Asparagus with Lemon and Parmesan
Amount Per Serving (1 (1/2 of total))
Calories 81 Calories from Fat 45
% Daily Value*
Fat 5g8%
Saturated Fat 1g6%
Cholesterol 4mg1%
Sodium 79mg3%
Potassium 229mg7%
Carbohydrates 5g2%
Fiber 2g8%
Sugar 2g2%
Protein 4g8%
Vitamin A 900IU18%
Vitamin C 9.1mg11%
Calcium 83mg8%
Iron 2.4mg13%
* Percent Daily Values are based on a 2000 calorie diet.

Here’s one more to pin on you Pinterest boards!It's easy to prepare grilled asparagus on the BBQ in only a few minutes! Garnished with lemon zest and Parmesan cheese, this is a delicious side dish!


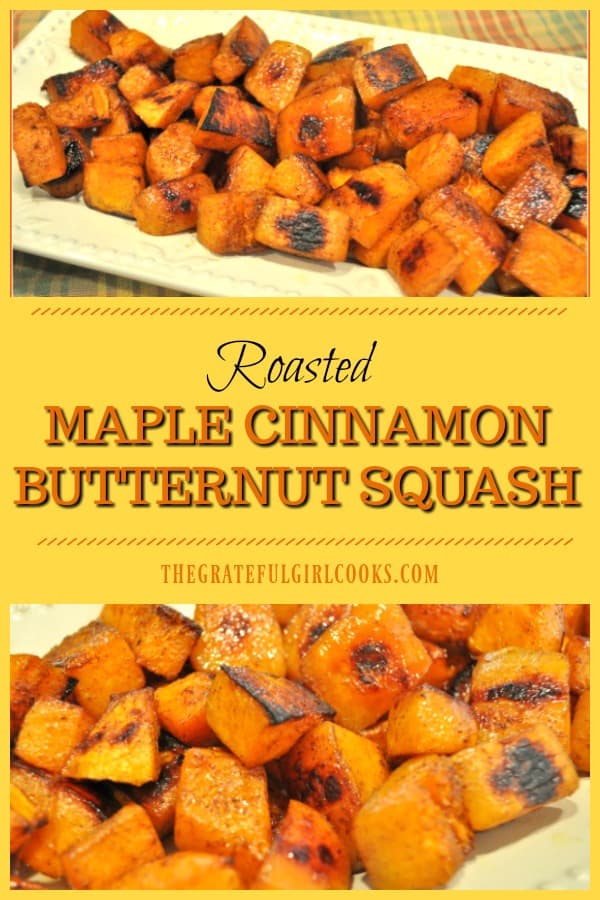
Maple Cinnamon Butternut Squash

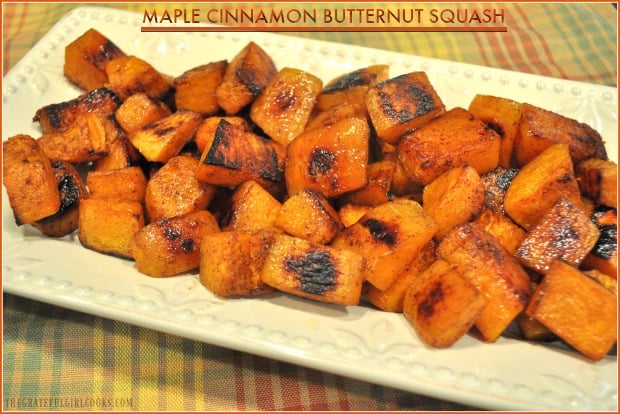
Maple Cinnamon Butternut Squash is an easy to make, healthy and delicious roasted vegetable side dish – this is caramelized squash you’re gonna love!
Maple Cinnamon Butternut Squash is an easy to make, healthy and delicious roasted vegetable side dish - caramelized squash you're gonna love!

Do you like butternut squash? While it is not something I routinely fix in our home, I sure do enjoy this delicious veggie once made. A few years ago I made the best butternut squash soup (with bacon) that I’ve ever had. Now we routinely enjoy this soup, especially in the Fall and Winter. Seriously… YUM!

I’ve also used this versatile “winter” vegetable to make a couple other delicious recipes. The recipes include Roasted Butternut Squash with Cranberries, Honey & Feta, and Butternut Squash Ravioli with Browned Butter Sage Sauce. Both are delicious!

THIS recipe I am sharing today is for simple roasted maple cinnamon butternut squash. This dish is gluten-free, and doesn’t contain any refined sugar, for those of you that are interested. Crispy on the outside, soft and creamy on the inside, it’s easy to prepare, and is a GREAT side dish!

Scroll Down For A Printable Recipe Card At The Bottom Of The Page

How To Make Maple Cinnamon Butternut Squash

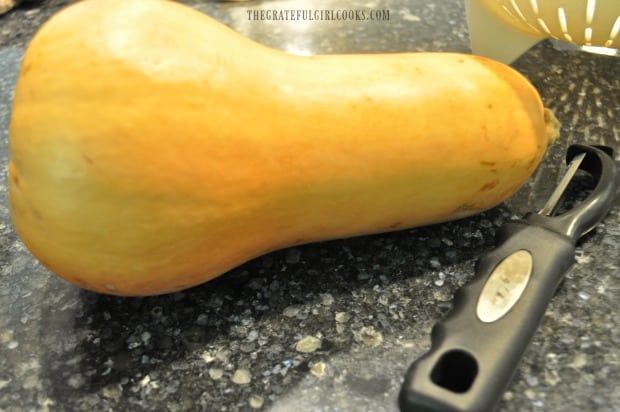
Before starting, preheat your oven to 400° F.  Peel a large butternut squash with a vegetable peeler. This is the “hardest” and “messiest part of the recipe (and it’s not really that bad). Once peeled, carefully slice the squash in half lengthwise.

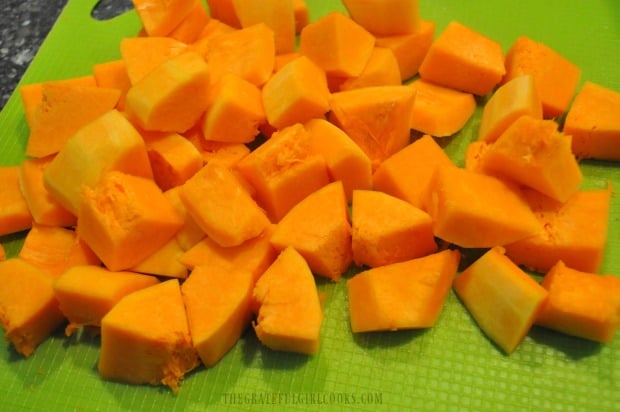
Use a spoon (and maybe even your fingers) to remove all the seeds and “fibrous strings” from the inside. Once all seeds have been removed, cut the squash into bite sized cubes. Try to keep most of the pieces about the same size, for even baking.

Butternut squash is ready to be peeled, seeded and cubed, to make maple cinnamon butternut squash.

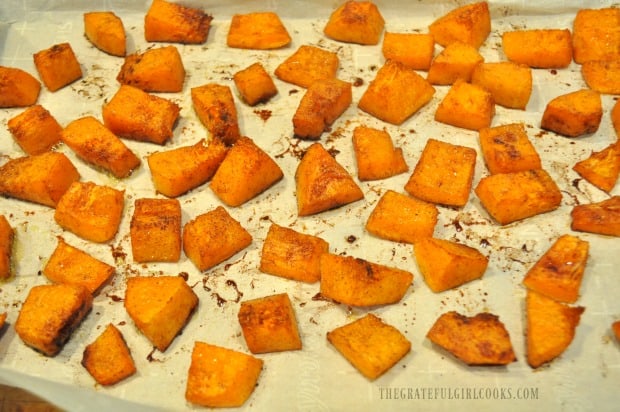
The butternut squash is peeled, seeded, then cut into bite sized pieces before baking.

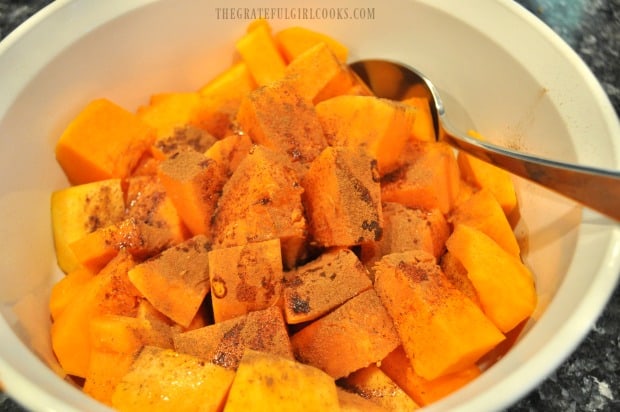
Place the butternut squash pieces into a large bowl, and drizzle them with the olive oil. Season the squash with a pinch of salt and pepper (to taste), then add the cinnamon, and maple syrup. Stir the ingredients, in order to fully combine and lightly season all the pieces of maple cinnamon butternut squash.

Maple syrup and cinnamon are mixed into the butternut squash pieces before baking.

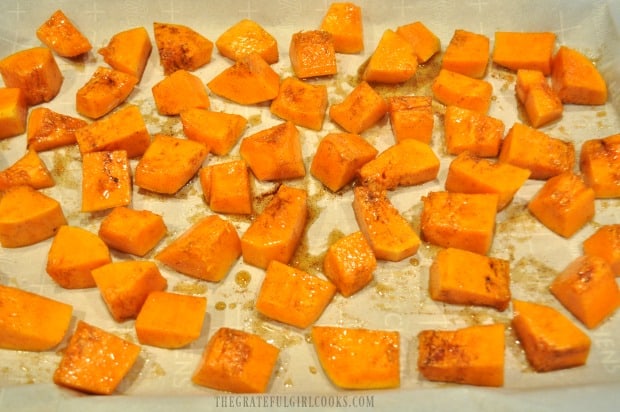
Line a large baking sheet with parchment paper. Spread the butternut squash cubes out in a single layer, leaving a bit of space between each piece.

The pieces of maple cinnamon butternut squash are placed on parchment paper to bake.

Roast The Maple Cinnamon Butternut Squash

Roast the maple cinnamon butternut squash in a preheated 400° F. oven for 35 minutes. HALFWAY through the baking time, rotate the pan in the oven to ensure even baking. When the 35 minutes is up, carefully flip each piece over so the bottom side is up, and put back in oven. Cook for 5 more minutes, to help caramelize the squash a bit on the other side.

Halfway through baking time, maple cinnamon butternut squash is turned to other side to finish cooking.

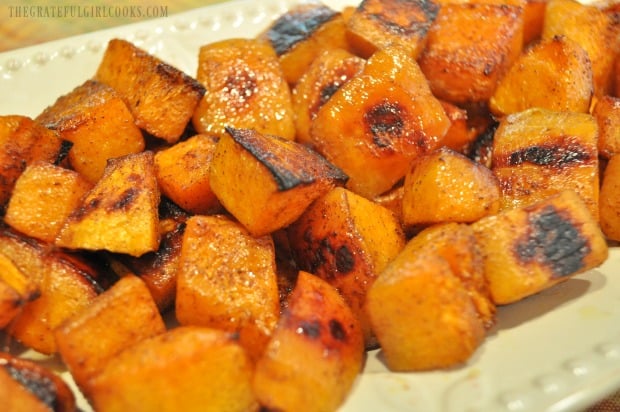
Once the maple cinnamon butternut squash has finished roasting, remove from oven; transfer squash to a serving platter. It is now ready to enjoy!  This time, we enjoyed it served alongside our main dish of grilled chicken!

Once done, the maple cinnamon butternut squash is transferred to serving platter before serving.

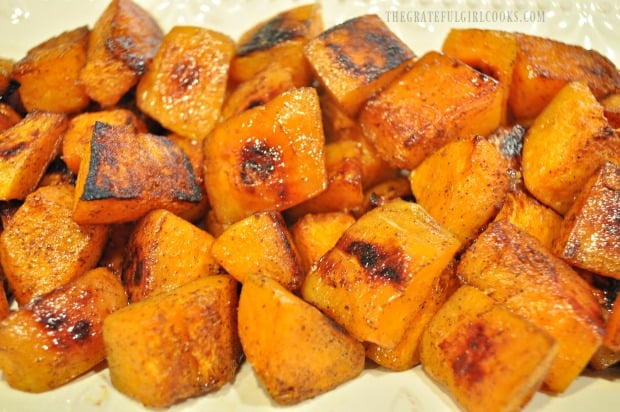
See the dark caramelized parts of the roasted maple cinnamon butternut squash? It tastes wonderful!  The natural sugars (and maple syrup) caramelize slightly while baking, which leaves the outside slightly crispy, while the inside is soft and creamy!

The maple cinnamon butternut squash is caramelized on the outside and soft on the inside.

This really is a GREAT tasting, simple side dish that pairs especially well with chicken, turkey or pork!  Maple cinnamon butternut squash would also be an easy veggie side dish for Thanksgiving or Christmas dinner!  If you prefer your butternut squash “mashed”, be sure to try my recipe for Creamy Mashed Butternut Squash, too! Sure hope you enjoy it! Have a GREAT day, friends.

Looking For More VEGETABLE SIDE DISH Recipes?

You can find all of my recipes in the Recipe Index, located at the top of the page. A few favorite vegetable dishes include:

Interested In More Recipes?

Thank you for visiting this website. I appreciate you using some of your valuable time to do soIf you’re interested, I publish a newsletter 2 times per month (1st and 15th) with all the latest recipes, and other fun info. I would be honored to have you join our growing list of subscribers, so you never miss a great recipe! 

There is a Newsletter subscription box on the top right side (or bottom) of each blog post, depending on the device you use, where you can easily submit your e-mail address (only) to be included in my mailing list.

You Can Also Find Me On Social Media:

Facebook page: The Grateful Girl Cooks!
Pinterest:
The Grateful Girl Cooks!
Instagram:
jbatthegratefulgirlcooks

Author's signature.

Original Recipe Source: https://lifemadesweeter.com/maple-cinnamon-roasted-butternut-squash/

0 from 0 votes
Maple Cinnamon Butternut Squash
Prep Time
10 mins
Cook Time
40 mins
Total Time
50 mins
 
Maple Cinnamon Butternut Squash is an easy to make, healthy and delicious roasted vegetable side dish - caramelized squash you're gonna love!
Category: Side Dishes, Vegetable Dish
Cuisine: American
Keyword: maple cinnamon butternut squash
Servings: 4
Calories Per Serving: 151 kcal
Author: JB @ The Grateful Girl Cooks!
Ingredients
  • 1 large butternut squash
  • Tablespoons extra virgin olive oil
  • Tablespoons pure maple syrup
  • 1/2 teaspoon ground cinnamon
  • 1 pinch salt and pepper, to taste
Instructions
  1. Preheat oven to 400° F.  Carefully peel a large butternut squash with a vegetable peeler (or sharp knife).  Once peeled, slice the squash in half lengthwise. Use a spoon to remove all the seeds and "fibrous strings" inside squash. Cut squash into bite sized cubes. Try to keep the pieces about the same size, for even baking.

  2. Place squash cubes into a large bowl; drizzle with olive oil. Season the squash with a pinch of salt and pepper (to taste), then add the cinnamon and maple syrup. Stir to combine ingredients, so all pieces are coated.

  3. Line a large baking sheet with parchment paper. Spread seasoned squash out in a single layer, leaving a bit of space between each piece. Roast in 400° F. oven for 35 minutes. HALFWAY through baking time, rotate the pan in the oven to ensure even baking. When 35 minutes is up, carefully flip each piece over so the bottom side is up, and put back in oven. Cook for 5 more minutes, to help caramelize the squash a bit on the other side. Once squash is done, remove from oven; transfer to a serving platter. Serve, and enjoy!

Nutrition Facts
Maple Cinnamon Butternut Squash
Amount Per Serving (1 (1/4 of total))
Calories 151 Calories from Fat 45
% Daily Value*
Fat 5g8%
Sodium 17mg1%
Potassium 676mg19%
Carbohydrates 27g9%
Fiber 3g13%
Sugar 8g9%
Protein 1g2%
Vitamin A 19930IU399%
Vitamin C 39.4mg48%
Calcium 98mg10%
Iron 1.3mg7%
* Percent Daily Values are based on a 2000 calorie diet.

Here’s one more to pin on your Pinterest boards!Maple Cinnamon Butternut Squash is an easy to make, healthy and delicious roasted vegetable side dish - caramelized squash you're gonna love!

Fried Cabbage with Bacon, Onion and Garlic

This simple, yet absolutely delicious side dish of fried cabbage is enhanced with the addition of crisp bacon crumbles, onions, carrots and garlic!

Over the past 30+ years, I have made fried cabbage very simply, just like I was taught by my mom.  She cooked cabbage with onion and butter, and seasoned it with salt and pepper, for a no-frills version.

Recently I tried a NEW WAY to make this simple veggie side dish, and it tastes so good that it will be the way I will cook it, from now on!  My husband and I LOVED this fried cabbage (with bacon, onion and garlic)!

This simple dish of fried cabbage went from good to GREAT, with the addition of a few extra ingredients, so I am sharing the recipe with you today. The recipe, as written below, makes 4 servings of about 3/4 cup each, but can be EASILY doubled.

Scroll Down For A Printable Recipe Card At the Bottom Of The Page

How To Make Fried Cabbage (with bacon, onion and garlic)

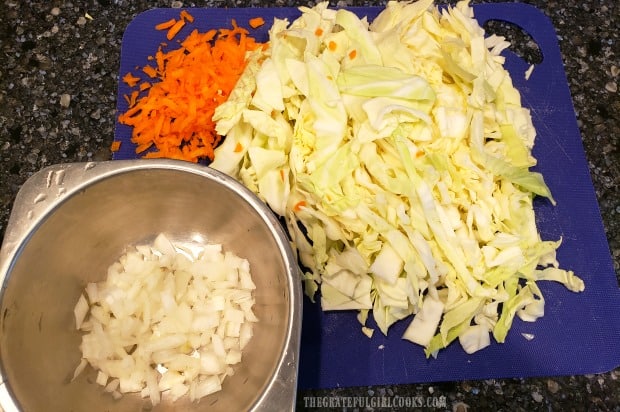
Before beginning to cook this dish, get all the veggies prepped and ready.  Chop the onions, grate the carrots, and core, then thinly slice the green cabbage. Once done with this step, set the veggies aside.

Chopped onions, shredded carrots and cabbage are ready to make fried cabbage.

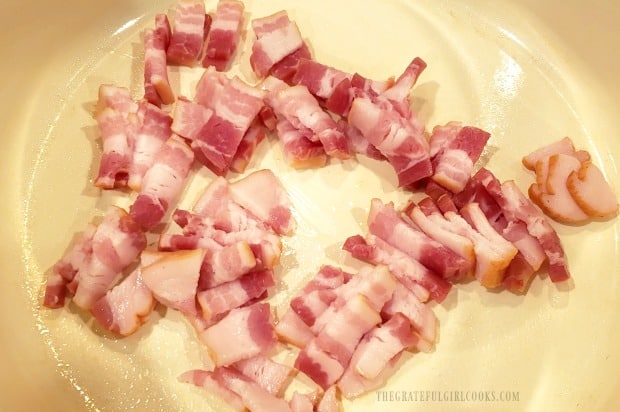
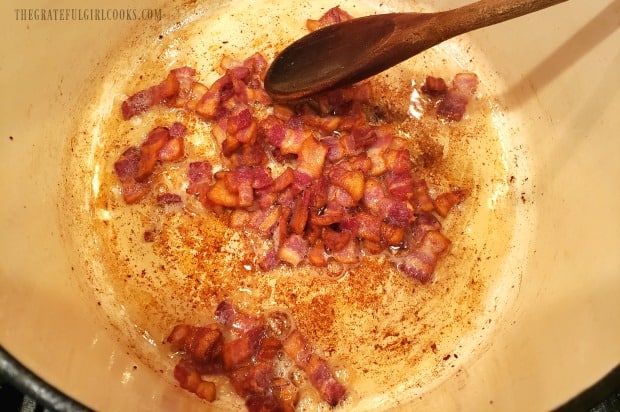
Place the chopped bacon into a large stockpot. Turn heat to medium-high, then cook the bacon until it is brown and crispy, stirring often. This step will take between 8-10 minutes. When done, do NOT drain the bacon grease from the pan. It will be left in the pan, which will add lots of flavor to the fried cabbage!

Thinly sliced bacon is cooked to add to fried cabbage.

Bacon is cooked until crispy, before adding to fried cabbage.

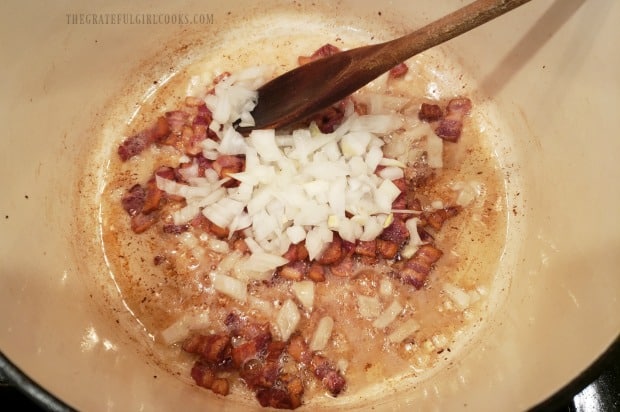
Add the chopped onions to the bacon in the pan. Stir and cook for about 5 minutes, until the onions have softened and slightly browned. Now add the minced garlic and cook for one minute, stirring the mixture often, so the garlic doesn’t burn.

Chopped onions are added to bacon, before adding them to fried cabbage.

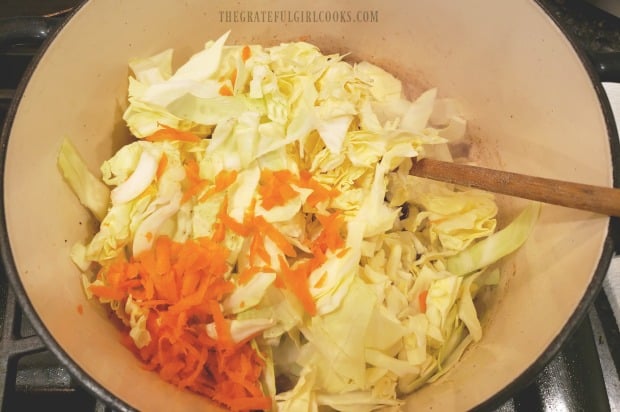
Add the sliced cabbage and shredded carrots to the bacon and onion mixture. Stir the mixture to combine, and cook for 5-6 minutes (uncovered), stirring often.

Shredded carrots and cabbage are added to bacon and onions to make fried cabbage.

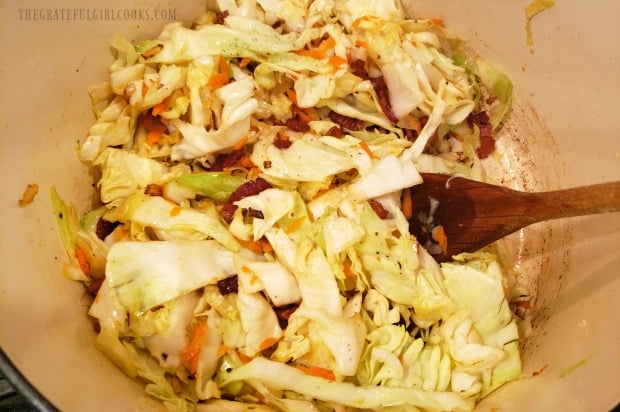
Season the fried cabbage with salt, pepper, paprika, onion powder and garlic powder. Put a lid on the pan, and turn the heat down to LOW. Continue to cook the fried cabbage (covered) on low heat for about 10 minutes. Stir occasionally during this cooking time. The fried cabbage will “wilt down” as it cooks.

The fried cabbage ingredients are combined, then cooked until tender.

The Fried Cabbage Is Ready To Serve

Once the fried cabbage has finished cooking, it is ready to serve!  Transfer the cabbage into a serving bowl, and serve while hot!

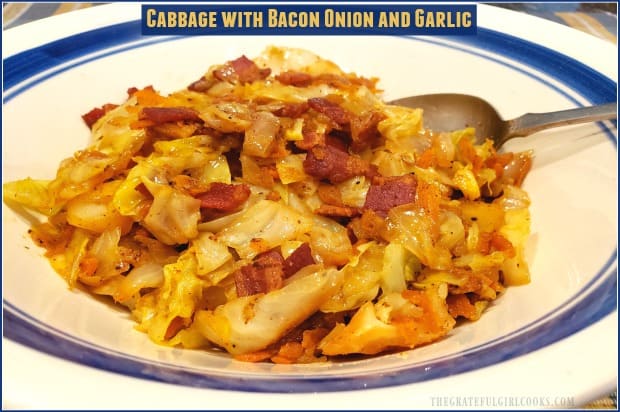
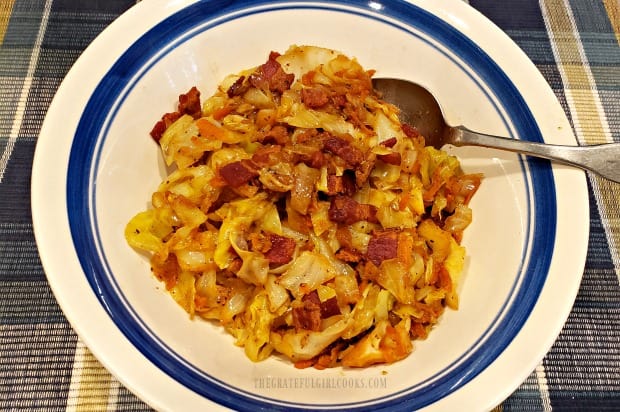
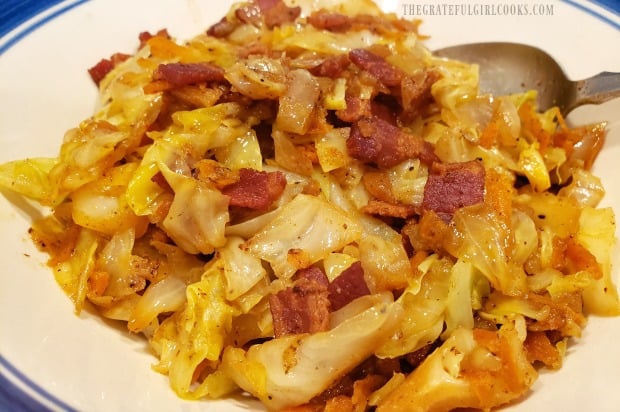
Once done, the fried cabbage (with bacon, onions and garlic) are served.

The fried cabbage is so delicious, and filled with flavor! With pieces of delicious bacon, onions, and carrots throughout it, how could you not like this simple vegetable side dish?

Fried cabbage, with bacon, onions, carrots and garlic is served as a side dish.

Sure hope you will consider trying this easy, simple, and DELICIOUS side dish of fried cabbage, with bacon, onion, carrots, and garlic! It’s going to be my “new” way of cooking cabbage!  Have a wonderful day… there really is so much to be thankful for!

Looking For More VEGETABLE SIDE DISHES?

You can find all of my recipes in the Index Page, located at the top of the page. A few of our favorite veggie side dishes include:

Interested In More Recipes?

Thank you for visiting this website. I appreciate you using some of your valuable time to do soIf you’re interested, I publish a newsletter 2 times per month (1st and 15th) with all the latest recipes, and other fun info. I would be honored to have you join our growing list of subscribers, so you never miss a great recipe!
There is a Newsletter subscription box on the top right side (or bottom) of each blog post, depending on the device you use, where you can easily submit your e-mail address (only) to be included in my mailing list.

You Can Also Find Me On Social Media:

Facebook page: The Grateful Girl Cooks!
Pinterest:
The Grateful Girl Cooks!
Instagram:
jbatthegratefulgirlcooks

Author's signature

Recipe Adapted From: https://www.justpaleofood.com/fried-cabbage-bacon-onion-garlic/

0 from 0 votes
Cabbage with Bacon, Onion and Garlic
Prep Time
20 mins
Cook Time
10 mins
Total Time
30 mins
 
This simple, yet absolutely delicious side dish of fried cabbage is enhanced with the addition of crisp bacon crumbles, onions, carrots and garlic!
Category: Side Dish, Vegetable Dish
Cuisine: American
Keyword: fried cabbage
Servings: 4 (3/4 cup servings)
Calories Per Serving: 131 kcal
Author: JB @ The Grateful Girl Cooks!
Ingredients
  • 4 slices bacon , chopped
  • 1/2 large onion , diced
  • 2 cloves garlic ,minced
  • 1/2 head cabbage (large) , cored/thinly sliced
  • 1/2 teaspoon salt
  • 1/2 teaspoon pepper
  • 1/4 teaspoon garlic powder
  • 1/4 teaspoon onion powder
  • 1/8 teaspoon paprika
Instructions
  1. Chop onions, grate carrots, and core, then thinly slice the green cabbage. Once done with this step, set the veggies aside.

  2. Place the chopped bacon into a large stockpot. Turn heat to medium-high, then cook the bacon until it is brown and crispy, stirring often. This will take about 8-10 minutes. When done, do NOT drain the bacon grease from the pan. It will be left in the pan, which will add lots of flavor to the fried cabbage!

  3. Add chopped onions to the pot. Stir and cook for about 5 minutes, until the onions have softened and slightly browned. Add the minced garlic and cook for an additional minute, stirring often so the garlic doesn't burn. Add the sliced cabbage and shredded carrots to the bacon and onion mixture. Stir the mixture to combine, and cook for 5-6 minutes (uncovered), stirring often.

  4. Season cabbage with salt, pepper, paprika, onion powder and garlic powder. Put a lid on the pot, and turn the heat down to LOW. Continue to cook the fried cabbage (covered) on low heat for 10 minutes. Stir occasionally during this cooking time. The fried cabbage will "wilt down" as it cooks. Once the cabbage has finished cooking, it's ready to serve!  Transfer cabbage into a serving bowl, and serve while hot! Enjoy!

Nutrition Facts
Cabbage with Bacon, Onion and Garlic
Amount Per Serving (1 (3/4 cup serving))
Calories 131 Calories from Fat 72
% Daily Value*
Fat 8g12%
Saturated Fat 2g13%
Cholesterol 14mg5%
Sodium 458mg20%
Potassium 263mg8%
Carbohydrates 9g3%
Fiber 3g13%
Sugar 4g4%
Protein 4g8%
Vitamin A 140IU3%
Vitamin C 43.4mg53%
Calcium 52mg5%
Iron 0.6mg3%
* Percent Daily Values are based on a 2000 calorie diet.

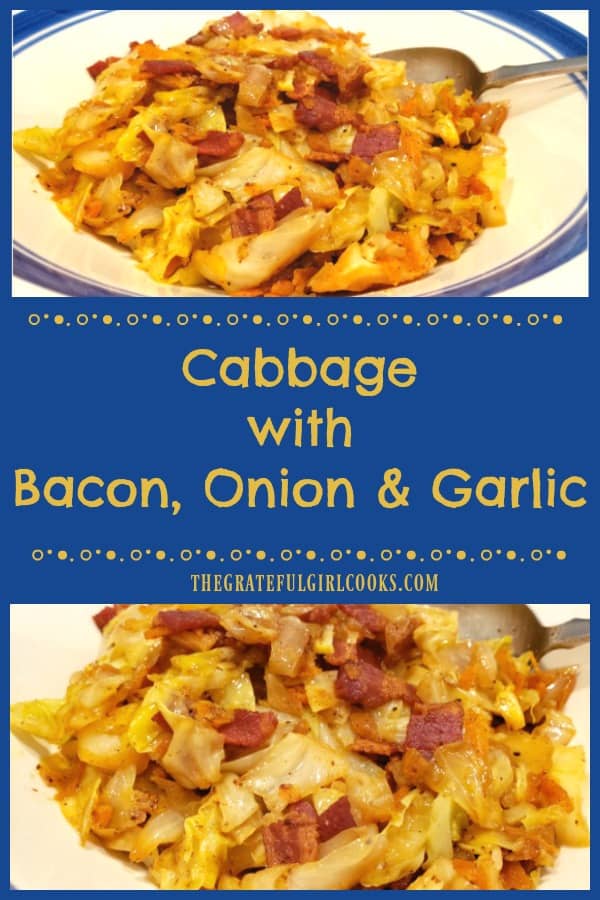
Here’s one more to pin on your Pinterest boards!This simple, yet absolutely delicious side dish of fried cabbage is enhanced with the addition of crisp bacon crumbles, onions, carrots and garlic!

Kale Orange Salad

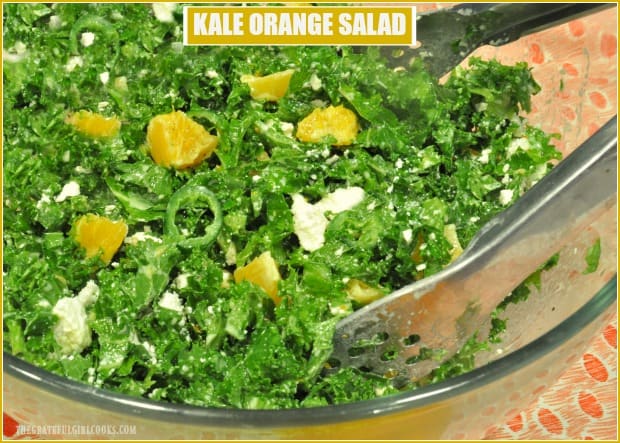
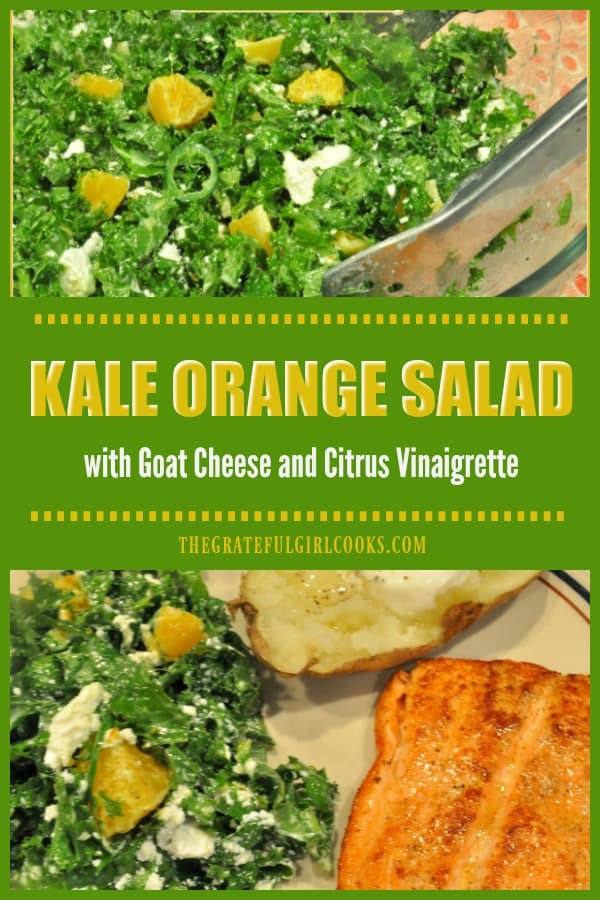
Kale Orange Salad, topped with a creamy citrus vinaigrette, crumbled goat cheese, fresh oranges, and jalapeño slices, may surprise you with just how GOOD it tastes!
Kale Orange Salad, topped with citrus vinaigrette, crumbled goat cheese, fresh oranges, and jalapeño slices, may surprise you with how GOOD it tastes!

KALE… most people either LIKE it or HATE it! I happen to like it. Several years ago I found a recipe for a kale and citrus salad online, from Ree Drummond, also known as The Pioneer Woman.  She had ordered a similar salad at a restaurant in Hollywood, loved it, then went home and recreated it! I enjoy her cookbooks and recipes, so I knew this kale orange salad just HAD to be GOOD!

Our little backyard raised bed garden, at the time, happened to be overflowing with kale! I use our homegrown kale in my recipe for Olive Garden’s “Zuppa Toscana” Soup (a favorite), so I try to have it around. After reading through the ingredient list, a kale orange salad sounded very interesting, so I harvested a bunch from our garden, and made this salad! YUM!

My husband and I really enjoyed this unique salad (and he’s not a HUGE kale fan)!  It’s also easy to make, which is always a big PLUS in my book! Here’s how to make this delicious salad:

Scroll Down For a Printable Recipe Card At the Bottom Of The Page

Prepare The Kale For The Salad

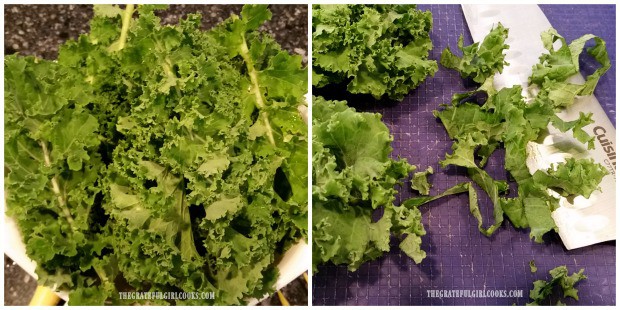
Rinse and drain the kale thoroughly, then place the leaves onto a cutting surface. Using a sharp knife, remove the long stem from the middle of the leaves (discard the stems). Once de-stemmed, thinly slice the kale, a handful of leaves at a time. Place all the sliced kale into a large salad bowl, and set aside.

Kale is rinsed, then finely chopped to prepare it for the kale orange salad.

Make The Salad Dressing For The Kale Orange Salad

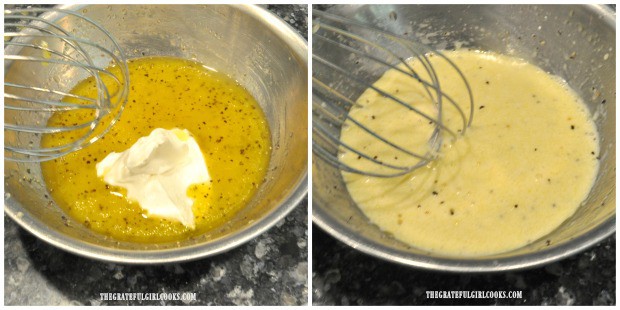
Place the orange juice, olive oil, white wine vinegar, granulated sugar, minced garlic, salt and pepper in a small bowl.  Whisk these ingredients together until fully blended. Add the sour cream (or plain Greek yogurt, if using), and whisk again, to blend fully. The finished salad dressing will be smooth and creamy.

The citrus vinaigrette is prepared, to dress the finished kale orange salad.

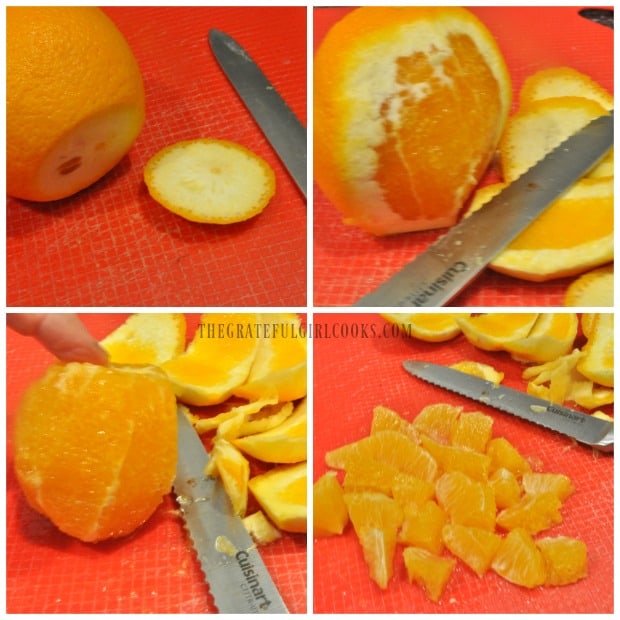
You will need beautiful, peeled orange chunks for this salad. Below is a handy photo of how to peel an orange to get perfect little chunks, without all the bitter tasting white “pith” attached!

Cut a slice off the bottom of the orange. Stand up the orange with the sliced edge on the bottom. Carefully cut off the peel, from top to bottom, following the curve of the orange. Remove all the white “pith” from the outside of the orange. Slice the peeled orange into chunks.

Photo collage showing how to peel whole orange to add to the kale orange salad.

Assemble The Kale Orange Salad

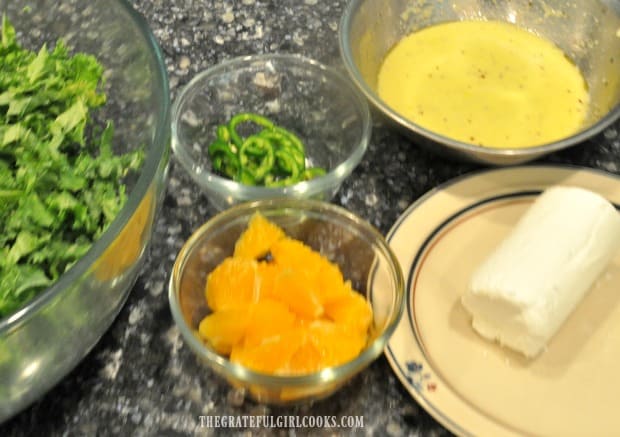
Gather the salad bowl and the rest of the ingredients when ready to build the salad. This includes the thinly sliced kale, seeded and thinly sliced jalapeños, citrus salad dressing, orange chunks, and the goat cheese. (Oops… sorry about the slightly blurry photo).

Kale, jalapenos, orange chunks, goat cheese and salad dressing ready to make a kale orange salad.

Pour HALF the salad dressing over the sliced kale, and give it a good toss.  Add the oranges and the sliced jalapeños, and toss again, to ensure everything is covered with salad dressing. If the kale orange salad needs a bit more dressing, add more, until it is to your liking. TIP: Any extra salad dressing can be stored (covered), in the refrigerator for several days, and can be used on other salads.

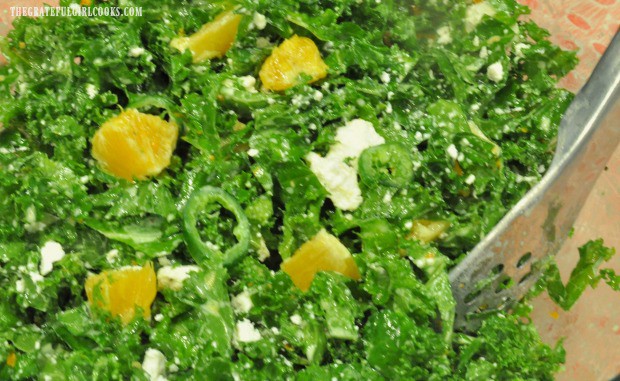
Use a fork to crumble up the goat cheese, and add it to the kale orange salad right before you serve it! Give the salad one final toss, to combine ingredients, then serve!

The kale orange salad is tossed with the salad dressing before serving.

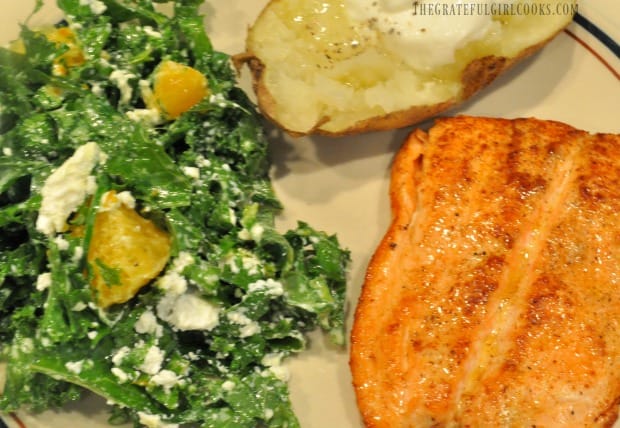
We enjoyed this simple, but yummy salad, along with a piece of pan seared creole salmon, and a small baked potato! The creamy goat cheese, along with the sweet oranges and creamy citrus salad dressing really make this a delicious side salad!

Baked potato and roasted salmon on dinner plate with the kale orange salad.

I hope you will consider trying this kale orange salad, and have a feeling you will be pleasantly surprised with the taste (even if you’re not a big KALE fan!). Have a wonderful day!

Looking For More SALAD Recipes?

Interested In More Recipes?

Thank you for visiting this website. I appreciate you using some of your valuable time to do soIf you’re interested, I publish a newsletter 2 times per month (1st and 15th) with all the latest recipes, and other fun info. I would be honored to have you join our growing list of subscribers, so you never miss a great recipe!
There is a Newsletter subscription box on the top right side (or bottom) of each blog post, depending on the device you use, where you can easily submit your e-mail address (only) to be included in my mailing list.

You Can Also Find Me On Social Media:

Facebook page: The Grateful Girl Cooks!
Pinterest:
The Grateful Girl Cooks!
Instagram:
jbatthegratefulgirlcooks

Author's signature

Original Recipe Source: http://tastykitchen.com/recipes/salads/kale-citrus-salad/

0 from 0 votes
Kale Orange Salad
Prep Time
20 mins
Cook Time
0 mins
Total Time
20 mins
 

Kale Orange Salad, topped with citrus vinaigrette, crumbled goat cheese, fresh oranges, and jalapeño slices, may surprise you with just how GOOD it tastes!

Category: Salad
Cuisine: American
Keyword: kale orange salad
Servings: 6
Calories Per Serving: 127 kcal
Author: JB @ The Grateful Girl Cooks!
Ingredients
For Salad:
  • 1 bunch kale , rinsed, stems removed
  • 1 large orange , peeled and cut into chunks
  • 1 medium fresh jalapeño pepper , seeded/sliced very thin
  • 4 ounces goat cheese (chevre)
For Salad Dressing:
  • 1/4 cup orange juice
  • 2 Tablespoons olive oil
  • 1 teaspoon white wine vinegar
  • 1 clove garlic , minced
  • 1 teaspoon granulated sugar
  • Salt and Pepper, to taste
  • 1 Tablespoon sour cream , or plain Greek yogurt
Instructions
  1. Prepare kale: Rinse and drain kale thoroughly, then place leaves onto cutting surface. Using a sharp knife, remove long stem from the middle of the leaves (discard the stems). Once de-stemmed, thinly slice kale, a handful at a time. Place sliced kale into a large salad bowl; set aside.

  2. Make The Salad Dressing: Place orange juice, olive oil, white wine vinegar, granulated sugar, minced garlic, salt and pepper in a small bowl.  Whisk together until fully blended. Add sour cream (or plain Greek yogurt, if using), and whisk again, to blend fully. Finished salad dressing will be smooth and creamy.

  3. Build Salad: Pour HALF the salad dressing over sliced kale in bowl; give it a good toss, to distribute salad dressing.  Add orange pieces and sliced jalapeños, and toss again, to ensure everything is coated with salad dressing. If salad needs a bit more dressing, add more until it is to your liking. TIP: Any extra dressing can be stored (covered), in refrigerator for several days, and can be used on other salads.

    Use a fork to crumble up the goat cheese, and add it to the kale orange salad right before you serve it! Give the salad one final toss, to combine ingredients, then serve! Enjoy!

Recipe Notes

Substitutions for the orange chunks in the Salad: 3 tangerines or clementines.

Nutrition Facts
Kale Orange Salad
Amount Per Serving (1 (1/6th of total))
Calories 127 Calories from Fat 81
% Daily Value*
Fat 9g14%
Saturated Fat 3g19%
Cholesterol 9mg3%
Sodium 79mg3%
Potassium 182mg5%
Carbohydrates 7g2%
Sugar 4g4%
Protein 4g8%
Vitamin A 2475IU50%
Vitamin C 50.4mg61%
Calcium 74mg7%
Iron 0.7mg4%
* Percent Daily Values are based on a 2000 calorie diet.

Here’s one more to pin on your Pinterest boards!Kale Orange Salad, topped with citrus vinaigrette, crumbled goat cheese, fresh oranges, and jalapeño slices, may surprise you with how GOOD it tastes!

Spiralized Carrot Salad in Lemon Ginger Dressing

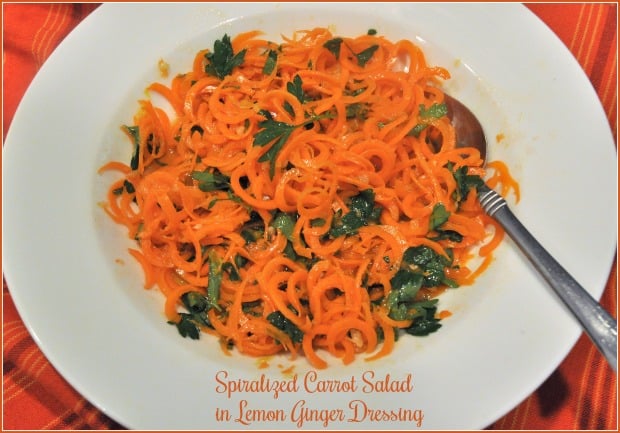
Spiralized Carrot Salad in Lemon Ginger Dressing is a delicious, fresh veggie side dish! It is easy to make, using a vegetable peeler OR spiralizer!

This spiralized carrot salad is really delicious! The salad itself is made with fresh crispy carrots and flat leaf Italian parsley. An easy to make lemon ginger salad dressing is where the magic happens! Once “dressed”, this simple side salad shines!

If you have a spiralizer, you might also enjoy trying Sweet Potato Sage Noodles. It’s a nice, hot side dish that is also very simple to make!

Here are the directions to make this Spiralized Carrot Salad, and I really hope you enjoy this simple, great-tasting dish.

Scroll Down For A Printable Recipe Card At The Bottom Of the Page

Do I Need A Spiralizer To Make This Carrot Salad?

Well, that’s the best part! You DO NOT have to own a special machine to make this dish! The salad can be made using a simple kitchen appliance called a spiralizer OR it can just as easily be made using a good old hand held vegetable peeler!

The salad tastes just as wonderful with long shreds of carrots as it does with curly spiralized carrots! YAY!

How To Make Spiralized Carrot Salad

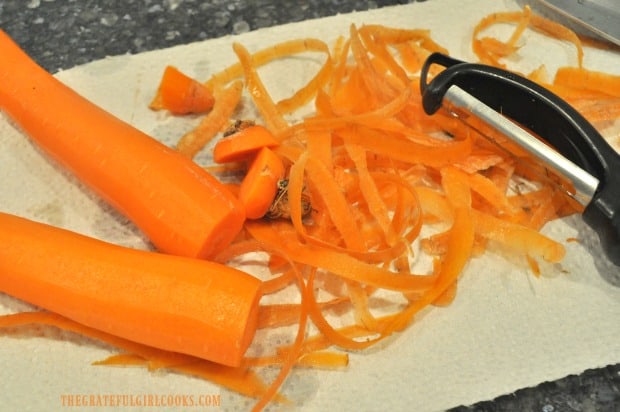
The first thing to do is slice the ends off the fresh carrots.  Once they are cut off, use a vegetable peeler to peel the carrots. Discard peels and end pieces. Easy!

Using a vegetable peeler to peel carrots for spiralized carrot salad.

Using A Spiralizer Appliance To Make This Salad

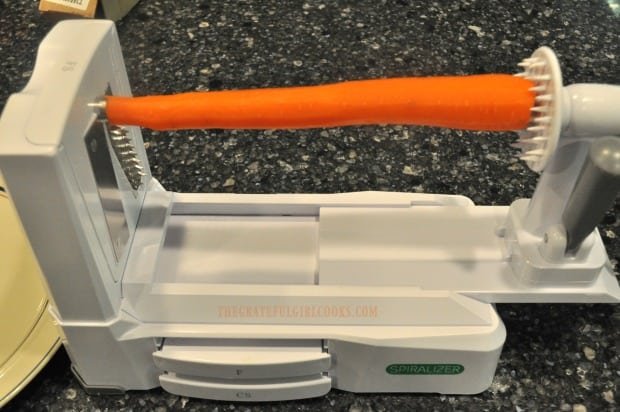
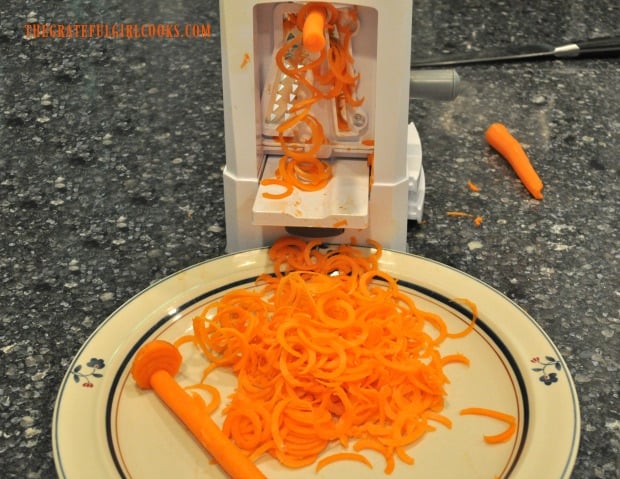
If you own a spiralizer, place the carrot in machine (with a fine shredding blade on it). Spiralize the carrots onto a plate or into a medium sized bowl.

Spiralizing carrots works best if you begin with large, wide carrots (at least 2 inches across).

A machine can be used to shred fresh carrots for spiralized carrot salad.

Spiralized carrot salad uses fresh carrots that have been peeled in curly strips.

Using A Vegetable Peeler To Make This Salad

If you do not own a spiralizer machine, no problem! Most people don’t! Simply use your hand held vegetable peeler to make long shreds of the carrots. Do this by peeling the length of the carrots to get nice long shreds.

To Make Lemon Ginger Salad Dressing

In a small bowl, mix together lemon juice, honey, lemon zest, ginger, minced garlic, rice wine vinegar and salt.

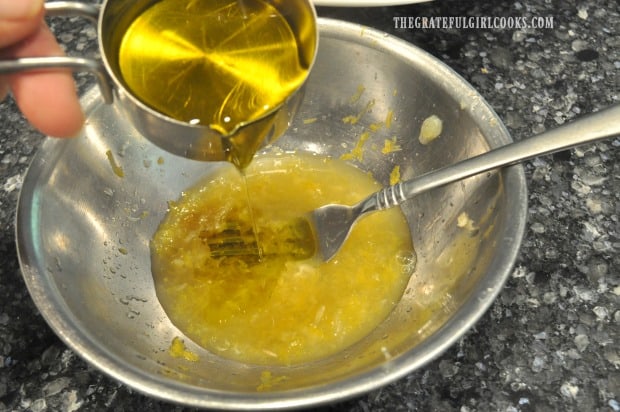
Olive oil is added to lemon ginger salad dressing for spiralized carrot salad.

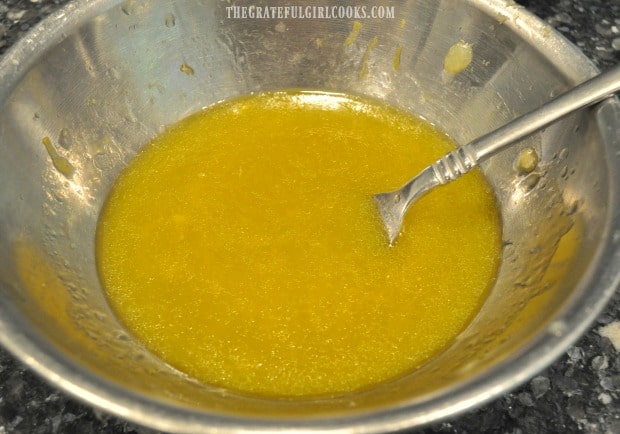
Once mixed, slowly drizzle in the olive oil, while whisking. Continue to whisk until the salad dressing has emulsified.

Lemon ginger salad dressing for spiralized carrot salad is whisked, to emulsify it.

Prepare The Salad

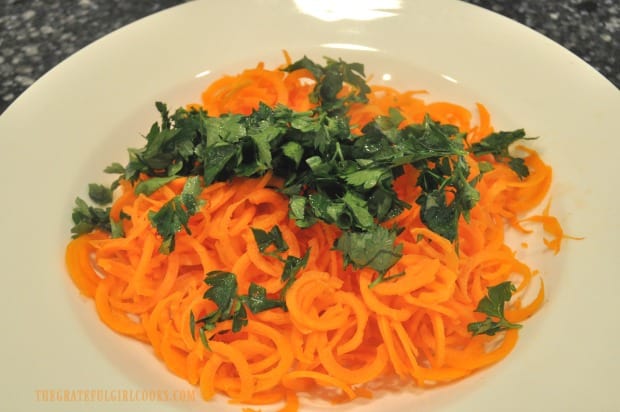
Place the spiralized (or shredded) carrots into a serving bowl.  Add roughly chopped flat leaf parsley, then stir to combine ingredients.

Fresh chopped flat leaf parsley is added to spiralized carrots for salad.

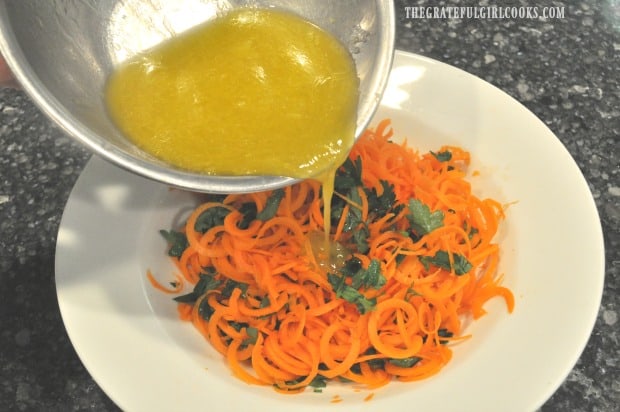
Pour the lemon ginger salad dressing over the spiralized carrot salad. Toss the salad, to ensure that all the carrots are covered with the salad dressing.

Once the spiralized carrot salad is covered with dressing, cover the dish with plastic wrap, and place in the refrigerator to chill.

TIP: For maximum flavor and best results, let the salad refrigerate for at LEAST 15 minutes!

Lemon ginger salad dressing is poured over spiralized carrot salad.

Time to Eat The Spiralized Carrot Salad

When ready to serve the spiralized carrot salad, simply remove it from the refrigerator. Give it a final toss before dishing it up and eating!

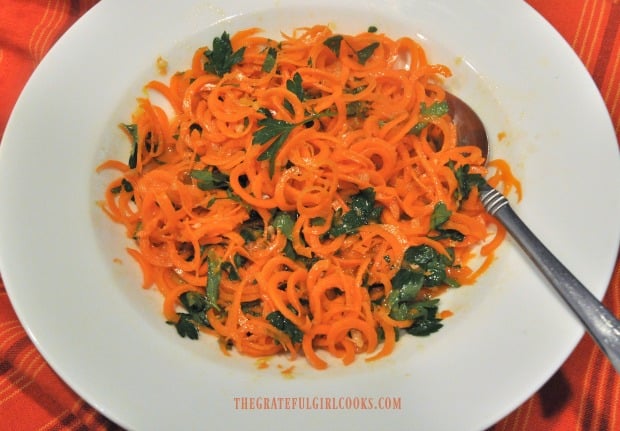
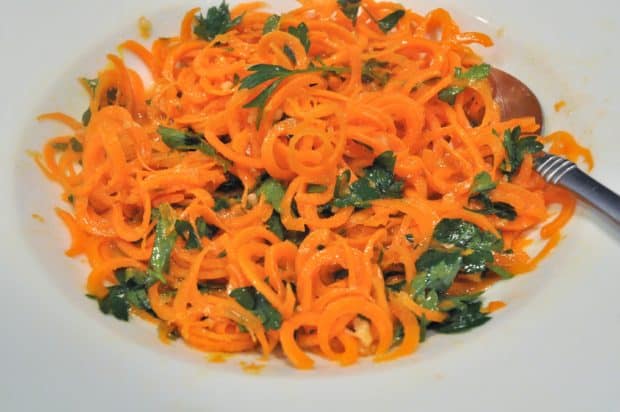
Spiralized carrot salad with lemon ginger dressing is served in a white bowl.

Spiralized carrot salad in white bowl.

This spiralized carrot salad is really GOOD! The fresh tasting lemon ginger dressing is a perfect flavor combination for this simple, crisp salad! The finished salad will keep for 1-2 days, if stored (covered) in refrigerator.

Thanks for stopping by, and I invite you to come back again soon for more family-friendly recipes. Take care, and have a GREAT day!

Interested In Other Side Salad Recipes?

If you enjoy a good side salad like we do, you might consider trying some of my other recipes. These side salad recipes include:

These and many other salads can be found in the Recipe Index, shown in the menu bar at the top of each blog post! I hope you will give this recipe for carrot salad a try, and as always, I trust you will enjoy it, as much as we do!

Want More Recipes? Get My FREE Newsletter!

I publish a newsletter 2 times per month (1st and 15th) with lots of recipes, tips, etc..
Would you like to join our growing list of subscribers?

There is a Newsletter subscription box on the top right (or bottom) of each blog post, depending on the device you use.
You can submit your e-mail address there, to be added to my mailing list.

Find Me On Social Media:

Facebook page: The Grateful Girl Cooks!
Pinterest:
The Grateful Girl Cooks!
Instagram:
jbatthegratefulgirlcooks

Author's signature

Recipe Adapted From: http://girlinthelittleredkitchen.com/2015/06/spiralized-carrot-salad-with-lemon-ginger-dressing/

↓↓ PRINTABLE RECIPE BELOW ↓↓

0 from 0 votes
Spiralized Carrot Salad In Lemon Ginger Dressing
Prep Time
10 mins
Cook Time
0 mins
Refrigeration
15 mins
Total Time
25 mins
 
Spiralized Carrot Salad in Lemon Ginger Dressing is a delicious, fresh veggie side dish! It is easy to make, using a vegetable peeler OR spiralizer!
Category: Salad, Vegetable Dish
Cuisine: American
Keyword: spiralized carrot salad
Servings: 4
Calories Per Serving: 150 kcal
Author: JB @ The Grateful Girl Cooks!
Ingredients
  • 3 large carrots , peeled
  • 1/4 cup flat leaf parsley , chopped
For Lemon Ginger Salad Dressing
  • 1 large lemon (juice AND zest)
  • 1 teaspoon honey
  • 1 inch piece of ginger , peeled and finely minced
  • 1 medium garlic clove , finely minced
  • 1 Tablespoon rice vinegar
  • 1/2 teaspoon salt
  • 1/4 cup extra virgin olive oil
Instructions
  1. Slice the ends off the carrots.  Use a vegetable peeler to peel the carrots. Discard peels and end pieces.

Using A Spiralizer
  1. If you own a spiralizer, place the carrots, one at a time in machine (with a fine shredding blade on it). Spiralize the carrots onto a plate or into a medium sized bowl. Spiralizing carrots works best if you use large, wide carrots (at least 2 inches across).

Using Vegetable Peeler
  1. If you do not own a spiralizer machine, no problem! Simply use a hand held vegetable peeler to make long shreds of the carrots. Do this by peeling the length of the carrots to get nice long shreds.

Make Salad Dressing
  1. In a small bowl, mix together lemon juice, honey, lemon zest, ginger, minced garlic, rice wine vinegar and salt. Once mixed, slowly drizzle in the olive oil, while whisking. Continue to whisk until the salad dressing has emulsified.

Make Salad
  1. Place the spiralized carrots into a serving bowl.  Add roughly chopped flat leaf parsley, then stir to combine. Pour salad dressing over salad. Toss gently to coat salad completely. Cover dish with plastic wrap, and place in the refrigerator to chill. For maximum flavor, let the salad refrigerate for at LEAST 15 minutes. Once chilled, serve, and enjoy!
Nutrition Facts
Spiralized Carrot Salad In Lemon Ginger Dressing
Amount Per Serving (1 (1/4 of total))
Calories 150 Calories from Fat 117
% Daily Value*
Fat 13g20%
Saturated Fat 1g6%
Sodium 330mg14%
Potassium 193mg6%
Carbohydrates 7g2%
Fiber 1g4%
Sugar 4g4%
Vitamin A 9335IU187%
Vitamin C 8.2mg10%
Calcium 23mg2%
Iron 0.5mg3%
* Percent Daily Values are based on a 2000 calorie diet.

Here’s one more to pin on your Pinterest boards!Spiralized Carrot Salad in Lemon Ginger Dressing is a delicious, fresh veggie side dish! It is easy to make, using a vegetable peeler OR spiralizer!


How To Cook Spaghetti Squash

This easy tutorial for how to cook spaghetti squash makes it simple to prepare this vegetable dish, which can also be used as a substitute for pasta!

Fall is upon us, and winter squash is everywhere! Grocery stores, gardens, and farmer’s markets are proudly displaying these “winter” vegetables, including the humble, yet versatile spaghetti squash!

Do you enjoy spaghetti squash?  It has an interesting history, which can be read here. It is known for being low carb and low calorie. Spaghetti squash is often used as a substitute for pasta in various dishes. One of my favorite ways to use spaghetti squash is in Spaghetti Squash Italiano… yum!

Scroll Down For A Printable Recipe Card At The Bottom Of The Page

How To Cook Spaghetti Squash

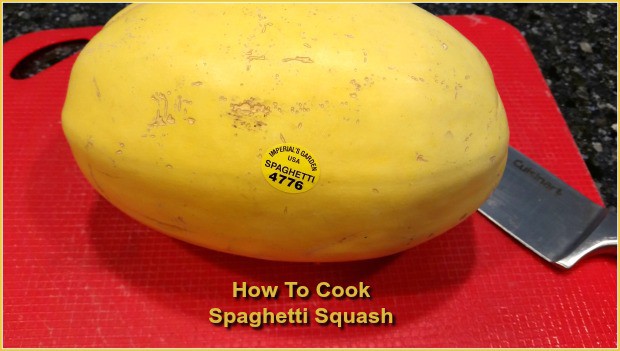
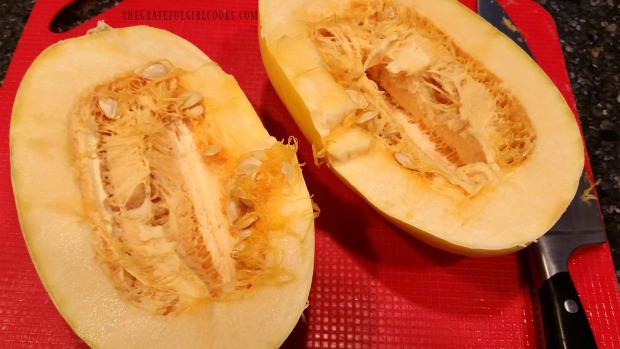
It’s actually very easy to cook spaghetti squash. The most common way to prepare it is to bake (or roast) it in an oven until tender, then pull the spaghetti like strands away from the peel once done. The first thing you will need to do is cut the spaghetti squash in half, from top to bottom (lengthwise) with a very sharp knife. Since the squash is very firm before baking, you will need to be extremely careful when cutting!

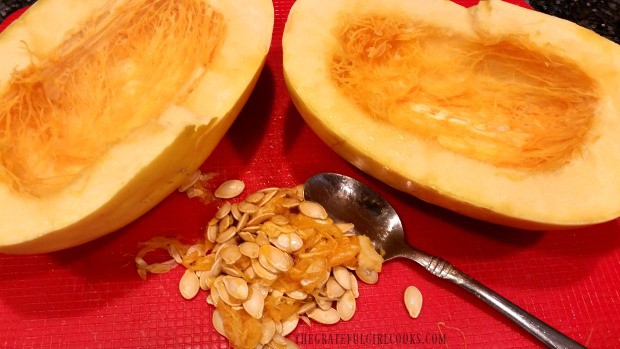
Once the squash has been cut into halves, scoop out the seeds and stringy flesh inside using a spoon. You can discard the seeds, or roast them (similar to pumpkin seeds). If you’d like to roast the seeds, check out my blog post showing how to do that HERE.

Spaghetti squash is cut in half lengthwise to remove seeds.

Seeds and pulp are removed from the spaghetti squash.

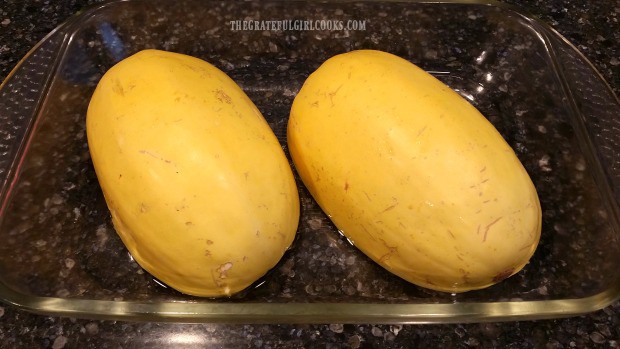
Once the spaghetti squash has been cleaned out, place them cut side DOWN, in a 9×13 baking dish. Pour enough water in the dish to just cover the bottom of the pan.  The water will help to create steam, which will help cook and tenderize the squash!

Time To Bake The Spaghetti Squash

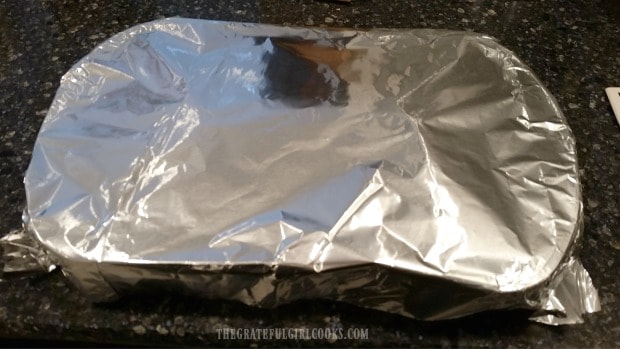
Cover the baking dish with aluminum foil.  Place the covered baking dish in a preheated 400° oven.  You will need to bake it between 35 and 45 minutes, depending on the size of the squash.

De-seeded spaghetti squash halves are placed cut side down in baking pan with water.

Baking dish with spaghetti squash is covered with foil before baking.

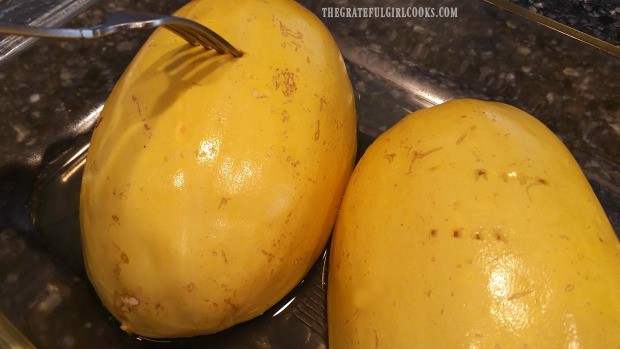
Check the squash to test for tenderness after about 30 minutes. You will know the spaghetti squash is done baking if you can EASILY pierce the skin through to the flesh with a fork. If it is still a bit firm, cover, place it back into the oven and continue cooking for another 15 minutes or so.

When done cooking, the spaghetti squash can easily be pierced with a fork.

After The Squash Has Finished Baking

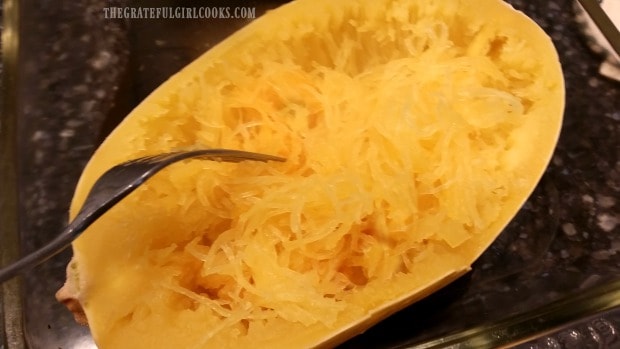
Once done, remove the spaghetti squash from the oven. Turn each of the squash halves over. Using a fork, gently pull the squash strands from side to side. The “noodles” should pull away from the peel. Make sure to pull across the width (not top to bottom) of the squash… that way the “noodle strands” will be a bit longer.

A fork can be used to shred cooked spaghetti squash into strands resembling spaghetti noodles.

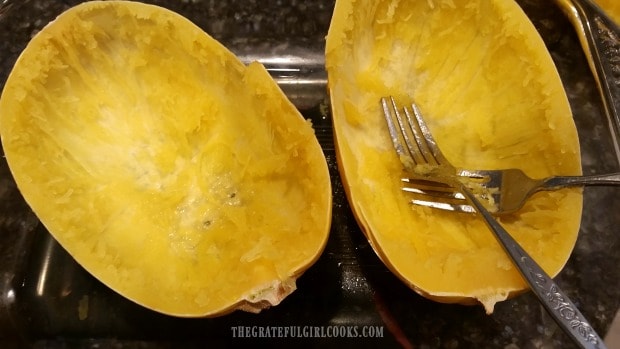
Pull all the spaghetti squash out from the outer shells. When done, the “shells” will look like this! The empty shells can also be used to serve the spaghetti squash! Simply place the “noodles” back into empty shell after seasoning with desired toppings.

All of the spaghetti squash strands have been removed from the squash shells.

And there you have it! You just found out how to cook spaghetti squash! You will end up with several cups of it, to use however you wish! Cooked spaghetti squash will also keep for 4-5 days, if refrigerated in an airtight container!

What Can I Do With Cooked Spaghetti Squash?

Spaghetti squash can be eaten hot, drizzled with olive oil (or melted butter), salt, pepper, and other flavors. You can add garlic powder, Parmesan cheese or your favorite spices for additional flavor. You can also use spaghetti squash strands as a substitute for pasta noodles in various recipes! There’s really no limit to how you can use this wonderful vegetable!

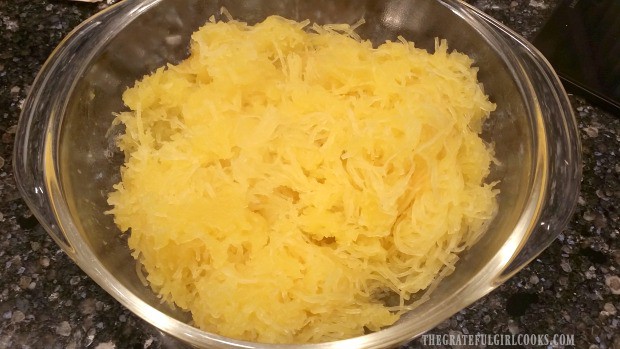
Spaghetti squash strands are in bowl, and are ready to eat or use in other recipes!

Spaghetti squash is really very easy to cook! You can substitute it for pasta and really help cut down on calories, if you’re trying to watch what you eat!  I hope you will consider trying this easy vegetable recipe.

Interested In Other Vegetable Side Dishes?

Be sure to check out my Recipe Index (at top of blog) for ALL my recipes. I have lots of delicious veggie recipes, including:

Interested In More Recipes?

Thank you for visiting this website. I appreciate you using some of your valuable time to do soIf you’re interested, I publish a newsletter 2 times per month (1st and 15th) with all the latest recipes, and other fun info. I would be honored to have you join our growing list of subscribers, so you never miss a great recipe! 

There is a Newsletter subscription box on the top right side (or bottom) of each blog post, depending on the device you use, where you can easily submit your e-mail address (only) to be included in my mailing list.

You Can Also Find Me On Social Media:

Facebook page: The Grateful Girl Cooks!
Pinterest:
The Grateful Girl Cooks!
Instagram:
jbatthegratefulgirlcooks

Author's signature

Original Recipe Source: https://www.thekitchn.com/how-to-cook-spaghetti-squash-in-the-oven-178036

↓↓ PRINTABLE RECIPE BELOW ↓↓

0 from 0 votes
How To Cook Spaghetti Squash
Prep Time
10 mins
Cook Time
40 mins
Total Time
50 mins
 
This easy tutorial for how to cook spaghetti squash makes it simple to prepare this vegetable dish, which can also be used as a substitute for pasta!
Category: Vegetable Dish
Cuisine: American
Keyword: spaghetti squash
Servings: 6 servings
Calories Per Serving: 33 kcal
Author: JB @ The Grateful Girl Cooks!
Ingredients
  • 1 medium spaghetti squash , 2-3 pounds
Instructions
  1. Carefully cut spaghetti squash in half, from top to bottom (lengthwise).  Once squash has been halved, scoop out seeds and stringy flesh with a spoon.  You can discard the seeds, or roast them (similar to pumpkin seeds).

  2. Once cleaned out, place squash halves cut side DOWN in a 9x13 baking dish. Pour just enough water in dish to cover the bottom.  The water will help to create steam, which will help cook and tenderize the squash! Cover dish with aluminum foil.  Place on medium shelf in a preheated 400° oven.  Bake squash between 35 and 45 minutes, depending on the size. 

  3. Check the squash for tenderness after about 30 minutes. You will know the squash is done baking if you can EASILY pierce the skin through to the flesh with a fork.  If it is still a bit firm, cover with foil, and put back into oven. Continue cooking for another 15 minutes or so, until tender.

  4. Once done, remove from oven. Turn each of the squash halves over. Using a fork, gently pull the squash strands from side to side to make the "noodles". The "noodles" should pull away from the peel. Make sure to pull across the width (not top to bottom) of the squash... that way the "noodle strands" will be a bit longer.

  5. Cooked spaghetti squash will keep for several days, if refrigerated in an airtight container! Spaghetti squash can be eaten hot, drizzled with olive oil (or melted butter), salt, pepper, Parmesan cheese, and other spices. Spaghetti squash strands can be used as a substitute for pasta noodles in various recipes! ENJOY!

Recipe Notes

NOTE: If you want to bake a WHOLE, uncut spaghetti squash, place in dish with water. Cover with foil. Roast for about an HOUR or more at 400°. Test for doneness. Once done, cut in half, then scoop out seeds before pulling spaghetti squash strands.

Nutrition Facts
How To Cook Spaghetti Squash
Amount Per Serving (1 g)
Calories 33
% Daily Value*
Sodium 18mg1%
Potassium 115mg3%
Carbohydrates 7g2%
Fiber 1g4%
Sugar 2g2%
Vitamin A 130IU3%
Vitamin C 2.2mg3%
Calcium 25mg3%
Iron 0.3mg2%
* Percent Daily Values are based on a 2000 calorie diet.

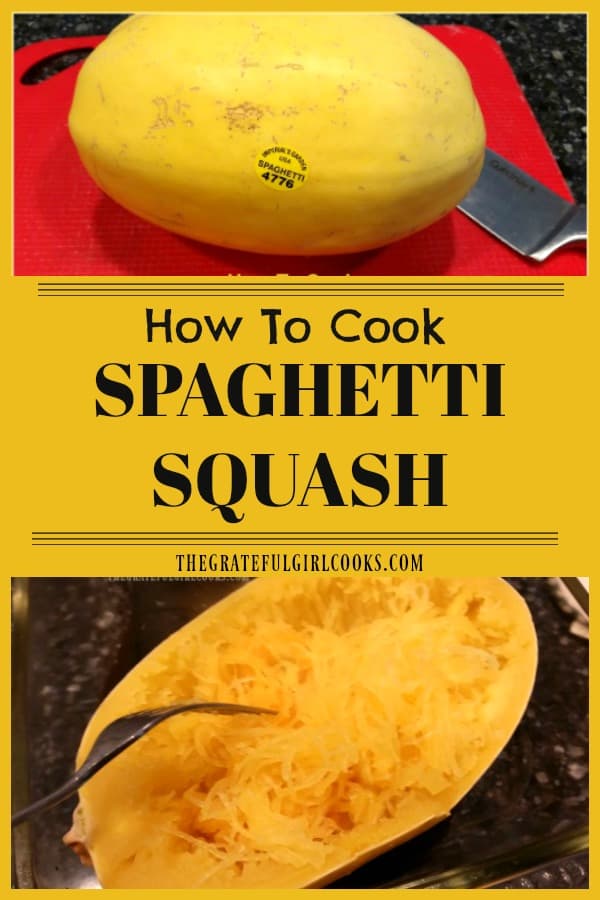
Here’s one more to pin on your Pinterest boards!This easy tutorial for how to cook spaghetti squash makes it simple to prepare this vegetable dish, which can also be used as a substitute for pasta!

Garden Vegetable Chowder

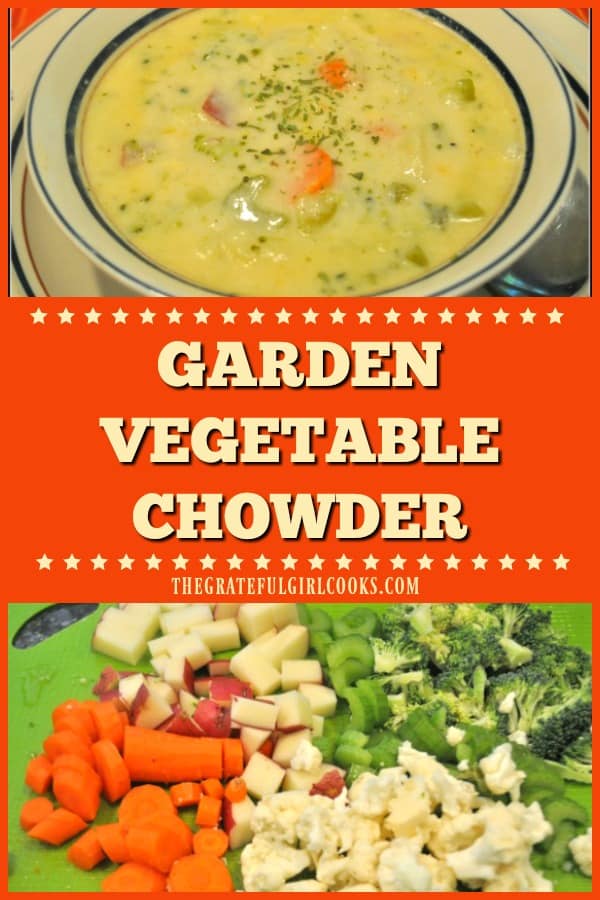
Easy to make, thick and creamy Garden Vegetable Chowder, with broccoli, cauliflower, potatoes, celery, and carrots will fill and warm you up, any time of year!

Do you have an overabundance of garden veggies or a produce drawer (filled with veggies) in your refrigerator begging for mercy? If so, then do I have a SOUP for YOU! I found it in one of my old Taste of Home magazines from July 1998 (yes… I kept them ALL from years of subscriptions!)..

Well, it’s actually a thick, wonderful vegetable chowder that is filled with a LOT of veggies… such as carrots, potatoes, cauliflower, bell peppers, onions, broccoli, and celery. The best part besides using all those yummy vegetables? Trust me – this chowder is EASY to make!

Scroll Down For A Printable Recipe Card At The Bottom Of The Page

How Do I Make Garden Vegetable Chowder?

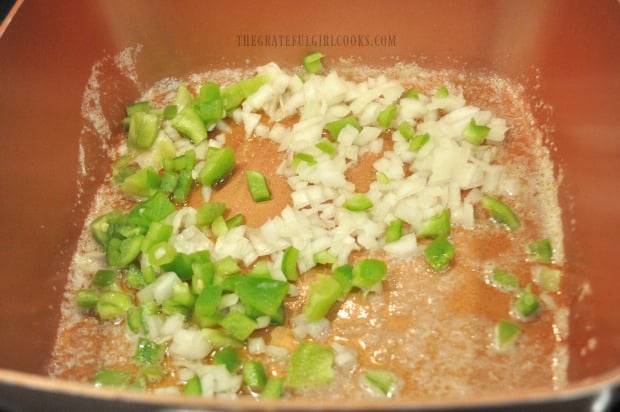
Sauté chopped onions and green bell peppers in butter. While they are cooking, prep the remaining veggies.

Cooking onions and peppers in butter for chowder.

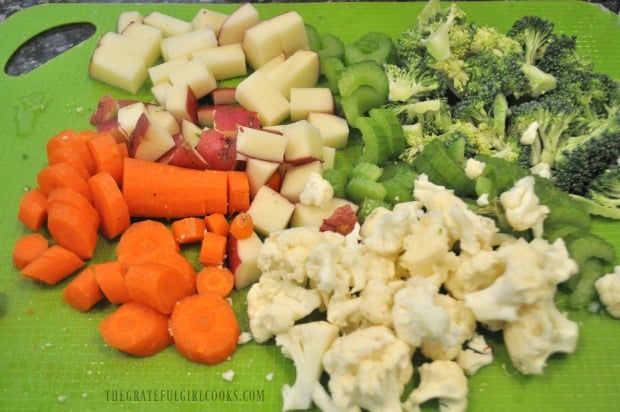
The vegetables in this chowder besides the onions and bell peppers are carrots, red potatoes, celery, broccoli, and cauliflower. These additional veggies are all cut into bite sized pieces. Add veggies, water, chicken bouillon, and salt and pepper to onion/bell pepper mixture in pan.

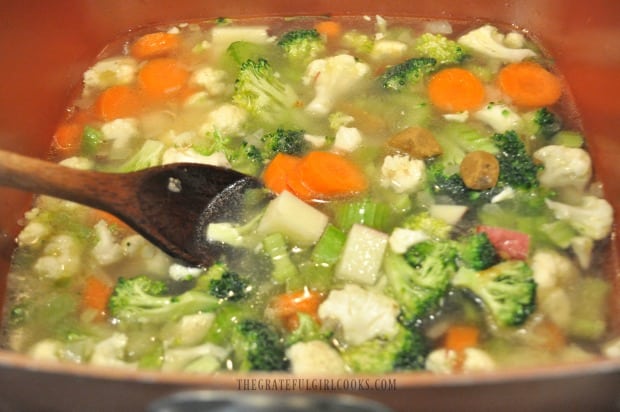
Bring this mixture to a boil. Once the liquid is boiling, reduce the heat. Cover the pan, and simmer the soup for 20 minutes.

Carrots, potatoes, celery, broccoli and cauliflower used to make vegetable chowder.

Vegetables for chowder cooked in chicken broth.

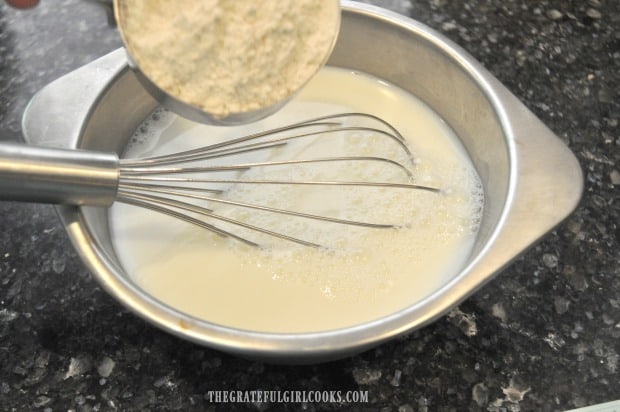
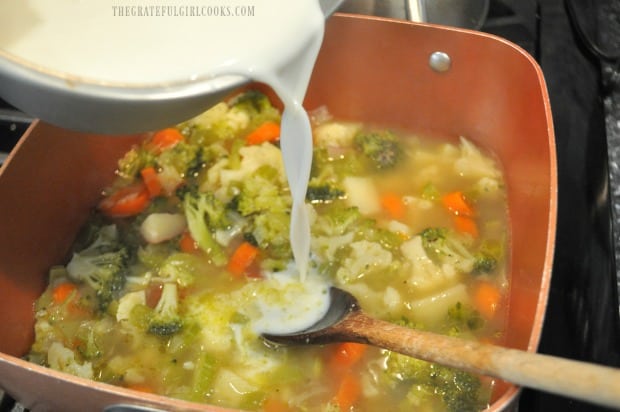
Make a slurry (used to thicken soup) by whisking together milk and flour until all lumps have disappeared. Once soup has cooked for 20 minutes, stir the slurry into the soup.

Making a slurry to add to soup to thicken it into chowder.

Adding flour slurry to soup to thicken it for vegetable chowder.

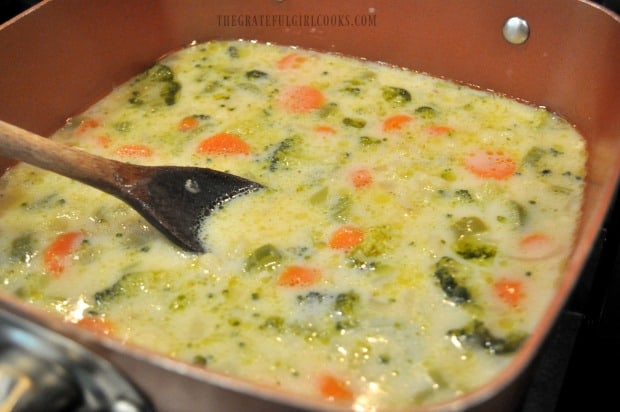
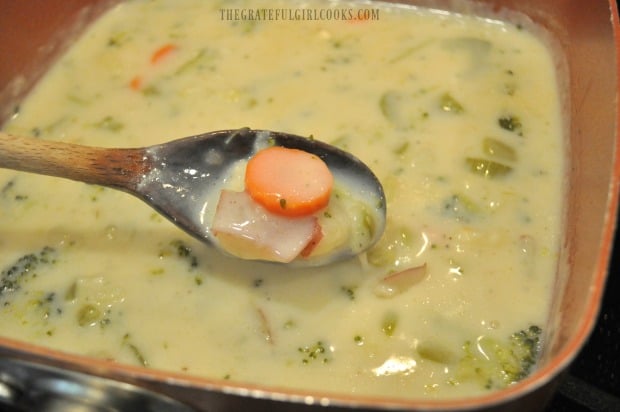
Once the flour slurry has been added, stir to combine, then bring the soup to a boil. Cook soup for 2 minutes. The liquid will thicken as it cooks.

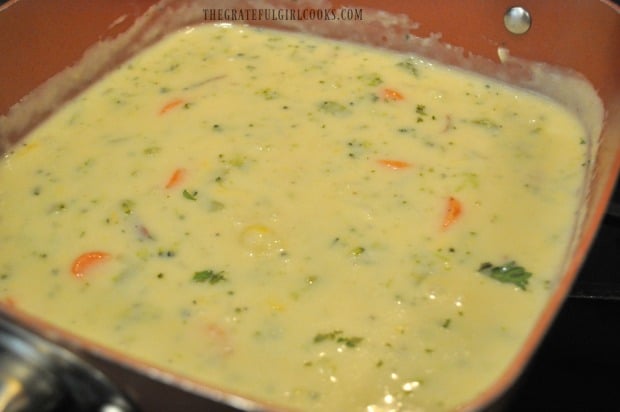
After slurry is added to vegetable soup, it cooks until the broth thickens.

The vegetable chowder has thickened considerably in pan.

Time For Some Cheese!

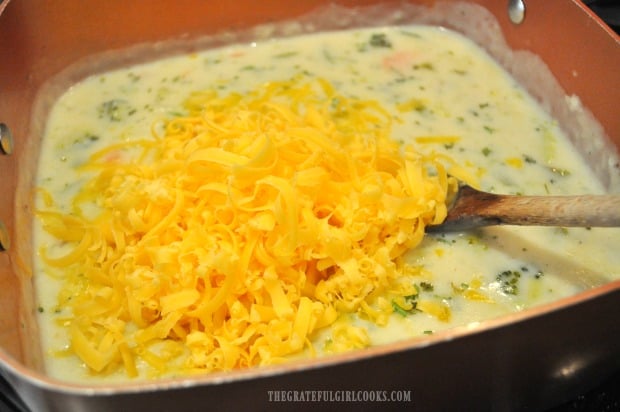
Add parsley and grated cheddar cheese to vegetable chowder. Stir and cook on medium low heat until soup is heated through and all cheese has melted.

Grated cheddar cheese is added to vegetable chowder.

Cheese is mixed into the vegetable chowder until it has melted.

Serve The Garden Vegetable Chowder

Ladle hot, thick vegetable chowder into serving bowls. Garnish each bowl of soup with additional parsley, if desired. Serve it immediately, and enjoy a hot bowl of veggie chowder!

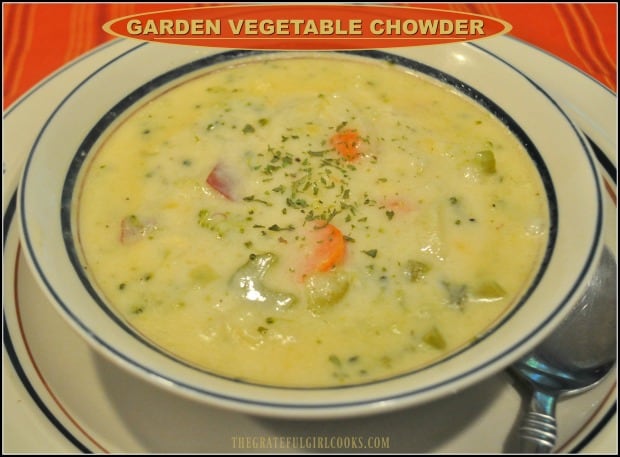
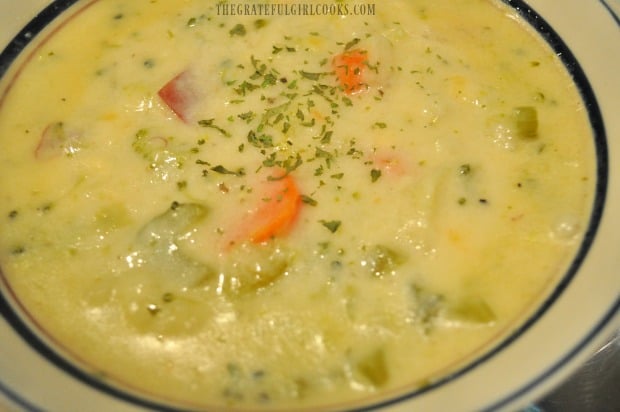
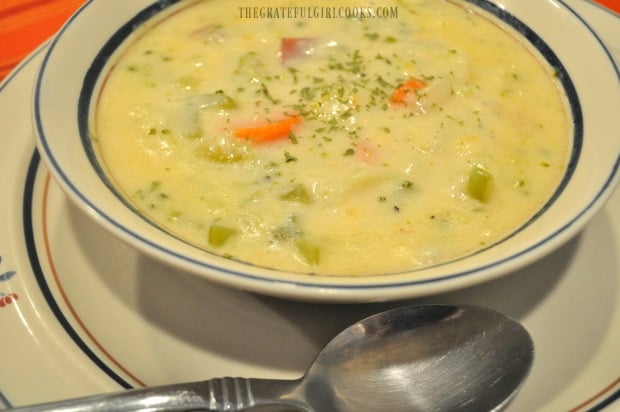
Bowl of garden vegetable chowder, garnished with dried parsley.

Garden vegetable chowder is ready to eat!

I really hope you enjoy this thick, creamy and DELICIOUS garden vegetable chowder! It’s so easy to make, and I think you will really LOVE it! What a delicious way to get your kids (or spouses or friends) to eat their veggies!

Looking For More SOUP Recipes?

You can find ALL of my recipes in the Recipe Index, located at the top of the page. I have lots of delicious soup recipes you might enjoy, including:

Interested In More Recipes?

Thank you for visiting this website. I appreciate you using some of your valuable time to do soIf you’re interested, I publish a newsletter 2 times per month (1st and 15th) with all the latest recipes, and other fun info. I would be honored to have you join our growing list of subscribers, so you never miss a great recipe!
There is a Newsletter subscription box on the top right side (or bottom) of each blog post, depending on the device you use, where you can easily submit your e-mail address (only) to be included in my mailing list.

You Can Also Find Me On Social Media:
Facebook page: The Grateful Girl Cooks!
Pinterest: The Grateful Girl Cooks!
Instagram: jbatthegratefulgirlcooks

Author's signature

Recipe Source: Taste of Home Magazine, July 1998 edition.

5 from 1 vote
Garden Vegetable Chowder
Prep Time
10 mins
Cook Time
25 mins
Total Time
35 mins
 

Easy to make, thick and creamy Garden Vegetable Chowder, with broccoli, cauliflower, potatoes, celery, onions, bell peppers and carrots will fill and warm you up, any time of year!

Category: Soup
Cuisine: American
Keyword: vegetable chowder
Servings: 6
Calories Per Serving: 356 kcal
Author: JB @ The Grateful Girl Cooks!
Ingredients
  • 1/4 cup butter
  • 1/2 cup onion ,chopped
  • 1/2 cup green bell pepper ,chopped
  • 1 cup (EACH) potato/celery/broccoli/cauliflower/carrots ,chopped, sliced or florets
  • 3 cups water
  • 3 cubes chicken bouillon
  • 1 teaspoon salt
  • 1/4 teaspoon black pepper
  • 1/2 cup all purpose flour
  • 2 cups milk
  • 1 Tablespoon parsley
  • 2 cups cheddar cheese ,grated
Instructions
  1. Sauté chopped onions and green bell peppers in butter in bottom of soup pot. While they are cooking, prep the remaining veggies, by slicing, chopping or cutting them into florets.

  2. Add veggies, water, chicken bouillon, and salt and pepper to onion/bell pepper mixture. Bring this mixture to a boil. Once boiling, reduce heat. Cover pan, and simmer soup for 20 minutes.

  3. Make a slurry (used to thicken soup) by whisking together milk and flour until all lumps have disappeared. Once soup has cooked for 20 minutes, stir the slurry into the soup.  Once the flour slurry has been added, stir to combine, then bring the soup to a boil. Cook soup for 2 minutes. The liquid will thicken as it cooks.

  4. Add parsley and grated cheddar cheese to vegetable chowder. Stir and cook on medium low heat until soup is heated through and all cheese has melted. Ladle hot, thick vegetable chowder into serving bowls. Garnish each bowl of soup with additional parsley, if desired. Serve... and enjoy!

Nutrition Facts
Garden Vegetable Chowder
Amount Per Serving (1 (1/6) of total)
Calories 356 Calories from Fat 207
% Daily Value*
Fat 23g35%
Saturated Fat 14g88%
Cholesterol 68mg23%
Sodium 775mg34%
Potassium 554mg16%
Carbohydrates 23g8%
Fiber 3g13%
Sugar 7g8%
Protein 15g30%
Vitamin A 4580IU92%
Vitamin C 39.8mg48%
Calcium 408mg41%
Iron 2.2mg12%
* Percent Daily Values are based on a 2000 calorie diet.

Here’s one more to pin on your Pinterest boards!Easy to make, thick and creamy Garden Vegetable Chowder, with broccoli, cauliflower, potatoes, celery, and carrots will fill and warm you up, any time of year!

Oven Roasted Beets

It’s easy to make perfect oven roasted beets, with only 2 ingredients! Easy to bake, with little mess, and you’ll have perfectly cooked beets for eating, using in salads, or other dishes!
It's easy to make perfect oven roasted beets, with only 2 ingredients! Easy to bake, with little mess, and you'll have perfectly cooked beets for salads, etc.!

Growing up, I loathed beets (and that’s putting it mildly!). I did NOT enjoy the taste at all, and would “shudder” when I would see them in a salad buffet line, or taunting me in the canned vegetable section of the grocery store as a young married woman. Yeah… beets and I go way back! Ha Ha!

If you can even believe it., as an adult I even GREW beets in my little backyard garden (just to learn how to grow them by TRYING). Go figure! I gave them away to neighbors, because, you know… BEETS. Sigh.

Scroll Down For A Printable Recipe Card At The Bottom Of The Page

BUT… many years have come and gone, and I started to want to give them a try again (call me crazy). I found a recipe for a salad that had beets in it that I really wanted to make, so I bit the bullet, and bought some humble beets at our local grocery store.

The rest is history! I actually, truly liked them! It’s a Christmas miracle – my taste buds changed! So now I want to show you how easy it is to make oven roasted beets!

How To Make Oven Roasted Beets


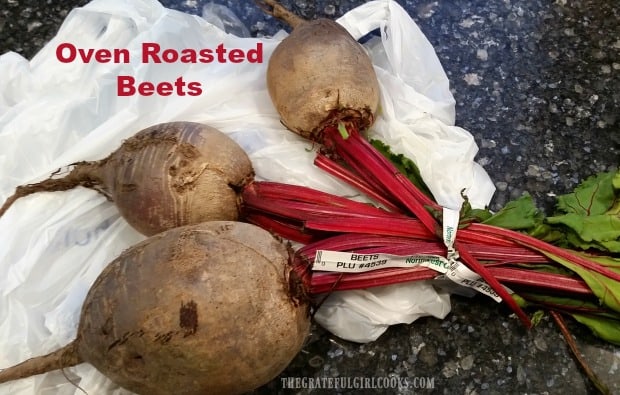
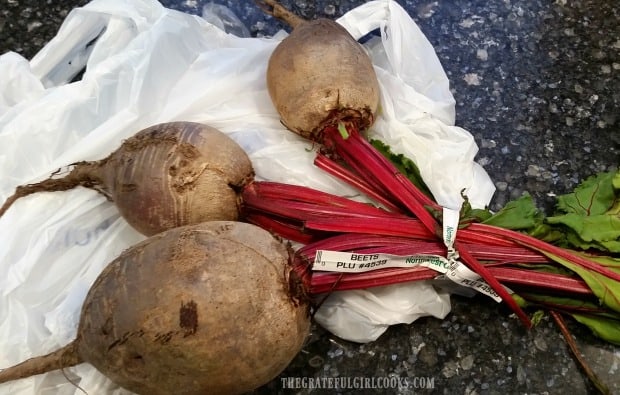
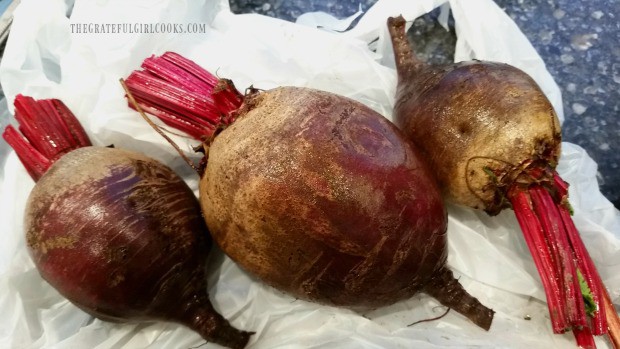
Raw beets, fresh from the store!

Preheat your oven to 375° F. Before roasting the beets, scrub them well in water. Trim off most of the stem and leaves. Pat dry.

Beets are rinsed and trimmed before oven roasting.

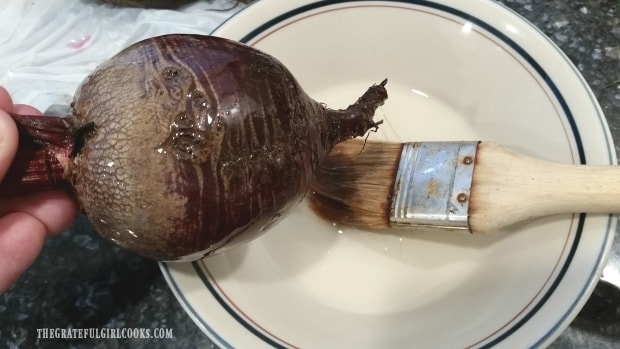
Lightly coat each beet with olive oil. I used a pastry brush for this, but you can also just use your hands, if you don’t have a pastry brush. Some people recommend wearing gloves to cook beets (so you don’t end up with semi-stained red fingers), but you don’t have to!

Raw beet is lightly brushed with oil before oven roasting.

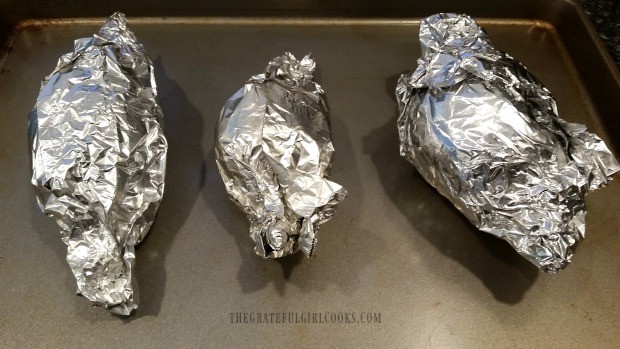
Wrap each beet well, in aluminum foil. Seal foil well. Place the wrapped beets on a cookie sheet.

Beets are individually wrapped in foil before oven roasting.

Time To Roast The Beets

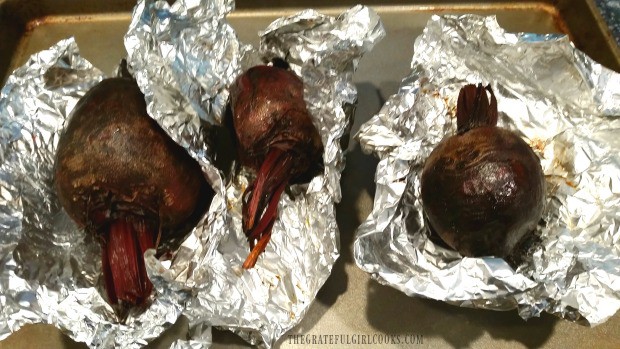
Bake beets in a preheated 375° F. oven, until they are cooked through (approximately 45 to 65 minutes, depending on the size of the beets). This is what they looked like, straight from the oven after roasting (see below).

Oven roasted beets, hot from the oven.

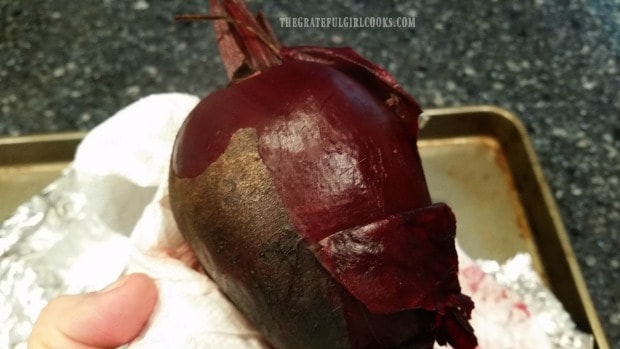
Once you take the beets out of oven, open the foil. Let beets cool for 10 minutes, then peel them. The peel should come off easily. If you’re not wearing gloves, simply use a couple paper towels wadded up to gently rub the skins off.

Skin is removed from oven roasted beets by rubbing with paper towels.

Slice The Oven Roasted Beets Once Peeled

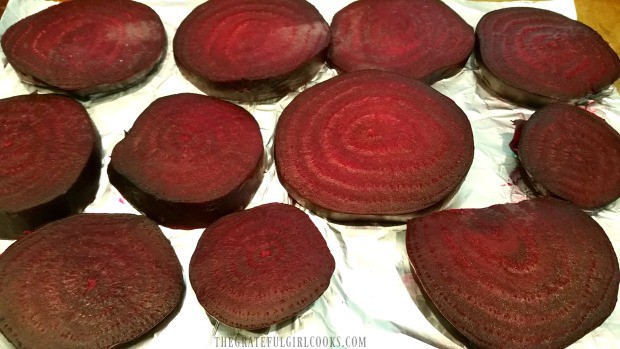
Once the peel is off, cut each of the oven roasted beets into 1/4″ slices. I LOVE the designs inside each one, nice spirals of color!

Once cooled, oven roasted beets are sliced thinly before serving.

They are ready to eat, as is (possibly with a touch of salt and pepper), or you can cut them into chunks for salads, or other recipes. I’ve even used them in fruit smoothies for extra nutrients!

That’s it! See how easy it is to make oven roasted beets? I hope you will consider trying this method. I really do think they taste much better than store bought canned beets. Have a wonderful day! Thanks for stopping by, and I hope you will come back soon.

Looking For More Veggie Recipes?

You can find all my recipes in the Recipe Index, located at the top of the page. I have a great variety of vegetable recipes, including:

Interested In More Recipes?

Thank you for visiting this website. I appreciate you using some of your valuable time to do soIf you’re interested, I publish a newsletter 2 times per month (1st and 15th) with all the latest recipes, and other fun info. I would be honored to have you join our growing list of subscribers, so you never miss a great recipe!
There is a Newsletter subscription box on the top right side (or bottom) of each blog post, depending on the device you use, where you can easily submit your e-mail address (only) to be included in my mailing list.

You Can Also Find Me On Social Media:
Facebook page: The Grateful Girl Cooks!
Pinterest: The Grateful Girl Cooks!
Instagram: jbatthegratefulgirlcooks

Have a GREAT day!

Author's signature

Recipe Source: http://www.geniuskitchen.com/recipe/bobby-flays-roasted-beets-for-recipes-370885

0 from 0 votes
Oven Roasted Beets
Prep Time
5 mins
Cook Time
50 mins
Total Time
55 mins
 
It's easy to make perfect oven roasted beets, with only 2 ingredients! Easy to bake, with little mess, and you'll have perfectly cooked beets for salads, etc.!
Category: Vegetable
Cuisine: American
Keyword: oven roasted beets
Servings: 4
Calories Per Serving: 57 kcal
Author: JB @ The Grateful Girl Cooks!
Ingredients
  • 3 medium sized beets
  • 1 Tablespoon olive oil
Instructions
  1. Preheat your oven to 375° F. Before roasting the beets, scrub them well in water. Trim off most of the stems and leaves, leaving an inch or so to hold. Pat dry.

  2. Lightly coat each beet with olive oil. I used a pastry brush for this, but you can also just use your hands, if you don't have a pastry brush. Some people recommend wearing gloves to cook beets (so you don't end up with semi-stained red fingers), but you don't have to!
  3. Wrap each beet in aluminum foil. Seal foil well. Place beets on cookie sheet. Bake beets in a preheated 375° F. oven, until they are cooked through (approximately 45 to 65 minutes, depending on the size of the beets). Once done and out of oven, open foil. Let beets cool for 10 minutes, then peel. The peel should come off easily. If not wearing gloves, use paper towels wadded up to rub the skins off. Once peel is off, cut beets into 1/4" wide slices. Enjoy!

Nutrition Facts
Oven Roasted Beets
Amount Per Serving (1 (1/4 of total))
Calories 57 Calories from Fat 27
% Daily Value*
Fat 3g5%
Sodium 48mg2%
Potassium 199mg6%
Carbohydrates 5g2%
Fiber 1g4%
Sugar 4g4%
Vitamin A 20IU0%
Vitamin C 3.1mg4%
Calcium 10mg1%
Iron 0.5mg3%
* Percent Daily Values are based on a 2000 calorie diet.

Here’s one more to pin on your Pinterest boards!It's easy to make perfect oven roasted beets, with only 2 ingredients! Easy to bake, with little mess, and you'll have perfectly cooked beets for salads, etc.!

Summer Squash Bacon Sauté

Summer Squash Bacon Sauté is a simple veggie side dish with green and yellow zucchini, crisp bacon, carrot, onions, garlic and cheese, and takes only minutes to make!
Summer Squash Bacon Sauté is a simple side dish with green and yellow zucchini, crisp bacon, carrot, onions, garlic and cheese, and takes only minutes to make!

We have a small raised bed garden in our backyard.  I love to grow green and yellow zucchini (since they multiply like crazy). It’s always fun to pick beautiful summer squash and then use them to create something fresh and delicious in our kitchen!

Scroll Down For A Printable Recipe Card At The Bottom Of The Page

Do You Enjoy Recipes Using Zucchini?

I’ve posted several recipes on this blog using our fresh garden zucchini, including Summer Vegetable Tian, Zucchini Relish, Chili Mac with Summer Squash, Baked Parmesan Zucchini Fries,  Cucumber and Zucchini Carpaccio Salad, and Curried Zucchini Soup.

Collage of recipes on blog using summer squash (zucchini).

All are wonderful ways to use up any over abundance of zucchini you grow, are given by a neighbor with a garden, or what you buy at the store!

I decided to play around with a couple of the zucchini (yellow and green) and some bacon in the kitchen (cooking NOT juggling!), and a few other ingredients, and came up with this simple, delicious veggie side dish! I served it with pan-seared Creole salmon and rice, and it was delicious!

Yellow and green summer squash (zucchini) are used for veggie side dish

How To Make The Summer Squash Bacon Sauté

To make this Summer Squash Bacon Sauté, I began by cutting two strips of thick bacon into strips (using kitchen scissors), and placed the pieces in a skillet with some thin slices of red onion. You will not need to spray the skillet, because the bacon will provide it’s own “oil” as it cooks.

Bacon pieces and red onion slices sauté in skillet

Sauté on medium heat until bacon is crisp and the fat (bacon grease) is rendered into skillet.

Bacon is cooked until crispy and some fat is rendered.

Add The Veggies

Add green and yellow zucchini (cut into bite sized chunks), and carrot to skillet. Season with a pinch or two of salt and pepper (to your taste). Stir and cook in the bacon “drippings” for 4-5 minutes on medium heat, until zucchini is slightly browned, and is tender-crisp (NOT soggy!).

Summer squash and carrots are added to bacon sauté.

Add minced garlic, and stir to combine. Cook for an additional minute, stirring often. The reason to put the garlic in at the last minute is so that it does not burn (which makes the garlic taste bitter- no one wants THAT!).

Minced garlic is added to sauteéd summer squash.

Sprinkle grated sharp cheddar cheese over the top of the veggies. Do NOT stir. Turn off heat. Place a skillet lid over top of skillet for about a minute (this will melt the cheese).

Grated cheddar cheese is added to the top of the summer squash.

Time To Eat The Summer Squash Bacon Sauté

Remove skillet lid, and you will see the cheese has melted.  Use a spatula and transfer veggies to individual serving plates. Serve hot… and enjoy this delicious vegetable dish!

Cheddar cheese melts to top of the summer squash bacon sauté.

I love to try new veggie dishes… I mean, doesn’t EVERYONE get tired of boring, plain vegetables at one time or another? This one tasted GREAT (a bit of bacon makes EVERYTHING better, right?). I hope you will consider trying this summer squash bacon sauté- the quantity can be easily doubled or tripled!

Thanks for stopping by today, and I hope you will come back again soon. Don’t forget to check out ALL of my recipes, which are in the Recipe Index, located at the top of the page.

Interested In More Recipes?

Thank you for visiting this website. I appreciate you using some of your valuable time to do soIf you’re interested, I publish a newsletter 2 times per month (1st and 15th) with all the latest recipes, and other fun info. I would be honored to have you join our growing list of subscribers, so you never miss a great recipe!
There is a Newsletter subscription box on the top right side (or bottom) of each blog post, depending on the device you use, where you can easily submit your e-mail address (only) to be included in my mailing list.

You Can Also Find Me On Social Media:

Facebook page: The Grateful Girl Cooks!
Pinterest:
The Grateful Girl Cooks!
Instagram:
jbatthegratefulgirlcooks

Have a GREAT day!

Author's signature

↓↓ PRINTABLE RECIPE BELOW ↓↓

0 from 0 votes
Summer Squash Bacon Sauté
Prep Time
10 mins
Cook Time
5 mins
Total Time
15 mins
 
Summer Squash Bacon Sauté is a simple side dish with green and yellow zucchini, crisp bacon, carrot, onions, garlic and cheese, and takes only minutes to make!
Category: Vegetable Dish
Cuisine: American
Keyword: summer squash bacon saute
Servings: 3 servings
Calories Per Serving: 157 kcal
Author: JB @ The Grateful Girl Cooks!
Ingredients
  • 2 slices bacon
  • 1/4 cup red onion (thinly sliced)
  • green zucchinis (medium sized)
  • 1/2 yellow zucchini (or crookneck squash) (medium sized)
  • 1 carrot (medium sized)
  • 1/2 teaspoon minced garlic
  • 1 pinch salt/pepper (to taste)
  • 3 Tablespoons sharp cheddar cheese (grated)
Instructions
  1. Cut bacon into thin slices (with knife or kitchen scissors). Thinly slice red onion. Cut zucchini in bite sized chunks. Peel carrot and cut into chunks. Set aside.

  2. Place bacon pieces in skillet with thin slices of red onion. You don't need to spray skillet, because the bacon will provide it's own "oil" as it cooks. Sauté on medium heat until bacon is crisp and fat (bacon grease) is rendered into skillet.

  3. Add green and yellow zucchini (cut into bite sized chunks), and carrot to skillet. Season with a pinch or two of salt and pepper (to taste). Stir and cook in the bacon "drippings" for 4-5 minutes on medium heat, stirring occasionally, until zucchini is slightly browned, and tender-crisp (NOT soggy!). Add minced garlic, and stir to combine. Cook for an additional minute, stirring often. The reason to put the garlic in at the last minute is so that it does not burn (which makes the garlic taste bitter- no one wants THAT!).

  4. Sprinkle grated sharp cheddar cheese over the top of the veggies. Do NOT stir. Turn off heat. Place a skillet lid over top of skillet for about a minute (this will melt the cheese). Remove skillet lid, and you will see the cheese has melted.  Use a spatula and transfer veggies to individual serving plates. Serve hot... and enjoy!

Nutrition Facts
Summer Squash Bacon Sauté
Amount Per Serving (1 (1/3 of total))
Calories 157 Calories from Fat 99
% Daily Value*
Fat 11g17%
Saturated Fat 5g31%
Cholesterol 25mg8%
Sodium 226mg10%
Potassium 469mg13%
Carbohydrates 7g2%
Fiber 2g8%
Sugar 4g4%
Protein 7g14%
Vitamin A 3810IU76%
Vitamin C 25.2mg31%
Calcium 135mg14%
Iron 0.6mg3%
* Percent Daily Values are based on a 2000 calorie diet.

Here’s one more to pin on your Pinterest boards!Summer Squash Bacon Sauté is a simple side dish with green and yellow zucchini, crisp bacon, carrot, onions, garlic and cheese, and takes only minutes to make!

Au Gratin Potatoes

Au Gratin Potatoes are a comforting classic side dish, with thinly sliced potatoes covered in a homemade cheese sauce, then baked until golden brown and bubbly!

Do you like Potatoes au Gratin? Pretty fancy sounding French name for potatoes and cheese, right? My husband found a simple translation online for  “au gratin” which said that it simply means “cooked with a cover of cheese and bread crumbs mixed with butter”.

Well, I do not speak French, but I do know that I love this “comfort food” side dish! That description of au gratin fits this recipe perfectly! How can you go wrong with baked russet potatoes smothered in cheese sauce, and covered with a buttery bread crumb topping?

I found an old recipe recently that I had written down on an index card many years ago, made a few slight changes to the original, then made them for dinner. It is fairly straight forward to make, and was very delicious!

Scroll Down For A Printable Recipe Card At The Bottom Of The Page

Here’s How To Make Au Gratin Potatoes:

Melt butter in a medium saucepan on medium low heat.  Stir in flour. Continue stirring; the mixture will clump up a bit (as seen in photo). Continue cooking for one minute, stirring often (this helps cook the “floury” taste out of it).

Cooking butter and flour to make a thickener for cheese sauce

Stir the milk, salt and pepper into butter mixture. Continue to cook on medium heat until mixture thickens considerably.  Add sharp cheddar cheese; stir until cheese has fully melted, and sauce is quite thick.

Cheddar cheese is added to thickened au gratin sauce

Peel, then slice potatoes into 1/8″ round slices.  If you have a mandoline, use that to get very thin slices (1/8″ is best!).  I have a mandoline, but used a knife to slice the potatoes to show how thin the potato slices should be (when using a knife try hard to get them 1/4″ or thinner), in case you don’t have one.

If the potatoes slices are too thick, it will take much longer to cook them until tender! The thinner the slices are, the better!

Potatoes are sliced very thin for au gratin dish
Place the sliced potatoes to the cheese sauce in pan. Stir well, to completely cover potatoes with cheese sauce.

Potato slices are added to au gratin cheese sauce in pan

Spray a 2 quart sized baking dish with non-stick spray (bottom and sides).  Add the cheesy potatoes to the dish, and evenly spread to disperse. Set aside.

Potatoes and cheese sauce layered into baking dish

Create the buttery crumb topping by mixing together melted butter and soft breadcrumbs.

Buttery crumb topping is mixed for top of au gratin potato dish

Sprinkle the buttered bread crumbs over the entire surface of the au gratin potatoes.

Buttered bread crumbs top potatoes in dish

Bake potatoes in a preheated 400 degree oven for 60 minutes (covered with foil). Remove foil and continue baking for an additional 15 minutes, or until surface of potatoes is golden brown and cheese sauce is bubbly around the edges of dish.

Potatoes au gratin are baked until golden brown on top

When done baking, remove dish to a wire rack.  The cheese should be bubbling around the edges, and the potatoes should be fully cooked through and tender. Season with additional salt and pepper, if desired, serve, and enjoy these au gratin potatoes!

Au gratin potatoes are served as a side dish with meat and vegetables

We enjoyed the potatoes, served with grilled vegetables and my REALLY GOOD meatloaf. This meal was a tried and true meat and potatoes dinner, to be sure! Hope you will consider making this delicious side dish to compliment YOUR favorite meal!

Looking For More POTATO Recipes?

You can find all of my recipes in the Recipe Index, located at the top of the page. I have quite a few recipes featuring potatoes, including:

Interested In More Recipes?

Thank you for visiting this website. I appreciate you using some of your valuable time to do soIf you’re interested, I publish a newsletter 2 times per month (1st and 15th) with all the latest recipes, and other fun info. I would be honored to have you join our growing list of subscribers, so you never miss a great recipe!
There is a Newsletter subscription box on the top right side (or bottom) of each blog post, depending on the device you use, where you can easily submit your e-mail address (only) to be included in my mailing list.

You Can Also Find Me On Social Media:
Facebook page: The Grateful Girl Cooks!
Pinterest: The Grateful Girl Cooks!
Instagram: jbatthegratefulgirlcooks

Have a wonderful day… God Bless You!

Author's signature

Original Recipe Source: unknown (written down many years ago on 3×5 card-no author noted)

0 from 0 votes
Au Gratin Potatoes
Prep Time
15 mins
Cook Time
1 hr 15 mins
Total Time
1 hr 30 mins
 
Au Gratin Potatoes are a comforting classic side dish, with thinly sliced potatoes covered in a homemade cheese sauce, then baked until golden brown and bubbly!
Category: Side Dish, Vegetables
Cuisine: American
Keyword: au gratin potatoes
Servings: 8 servings
Calories Per Serving: 283 kcal
Author: JB @ The Grateful Girl Cooks!
Ingredients
  • 6 medium potatoes (or 4 large), peeled, thinly sliced into 1/4" rounds
For Cheese Sauce (total approx. 2½ cups)
  • 4 Tablespoons butter
  • 4 Tablespoons all purpose flour
  • 1/2 teaspoon Salt , plus more to taste (if desired)
  • 1/4 teaspoon Pepper
  • 2 cups milk
  • cups sharp cheddar cheese (grated)
For Bread Crumb Topping:
  • 1/2 cup bread crumbs
  • 2 Tablespoons butter, melted
Instructions
  1. Melt butter in a medium saucepan on medium low heat.  Stir in flour. Continue stirring; the mixture will clump up a bit. Continue cooking for one minute, stirring often (this helps cook the "floury" taste out of it). Stir the milk, salt and pepper into butter mixture. Continue to cook on medium heat until mixture thickens considerably.  Add sharp cheddar cheese; stir until cheese has fully melted, and sauce is quite thick.

  2. Peel, then slice potatoes into 1/8" round slices.  If you have a mandoline, use that to get very thin slices.  If using a knife to slice potatoes, slice them as thin as possible (no more than 1/4" thin). If the potatoes slices are too thick, it will take much longer to cook them until tender! The thinner the slices are, the better!

  3. Add potatoes to the cheese sauce in pan. Stir well, to completely cover potatoes. Spray a 2 quart sized baking dish with non-stick spray (bottom and sides).  Add potatoes to the dish, and evenly spread to disperse. Set aside.

  4. Make the buttery crumb topping by mixing together melted butter and soft breadcrumbs. Sprinkle the buttered bread crumbs over the entire surface of the au gratin potatoes.

  5. Bake potatoes in a preheated 400 degree oven for 60 minutes (covered with foil). Remove foil and continue baking for an additional 15 minutes, or until surface of potatoes is golden brown and cheese sauce is bubbly around the edges of dish. Remove from oven, season with additional salt and pepper, if desired. Serve, and enjoy!
Nutrition Facts
Au Gratin Potatoes
Amount Per Serving (1 serving)
Calories 283 Calories from Fat 189
% Daily Value*
Fat 21g32%
Saturated Fat 13g81%
Cholesterol 62mg21%
Sodium 515mg22%
Potassium 136mg4%
Carbohydrates 11g4%
Sugar 3g3%
Protein 12g24%
Vitamin A 730IU15%
Calcium 342mg34%
Iron 0.8mg4%
* Percent Daily Values are based on a 2000 calorie diet.

Here’s one more to pin on your Pinterest boards!Au Gratin Potatoes are a comforting classic side dish, with thinly sliced potatoes covered in a homemade cheese sauce, then baked until golden brown and bubbly!